Kenneth Powell
-
Posts
237 -
Joined
-
Last visited
Recent Profile Visitors
1,216 profile views


-
 Kenneth Powell reacted to a post in a topic:
USCGC Eagle by mysticlee - Constructo - 1:102
Kenneth Powell reacted to a post in a topic:
USCGC Eagle by mysticlee - Constructo - 1:102
-
SiriusVoyager reacted to a post in a topic:
Emma C Berry by Kenneth Powell - Model Shipways - 1:32 - as a yacht
-
Kenneth Powell reacted to a post in a topic:
HMS Grogblossom c. 1700 by Dan DSilva - 1:128 - hoy - solid hull
-
Keith Black reacted to a post in a topic:
Emma C Berry by Kenneth Powell - Model Shipways - 1:32 - as a yacht
-
Kenneth Powell reacted to a post in a topic:
HMS Sphinx 1775 by rvchima - Vanguard Models - 1:64 - 20 Gun Sixth Rate Frigate
-
 Thanks, Allan and to all the likes and comments. - Kenneth
 -
 Kenneth Powell reacted to a post in a topic:
Emma C Berry by Kenneth Powell - Model Shipways - 1:32 - as a yacht
Kenneth Powell reacted to a post in a topic:
Emma C Berry by Kenneth Powell - Model Shipways - 1:32 - as a yacht
-
yvesvidal reacted to a post in a topic:
Emma C Berry by Kenneth Powell - Model Shipways - 1:32 - as a yacht
-
allanyed reacted to a post in a topic:
Emma C Berry by Kenneth Powell - Model Shipways - 1:32 - as a yacht
-
allanyed reacted to a post in a topic:
Emma C Berry by Kenneth Powell - Model Shipways - 1:32 - as a yacht
-
Keith Black reacted to a post in a topic:
Emma C Berry by Kenneth Powell - Model Shipways - 1:32 - as a yacht
-
thibaultron reacted to a post in a topic:
Emma C Berry by Kenneth Powell - Model Shipways - 1:32 - as a yacht
-
Kenneth Powell reacted to a post in a topic:
Type 45 Destroyer by mikegr - 1/700
-
This is the Model Shipways kit. I'm altering the deck layout and such to build it as a pleasure craft - a little kit bashing. Maury S is building the schooner rig on the scratch side of the site. Thanks - Kenneth
-
JpR62 reacted to a post in a topic:
Emma C Berry by Kenneth Powell - Model Shipways - 1:32 - as a yacht
-
Keith Black reacted to a post in a topic:
Emma C Berry by Kenneth Powell - Model Shipways - 1:32 - as a yacht
-
JacquesCousteau reacted to a post in a topic:
Emma C Berry by Kenneth Powell - Model Shipways - 1:32 - as a yacht
-
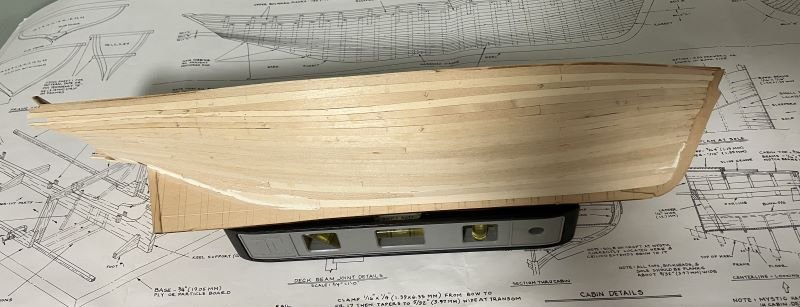
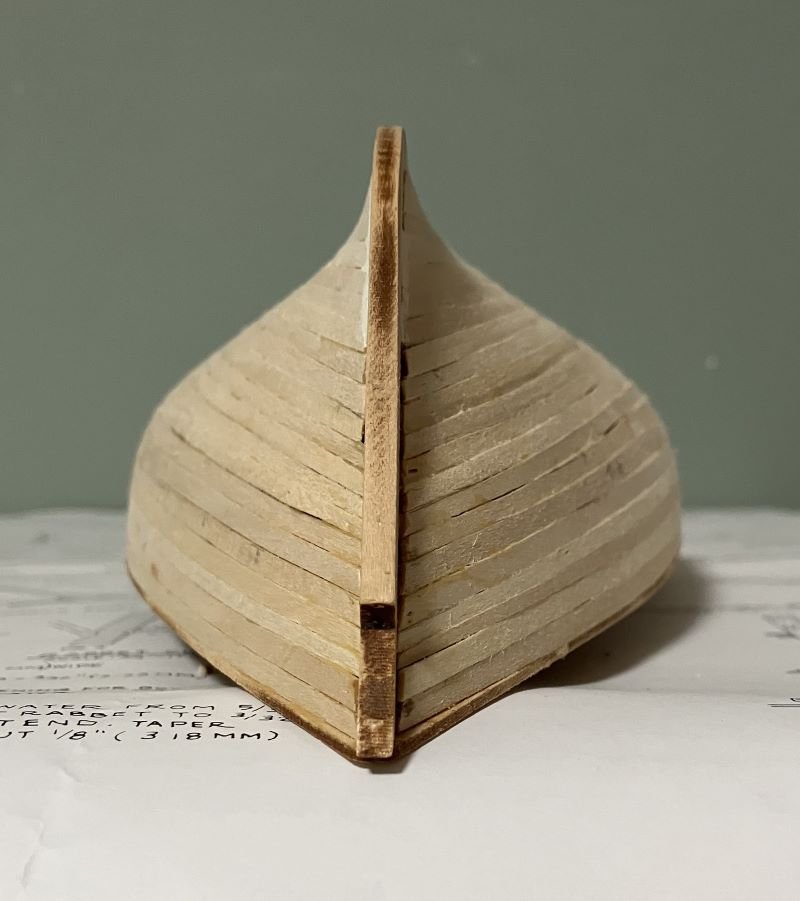
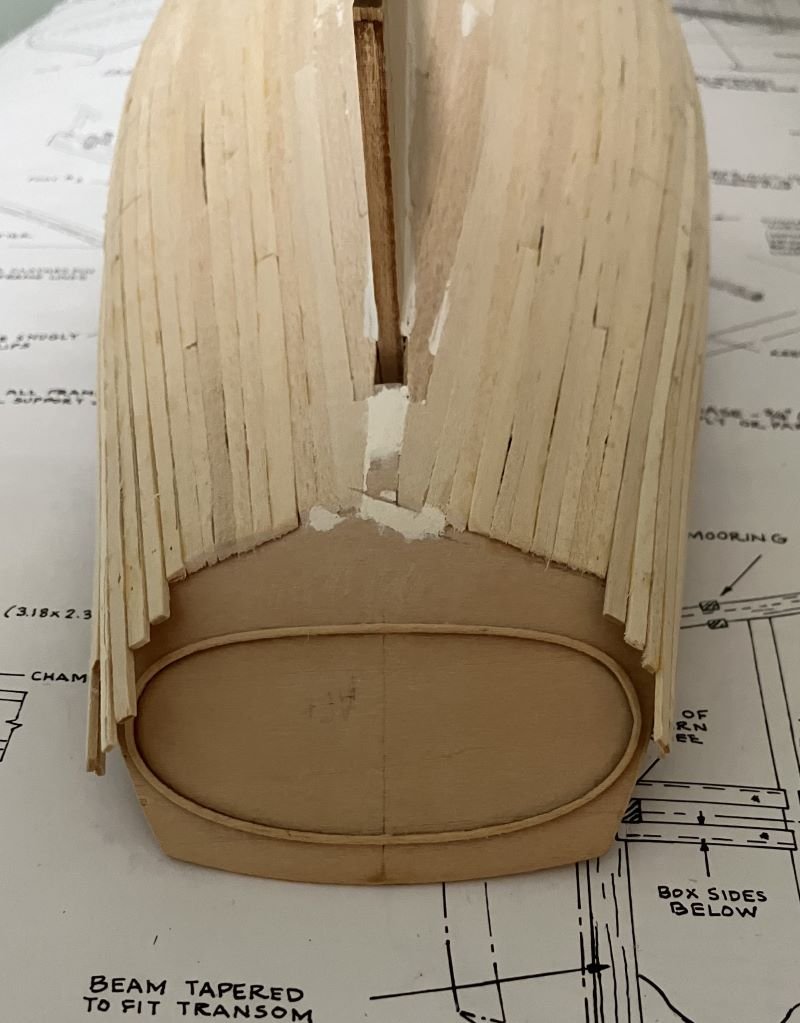
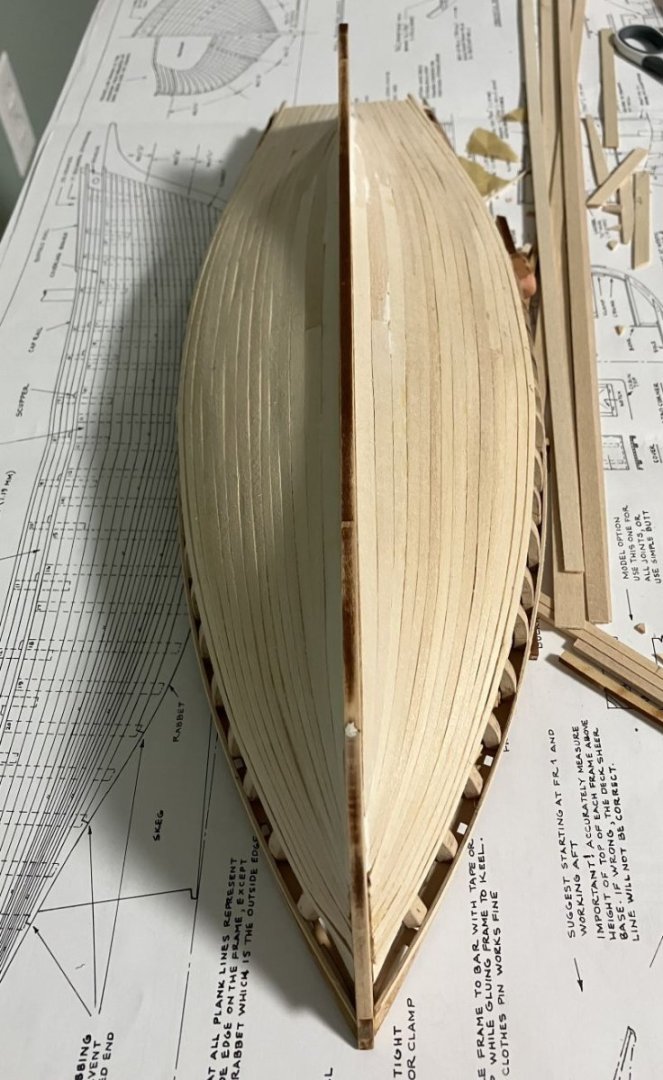
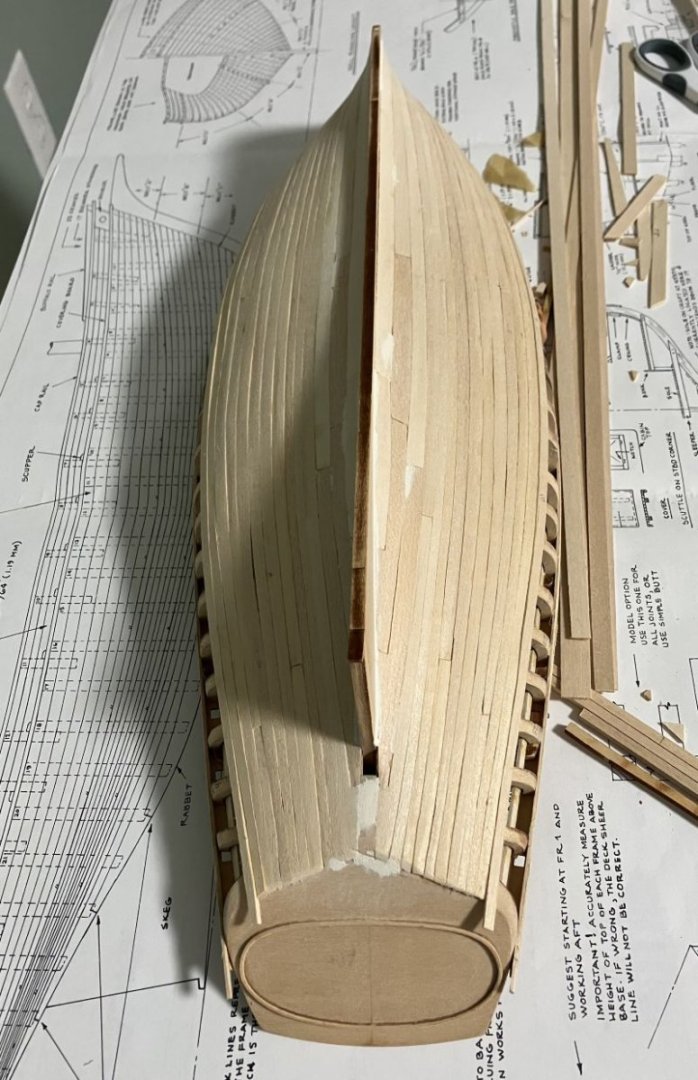
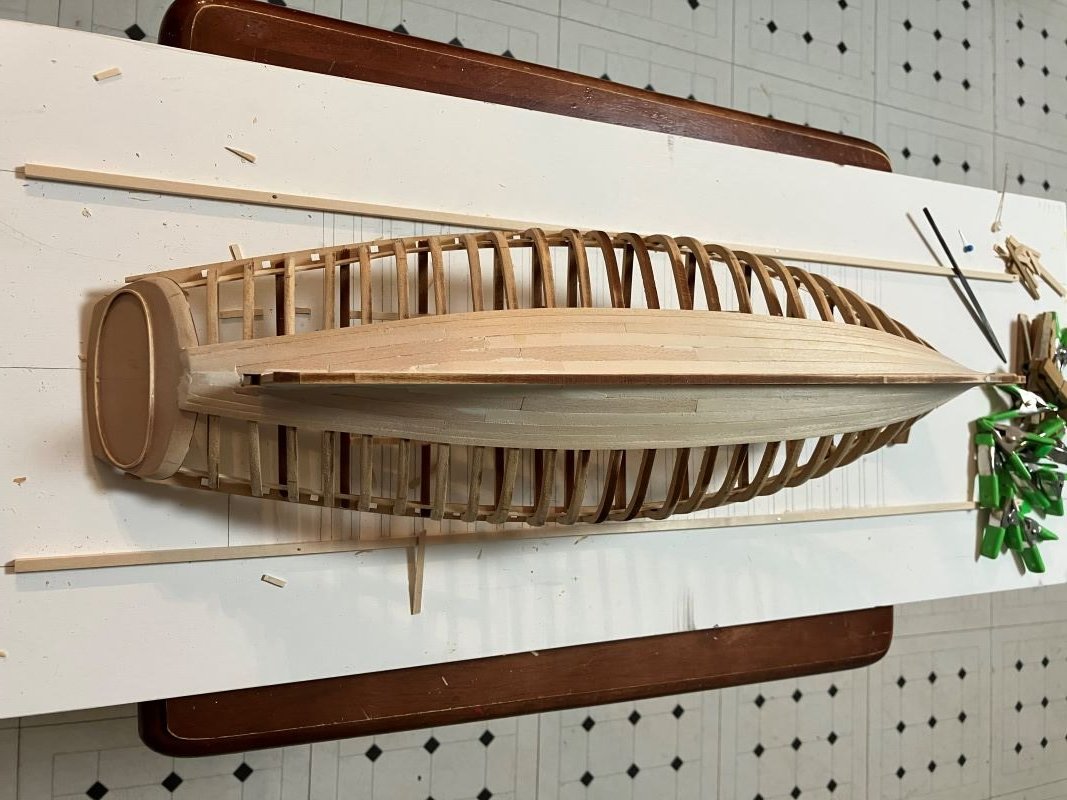
Hull planking is complete: Man, do I have some sanding to do. - Kenneth

-
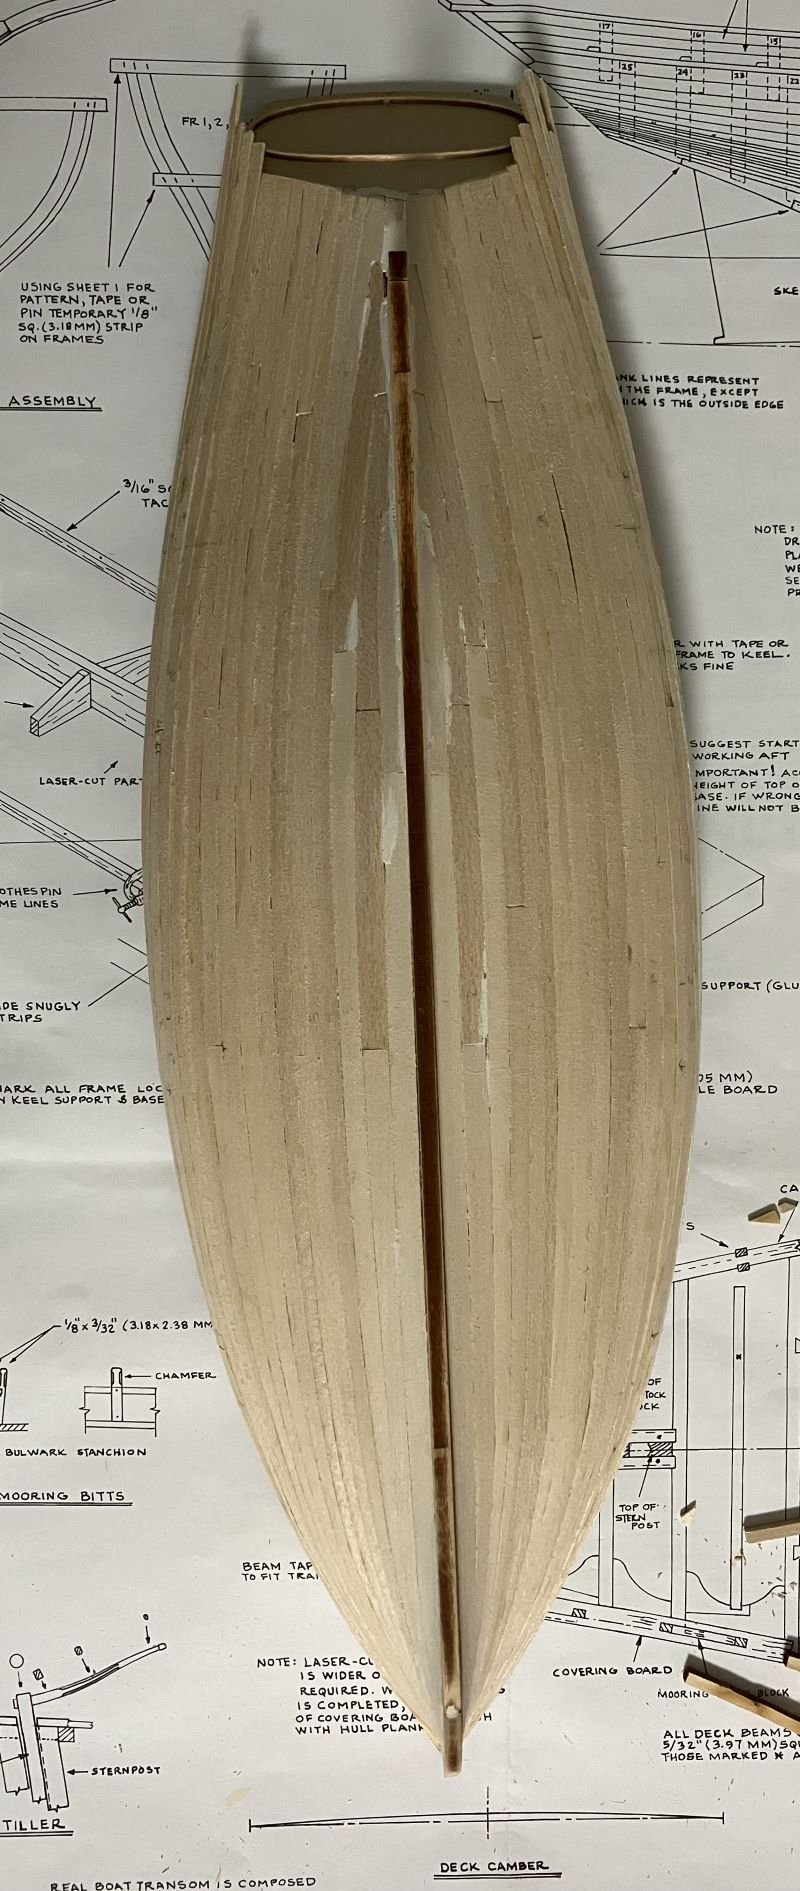
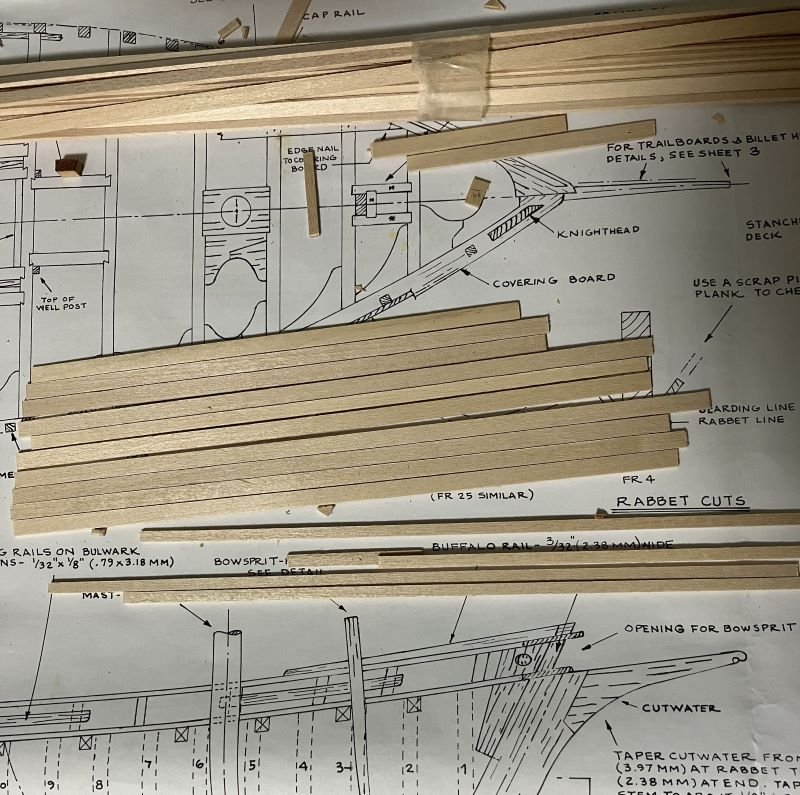
Hello Everyone - Checking in with some progress. Spring has sprung here on the gulf coast. So, I've been busy with yard work and honey does and stuff outside. Chores really take away time from hobbies. Anyway, I've finished belt B and sanded a little with 80 grit. I also added a plank in belt A and the sheer plank. The kit supplied planks are longer than the model, so I've mostly been able to cut one plank for the entire strake. Then I cut its duplicate for the other side - back and forth, back and forth. I kept the cut-offs and in the spirit of conservation of wood I can use 3 of them to make planks for one strake. I should be able to steal a few minutes here and there and set the rest of the planks. But I don't want to rush things either and get in a hurry. There has to be a balance. Then it's the 80 grit treatment followed by 150 grit. Then a few open seams and such will be filled and sanded. Comments welcome Thanks for stopping in - Kenneth

-
Kenneth Powell reacted to a post in a topic:
Canoa de Rancho by JacquesCousteau - Scale 1:32 - Lake Chapala Fishing and Cabotage Vessel
-
 Kenneth Powell reacted to a post in a topic:
HMS PEGASUS by giampieroricci - Scale 1:36 - Swan-Class Sloop from plans by David Antscherl & Greg Herbert
Kenneth Powell reacted to a post in a topic:
HMS PEGASUS by giampieroricci - Scale 1:36 - Swan-Class Sloop from plans by David Antscherl & Greg Herbert
-
Kenneth Powell reacted to a post in a topic:
Frigate USS United States 1789 by threebs - 1:72
-
Kenneth Powell reacted to a post in a topic:
Rattlesnake by Ed Ku20 - Model Shipways - 1:64
-
Kenneth Powell reacted to a post in a topic:
USS New York by threebs - FINISHED - 74 gun ship of the line
-
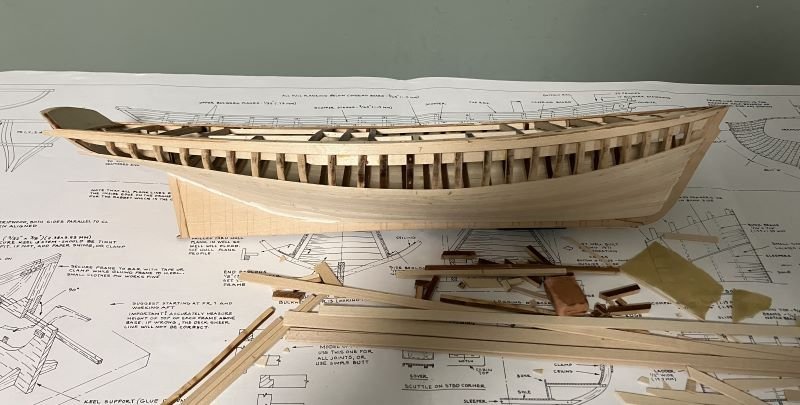
Hello everyone - Planking has started. The Modelshipways method of planking in belts works pretty well. It gives an opportunity to pause and check the progress and the math works out if the plan is followed. I followed it on my Rattlesnake and it worked well. I added belt C and sanded a little, then added a little putty in the seams. Once all the planking is complete, I'll sand and touch up everything. I won't use a lot of putty. The planks are visible on most wooden boats and I like the beauty marks. This is my first shot at nibbing hull planking, so please be gentle. Thanks - Kenneth
-
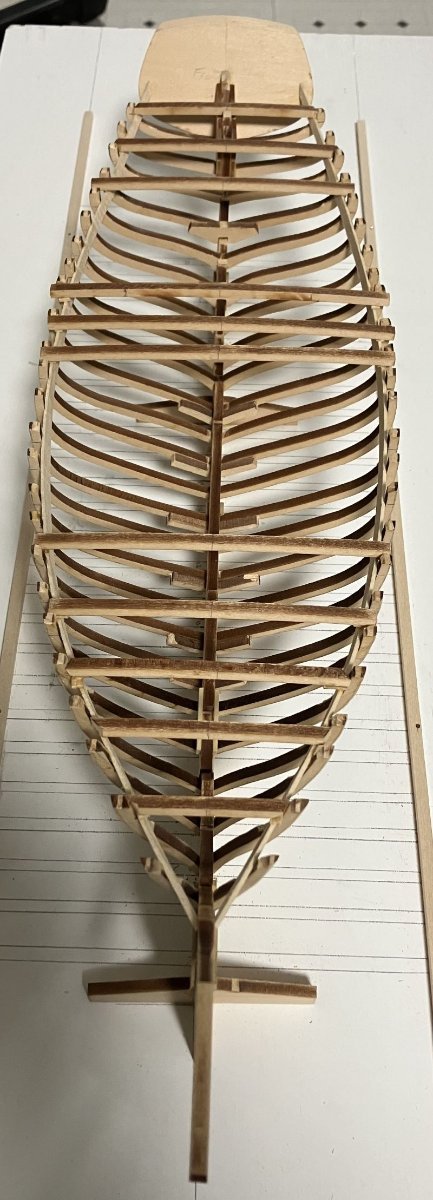
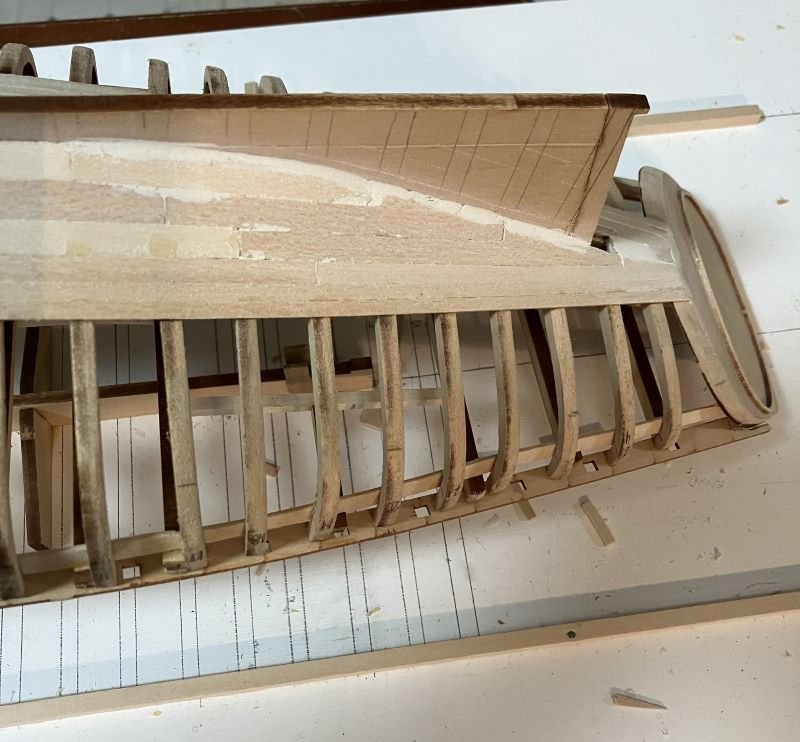
Thanks for the visits and the likes. I've finished the deck framing. I have a lot of sanding to do. I went across all the beams with a 1/16 inch thick piece of deck planking and checked all the beam heights and the sheer. They actually lined up pretty good. The strip at the transom seems a little off, bit it all lines up. It also seems solid and not too fragile. The forward cabin will be a little larger than the original cabin as seen in the photo. After sanding and double-triple checking heights and fairness, I'll install the covering boards. Comments welcome - Kenneth

-
Great build with the working rudder and all. Midwest does make very good kits and I really what you've with it. - Kenneth
-
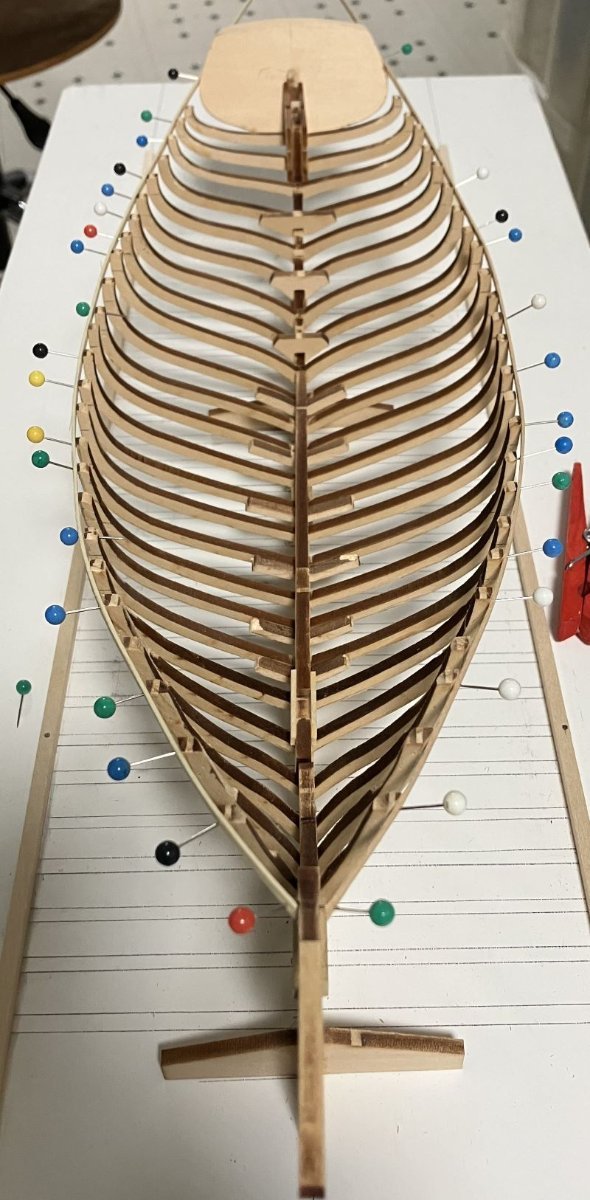
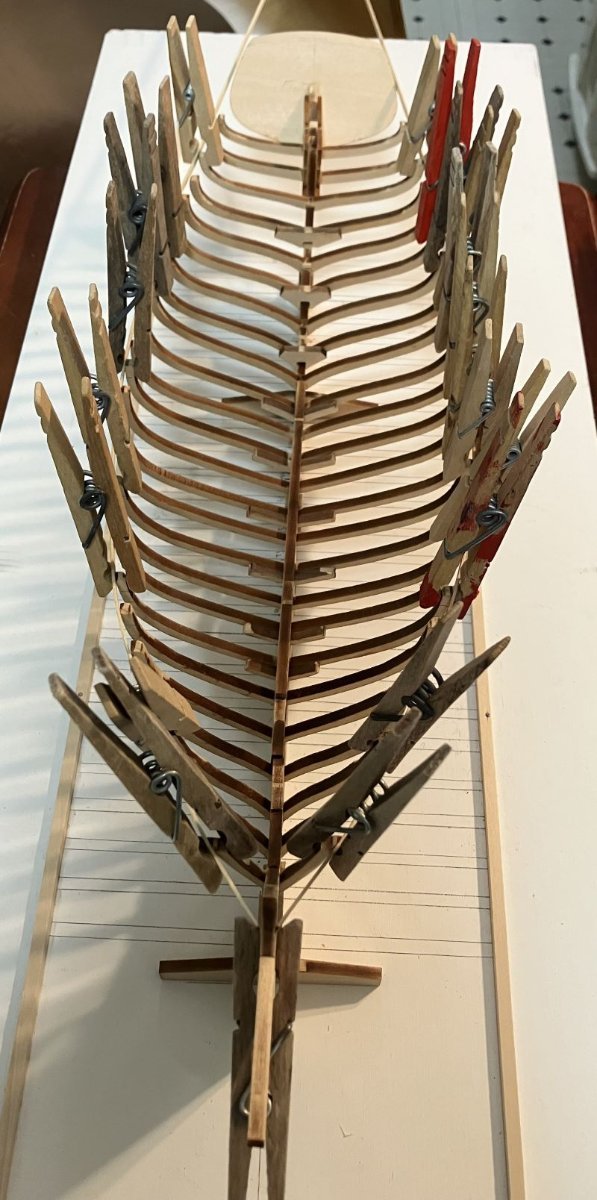
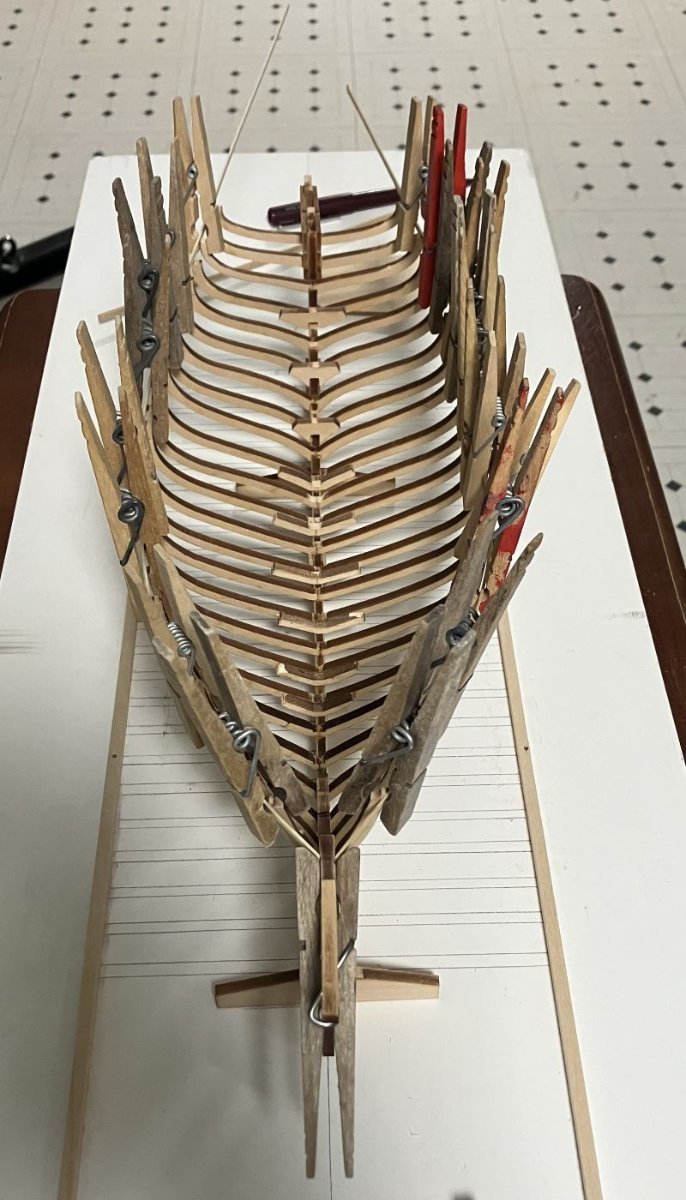
I exchanged clothes pins for push pins on the batten to make room to clamp the clamps. The clamp installed as per instructions with the bow sprit pawl just sitting there. Once the glue of the clamps dried, I went straight to installing the large deck clamps It was hard to edge bend the wide clamps to make the sheer, so some of the large deck beams have shims to bring them to the proper height. This is where I'm going off the grid. I'll frame the original cabin, then frame a larger cabin three beams forward of the original. The space can be seen in the above photos. - Kenneth


-
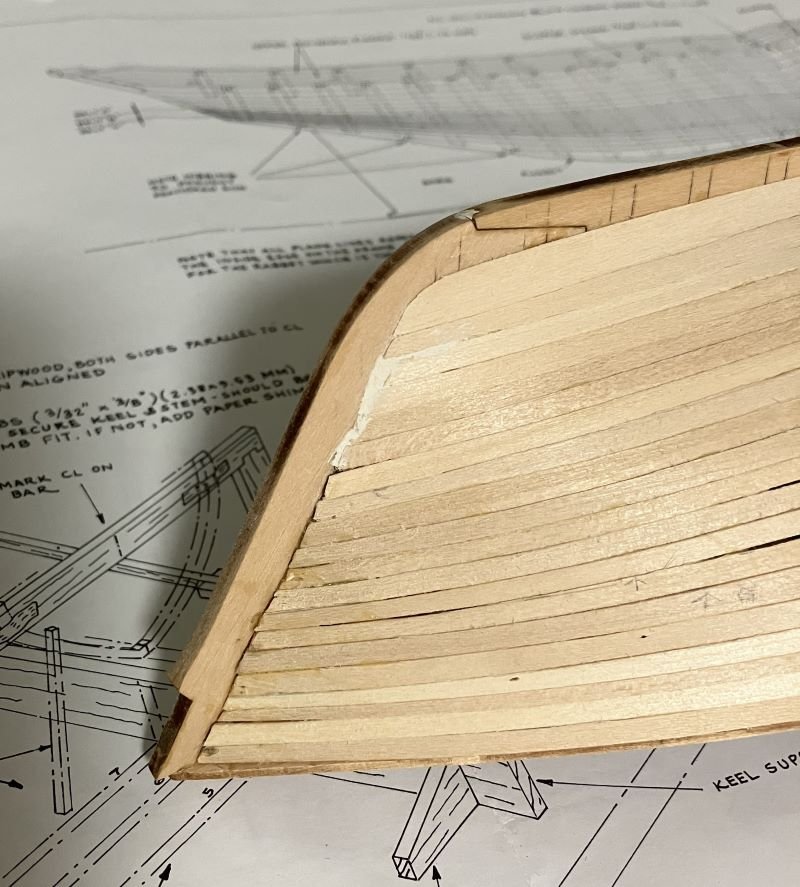
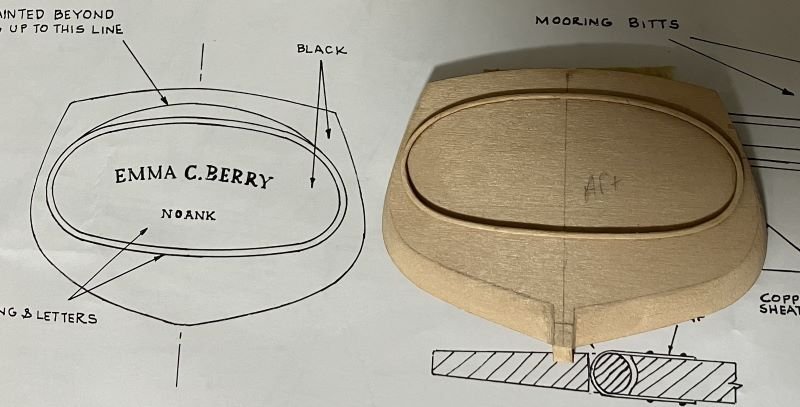
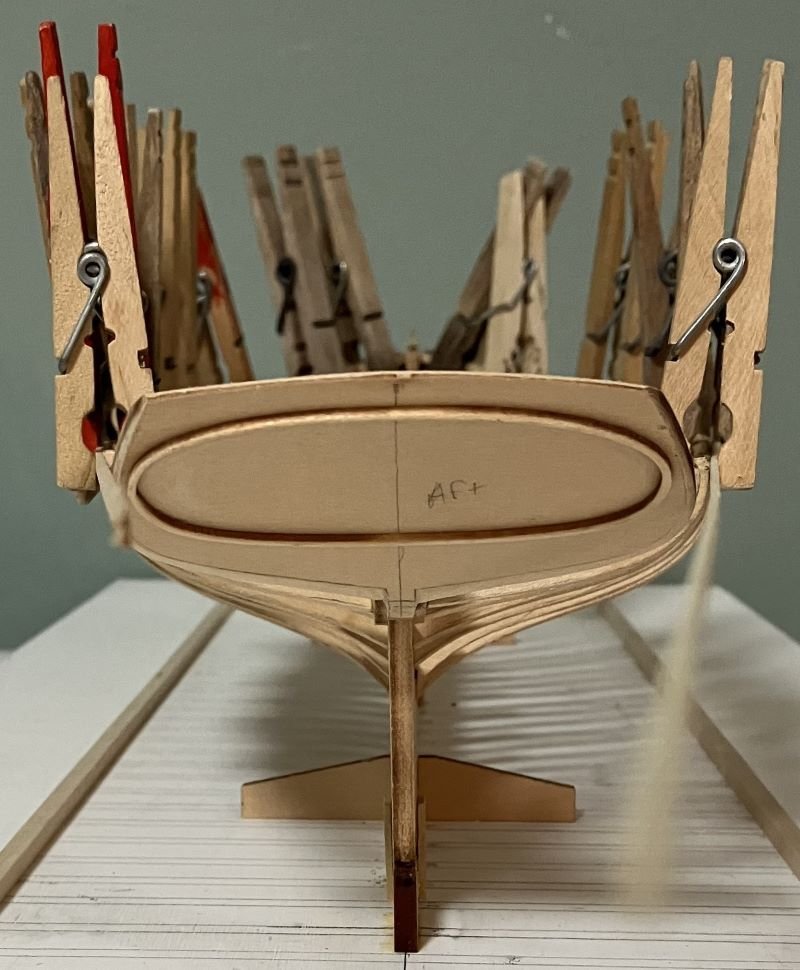
Carving the transom was fun and a little relaxing. The small molding proved to be fragile and broke once. So, I decided to glue it to the transom and then sand it to half round once it dried. Installed Clamps are next - Kenneth
-
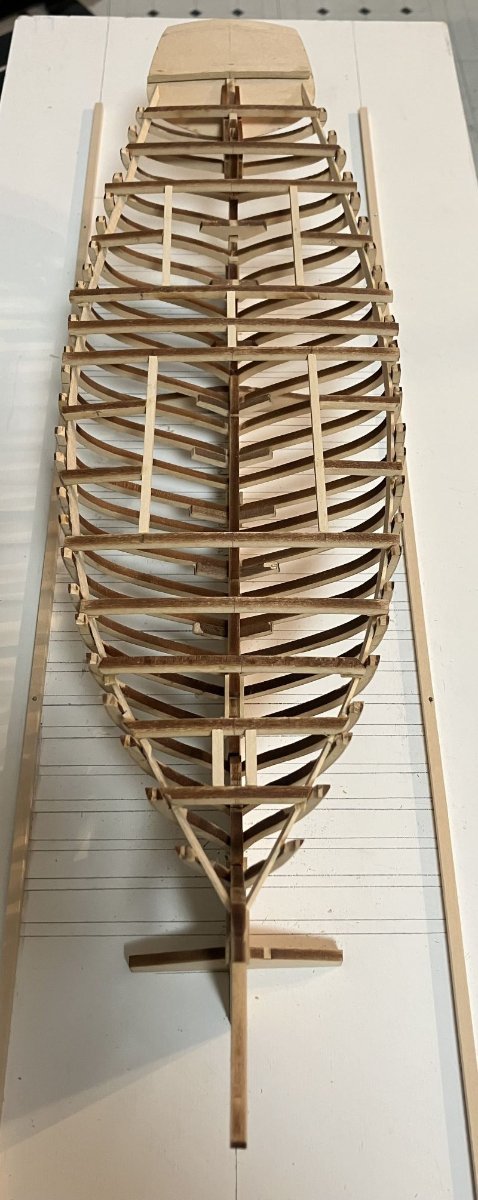
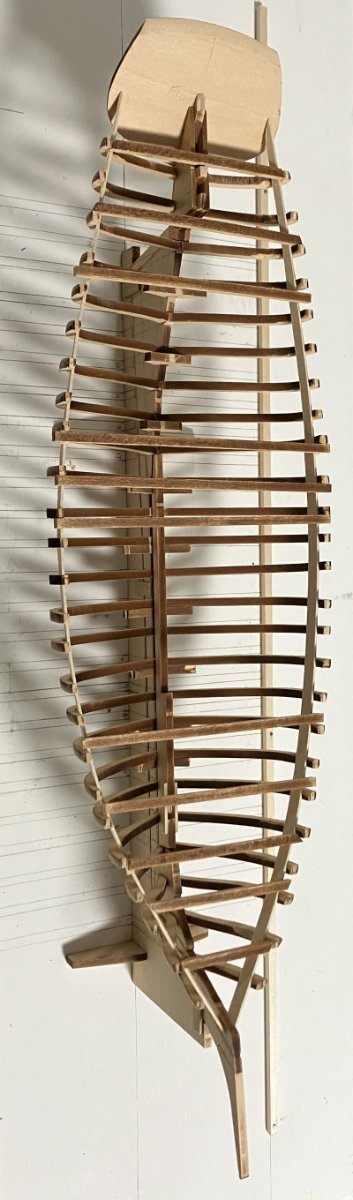
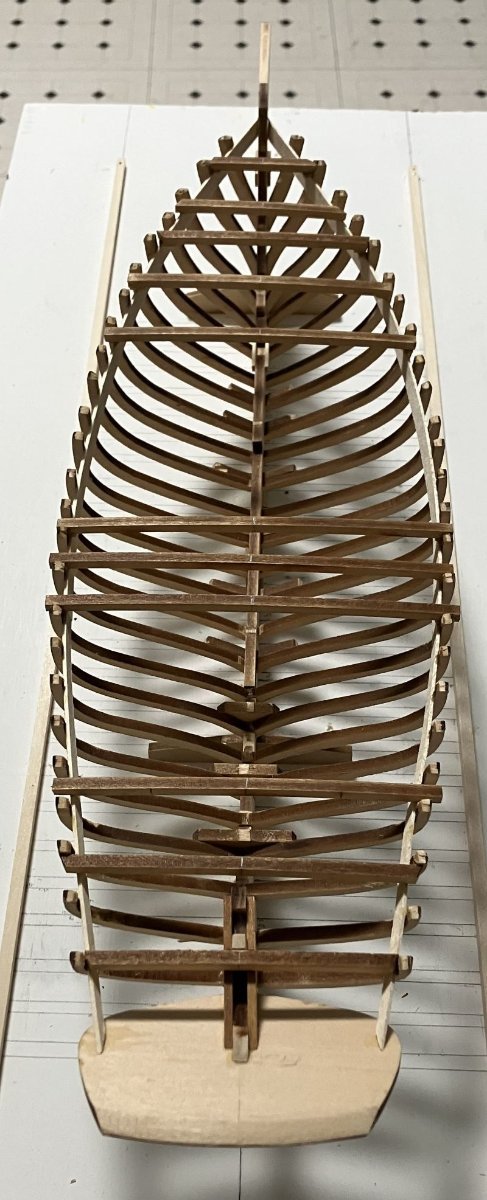
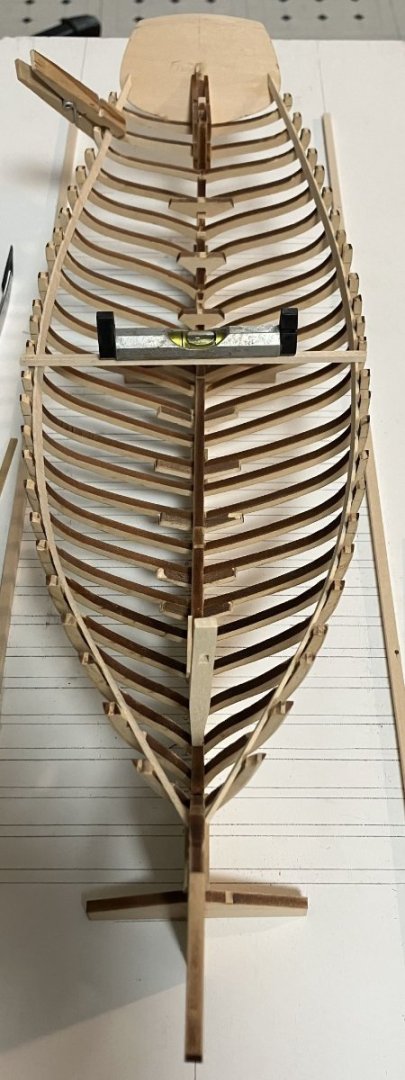
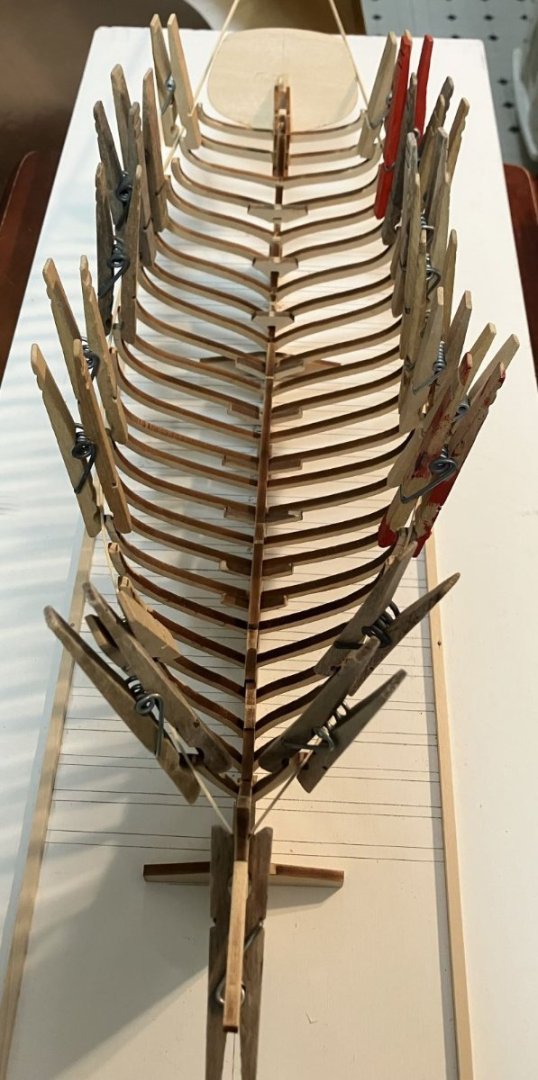
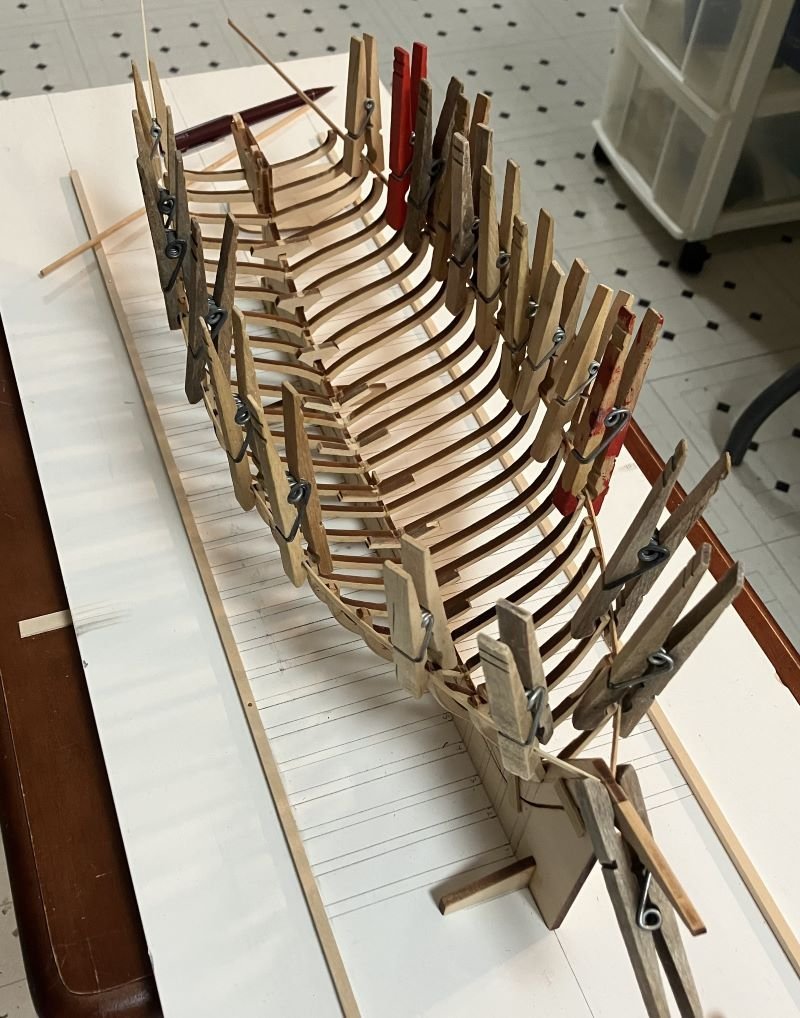
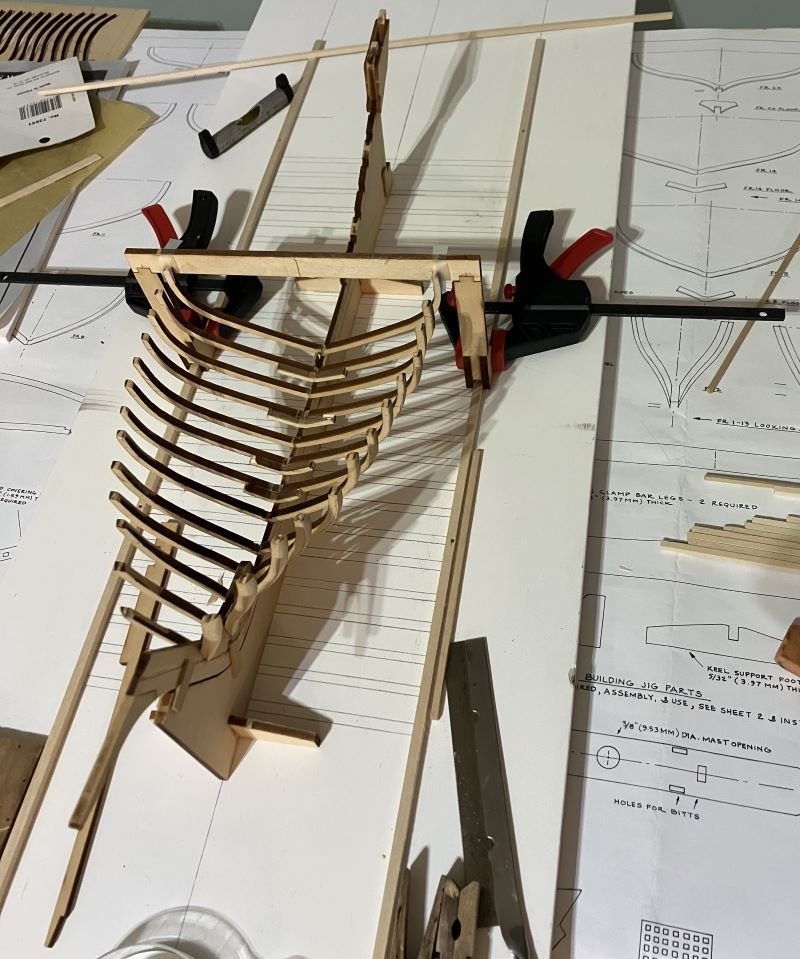
Hello, Everyone - The frames with no floors have a very small surface area for glue, so I cut a small piece of 1/32 strip and glued it to the front and out of the way before lifting them from the plans. They did help hold things together. I made my notch by cutting a piece from the laser cut sheet of the building fixture and gluing it on top. The thickness is the same and it's square. Then I carefully cut and removed the small section to allow the horn timber assembly to pass. There's no room for temporary strips on the last two frames, so I marked the height on the building fixture and clamped them in place. The temporary batten did tighten things up. She looks pretty fair and the clamps will finish holding things together. I will also dry fit the covering boards as I go to make sure things really fit accurately. Next on the list is to install the keelson and transom. Comments welcome - Kenneth

-
Outstanding work. She looks great. - Kenneth
-
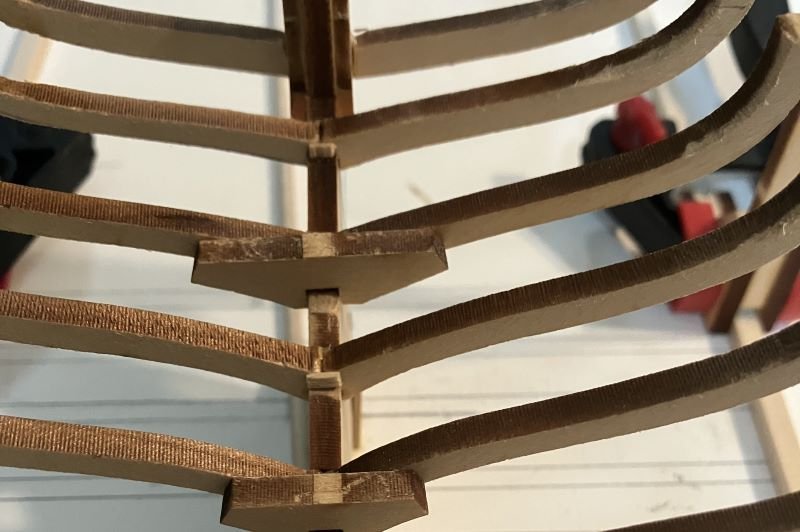
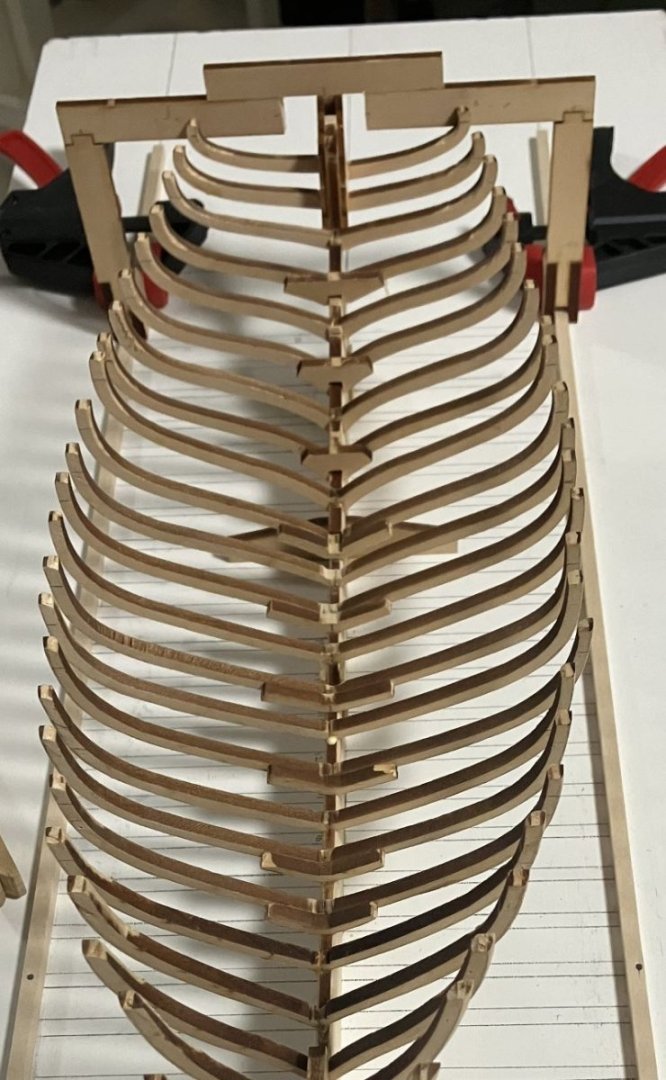
Update - I made it to frame 23 She looks a little snaggle toothed but the frames should pull in and level out with the clamps and battens. The keel assembly is too tall for the last two frames, so I'll have to cut a notch in the building fixture for them. It's important to check the height of each frame to keep the proper sheer. I've found that the height of each frame that sits on the keel is almost dead-on once it's made and glued. This is a really good kit. - Kenneth

-
I added frame # 13. Frome here to the end the bevels will be facing aft. - Kenneth
-
Thanks, Adam and all the likes. To add a few building comments: The instructions call to carve the bevels in the frames but I find that 80grit sandpaper with a good sanding block works better. Also, I'm dry fitting the keelson as I go to make sure the frames are cut accurately and to help place them properly on the keel. Don't want any surprises later on. Photos to follow - Kenneth