SkipW
-
Posts
50 -
Joined
-
Last visited
1 Follower

About SkipW

- Birthday September 8
-
 Knocklouder reacted to a post in a topic:
HMS Pegasus by SkipW - Amati/Victory Models - Scale 1:64
Knocklouder reacted to a post in a topic:
HMS Pegasus by SkipW - Amati/Victory Models - Scale 1:64
-
mugje reacted to a post in a topic:
HMS Pegasus by SkipW - Amati/Victory Models - Scale 1:64
-
Techtonic reacted to a post in a topic:
HMS Pegasus by SkipW - Amati/Victory Models - Scale 1:64
-
Landlubber Mike reacted to a post in a topic:
HMS Pegasus by SkipW - Amati/Victory Models - Scale 1:64
-
robdurant reacted to a post in a topic:
HMS Pegasus by SkipW - Amati/Victory Models - Scale 1:64
-
chris watton reacted to a post in a topic:
HMS Pegasus by SkipW - Amati/Victory Models - Scale 1:64
-
ccoyle reacted to a post in a topic:
HMS Pegasus by SkipW - Amati/Victory Models - Scale 1:64
-
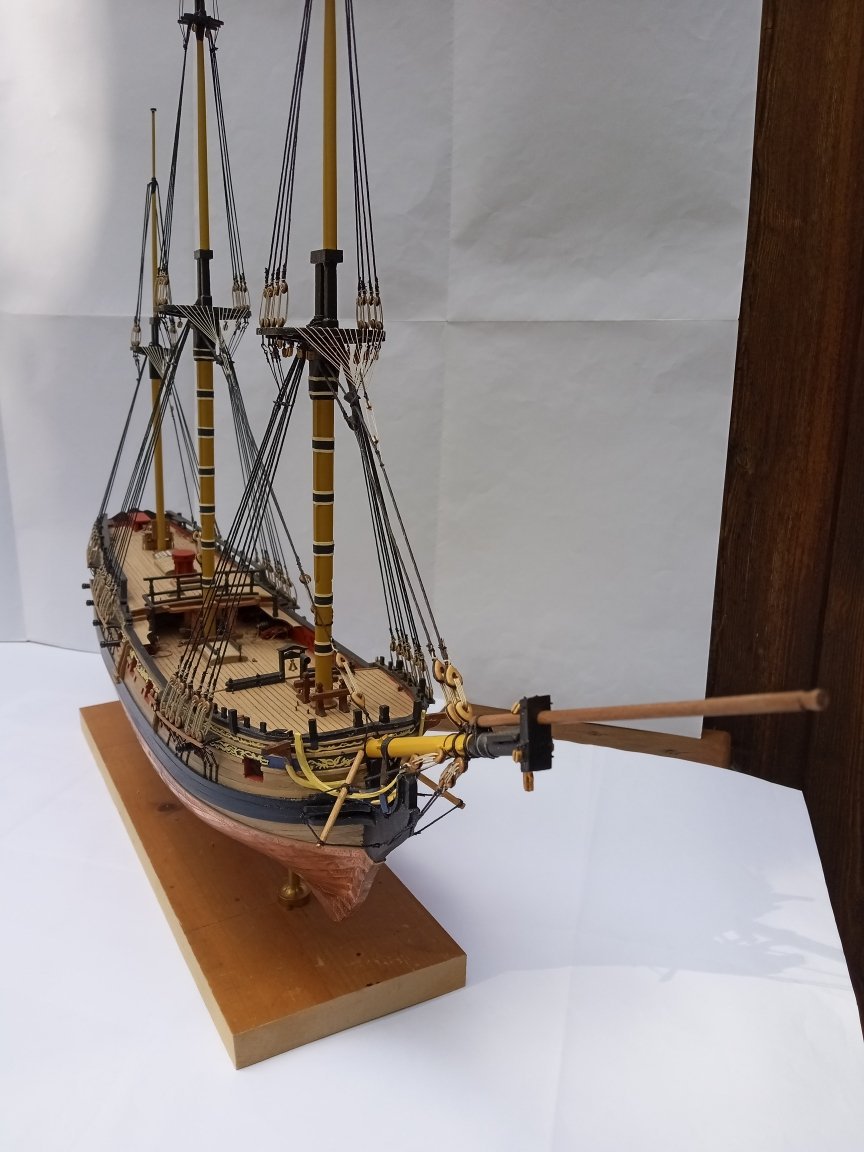
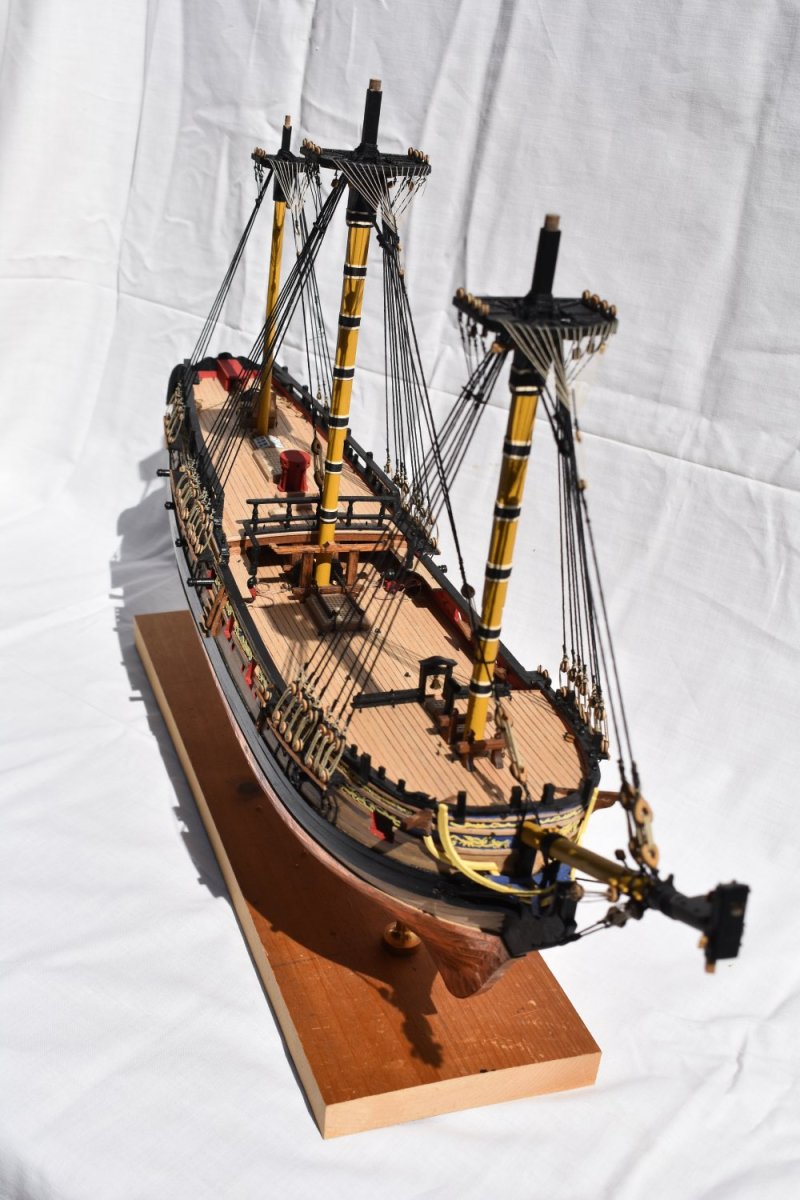
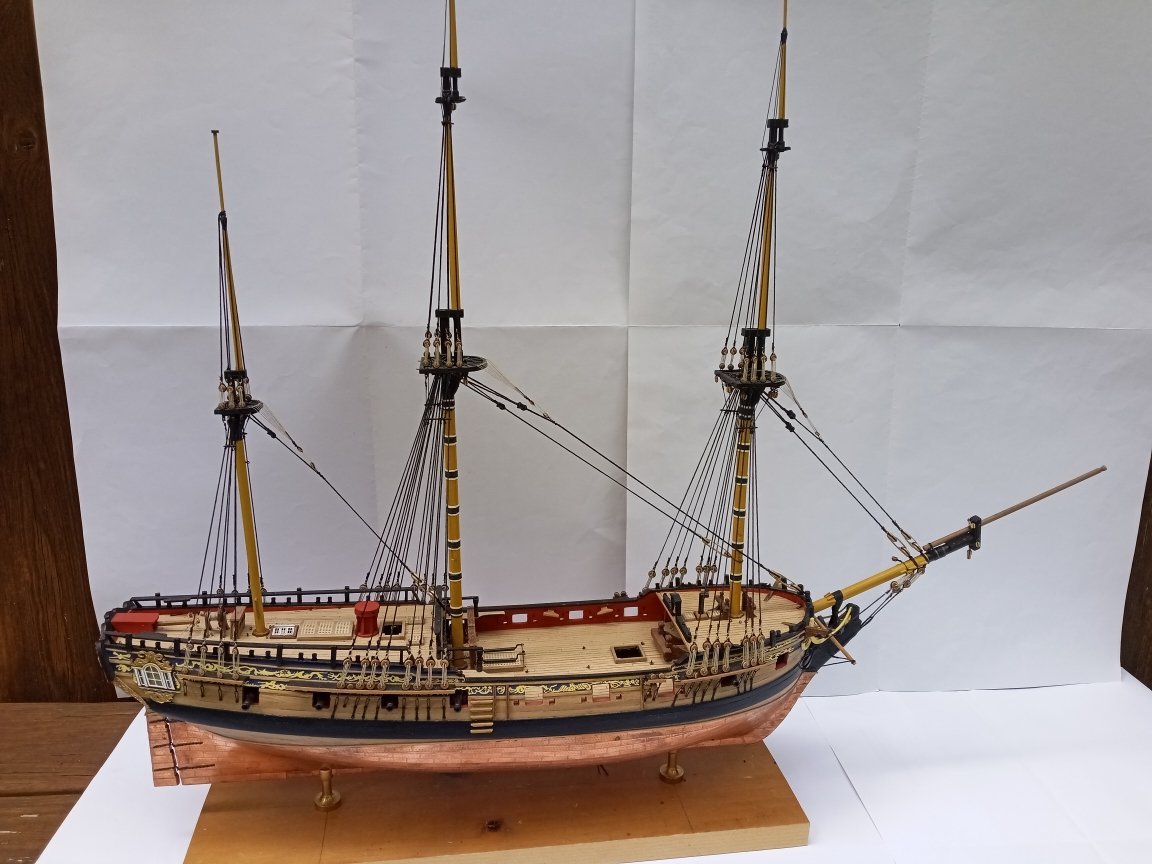
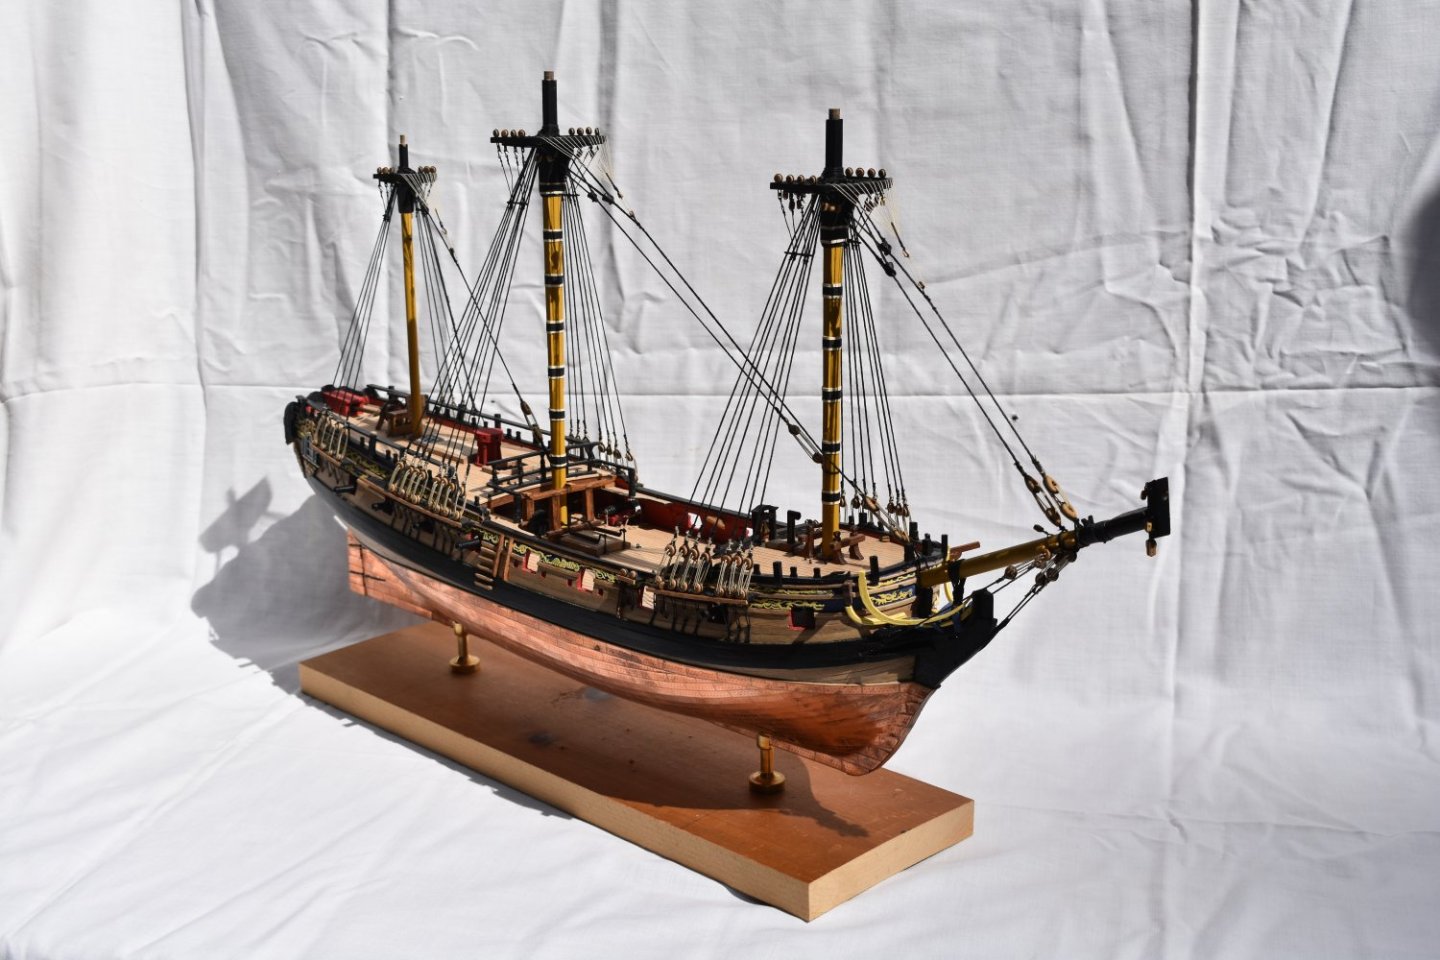
Well I know I haven't posted anything for quite a while, but I have not abandoned ship. Attached are two (not terrific) photos of the PEGASUS as she stands right now. Progress is being made, albeit somewhat slowly.

-
Knocklouder reacted to a post in a topic:
HMS Pegasus by SkipW - Amati/Victory Models - Scale 1:64
-
Knocklouder reacted to a post in a topic:
HMS Pegasus by SkipW - Amati/Victory Models - Scale 1:64
-
 Knocklouder reacted to a post in a topic:
HMS Pegasus by SkipW - Amati/Victory Models - Scale 1:64
Knocklouder reacted to a post in a topic:
HMS Pegasus by SkipW - Amati/Victory Models - Scale 1:64
-
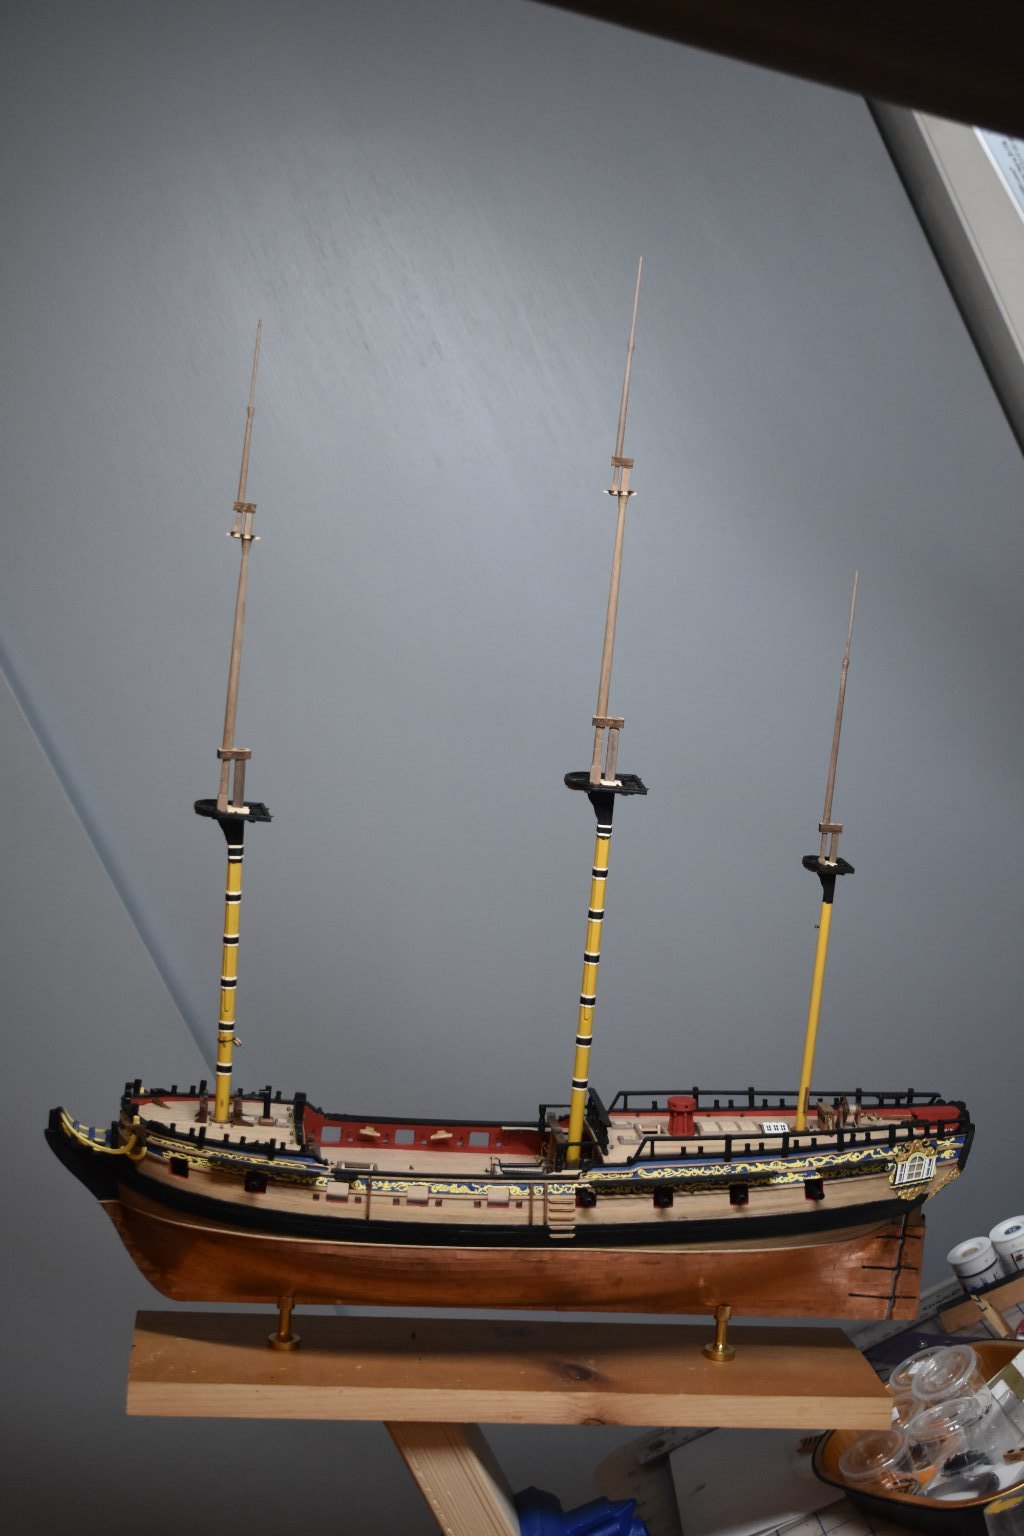
I haven't been "doing nothing" even though I haven't been keeping up with the blog for a while. As you can see quite a bit more standing rigging has been added. The standing rigging is challenging, but fun. Still have quite a bit more to go, and need to start going "up in masts".

-
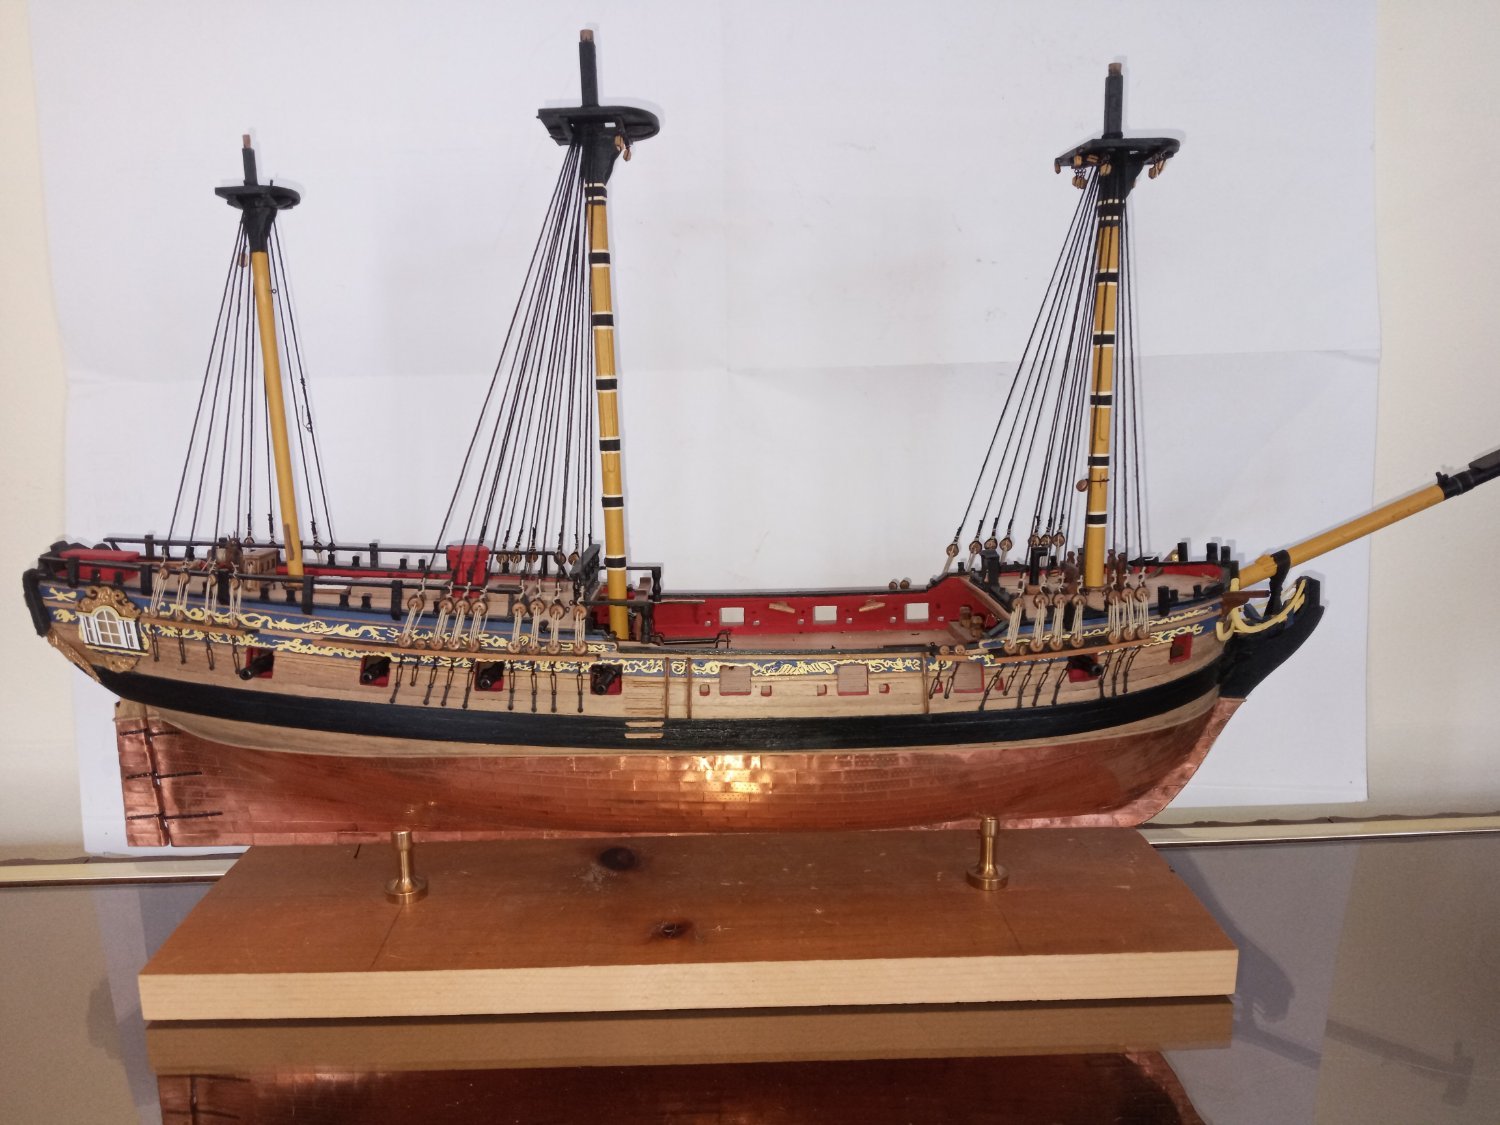
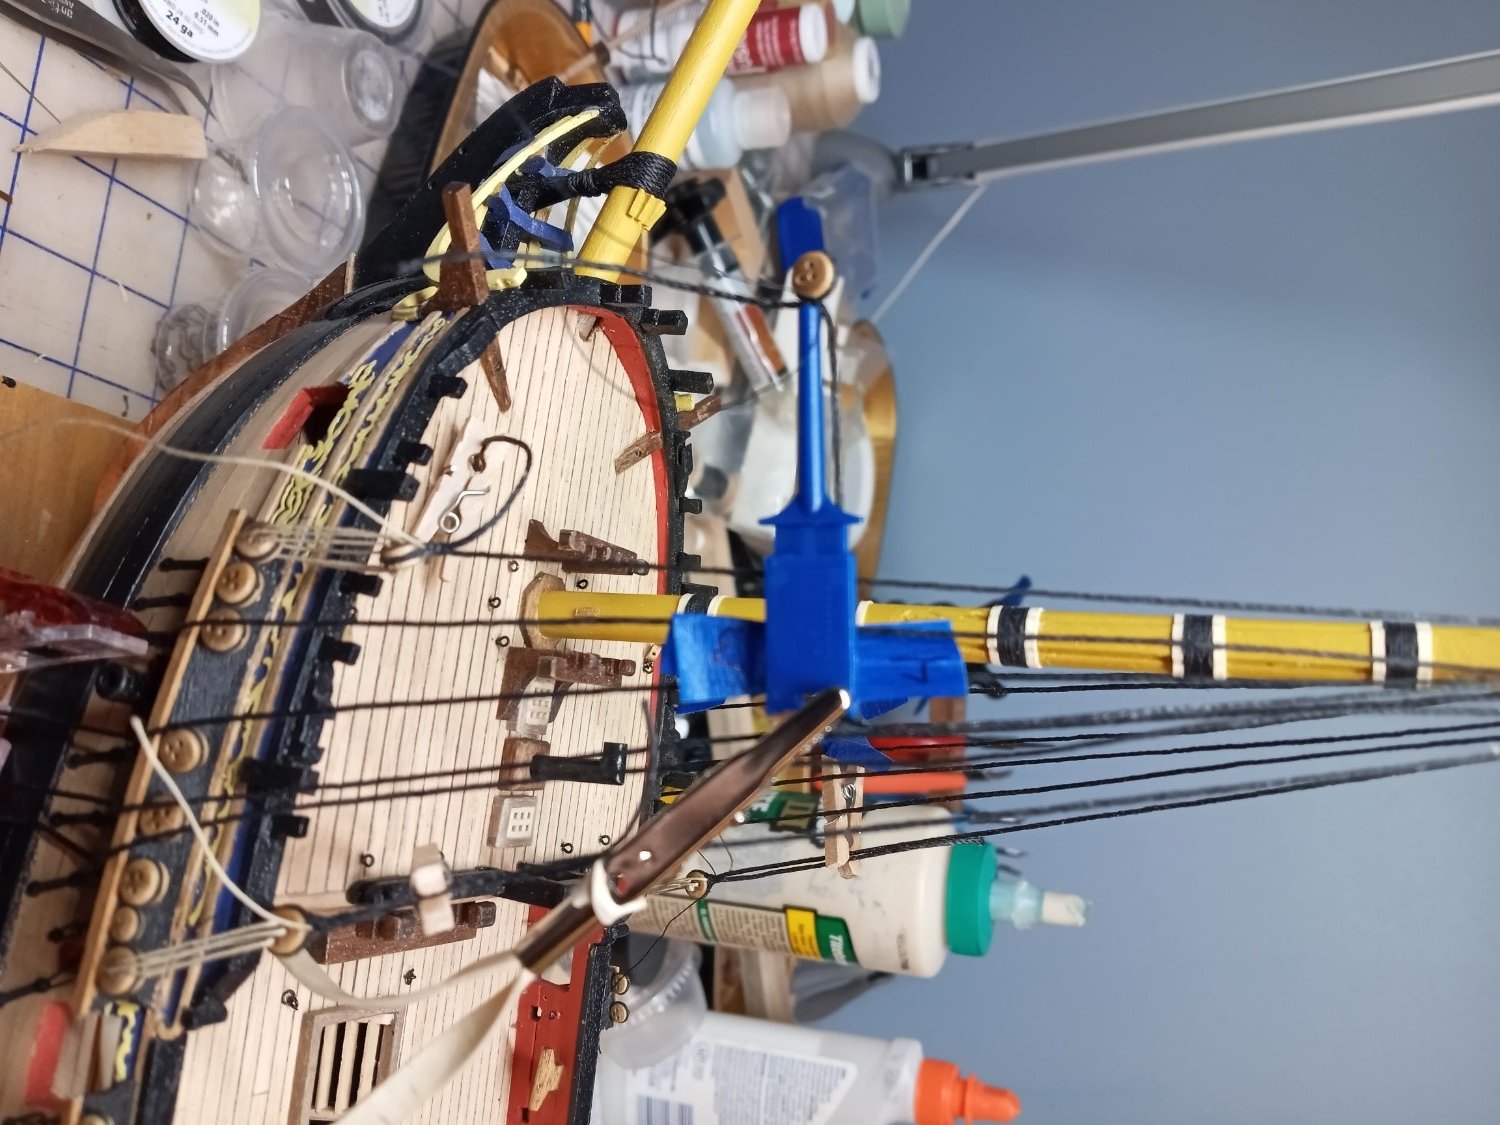
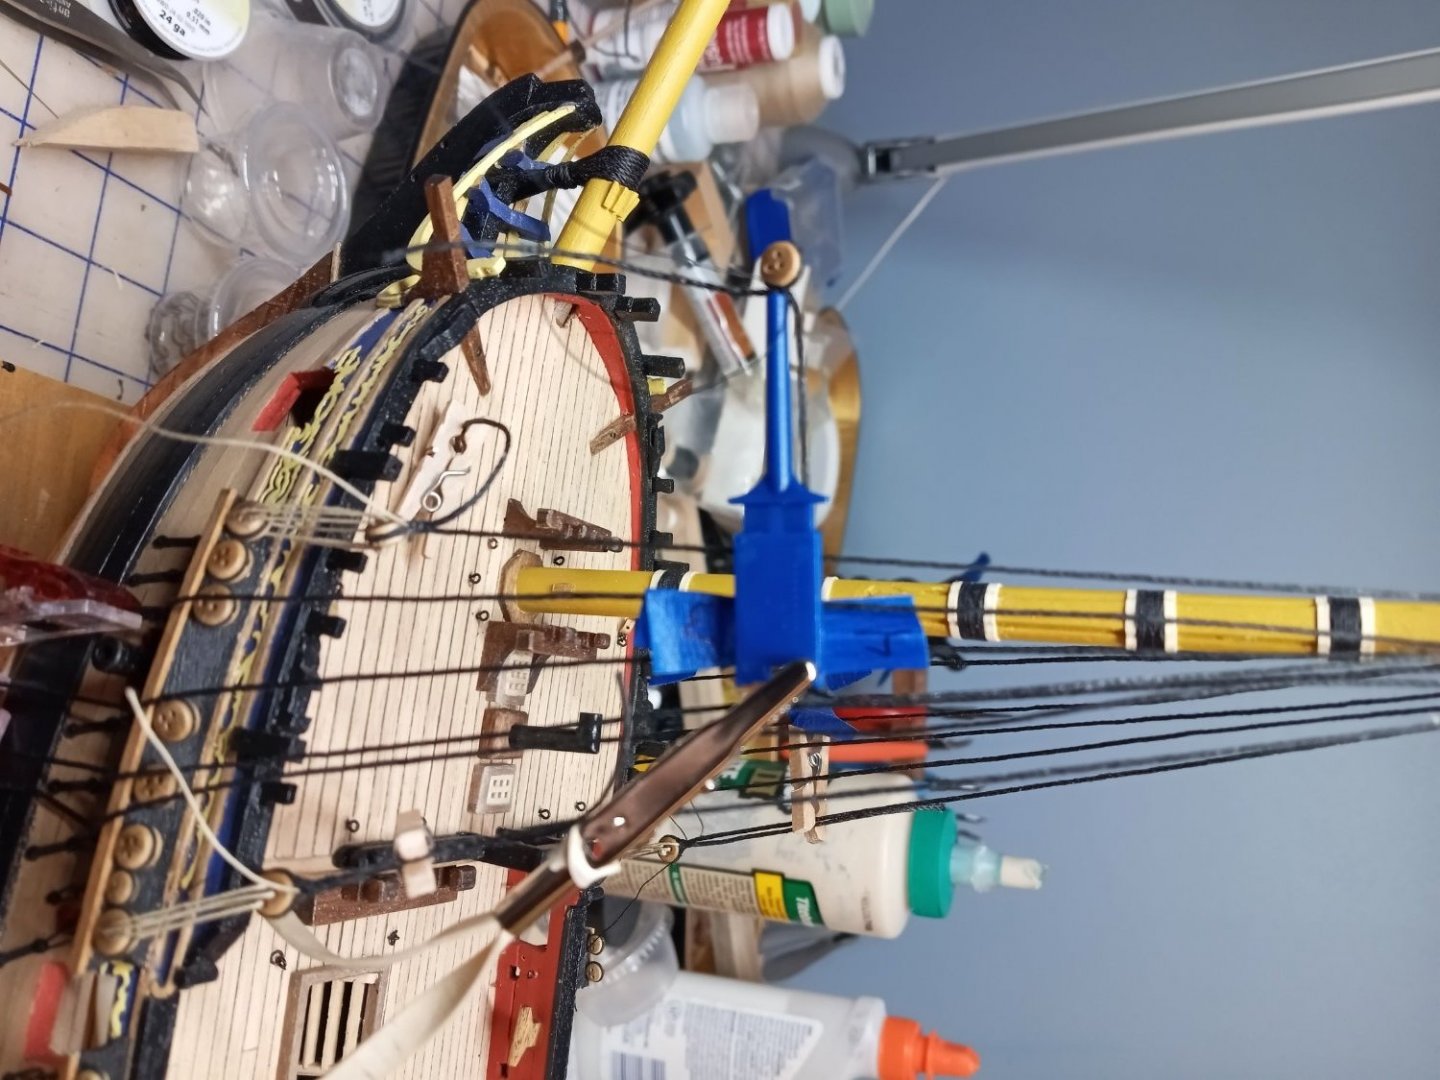
While "hiding" from COVID, I have spent a fair bit of time on the Pegasus. Attached is the current photo of her with all the lower mast shrouds, deadeyes and lanyards completed. No Small job. I tried a number of tricks/techniques to get the deadeyes where I wanted them. None seemed to work to my satisfaction. I watched a video on You-tube that gave me a good lead. I started by crossing the shroud over the top of the deadeye, which according to one of my references is how it actually was done. Then I took an electronics test lead clip (available on Amazon (as is everything)), and locked the deadeye in place. I could then lower the deadeye and check its height. If satisfied, I took a needle and thread and put a lashing across the "X", but not permanent. I then reeved up the lanyard. Once all the deadeyes were in place I could fine adjust the height by working the shroud thru the lashing a bit at a time until I was happy. Once happy, I tightened the lashing and locked it with some white glue. Then I could complete seizing up the free end of the shroud and lanyard. Took a while. Attached is a picture of the deadeye and shroud in the test clip.

-
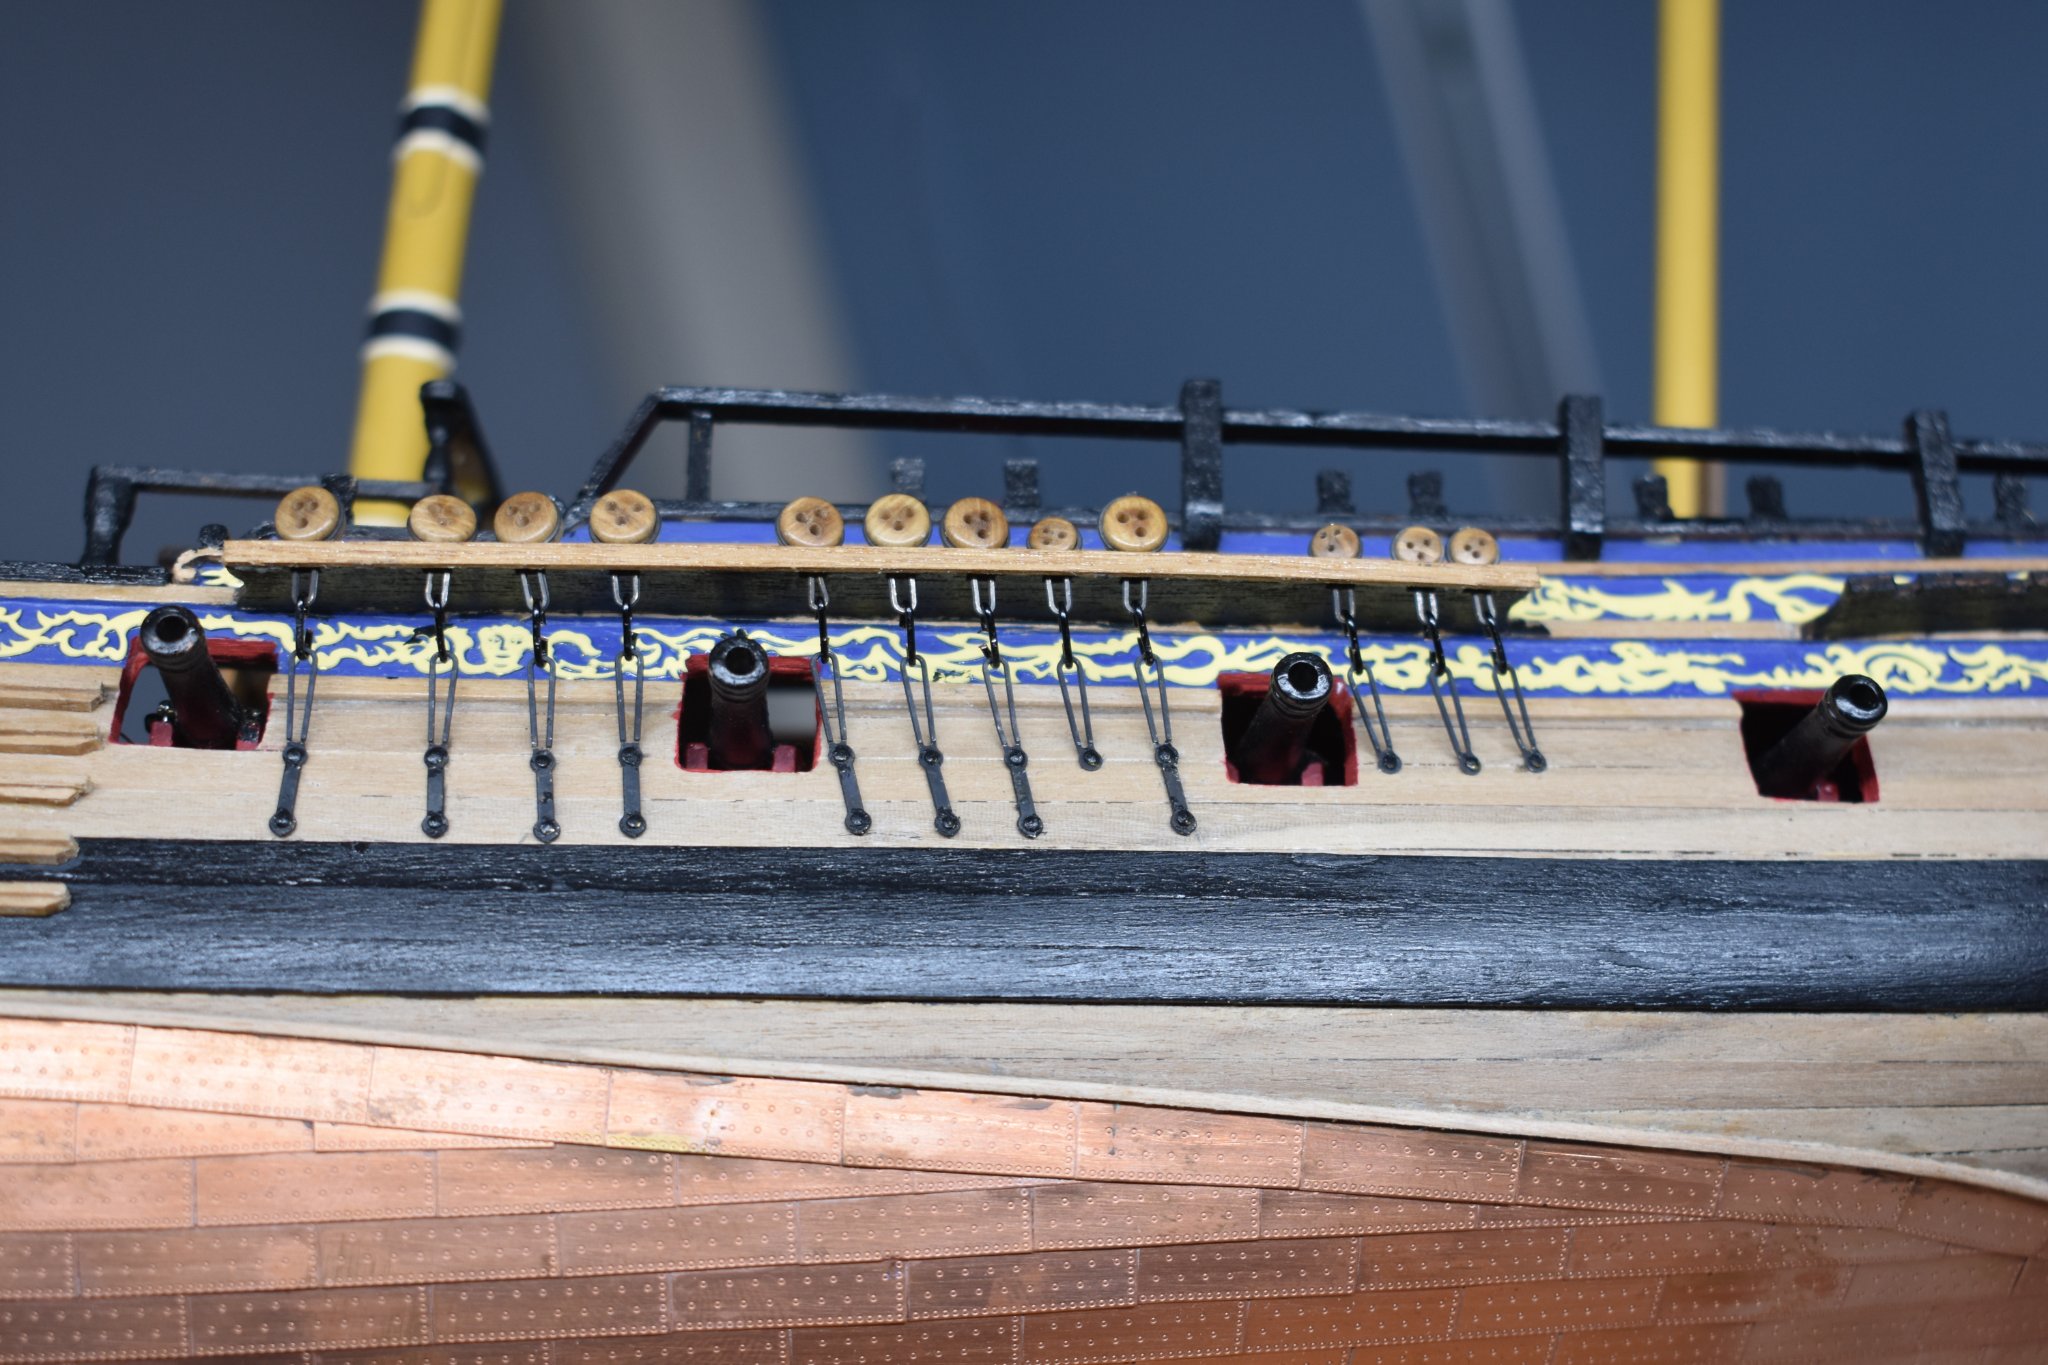
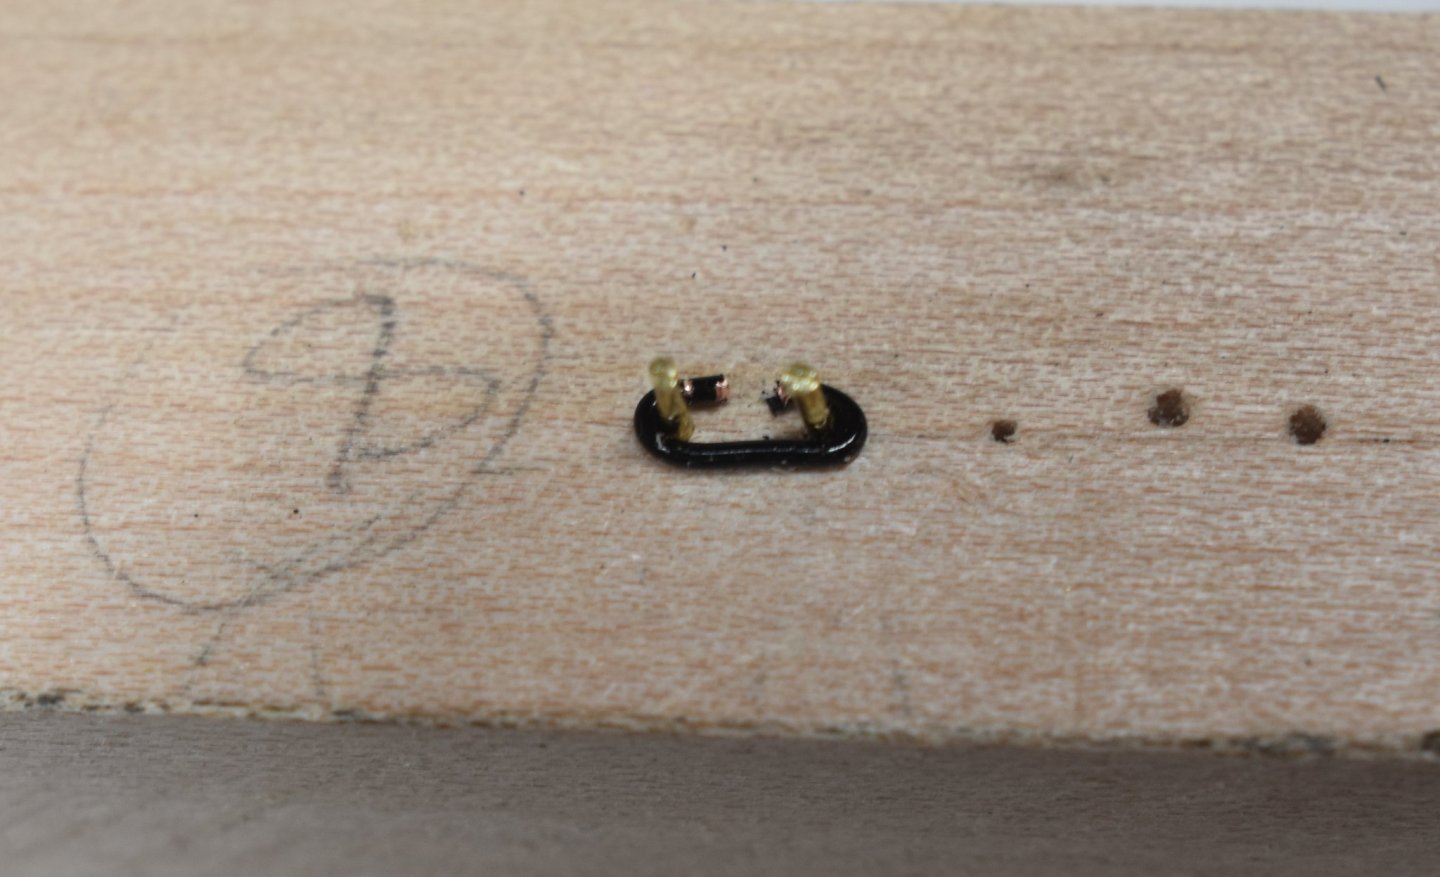
On to capping rails, chains and deadeyes. First I had a painful lesson on the fore-aft orientation of the capping rails. What I realized after getting them mounted (and glued) was that at least in the foremast capping rails the fore-aft position is super critical - due to the close proximity of the cannon ports and oar ports. Unfortunately they had to be removed and moved aft about 1/8th of an inch for every thing to clear. Mounting the fore mast deadeyes, chains and preventers went smoothly. However for the main mast I ran into the same problem cited by Blue Ensign and seen on other models. The preventer plates overlapped the wale by a fair bit. I don't like the look created by notching the wale. Therefore I took the same approach as Blue Ensign. I fabricated shorter chains to go from the deadeye to the long chain loop. I did this using the jig shown in the photo. Simply two brass nails about 3.5mm apart with the heads cut off. A small hook in one end of 22 Ga, black, artisan wire was hooked on one nail, pulled tight then hooked around the second nail. The wires were trimmed to leave about a 1/2mm opening in the open side. These gave chain links of a great length so that while the preventer plates touched the wale, they did not overlap it. Quite a few more deadeyes to go!

-
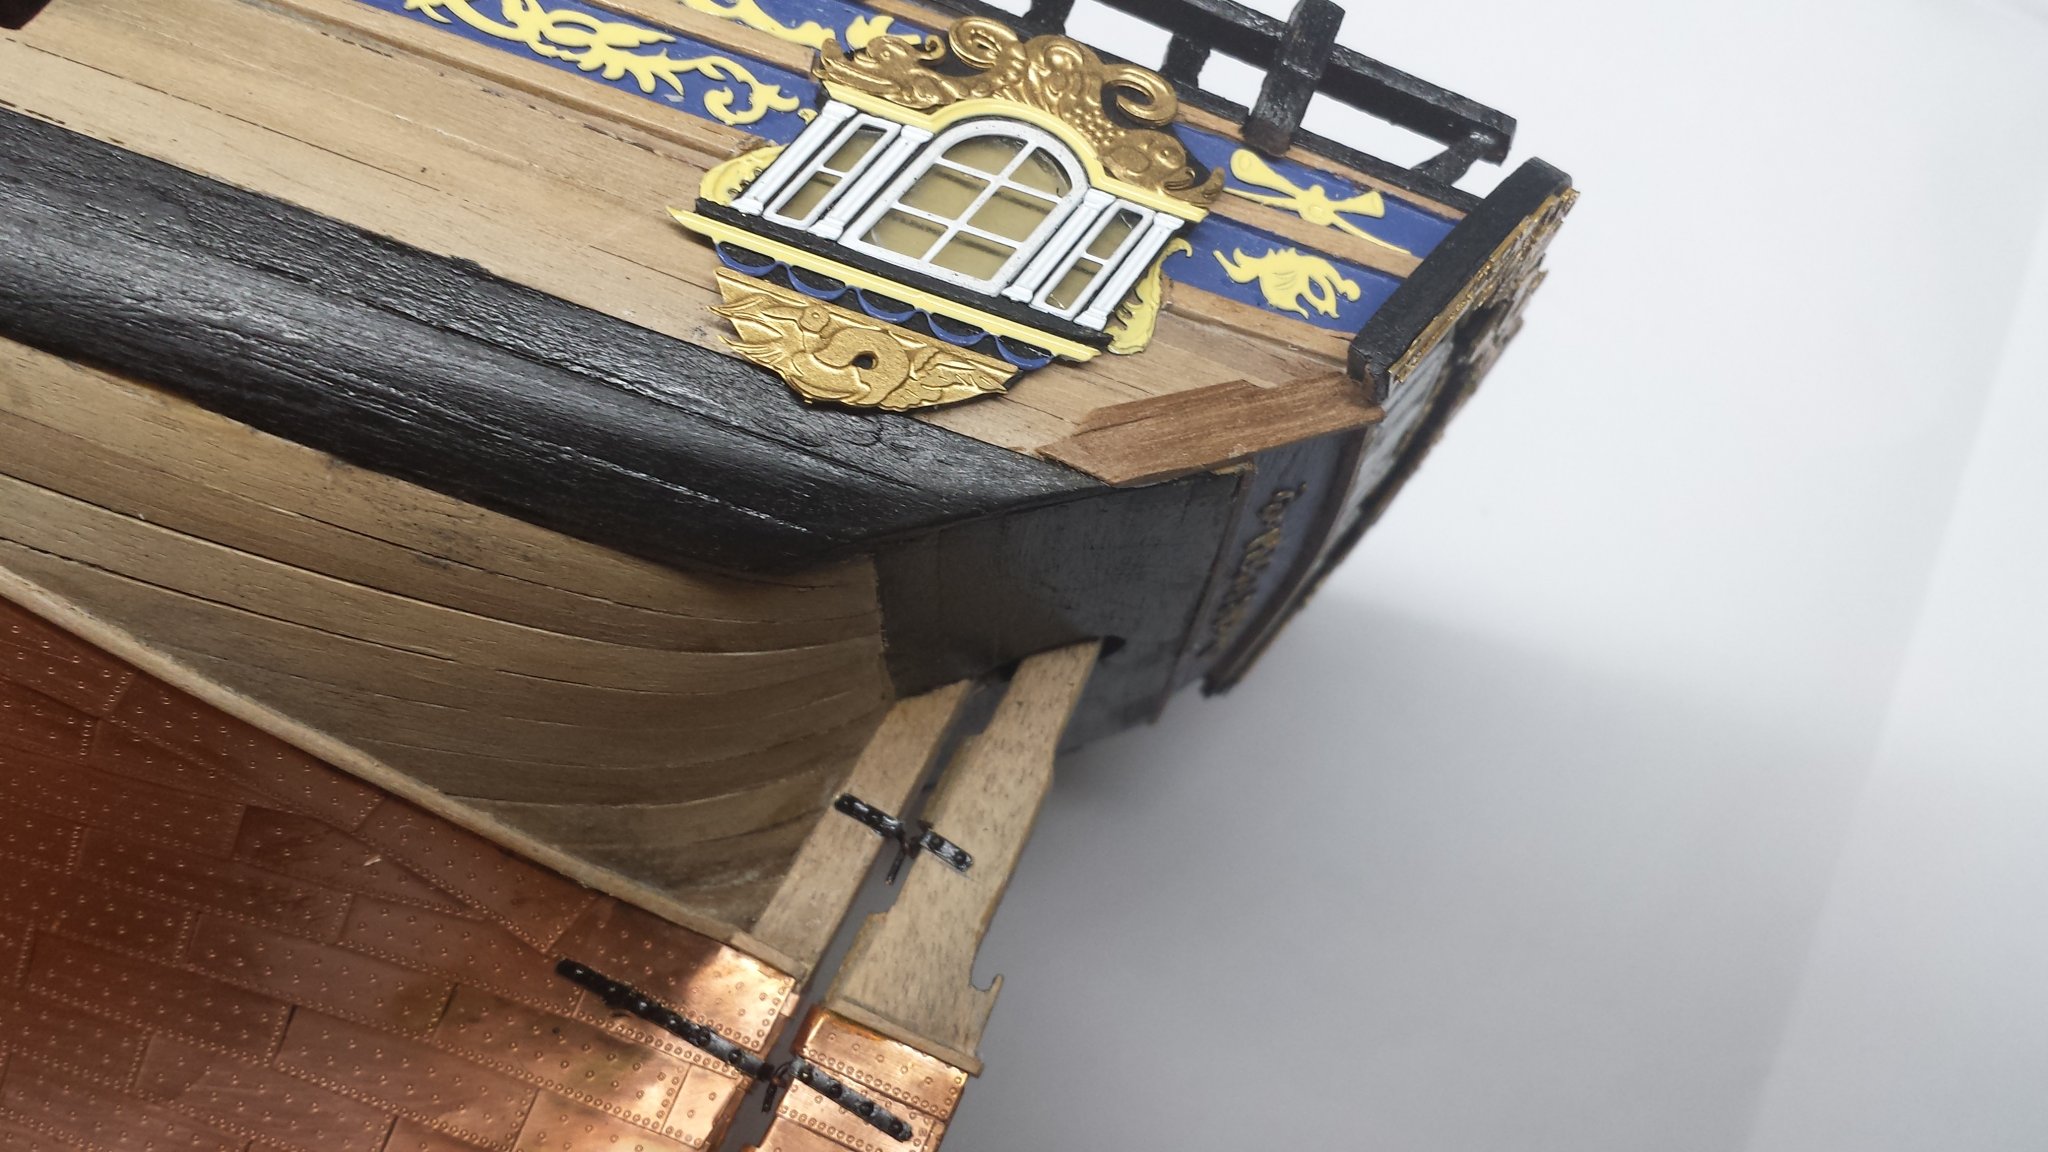
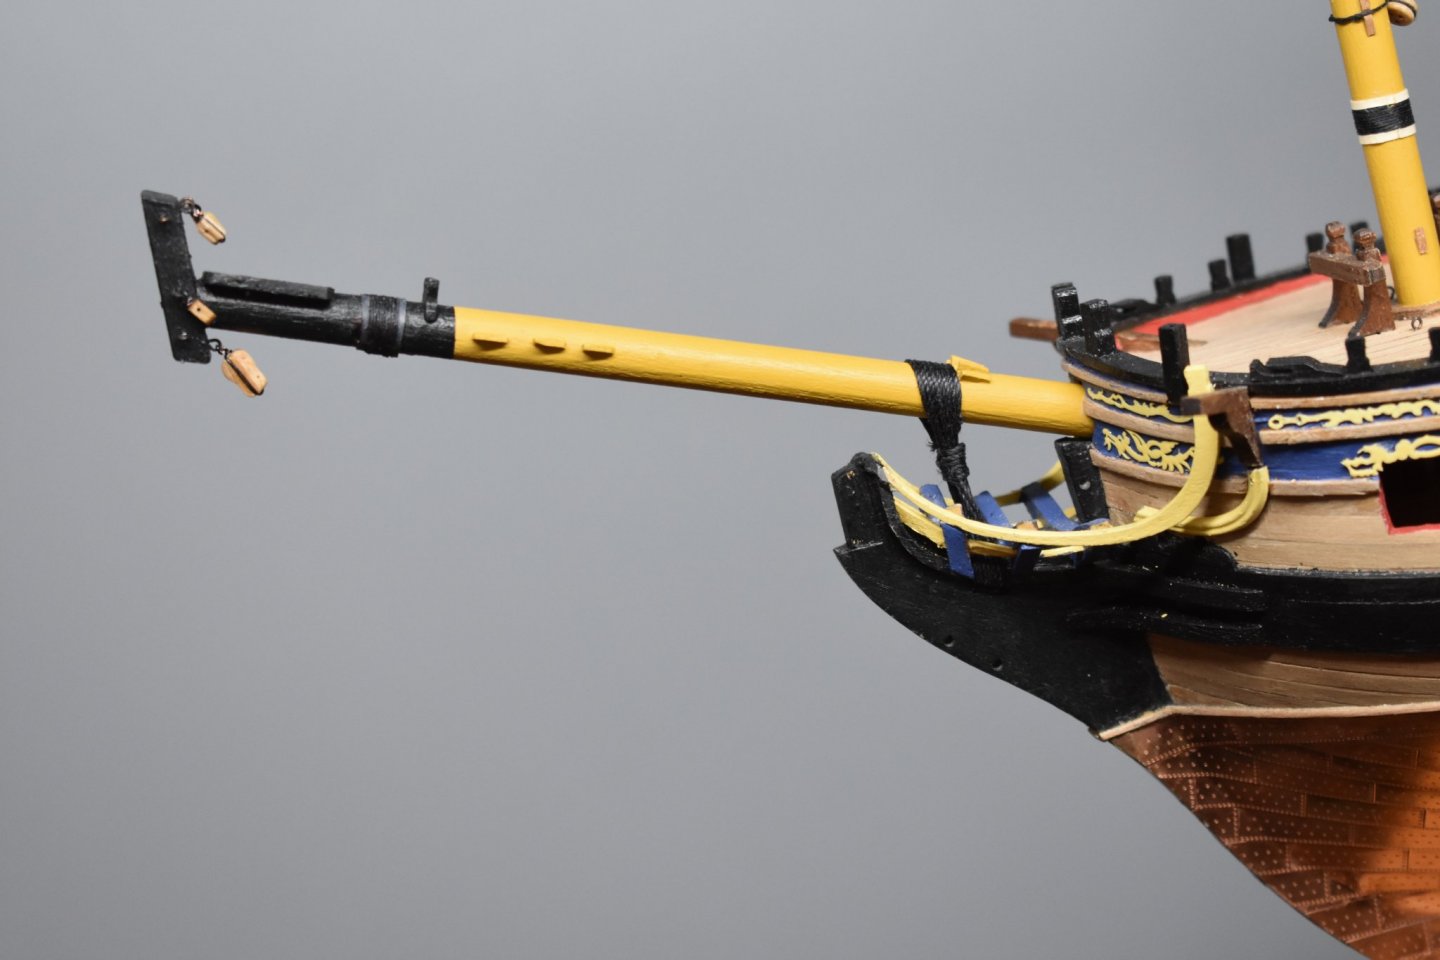
After consulting a few blogs I finished making and fitting up the bowsprit. A couple comments. I got the tip from Blue Ensign that the bowsprit cap in the kit was not really usable. He was right. So following his lead and looking at Anscherl's cap, I followed suit and made it bigger with holes drilled through at the proper angle using scrap 5mm walnut from the kit. There is no way that using the kit supplied cap you could get the angle right and mount all the eyebolts. The other interesting thing is the rigging of the bowsprit is different in the Anscherl book and the kit rigging sheets. I chose to go with the kit rigging scheme. I doubt many people will notice.😊
-
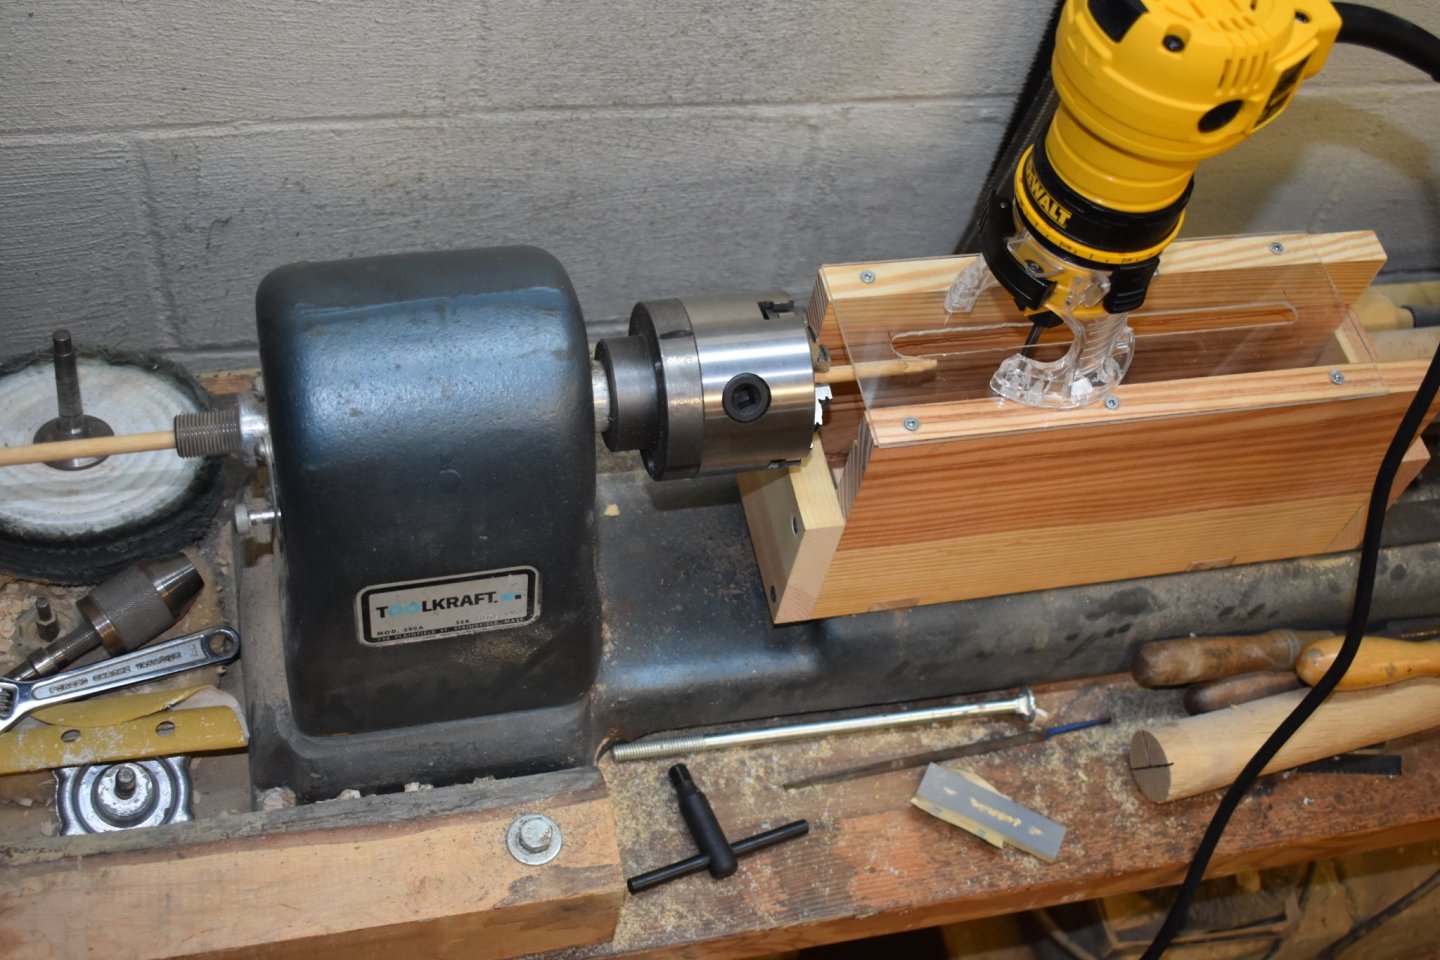
For turning the round mast tops - I started using the router and turning the lathe by hand - - but that was hard to accurately control the length of the rounded section. I ended up just "choking up" on the mast section (exposing maybe an inch) and turning the round section using a 1/4" gouge and 1/4" skew - just normal turning. For the square sections the lathe is just used for holding and getting precise angles. On the upper sections of the masts, where the dowels are 6mm and 4mm - it became impractical to use the router. So I took the jig off and simply used a flat file held parallel to the lathe ways, still using the indexing pulley to get perfect 90º angles. With a good flat file 5 or 6 strokes gave me the depth I needed. What I found intriguing was how to get a 6mm square base from a 5.88 mm round dowel. So at the base of the mast sections I cut the square section all the way down. Then laminated the lower part on all four sides with 1mm walnut veneer. Using a sharp knife cut the angle at the top. Looks very good and fits the trestle trees really well. There is another turner's trick I used which is not shown. To turn the tops of the t'gallants I made a steady rest for the tail stock. I drilled a hole just slightly bigger than the dowel. Then when putting the mast section in the lathe you insert about a 1/4" of the top into the steady rest. This way you can turn the dowel down very accurately and very thin. I lost my nerve when it got below 2mm and used a file and sand paper to get down to the ~ 1.5mm final diameter. Then you simply cut off the 1/4" of original material at the top. If you are interested I could post a picture of how this is done. I will probably use this technique to taper the spars.
-
While hiding from COVID I have been working along at a slow pace. Finished most of the fancy work at the bow. Then after attaching the chain plates realized that in order to get the proper angle on the deadeye straps I would need to get the masts at least roughly done. That started an adventure of building jigs for my lathe to round, square and taper the various mast segments. They are all finished now ant the attached photos show the lathe fixture that allowed me to use a laminate trimming router with a 1/4" bit to mill the masts. (Not the topgallants as they are a bit too small - a different technique was used for those). The lathe was fitted with a machinists chuck so the dowels could be passed thru the hollow live stock. The router was set up using a birch dowel of the correct diameter and then the walnut masts sections were milled. The square sections were done by using the indexing feature on the live stock. With the masts now close to absolute position I can line out the shrouds and backstays and get the deadeyes in place.

-
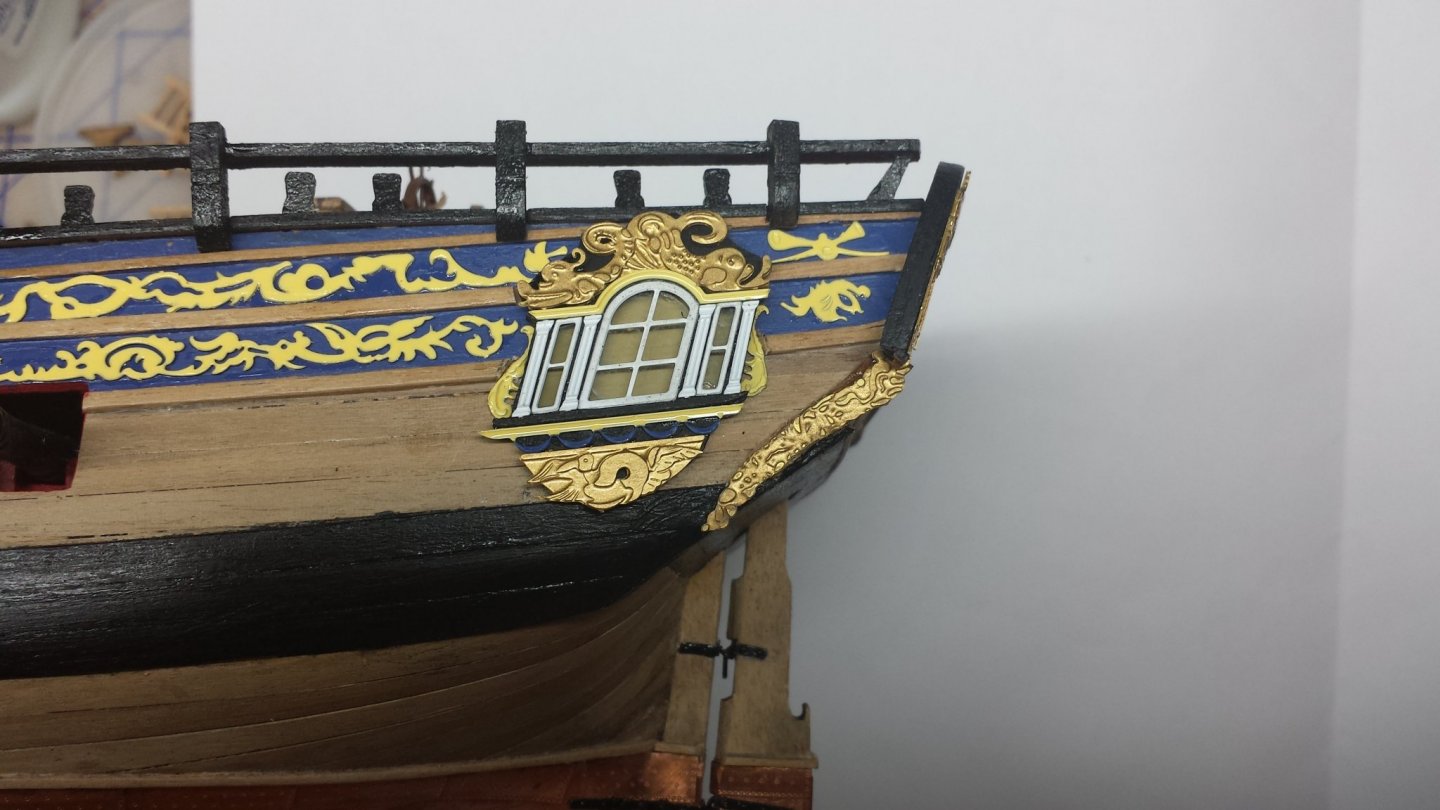
One part of the stern quarter trim that really does not fit well is the decoration running down to the wale. It must overlap the wale but that is a mm higher than the hull. Several of the blogs show how other builders have overcome this problem. A very complicated way is to make a piece running from the bottom of the stern window piece to the wale. It is composed of a double curve and it never seems to come out looking smooth due to the use of a lot of filler to get the curves and blend it in. My idea was to simply take a piece of the walnut hull planking and fill in the space so it is on the same level as the wale. Then once the trim piece is in place carefully carve back to the trim. While it may not be perfect it does seem to look as the original plan sheet shows.

-
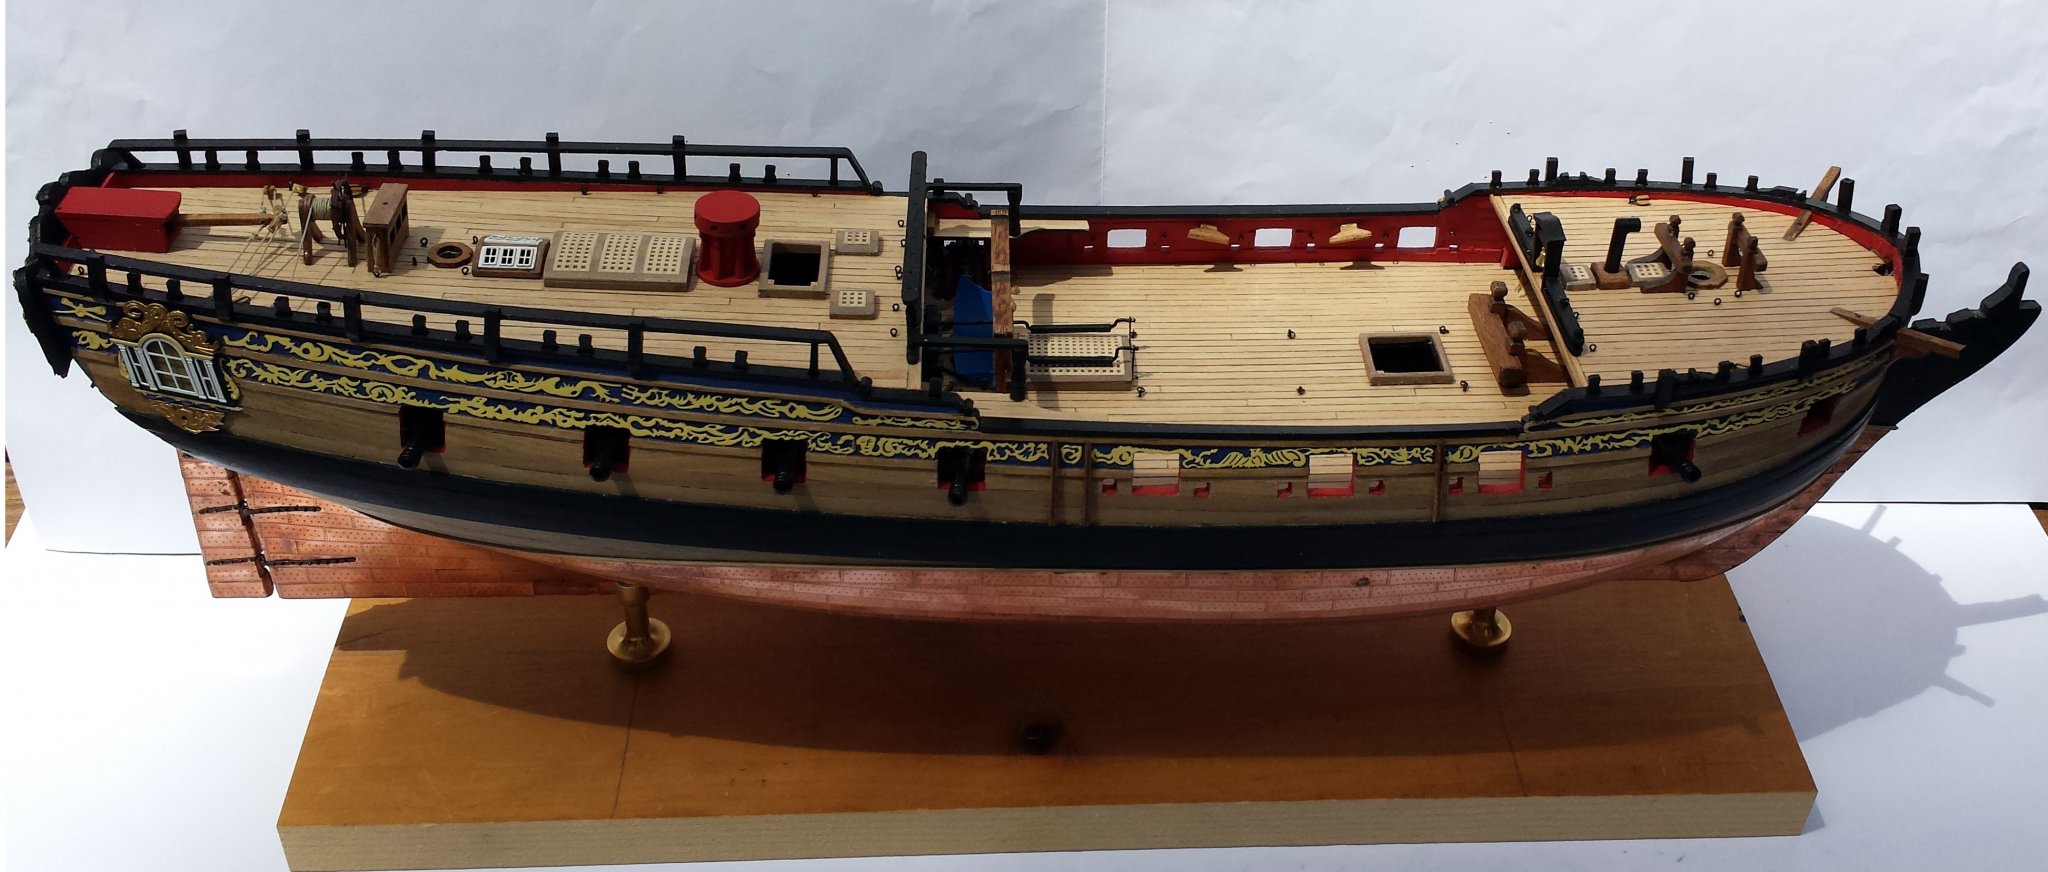
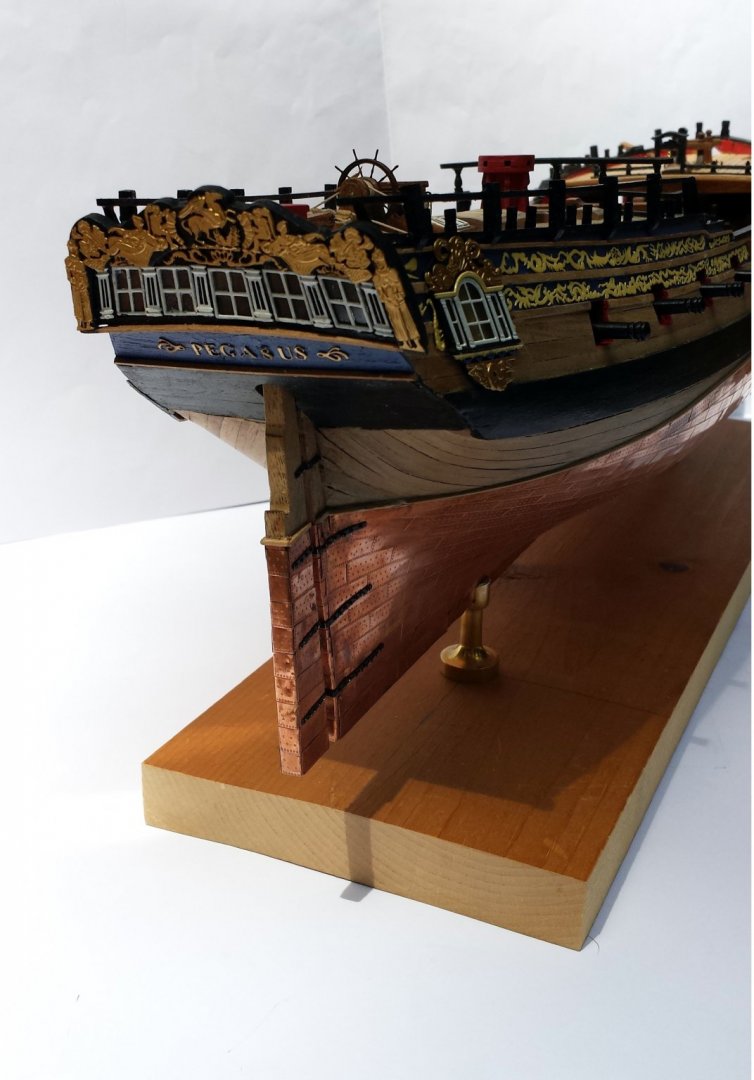
Just because I've been rather silent, doesn't mean I haven't been working. I'm amazed it's been 10 months since my last post. With the free time afforded by COVID I have been working away, albeit a bit slowly. Most of the hull construction is finished. A few challenges faced and met. Some of the coppering needs a bit of recleaning but close to time to start thinking about masts, spars and some rigging. I have gotten a lot of help from the Build Logs on line - without those this would be infinitely harder. Thanks to all those who have "gone before". Stay well.

- 45 replies
-
- 12
-
-
Really appreciate the explanation of the catheads - - I've been struggling with this for several days. You're exactly right - the only way to completely comply with the kit parts and drawings and keep them below the rail is to install them "upside down". It wasn't until I saw your write-up that I realized they needed modification to get the proper upward angle coming thru the side. Thanks!
- 363 replies
-
- 2
-
-
- pegasus
- victory models
- (and 2 more)
-
Blocks In checking the kit parts list I should have 180 3mm single blocks - - however on checking the contents of the large packet of 3mm (actually 3.8mm) blocks I have 110 single blocks and 100 double blocks. Anyone else make this observation? I think I am seriously short of 3 mm single blocks. All the other sizes/types of blocks and deadeyes check out.
-
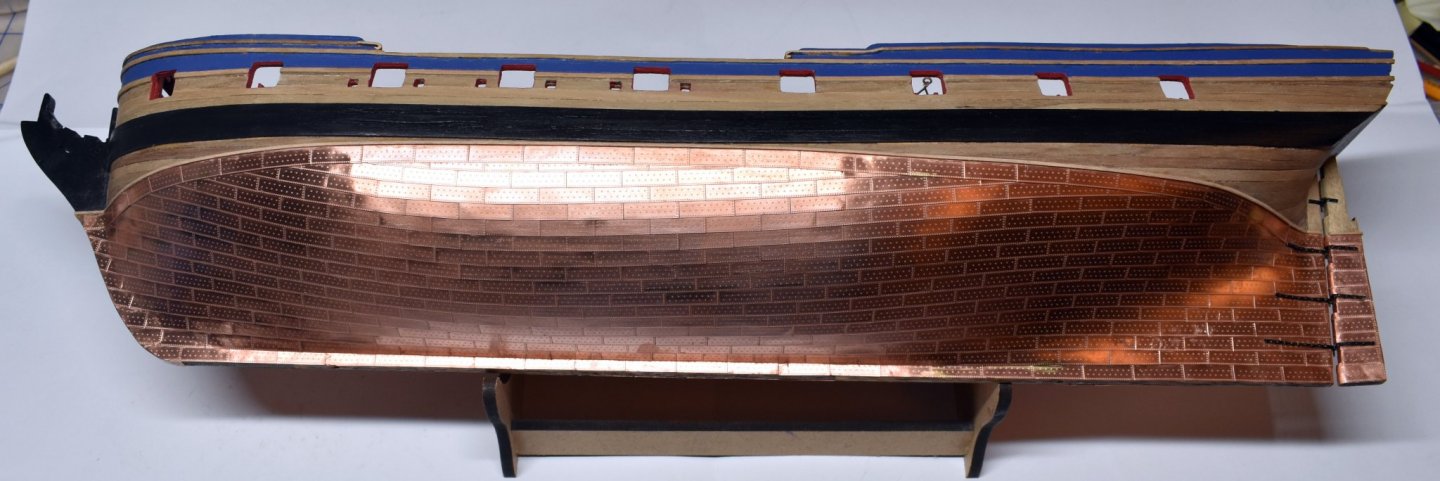
The lower hull is finally finished. All the excess CA was cleaned off by using a brass wire wheel in the Dremel tool. It was not easy, but it did work. The best approach is to try to minimize CA squeeze-out when applying the plates. I probably over-applied CA being cautious about the plates adhering. When using the wire wheel it has to be low speed, low pressure. If you generate too much frictional heat you get transfer of brass onto the copper and that is harder to get off then the CA! That requires medium coarseness steel wool. The top of the coppered area was finished off with a 1x1mm walnut strip as others have done - it dresses it up nicely. Hanging the rudder was a bit challenging, but once you realize the gudgeons are at a right angle to the stern post the rest is just care in fitting them, aligning the gudgeons on the rudder and putting in the dozens of nails. The preventer chains will be put on later. Now onto the upper decks.
- 45 replies
-
- 10
-
-
My coppering job is done - I will post some pictures when I am satisfied with the clean up. A word of advice to those who will copper the hull - - - be very judicious with the CA adhesive. Getting it off the plates when you are done is more than onerous. The problem with CA is it polymerizes and that "plastic" that is formed is very tough and not very soluble. I've tried many ideas, and while acetone is helpful, for the thicker spots, especially along the bottom edges of the plates, it is not that effective. I am now using medium coarseness steel wool, which does work, very slowly, and does not mark the plates. Going over it with 0000 steel wool leaves the plates bright and shiny. I'll be cleaning plates for a while so if anyone has any suggestions please let me know.
-
Hi Martin - Looks great. I see your struggling with some of the same issues I had, When to Do What, or conversely What to do When! Good luck on the carving, that's really ambitious. I look at some of these books of museum models and carvings are exquisite. I've never had any luck carving stuff. I don't think I'll start now.
- 467 replies
-
- 1
-
-
- fly
- victory models
- (and 1 more)