
Soup591
-
Posts
15 -
Joined
-
Last visited
Content Type
Profiles
Forums
Gallery
Events
Everything posted by Soup591
-
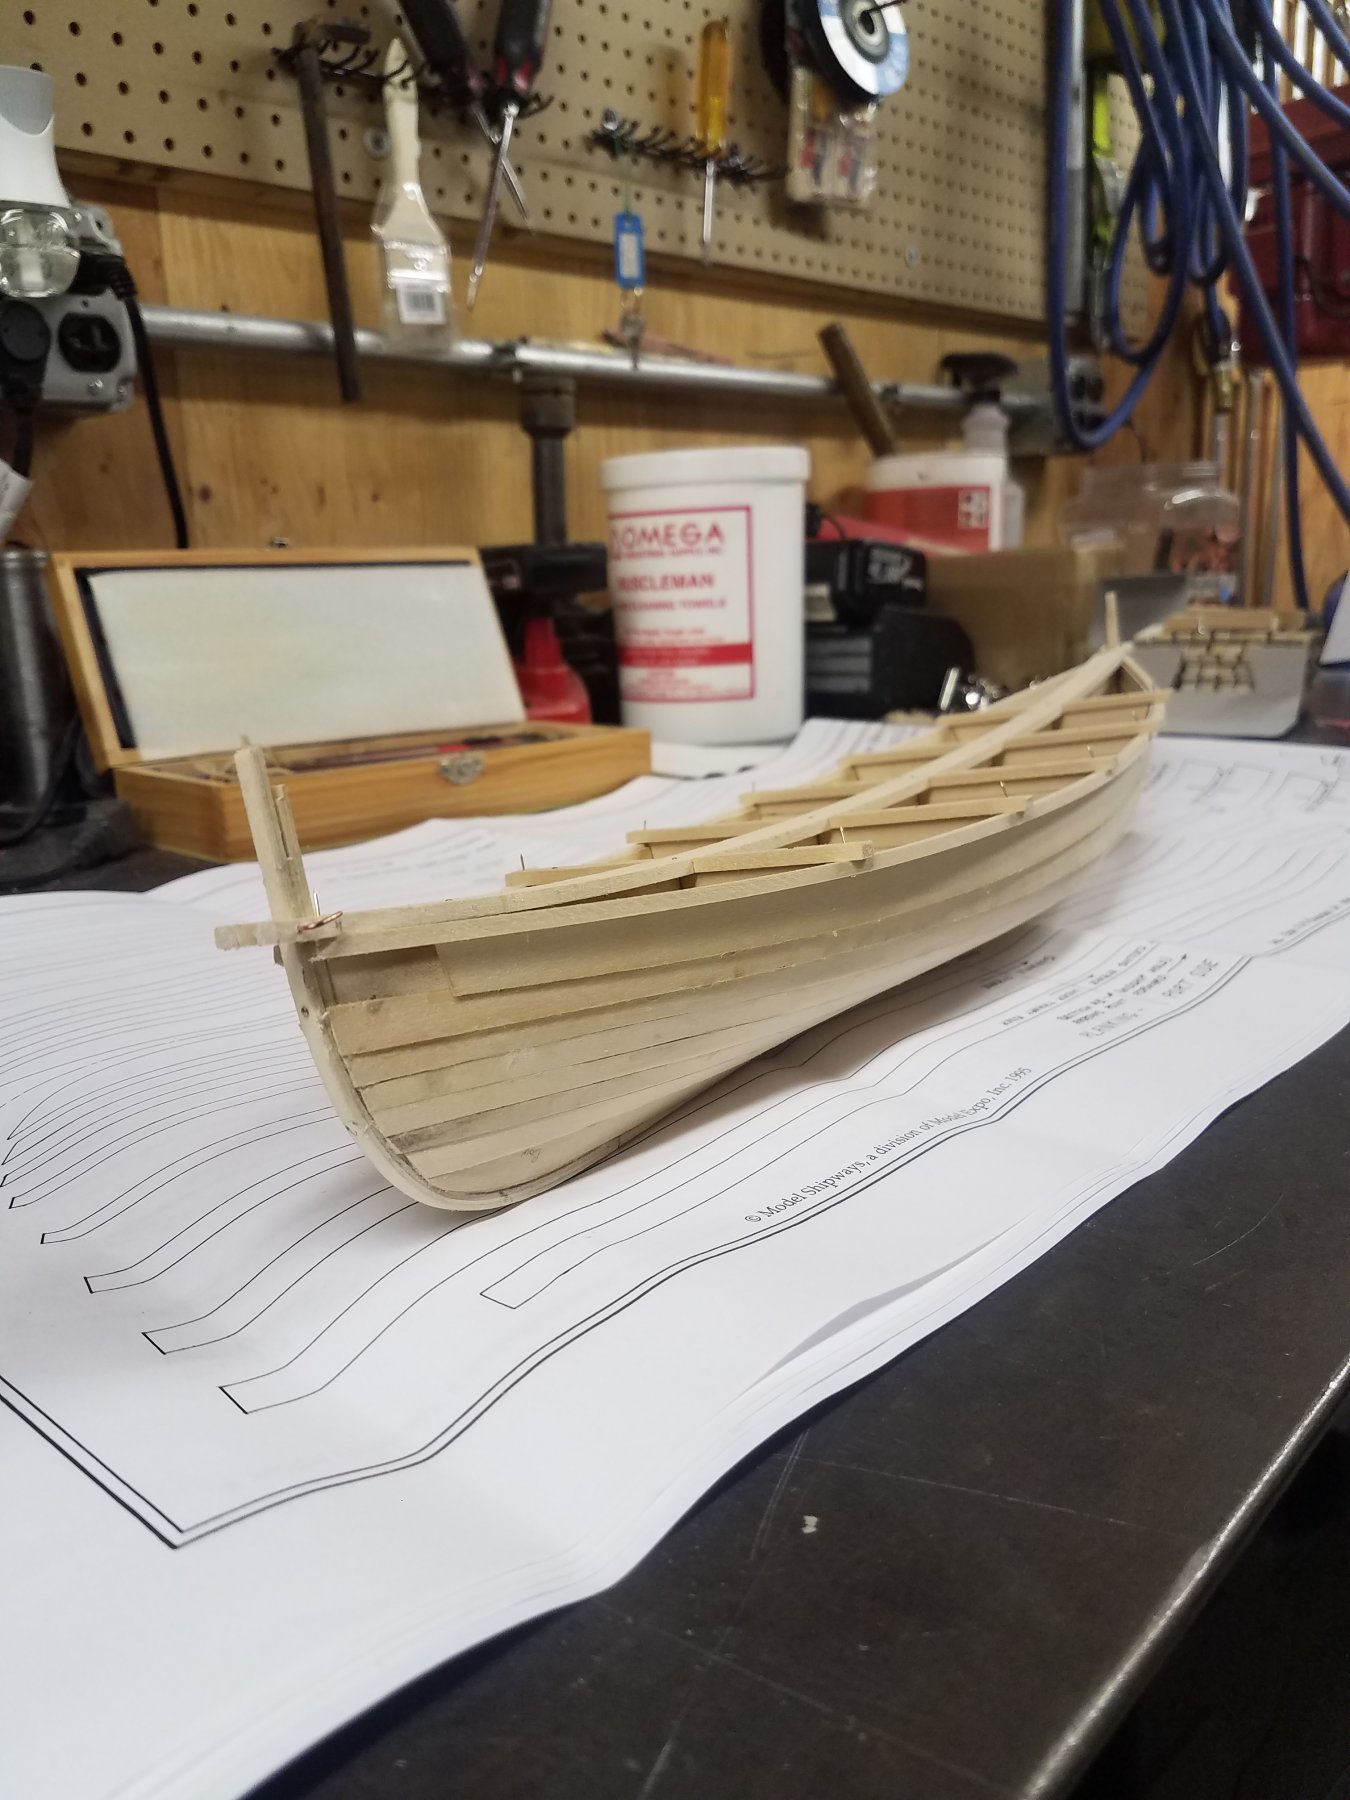
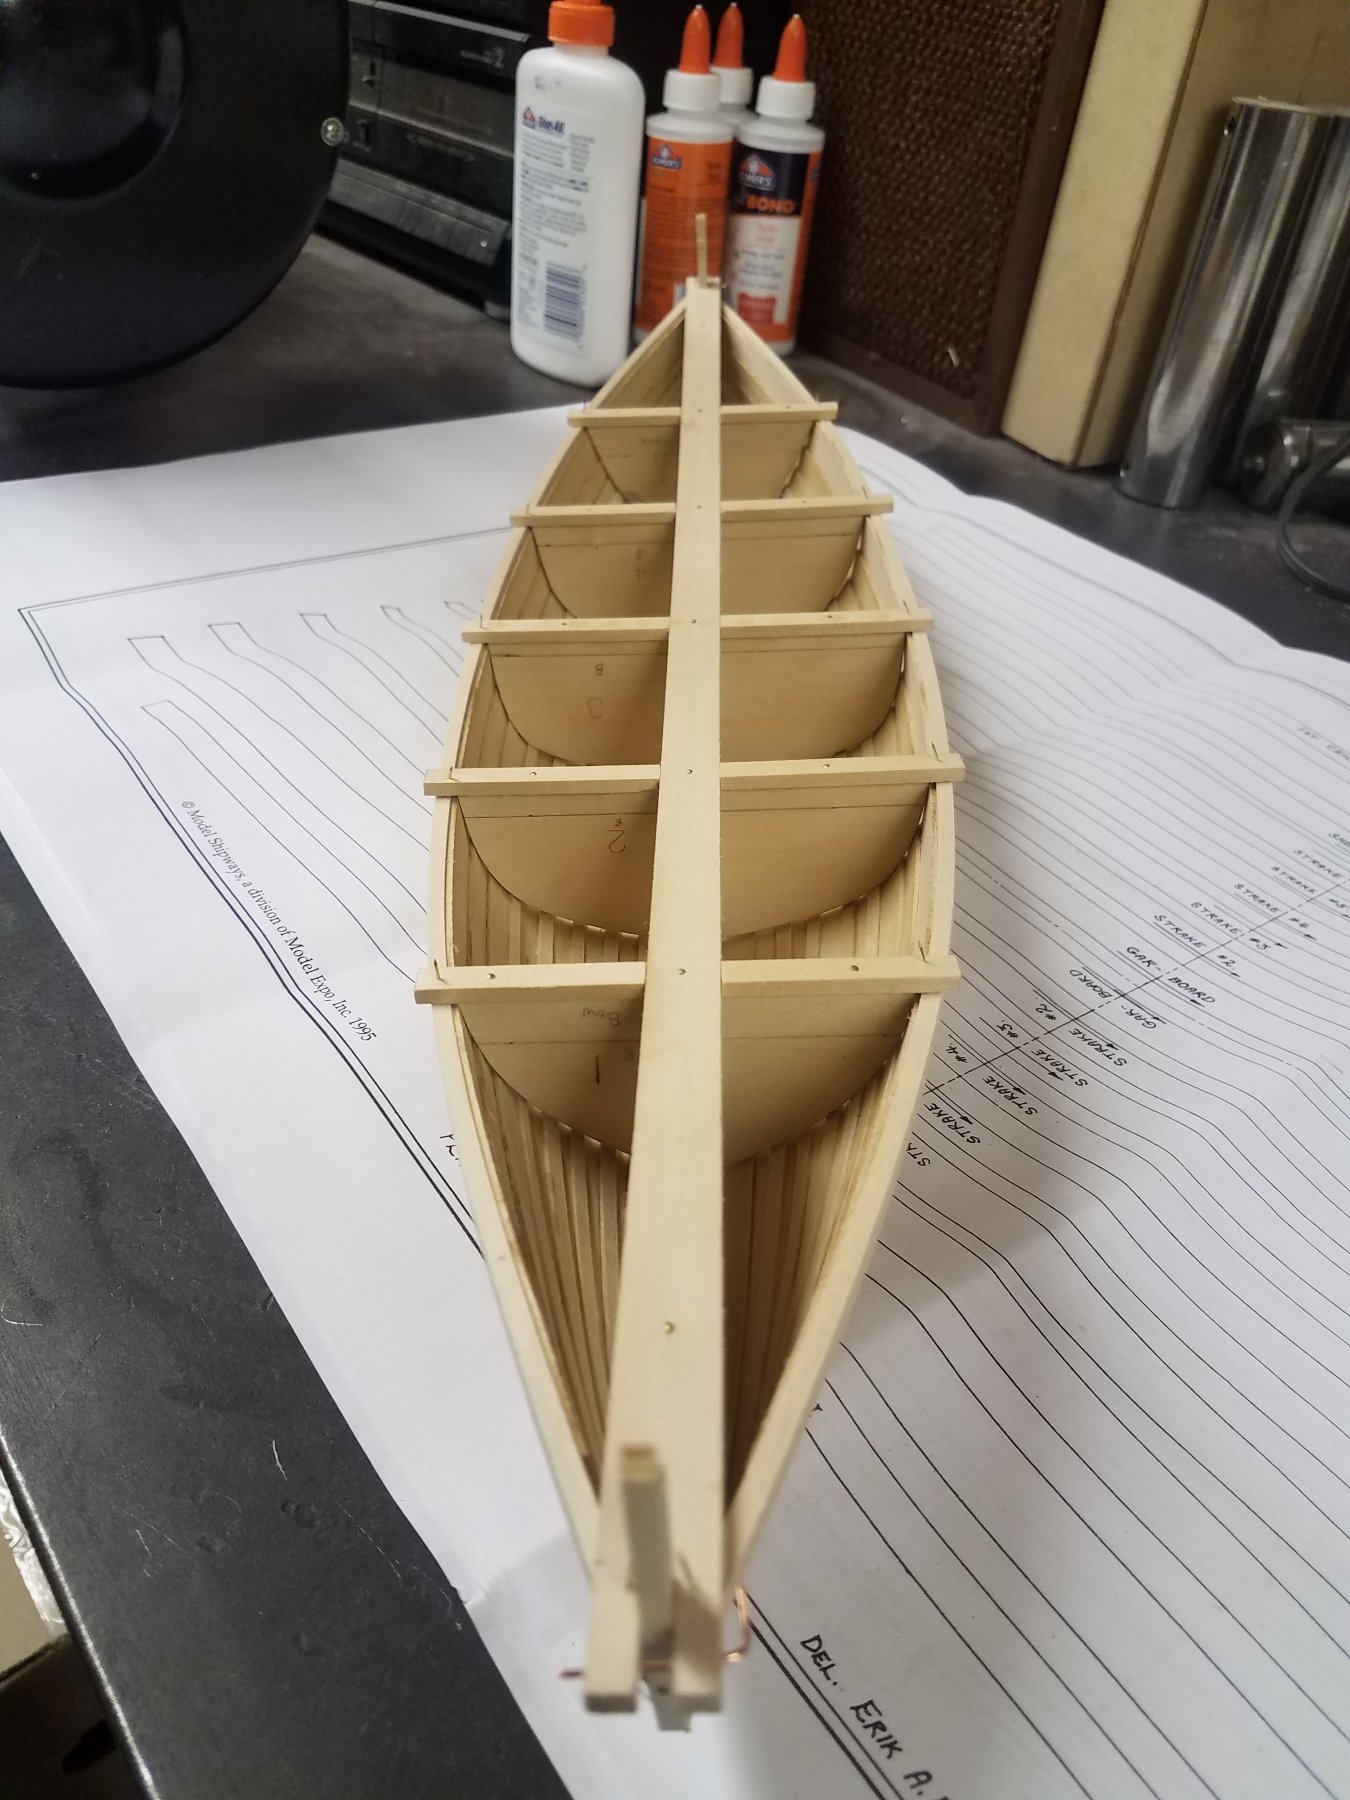
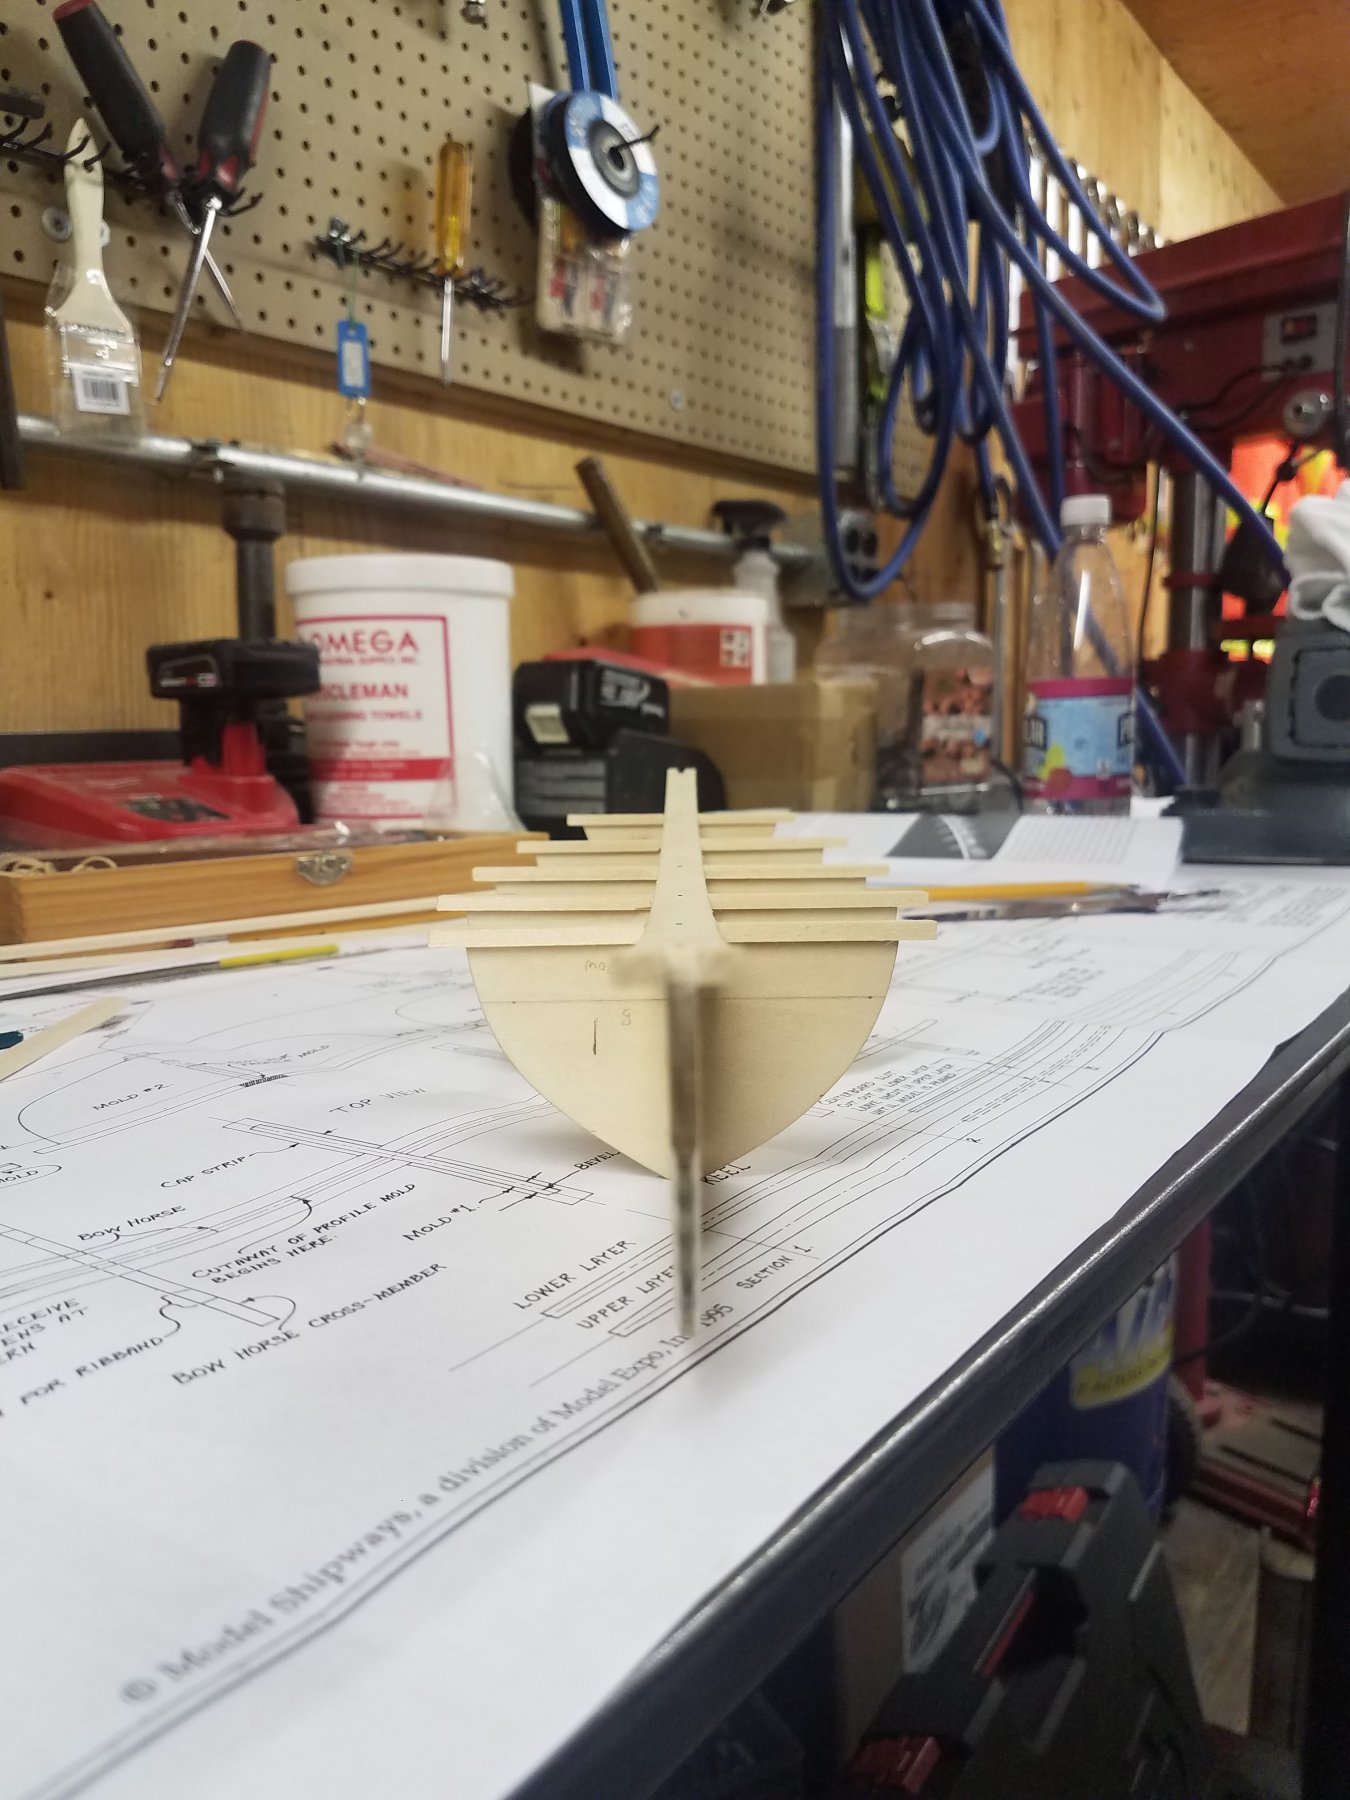
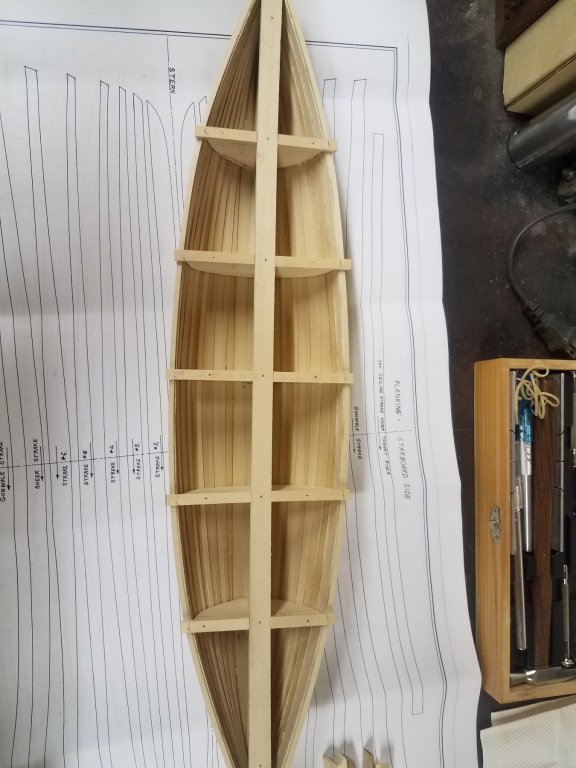
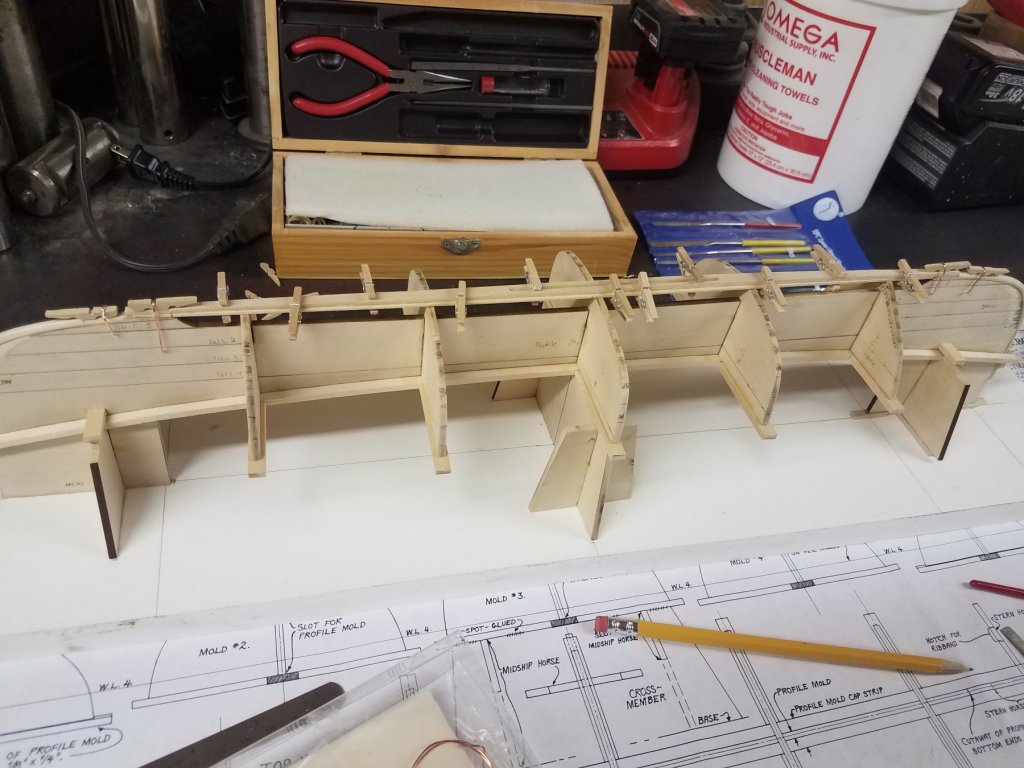
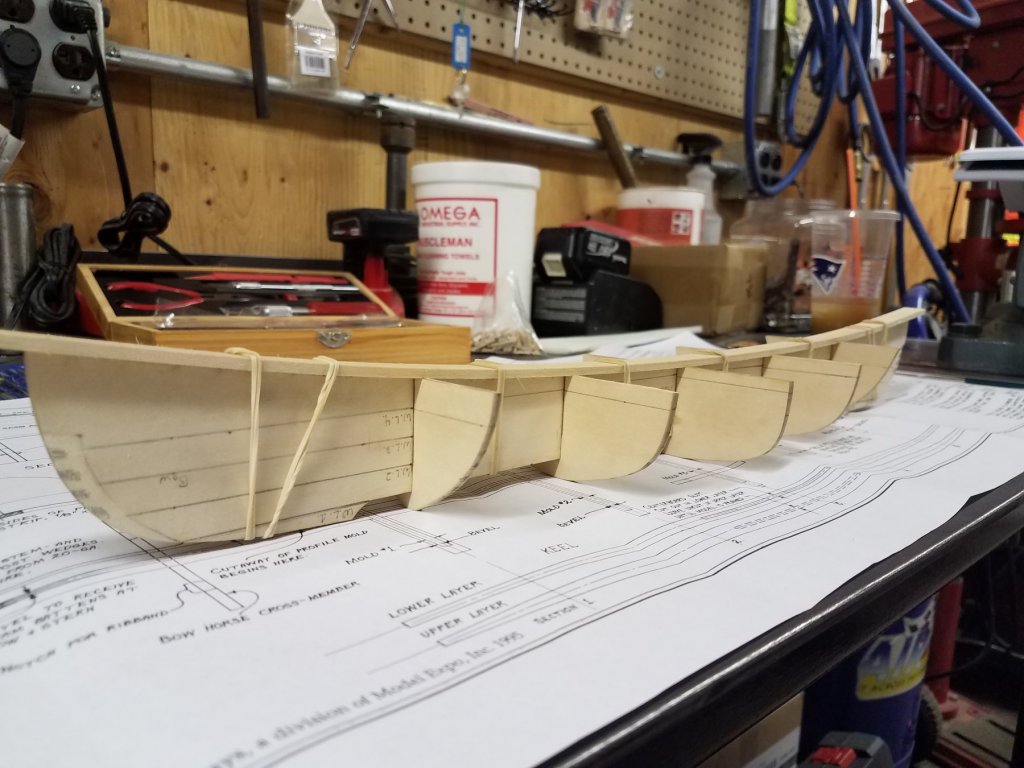
Did a bit more last night - started framing the hull. I got about 80 percent through the entire framing process. I should have that done and be moving on by late this week. Its amazing how strong the hull is after framing!


- 21 replies
-
- 6
-

-
- whaleboat
- model shipways
- (and 1 more)
-
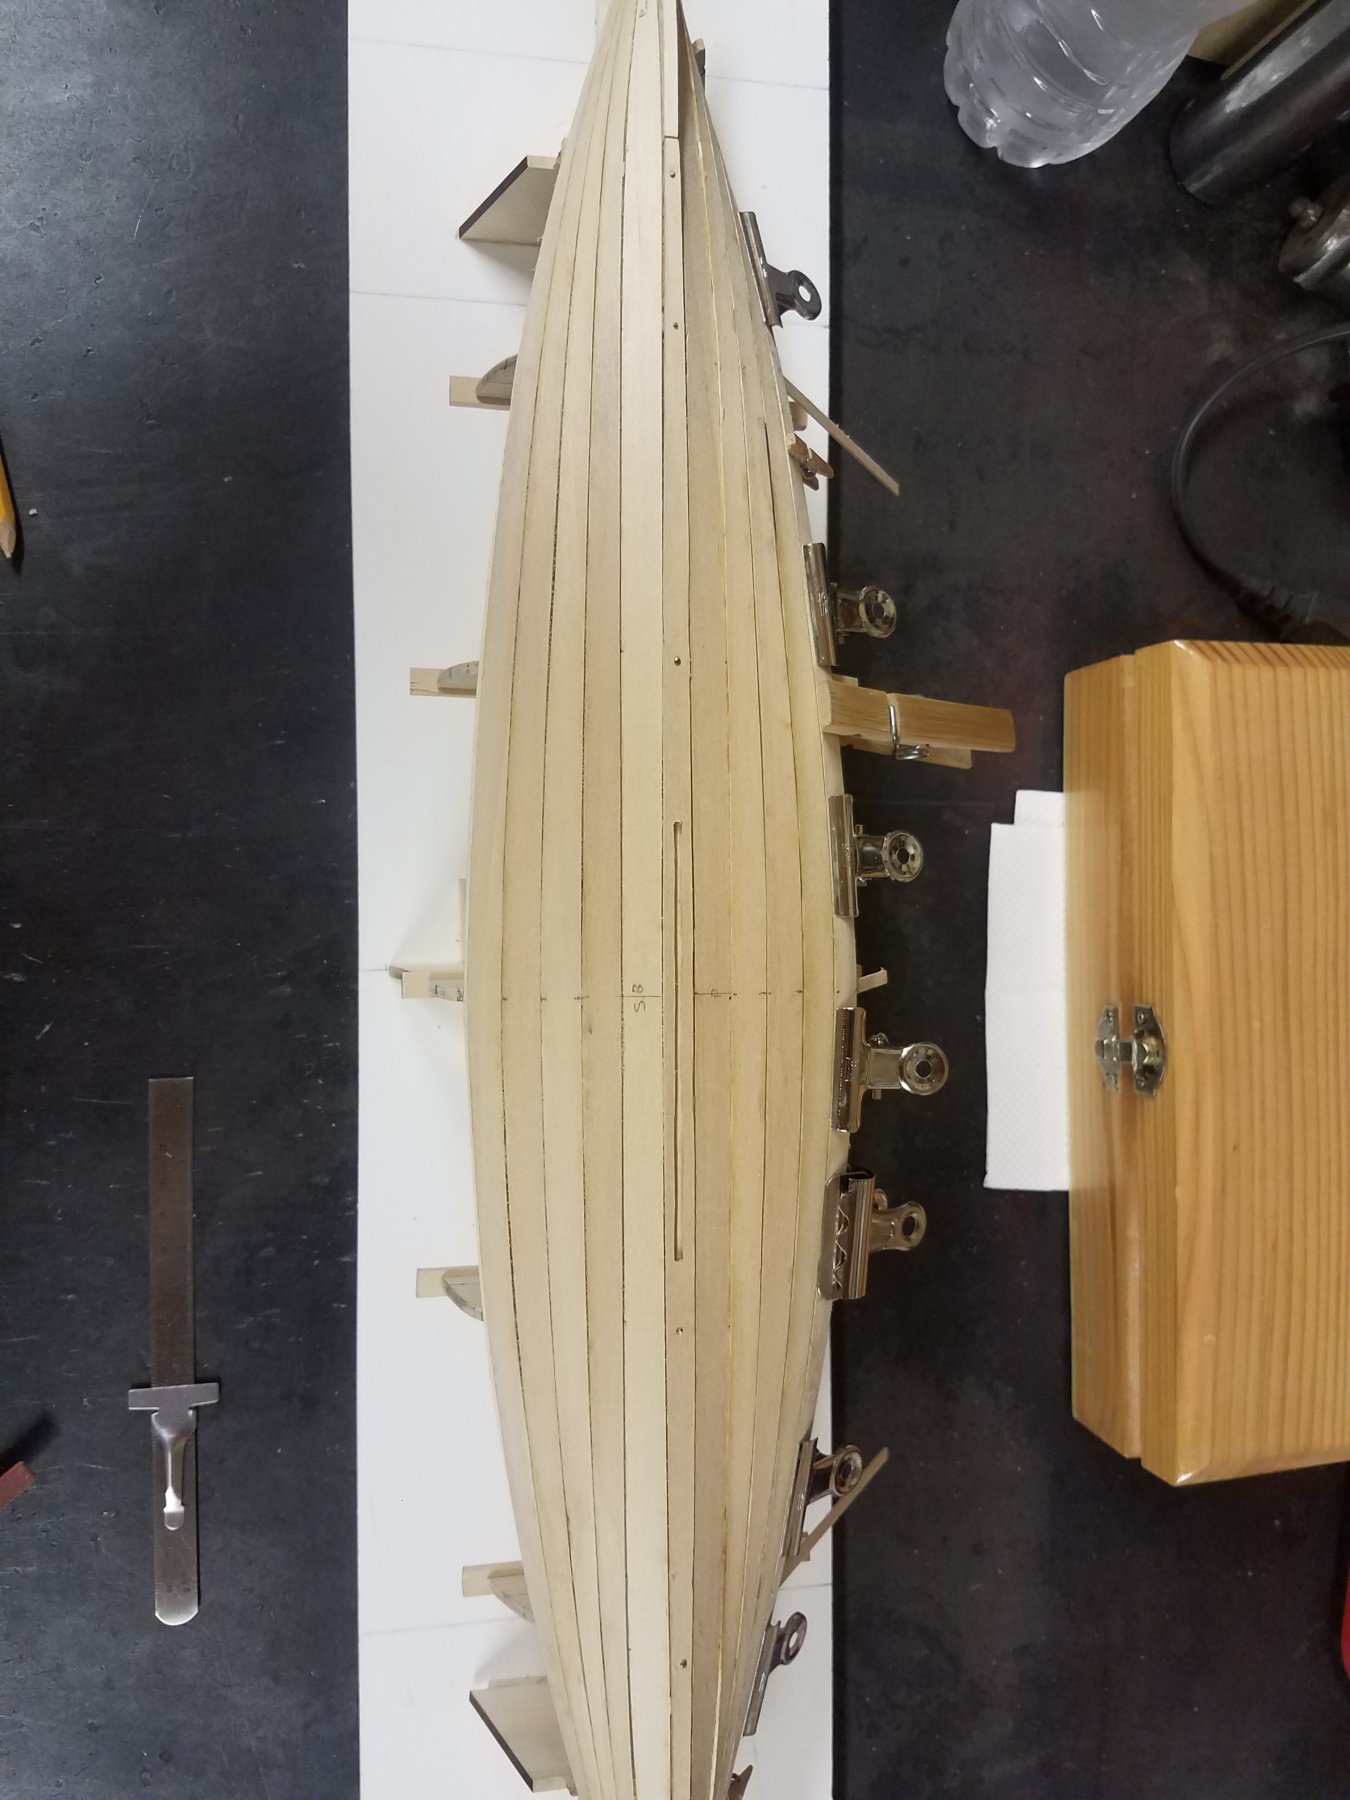
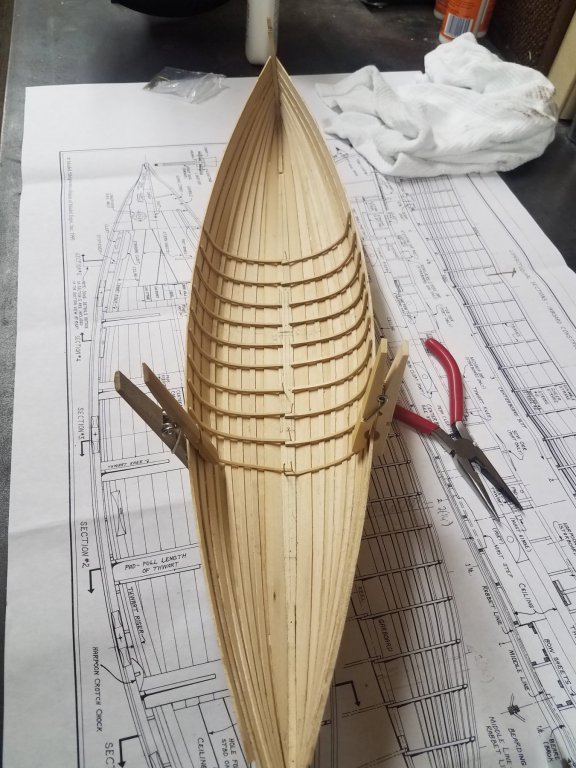
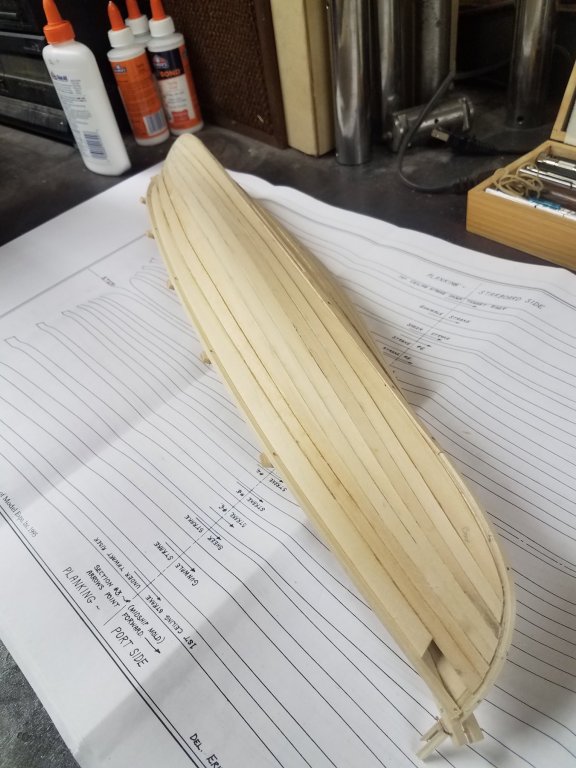
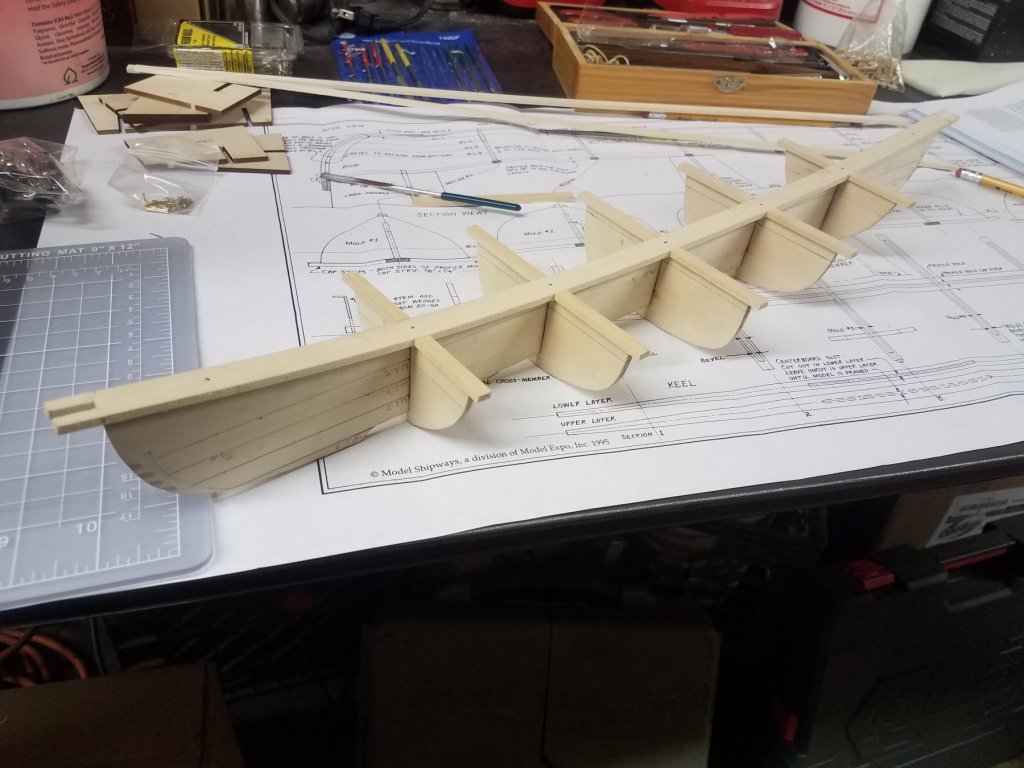
Thanks DanO and thanks for whoever took the time to view and like the pictures. Appreciate it! Another small update because im feeling pretty accomplished today. I finally removed the hull from the horses and it felt great. Although i ran into a few minor issues i think the end result after my first ever planking job came out ok!!


- 21 replies
-
- 4
-
-
- whaleboat
- model shipways
- (and 1 more)
-
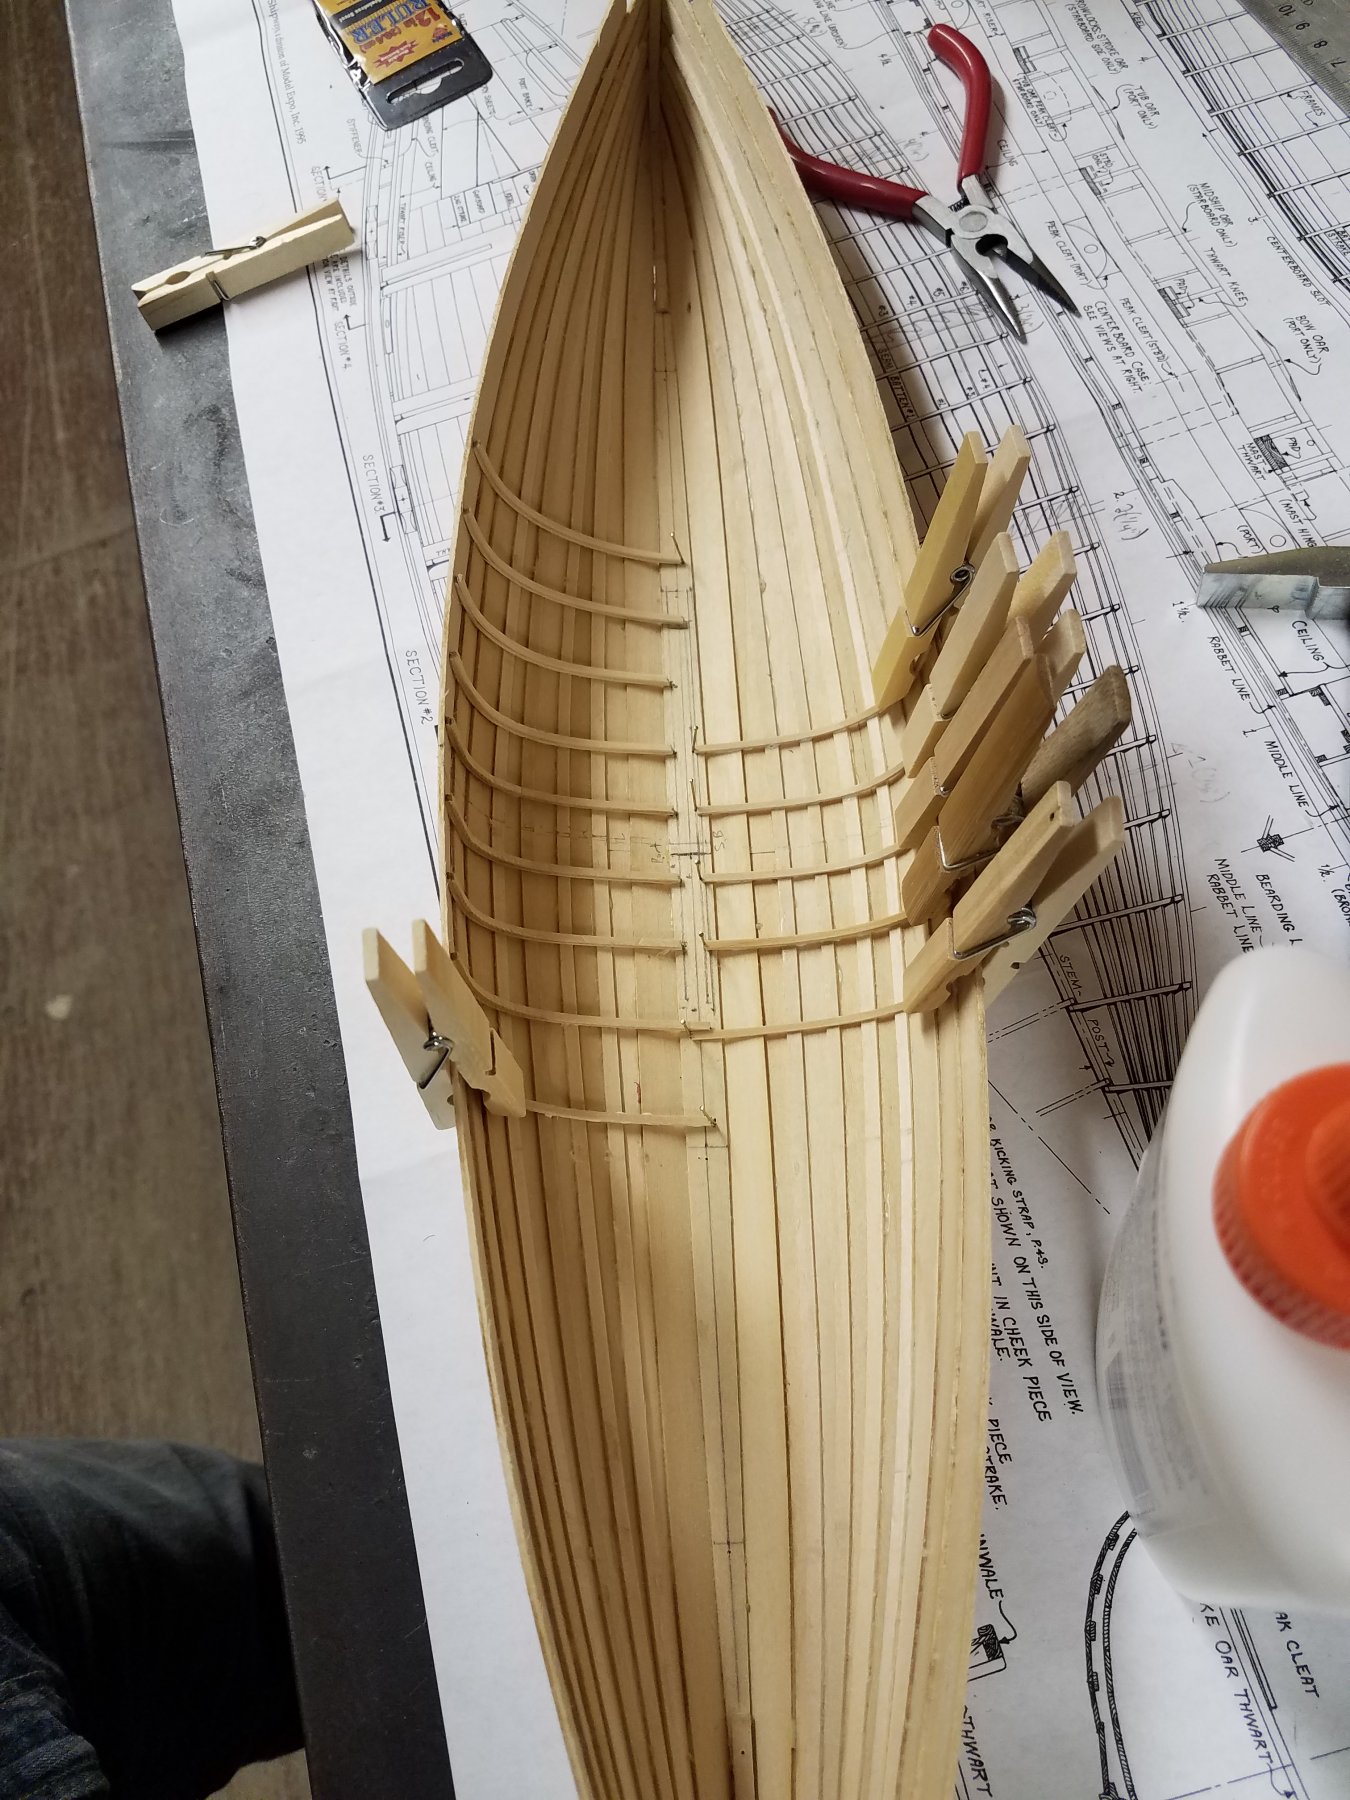
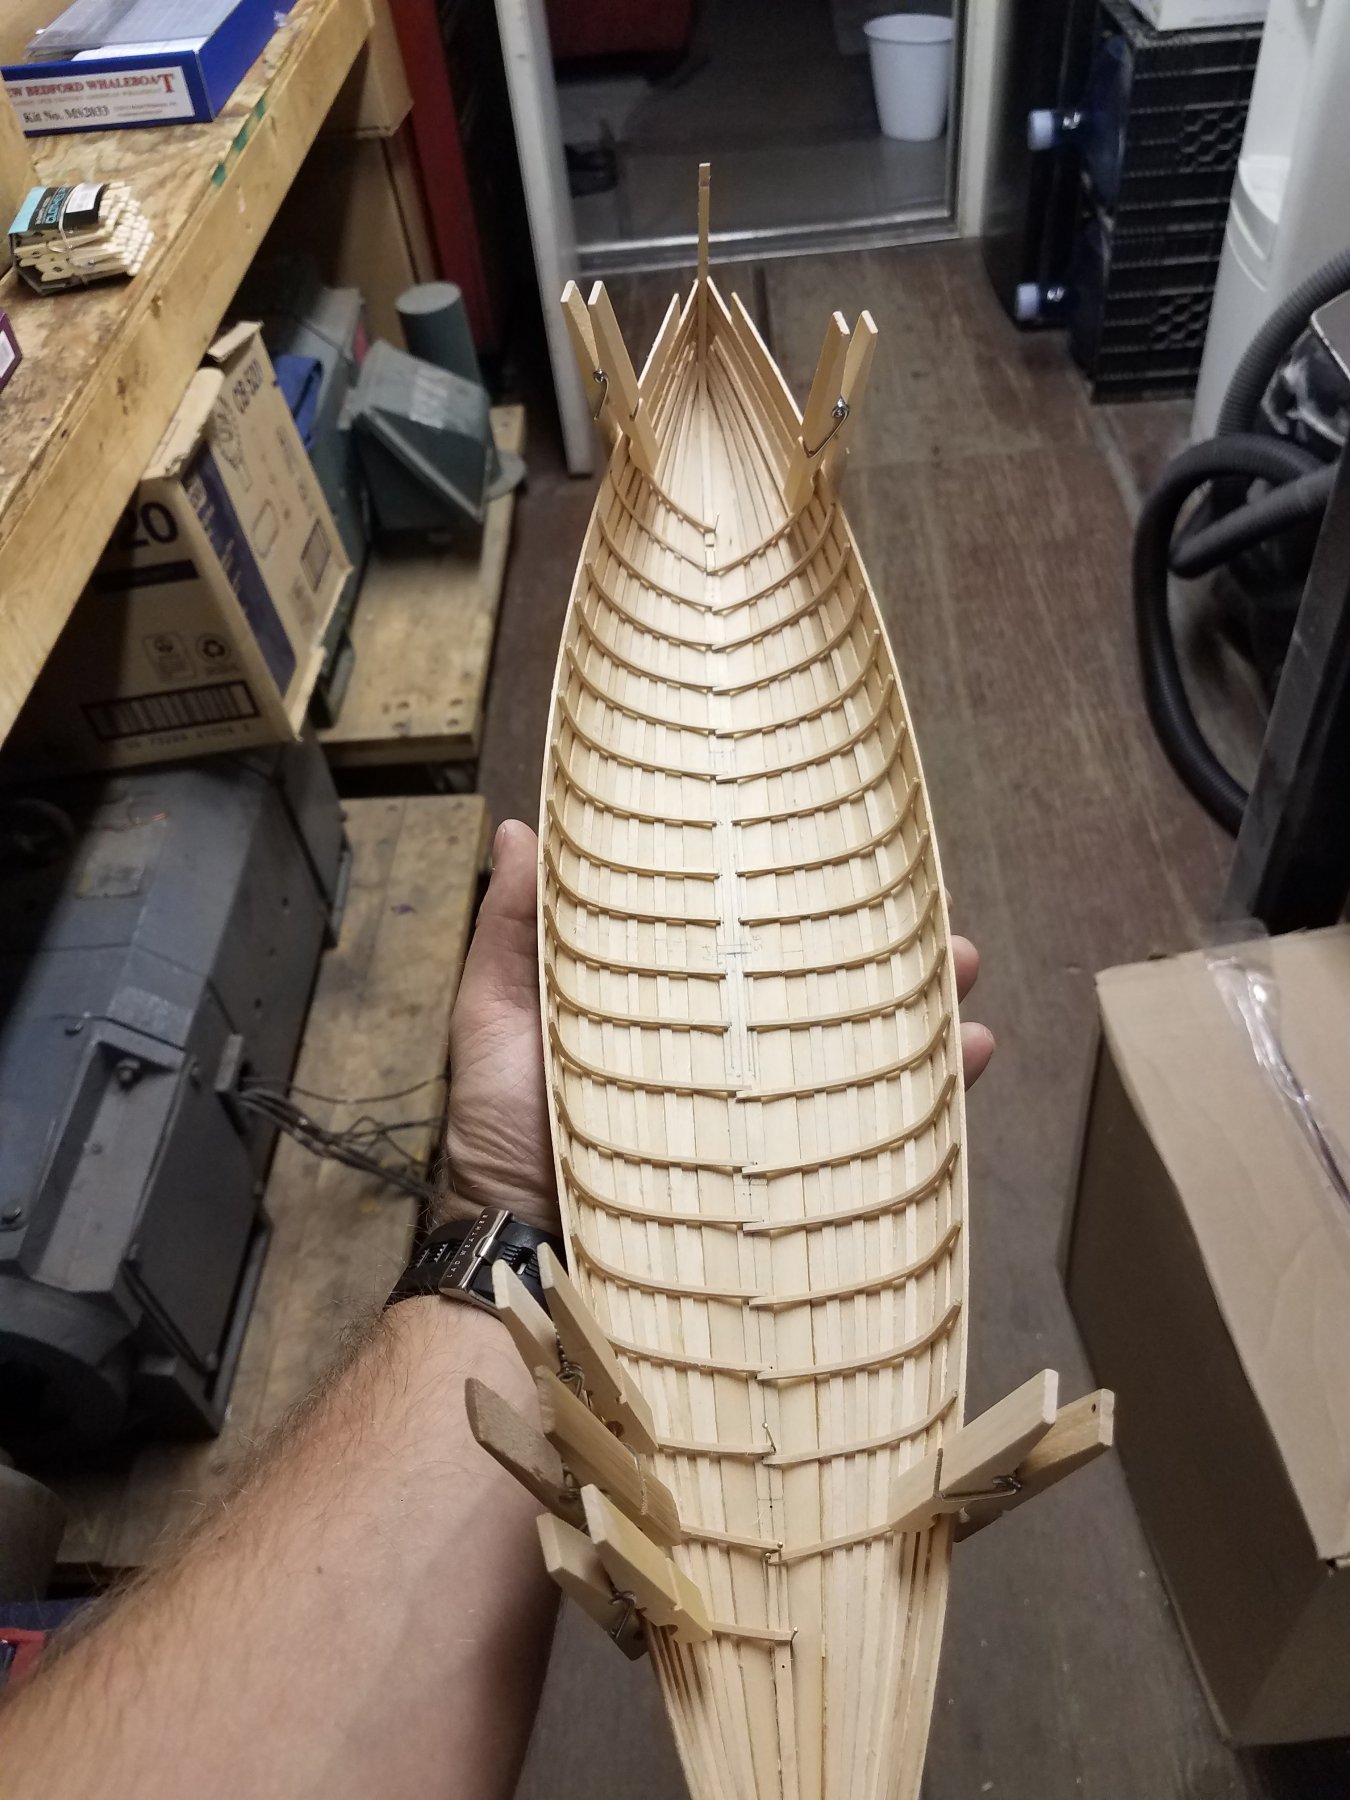
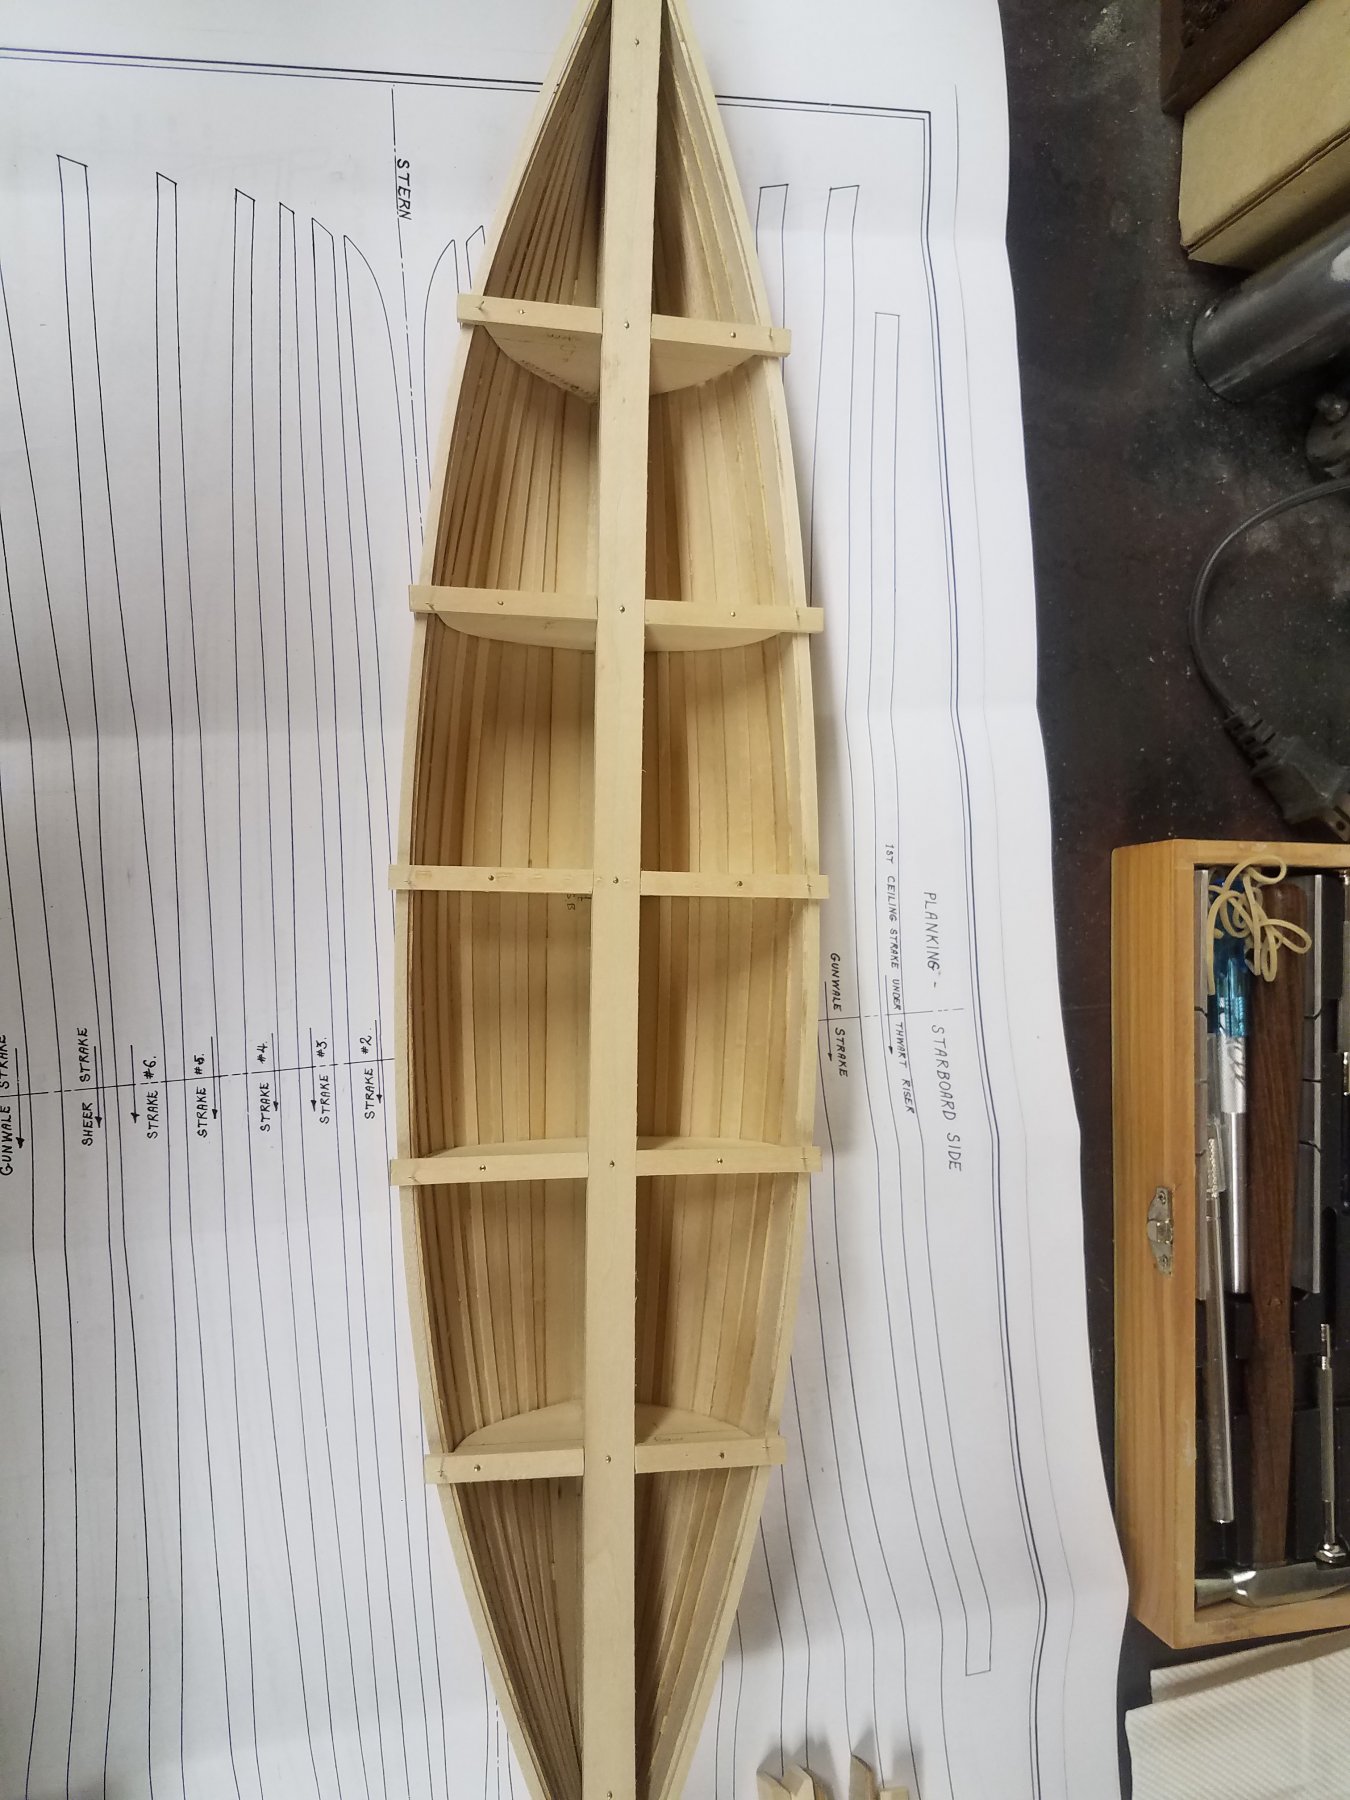
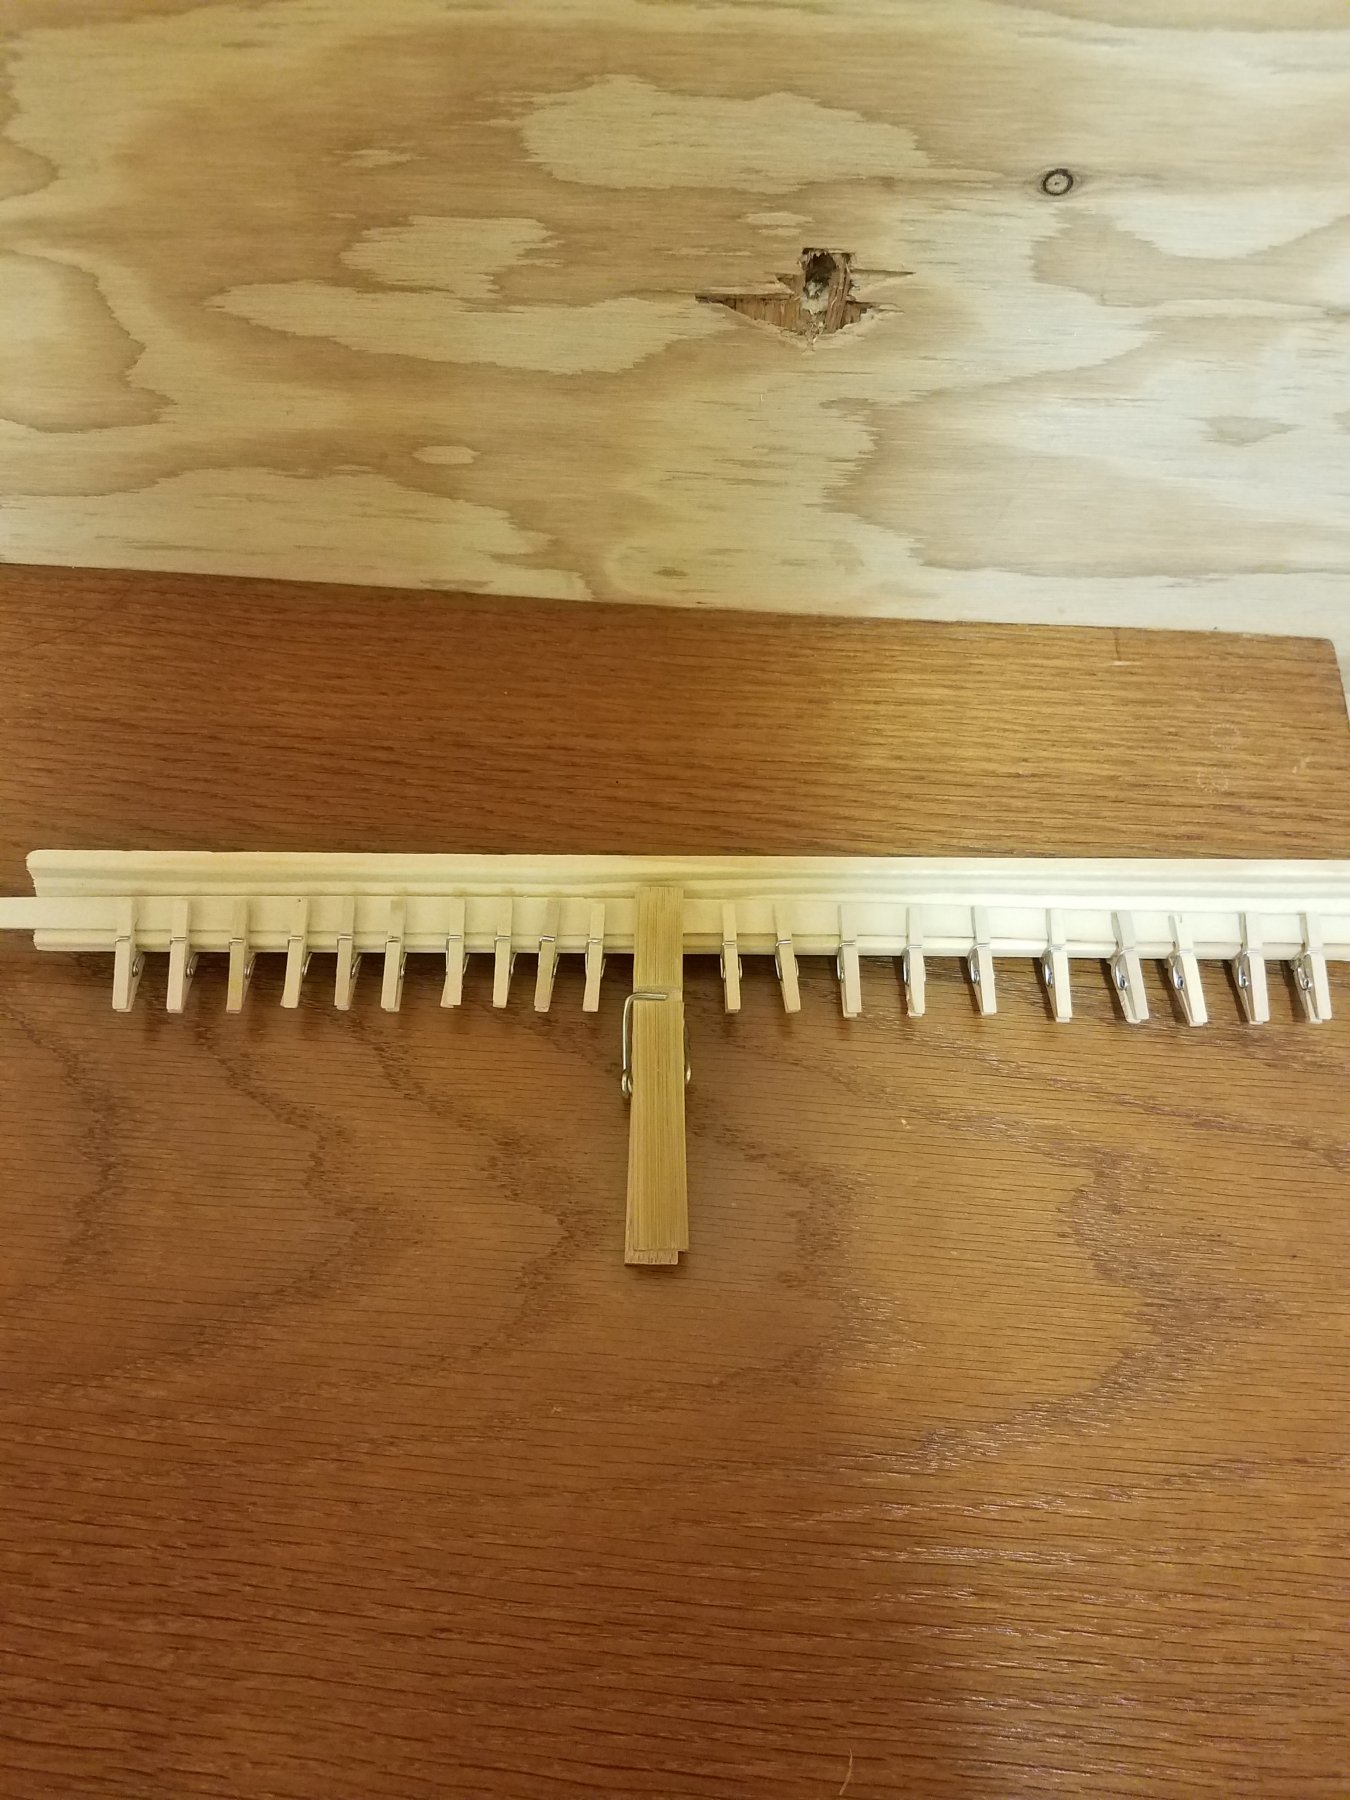
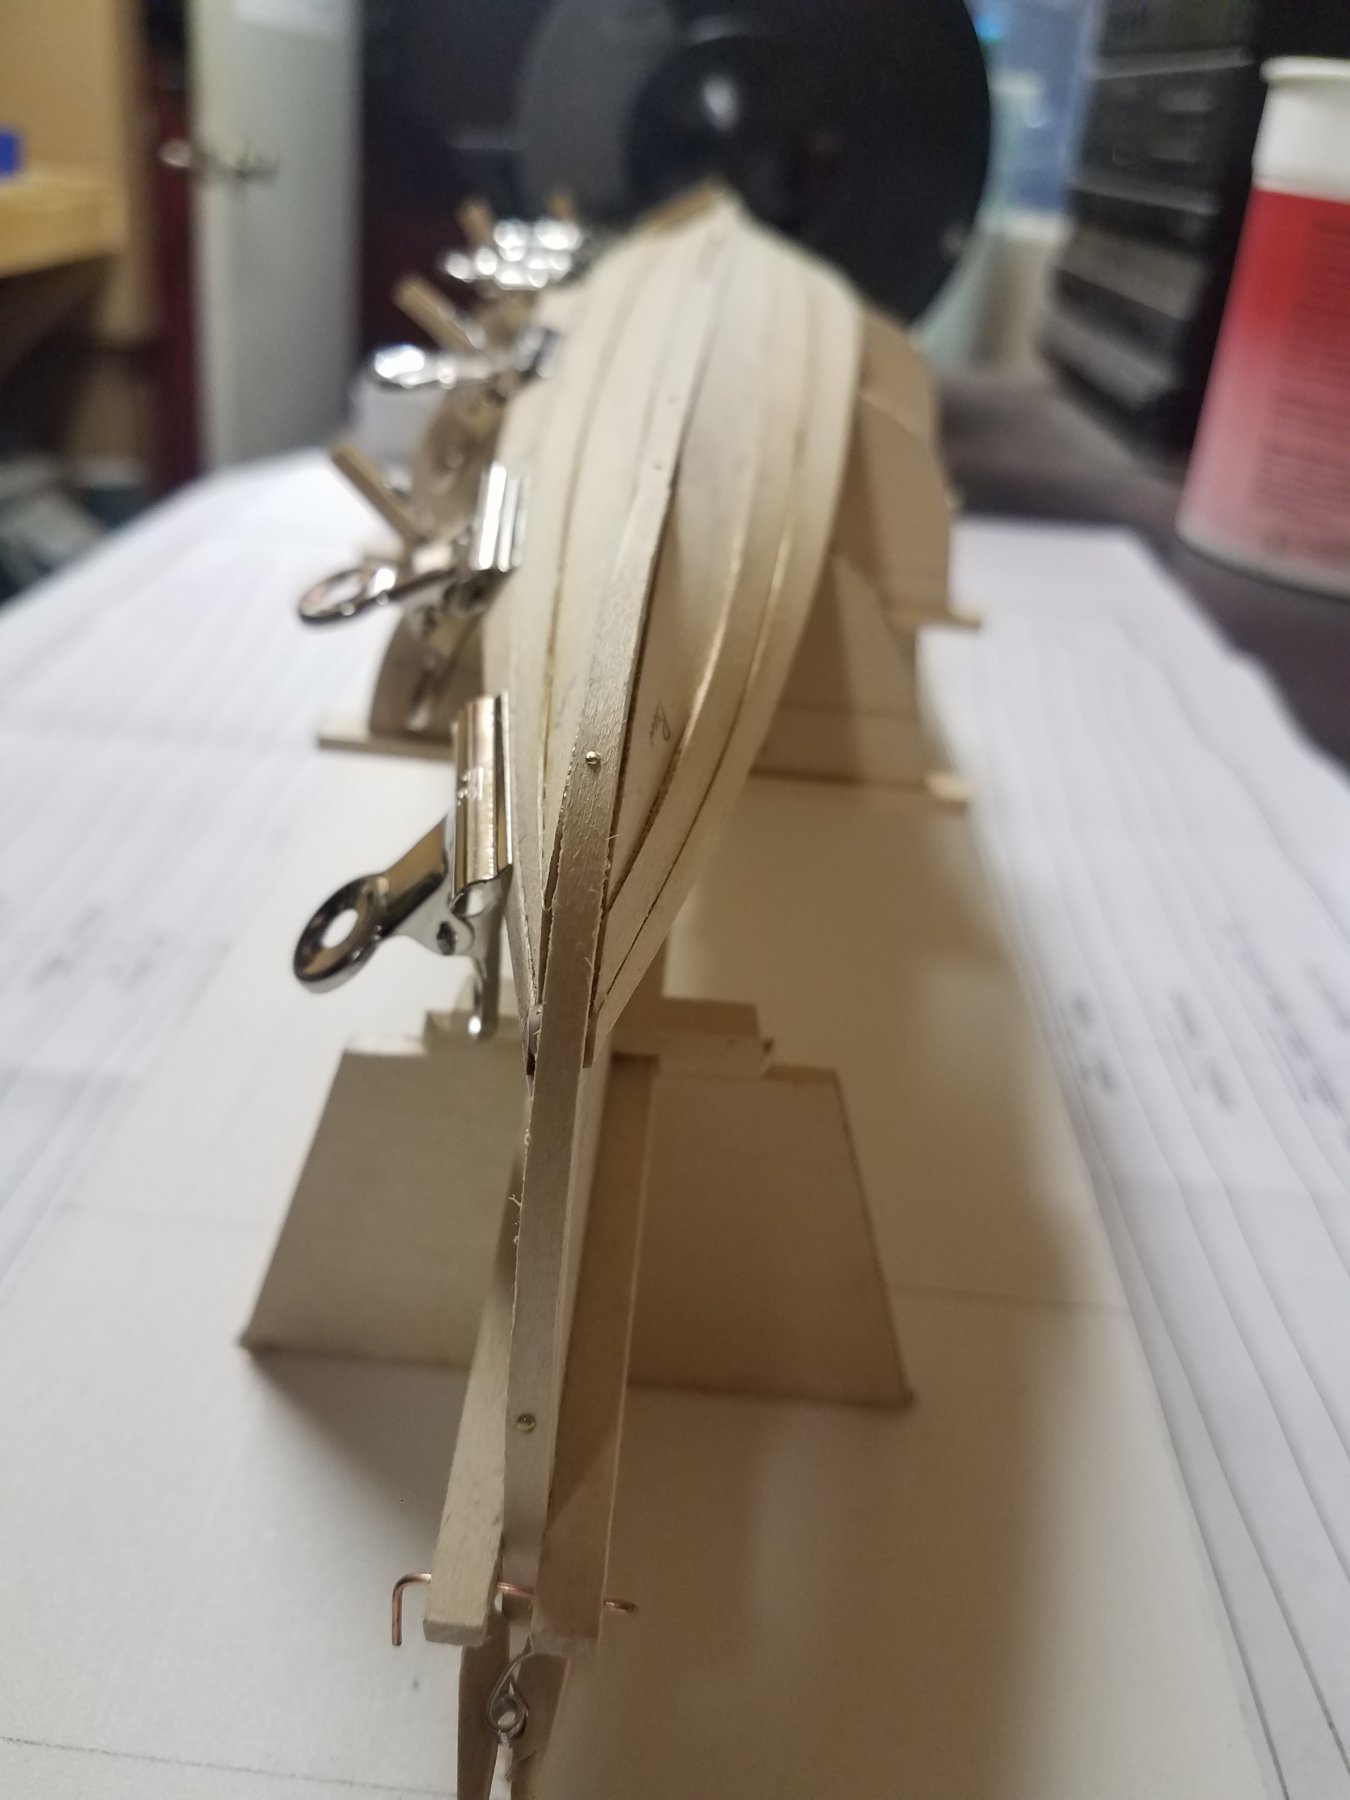
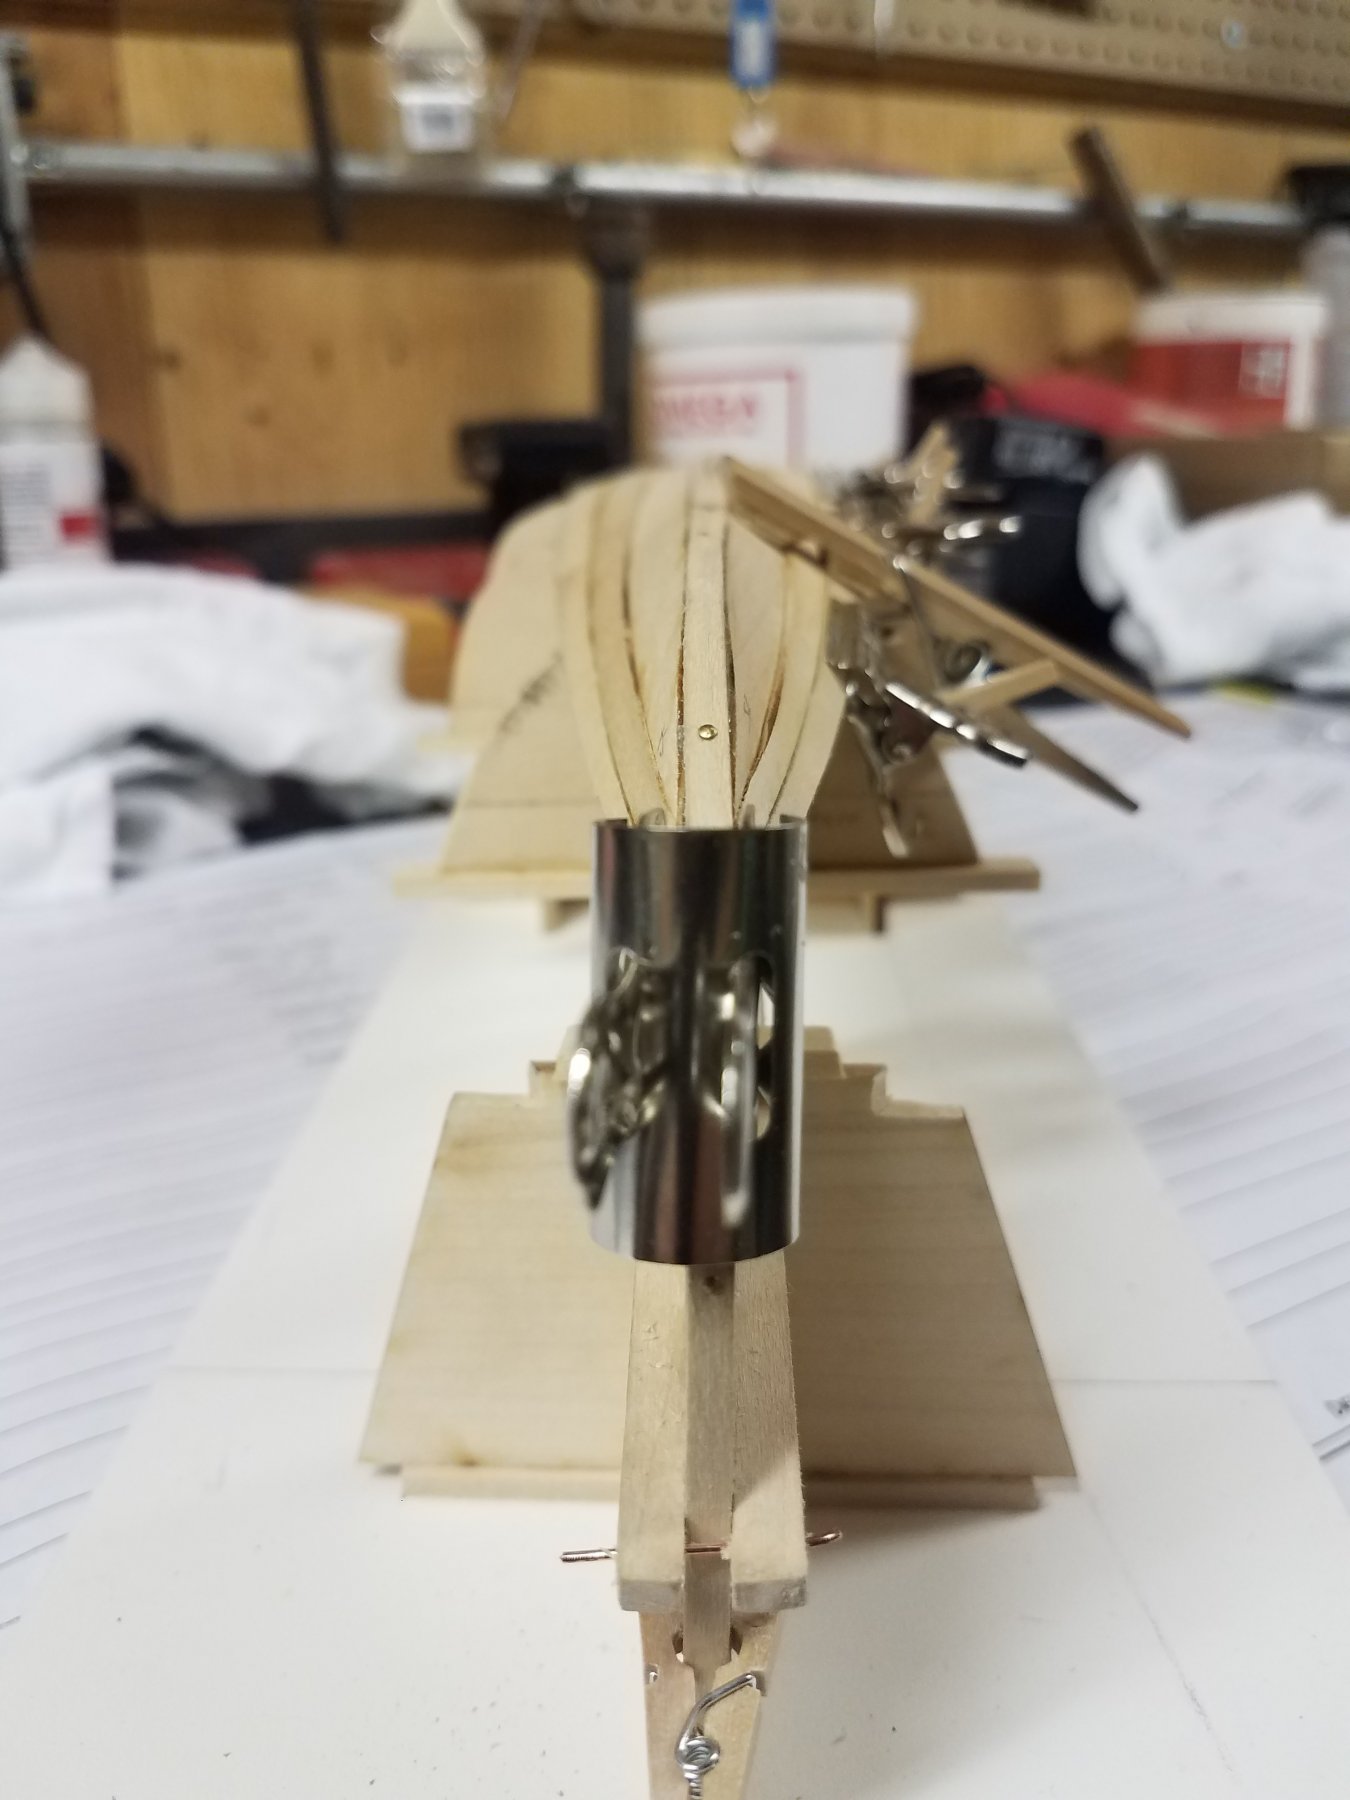
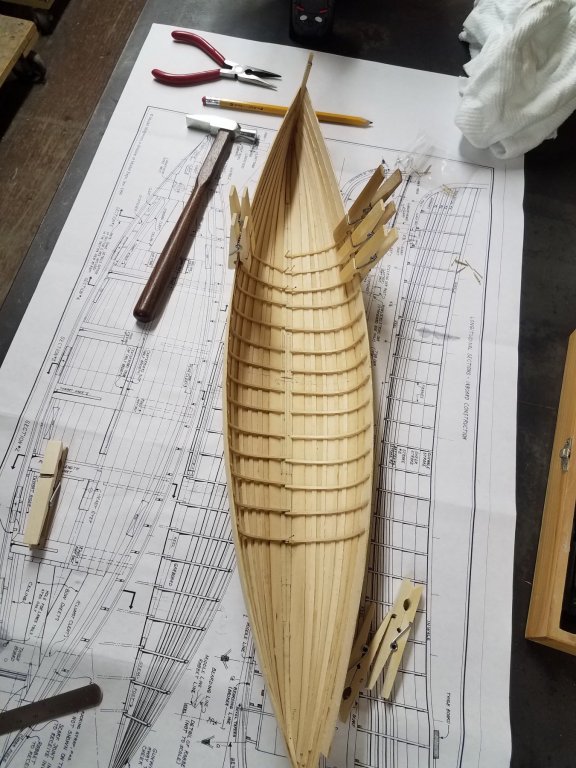
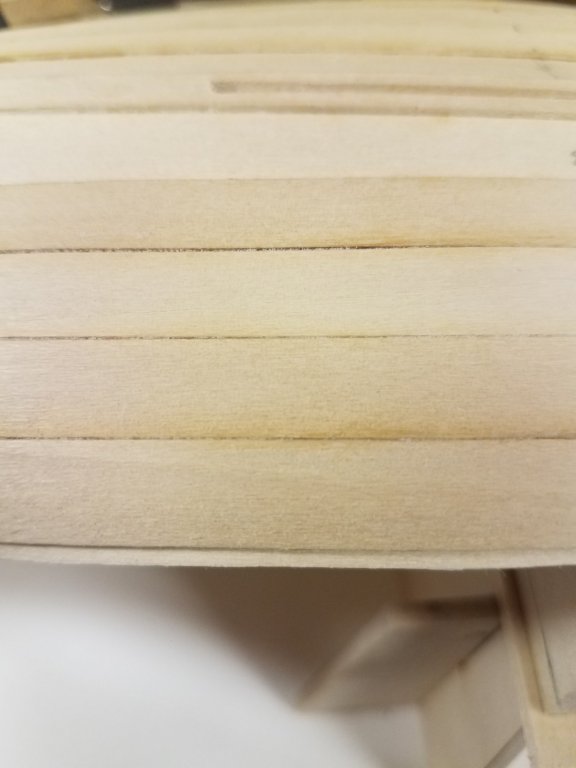
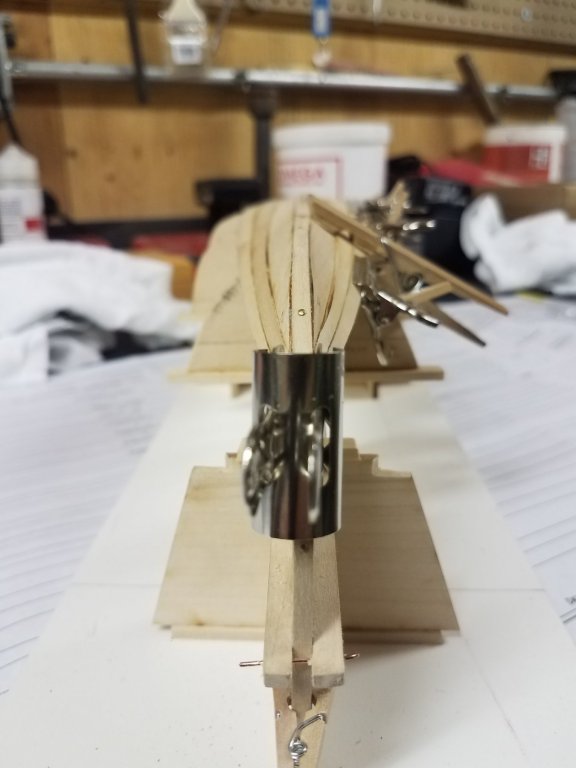
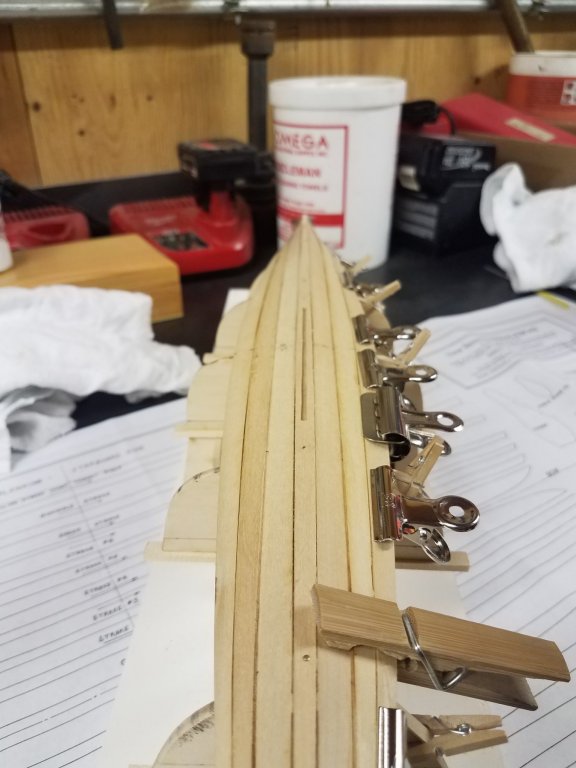
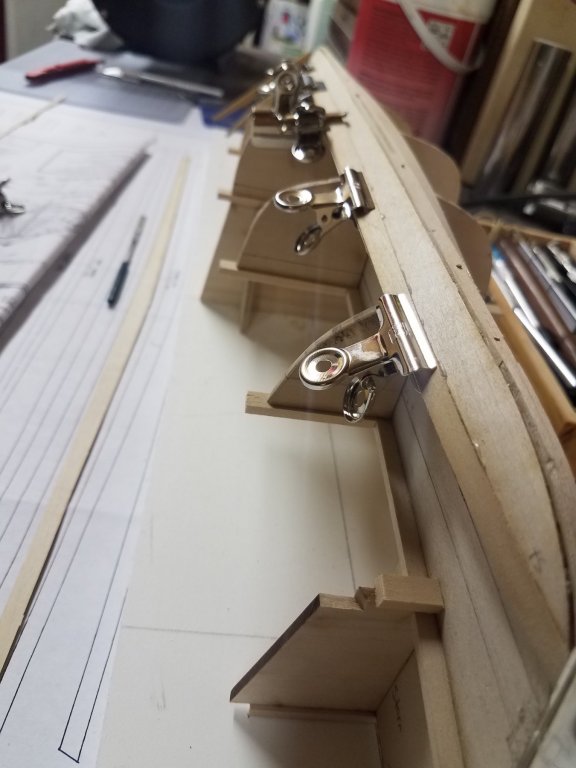
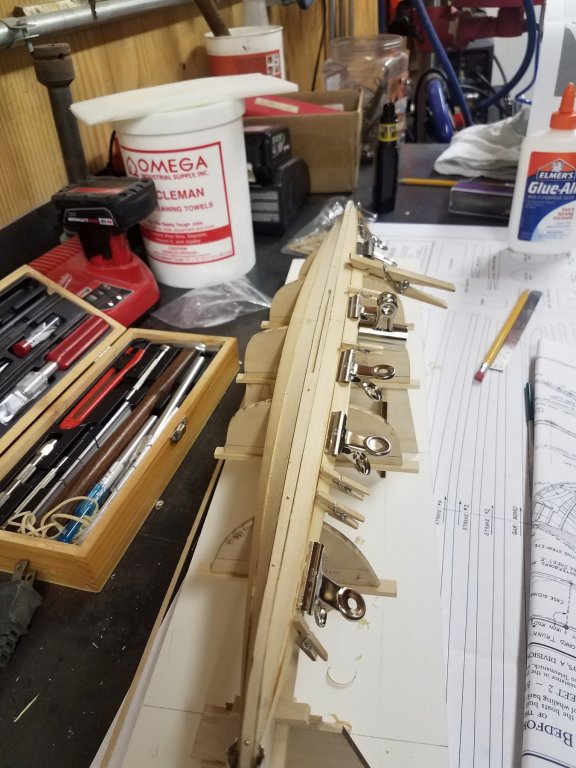
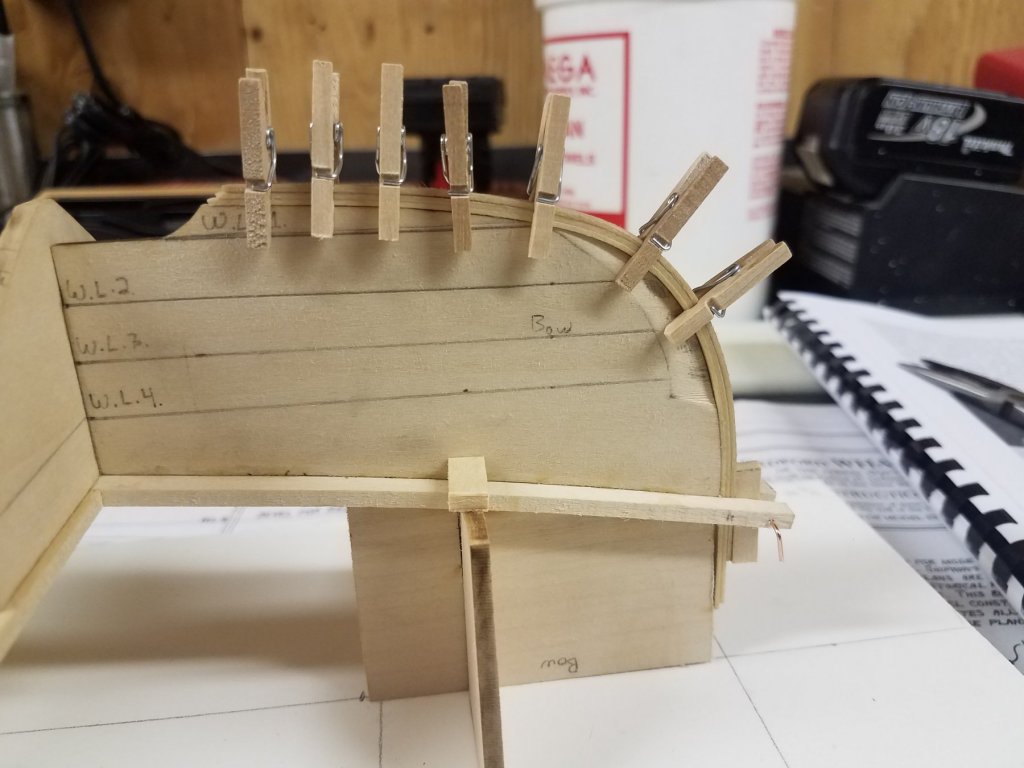
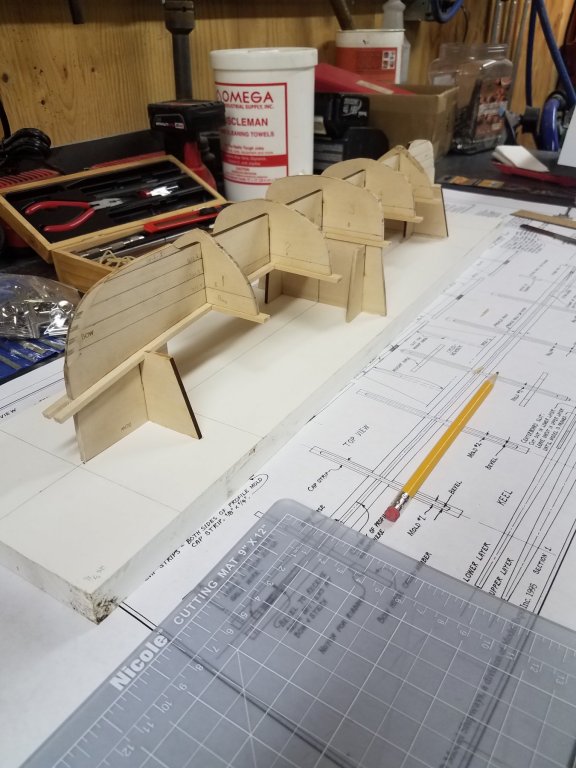
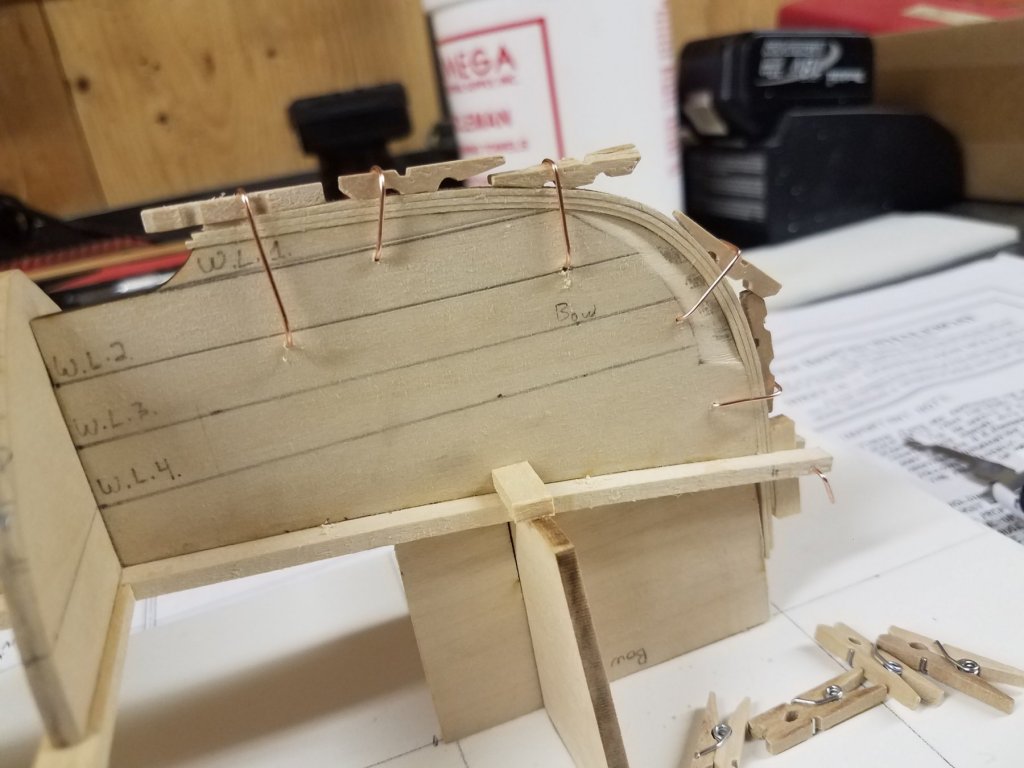
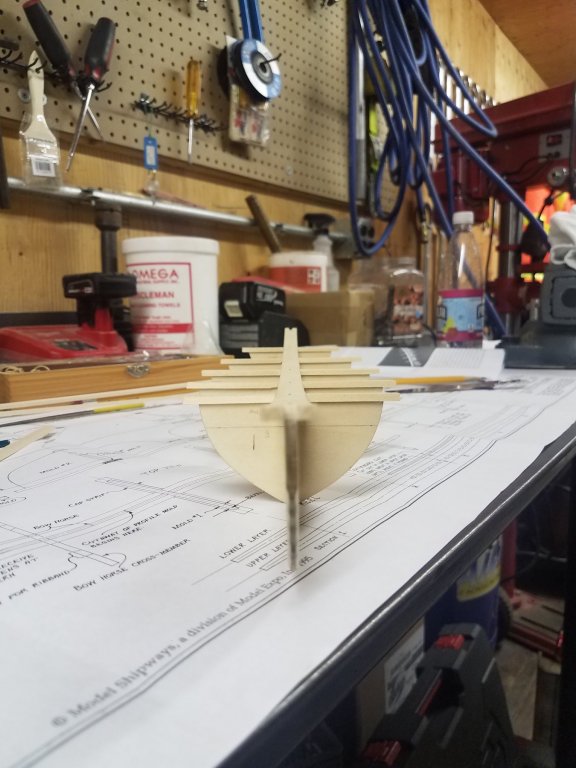
Hey everyone! It has been a few days since i havhave had any updates, and i haven't had much time to do too much work so i will post what I have for now... The first picture is one of the 5th strakes being clamped so that it follows the profile mold curvature and is "cupped". Next is a picture looking down the hull at the strakes, and waiting on number 5 to dry. Third is an overhead view of the progress and where i am currently. Lastly, a close up of one of the better sections showing tight plank installation. I ran into an issue where the strakes were not lining up port to starboard when viewed at from head on. I corrected this by simply sanding down more on one side to get a slightly thinner strake, and sanding less on the other side to get the planks to line up( this was recommended in the instructions, and the difference was not big at all, MAYBE 1/32nd max). Either way, cruising along and hope to have the planking done by the end of the weekend. Hope everyone is enjoying the build so far!! Ryan


- 21 replies
-
- 2
-
-
- whaleboat
- model shipways
- (and 1 more)
-
Thank Jond, i guess i need to figure out the format for posting with descriptions of the pictures first. For some reason, on my phone the format was fine but it looks way off on my pc. I'll try to get the text so it doesn't end up on the side of photos the next time around!
-
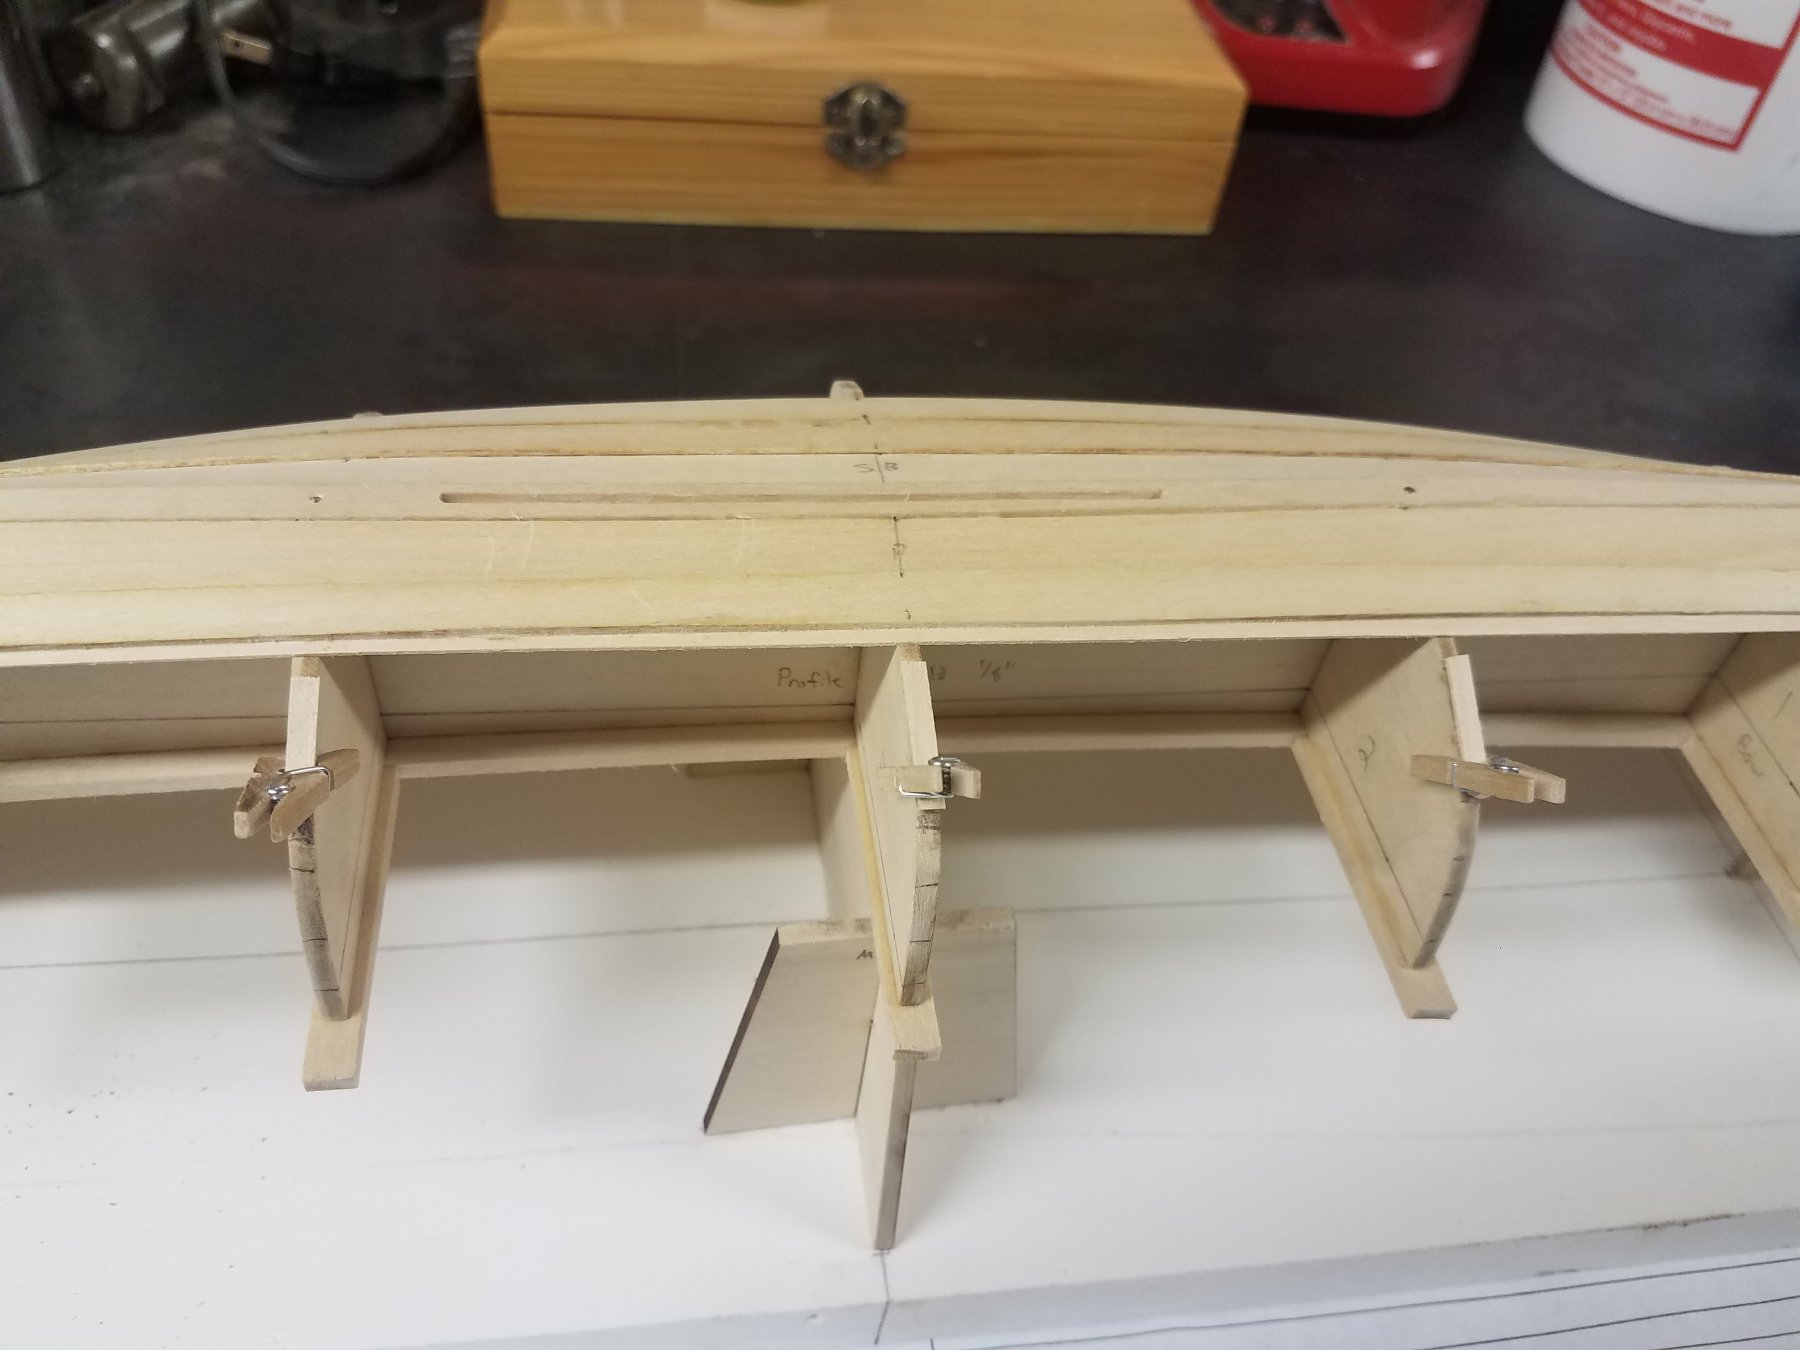
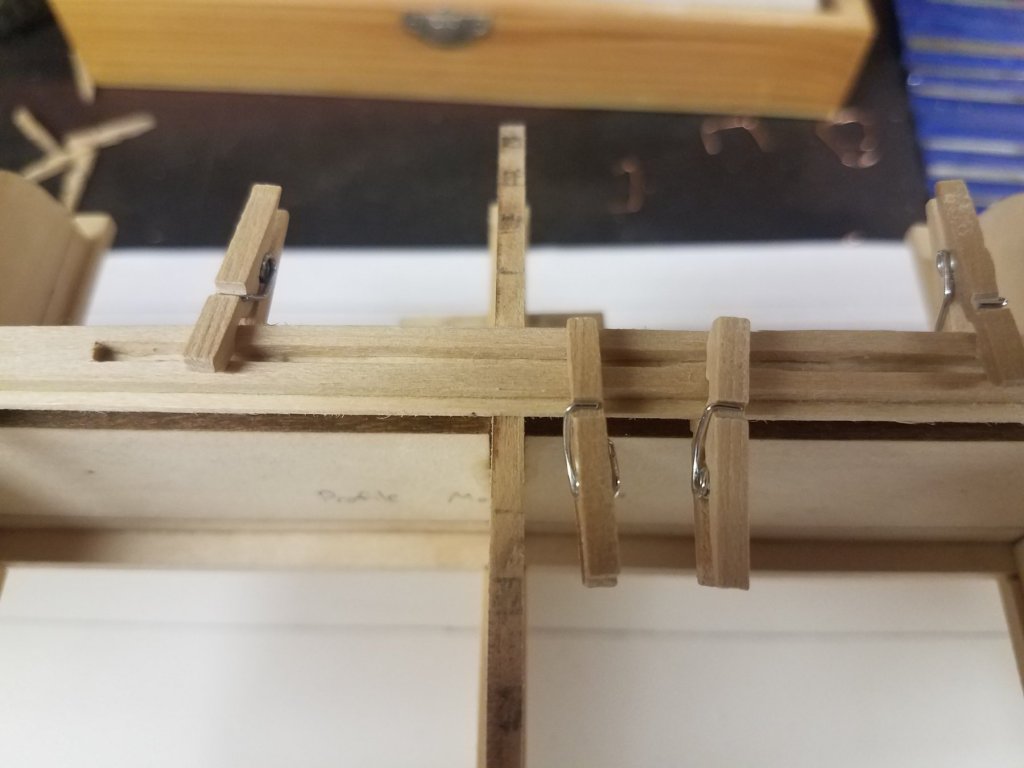
Had a little bit of time today to add the third strake to my whaleboat. I am doing my best to make sure that each additional strake and batten seam is where it is supposed to be following the plans. I wont be able to do any work in the next few days so I figured i would post with a full update.One side has the third strake glued and unclamped, the other side is glued and clamped.A view showing (hopefully) symmetry between port and starboard garboard/strakes so far.Another view during the gluing process.A view before the third strake was added showing the batten seam in place. Also note the 1/32" sections of basswood clamped temporarily that I used to place under the third strake. This is done for ease of installing the batten seam after the strake is installed. Now that the hull is coming together, im getting even more excited about this build. I hope to finish planking and start some internal framework relatively soon!! Ryan


- 21 replies
-
- 3
-
-
- whaleboat
- model shipways
- (and 1 more)
-
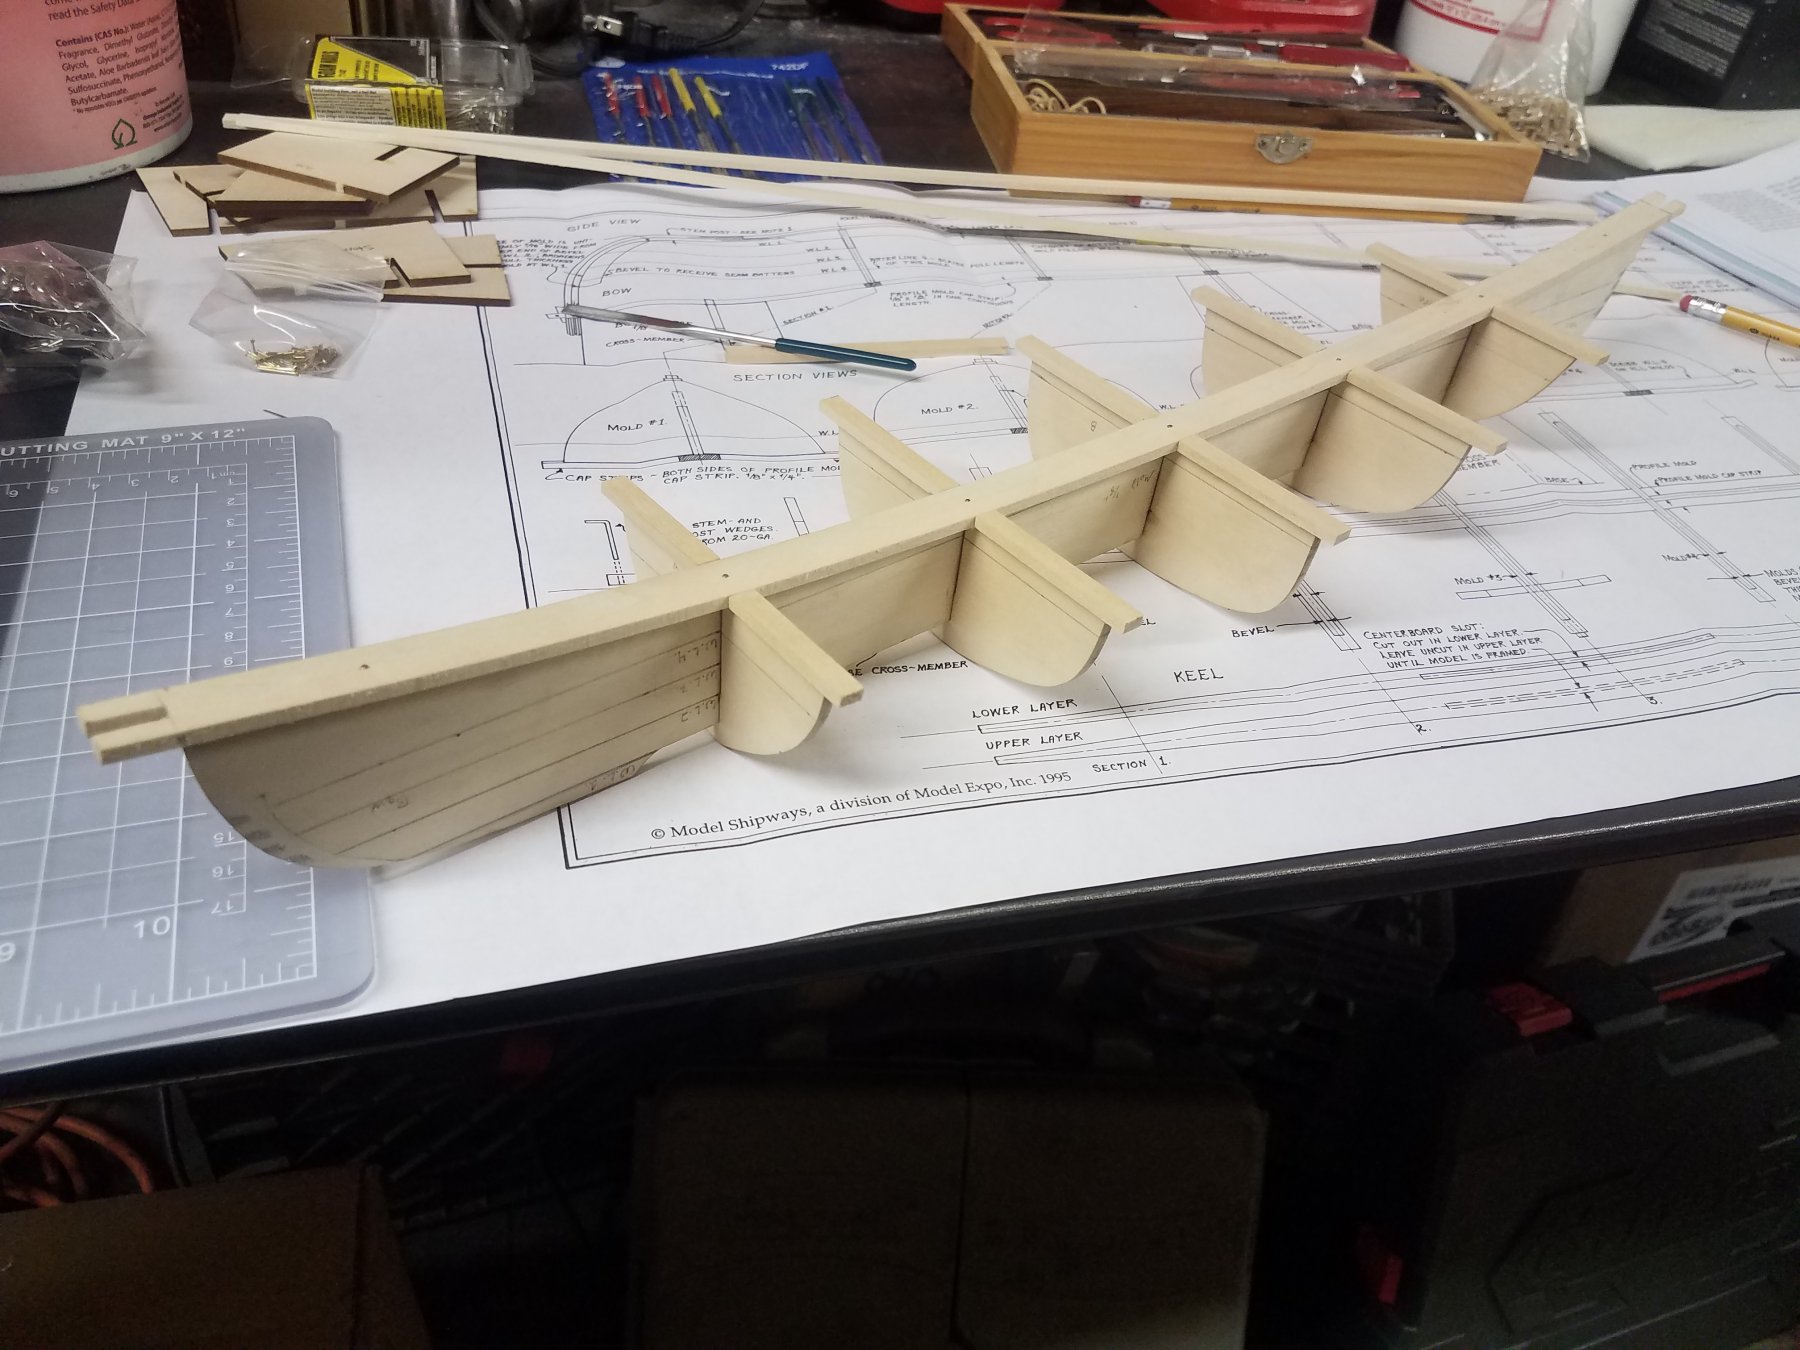
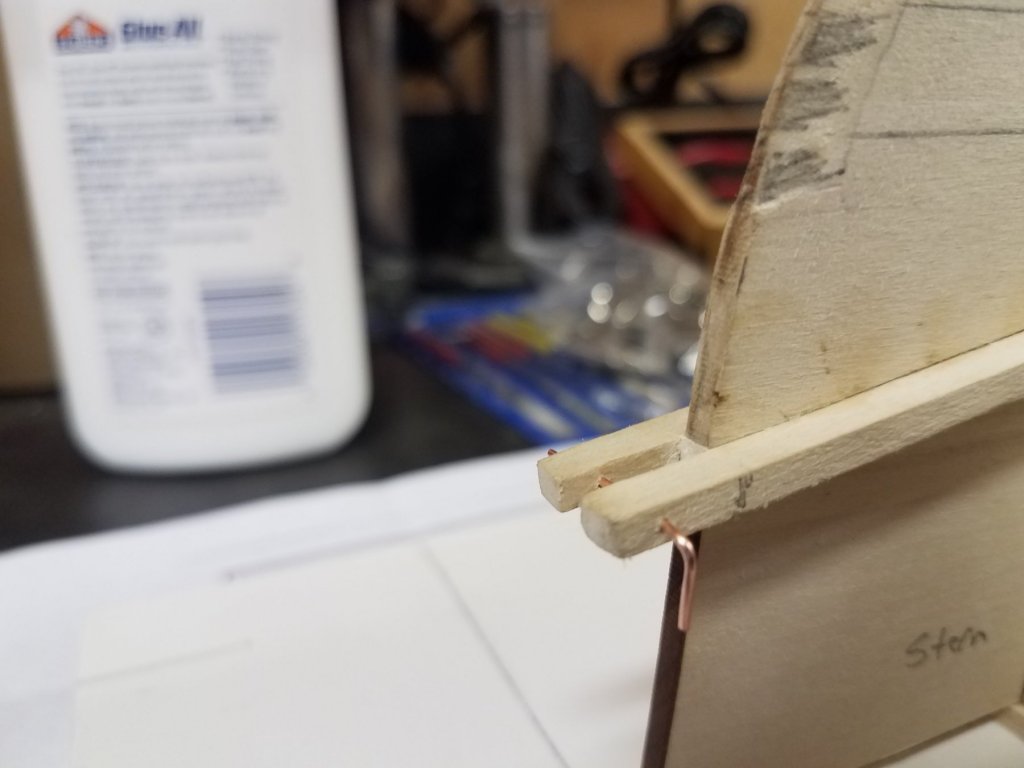
I feel like i did a whole lot, but i guess when it comes down to it its not actually that much work!! Anyways..The upper and lower levels of the keel is set to dry. Following instructions, they are clipped and wedged to the hull mold.A closeup of the cutout on the lower keel. The upper keel is left uncut for structural rigidity purposes at this time.A closeup of the complex union of keel and stem post. This is before sanding and continuation of the rabbet along the length of the keel. Also, this is before the second 3 laminations of the stem post are added (they meet the lower keel section).Here is the last 3 laminations of the stem post. The rabbet now has to be extended the length of the keel and blended through the scarf. This was tricky!After lots of sanding and measuring, the garboards were added.Here is the second strake being clamped while the glue is drying. This step was also tricky because you need to keep a 1/32 gap between the second strake and the profile molds to allow room for the batten seam.And this is how she sits tonight, the second strake glued and drying overnight. Hoping to have another update tomorrow before i take a few day break! -Ryan


- 21 replies
-
- 1
-
-
- whaleboat
- model shipways
- (and 1 more)
-
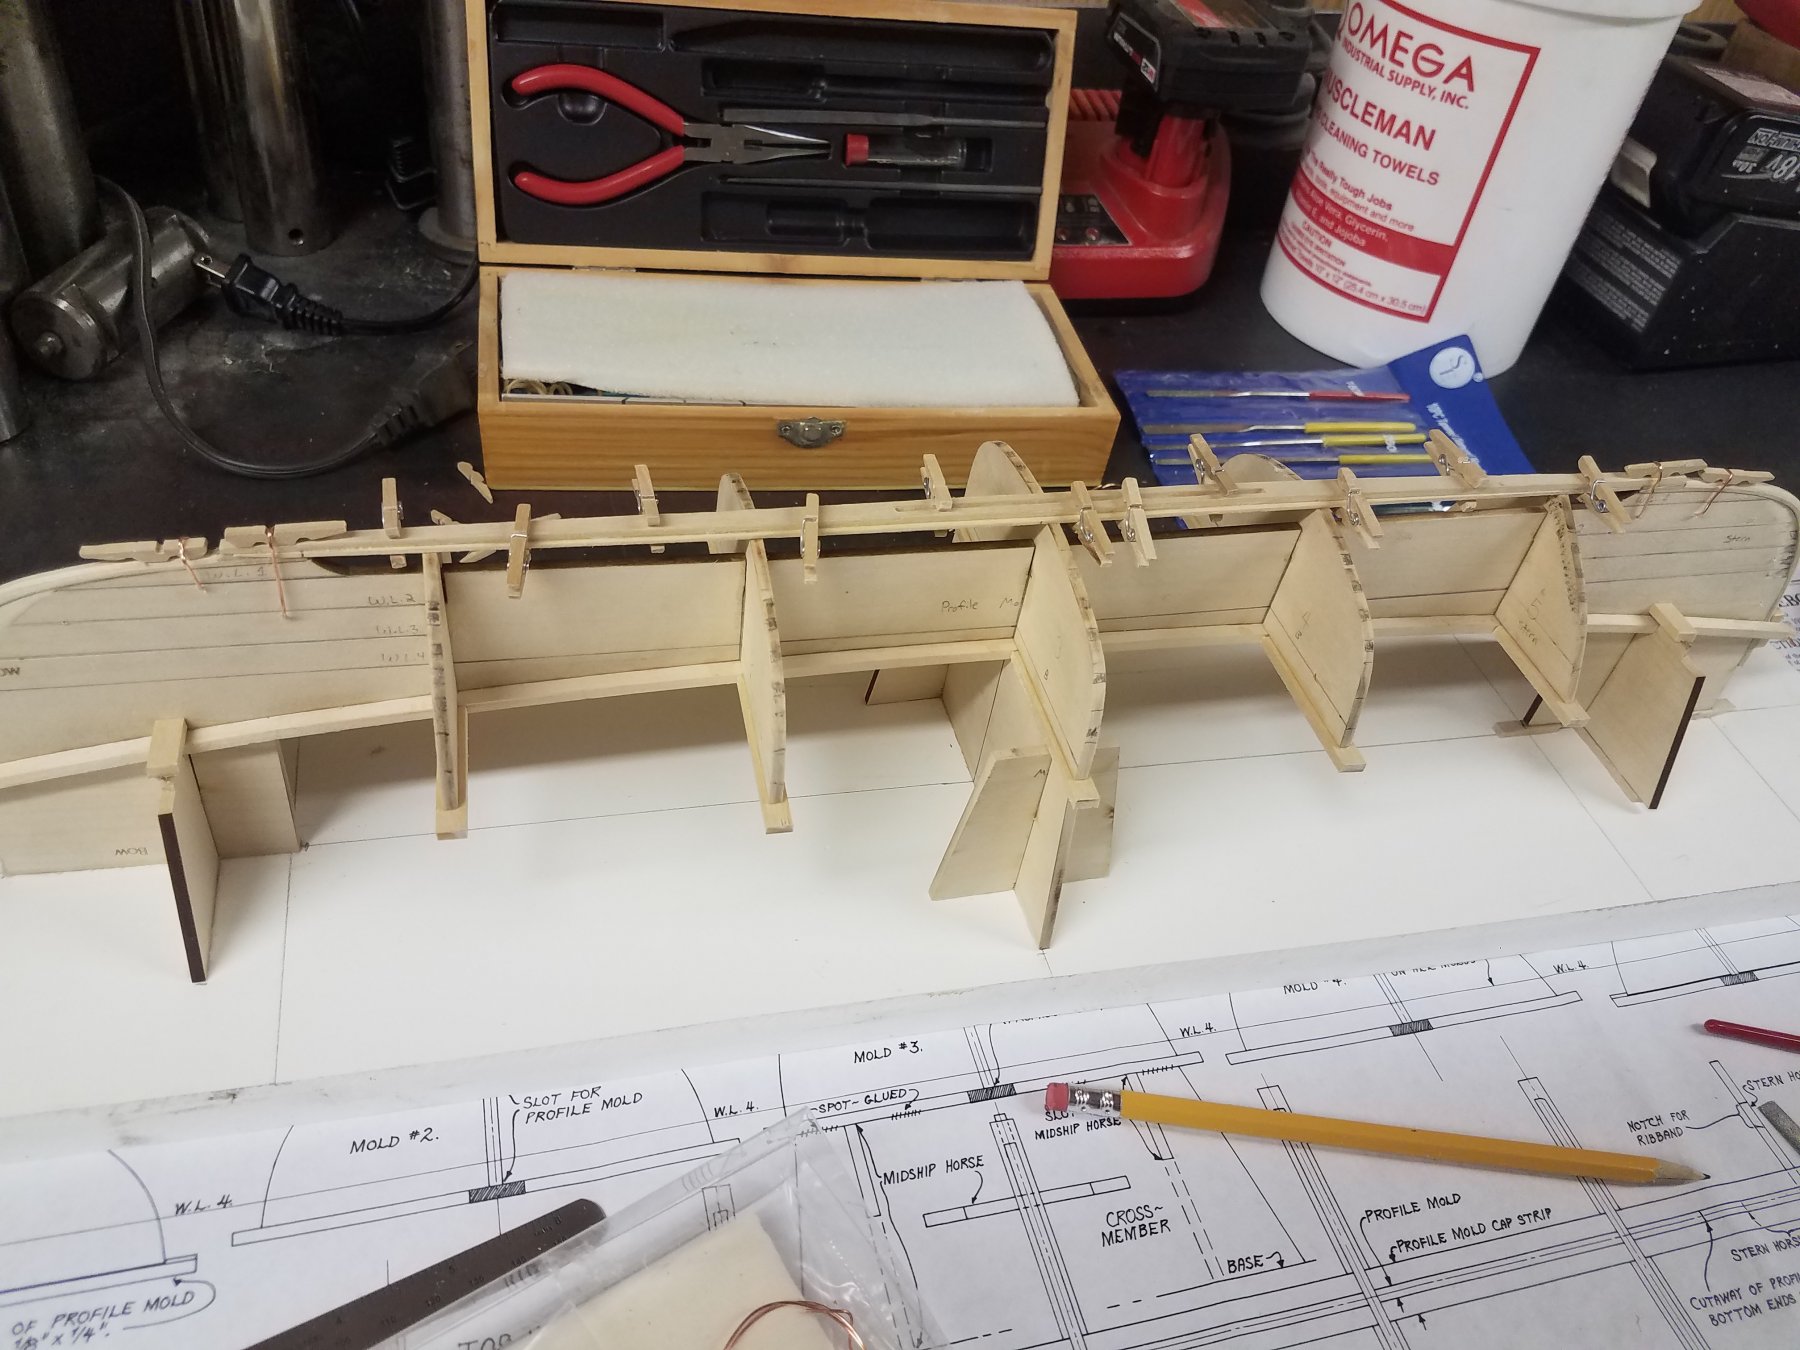
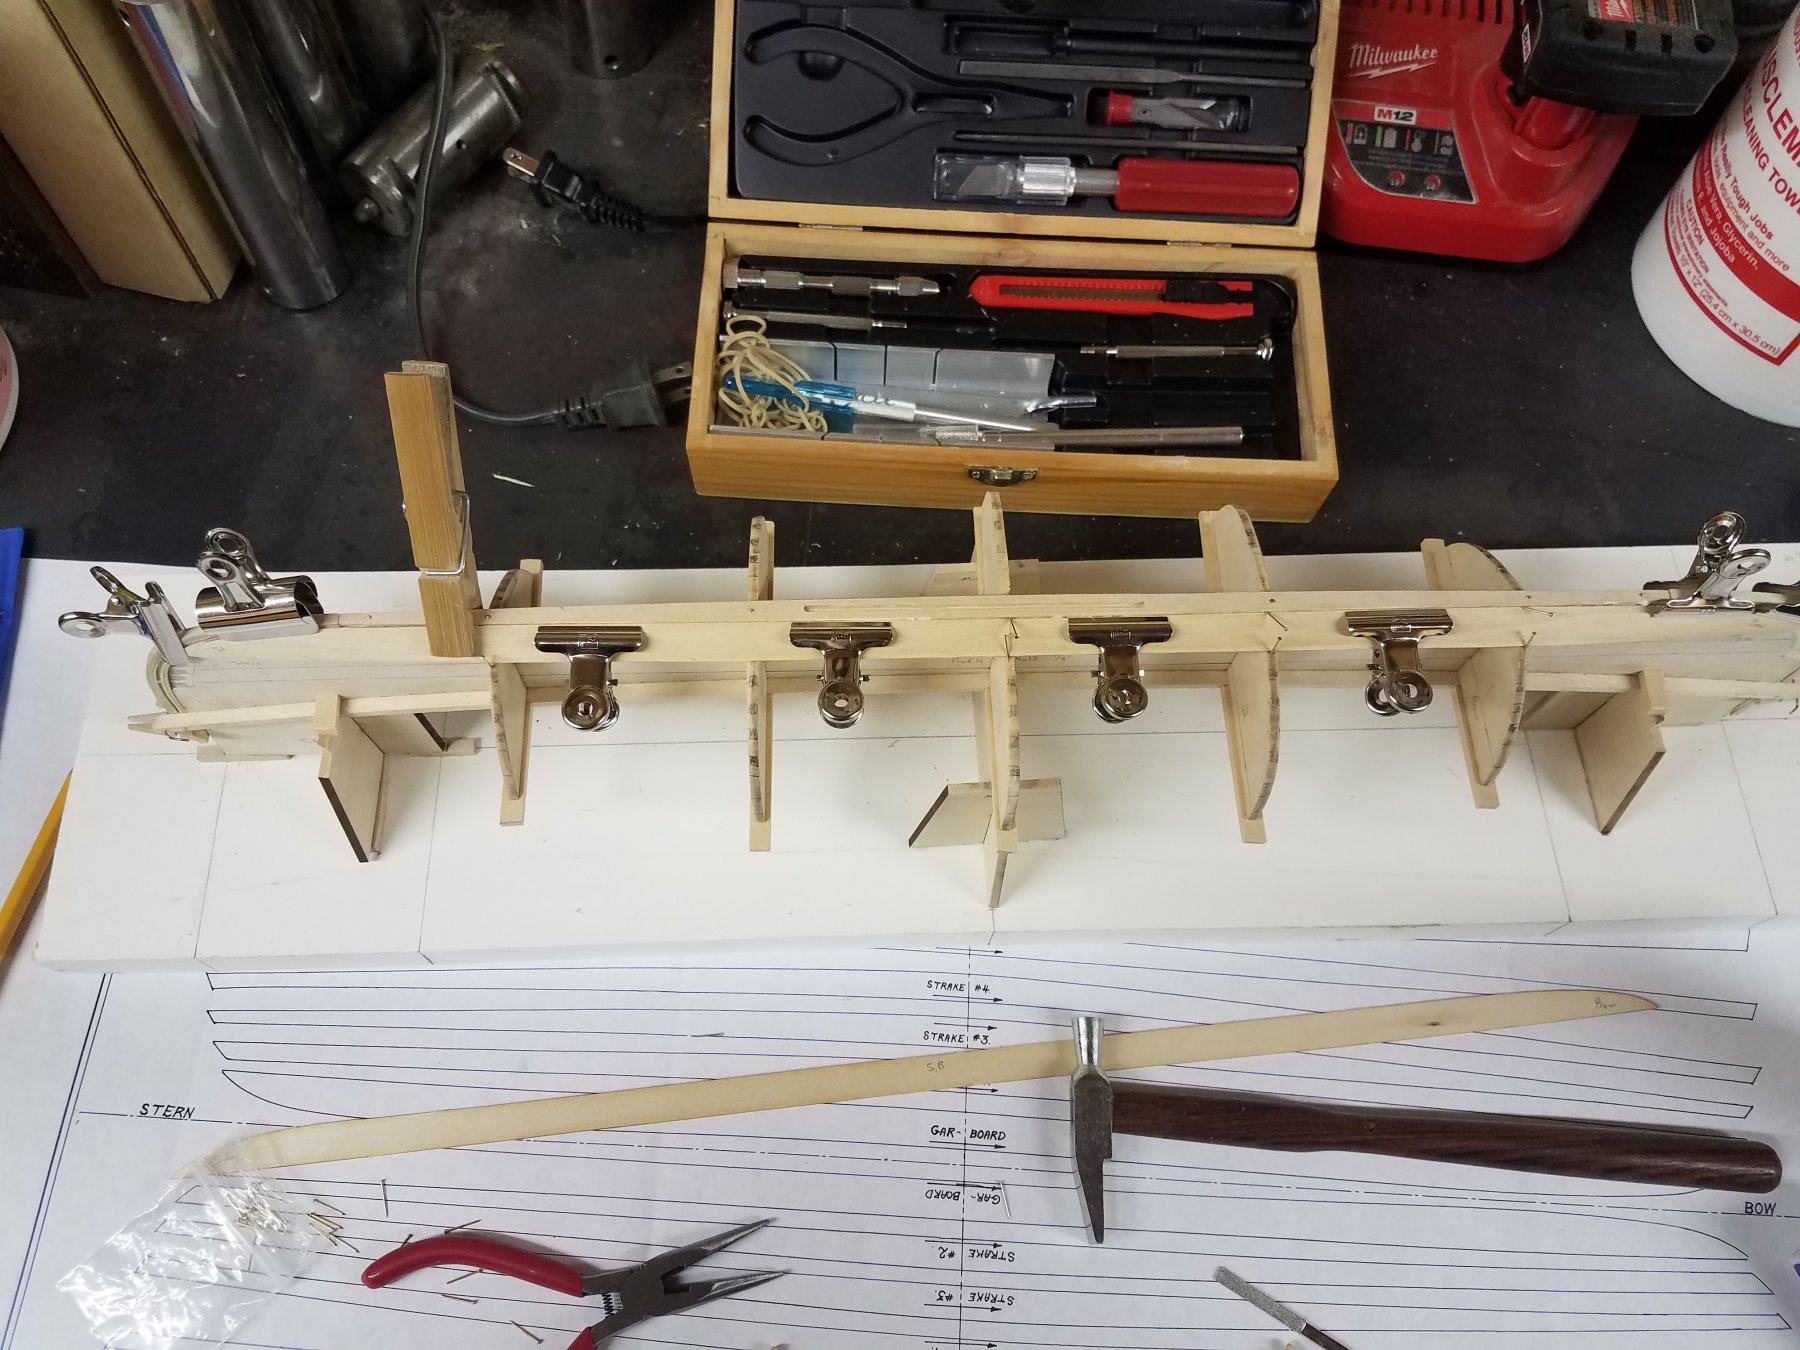
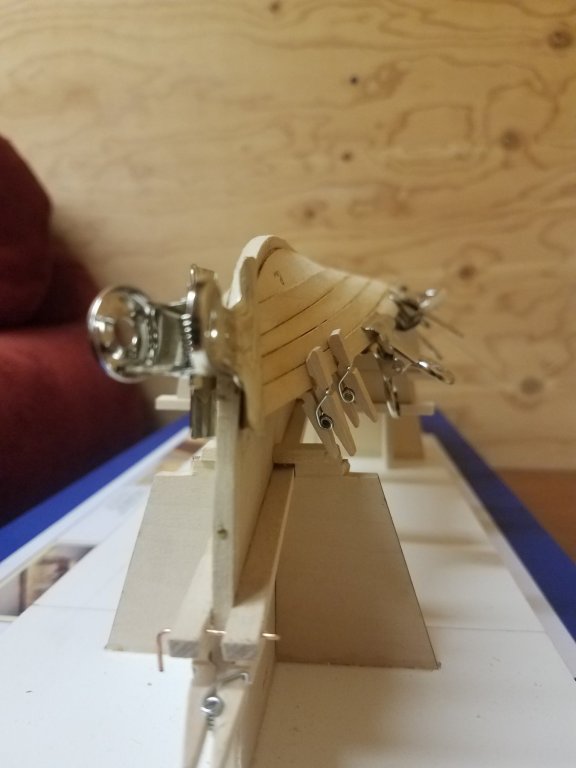
Ok guys this will be a long one, a LOT was done today 😁. First is a picture of the "shimmed" number 3 mold that i had issues with. It worked out perfectly fine and fit great. The cap strip was soaked and held in place along the profile mold to dry and take shape. A picture of the hull mold after all cap strips were glued and nailed into place. Looking down the newly constructed hull mold. A picture of the hull mold dry mounted on horses. The cap strips are "spot glued" in pictures after this for easy removal after the planking process. Note the notch at the front of the cap strip, more on that in a minute!! The notch at the bow and stern are for the stem / stern posts and the lamination process of those. A wedge is used to keep pressure on the layered posts while the glue is drying. Letting the three layers of the stem post dry after the wetting/shaping process. Note the wedge being used. And lastly is the glued and wedged stem post. Following the instructions, the metal clips were made. Instead of using scrap wood, i decided to use a few small craft clothespins as wedges that i had handy. Worked out great. Sorry there are not too many pictures following the entire process. There were a few issues i ran into that i was able to correct with little issue. One was that i discovered one of the molds (early on before the cap strips were glued into place) was not square. I ended up soaking the glued mold with water and was able to wiggle it free re-position/glue it. Secondly, during the process of setting up the horses to mount the hull frame on, i noticed i had trimmed just a little too much off of the bow and stern horses, so shims were used. Following the instructions, the horse alignment/fitment was not important to be perfectly shaped/square. Guess i was a little too careless! Either way, the stem and stern post laminations are drying and i should be able to start beveling the posts tomorrow to accept the keel. Having an absolute blast so far! -Ryan

-
Its awesome so far! Its nice being presented with issues and being a bit on your own without direct step by step instructions, stimulates the mind 🤣. But seriously i am having a blast. Picked up some glue and am ready to continue on tomorrow. Thanks for all the replies everyone!!
- 21 replies
-
- 1
-
-
- whaleboat
- model shipways
- (and 1 more)
-
No worries i definitely wont be using it! And thank you.
- 21 replies
-
- 1
-
-
- whaleboat
- model shipways
- (and 1 more)
-
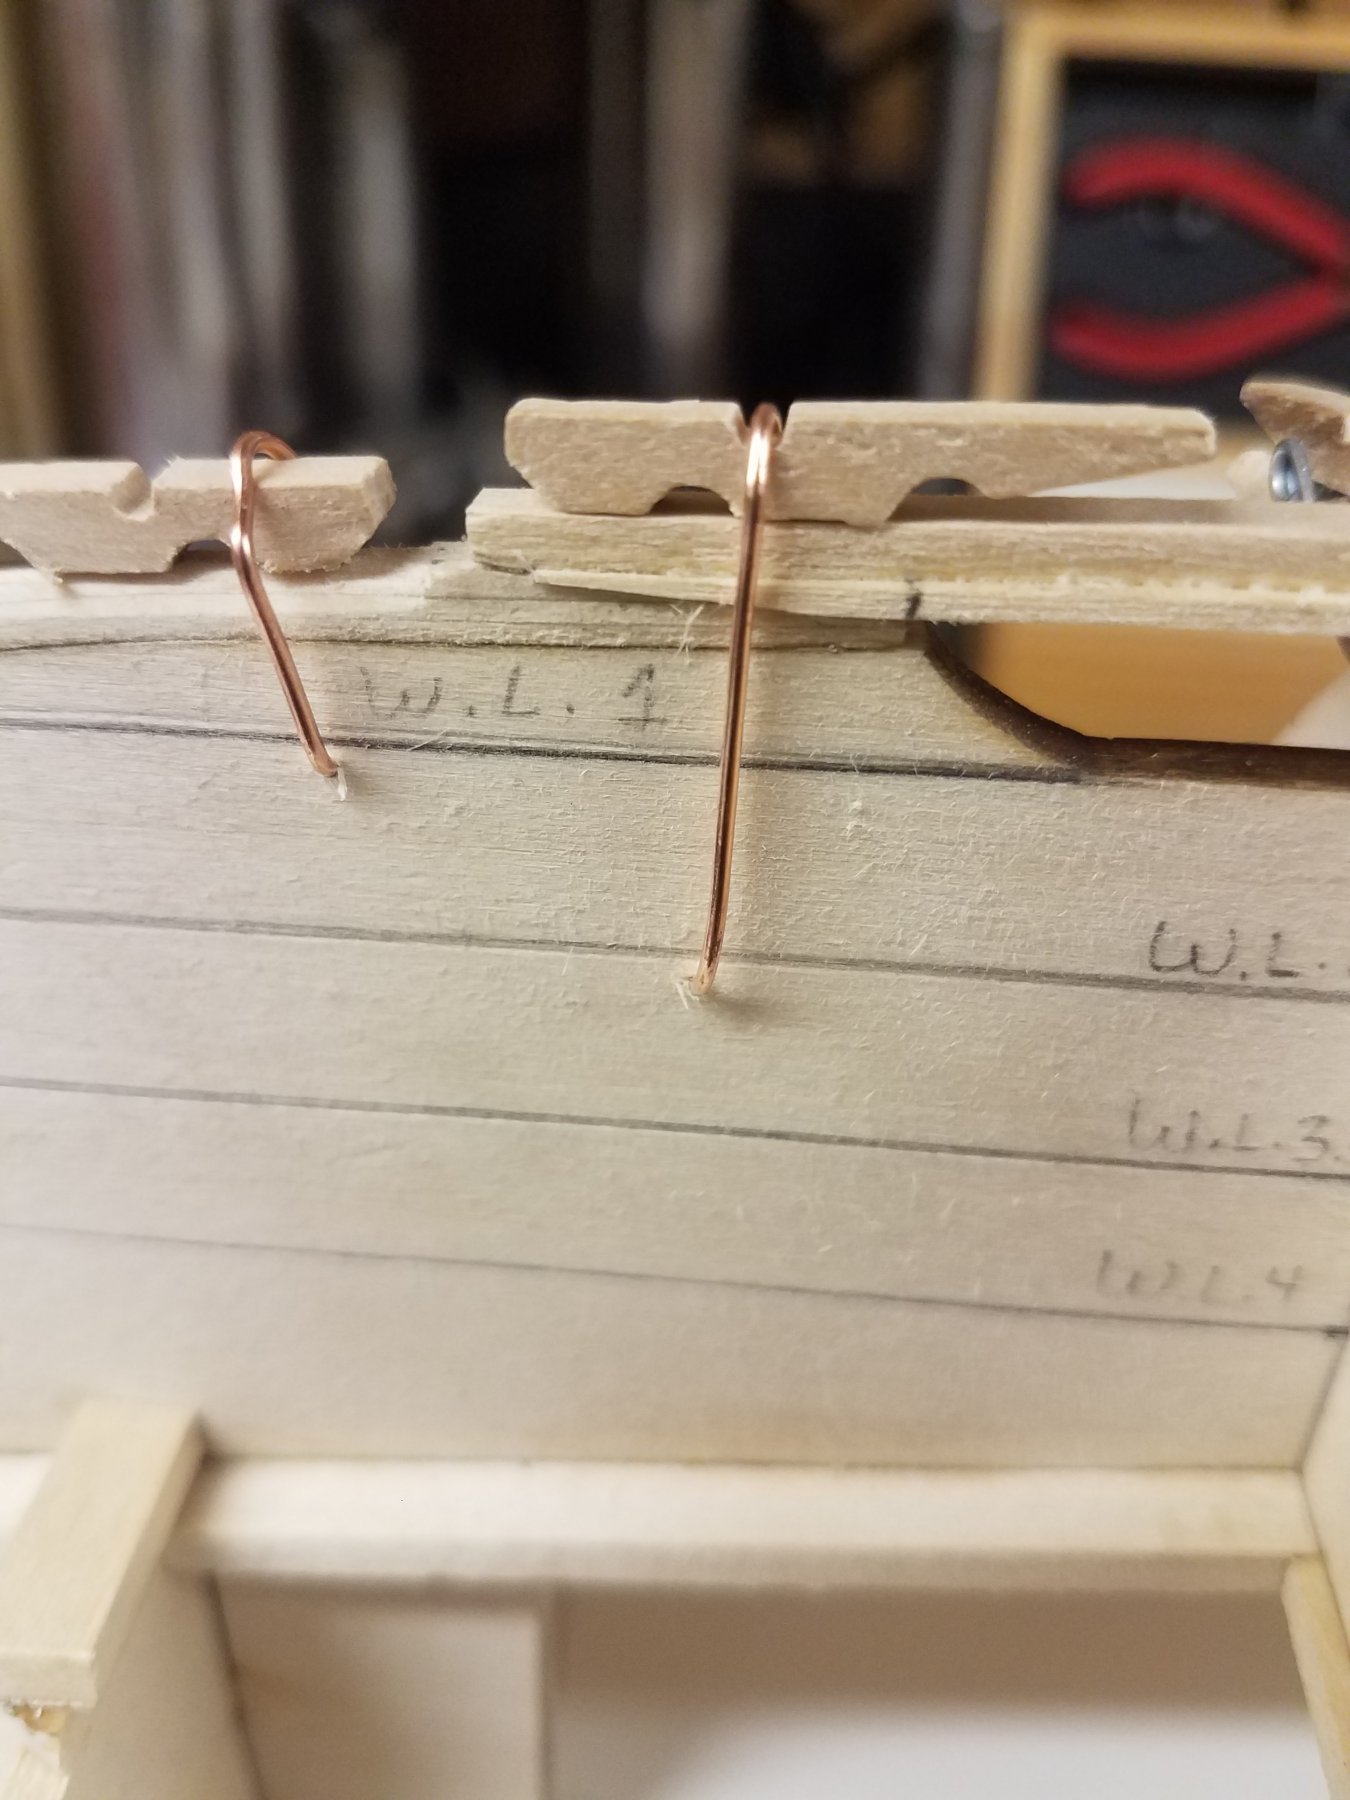
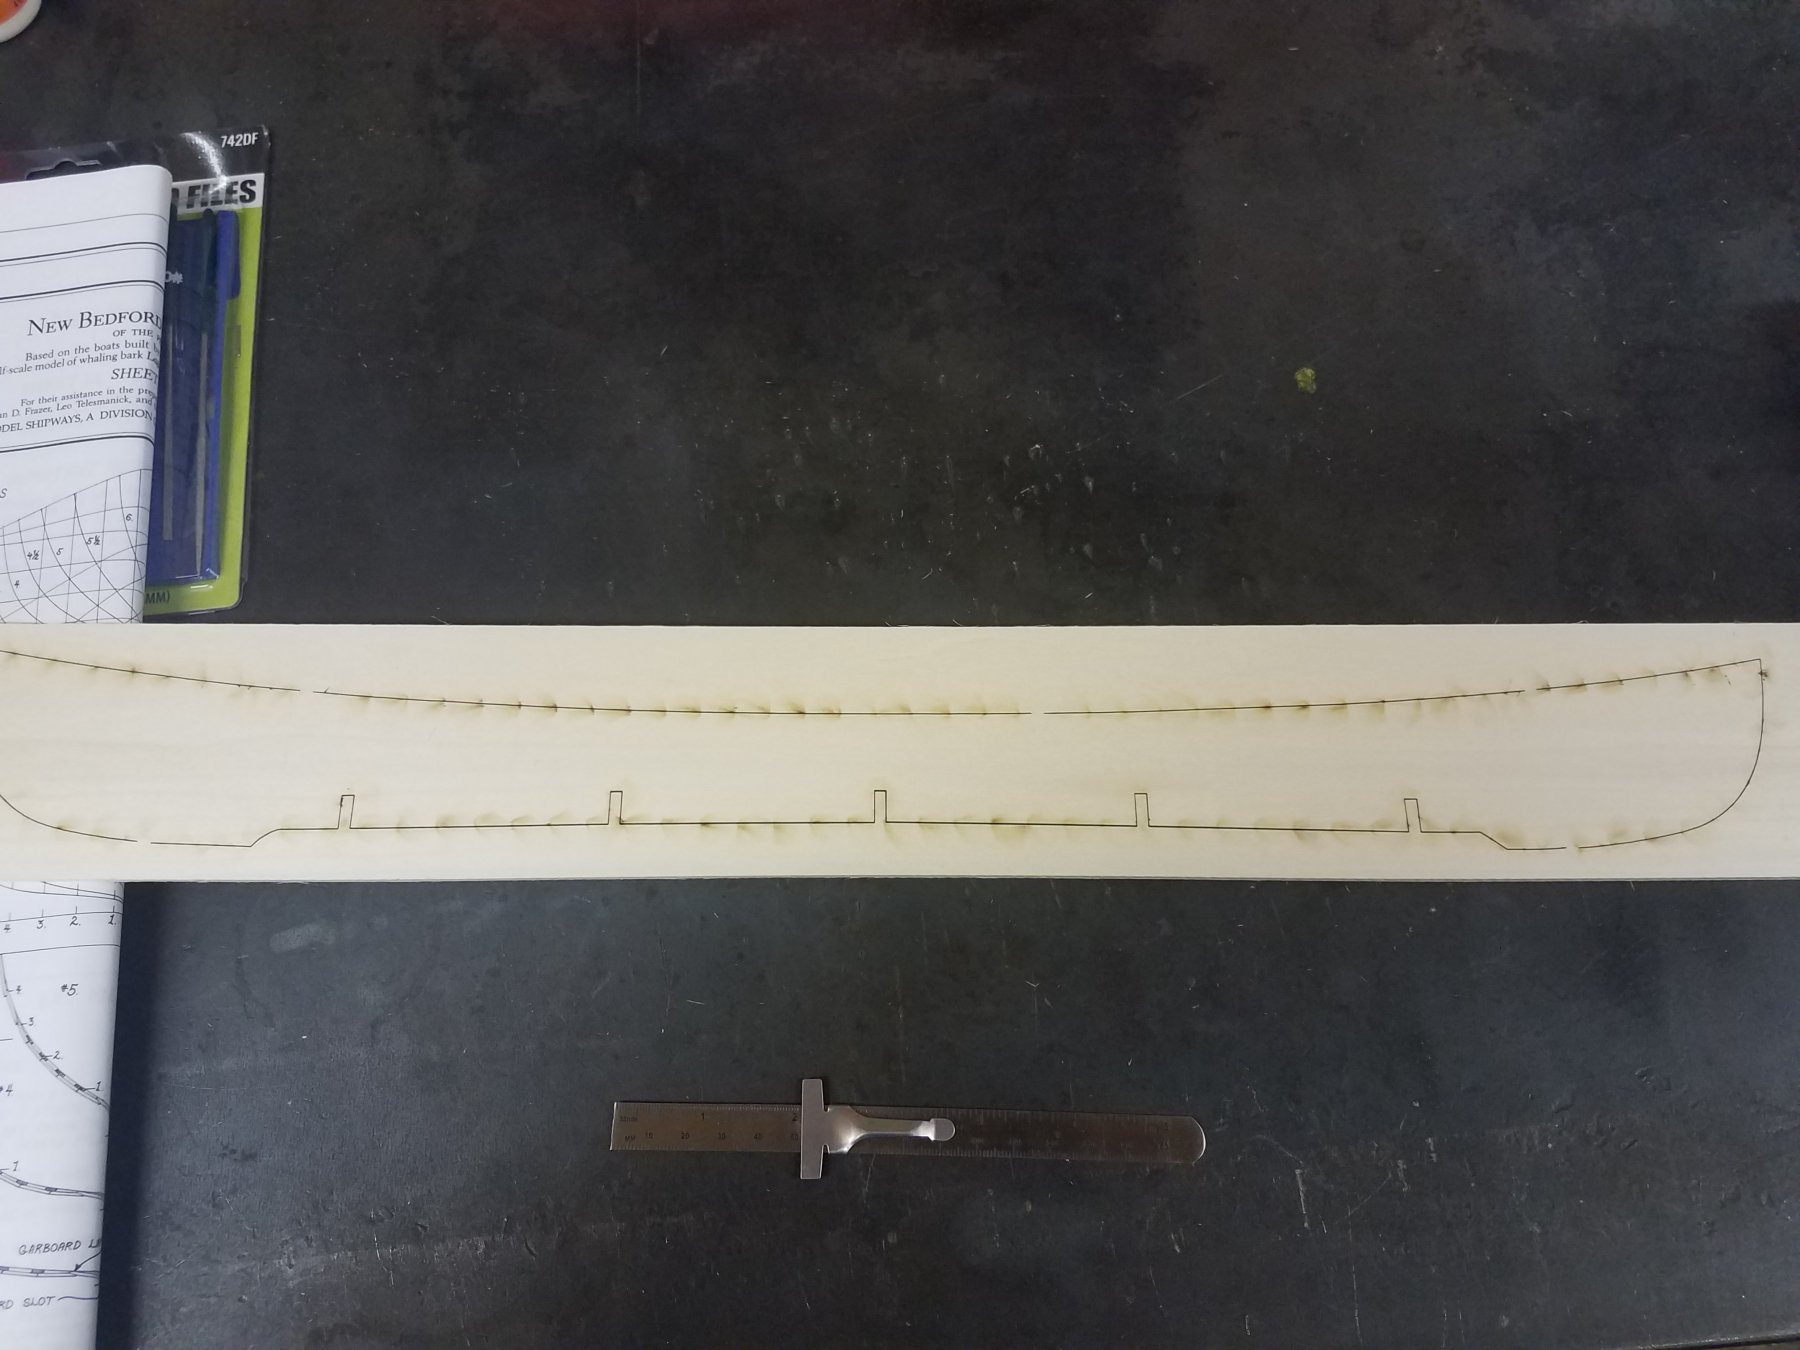
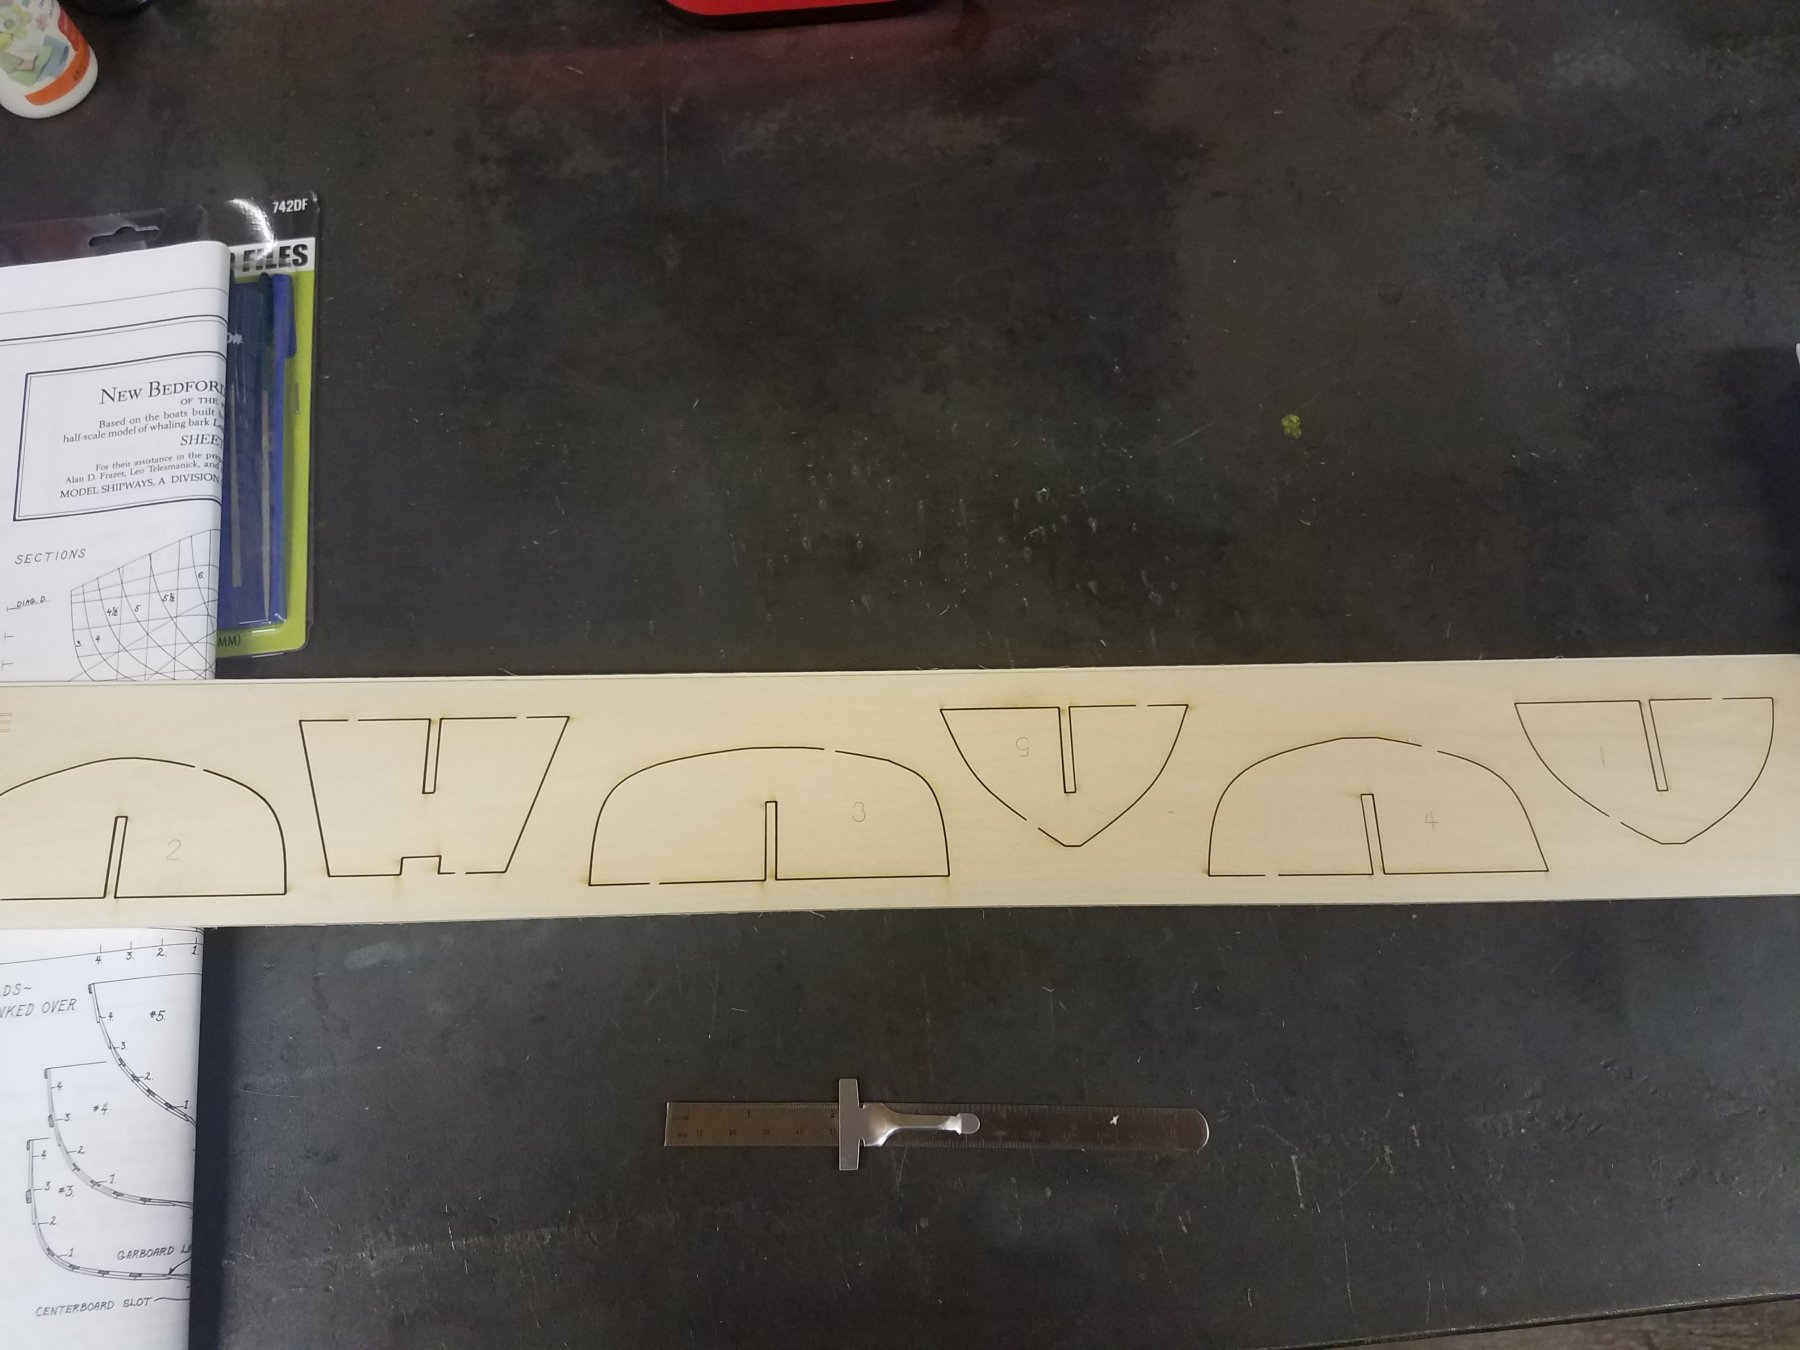
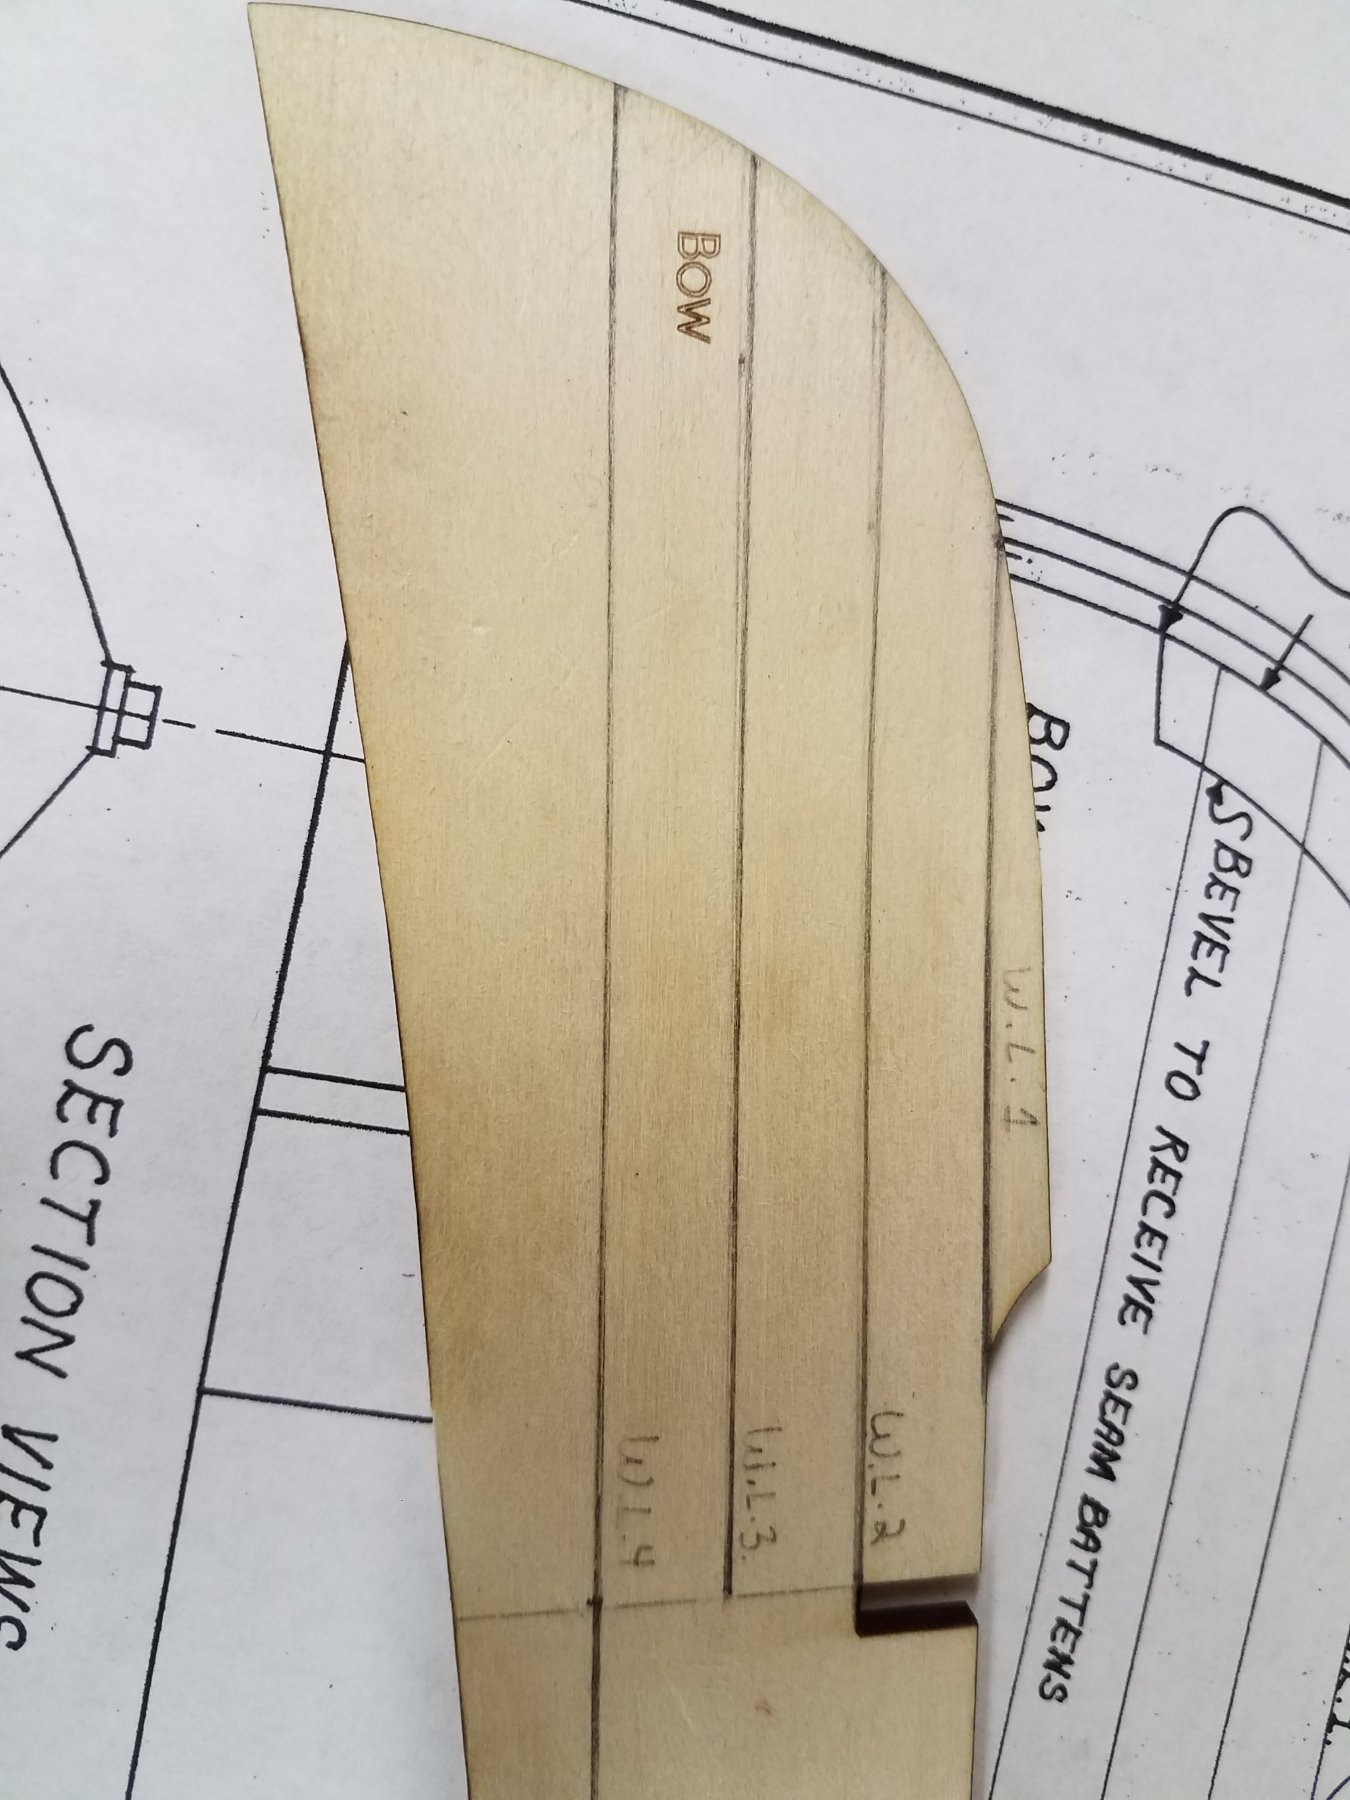
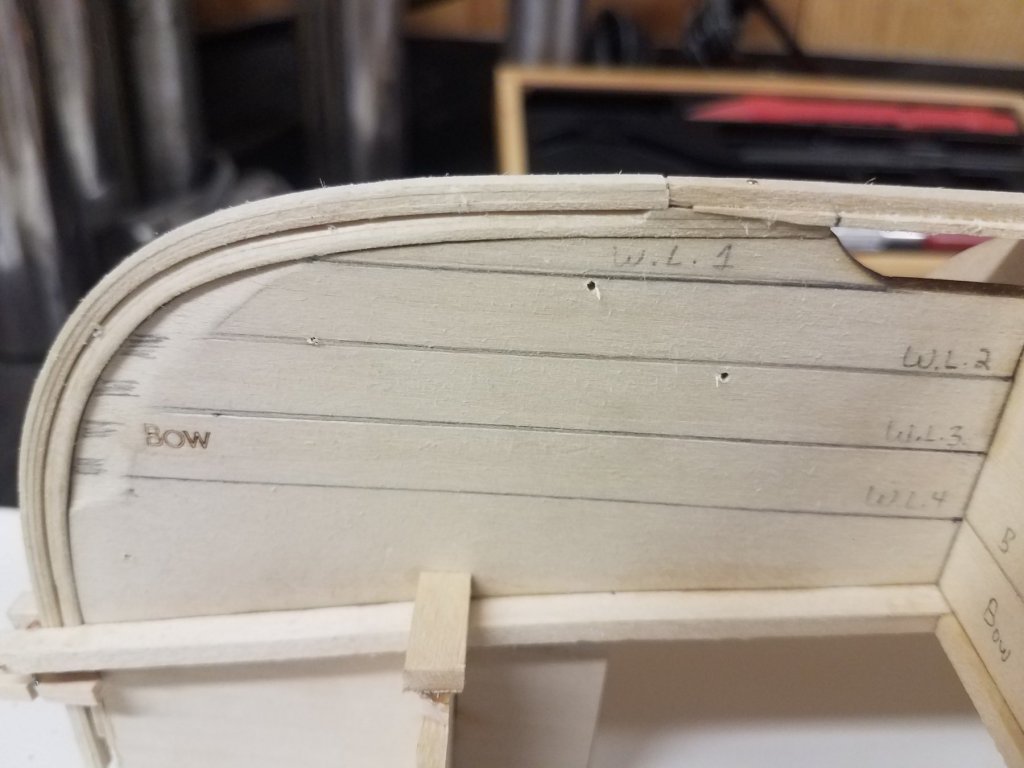
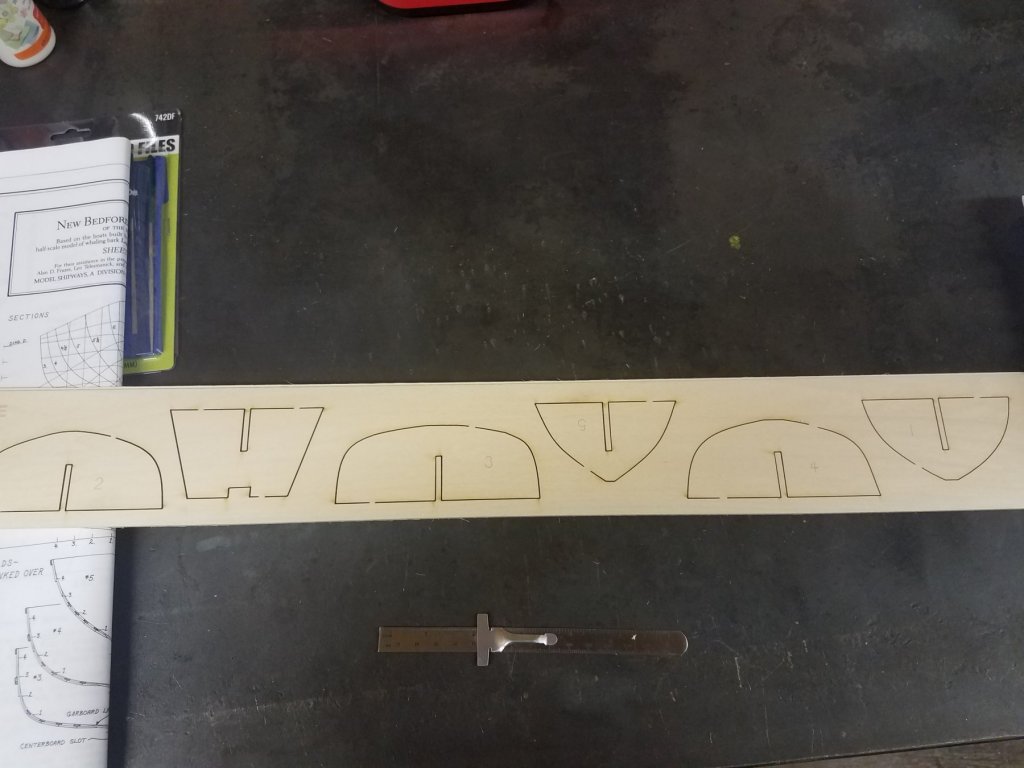
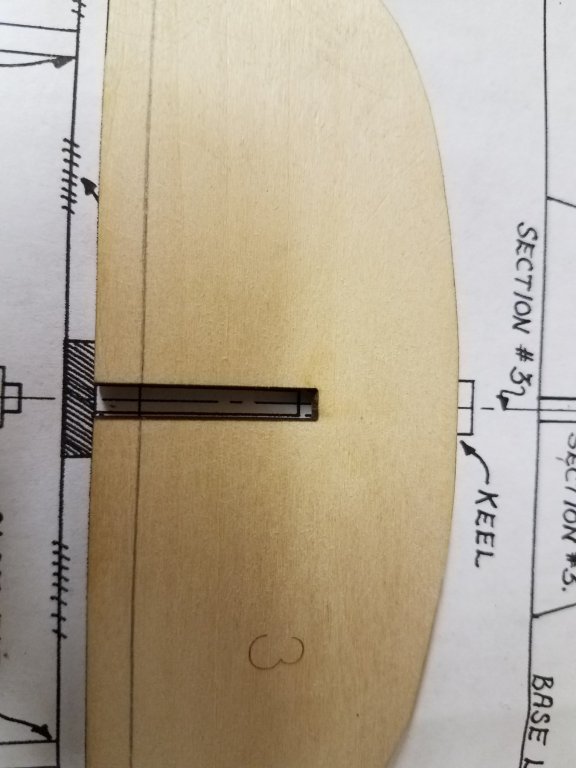
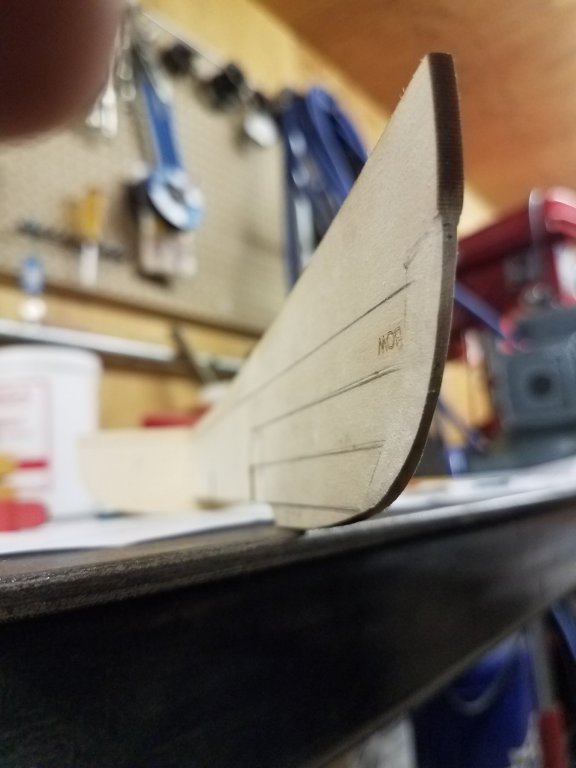
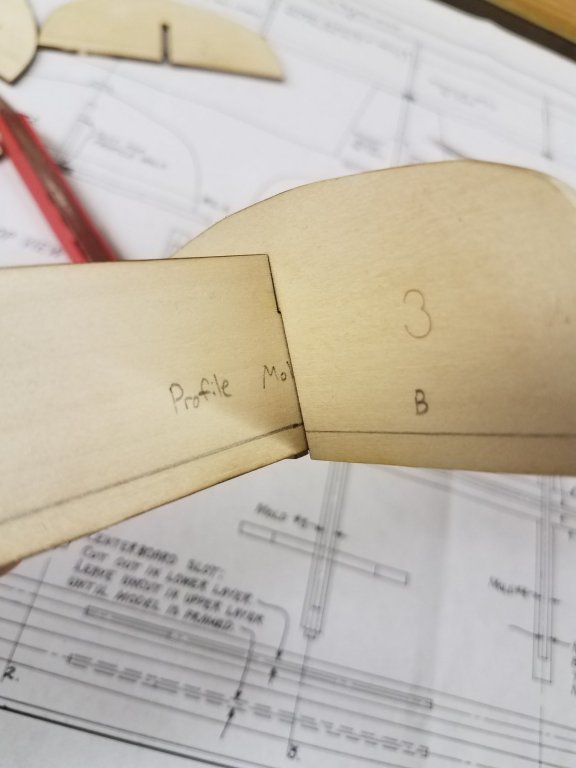
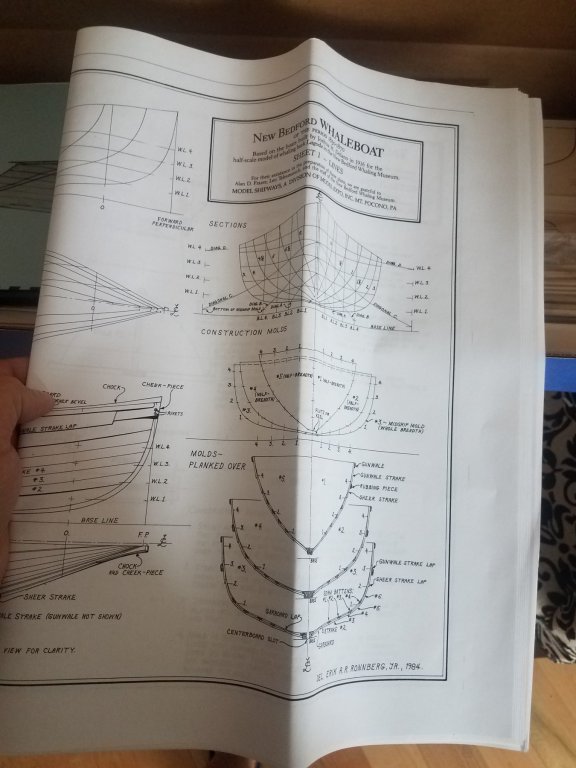
I was able to get a little time today to open the kit and get going. Basic picture of the profile mold with char marks before removing it from the sheet. Here are some of the frame pieces still in their sheet. This picture shows the first issue I ran into. The center slot is deeper than it should be. When dry fitted to the profile mold, it doesn't sit properly (see below). I will have to shim this I assume. Any recommendations on that process are appreciated! Picture to go along with above statement. See the 4th waterline mark and how far off it is. This is also pre sanding. A picture of the required bevel on the bow of the profile mold. The stern was done the same. Still needs some finishing touches. That is all for now. Like i said, being my first model ship period any and all recommendations or criticism are welcome. Hope to have more updates soon. Thanks in advance ! Ryan


- 21 replies
-
- 1
-
-
- whaleboat
- model shipways
- (and 1 more)
-
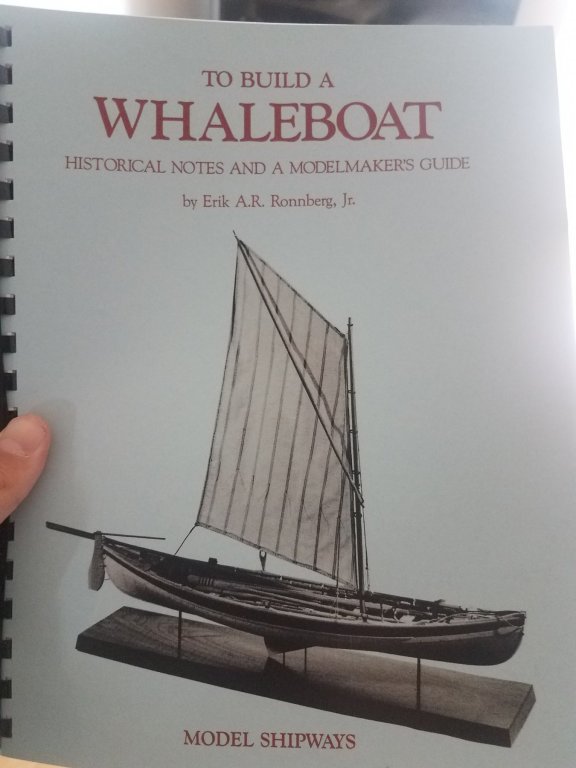
Mtaylor, thats a really good idea. I'll stop and pick some up soon. The inventory process is done with no missing parts. I'll be moving on to reading the instruction book next. It's a lengthy one.
- 21 replies
-
- 1
-
-
- whaleboat
- model shipways
- (and 1 more)
-
Thanks ccoyle, I will be sure to get some actual wood glue for this project, probably Titebond. And you have a good point, I will definitely find out what I need throughout the process. No rush! I will do my best to take my time and learn from my inevitable mistakes.
- 21 replies
-
- 1
-
-
- whaleboat
- model shipways
- (and 1 more)
-
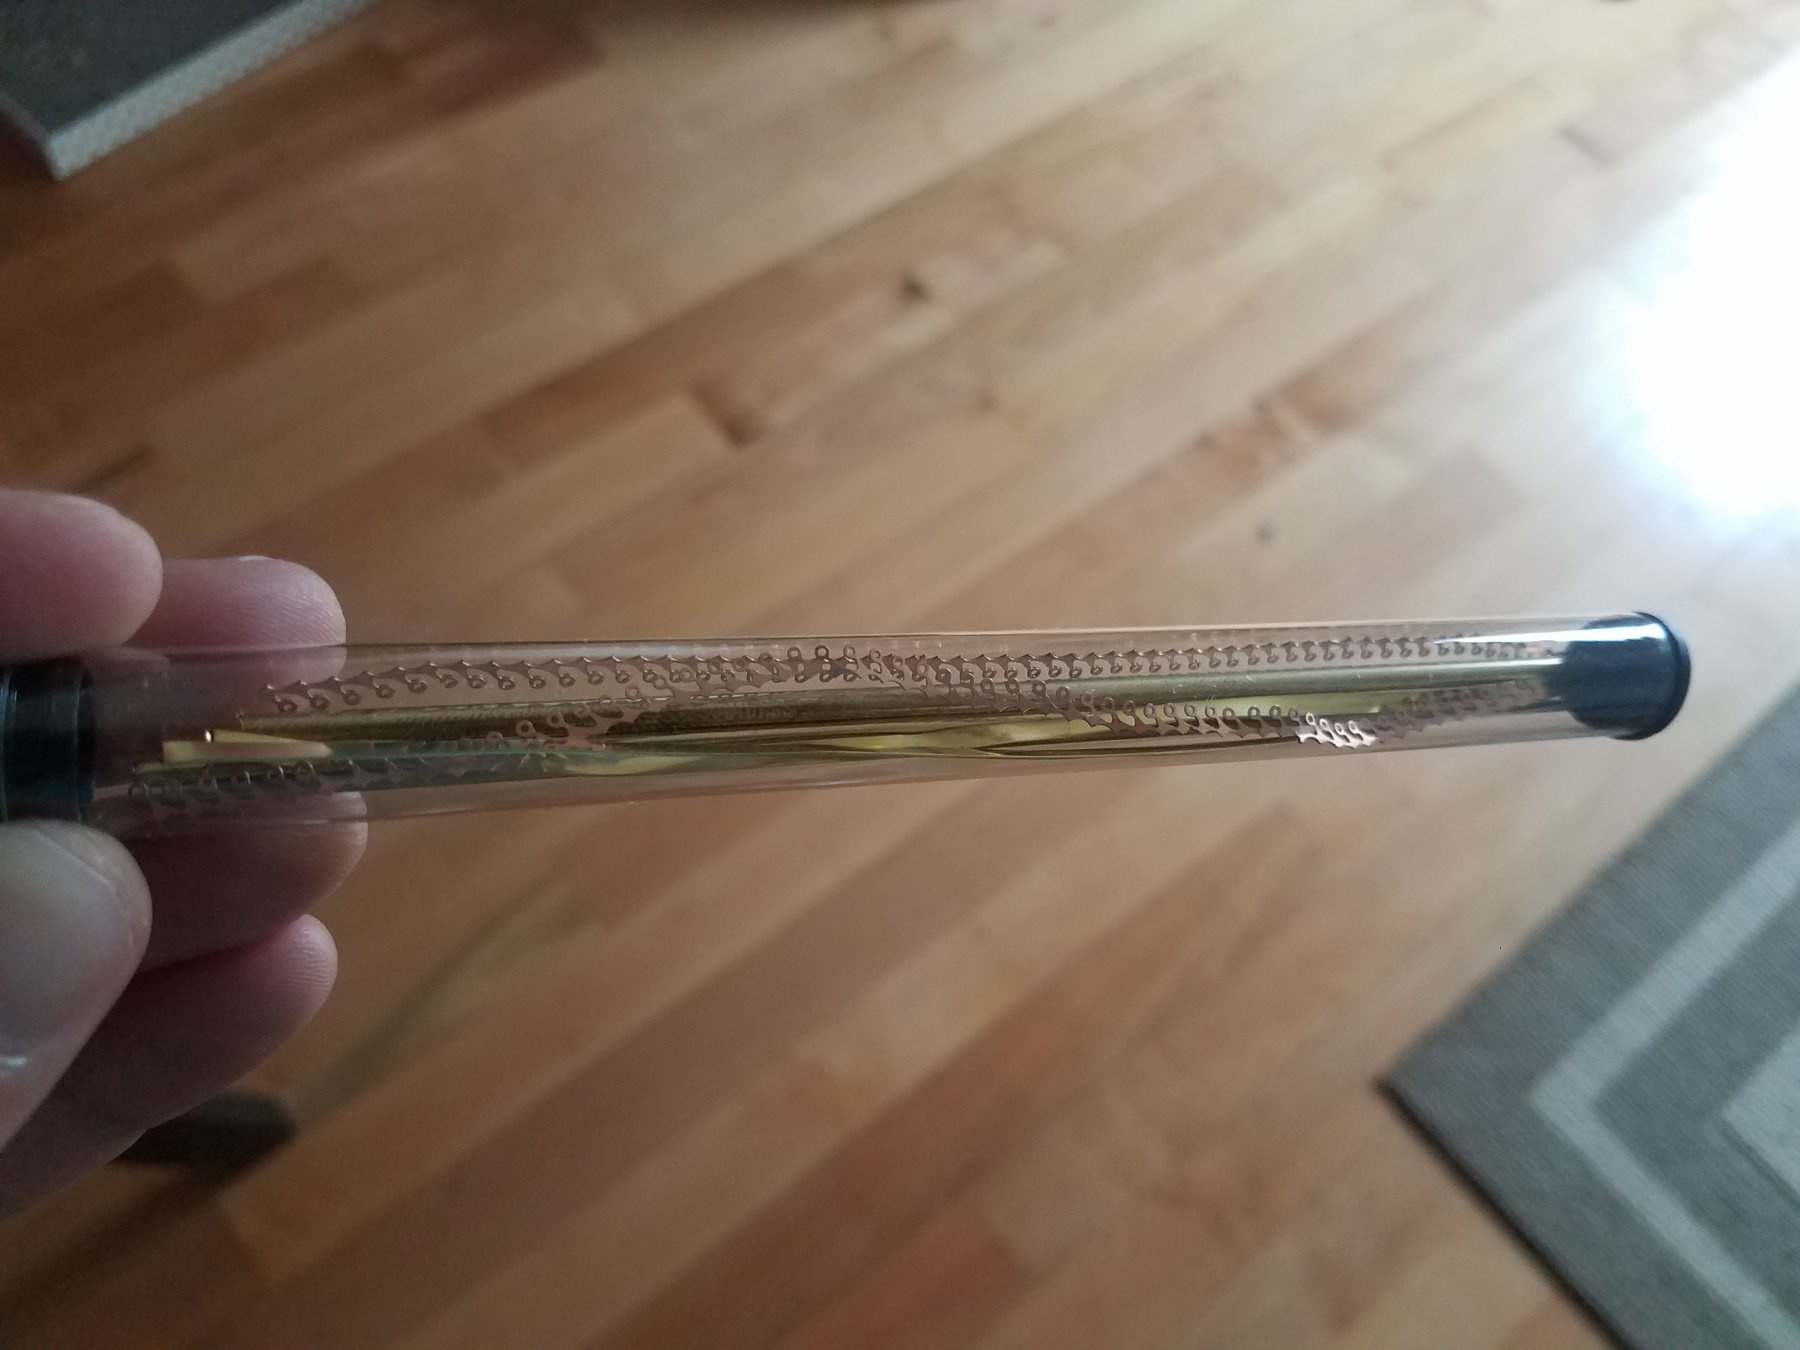
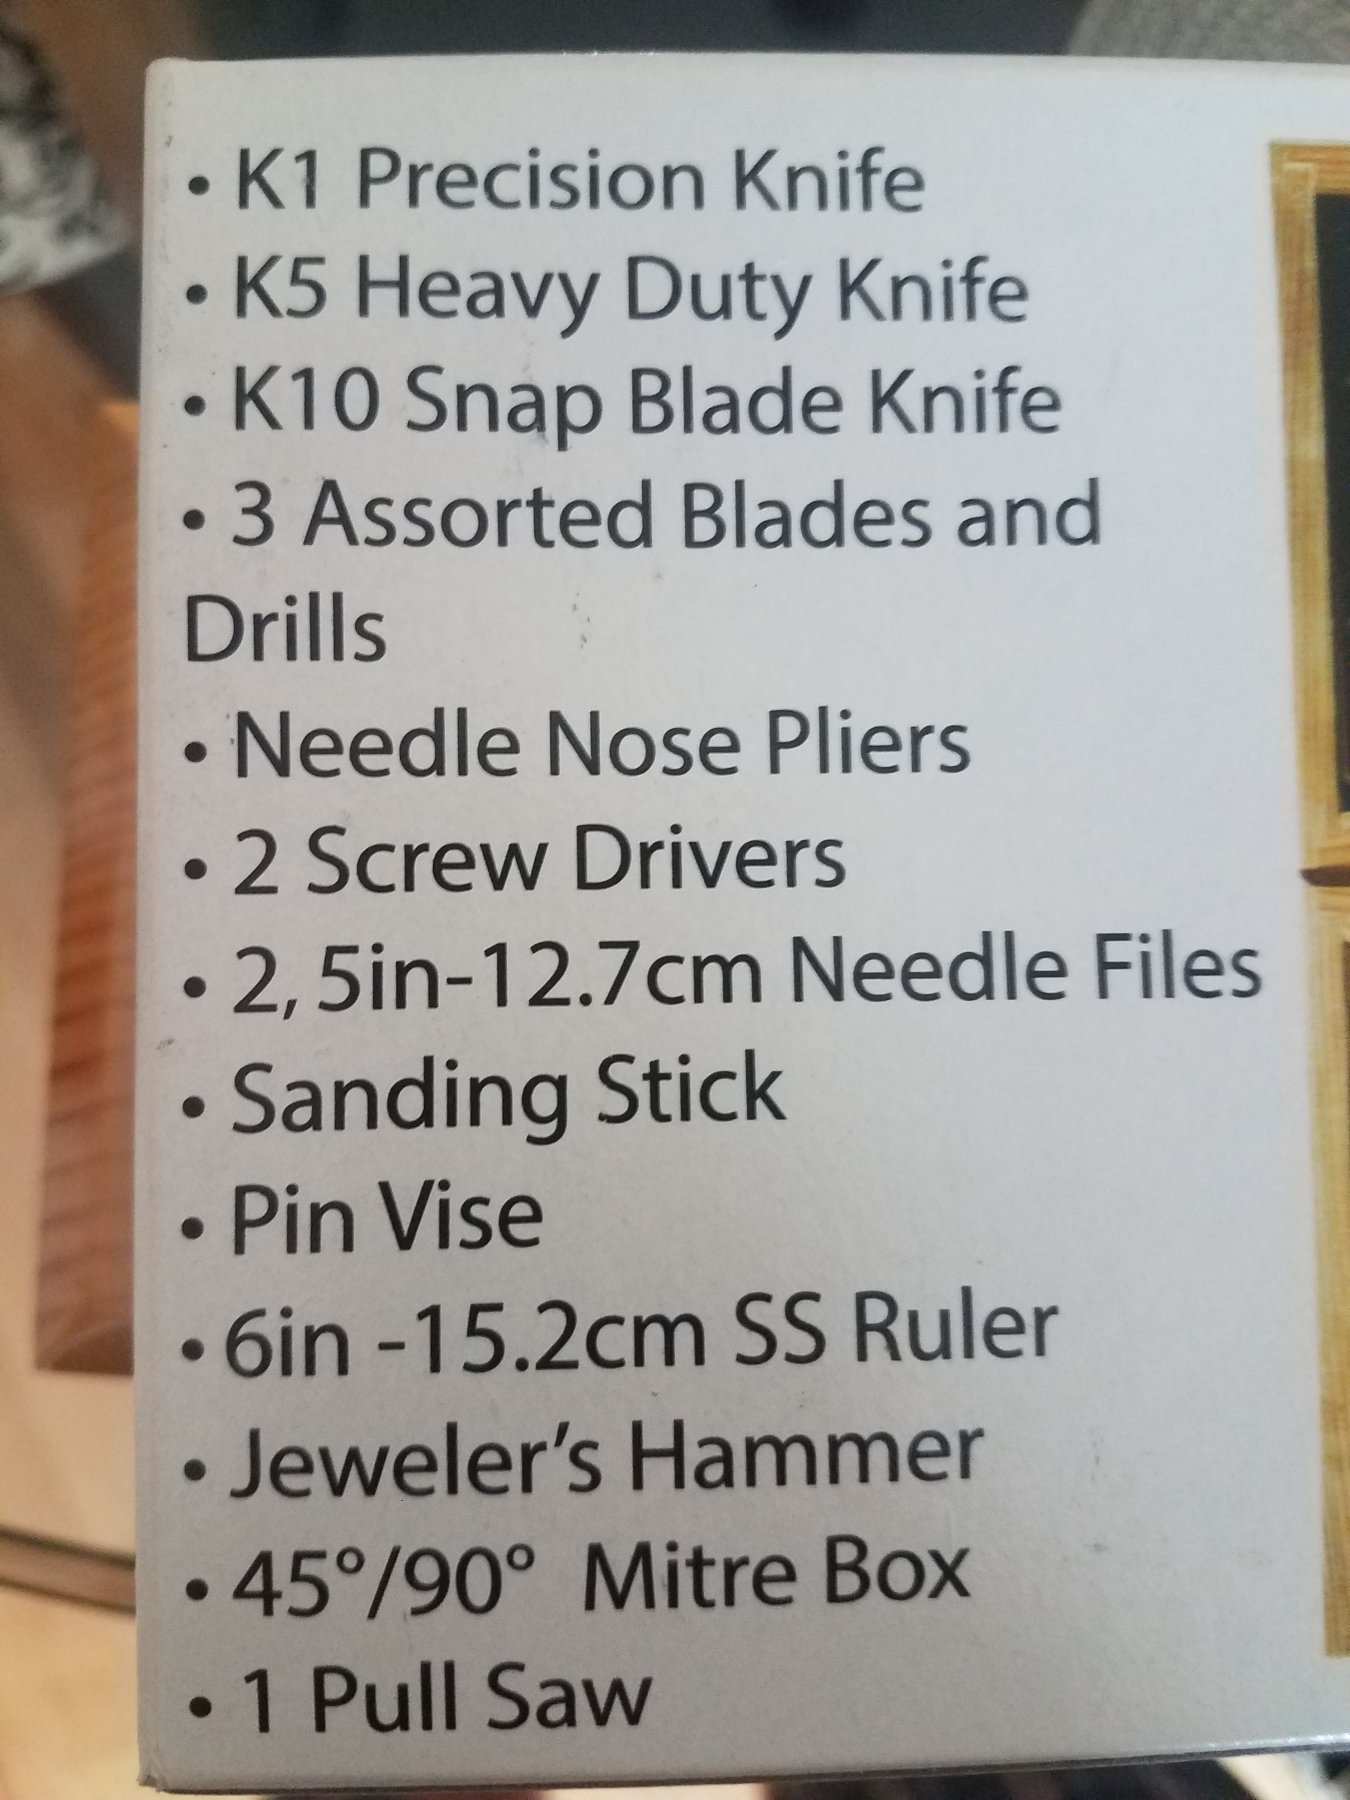
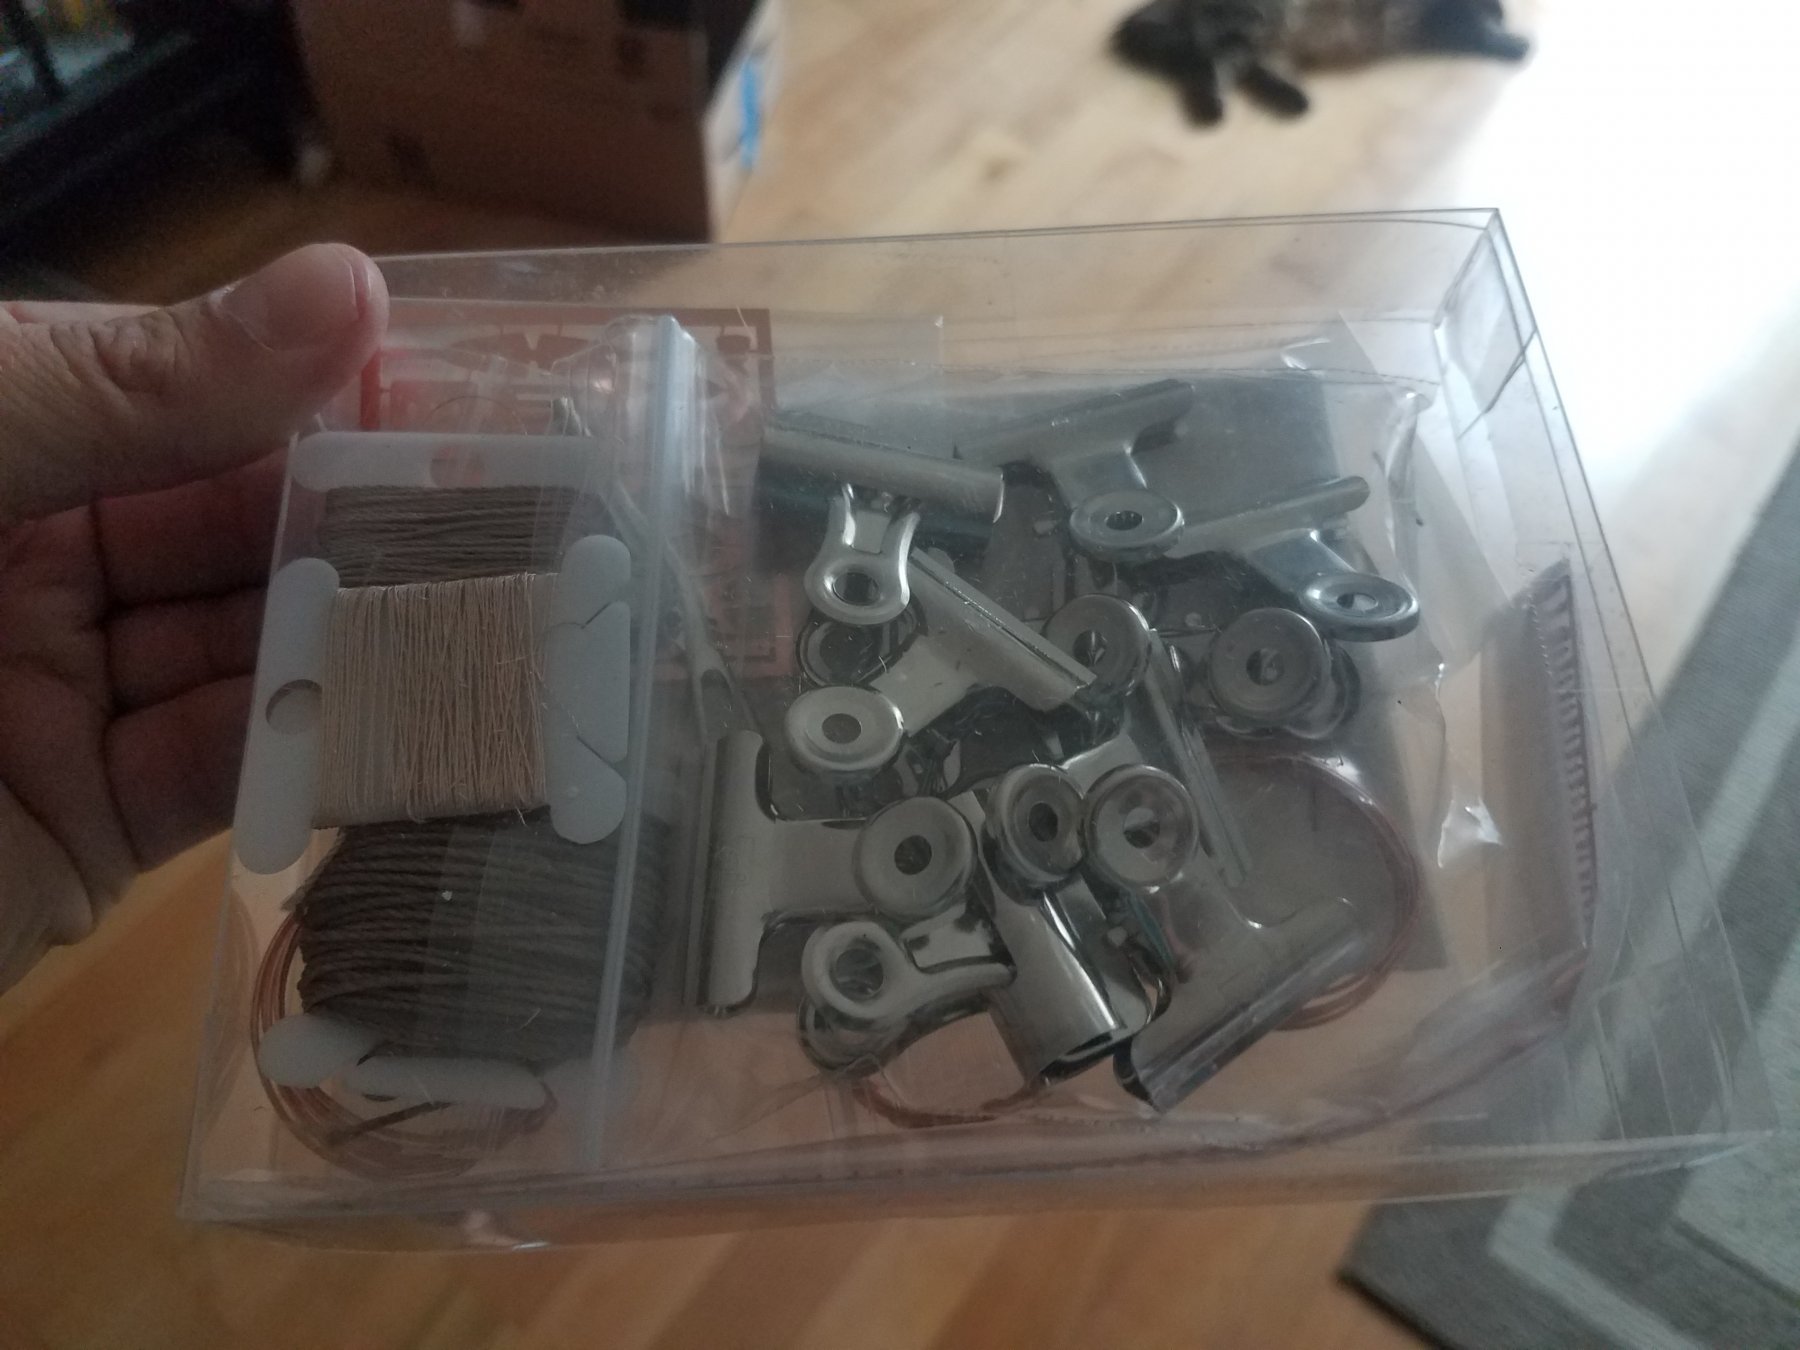
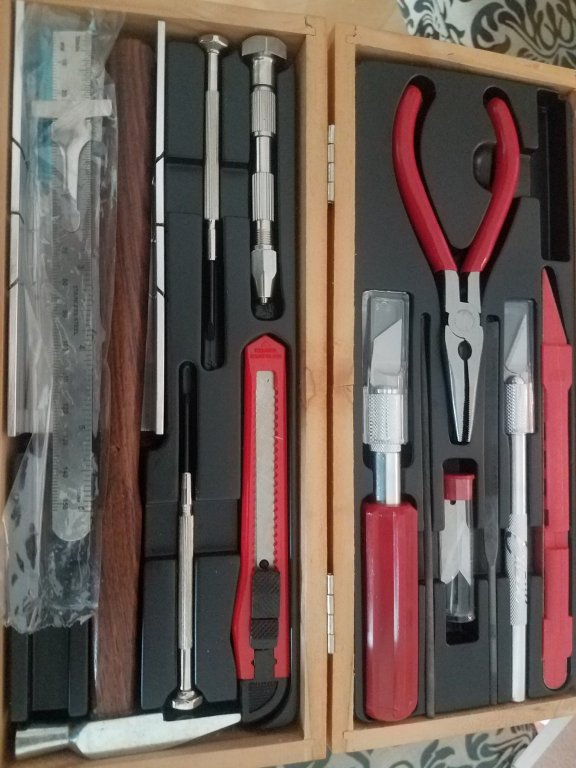
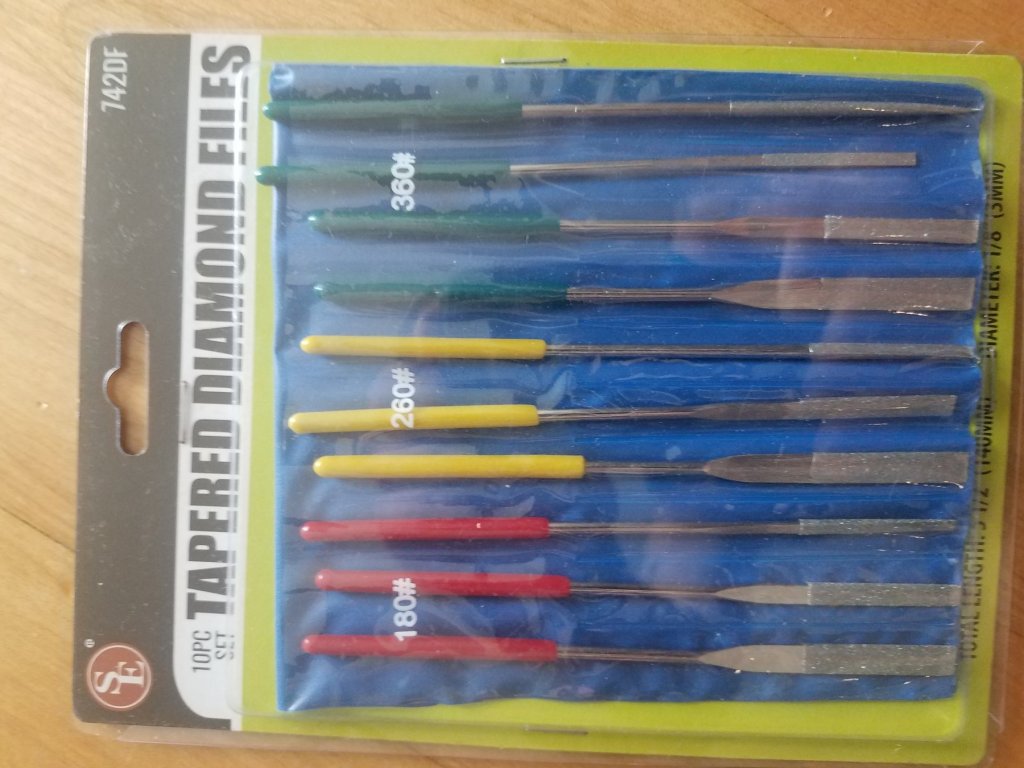
Hi all - I received my tool kit, glue and my model kit today. Although actual building may not start for a few days, i wanted to start my build log and post a few pictures of my current toolkit and ask a few questions. Here are a few questions I have before digging in, with a statement about what i got in the mail first: I had an issue with shipping on my original order ( see my member introduction post for more on this ). Long story short, i have a claim in with the post office for a lost 18th century longboat kit originally ordered. The tools i ordered may not be the ones i originally wanted, because amazon gave me an allowance to spend on AMAZON SOLD AND SHIPPED ITEMS ONLY. So my buying options for tools were limited. Unfortunate. 1) Will this glue work for the model kit? I haven't seen anyone use it, and im doubtful because it "remains flexible". It is a craft glue, but seems to be more for fabrics. Anyone with experience? I have no issue getting the right glue, i only ordered this because of my limited buying options ( see above). 2) I will be doing a full inventory on the kit soon, but one thing i noticed is that some of the metal parts were out of the clear shipping tube upon arrival and bent quite a bit. None were broken. Is this cause for concern? Wondering if I may run into issues because of this down the line. 3) Is there anything missing that is truly vital from the tools in the pictures I posted? I know i may need some higher grit files or sand paper, but the kit was described as a model railroad tool kit. Again, limited buying options due to amazon allowance from shipping issues. PHEW that was a lot. Sorry for the novel, i plan on keeping my posts from here on out lighter and to the point!! Thanks in advance, Ryan (Soup591)


- 21 replies
-
- 6
-
-
- whaleboat
- model shipways
- (and 1 more)
-
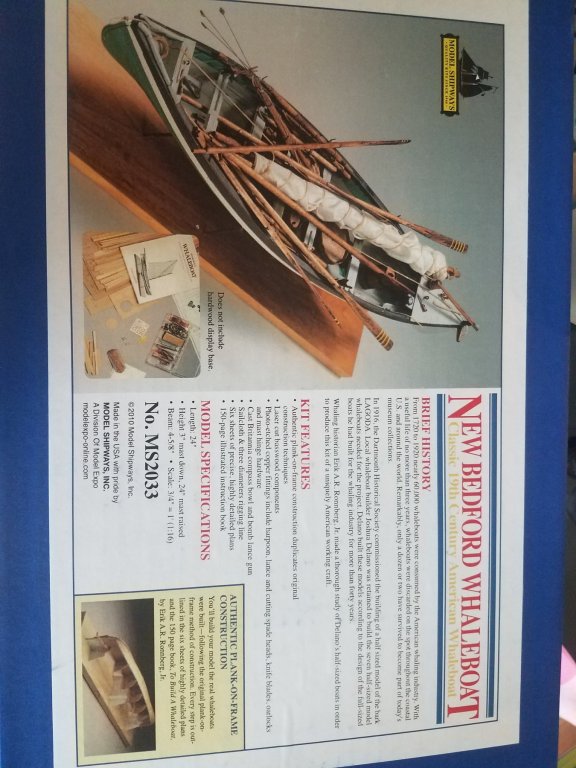
Thanks for the replies everyone, and my name is Ryan. Also... Had a big shipping issue with my 18th century longboat... Long story short, it got lost and i have a claim in with the usps. That being said i went ahead and ordered the new bedford whaleboat kit from model shipways and it's set to show up today along with whole bunch of tools. Hoping to start a build log on that pretty soon. EDIT: I went with the whaleboat kit for two reasons. 1) the longboat kit was no longer in stock 2) new bedford is close to me geographically and i reaaally like the look of it
-
I just wanted to post and say hello. I am a new member in my late 20’s from the Boston area, and brand new to the ship modeling world. I have always been interested in modeling - starting at a young age with plastic car kits, and most recently gathering n-scale trains and parts for when I eventually own a home with space for a layout. That being said, model shipbuilding has (somehow) just recently caught my attention. I have ordered the 18th century longboat kit that has, from what I have seen, been built and logged on here so many times. Which is good for a beginner, I think! Lots of logs to learn from. Anyways, I ordered model shipways kit as a combo with their tool kit. I am lucky enough to have a lot of downtime at work and plenty of space and tools both at work and at home to be able to spend a lot of time with this kit. Looking forward to meeting everyone and thanks in advance for all of the advice I will probably get and questions that will be answered! EDIT: Oh, and i will definitely start a build log once i get my kit and start working on it!!