MikeU48
-
Posts
111 -
Joined
-
Last visited
Content Type
Profiles
Forums
Gallery
Events
Everything posted by MikeU48
-
 Looks nice!! You made a lot of progress. One thing to mention when you start installing items to the spar deck. I'd recommend not installing parts 51-54 (step 12) around the hole for the Fore Mast as well as parts 65 and 66 (step 12) that are by the main mast. These pinrails (to keep it simple) are there to secure rigging way down the road and they will make attaching eyebolts and deadeyes to holes in the spar deck very difficult. You may want to check the holes around the fore mast opening where the eyebolts attach (Shown in the second rigging manual) to make sure the eyebolts will fit because of the paint in this area. I like to read ahead of myself many many times in the instructions but this was one thing I missed along the way. After you attach the necessary eyebolts and rigging to these areas then it's time to glue the above mentioned parts on the spar deck.....in my humble opinion. Keep up the good work.
- 35 replies
-
- 1
-

-
- constitution
- revell
- (and 1 more)
-
OK...this is better BOB...I have an older brother named.... My dad had him practice writing his name forwards and backwards. Took him awhile to figure it out....rotflmao. Have a nice night and nice to meet you Bob.
- 35 replies
-
- 1
-
-
- constitution
- revell
- (and 1 more)
-
WOW!! I like your decks. You did a great job on them Daddy (ya gotta put your first name up here guy...I feel funny calling you Daddy...lol) I like the different shades of wood. Keep up the good work and yes....take your time...lol Mike
- 35 replies
-
- 1
-
-
- constitution
- revell
- (and 1 more)
-
You can really use any scrap material you have (maybe some of the wood scraps from your wood veneer deck sheets) Just make sure it doesn't elevate the carriage especially on the spar deck where the front of the cannon carriage fits on pins at the gun port opening.
- 35 replies
-
- 2
-
-
- constitution
- revell
- (and 1 more)
-
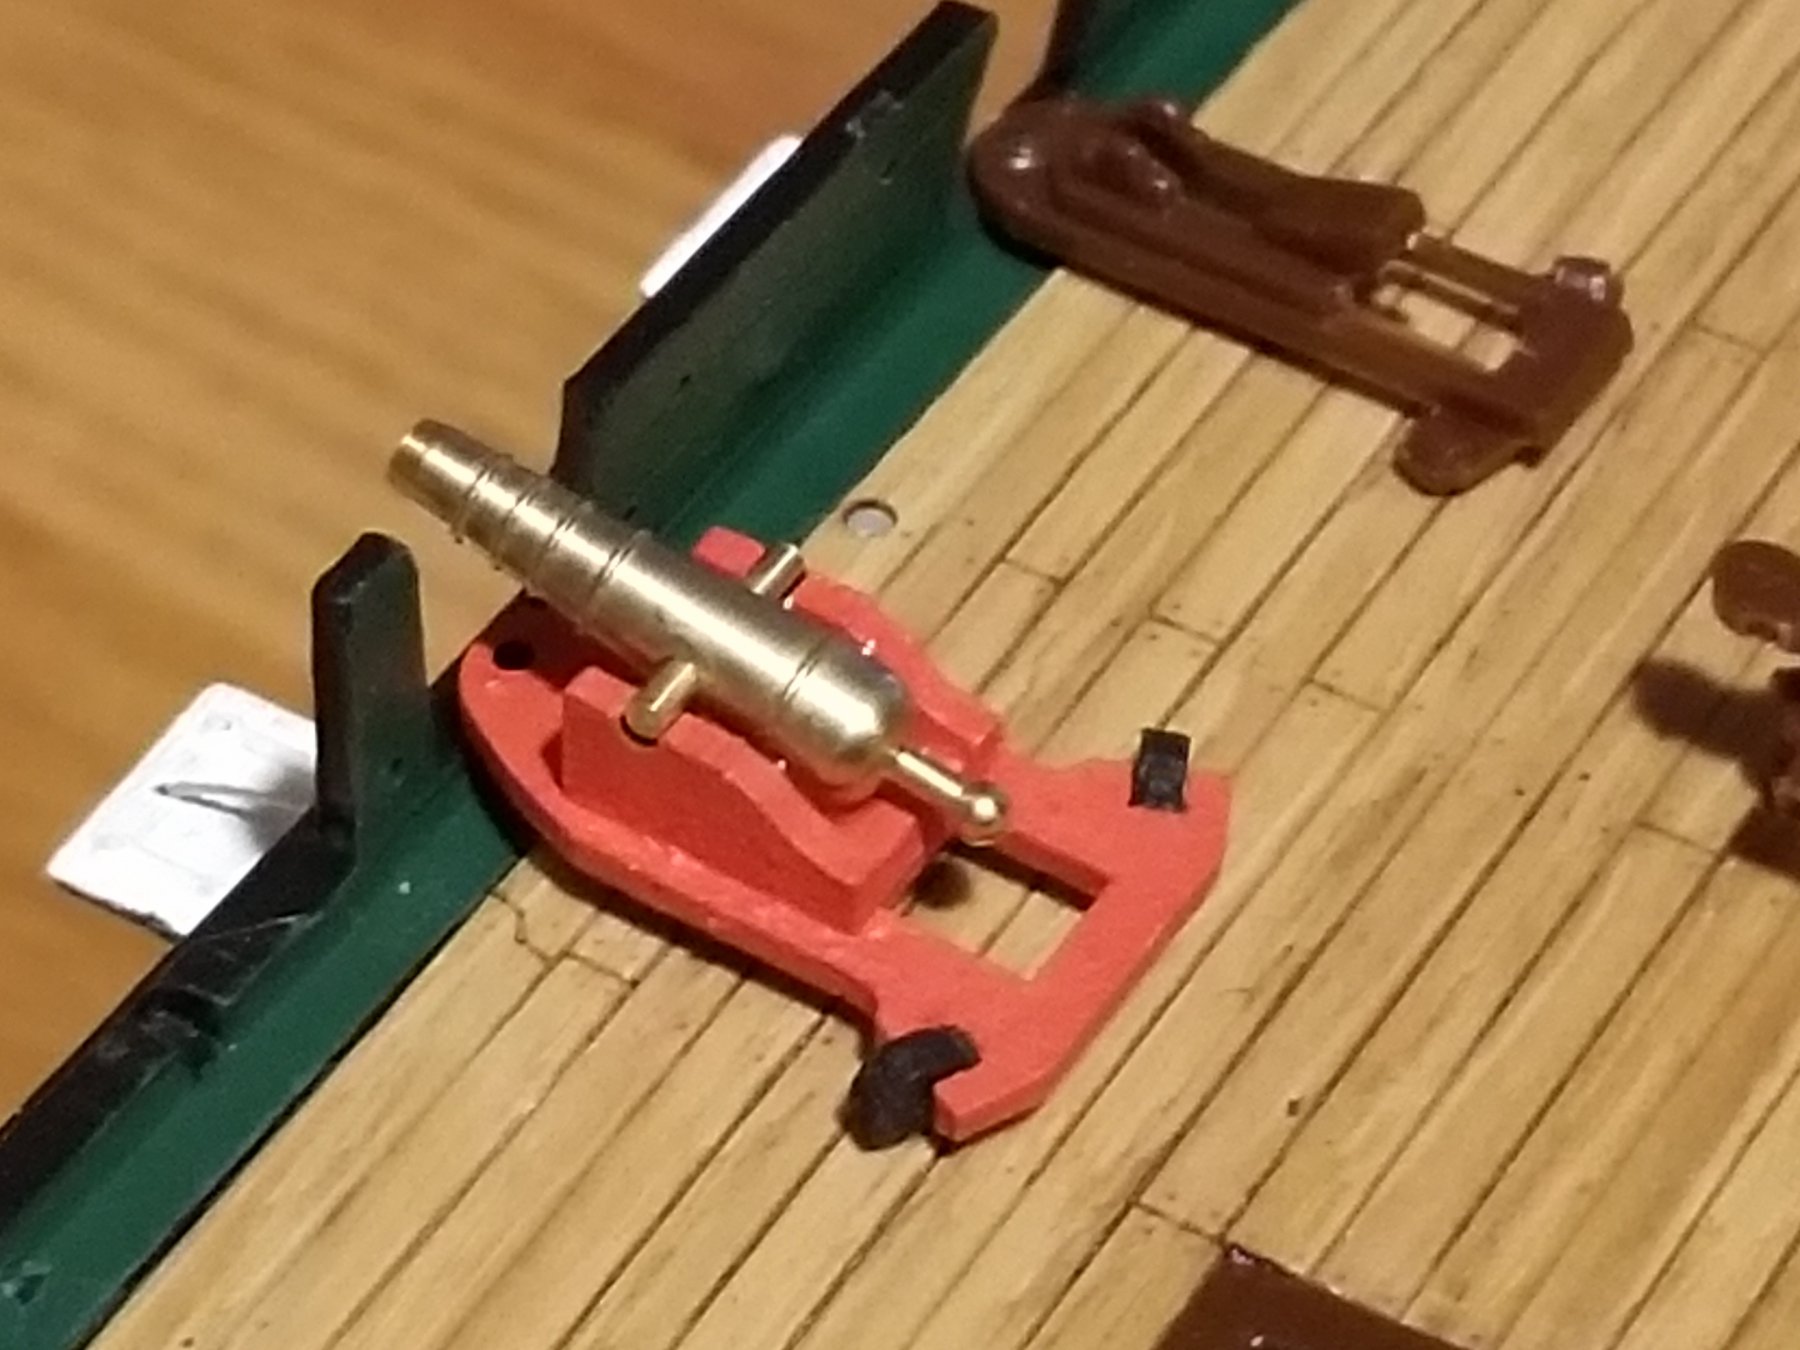
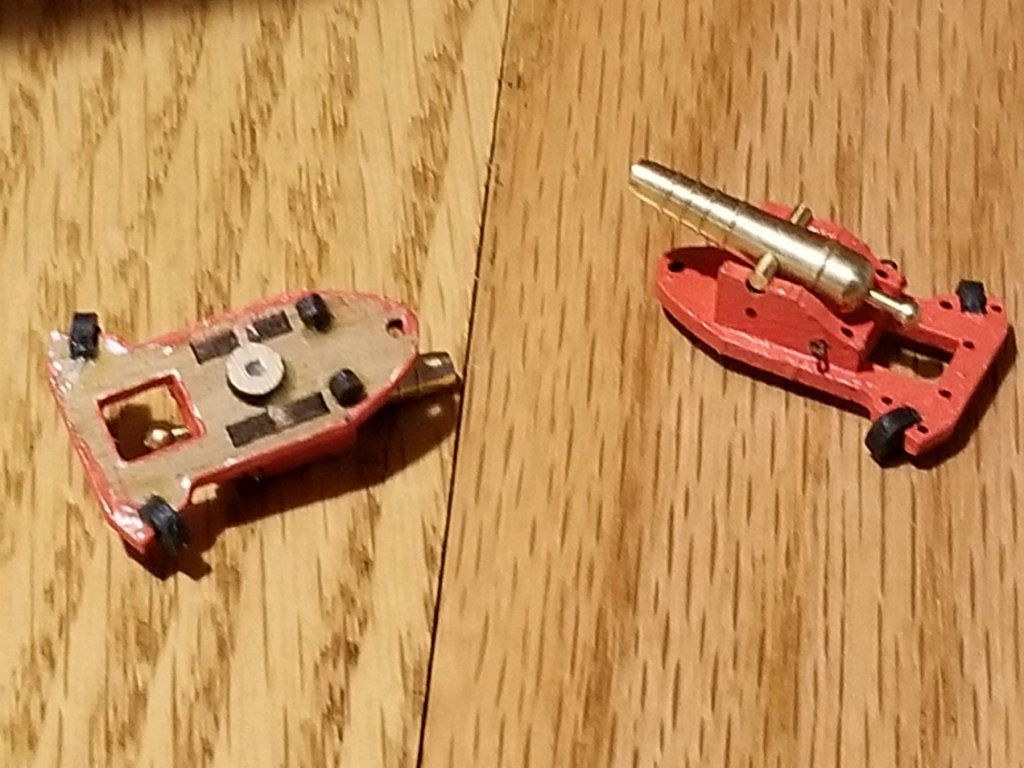
Looks Super !!! One thing to be aware of with the satin finish...you may need to scuff up the area under the cannon carriages when you glue them to the deck. Otherwise the glue may not hold. Especially important on the lower gun deck because once the upper spar deck is installed it's a real challenge to put the cannon back where it belongs. Trust me I know. I just used liquid plastic cement (several coats) but still several cannons broke loose from the glue joints. I used plastic carriages on the gun deck as they would not be seen. On the spar deck I used the wooden carriages from HisModel. I glued spare wheels under the carriage so I would have a glue spot. I ruff up the area under the spare wheel on the deck and used Titebond wood glue professional strength that I got at the local hardware store. Here's the spare wheel glued under the carriage for the spar deck.

- 35 replies
-
- 3
-
-
- constitution
- revell
- (and 1 more)
-
Hey Ozark, Nice to see you back. I'm enjoying the pics of your build and you're doing a great job. That tiny scroll painting drove me crazy and crossed eyed as well even with the mag headset. Anyone who criticizes your work I'd just say..."So show me yours"...lol Keep up the good work. I'd contact Syren about the beeswax for their threads. I have just started rigging blocks on the bowsprit (off the ship) and am using the stock thread that came in the kit for blocks and deadeyes. I have started using a safety pin to open up the holes to make it easier later. When I tie the threads I use CA on the knots because they don't hold that well without it and I don't want them coming loose when I start the actual rigging. I know it's hard sometimes to get a clean cut on the threads with scissors and the beeswax helps get a clean cut. Let us know what Syen says about the beeswax.
- 49 replies
-
- 1
-
-
- constitution
- revell
- (and 1 more)
-
Hey Daddytotwo, Thought I'd drop by and pull up a chair. Nice paint job and I like the three pedestals and the red strip (I only used two pedestals i mean...not stripes) Just one thought at this point. Consider replacing the wood base now as it will be much easier to handle compared to trying to do it once your Connie is finished. You can always cover the wood to protect it during construction. Just a thought and I'm full of them ....among other things...lol What after market upgrades have you bought? Looking forward to following your progress. Mike
- 35 replies
-
- 2
-
-
- constitution
- revell
- (and 1 more)
-
Hey Daddytotwo, Thanks for the compliment. Tell Radimir at HisModels in the Czeck Republic I said HI!!! I'm headed over to your build now and I'll pull up at chair. Anxious to see your build and progress along the way. Got any Dr. Pepper and Pretzels??? lol
- 209 replies
-
- 2
-
-
- constitution
- revell
- (and 1 more)
-
Hey Lou, Thanks as always for the reply. I may have gotten to wordy on the rigging subject. I will contact Revell but I have to email Germany and it seems according to there website that the US service Dept. is closed for revamping. I'll try to make my long story short. In the Revell instructions for the Connie there is a symbol used for option parts. This is the case with several sections of the running rigging. As I understand it the build can be done with just the running rigging or with the running rigging necessary for sails. Some areas of the Rigging Only option are included with the sails option as I see repetitive steps for both. The rigging only option is just more extensive. I hope I cleared that up a little.
- 209 replies
-
- 2
-
-
- constitution
- revell
- (and 1 more)
-
Nirvana, LOL...That's what I told Lou after his suggestion to visit the Ebay site. So far, and I THINK I'm done I've purchased Oak Veneer decks (Gun and Spar) Brass cannons for Gun and Spar deck with their carriages, 25 piece cloth sail kits (12 piece studding sail kit in the mail) Cloth flags Depth marker decals metal eyebolts and a partridge in a pear tree,,,,, So far sell my plasma has kept me from bankruptcy and sell my home.... he he he
-
Nirvana, HisModel has expanded his web site to show all the accessories available for the 1/96 scale Connie. https://www.hismodel.com/uss-constitution-united-states-revell-1-96?PaggingValues=5%3A24%3A1%3B&_TargetFile=uss-constitution-united-states-revell-1-96
-
I'm sorry... I forgot two other questions Is there an easy way to attach the stock plastic deadeyes to the bowsprit (no eyebolts just wrapped around bowsprit) as well as attaching the deadeyes to eyebolts? Instructions don't really cover it. I assume I just have to tie a knot the glue it to the deadeye then do the same to the eyebolt. On the bowsprit the assumption it to again tie the thread to the deadeye wrap it around the bowsprit then glue the wrapped thread on the bowsprit (to hold it in position on the bowsprit) the tie the other end of the thread to the last deadeye on the bowsprit but I know what assuming can mean. Also should the holes on the blocks be "expanded" before they are rigged? One of my only memories of building this model 40 years ago is using a heated safely pin to open the blocks up so I could get the various size threads through the blocks. It will be easier to do while they are on the plastic tree. Thanks guys in advance as always.
-
OK folks.... A couple of "uninformed" questions. Remember...I'm a NOVICE here picking my way thru an "interesting" build. I also ask this for other novices following behind me. All the build logs I have seen are what I consider as Master Builders that take this plastic model any create their own masterpiece with a millions custom parts. 1. Is it necessary to glue the three mast to the spar- gun deck? Reason for the question is that I and installing as much as I can with the masts off the deck. Easier to install the standing rigging (most of it) when it's not inserted to the ship. I'm also thinking that the Standing and running rigging will hold them in place anyway. Remember these questions are coming from a NOVICE so be KIND in your replies...lol 2. After reading the Rigging instructions a bazillion times I think I am understanding them a little better. Backstay and forestays now make sense Lou. Question: I will be building the Connie with sails including the studding sails. The rigging instruction (booklet #2) starts out with the standing rigging rat lines, bowsprit rigging, forestay then backstay rigging. Then it proceeds to optional steps 13-18 Running rigging. That is followed by another optional section, running rigging- steps 19-26. Then we come to Optional steps 27-33 Running rigging with sails followed ,(last but not least) Optional steps 34-41 Running rigging with sails. I took the long way around the question but if I am going to install the sails I just eliminate steps 13 thru 26. I hope this makes sense...Again be kind in your replies as I cry easily...rotflmao.....
-
Just a few comments on the instructions for the 1/96 scale plastic Revell Connie for the novices like me. Step 12 of the basic ship construction shows the fife pinrails, fore fiferail , monkey rail and main fiferail all to be installed on the spar deck around the Fore and Main Mast. Doing so this early in the construction, in my humble novice opinion, will obstruct installing eyebolts and eyebolt/deadeyes that are described in the second set of instuctions (Rigging). It would be easier to wait until eyebolt and eyebolt/deadeyes are connected to the spar deck and then glue (and surround) the rigging eyebolts. I wasn't so fortunate to realize this error until the forementioned Fiferails, etc. were glued to the spar deck. Any deadeyes connected to eyebolts will be mated before the eyebolt is glued to the deck. Live and learn I guess...lol Also, for the Novice, I have found reverse tweezers are really the go to tool, in so many instances, when working with tiny parts, threads etc.
- 209 replies
-
- 2
-
-
- constitution
- revell
- (and 1 more)
-
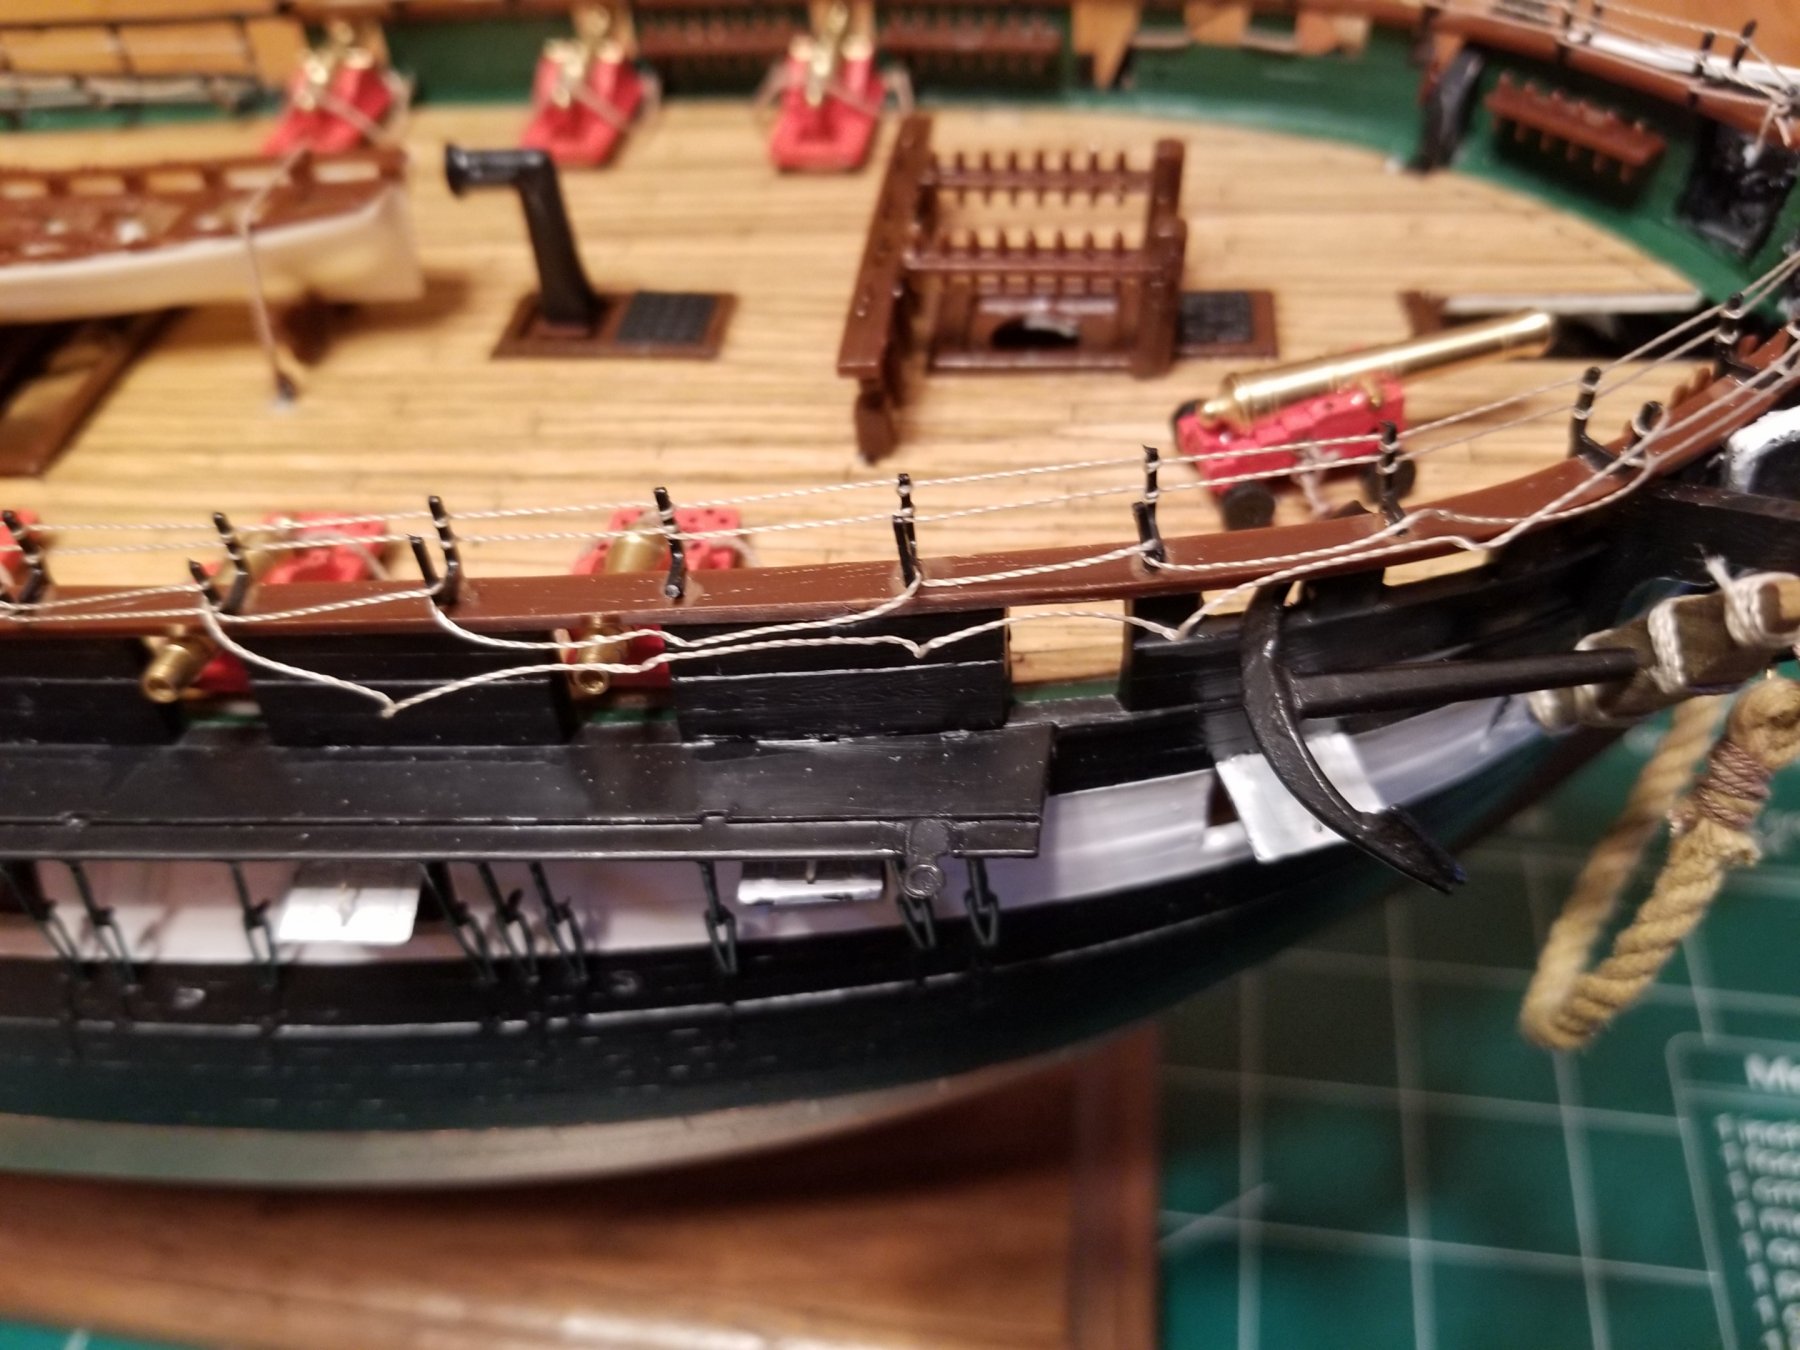
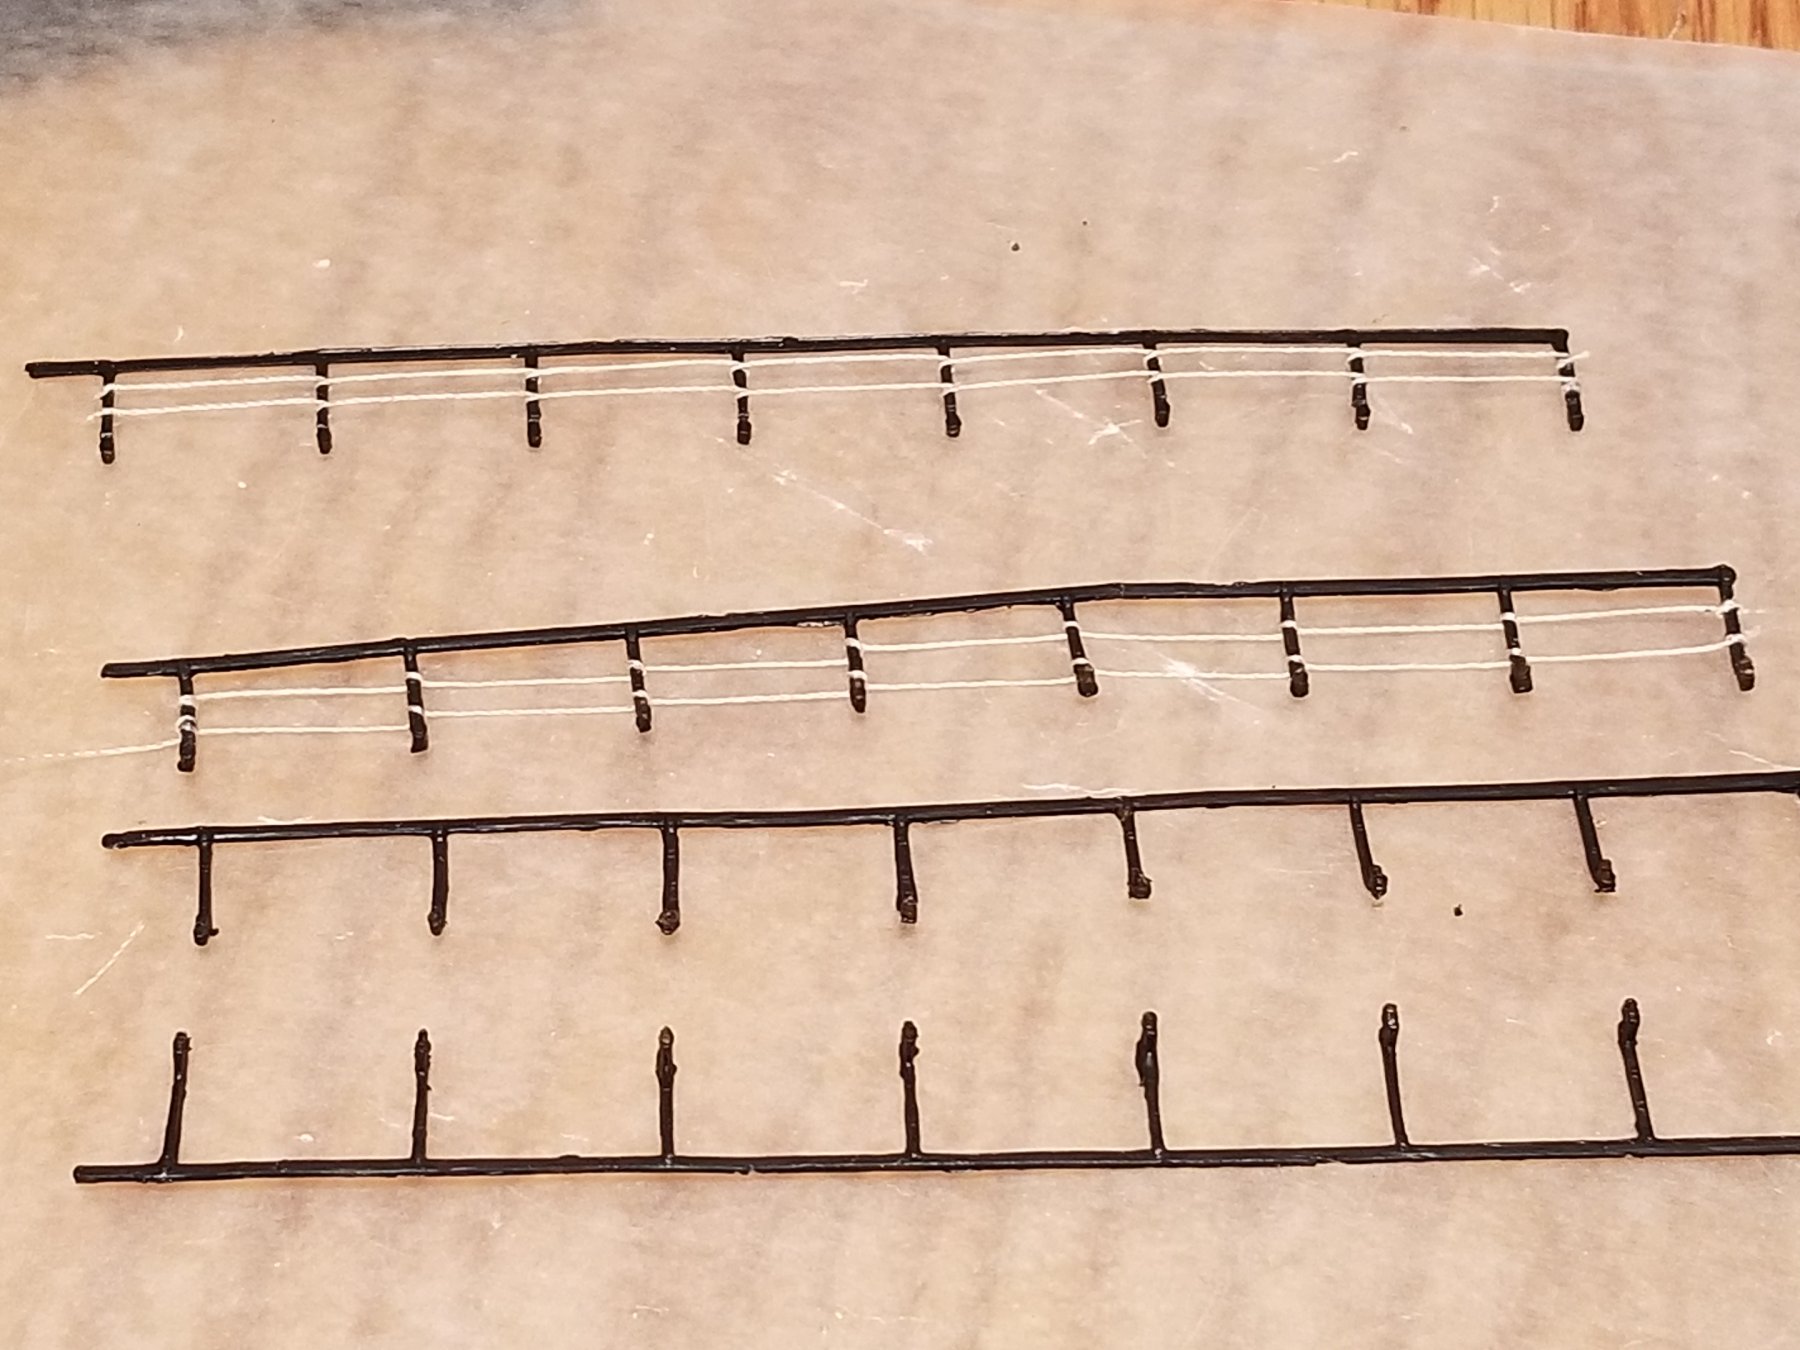
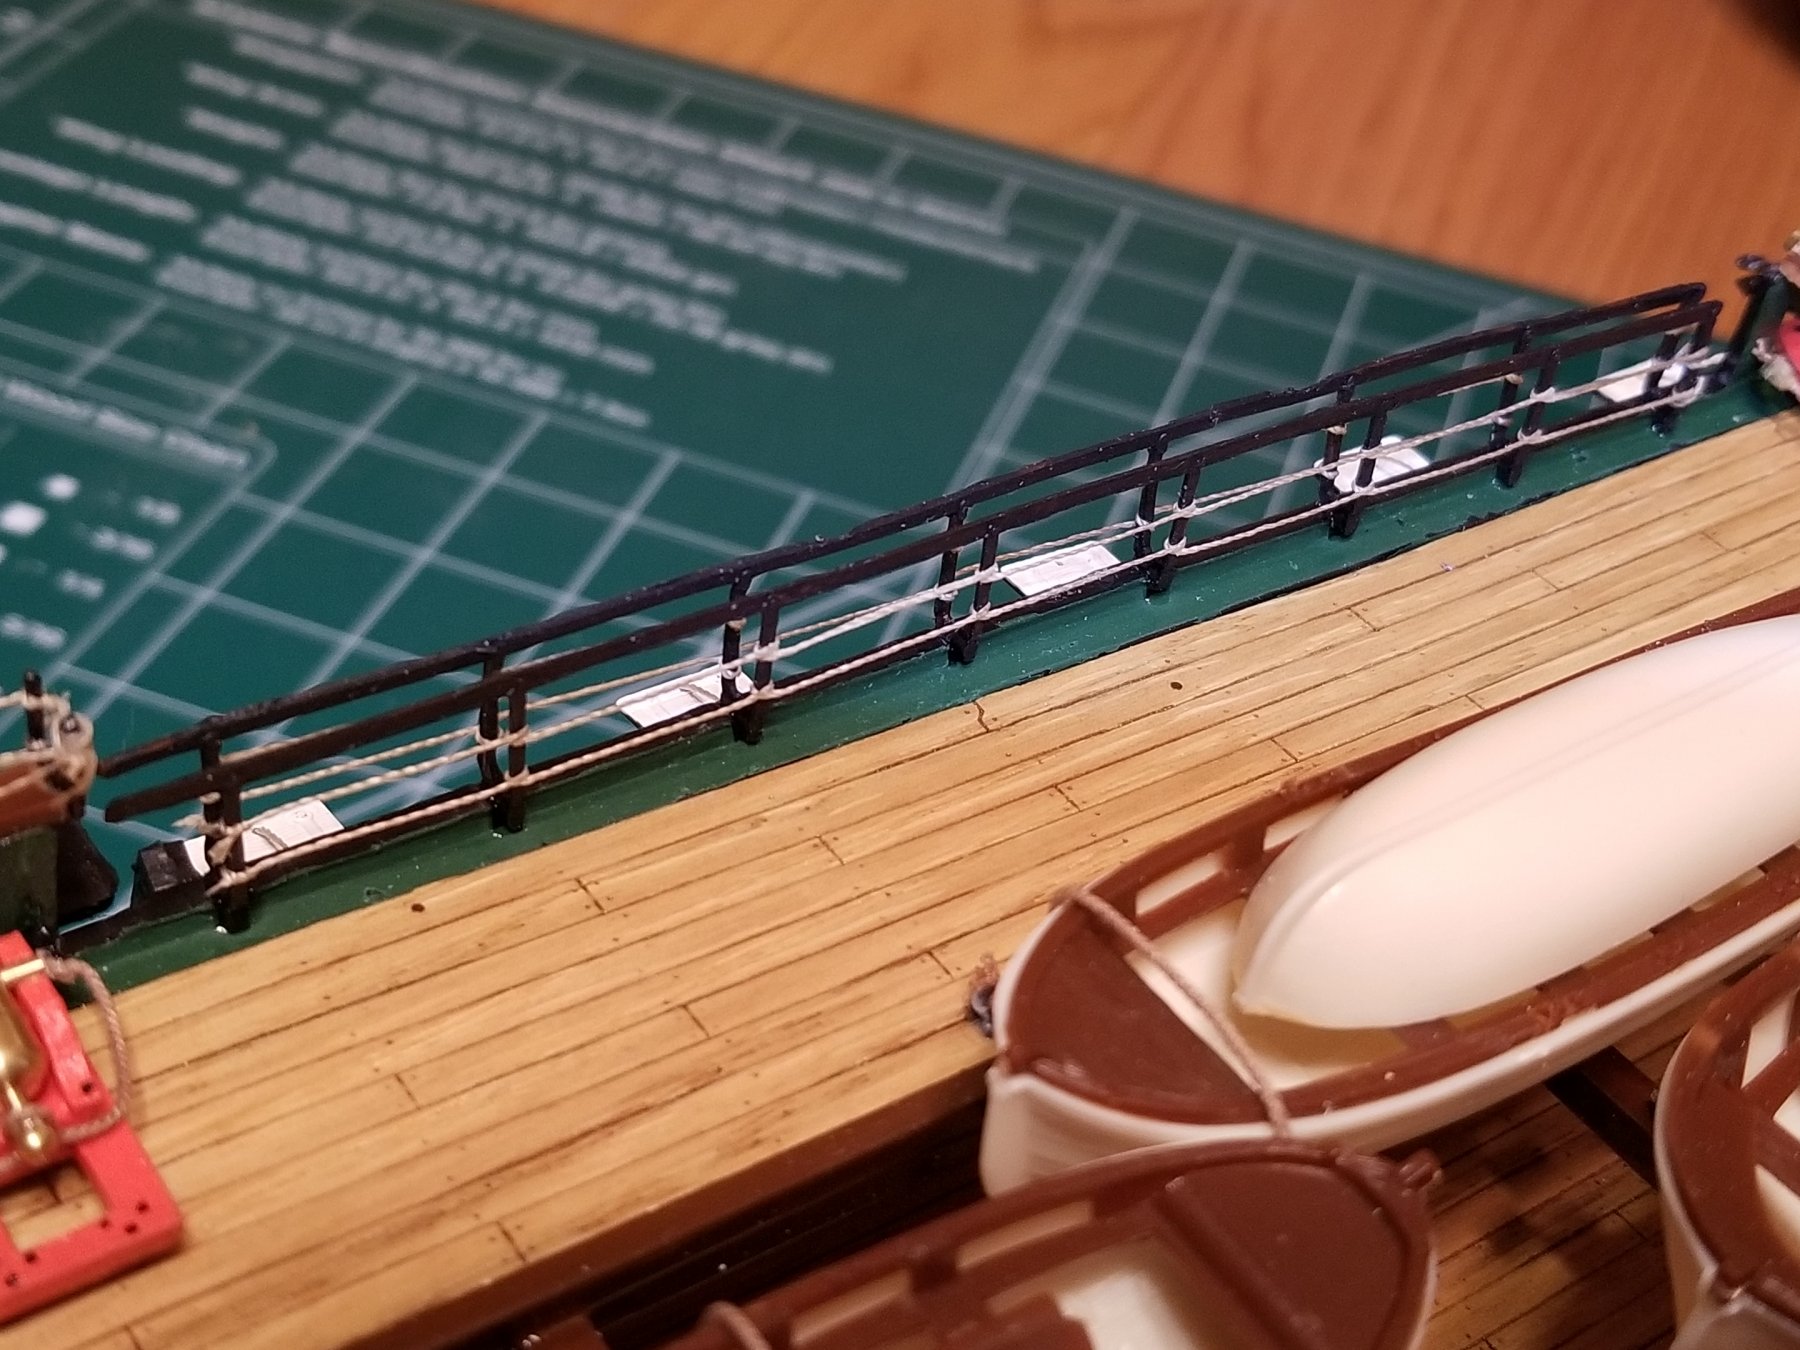
Thanks Ozark. I always start any work on the Port side as that will be the back of the Connie when its in its case. That way I can learn from my mistakes before I do the Starboard side. It just took time and patience using a toothpick to help wrap the thread around the stanchions. You just can't pull the thread too tight. I found the gluing the thread on each Stanchion as I went helped keep it from unraveling as I went. I also used a small round file to open up the eyebolts at each end. I also glue the knots on the eyebolts as the waxed thread doesn't hold a knot too well and the last thing I want is for the thread to come loose when I start the rigging. Low, Thanks for your tips, as always. I haven't built anything of this complexity in 40 years. I will do the blocks on the bowsprit BEFORE I glue the bowsprit into the ship. I think it will be easier to maneuver. Same with the Standing rigging for the masts.
- 209 replies
-
- 3
-
-
- constitution
- revell
- (and 1 more)
-
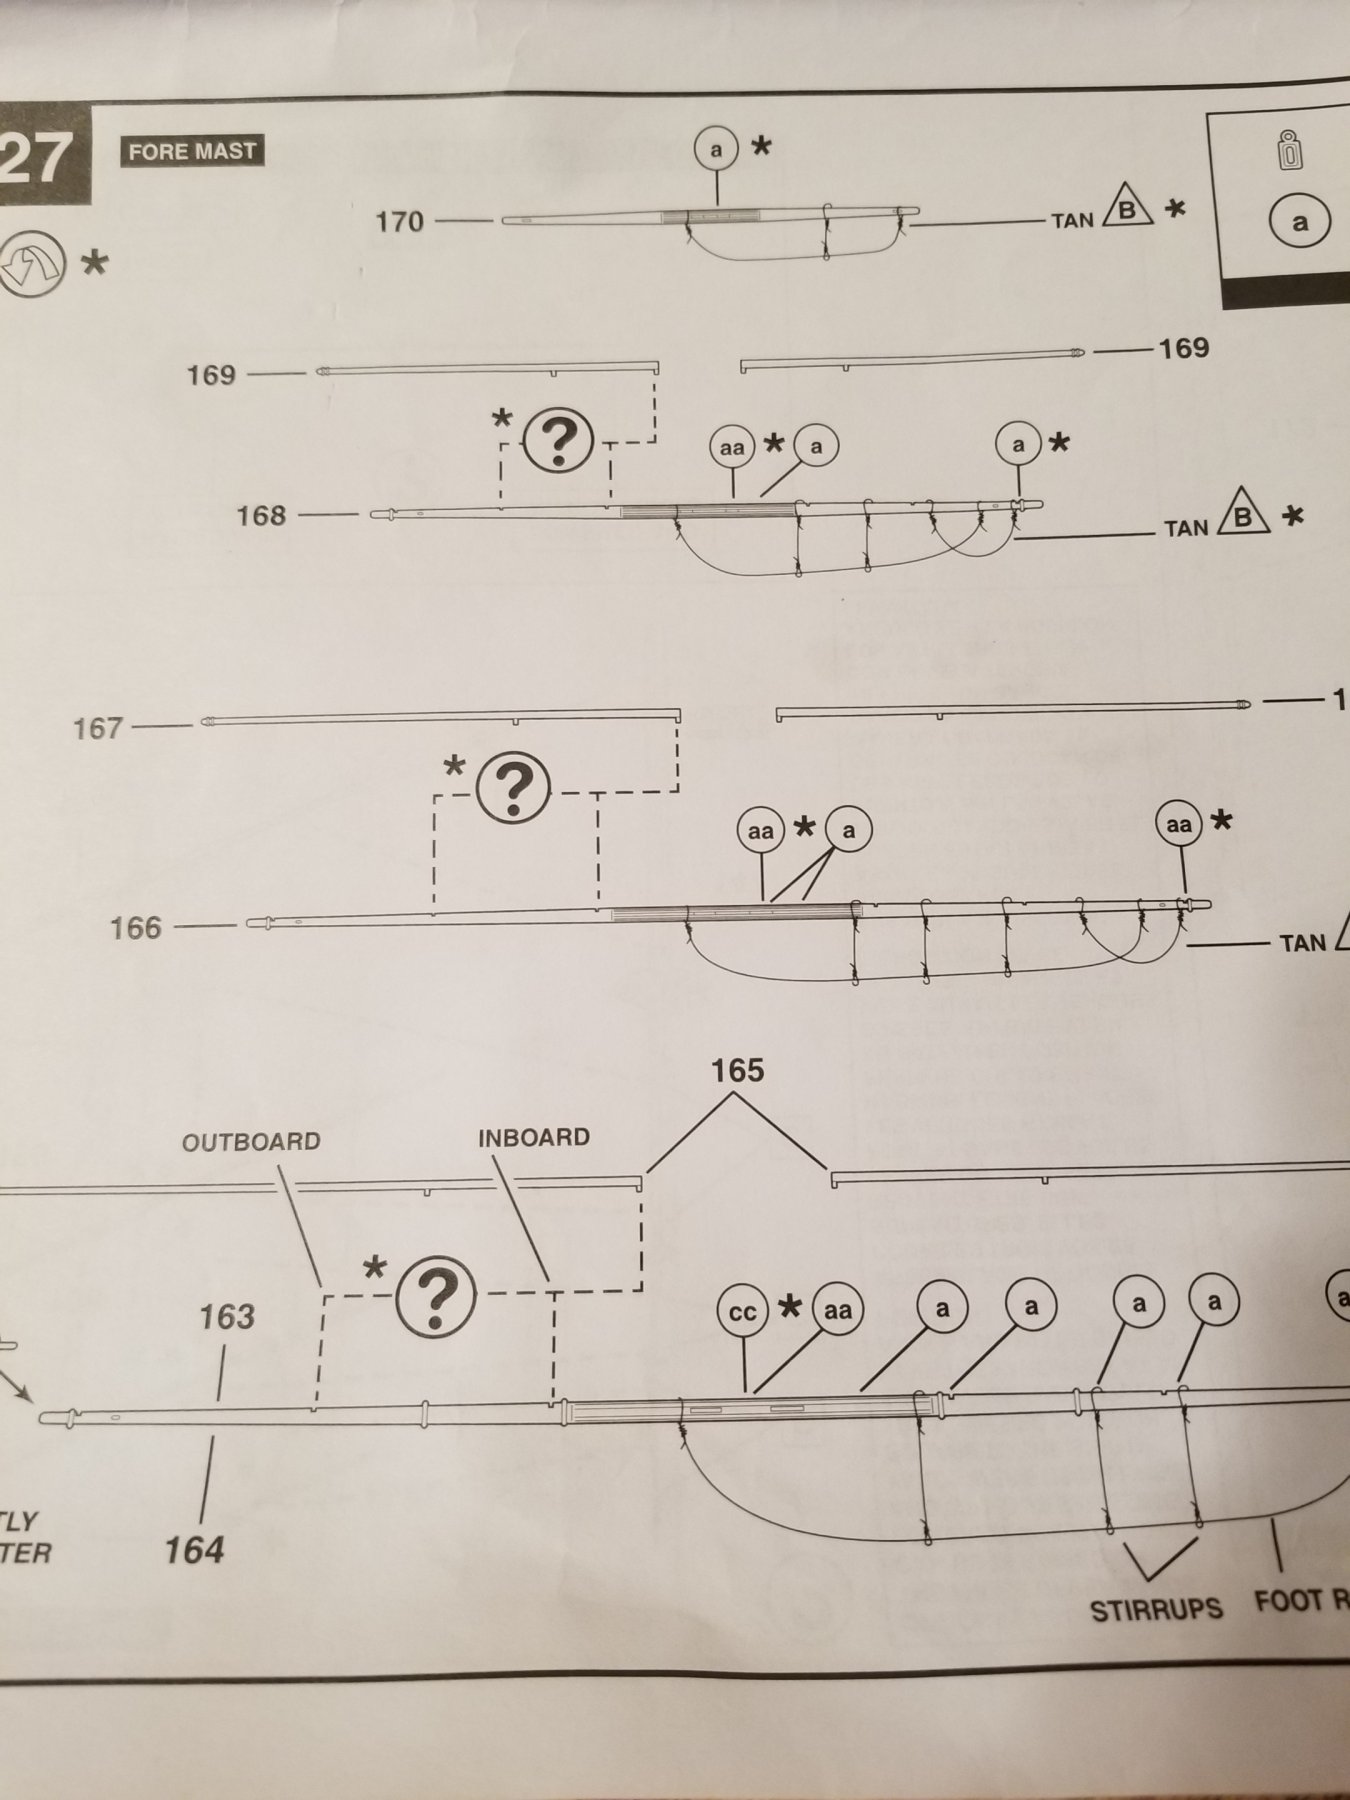
Thanks guys for the compliments. 2 questions I need advice on. Should the booms be glued on the outboard position on the yards? I plan to order amd use studding sails. And would it be easier to install the standing rigging BEFORE the yards are glued into position? Lou, I appreciate the comments on the mast positions. Don't understand backstays or forestays. Remember my lack of nautical terms?...lol
- 209 replies
-
- 2
-
-
- constitution
- revell
- (and 1 more)
-
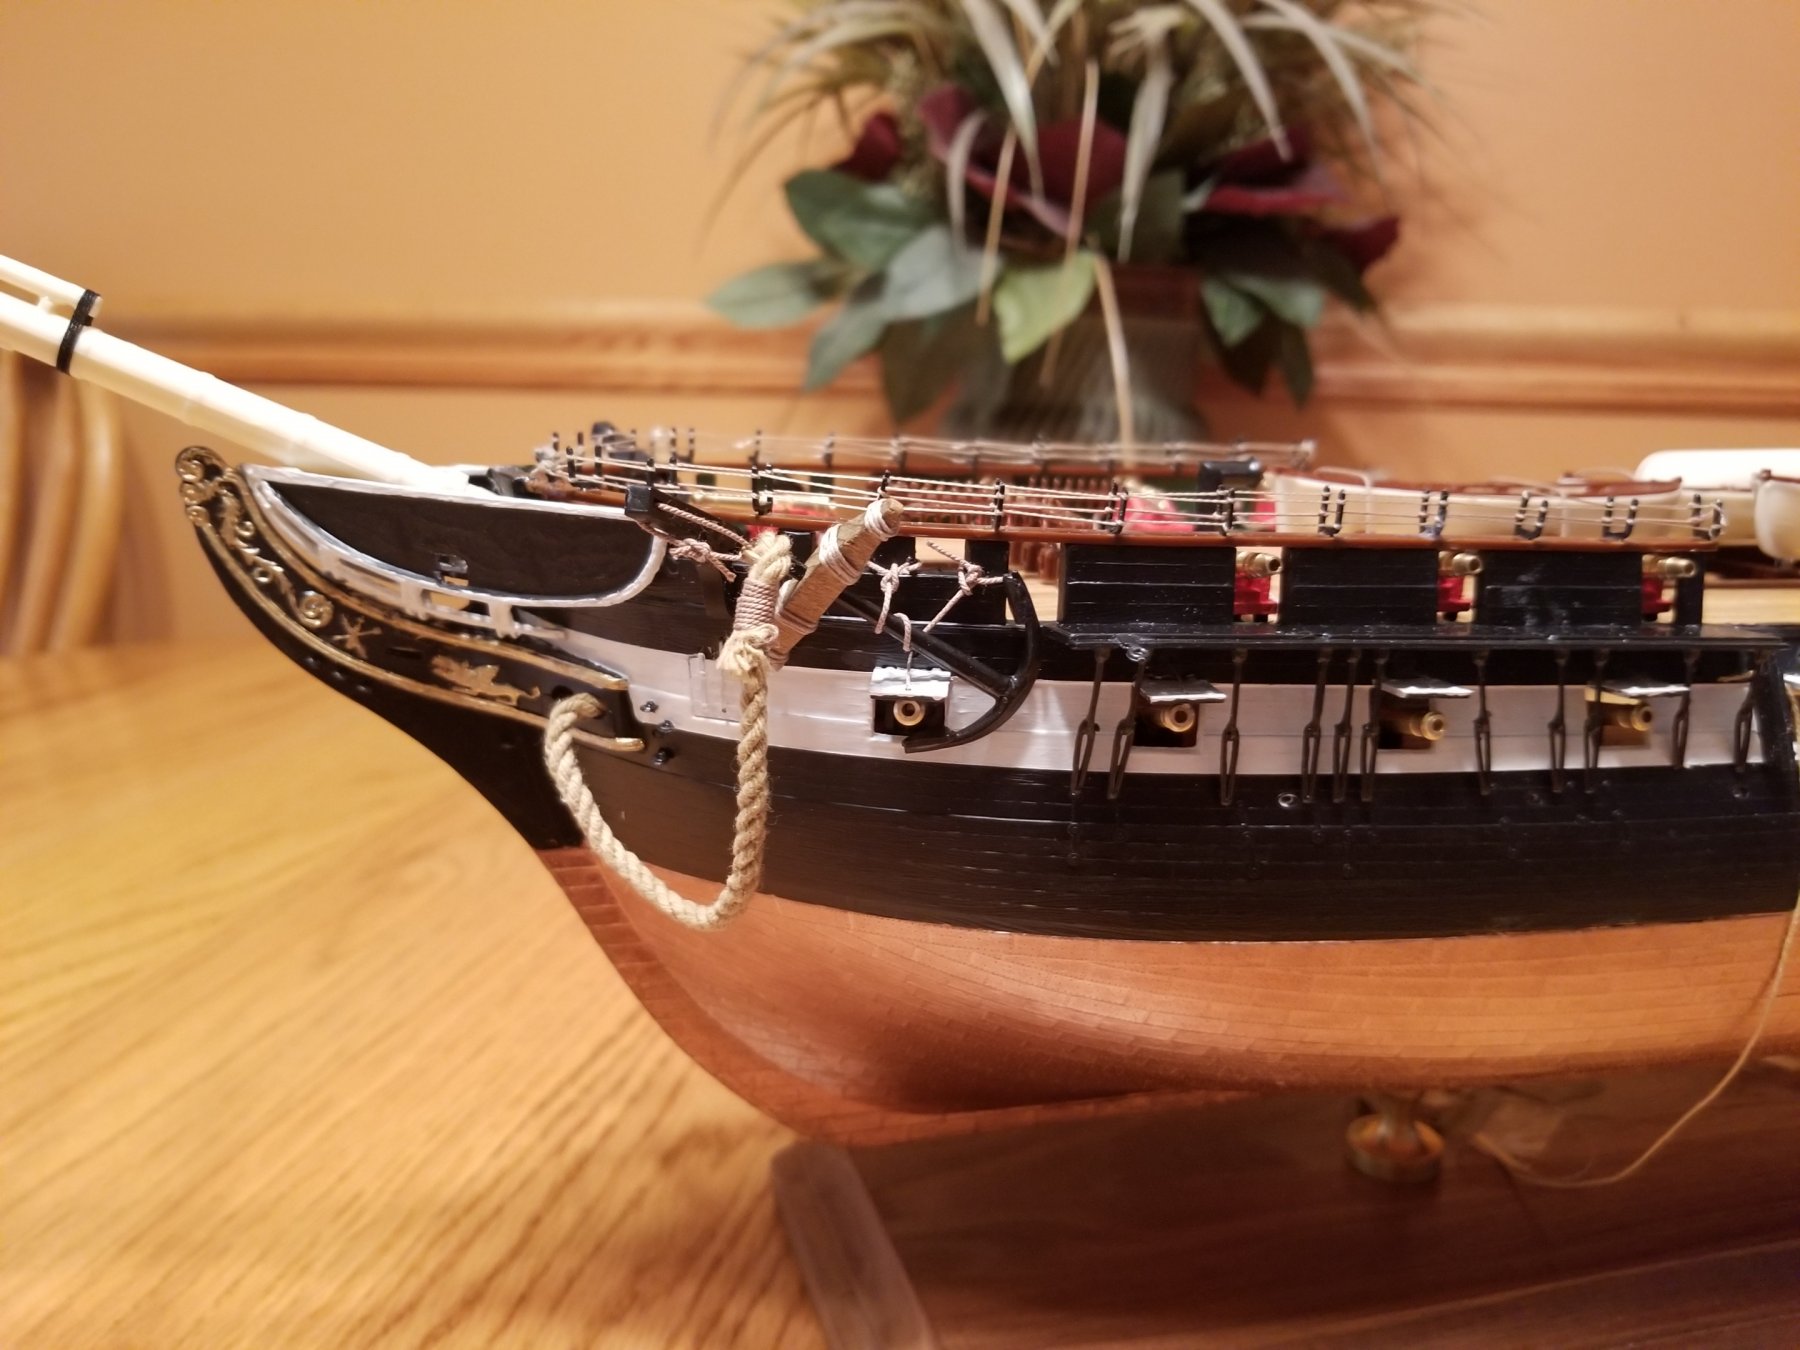
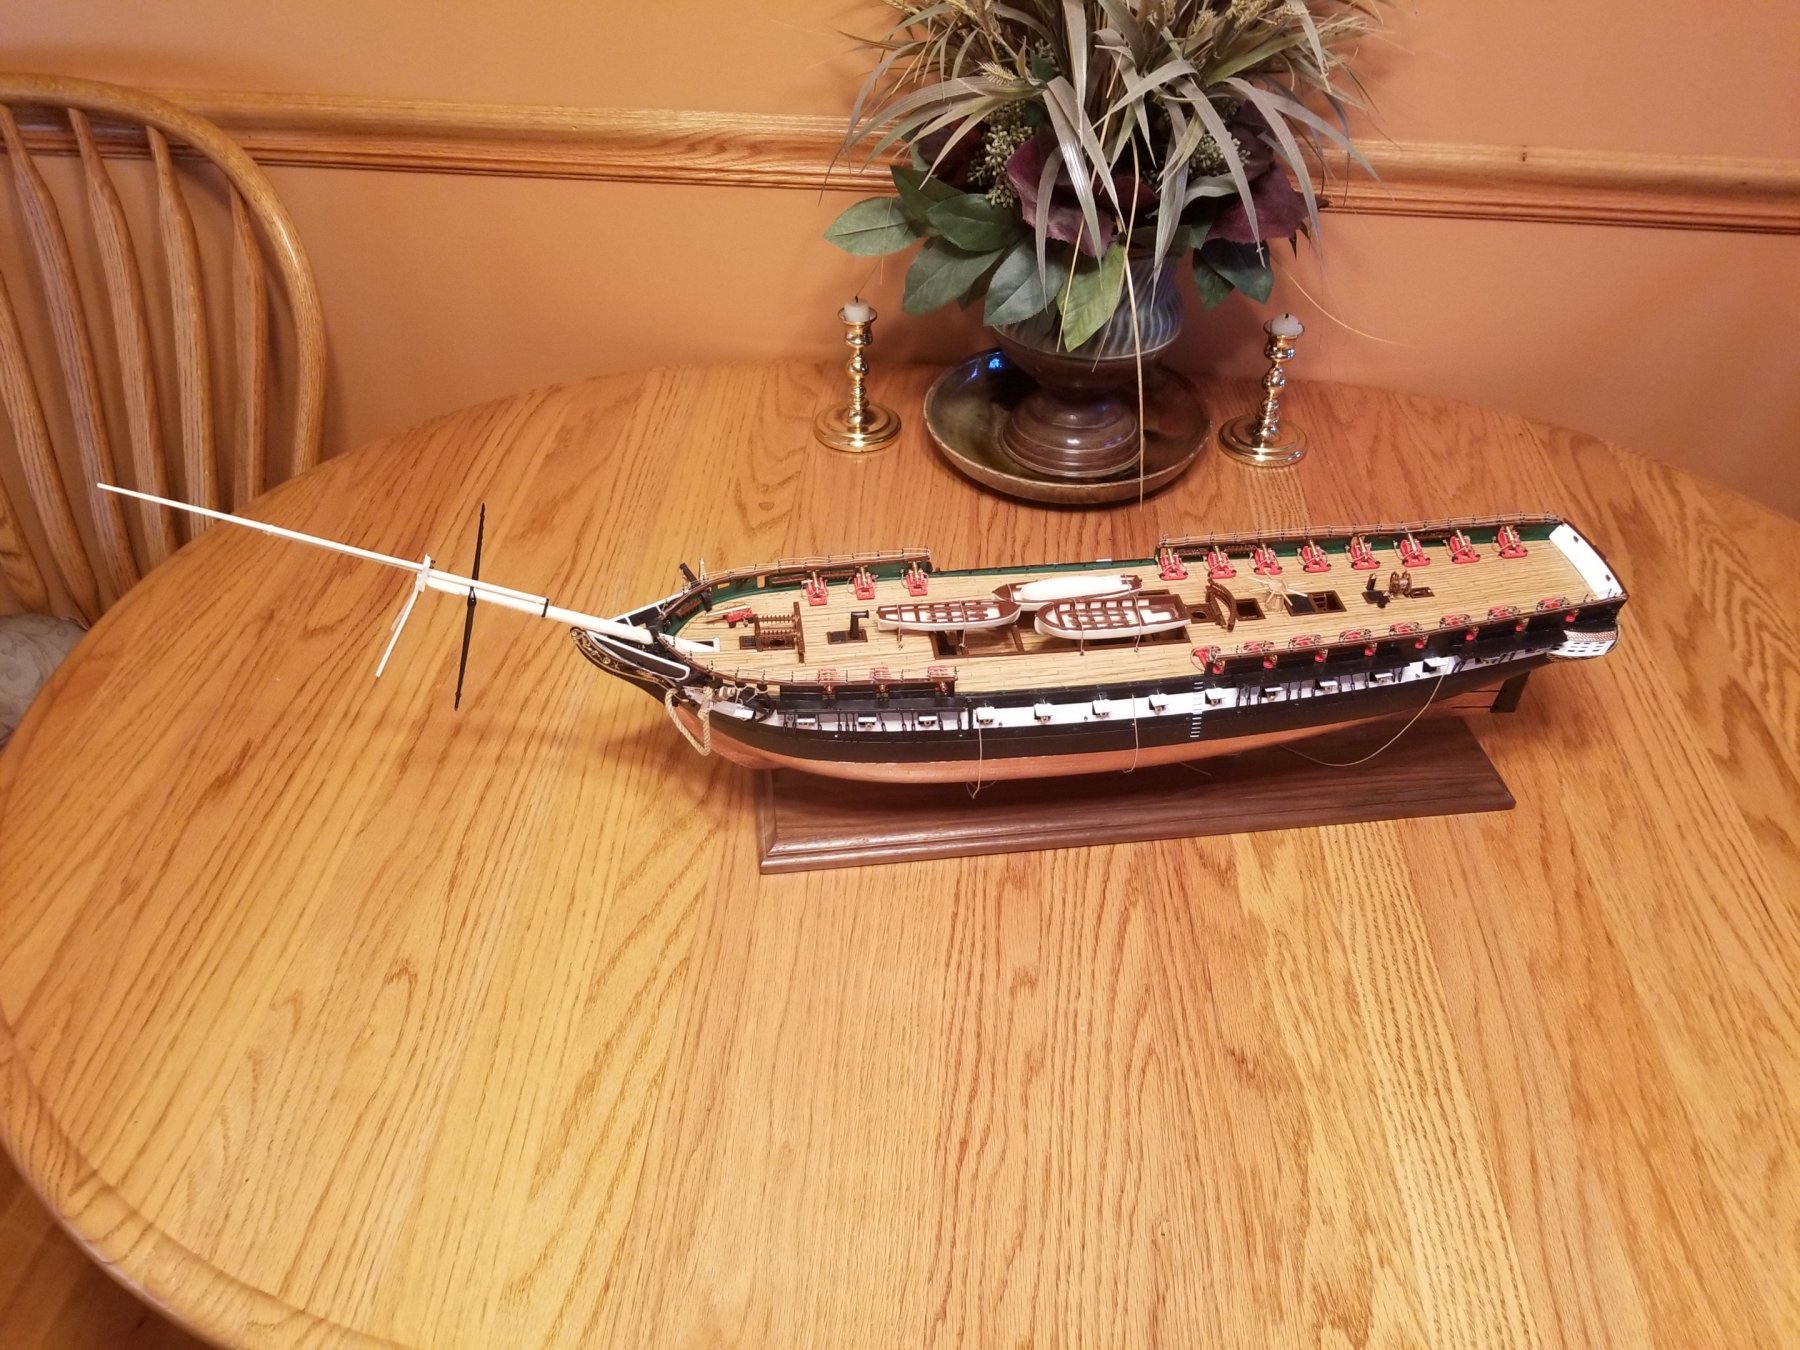
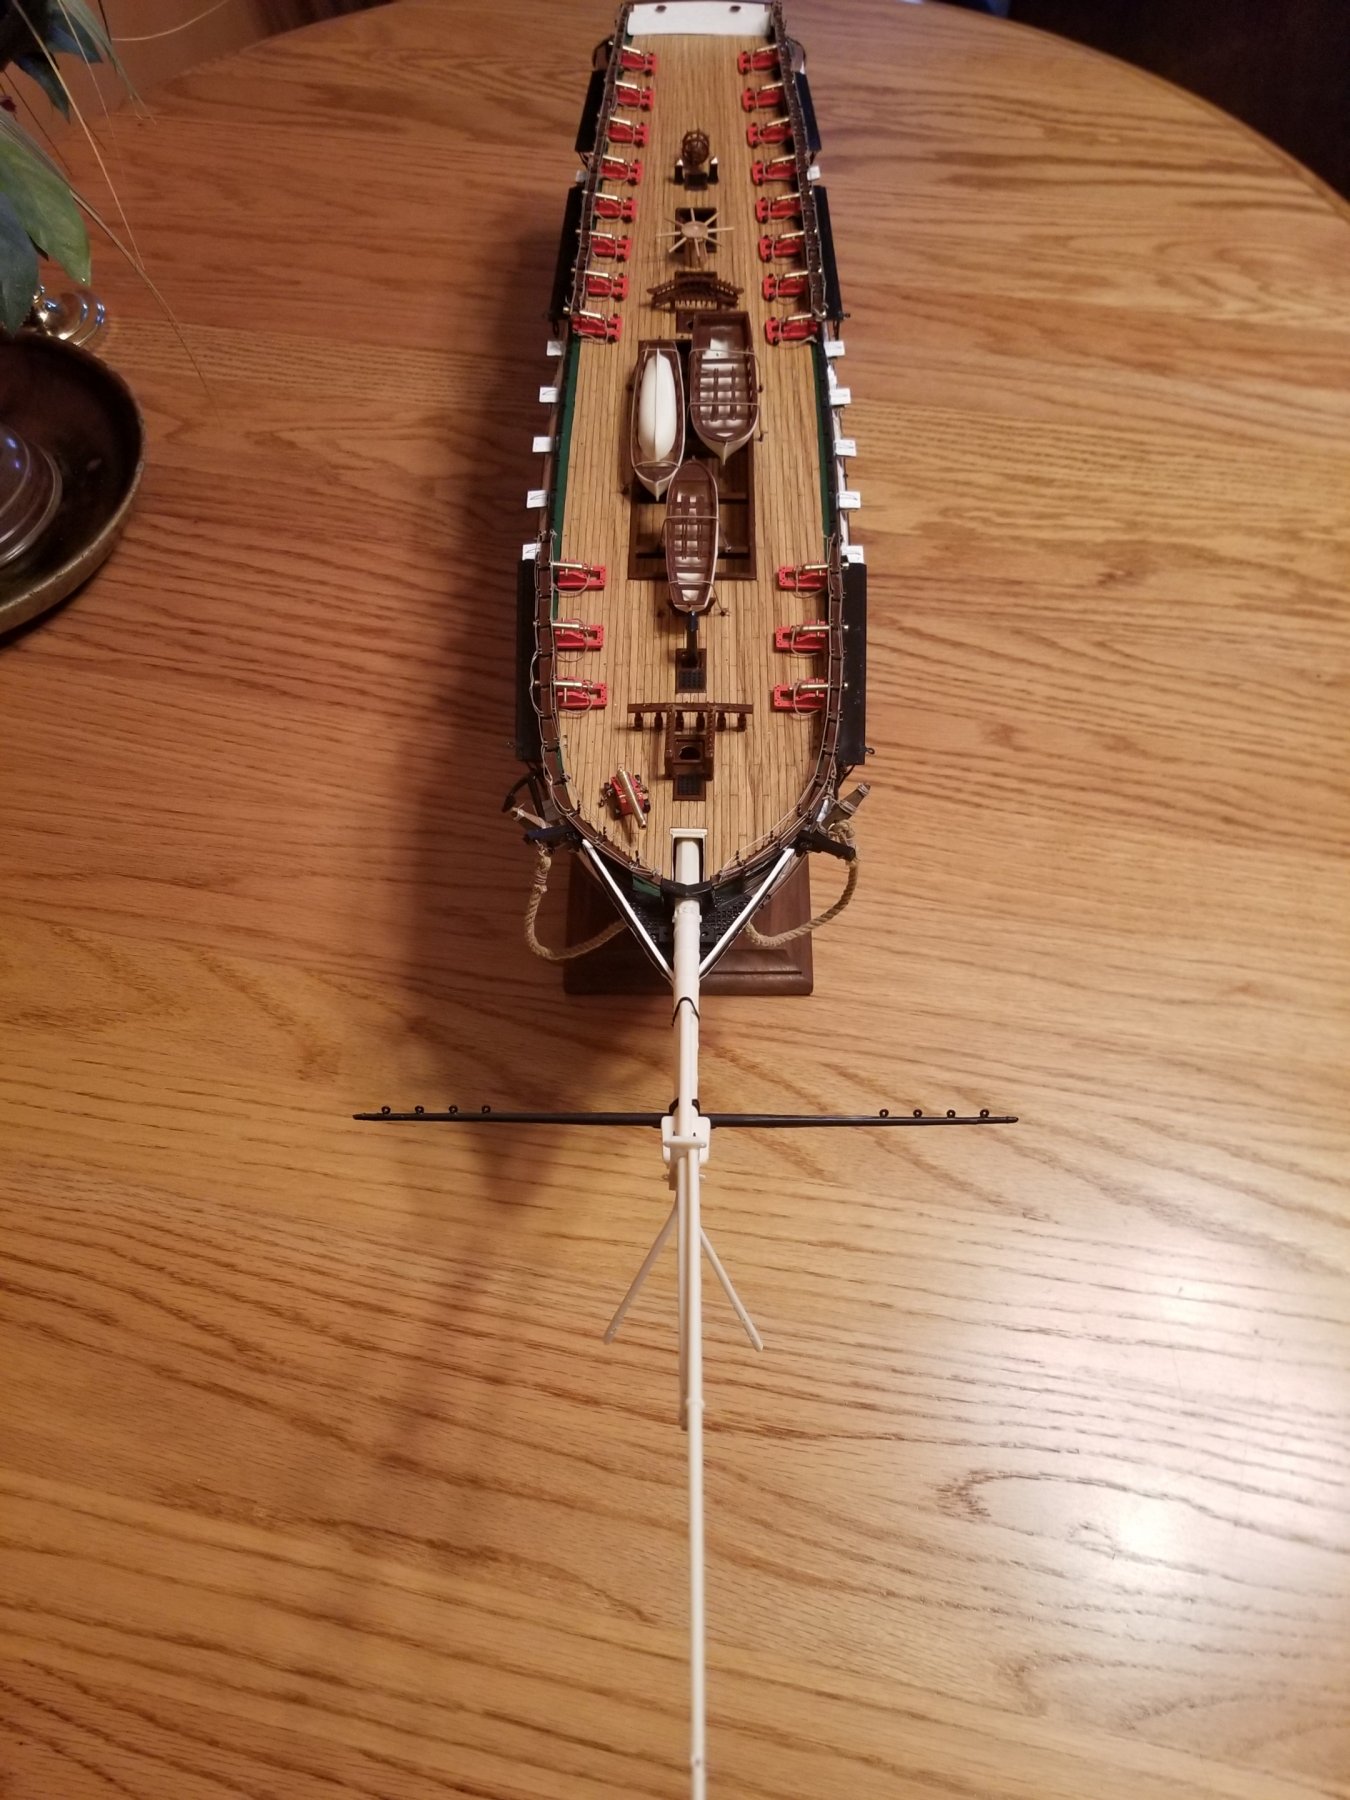
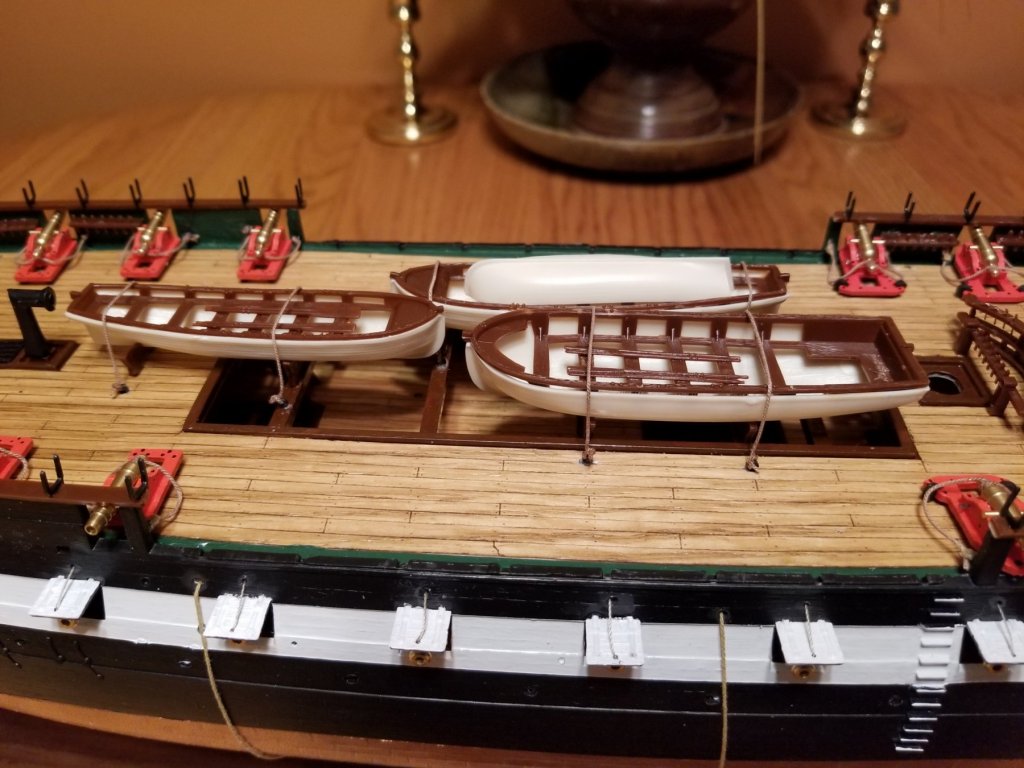
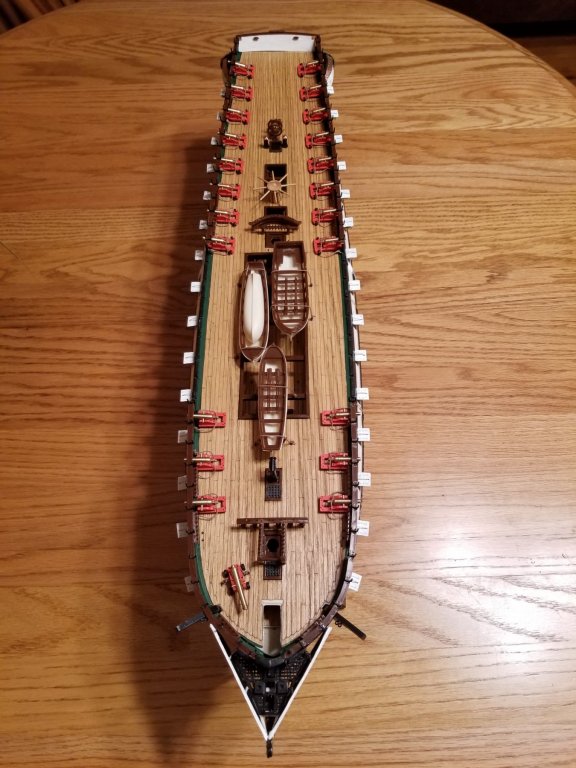
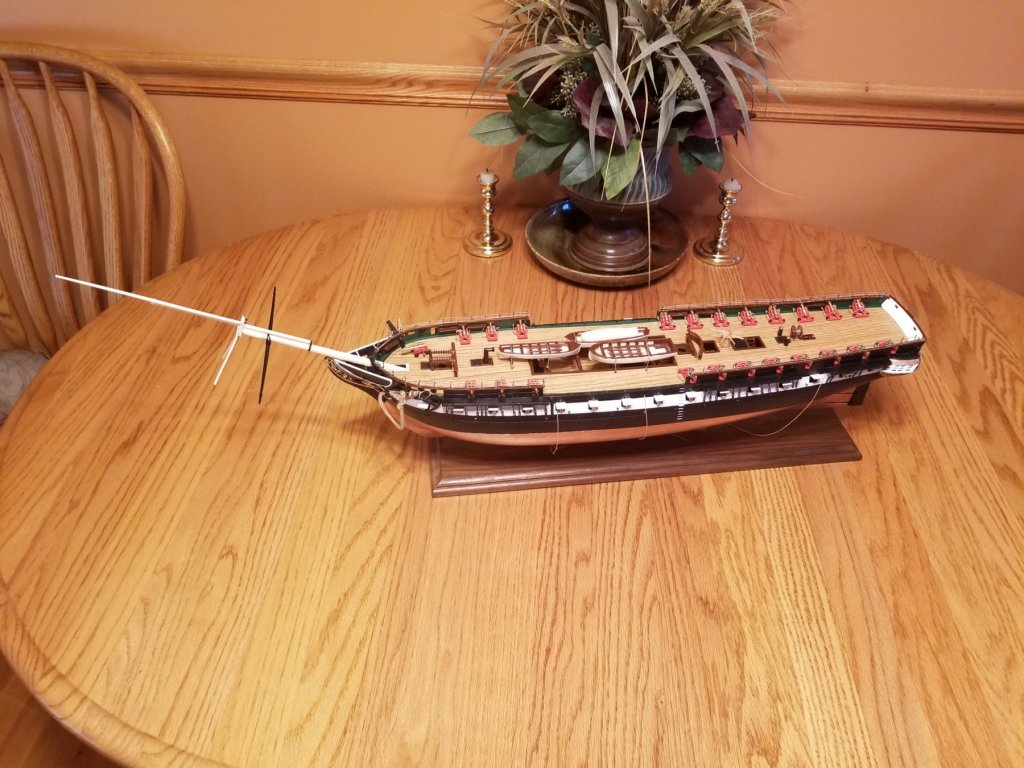
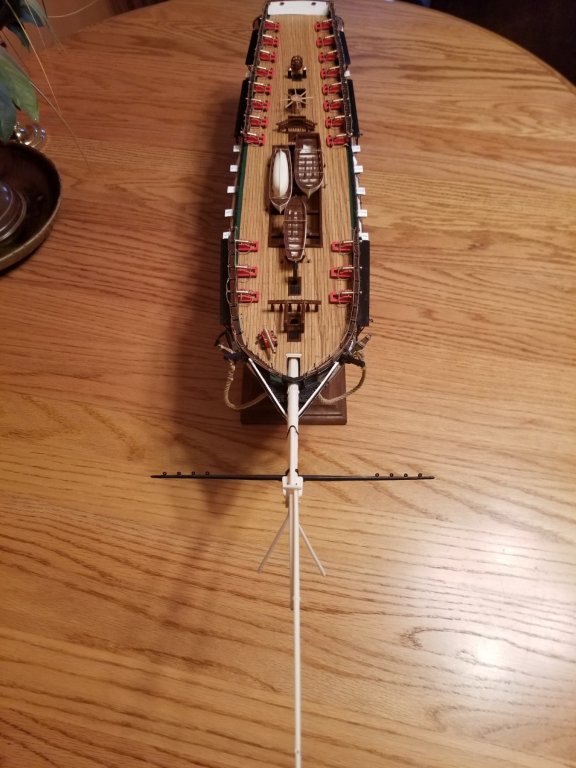
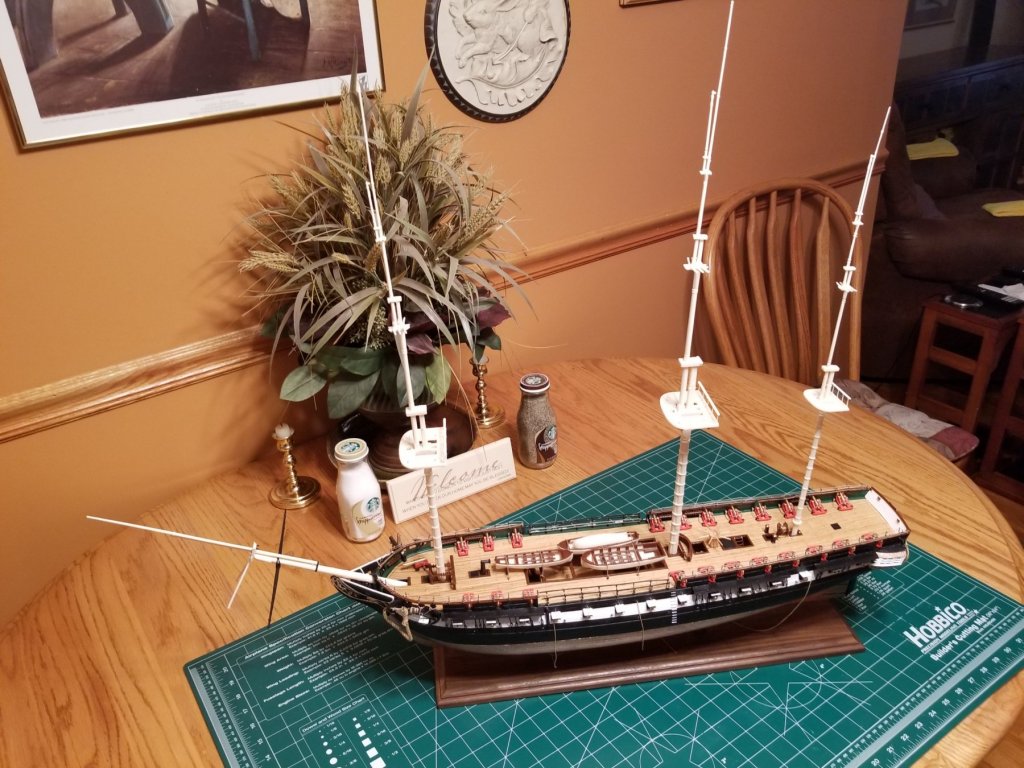
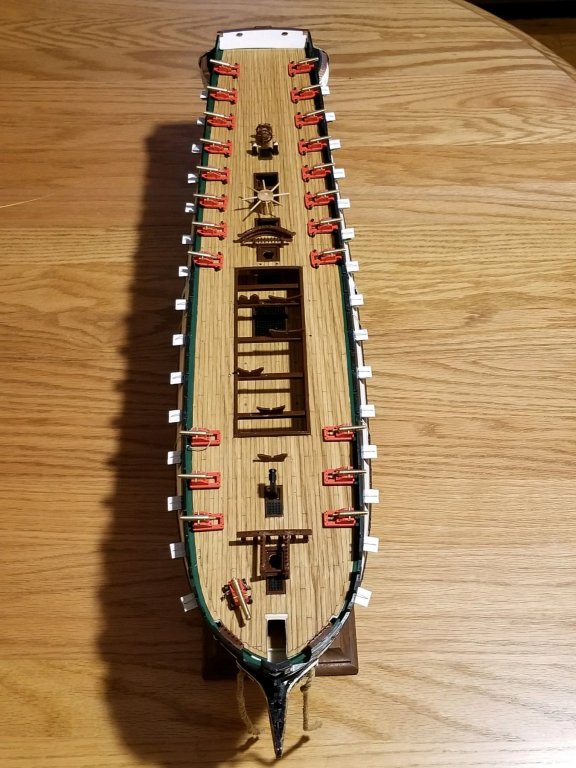
Well I have been busy finishing up the "ropes" on the cannon carriages and cementing the carriages to the spar deck. Got my Anchor in the mail and installed that. Happy with it compared to the stock one. Also installed the Stanchions and ran the thread on them. What a pain in the ****. Found a tooth pick helped to wrap the thread around the upright portion of the stanchions. Broke several in the process. I have some spare Stanchions so some time will be needed to do the repair. Bowsprit assembled but not glued in. I will install all of the rigging blocks first as I figure it will be easier to tie the blocks on the bowsprit when it's not installed. Also finished the Amidship inner and outer rails. Much easier to wrap the thread but not easy to glue together on the deck. Also had them break in several places when wrapping the thread. Very thin plastic parts. Masts assembled but not glued in. Have to attach blocks to the yards first. Question on the assembly of the studding sail booms when they are attached to the Yards. The instructions show either inboard or outboard positions when attaching the booms to the yards. I'm going to assume one is with sails (outboard position) and the other (inboard position) is without sails. See pic below. My Connie will not have yard sails. The cloth sail set I bought did not include the yards sails but they are available..Are they worth it??? I will attach all the blocks before glueing the yards to the masts. Is it easier to do the standing rigging before the yards are attached to the masts? Seems like less pieces to manuerver around... Humm Last but not least all three mast assembled but not glued in. They look less perpendicular than they are but figure the rigging will help straighten them up....I hope. The Mizzen mast is the worst and I am thinking about carefully opening up the hole on the gun deck with a drill (very carefully...I don't know) Any thoughts????


- 209 replies
-
- 8
-
-
- constitution
- revell
- (and 1 more)
-
Hey Lou, Thought I'd pull up a chair. WOW....a wooden ship....NEVER ventured in that territory. Looks nice... Keep the photos coming. Mike
-
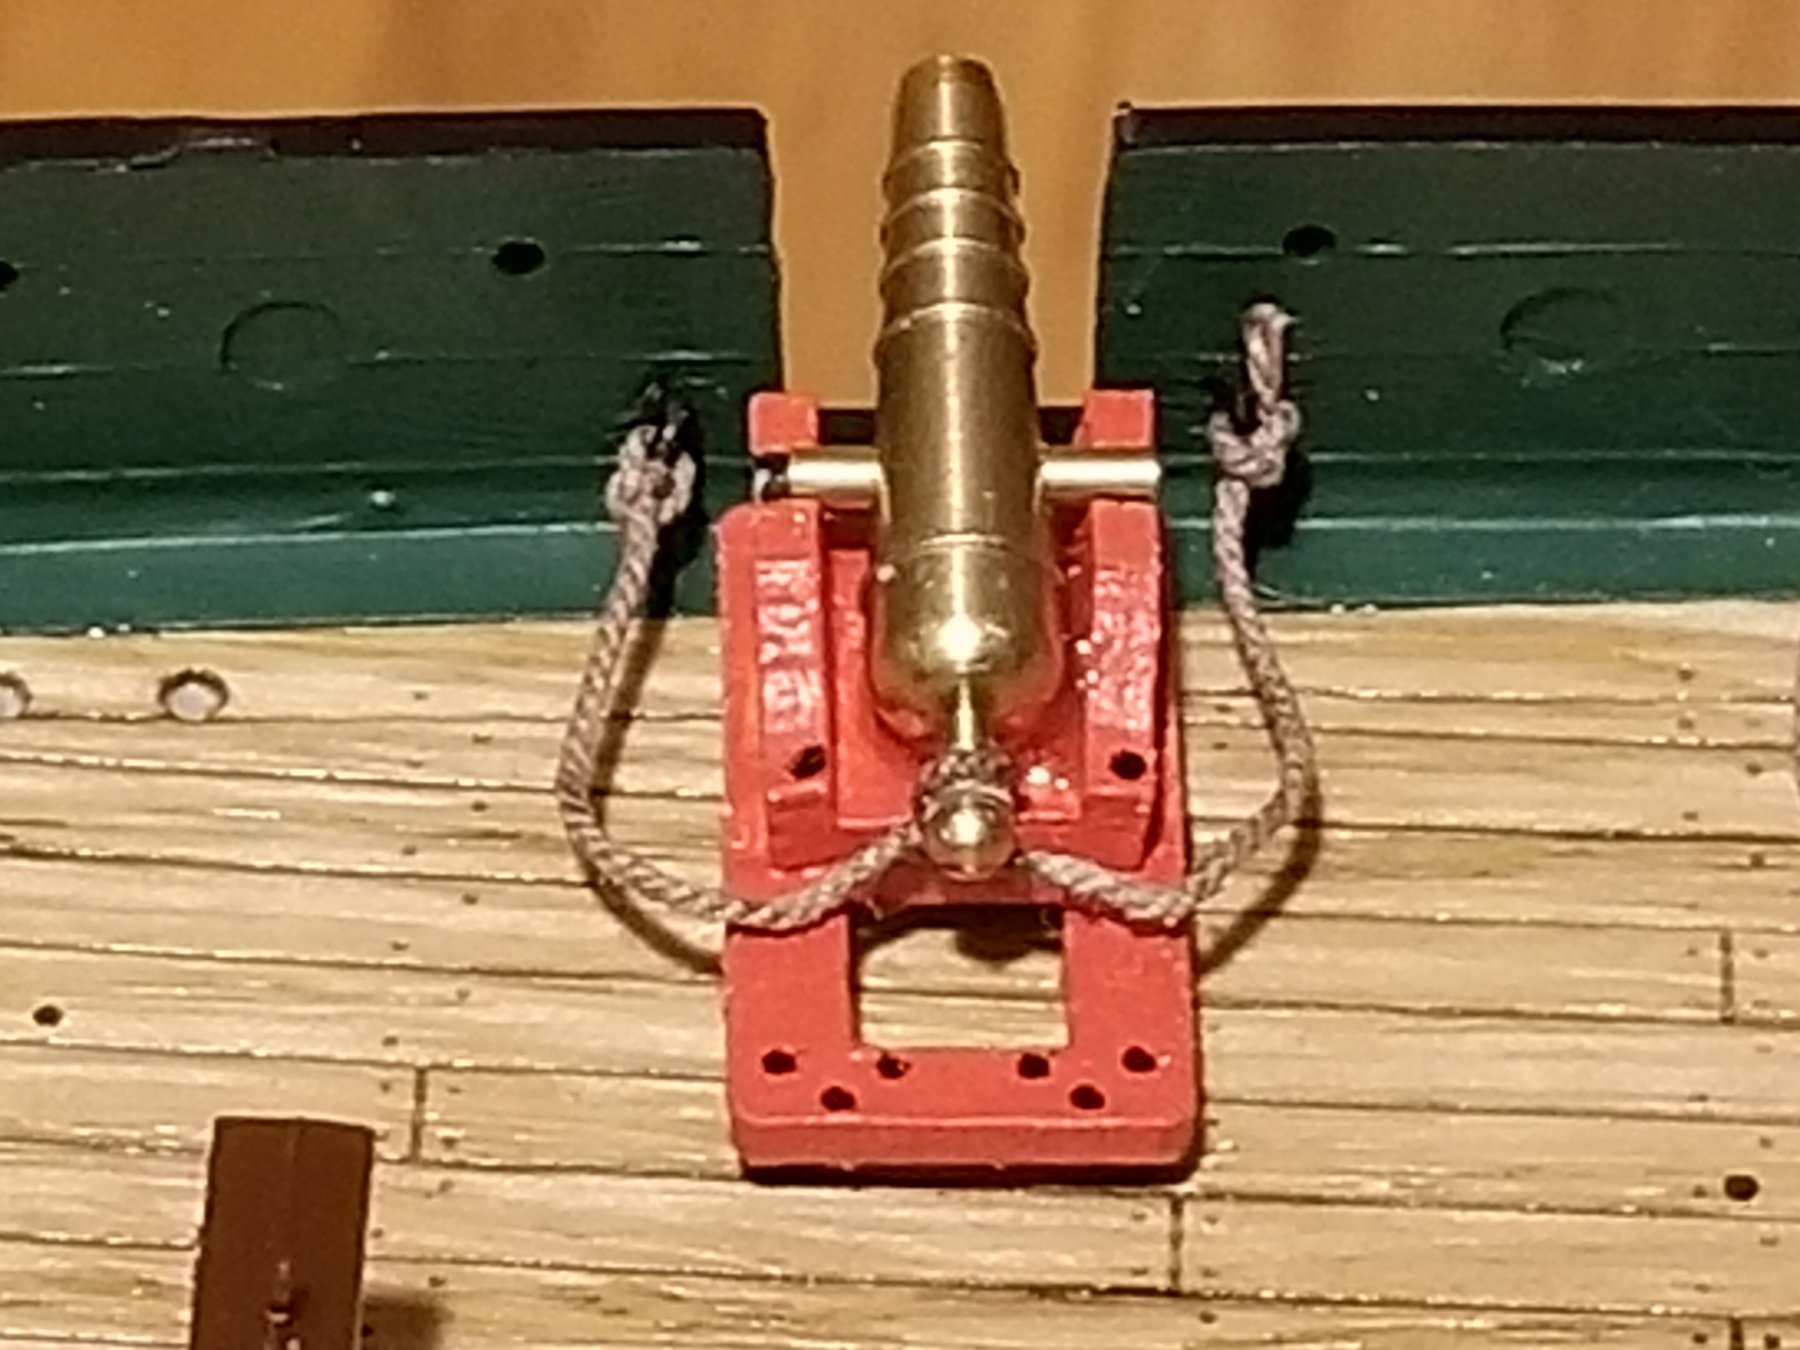
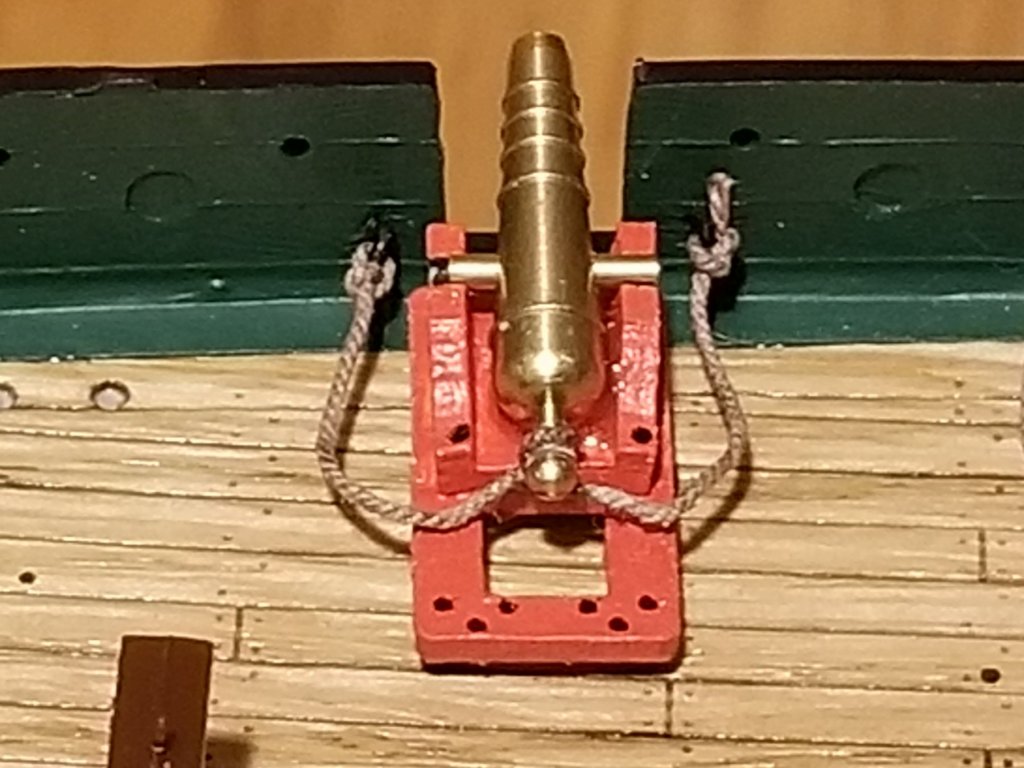
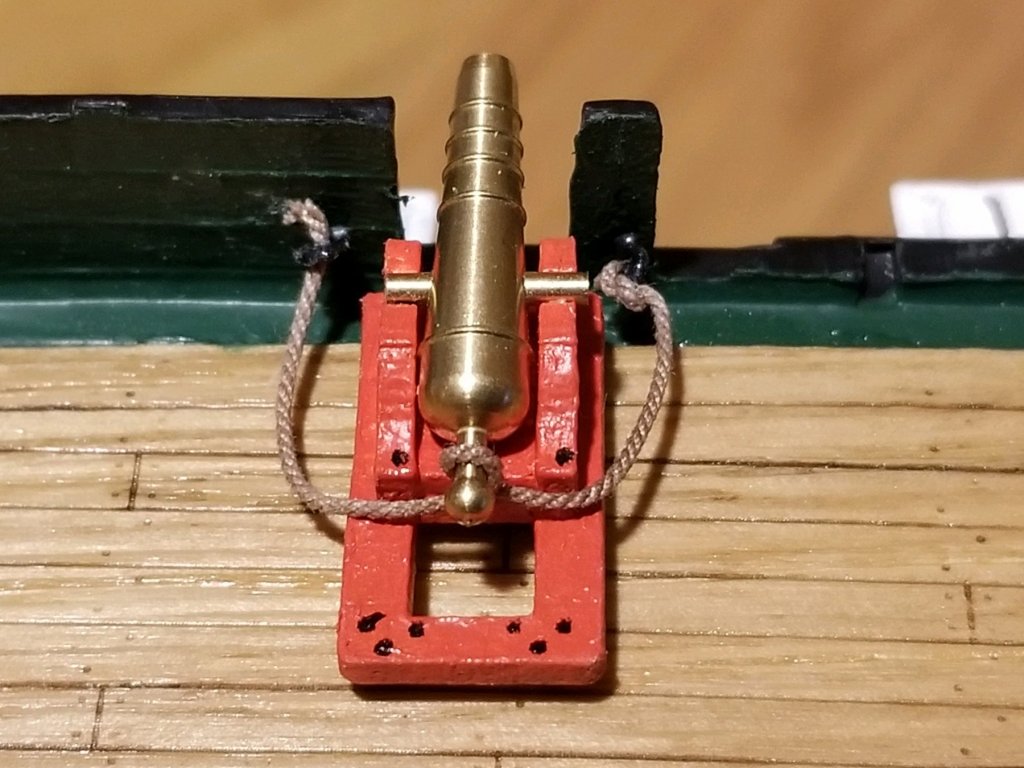
Morning OC and Lou. Thanks for the comments. Lou you are right ...my house is a museum but with limited admissions...lol I think I have figured out a way to rig these canons. I cut a 2 1/2" length of cord and attached eye bolts to each end. Positioned each eyebolt (1/2 knotted) at 2" apart. I then glued each eyebolt into the ceiling and let them dry. I then wrapped the cord around the end of the canon and tightened the cord around the end. Holding the cord tight with two reverse tweezers I glued the cord to the cannon end. This morning I removed the reverse tweezers and WA LA...Not bad.
- 209 replies
-
- 6
-
-
- constitution
- revell
- (and 1 more)
-
Well Kevin I thought about it long and hard (about 30 seconds) and realized it was far beyond my talents and patience. The first mistake I made was doing the rigging on the carronades on the port side. I should have started on the starboard side as the knots in the eye bolts glued to the ceiling would not be readily seen as I plan to display the Connie with the starboard facing out. Oh well, the great plans of mice and men. It's not going in a museum so I am good with the progress so far and it is FAR better all around than my first Connie so count me as a happy camper. Thanks for the complement.
- 209 replies
-
- 2
-
-
- constitution
- revell
- (and 1 more)
-
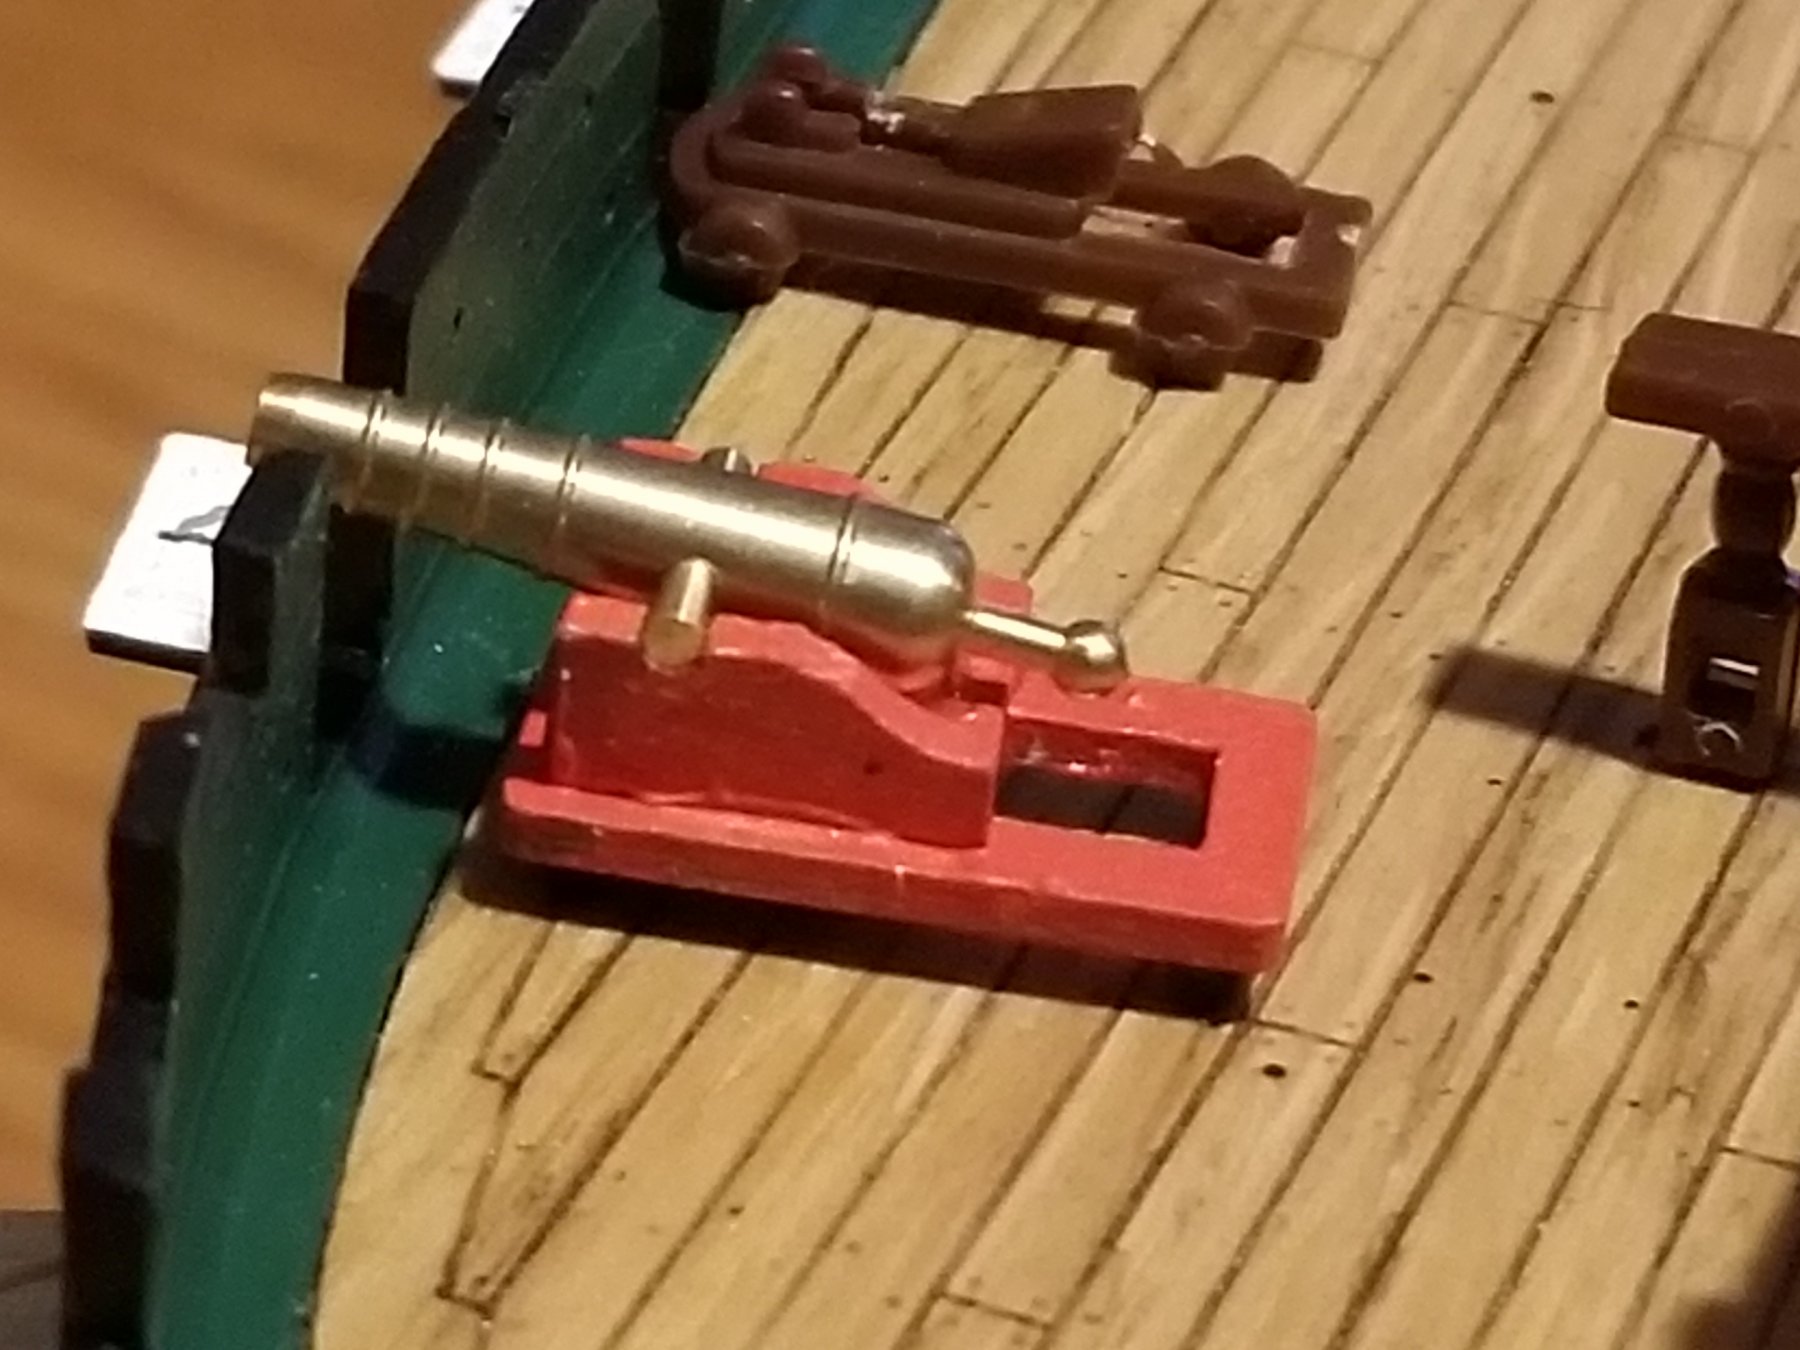
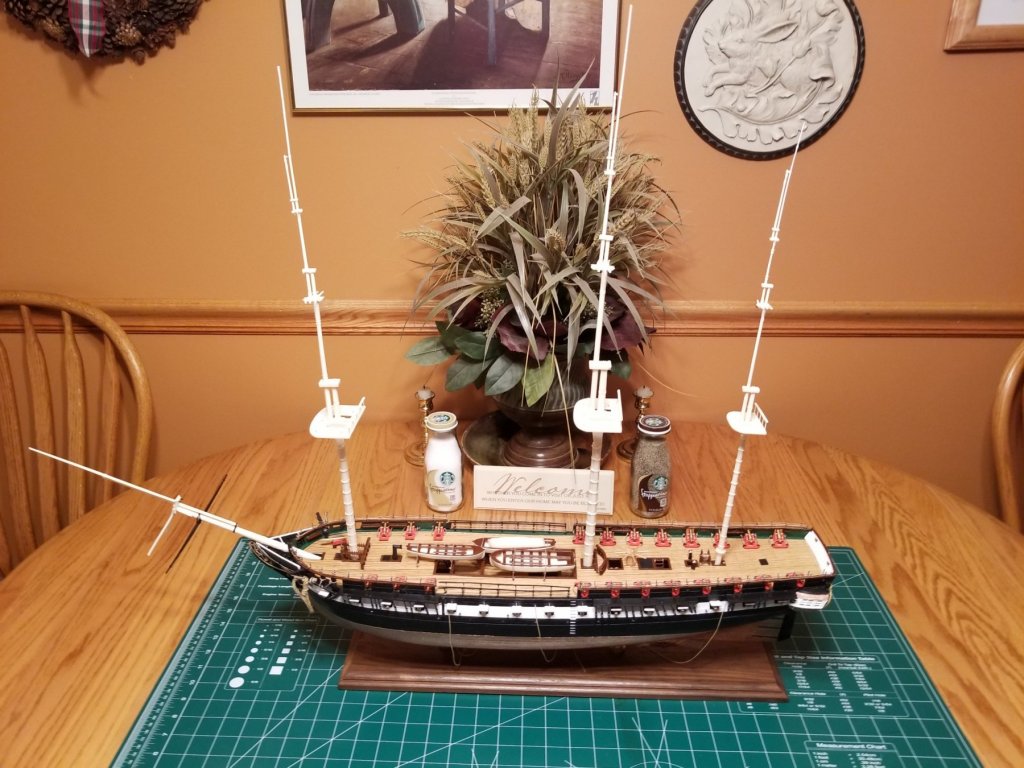
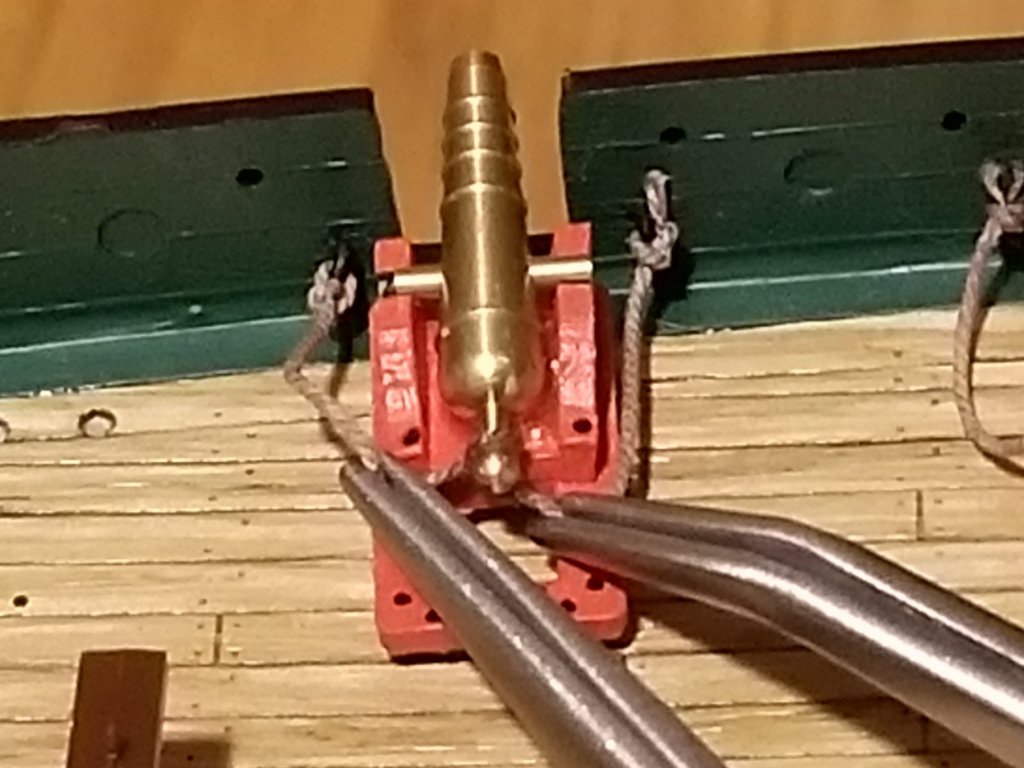
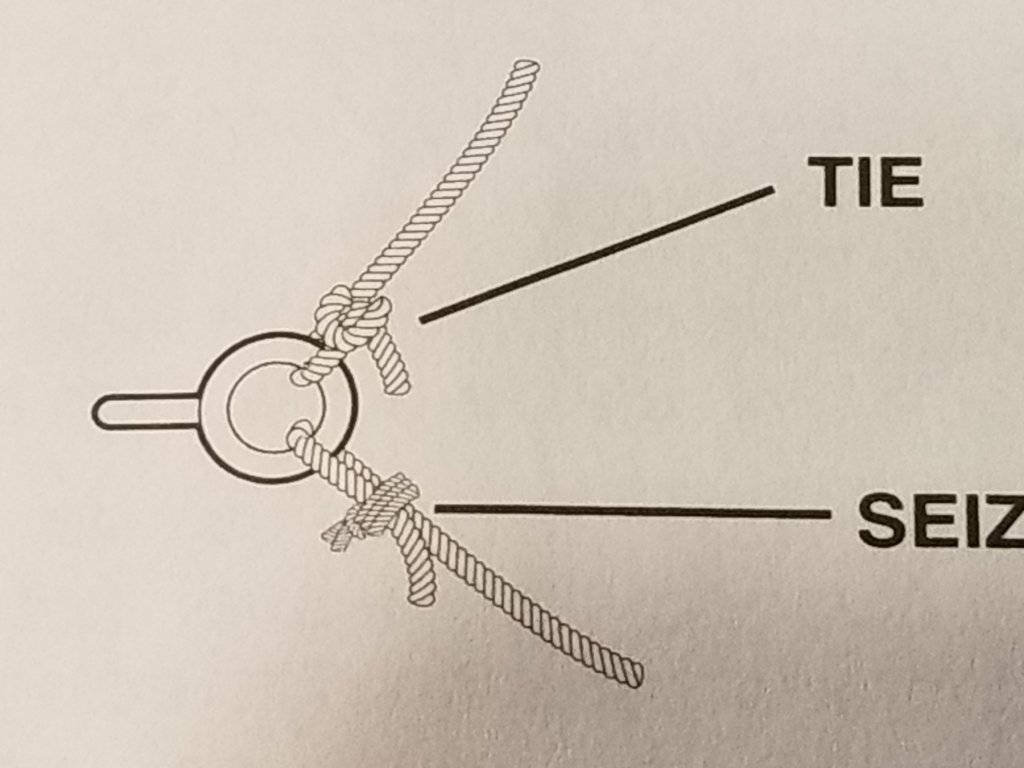
Well I finally got all the Spar deck carronades assembled, primed, 2 coats of paint and cannons glued on to all 22 guns. I had some spar wheels that I glued to the bottom so I had an "invisible" glue point to the deck. Through trail and error I found I needed to ruff up the deck with sand paper so the wood glue would stick to the semi-gloss oak veneer deck. NOW the fun part ... rigging the carronades to the eye bolts on the ceiling (I think I said that correctly...lol). I didn't follow the instructions to glue the eye bolts to the ceiling before the carronades were glued to the deck as I figured it would be impossible to thread the rope thru the eye bolts once glued to the ceiling. I also found it easier to leave the eye bolts attached to the plastic tree and use a round file to open up the holes a little bit. The first one I did (pic below) I tied a half knot in the eye bolt and glued the rope to the eye bolt. Not know the length I just threaded the eye bolt to the other end with enough length in the rope to tie a knot. I glued the right eye bolt in the ceiling and wrapped the rope around the back of the brass cannon as per the instructions. I then glued the rope to the cannon and let it set for awhile. I glued the left eye bolt in place and even glued the rope to the eye bolt, leaving a little slack in the rope. After that set for a while I tried to tie a knot in the left eye bolt. After a bazillion attempts I just cut the @#$@# off. See where I'm going with this folks??? HELP!!!! I decided to tie both ends of the rope to the eye bolts first and then cement the right eye bolt first... let that dry then wrap the rope around the end of the cannon , leaving a little slack to the glued eye bolt. In theory this should work except the glued half knot on the right eye bolt didn't hold and guess what??? Yeah I know...but the pic in the instructions doesn't look like a full knot. Any suggestions will be GREATLY appreciated.....


- 209 replies
-
- 6
-
-
- constitution
- revell
- (and 1 more)
-
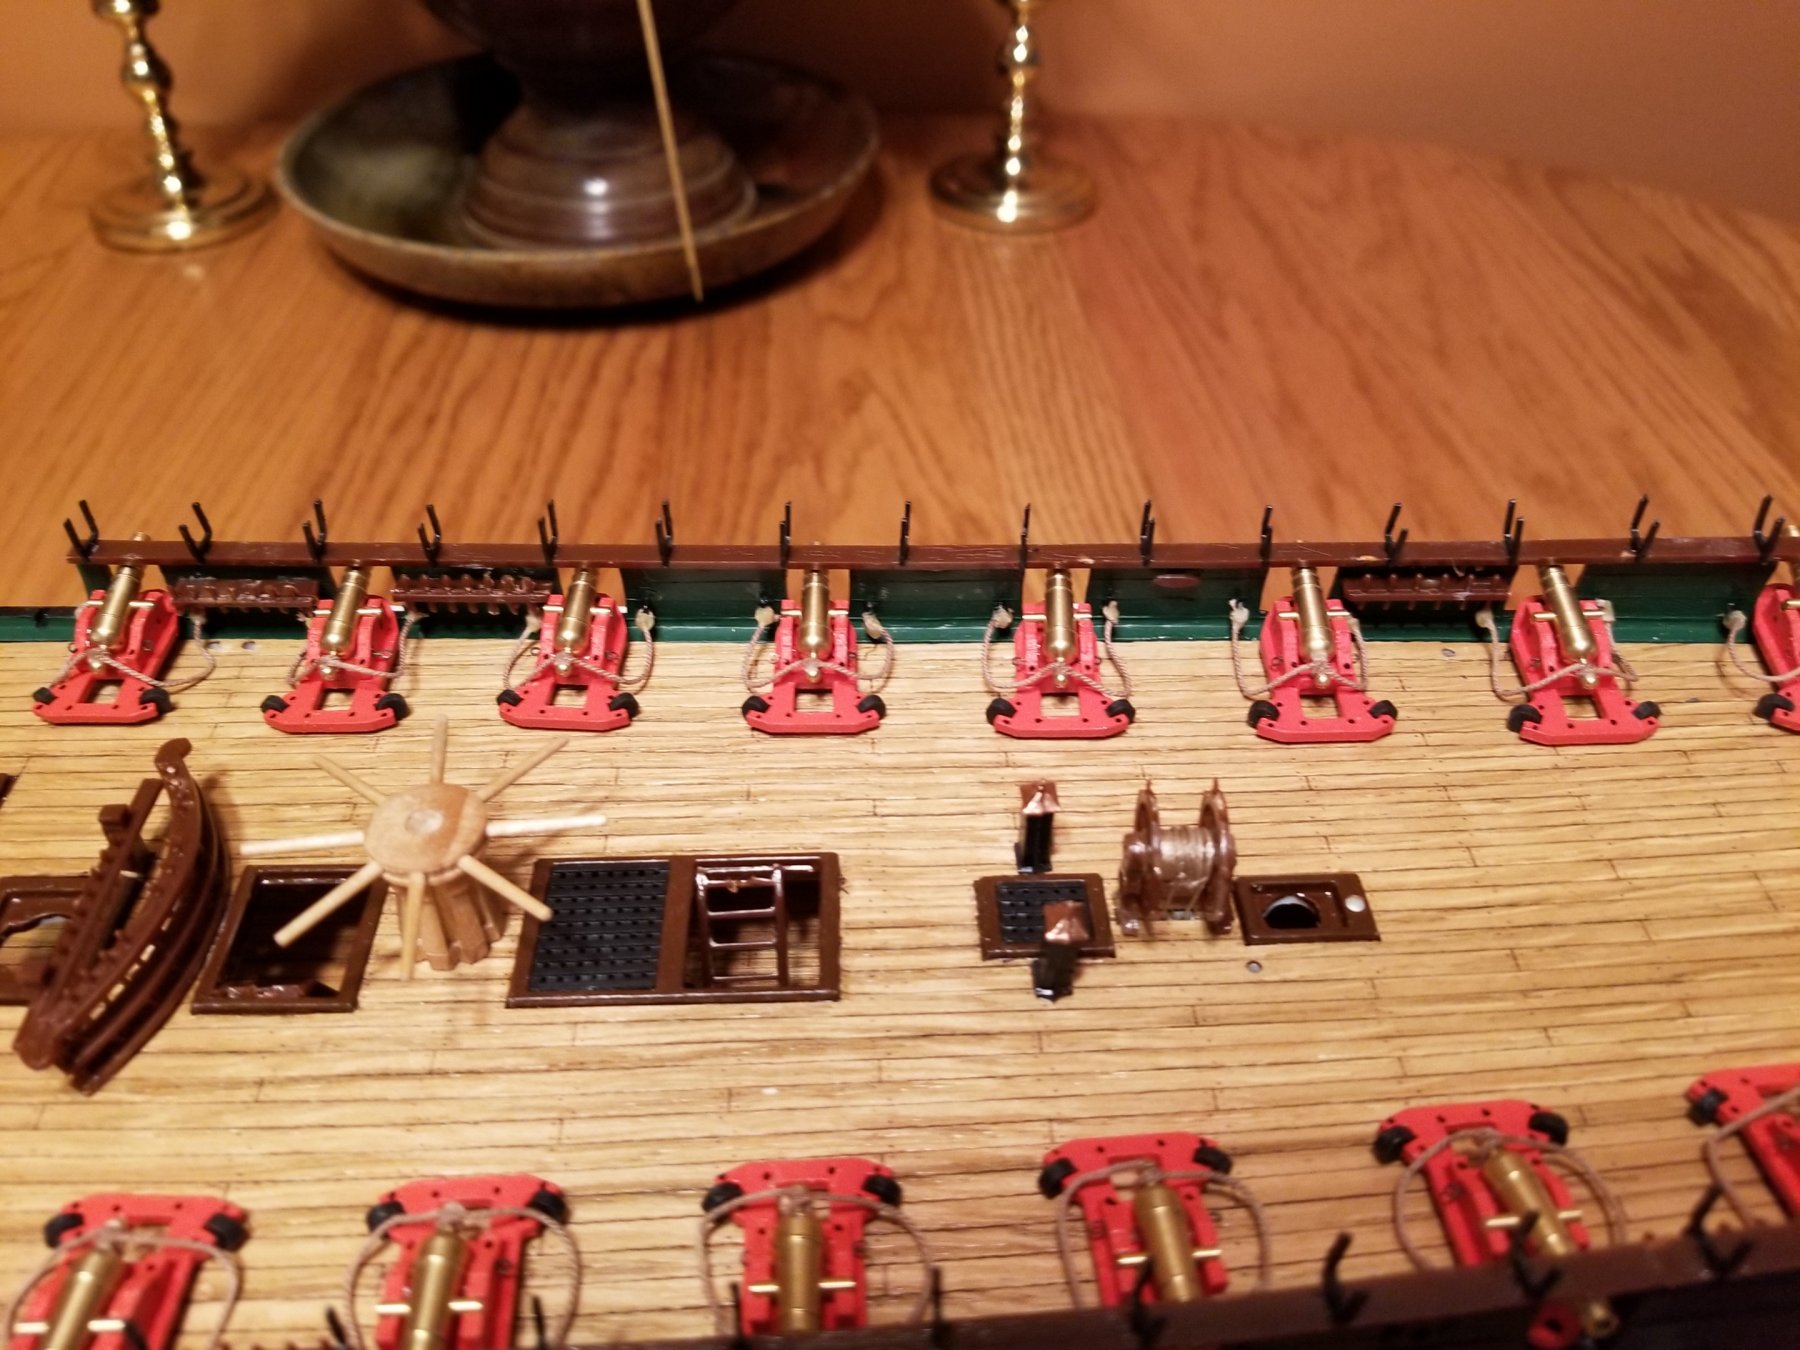
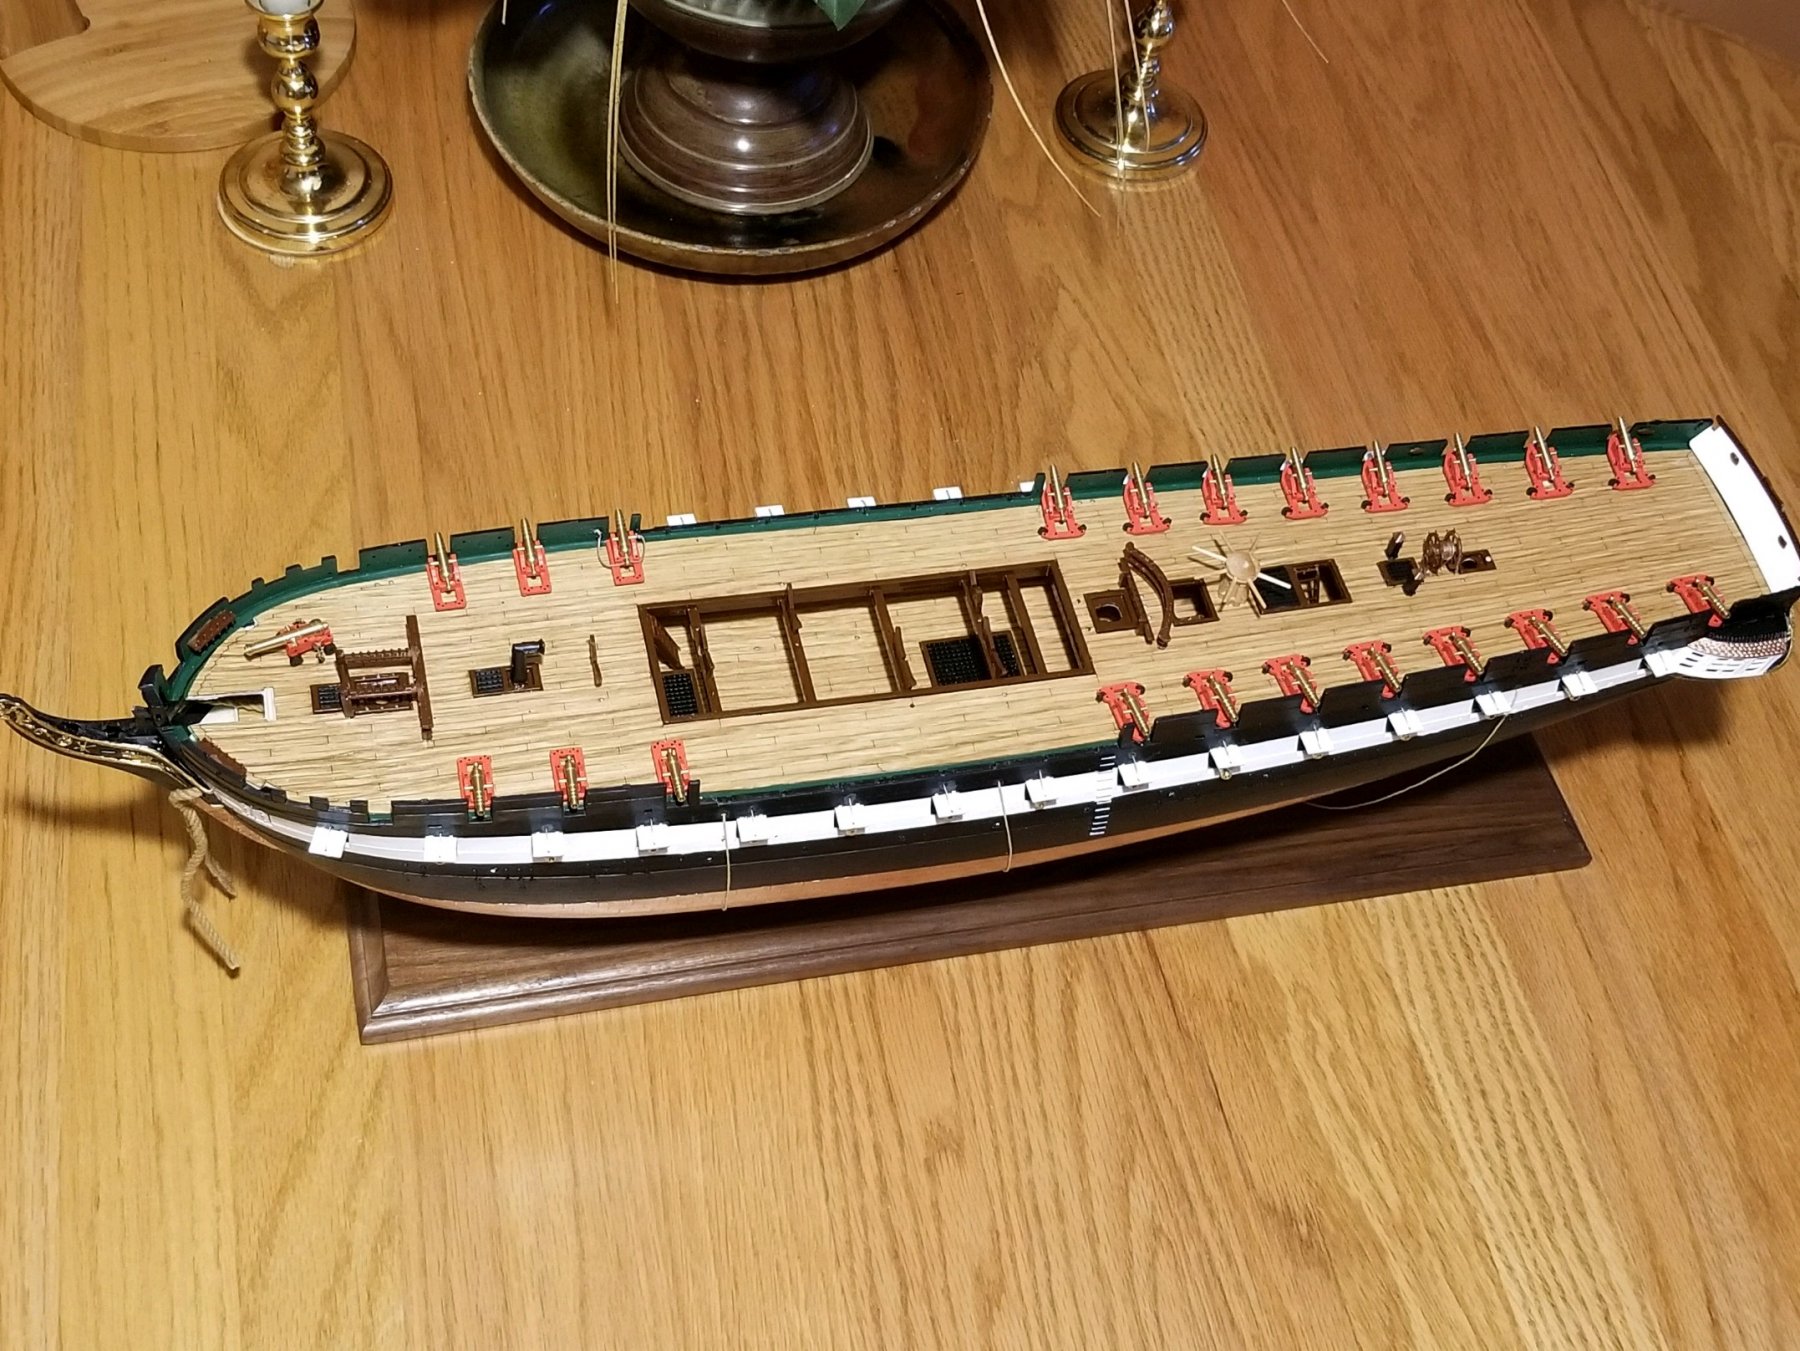
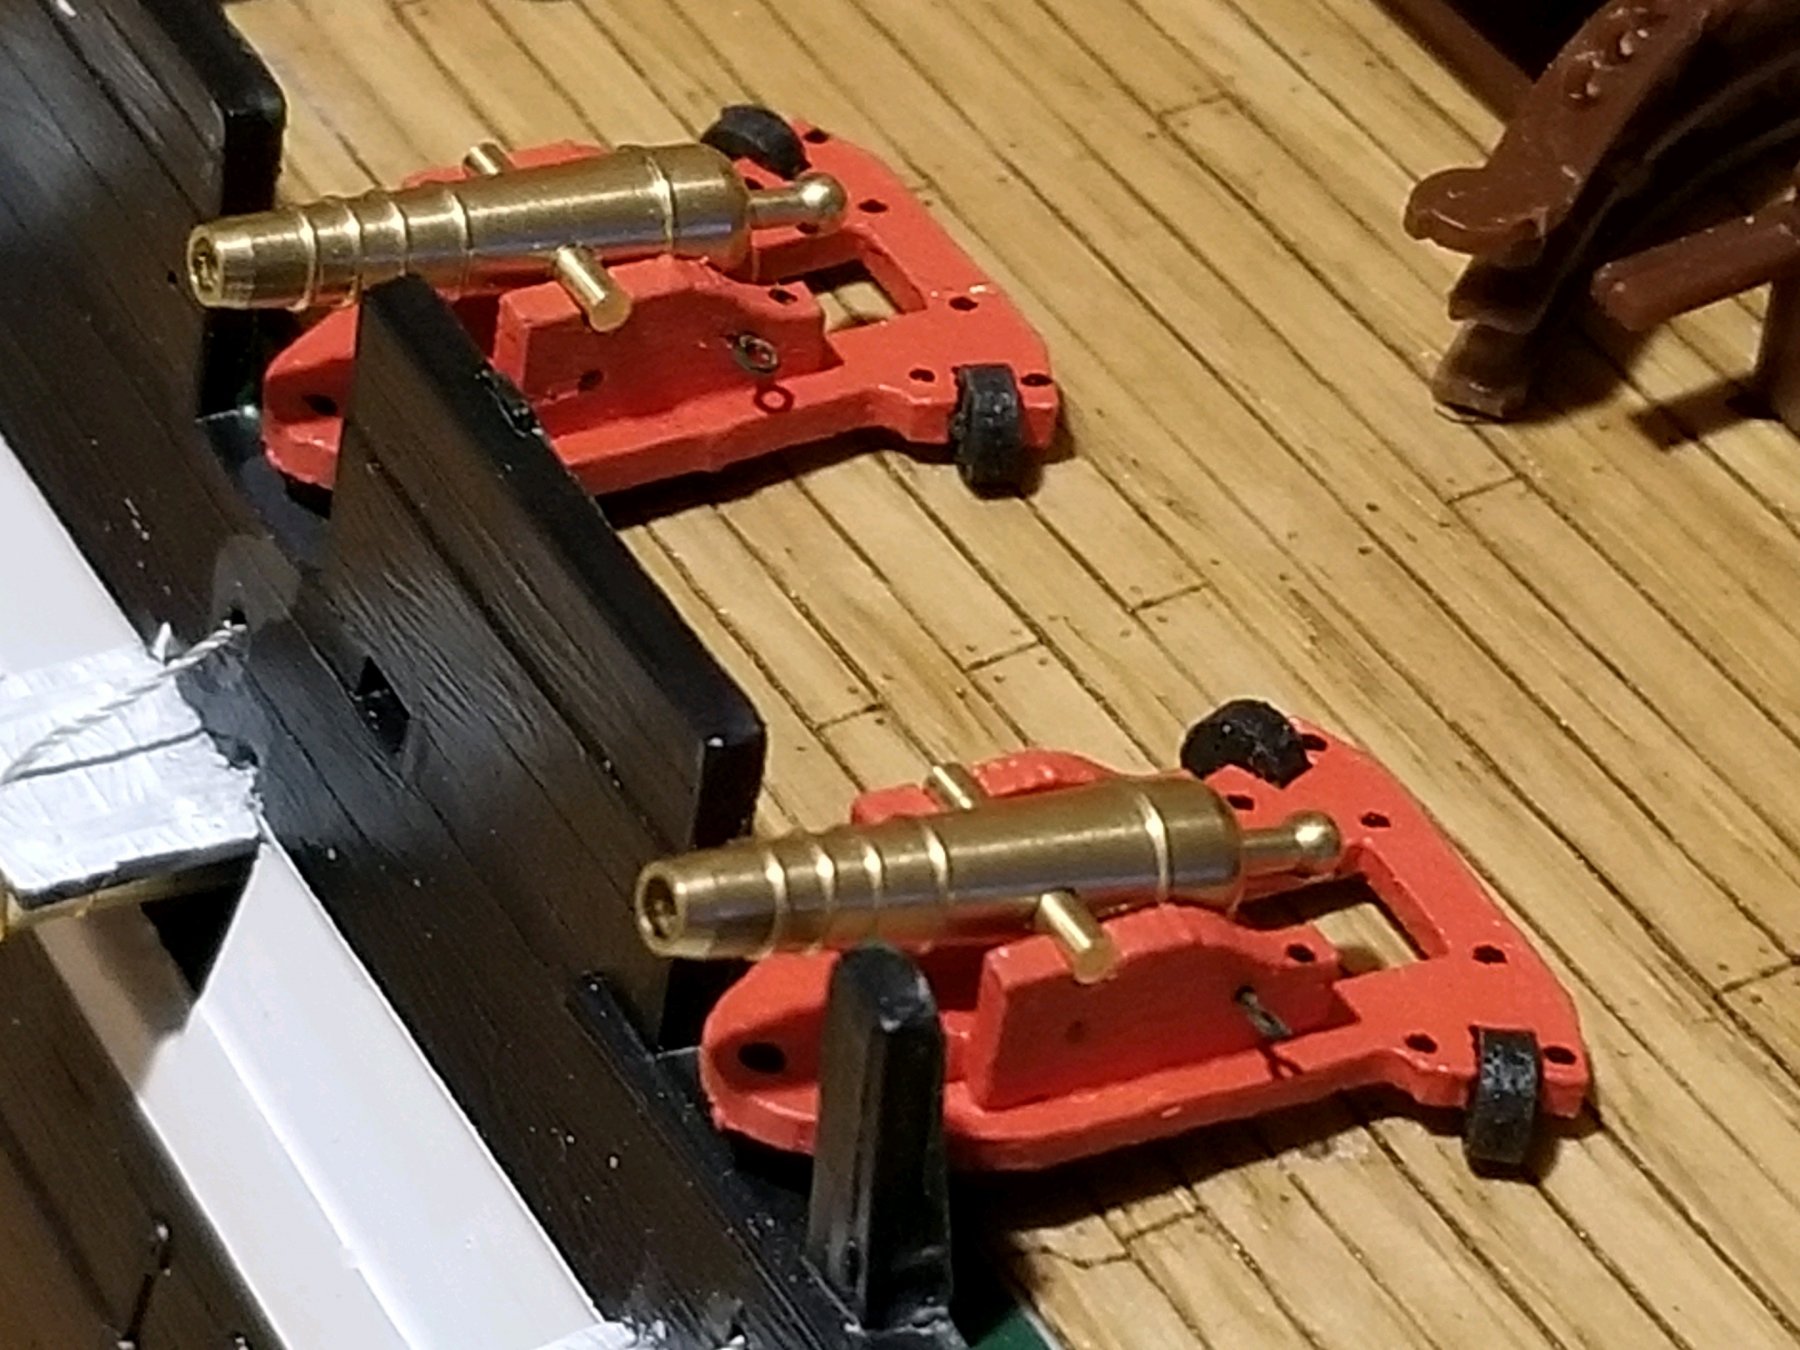
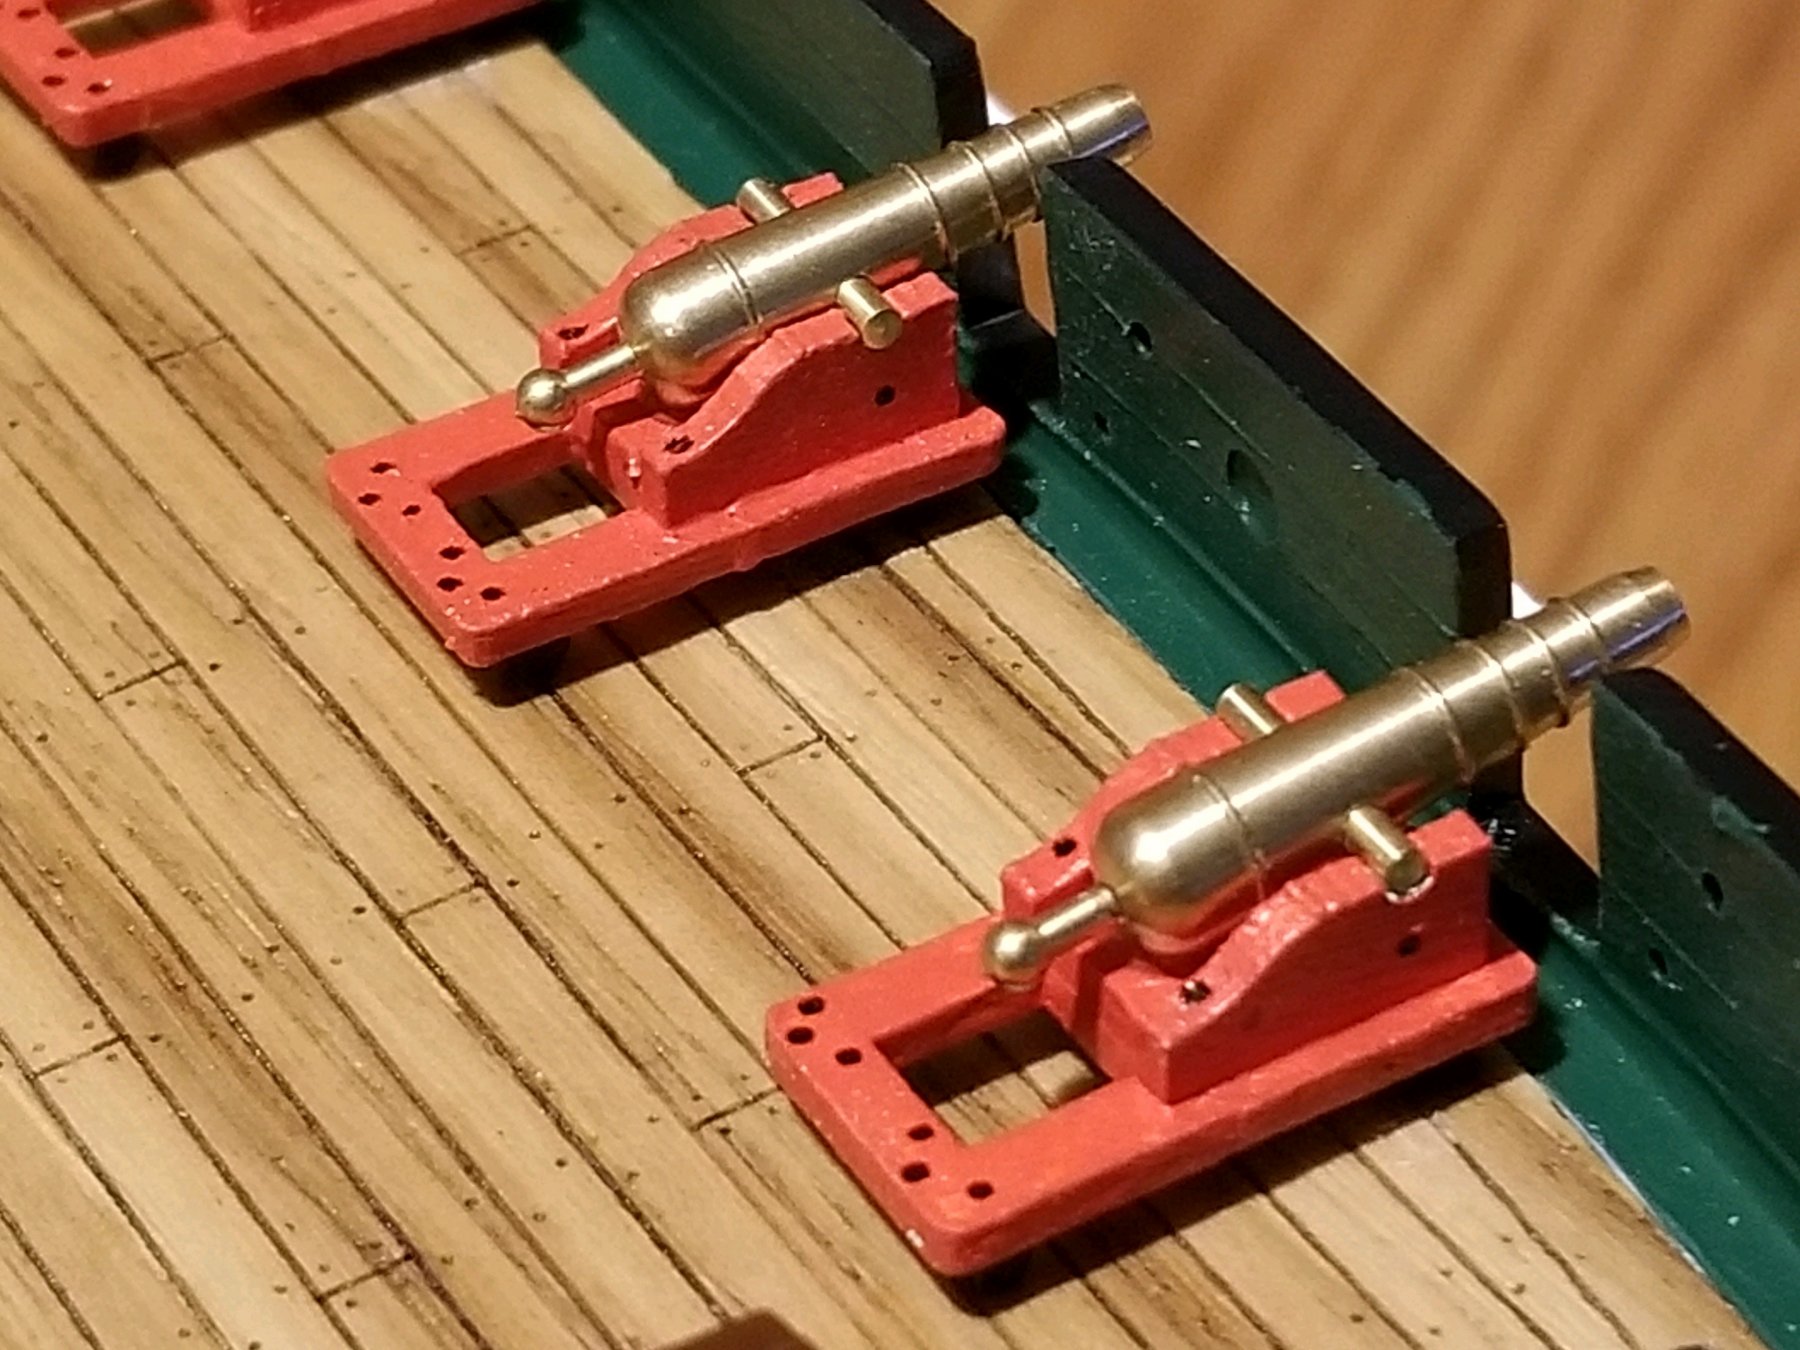
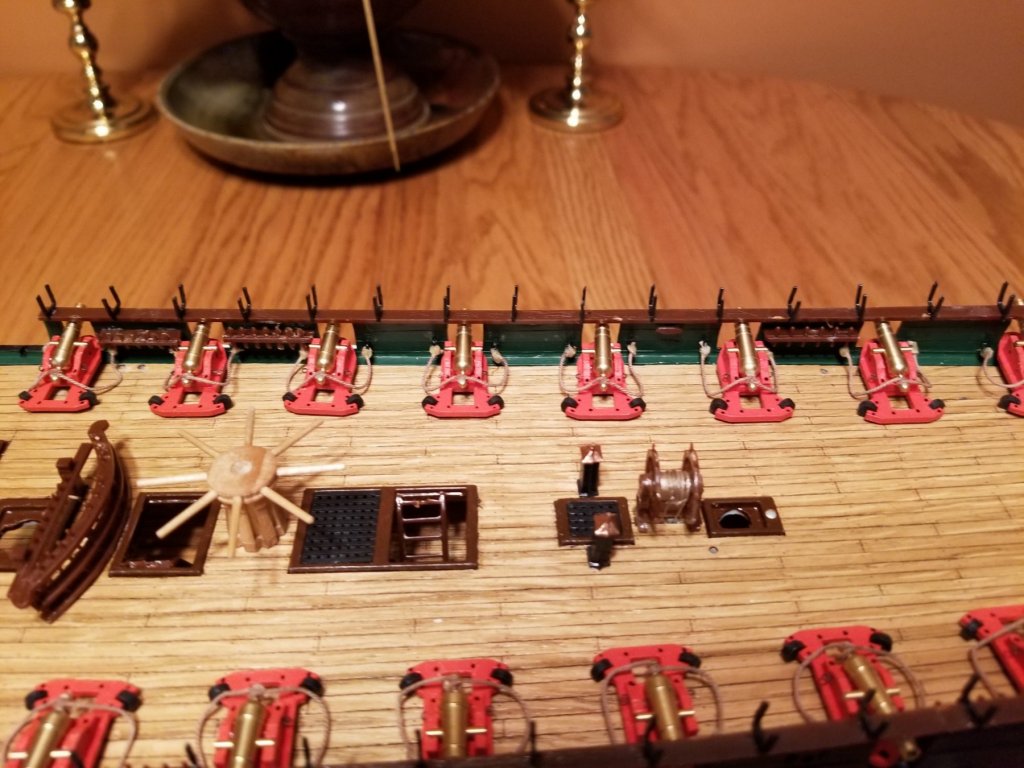
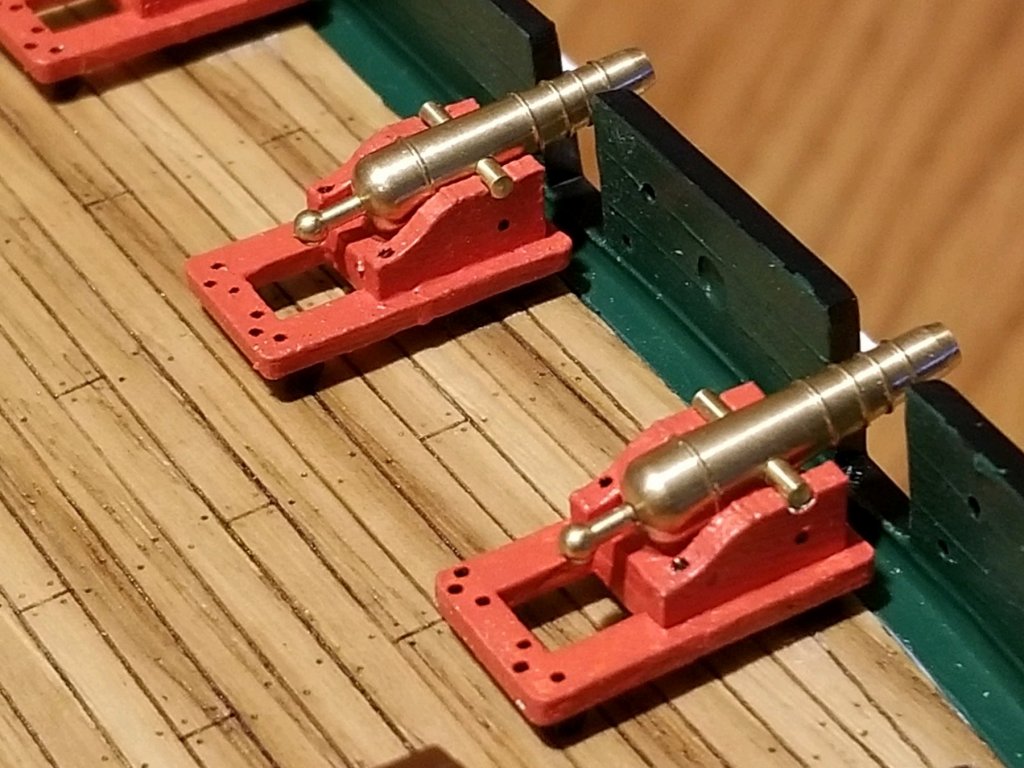
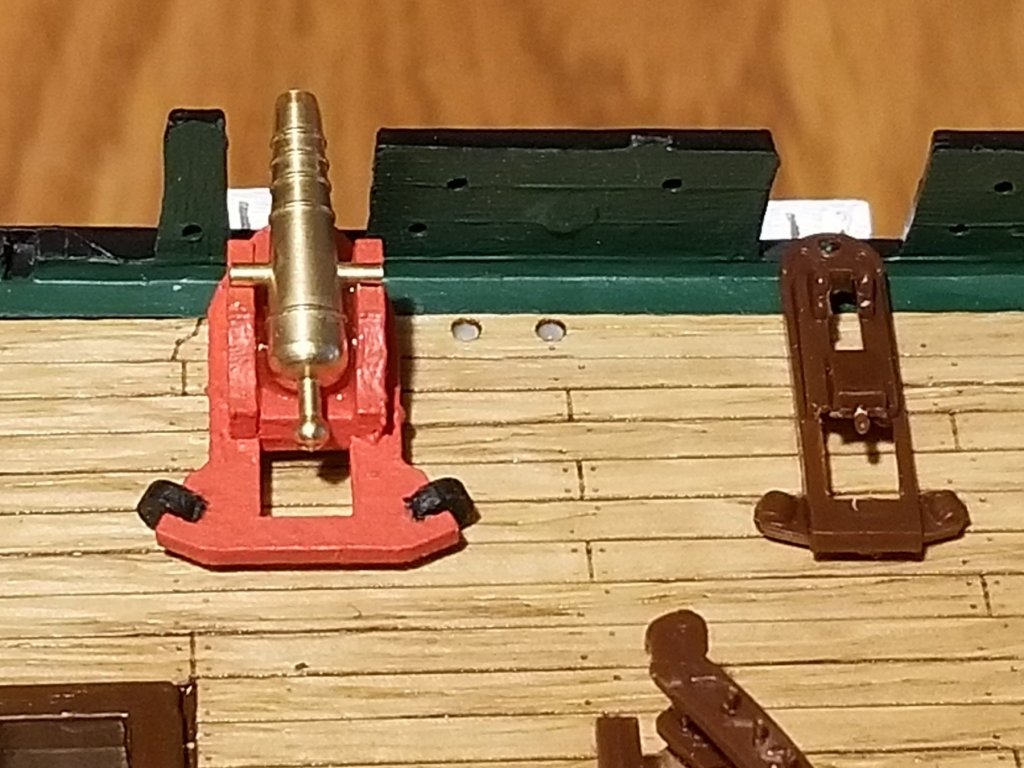
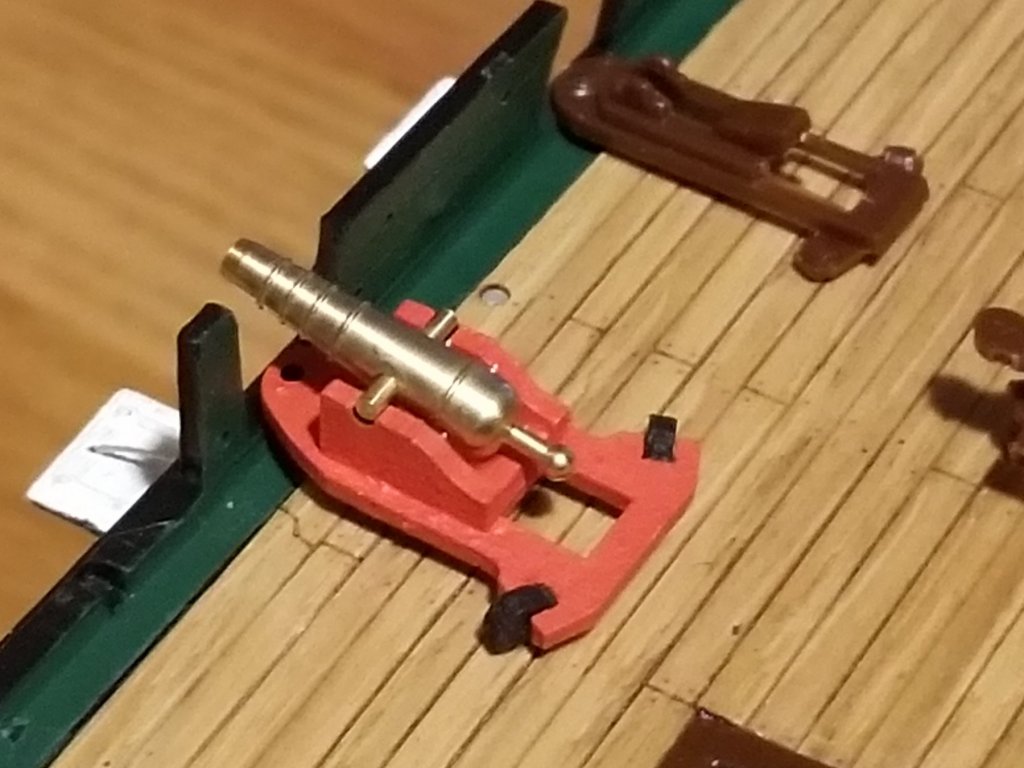
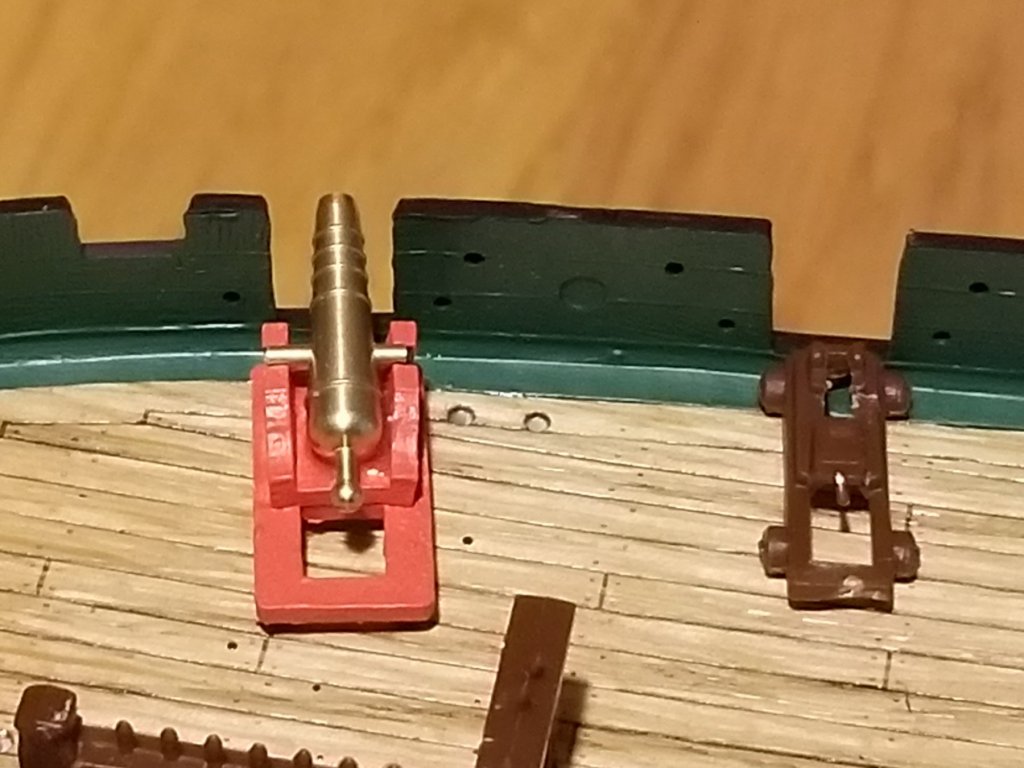
Well, I finally got some more accessories from Radek at HiSModel in the Czech Republic. Didn't care for the look of the plastic carronades with my brass cannons for the Spar deck so I sold some more plasma and ordered the wooden ones from Radek. I had to do some sanding on the block between the upright sides as it was a little wide for the sides to set perpendicular. Also, the brass cannons will more on the cross pin so after many failed attempts at gluing brass to brass I put some 5 min epoxy the back portion of the carronade for the barrel to rest in. Now I only have 20 more to go. I figure I should be done with the spar deck cannons by spring but don't ask me WHICH spring... First 4 glued...2 primed. Tiny parts...Thank God and Lou for tweezers..... Here they are on the Spar deck with their plastic counterparts... Thanks again Jim and Lou for suggesting the ceilings be painted green. I really like it now.


- 209 replies
-
- 5
-
-
- constitution
- revell
- (and 1 more)
-
Mornin Ozark, When I paint small areas I usually have my face fairly close to the mat where I rest the part. I find my hand is steadier when I can rest it on the mat. I usually use the paint lid as my paint source (a tip Lou gave me). I never have to lift the lens to see as I have the paint jar lid close to my part. Hope that helps. I enjoy the mag light immensely. It also has two brightest levels.
- 49 replies
-
- 1
-
-
- constitution
- revell
- (and 1 more)
-
Hey Ozark, I share your frustration with doing detail work on areas of the Connie that will be hidden. I started to paint the interior of the Captain's quarters and gave up as it seemed fruitless to me. The way I look at it is that ever an individual builder wants to do to be satisfied with their build is what they should do. In so far as the mag headset is concerned, I found this one that I really like. It gives you great magnification for the tiny details. https://www.amazon.com/gp/product/B07DW6FJ6S/ref=oh_aui_detailpage_o03_s00?ie=UTF8&th=1
- 49 replies
-
- 1
-
-
- constitution
- revell
- (and 1 more)
-
Hey Lou, I was just browsing through the Connie instruction manual as I do pretty often and guess what? I was a picture on the cannon carriages. Yepper....Big wheels up front for the gun deck carriages. NOW I can sleep tonight...lol
- 209 replies
-
- 1
-
-
- constitution
- revell
- (and 1 more)