


KurtH
-
Posts
362 -
Joined
-
Last visited
Content Type
Profiles
Forums
Gallery
Events
Posts posted by KurtH
-
-
-
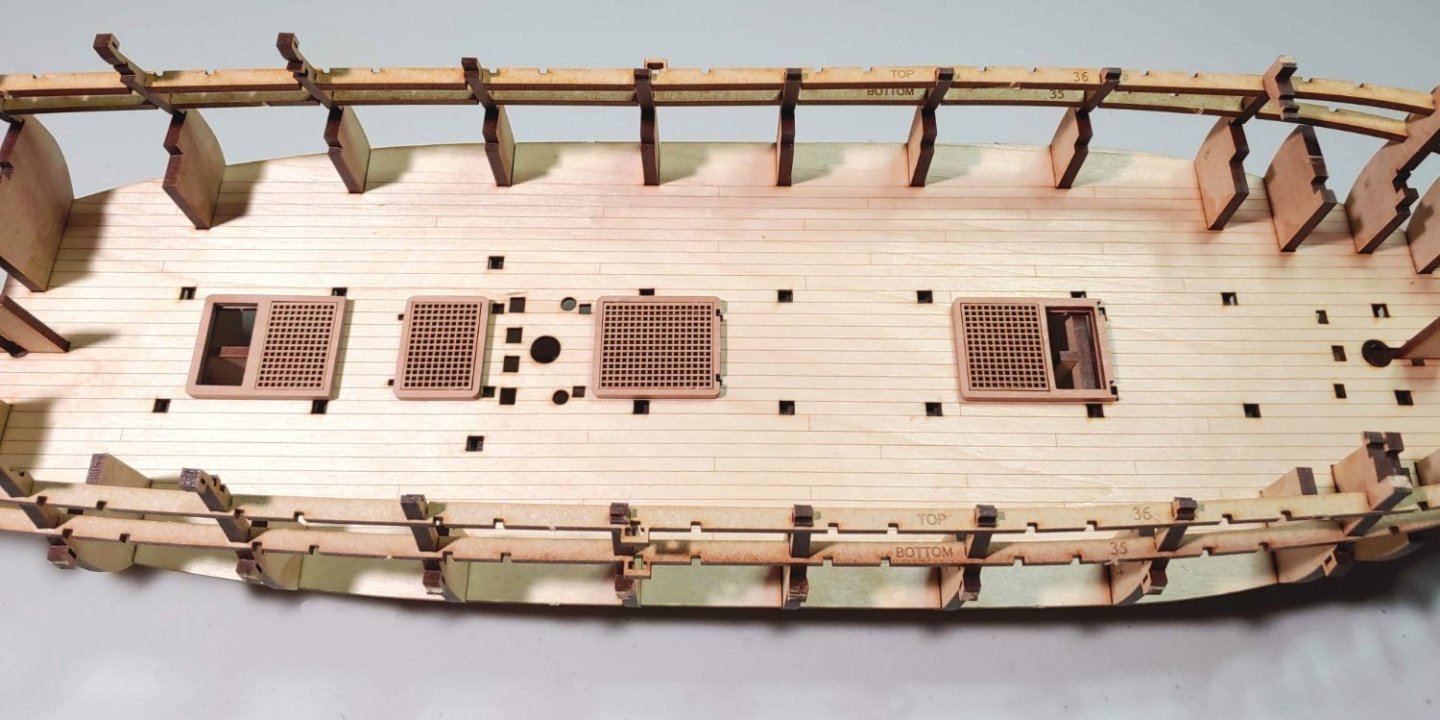
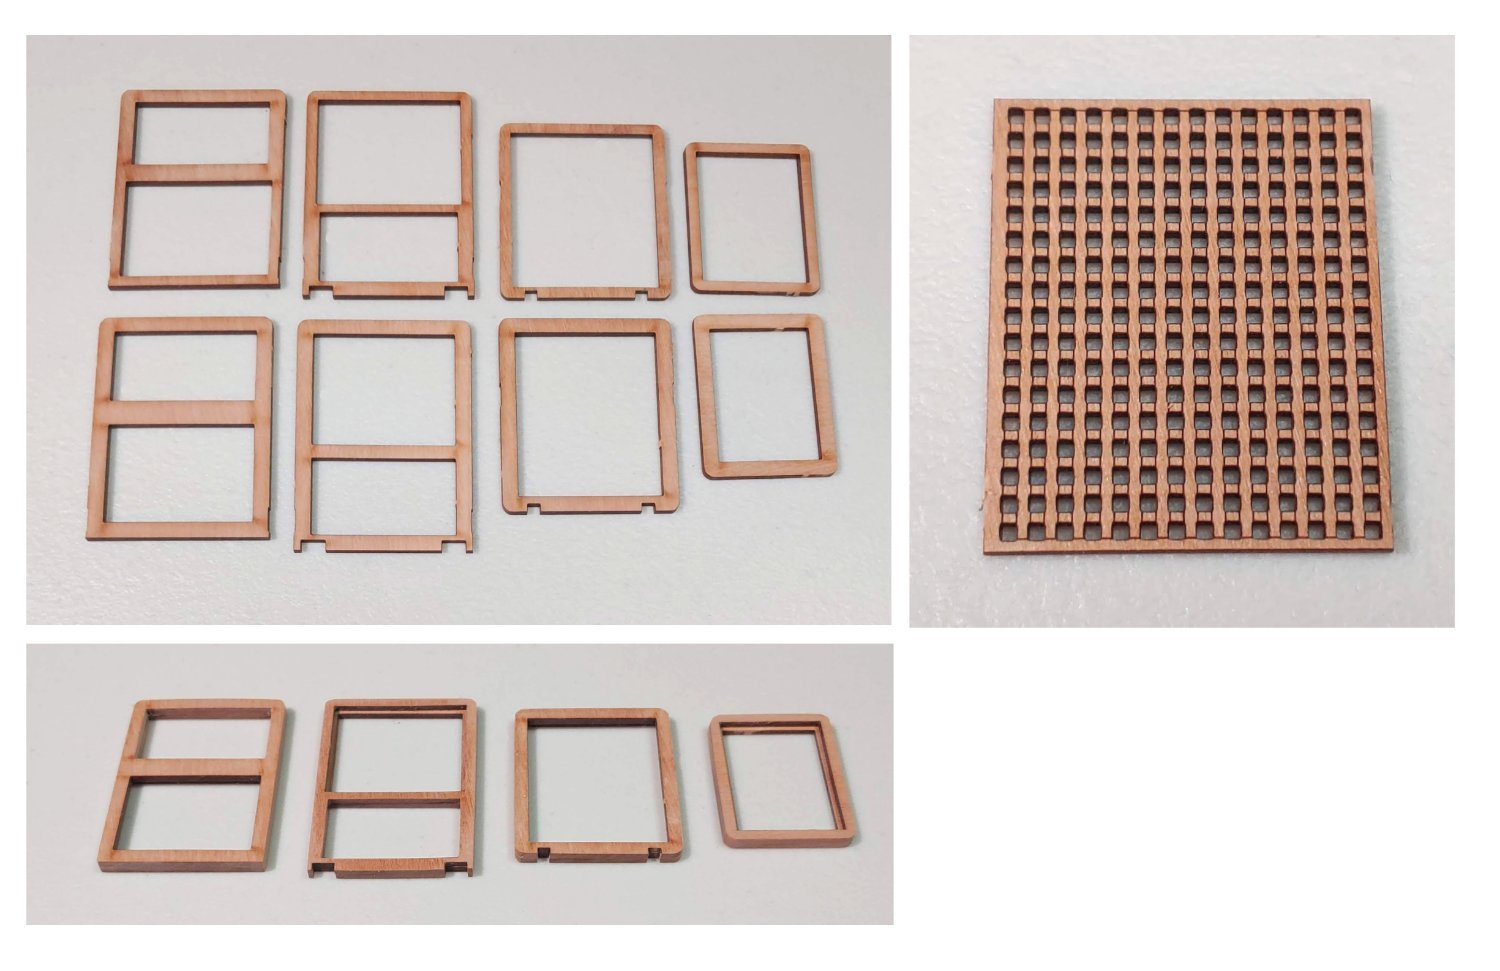
The lower deck hatch coamings come as laser cut components which are assembled to form a two layer unit into which the gratings can be inserted:

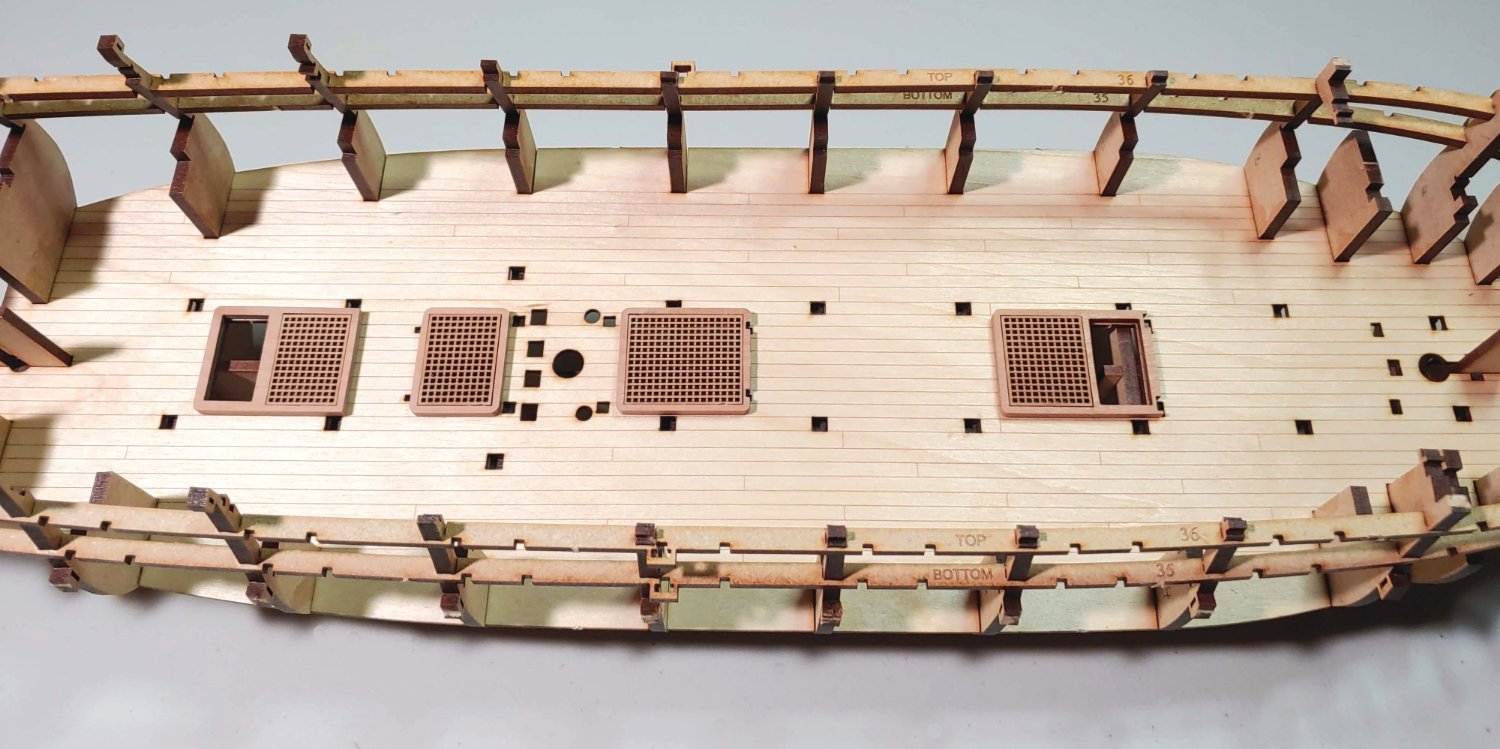
Pear is a wonderful material to work with which makes a smooth surface when sanded and varnished. This is novel for me, and helps me to reach my goal of building a model which not only looks good from a normal viewing distance but up close as well. The grates are superbly detailed as you can see. Having looked at many different builds of many different kits from a variety of manufacturers, I have thought that having grates that are in scale is a pipe dream until now. These grates have reached that goal as you can see from this photo of the coamings and grates glued into place:
- RossR, schooner, KARAVOKIRIS and 9 others
-
 12
12
-
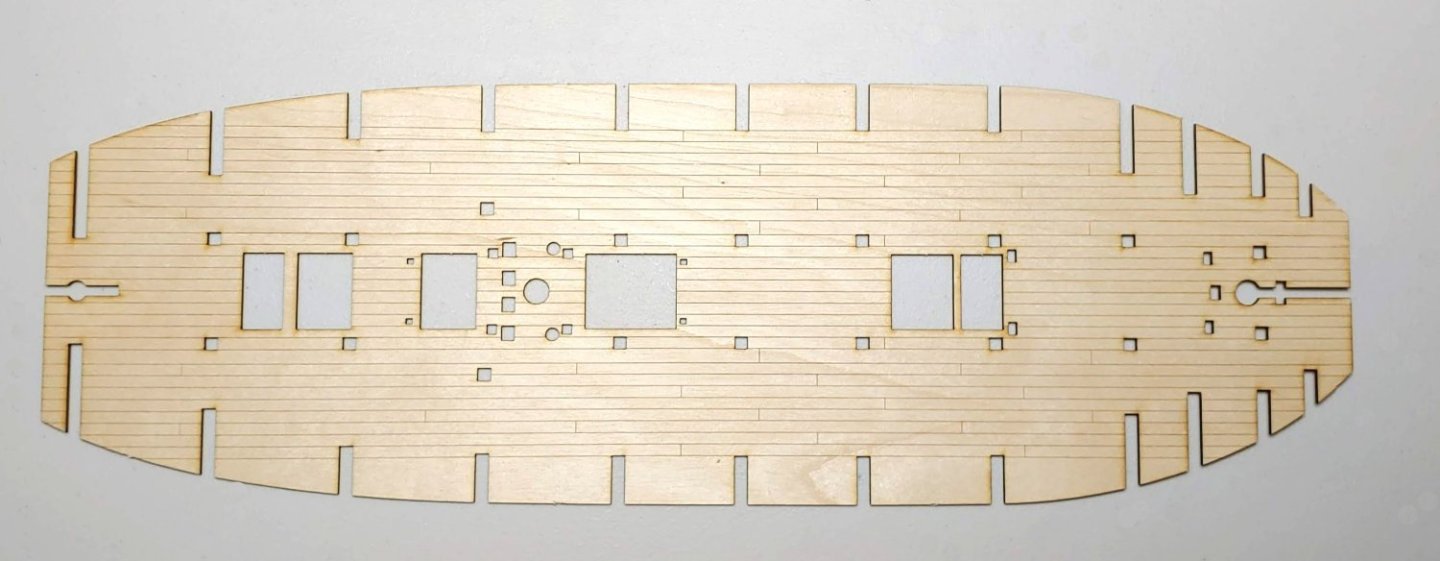
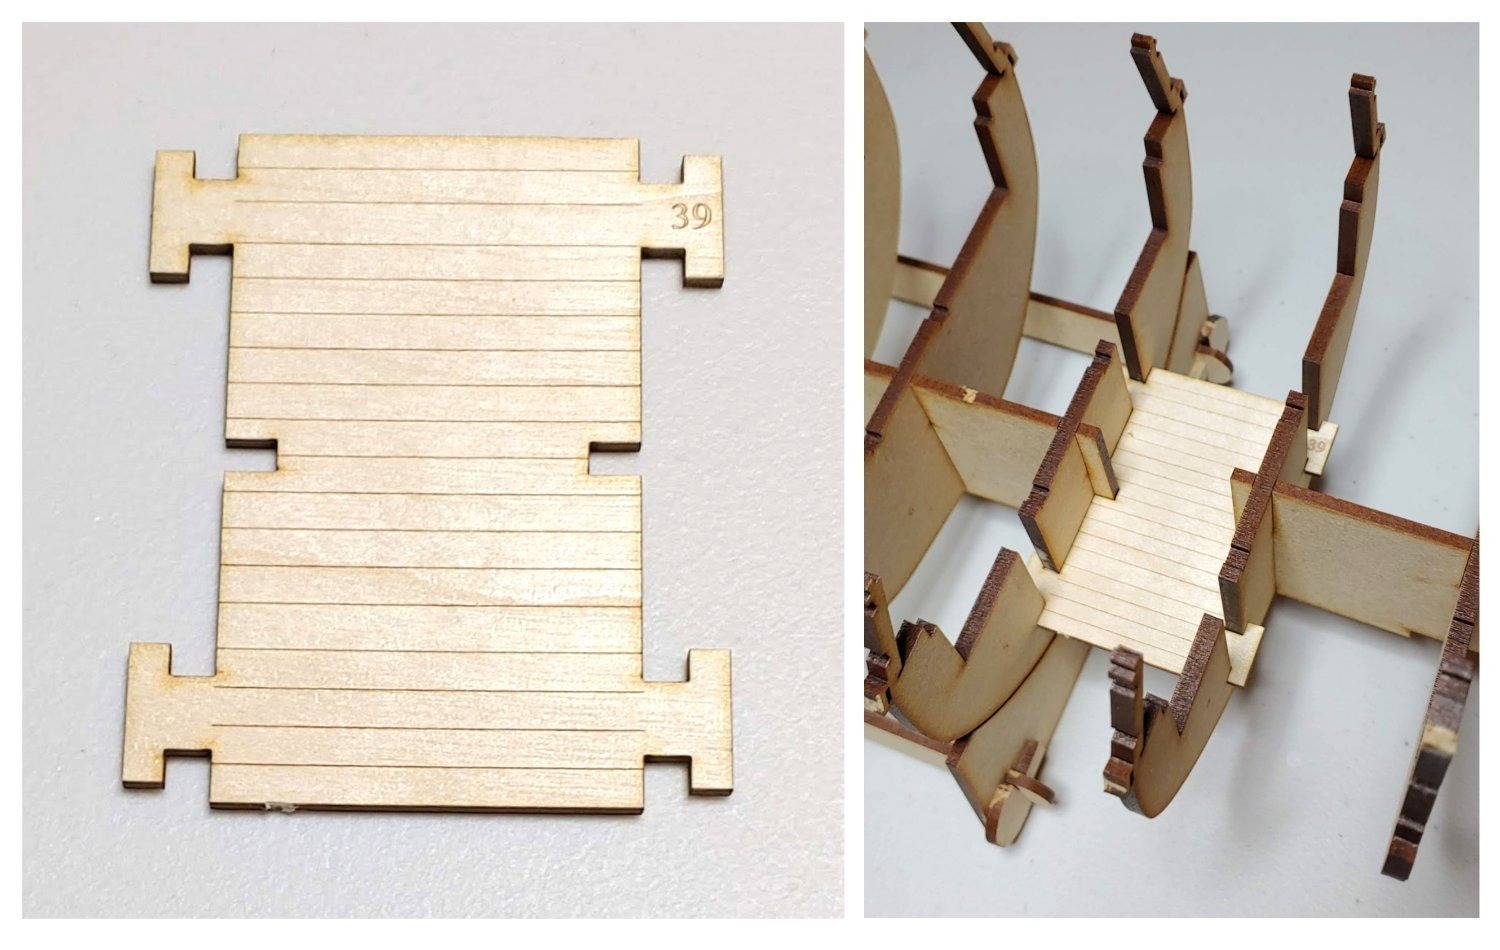
The orlop section piece is removed from the 2 mm ply sheet, then glued into the assembly:

The lower deck is also 2mm ply. I am not sure what wood it is, but it looks like maple to me.
It slots into the keel/bulkheads assembly thus:

This assembly is inverted and PVA brushed into all the joints. Incidentally, PVA and MDF are a good match. The MDF absorbs the PVA quickly, resulting in a quick bond which holds fast when set.
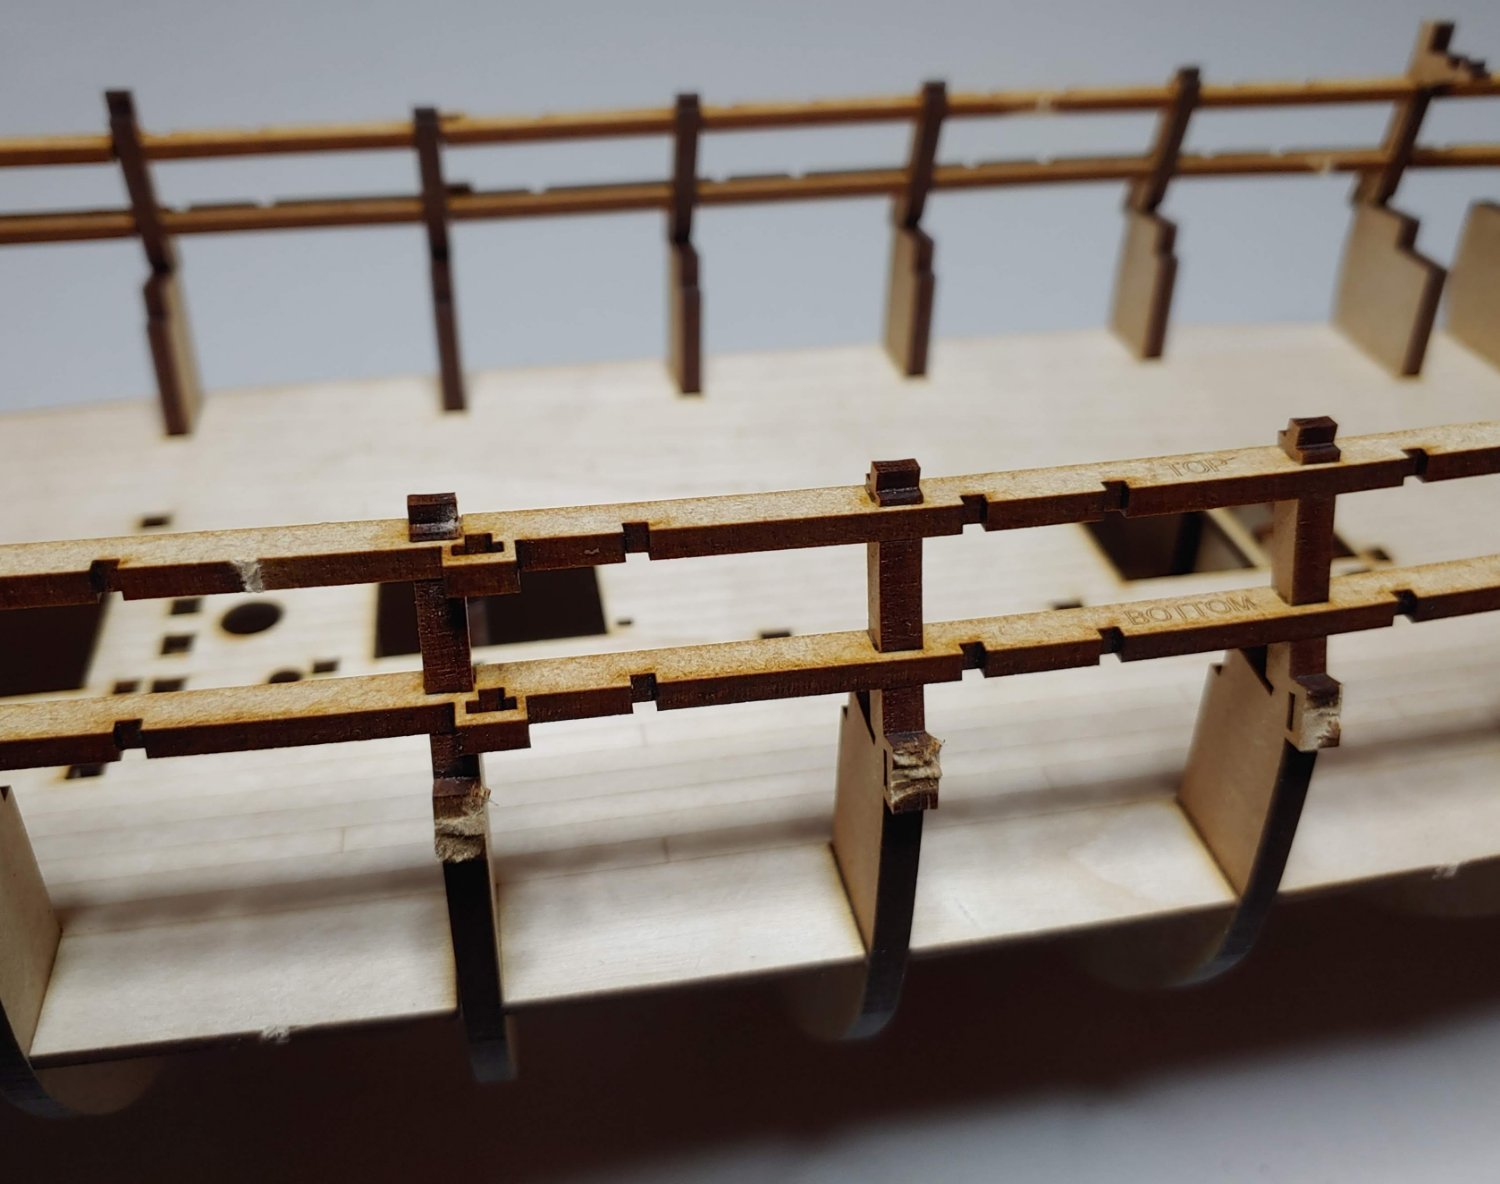
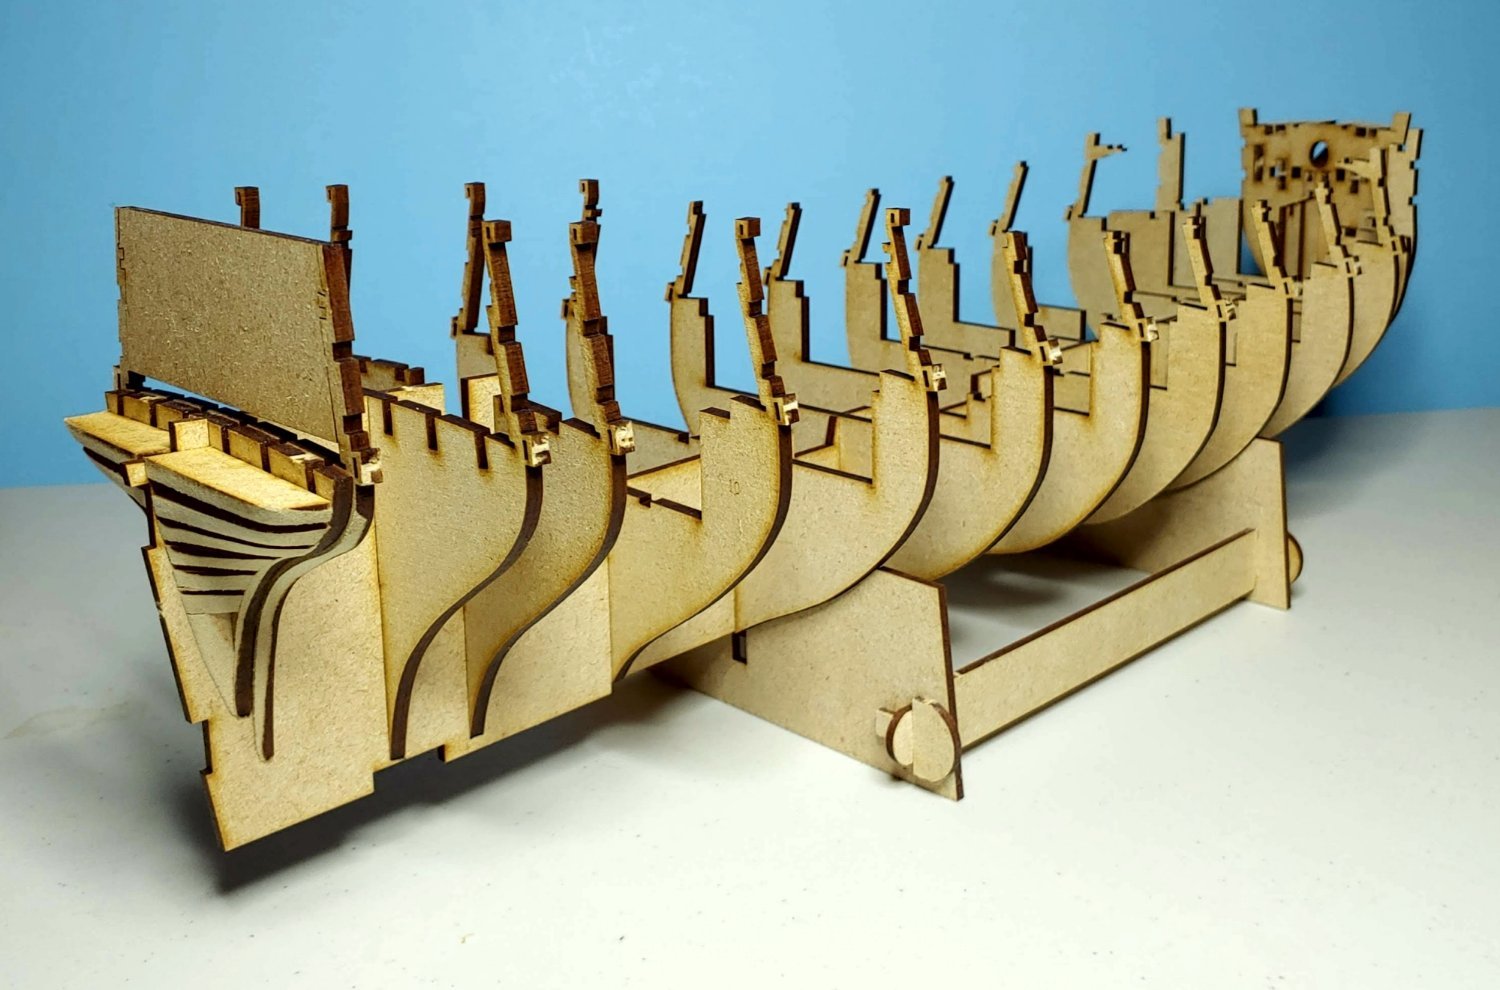
The next step is the installation of the longitudinal gun port frames:
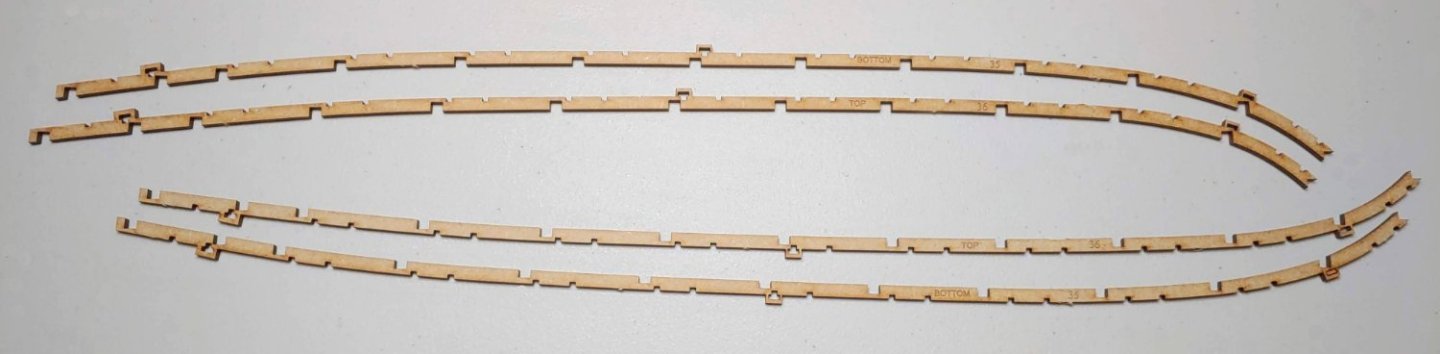
These slot into notches in the bulkhead ears. Labeling them top and bottom assures correct assembly. They tend to spring out a bit from some of the notches, so clamping was used where needed. I have never applied glue to joints after assembly before, but I find that when diluted a bit, the glue wicks nicely into the joints and holds well. I use 3 3/4" (9.2 cm) bamboo skewers I bought at a local grocery store to apply the glue. I like them better than toothpicks because they have a very sharp point and are very smooth, making them ideal for the application of small amounts of glue. If the glue is to be diluted, I can do that with a wet skewer in situ.
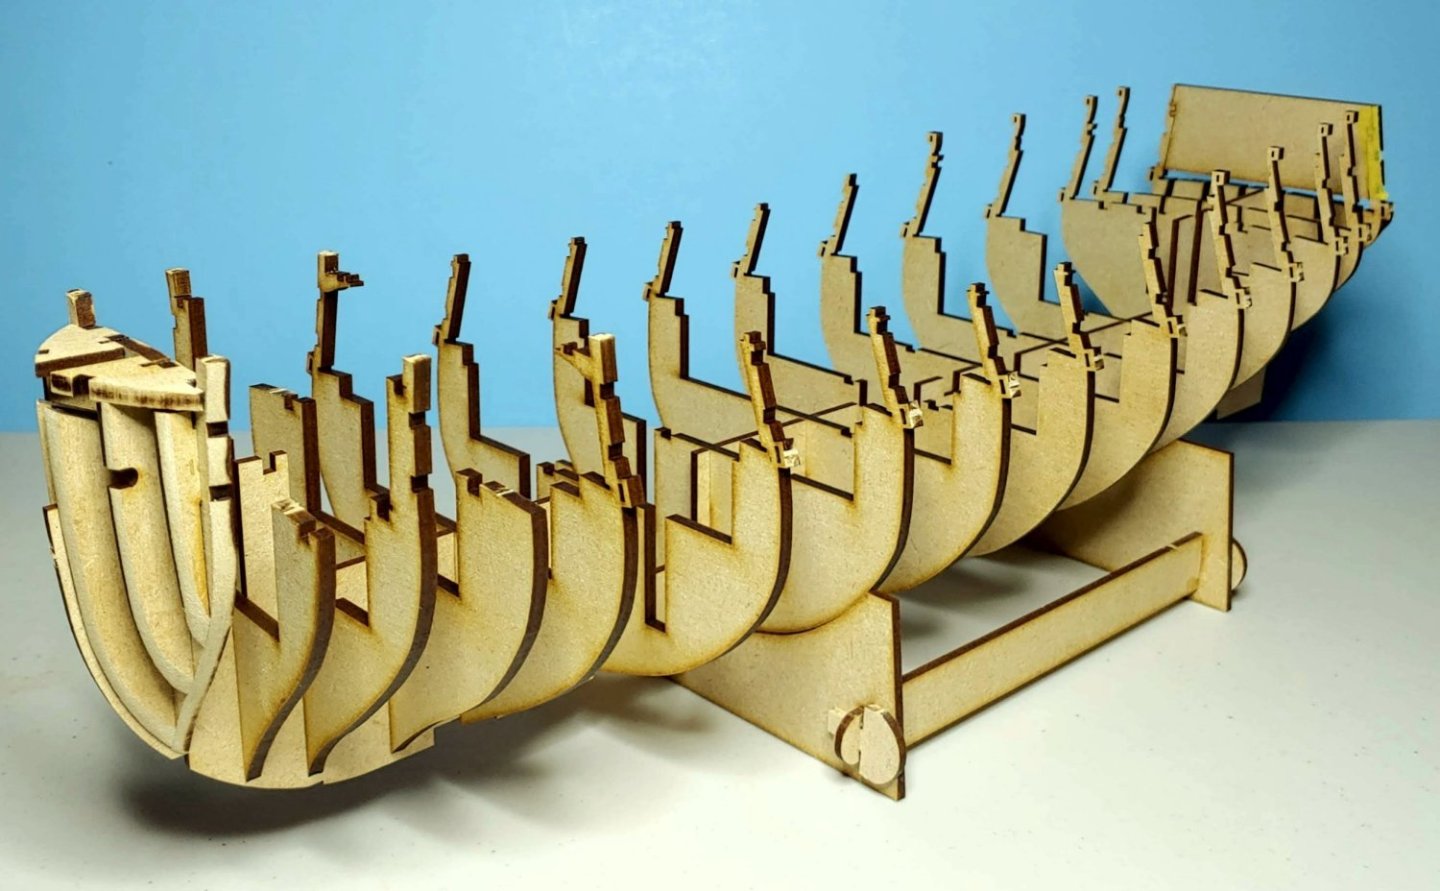
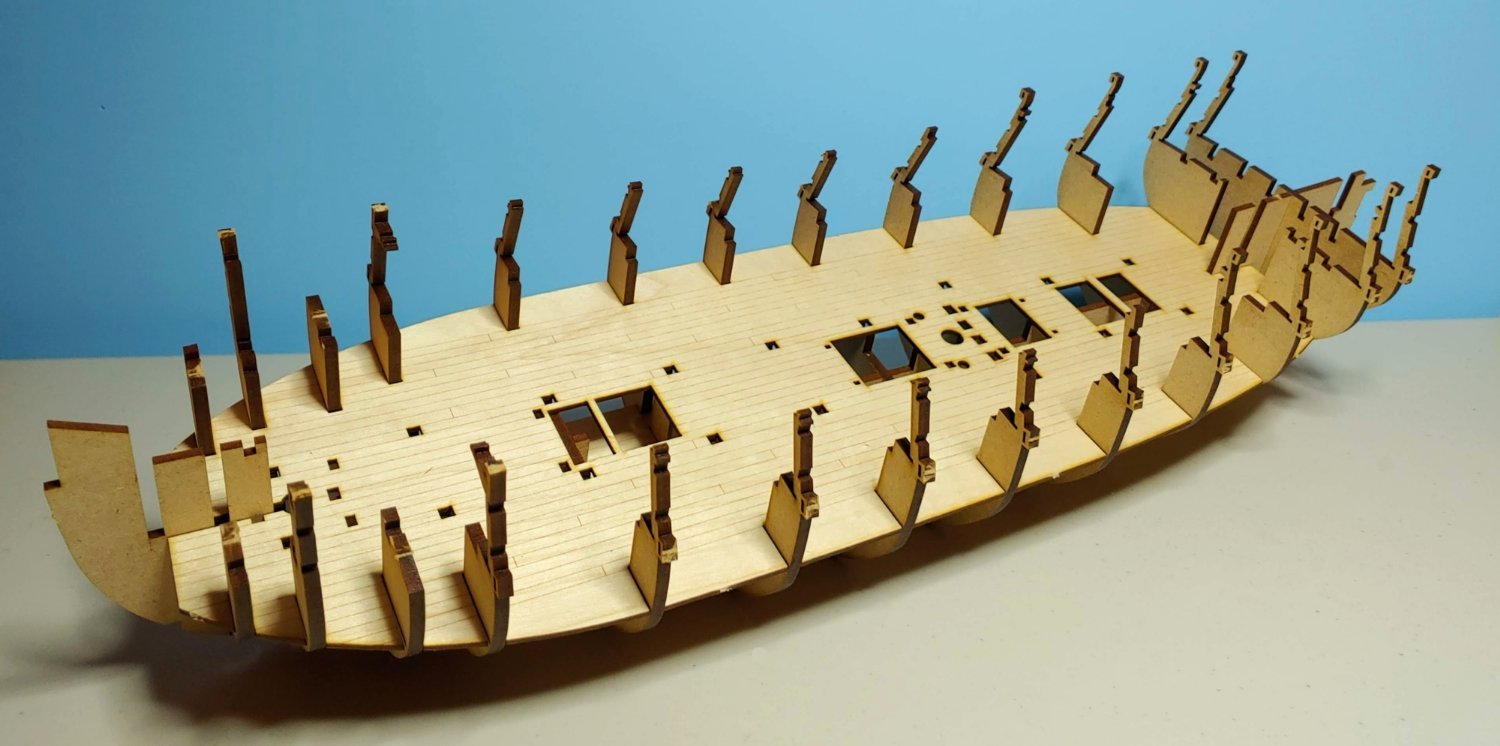
Here is the resulting structure:
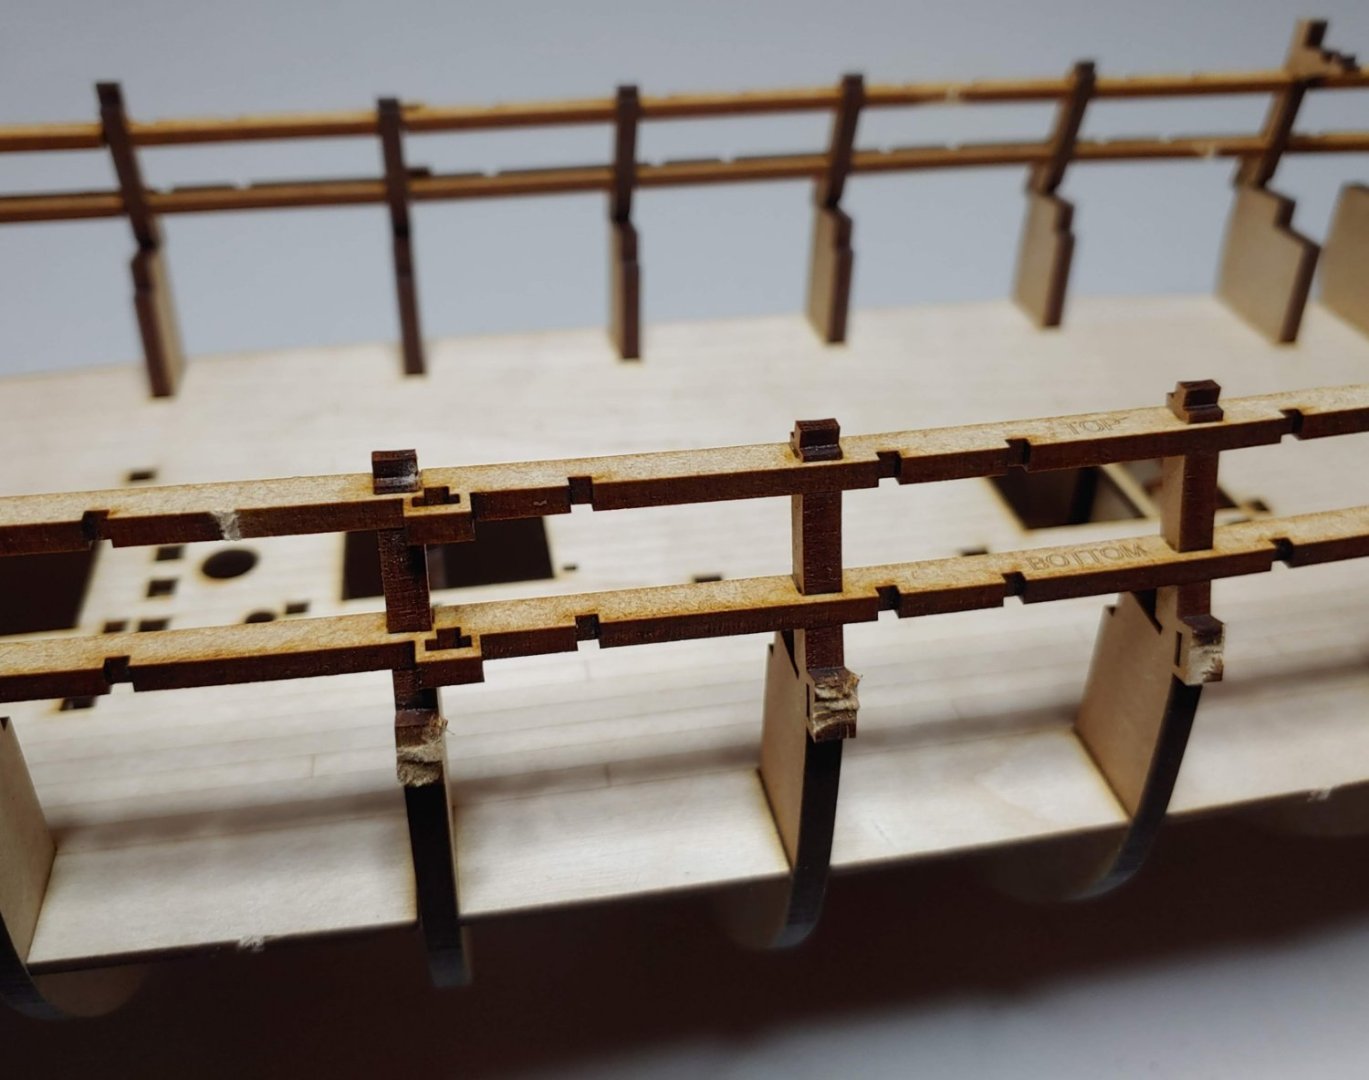

So far, so good. I have not broken off any bulkhead ears.
-
Looking great! Actually you are ahead of me. I am taking my time with this build, as it is my first POB build. I will be checking in regularly.
-
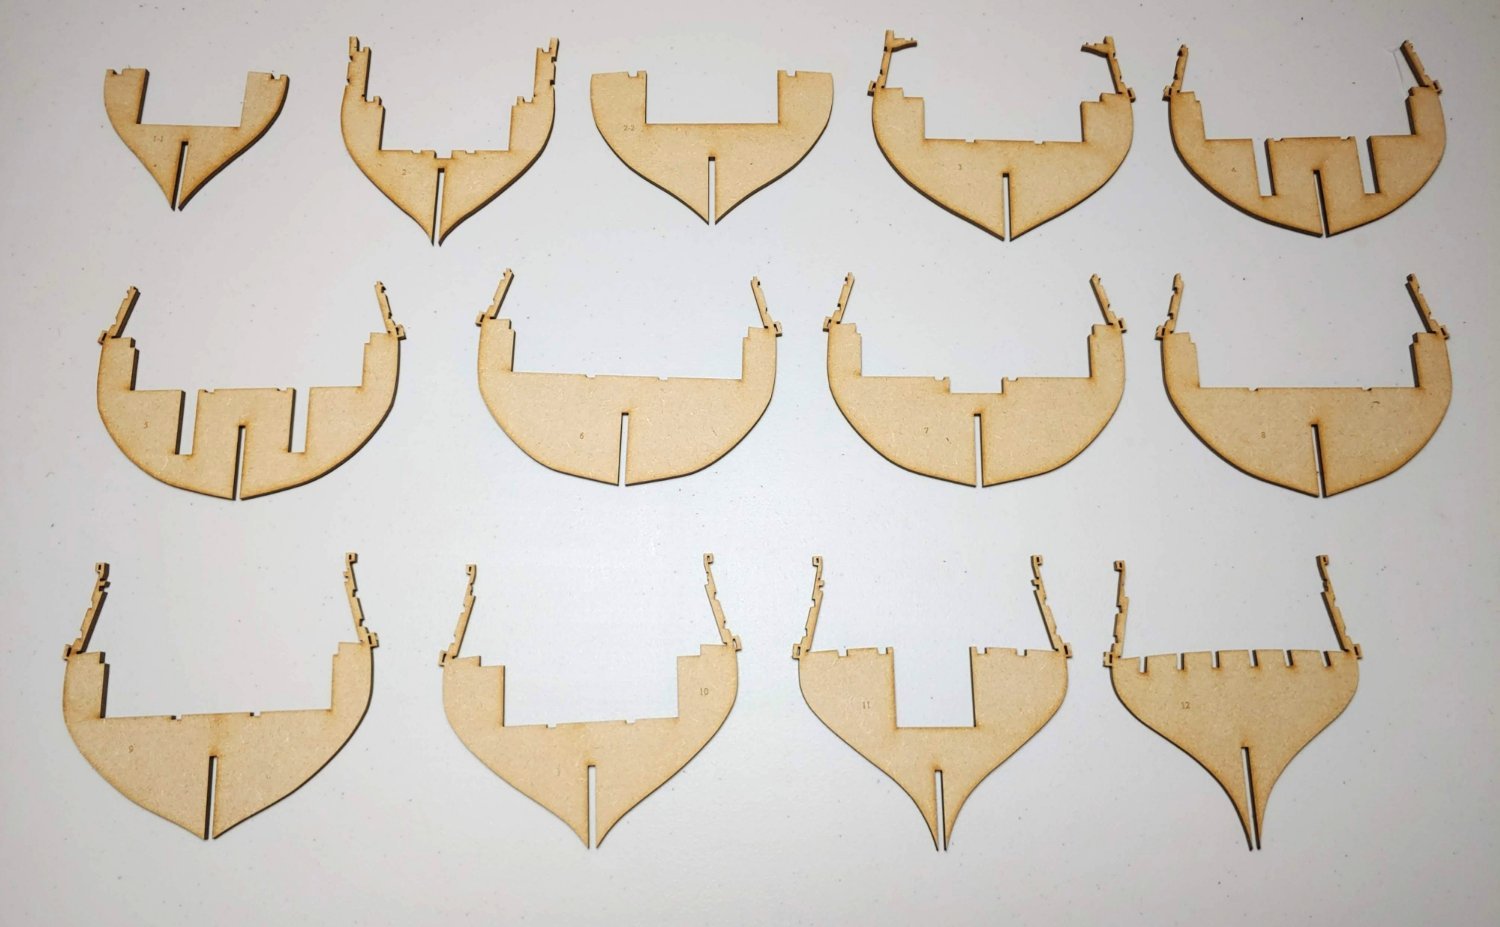
I separated the bulkheads from their MDF sheets:
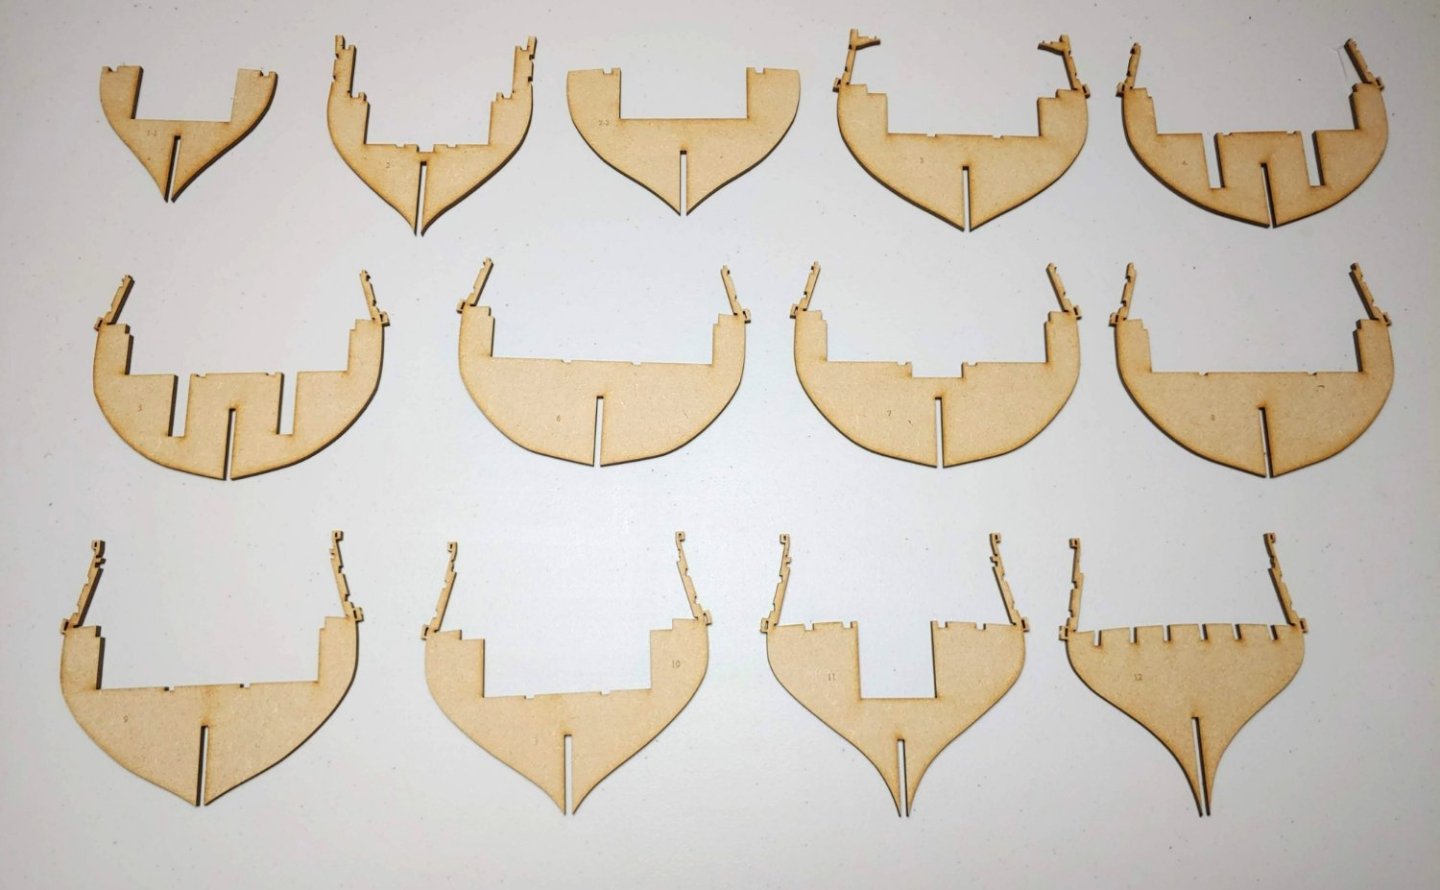
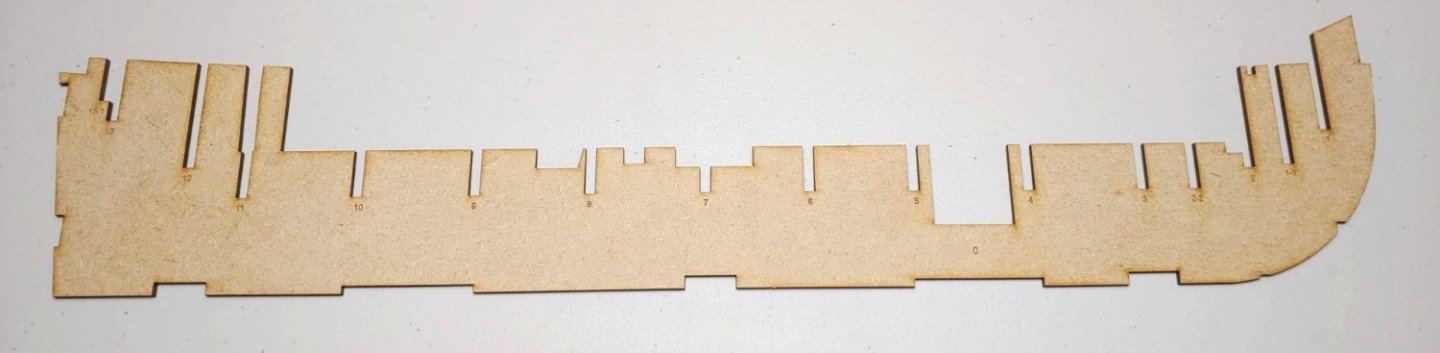
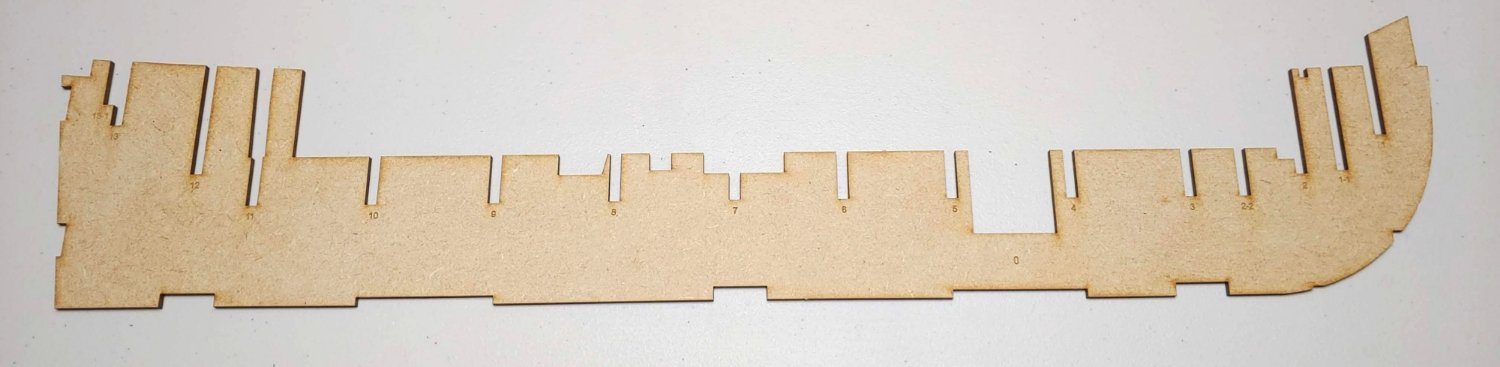
...and the keel pattern:
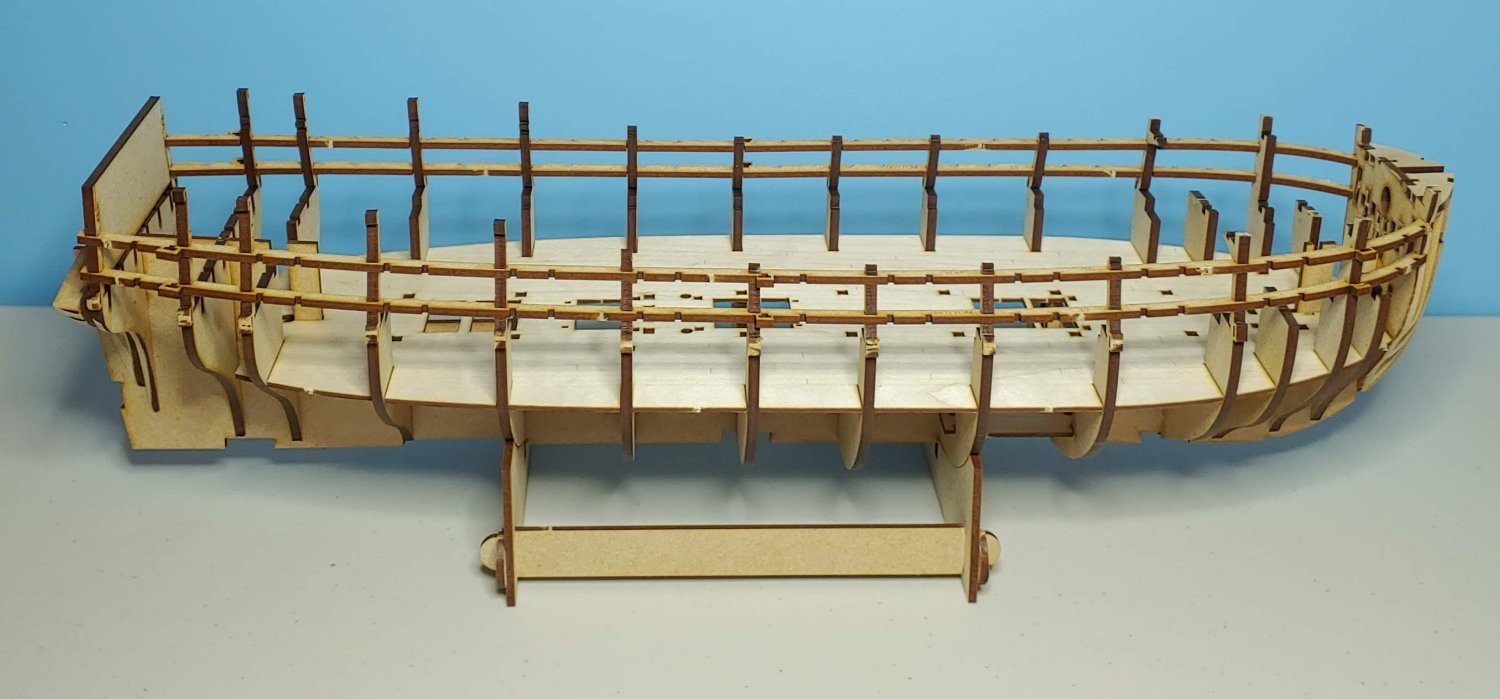
These pieces slotted together very nicely. I could get used to this! All components are dry fitted for now.

As more components are added, this structure will get a lot stronger. In the meantime, it must be handled with great care.
- chris watton, DaveBaxt, schooner and 7 others
-
10
-
-
-
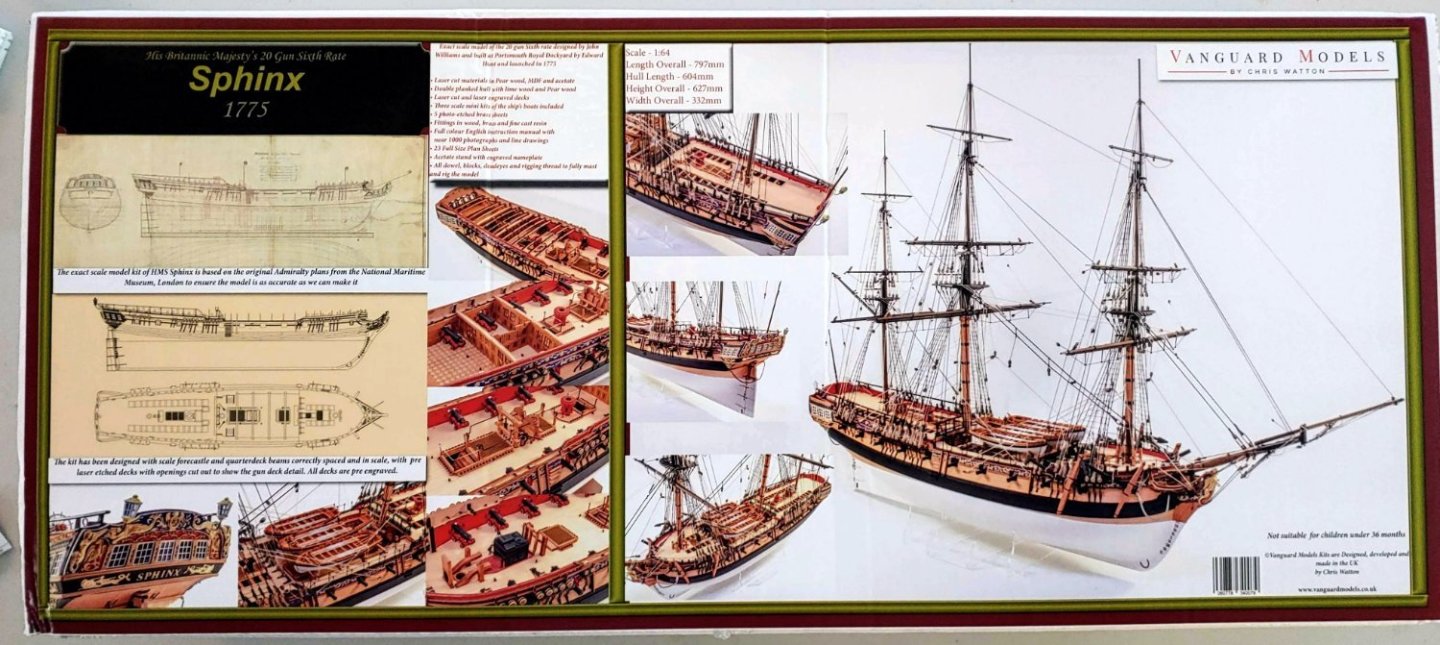
Yes, here is yet another HMS Sphinx build. This is a very popular kit for obvious reasons. While there can never be a kit that is 100% "idiot proof", this kit comes as close to that as you are ever likely to find. Not only are the instructions clearly written and accompanied with a wealth of top quality photos, but there are a great many other builds that I can look at. Since this is my first POB build, this build log is intended to document progress rather than instruct others. I would like to build this model as an Admiralty rather than a fully rigged model. I may add scantling details and open up the quarter deck more, when I get to that phase of the build. We'll see. To begin with, here is a photo of the box:
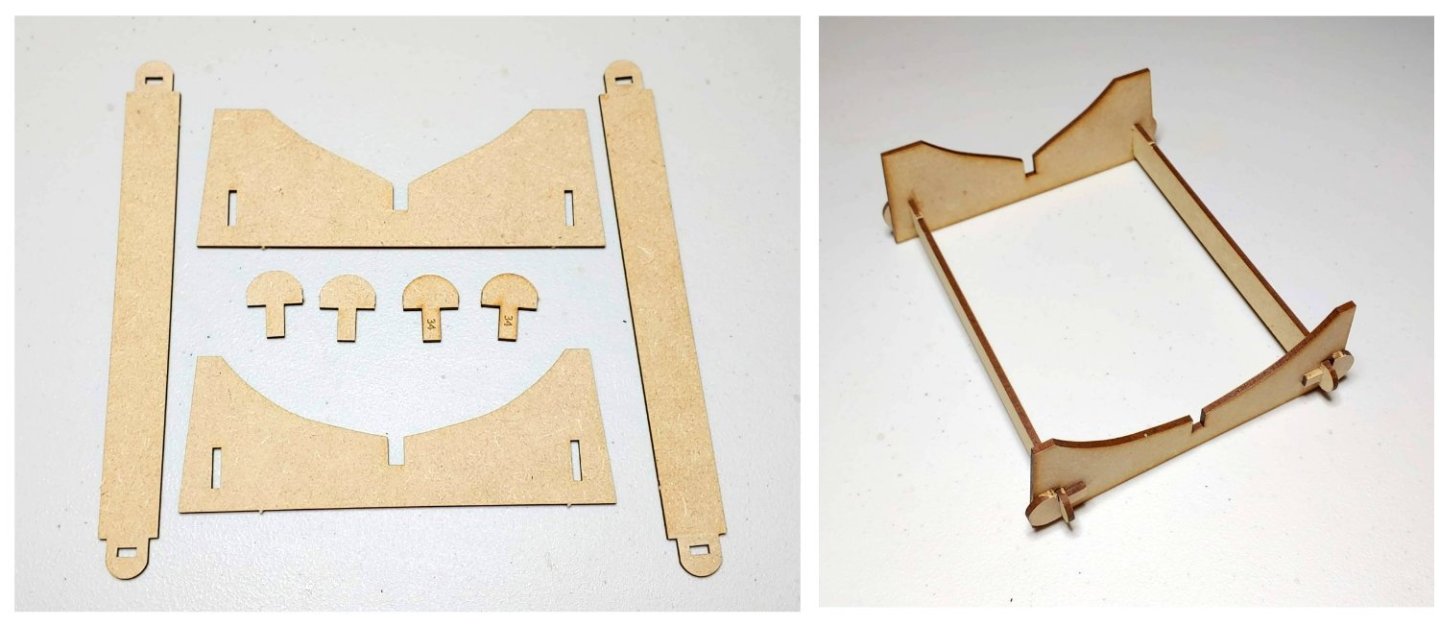
Photos of the contents will be posted as the build progresses. To begin with, I am struck by the quality of the materials that are provided. My last build was done entirely in basswood with a few birch dowels thrown in. It will be fascinating to see how pear, MDF, and maple compare. As far as I can see, only the more recently released kits include a display cradle. This kit not only does that but adds a build cradle to boot! I have never worked with MDF before, and I find it really great. Here are the components of the display cradle, and its appearance when assembled.
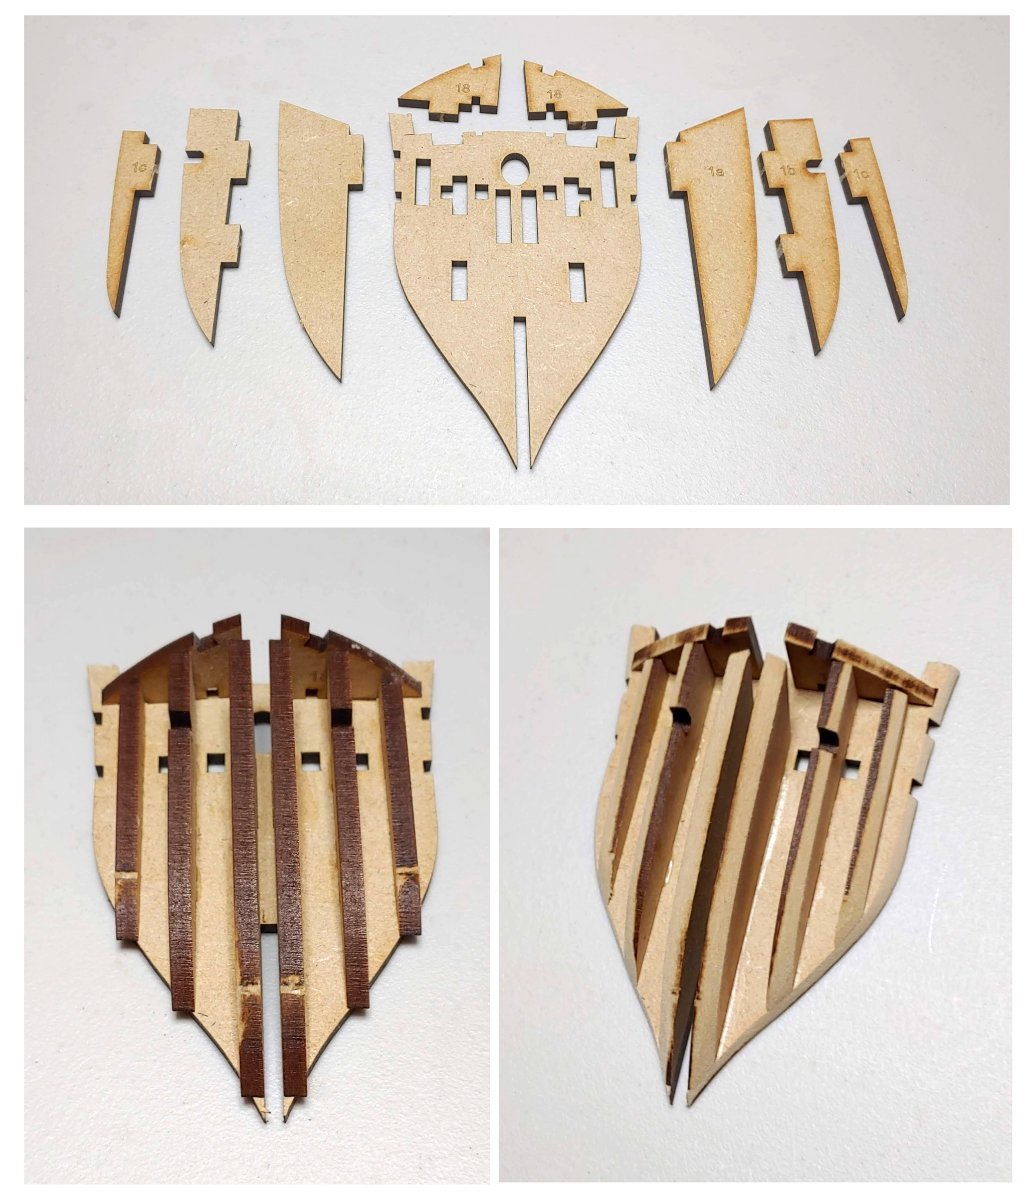
The next step is the assembling and shaping of the lower counter:

The parts went together easily and precisely. Looking at the diagrams of the Pandora AOS by McKay & Coleman (the Pandora is nearly identical to the Sphinx), I see that the resulting structure closely resembles the "transoms" in the real ship. Designing this part in this manner makes perfect sense, yet I have never seen it in any kits other than Vanquard. Shaping was done with a sanding block using 100 grit sandpaper. I do not trust myself with a dremel yet. It seems to me than inexpert handling of a Dremel can result in things going very wrong very fast, so I did it the slow way to be safe. Hopefully the planks will like my shaping of this part. We'll see.
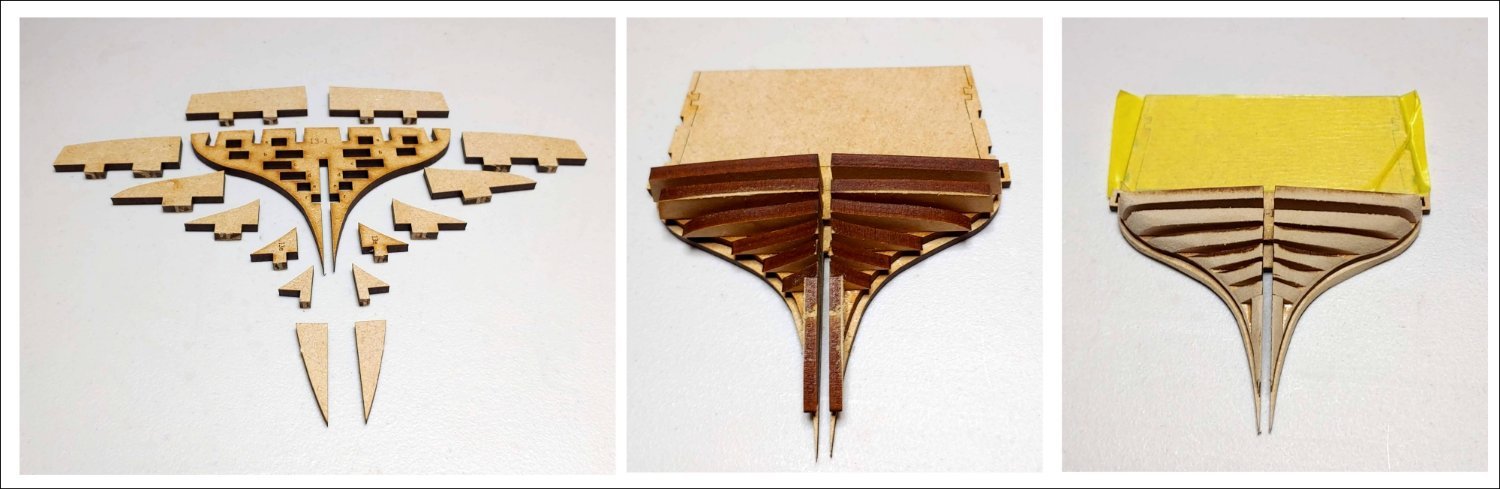
The next step is doing the same thing for the bow:
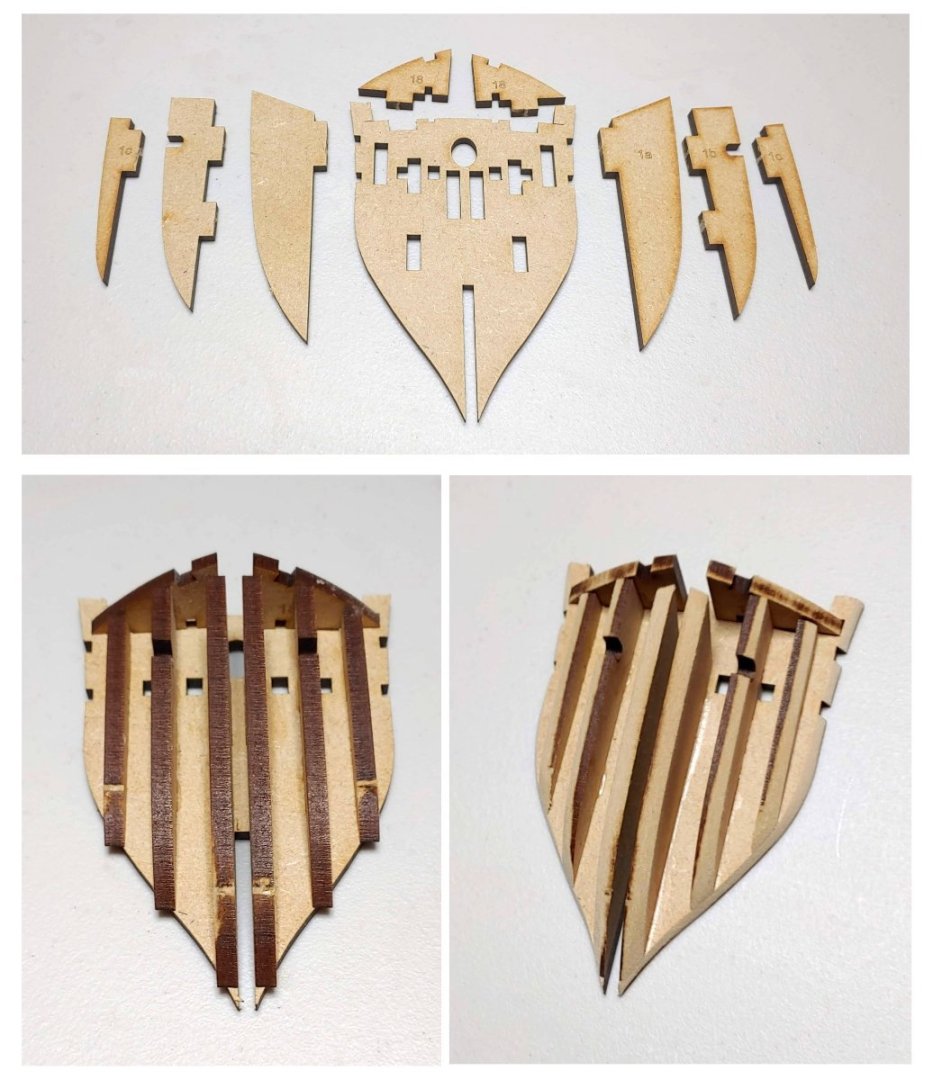
Again, the structure resembles the hawse timbers in the real ship. Again, I have found that the pieces fit together easily and precisely. The MDF sands very well, enabling sanding in any direction with no splintering. In addition I have not seen any signs of warping. The final fairing and planking will reveal how well my shaping will integrate into the hull shape.
Next step is to fit all the bulkheads to the keel unit.
- KARAVOKIRIS, JeffT, HardeeHarHar and 8 others
-
11
-
-
-
Bravo! That is a big, challenging, and complex build. You can be very proud of your work! My heartiest congratulations!
-
Congrats on the completion of a really beautiful model. Well done!
- Keith Black and usedtosail
-
2
-
-
Thank you so much! I will be following your very fine build with great interest.
-
-
-
Thanks Mort! I appreciate your constant support throughout this project starting from before I joined MSW.
-
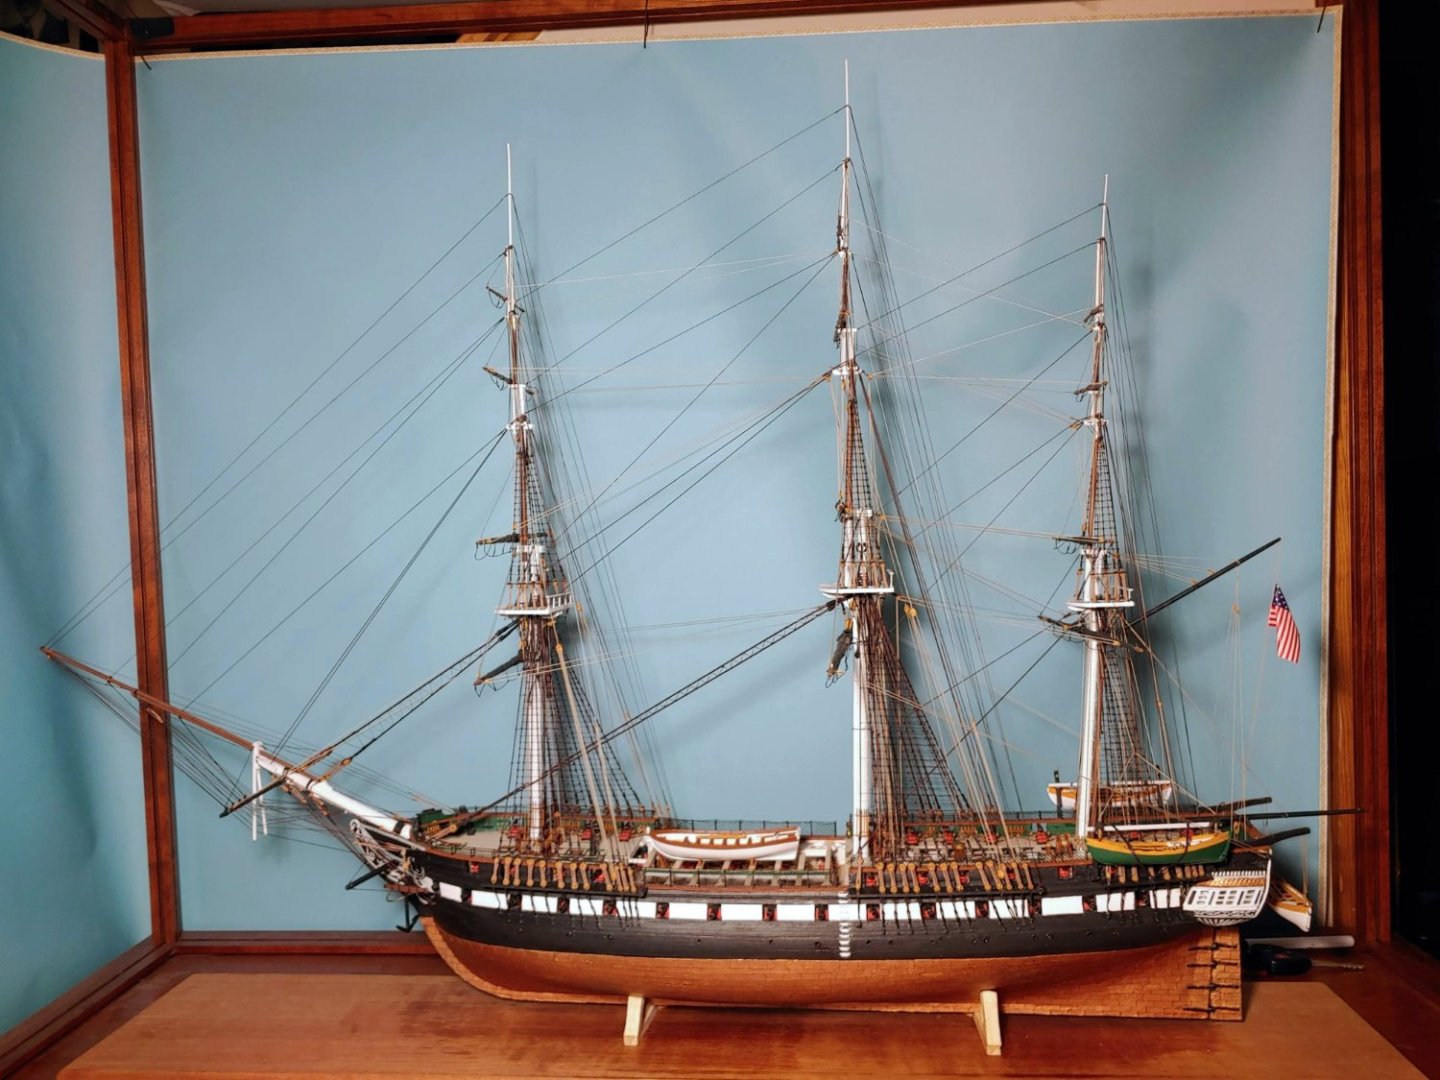
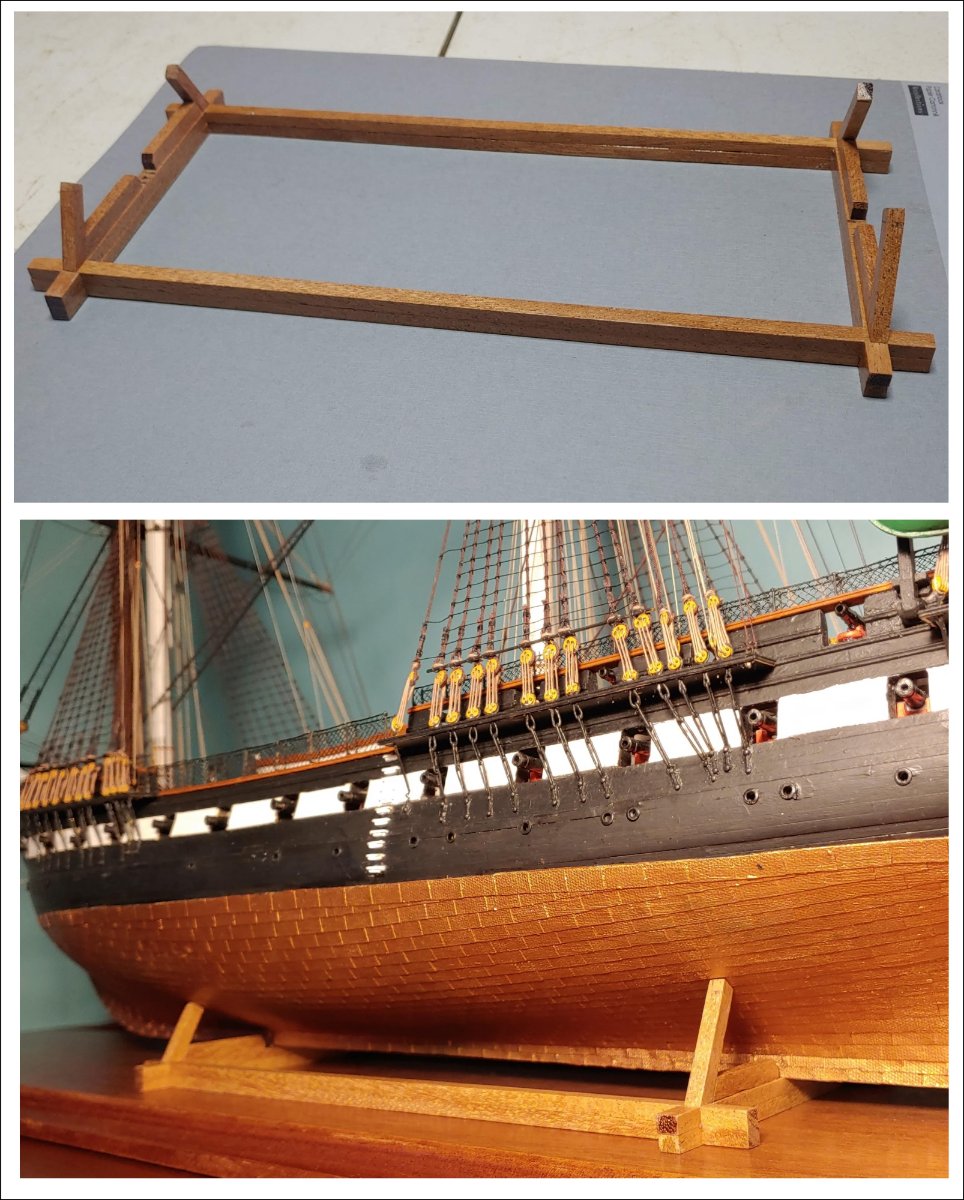
I have completed and varnished the display cradle, and have finished and varnished the base board. I modeled it after some cradles I saw in Keith Julier's books on modeling techiques.

This will be my last build log post. I understand that all shots of the completed model belong in the gallery which I will begin work on shortly.
I began this build in 2007, 16 years ago! There are two reasons it took this long. One reason is that this is a very challenging build, and I had never tried the majority of tasks required. It was therefore a matter of learning skills as I went rather than applying skills already mastered. The other reason was that I needed to take months at a time off during the year to pursue my audio-video jobs. In view of the fact that this is a challenging build, and that I was a novice in most respects when I began, it is not surprising that the errors and flaws in my model are legion. Nonetheless, I am happy with the overall appearance of the model. Actually, I think I deserve an "A" for persistence if nothing else, and I am patting myself on the back just for having finished it.
I would like to express my great appreciation for the encouragement in the form of comments and "likes" and advice I have received from other MSW members. MSW is truly a mutually supportive and collegial group of model enthusiasts. I would also like to thank Nic and the folks at Bluejacket who have been a delight to work with, and prompt in sending me all those little items I bought one at a time because I could not always forsee my needs. I also benefitted greatly from the availability of fine rope from Chuck at Syren.
-
-
Thanks so much gentlemen! Your kind words mean a great deal to me! Once the cradle is done, I will wrap up the build log and start work on my gallery photos.
-
-
-
I am almost finished with my Constitution model, and I will soon want to post Photos in the gallery. I looked at the above instructions the images of which bear little resemblance to the pages I encounter beginning of the absence of a shadow person avatar. When I go to the editing of my profile, there is no prompt for gallery. Can someone set me straight? Thanks.
-
Flag installed.
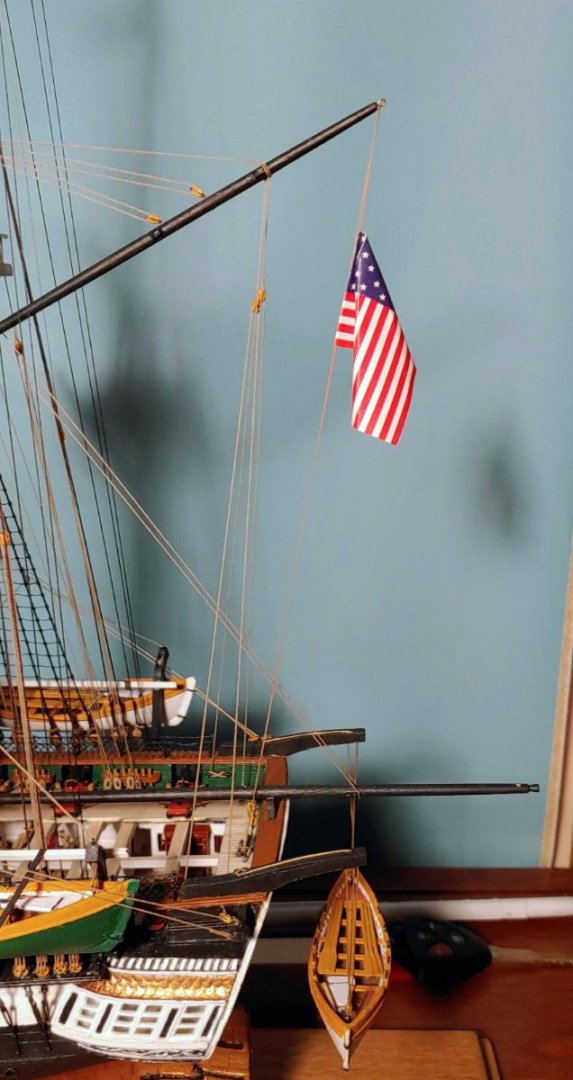
This completes the model (!!!!!!).
Now my attention turns to finalizing the display starting with the cradle. I would like to do this in mahogany to match the base board. Let's see how it comes out. Worst case scenario- I am unable to improve on what I have, in which case, I will paint the current cradle black. We shall see. More posts to come.
- usedtosail, Auger, Dziadeczek and 16 others
-
15
-
 4
4


HMS Sphinx by KurtH - Vanguard Models - 1/64 - First POB Model
in - Kit build logs for subjects built from 1751 - 1800
Posted · Edited by KurtH
Thanks Dave! Before long there may be enough Sphinxes on MSW to form a squadron.