Adrift
-
Posts
20 -
Joined
-
Last visited
-
 DaveBaxt reacted to a post in a topic:
Acrylic paint tips and techniques
DaveBaxt reacted to a post in a topic:
Acrylic paint tips and techniques
-
Old Collingwood reacted to a post in a topic:
Acrylic paint tips and techniques
-
modeller_masa reacted to a post in a topic:
Bluenose II by Adrift - Artesania Latina - Scale 1:75
-
modeller_masa reacted to a post in a topic:
Bluenose II by Adrift - Artesania Latina - Scale 1:75
-
CPDDET reacted to a post in a topic:
Bluenose II by Adrift - Artesania Latina - Scale 1:75
-
GrandpaPhil reacted to a post in a topic:
Bluenose II by Adrift - Artesania Latina - Scale 1:75
-
GrandpaPhil reacted to a post in a topic:
Bluenose II by Adrift - Artesania Latina - Scale 1:75
-
GrandpaPhil reacted to a post in a topic:
Bluenose II by Adrift - Artesania Latina - Scale 1:75
-
thibaultron reacted to a post in a topic:
Acrylic paint tips and techniques
-
hof00 reacted to a post in a topic:
Bluenose II by Adrift - Artesania Latina - Scale 1:75
-
 I am still building my first ship model, so I still have no experience with wood and acrylic. but have done miniatures, plastics and other crafts. I have to second the wet palette. By far the best way to use acylics. I use Vallejo paints and they work well with this method. Flow Aid helps thin out and makes washes Retarder Medium will help slow the drying time to help with blending and making fades. Great topic to have all in one place. 👍 cheers Berto
 -
Adrift reacted to a post in a topic:
Acrylic paint tips and techniques
-
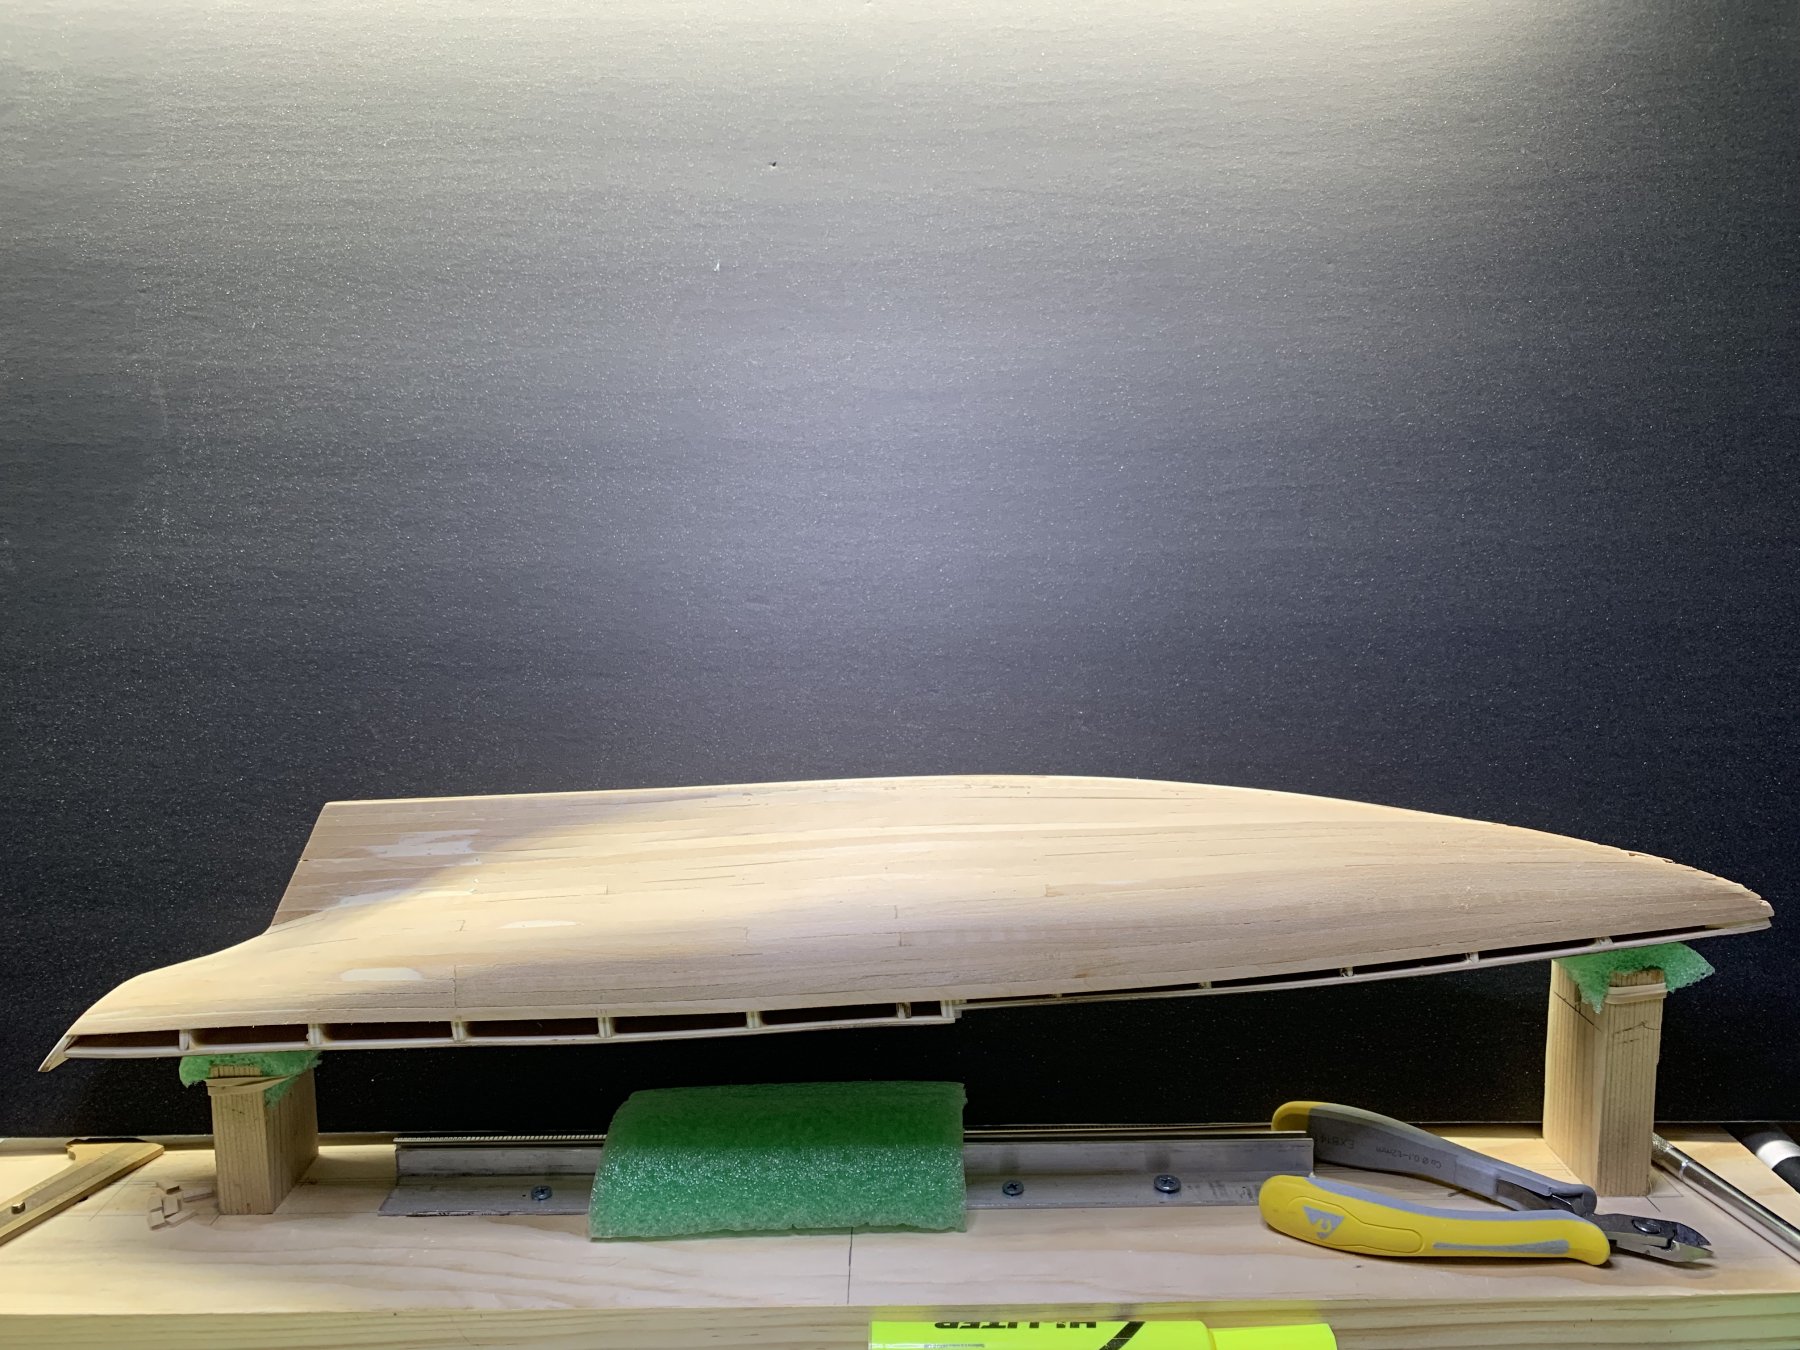
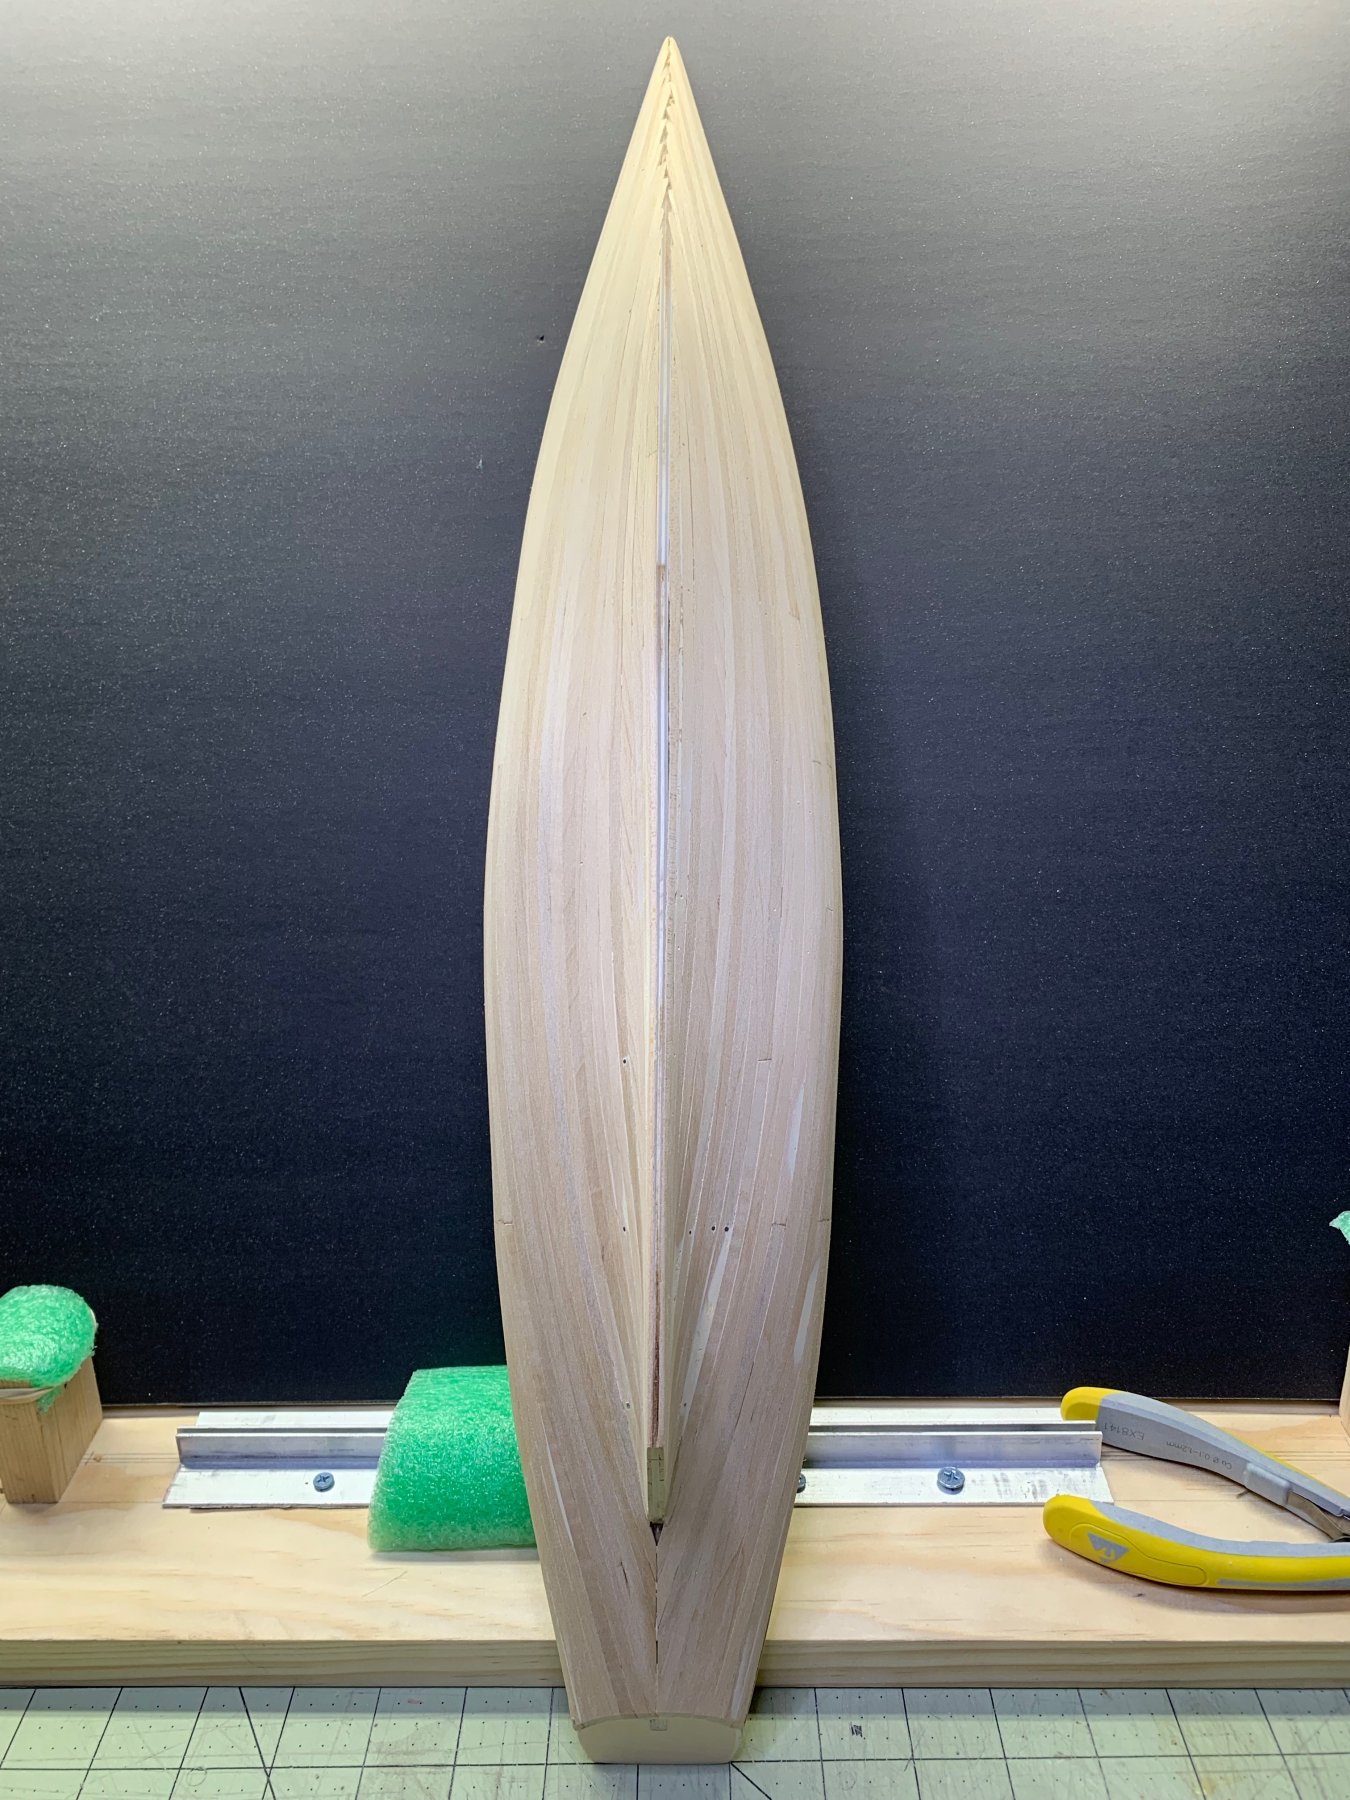
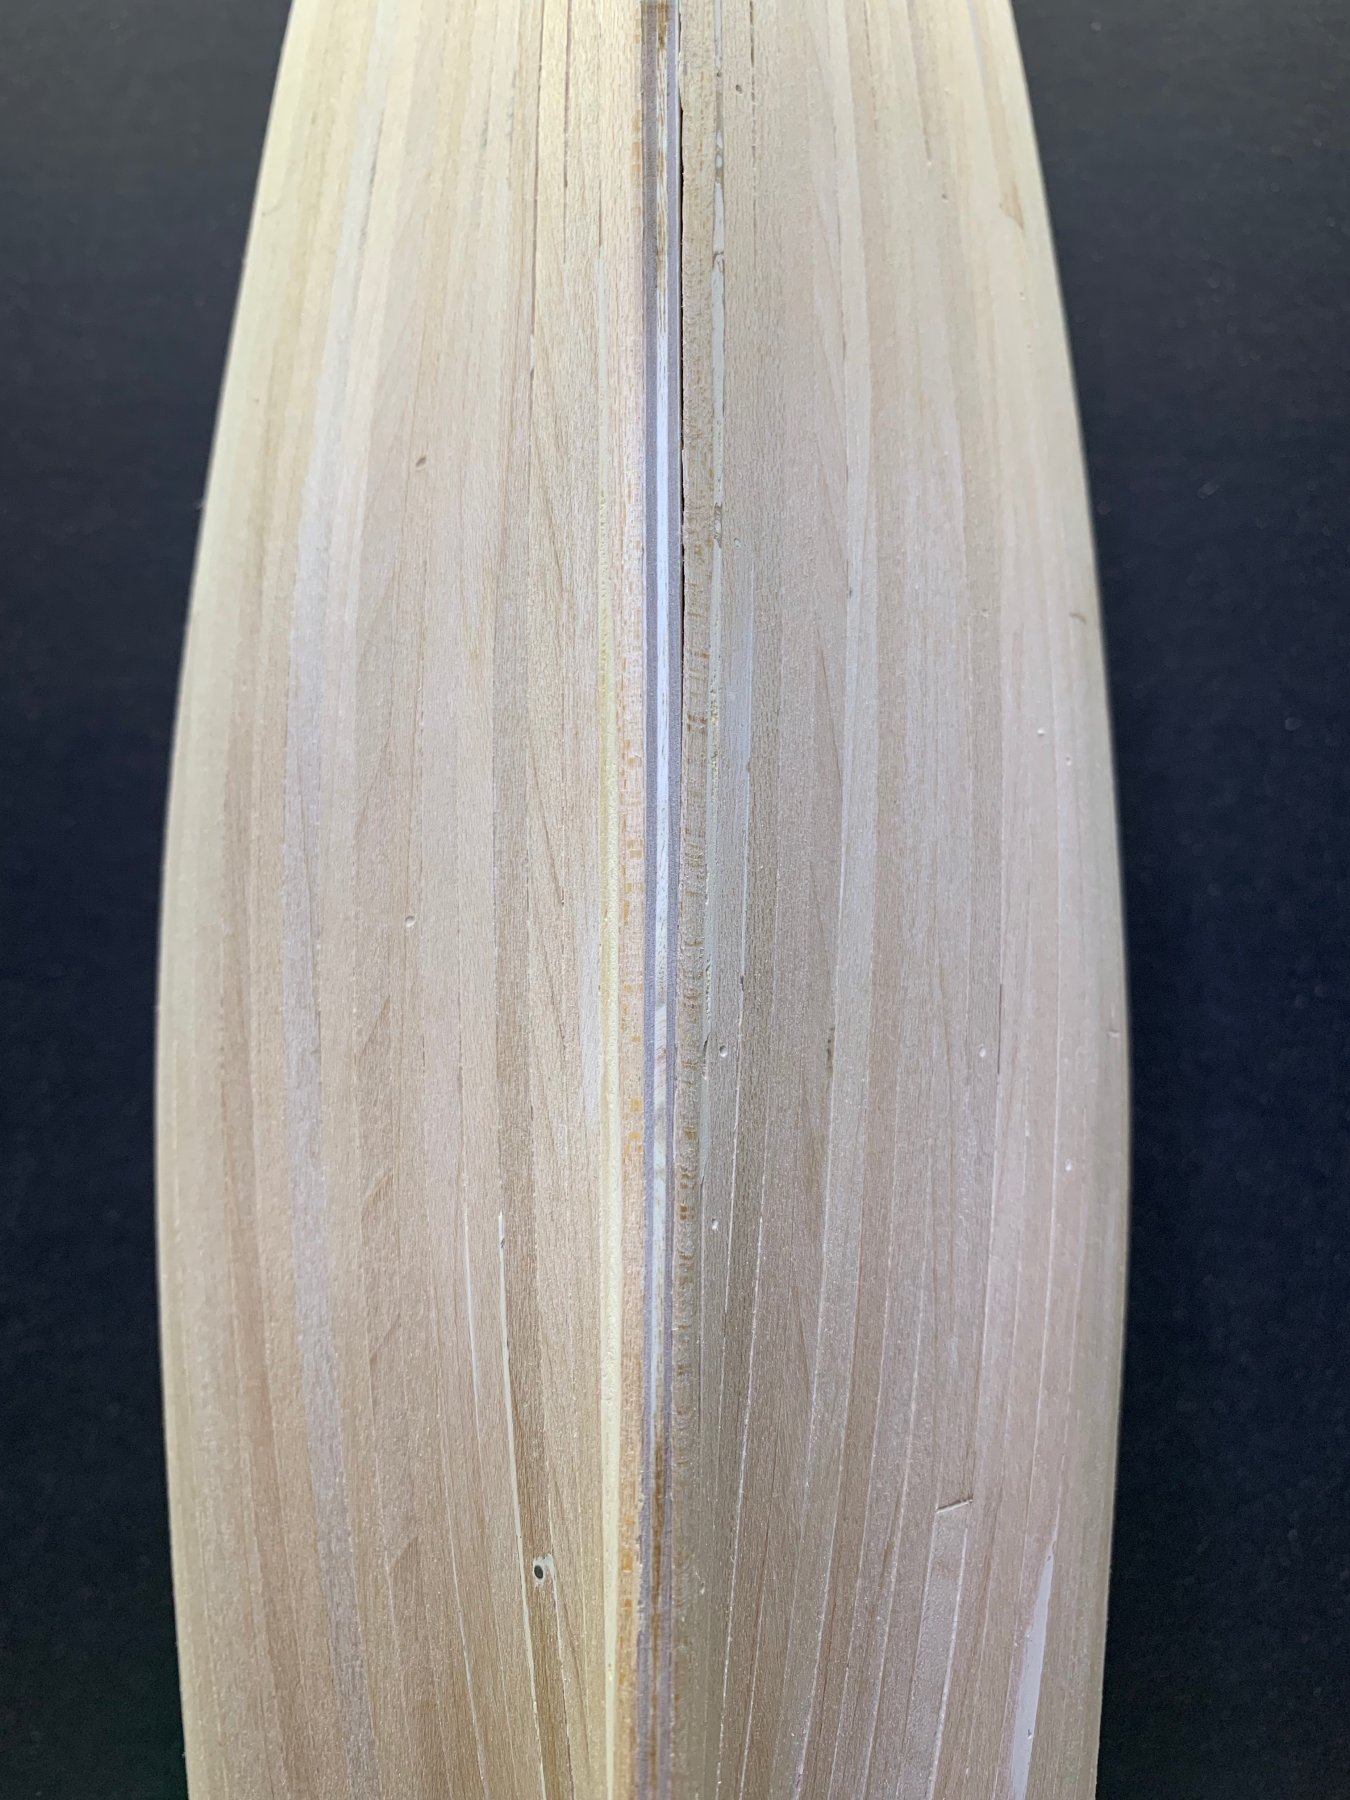
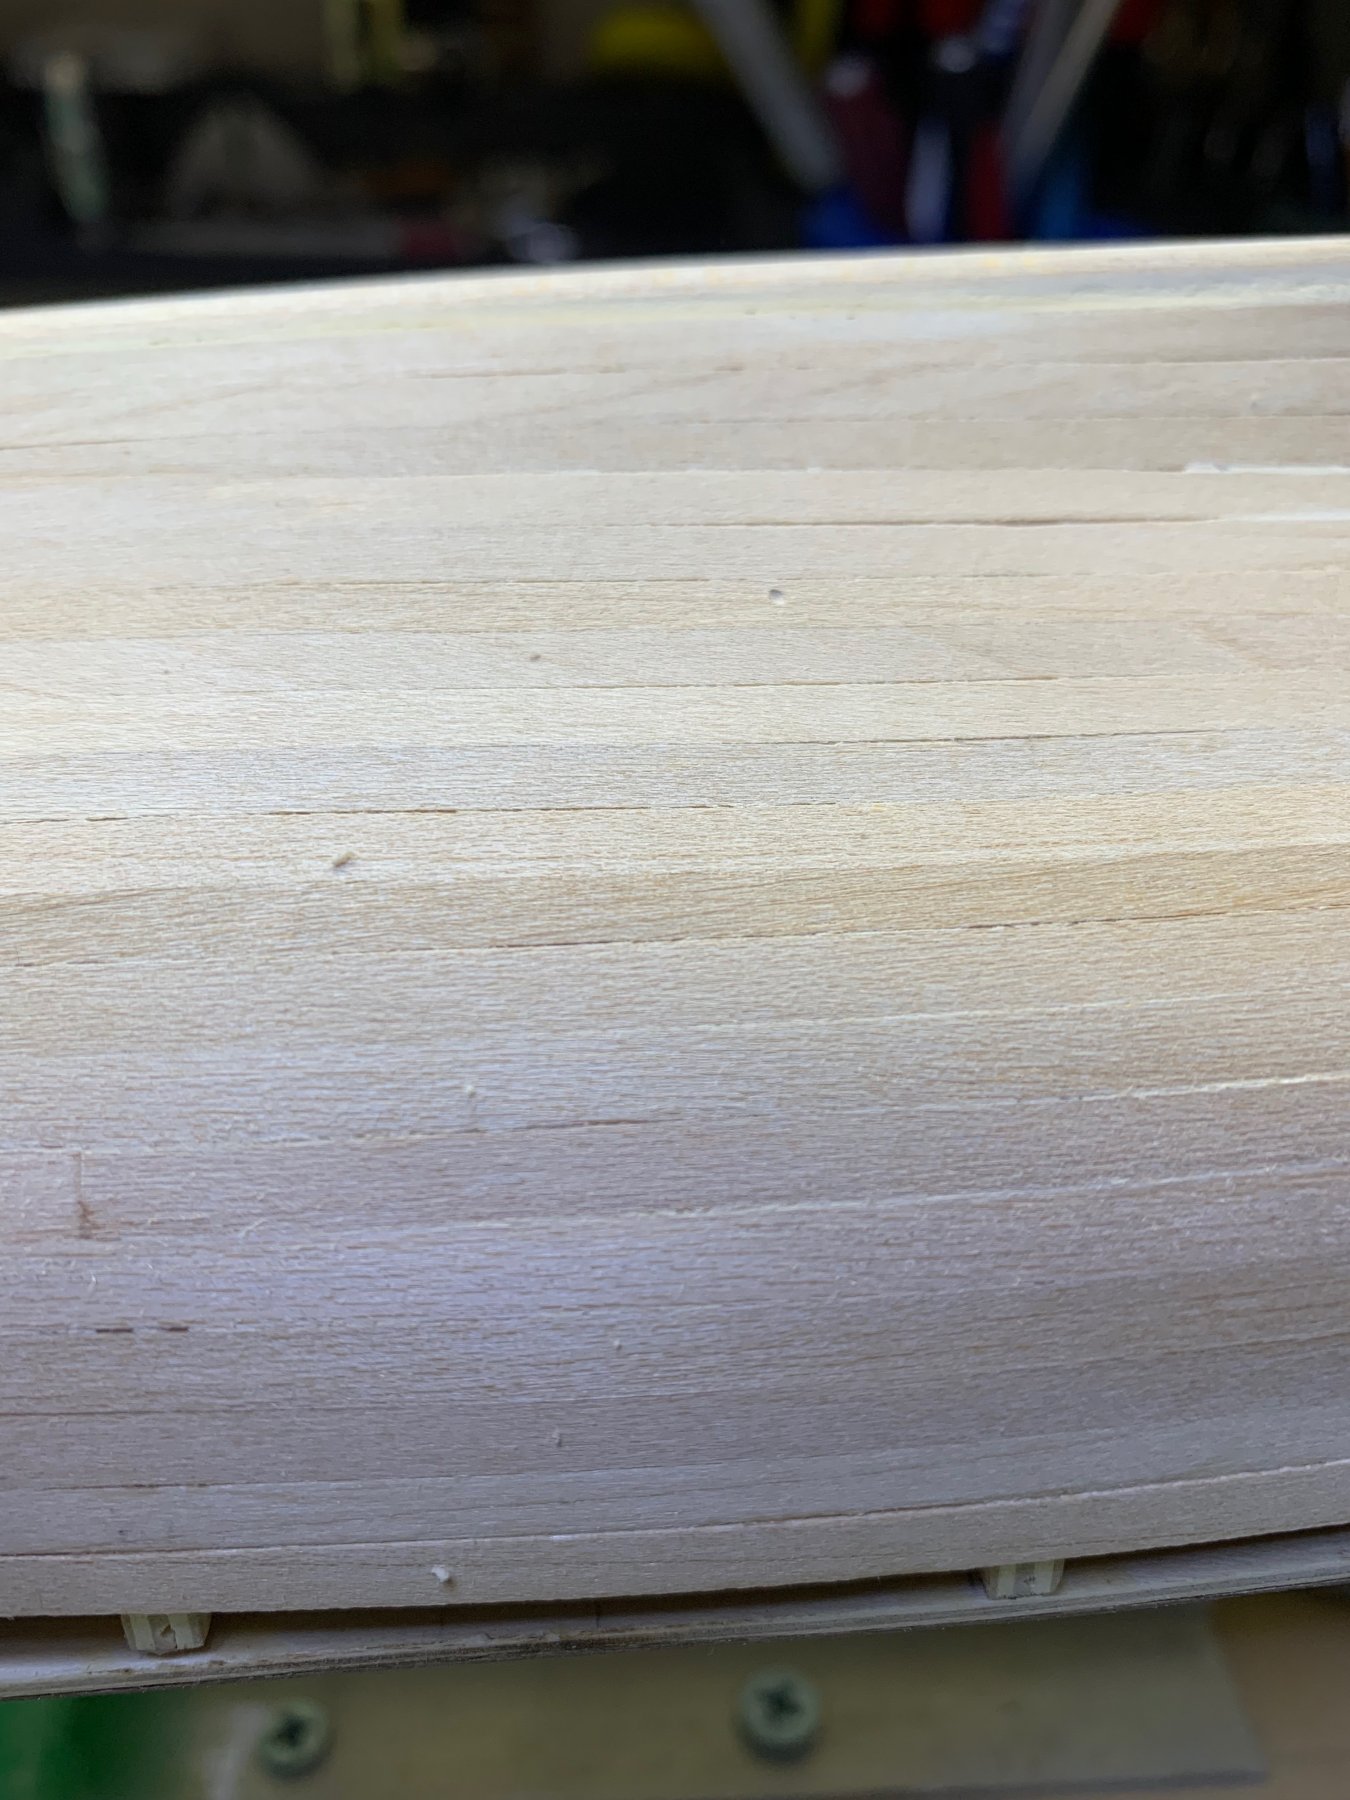
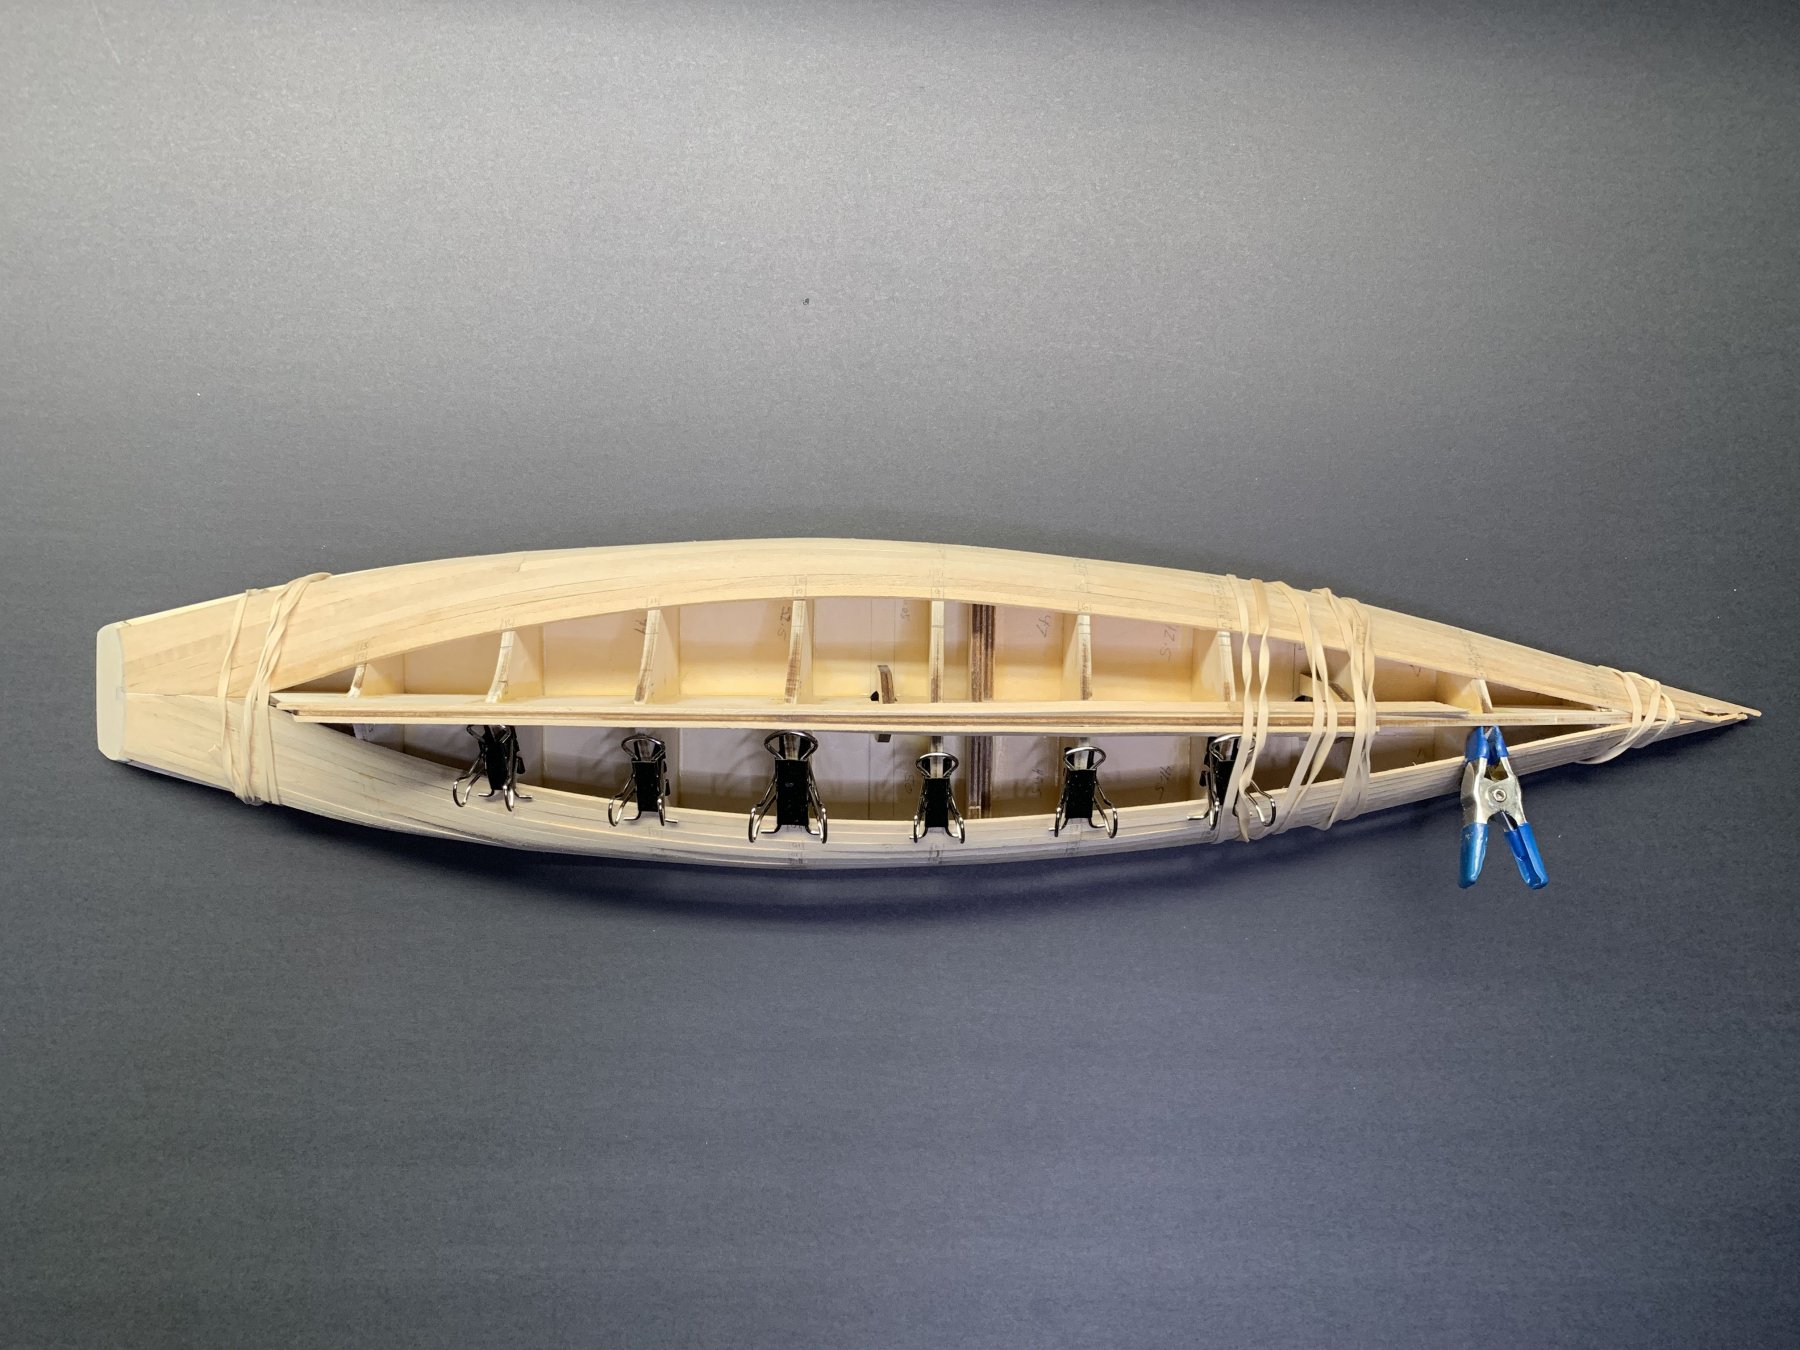
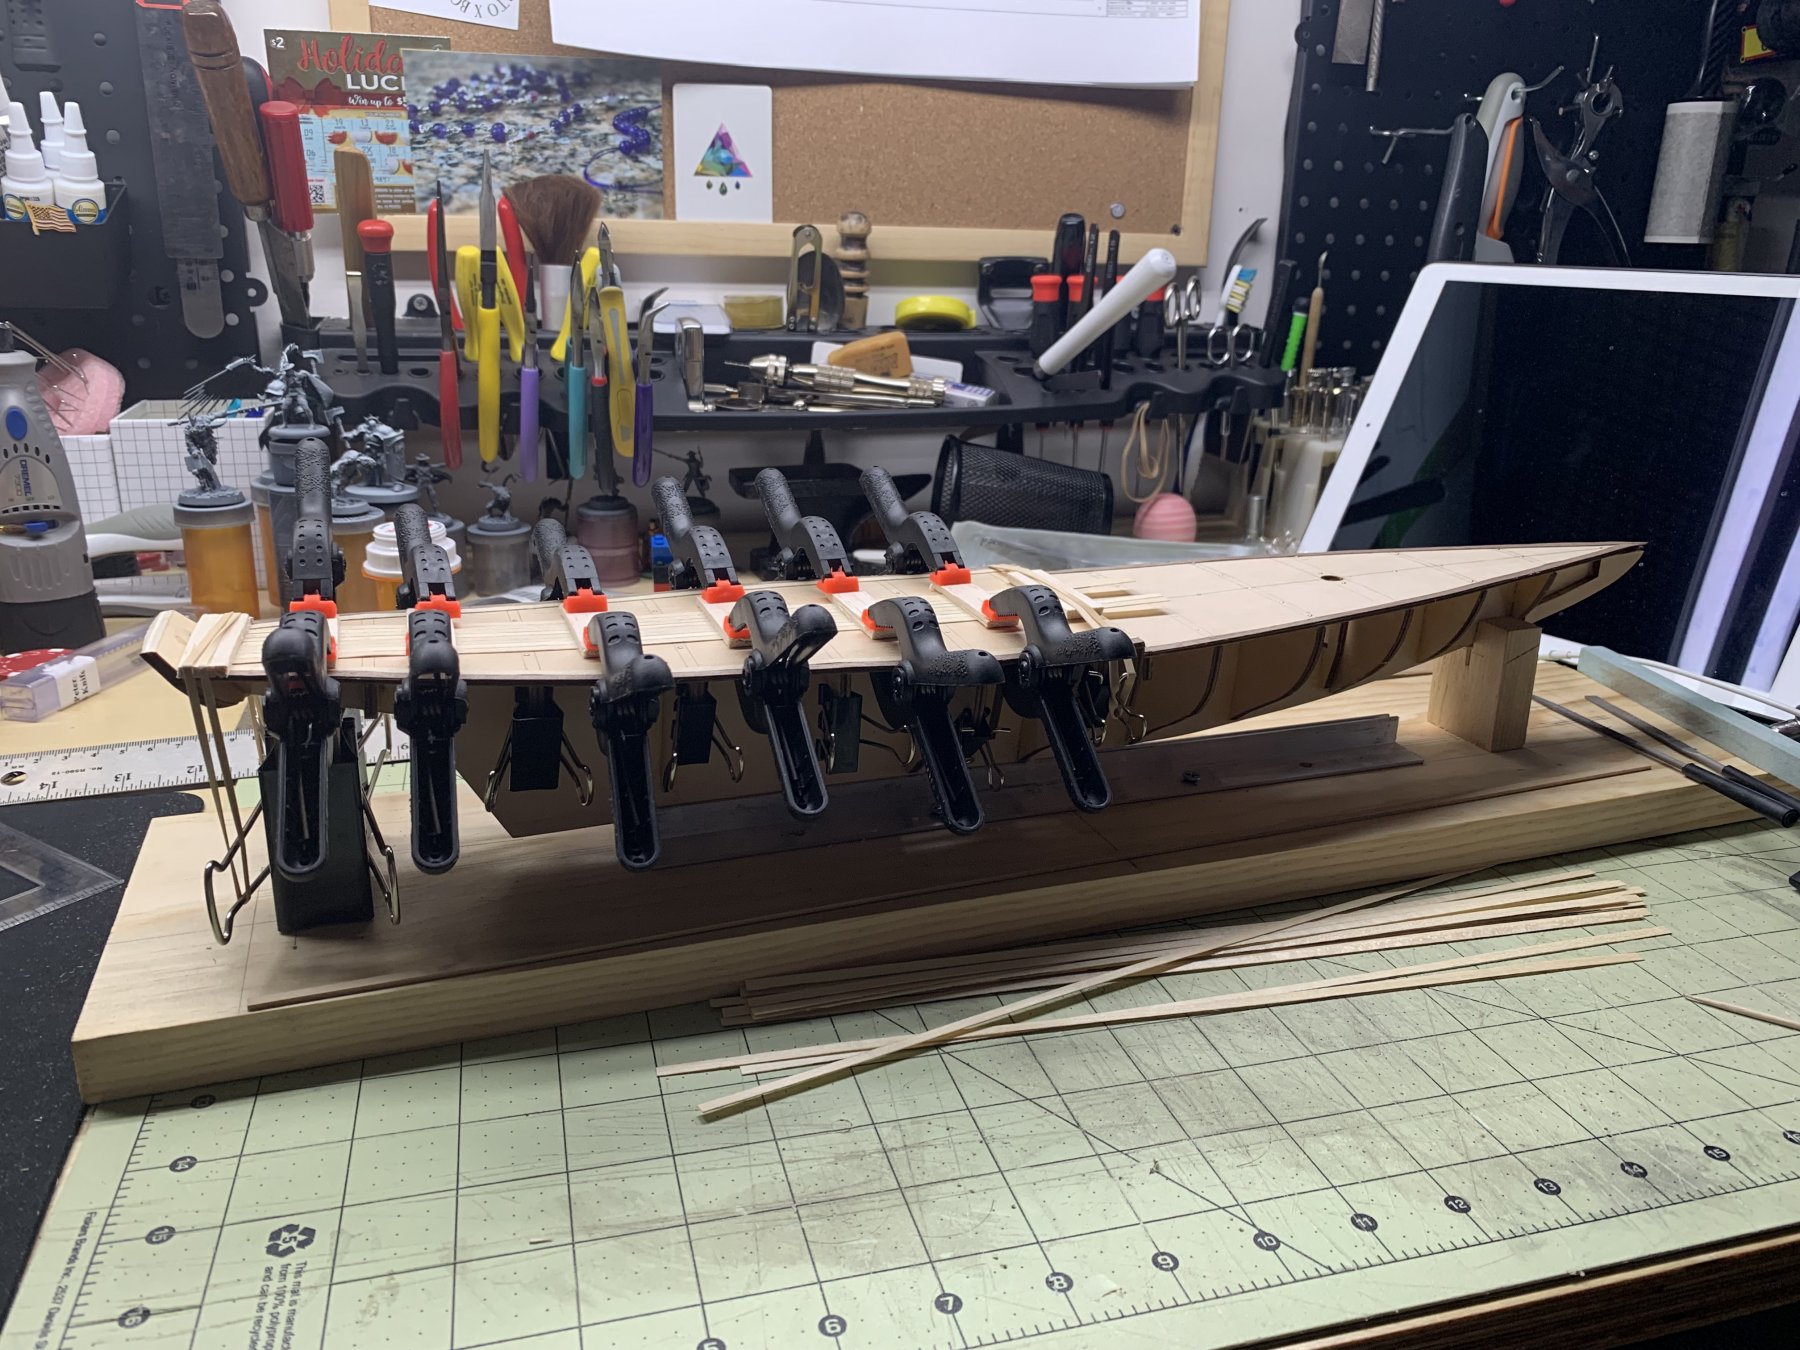
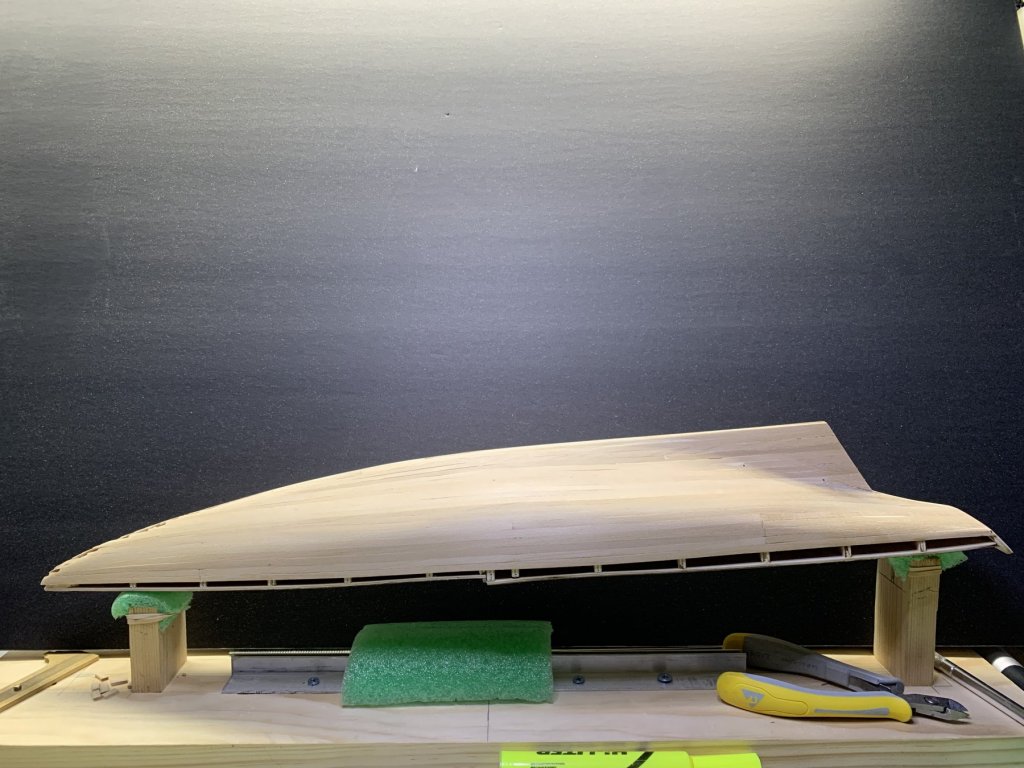
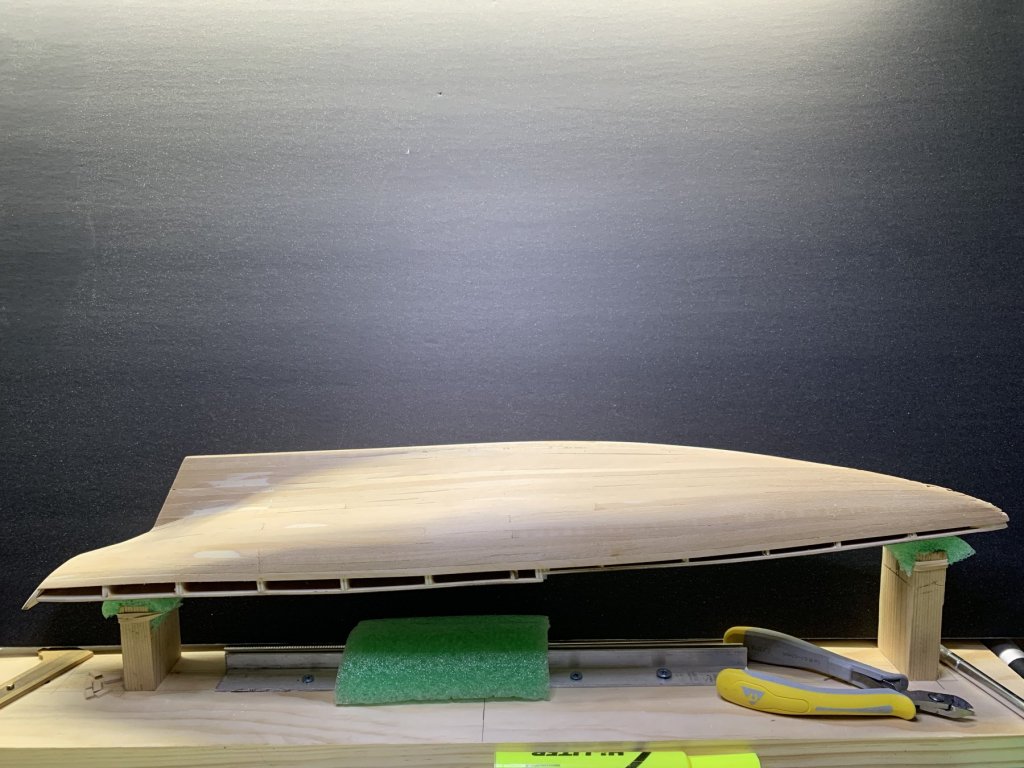
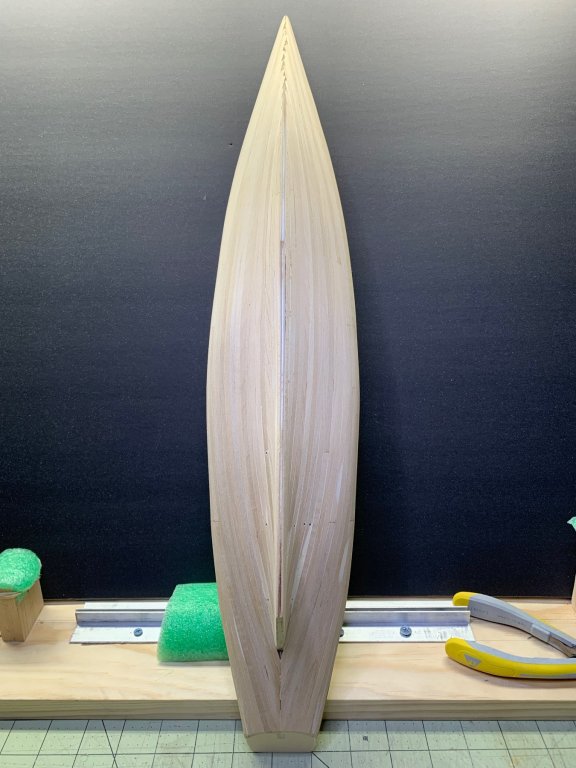
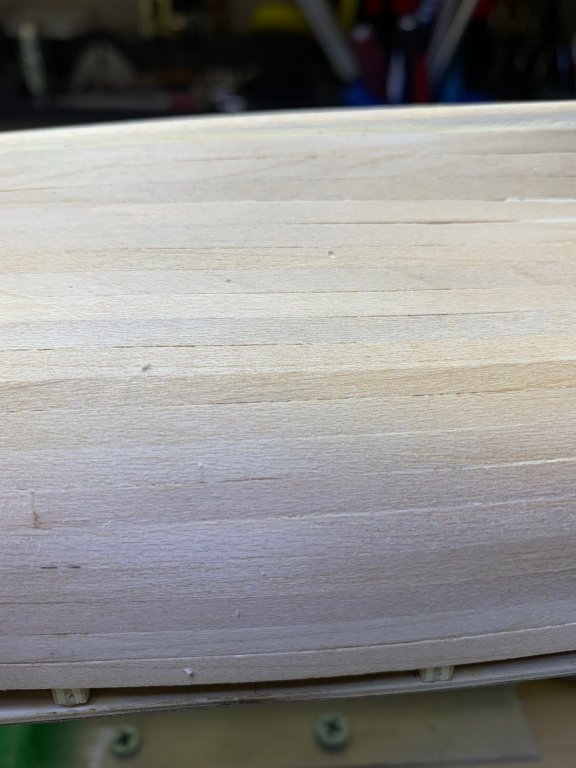
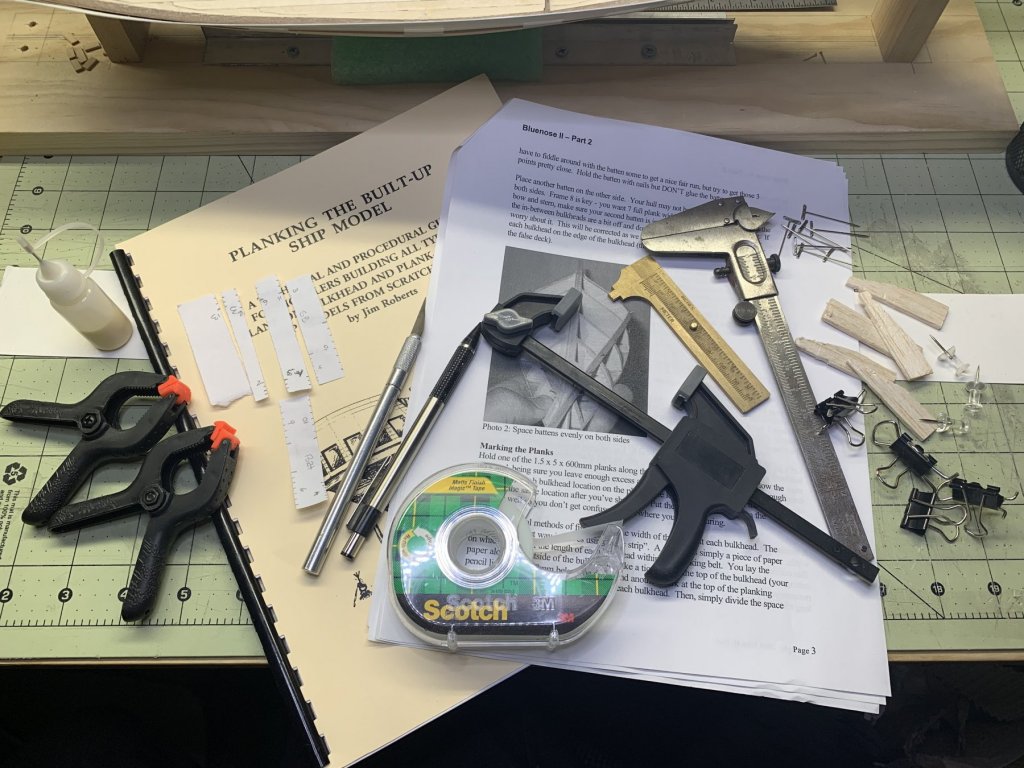
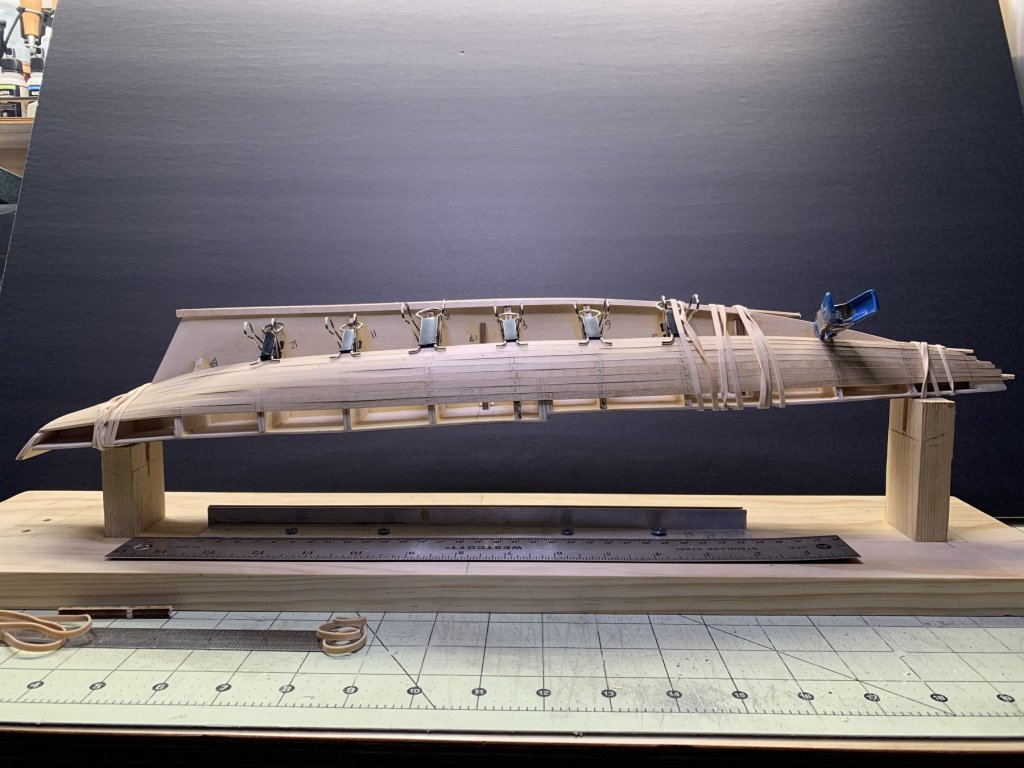
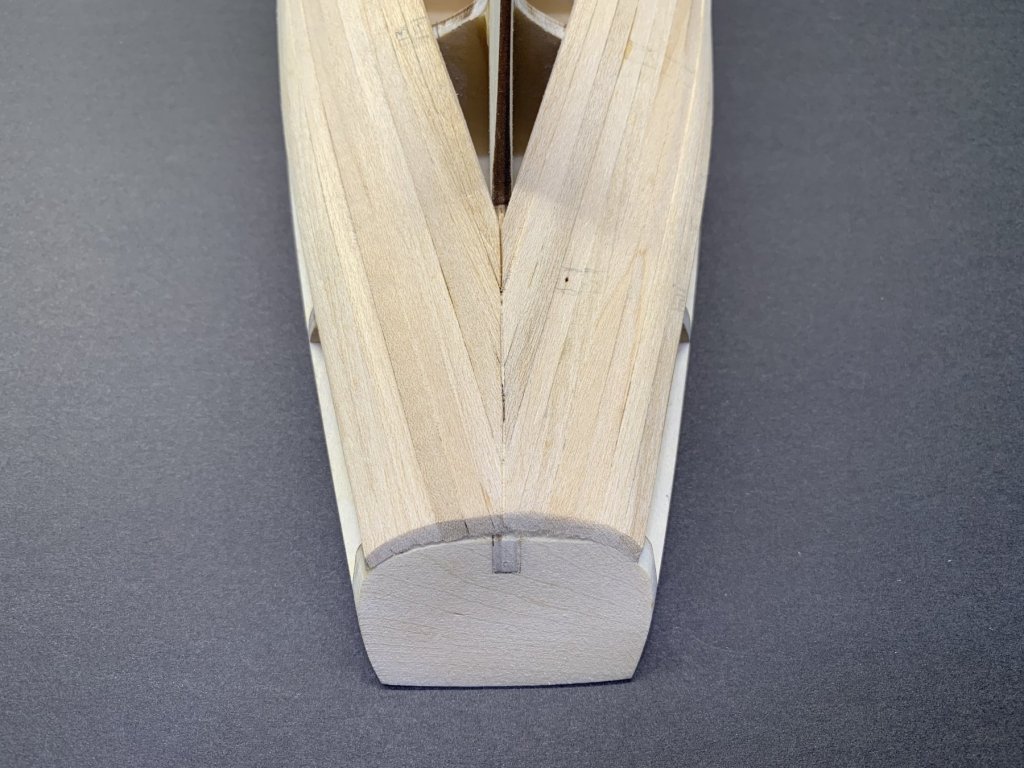
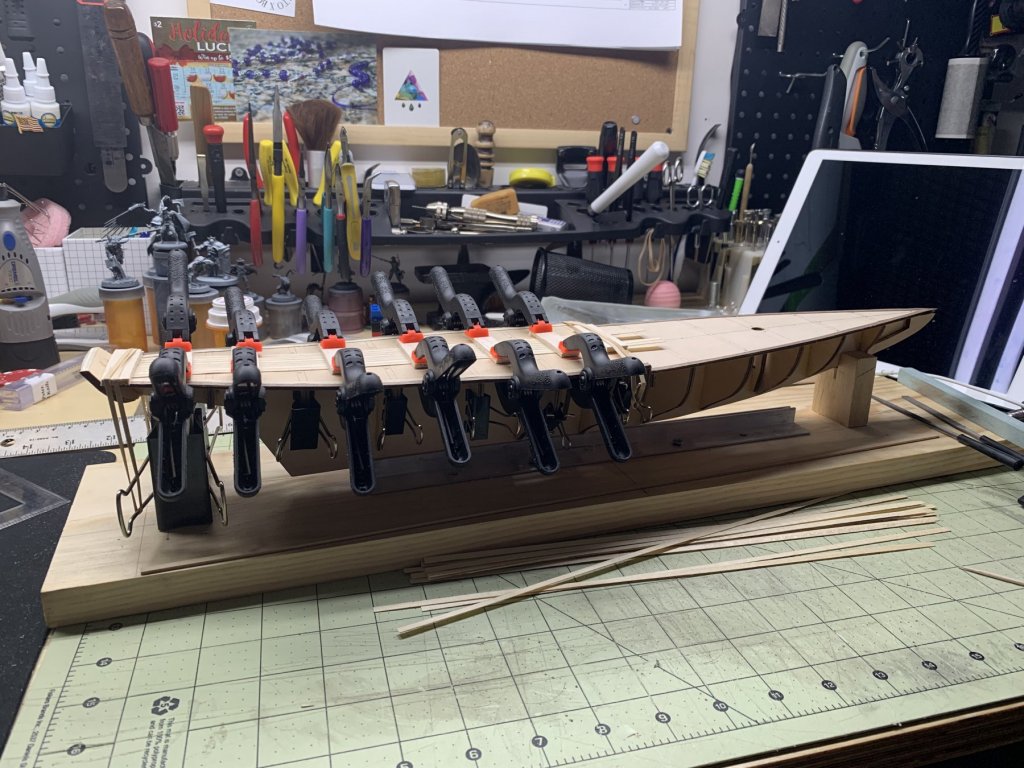
Finished first layer planking. after a bit of deciding which way to run it, I ended up just going straight across. I think the second layer I will curve the bottom half up. didn't need to use much wood filler which surprised me. Here is pretty much everything I used to plank. I went with the tick paper and Planking Fan. For the final plank I used the scotch tape to trace the slot and transfer to the final plank. Obviously all the great Bluenose builds on this forum were referenced at some point. Simple Hull Planking Techniques For Beginners was also used specifically pages 29 to 31, the beveling of the planks. which I believe is the main reason the planks actually came out so tight, close together. Planking The Build-Up Ship Model by Jim Roberts was also very useful. And of course Mr John H. Earls Guide to his beautiful Bluenose II build. which is my main reference and what I will likely be following for the remainder of my build. All the tools used to plank. First layer complete. Now taking a look at building the bulwarks per Mr Earls guide. Thanks for this great community. If it wasn't for all the knowledge on here, I don't think I would have made it this far. Berto


-
Adrift reacted to a post in a topic:
Black Pearl by Old Collingwood - FINISHED - 1/72 Scale
-
Adrift reacted to a post in a topic:
Sanson by hof00 - FINISHED - Artesania Latina - 1/50 - 19th century tug
-
Adrift reacted to a post in a topic:
Bluenose II by Adrift - Artesania Latina - Scale 1:75
-
Adrift reacted to a post in a topic:
Bluenose II by Adrift - Artesania Latina - Scale 1:75
-
Thank you for the kind words, sincerely. So i am torn between painting or double planking and leaving the walnut exposed. The keel is next. It is the AL but i believe it is a second version from them. There are some differences from the older AL builds I've seen on here. I am also in the “learning mode” and want to just keep going. But then i keep remembering the go slow and think ahead advise. 😆 Hey Russ thanks for the kind words. I tried to keep it low, keeping in mind the whole planks should not be narrower than half at the thinest point. So i hope i can fit the rest in. Thank again I really do appreciate the kind words. Berto
-
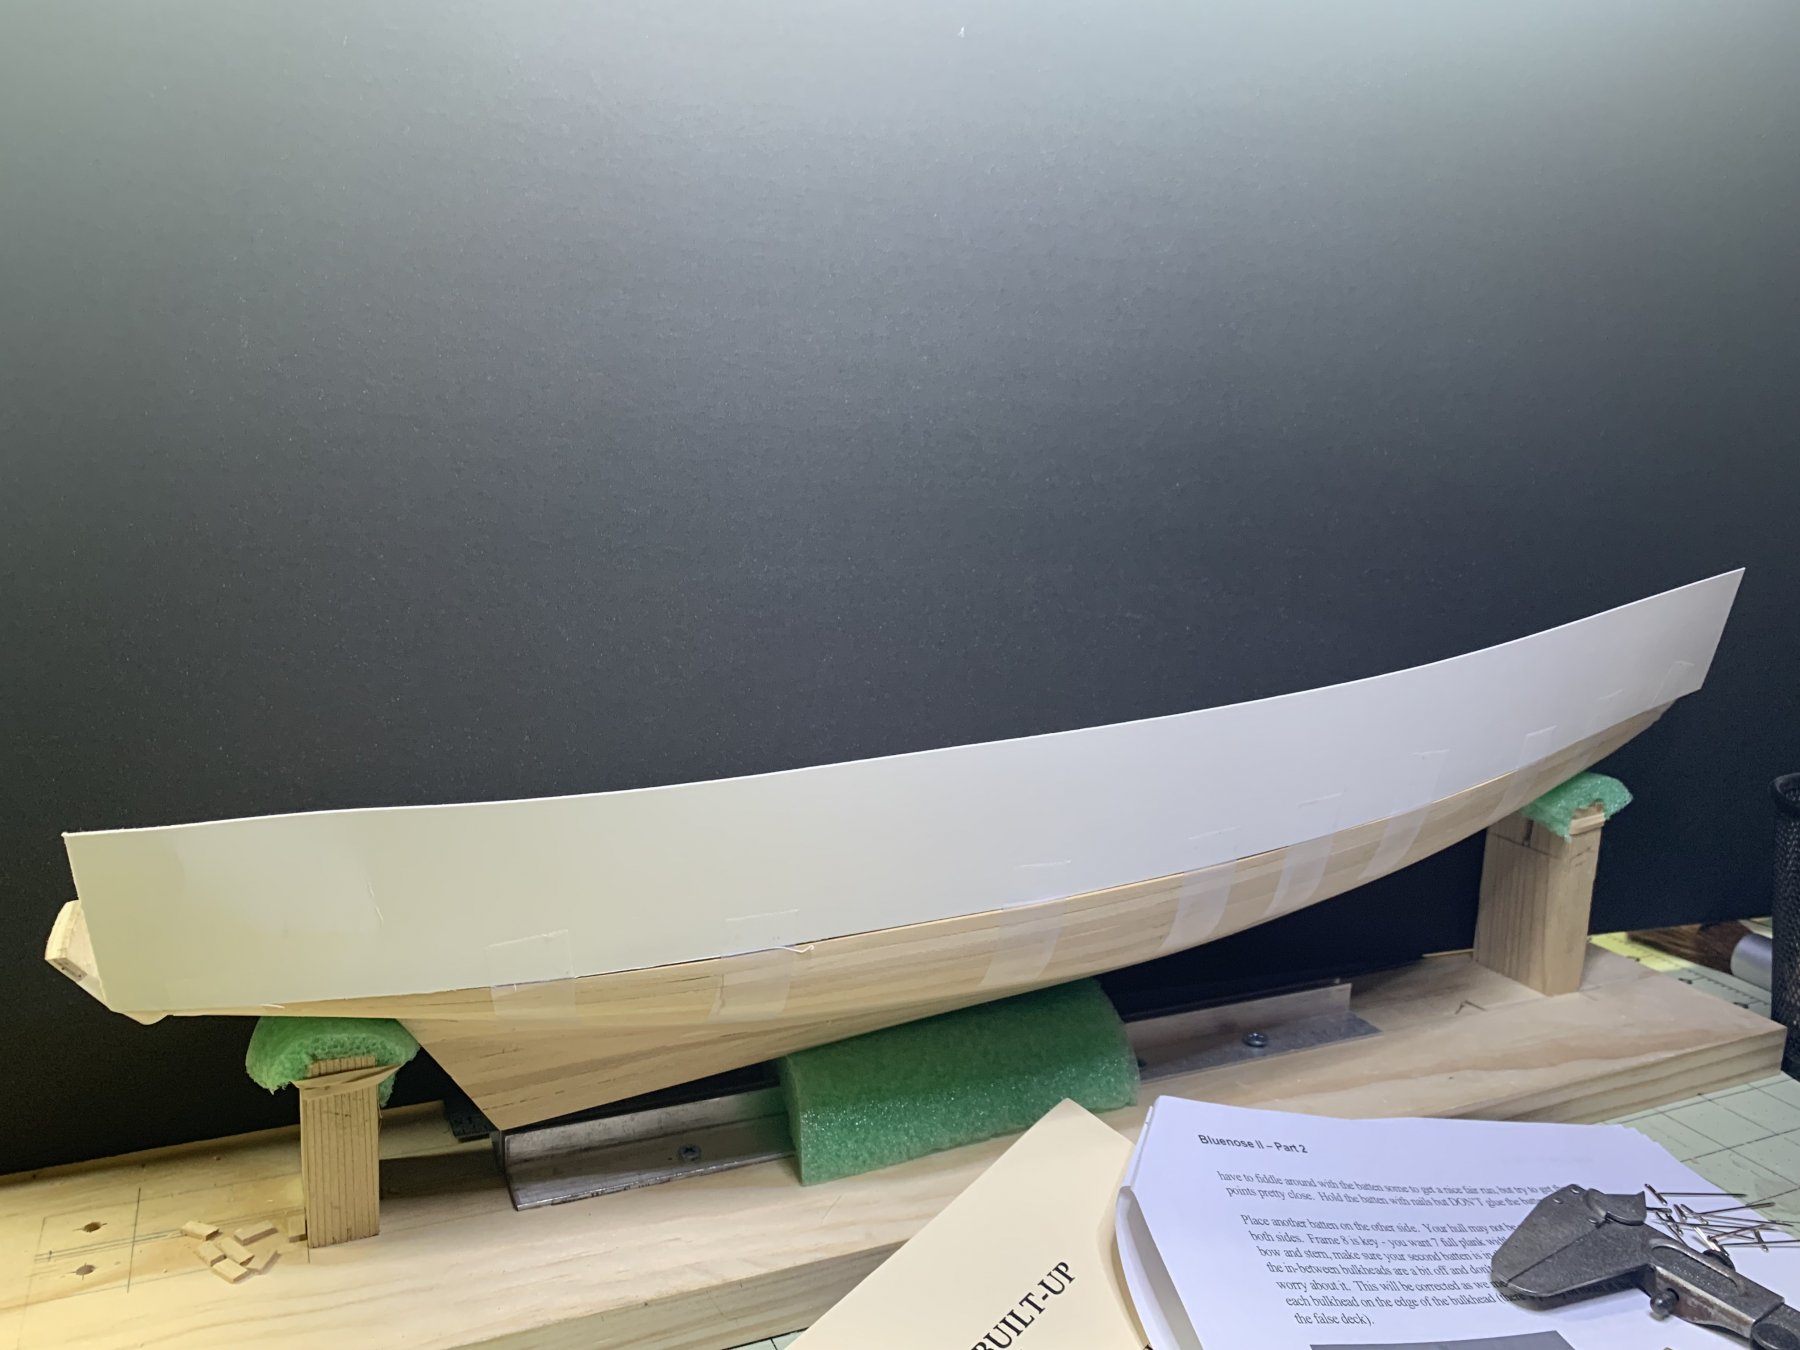
So let me beck up a step and say. I have never been into ships growing up. this is ALL new to me. grow up on the coast have done some fishing and have been on friends modern fishing boats and have my boaters license. so the extent of my knowledge was port, starboard, aft. bow and grab me a beer. 😂 As I'm building, I am learning so much. as I'm researching other build logs on any ship here I am learning even more. once agin I just want to thank everyone on this forum for all their knowledge that they are sharing. that being said, back to the log. I am a tad stuck but hope to soon move forward. I am currently doing the first layer of planking and am almost done. but getting to the garboard strake (think that's correct) I'm questioning myself to much. I have it set but now the planks going up from there towards the top I keep seeing two ways that people are planking. one is curved up towards the upper planks and others are straight following the keel running parallel to the top planks. is this a preference thing or is one better that the other? I plan on just curving up and following the manuals way of doing it. but I may change my mind. any ways here a few updated pics. thanks all for looking. questions and comments, good or bad are always welcome. Berto

-
Adrift reacted to a post in a topic:
Revenge 1577 by xodar461 - FINISHED - Amati - Scale 1:64
-
Update. Going slow but thus is the nature of the beast. Finished fairing and started first layer planking. Its a definate learning process but enjoyable. I had attempted to contact AL to see if they would replace the keel just to see and that has turned into a weird fiasco. So i just decided to move forward.
-
Adrift reacted to a post in a topic:
Bluenose II by jaybees - Artesania Latina - Scale 1:75
-
Very nice jaybees. Im currently building this same ship. It is my first wood ship ever so going slow for me. I do have to say that your post came at the perfect time and your pictures have been a great help in helping me move forward. I was really questioning if i sanded the bow down enough and thought i would have to start over. So thanks Jaybees for sharing.
-
Adrift reacted to a post in a topic:
HMS ROYAL KATHERINE 1664 by Doris - 1/55 - CARD
-
Adrift reacted to a post in a topic:
HMS ROYAL KATHERINE 1664 by Doris - 1/55 - CARD
-
Adrift reacted to a post in a topic:
Bluenose II by Adrift - Artesania Latina - Scale 1:75
-
welcome aboard Philip, I also am new and since joining have started a build log. I am not far along and have already received help and advise shortly after posting. So I would absolutely suggest starting a log. Berto
-
Welcome aboard berto
-
absolutely incredible. very nice work looking great. can wait to follow along.
-
I am new to this hobby and the forums. It is threads like this that inspire and motivate myself and im sure many others. This is just amazing. The history lesson at the start and throughout. the detail being put in makes this just a phenominal work of art. I hope to one day be able to have the knowledge to achieve such a level of craftmanship. I look forward to what lies ahead. Thank You sir G.L. for this lovely build that i am thrilled to follow all the best Berto
- 219 replies
-
- 4
-
-
- cross section
- fishery
- (and 1 more)
-
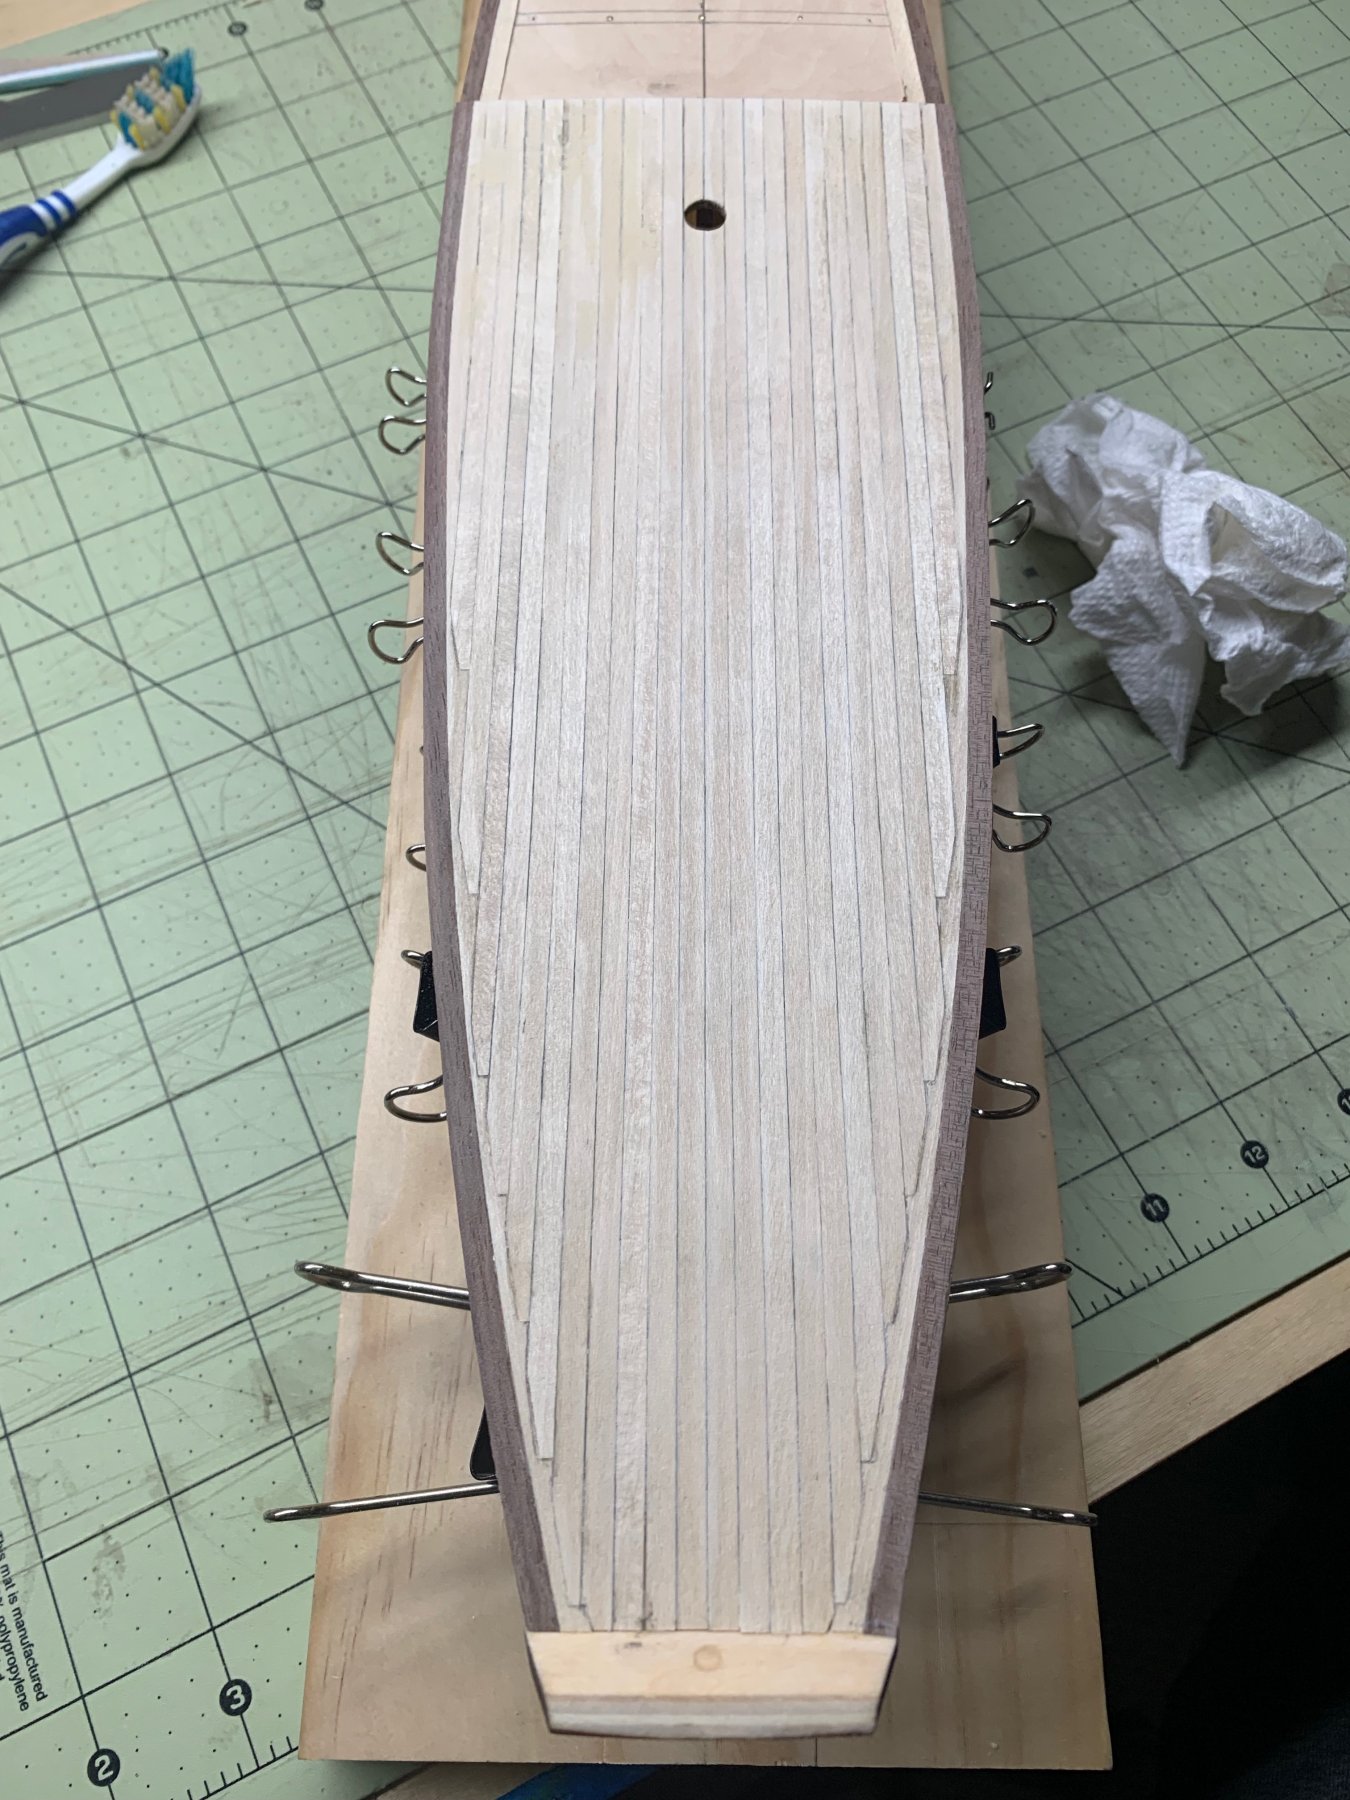
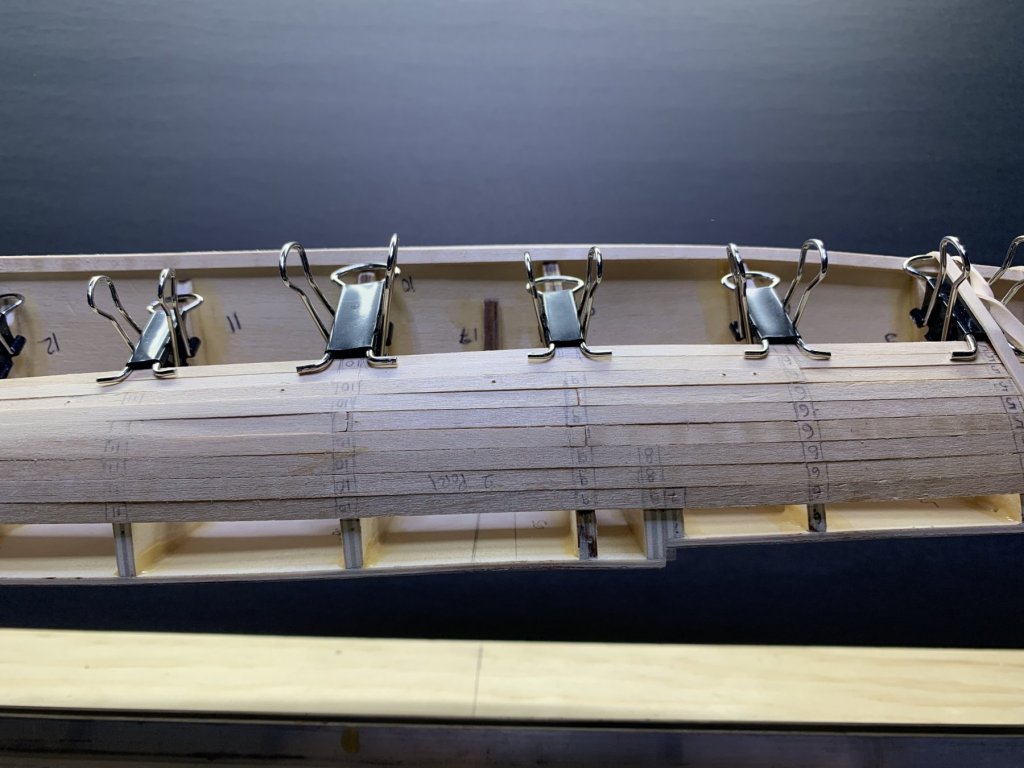
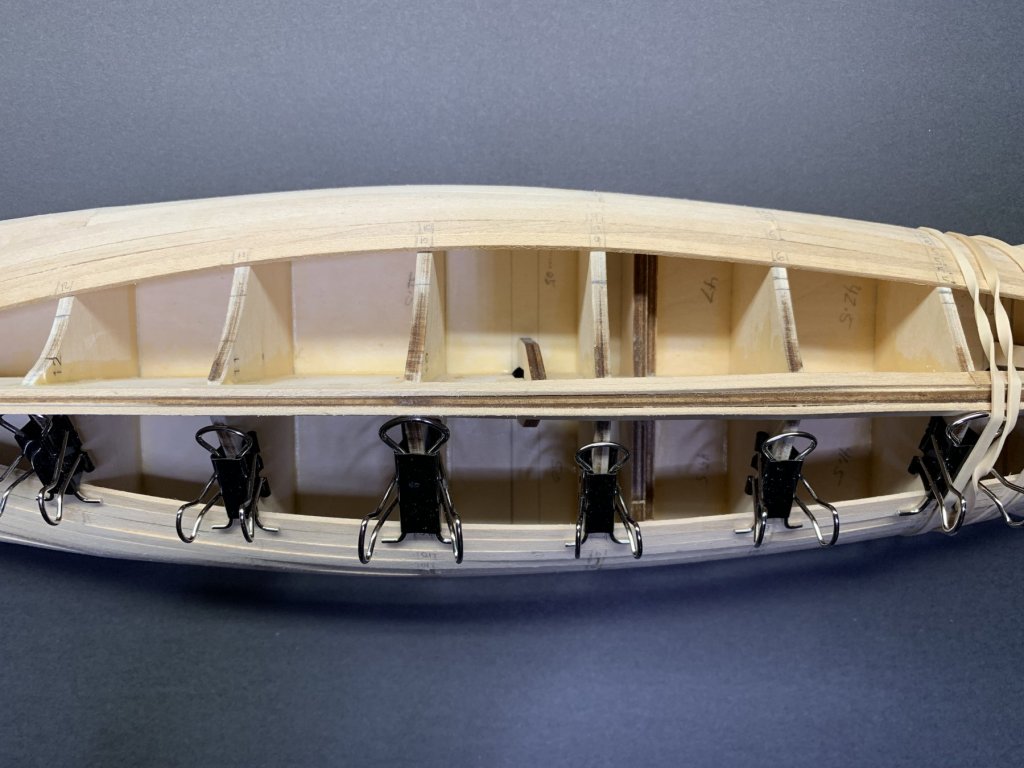
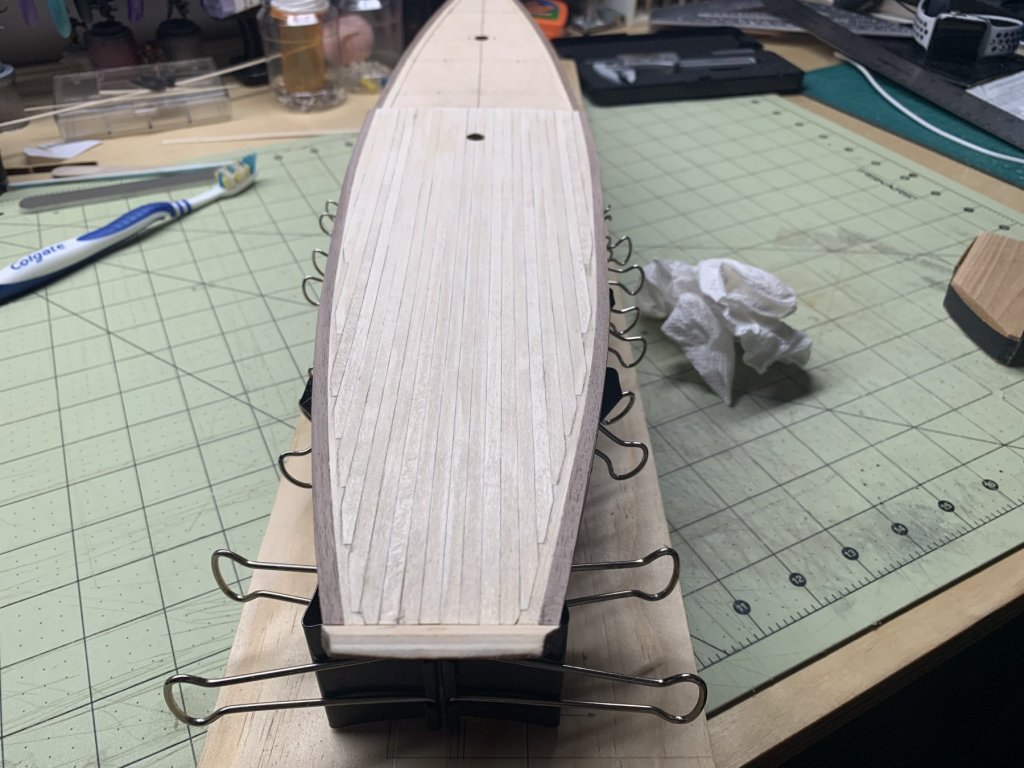
todays update finished up planking rear deck. started testing the wood putty to fill in any gaps. didn't have many but figured I would fill in. hope to start forward deck planking tomorrow. then the hull planking after that which I am dreading and intimidated by. going to need to get a syringe for this glue though. tough getting a fine line with the little bottle I'm using. live and learn 😂 thanks all whom have visited and have liked 😁

-
Just caught up on this thread and it is amazing. Great work! OC all the best to you and your wife. I truly hope everything is working out. Berto
-
Hof thanks again. I actually had printed out the first three parts of Mr. Earls guide prior to even having the model. i actually even still have all the build logs open on my computer, including yours. i spend my time bouncing between attempting a step and reading as much as i can prior to doing the next step. sometimes i just need to talk it over with someone to actually get it 😝 i have had MANY hobbies in the past, but i must admit, this is by far one of the most challenging and involved. But in a good way. its amazing how little i am completing each day but at the end of the day how satisfied i feel. waiting on waterways (think that's what they are) to shape up so i can possibly start planking the deck. take care Berto
-
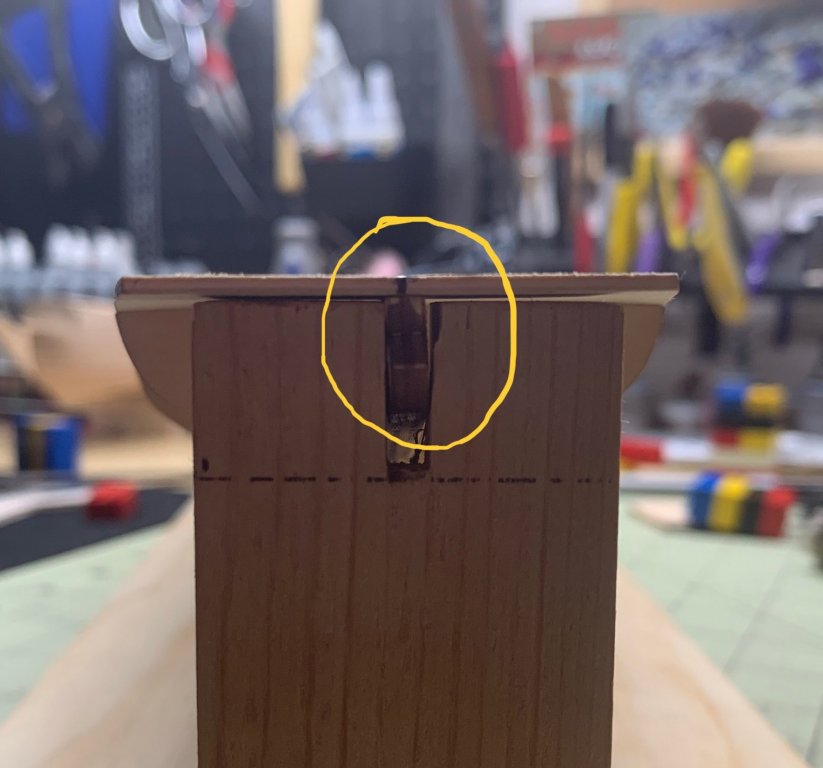
@hof00 first I really want to thank you for your advise, tips, and expertise. this is my first build ever and it is daunting. I never thought of dry attaching and if I did happen to read it somewhere, I completely forgot it. I did soak and press and it seemed to help a bit but after going through some other threads on here it would seem I should have soaked longer and pressed for a few days. but I did what you suggested and it absolutely helped. when I look from the stern down to the bow its seems level now. there is a twist to the keel right at the end where the last frame piece goes that completes the stern. its a bit hard to tell in photo but I may be able to get away with some sanding and filling to get this corrected. I think I will continue forward, not rushing, but taking this all as a learning experience. Thanks again so much for the help now I need to message someone about a local club 😁 all the best Berto