Dr PS - Paul Schulze
-
Posts
304 -
Joined
-
Last visited
Content Type
Profiles
Forums
Gallery
Events
Posts posted by Dr PS - Paul Schulze
-
-
1 hour ago, Osmosis said:
You will find the devices used to hold a hull while planking range from the fanciest store bought and home made clamping devices (some made custom for only one type of ship) to an old dirty pillow. Like most things in this hobby it all depends on you budget and what you are comfortable with.
The pillow approach gives me an idea. I think a homemade “bean bag” would work well. Thanks 😎
-
1 hour ago, ccoyle said:
I'm not clear on what you are asking, and I don't know what is meant by "frame knockouts or strong back." What kit are you working on, and can you post a picture.
BTW, I have completed four POB hulls and never used a keel clamp or building board -- have always just held the hull in my lap while I worked (and tempted to add "and I have the scars to prove it," but actually I've never really had much trouble).
A previous build, Model Shipways Armed Longboat, had frames which were like shown below.

My current build, Dusek Gokstad has neither the frame centers intact (to be removed or knocked out later) or the attached “plank” or “strong-back” running from stem to stern. -
I am ready to plank my ship which has no solid frame knockouts or strong back. Also, it has a false deck in place which is not strong enough to attach any kind of holding rod or device. I think the stem and stern are not strong enough to use.
Does anyone have experience or ideas?
-
Ah Colorado Springs one of my old stomping grounds. I grew up in Denver and I love the Rockies. I hope you get your move and house soon.
Right now I’m working on my N scale railroad layout and have a project going which I want to finish before starting the Gokstad.
BTW, I just finished a Model-Expo Gatling Gun for my son-in-law. These are quick and fun projects.
-
Hey Arthur, when are you going to post more on this one? Your work looks superb as usual.
I am going to start a Dusek model soon. I have decided on the Gokstad Viking ship. It looks like it will be fun build and its history is very fascinating.
-
Hello John, I just got my Dusek Gokstad and plan to start on it soon. I will be following your build with interest. 😎
Paul
-
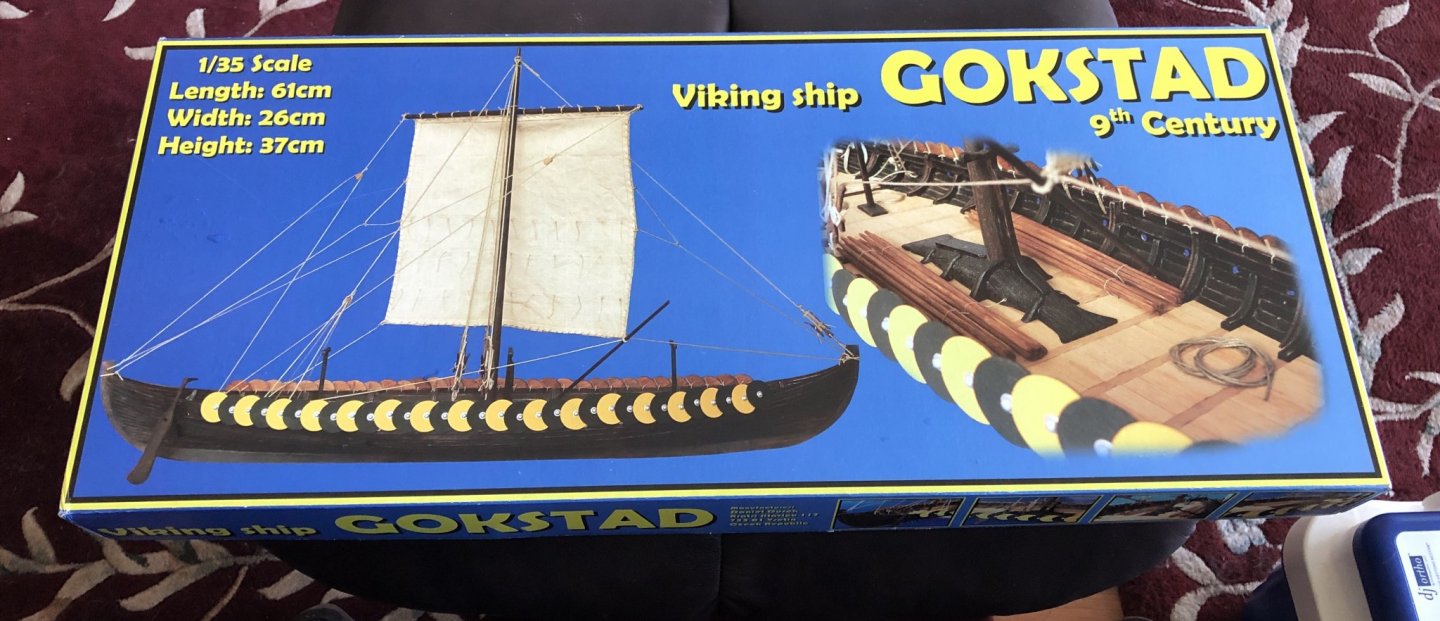
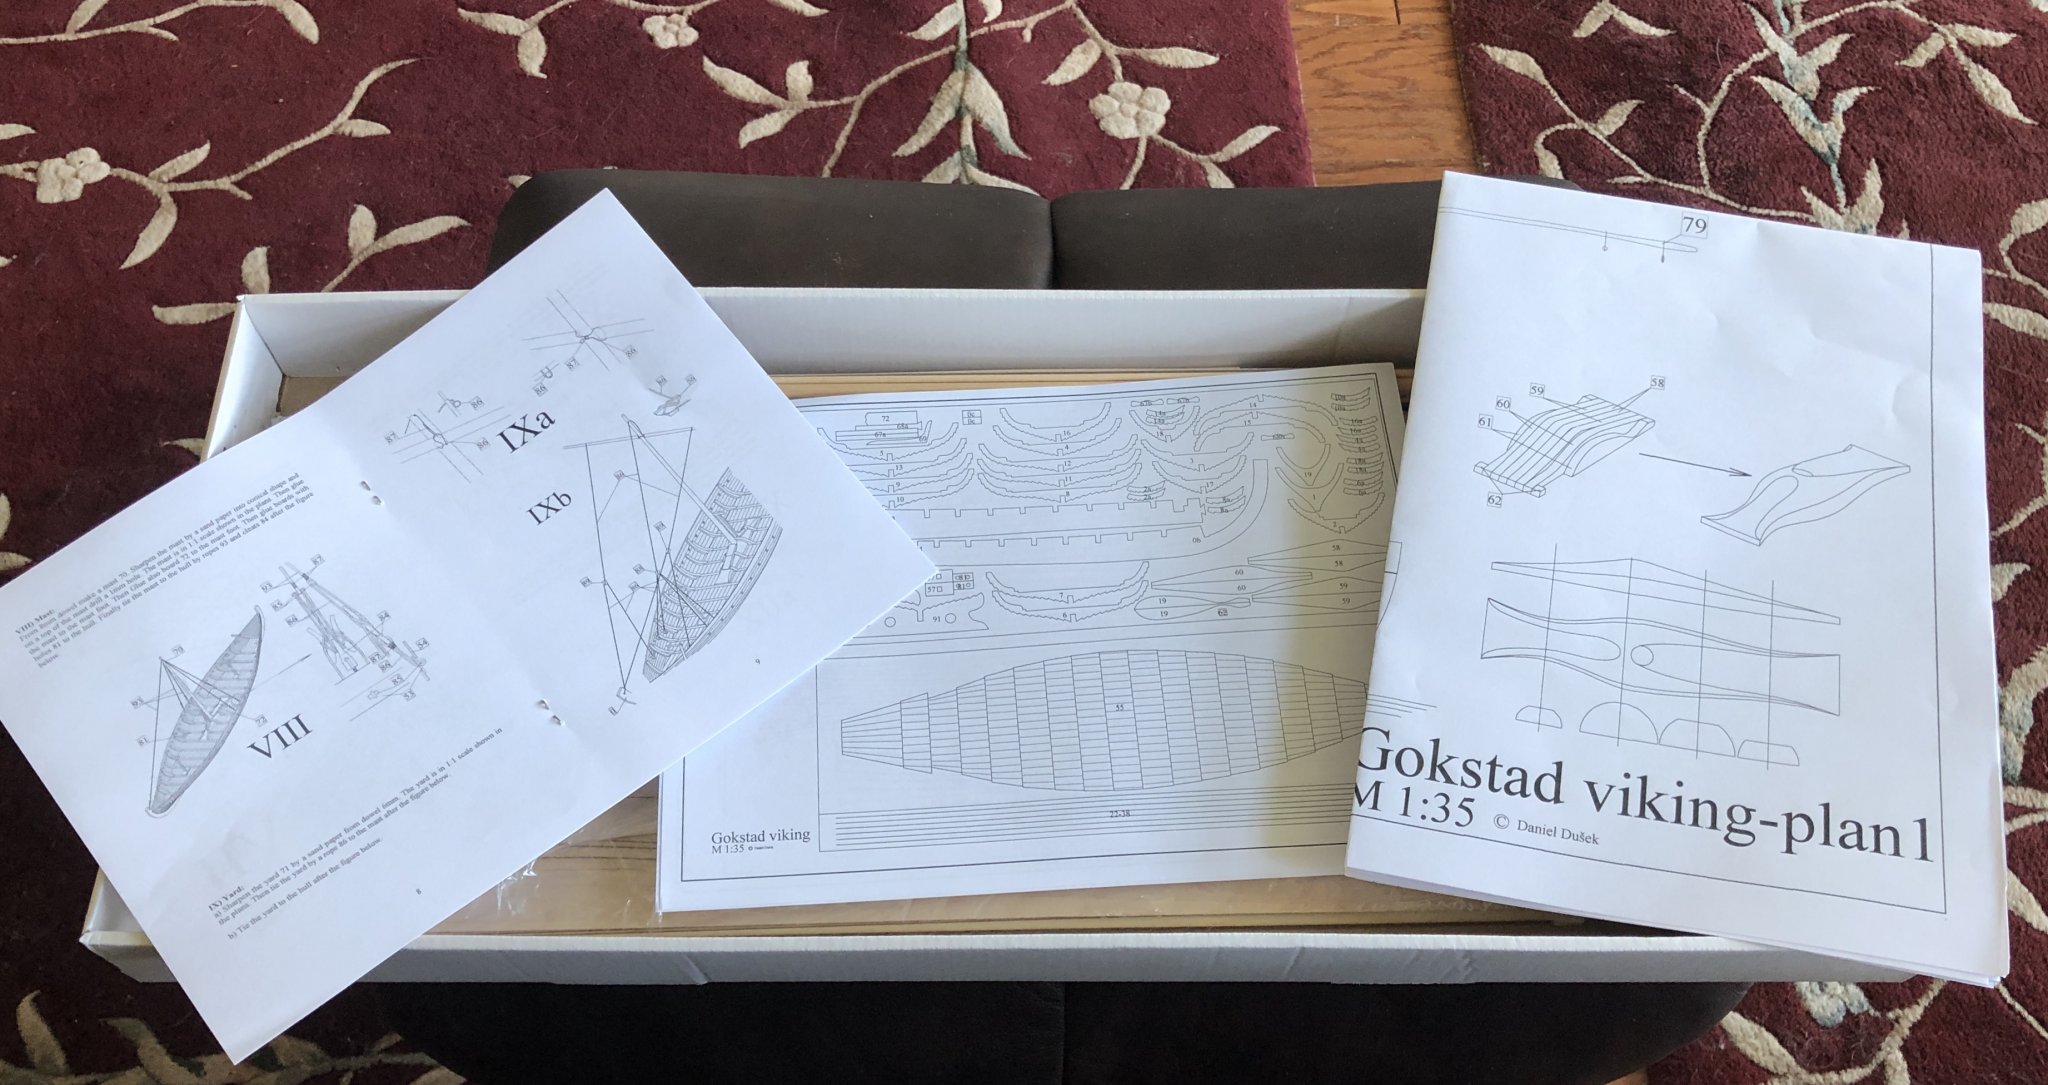
I will be starting my third ship build log. Gokstad Viking Ship, a Dusek Ship Kits - 1:35 Scale The model is based on a find near Gokstad Norway in 1880. The prototype was built in mid ninth century. The ship was shown to be very seaworthy by Magnus Anderson in 1893. The ship had 32 oars and a square sail.
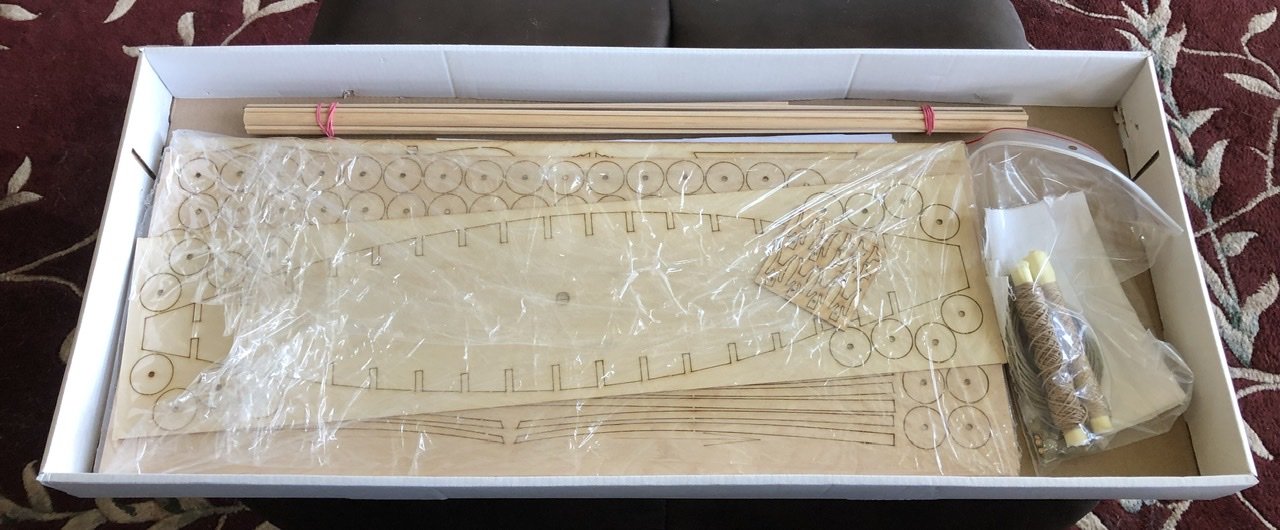
I will be starting the actual building in a couple weeks but I would like to post the usual kit pictures.

-
On 1/10/2020 at 5:24 PM, tmj said:
Take care in insuring that your whale has actually been properly 'saddle-broke' prior to blindly trusting it to give that beautiful 'whaleboat' a gentle ride! 😲
"Great Job!"
Thanks I will. 😎. Thanks to all for your wonderful comments.
-
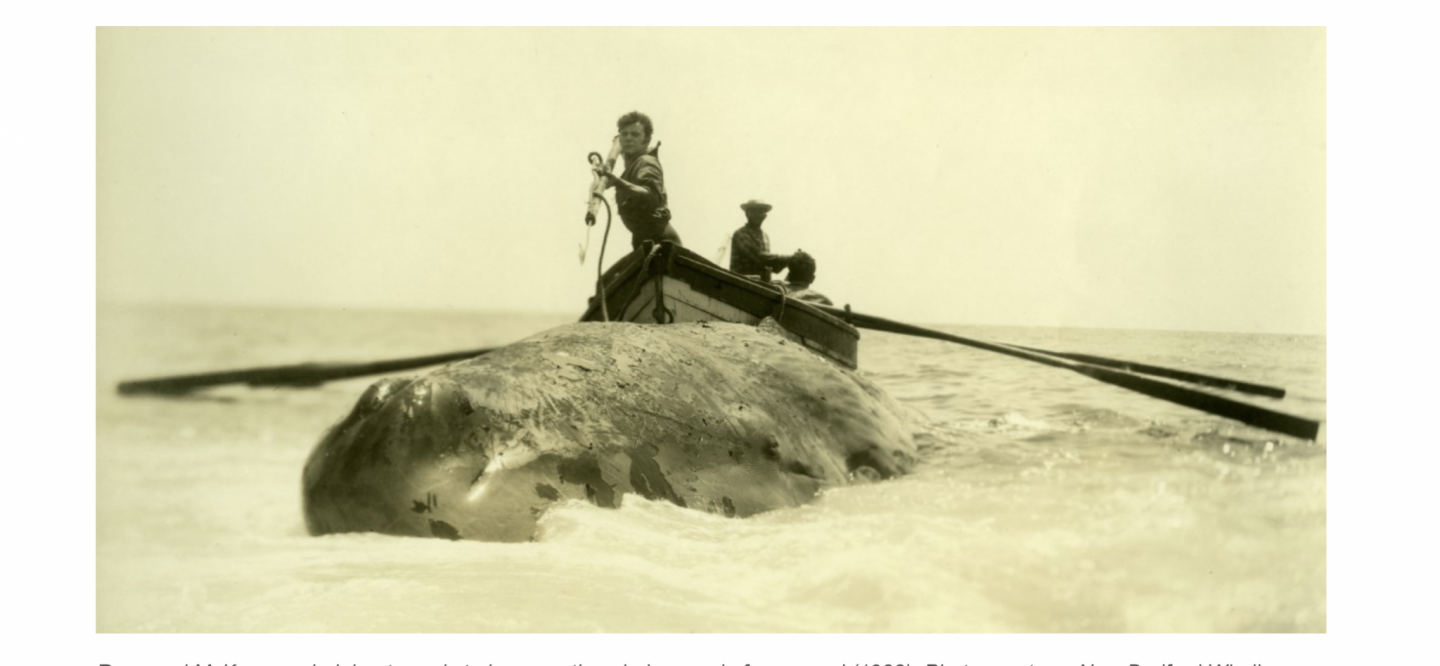
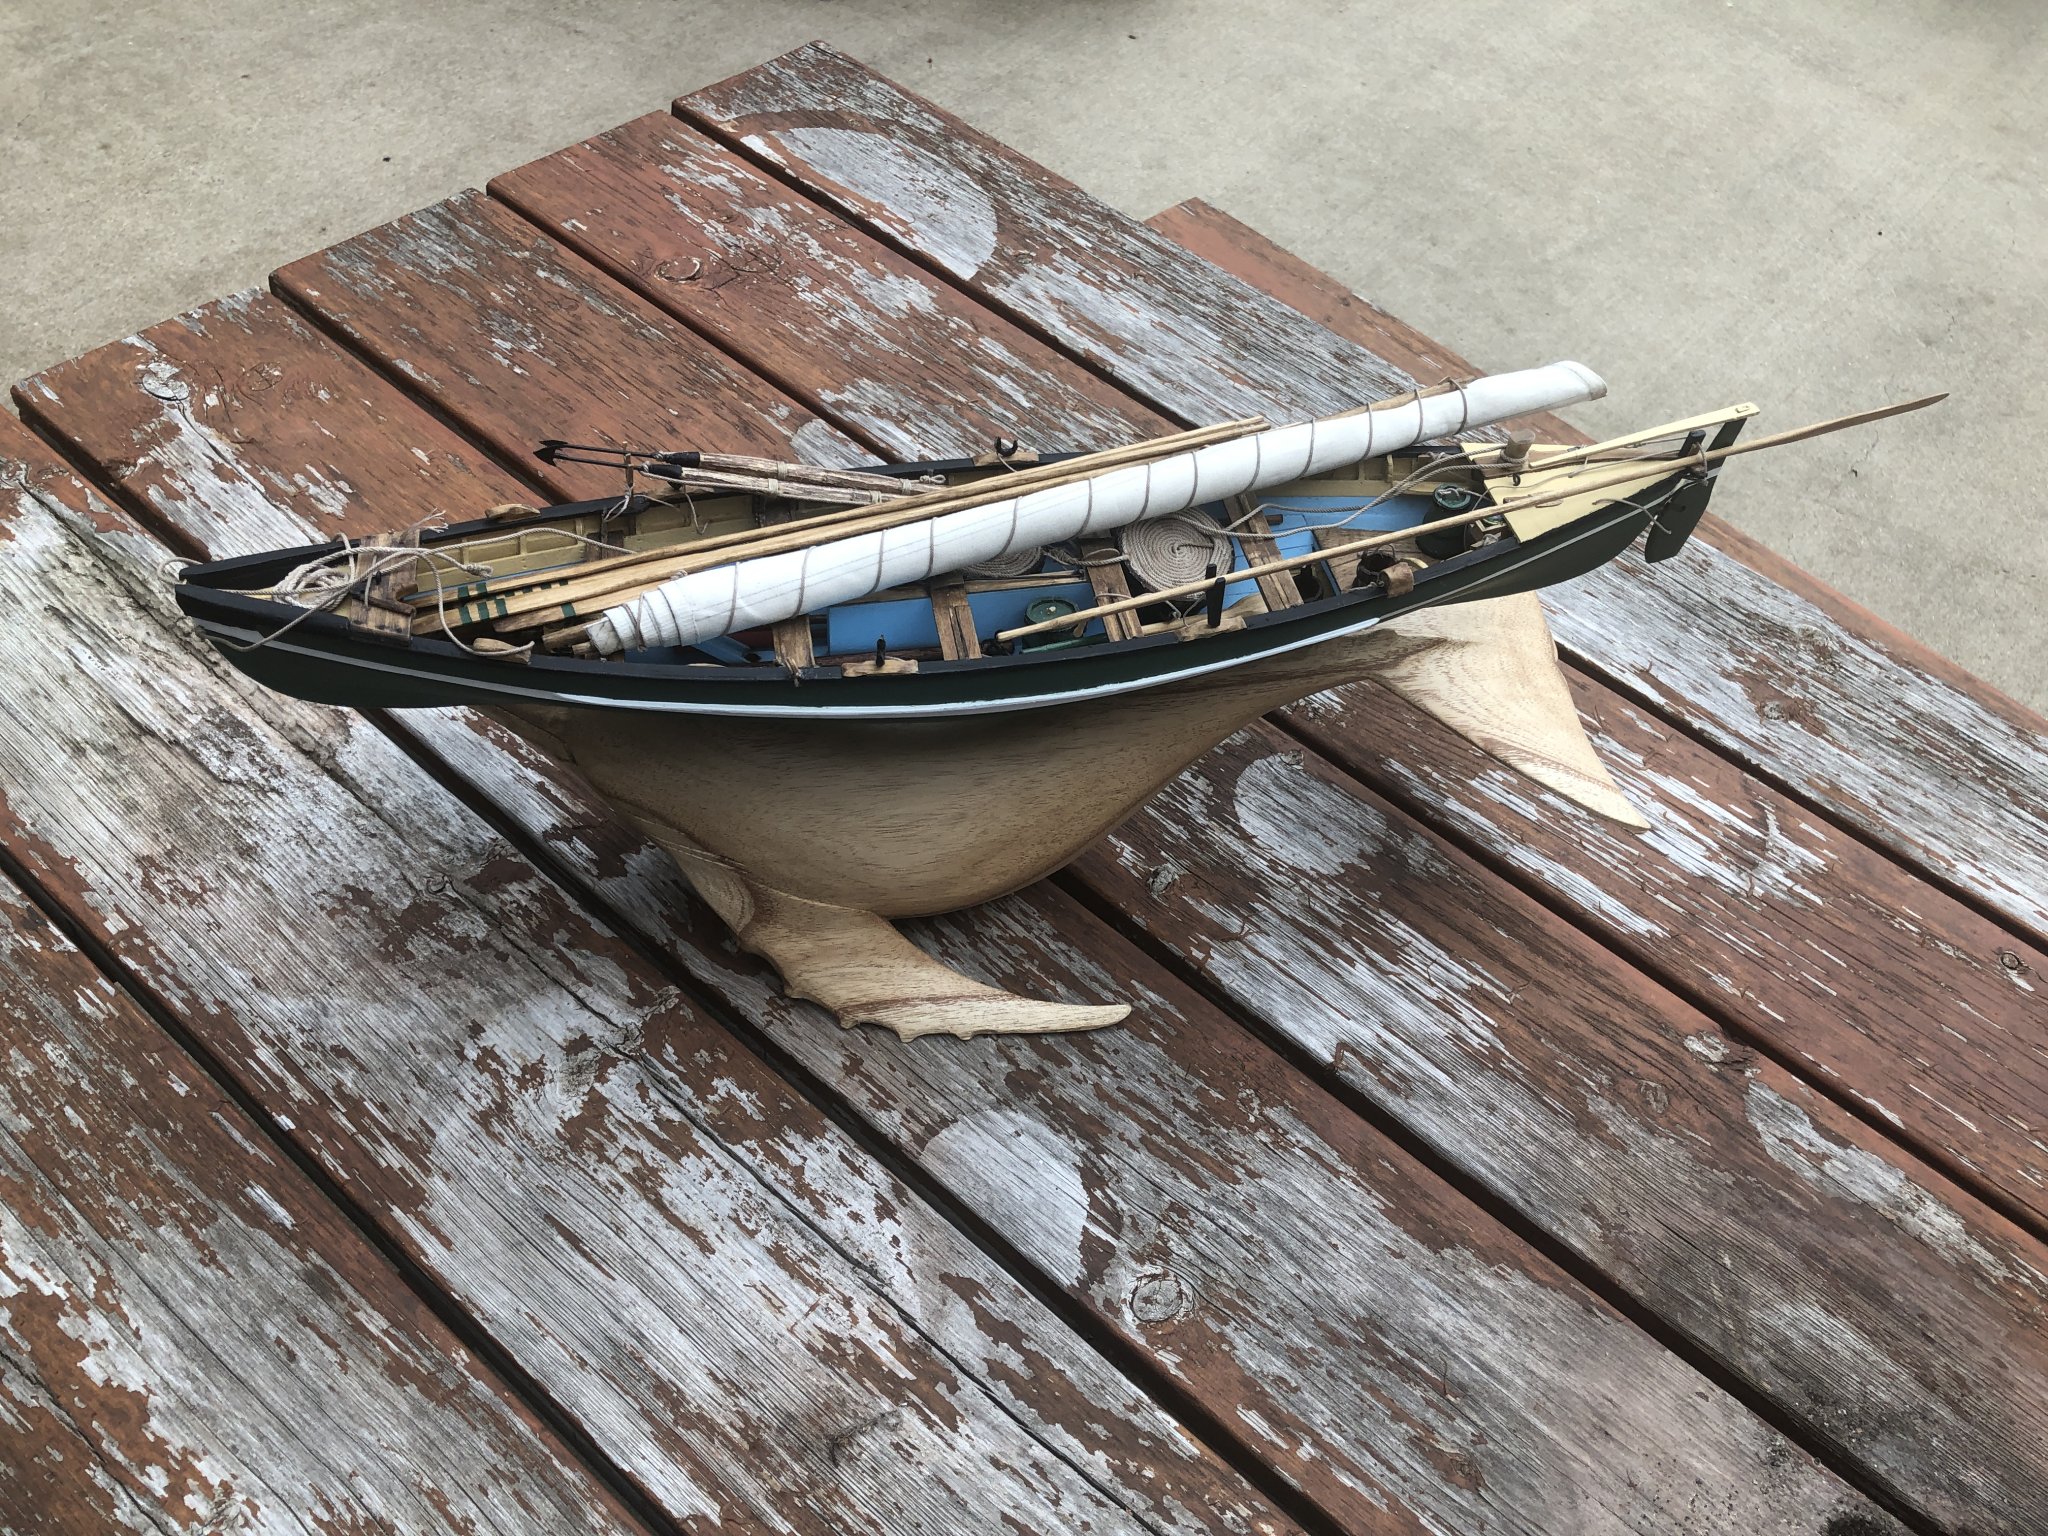
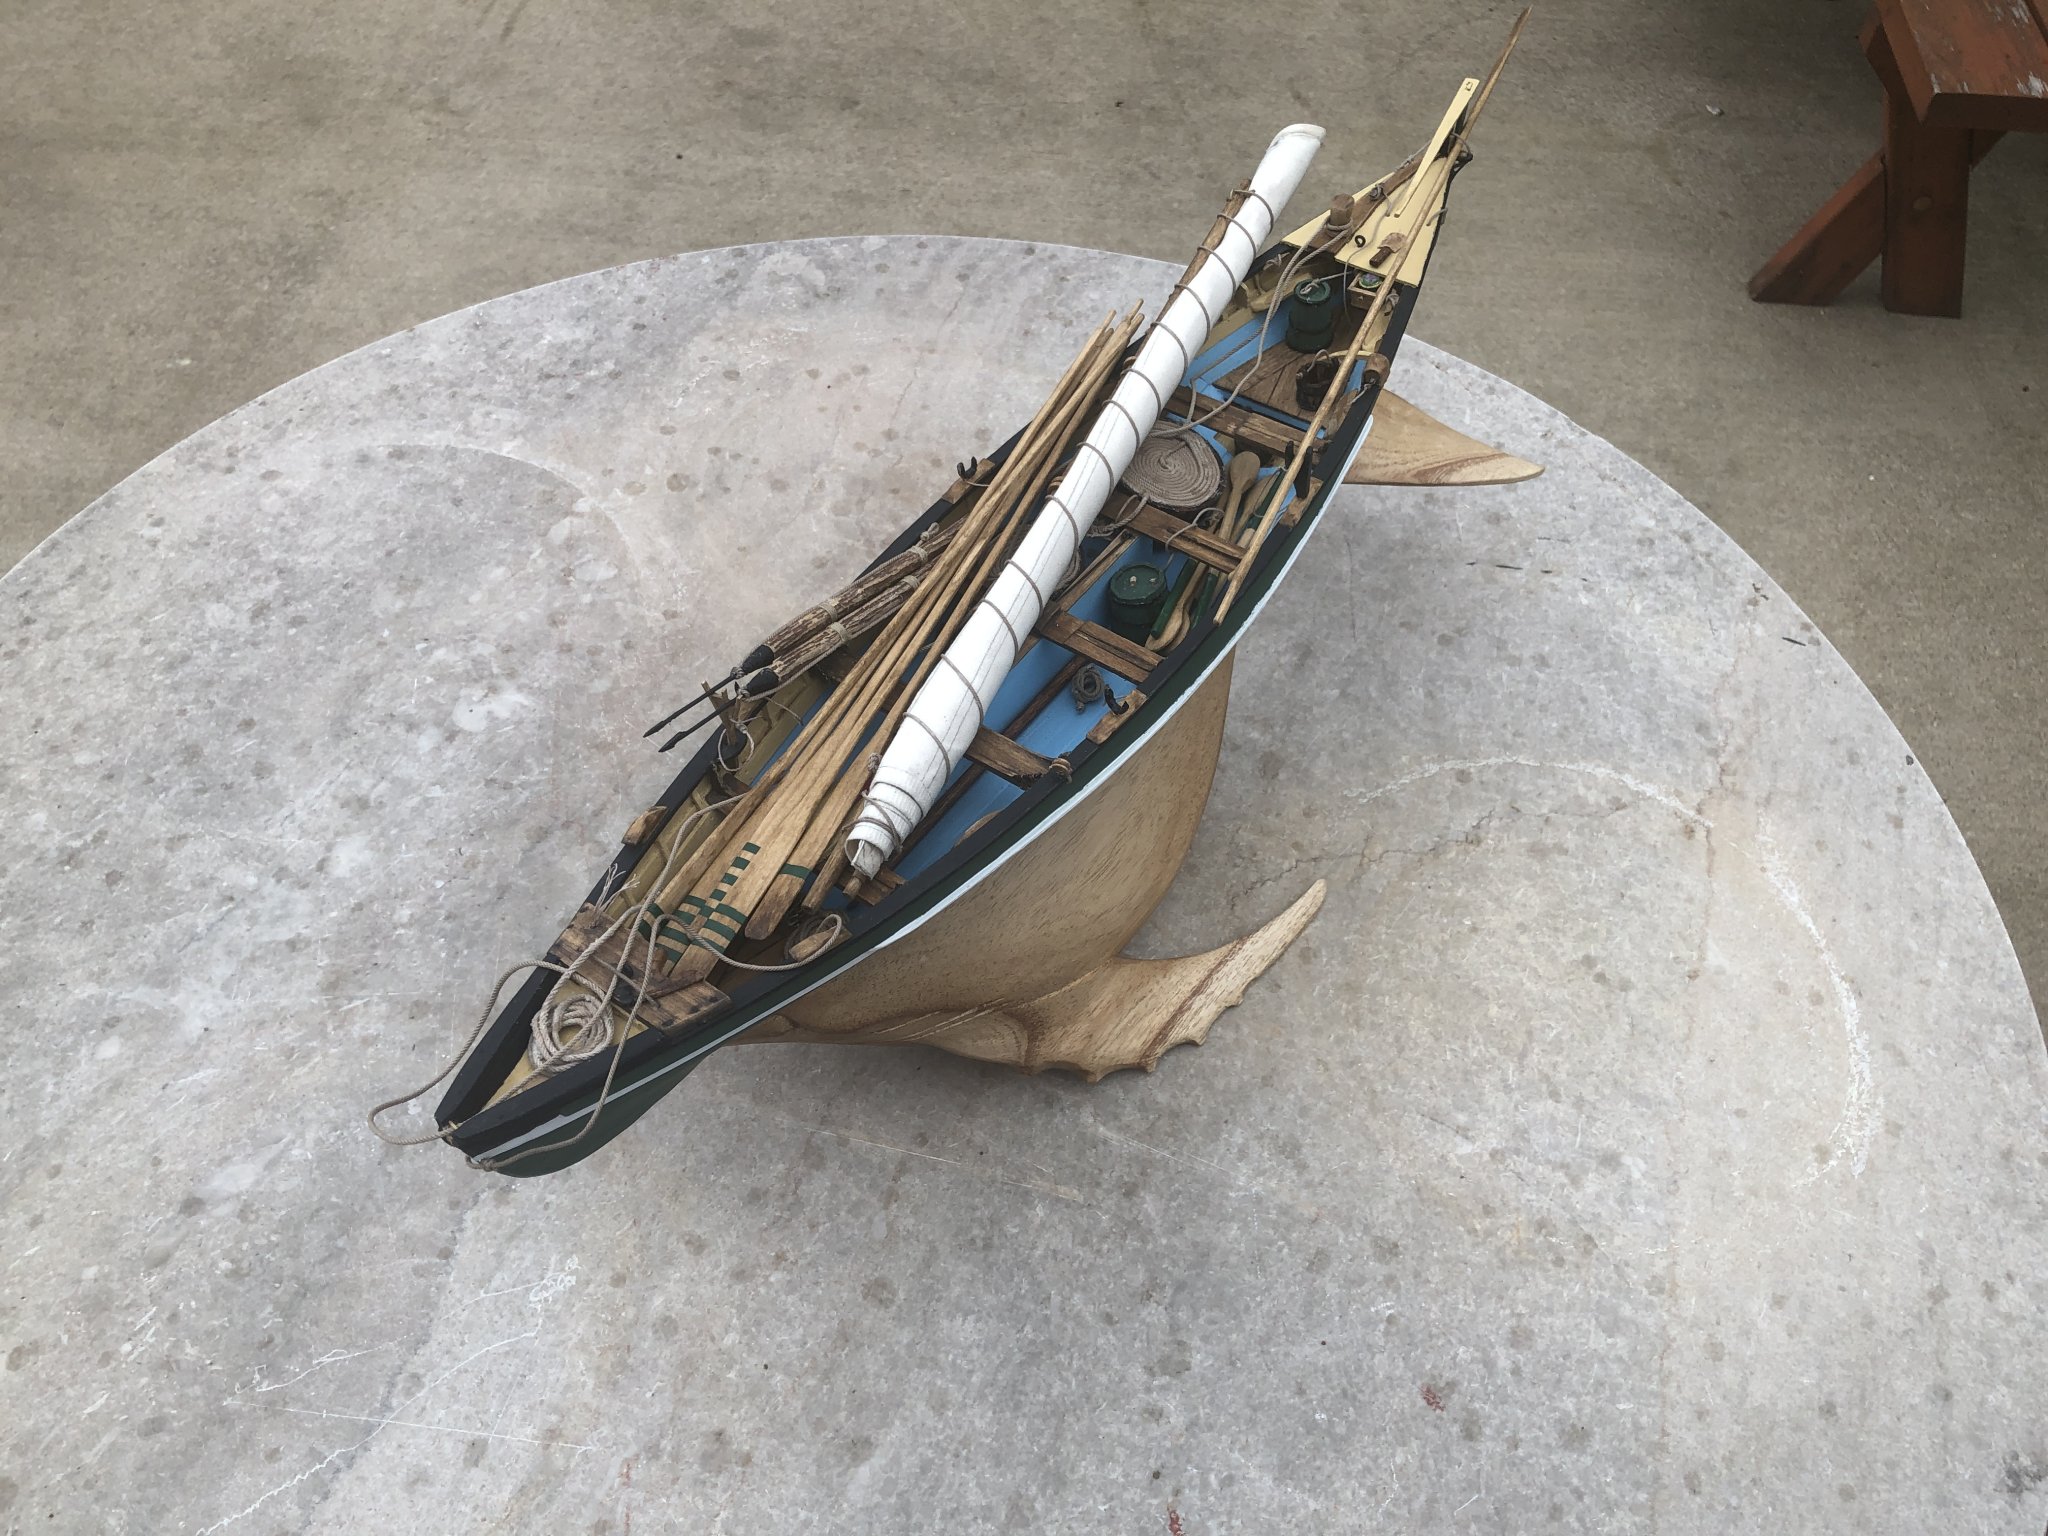
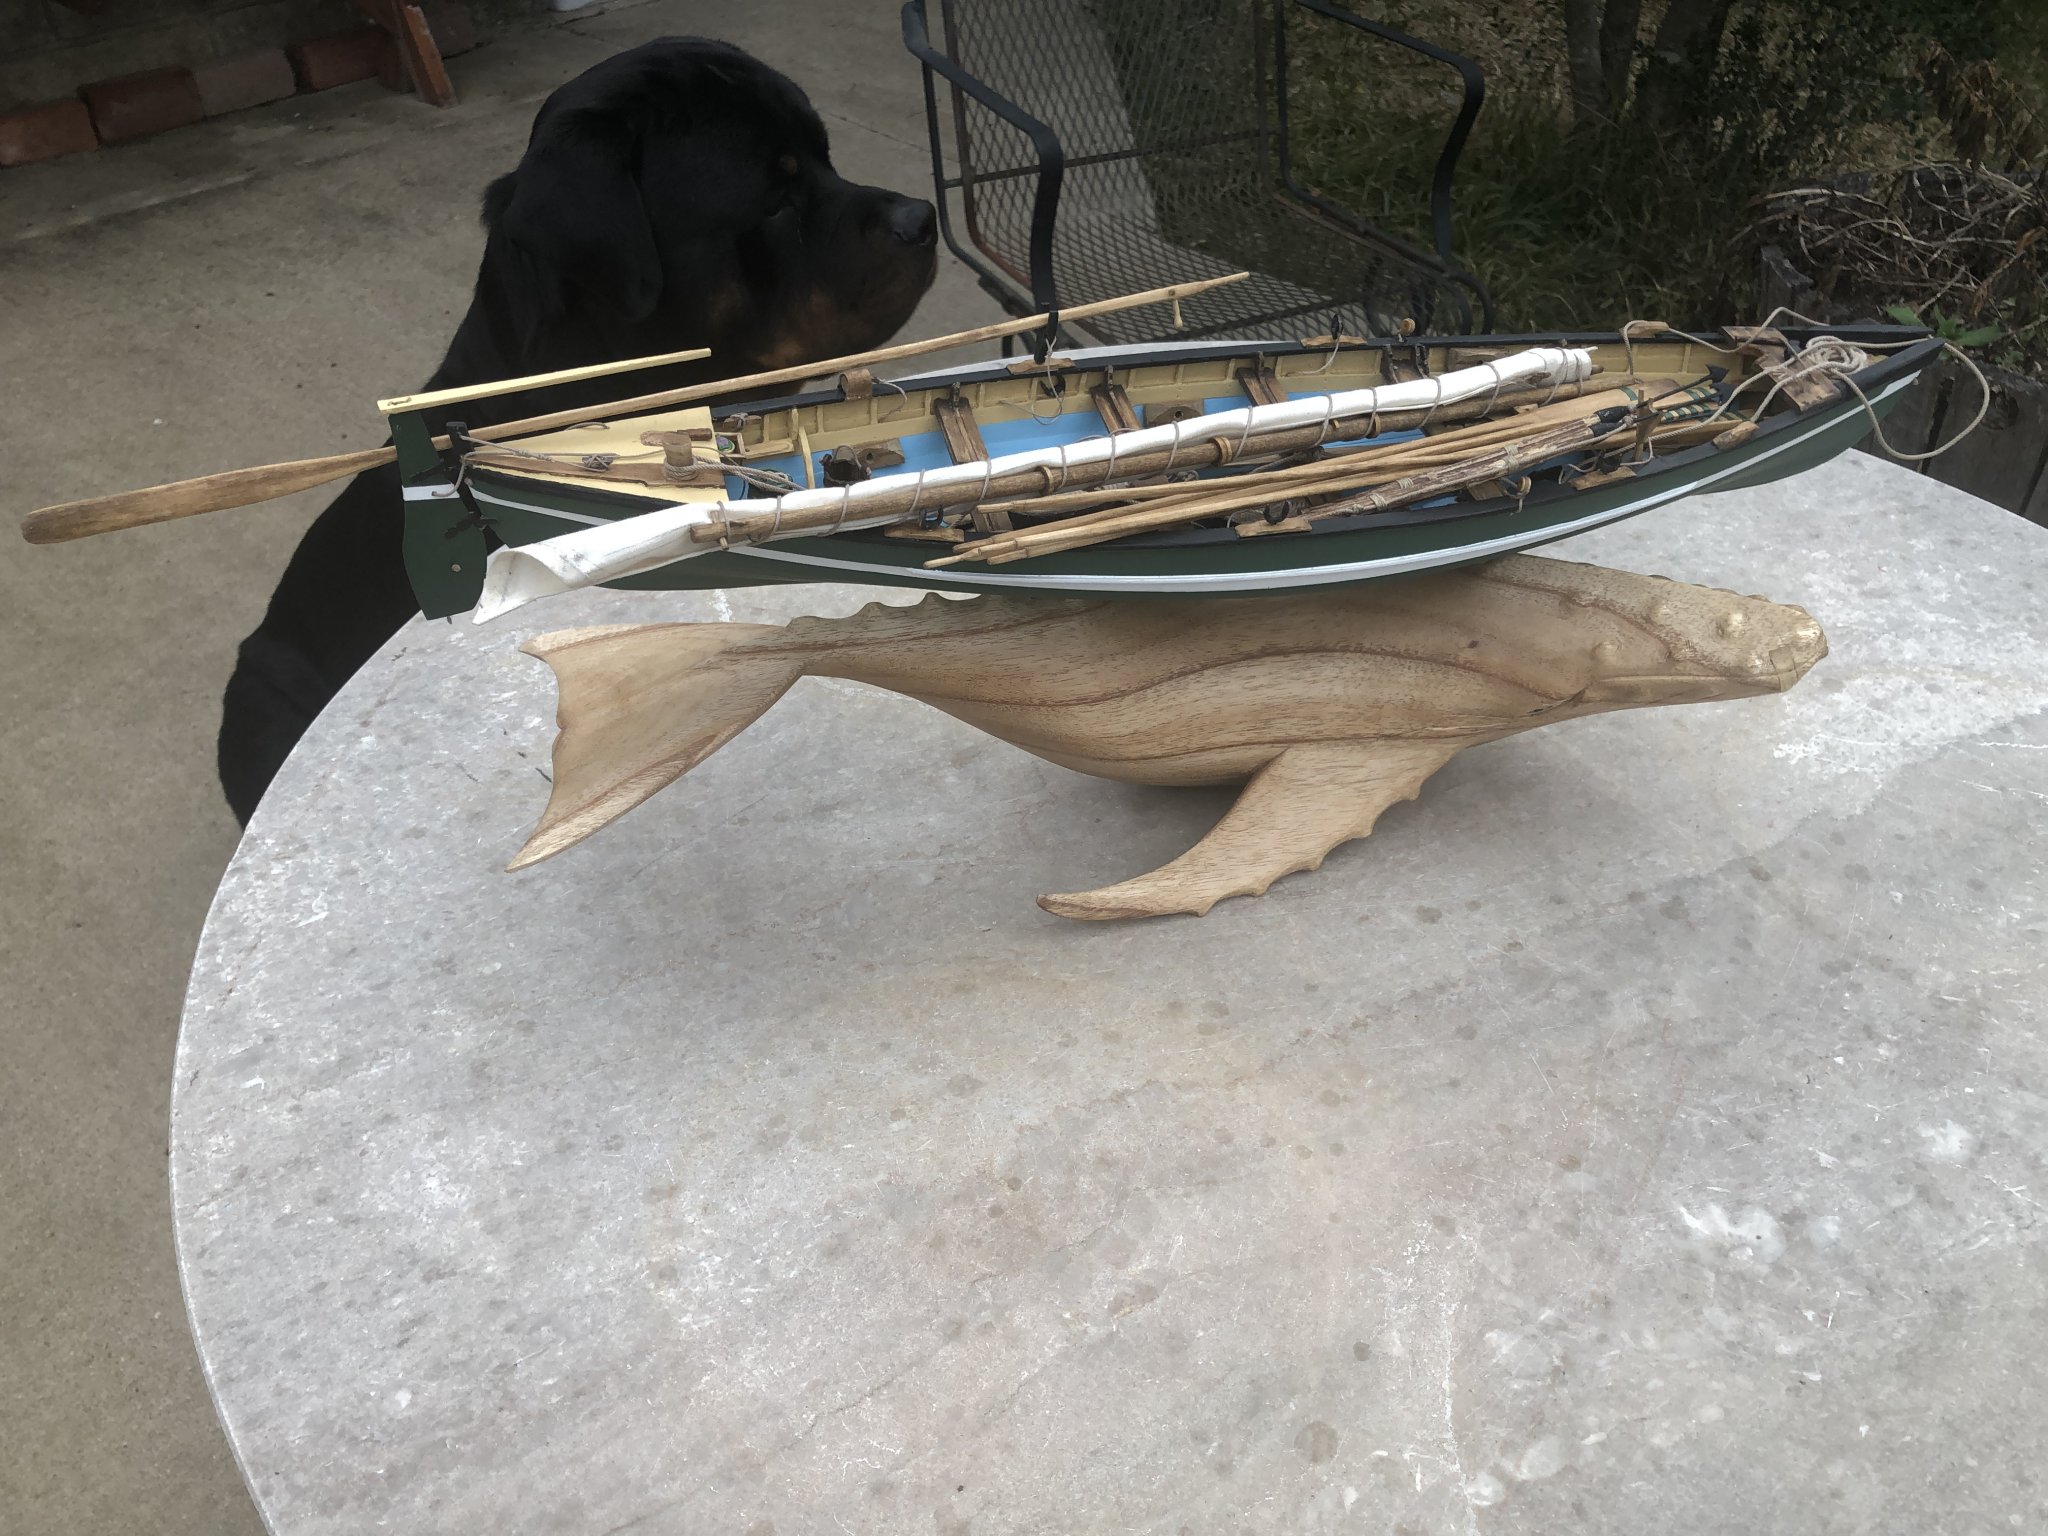
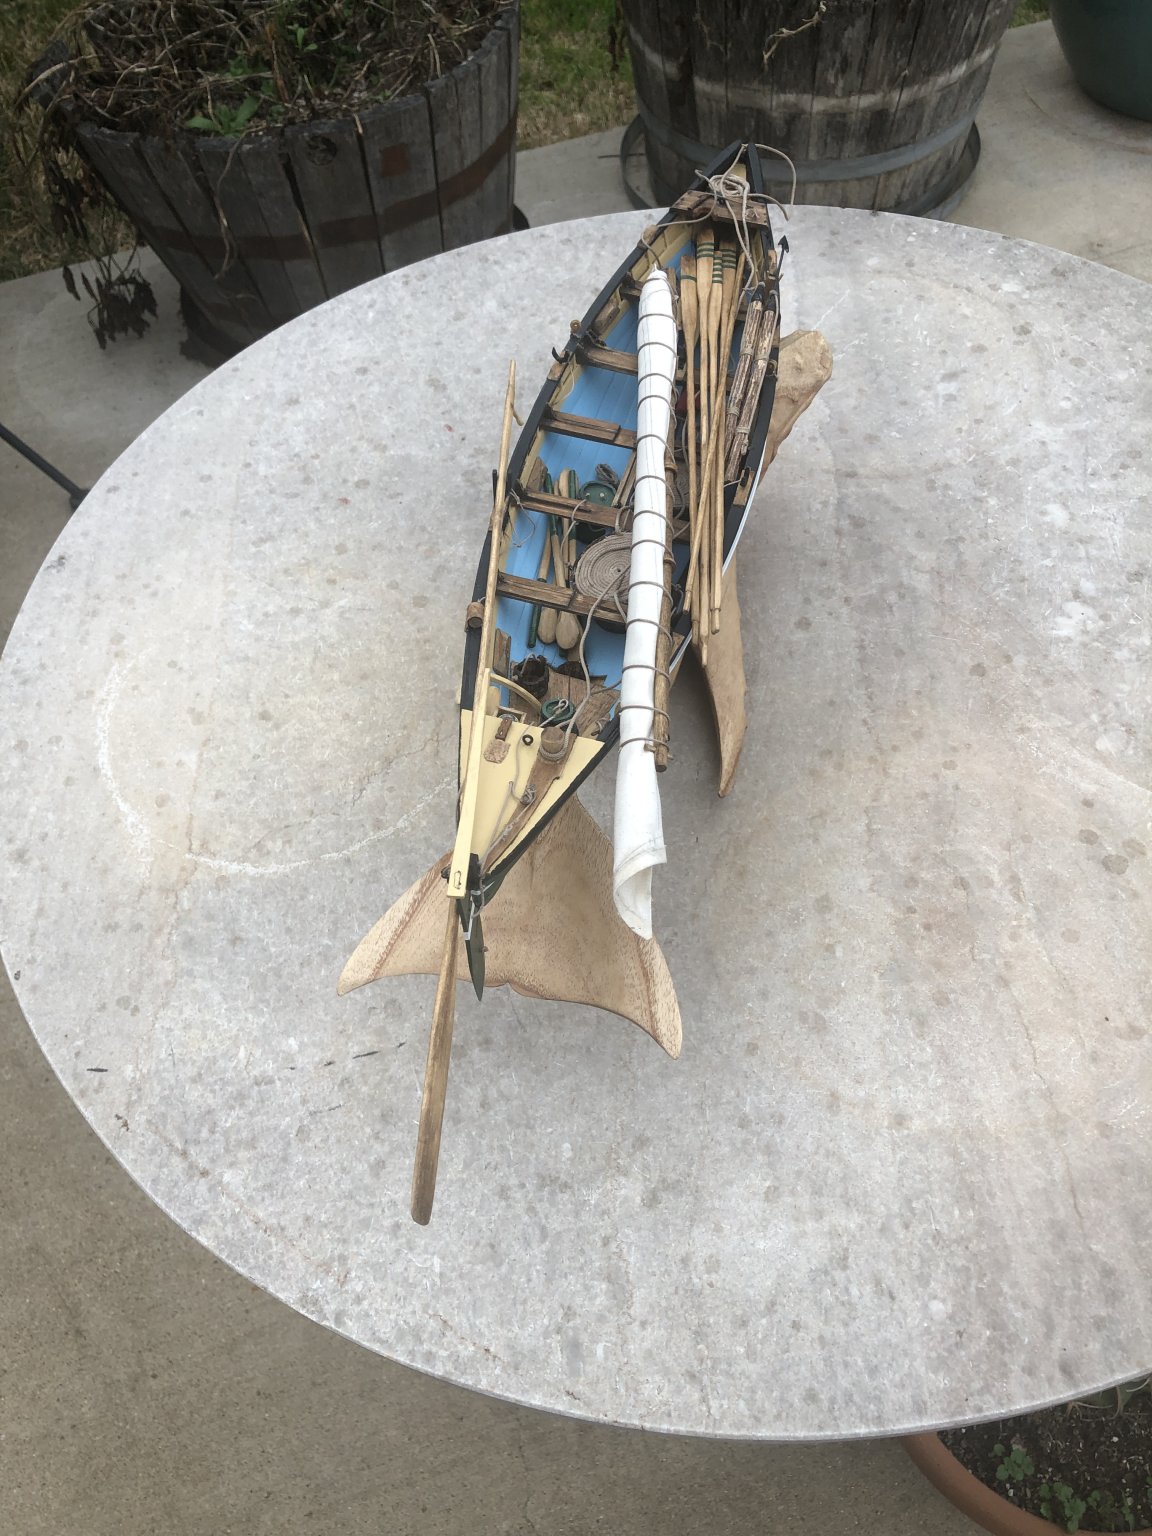
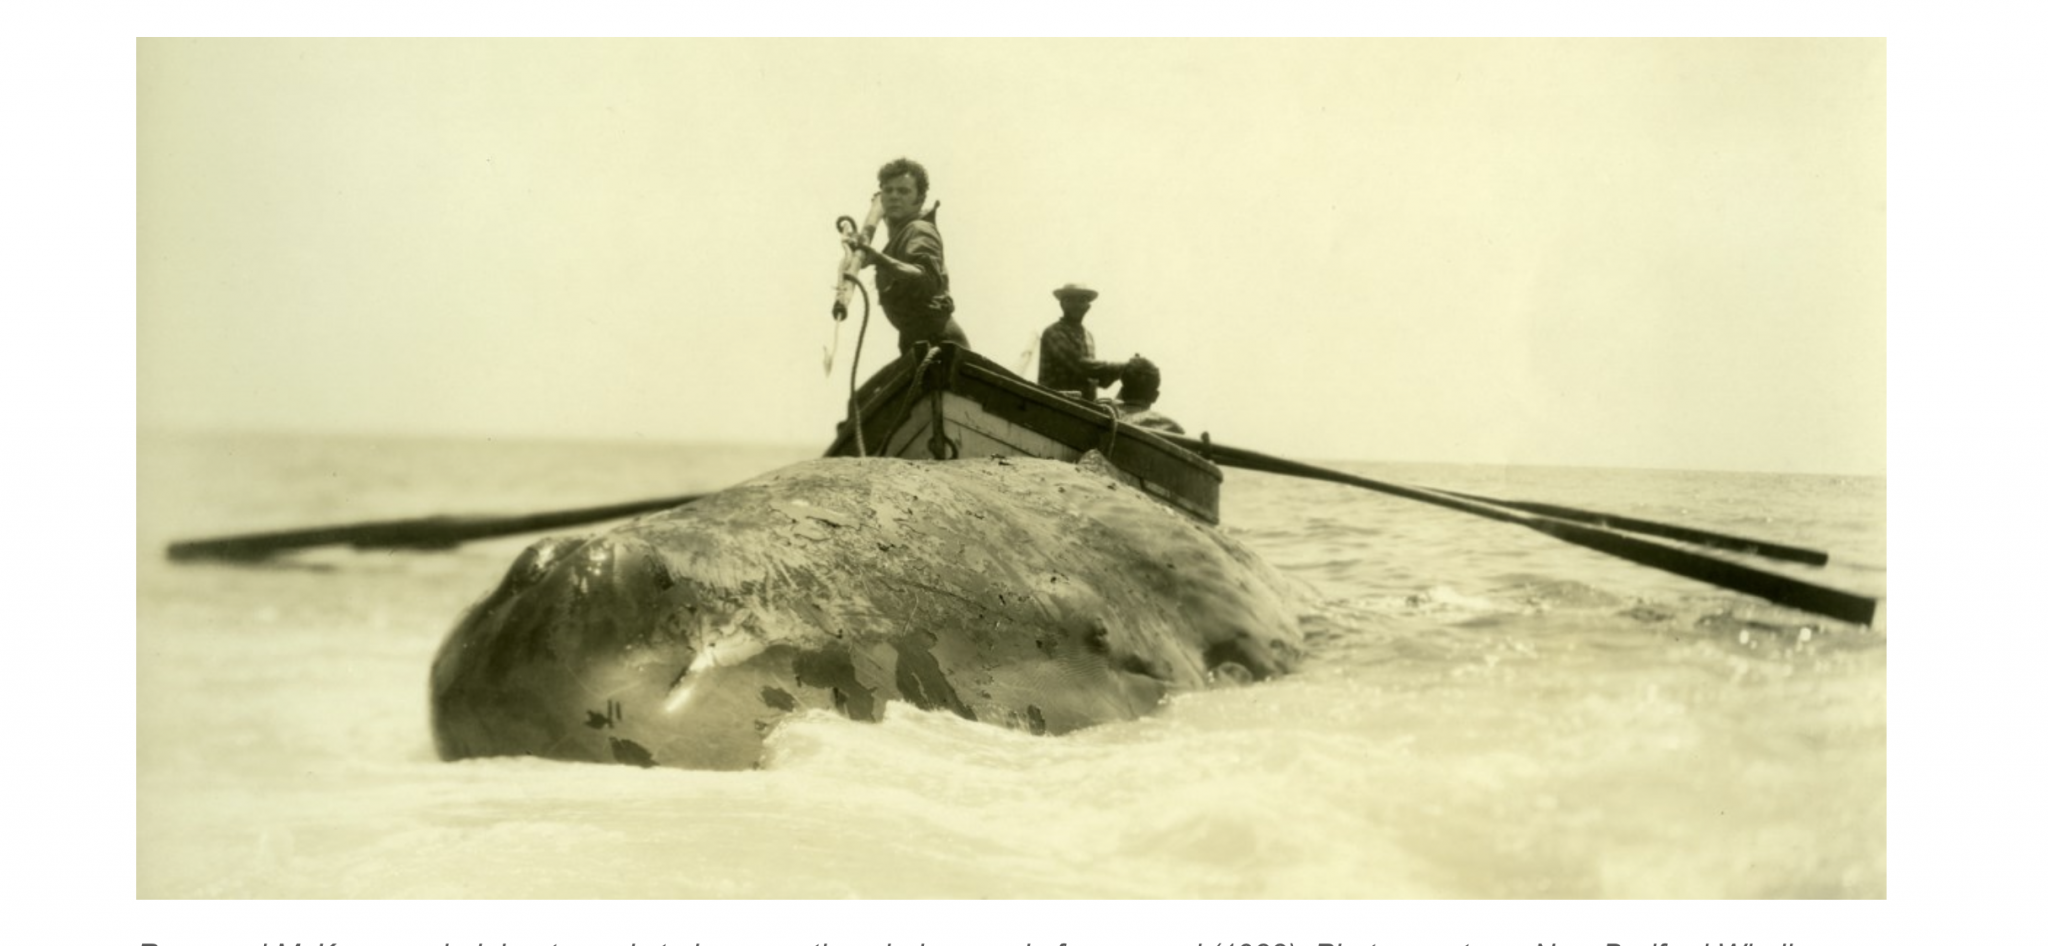
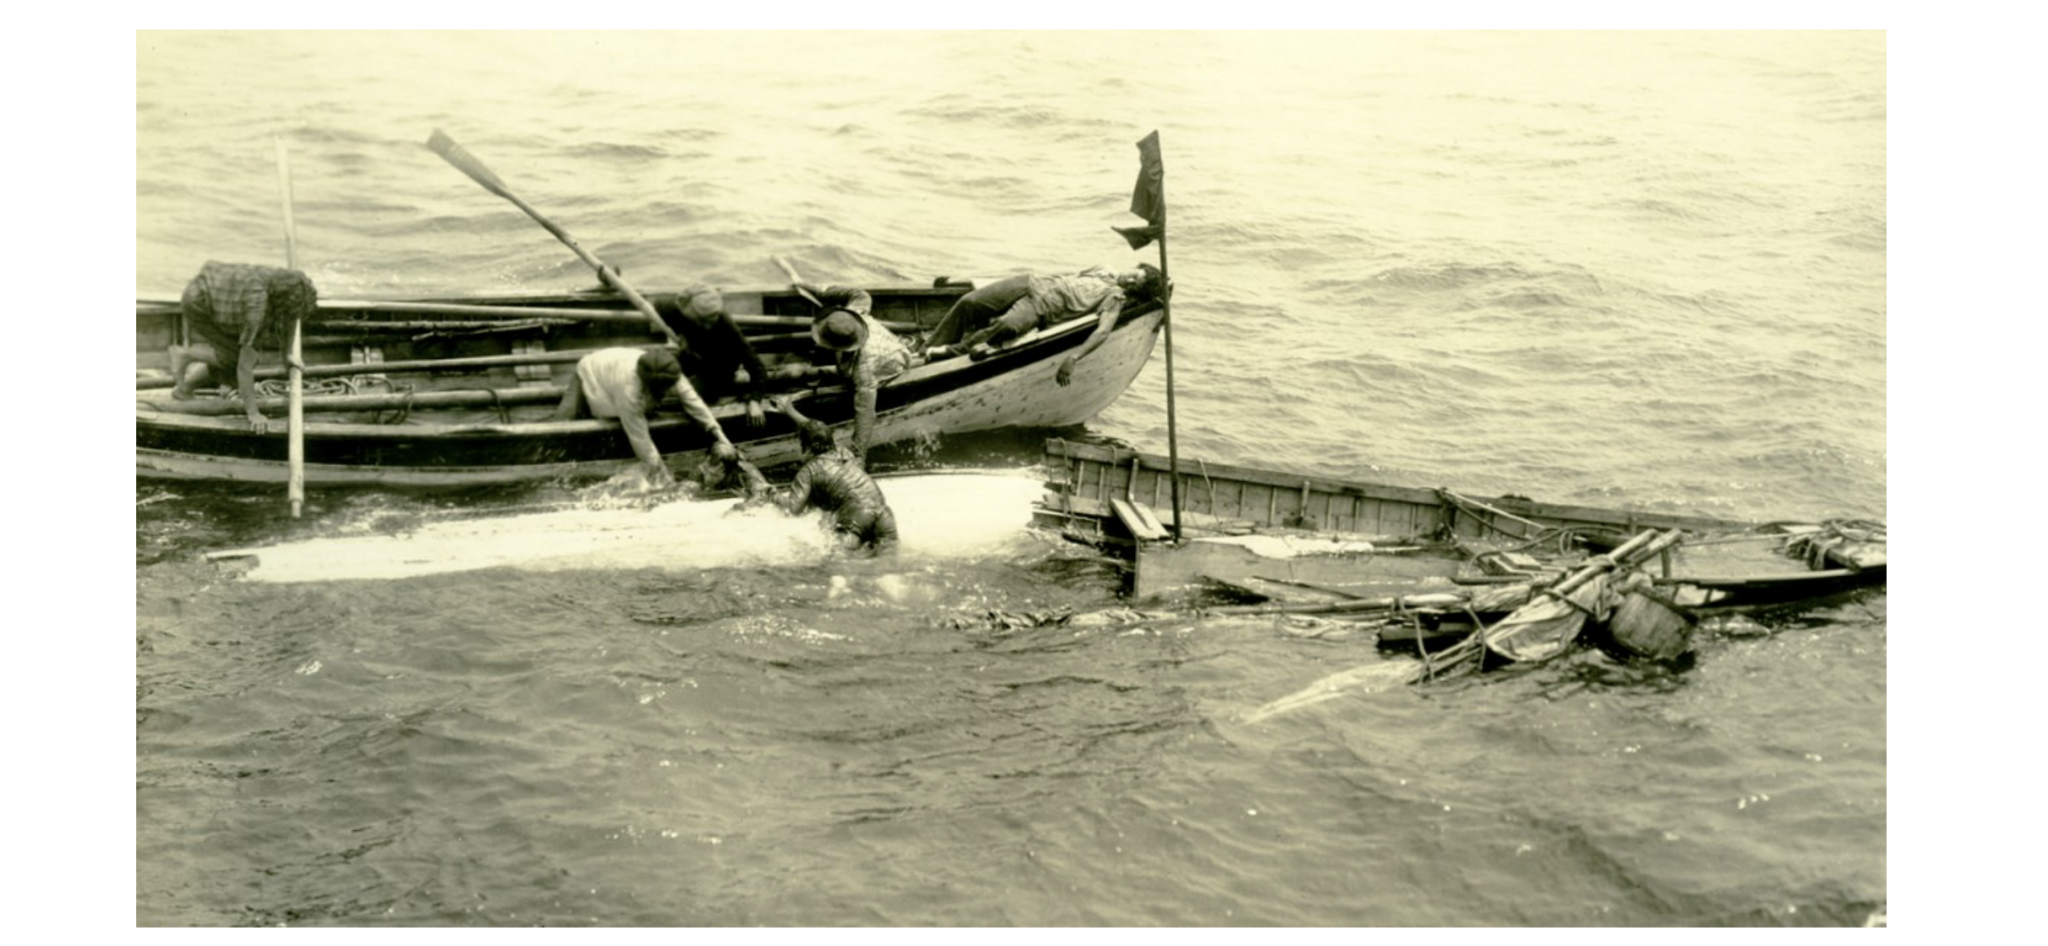
I have finally finished the New Bedford Whaleboat. In line with the pictures in my last post, I have mounted my whaleboat on a whale 🐋 The picture of whalers in a whaleboat on a whale with sail tucked away was excellent inspiration for my final display.
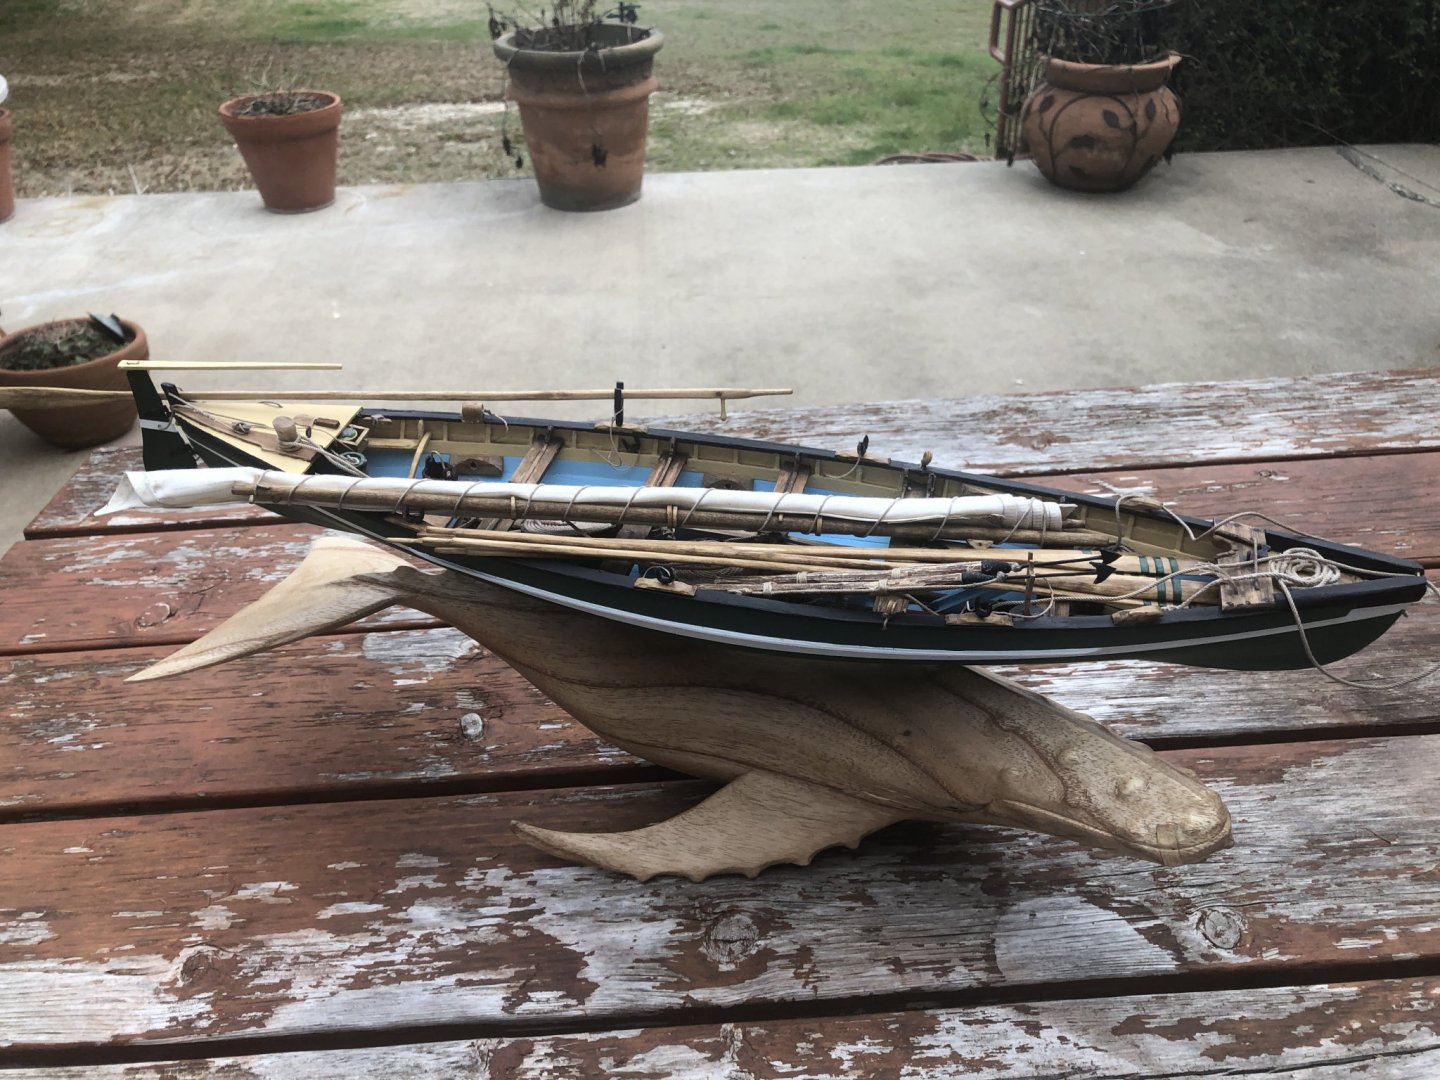
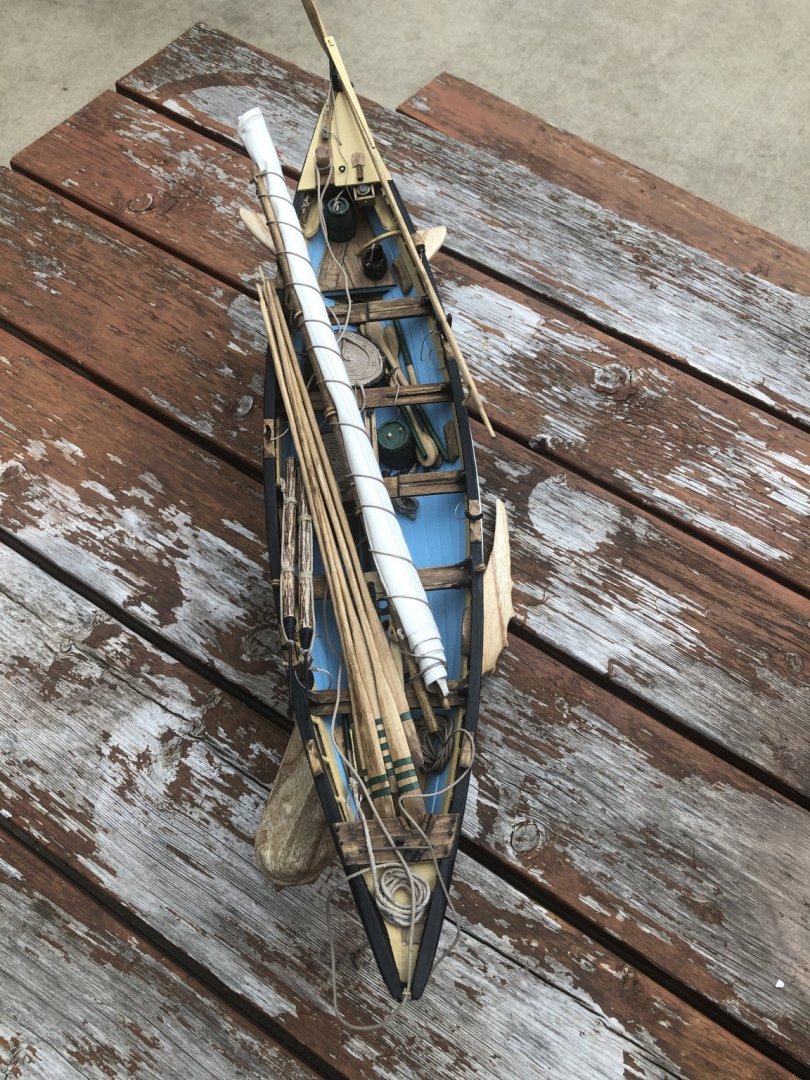

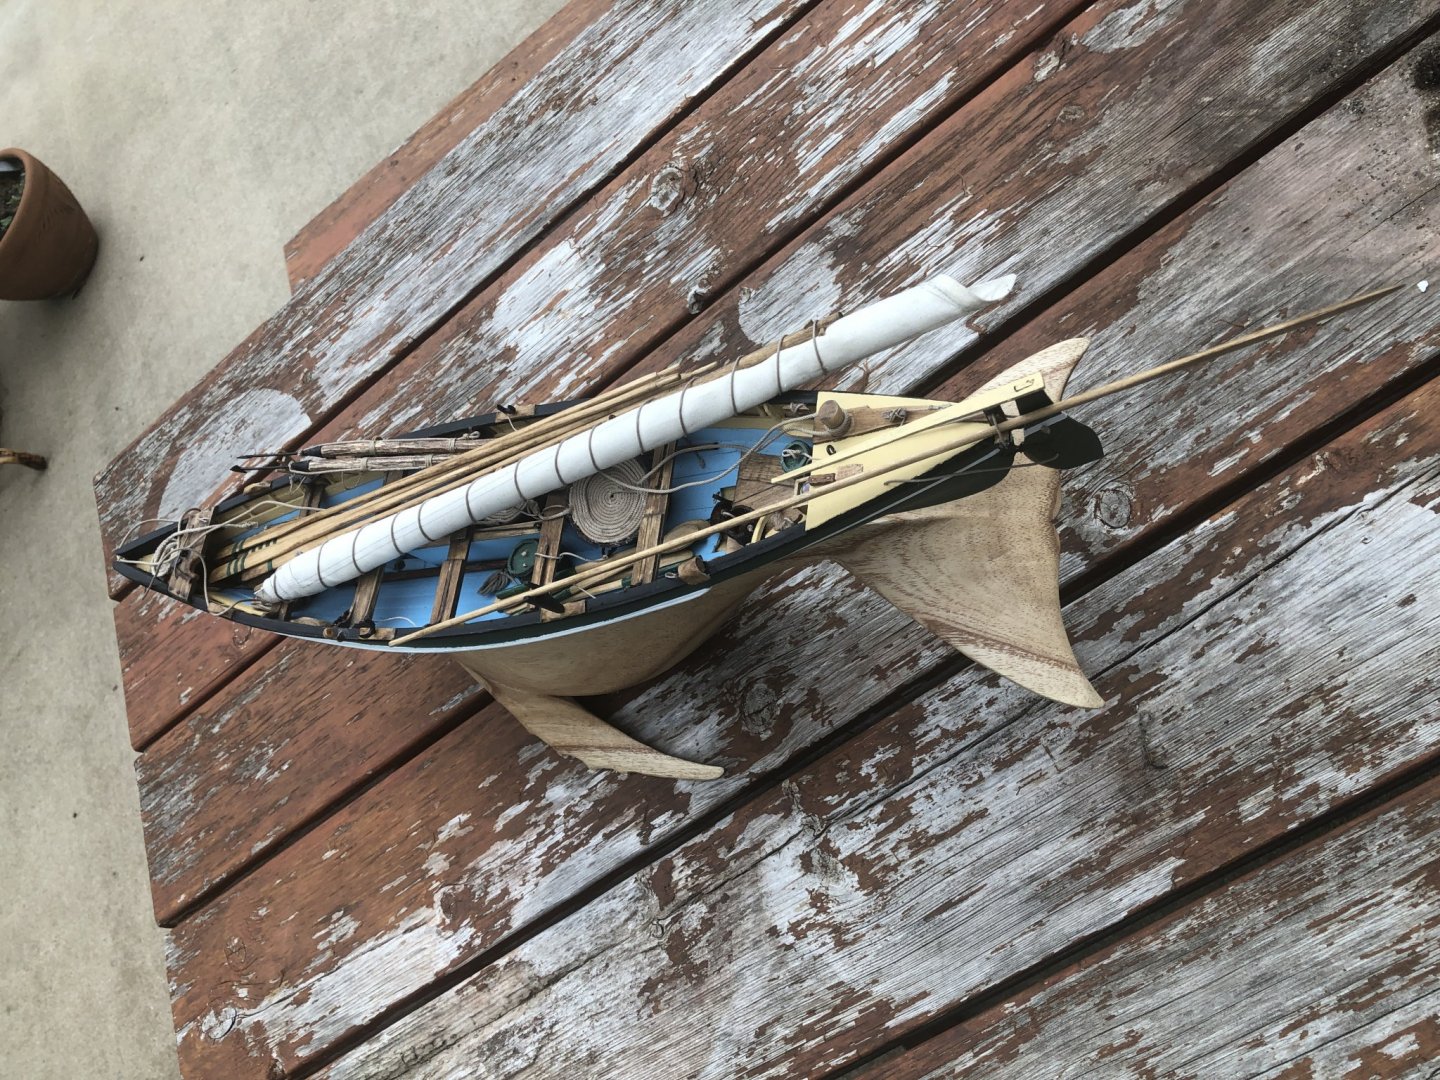

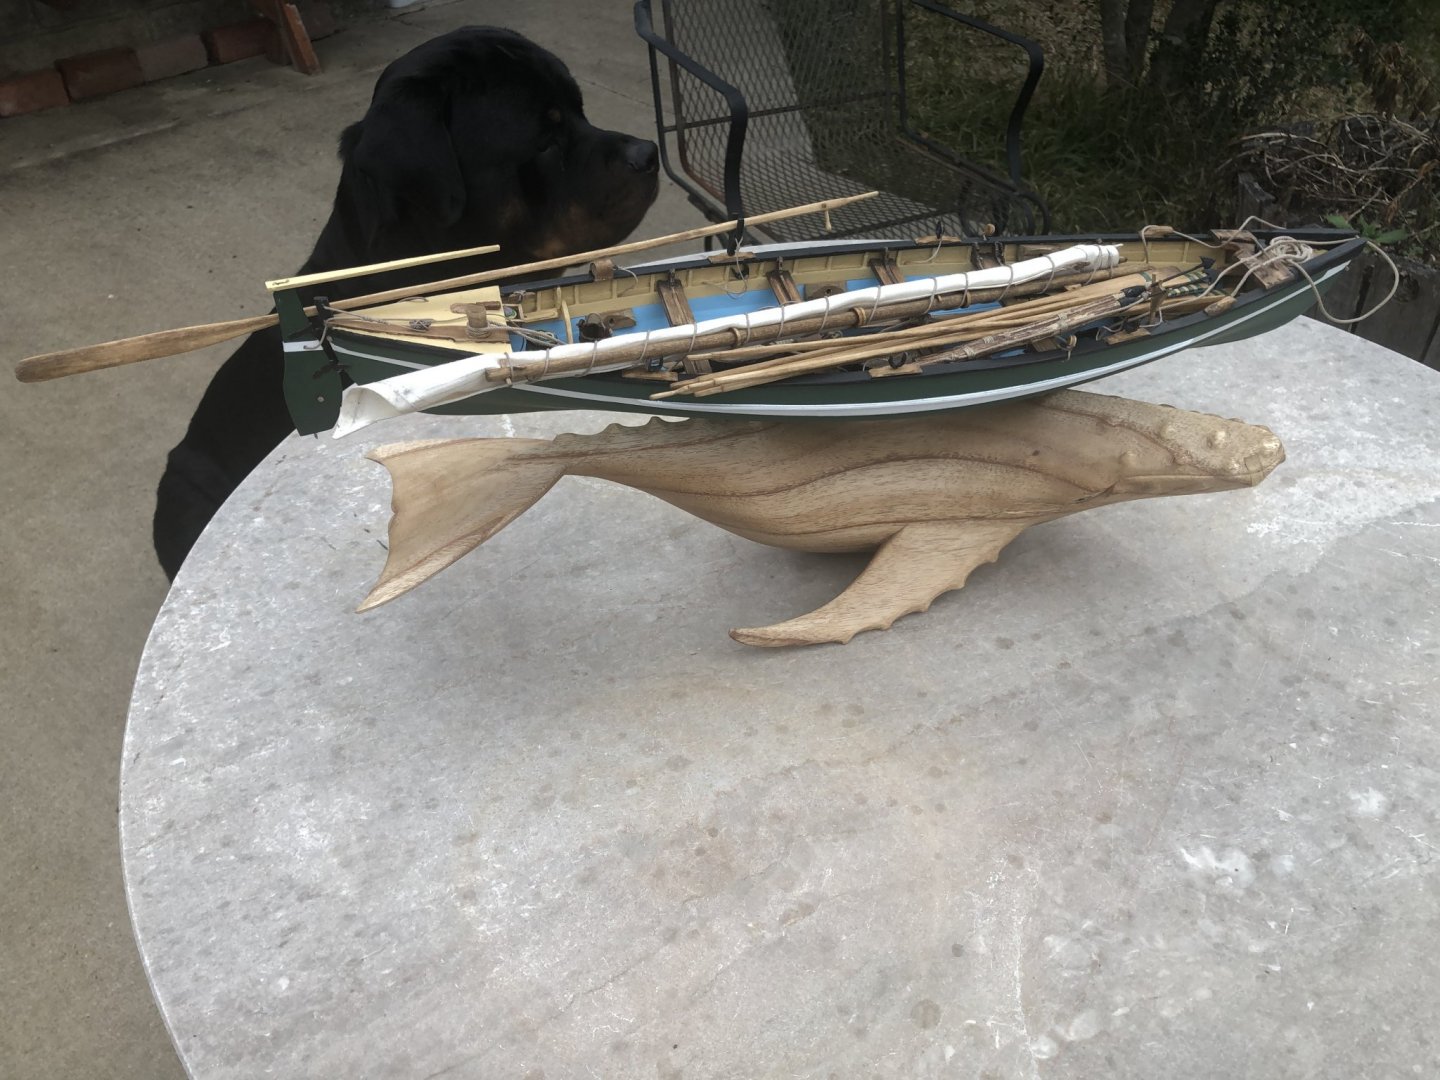

Thanks for looking and for all your comments. This has been a fun build and one which added more to my skill and confidence bag. My next project will be Model Shipways Gatling Gun.
- Ryland Craze, GrandpaPhil, BobG and 6 others
-
 9
9
-
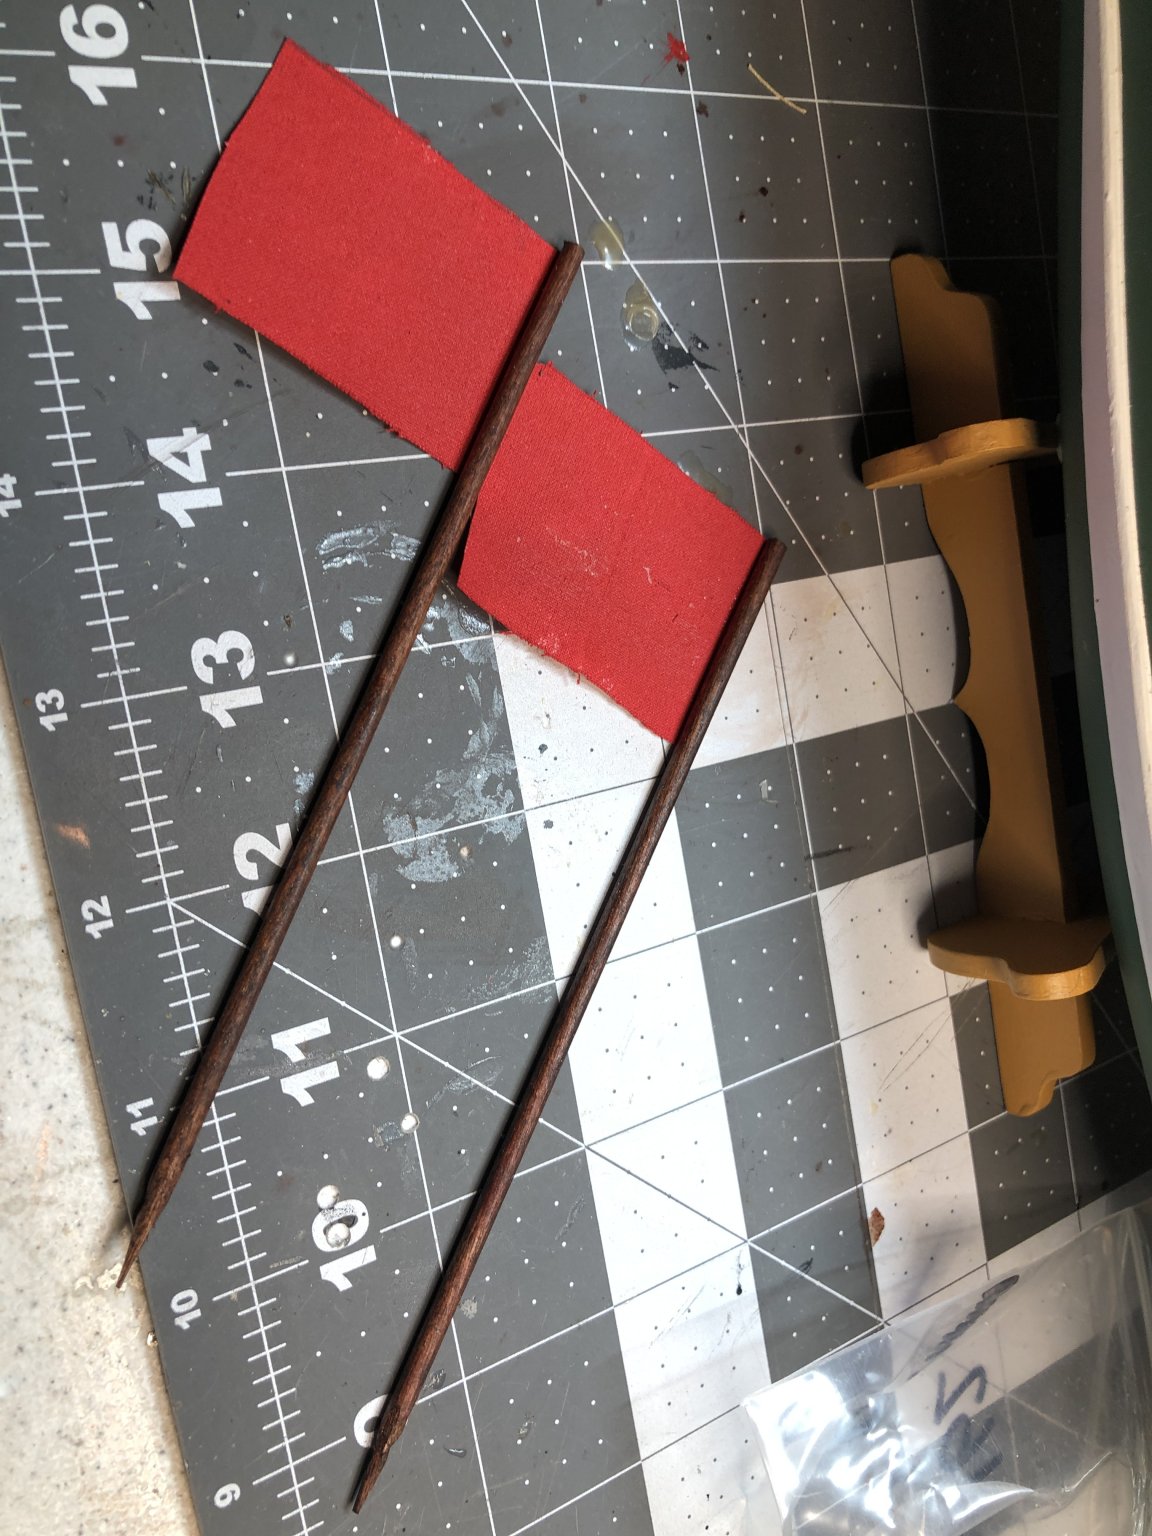
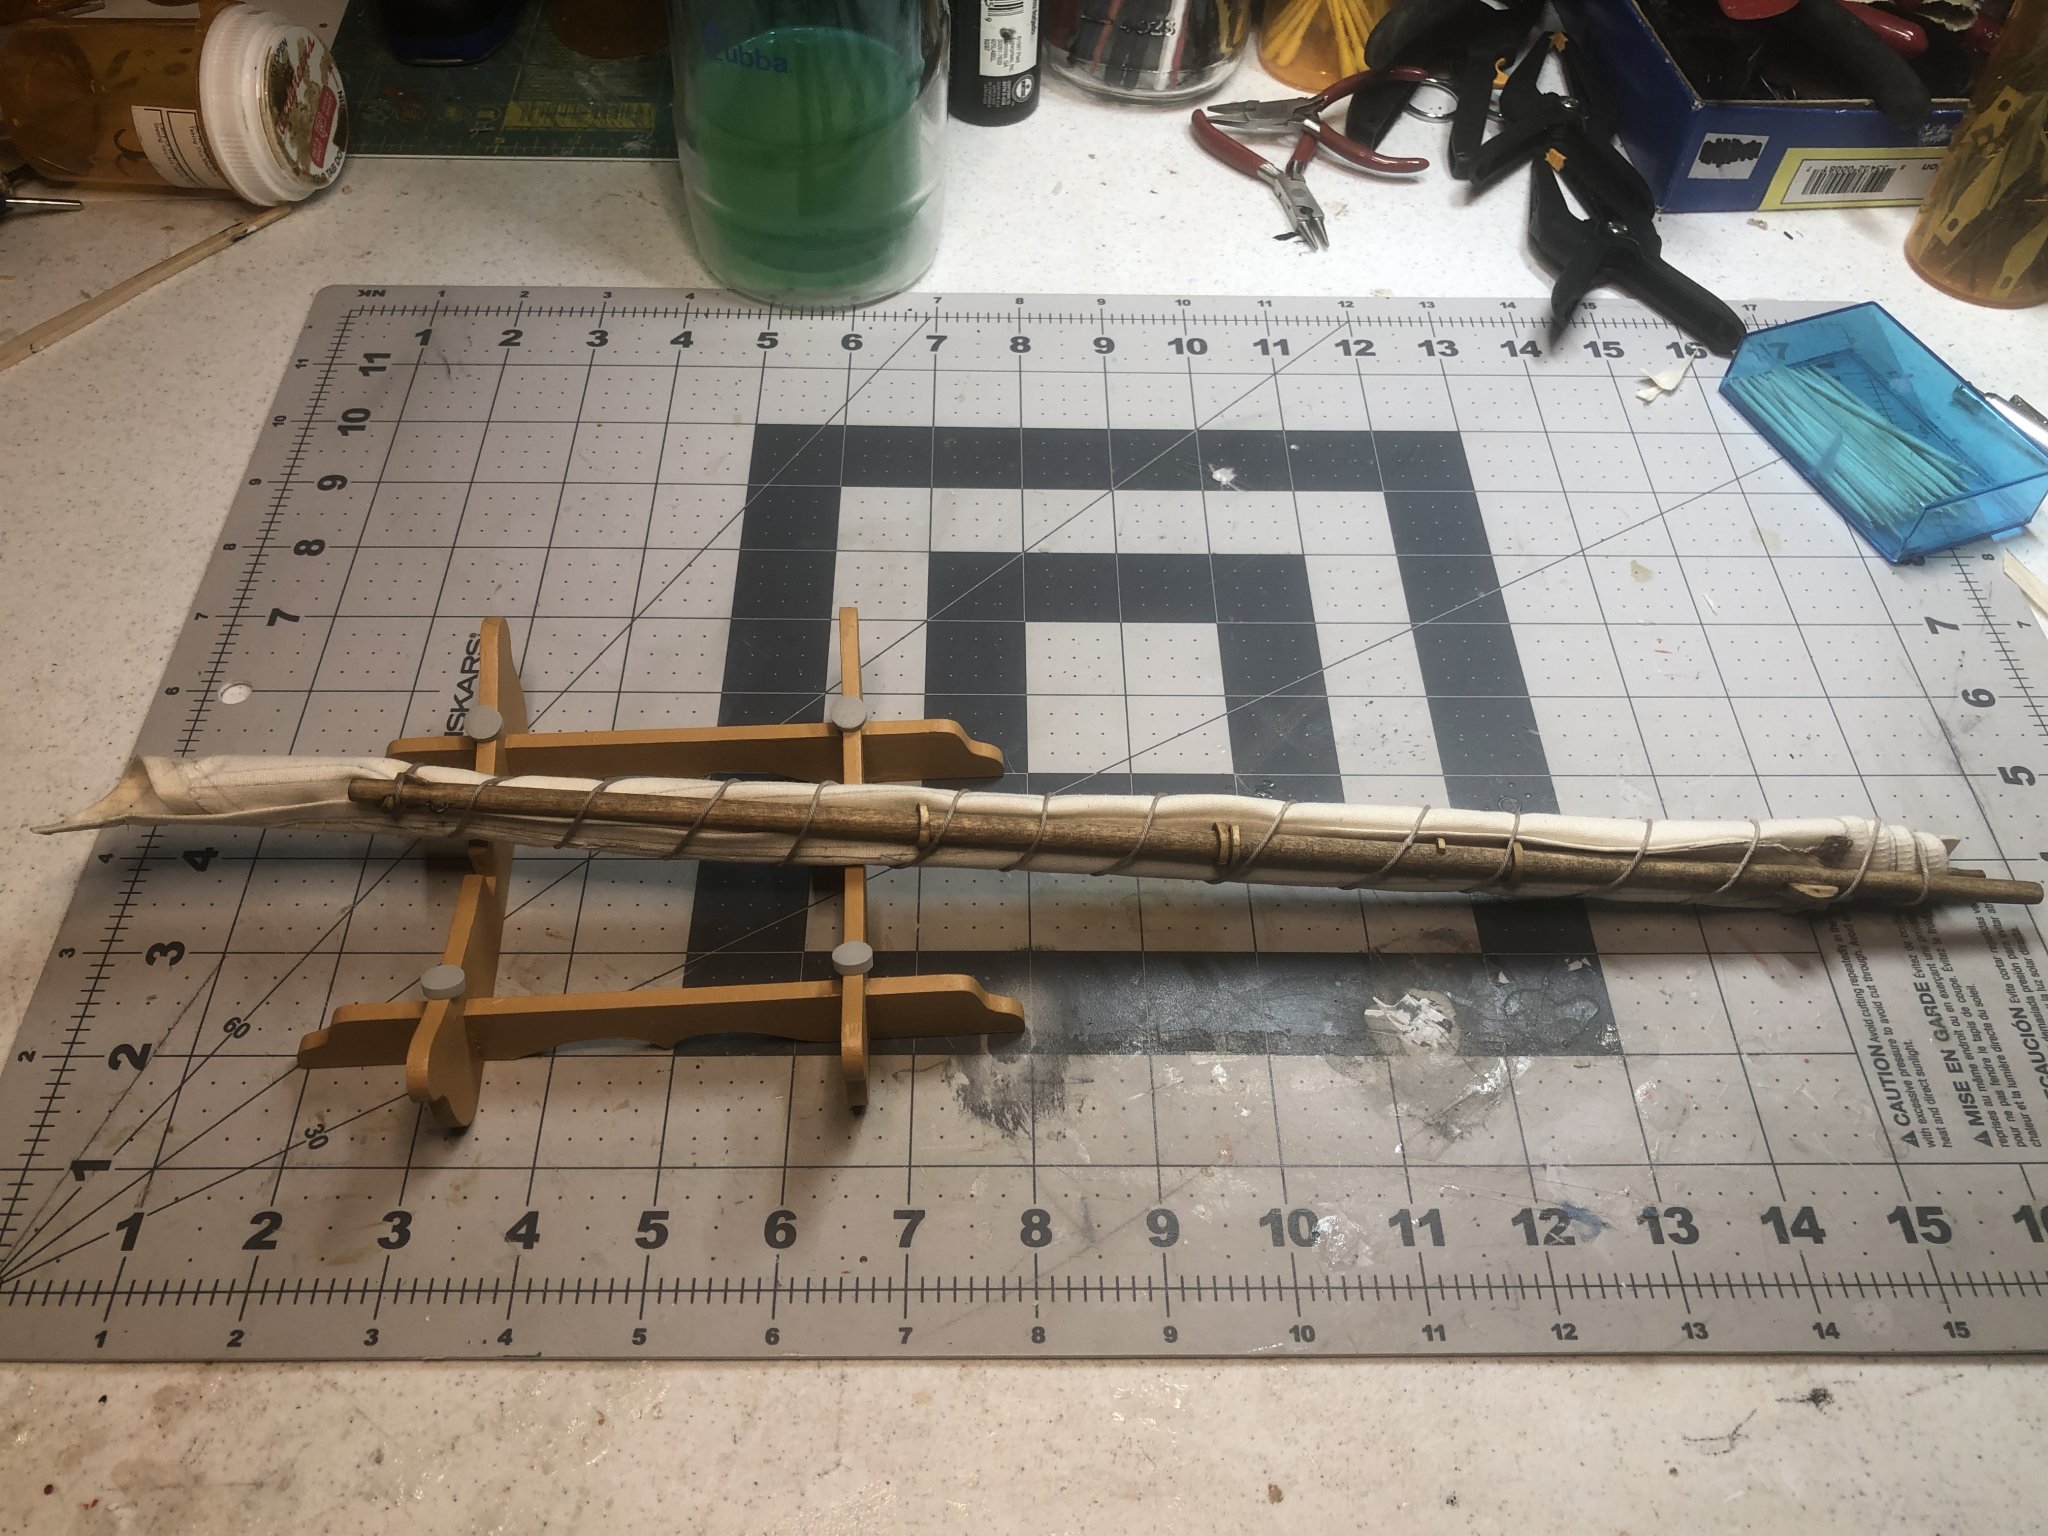
I made two waifs using a visible red color. I painted some “sail” cloth and rolled them onto the poles.
I forgot to mention the making of the hatchet in my last post. The waifs and hatchet can be seen in the following pictures.


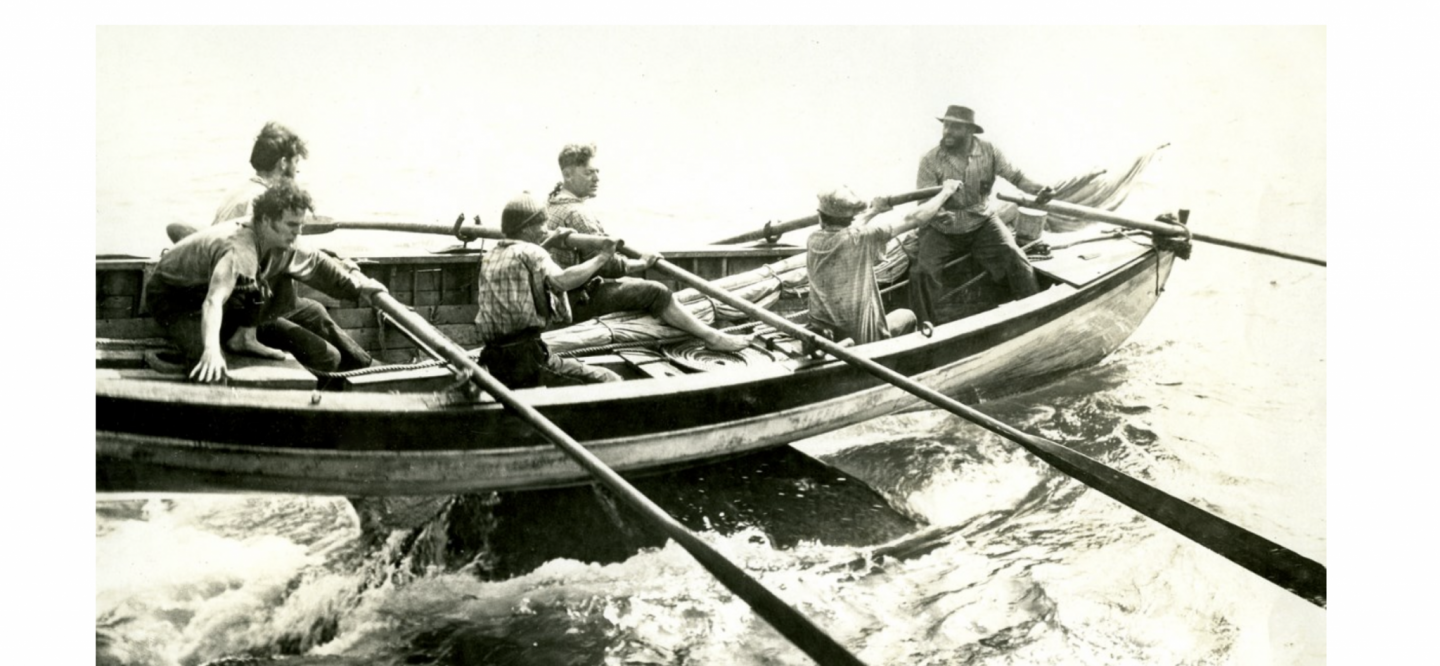
The last item in completing the Whaleboat was the sail. I was in a quandary whether to have a raised sail or a wrapped sail as shown on the kit box (see post #1). I decided on the latter as it will fit my display (to be shown later when completed) as well as the following pictures which I found on the internet (no source was found).

My finished sail is shown below.

- Ryland Craze, G.L., tmj and 1 other
-
4
-
Some pics of progress so far.


- Tigersteve, GrandpaPhil and G.L.
-
3
-
I delete photos from text, not download area and some pop up in text. I cannot seem to delete them unless I trash them from download area which I don’t want to do if the.photo is used elsewhere in the text. Any suggestions?
-
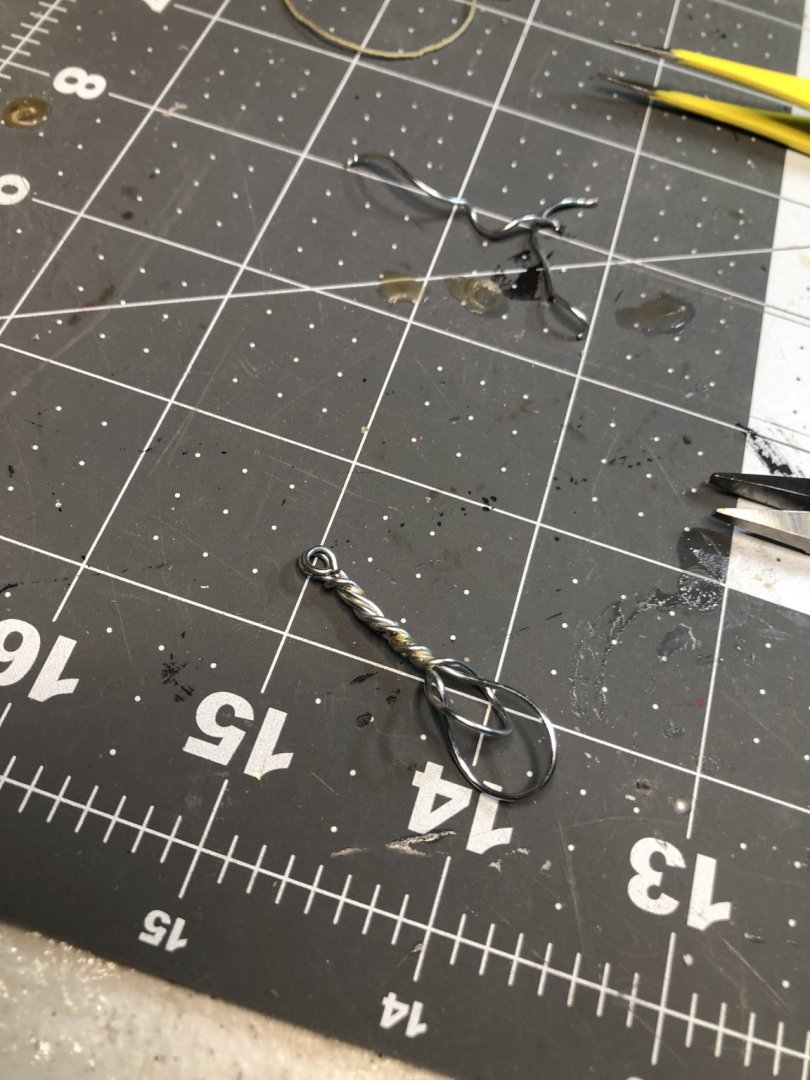
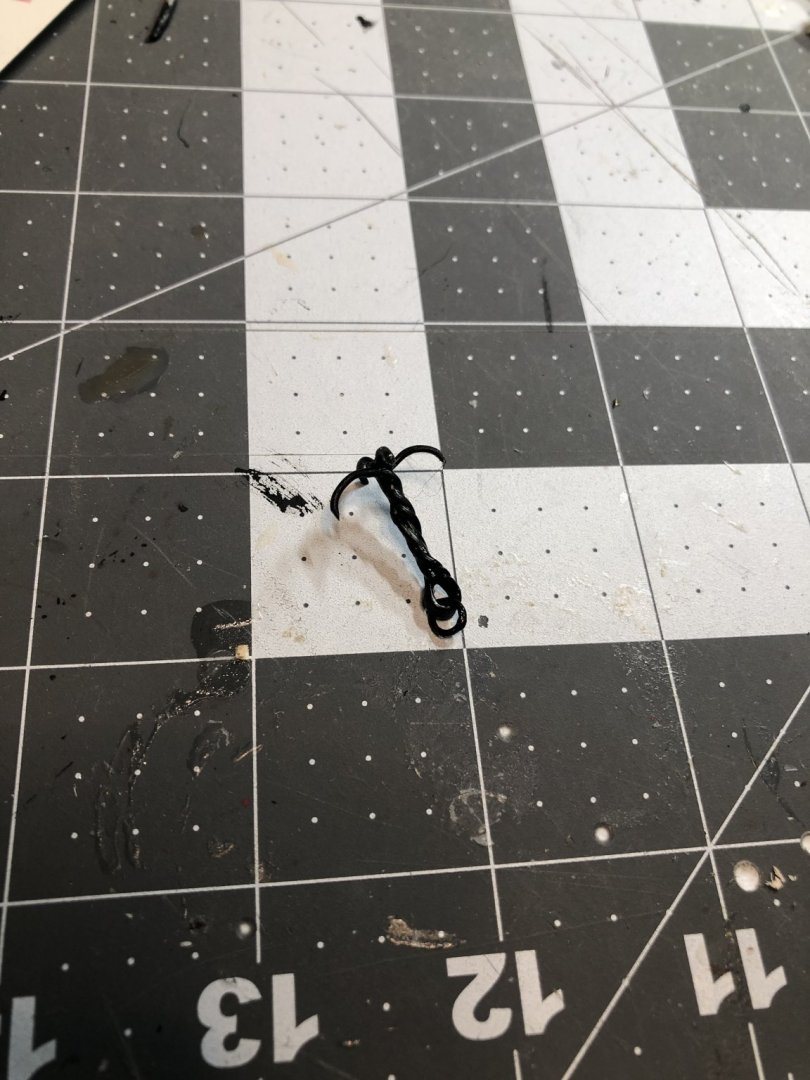
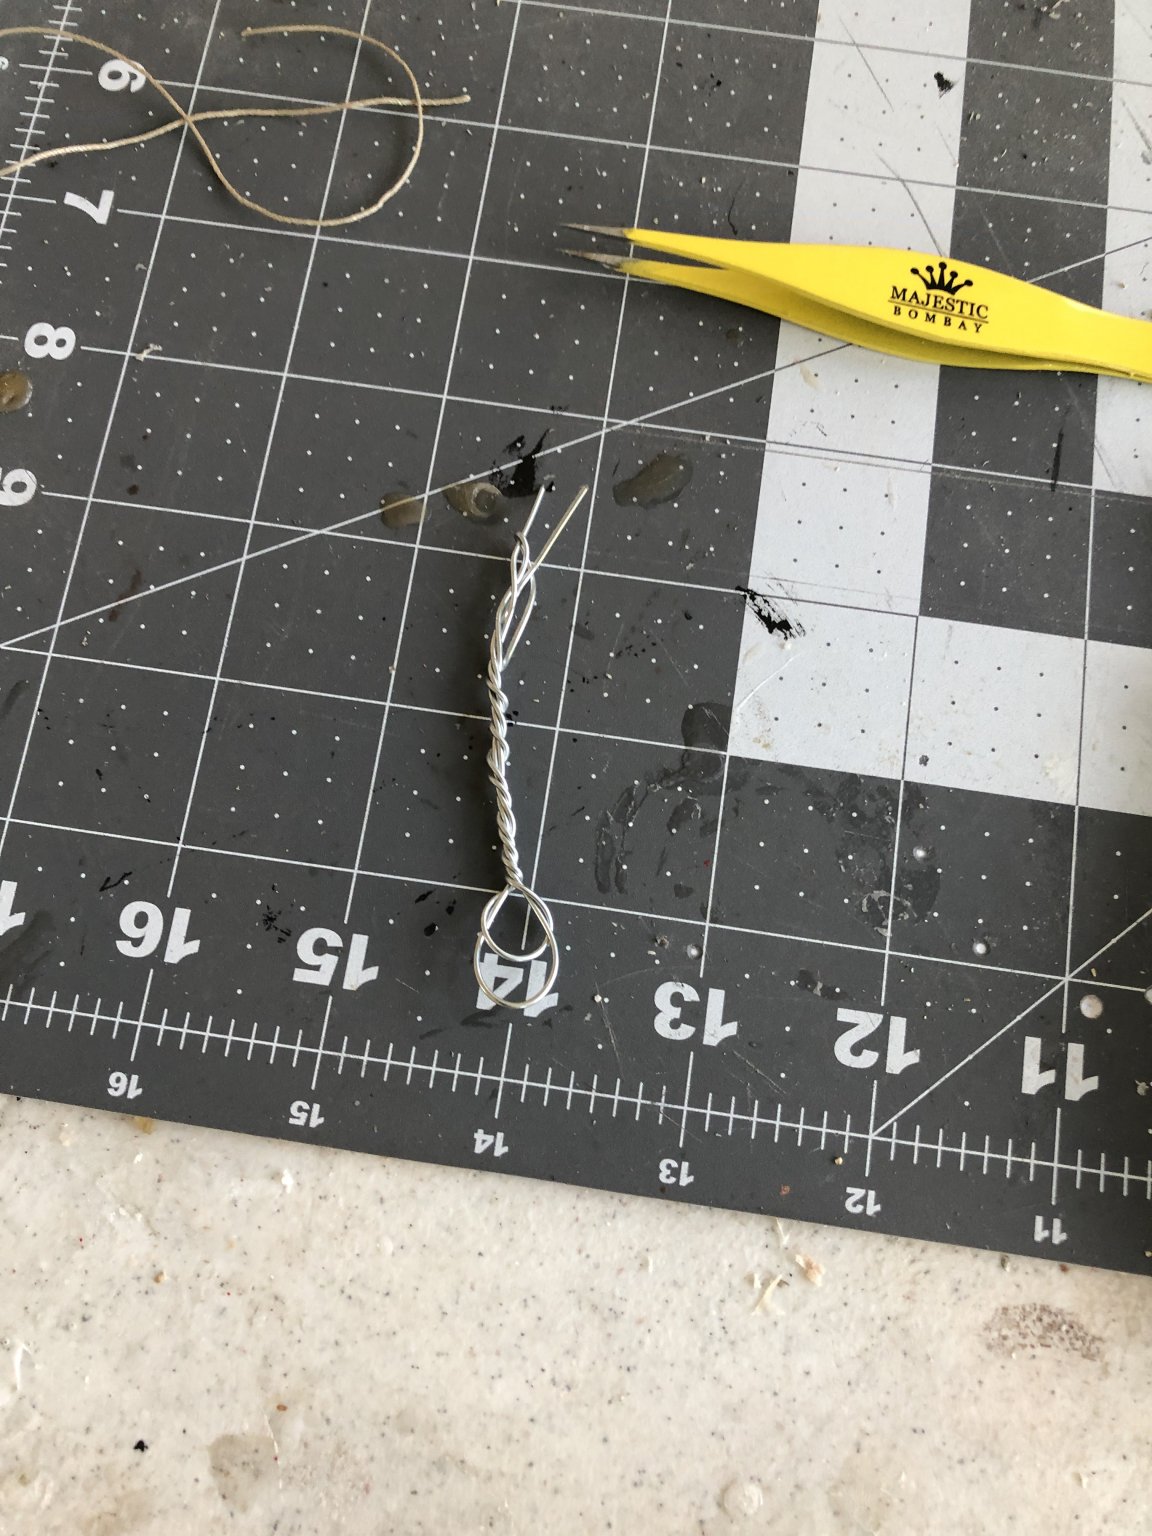
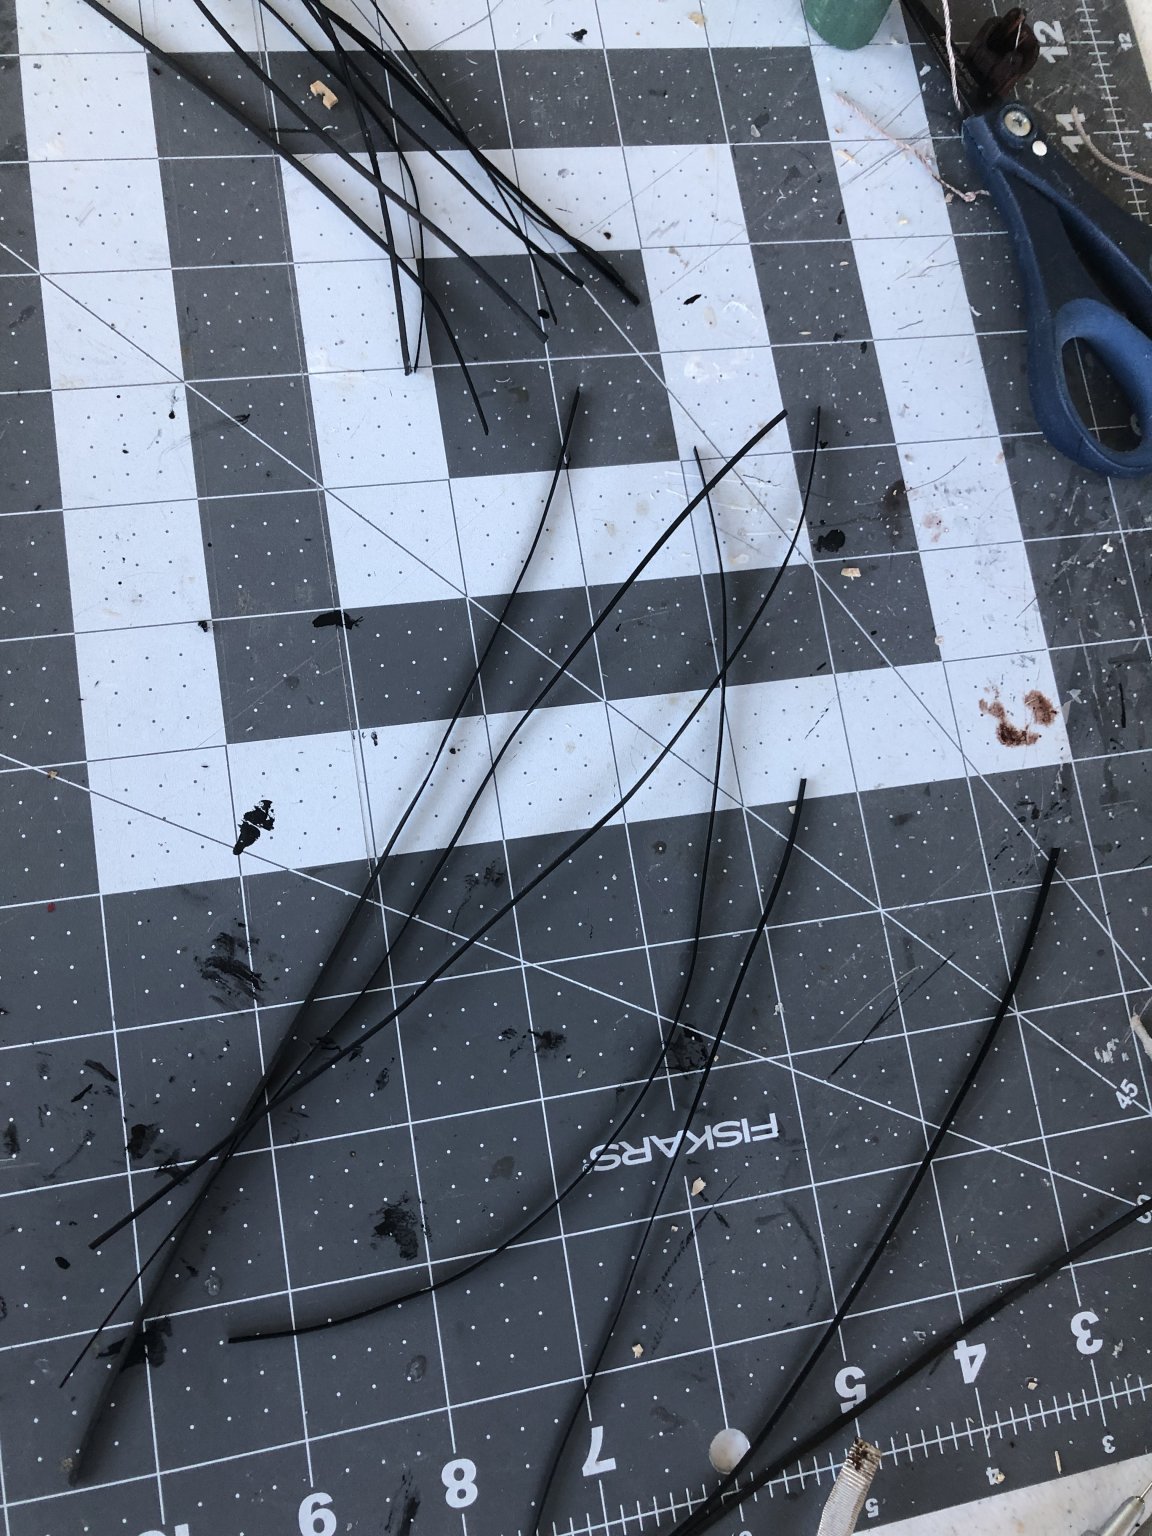
The Grapnel was made from 20 gauge galvanized wire. A length was folded twice yielding four strands. The strands were twisted tightly and soldered to form the shank. The end loops were cut open and the resulting tines were bent into an eye at one end and four prongs at the other.
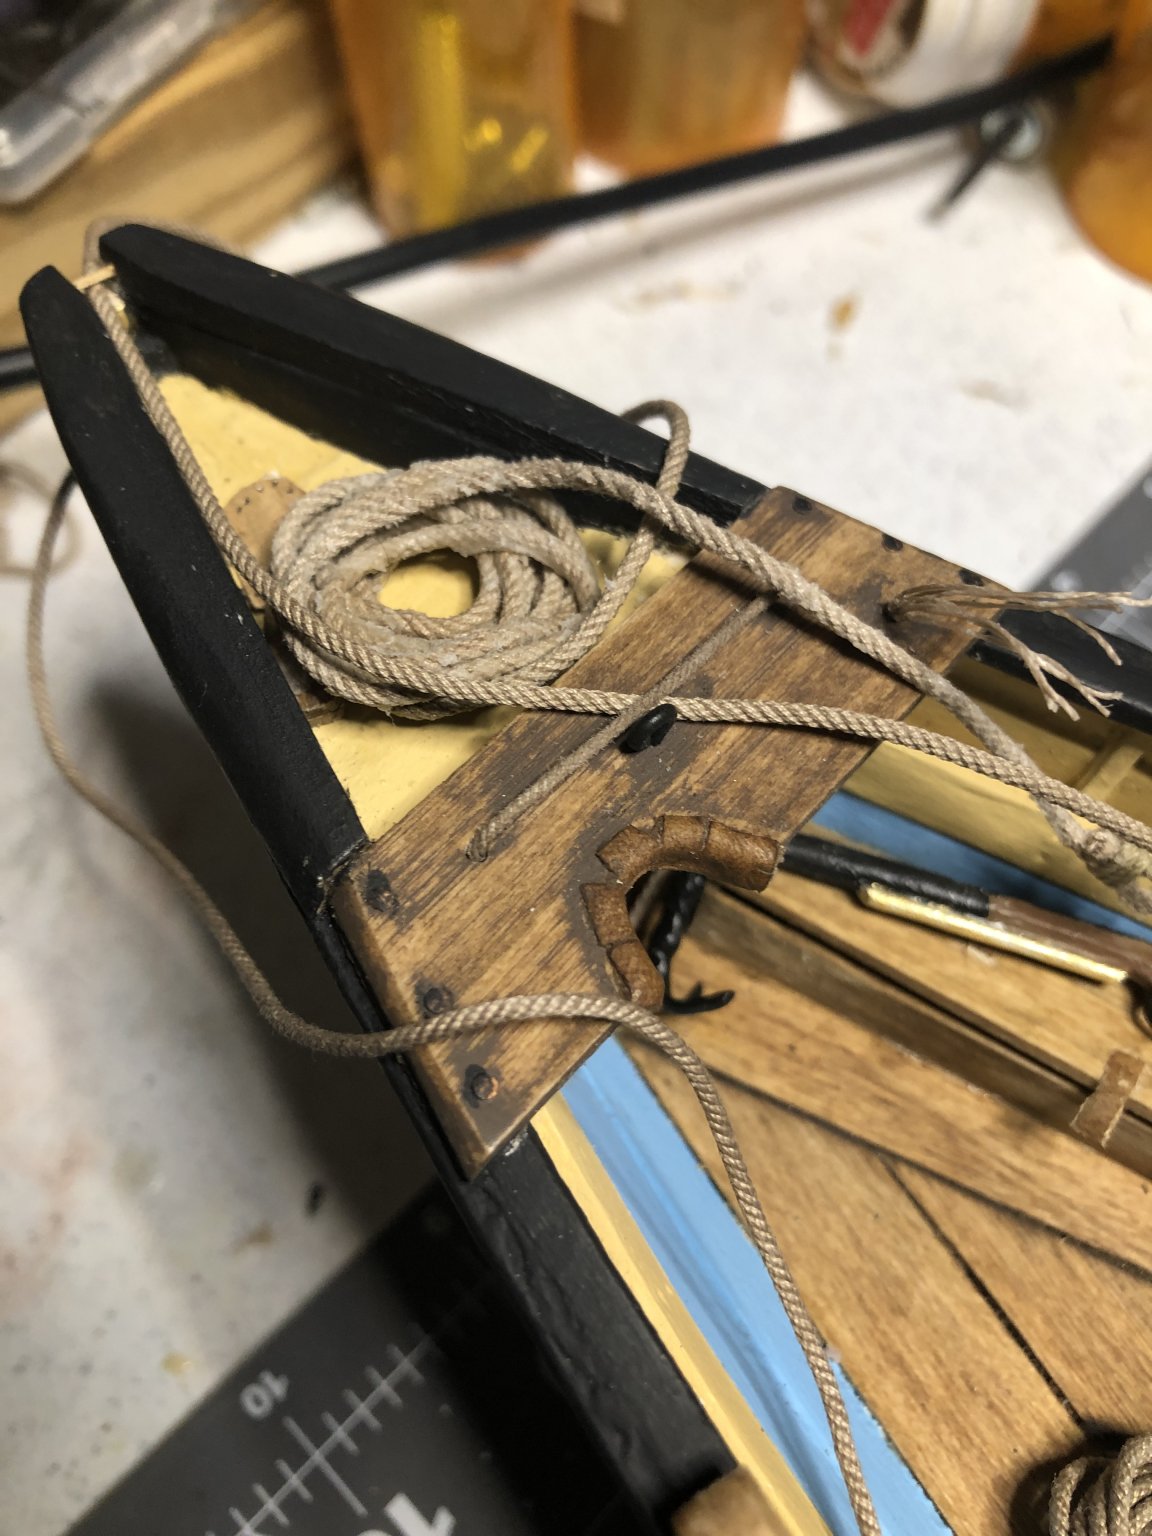
 Grapnel painted black with line attached
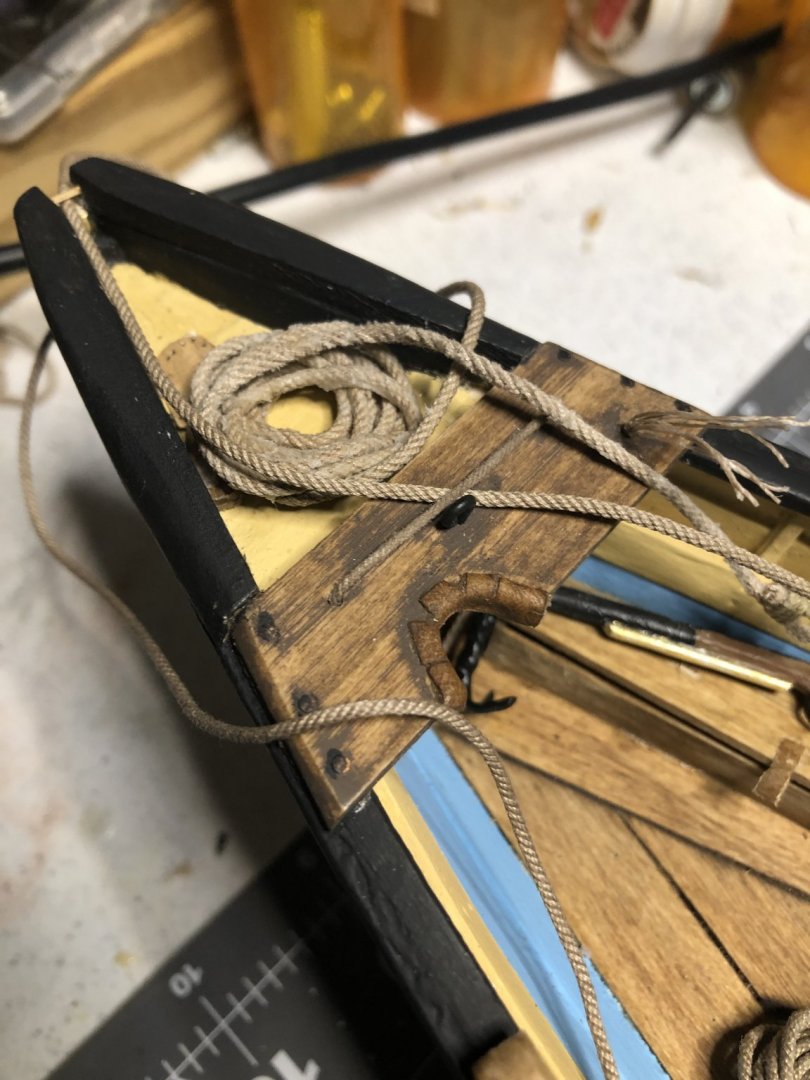
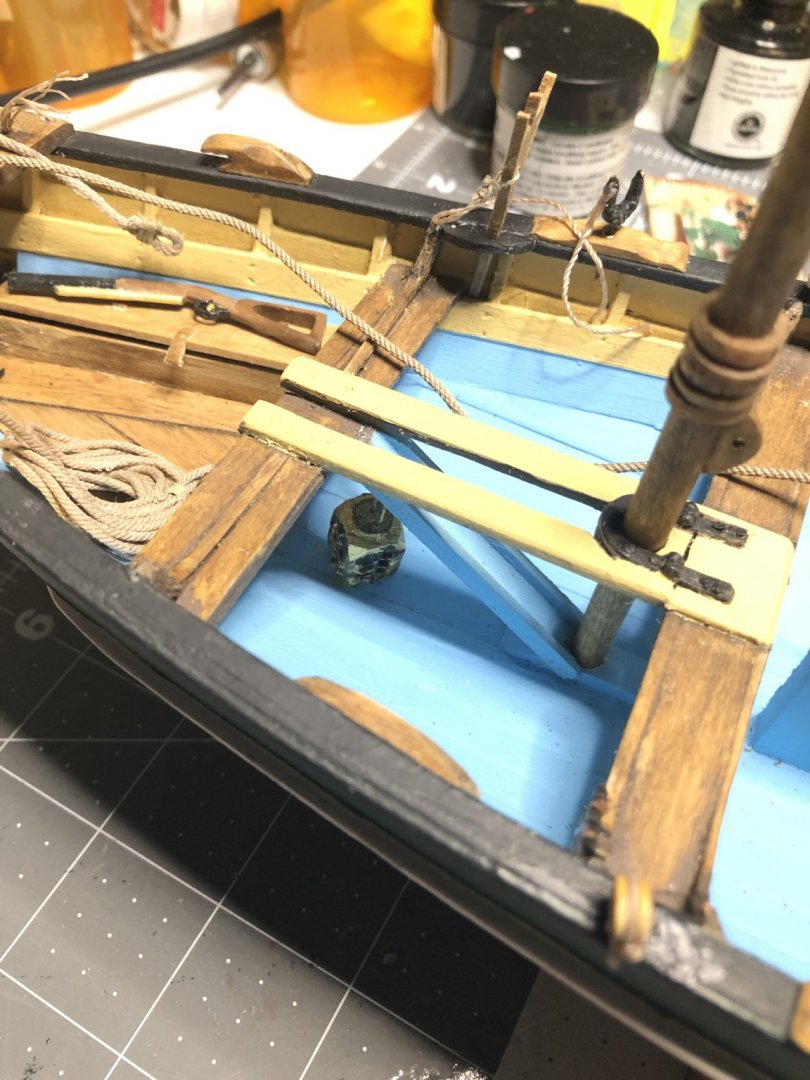
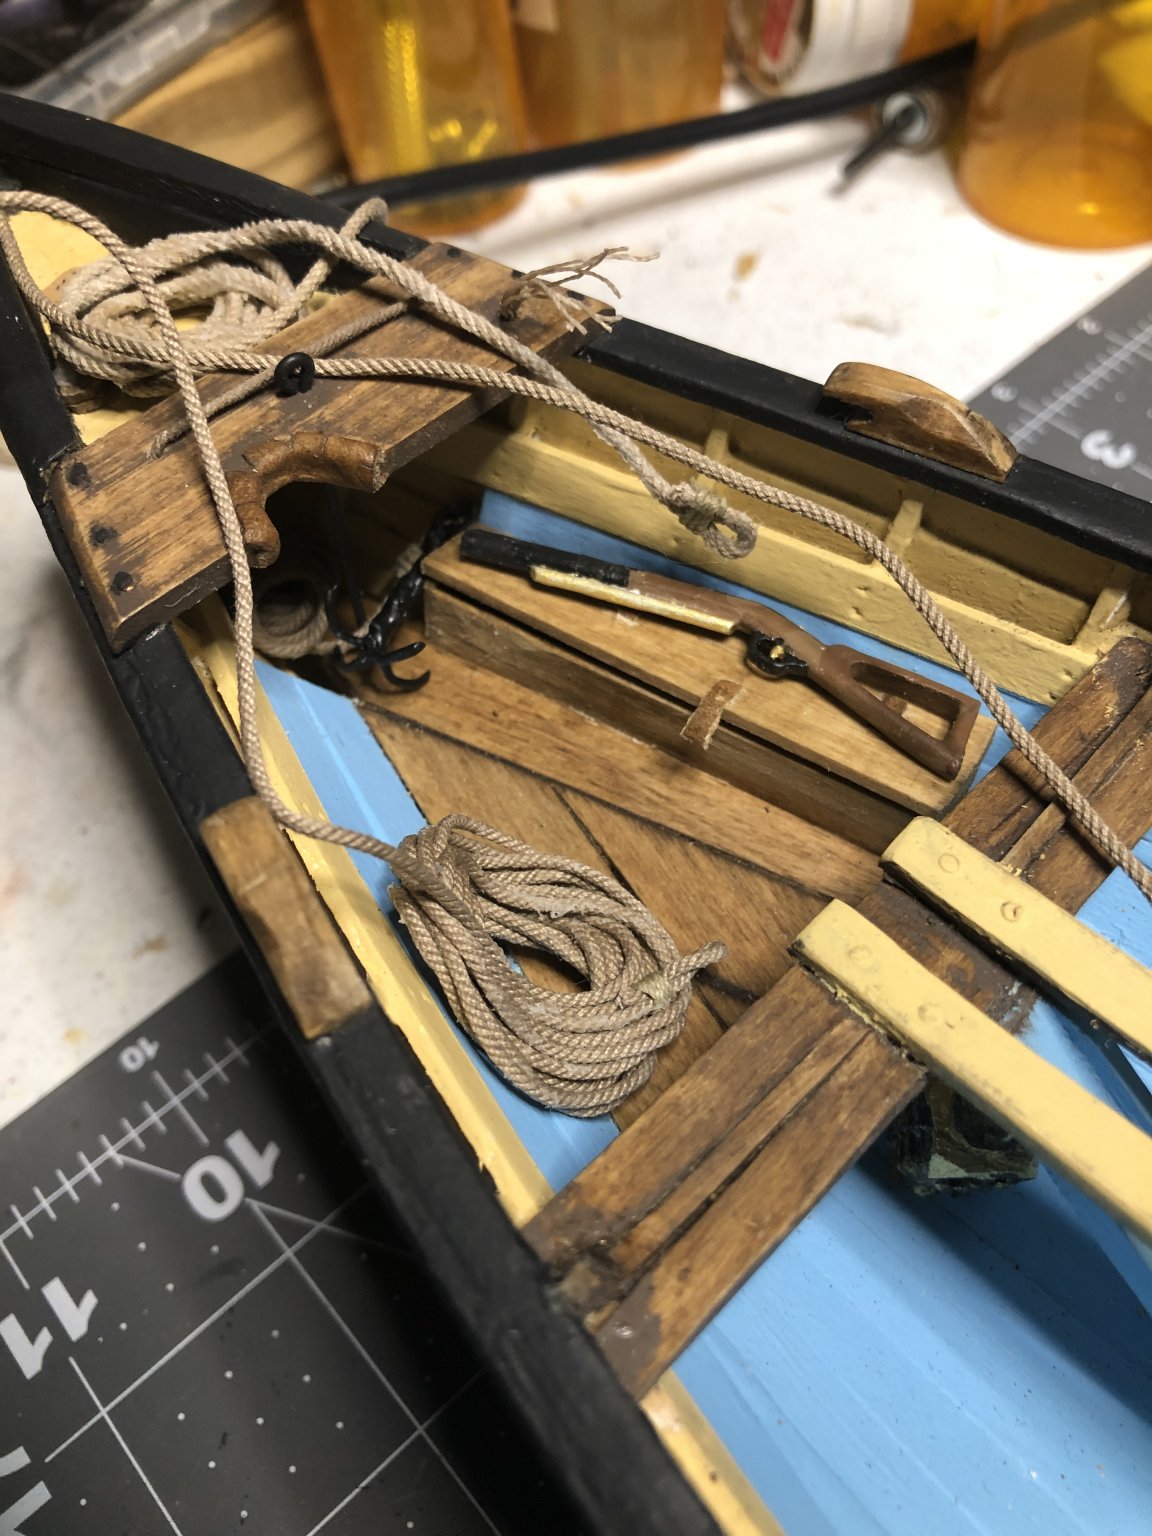
 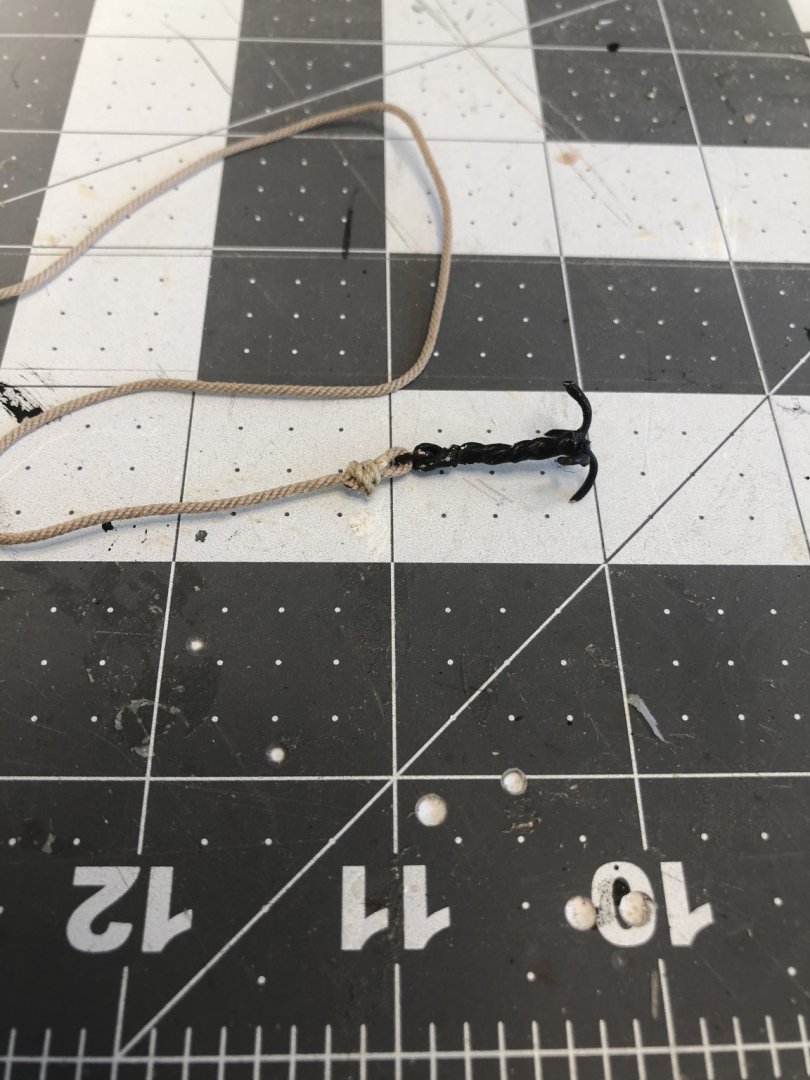 Grapnel stowed under Thigh Board in bow.
- G.L. and GrandpaPhil
-
2
-
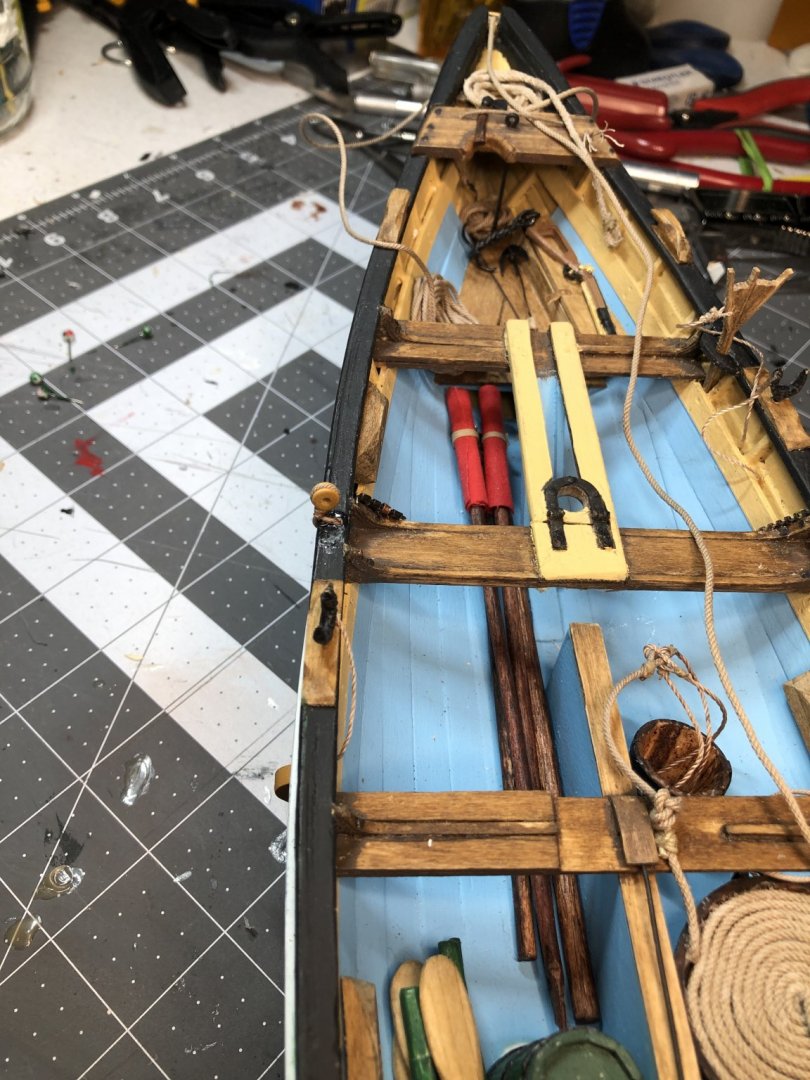
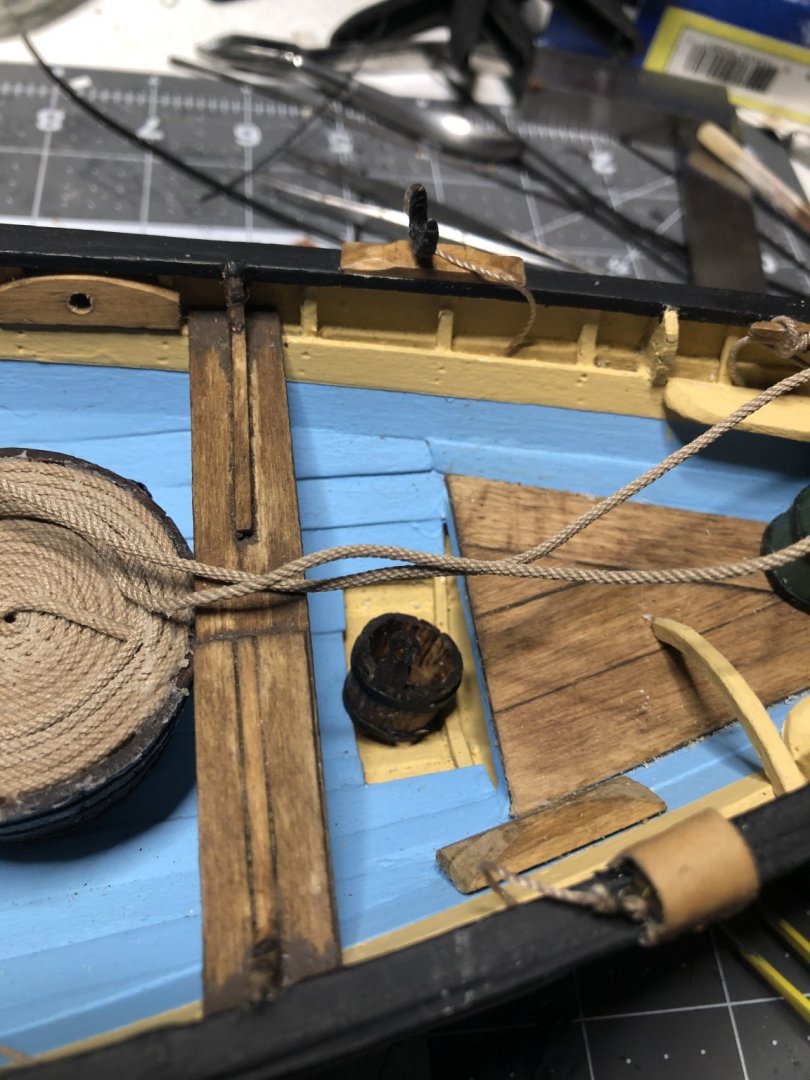
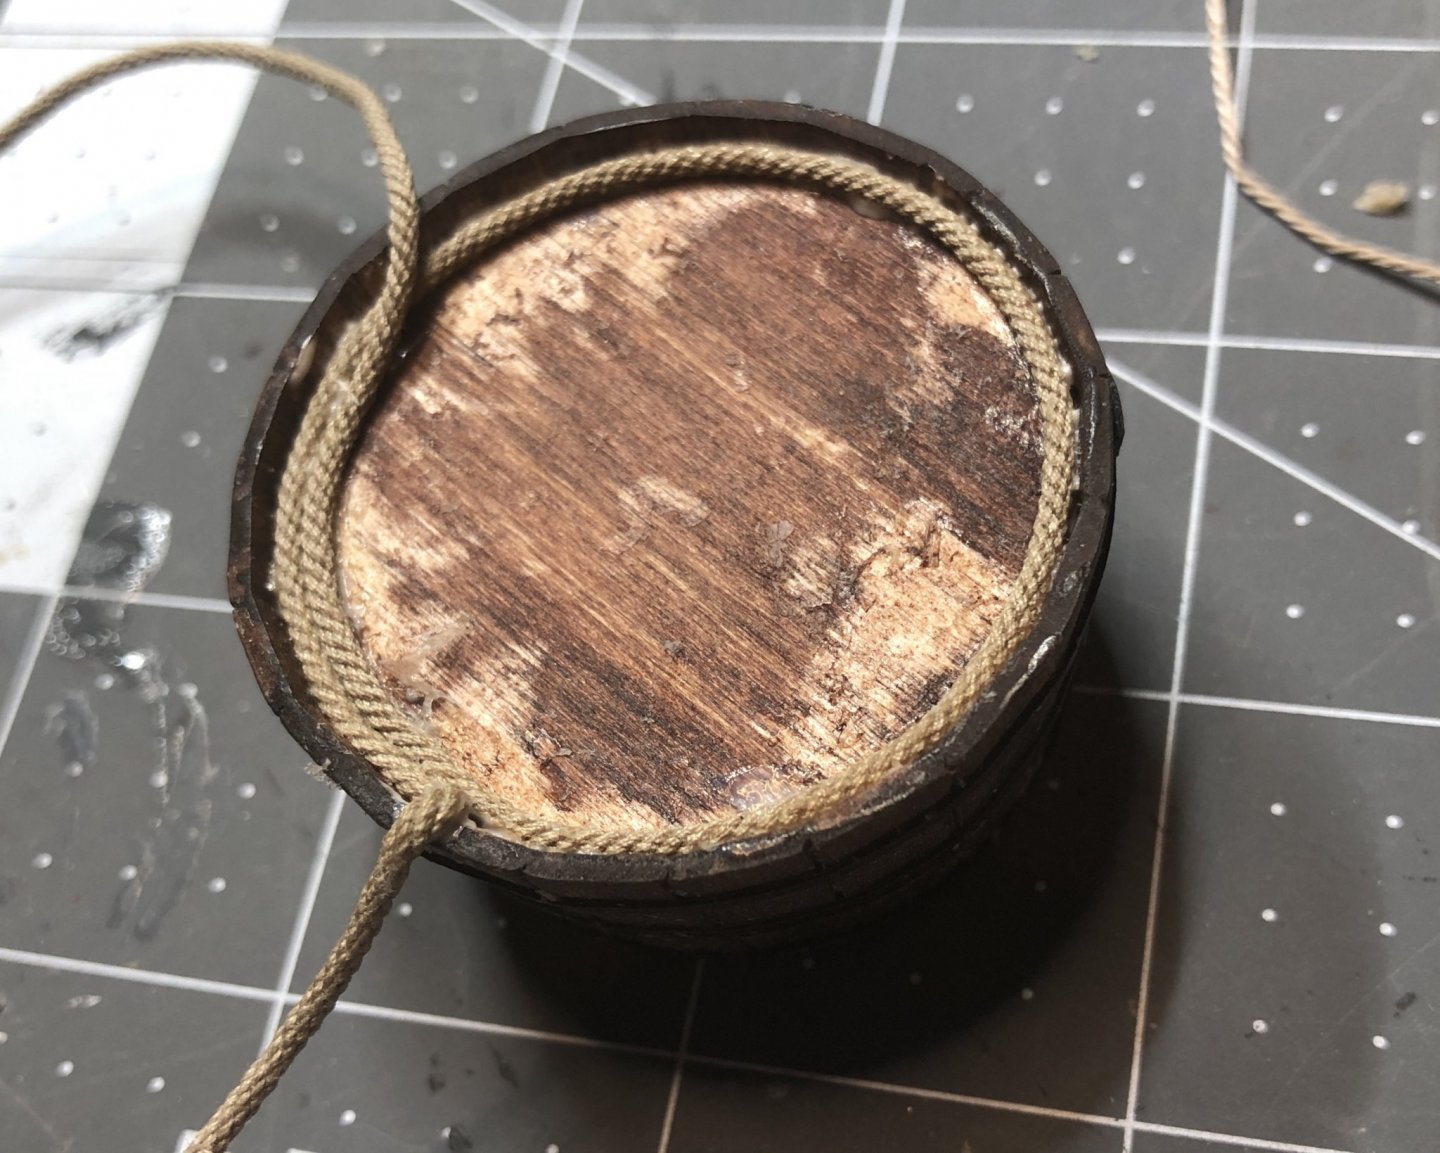
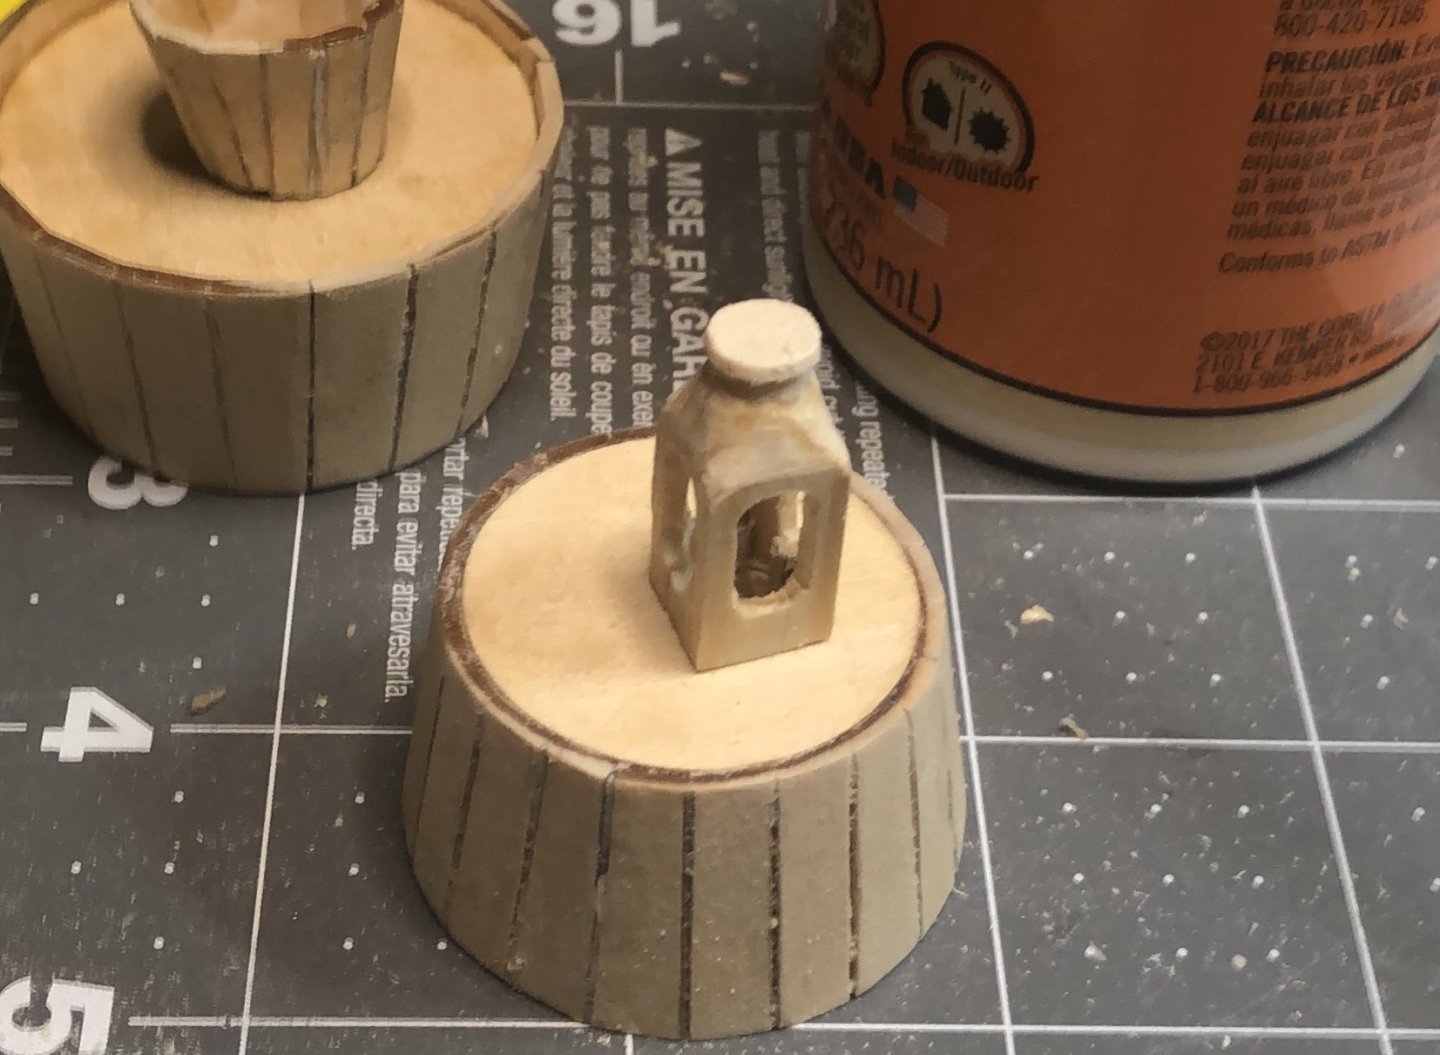
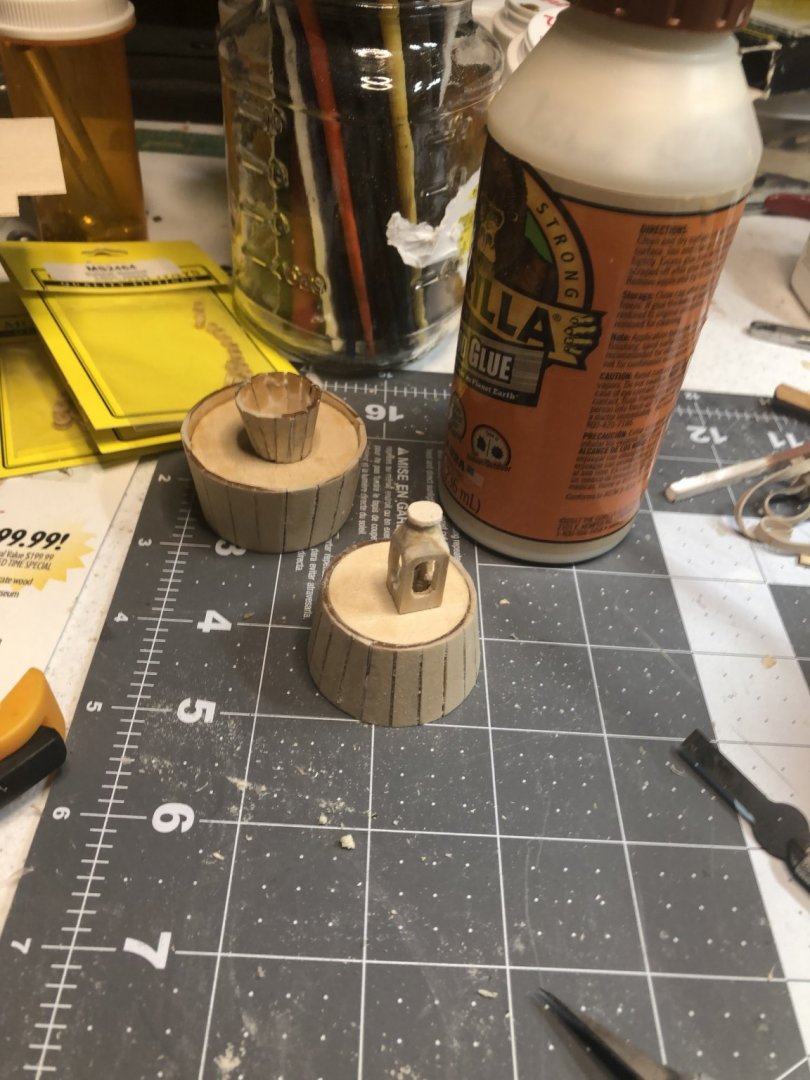
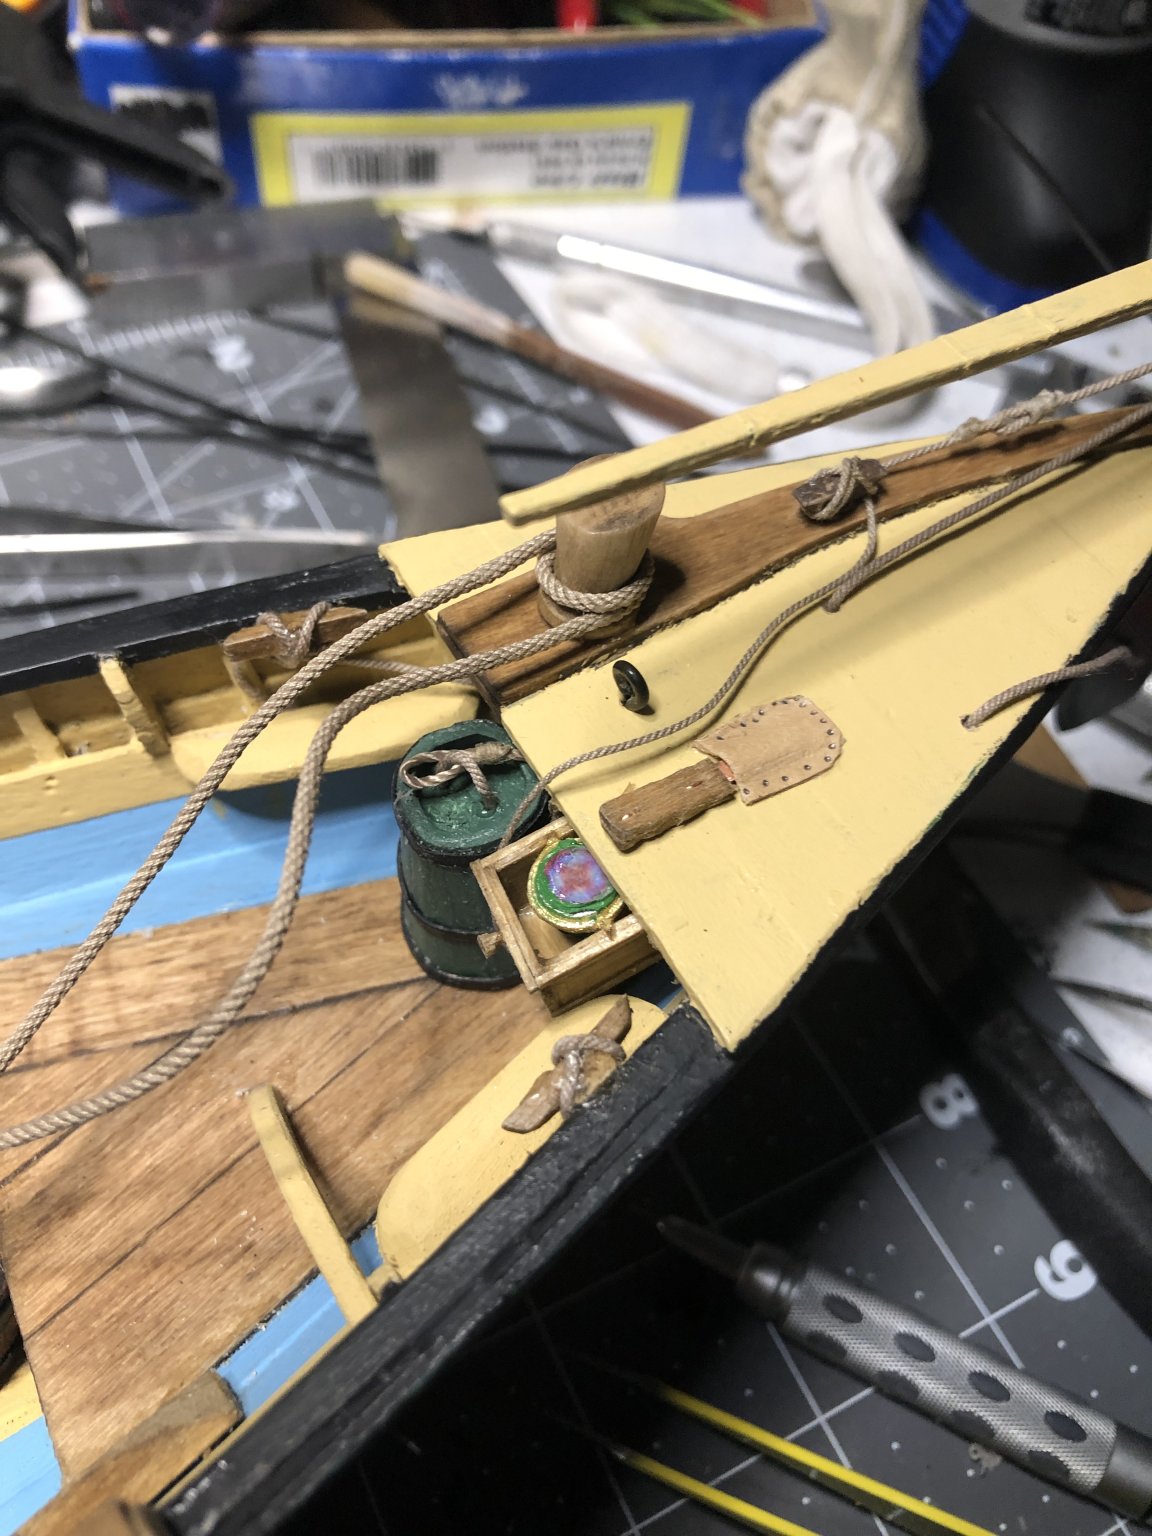
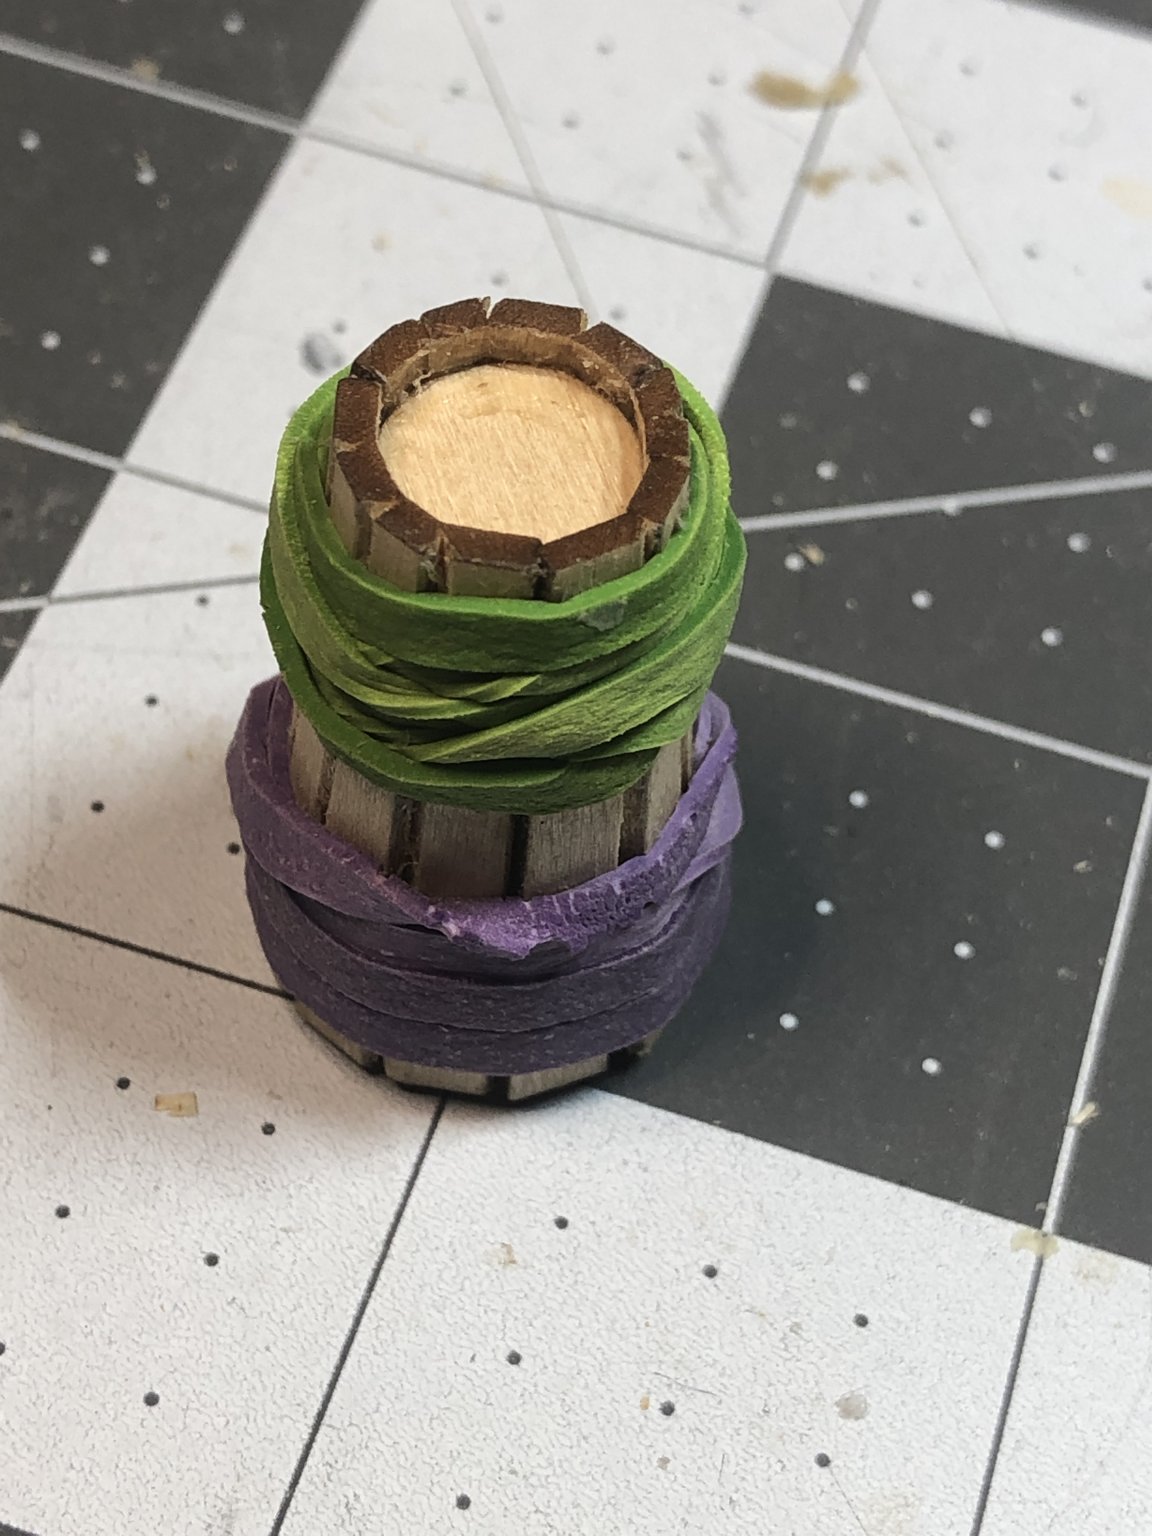
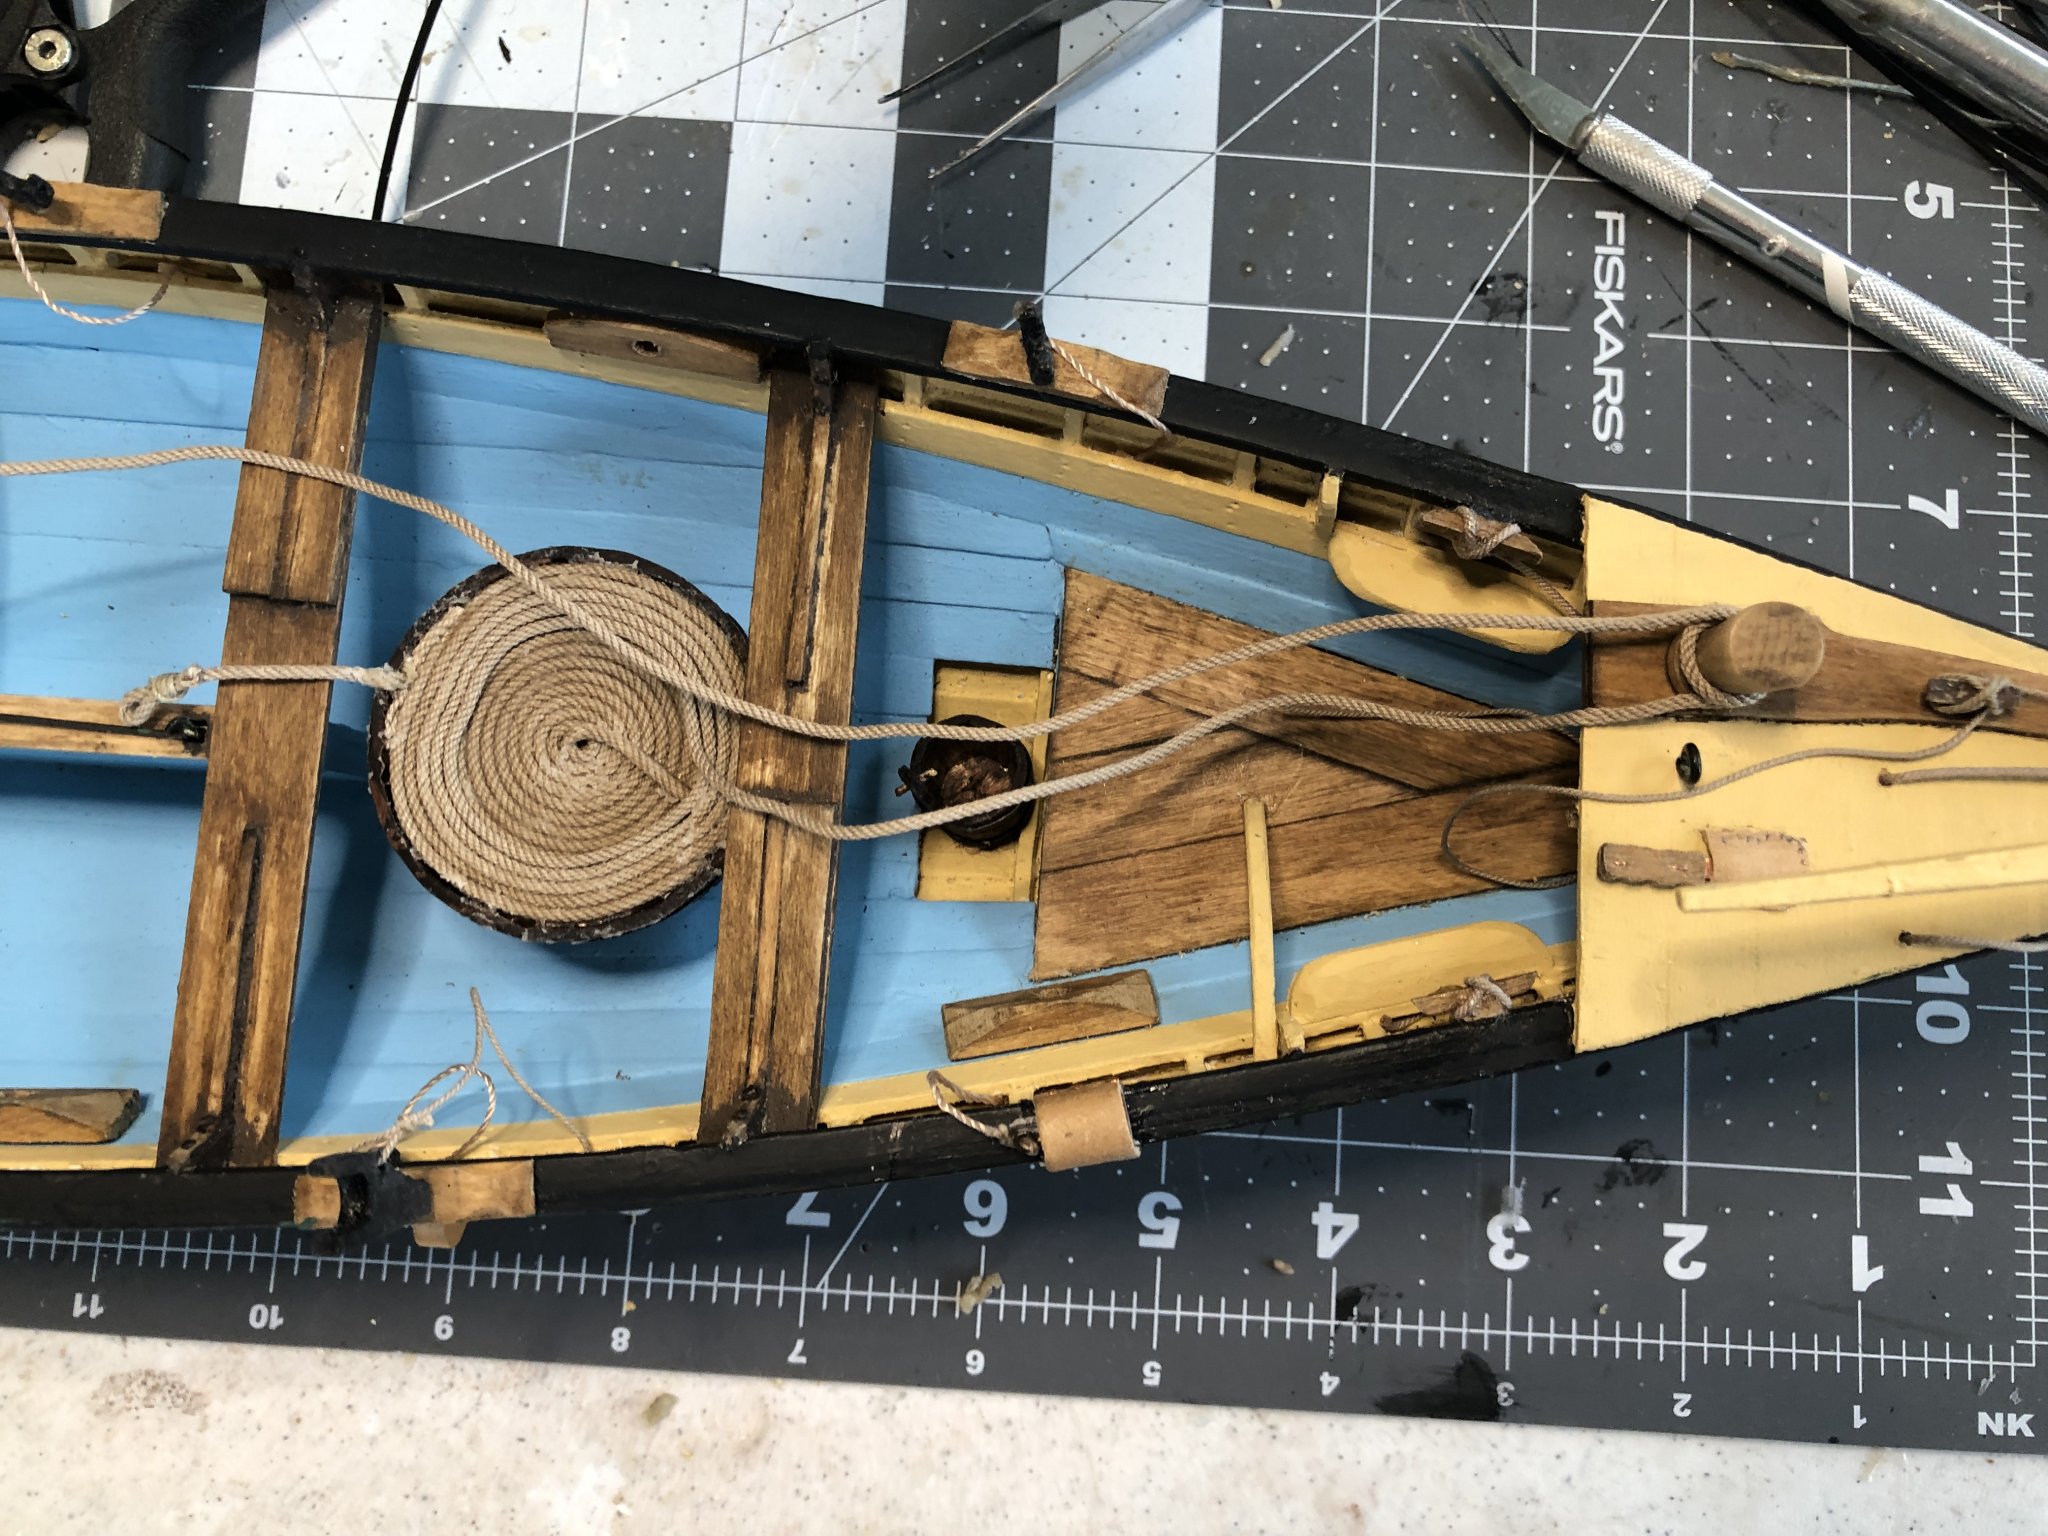
I completed the “bucket “ drogue, bucket, piggin, water and lantern kegs, waist tub and line tub. The stave sheets were scored and bent to fit the plugs. After gluing and drying, all items were stained with a dark oak stain except the water and lantern kegs which were painted the green hull color. The hoops were made from 1/16” slices of Bristol paper darkened with India ink and glued on last.
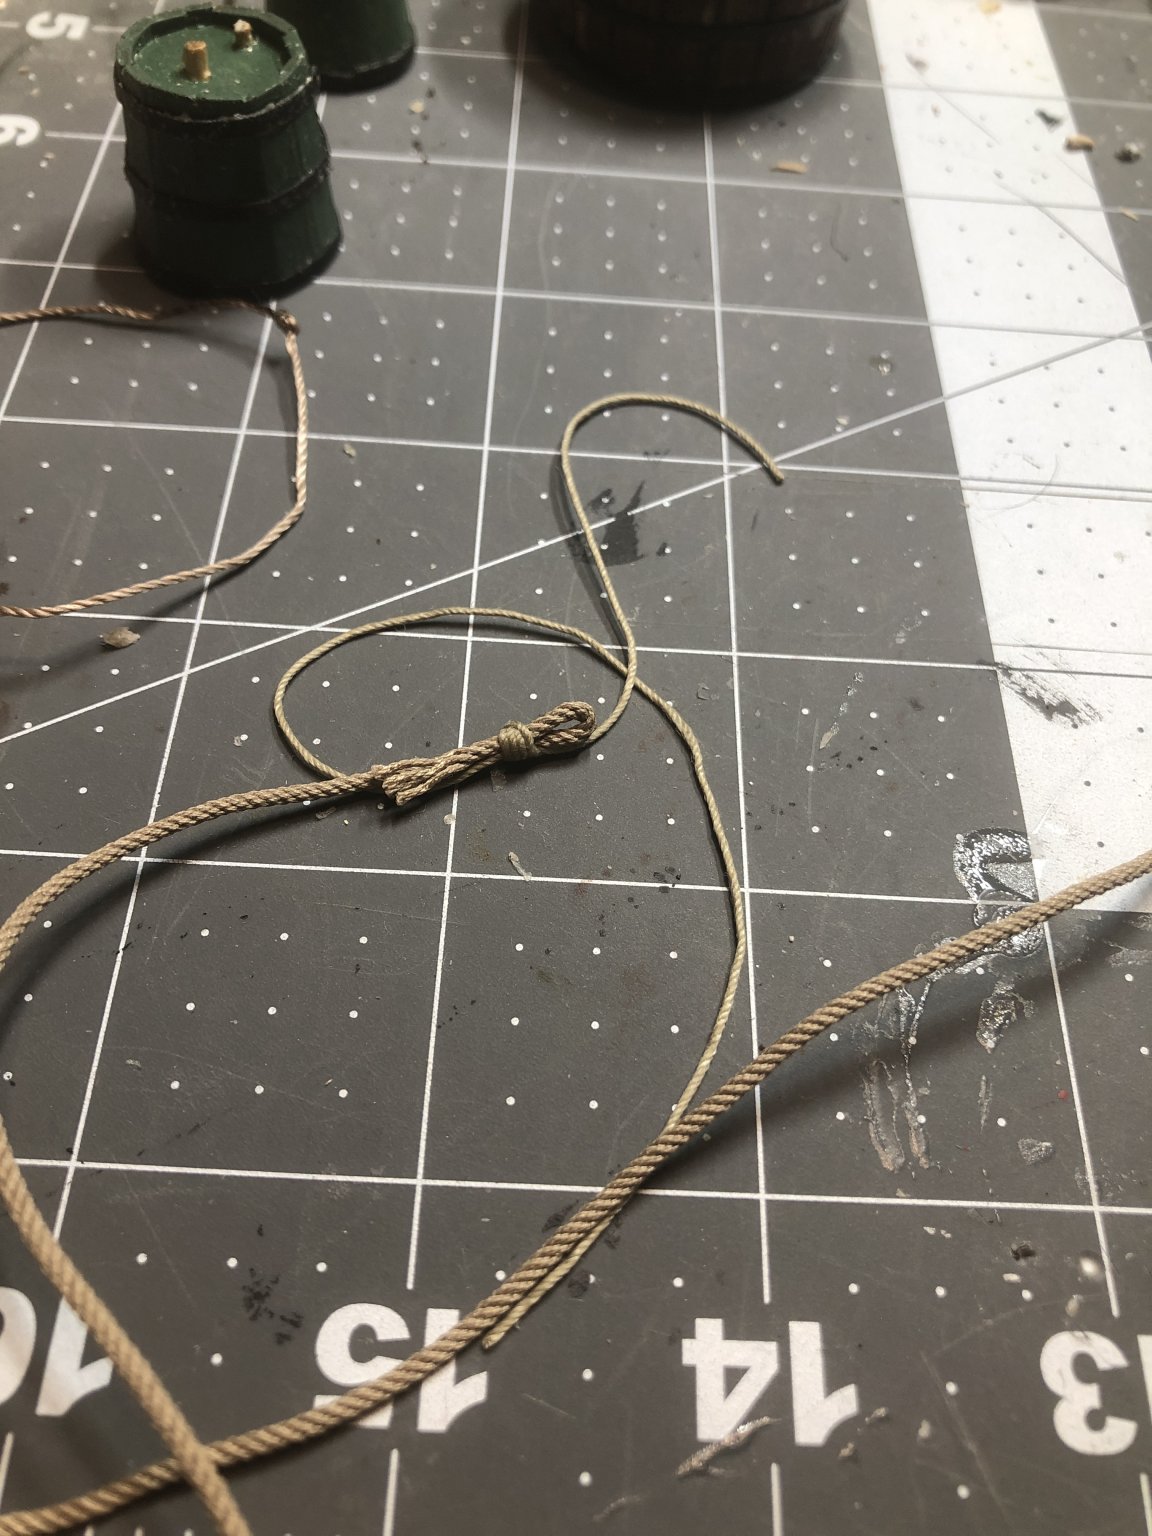
Eye splices on the end of the whale line.

Hoop strips
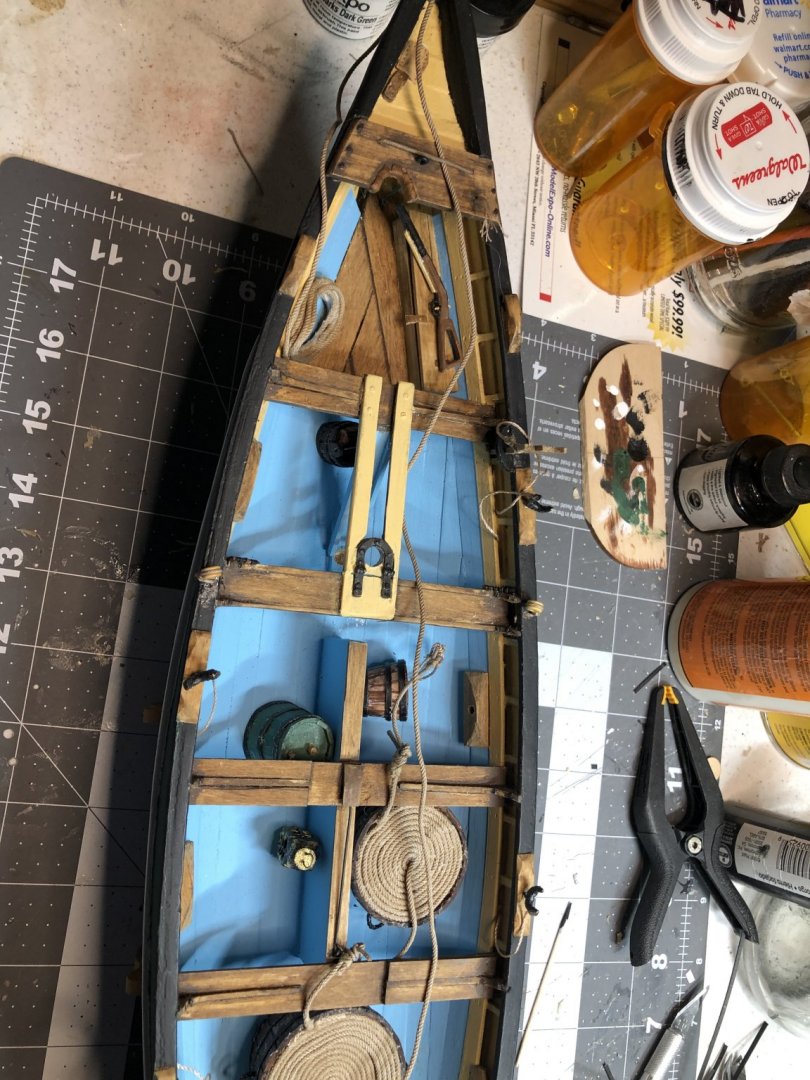
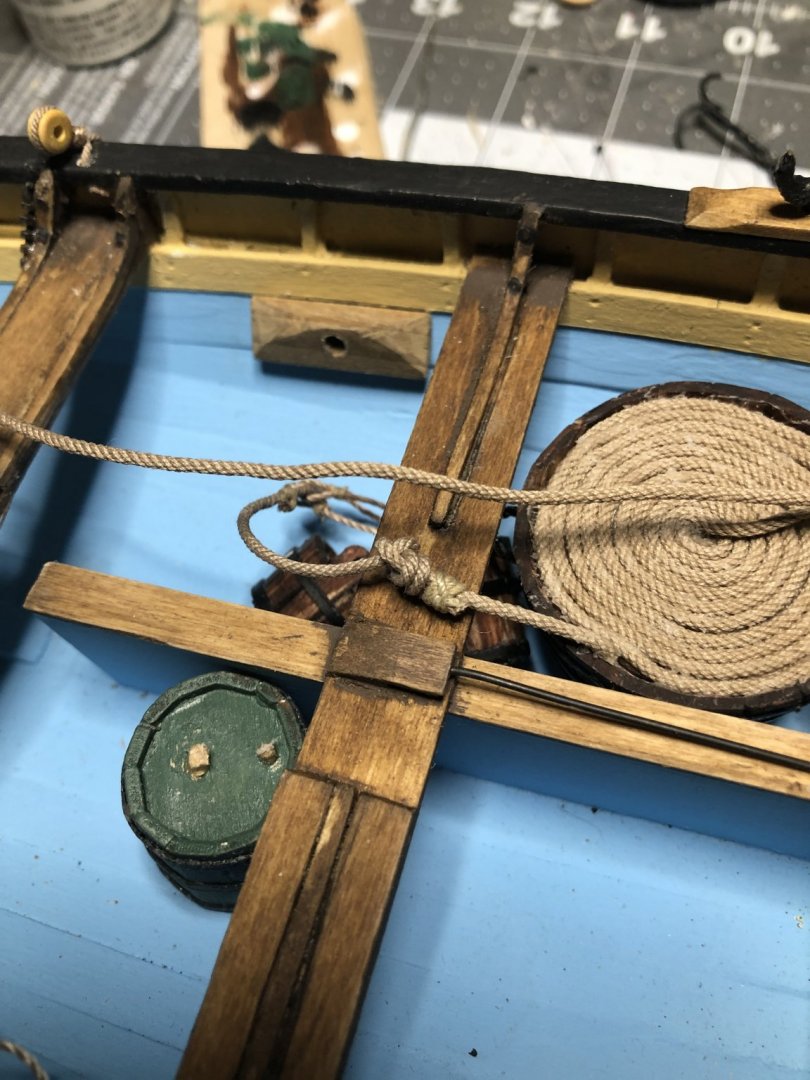
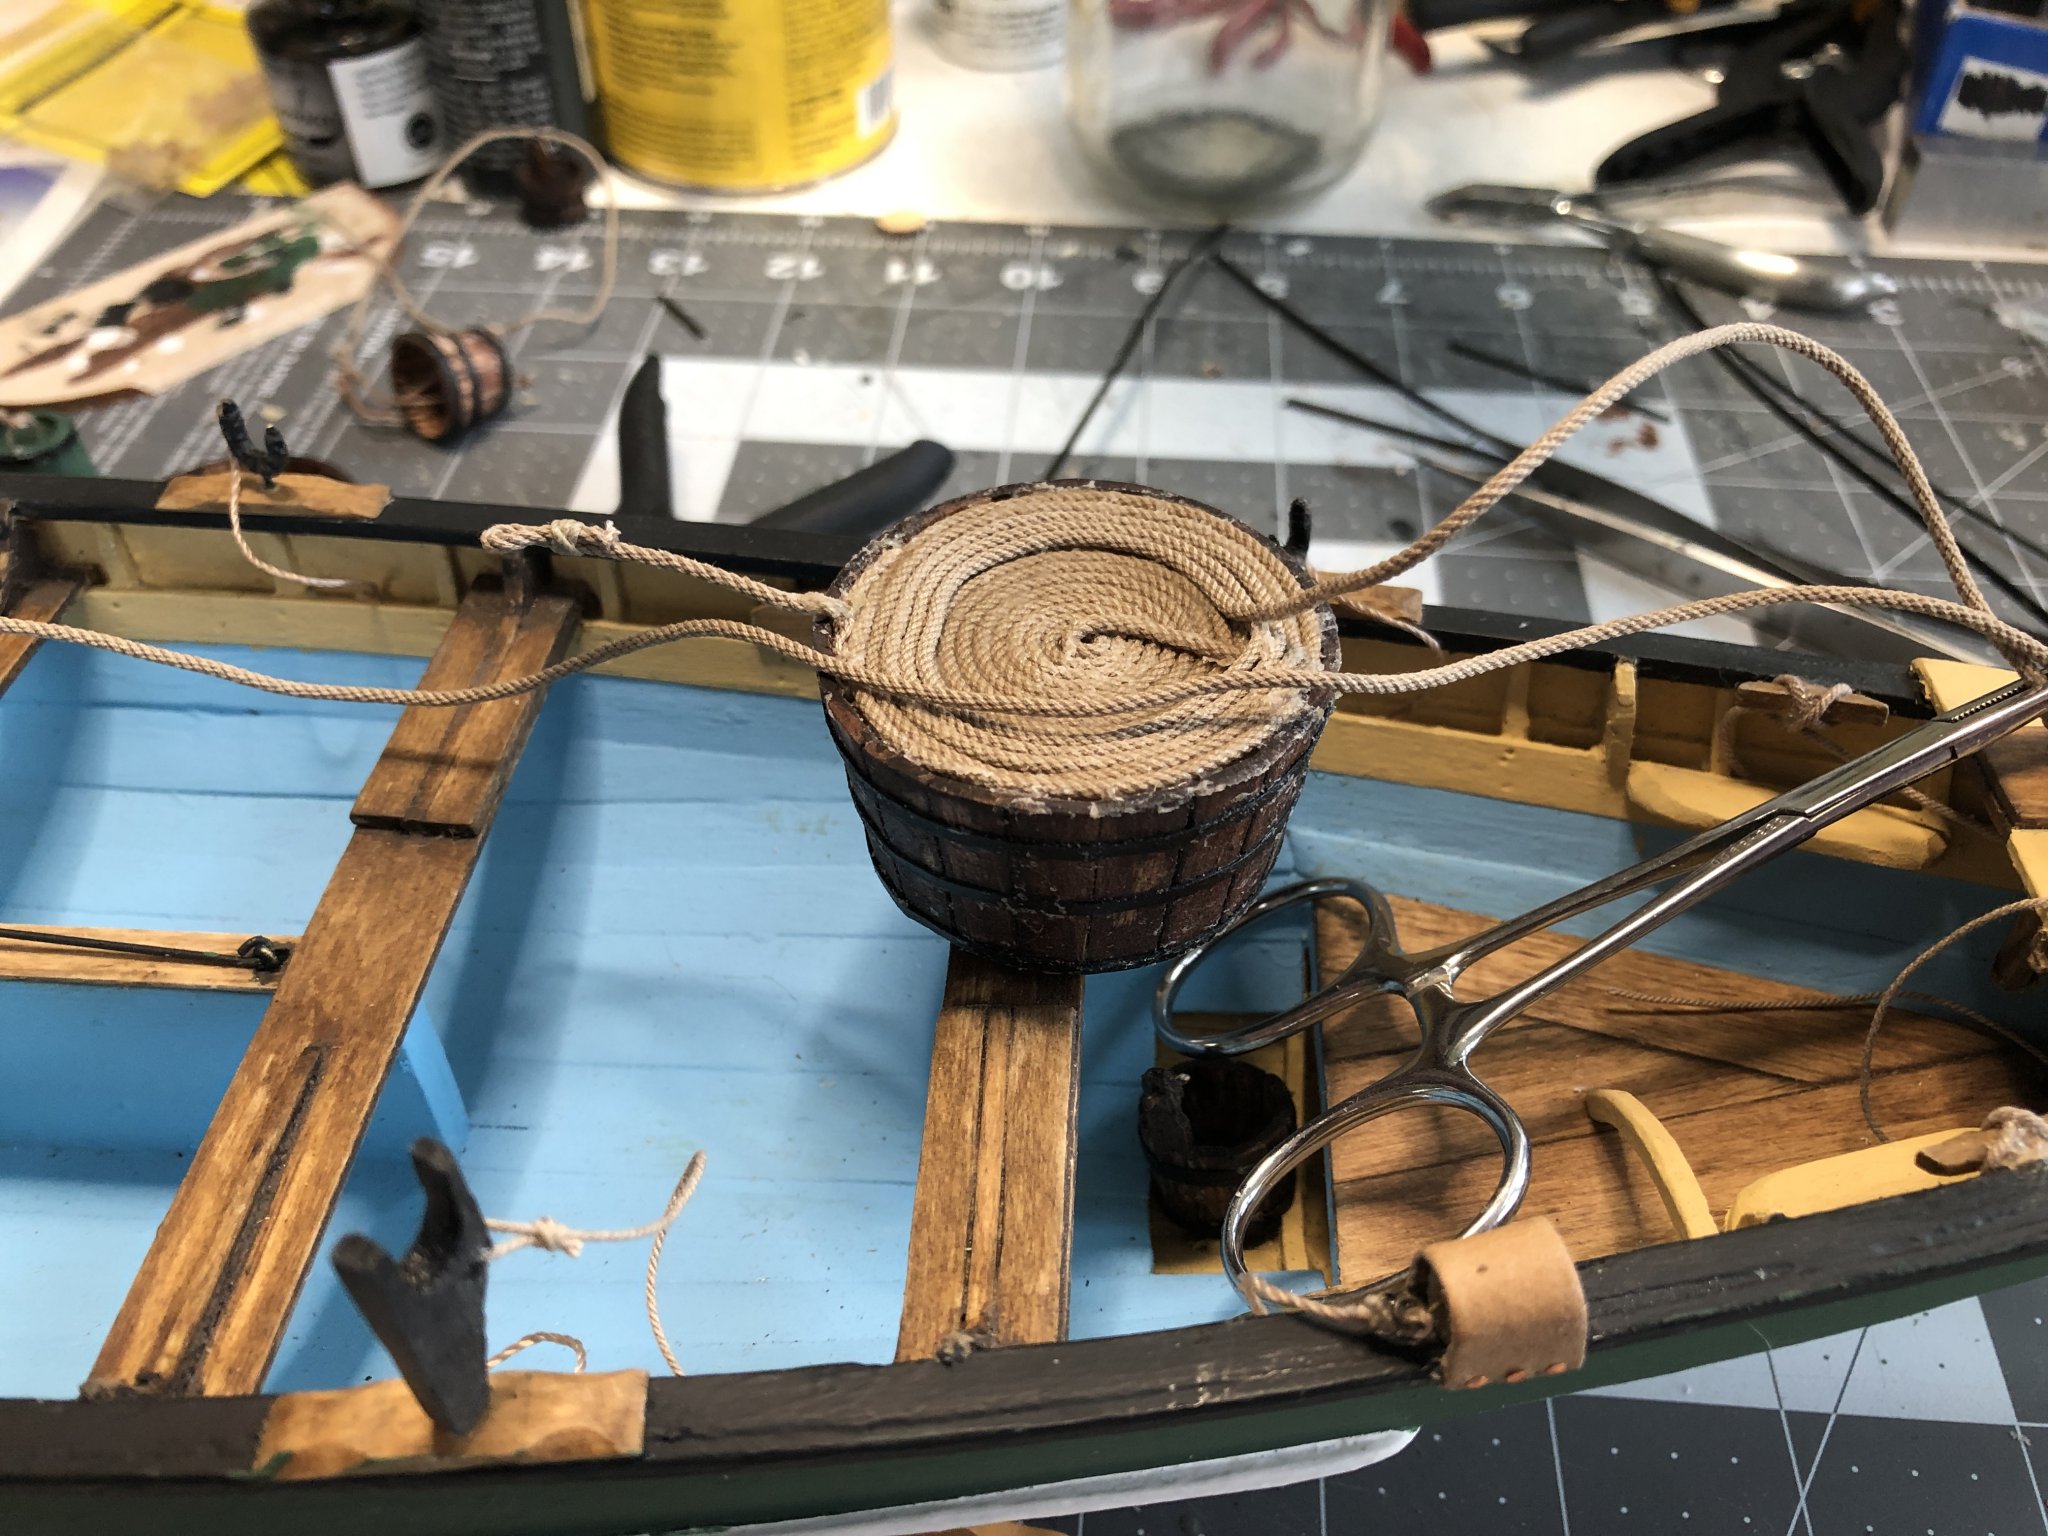
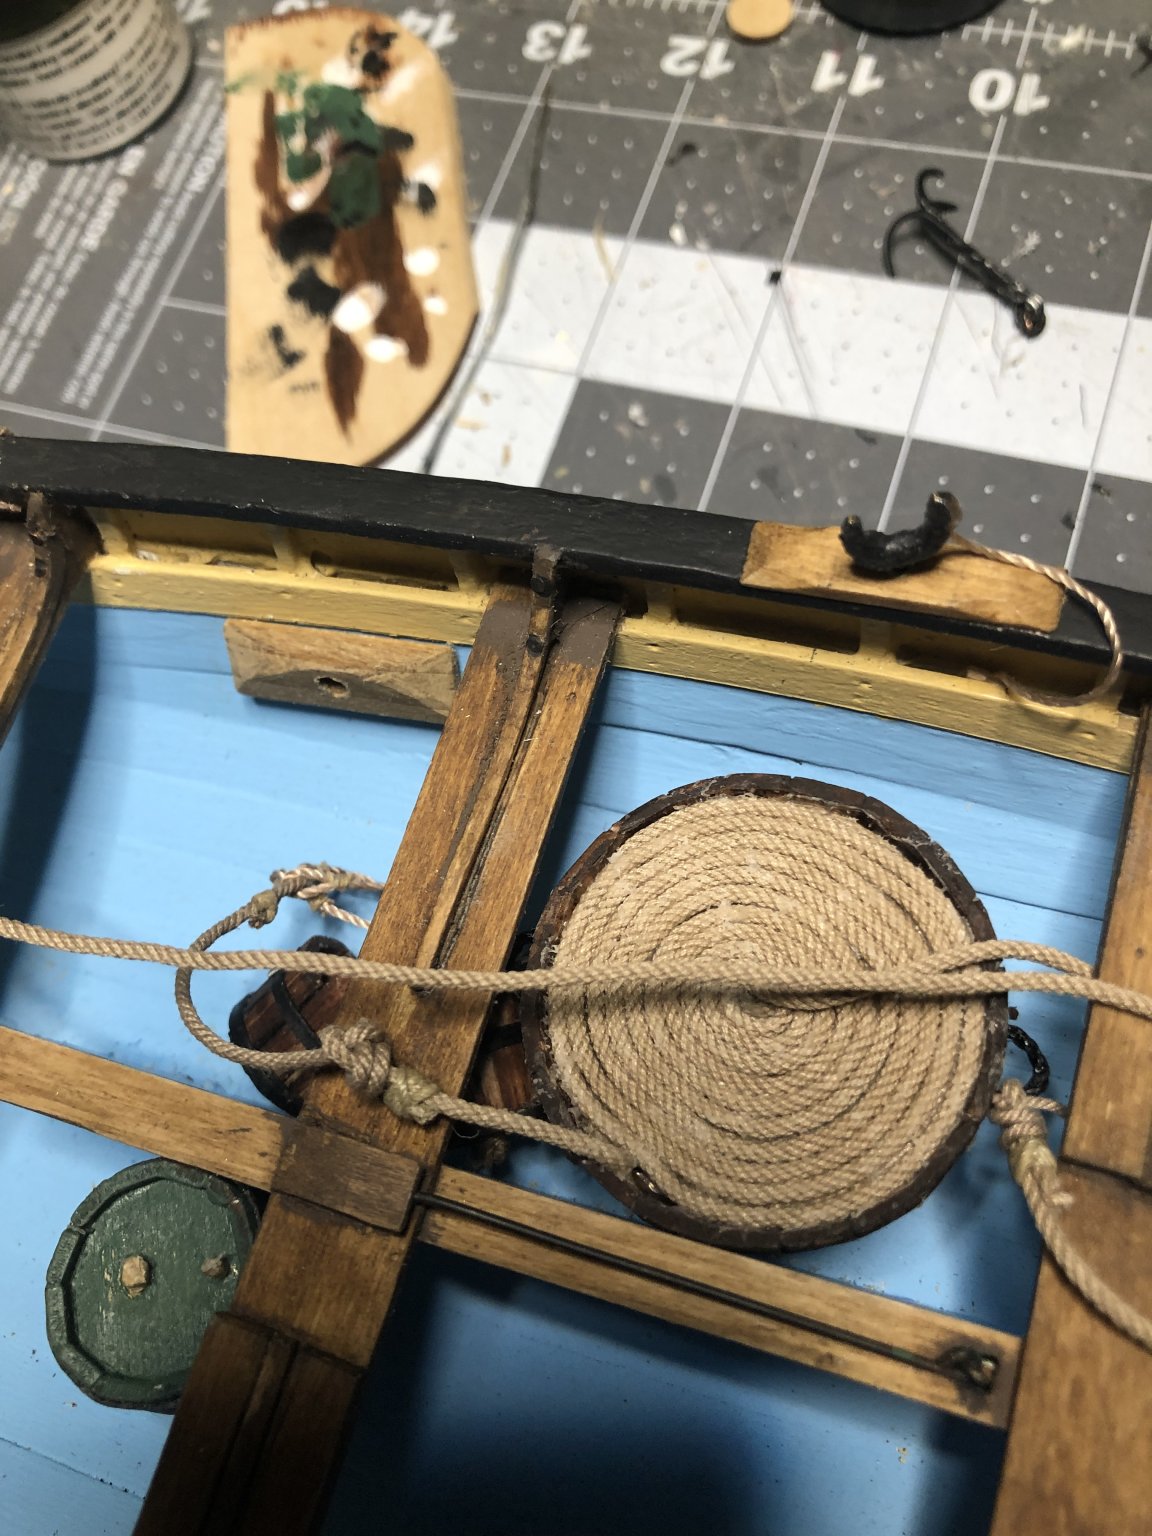
Each tub was completed by coiling two flakes or layers on each.

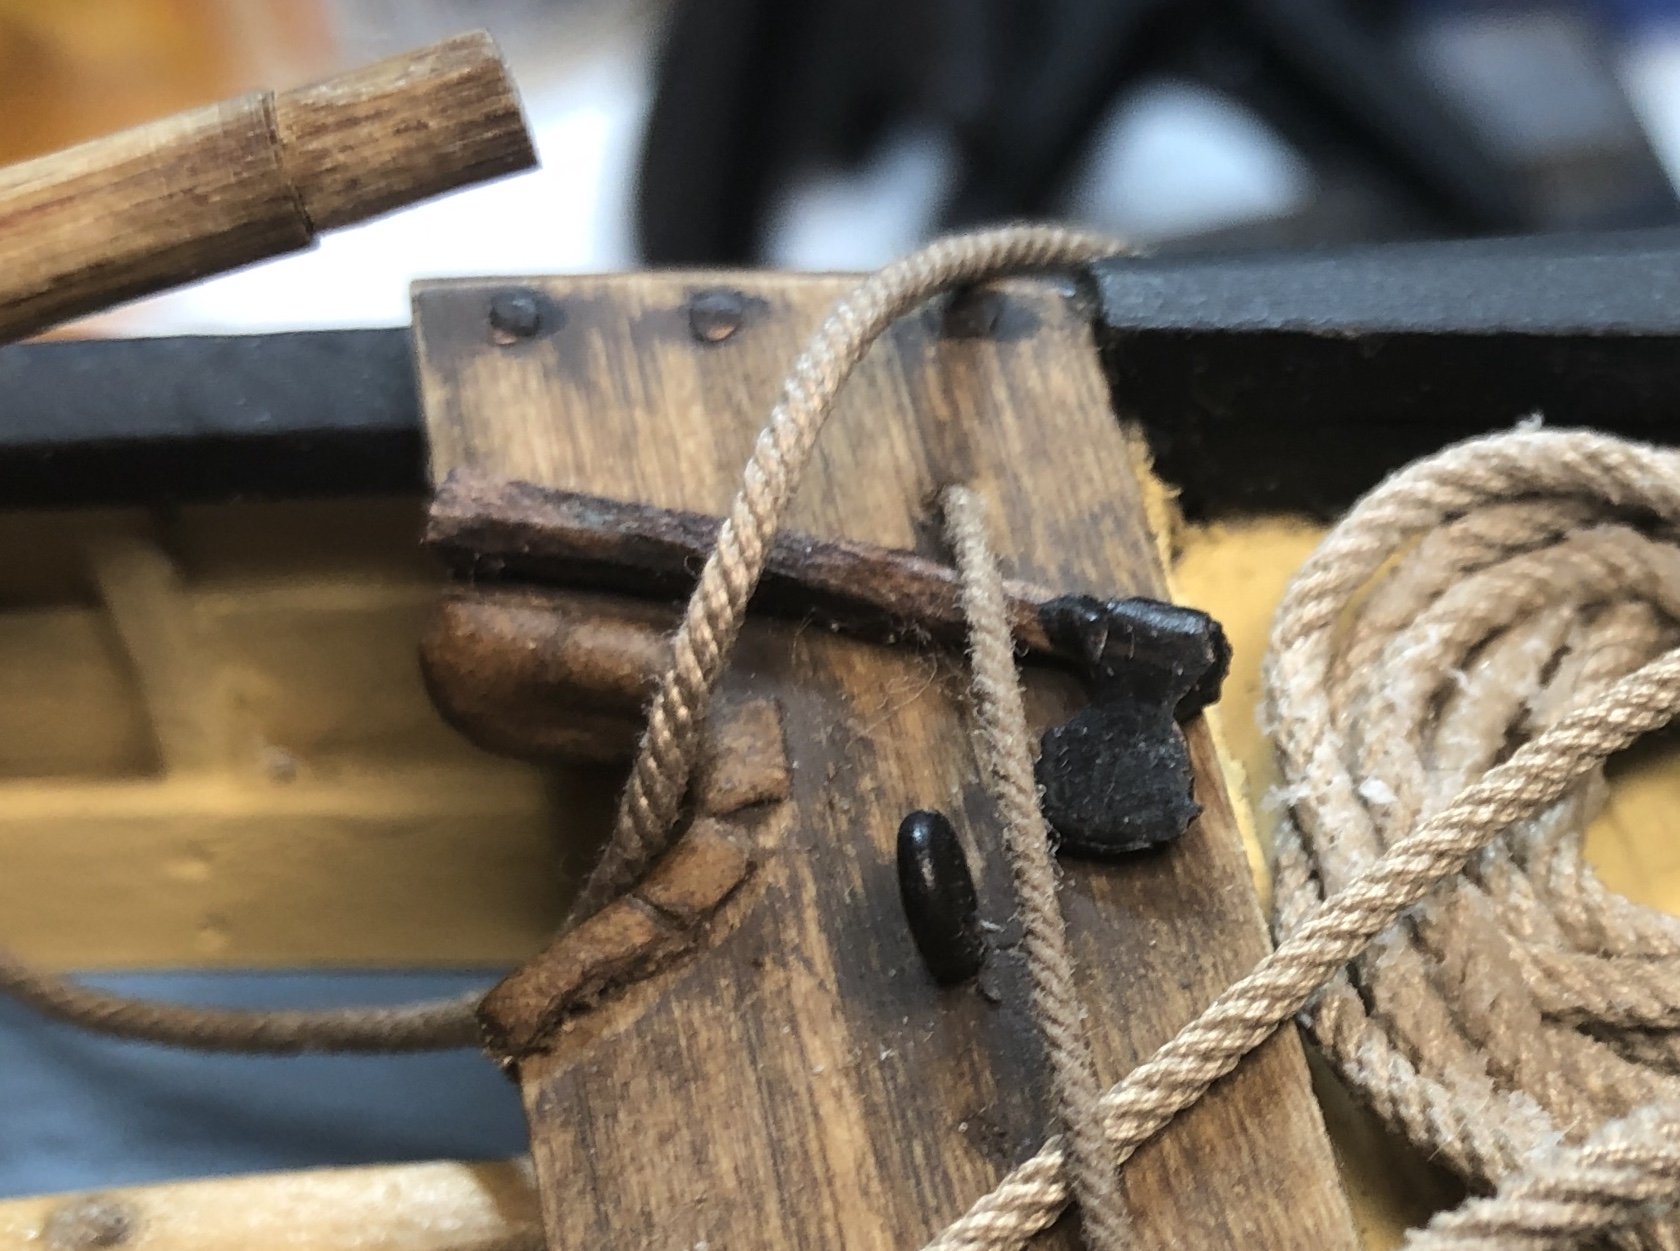
Lines connecting the two tubs and drogue are shown. The line goes around Logger Head to the bow. Excess line is coiled in the box at the bow. The Painter or towing line is shown coiled on the port side behind the thigh board.
The drogue is attached to the whale line with a Double Becket Hitch.
Piggin
Cannot get rid of following photos. Deleted them but they keep appearing. 😳

-
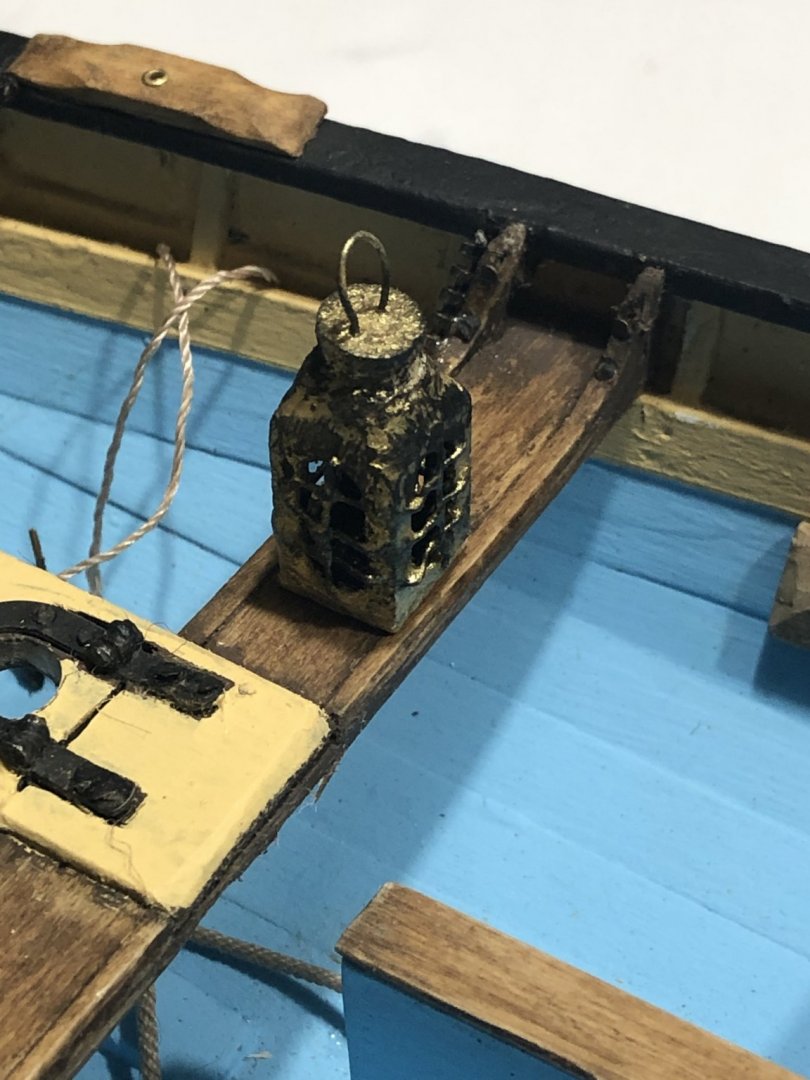
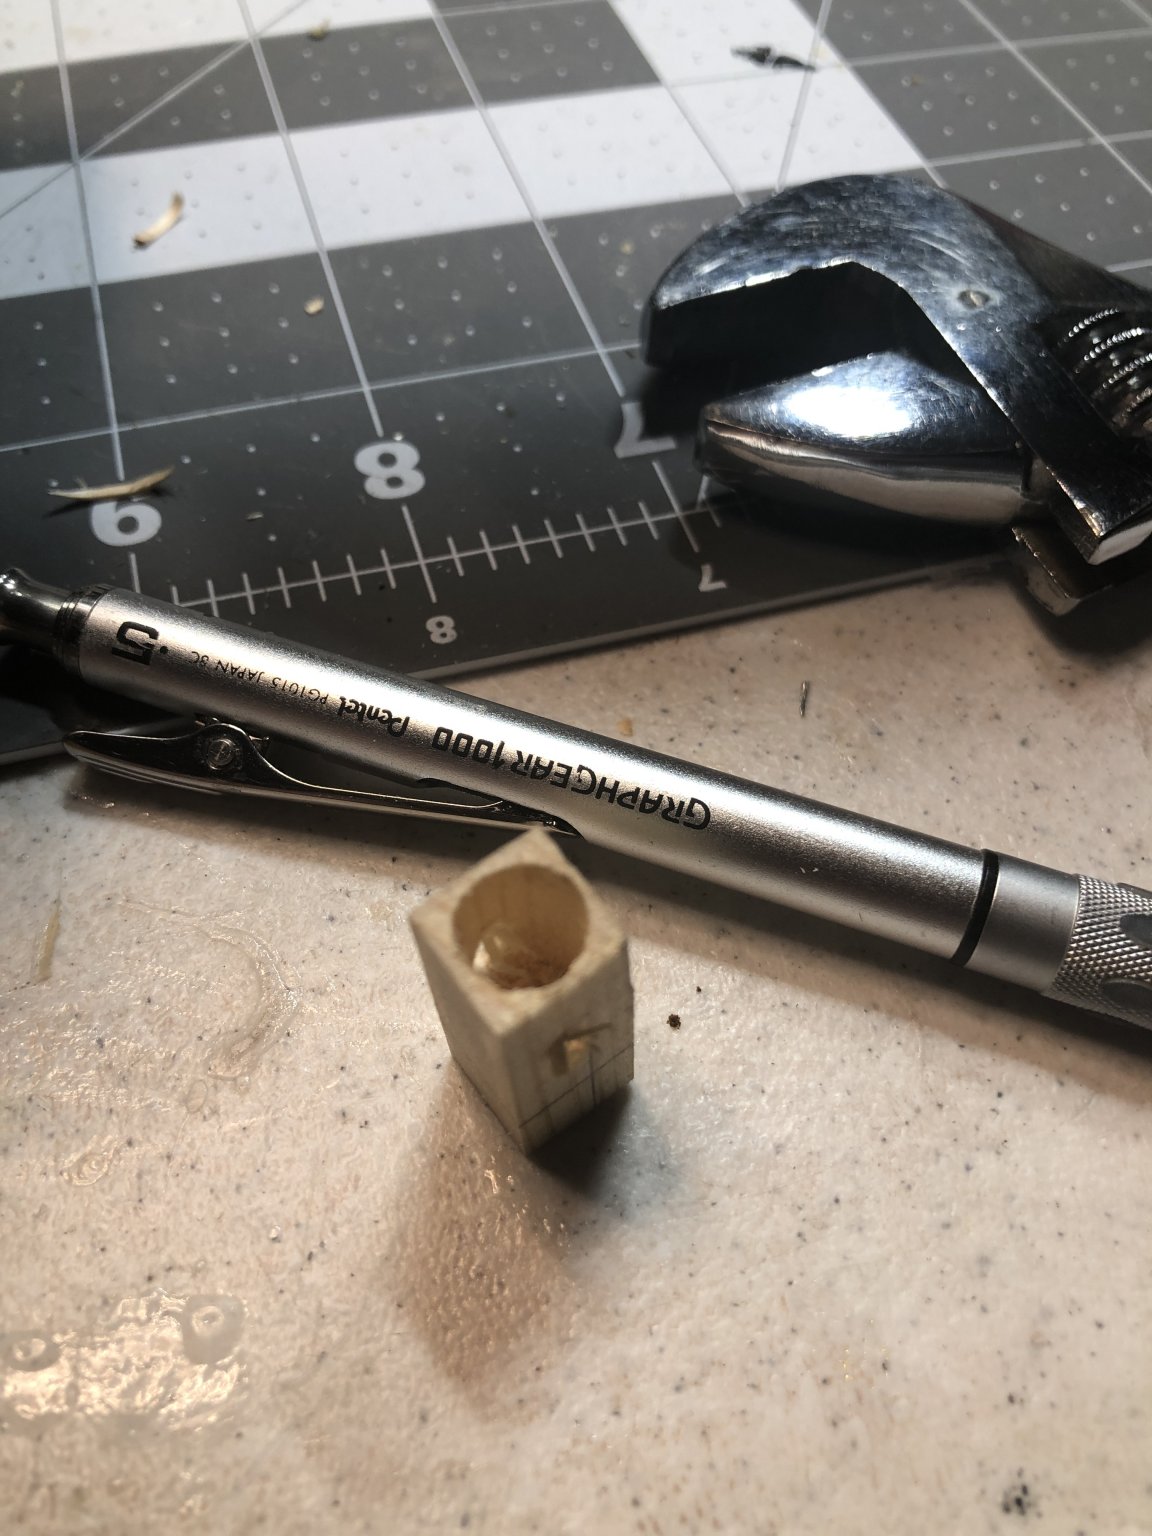
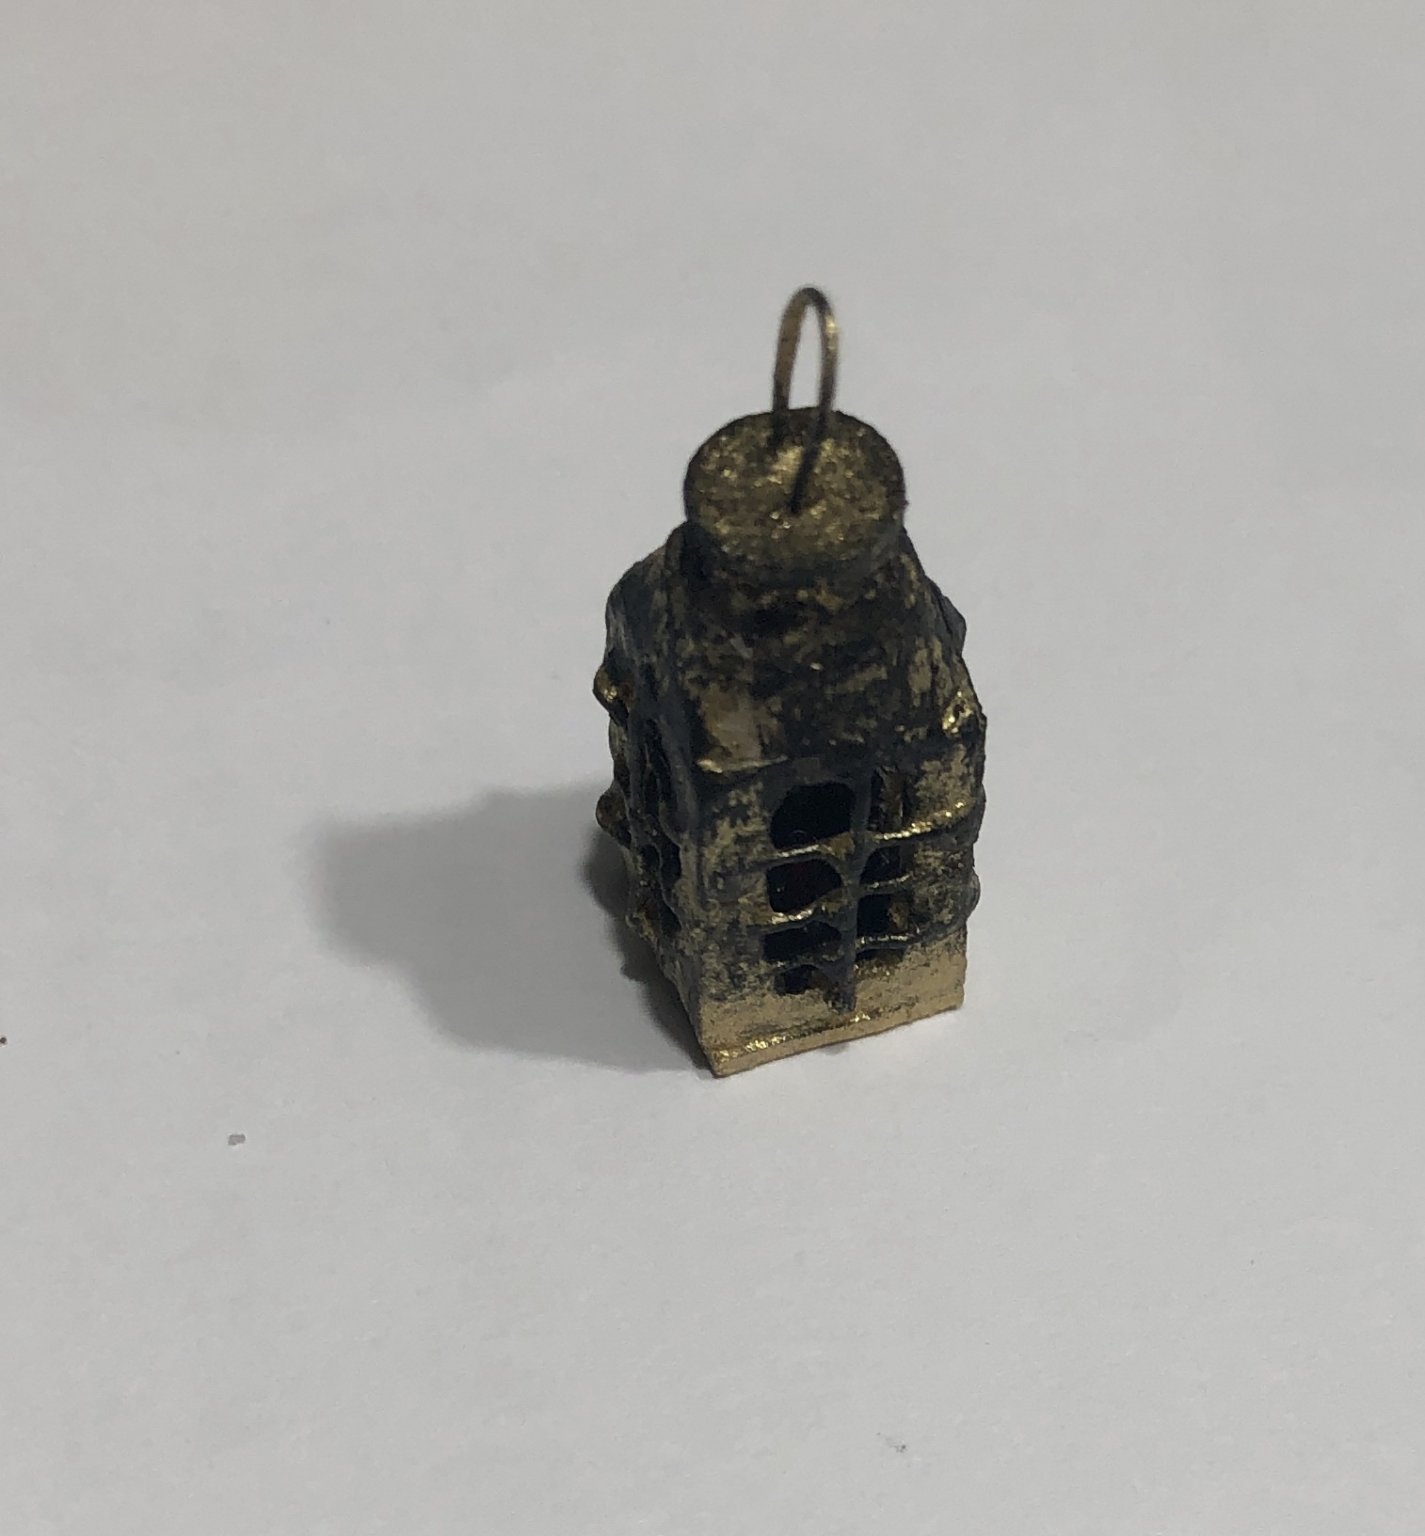
Finished the Rowlocks, TubOar Lock and harpoon racks a while back and started on the lantern. I bored a hole in a 1/4” square rod, carved out the “windows,” mounted 28 gauge wire in place for grills and painted it brass color with some black streaks. The grill bars were bent at each end and put into holes drilled into the wood.
Next was/is to finish the cooperage which I started before finishing the lantern.


- GrandpaPhil and G.L.
-
2
-
4 hours ago, the learner said:
Try using paper
How does paper work out?
-
I finished the Civil War Coffee Wagon and Limber. I am working very slowly on the New Bedford Whaleboat but realize that making the sail is going to take me to another whole skill level. I need to learn how to sew. I will be doing some practicing with the help of my wife and her Bernina sewing machine. After the first of the year, I hope to start up again. In the meanwhile, Merry Christmas and Happy New Year.
-
Finished awhile back and I need to post the final display. Thanks for watching.


- popeye the sailor, hexnut, mtaylor and 5 others
-
8
-
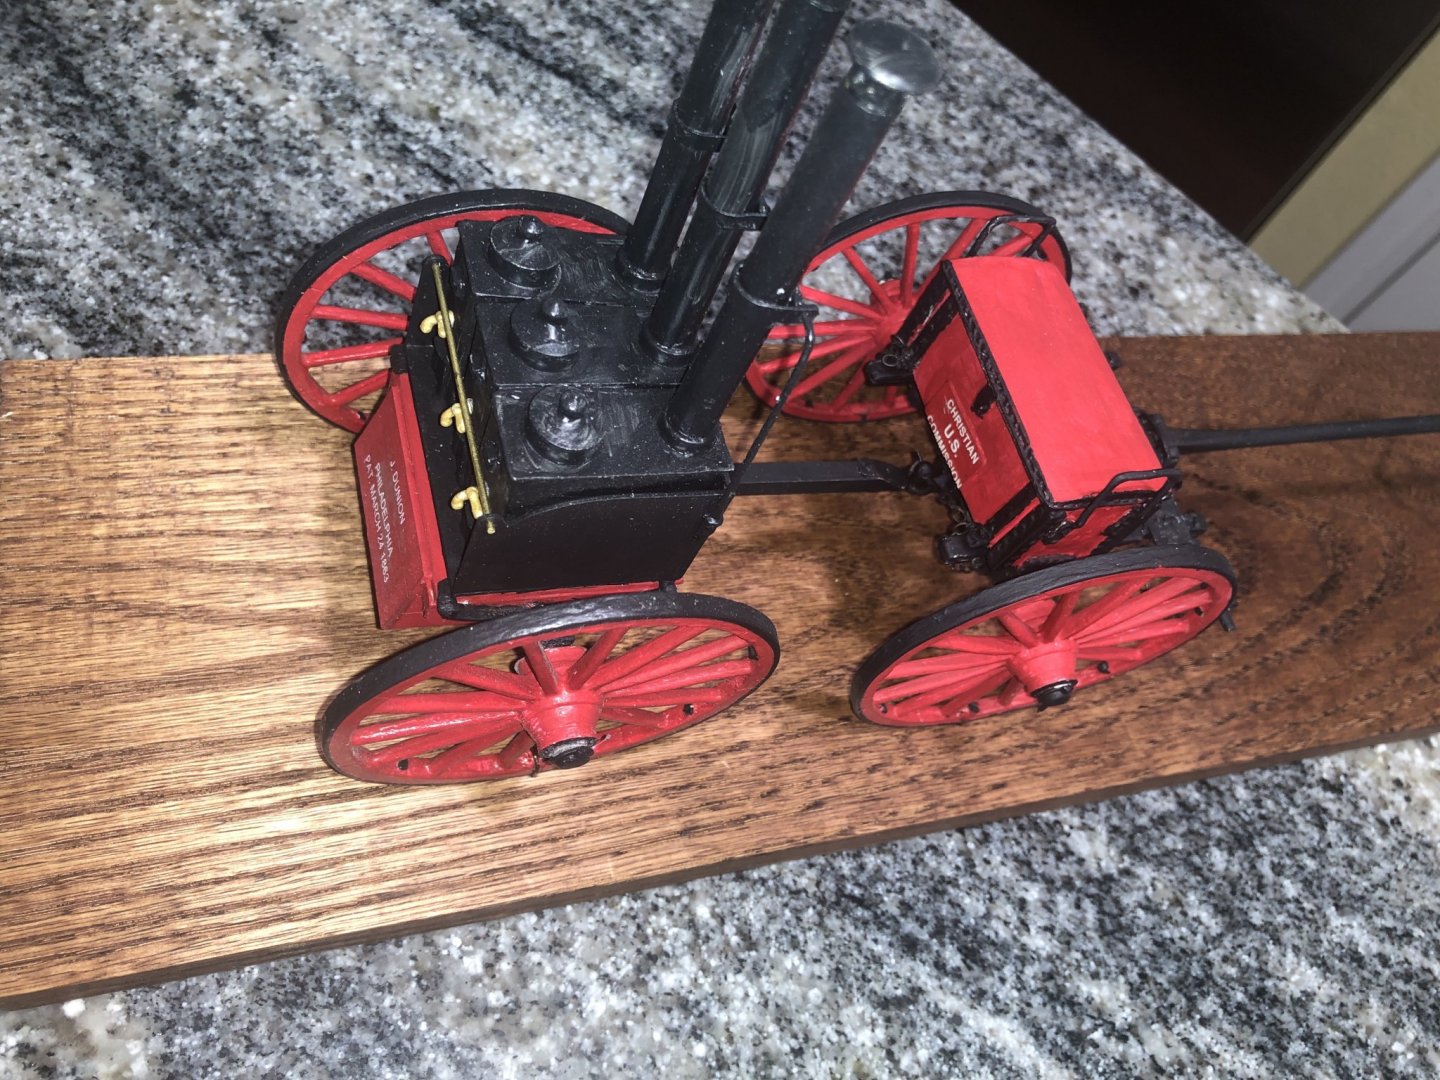
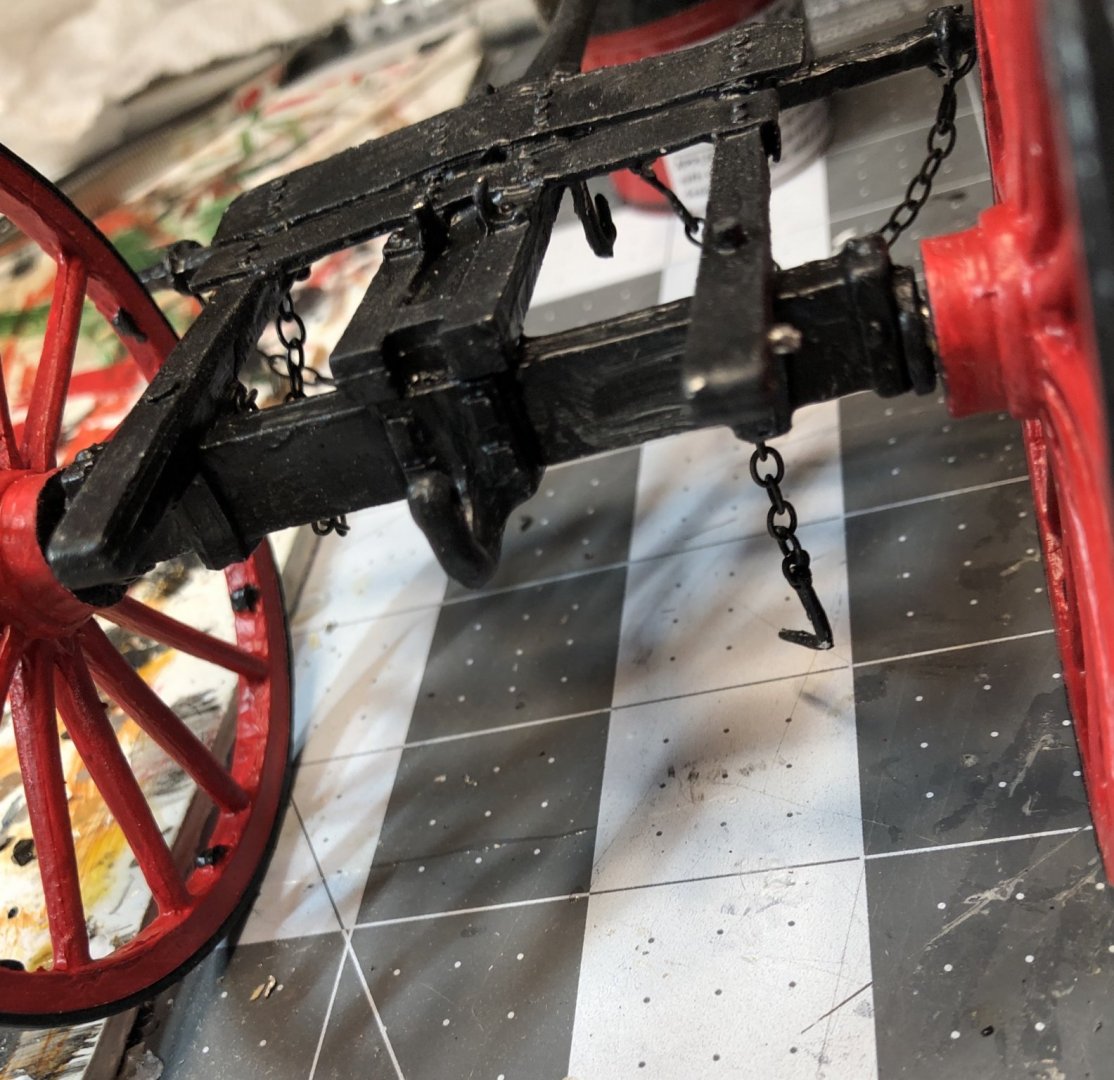
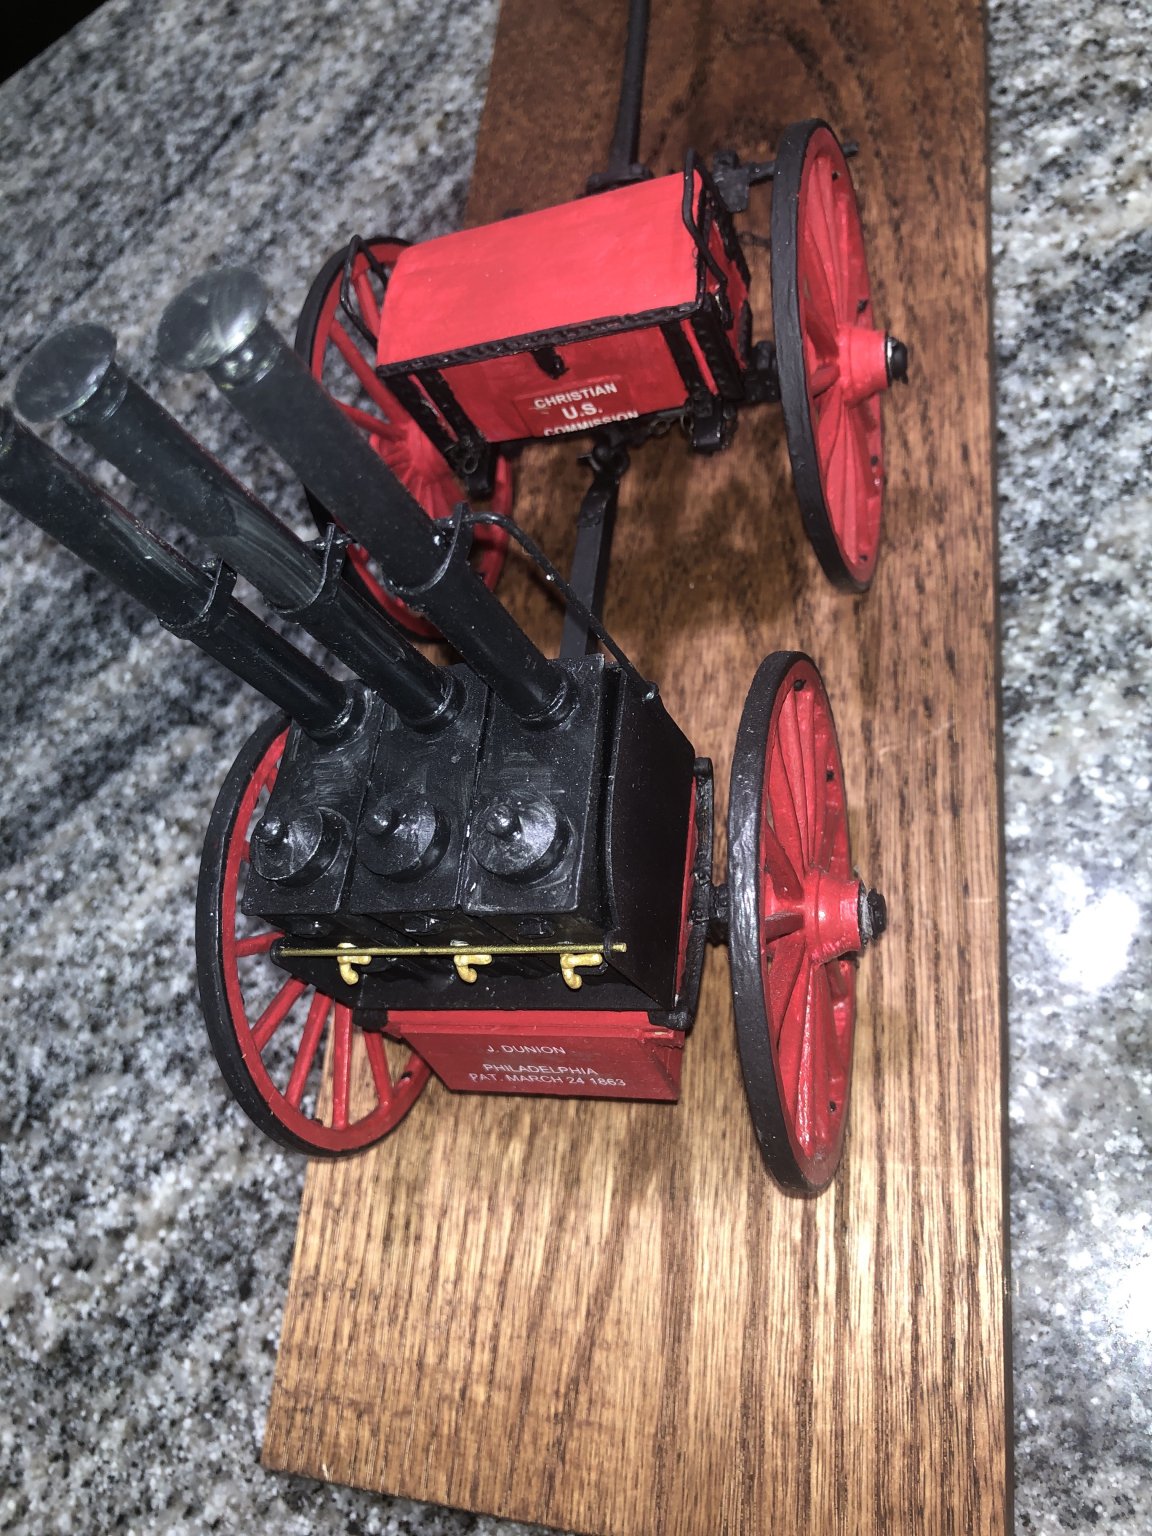
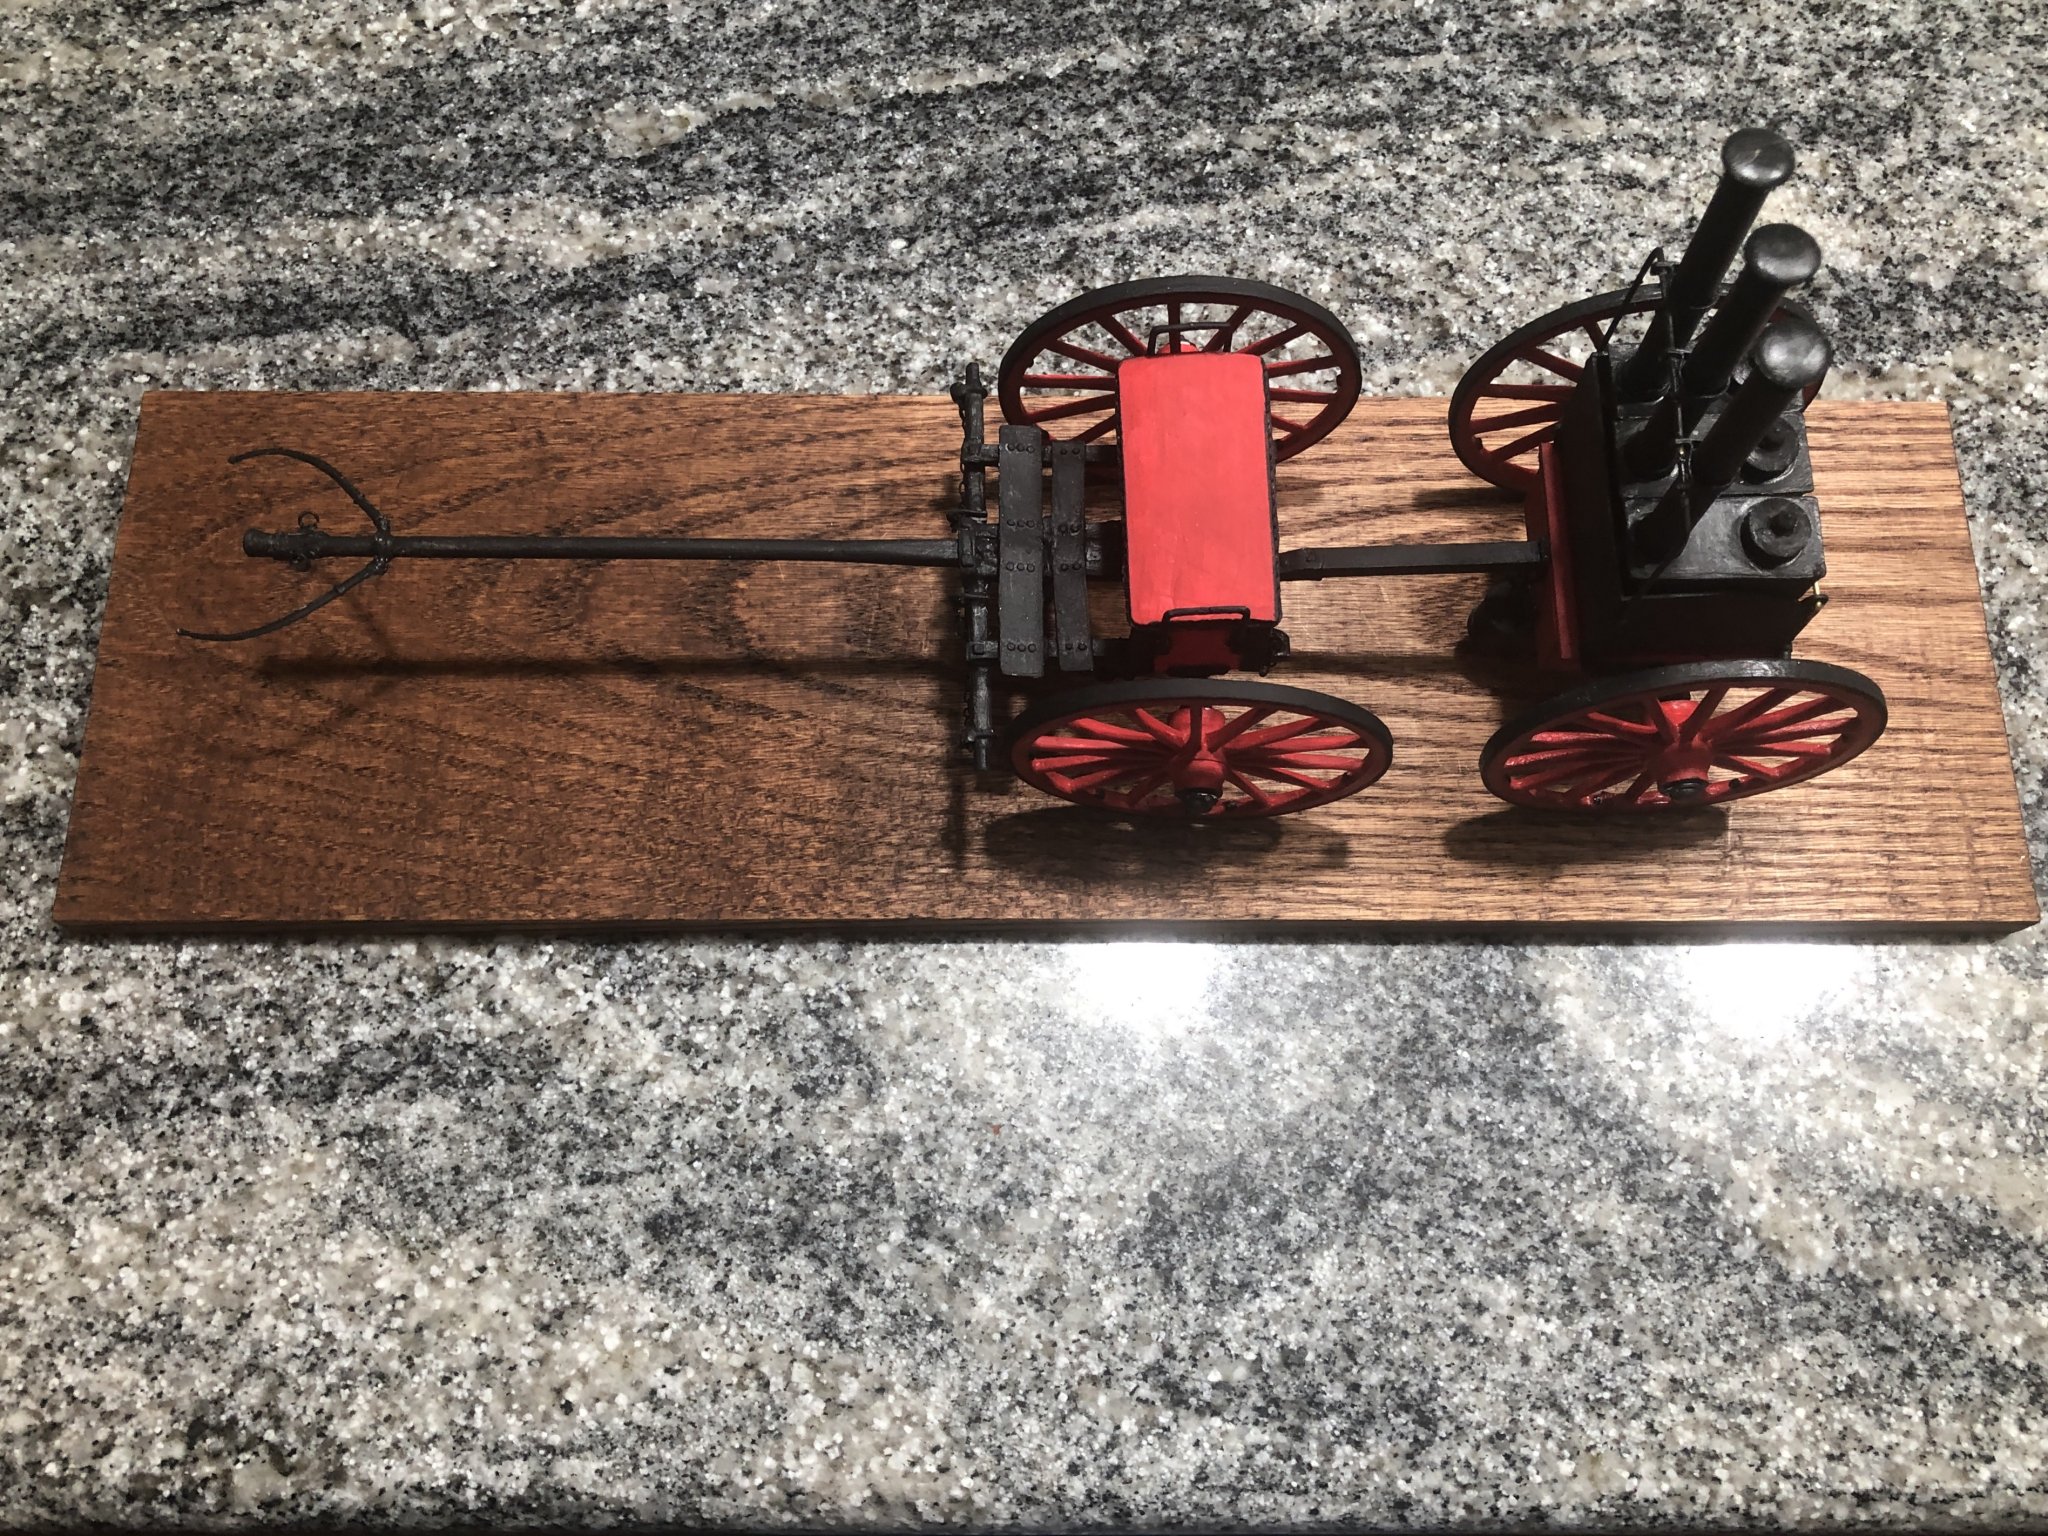
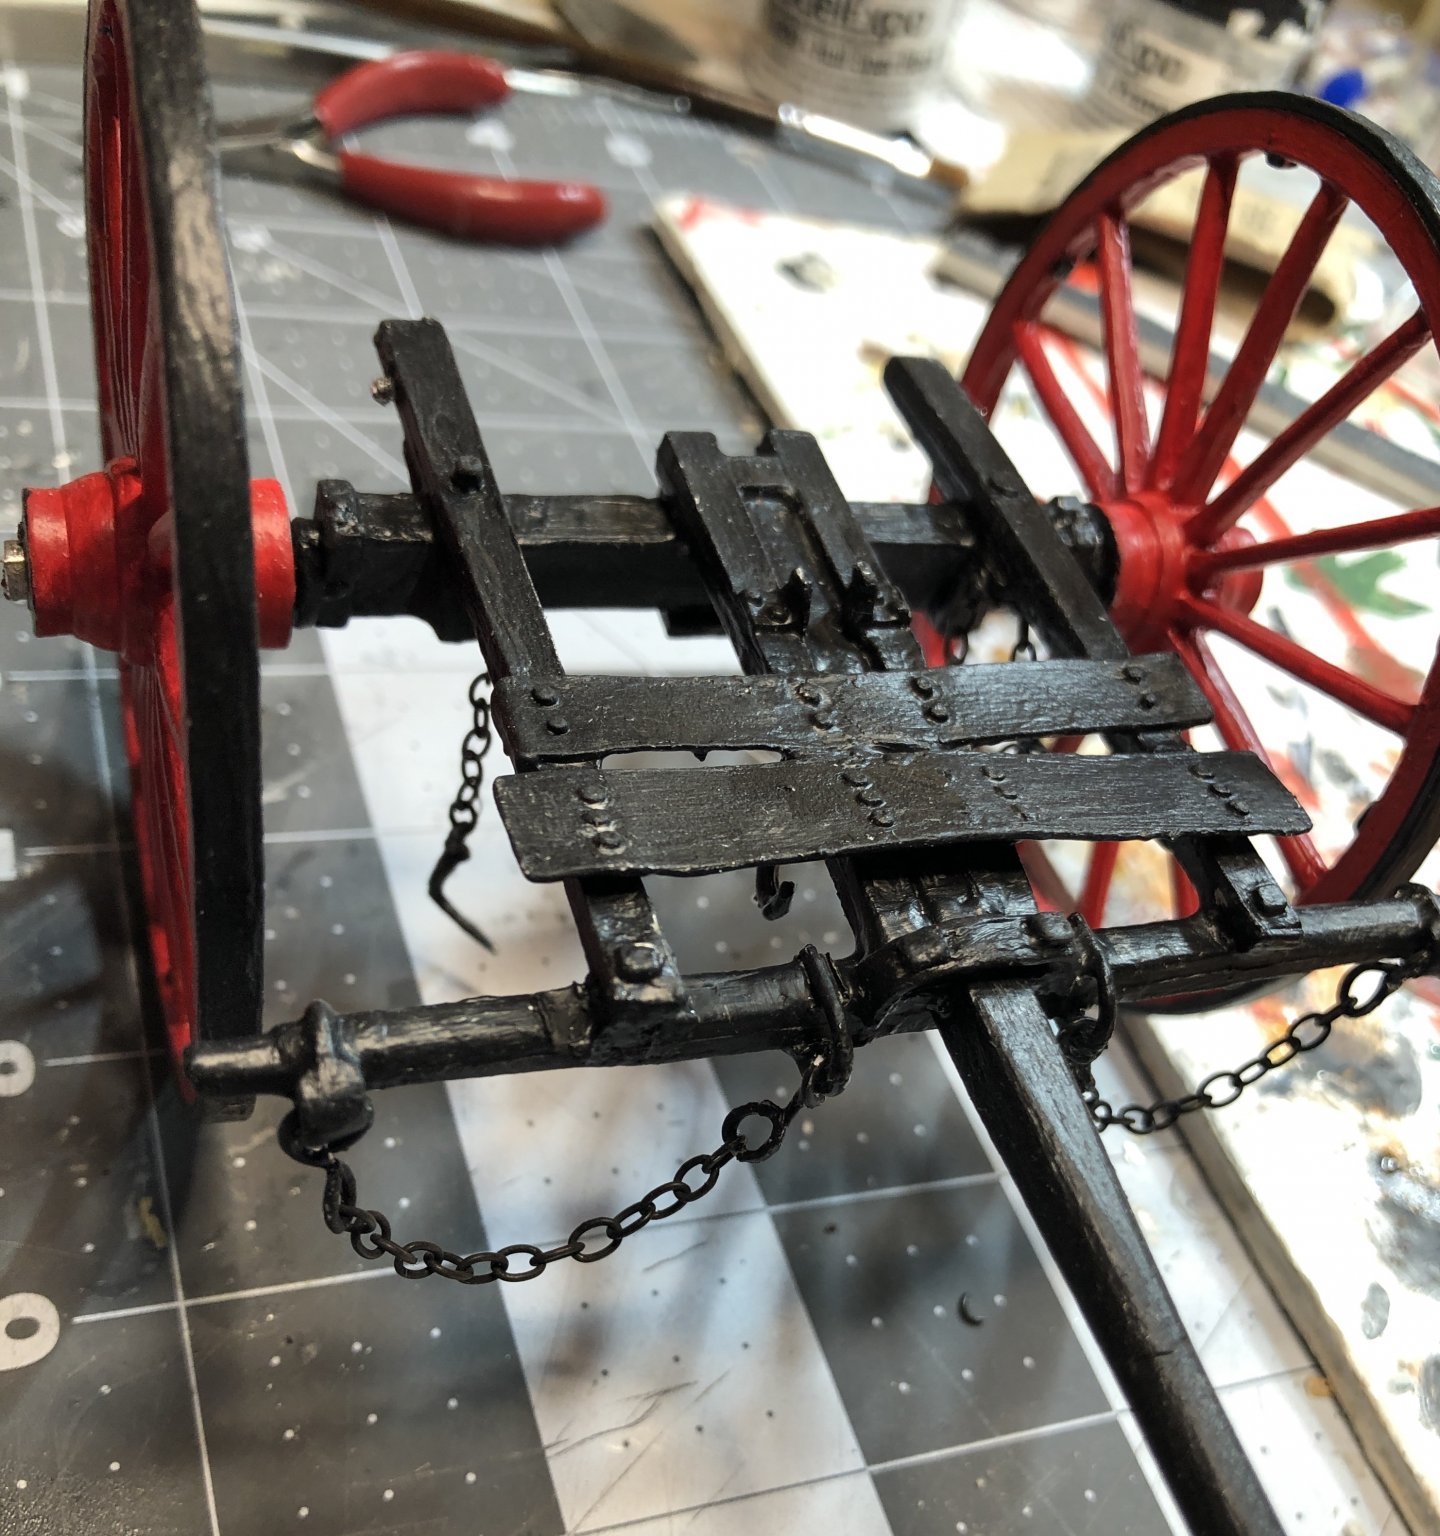
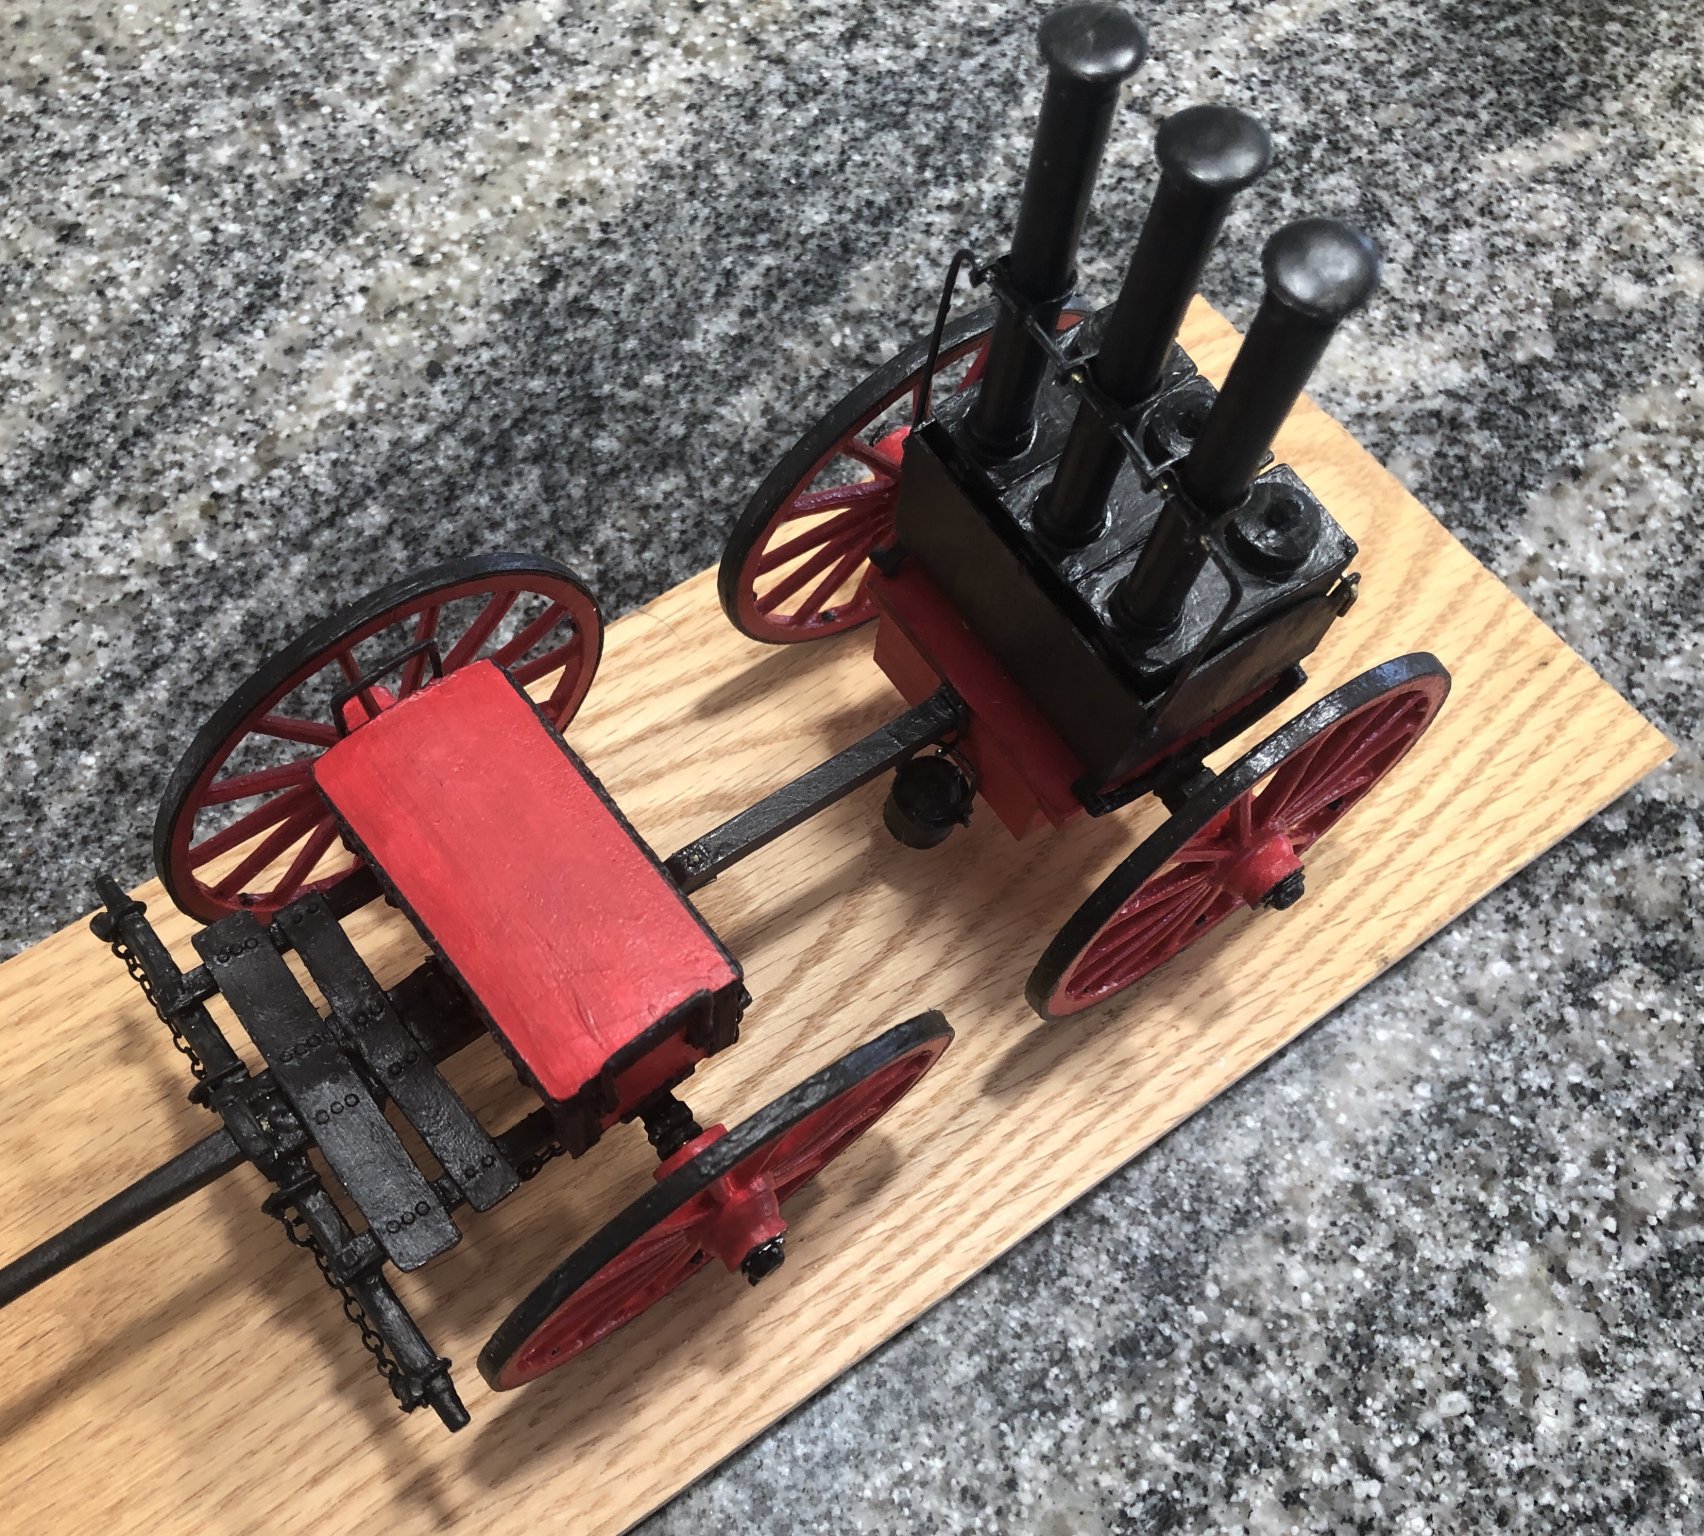
The Tree is attached to the Hound and the Fork Strap to the Fork.
The The Muff Collar, Branches, Pad and Irons were attached to the Pole and painted black.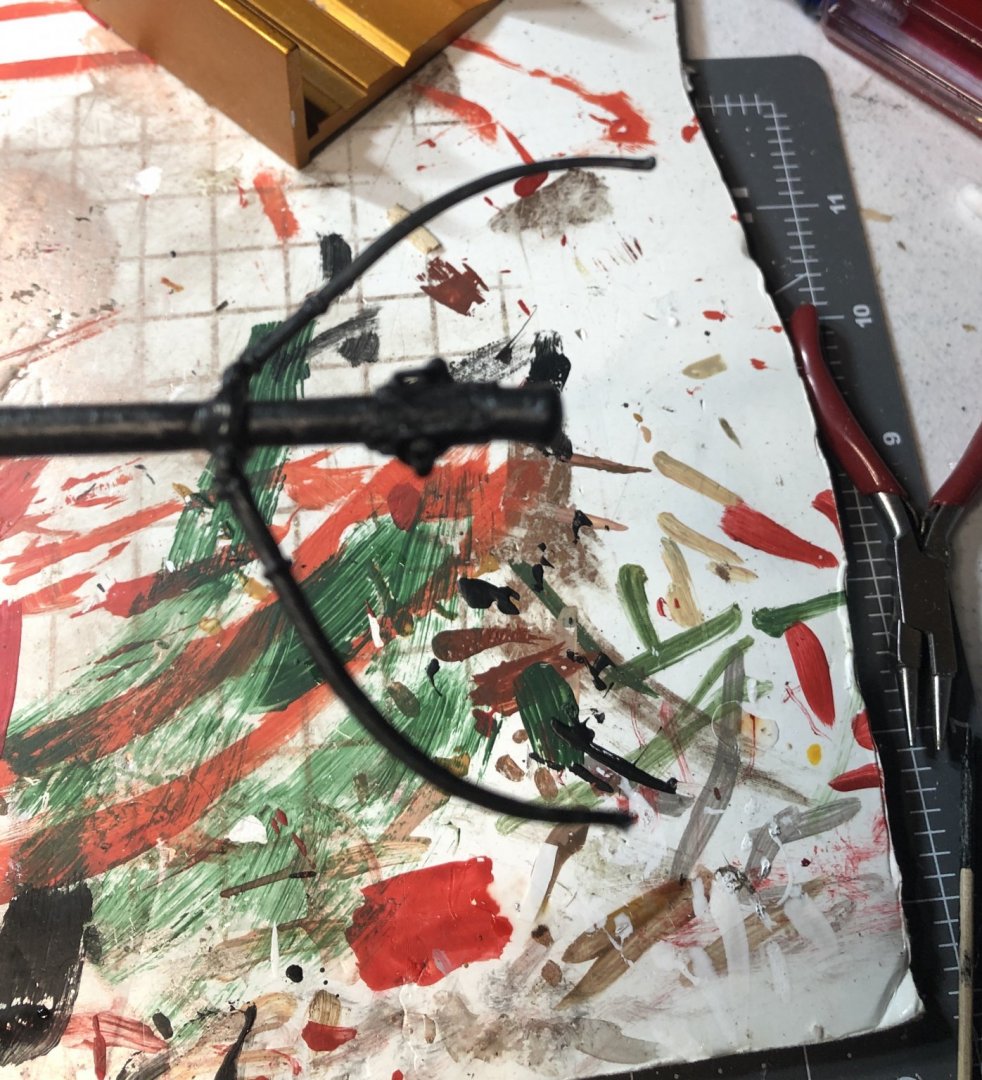
The Pole, Axel and Under Straps were attached to the carriage and painted black.
Chains were added.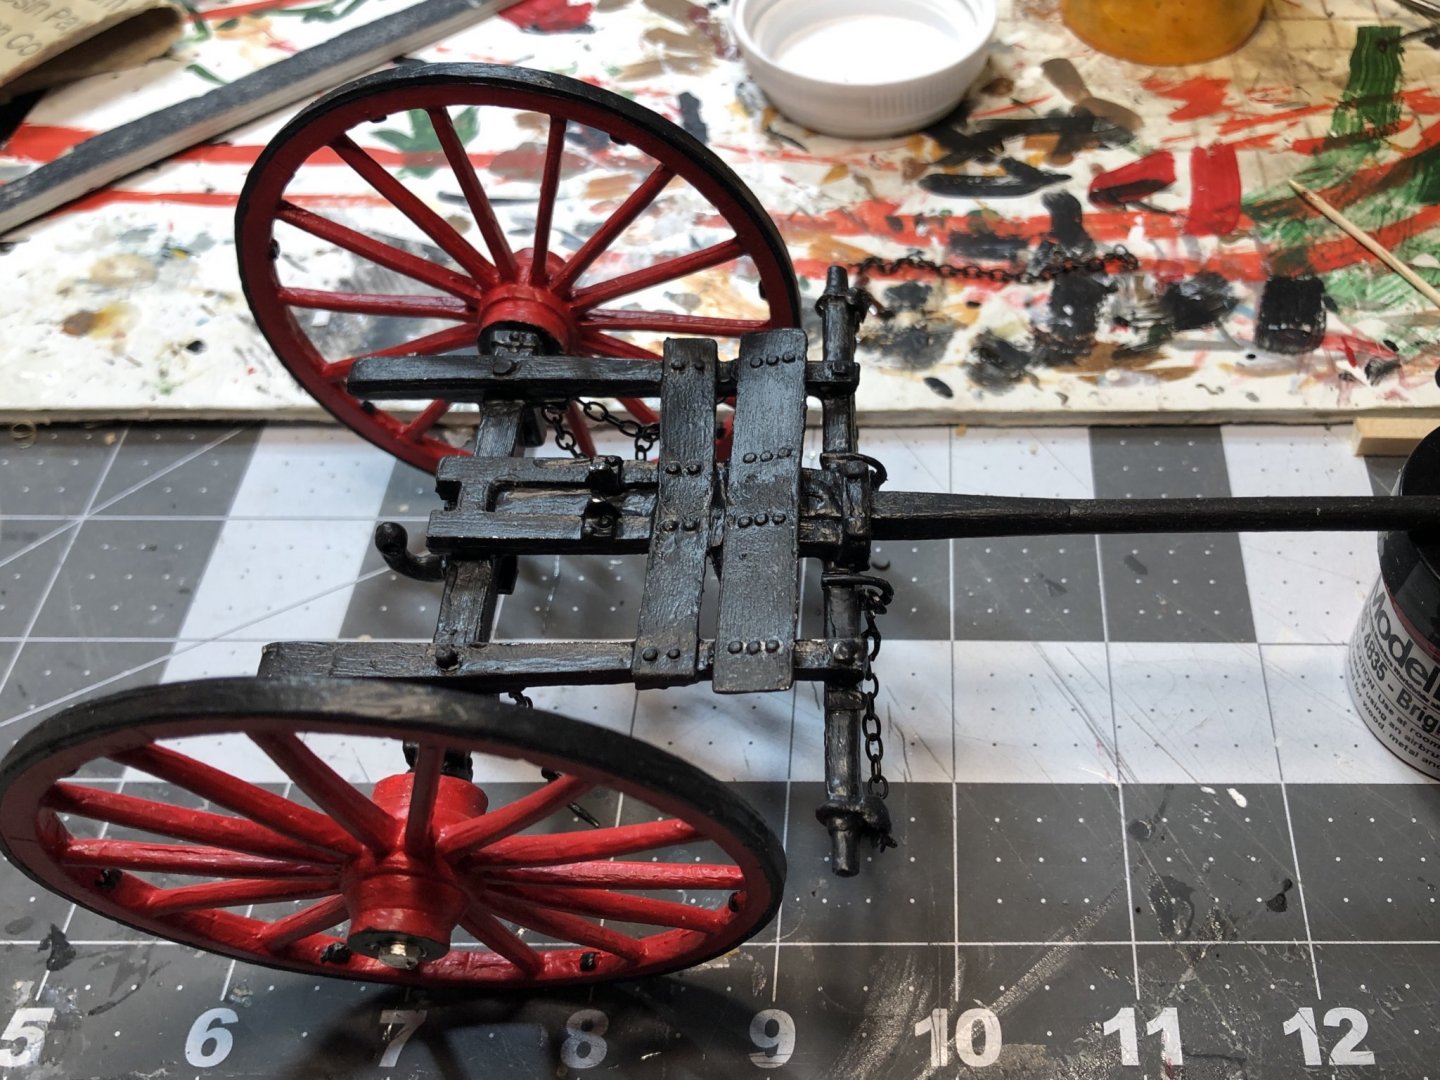

In the above three photos the wheels were not attached yet but only serving as props. The next photo shows the nearly finished models sitting on an unfinished mounting board. The wagon and limber will be attached to the board for display after it has been finished.
- mtaylor, GrandpaPhil, Canute and 3 others
-
6
-
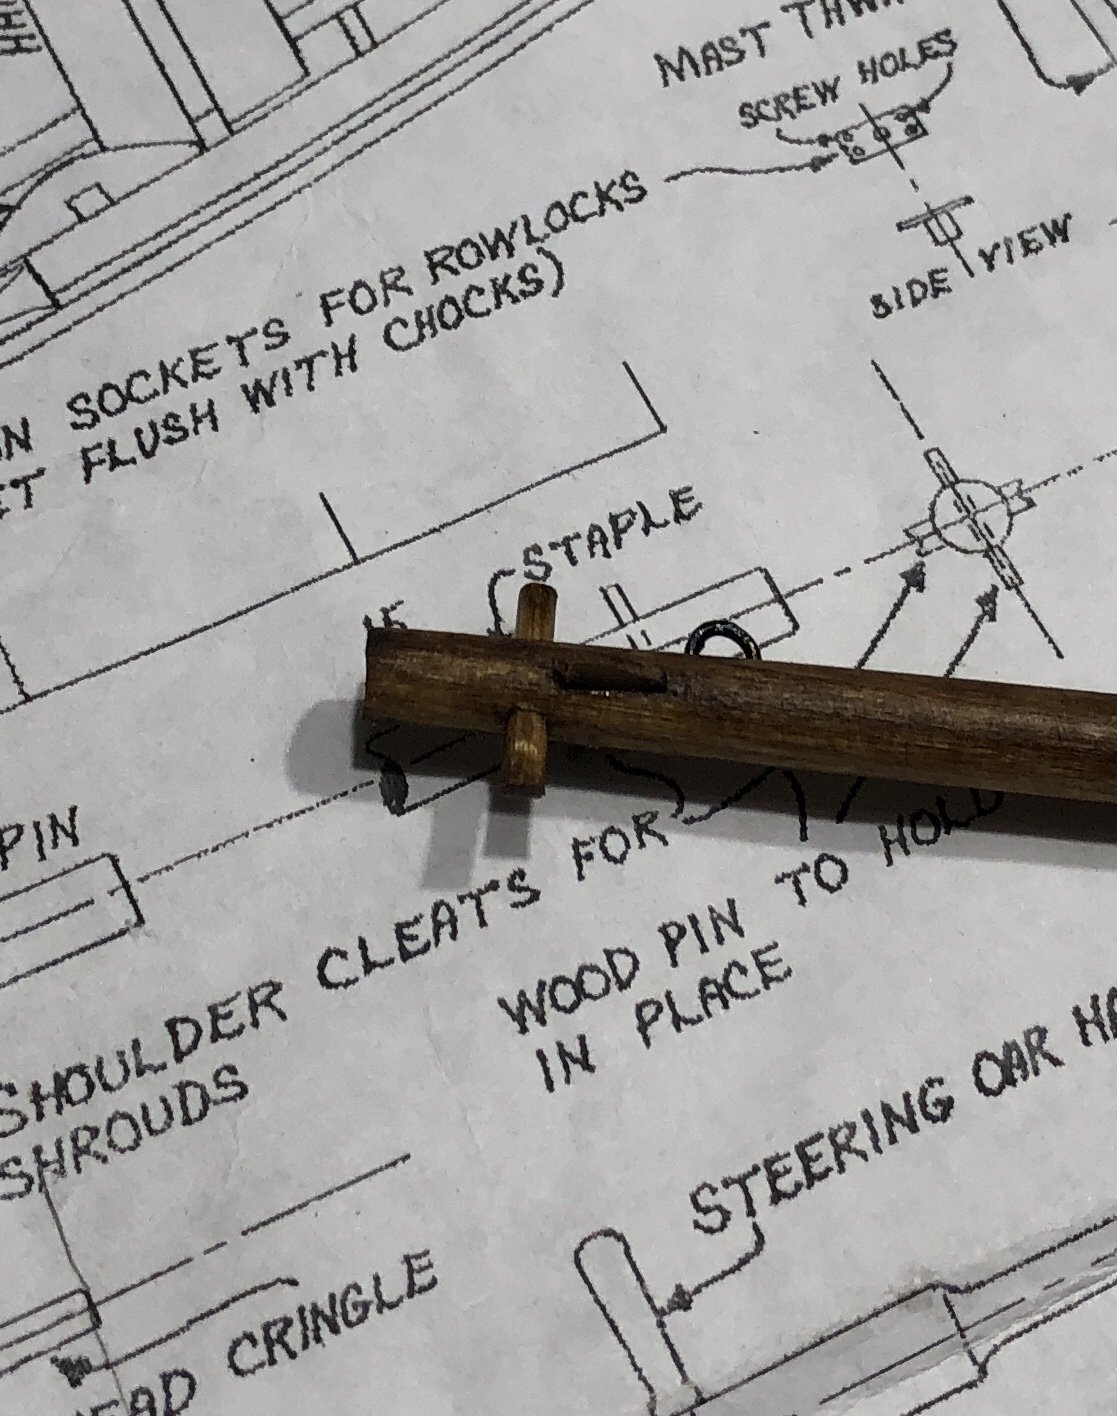
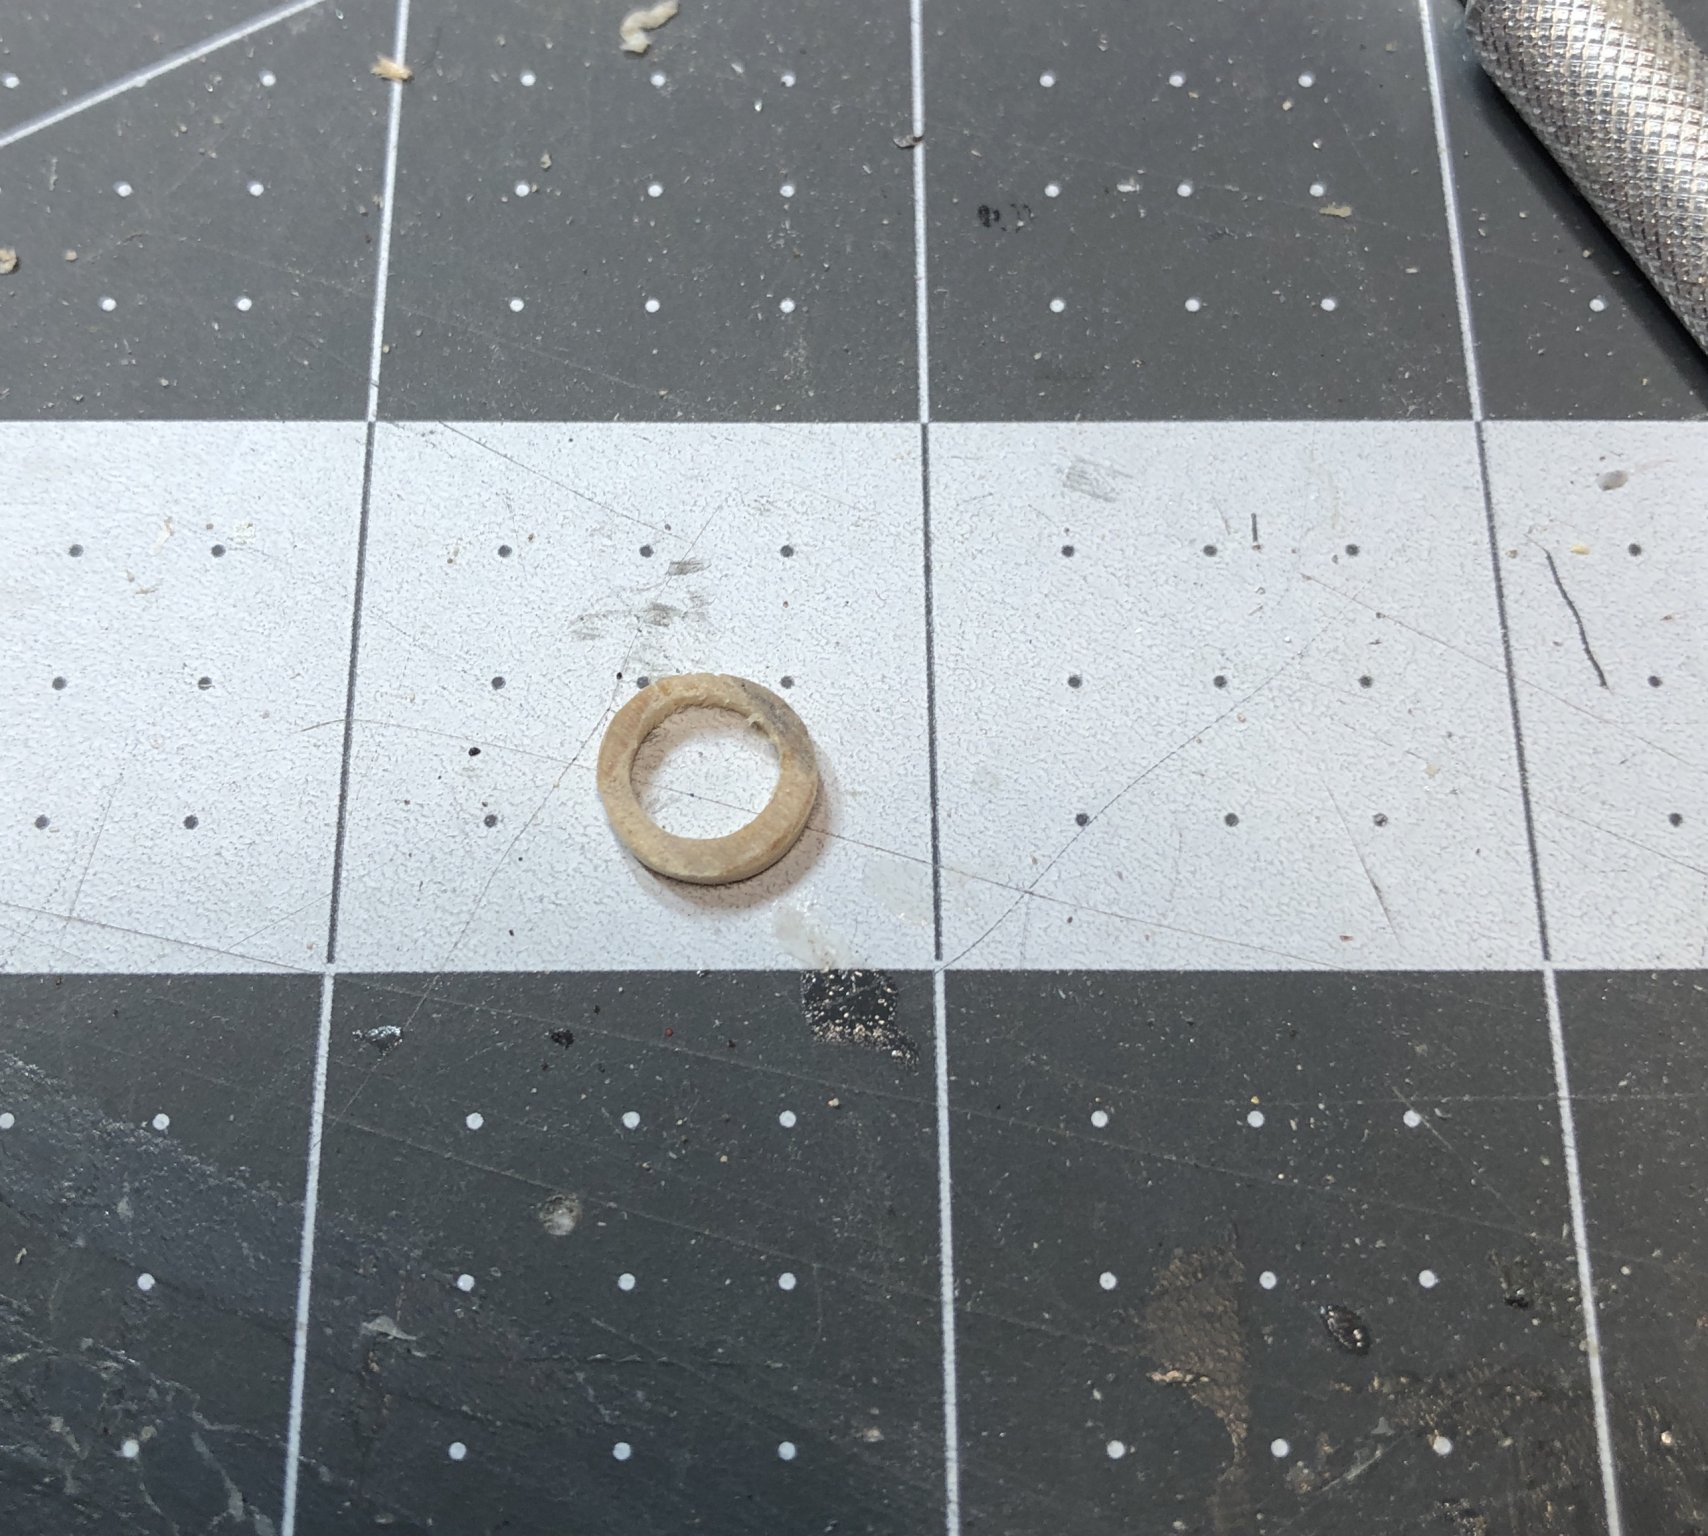
I am now working on a Civil war Limber to go with my finished Coffee Wagon. However, I did get the mast and sprit pole finished and ready for the sail. I have not decided how I want to do the sail. This will be a challenge no matter what I do.

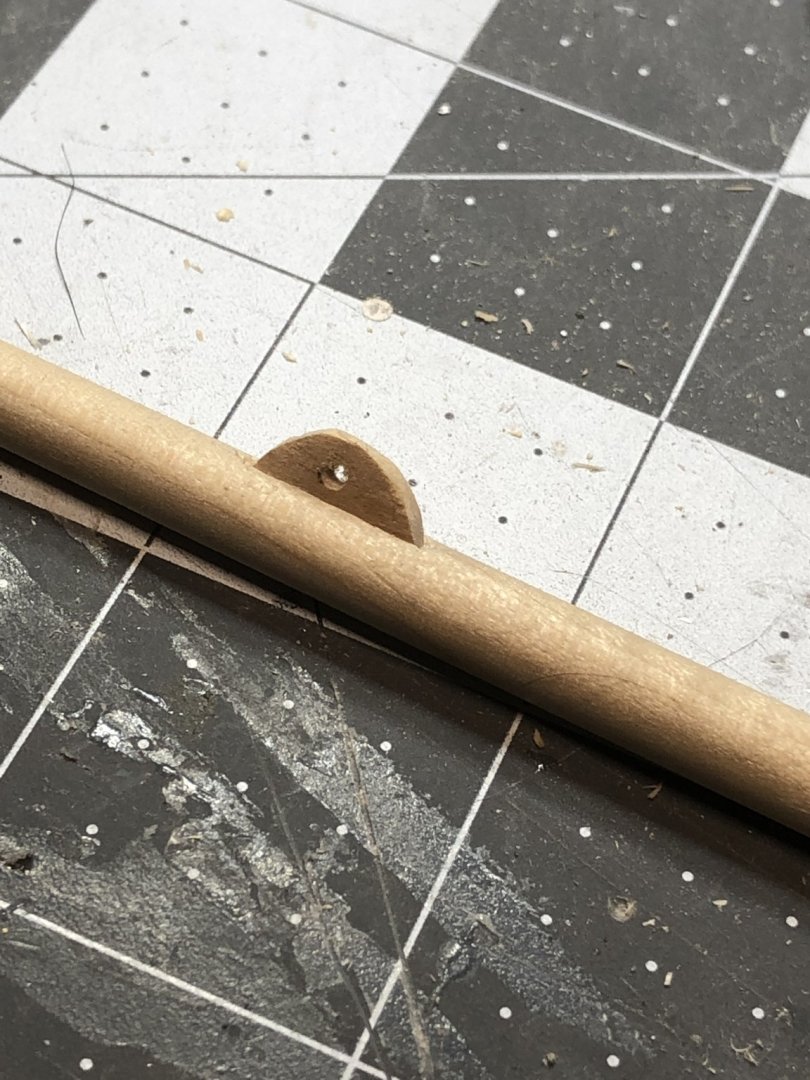
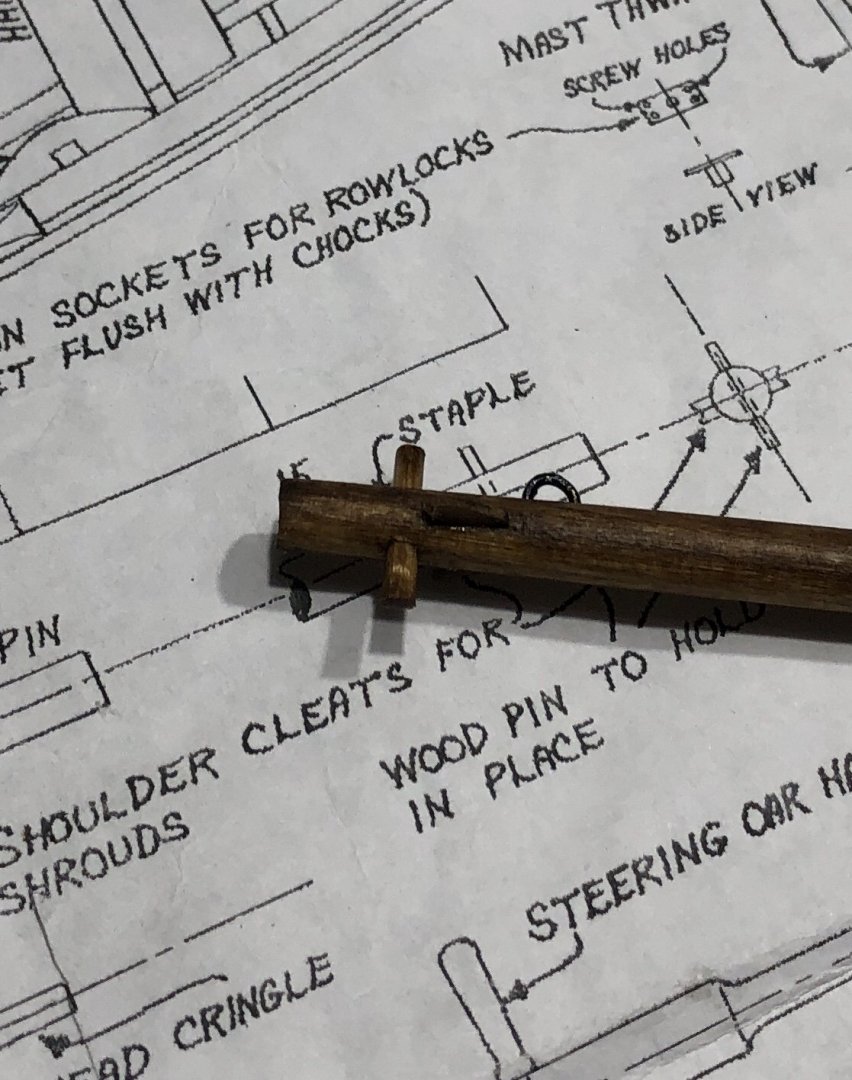
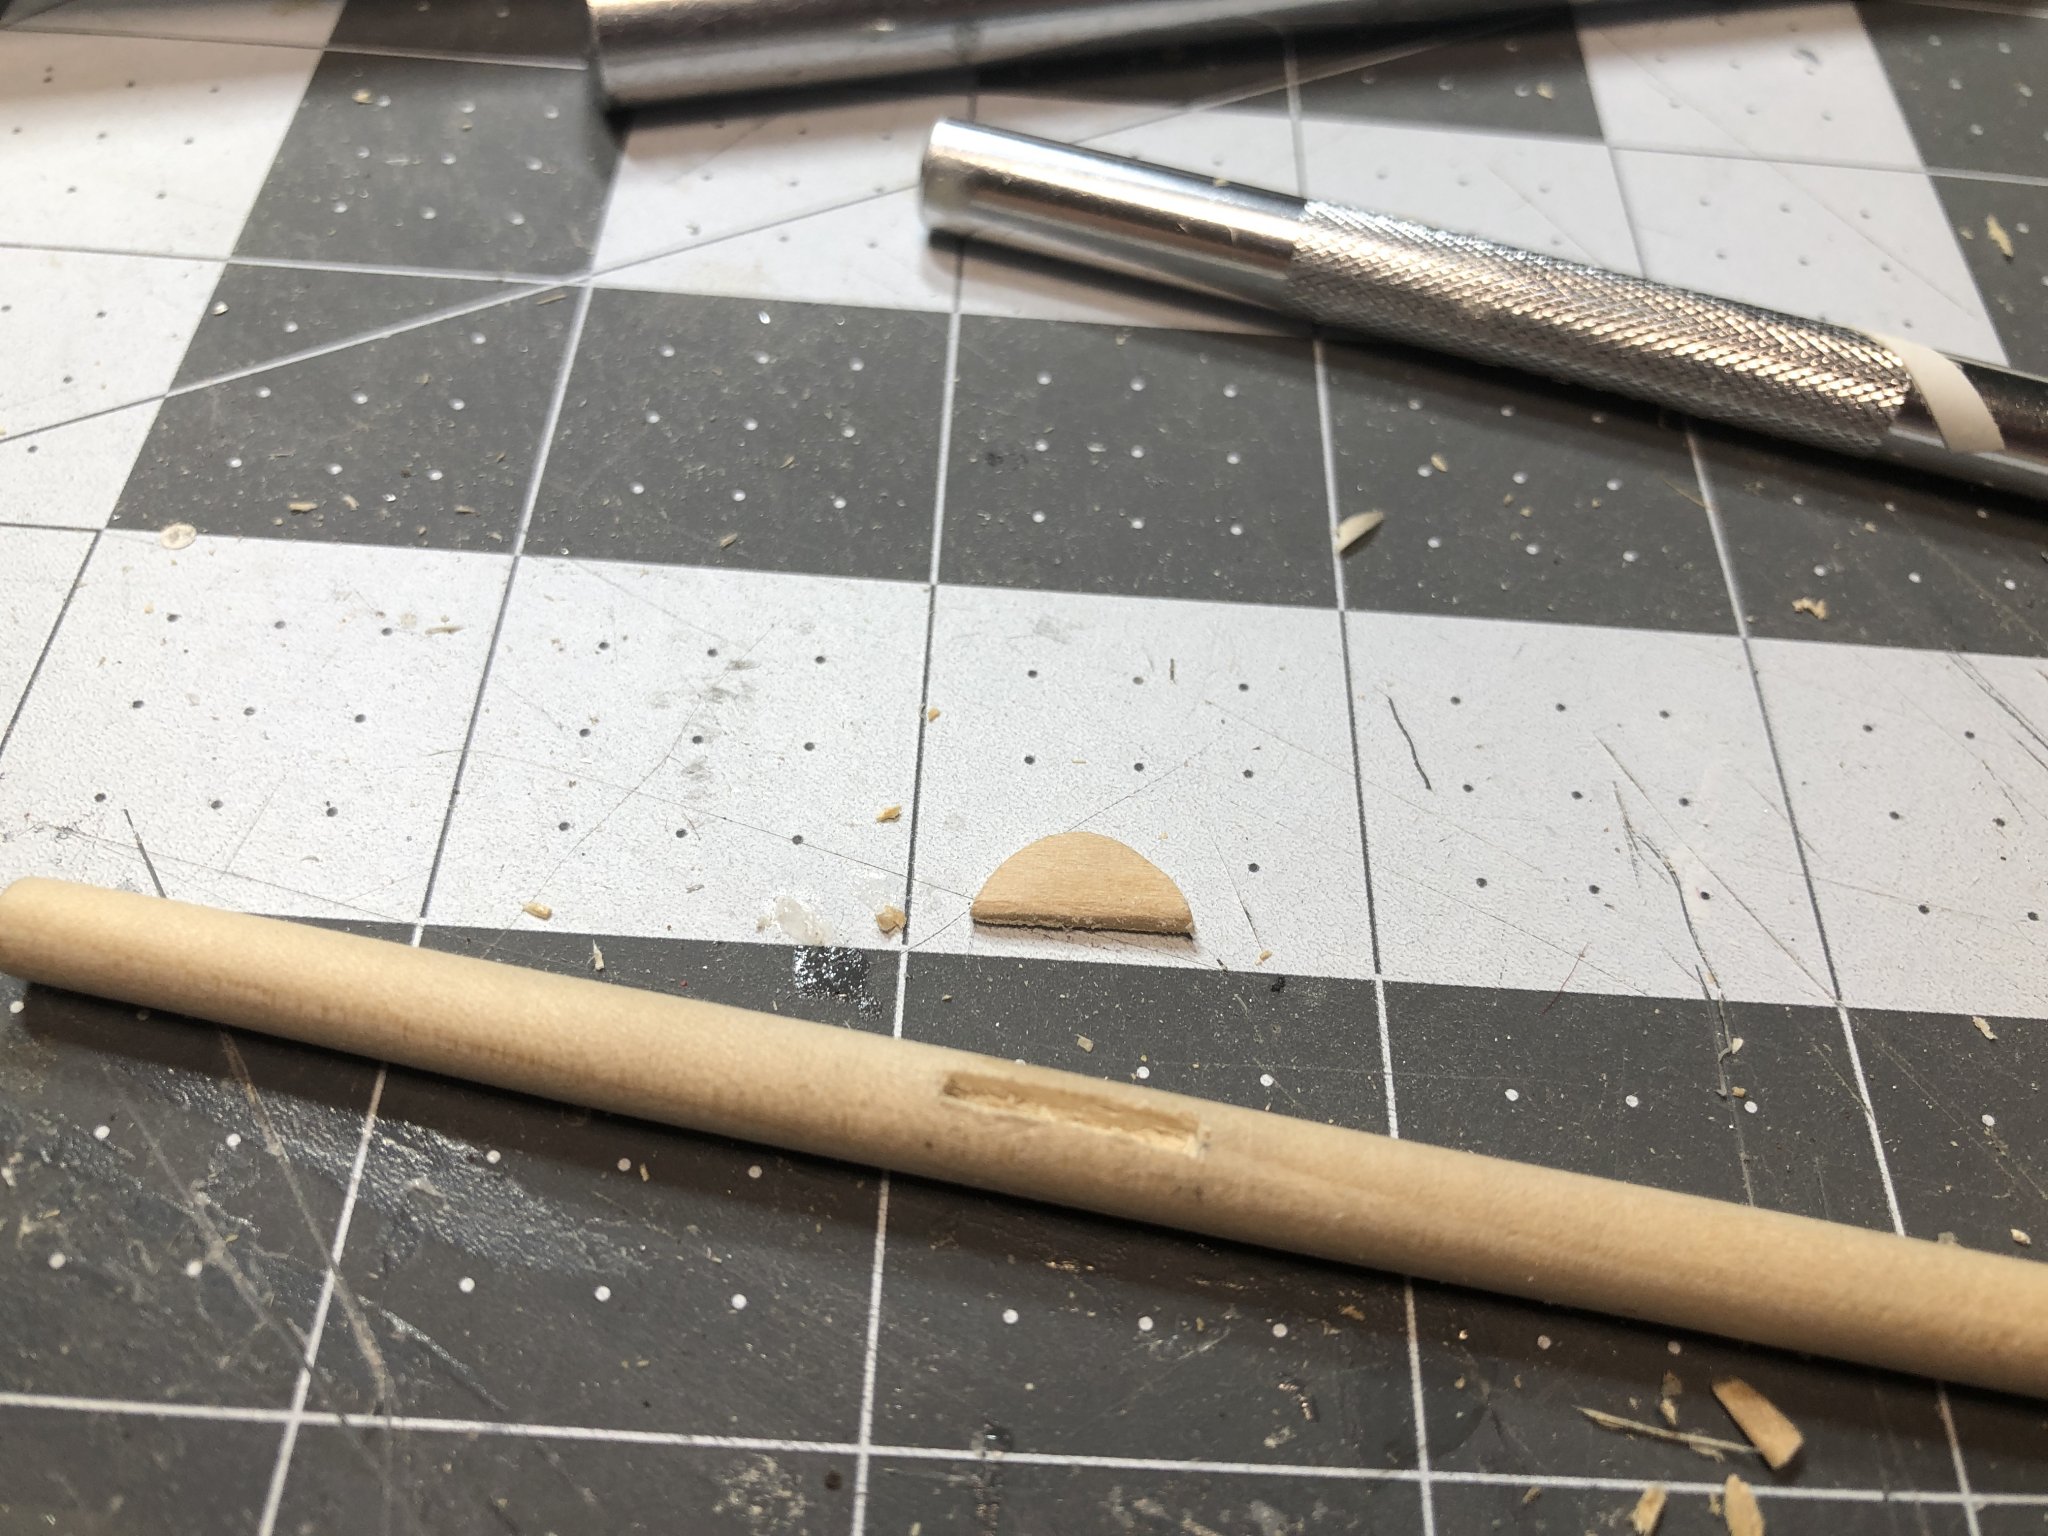
Rings for attaching the sail to the mast were made by drilling a hole in a dowel larger than the mast and then sectioning it.
Mast and Sprit pole.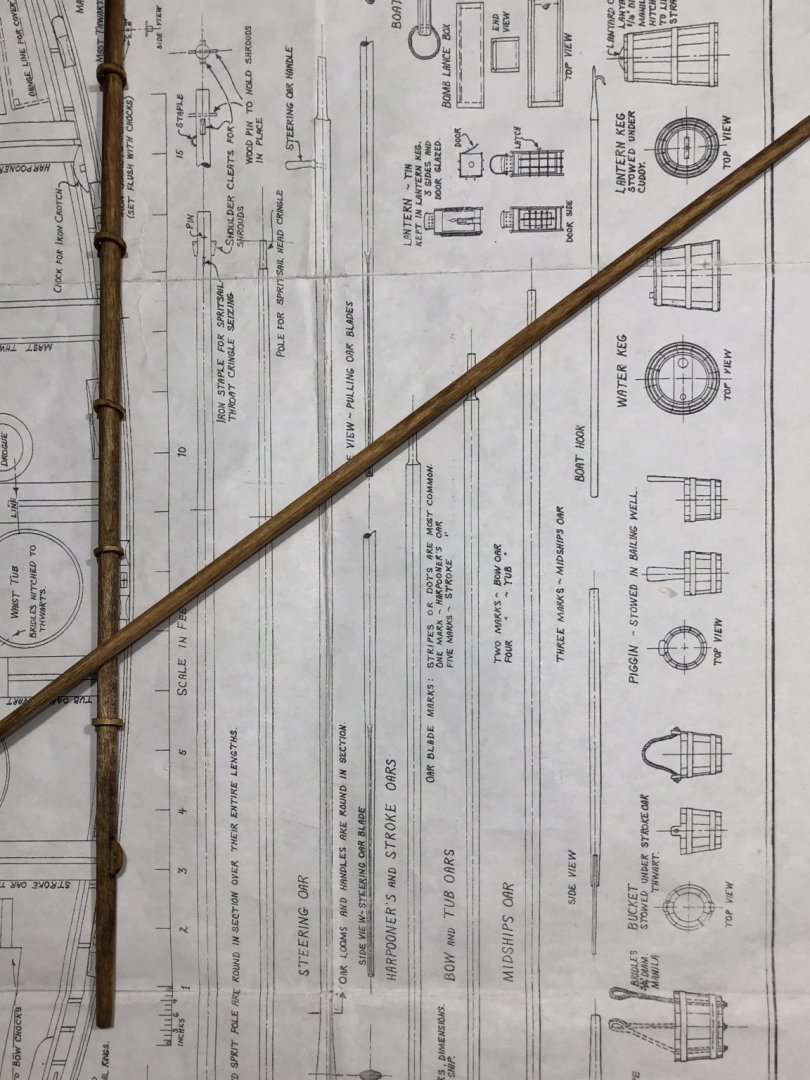
- Tom E, G.L. and GrandpaPhil
-
3
-
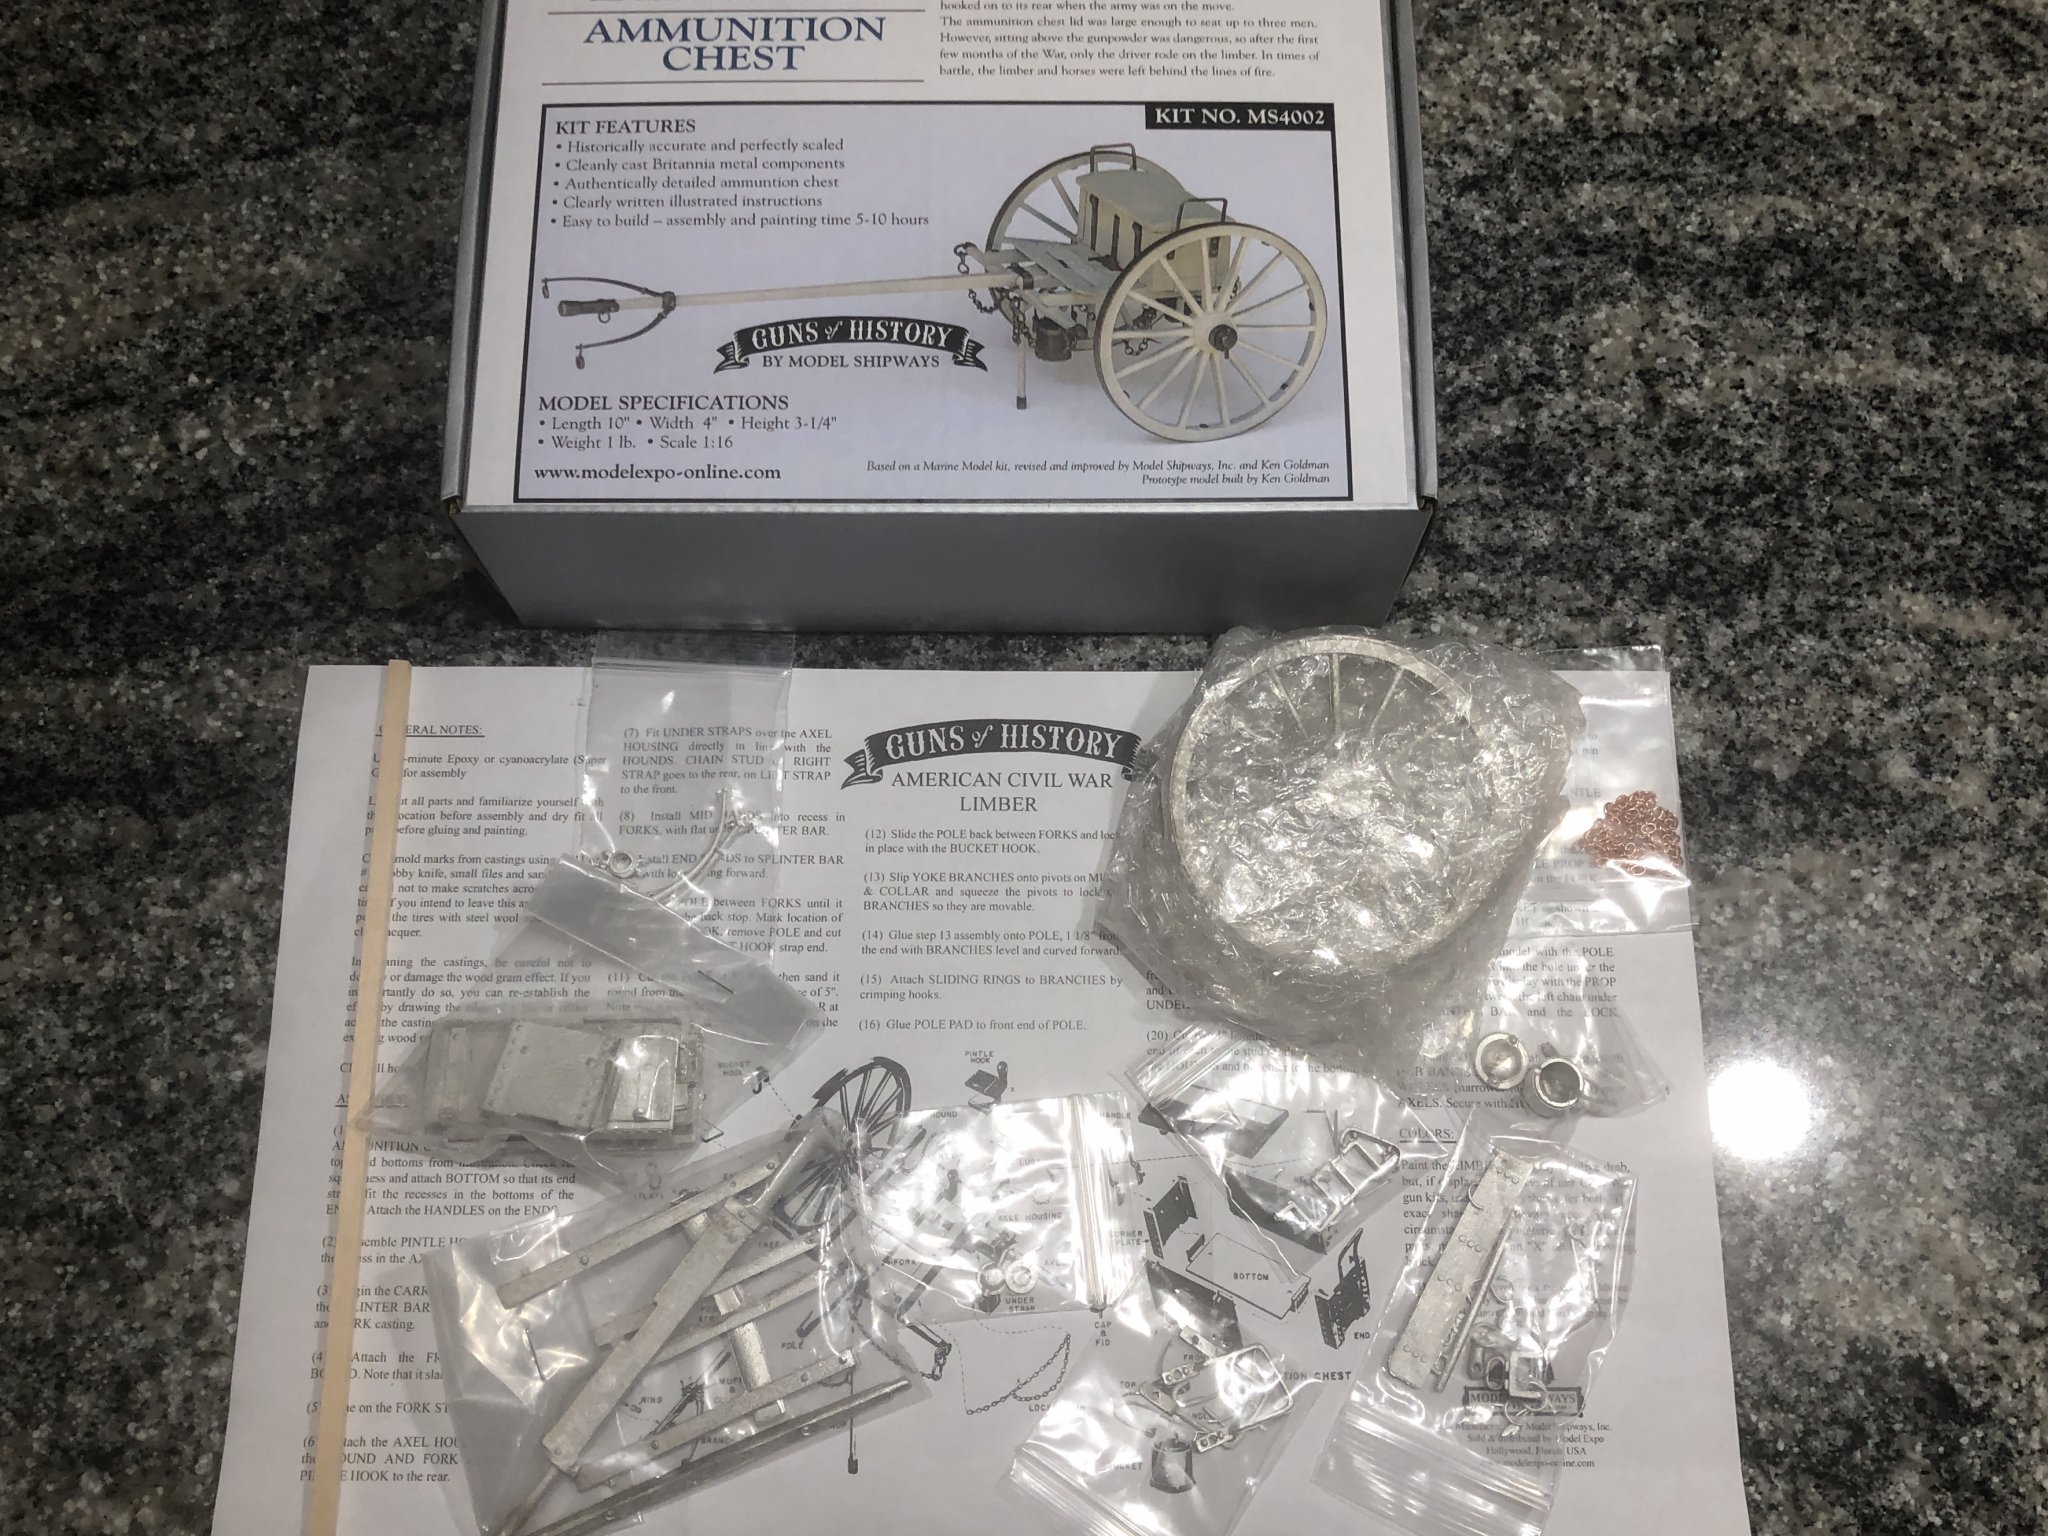
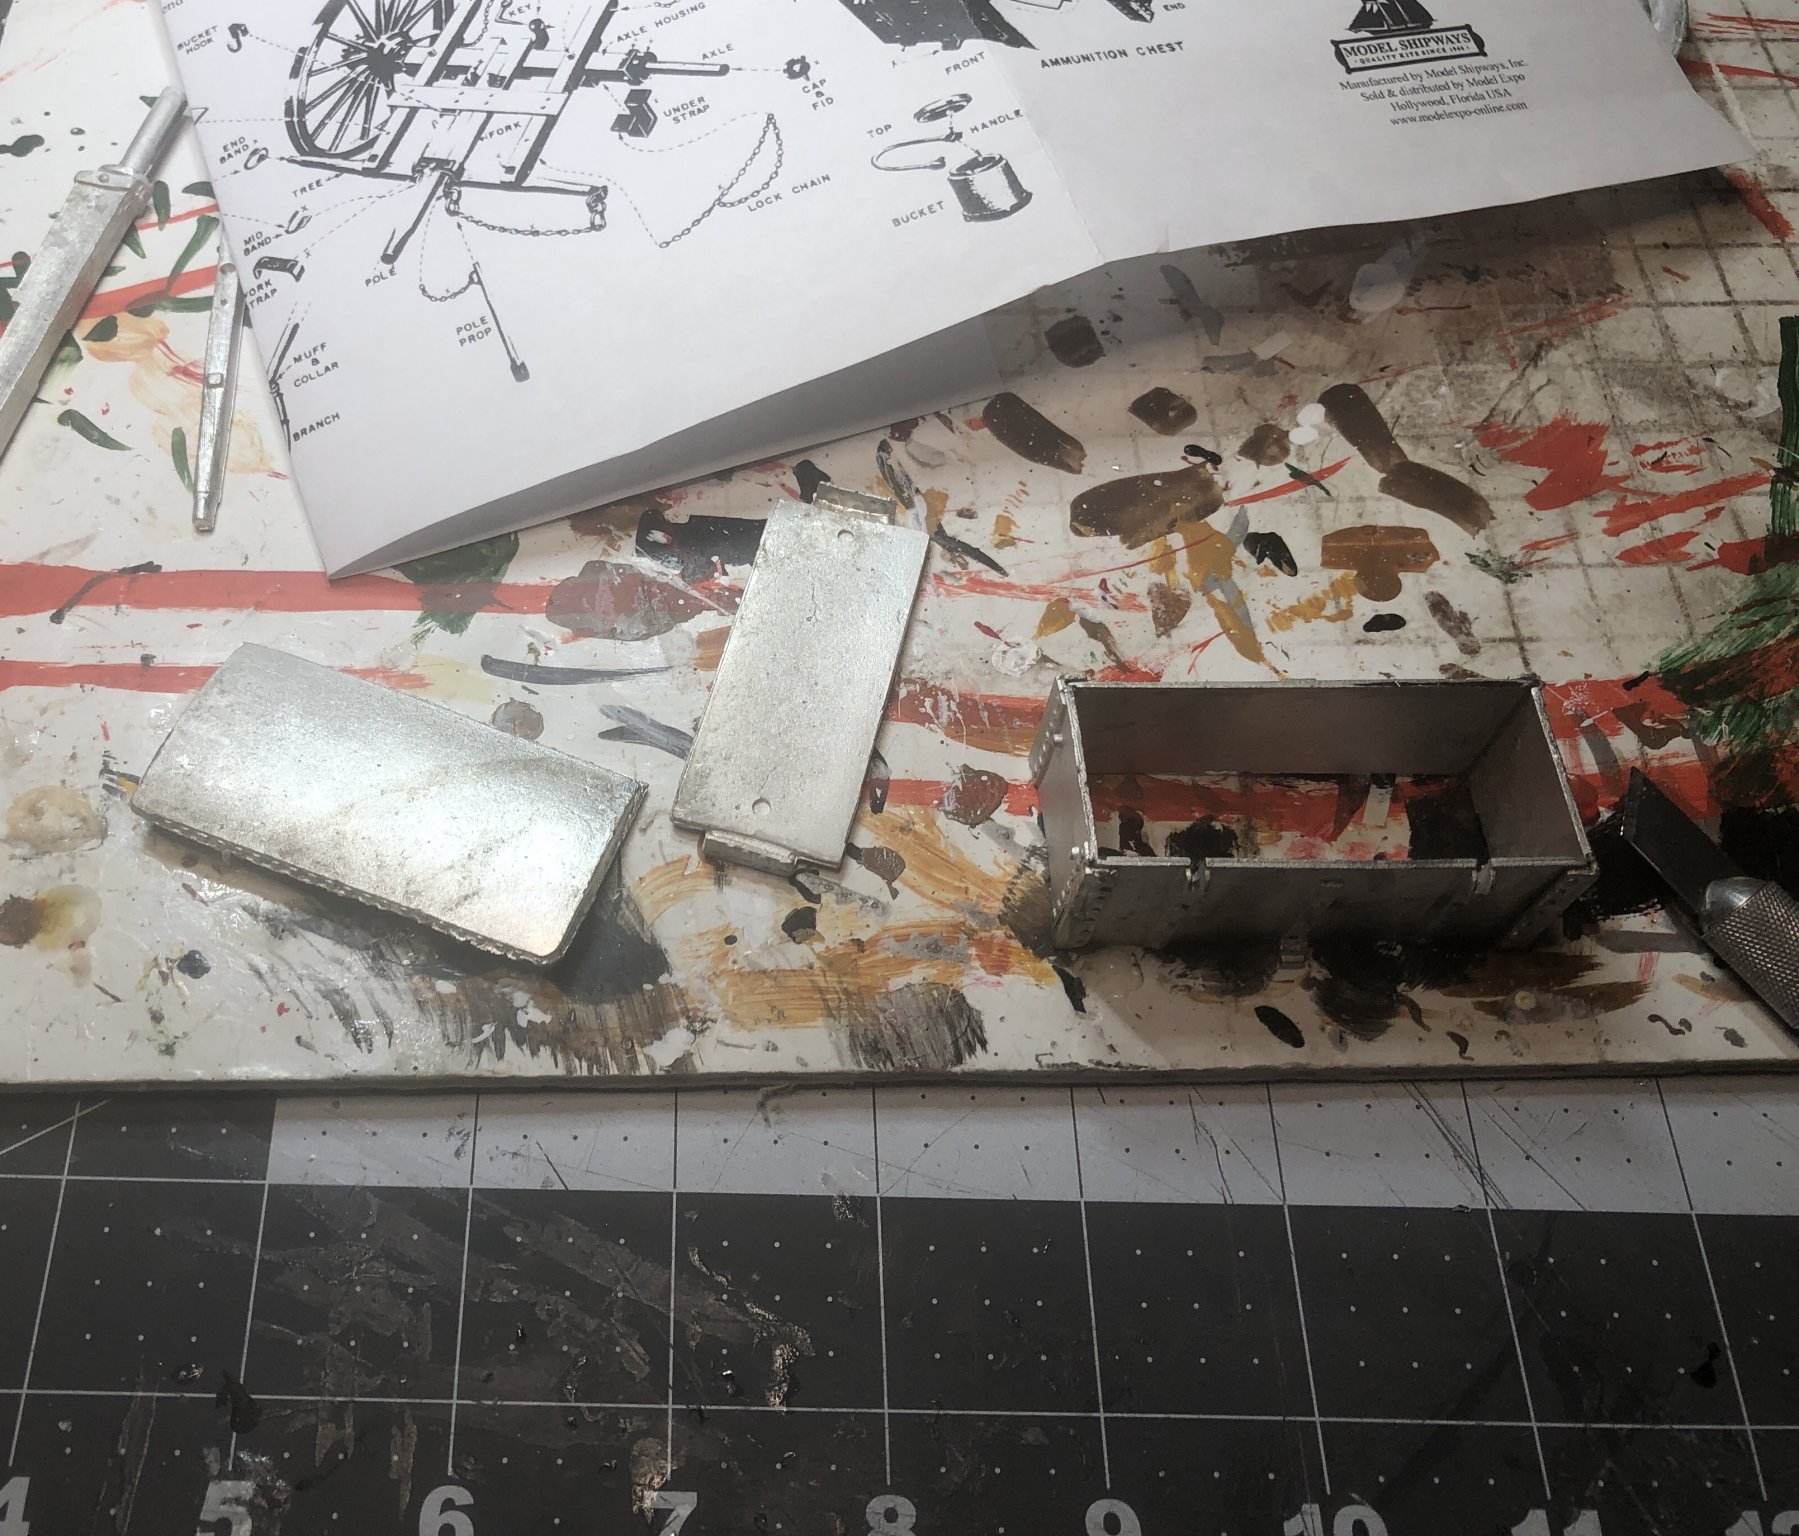
Just received the Civil War Limber to add to the Coffee Wagon. This kit should not take very long. First the kit pics -

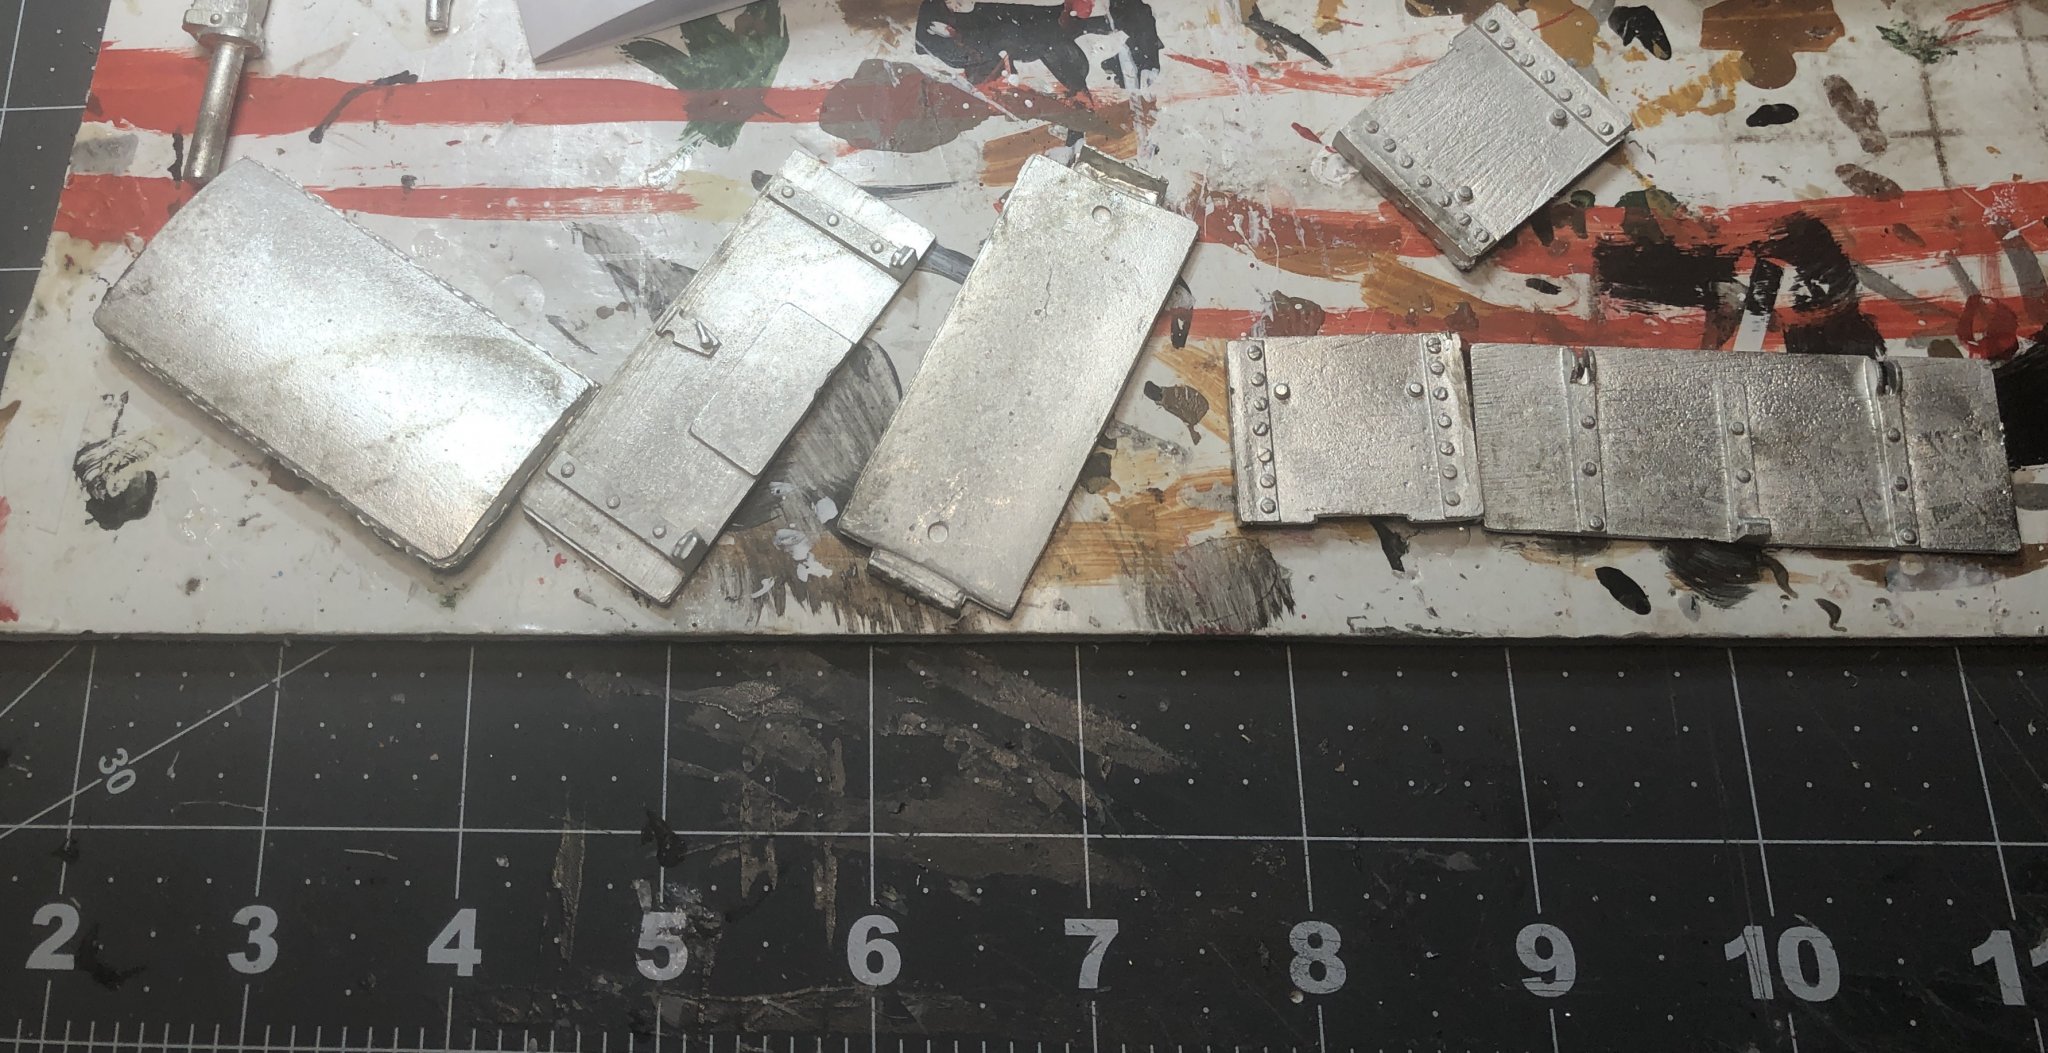
I first tackled the wheels and ammunition chest. Most of this kit consists of parts made from Britannia metal. As a result of this, I will be using only CA glue.
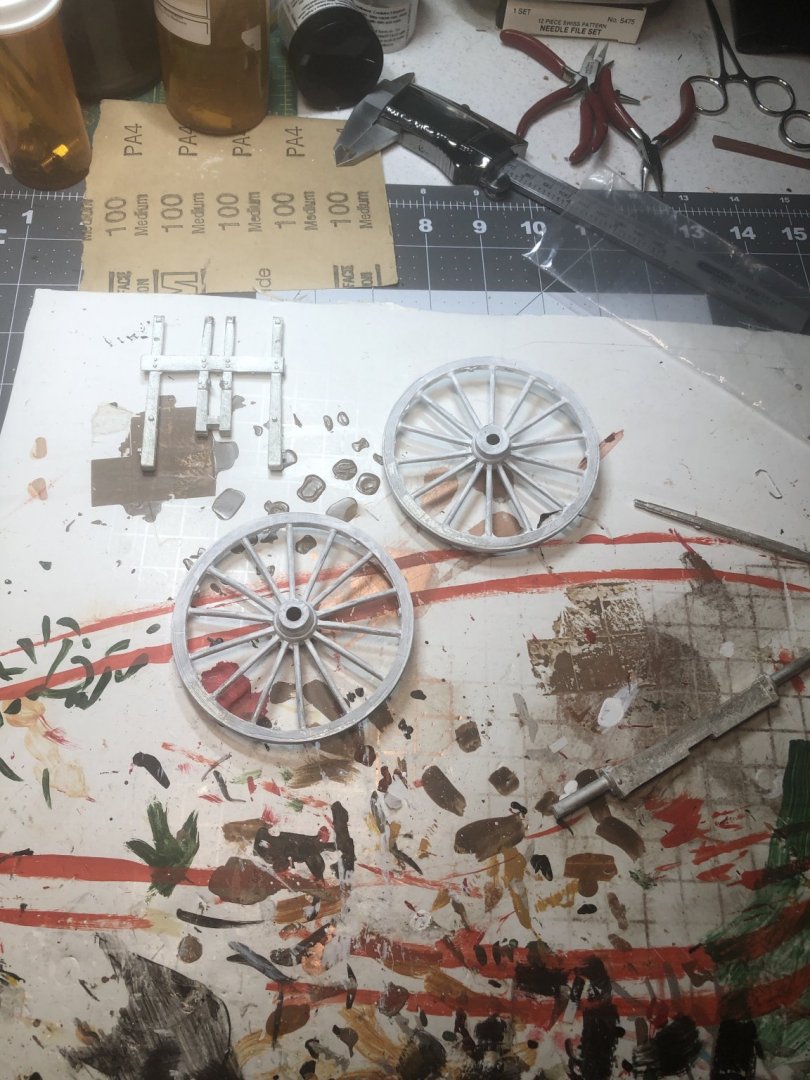
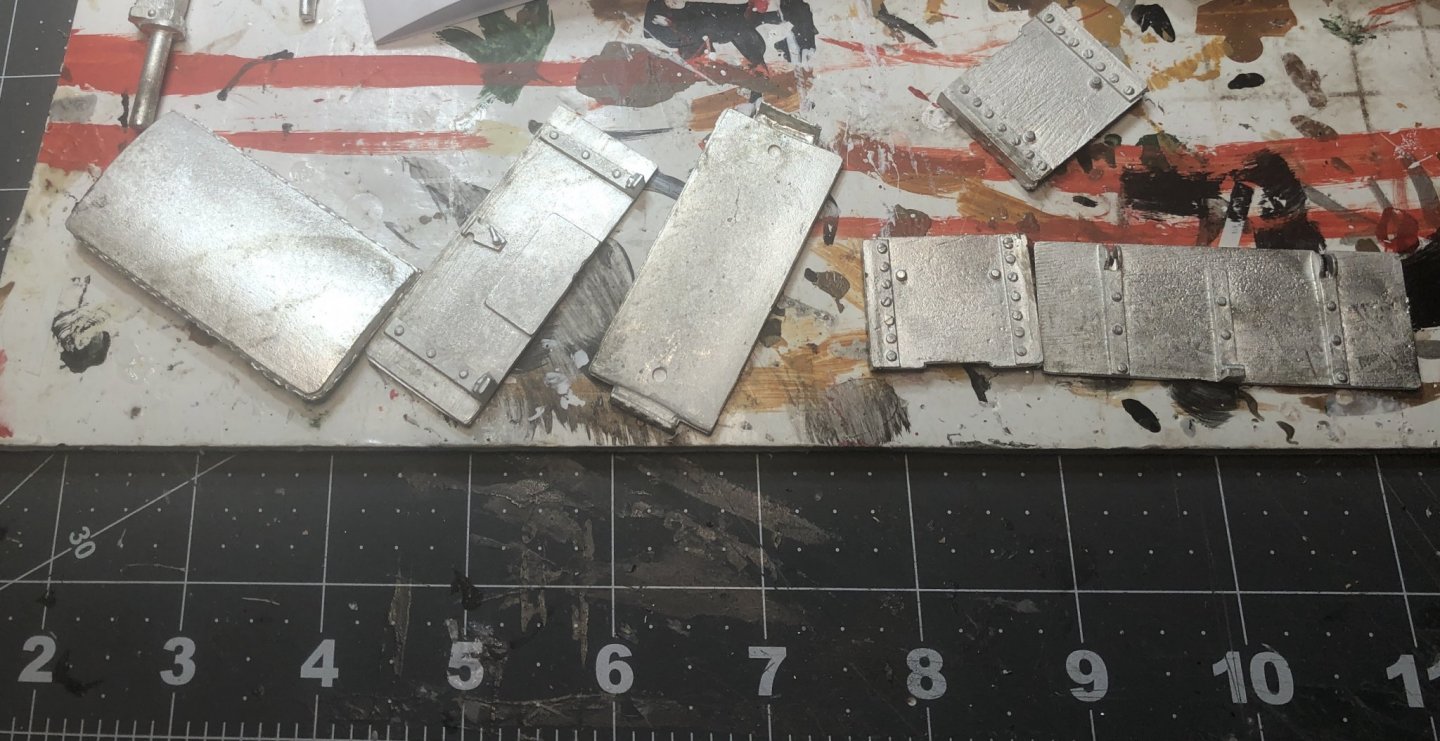
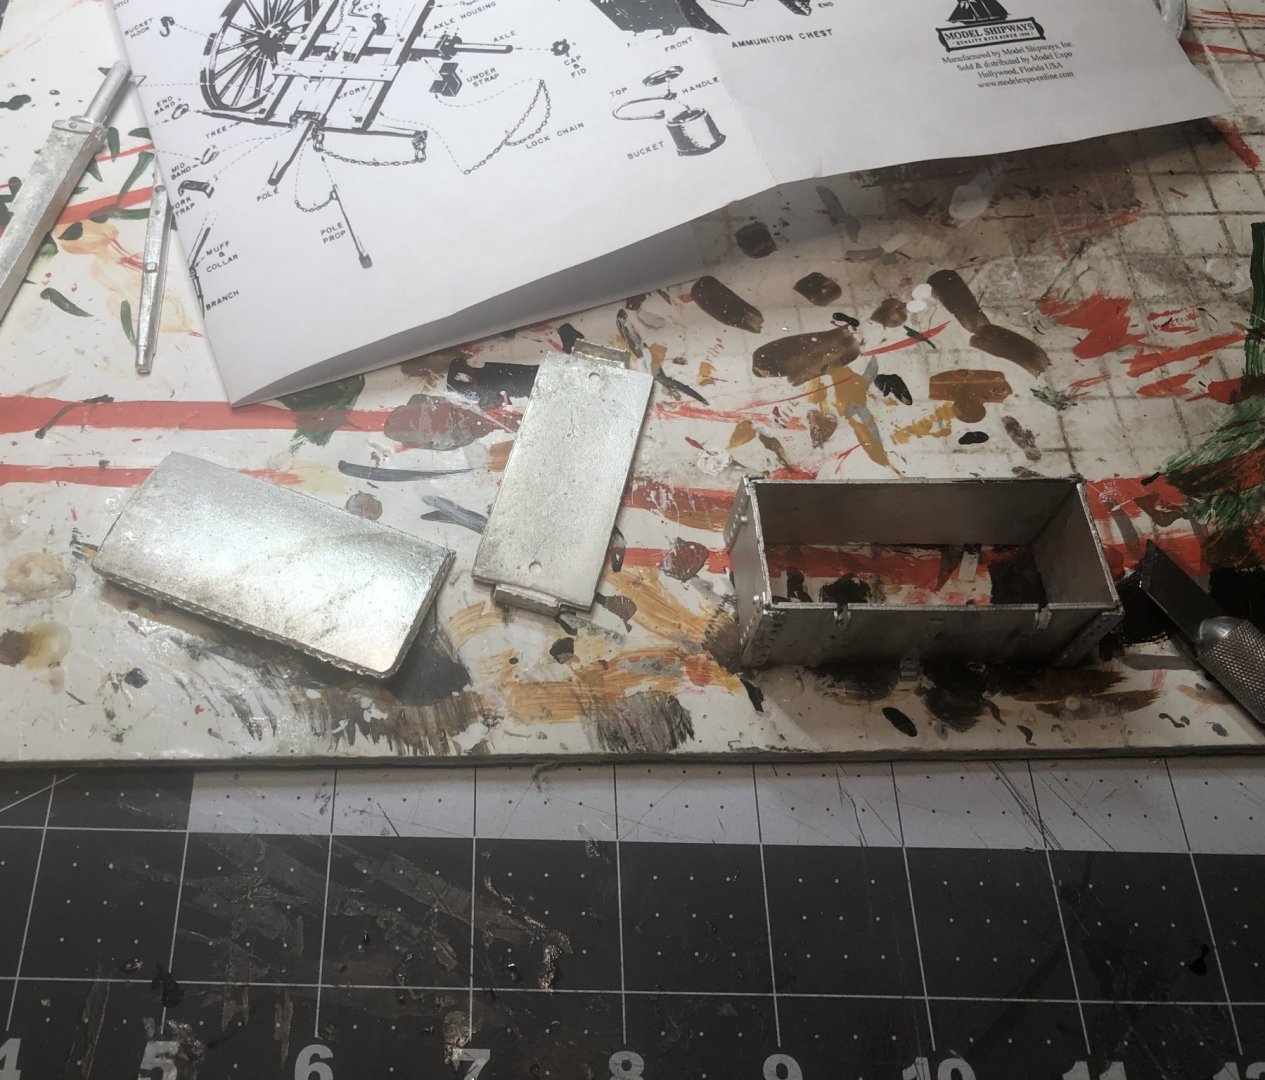
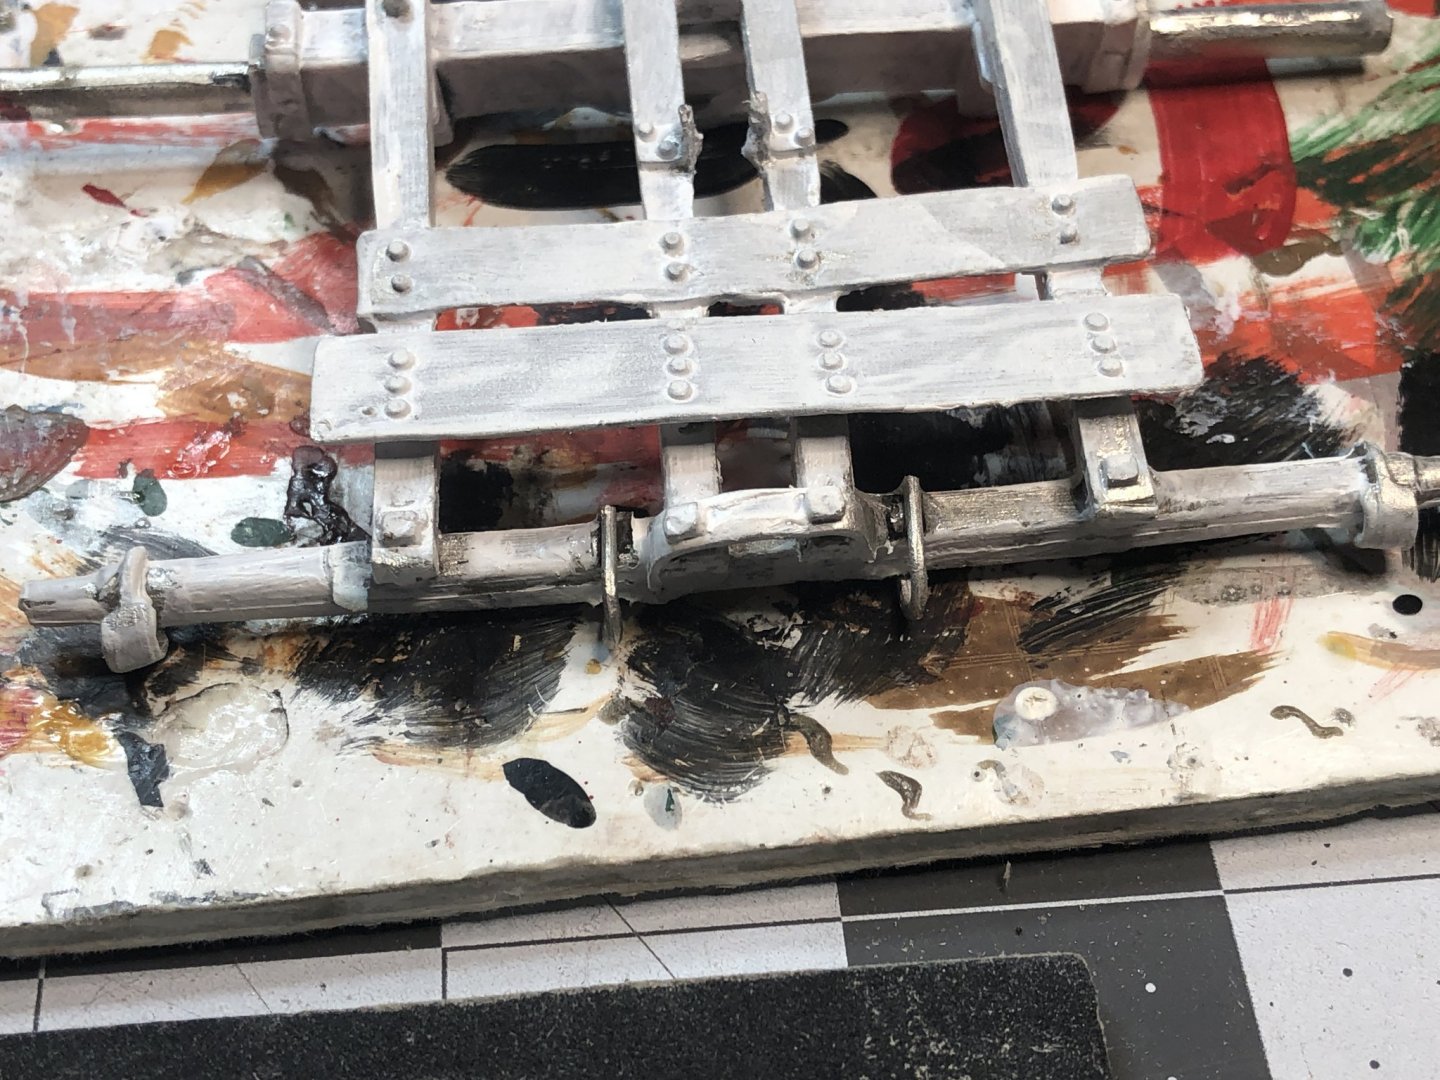
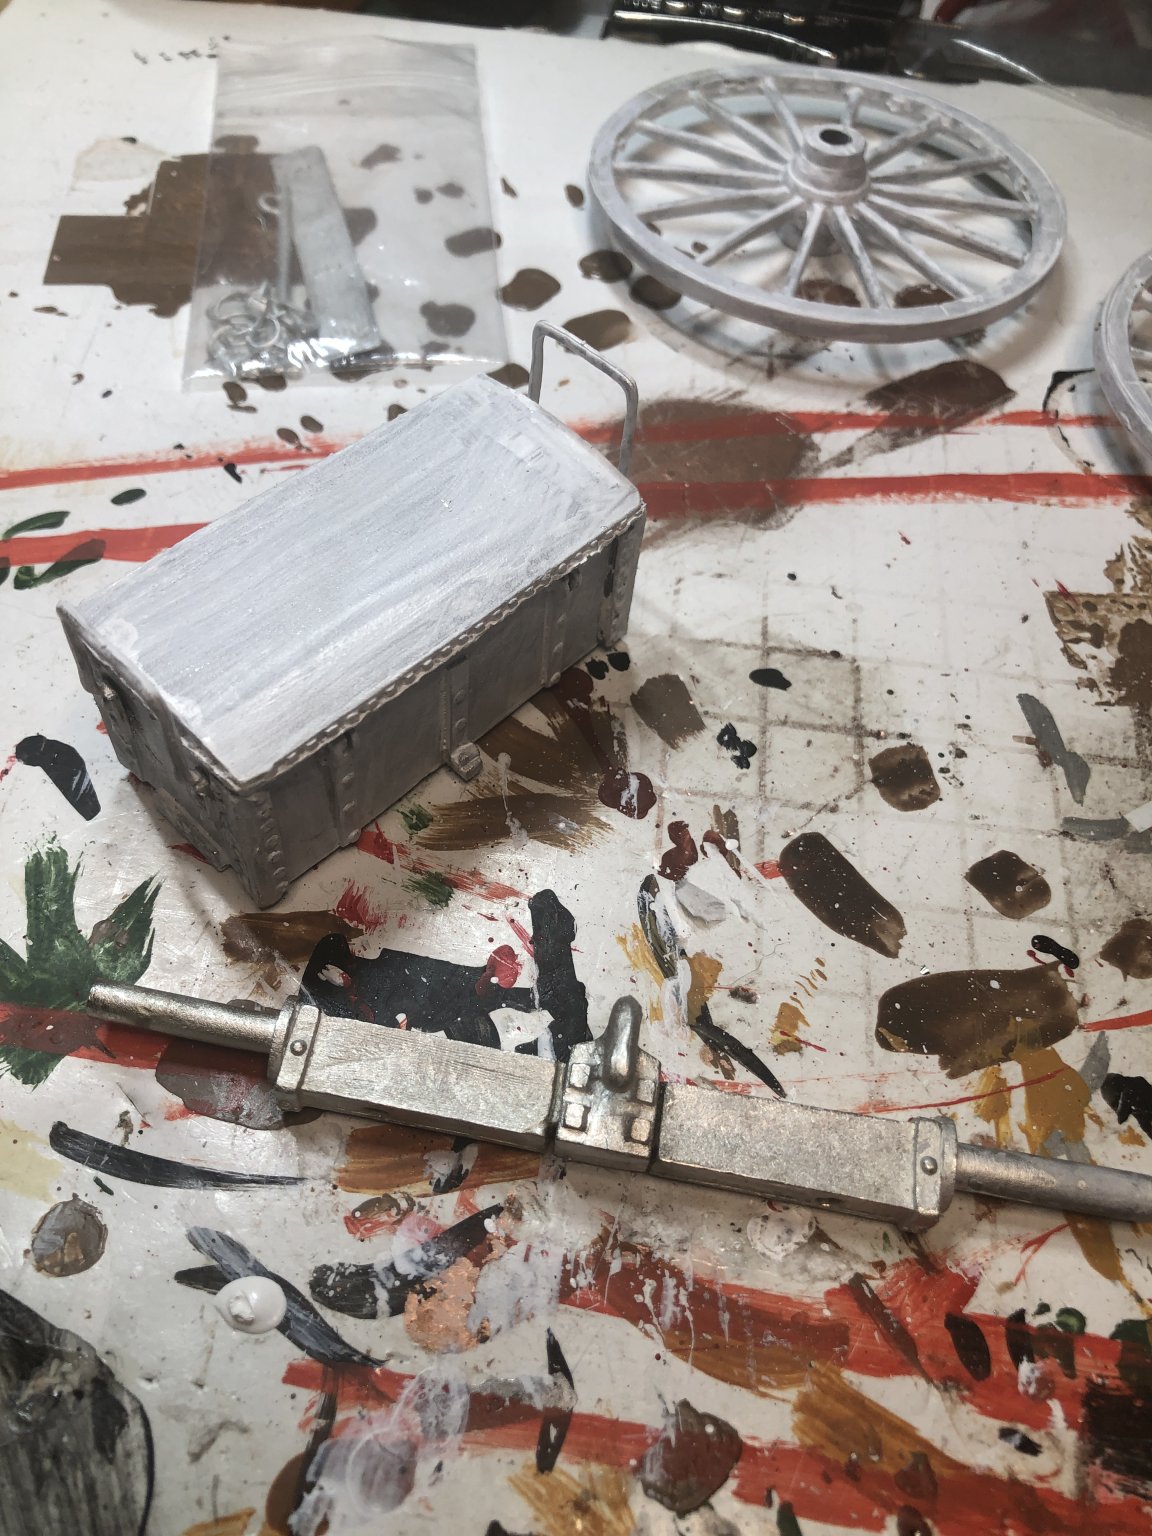
Below is shown a primed wheel, the primed chest and axel housing with the Pintle Hook attached. Britannia metal needs to be primed before painting.
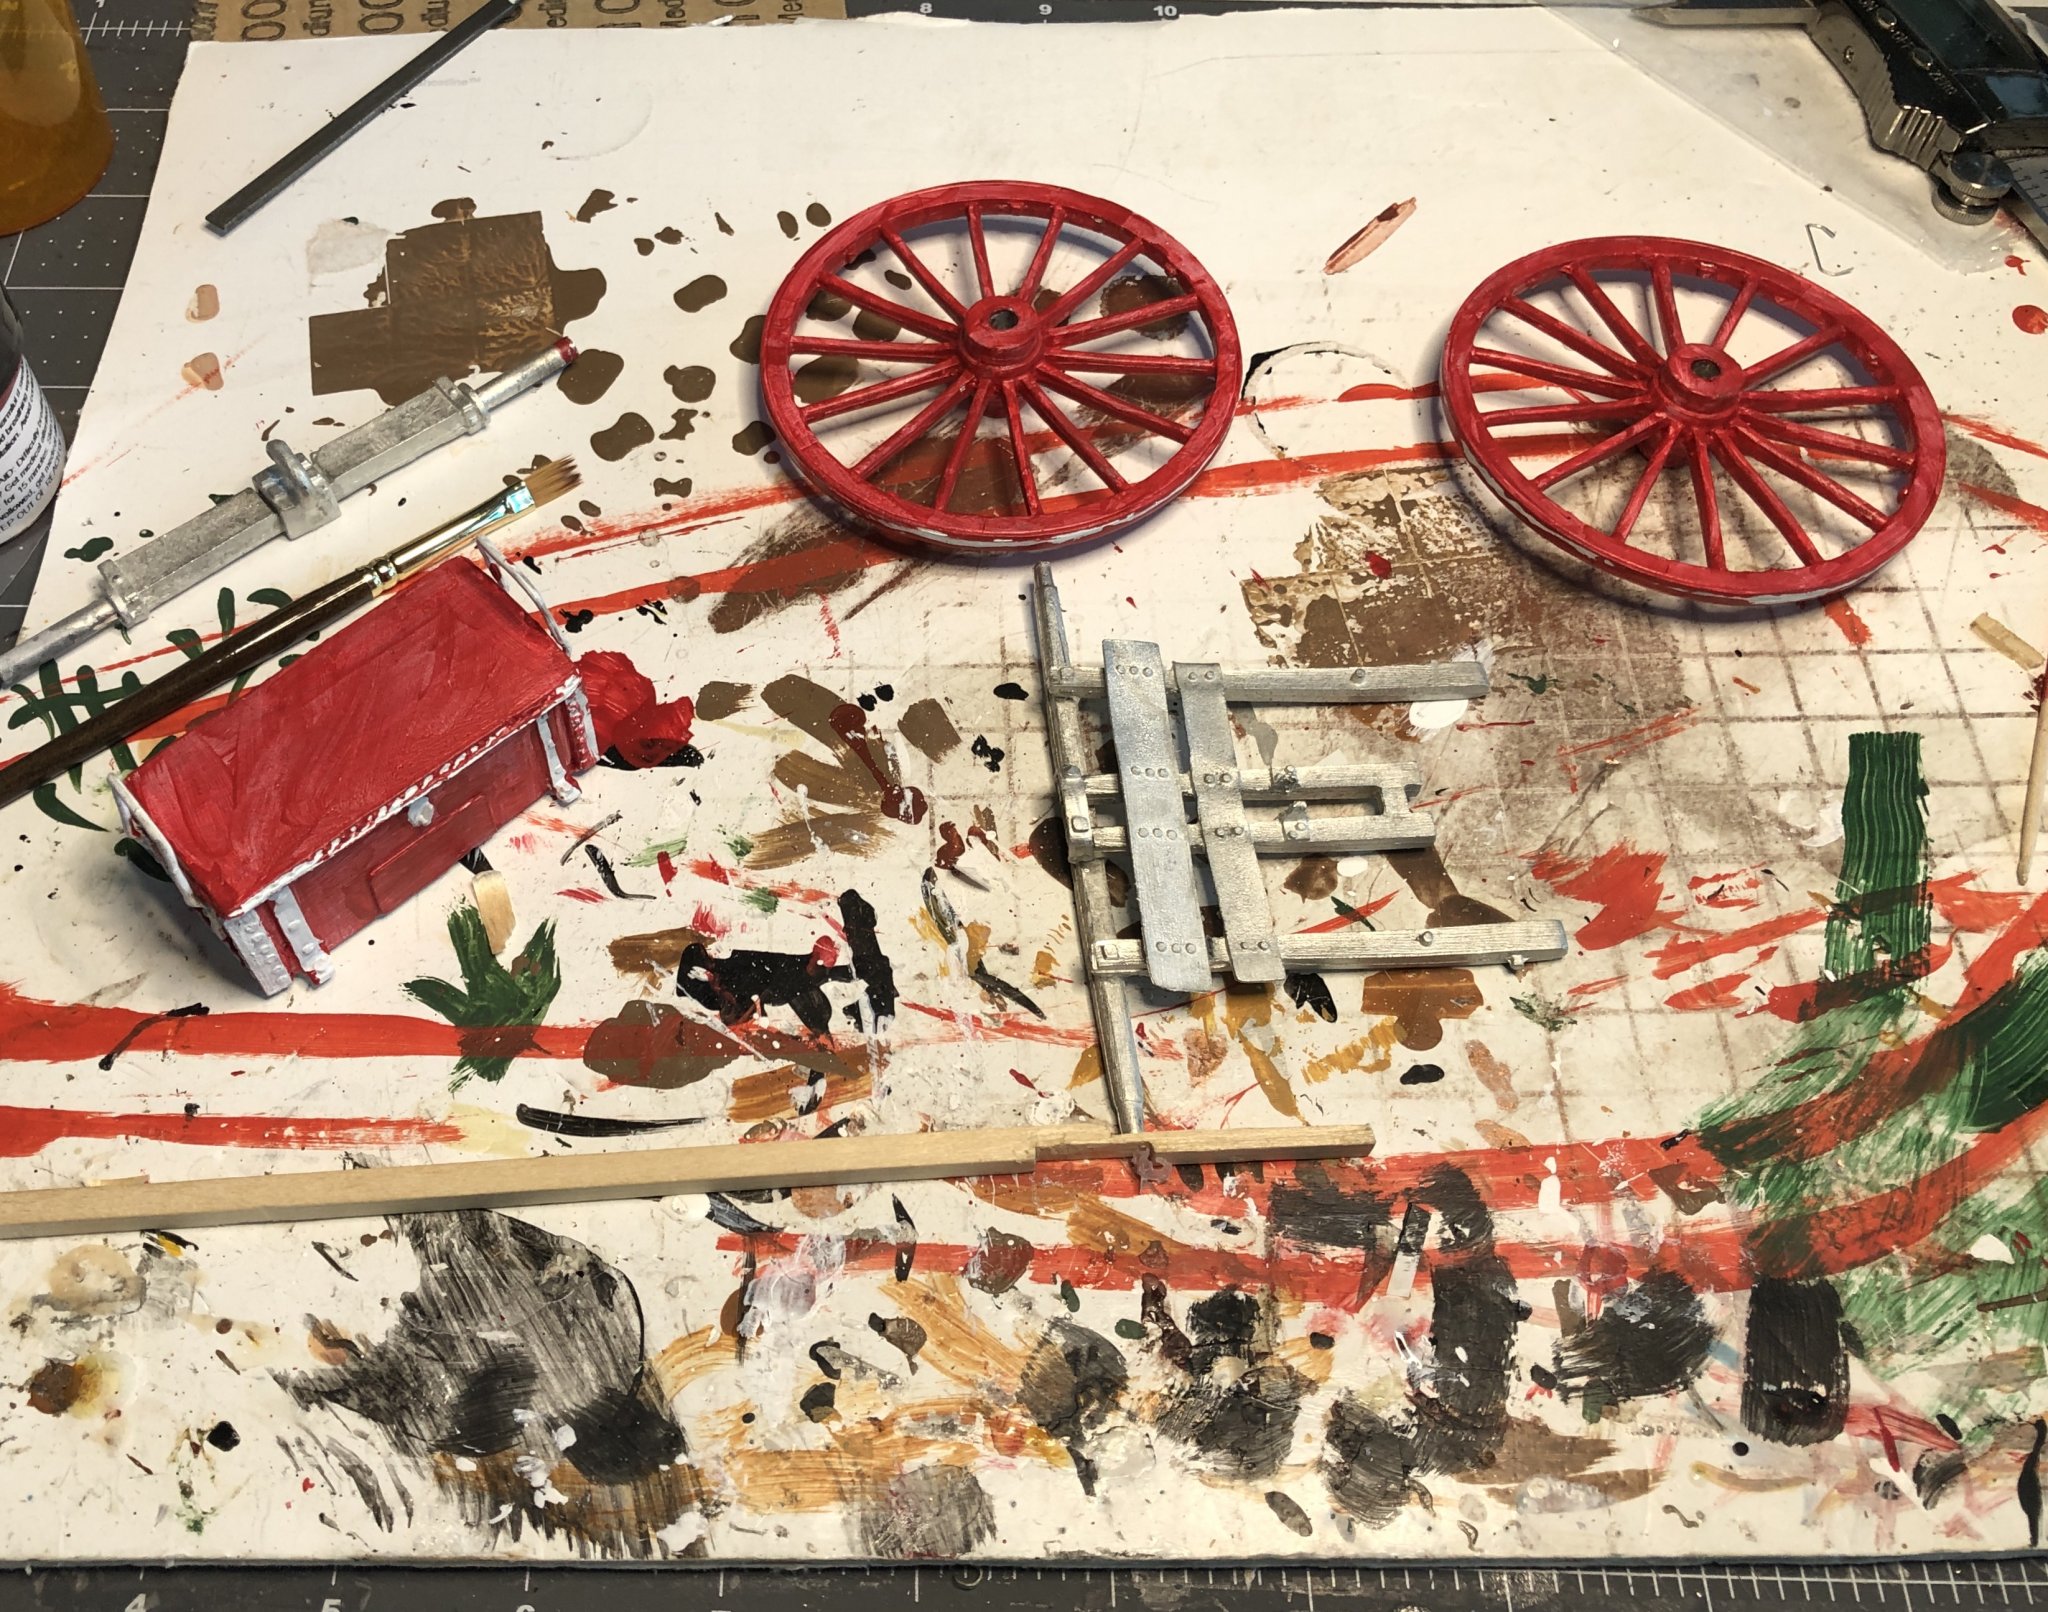
Next I painted the chest and wheels red with black trim. Normally the limber would be painted army colors but the Coffee Wagon was painted with red color to differentiate it from regular army use.

Above and below are also shown the unpainted carriage and wood pole. I had to carve the pole (tongue) to fit the carriage. Since the supplied wood was square, the pole had to be carved round most of its length.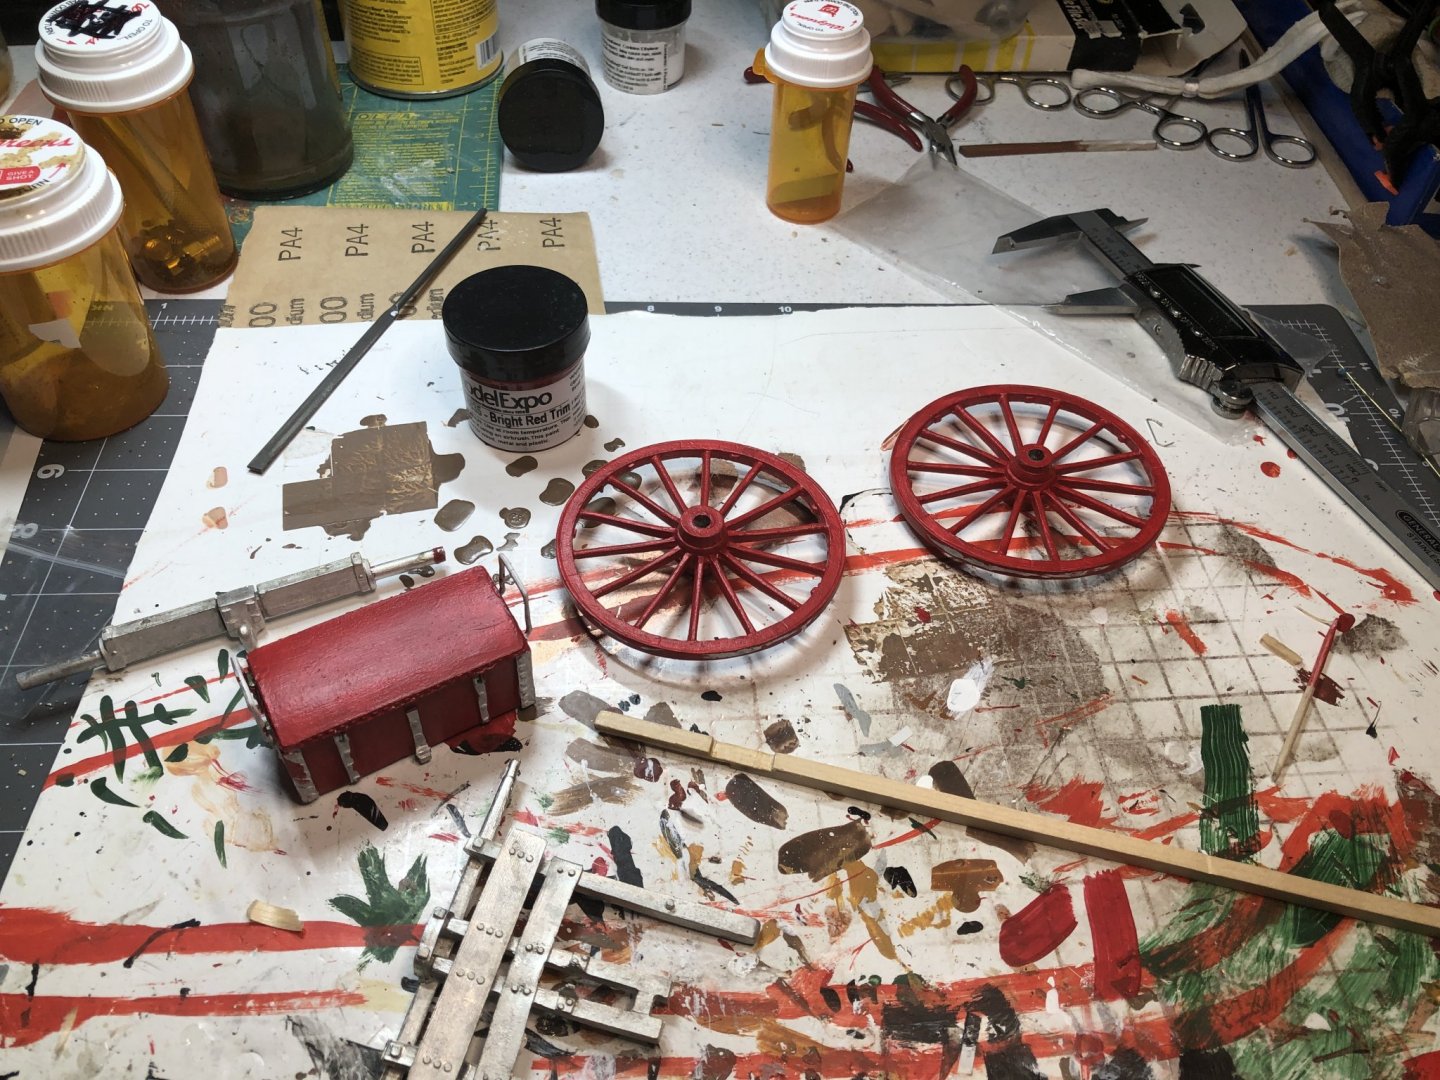
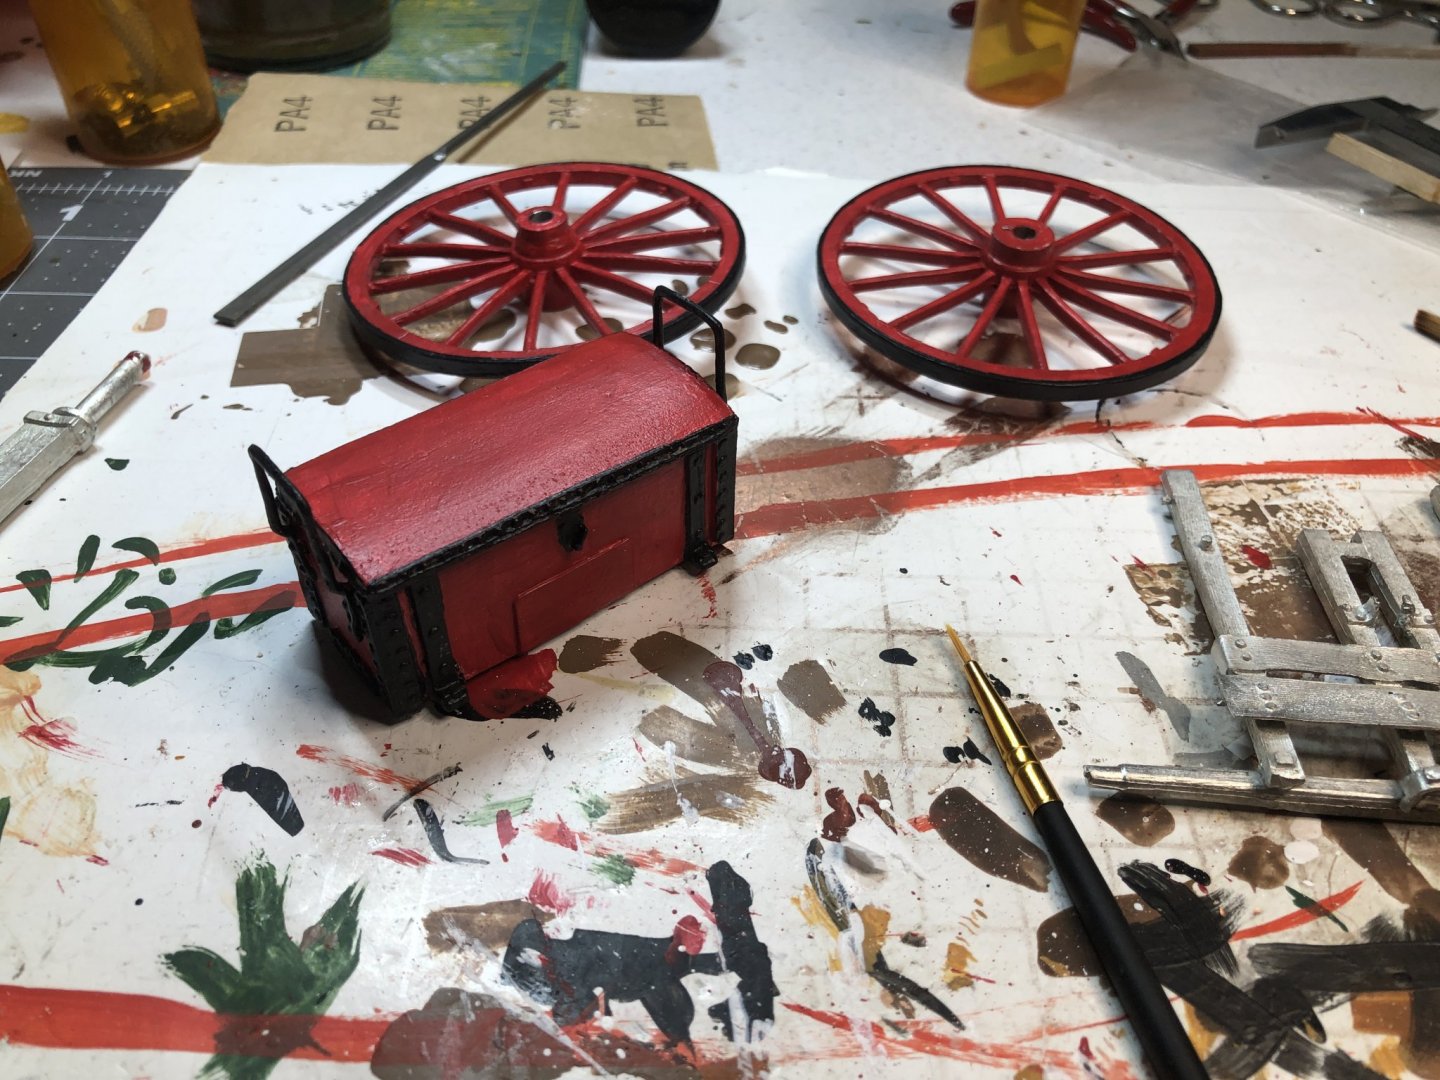
The rest of the wagon will be black.- mtaylor, hexnut, Edwardkenway and 4 others
-
7
-
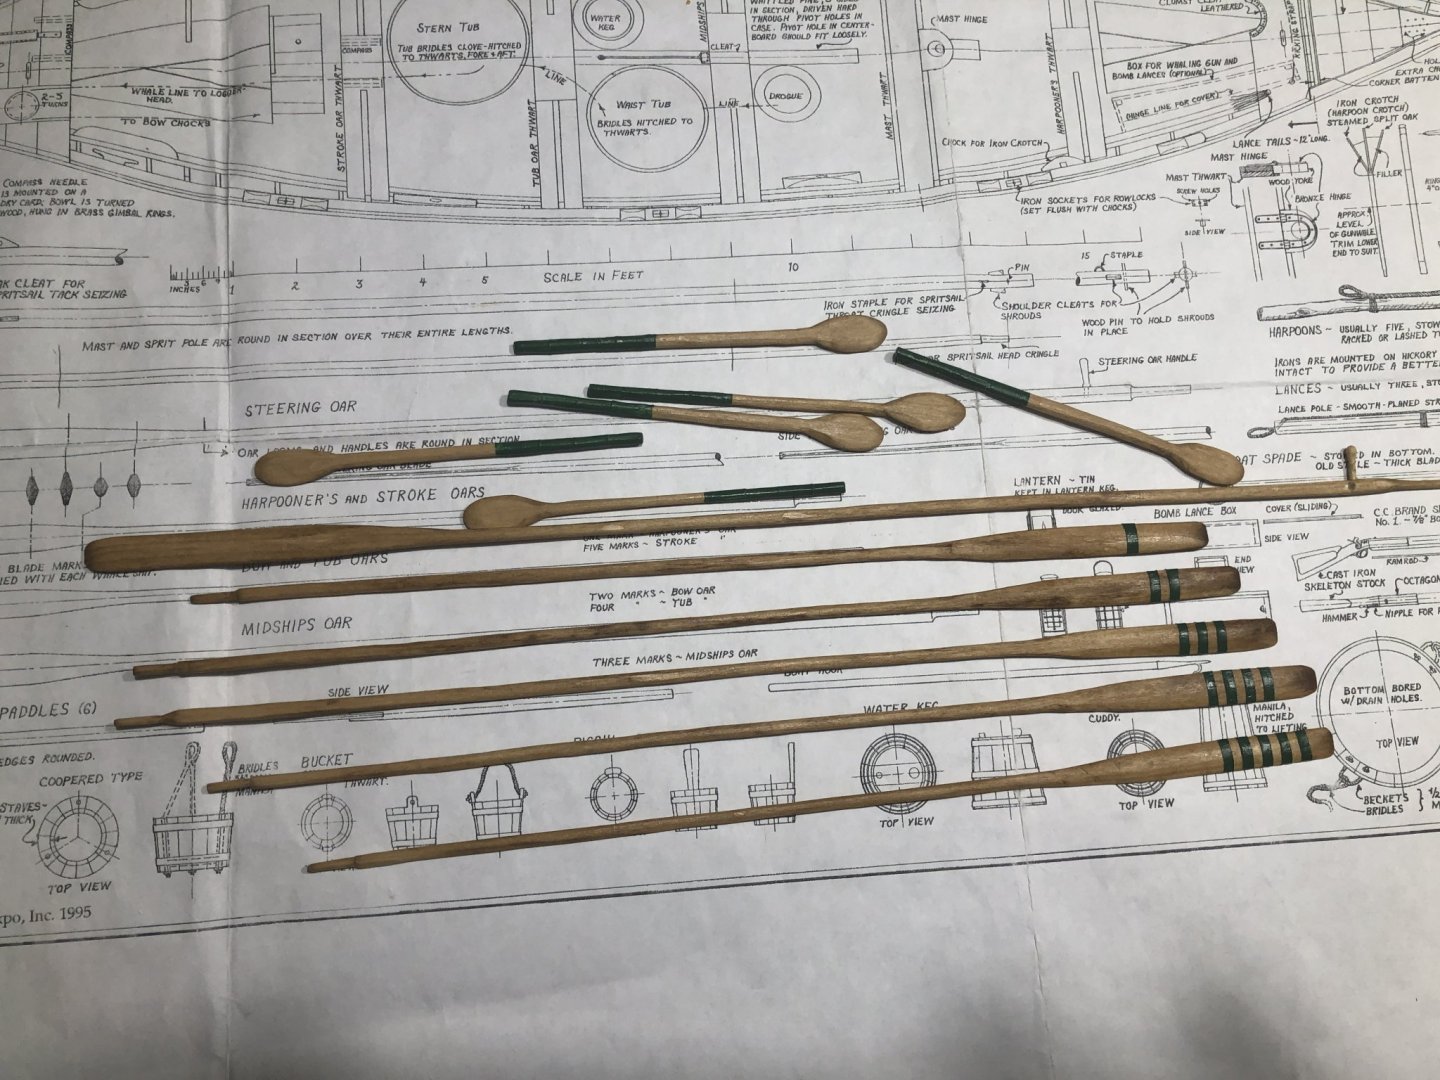
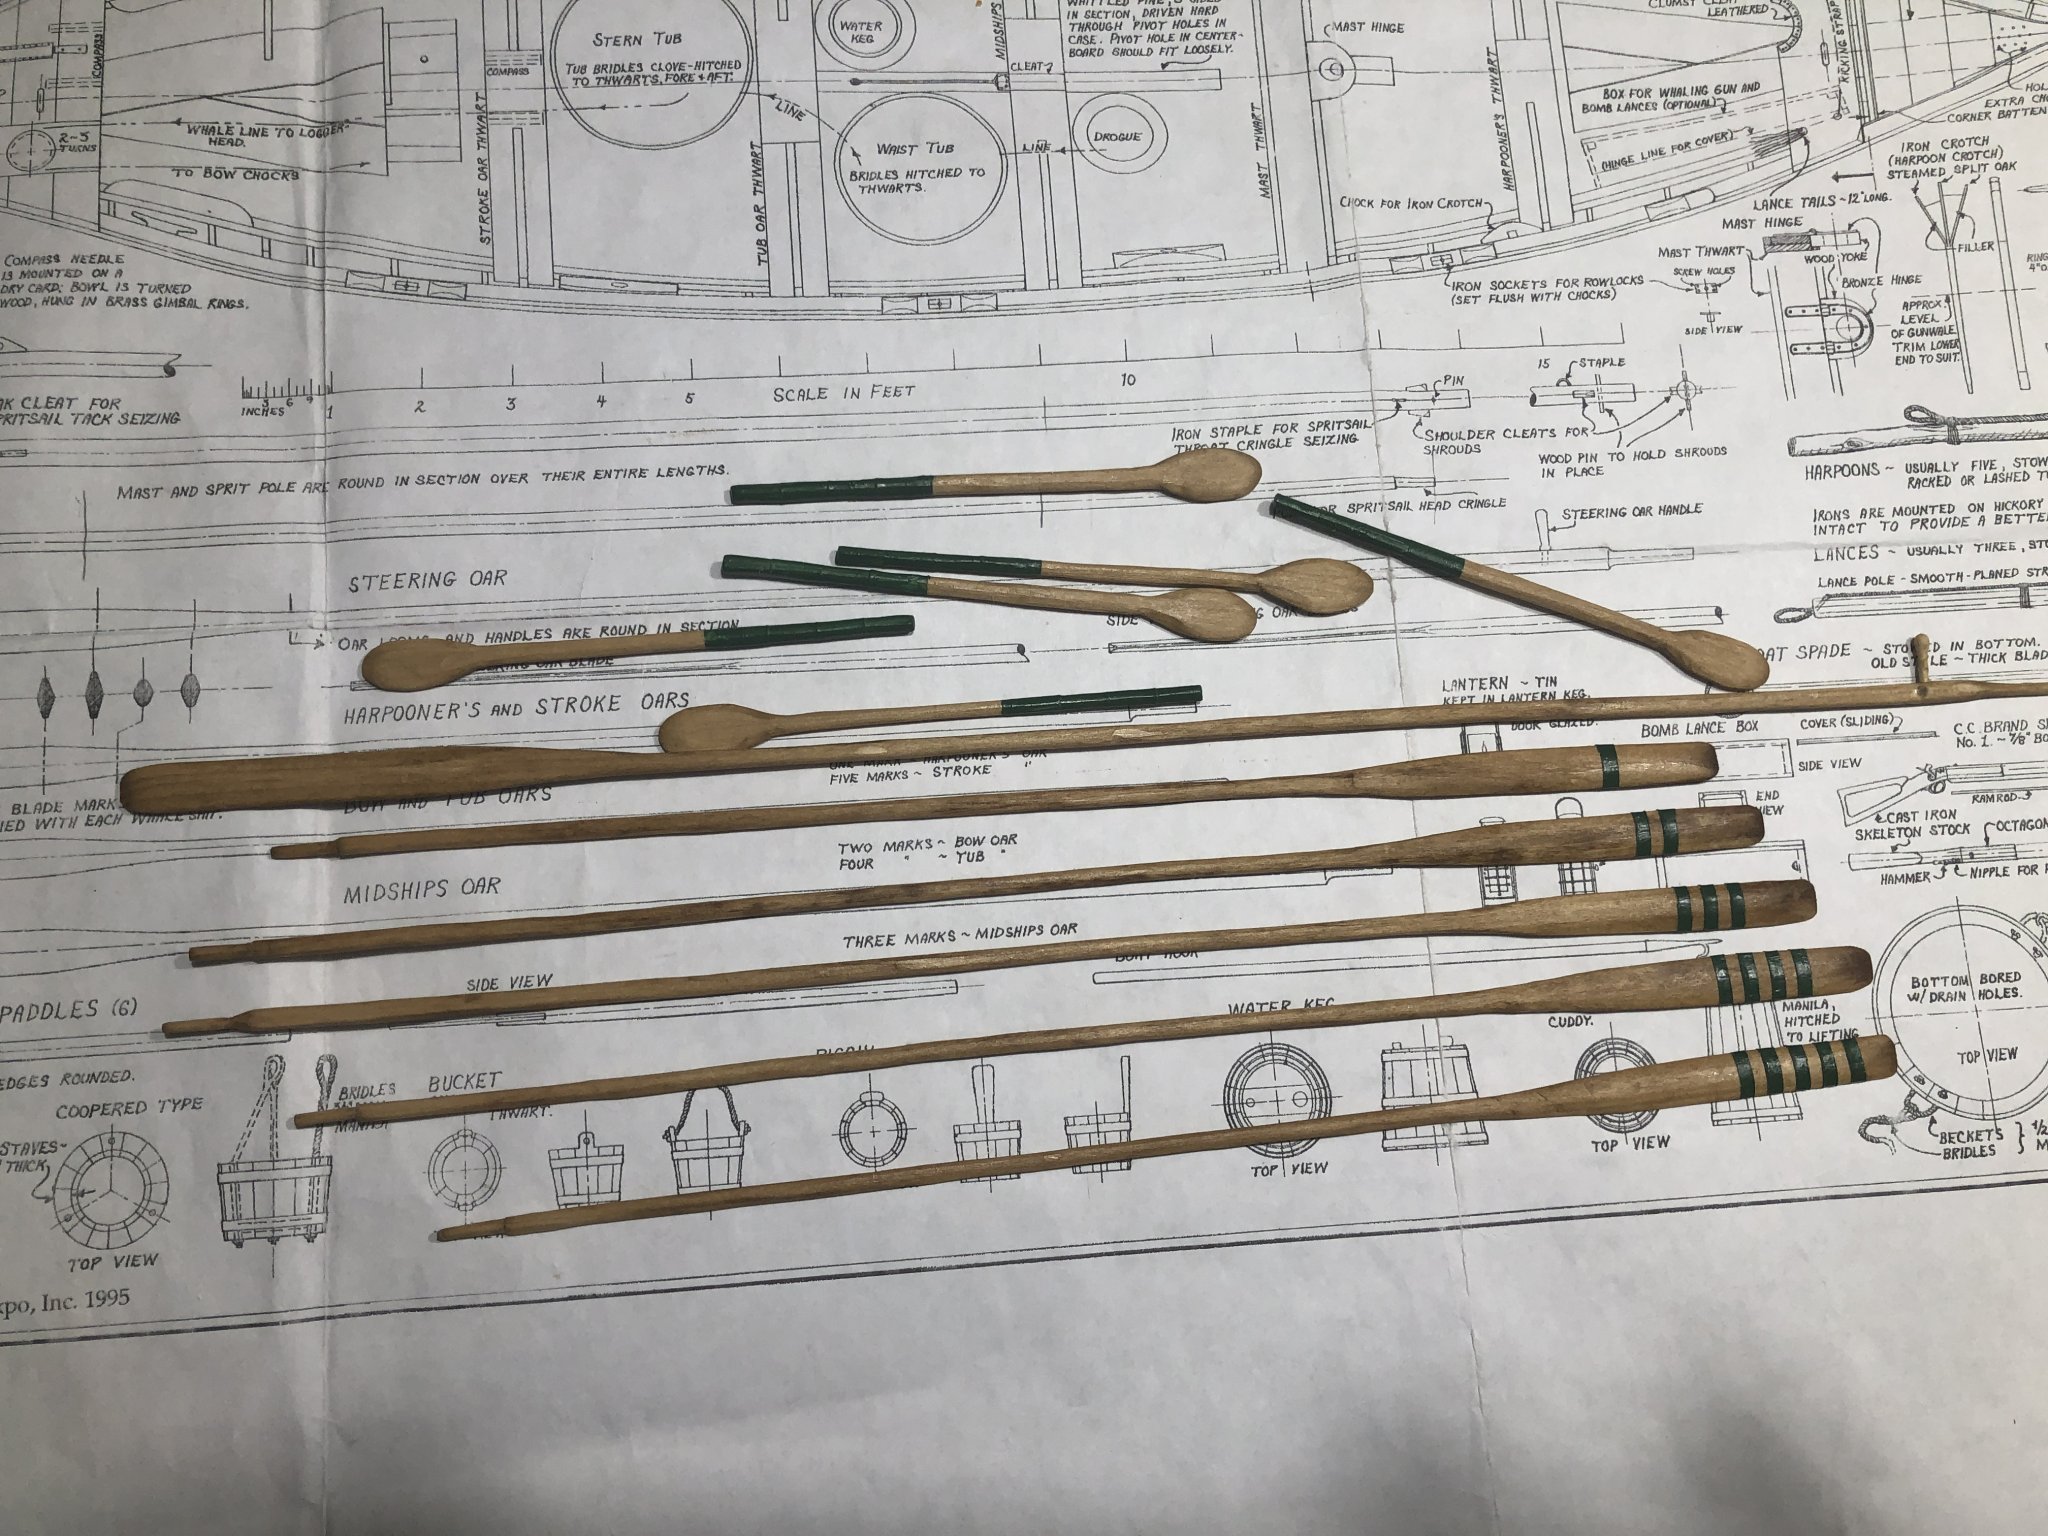
Not a whole lot to report, but I did get the oars and paddles finished.
- G.L., GrandpaPhil, Tigersteve and 1 other
-
4
-
Thanks all for the comments. Come back when I start on the limber.
- popeye the sailor, Canute, mtaylor and 1 other
-
4
-
I just ordered the Model Shipways Civil War Limber to go with this model Civil War Coffee Wagon. When I get it I will continue this log as I complete it.
- Canute, mtaylor, popeye the sailor and 1 other
-
4


Gokstad Viking Ship by Dr PS - Paul Schulze - FINISHED - Dusek Ship Kits - 1:35 Scale
in - Kit subjects built Up to and including 1500 AD
Posted · Edited by Dr PS - Paul Schulze
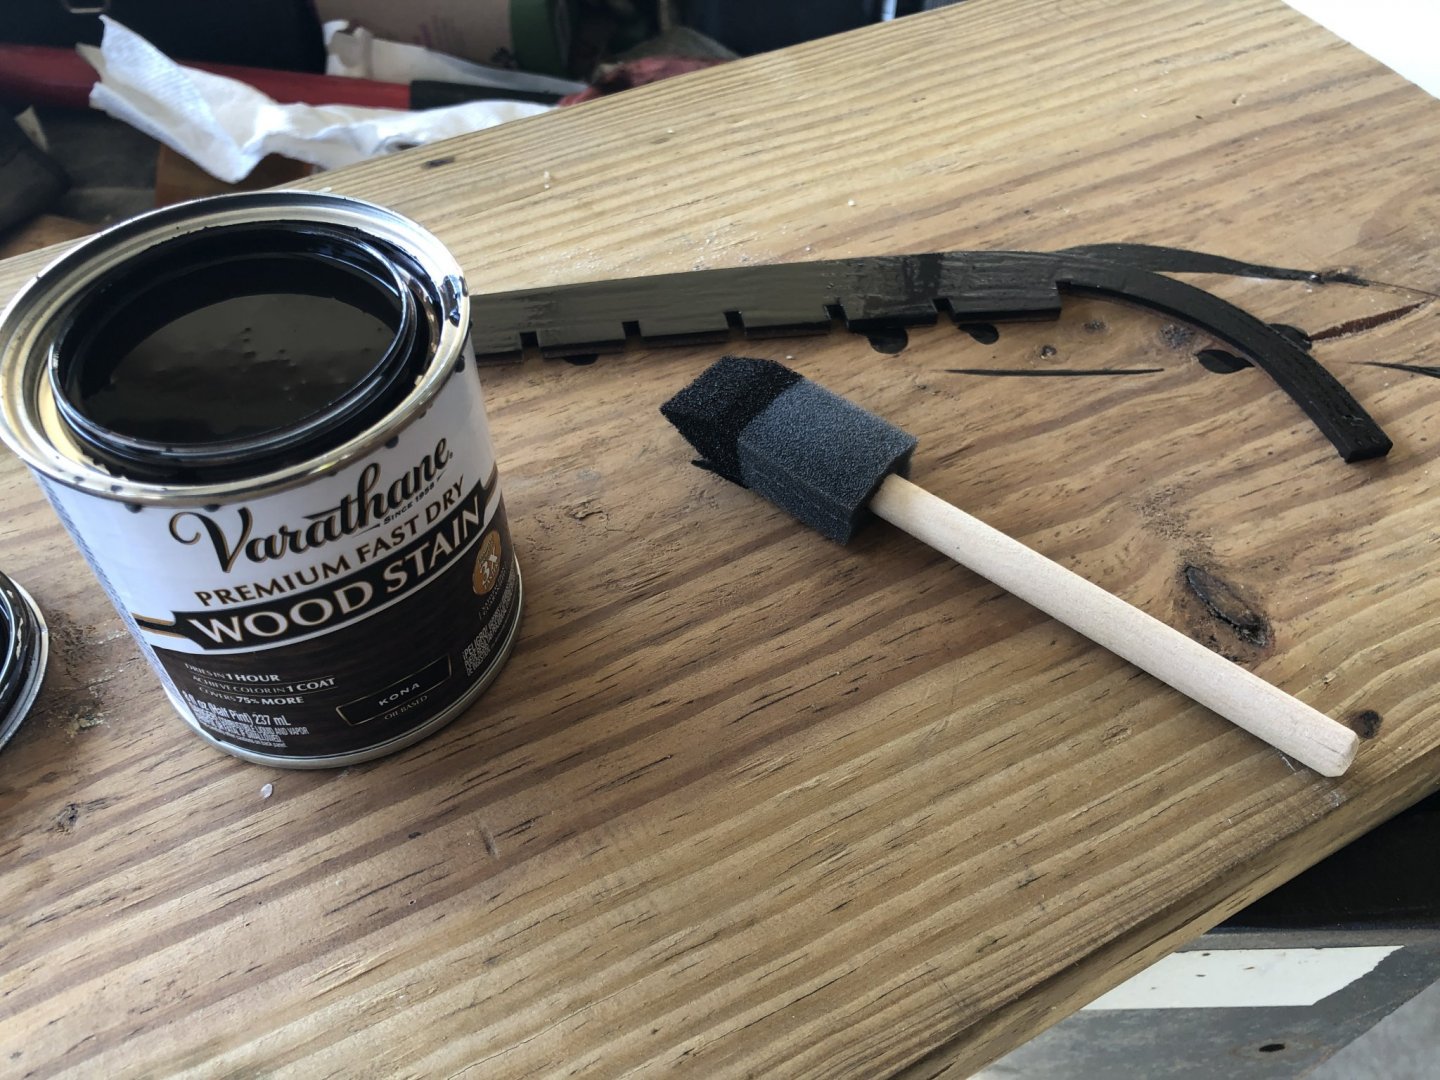
Well, I have finally started the build. After reading the instructions, I have decided to follow them for assembling the keel, frames and false deck. I think the false deck should properly align the frames. Some others have found success building jigs to aid in frame installation and alignment. First I drilled the required holes in the stem and stern posts.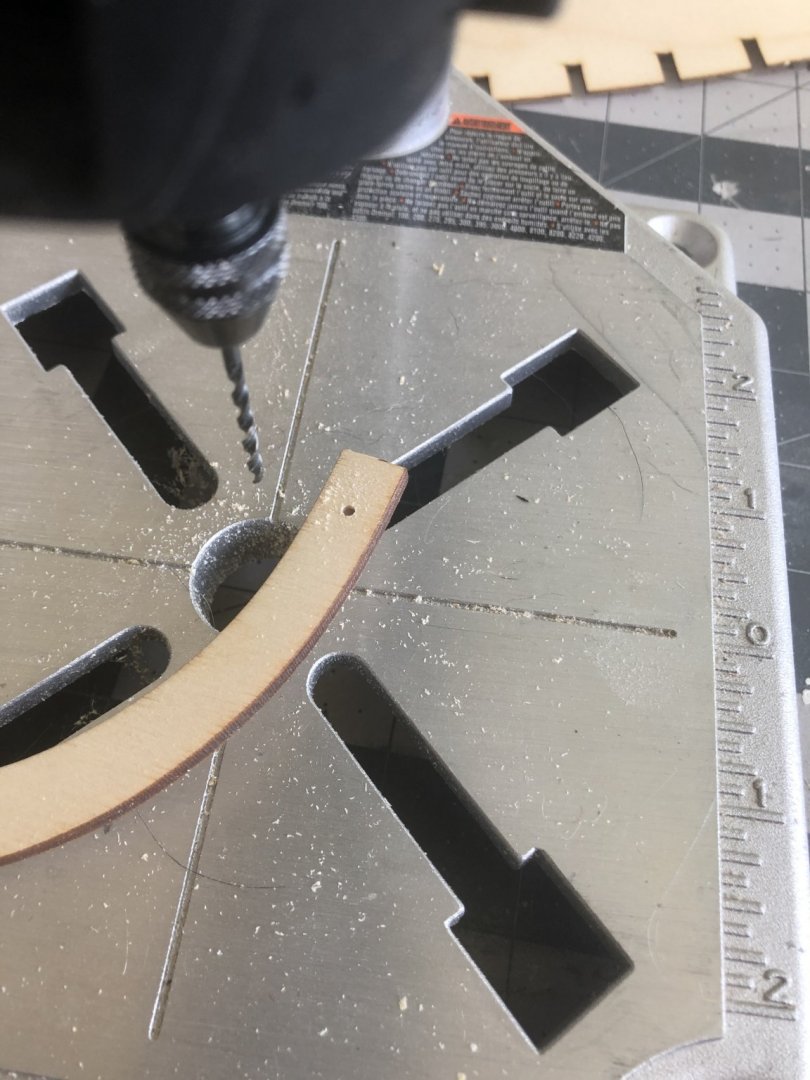
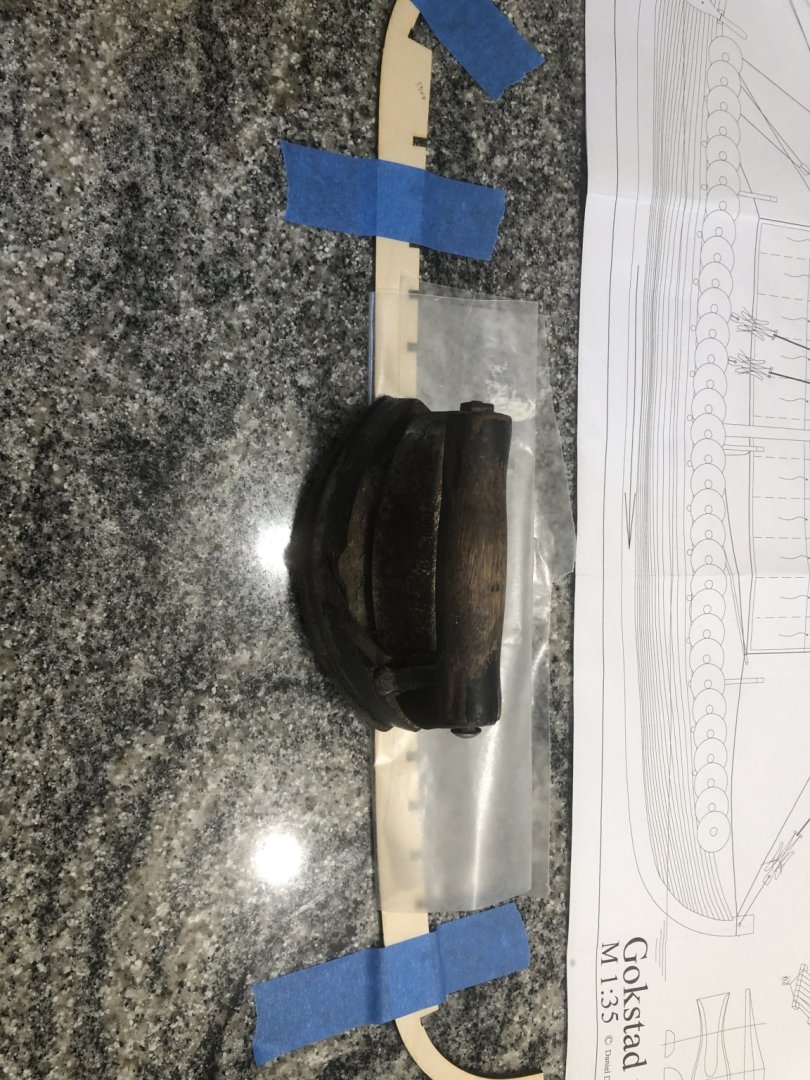
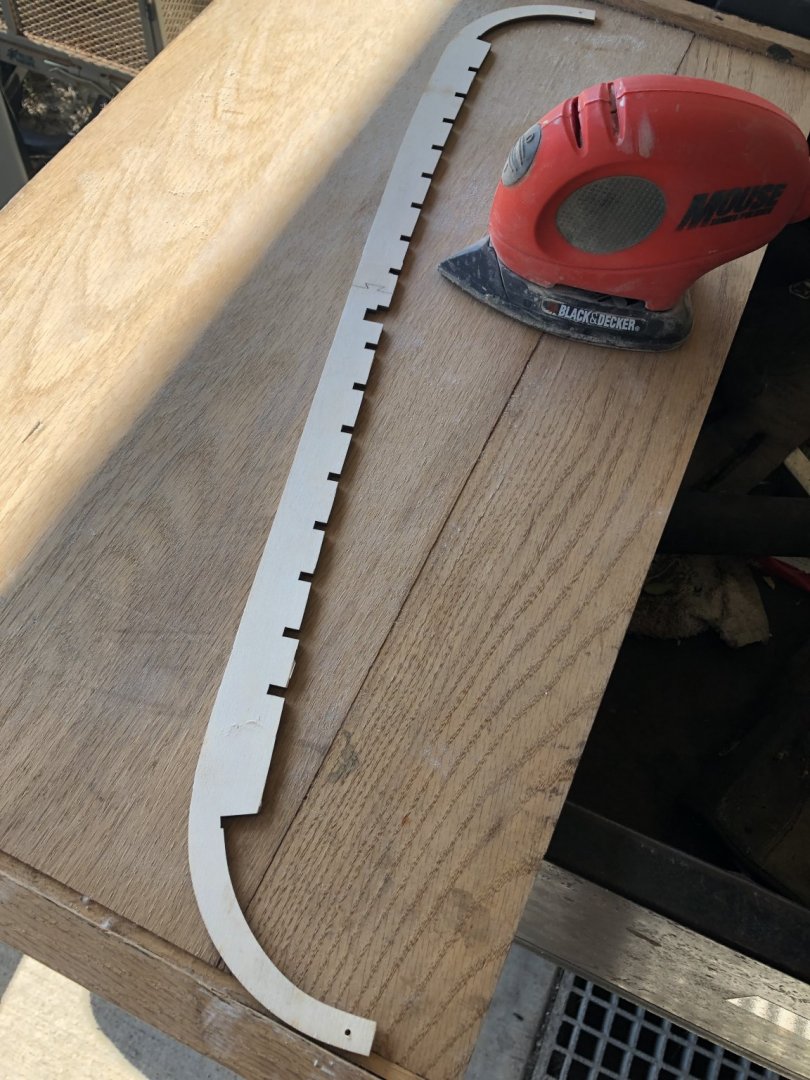
Next, I glued the two keel pieces together between wax paper held down by a “sad” iron. Sad irons were fire heated clothes irons.
Then the finished piece was stained Kona color