.jpg.01e54eff8de6be562e7bc1146f40d40a.jpg)
Matt D
-
Posts
606 -
Joined
-
Last visited


-
 Matt D reacted to a post in a topic:
Sloop Speedwell by Chuck - Ketch Rigged Sloop, 1752 - POF
Matt D reacted to a post in a topic:
Sloop Speedwell by Chuck - Ketch Rigged Sloop, 1752 - POF
-
Matt D reacted to a post in a topic:
HMS Sphinx 1775 by mugje - Vanguard Models - 1:64
-
Matt D reacted to a post in a topic:
Chris Watton and Vanguard Models news and updates Volume 2
-
Matt D reacted to a post in a topic:
USS Constitution by Der Alte Rentner - Model Shipways - 1/76
-
Matt D reacted to a post in a topic:
USS Constitution by Der Alte Rentner - Model Shipways - 1/76
-
Matt D reacted to a post in a topic:
what program to print from the gives me an accurate print?
-
Matt D reacted to a post in a topic:
Sloop Speedwell 1752 by Rustyj - Syren Ship Model Company - 1:32 Scale - POF Sloop
-
Matt D reacted to a post in a topic:
Sloop Speedwell by Chuck - Ketch Rigged Sloop, 1752 - POF
-
Matt D reacted to a post in a topic:
18th-Century Merchantman Half-Hull Planking Project by mtaylor - NRG
-
Matt D reacted to a post in a topic:
HMS Sphinx 1775 by mugje - Vanguard Models - 1:64
-
Scottish Guy reacted to a post in a topic:
For Beginners -- A Cautionary Tale
-
Scottish Guy reacted to a post in a topic:
For Beginners -- A Cautionary Tale
-
Mr Whippy reacted to a post in a topic:
HMS Indefatigable 1794 by Kevin - Vanguard Models - 1:64 - Feb 2023
-
mtaylor reacted to a post in a topic:
Frigate USS United States 1789 by threebs - 1:72
-
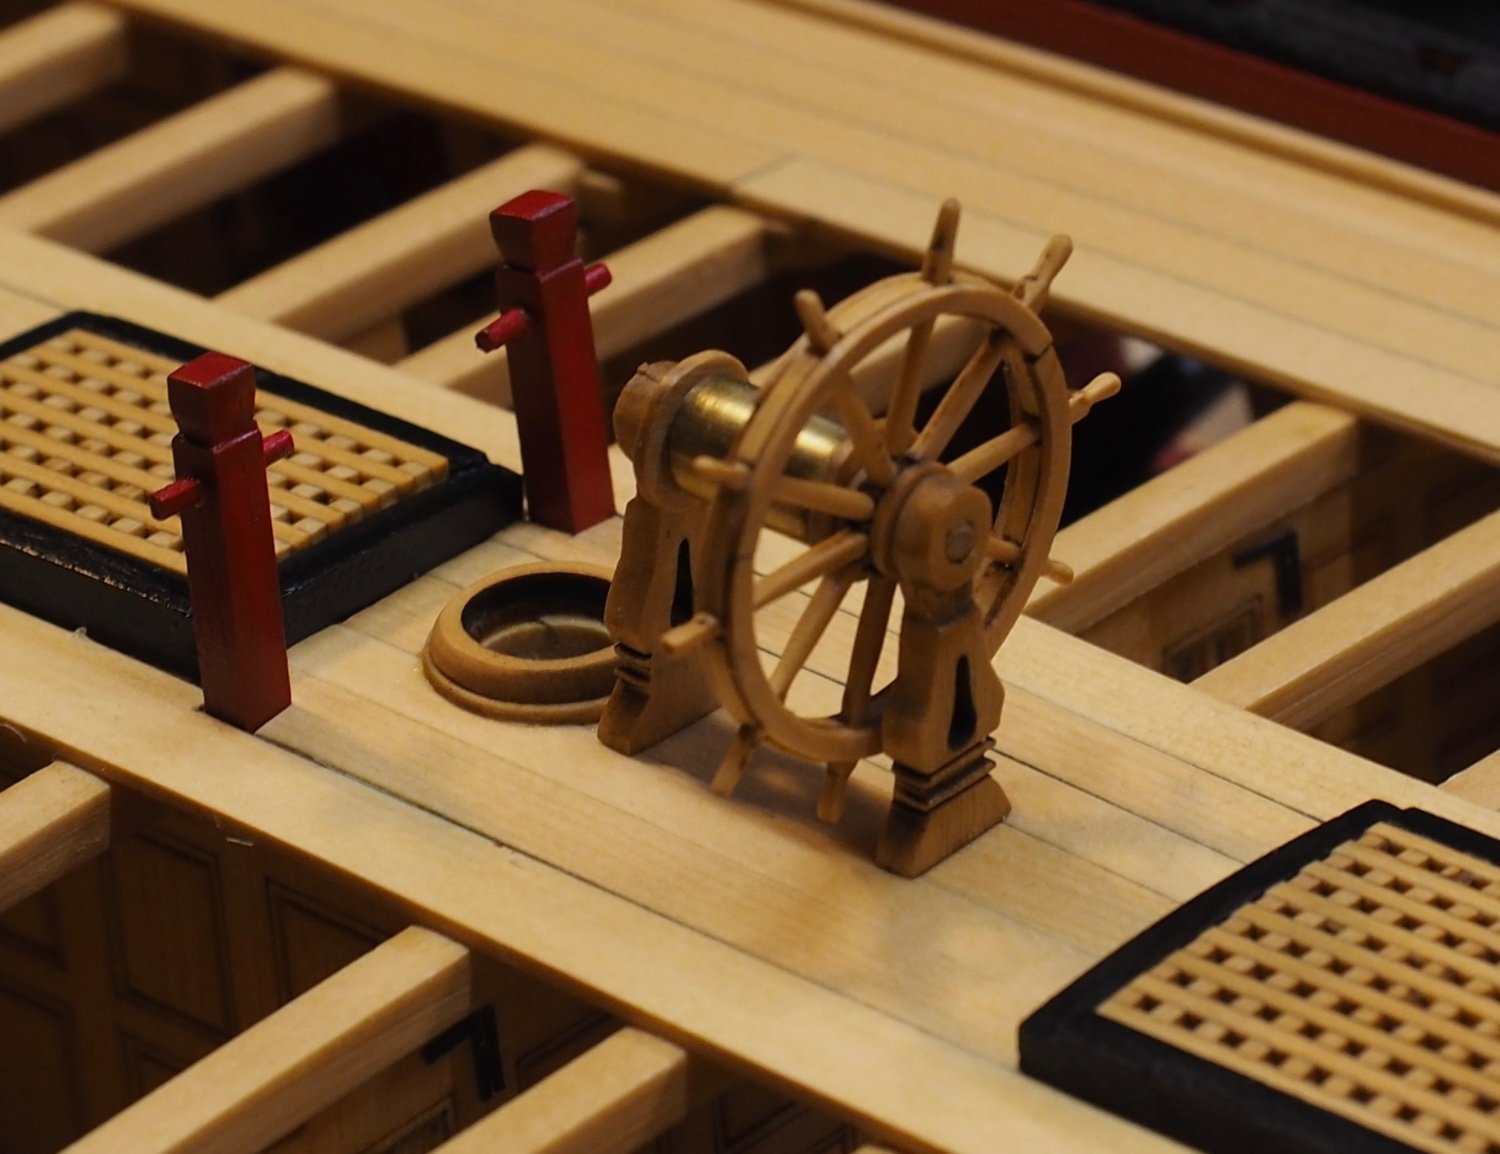
.thumb.jpg.6d6ee4bdbfaac2c58ecc77e7b80ae374.jpg) Beautiful work! Your ship’s wheel looks like it was tricky to make. It came out great!
Beautiful work! Your ship’s wheel looks like it was tricky to make. It came out great! -
I’m so sorry, Kevin. It sounds like he has been a wonderful pet.
-
Beautifully done, Frank! Your moldings look amazing. I agree with Glenn that you are miles ahead having the channels fit while doing the moldings. I’m glad you’ve recovered from the flu and/or Covid.
-
Beautifully done, Glenn! Your work is amazing.
-
She’s looking great, Adam! This looks like a really nice kit.
-
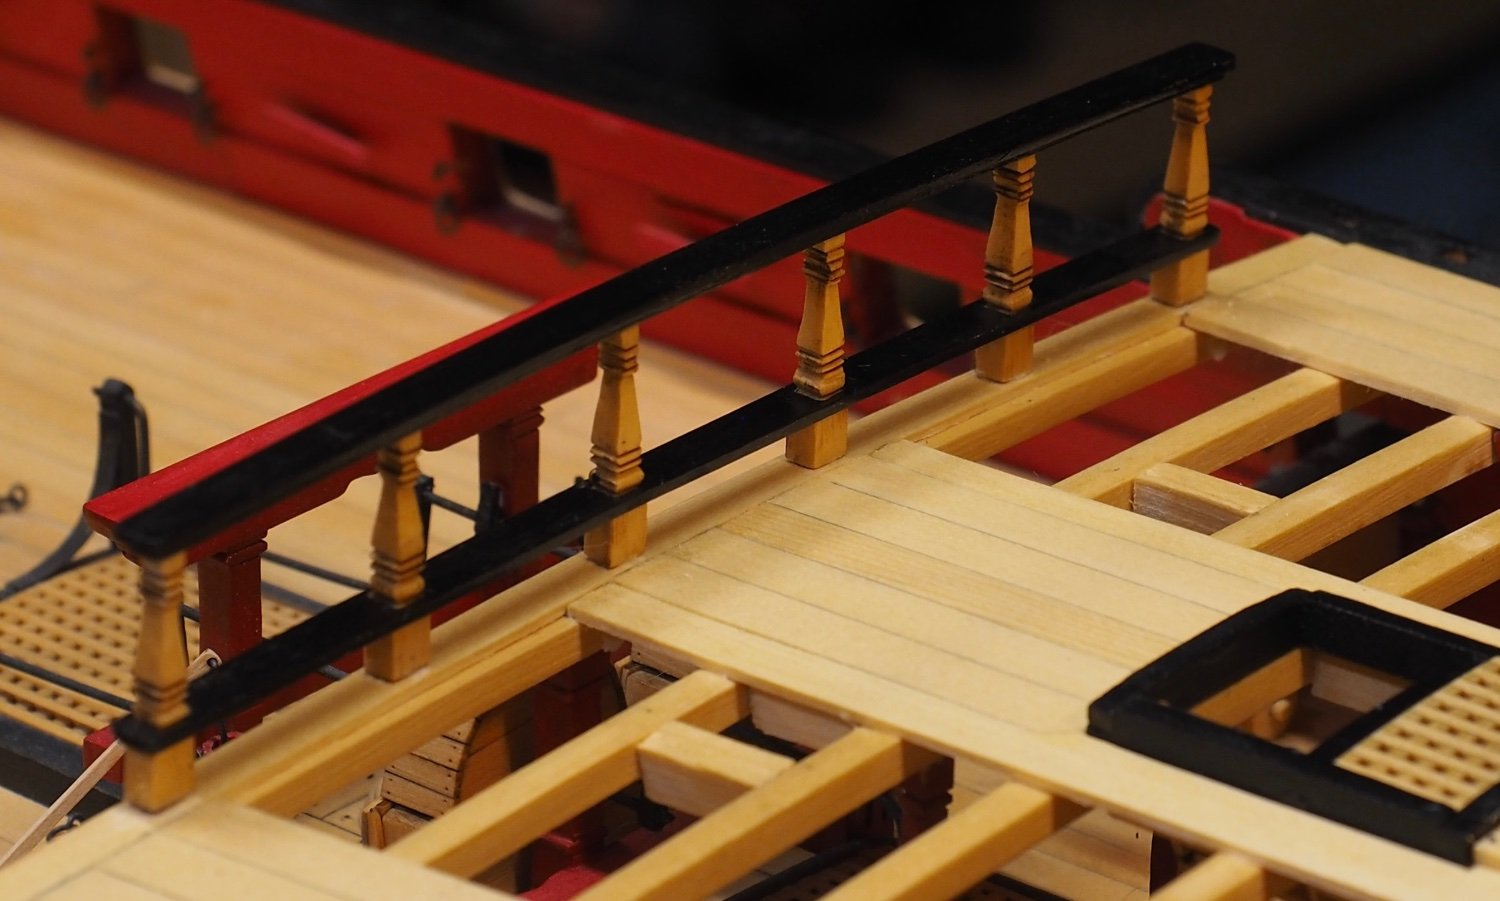
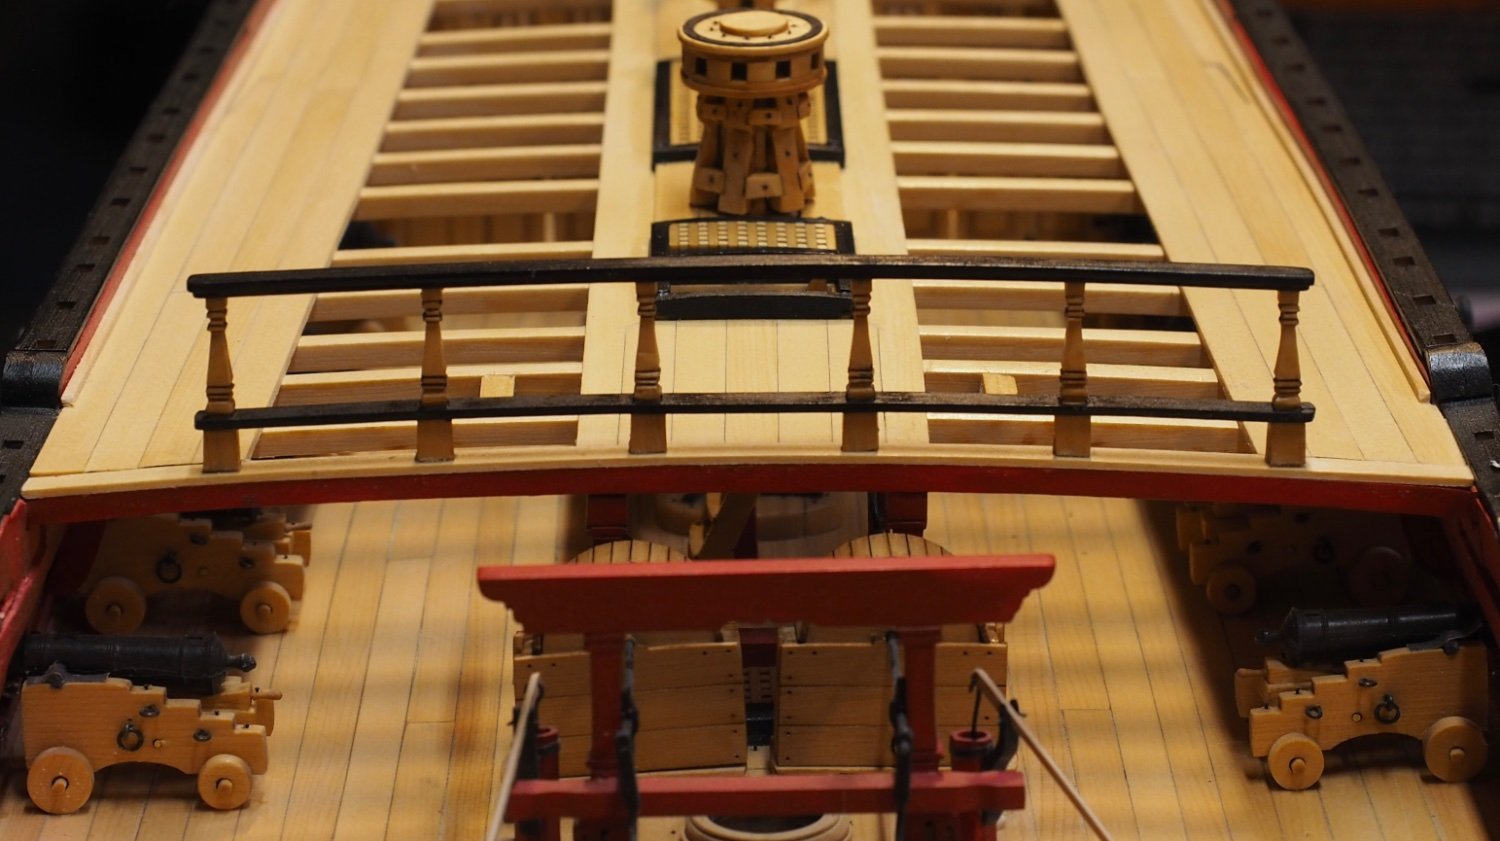
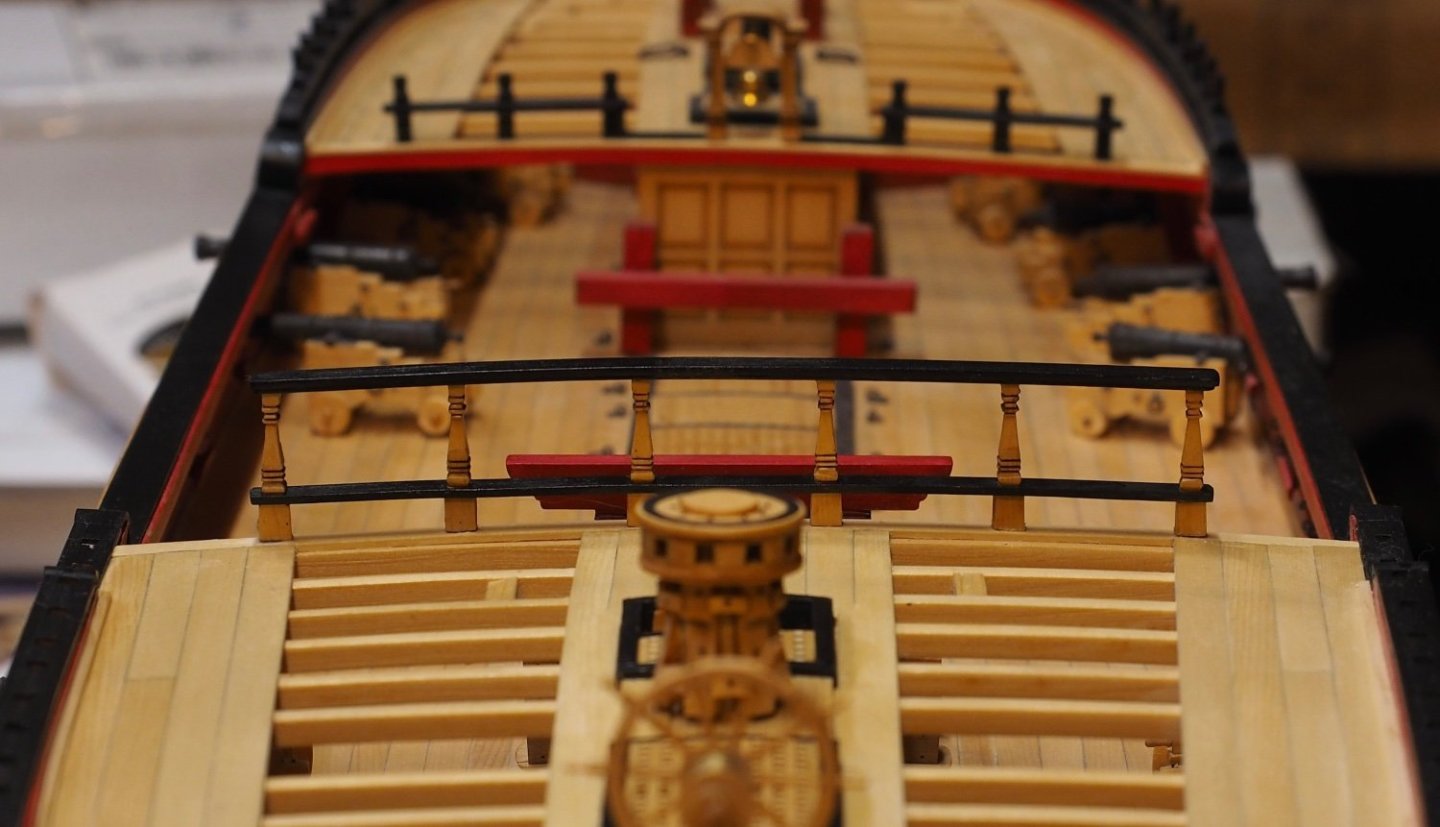
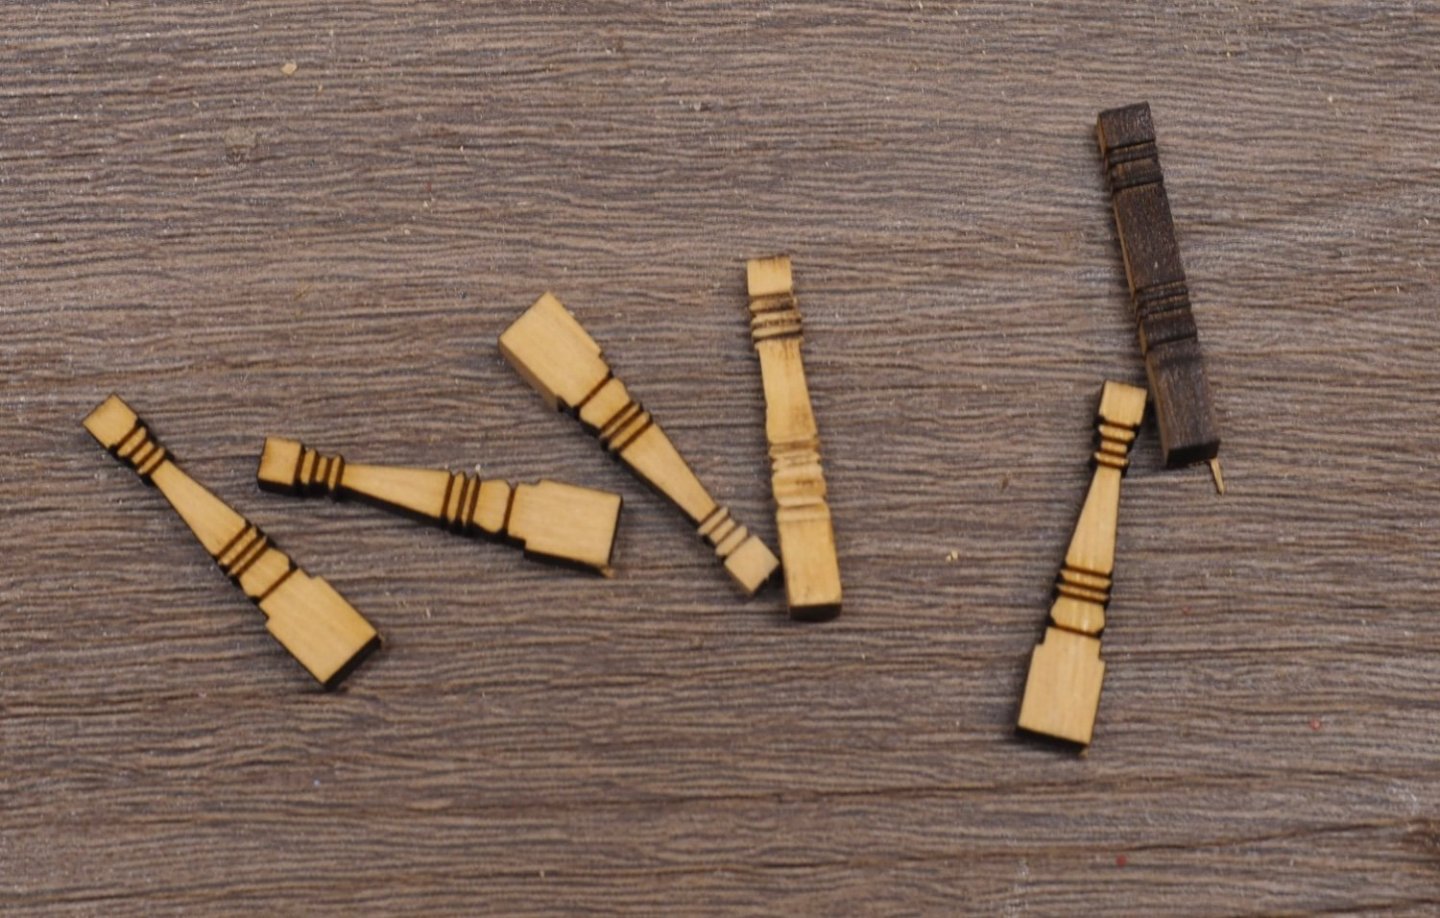
Here is the breast rail and ship’s wheel. The ship’s wheel is just sitting in place and has not been glued down, yet. I started by cleaning the uprights with 320 grit sandpaper, jeweler’s files, and a number 11 blade. Then I carefully adjusted the fit in the lower rail and the bottom piece of the upper rail. I made sure the fit was good before gluing the top and bottom pieces of the upper rail together. I painted the rails before assembling and then used a brush to apply wipe on polyurethane to the whole assembly after it was all together. I used a clear gel glue for assembling everything. I used an Emory board to adjust the fit of the uprights to the deck. I pinned the breast rail at the outboard uprights, hoping that gives them a little bit better bite using medium CA to attach the railing to the deck.


-
Thank you for your nice comment, Kenny. You’re starting at a great time, because there are so many members at various chapters. This is a very helpful group. I hope you have as much fun building yours as I am having with mine.
-
Hi Kenny. I don’t know anything about your conversion process, but if it involves the print function, you will need to make sure the scale is set to 100%. Read my log for a tale of whoa and despair over that error.
-
Hi Binchicken. Thank you so much for commenting on my build log. This was my first wooden ship model. I picked it after seeing several great build logs on MSW.
-
Thanks, JJ, Glenn, and Rusty. And thank you for the likes. Happy New Year! I’m working on the breast rail and not quite ready to show any pictures of it.
-
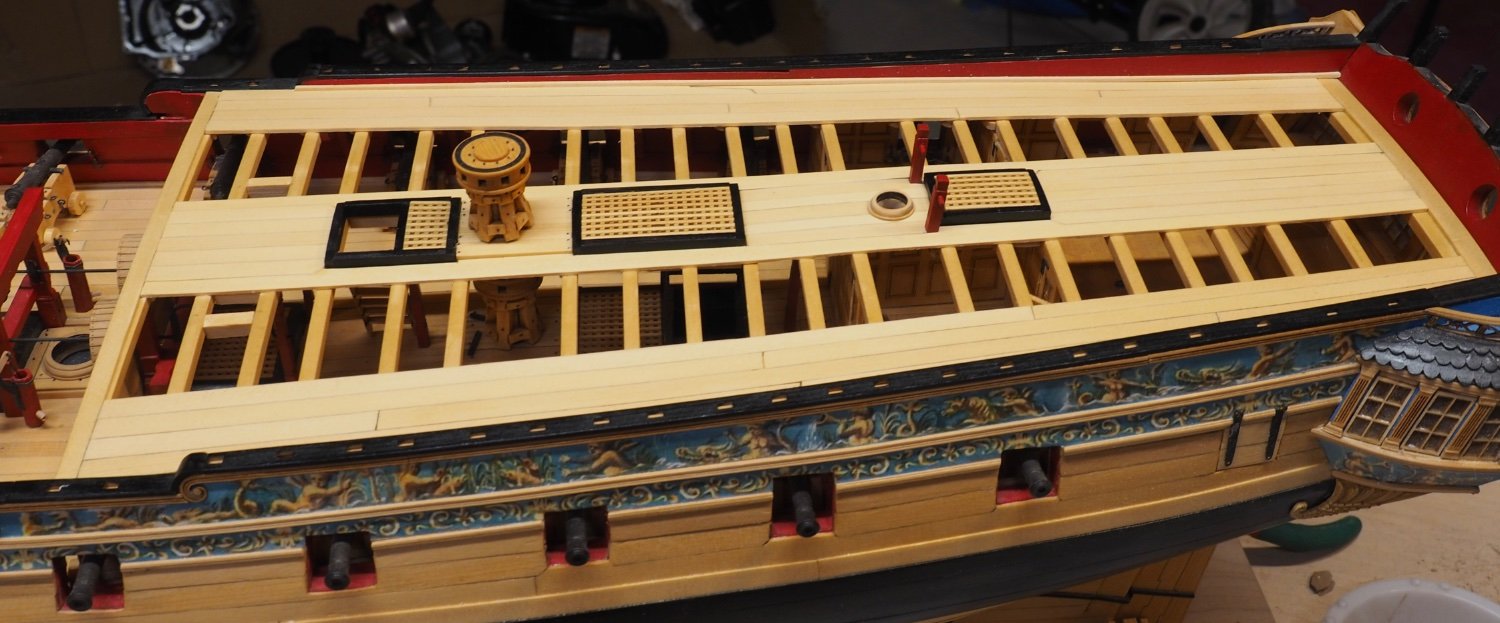
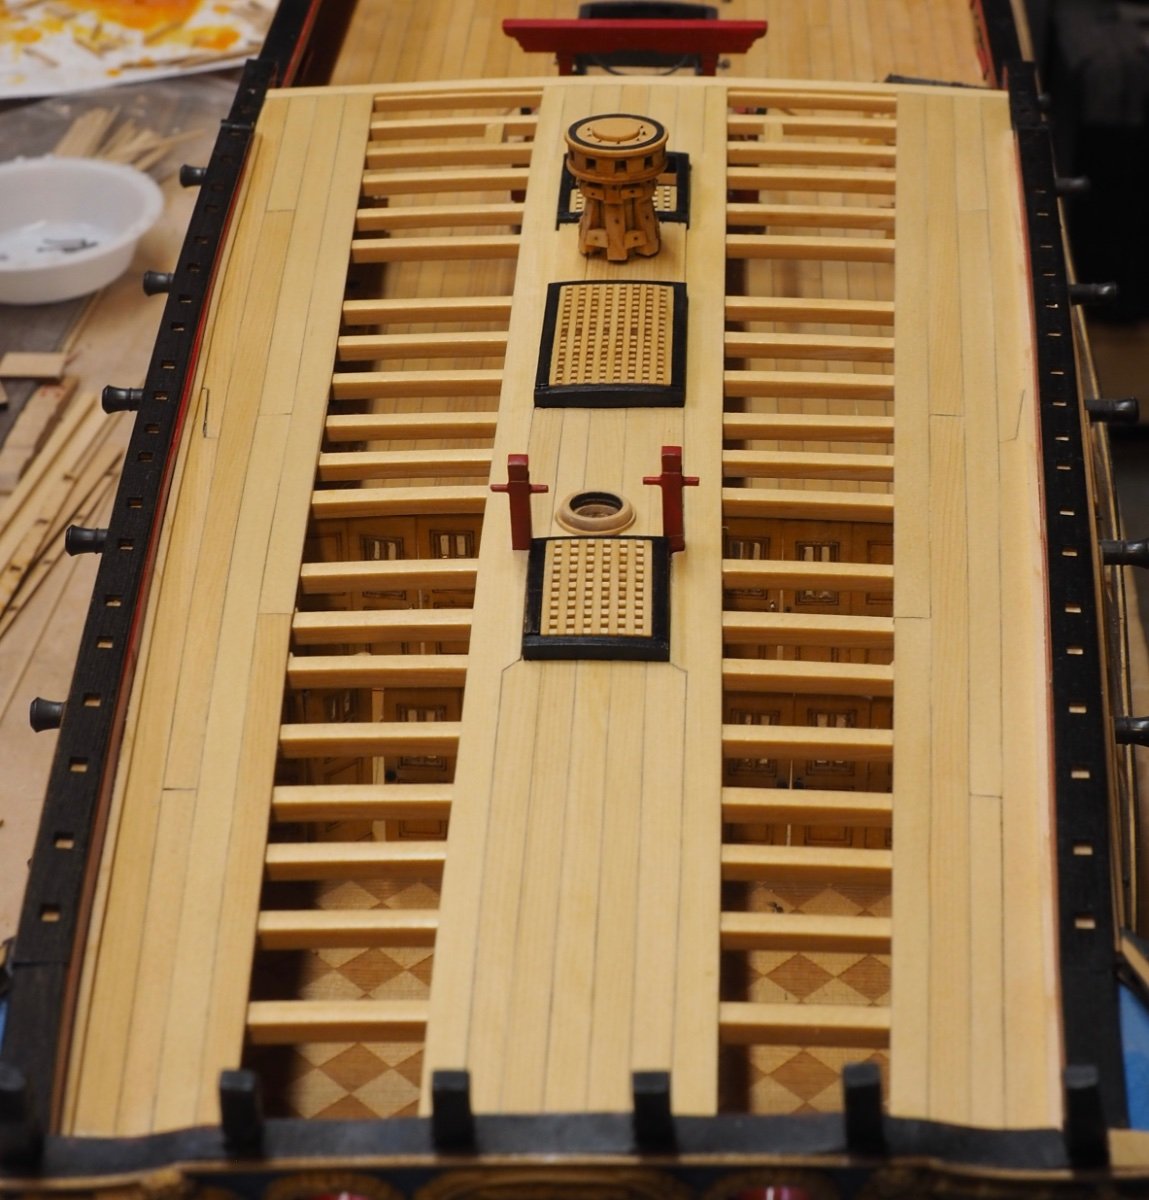
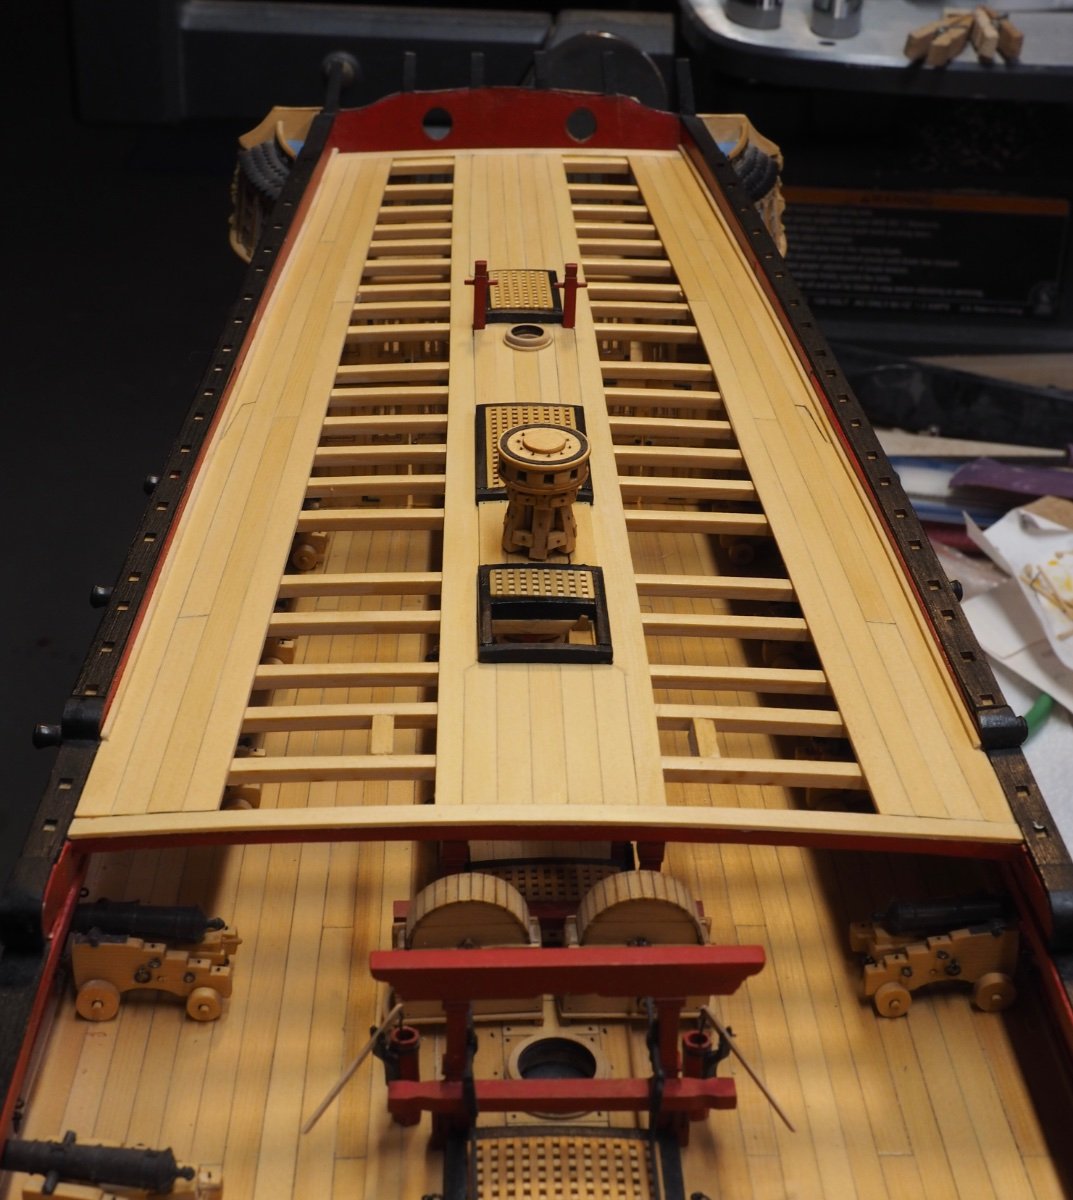
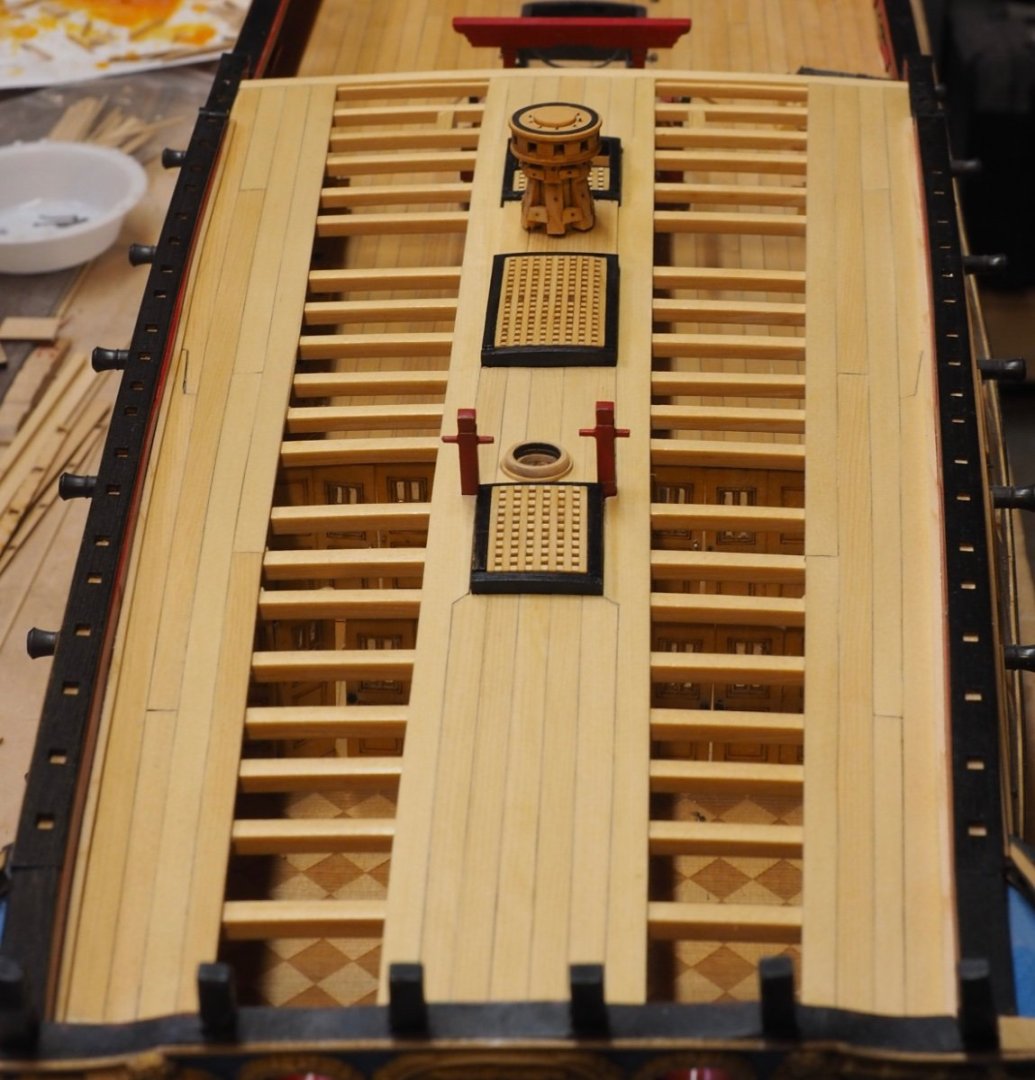
Welcome back to my Winchelsea build log. Once again, I’ve neglected it for several months. I’m working on chapter 10 and have finished planking down the center of the quarter-deck. The outboard planks were very challenging, and I’m pretty happy with my results. I did manage to screw up the binnacle to the point that I’ll be reaching out to Chuck for a new one. And I think I will leave it bright to match my capstan. I’m now starting to clean up the breast rail uprights. This will take me a while because I plan to leave them bright like Chuck’s.


-
Welcome to the Winnie group, Kenny! I'm looking forward to seeing your CNC work.
-
Beautifully done, Adam!
-
This has happened to me in the shipyard many times! Your lobster smack is looking great so far. And I really like what you did with the stand.