Sgt_Hoser
-
Posts
18 -
Joined
-
Last visited
-
 Sgt_Hoser reacted to a post in a topic:
US Brig Syren by Hipexec - FINISHED - Model Shipways - 1:64 - building as USS Argus
Sgt_Hoser reacted to a post in a topic:
US Brig Syren by Hipexec - FINISHED - Model Shipways - 1:64 - building as USS Argus
-
Sgt_Hoser reacted to a post in a topic:
US Brig Syren by Gahm - Model Shipways
-
Sgt_Hoser reacted to a post in a topic:
US Brig Syren by Gahm - Model Shipways
-
Sgt_Hoser reacted to a post in a topic:
HMS Victory by GrandpaPhil - Mantua - Scale 1:98 - Kit-Bash
-
Sgt_Hoser reacted to a post in a topic:
US Brig Syren 1803 by blackjack40 - Model Shipways - Scale 1:64 - by Joseph Brown
-
Sgt_Hoser reacted to a post in a topic:
US Brig Syren by Gahm - Model Shipways
-
ccoyle reacted to a post in a topic:
HMS Victory 1765 by Sgt_Hoser - Western Wooden Sailboat - 1:200
-
Jeff-E reacted to a post in a topic:
HMS Victory 1765 by Sgt_Hoser - Western Wooden Sailboat - 1:200
-
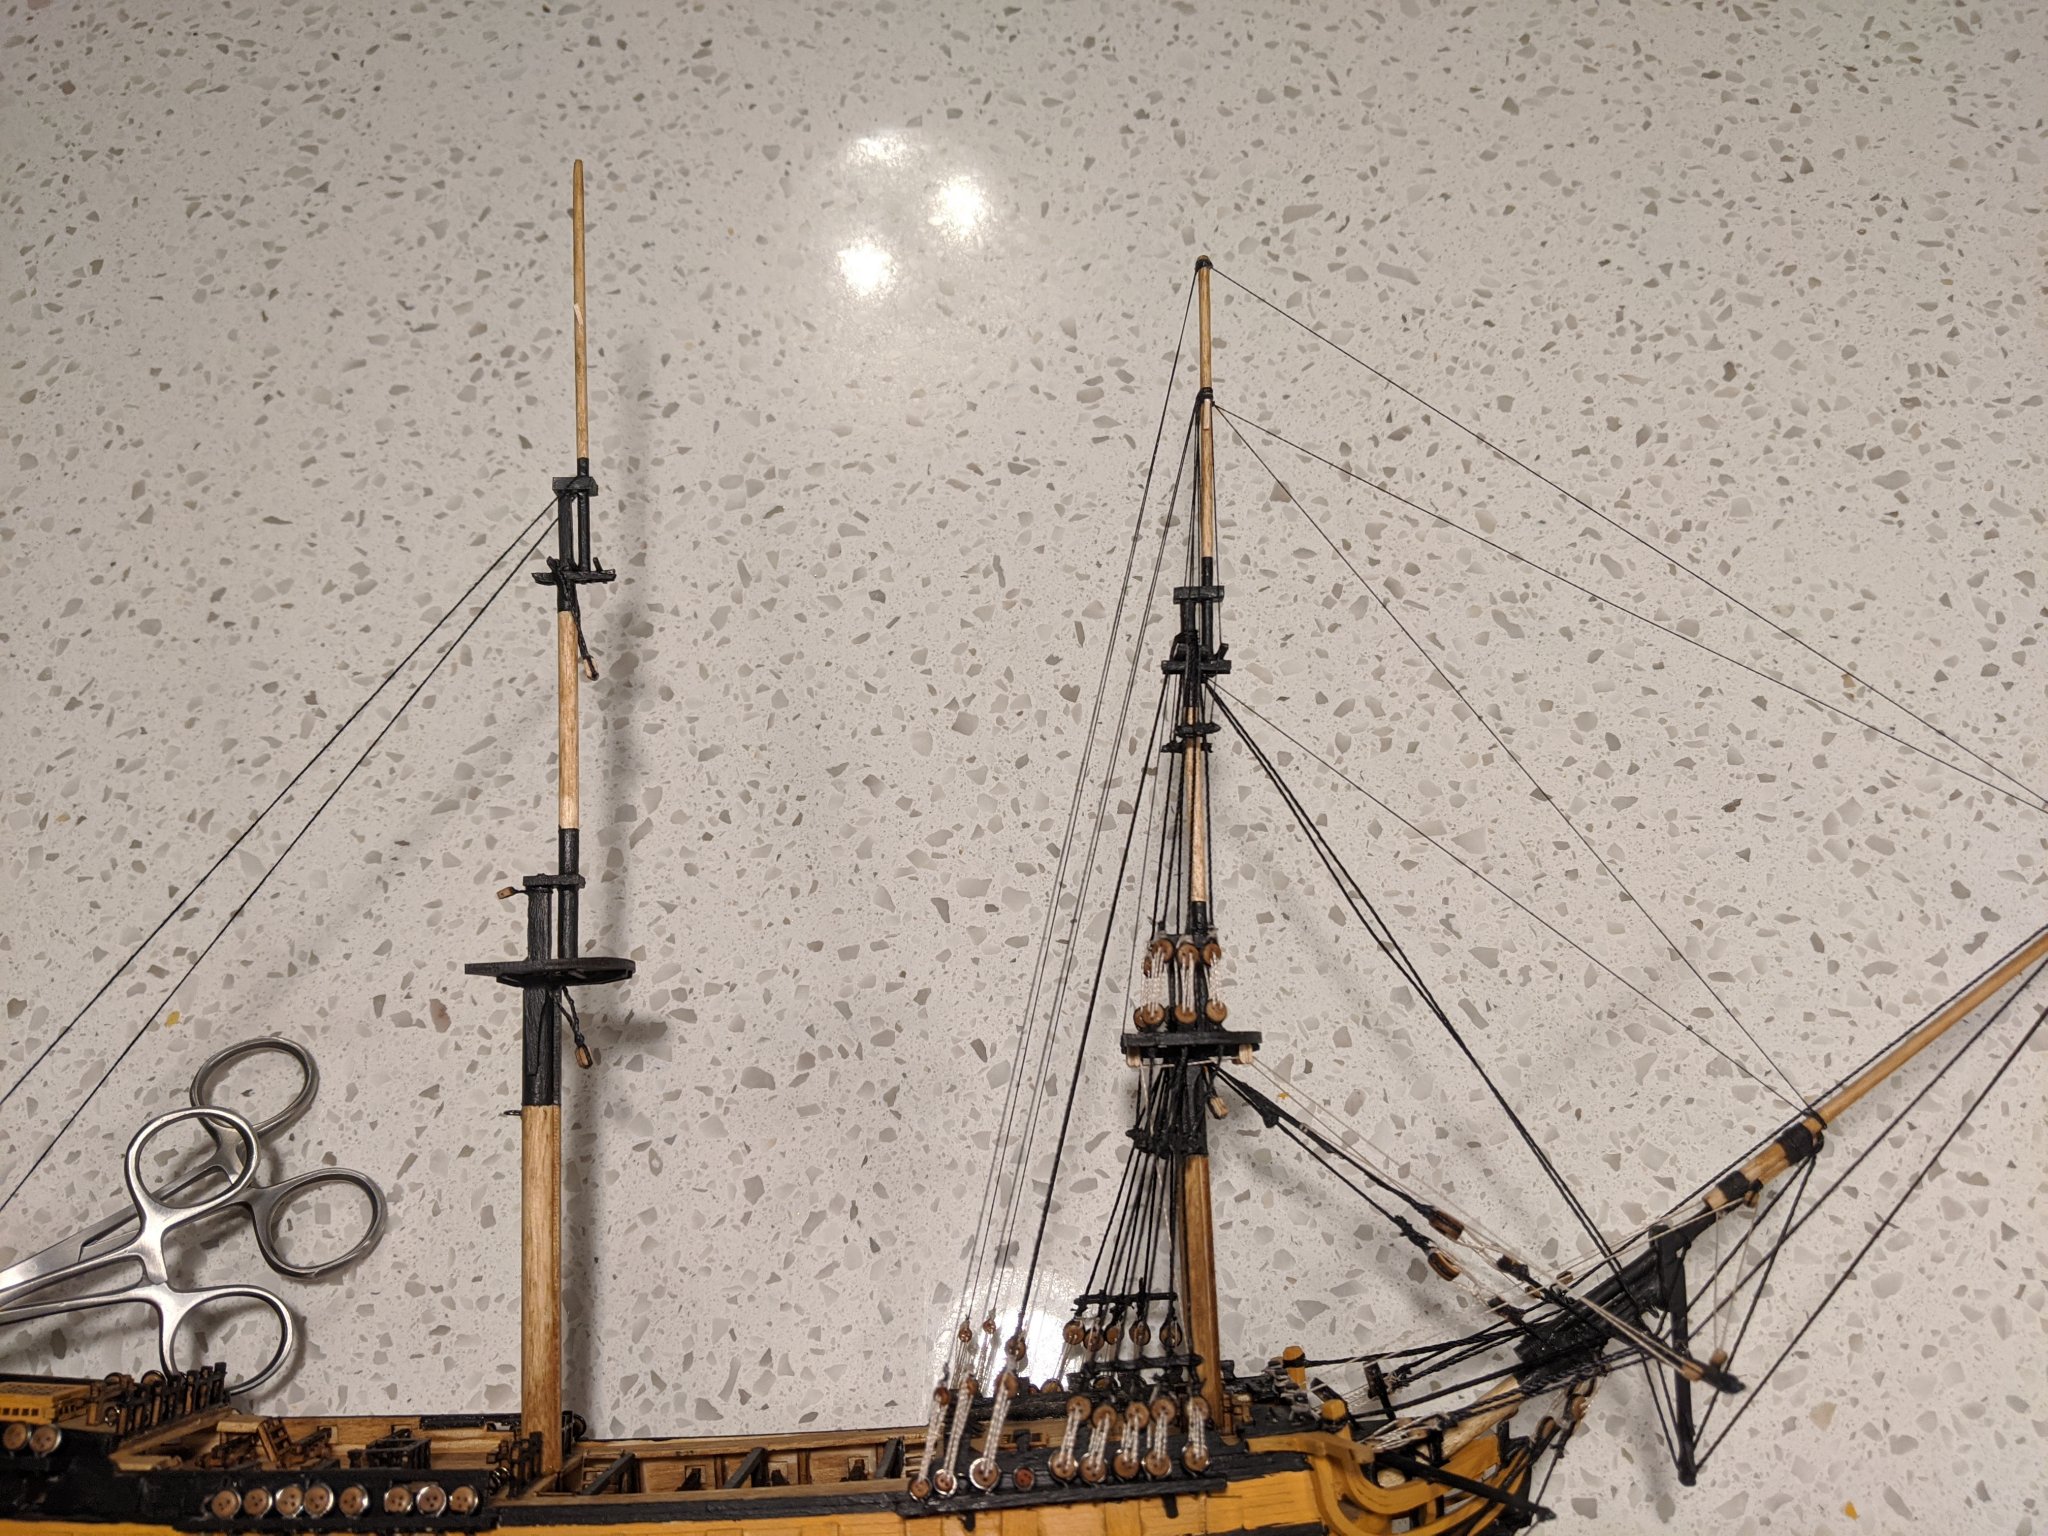
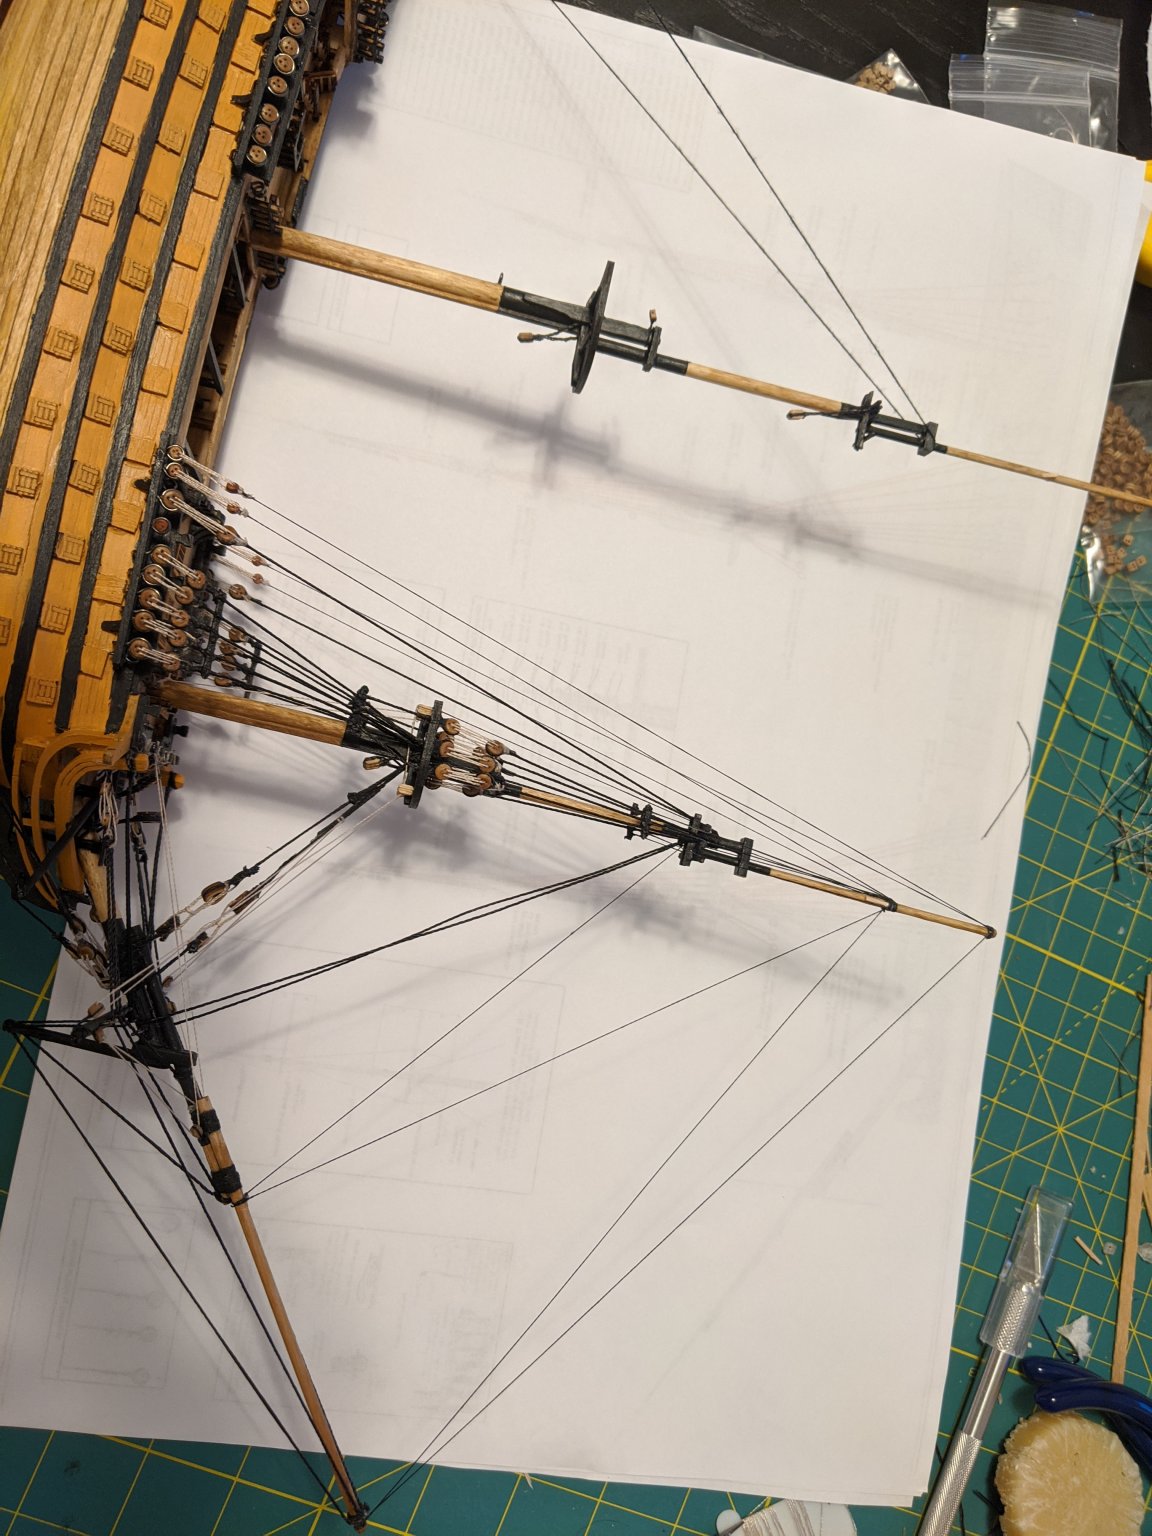
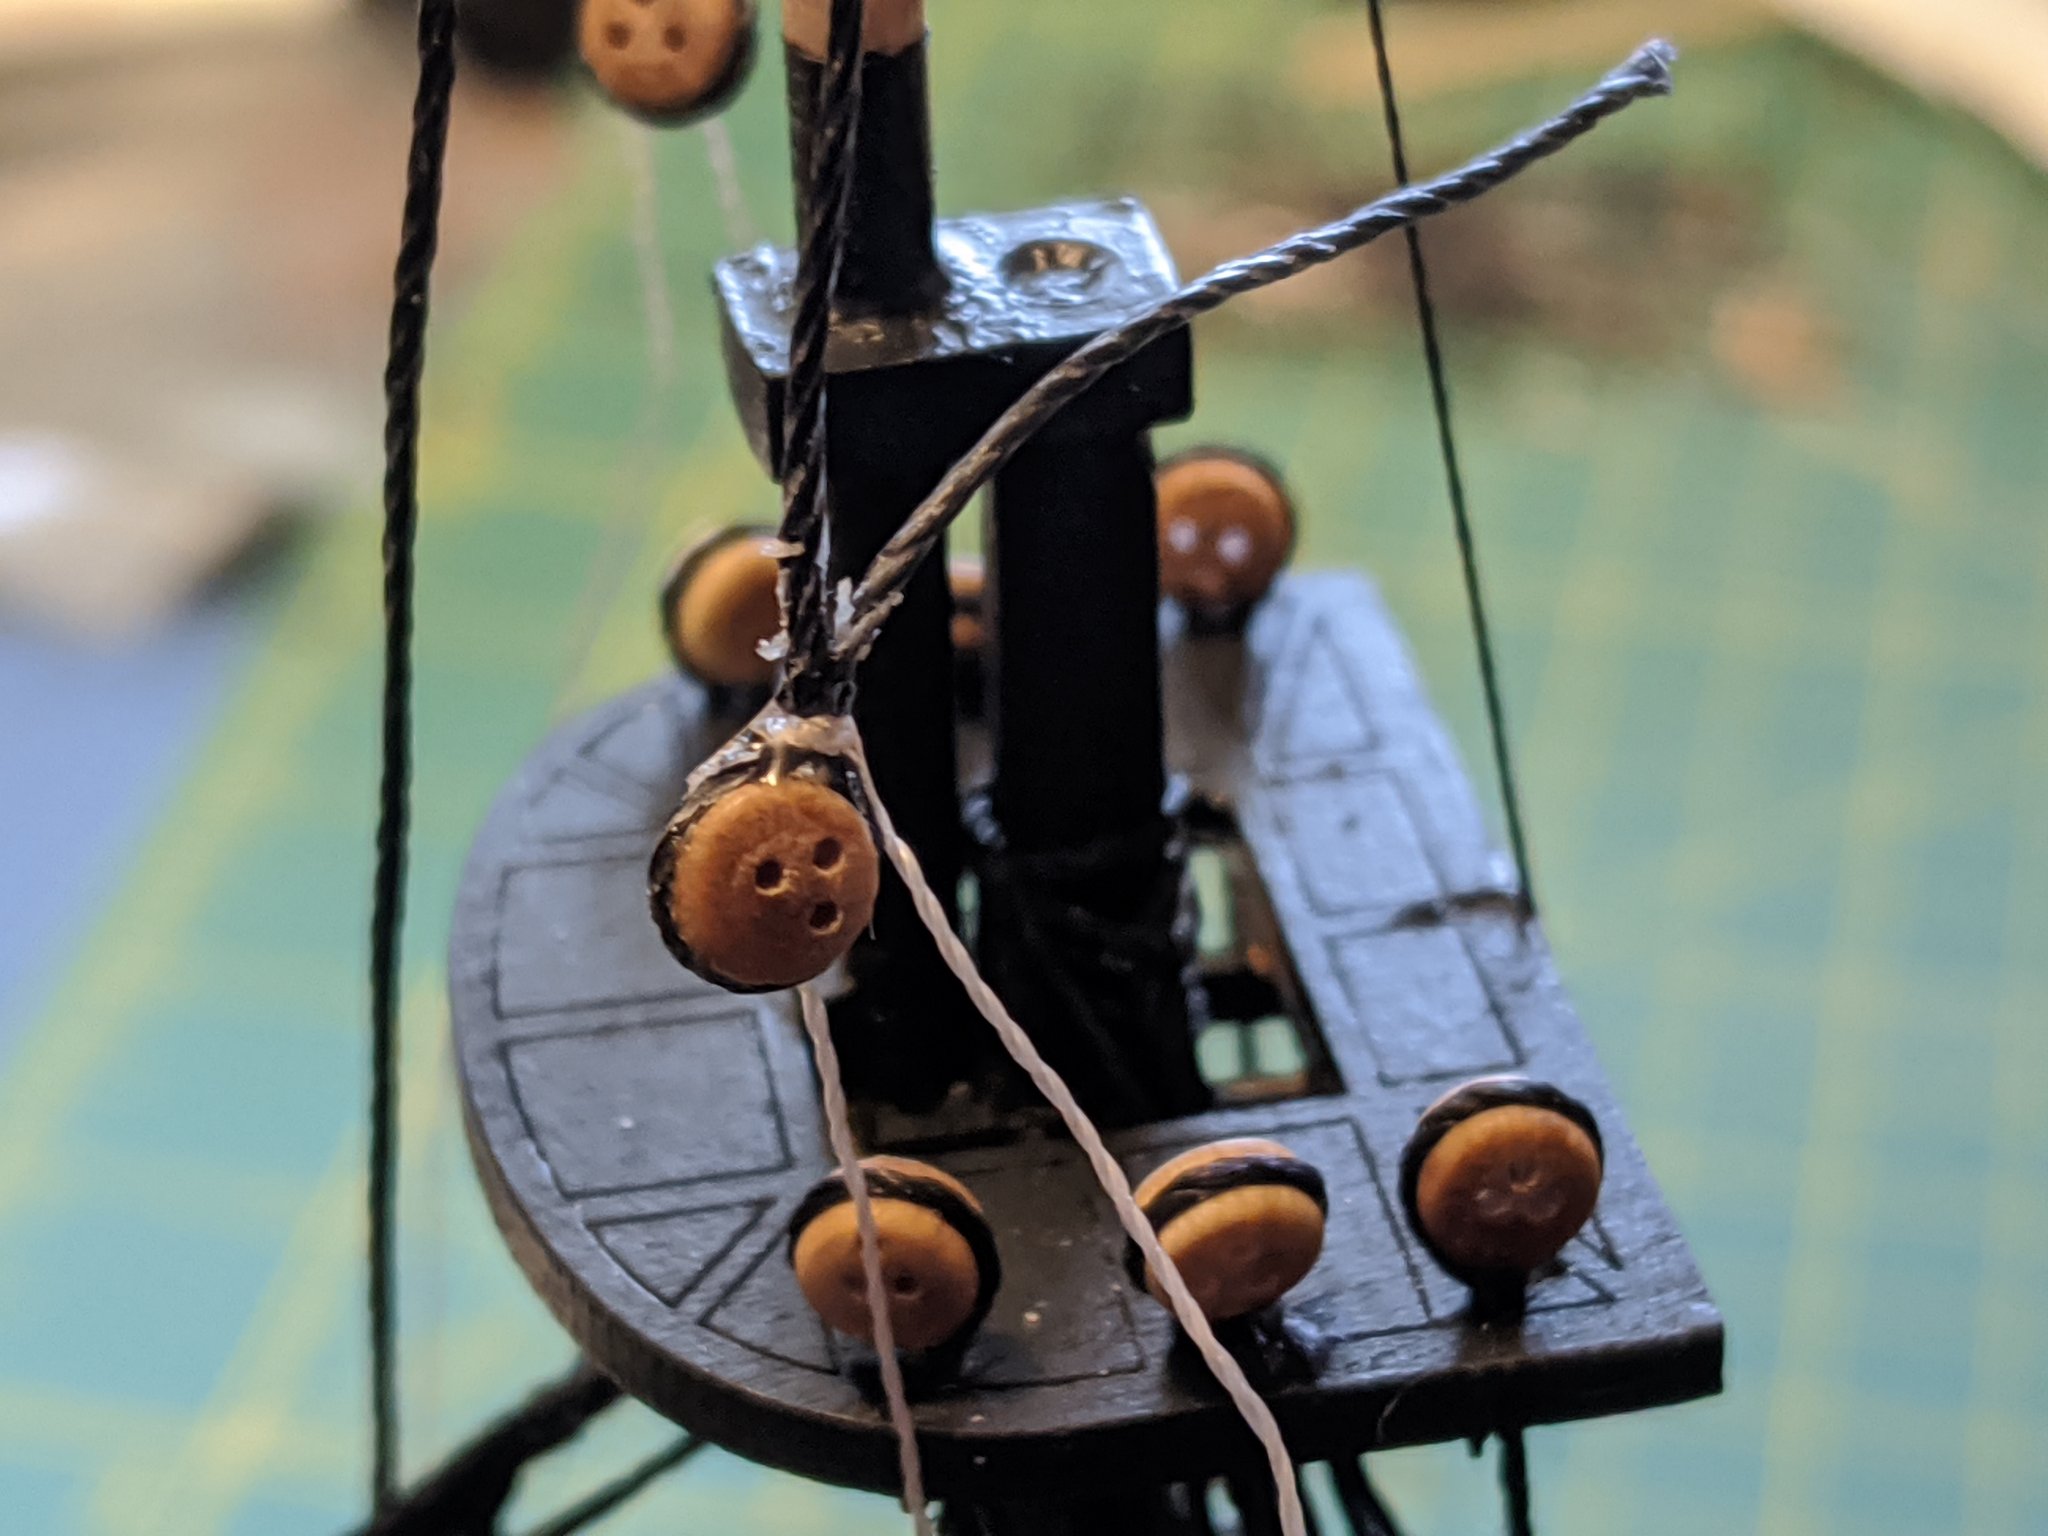
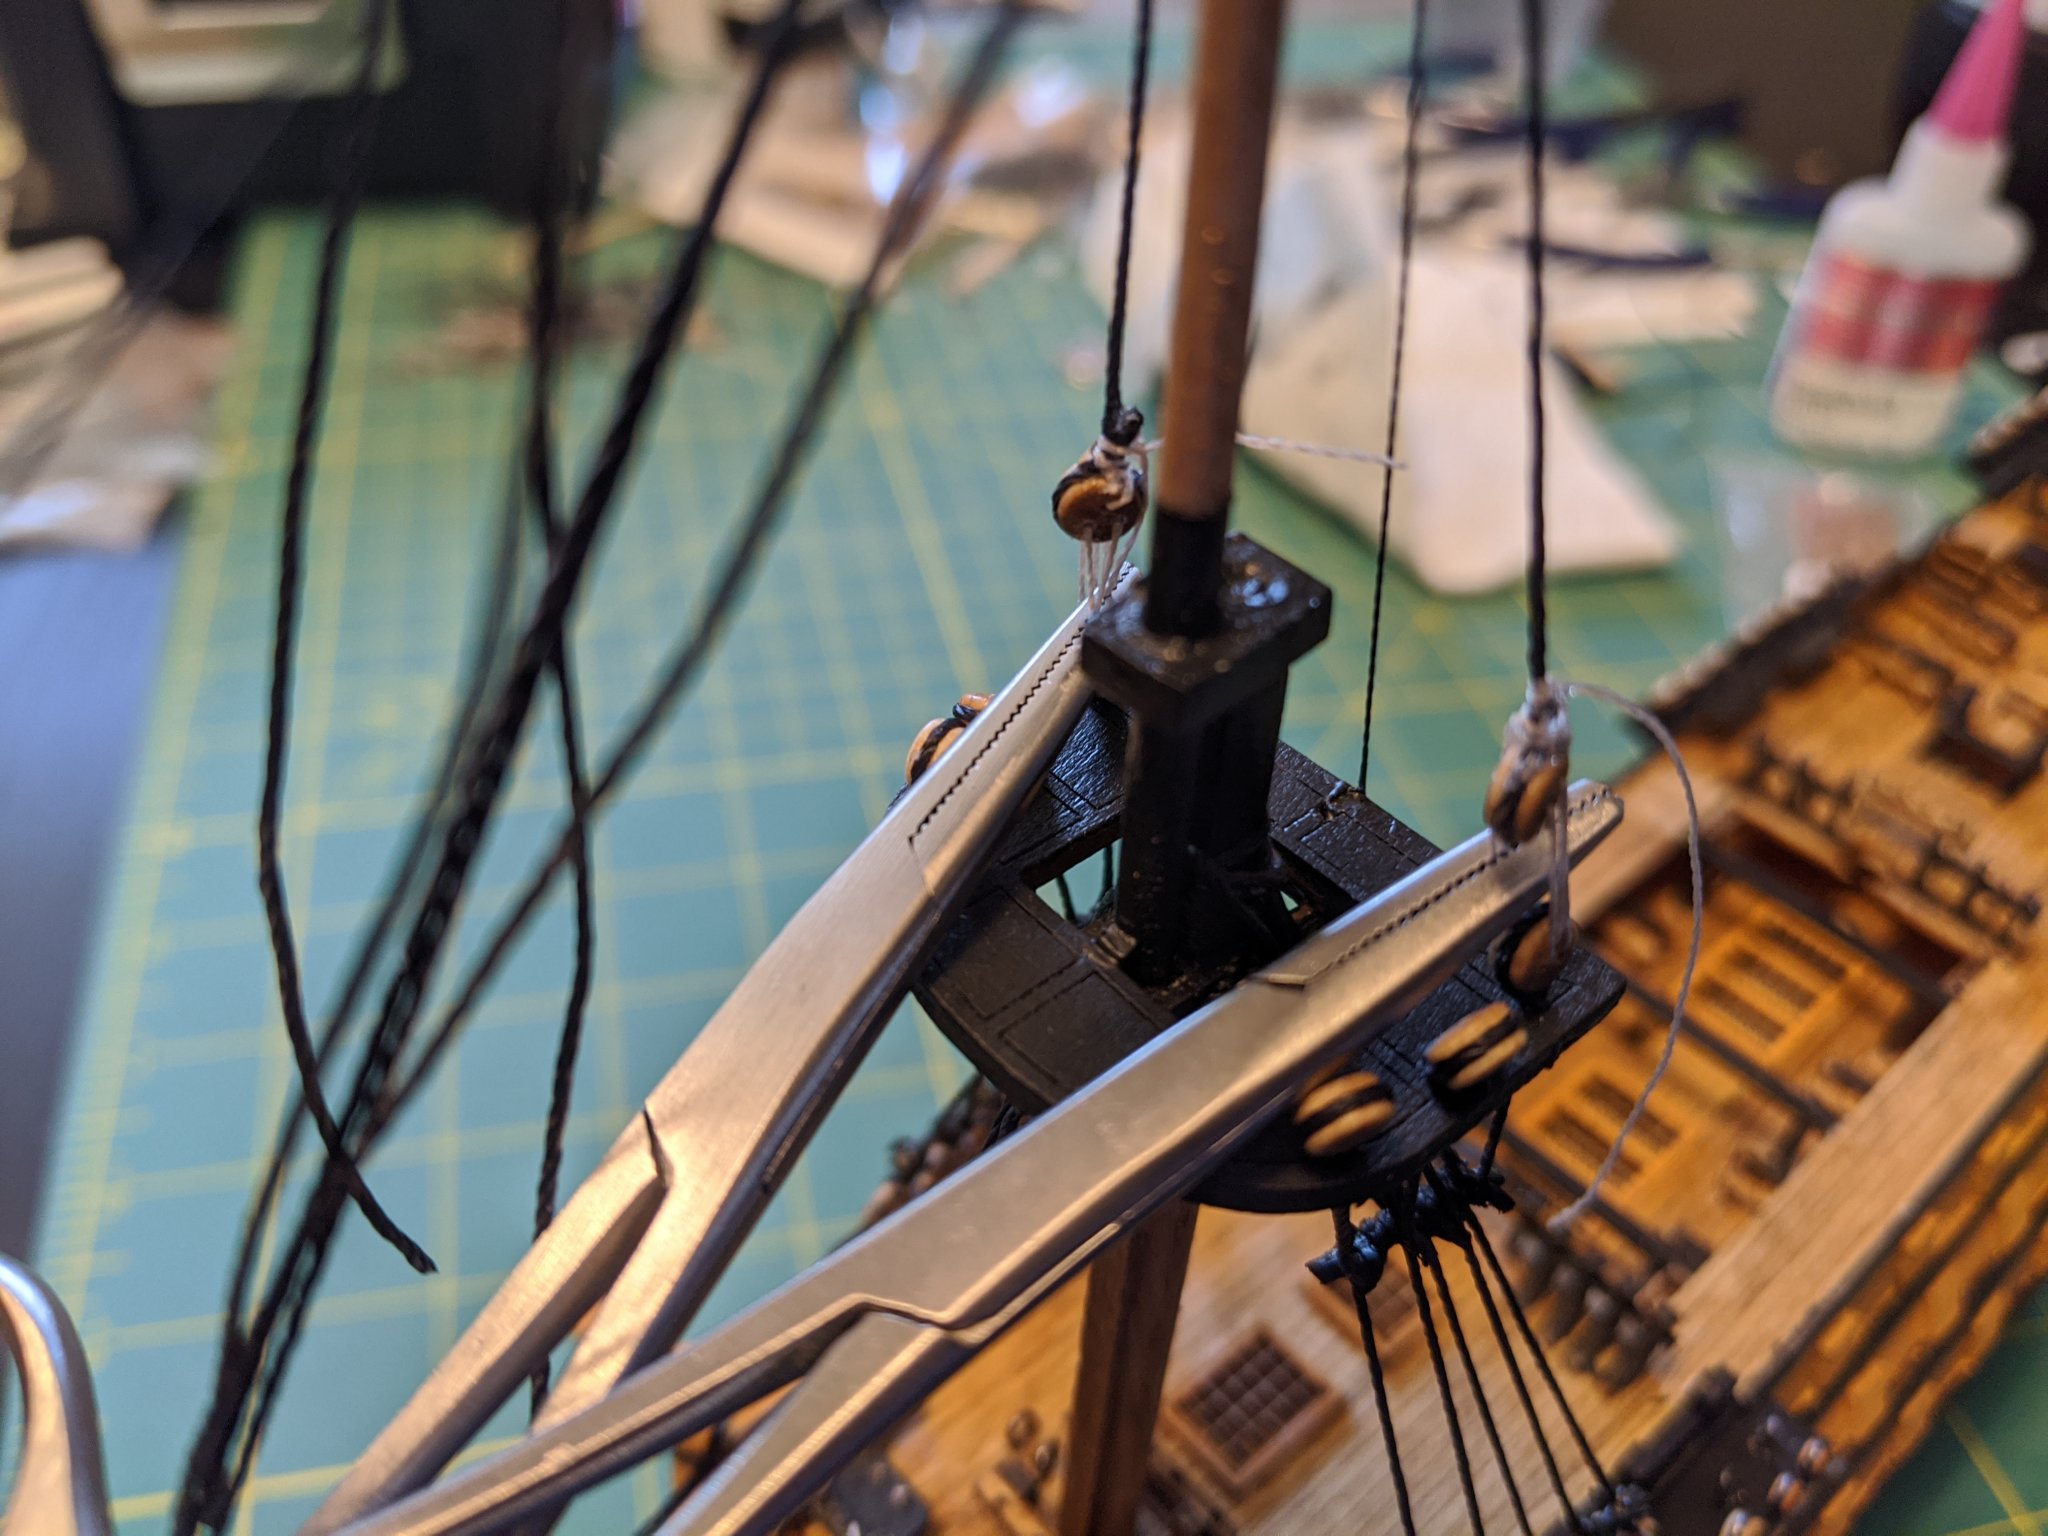
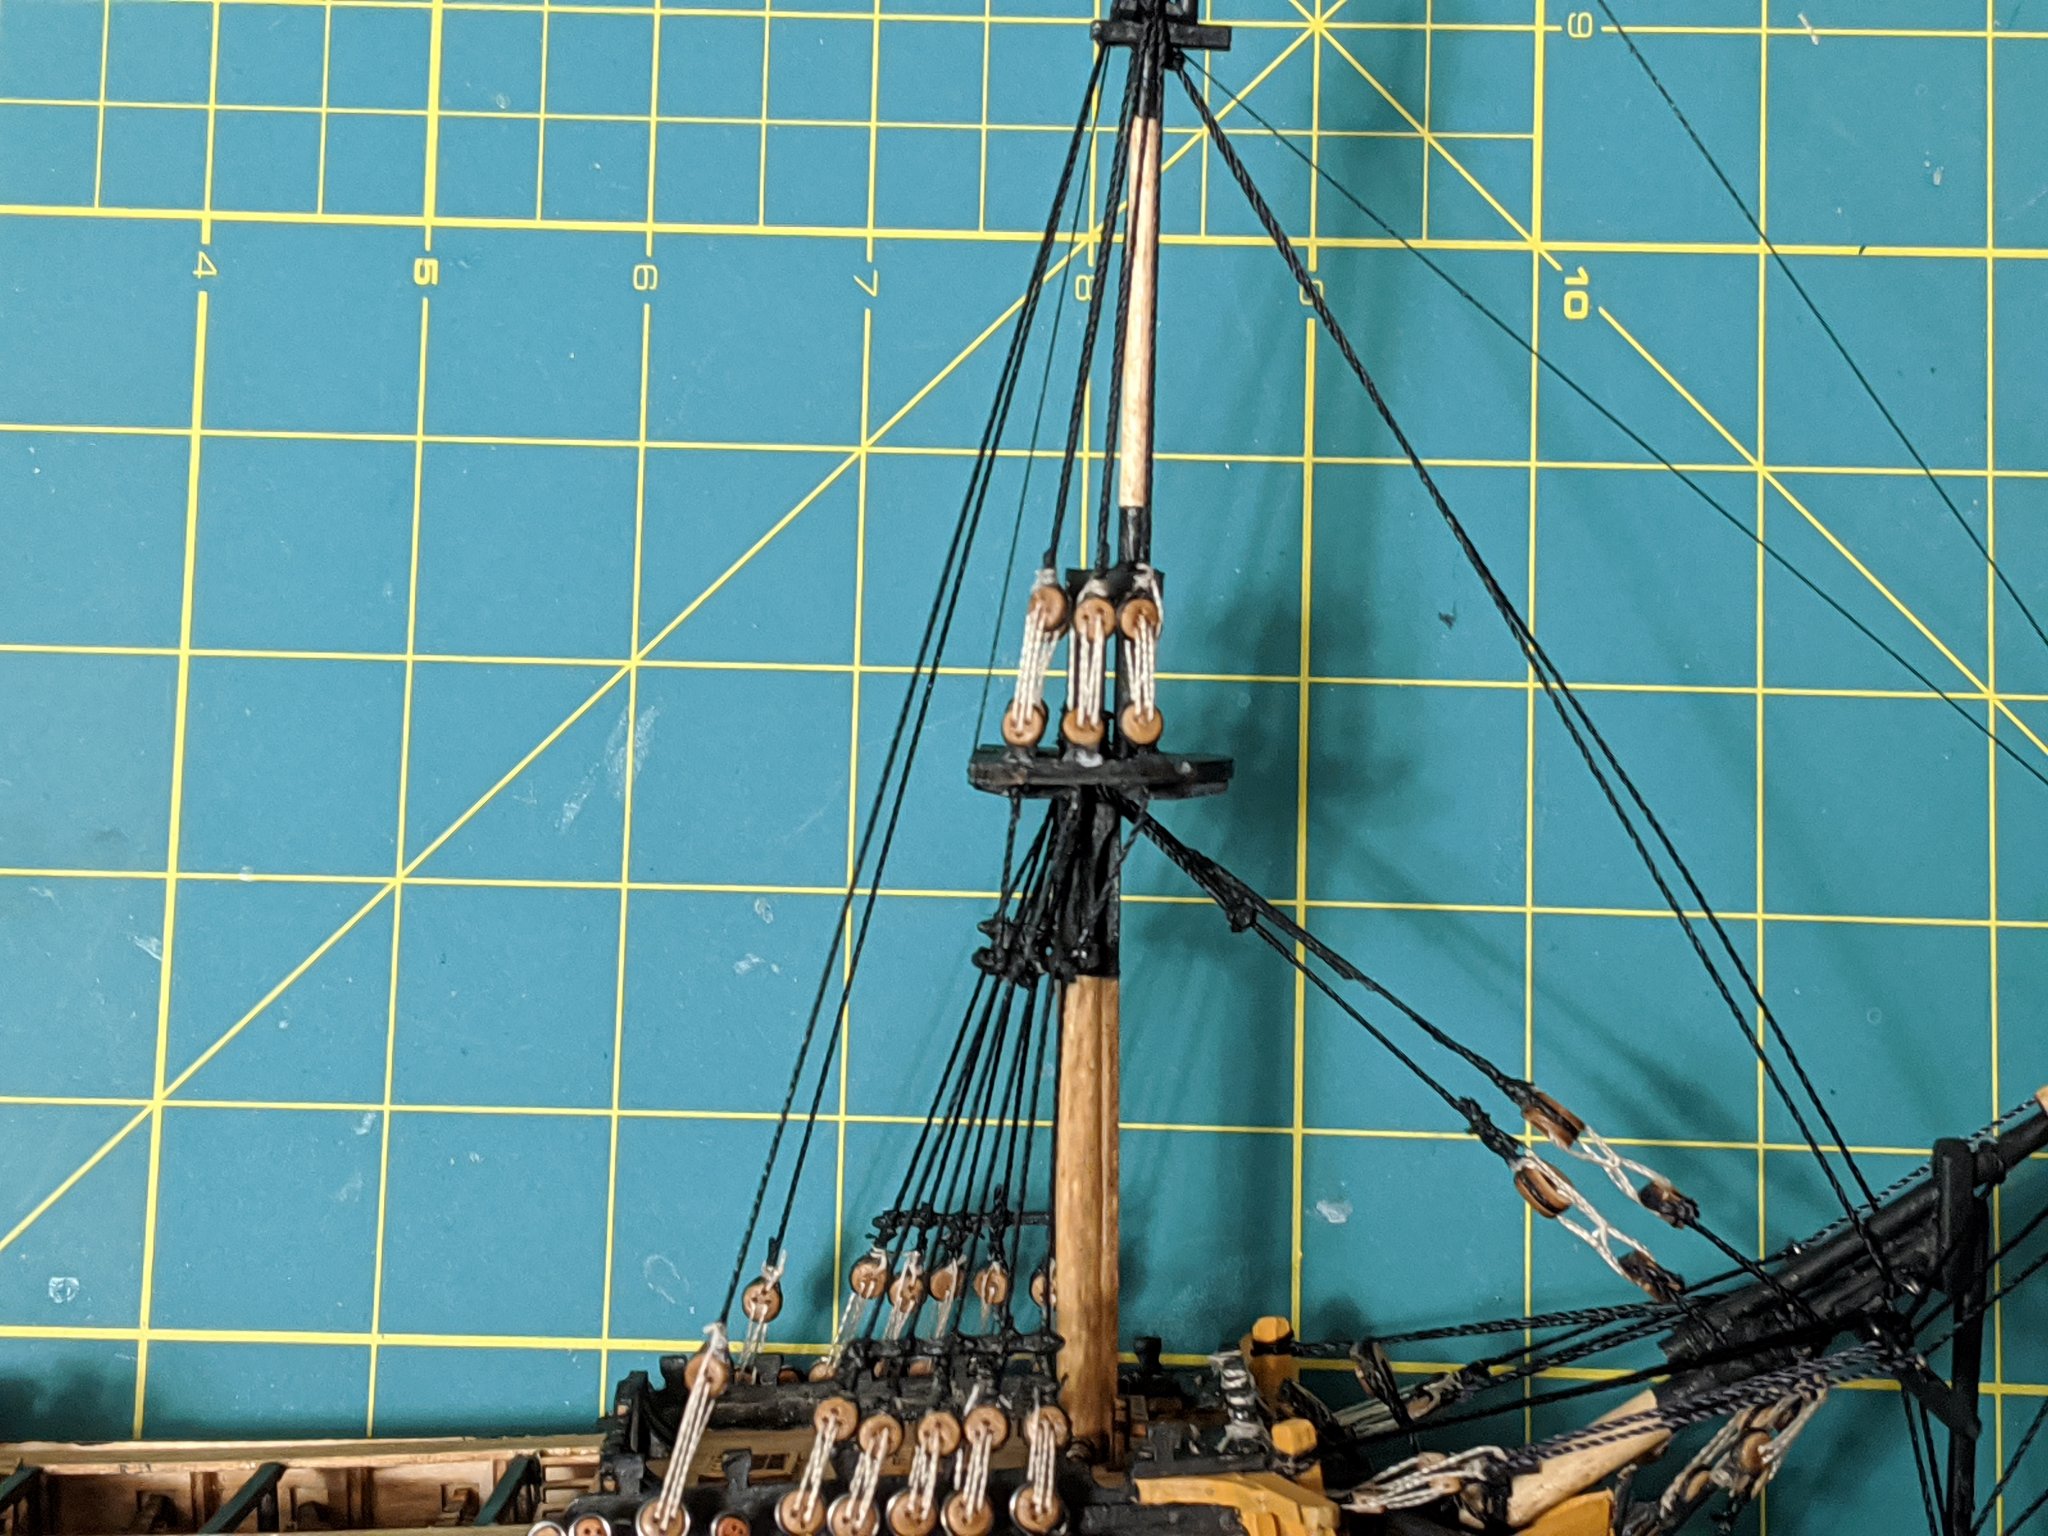
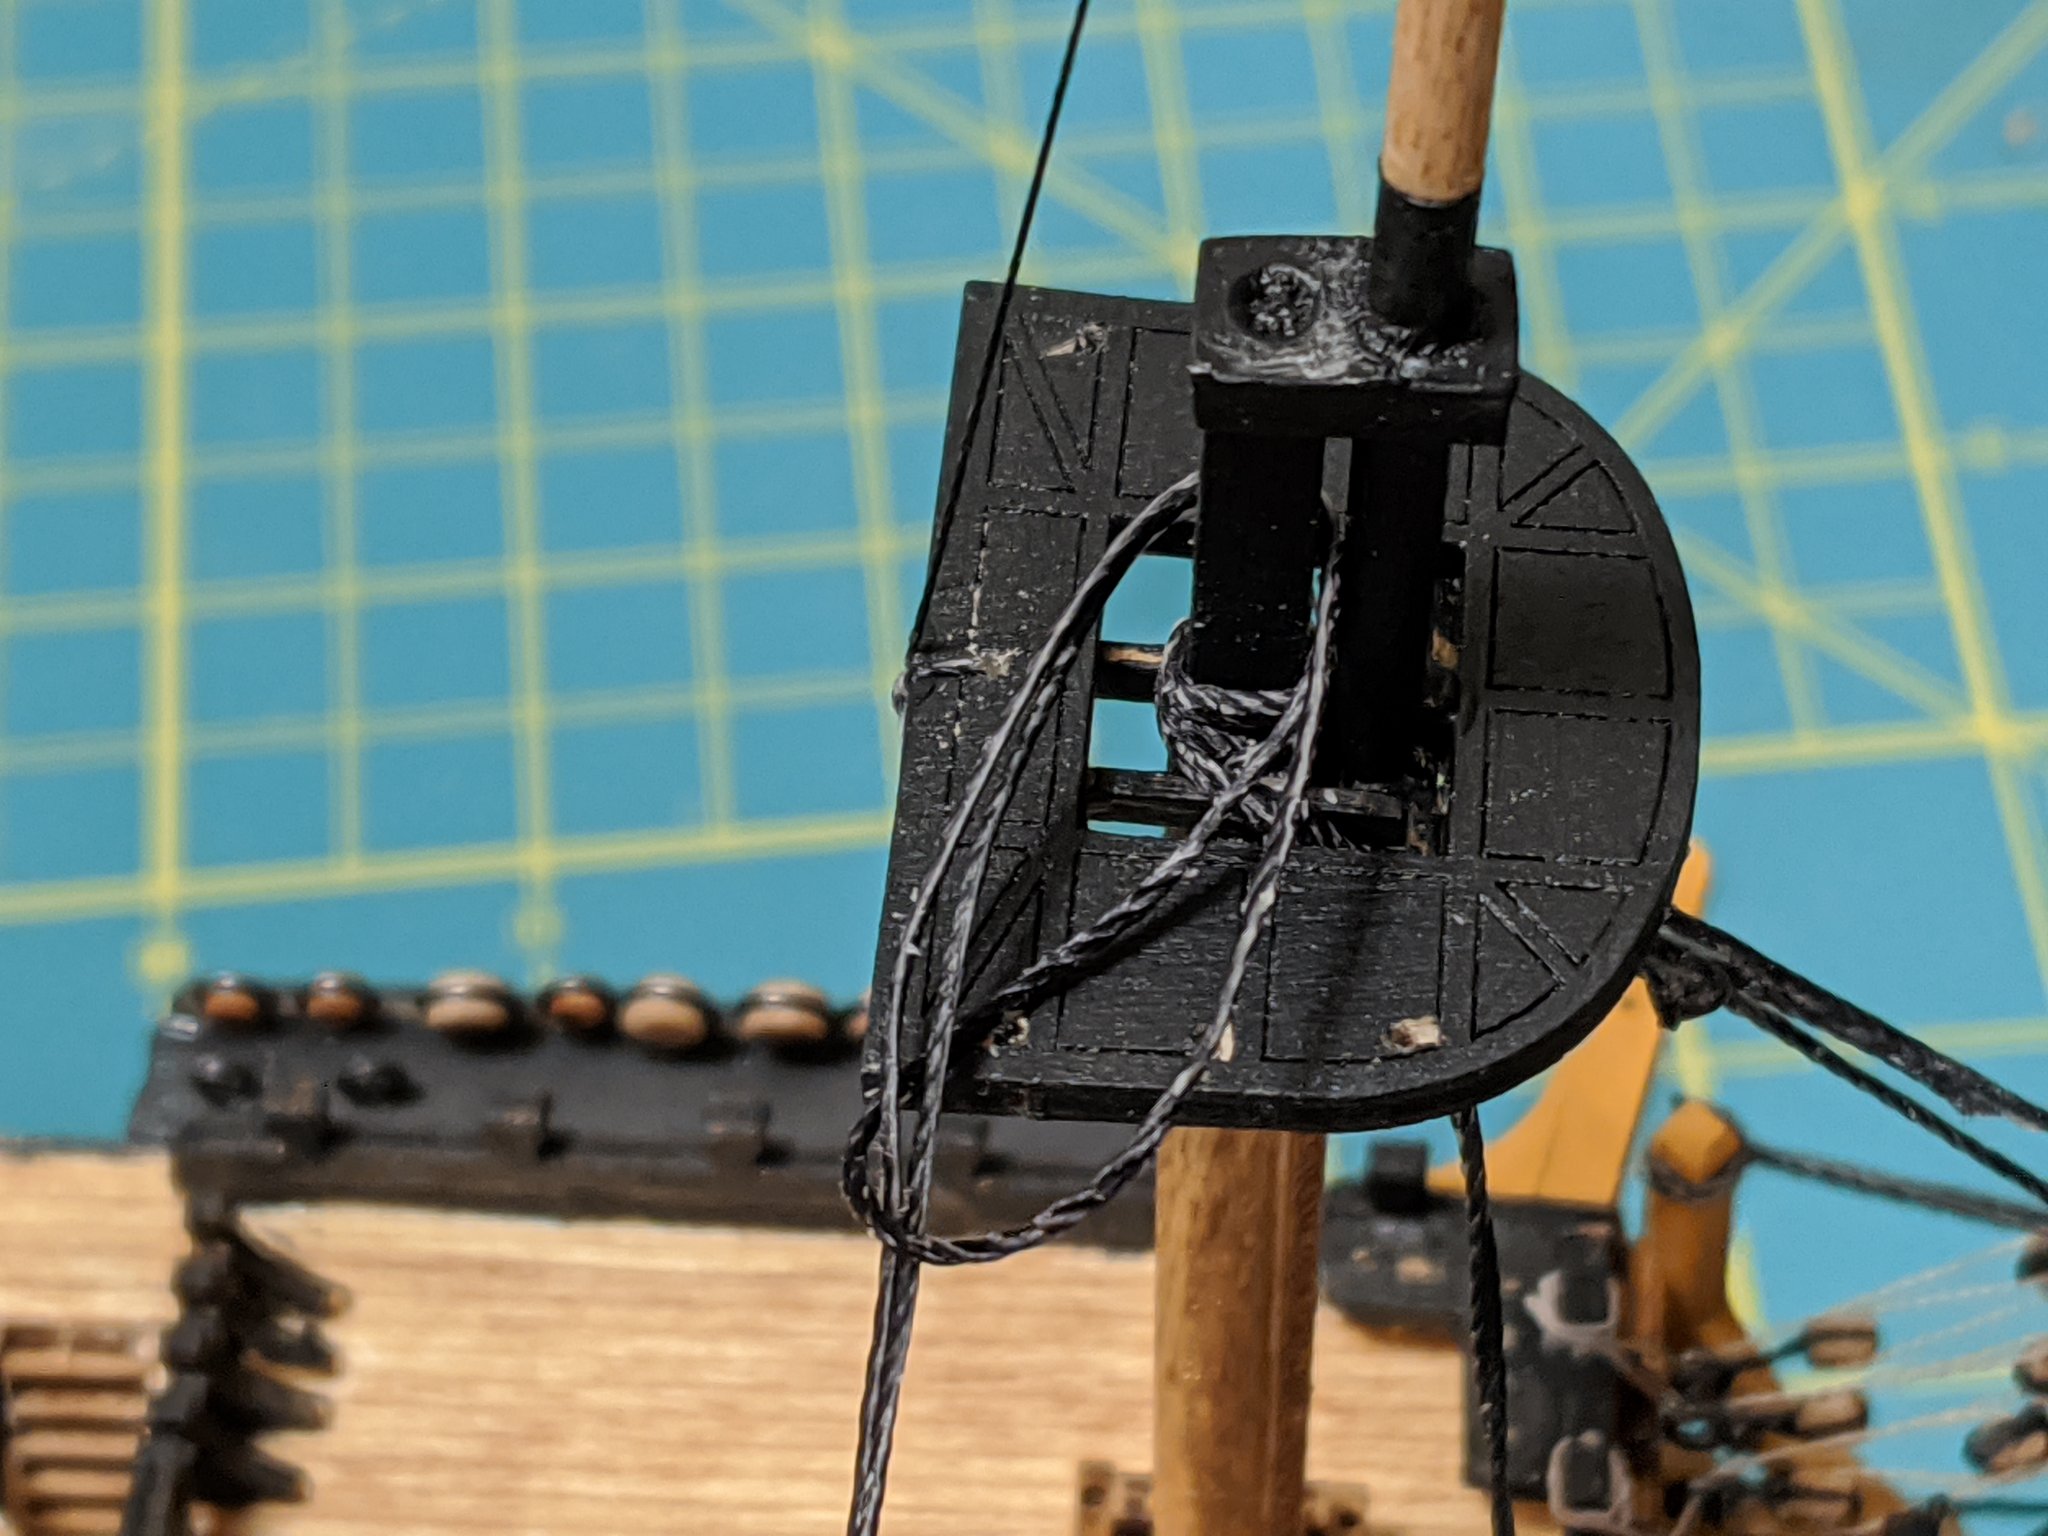
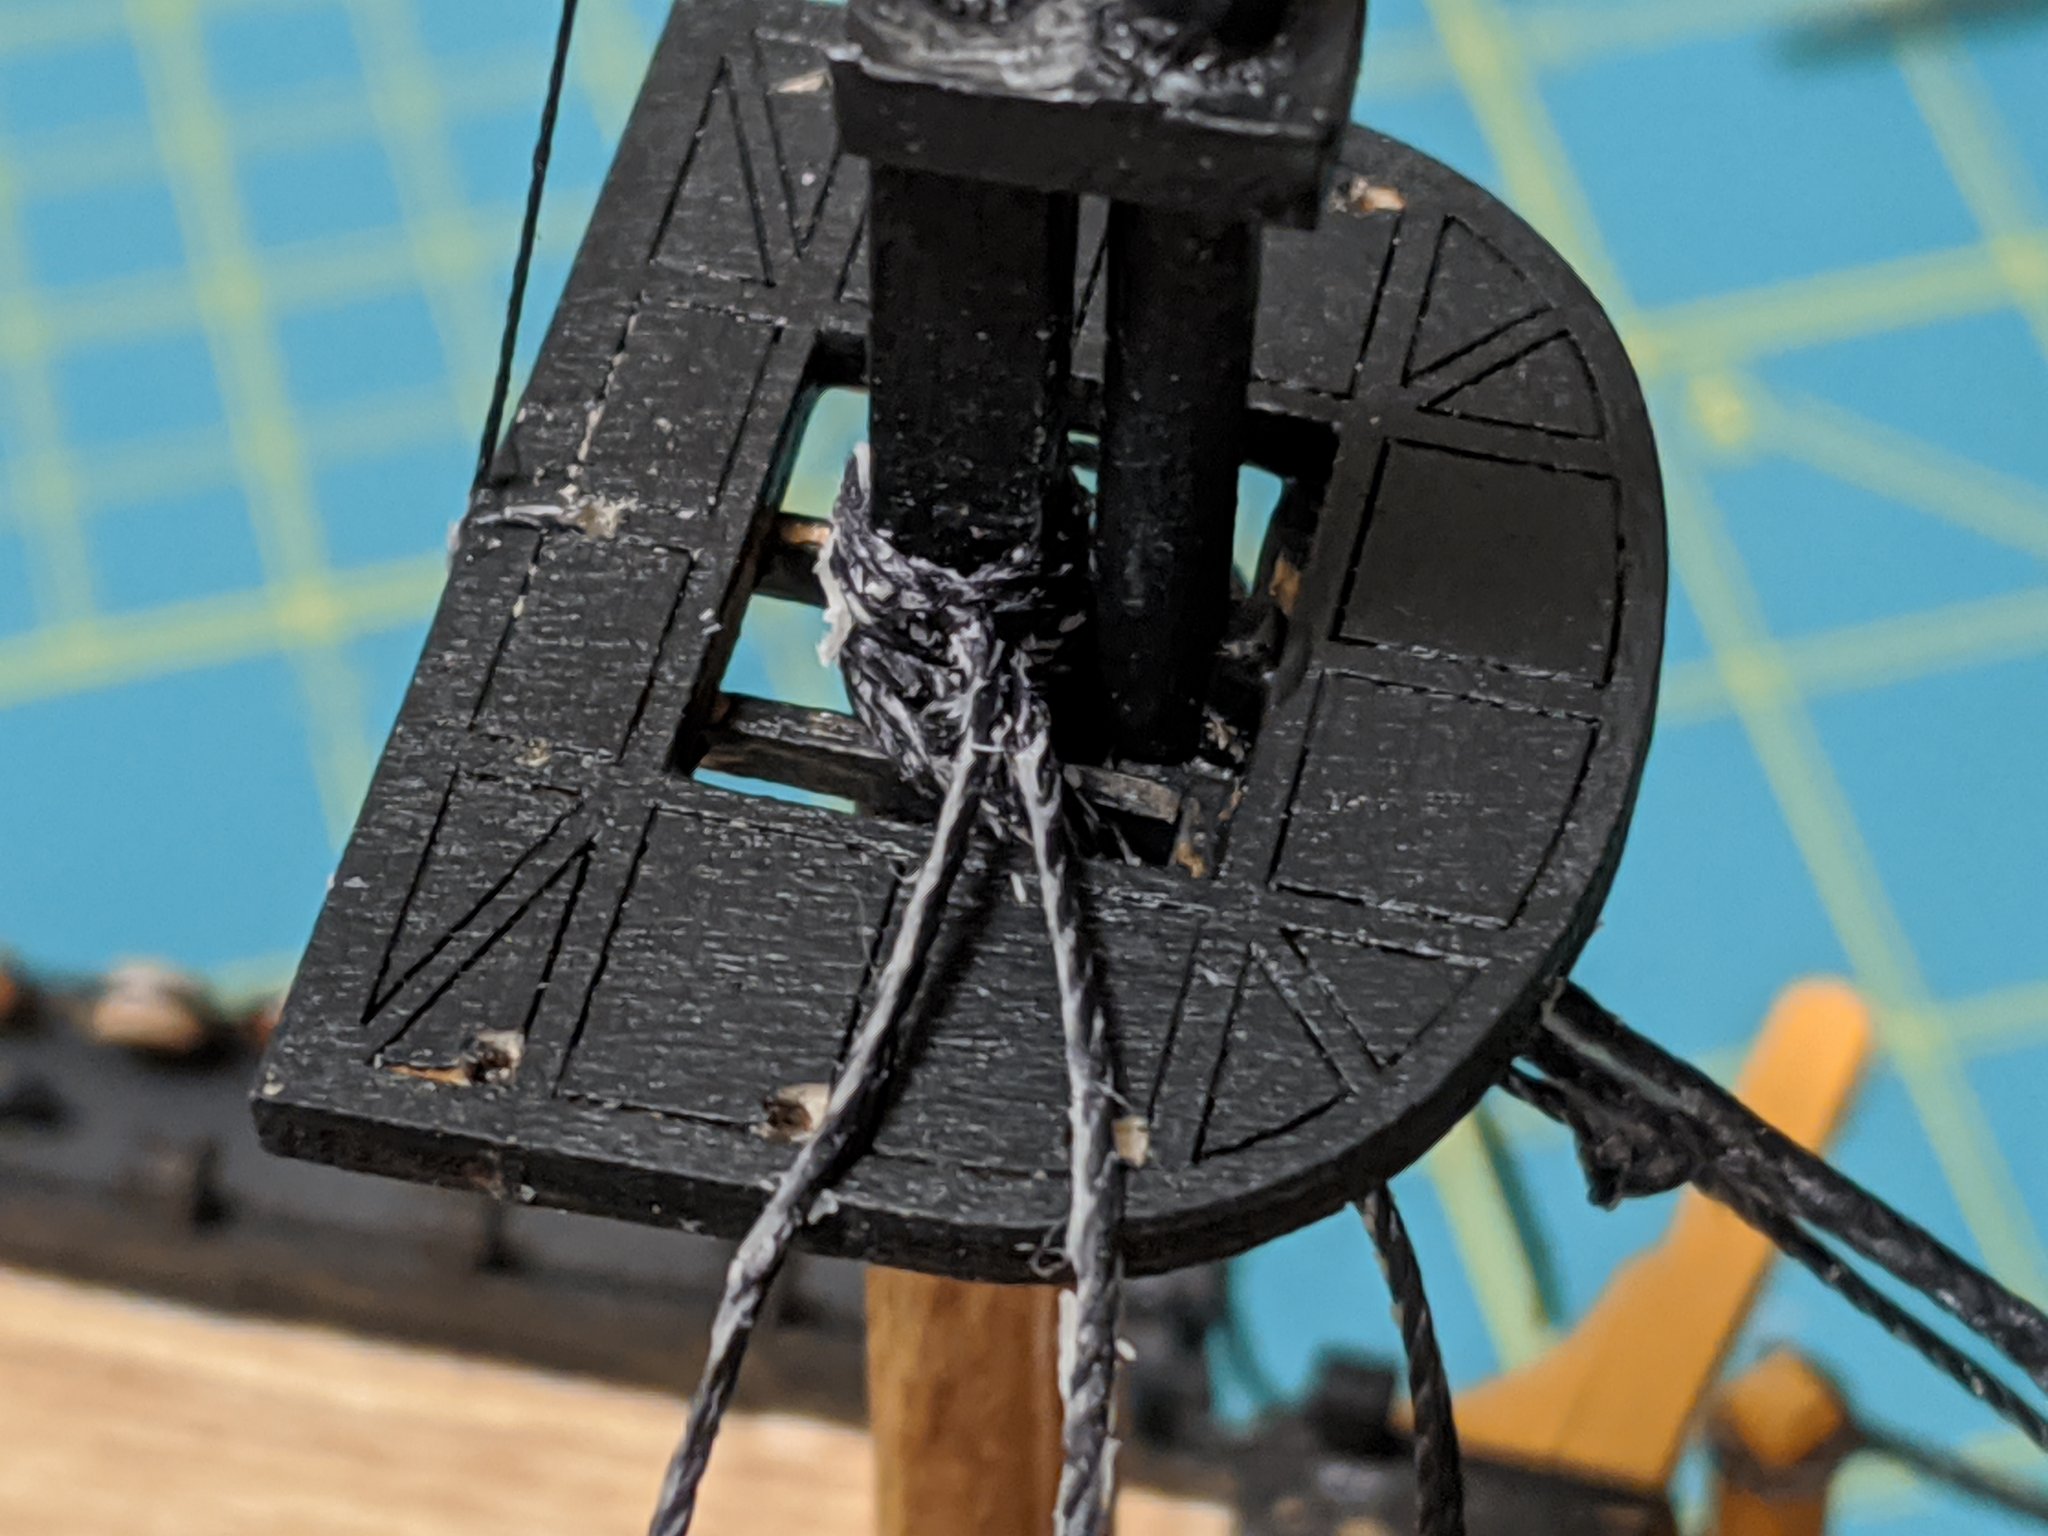
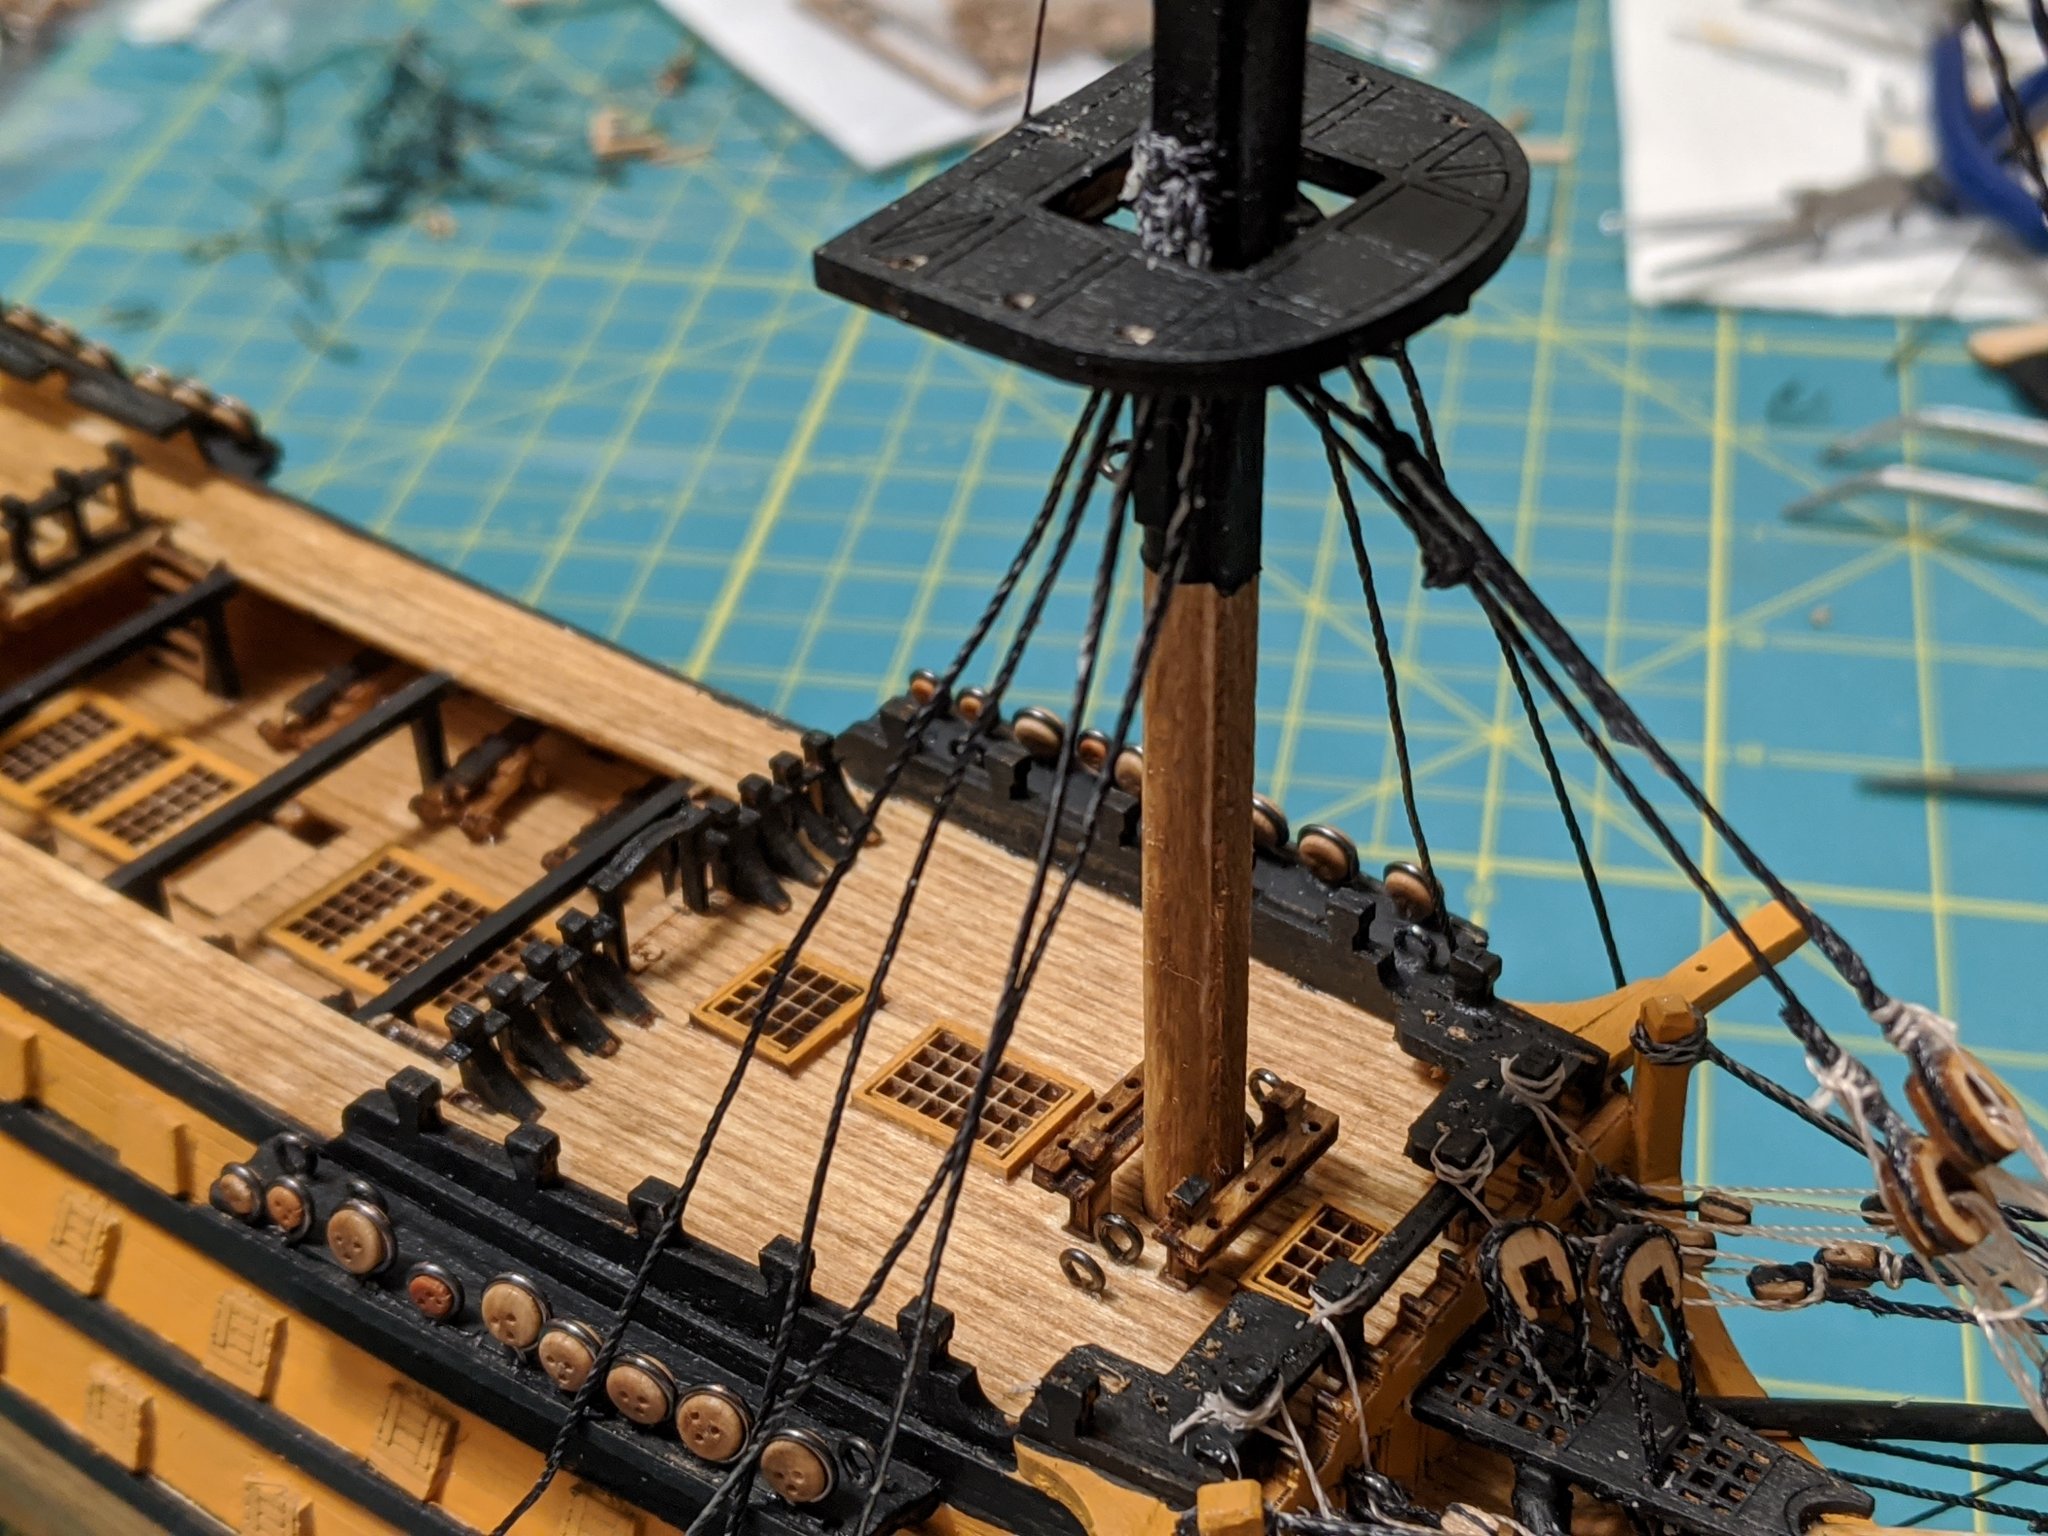
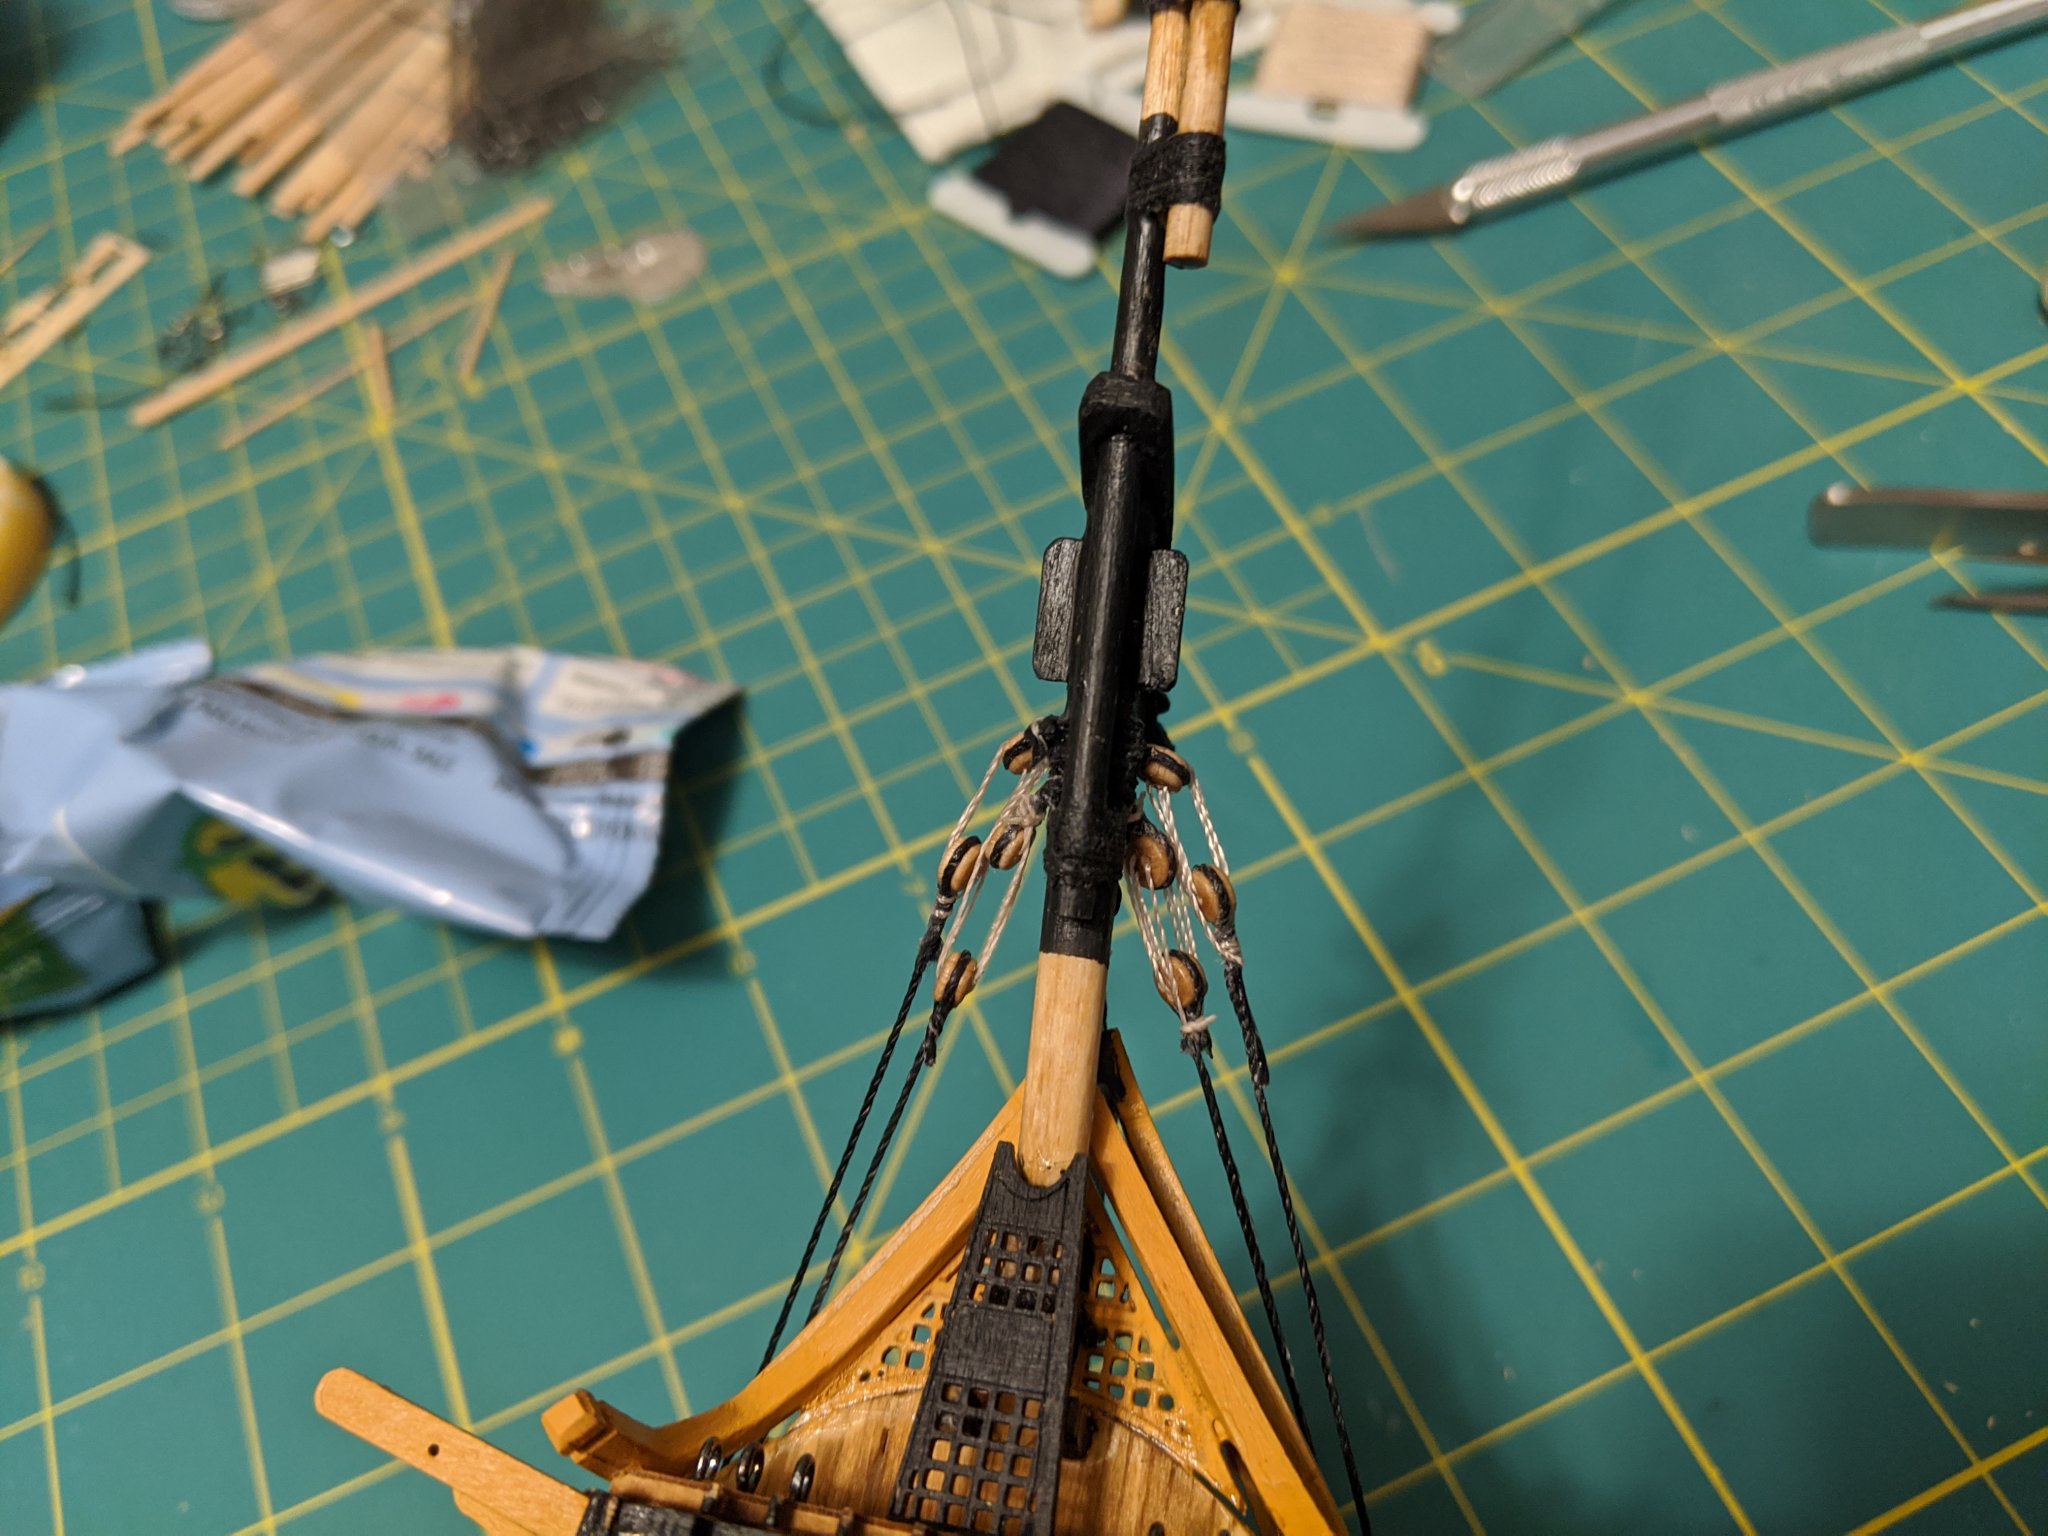
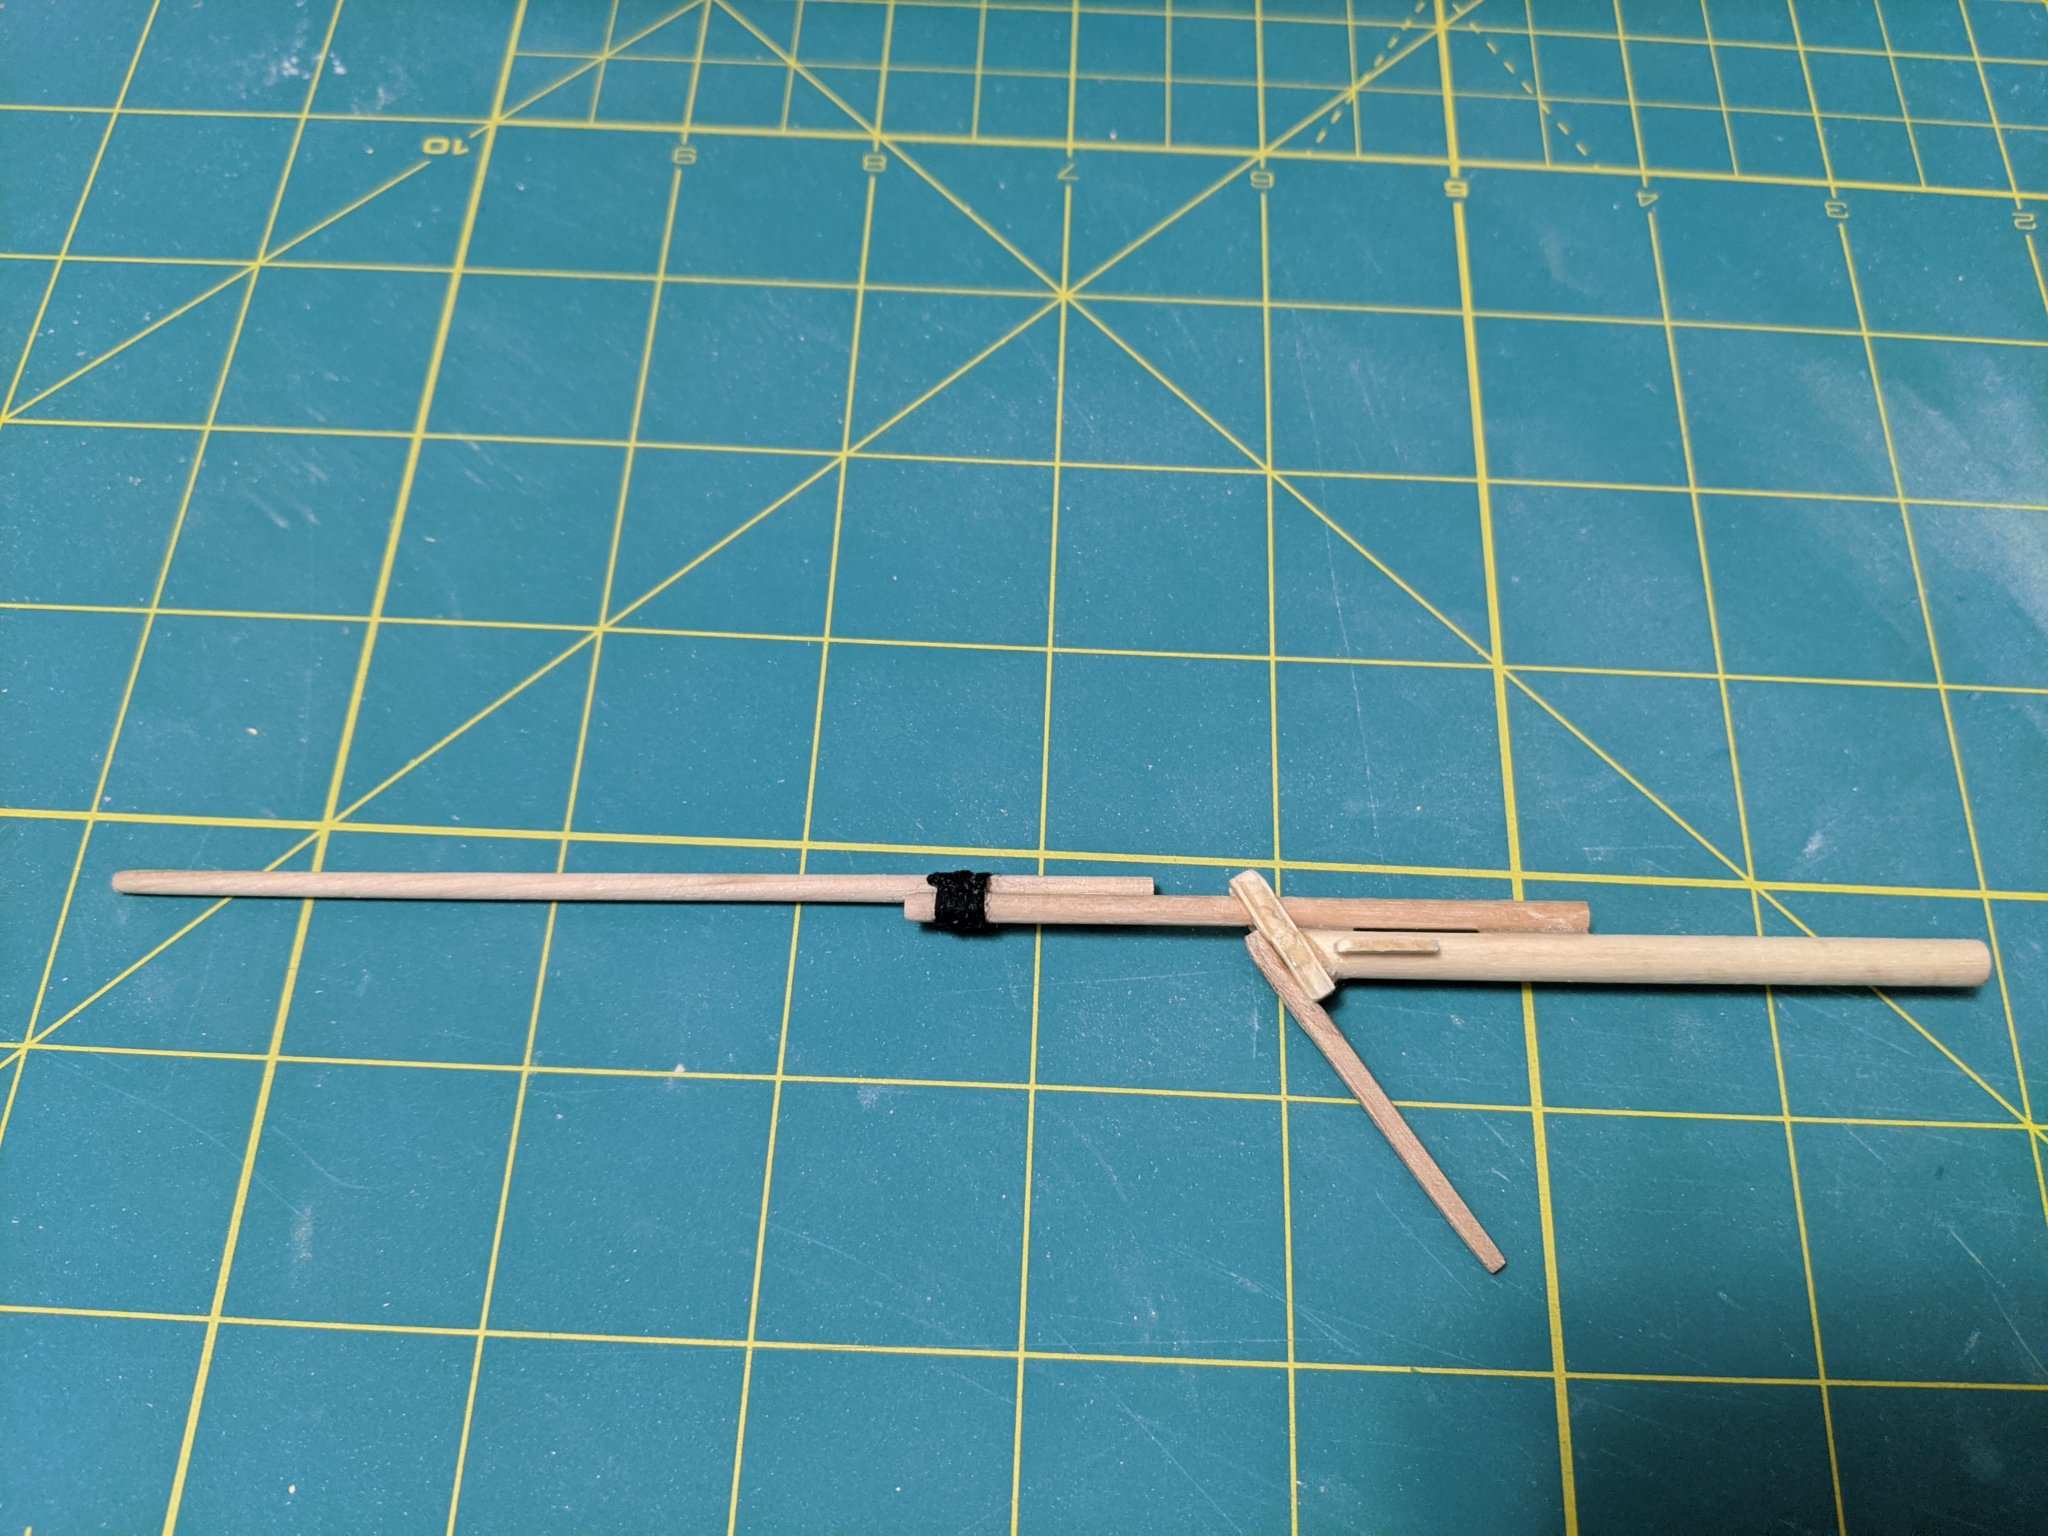
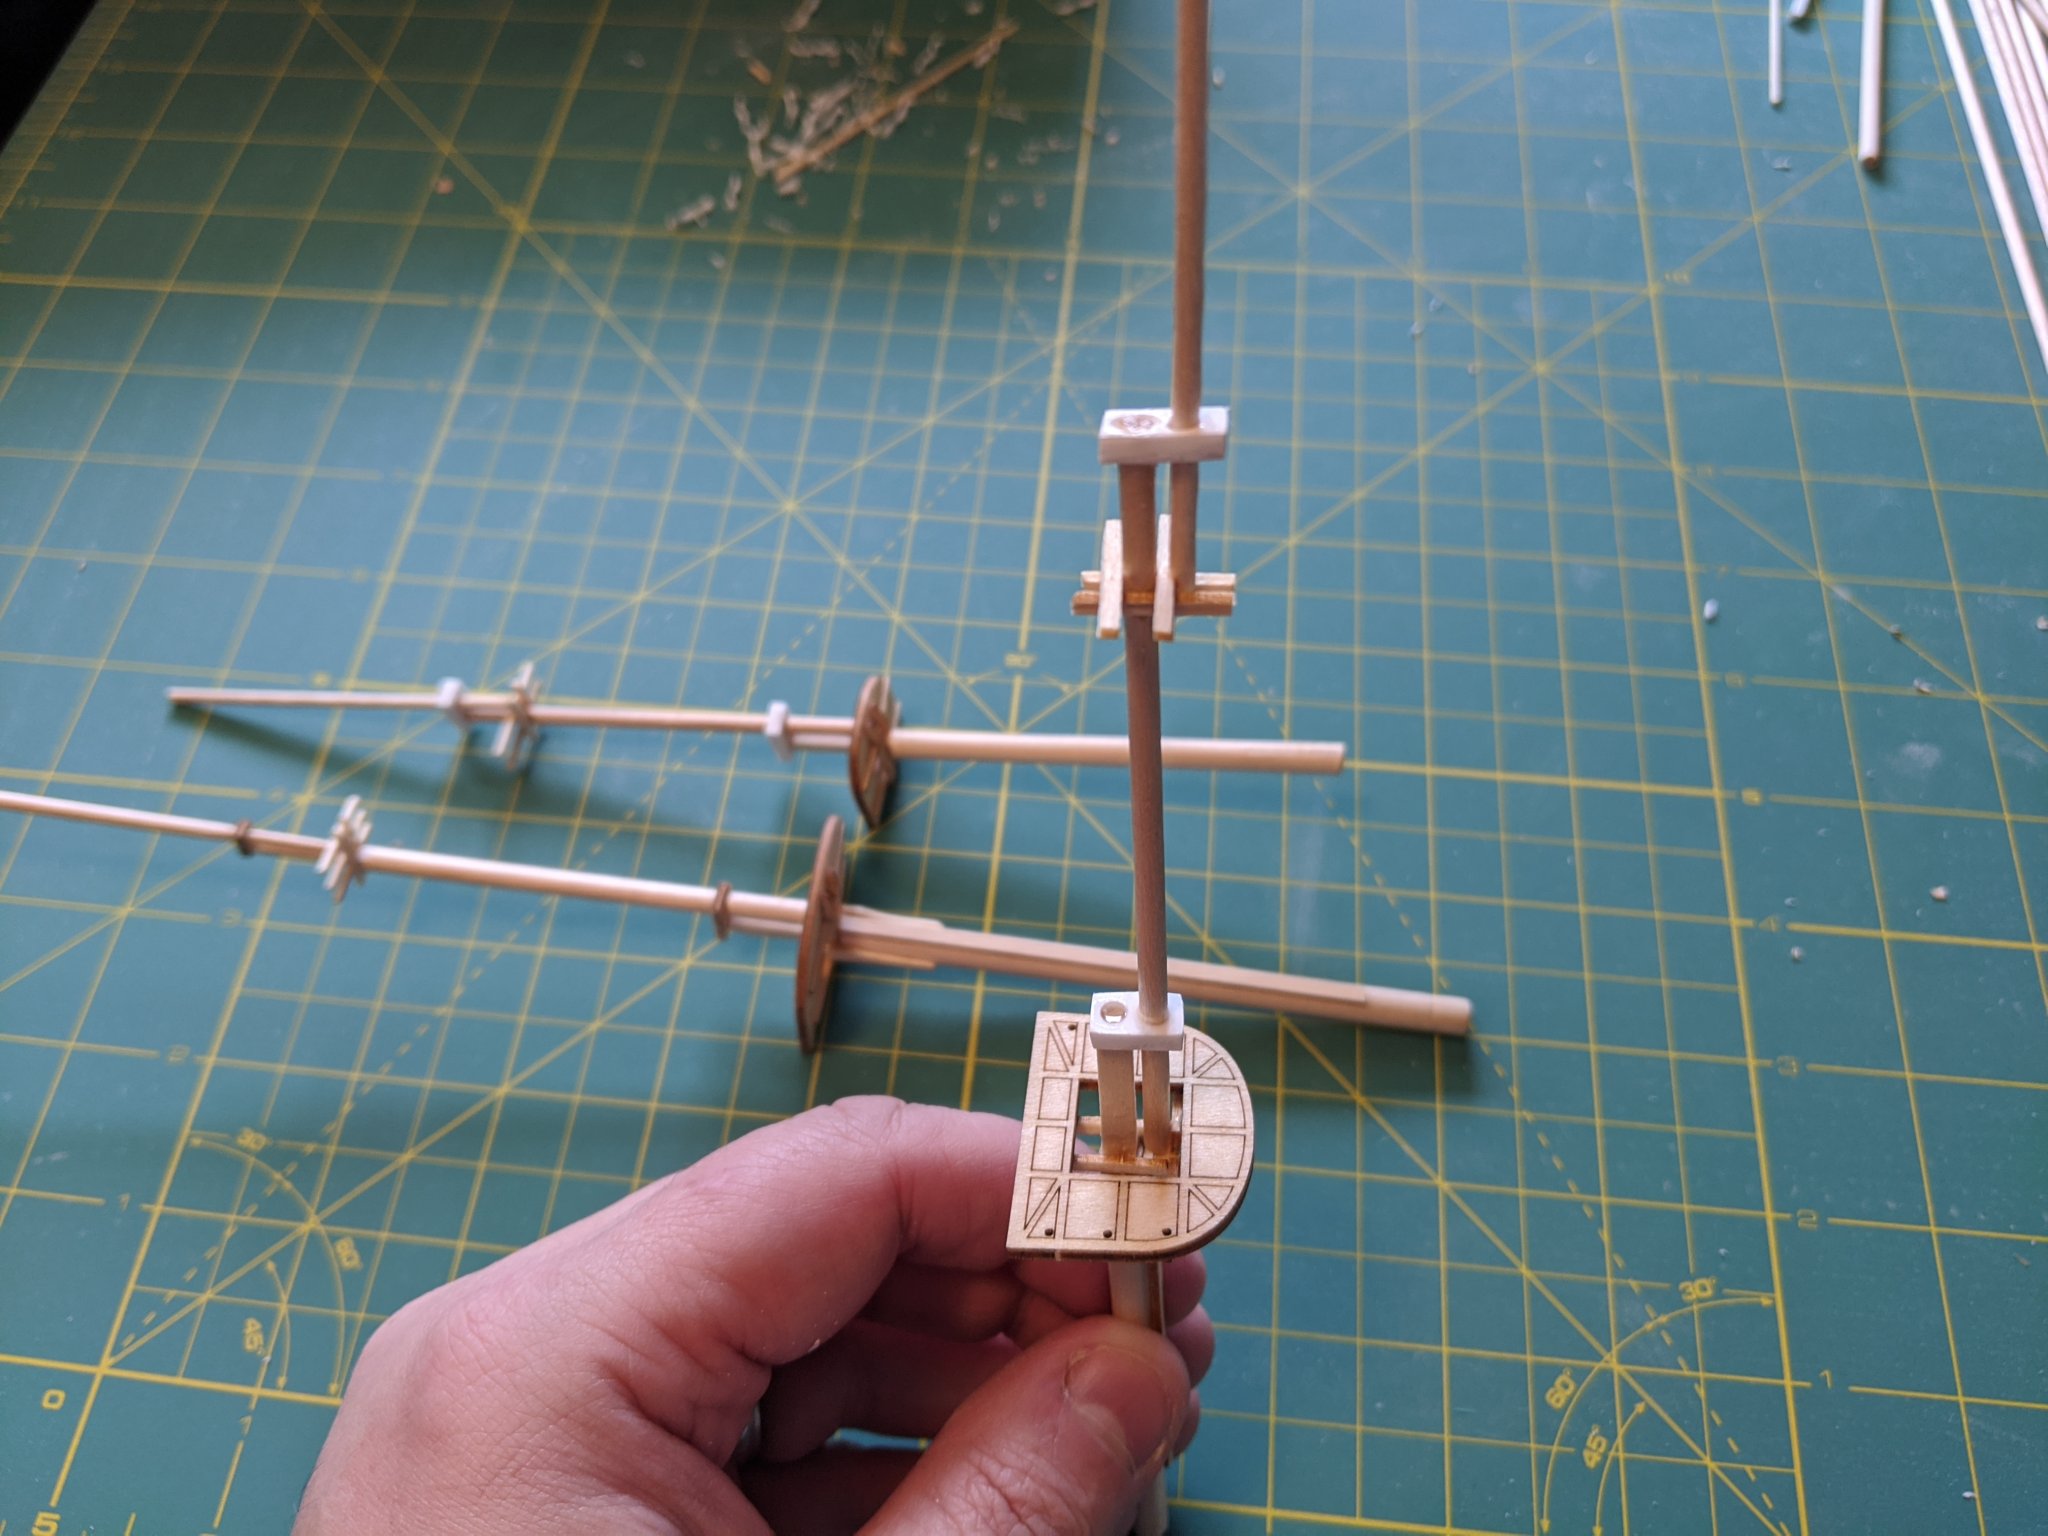
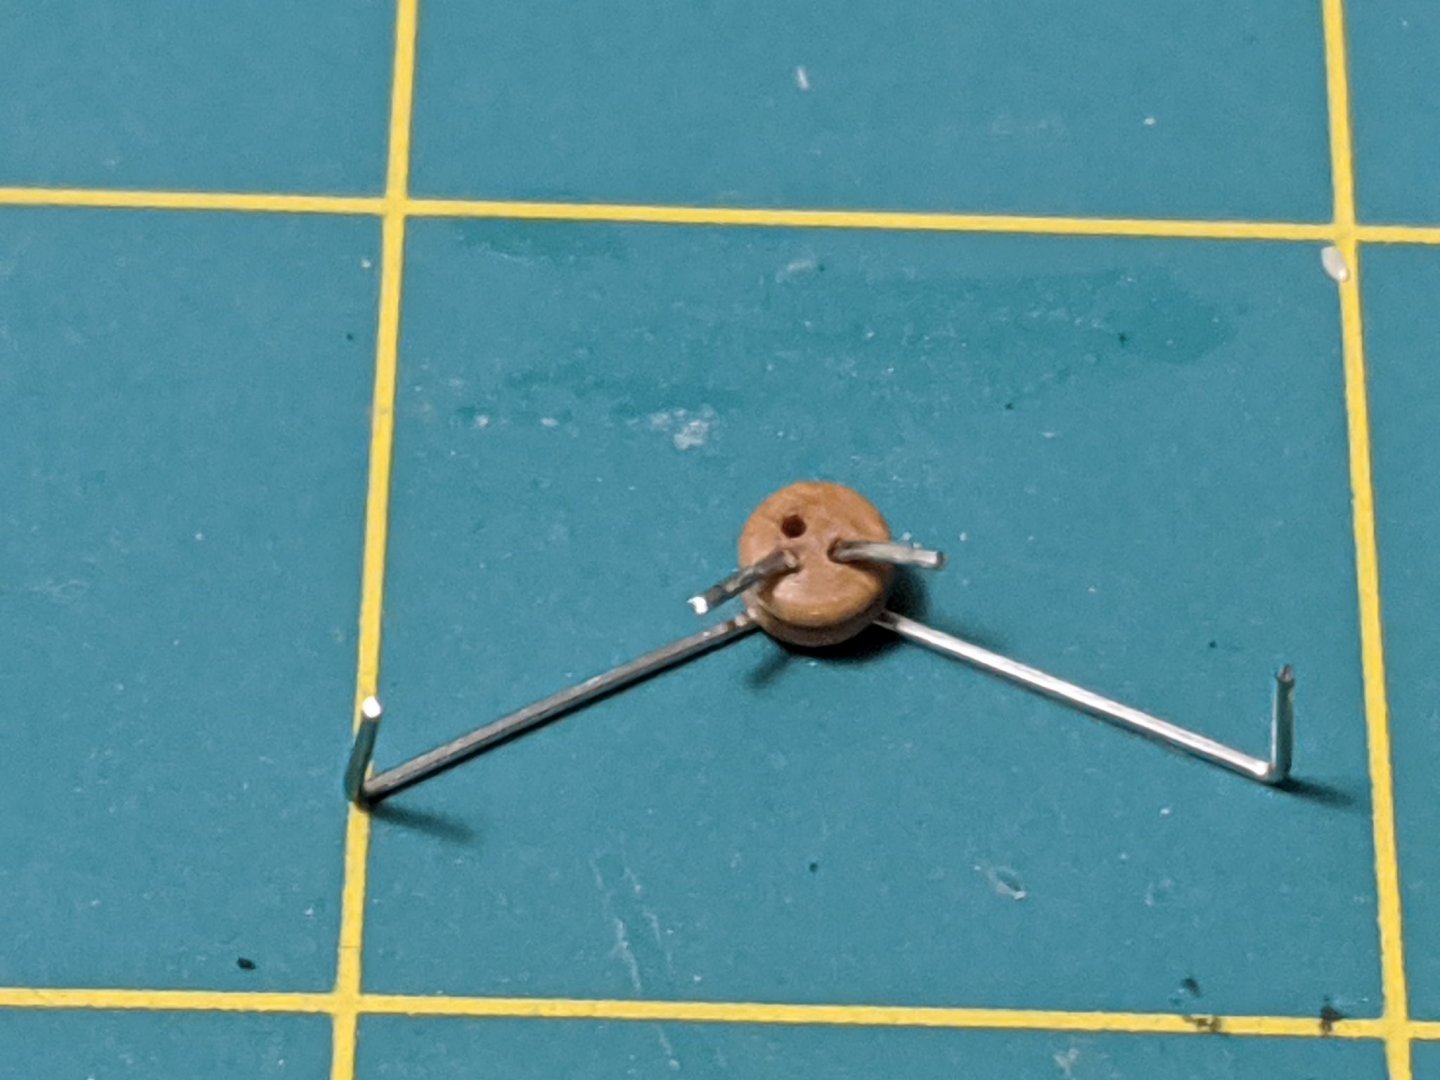
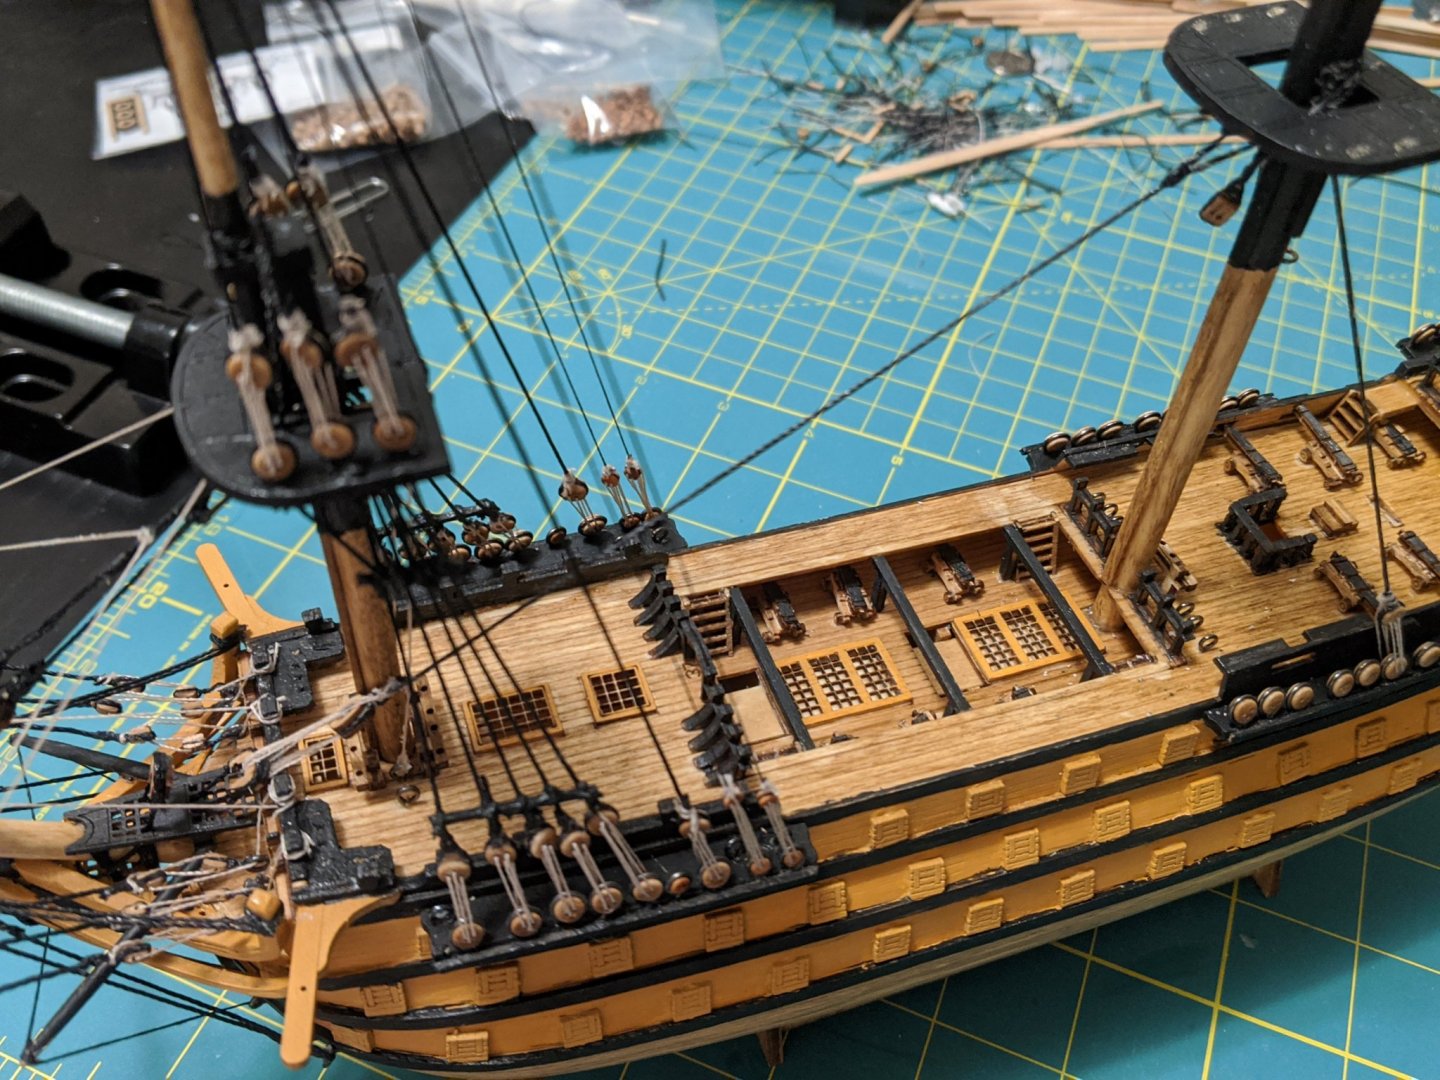
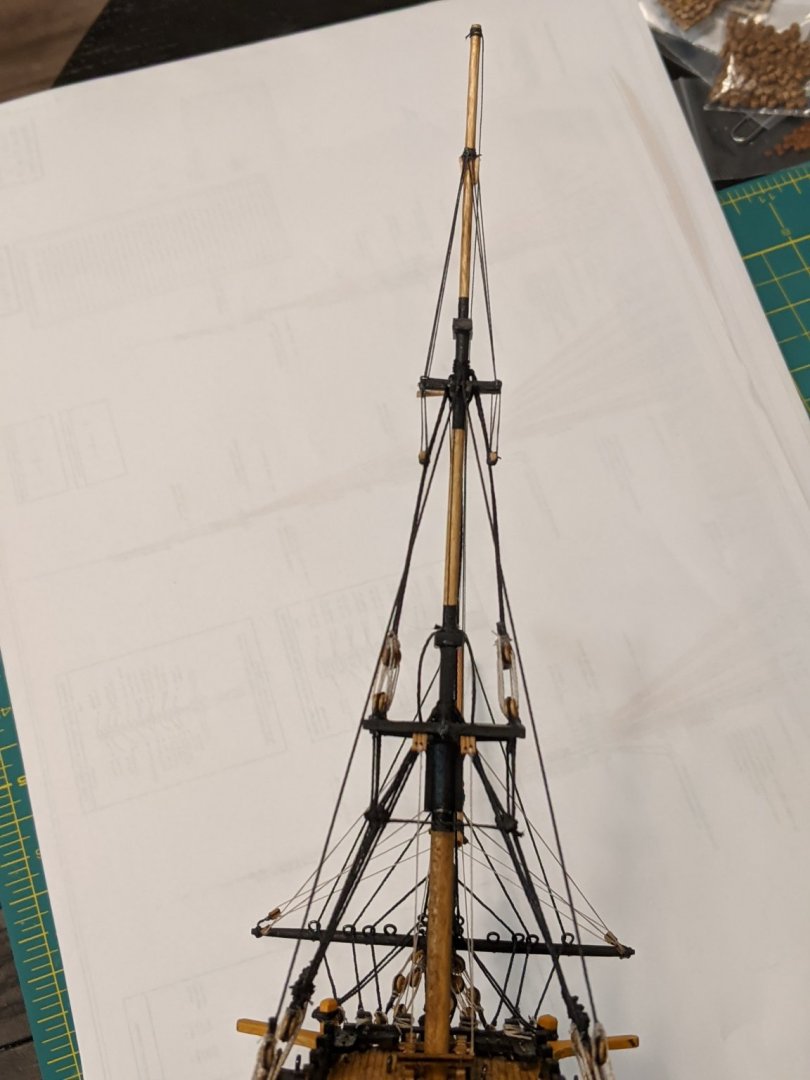
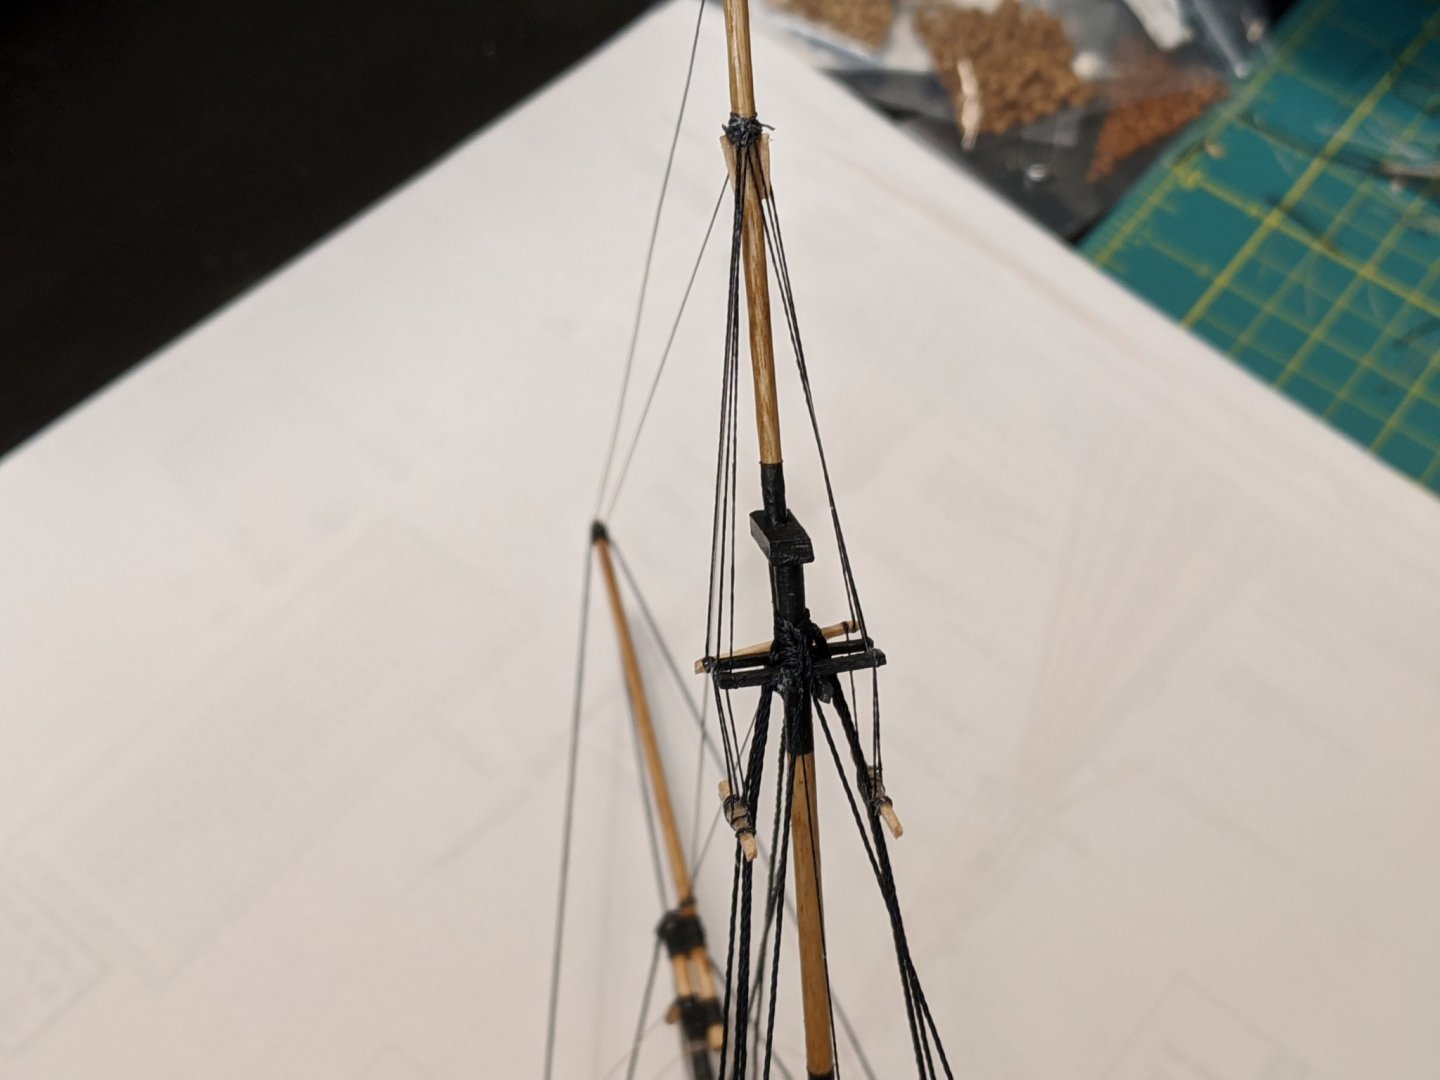
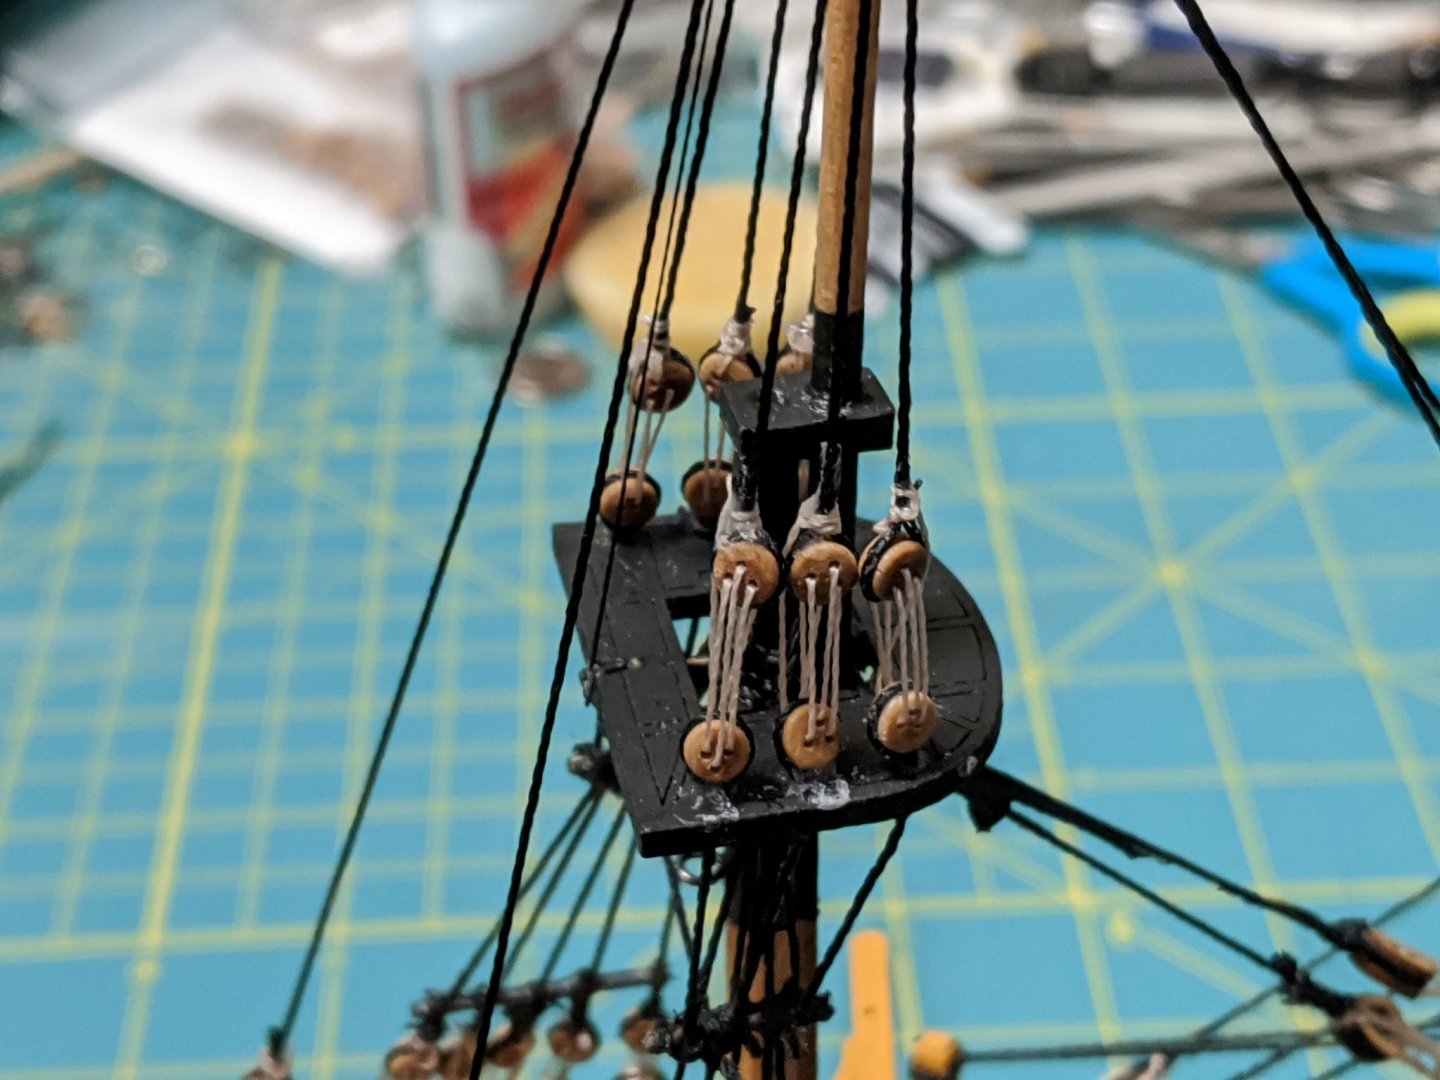
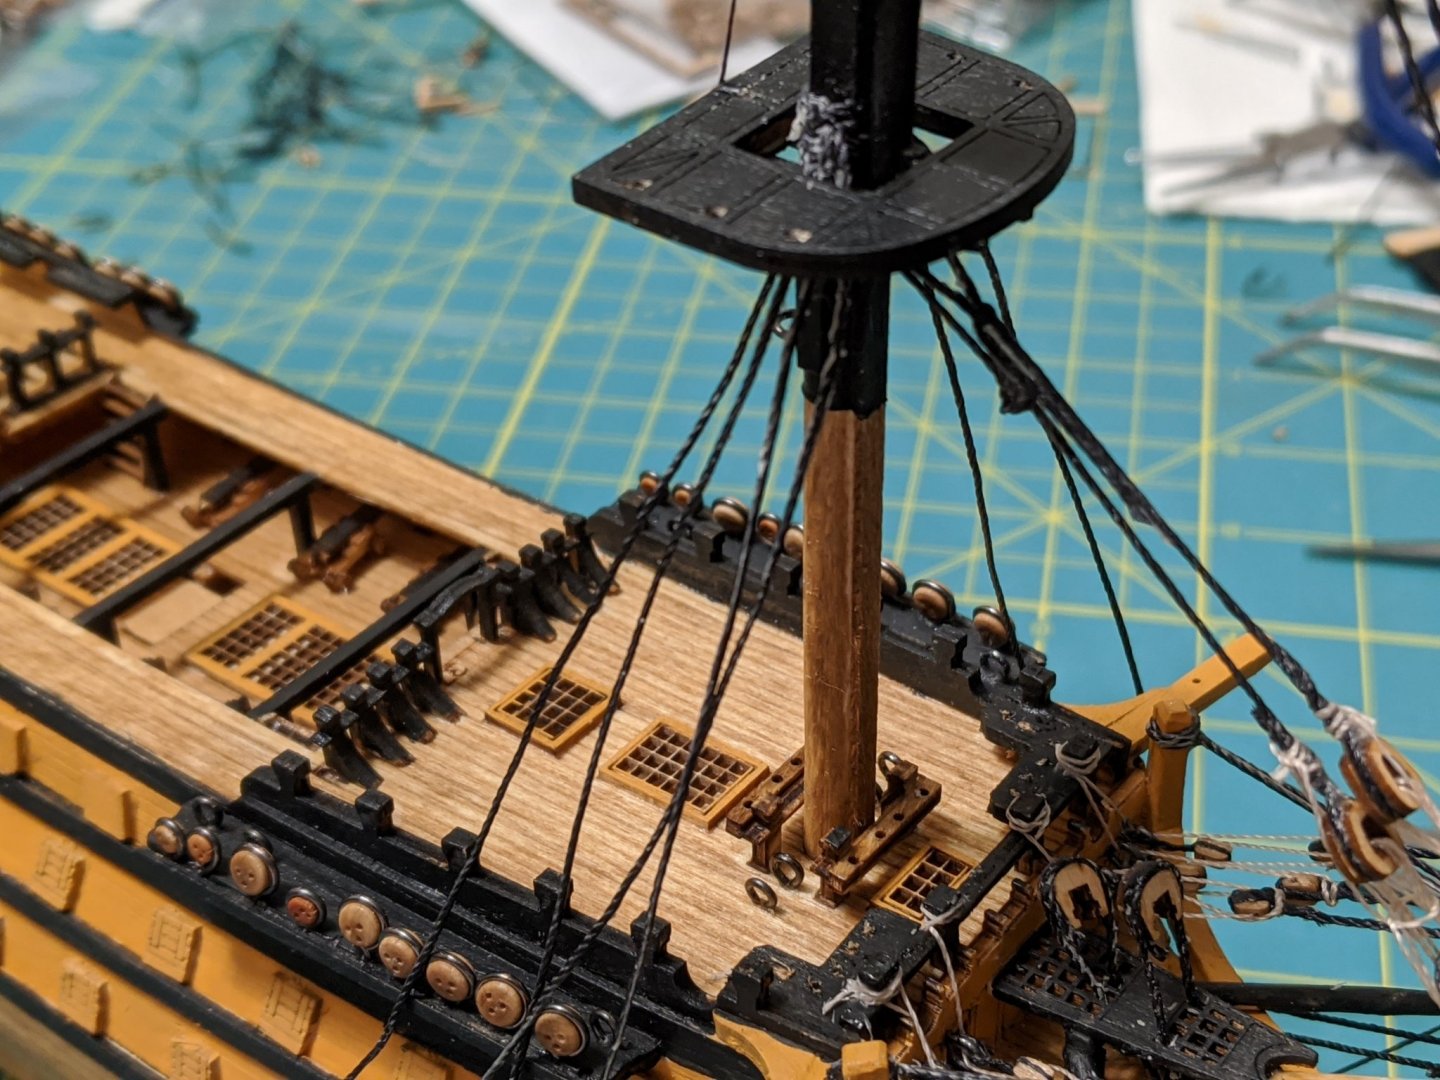
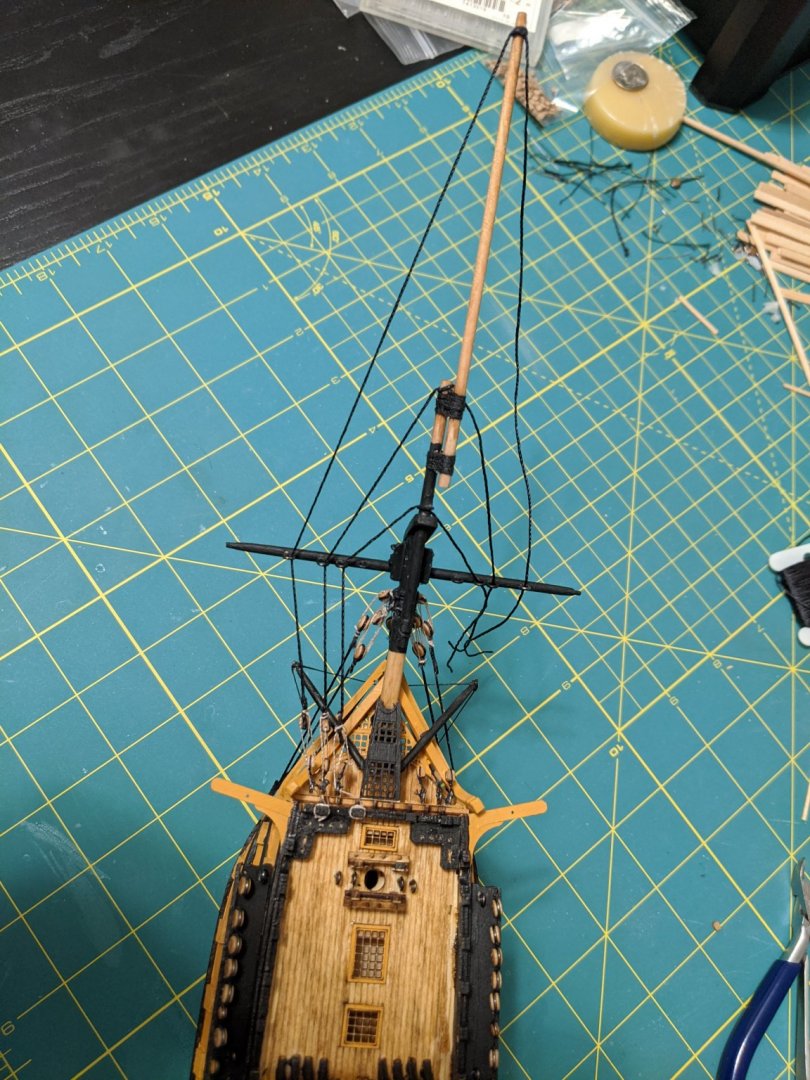
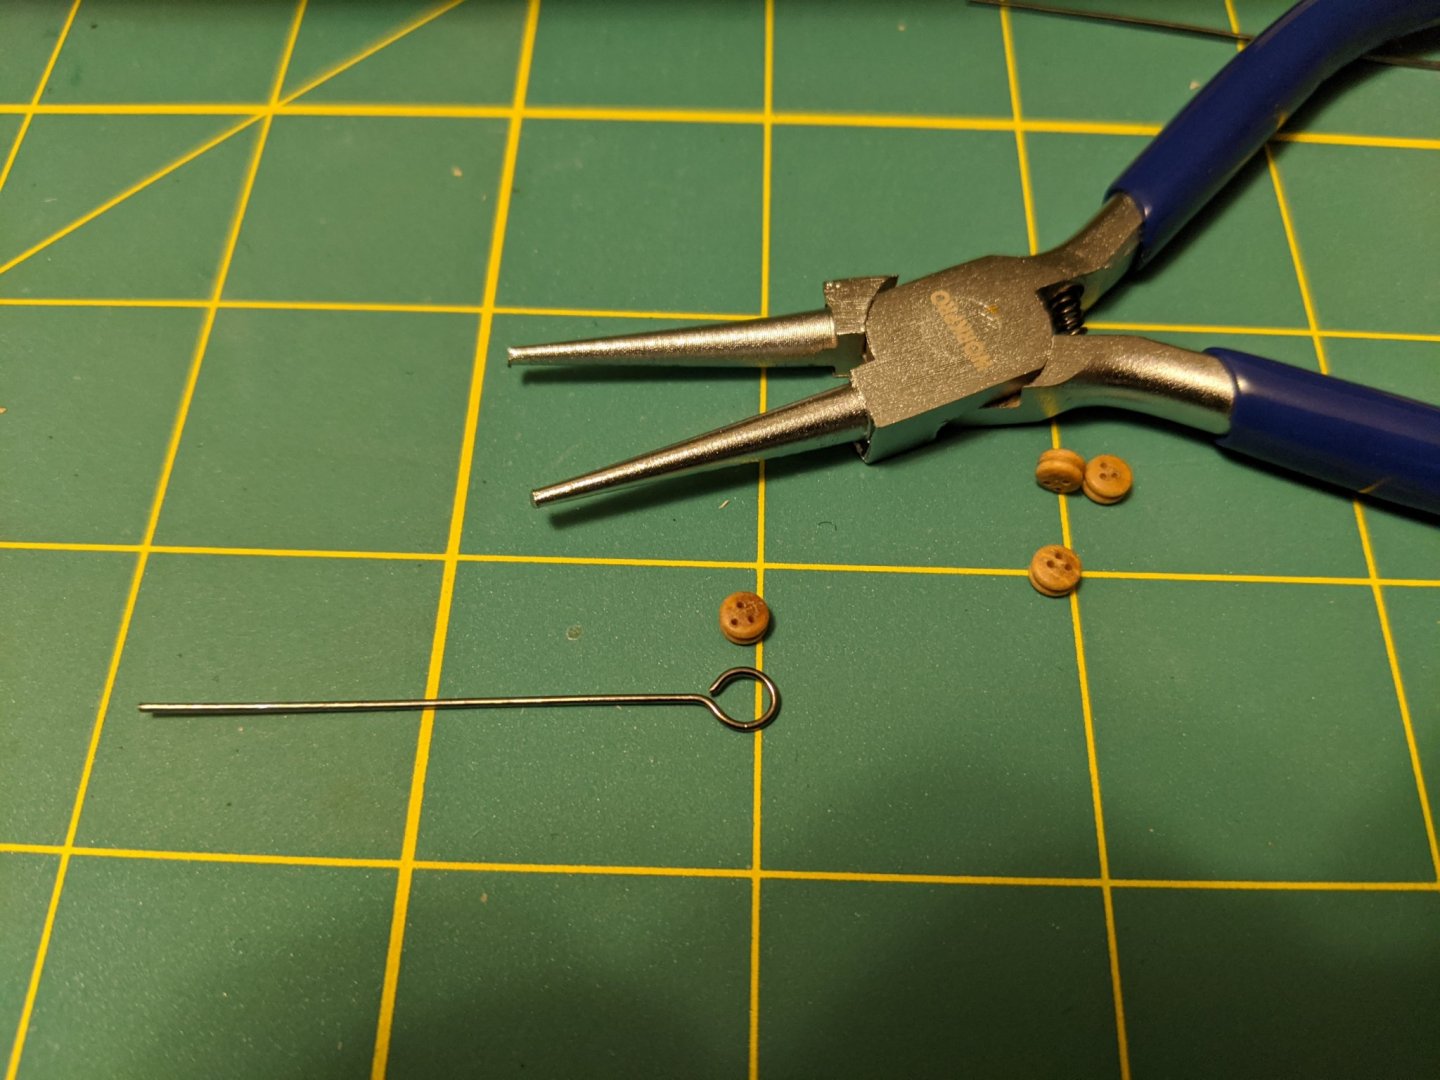
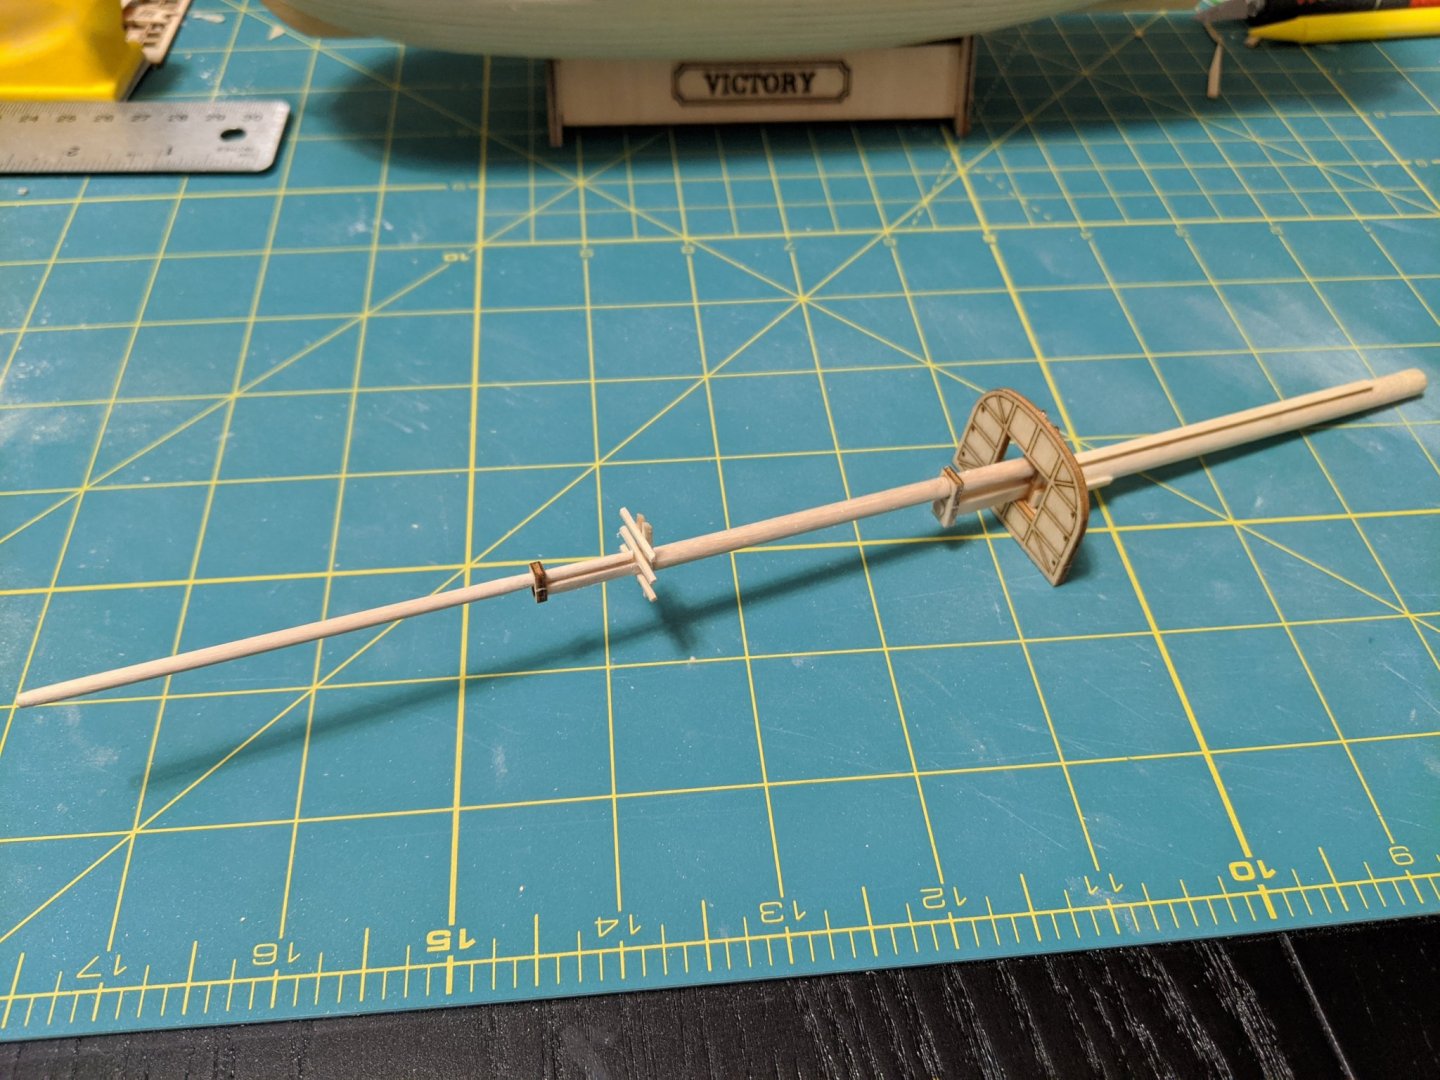
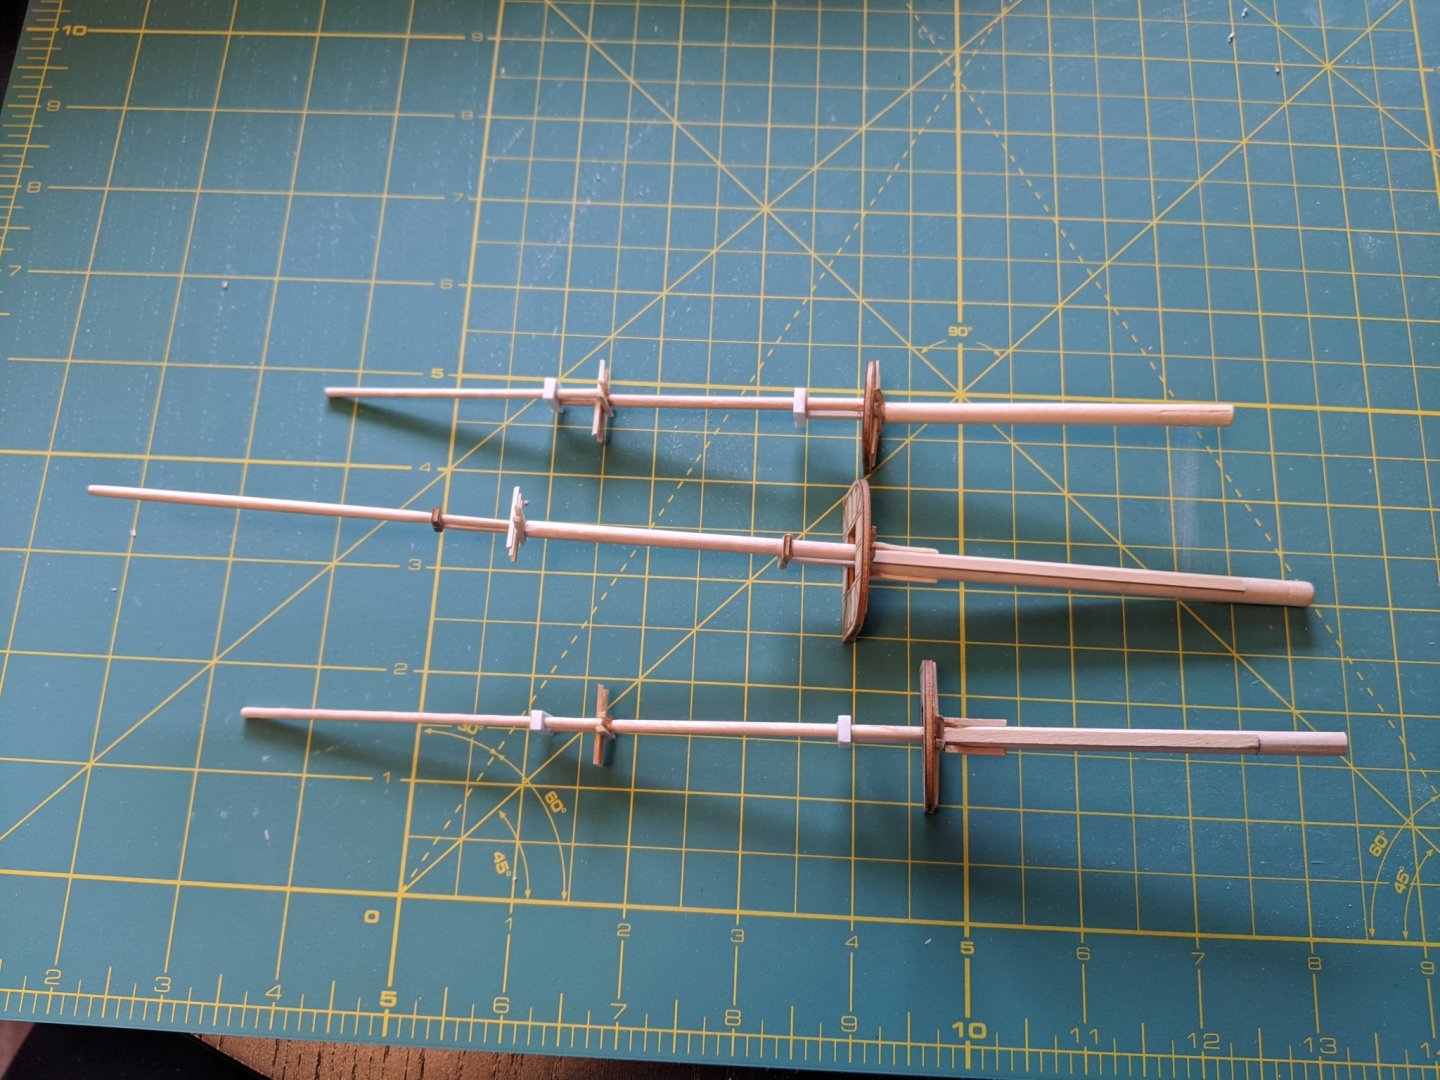
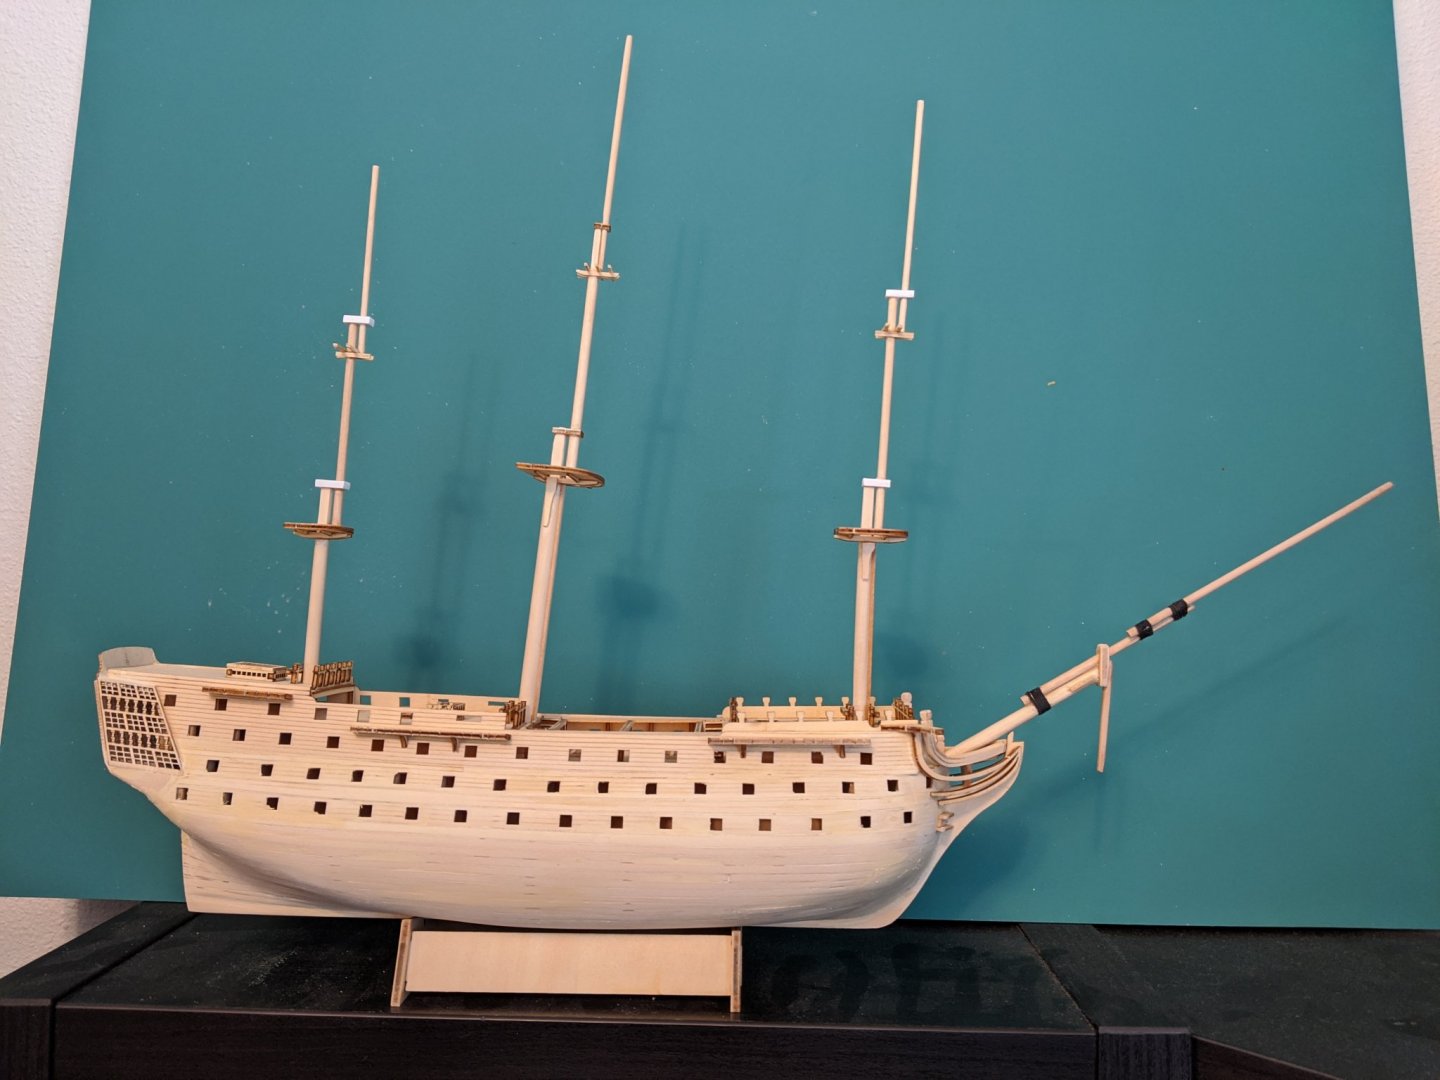
 Tonight I finished the last two sets of fore top gallant back stays, bot are those 2mm deadeyes damn small!! Next I stepped the main mast and secured it with a temp set of back stays and clamps Once the glue dried on the foot of the mast, it was time to rig the first of the shrouds. I decided to try something new for the main mast shrouds, and inserted two standard Staples into a deadeye and bent over the legs I then rigged the set of shrouds as previous and looped them carefully around the deadeyes and tied a simple knot and secured with a dot if glue. Once the glue dried, I carefully clipped and removed the staples and rigged the deadeyes as normal. At this point I rigged the main fore stay, kinda tricky in and around all the shrouds around the foot of the fore mast, and anchored this to the main top, locking the main mast in place. Before I can continue to rig the main, I need to order more rigging line, ran through the small spools I bought already. While I wait for the new order, I'm planning to start forming and setting up the yards, so they'll be ready once I finish the standing rigging. Thanks for reading and offering advise and support. Hoser

-
Sgt_Hoser reacted to a post in a topic:
US Brig Syren by Hipexec - FINISHED - Model Shipways - 1:64 - building as USS Argus
-
Sgt_Hoser reacted to a post in a topic:
HMS Victory by GrandpaPhil - Mantua - Scale 1:98 - Kit-Bash
-
Edwardkenway reacted to a post in a topic:
HMS Victory 1765 by Sgt_Hoser - Western Wooden Sailboat - 1:200
-
JayCub reacted to a post in a topic:
HMS Victory 1765 by Sgt_Hoser - Western Wooden Sailboat - 1:200
-
JayCub reacted to a post in a topic:
HMS Victory 1765 by Sgt_Hoser - Western Wooden Sailboat - 1:200
-
JayCub reacted to a post in a topic:
HMS Victory 1765 by Sgt_Hoser - Western Wooden Sailboat - 1:200
-
JayCub reacted to a post in a topic:
HMS Victory 1765 by Sgt_Hoser - Western Wooden Sailboat - 1:200
-
JayCub reacted to a post in a topic:
HMS Victory 1765 by Sgt_Hoser - Western Wooden Sailboat - 1:200
-
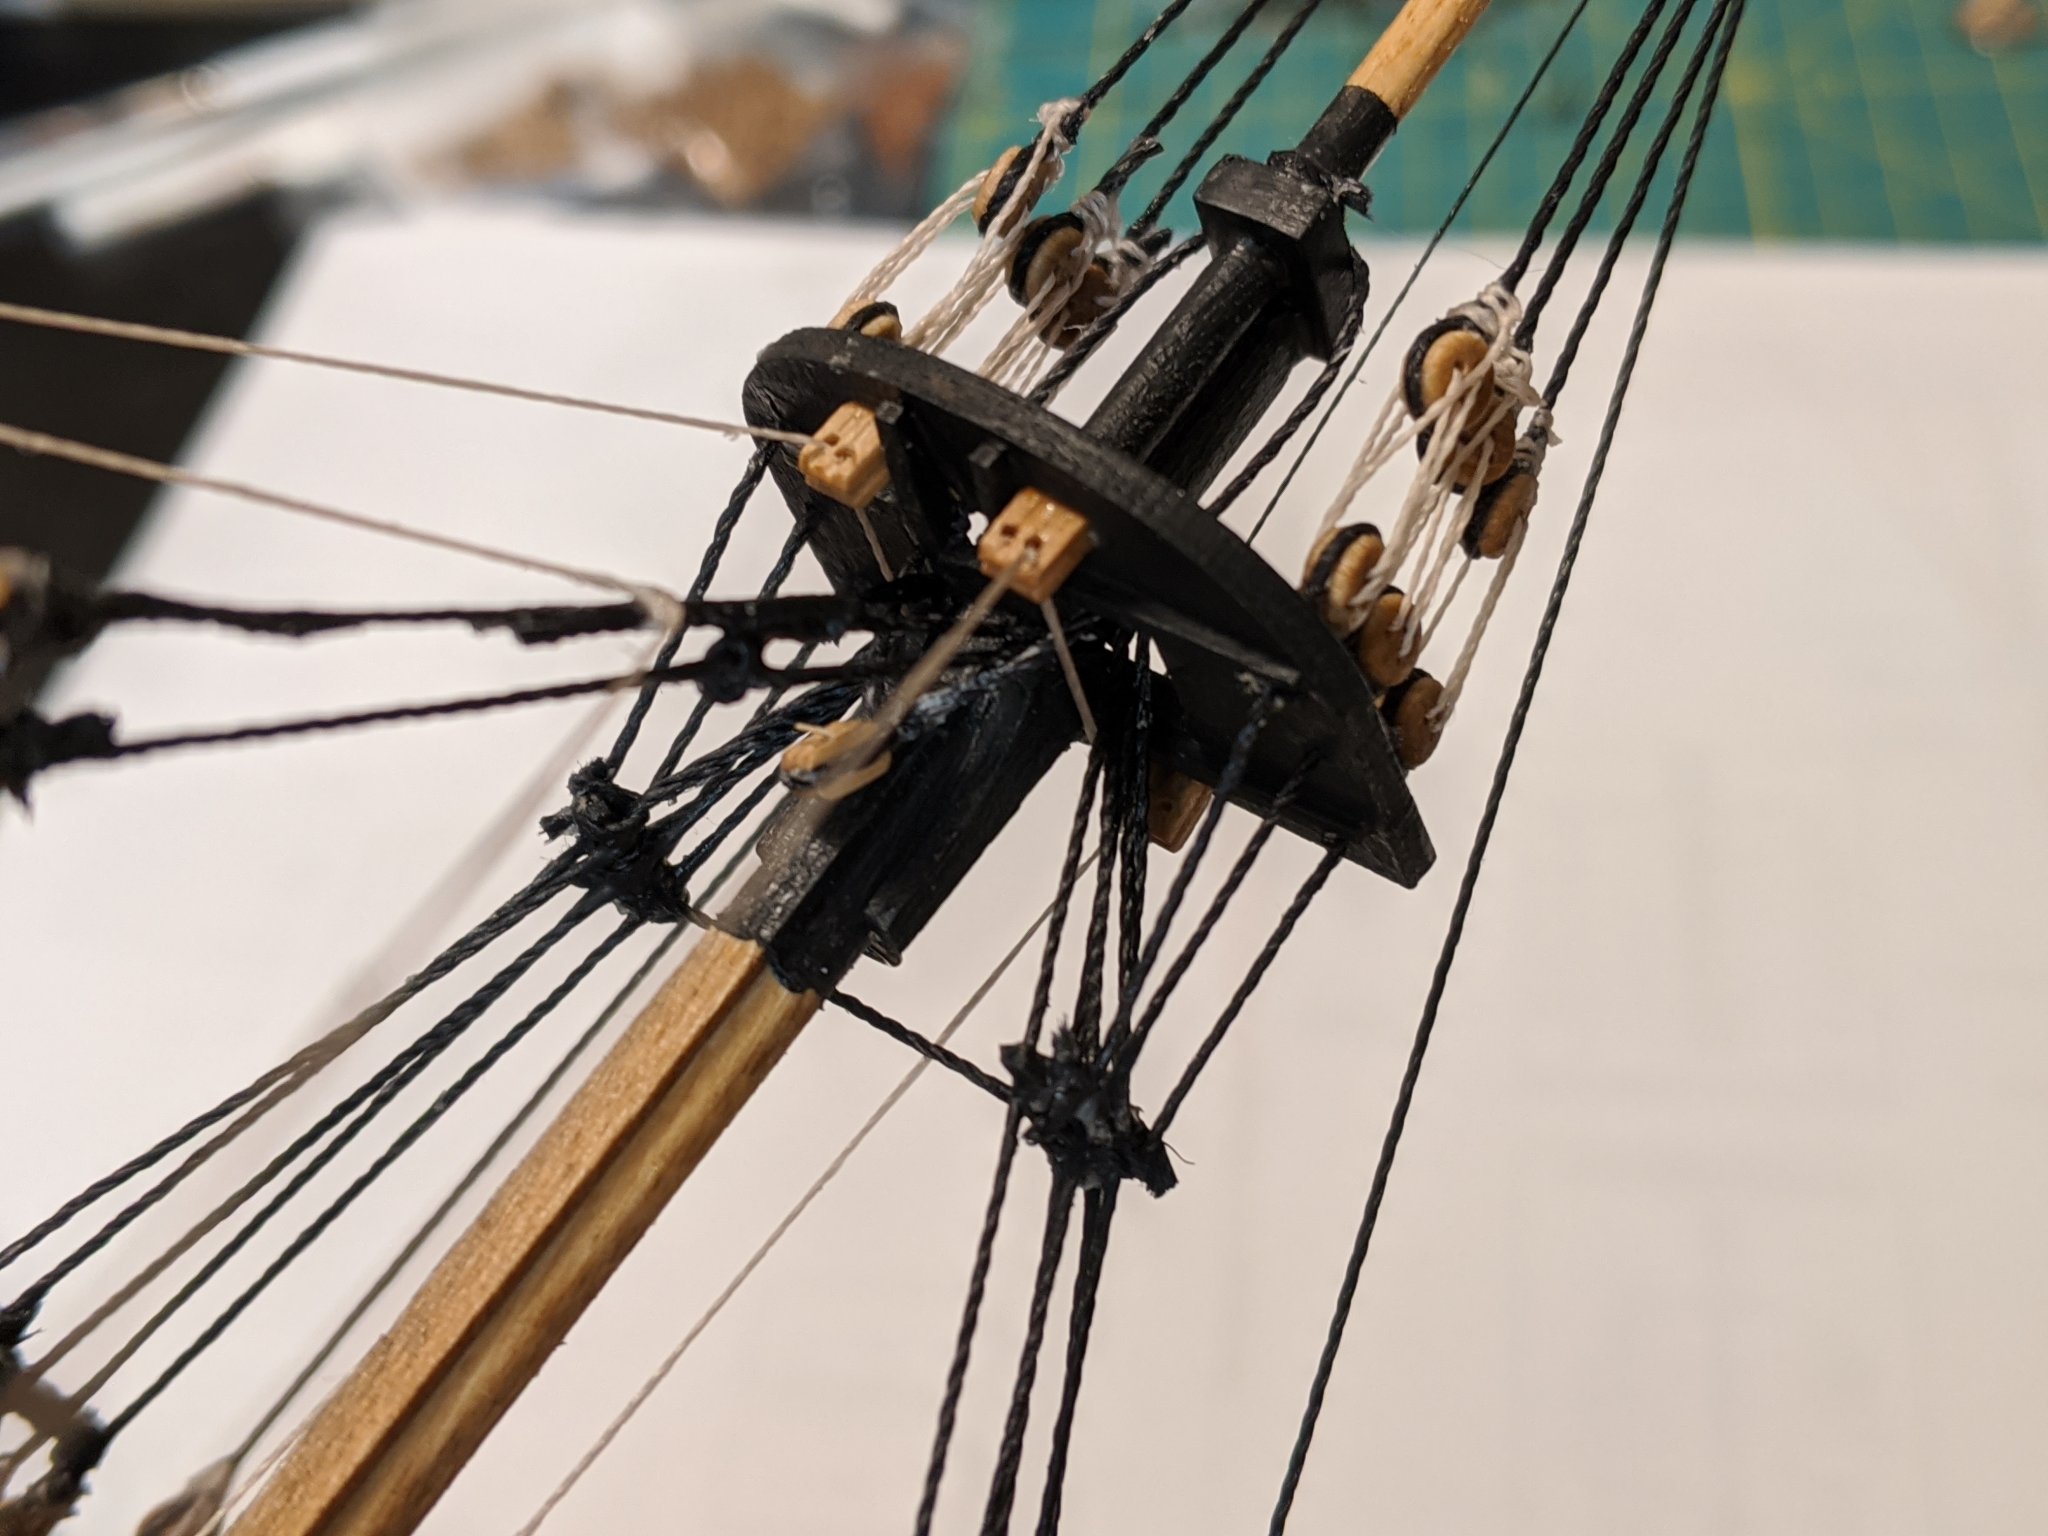
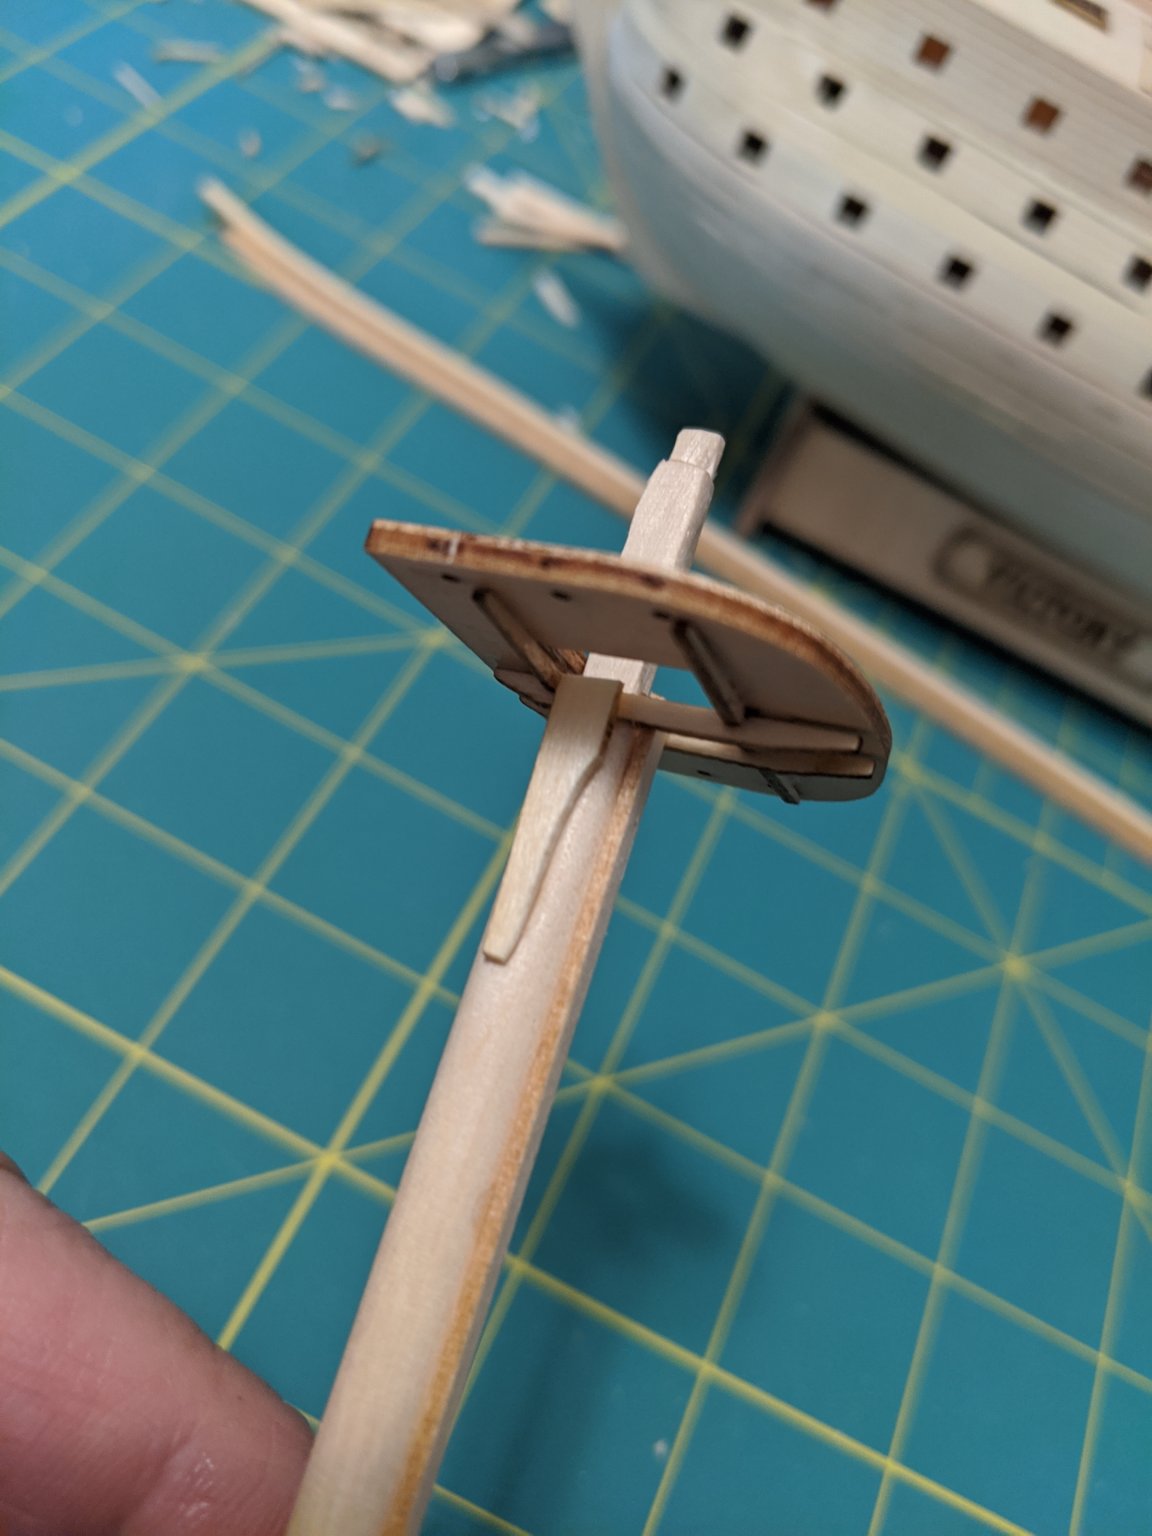
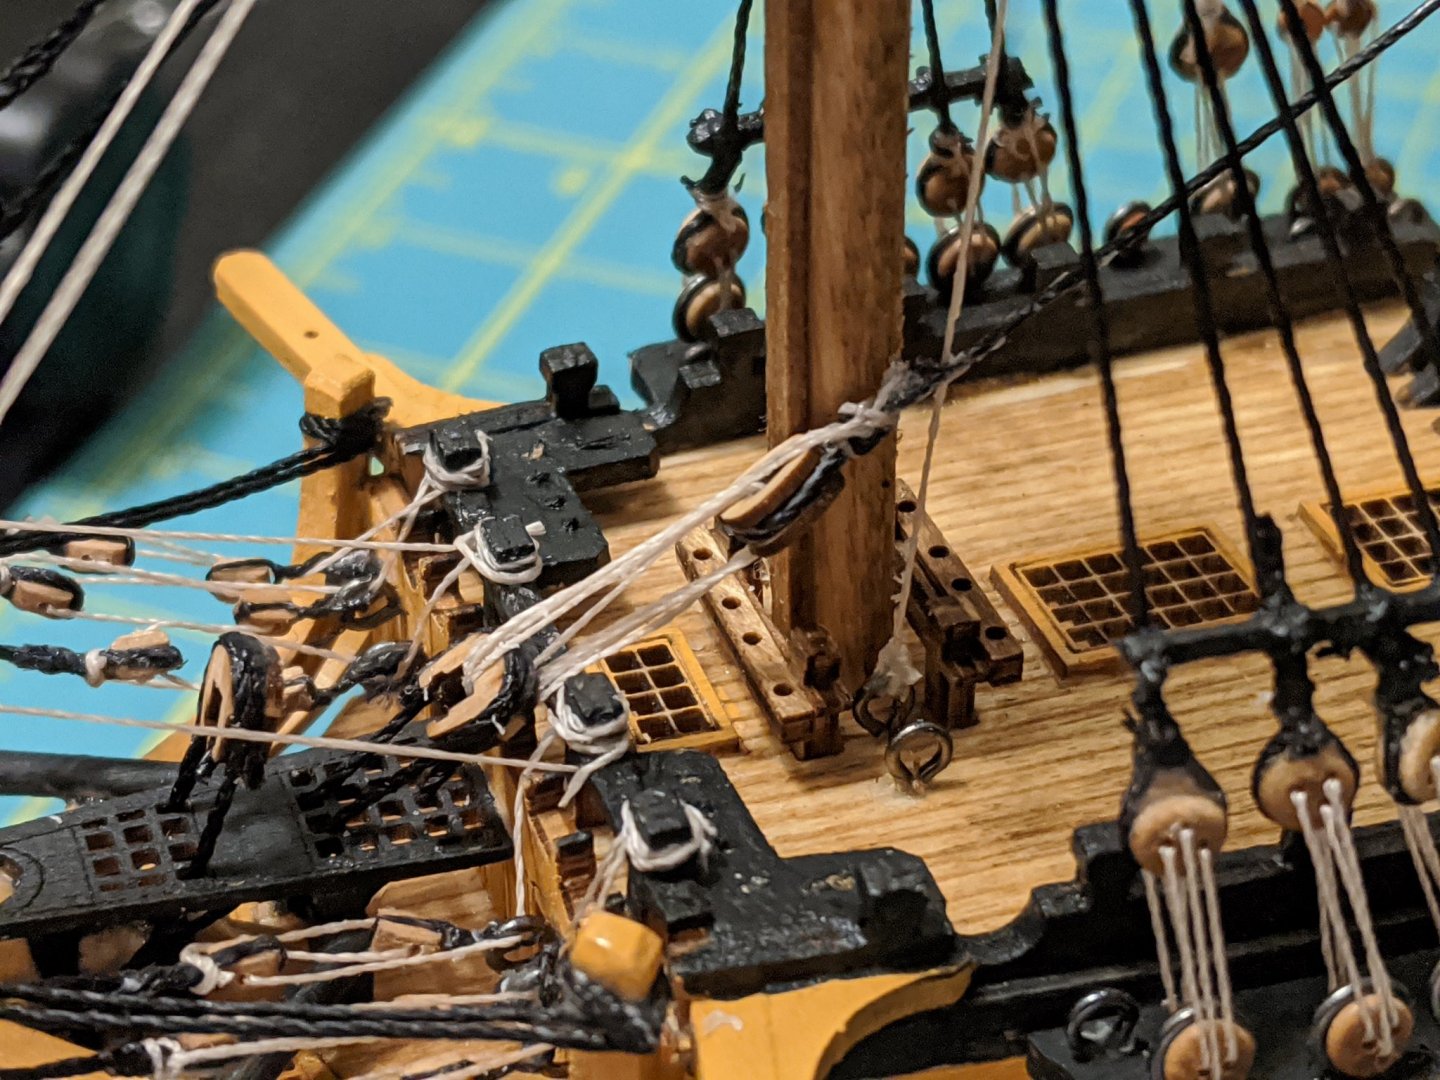
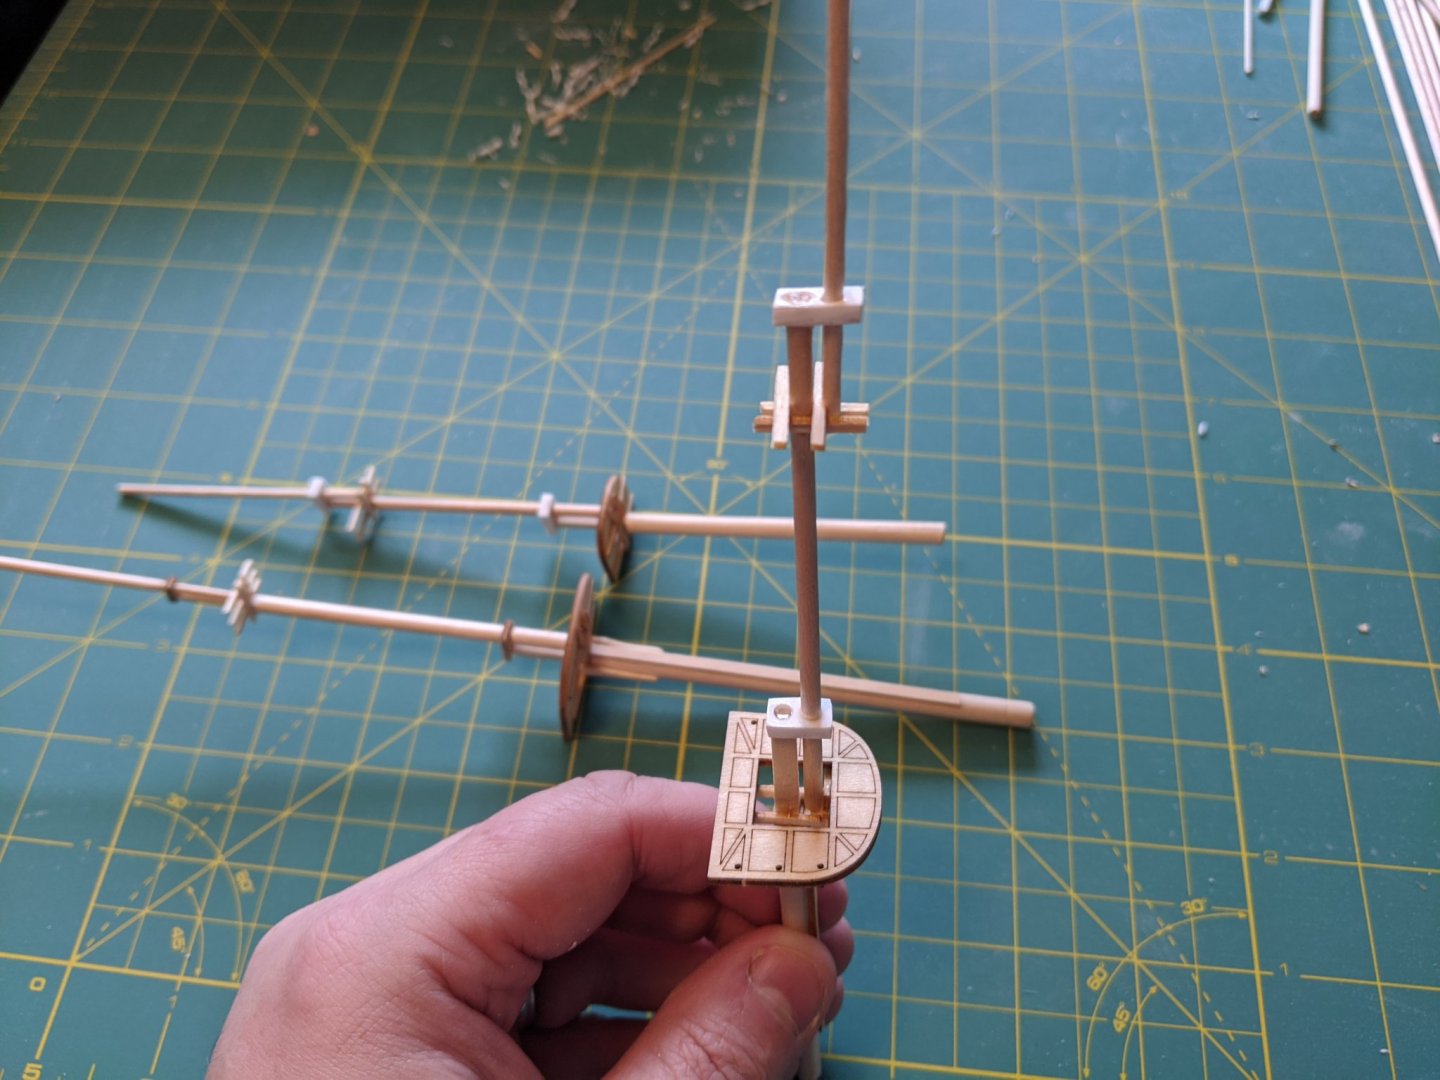
Tonight I installed the futtock staves for the fore top shrouds, and rigged the top gallant shrouds to the top cross trees a the futtock staves. Other then the ratlines, the foremast shrouds are done. I'll rig ratlines once all the glued knots are good and dry. I then glued 4 double blocks to the bottom of the fore top, and rigged a double block for the fore mast yard over the fore top saddle. With these rigged and adding the single blocks top the bow sprit and yard, I rigged the lifts and sheets for the sprit yard. I've decided to hold off on the job boom yard until I fab all the yards once I have all three masted stepped and the standing rigging done. Thanks Hoser


-
Edwardkenway reacted to a post in a topic:
HMS Victory 1765 by Sgt_Hoser - Western Wooden Sailboat - 1:200
-
hof00 reacted to a post in a topic:
HMS Victory 1765 by Sgt_Hoser - Western Wooden Sailboat - 1:200
-
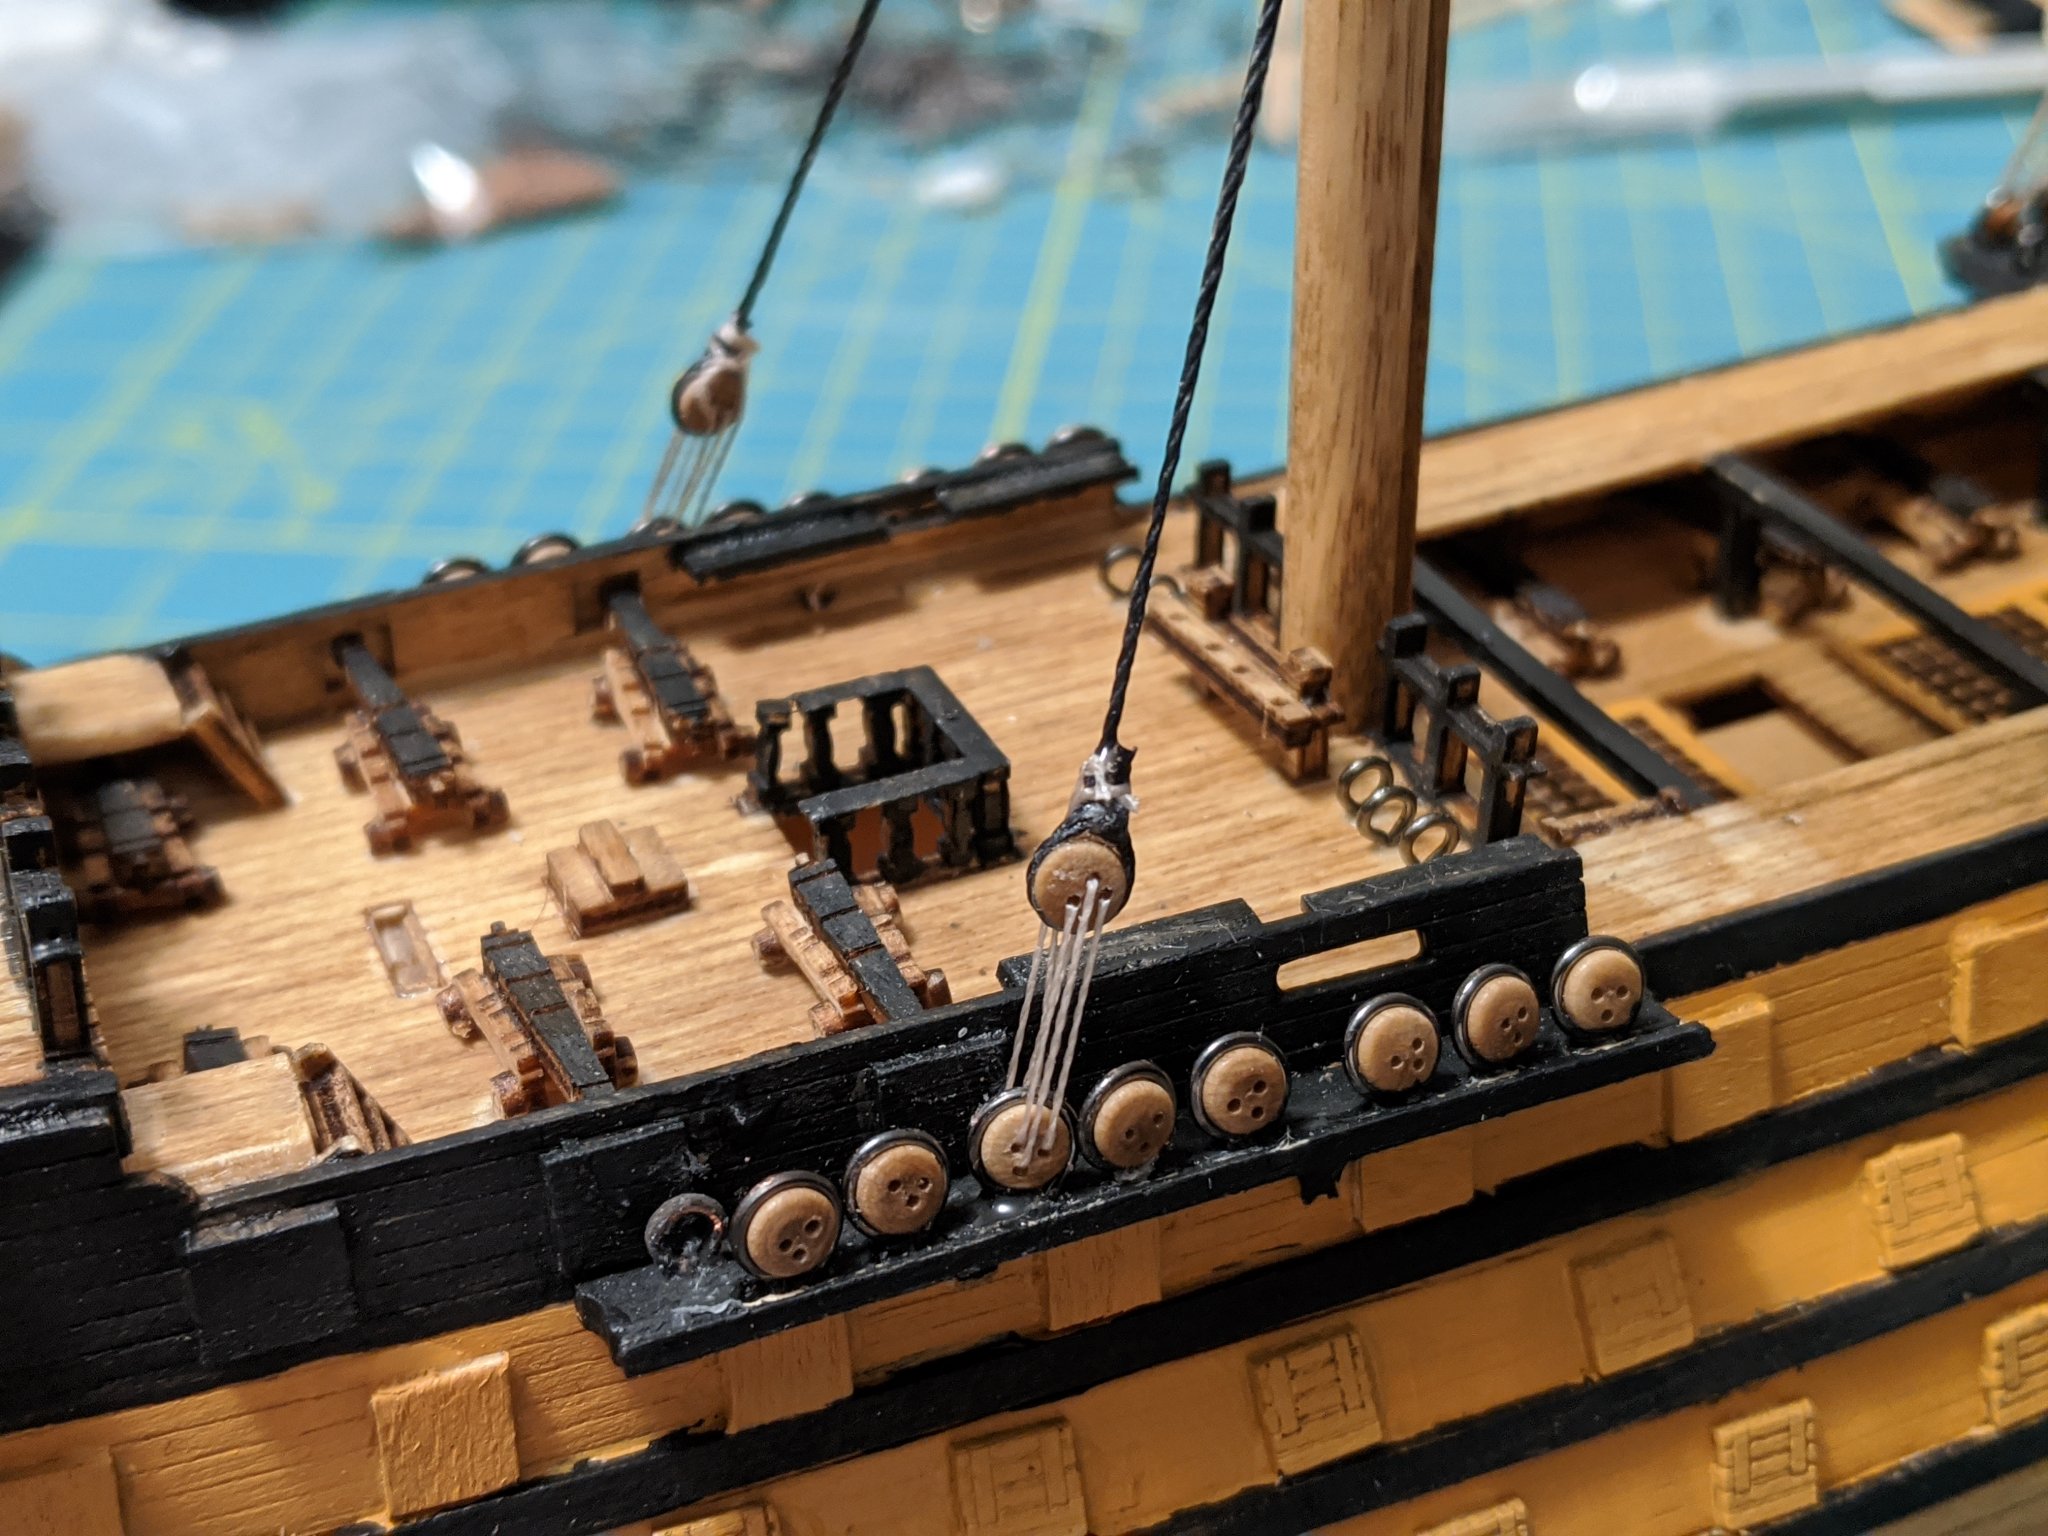
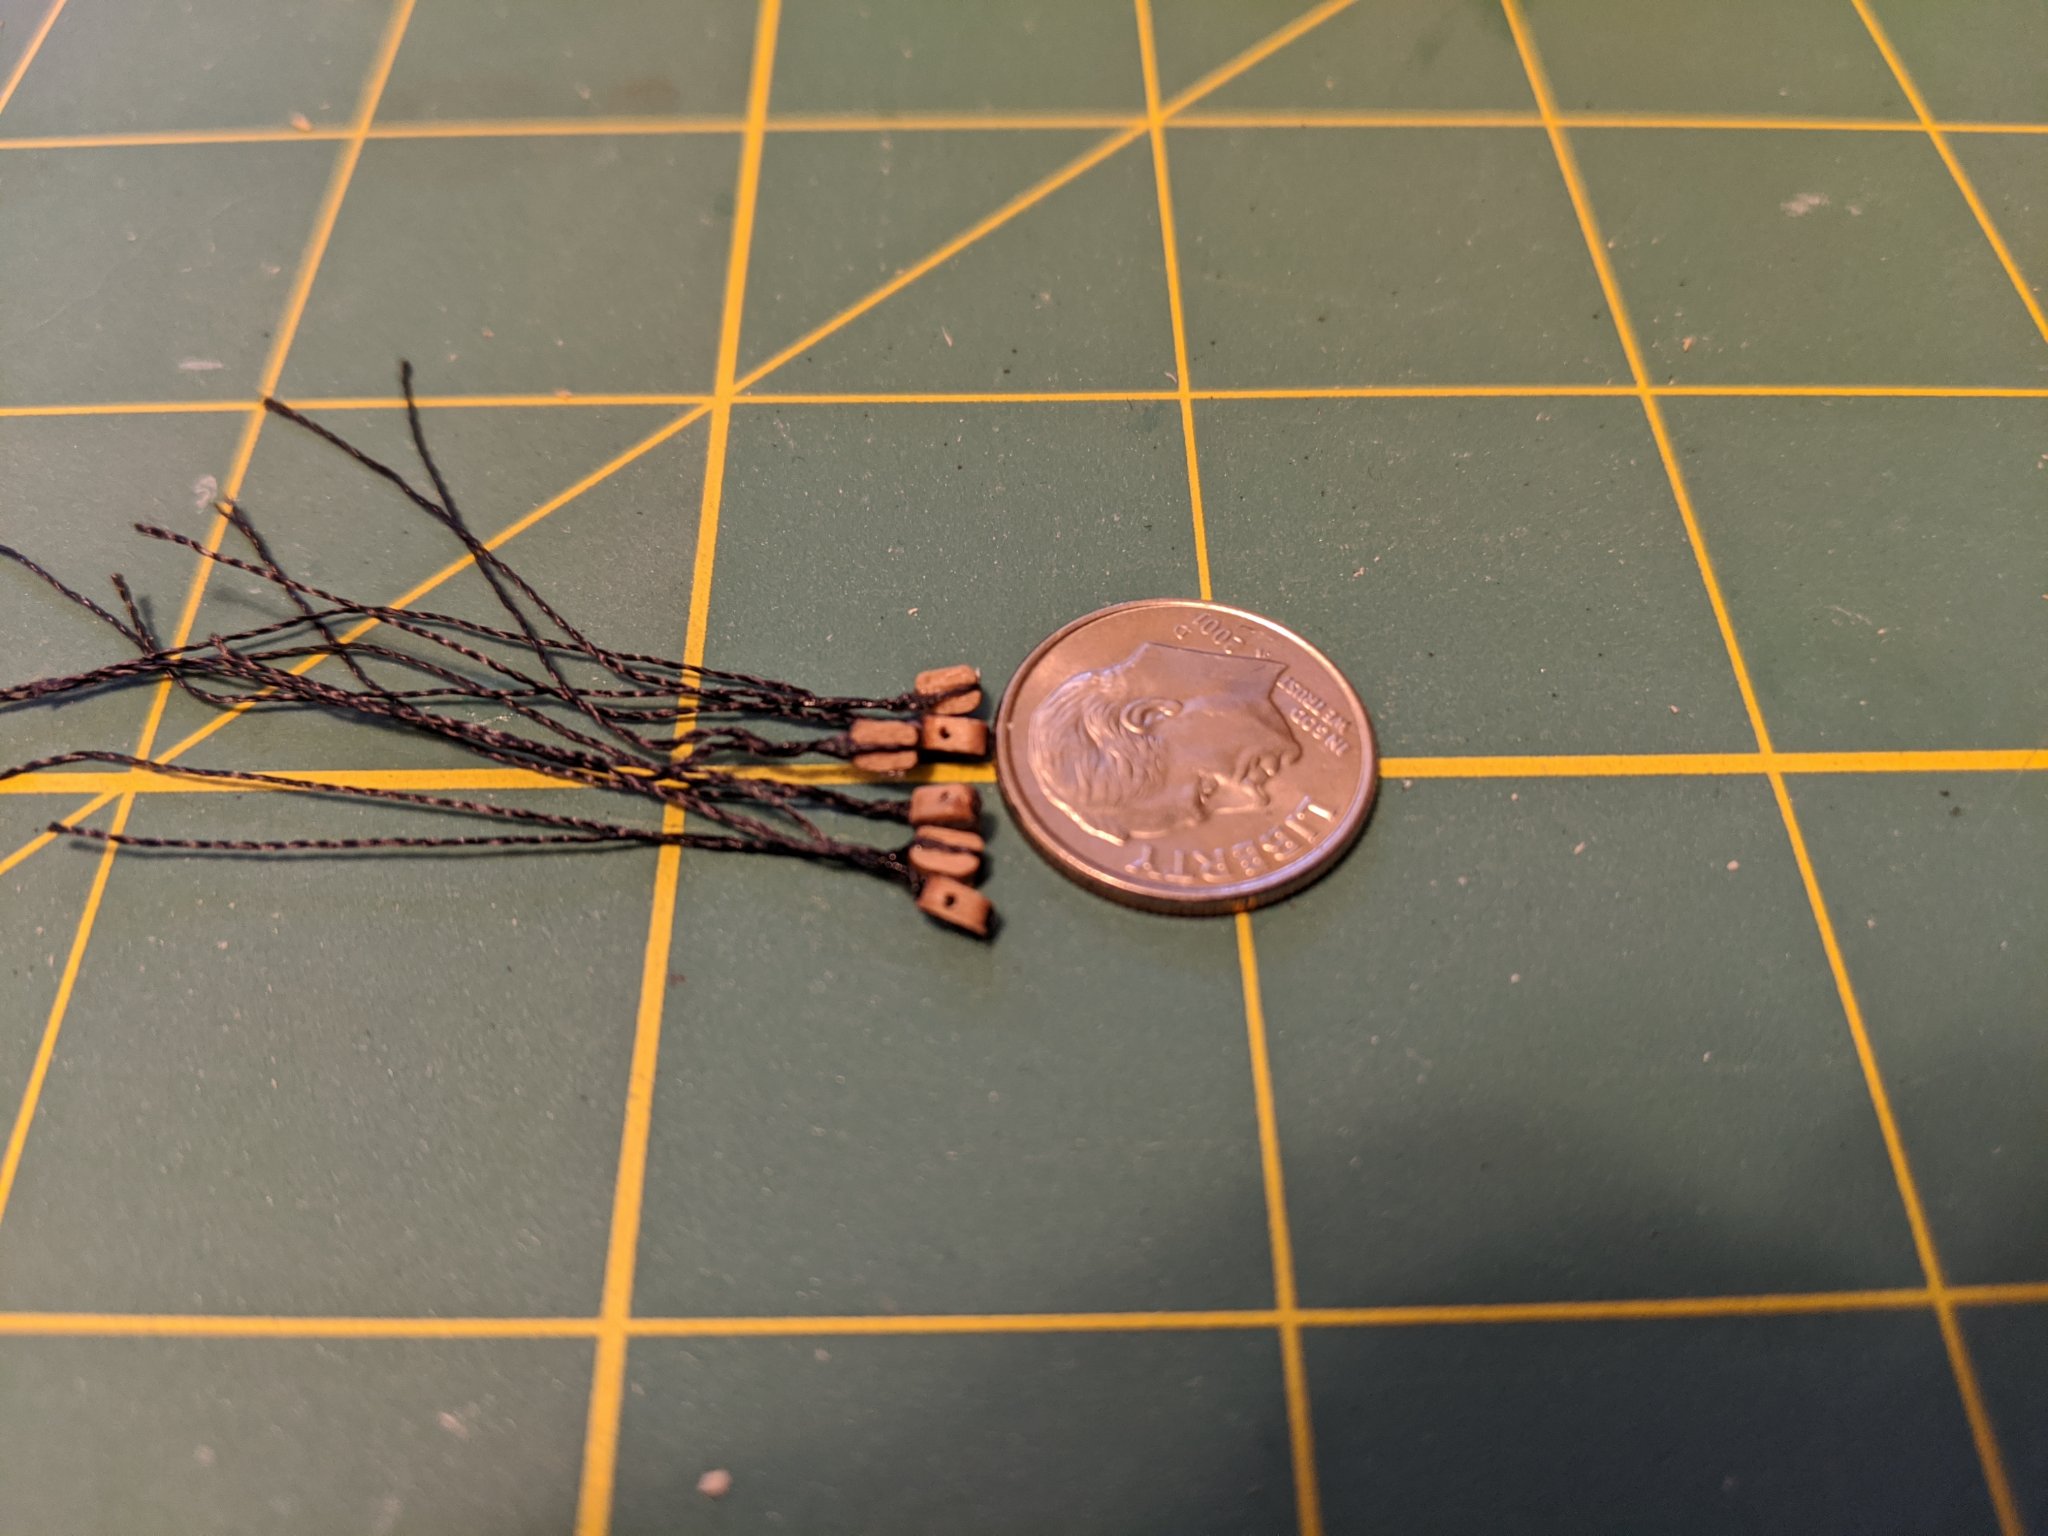
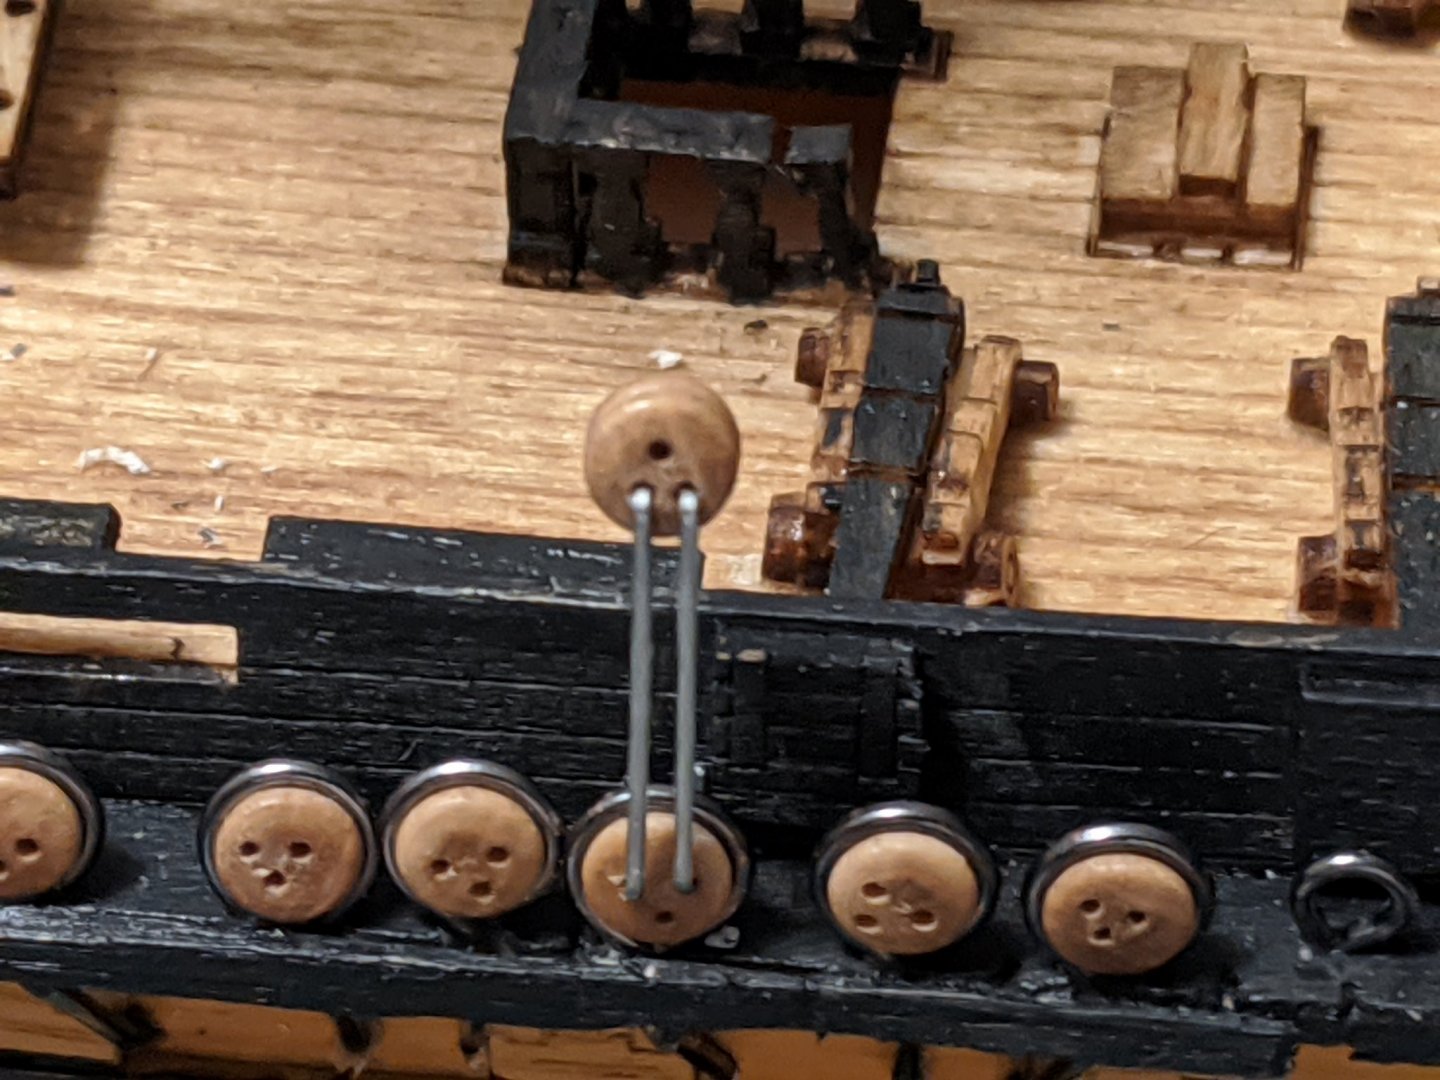
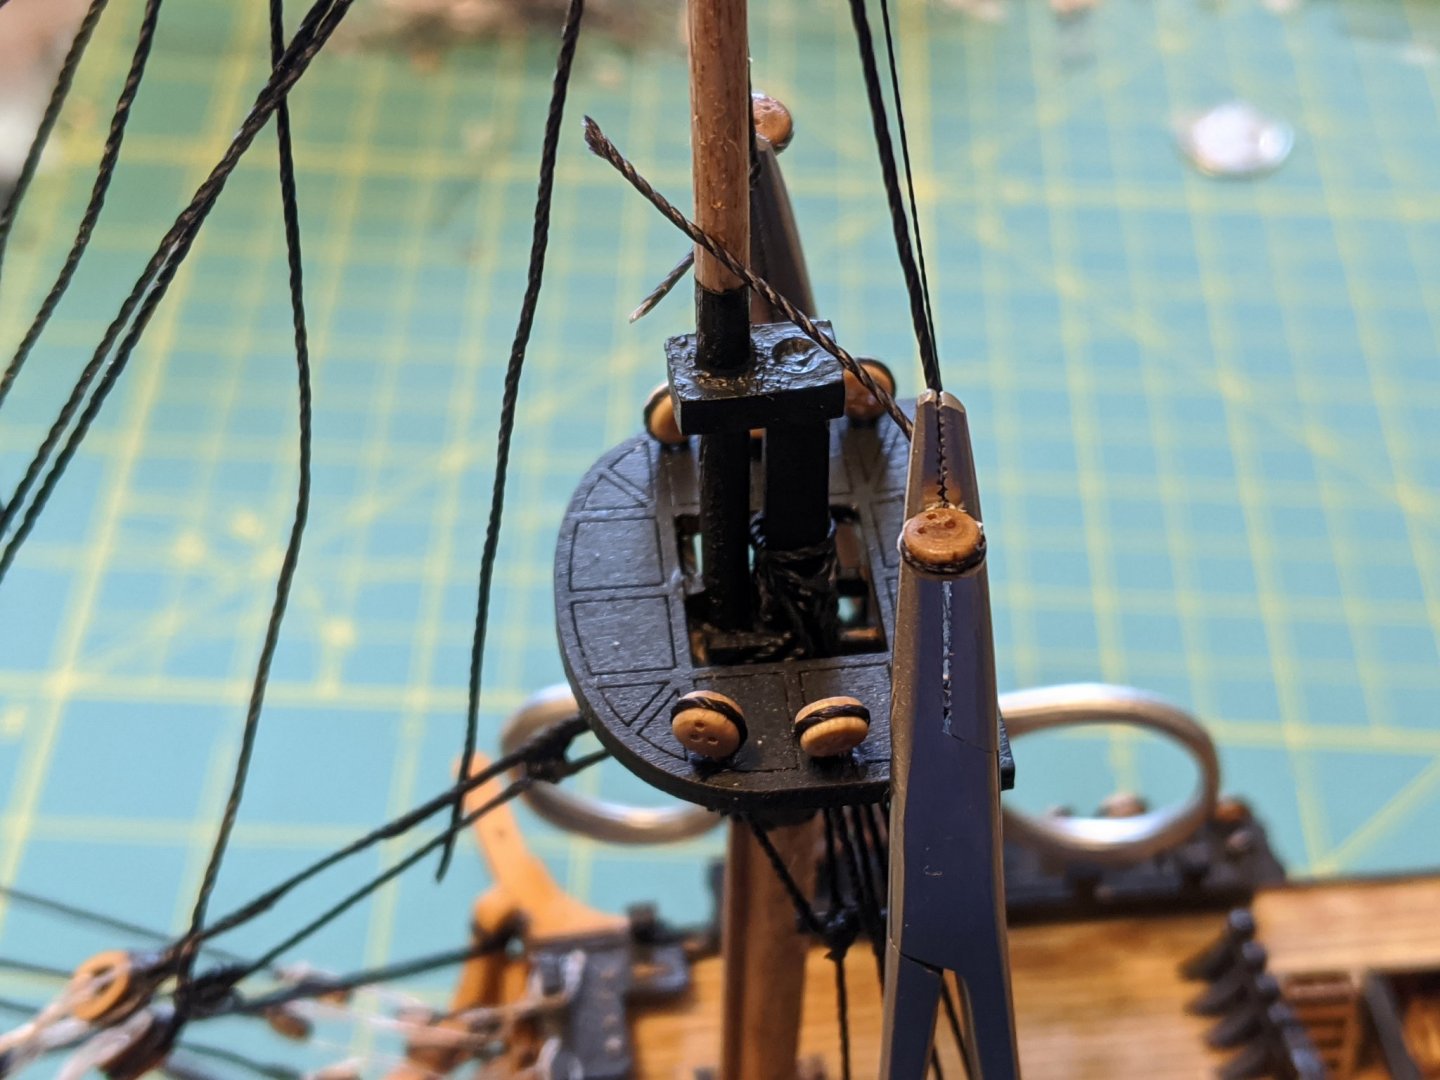
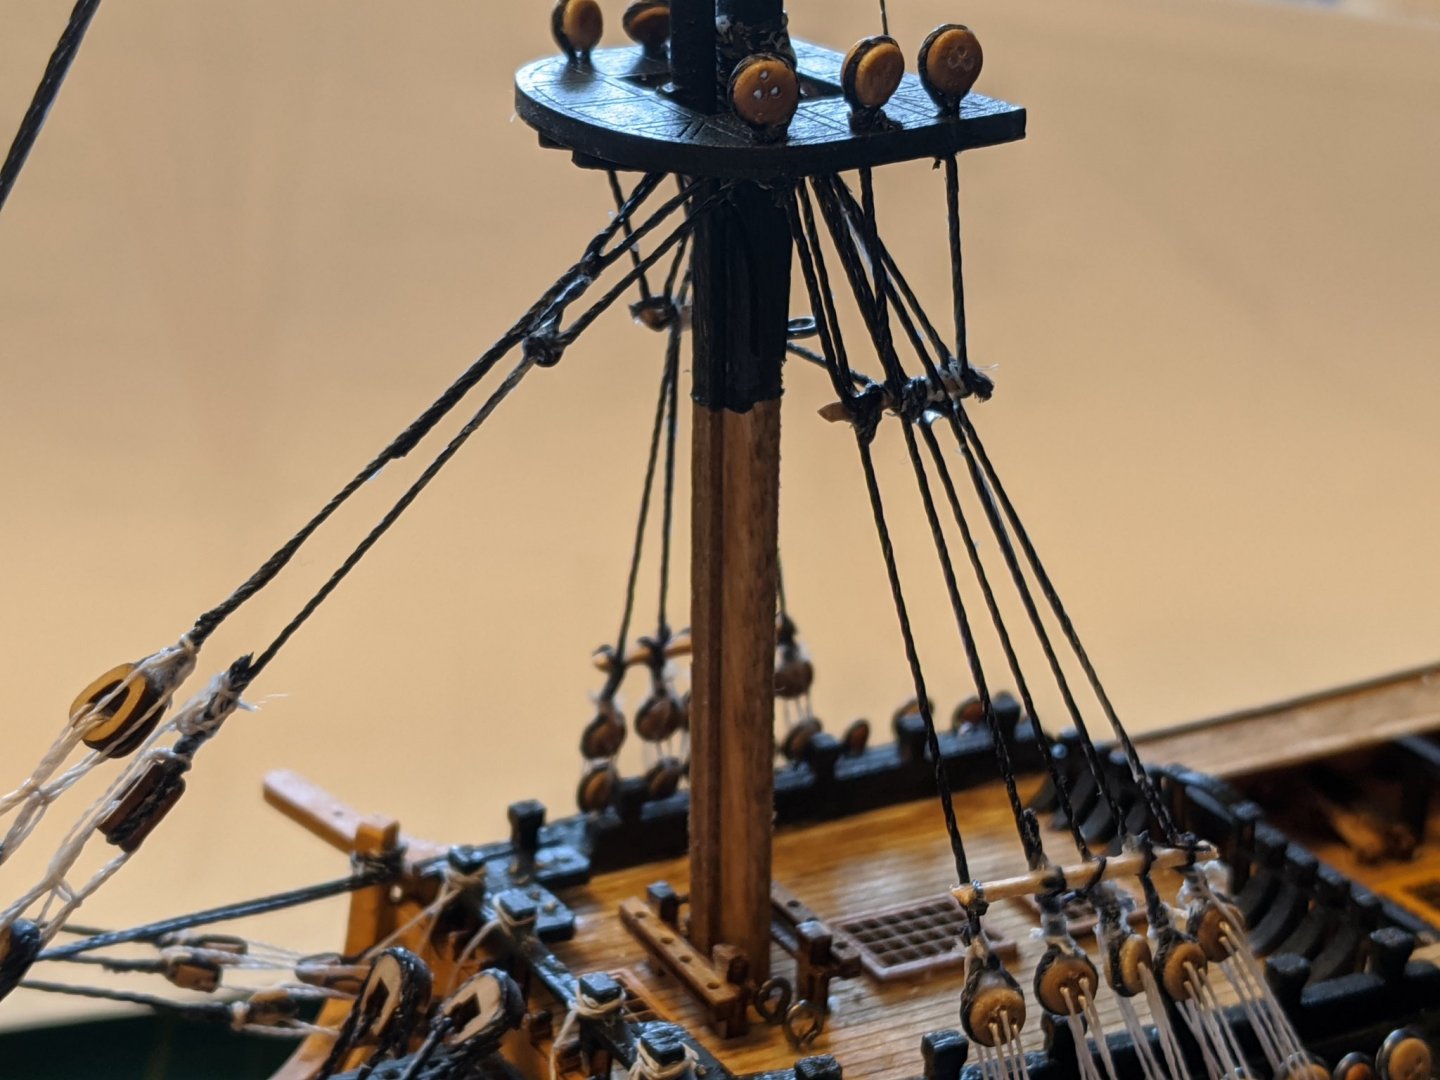
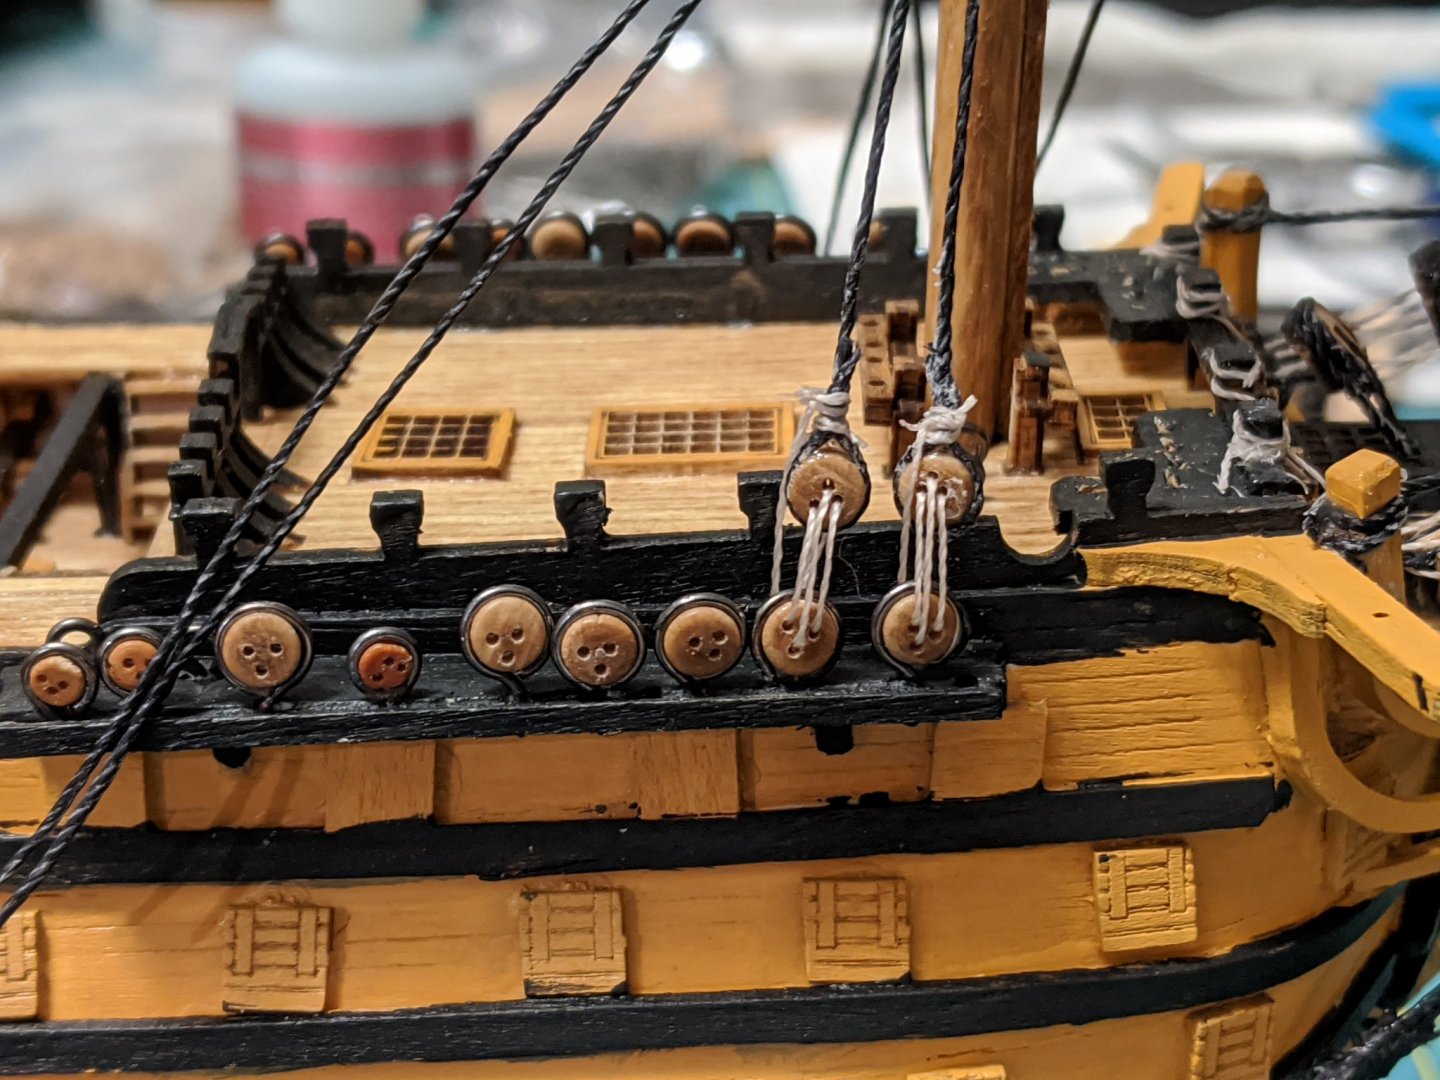
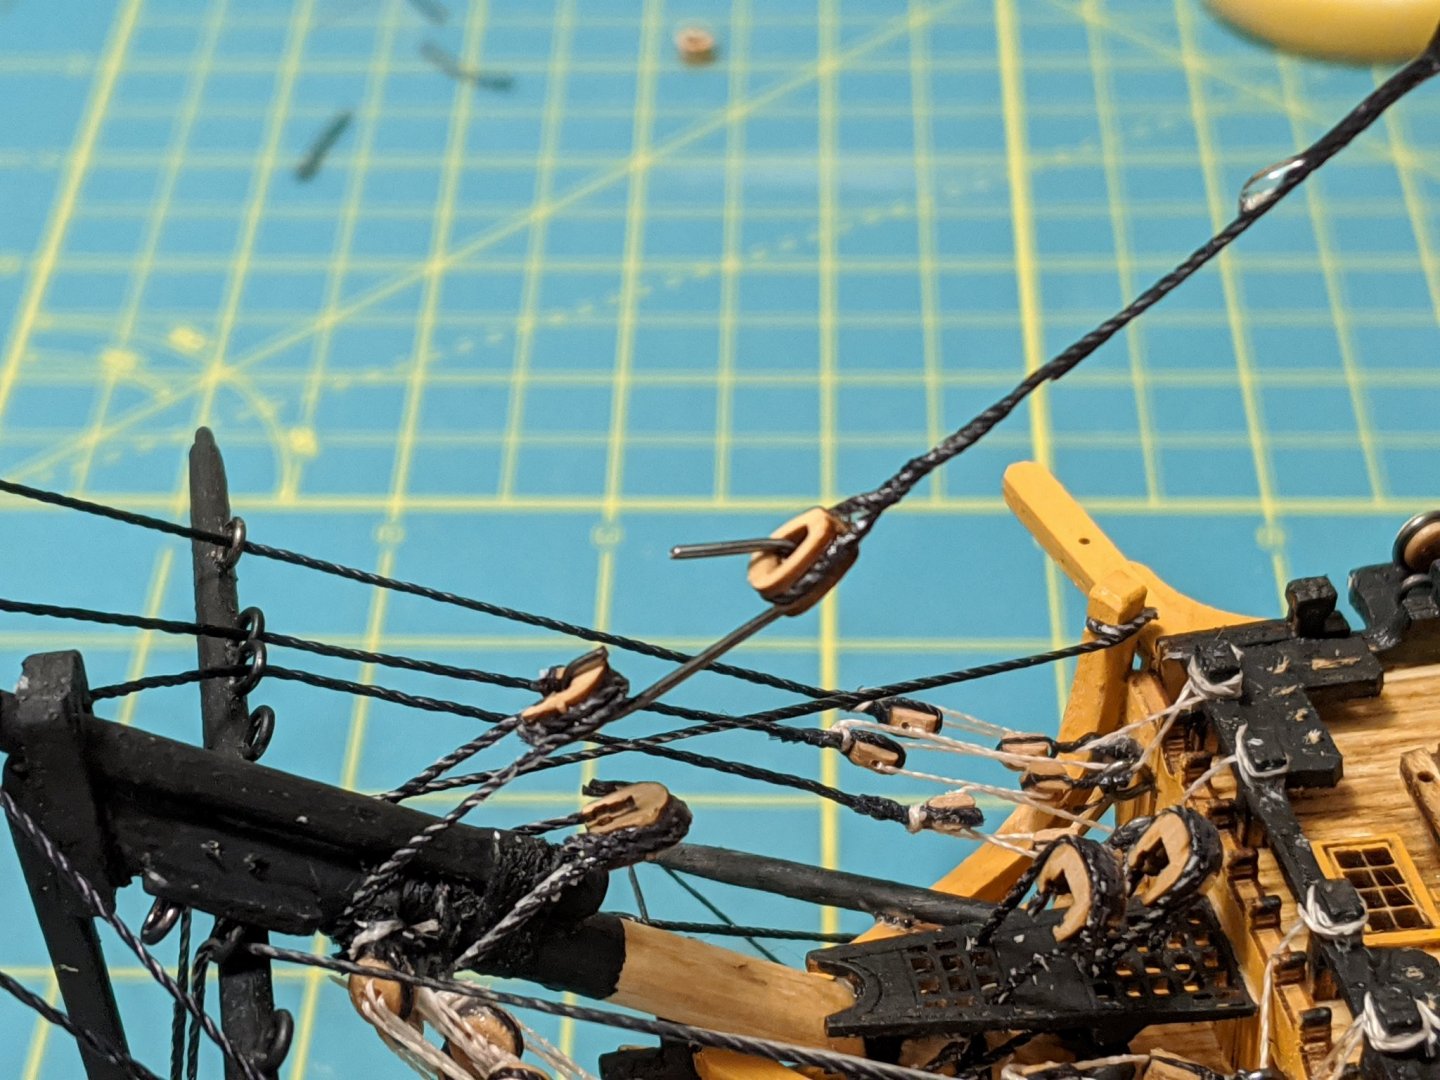
Finished the fore top mast back stays. I am not very happy with how the lower back stays turned out in terms of how even they are, so I decided to try a different tack. I still looped rope through the fore top to get even drops to the deadeyes, but this time once I stretched and looped around another deadeye, I locked them in my smallest hemostat the made sure the length was right. I then put a dab of glue on the bottom of the loop and left them to hand and dry. I then tied the rope for the deadeye rigging around the top of the deadeye to close the loop and lock it in place with another dab of glue. Once I had rigged the rope through the deadeye I again took the hemostat and locked it on the ropes on the back side of the deadeyes to lock the tension in so I could lash and tie off the rope and complete the rig with a dab of glue. This turned out better and more even then the lower stays, and I'm happy with the results. I also rigged the fore top back stays to the chain rail. I need to next rig the fore top gallant back stays, determine how I want to run the ratlines and I think I'm about ready to move on to the main mast. Thanks Hoser


-
Sgt_Hoser reacted to a post in a topic:
HMS Victory by The Lazy Saint - Mantua - Scale 1:200 - Third wooden ship
-
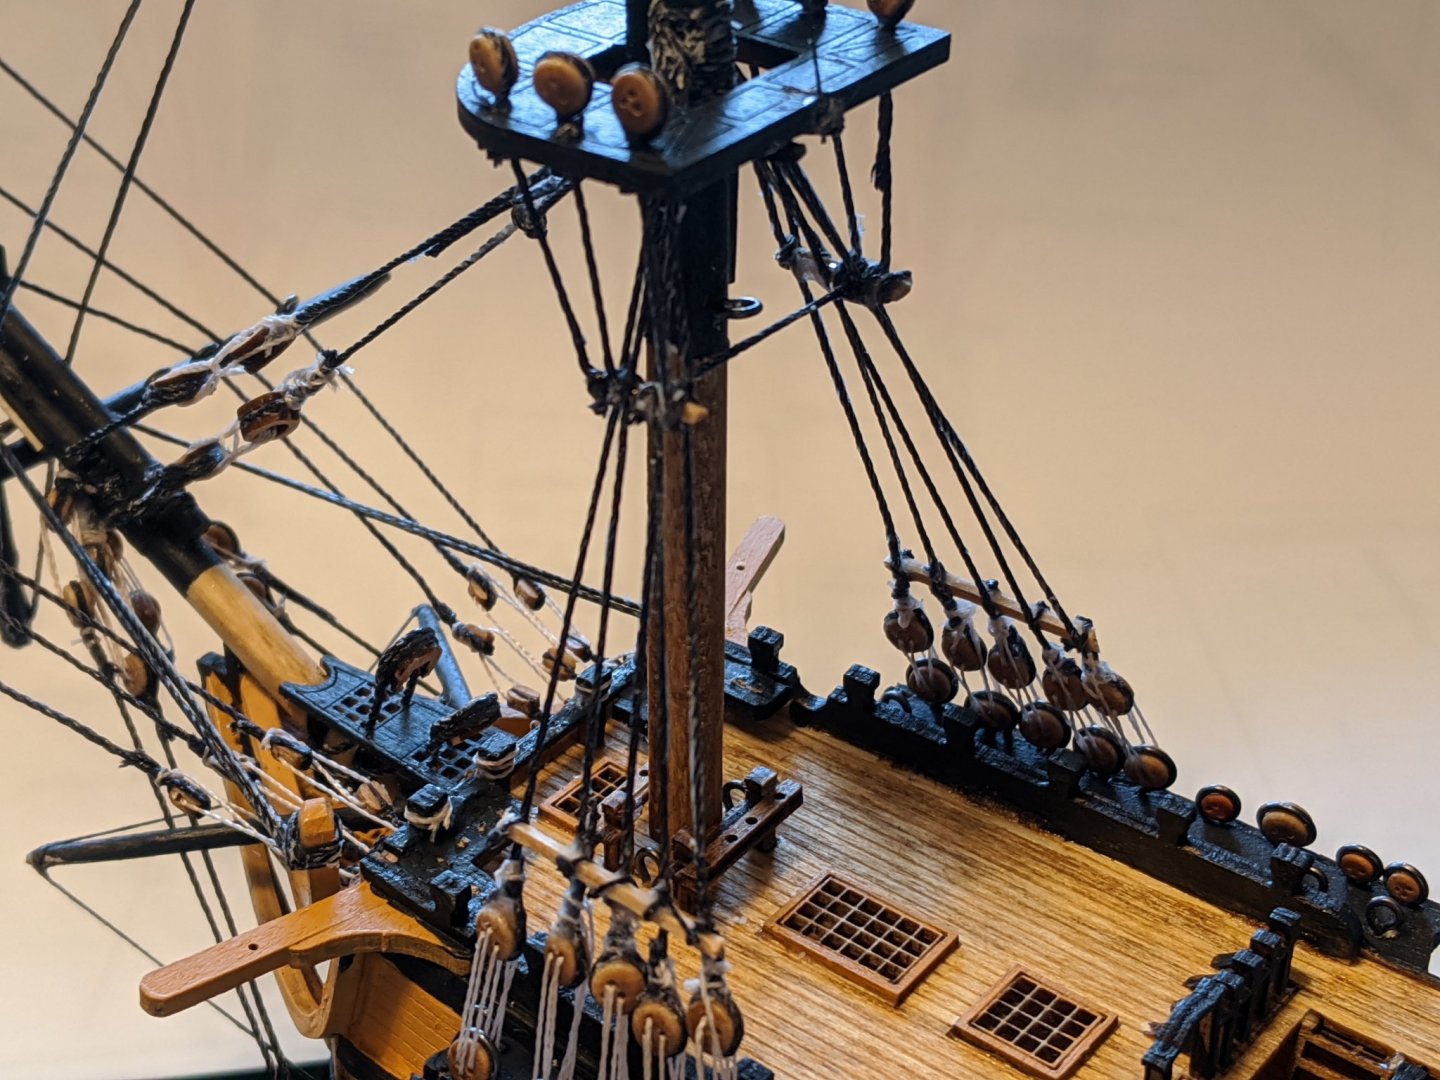
Some progress this weekend, I got the remaining lower fore stays rigged to the deadeyes, glued and tied in the futtock staves and rigged the deadeyes and stays on the fore top. Next up will be the fore top back stays, the top gallant back stays, ratlines and the final stays rigged to the chain rails, then I step the main mast and start it all over again 😂.
-
Thanks for the support and encouragement ccoyle, and after some discussion with the Admiral, she has agreed that i get to pick the kits going forward. I just bought the Model Shipways Syren Chuck designed while it was on sale in January for my birthday. I look forward to this build once the Victory is complete as there is such a wealth of info and inspiration here on MSW for this kit. Lazy Saint, much can be said for keeping to the instructions as published. Your build is beautiful as is. Thanks again Hoser
-
Sgt_Hoser reacted to a post in a topic:
HMS Victory 1765 by Sgt_Hoser - Western Wooden Sailboat - 1:200
-
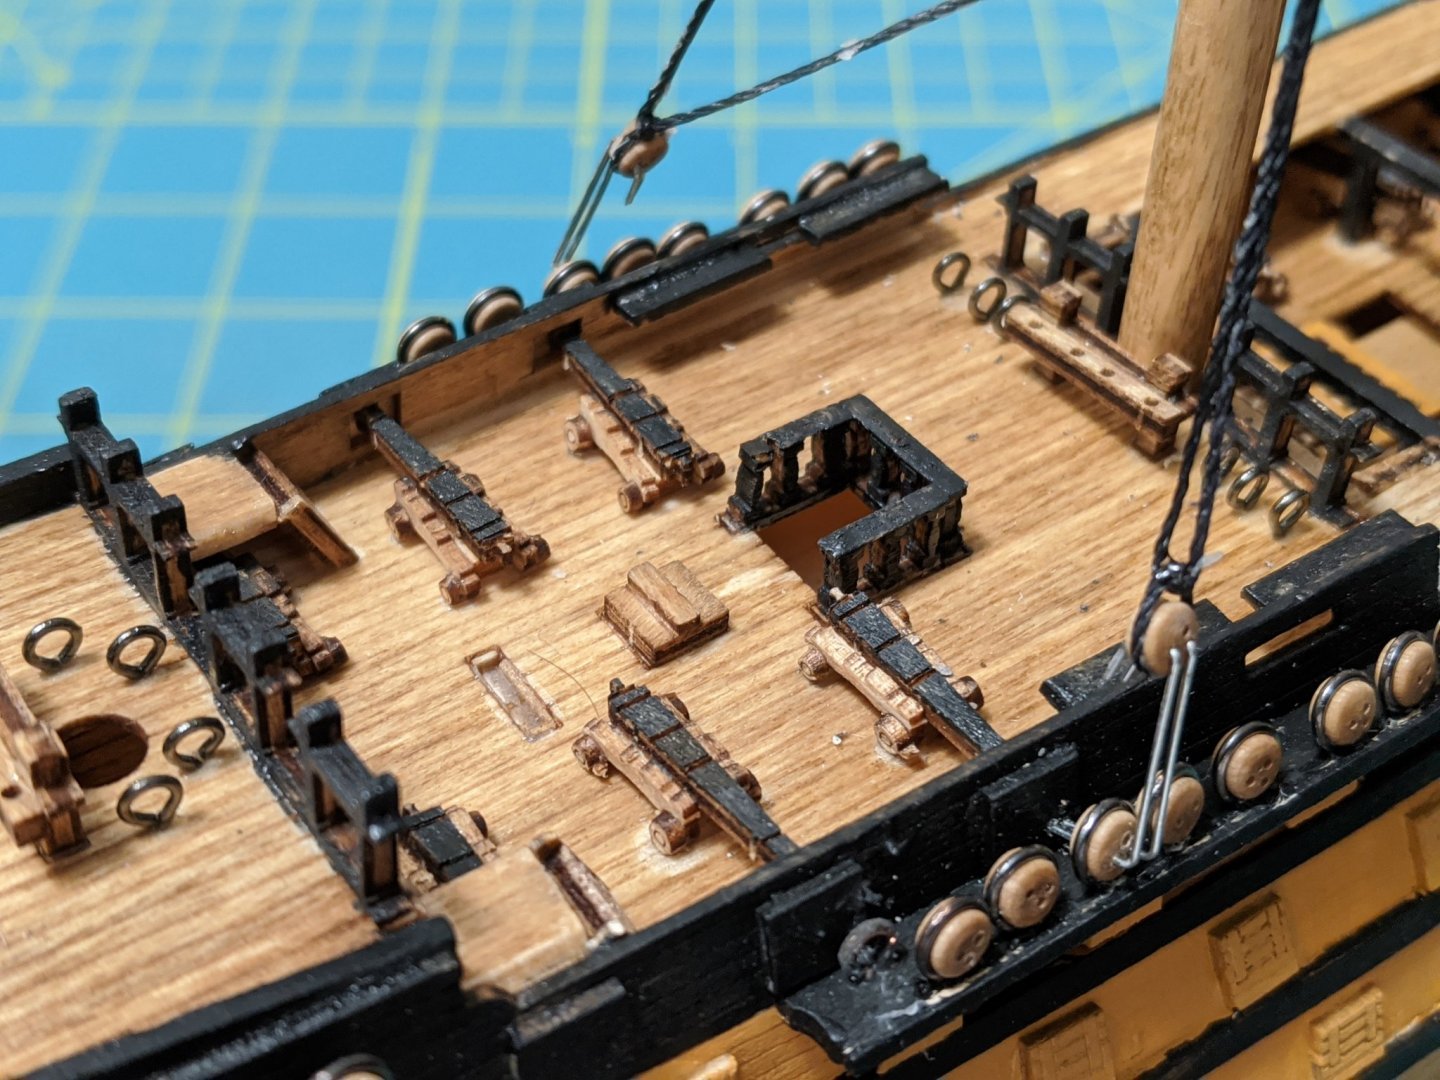
Ok, more slave driving in the yard, one of these days the yard apes will rebel! I rigged the rest of the fore stays for the foremast, but the pics didn't turn out so well,I need a better back ground to contrast with the rigging. Next I started rigging the lower back stays to the foremast. I looped the rope through the top and back through itself and pulled it tight. Once I snugged it down to the base of the top I ran the two new stays down through the top. This way I now have 4 sets of back stays running down to the deadeyes and the fore top looks like it's rigged appropriately. Next I rigged up the first two deadeyes on the starboard side, taking special care to keep them as even as I can. ok, I'm cross eyed enough for the night, time to shut down the ship yard. Thanks Hoser


-
Thanks LS, much appreciated. I'll be honest, when I got this kit and opened it to see what it was, I was quietly disappointed, but had to out a brave face on as it was a Christmas gift from the Admiral. Don't tell the Admiral.... But I have come to realize that while the kit itself is not the same quality as others, it's not that bad for $50. And it gives me a wide open license to be as creative as I want to be in terms of how I finish it, what I do or do not include or model. And as a learning experience to prime me for the next steps and better and more complex models it's been great to work through this build. I will soon have to start building the yards and I will refer again to your work for inspiration. Thanks again Hoser
-
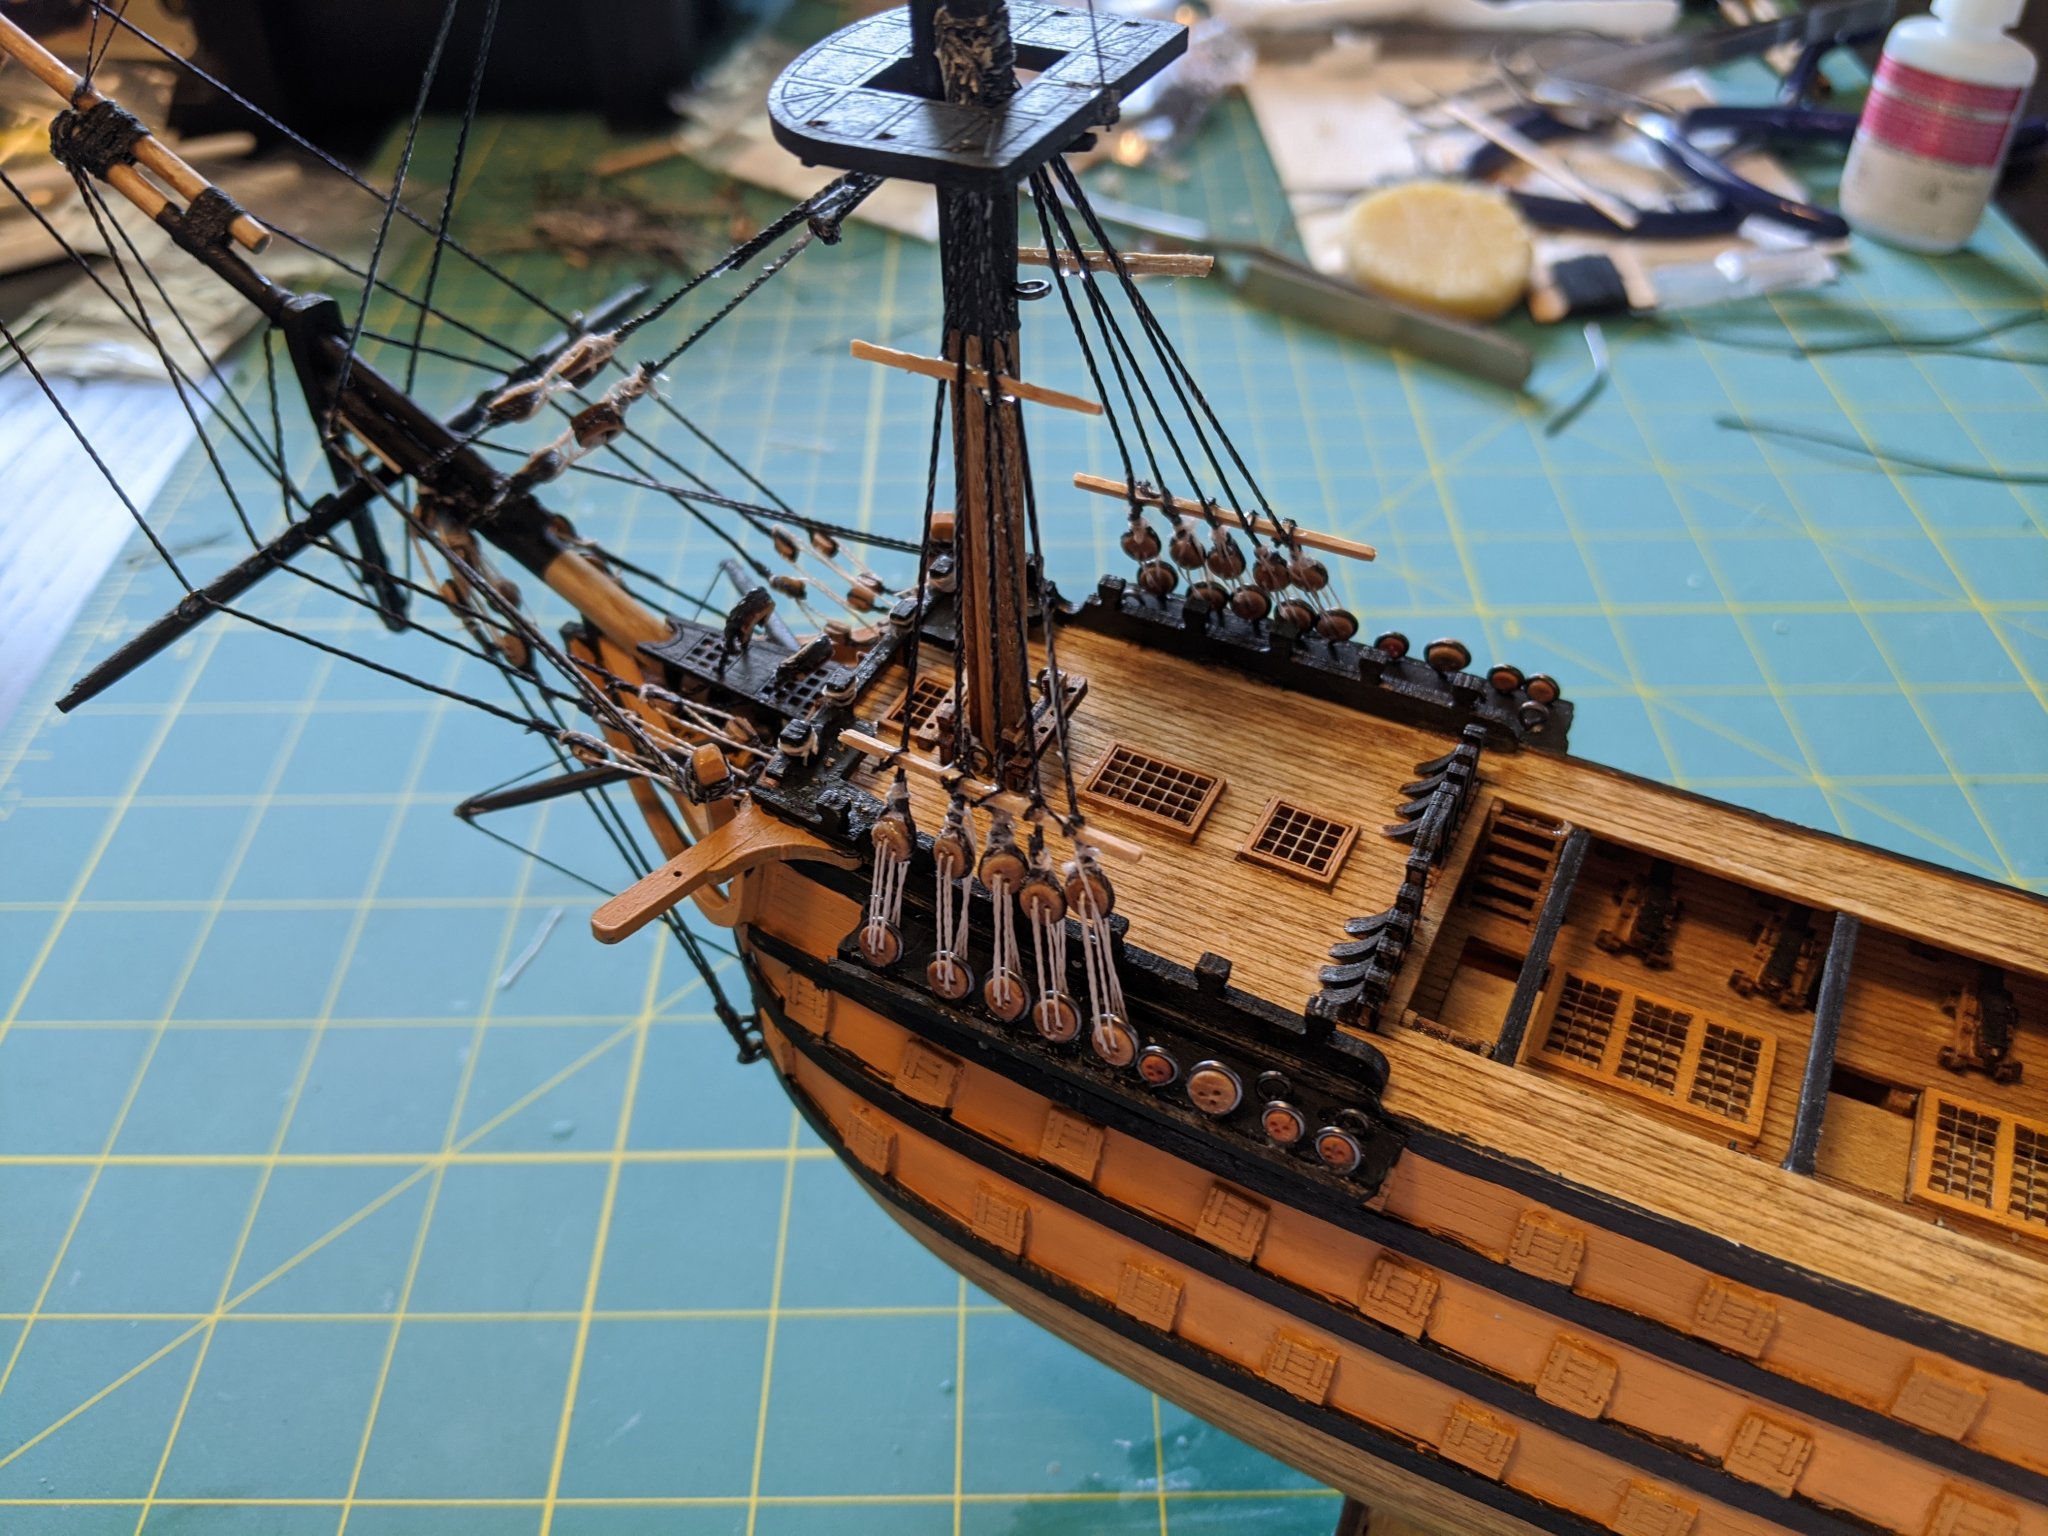
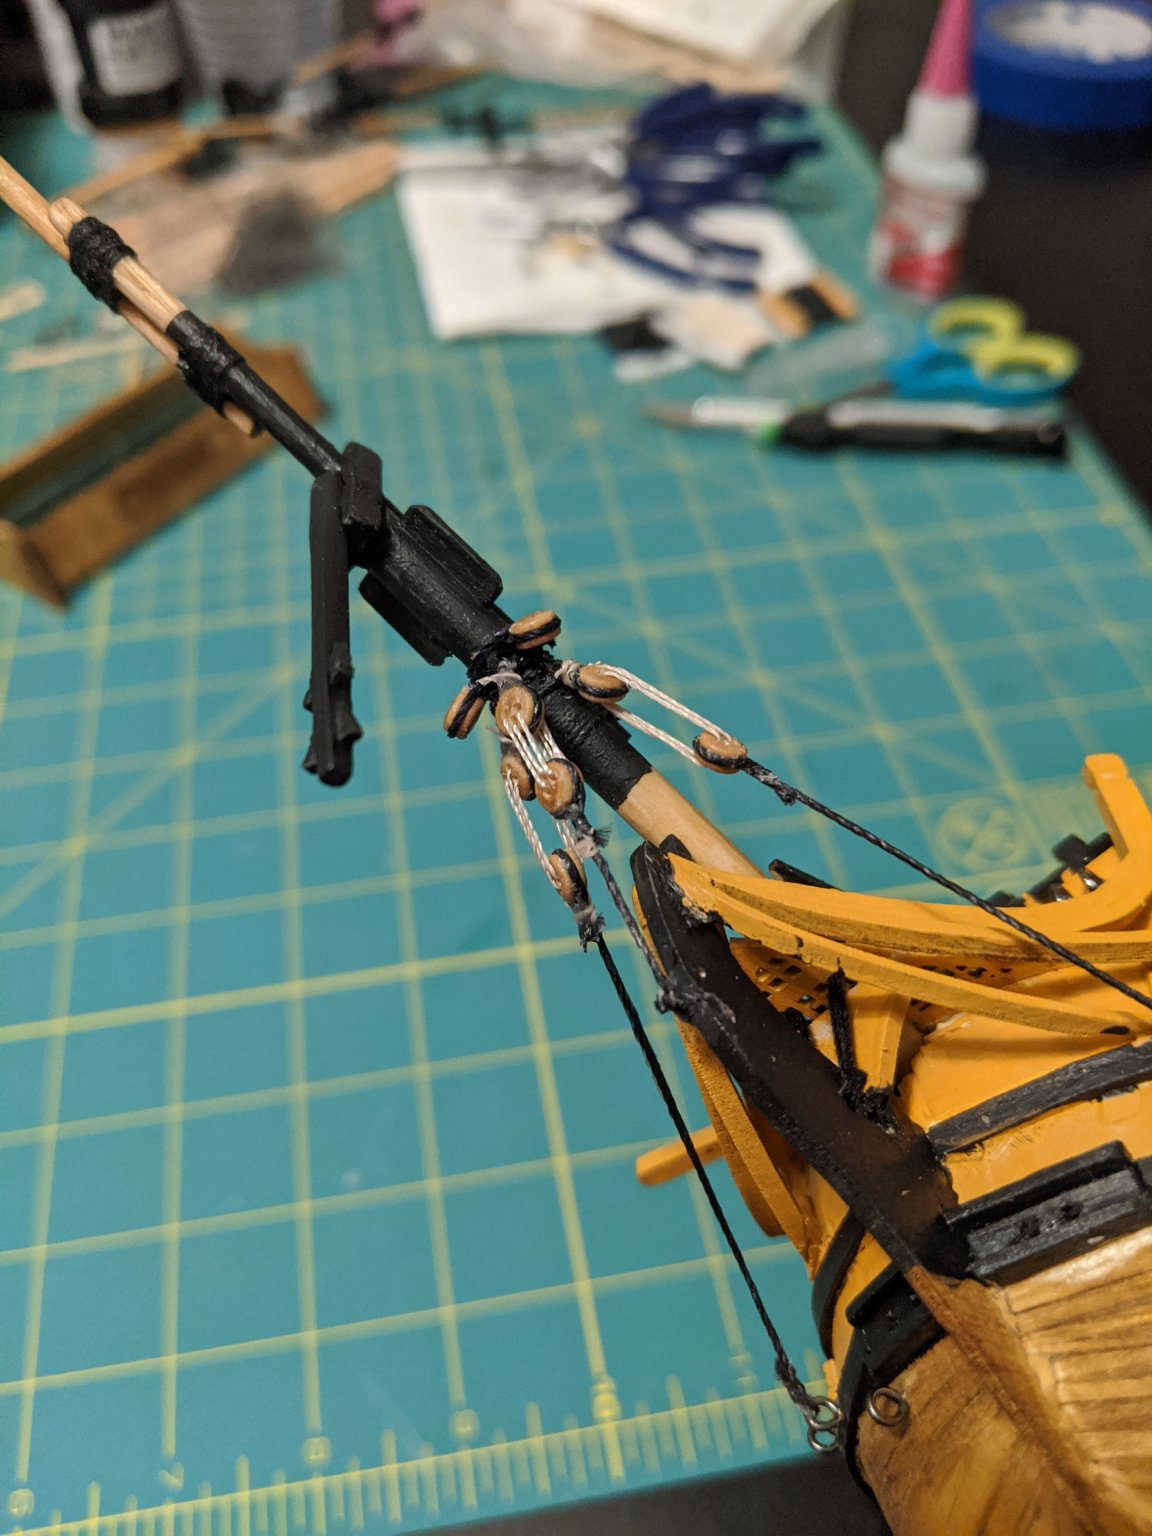
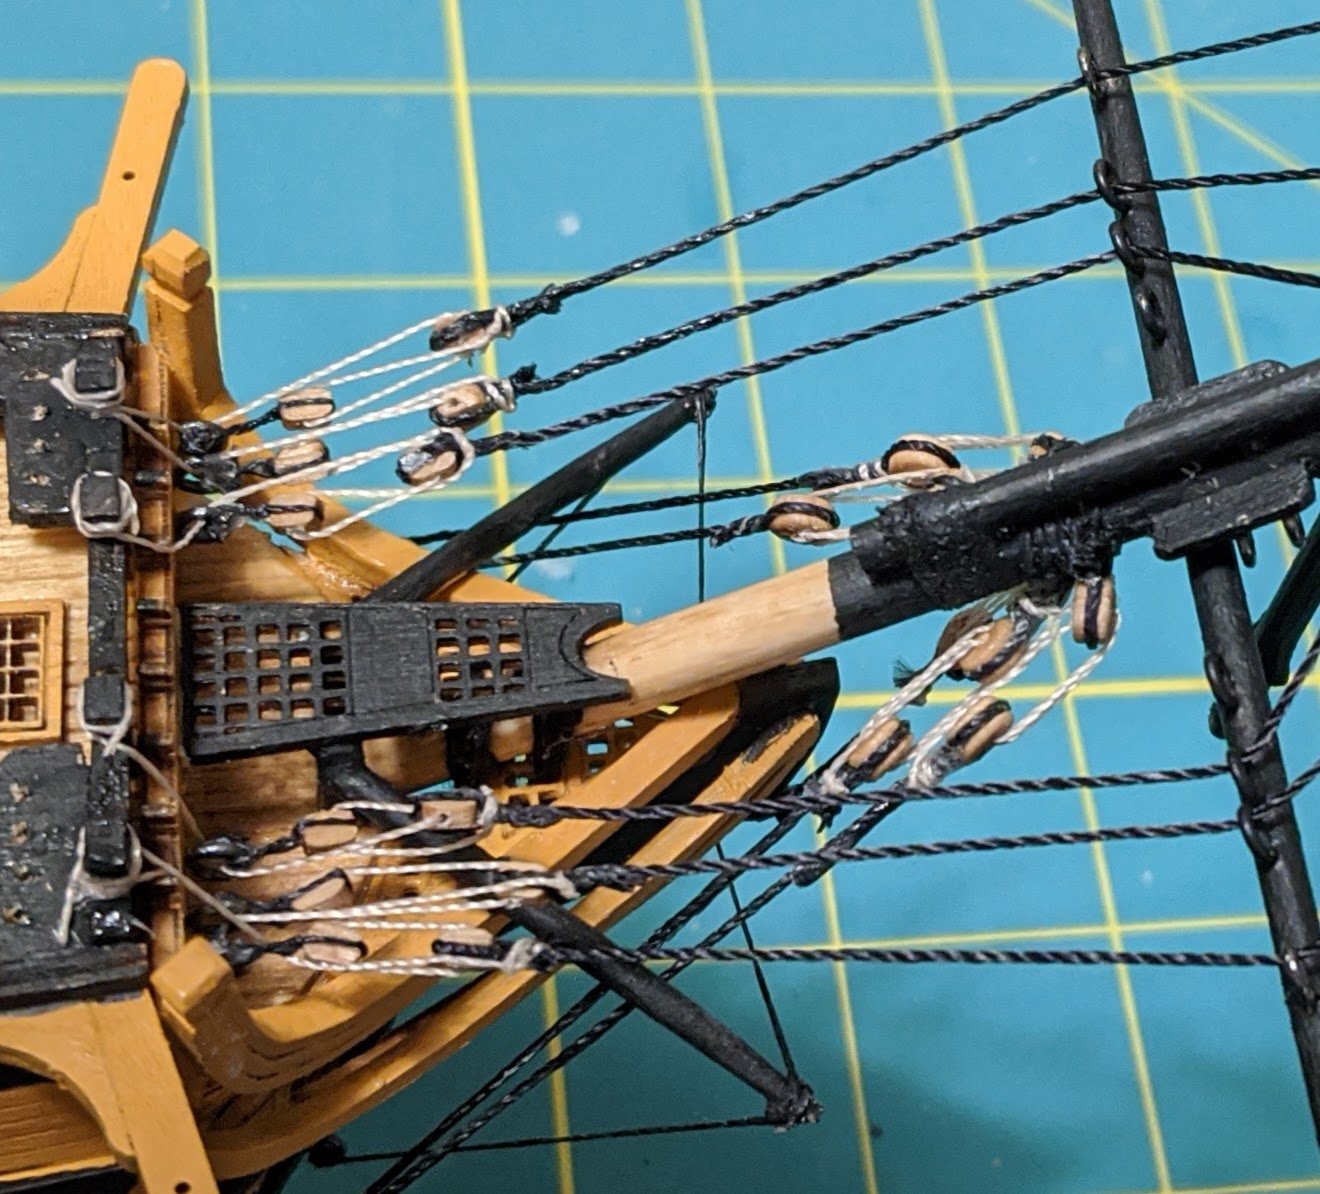
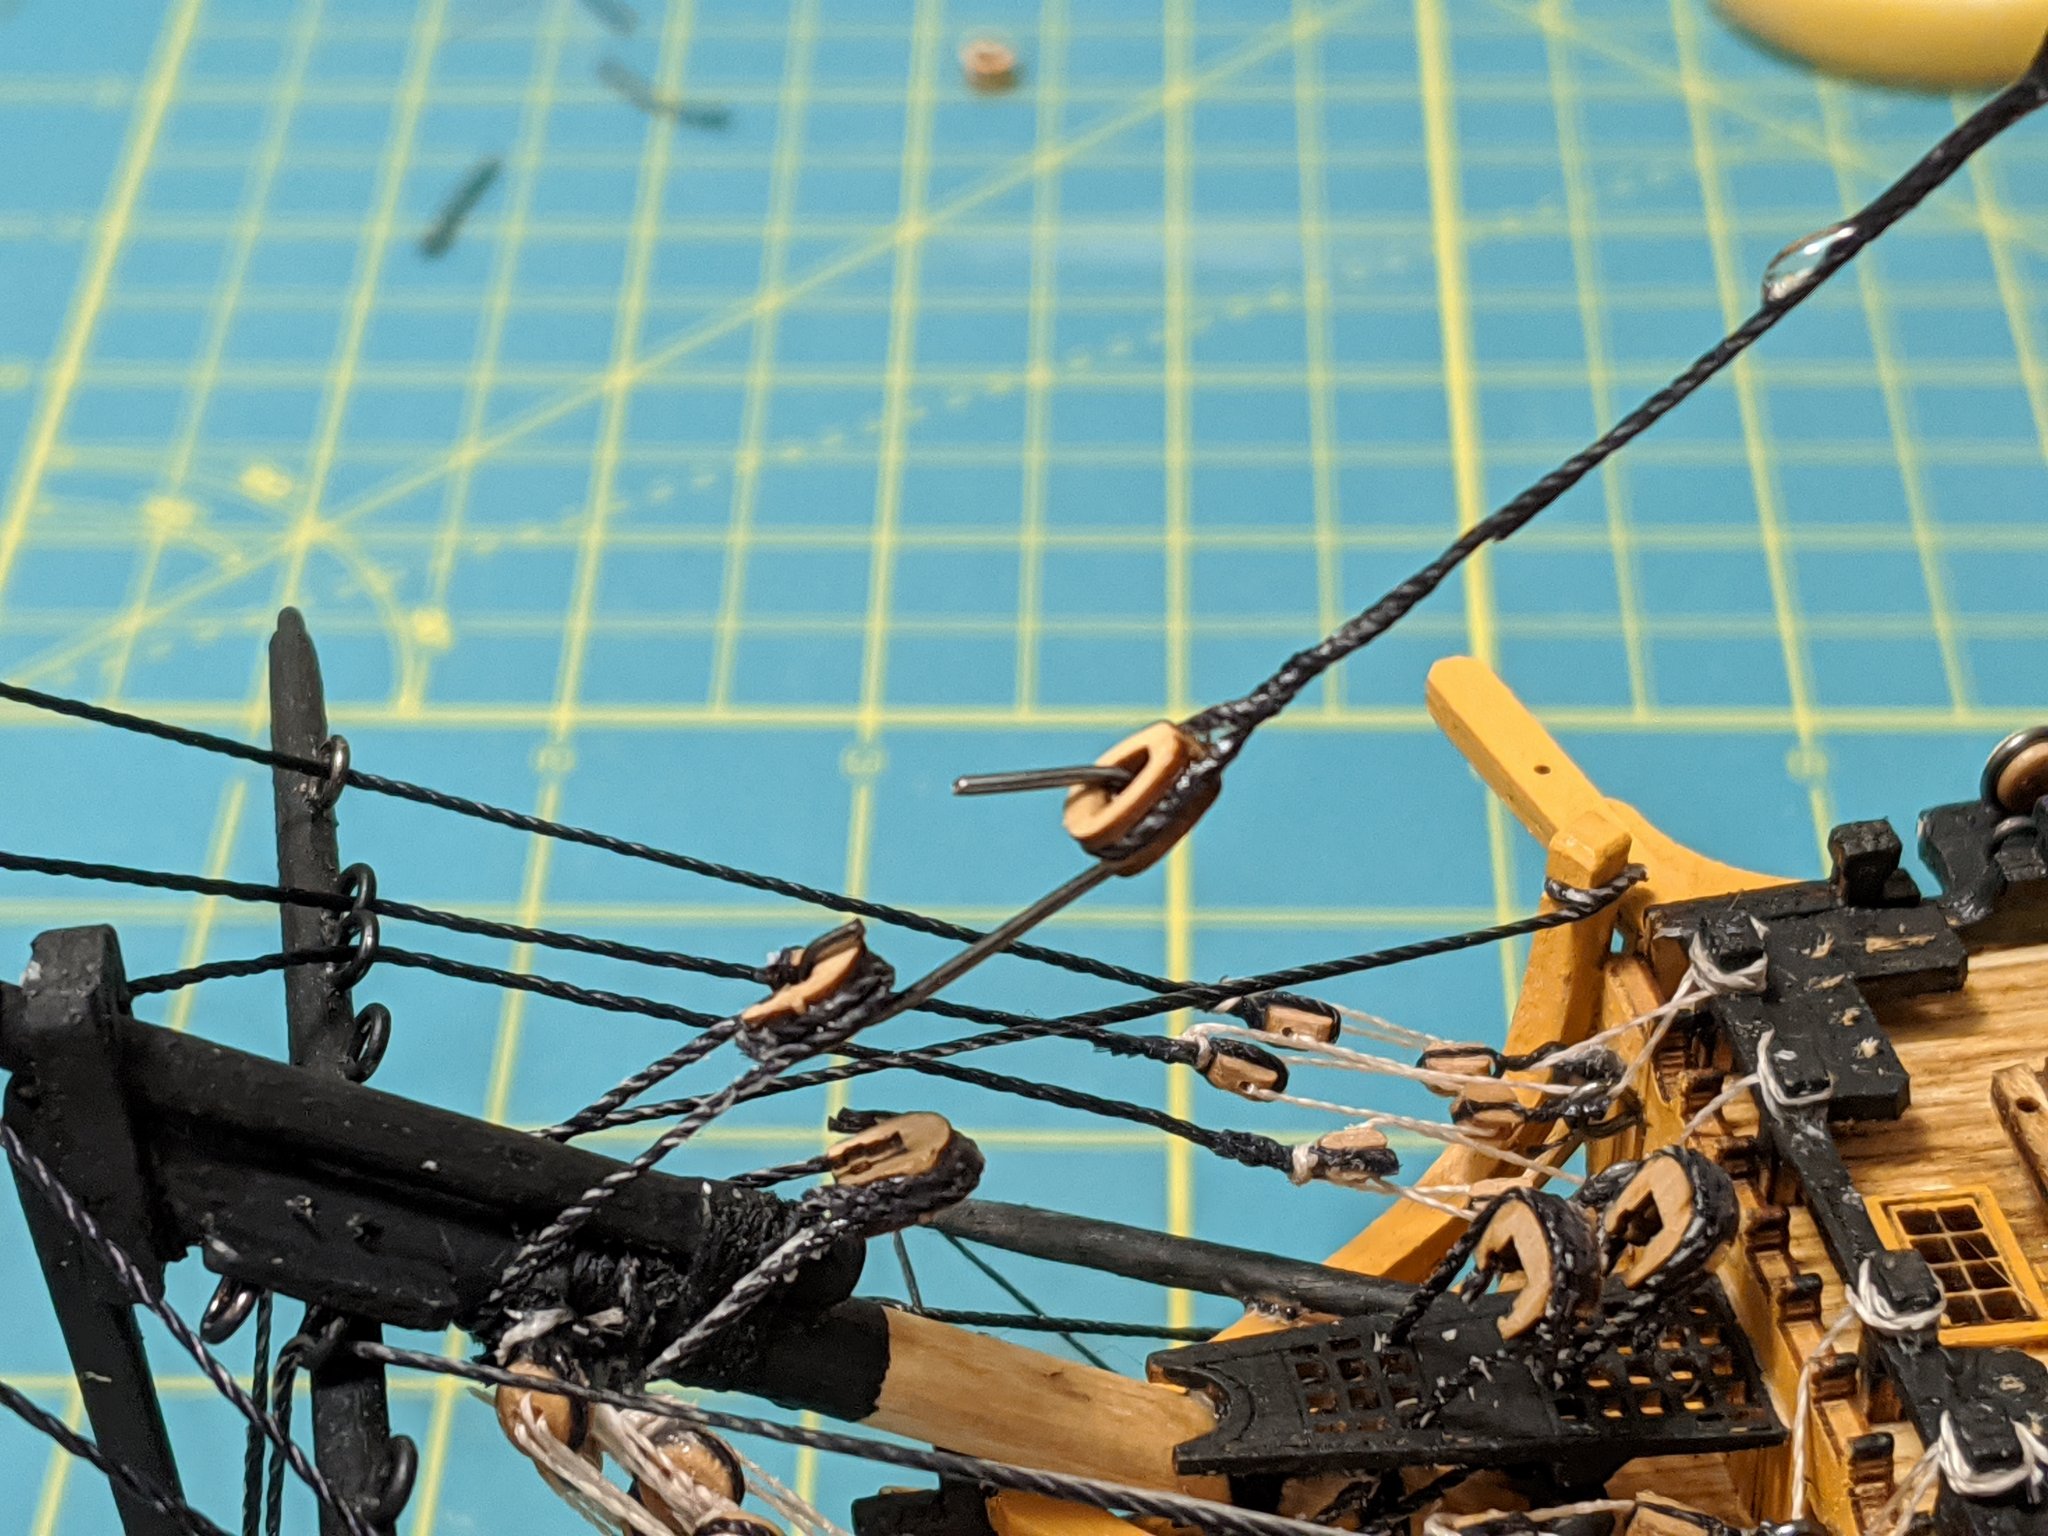
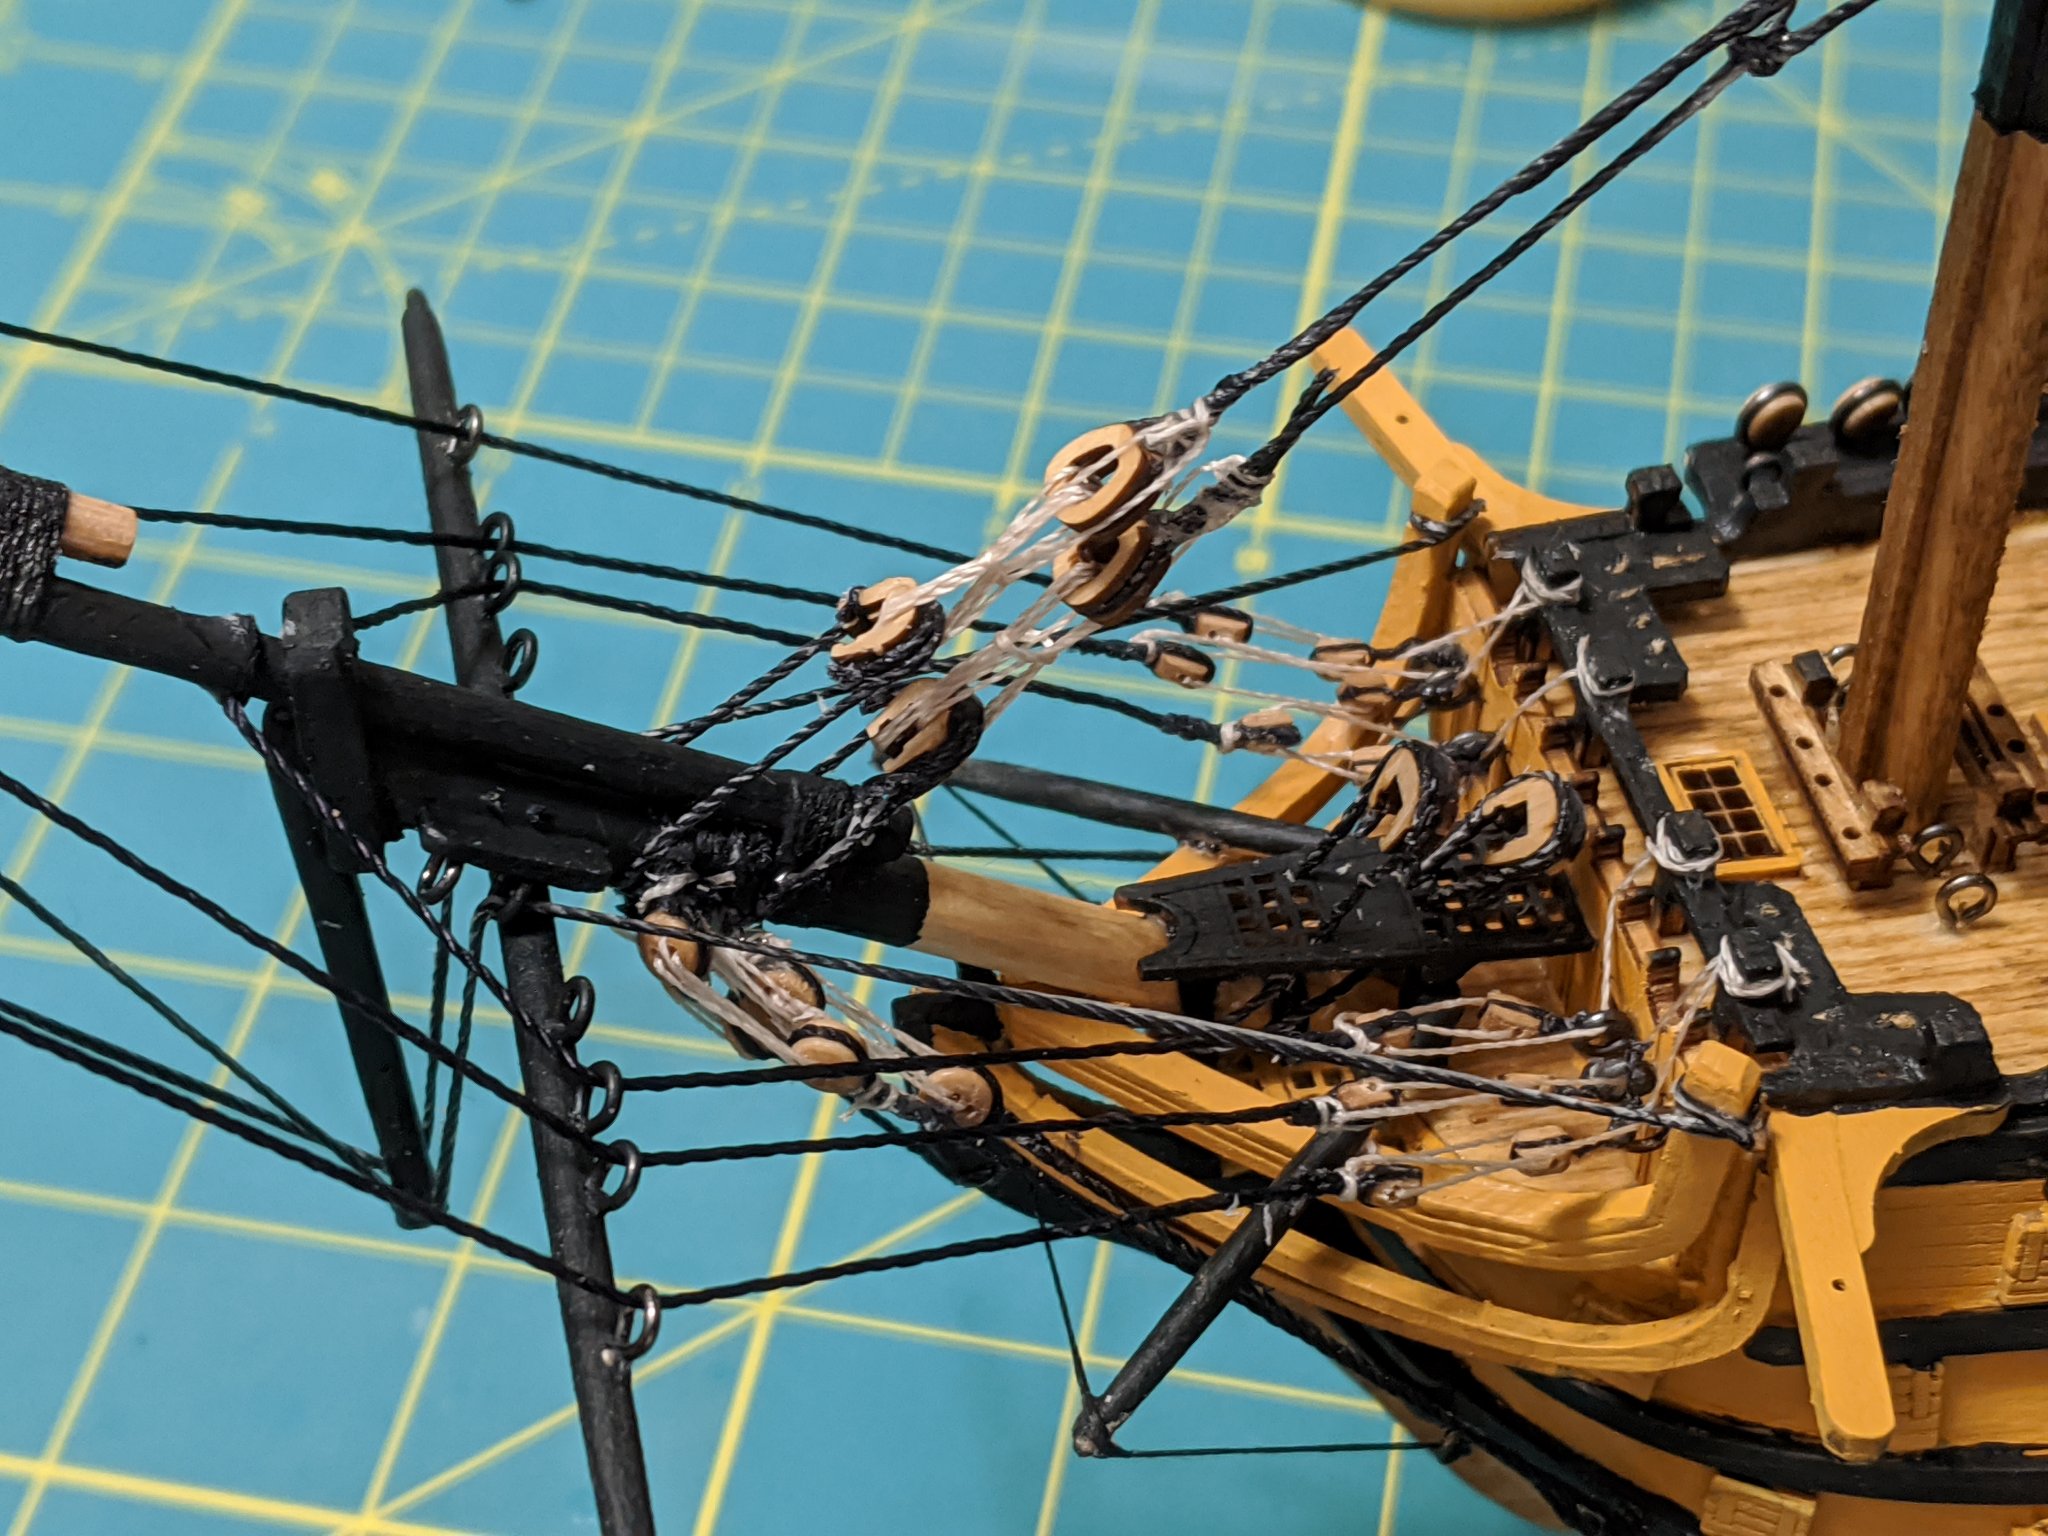
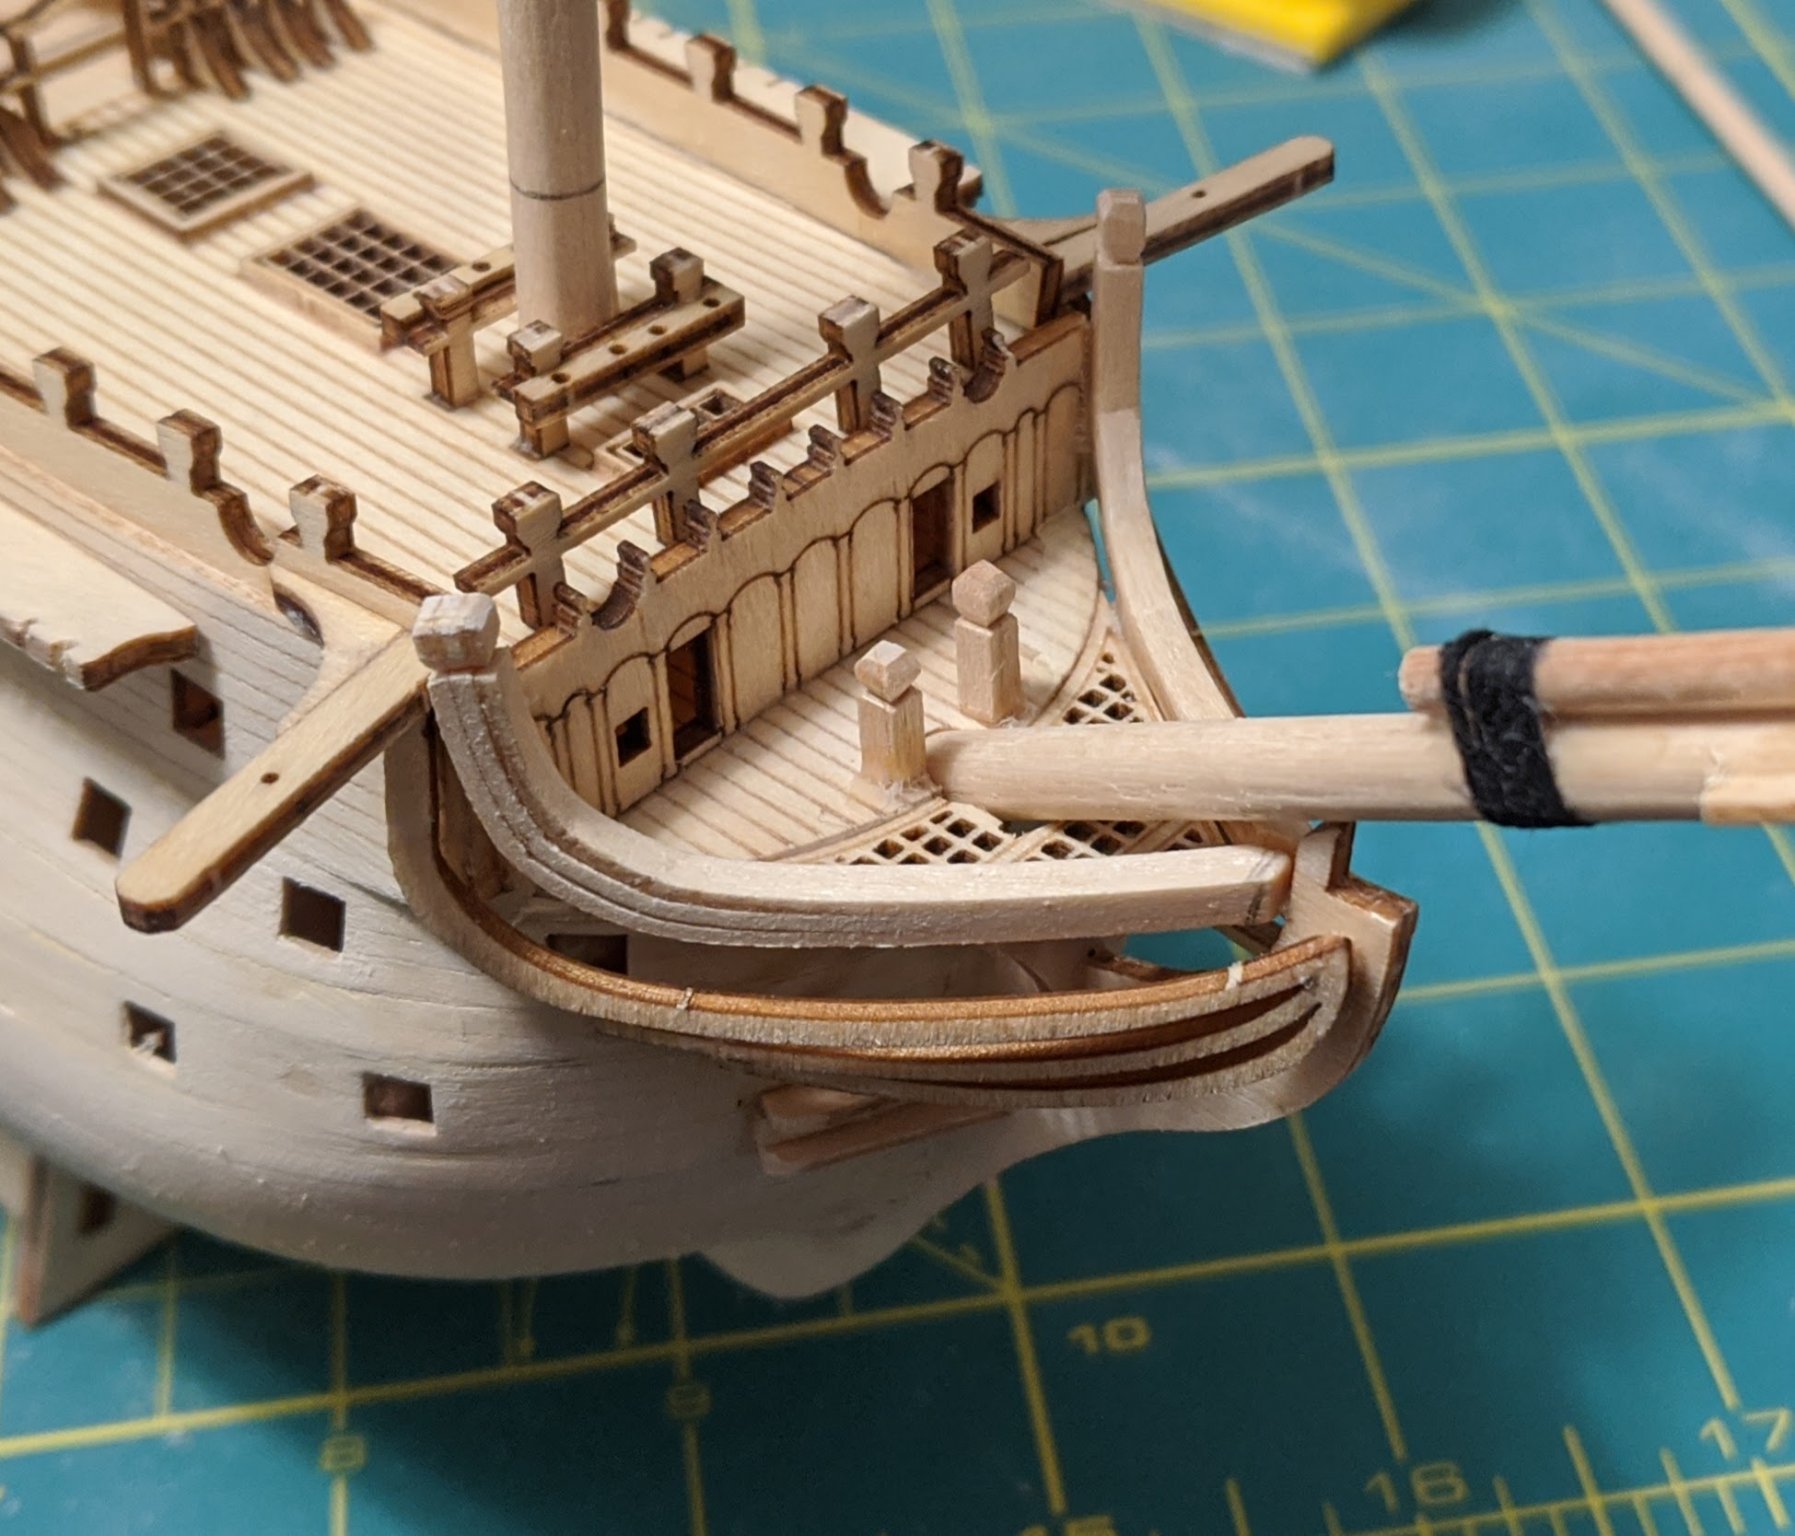
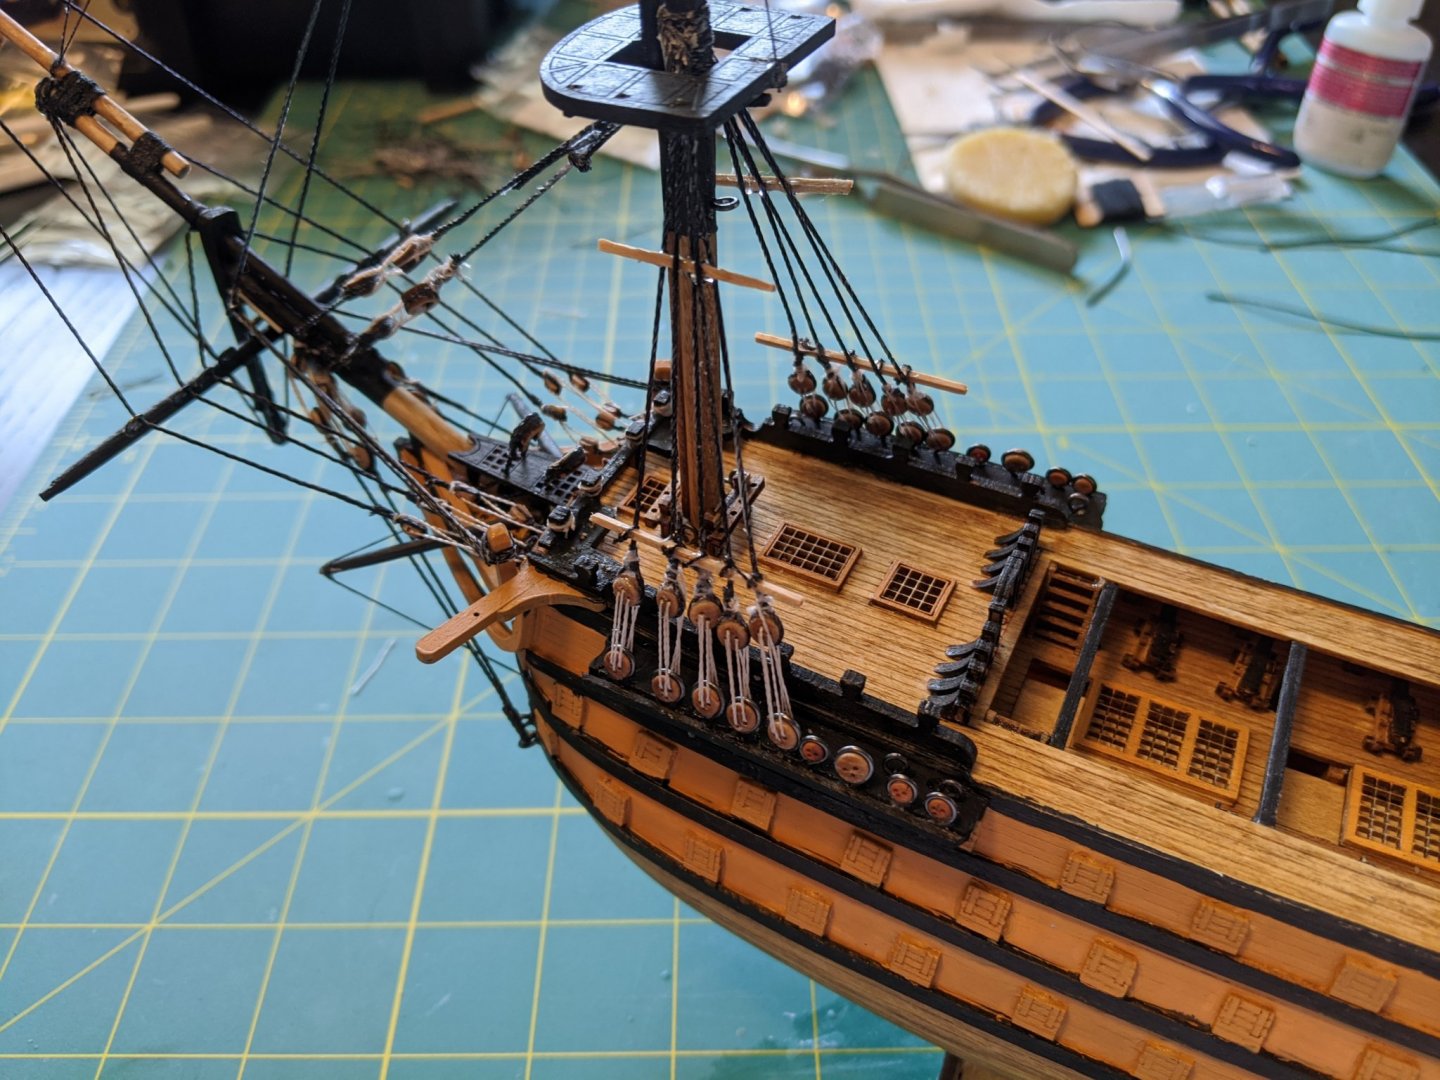
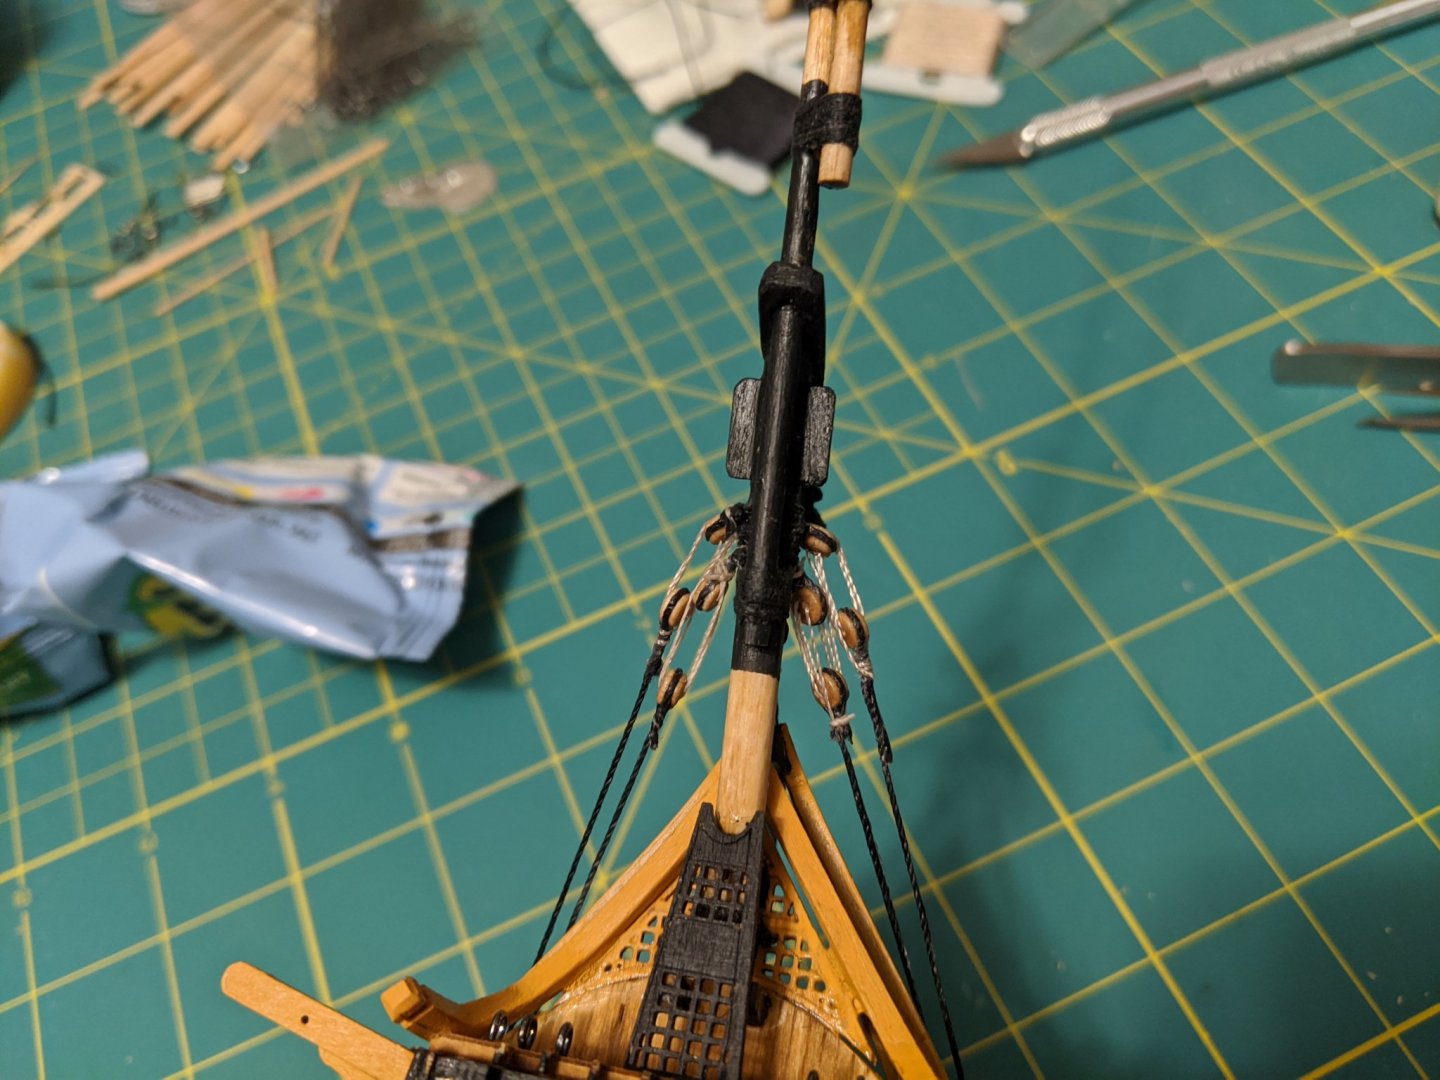
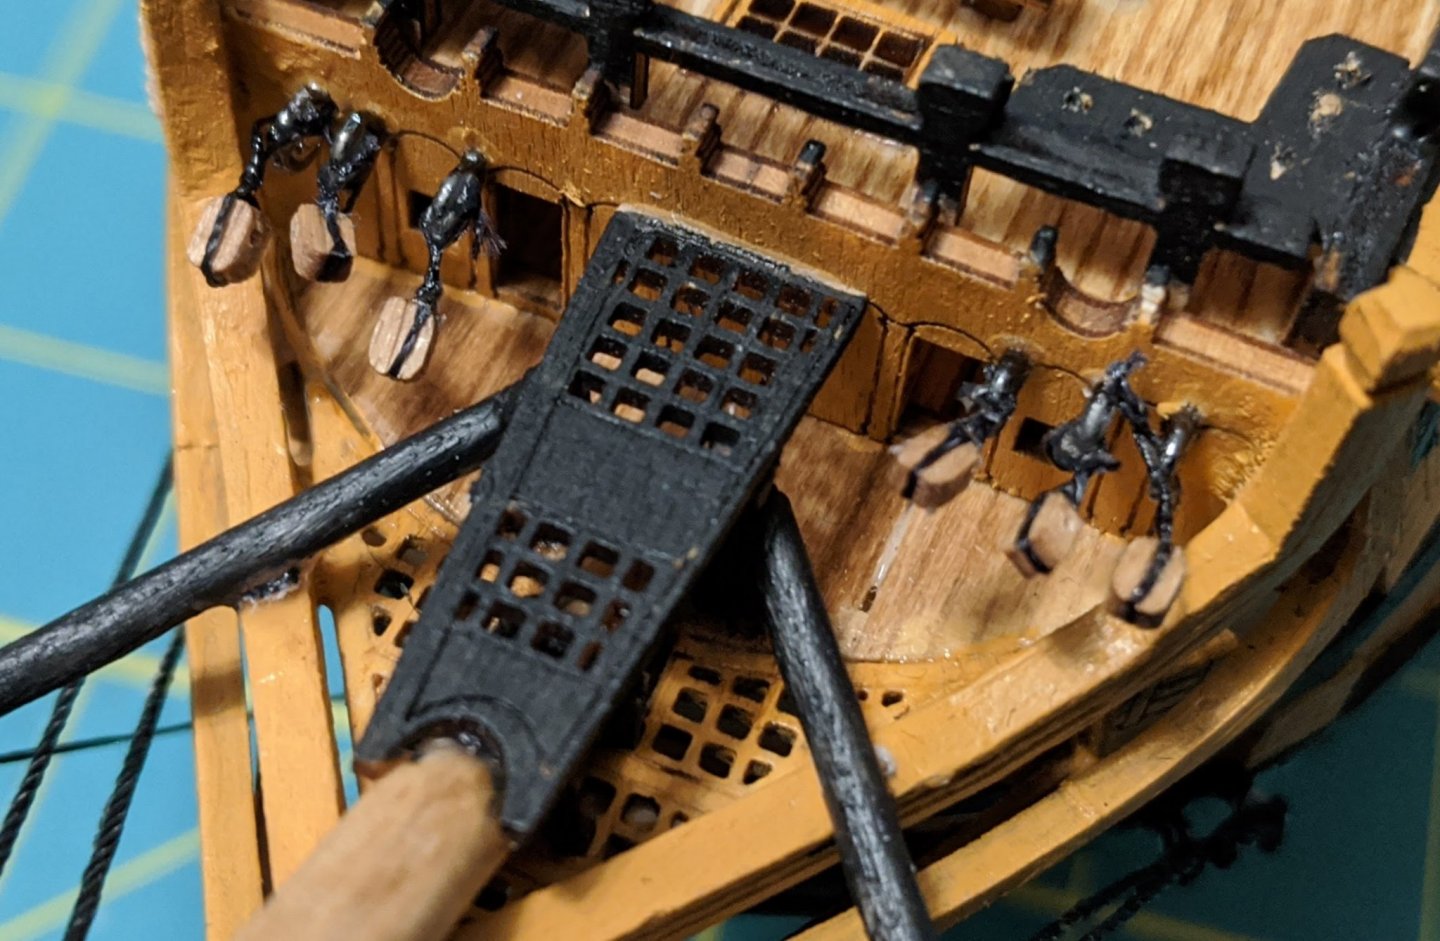
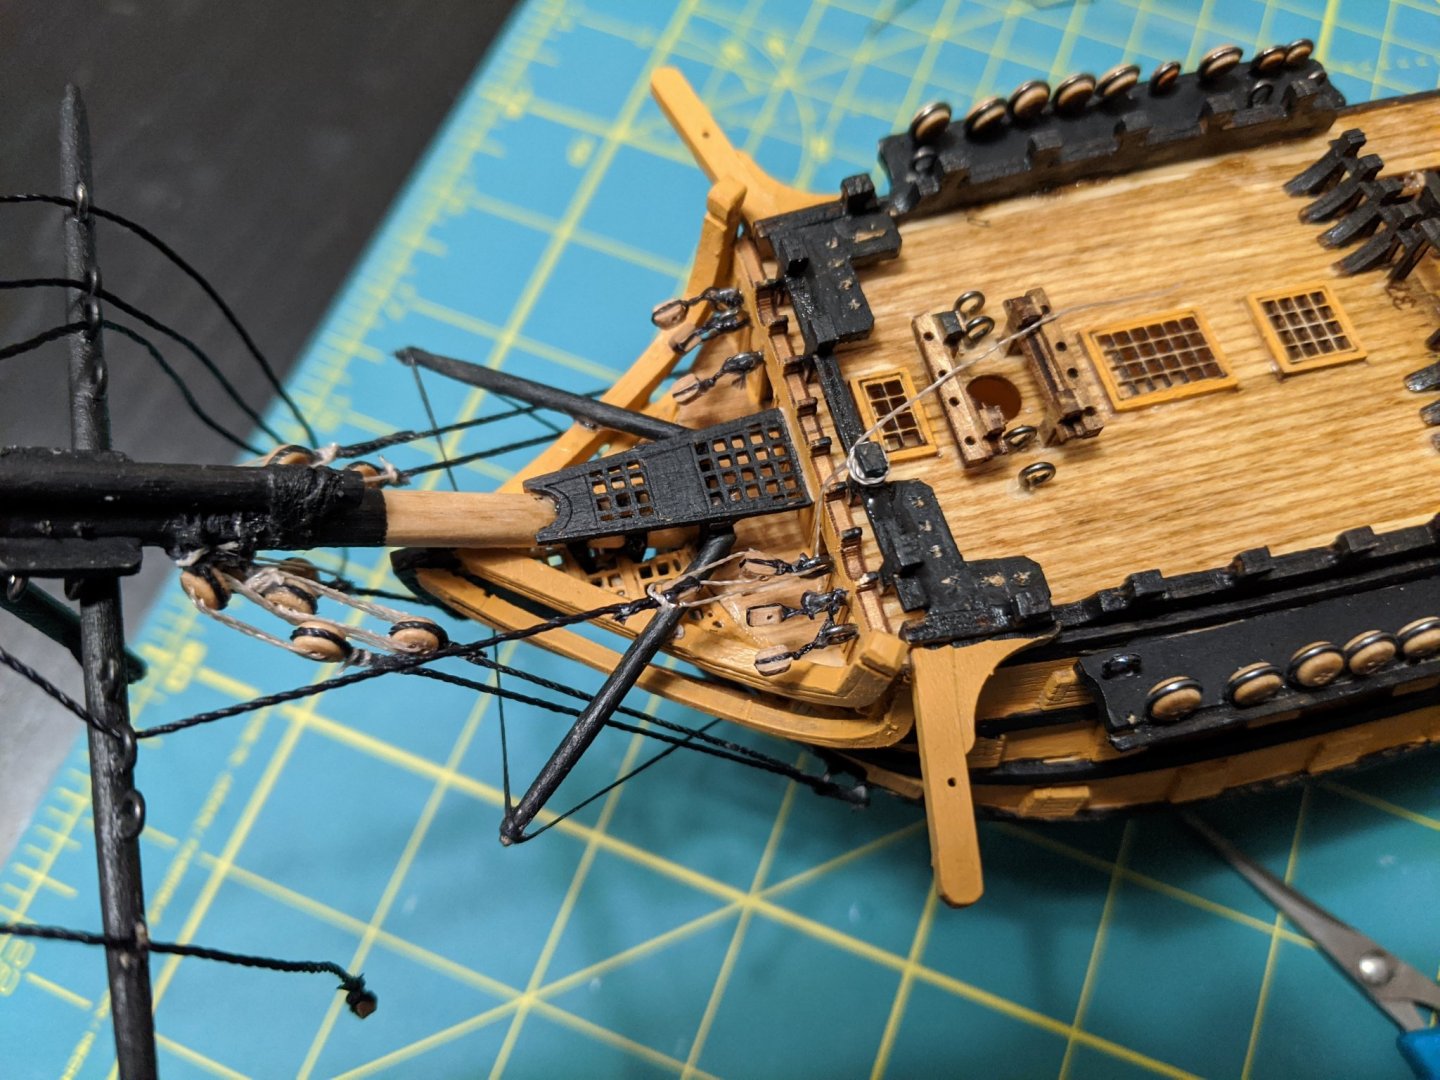
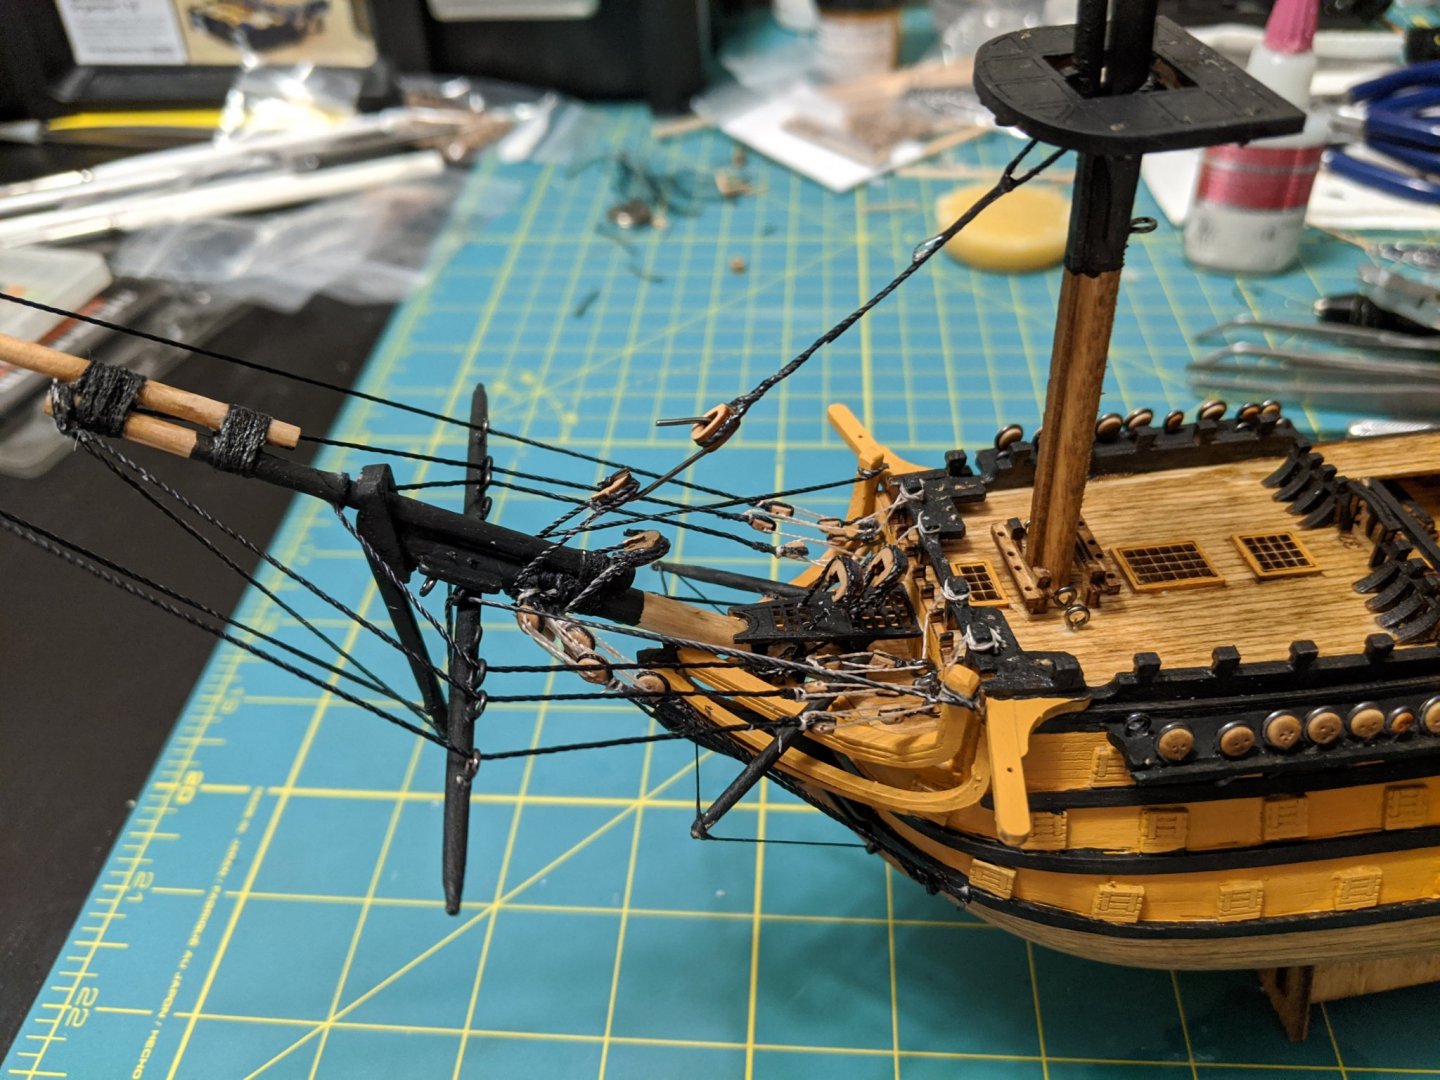
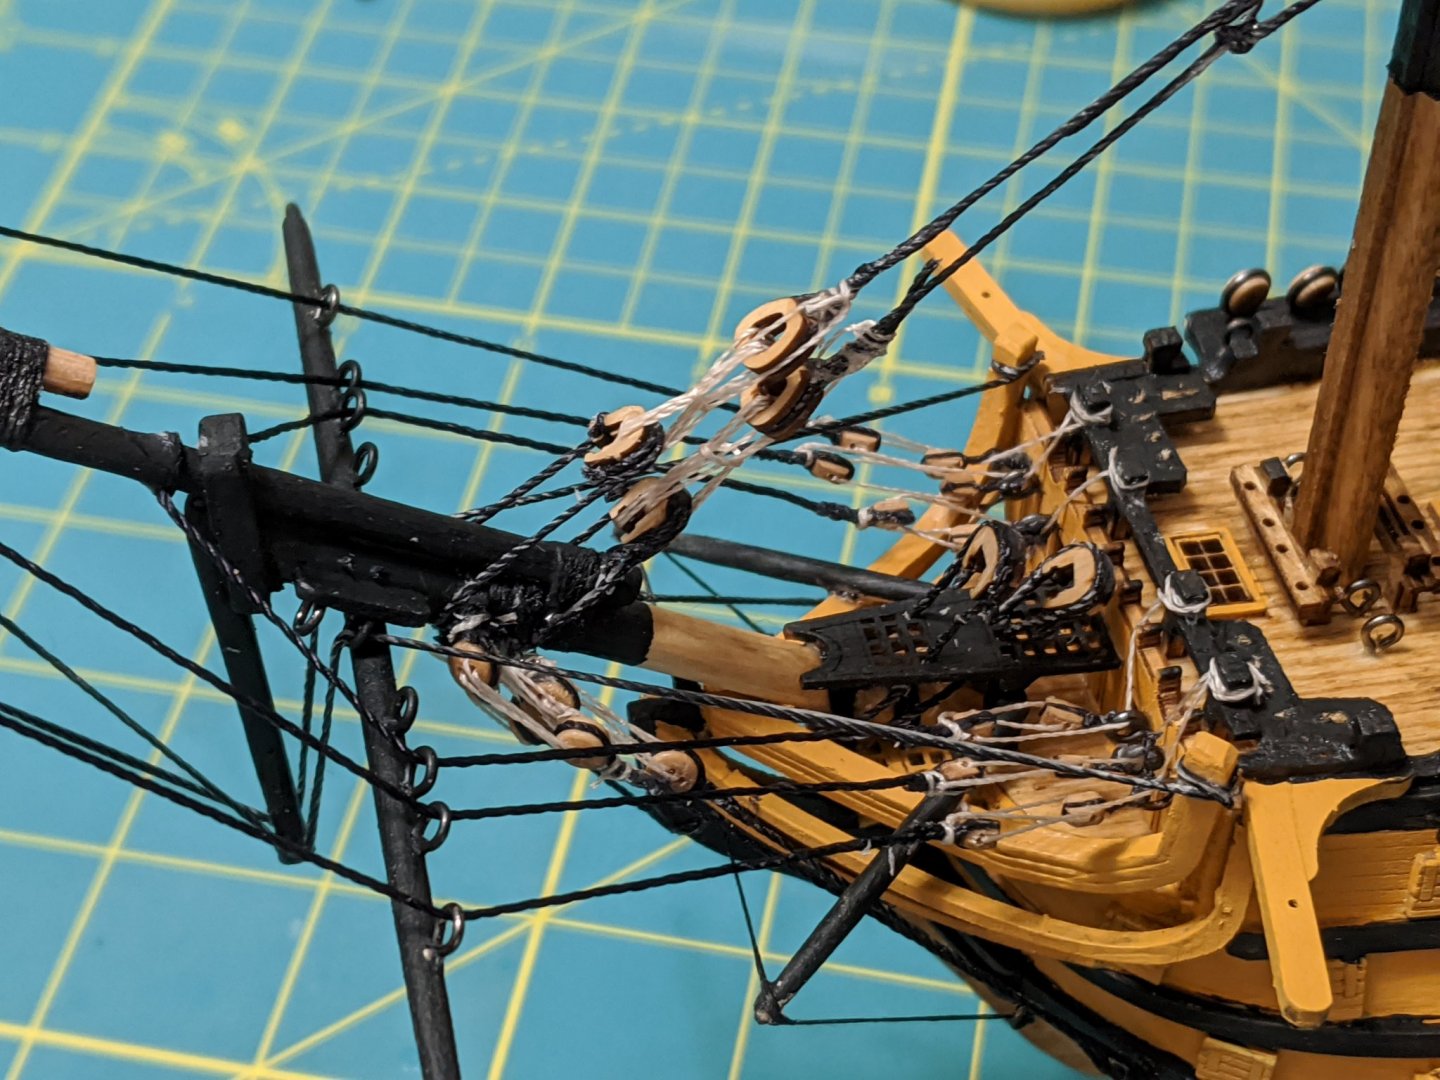
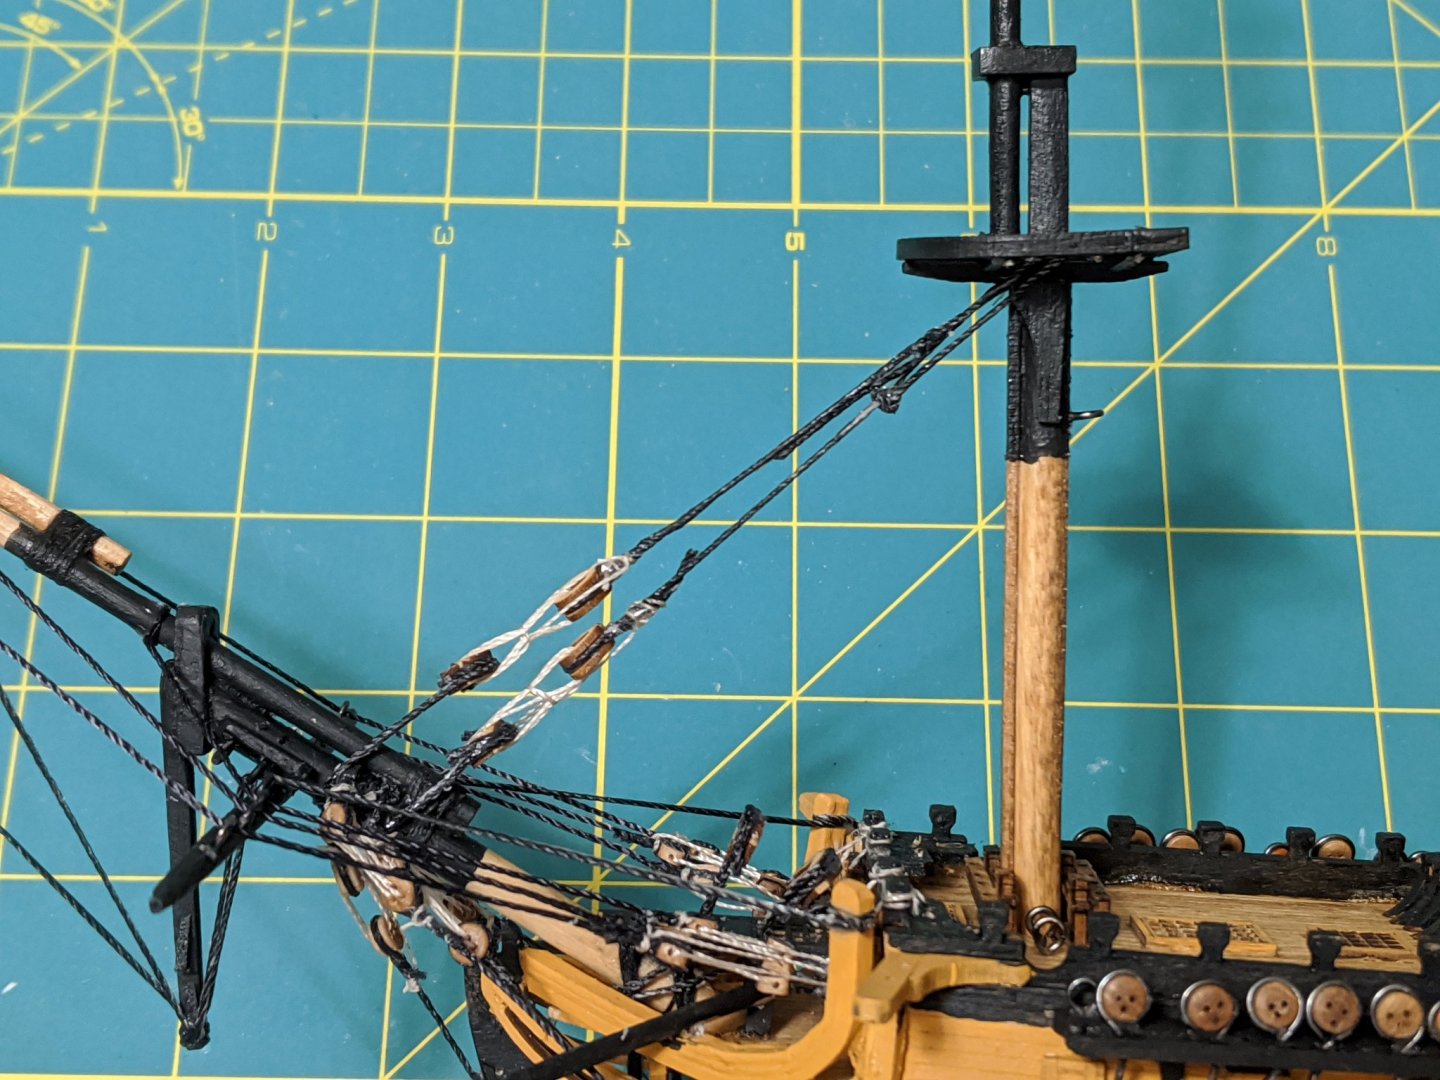
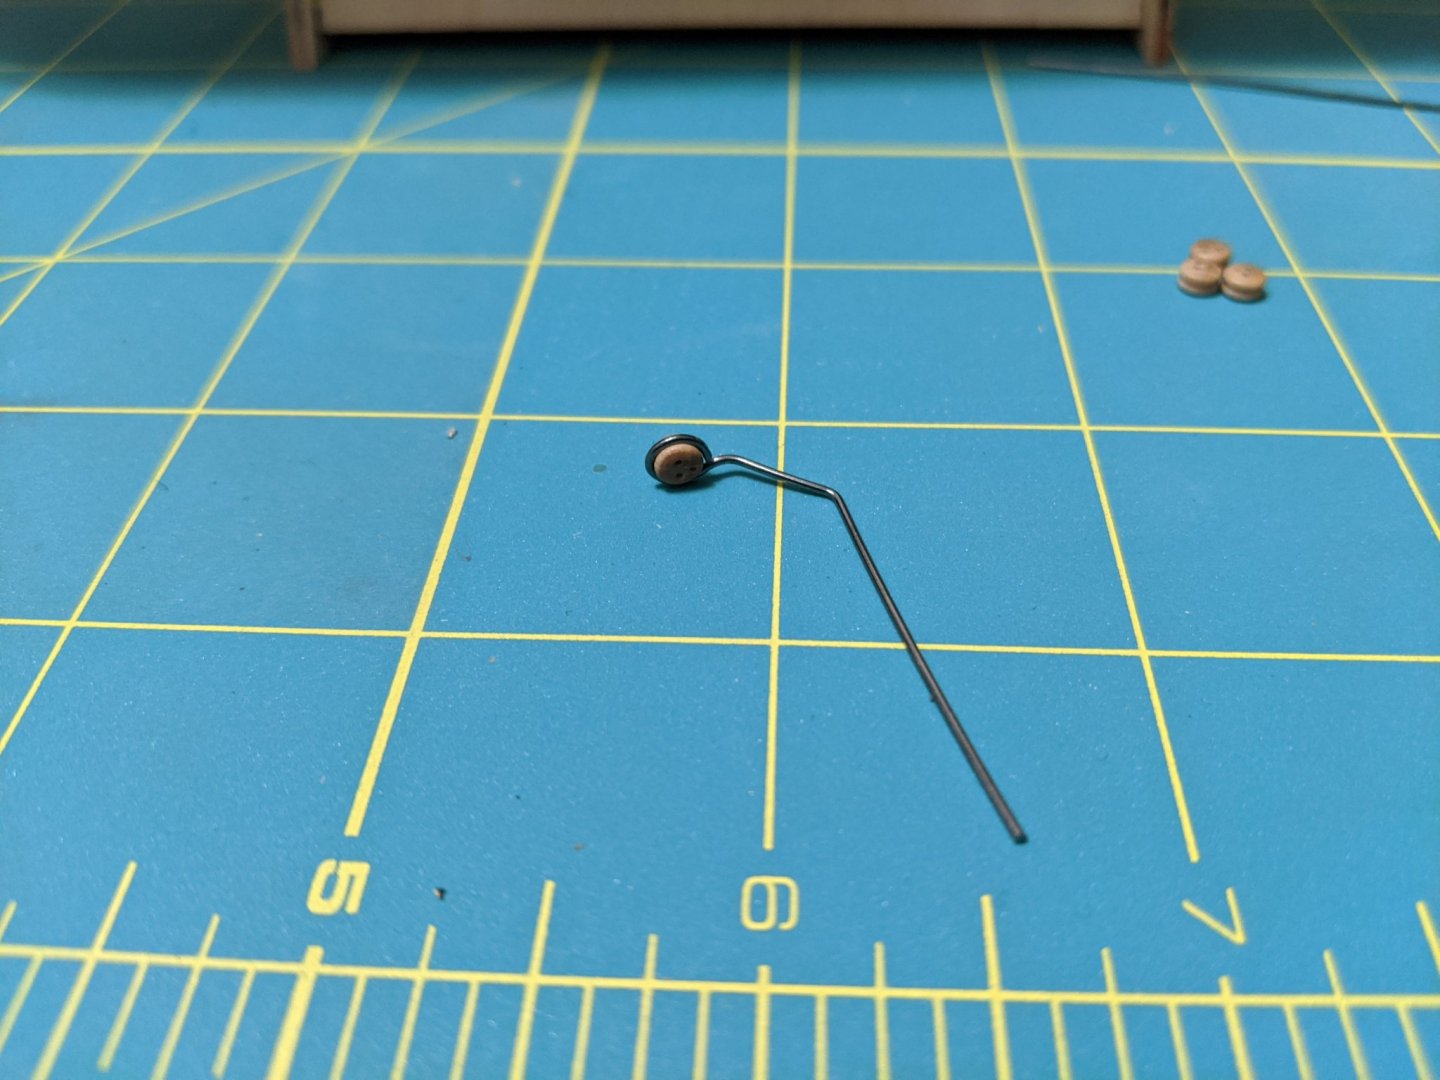
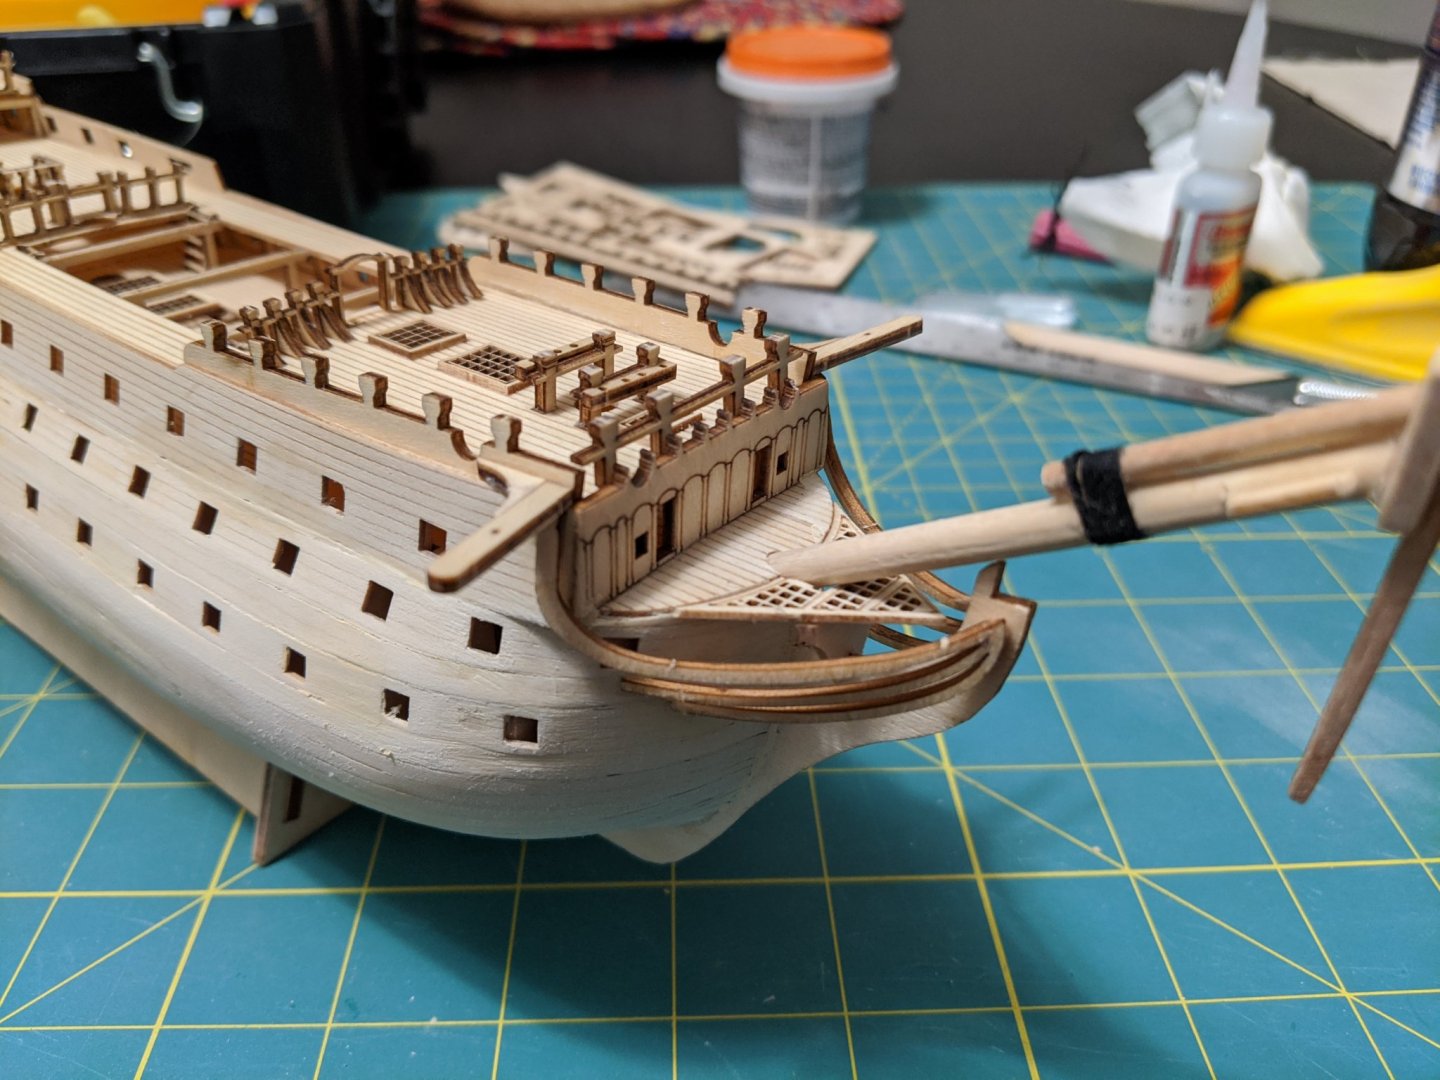
So i have begun the rigging, starting with the bow sprit stays. I added in the boomkins and rigging, as well as the sprit yard, and rigged the 6 2mm single blocks I need on the bow bulkhead. Next i rigged the travelling guy, guy pendant and flying jibboom guy to the blocks i had rigged Up next was the martingale stays, and Thanks to Lazy Saint again for the pics of how he did his, and the open hearts for the foremast and main mast stays. PRO TIP, rig the open hearts FIRST before you start rigging anything else. There is SO much going on here in the bow that if you don't cross your eyes, stick out your tongue and hold your pinkies out just right, it's next to impossible to fish these lines down through the rigging, particularly for the main mast stay open hearts that have to pass through the grate over the base of the bow sprit. Wish I had done these first! At this point, I stepped the fore mast and glued it in, and rigged the foremast stays. I used w short length of wire I bent to form a jig to set the length between hearts while i stretched the stay to the fore top and glued in place. Once this dried i then rigged the hearts, though i might redo the preventor stay as i am not happy with how this one turned out once I good a really good look at it in these pics! Side note, I ordered the 5mm open and closed hearts kits from Chuck P at Syren and could not be happier with these. Definitely will have to start collected more of Chucks blocks and rigging kits before I start on my MS Syren which I just got for my birthday as my next build. I want to finish this build first to make sure I learn all I can from this kit before I move on.


-
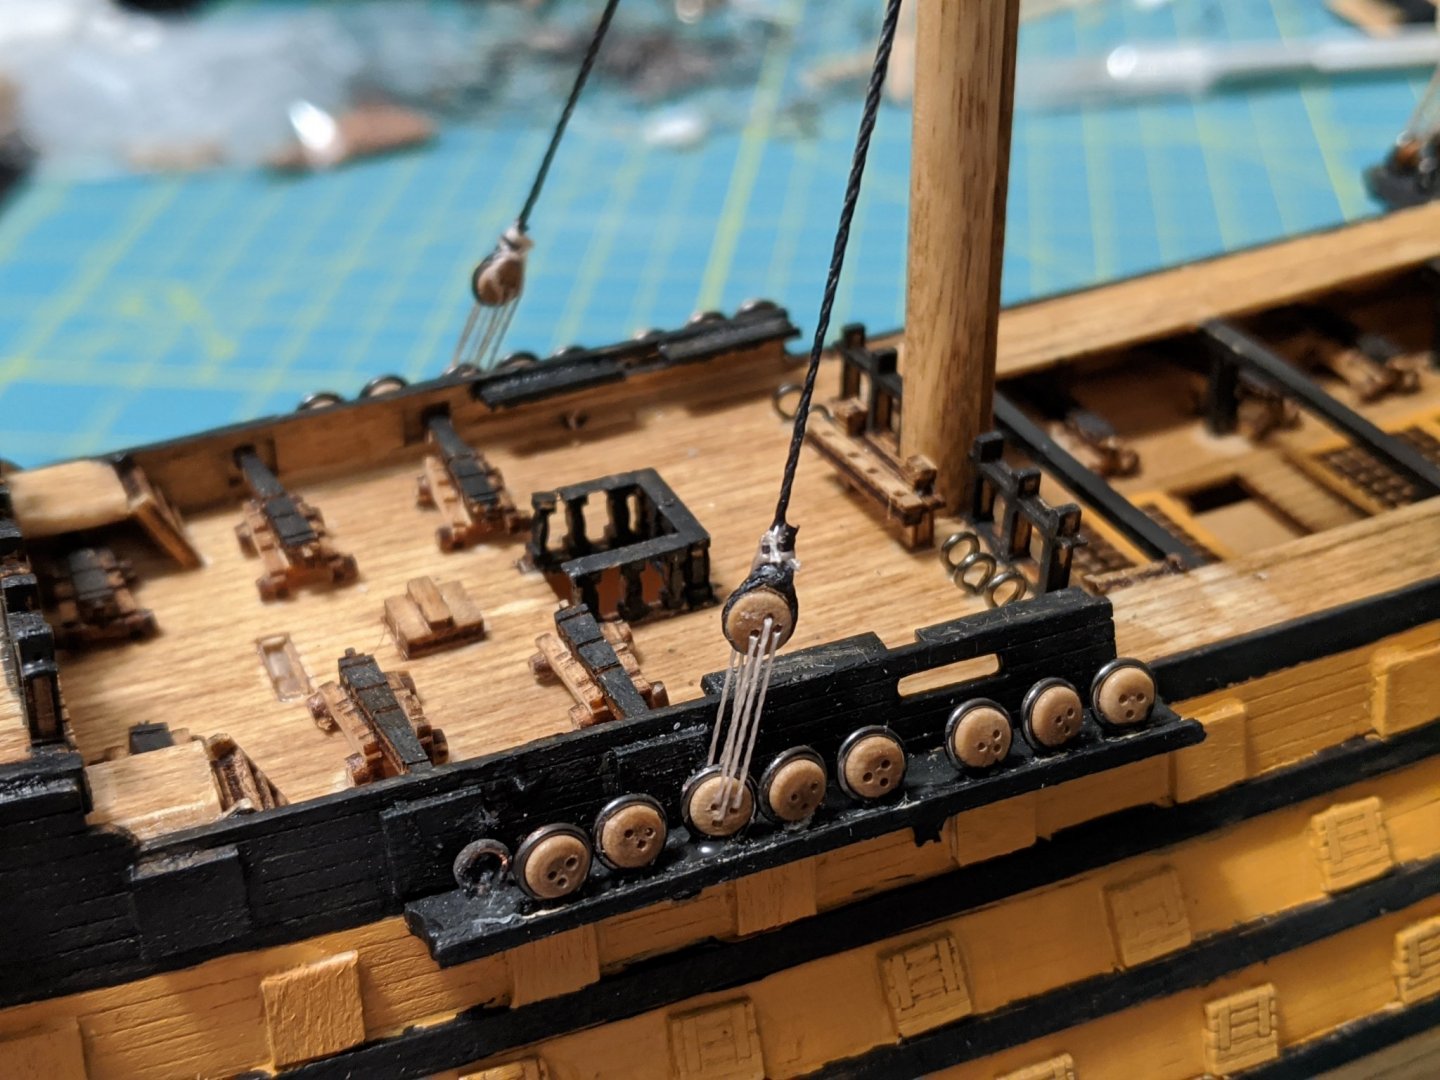
I've been busy rigging deadeyes to the chain rails and those that i need for the bow sprit stays as well as adding the eye bolts to the bow and decks i'll need for future rigging. It's at this point I need to make some hard choices. As stated above, I have found a complete rigging drawing set, and I need to decide what I can rig in the space allowed at this scale and with the blocks and deadeyes i would find to work with vs reality. Above, the i have rigged 5 deadeyes for the bow sprit stays, when there should be 7. But I will limit it to these 5 since there is simply not the space for all. Same one the chain rails, i will be reducing the total number of deadeyes and back stays because there is simply not more room for the 2.5 and 3.5 mm deadeyes I have found.

-
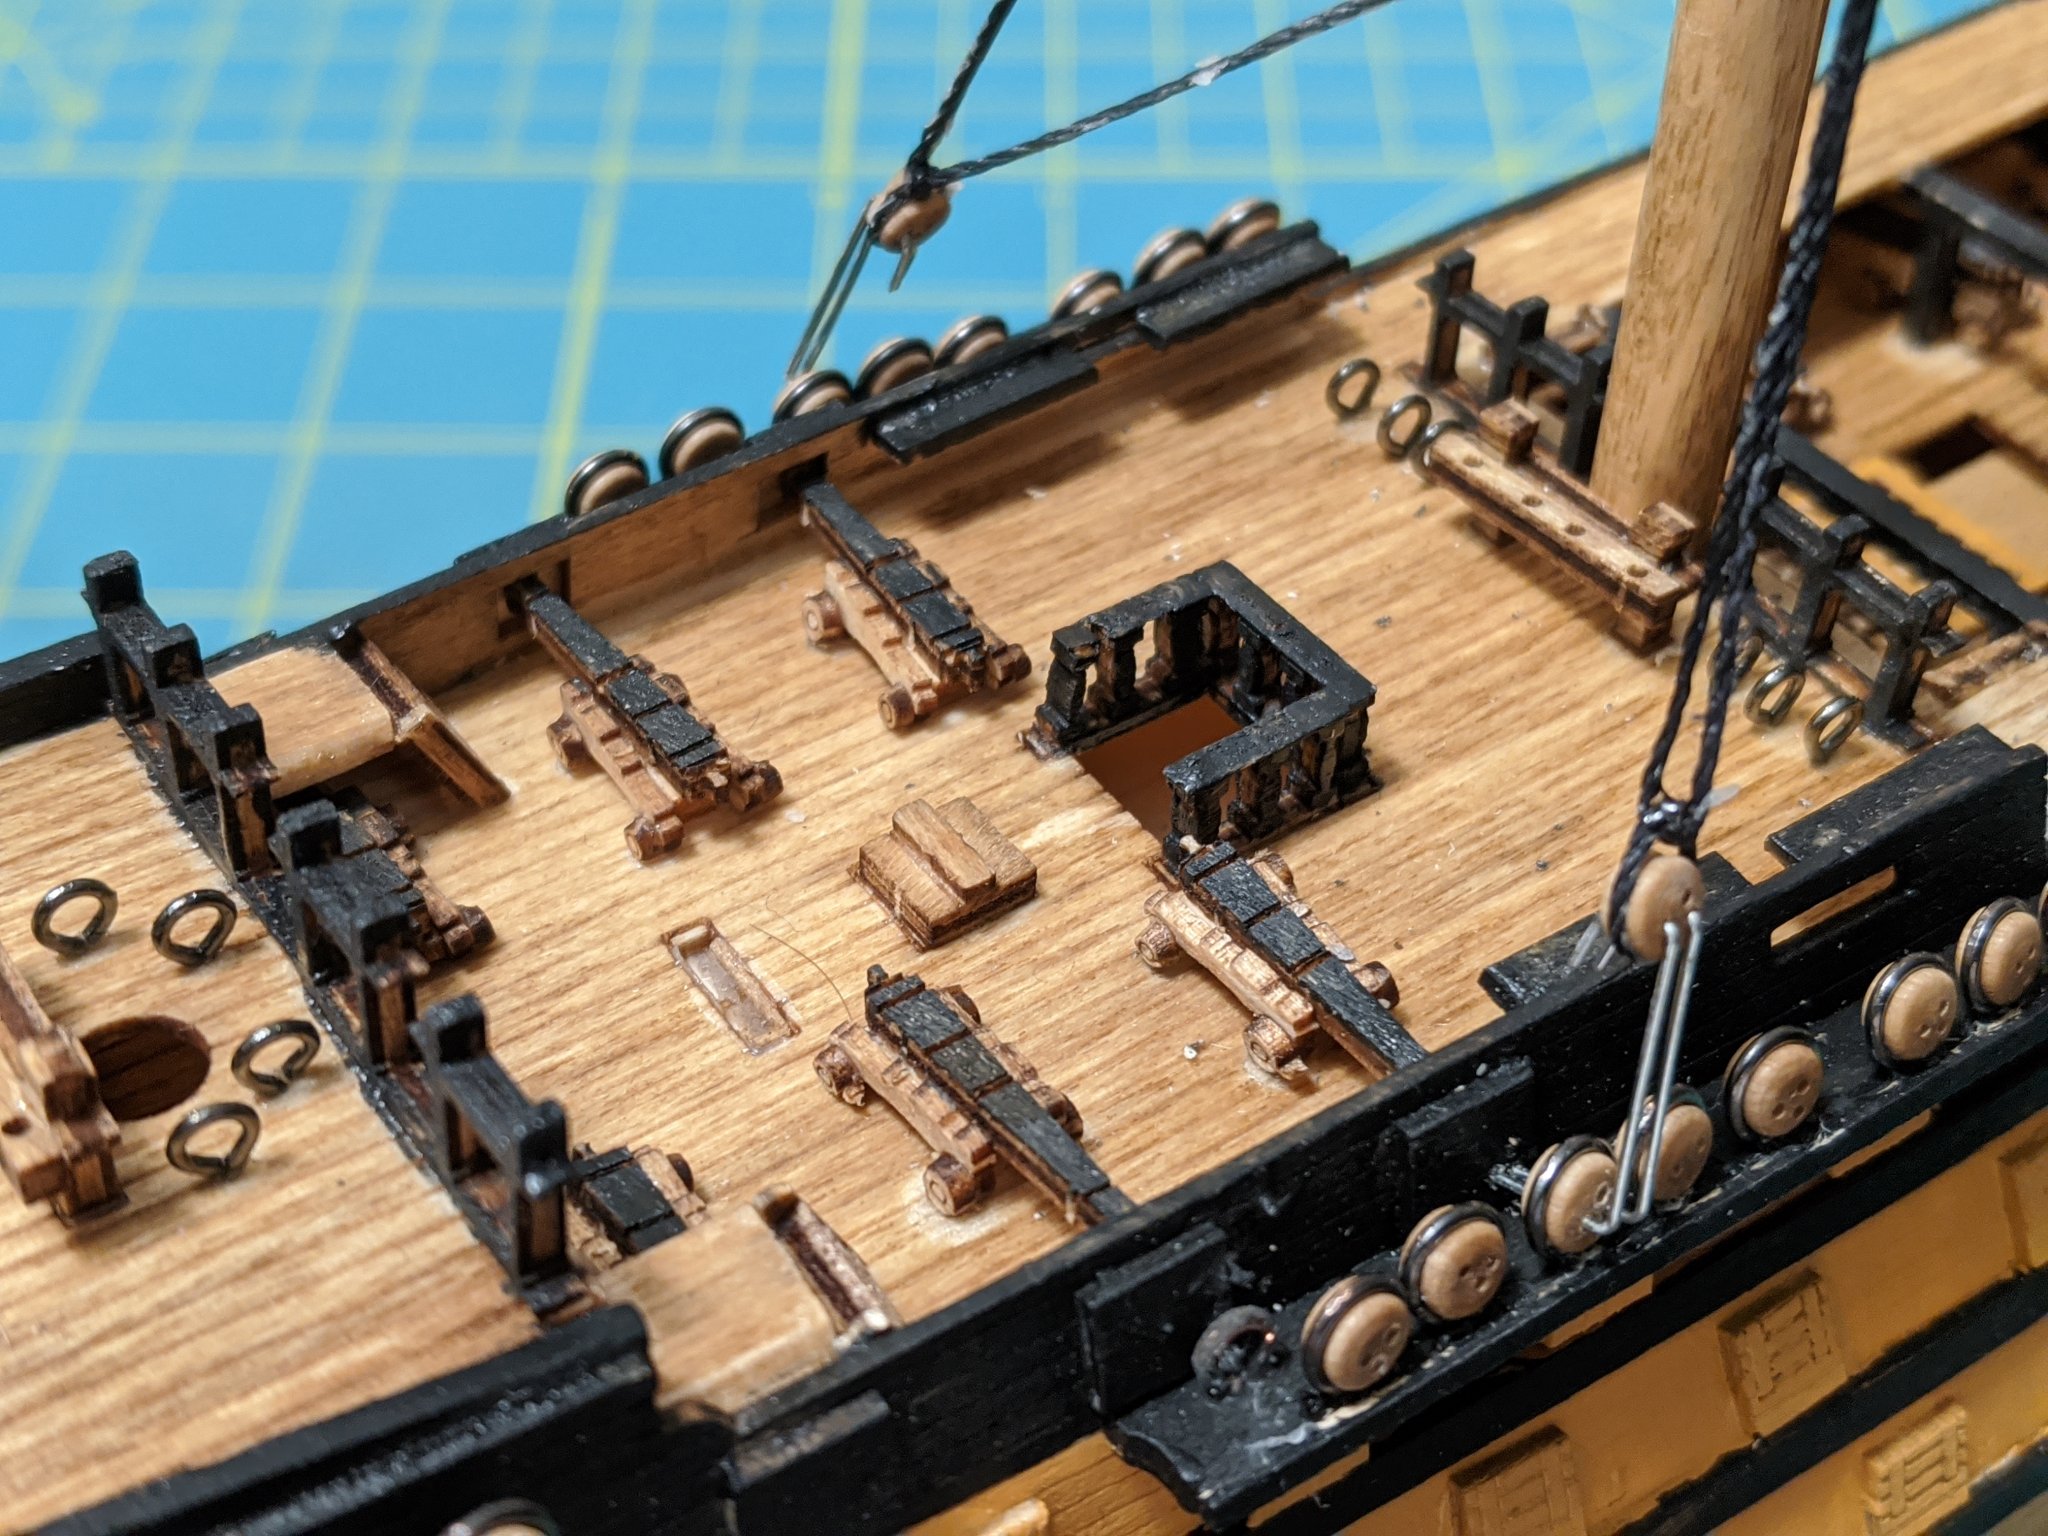
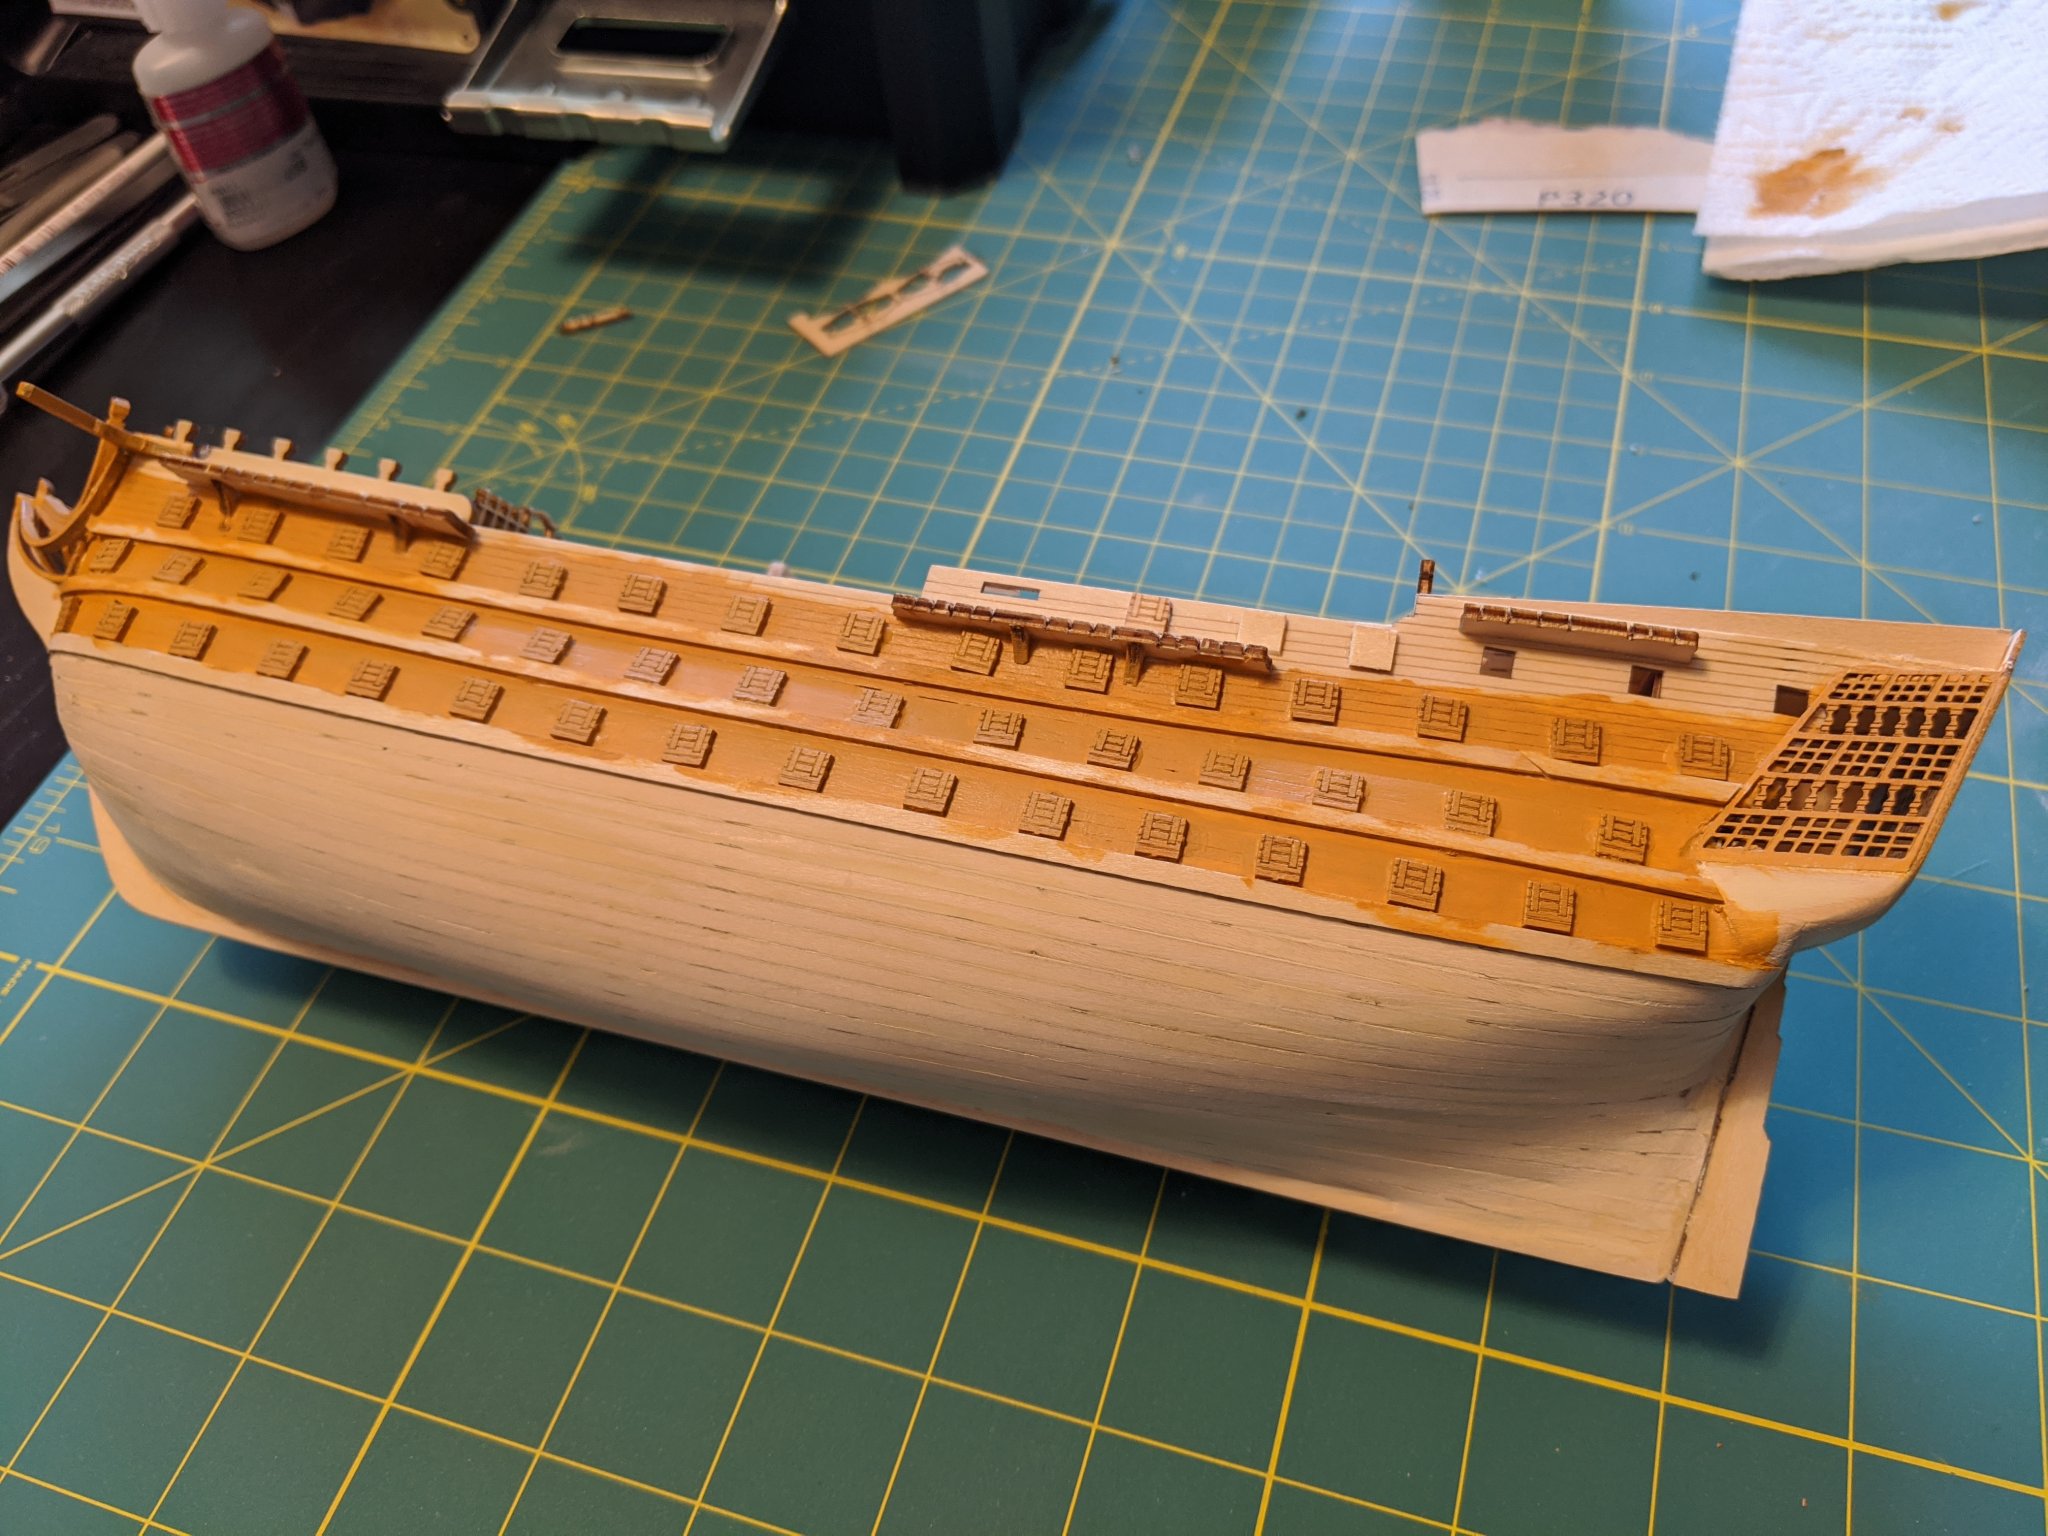
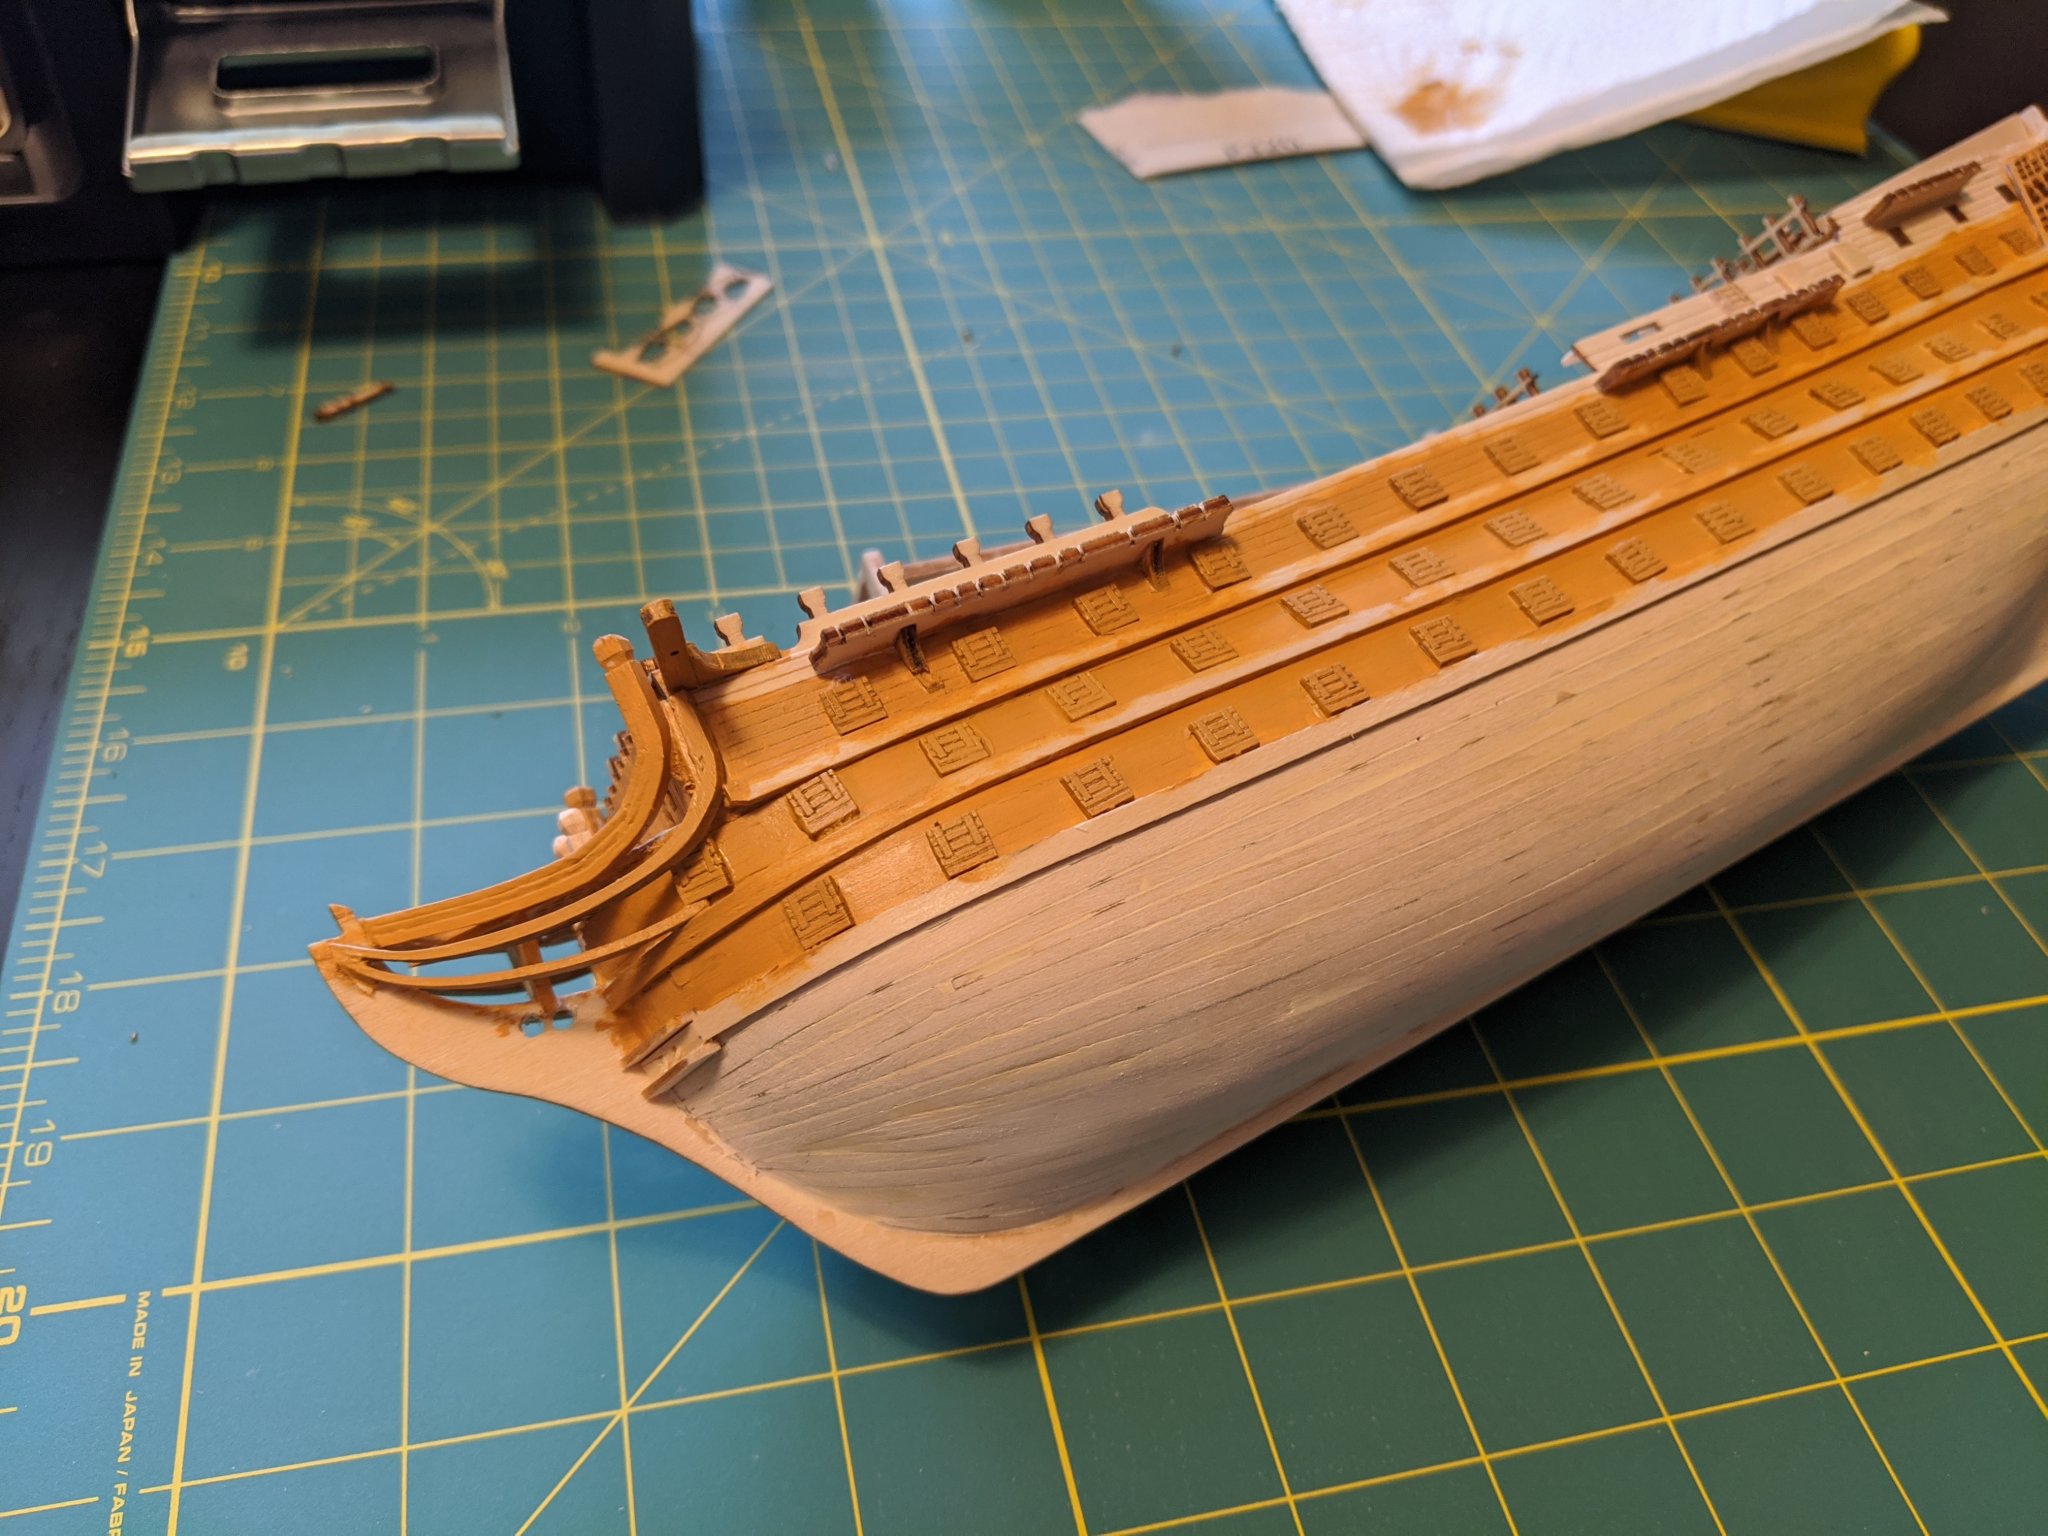
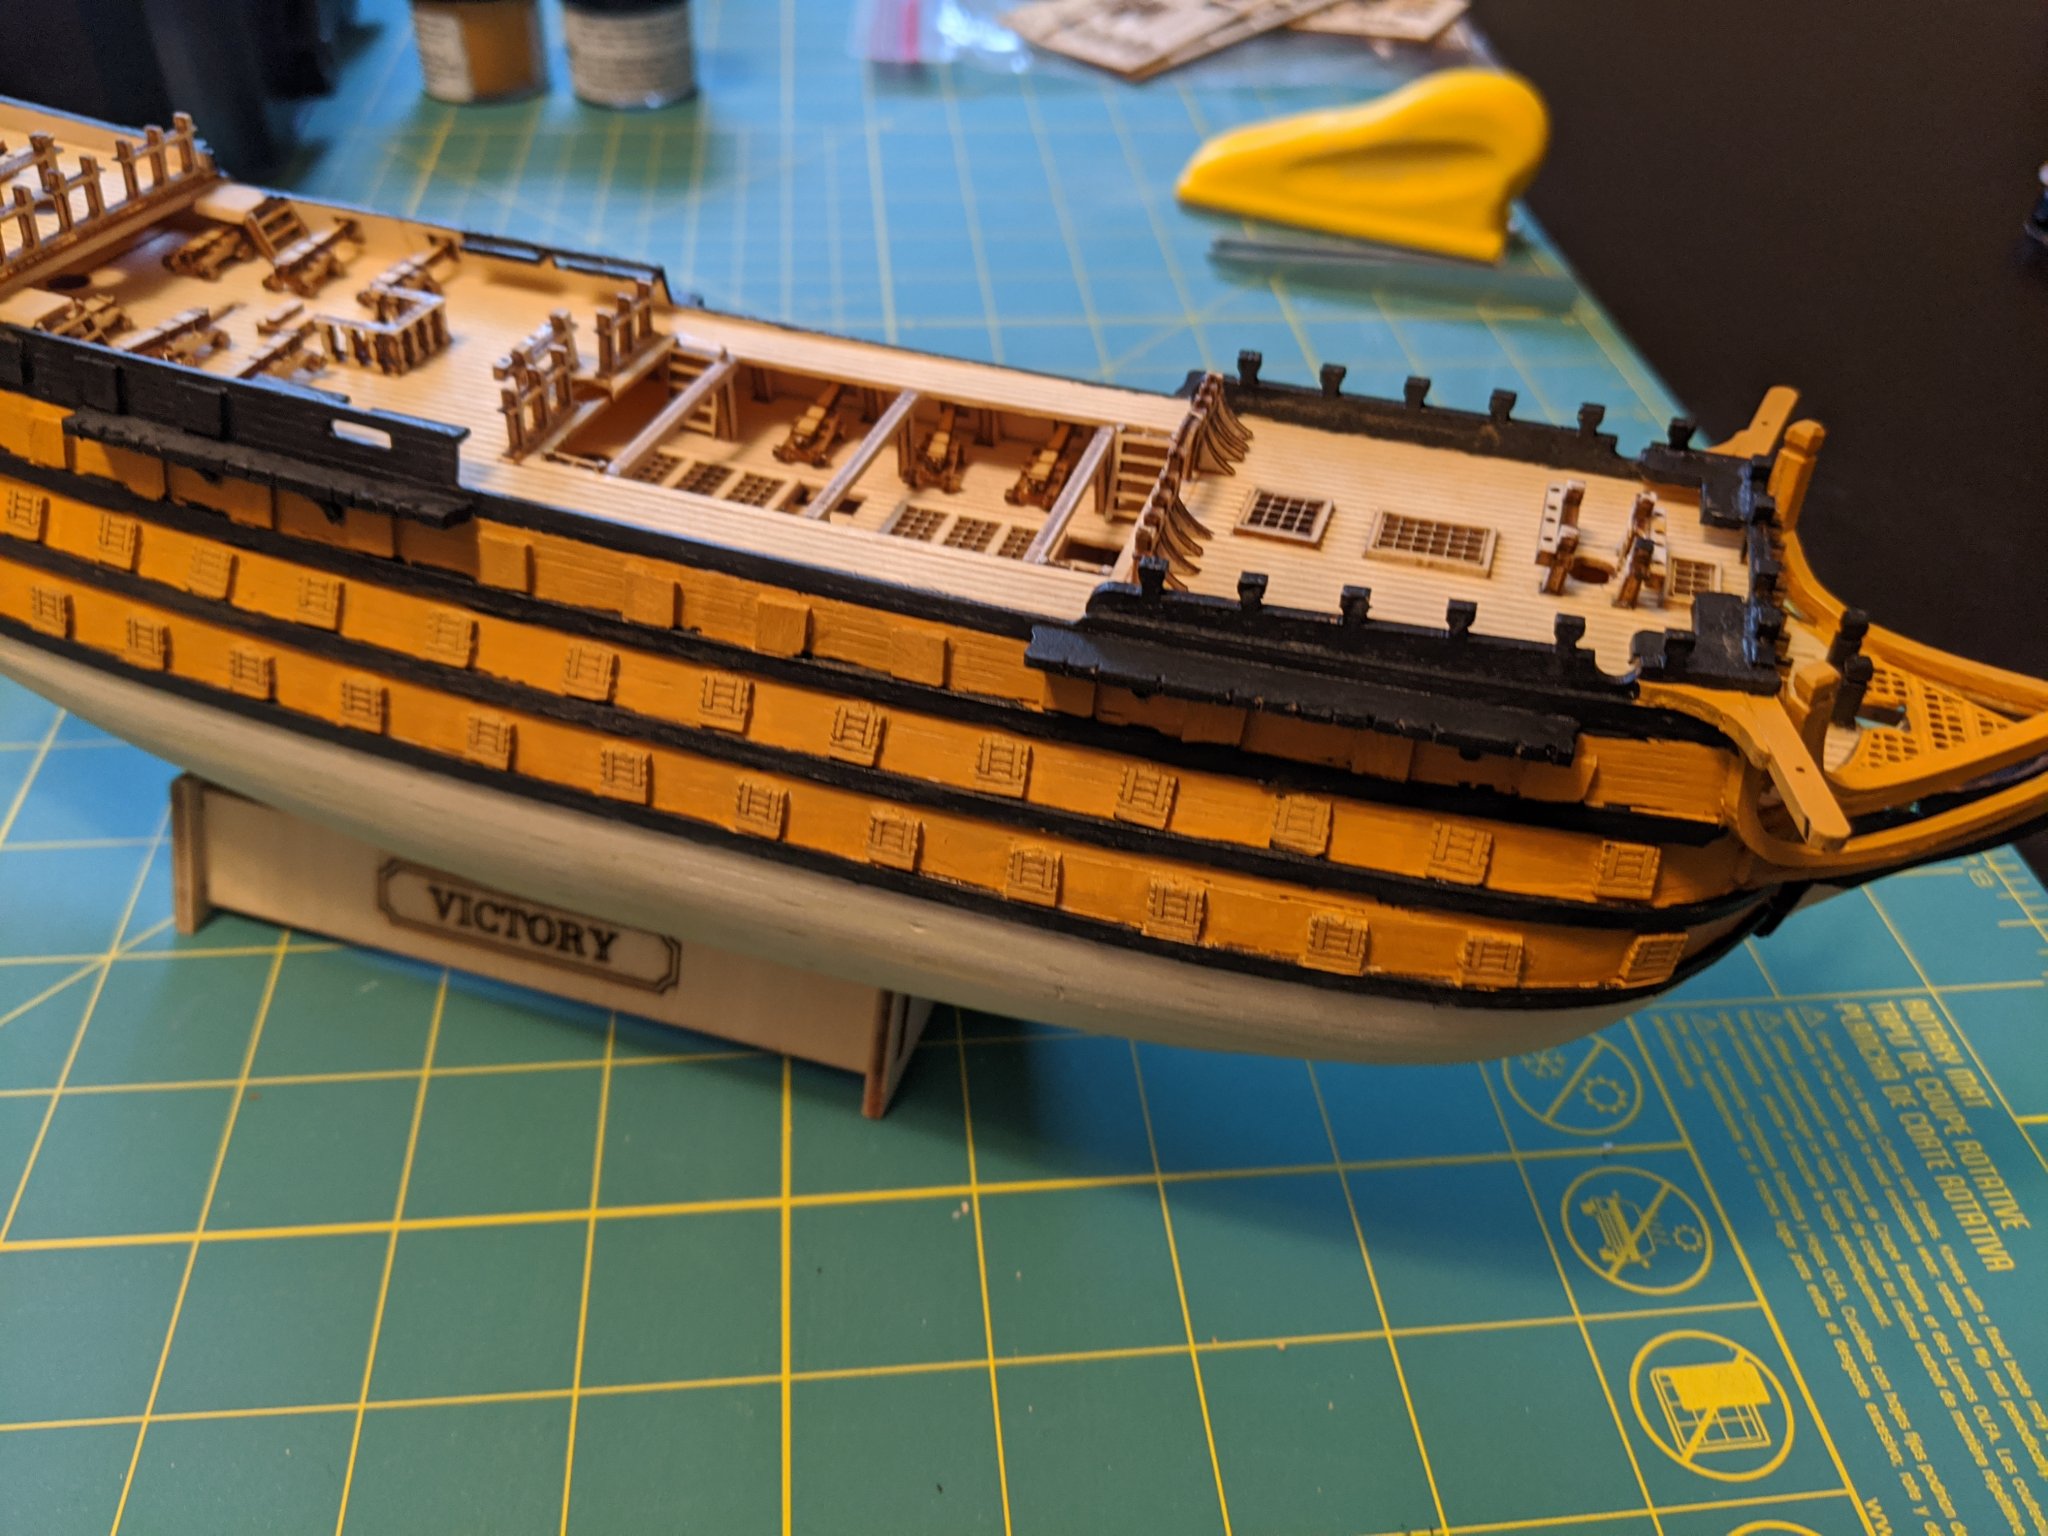
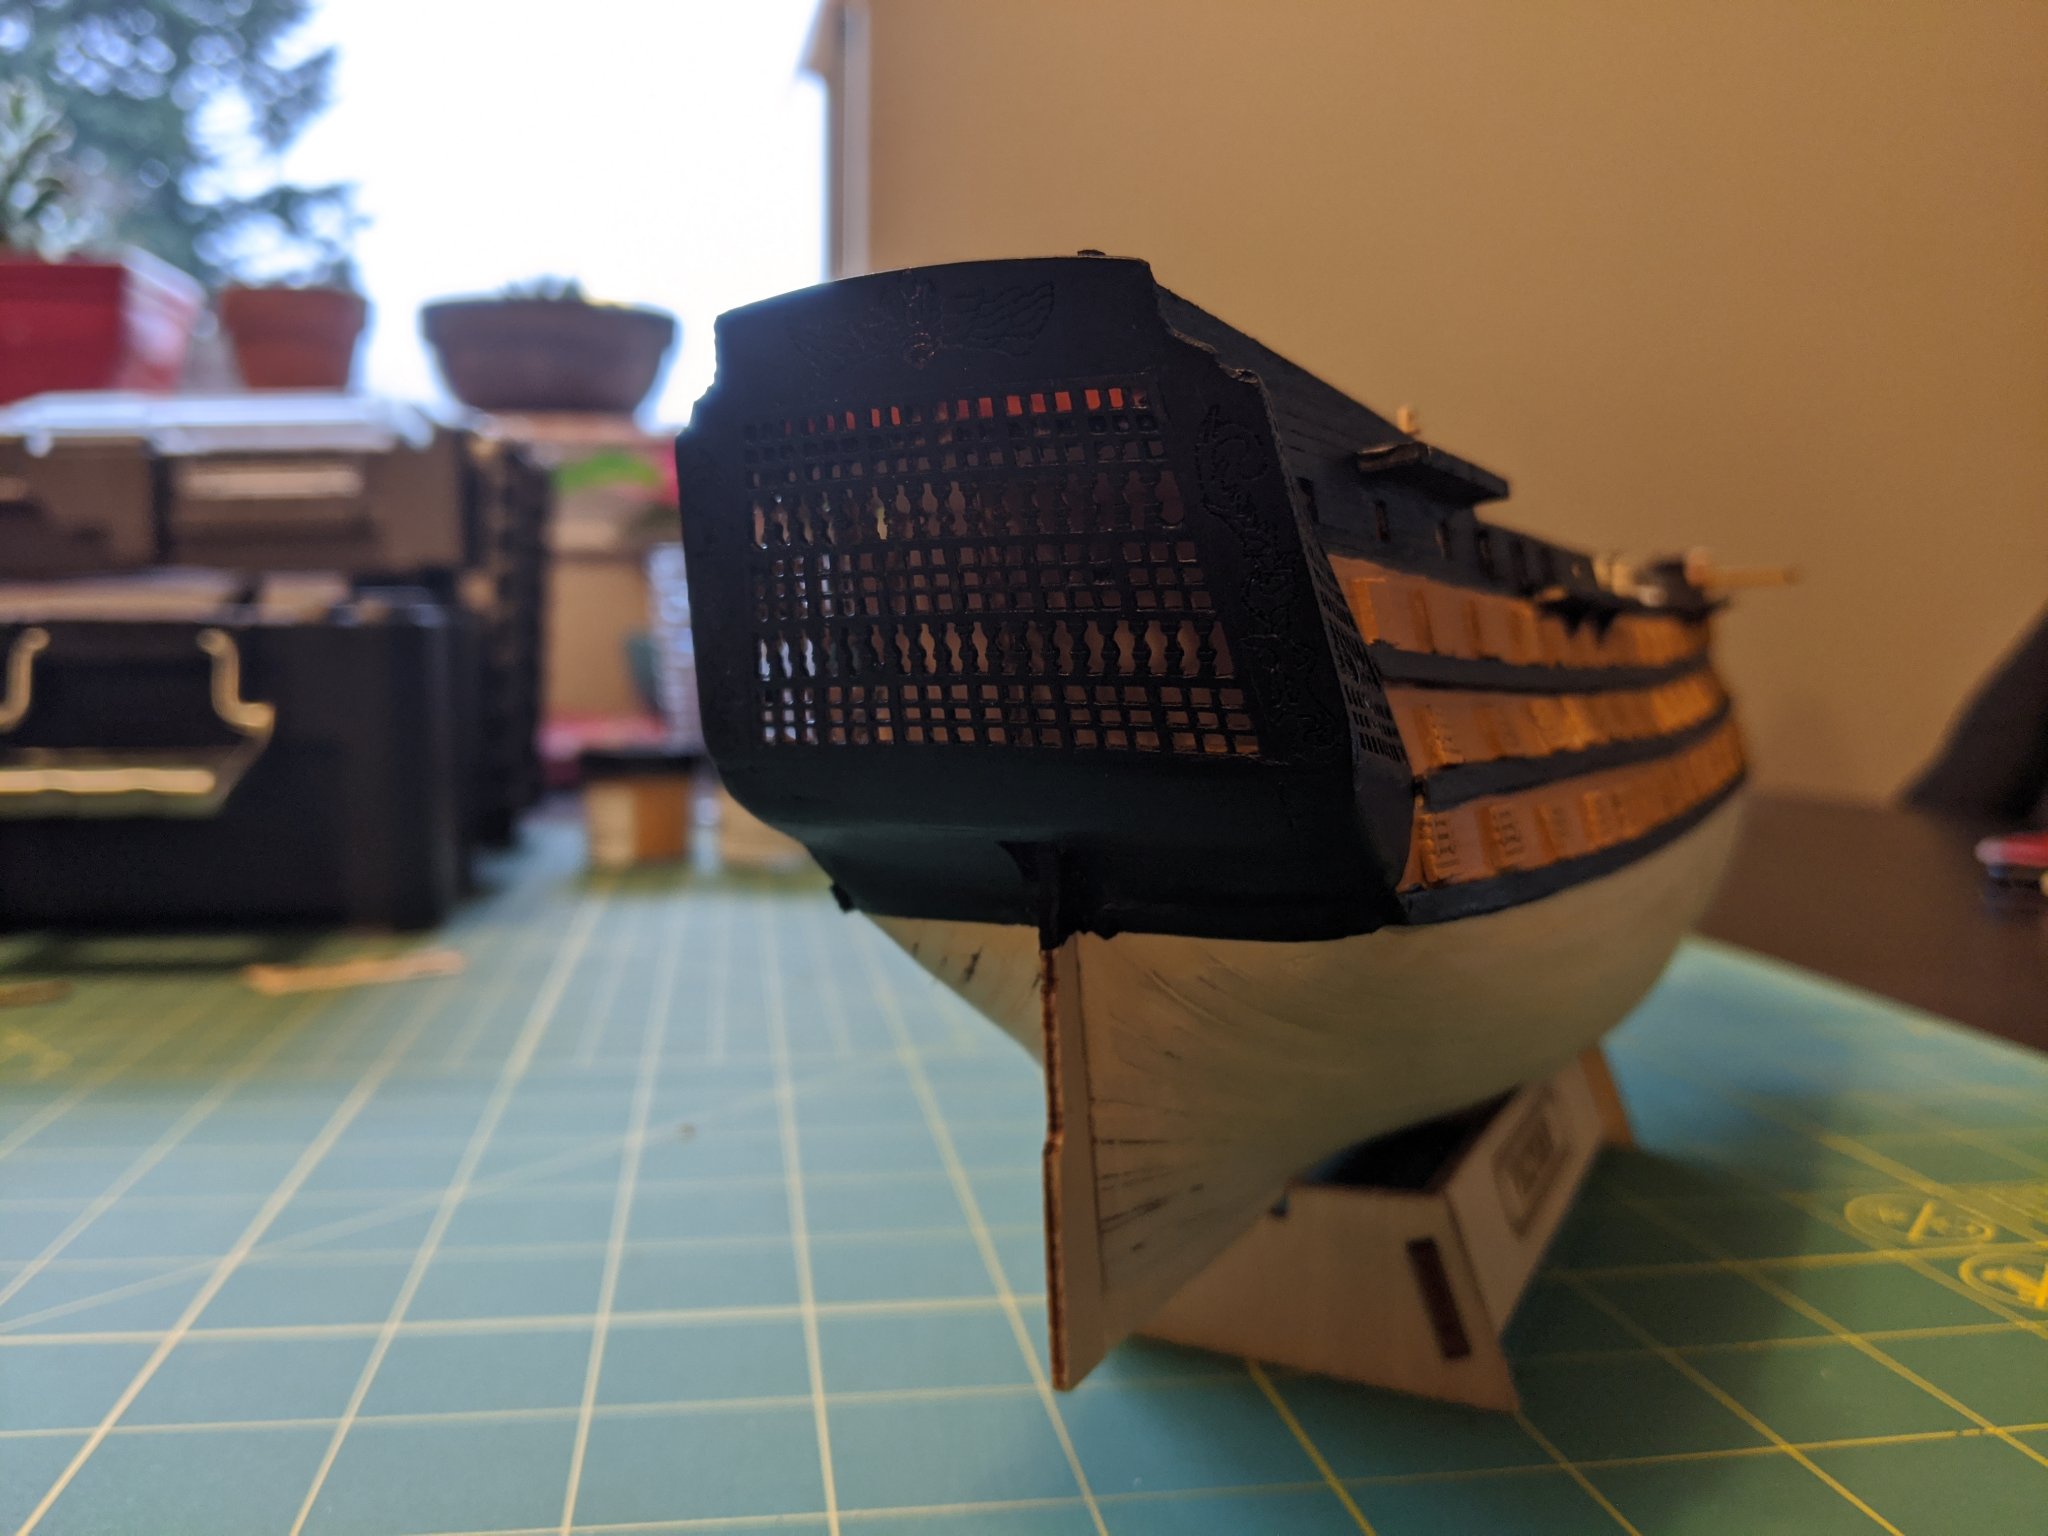
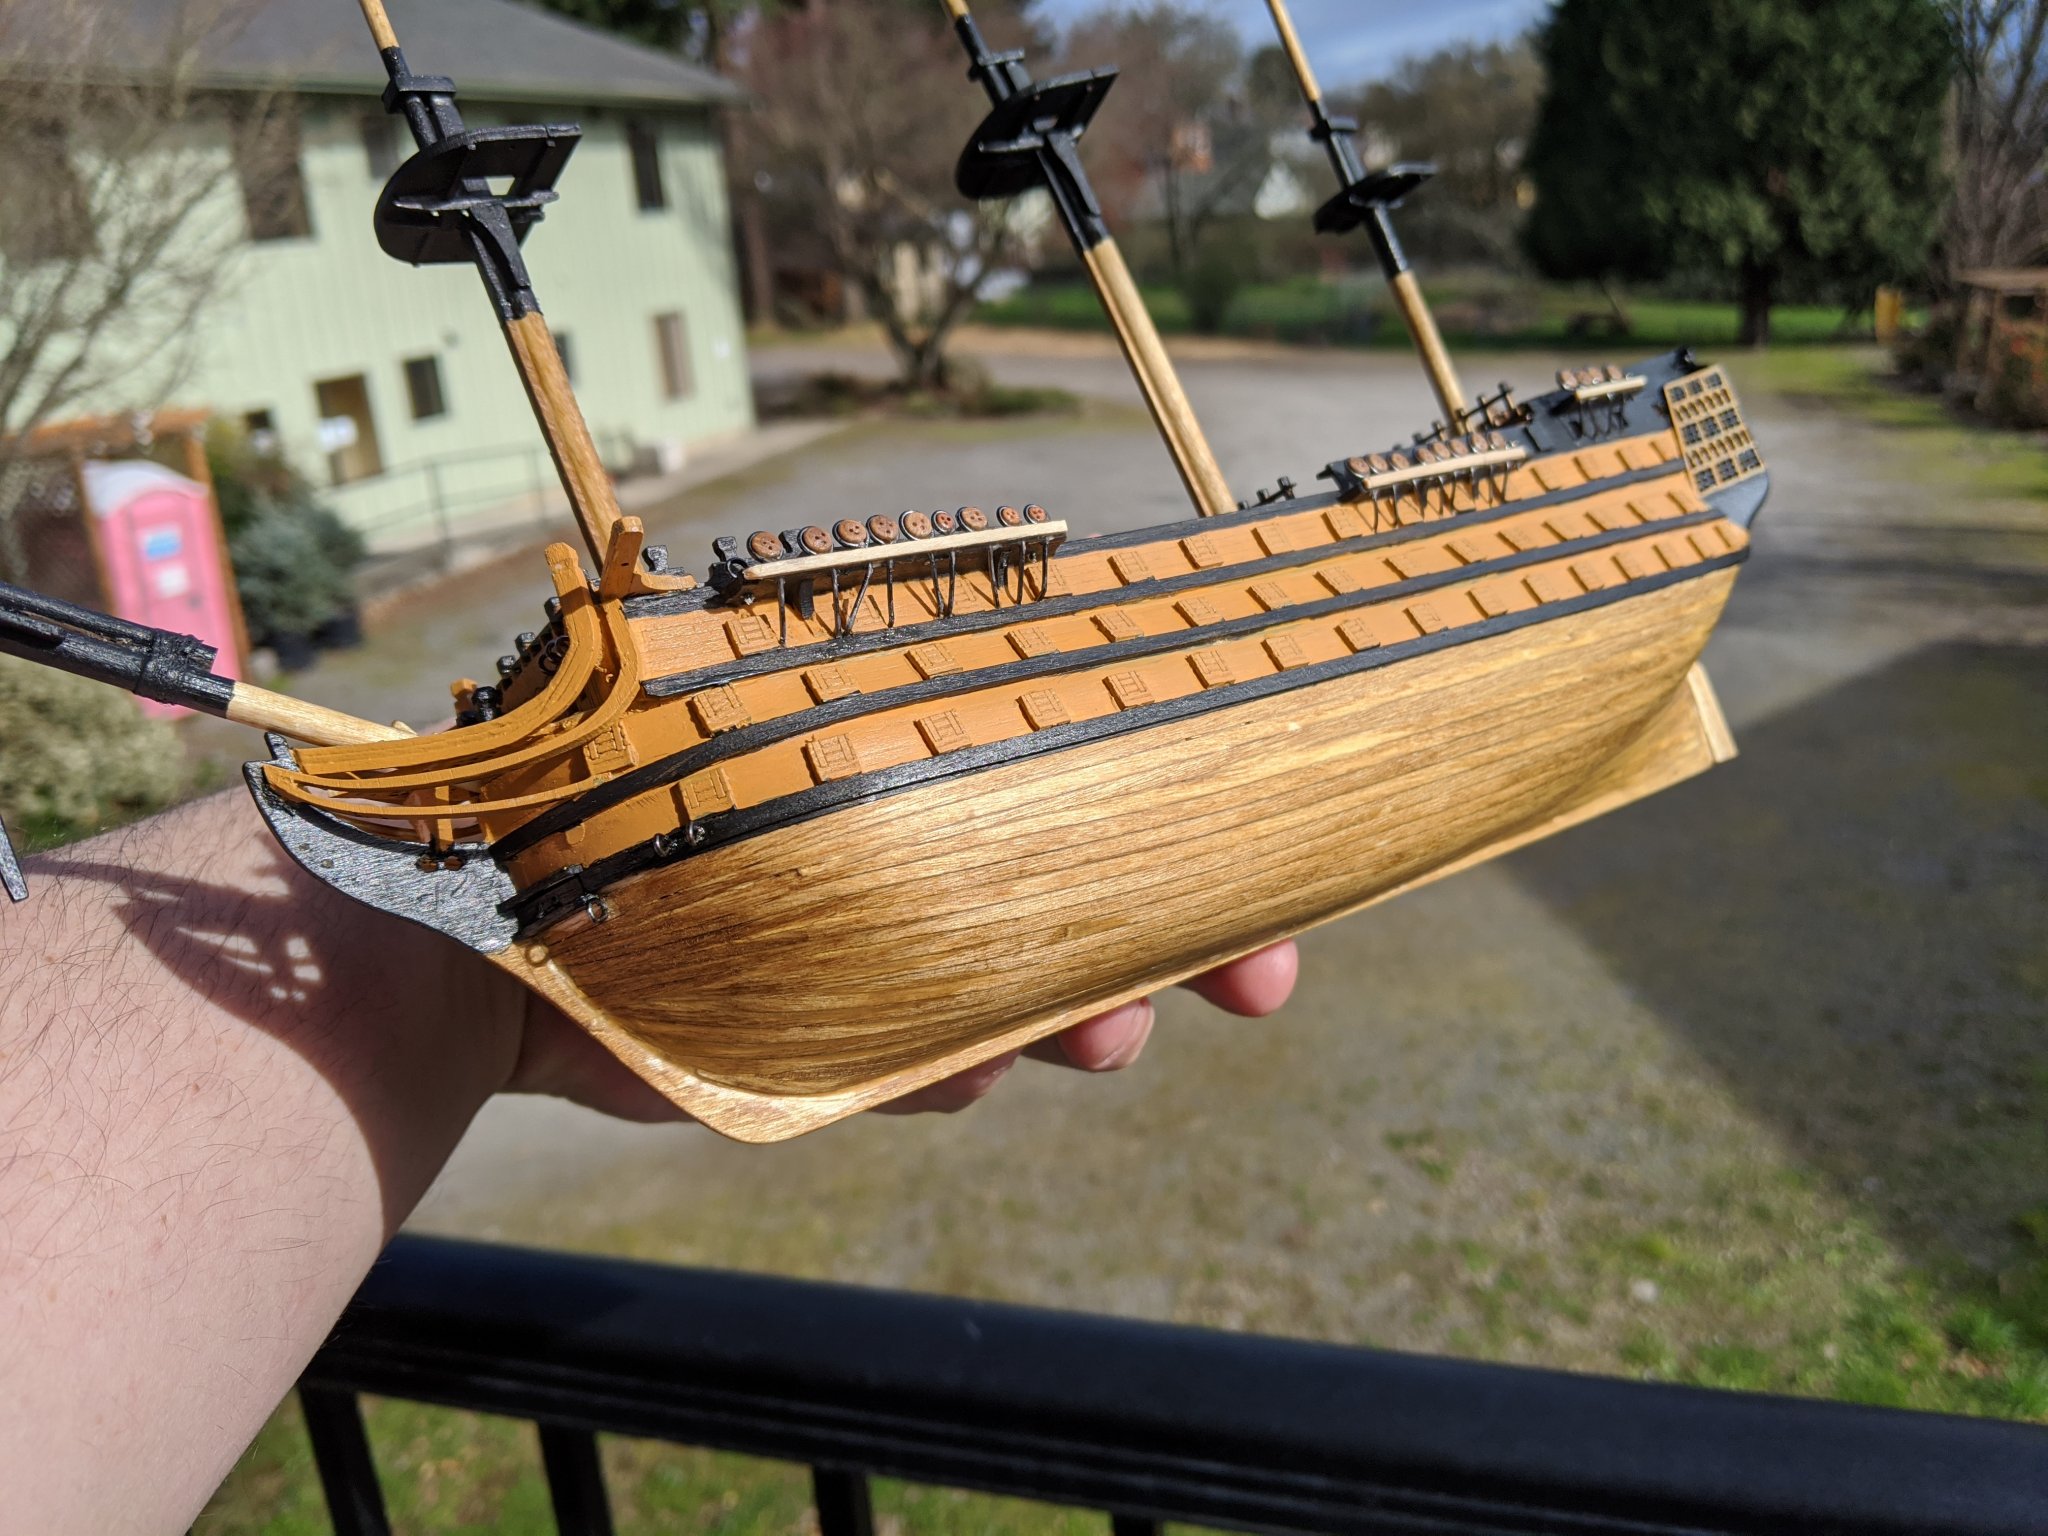
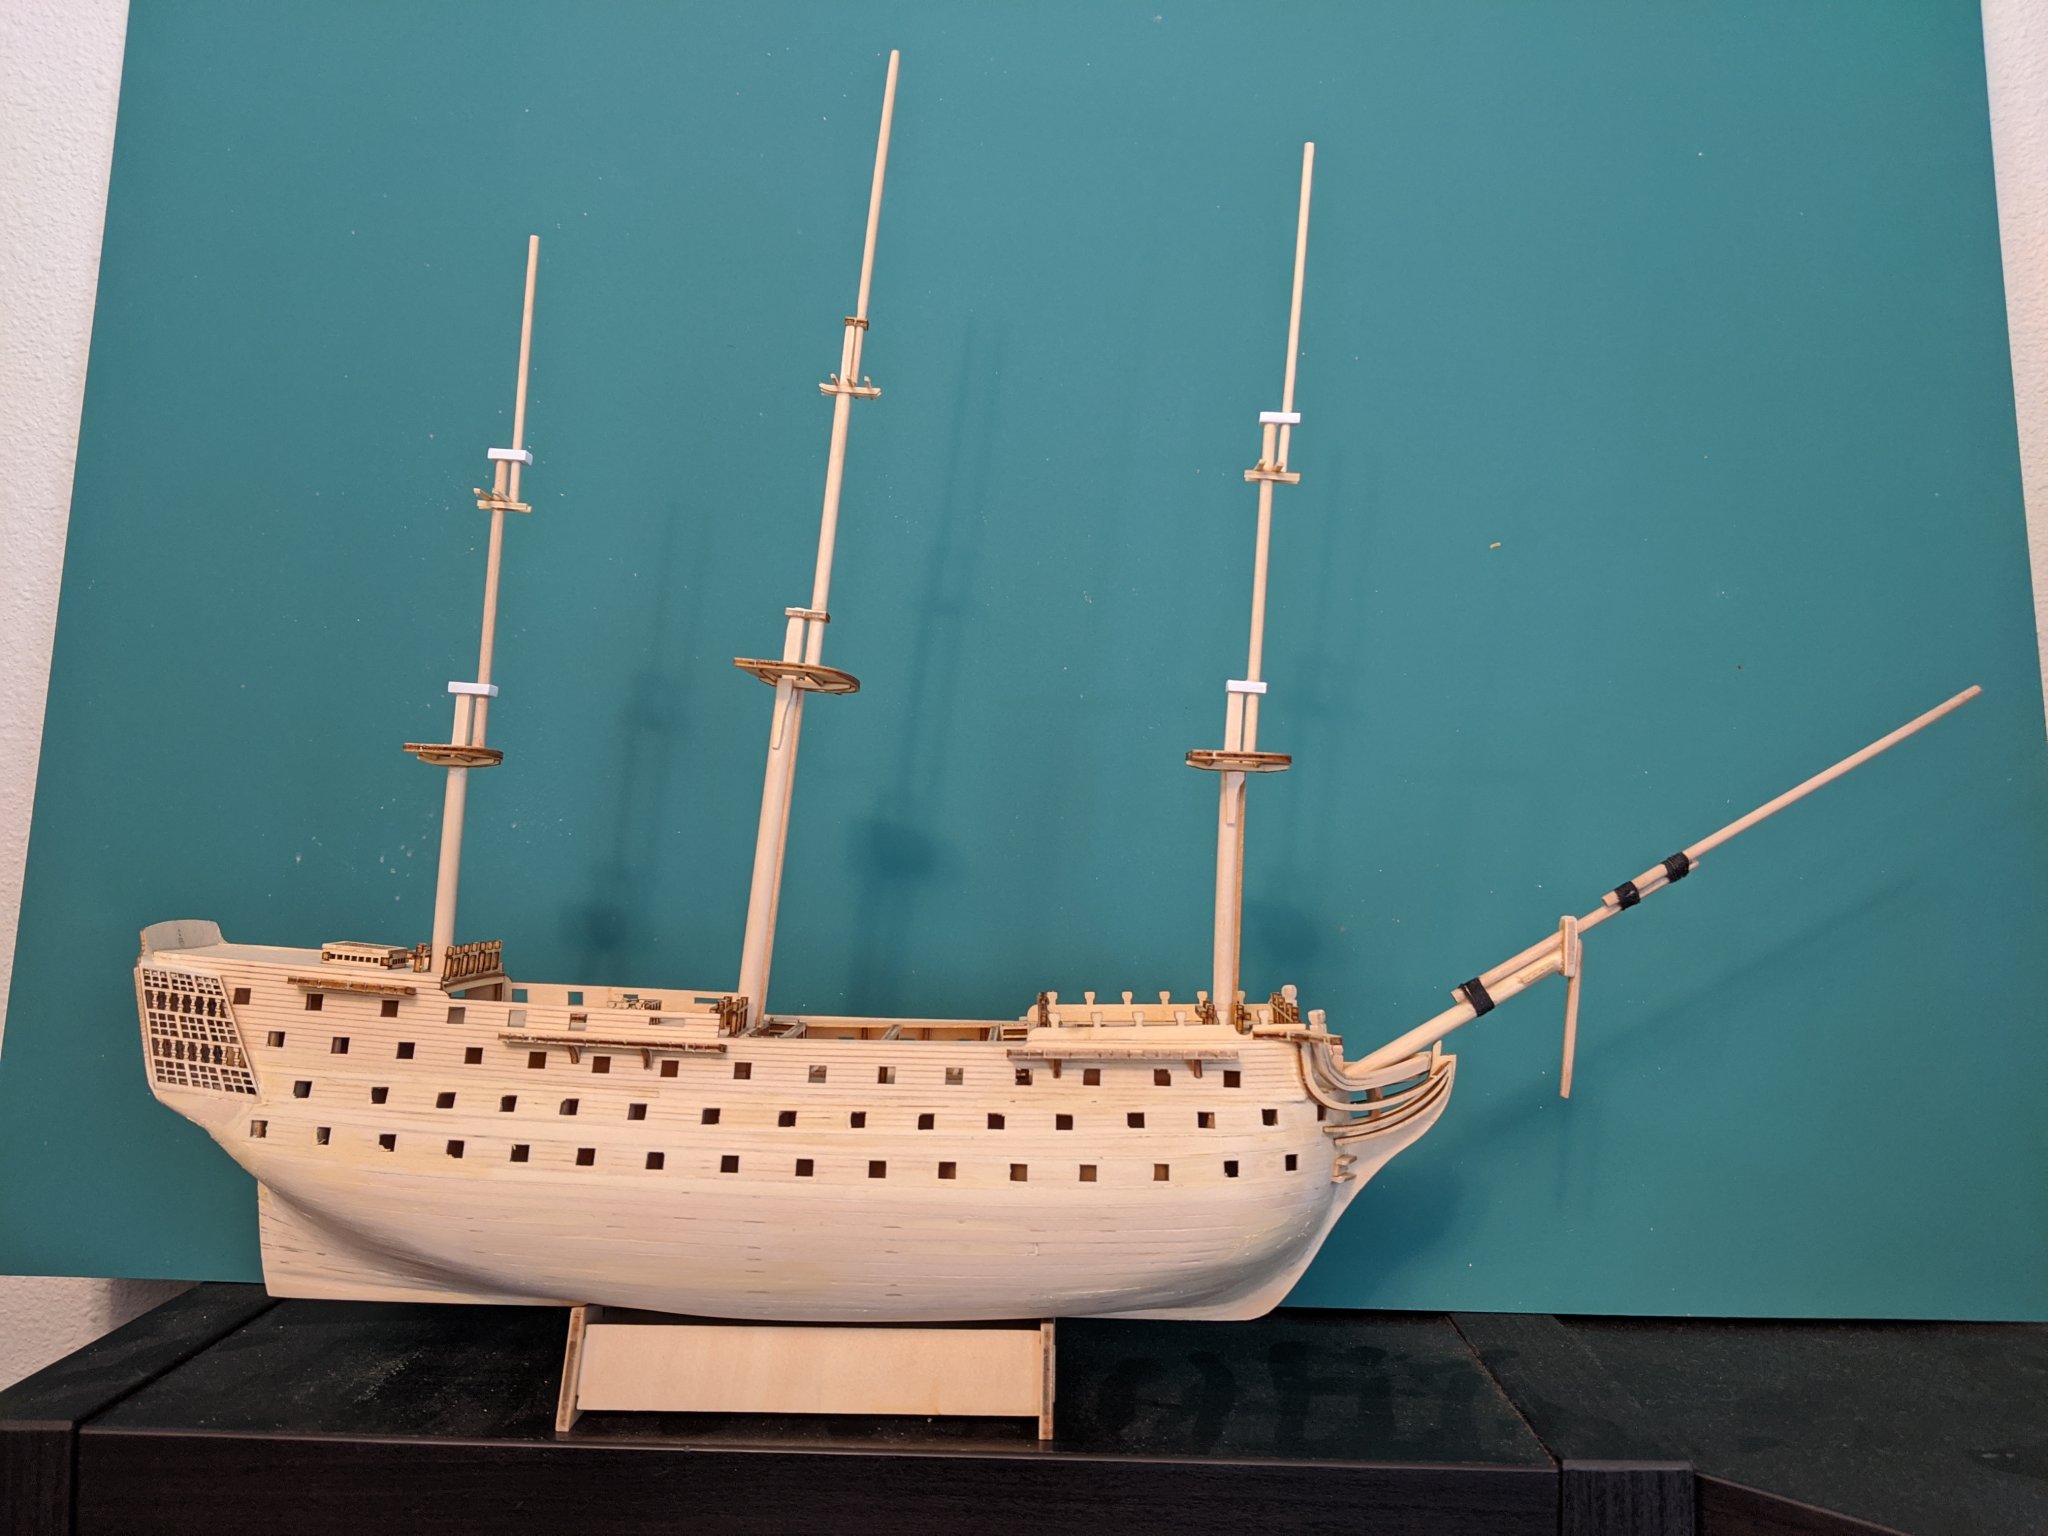
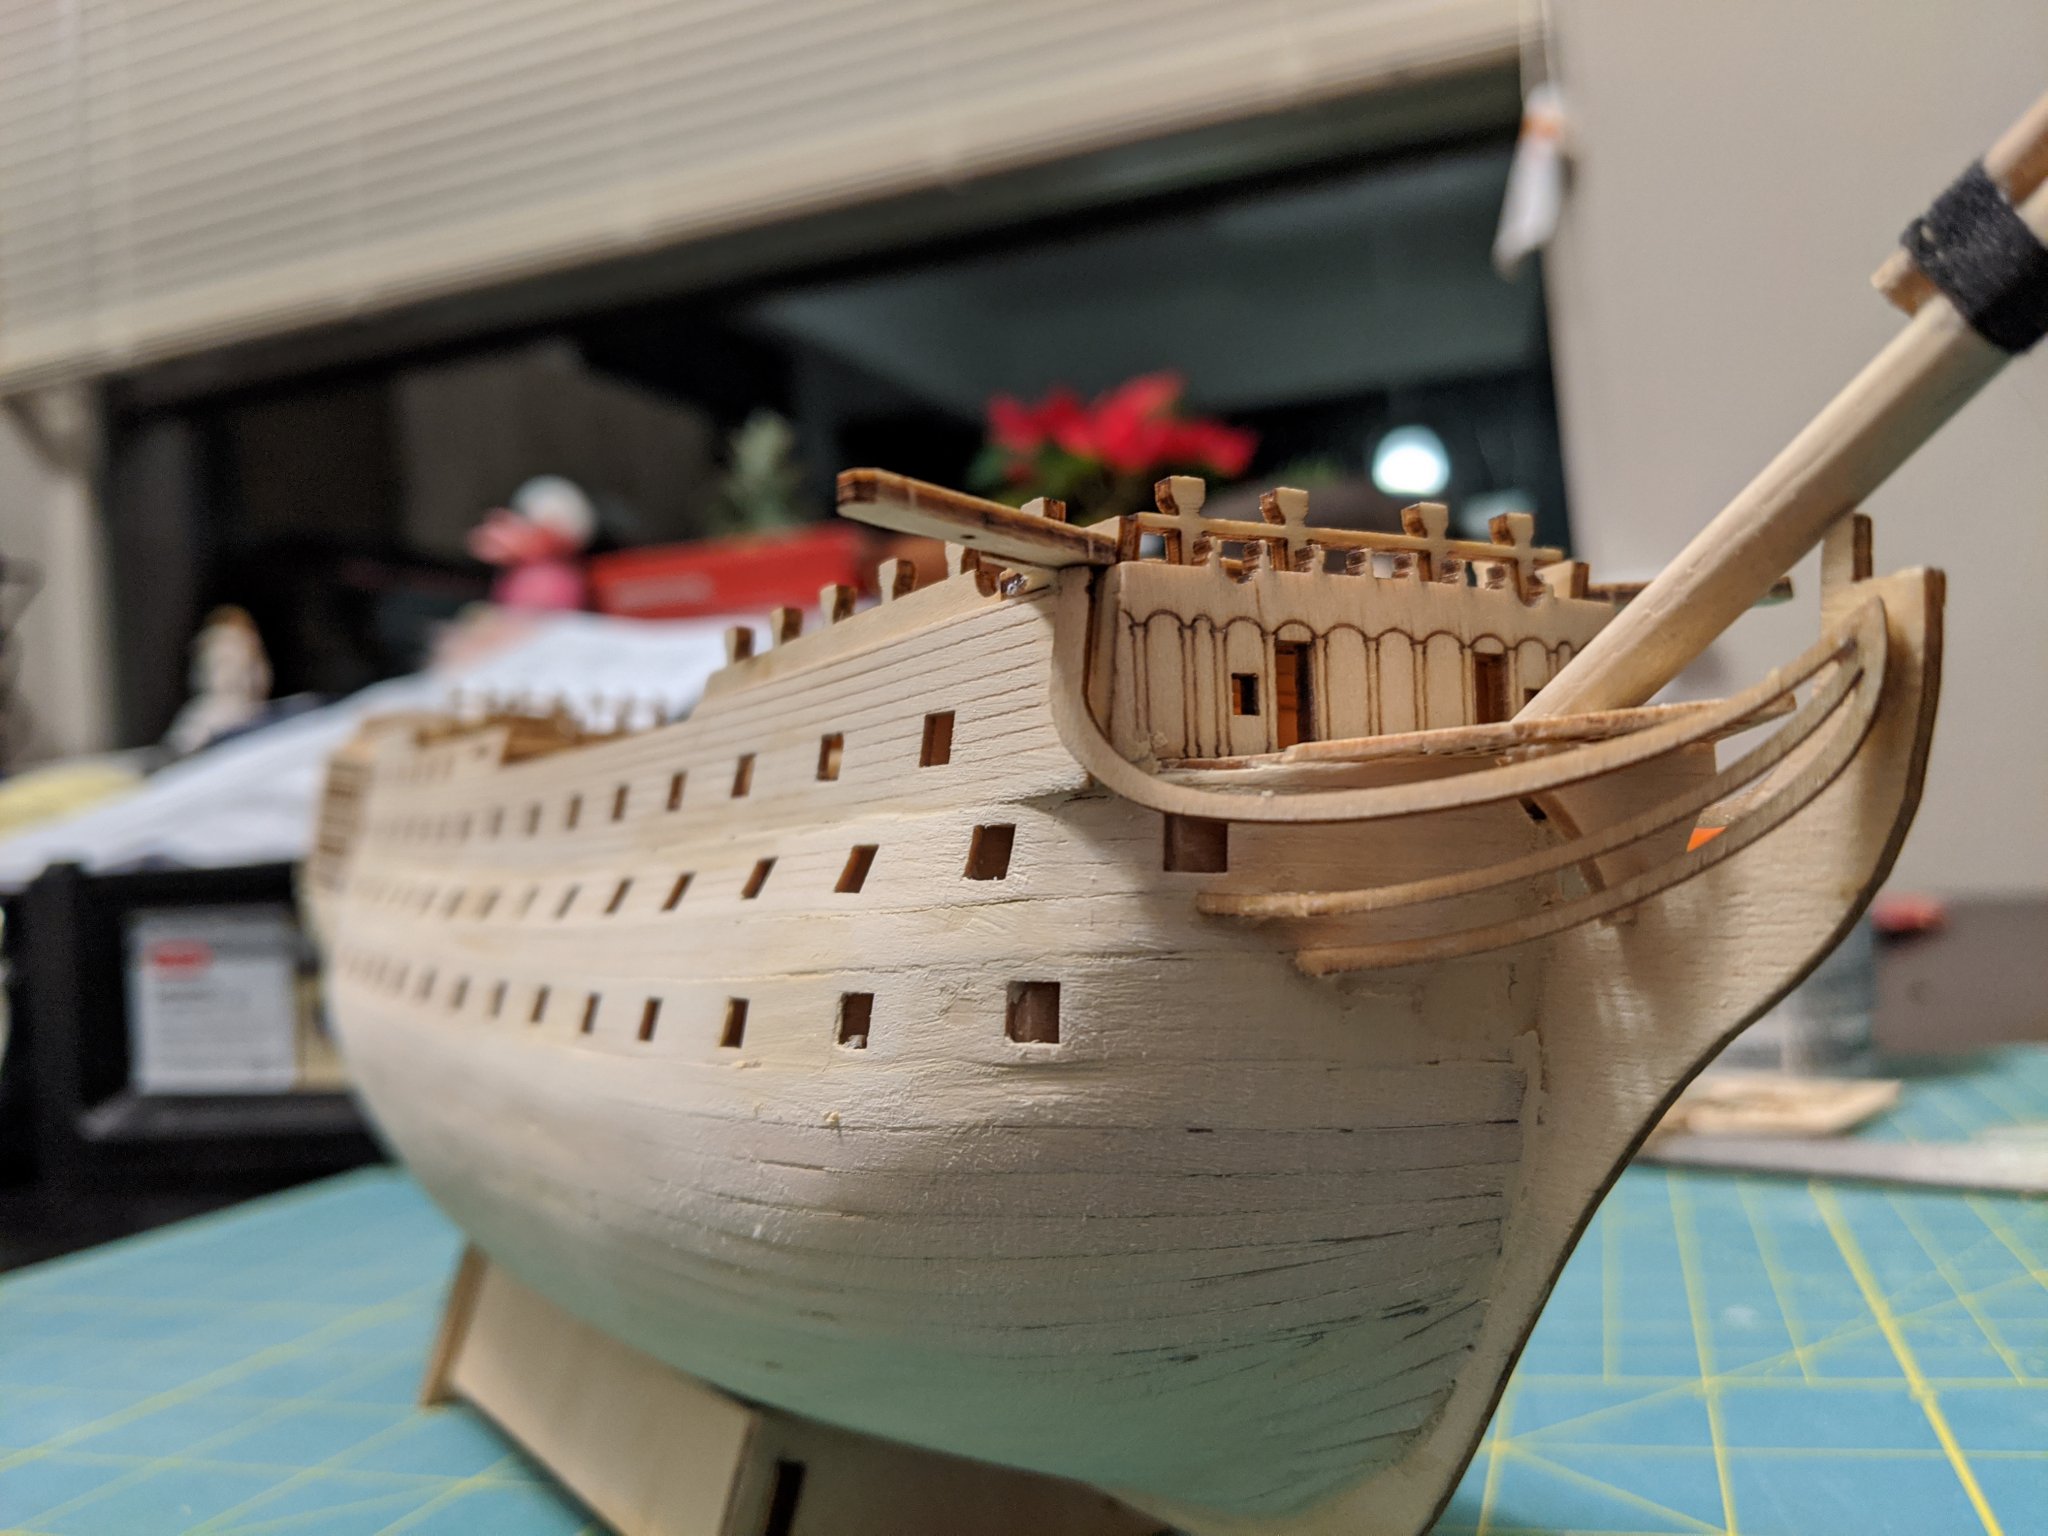
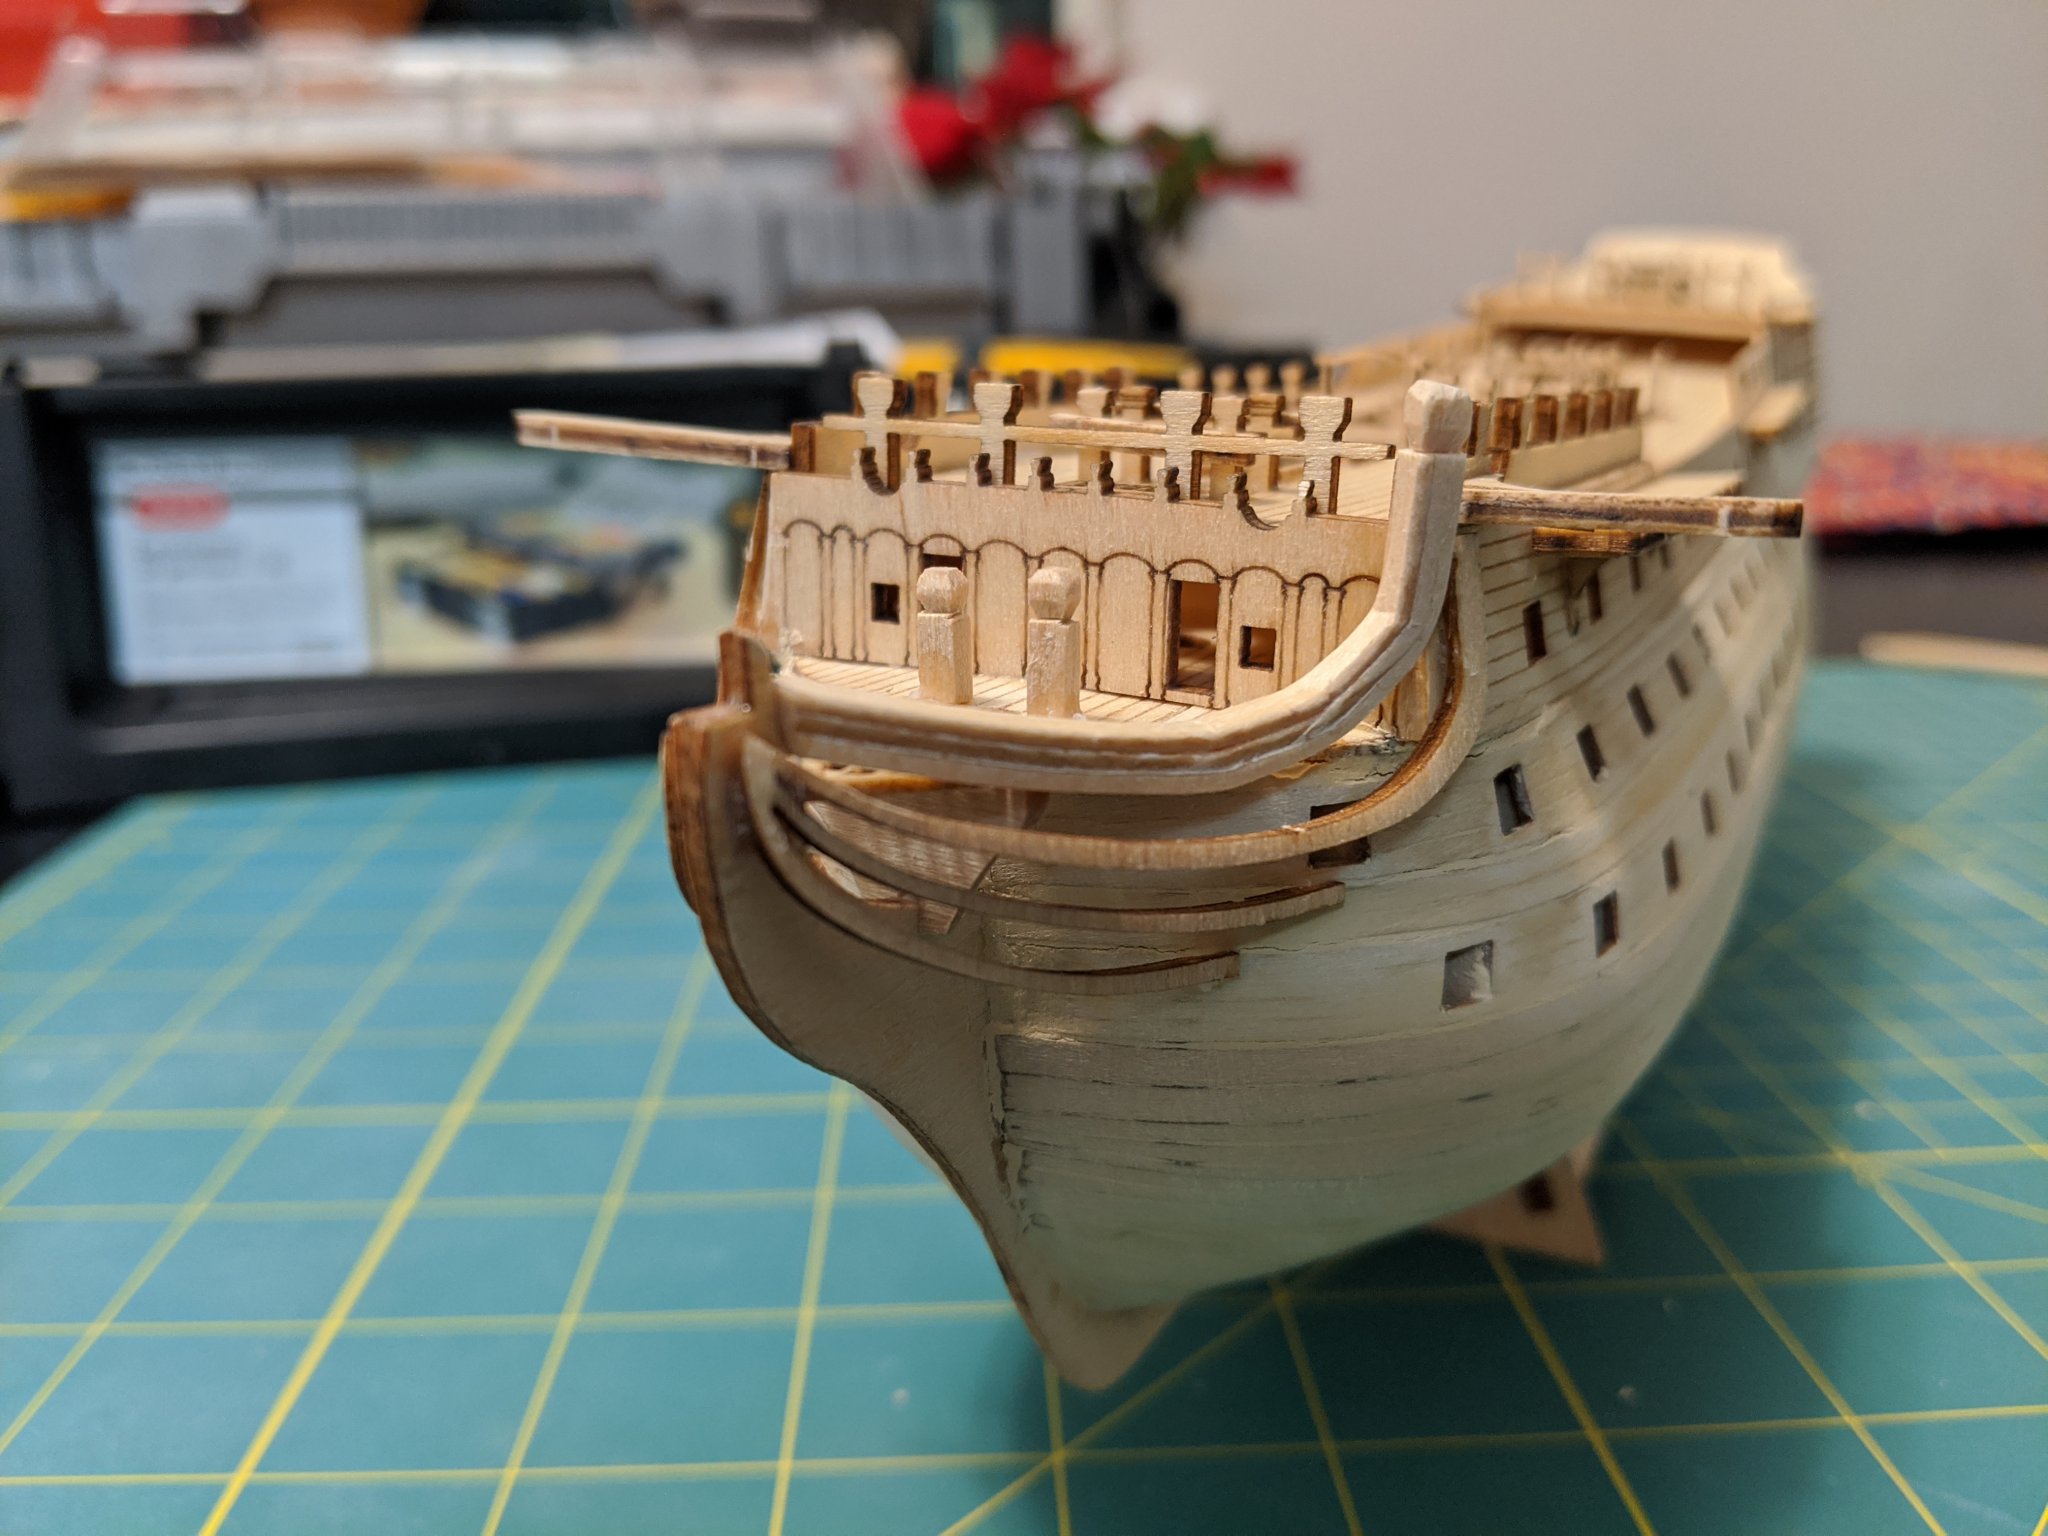
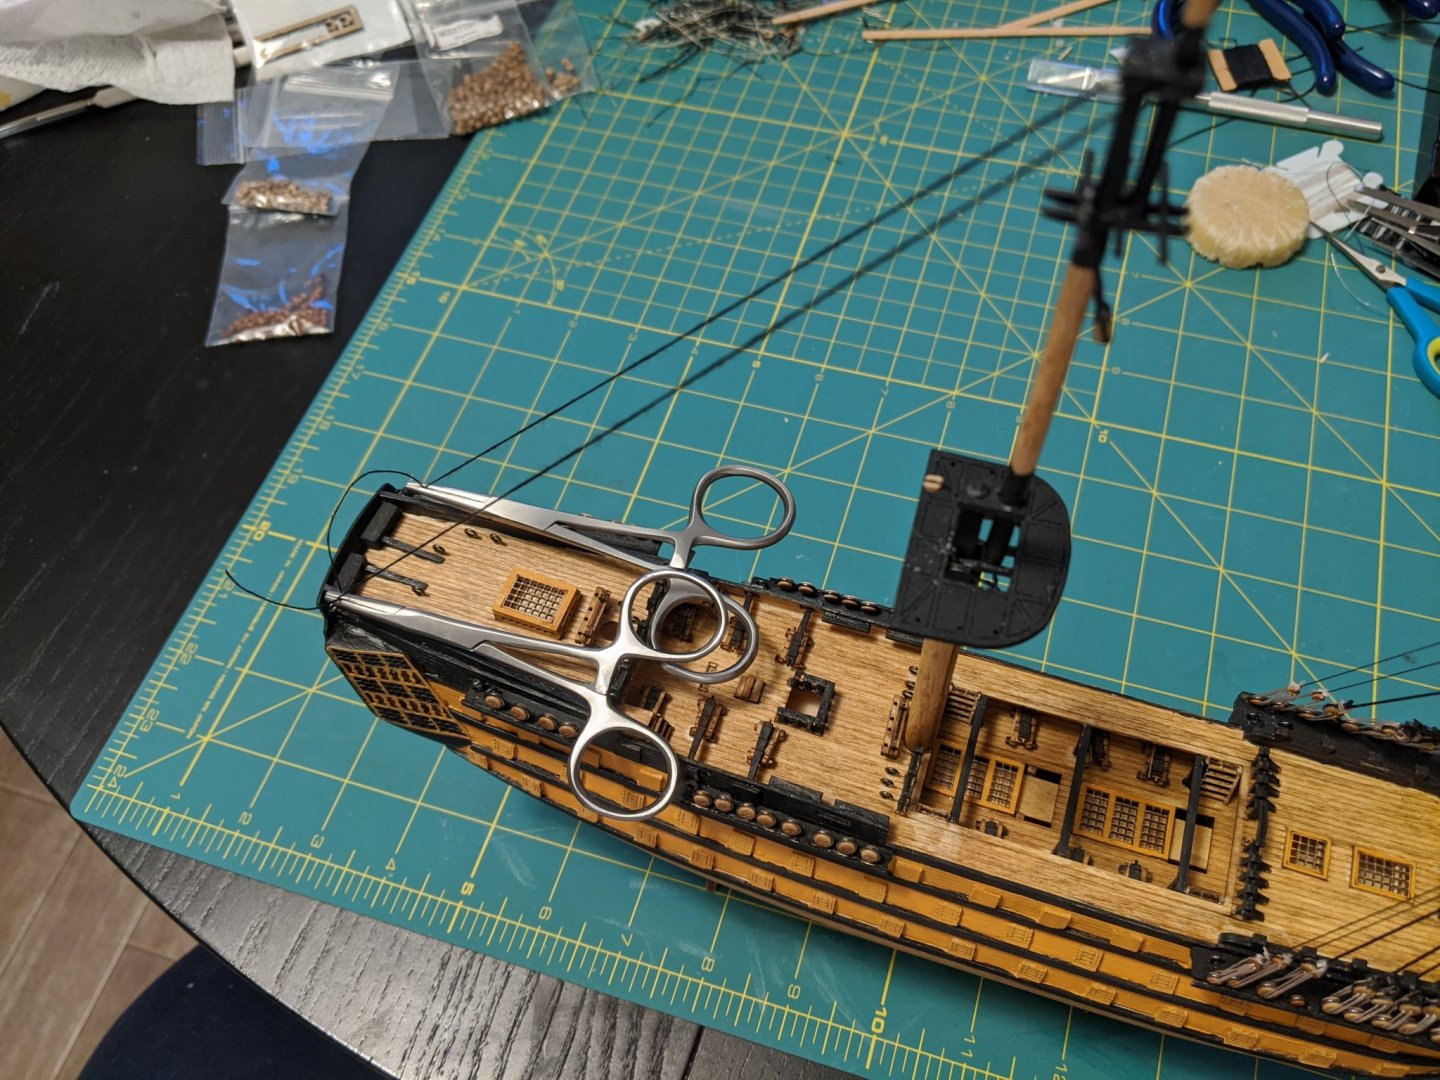
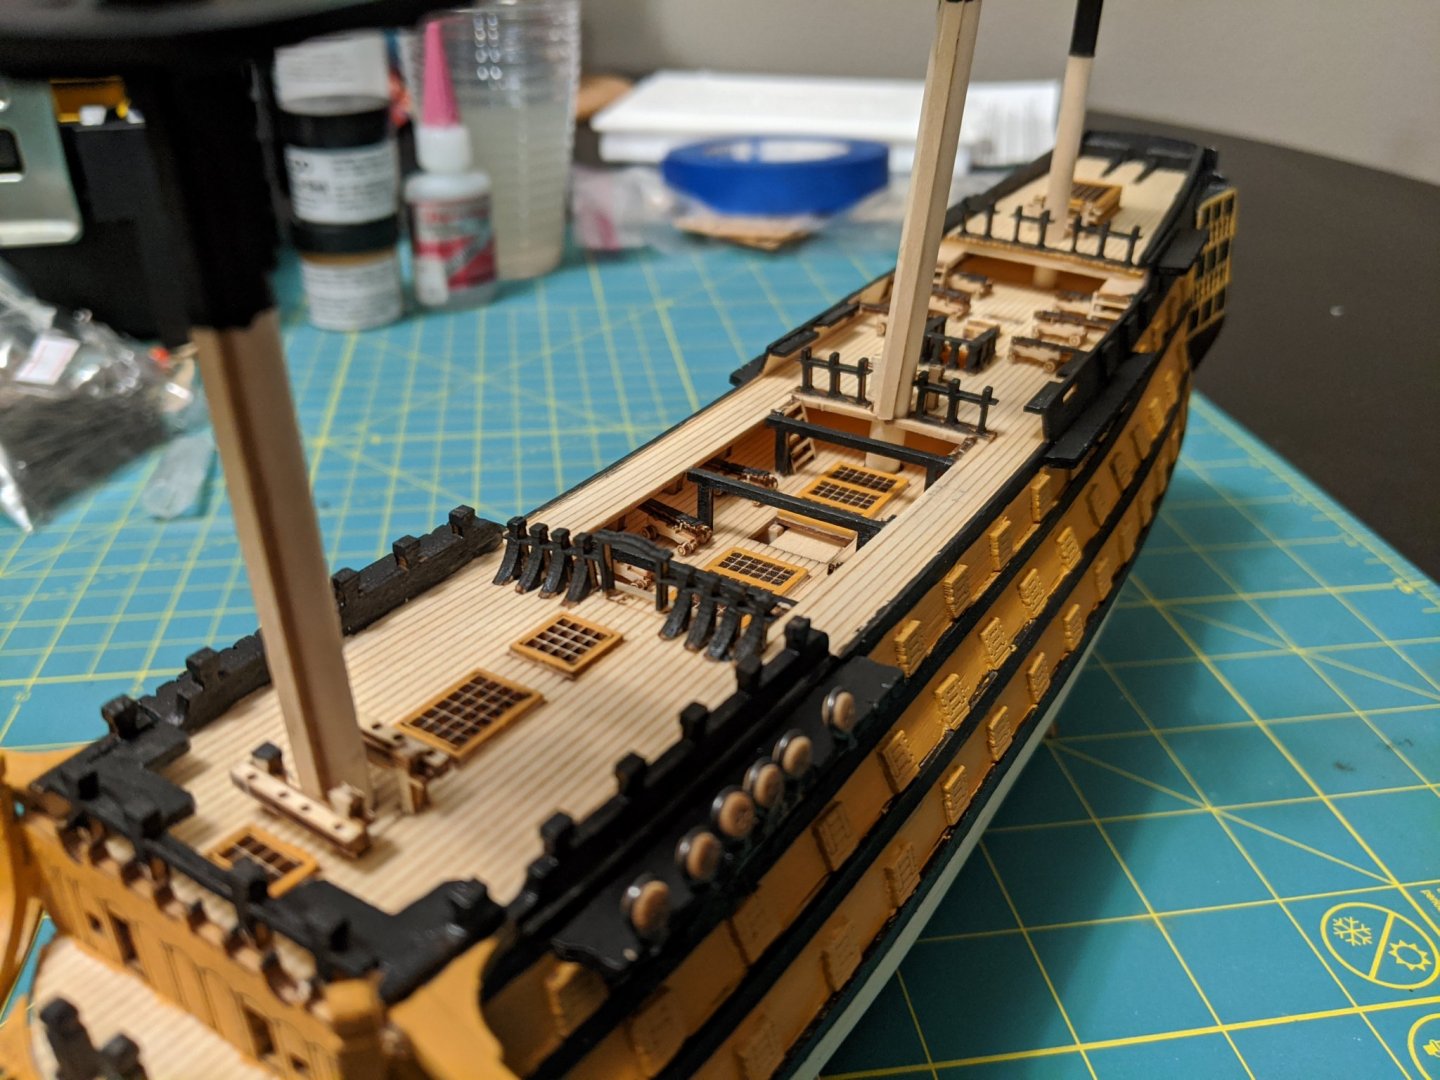
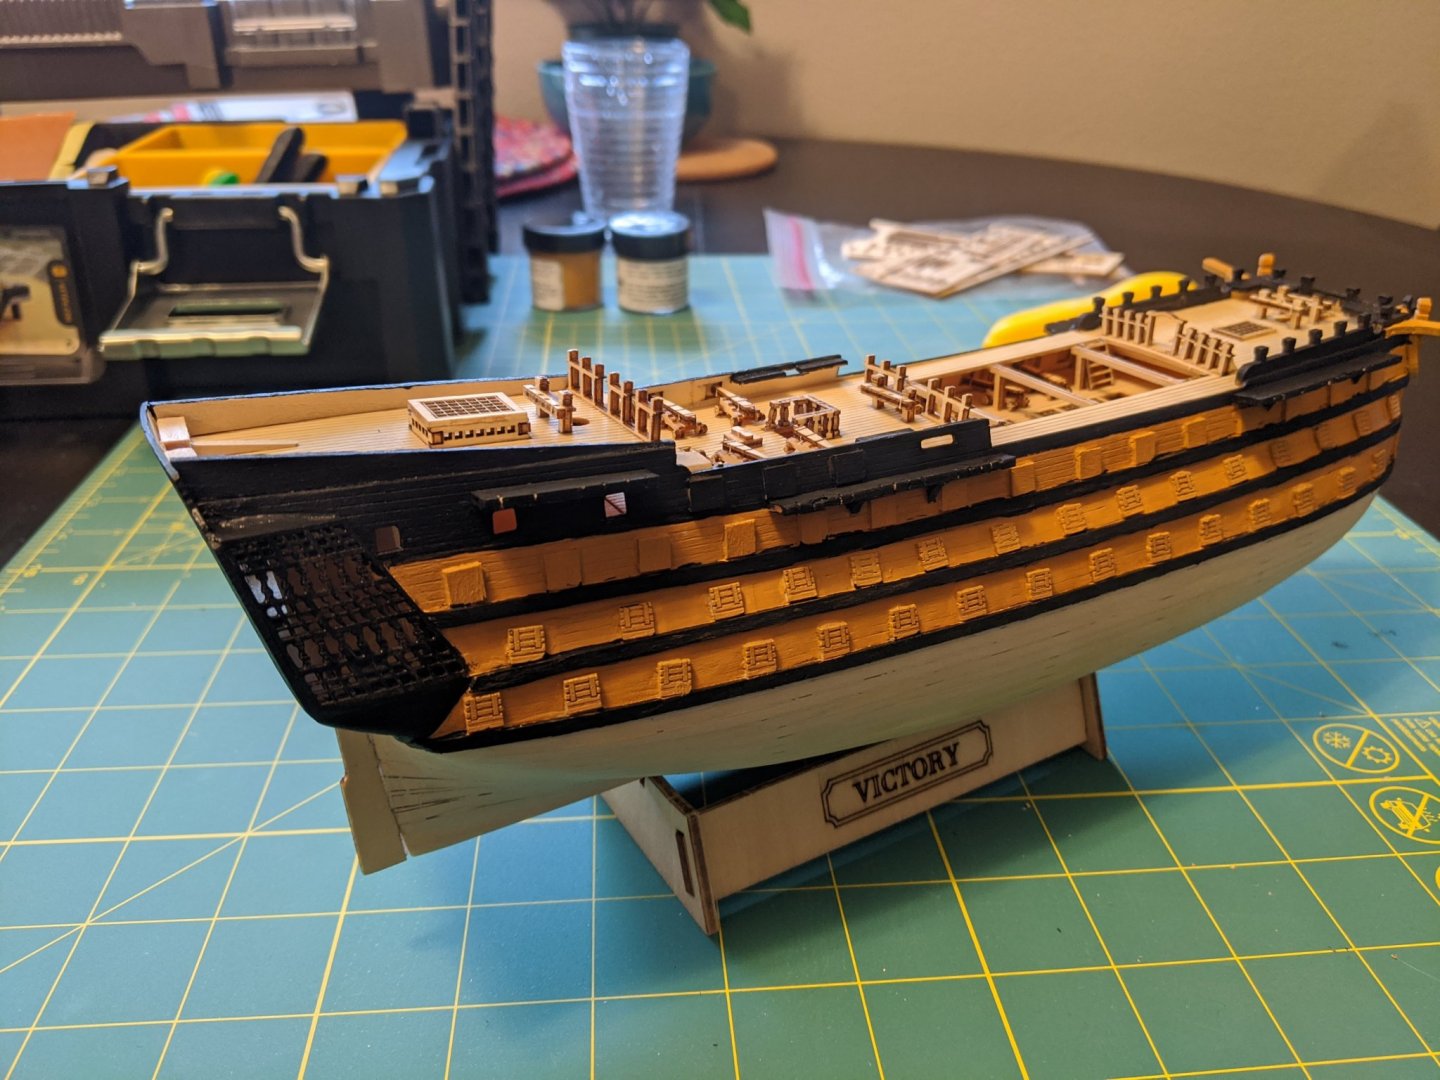
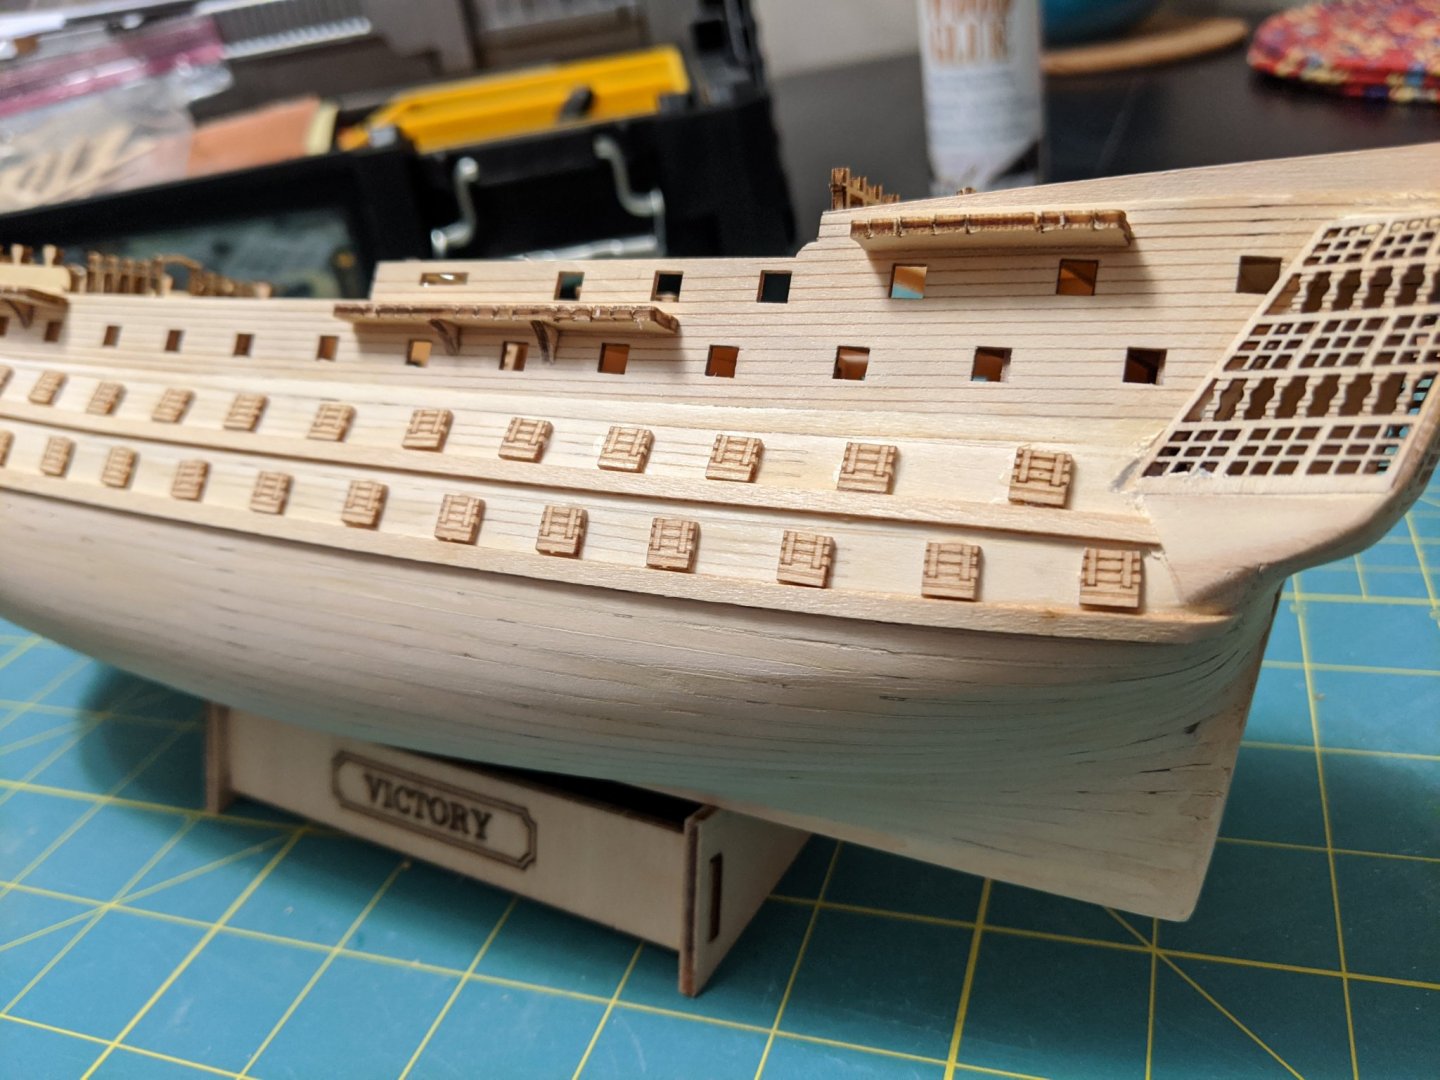
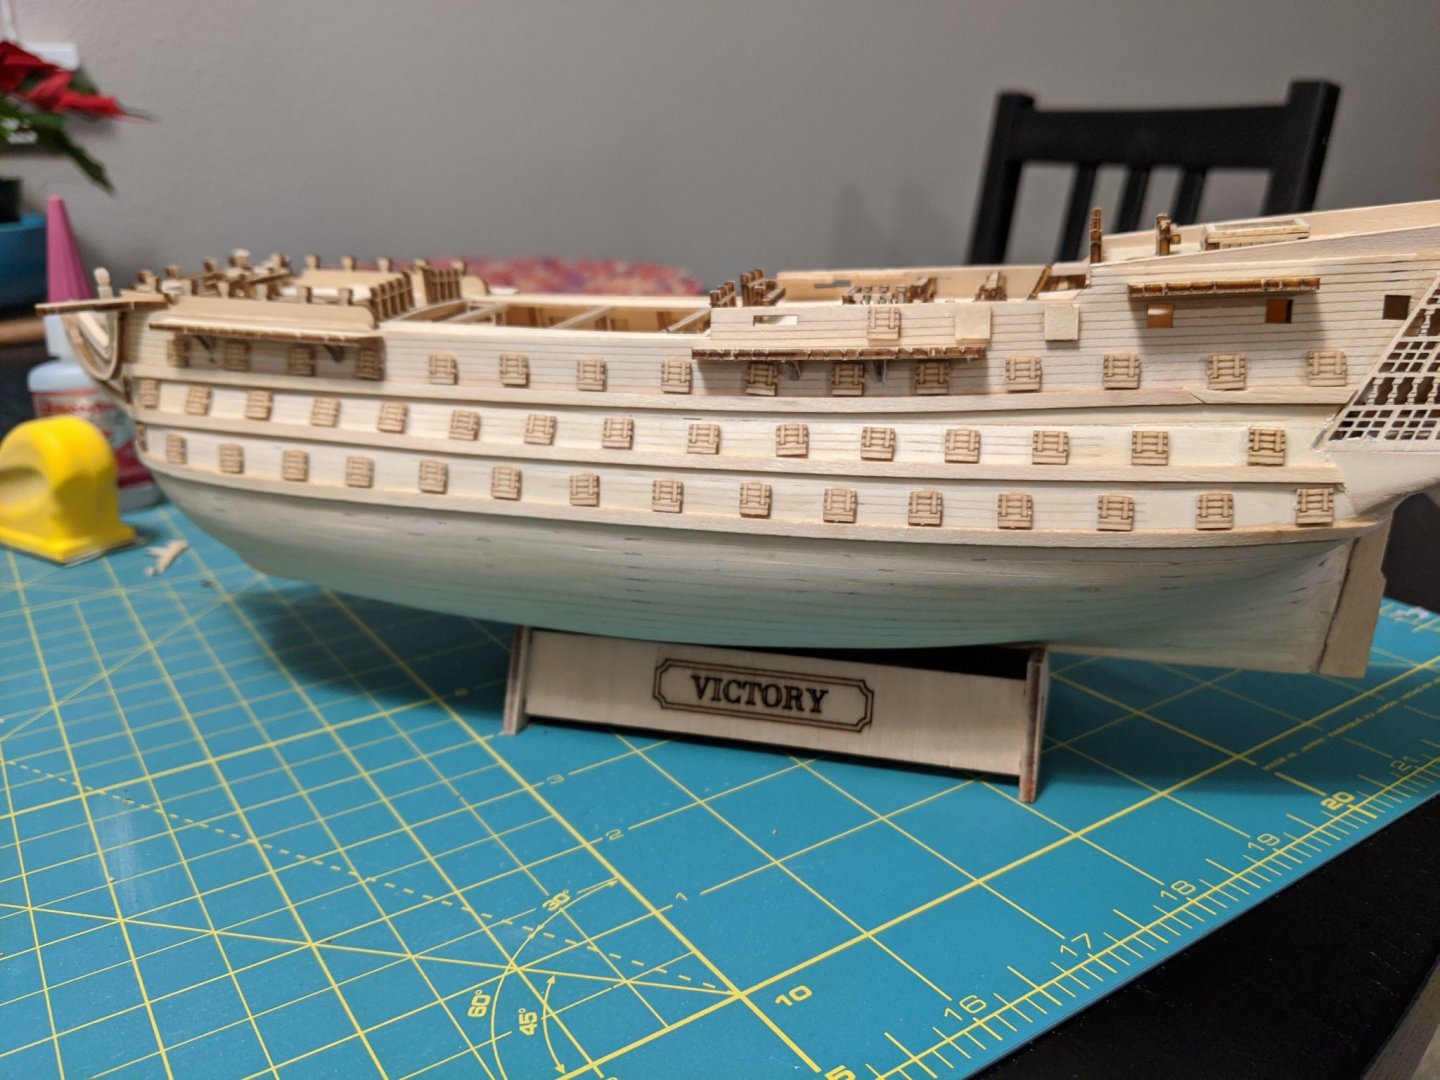
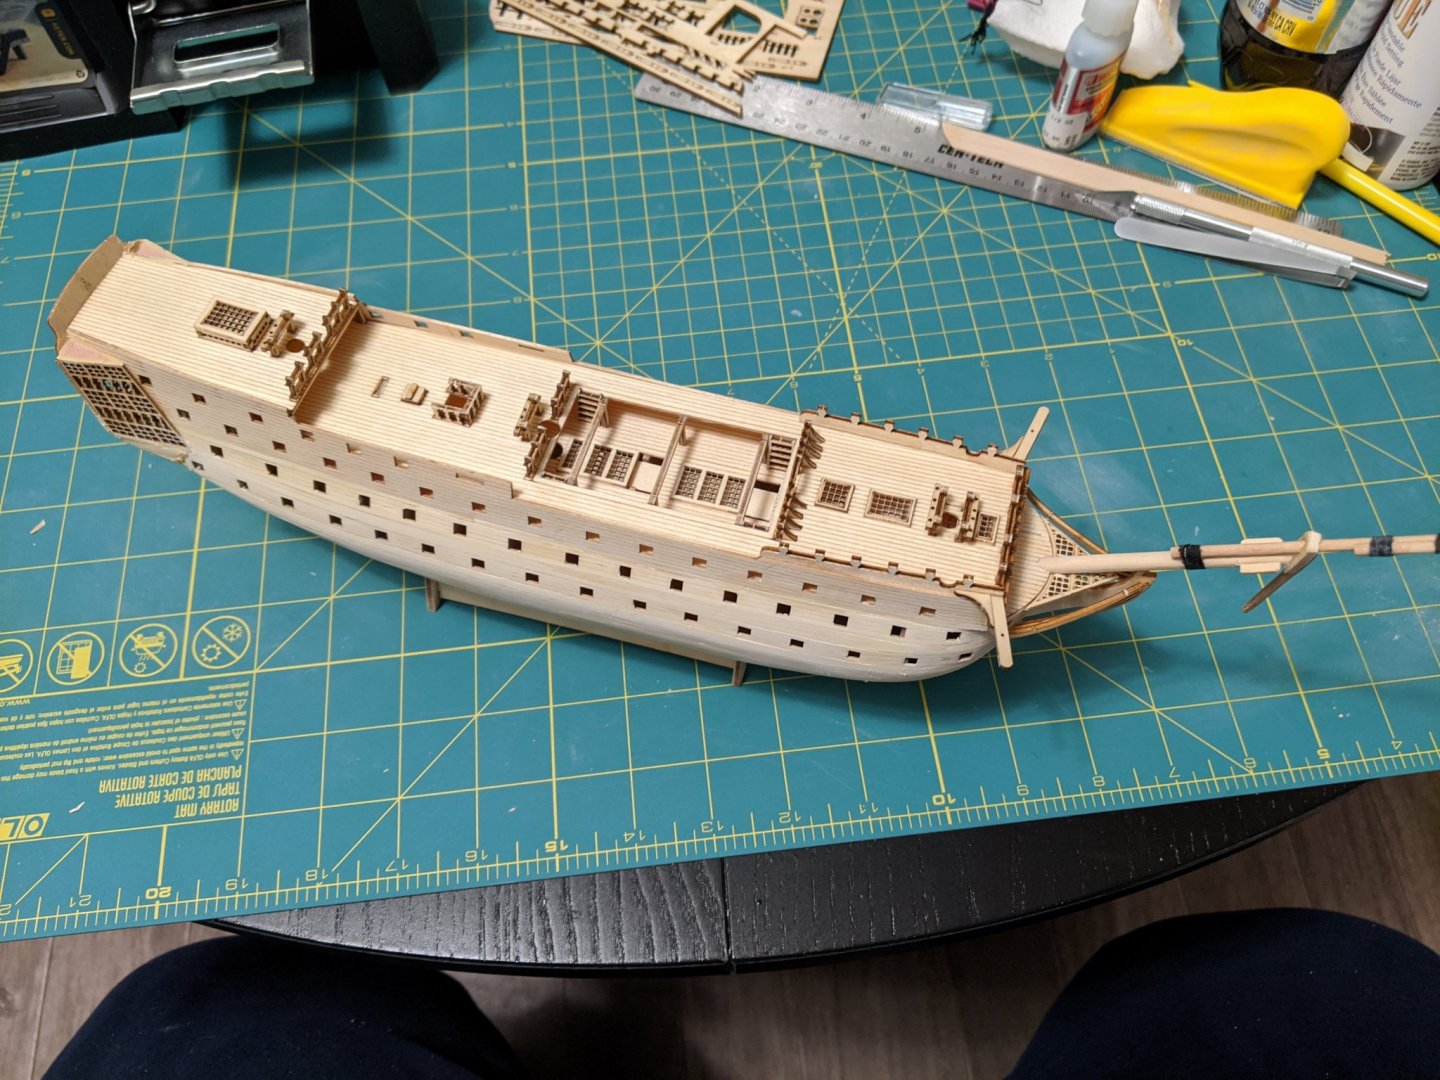
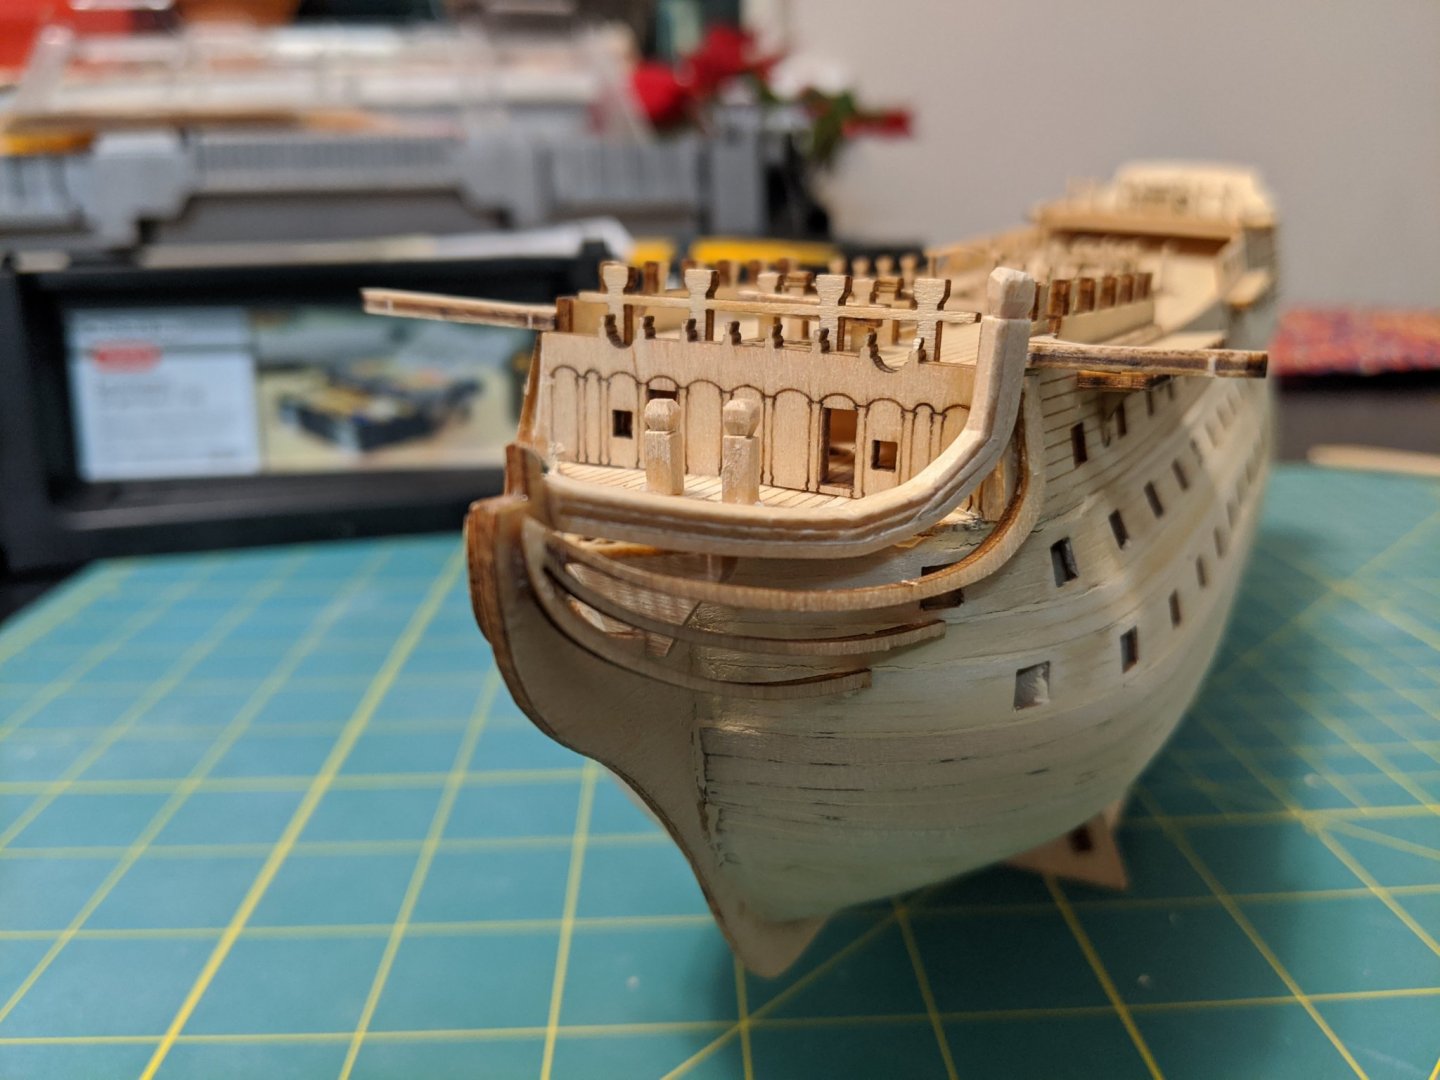
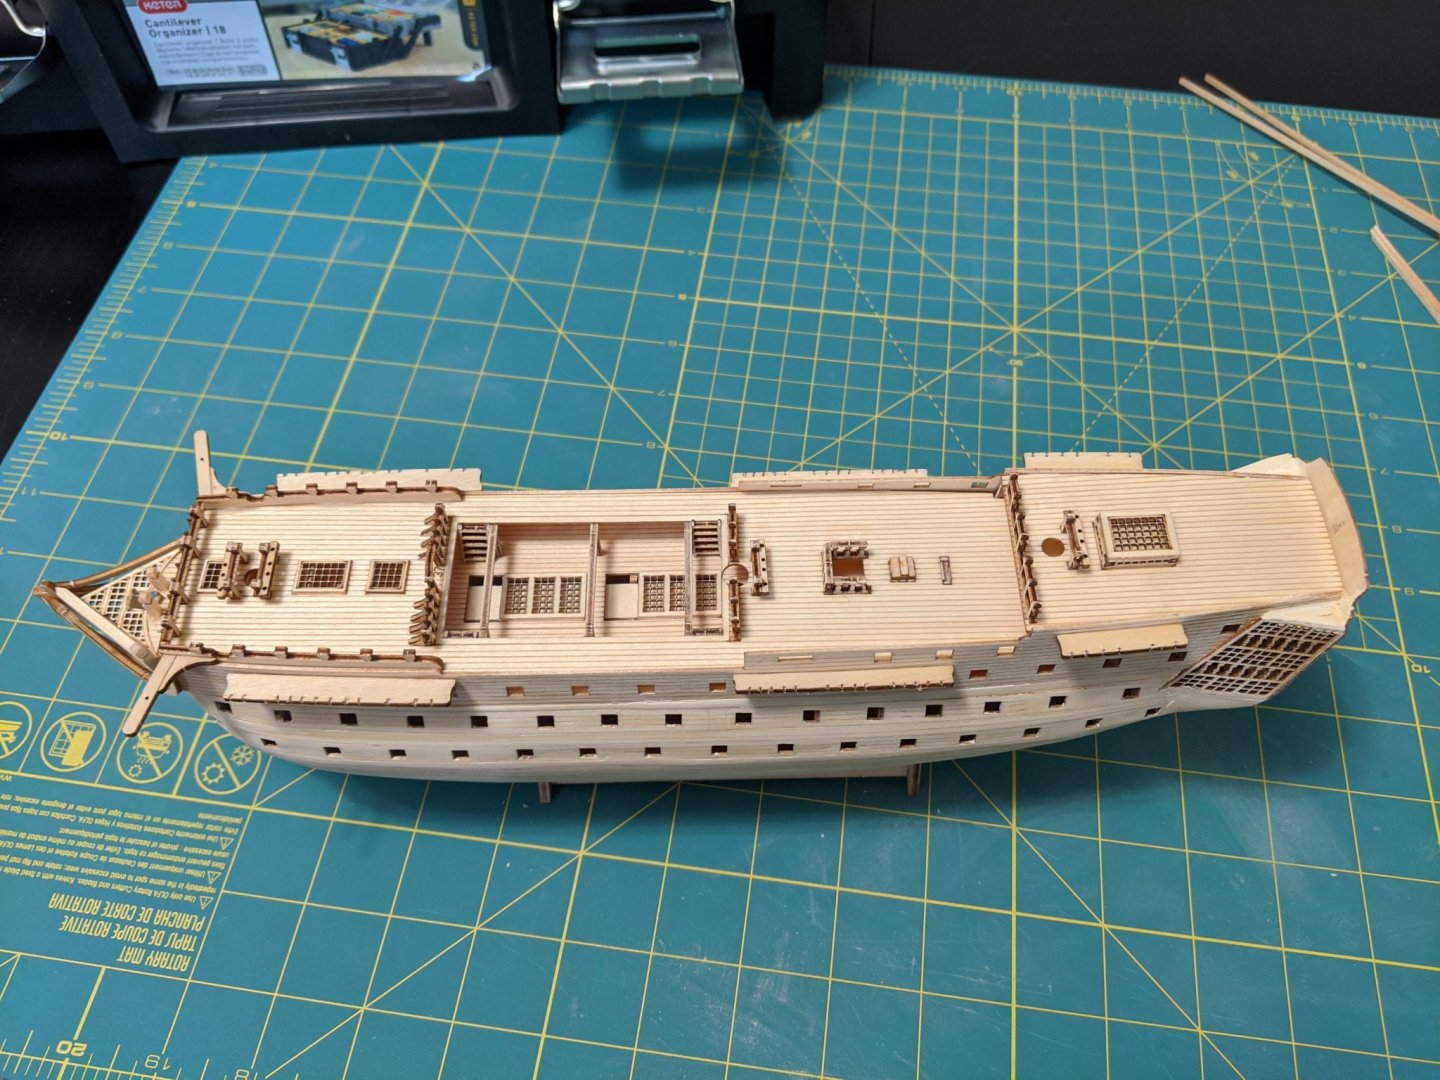
My order for the paints and rigging supplies this kit did not include has arrived, so I started painting the hull in the traditional black and ocher fleet colors. I have decided to forego the copper plating on the lower hull, as the kit did not include these and there we few options I could find online. I know I could have ordered replacement plated from Mantua that were the right size, or ordered some 1/8 copper tape, but I wanted to see the wood work, so instead I plan to stain the lower hull and decks in Minwax Golden Oak. I don't have a good pic of the stern galleries once I finished painting the balusters and window frames, so I will have to include one later, but here are the results once i stained the rest. Except for a few spots I need to sand out some glue stains and stain it again, I am pretty happy with the results.


-
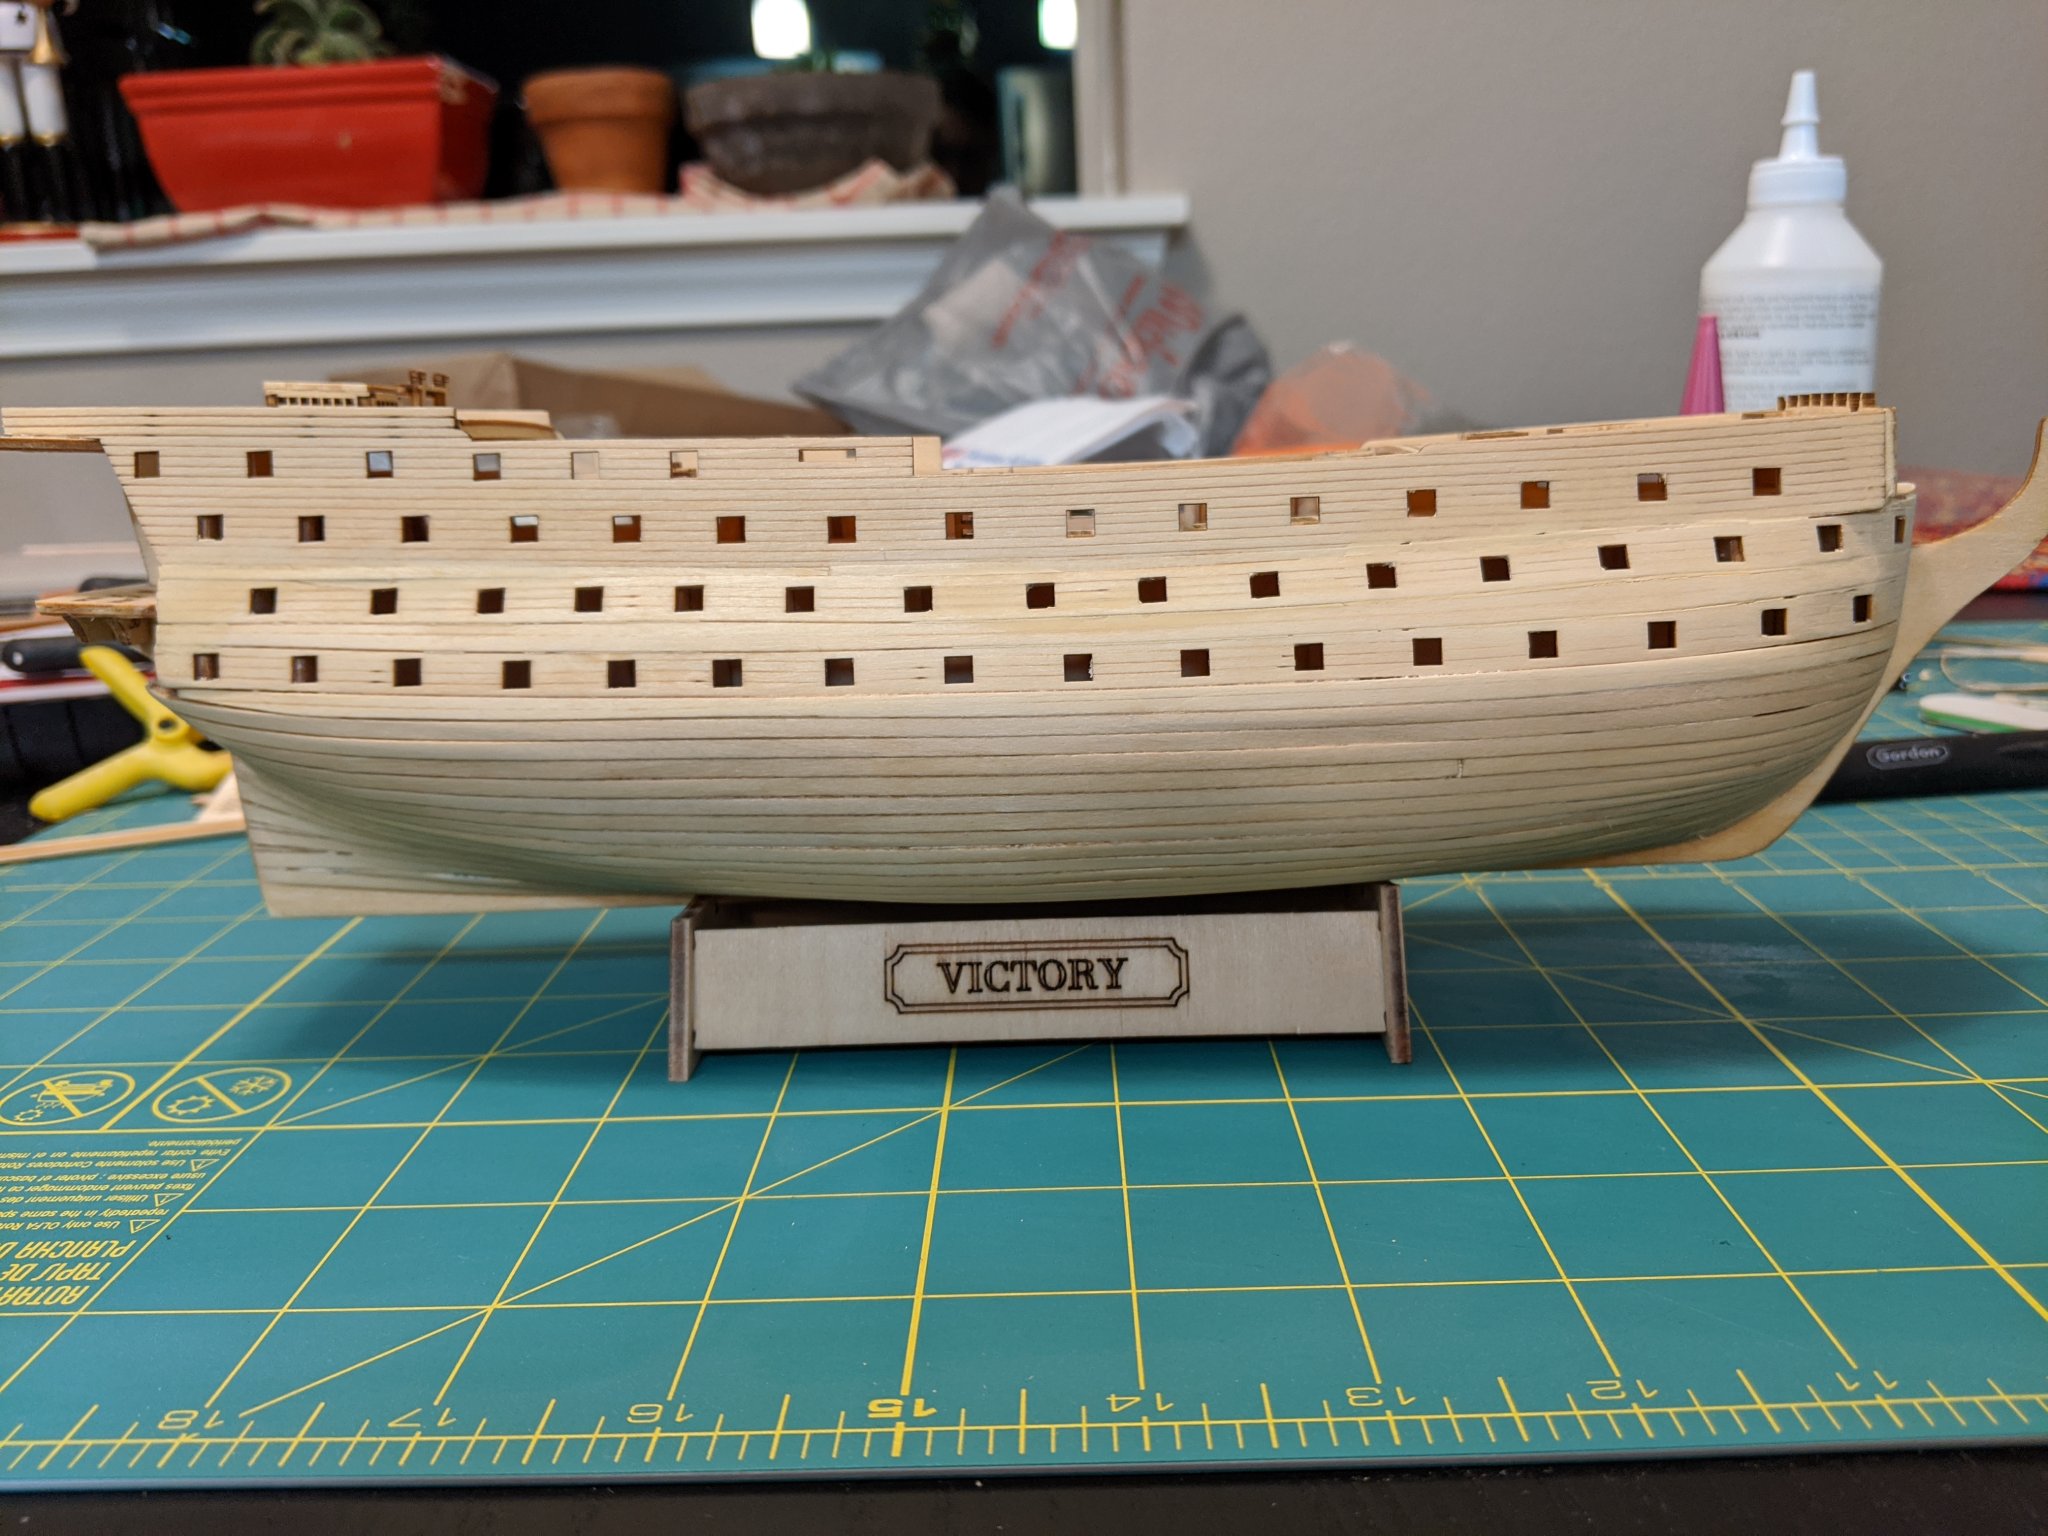
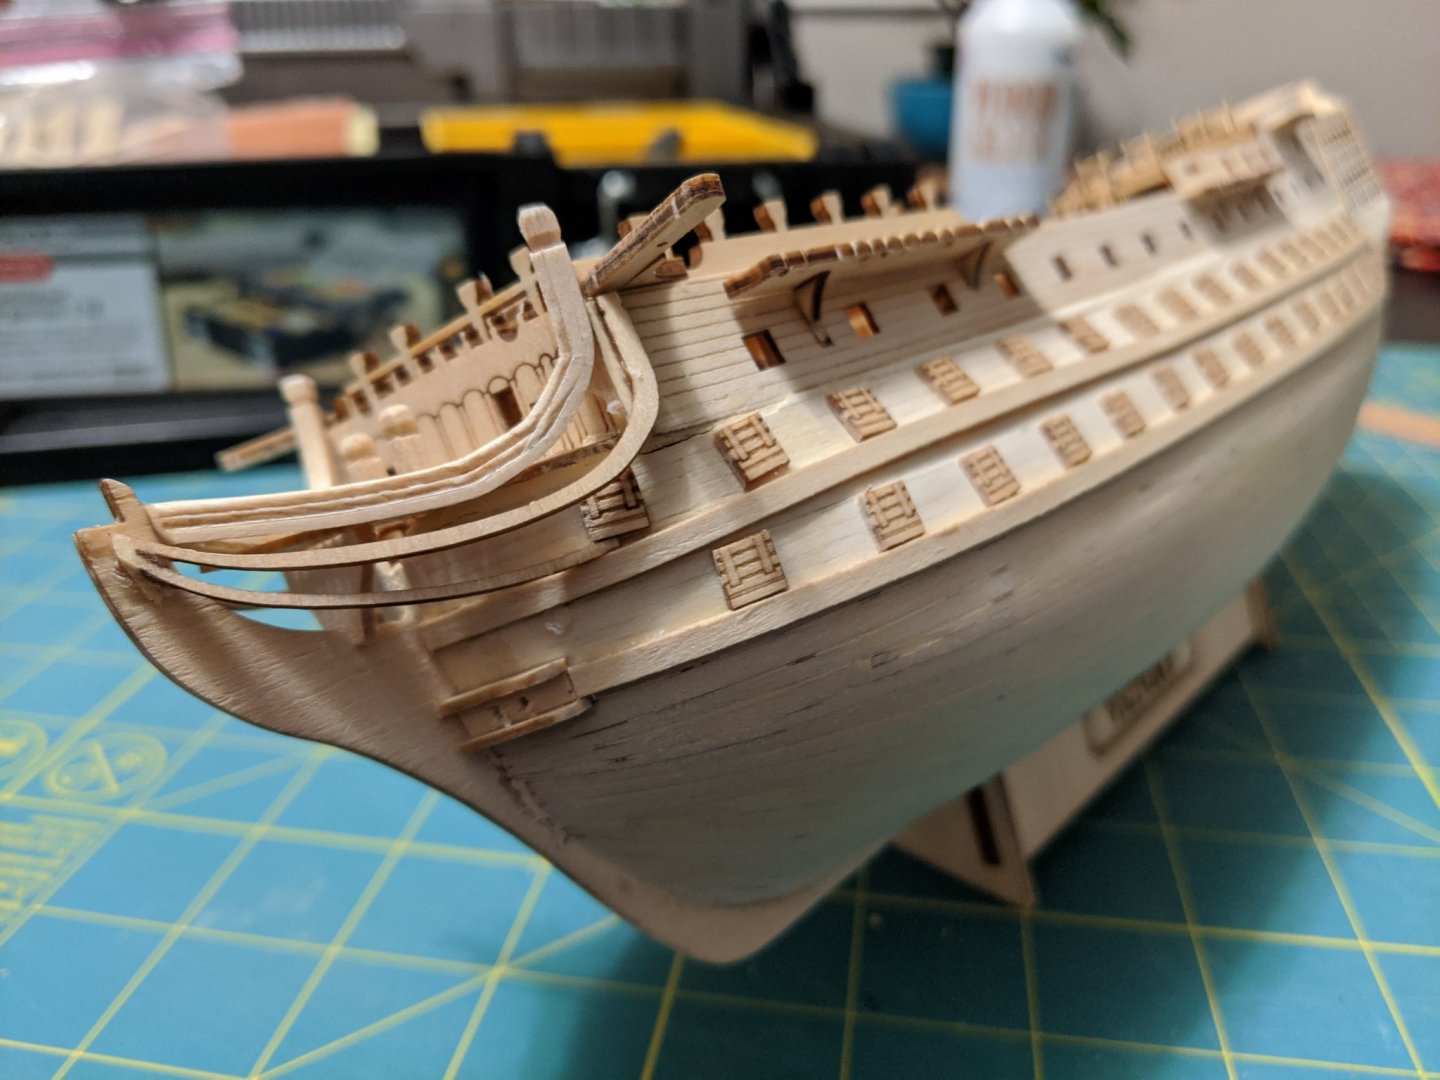
Now it was time to work on the wales and gun port lids. Since the kit did not supply the strips of wood to act as supports behind the lower gun ports, nor the guns for this, I opted to model this one closed up. So I started adding wales and closed gun ports. Another detail this kit lacks is the lintels over the gun ports, nor any provision of the mid ships entry port. I've decided to not try and model these as my carving skills are just not there and the scale for me is to small. I might go back later and add the entry port and ladders, but I'll make that decision later.
-
At this point I started on the masts. These won't be stepped yet, but i wanted to get them ready to go once I started painting and staining. The kit supplied mast head caps were junk, so I made my own out of polystyrene from the local hobby store


-
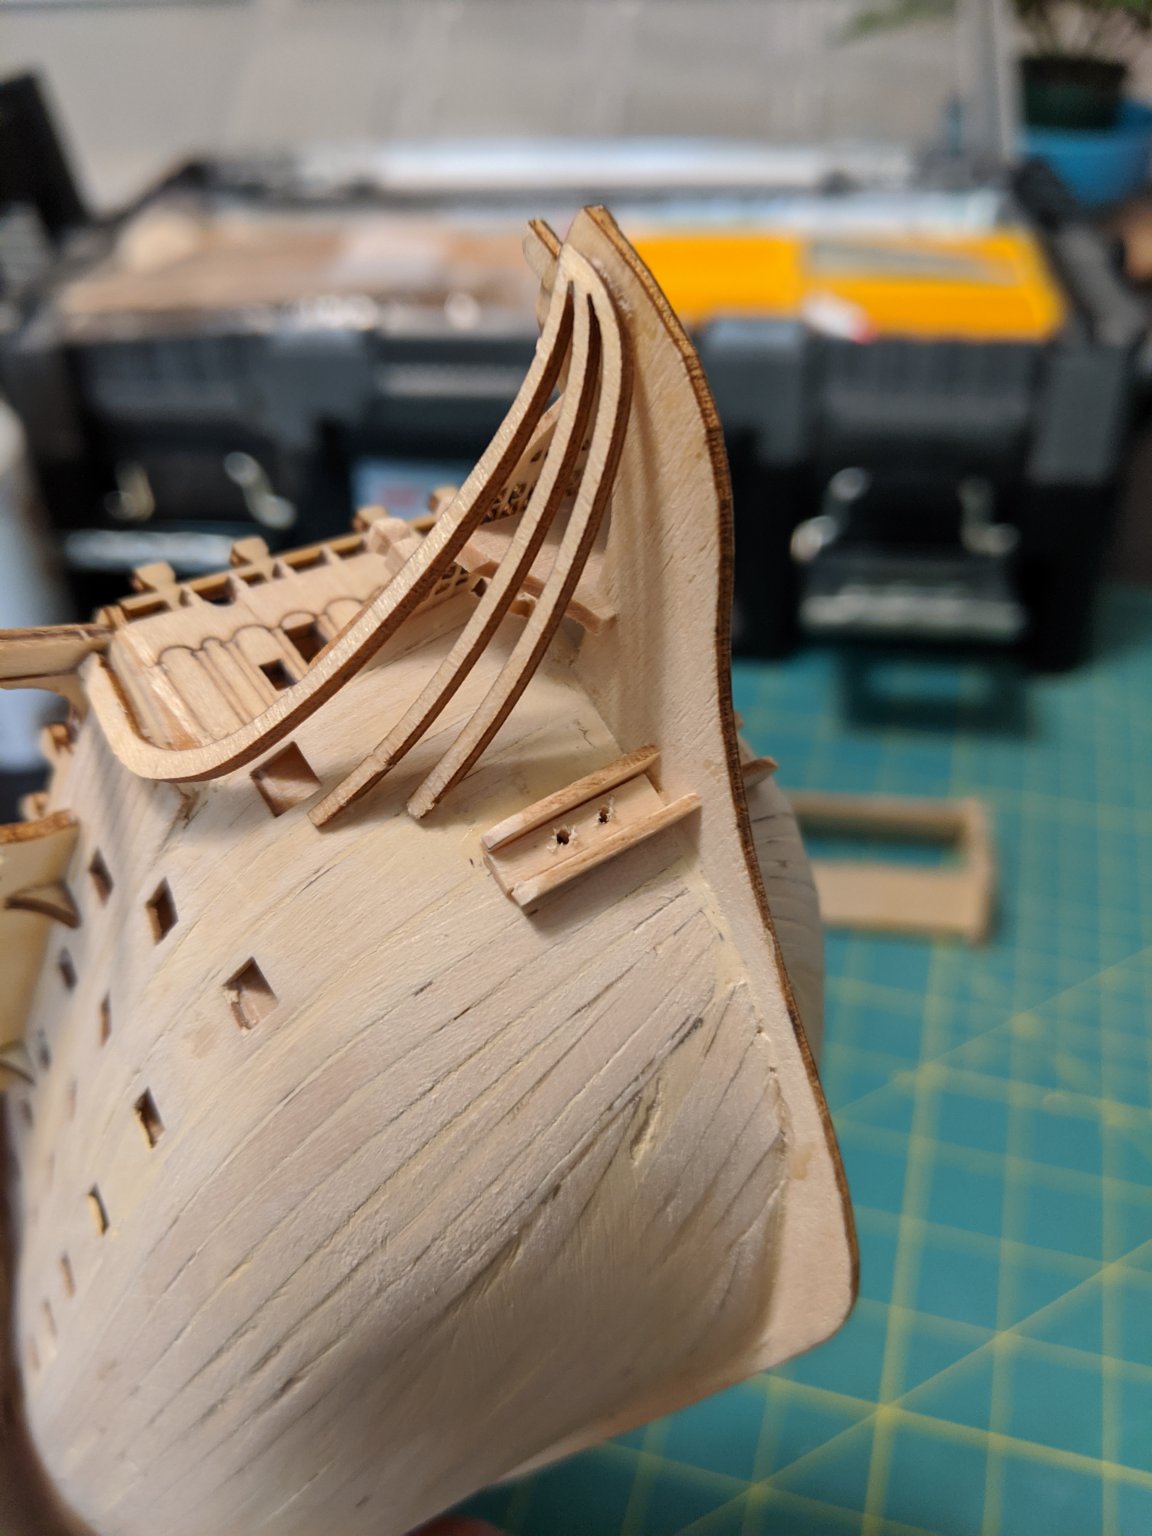
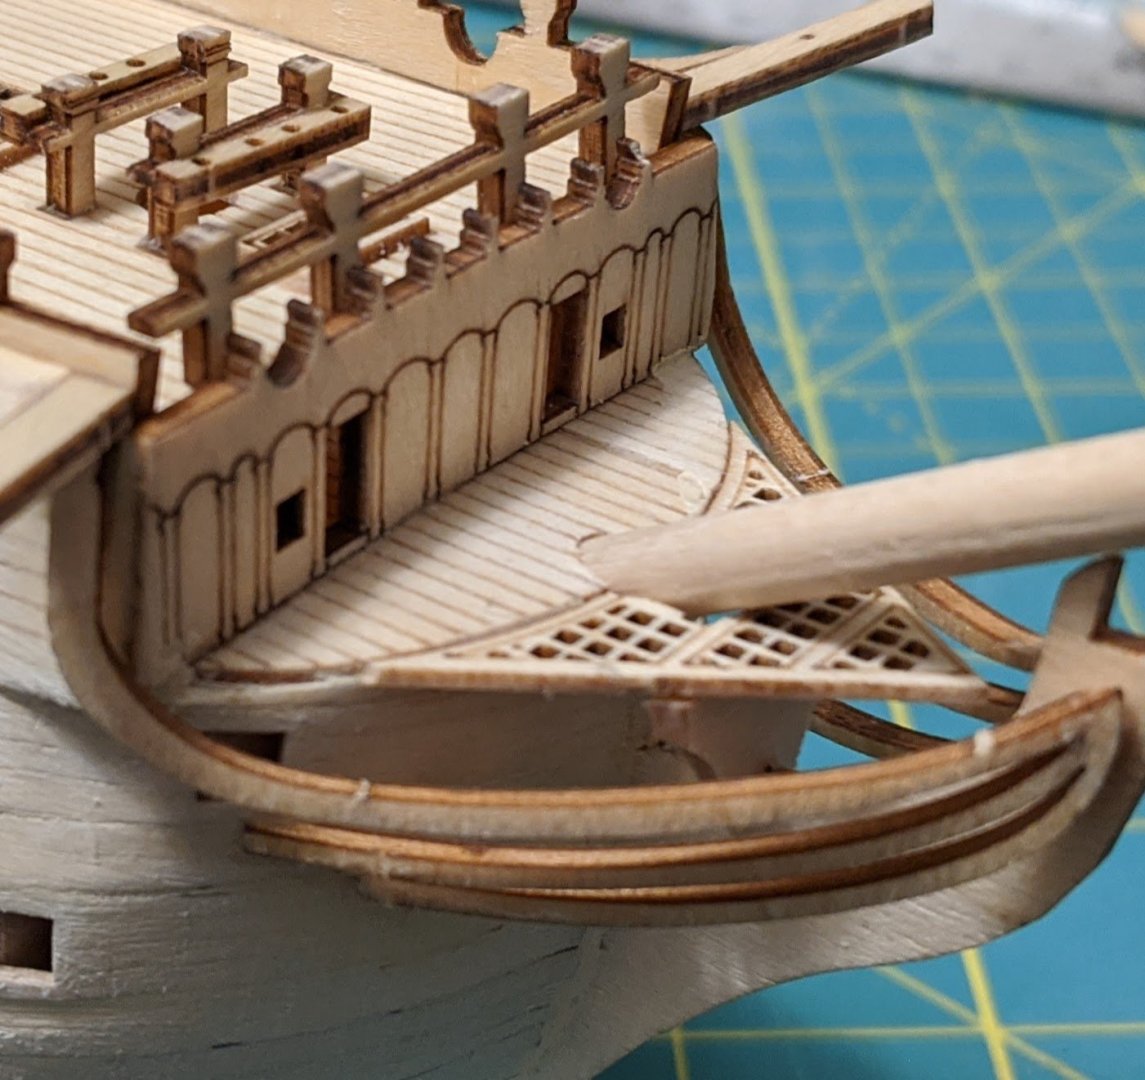
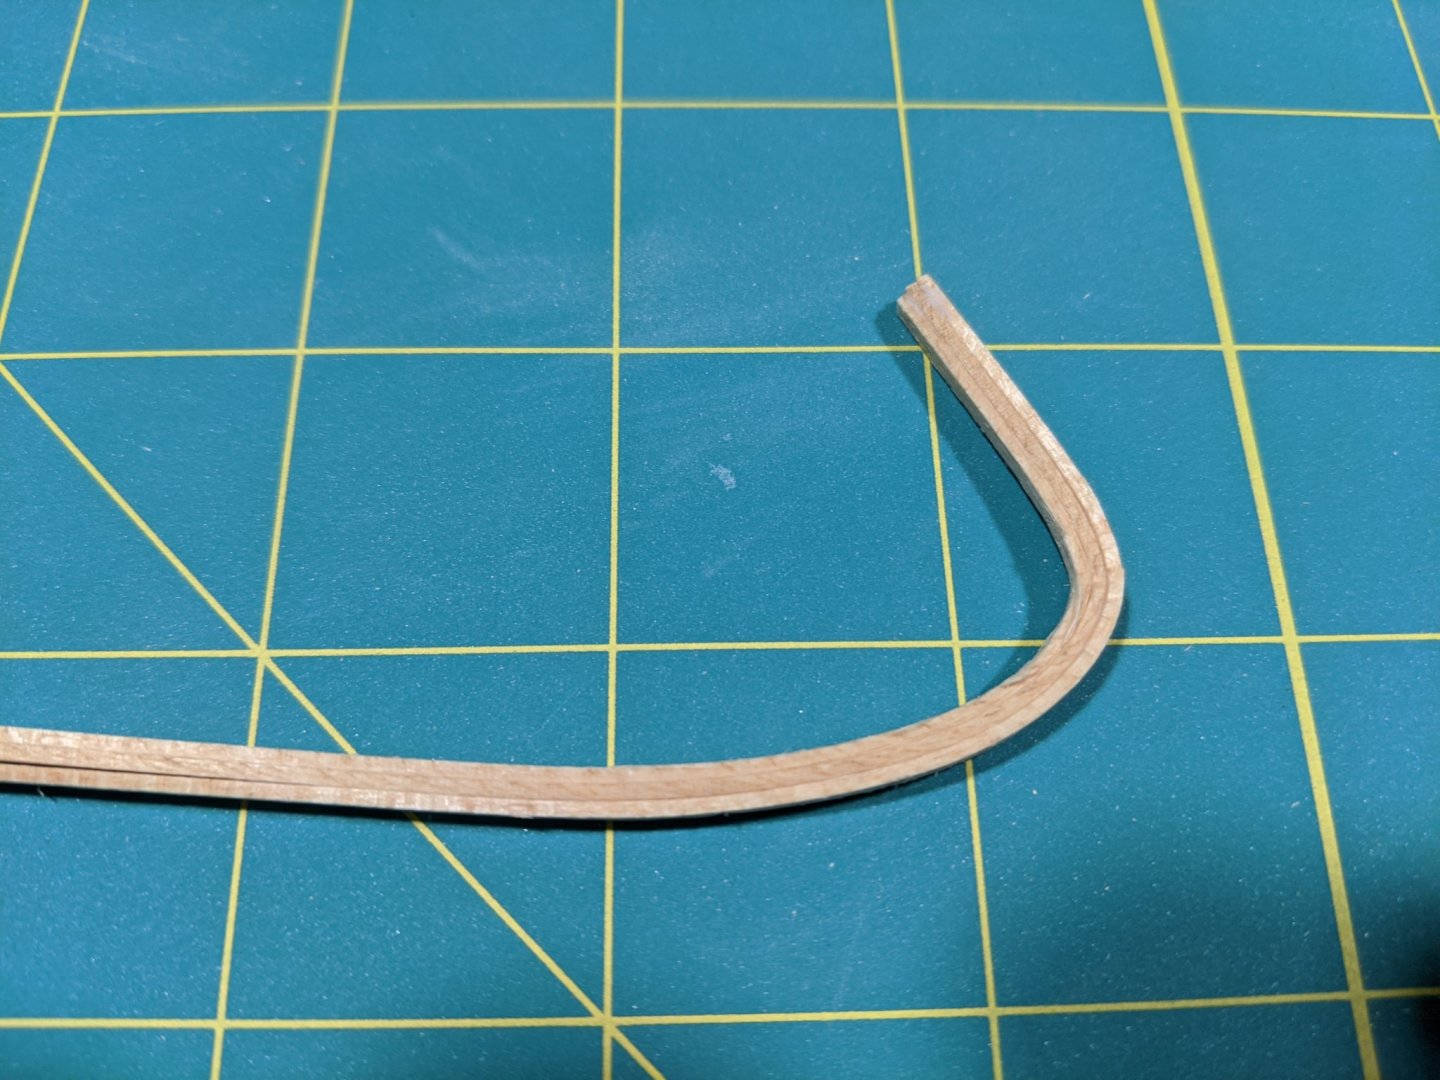
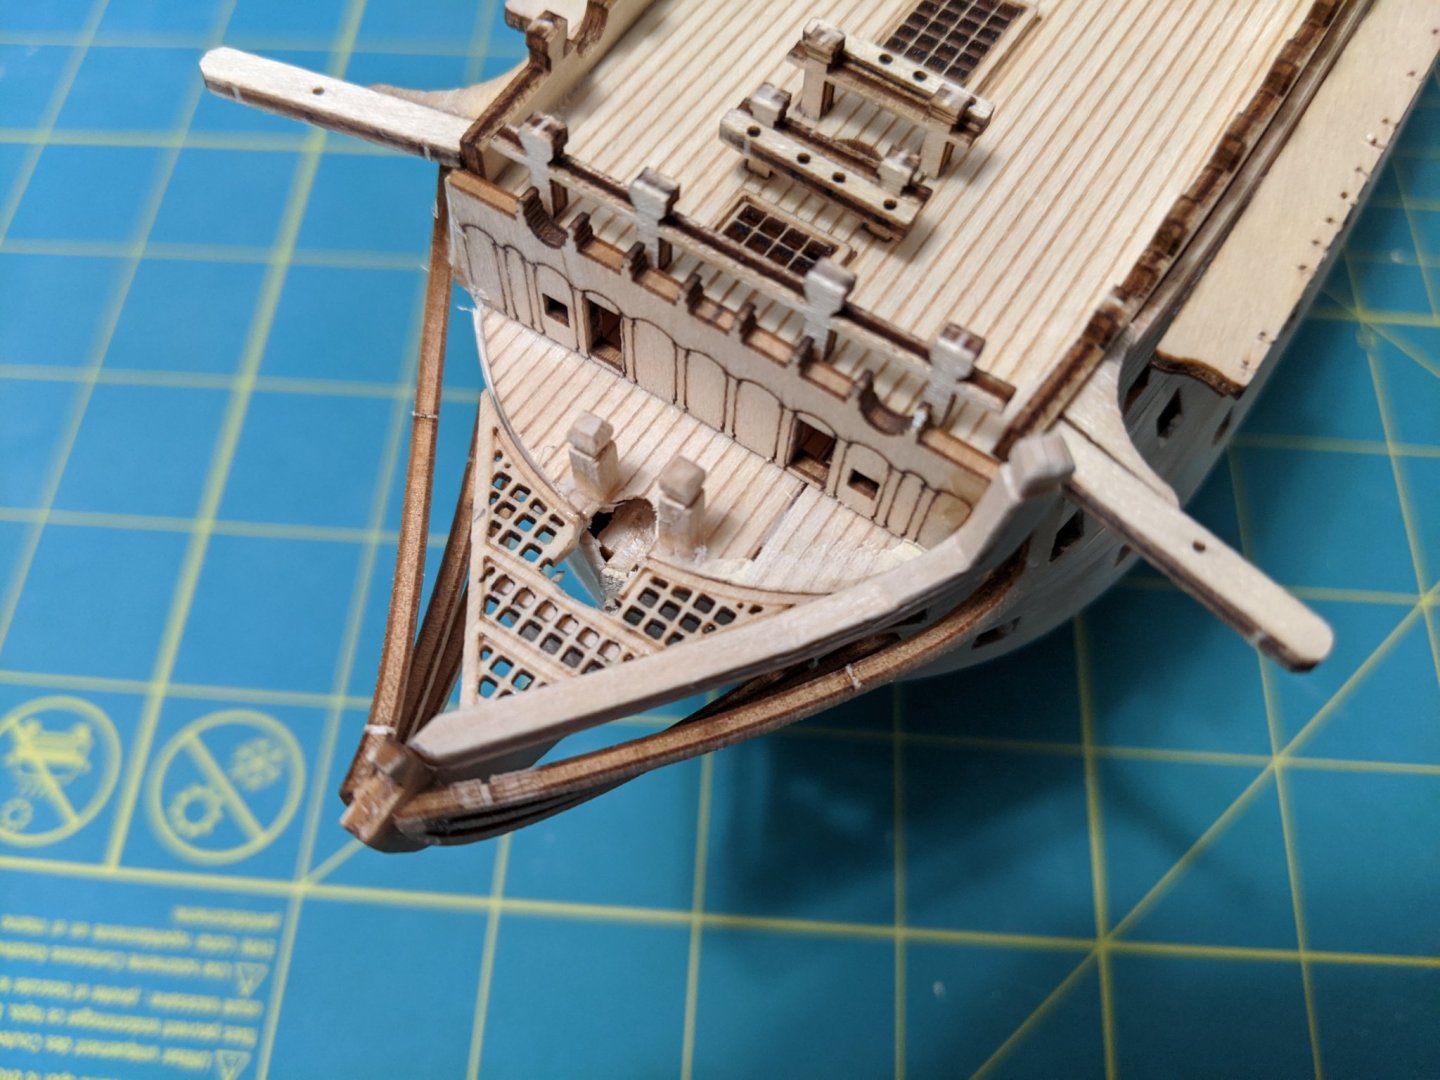
Slow progress, but still progress. I got the stern gallery base/support structure built out, still needs a little fill and sanding. More work on the bow, bow sprit and deck furniture, though I am not happy with the head rails. So i decided to make my own head rails. I cut out the section of the sheet the head rails come from to act as a form, and laminated three short lengths of the planks for the hulls. Once this dried I trimmed and carved the knight head and glued these in place I also added the chain rails to the hull and filled out the poop deck area and added some wood blocks to simulate the signal flag lockers.


-
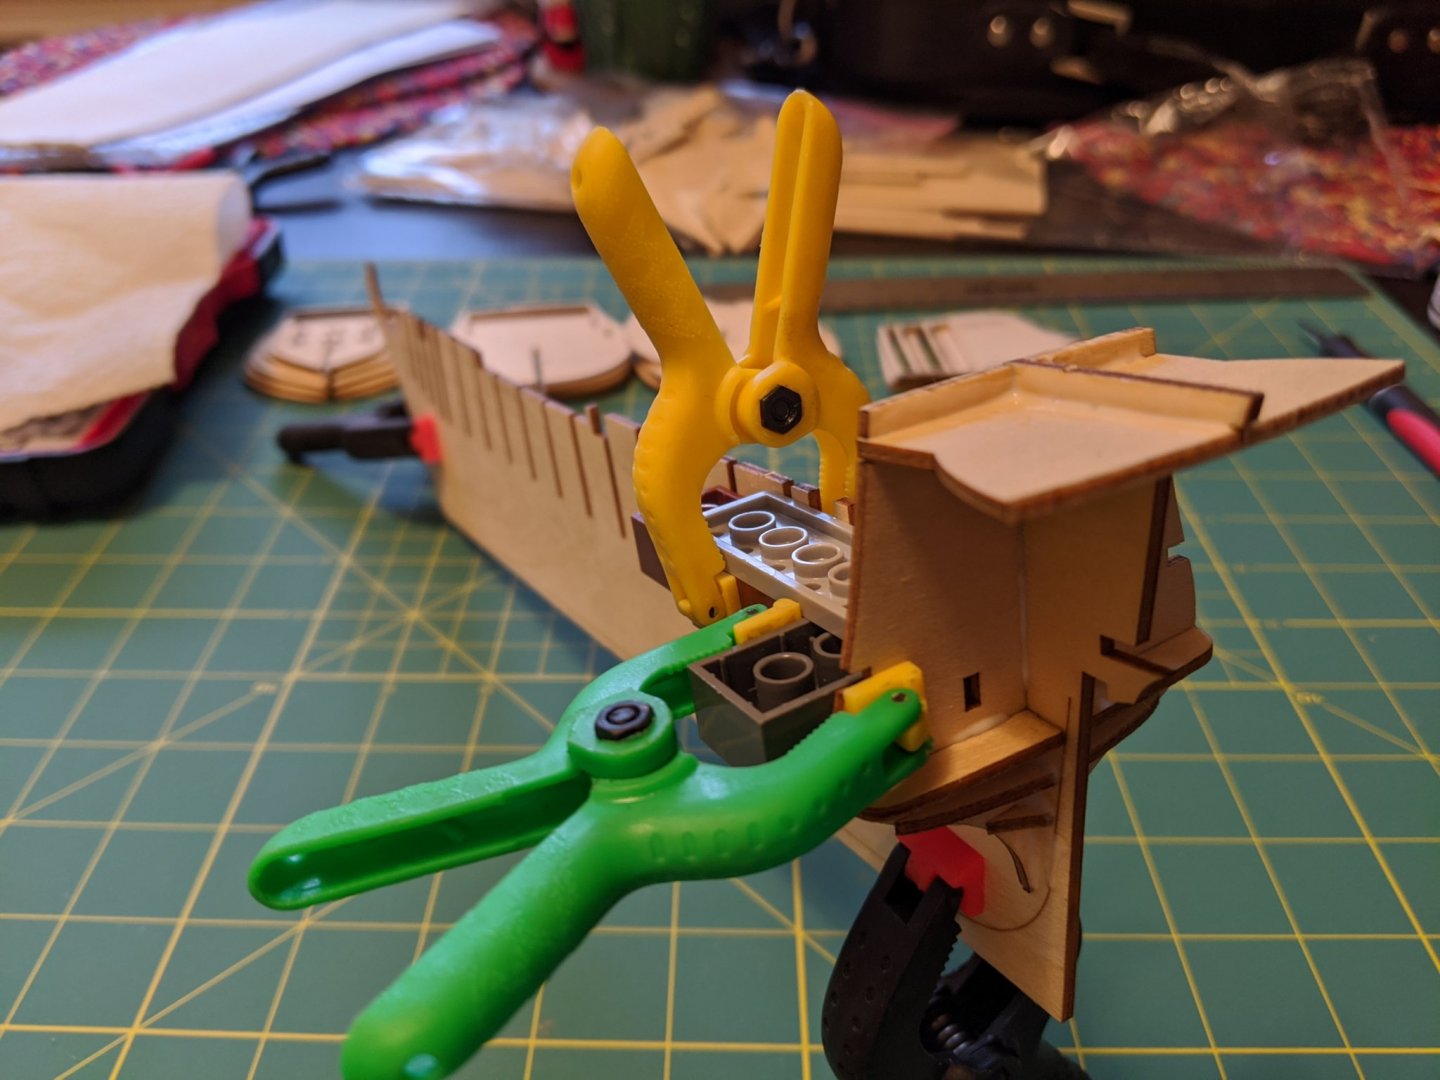
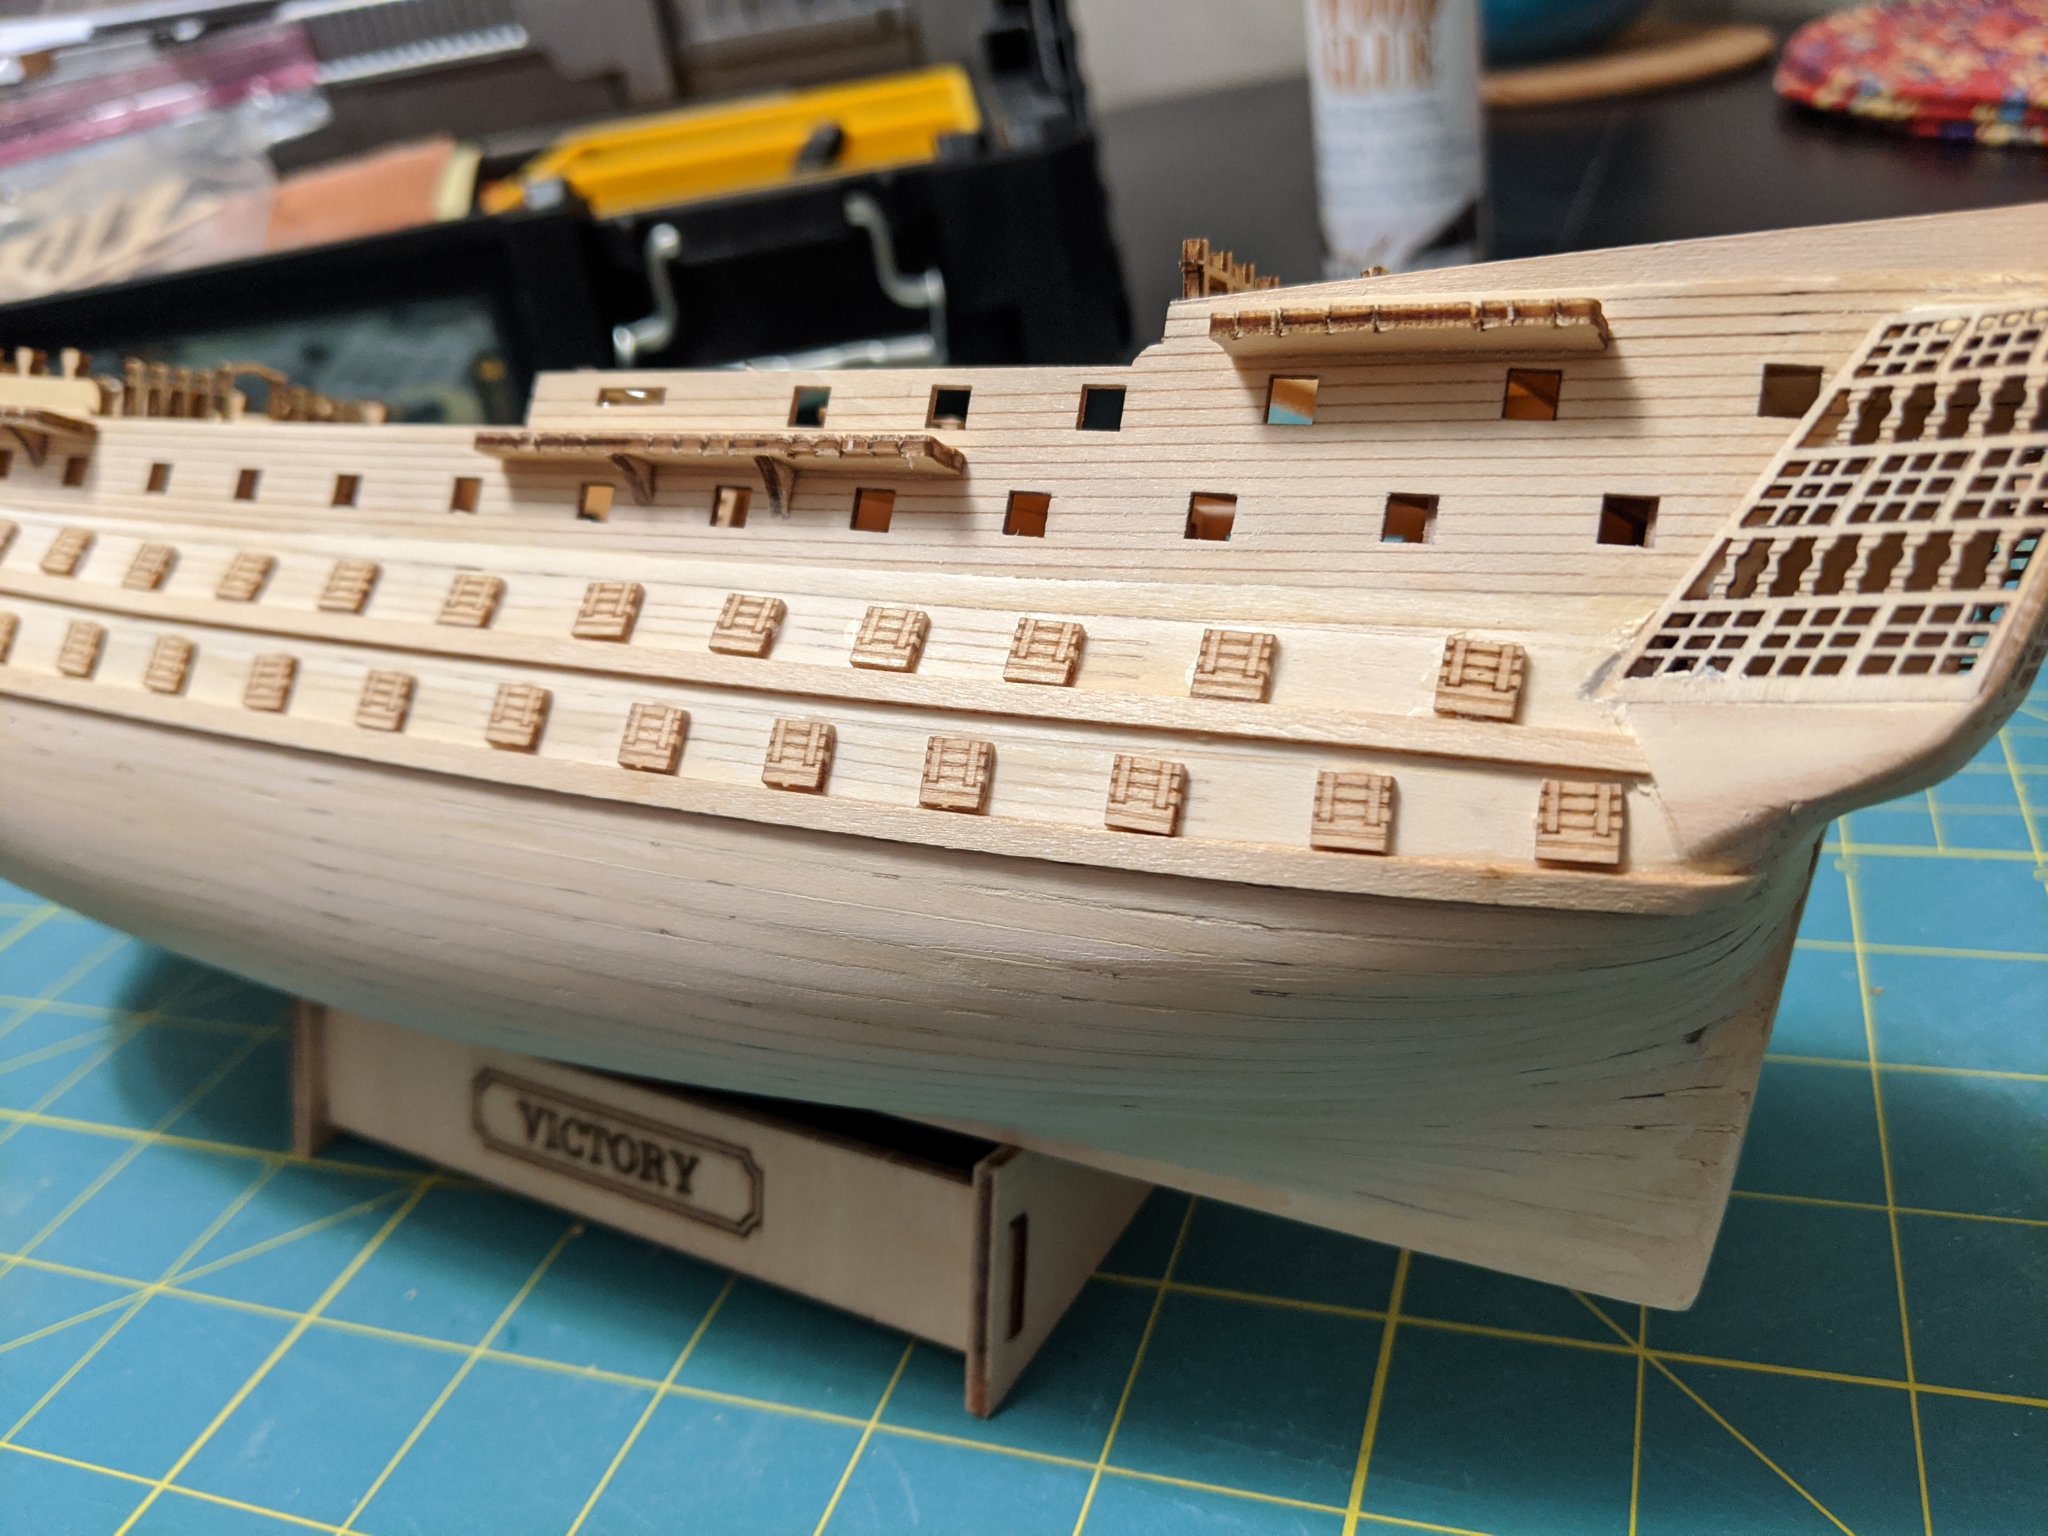
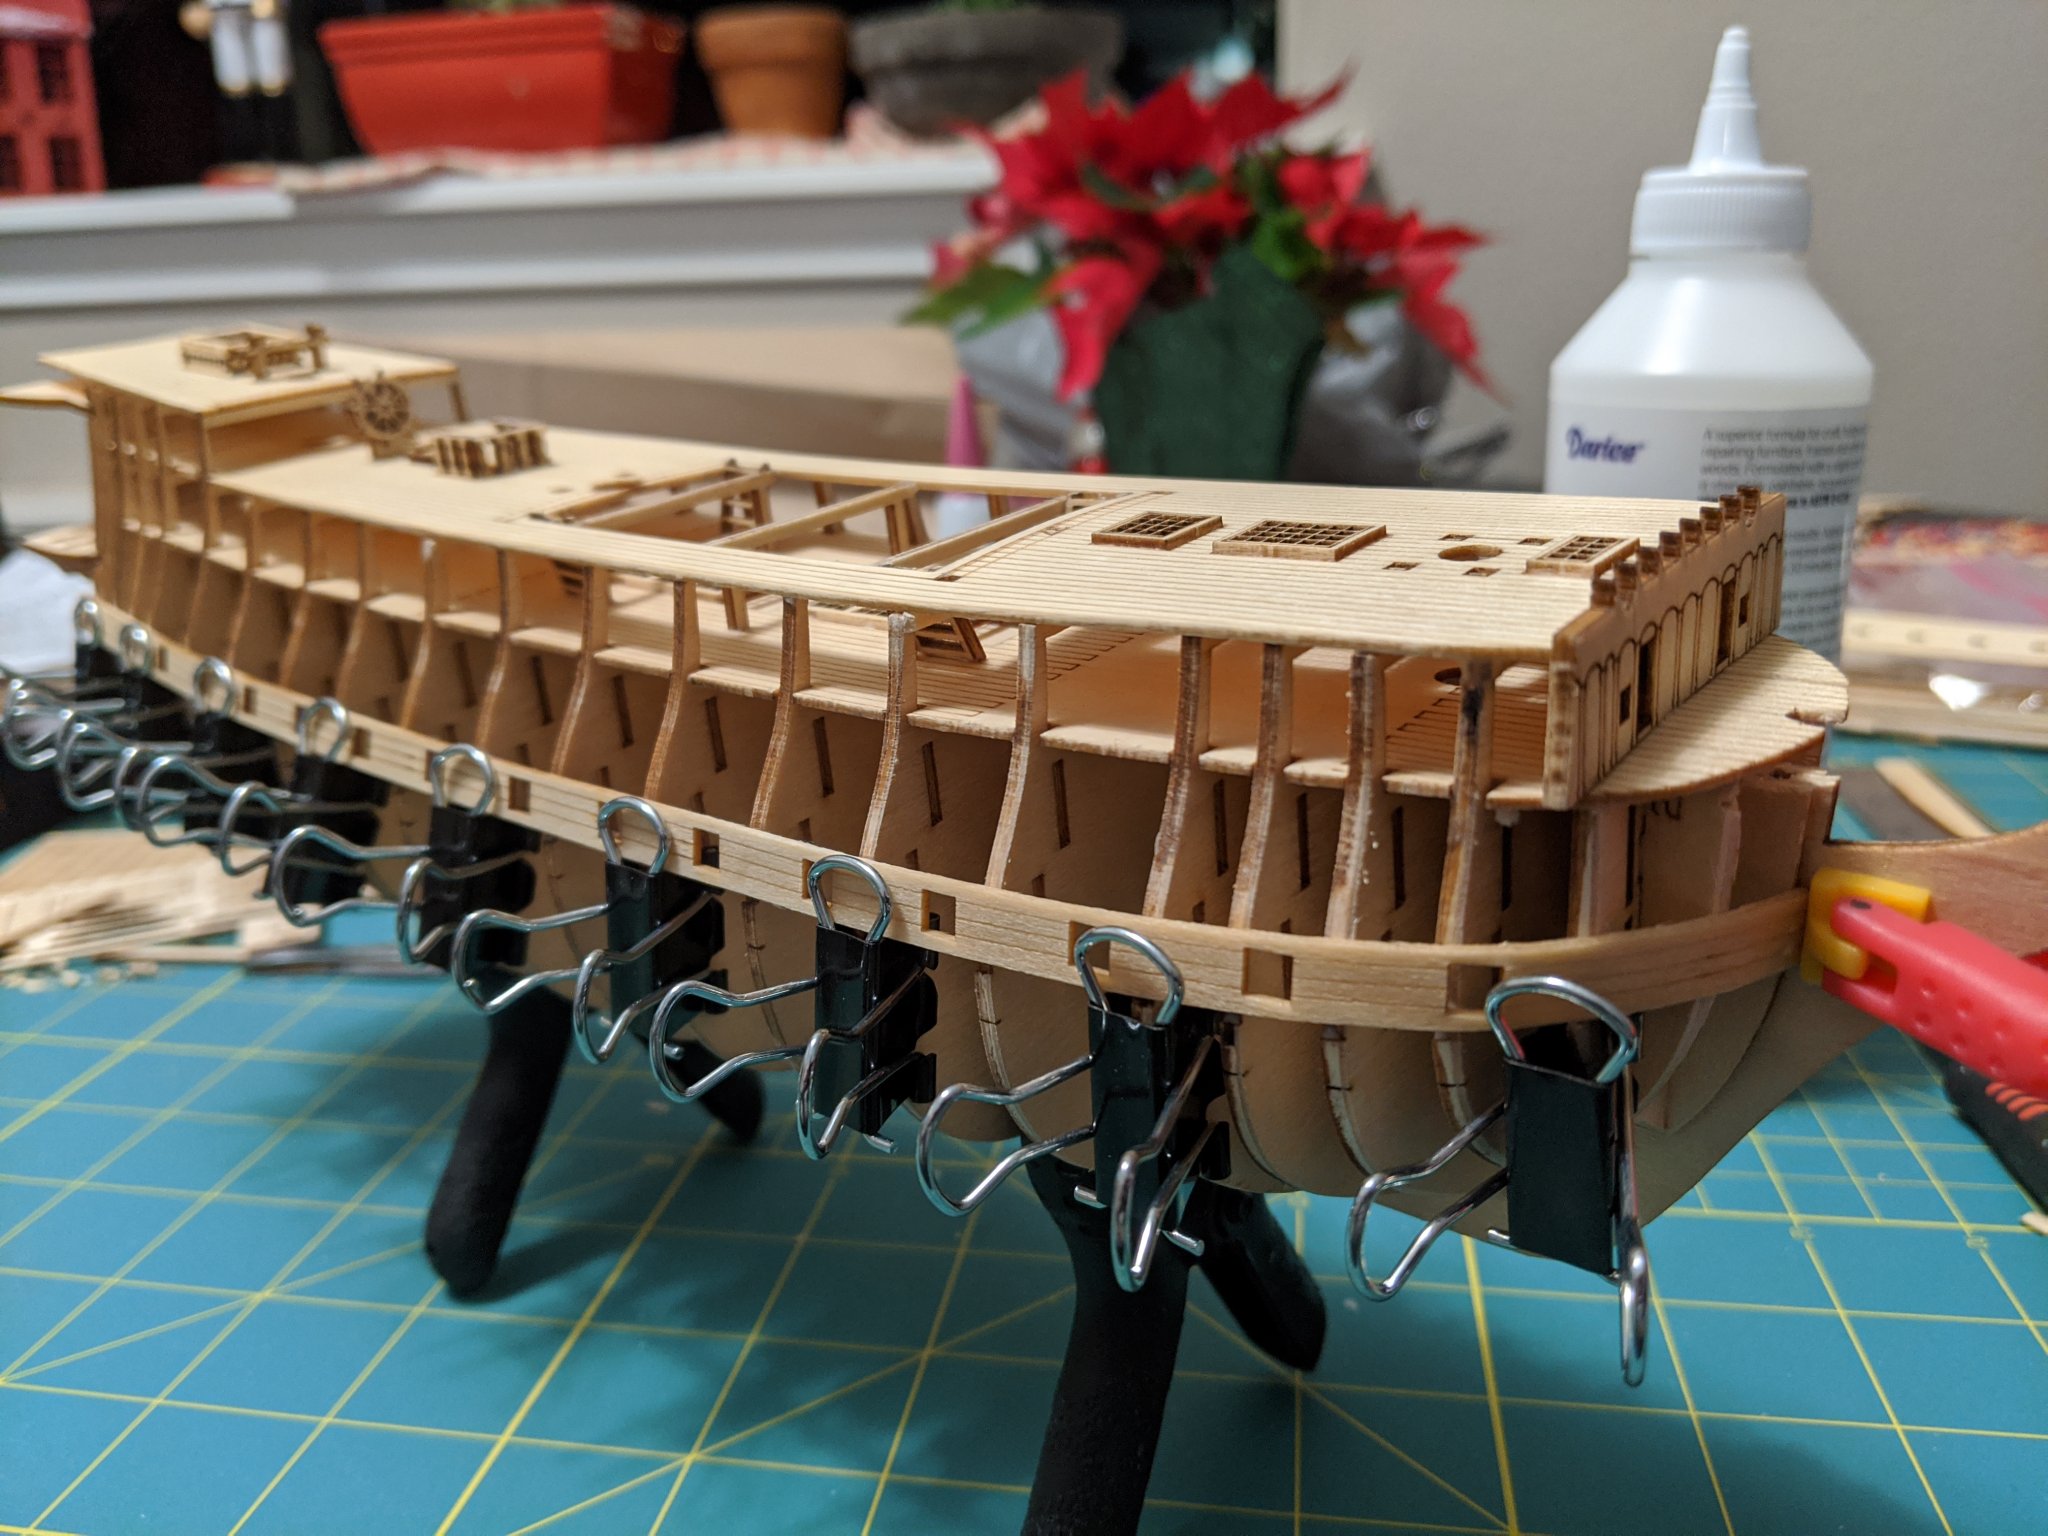
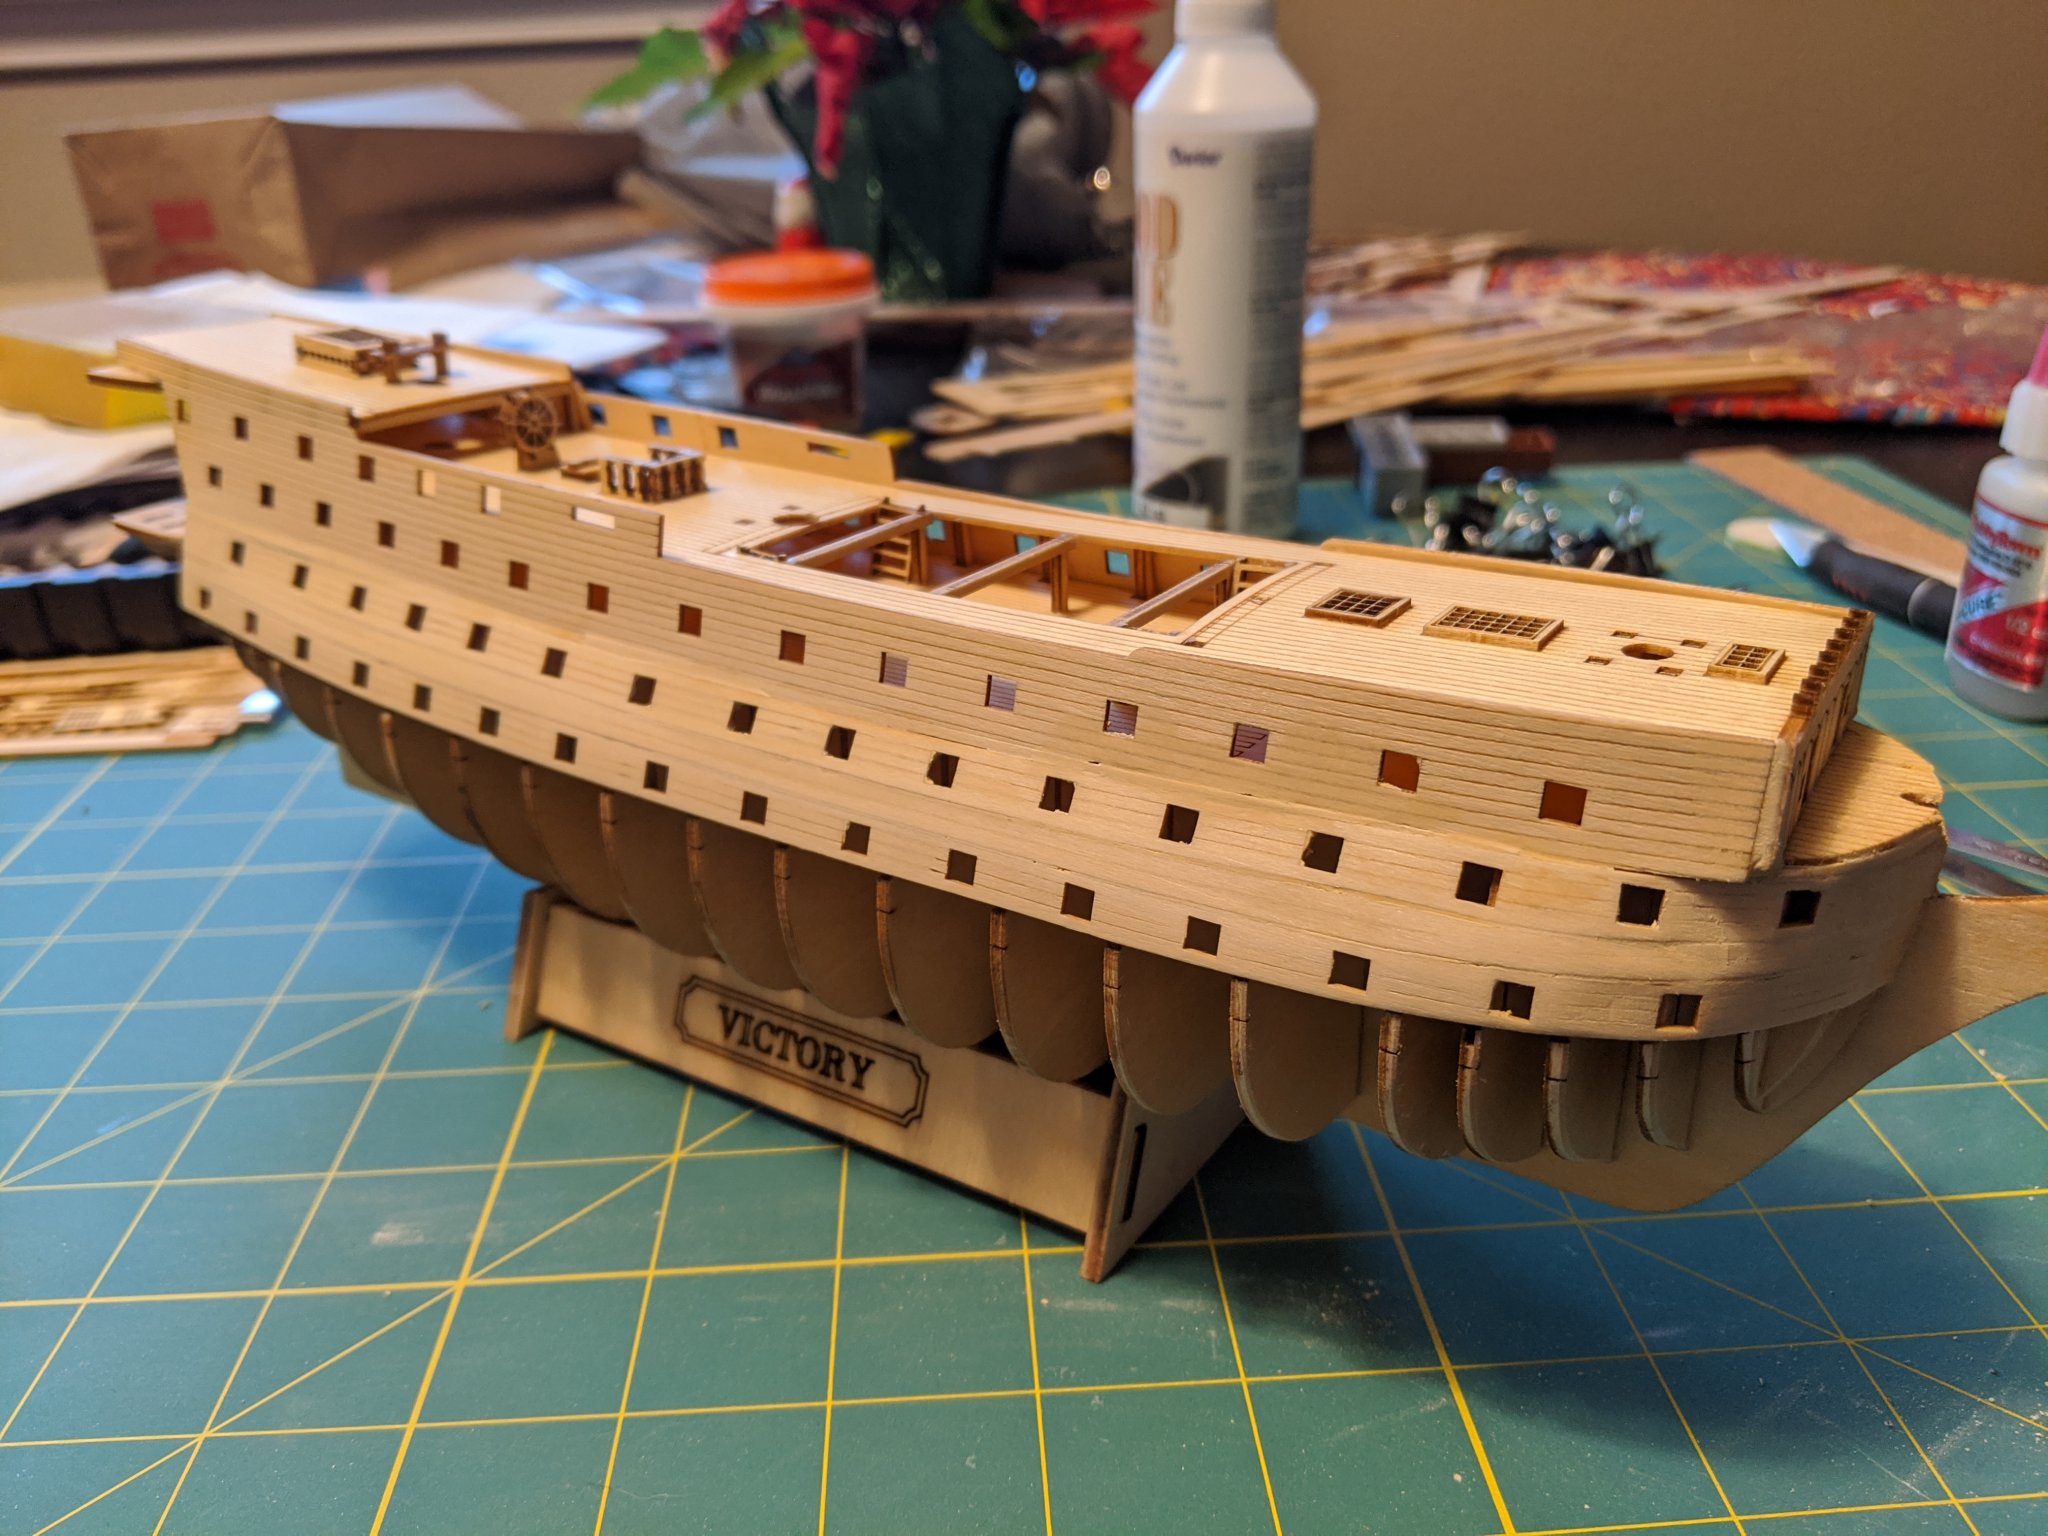
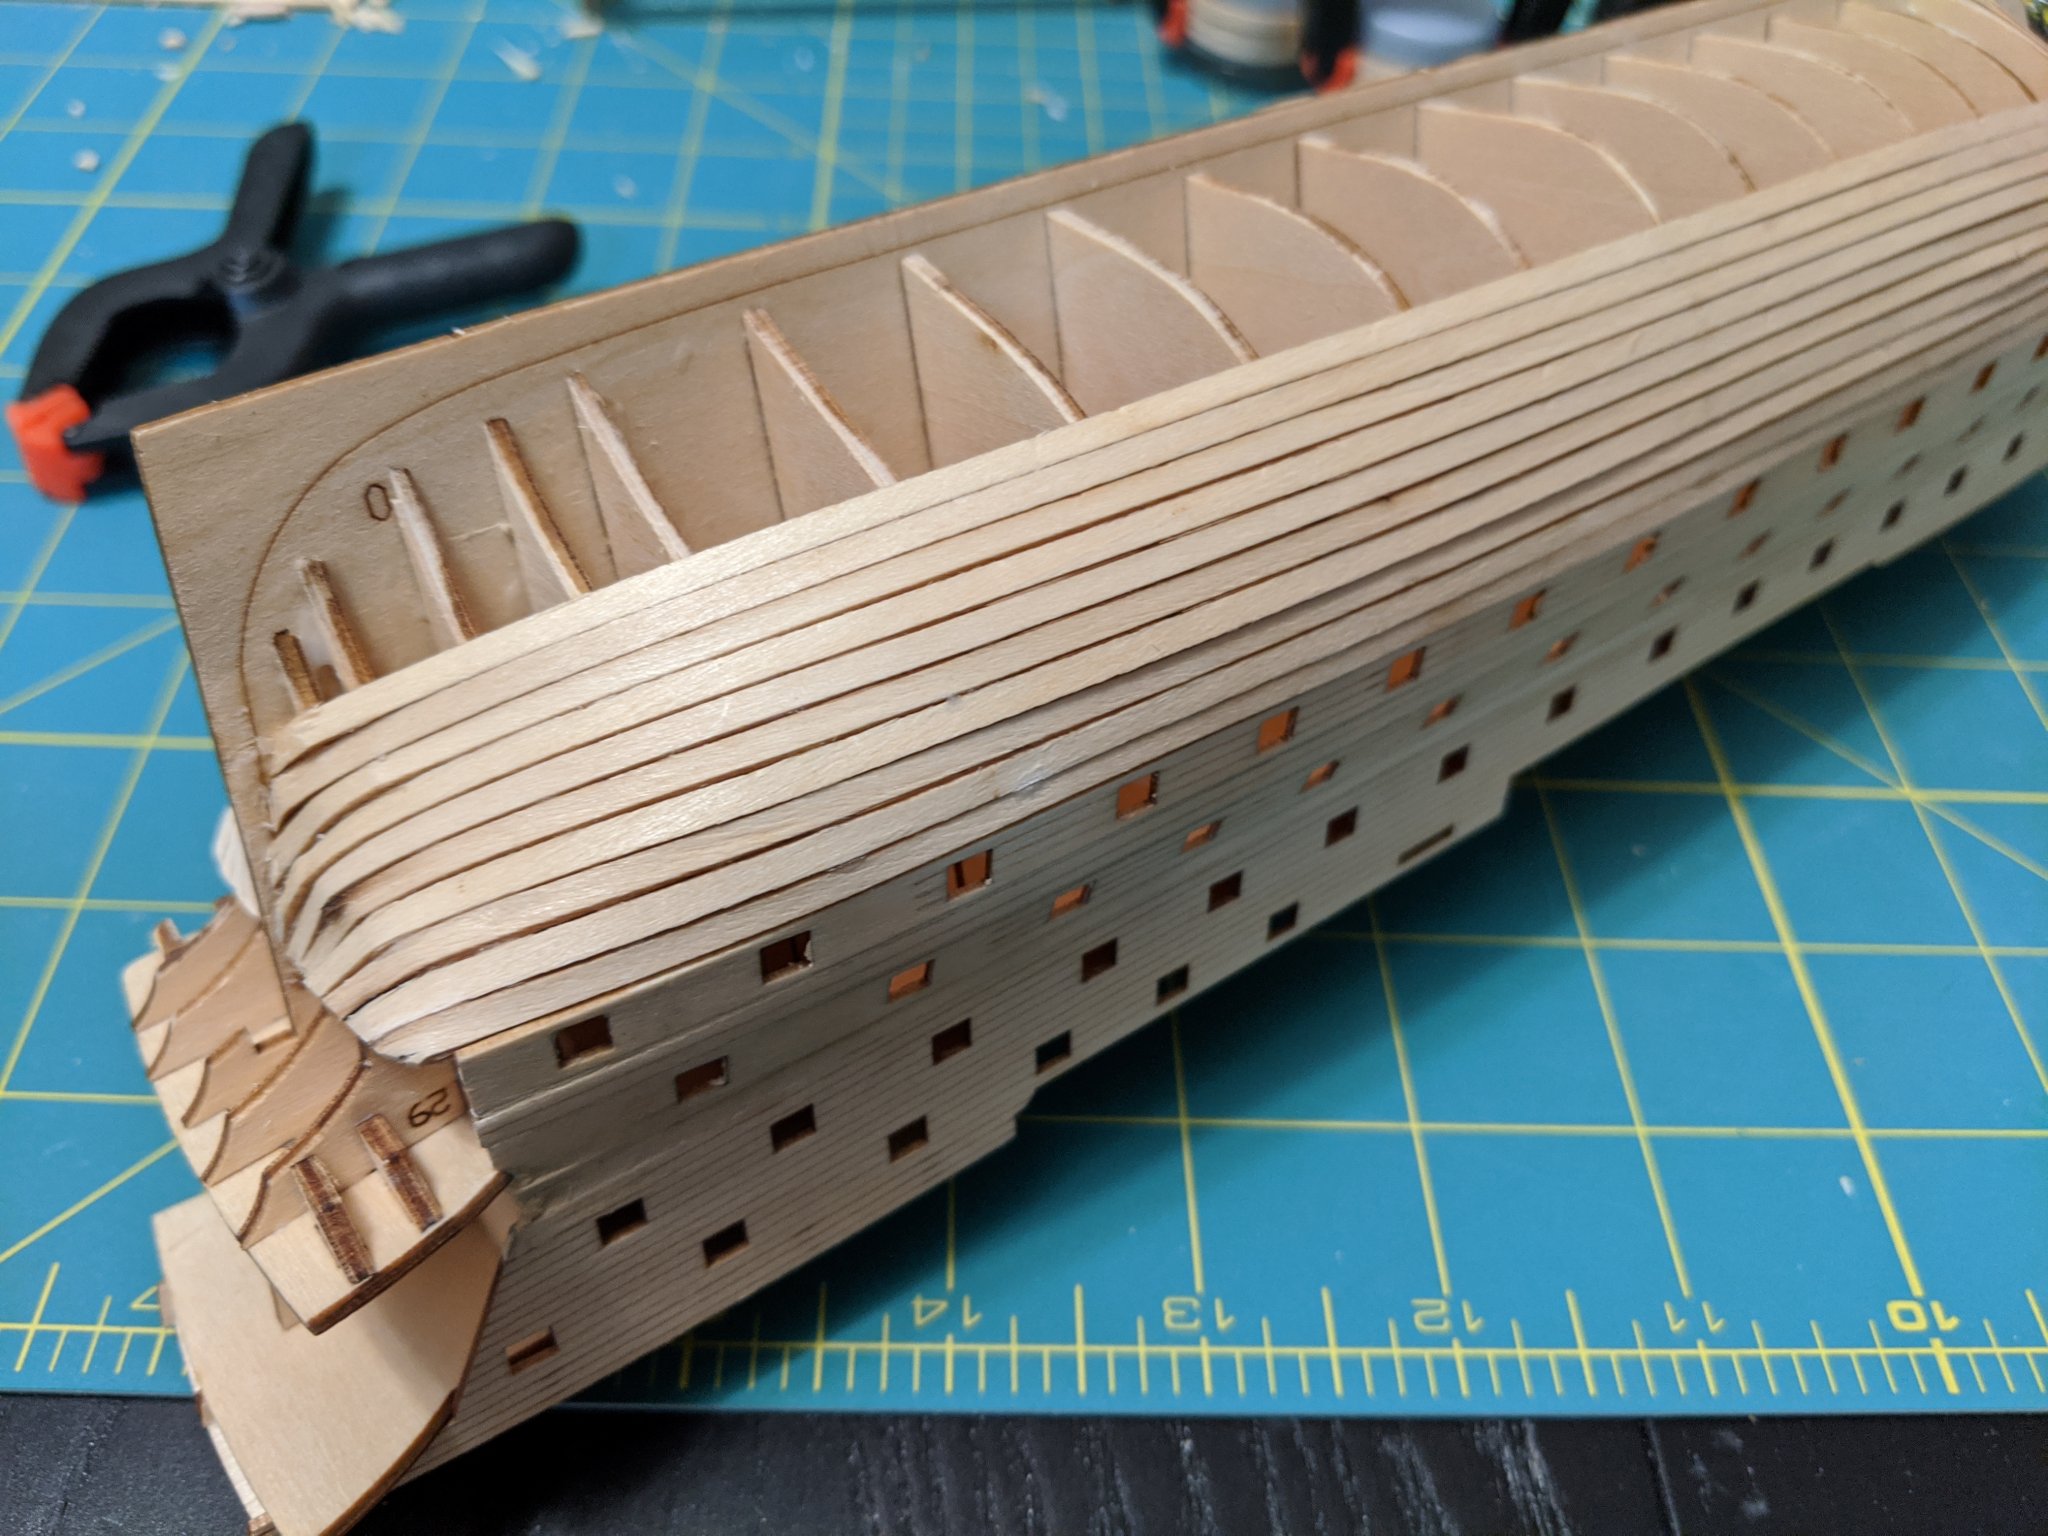
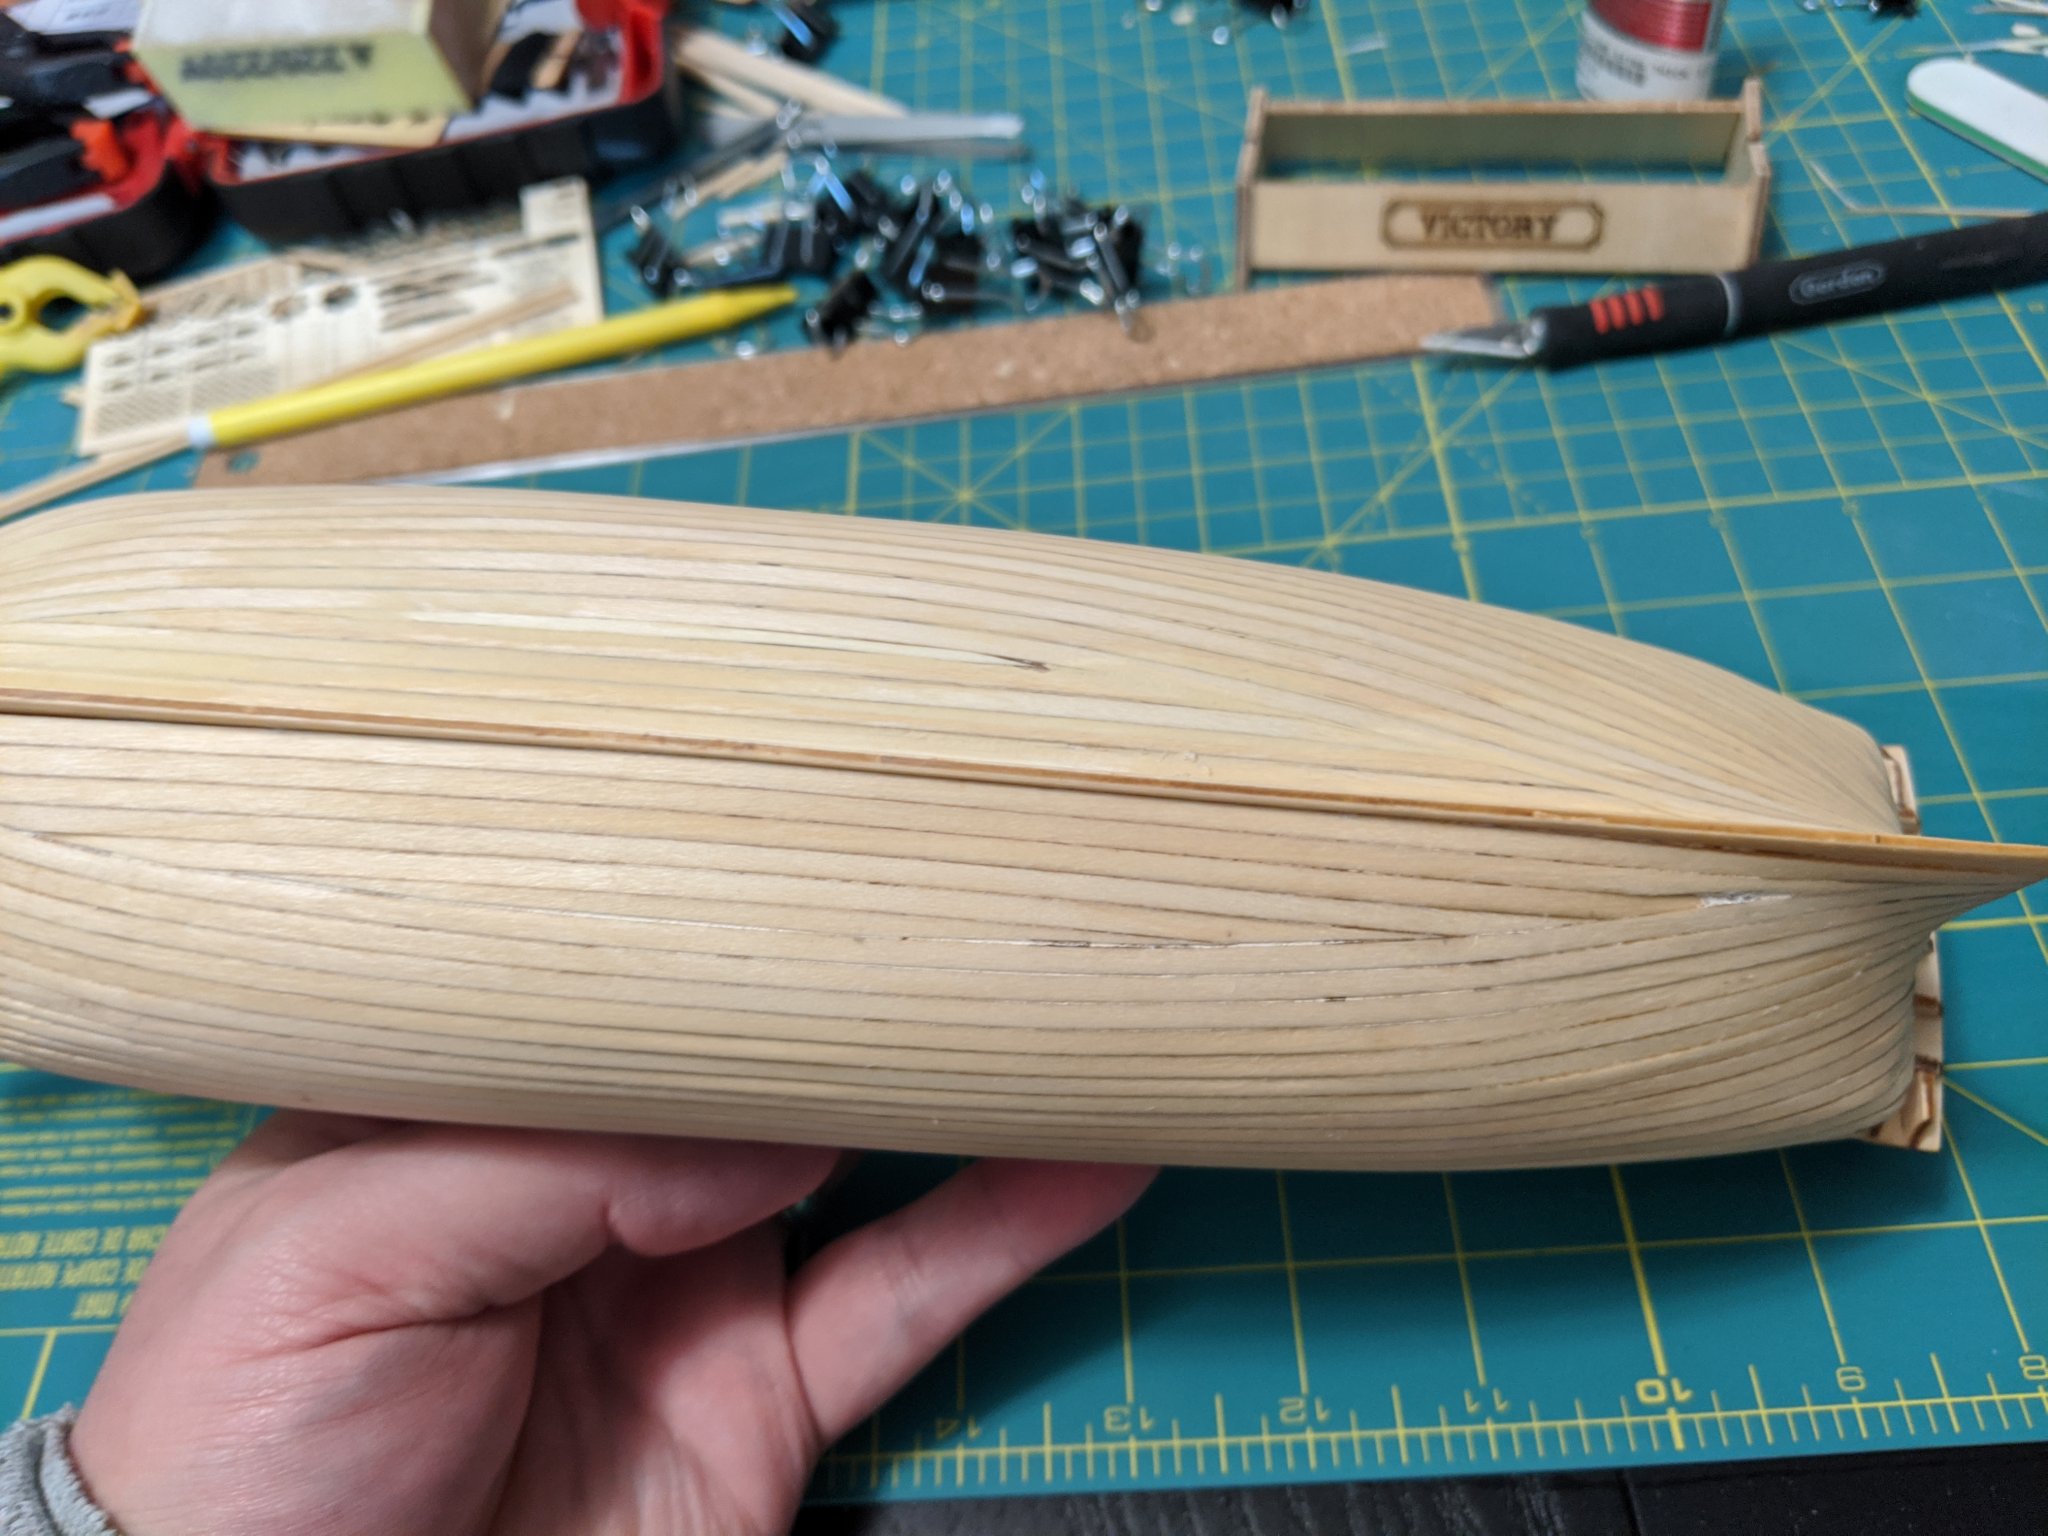
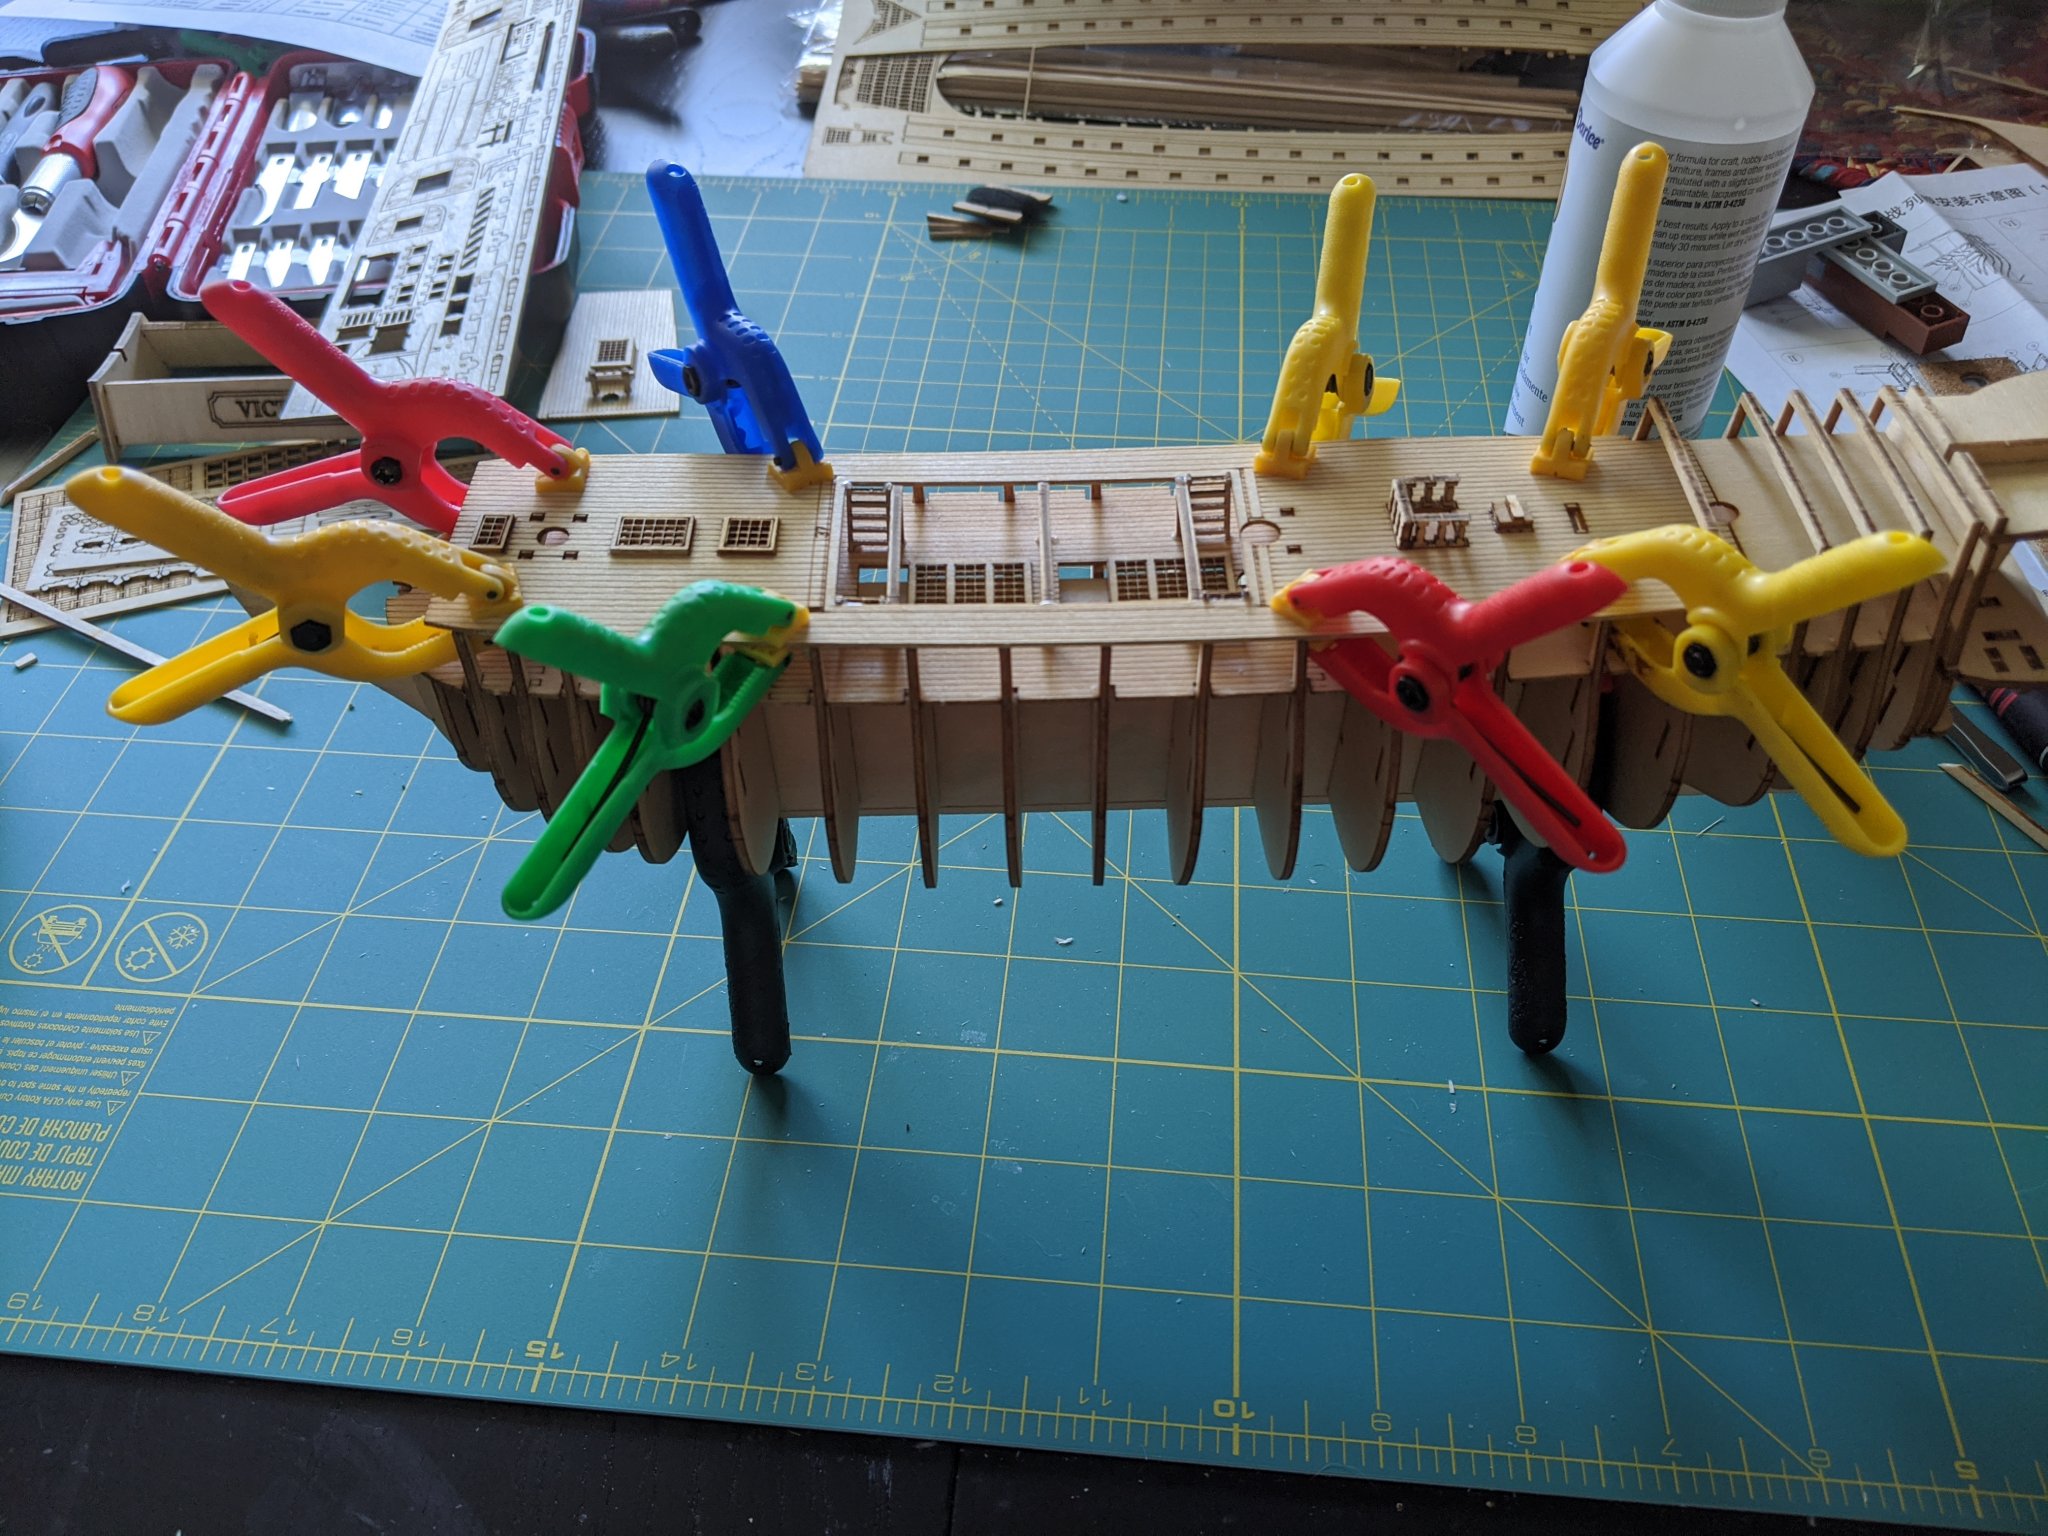
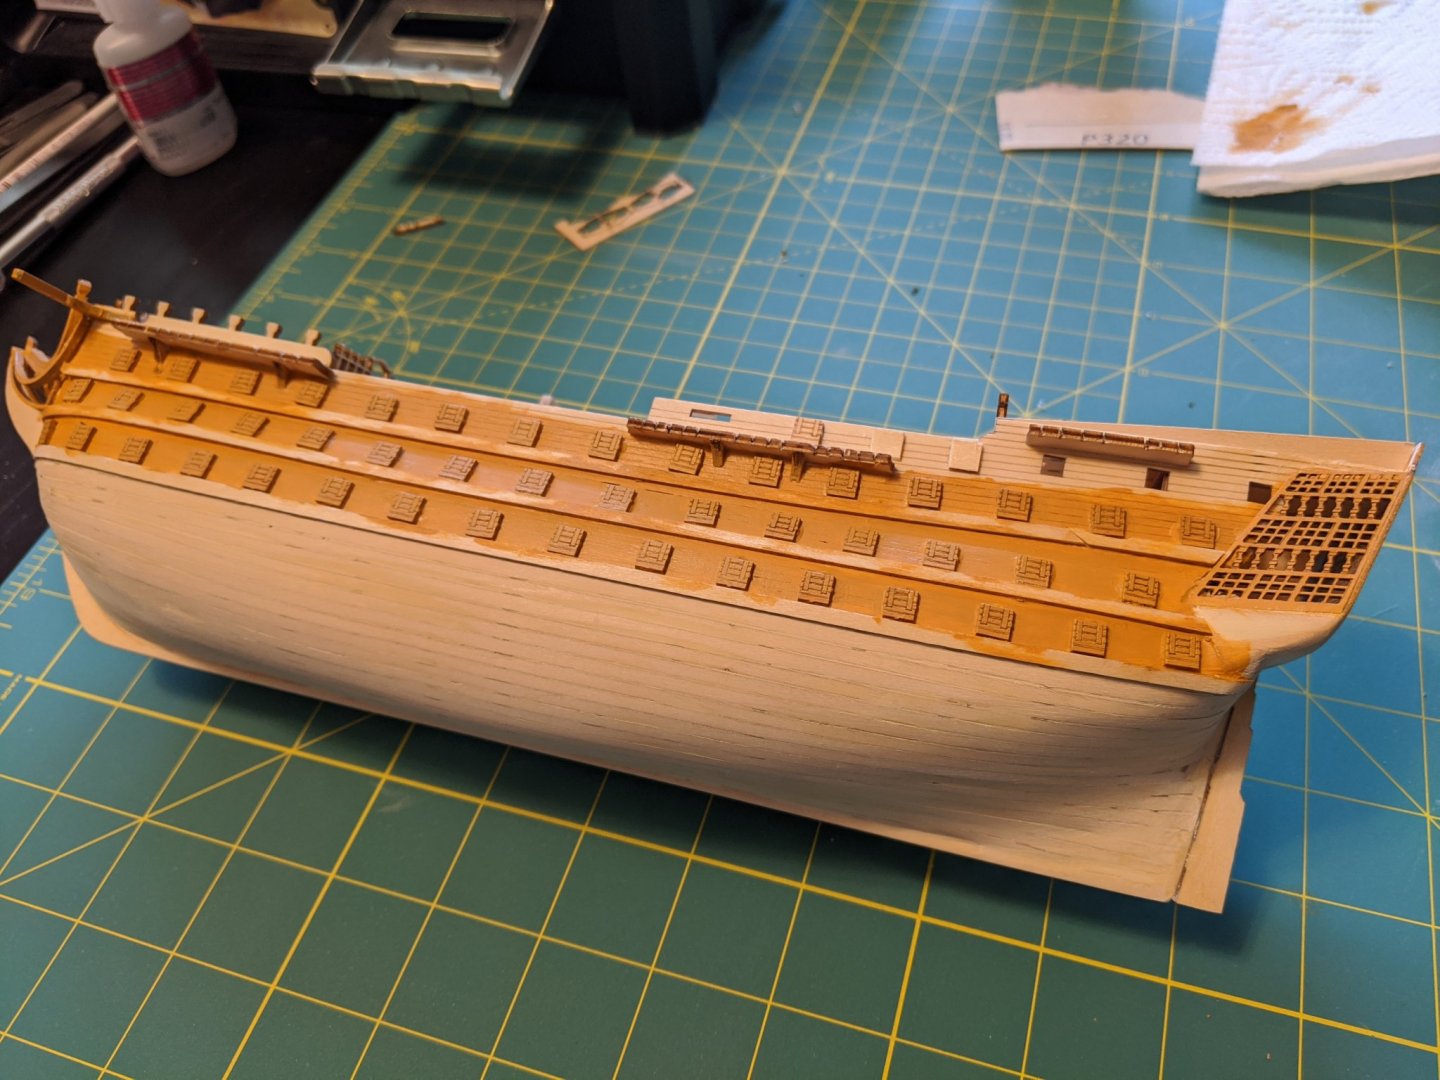
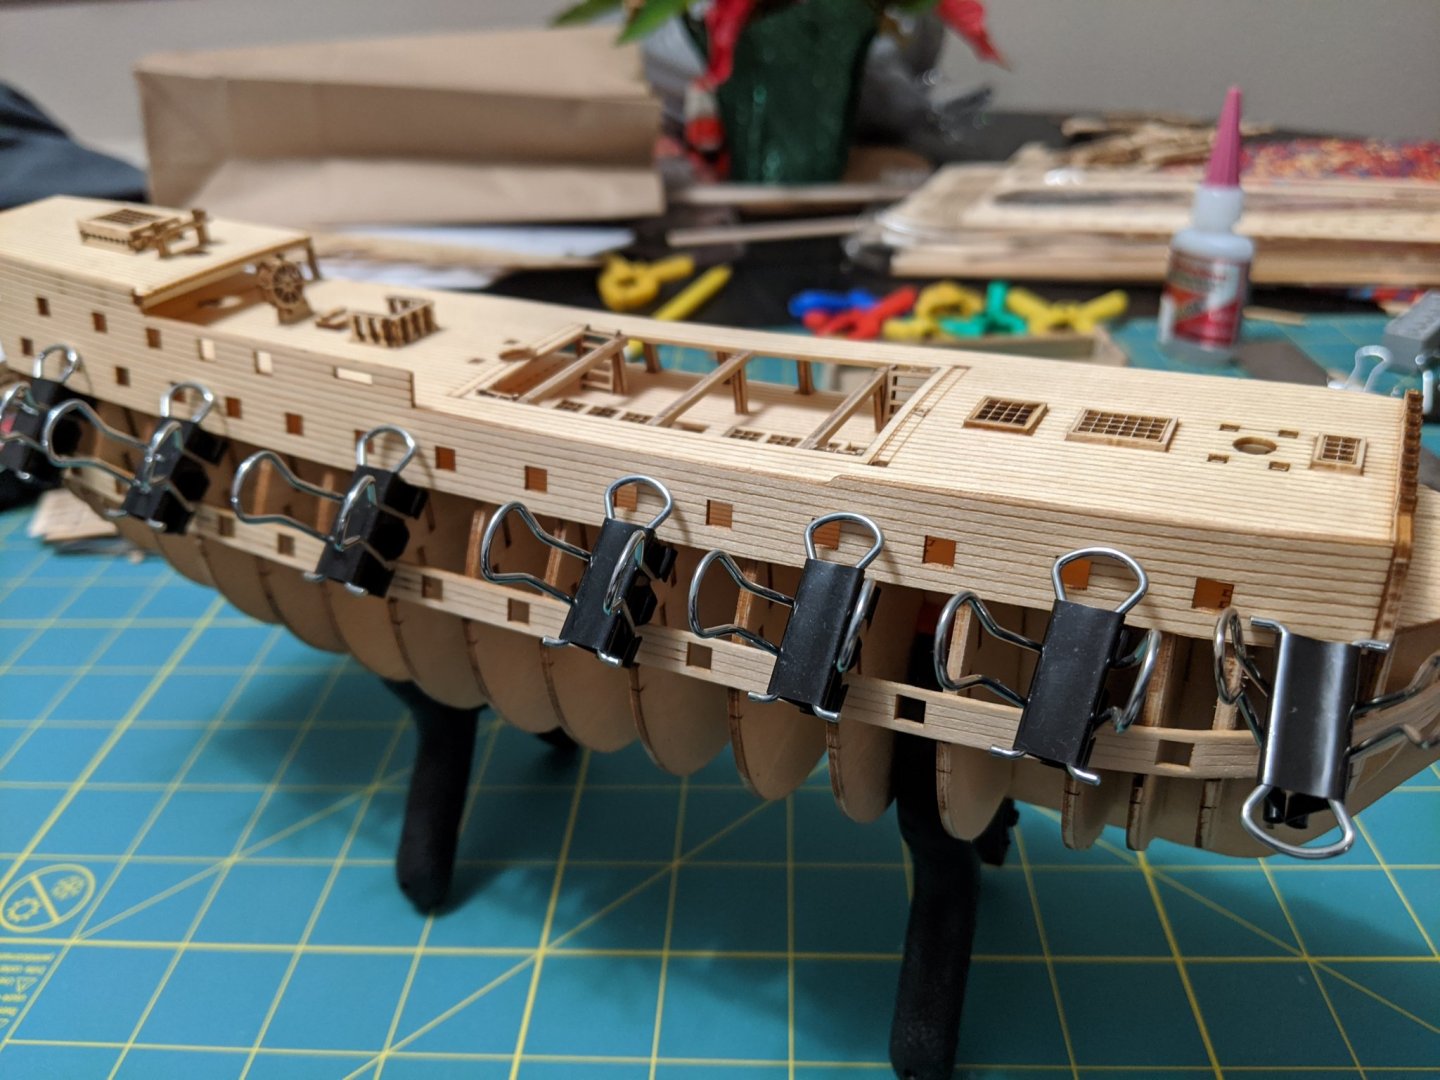
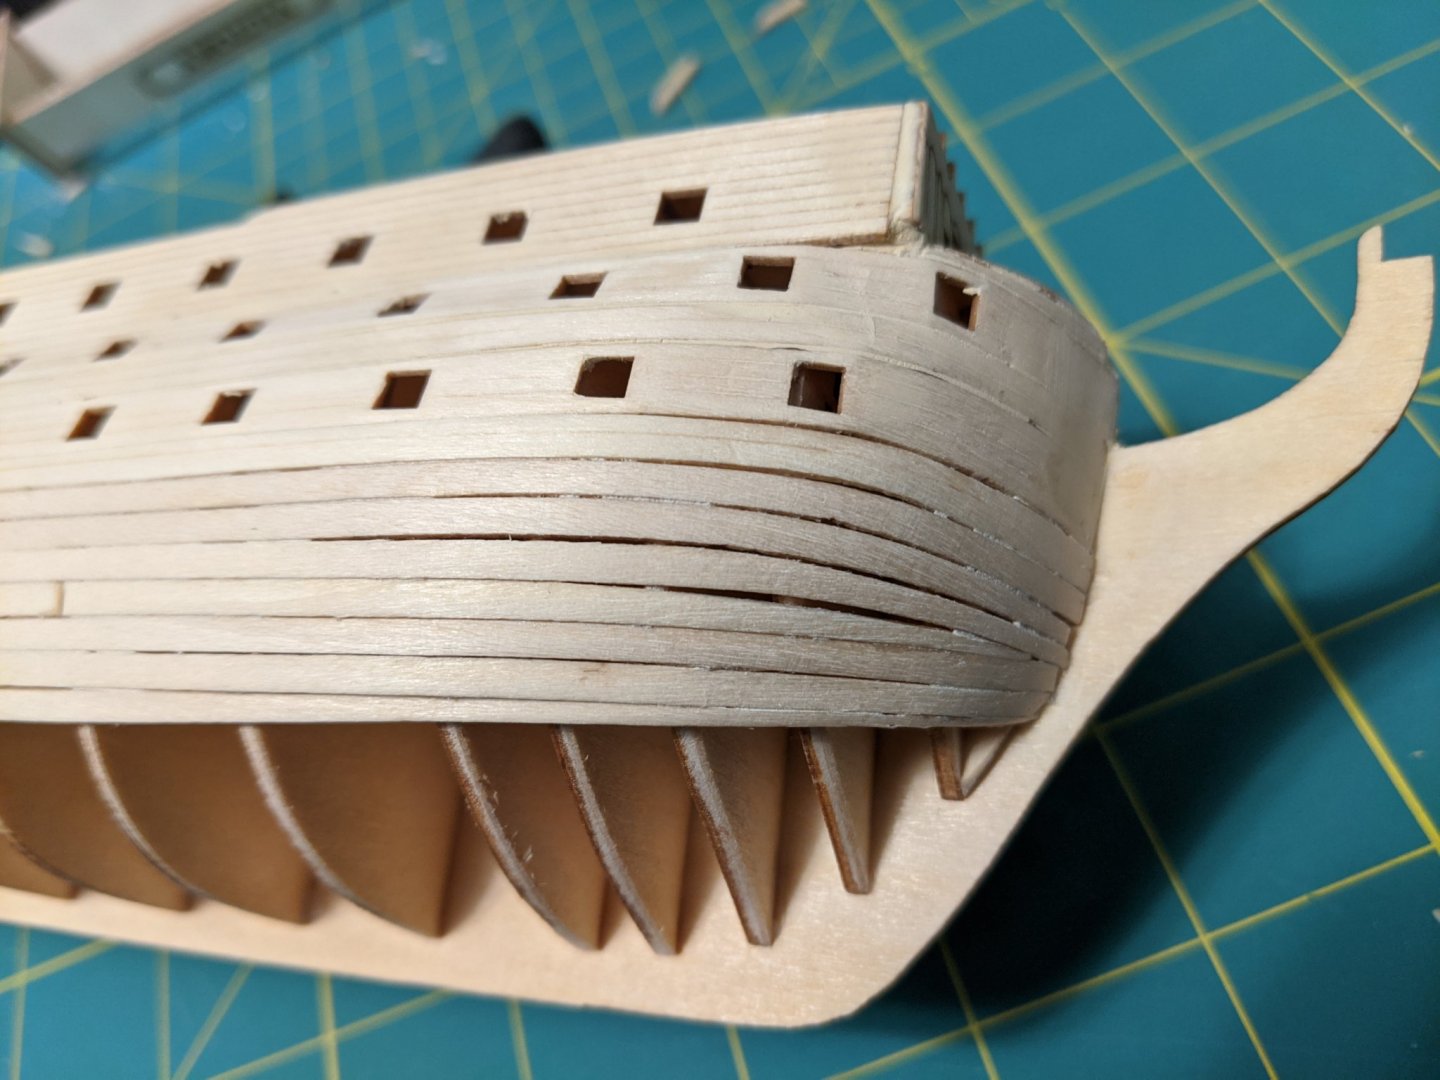
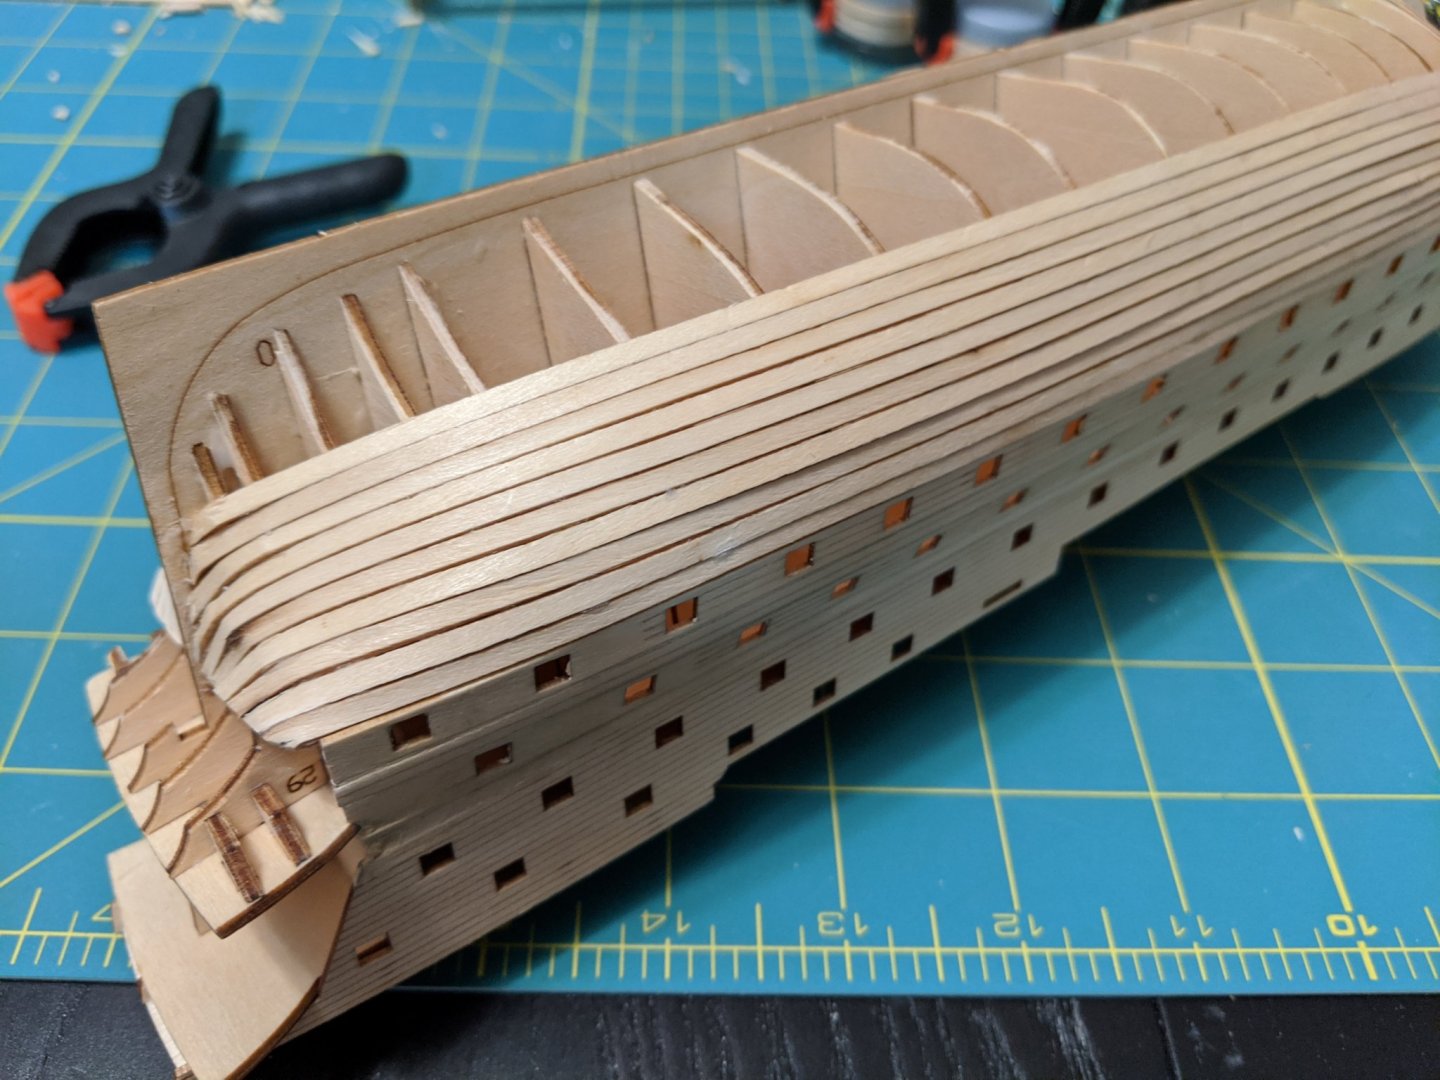
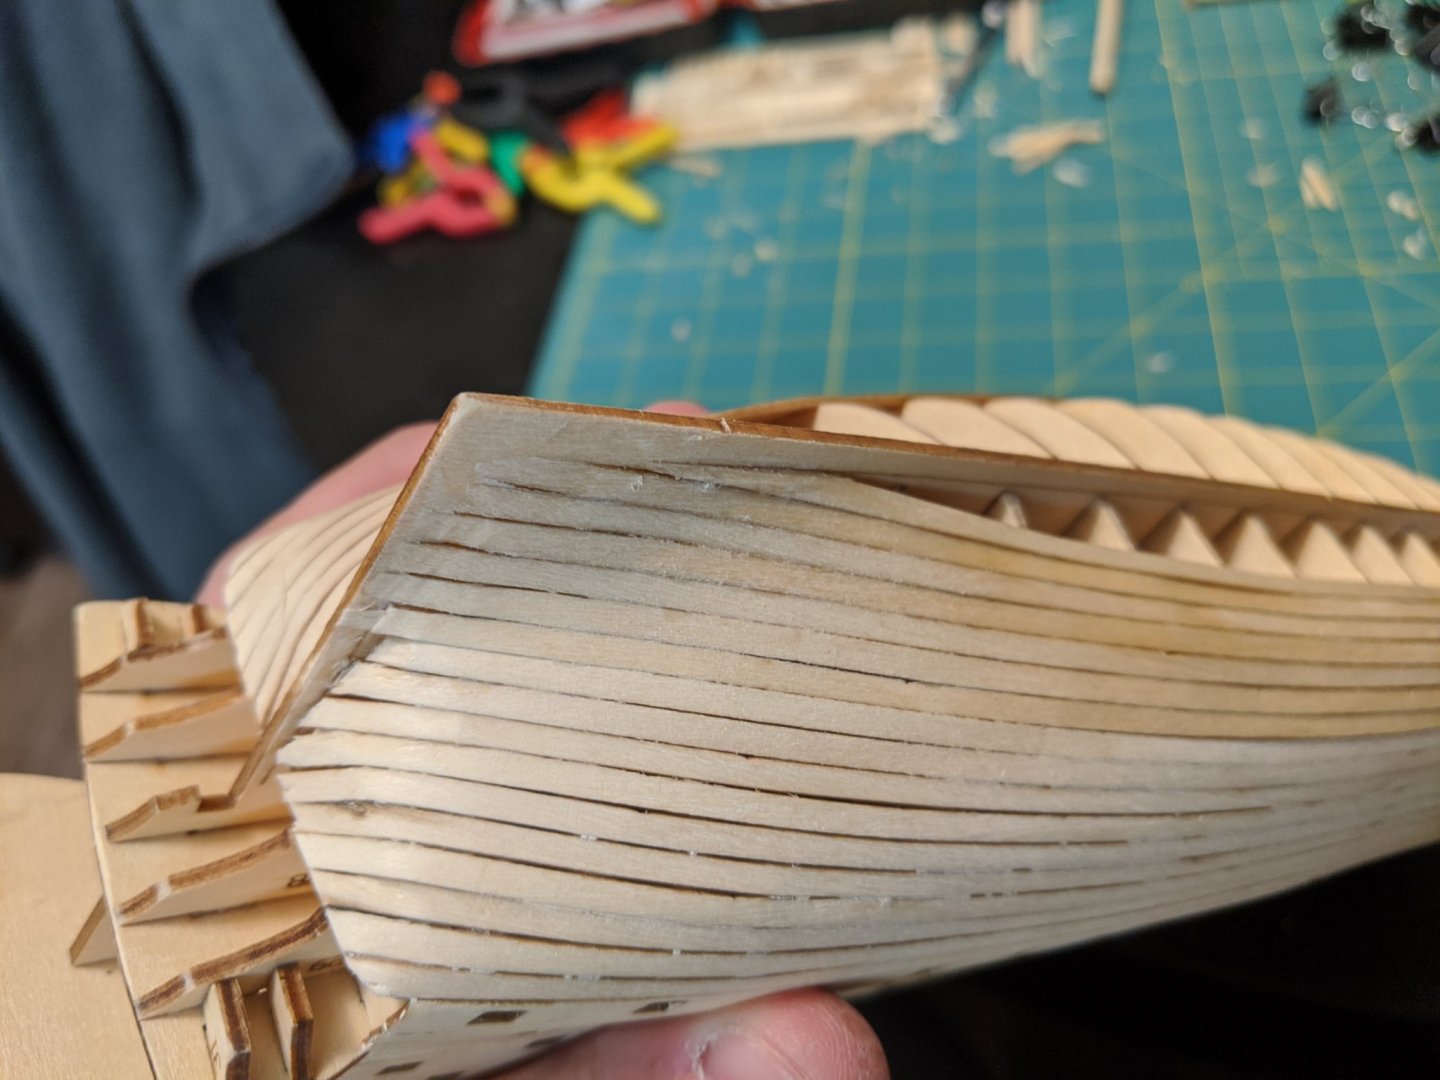
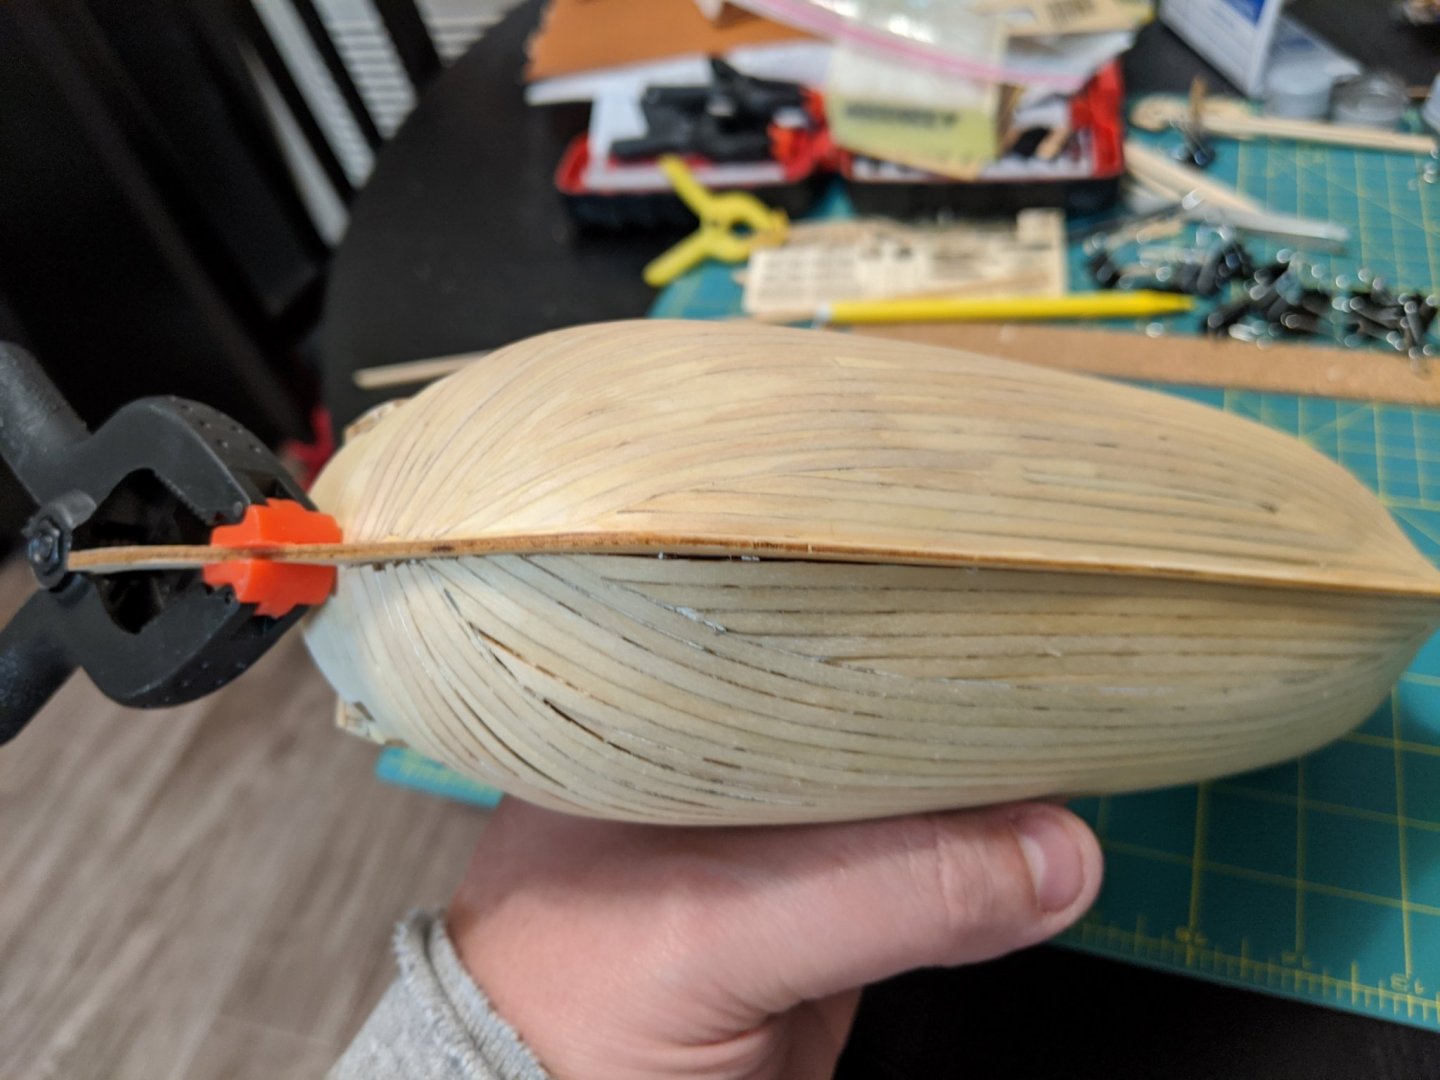
Fun update, I found a moderately decent build log for this exact kit, in Chinese. Thank God for Google translate. So I have some better resources to work with for this kit, as well as numerous documents, plans, build logs aplenty for the Victory that I can use to fill in the blanks. As well as a complete set of drawings for the rigging plans. On to the shipyard. The plank gang got to work, and have a little progress. I started with he lowest section of the precut hull pieces, and got it bent and glued down. I then decided to glue down the top most section, as I wanted to make sure these two were in place and could modify the others as they go in as needed. Once the glue dried, i started on the lower hull planking with the pre cut planks provided in the kit. While these were laser cut from a sheet, they did not have any preset curves and were simple straight cut planks. I made some definite first time mistakes as I worked my way down, trying different options to taper or use stealer planks, and slowly I got the hang of it as i rounded the belly of the hull and onto the bottom.


-
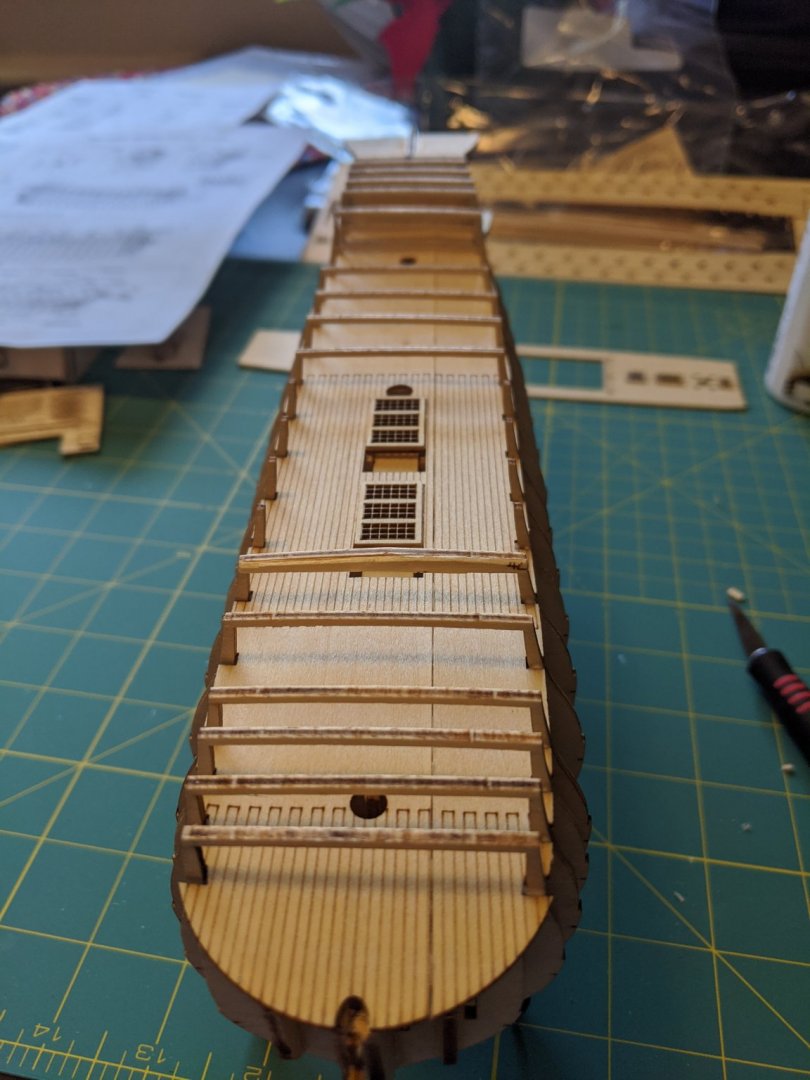
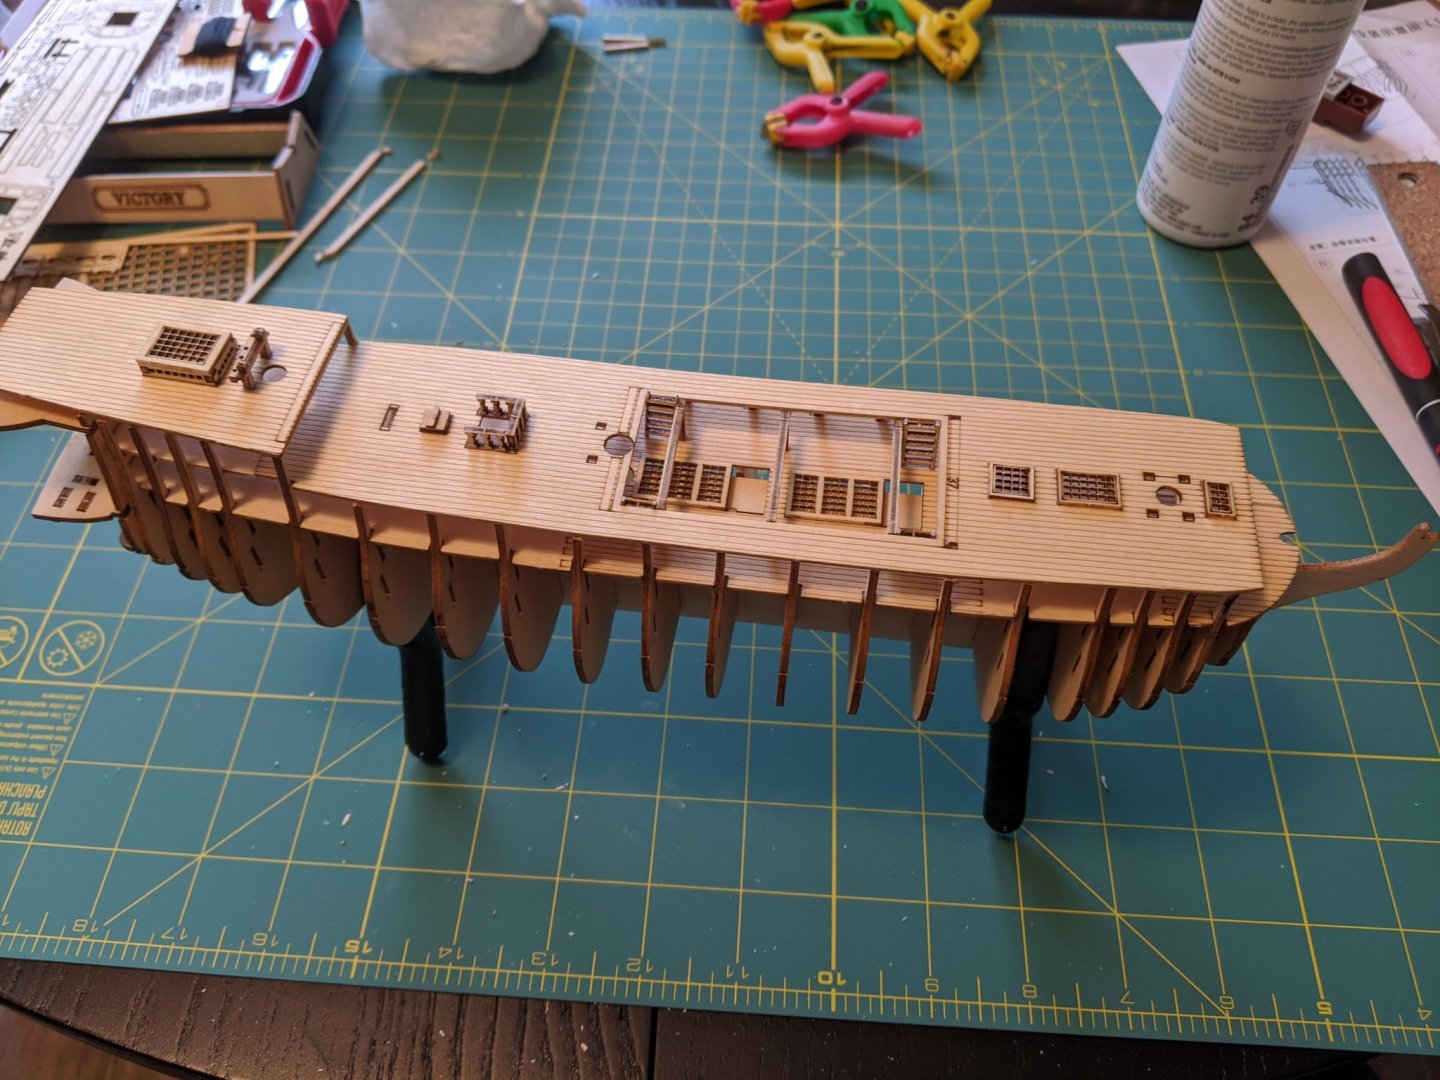
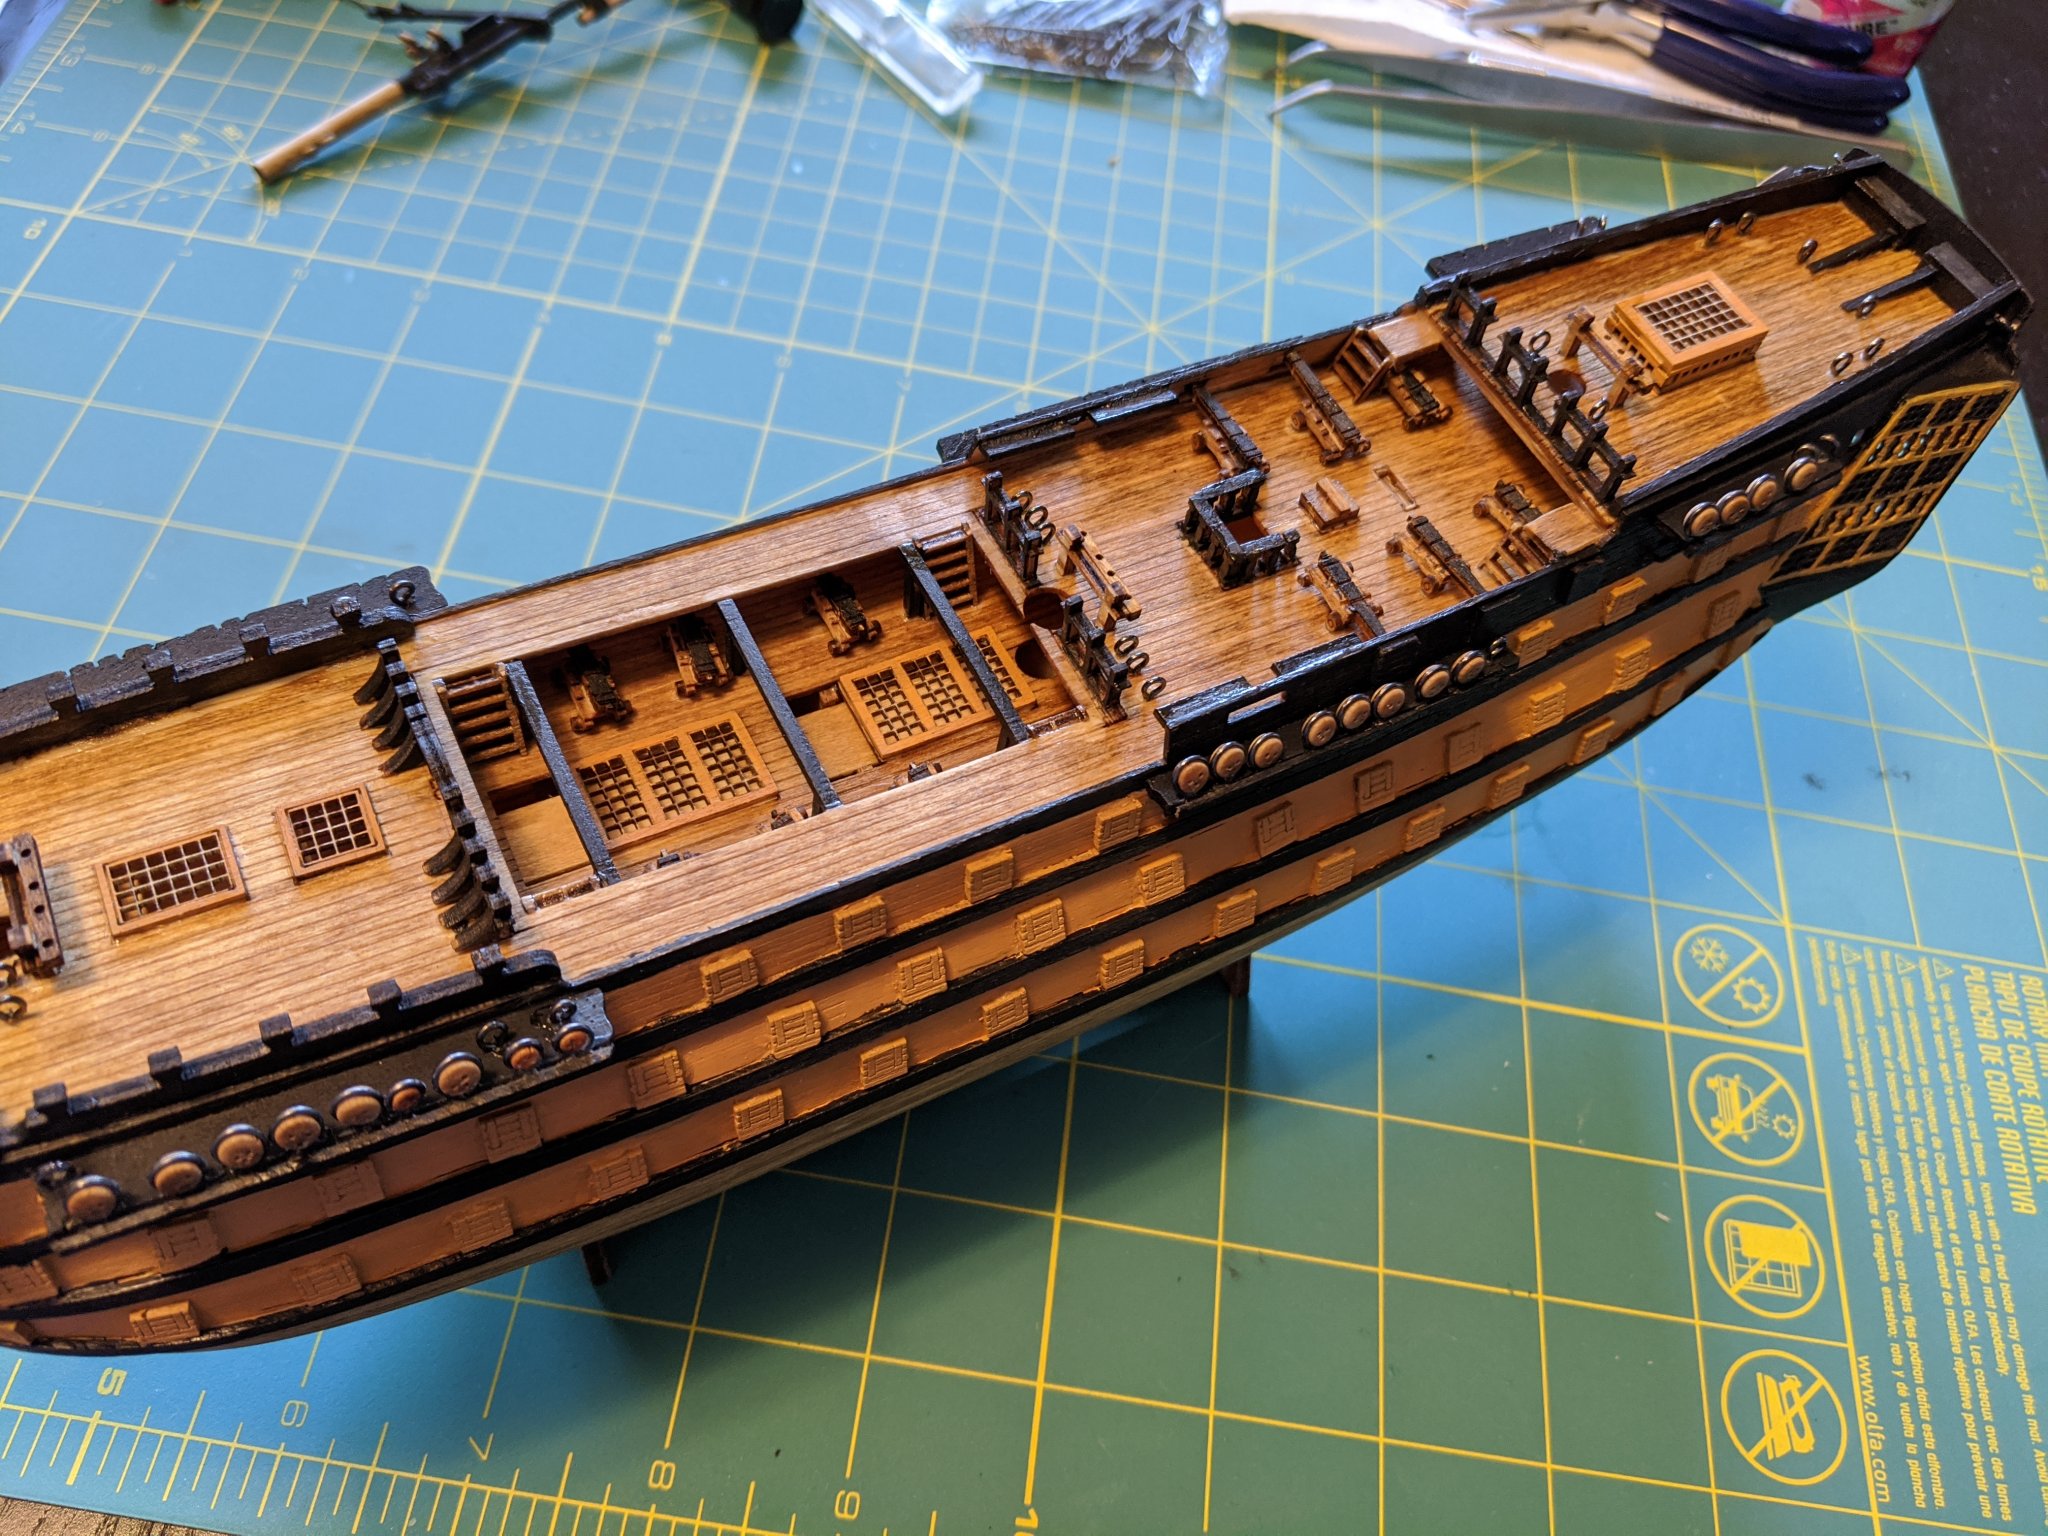
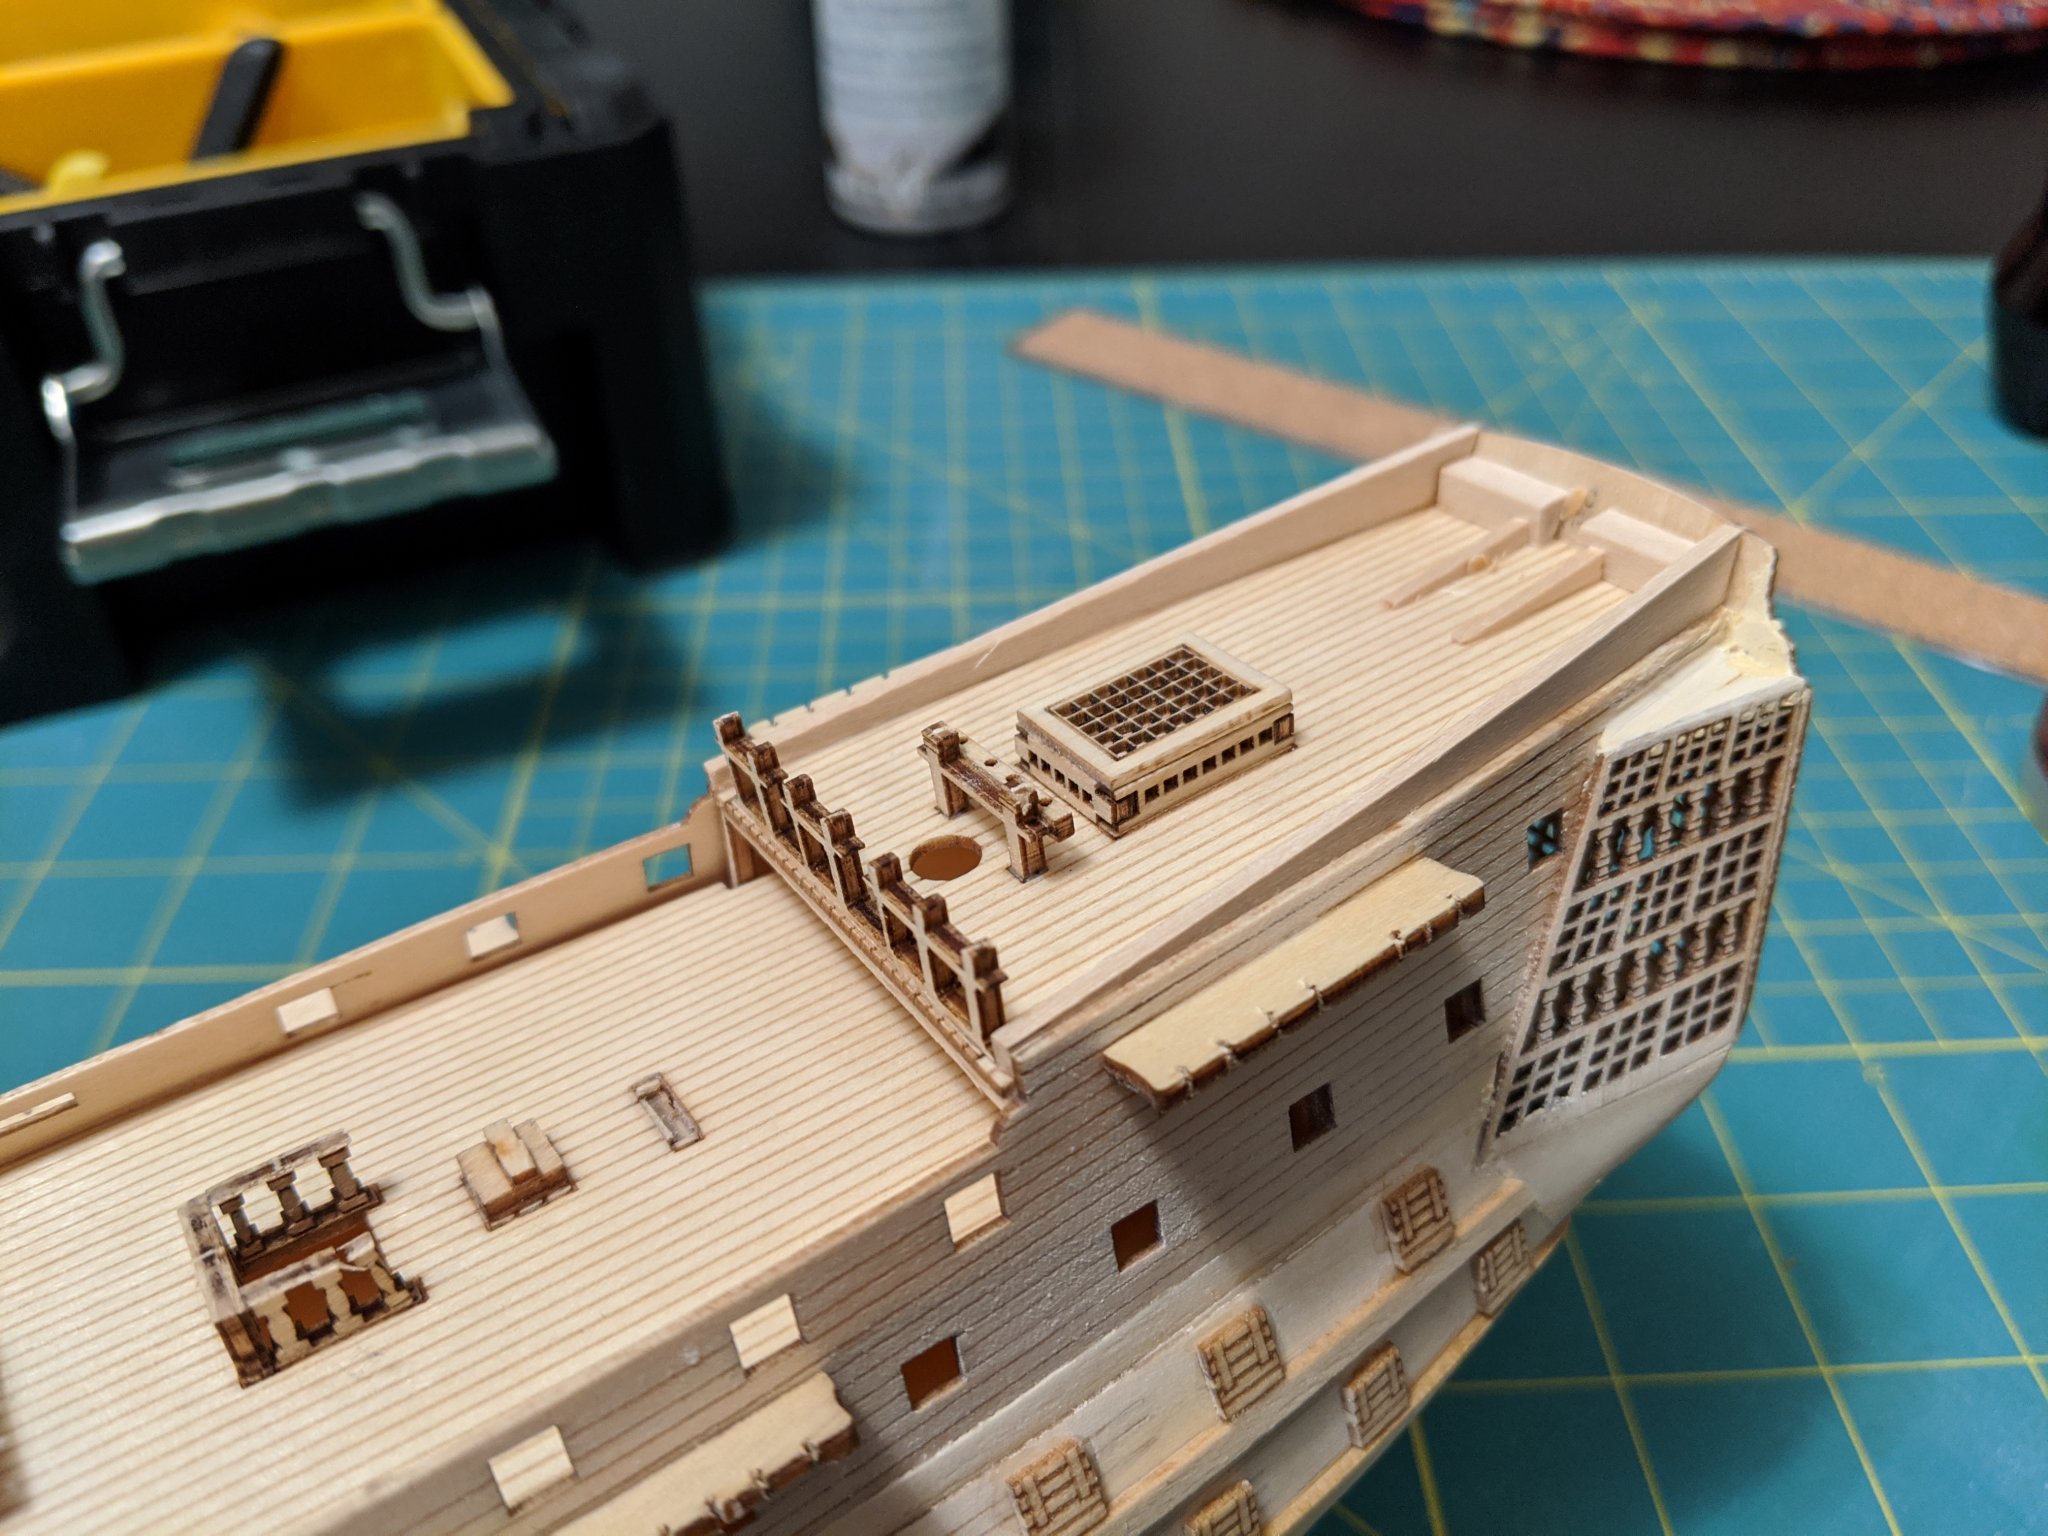
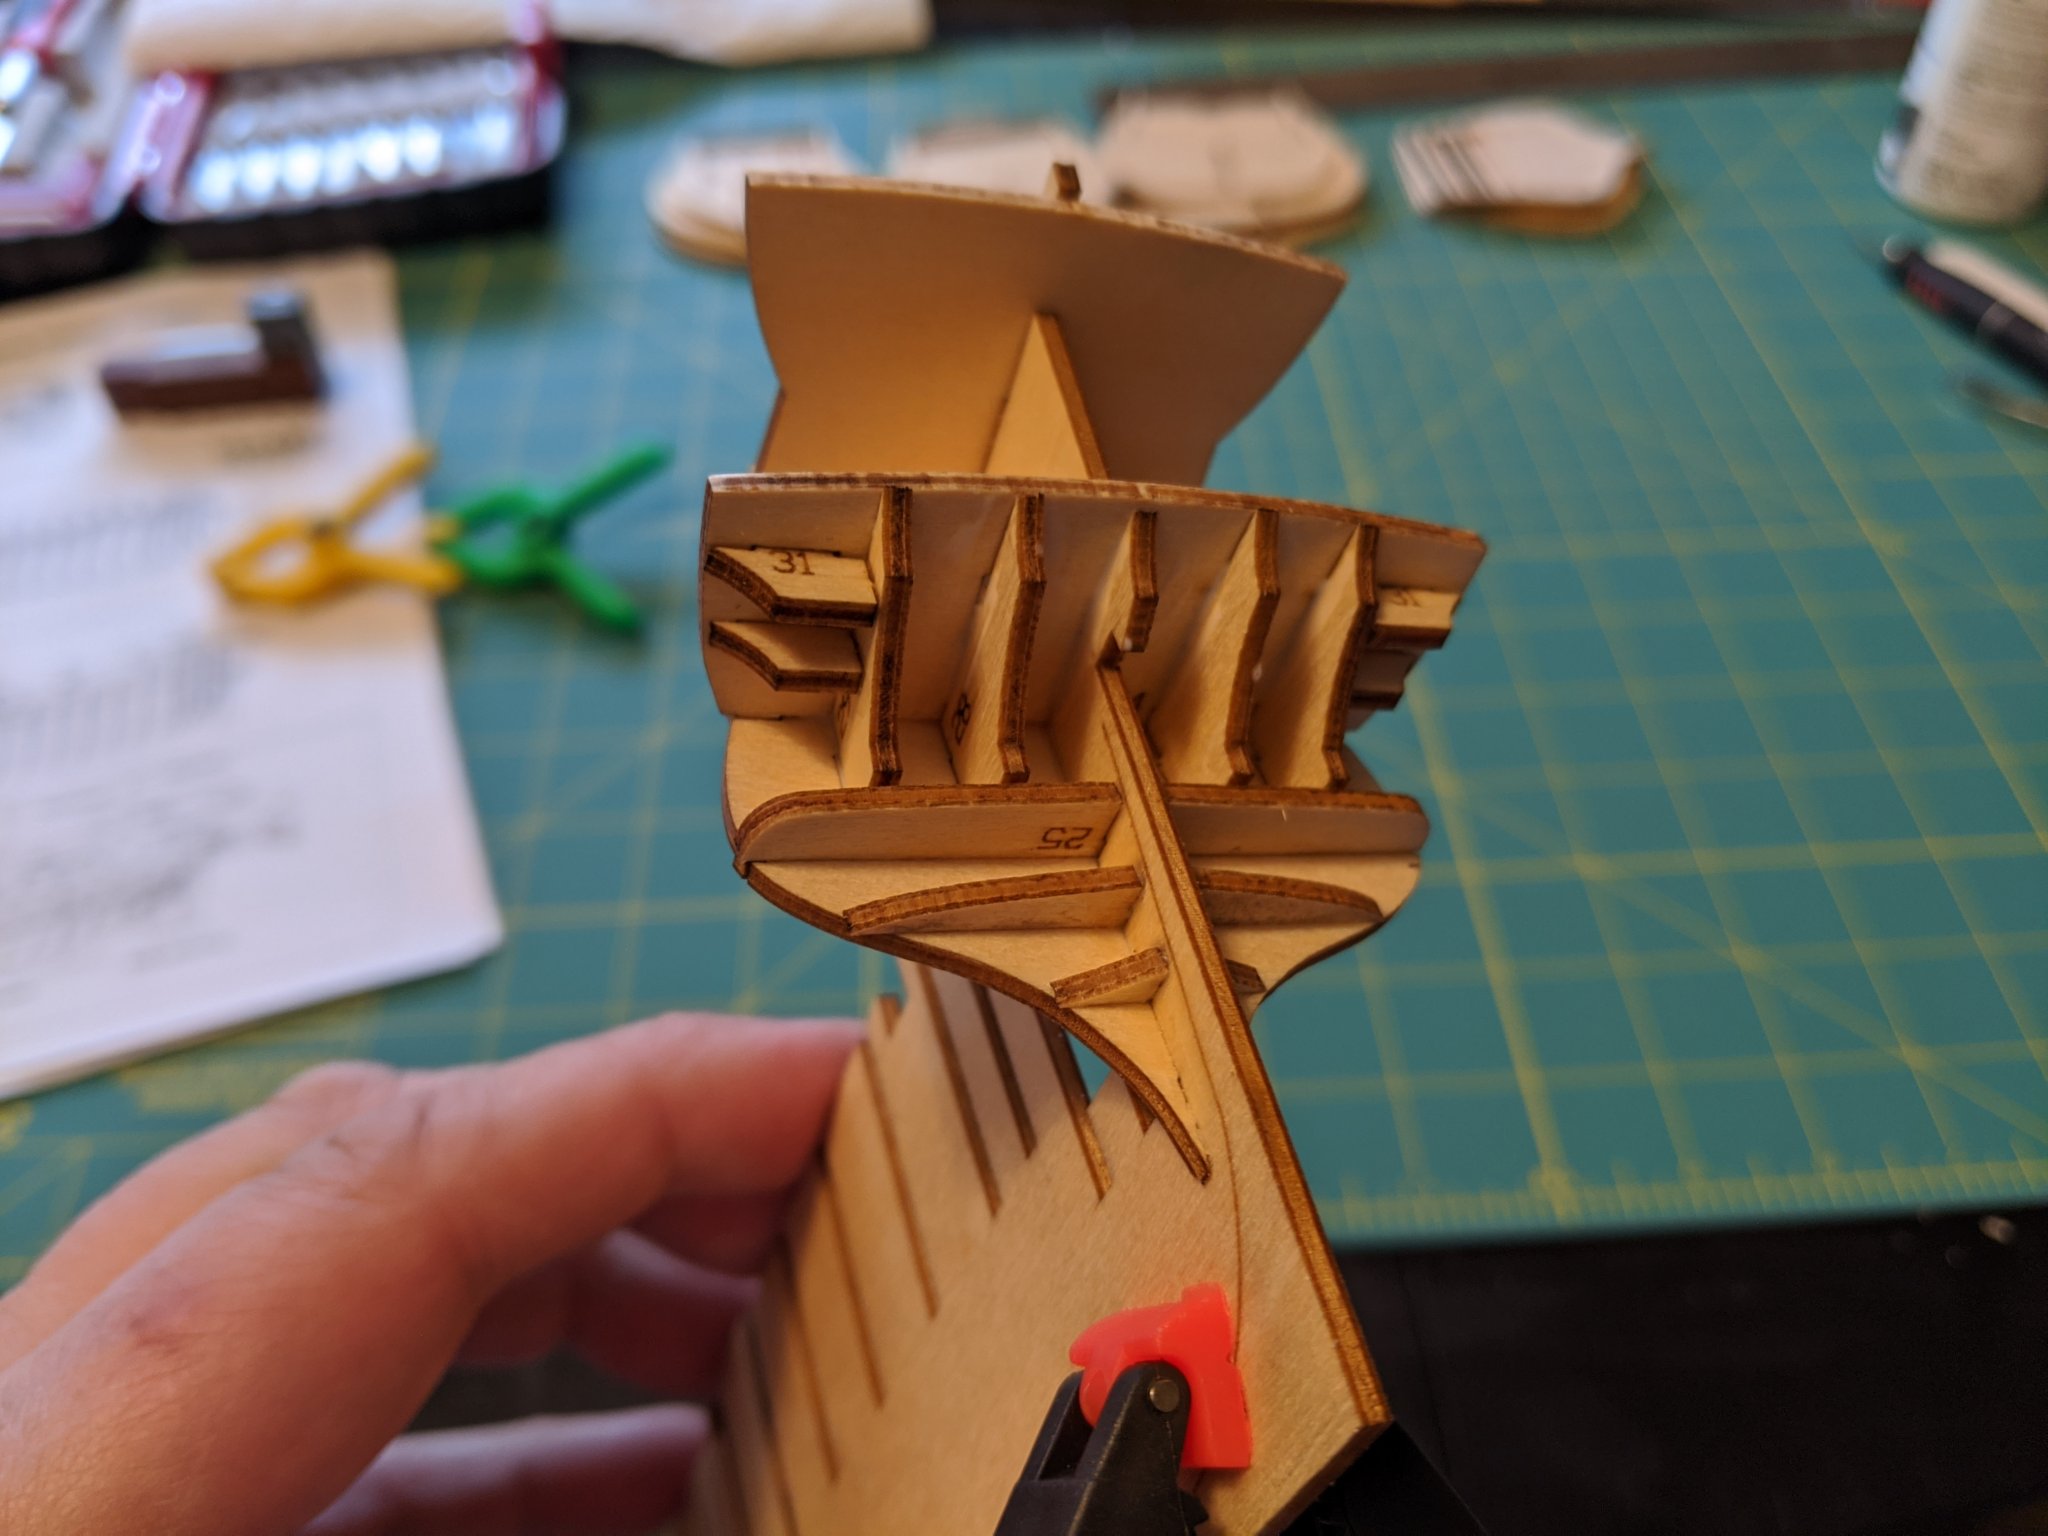
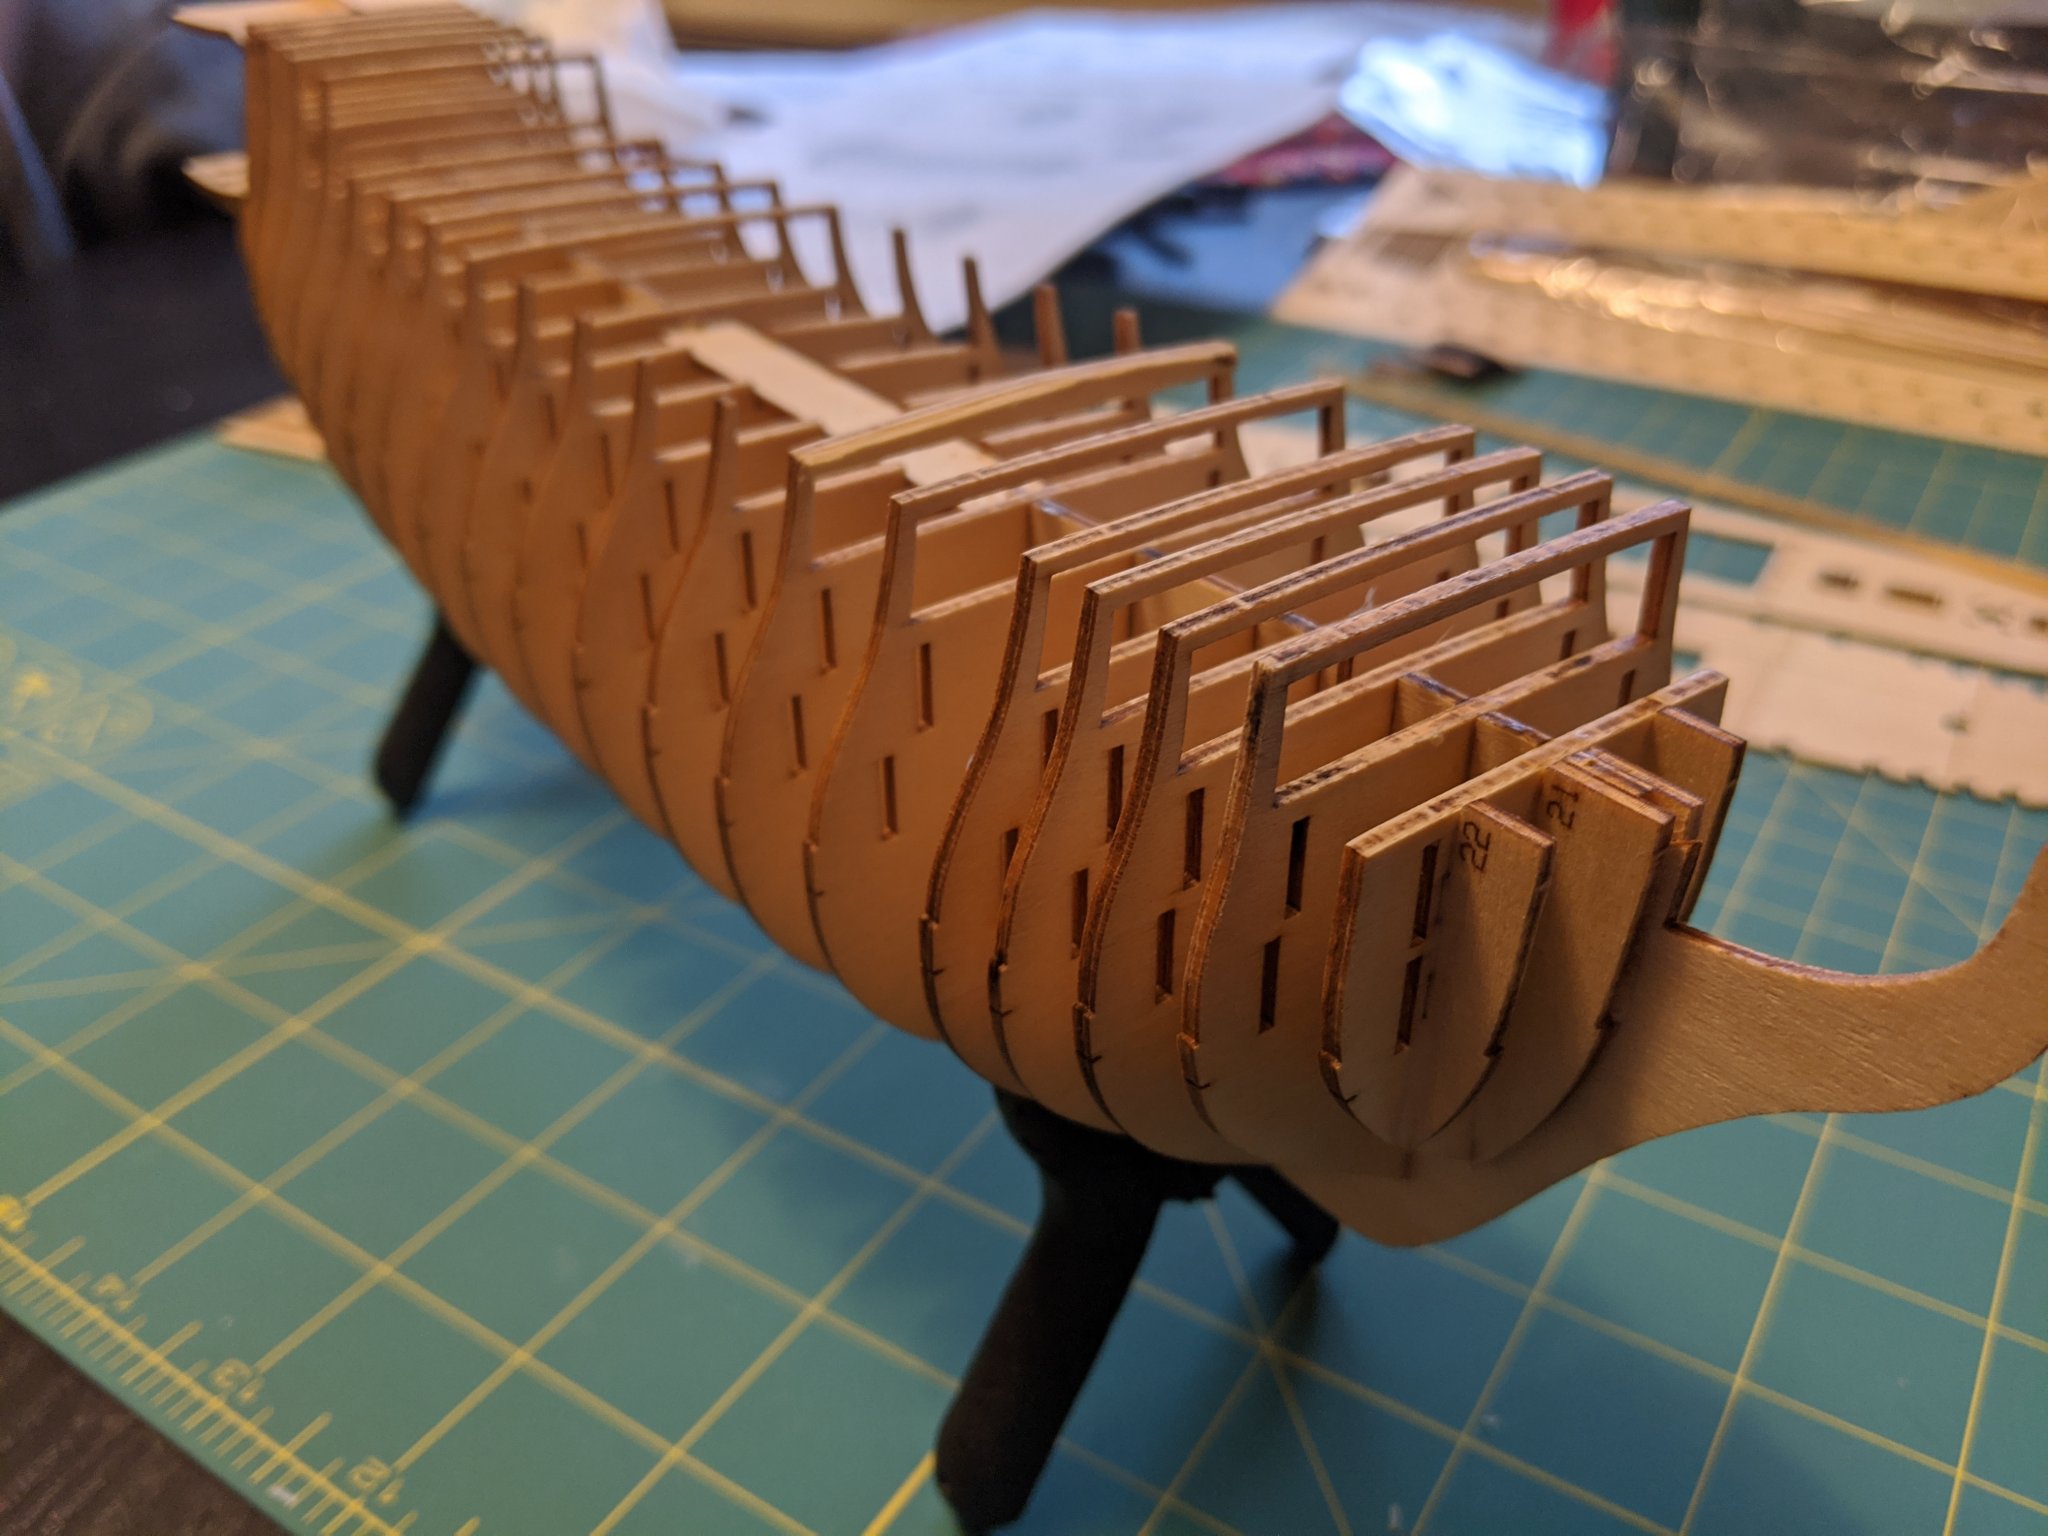
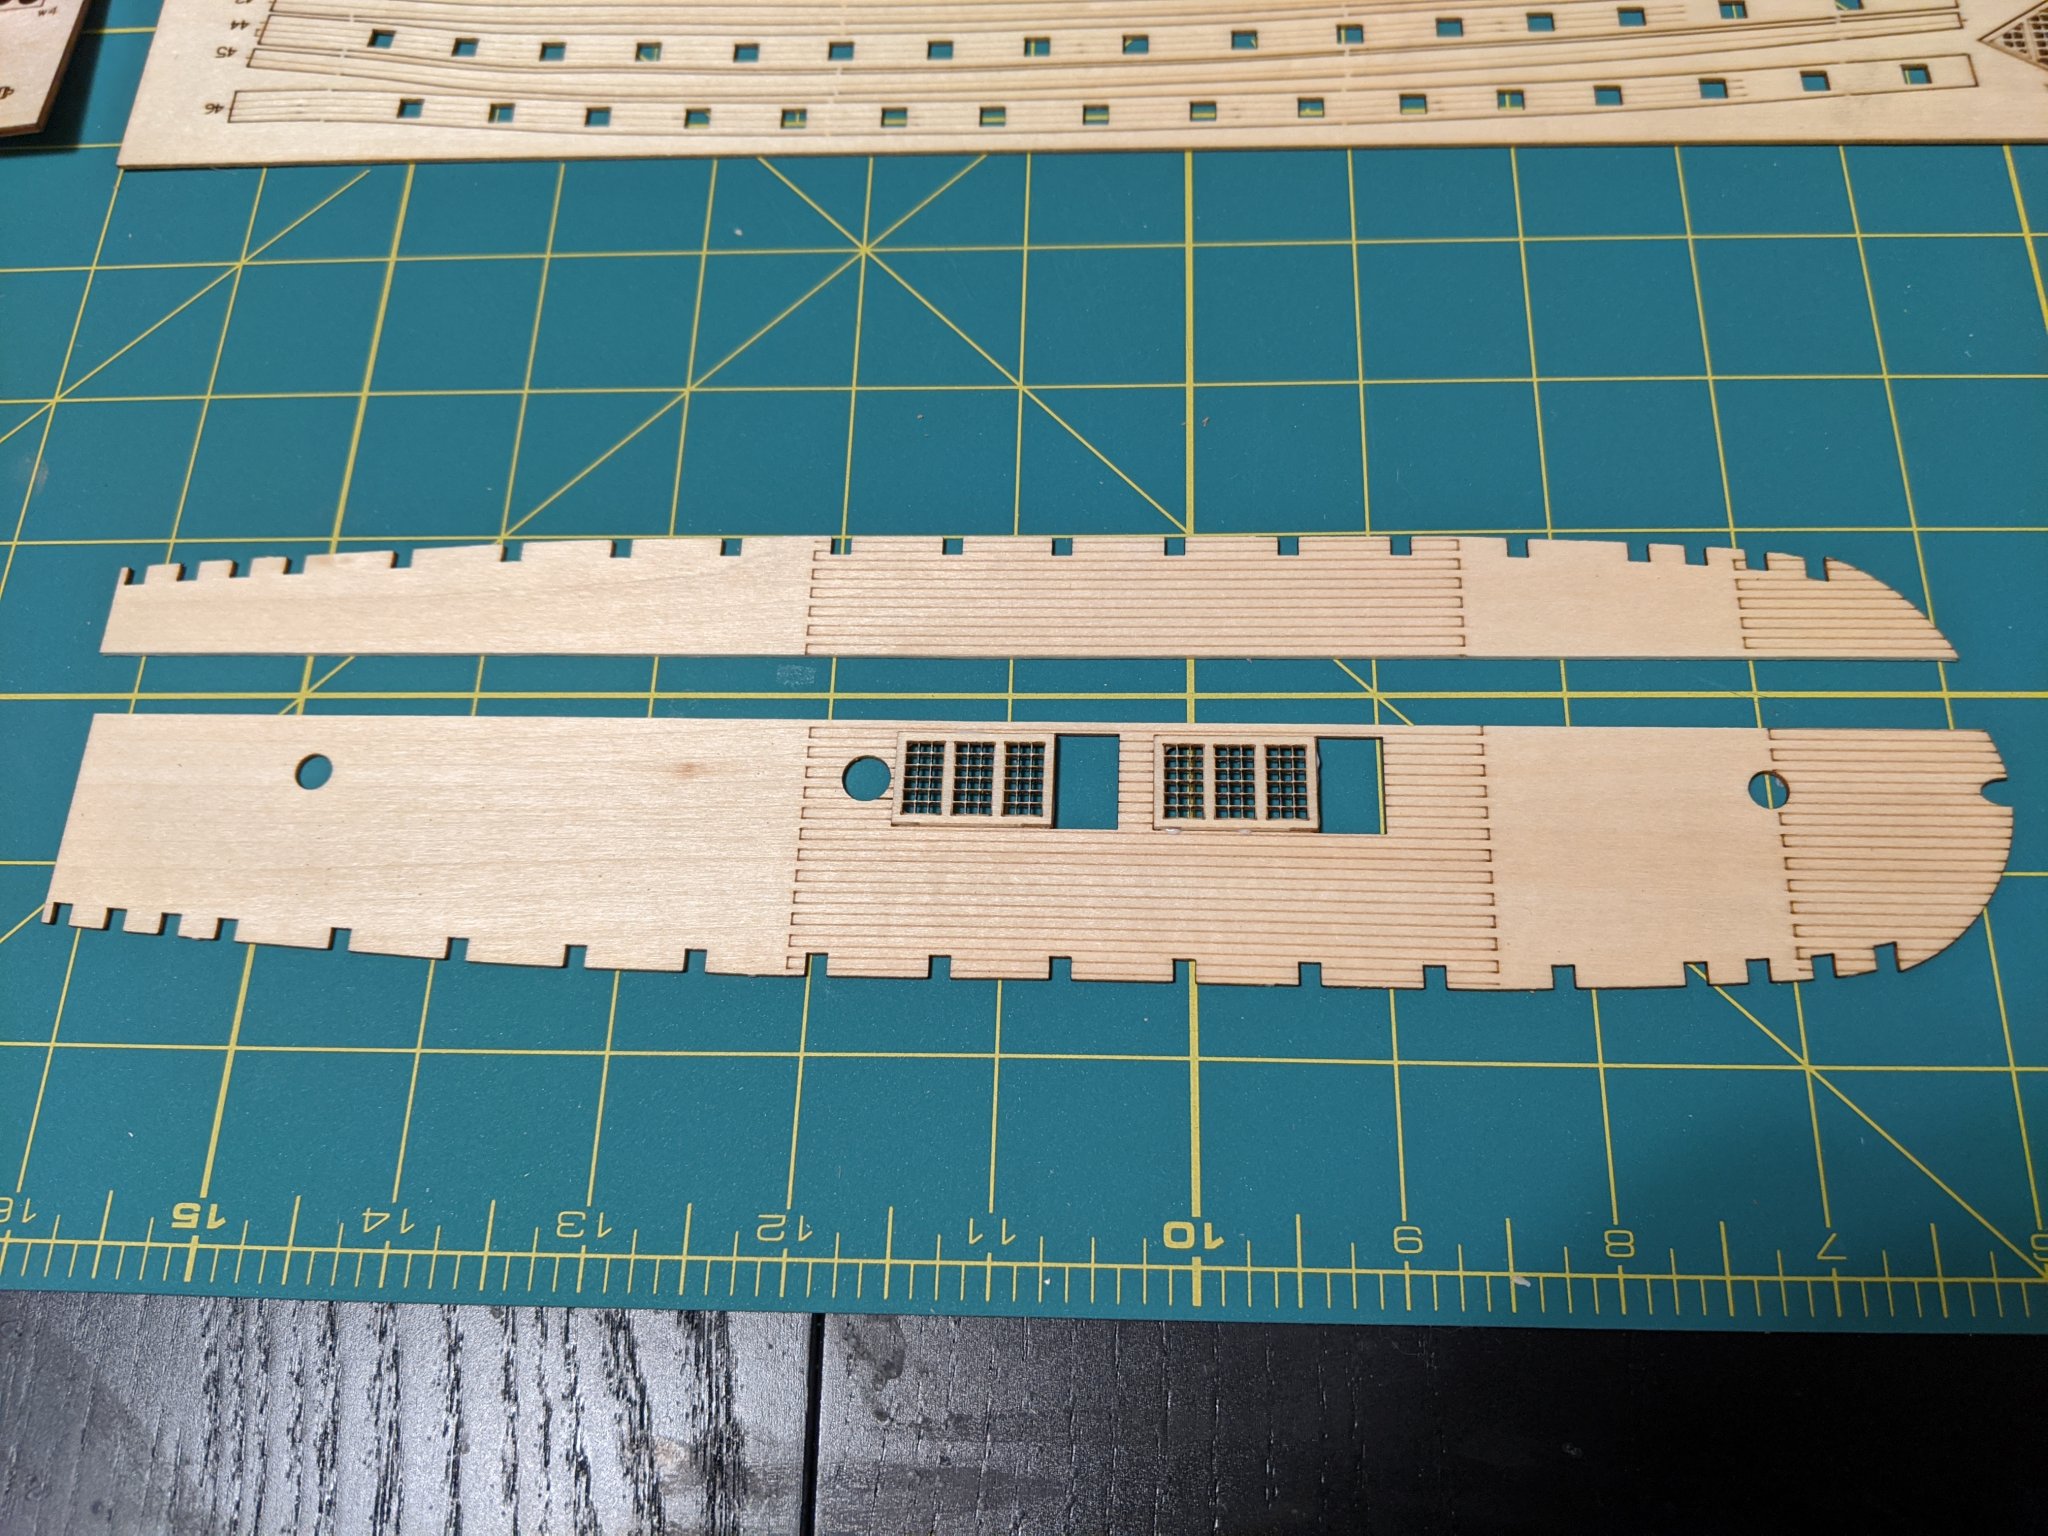
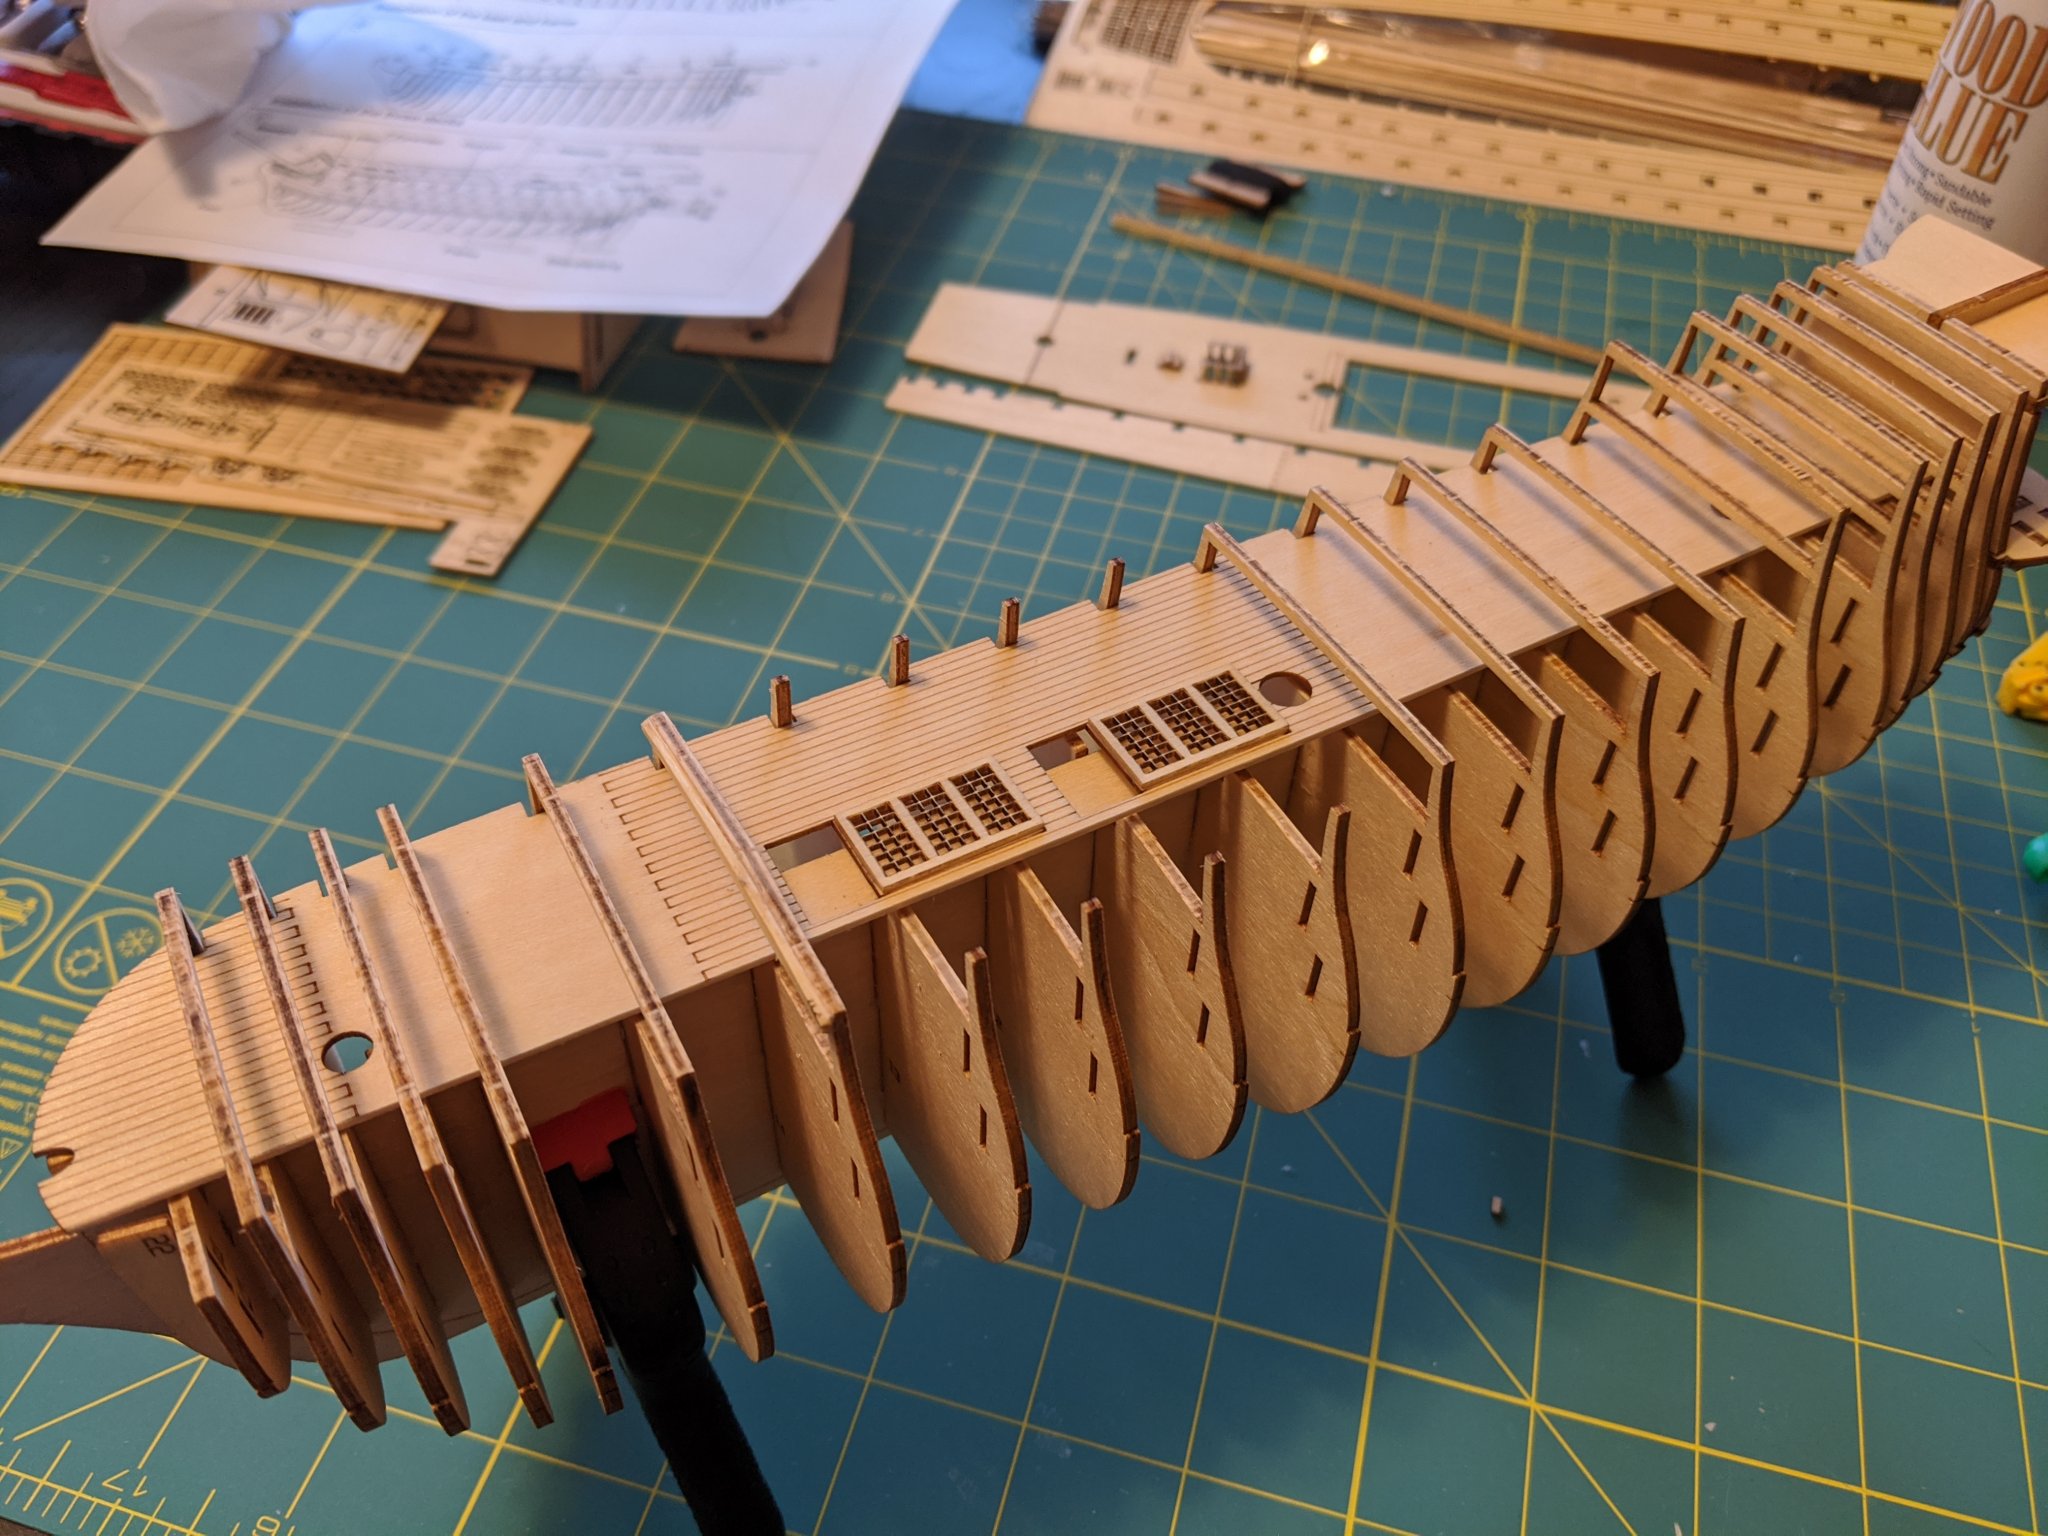
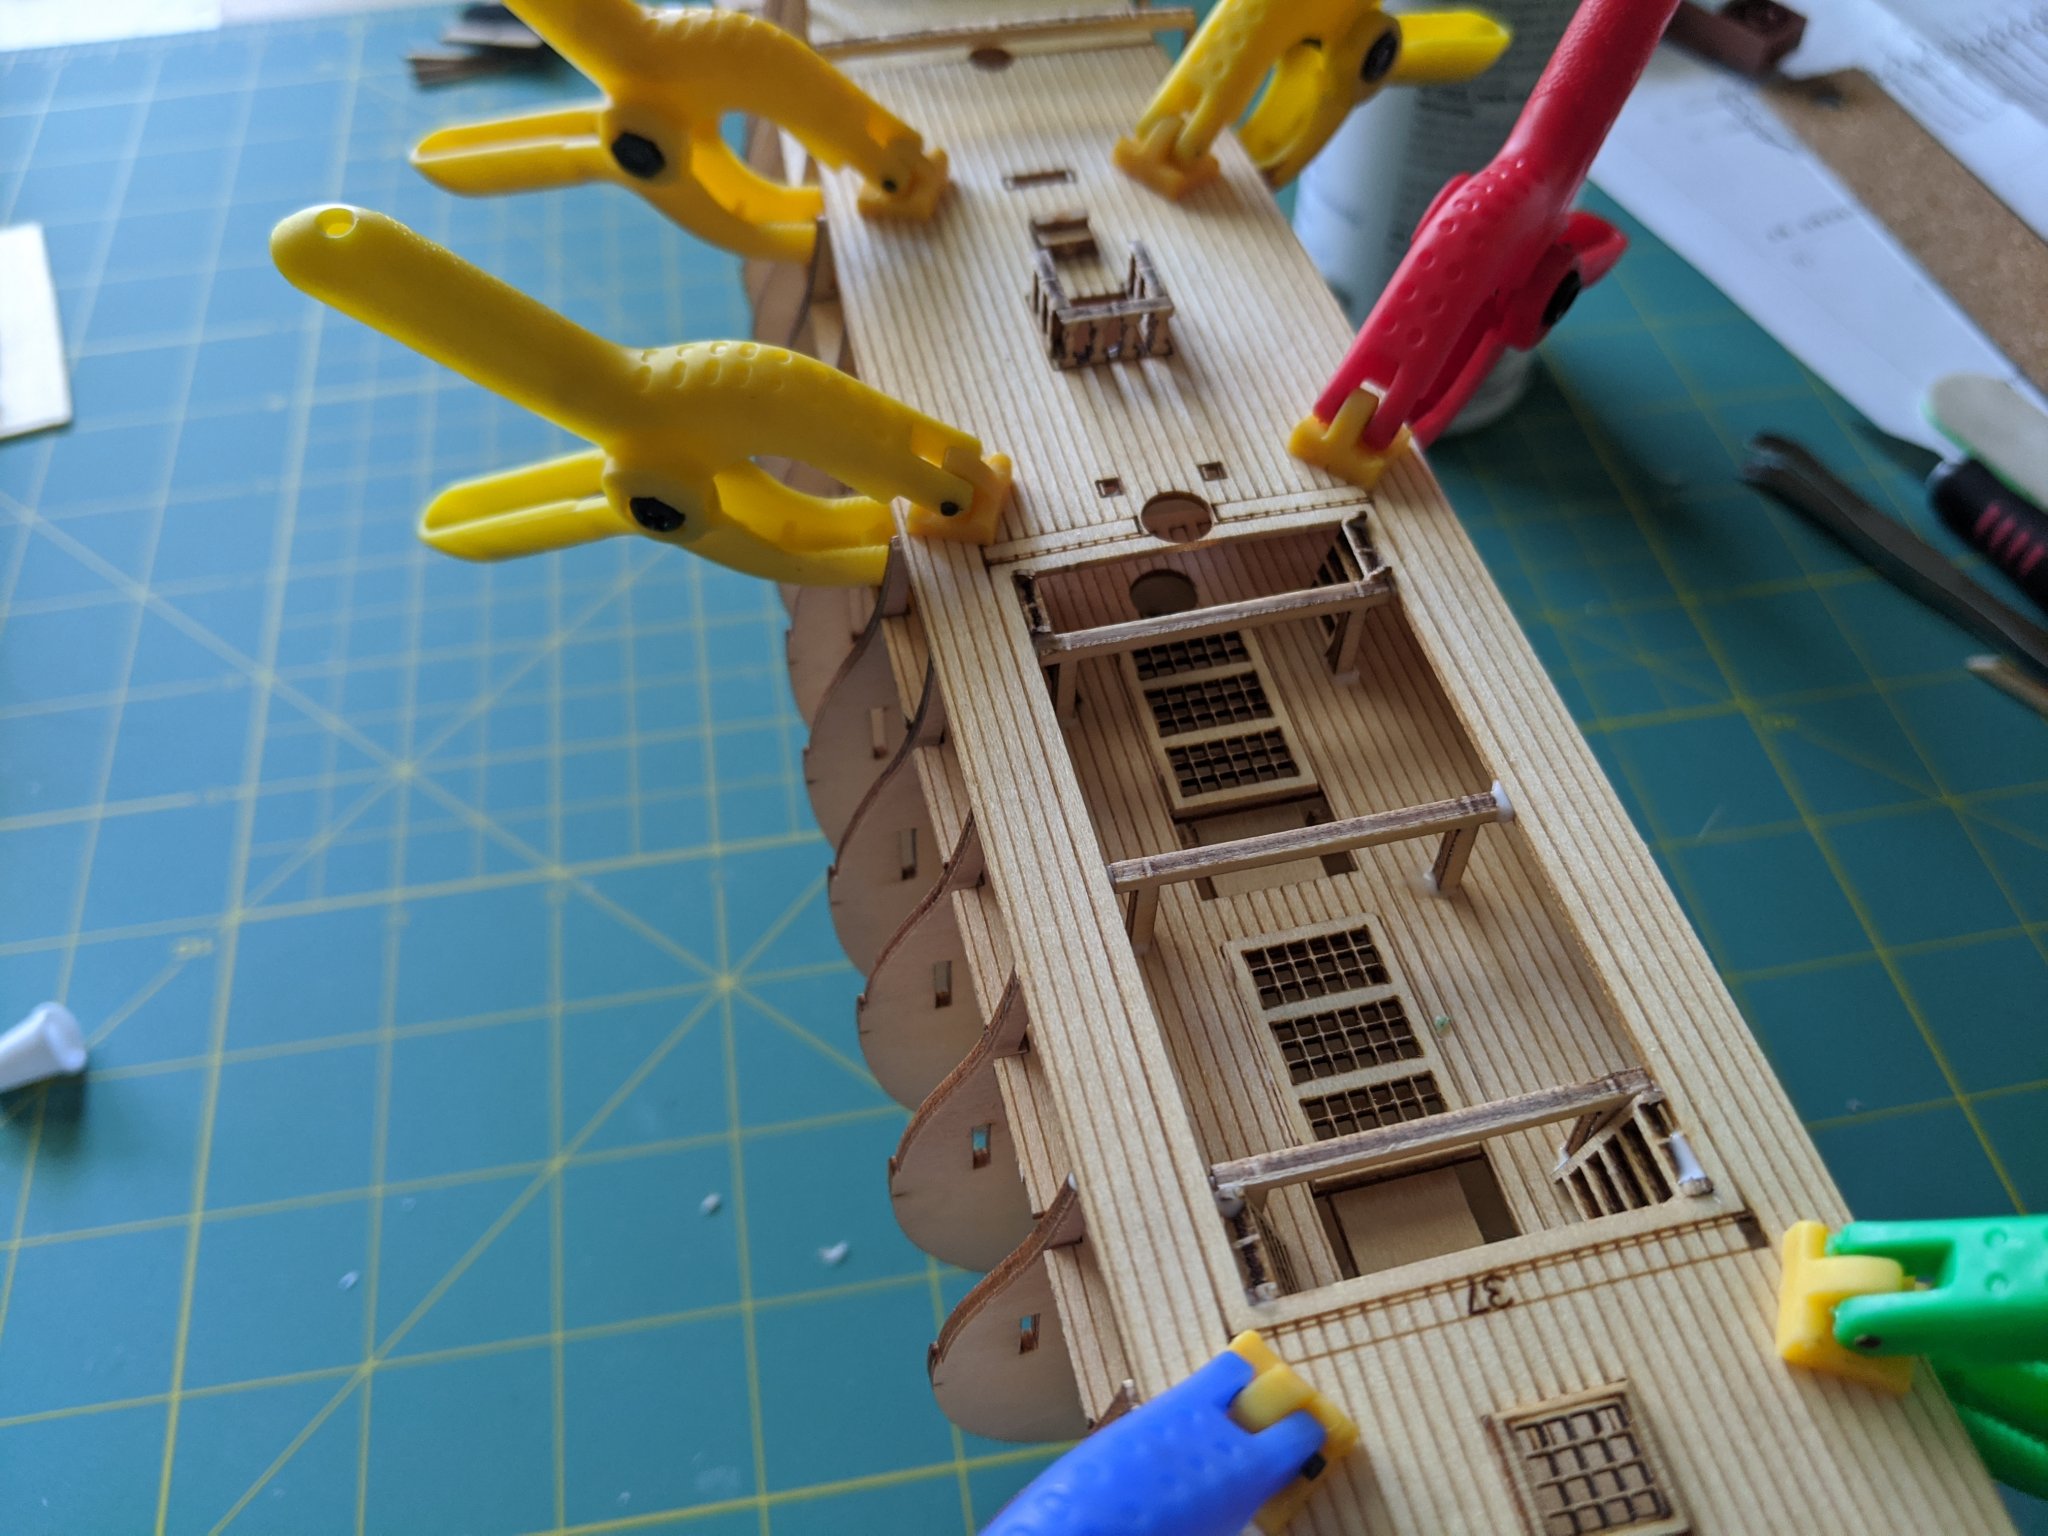
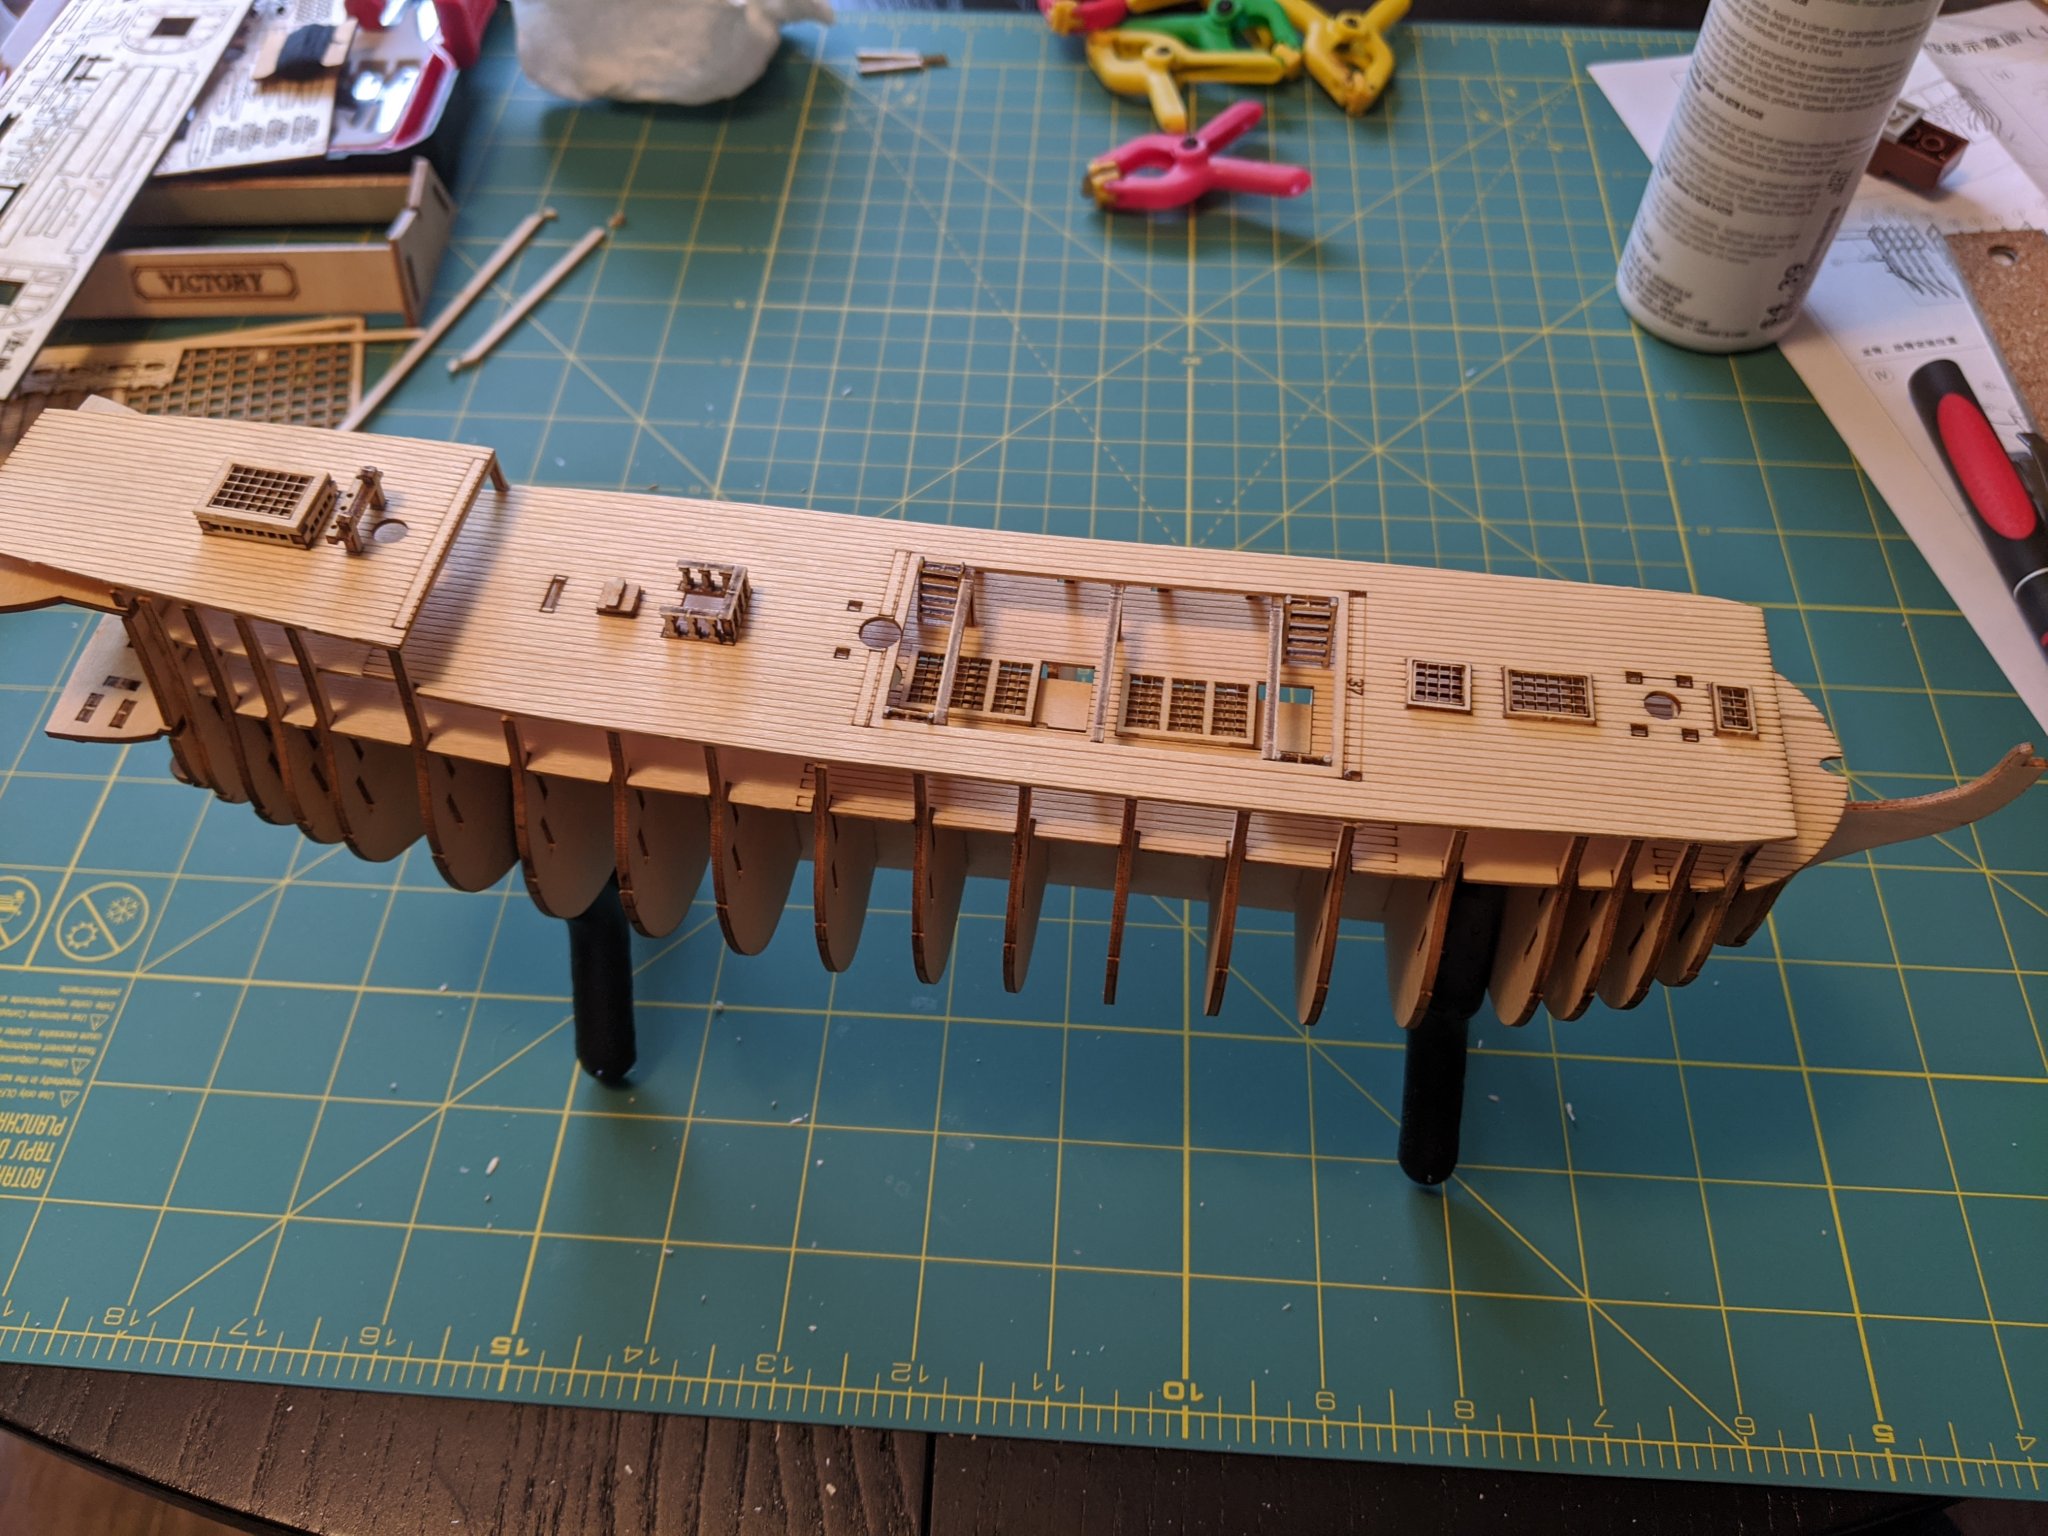
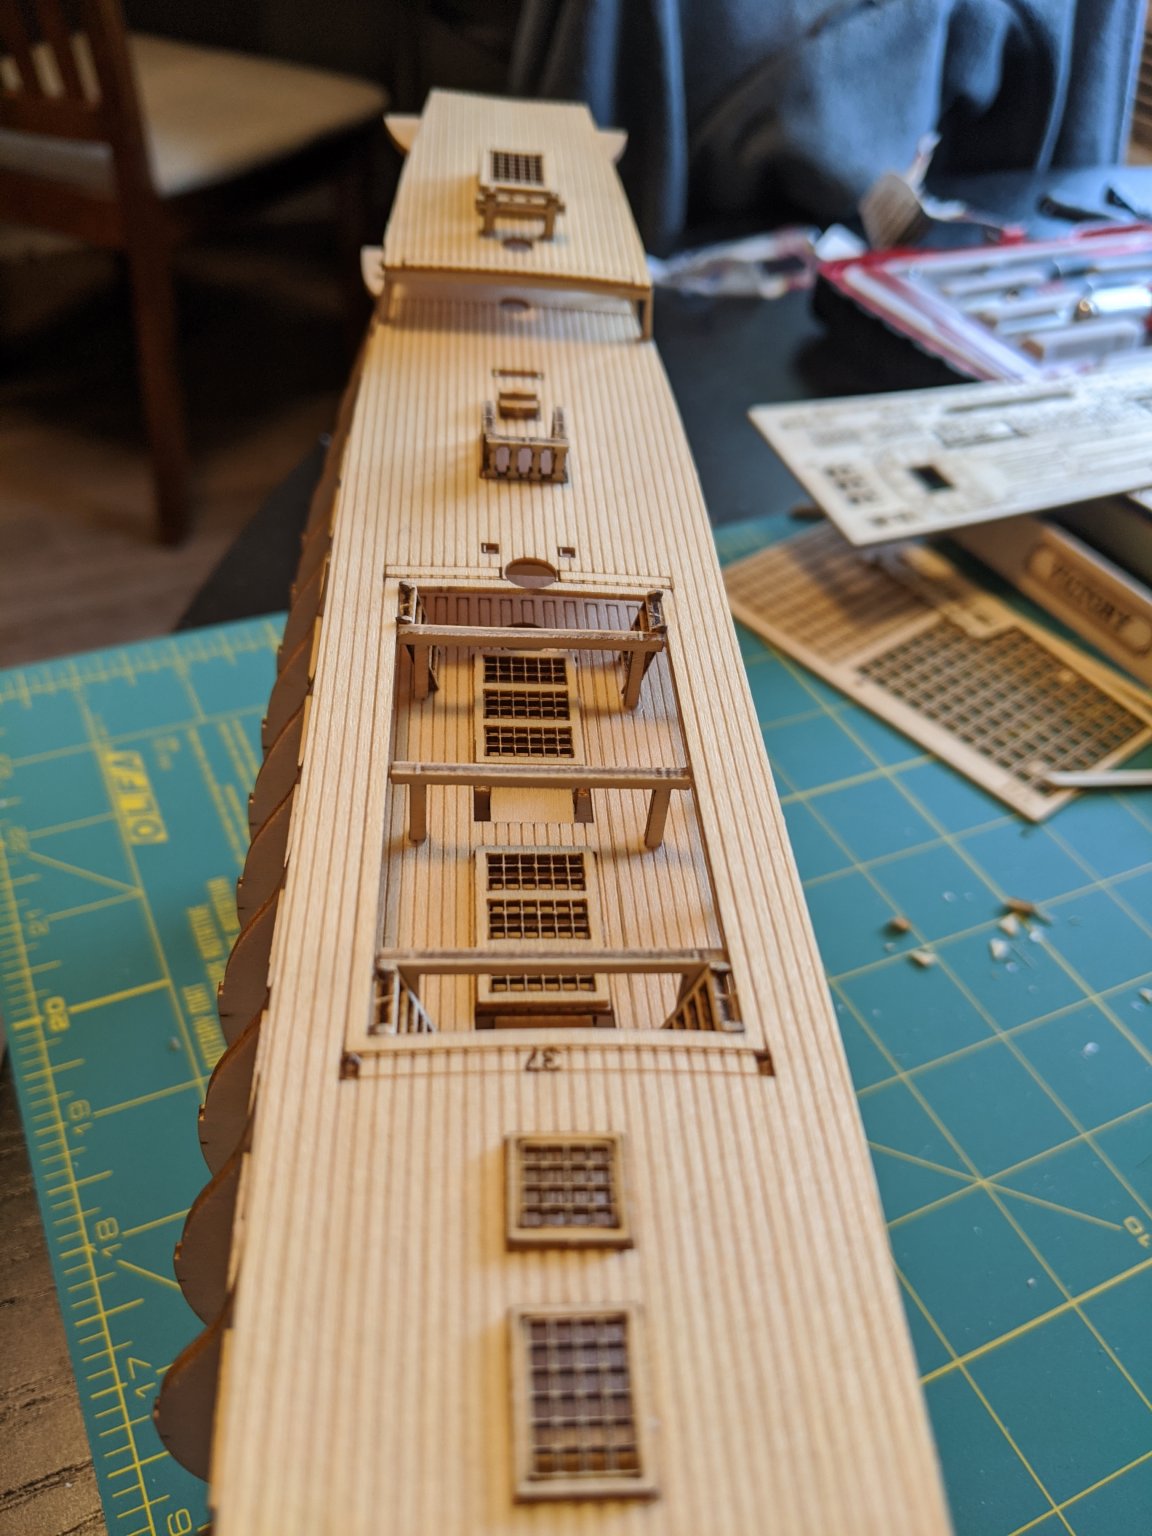
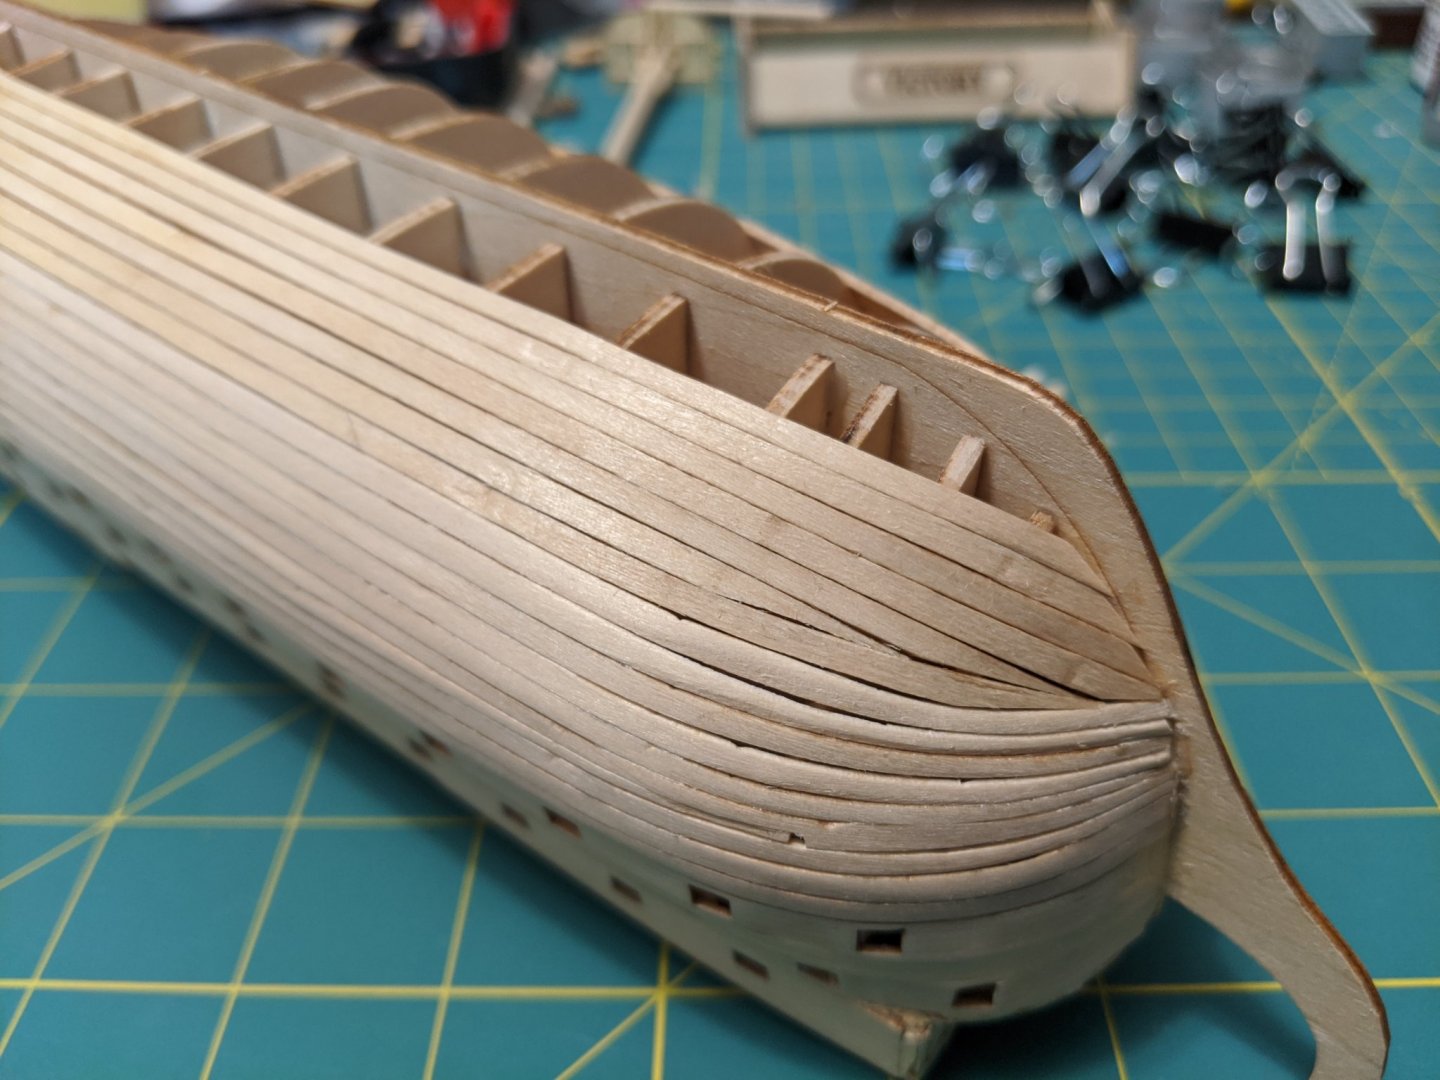
Started gluing in the bulkheads, beginning with the stern gallery supports and working my way forward. I removed the gun deck from the sheet and fiddled with it until i realized I would no be able to fit it down inside all the bulkheads unless i split it. So i decided on a roughly 60/40 split as i did not want to cut it through the center and all the details there. Once the glue dried on the gun deck, I glued down the main and poop decks as well as added some of the deck furniture. On retrospection, I should have waited on the deck furniture, as it is pretty fragile and handling the model since I have had to be VERY careful not to break any of it off. Now its time to fare the bulkheads and start on the upper hull planking. As mentioned, this kit is strange, as the Amazon seller now has it listed as a 3D educational puzzle. But at the same time there are 21 bulkhead spaced closely together, which will make it easier to get a smooth lie on the planking, particularly around the bow and stern.