


Dsmith20639
-
Posts
254 -
Joined
-
Last visited
Content Type
Profiles
Forums
Gallery
Events
Posts posted by Dsmith20639
-
-
Never thought about using my laser level when building my models. Good idea.
-
Some books sold, here's what's left.
Title Price Date Author
The National Watercraft Collection 7.00 1960 Howard L. Chapelle
Model Power Boats 15.00 1929 Edward W. Hobbs
Building and Operating Model Ships 7.00 1965 Walter A. Musciano
Ship Modeling Techniques 25.00 1990 Portia Takakjian
Historic Ship Models (2) 4.00 1073 Toby Wrigley
Ship Models Illustrated (3) 4.00 1943 F. Ward Hartman
Prisoner of War Ship Models 10.00 1987 Ewart C. Freeston
Planking the Built-Up Ship Model 5.00 1987 Jim Robert’s
American Ship Models 5.00 1942 V.R. Grimwood
Plank-on-Frame Models Volume II 20.00 1998 Harold A. Underhill
Ship Models in Miniature 7.00 1975 Donald McNarry
Down-Easter building a model
of the Benjamin F. Packard 6.00 1954 Roger Weare Brandon
Ship Modeling from Scratch 3.00 1994 Edwin B. Leaf
The World of Model Ships and Boats 3.00 1971 Guy R. Williams
Scale Model Ships 12.00 1951 Bernard Reeve and P.W. Thomas
Building Model Ships from Scratch (3) 4.00 1977 Kent Porter
Watercraft Modeler’s Handbook 8.00 1988 Benjamin Langford Jr.
Miniature Boatbuilding 20.00 1928 Albert C. Pritchard
Ship Model Making: Clipper Ship 10.00 1926 E. Armitage McCann -
I am in the process of cleaning up my library. As a result, I have the following list of books for sale.
If interested send me a PM, the first message received will be the buyer.
Once I have your response and location I will respond with the total including shipping cost.
Look up the titles on ebay or bookfinder for comparison.
You can also make an offer.
If you prefer I can ship first and you can pay me after receiving the items.
Title with a number in parens, like (2) indicate multiple copies available.
Title Price Date Author
The National Watercraft Collection (2) 7.00 1960 Howard L. Chapelle
Model Power Boats 15.00 1929 Edward W. Hobbs
Building and Operating Model Ships 7.00 1965 Walter A. MuscianoShip Modeling Techniques 25.00 1990 Portia Takakjian
Historic Ship Models (2) 4.00 1973 Toby Wrigley
Ship Models Illustrated (3) 4.00 1943 F. Ward Hartman
Prisoner of War Ship Models 10.00 1987 Ewart C. Freeston
Planking the Built-Up Ship Model 5.00 1987 Jim Robert’s
The Colonial Schooner 1763-1775 8.00 1981 Harold M. Hahn
American Ship Models 5.00 1942 V.R. Grimwood
Rigging Period Ship Models 15.00 2018 Lennarth Peterson
Plank-on-Frame Models Volume II 20.00 1998 Harold A. Underhill
Ship Models in Miniature 7.00 1975 Donald McNarry
Down-Easter building a model
of the Benjamin F. Packard 6.00 1954 Roger Weare Brandon
Ship Modeling from Scratch 3.00 1994 Edwin B. Leaf
The World of Model Ships and Boats 3.00 1971 Guy R. Williams
Scale Model Ships 12.00 1951 Bernard Reeve and P.W. Thomas
Building Model Ships from Scratch (3) 4.00 1977 Kent Porter
The History of American Sailing Ships 6.00 1935 Howard I. Chapelle
The Bomb Vessel 15.00 1994 Chris Ware
Watercraft Modeler’s Handbook 8.00 1988 Benjamin Langford Jr.
Miniature Boatbuilding 20.00 1928 Albert C. Pritchard
The Cutty Sark 20.00 1975 C. Nepean Longridge
Ship Model Making: Clipper Ship 10.00 1926 E. Armitage McCann -
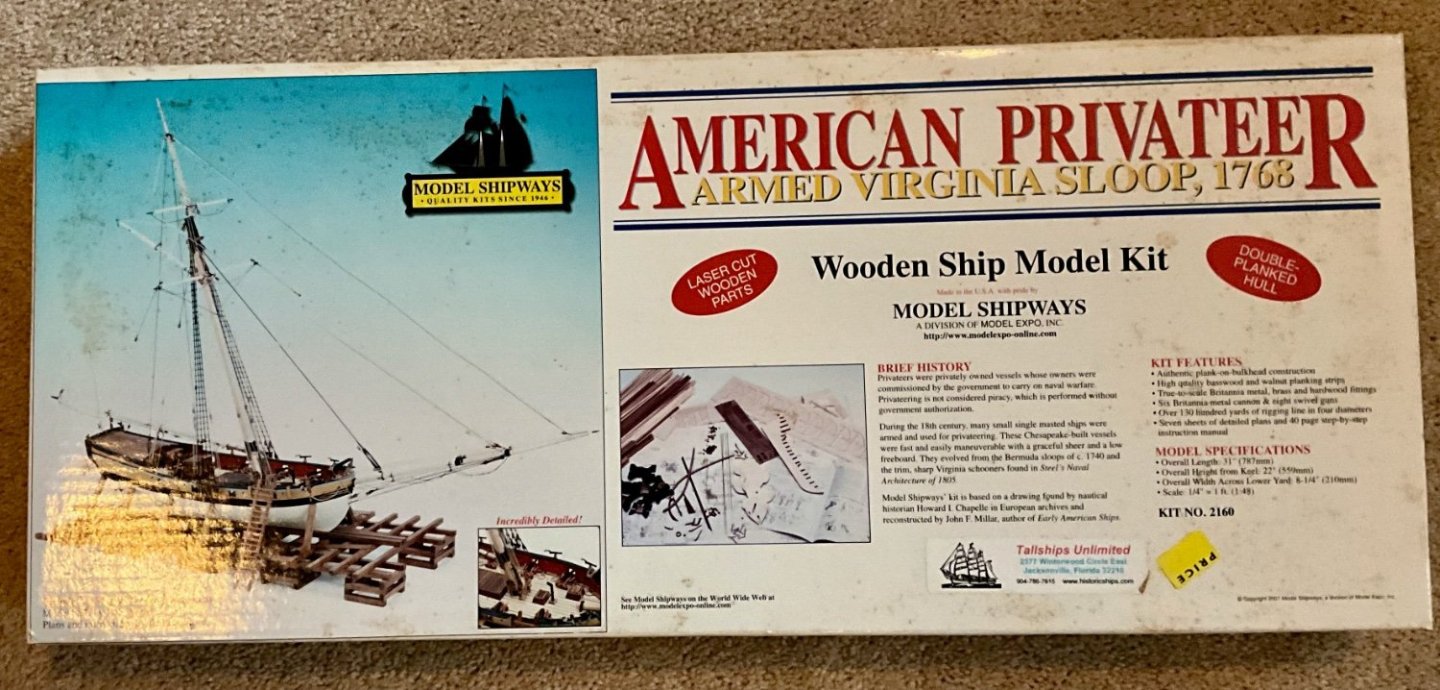
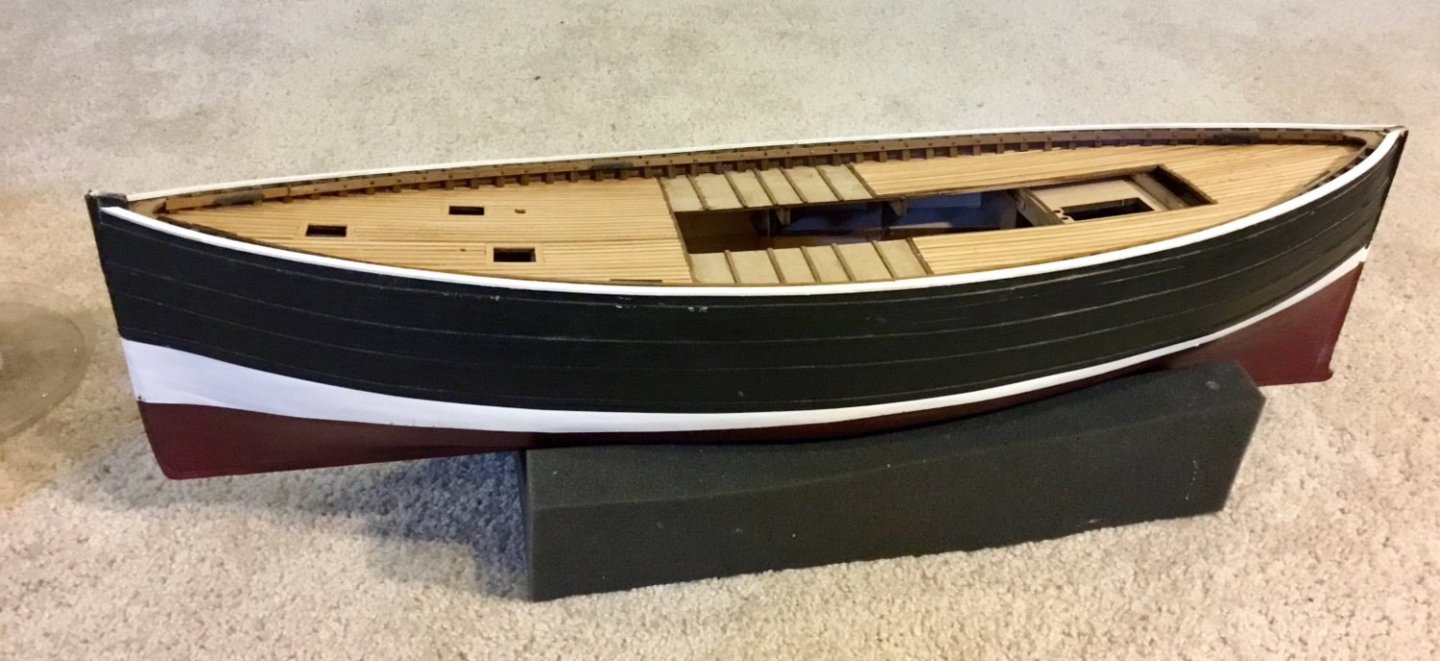
I think I made note of most of the problems with the kit as they occurred in my build log. Let me know by replying here if and when you start your build log and I will follow along and try to answer any questions you may have. As noted, I hated the MDF and the row boat was a challenge in itself. The kit is BIG. Planking the hull posed problems because off the thickness of the planking material so the final results were not up to my normal standards, but I thought the pictures on the box with exposed wood planks were unrealistic and that's why I fully painted the hull, also painting covers up a lot of minor mistakes. The final steps of finishing the model, rigging the masts, etc. is not difficult but the instructions at the end of the manual are sorely lacking compared the the rest of the manual (just a series of pictures with no commentary) and a few steps obviously omitted. By the way, I have Parkinson's disease so I understand your concerns about a hand tremor. Just go slowly, don't rush, and don't give up.
Good luck !
-
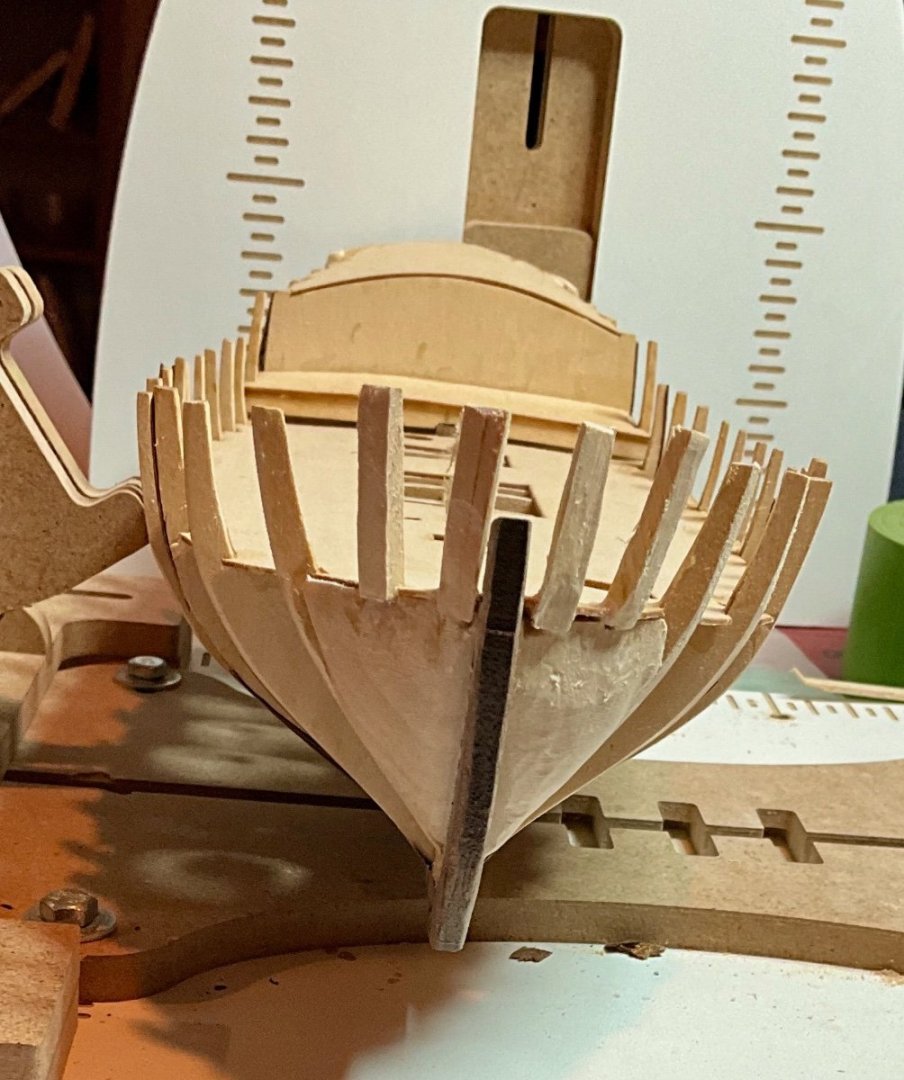
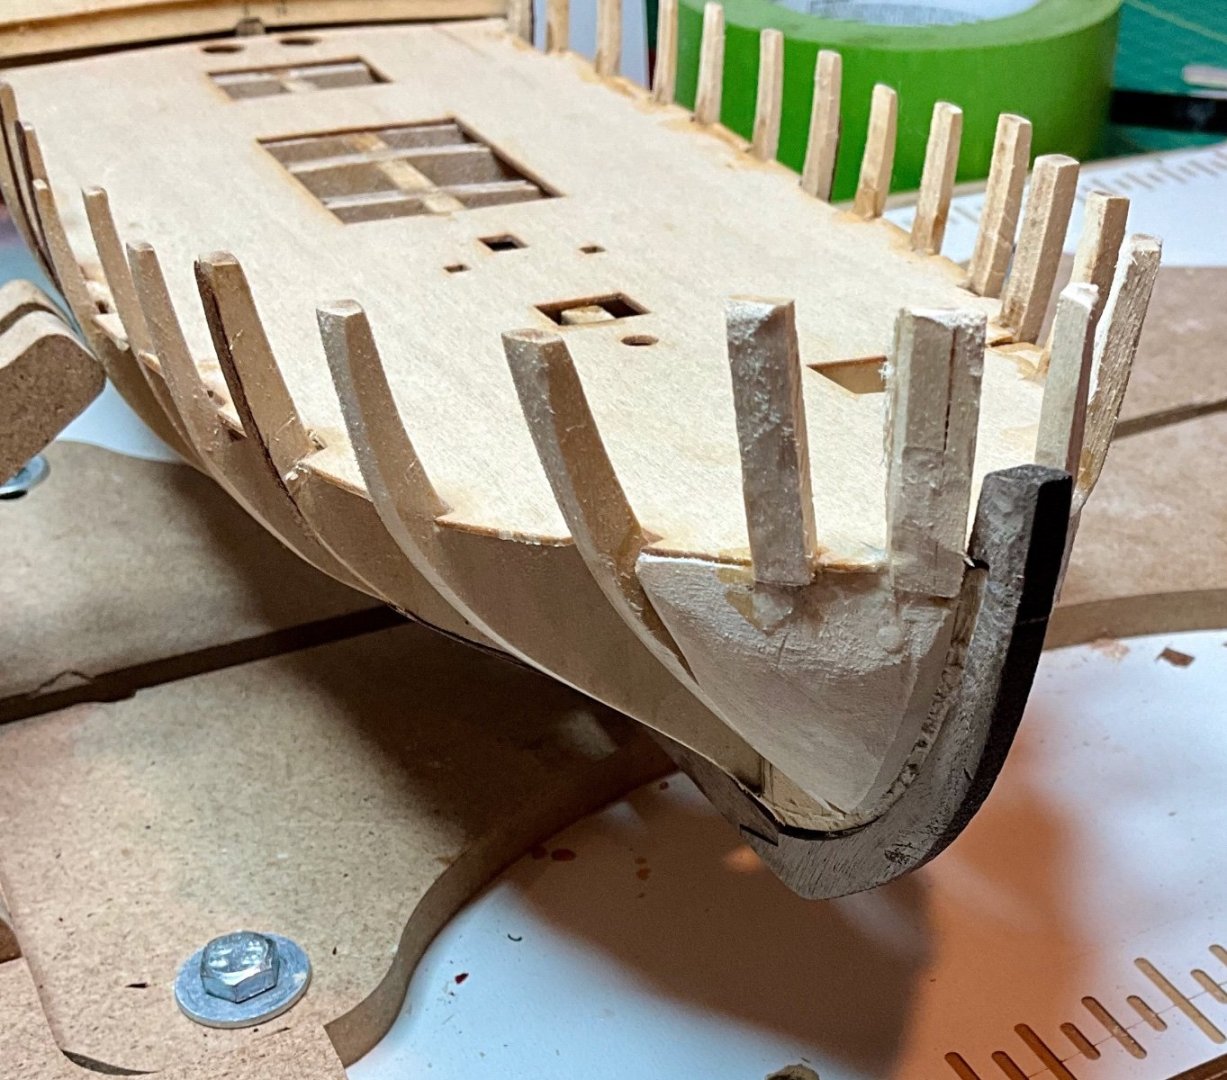
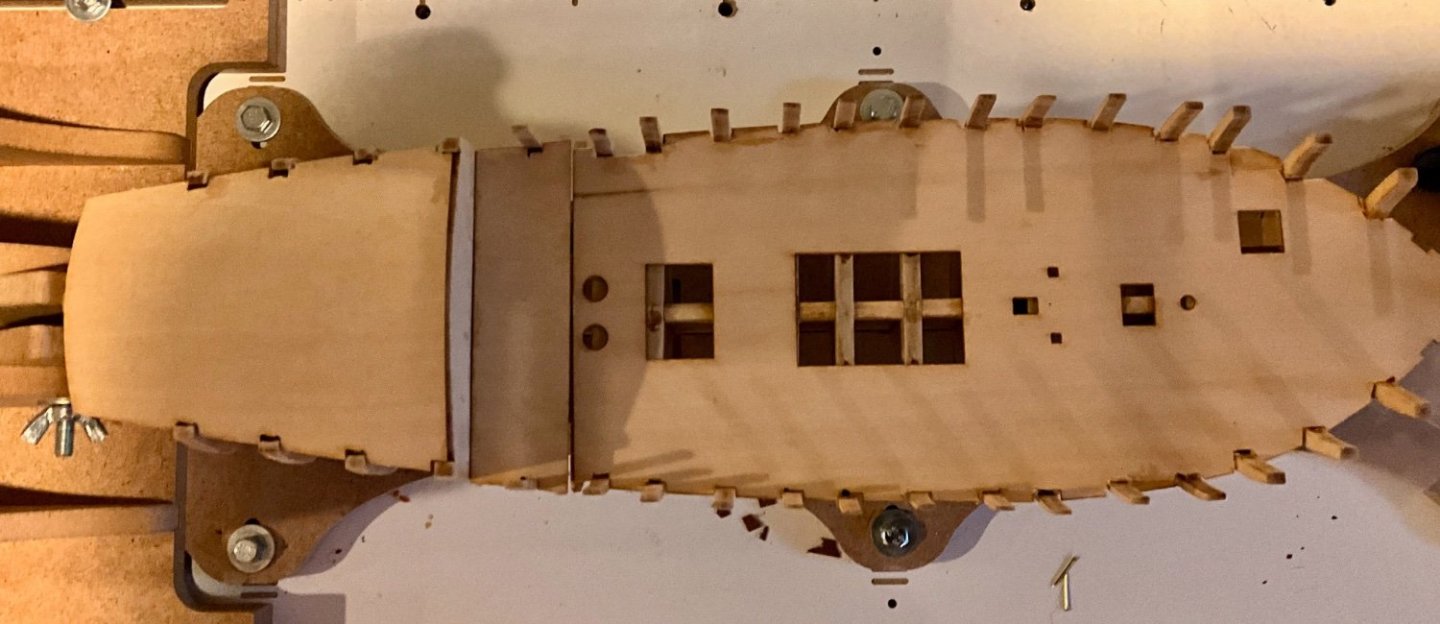
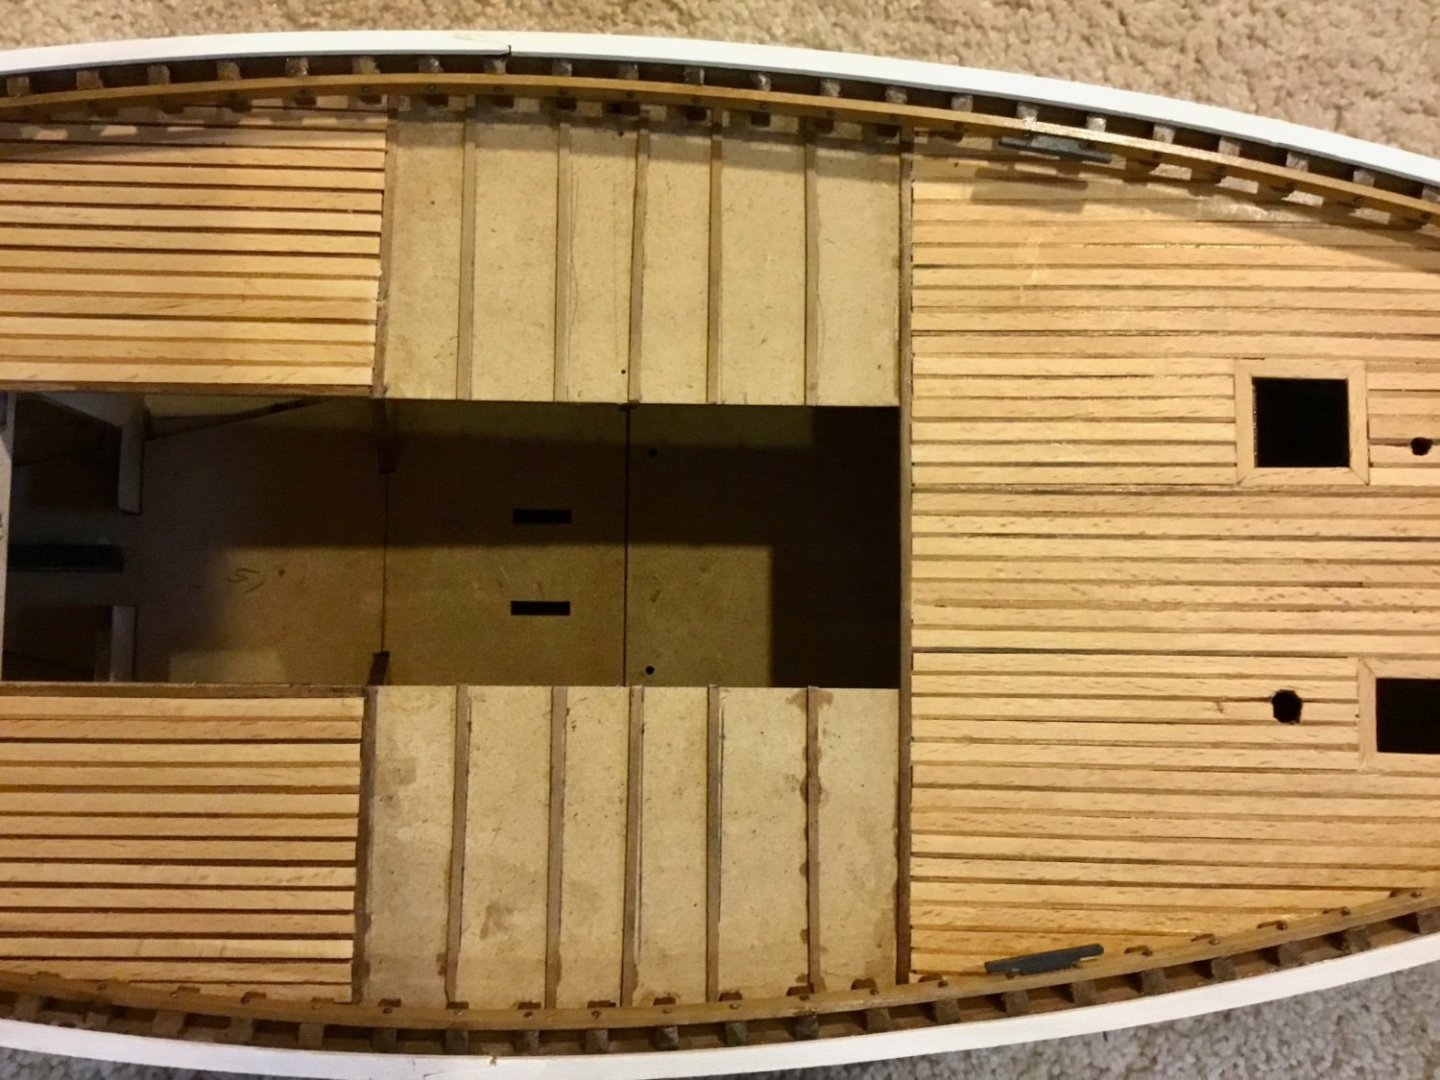
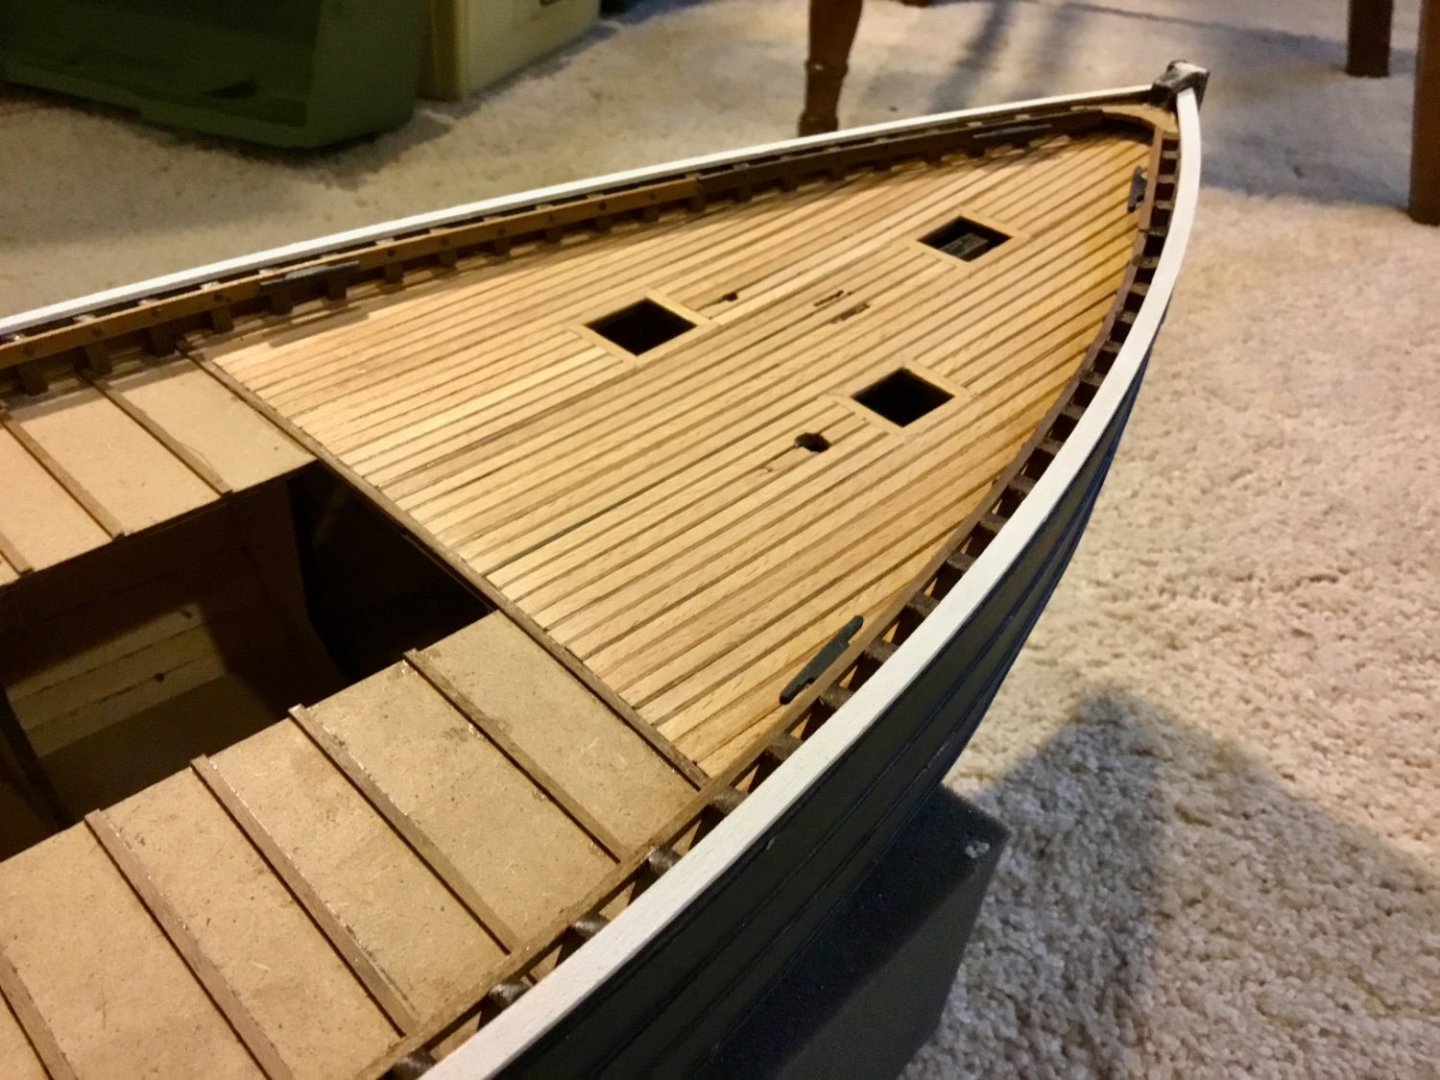
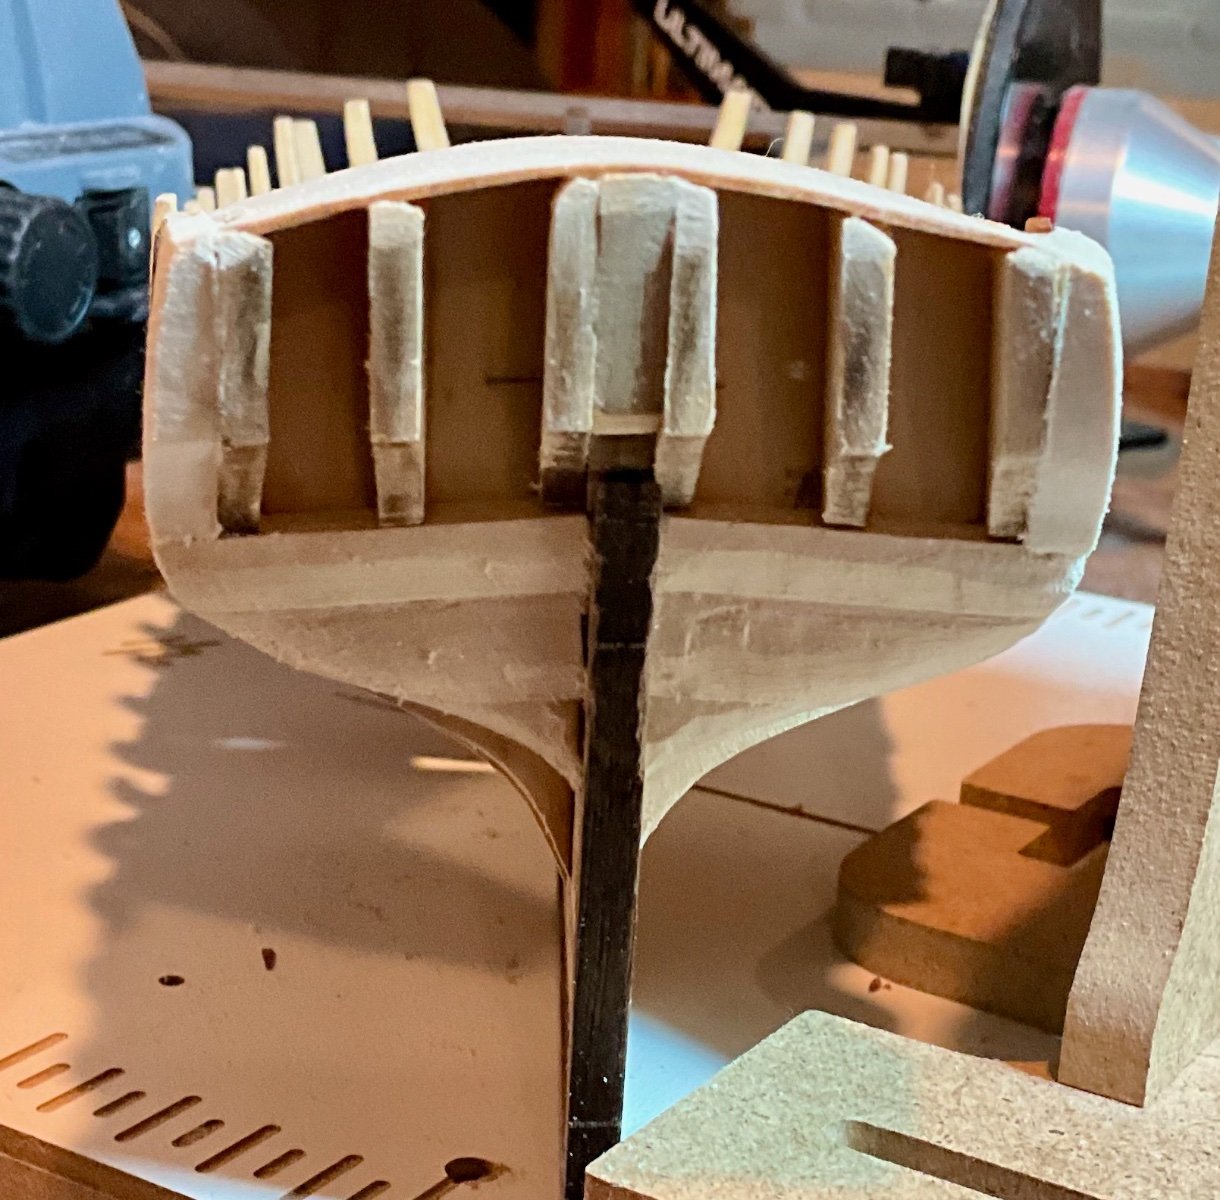
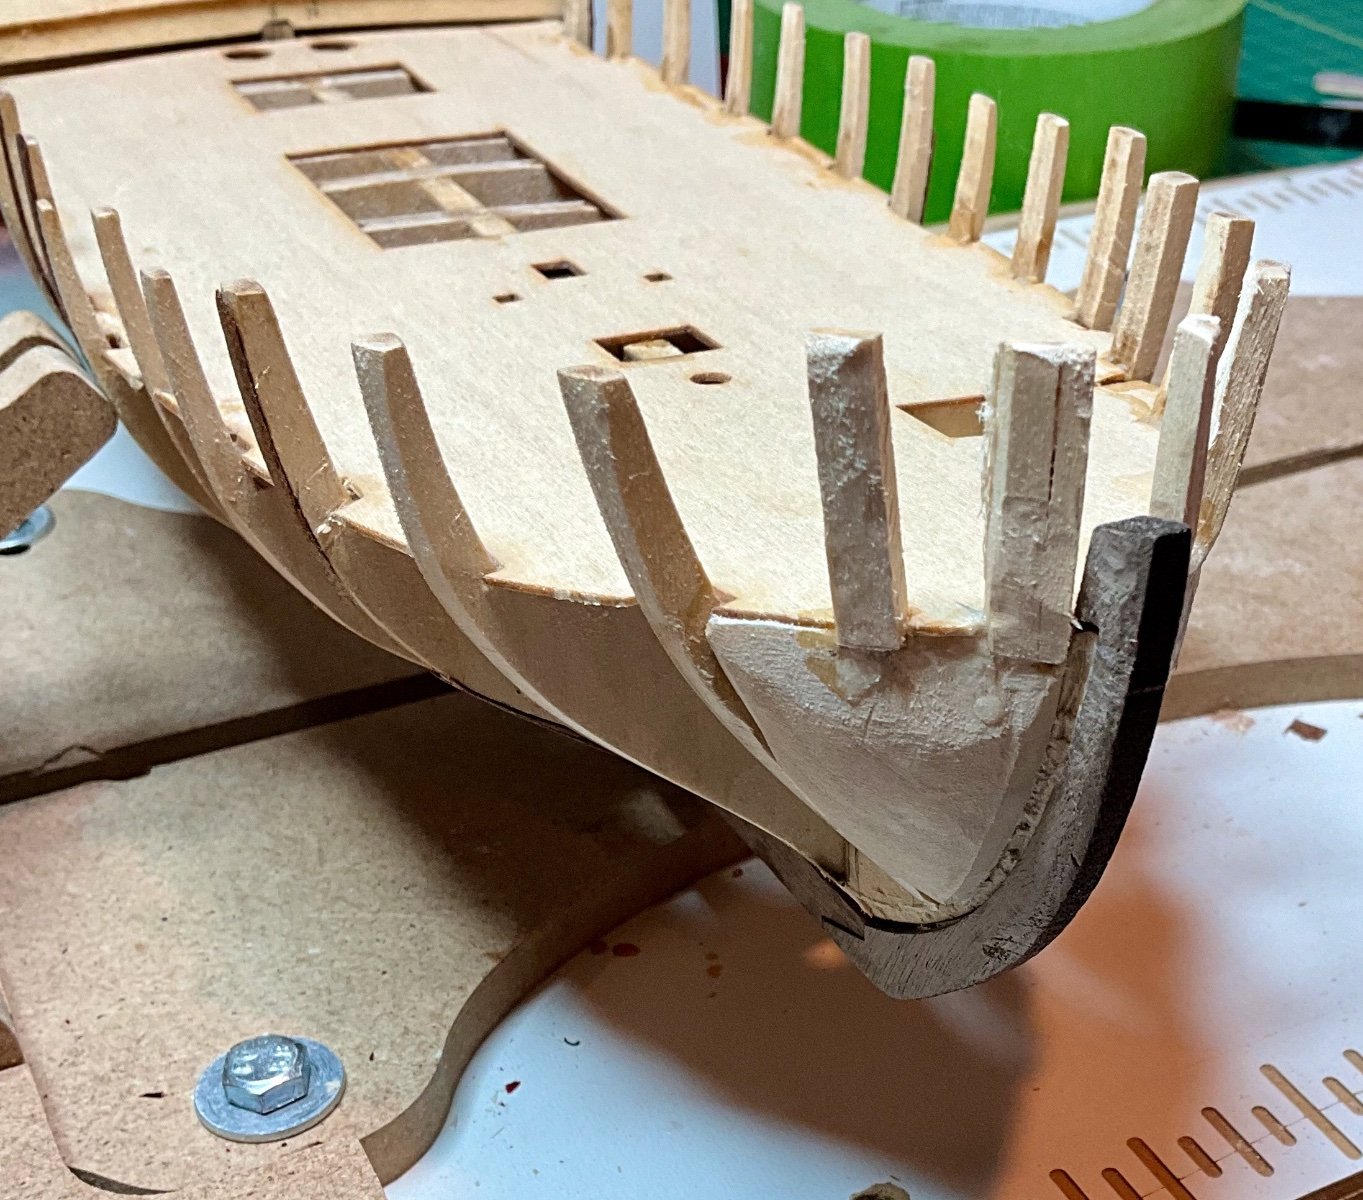
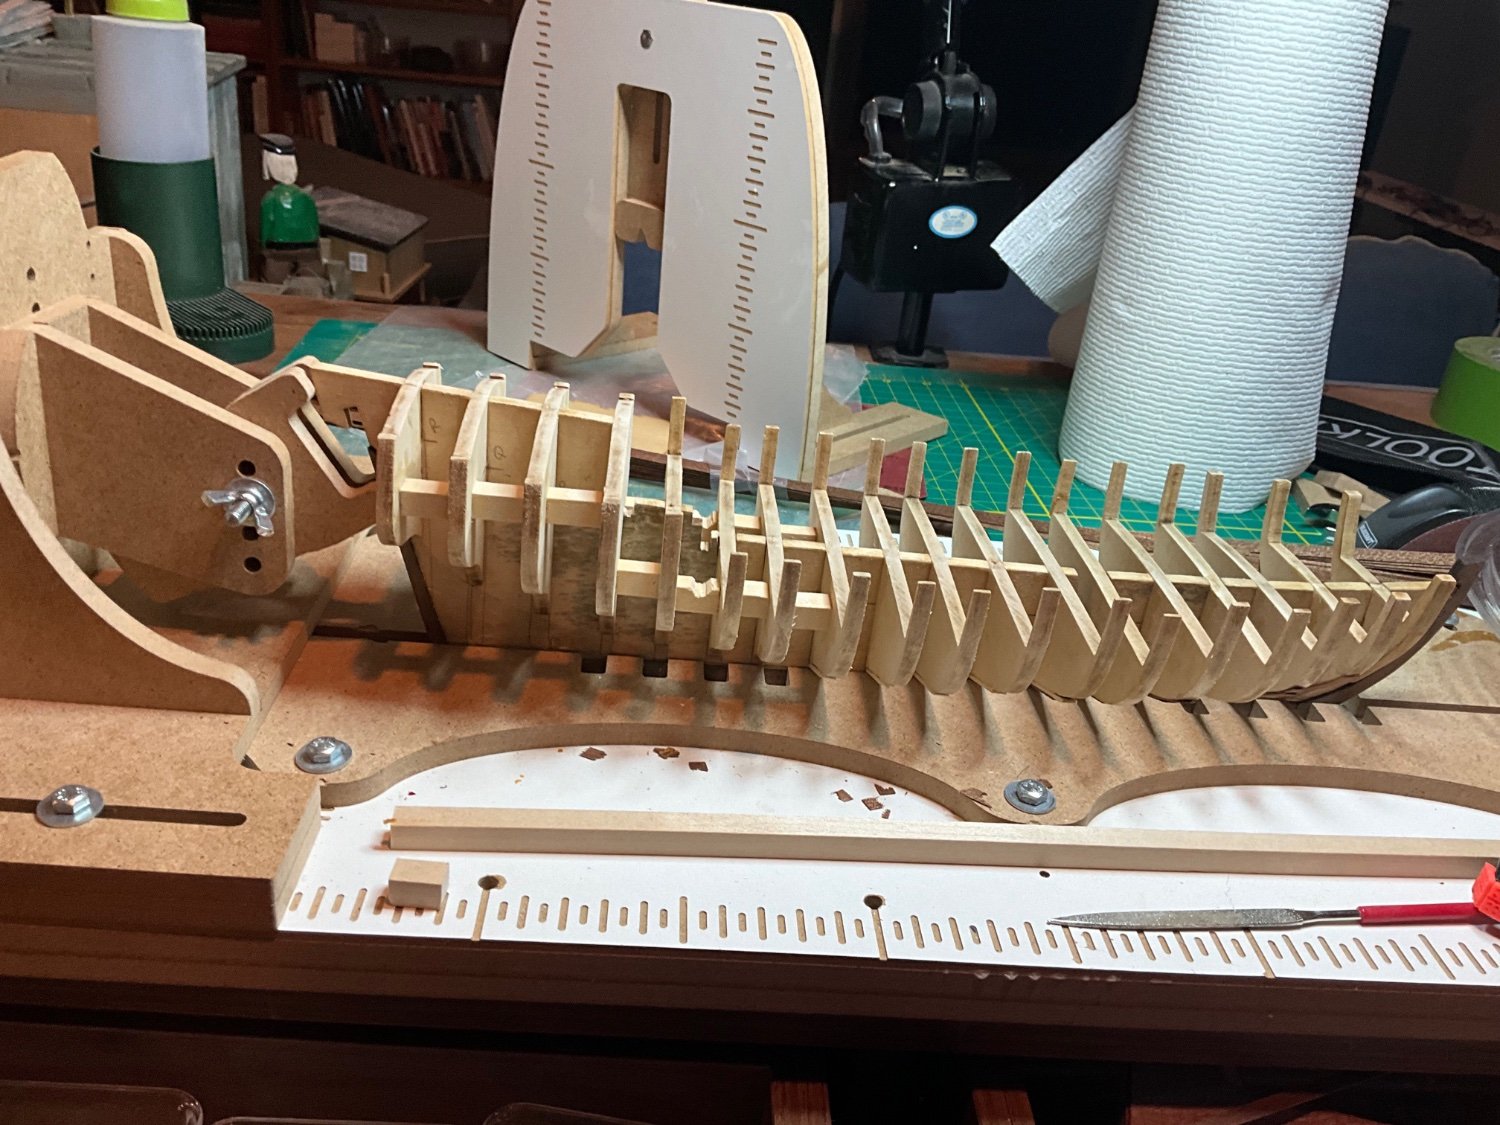
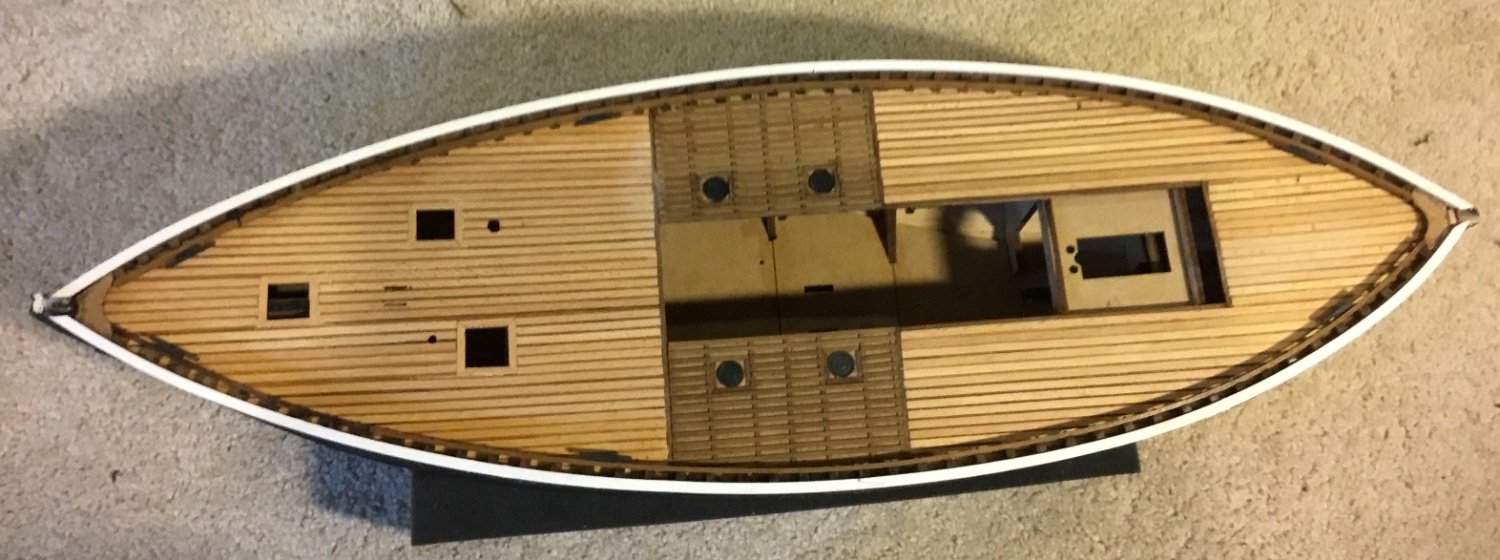
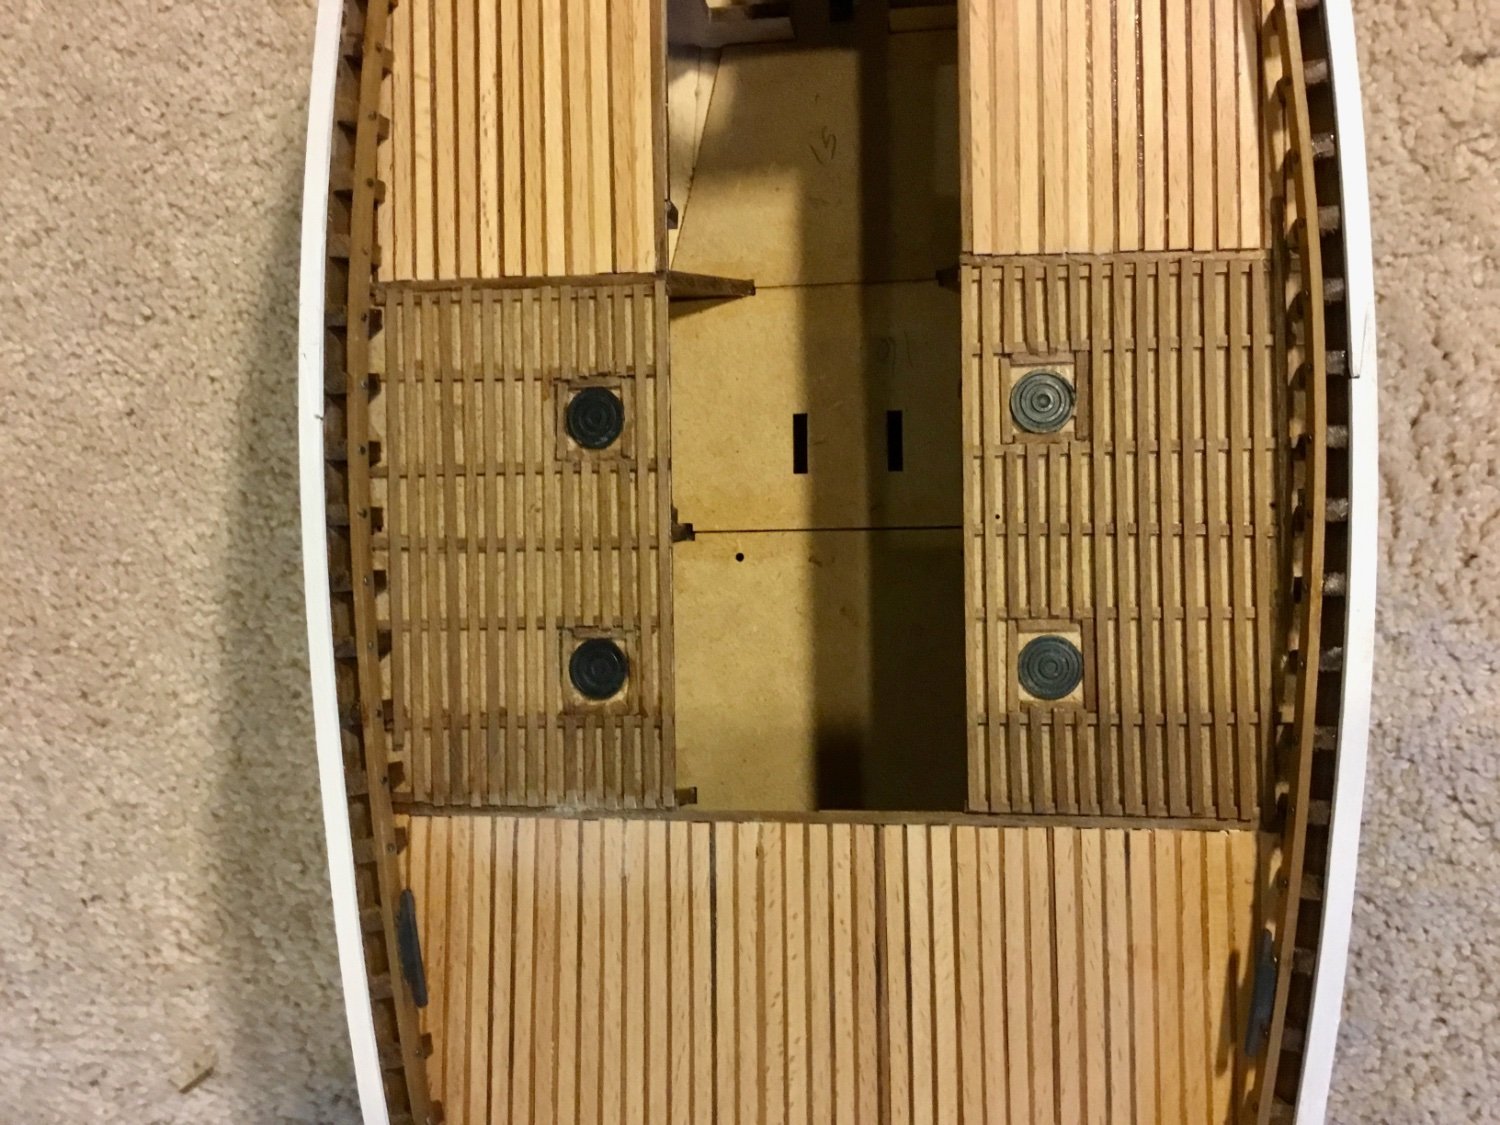
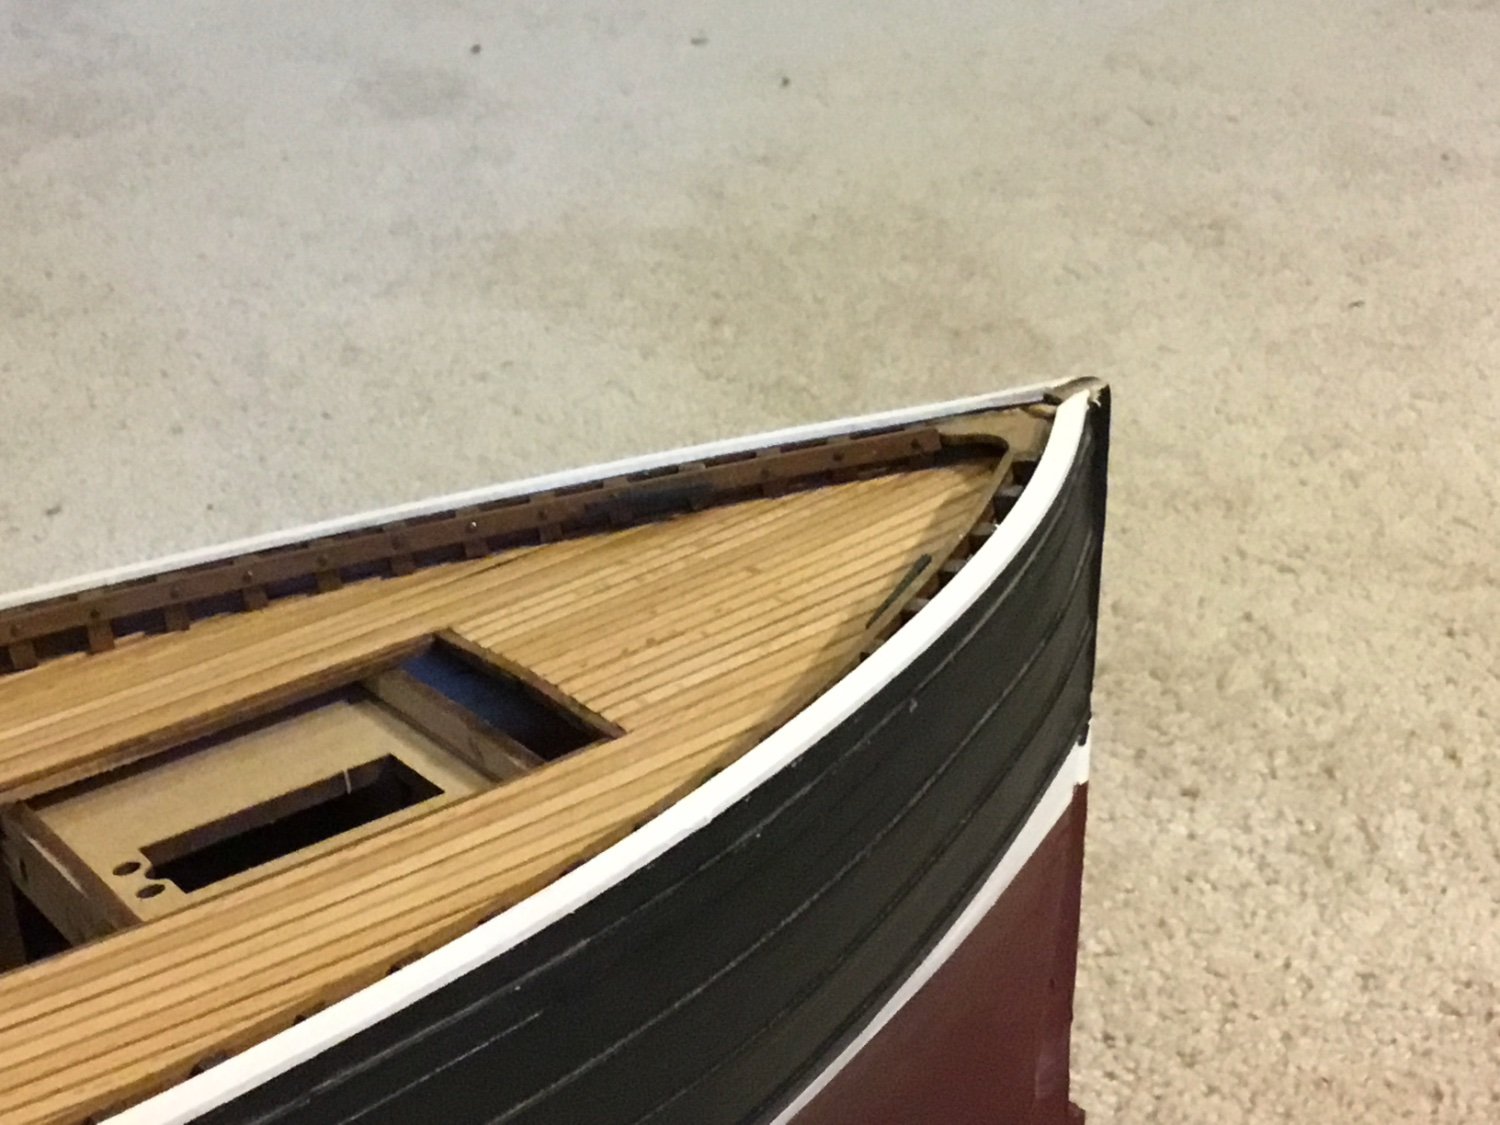
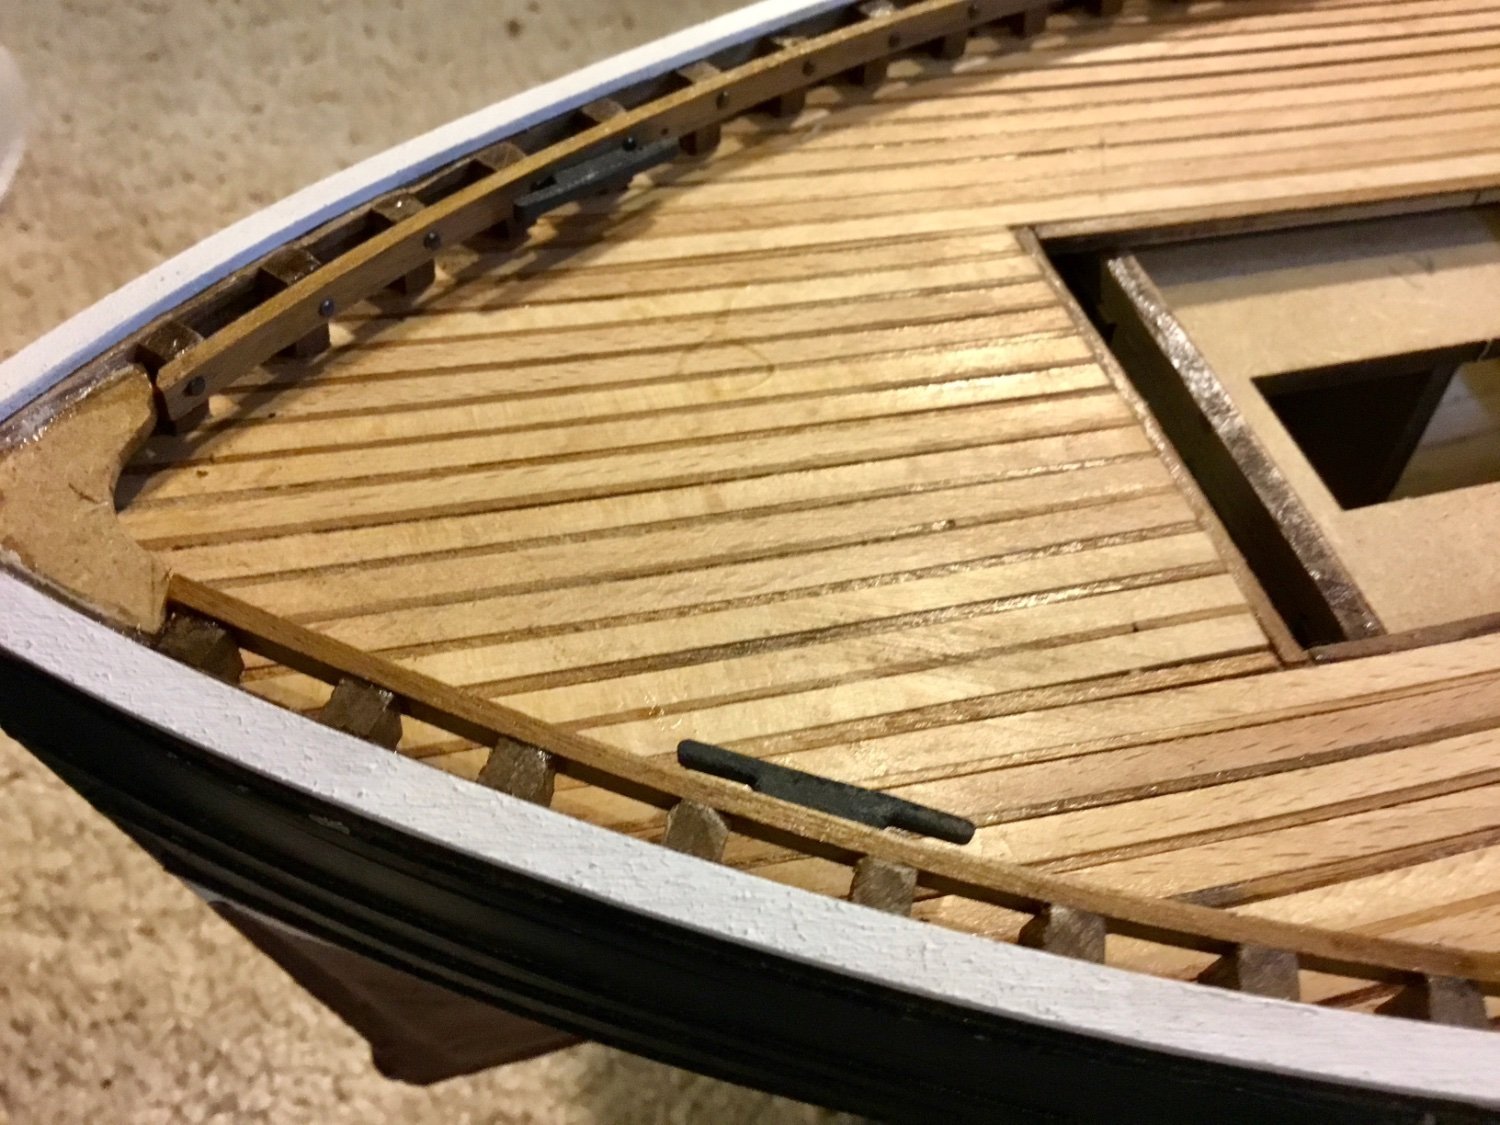
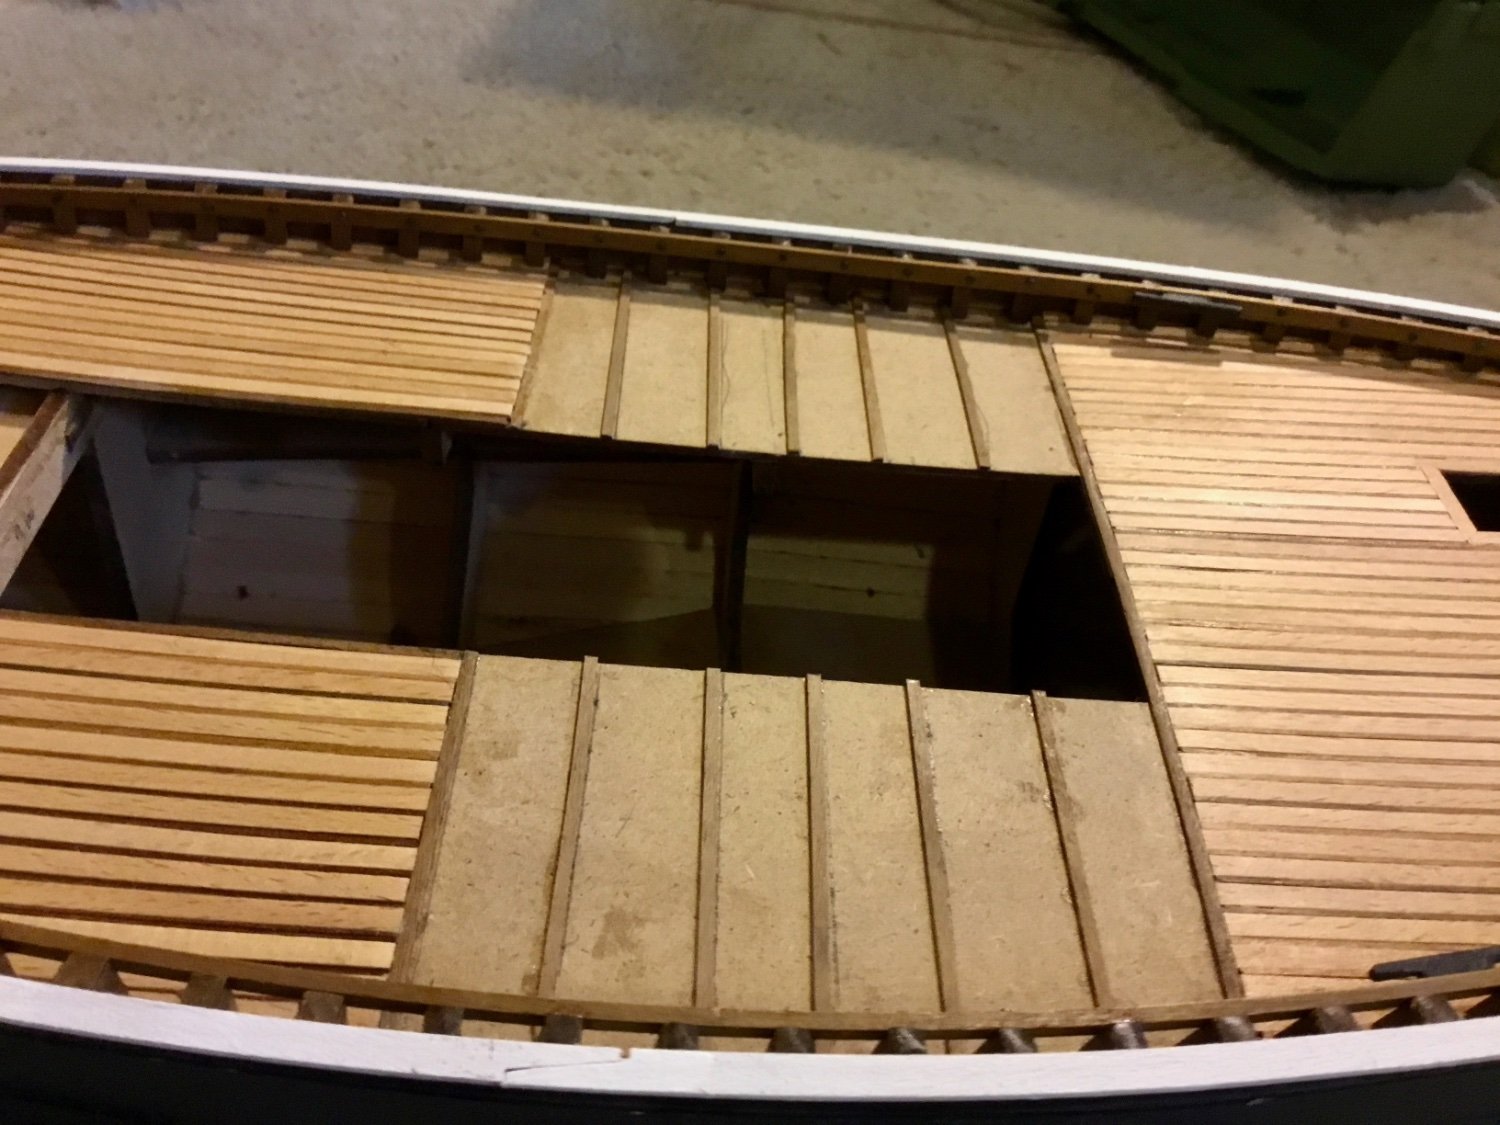
Completed the installation of the sub decks.

and the stern transom
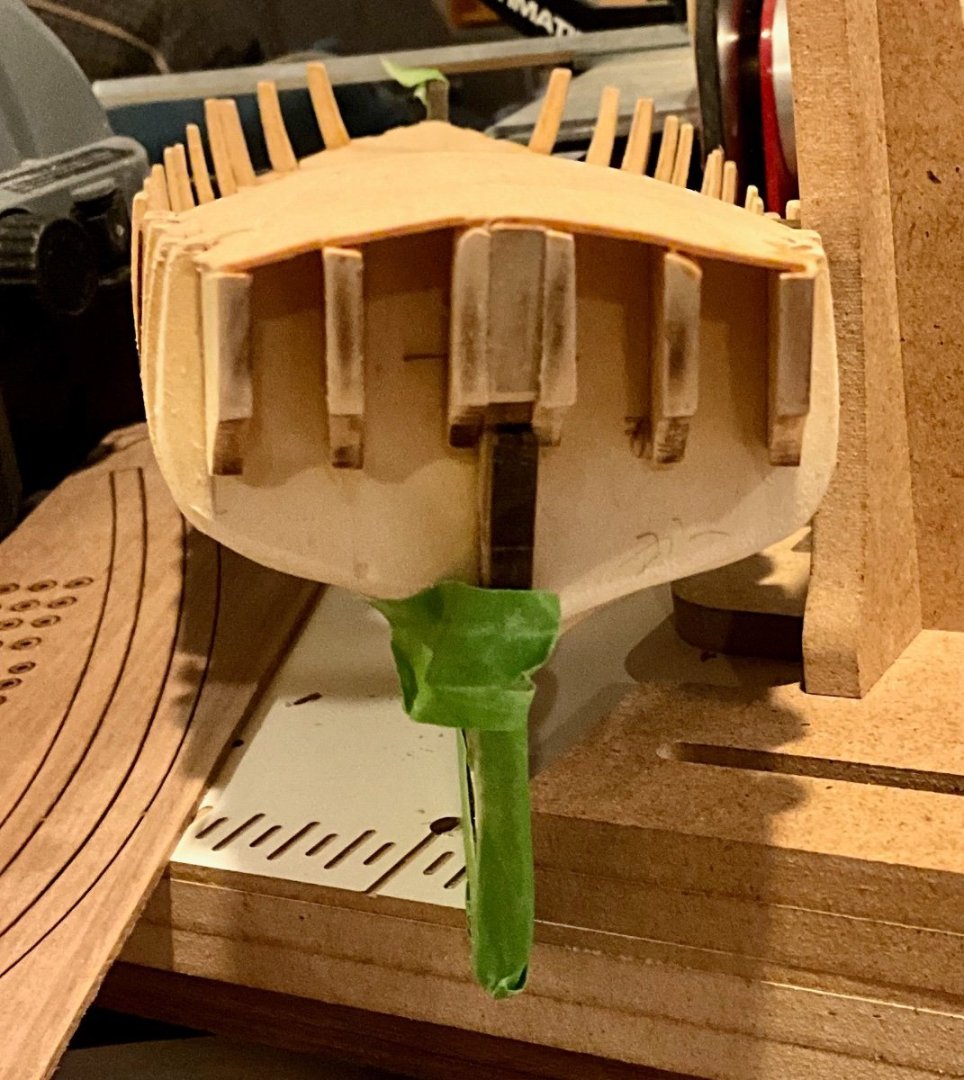
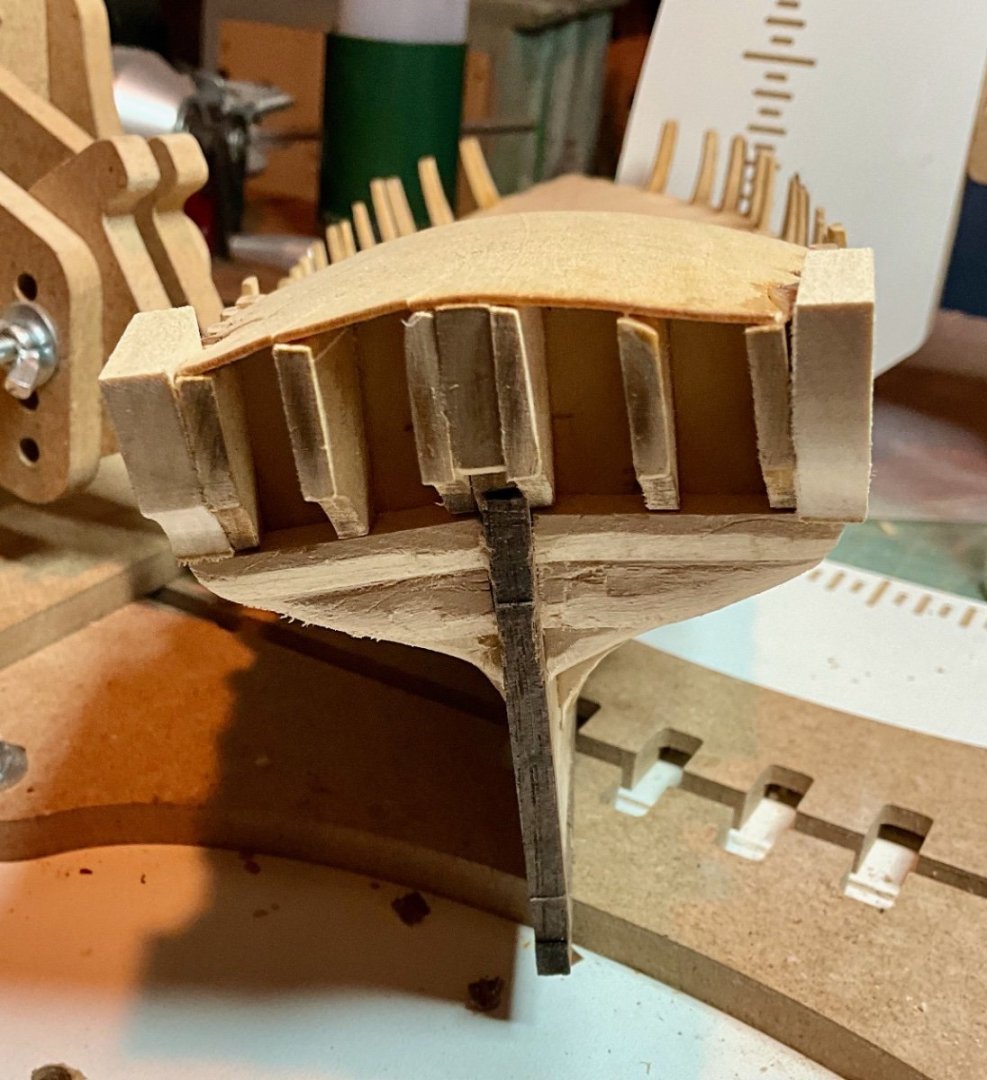

and cut out and added the bow fillers as well as the knightheads and timberheads. So I this stage I've just started Chapter 2 of Bob Hunts practicum. I also have a copy of Clayton Feldman's book to use as a reference while building.
- Ryland Craze, ccoyle, mort stoll and 1 other
-
 4
4
-
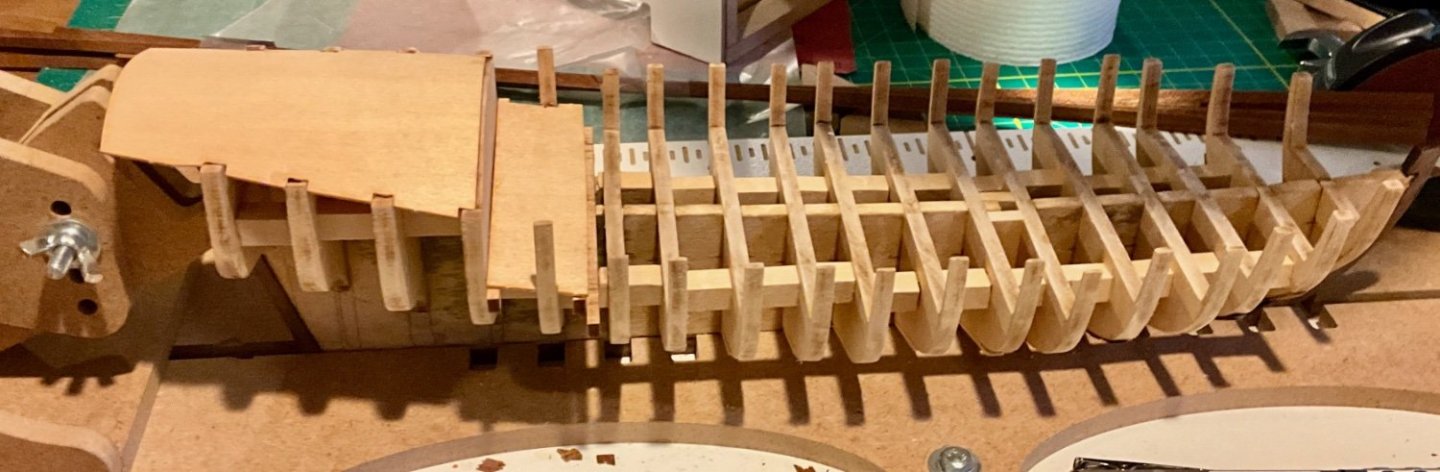
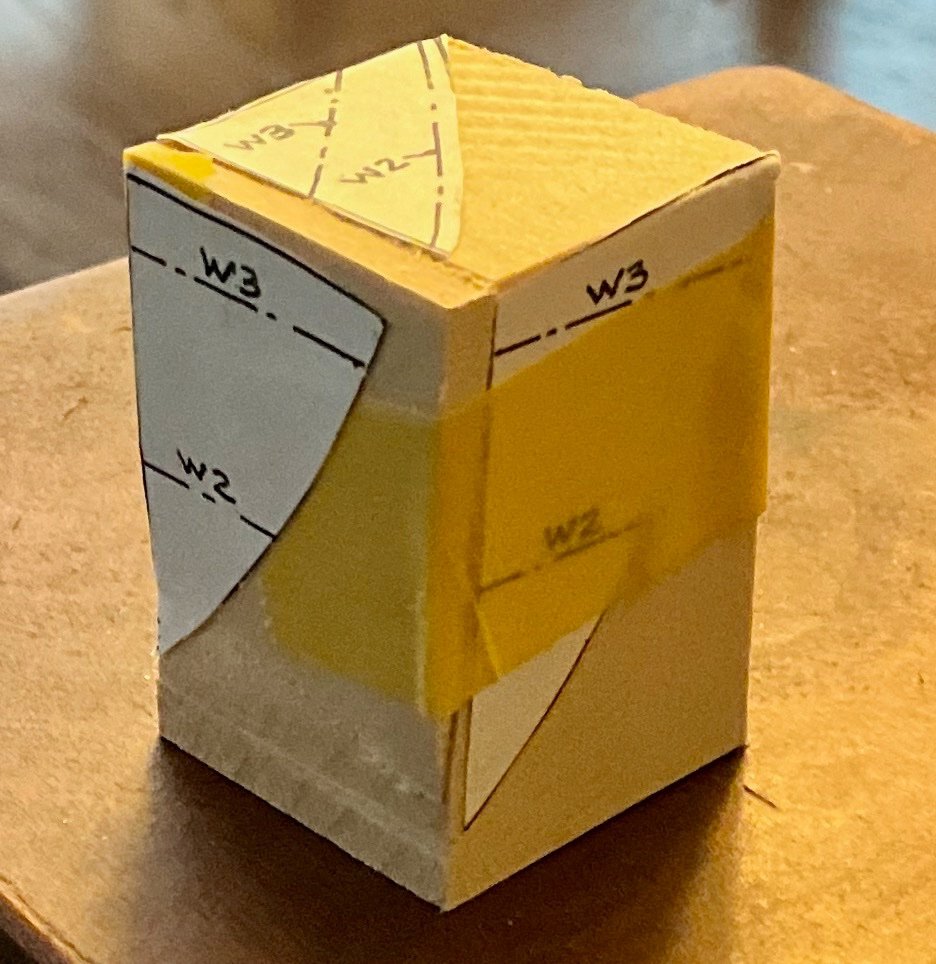
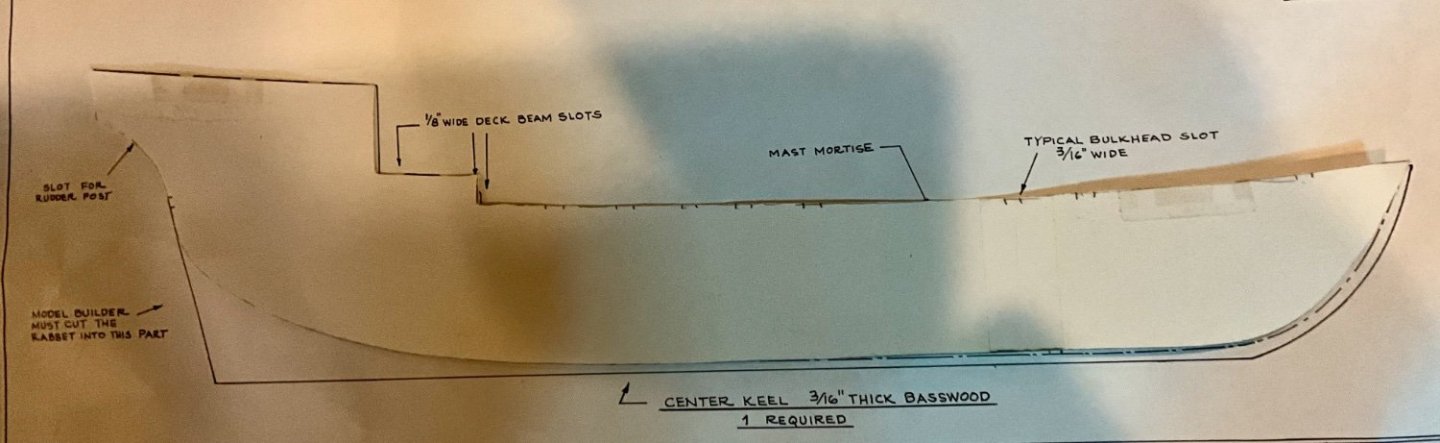
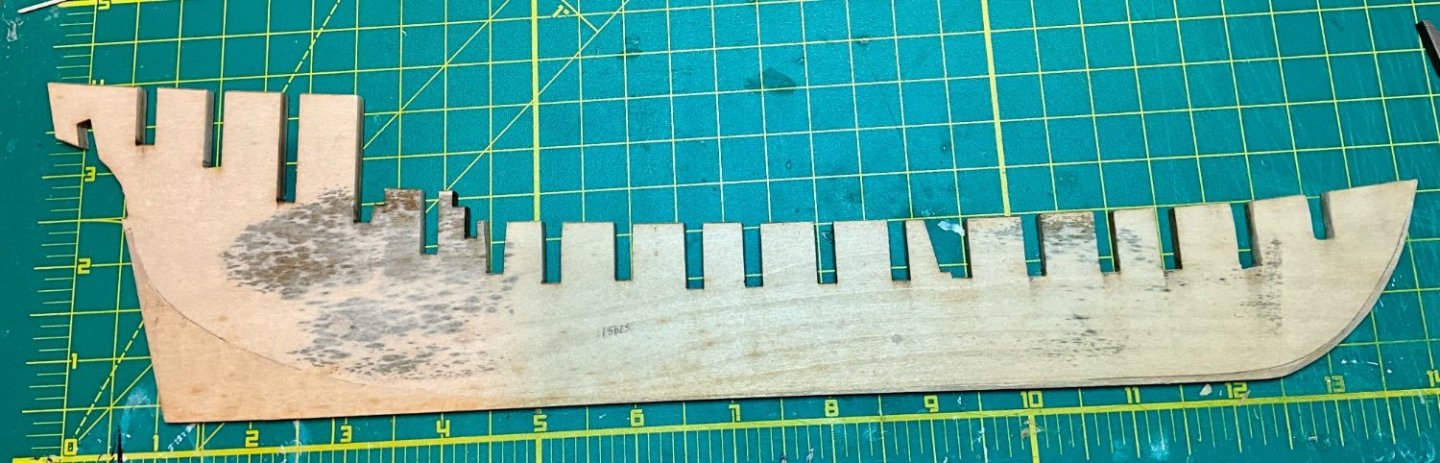
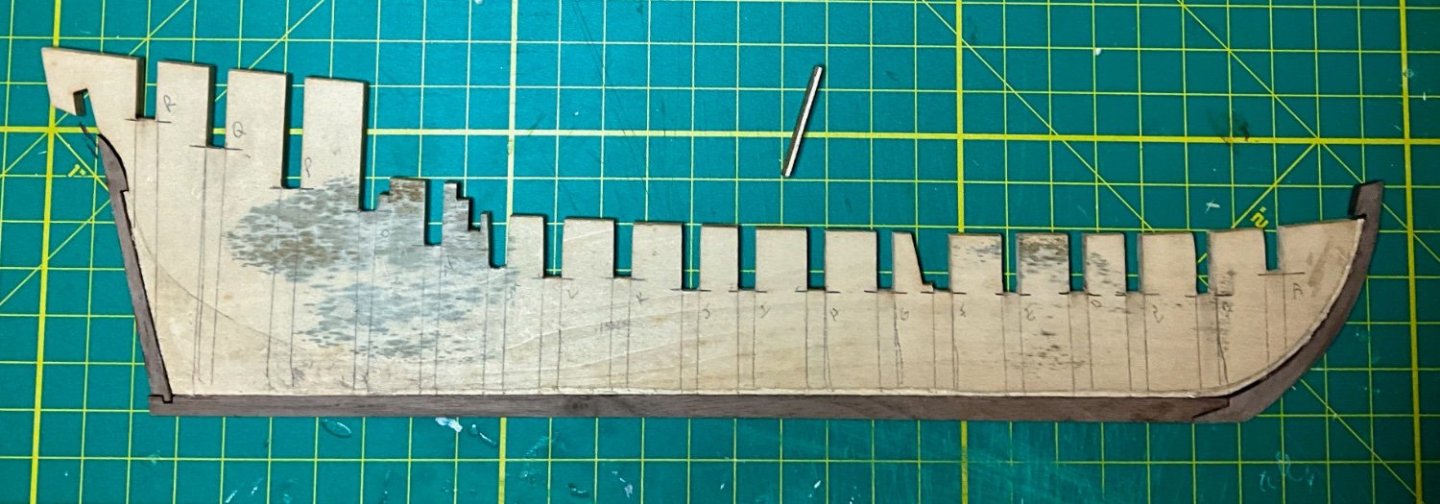
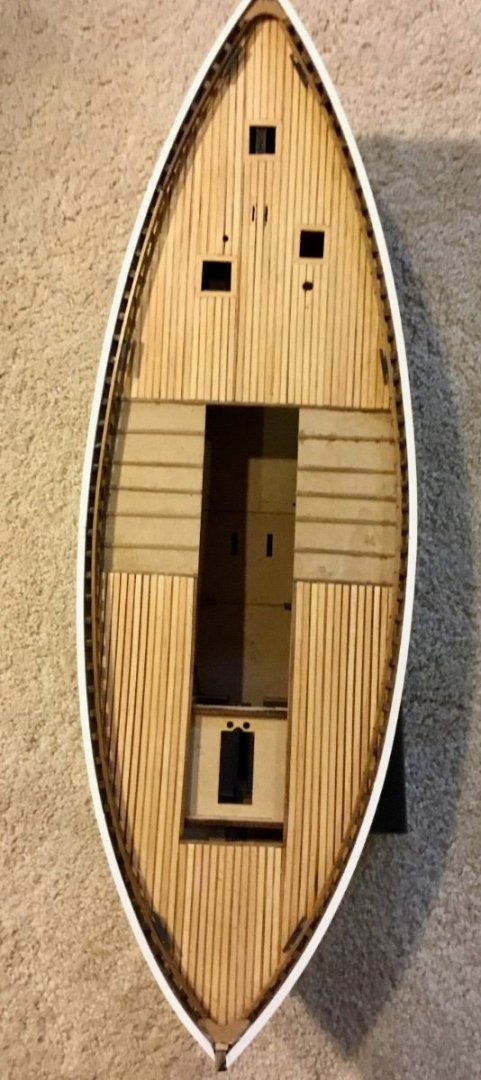
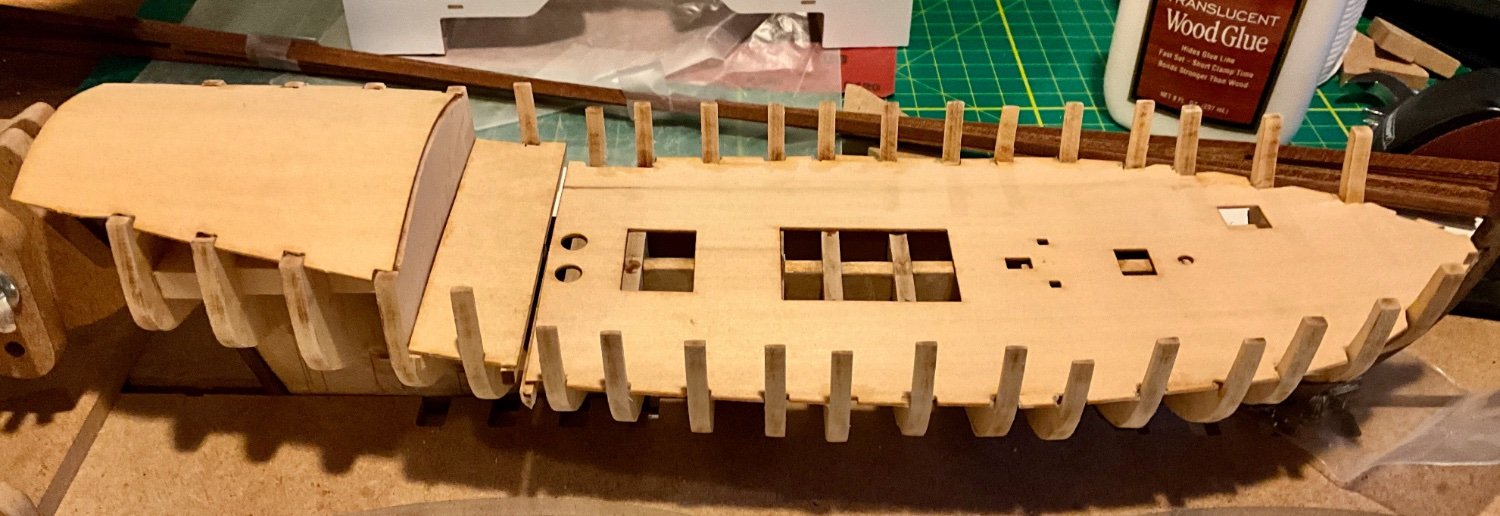
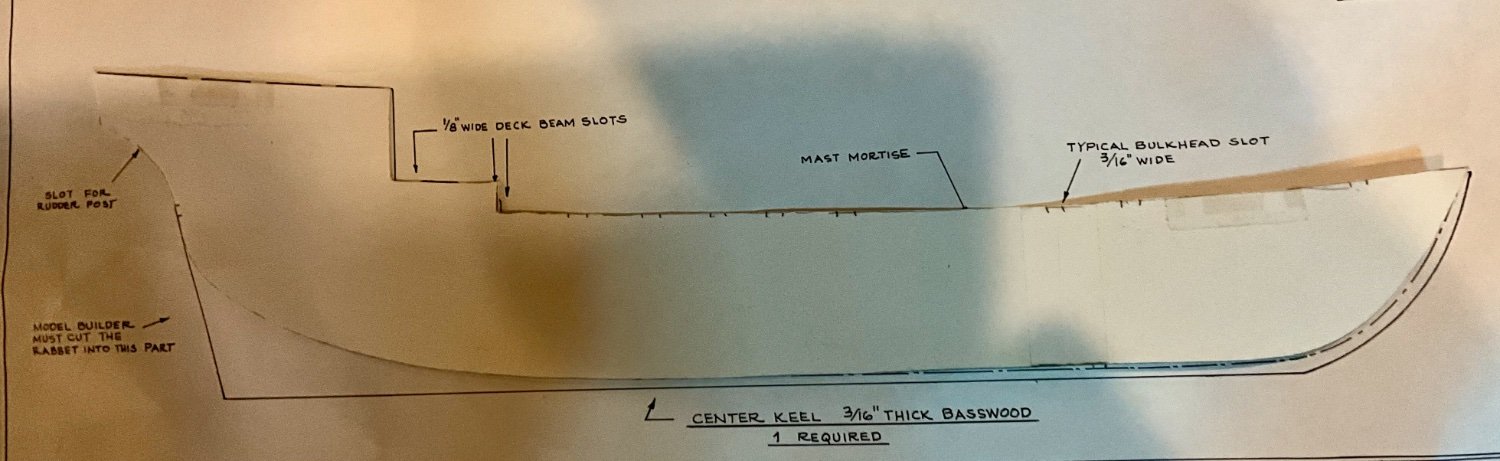
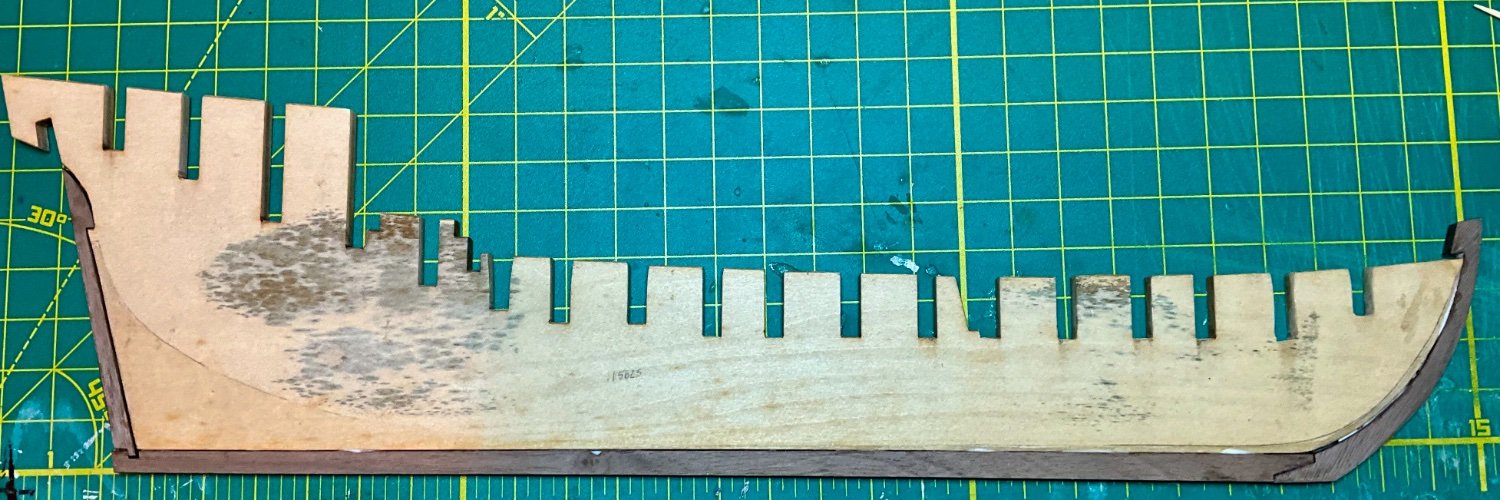
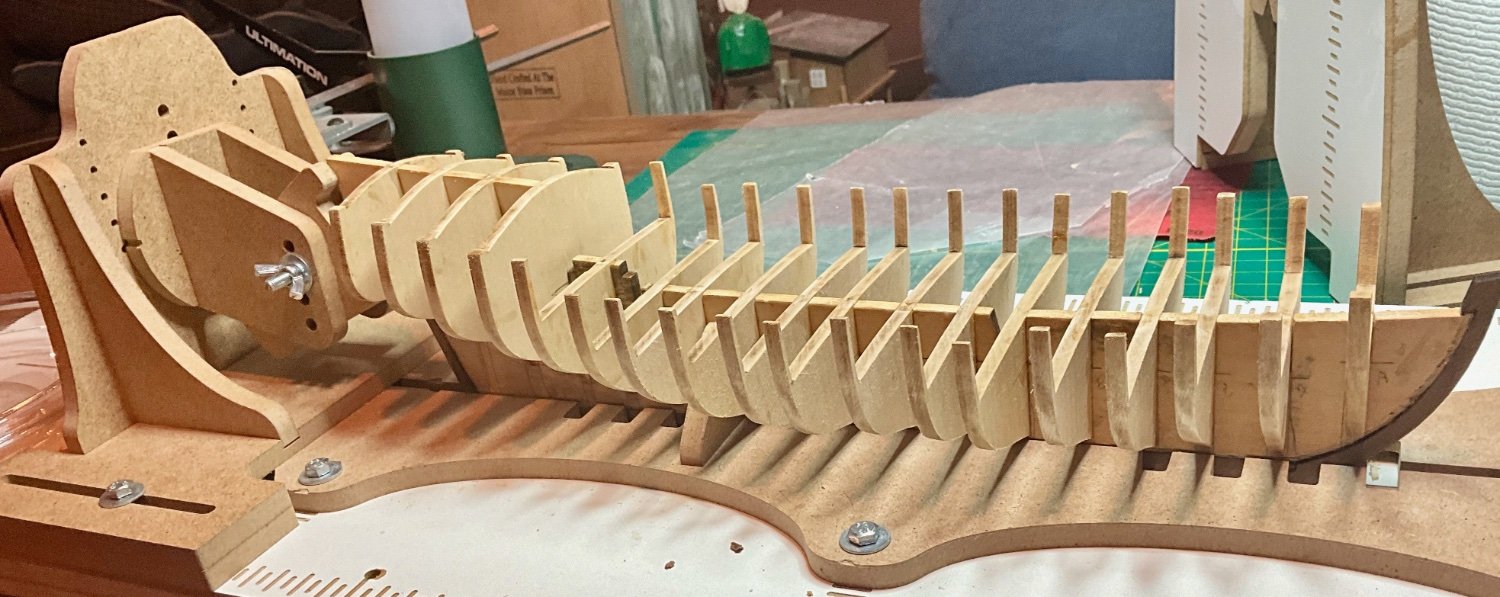
I purchased this kit several years ago but quickly realized it was too advanced for me at the time. Now that I have several completed ships under my belt I have decided to tackle it at this time. I will be basically following Robert Hunt's practicum with some modifications based upon reviews of of other completed builds on this site. I marked out the bearding line on the center keel and then cut the rabbet joint, attached the keel, stem, and sternpost. I then further refined the rabbet joint and began attaching the bulkheads. Since this is a double planked model I created a short test piece combining the planks of the two layers of wood to check the depth and width of rabbet. Some bulkheads fell short of the bearding line so I used some leftover wood from my stash to shim up the bulkheads where needed to meet the bearding line and rabbet. I am adding reinforcement blocks between the bulkheads and at the mast slot.


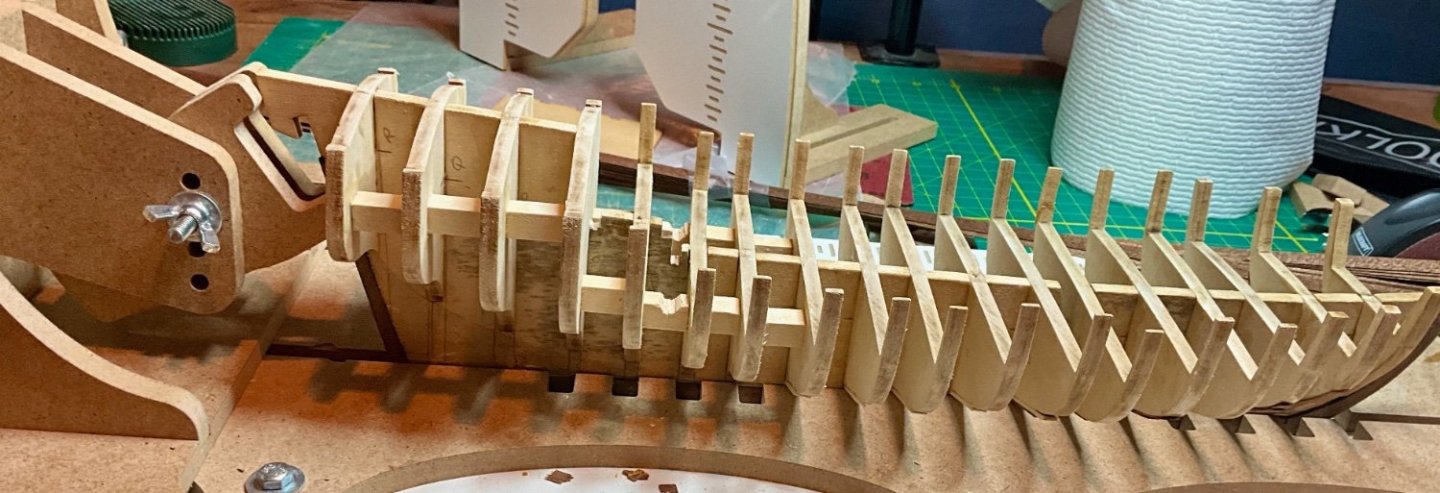


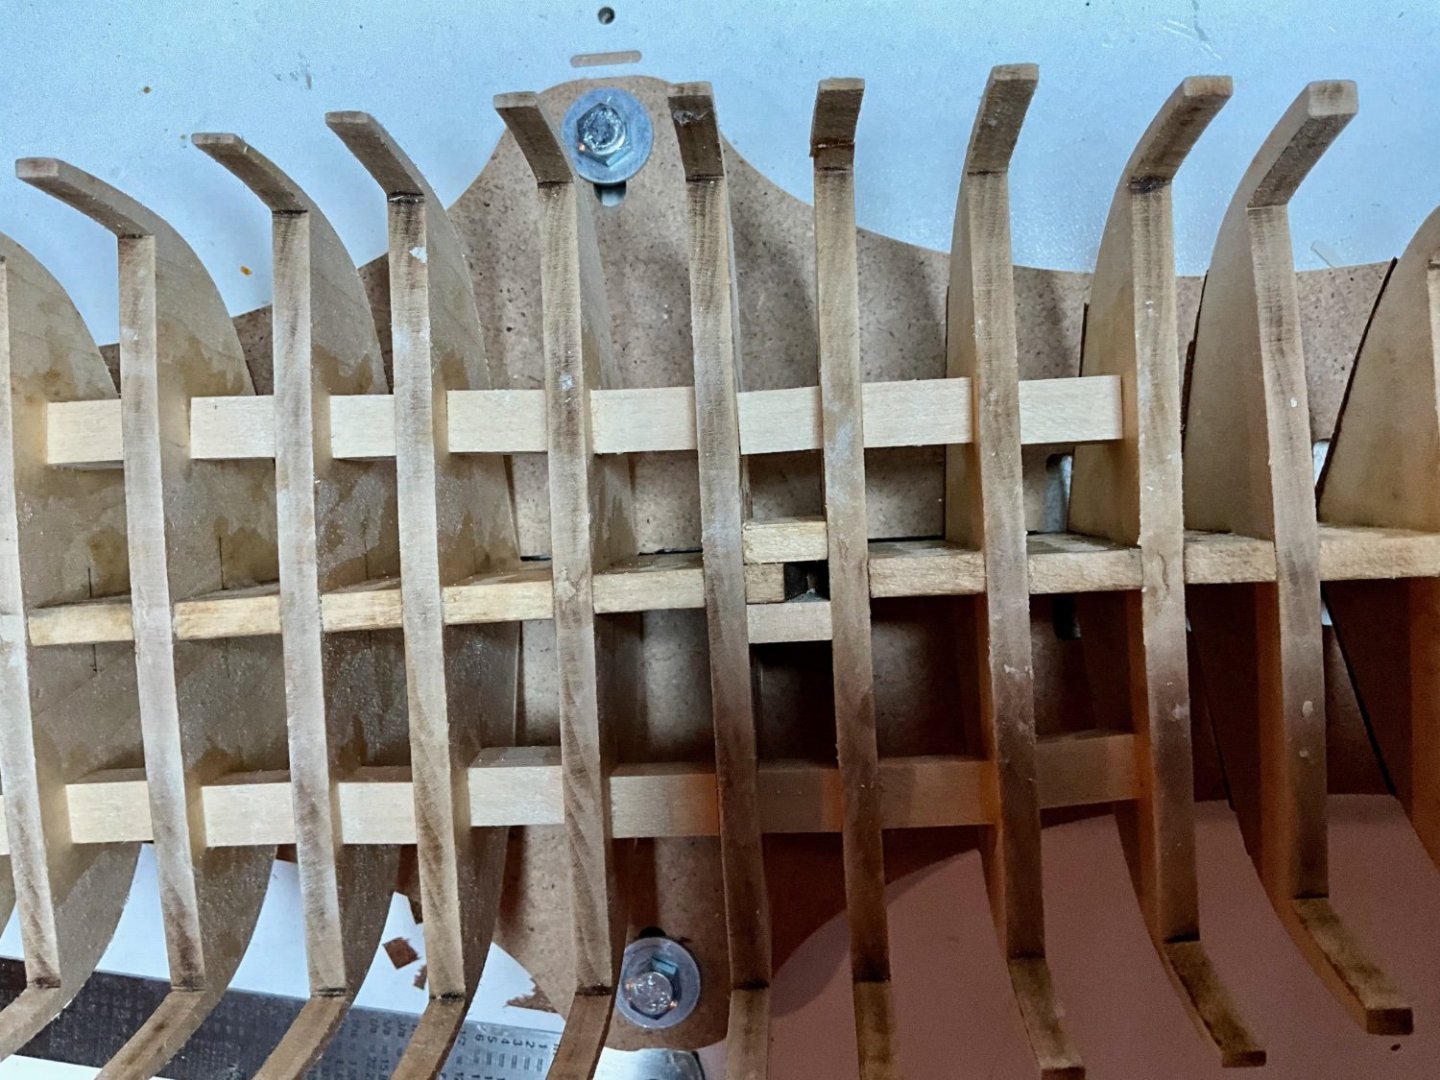
- Paul Le Wol, RossR, Ryland Craze and 4 others
-
7
-
You should include a link to your youtube videos. Great job!
-
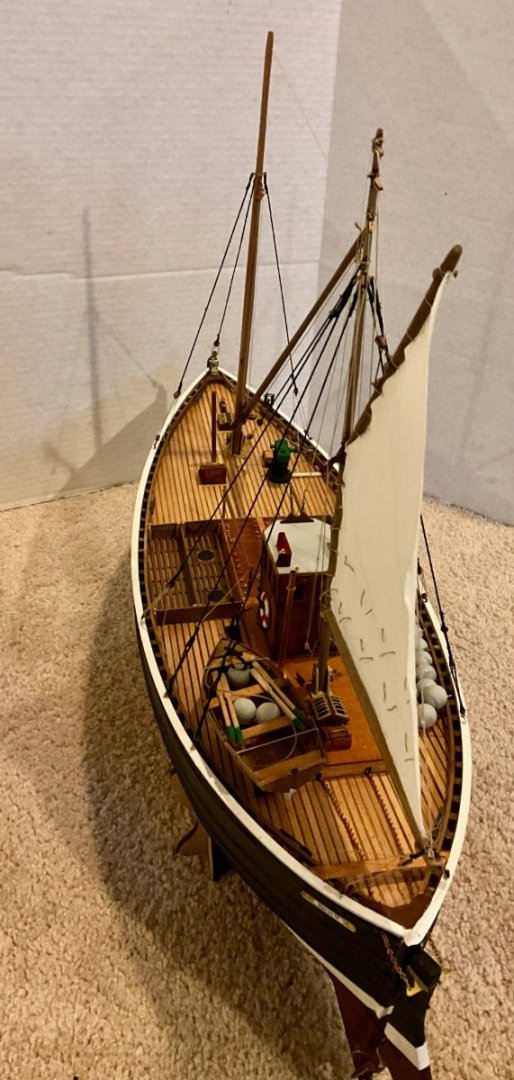
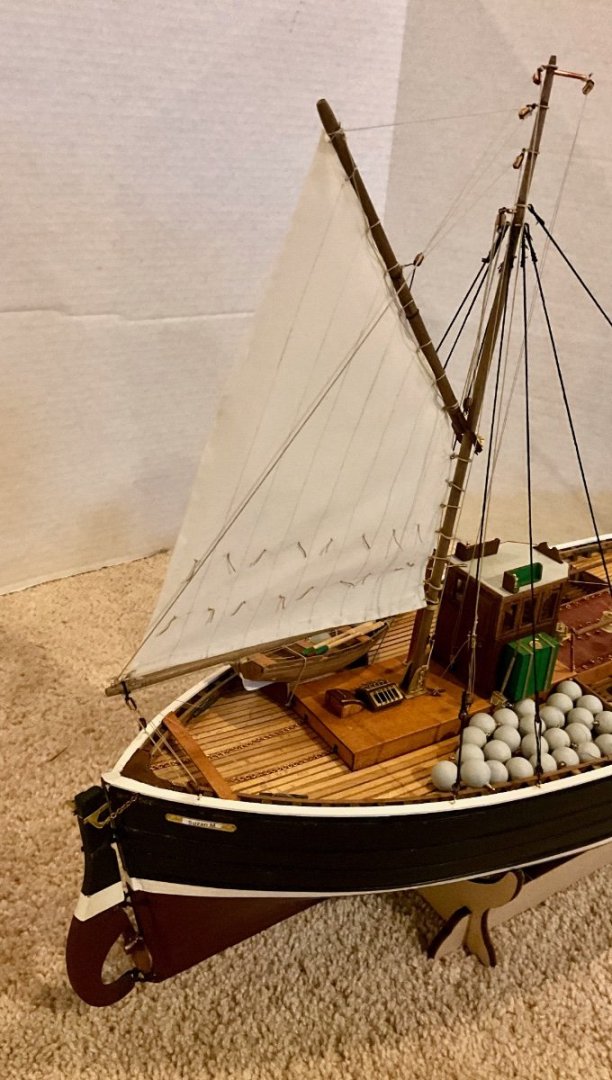
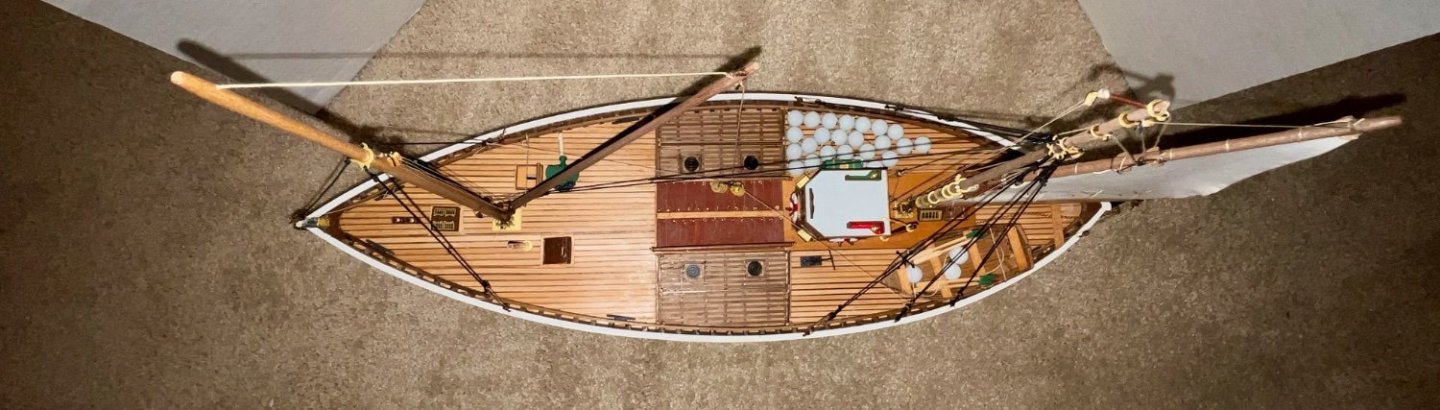
Well I've finally completed this build and the rigging. I had a small problem, I lost one of the small bullseyes for the shrouds but luckily I had a deadeye in my stash the same size and drilled out the center converting the 3 small holes to one large one.


-
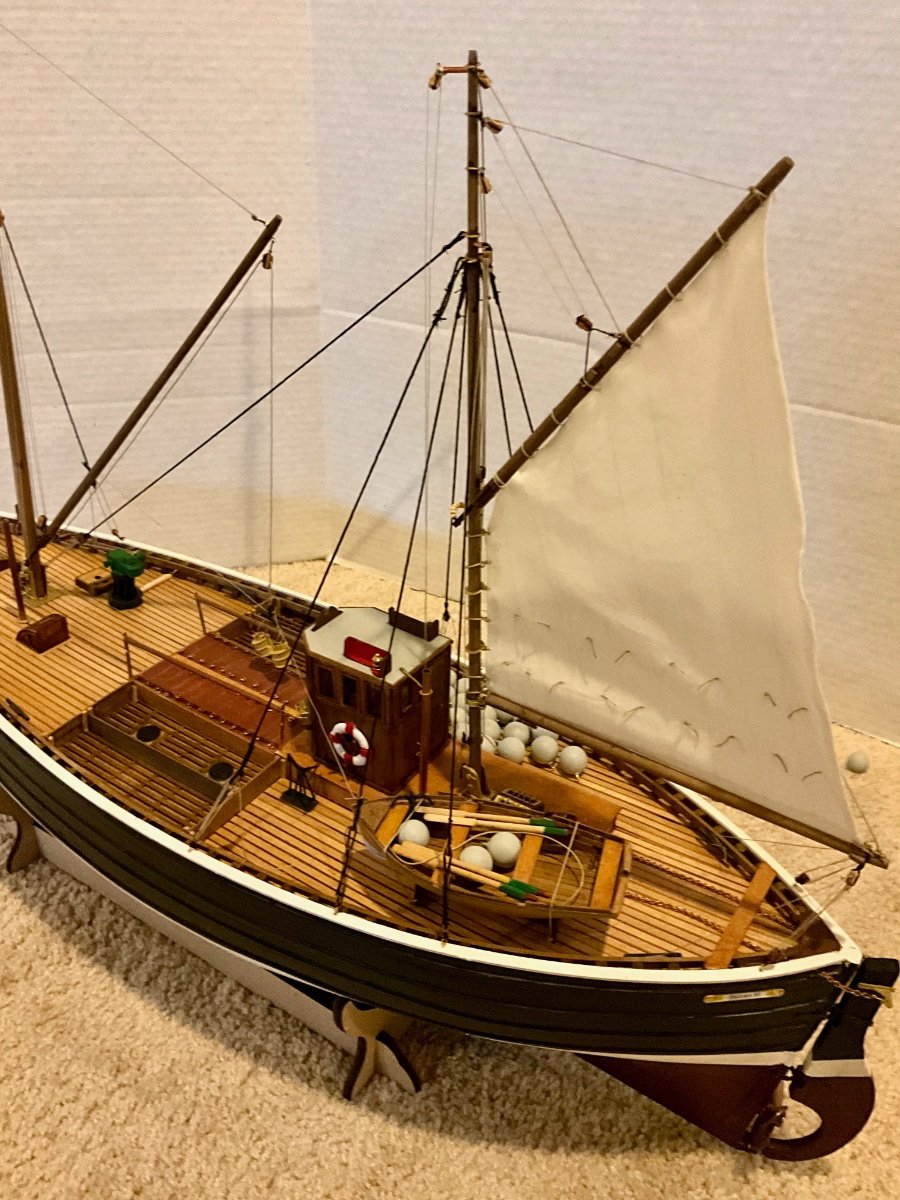
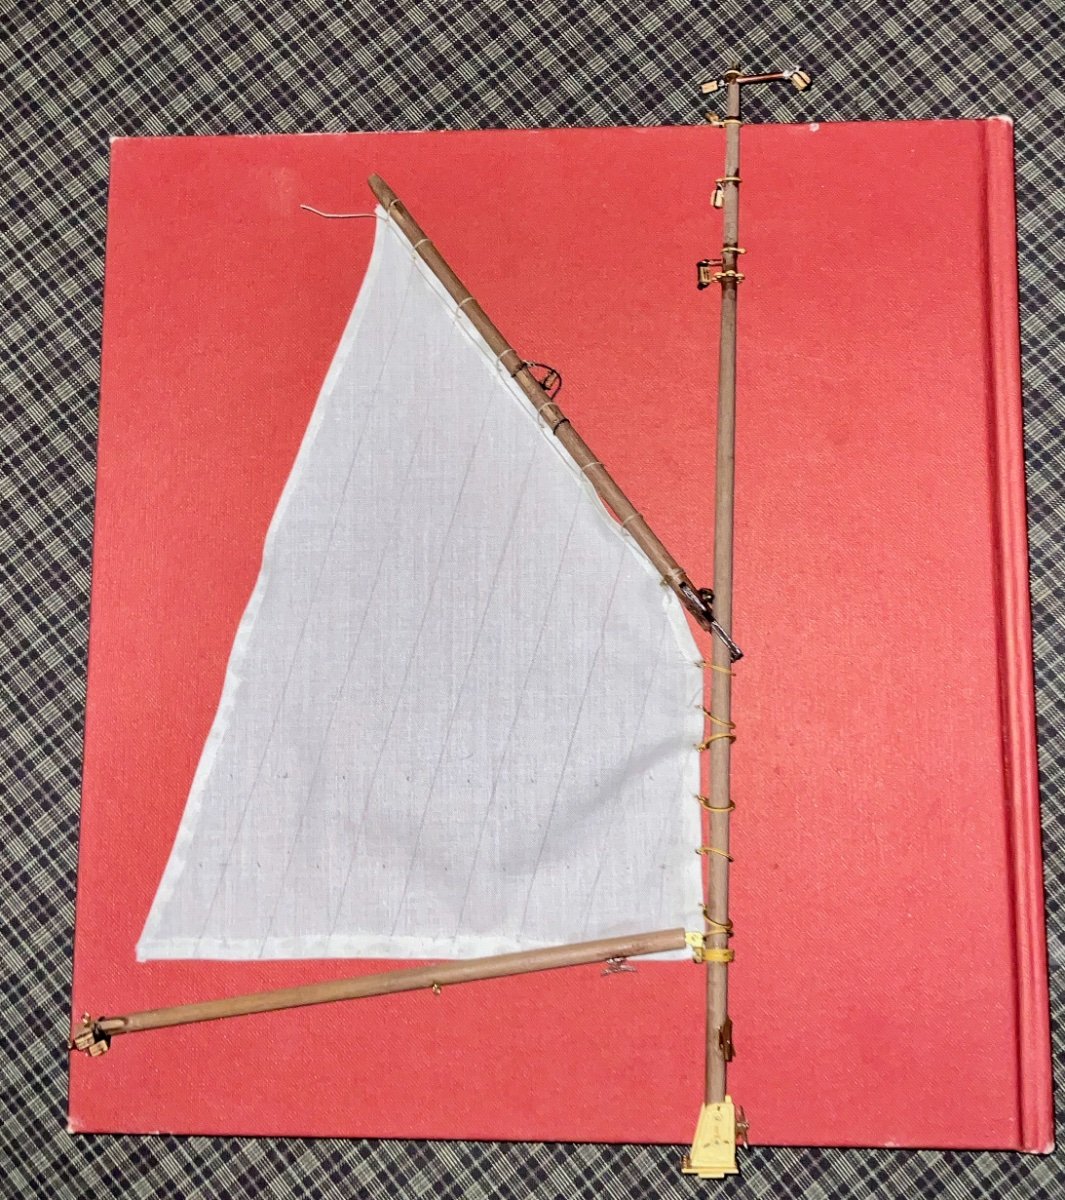
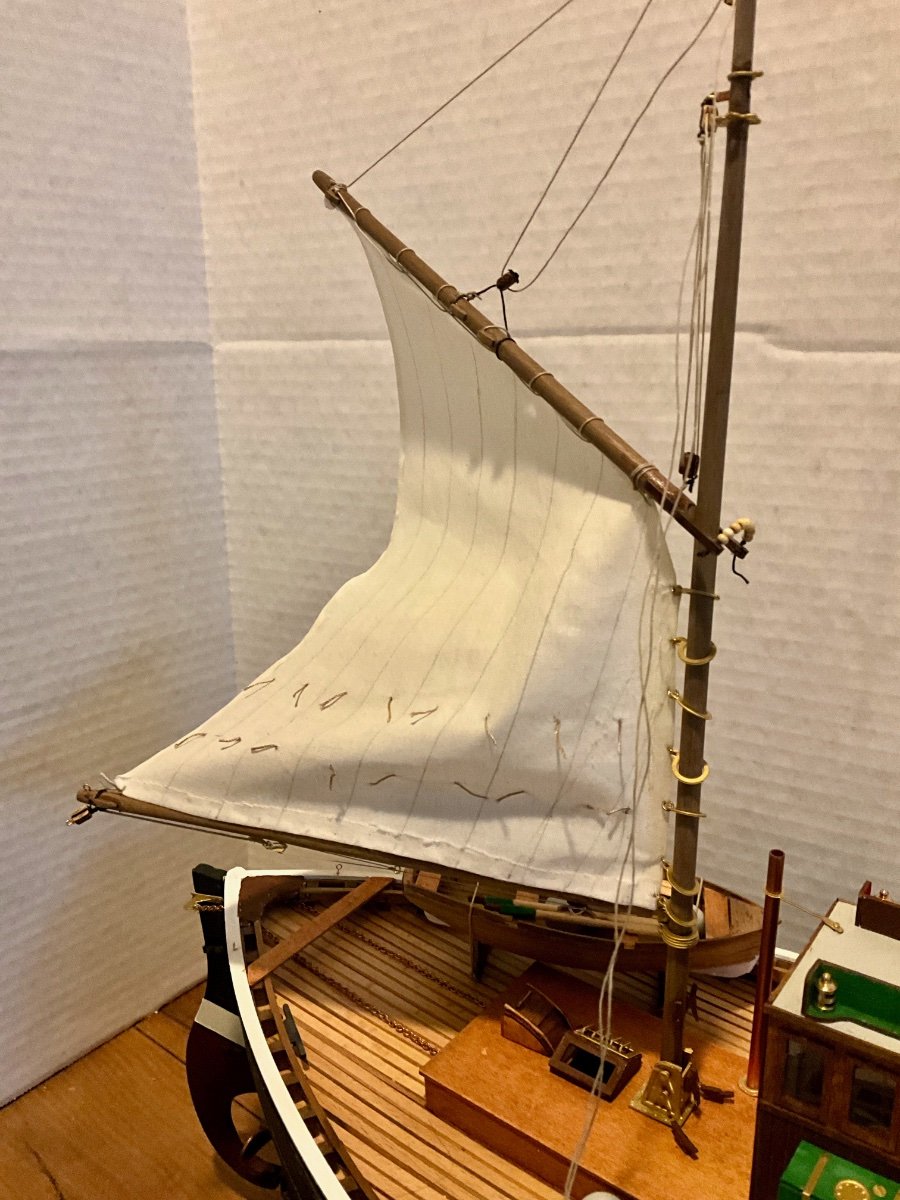
Continue making progress on rigging. Completed front mast


 and began work on main mast and sail.
- JacquesCousteau, JpR62, Ken_2 and 3 others
-
6
-
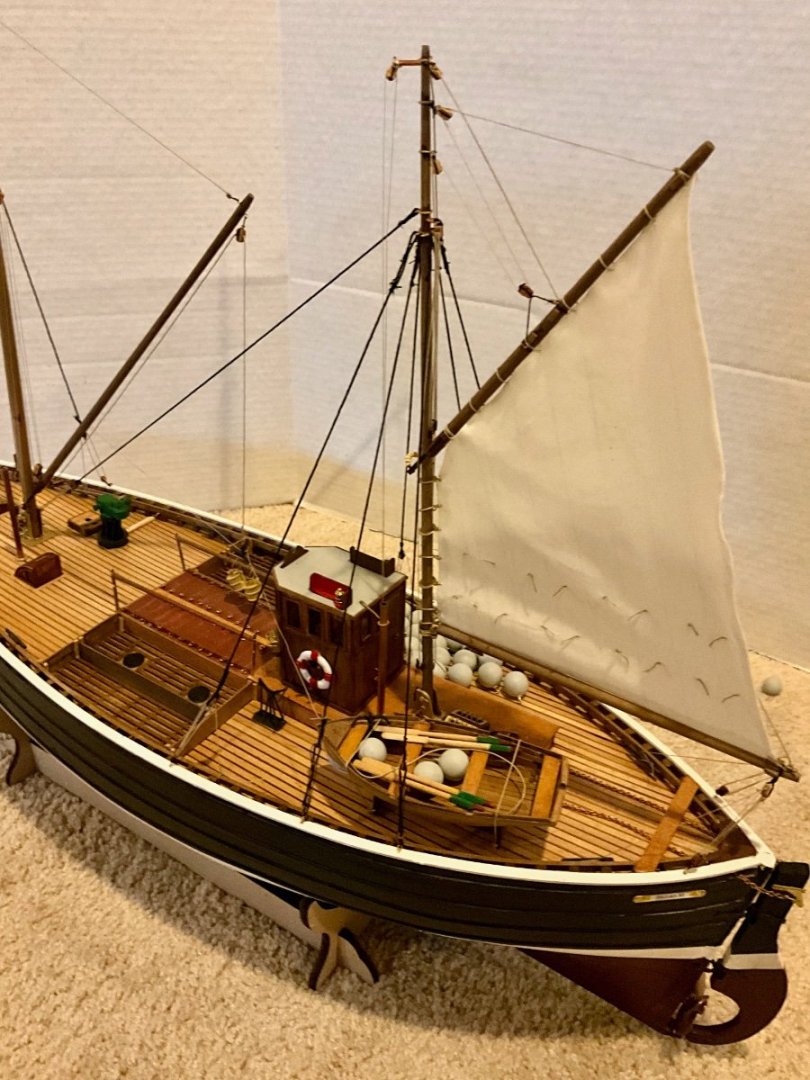
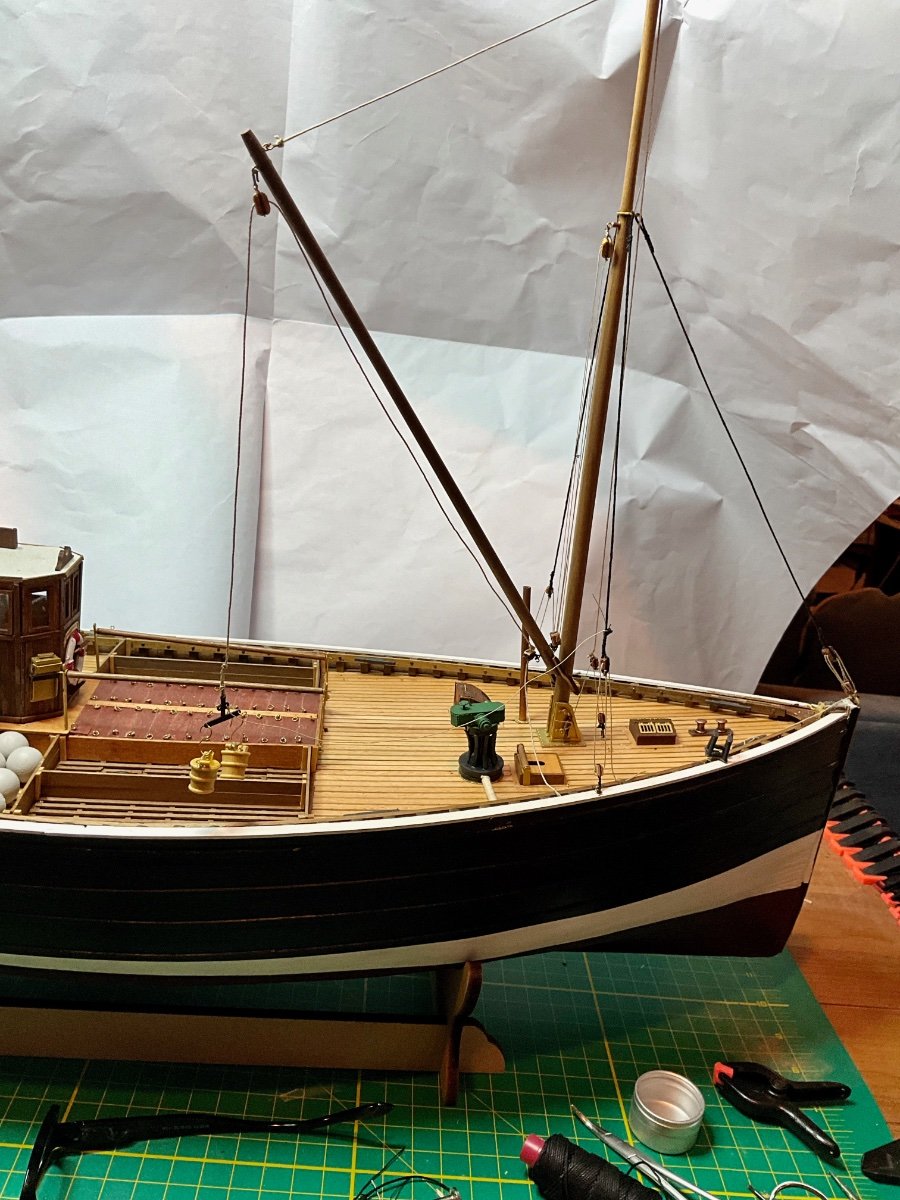
I mounted the derrick. boom to the front mast and completed the front mast rigging. I dismounted the main mast so it would be easier to rig the sail. It took awhile to connect the lower boom to the main mast due to the size of the tiny bolt and hex nut used and my lack of coordination, but eventually I got it installed. Next up is to make the sail and install it on the main mast.


- Knocklouder, ccoyle, JacquesCousteau and 1 other
-
4
-
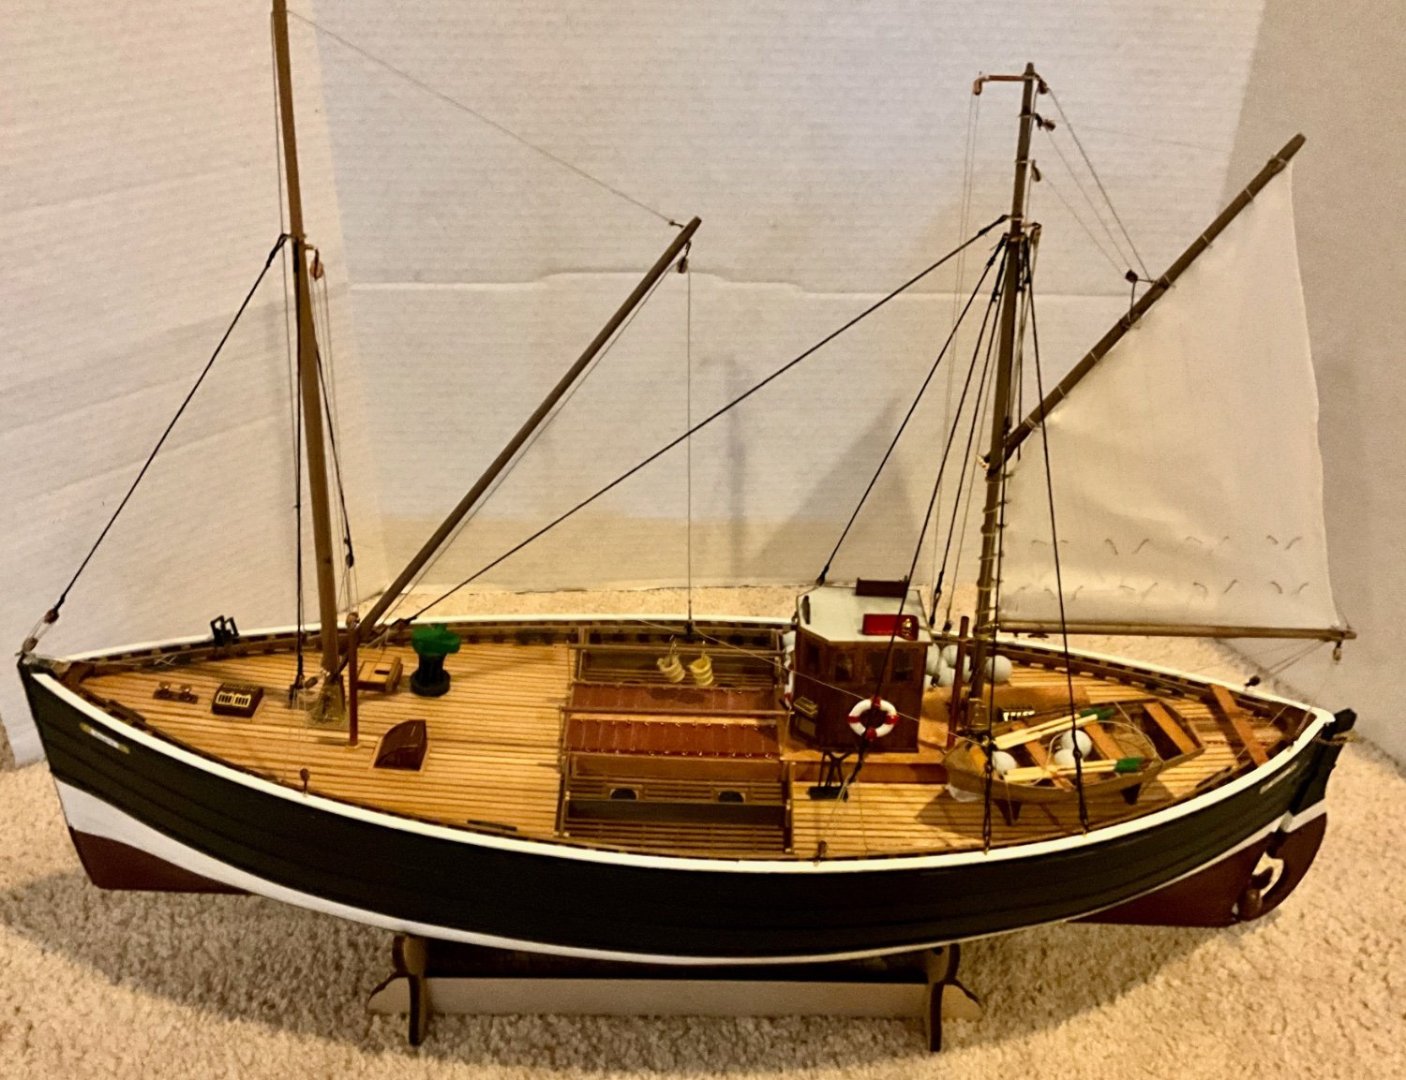
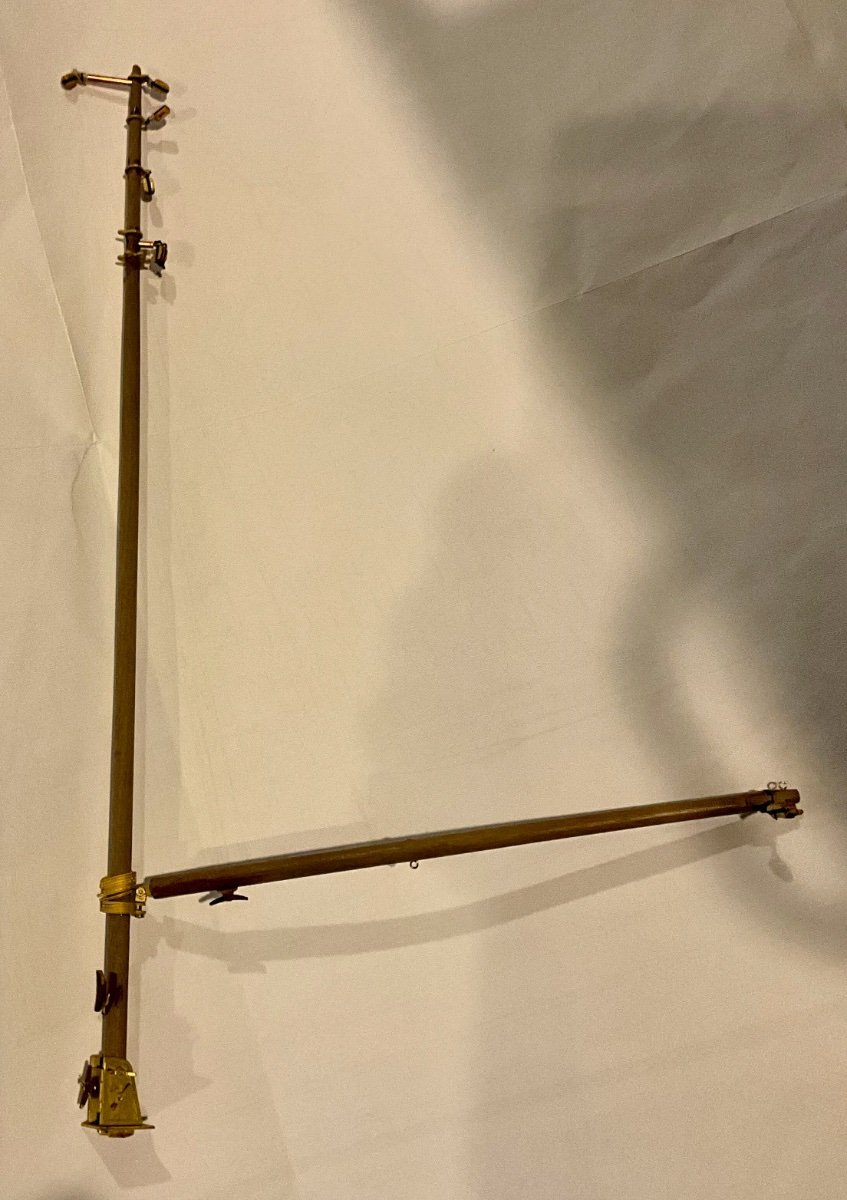
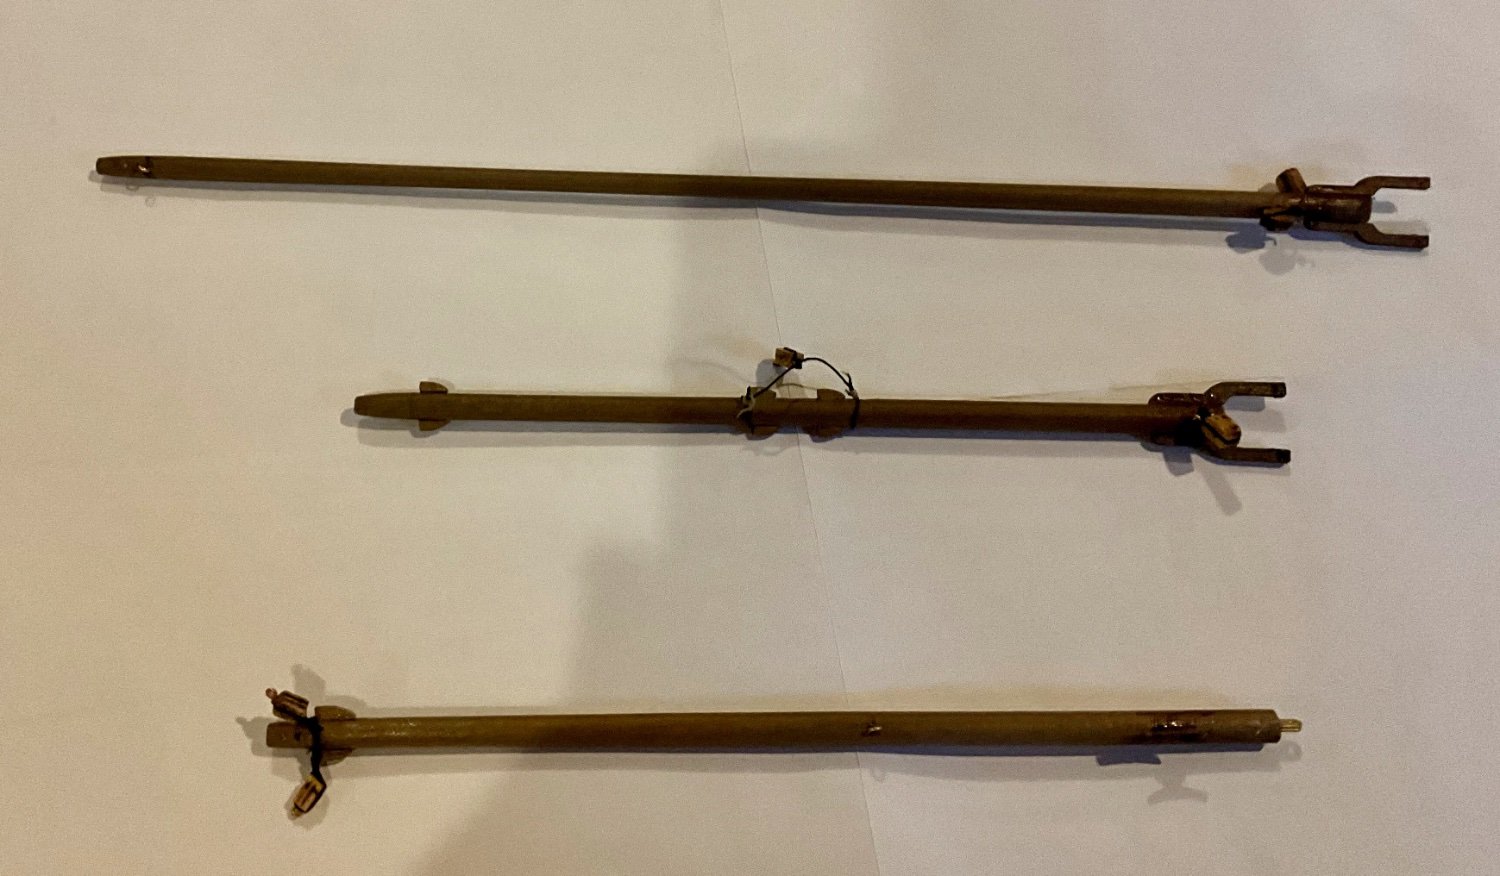
Completed derrick boom for foremast and upper and lower booms for the main mast.
-
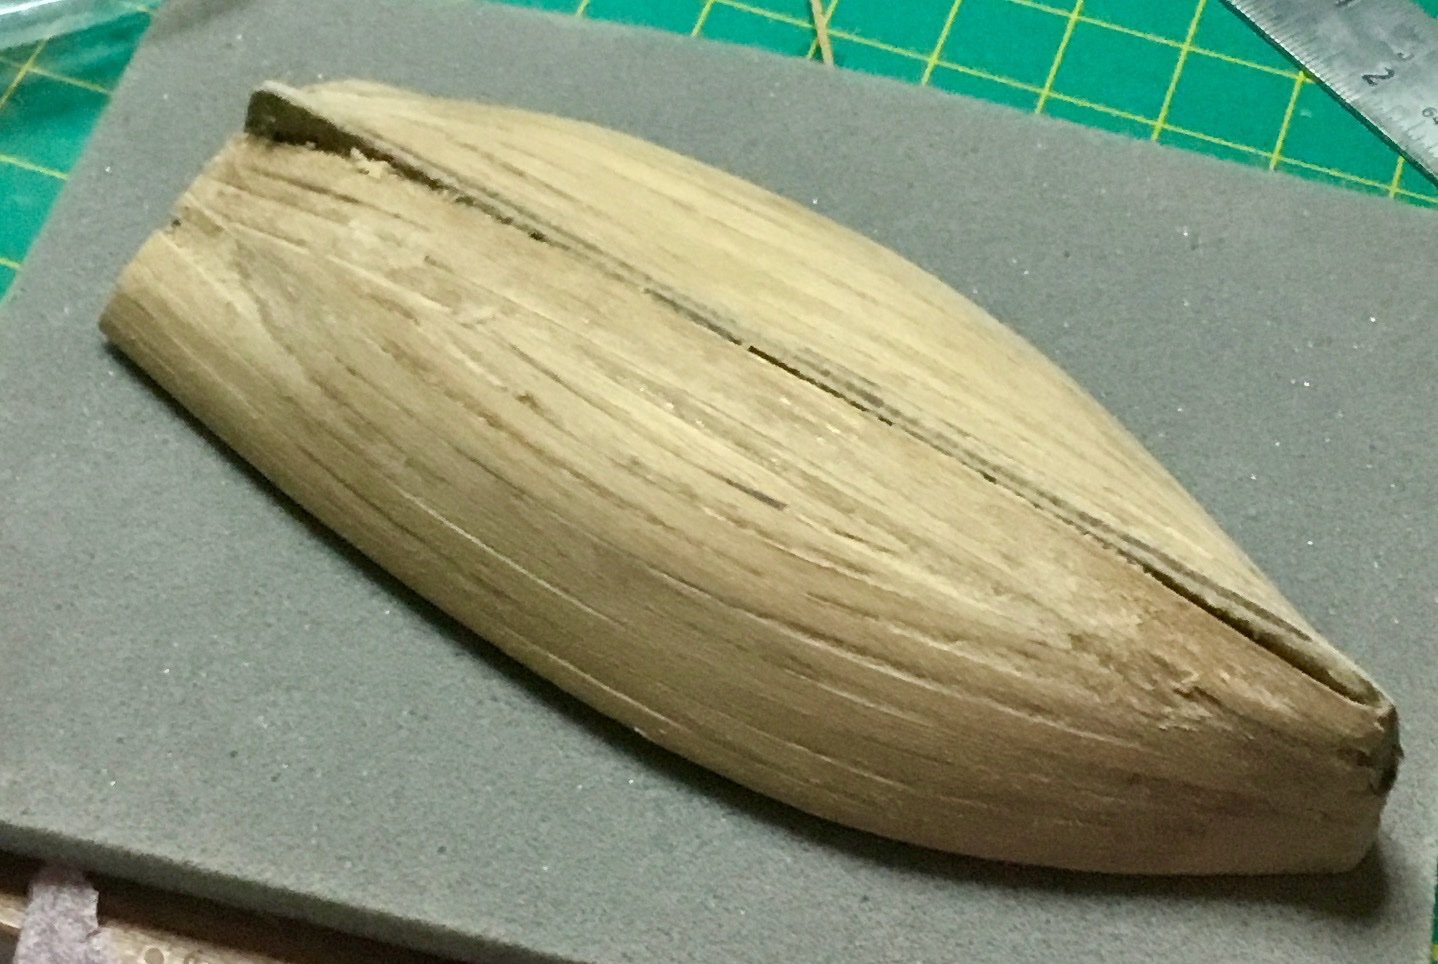
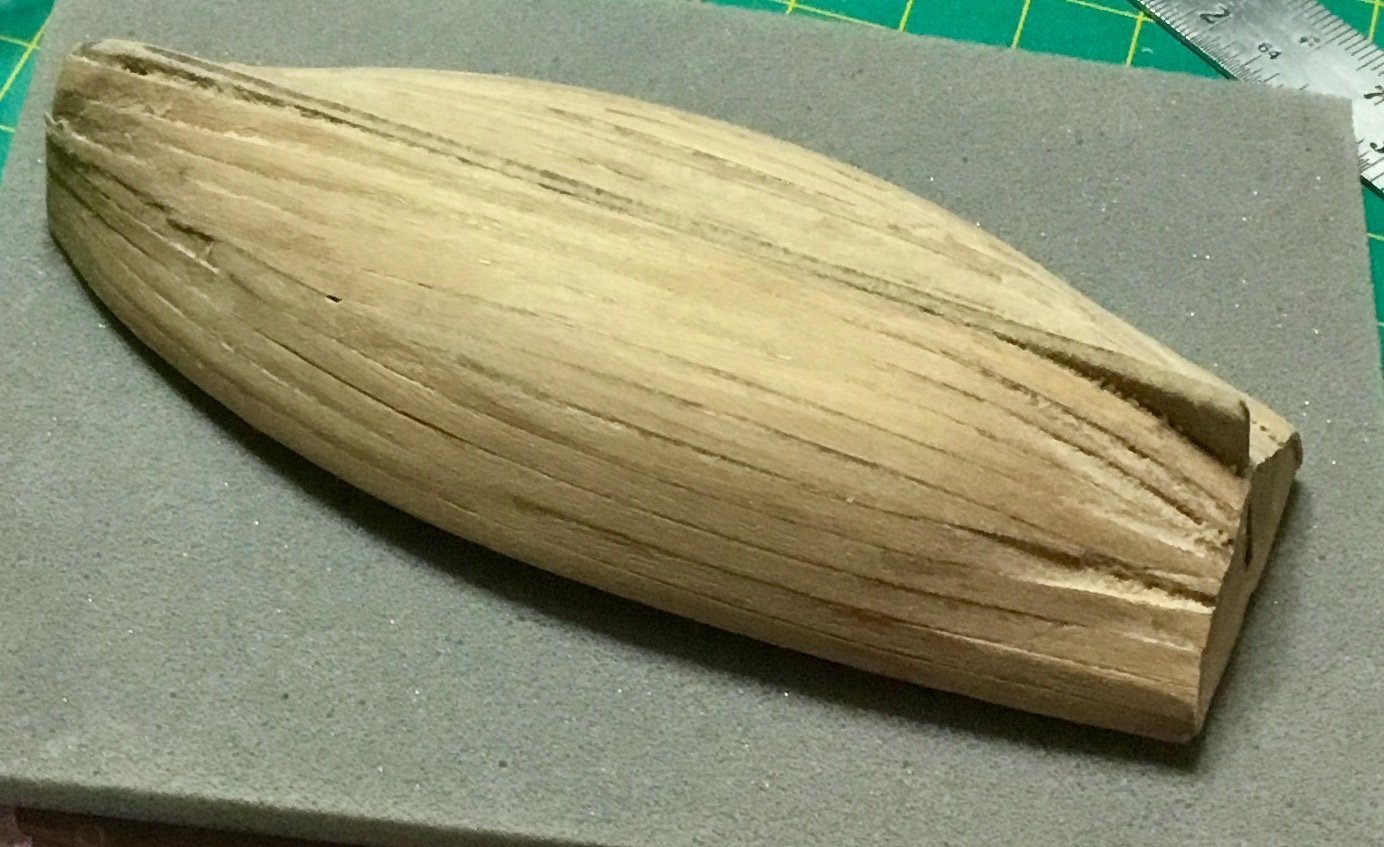
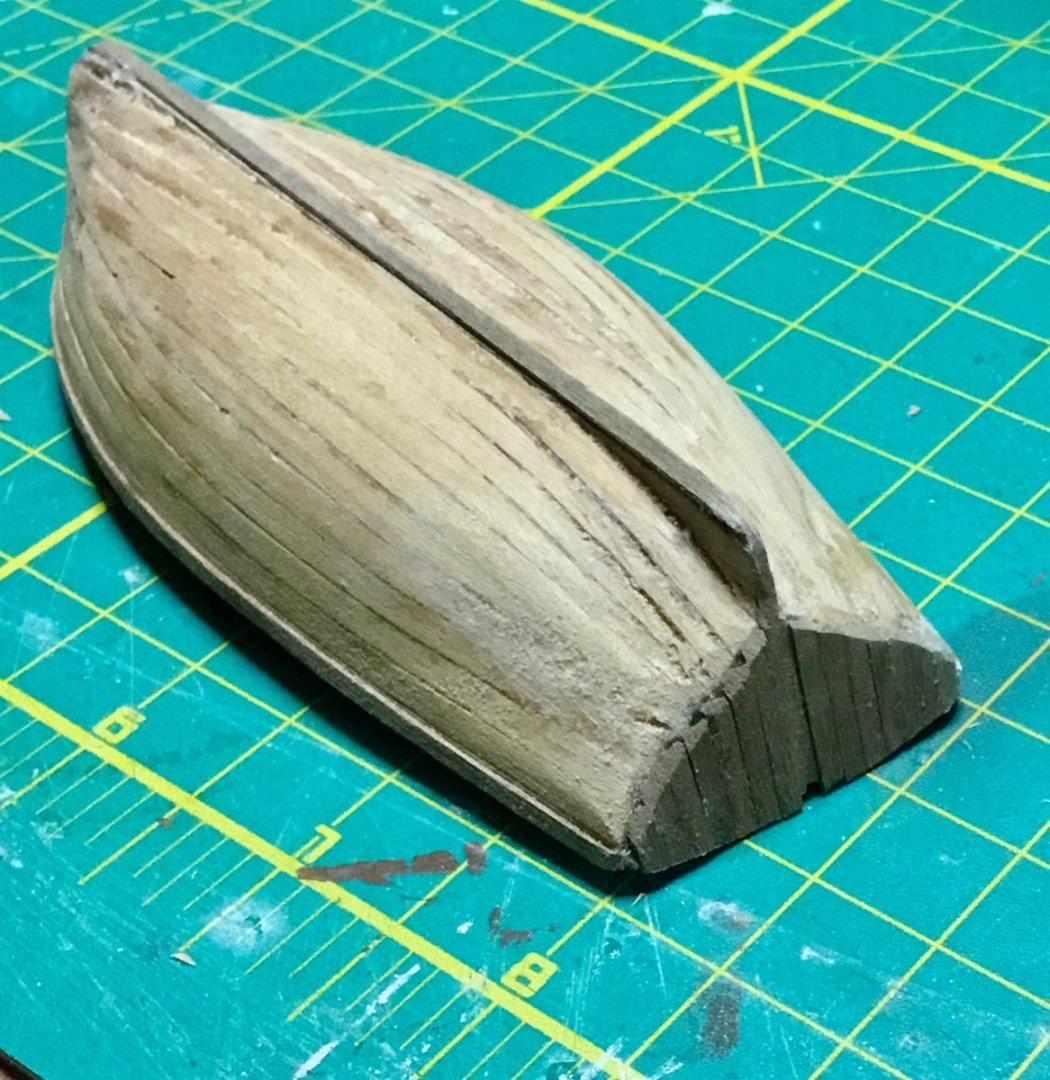
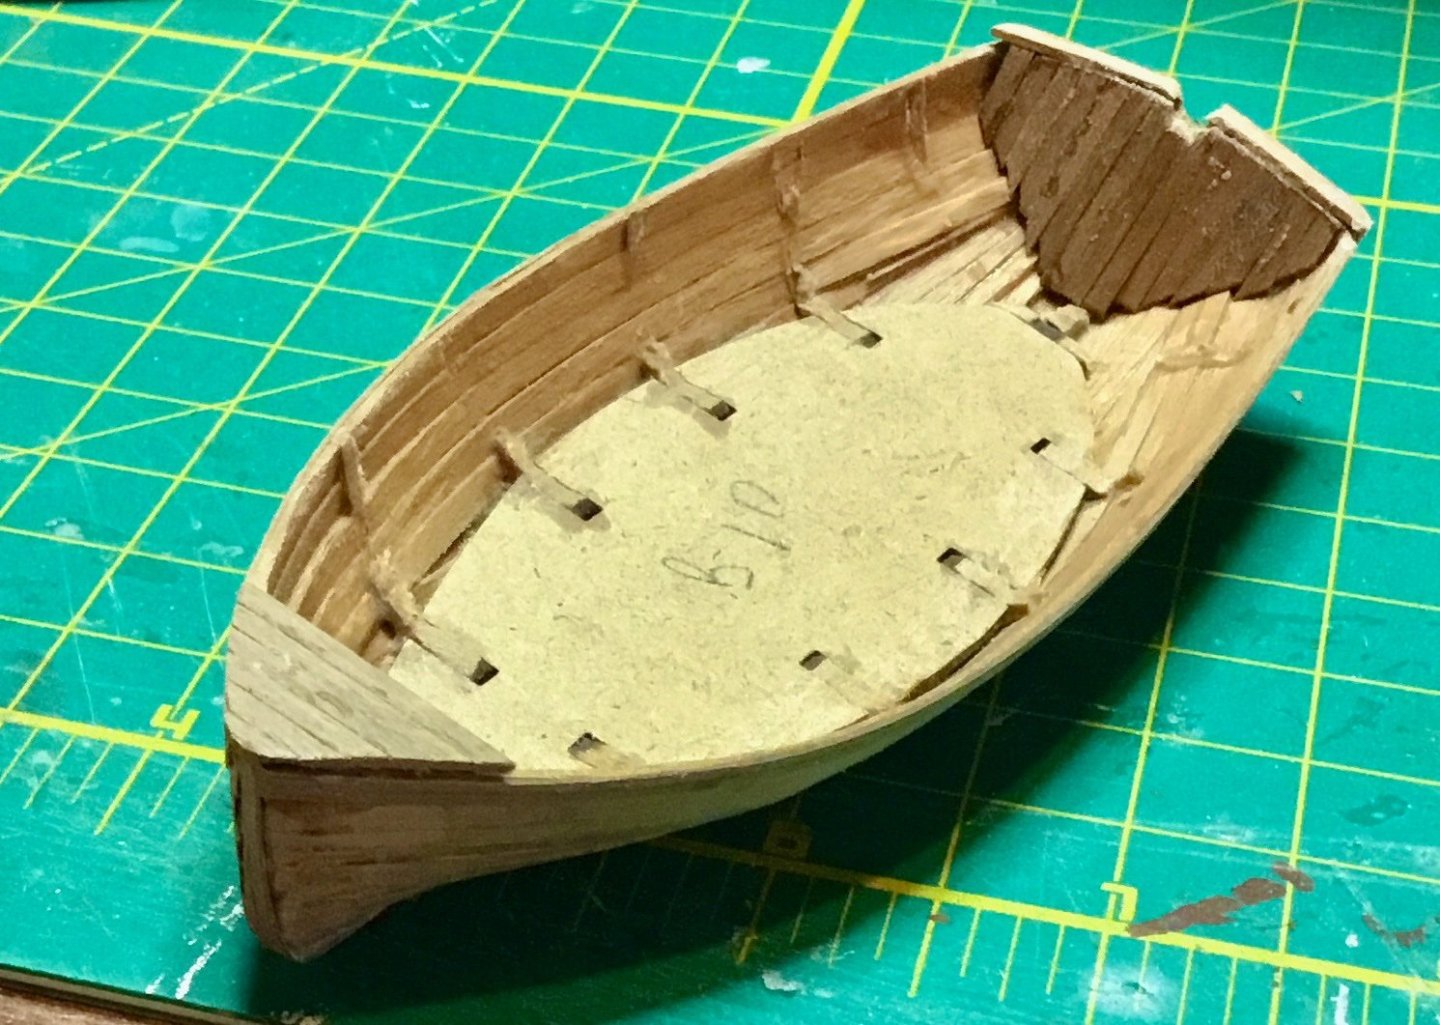
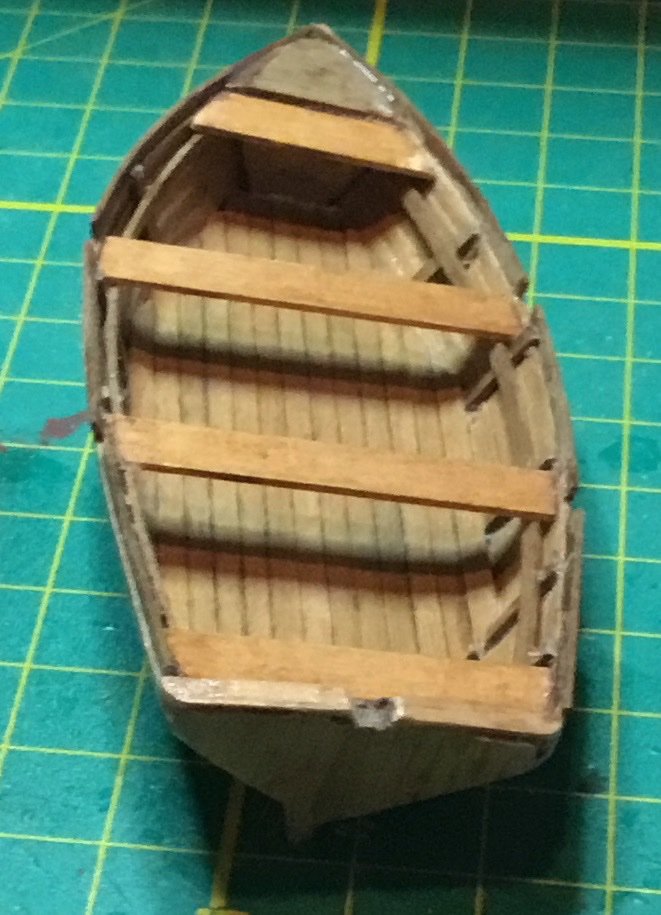
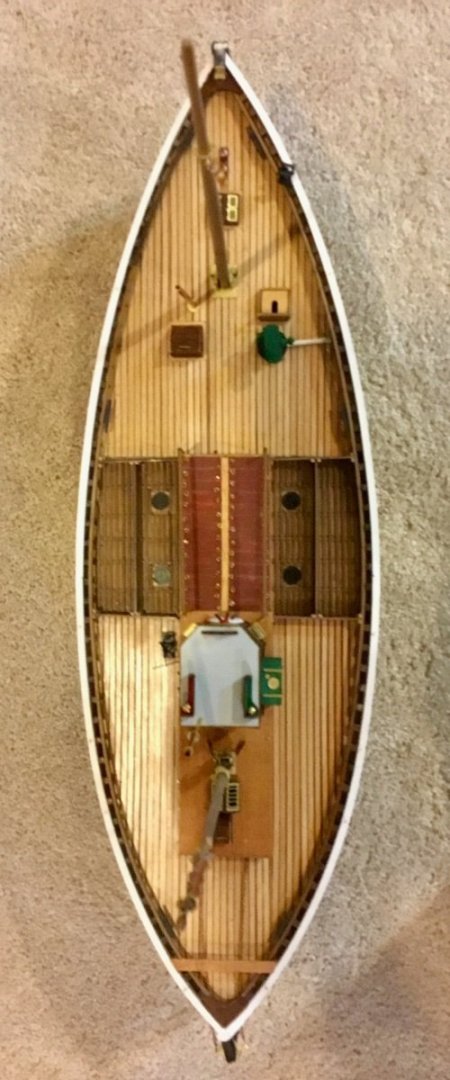
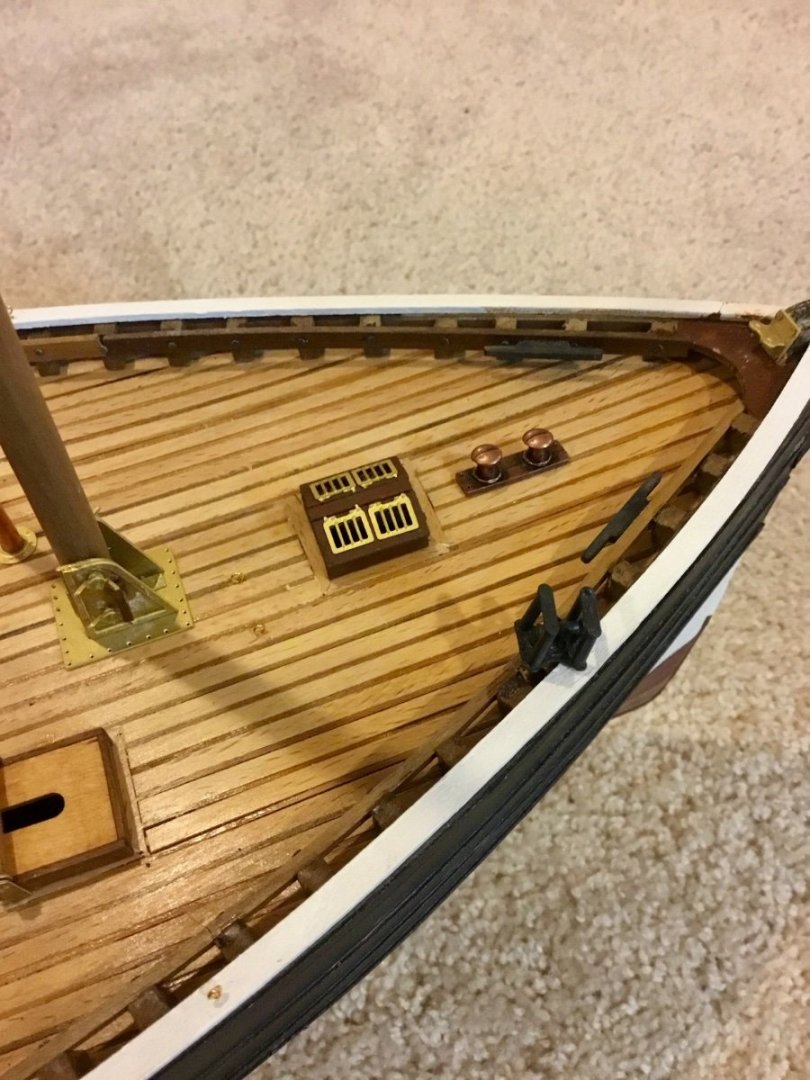
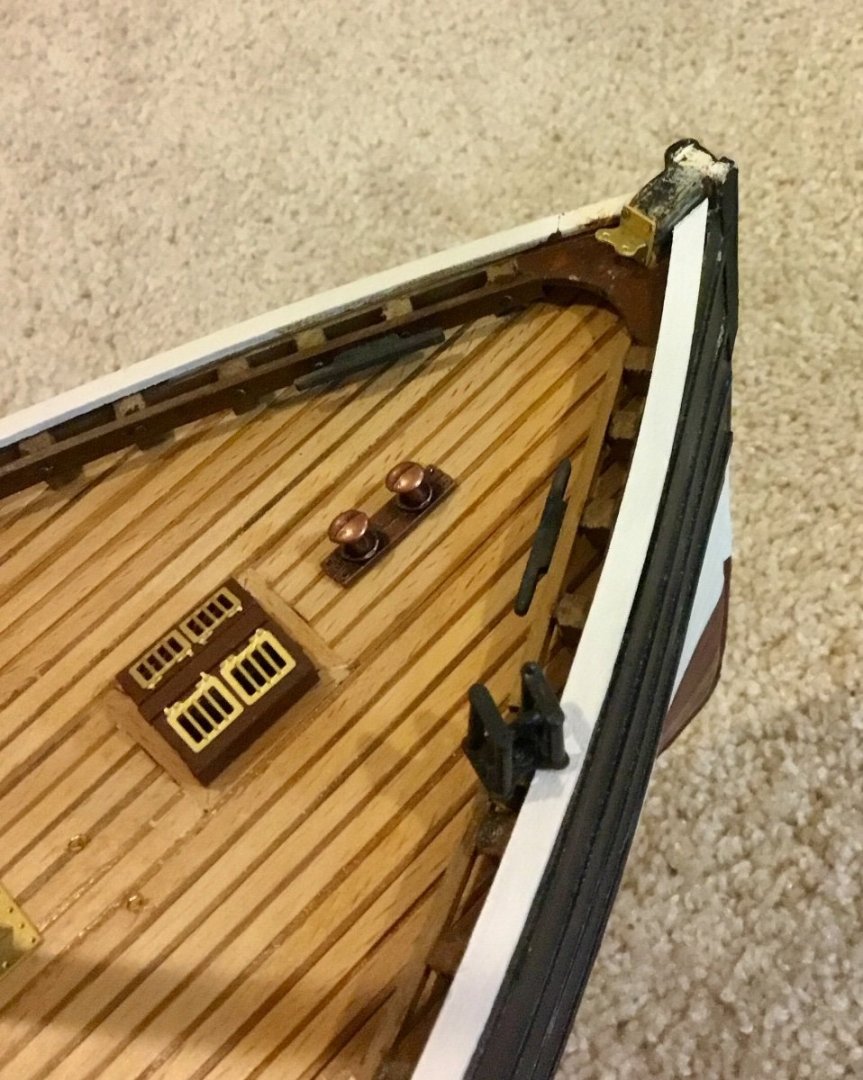
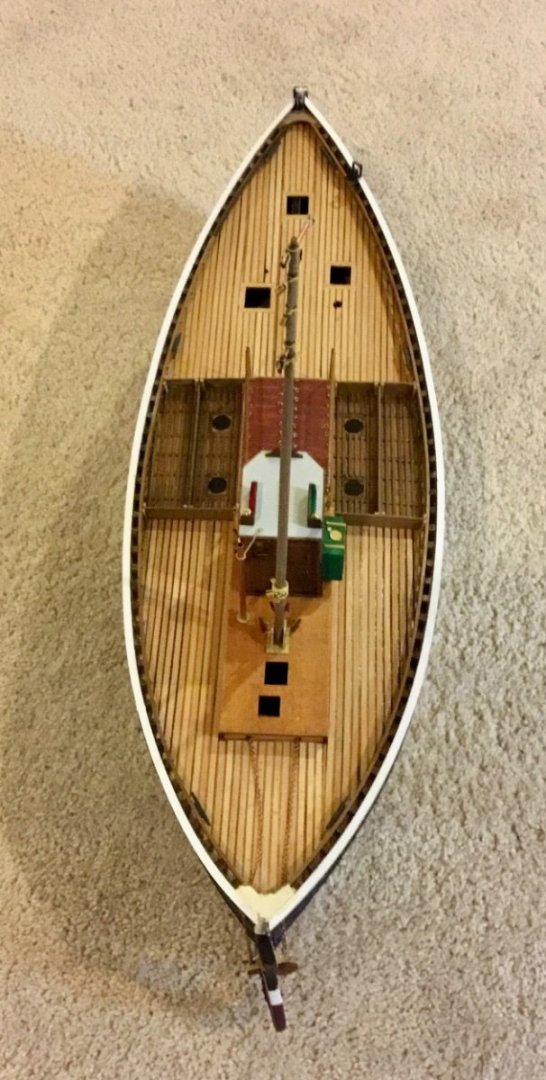
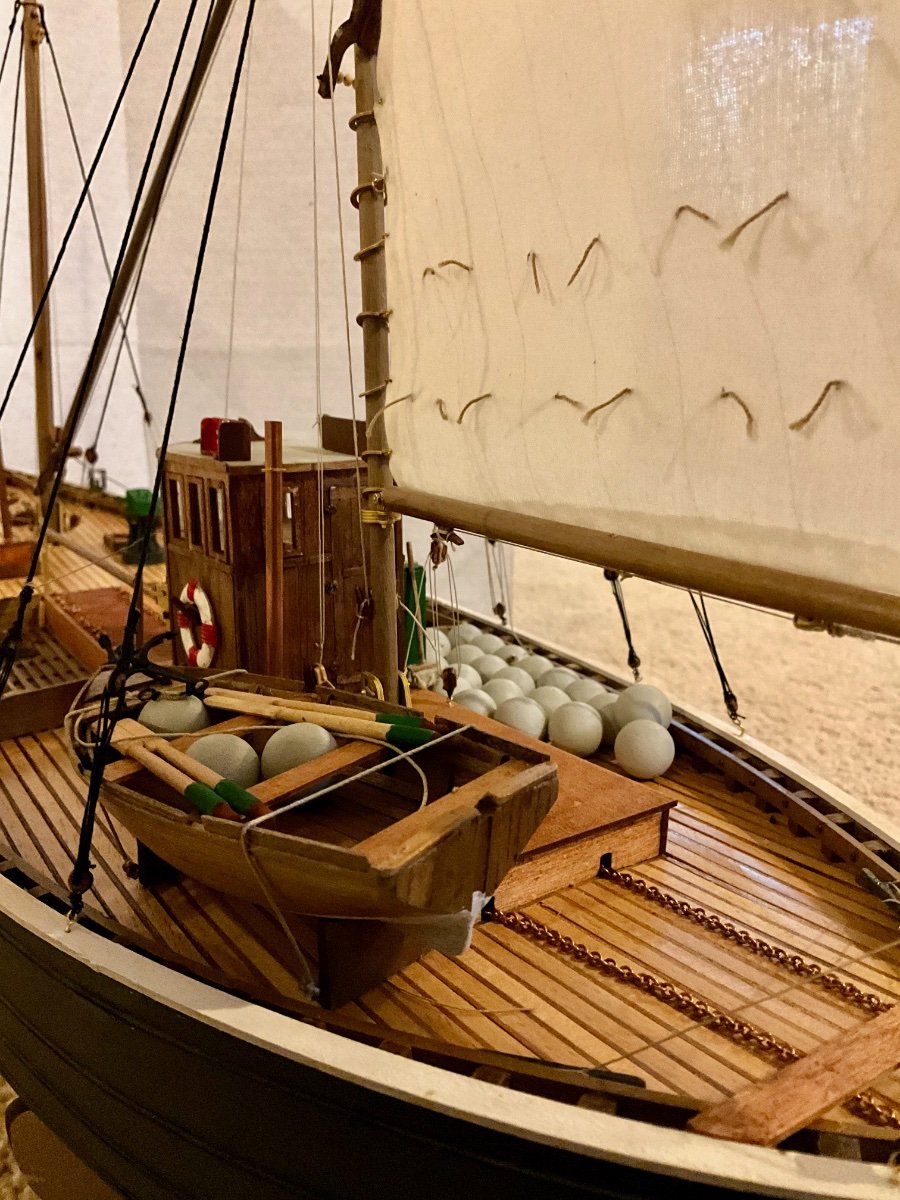
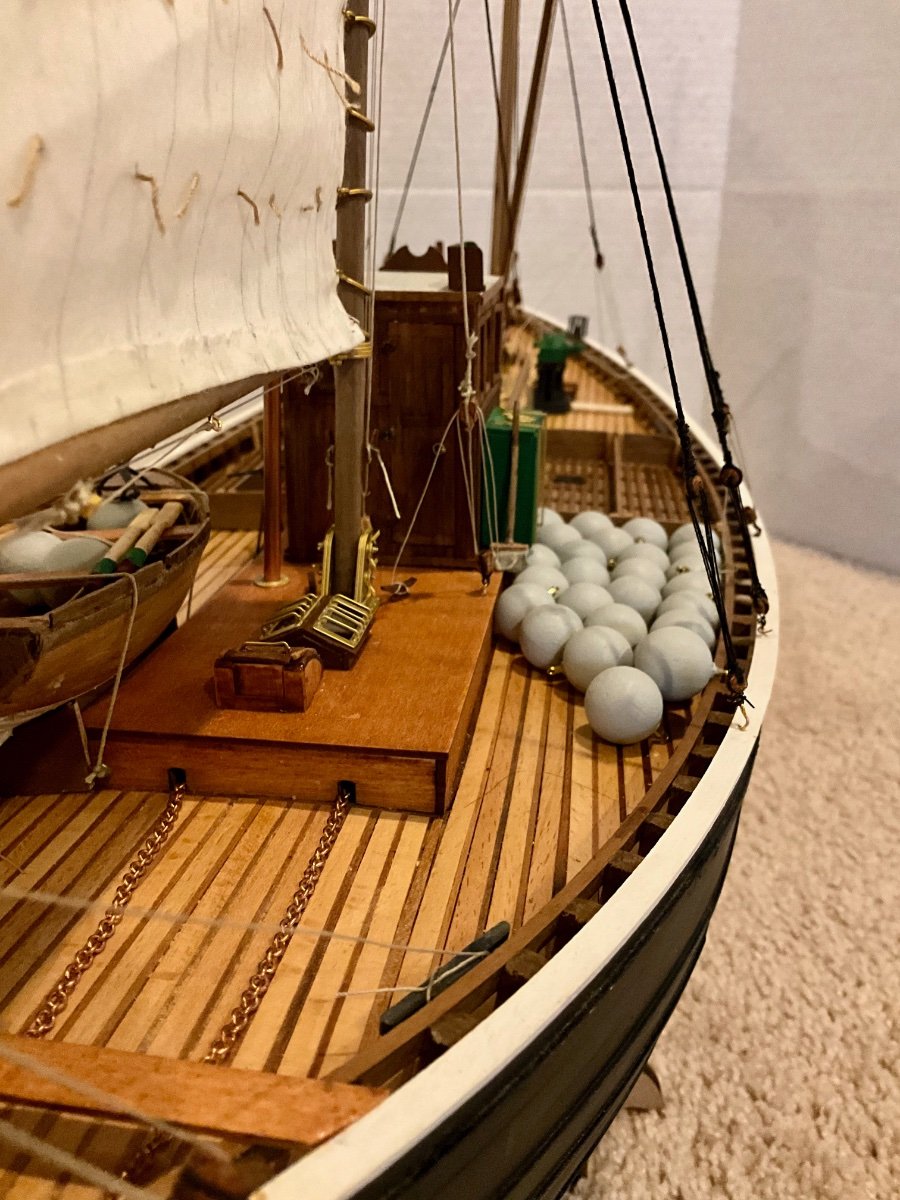
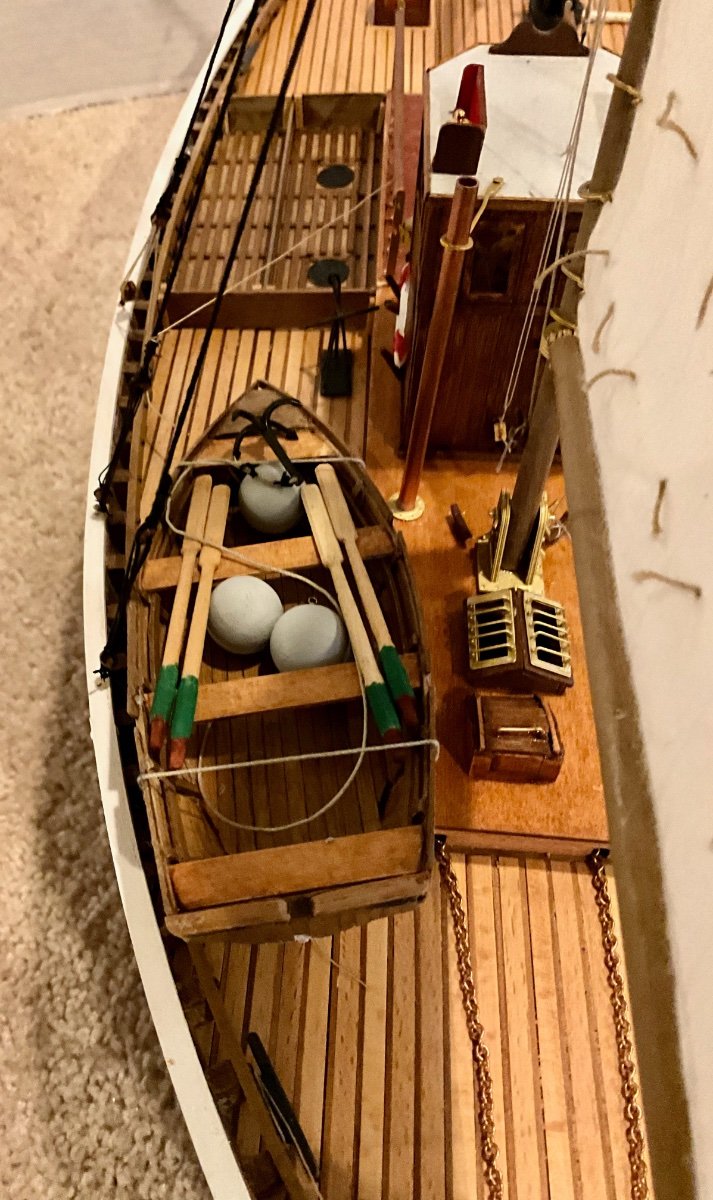
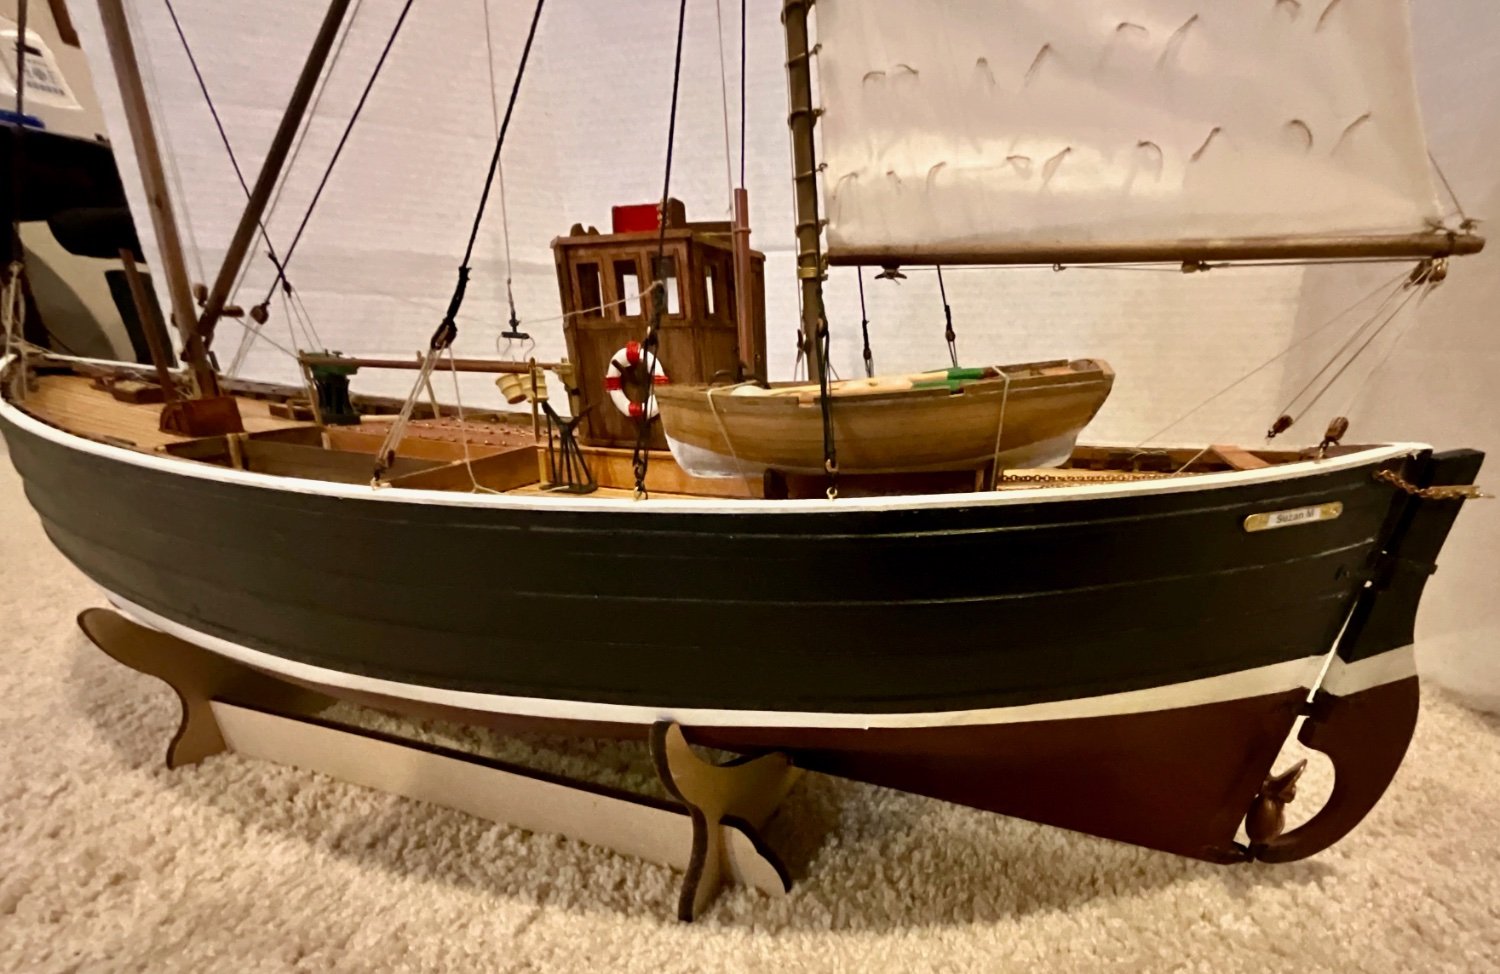
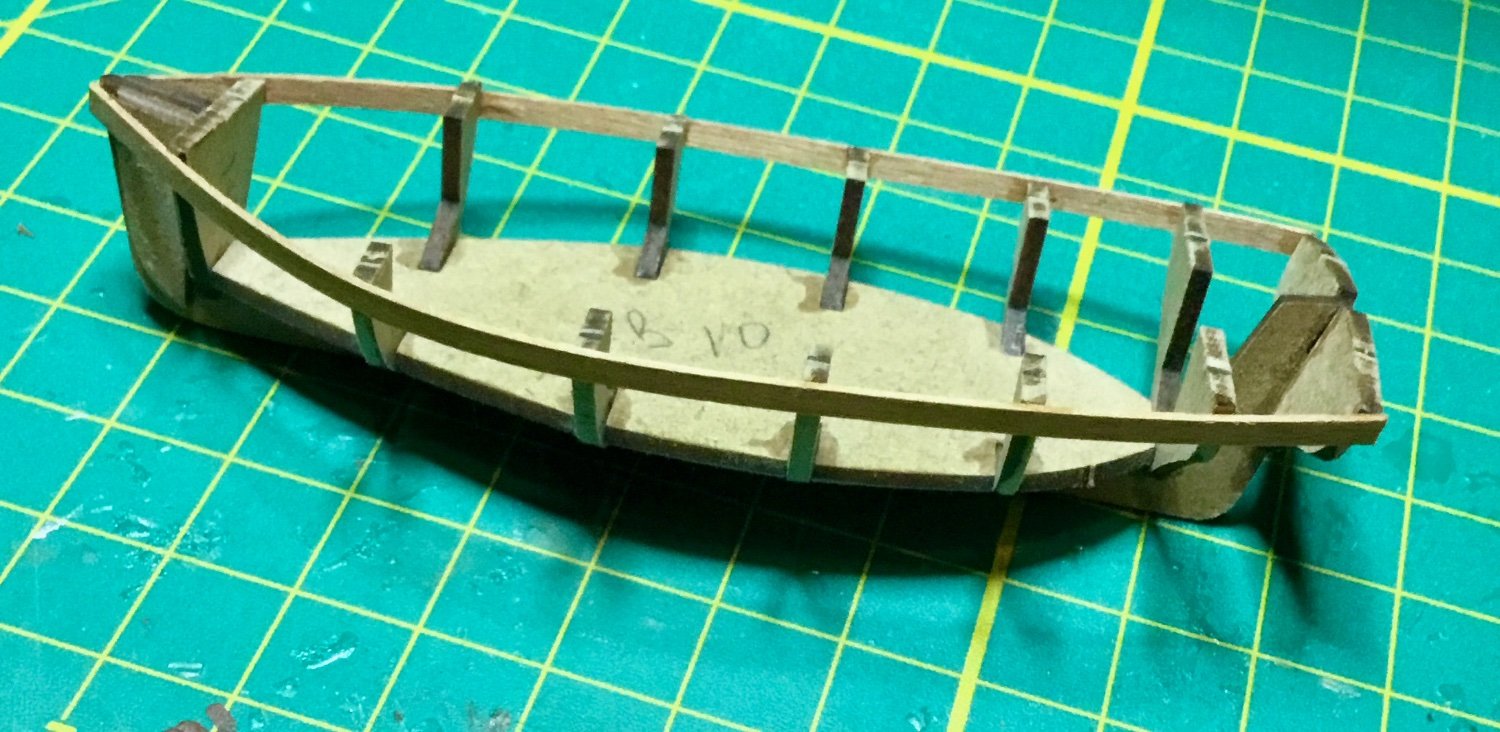
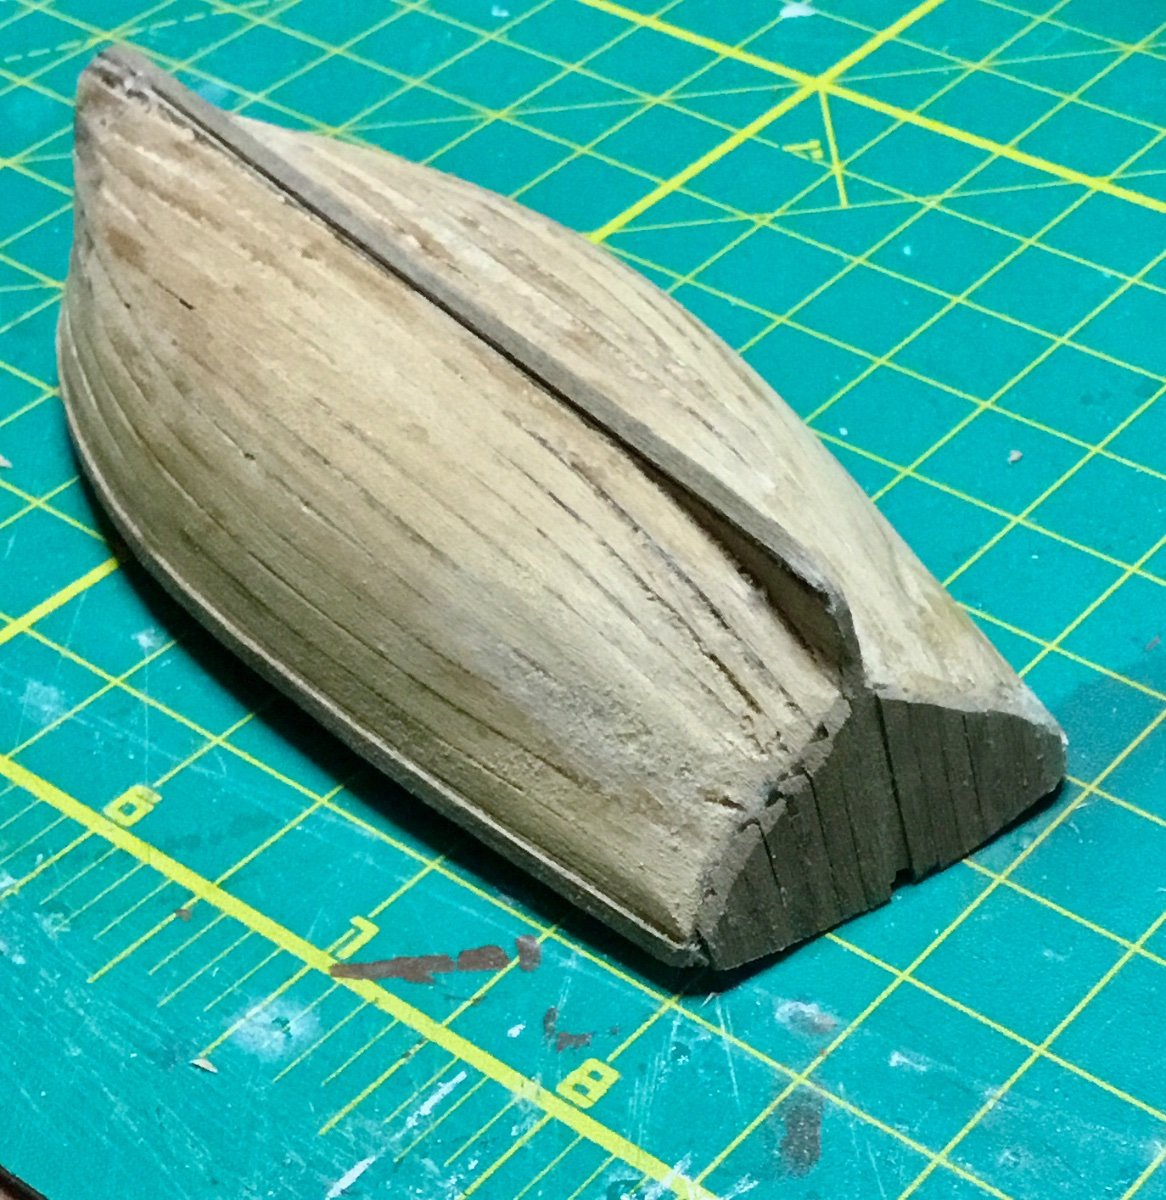
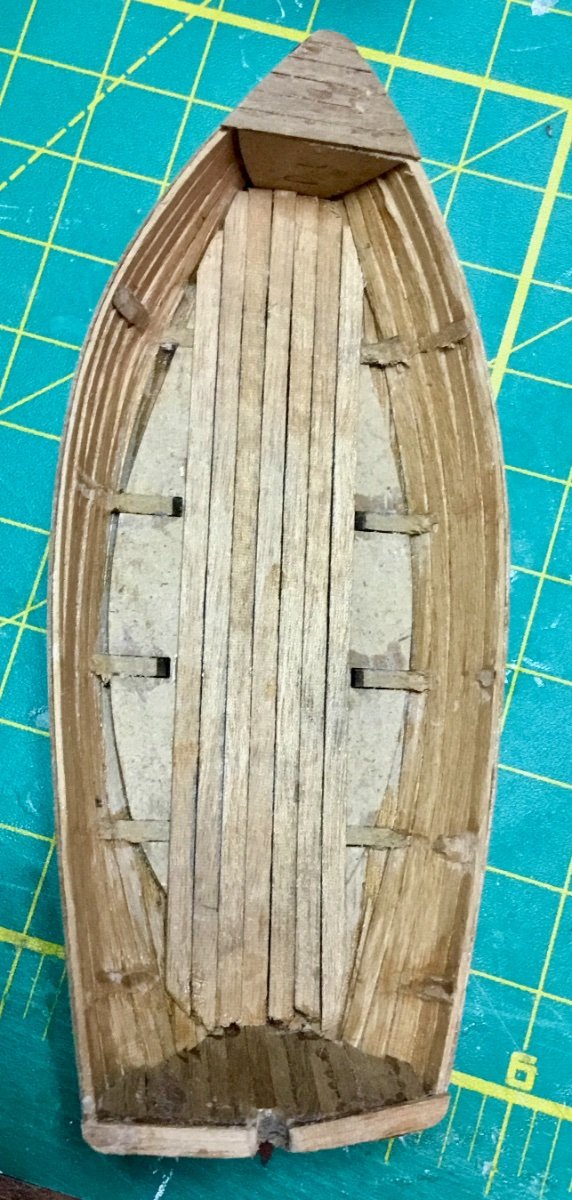
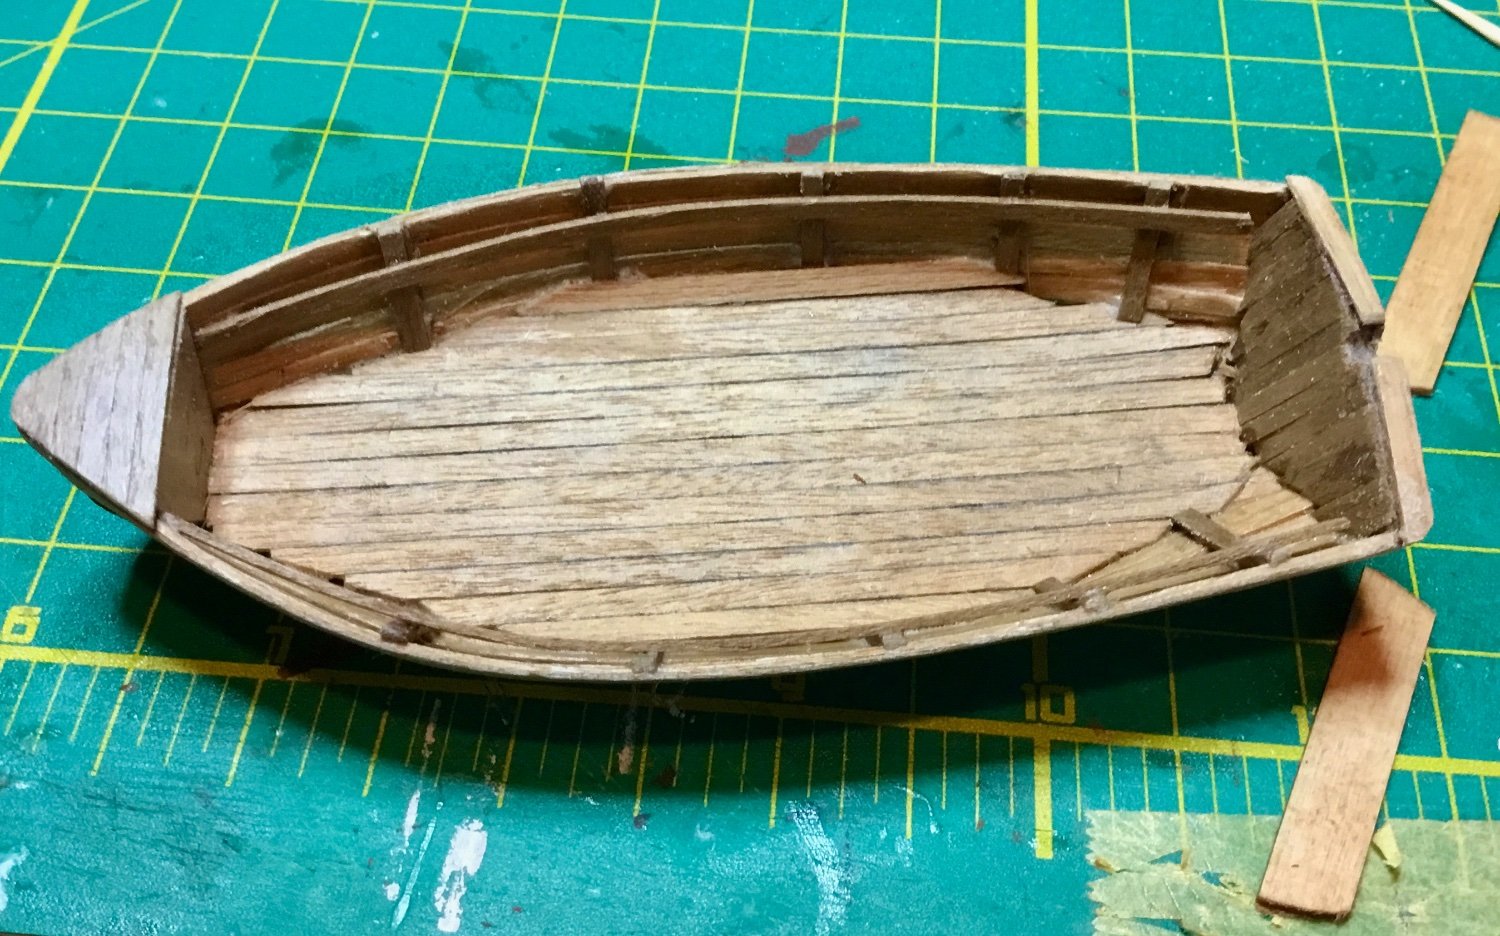
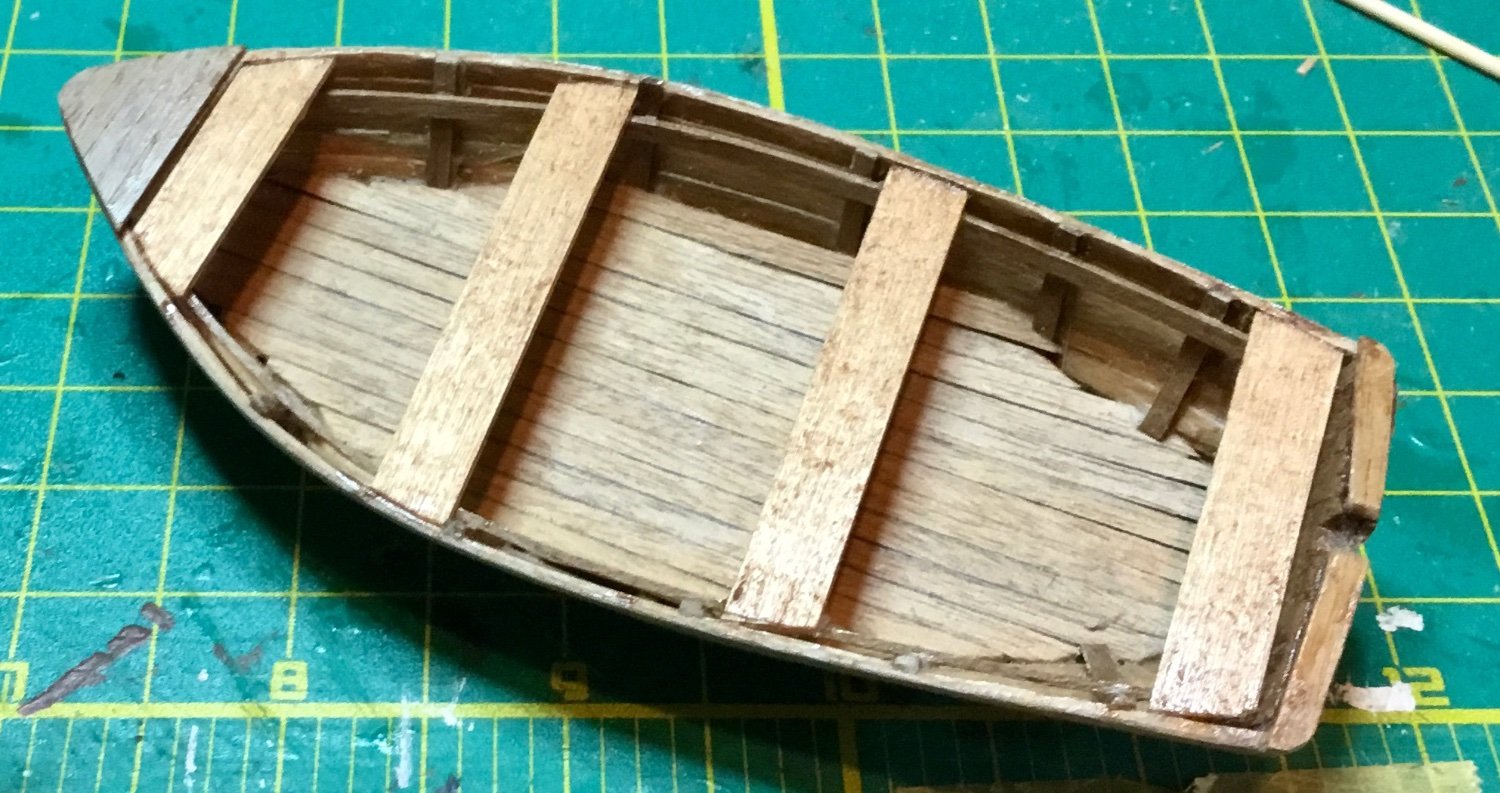
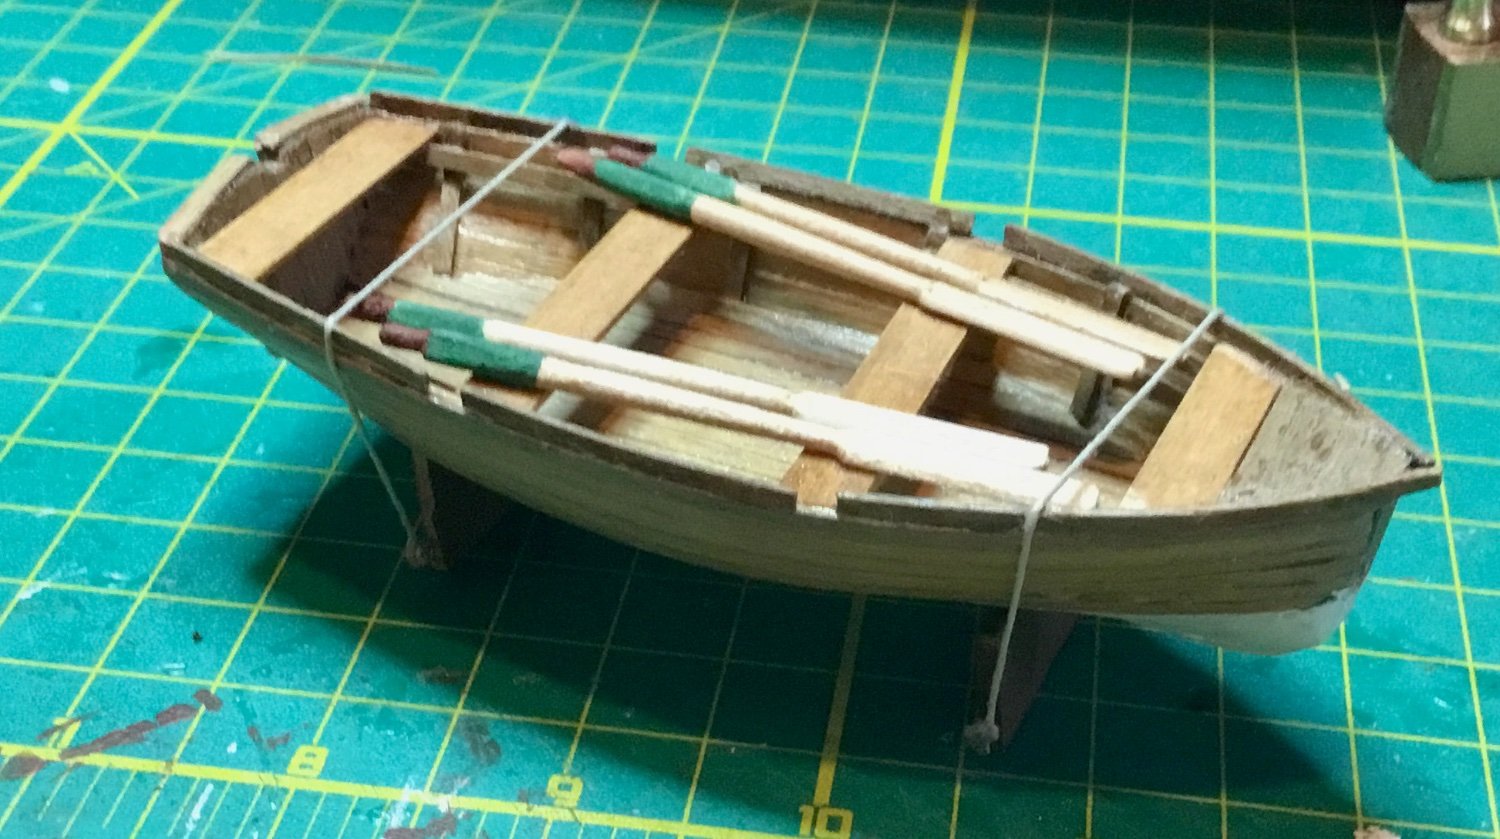
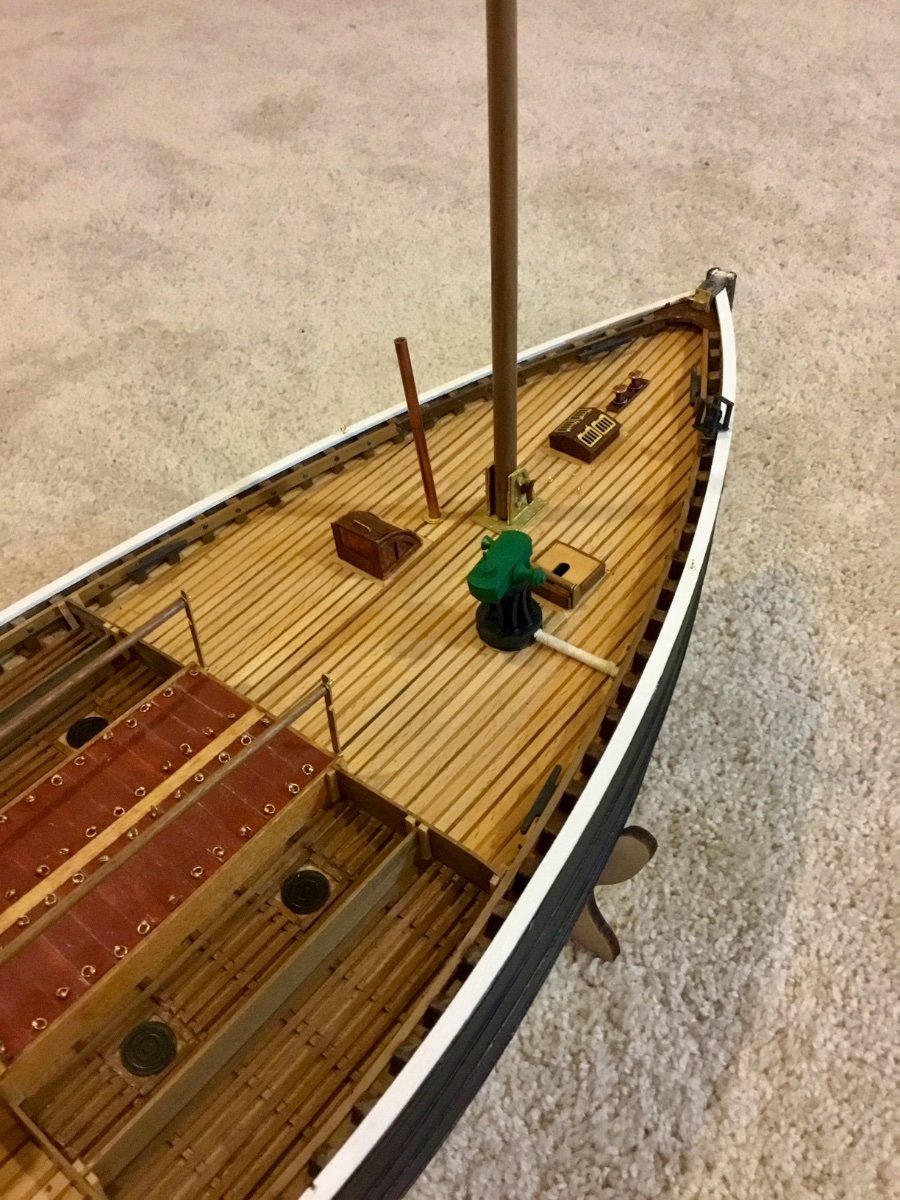
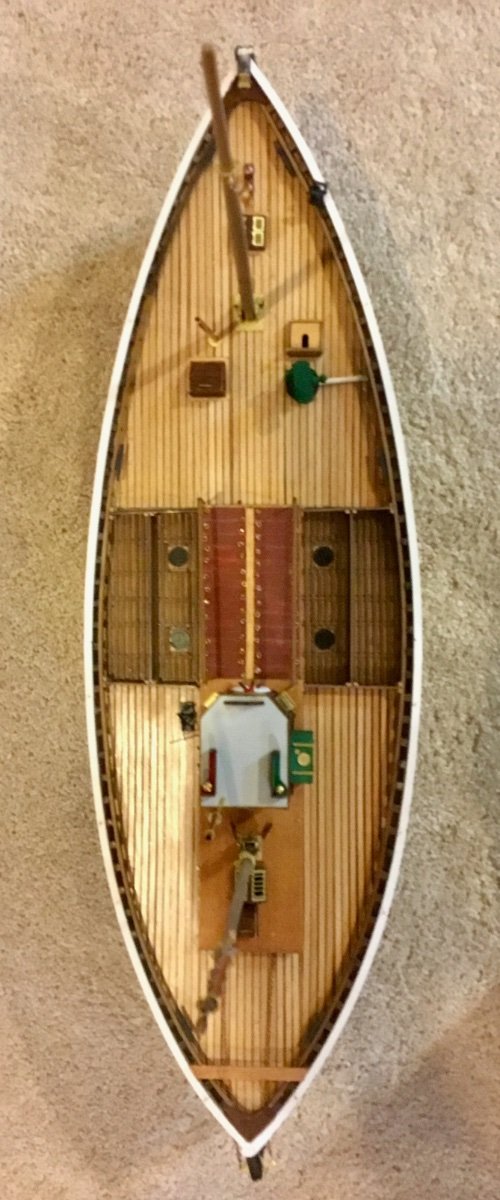
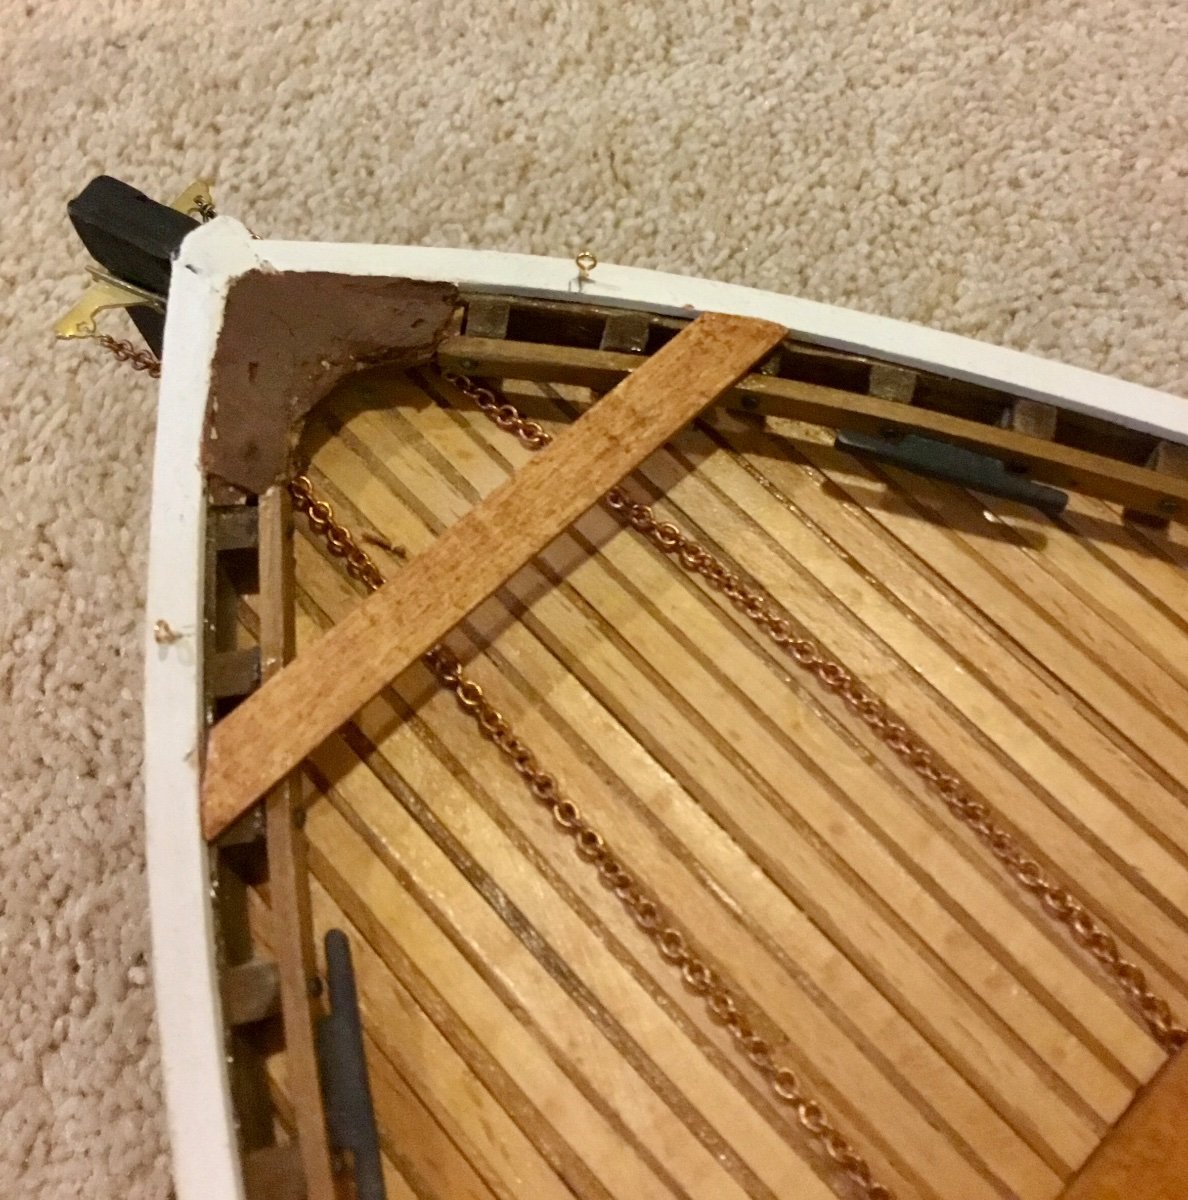
Progress on building the life boat has been very slow. For the last month I've had health related issues caused related to my medications for Parkinson's disease, etc. But at last the life boat is finished. It was equivalent to a mini kit build in itself! Here are the results such as they are:
.thumb.jpeg.edb75e38050af43dea58fbb54dcb13be.jpeg)
.thumb.jpeg.d71723686f4aace74b4e7a45e2445a63.jpeg)
.thumb.jpeg.baaddaf5ede4612b36cc05d7410a938a.jpeg)


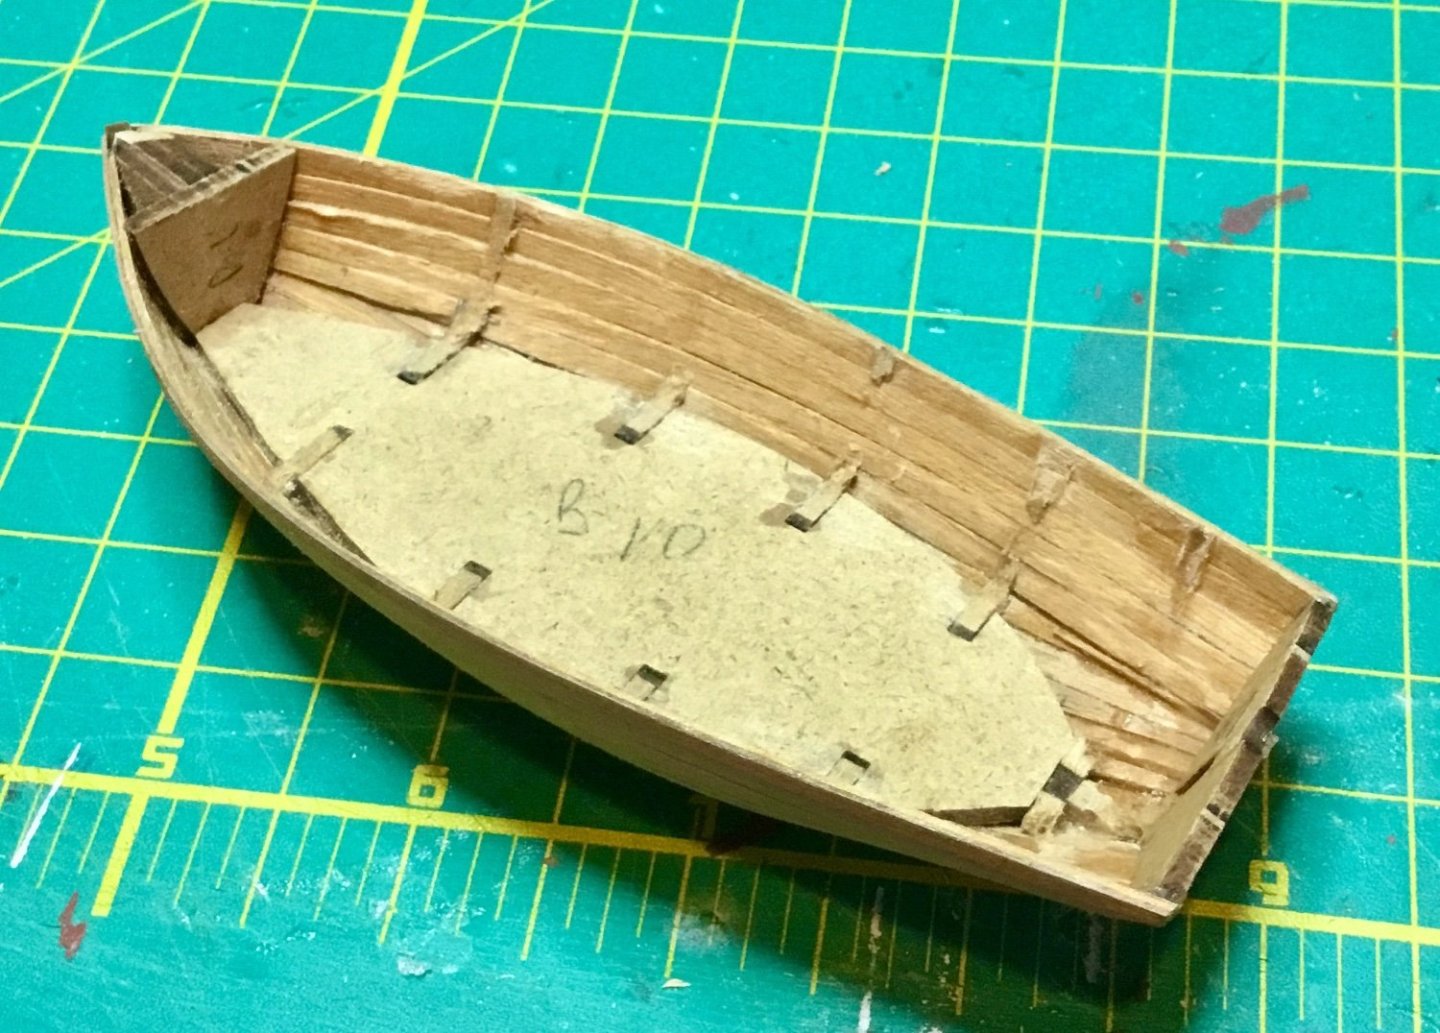


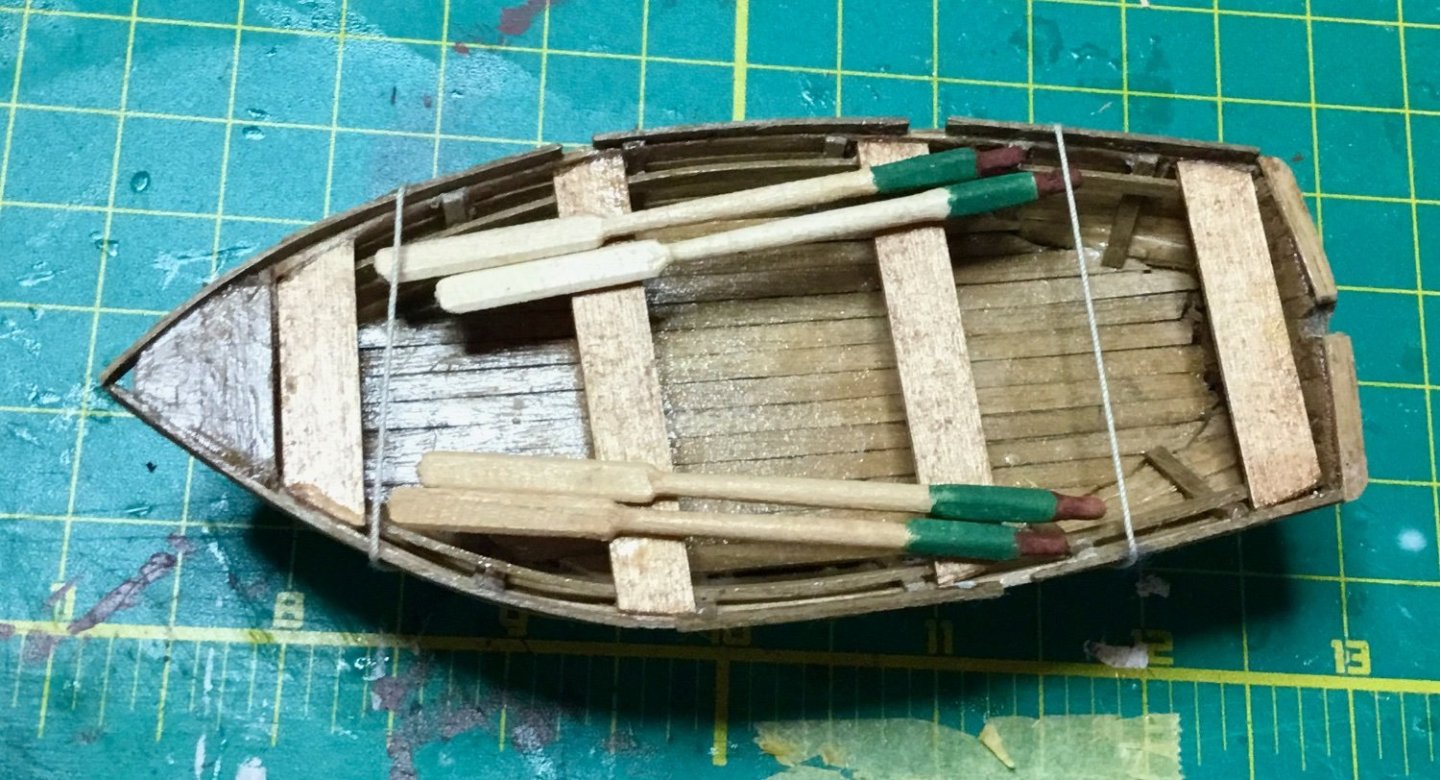
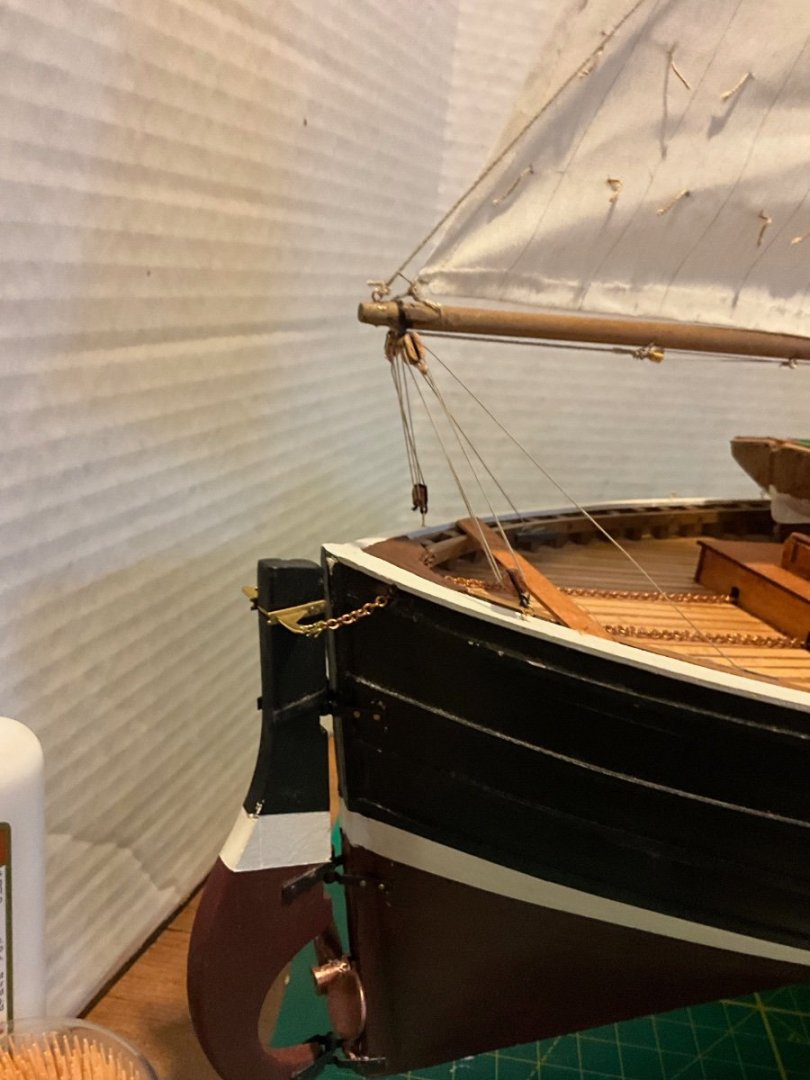
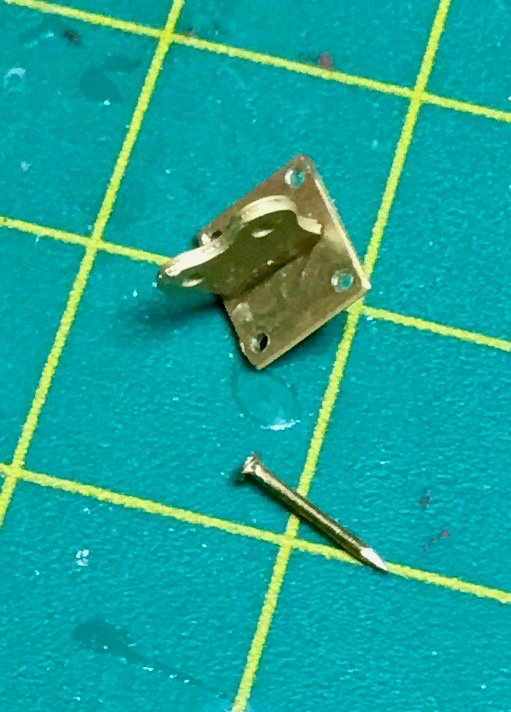
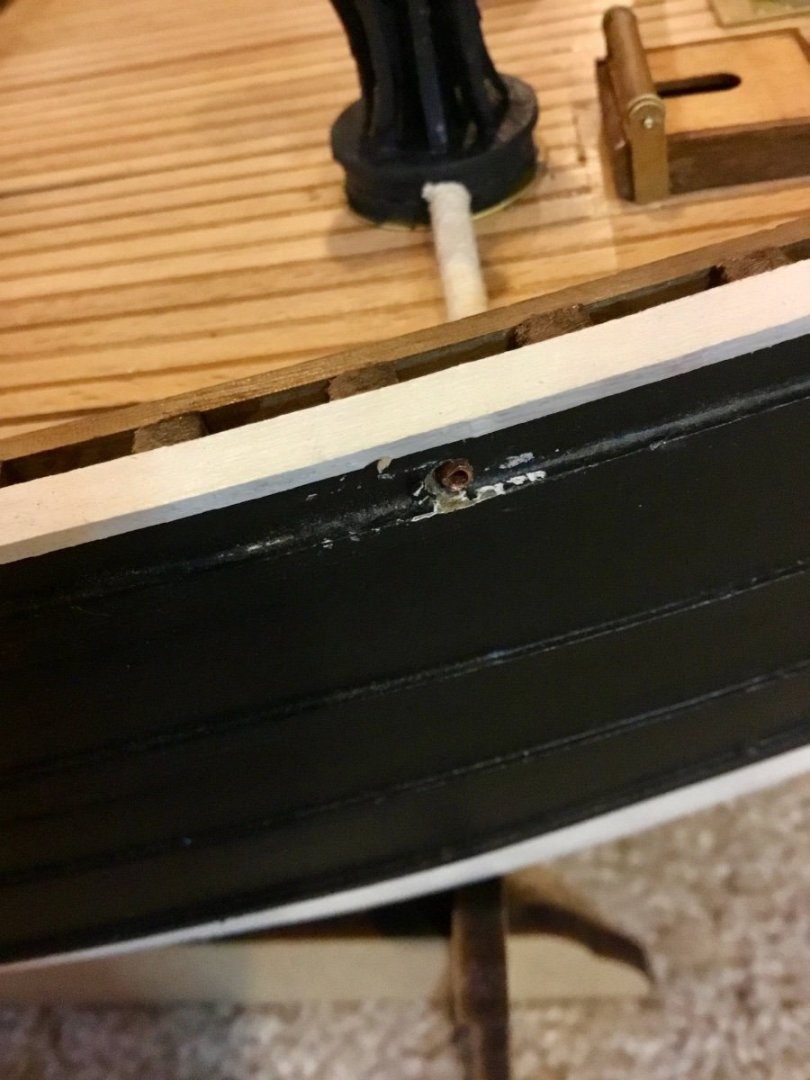
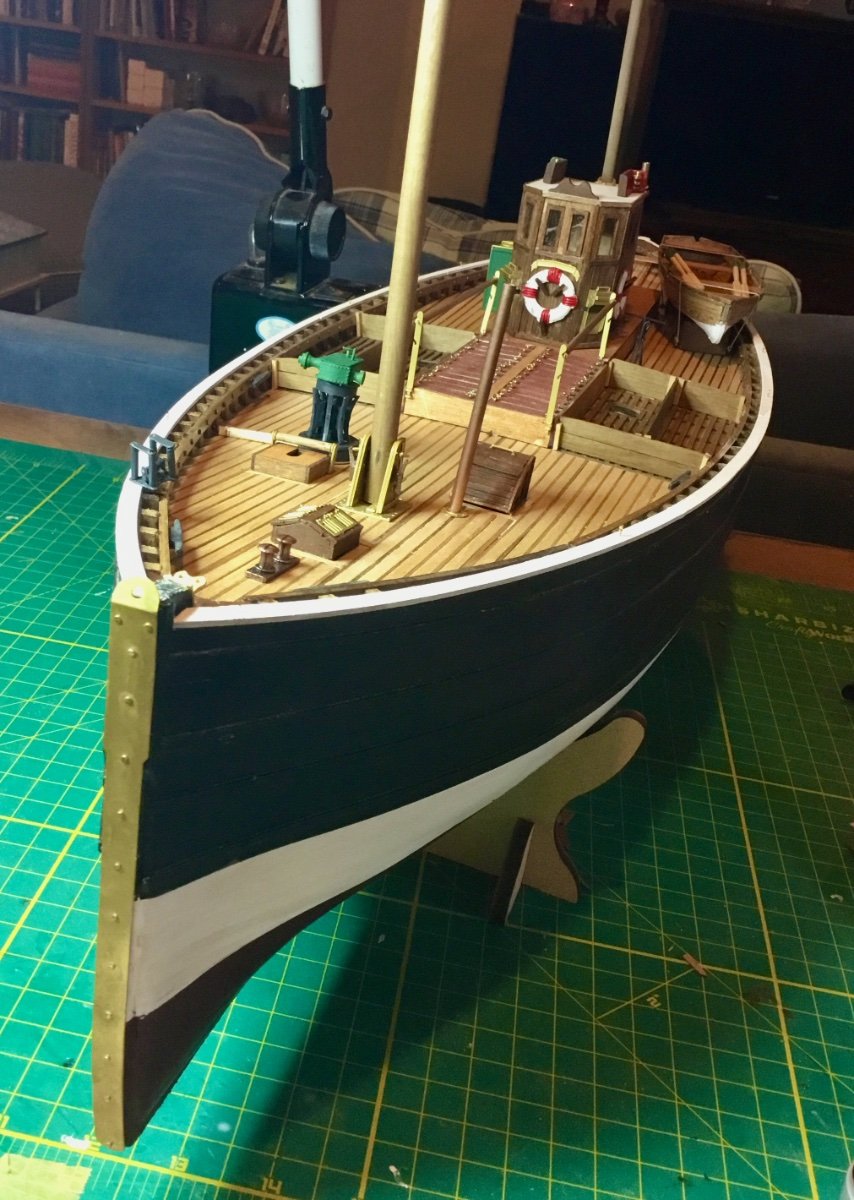
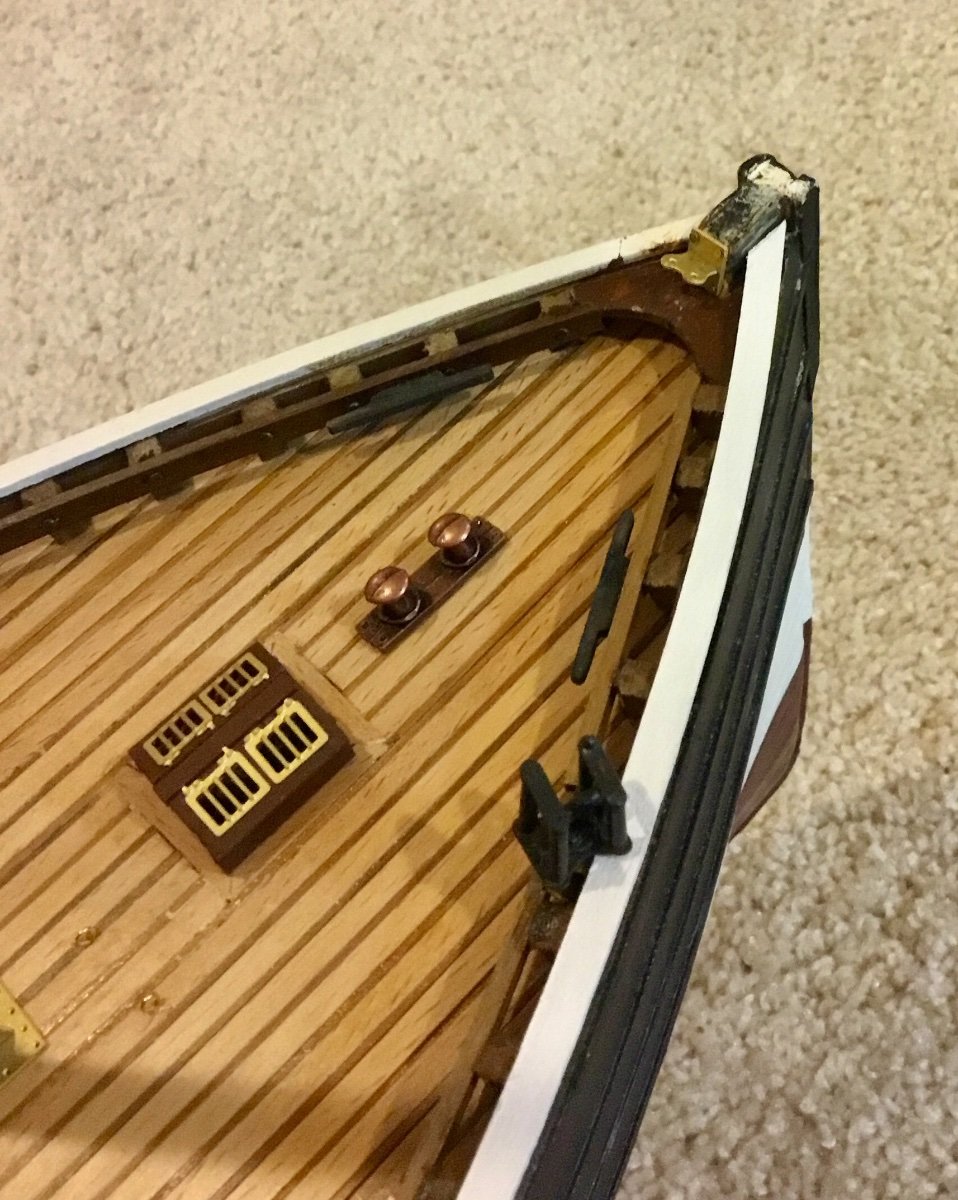
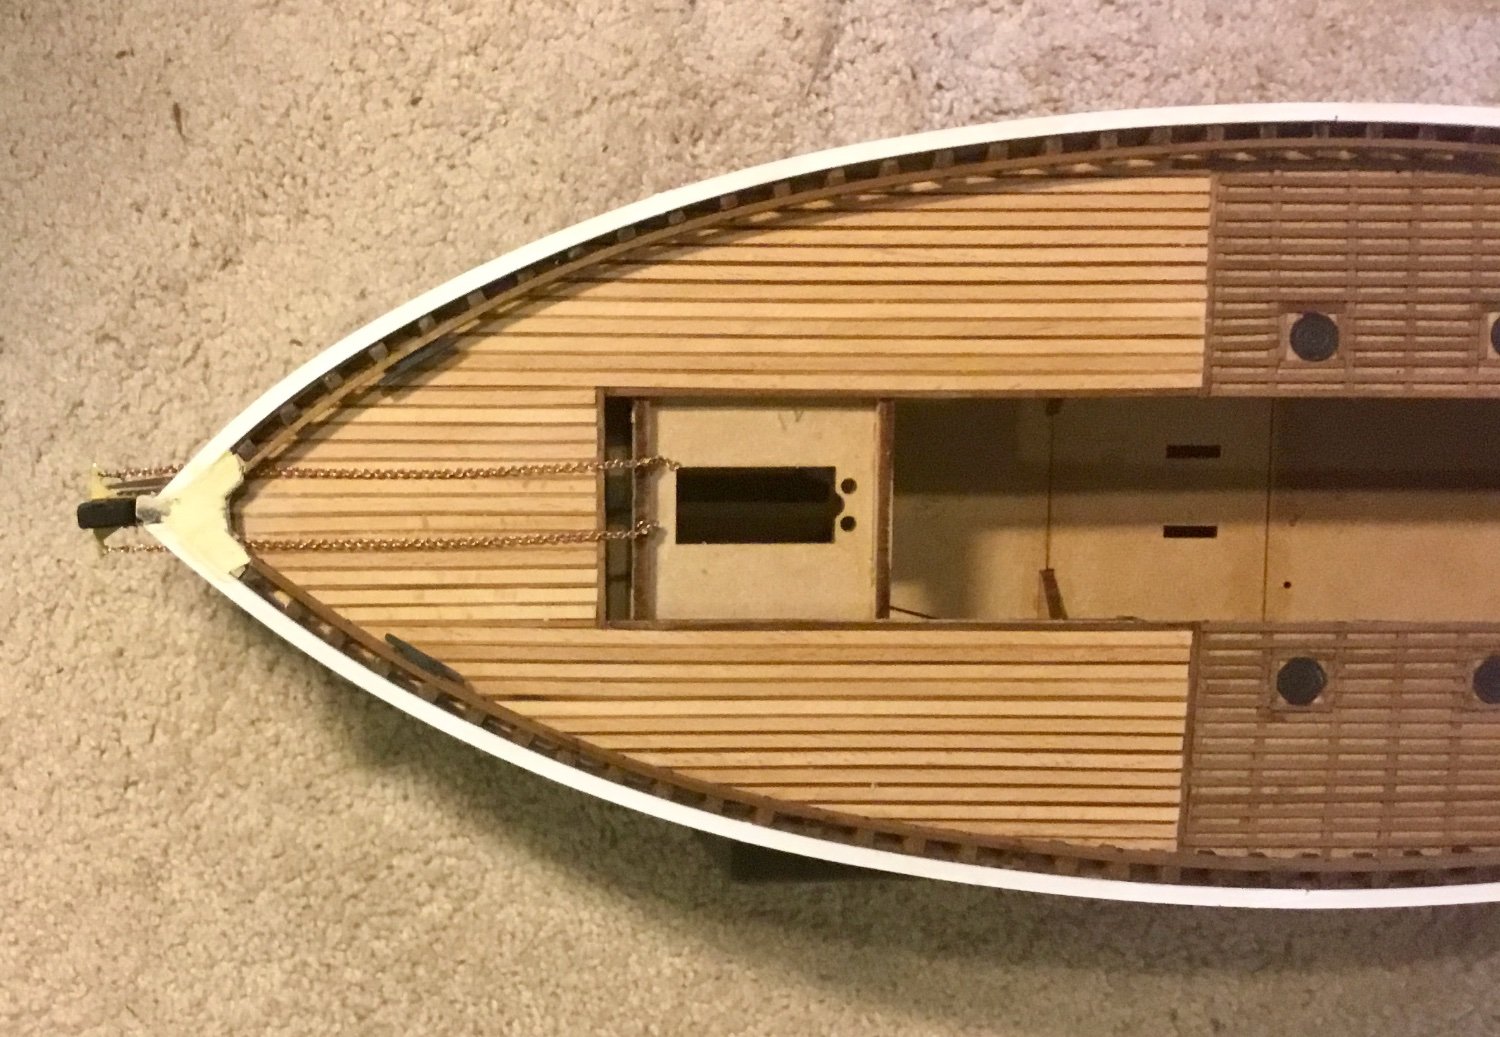
I then added the metal piece to the bow. (You can see the life boat on deck in the background.

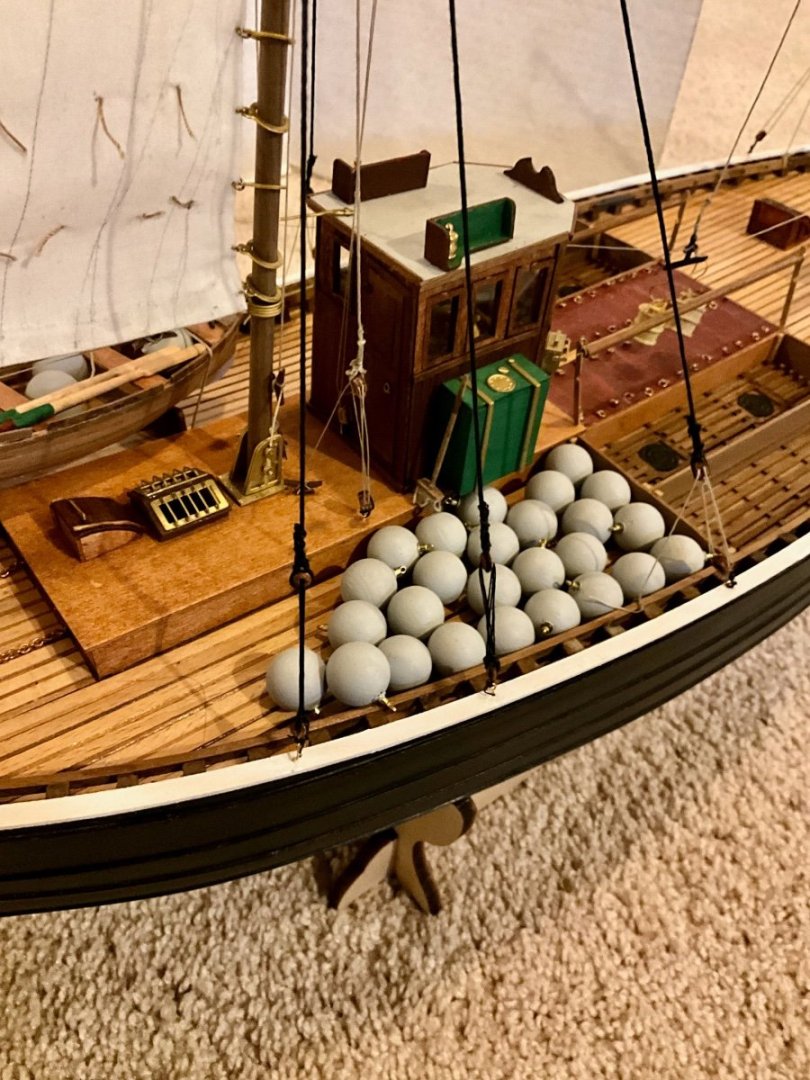
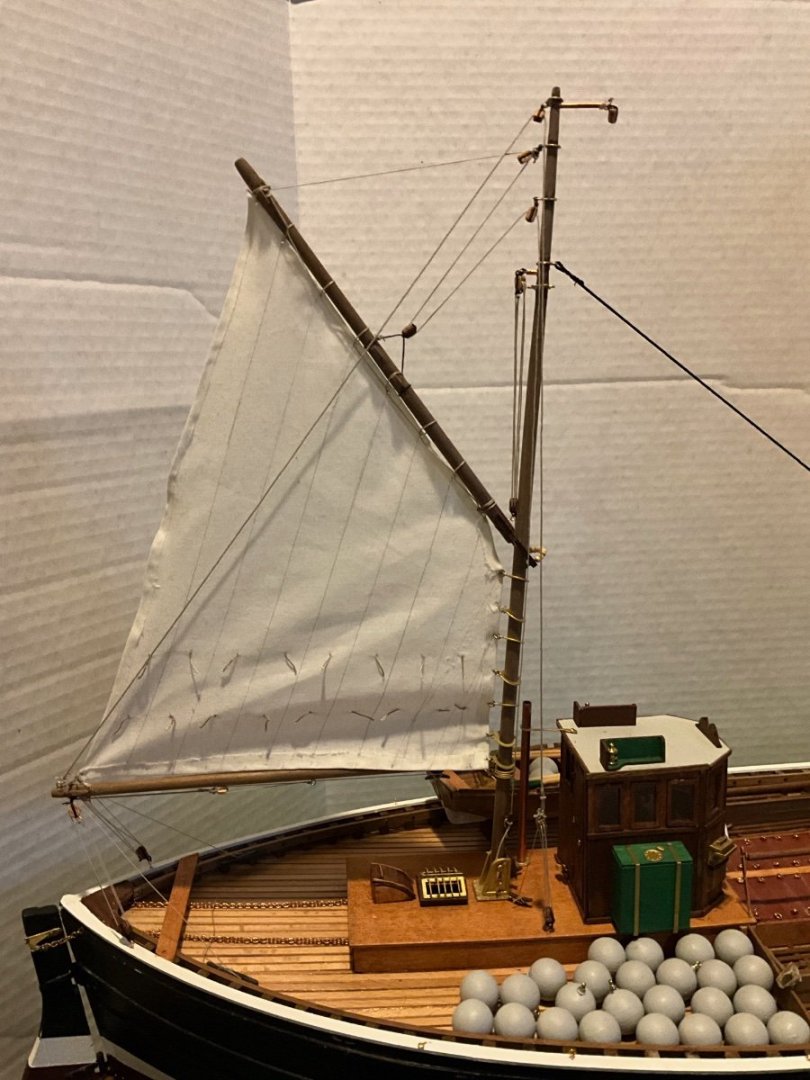
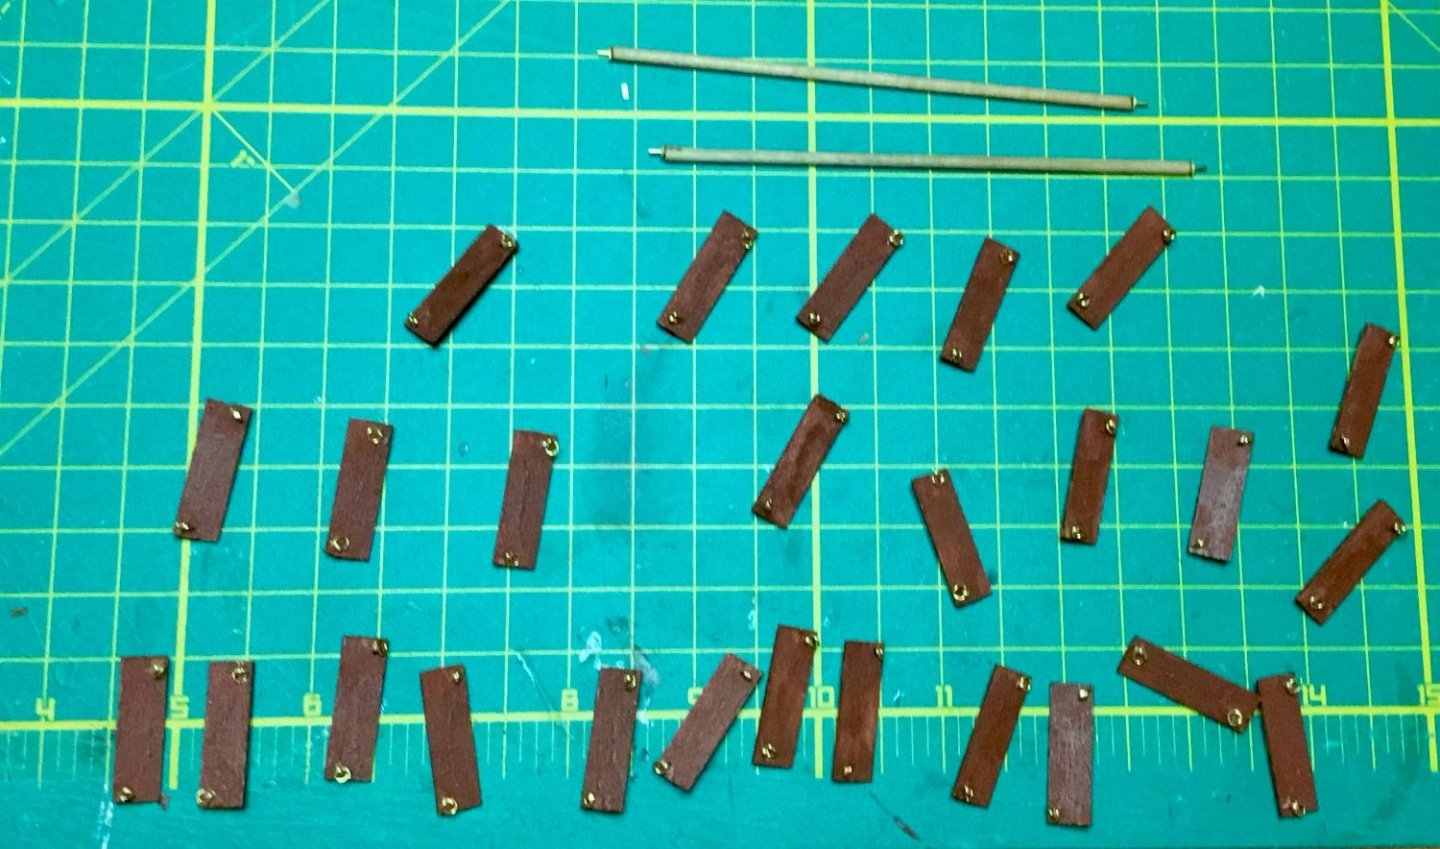
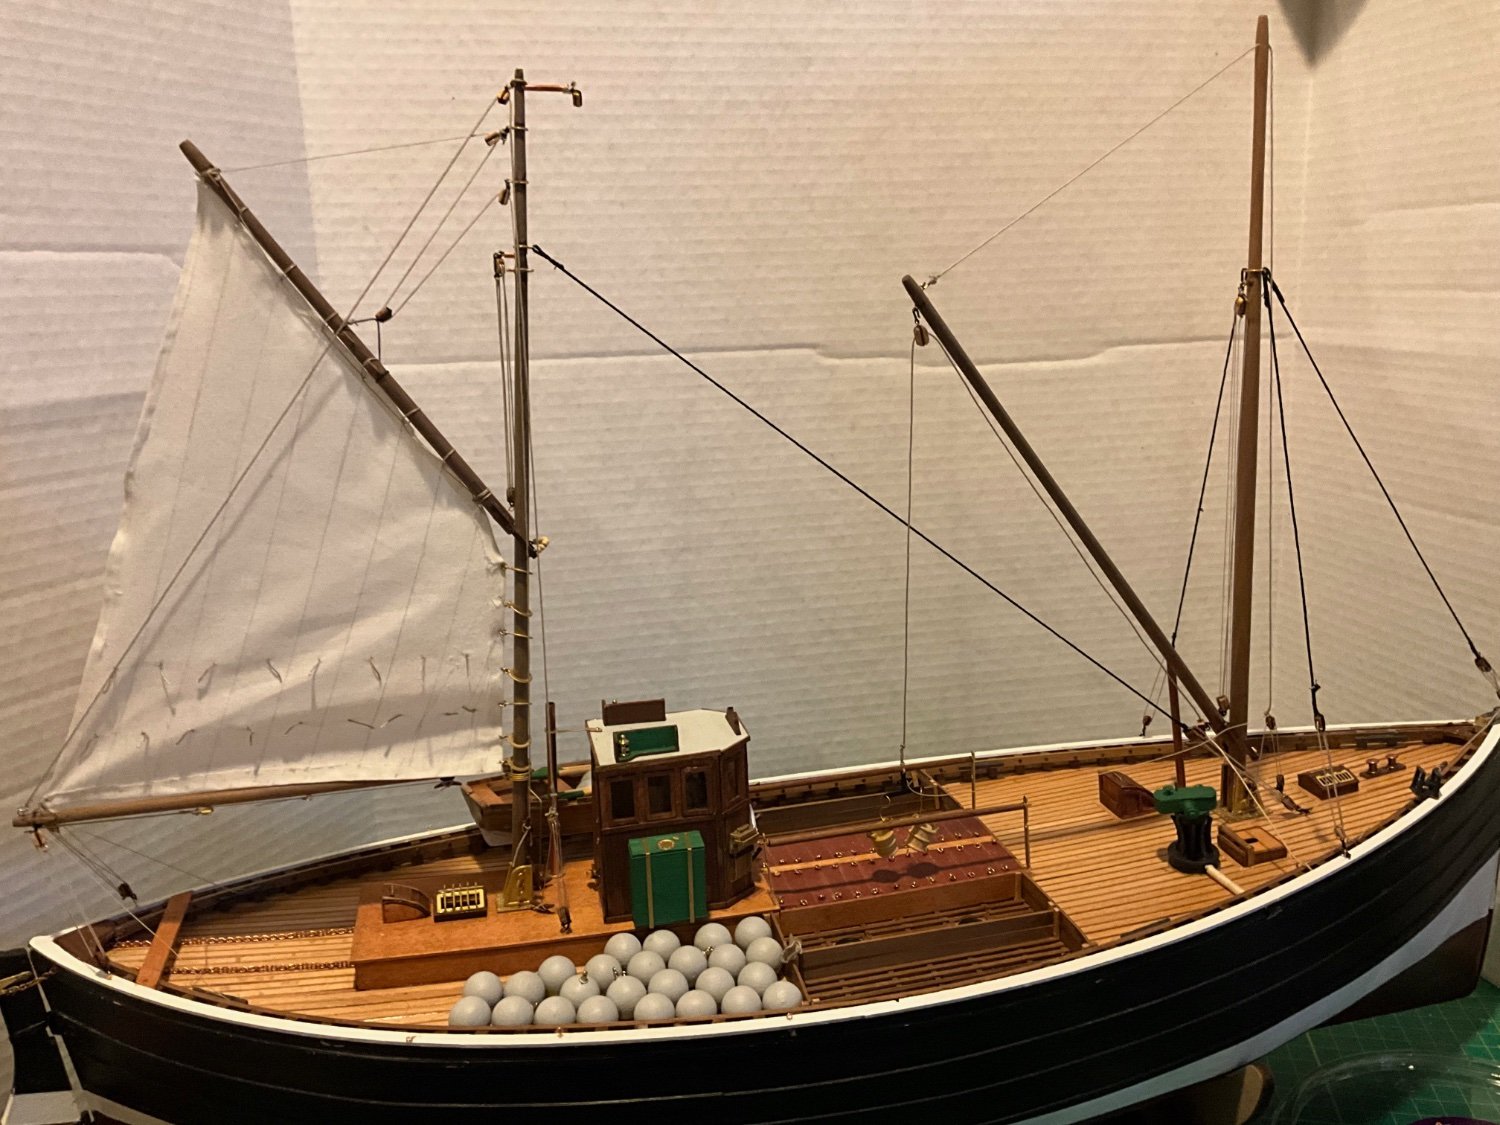
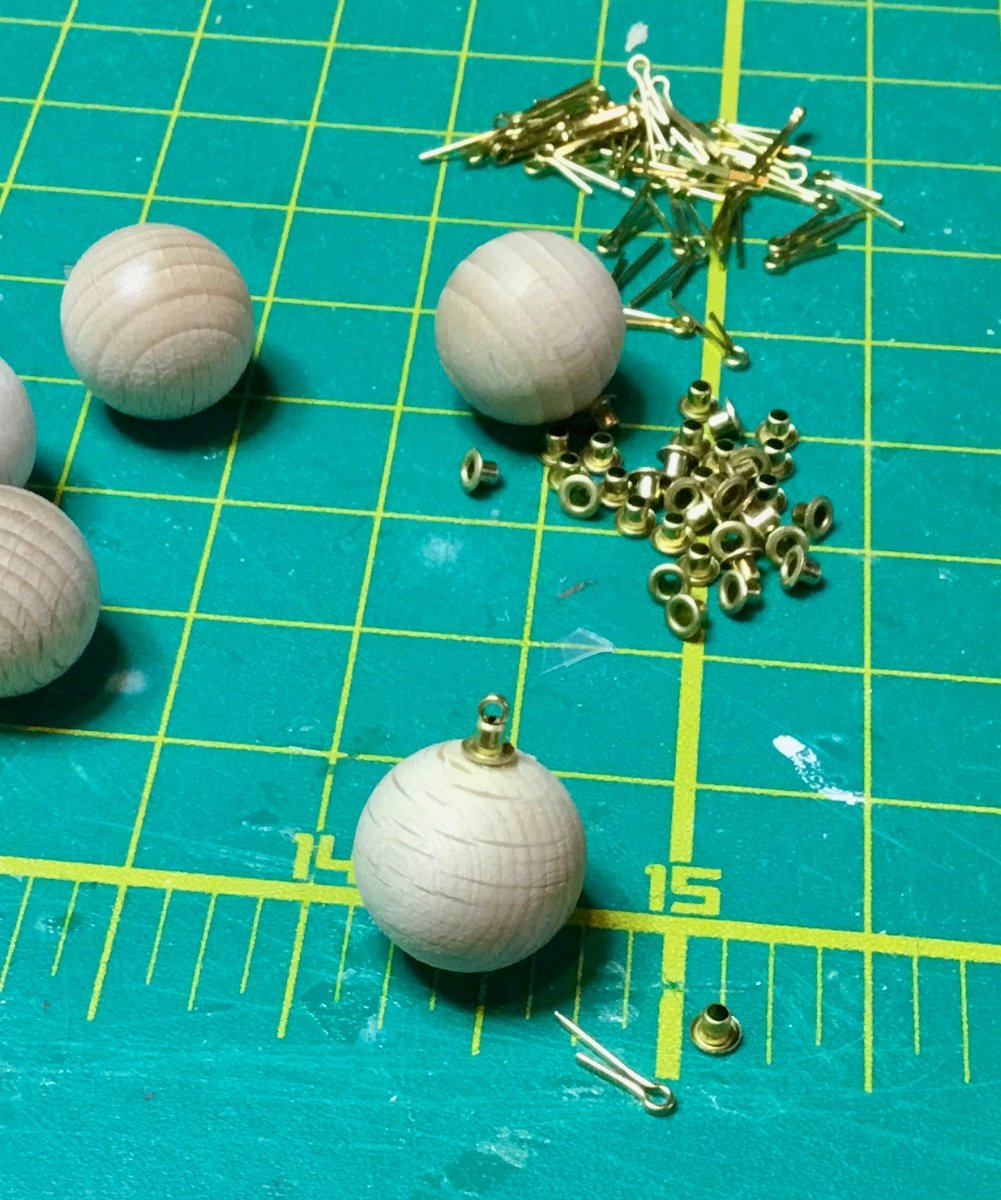
And currently I am working on the net buoys. All 30 off them.

-
Are you still working on this? It was looking pretty good at the last post.
-
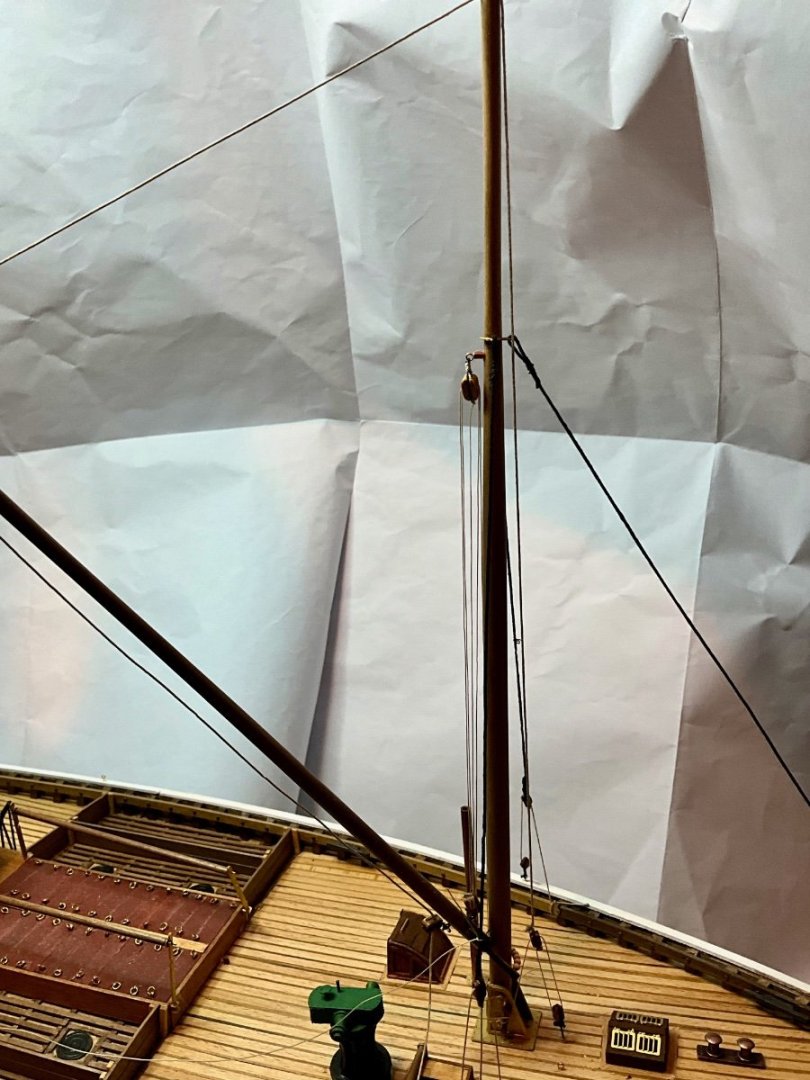
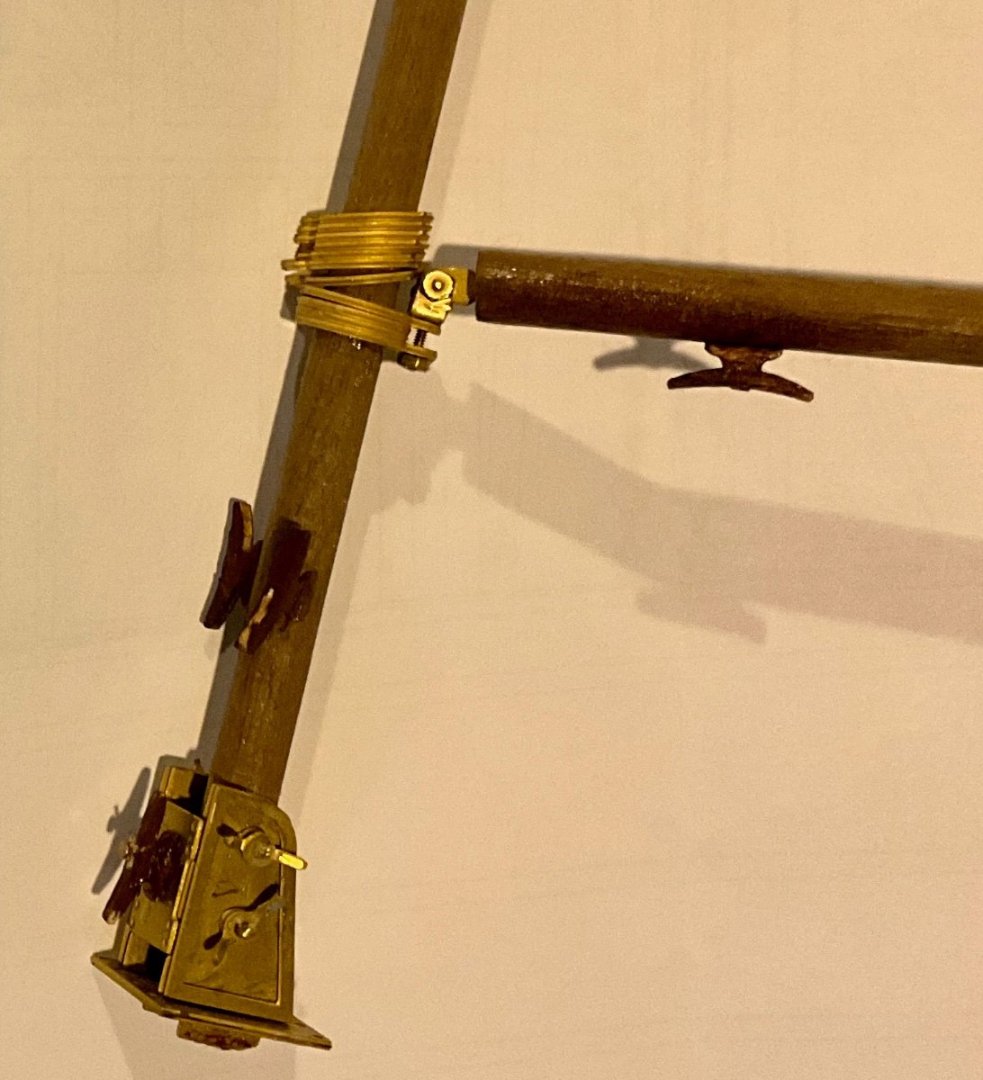
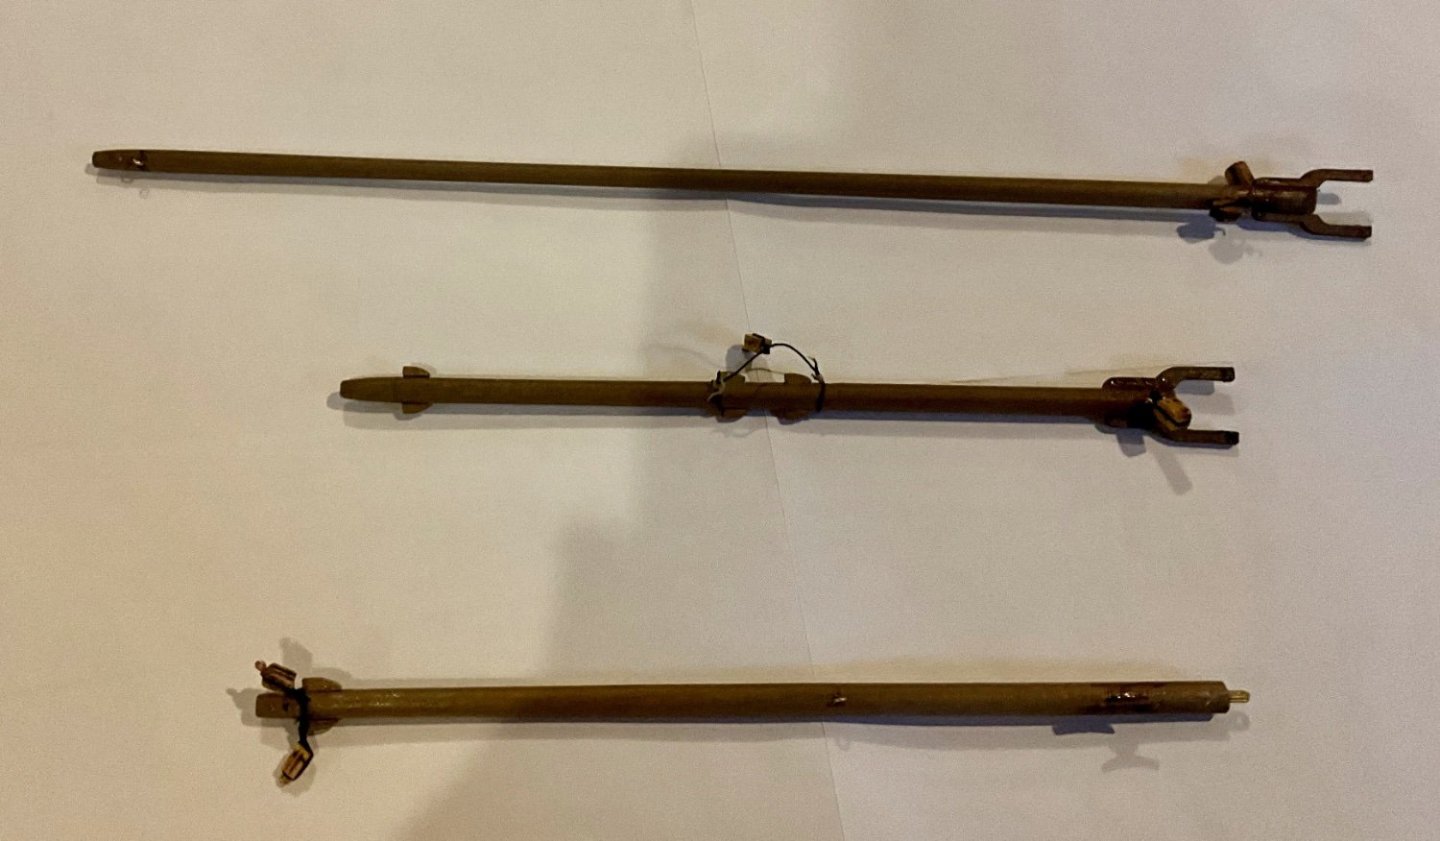
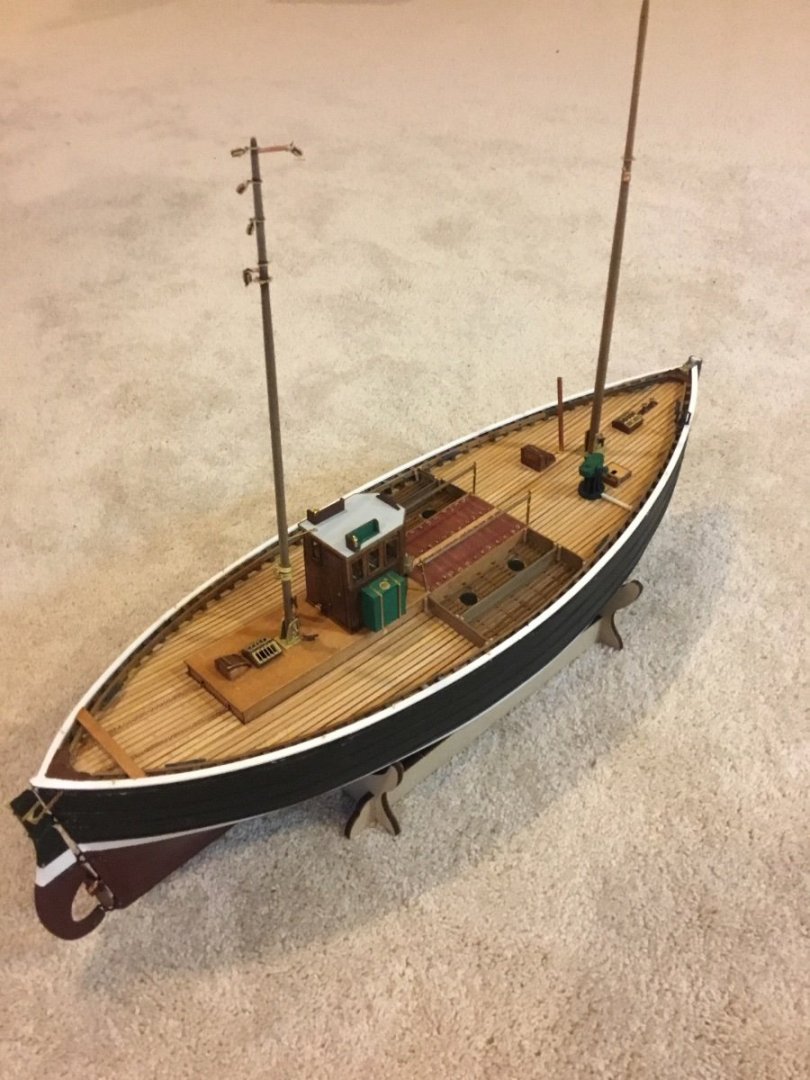
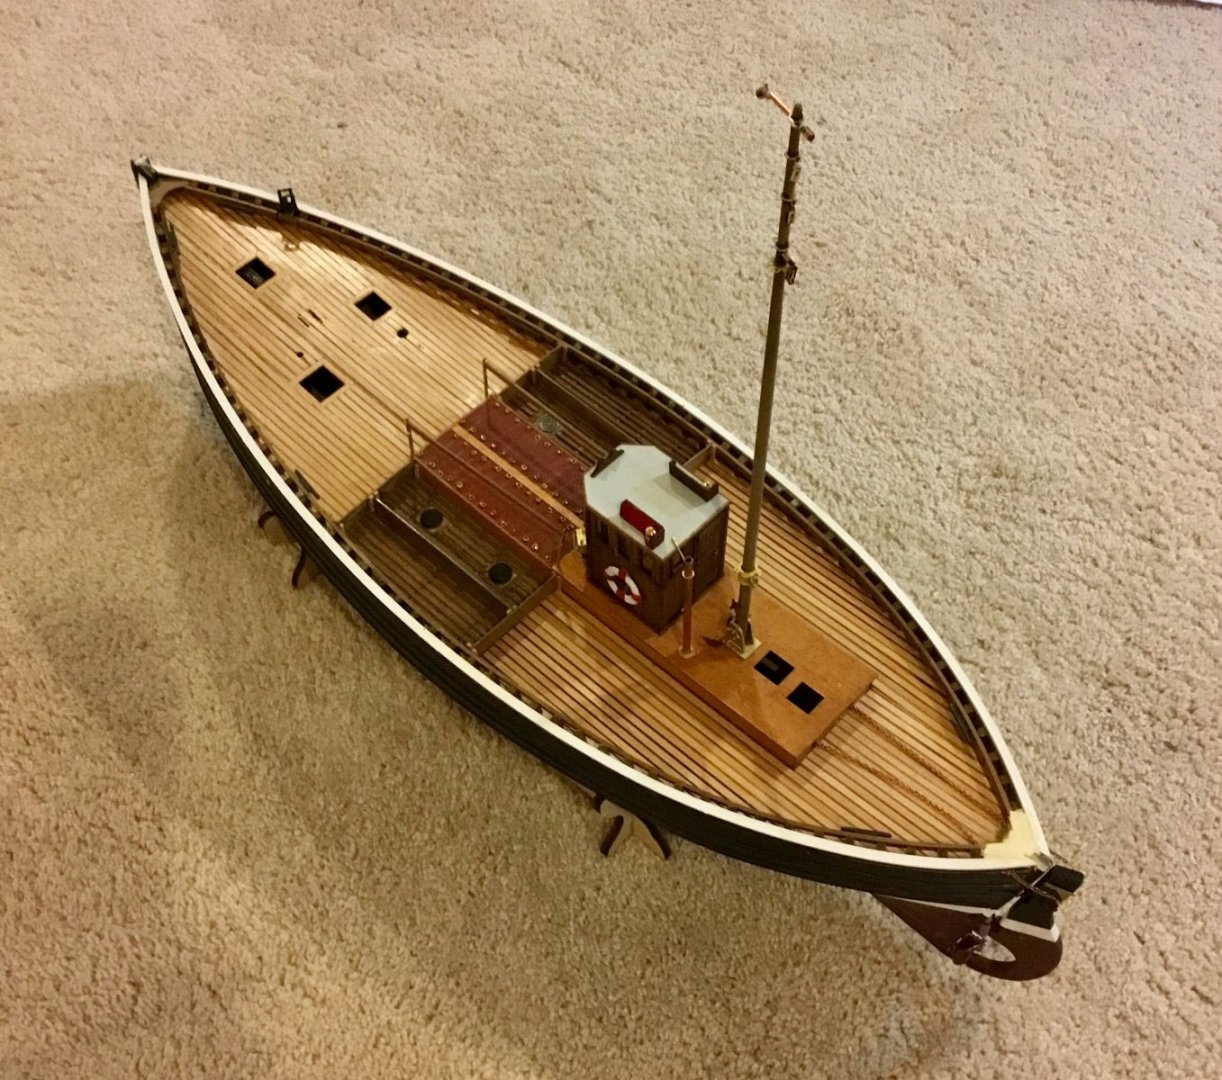
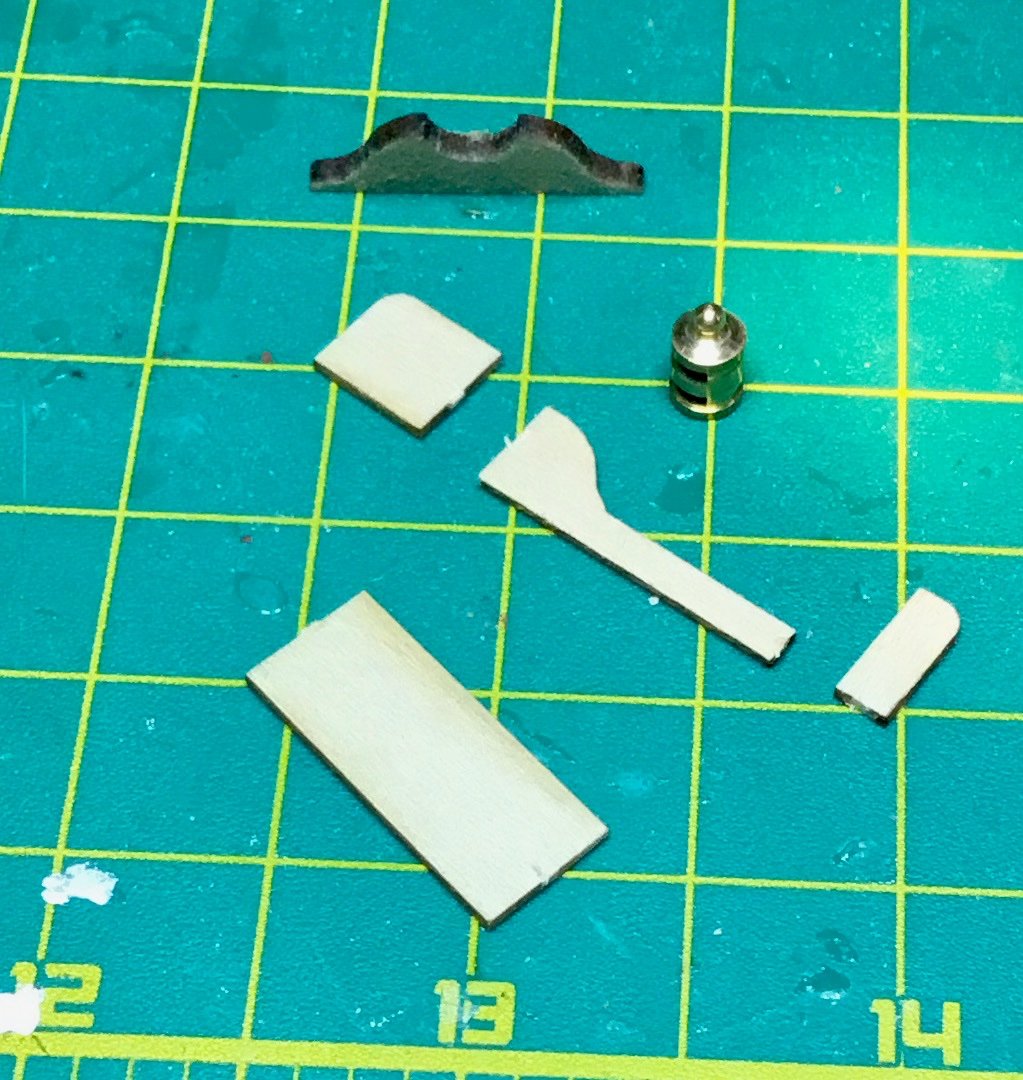
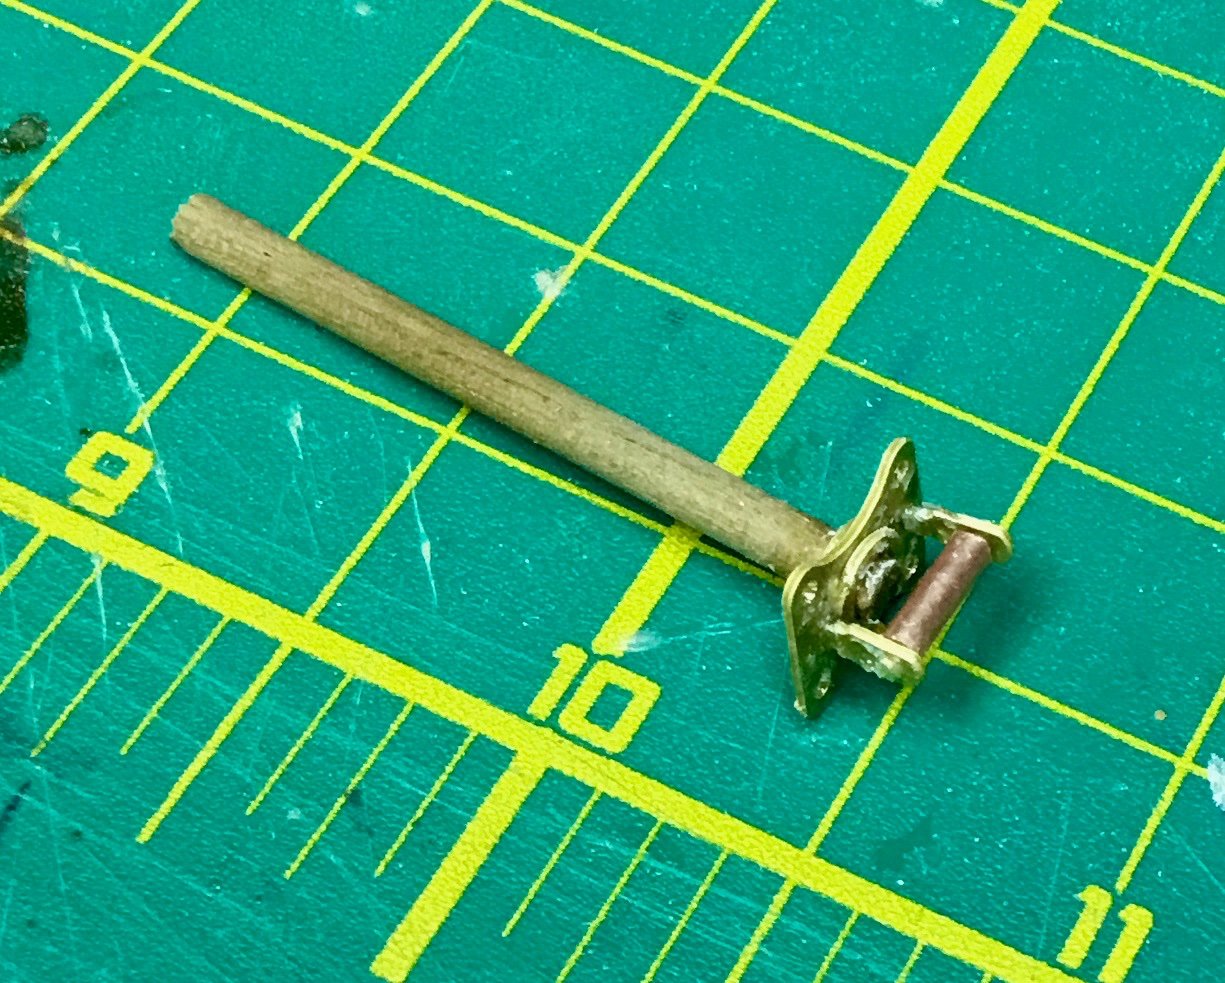
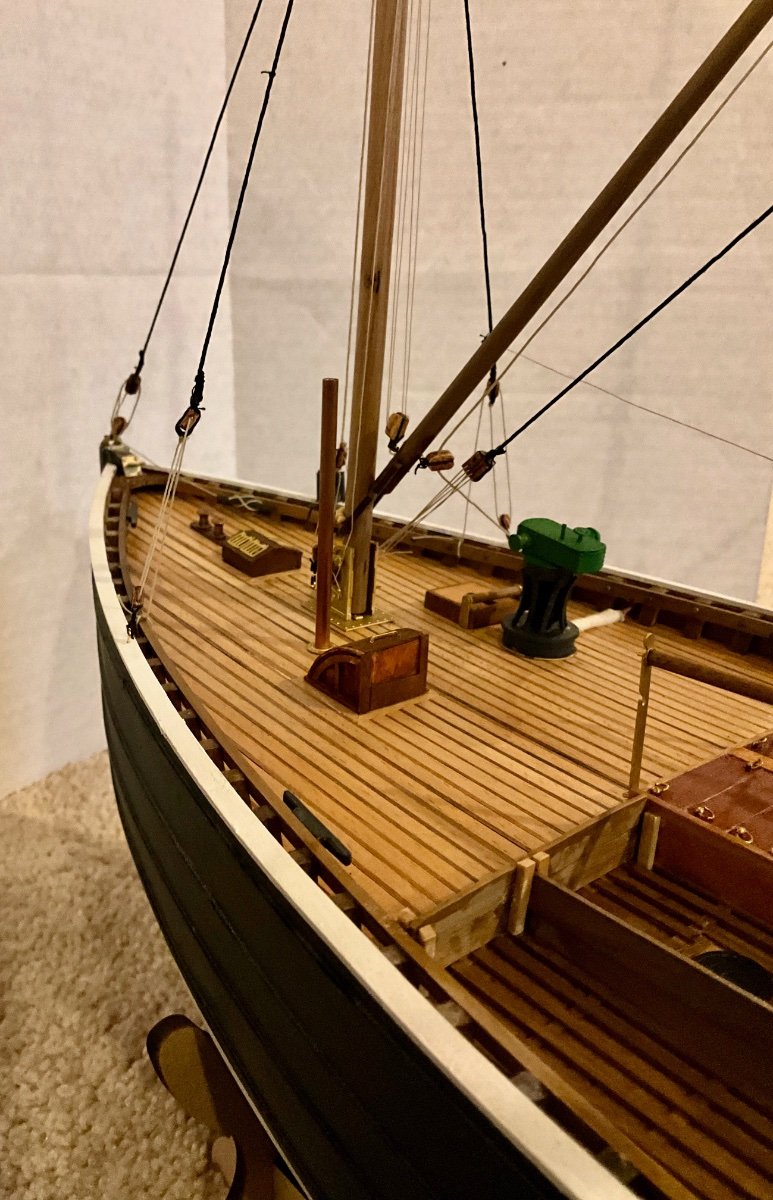
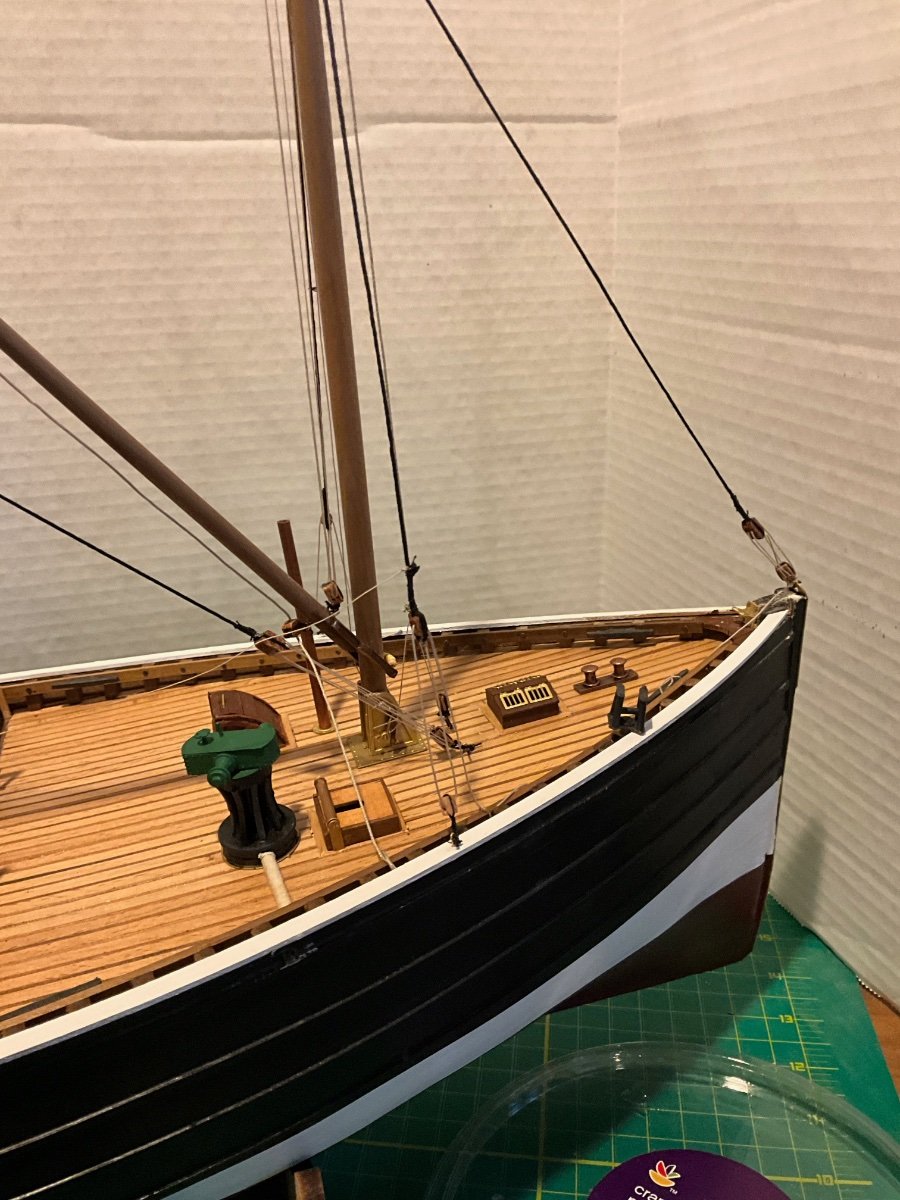
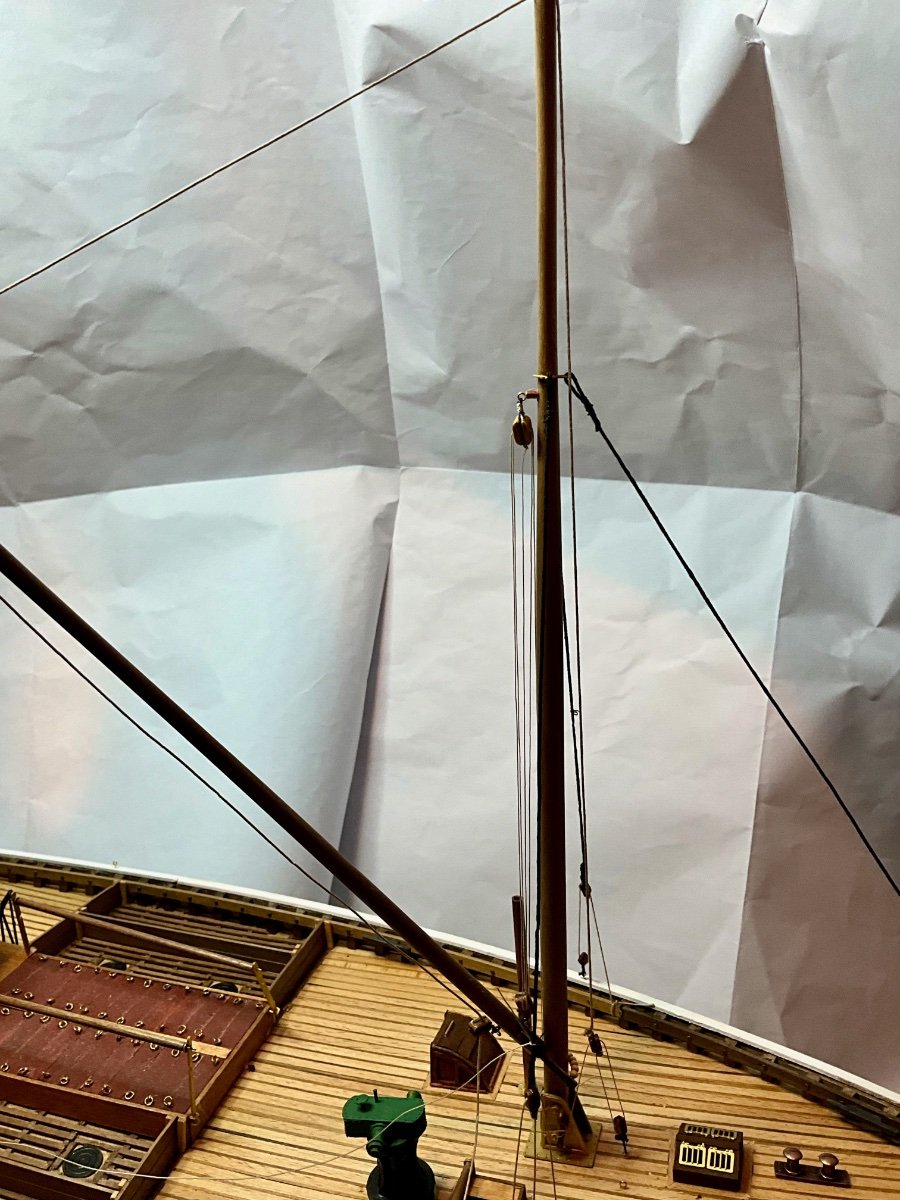
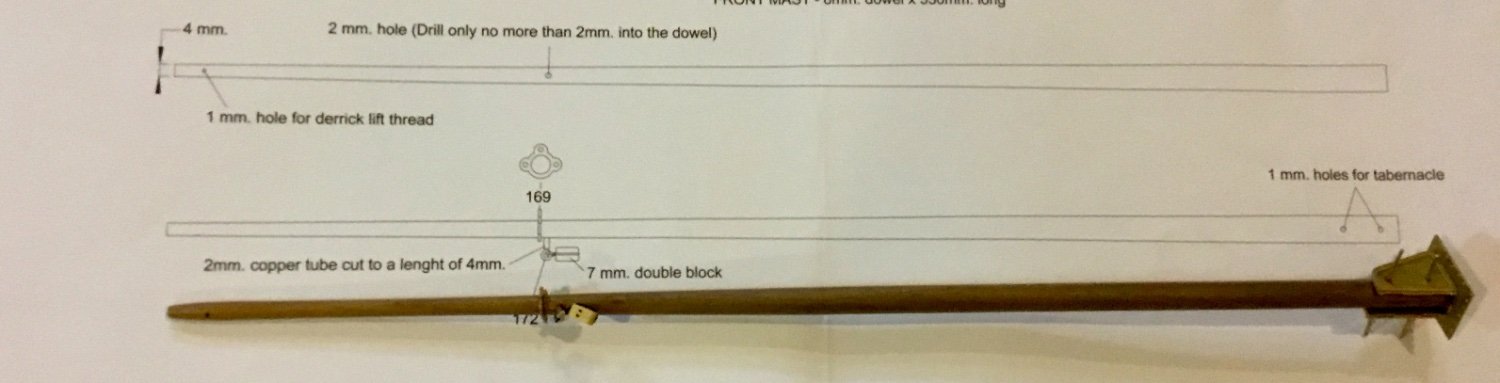
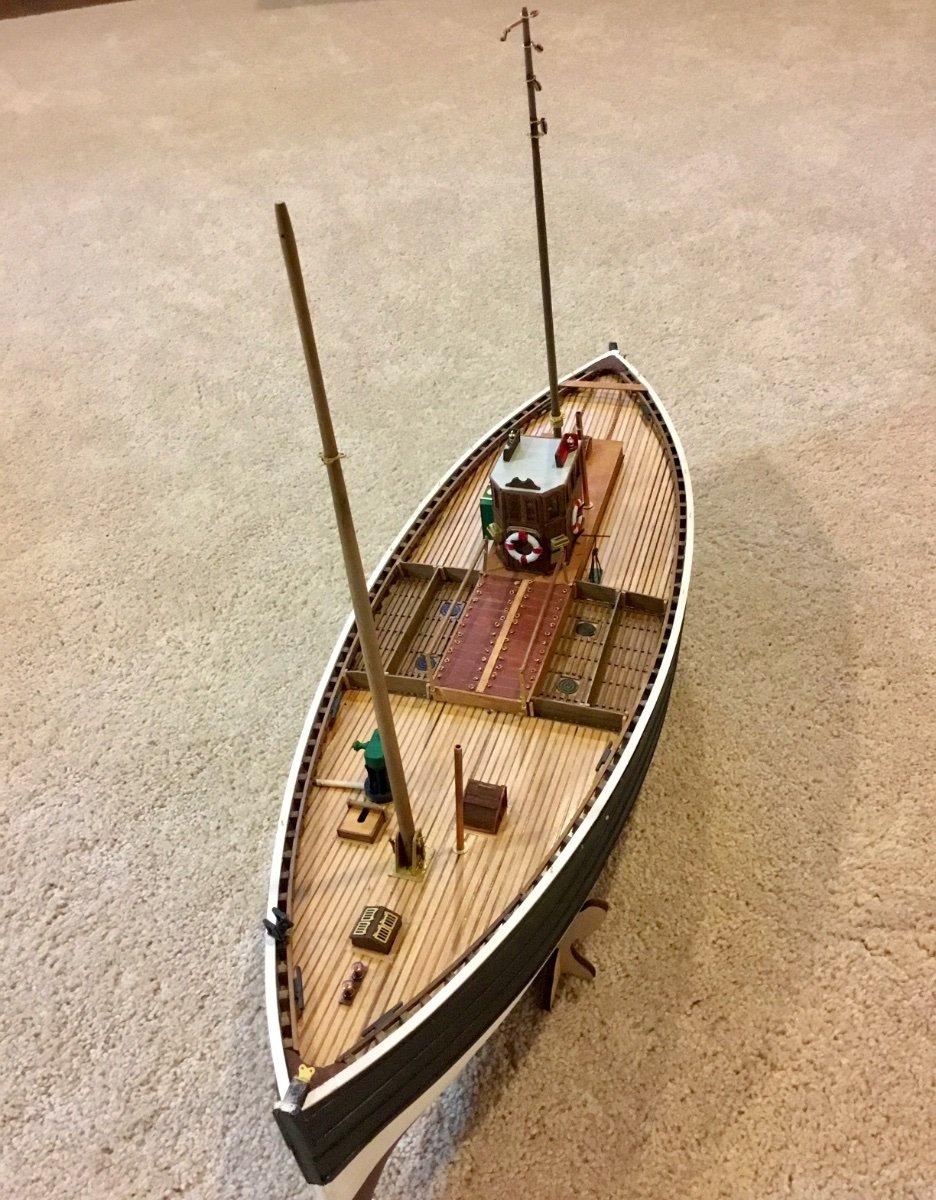
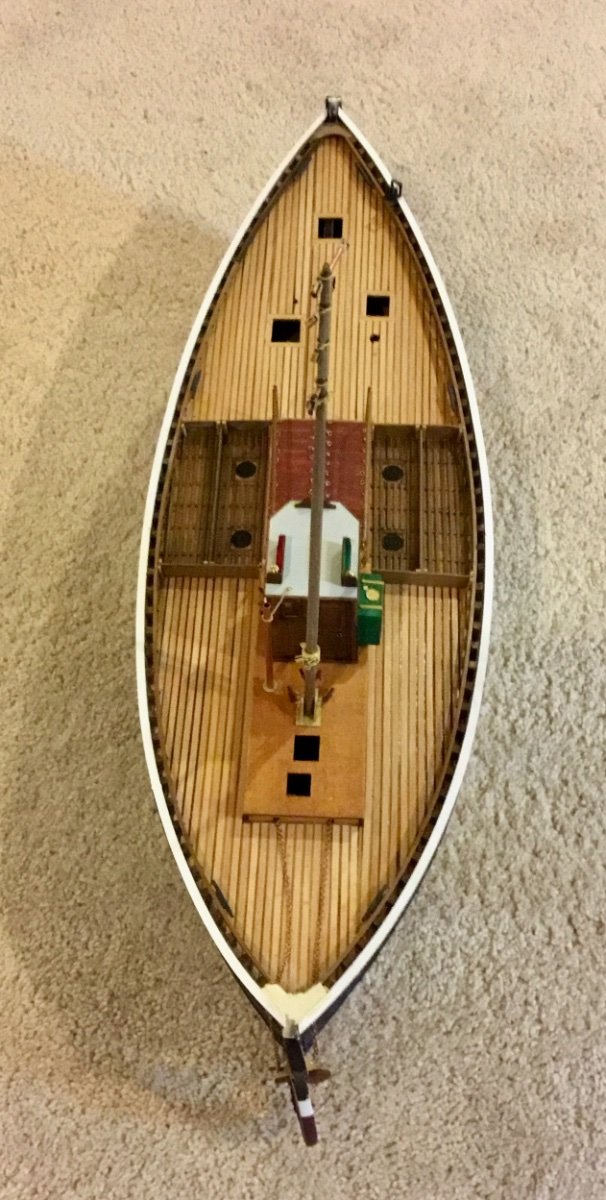
Assembled the front tabernackle (mast base).

Tapered main mast, attached to tabernackle, and added mast components.
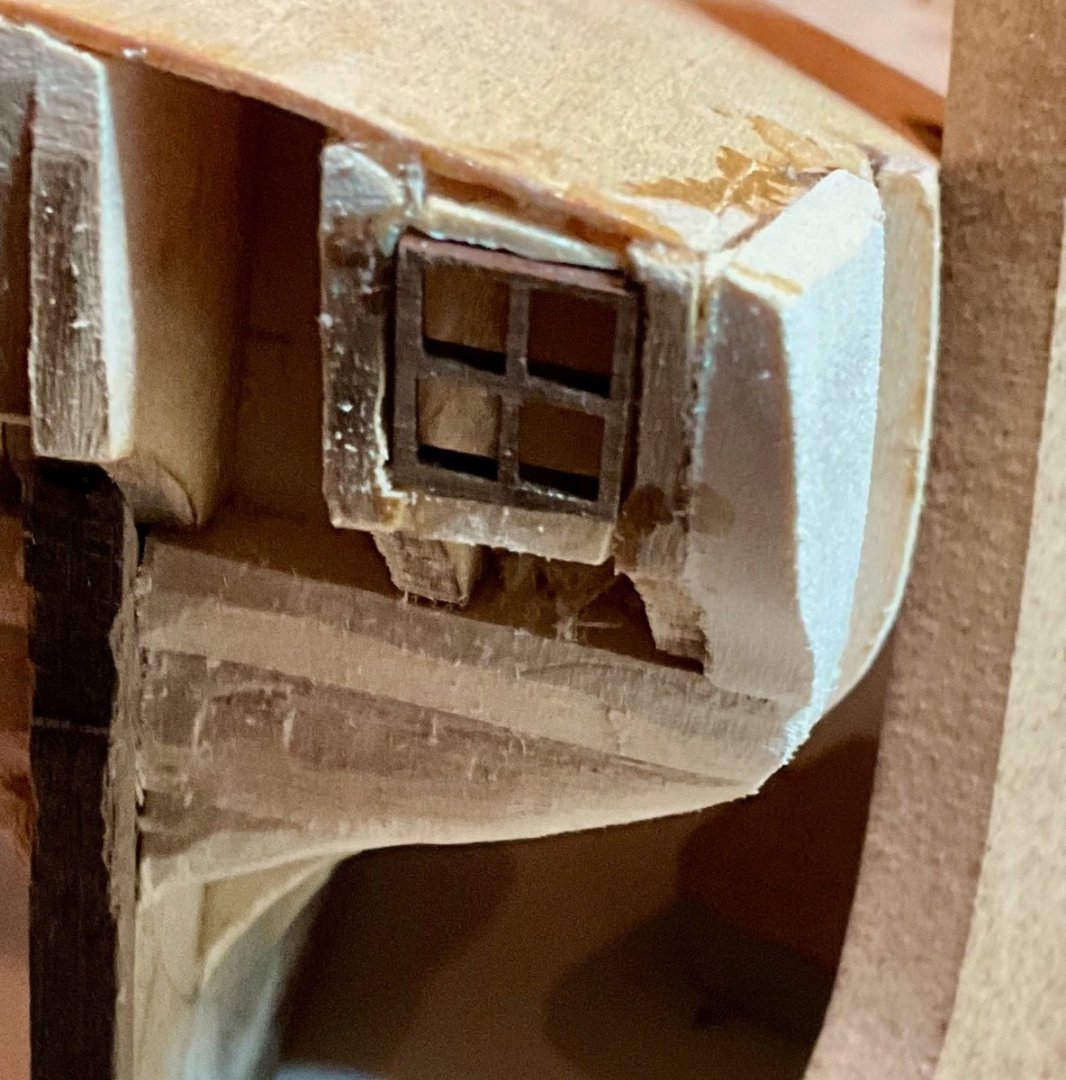
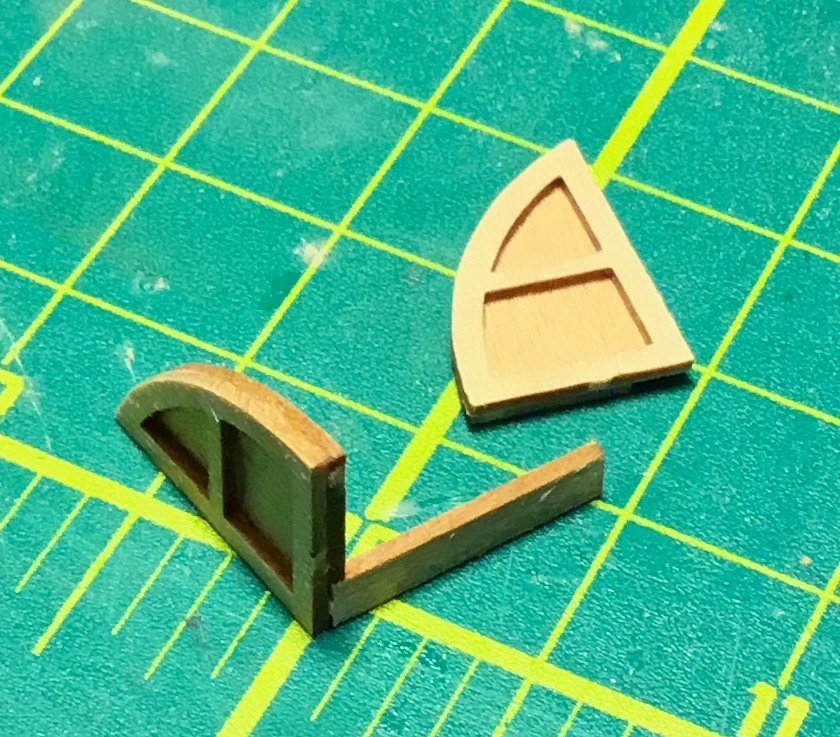
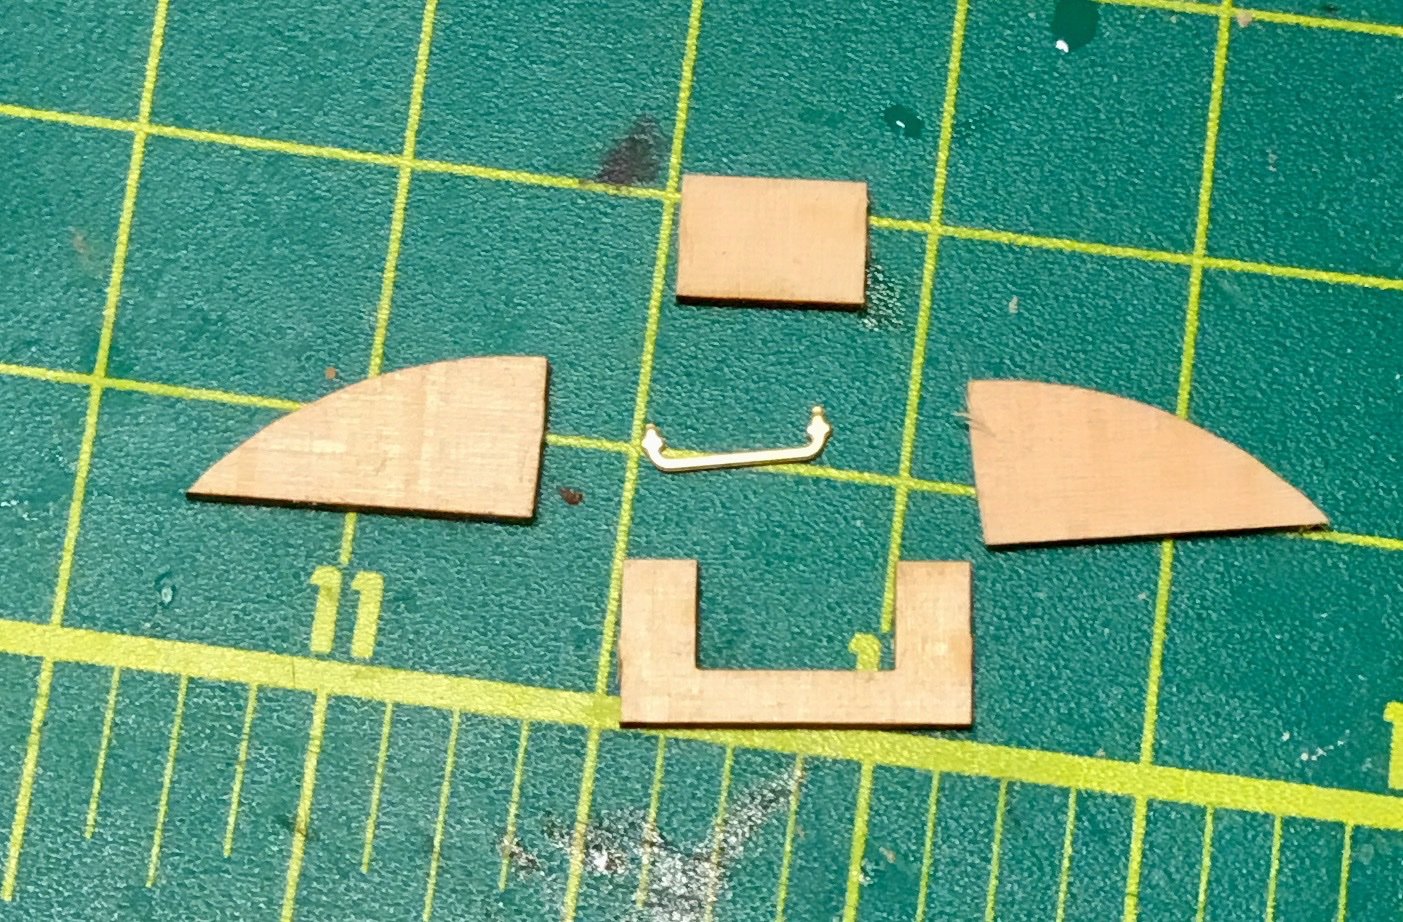
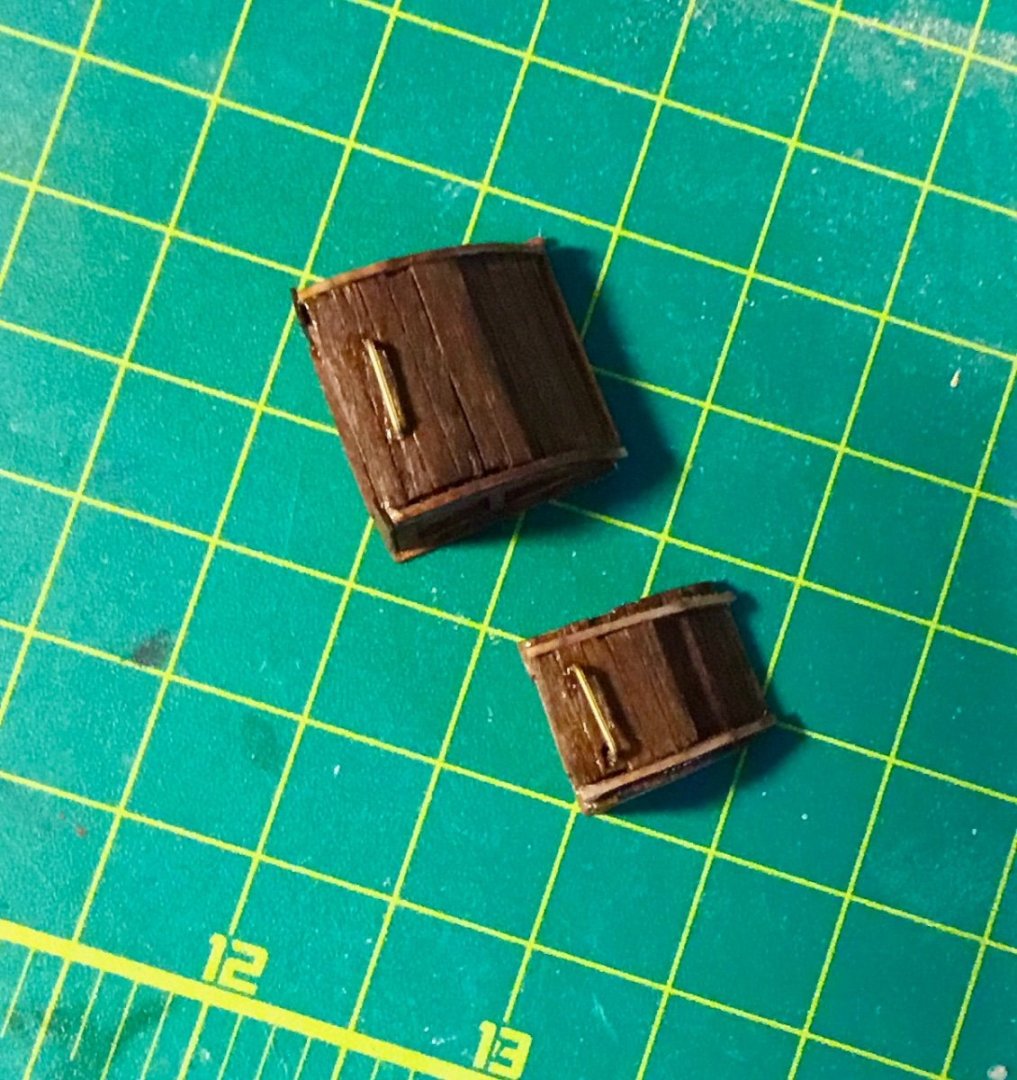
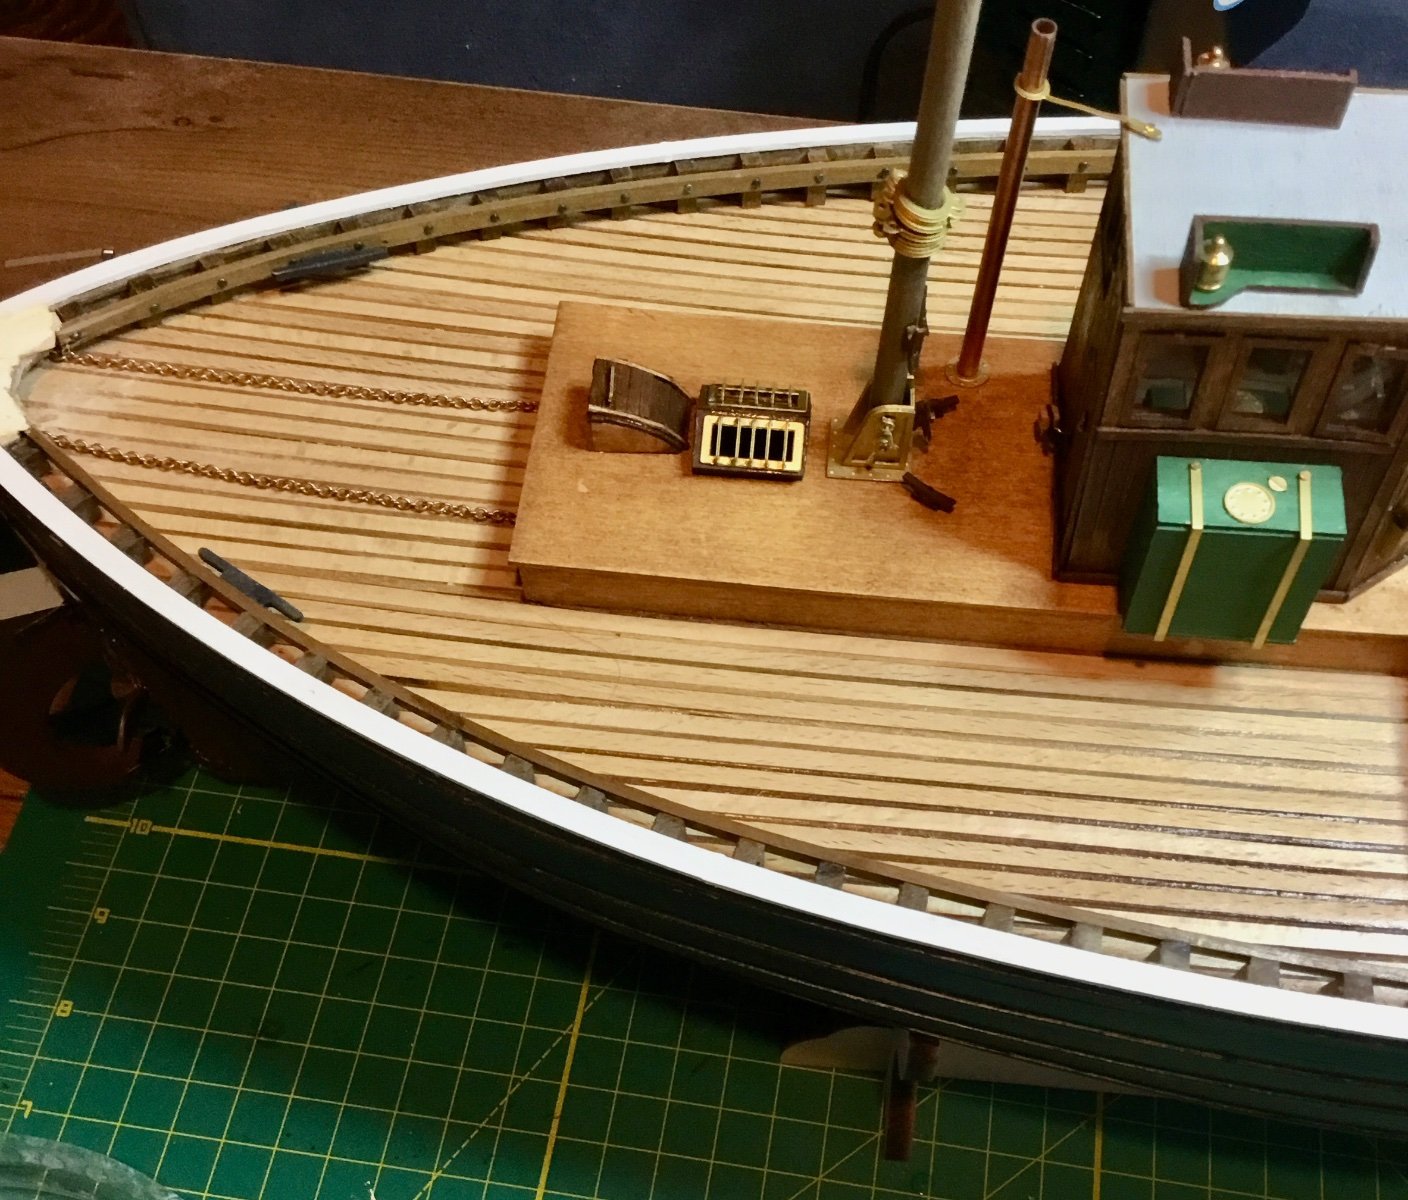
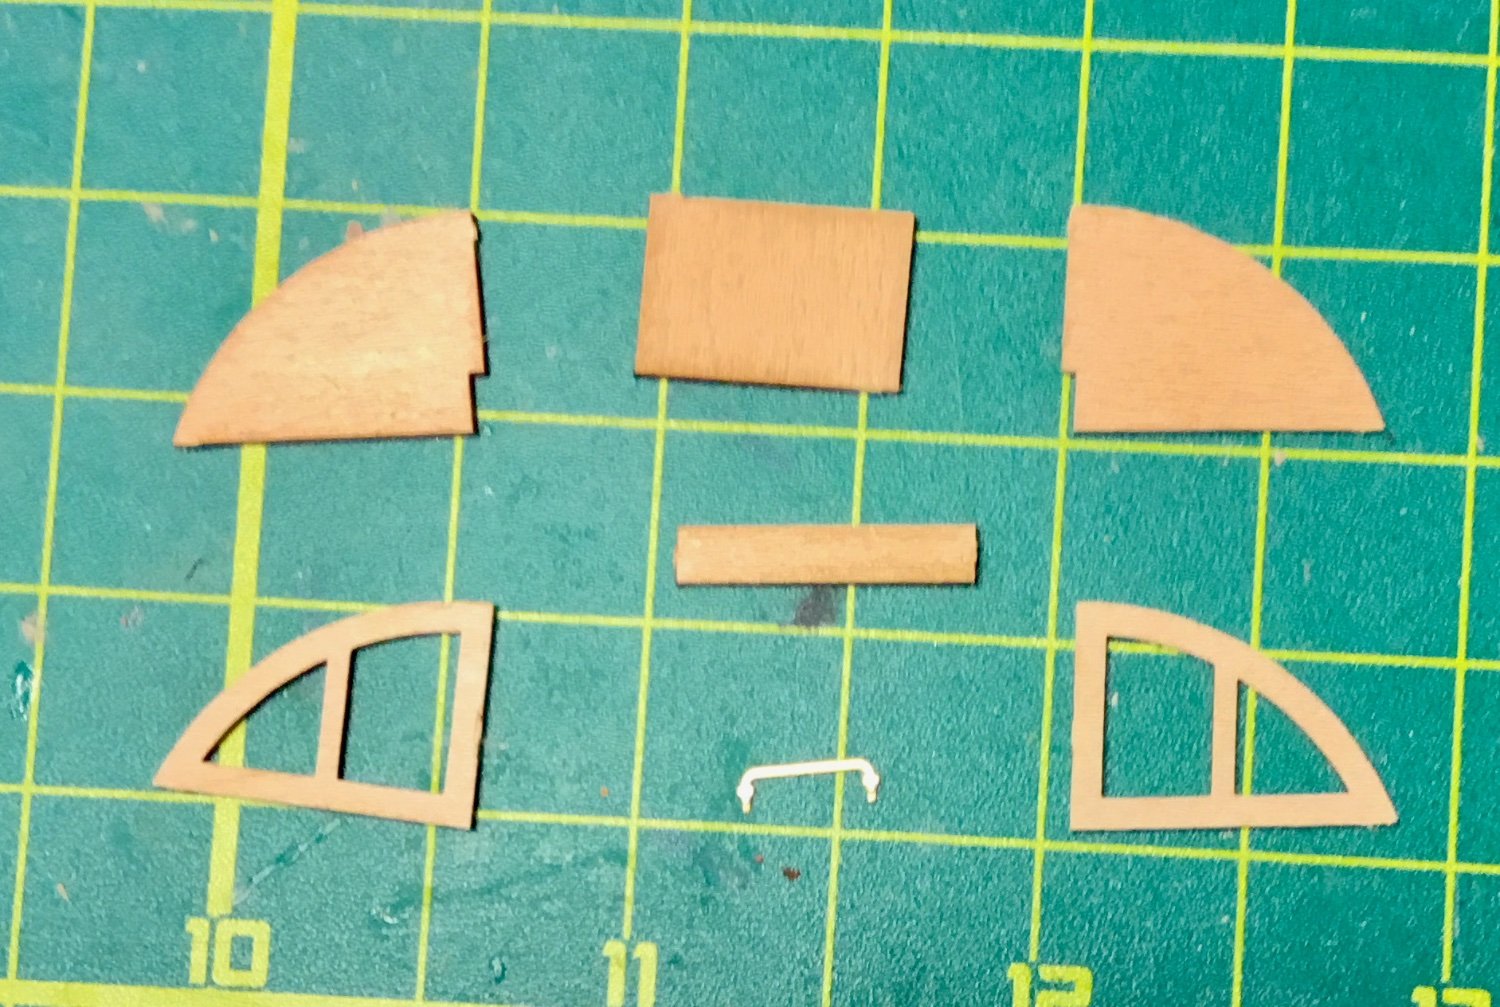
Built the front skylight.

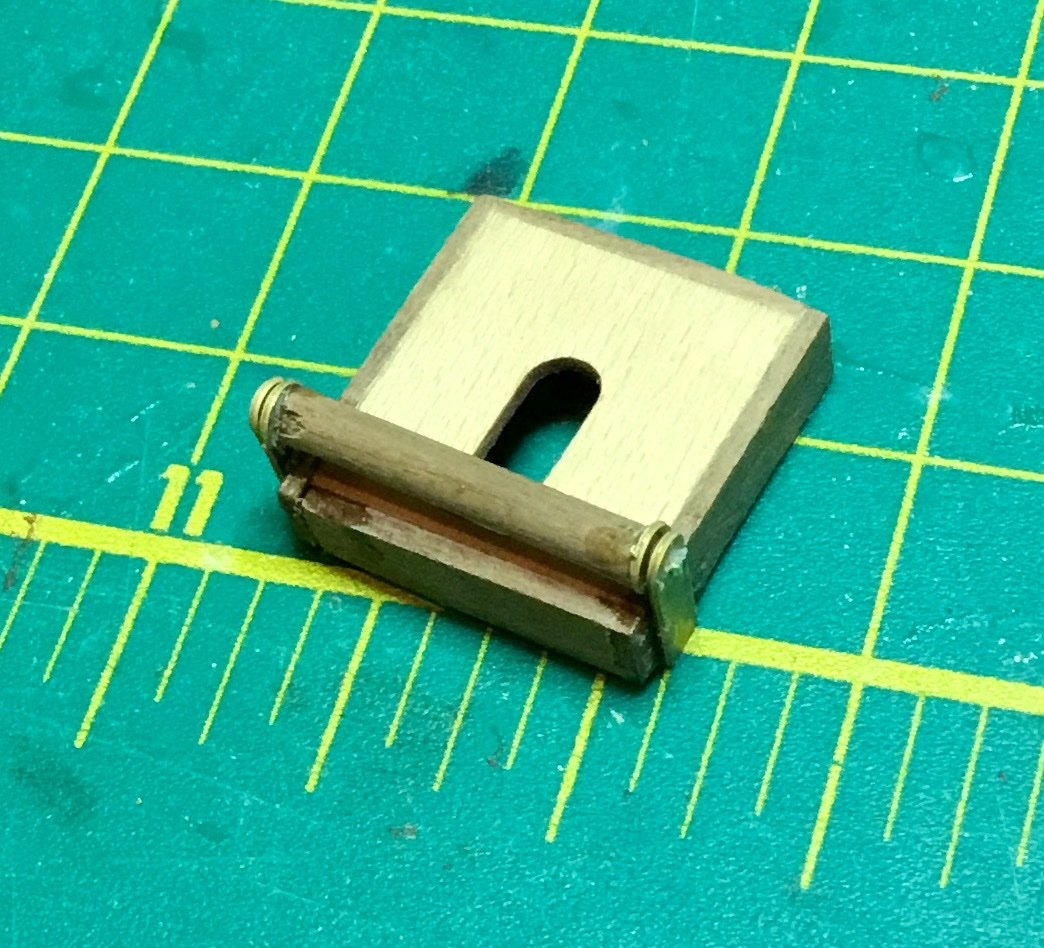
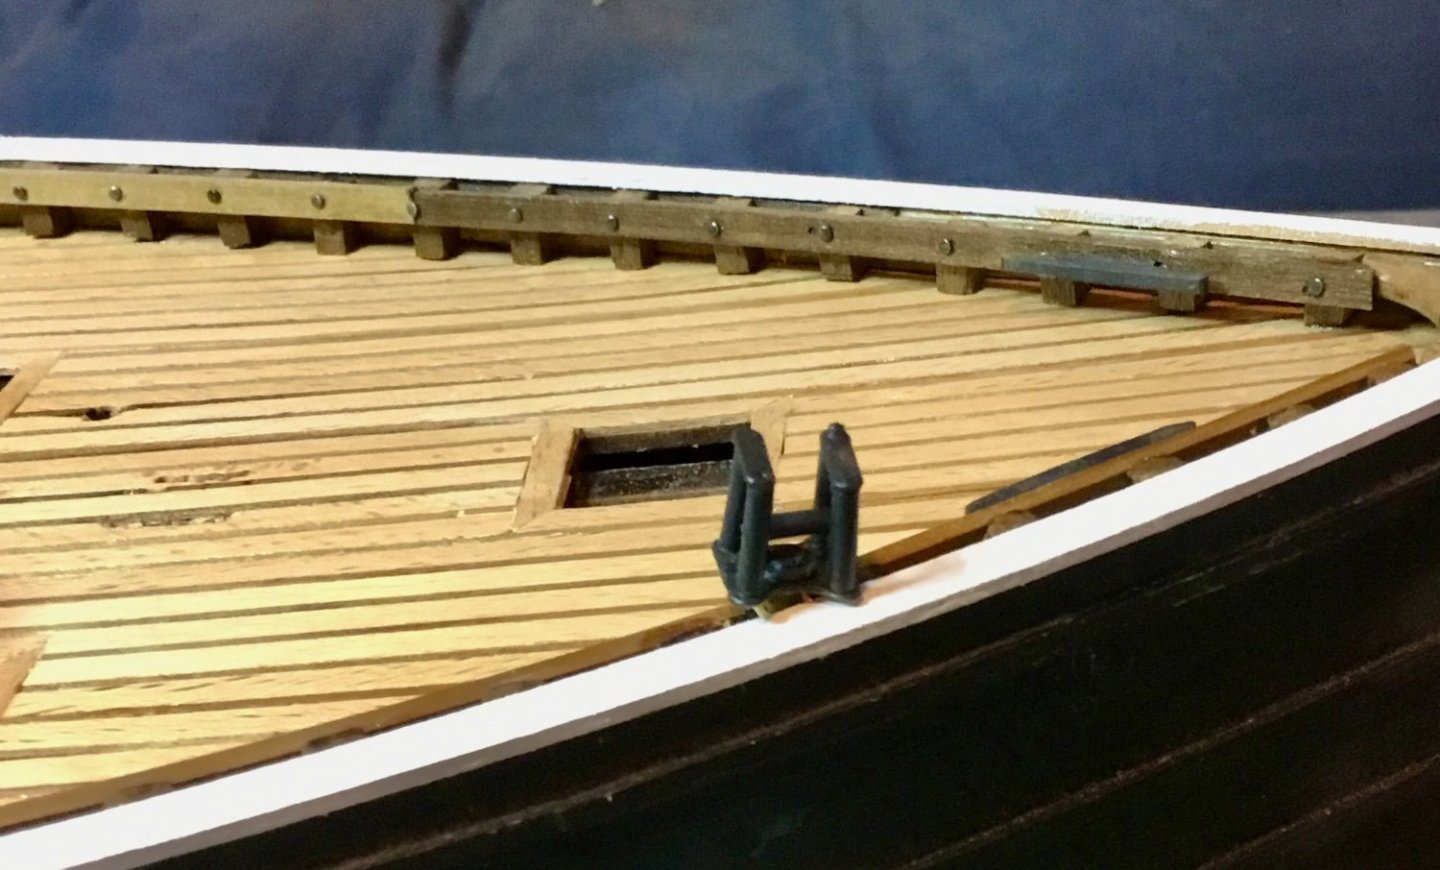
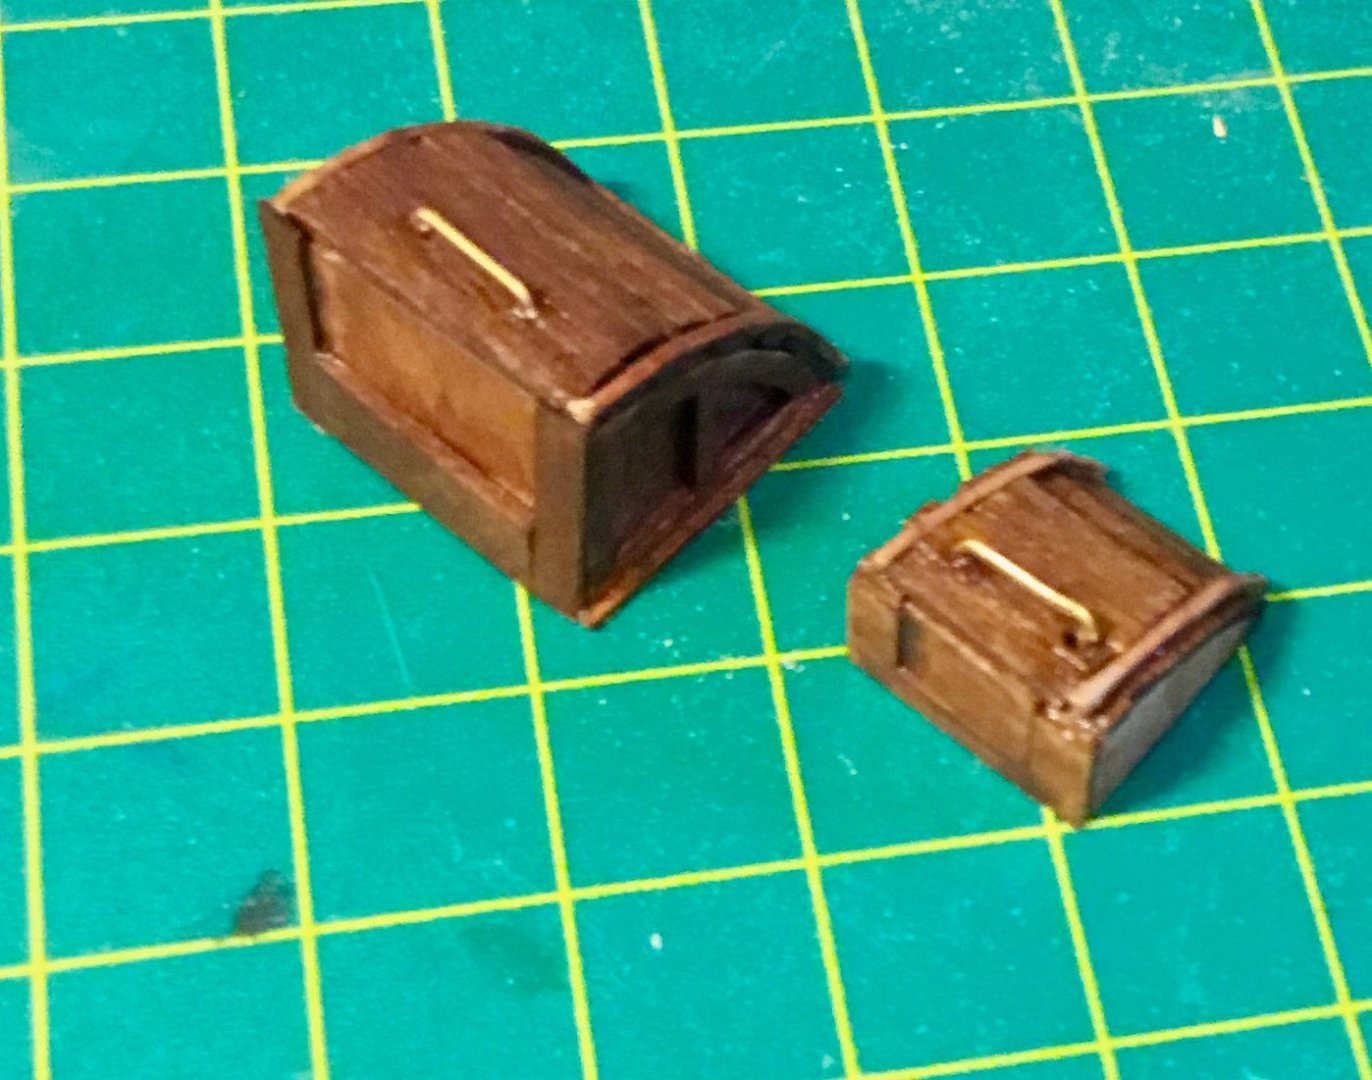
And the bus rope hatch (whatever that is).

Assembled and installed the bow stay.
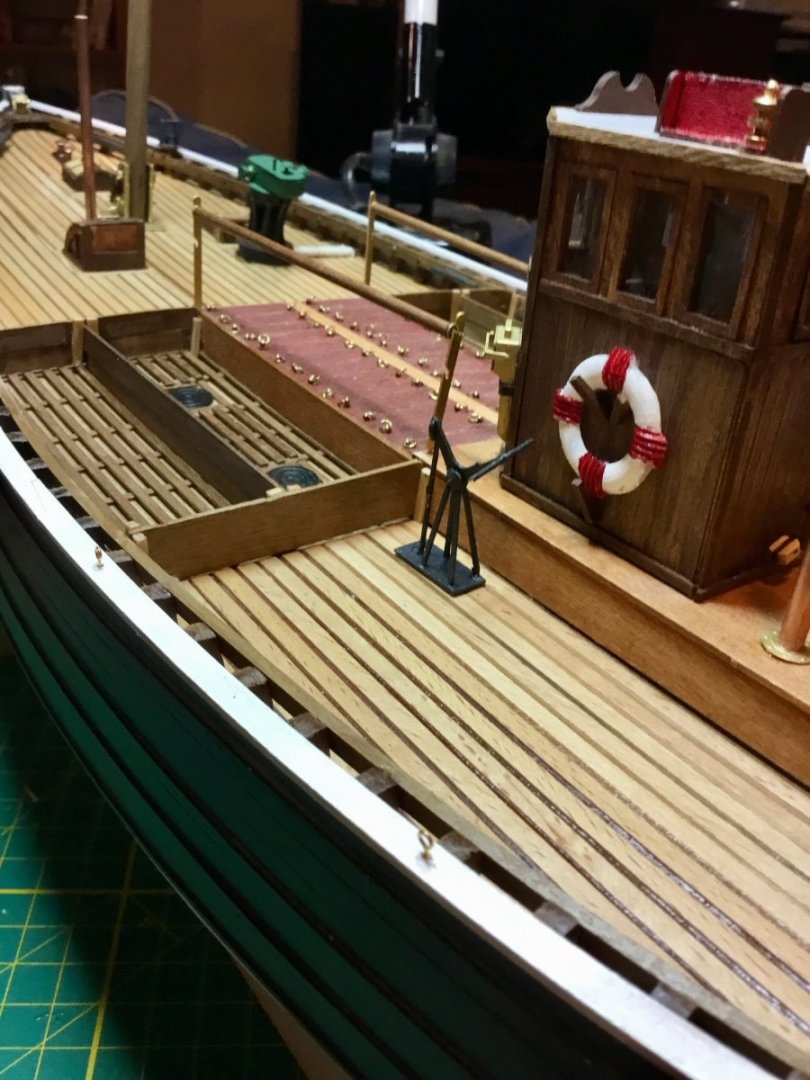
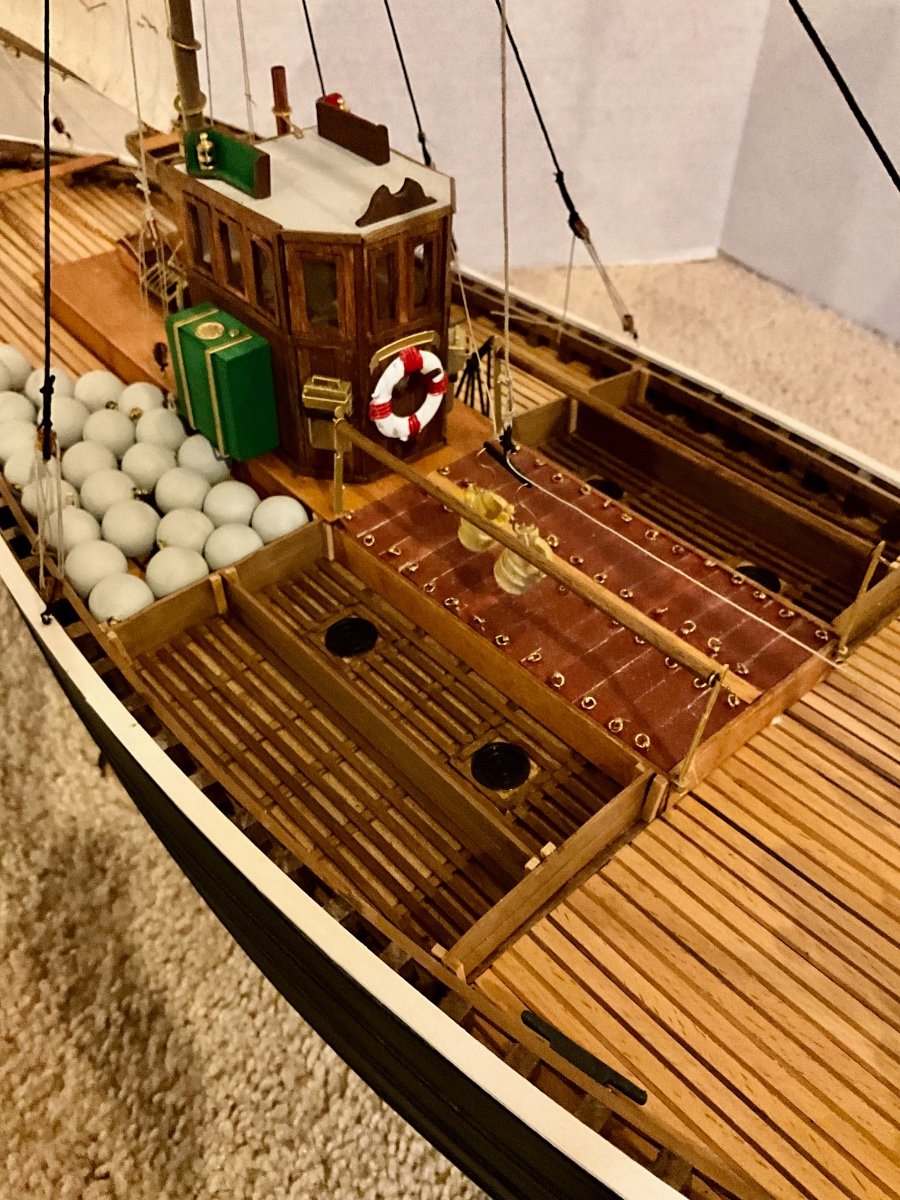
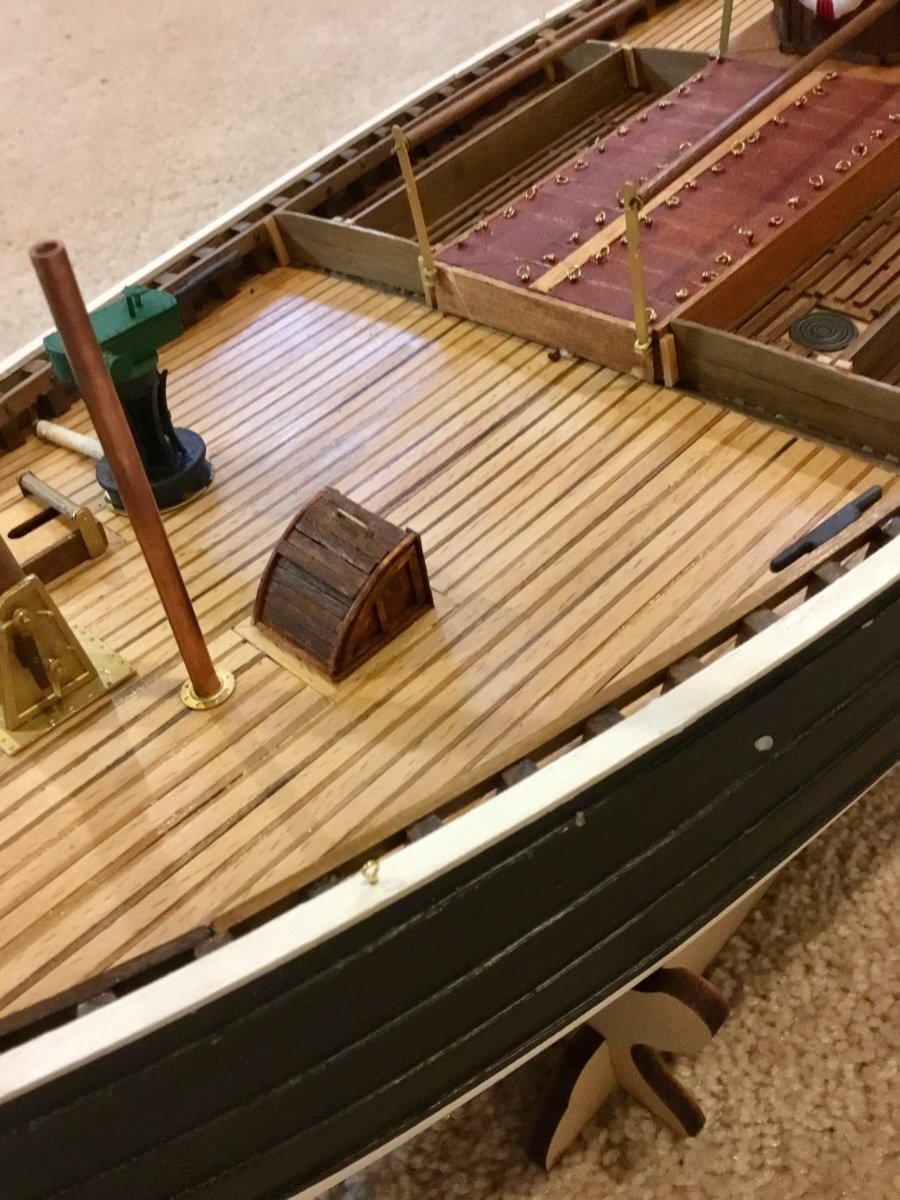
Then I began adding the various deck furniture, starting with the aft companion way and engine skylight.

The front companion way, bus roller hatch, and front skylight.
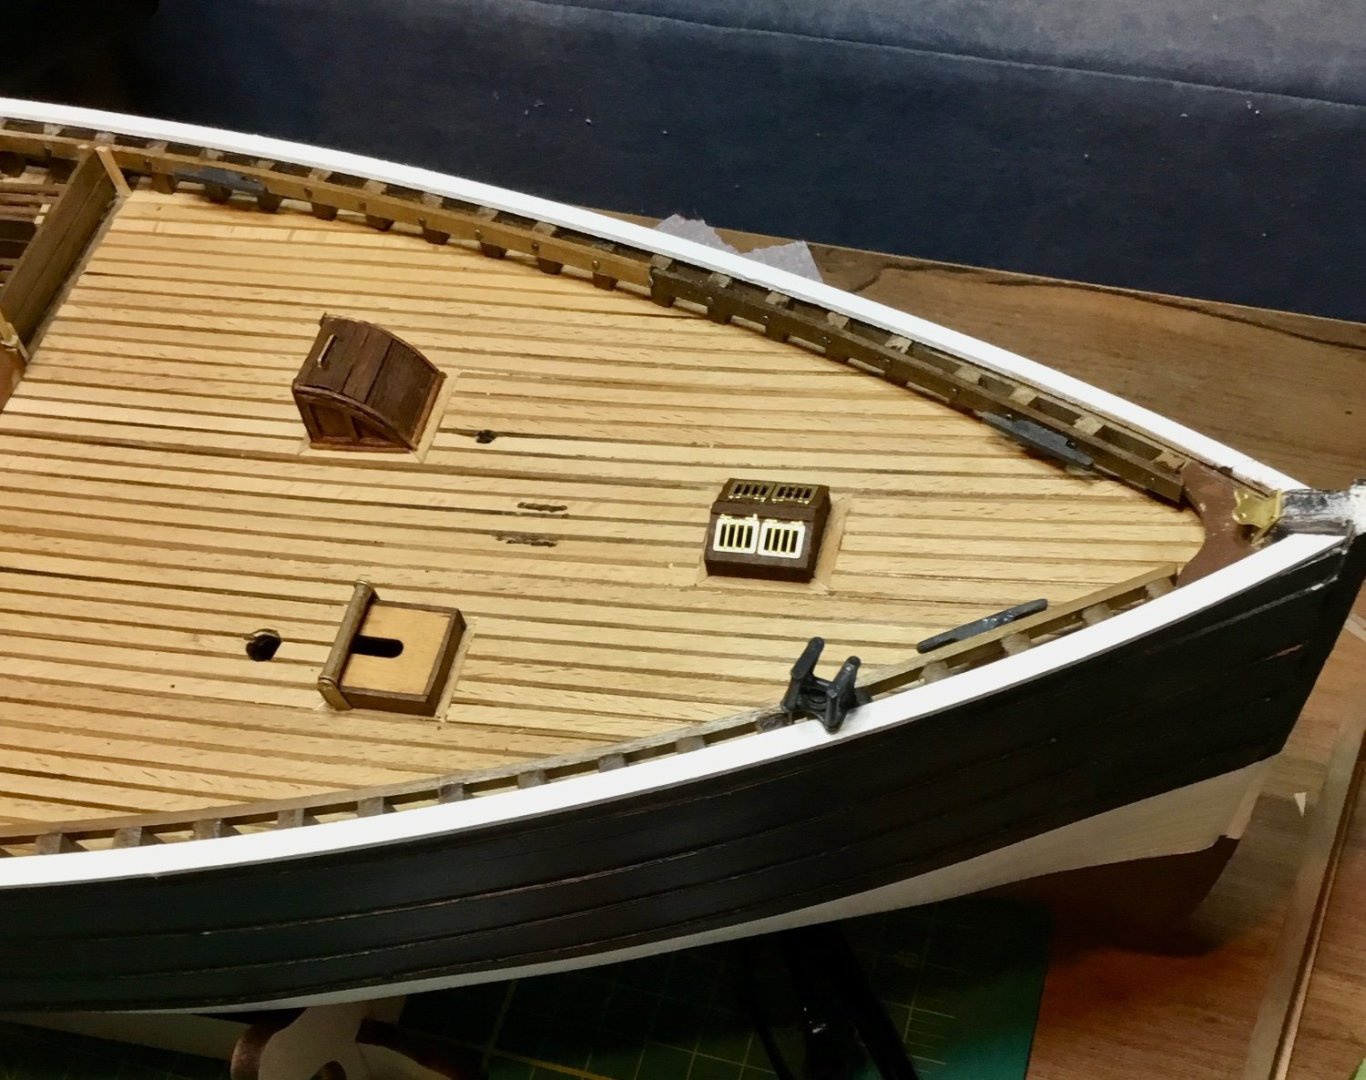
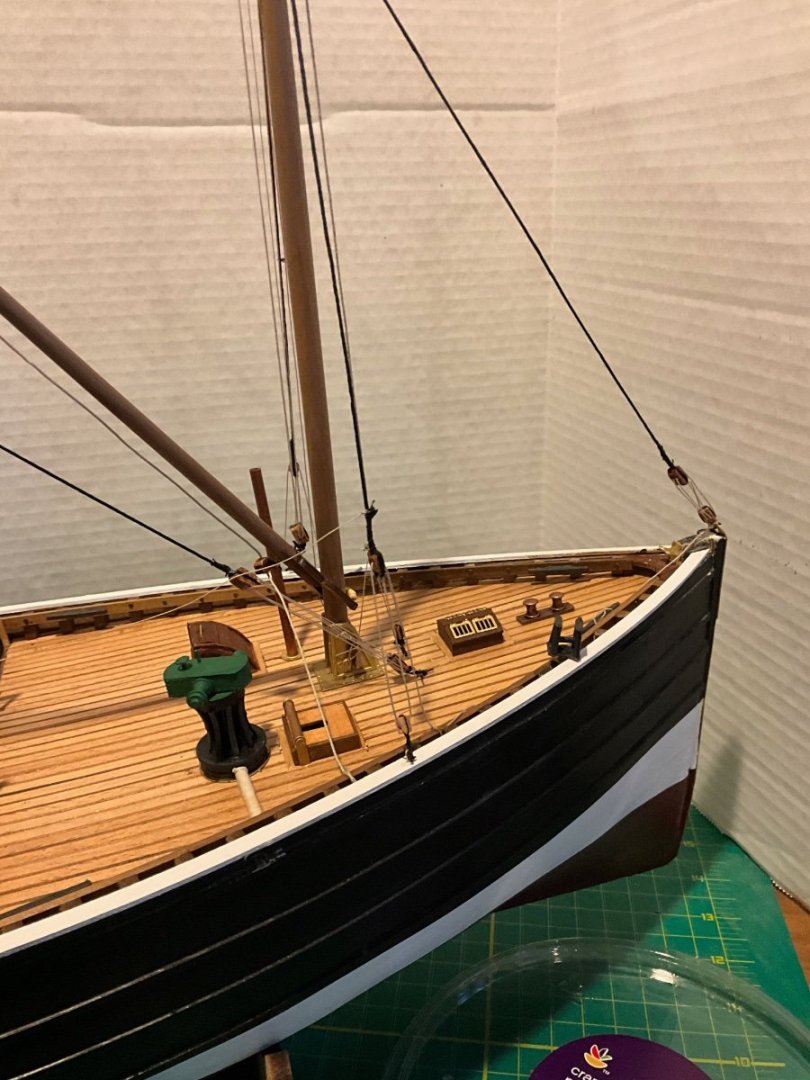
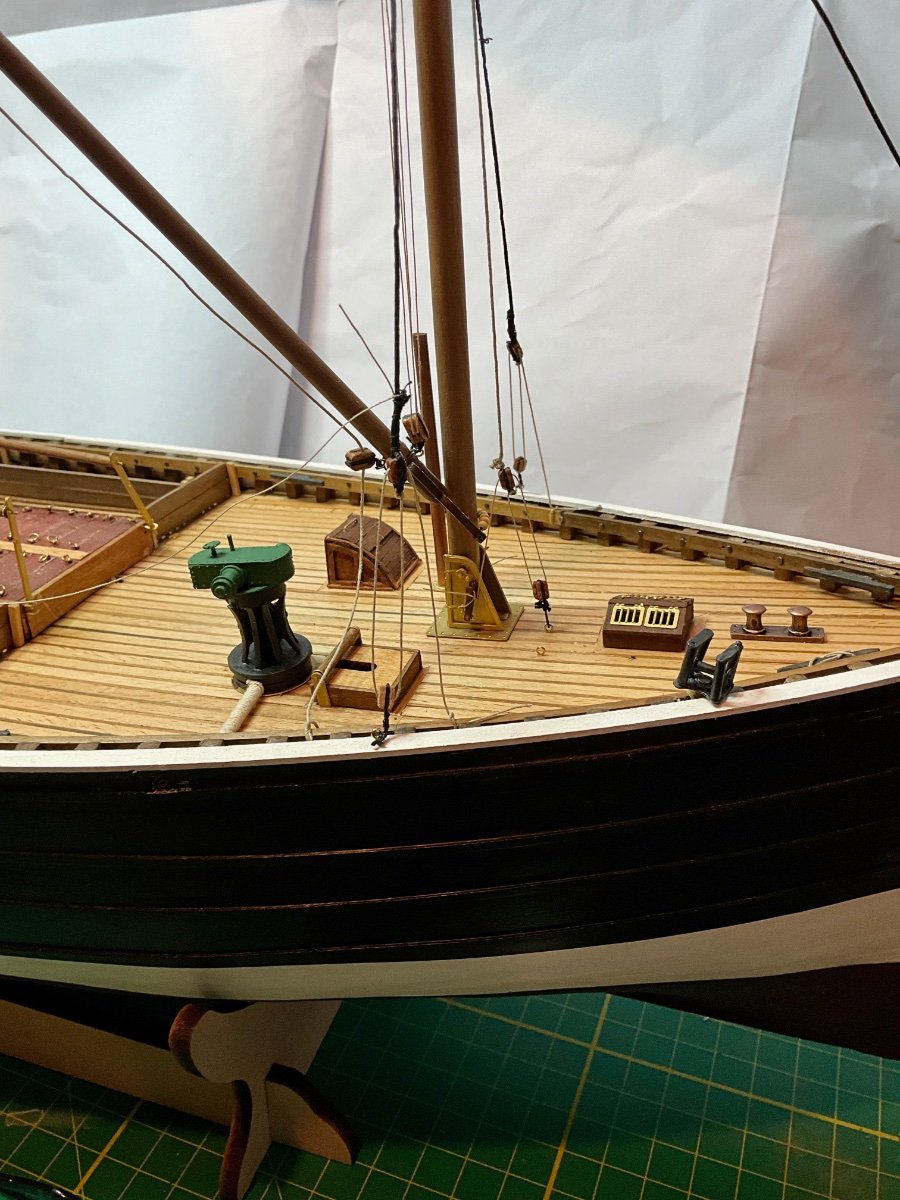
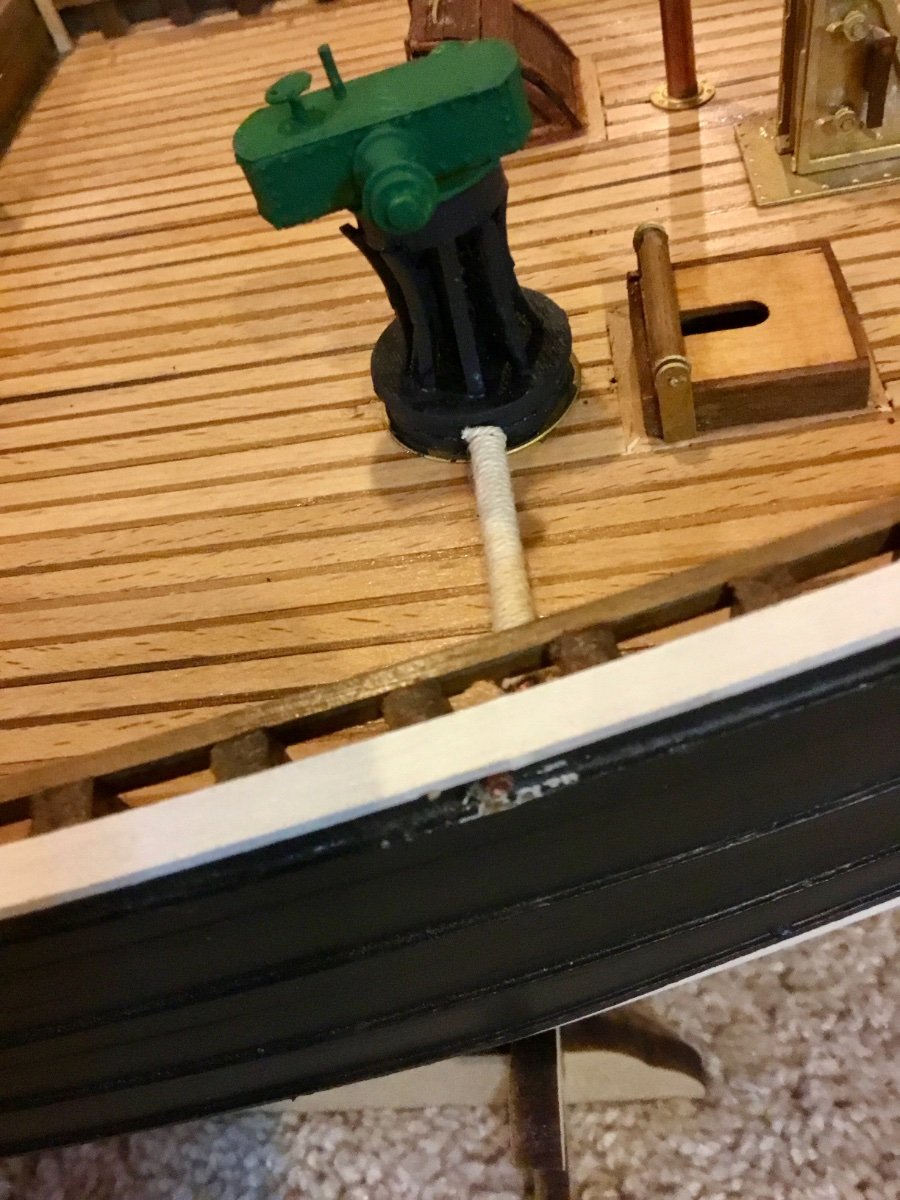
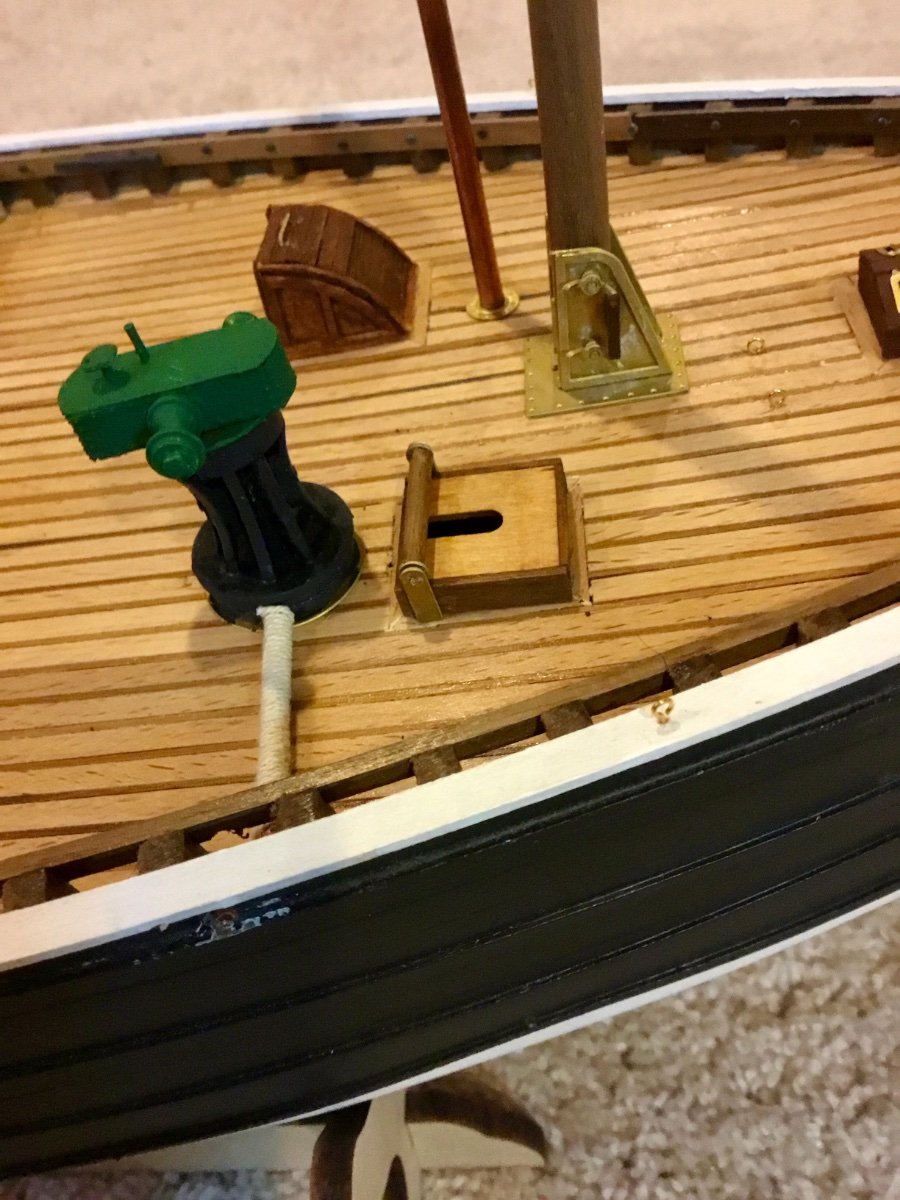
Installed the main mast assembly, chimney, bollards, steam winch, hand pump, stern seat, and various eyelets for mast stays.


Next up will be building the life boat.
-
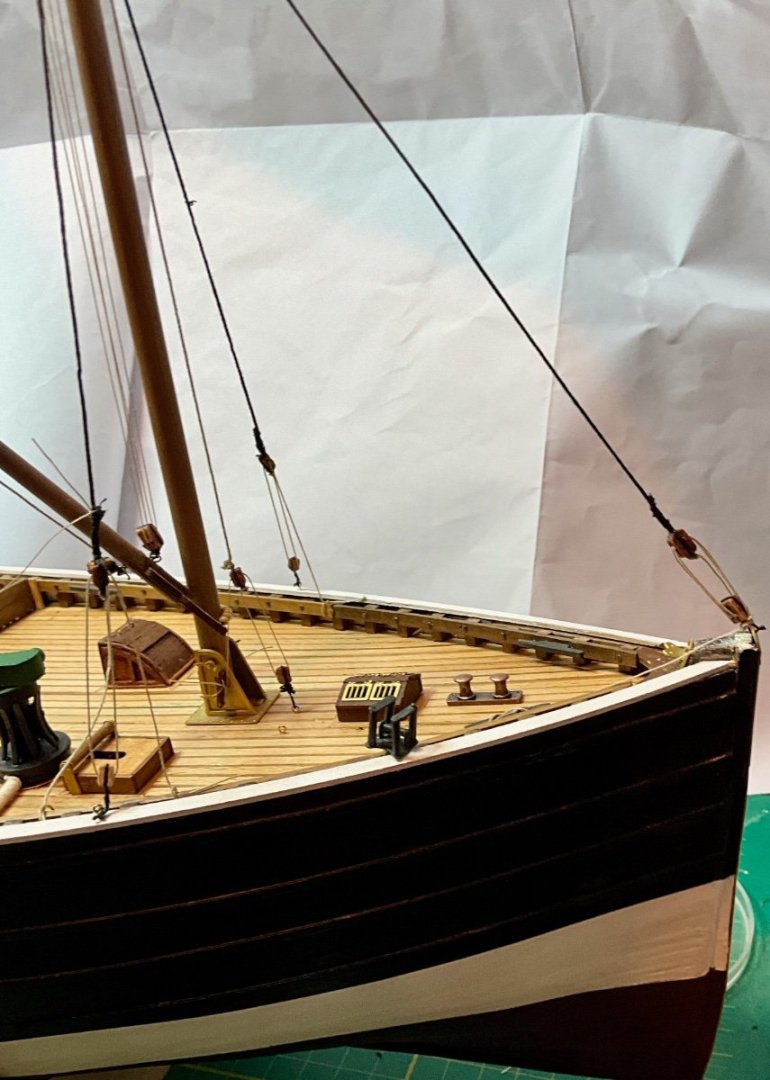
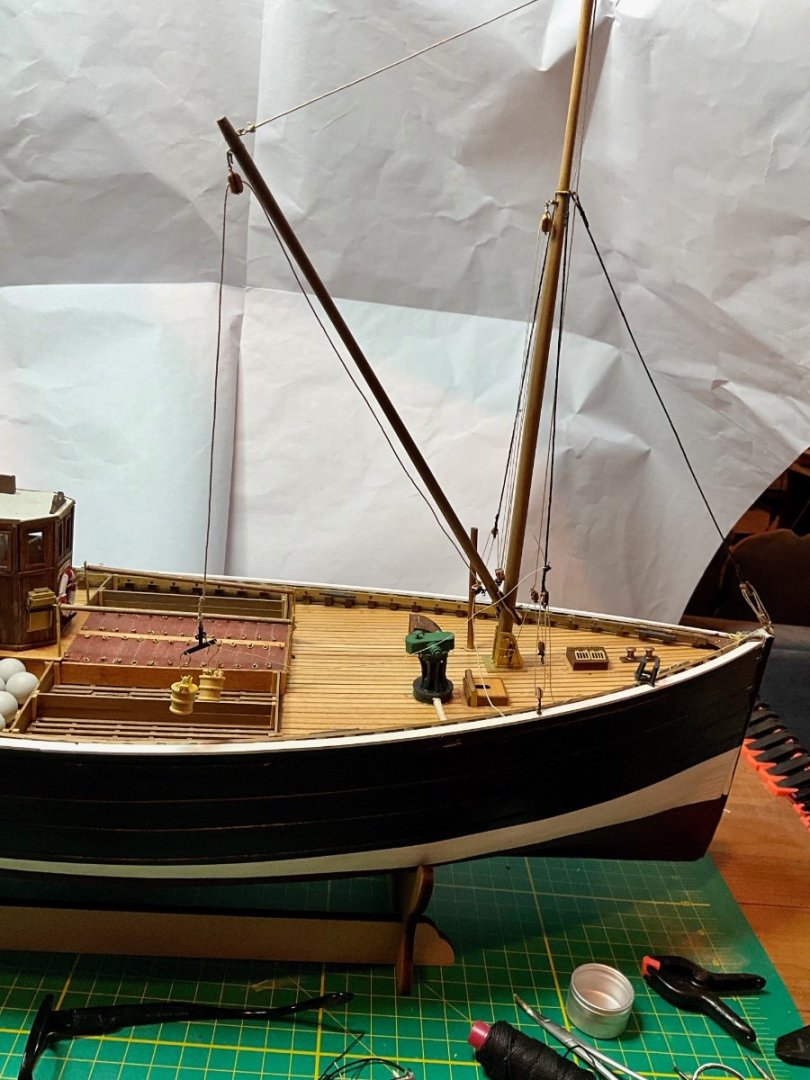
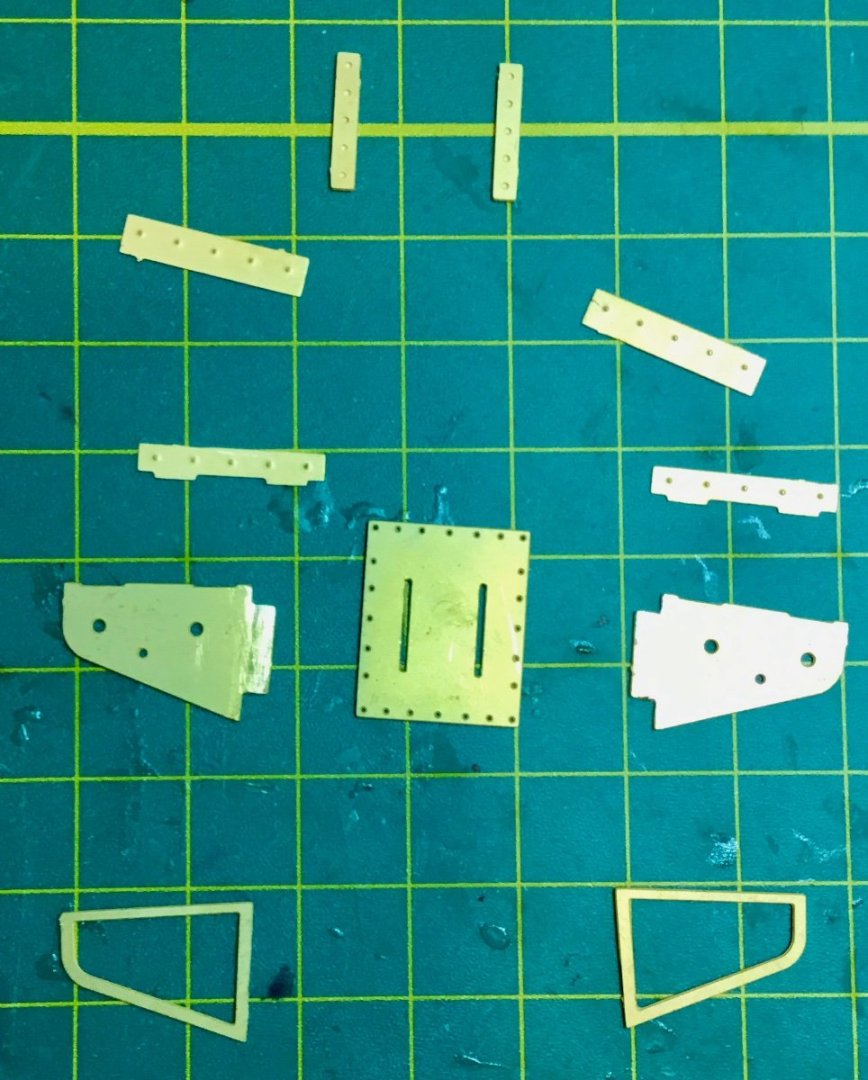
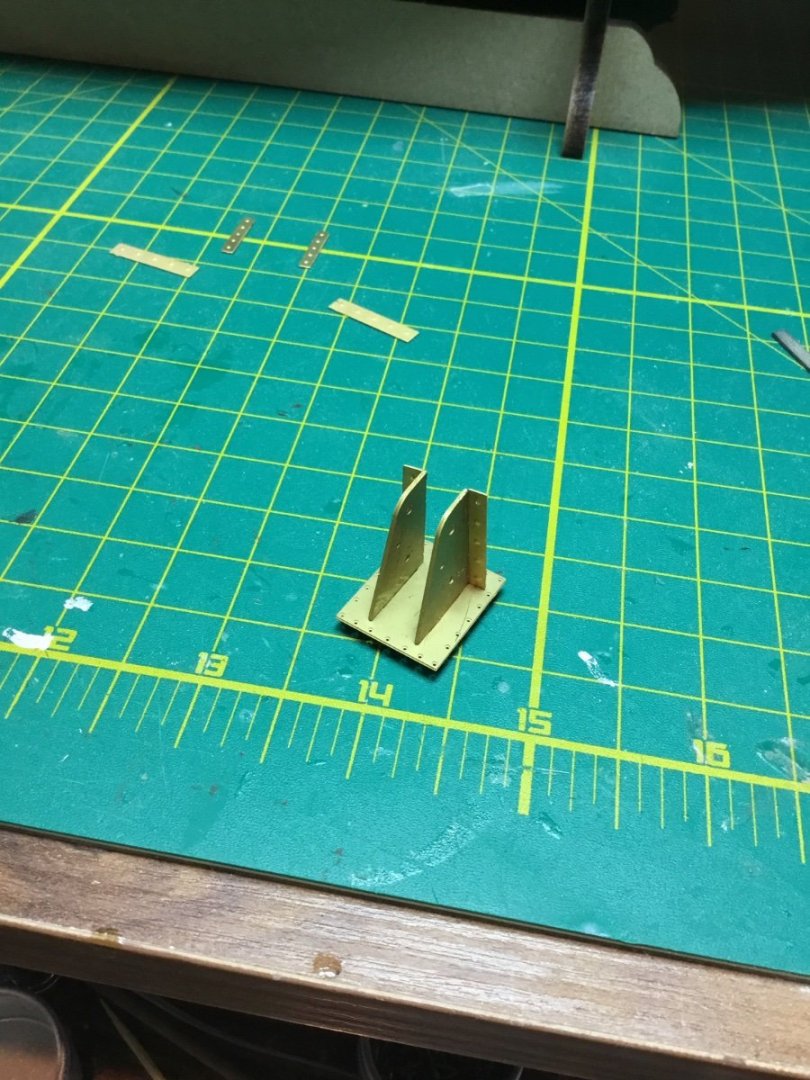
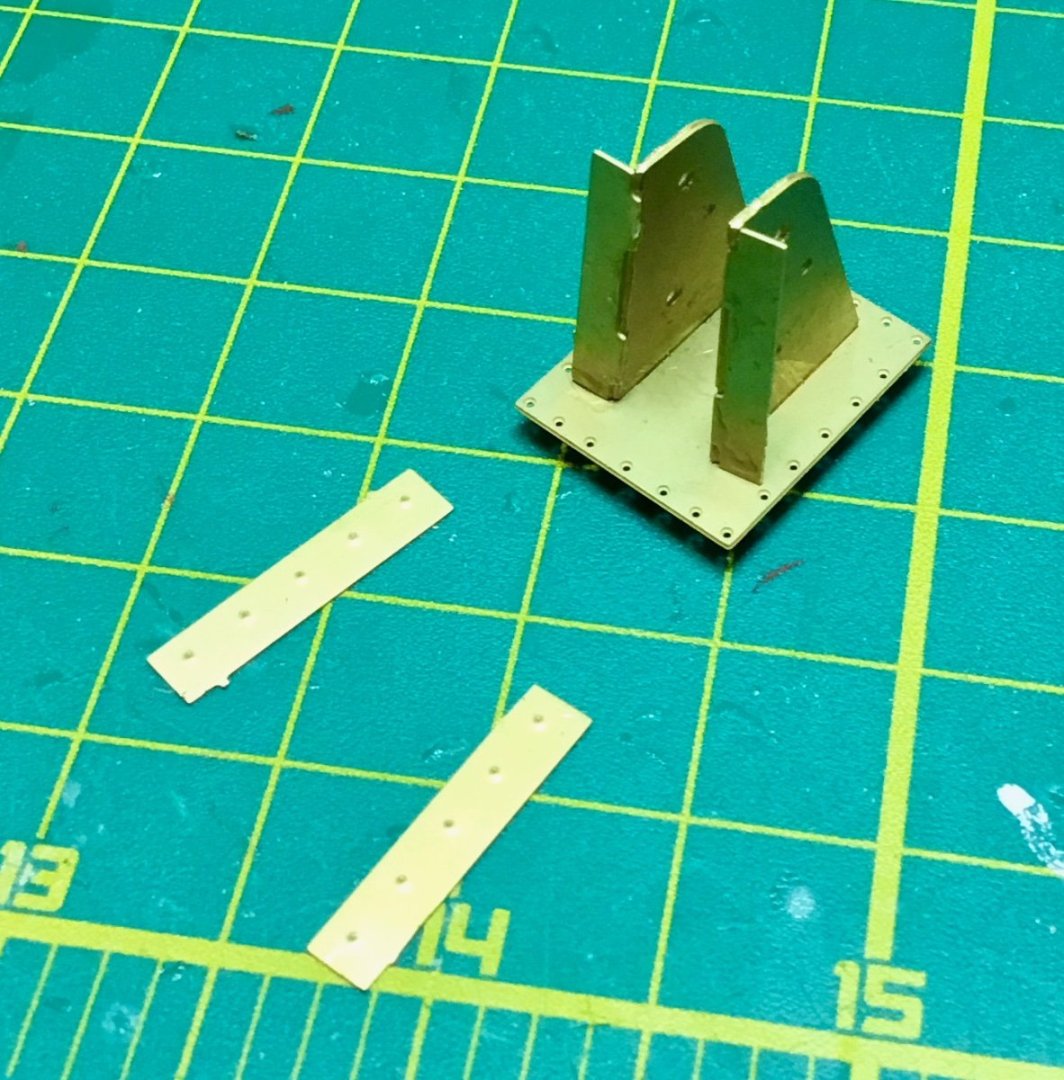
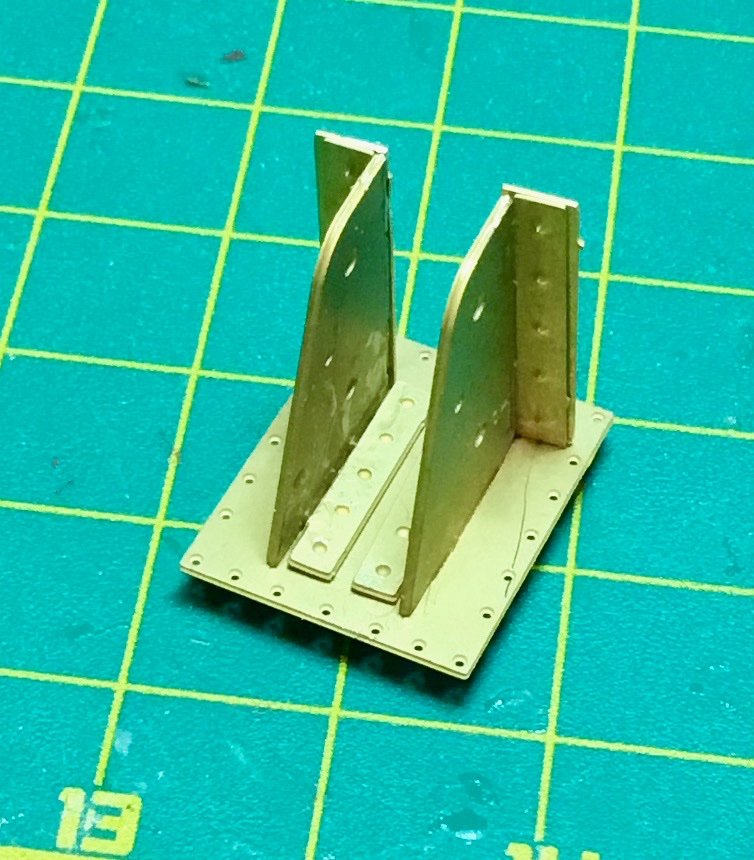
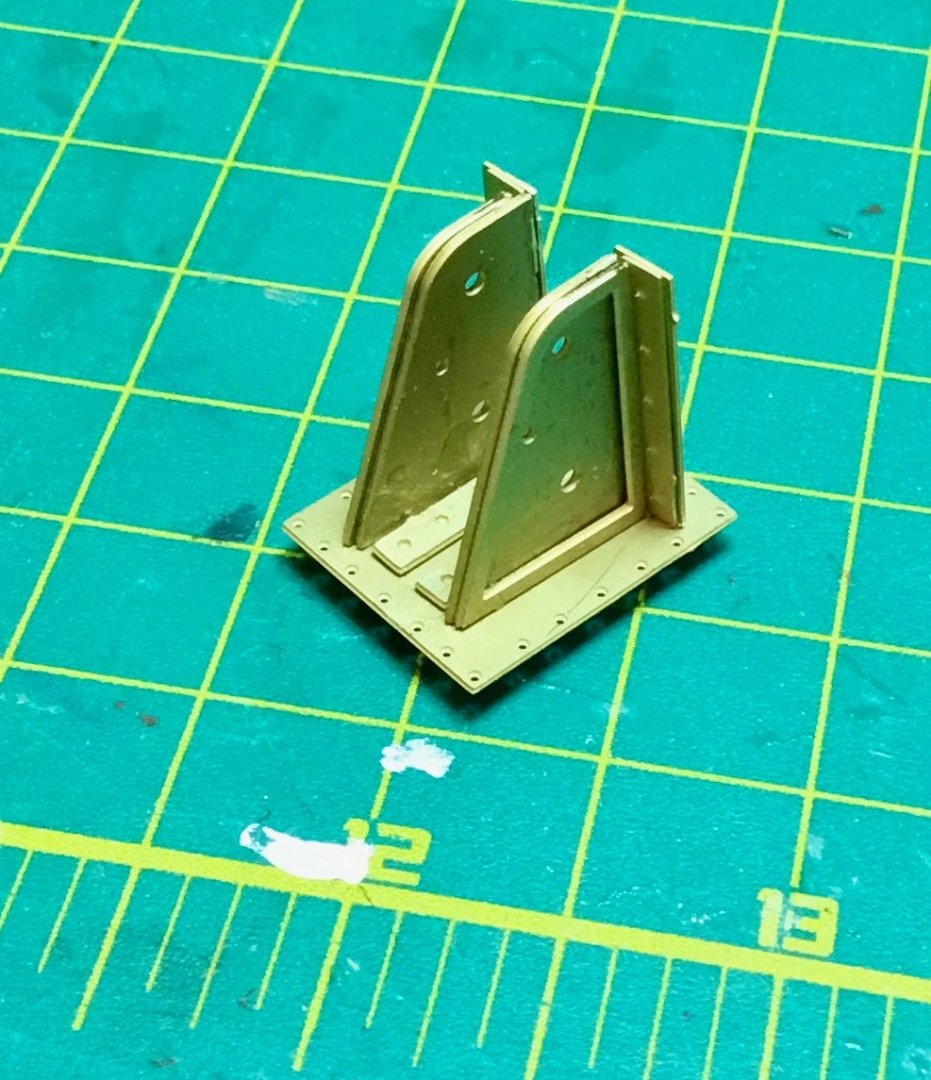
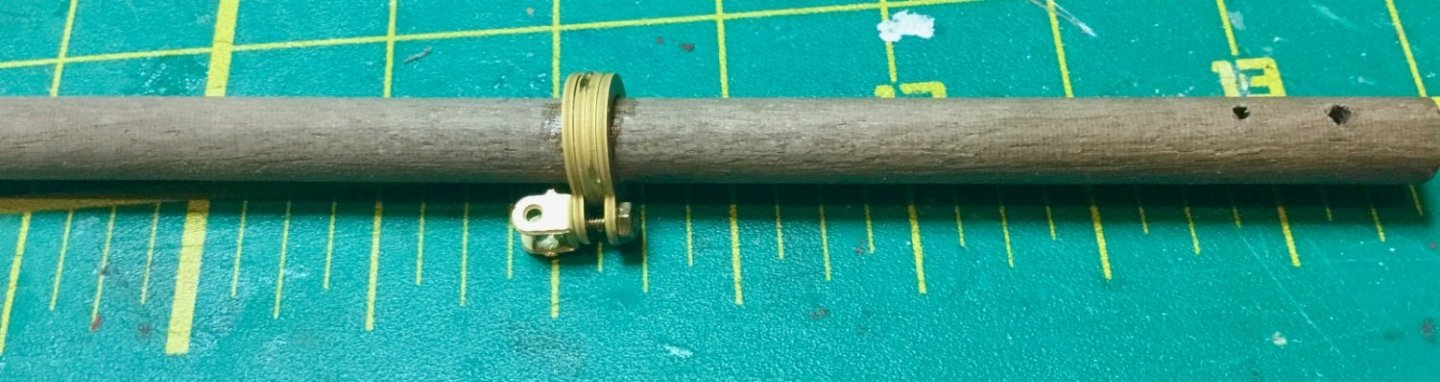
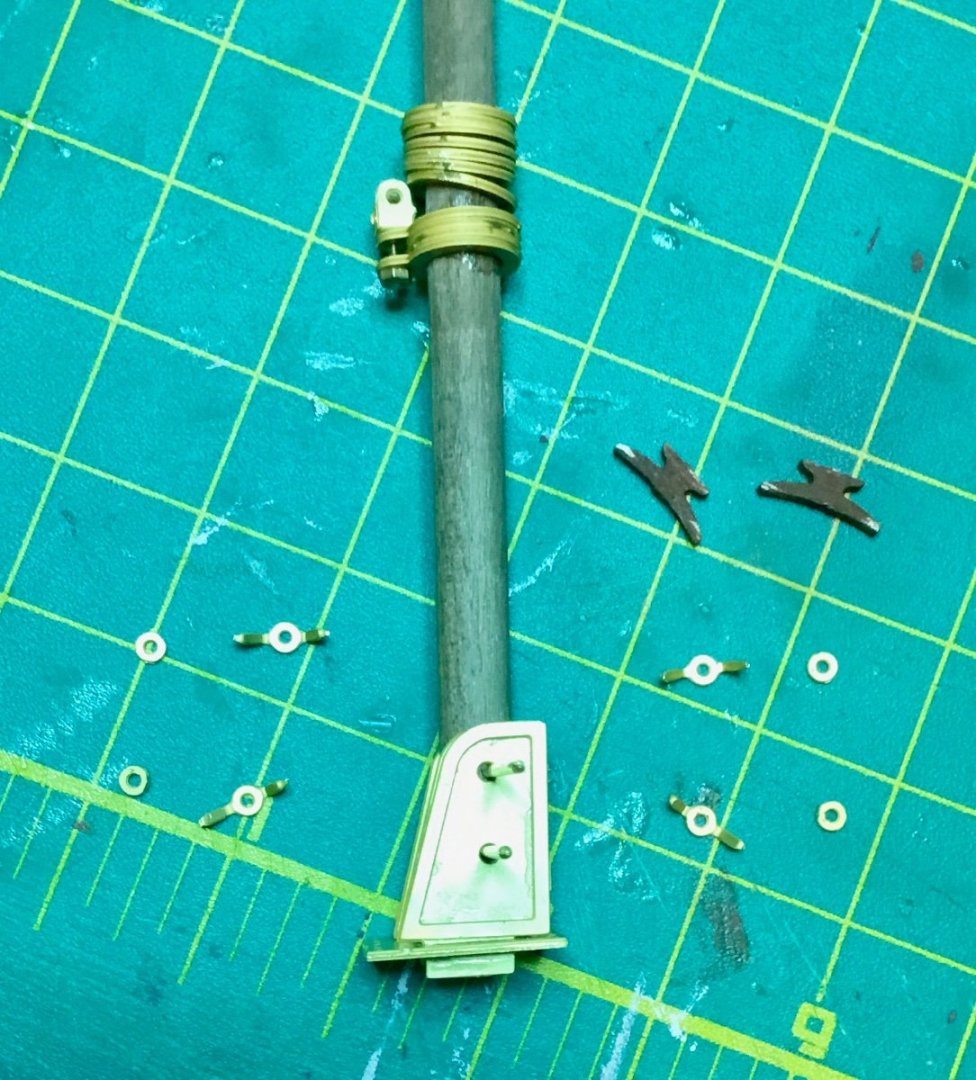
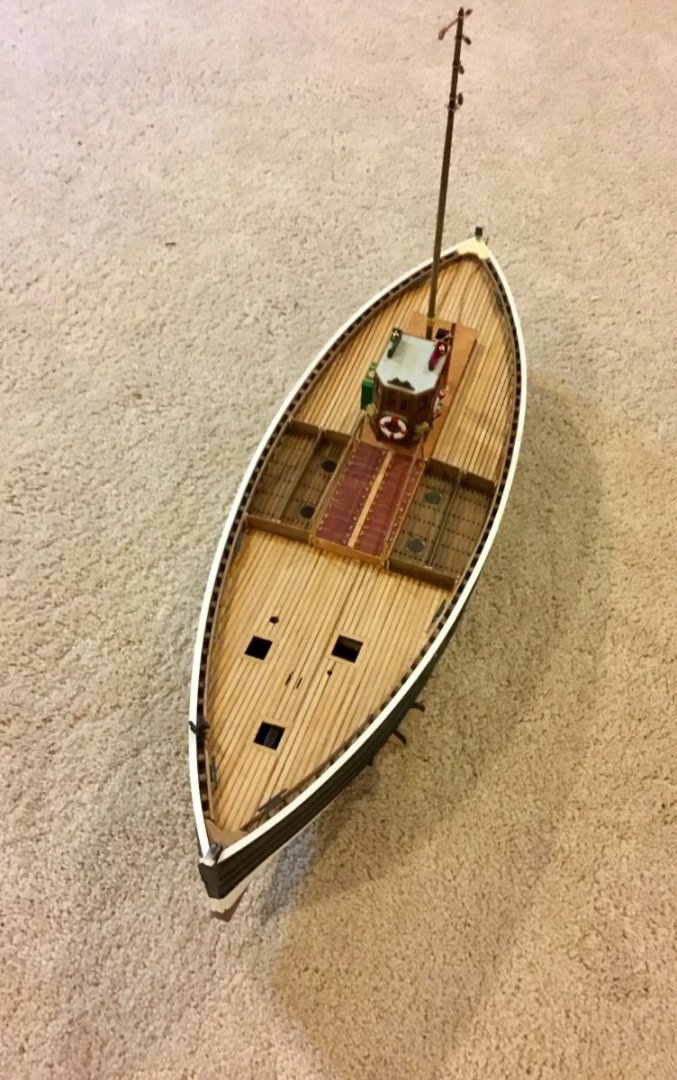
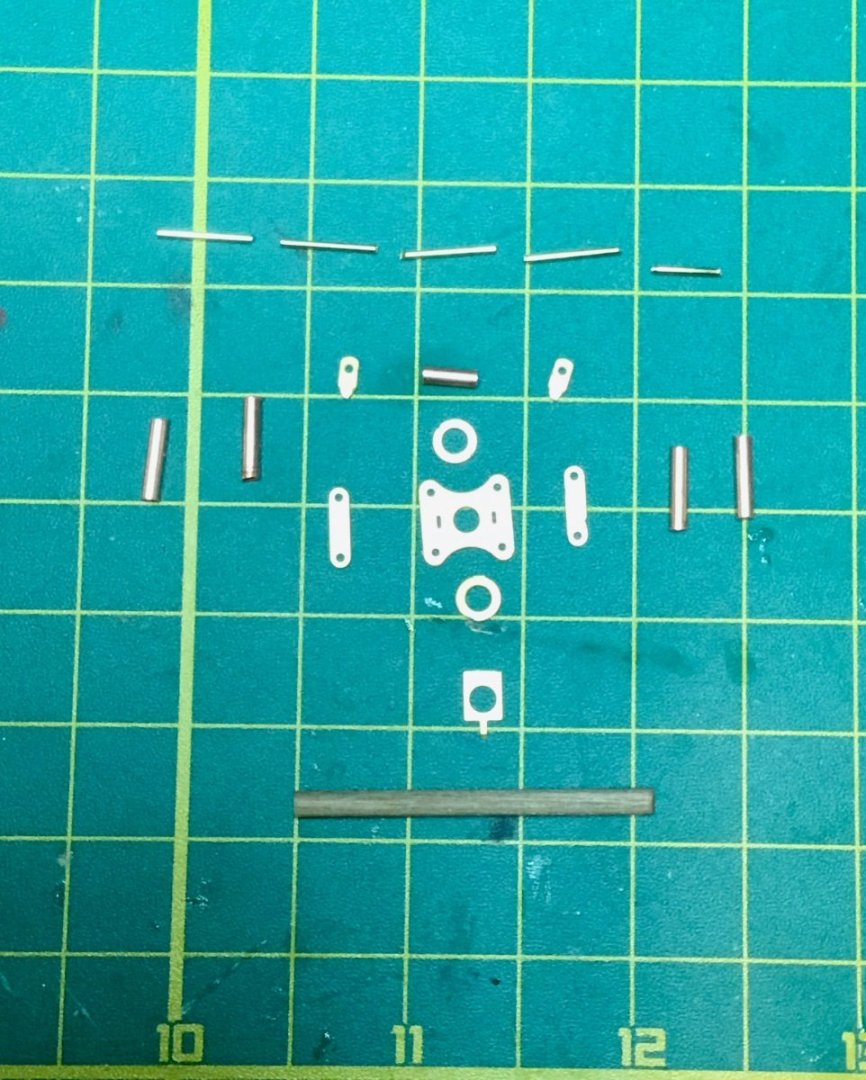
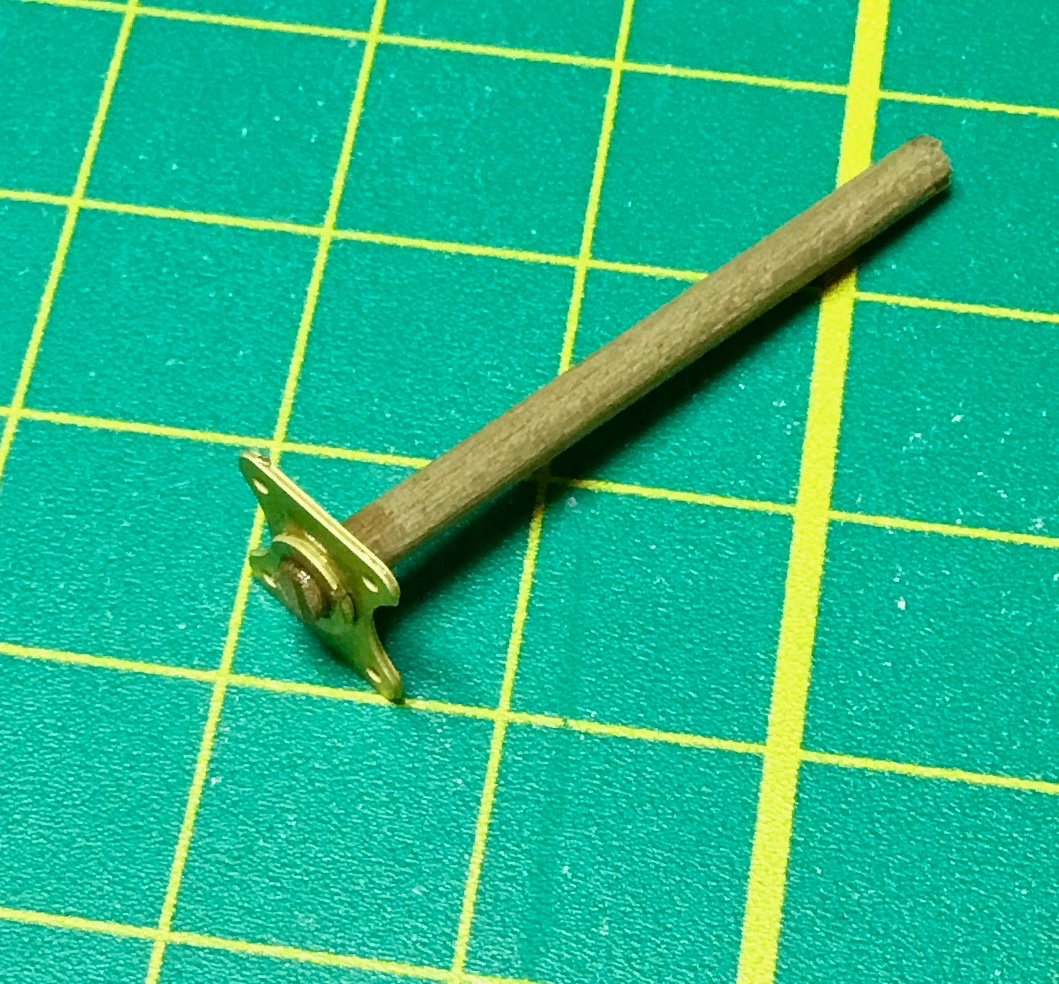
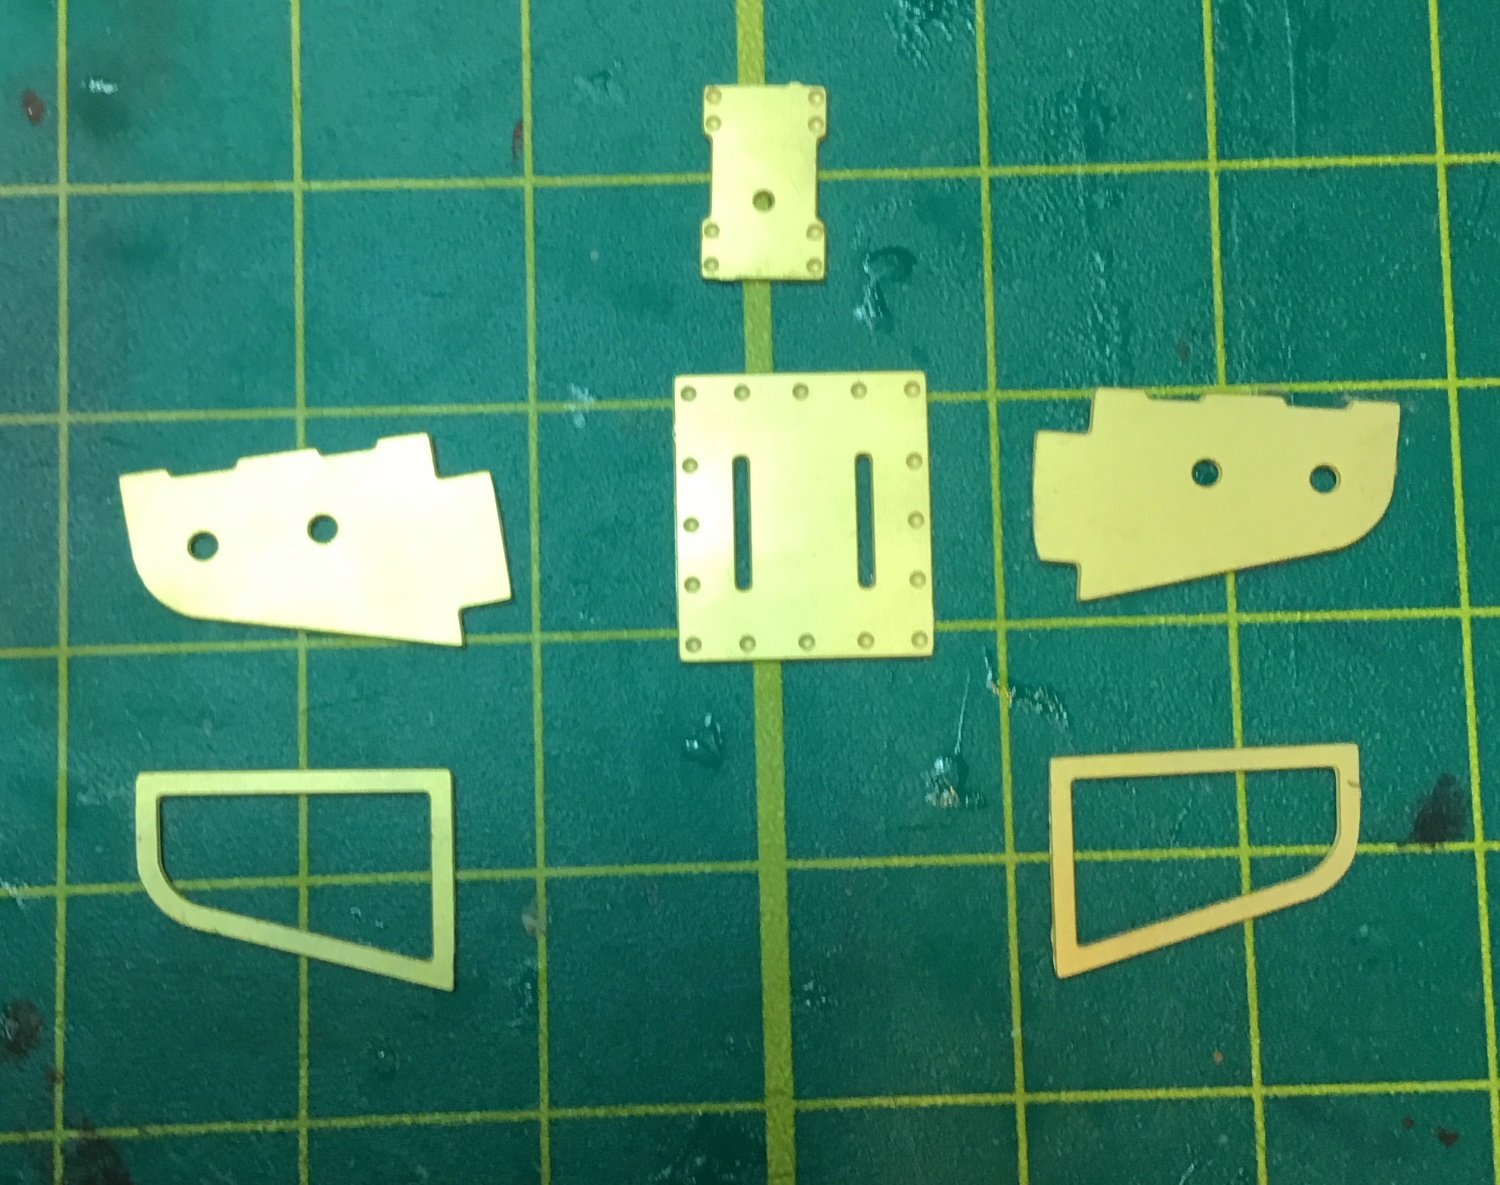
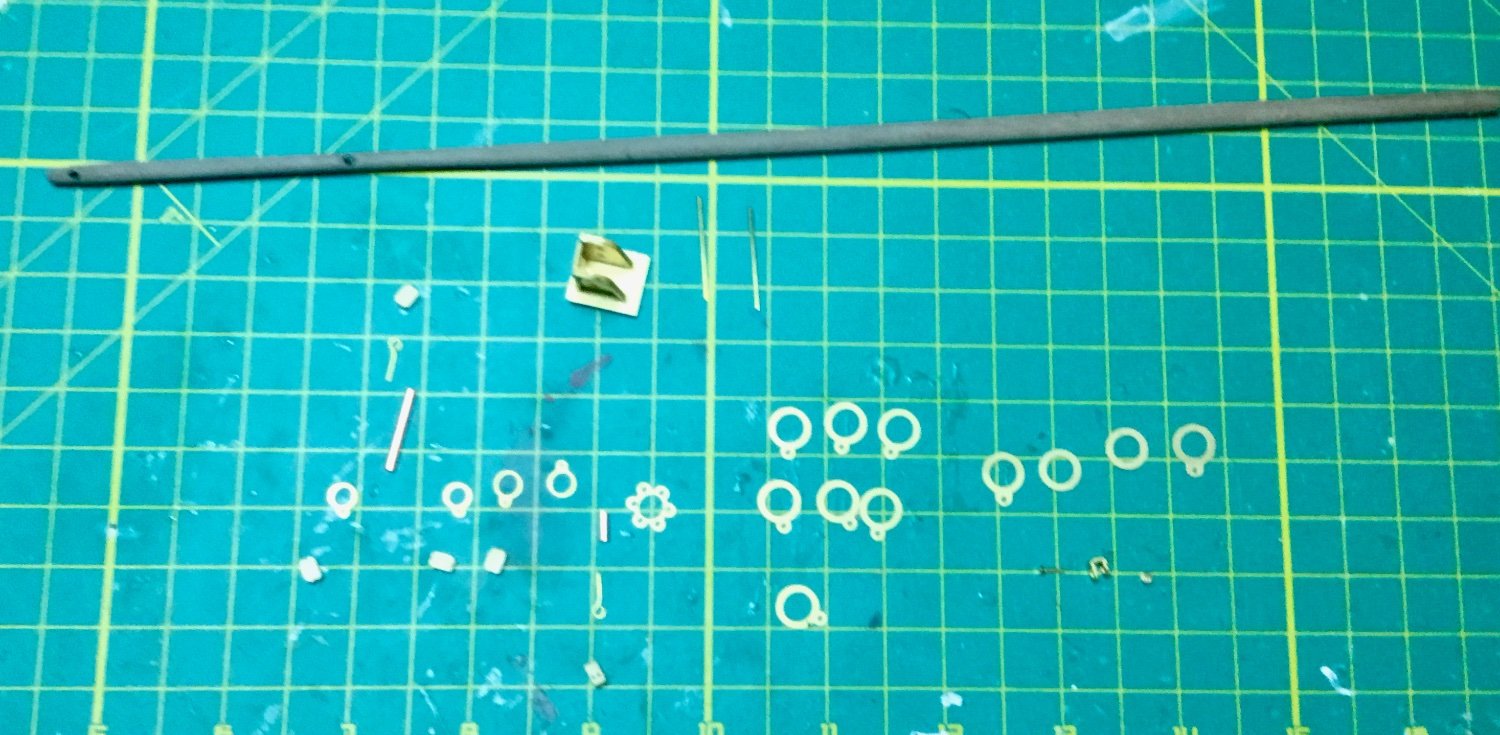
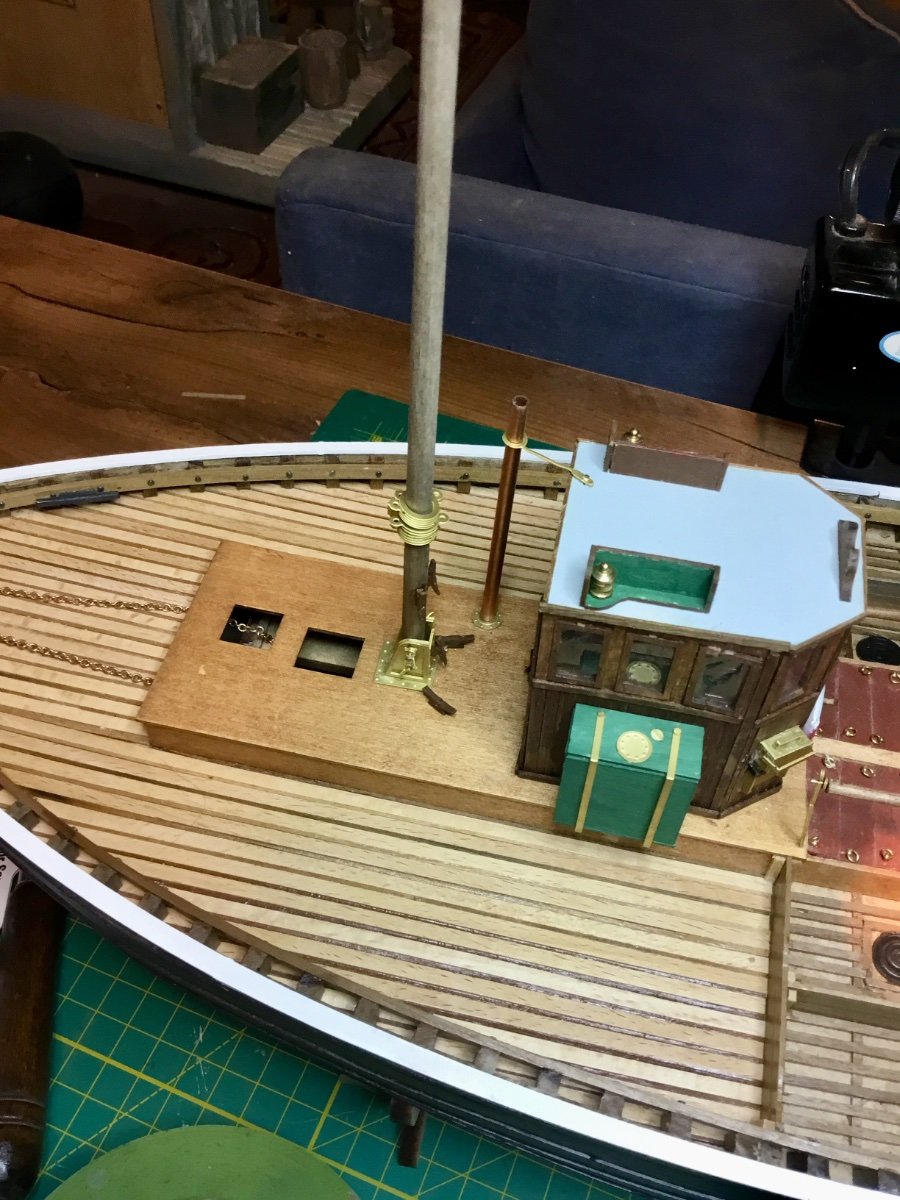
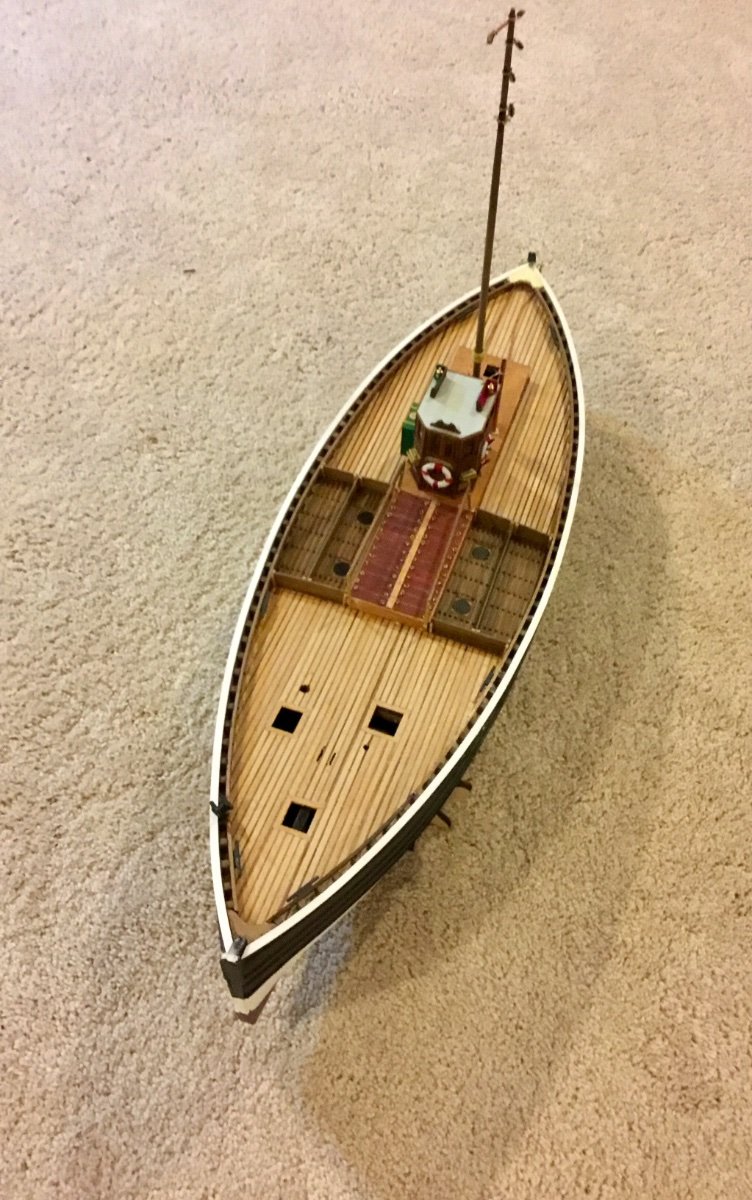
Continuing work in the Fifie I assembled the aft tabernacle (mast base) from the photo-etched brass parts provided.

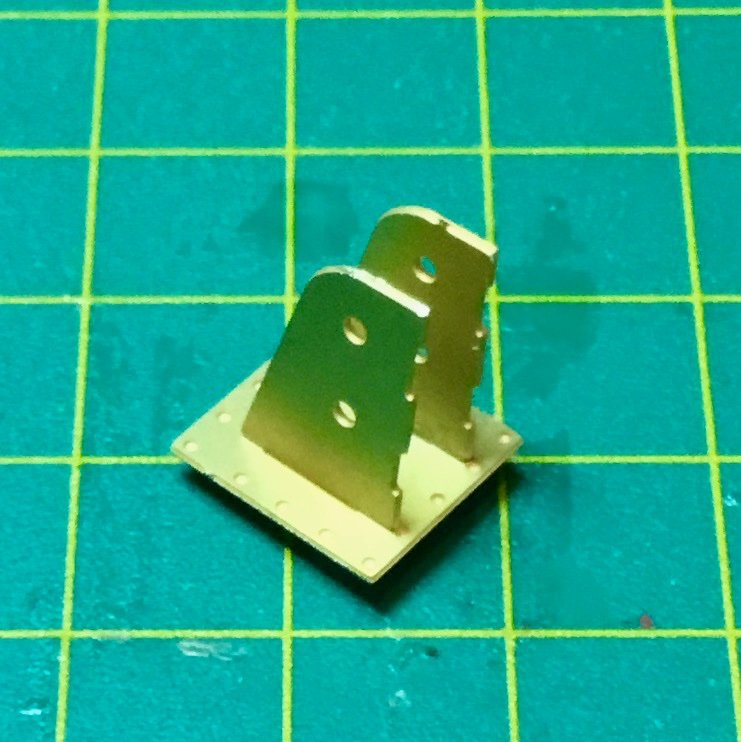
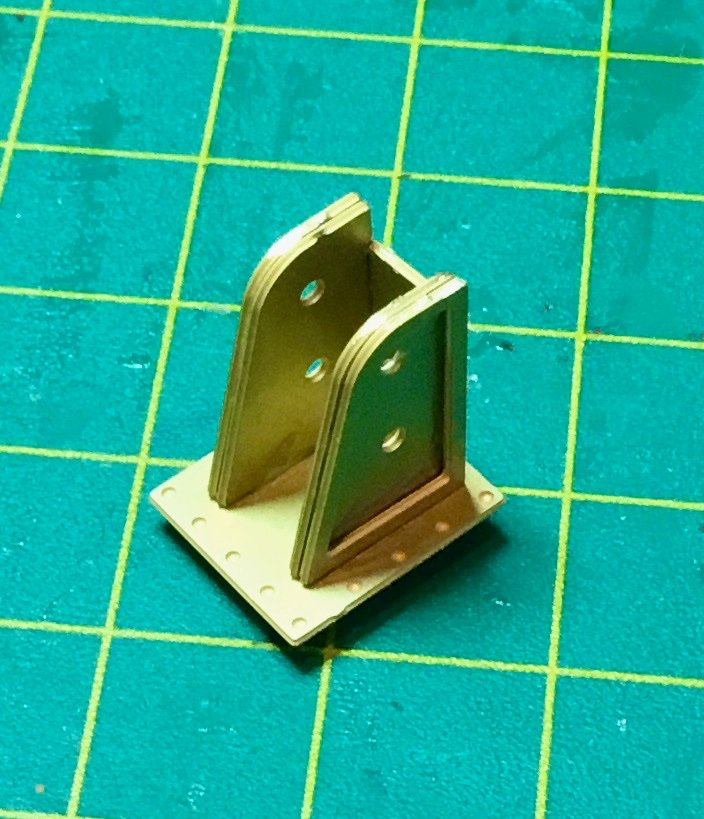
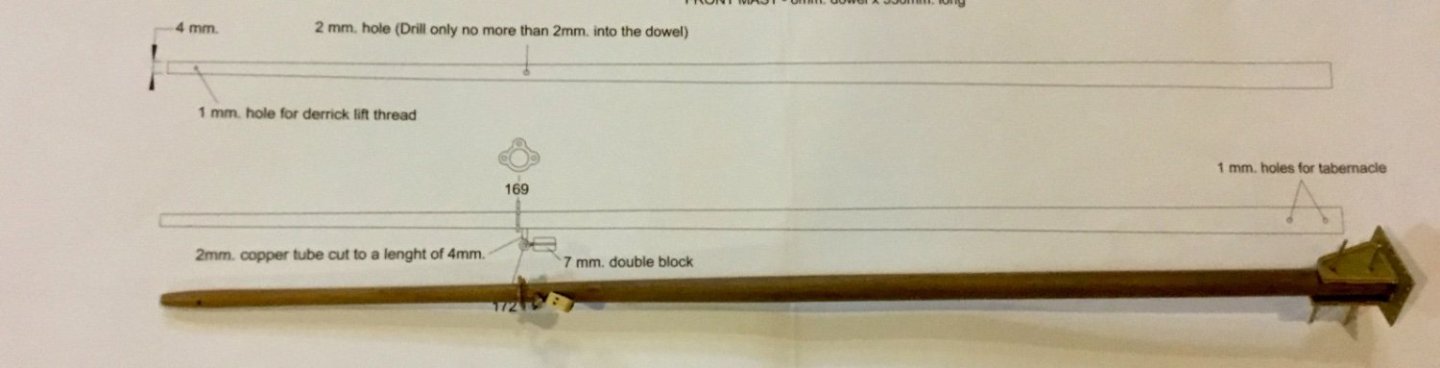
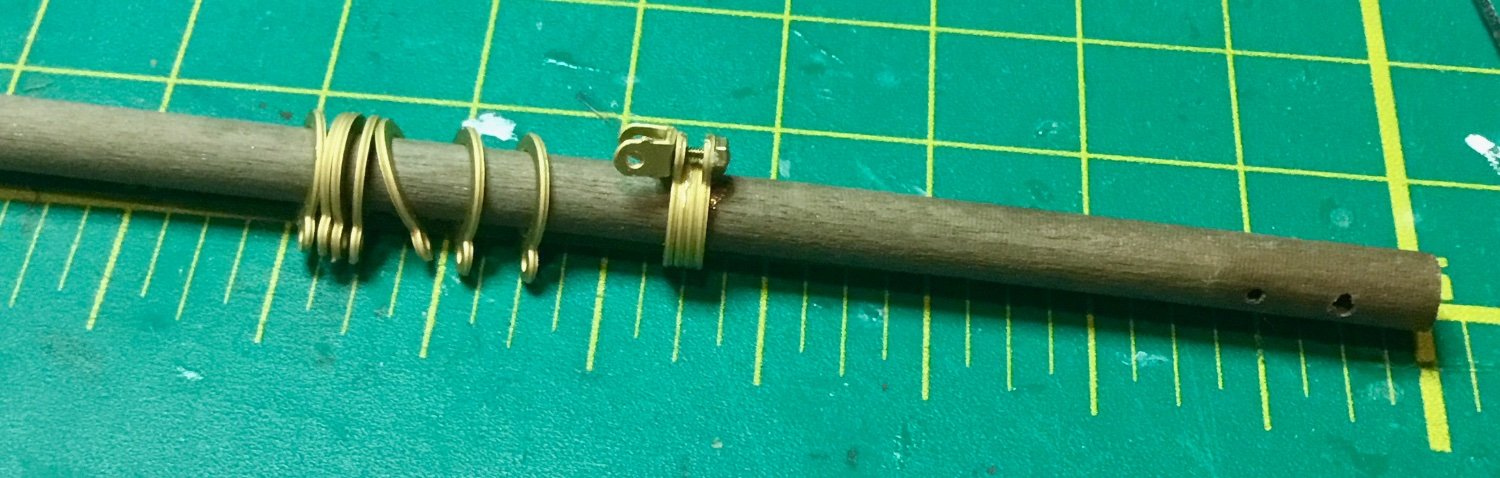
I cut and tapered the dowel for the aft mast and fitted its hardware as shown on the plans, gave it a coat of Wipe-on-Poly, attached it to the tabernacle, and mounted the assembly on the superstructure just behind the pilot house.

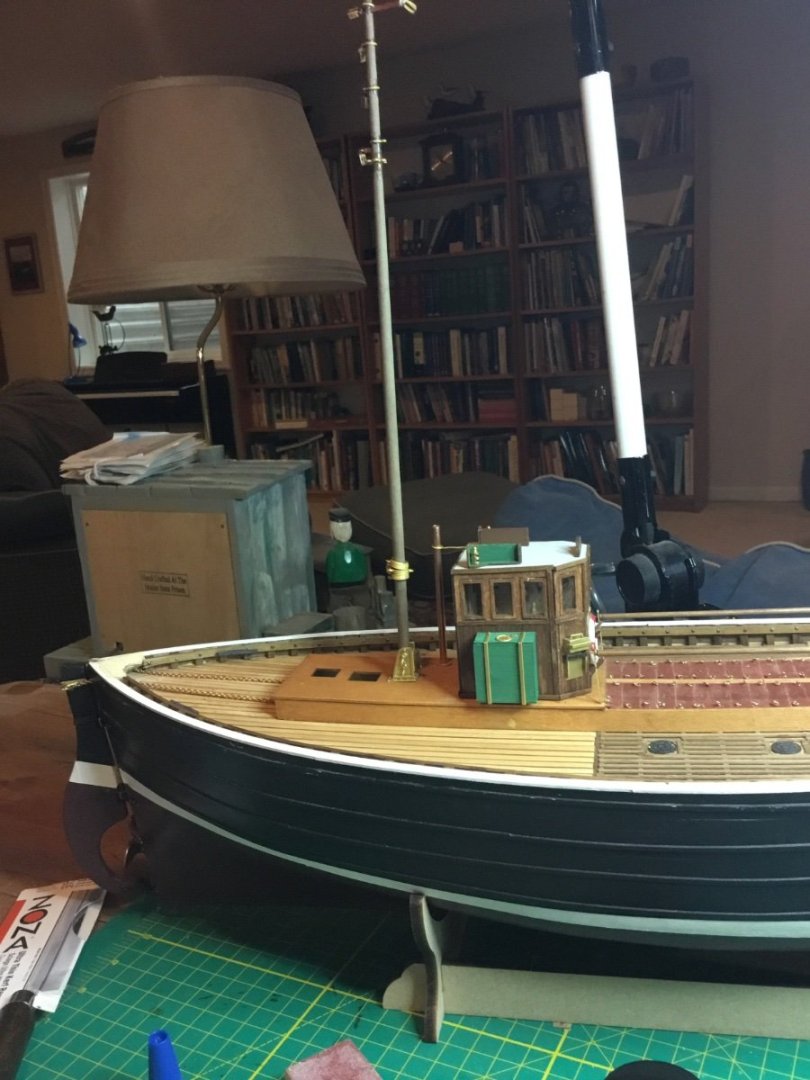
I then used CA to mount the wooden cleats to the mast and on the deck next to the base. The instructions called for pinning the cleats but I had trouble drilling the holes for the pins so I compromised and just glued them in place. I will need to be careful when installing the rigging.
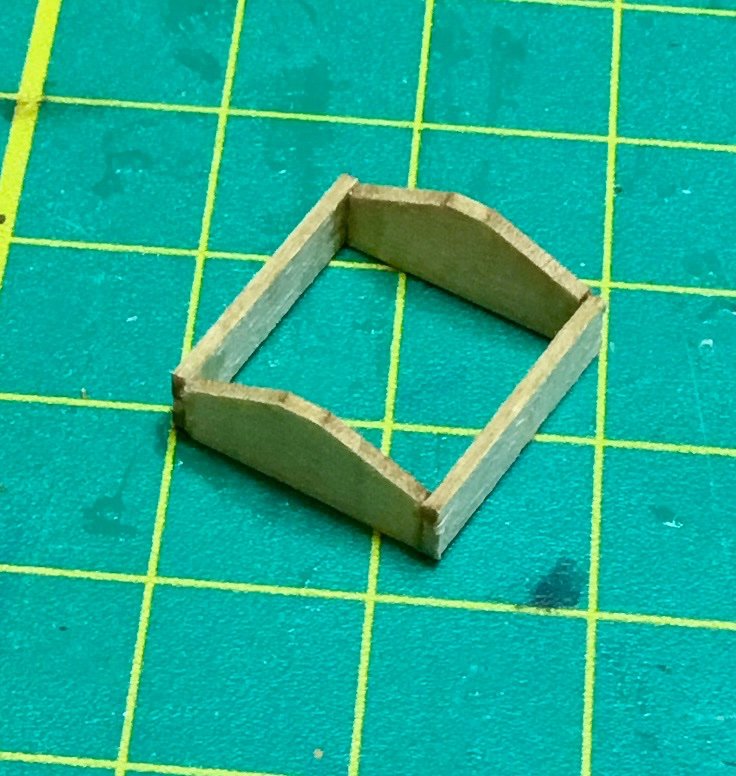
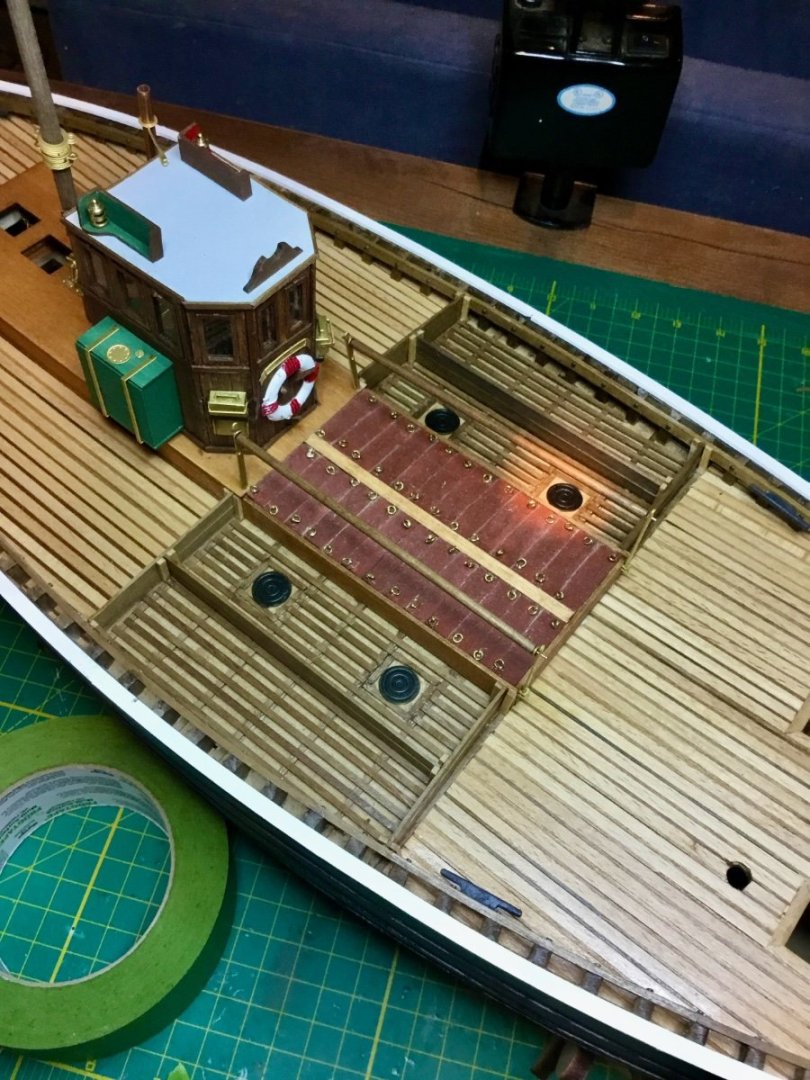
I also installed the boards enclosing the areas on either side of the hatches and net rollers (used to corral the catch of fish dumped from the nets?). These were not called out in the assembly manual but just appeared in the photos provided, soft of like the gunwales did at an earlier step. I've also noticed that the instruction manual glosses over the rigging of the boat with just a series of finished photographs so I will need to study the plans carefully when I get to that stage. Seems odd that some major parts of the build are completely left out of the nicely done and photographed instruction manual while some minor items are given detailed steps and photos. It's as if the writers couldn't make up their minds about the level of experience of the person buying the kit. A simple sentence at the correct step in the build process (like- using the parts as shown on Plan Sheet X, enclosing the fish collection areas port and starboard, etc.) would suffice. Anyway, just my opinion. Maybe that shows I'm still only a beginner if I am expecting detailed step-by-step instructions. But I would prefer that rather than missing steps and a bunch of glossy photos.


- Paul Le Wol and yvesvidal
-
2
-
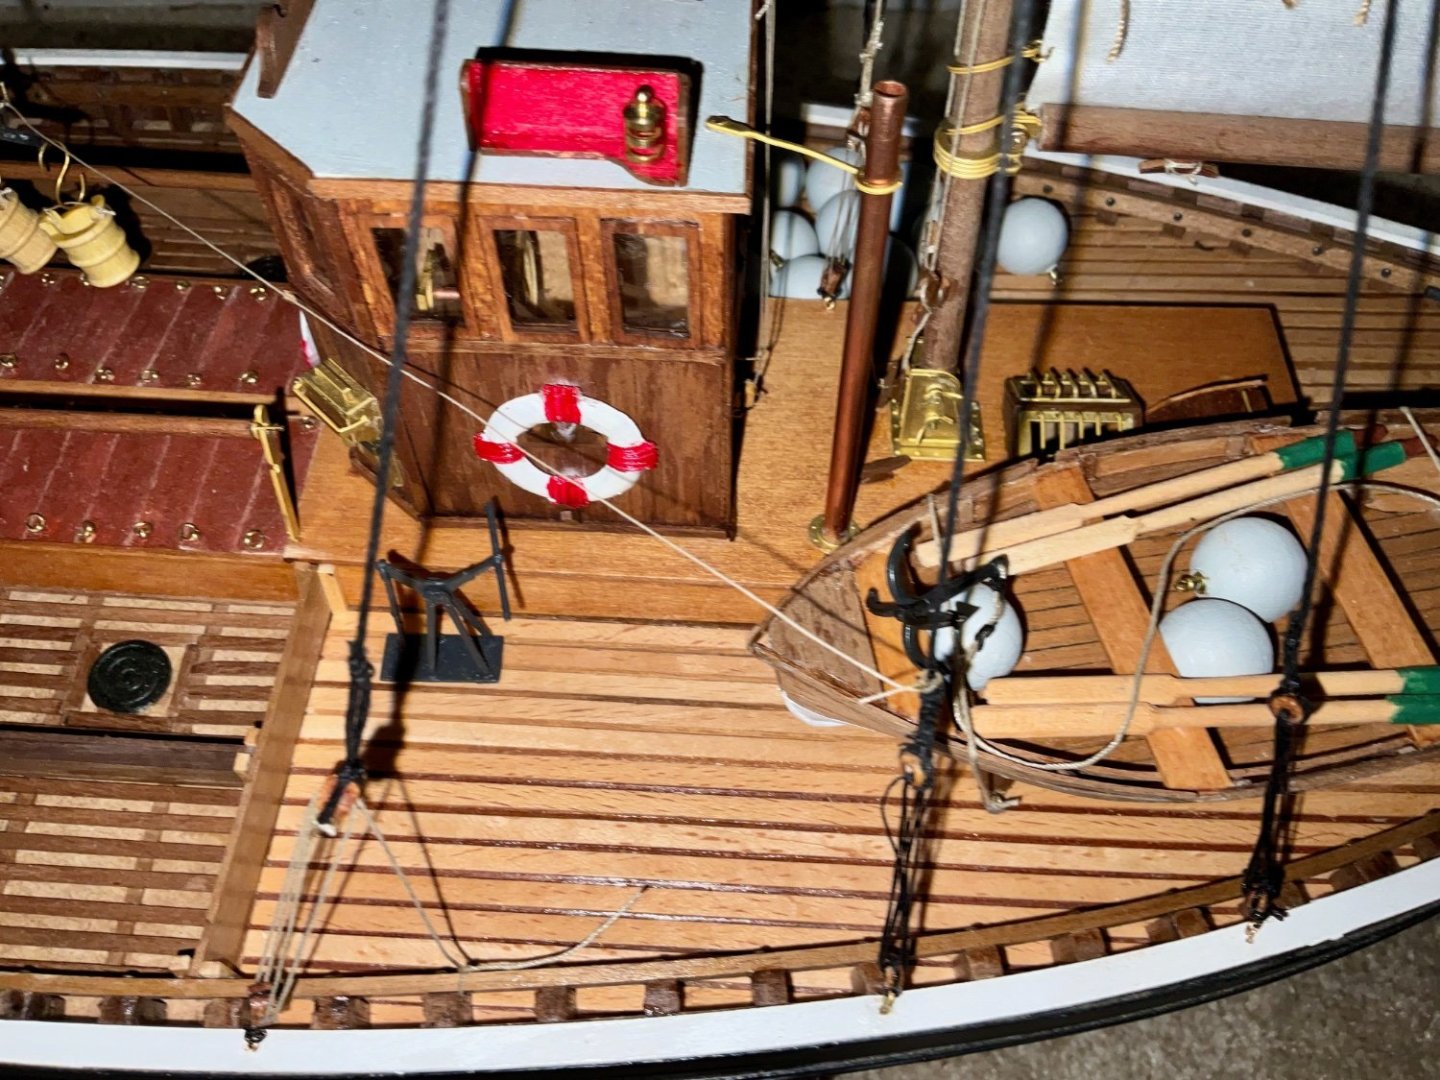
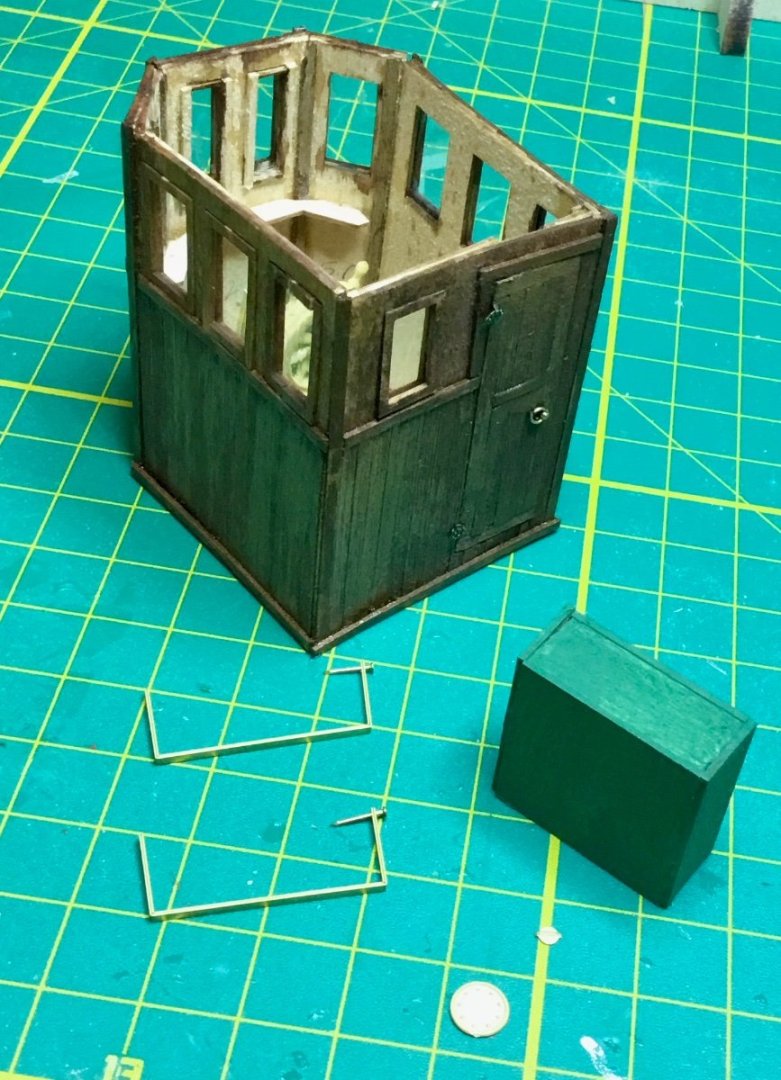
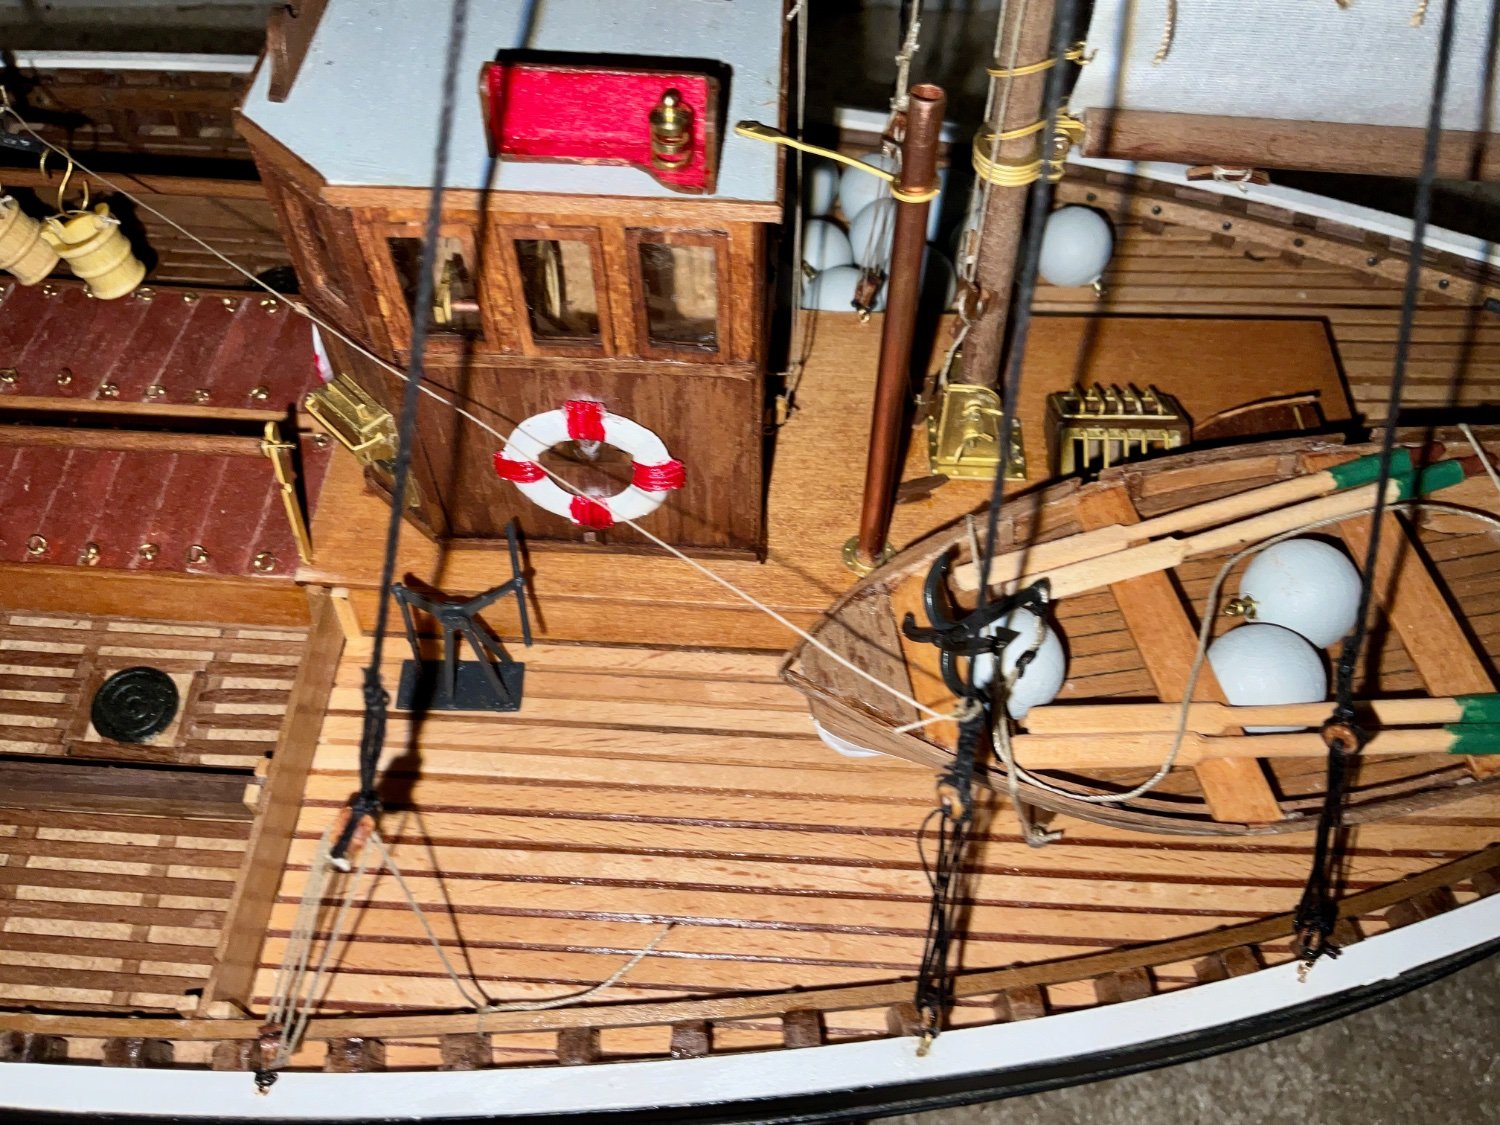
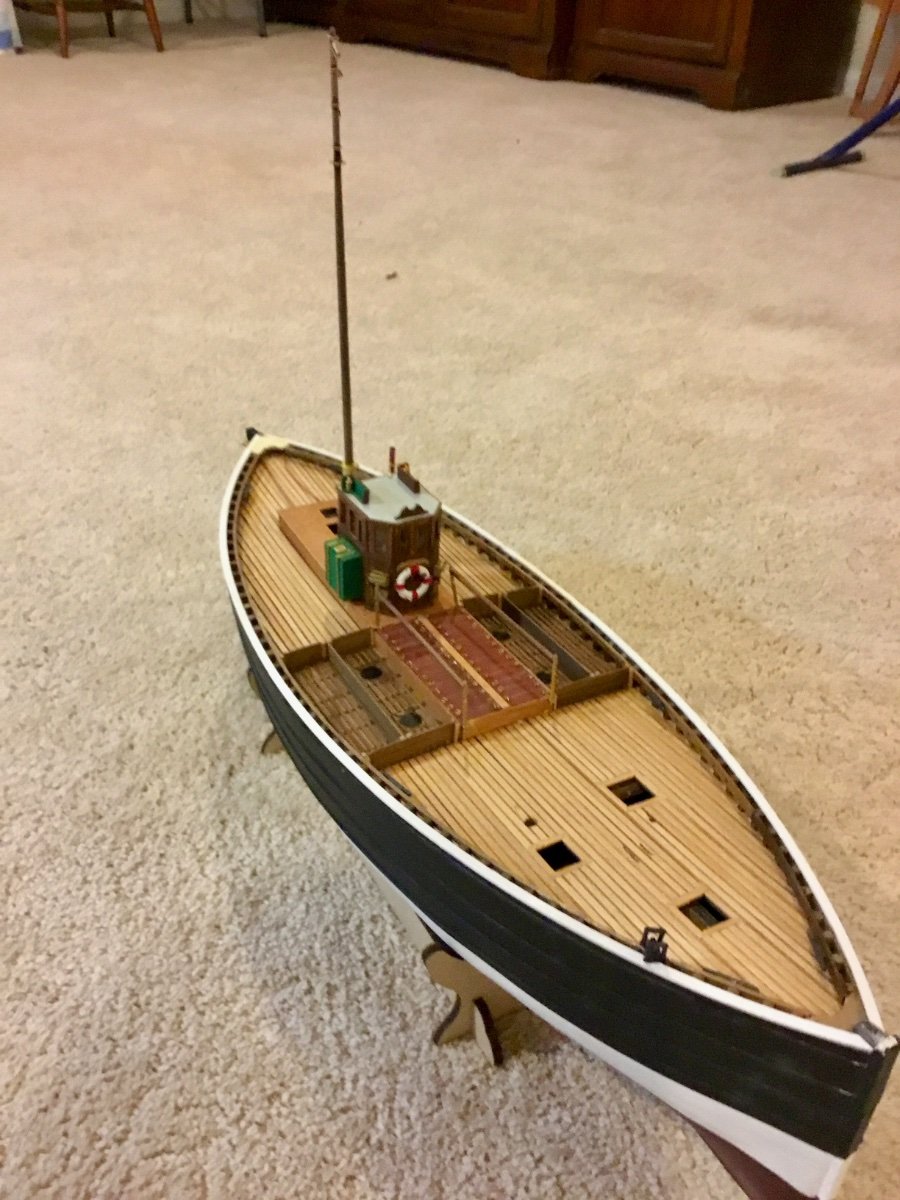
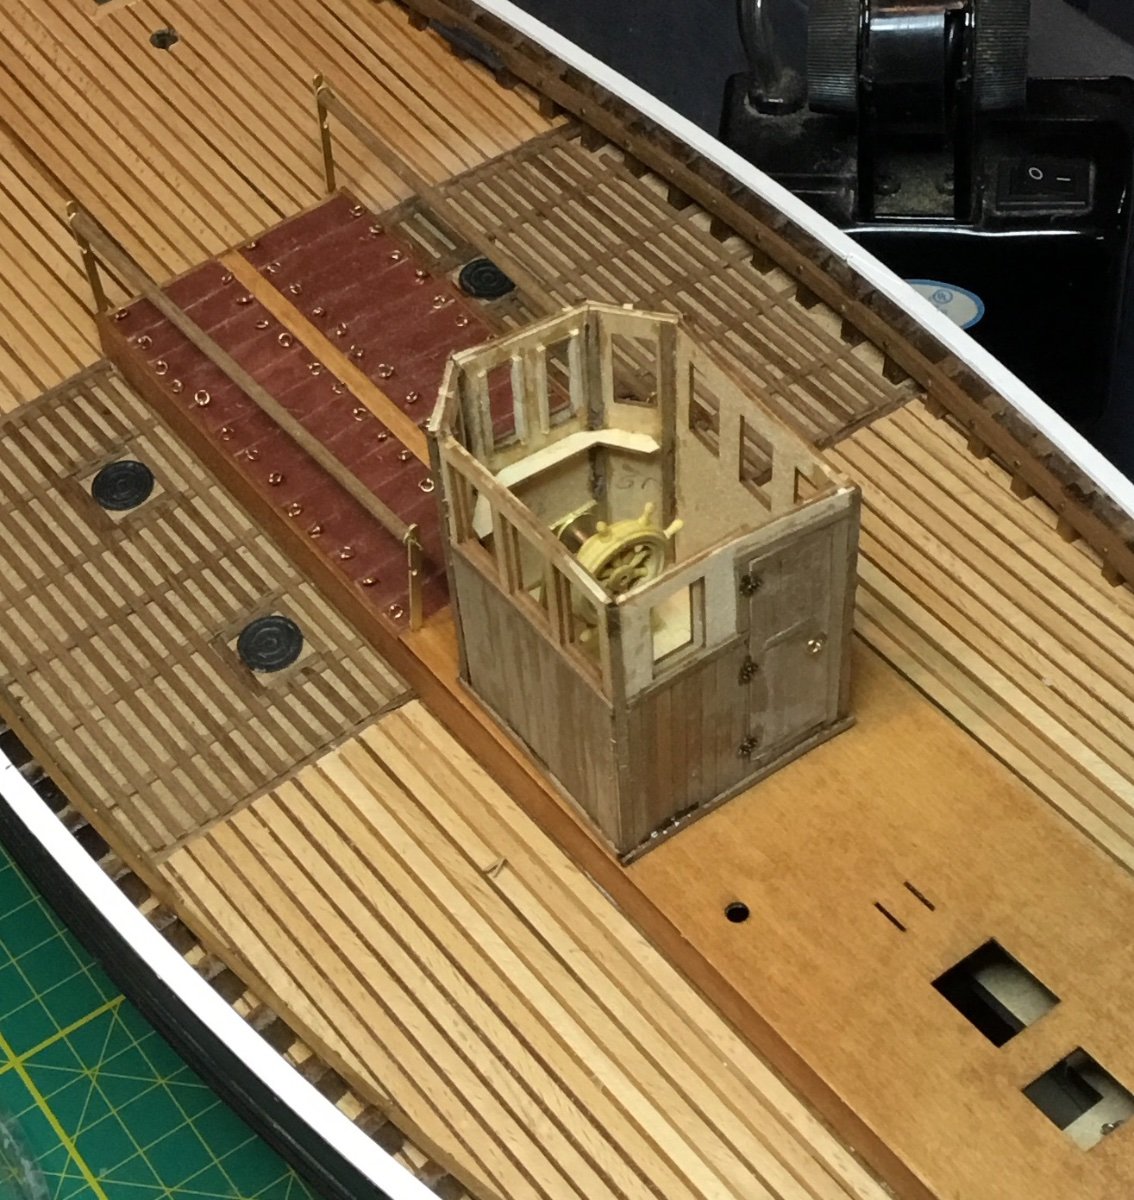
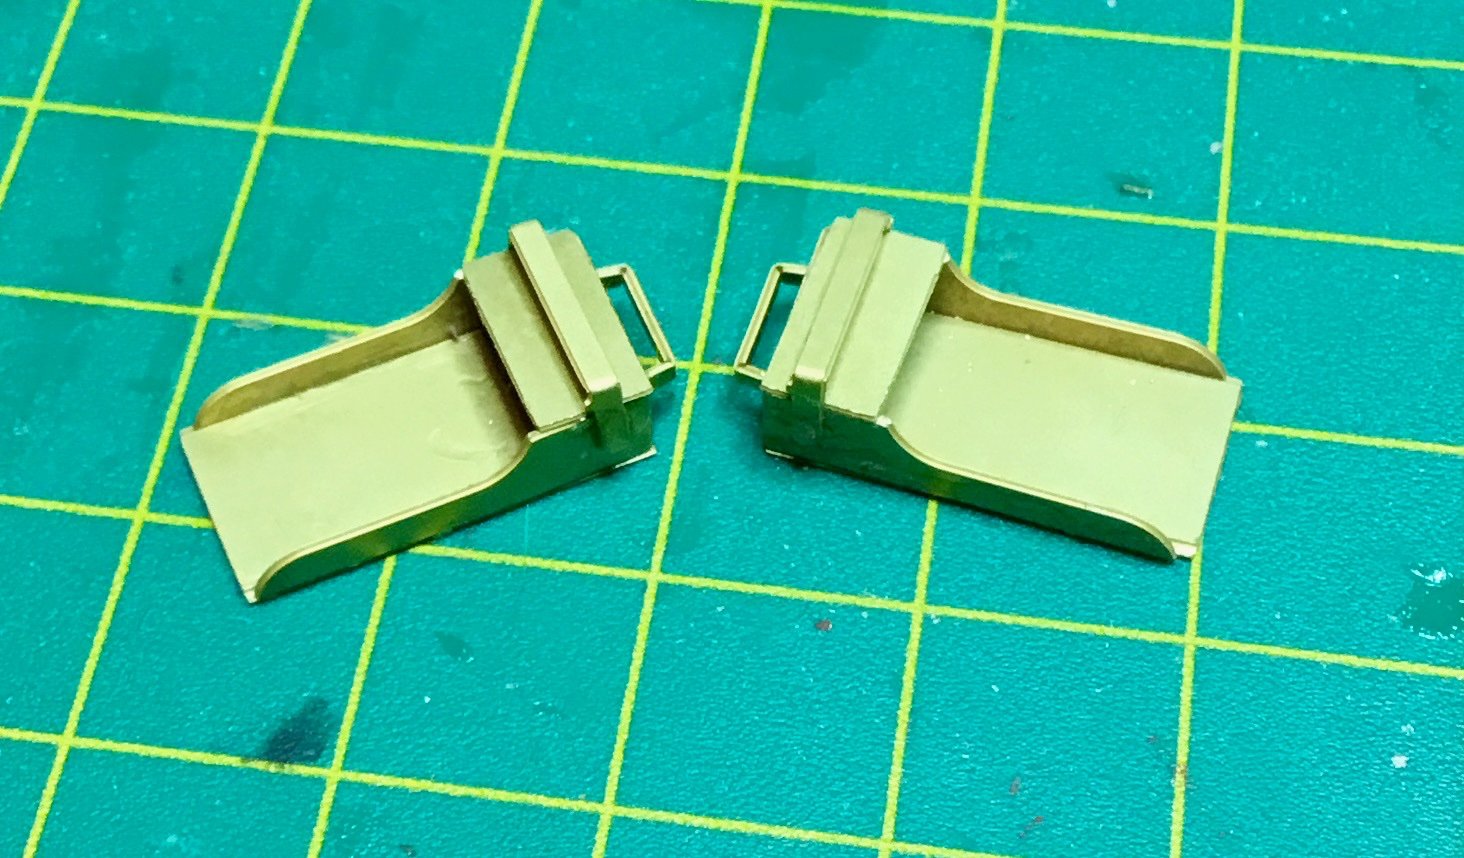
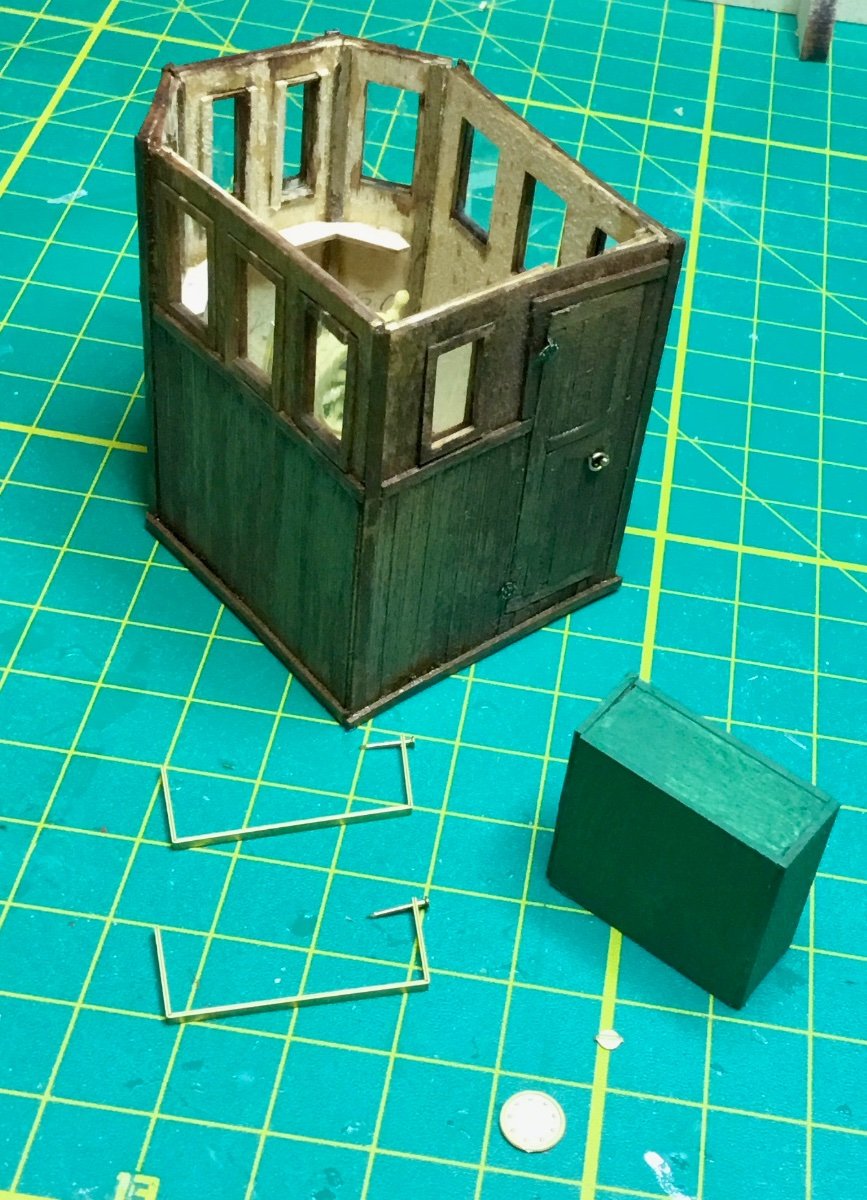
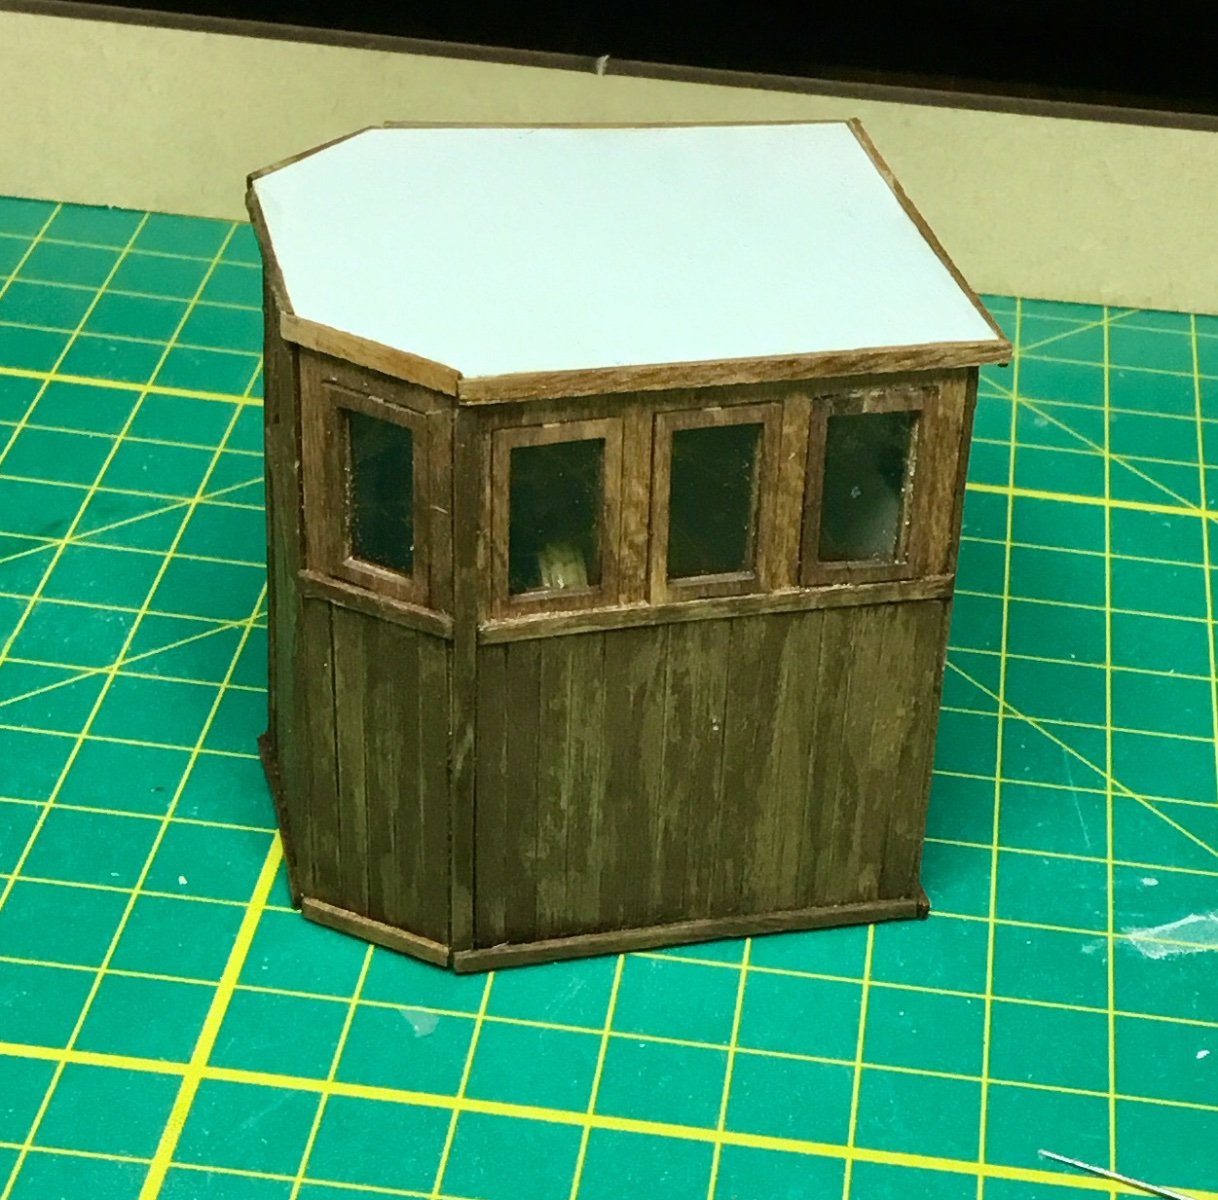
Continuing construction of the wheelhouse. I planked the sides, added the door and windows.
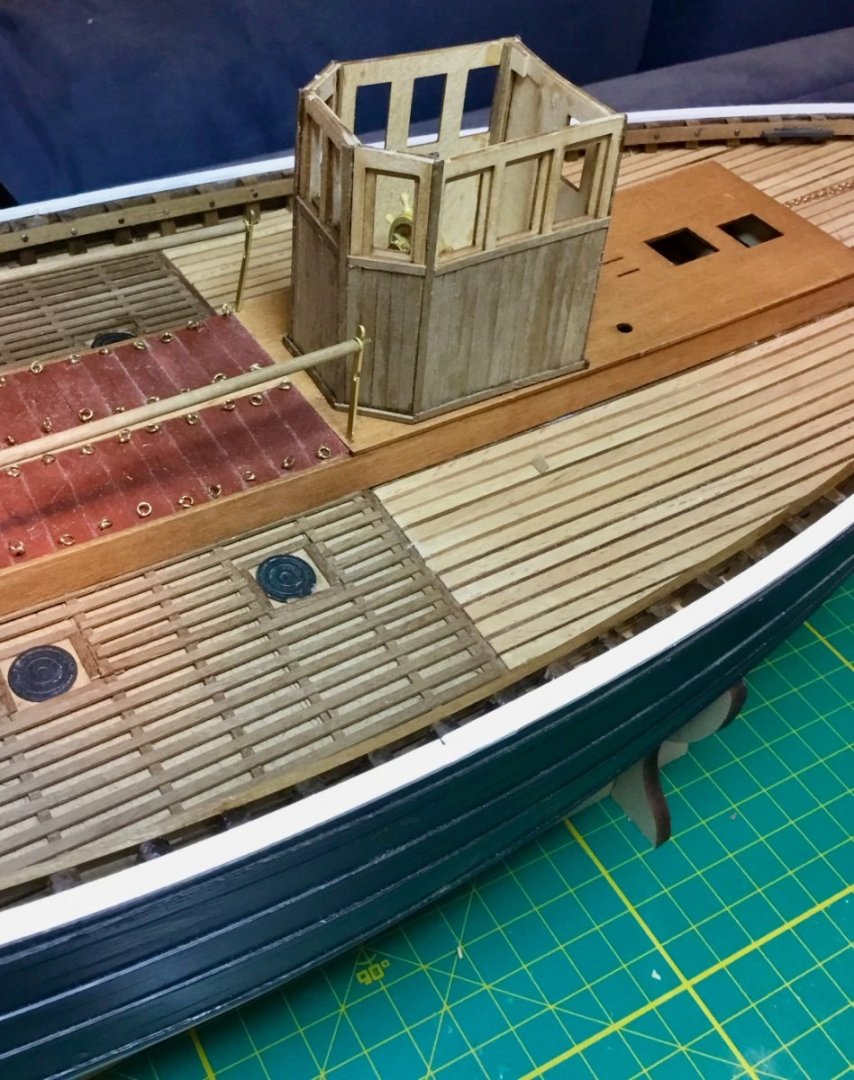

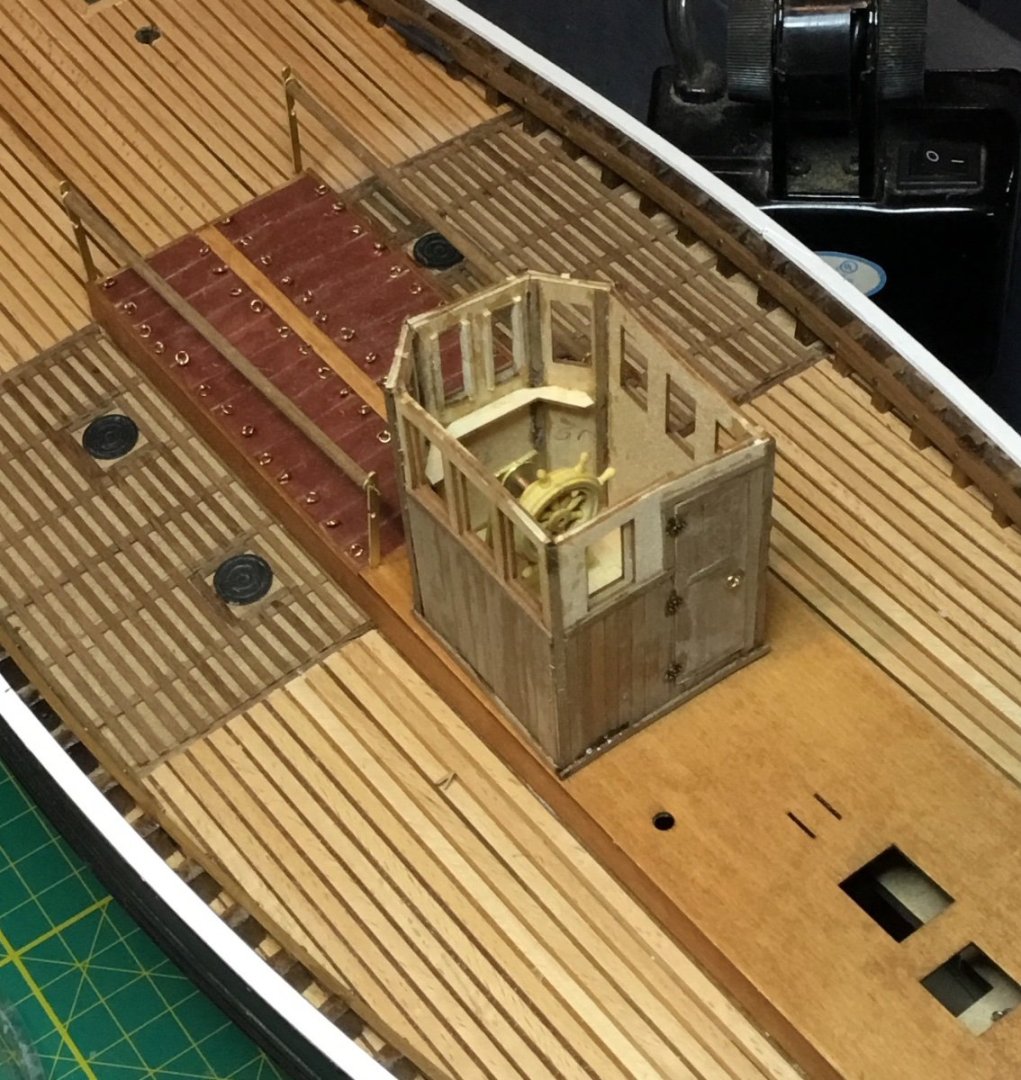
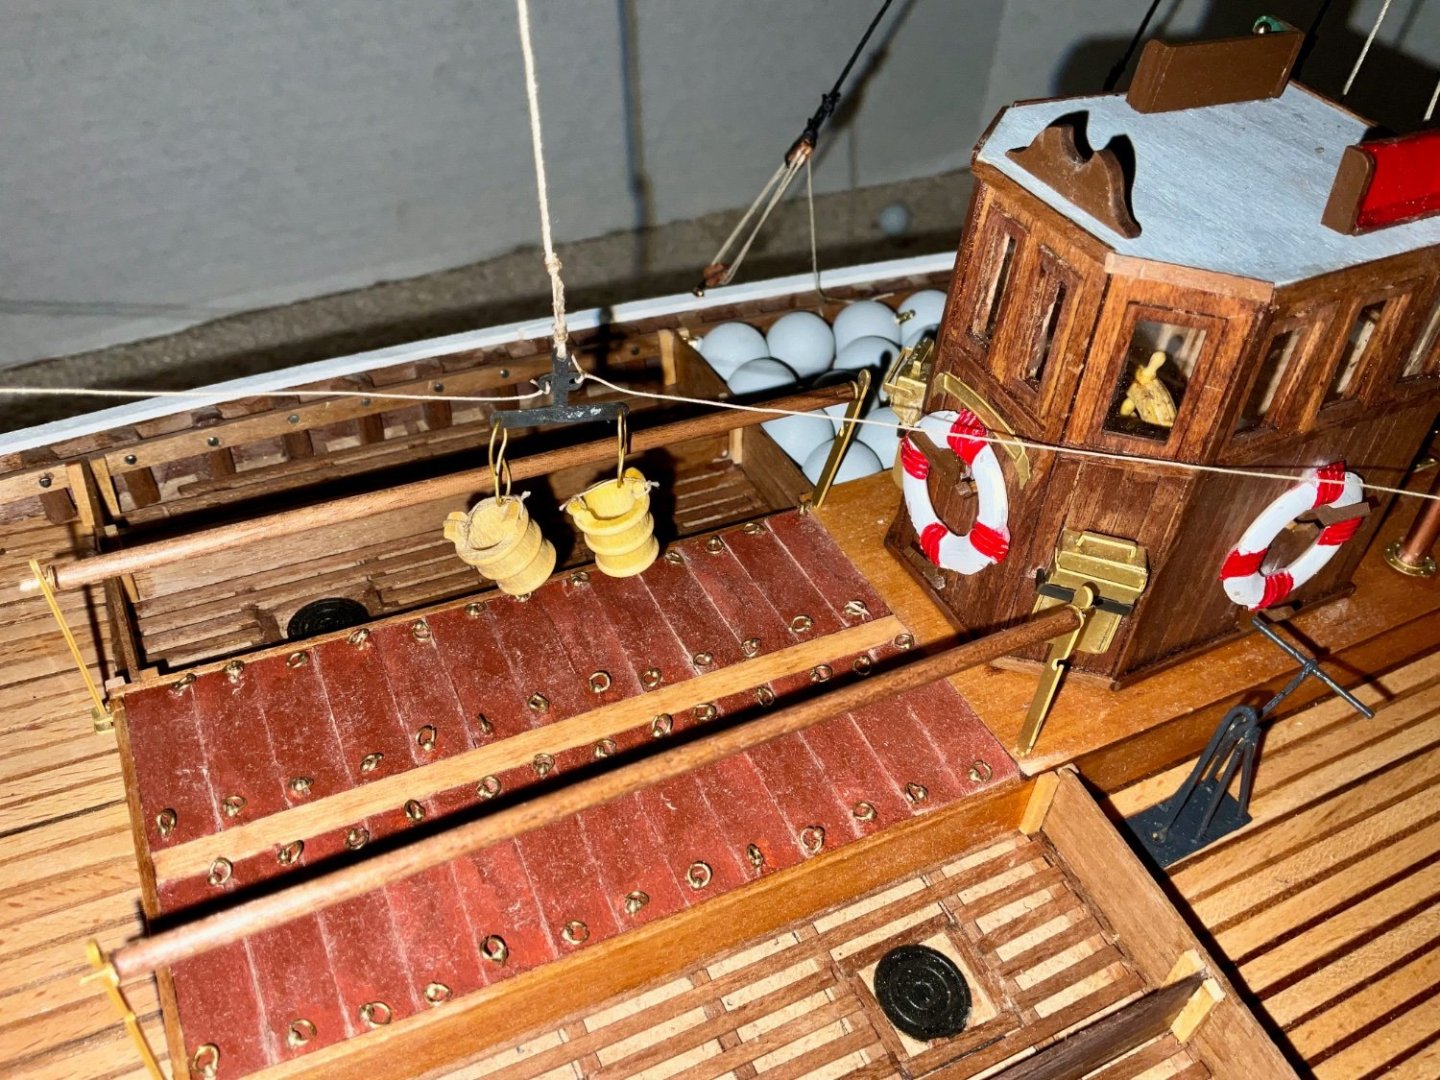
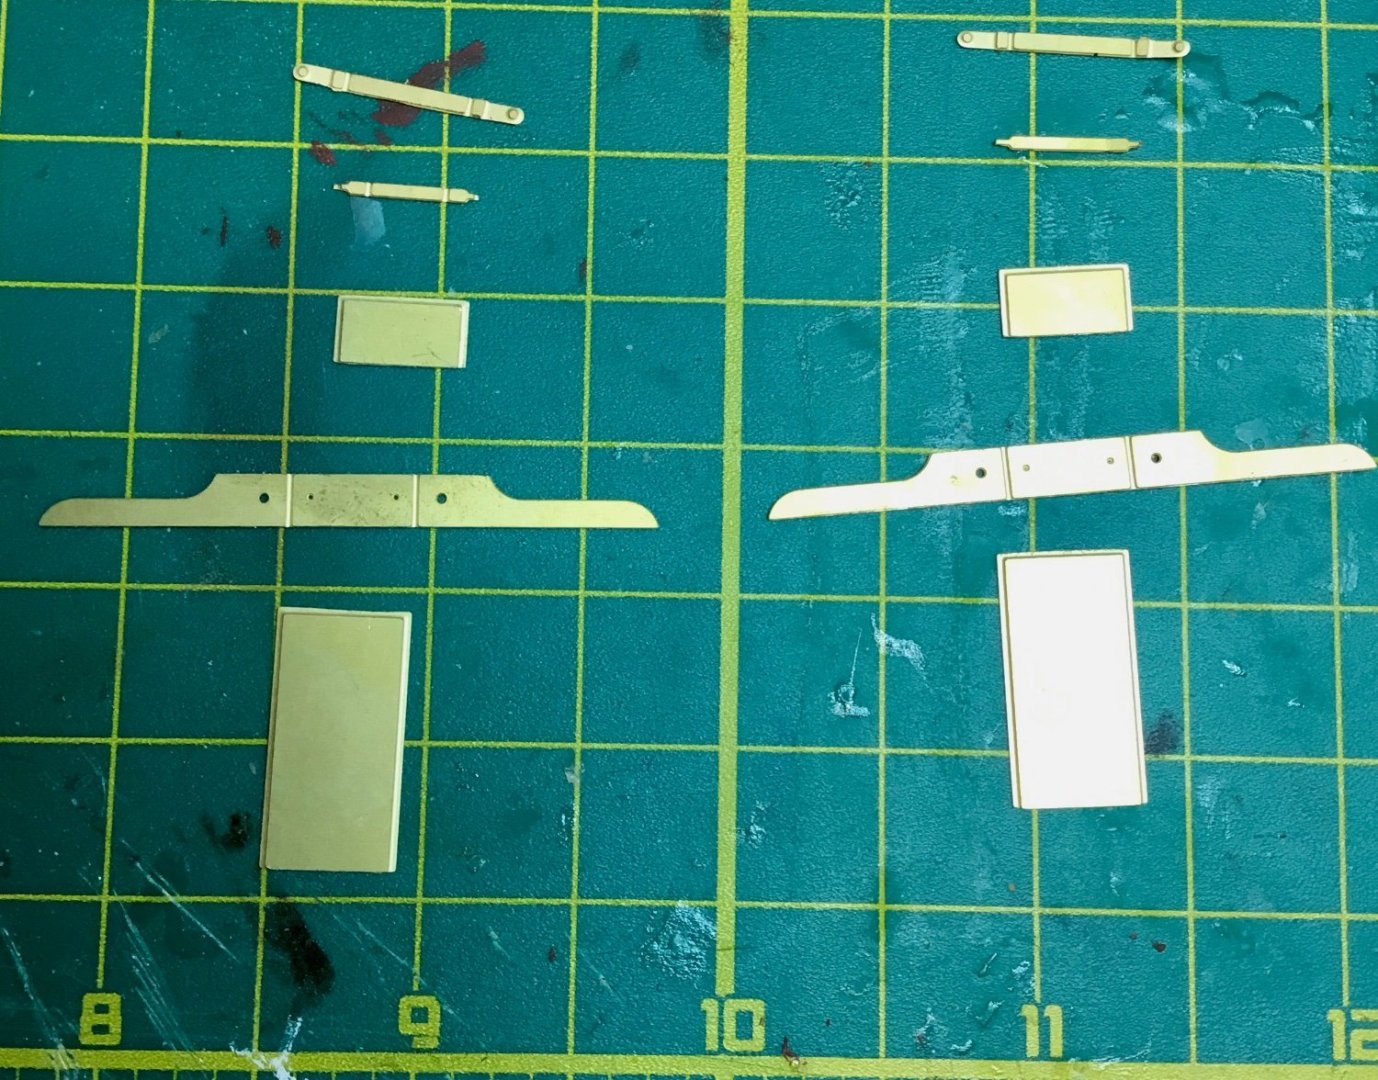
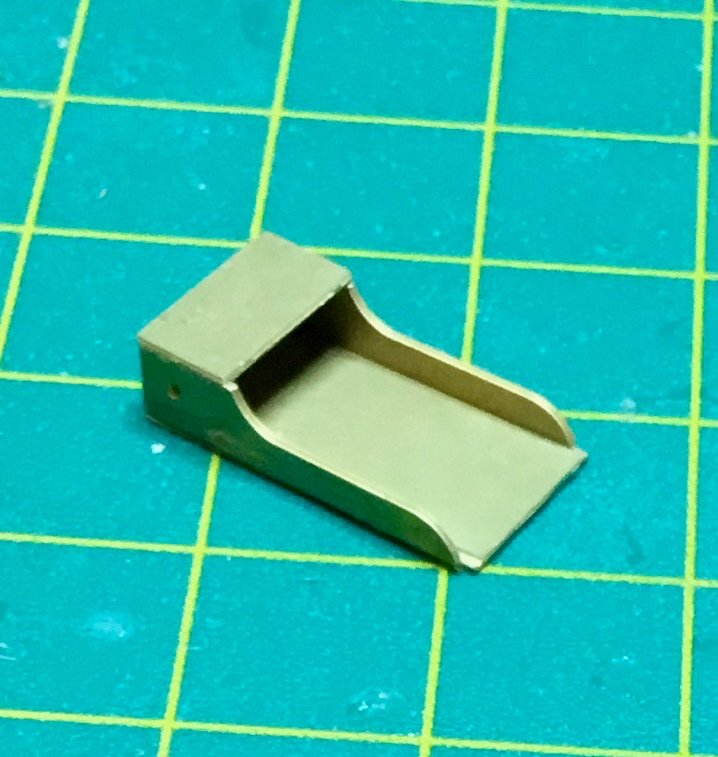
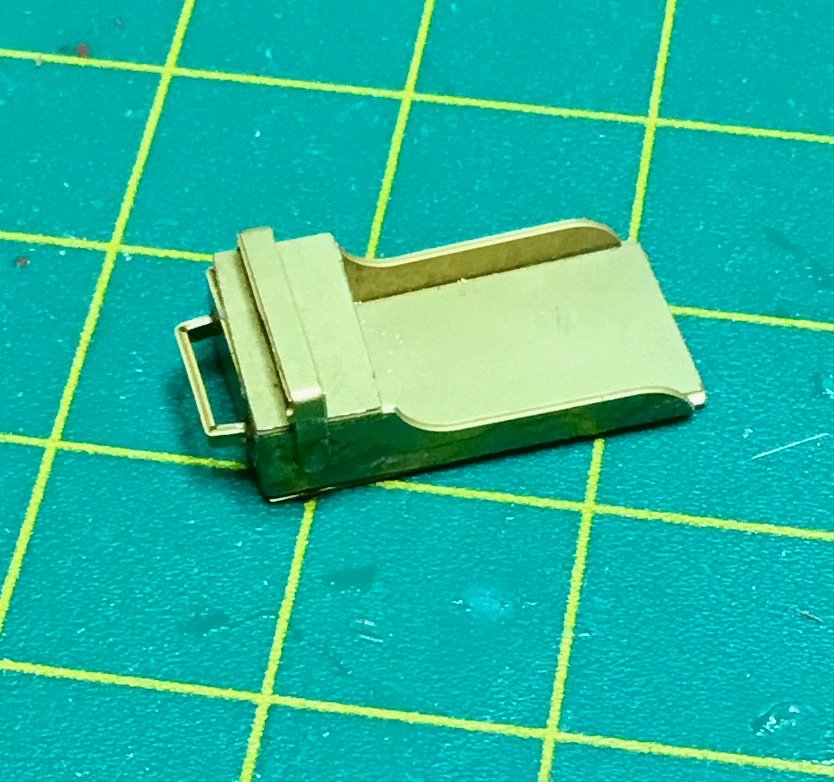
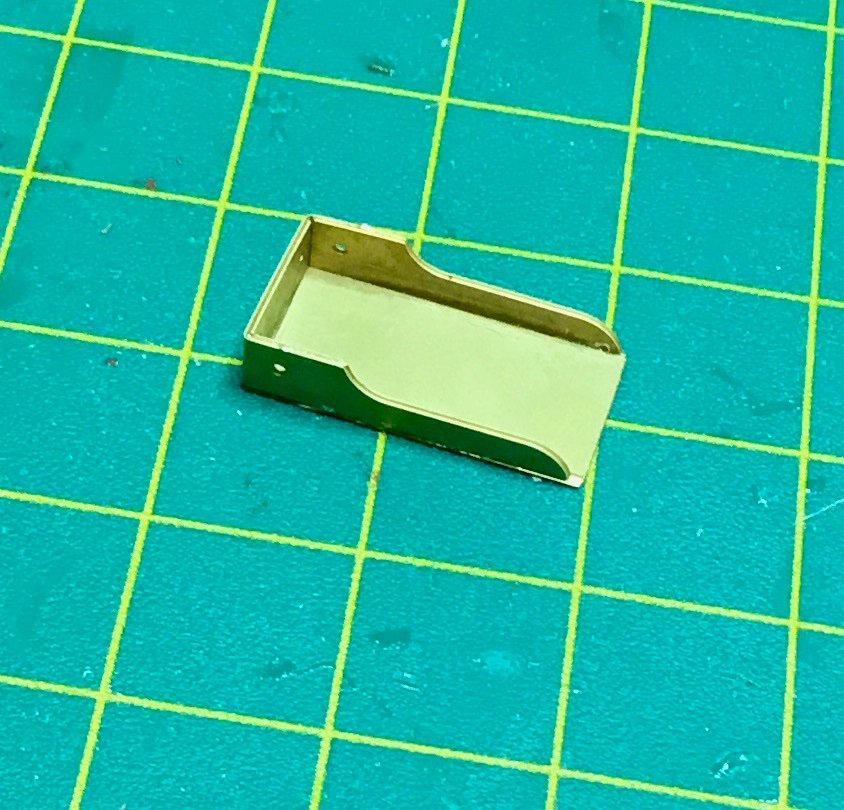
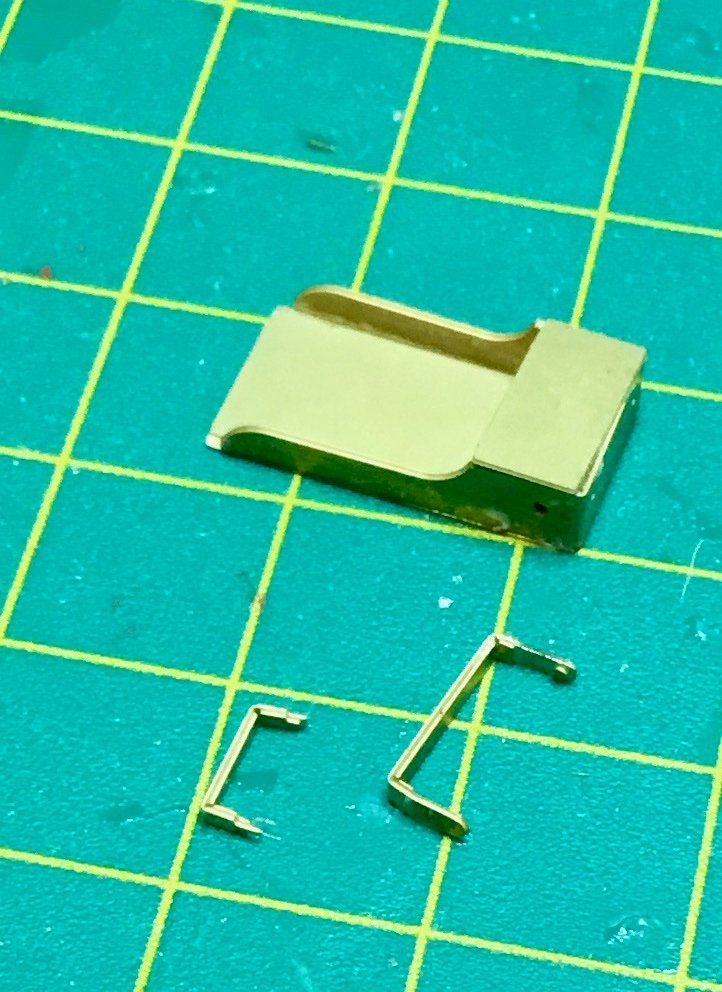
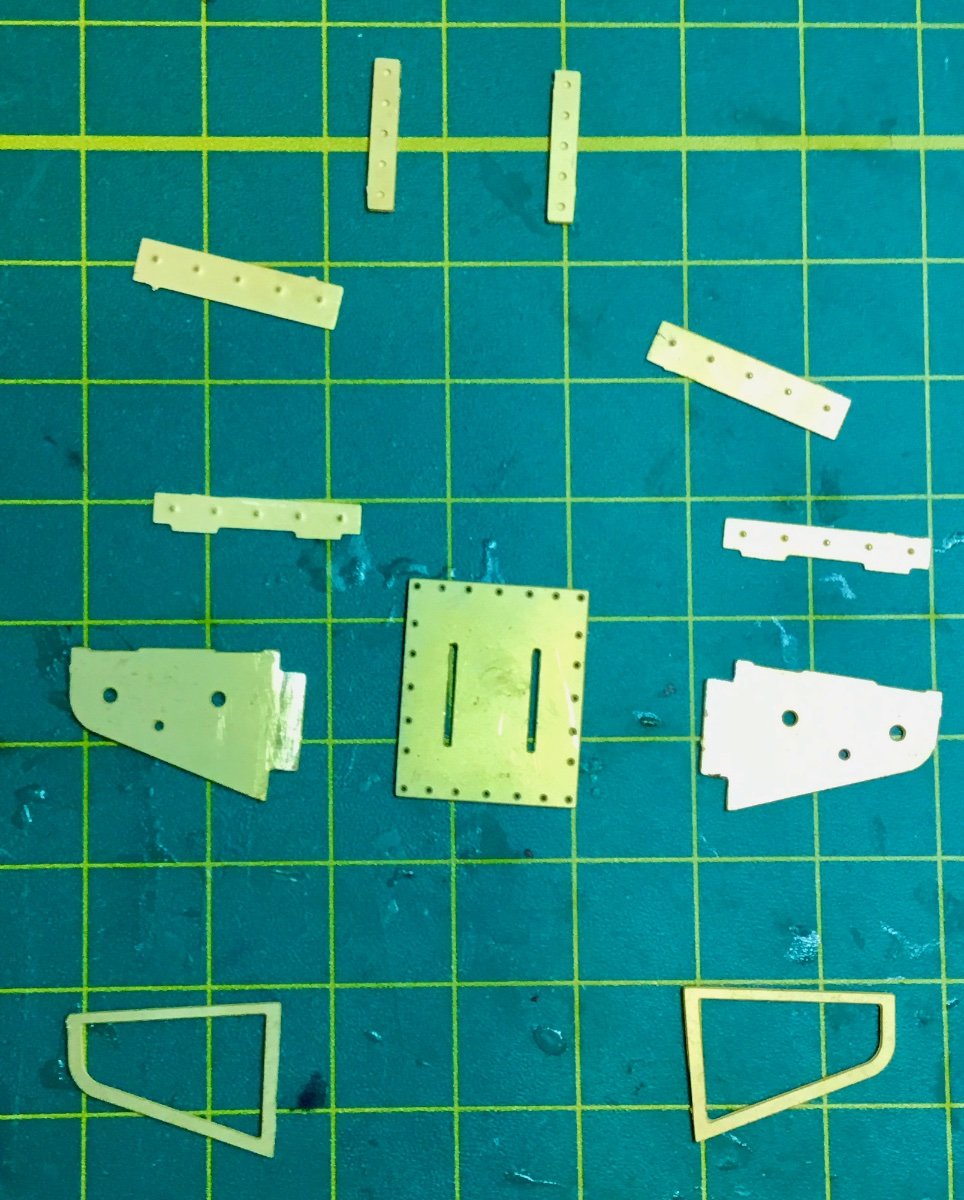
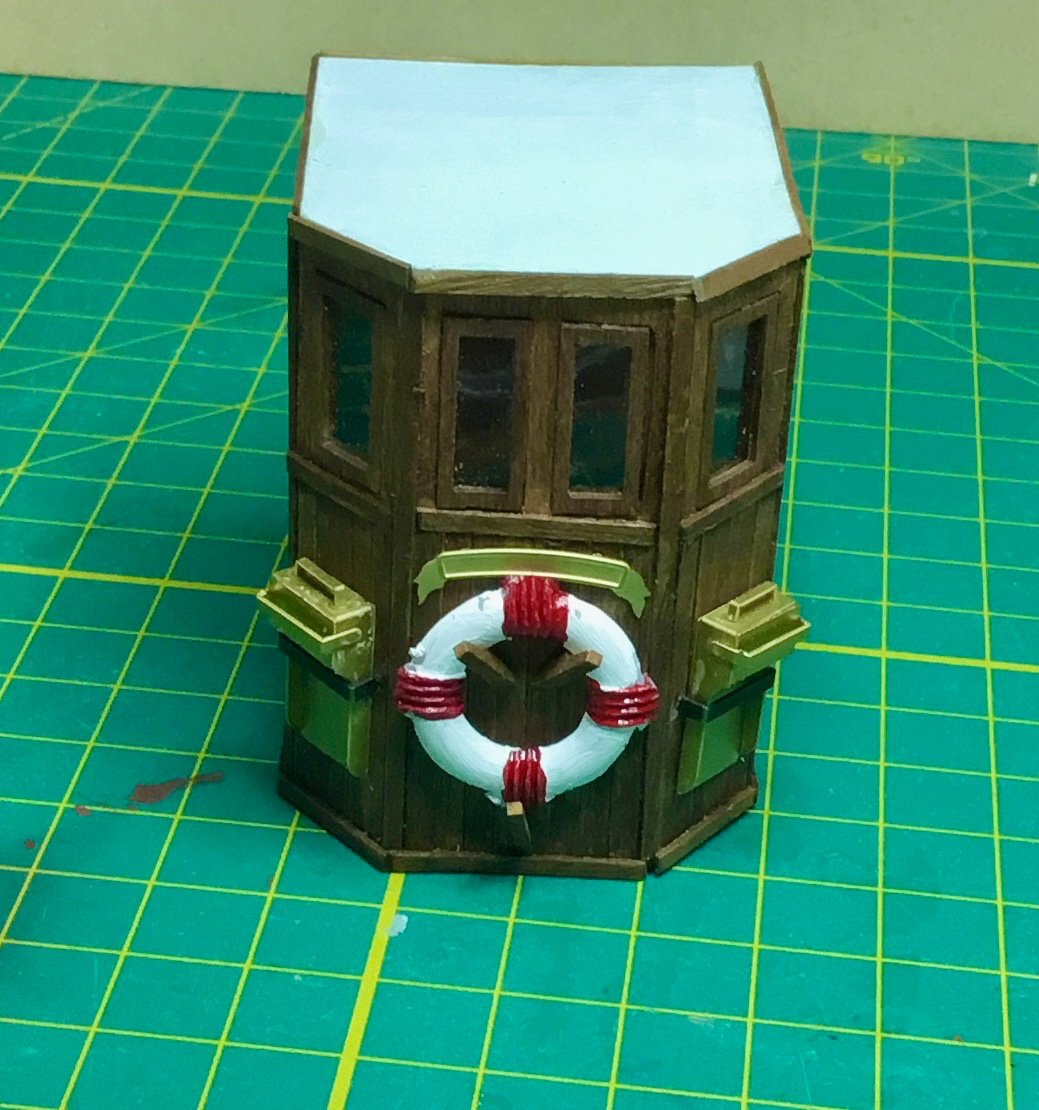
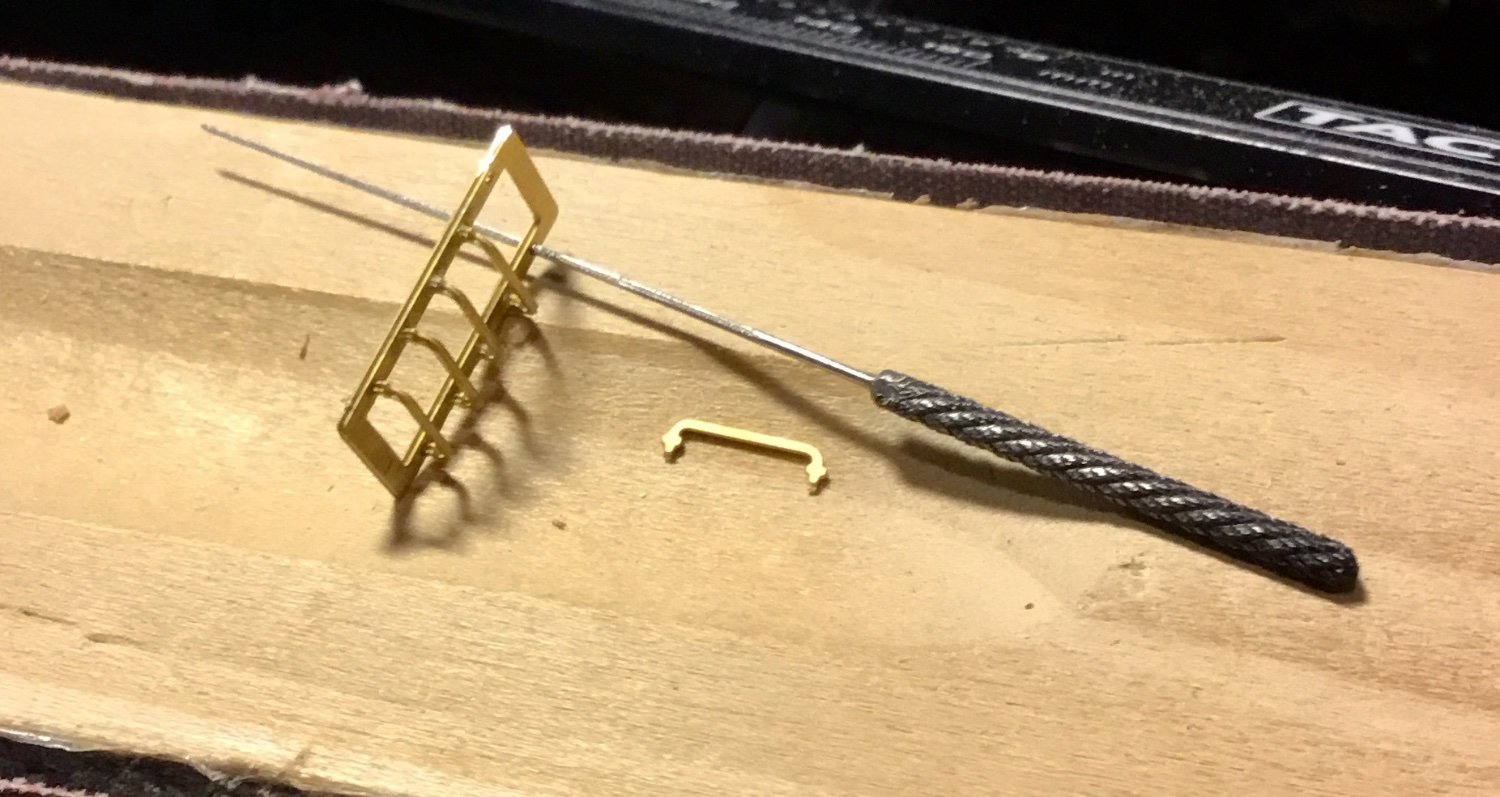
Used the excelllent photo-etched metal parts in this kit to create the two herring shovels.

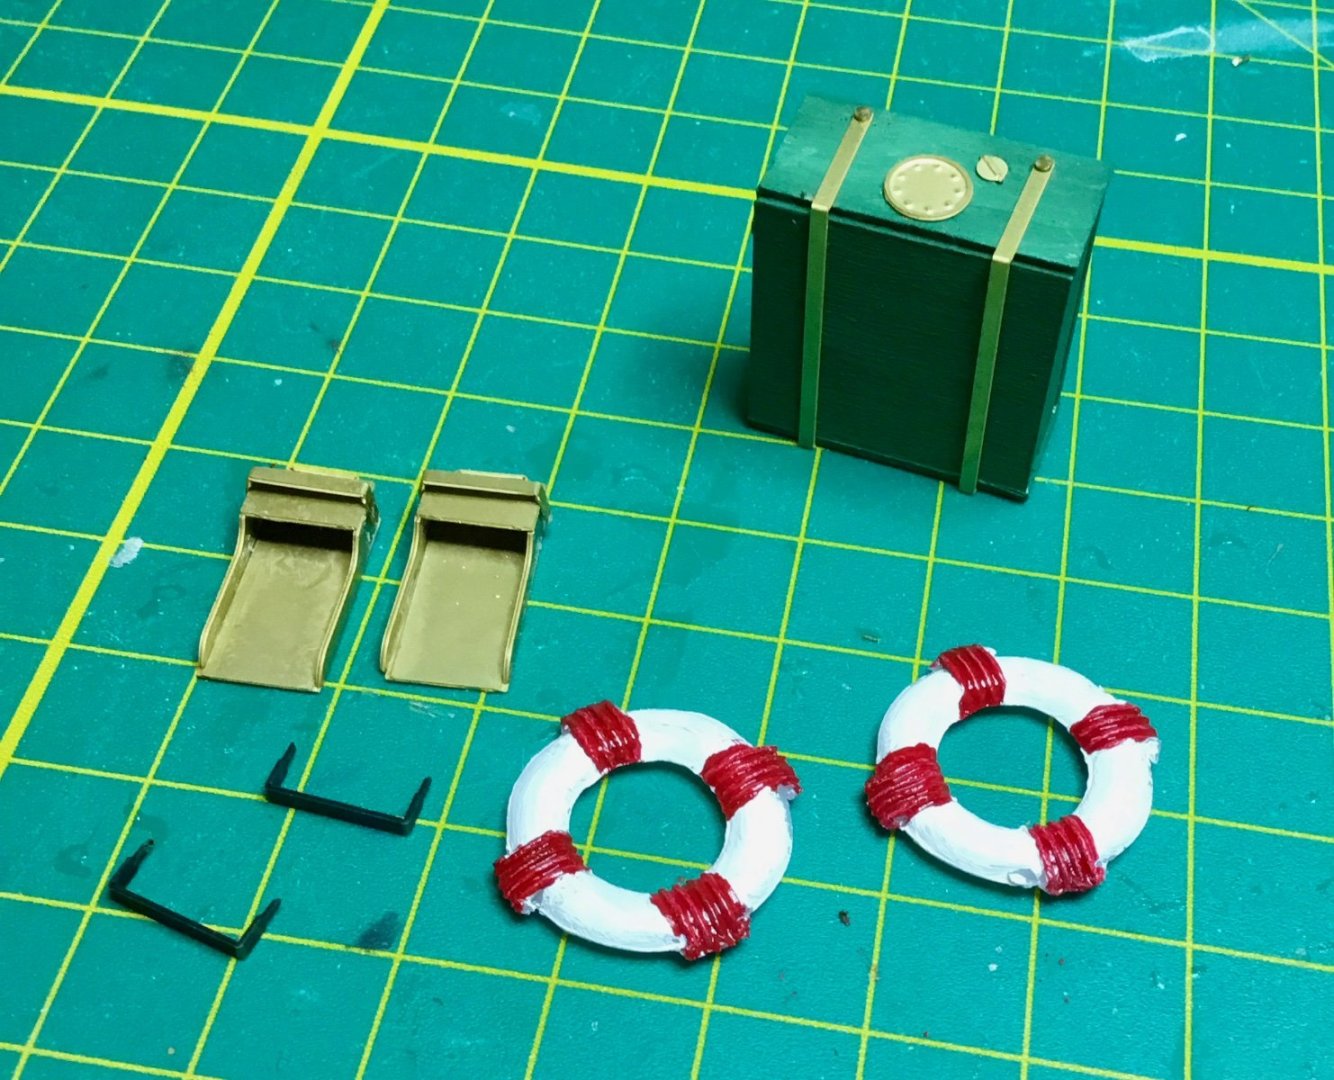
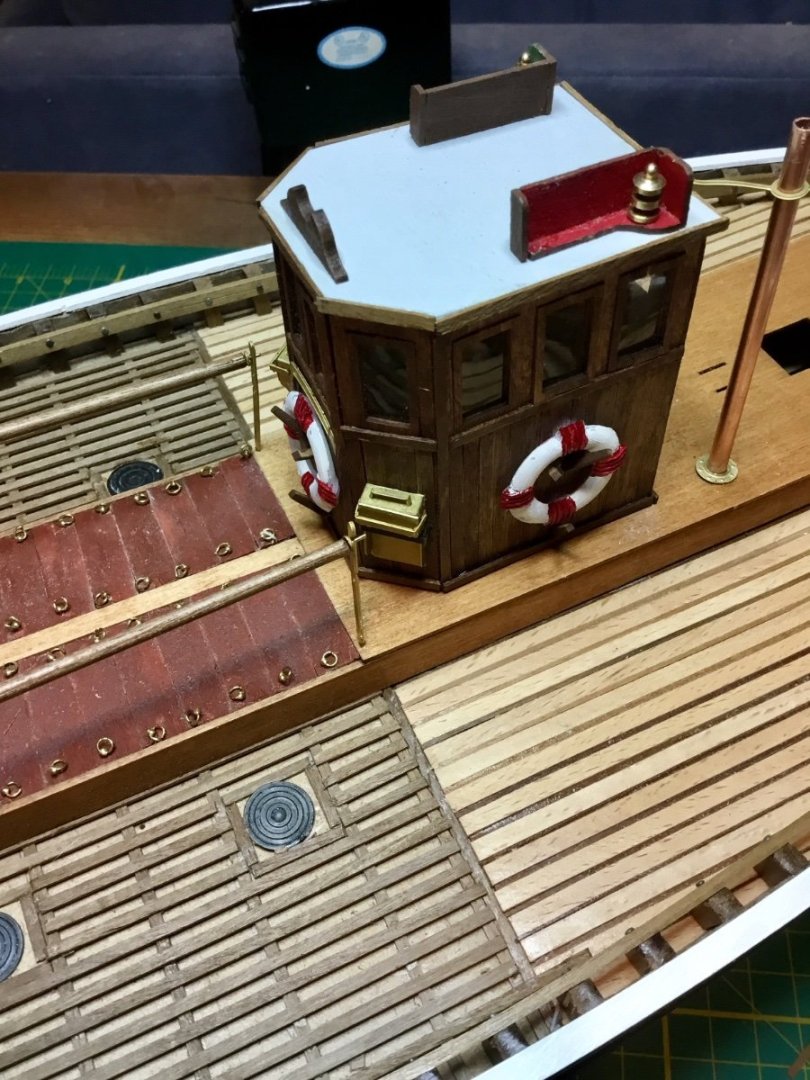
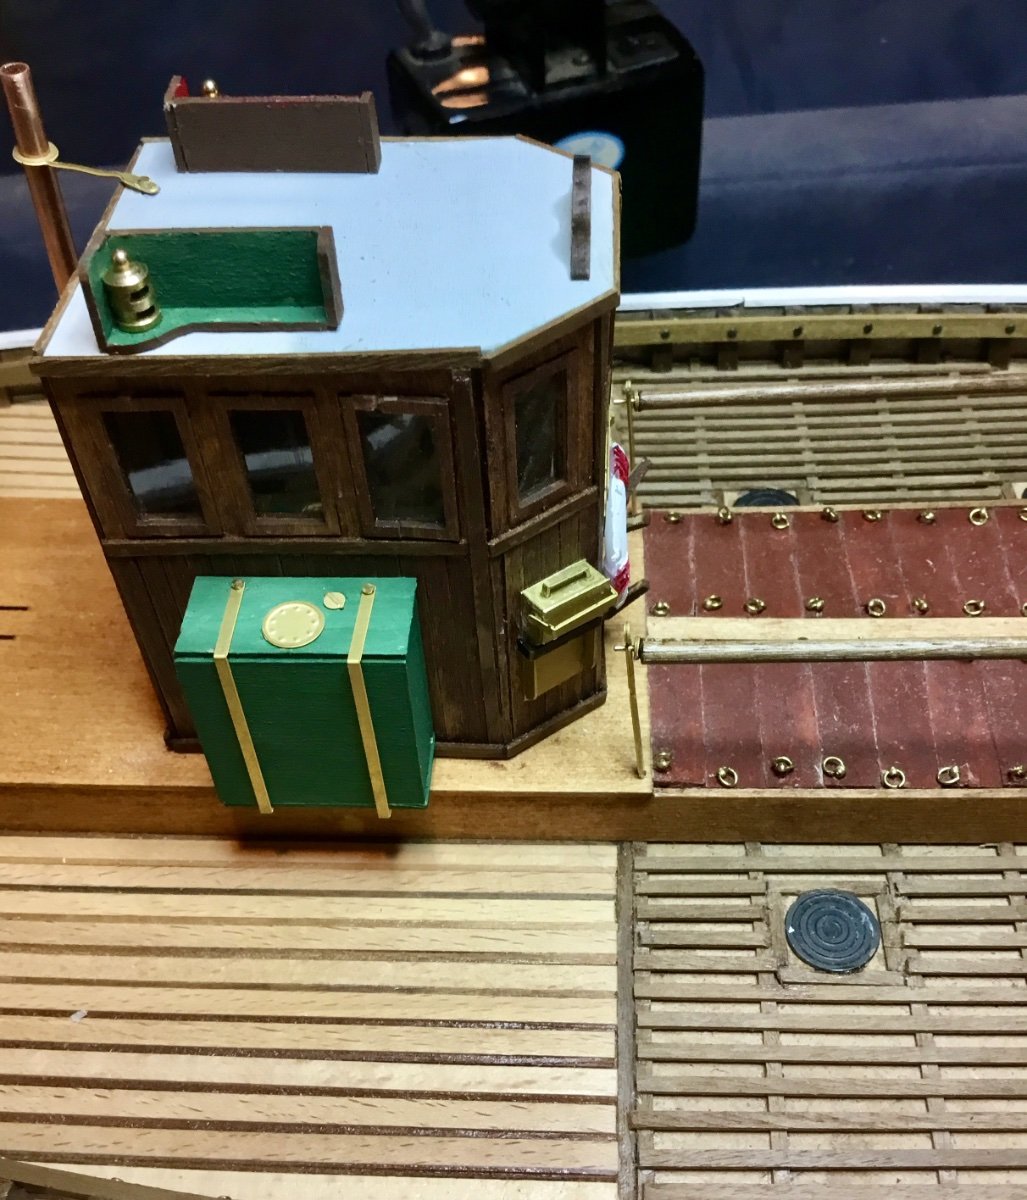
Made the water tank and painted it green. Then I painted the life belts, added the roof to the wheelhouse,built and painted the navigation lights and mounted all the parts along with the boom support and a single block to the wheelhouse.


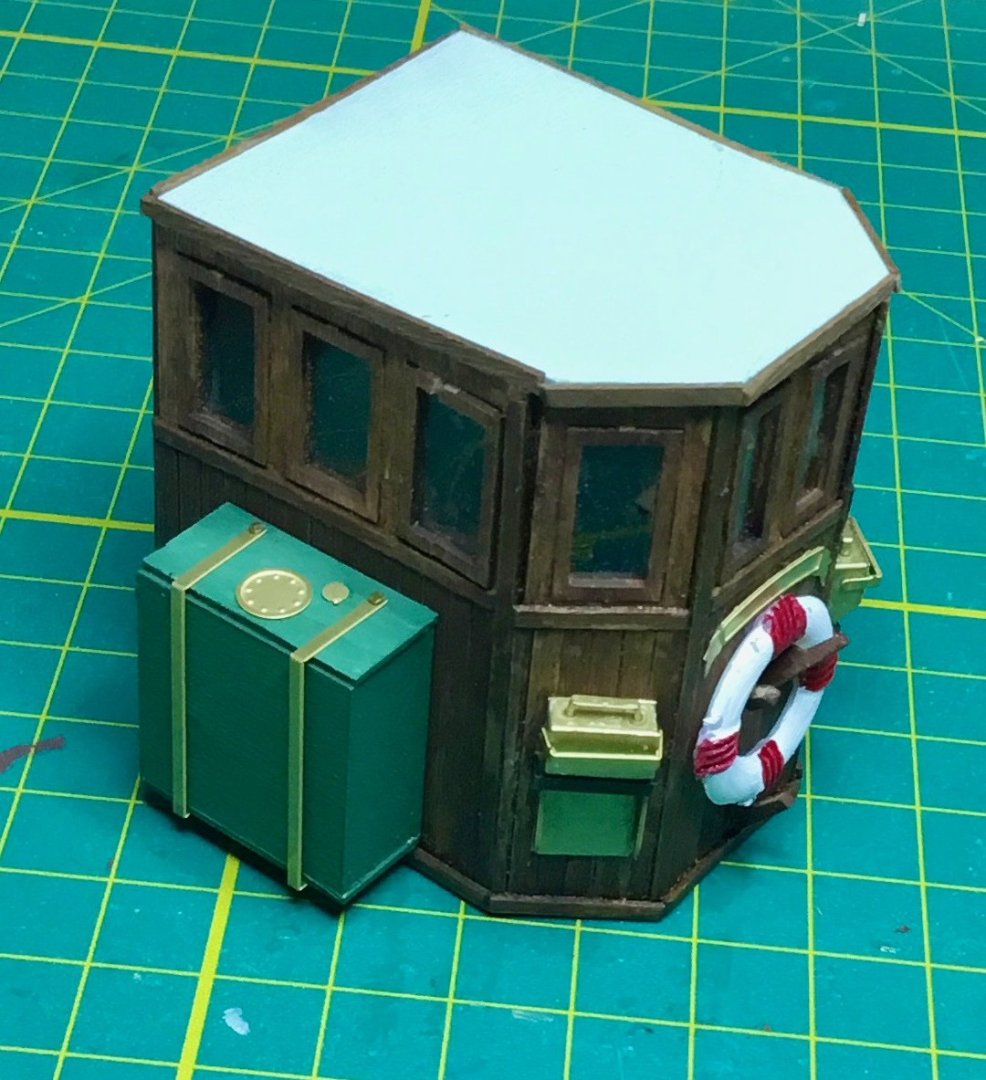
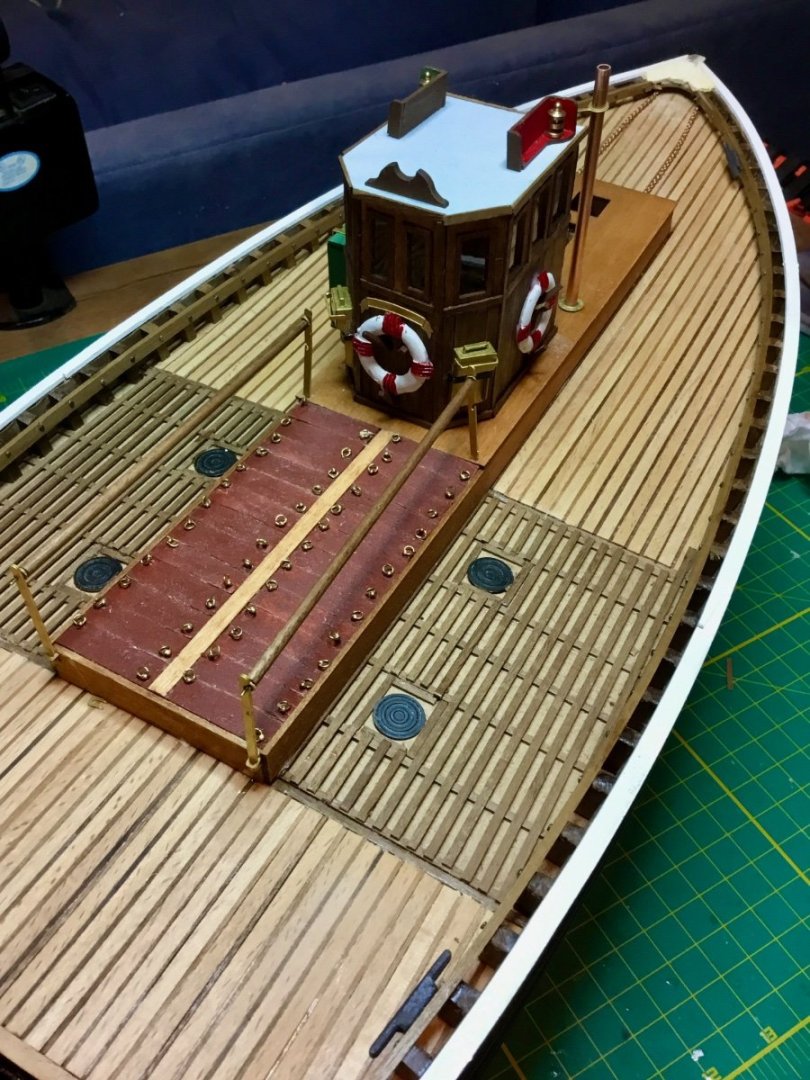
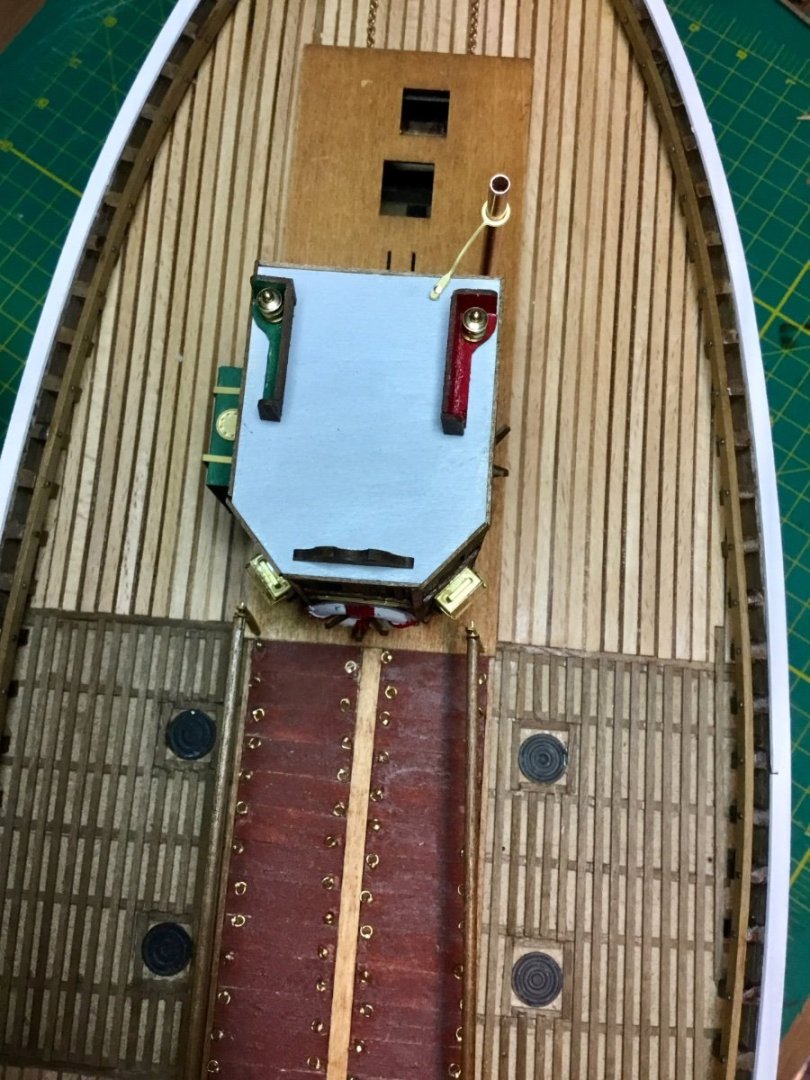
Finally I installed the wheelhouse on the superstructure along with the chimney and support bracket.
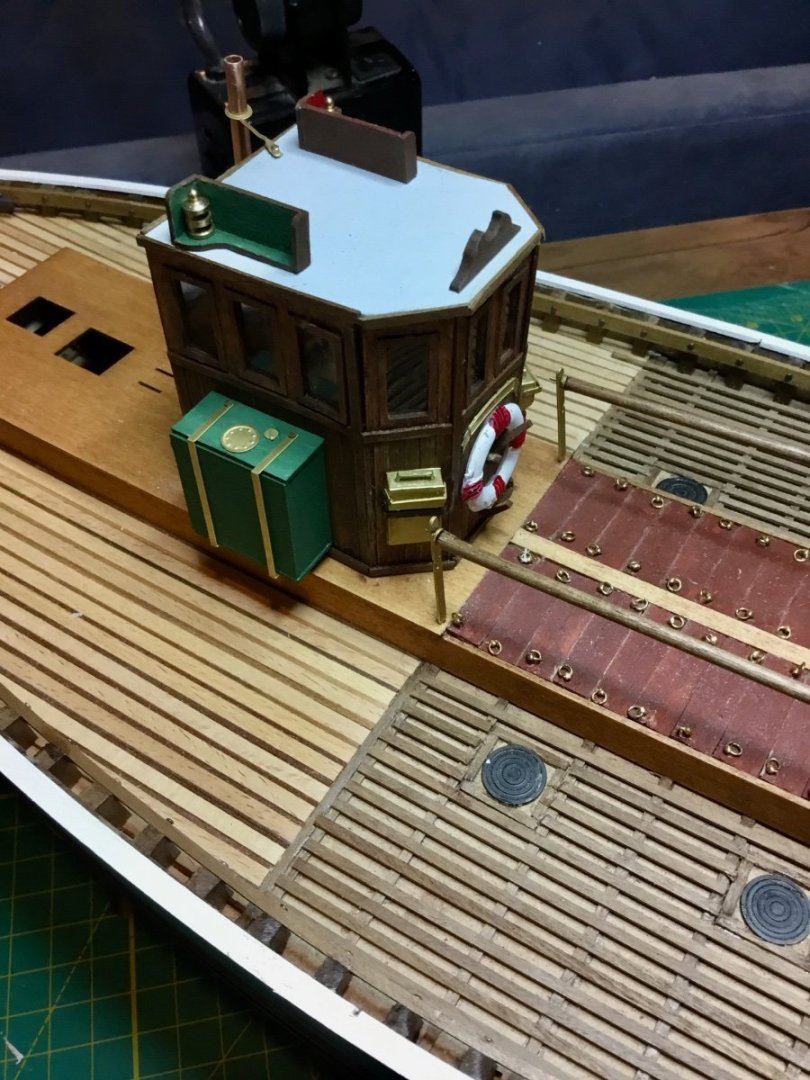
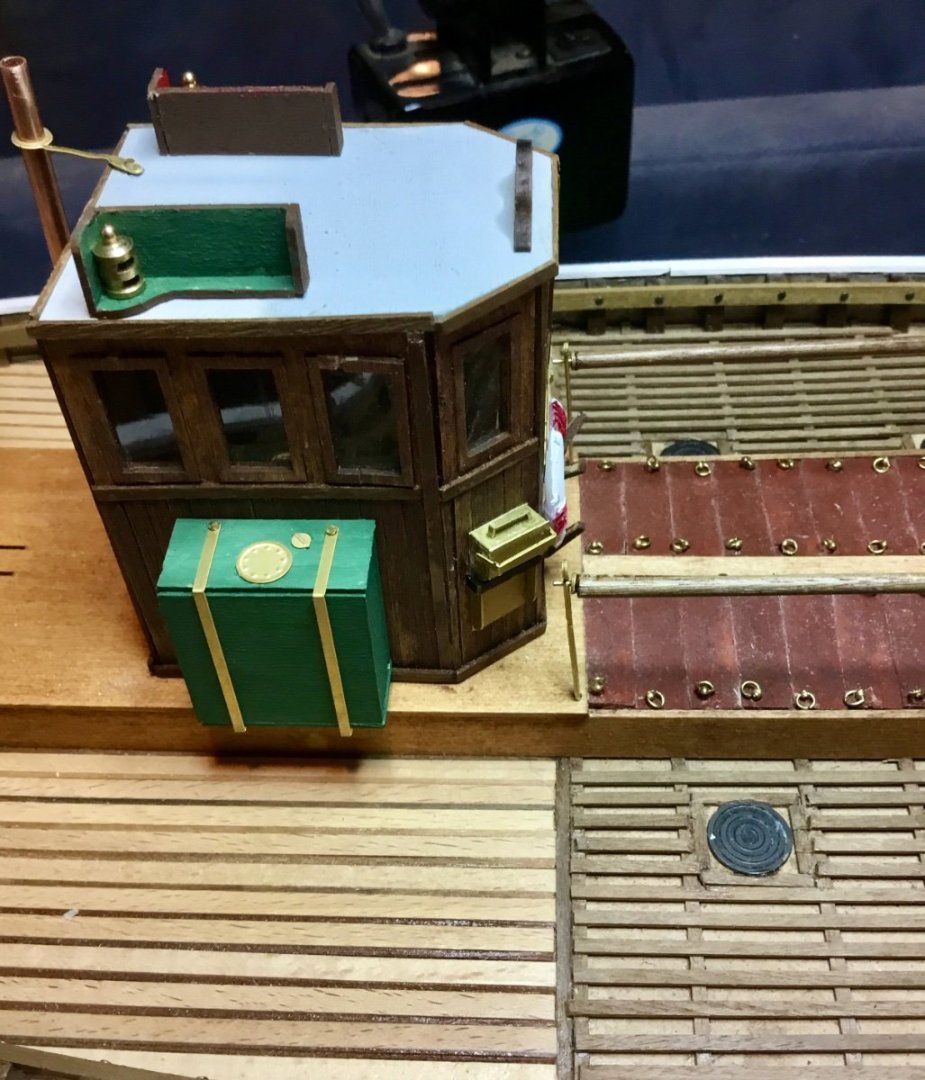
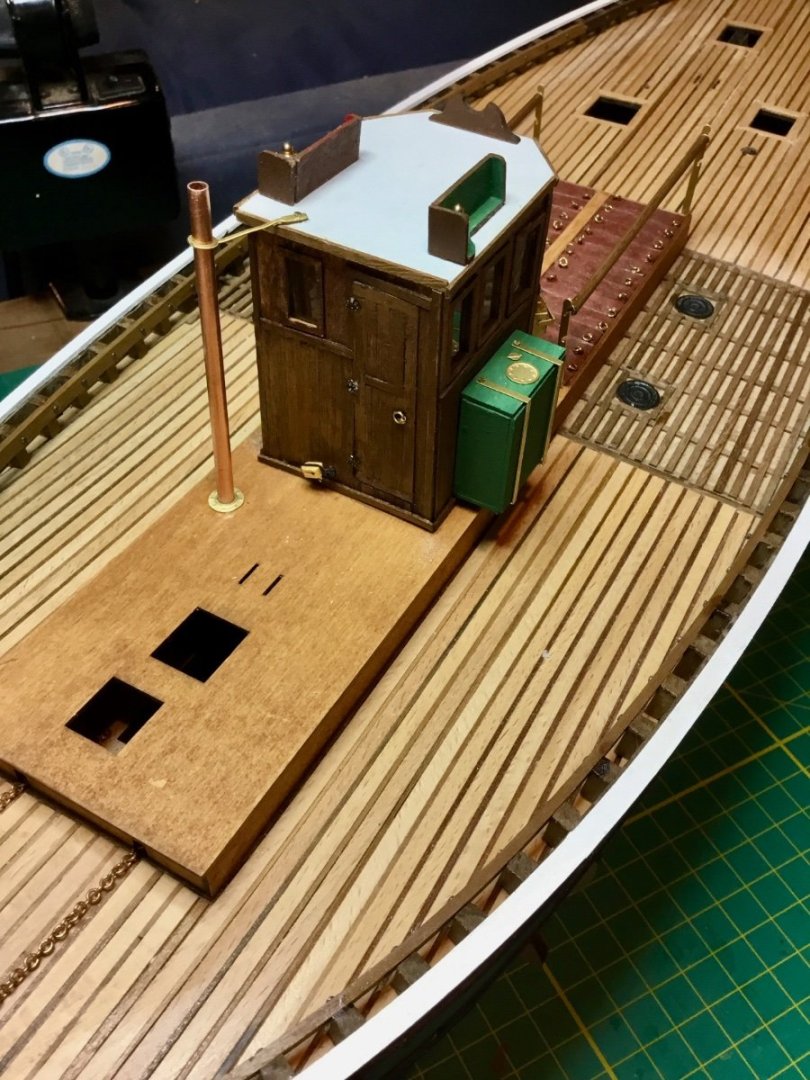
Next up will be the masts.
- Ken_2, chris watton, yvesvidal and 3 others
-
6
-
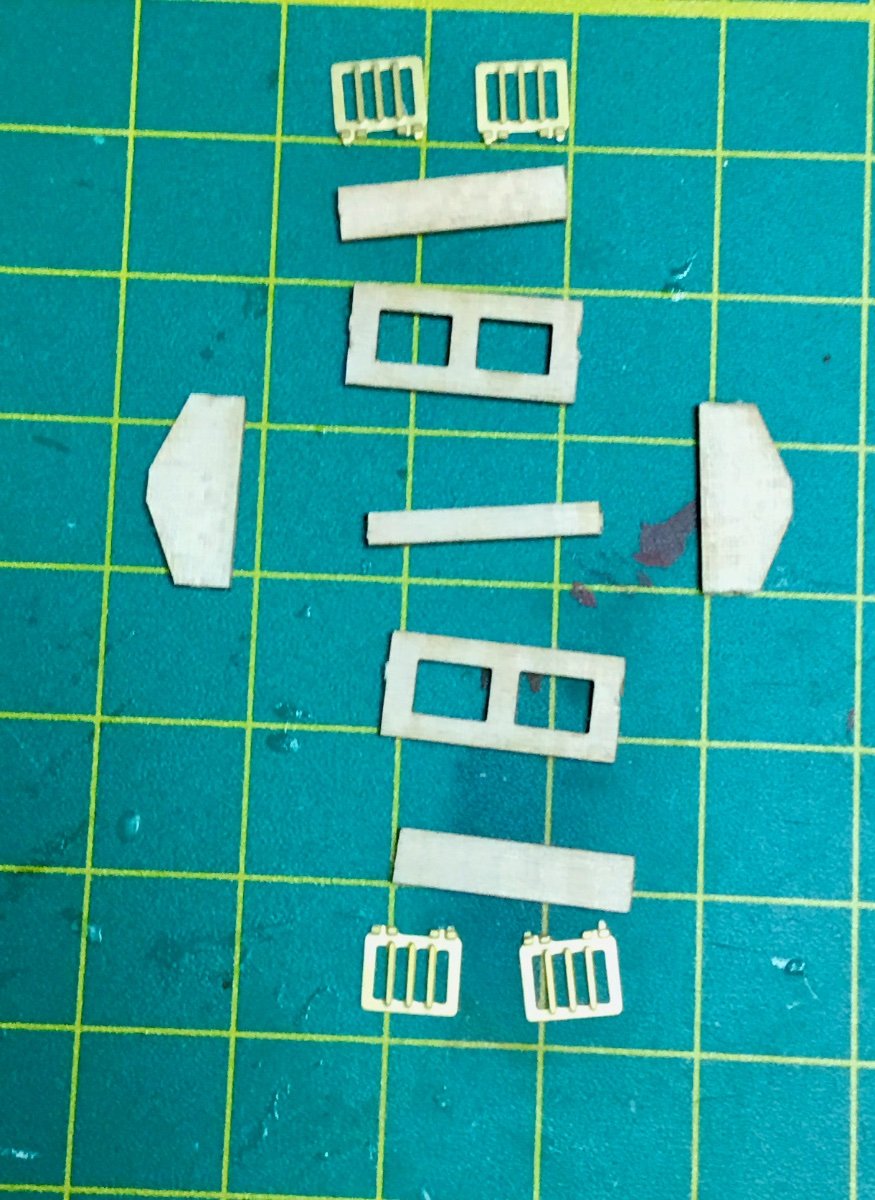
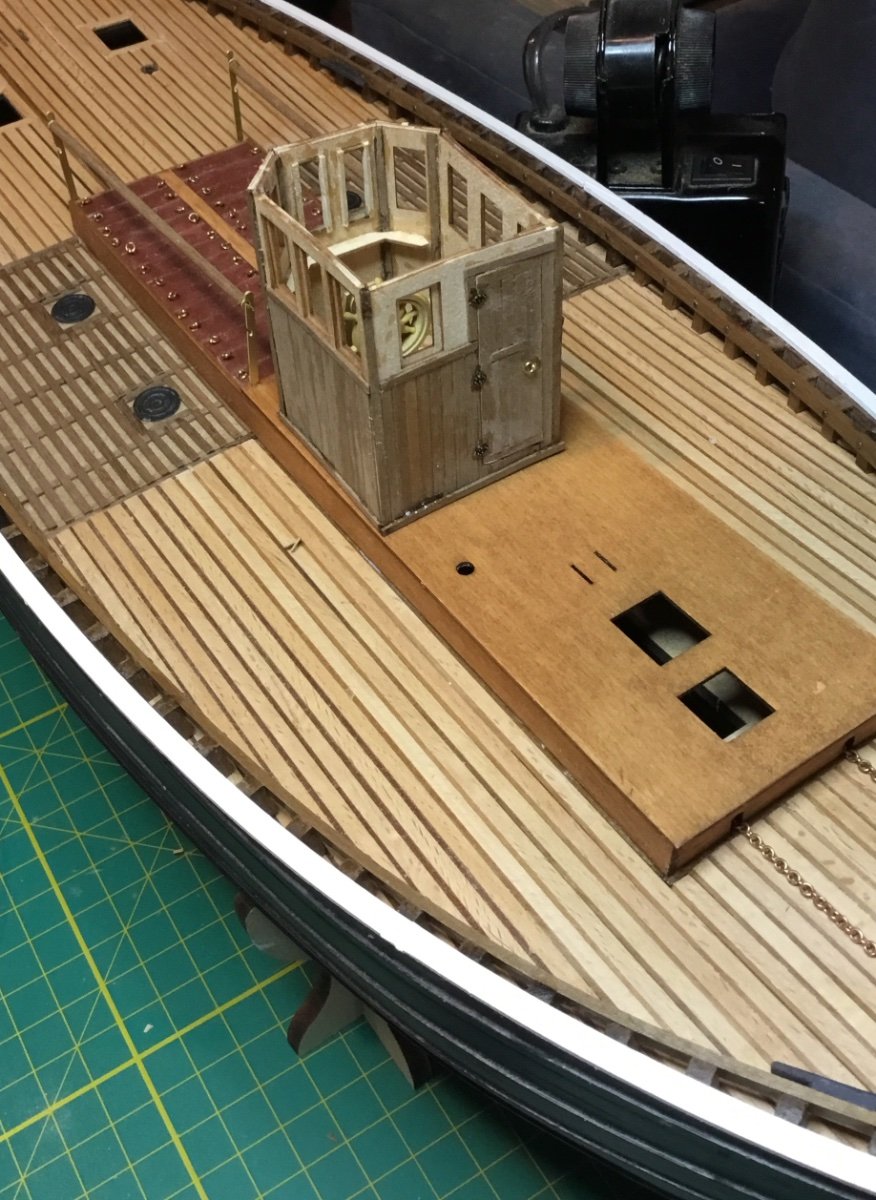
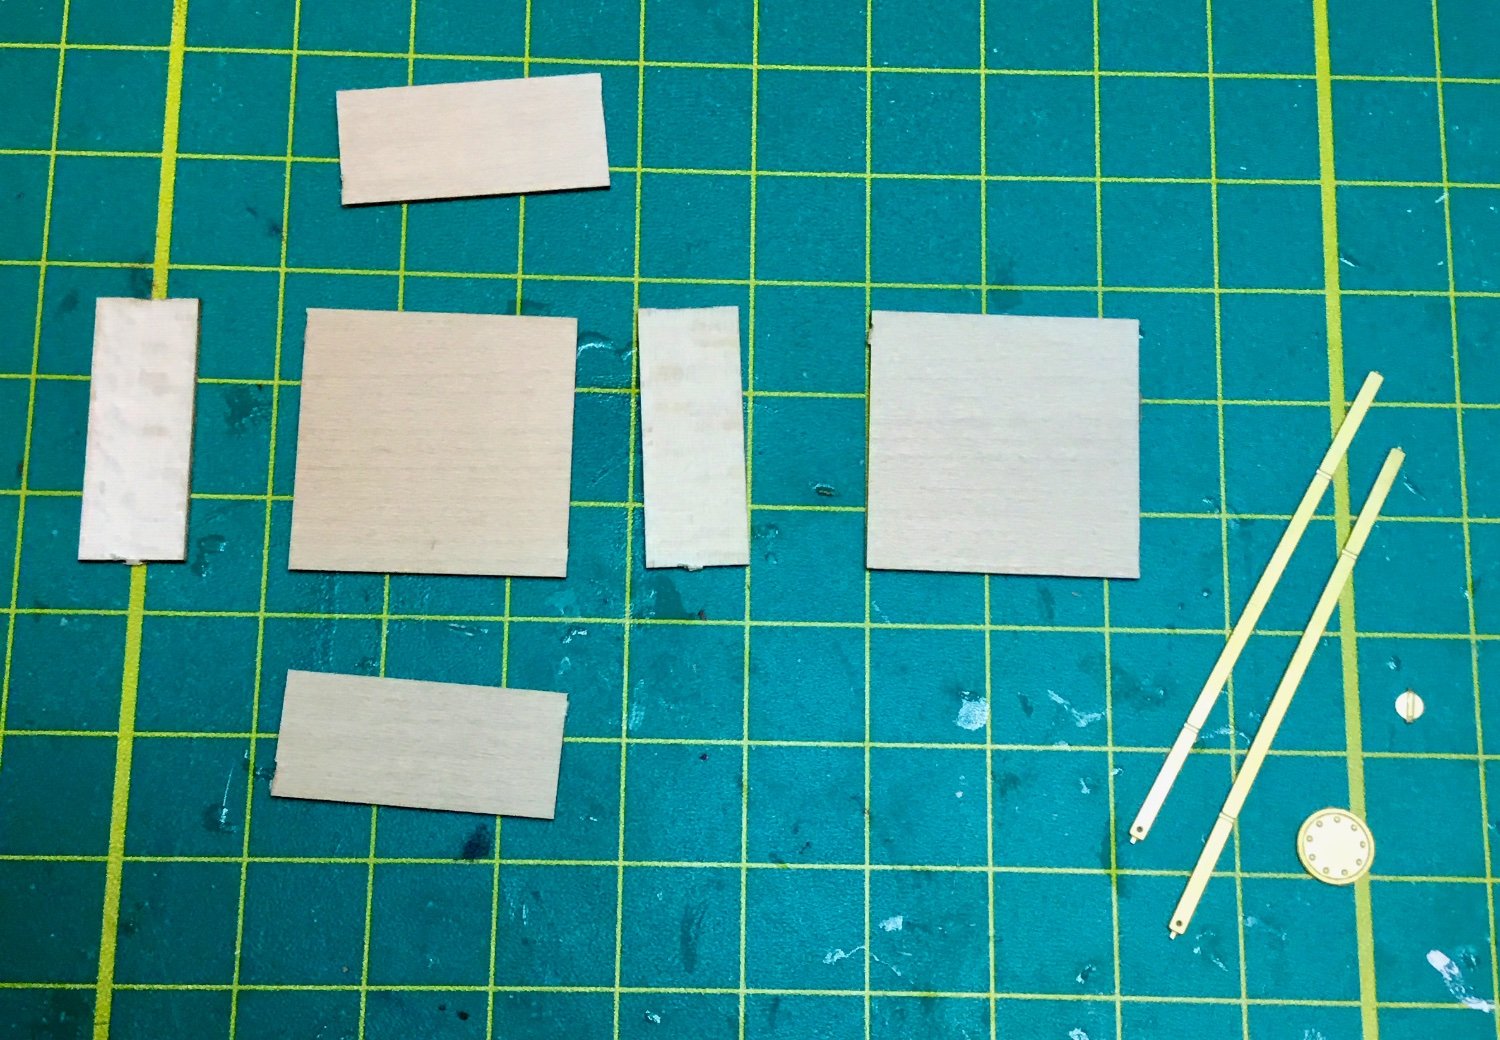
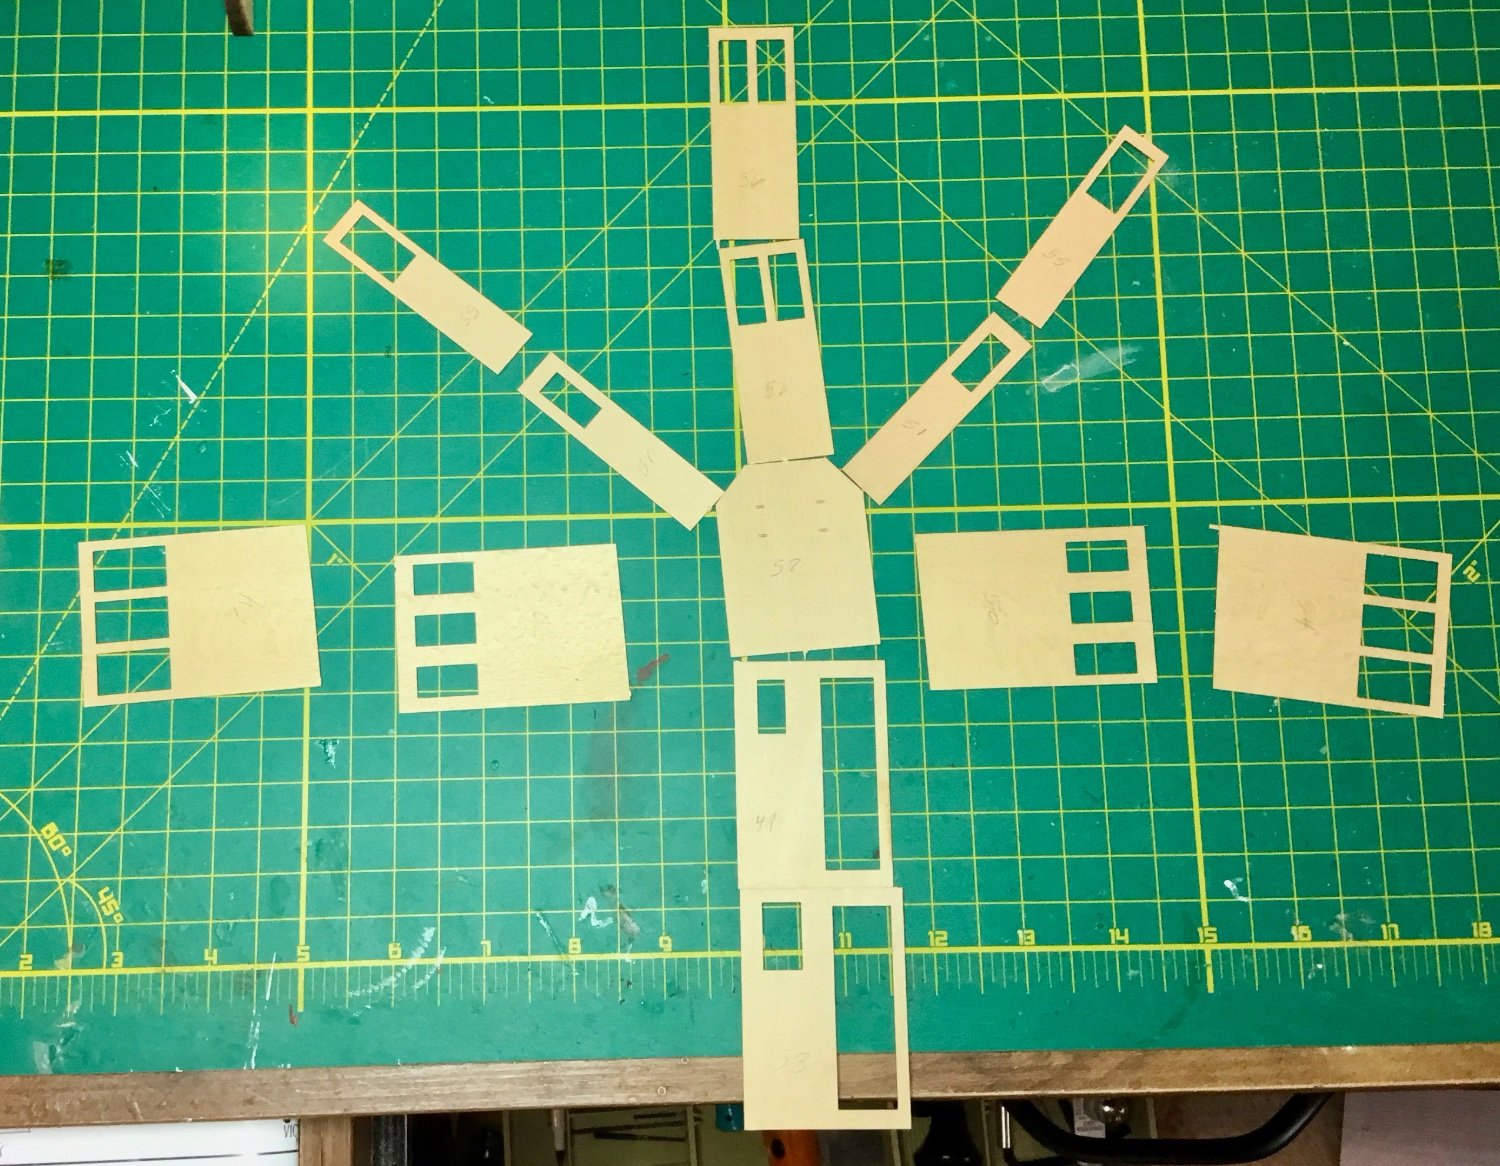
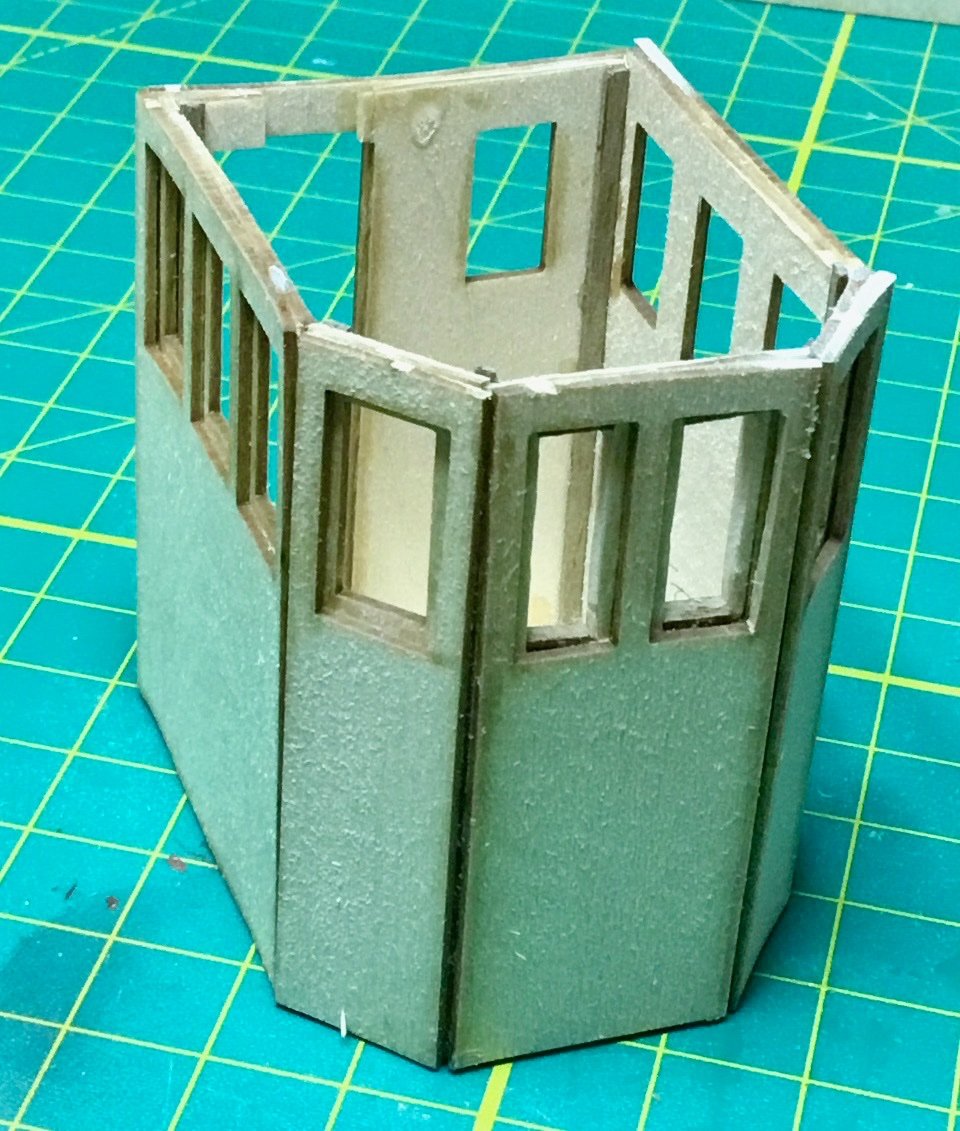
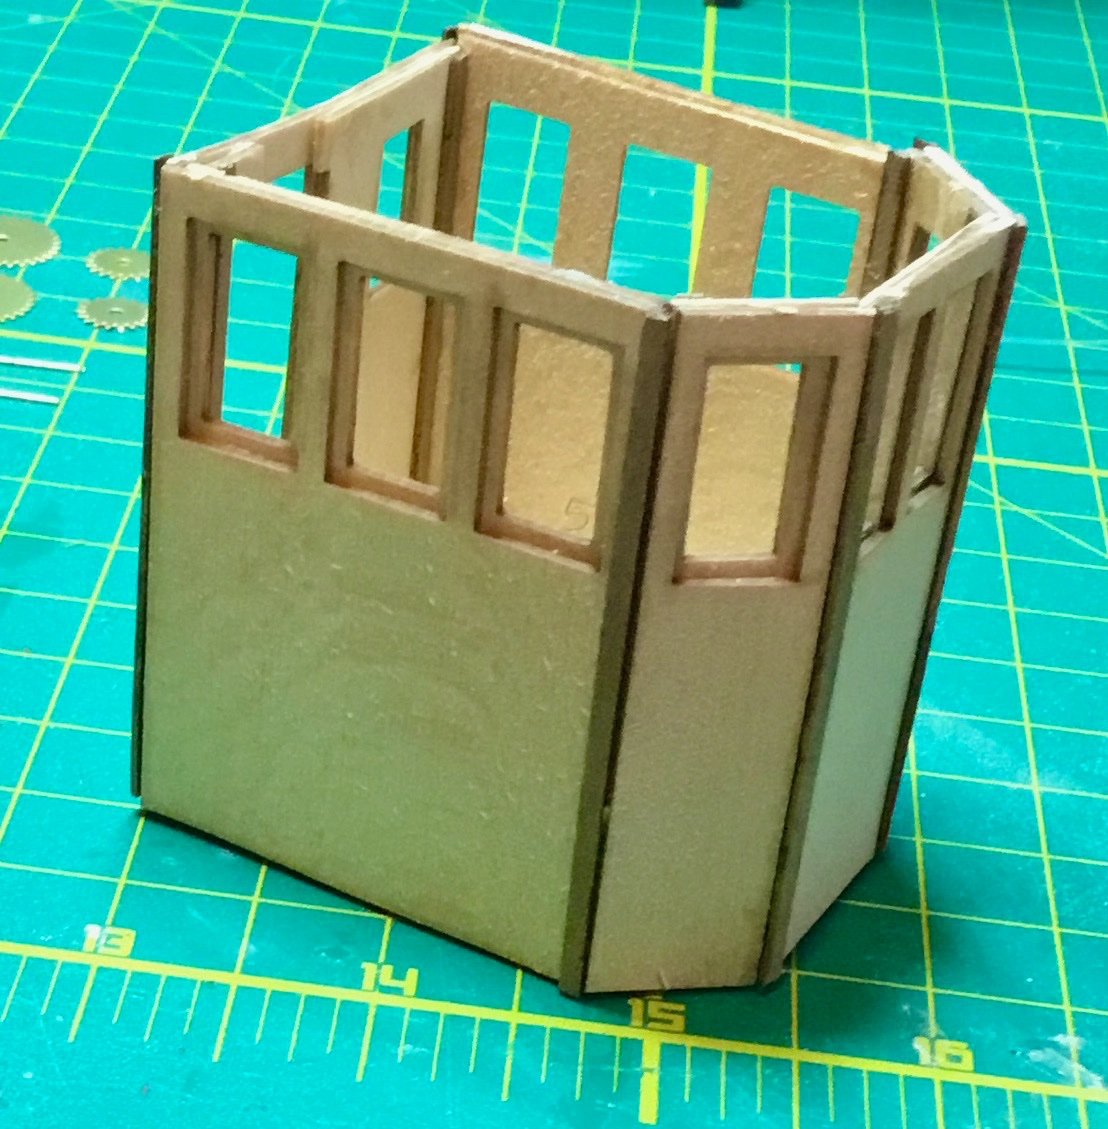
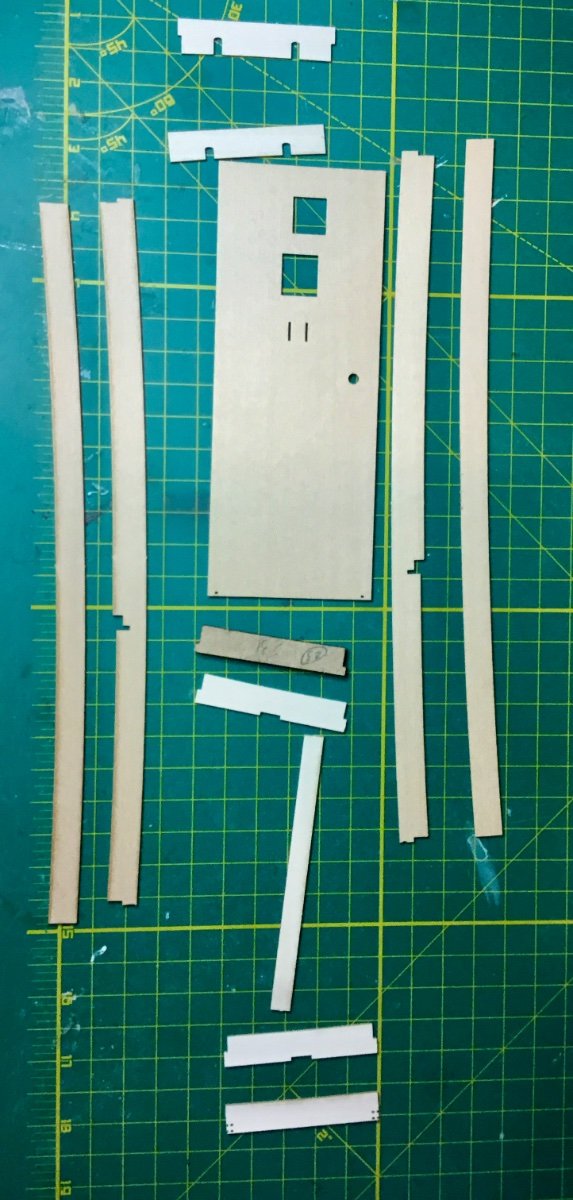
Began construction of the wheelhouse. The walls of the wheelhouse are made up of two layers; an inner layer with smaller window openings and an outer layer with slightly bigger window openings. This provides a surface to support the acetate windows to be added at a future step. Everything was going fine until I began to add the second layer. Then I noticed that the windows were not smaller for the front panel as described in the plans and instruction manual. As you can see in the first photo the parts at the top center marked 52 and 56 actually are two part 56s. So I had to add small strips of wood to the inner panel to make the window openings smaller before proceeding. This is the second time for this kit that the laser cut sheets were in error and did not match the plans.

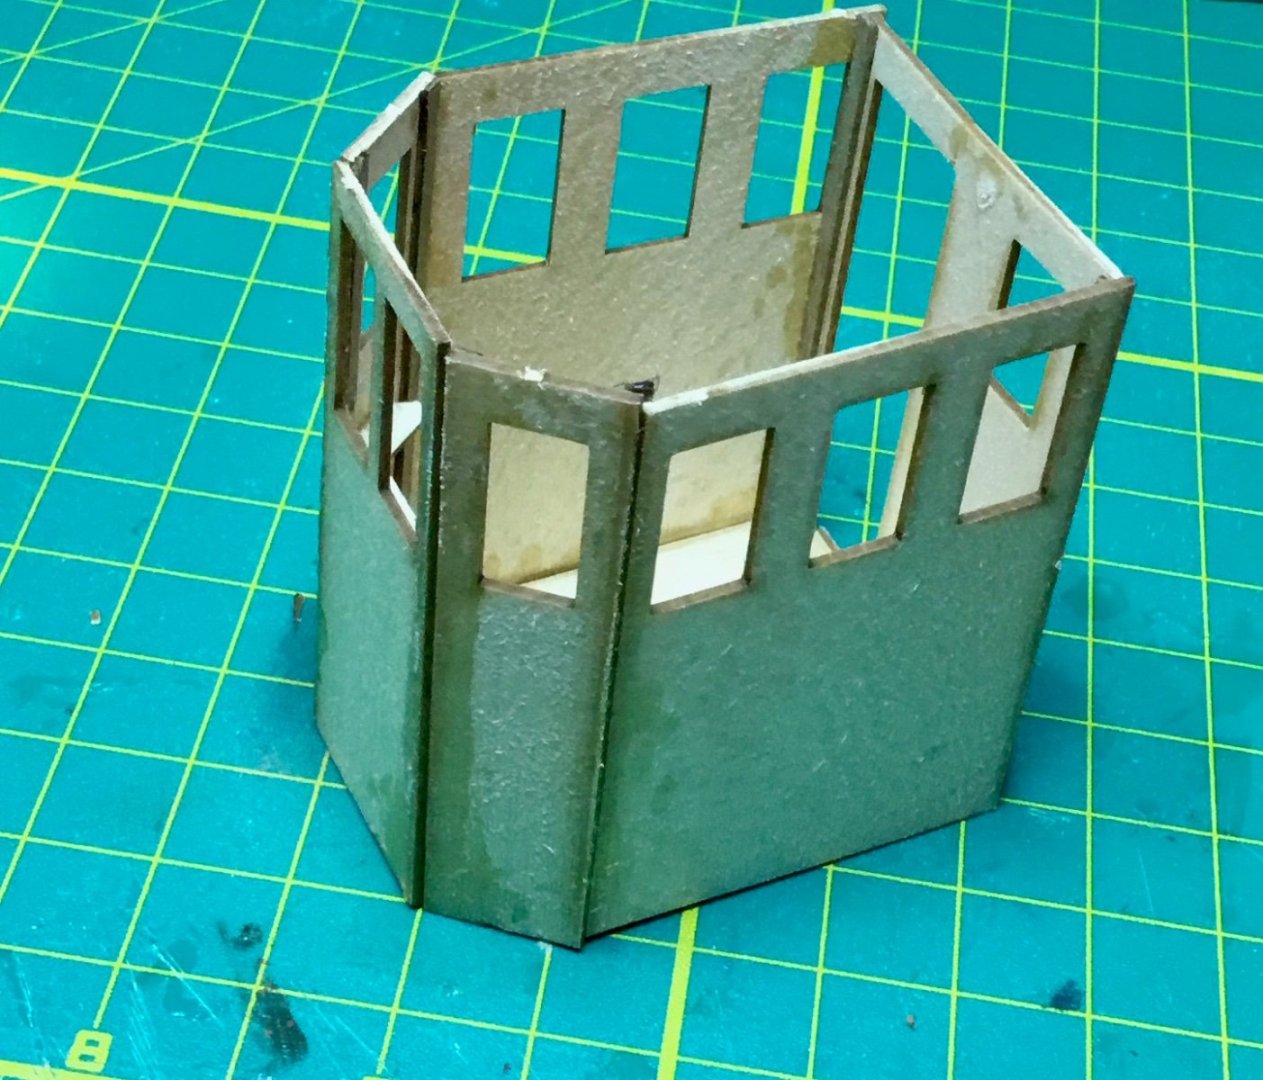
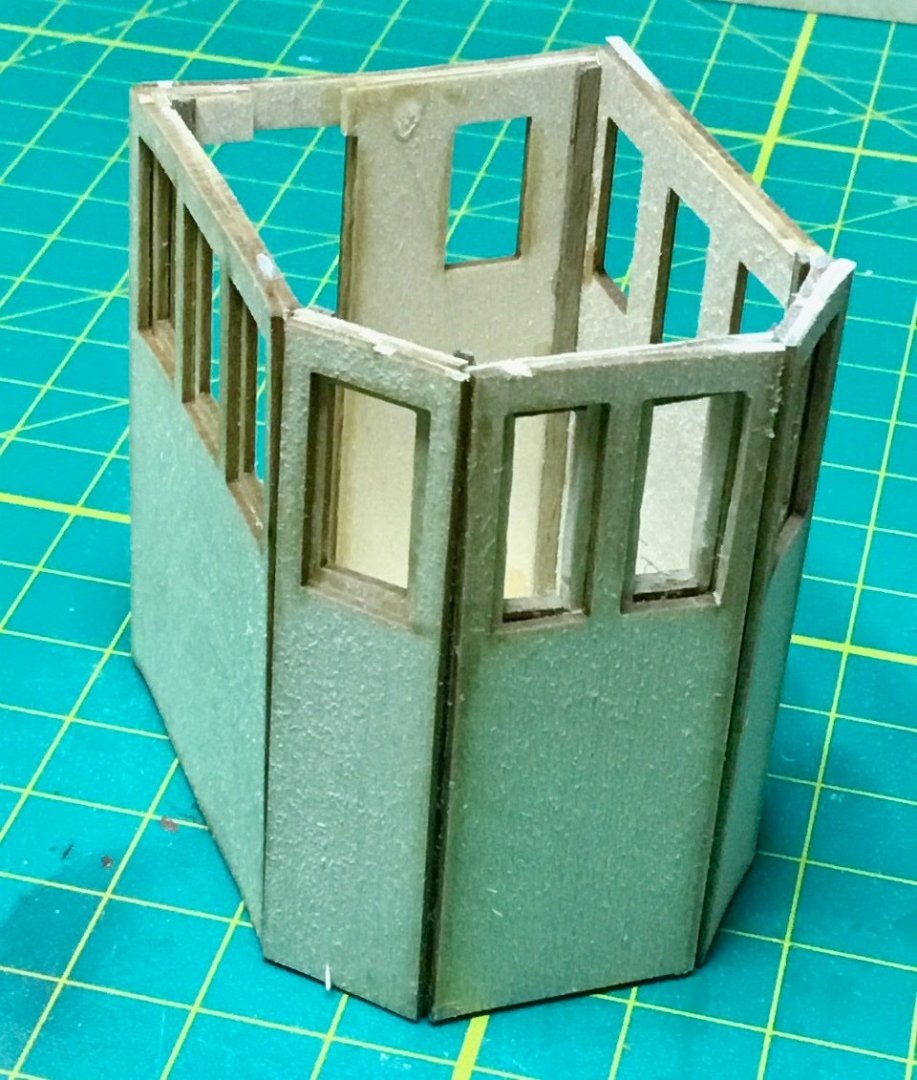

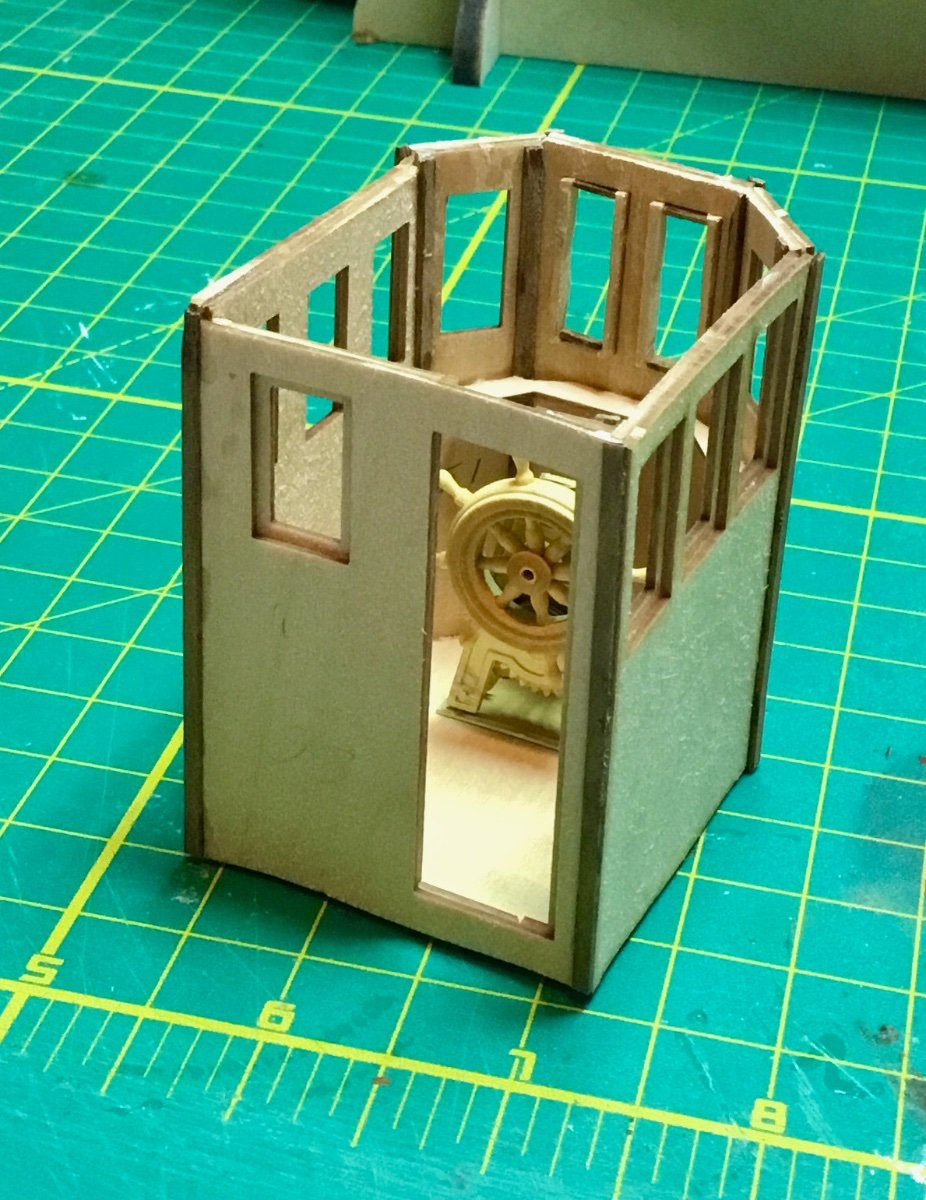
Next I made the wheel assembly and added it to the wheelhouse.

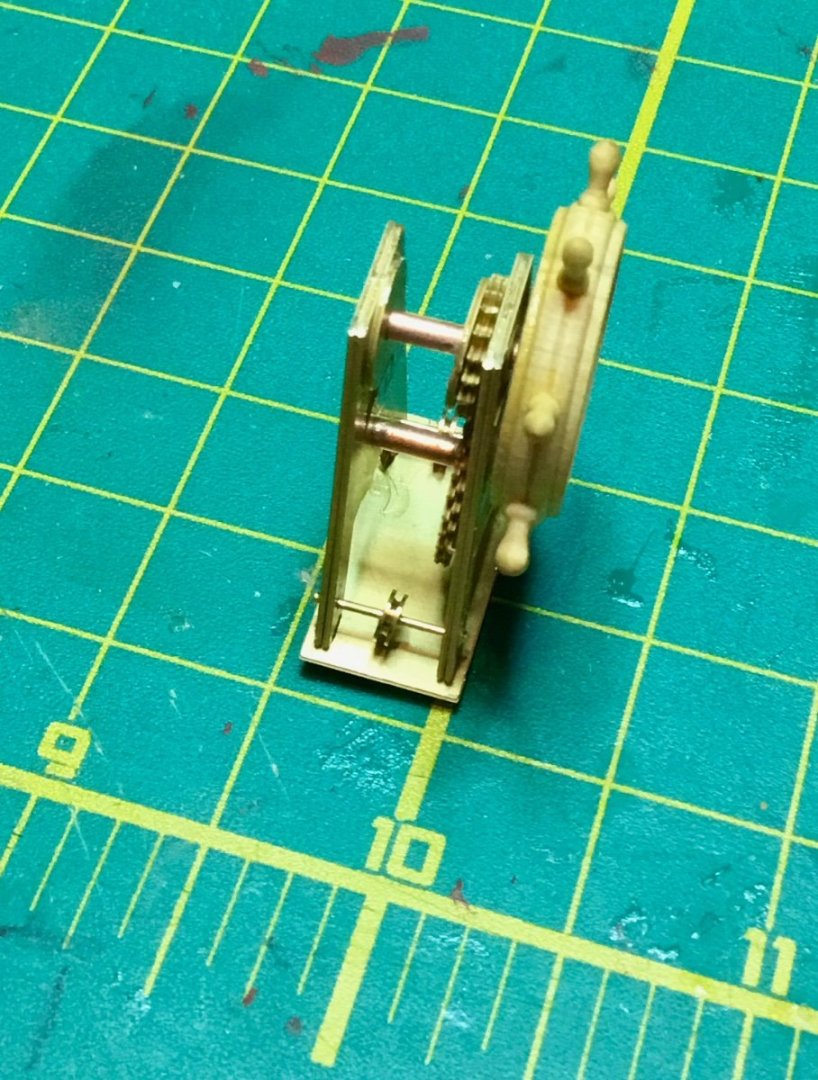
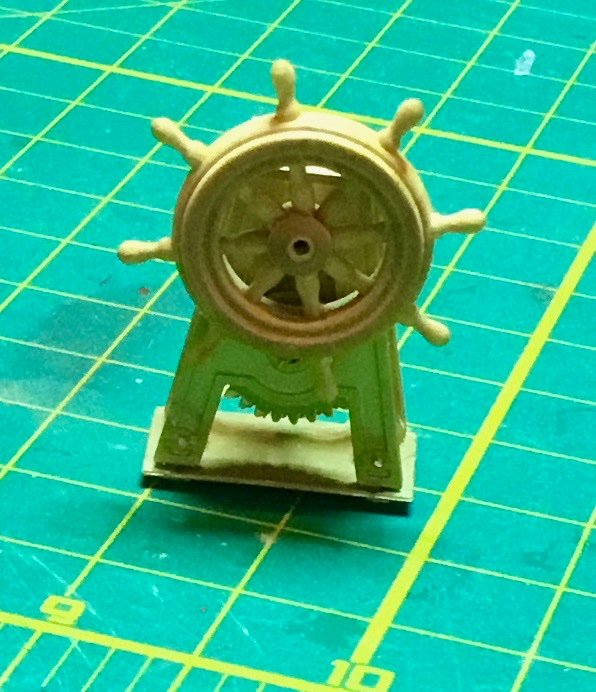

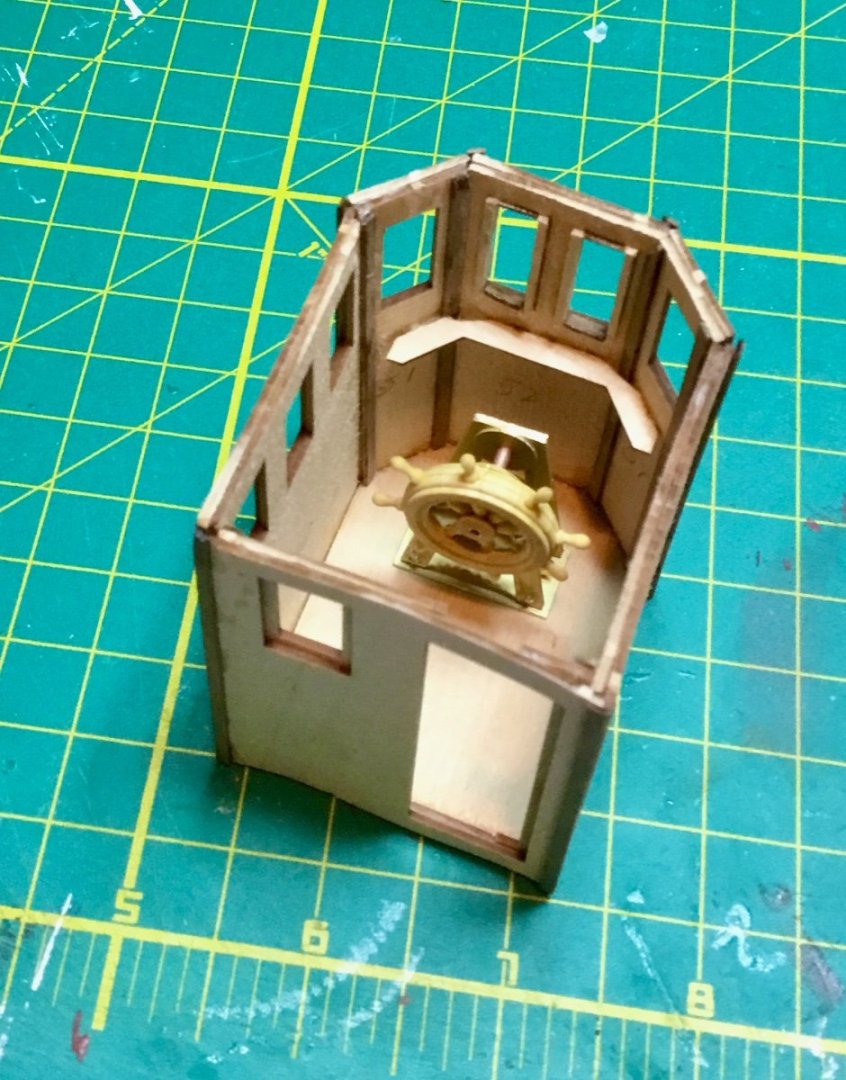
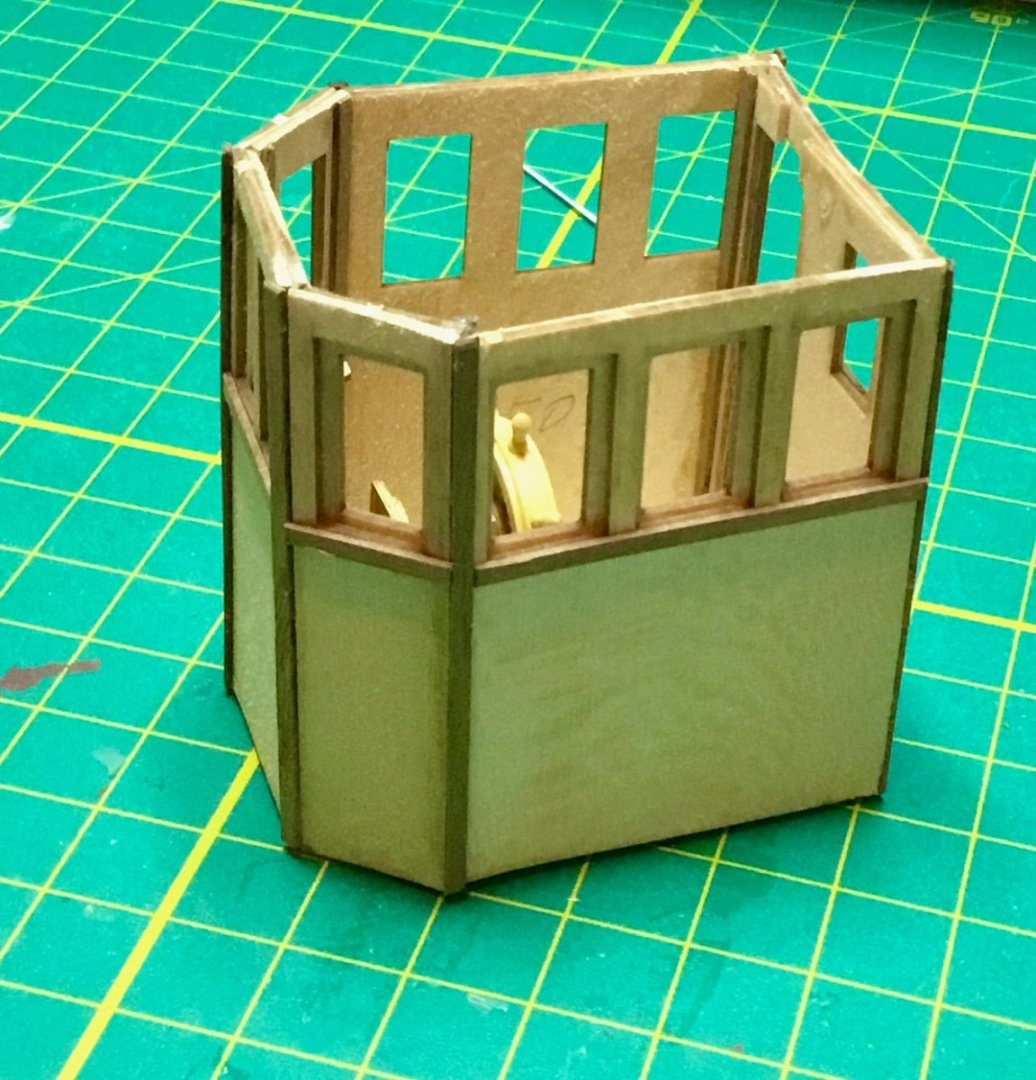
To be continued.
-
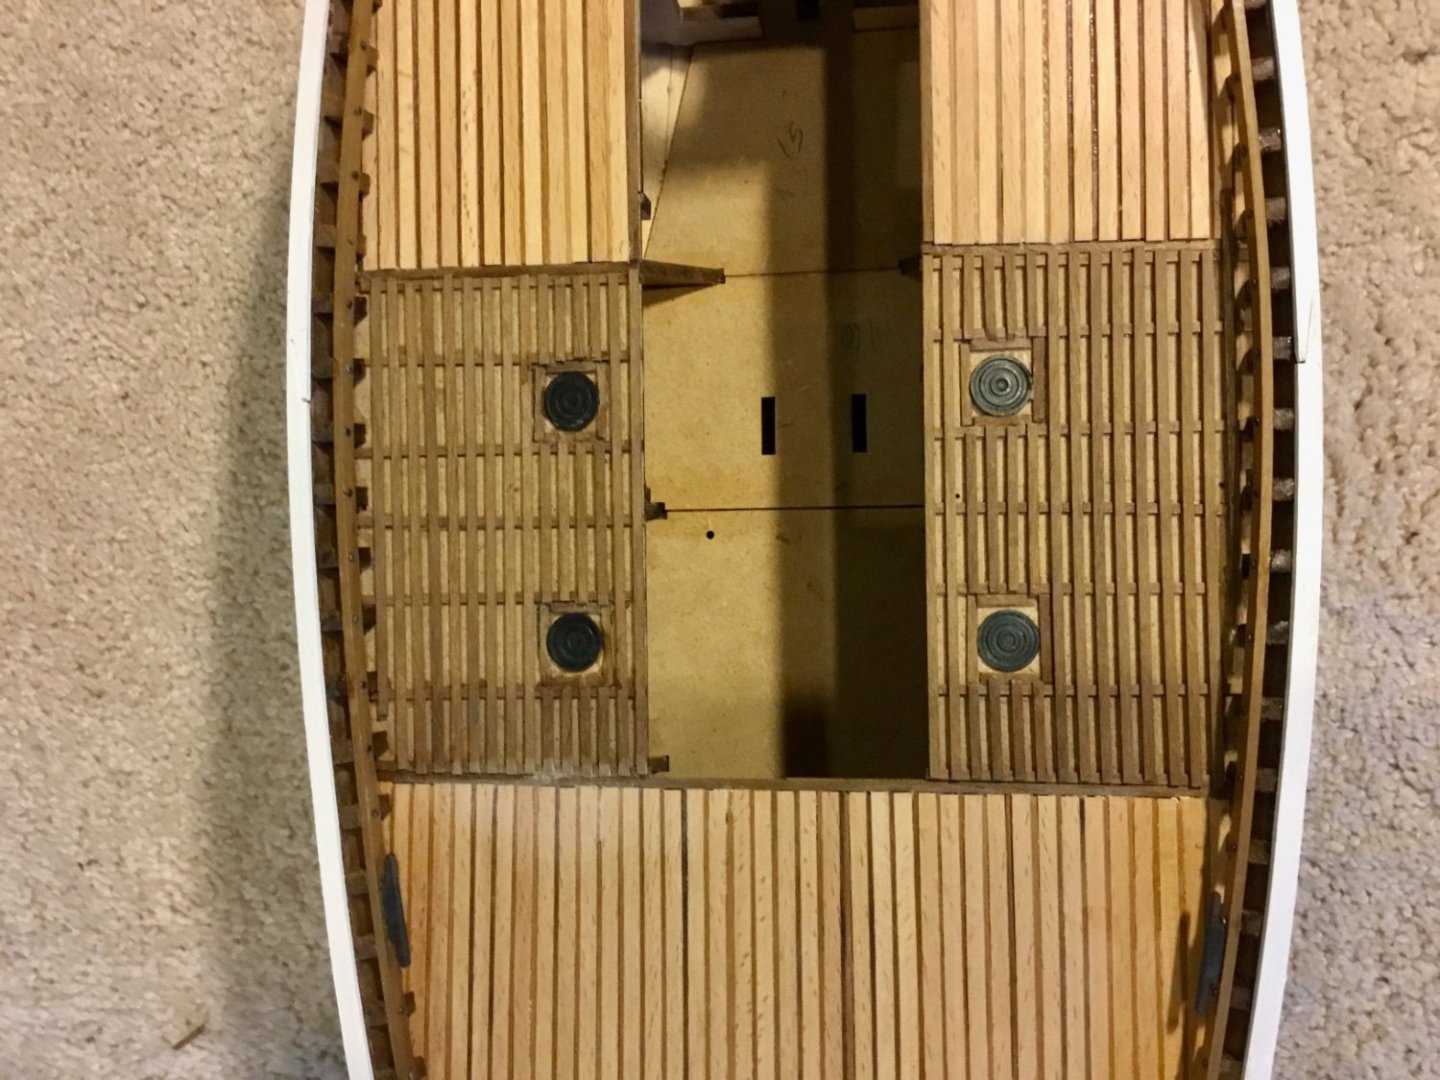
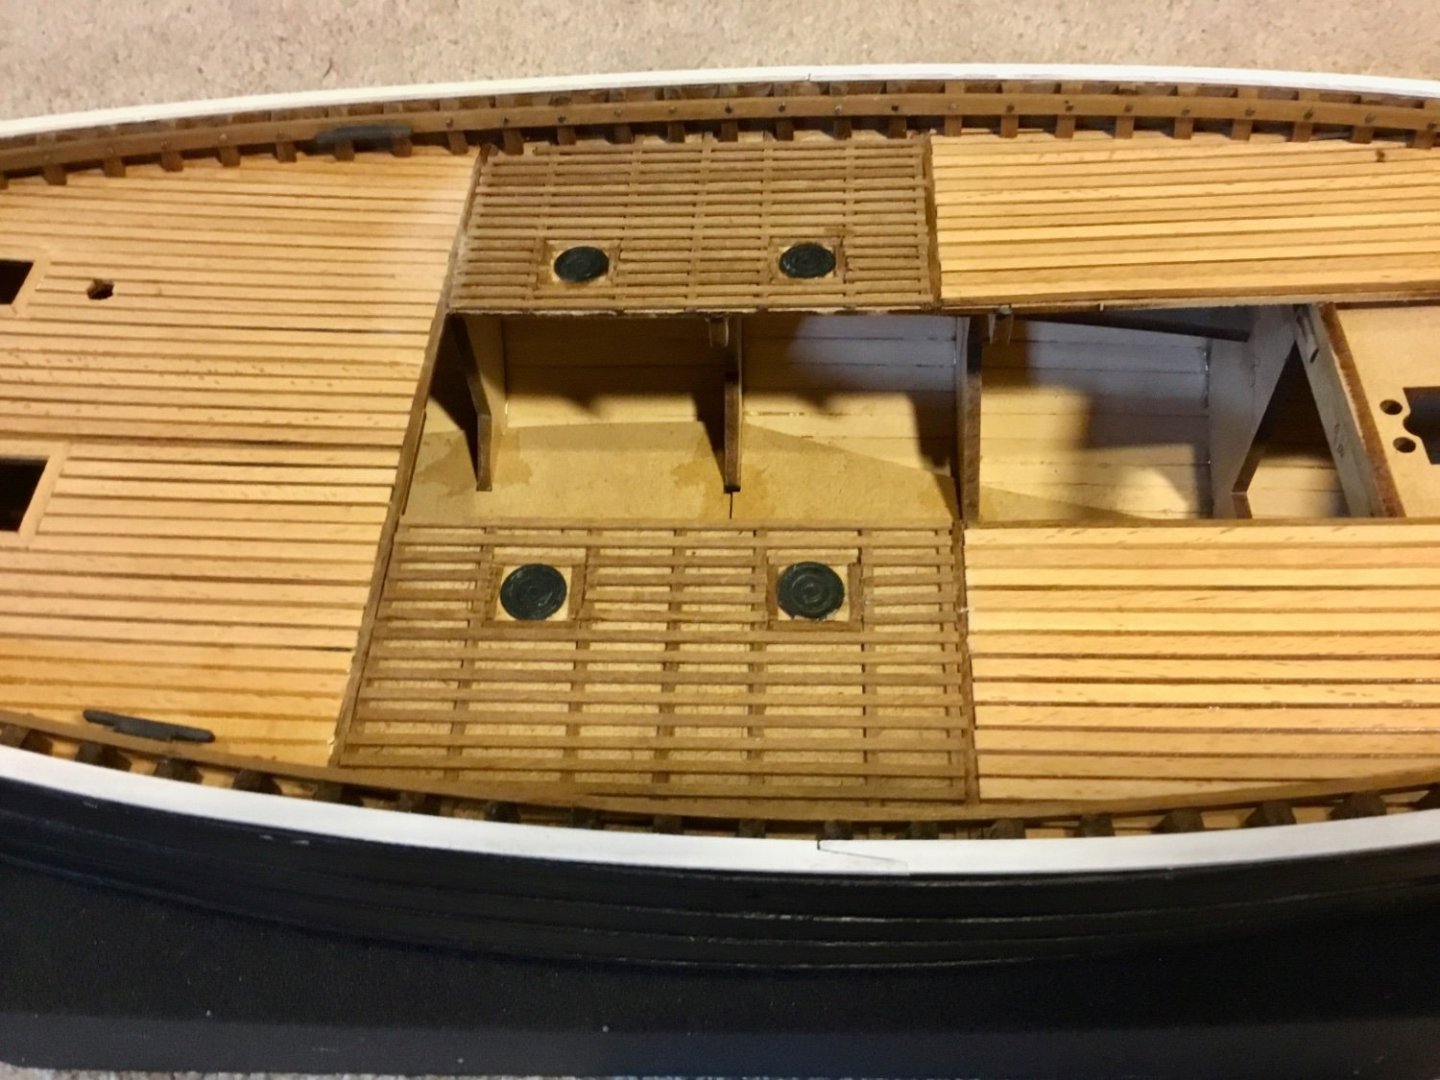
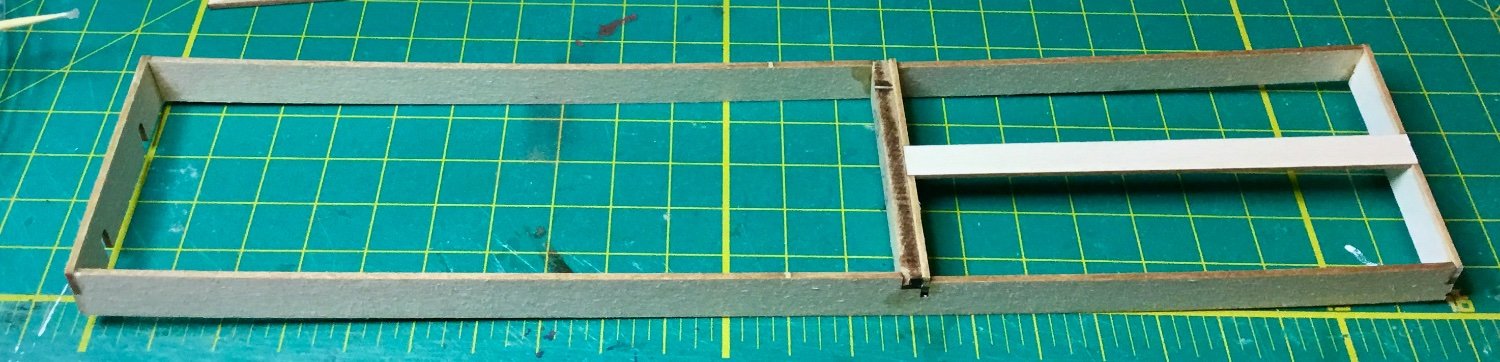
Assembled the main superstructure and attached it to the deck. Some minor adjustments to the deck opening was required to get the superstructure to fit.


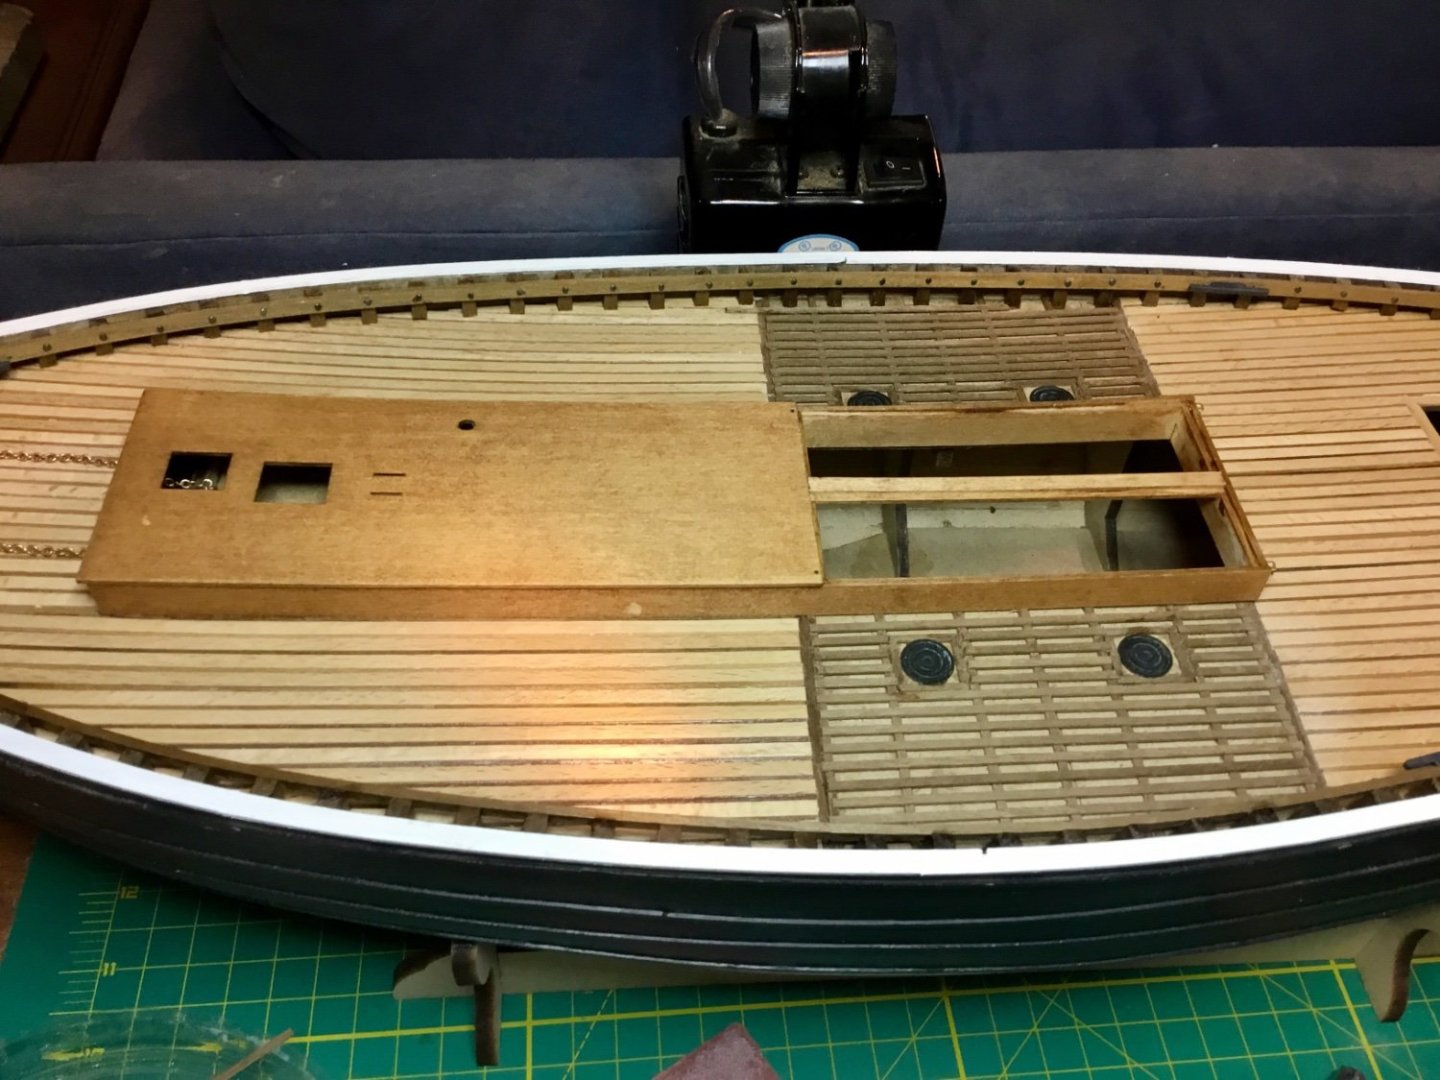
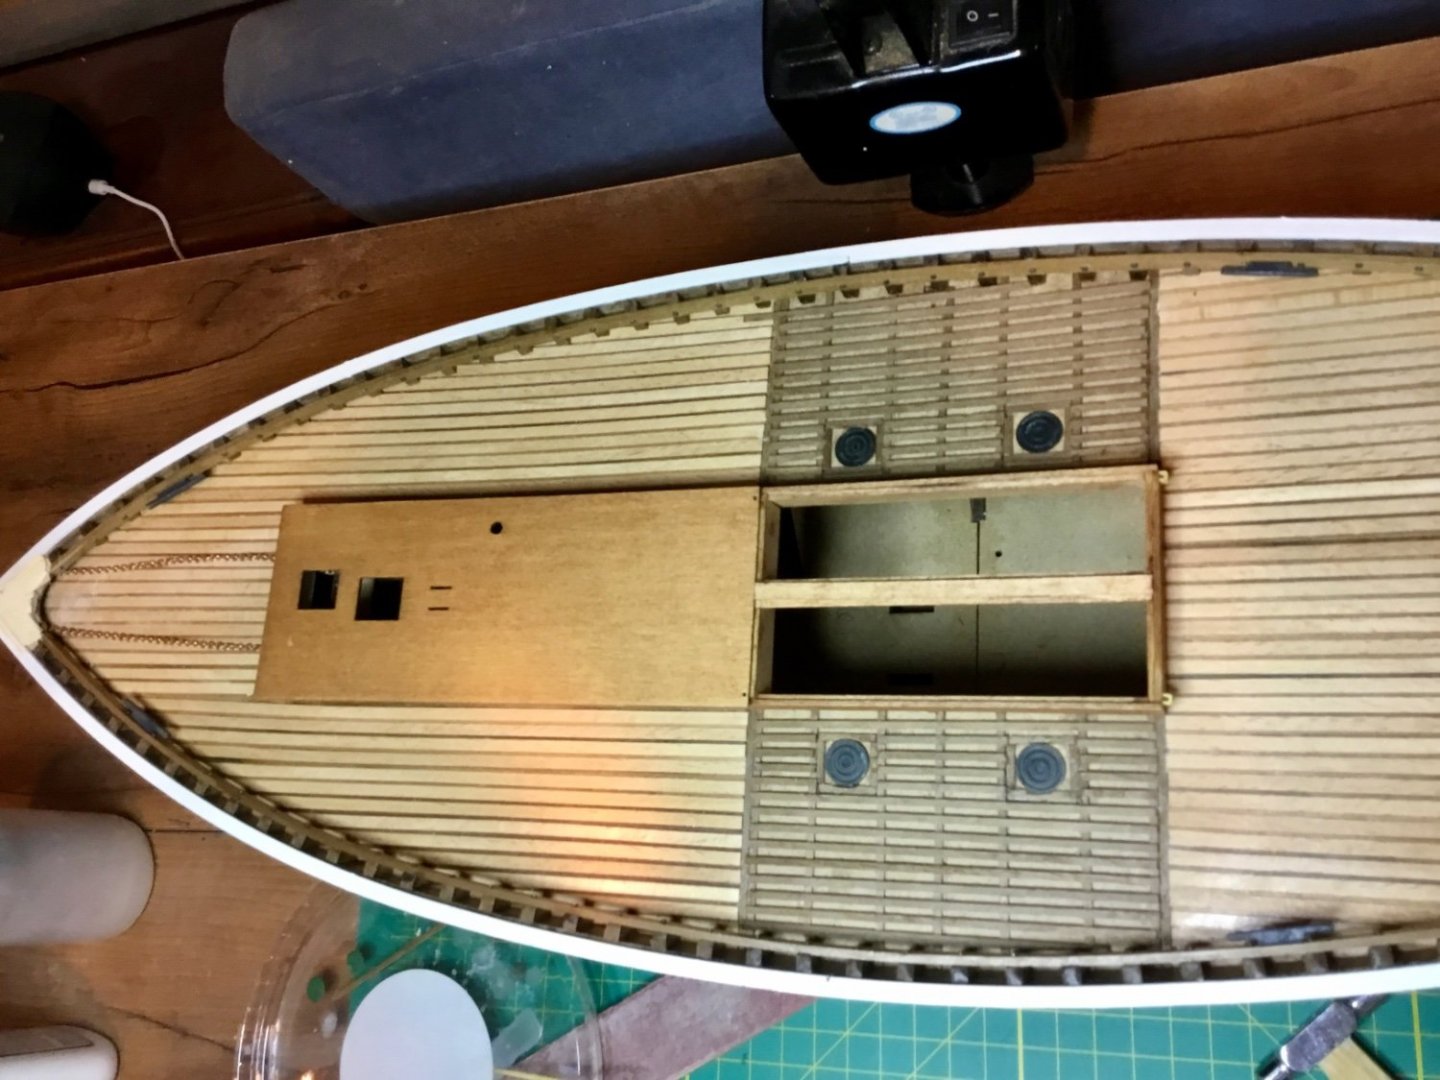
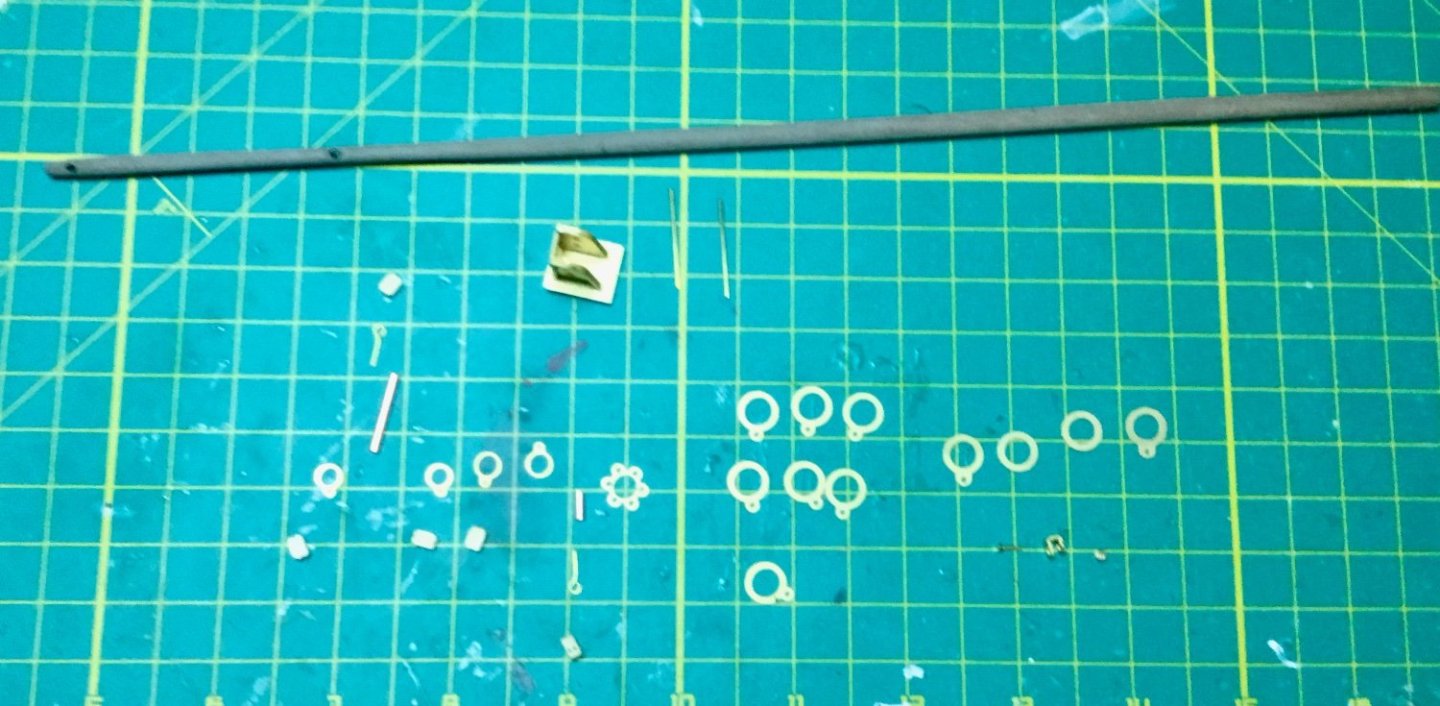
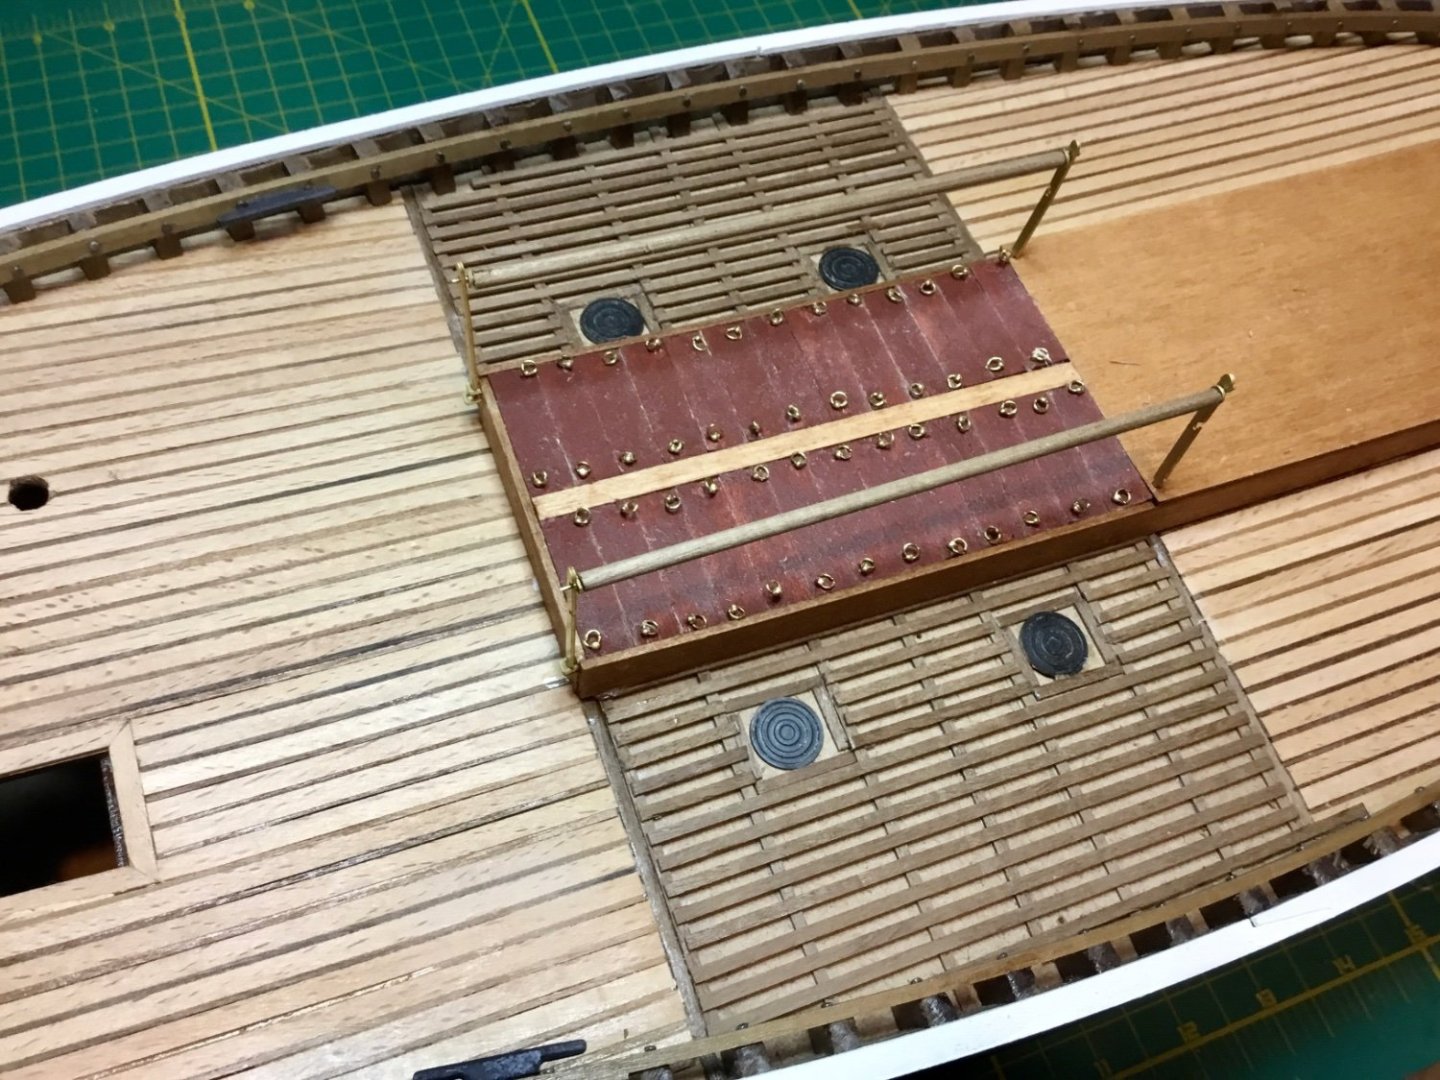
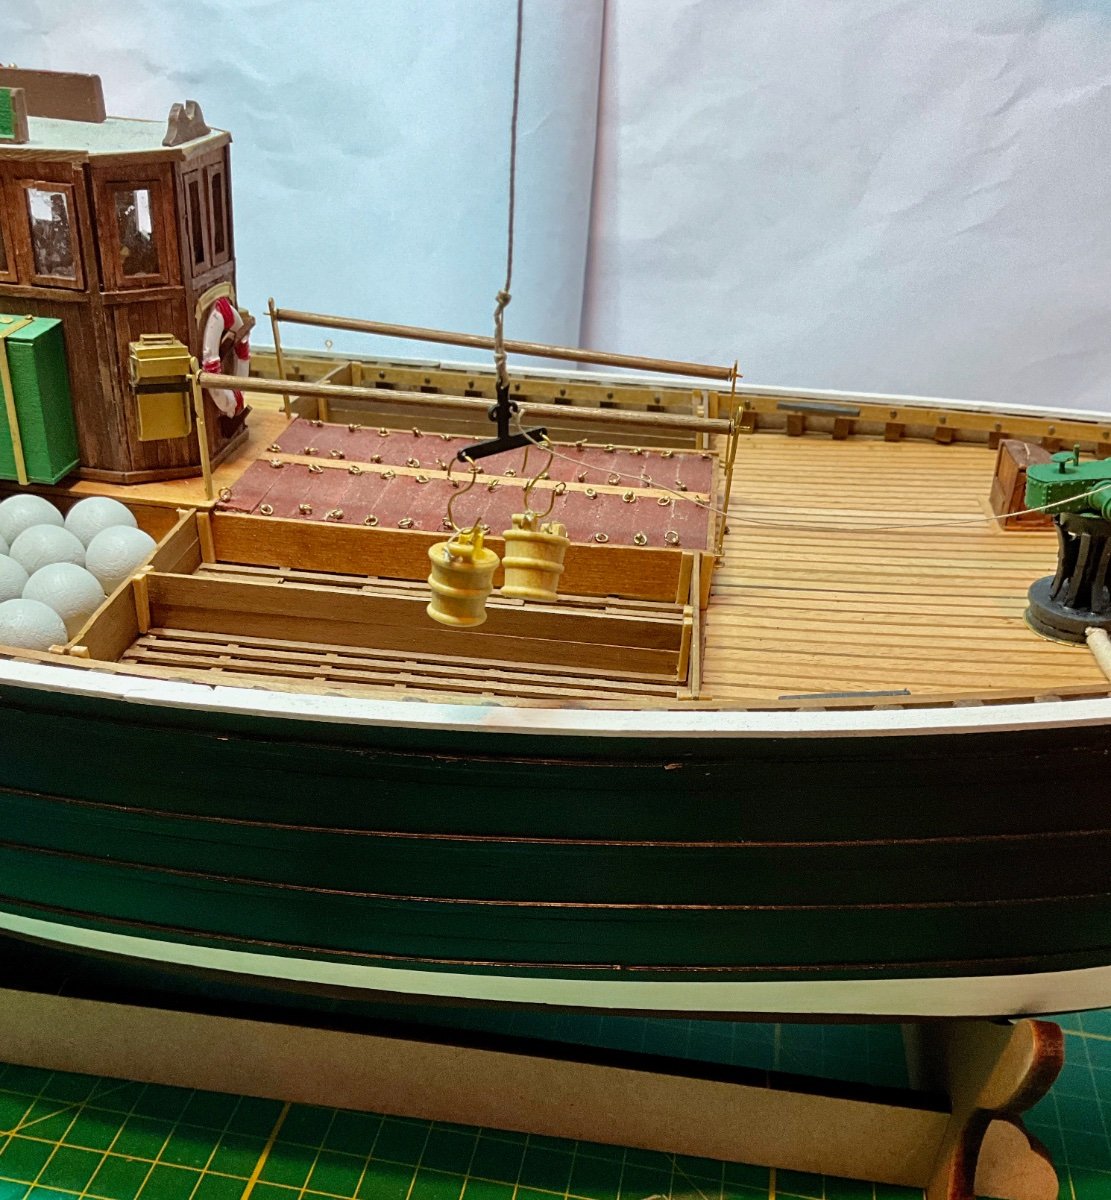
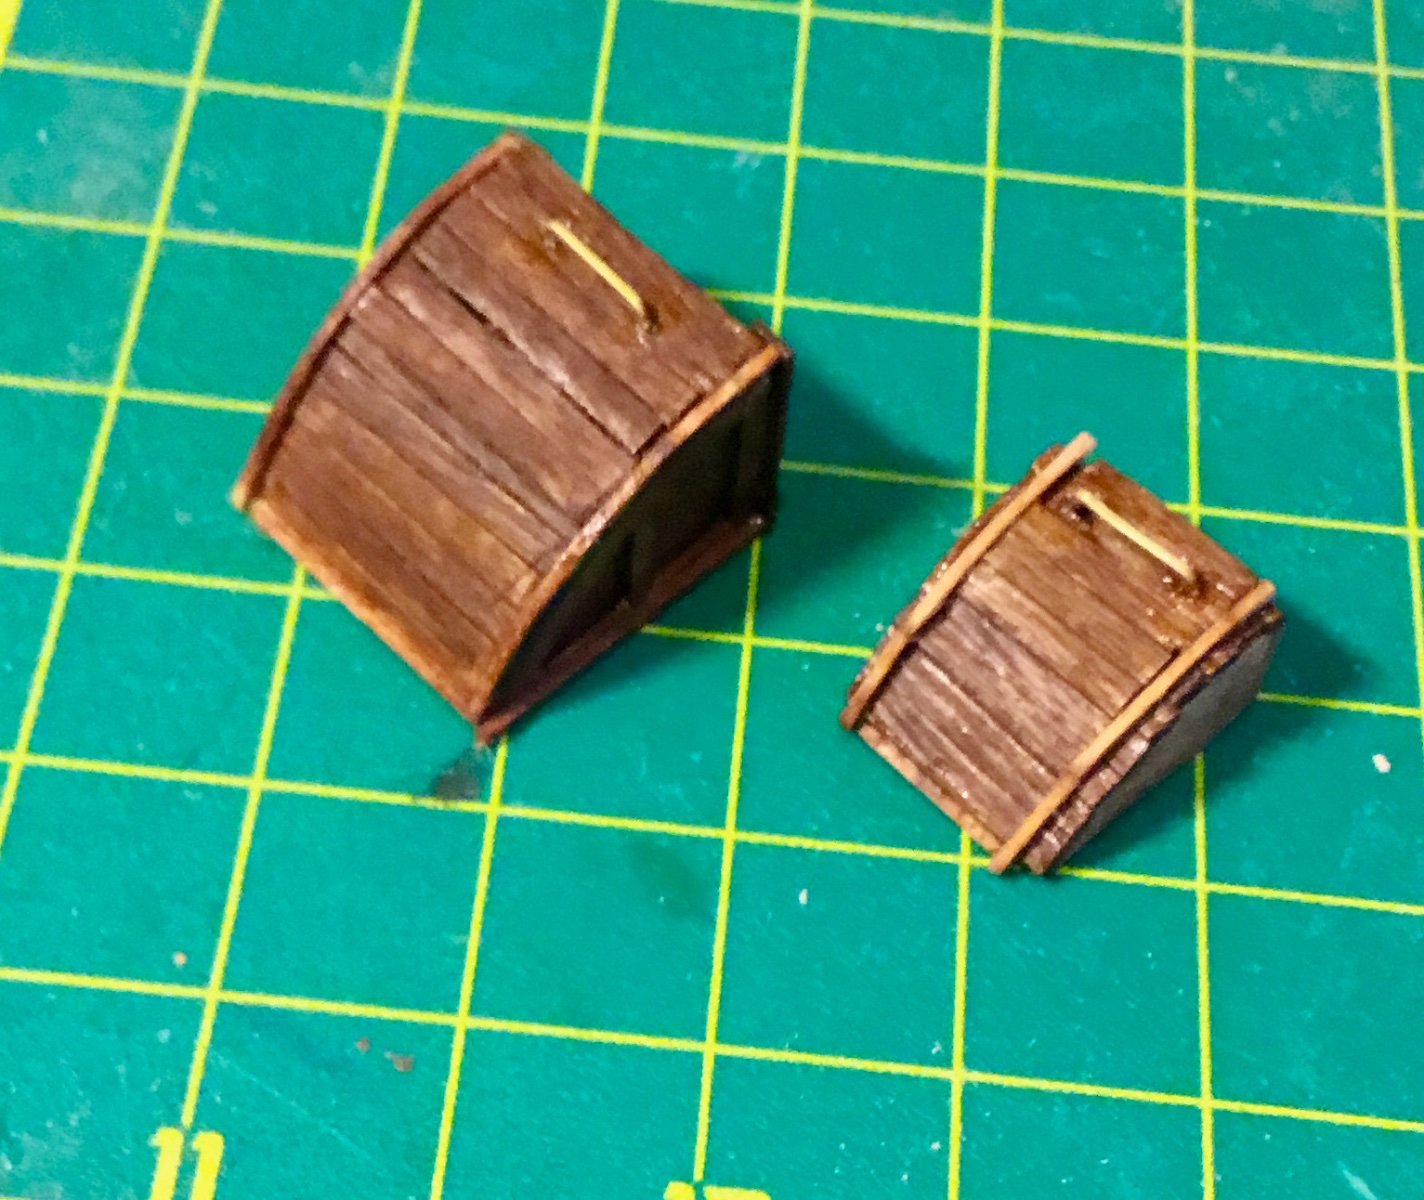
Assembled the net rollers. The holes in the end caps required the use of a small reamer to enlarge the holes for the brass wire to fit. I positioned the end caps at the ends of the rollers and used an awl to mark the position of the hole to drill in each end of the roller for the brass wire. I then glued the brass wire into the holes followed by sliding the end caps onto each wire and then gluing the end caps to the rollers.
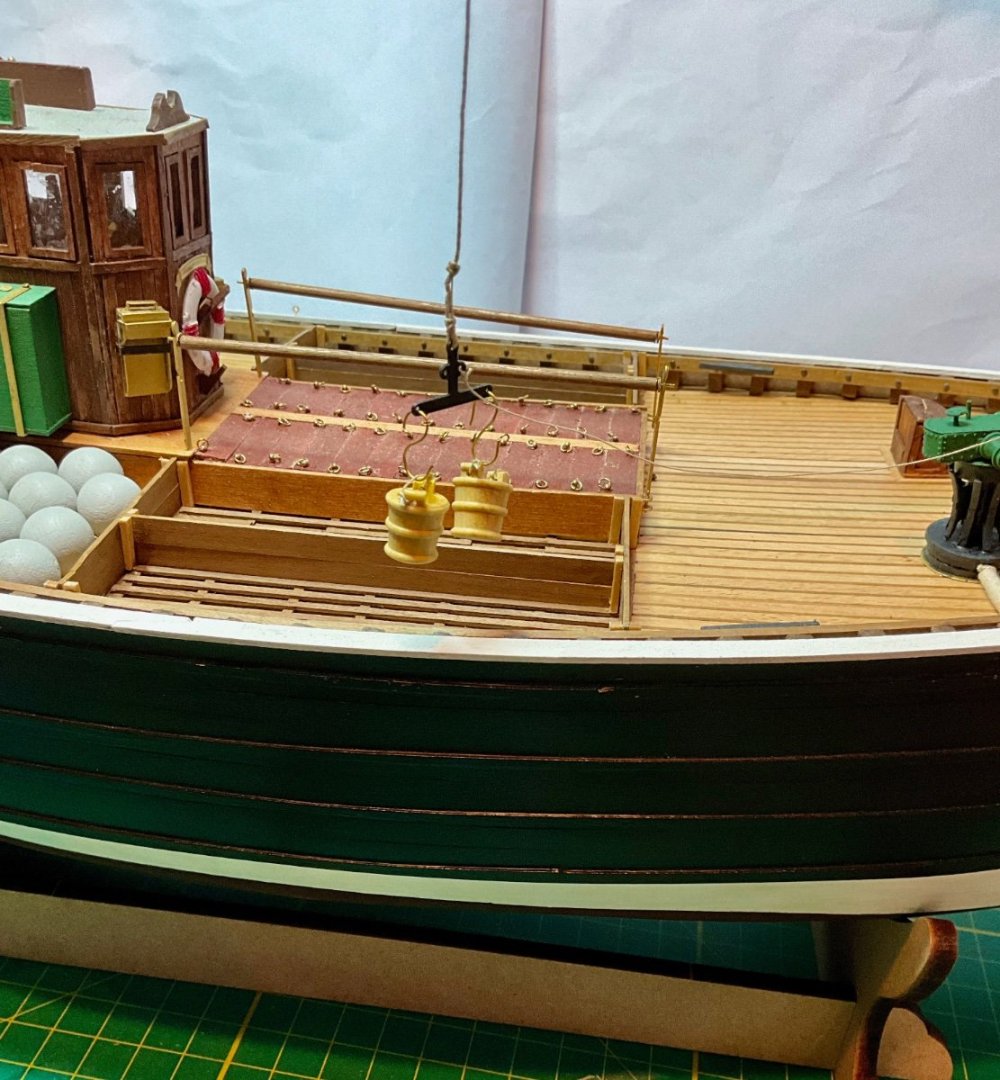
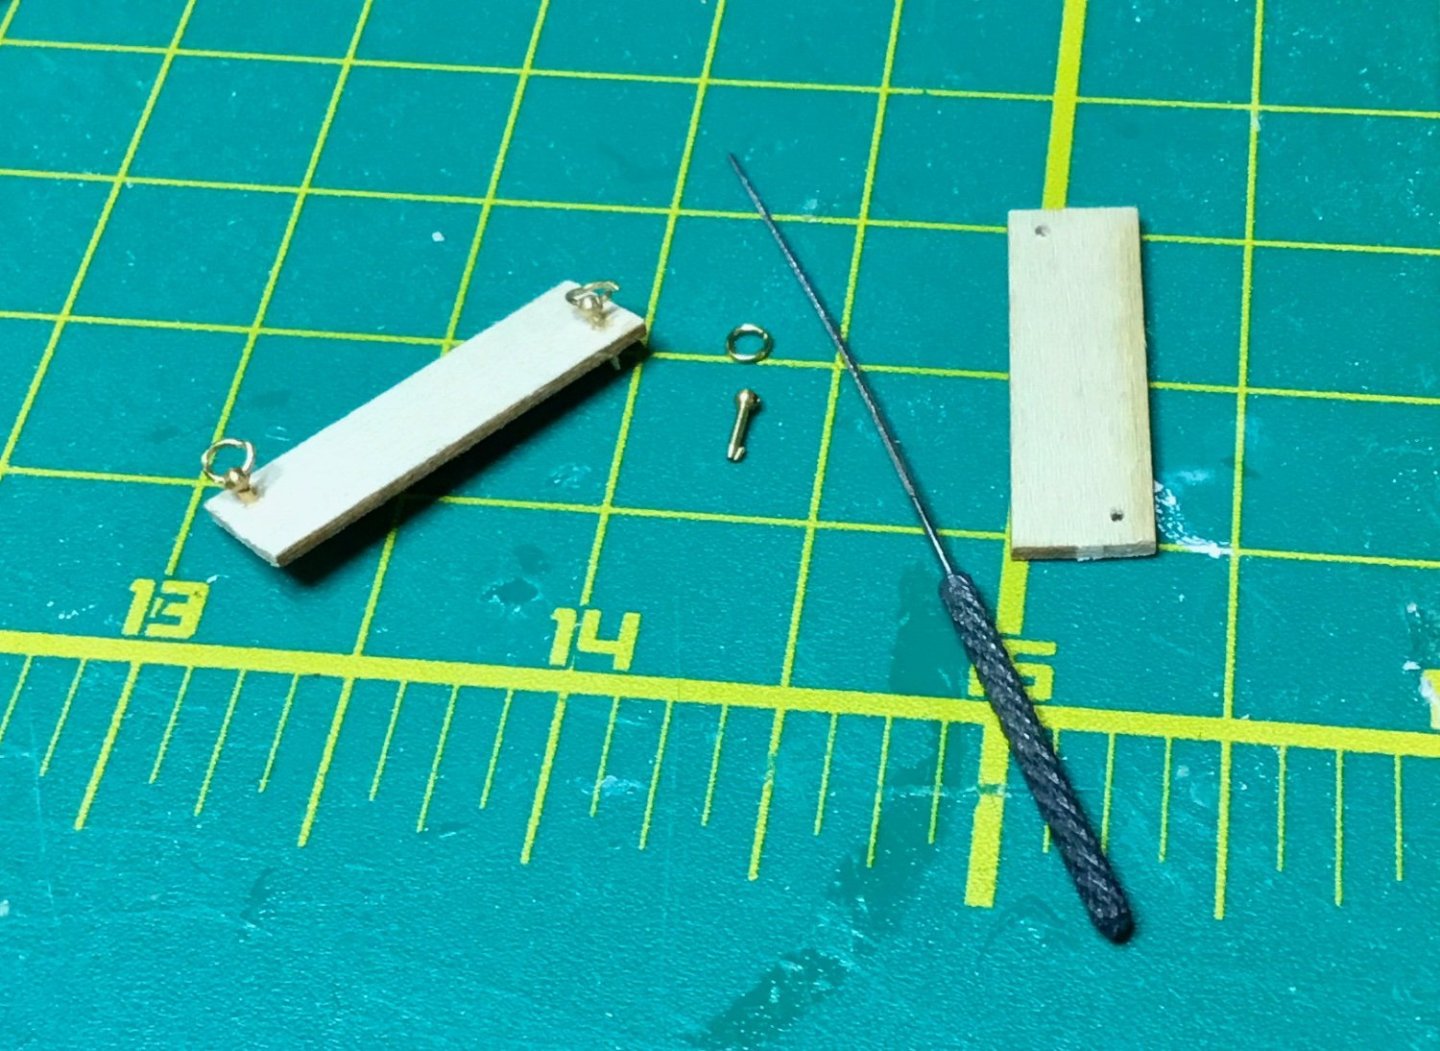
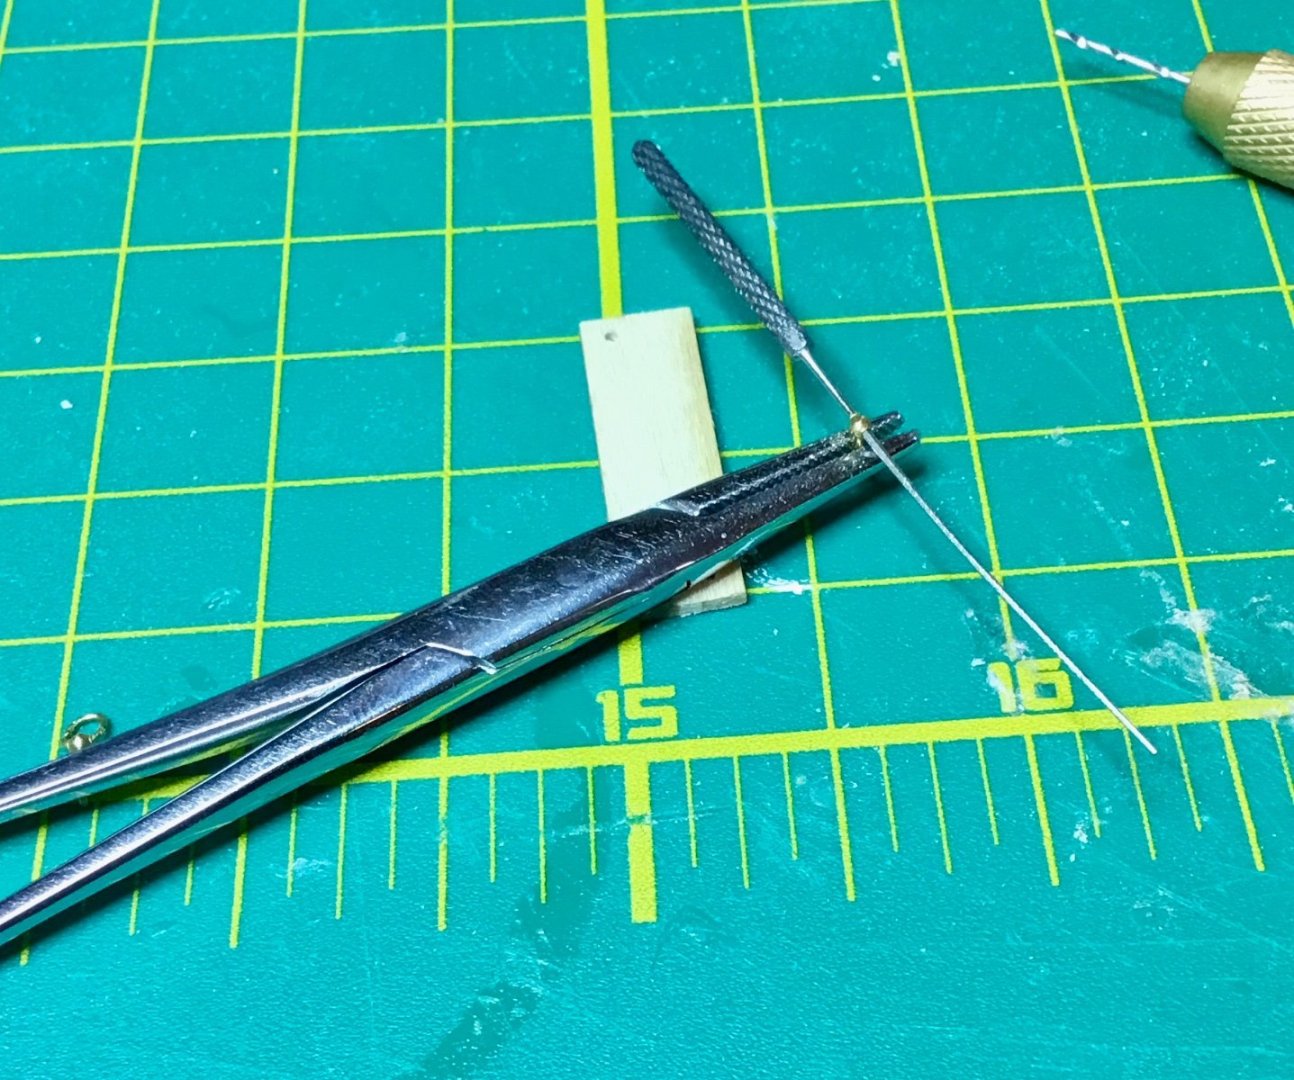
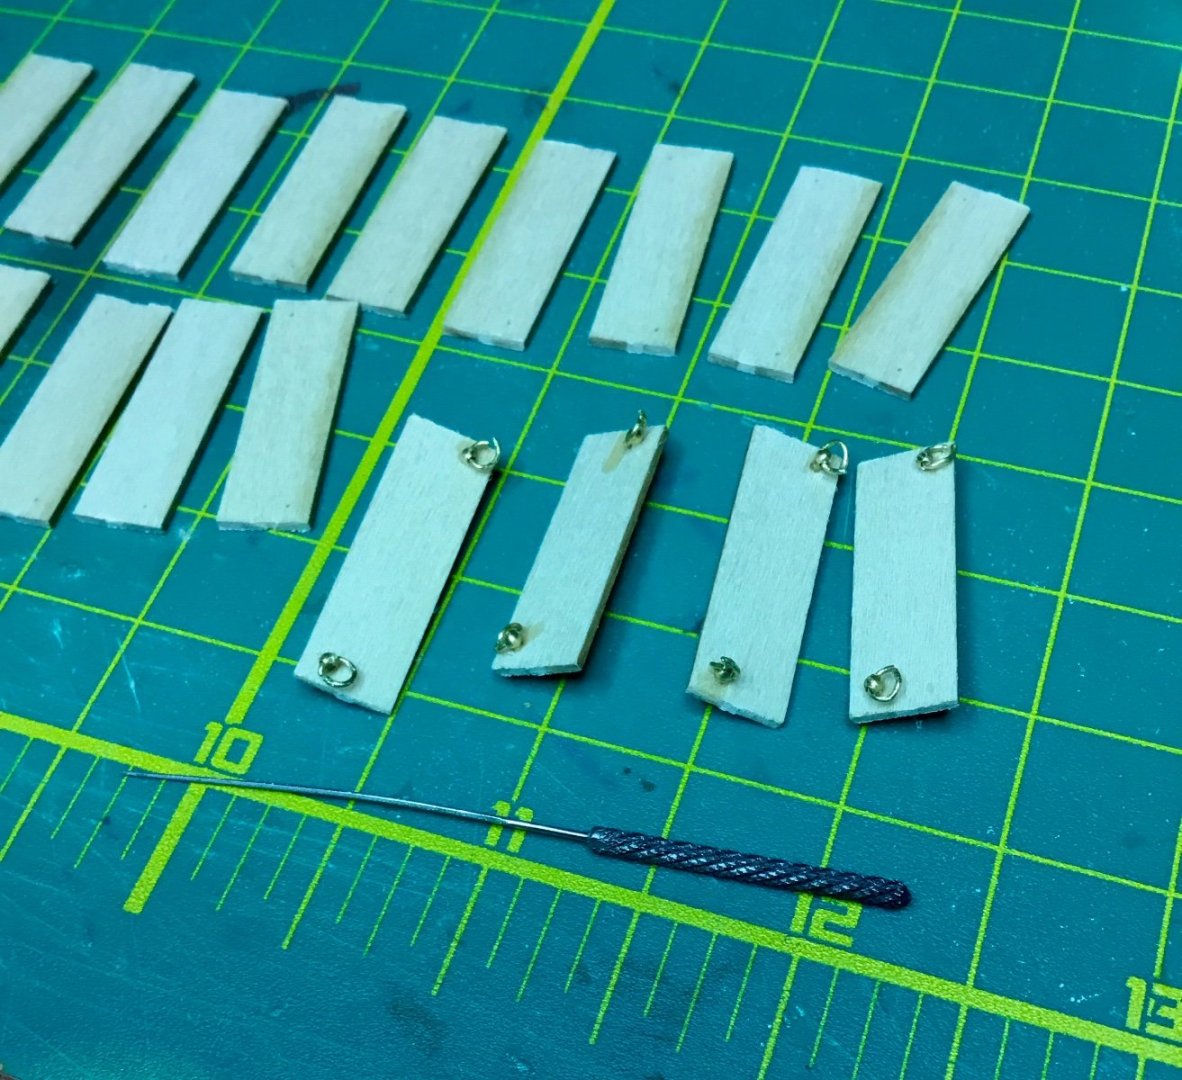
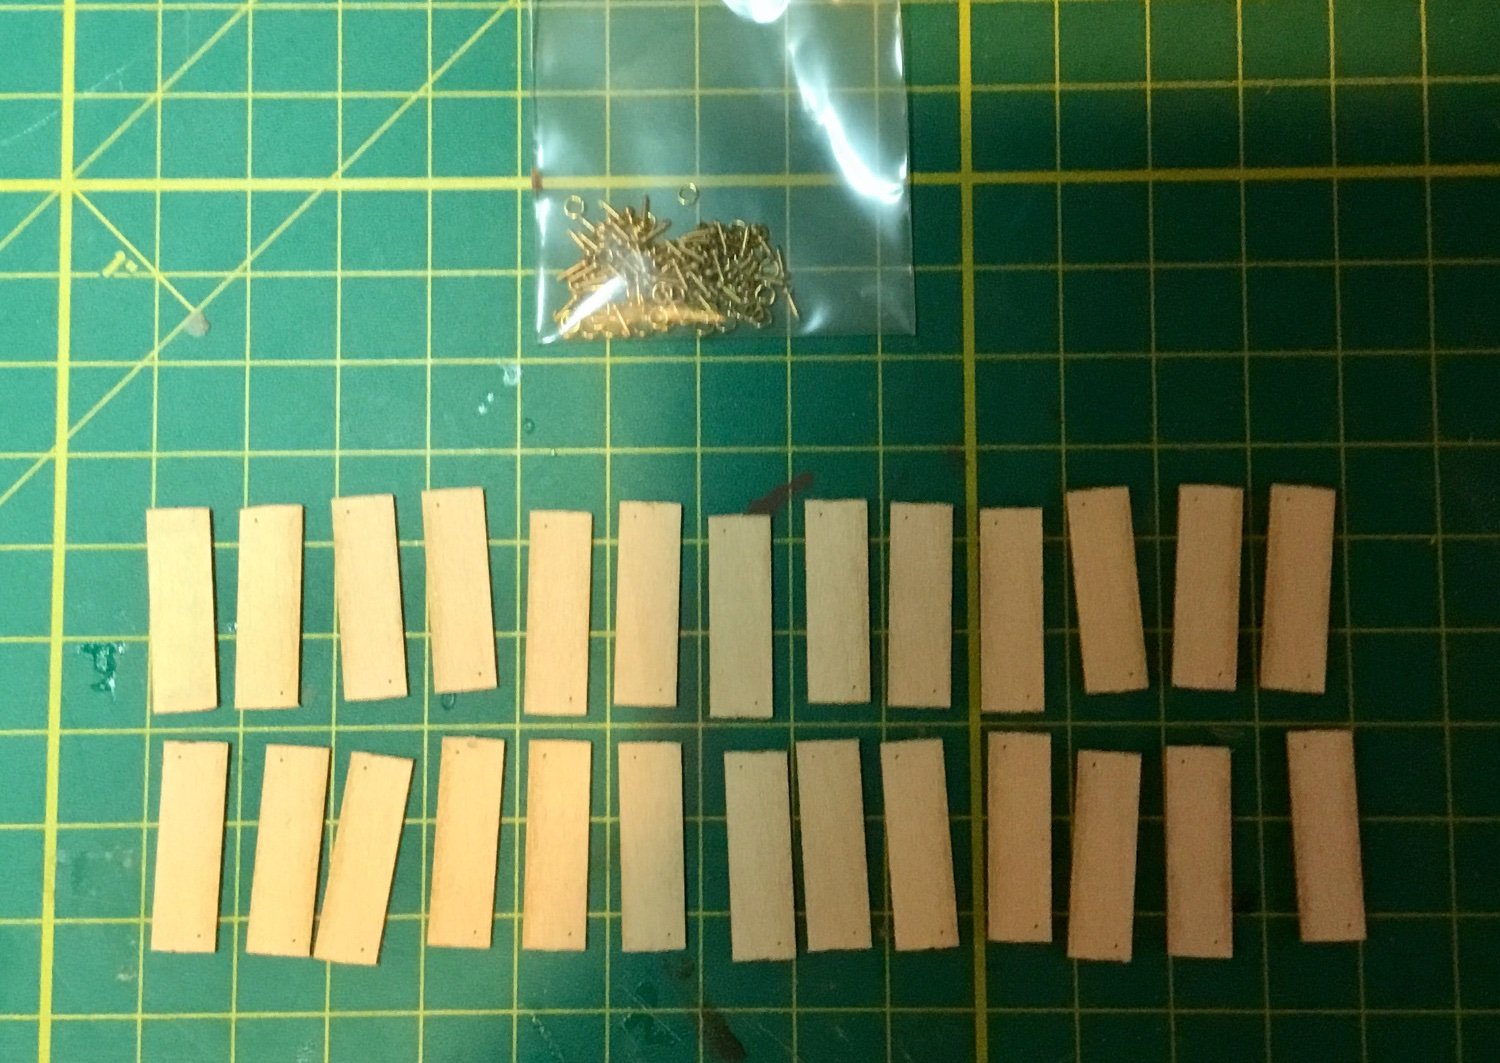
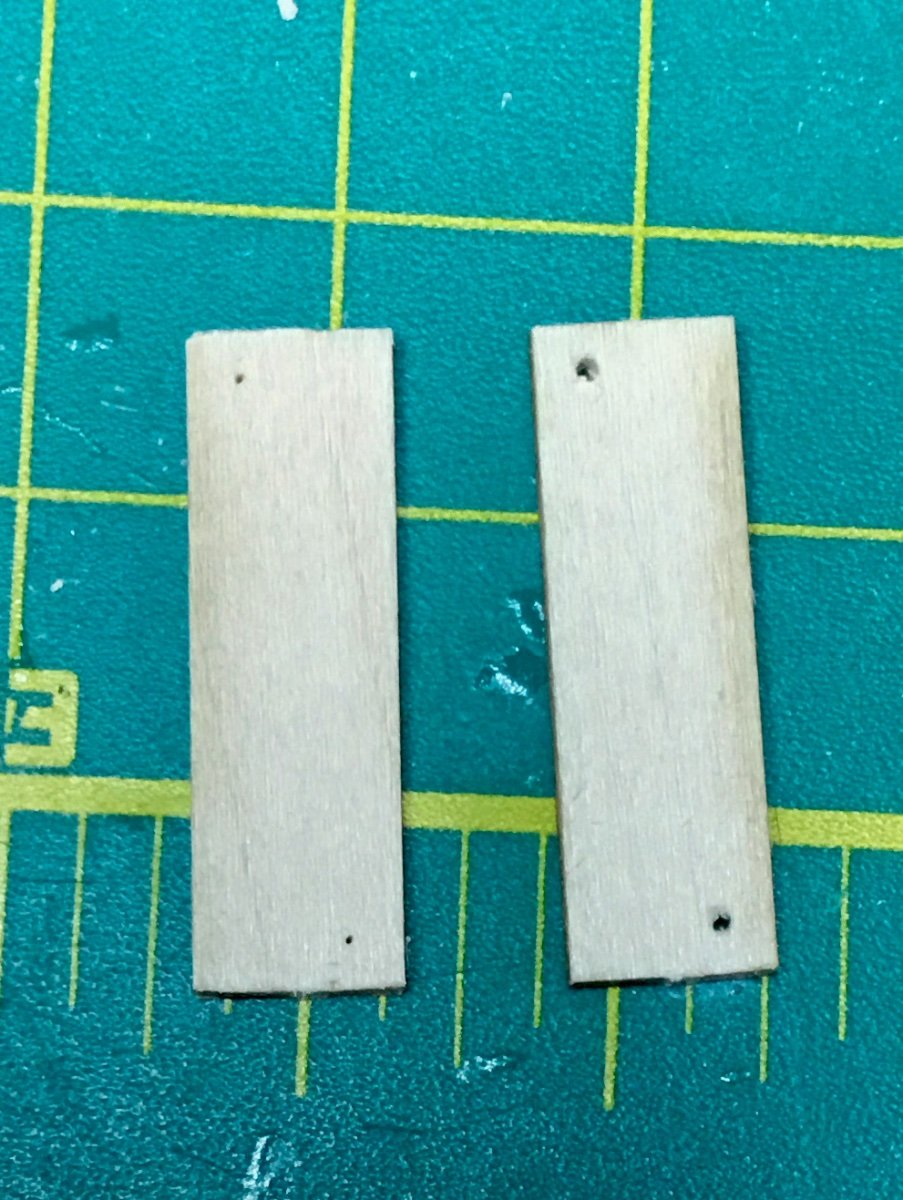
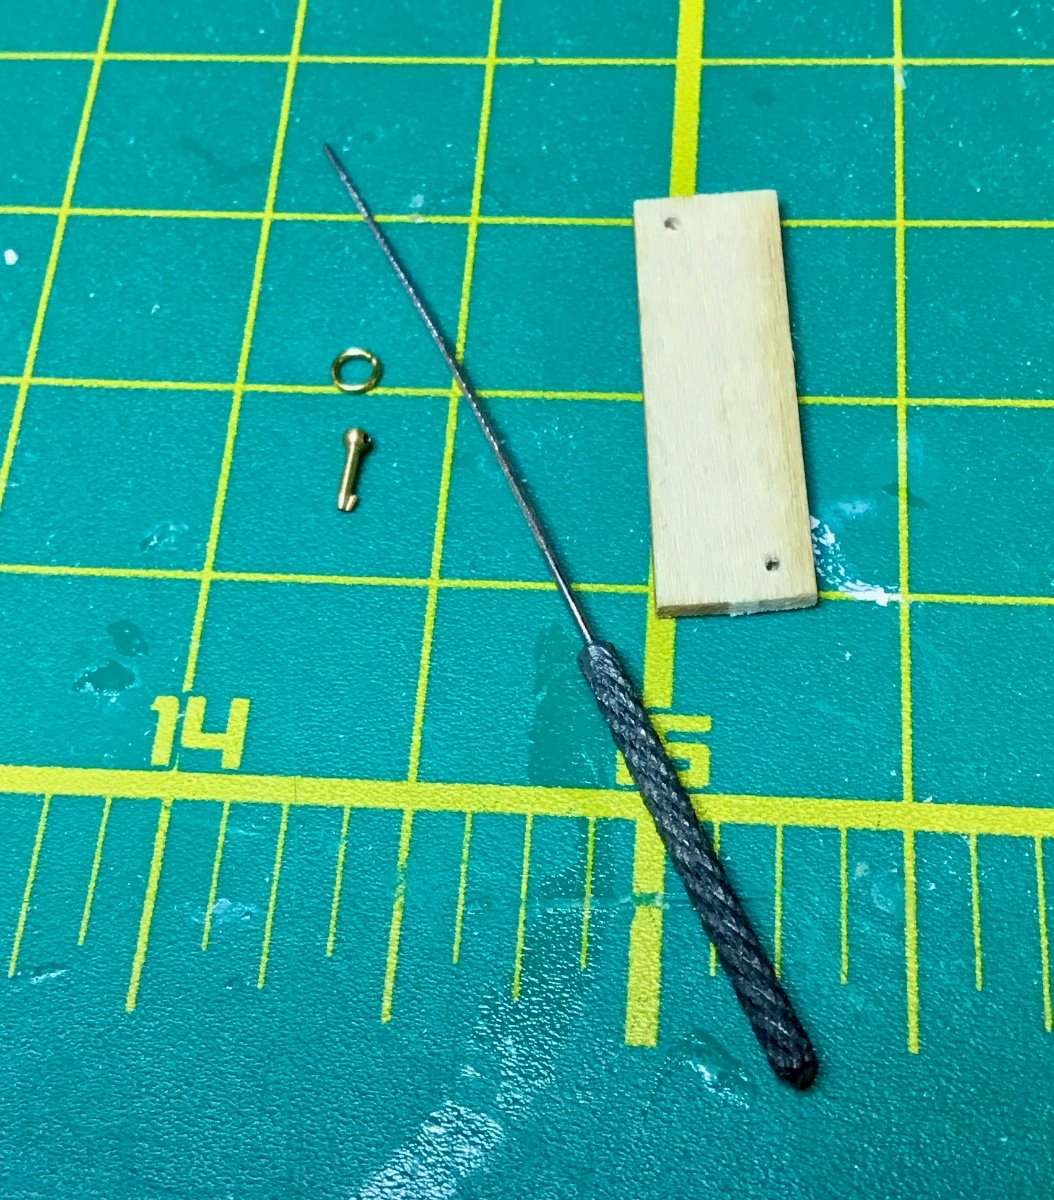
The 26 hatch boards were then created. Each hatch board had two very tiny holes marking the position of the eyebolts and ring fittings. The holes were enlarged using a reamer.
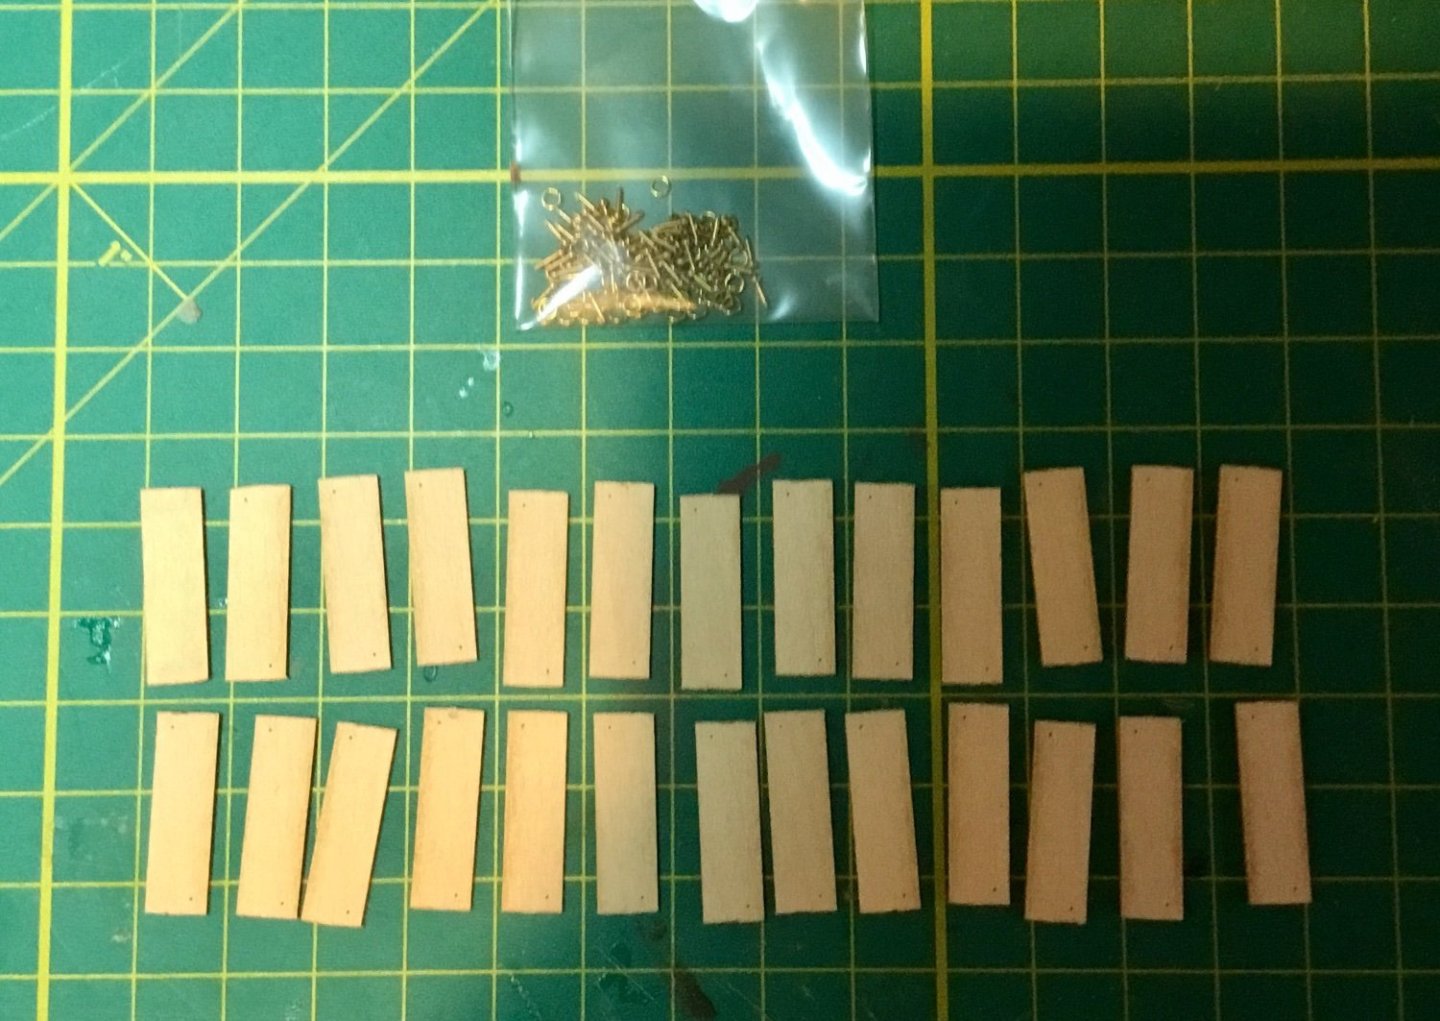
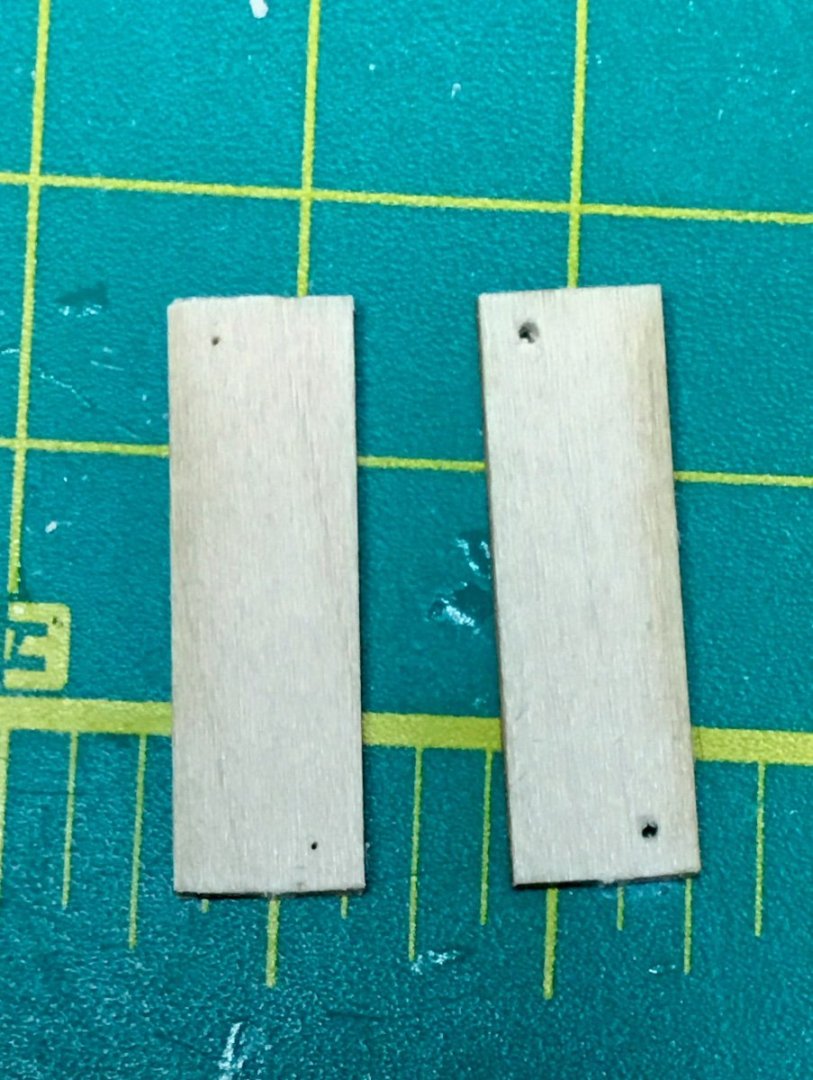

Each eyebolt needed the holes to be enlarged to accept the rings. This took a while as there are 2 eyebolt/ring pieces to create and then glue into the two holes in each of the 26 hatch boards. These are tiny parts and sometimes it was difficult to feed the rings into the holes in the eyebolts. After a while I determined that enlarging the holes in the eyebolts with the reamer sometimes raised a burr at the ends of the holes which was causing the problem. Filing the ends of the holes after enlarging to remove the burr eliminated the problem and made fitting the rings into the eyebolt holes less problematic.

Each hatch board was then painted red. I then ran into the problem that adding the hatch boards to the superstructure when dry fitting ended up not fitting correctly as the total widths of the 13 hatch boards was greater than the opening. I then measured the width of the opening and divided by 13 to determine the proper width of each hatch board. Then each board was reduced in width accordingly and installed into the opening along with the net rollers.
-
-
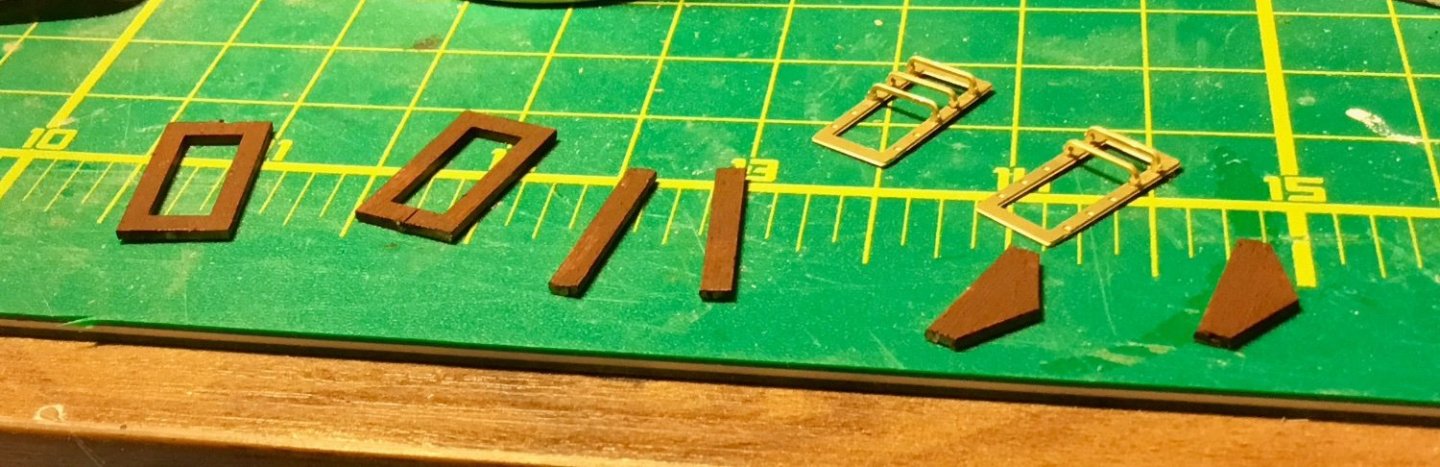
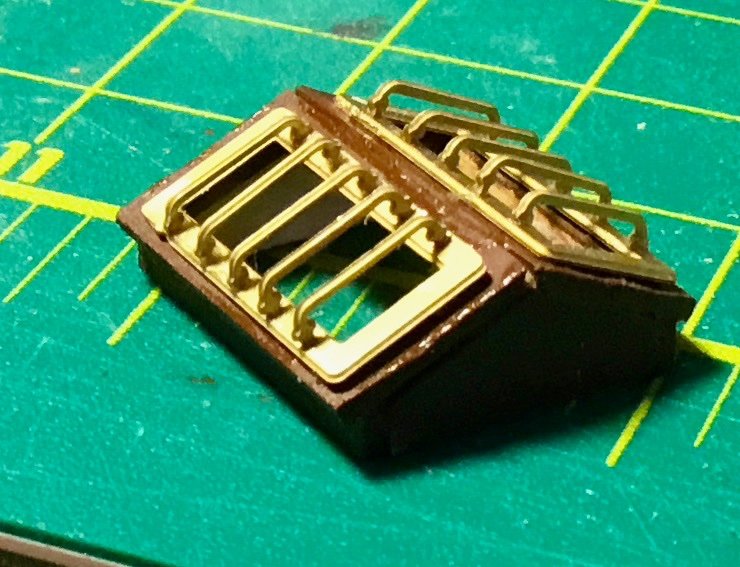
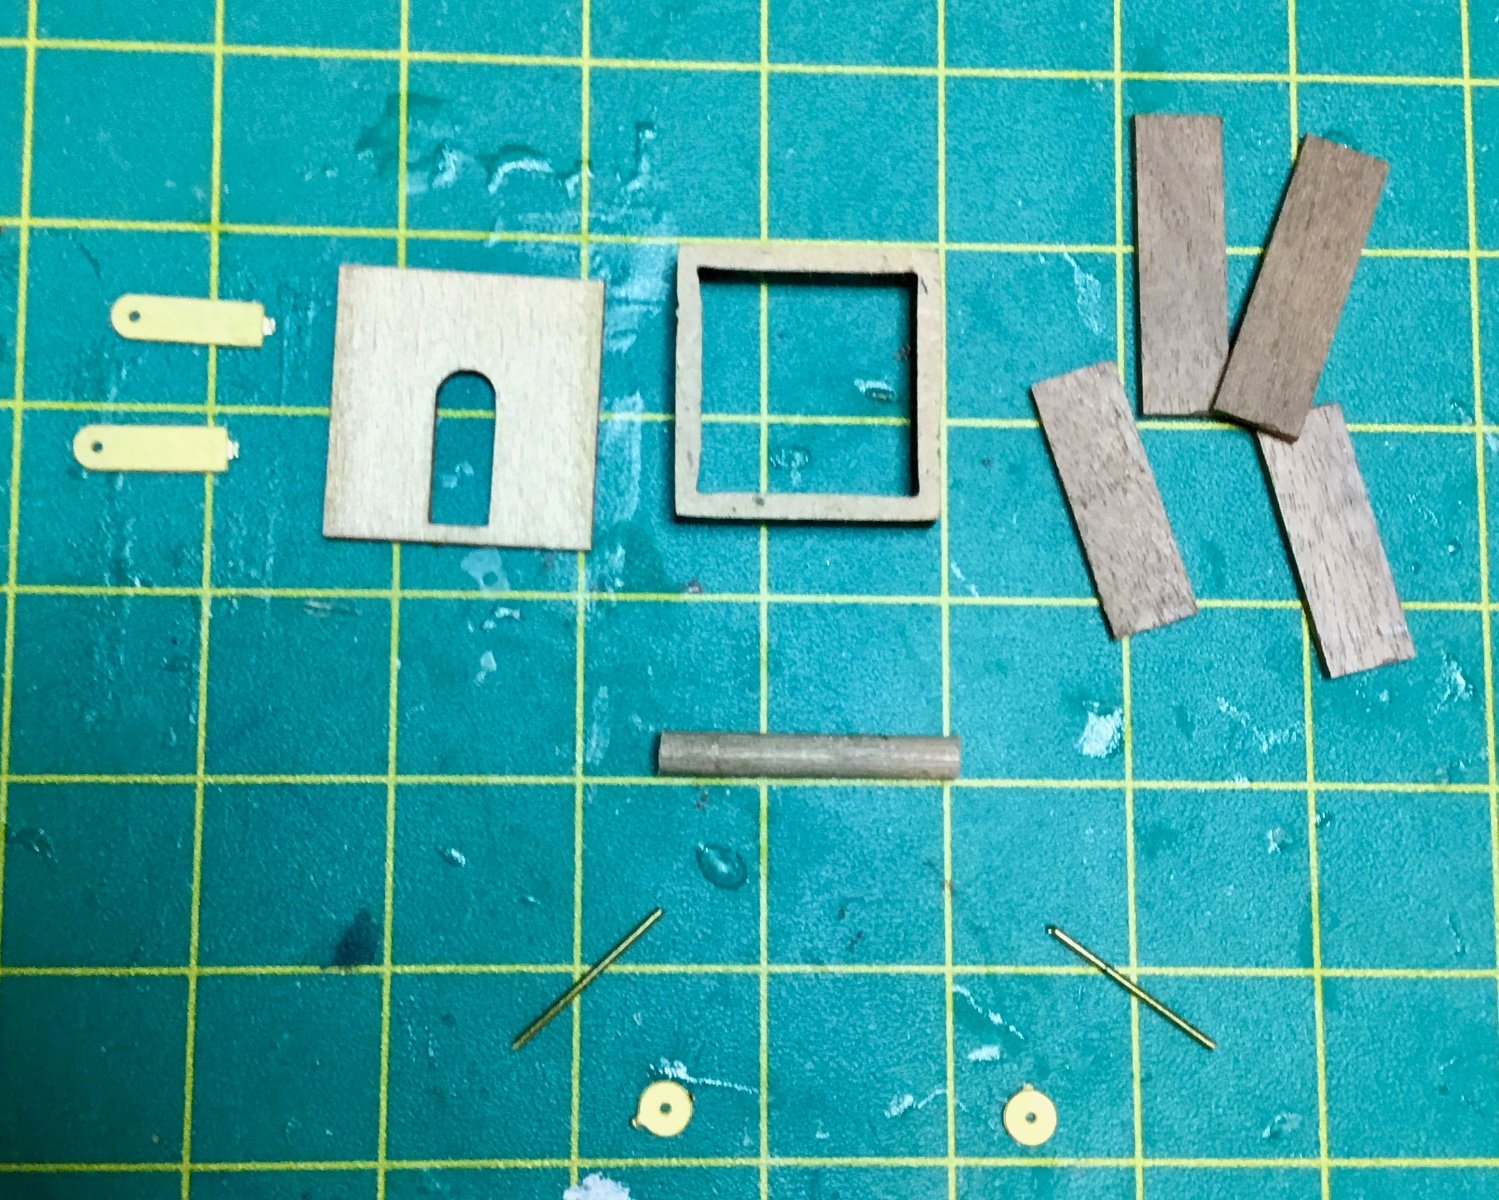
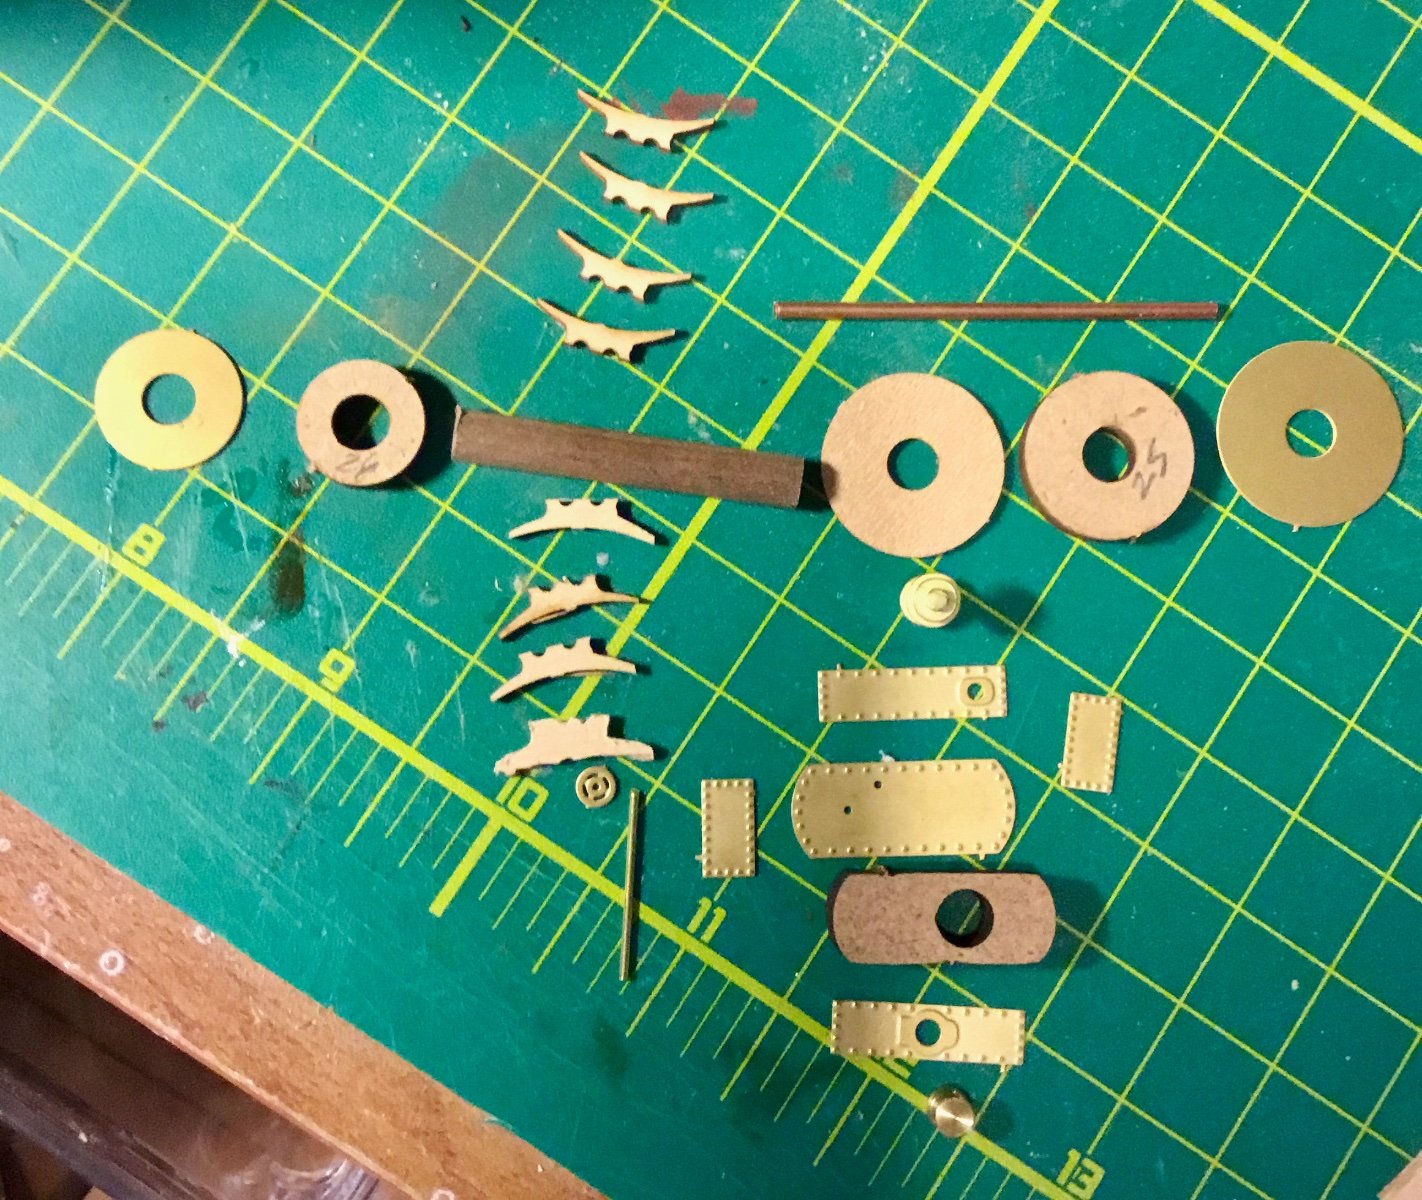
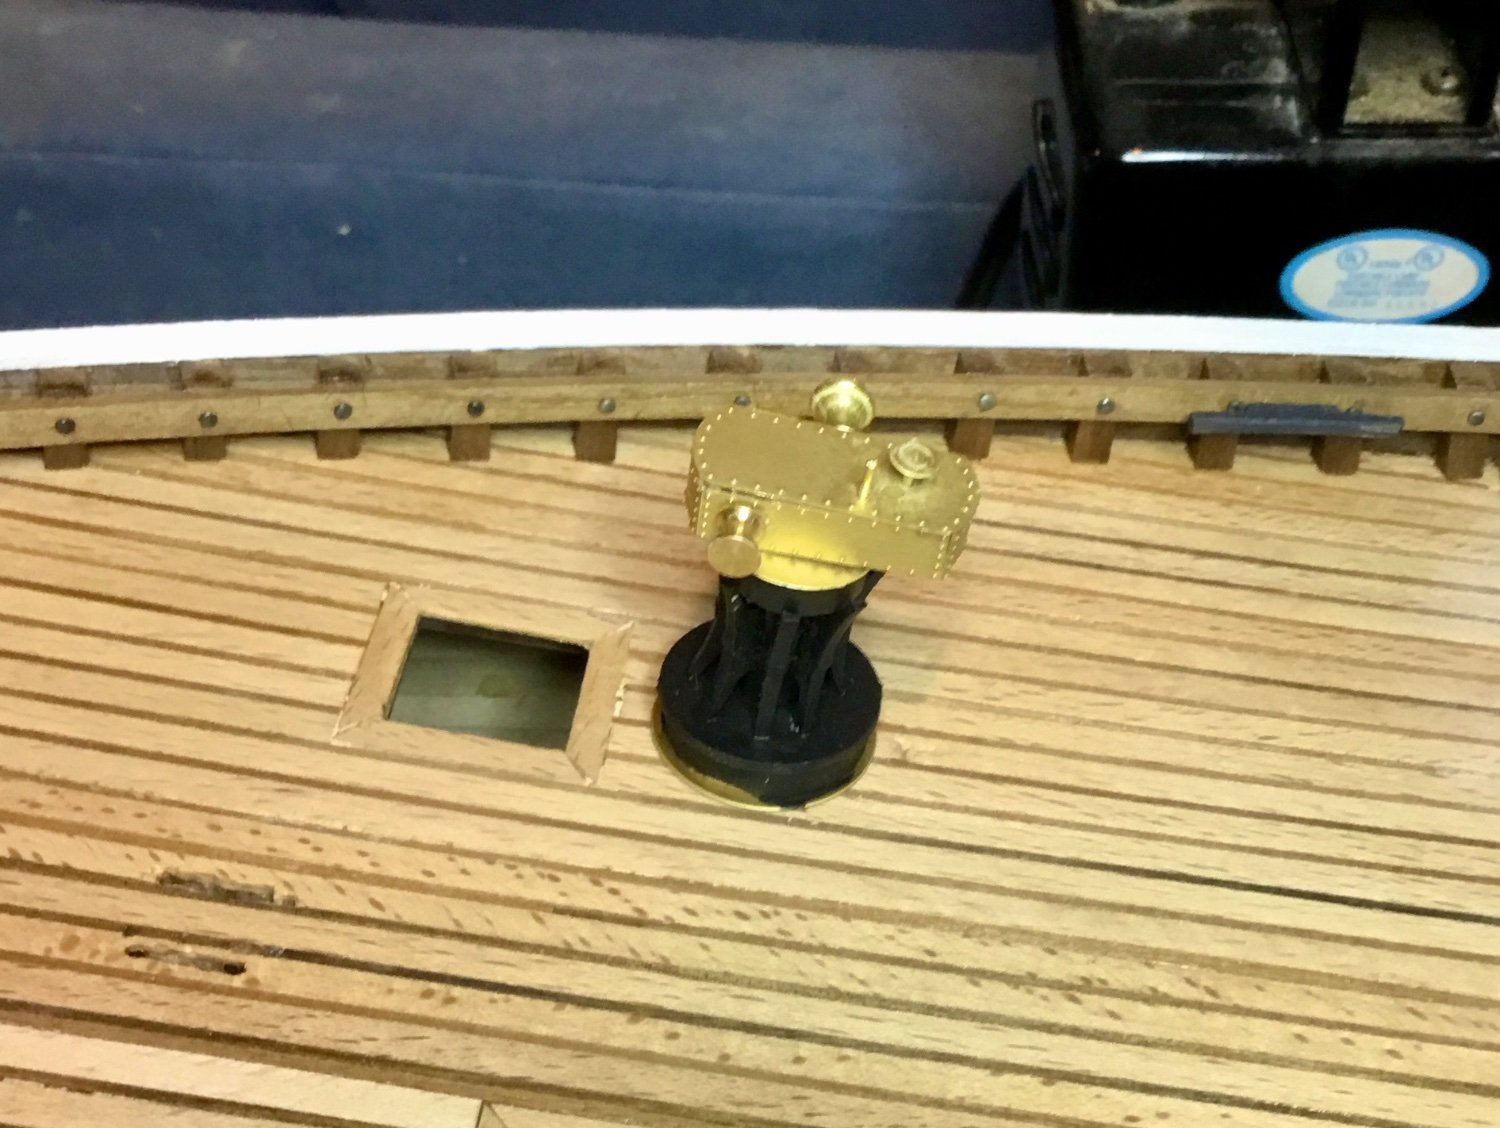
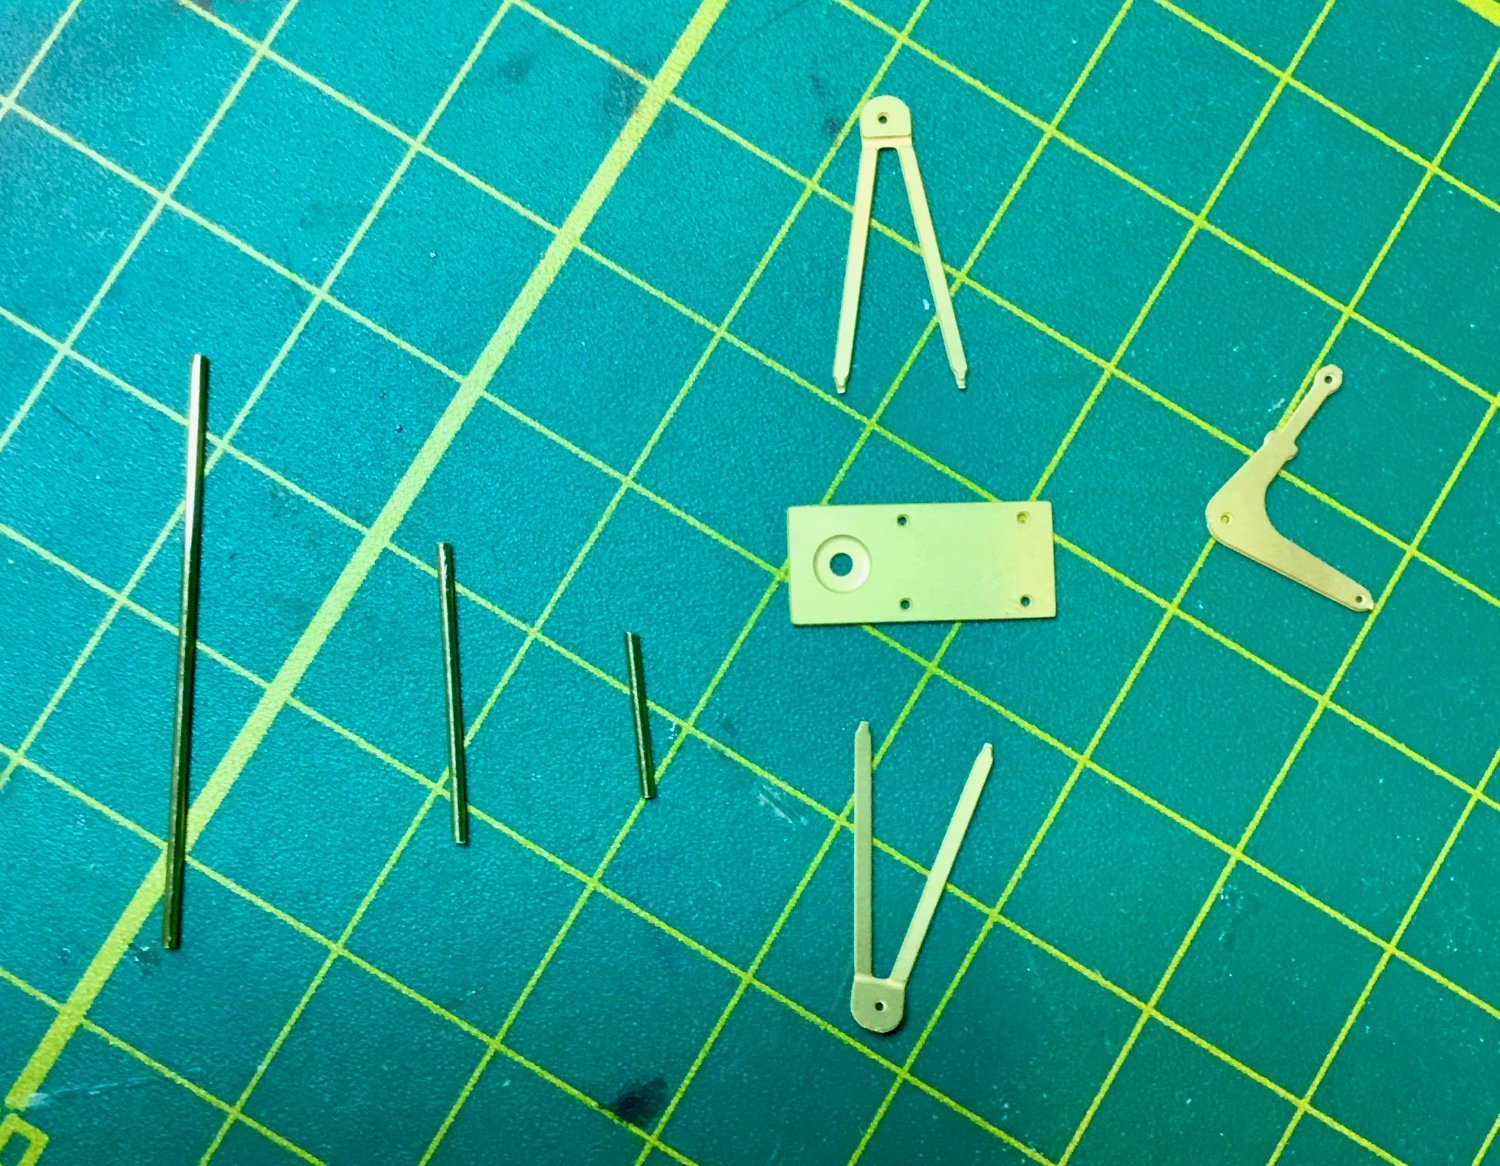
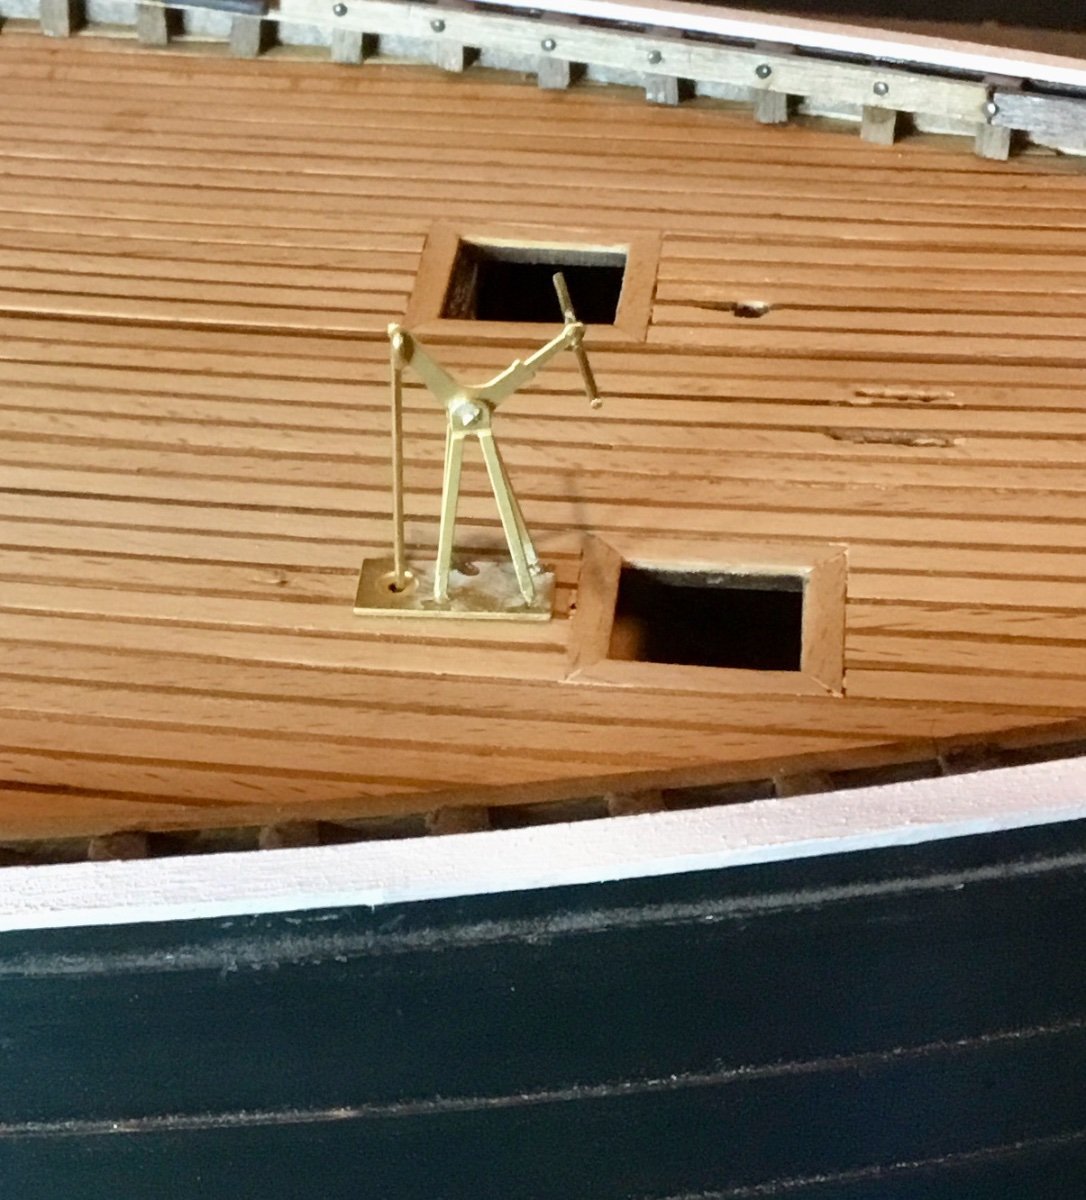
I assembled the steam winch. For some reason, there were only 7 laser-cut whelps instead of the plan's 8, so I had to fabricate the missing one.

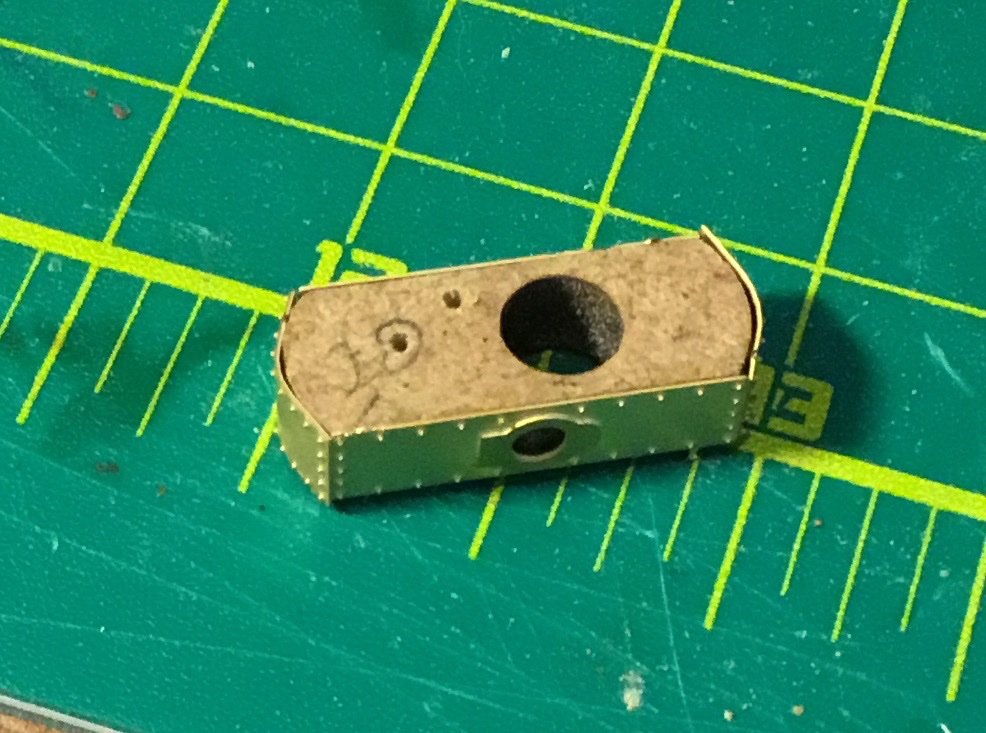

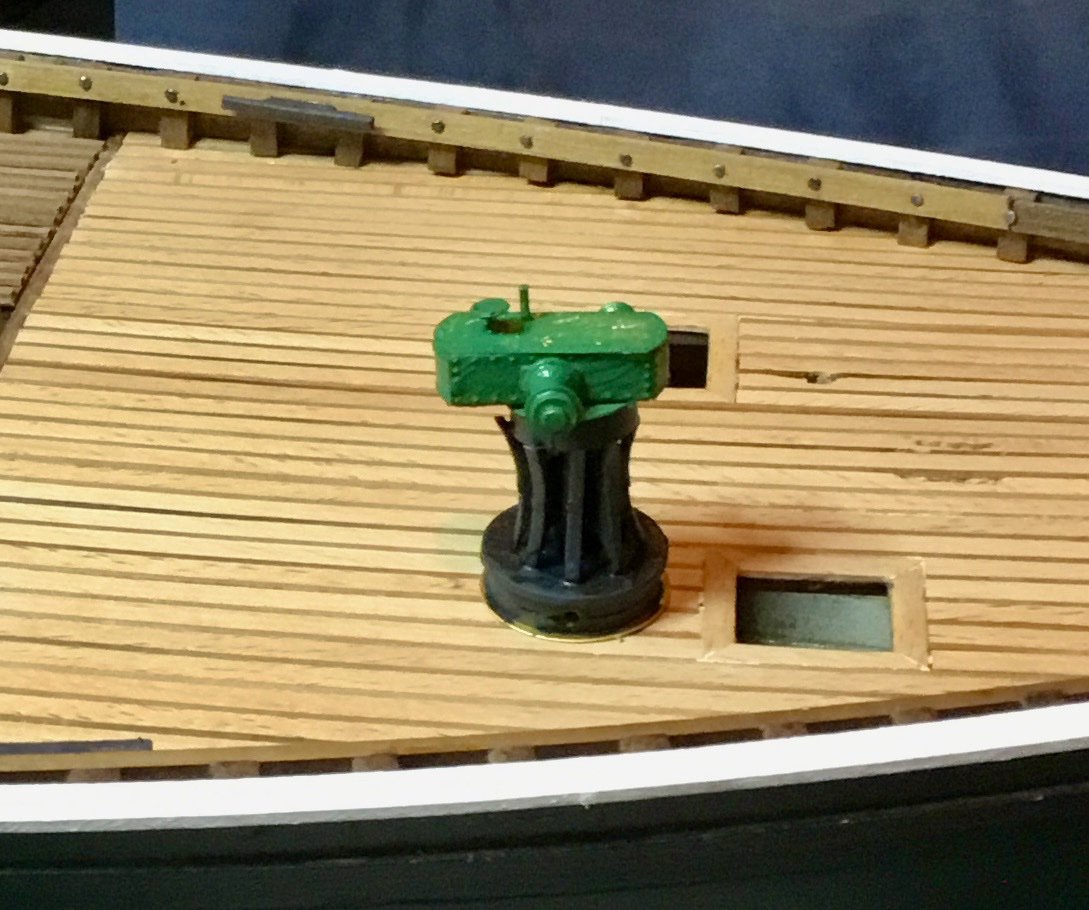
Then came the rope roller assembly, which like other brass parts required the holes to be reamed out before the 1mm brass rod parts would fit and a lot of sanding of the 2mm brass tubes to exact lengths to fit correctly.

And finally the deck hand pump. It was shown on deck in the position of the steam winch, just for the photograph. The only part mounted at this time was the rope roller.


-
I have completed the front and rear companionways. The only problem was construction called for 1x1 mm strips and there wasn't even enough of those in the kit to complete the deck. Luckily I still had a few left in my stash of leftovers from previous builds.


- DocRob, Snug Harbor Johnny, Diver and 2 others
-
5
-
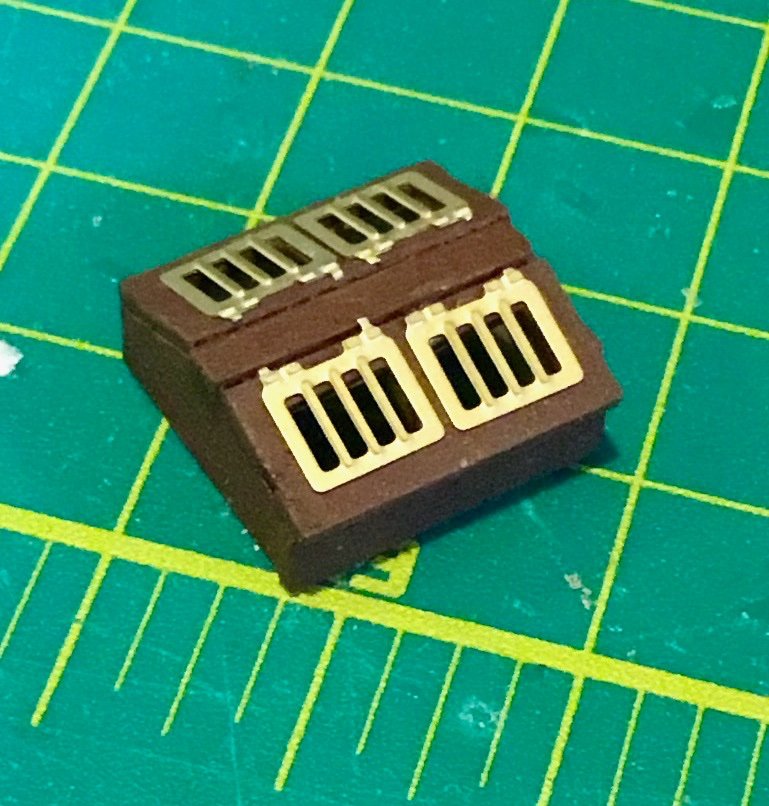
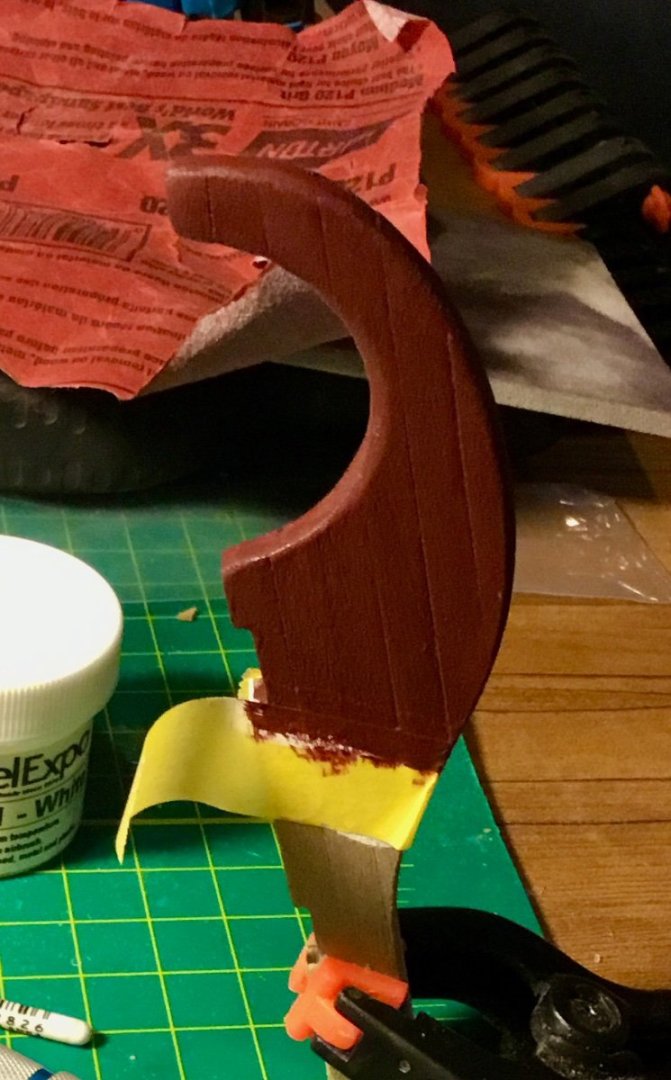
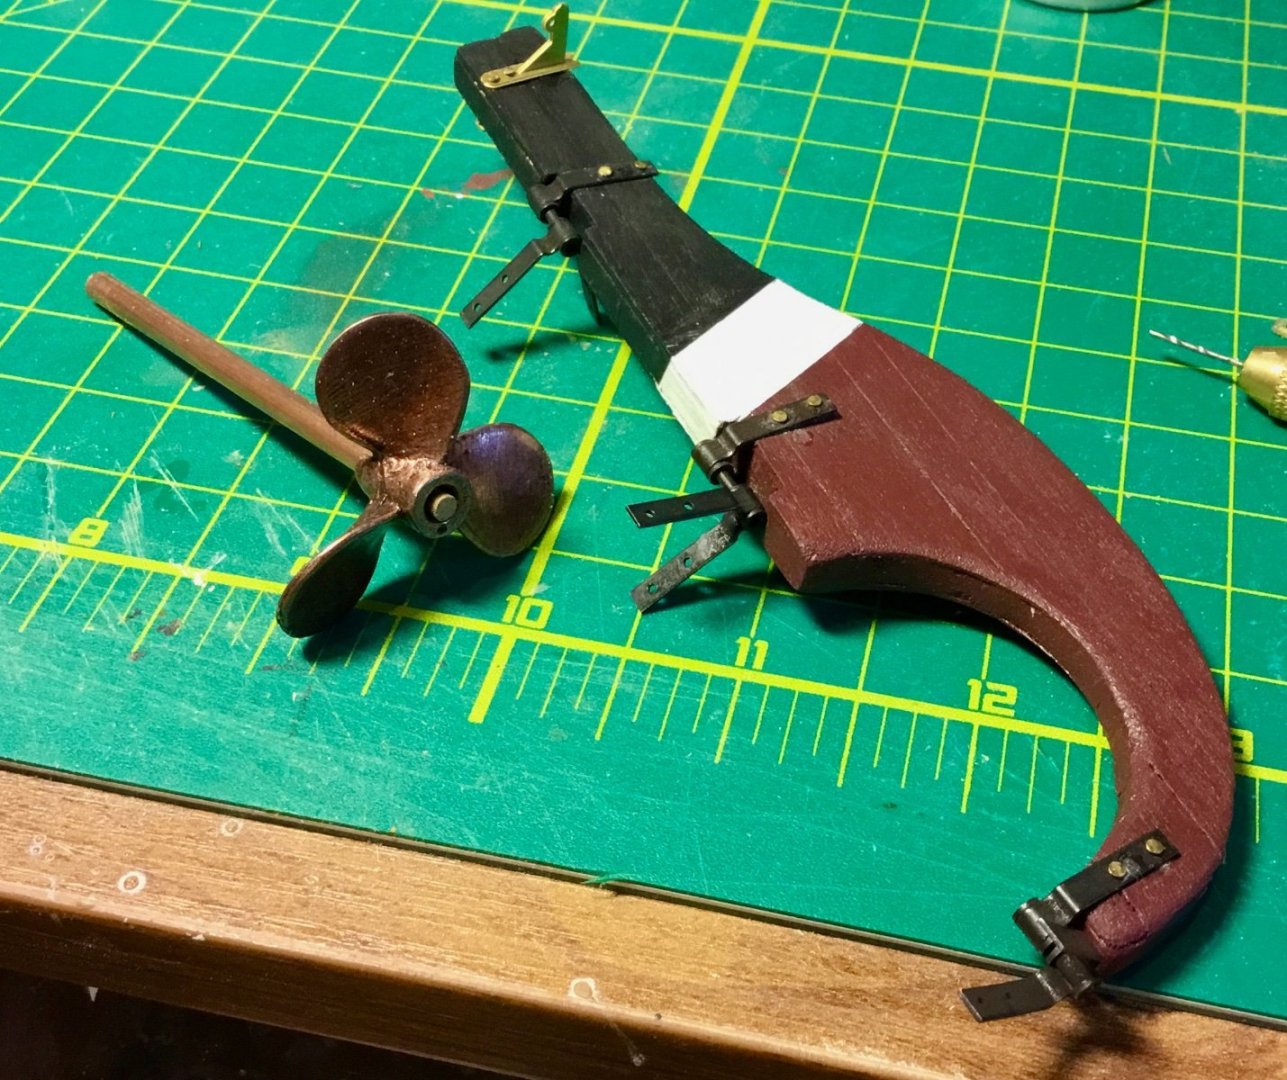
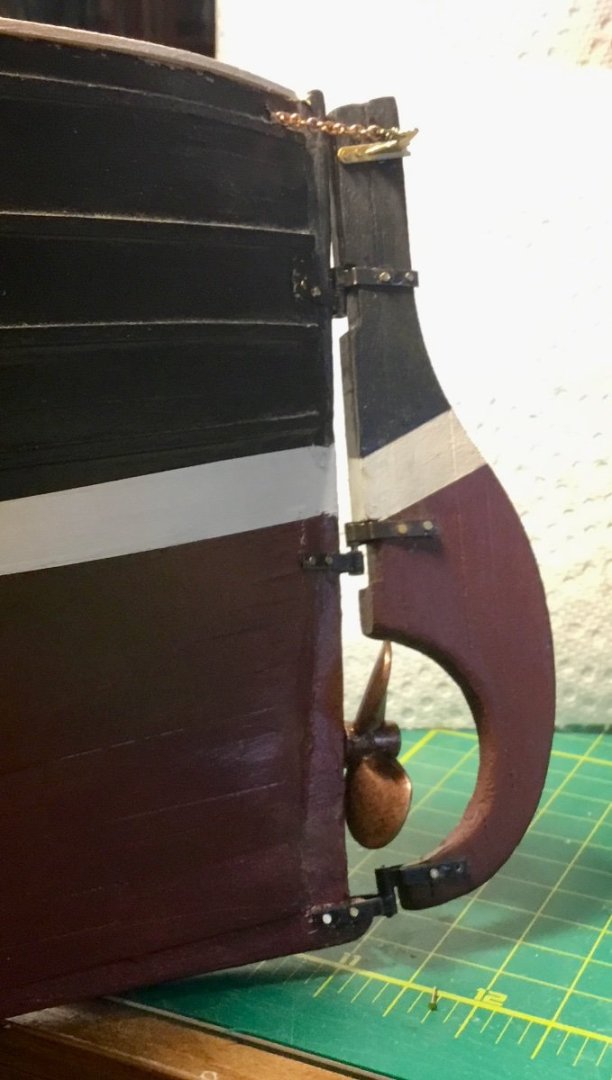
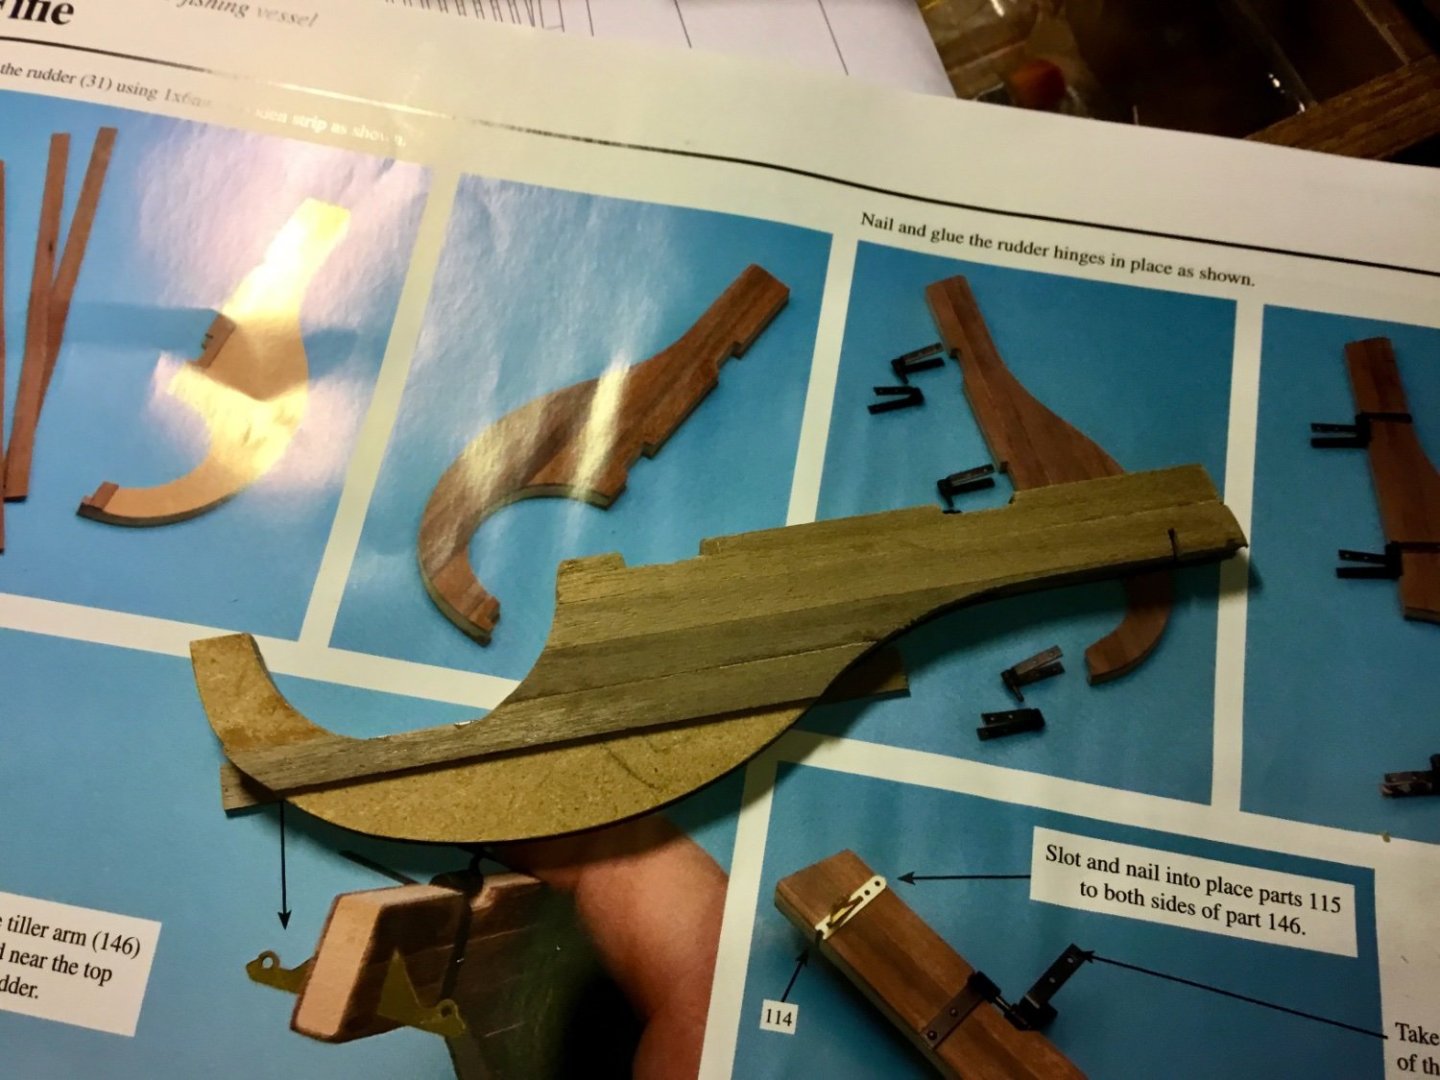
I finished painting the rudder to match the hull and then attached the tiller arm and the pintles to the rudder using the small nails provided. I used a very small reamer to enlarge the holes in the pintles and gudgeons as well as tiller arm fittings because the nails would not otherwise pass thru the holes in the parts. I installed the propeller and shaft but only made a short shaft as this will be a static model so a full length shaft was not necessary. The rudder was then attached to the hull using small nails to attach the gudgeons. Two holes were drilled in the bulwarks to allow the chain that was sunsequently fitted to the tiller arms to pass thru and be attached to the deck beam under the opening for the superstructure. Assembled the rear superstructure engine skylight, again using the reamer to open up the holes in the metal plates so that the tiny bars would fit easily.


- Helge Hafstad, Diver, Paul Le Wol and 2 others
-
5
-
Finished work on fish board (net drying?) areas on either side of the main hold and then began work on the rudder.

- Diver, ccoyle, chris watton and 2 others
-
5
-
Completed installation of inner rails. Added inner bulwark cleats after rounding off edges and painting black. Attached cleats with CA glue. Instructions called for attaching them with iron nails but the cleats provided are MDF (ugh!) which only began to split when trying that approach. Painted and applied the gunwales and. began construction of the fish board areas.


- Diver, VTHokiEE and Paul Le Wol
-
3


.jpeg.07e1ebbbaee091334eda52be5f7b1753.jpeg)
.jpeg.f322937e1e26af51643fa82248523a7a.jpeg)
.jpeg.7e018907a6cbfda73946624217337bfd.jpeg)


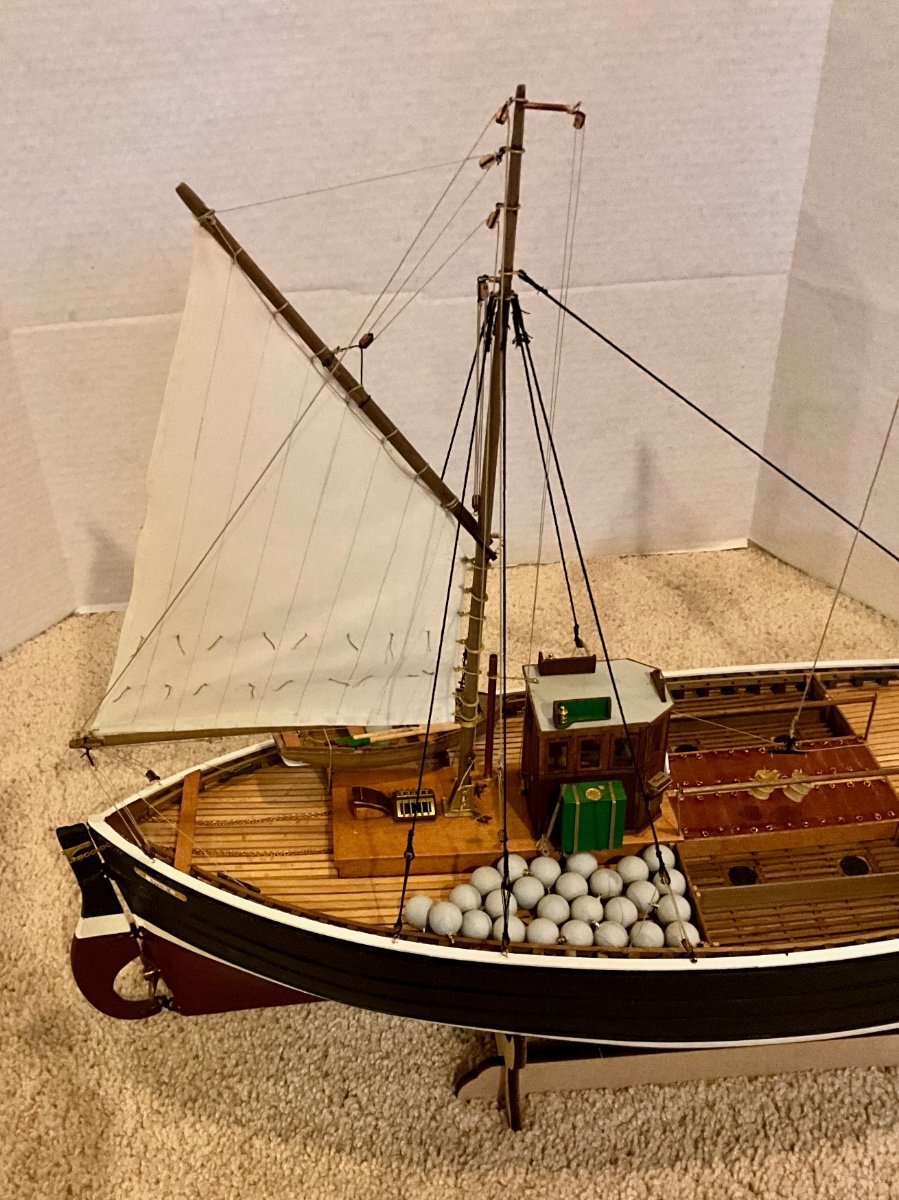
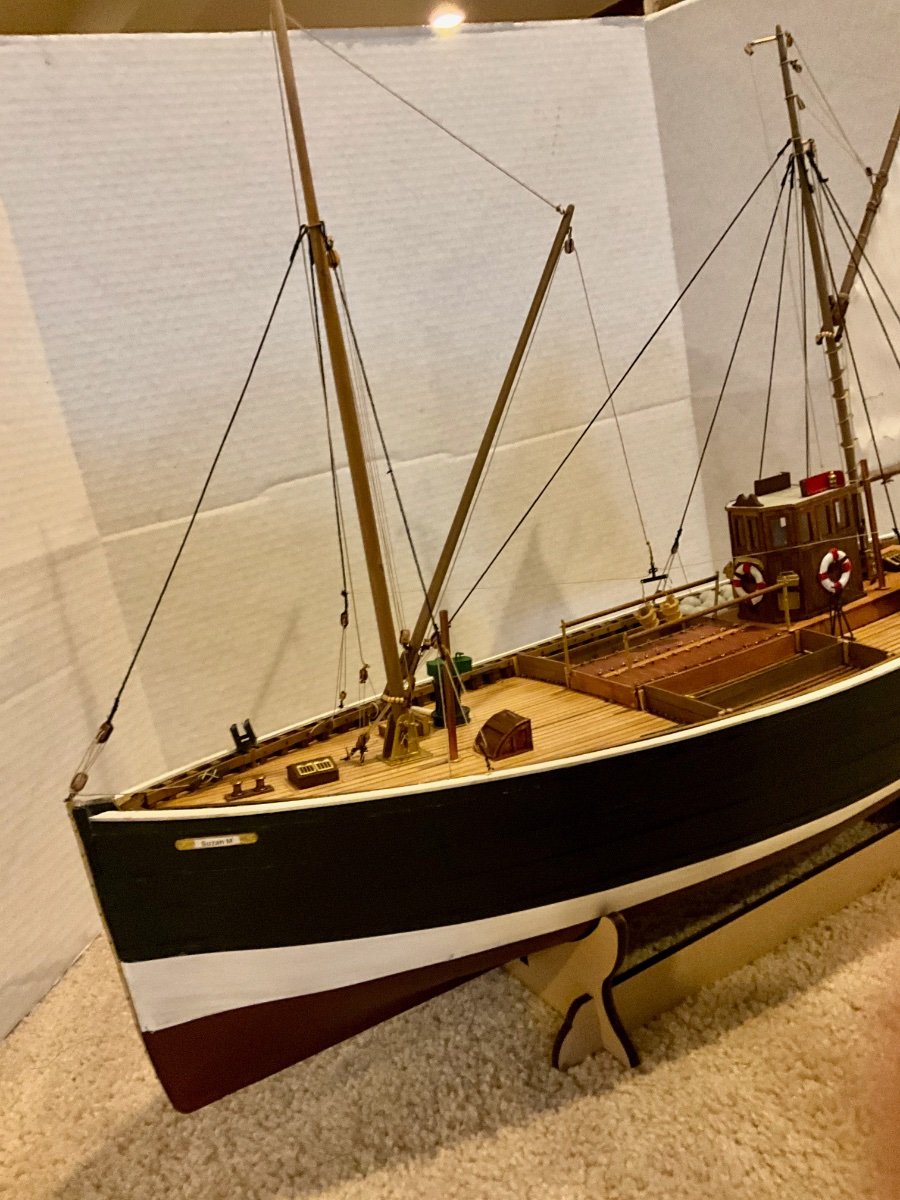
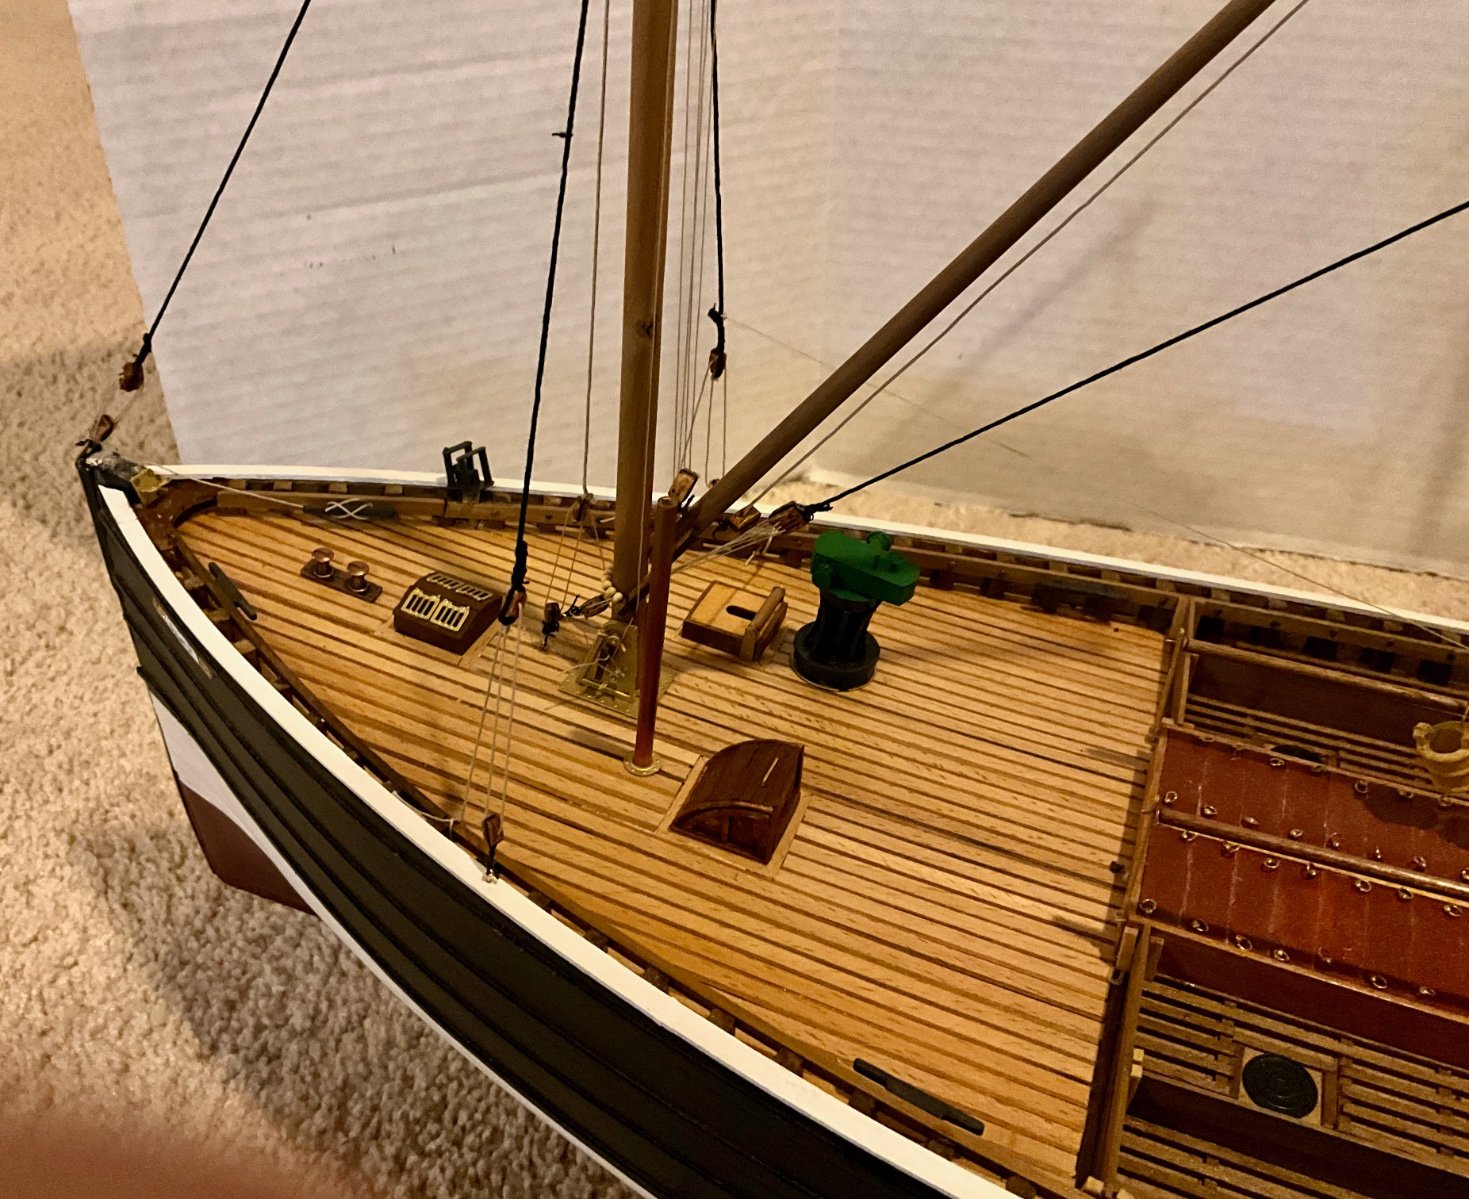
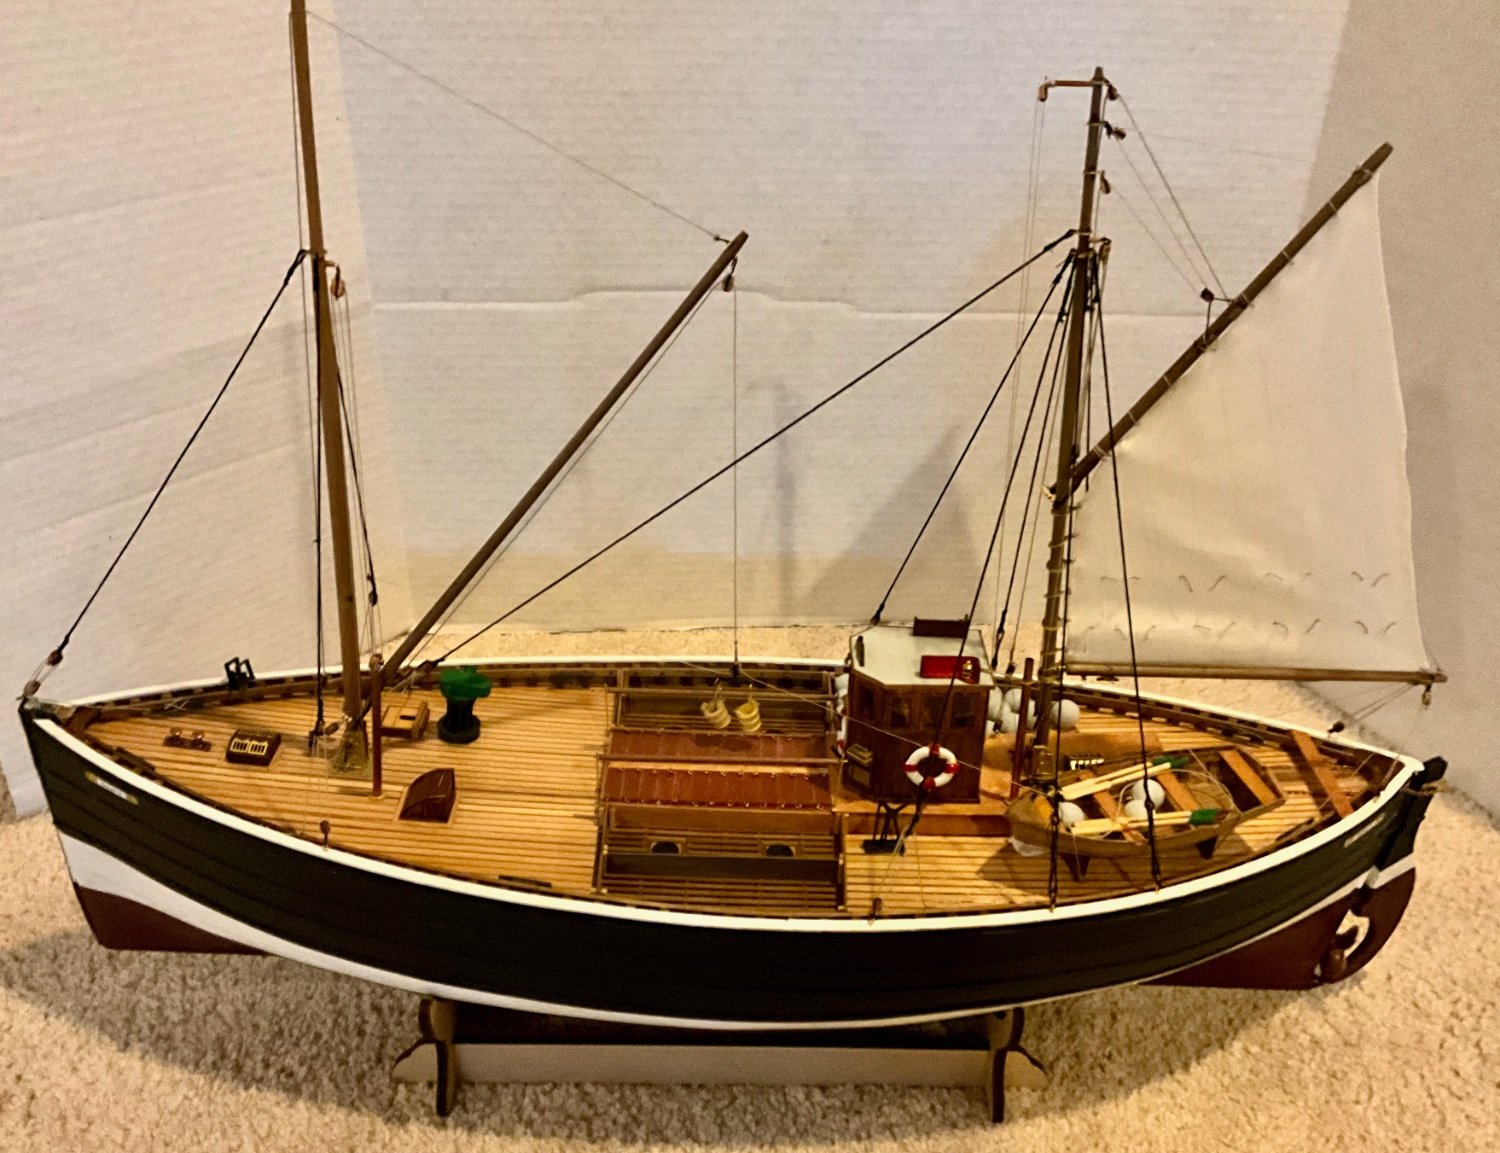
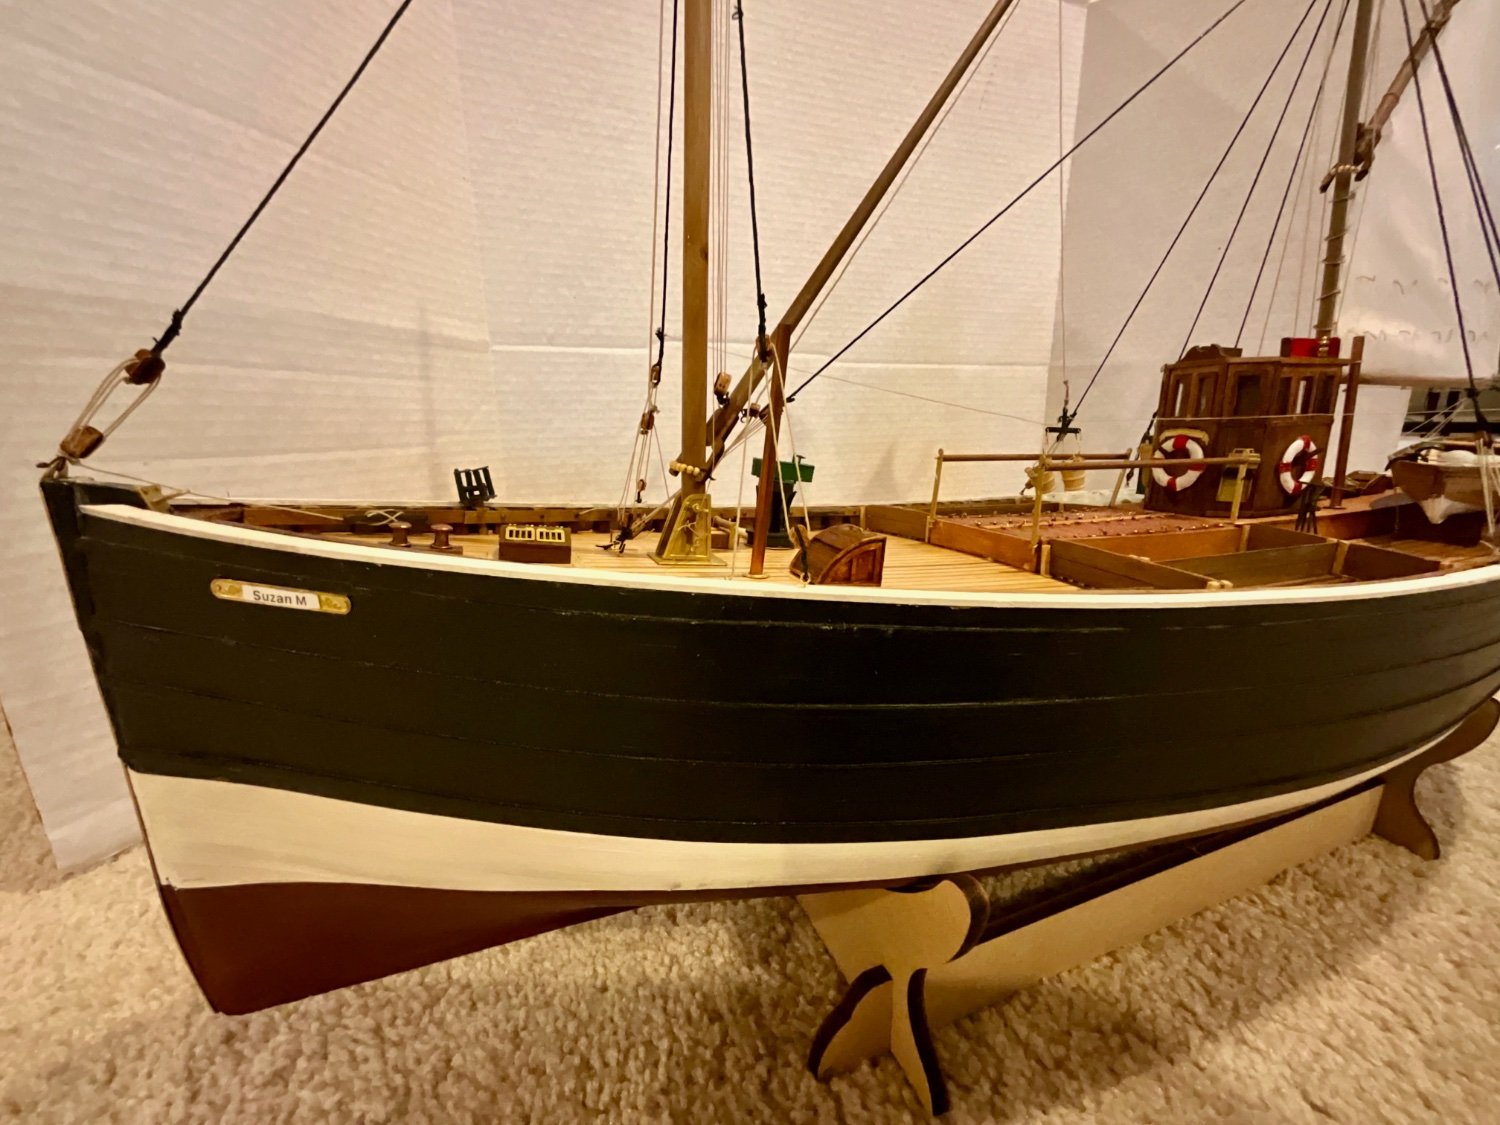
Fifie by Ken_2 – FINISHED - Amati/Victory Models – 1:32 - Scottish Motor Fishing Vessel
in - Kit build logs for subjects built from 1901 - Present Day
Posted
You should post your YouTube videos as well.
Nice job!