Cleat
-
Posts
159 -
Joined
-
Last visited
Content Type
Profiles
Forums
Gallery
Events
Everything posted by Cleat
-
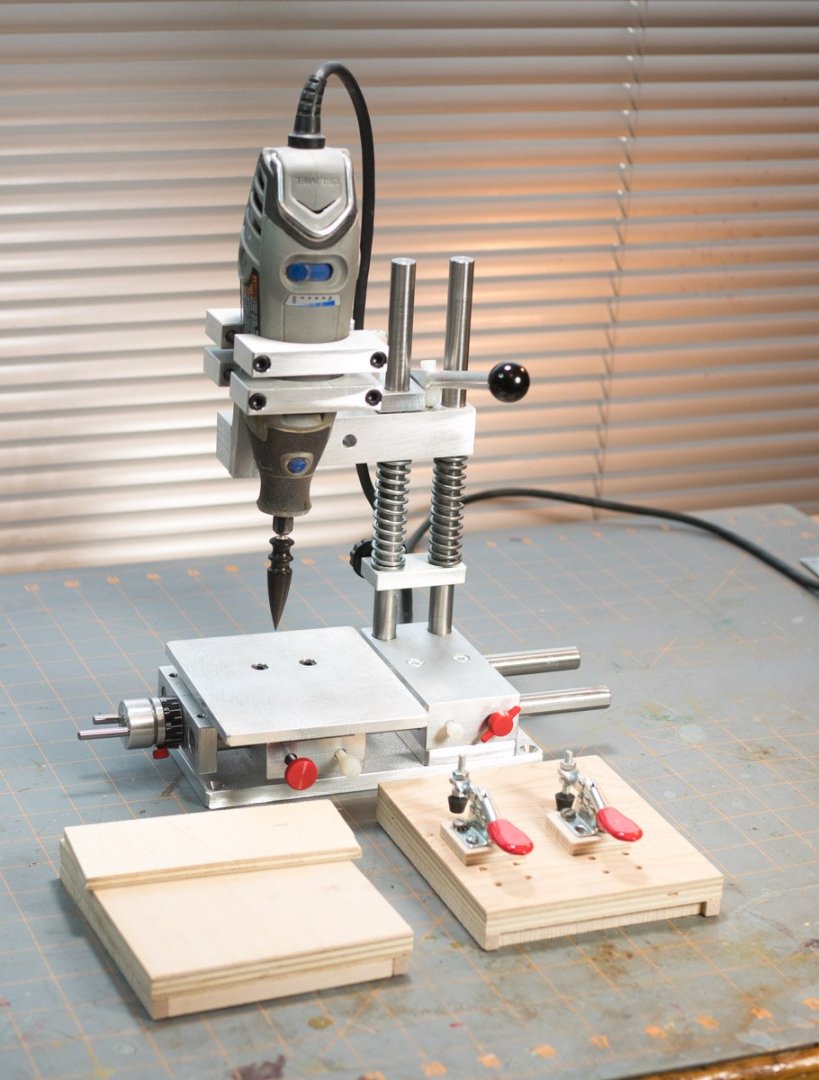
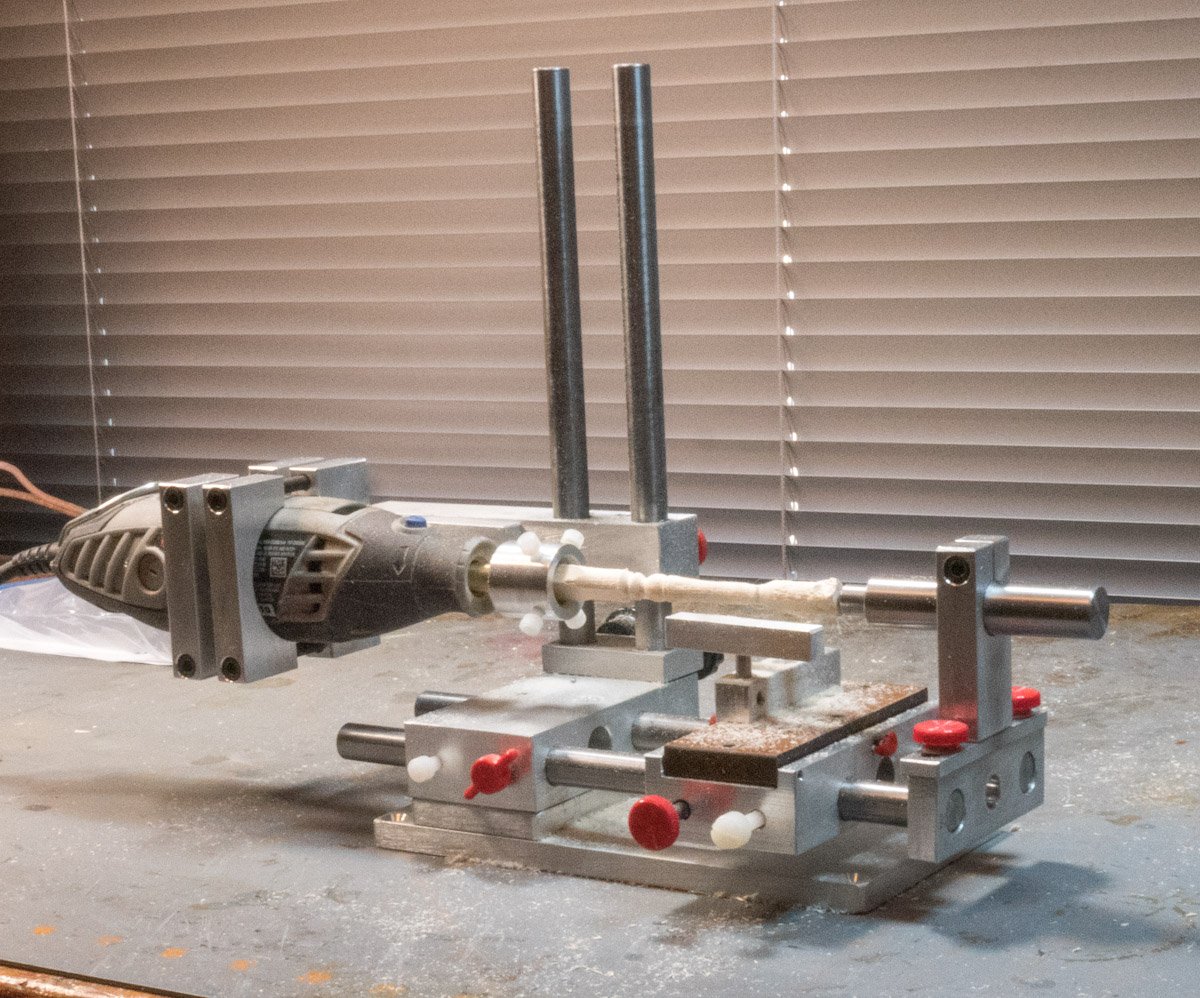
I have a Vanda Lay AcraMill with the drill press accessory. It has an X-axis adjustment that I used on my riverboat to drill a bunch of holes the same distance apart. I realized I no longer need the X-axis accessory; my hobby CNC machine can do the same thing. I bought the Micro Lathe accessory to repurpose the AcraMill and it works. I can switch it back to the drill press configuration with a few screws. It is a versatile tool. The Vanda Lay is designed to hold a smaller Dremel tool than what I have, I got stiffer springs for the drill press configuration to handle the weight of the Dremel 3000. I like the Vanda Lay because it can hold a Dremel tool which lets me use both hands with the material I’m working with. I made several drill press tables, I used the one with hold downs as a jig to assemble railings for my riverboat. The drill press configuration picture shows it with a burnishing bit which I use to burnish the edges of leather projects.
- 1 reply
-
- 5
-

-
 I looked at the dust on my first boat kit (dust collector) and decided to look into cutting plexiglass, I'll have to get some and try cutting it. I'll be using a dry cleaning bag to cover my riverboat until my garage becomes warm enough to see how plexiglass works. I'm checking out build logs for the Bluenose kit (or something similar) and cross-section kits for my next project.
 -
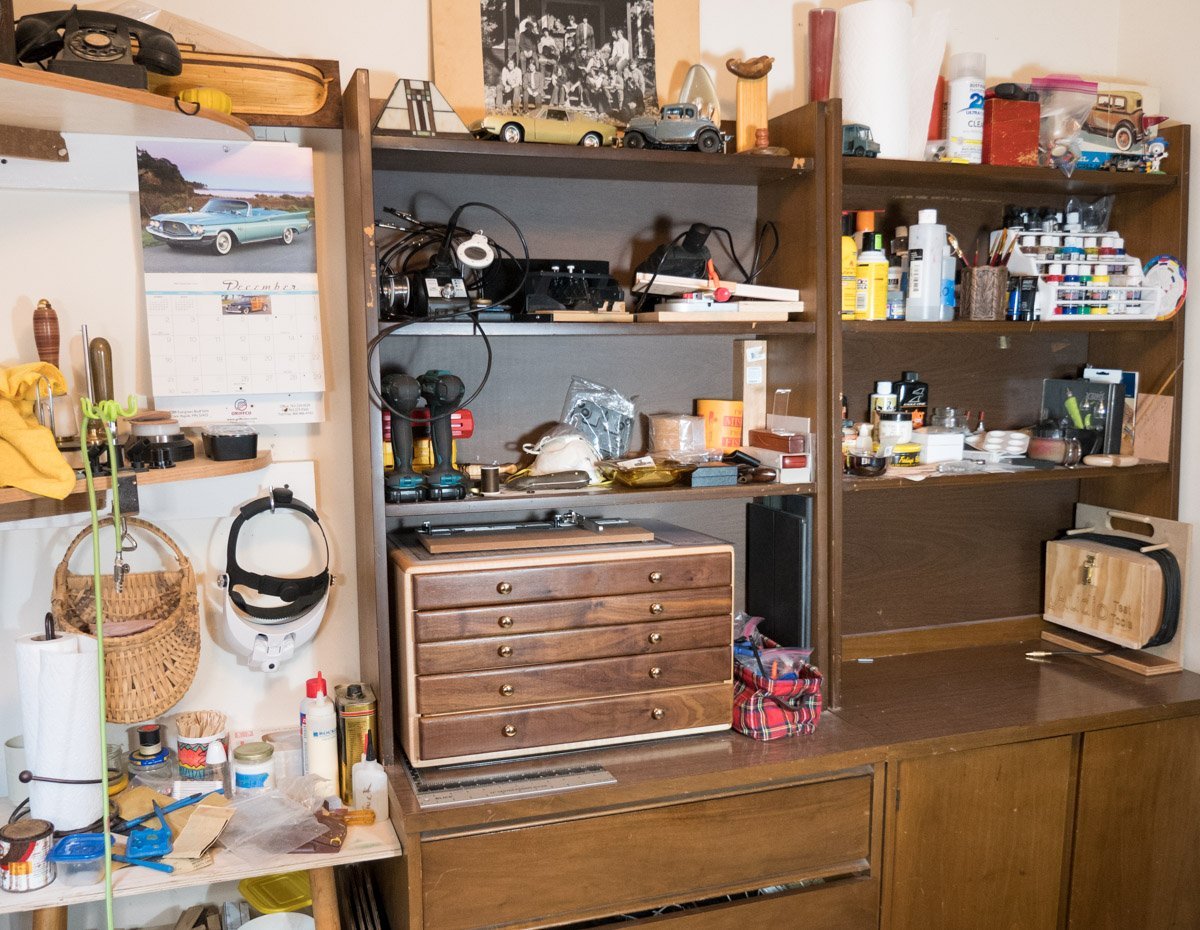
A couple favorite tools included Rockler’s silicone micro glue applicators and the Gluelooper CA glue applicator. I haven’t mastered tweezers yet but I got a lot of practice. I used Minwax Wipe-On Ploy on all of the wood, the number of coats depended on how much shine I wanted on the piece. I had built a small tools chest a few years ago (my best woodworking project). Here are a few more pictures:
- 128 replies
-
- 4
-
-

-
- King of the Mississippi
- Artesania Latina
- (and 1 more)
-
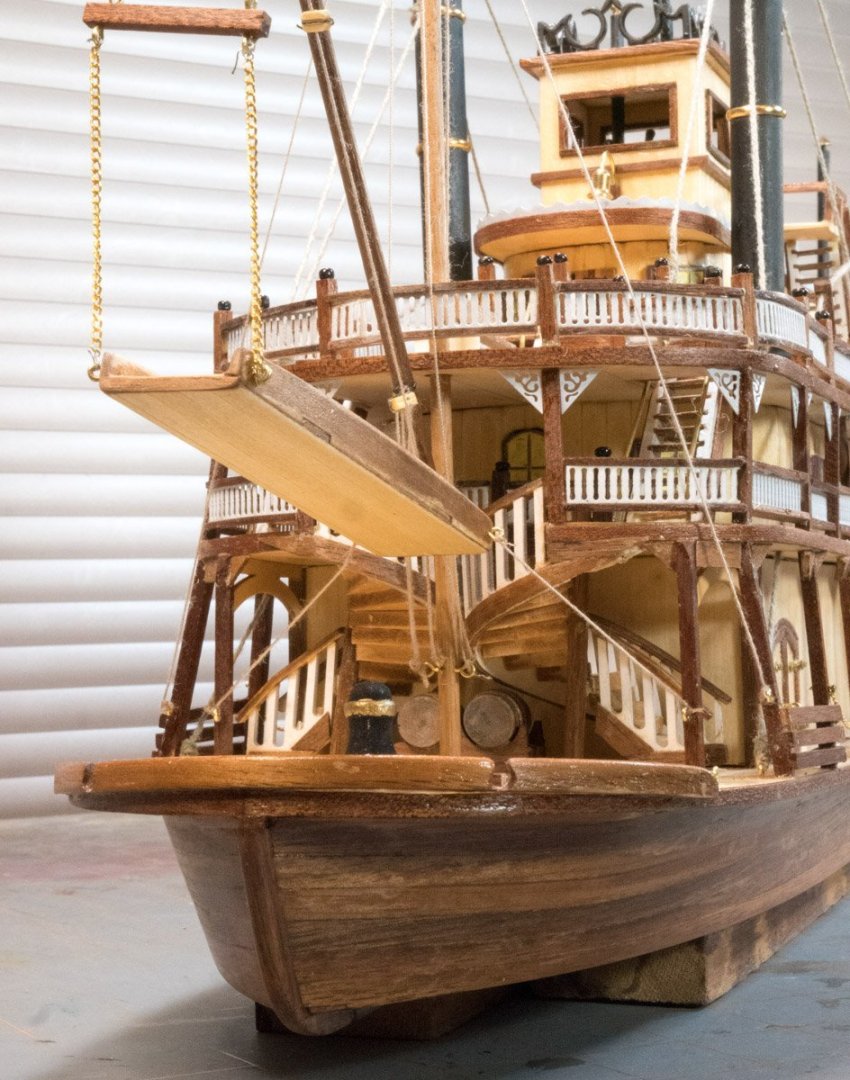
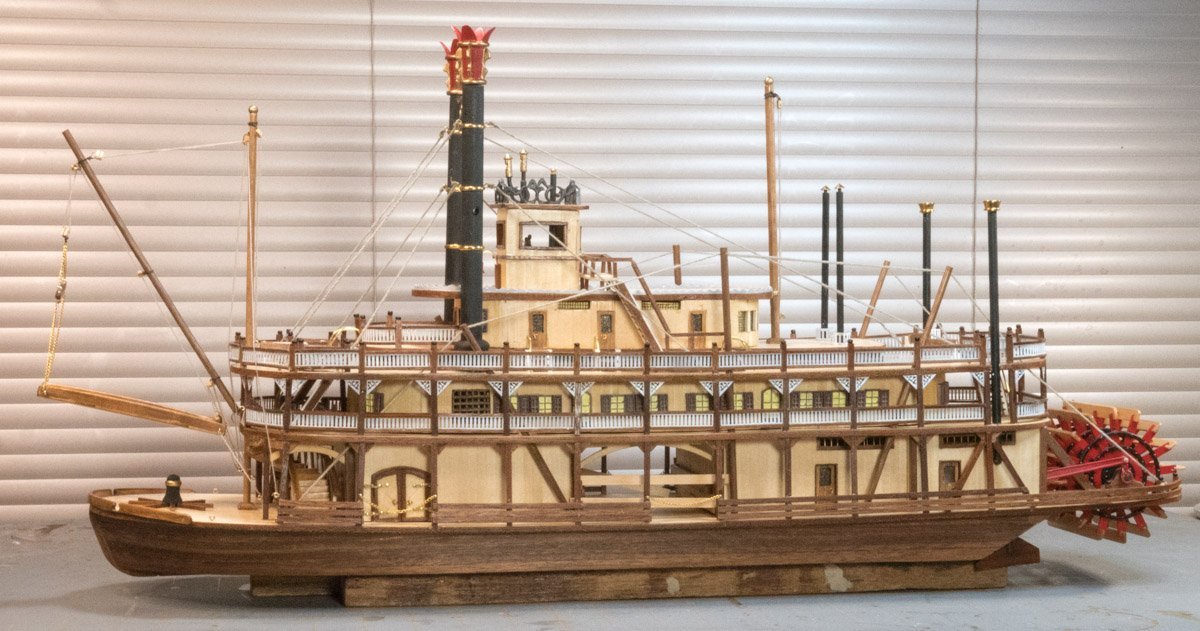
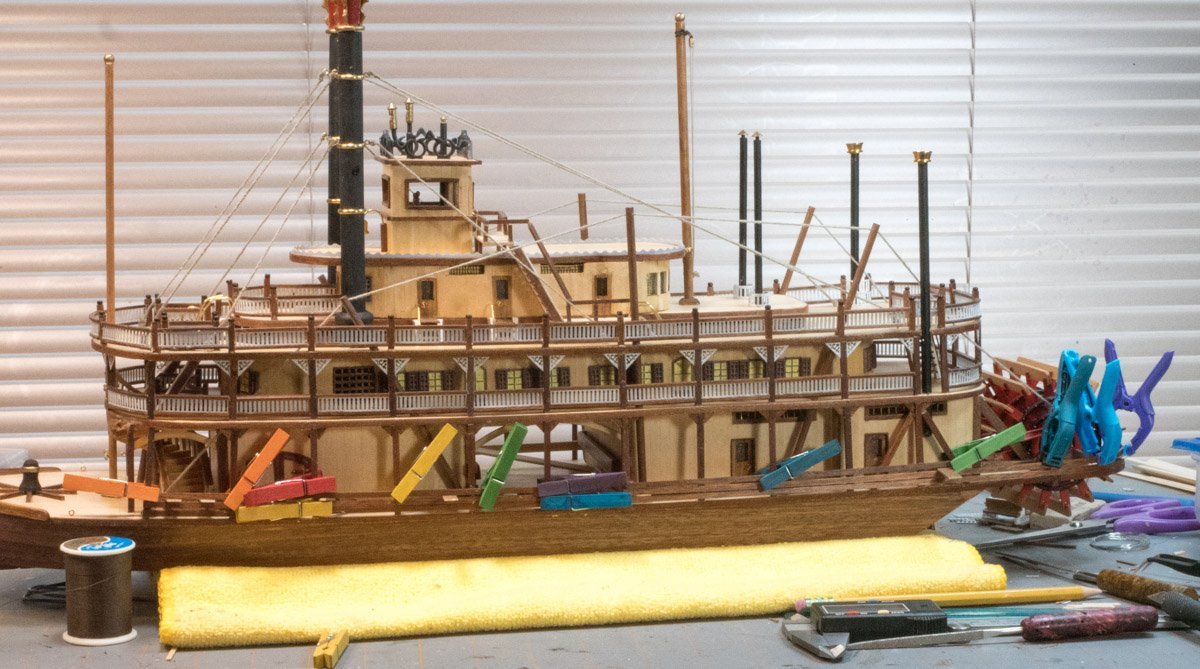
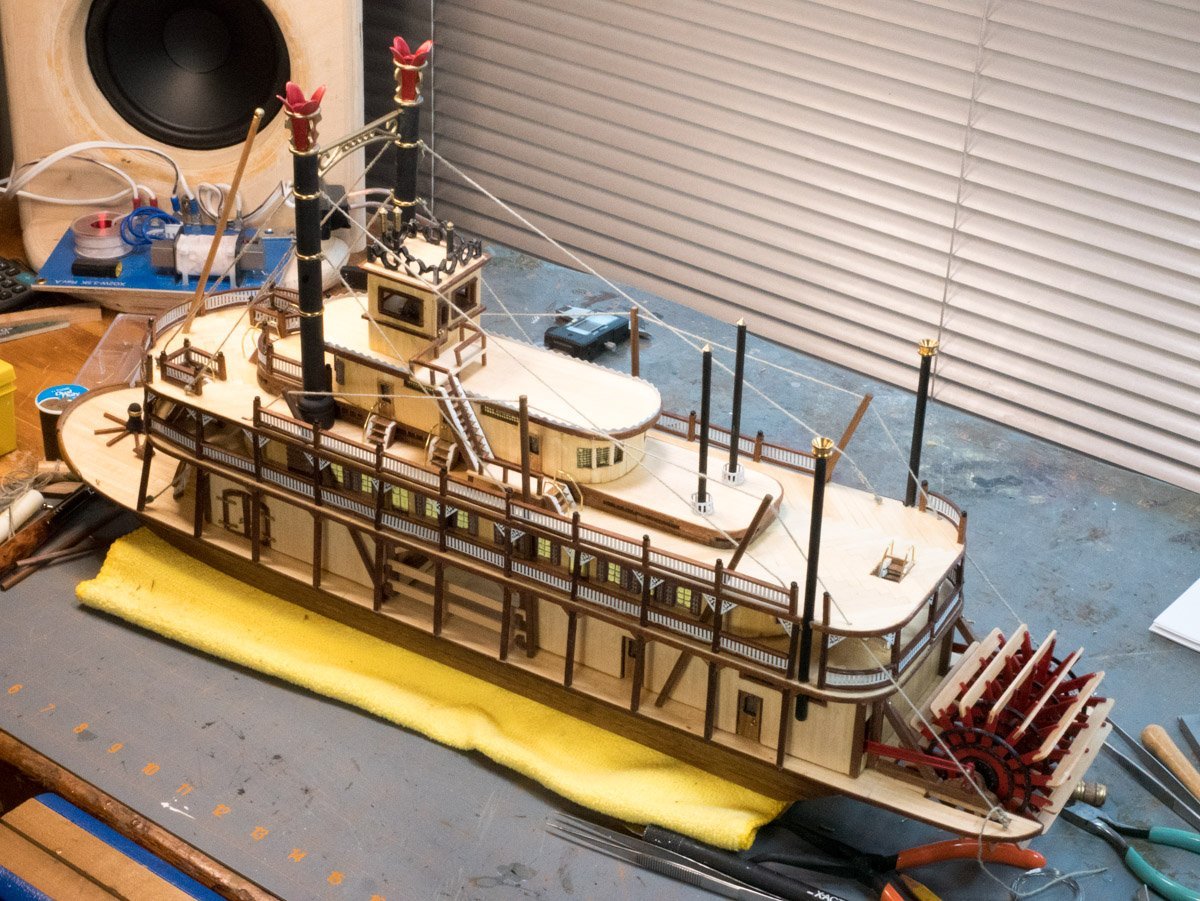
I am proud to finish my King of the Mississippi riverboat. A picture, a parts list, and minimal instruction required me to figure out how to do things I haven’t done before – problem solving is a good thing. I want to thank the others who made build logs and those who answered my questions in this log. I repeatedly referenced other build logs. I learned a lot and want to try another kit next fall. The build was a challenge for me, I enjoyed most of it but there was frustration (there was some a lot of swearing). When I built the spiral staircase, I knew I could overcome anything in the build. It felt good when I figured out how to complete a task (a few beers might have helped with the problem solving and feeling good). I’ll build a stand for it when my garage becomes available. Now I’m wondering how to deal with dust, the riverboat is moving into its dust collection era; I might look into a Plexiglass container but that isn’t a priority.
- 128 replies
-
- 5
-
-
-
- King of the Mississippi
- Artesania Latina
- (and 1 more)
-
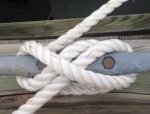
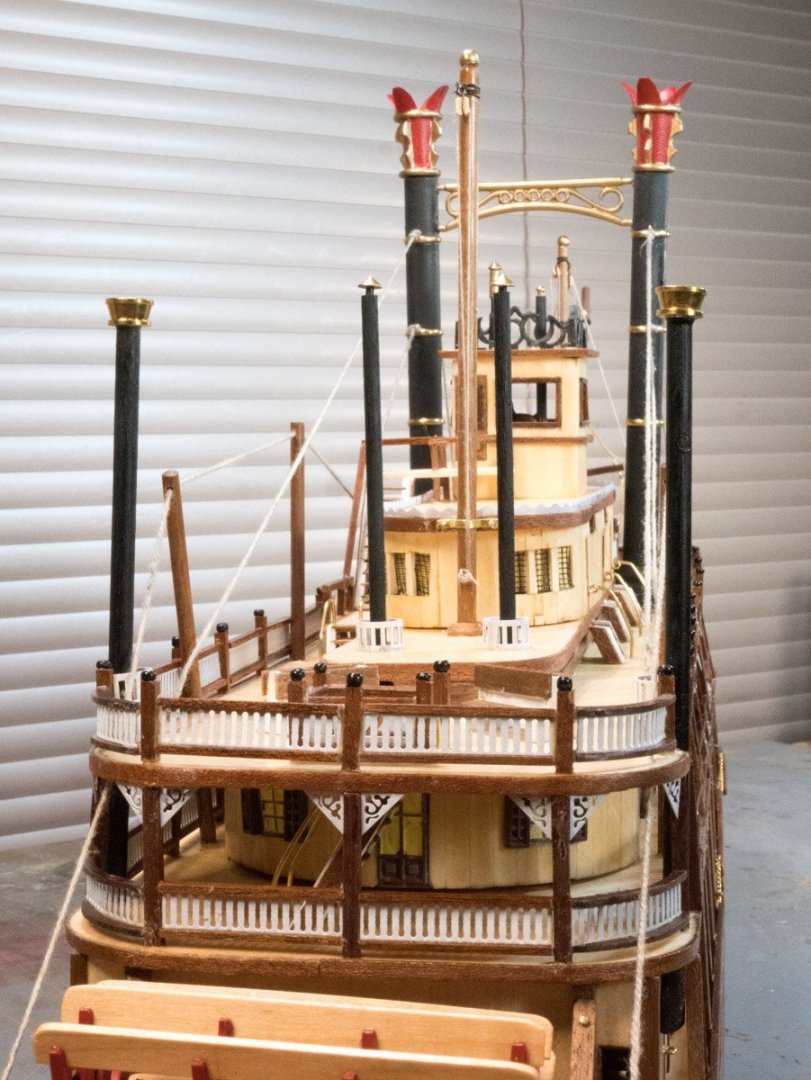
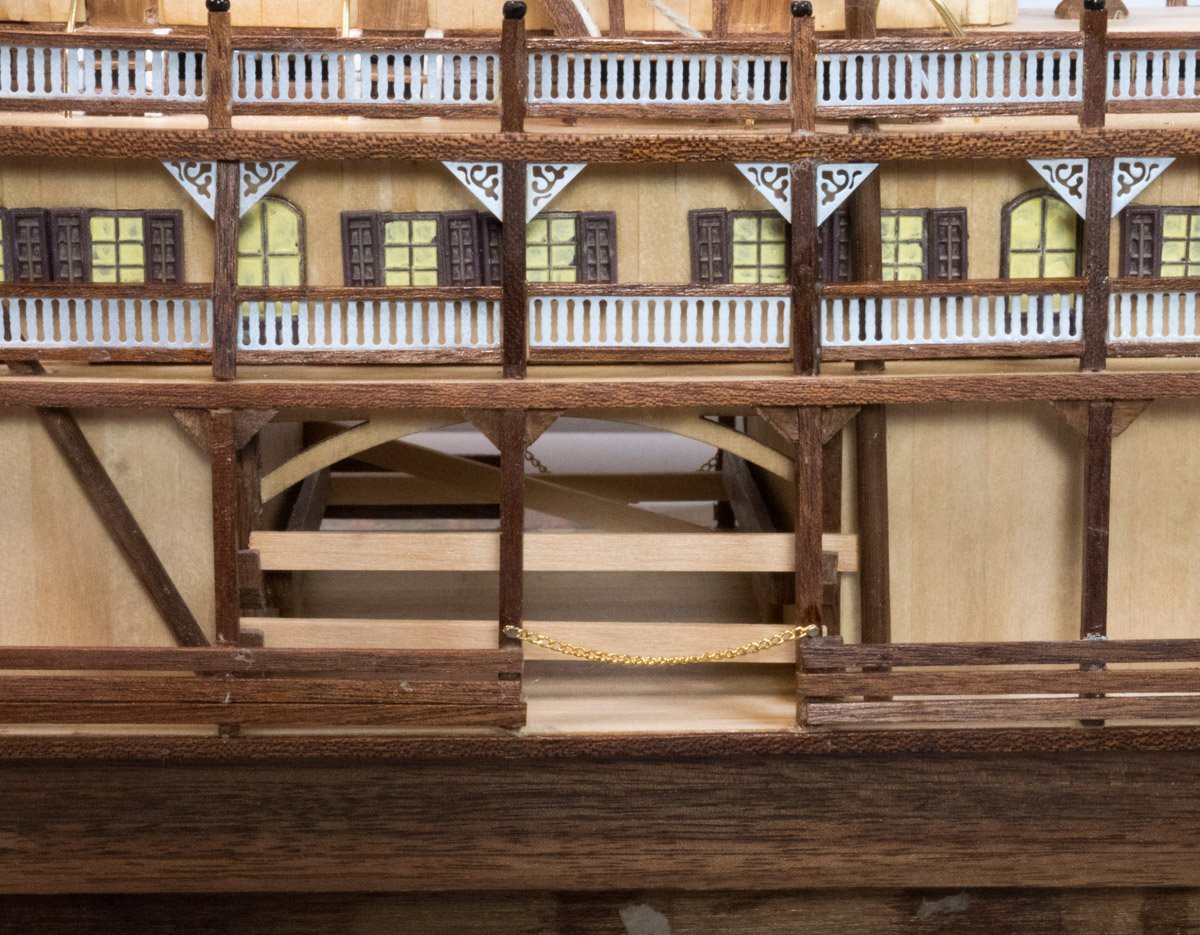
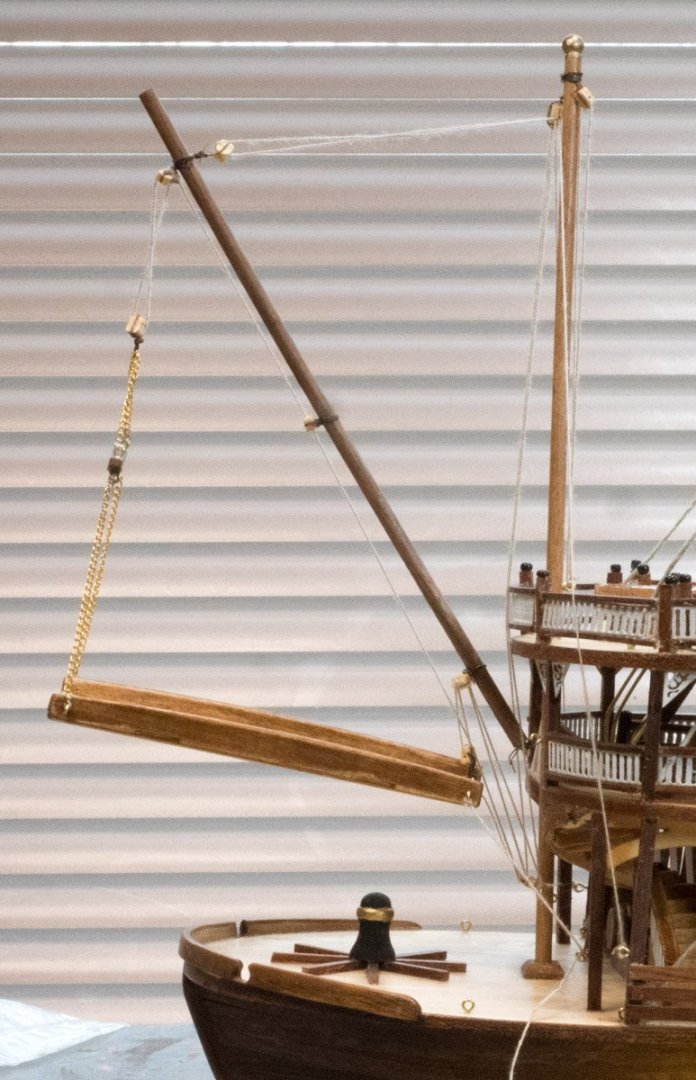
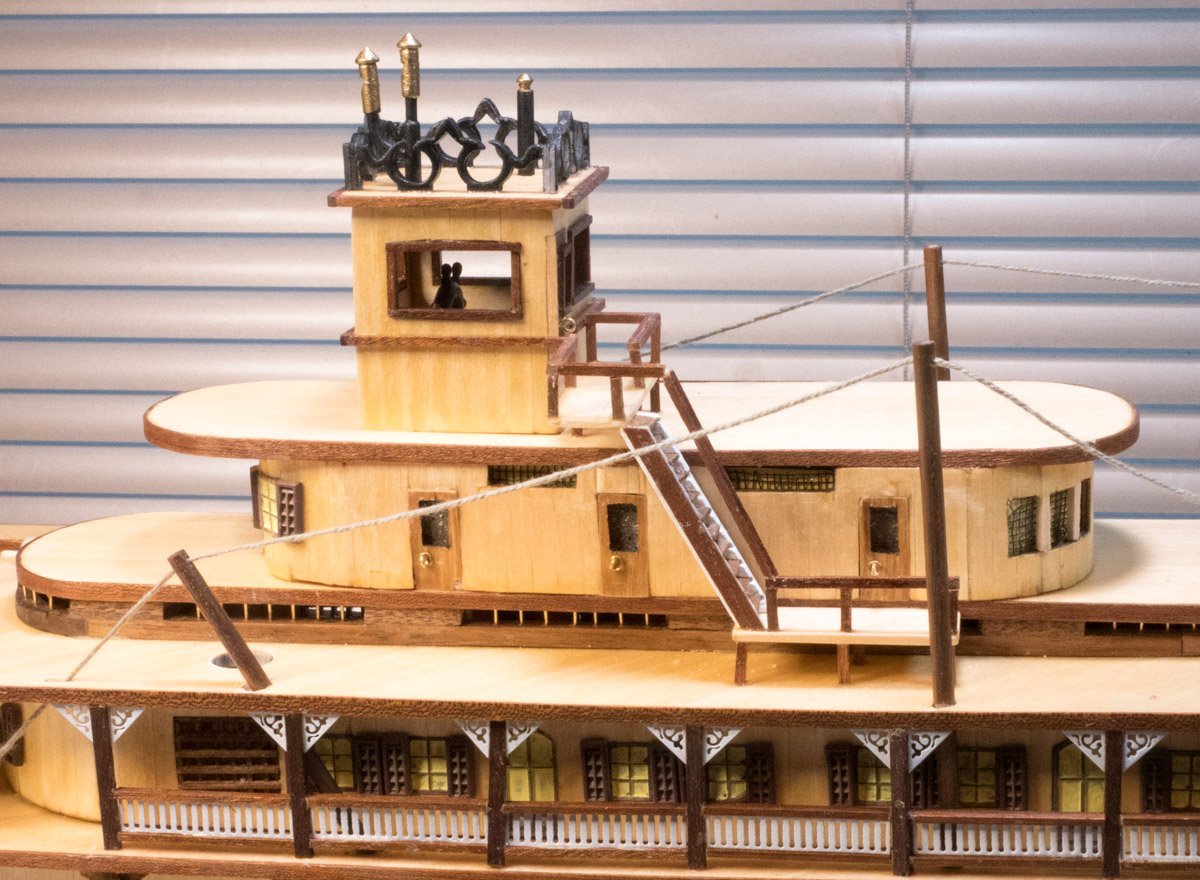
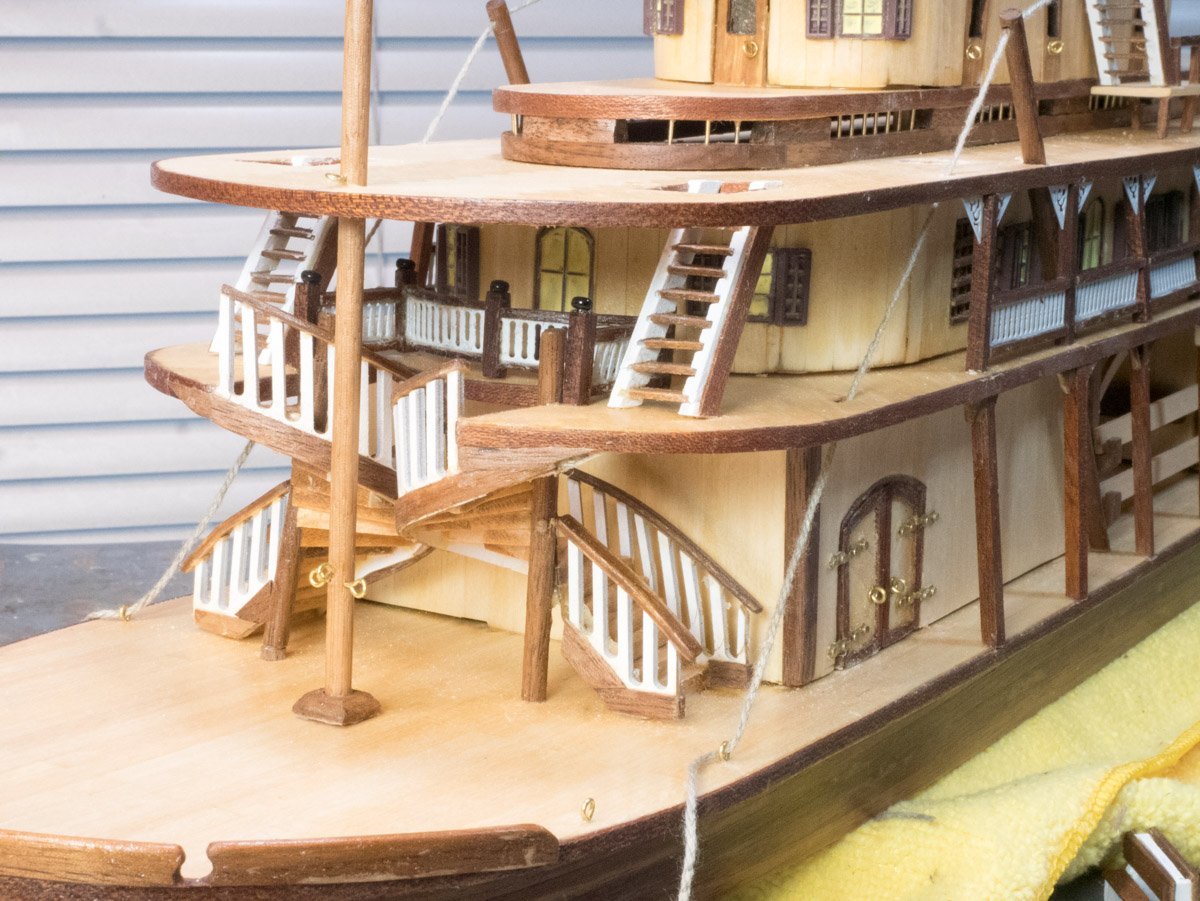
I was not looking forward to the gangway rigging. I don’t know how to tie rigging knots; I’ve seen some fancy knots in various pictures on the forum but they are beyond my skill. I looked into one and it resembled a fishing knot but it was too difficult to tie on a small scale so I went with simple knots and CA glue to accomplish this task. I tied a simple overhand knot and tried to lasso the groves in a block but that was too hard. I placed thread in the grove on one side and applied thin CA glue. When the glue set, I tied an overhand knot on the other side and applied thin CA glue. I extended the two threads and applied CA glue at the ends of the two threads to make it easier to tie a knot later. I looped the thread around a mast and wrapped it around the thread between the block and mast and applied CA glue to hold it in place. I tied a half hitch to complete installation. I found pictures in Bob Fraser's log (thread #68) to be very helpful (mast pictures). I found it difficult to work the rigging while the mast and gangway moved around. Parts of the routing didn’t make sense; I wasn’t sure where some lines ended. Working with 0.15 mm rigging and sewing thread required a level of precision I lack. The gangway ended up much higher than it should, I had adjusted the lines to get the gangway to the proper height but between sorting out the spaghetti of lines and taking up slack it had moved. I was focused on getting the knots tied and didn’t notice the change. After installing the rigging, I have a better idea how it works. I determined which lines control the gangway height and I think I have enough line to fix it. The gangway chains are unequal (I had adjusted them once already) so I have more to do.
- 128 replies
-
- 6
-
-
- King of the Mississippi
- Artesania Latina
- (and 1 more)
-
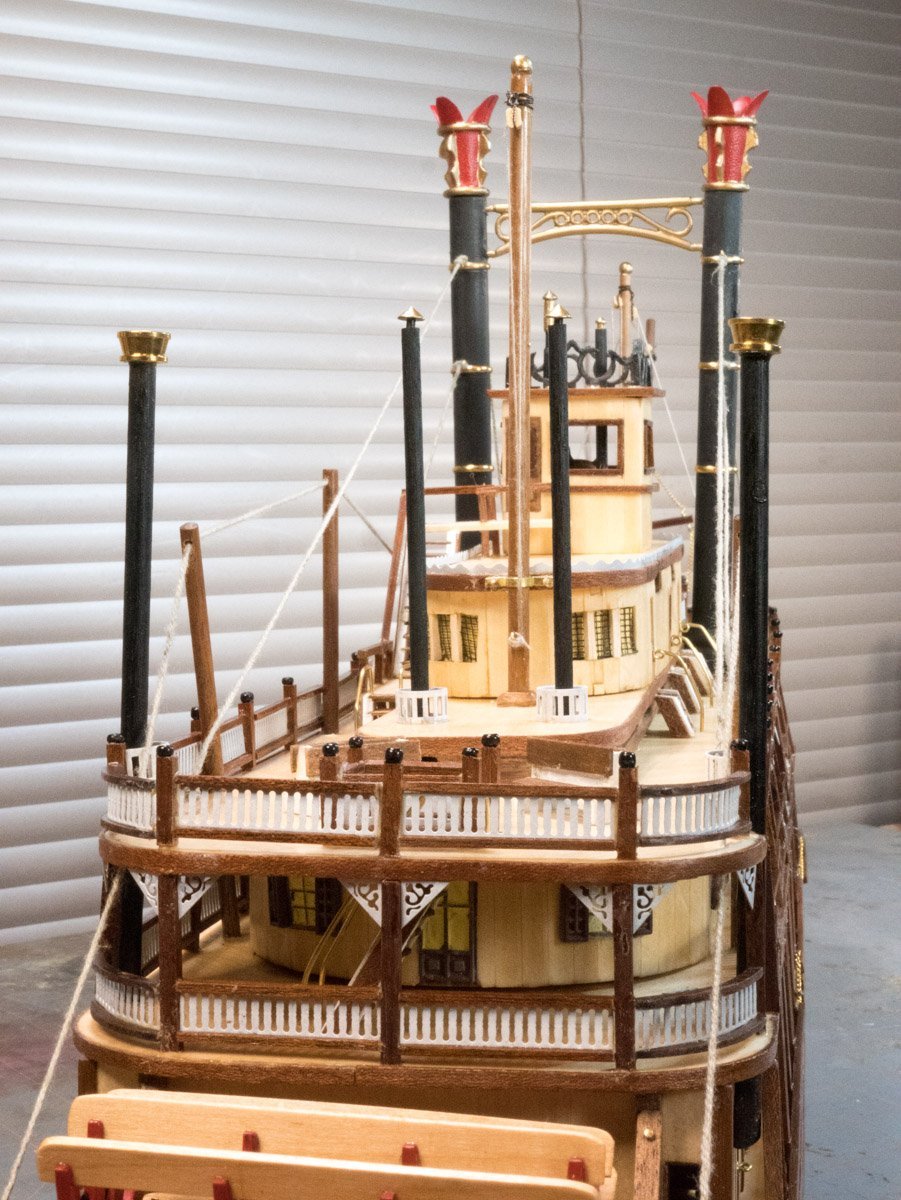
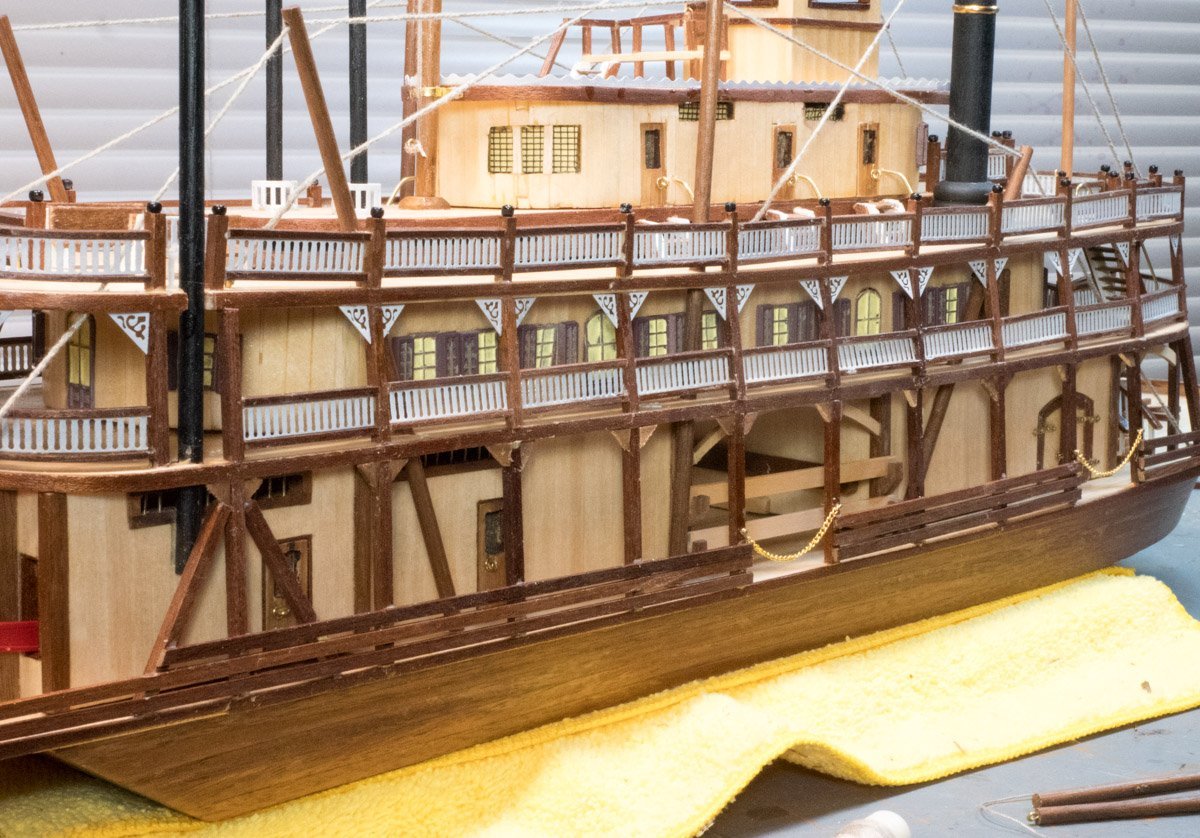
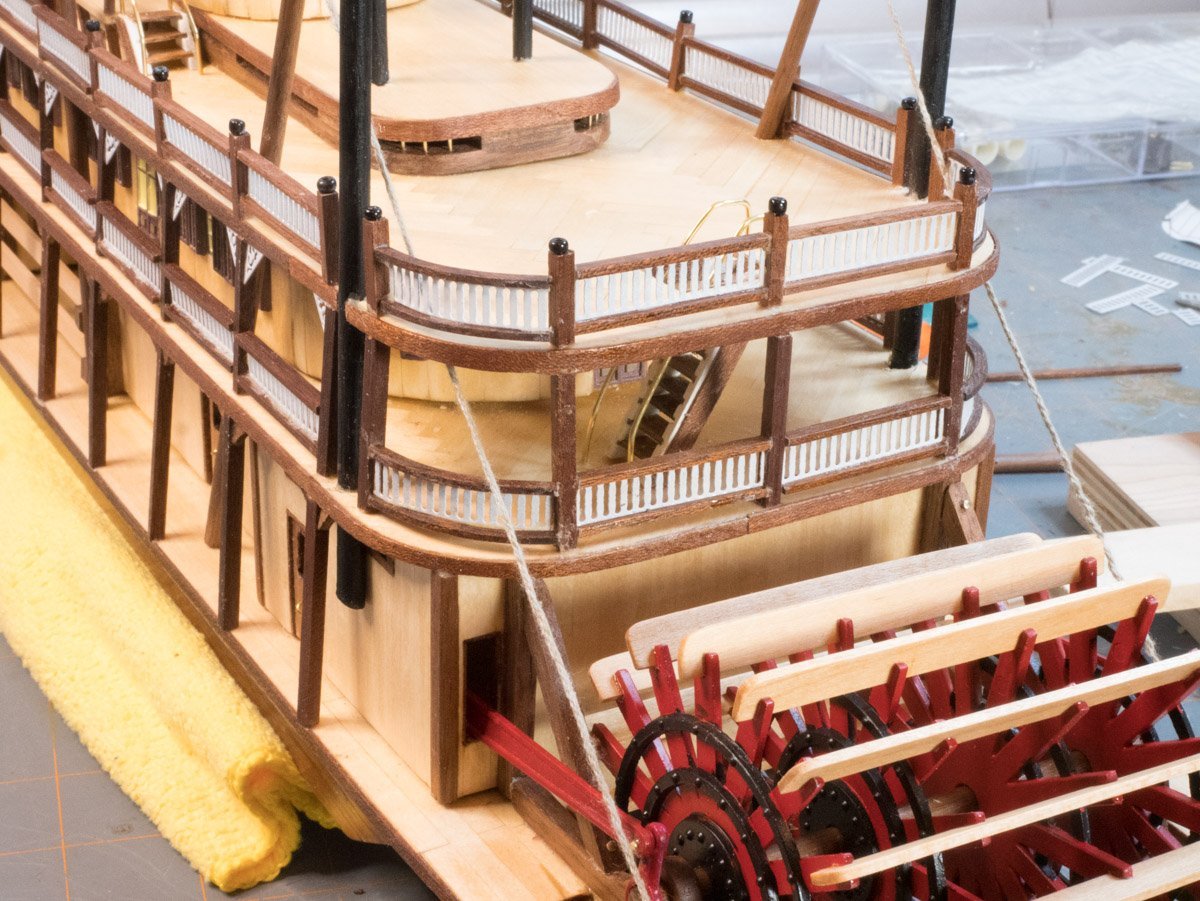
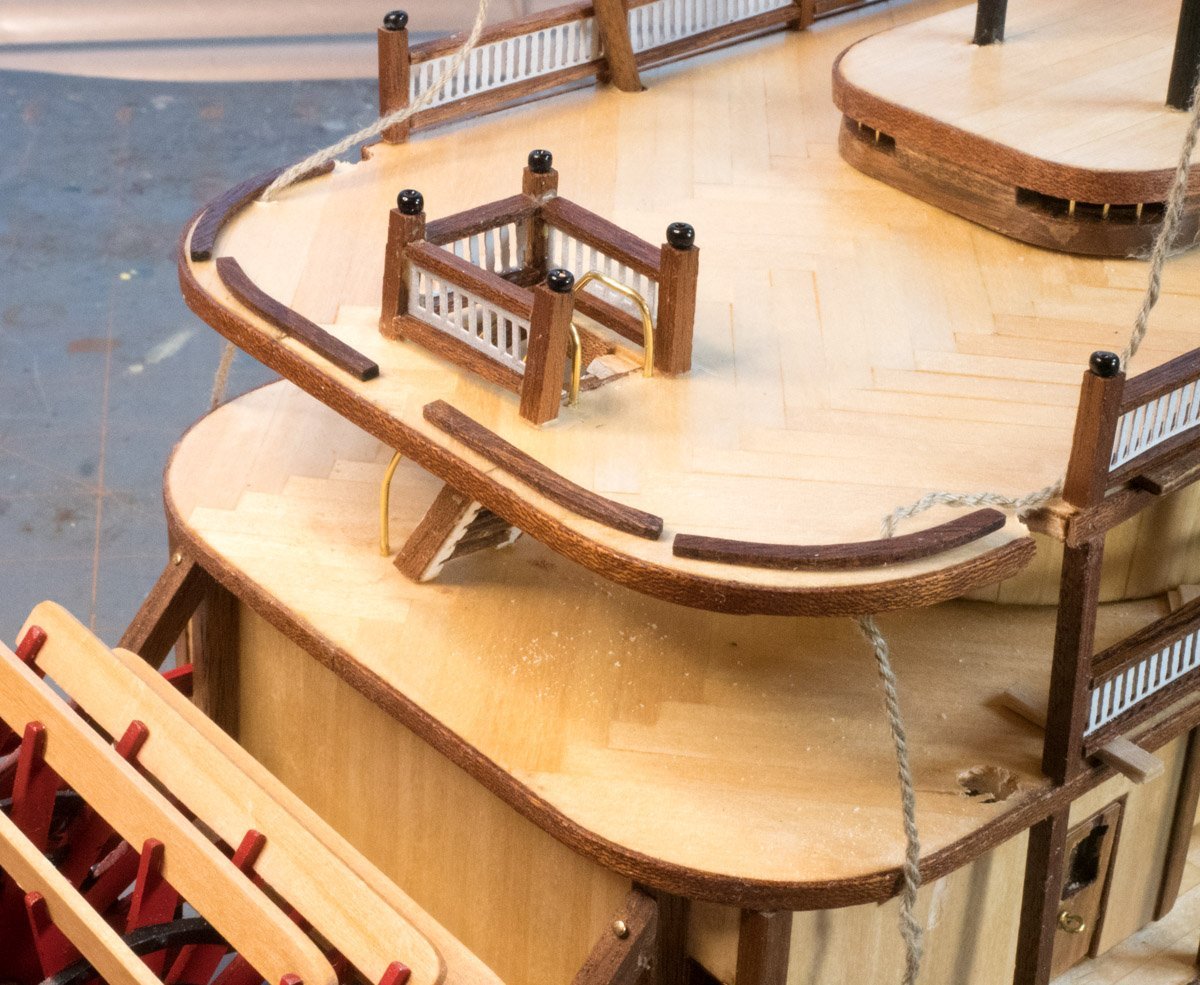
I installed the lower deck railings; the small clothes pins were the right size. I held off on these to leave access to rigging tie downs. I had applied finish to the long walnut stock and cut it to length so I didn’t want to soak the railings to bend them; I have a wood burner with a disk tip that I used to bend the wood with heat only. I made 10 mm railing posts on the paddle wheel deck. I installed the beads on top of the posts like the others I had made. I installed a short pin in the bottom of the posts, marked the deck, and drilled slightly oversized holes for the pins (to give me a bit of adjustment). Gluing the posts pinned to the deck made a solid attachment (I wish I had done that for the posts on the top deck). I'm making progress. I see I need to reapply one of the white triangle supports. I had to use a couple deck columns for the diagonal stern columns because I ran out of material of the proper length (I made too many deck columns), I should have installed the diagonals before cutting material for the upper decks.
- 128 replies
-
- 5
-
-
-
- King of the Mississippi
- Artesania Latina
- (and 1 more)
-
I used a drop of CA glue on the end of the line and cut it at an angle to make a point (as suggested). That technique worked fine to get the line through the block. I used dark brown sewing thread instead of the wire. I tie fishing knots to lures all the time but trying to tie sewing thread is hard. I also had a hard time tying the cotton thread for the smoke stack lines, a slip knot doesn't work on that material when trying to take up slack. I got practice working with the block on the pennant mast but the bow rigging will be a challenge.
- 128 replies
-
- 4
-
-
- King of the Mississippi
- Artesania Latina
- (and 1 more)
-
Hindsight Tip Do the rigging before installing the railings on the top deck. I've never worked with rigging before so I put it off. I bumped several railings off the deck when installing the smoke stack lines. So now I'm repairing railings (some of them needed adjustments anyway).
- 128 replies
-
- 4
-
-
- King of the Mississippi
- Artesania Latina
- (and 1 more)
-
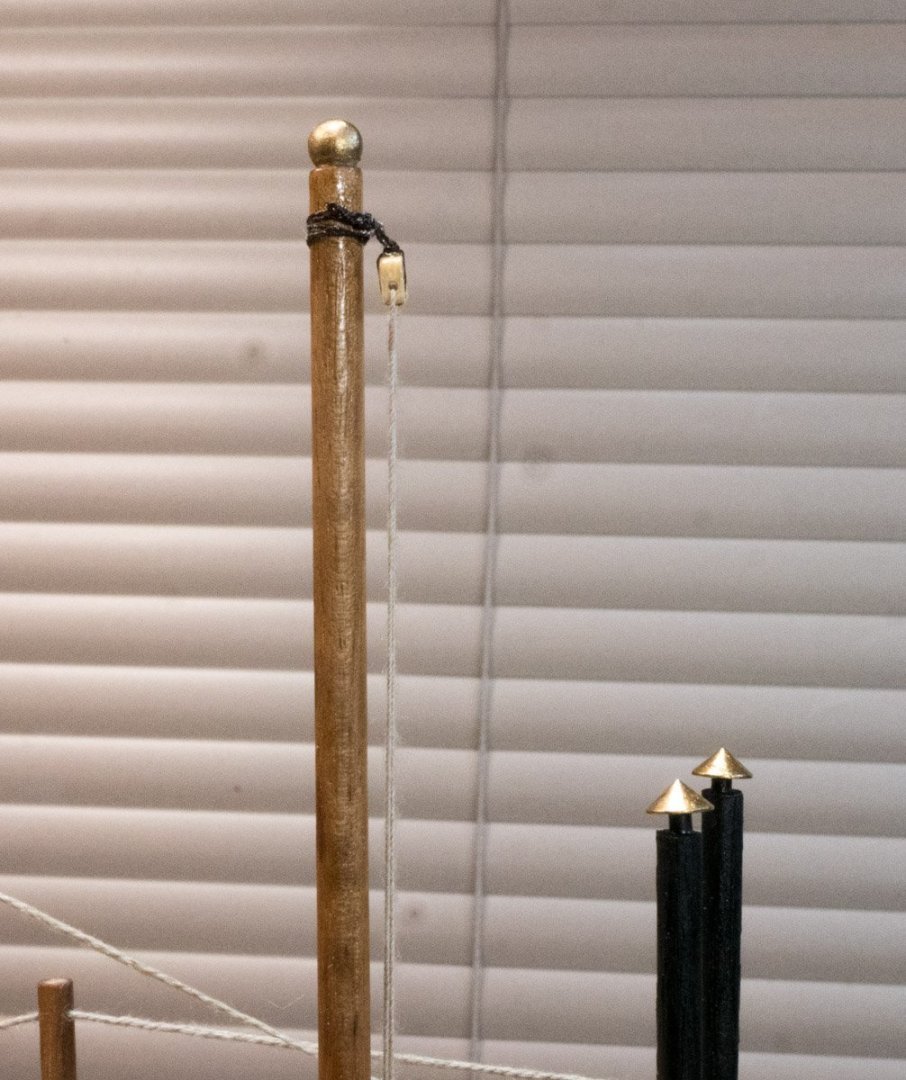
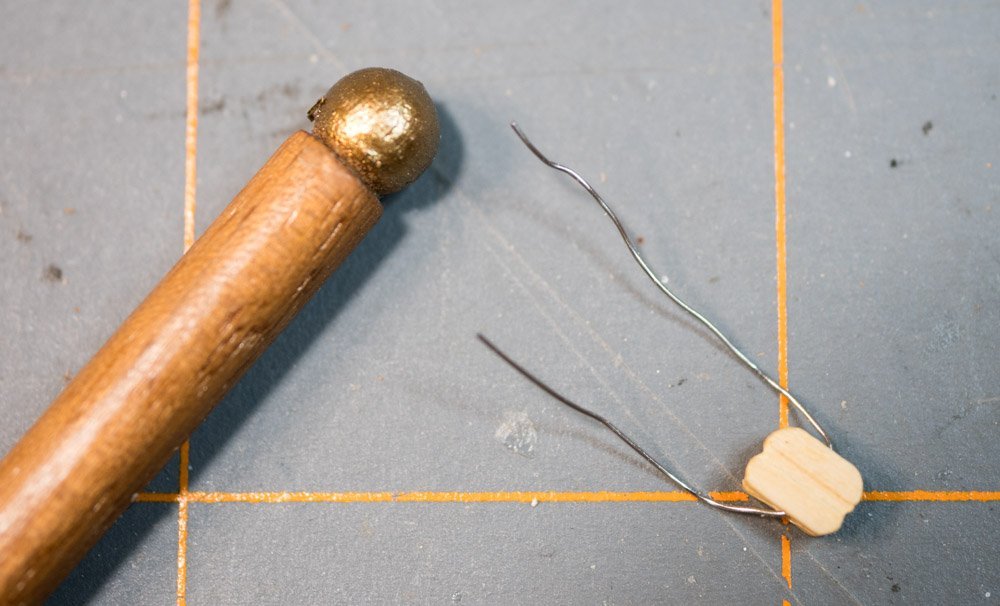
Thanks for the link. The thread showed me more about how the blocks work. I didn't know the rigging goes through the hole. I'm not able to thread the rigging through the hole, I need to get some sewing supplies to help me thread the rigging through the tiny hole (even after making the hole bigger). I also broke the wire trying to tighten a practice loop. I think some sewing thread could be used to attach the block to the mast.
-
I've been trying to figure out how to attach the blocks to the masts. I noticed the block has a hole the size of the wire but I haven't figured out how to use the wire to attach the block to the mast and have room to thread rigging on the block. I also noticed that two blocks (item 207) have two holes in them and I don't know what the extra hole is for.
-
How did you attach the buckles to the masts? It looks like the wire is used but I'm not sure how to attach the wire.
-
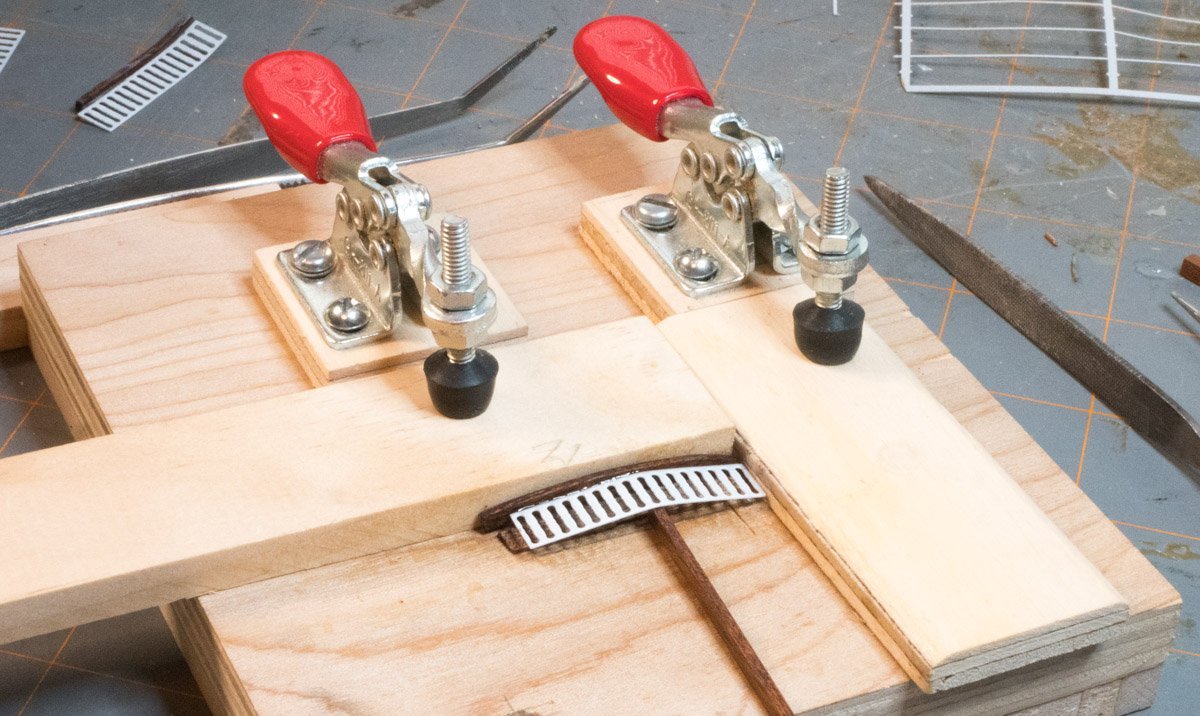
I got the railings installed. The straight sections went pretty well but I struggled with the curved sections. I made a jig to assembly the straight sections and I eventually figured out a way to assemble the top & bottom wood parts with the metal potion; I prefer to work with railing assemblies rather than building them piece by piece on the deck. Several things did not line up very well at the front, some of my mistakes and compromises can be seen. Attaching the white border on the top deck was tricky. I used a shot glass to help form a piece of white border trim but the material would spring back holding a mild bend. I used two finders to hold a section in place and used a Glu Looper to apply thin CA glue to the seam, then spray the area with activator. The glue would set fairly quick (but not instantly). Hindsight Tip: I wish I left a bit of a lip when I glued the sapelli trim on the state room ceiling (I sanded mine flush with the deck), it would have helped hold the border trim in place.


- 128 replies
-
- 4
-
-
- King of the Mississippi
- Artesania Latina
- (and 1 more)
-
Ahh, I see how that works. I had been thinking of my experience with pinning the beads on top. I just finished the railings today but I'm sure I'll bump something before I'm done so I'll probably will get as chance to try it.
- 128 replies
-
- 1
-
-
- King of the Mississippi
- Artesania Latina
- (and 1 more)
-
Thanks, that is a good idea. I did that for the top of the posts to place the bead on top. I learned I couldn't center the hole with consistency and I think aligning a post pin, deck hole, and connect to the railing assembly might be too hard for my accuracy skill. But I think a hole in the post and the deck could create a pin when the glue cures (I'll try that the next time I knock one off).
-
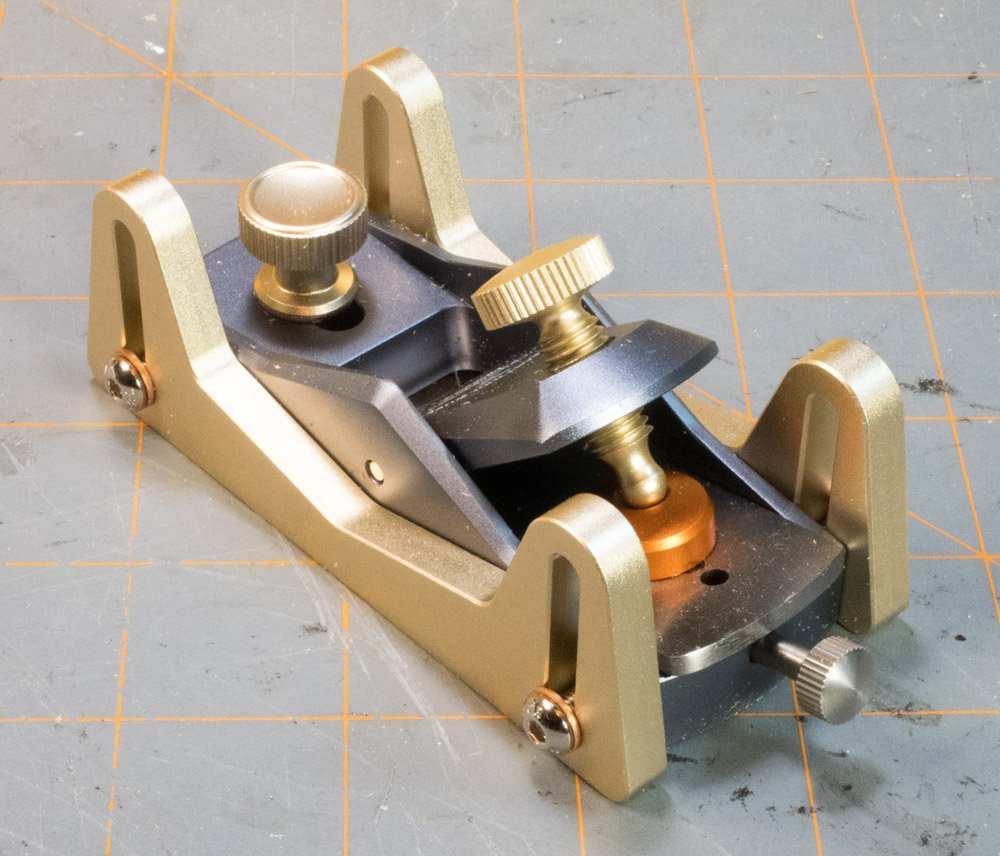
The company is Bridge City, this is a link to the plane: Adjustable Plane
-
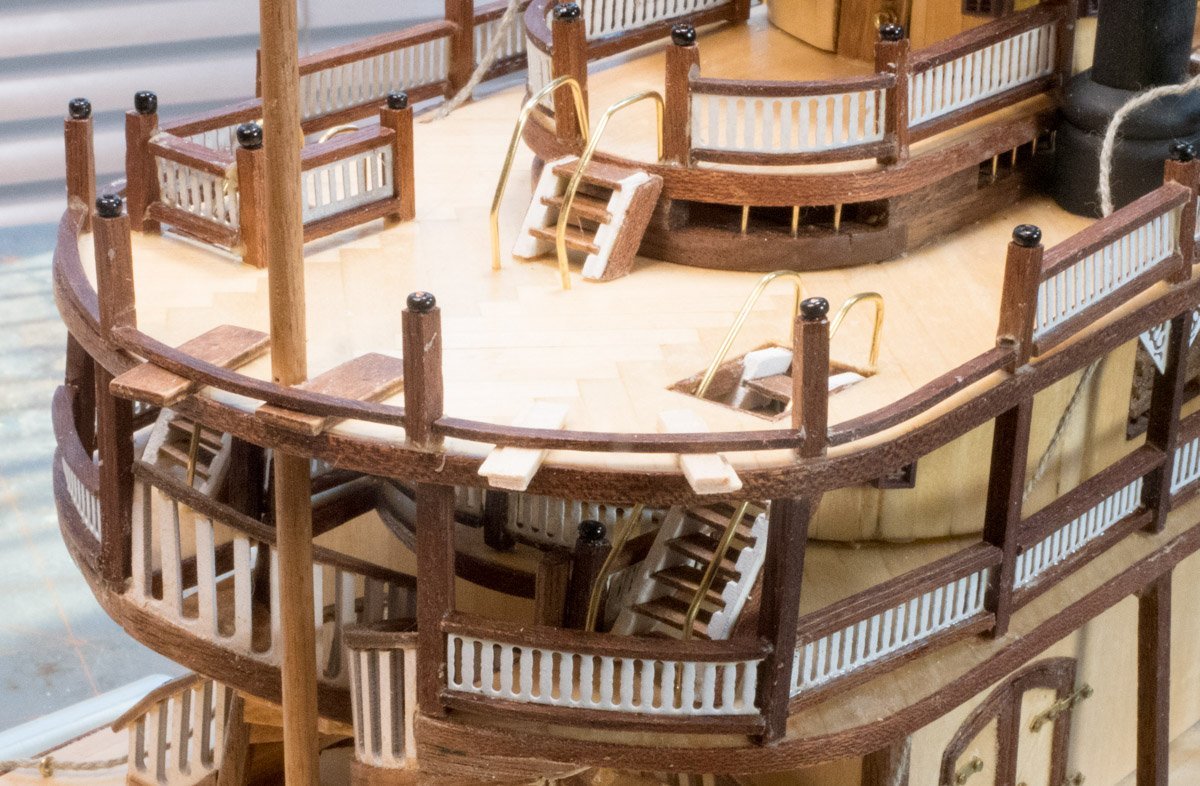
I played with the various curved railing pieces to find a way for the rear railings to work. I was wondering how to curve the brass railing pieces to match the wooden radius. My first attempt was the curved section on the forward short deck; I formed it to the wood piece, then bent the piece by hand to get it close to a fit (I wasn’t happy with the result). I used the railing jig I made and found it could help form the arch a little easier. I placed the curved wood railing with the straight metal piece in my jig; I pushed the straight metal piece to create an arc and used a piece of wood to help shape it. I used a Glue Looper to apply thin CA glue to each seem and sprayed the area with an activator to cure the connection. I added the second curved wood railing and glued it with the Glue Looper. I later added a short piece to the white railing to complete the assembly. One of the things I’m discovering is how light the wood glue bonds to the deck, my deck has many thin layers of finish making it a polished surface and it is only now that I realize I need to find a way to rough up the surface for a 3mm square post. I’ve knocked off many posts/rail assemblies via accidental touches (I swore each time).
- 128 replies
-
- 2
-
-
- King of the Mississippi
- Artesania Latina
- (and 1 more)
-
I played around with the curved pieces and found a combination that works for me. My kit included several curved pieces that aren’t called out in the manual. Item 234 is mostly straight with a little curve at one end. It looked like it might fit the forward end of the straight railings – and it does (I removed the railing I had installed). There are four pieces for two railing sections, I wish there were more for the same section in the lower deck. I’ll still have to figure out how to create longer brass railing sections (I painted white); I noticed the instructions don’t identify the curved brass railing section. The three bow brass railing sections will need to be created. For the stern I used the straight railings I removed from the bow and tested the fit with different curved sections. My custom stern railing doesn’t use any of the parts called out in the manual.
- 128 replies
-
- 5
-
-
- King of the Mississippi
- Artesania Latina
- (and 1 more)
-
When I scoped out the curved pieces at the front and rear decks, I discovered problems. The pieces that make the front railings are longer than the space available. You can see the last straight railing is too far forward which reduces the space for the curved pieces; it also cuts the corner a bit which probably caused the short space. Everything depended on where I aligned the first column on the main deck; I had cut out the second deck from the full scale drawing and laid it on the second deck to determine the column placement. I’m thinking I should shorten the forward straight railing to accommodate the curved pieces. I also noticed another problem with the length of the curved pieces, they are longer than the metal part of the railing. It looks like I’ll have to create a longer metal piece; I don’t know if glue will work and I’m wondering it solder might work. The rear of the deck also has a problem. The rear straight piece should be 45 mm but the metal railing in the kit is 35 mm (same problem as the front). I noticed other curved pieces (I don’t know what they are for) and laid them out to see how they might work but I need to figure out what they for (I can’t find item 192 in the manual).

- 128 replies
-
- 3
-
-
- King of the Mississippi
- Artesania Latina
- (and 1 more)
-
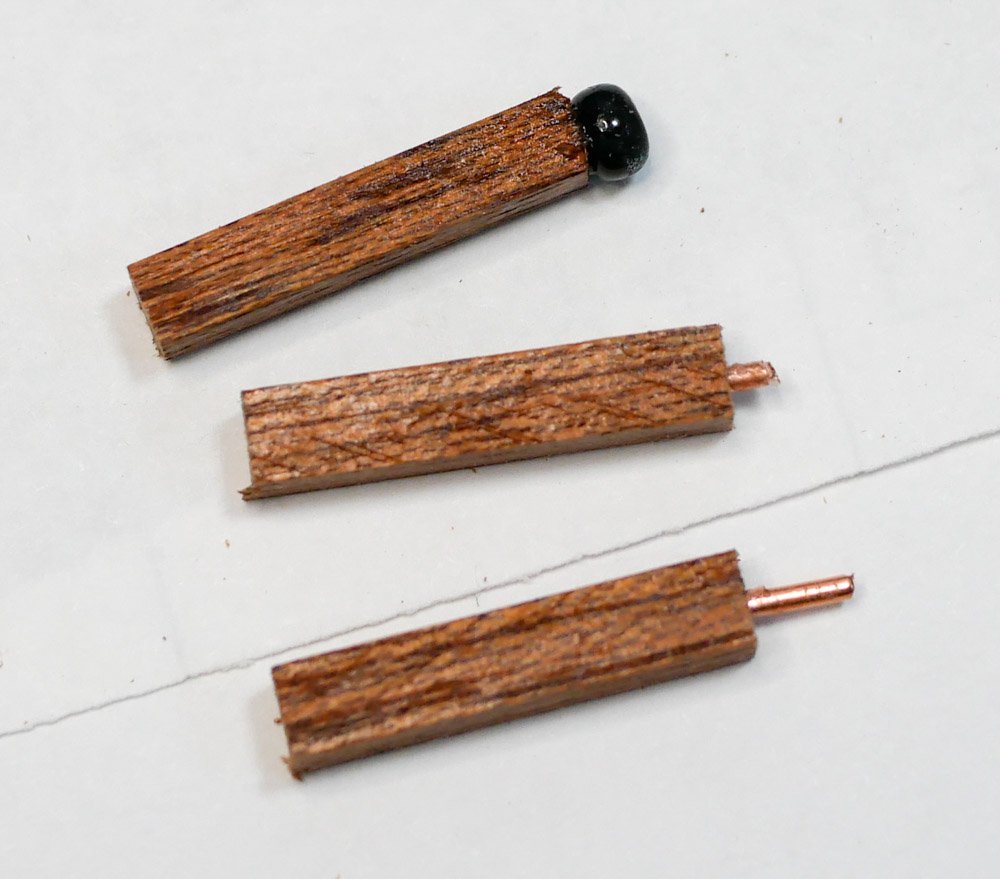
I have been working on the railings. I made more railing assemblies using my home-made jig. I installed the straight pieces. I discovered I need to determine how I want to modify things to finish the railings. I made all of the top deck railing posts. I drilled a .08 mm hole in one end of the posts and used thick CA glue to install a piece of solid electrical wire (20 AWG), then trimmed the length of the wire to fit in the bead. I quickly learned not to use tweezers on a small round piece when a bead took flight; I touched the trimmed wire in a puddle of thick CA glue and stabbed the hole in the bead with the wire and it sticks.
- 128 replies
-
- 2
-
-
- King of the Mississippi
- Artesania Latina
- (and 1 more)
-
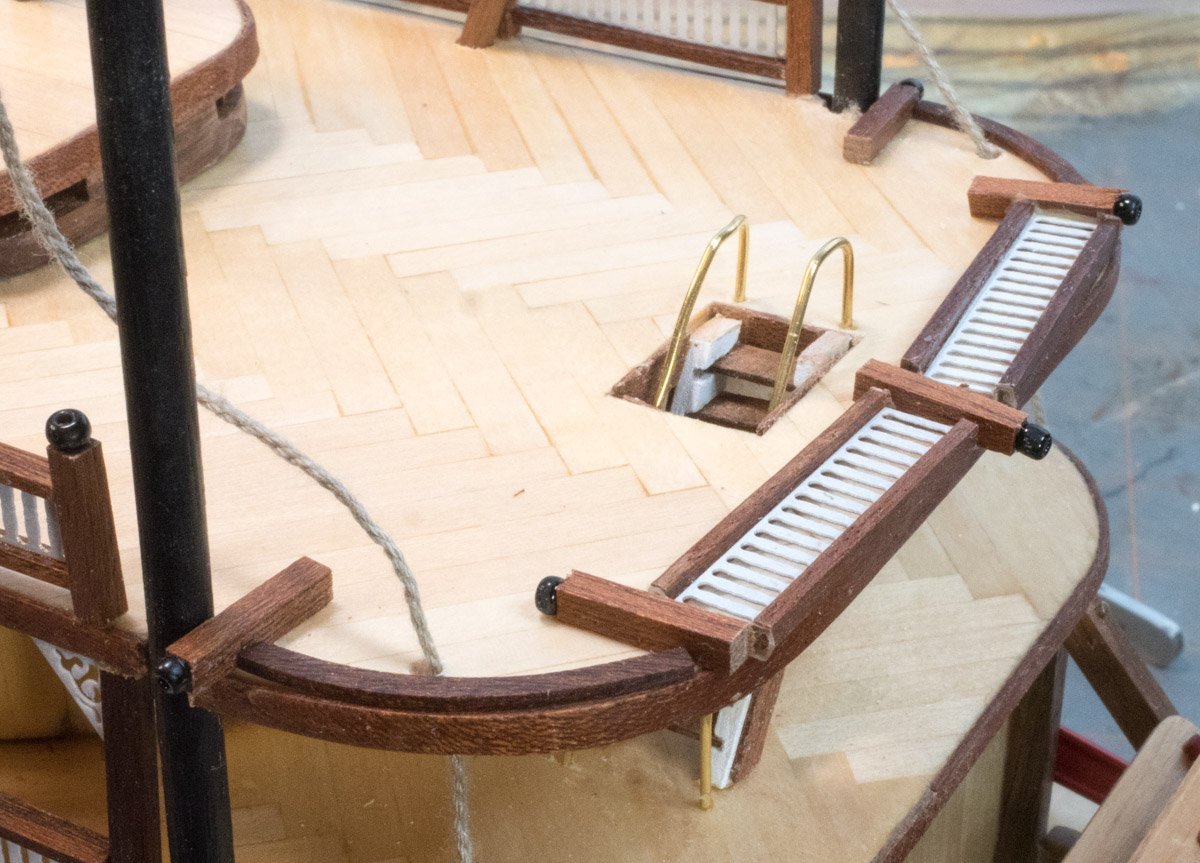
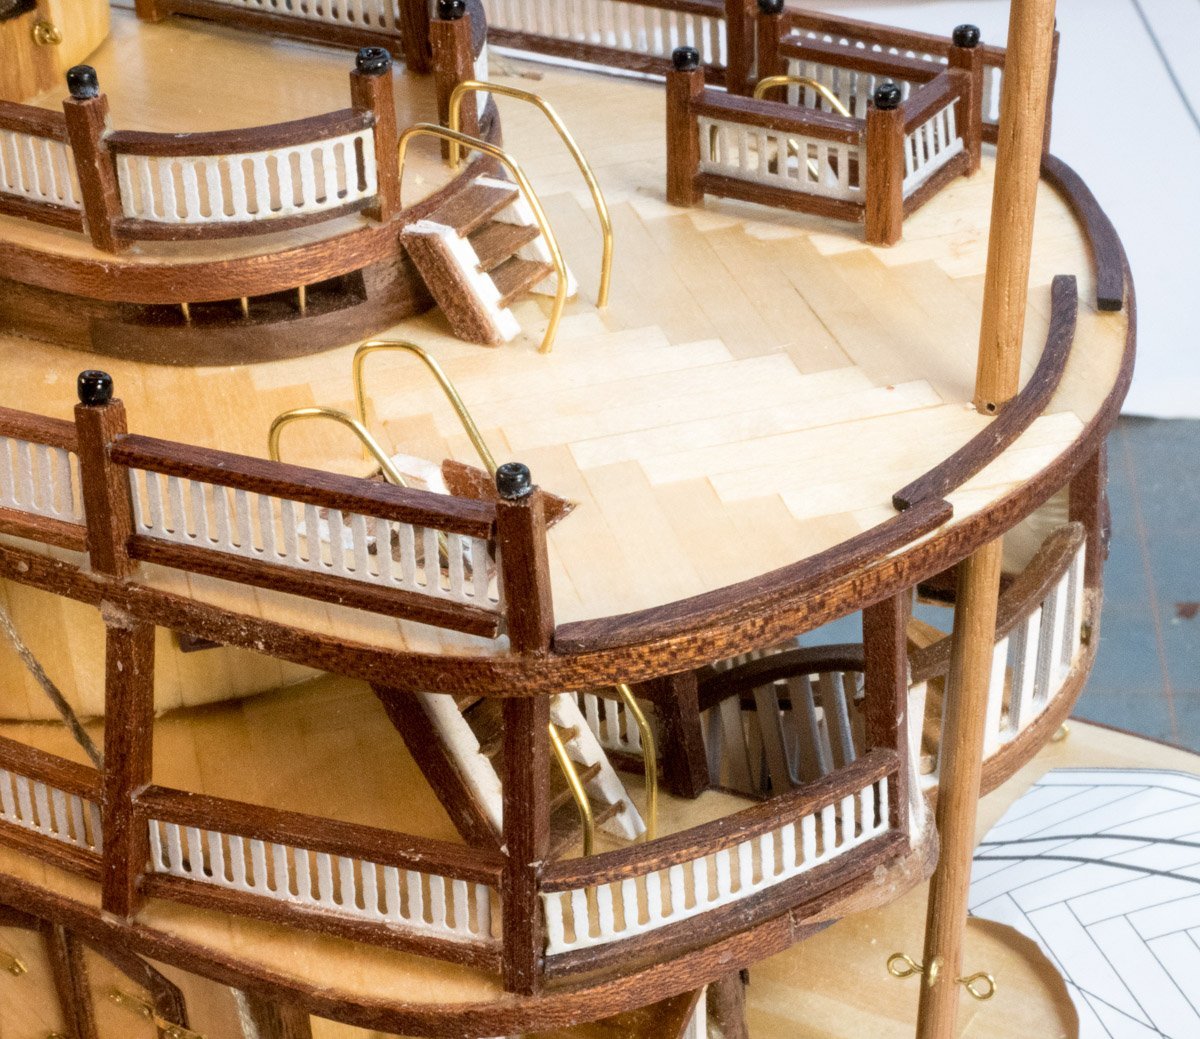
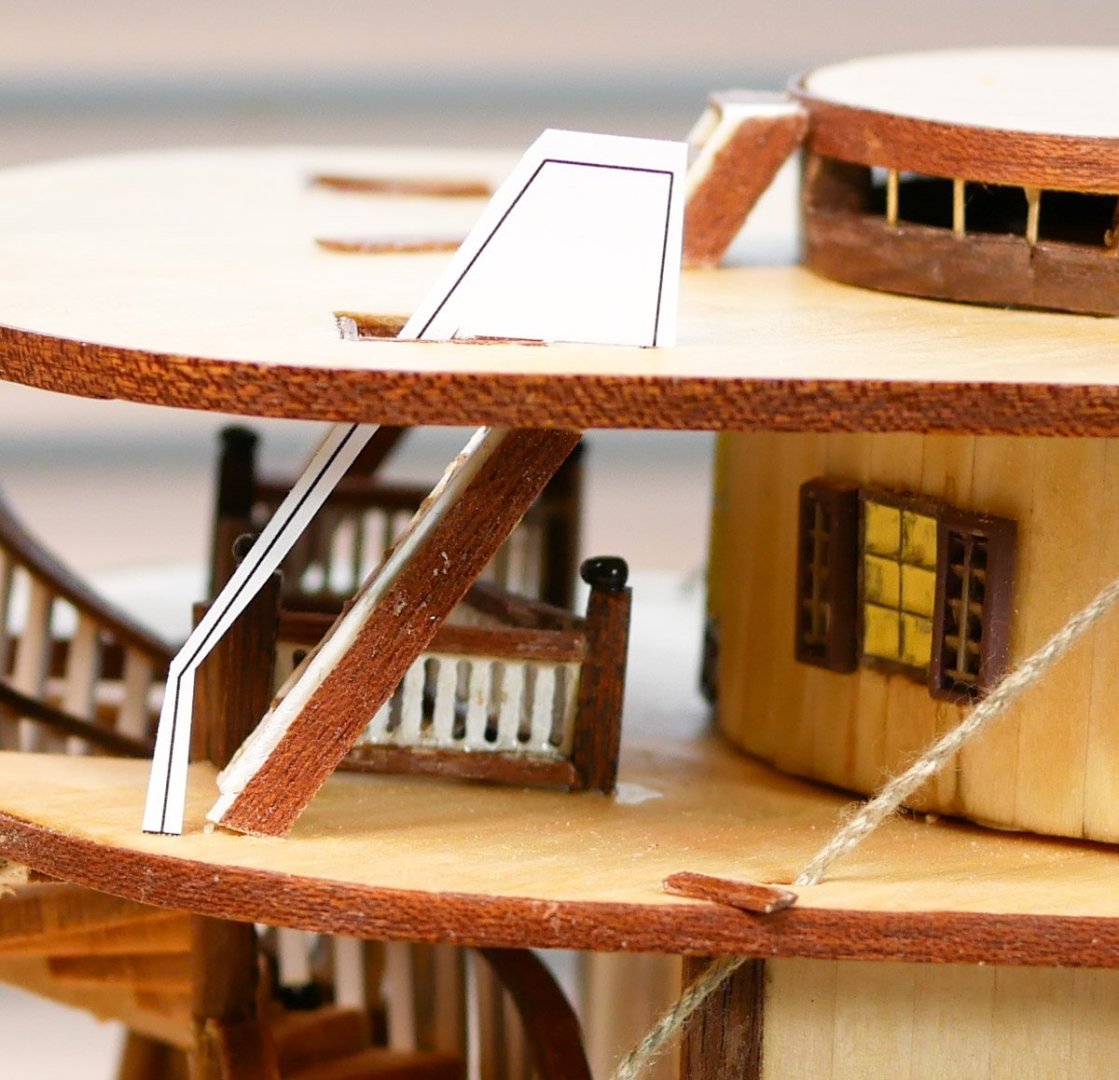
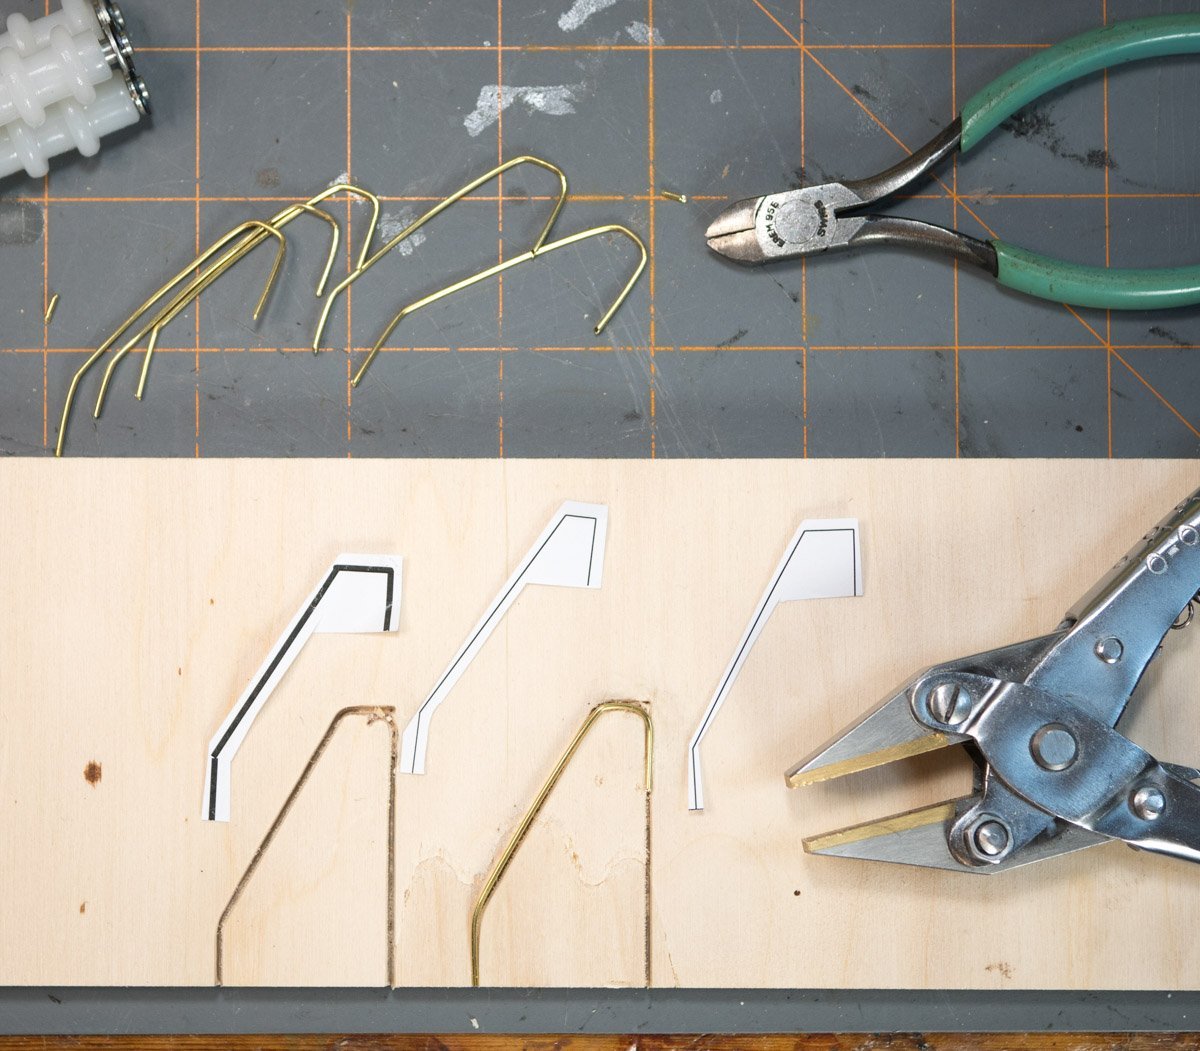
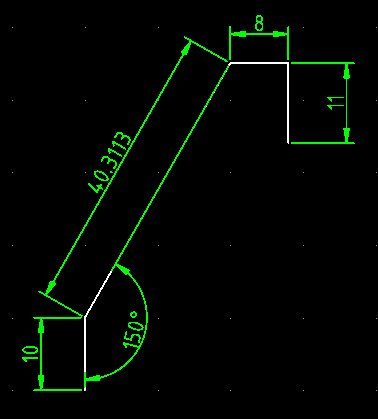
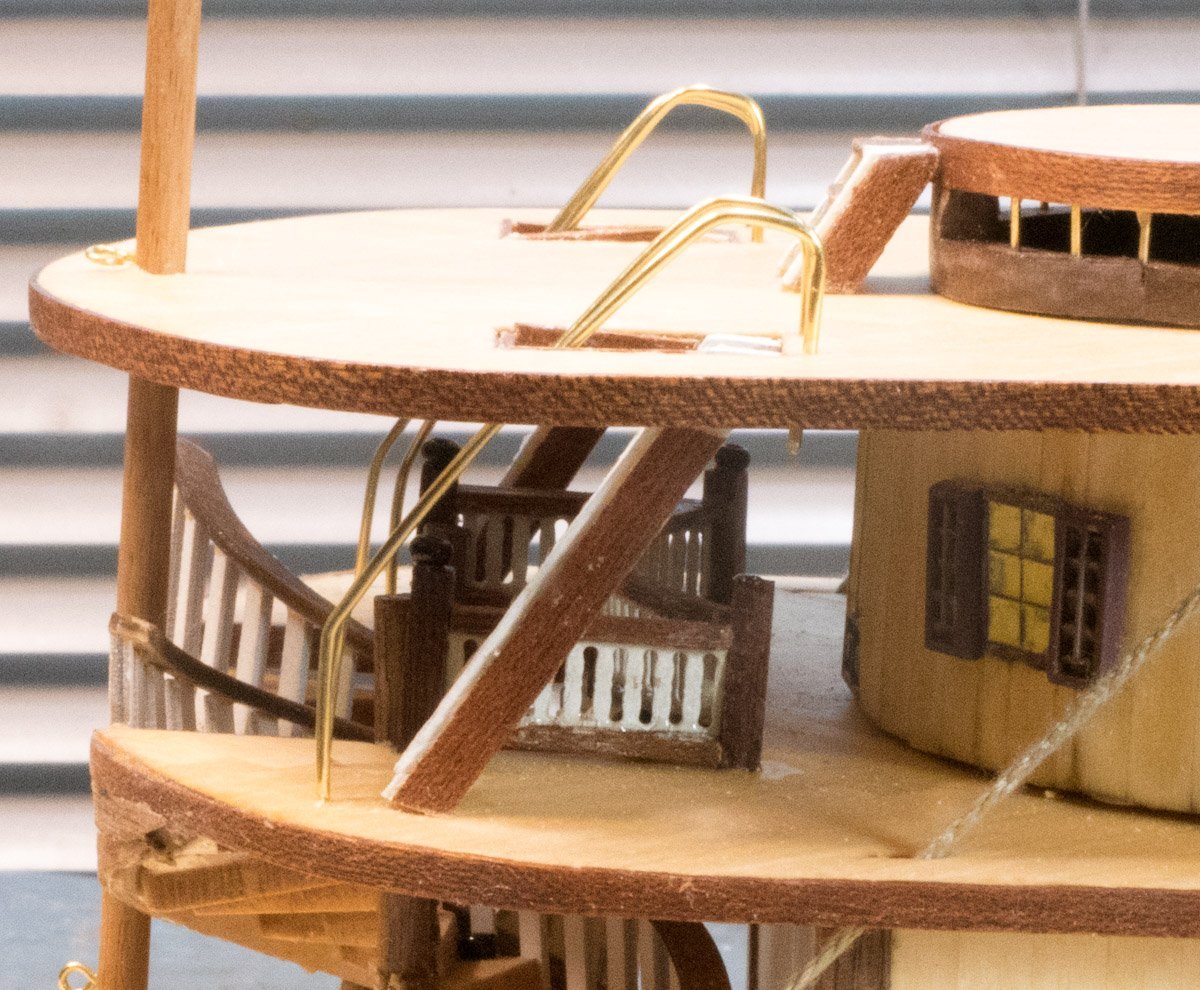
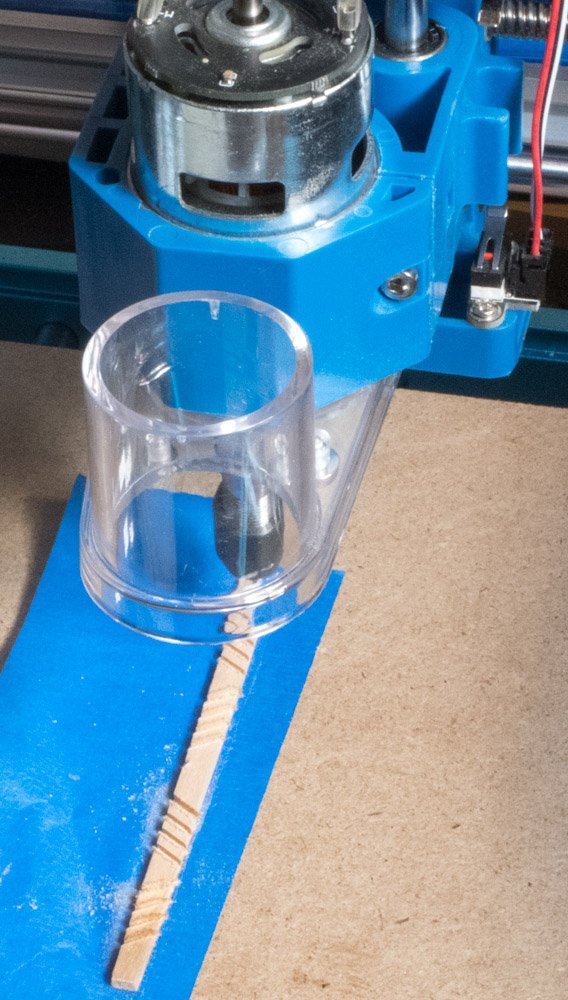
I looked at many Mississippi build logs to get an idea how others made the railings, I estimated a range of railing heights. I measured the angle of the steps (60° from horizontal) and made a couple measurements on the full-scale drawing to create a stick drawing of the railing. (I’ve discovered the full-scale drawing varies a bit from what I build). I printed my template and tested the fit to determine changes; I used it as a guide to form a railing with a piece of the brass wire with pliers. I adjusted the brass wire test piece to best fit the stairway. I revised my drawing, test fit a new print, and used it to revise the brass test piece again. Repeat as needed. I considered how I was going to make six railings the same. I think the easiest way is to print a template and use pliers to form the wire to match the template. I decided to make this an opportunity to use (learn) my hobby CNC machine; I took the drawing and turned into a file to use a spindle router to route the pattern into a piece of wood. The jig was helpful but you still form the wire with pliers to match a template. I drill 1mm holes to anchor the top of the railing. I added dimensions to my template drawing: Check fitting the railings. I see the forward pair are a little low, I pushed the wire in too far and you can see it below the floor.
- 128 replies
-
- 3
-
-
- King of the Mississippi
- Artesania Latina
- (and 1 more)
-
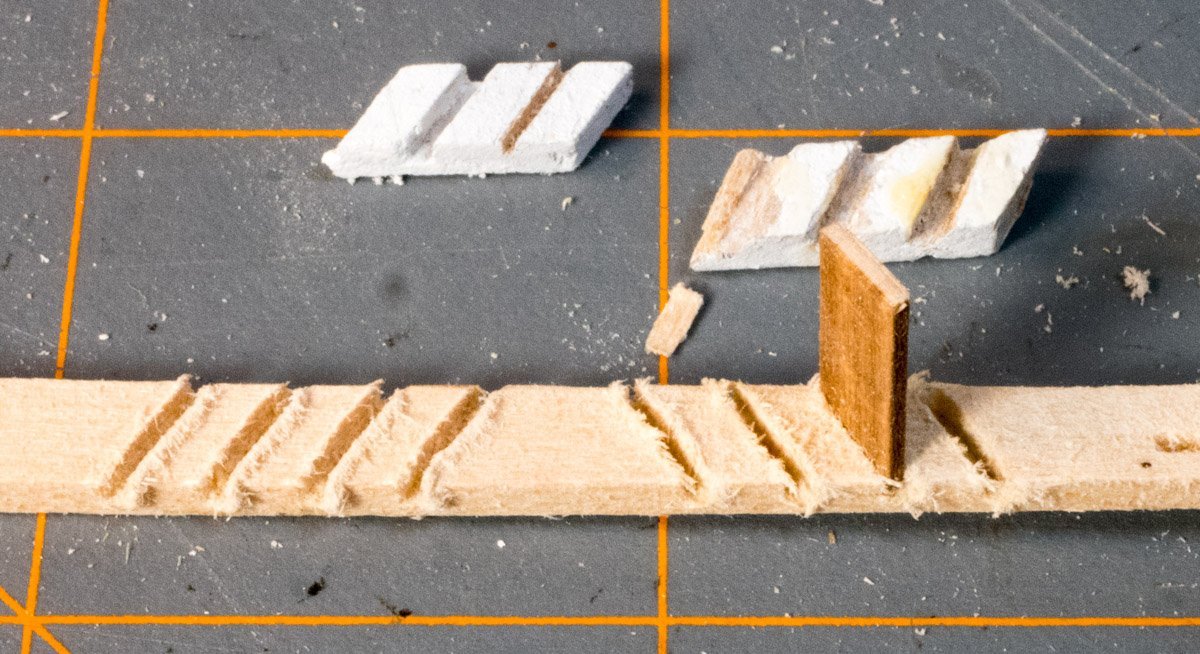
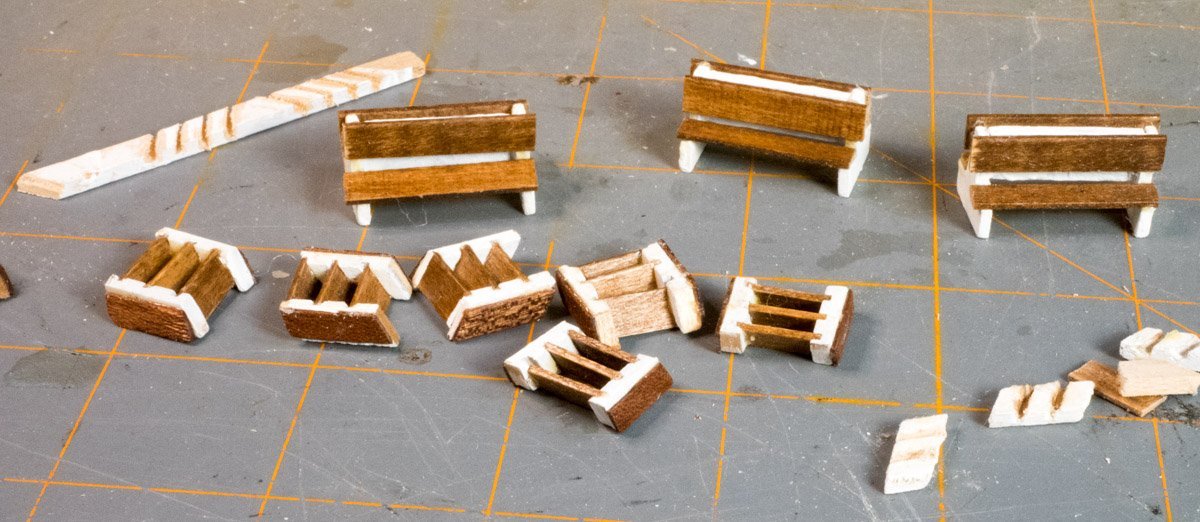
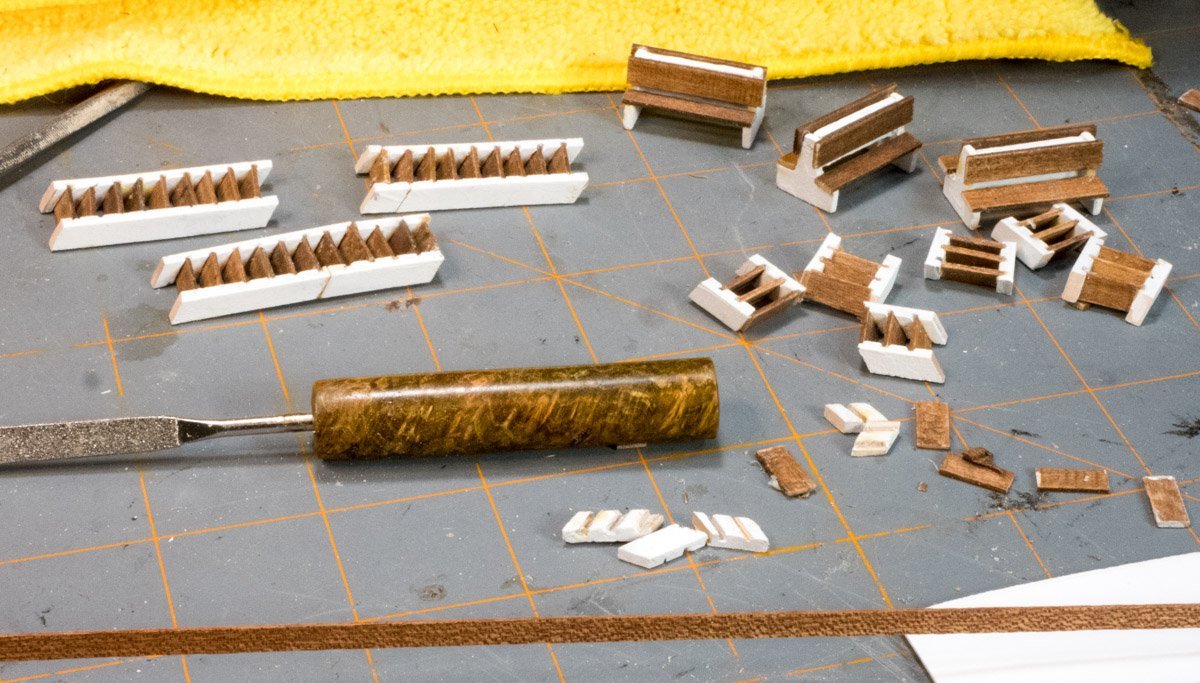
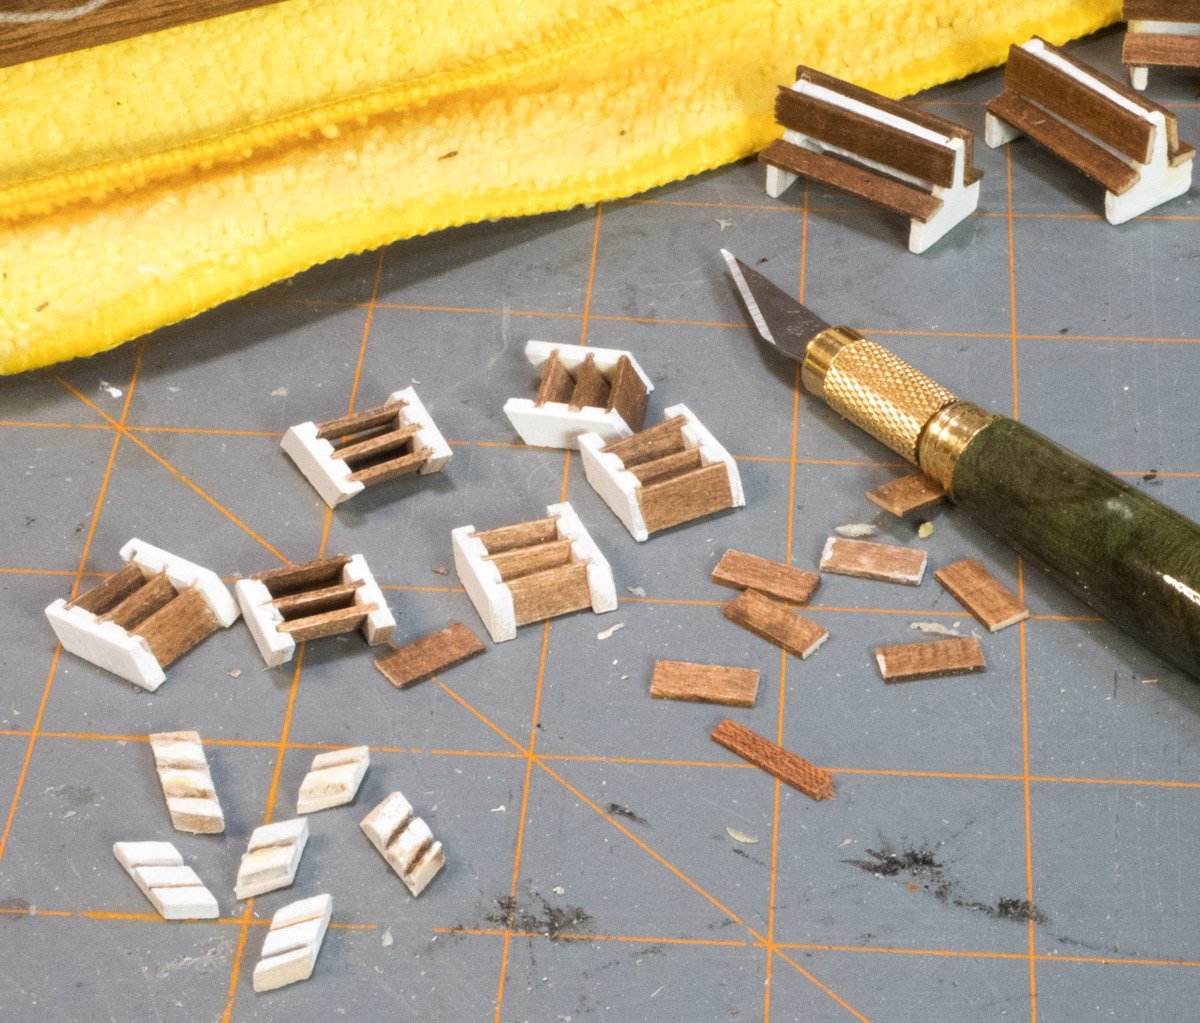
The stairways were tricky for me. The stairway sections included in the kit are delicate and I broke pieces. Rather than glue the broken pieces together, I have an option to make pieces from scratch so I decided I could use the practice. I also ran out of step material and had to make more. I made a pair of step runners with my hobby cnc machine. It was a straight forward process and everything worked as expected, then I discovered I routed the step slots to the wrong angle. I corrected my drawing and that started a fiasco making a new stair runner file. I’m learning CAD/CAM/CNC processes and it took me time to troubleshoot my process. I eventually cut what I wanted – it was educational. Test fit. I broke the 1 mm bit that routed clean (broke it during troubleshooting - bummer), my other 1 mm bit was a different style and made a rougher cut (hard to clean). Aligning the steps and the runners was tricky because I had not been consistent where I cut the pieces to length; when the steps were aligned the runners were not. I had to file the ends of the runners to get them even. I added 2mm sepeli wood to the 3mm stair runners on the other stairways so I did the same with the short steps.
- 128 replies
-
- 3
-
-
- King of the Mississippi
- Artesania Latina
- (and 1 more)
-
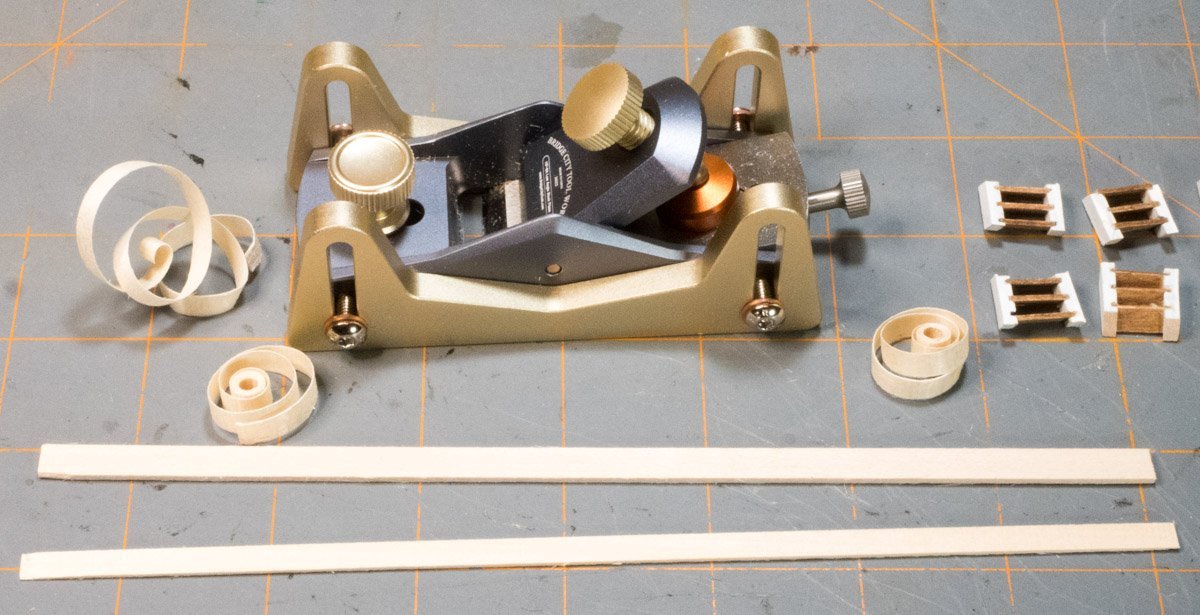
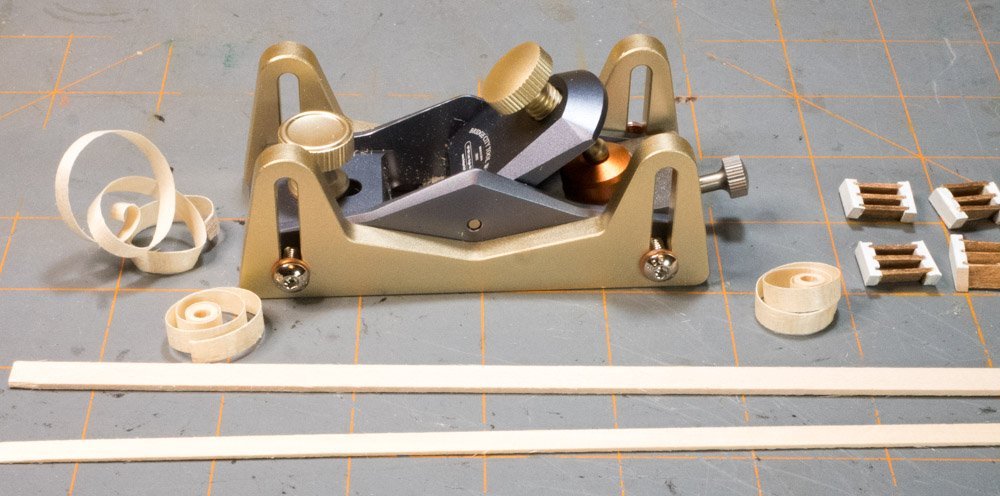
I got a Bridge City mini block plane with depth skids (HP-8). It looks scrupled; the best part is that the sides can be adjusted to set the height of the plane. The plane is about 4” (100 mm) long, with a working width of 1.25” (33 mm). Recently, I was running out of 1 mm thick material for steps. I had 1.5 mm material so I set the mini plane to 1 mm height (using some 1 mm material) and planed the 1.5 mm material – it works fine. And it looks cool.
- 4 replies
-
- 16
-
-
-
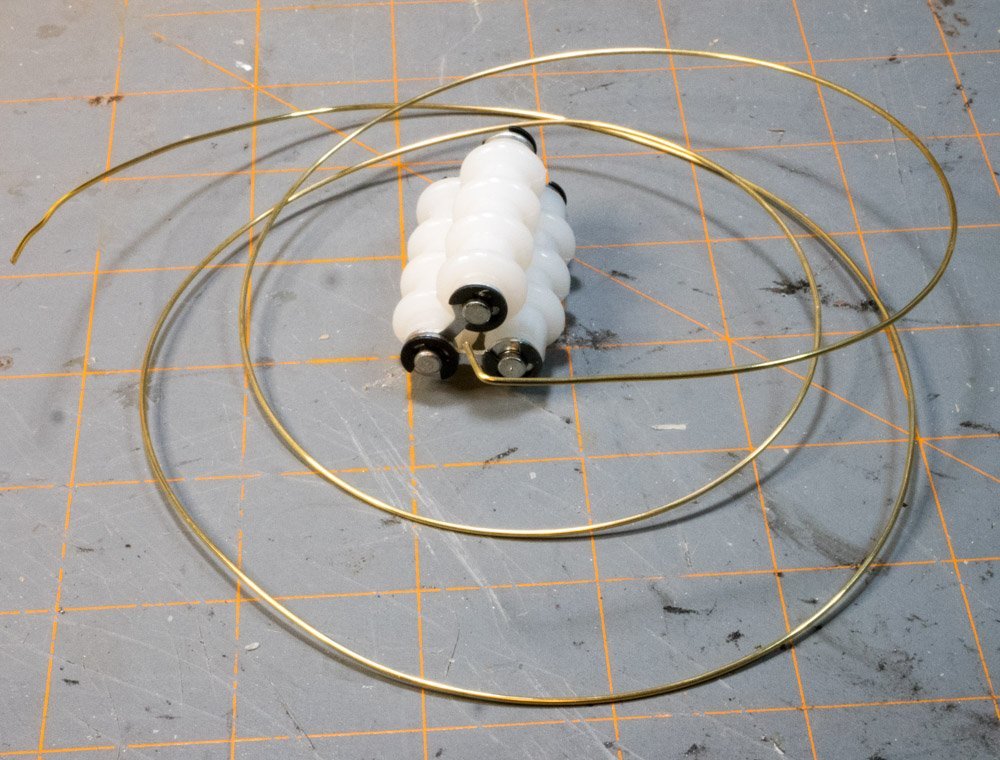
I got a device to straighten the brass coil for the stairway railings, I’m working out how it works. I’m trying to determine measurements for the railings. I want to make a template to help the railings be consistent.
- 128 replies
-
- 2
-
-
- King of the Mississippi
- Artesania Latina
- (and 1 more)
-
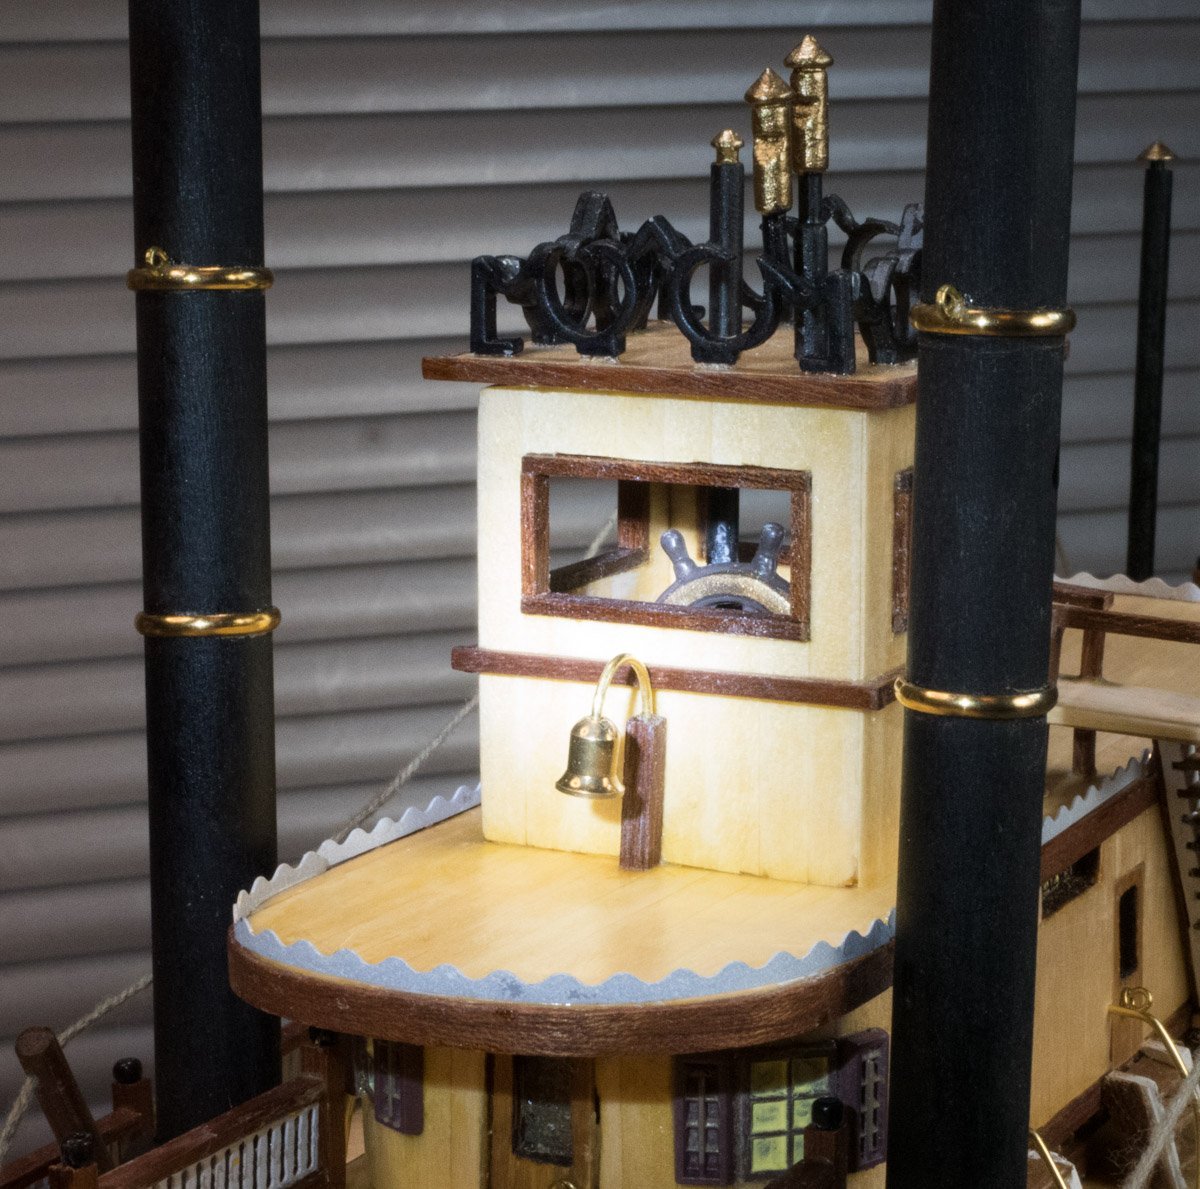
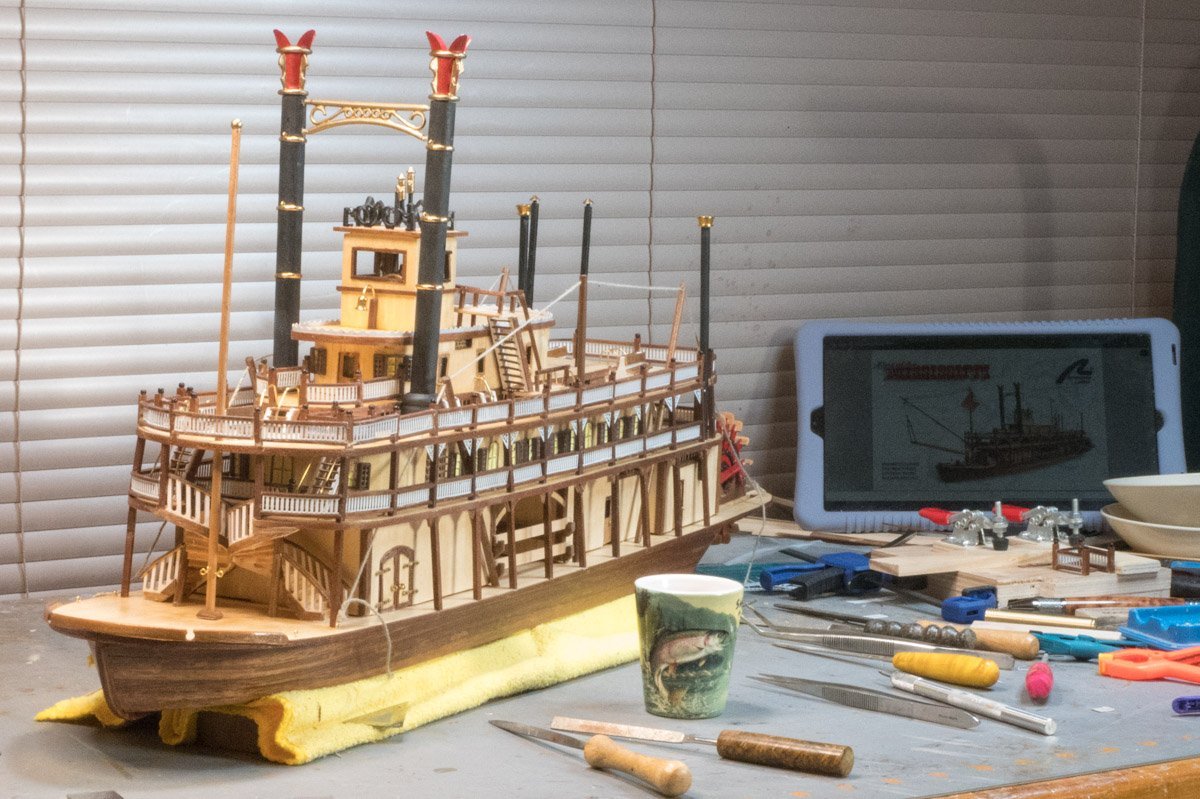
I left off making steps but I ran out of 1mm wood. I picked up a bag of assorted hobby wood (basswood) at Menards and found pieces 1.5mm thick. I had picked up a cool little hand plane last winter where you can adjust the sides to set a height. It took three passes to get some 1mm wood (the tool works fine). I had a lot of breakage with the stair runners, I had to assemble pieces for some of the runners – that was tricky to try and align the stair supports. I stained the steps and added a trim piece on the runners (like I did on the spiral staircase). I realized I needed to make one more, short stairway – I might be able to kludge together another short stairway. But I’m thinking about plan B; I’ve been learning my CNC machine and I think I’ll try making a new piece (just to practice with the machine). I found the wheelhouse crest I lost last spring (it was surprising where the missing piece managed to hide). I installed the wheelhouse and remembered that I attached the rear door piece backward so the platform & stairway goes off the other side of the stateroom. I discovered the wheelhouse stairway is a couple steps taller that the deck stairs.
- 128 replies
-
- 3
-
-
- King of the Mississippi
- Artesania Latina
- (and 1 more)
-
I hadn't thought of adding figures to the model. What scale are they?