

Steve Harvath
-
Posts
59 -
Joined
-
Last visited
Content Type
Profiles
Forums
Gallery
Events
Everything posted by Steve Harvath
-
I have now finished planking the starboard side. I am sure this side will be the non-display side. It was a real learning experience and I think I can do much better on the port side. Finding the right clamps and places to clamp was hard on some of the planks.

-
I am finally back to the build of the Albert Baldwin. After a cross country move and discouraging false starts on planking. I have been following the tutorials and think I am making progress. I steamed the bow end of the first plank and it seems to fit well.
-
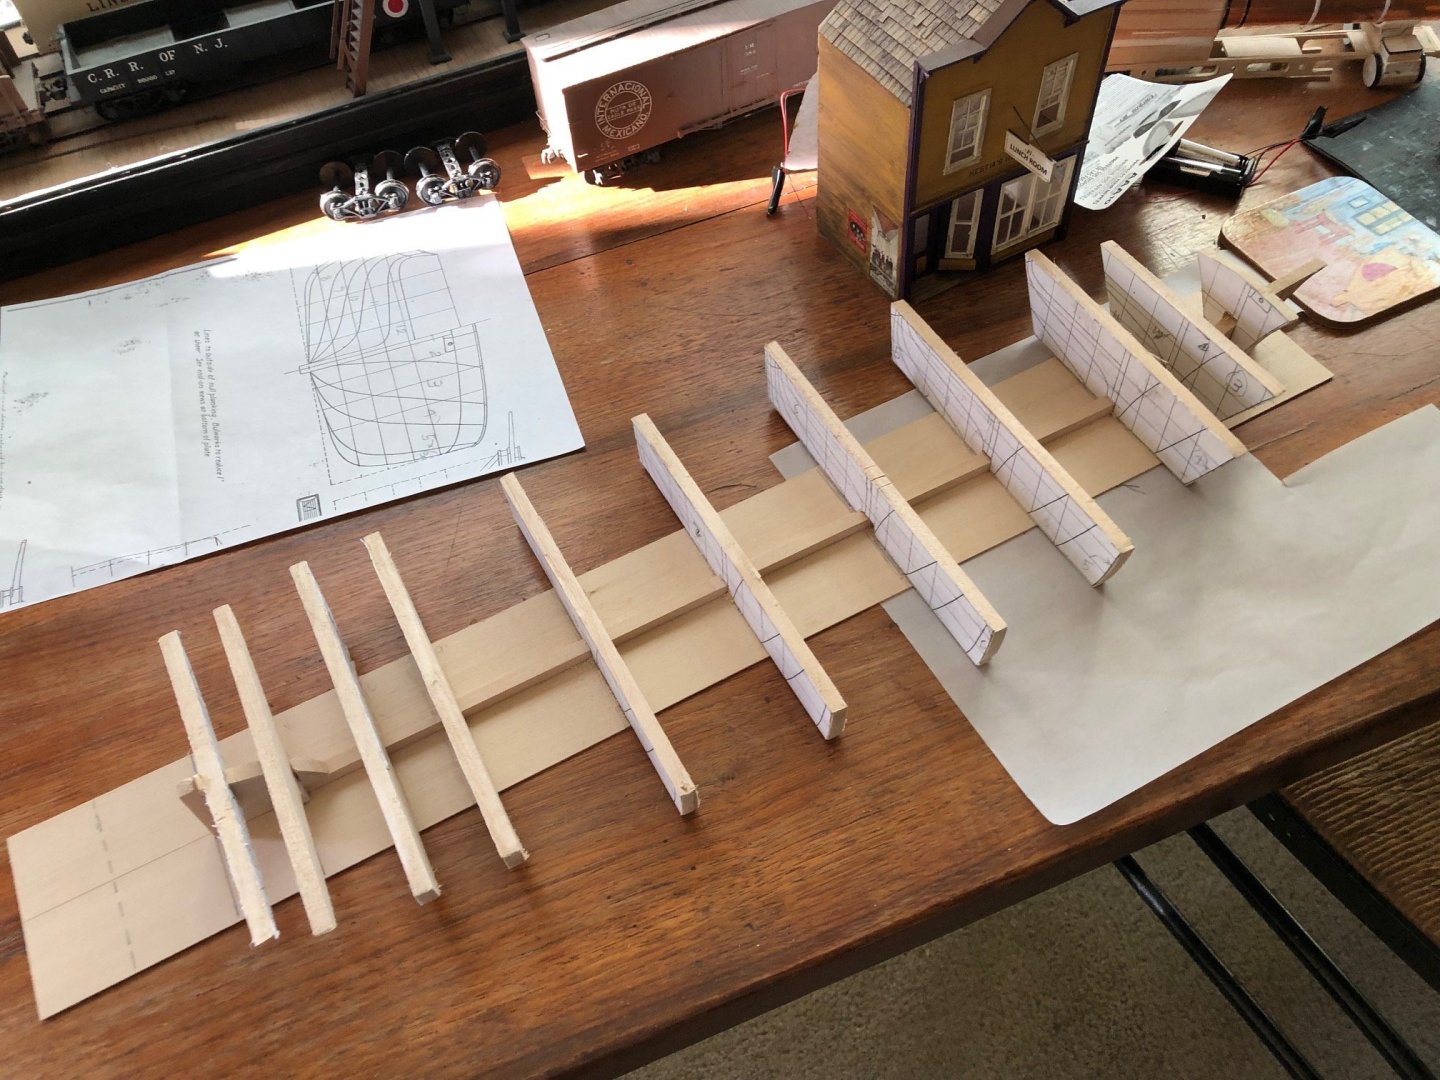
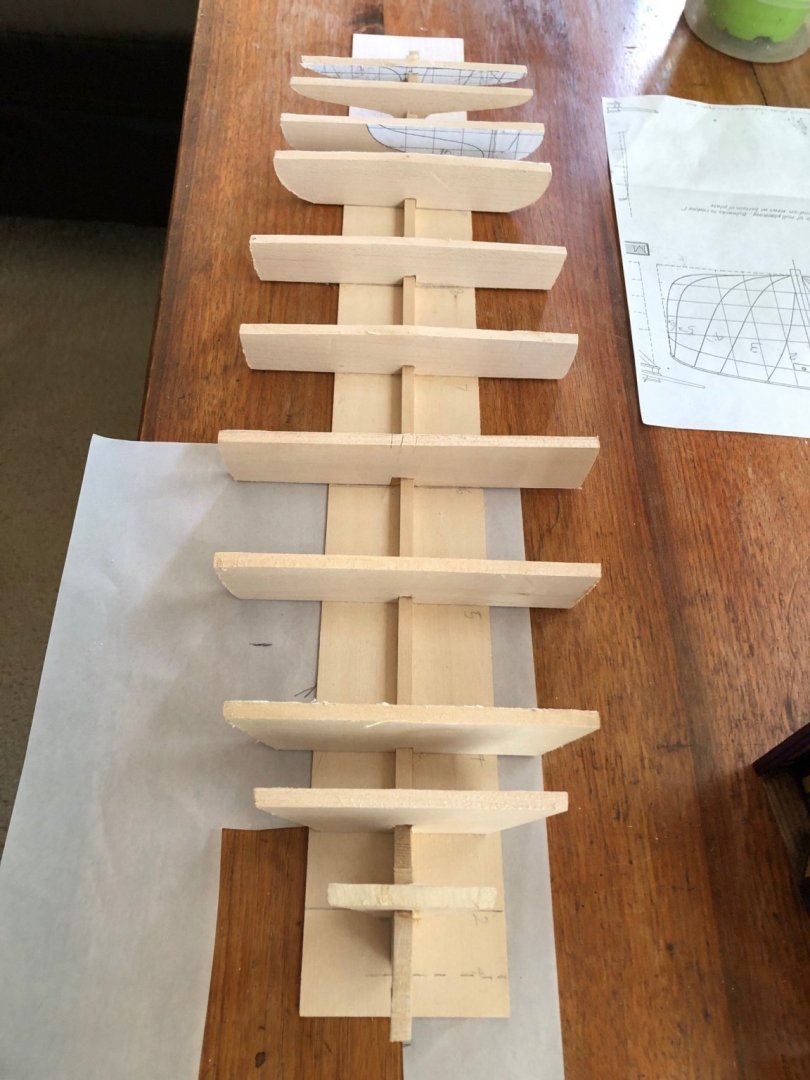
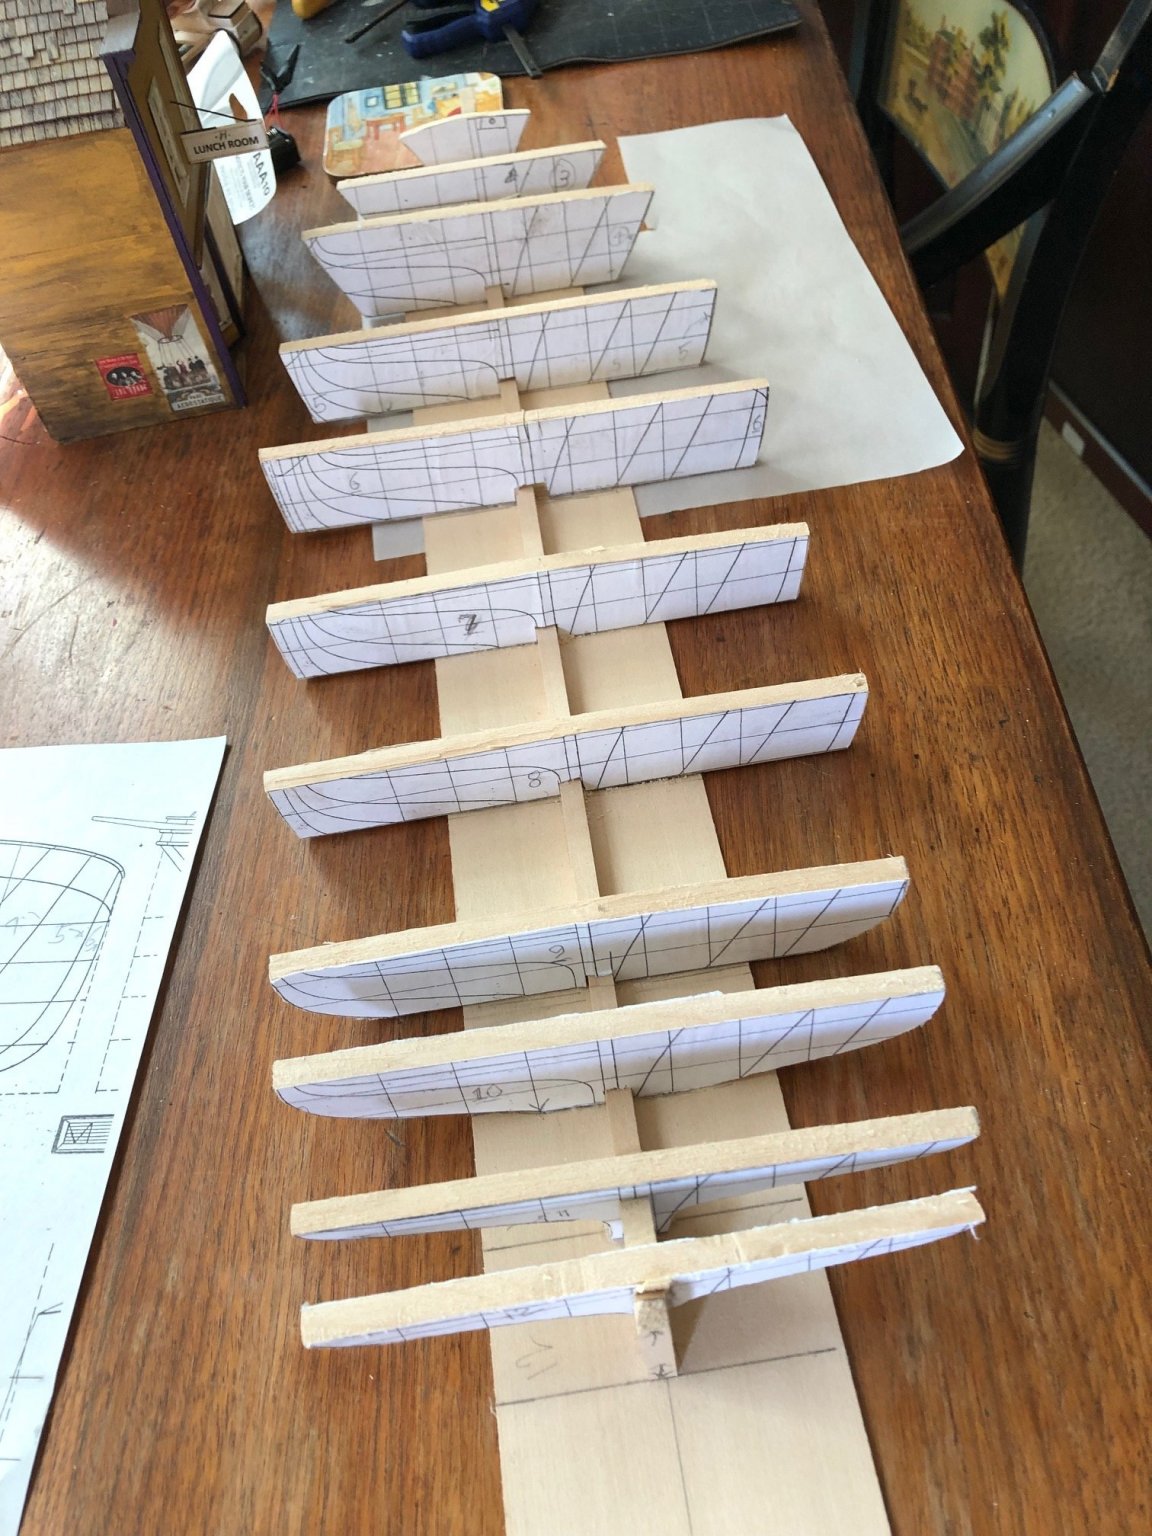
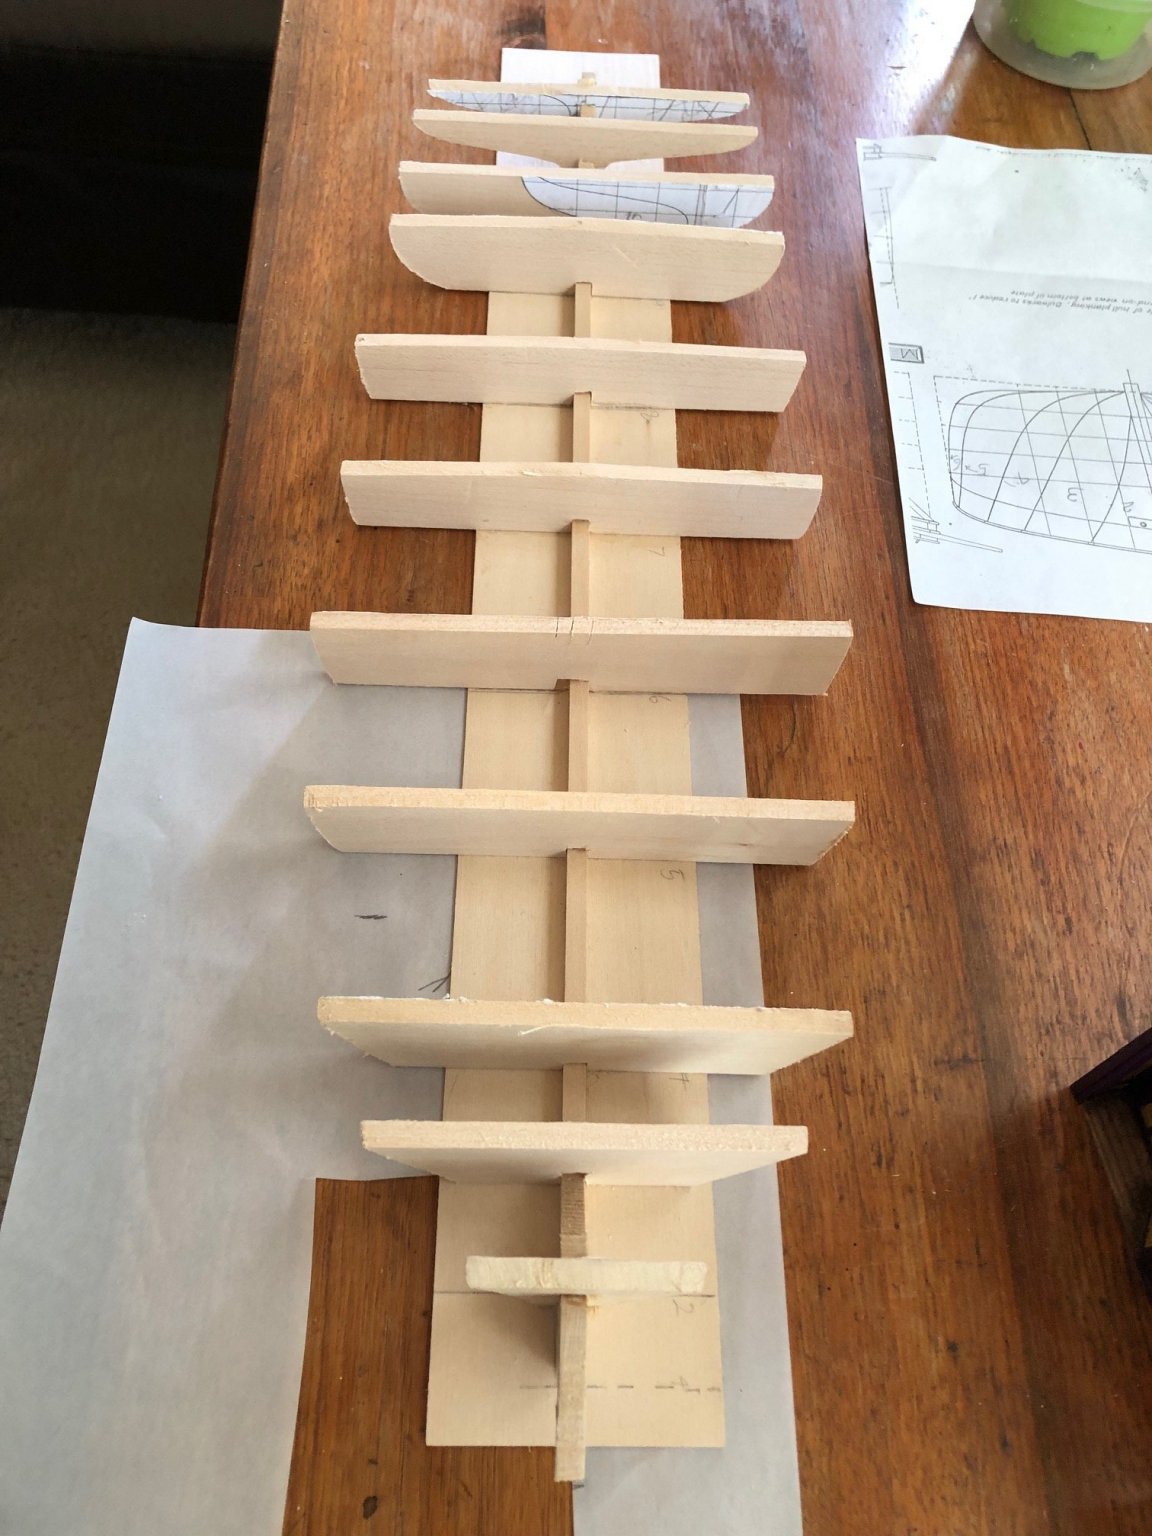
After looking at the tutorials I decided I had better fill in the fore and aft sets of bulkheads to create good surfaces for bonding the more radically curved hull planks. It was kind of labor intensive as it required a lot of fitting and sanding.


-
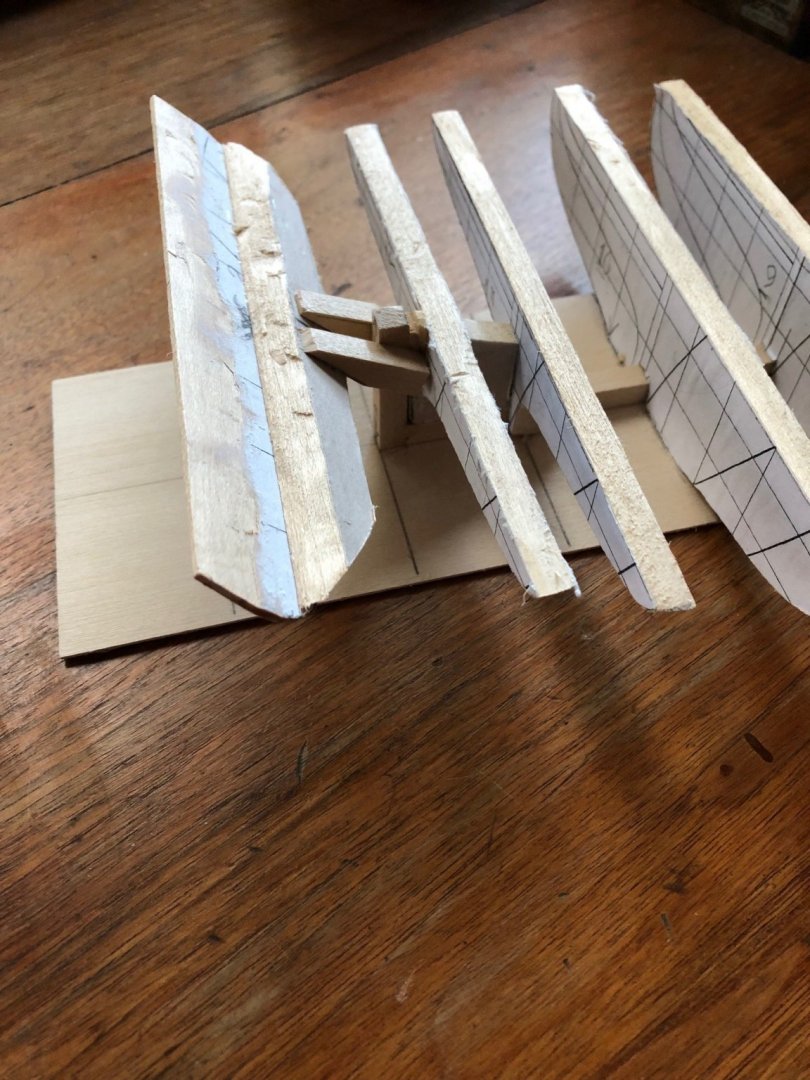
I built a sort of strut system to support the transom. Still needs a lot of fairing or truing up.
-
Here are some progress pictures -- false starts and all. I still have to correct and true up some of the bulkheads. How should I attach the transom?

-
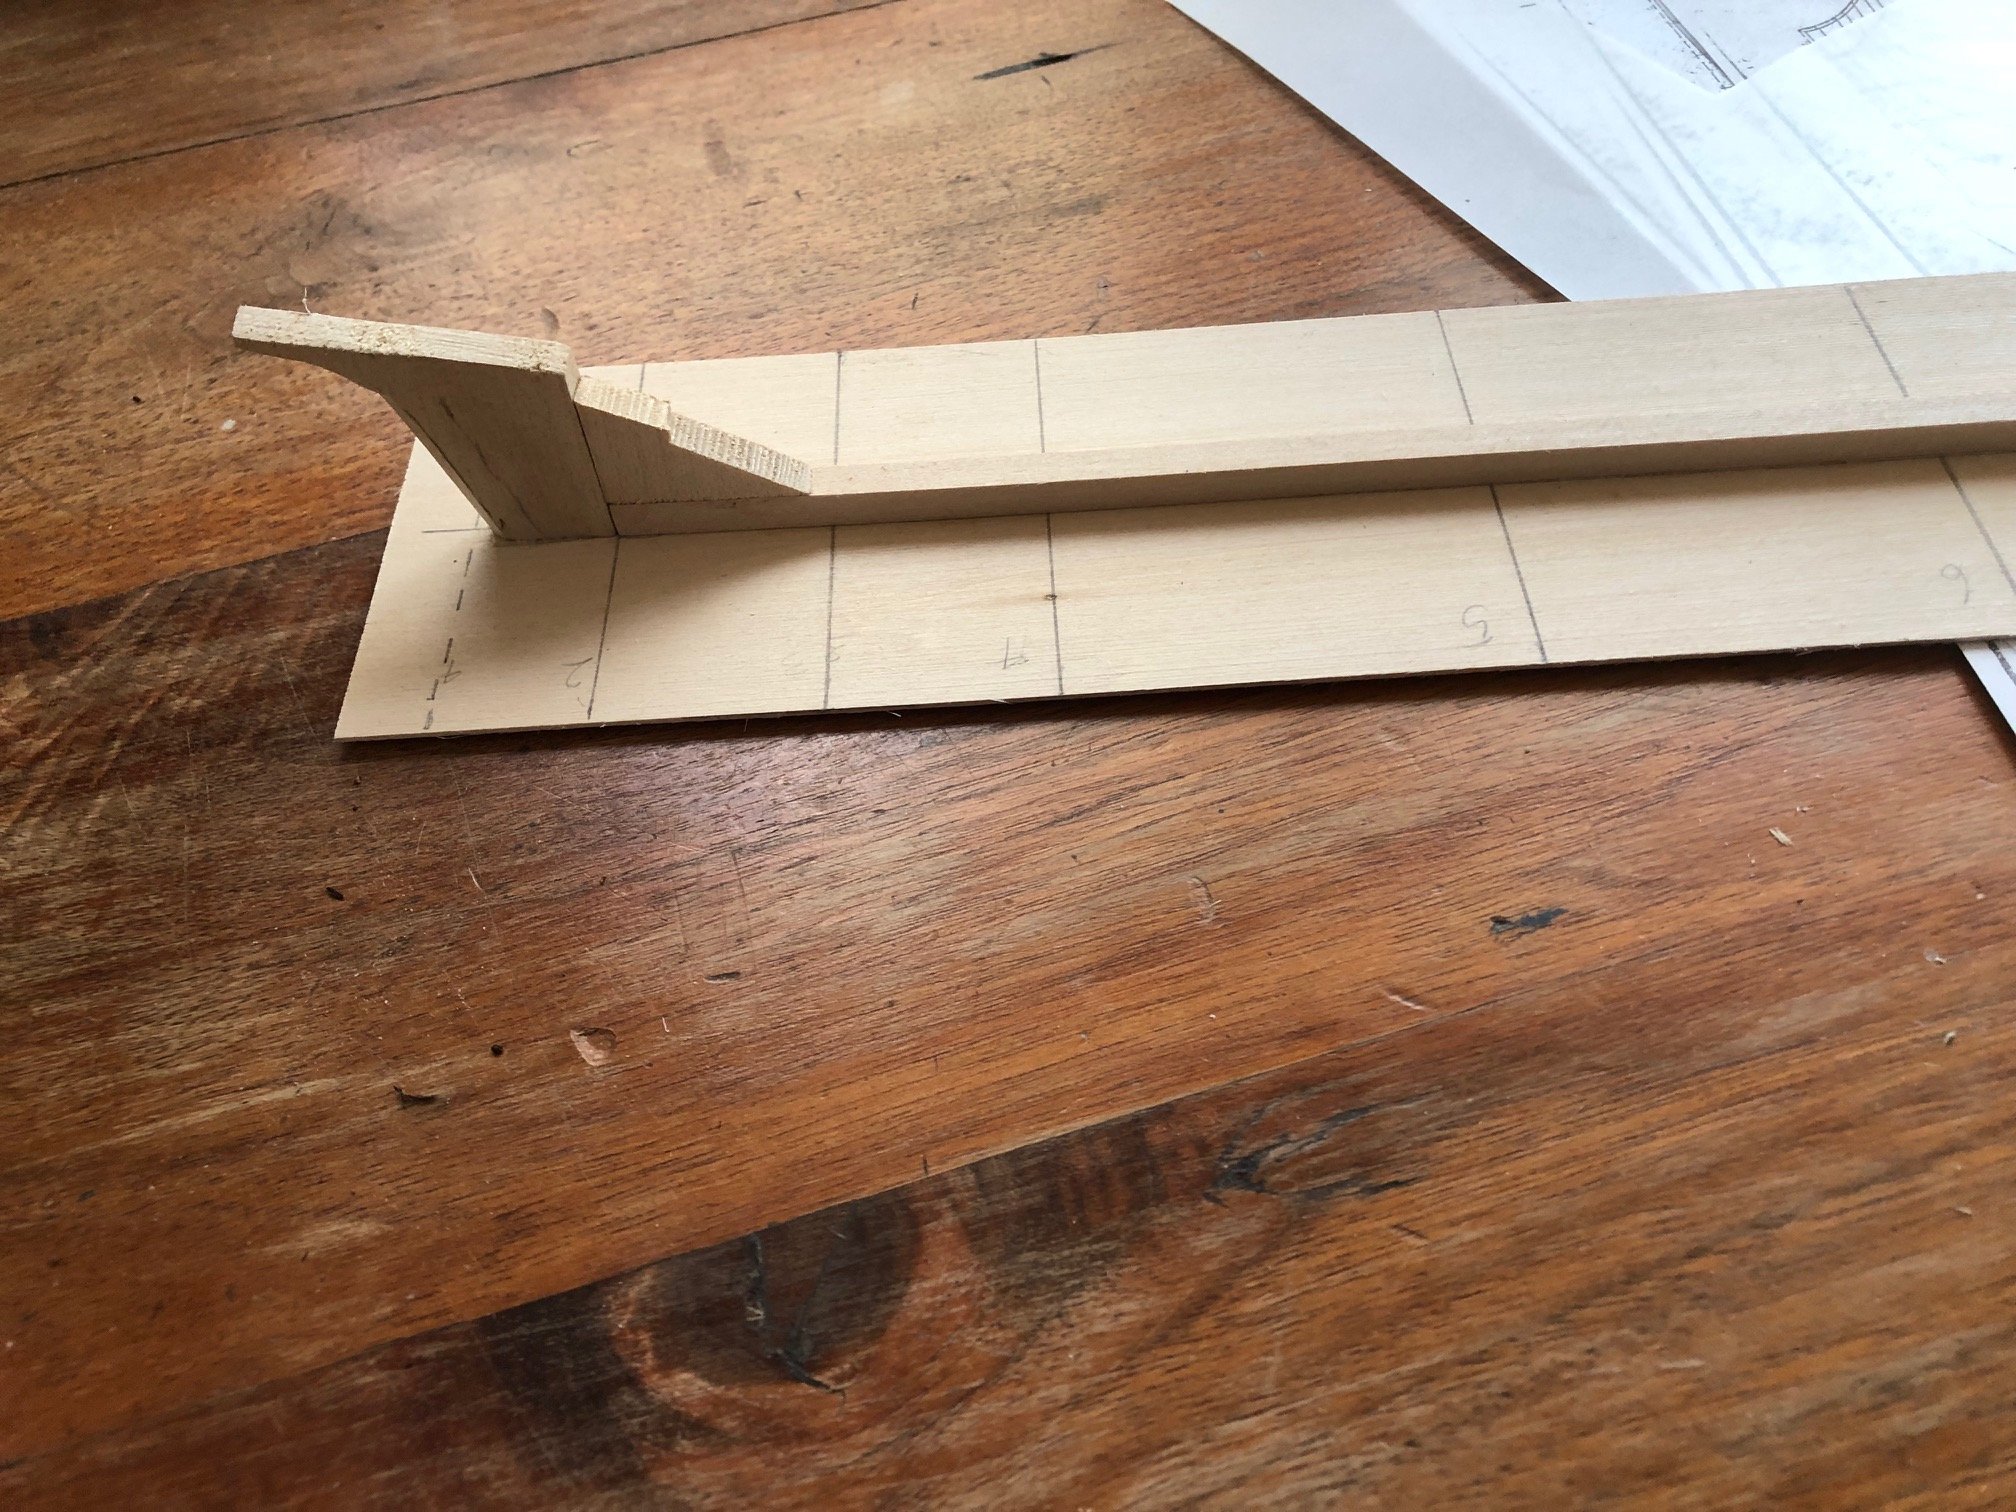
I mounted the stem on a thin Basswood sheet along with a 1/4" bass wood false keel to keep things aligned.

-
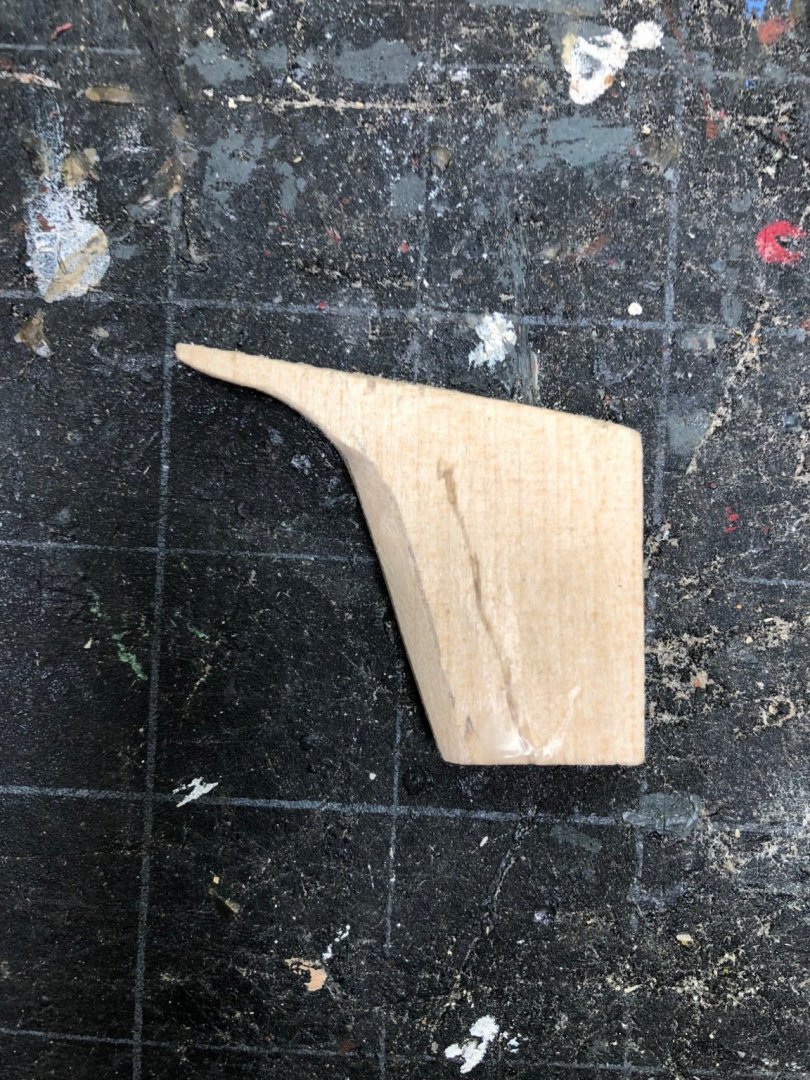
Chris, Stockton CA is still interesting. I love having a deep water port with several bulk carriers a week and a purpose built ship that just carries super long lengths of railroad rail. I traced the stem shape onto some vellum. I used white carpenter's glue to glue it to a 1/4 thick piece of Basswood. Coping saw, sandpaper and knife were used to carve it out.
-
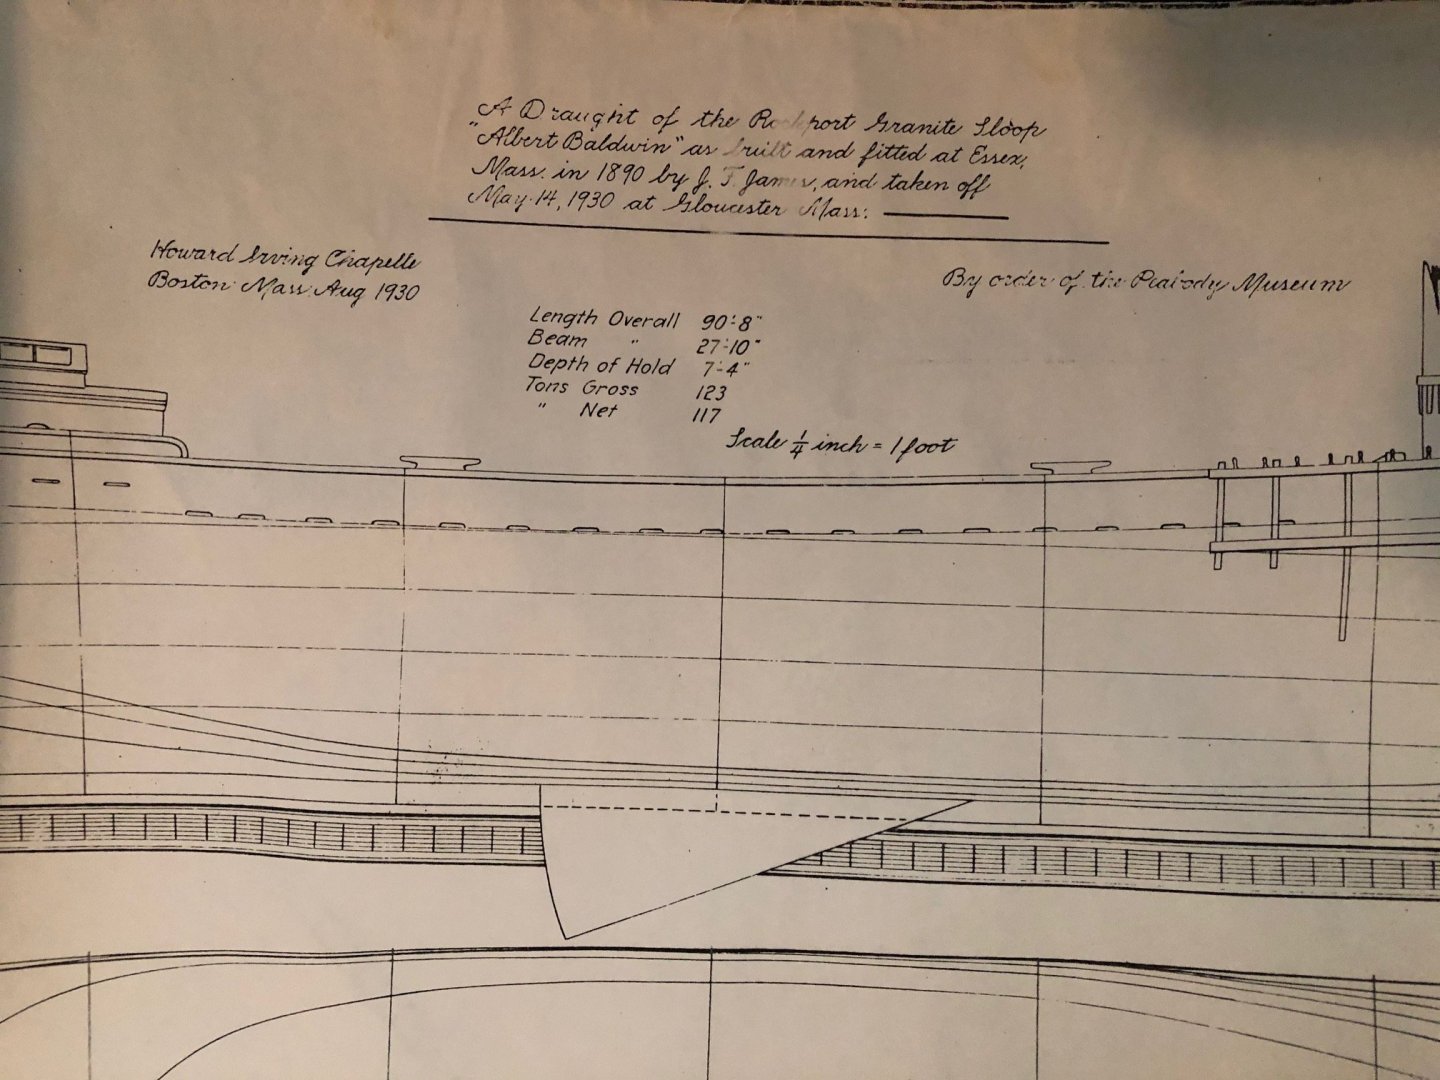
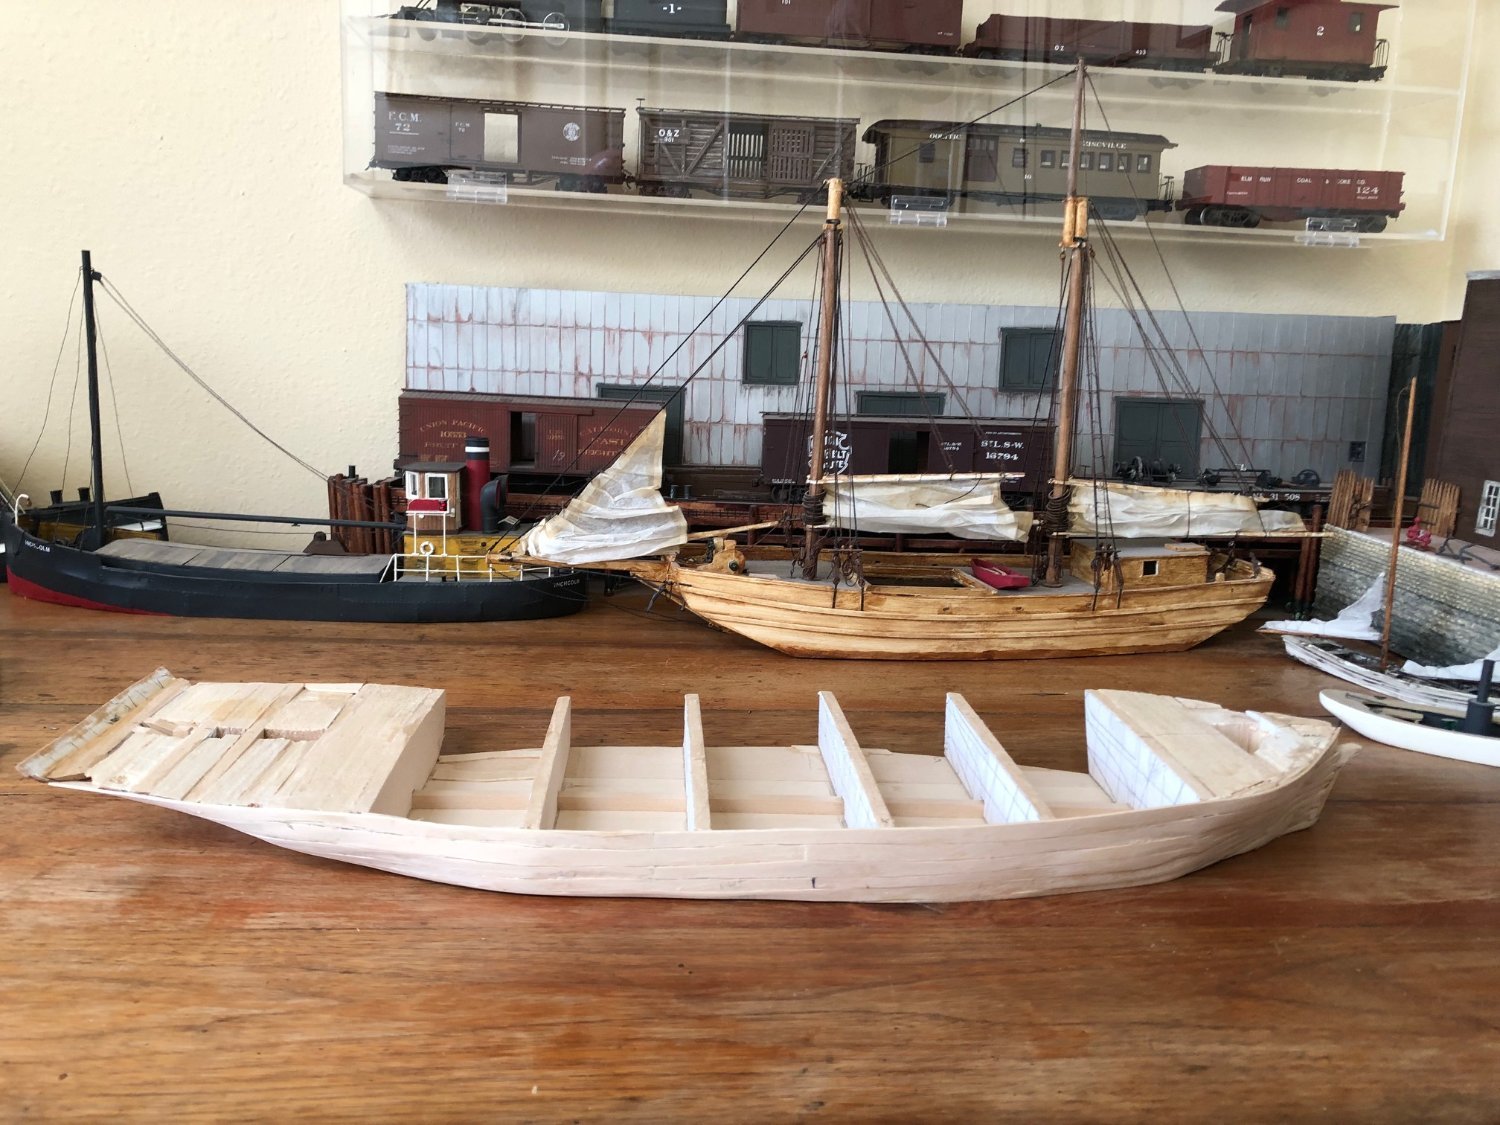
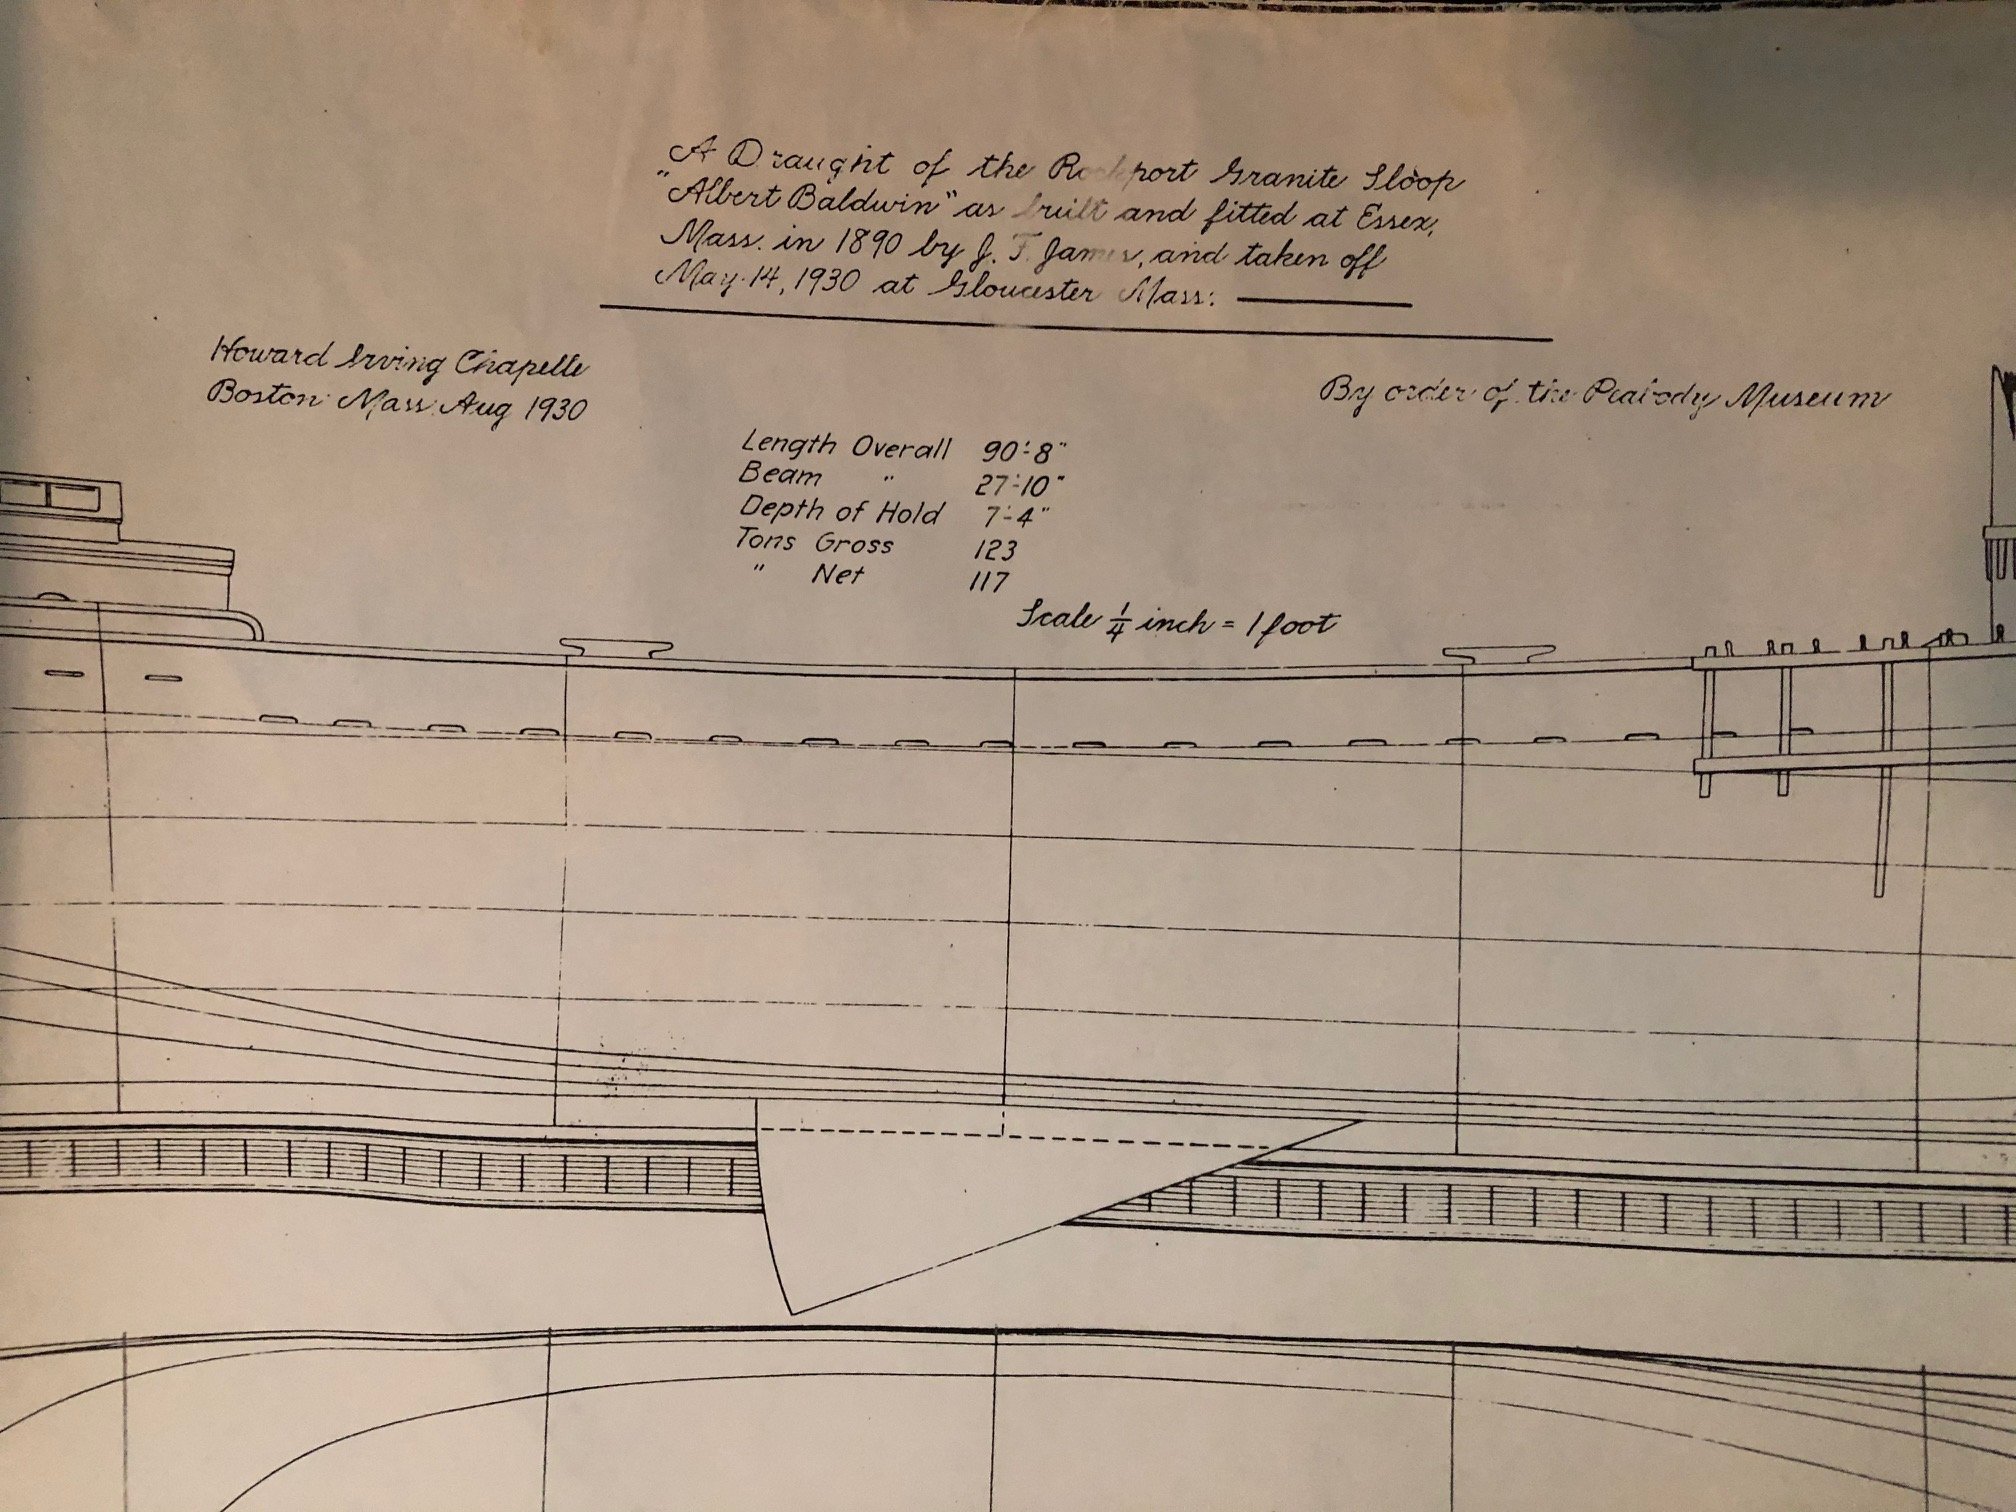
I have decided to build a waterline model of the granite sloop Albert Baldwin ca. 1890. It will fit in my harbor scene of the same period. The other craft and the wharf and railroad transfer bridge in the diorama are built to 1 inch equals 48 inch scale. I have the plans which are conveniently 1/4 inch to the foot scale. These are from 1930 by Howard Chapelle. I am planning on challenging myself and build it plank on bulkhead.
-
Very nice. I love that you are modeling a kind of watercraft would never have been in preservation. Dusty, everyday working craft that are hauled around a harbor. Contemporary commentators paid little attention to them because they were just there doing their jobs on the waterfront. I wonder if those grain barges came from the midwest via the Erie canal.
-
bateau 1881 by Steven Harvath
Steve Harvath replied to Steve Harvath's topic in - Build logs for subjects built 1851 - 1900
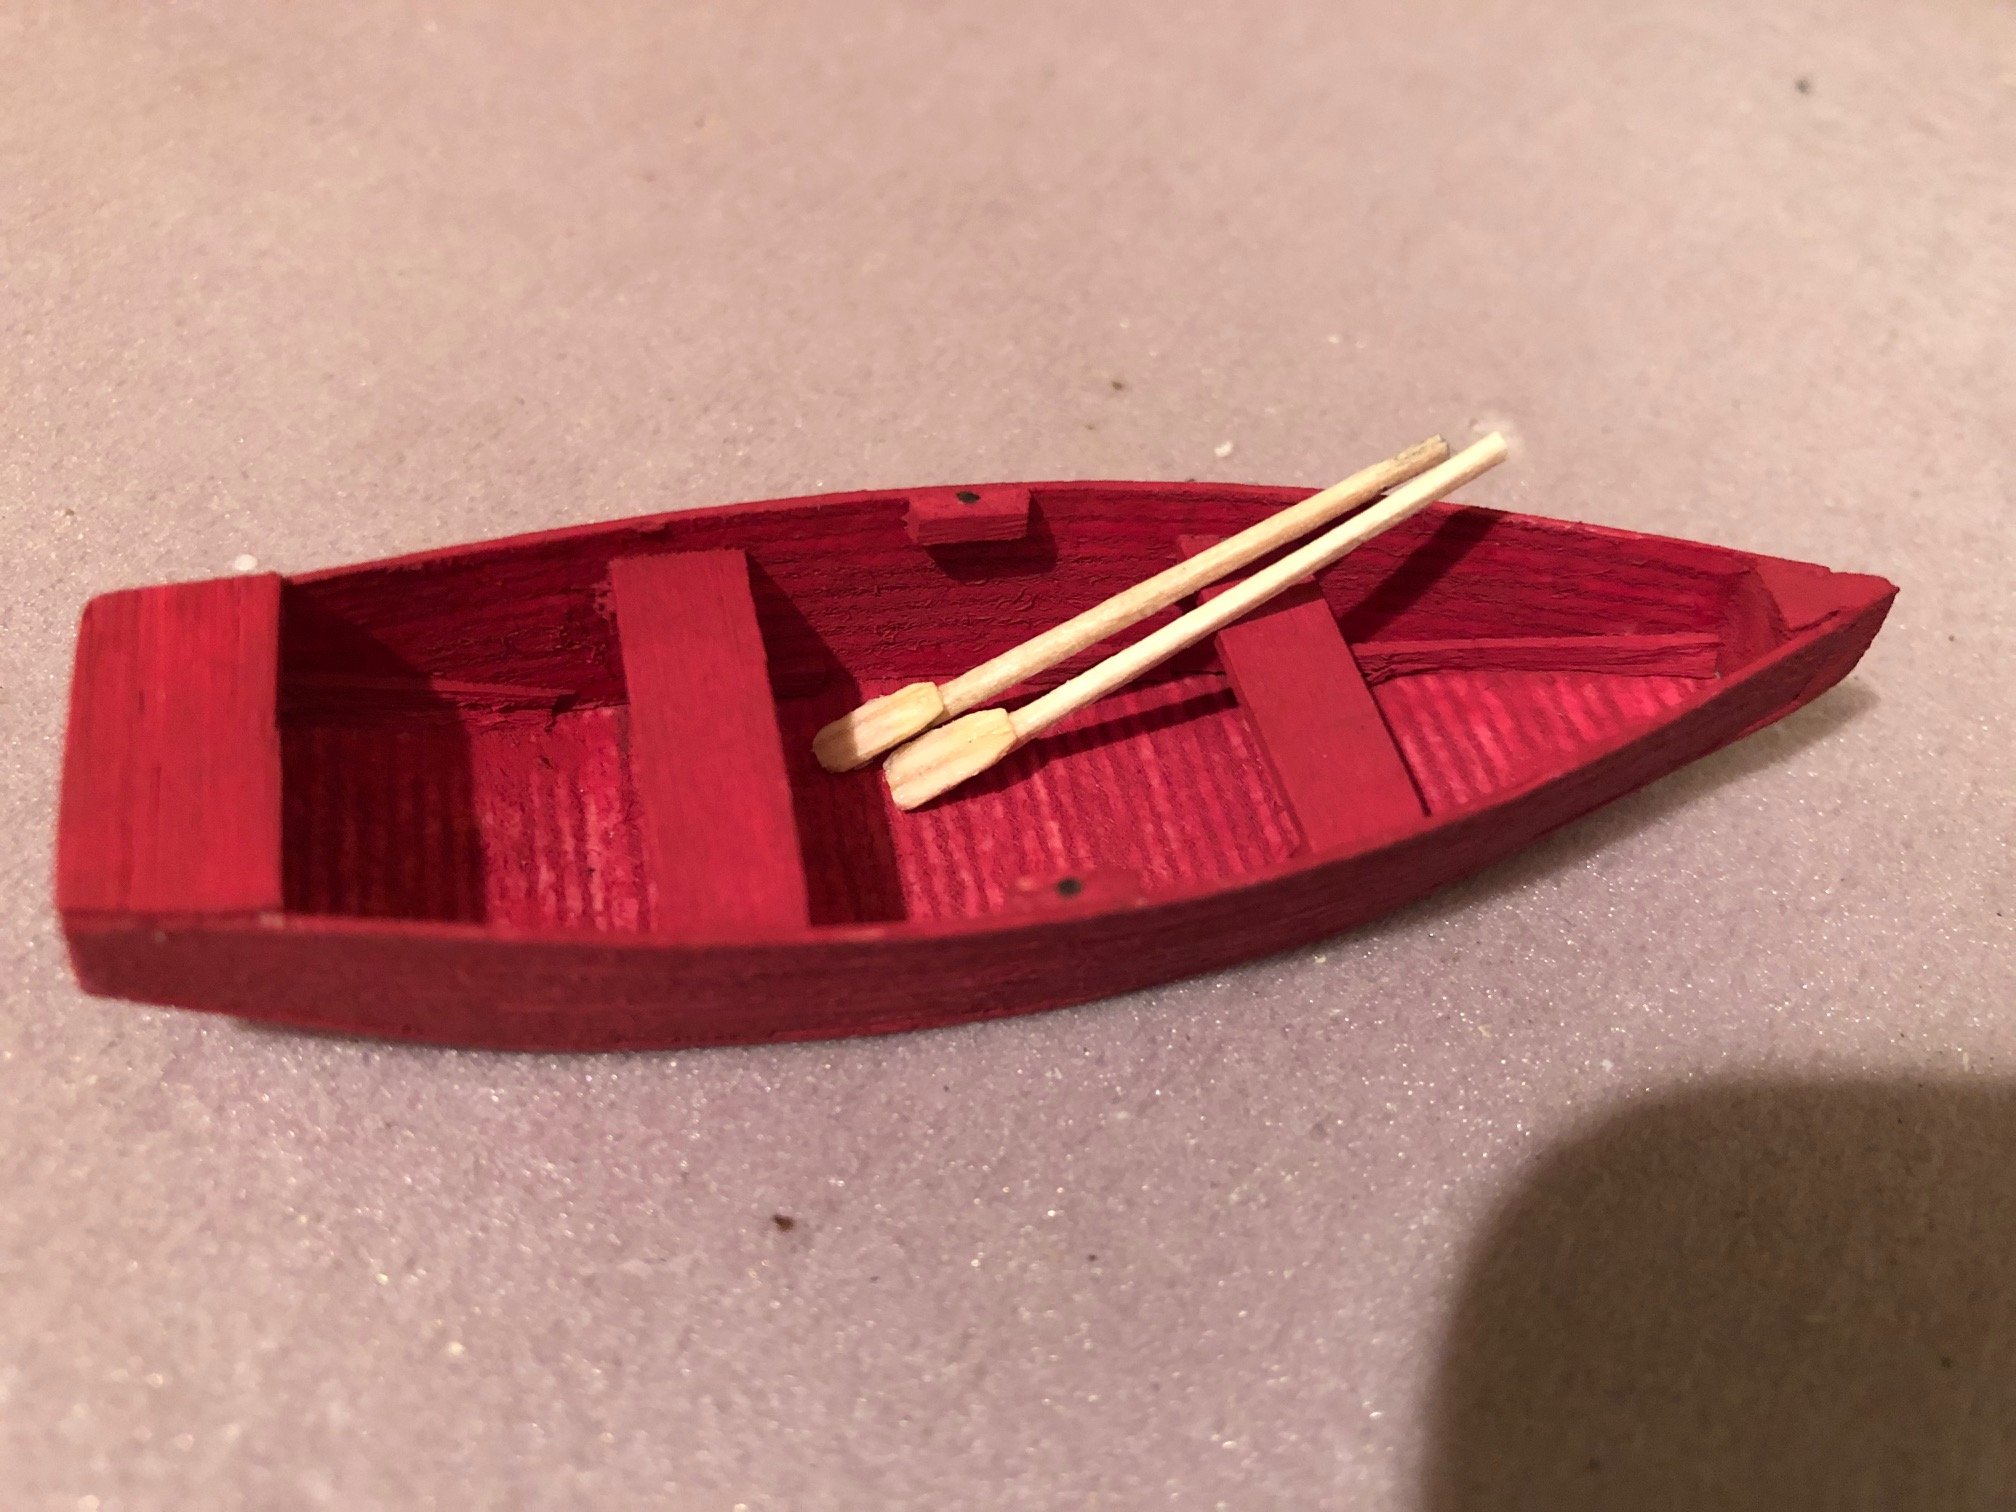
The instructions say to paint it to the builder's fancy. So I painted it red.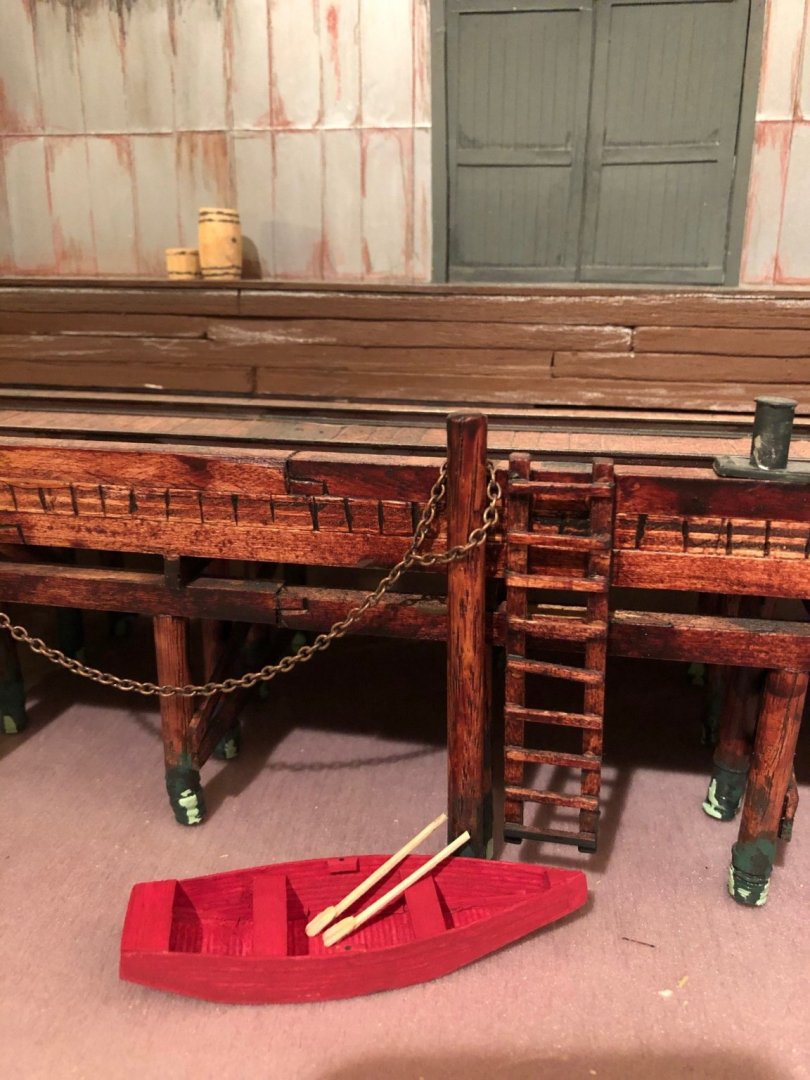

-
bateau 1881 by Steven Harvath
Steve Harvath replied to Steve Harvath's topic in - Build logs for subjects built 1851 - 1900
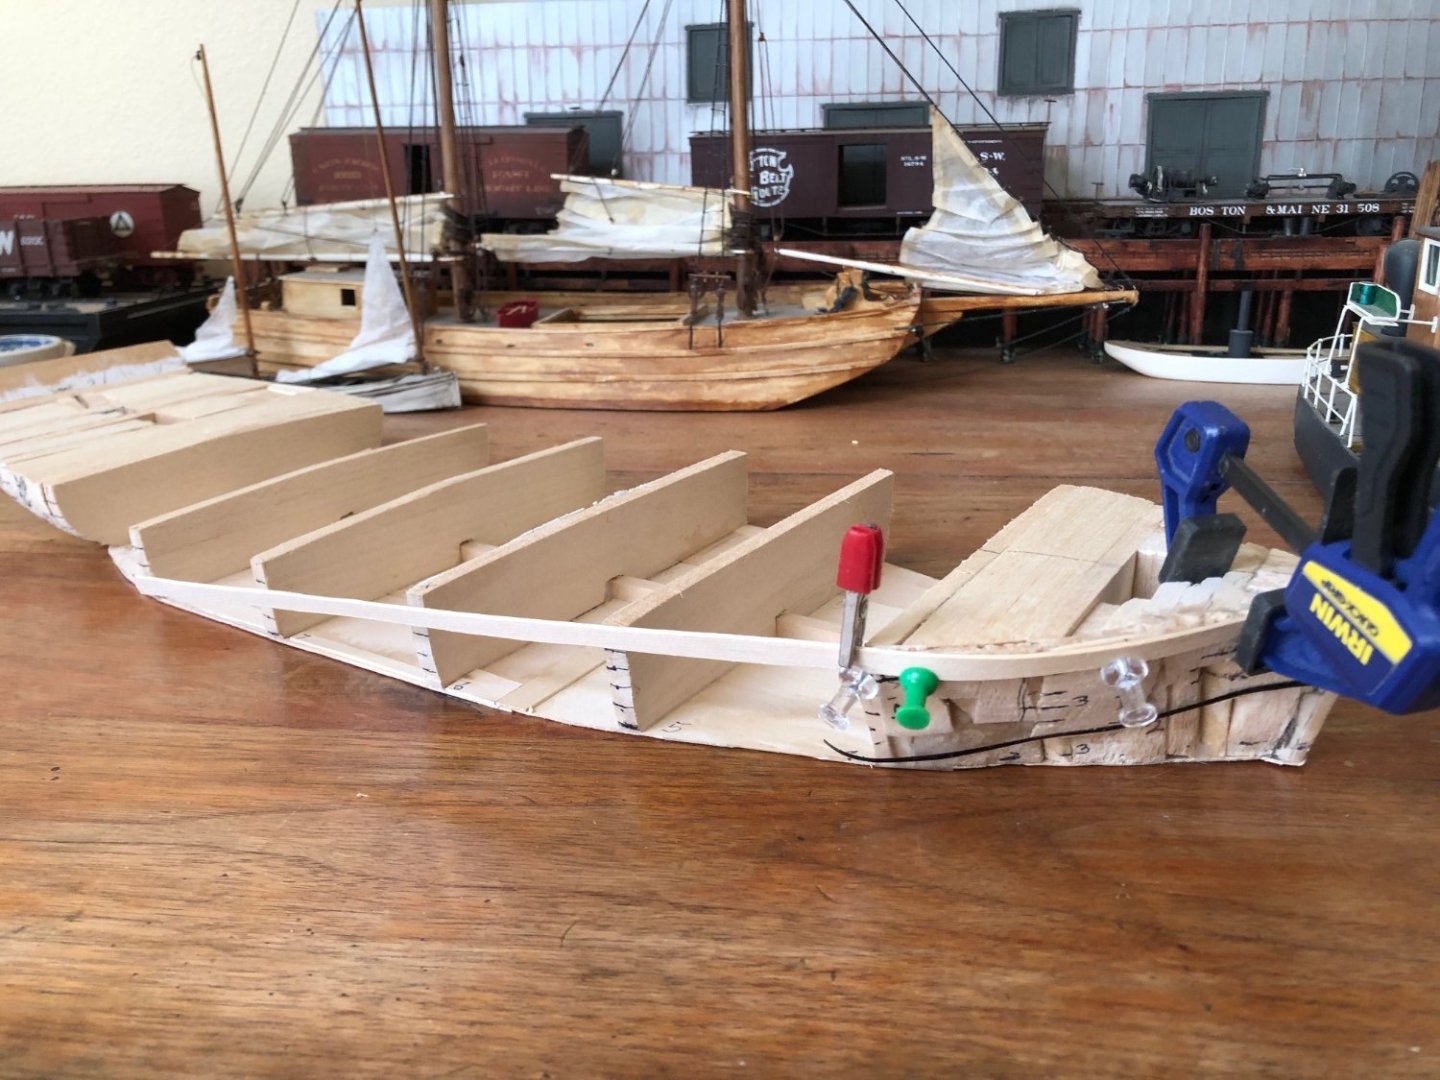
The seats are in. They are made of 1/32 basswood. I made them longer than the width of the boat so that they would serve to spread out the sides in a graceful way. The bamboo sides bent quite easily. Now I need to add some small side boards for the oar locks and make some oars.
-
bateau 1881 by Steven Harvath
Steve Harvath replied to Steve Harvath's topic in - Build logs for subjects built 1851 - 1900
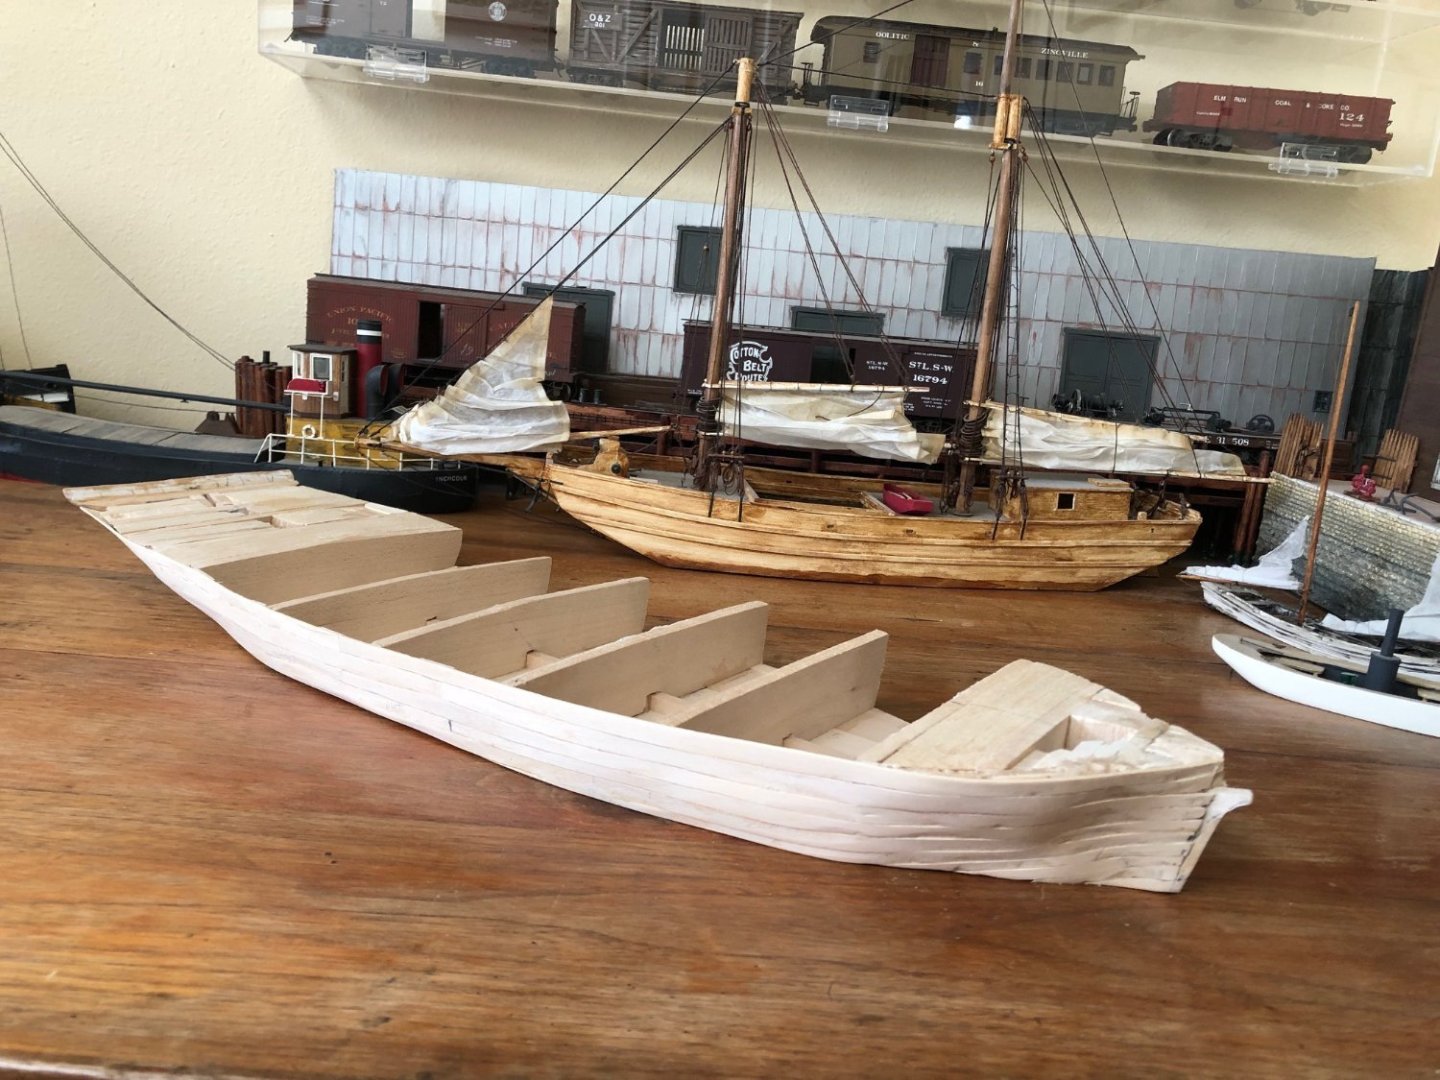
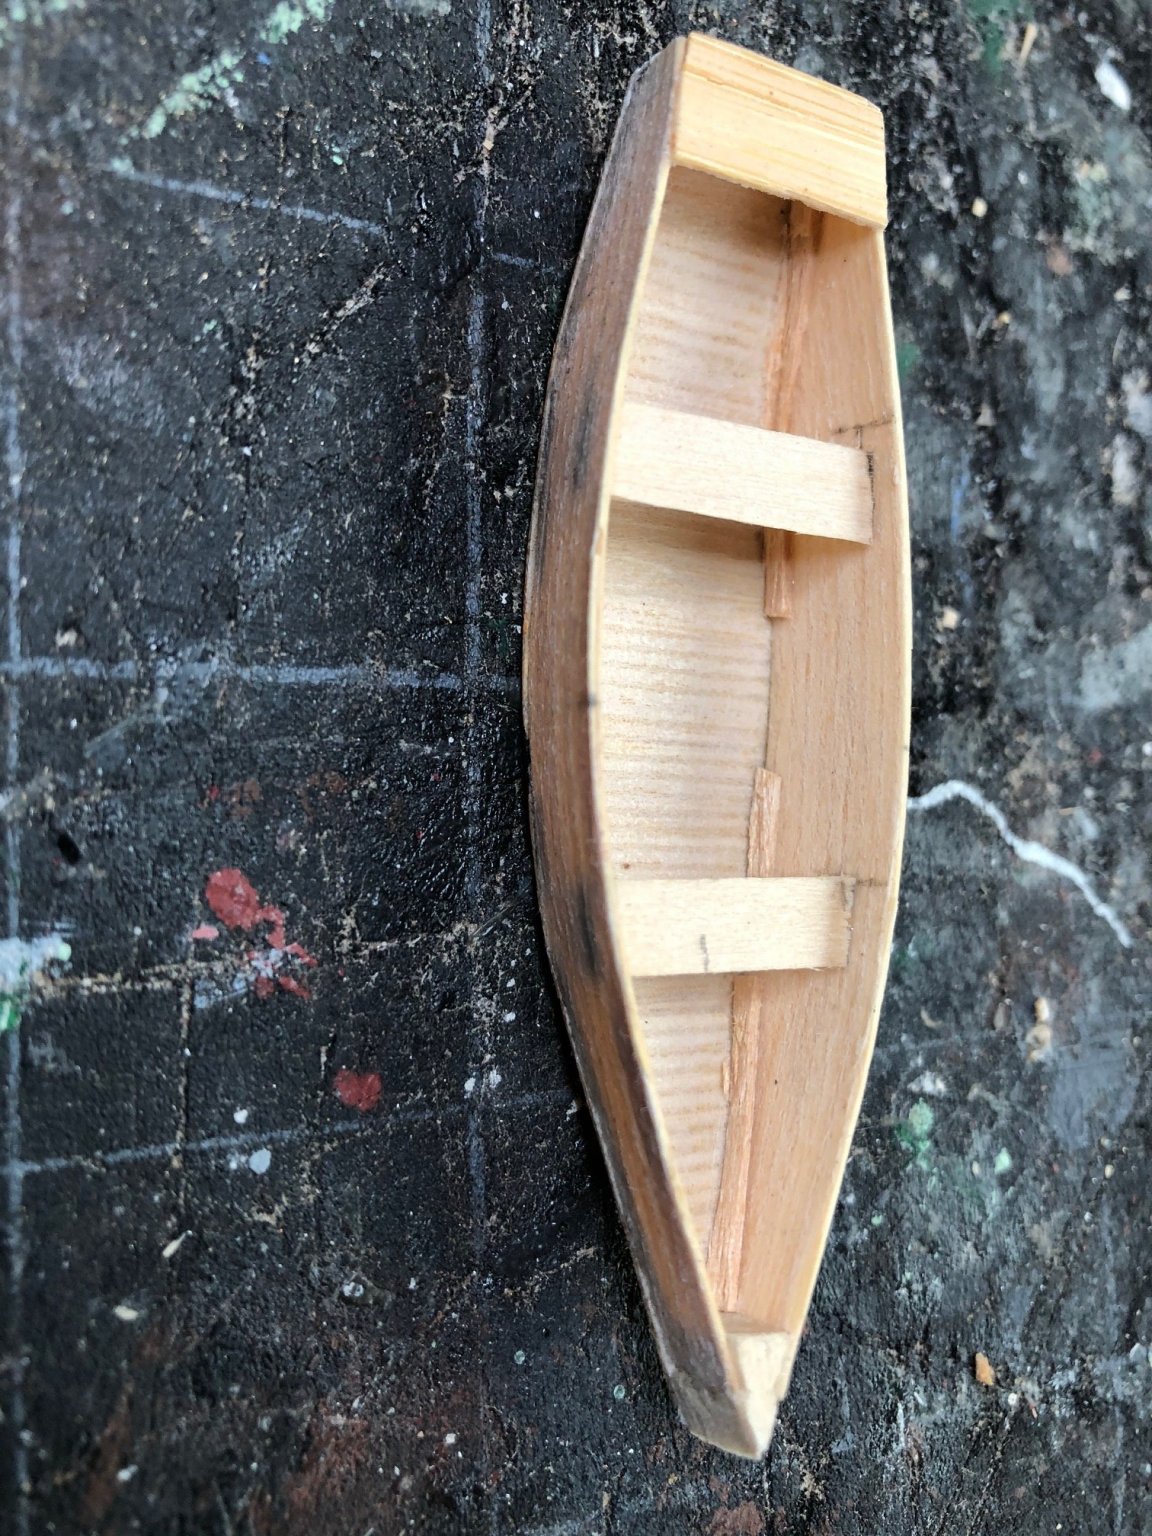
I glued the floor on. I added some pieces where the sides and bottom meet so the glue bond would be better. I have been able to thin these back a bit after the glued dried so they are less obvious.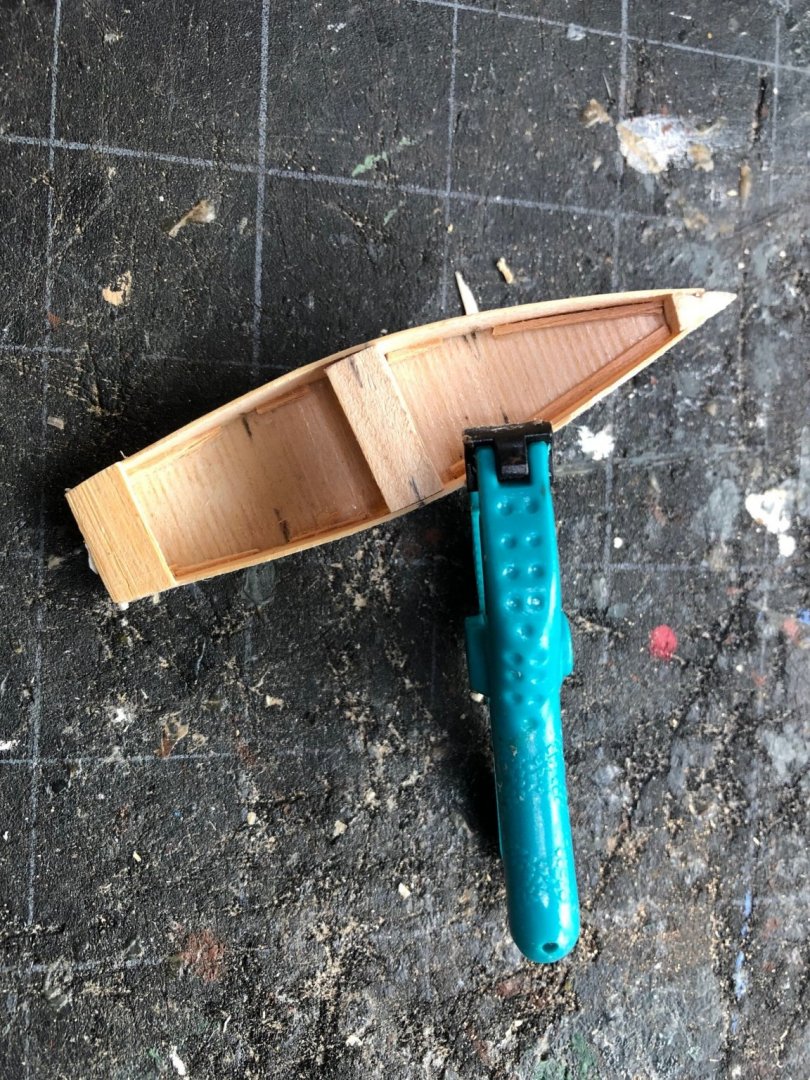
-
bateau 1881 by Steven Harvath
Steve Harvath replied to Steve Harvath's topic in - Build logs for subjects built 1851 - 1900
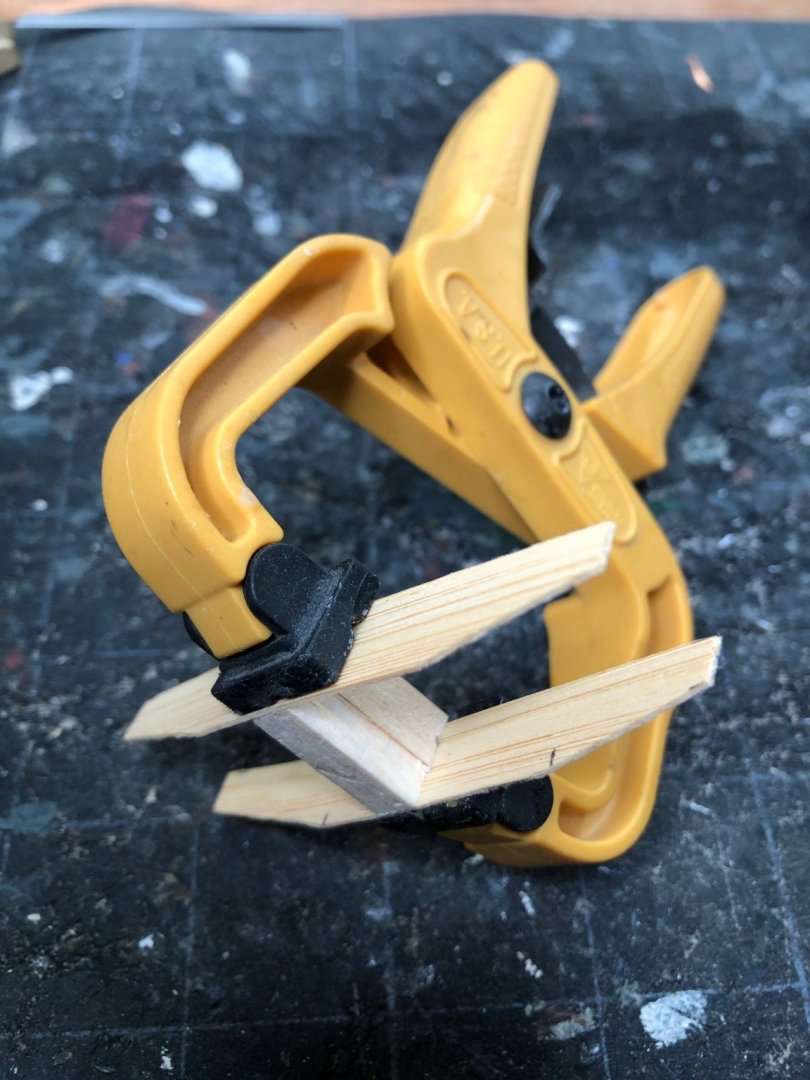
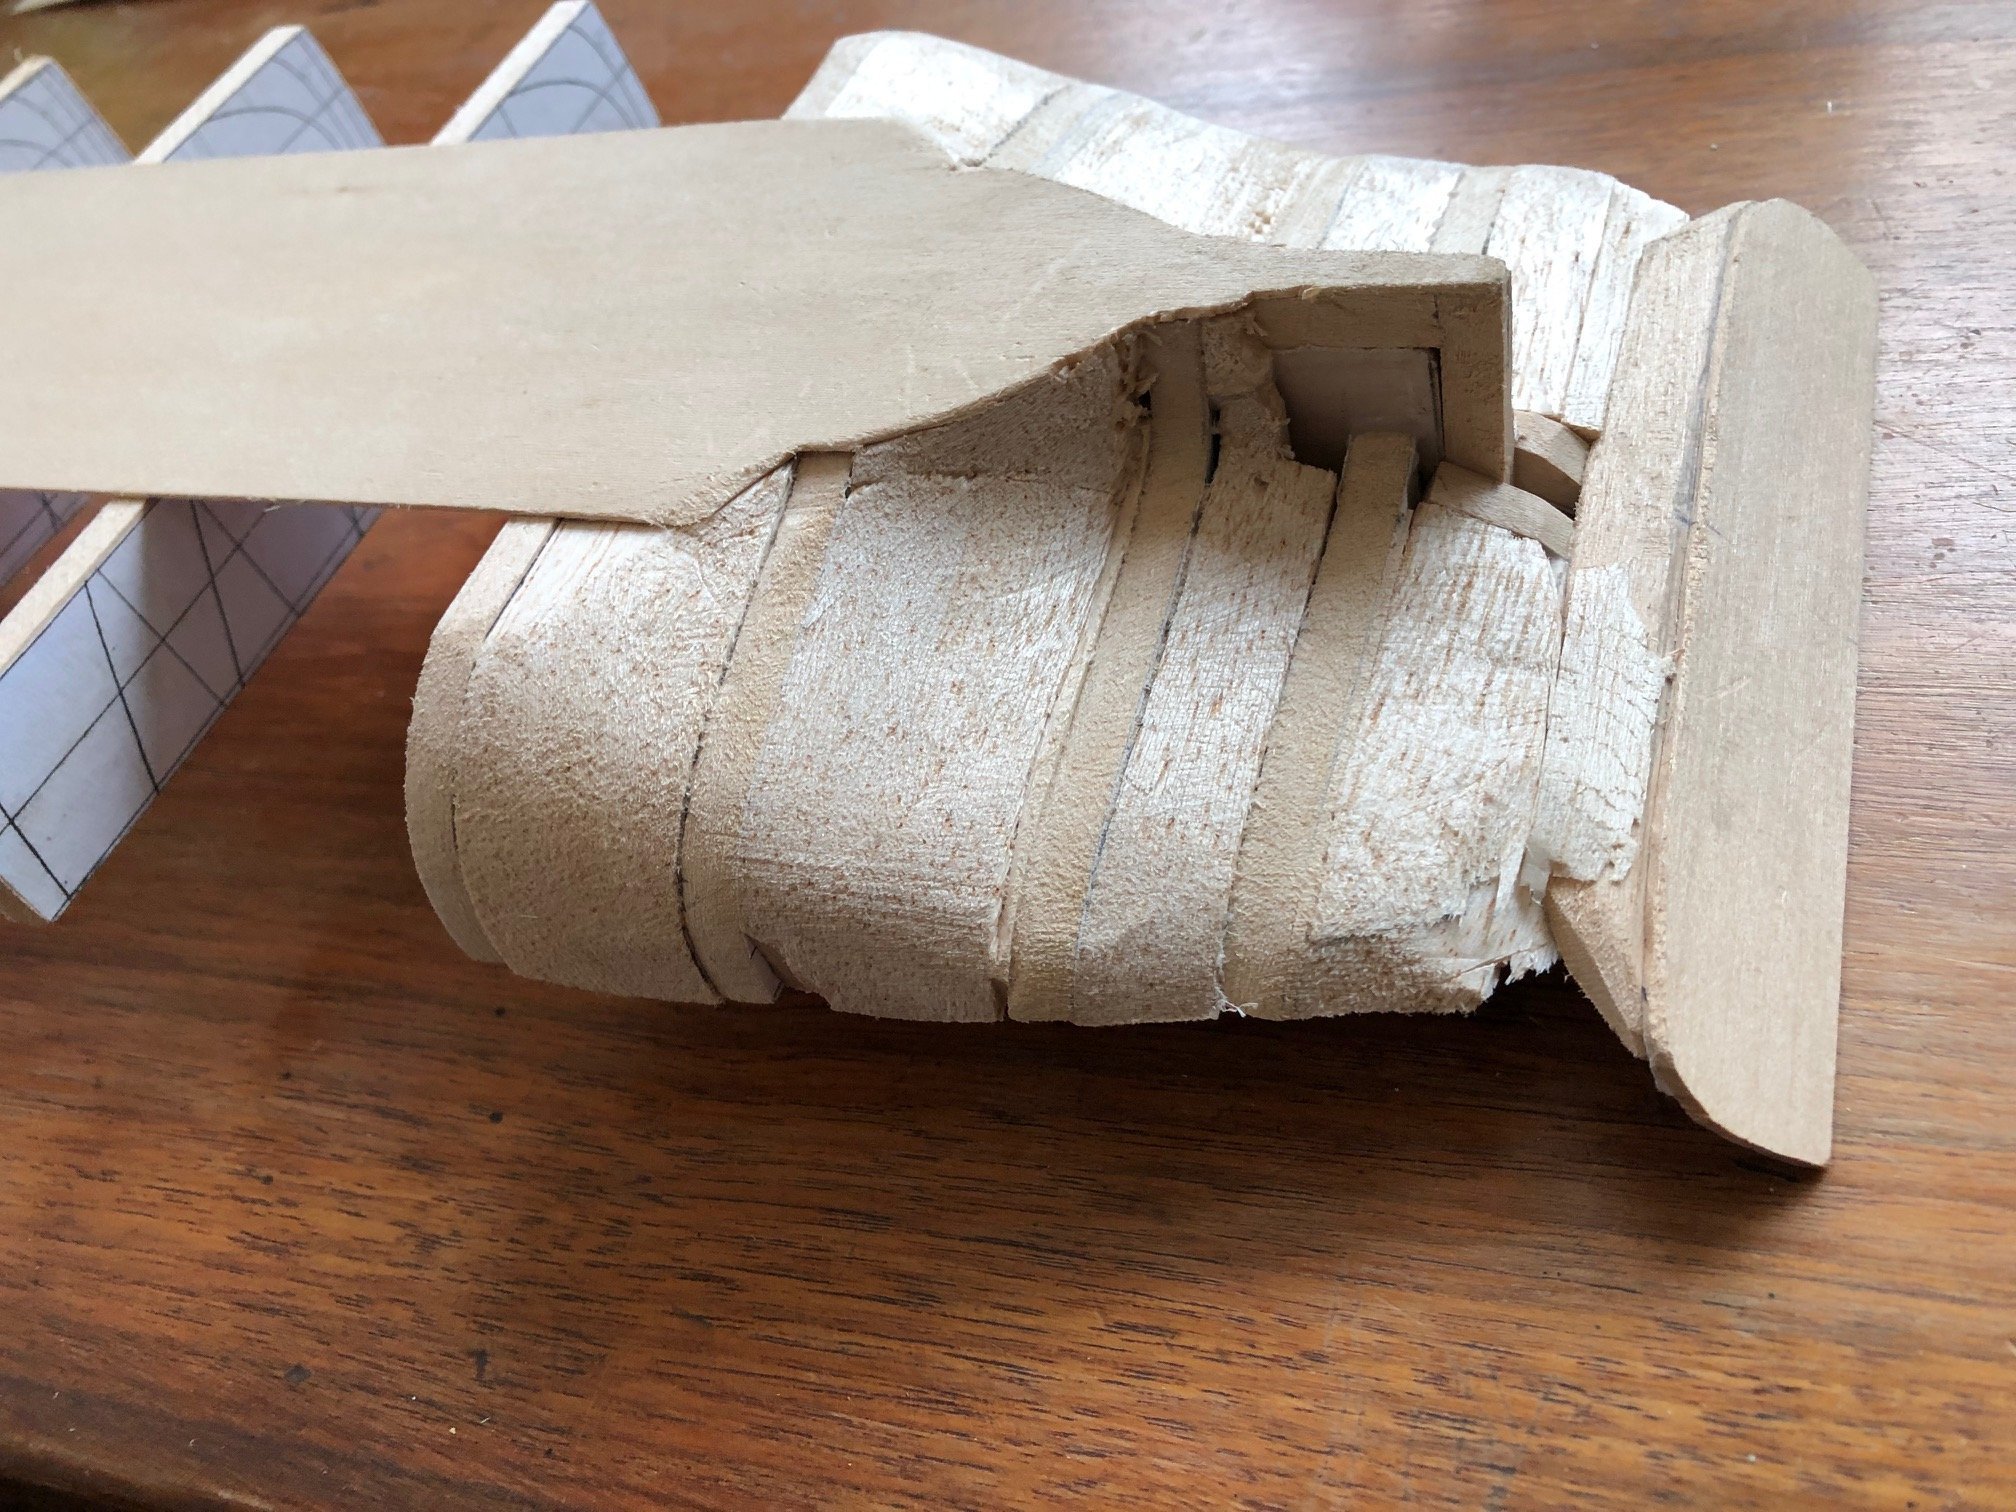
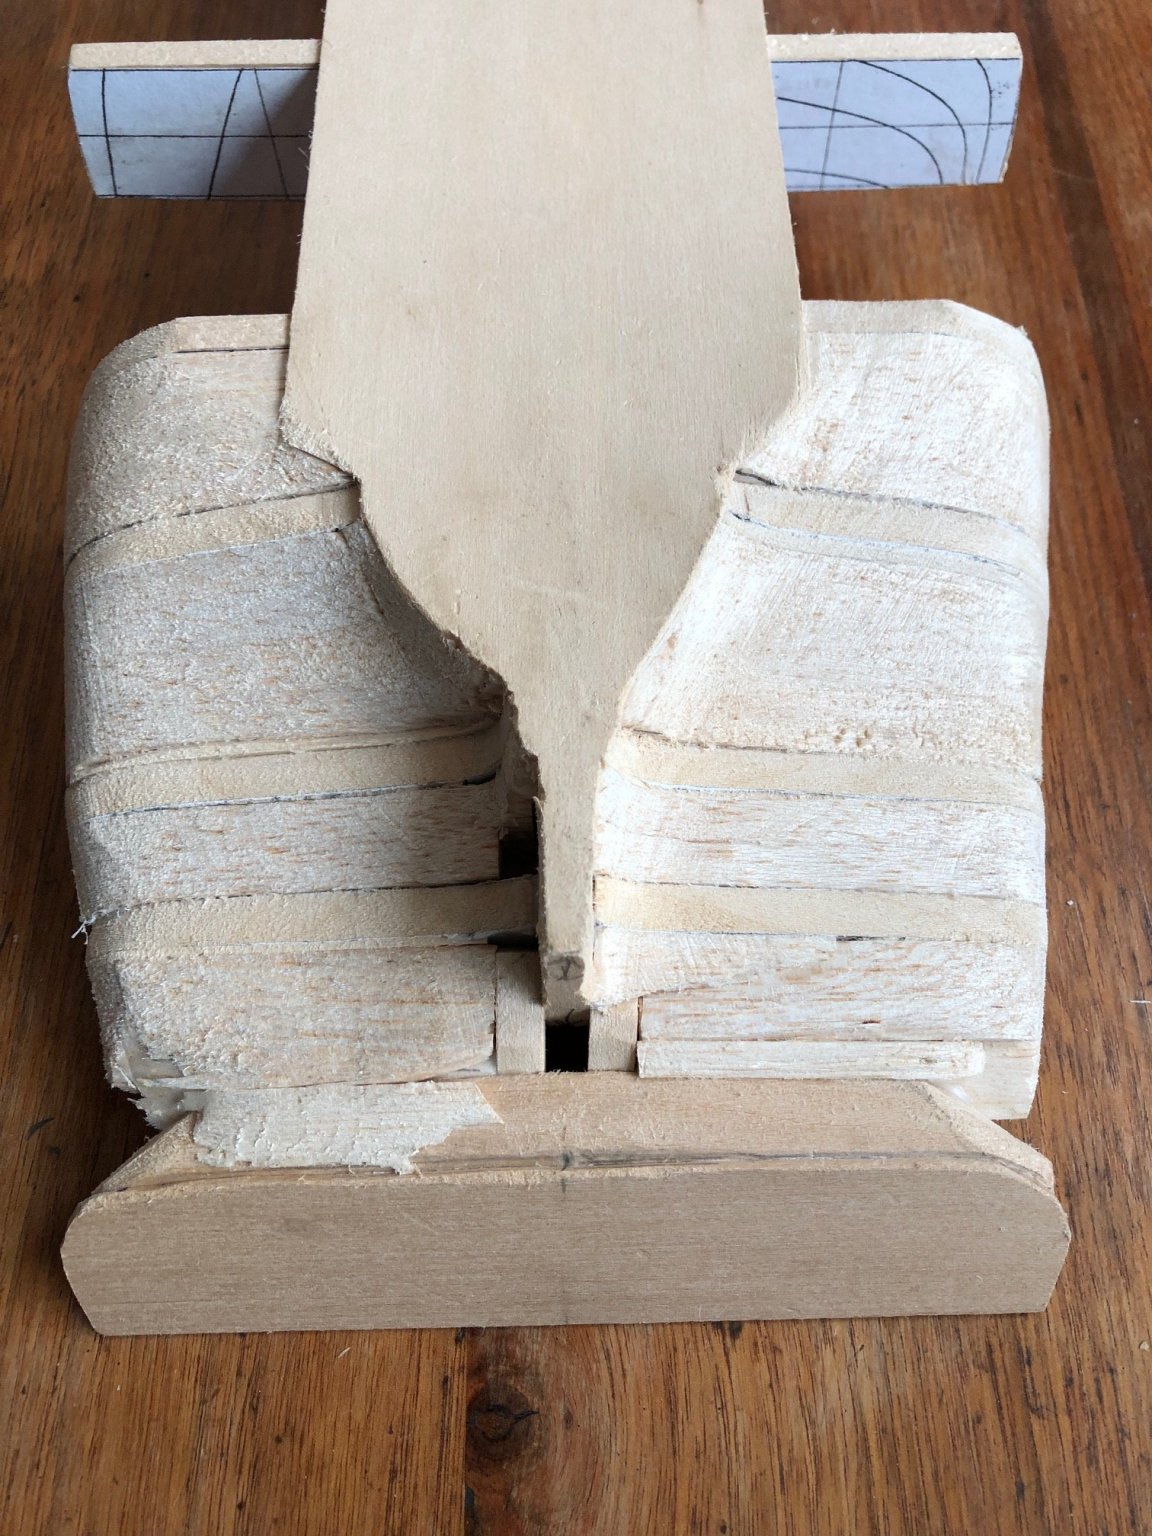
I started gluing and clamping the planks to the stem and stern
-
bateau 1881 by Steven Harvath
Steve Harvath replied to Steve Harvath's topic in - Build logs for subjects built 1851 - 1900
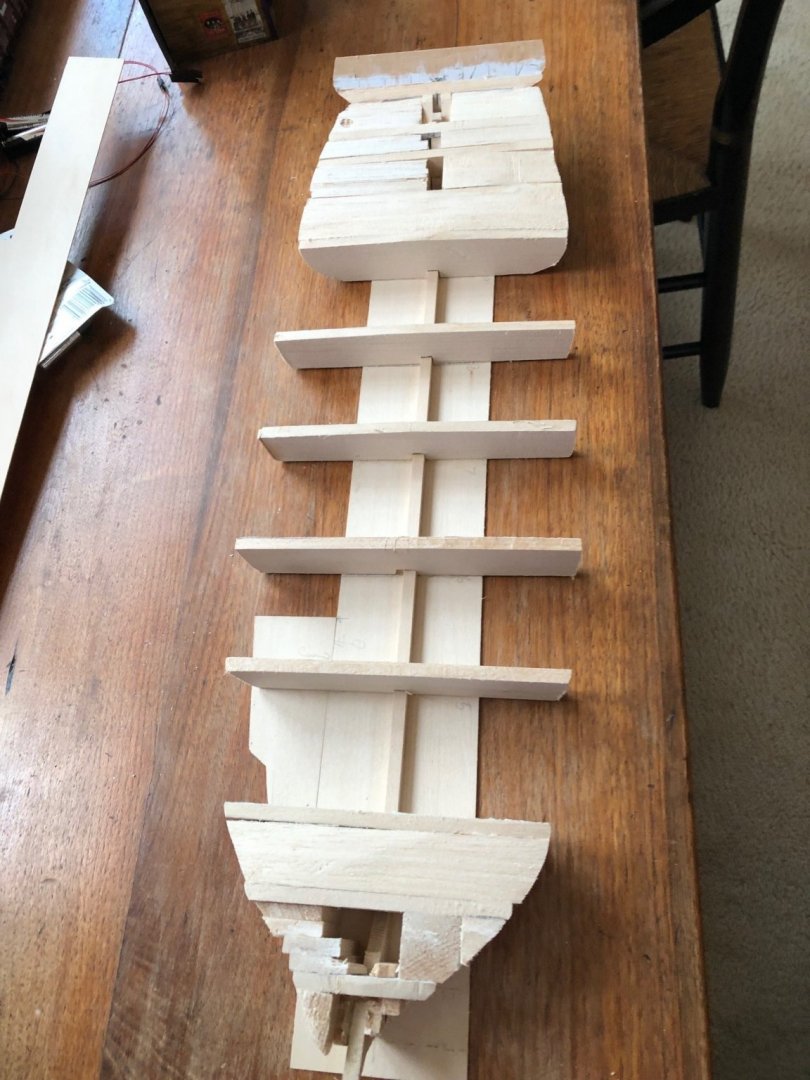
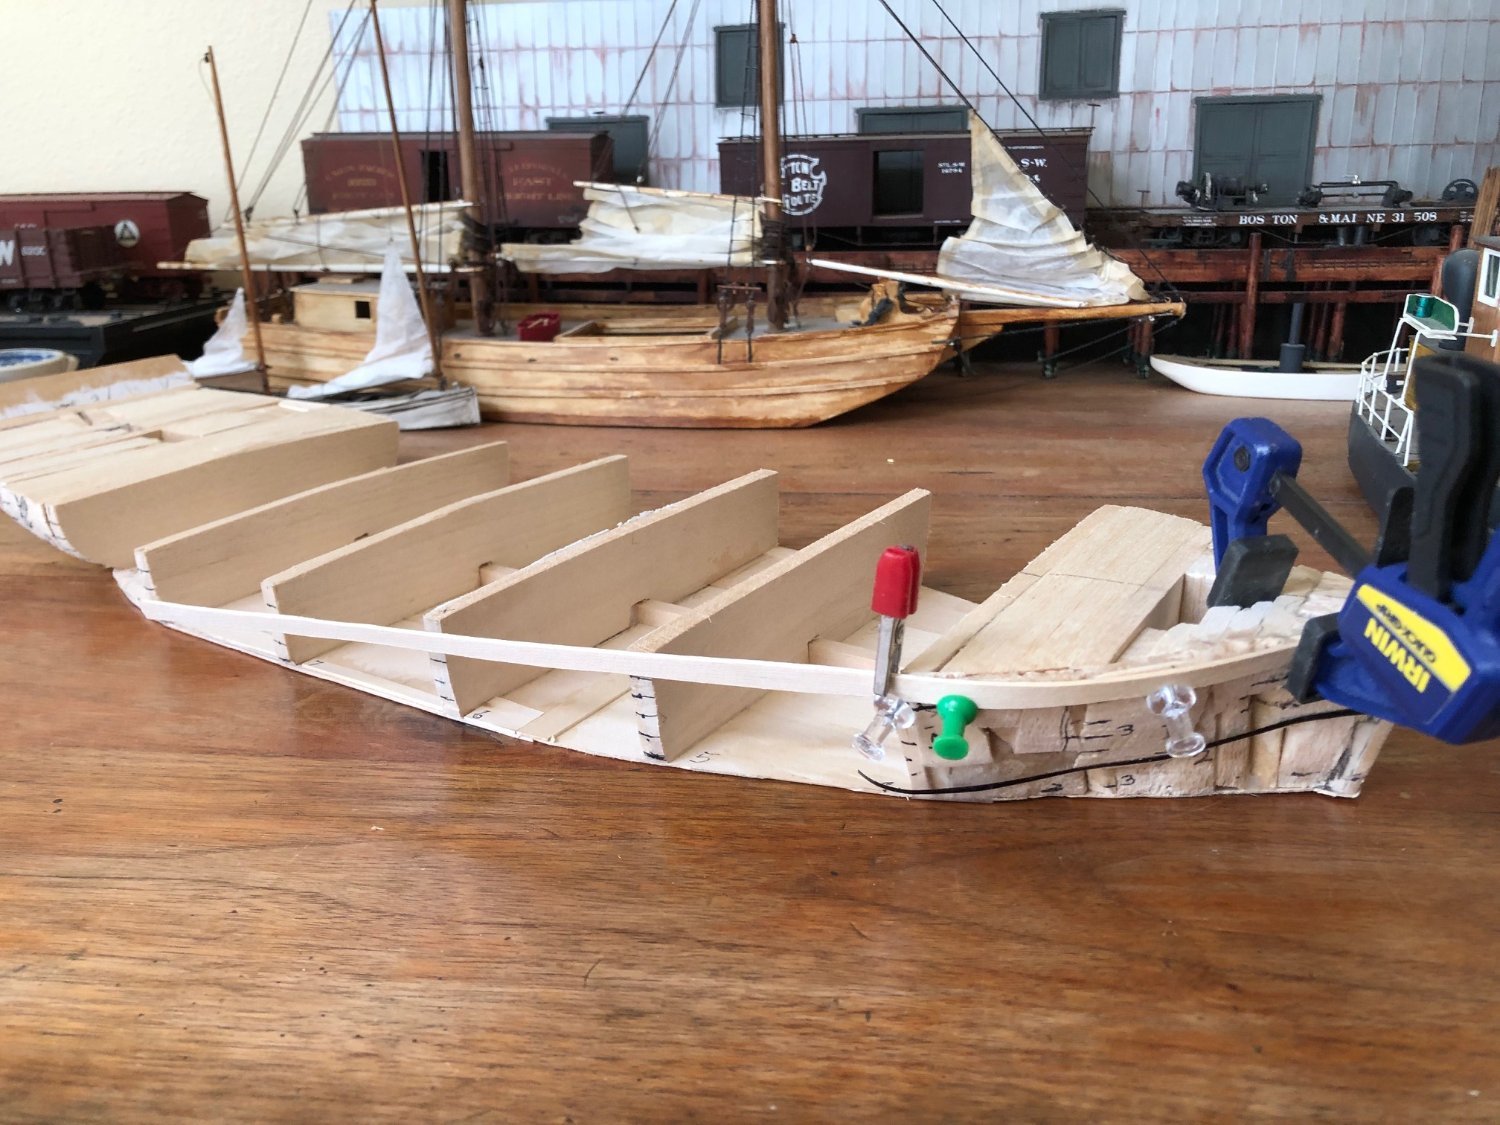
Following the instructions I carved a stem out of basswood and notched it to receive the side planks. The instructions for the boat have the builder attach three foot wide temporary braces at the center of the sides. These will define the shape of the boat when the sides are bent in to the stem and stern. I clamped them in place temporarily while I attach the stem and stern pieces.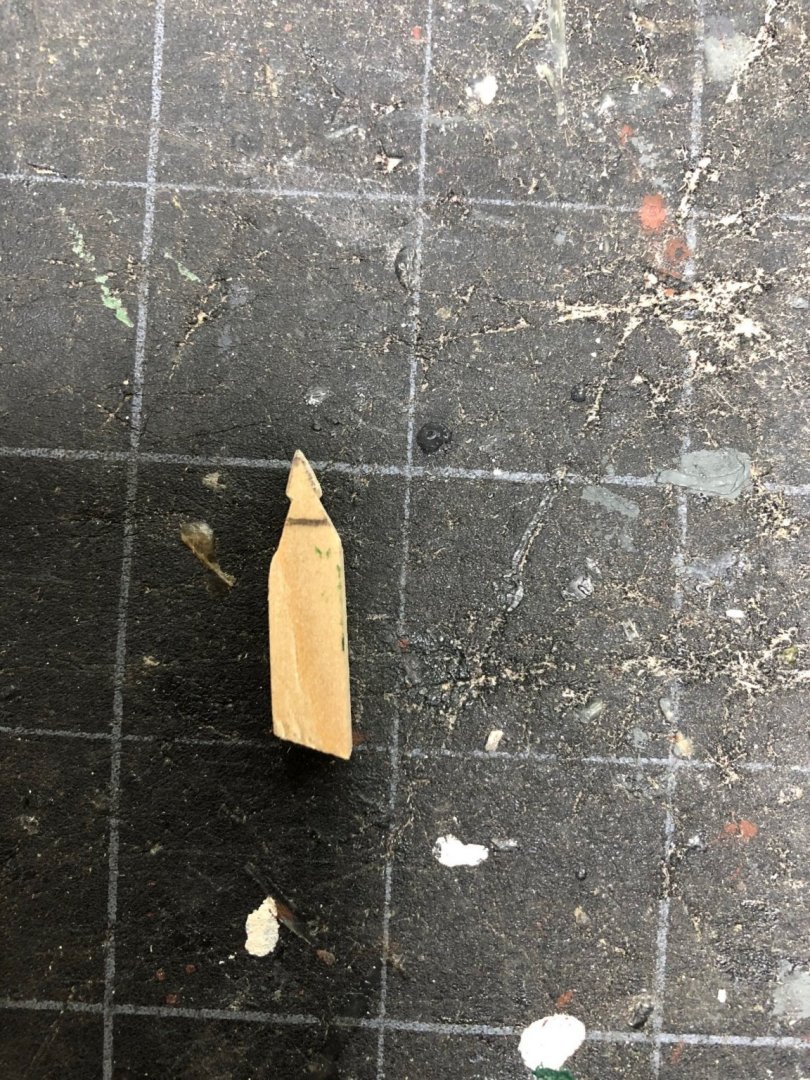
-
bateau 1881 by Steven Harvath
Steve Harvath replied to Steve Harvath's topic in - Build logs for subjects built 1851 - 1900
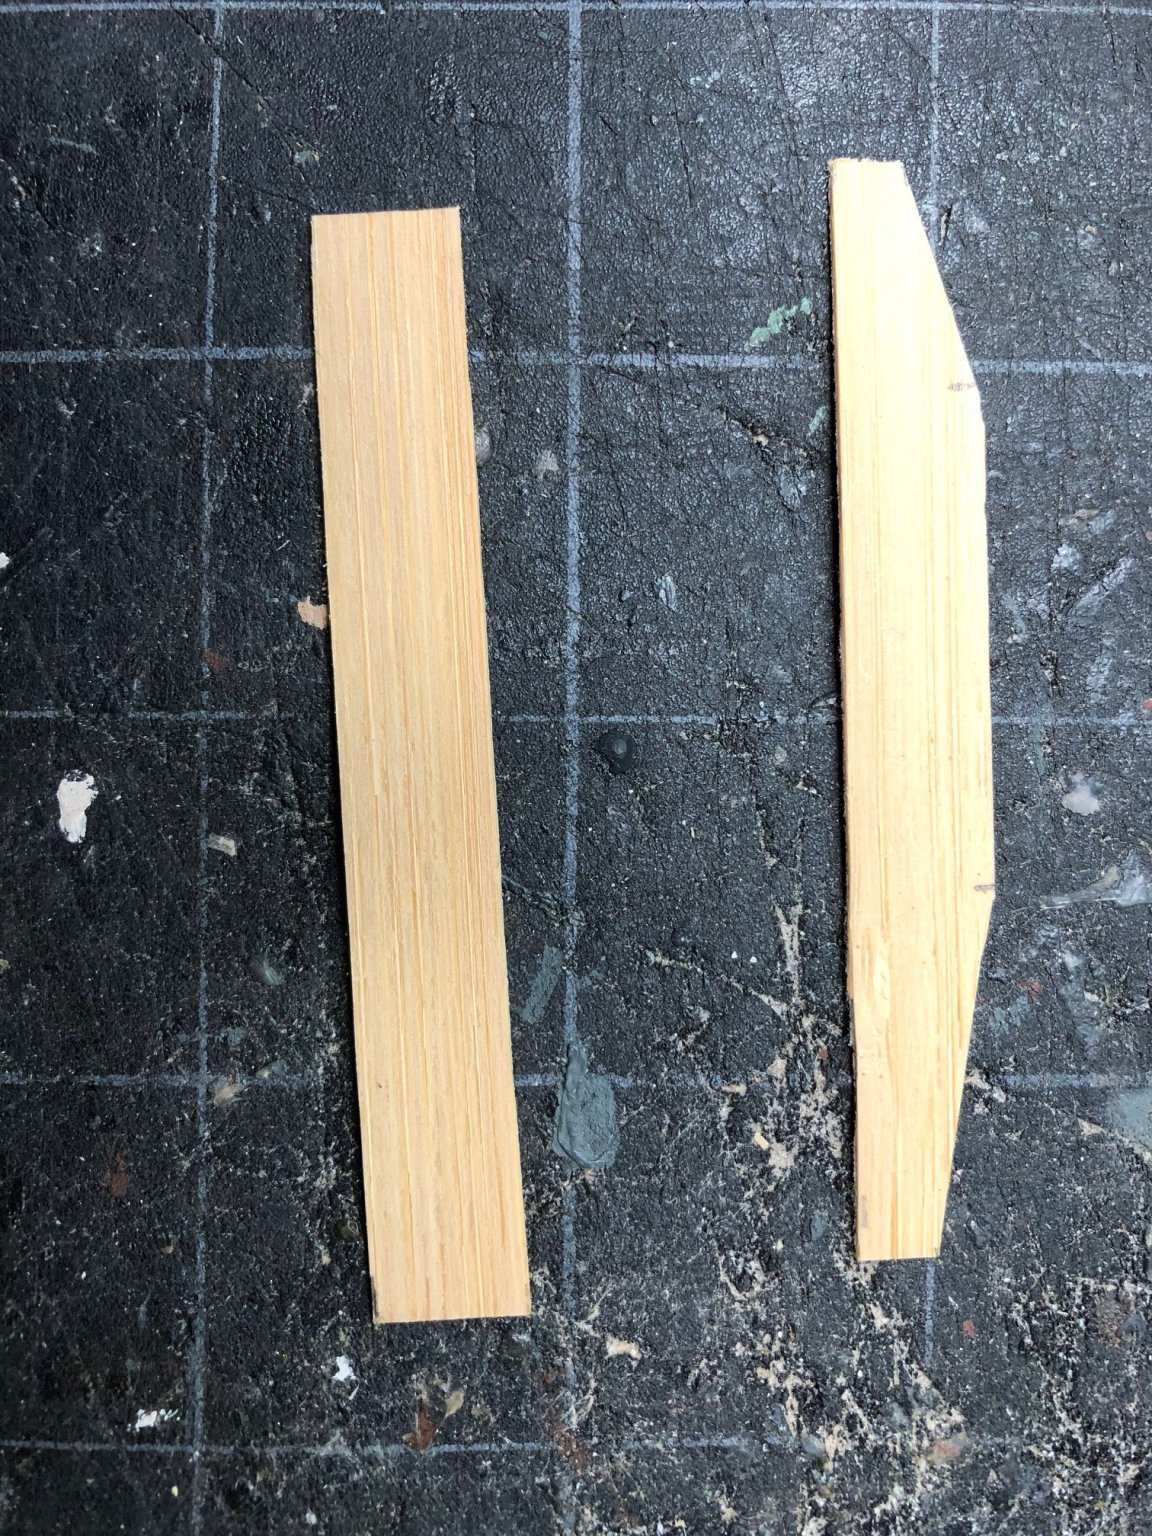
I found a piece of bamboo vaneer in my scrap box. It was a 4 by 4 inch sample that I picked up at a trade show a long time ago. It is very flexible and thin and should work for the sides of the boat.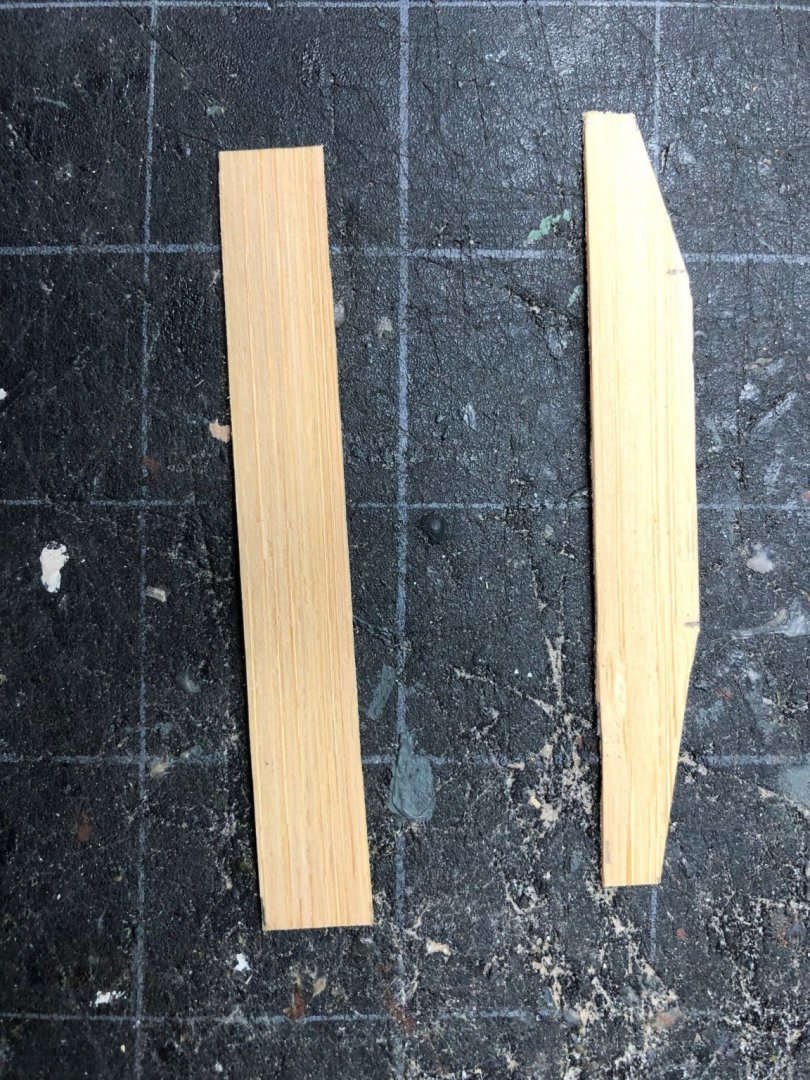
-
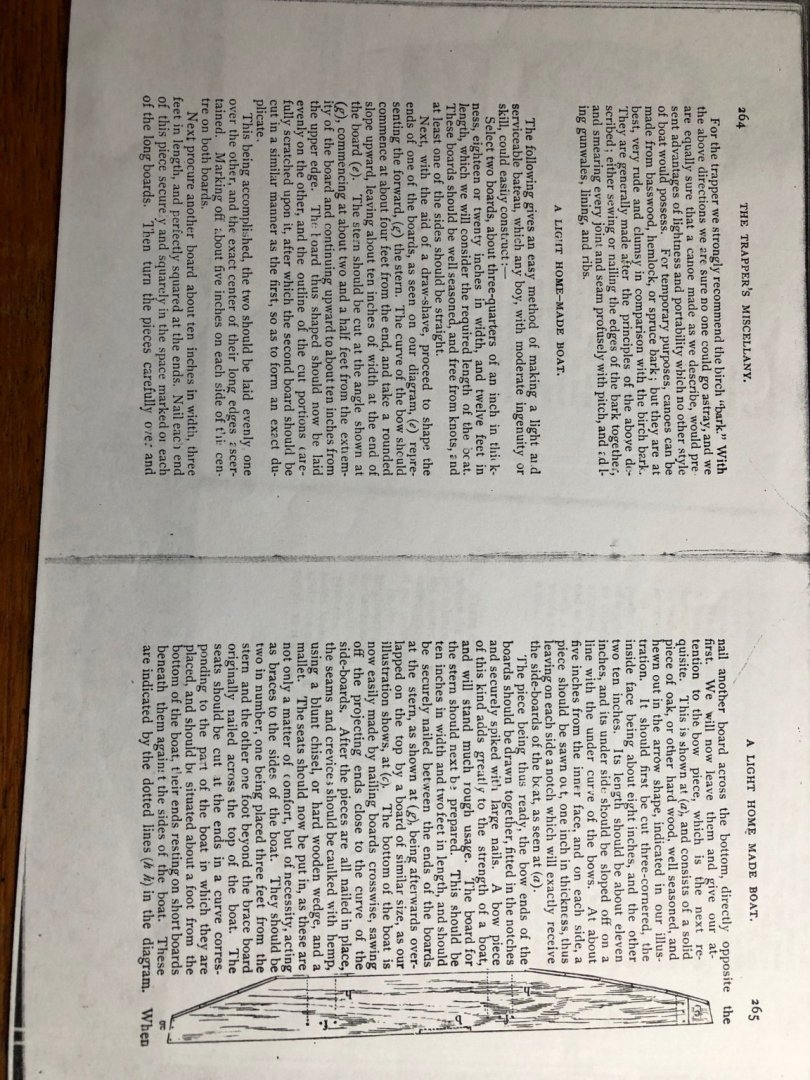
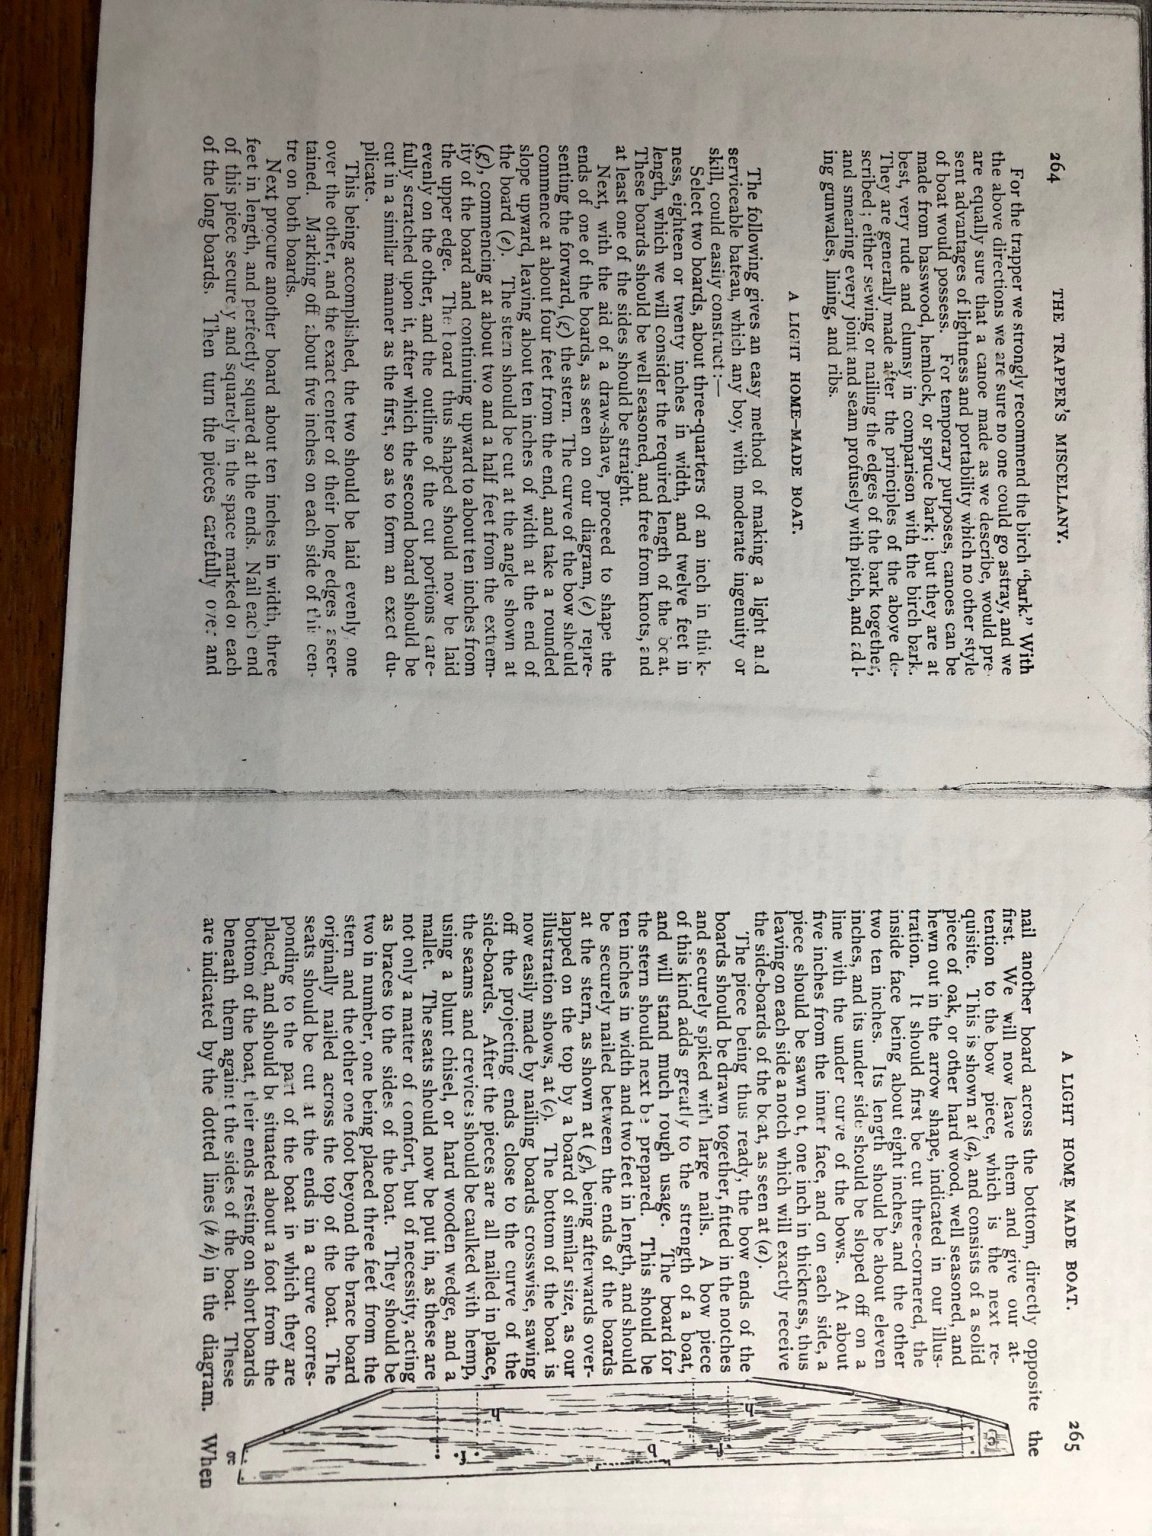
I decided to take a break from a big ship model building project and put together a small, utilitarian boat that would have been common in North American lakes and streams. I have detailed instructions for the building of a "bateau". It is from a book of instructions for how to become a fur trapper. It is called "Camp Life in the Woods" by W. Hamilton Gibson 1881. The author says "...a light, and serviceable bateau, which any boy with moderate ingenuity or skill , could easily construct...". I hope to live up to his expectations. Scale: 1:48 -- One inch to four feet.

-
Thanks everybody. I am glad i joined this group and got such great advice and comments. I am going to challenge myself next with a full depth model of a sailing vessel.
-
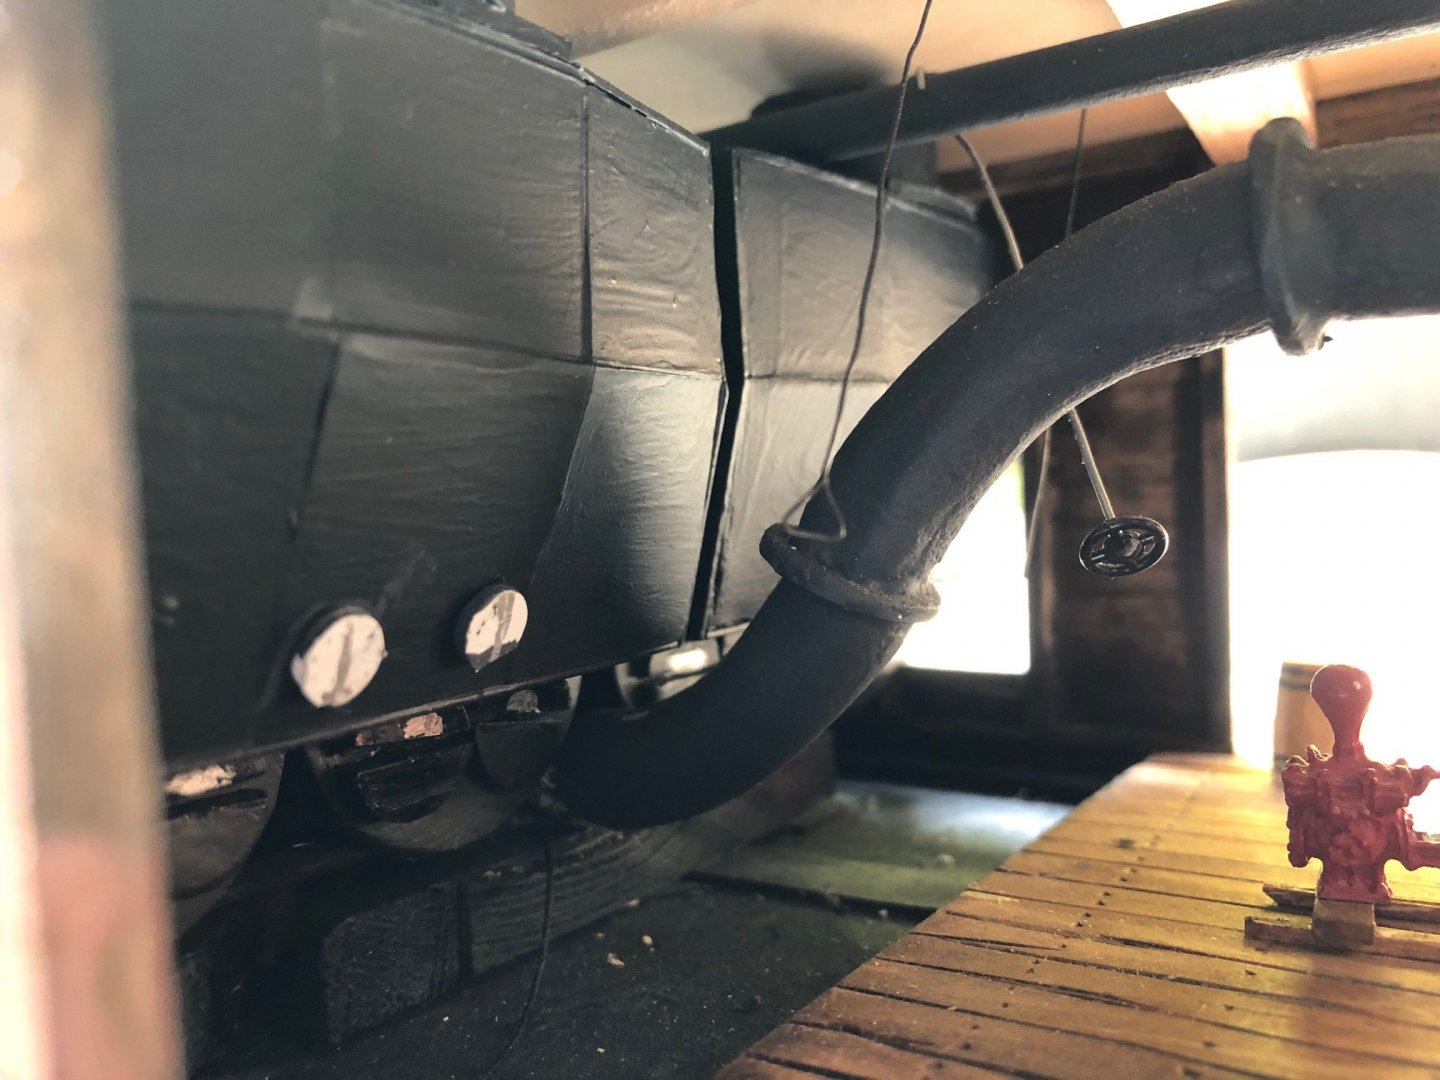
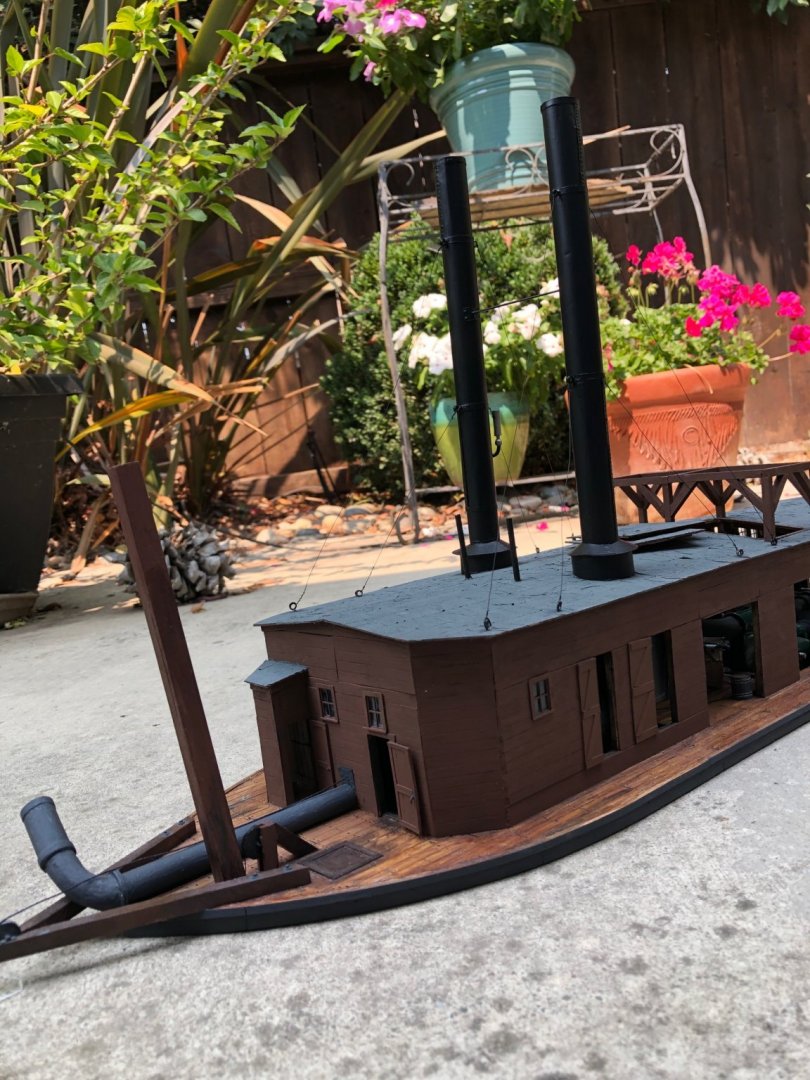
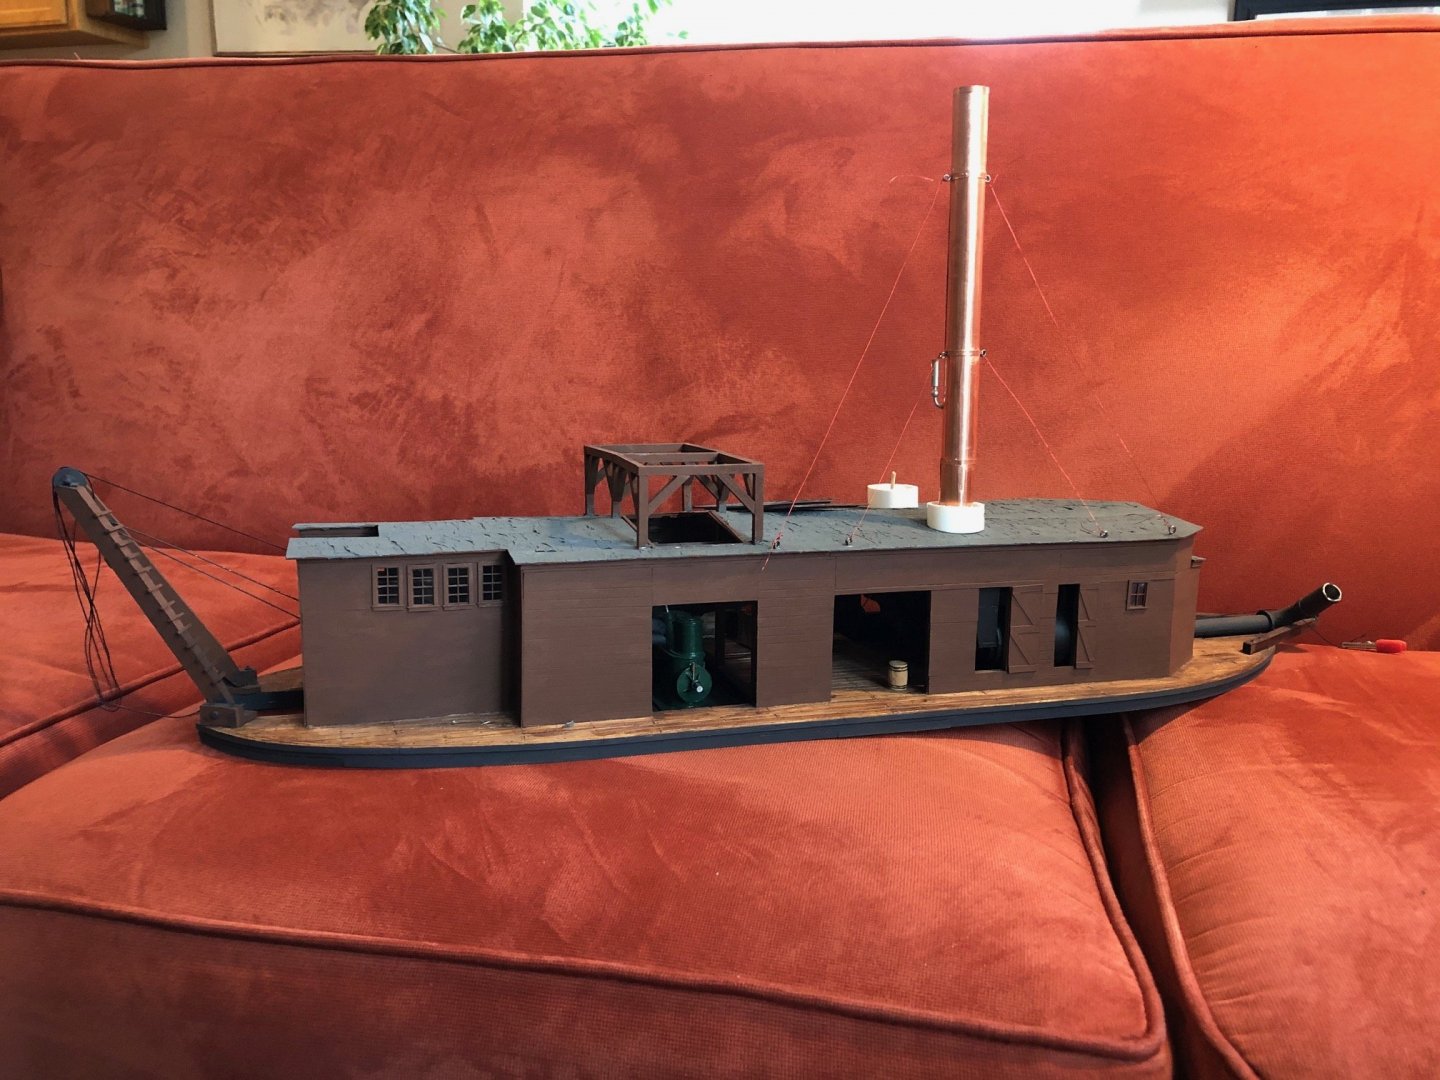
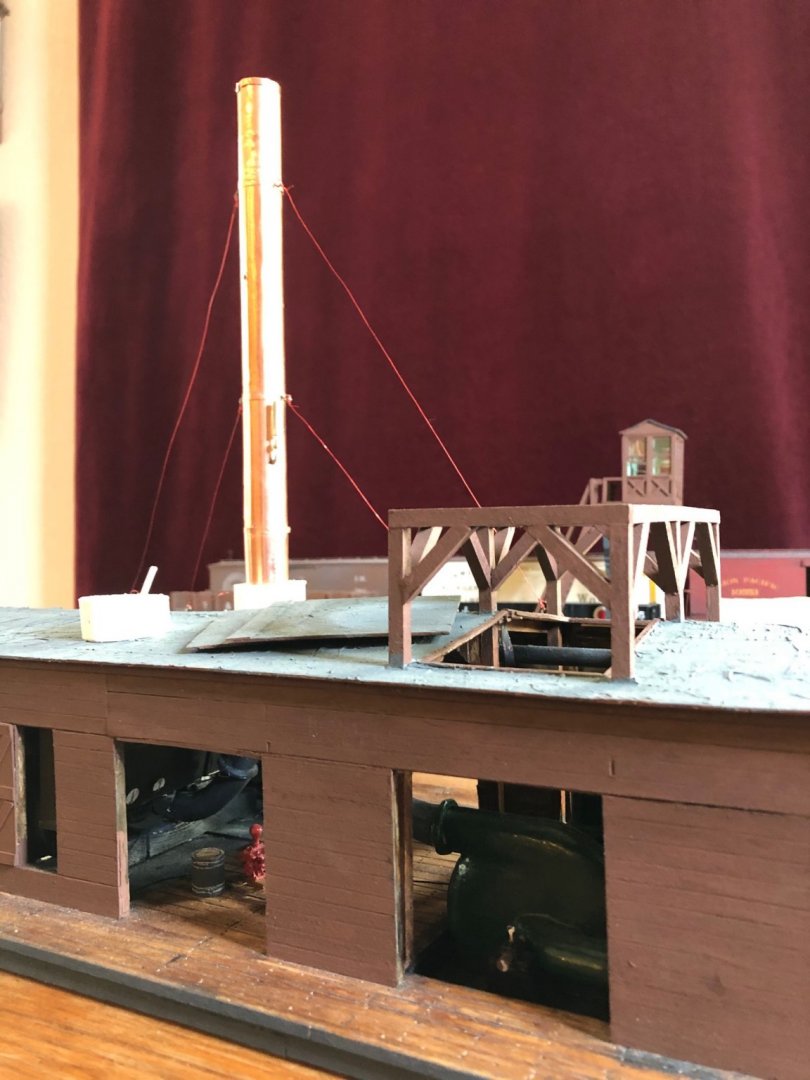
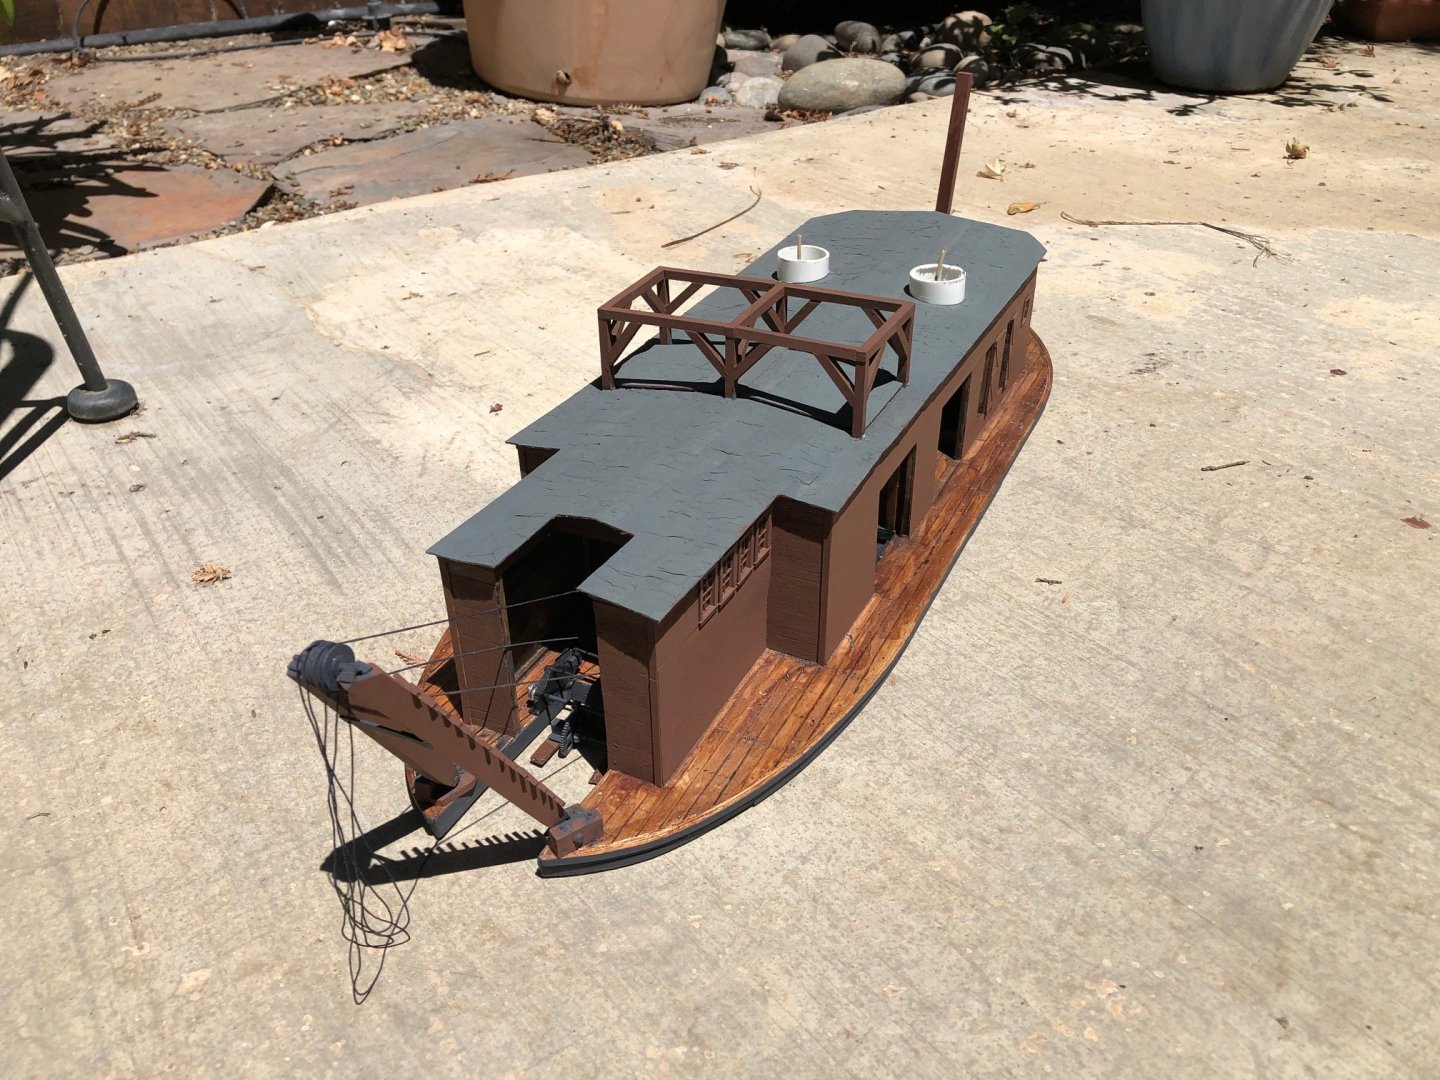
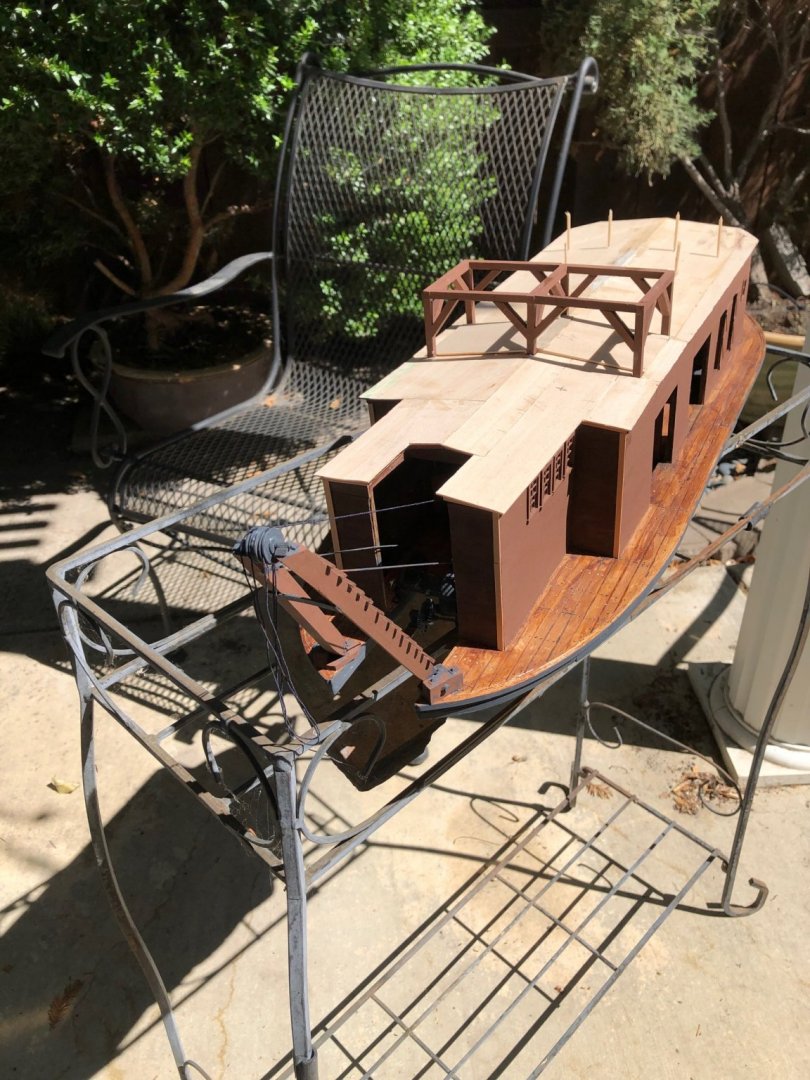
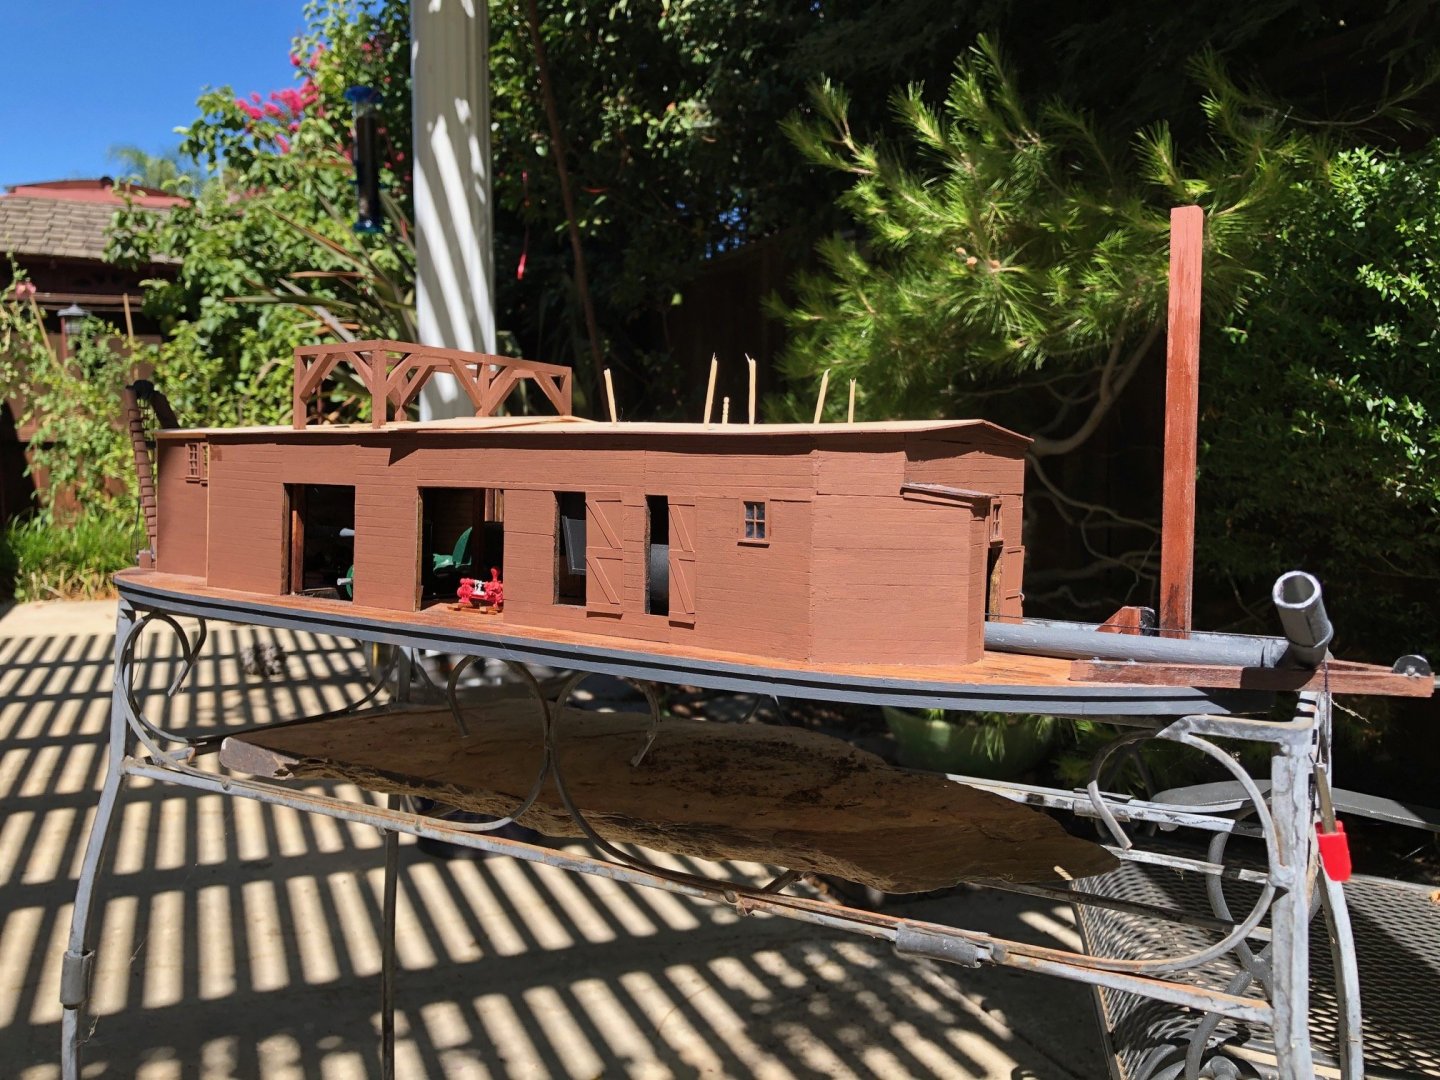
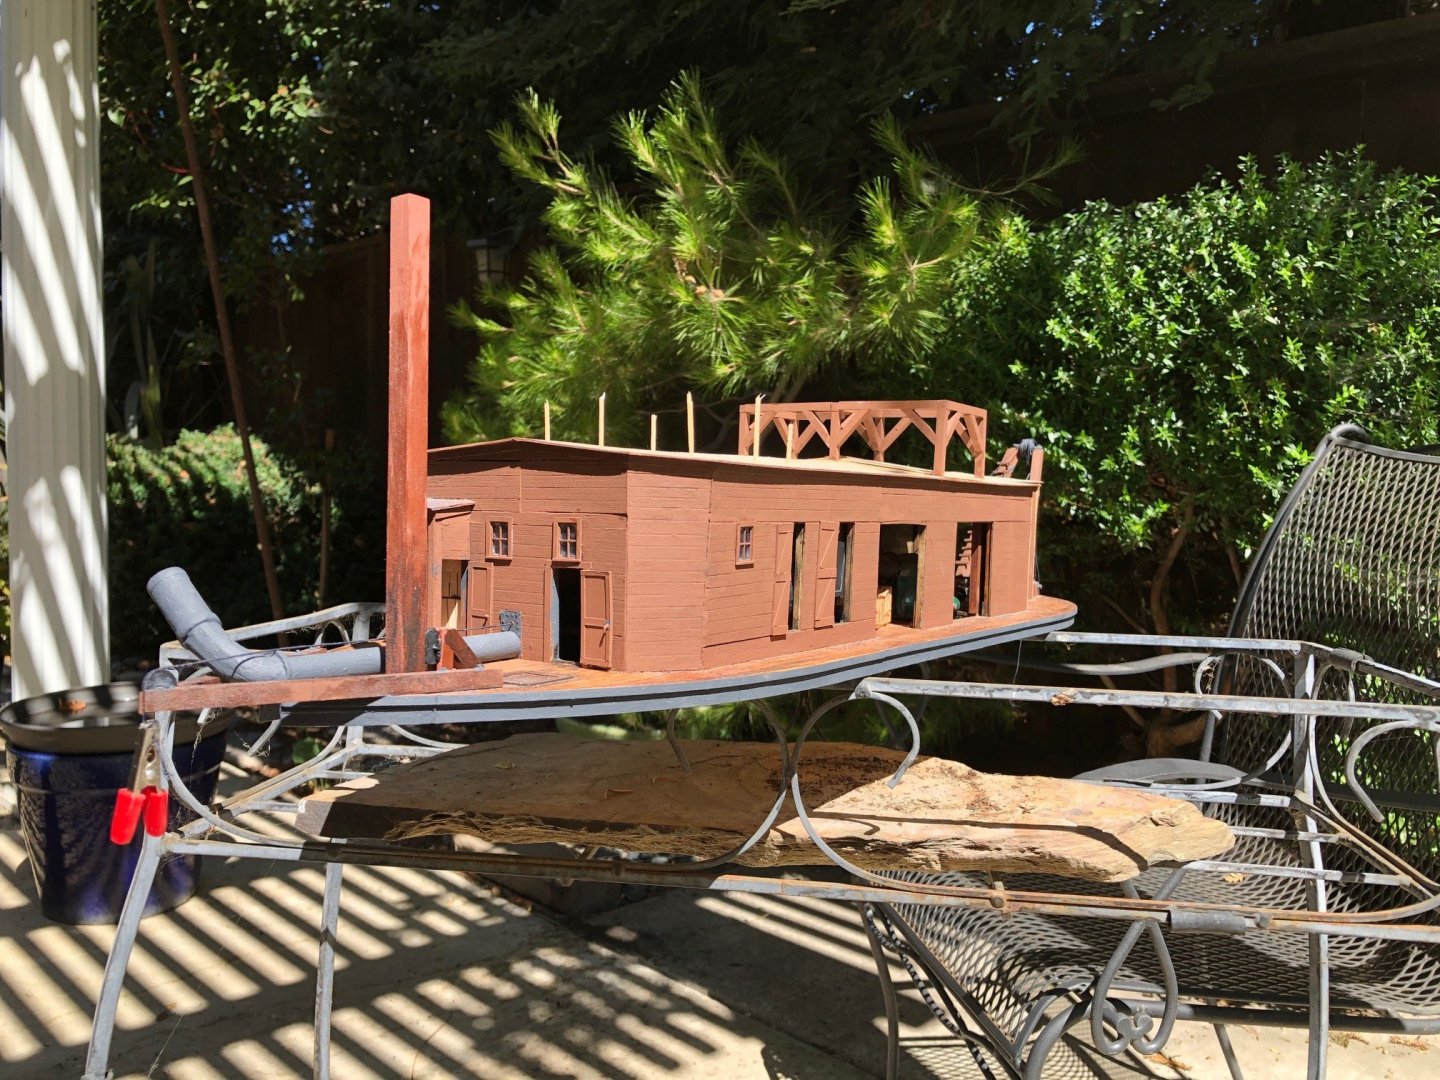
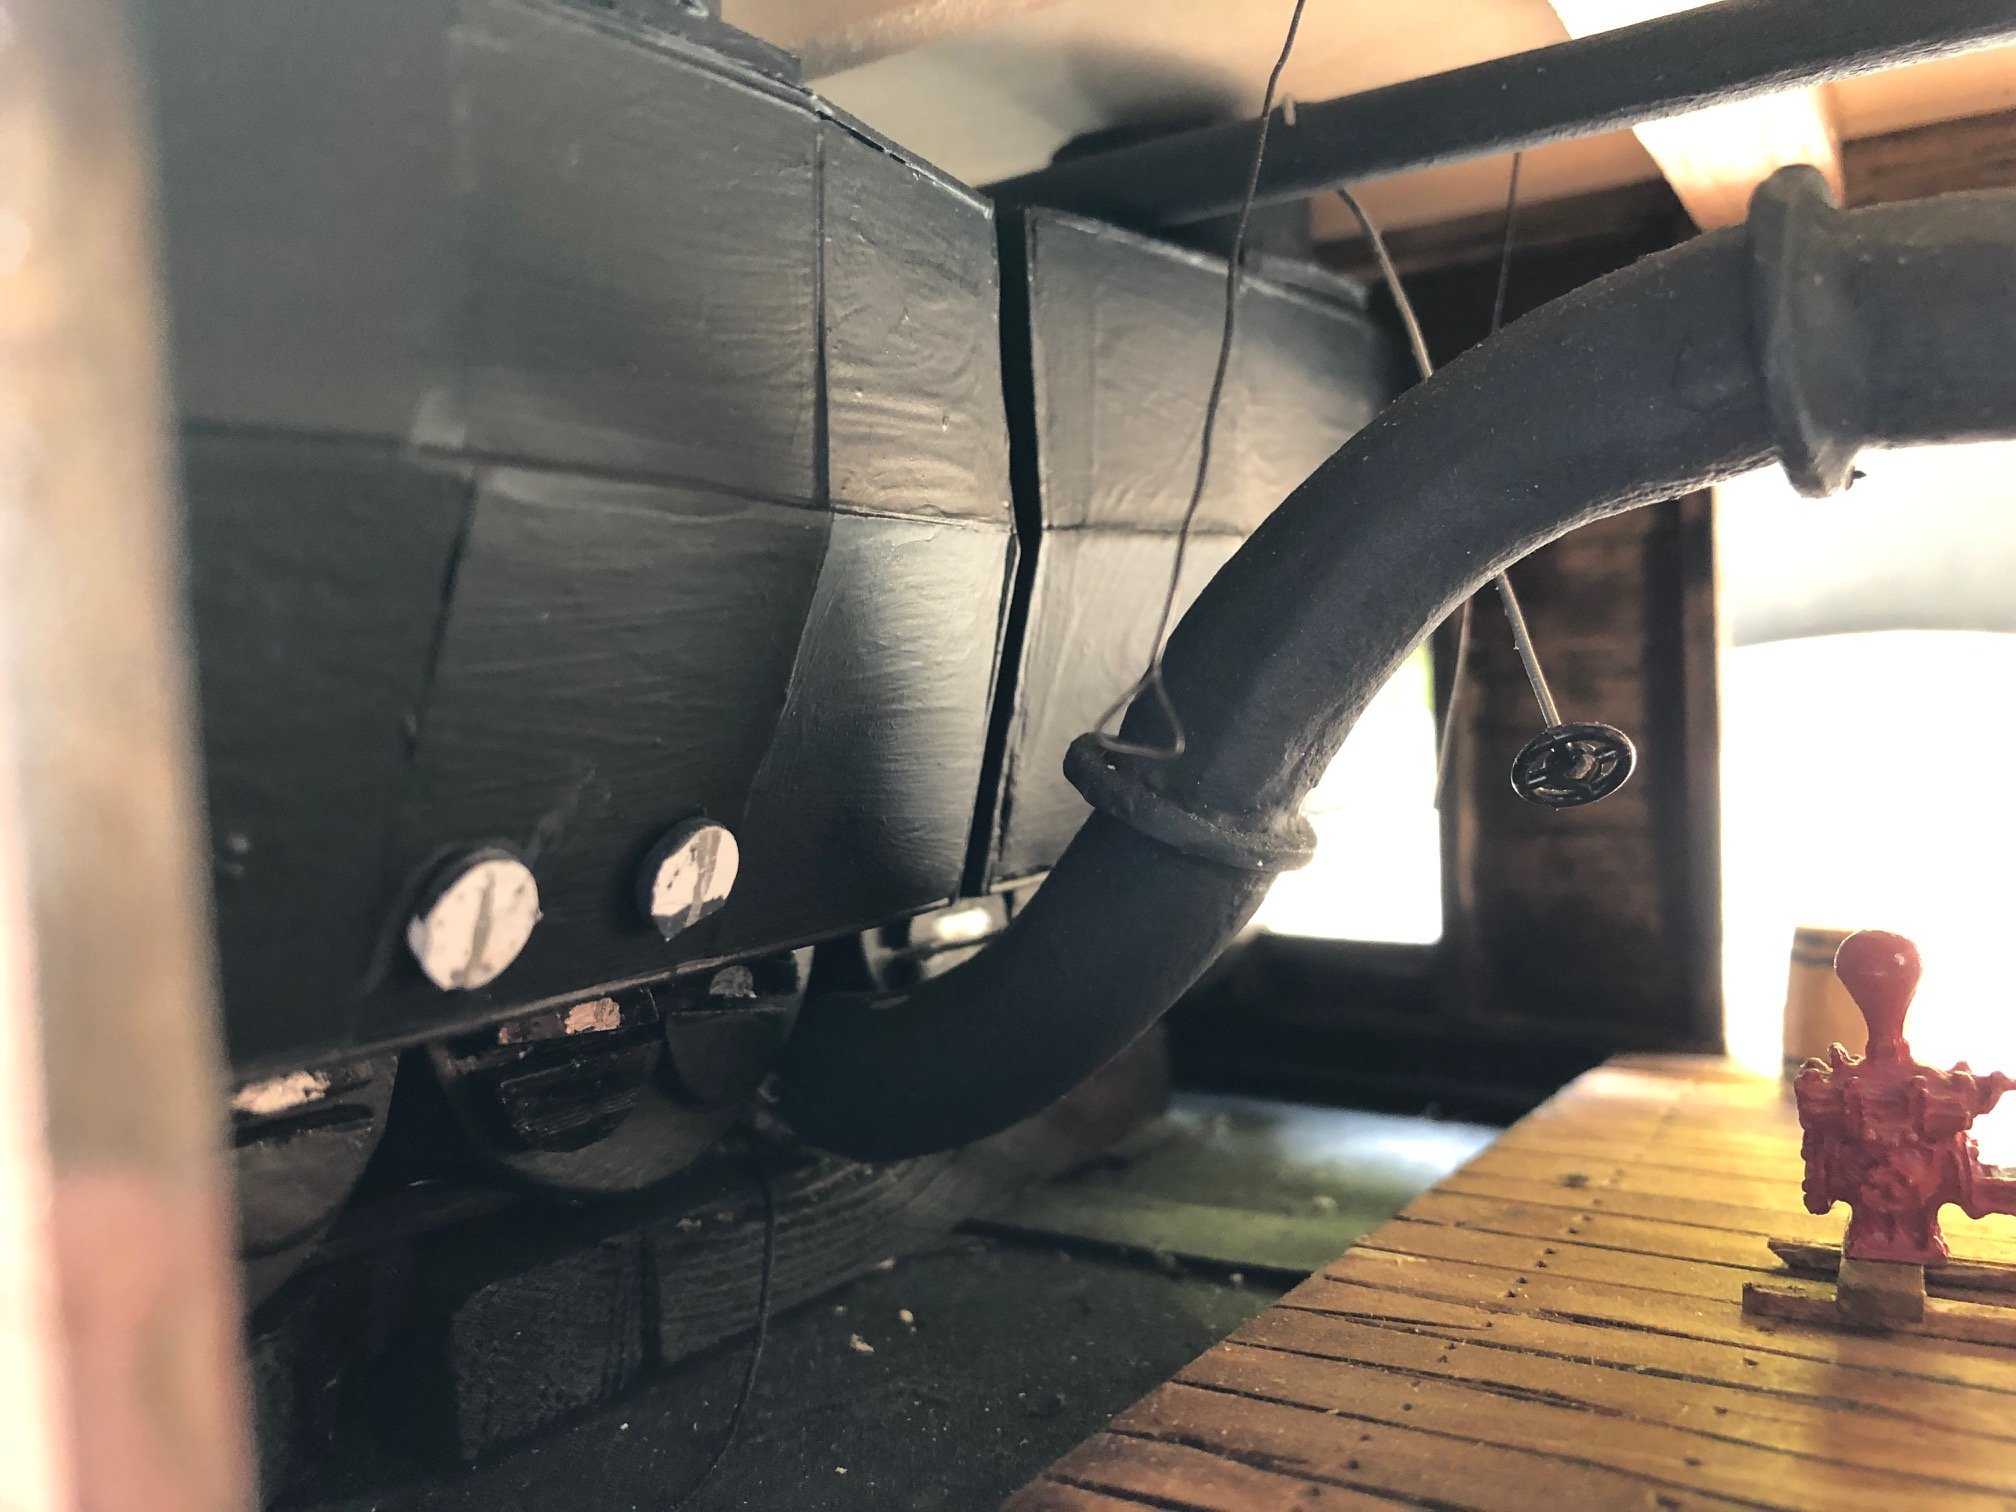
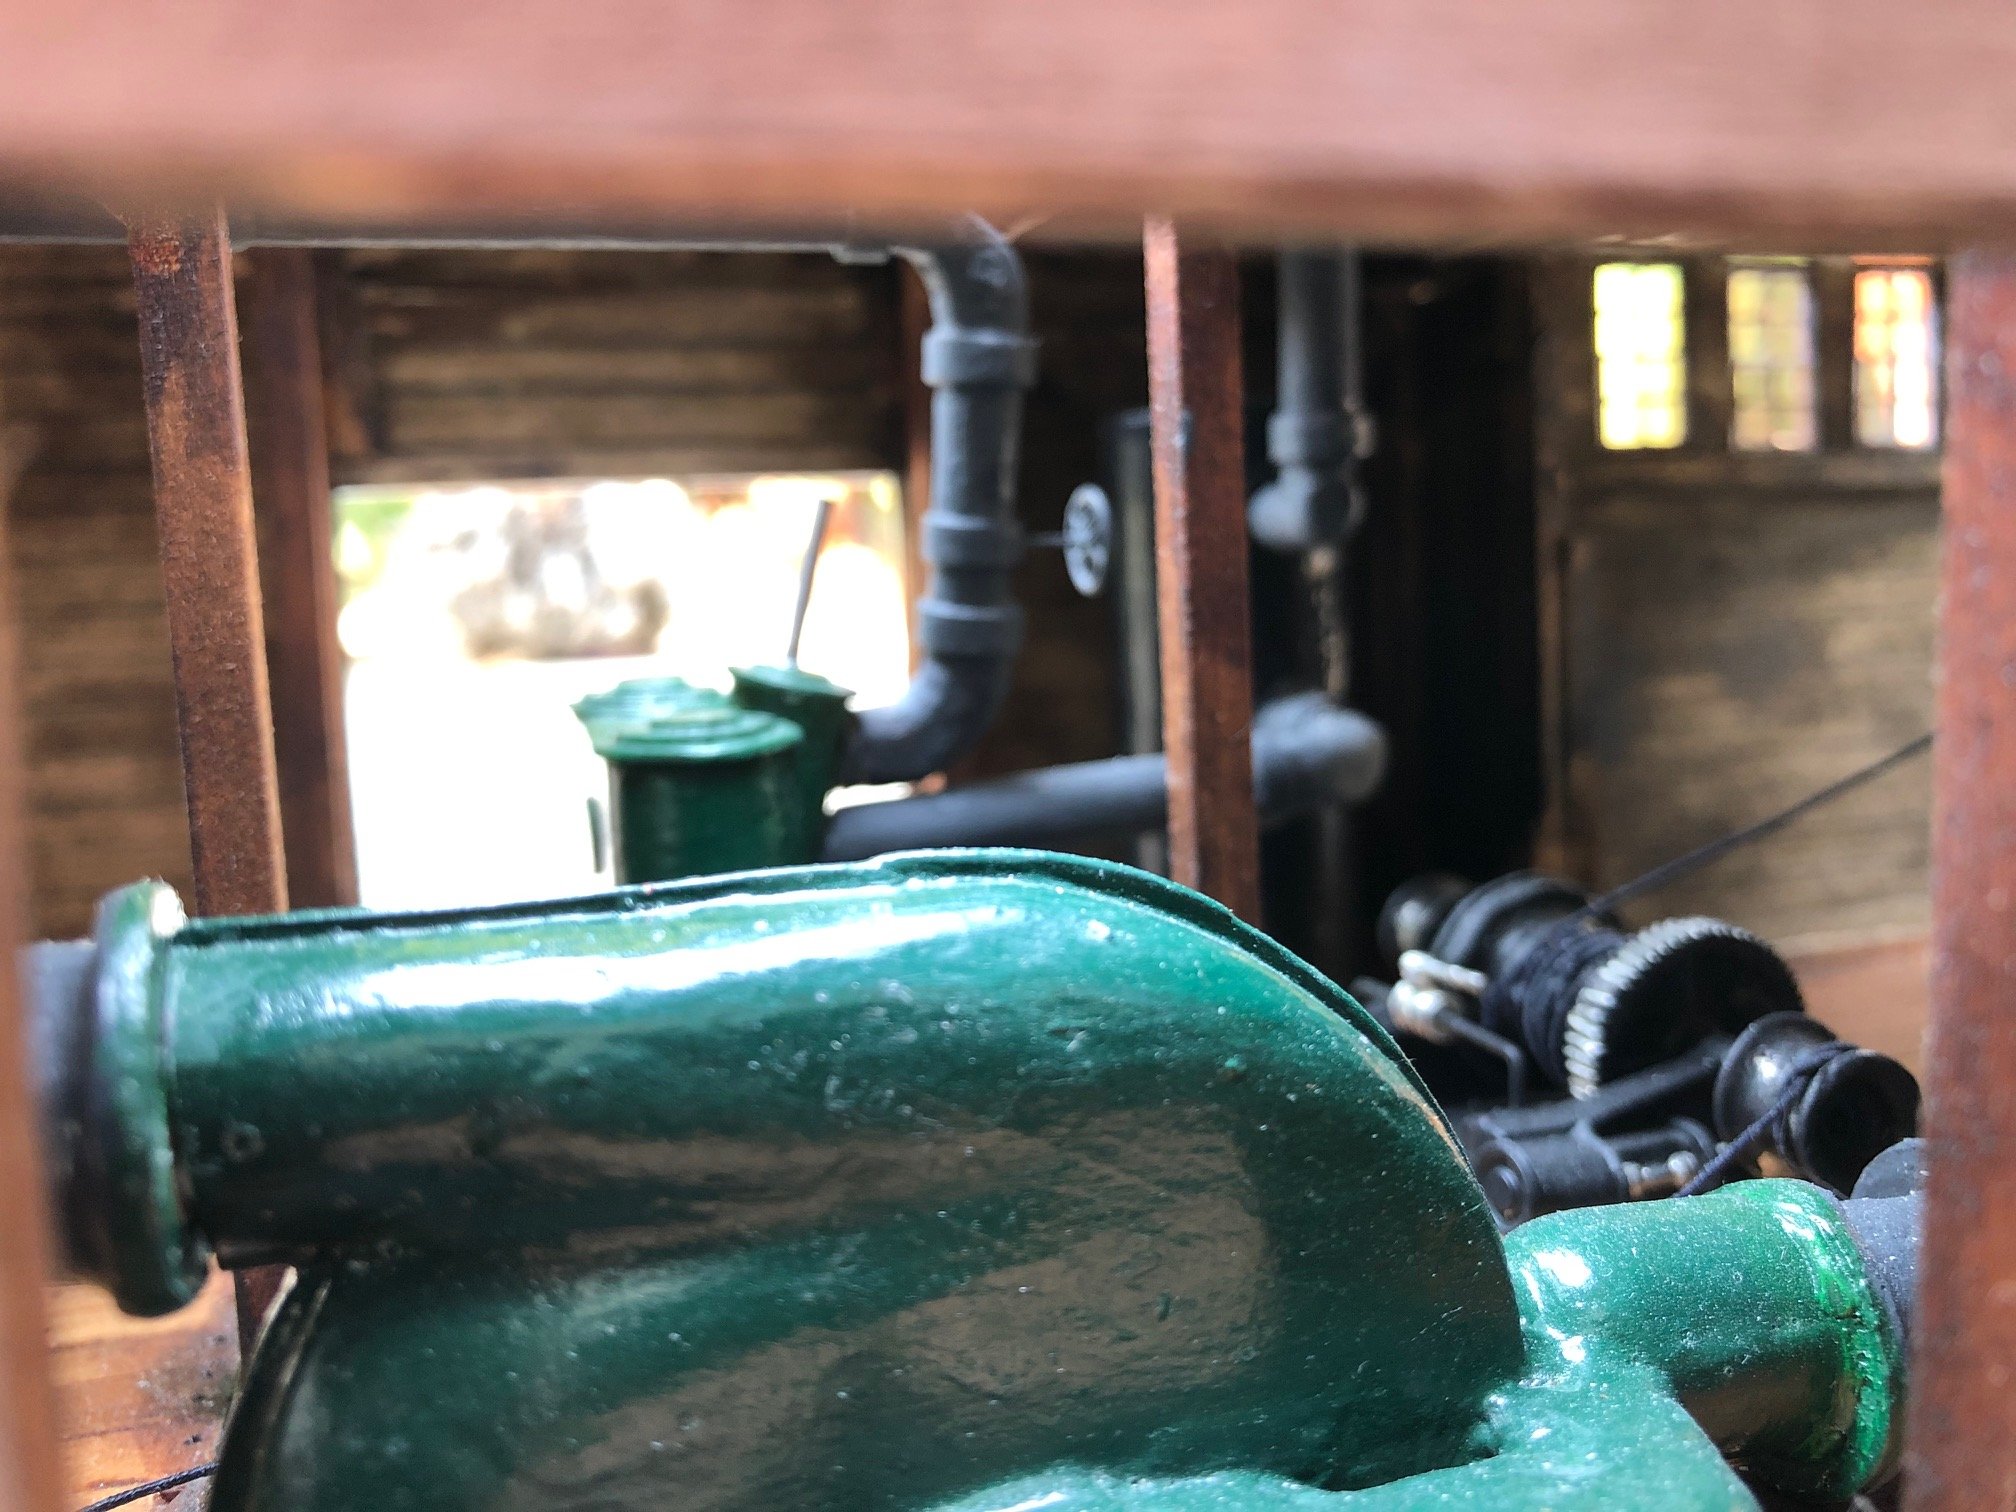
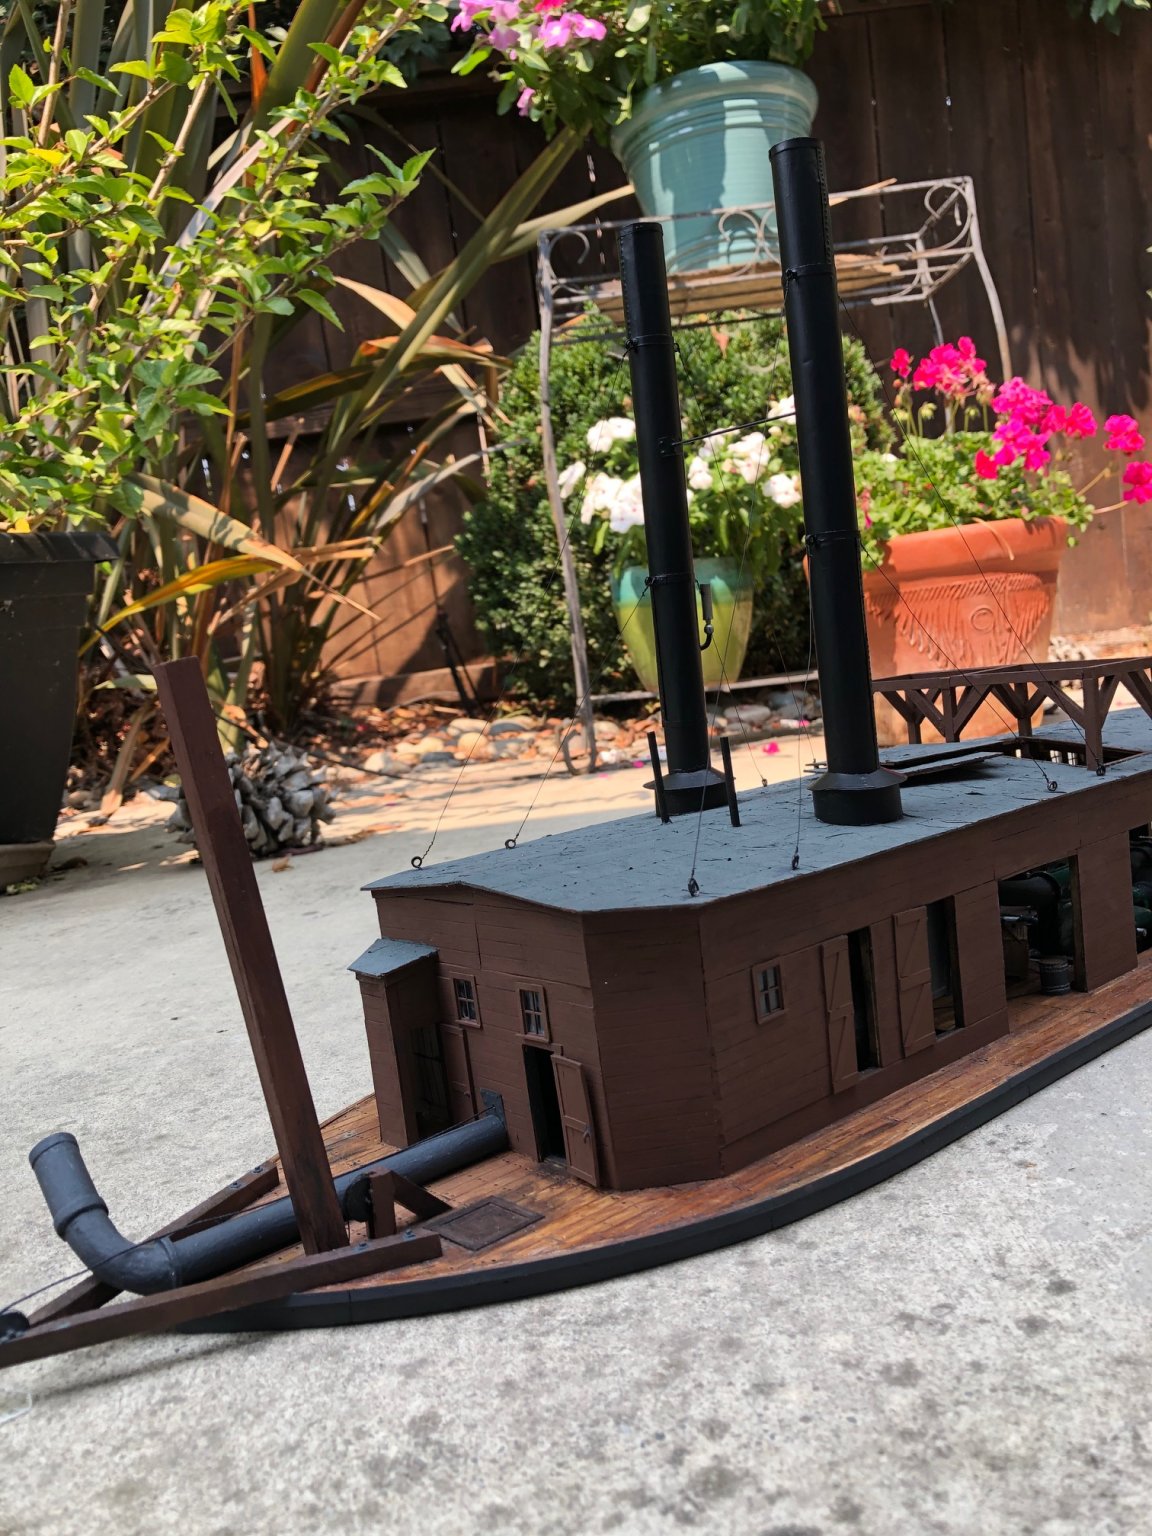
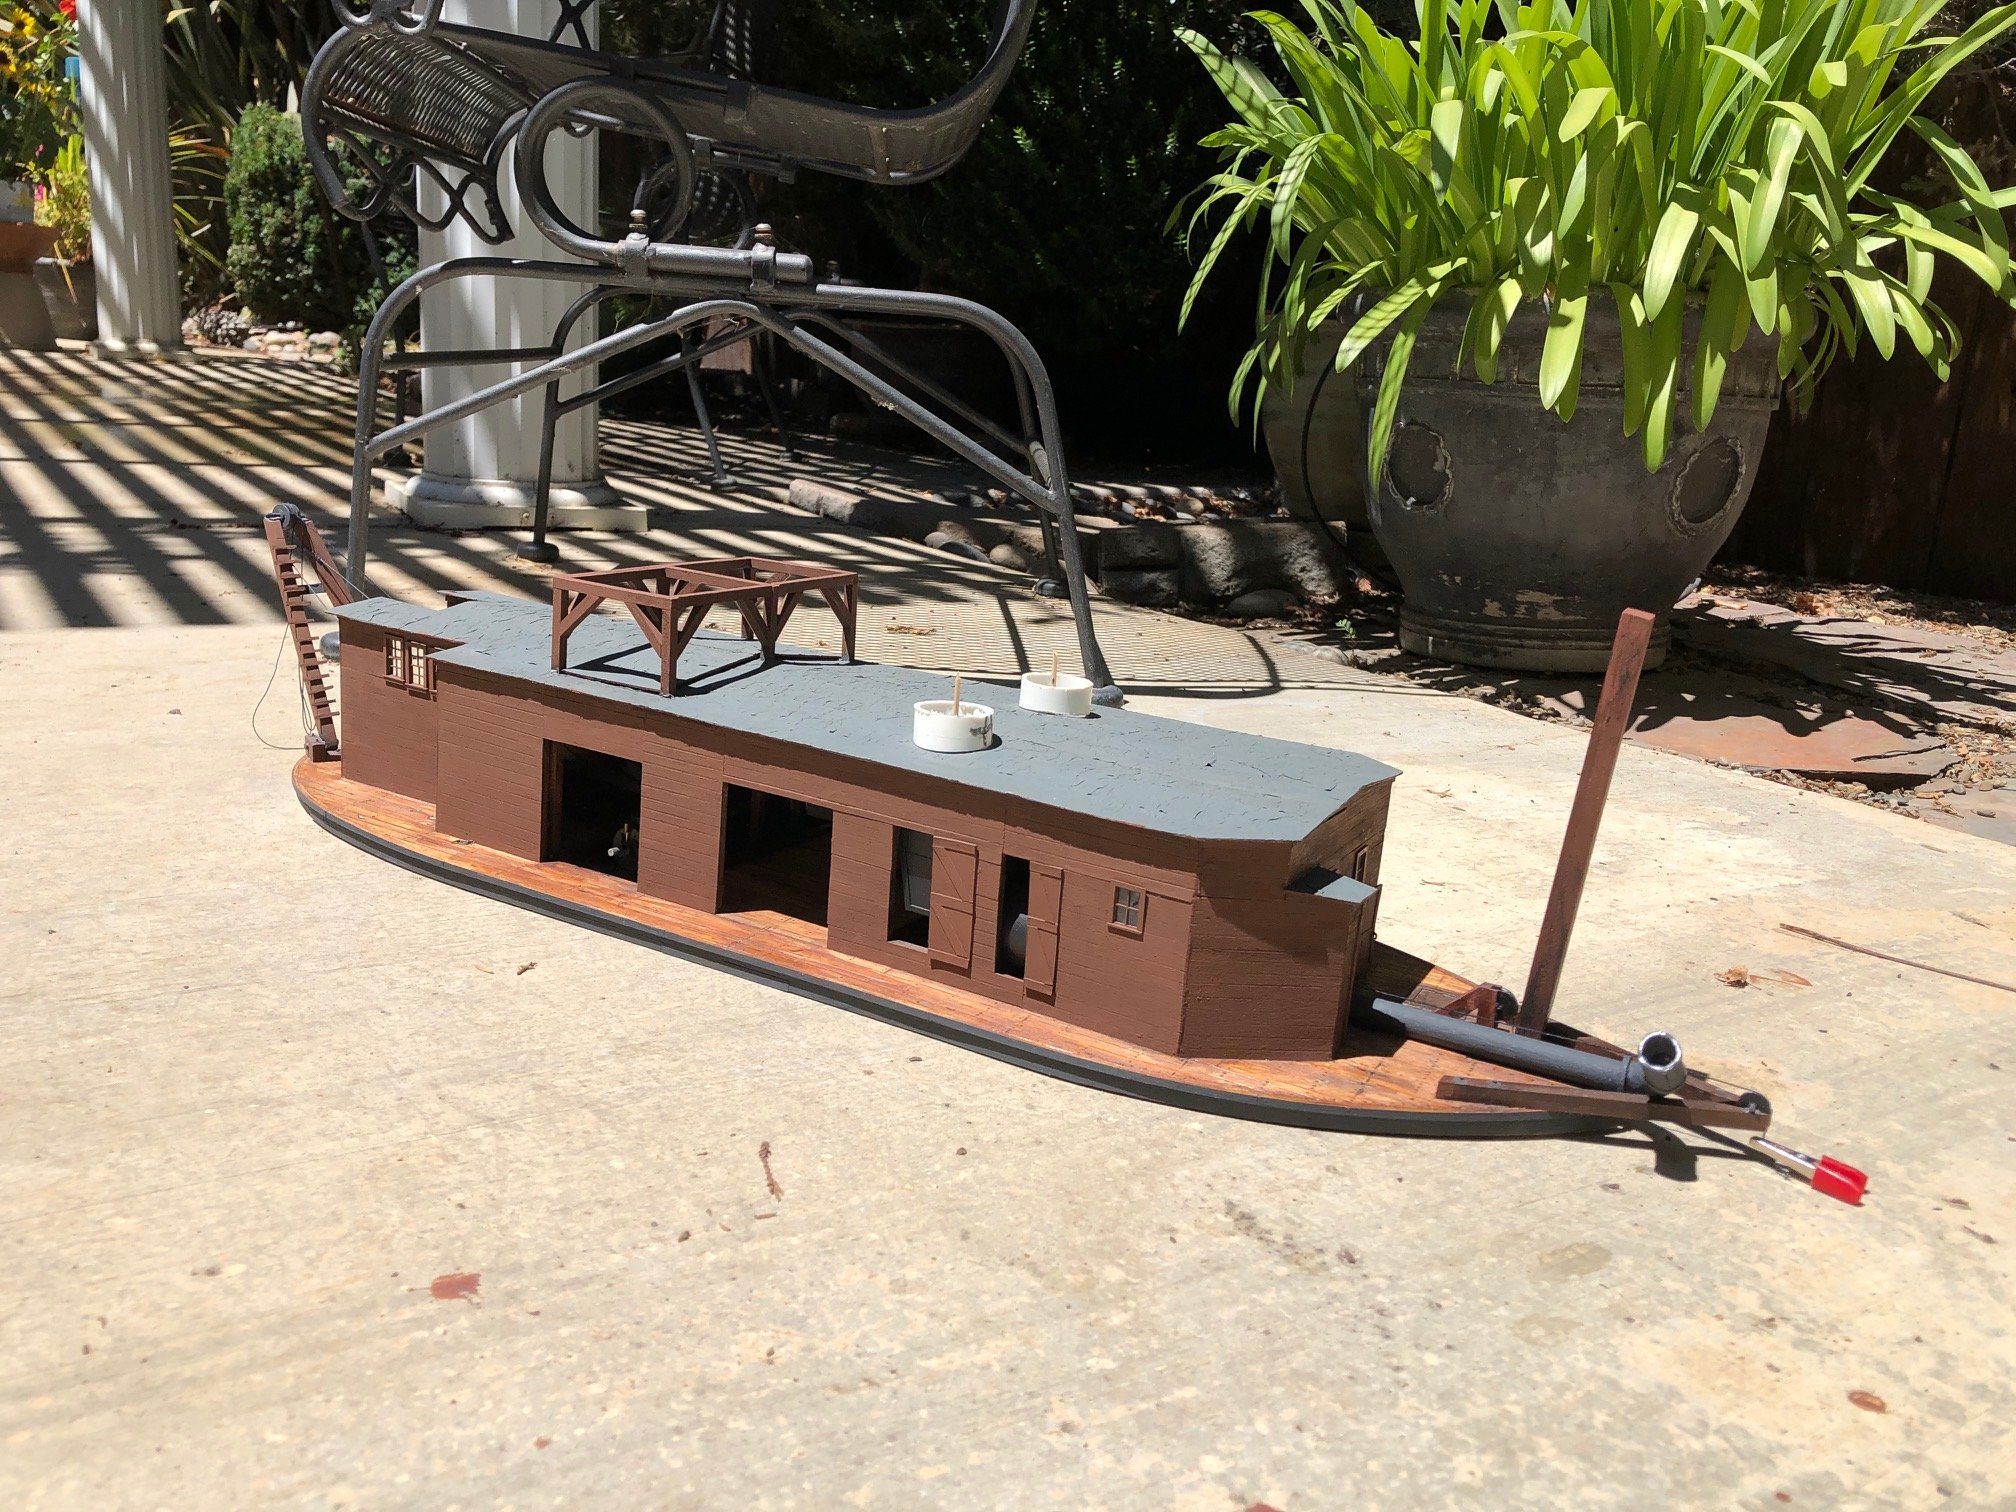
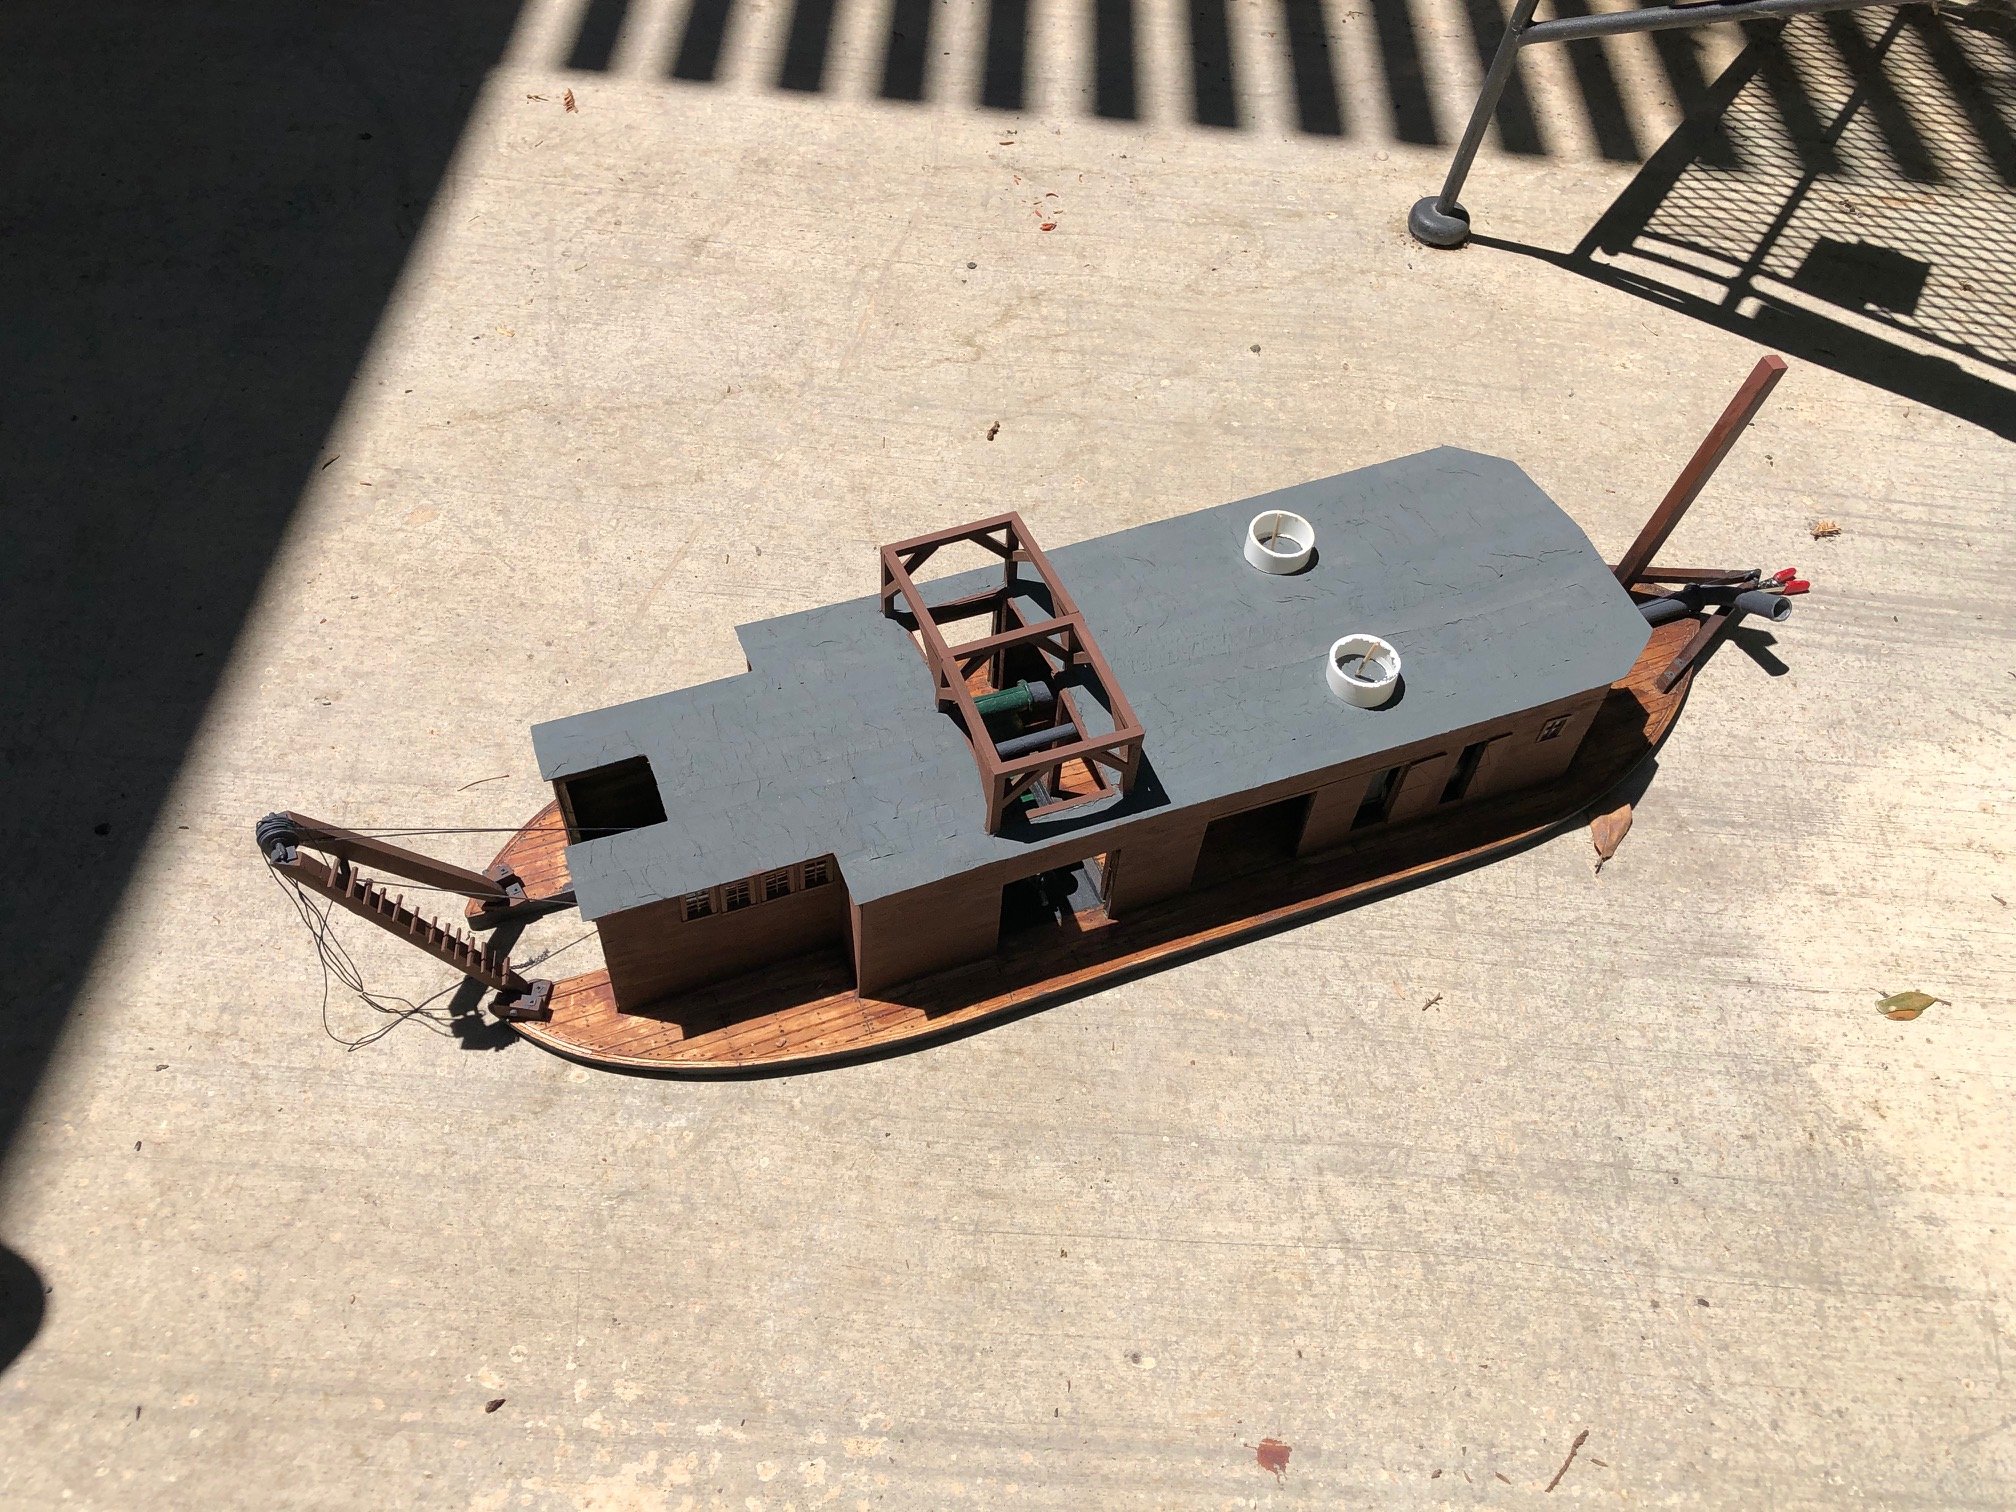
Finished (at least in my mind), I painted the stacks and added two vent pipes aft of the stacks. I think these would have been for the boiler safety valves or blow down. I think I will be weathering it a bit to look like it has been working. This might also bring some of the detail into sharper contrast.


.thumb.jpg.febc4eca0190657ab59b2cb952af6877.jpg)

-
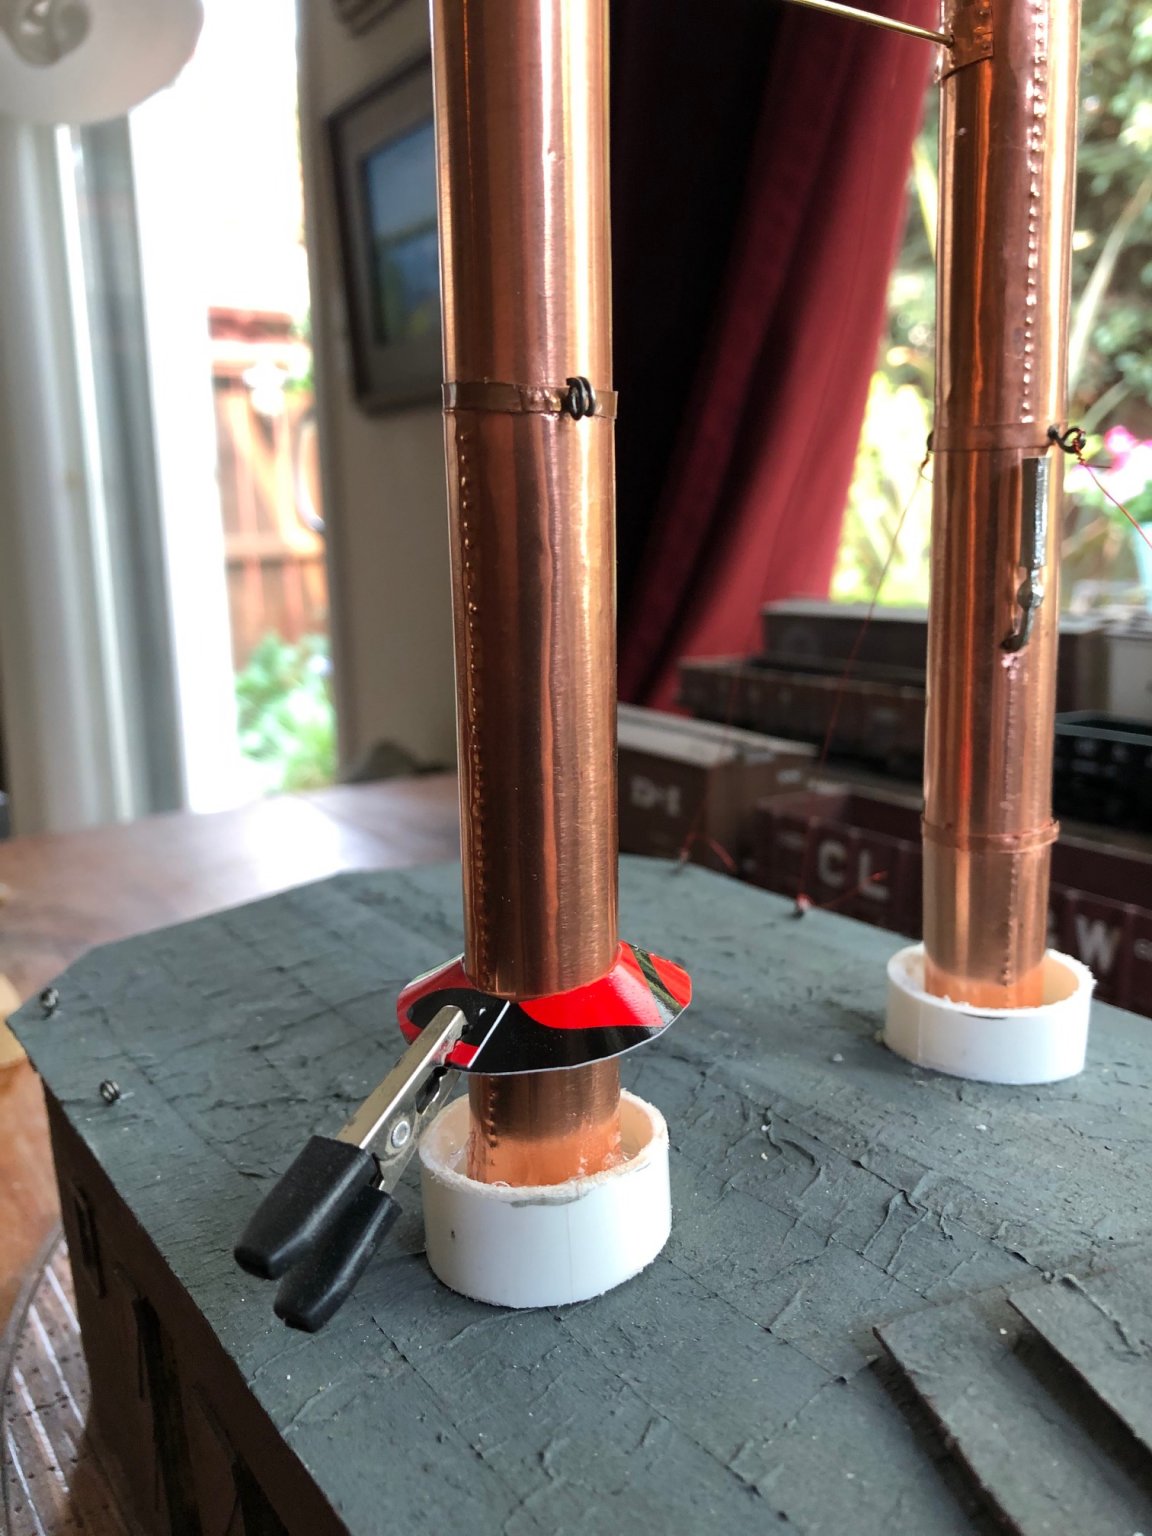
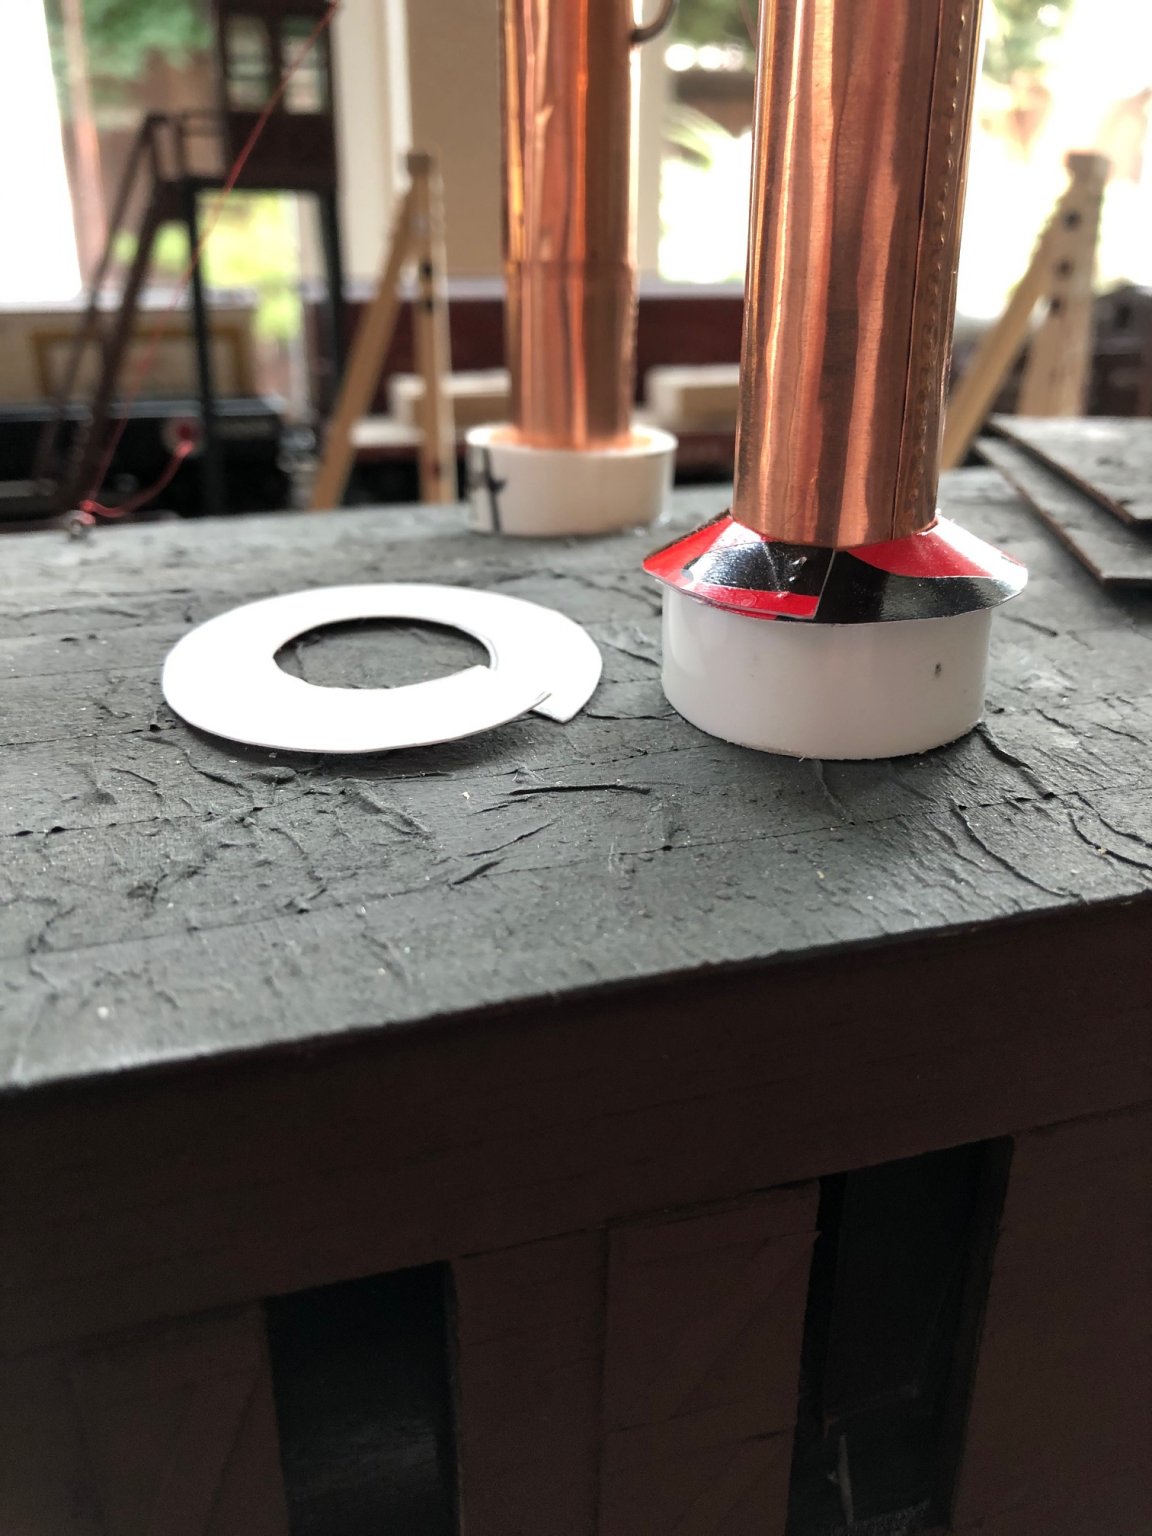
I have made up the drip caps for the chimney stack bases. I made them out of a 'beware of the dog" plastic sign. The plastic is thin and takes rivet impressions and paint well. It also bonds well with the solvent. I am sure there is a way to design them with geometry. I just used a hit and miss method for the diameter for the center cut out and the outside edge.


-
John, Yes, the from the plan the chimney stacks scale out at 37 feet above the roof. To me it kind of looks like a classic mid-America stern wheel river boat.
-
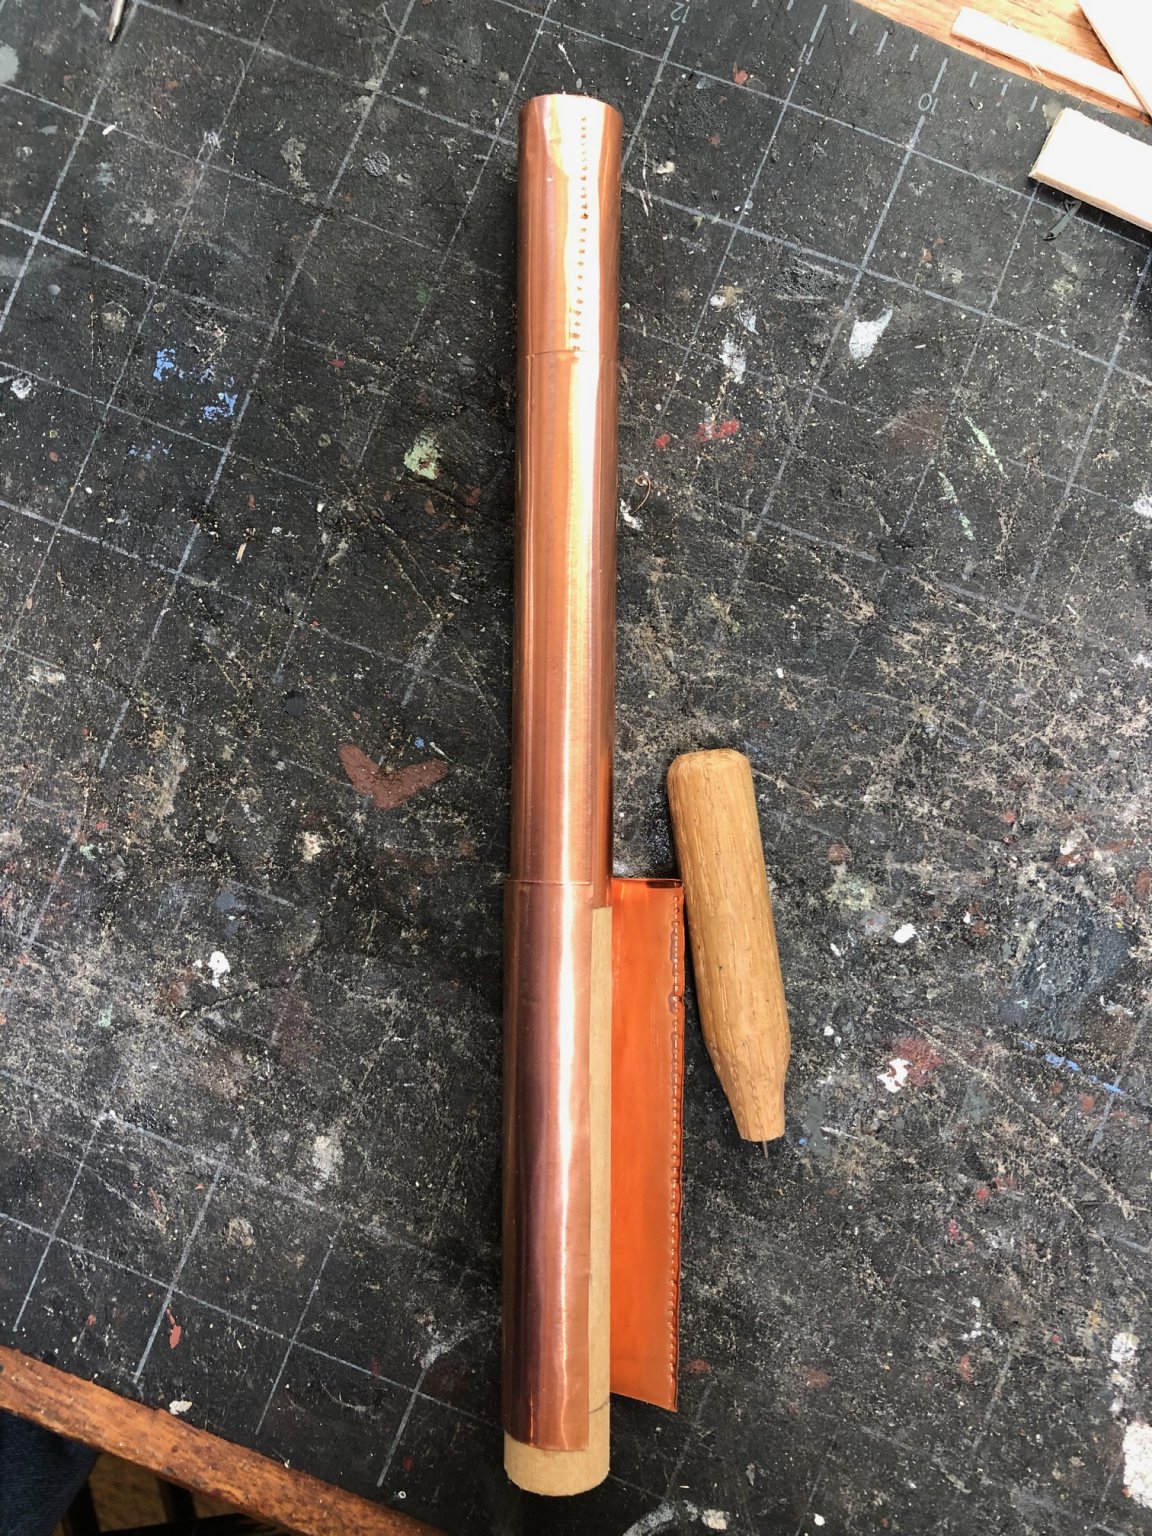
I have been constructing and installing the stacks. I found a wooden dowel that was close the correct scale diameter -- 41 inches. I sheathed the dowels with copper foil and simulated rivets with my home-made riveting tool (a dulled needle in a stick handle - patent pending).

-
Thank you
-
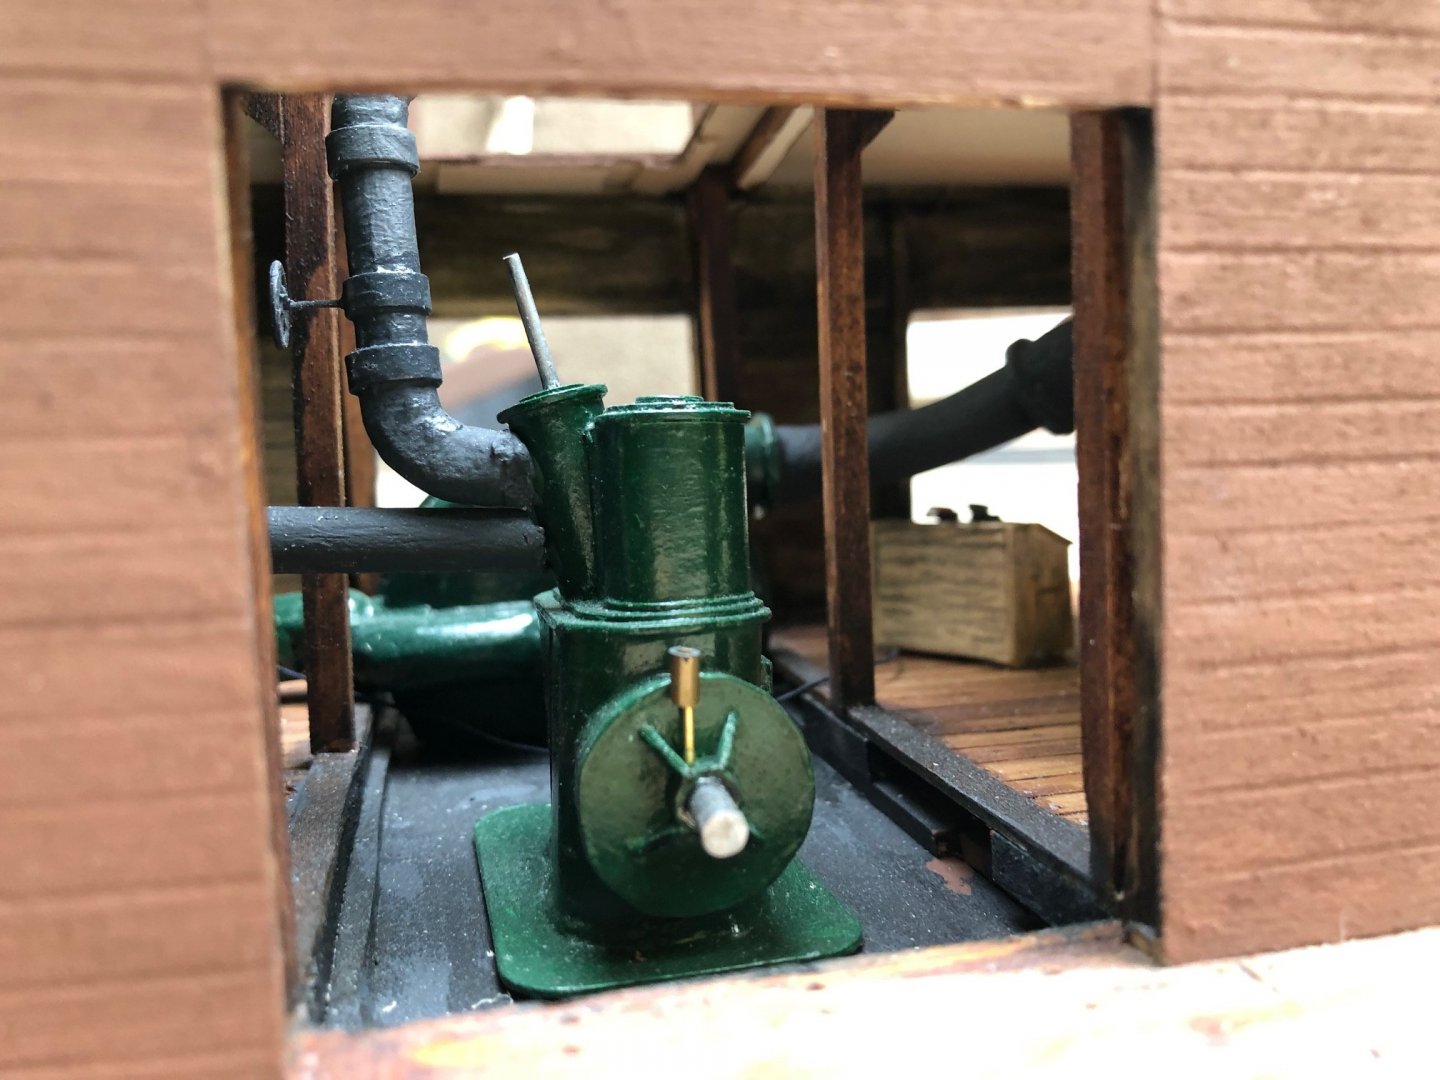
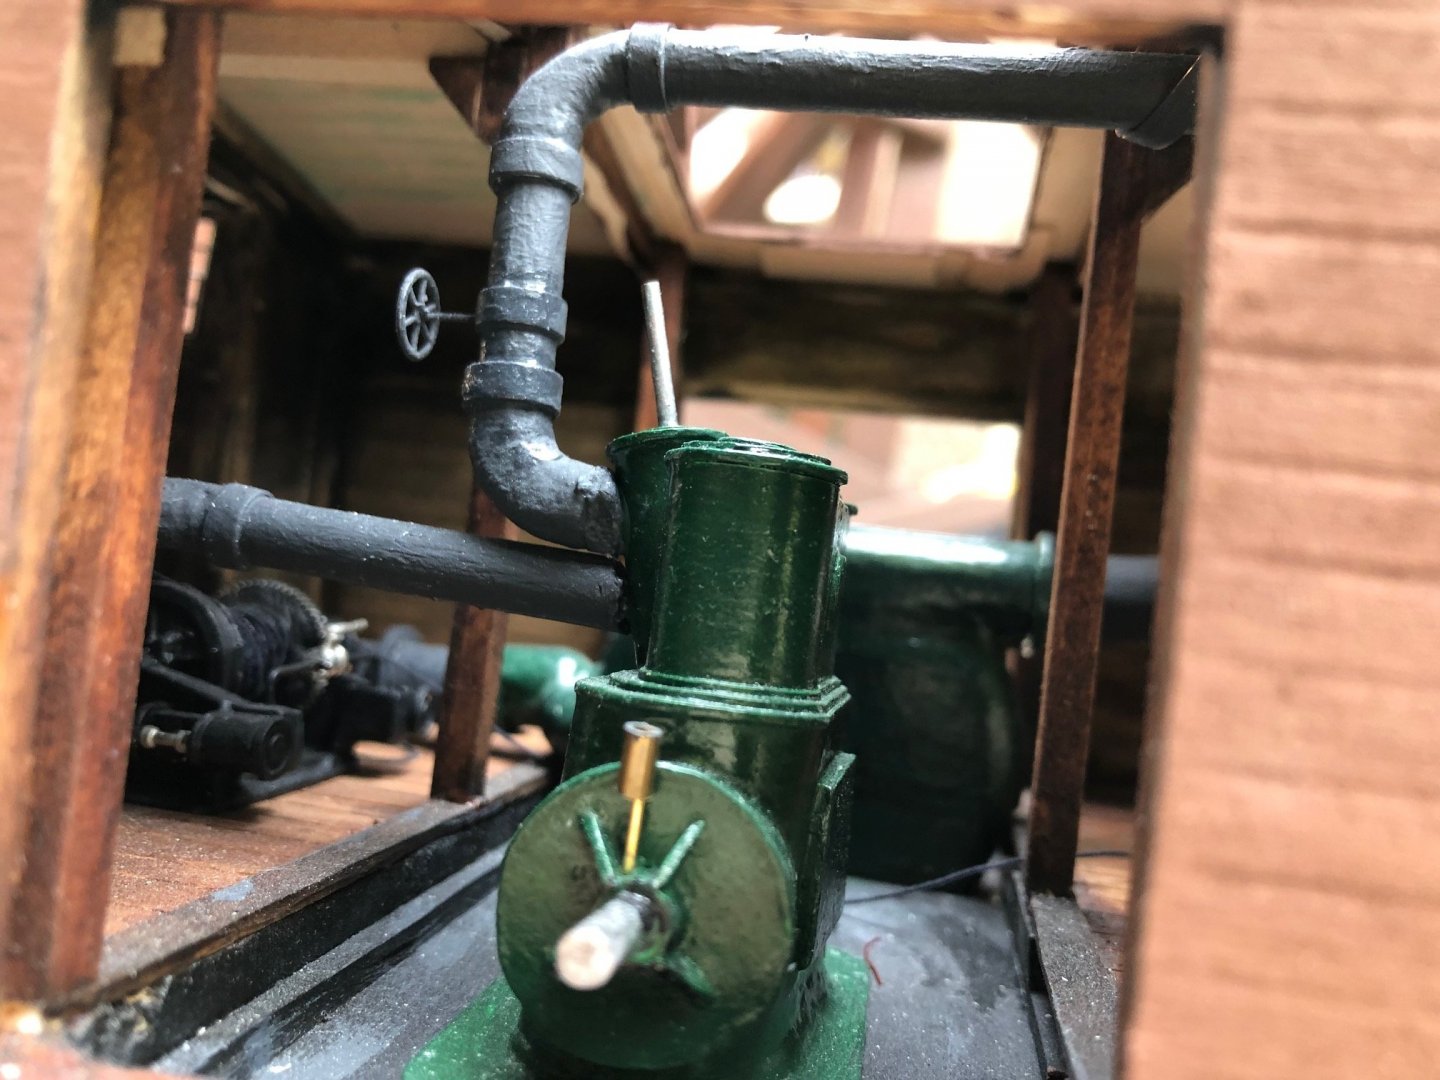
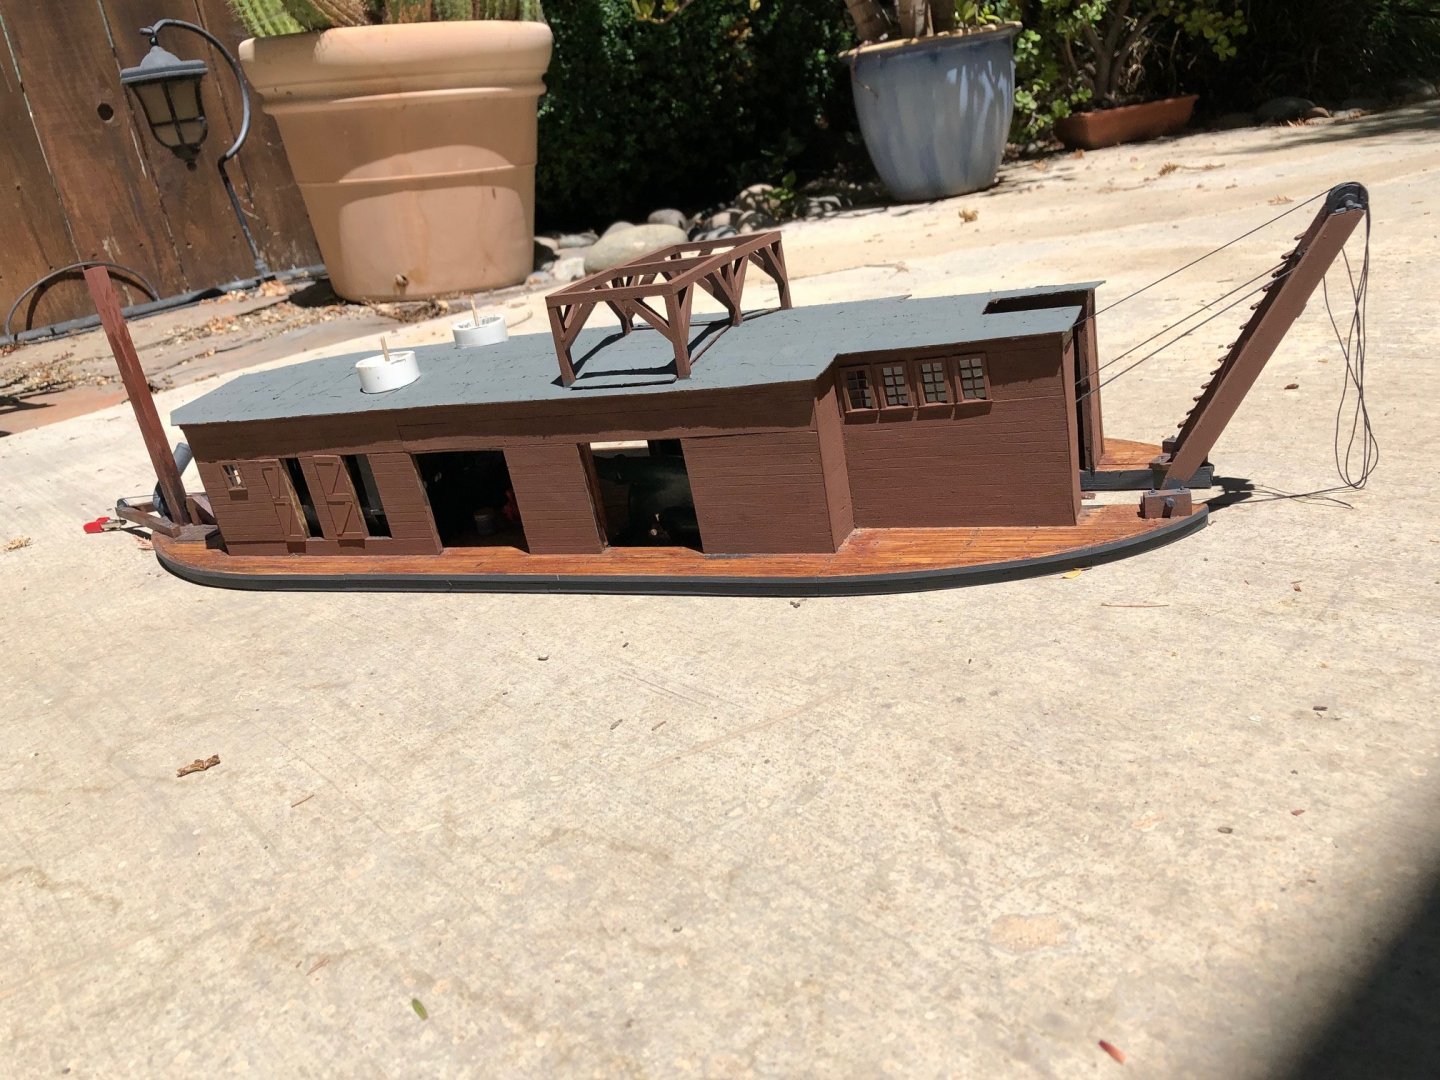
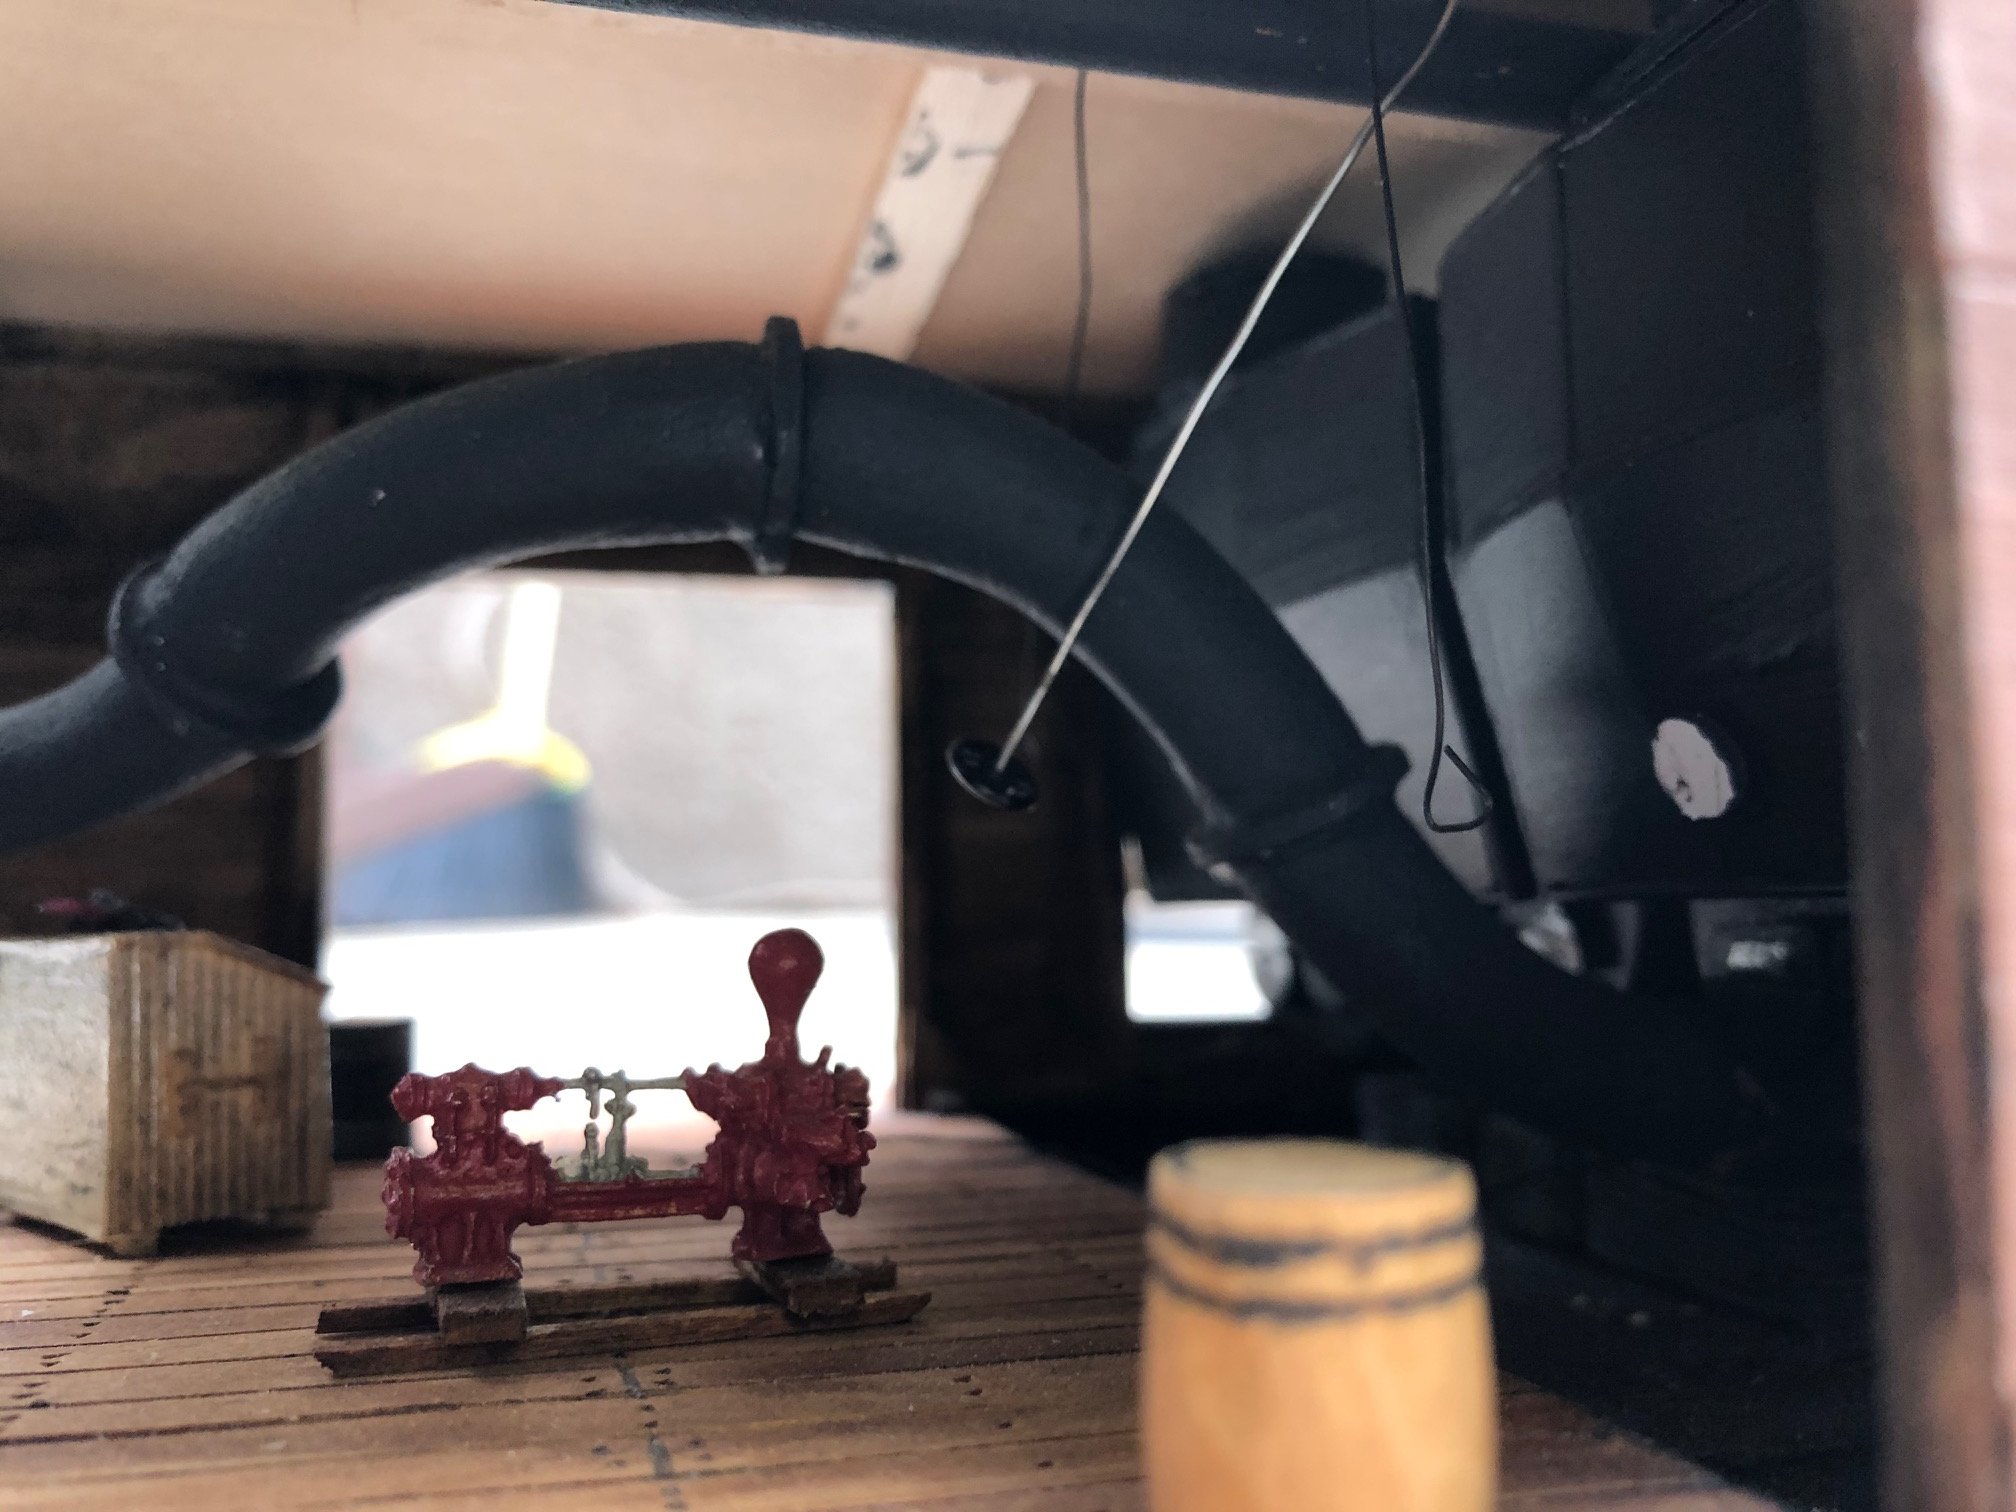
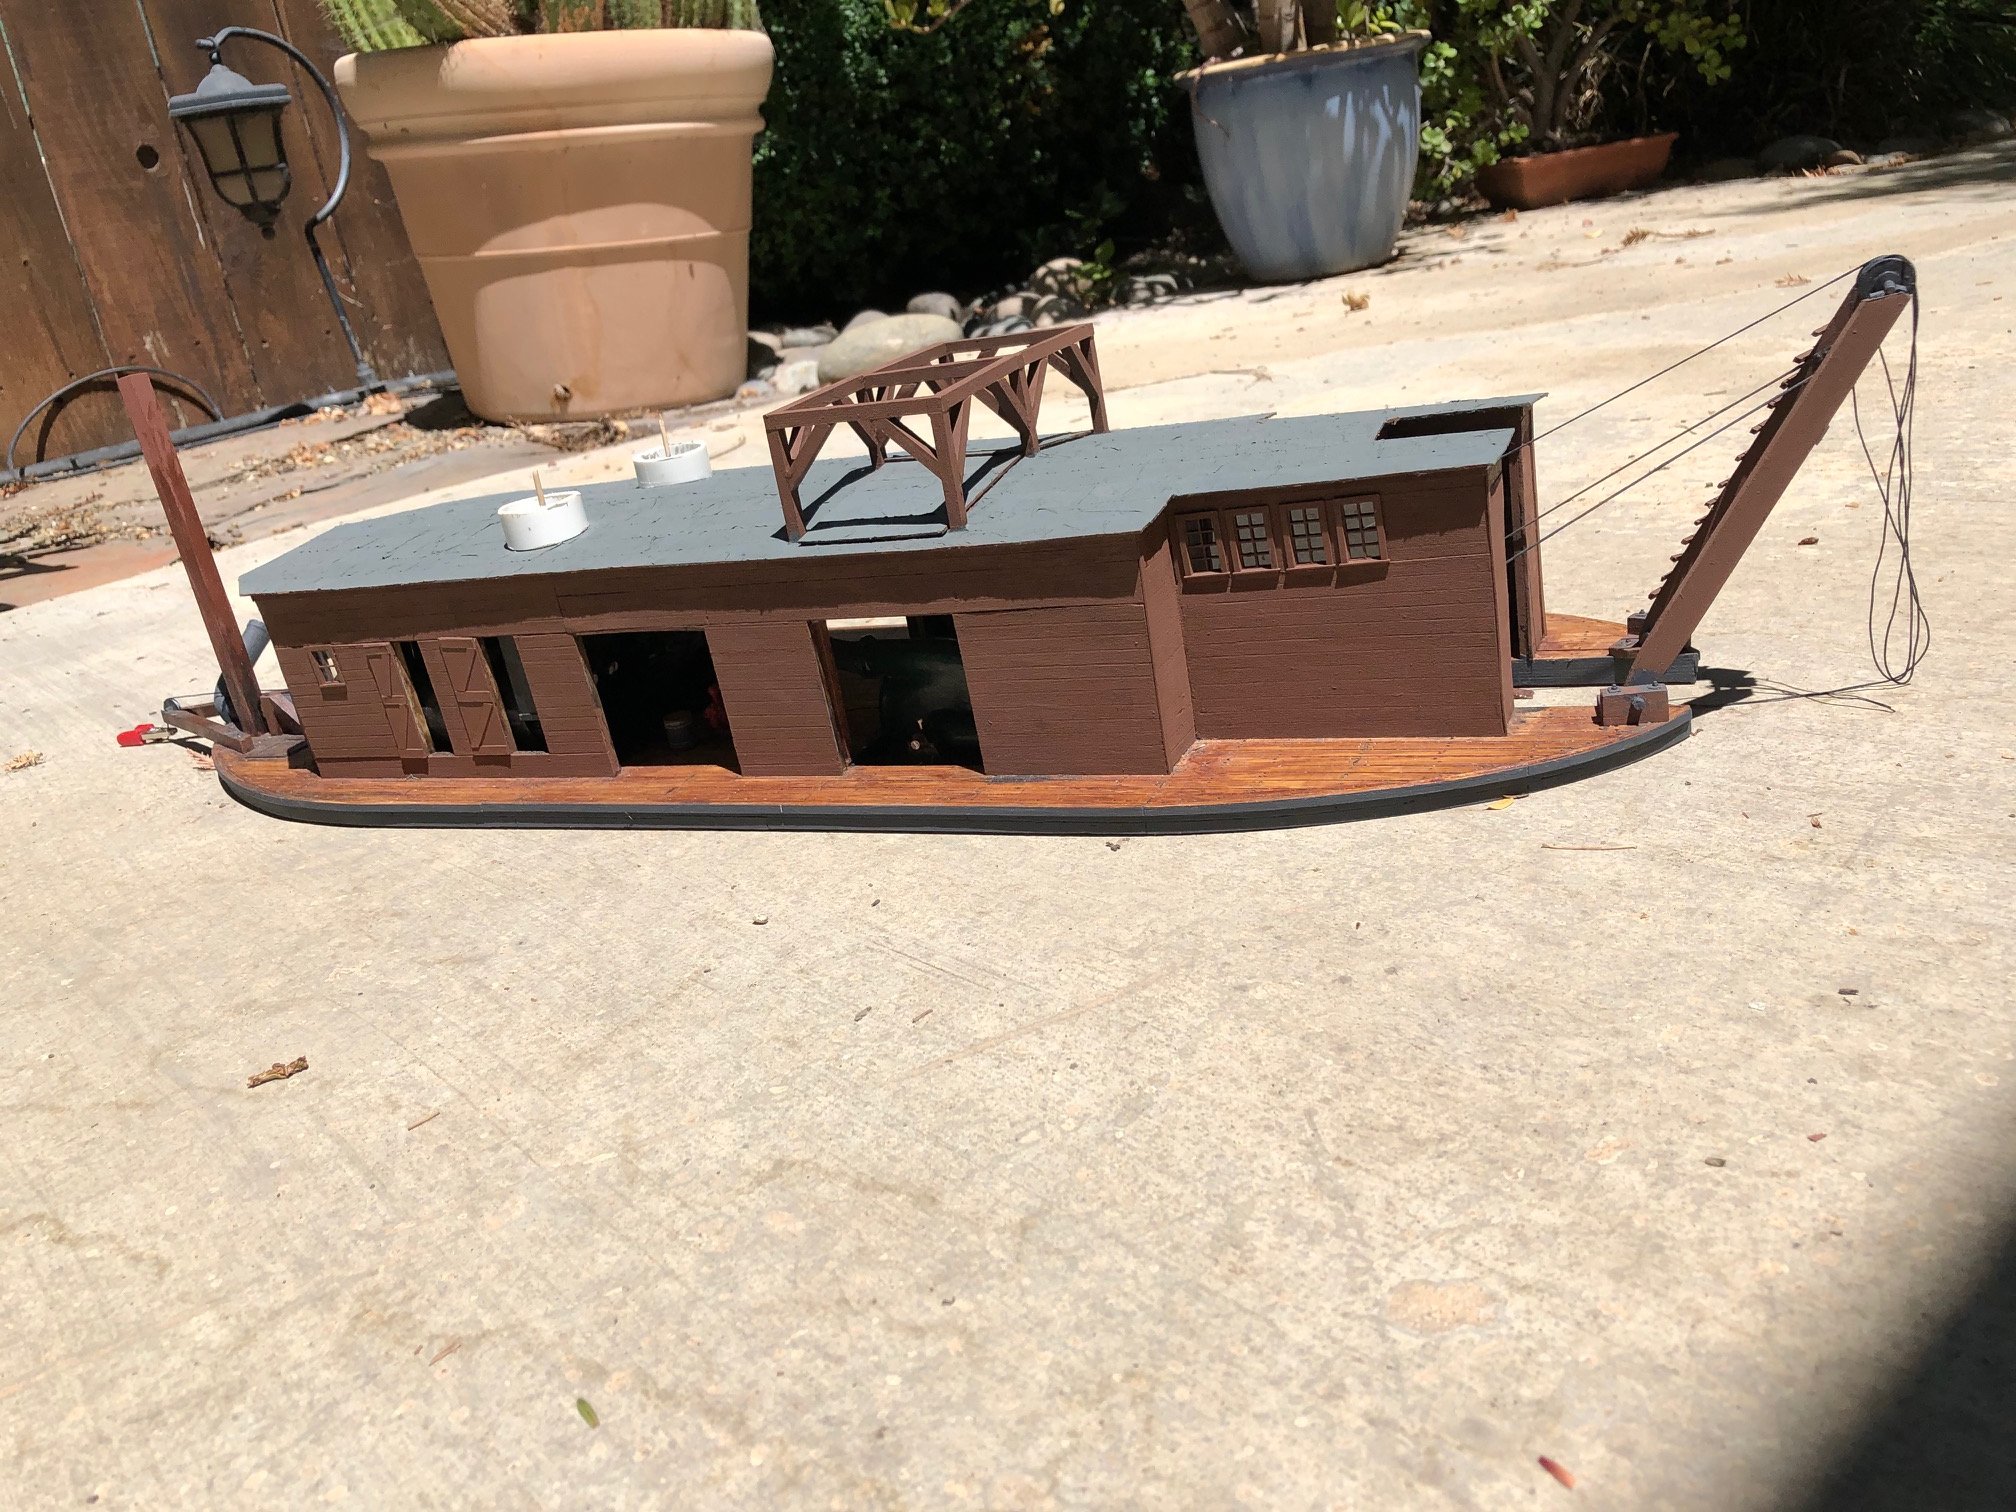
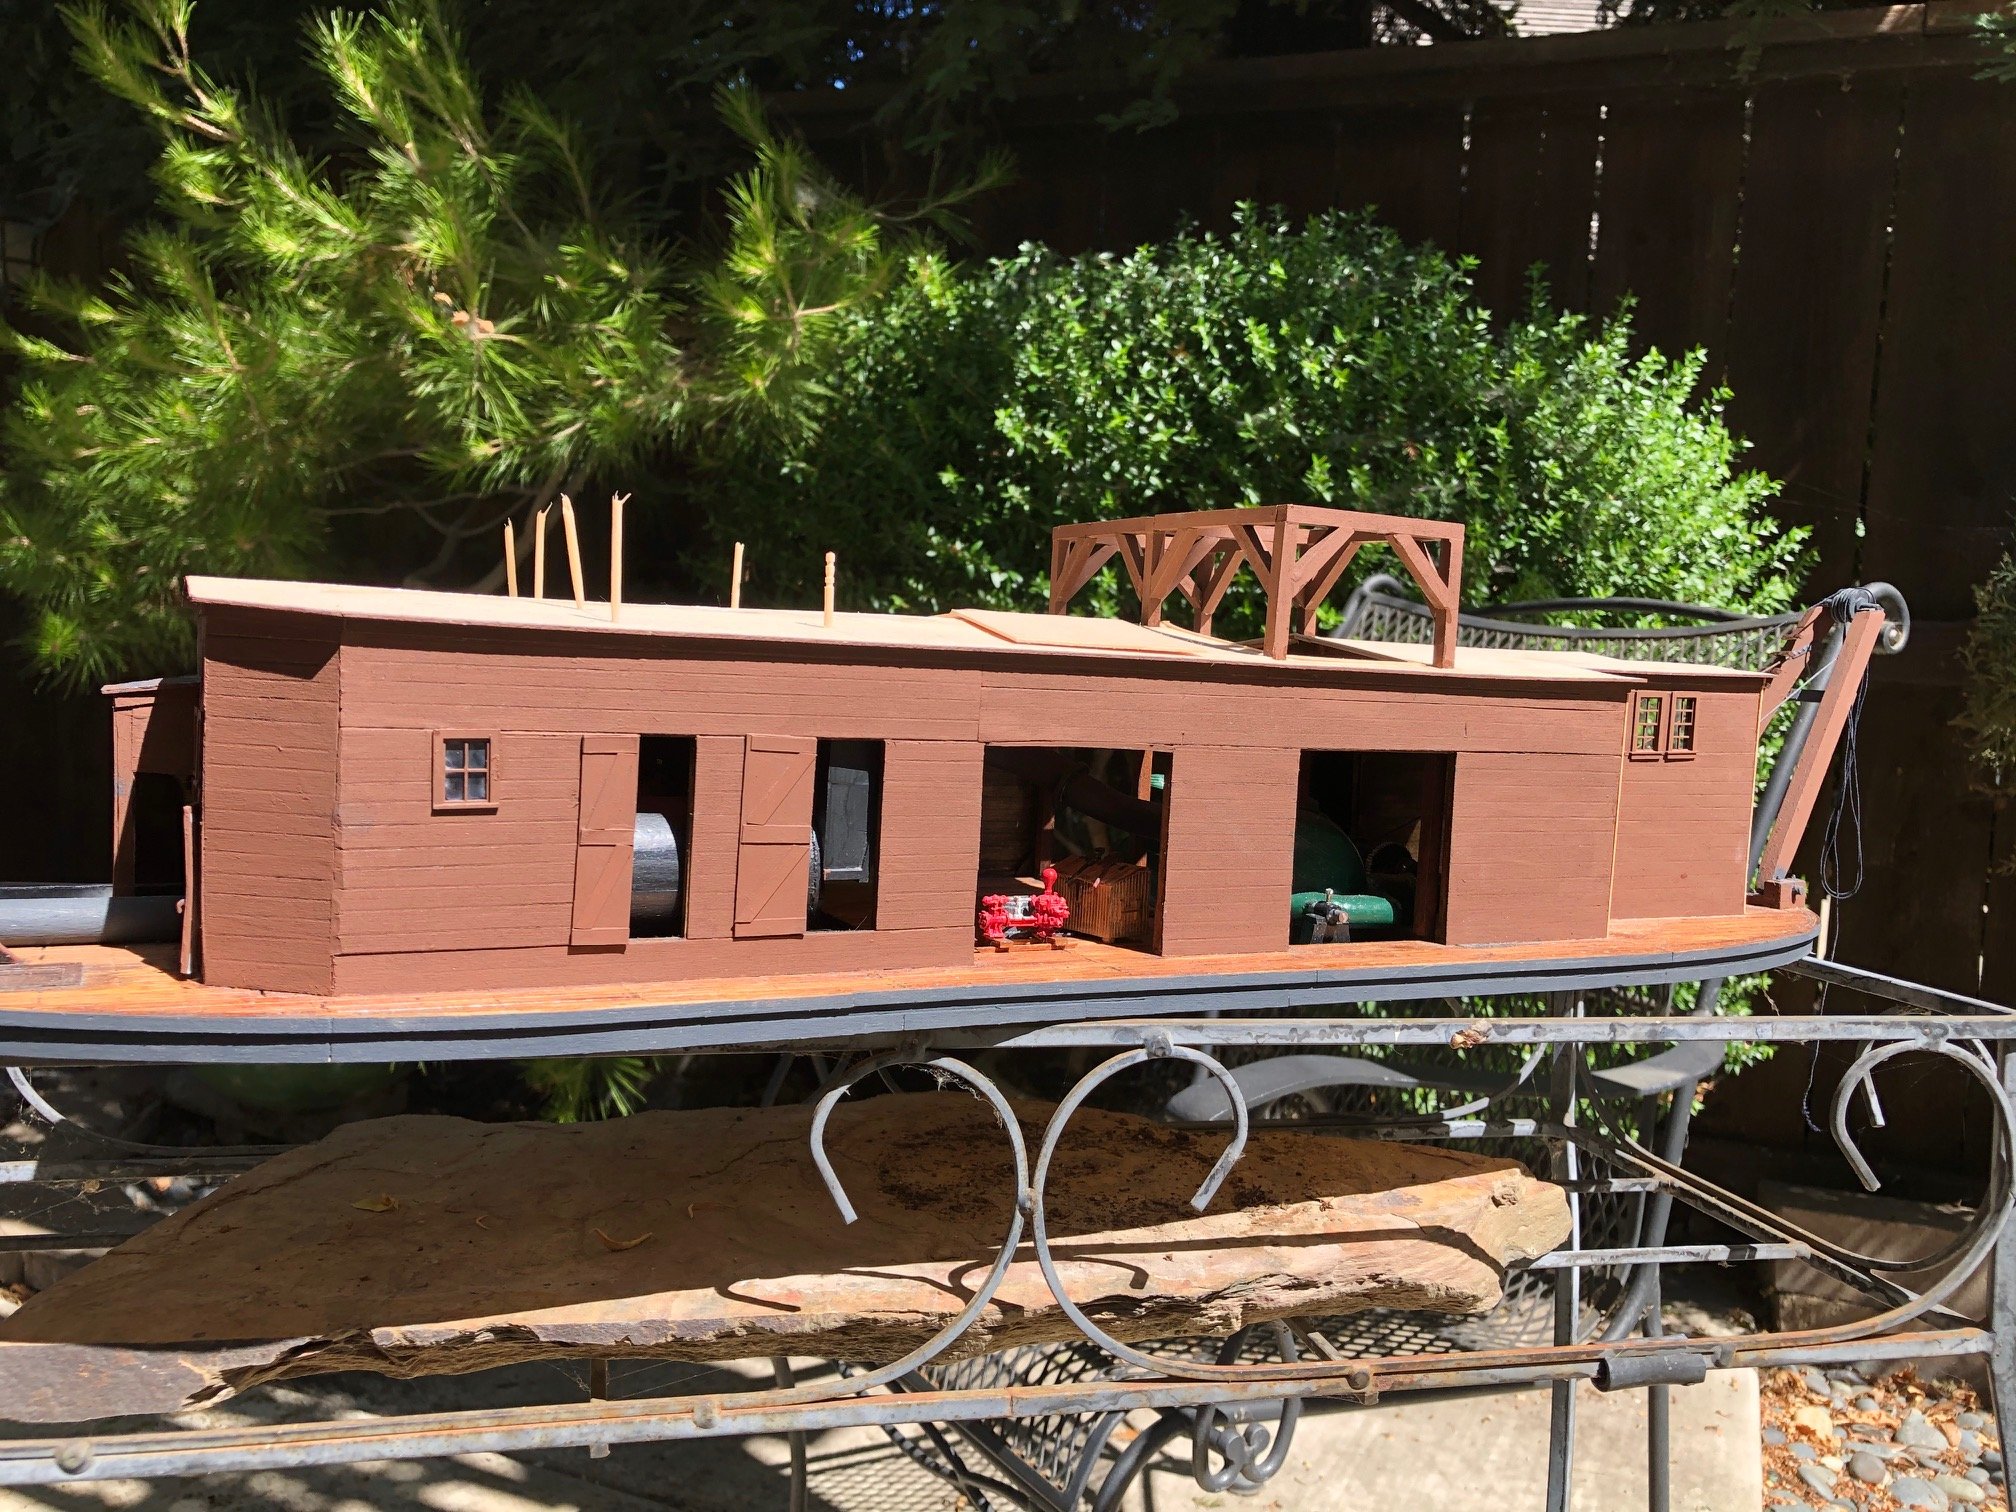
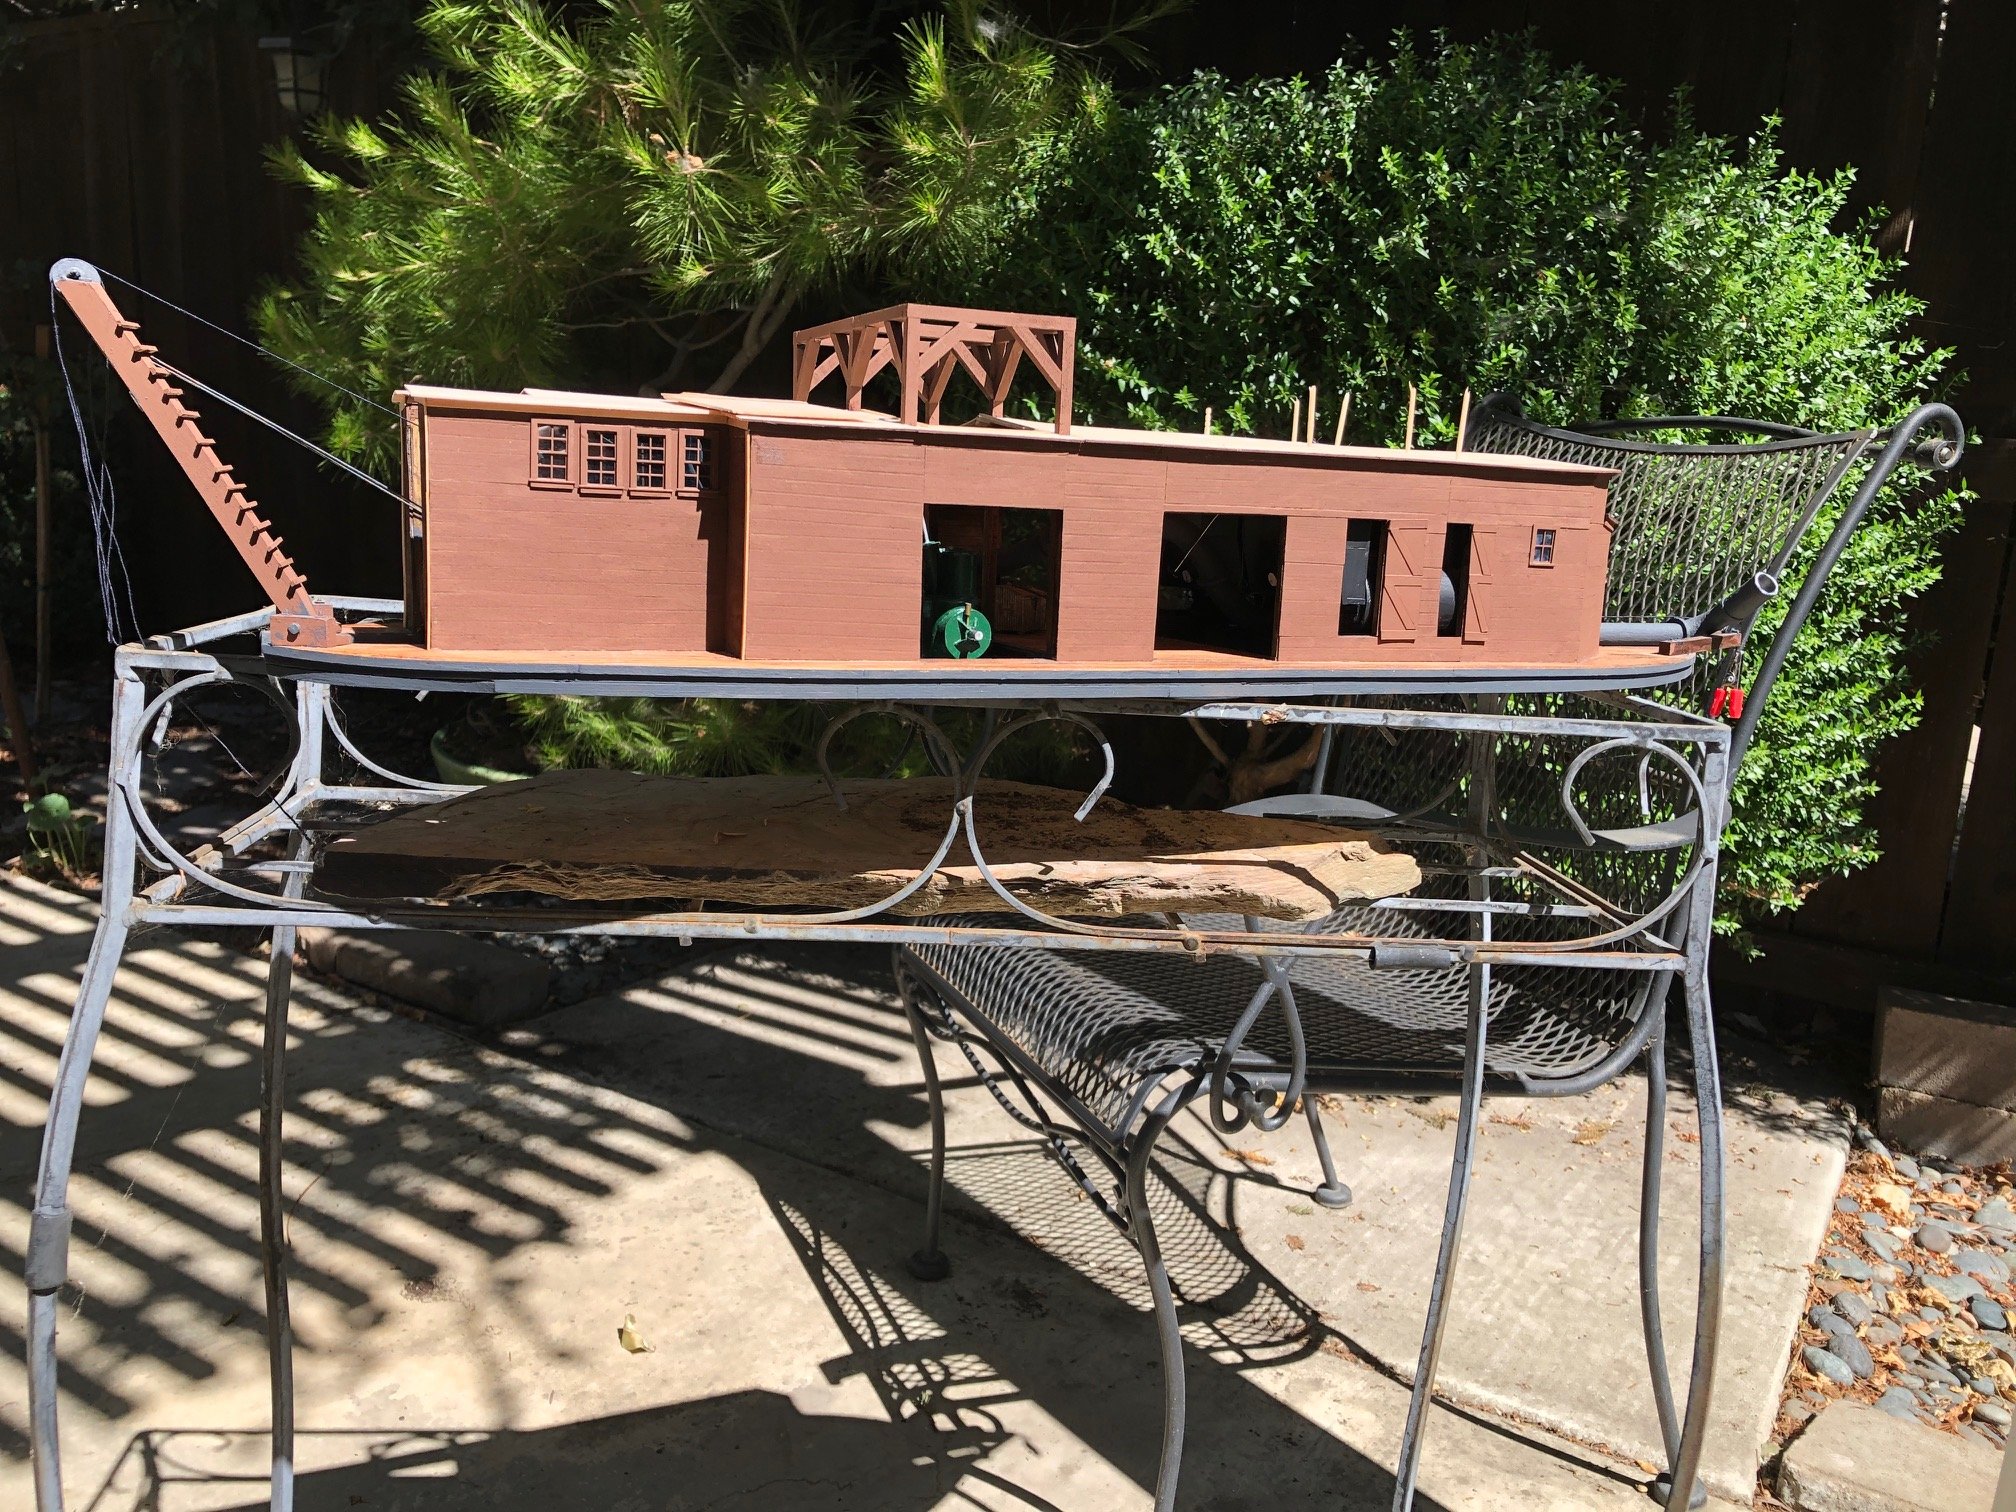
I have applied the roofing to the deck house. In keeping with the rough hewn industrial nature of the dredge I simulated rolled roofing with that rare commodity -- toilet paper. I cut it into strips a scale three feet wide and applied it with a gray paint. It came out like it was kind of bubbling up and warping in the heat and humidity. Here re some images with the roof hatches on and off. I also found some plastic tubing that is a good diameter to represent the wider base portion of stacks. There must be a name for these. They insulate the roof from direct contact with the flammable roof.


-
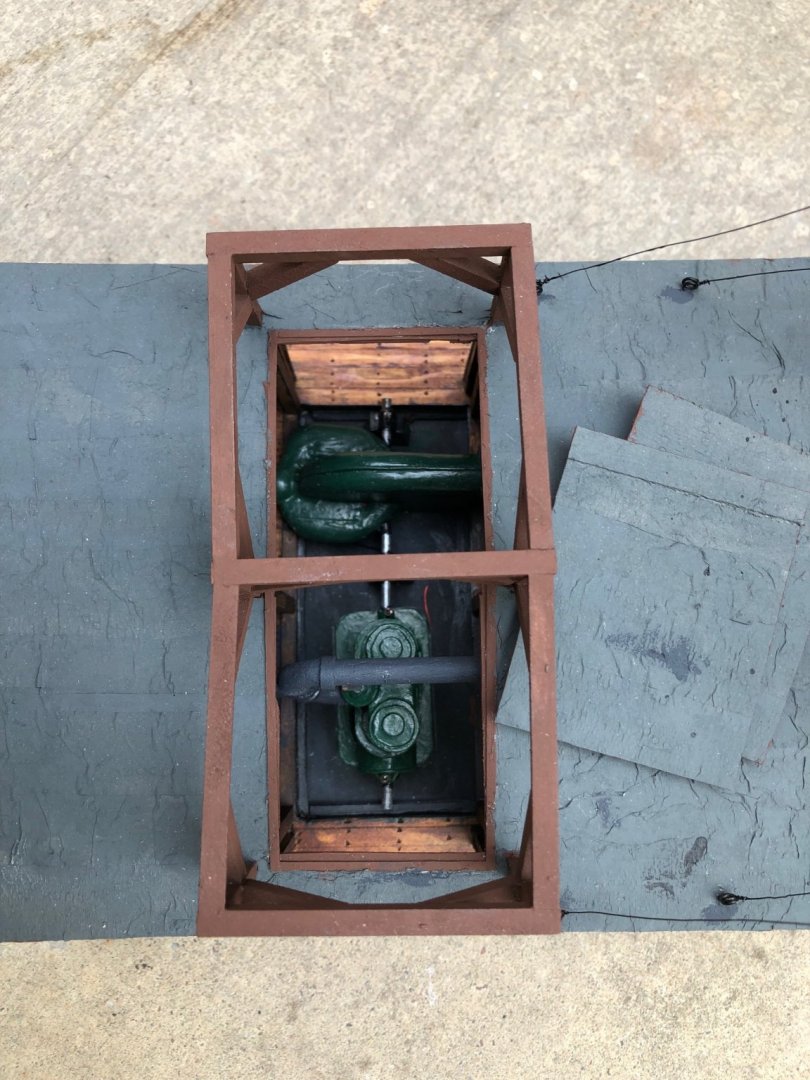
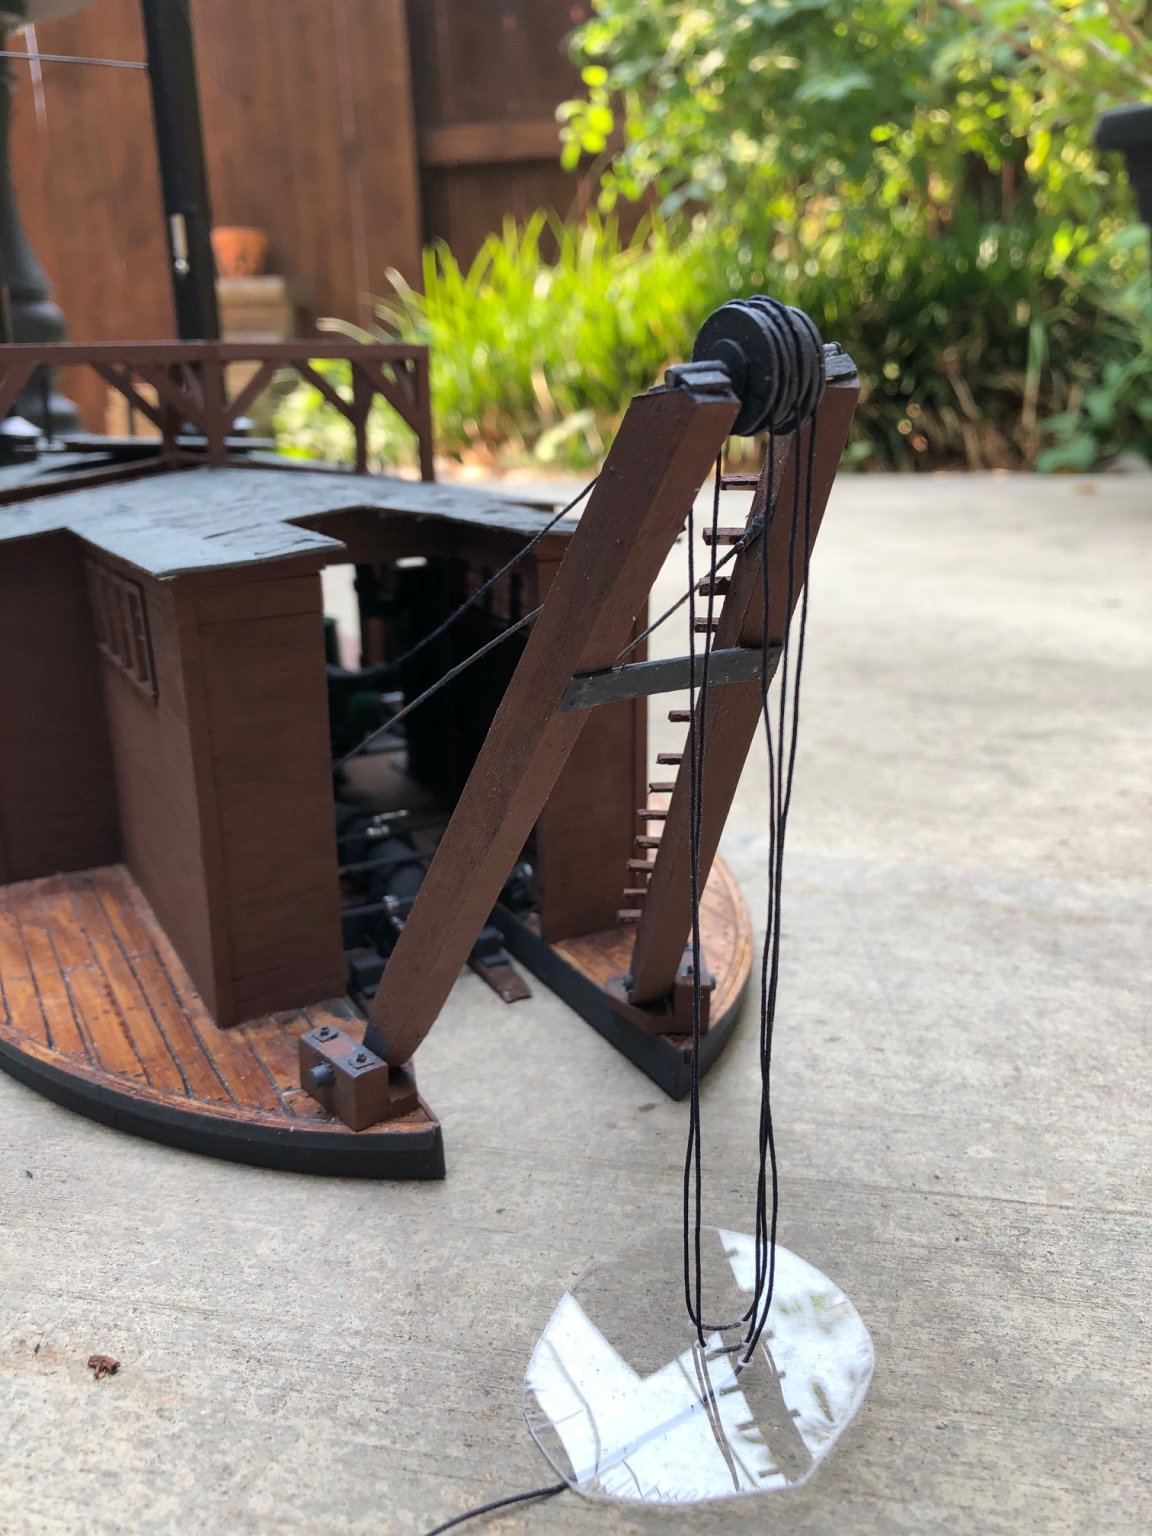
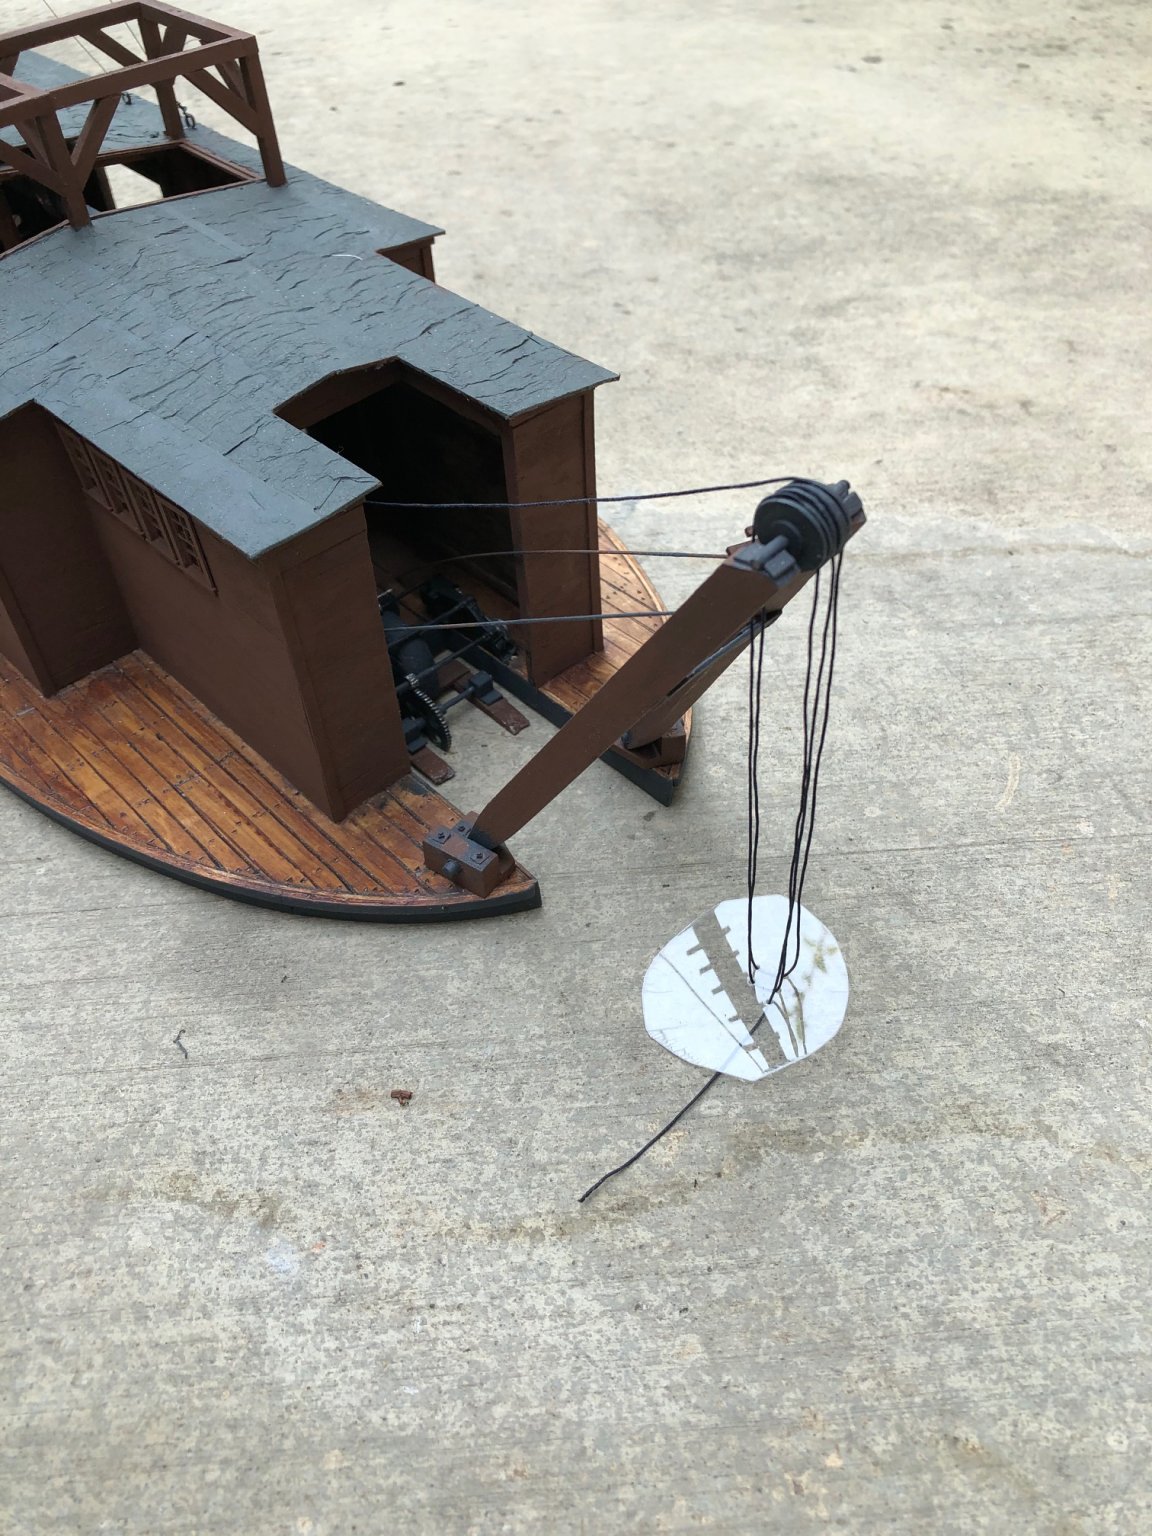
I have finished roofing the deck house and applying trim under the eaves and at right angle corners. I decided to model roof hatches over the pumping equipment bay. I think you can see the edge of a roof hatch in the image of the as-built dredge. My thought has been that the heavy duty scaffolding above the roof was used to service the equipment below with chain lifts. I made the roof hatches removable so it is easier to view the interior. Doing touch up painting as I go.
.thumb.jpg.9e54a5452ed20b4ca4292ec871c27a3e.jpg)


.thumb.jpg.f3b535b8058e042512f856089cebc5d7.jpg)
-
Mississippi stern wheeler by kpnuts
Steve Harvath replied to kpnuts's topic in - Build logs for subjects built 1851 - 1900
Very nice stern wheel project. I have to put twin stacks like that on my hydraulic dredge. How did you build them?


.jpg.27609ce48f5960930b9c31961c878553.jpg)


.jpg.d16709cd71cefbeebe56581107dacda6.jpg)


.jpg.a0d73d5ff18c857c488a9268f4f4fa9d.jpg)