rmazdra
-
Posts
8 -
Joined
-
Last visited
-
 mtaylor reacted to a post in a topic:
Artesiana Latina HMS Victory 1:84 scale kit (REVIEW)
mtaylor reacted to a post in a topic:
Artesiana Latina HMS Victory 1:84 scale kit (REVIEW)
-
Artesiana Latina HMS Victory 1:84 scale kit (REVIEW)
rmazdra replied to mtdoramike's topic in Wood ship model kits
Robert, I'm also building the AL Victory. My kit came with the plan sheets, but no CD (which is fine with me). However, I thought I might have been missing a sheet of plans, but after scouring the internet, I came across this link where you can find all the sheets. It appears I had everything to begin with. These sheets are for Ref.22900... https://www.slideshare.net/CRF1/hms-victory-construction-plan-by-artesania-latina My build log is on another site, and it seems like I can't cut/paste the link to it here. You can probably dig around and find it. There's not too many sites out there capturing build logs for ships (of scale - hint, hint). -
GrandpaPhil reacted to a post in a topic:
HMS Victory by rmazdra - Artesania Latina - Scale 1:84 - 1/2 1805 Trafalgar colors + 1/2 natural wood
-
Morgan reacted to a post in a topic:
HMS Victory by rmazdra - Artesania Latina - Scale 1:84 - 1/2 1805 Trafalgar colors + 1/2 natural wood
-
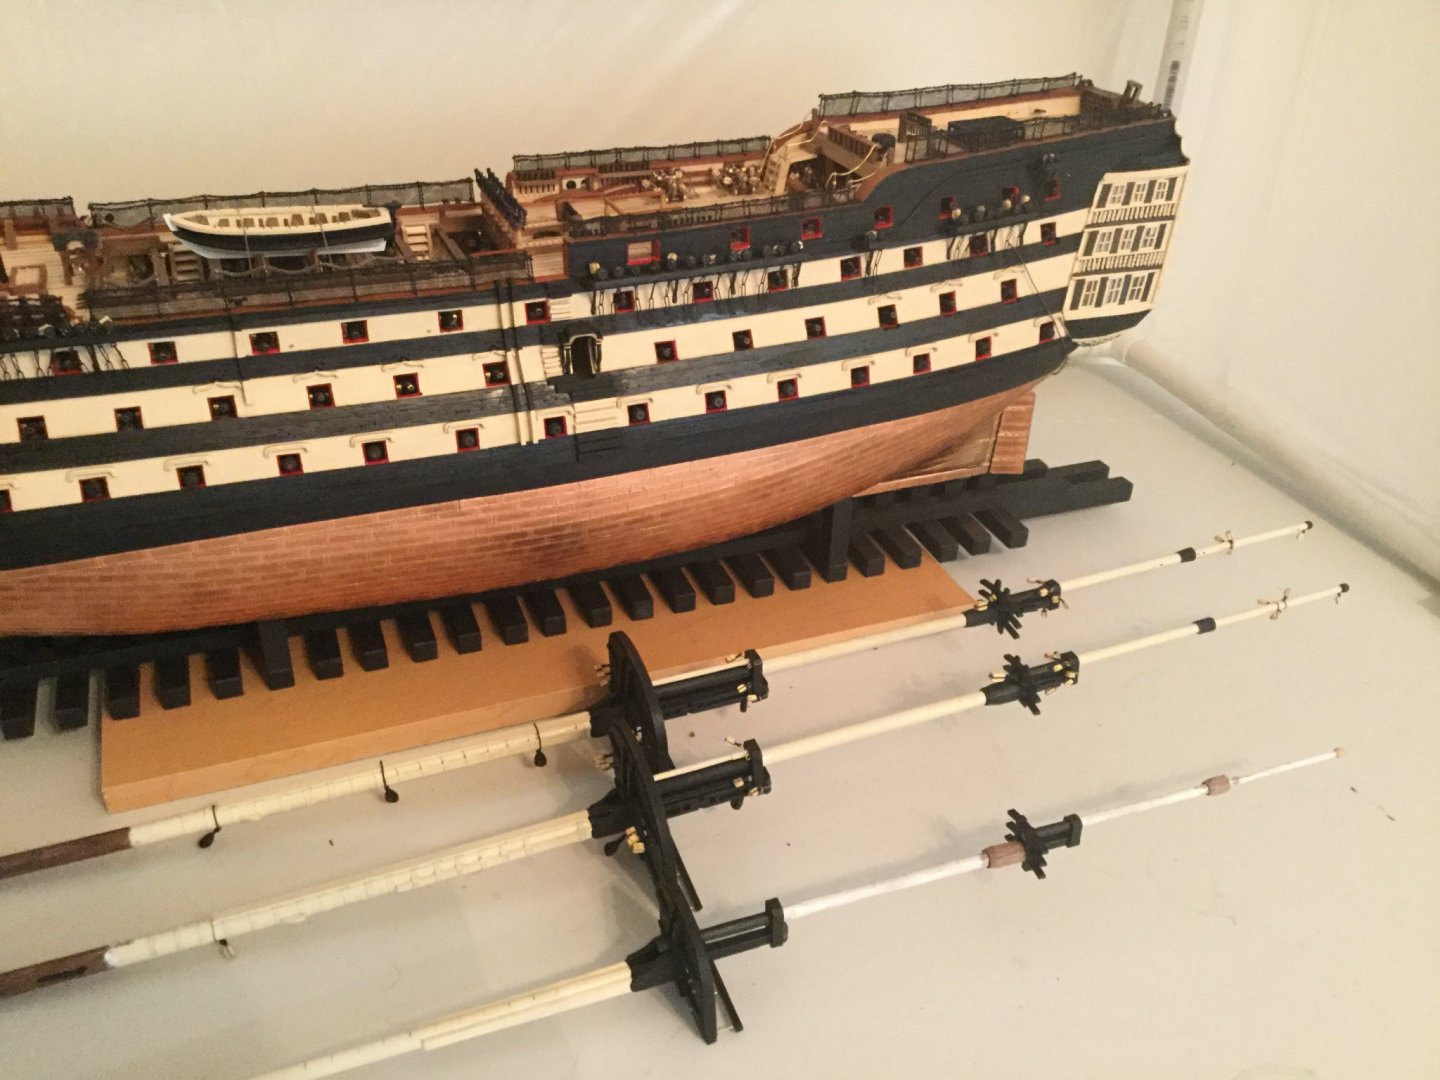
Sorry, haven't been on in a while...but my progress on Victory has progressed pretty nicely. The hull and decks are finished. I'm nearing the end of building the masts and will start on shrouds pretty soo.


-
Mike, I hear your heart when you say that no sails is the way to go. I love the intricacy and engineering of the rigging. But I've never done sails, and I want to have some present. I thought some unfurled sails and some furled, probably only those on the yardarms. Or maybe some type of "in harbor" look (all furled - sorry, I don't know the sailing term for that). I'm also thinking of displaying the yardarms on an angle versus being at perfect right angle to the port/starboard line of the hull so that the view from both sides of the hull will be different in the rigging as well as on the hull. However, I don't think I'd use the angle if all the sails were furled. I think it's great you donated your Vic to your local library. I feel mine may have a similar destination sometime in the future.
-
Jonesey reacted to a post in a topic:
HMS Victory by rmazdra - Artesania Latina - Scale 1:84 - 1/2 1805 Trafalgar colors + 1/2 natural wood
-
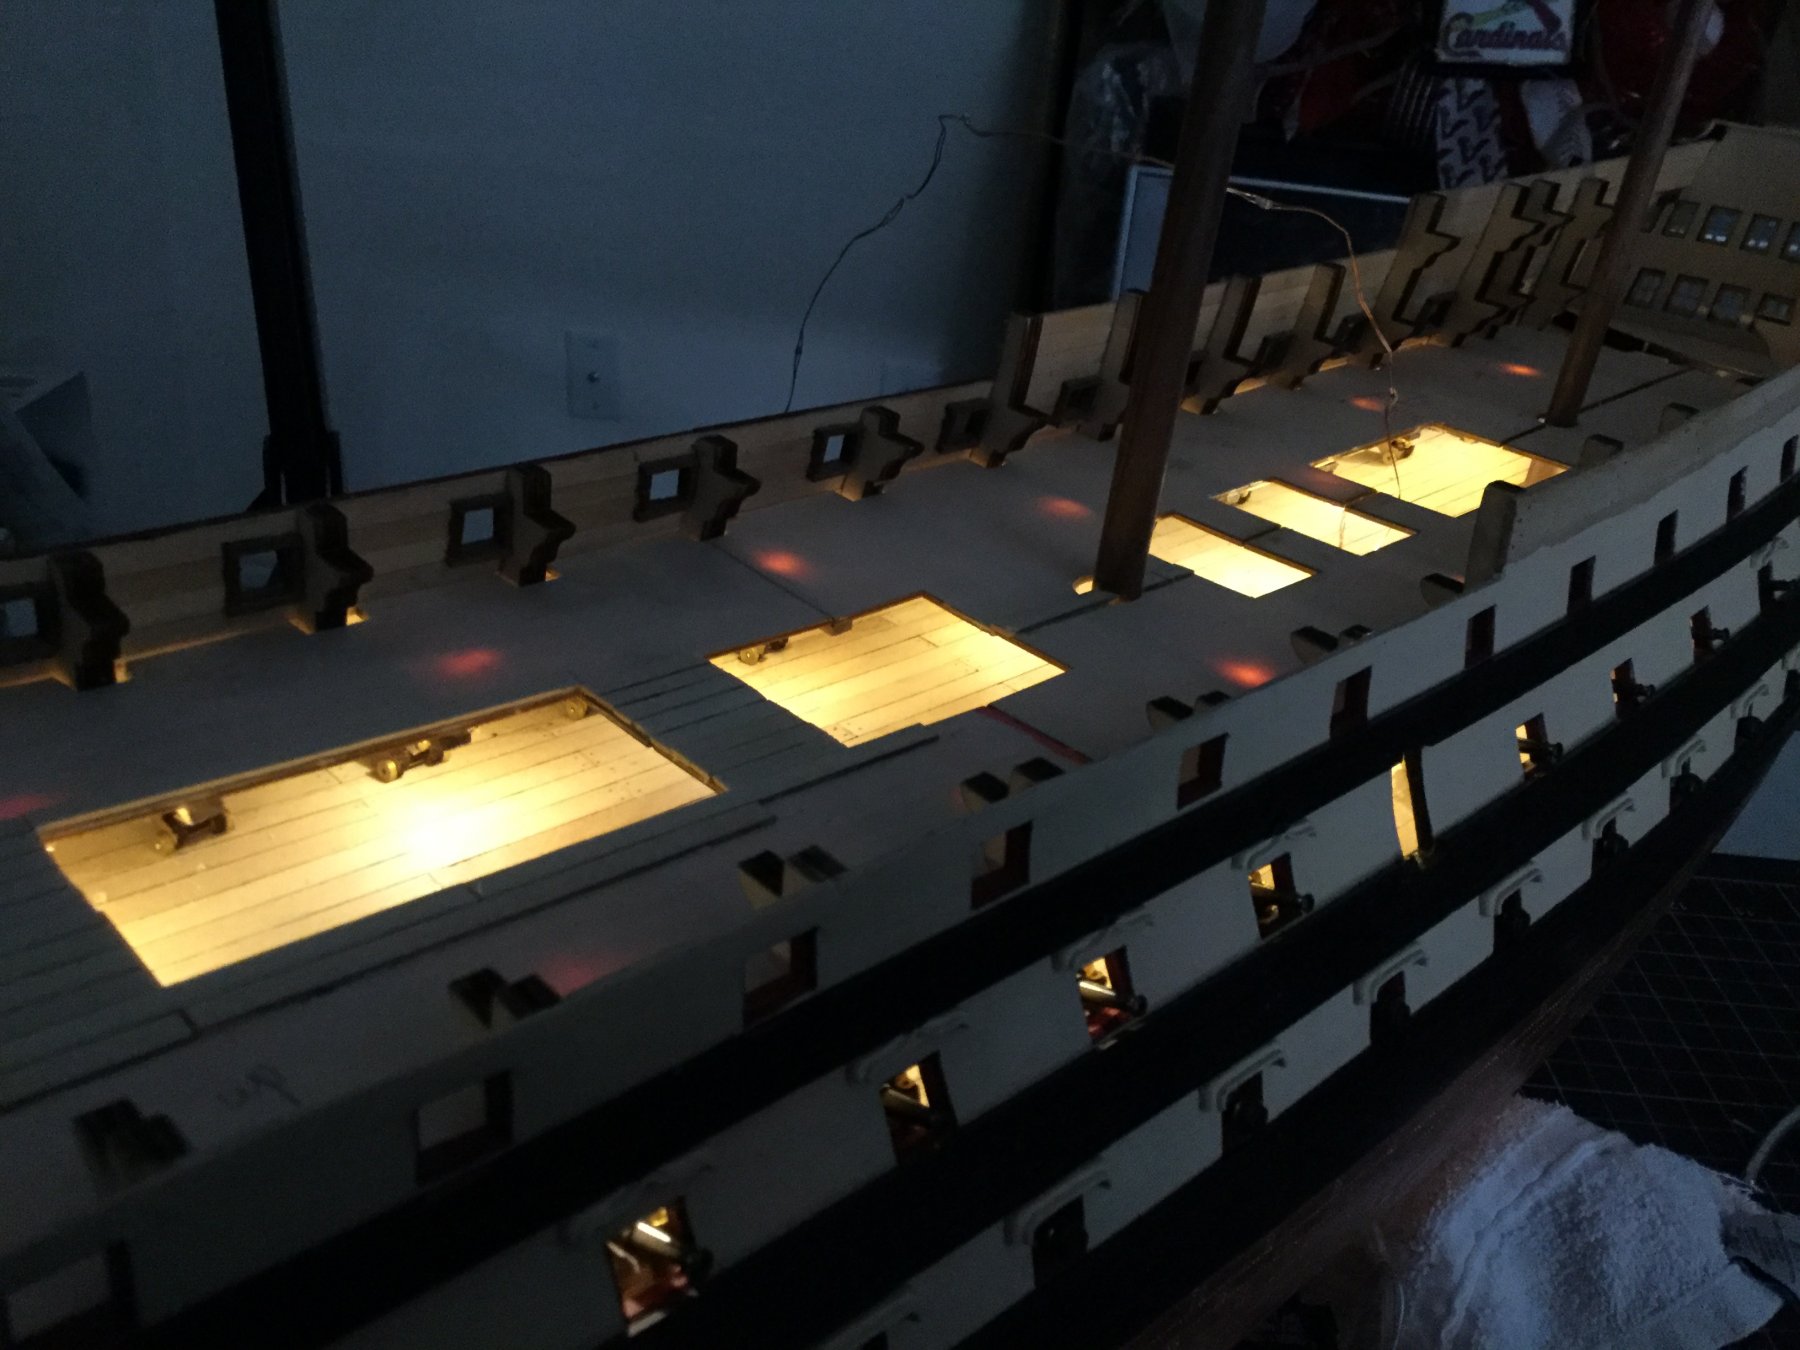
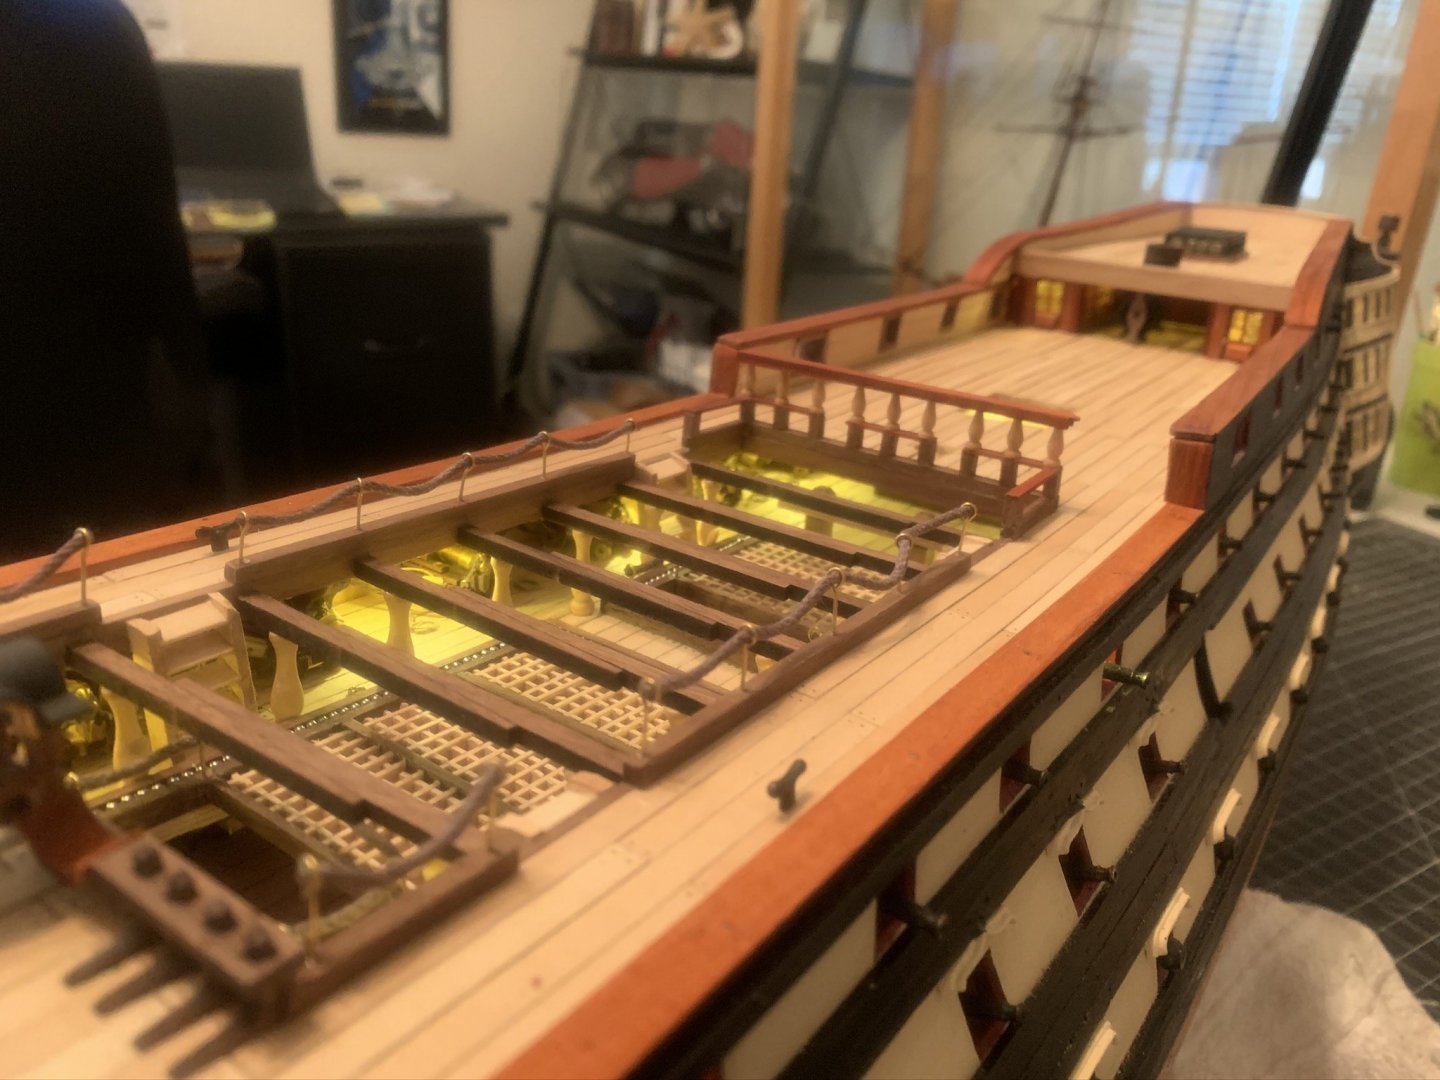
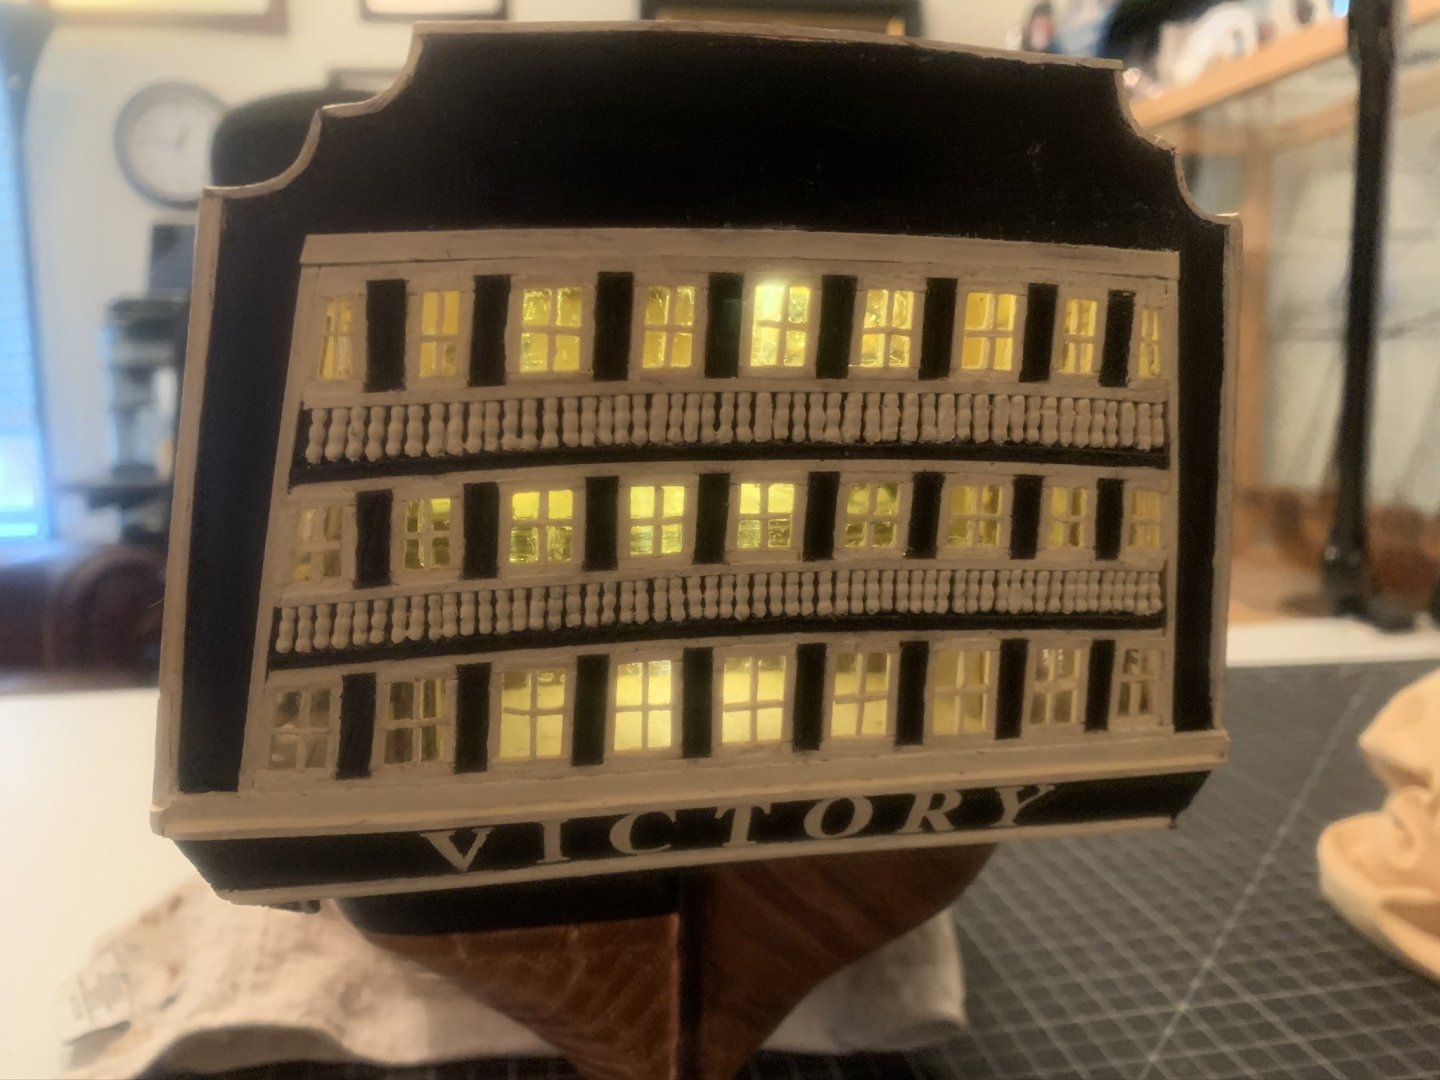
Dealing with the lights has introduced several challenges. First, what kind of lights. I thought initially that I wanted something that I could plug into a wall outlet, but I couldn't find any lights small enough to do that. So, I chose to use battery-operated string lings (10ft strand). These lights are super small and have copper wire between the lights that is easily bendable. I found that they come in different colors of light though. Some are bright white, which didn't look right in this application. The one I chose gives off a soft, warm, yellowish glow. I felt this was more appropriate to the candles/lanterns that would have been used. Second, how to get the lights threaded through to the decks. I make sure to drill a hole in the keel where I expected the mounting pedestal to go. I will have to ensure the pedestal as well as the display base is drilled out so the wiring can go through them undetected. I put a thin piece of wire through the keel and then through the bottom gun deck while I was planking so that I could just pull the lights through when it came time. An issue I didn't foresee was that some of the small lights actually didn't make it up to the ceiling of the bottom deck. They were below the bottom deck and between the frames of the hull. No big deal, I thought. No one would see them. However, when I was done planking and turned on the lights, because the AL Victory has only a single layer of planking, even the smallest of gaps between the planks had light shining through it when the lights were turned on. This was only a problem on the natural wood side of the ship. The other side had the copper plating and black paint, so any small gaps where covered or filled in. I should have used something like black construction paper to make a tube that the lighting would have to pass through from the keel to the lower gun deck. What I actually wound up doing was opening up the very thin gaps where light was coming through in the planks. They I inserted very thin shims of the planking wood. After sanding and varnishing, the gaps were patched up and unnoticeable. Third, placing the lights. I had to plan out what length of the string lights I needed. Initially I thought I would have to hang the lights from the bottom of the deck braces (the instructions call these braces "supporting bowsprits"). That would have been difficult as the lights would have to be installed on the braces first before the braces are glued in place. Instead, I just installed the braces first. Then I ran the copper wiring and lights right on top of the braces and taped it down in position. Next, the plywood decking would be laid on top of the braces, which also meant they would lay on top of the lights and wiring. The wiring was so thin that it didn't cause a problem when I planked the decks with the thin battens. Fourth, ensuring no "hot spots" appeared on the deck from the lights. As you can see from the picture of the lights already installed, the top gun deck has "hot spots" from the lights appearing on it (before the decking battens are laid down). I thought perhaps the battens would cover up the spots without a problem, but that wasn't the case. So, I used small squares of black construction paper to cover the hot spots and glued them onto the plywood decking. I will have to take a different approach when working with the foc'sle and quarterdeck (the deck above the upper gun deck) since it doesn't have a plywood deck. There are braces and directly on the braces go the battens. I think I'll use a full sheet of construction paper fitted correctly and lay that on top of the braces and lights. Then I'll plank with the battens on top of the paper. I'll include some pictures of this process as I get to it. Fifth, ensuring the lights aren't too bright. My battery operated string lights aren't dimmable. I felt that they were initially too bright on the lowest gun deck. So, I just used black paint on every other bulb. The lights are not going to be on very long, so I'm not worried about them getting too hot with the paint. I figure I'll turn the lights on for just a few minutes at a time when someone is looking closely at the finished product.
-
The thought has crossed my mind about stopping the build before I do anything with masts, sails, and rigging. Sort of a admiralty version. That version of any ship is awesome in it's own right. And then the size of the case is much smaller. If nothing else, I may take a break for a while before starting on the 2nd half of the build. If I do that, I need to figure out how to have a low cost dust cover that's still transparent to see through and easy to remove. Some thin Plexiglas maybe. Thoughts?
-
Mike, thanks for the feedback. I’m so far away from finishing that I haven’t thought too much about the display case yet. I have considered that I should place a mirror behind the case so that you could see both the painted and natural wood views at the same time. For my USS Constitution, I worked with a cabinetmaker and created a custom case. Although I didn’t build the case, I had a lot of fun helping design it. It turned out beautiful. The case separated from the base cabinet so I actually had 2 pieces of furniture. Hidden, dimmable lights were around the top of the case. I may need to go that route again.
-
Jonesey reacted to a post in a topic:
HMS Victory by rmazdra - Artesania Latina - Scale 1:84 - 1/2 1805 Trafalgar colors + 1/2 natural wood
-
mtdoramike reacted to a post in a topic:
HMS Victory by mtdoramike - FINISHED - Artesania Latina
-
ccoyle reacted to a post in a topic:
HMS Victory by rmazdra - Artesania Latina - Scale 1:84 - 1/2 1805 Trafalgar colors + 1/2 natural wood
-
GrandpaPhil reacted to a post in a topic:
HMS Victory by mtdoramike - FINISHED - Artesania Latina
-
GrandpaPhil reacted to a post in a topic:
HMS Victory by rmazdra - Artesania Latina - Scale 1:84 - 1/2 1805 Trafalgar colors + 1/2 natural wood
-
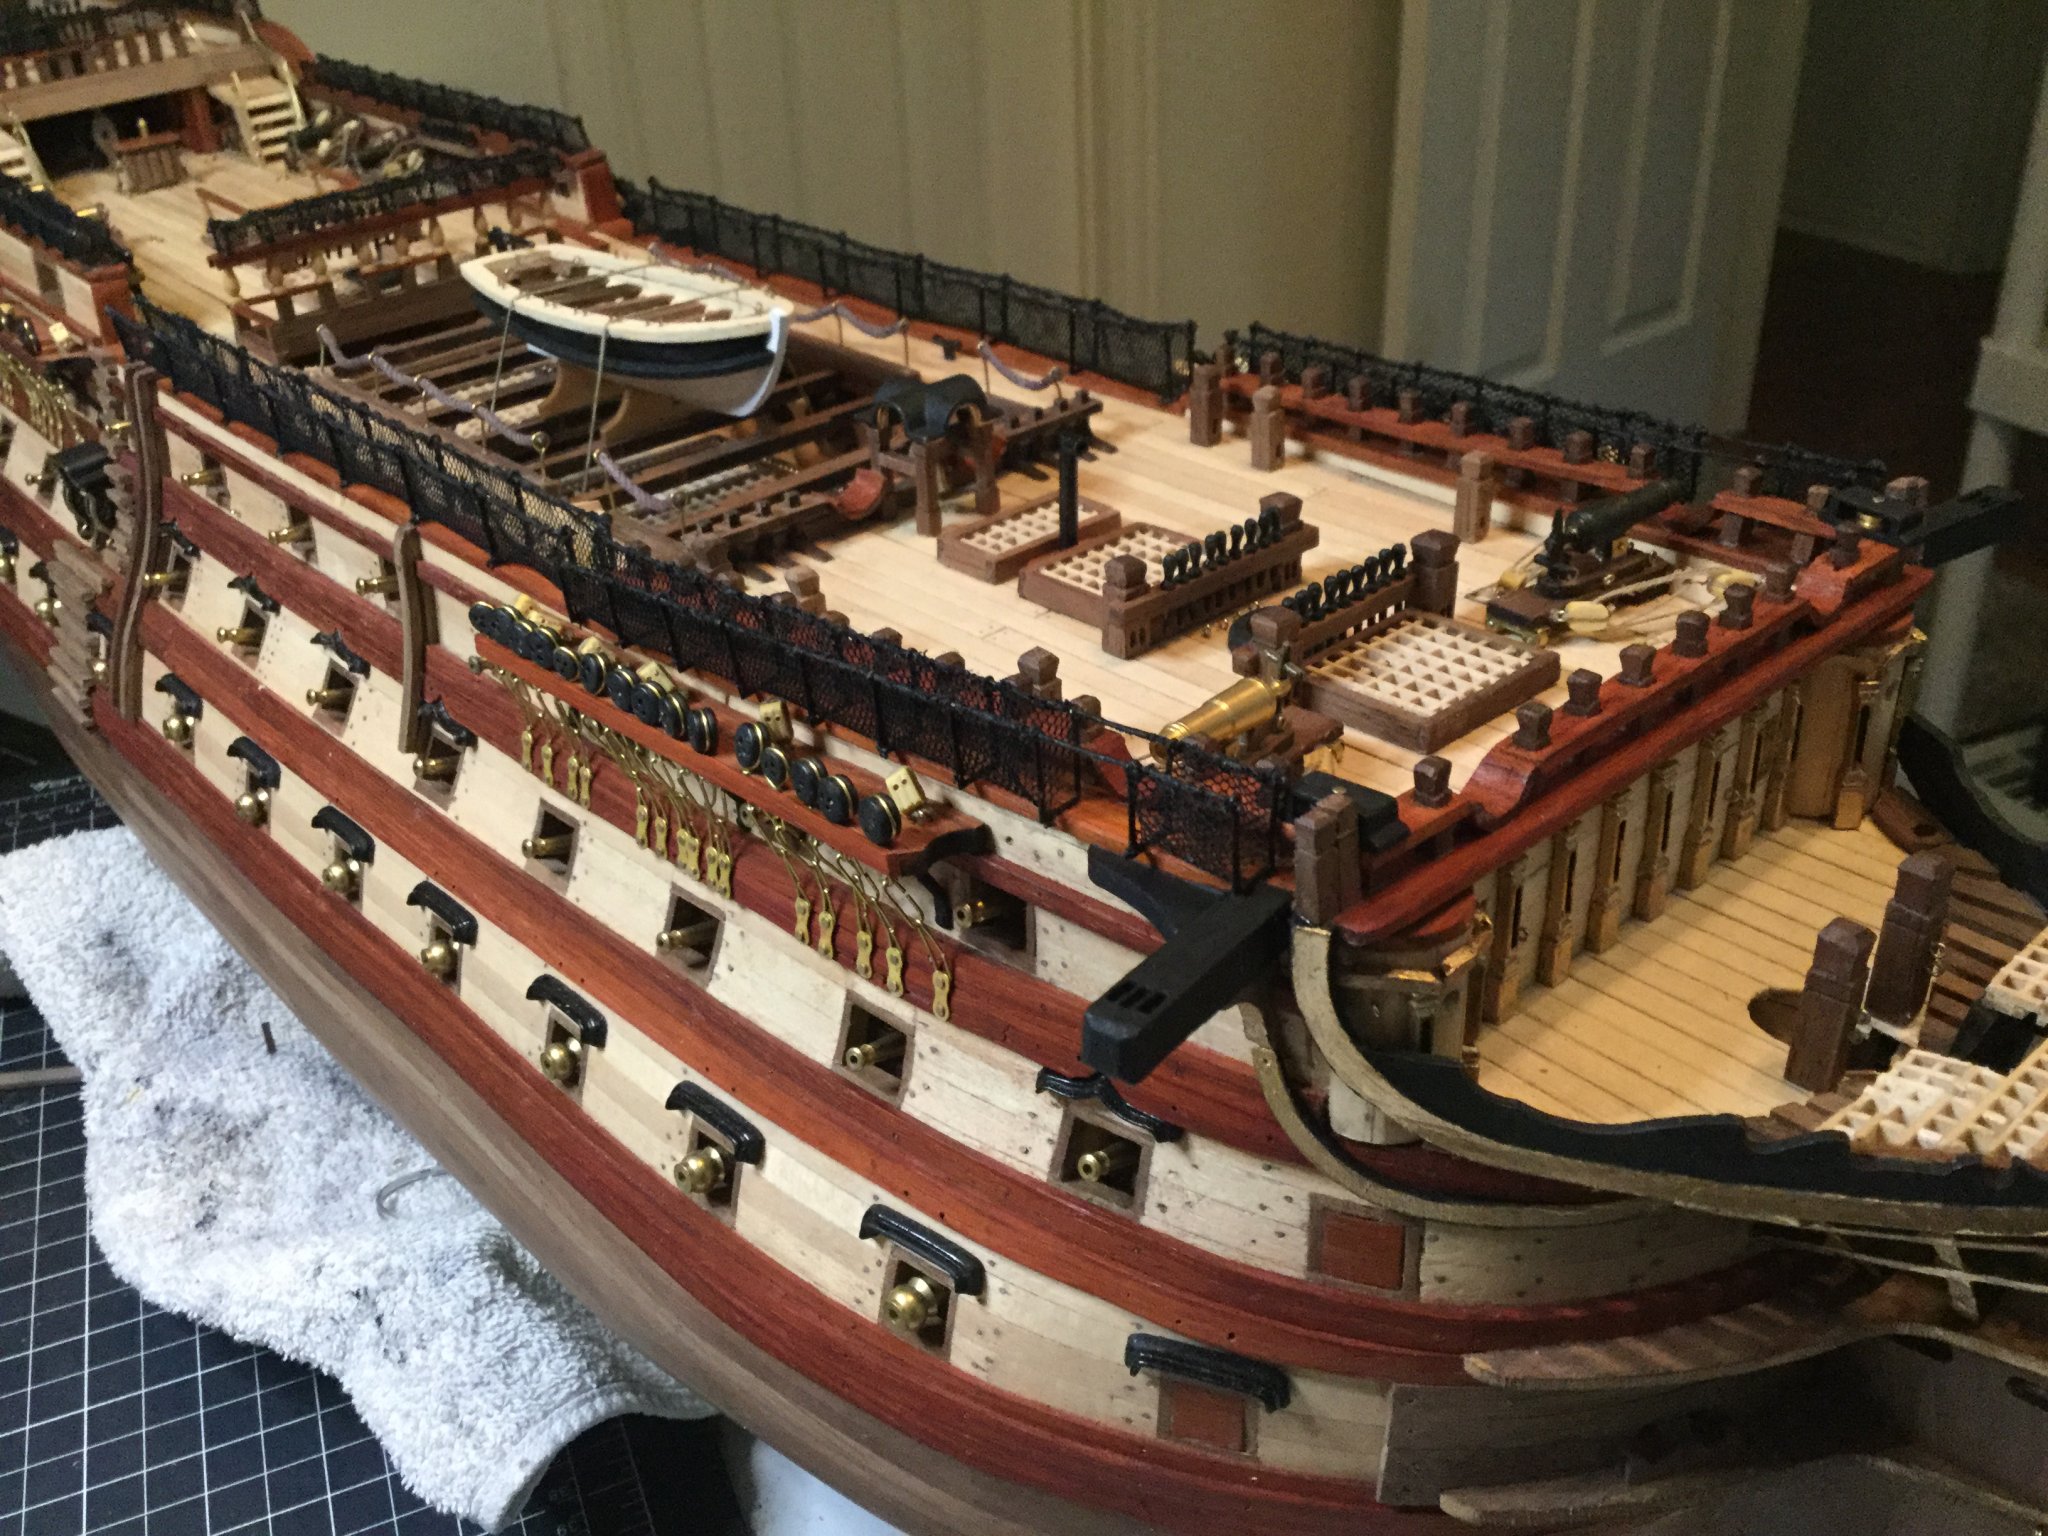
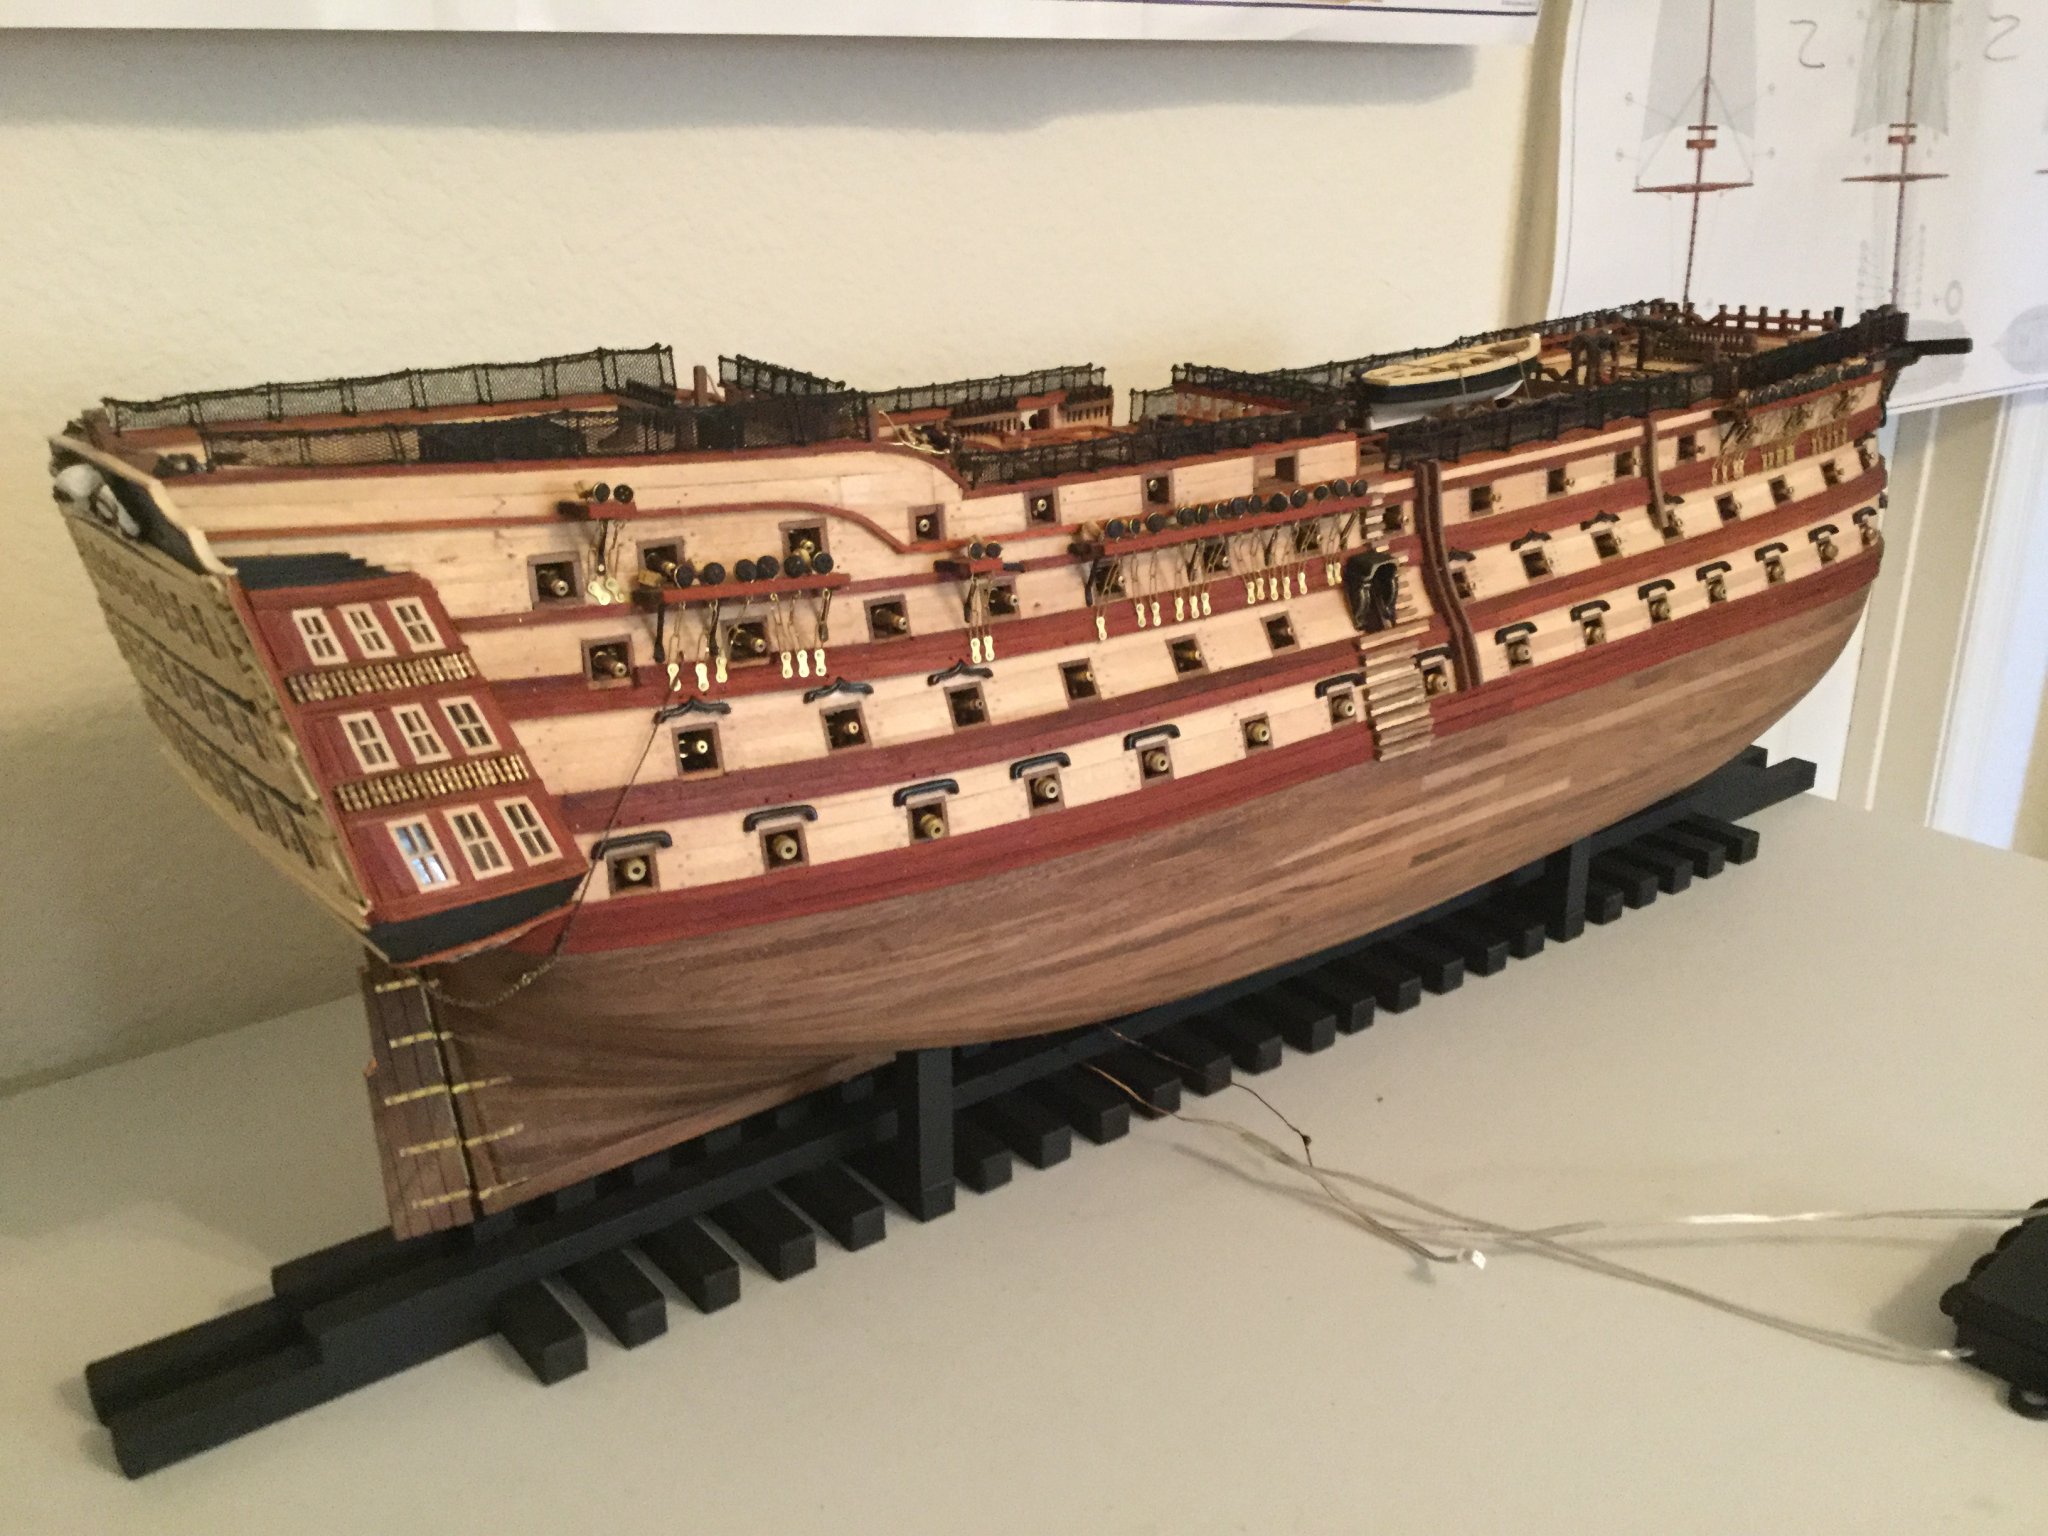
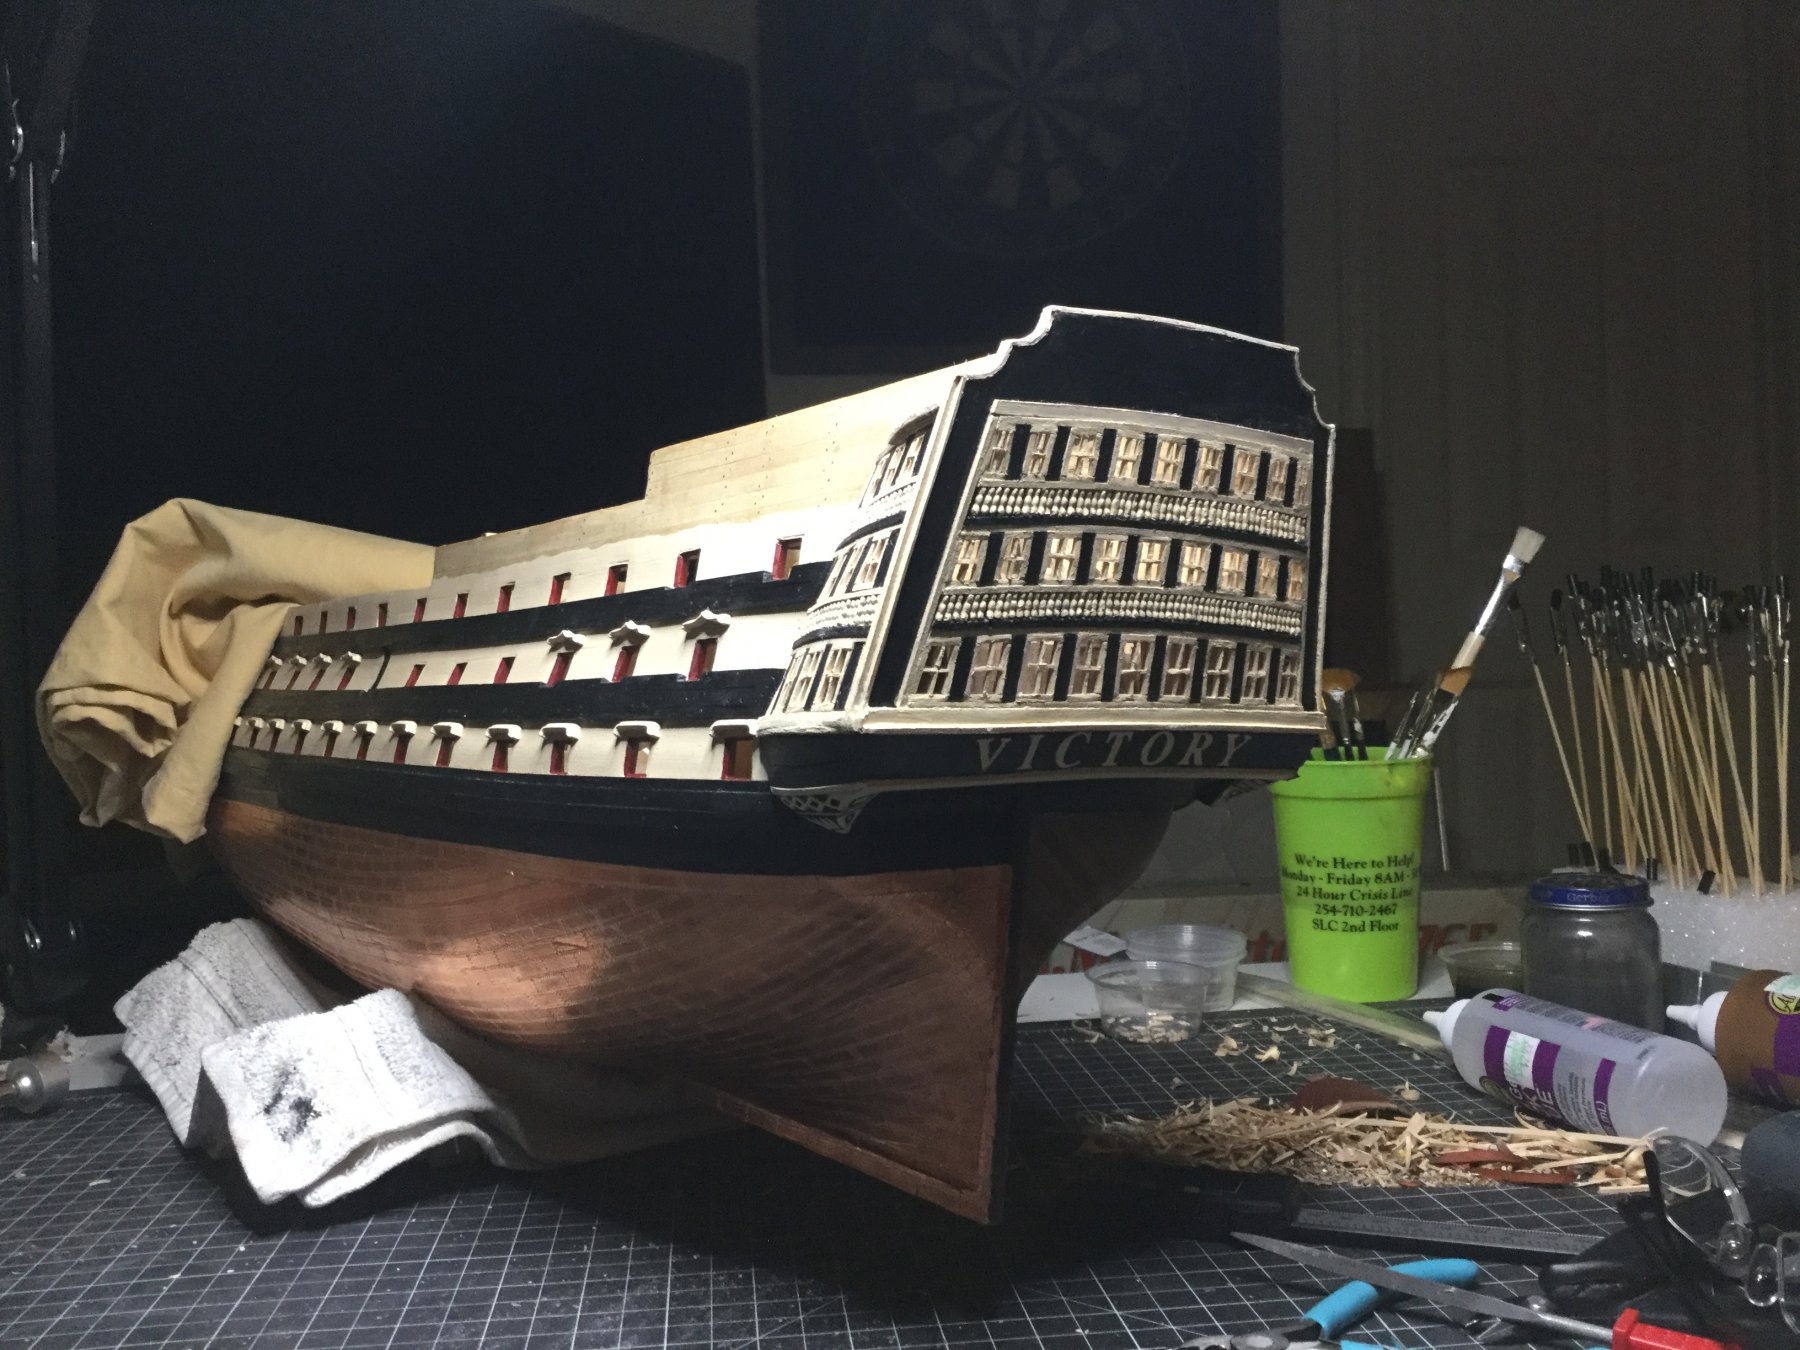
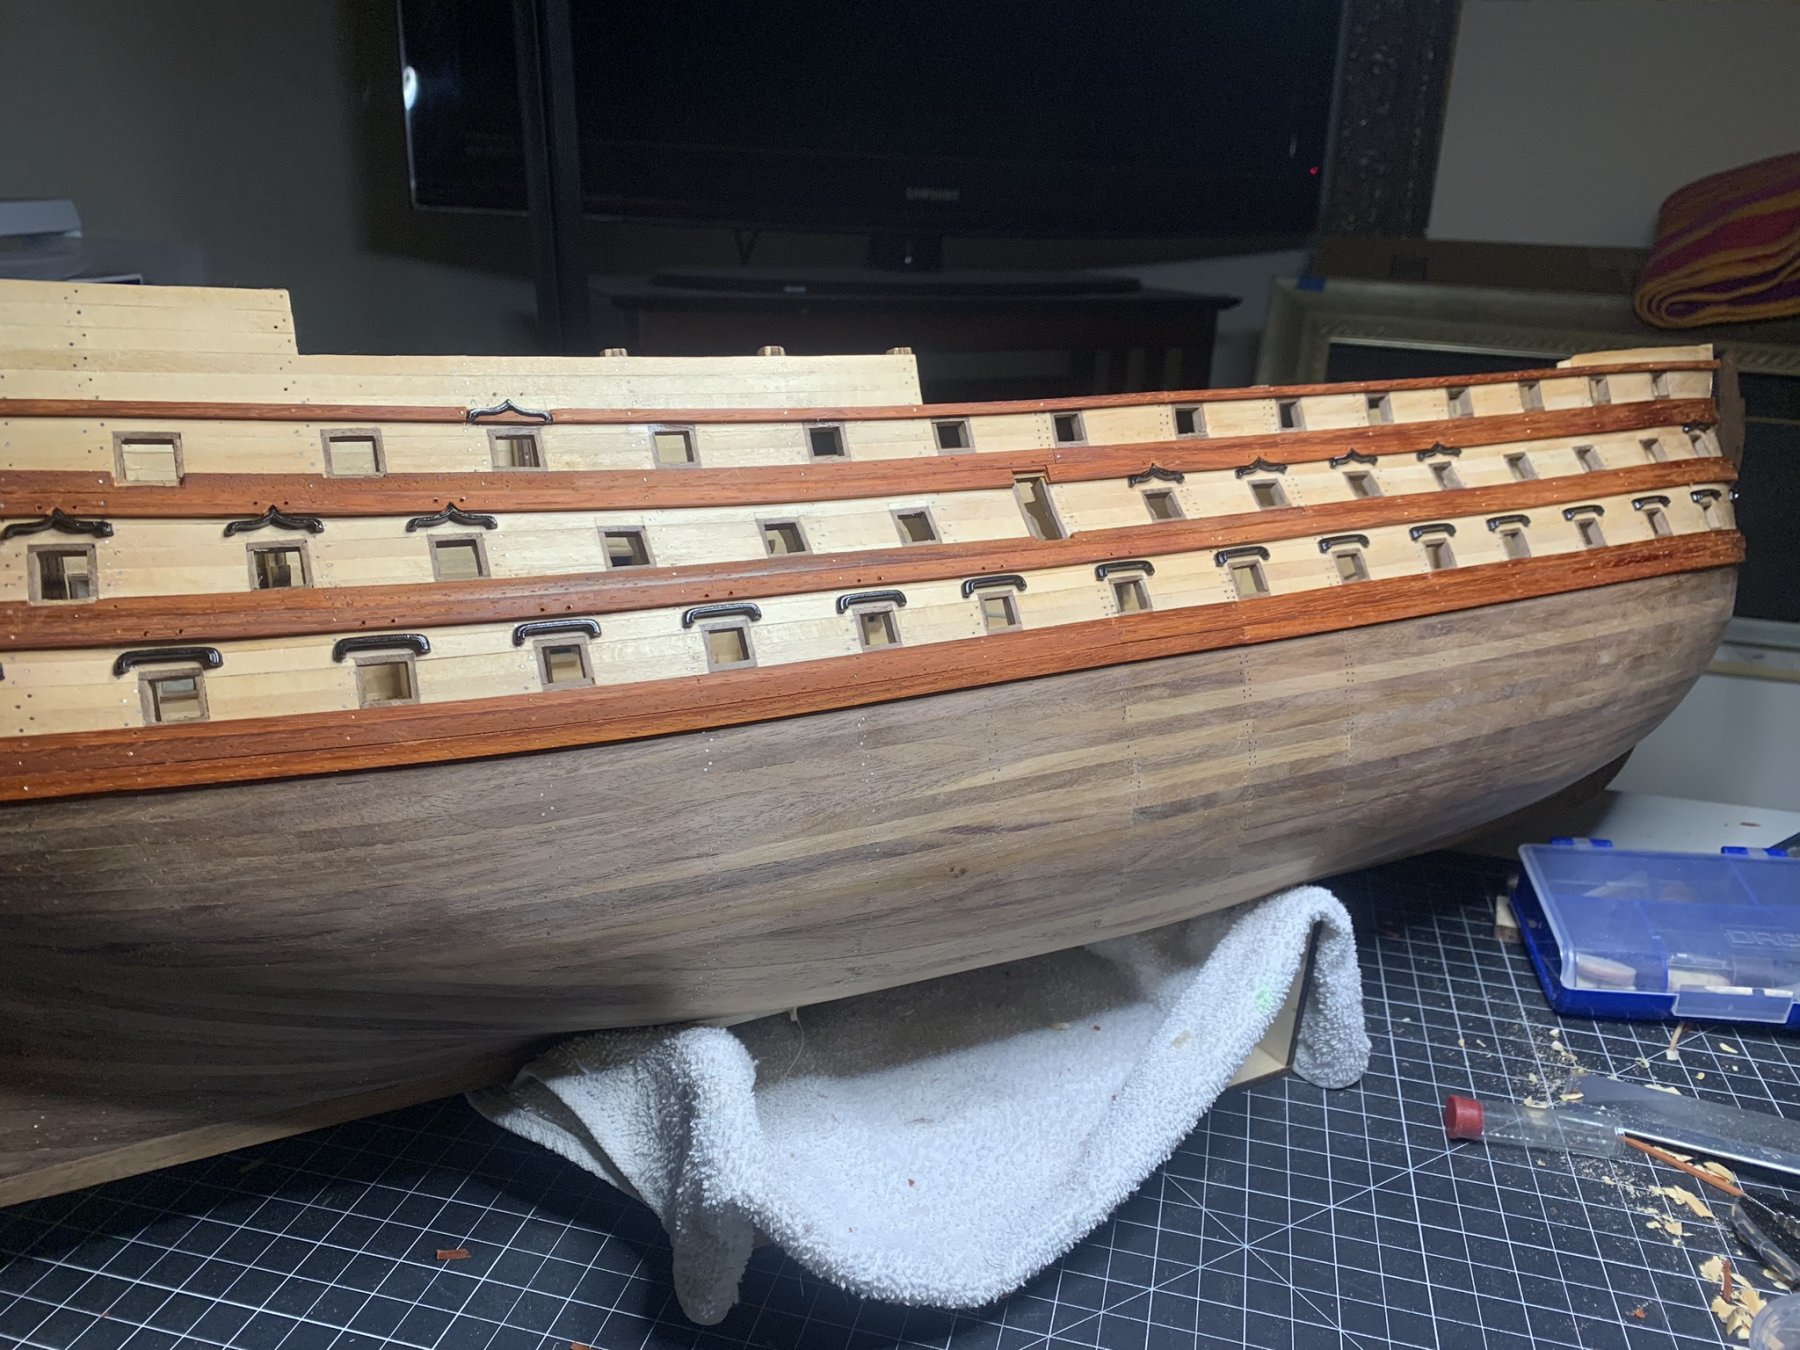
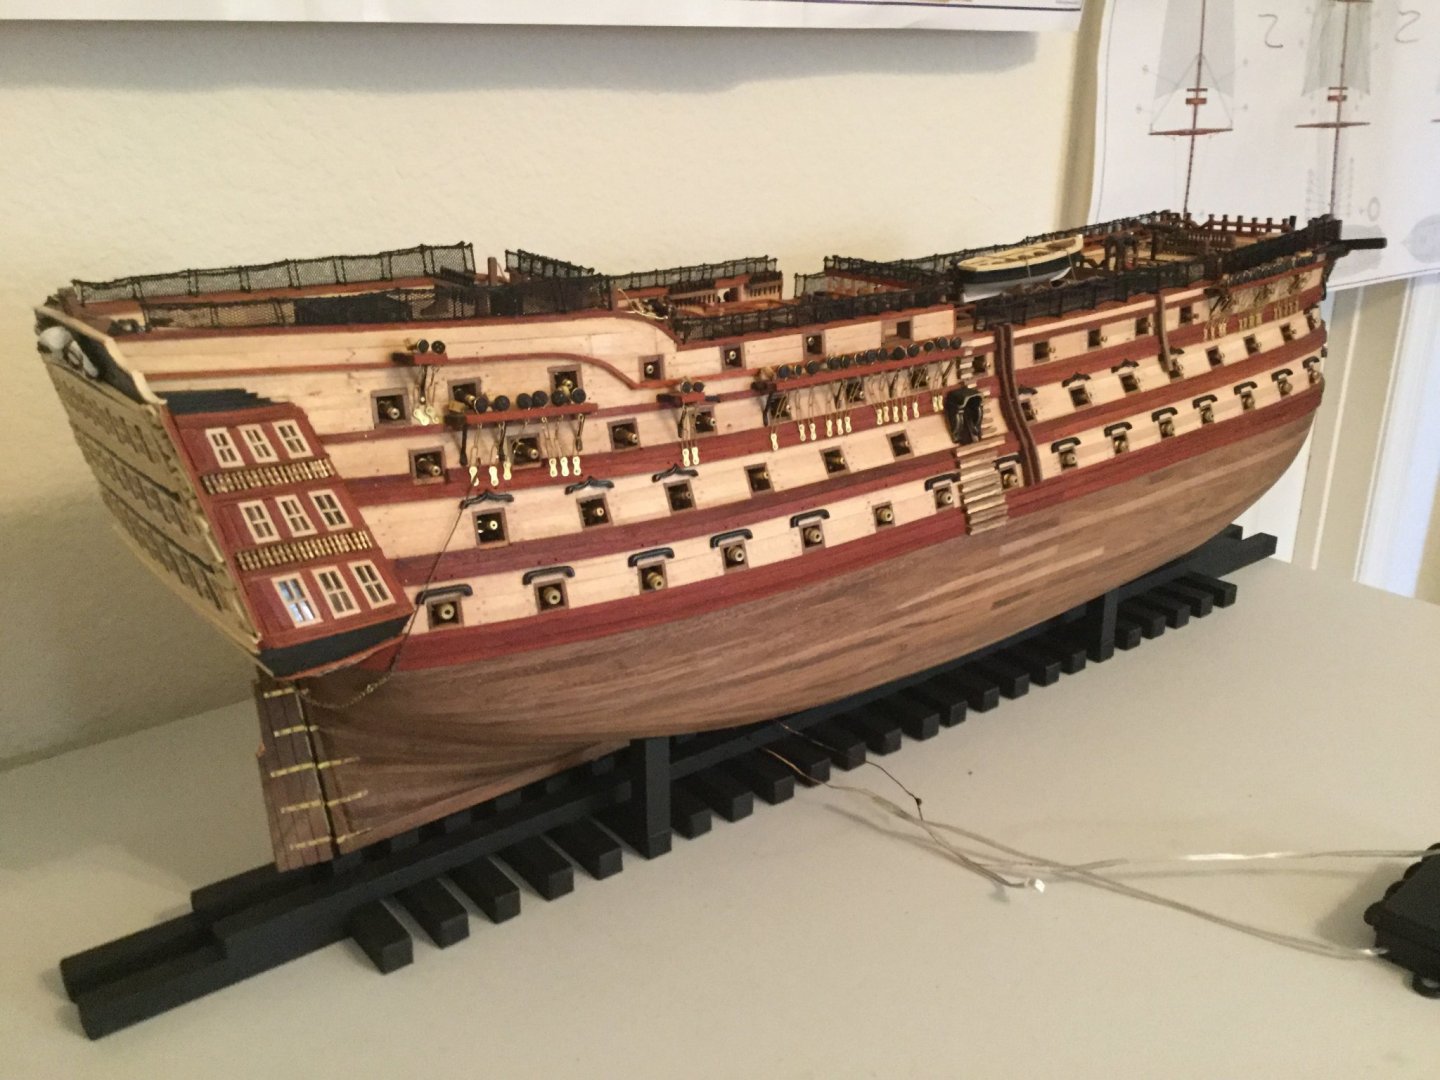
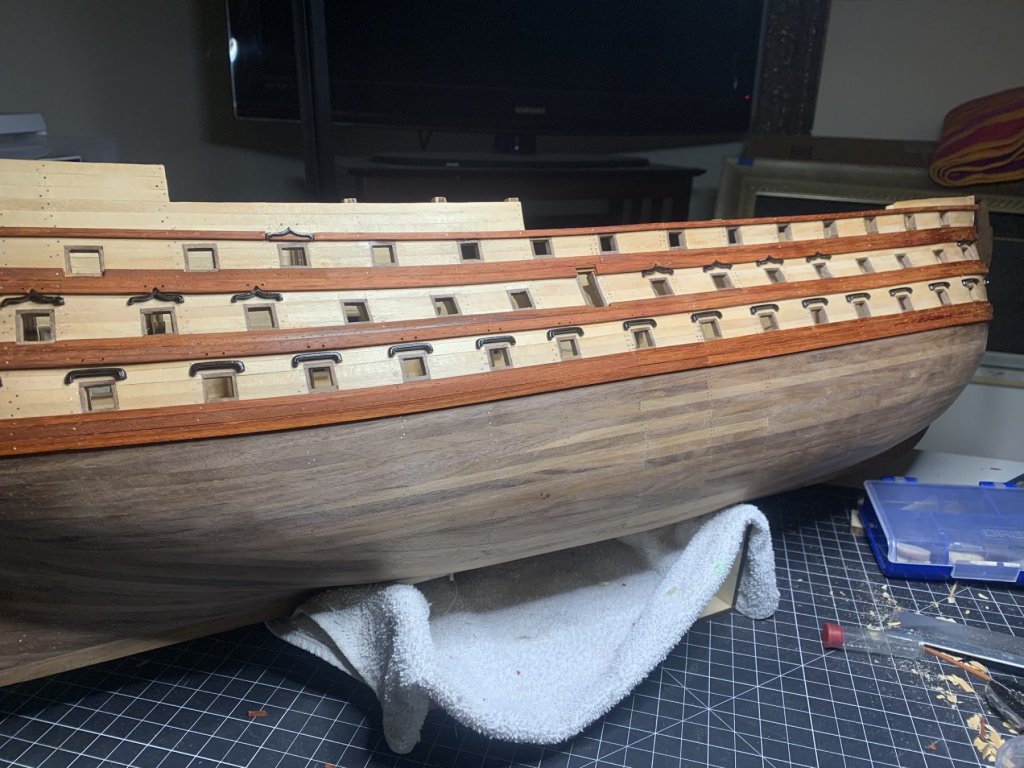
Hi everyone. I'm a new member of MSW but have viewed the contents on the site off and on for the last year. I'm starting my build log a bit late. I actually started the AL Victory in Feb'19. It has been about 30 years since I built my last wooden ship (USS Constitution kit by Mamoli). However, I had been thinking for the last 10 years about building 1 more ship. How could I go wrong with the most famous ship in naval history (at least in my opinion). I actually was going to build a the Fokker DR1 (Red Baron's triplane from WWI) first, but when it got ordered for Christmas and still had no word late January when it would be delivered, I plugged the plug on the plane and dove in the deep end with Victory. I seriously considered the Caldercraft kit for Victory, but I just didn't have the funds saved up for that. I would have to wait another year! So, I found the AL Victory on ebay and got it for $600, which I thought was reasonable. I haven't been disappointed with the AL kit. I like the quality of the wood. The instructions are ok. The full color instruction guide (no CD/DVD) has lots of pictures for reference. Building a model of this type is not for the faint of heart. The instruction guide is OK, but one needs to always be looking forward as to how a certain area of the model is going to change to ensure the earlier steps are done right. So, experience really helps. Right up front, I chose to do some customizations to the build: 1) Plate the hull with copper 2) Build out the lower gun deck with full cannons versus just exposing the cannon barrels attached to a blackened façade behind the port holes 3) Add lighting to the interior of the ship (thus wanting to have the lower gun deck fully available) 4) I'm painting half the ship with Victory's Trafalgar colors and the other half I'm leaving with the natural wood that's varished. The National Museum of the Royal Navy produced a video in 2015 (see here) describing the true colors of Victory in 1805. A big reason for choosing these colors is that for the masts, the color is a muted ivory color, which is relatively close to basswood and thus when viewing the side of the model with natural wood, it wouldn't be a distraction. A lot of this customization work is already done. So far, I'm at approximately 420 hours. At this rate, I expect to be in the 1500 hour ballpark before I finish. Thanks for reading. Any feedback is appreciated. Ron

-
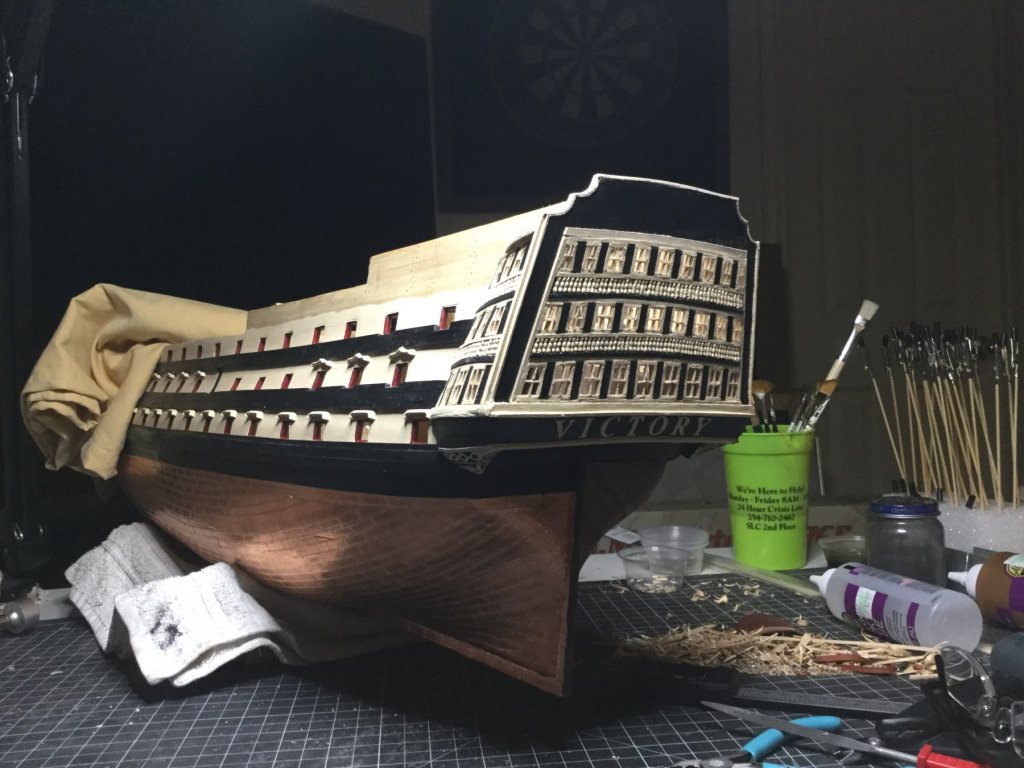
Hi Mike. I'm new to this forum and just looked through your build log. Great job! Lots of time and effor...I know. I'm in the midst of building the AL Victory myself. I have >400 hours in so far and I'm only into the interior decking and cannon work. Might sound like a lot of hours, but I'm adding some customizations. When I read your post above about having trepidation over painting the model, I knew exactly what you're talking about. I had the exact same feeling. My resolution? I chose to paint one side and leave the other side as natural wood!!! The masts and yardarms will be painted, but all the details on the decks will be natural. On the painted side, I also chose to do the copper plating (using tape as you did). The natural wood side shows the beauty of the mansonia and coral woods. The colors I'm using are based on a recent (2015) video from the National Museum of the Royal Navy discussing Victory's true colors at the Battle of Trafalgar. What I like about these true colors is that the masts are actually a somewhat muted ivory color, which isn't too far off from the natural basswood of the decks and upper hull. So, when looking at Vic from the side that has the natural wood, I don't think the painted masts and yardarms will be a distraction. Still a ways off from getting to that point, but that's my theory and I'm sticking to it! ;^) I'm hoping to start my own build log shortly and will post my pictures there. I'll attach a couple here to have a clue what she's looking like. Take care and God bless, Ron


- 230 replies
-
- 2
-
-
- victory
- artesania latina
- (and 1 more)