Rollingreen
-
Posts
18 -
Joined
-
Last visited
Content Type
Profiles
Forums
Gallery
Events
Everything posted by Rollingreen
-
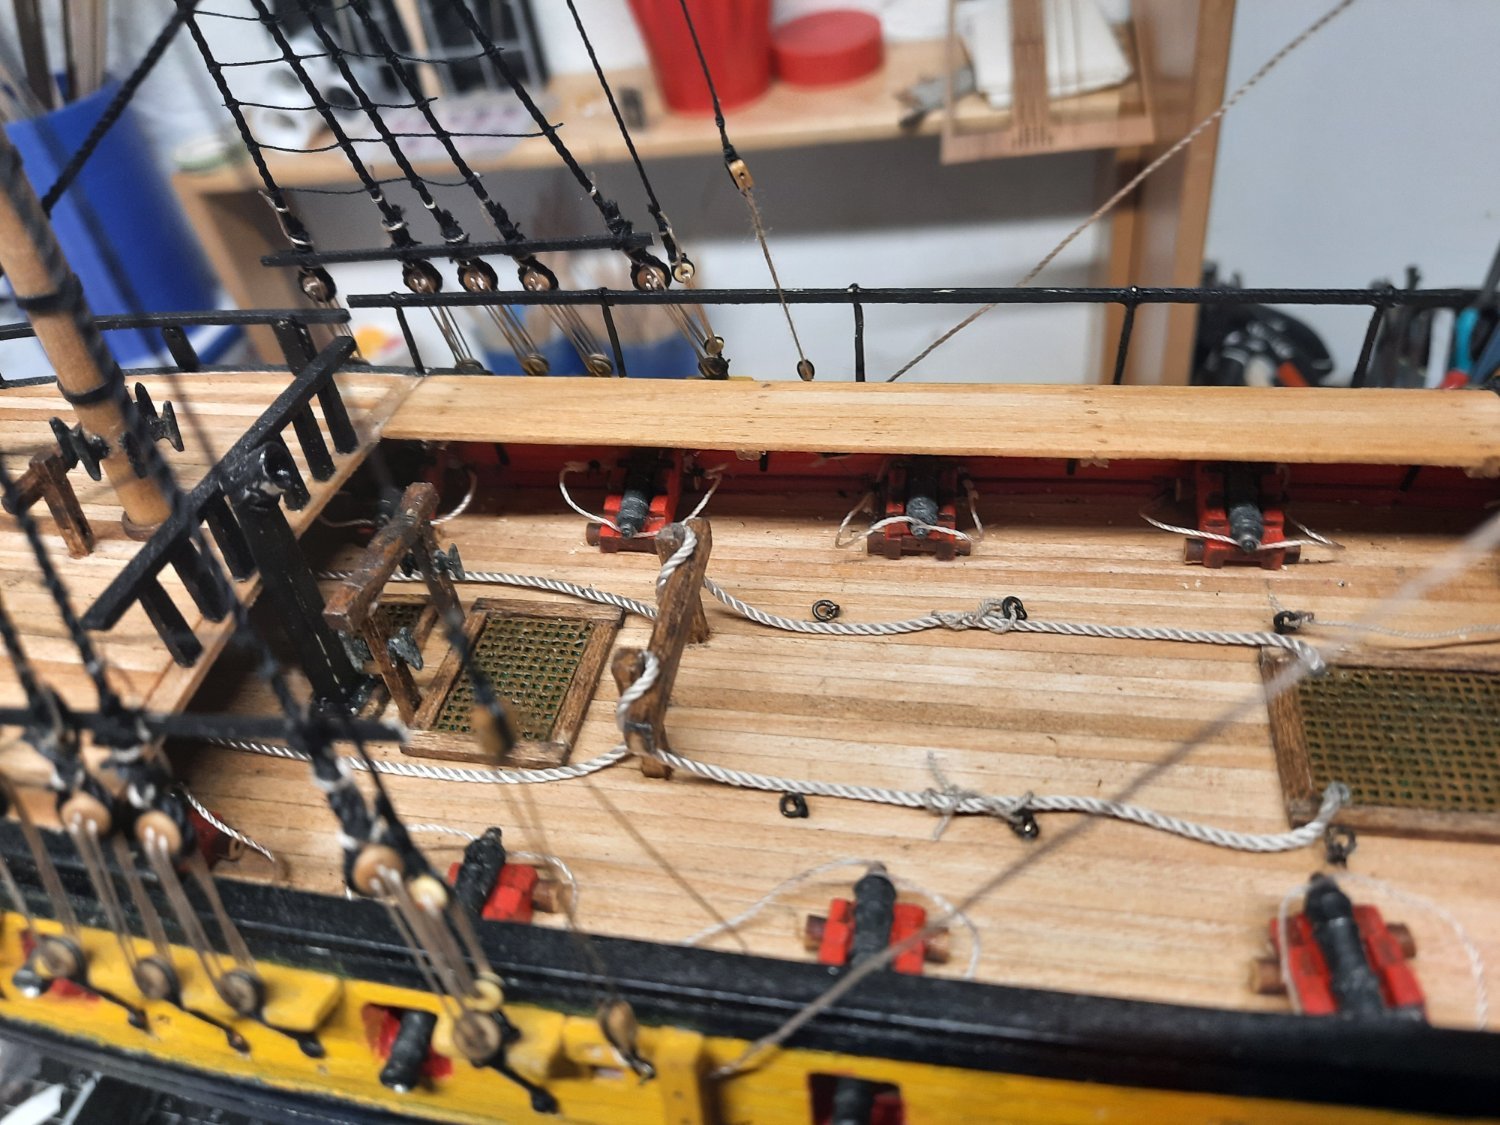
Kenneth, Looking Great. I'm really enjoying seeing the slight differences between your build and mine with the same kit. BTW the shrink tubing for the mast hoops is genius. I've already found several uses for them on other builds.

- 152 replies
-
- 2
-

-
- rattlesnake
- Model Shipways
- (and 1 more)
-
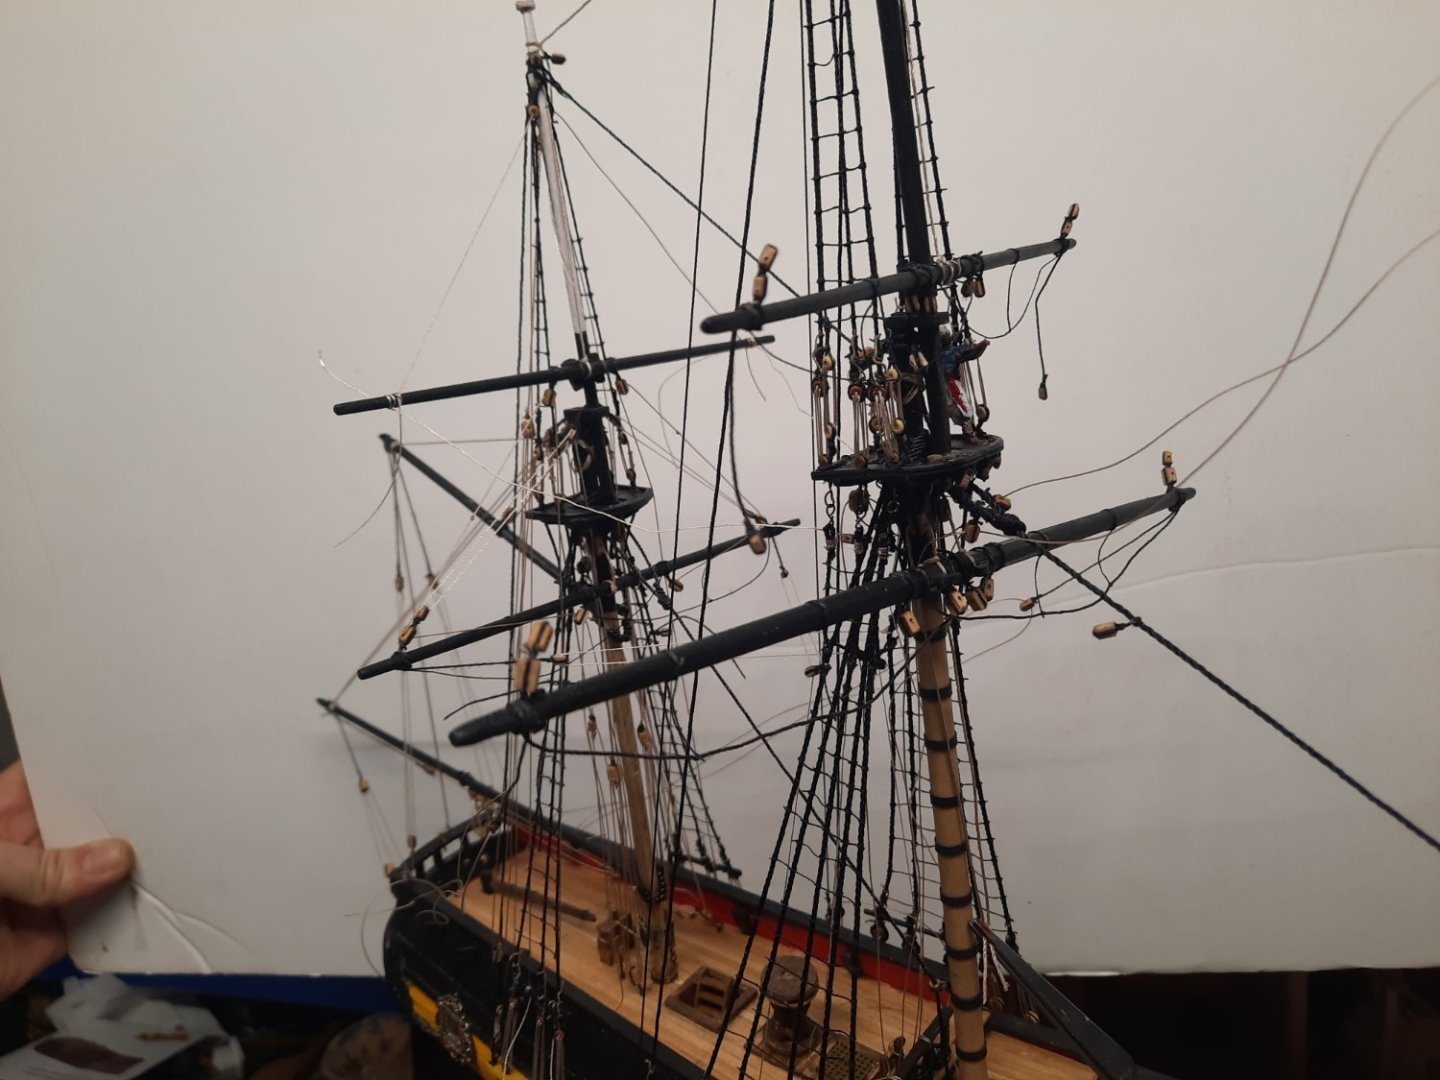
Thanks for the great work Ken! I am just starting the masts on my model and it is very helpful to see such clear photos of your work. You are setting a a high bar to keep up with.
- 152 replies
-
- 2
-

-
-
- rattlesnake
- Model Shipways
- (and 1 more)
-
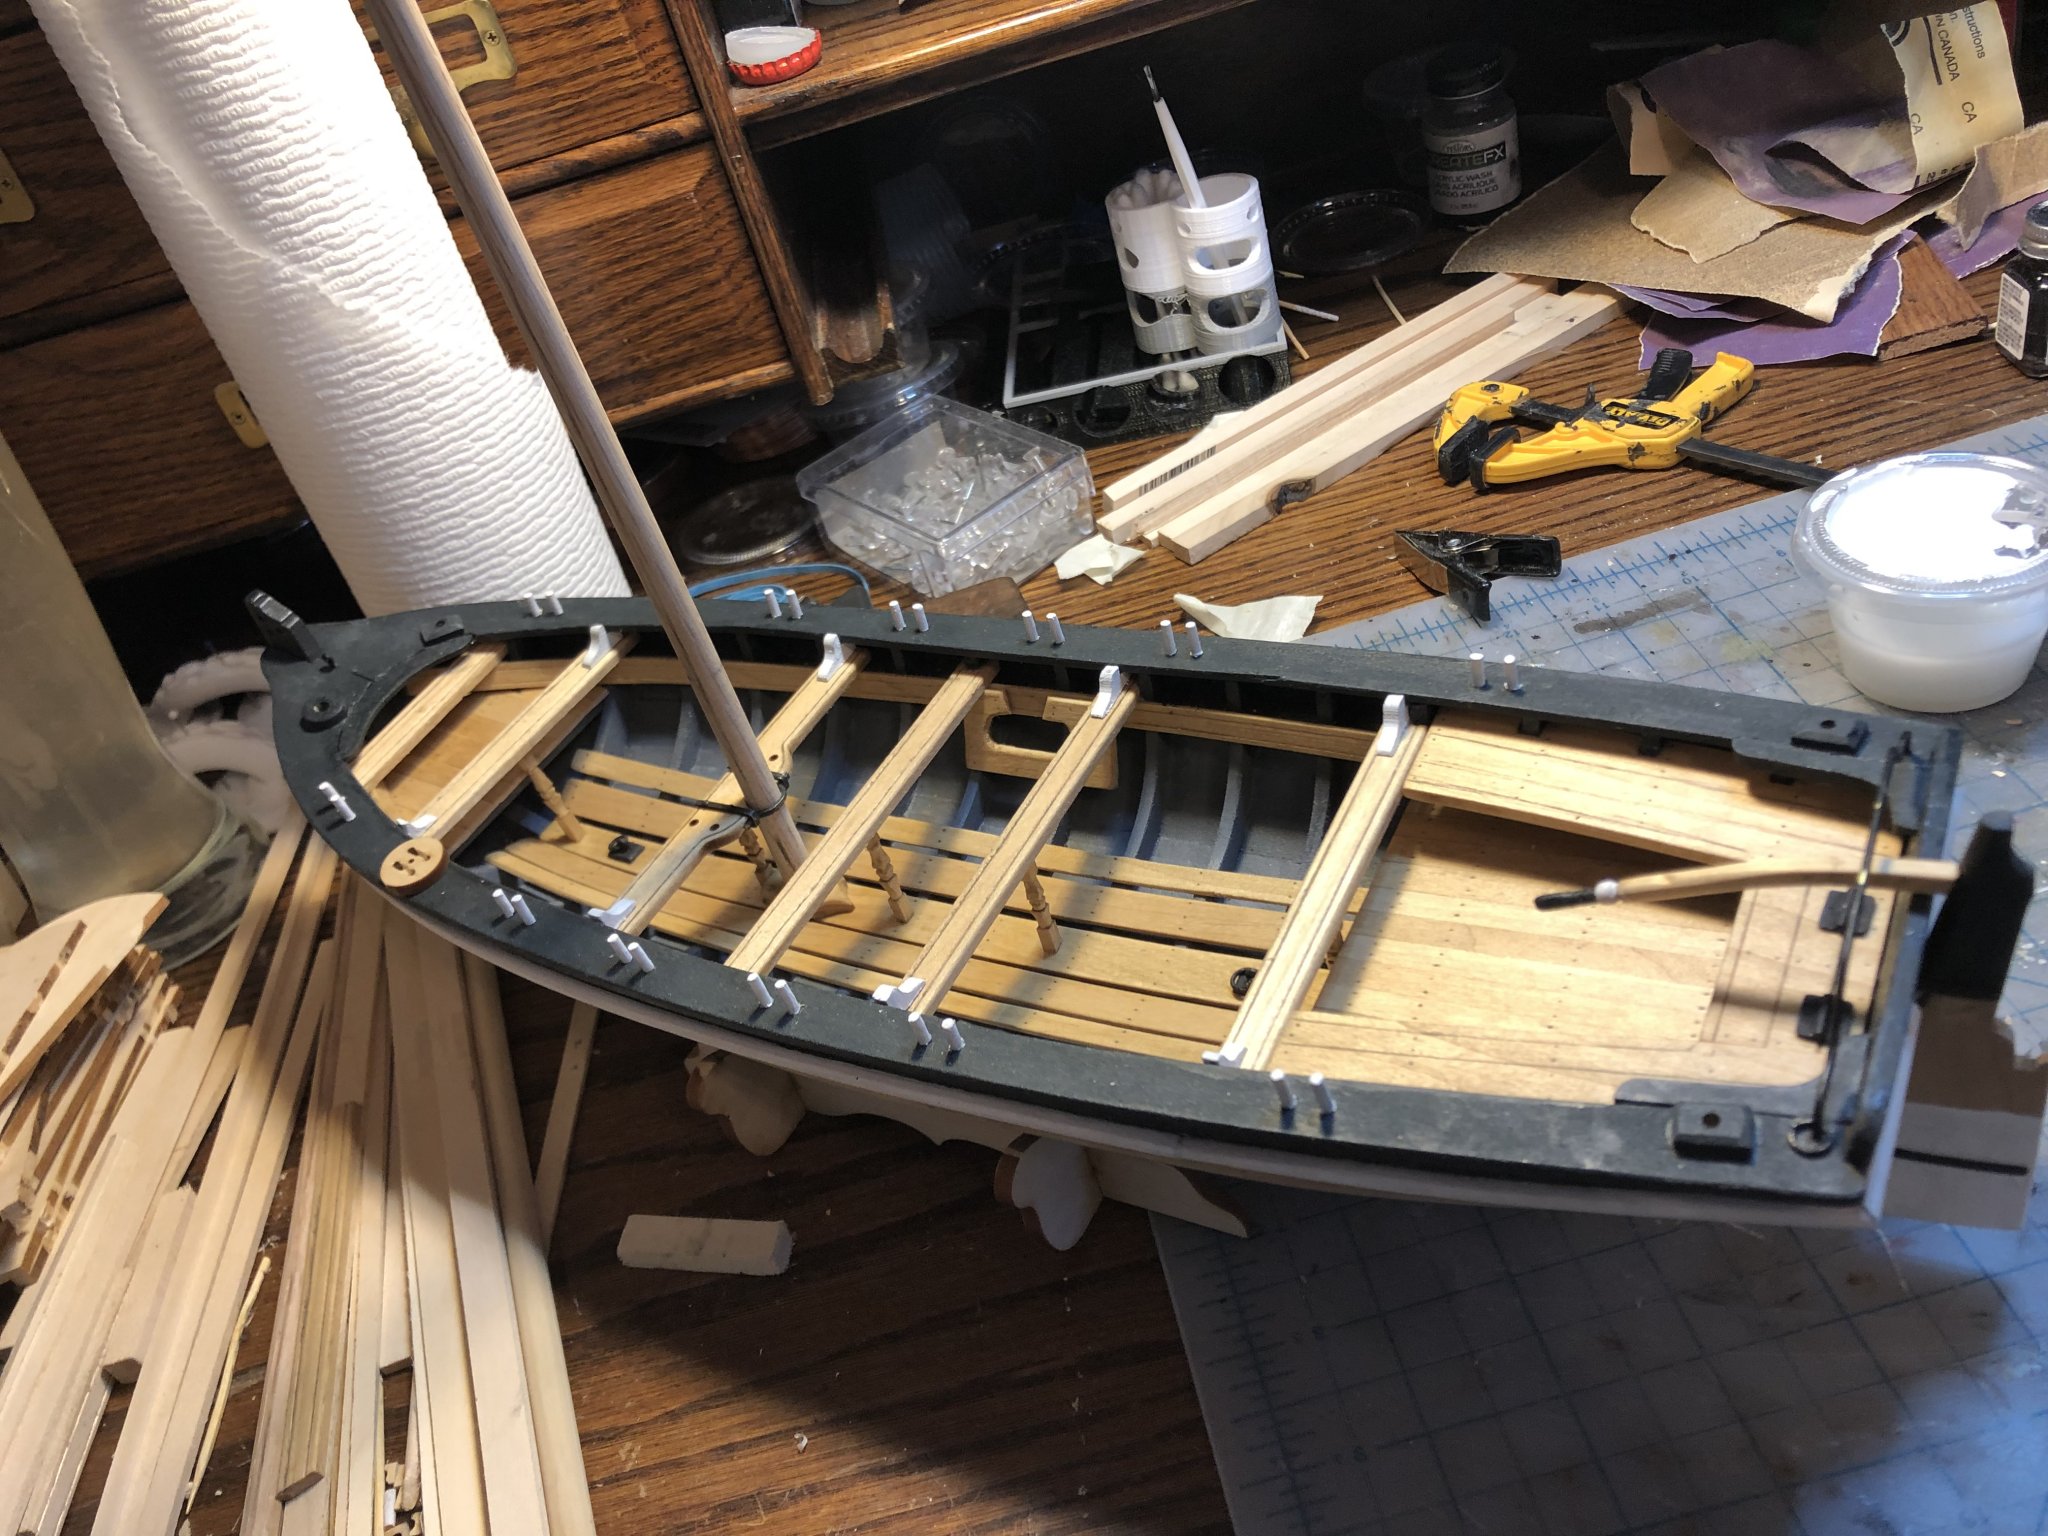
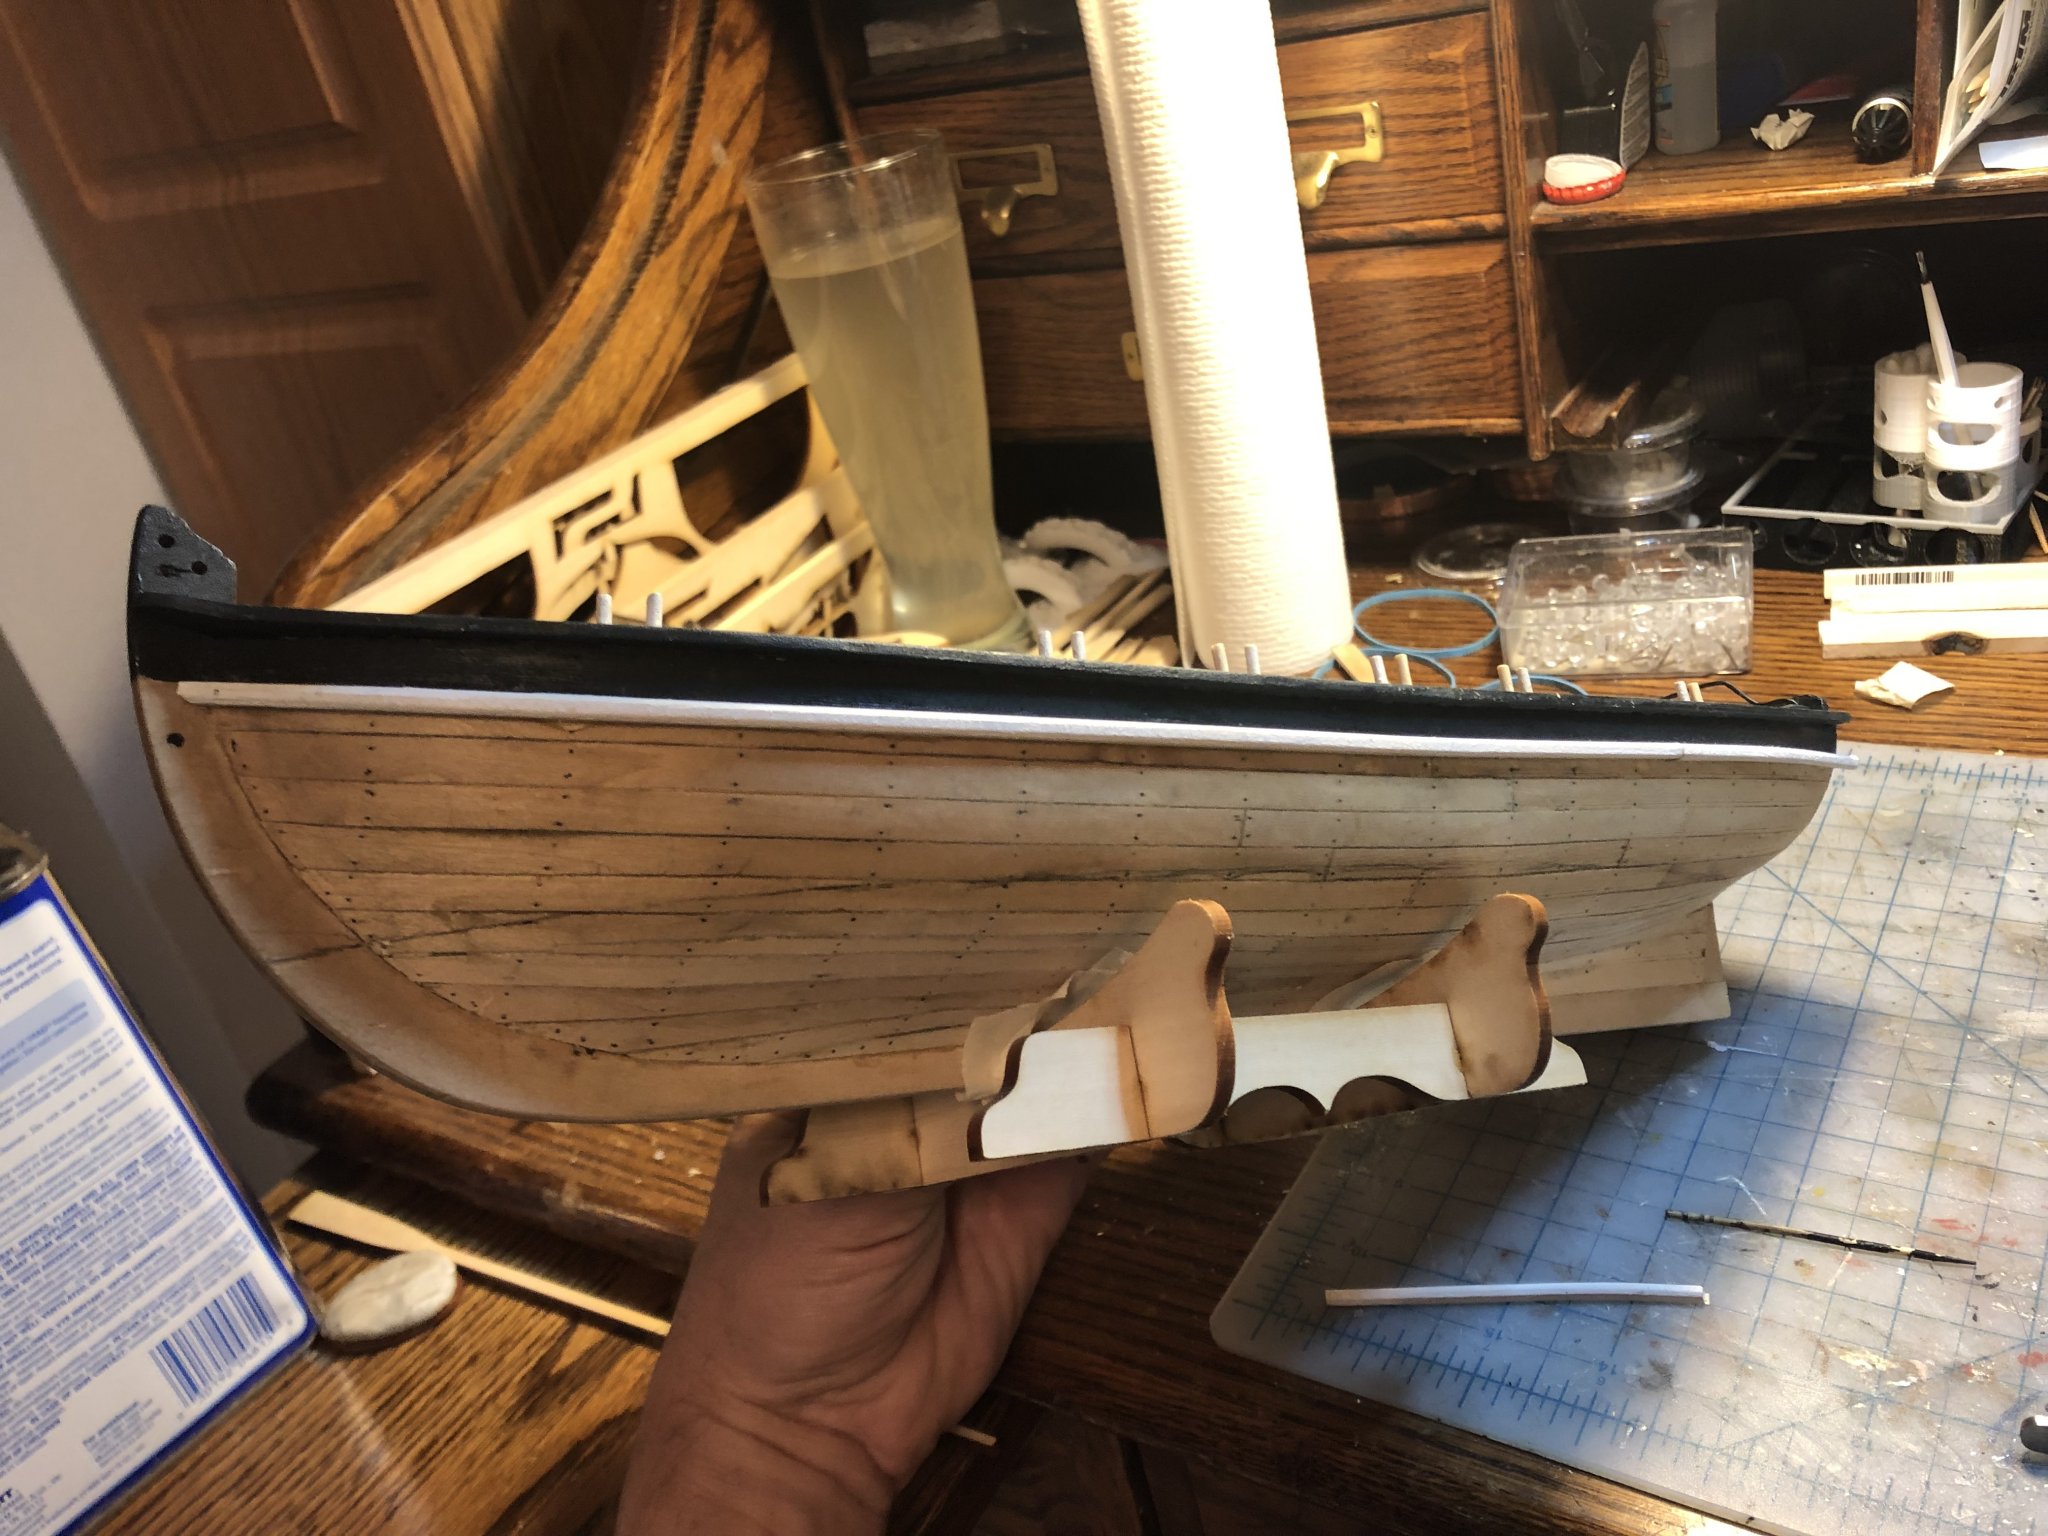
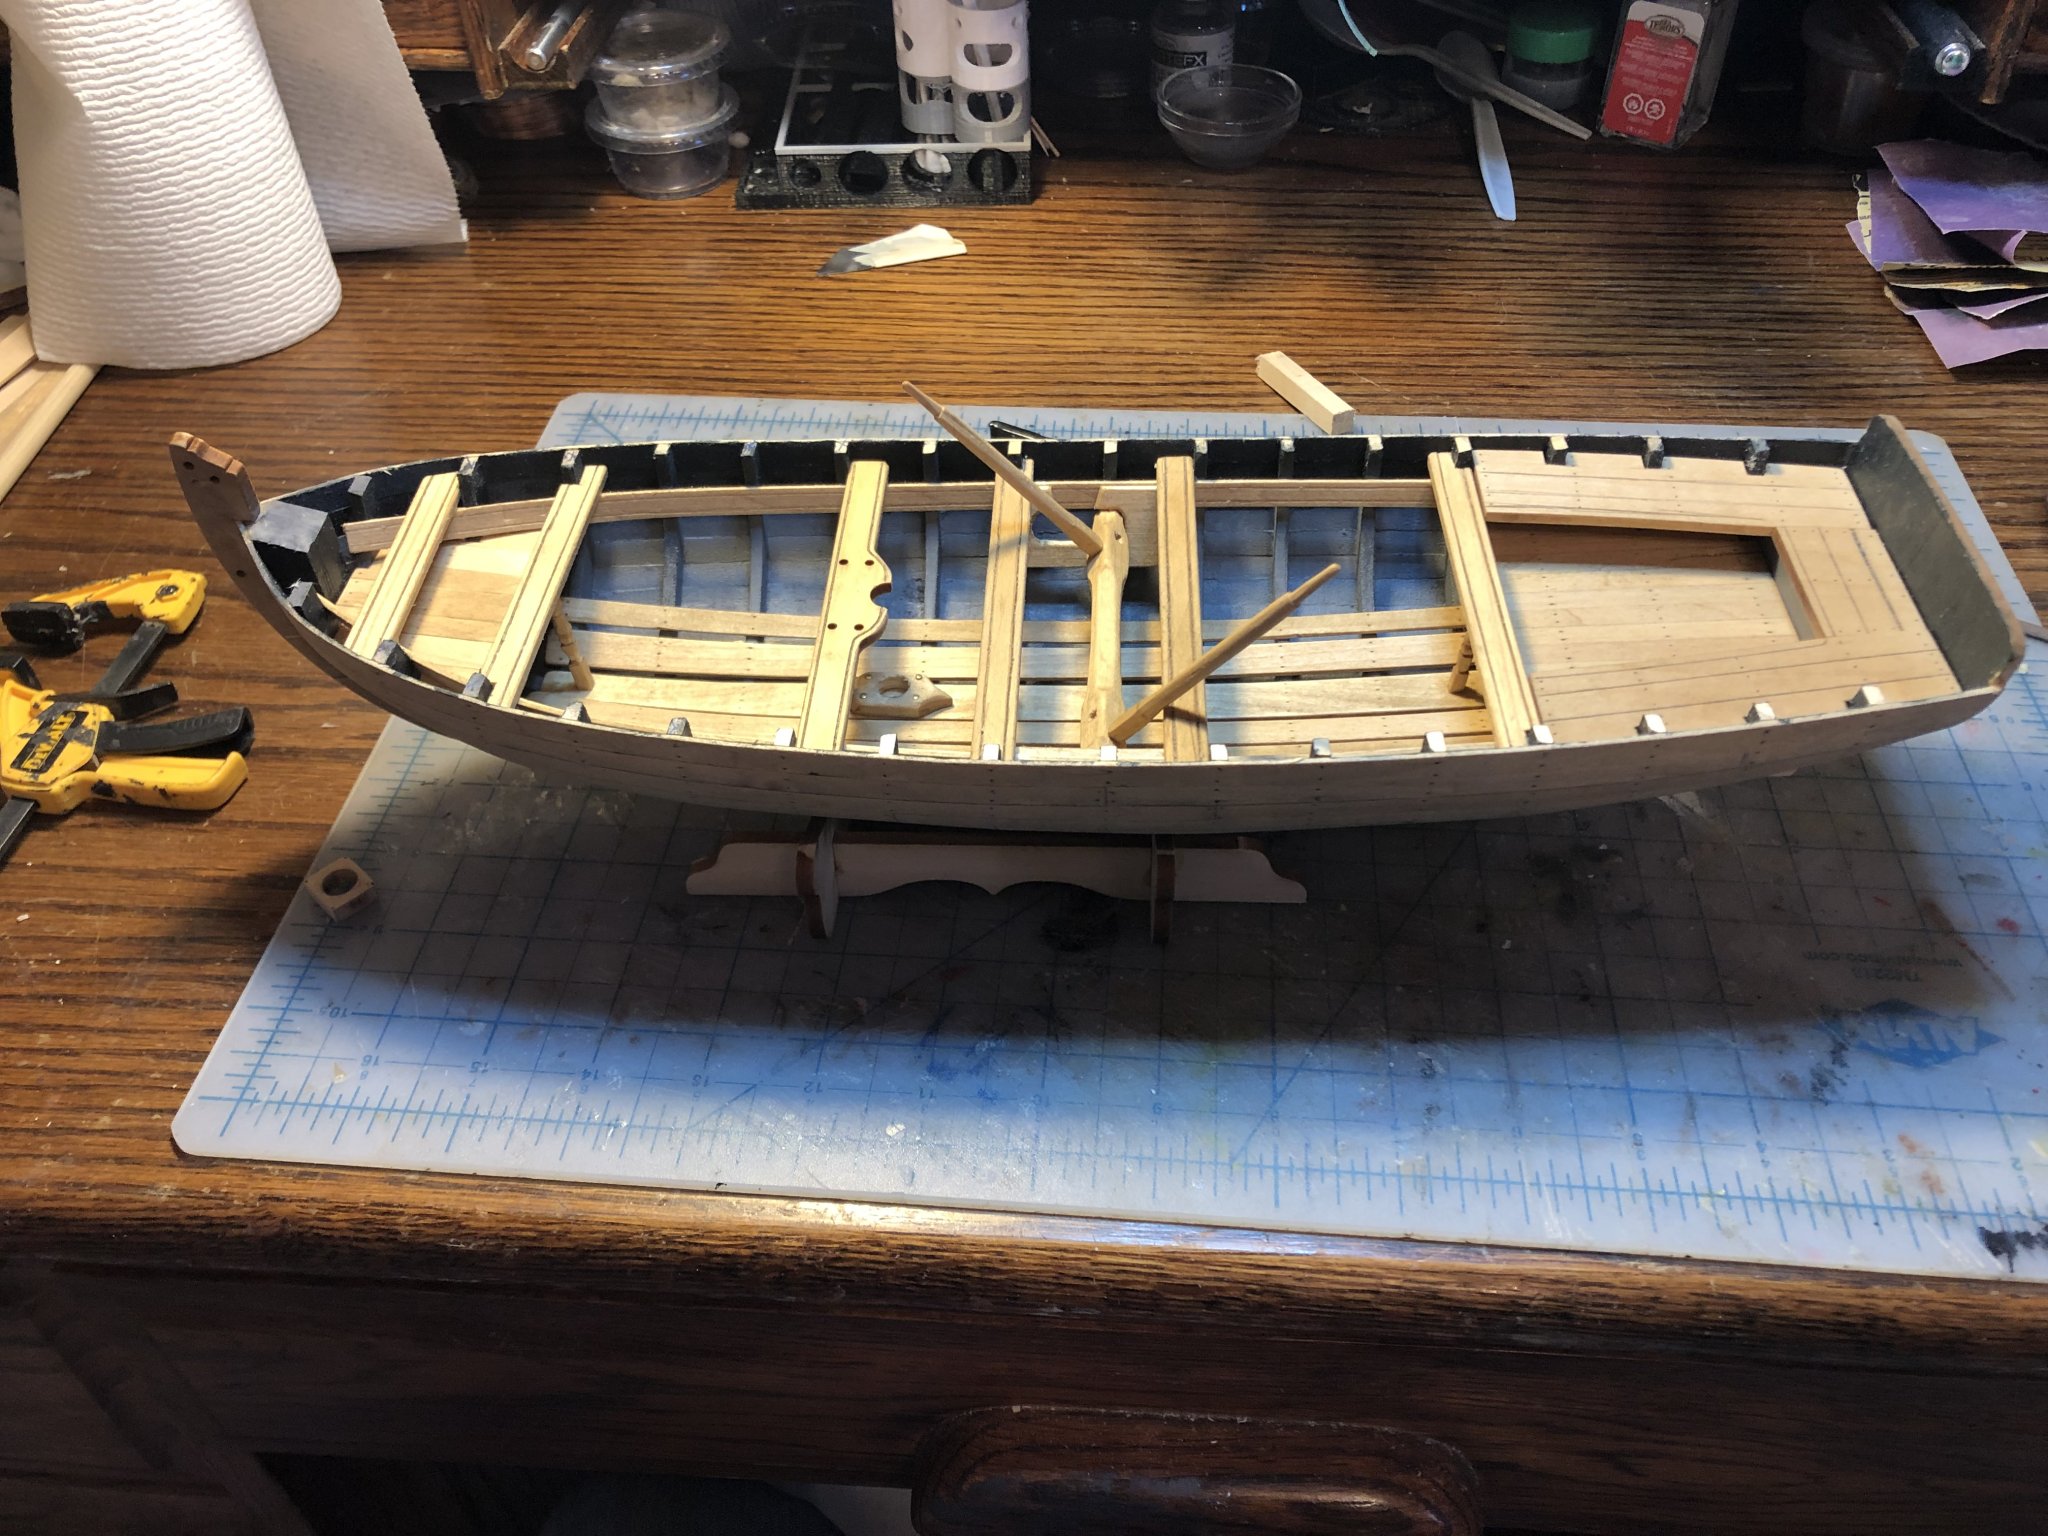
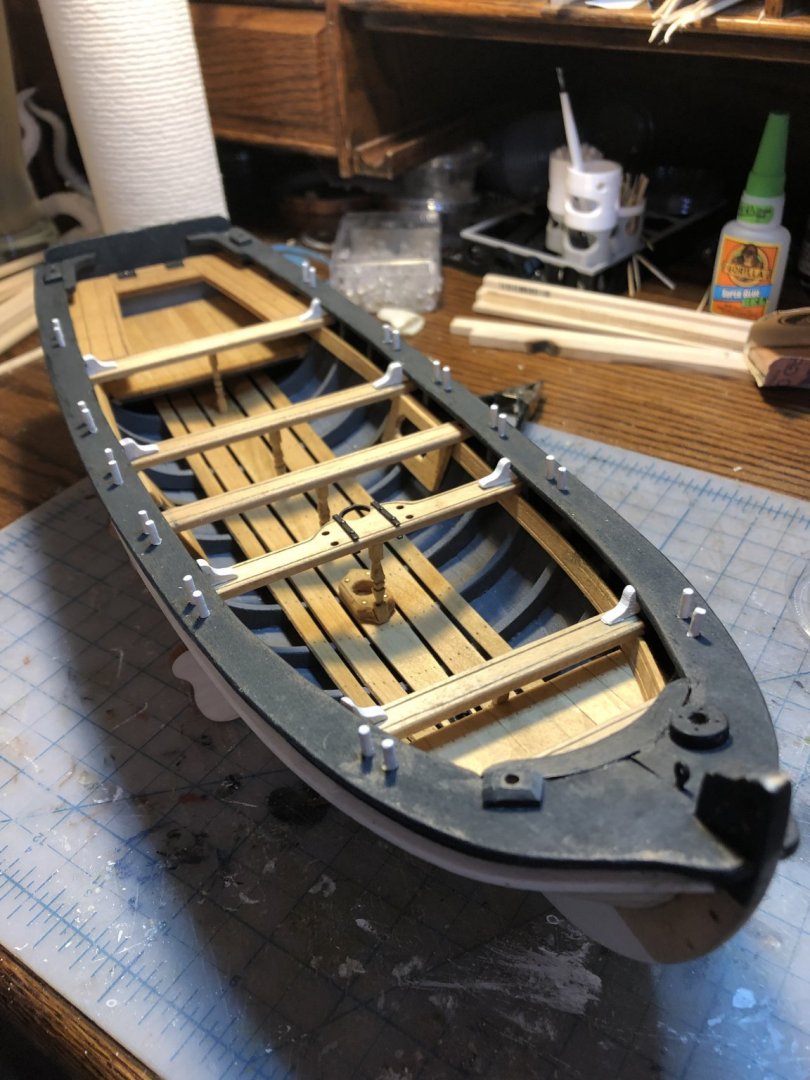
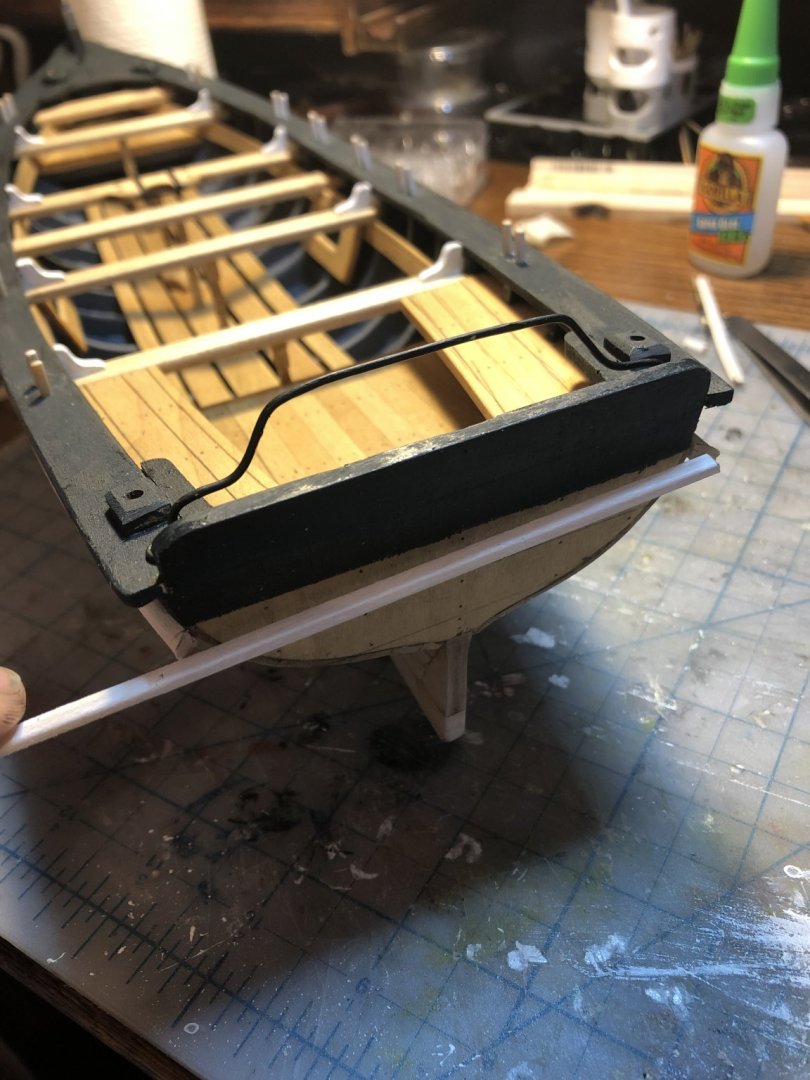
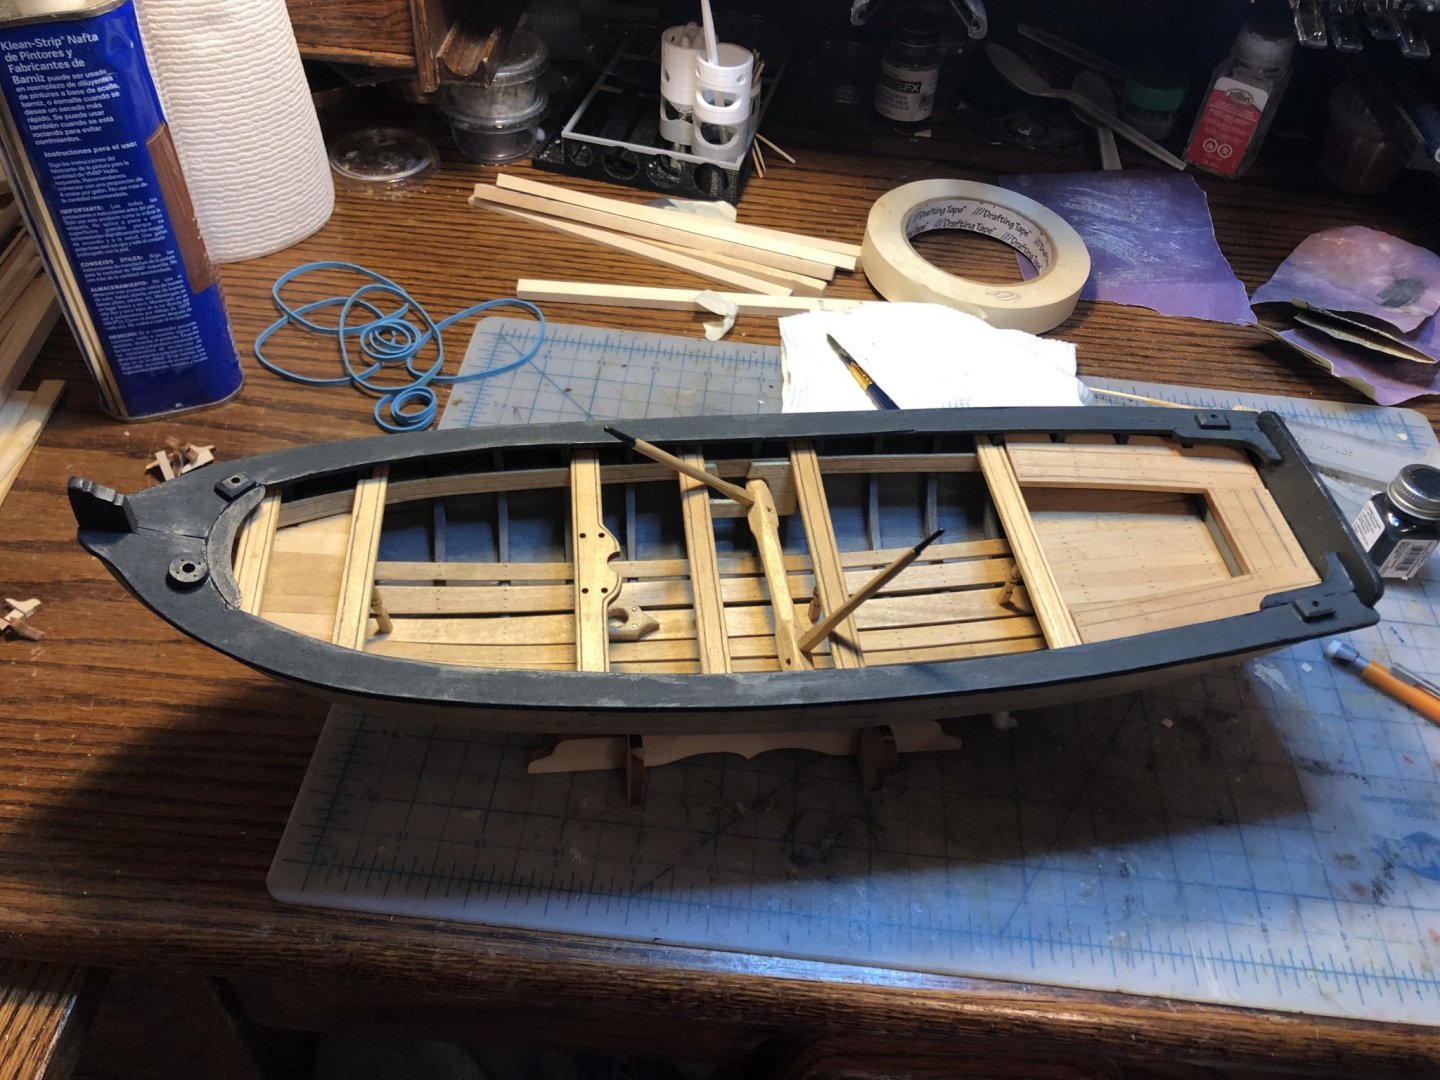
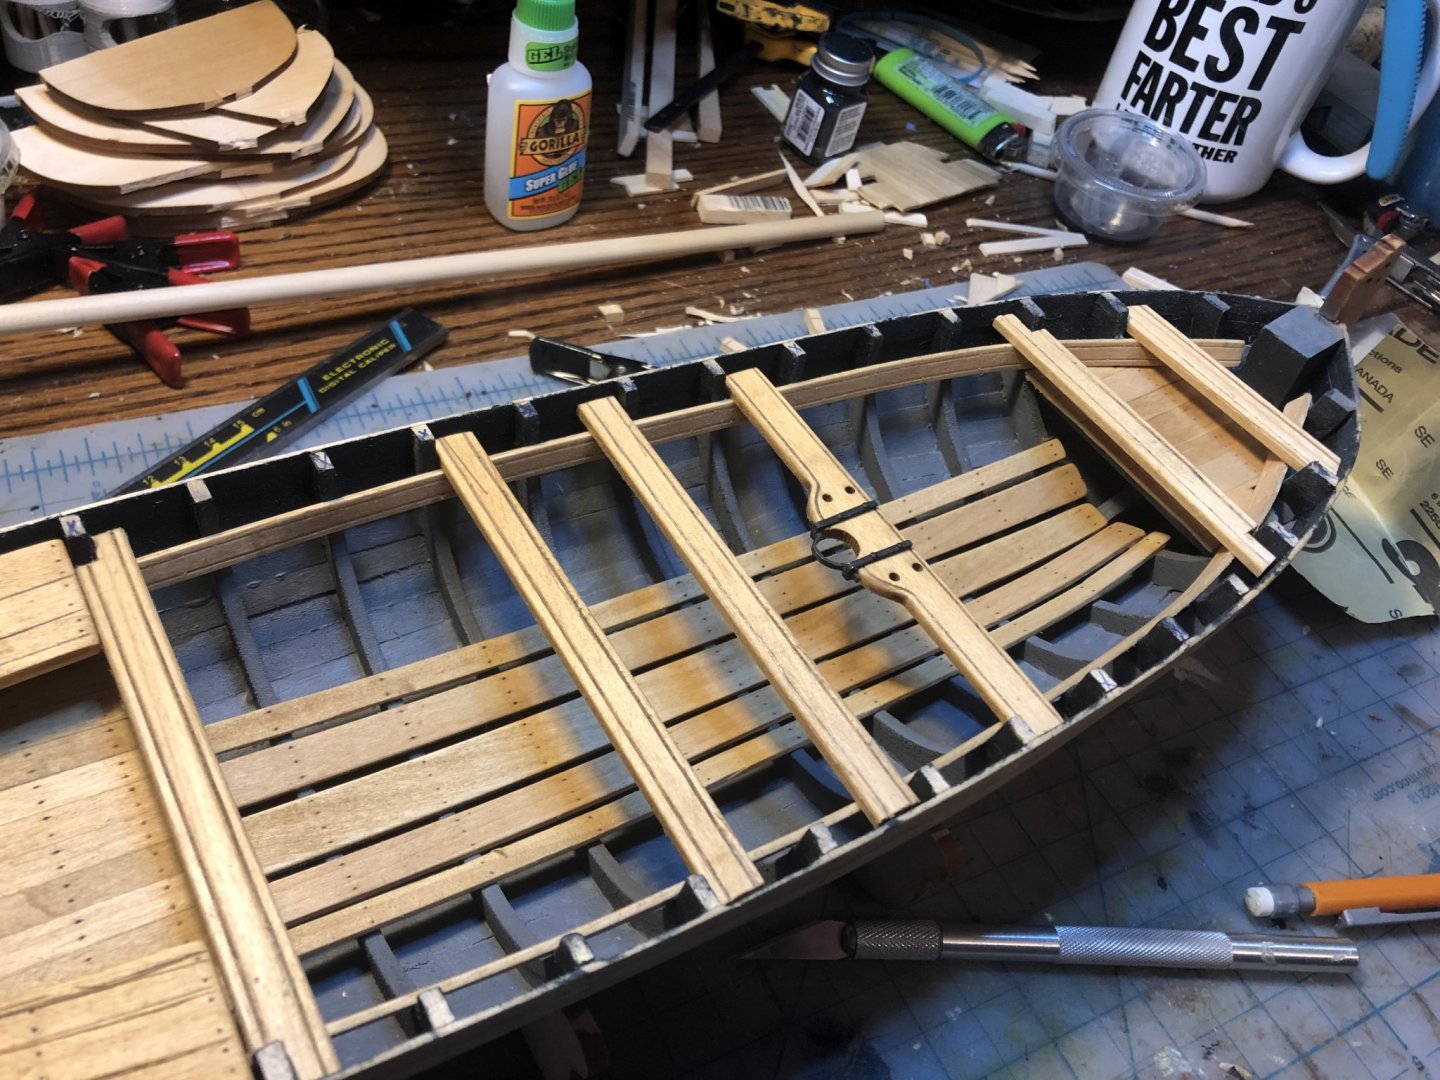
Mean while here is a pic of the mostly completed hull with thwart braces and oar locks in place.

- 16 replies
-
- 4
-
-
- 18th Century Armed Longboat
- Model Shipways
- (and 1 more)
-
Sea Hoss, Thanks for the reply, sorry for the delayed reply on my part. I did notice several things during construction that were off. The odd shape of bulkhead number 3 (i think it was) was a pain to fix while planking. The rigging layout seems to have a few issues also. The running rigging line provided is the wrong size, its larger than the anchor line. I ended up ordering some additional rigging line form Syren ship co., but I'll likely contact Model Expo to see about getting replacement line for the next build. This is my first wood kit build so I'm not sure if these are typical of Model Shipways kits or just a fluke for this model. Any ways, it has been a blast to build so far and I feel like small problems like these just add to the challenge of the build. I will be posting more updates to the build soon. I have been making progress, just no time to gather my thoughts and post. Also, there are sails coming!
-
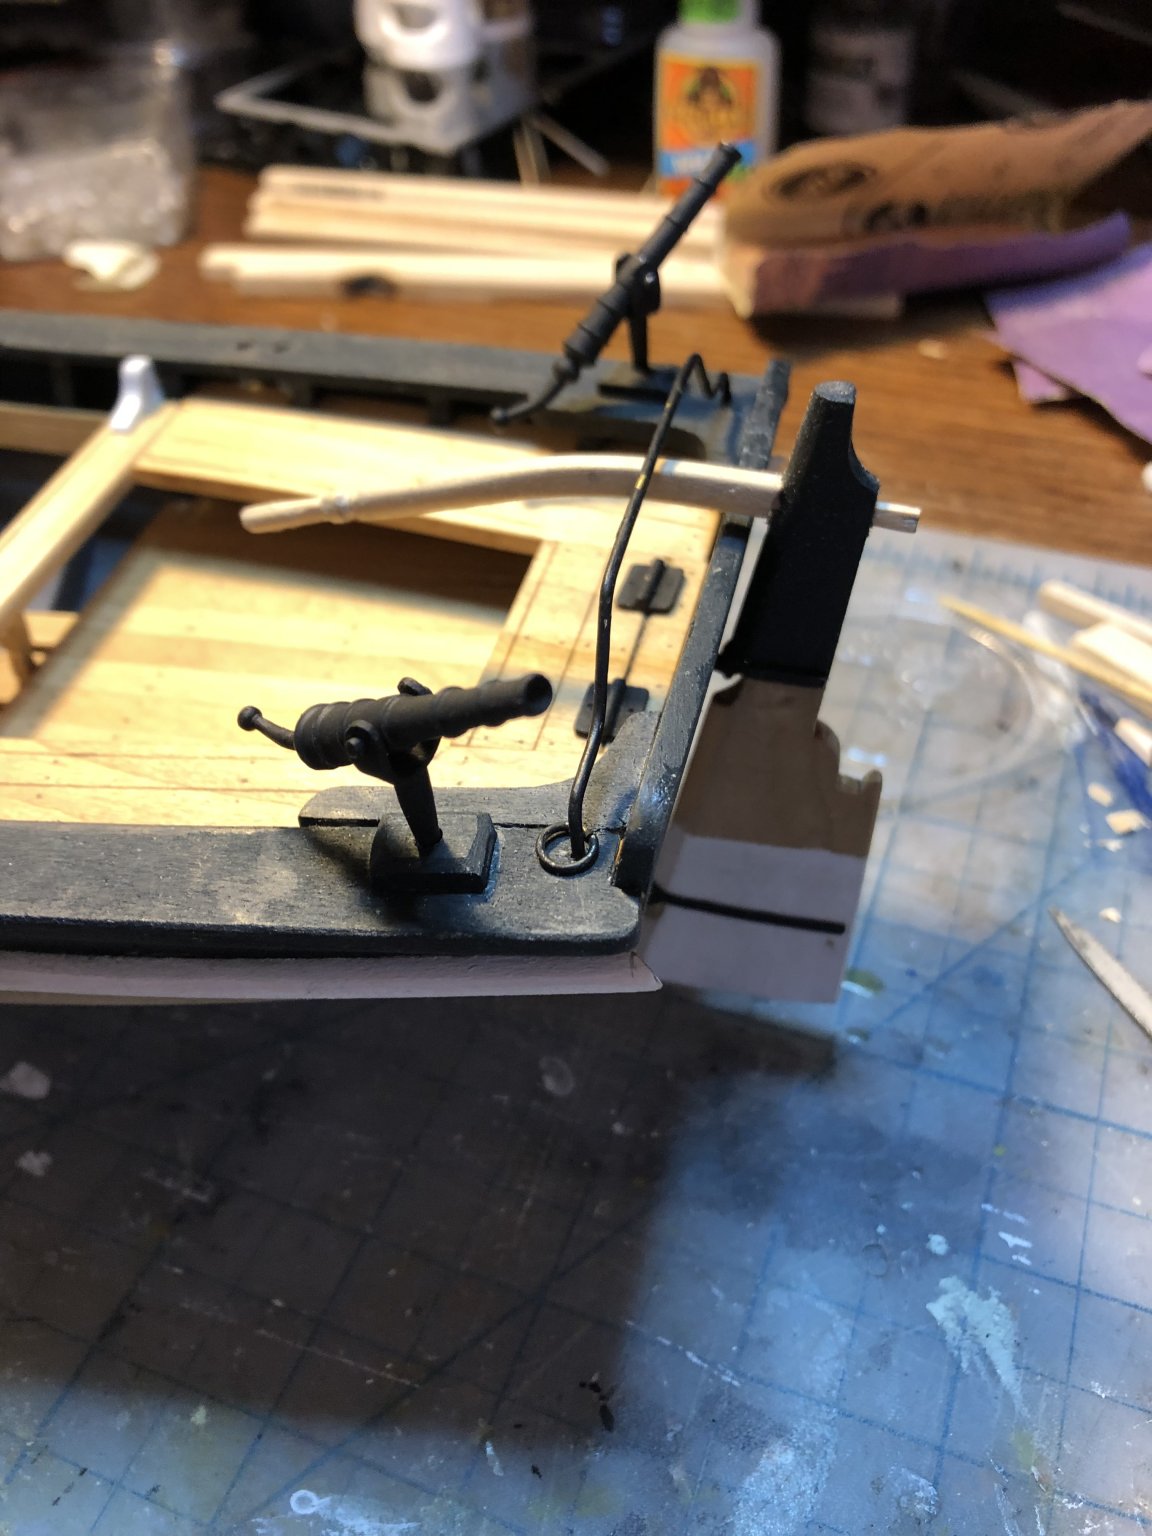
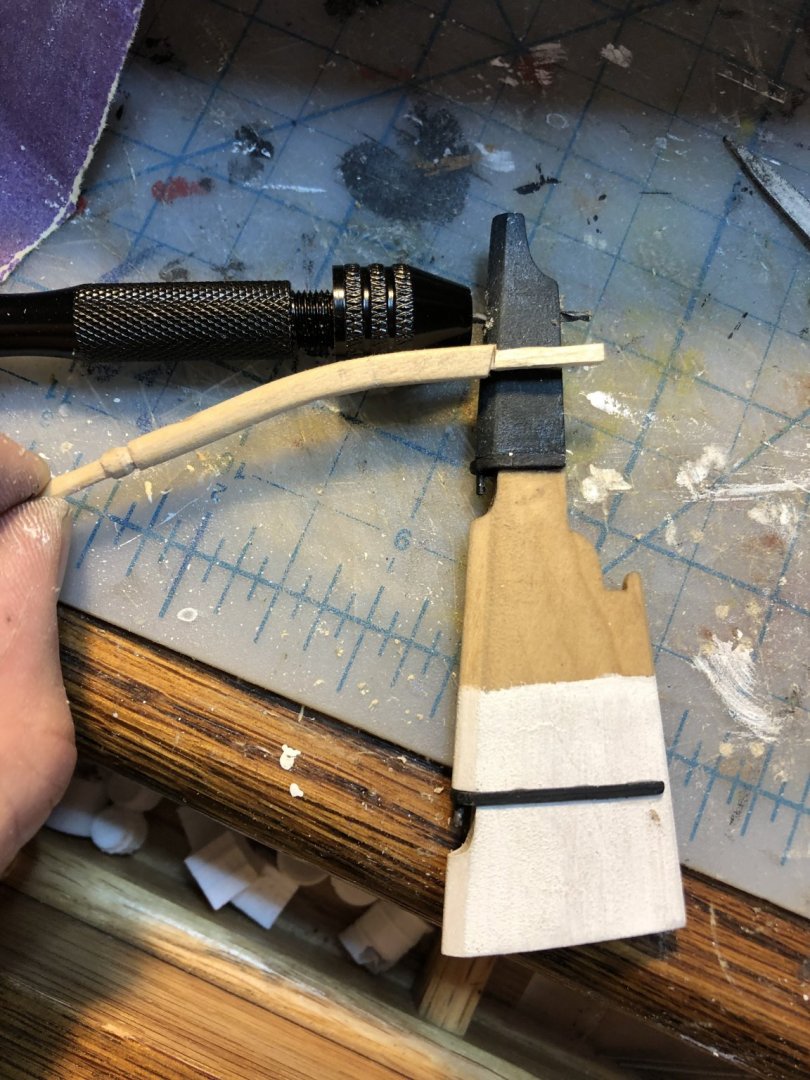
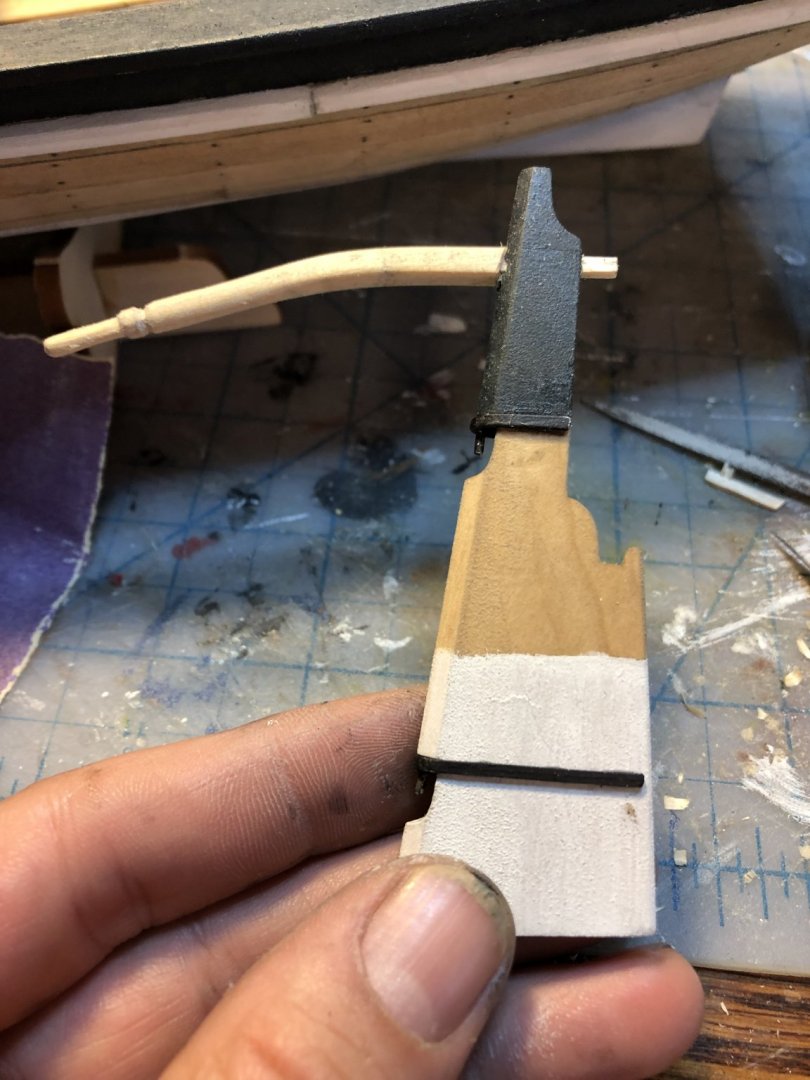
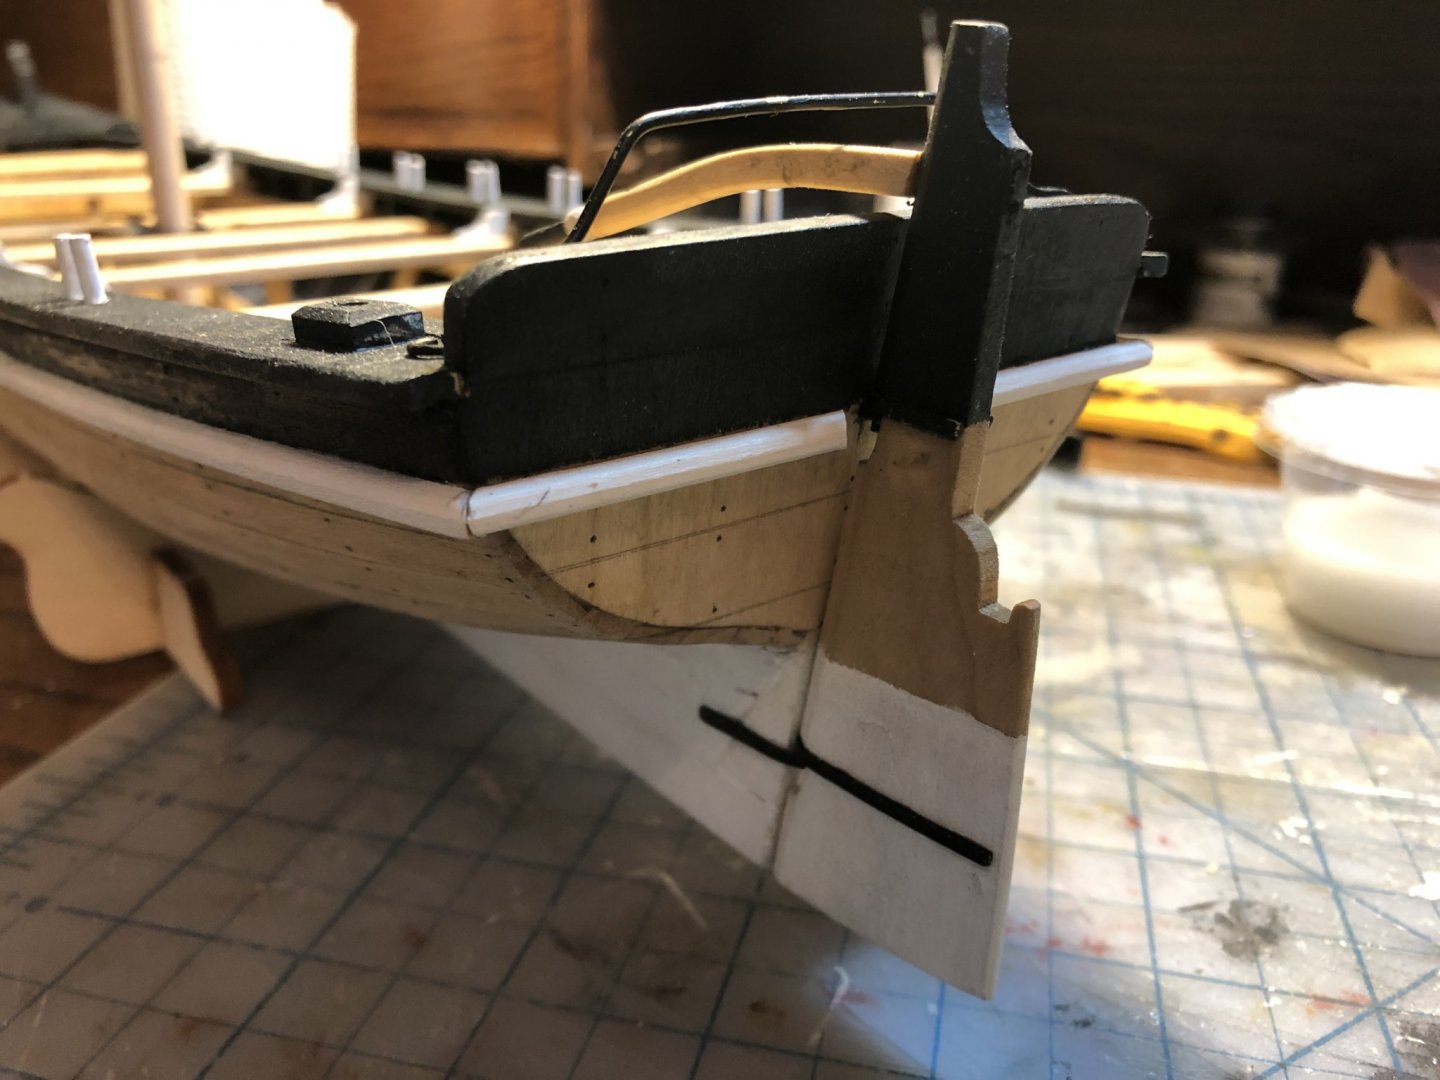
Drilling the hole through the rudder for the tiller attachment was a bit of a nightmare. The hole is not much smaller than the rudder is thick. and I had to drill three holes to make the slot large enough. But it worked out in the end. I think the tiller needs to be straightened out a bit, it looks a little sad as is, but we will see how it looks once its painted and installed. Note the horse running over the tiller. I read a few posts about this issue. I don't see how it is to work with the tiller over the horse. When you tack the tiller and mast rigging would collide and cause all sorts of trouble. Probably not a big deal on a model, but I couldn't leave it as shown in the plans. I also made a new ring for the traveler, the one provided seemed comically over sized. Thanks for looking!


- 16 replies
-
- 3
-
-
- 18th Century Armed Longboat
- Model Shipways
- (and 1 more)
-
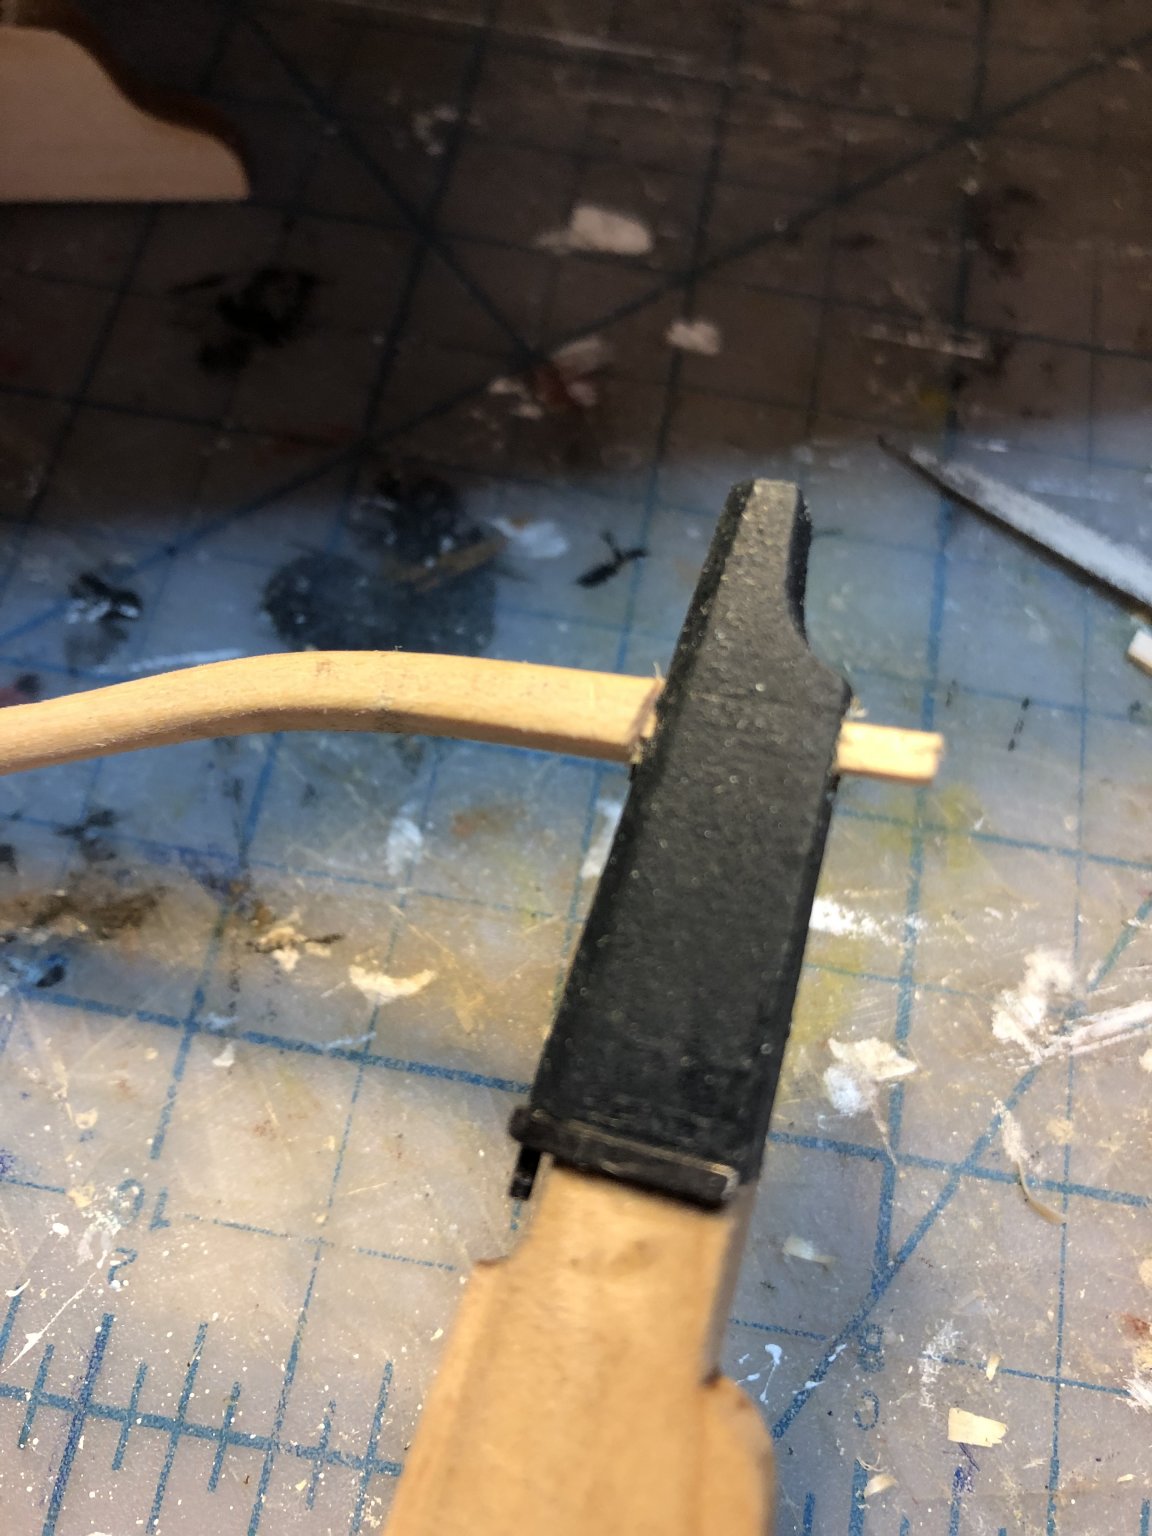
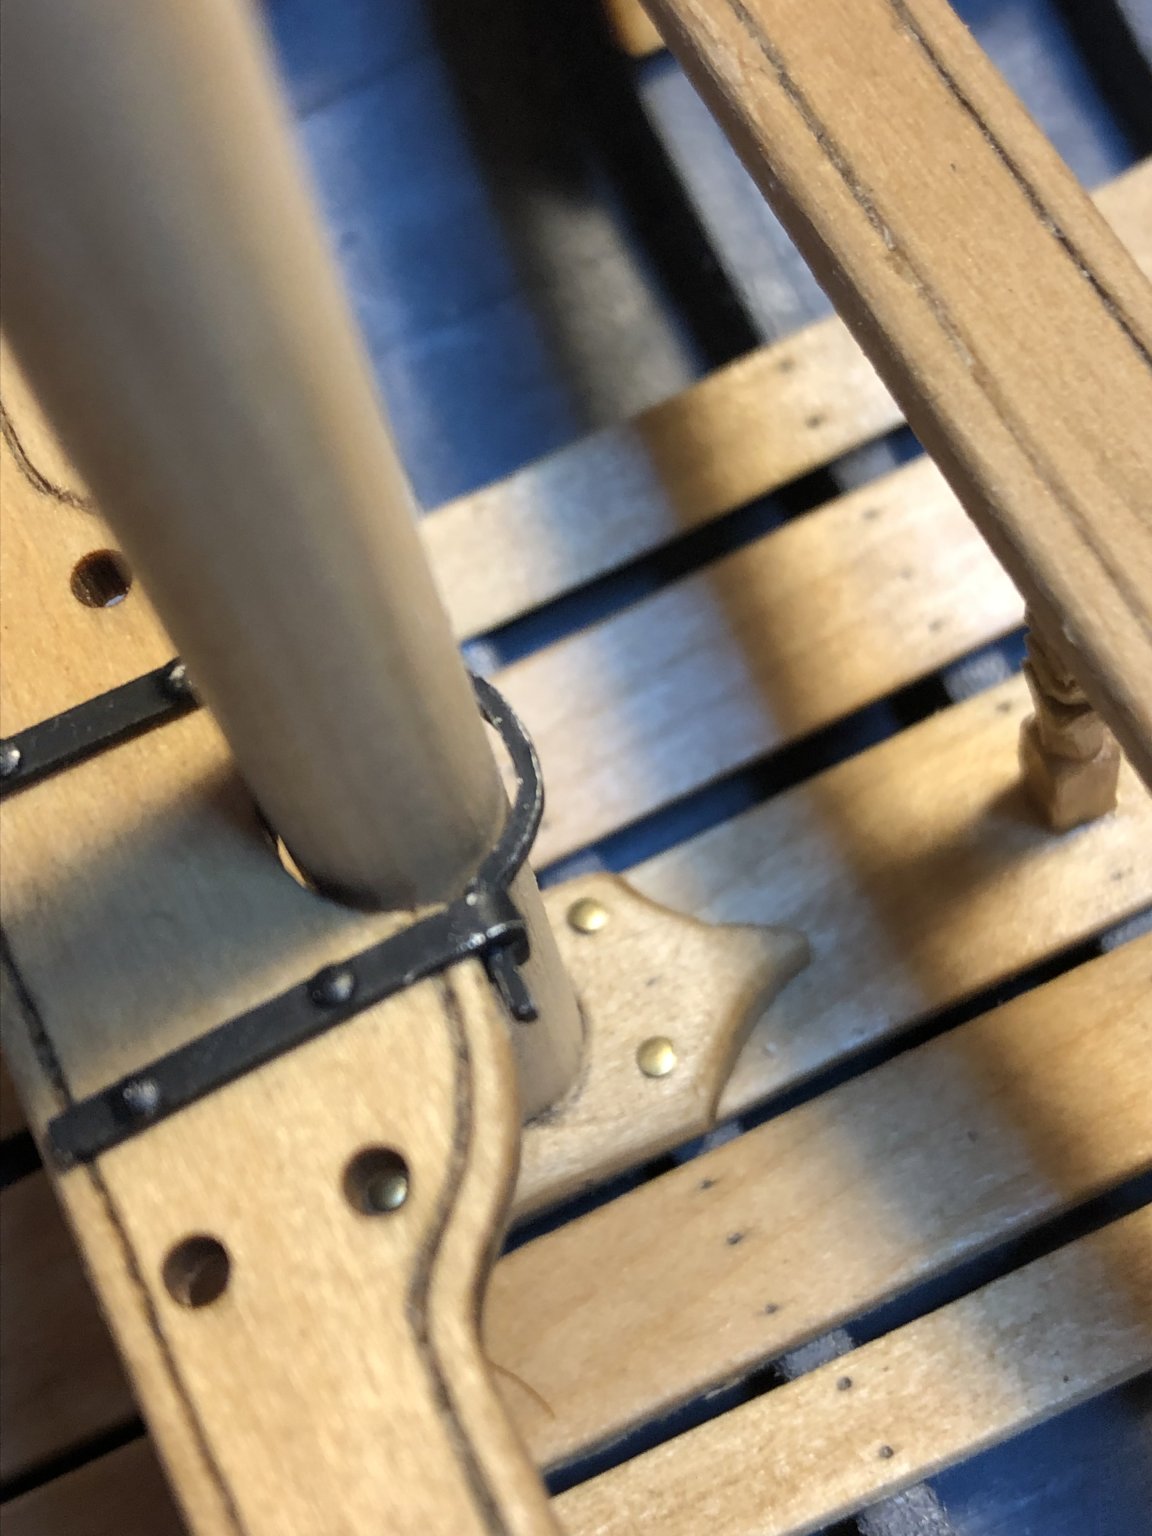
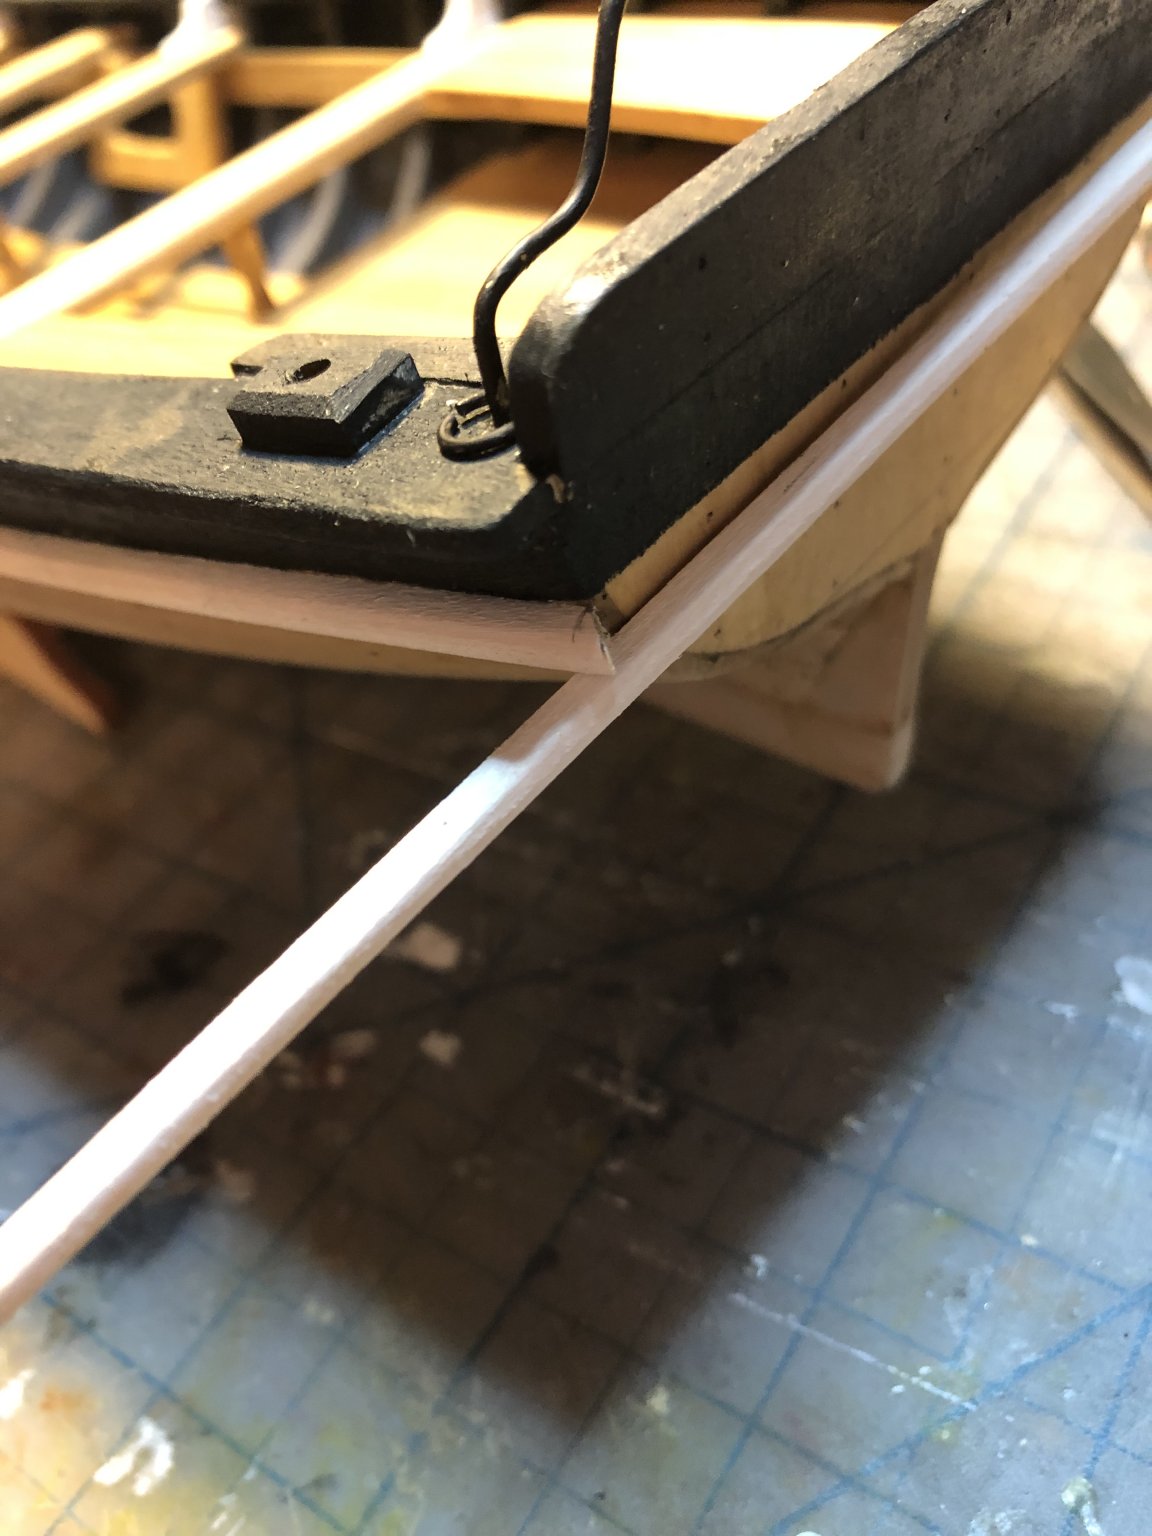
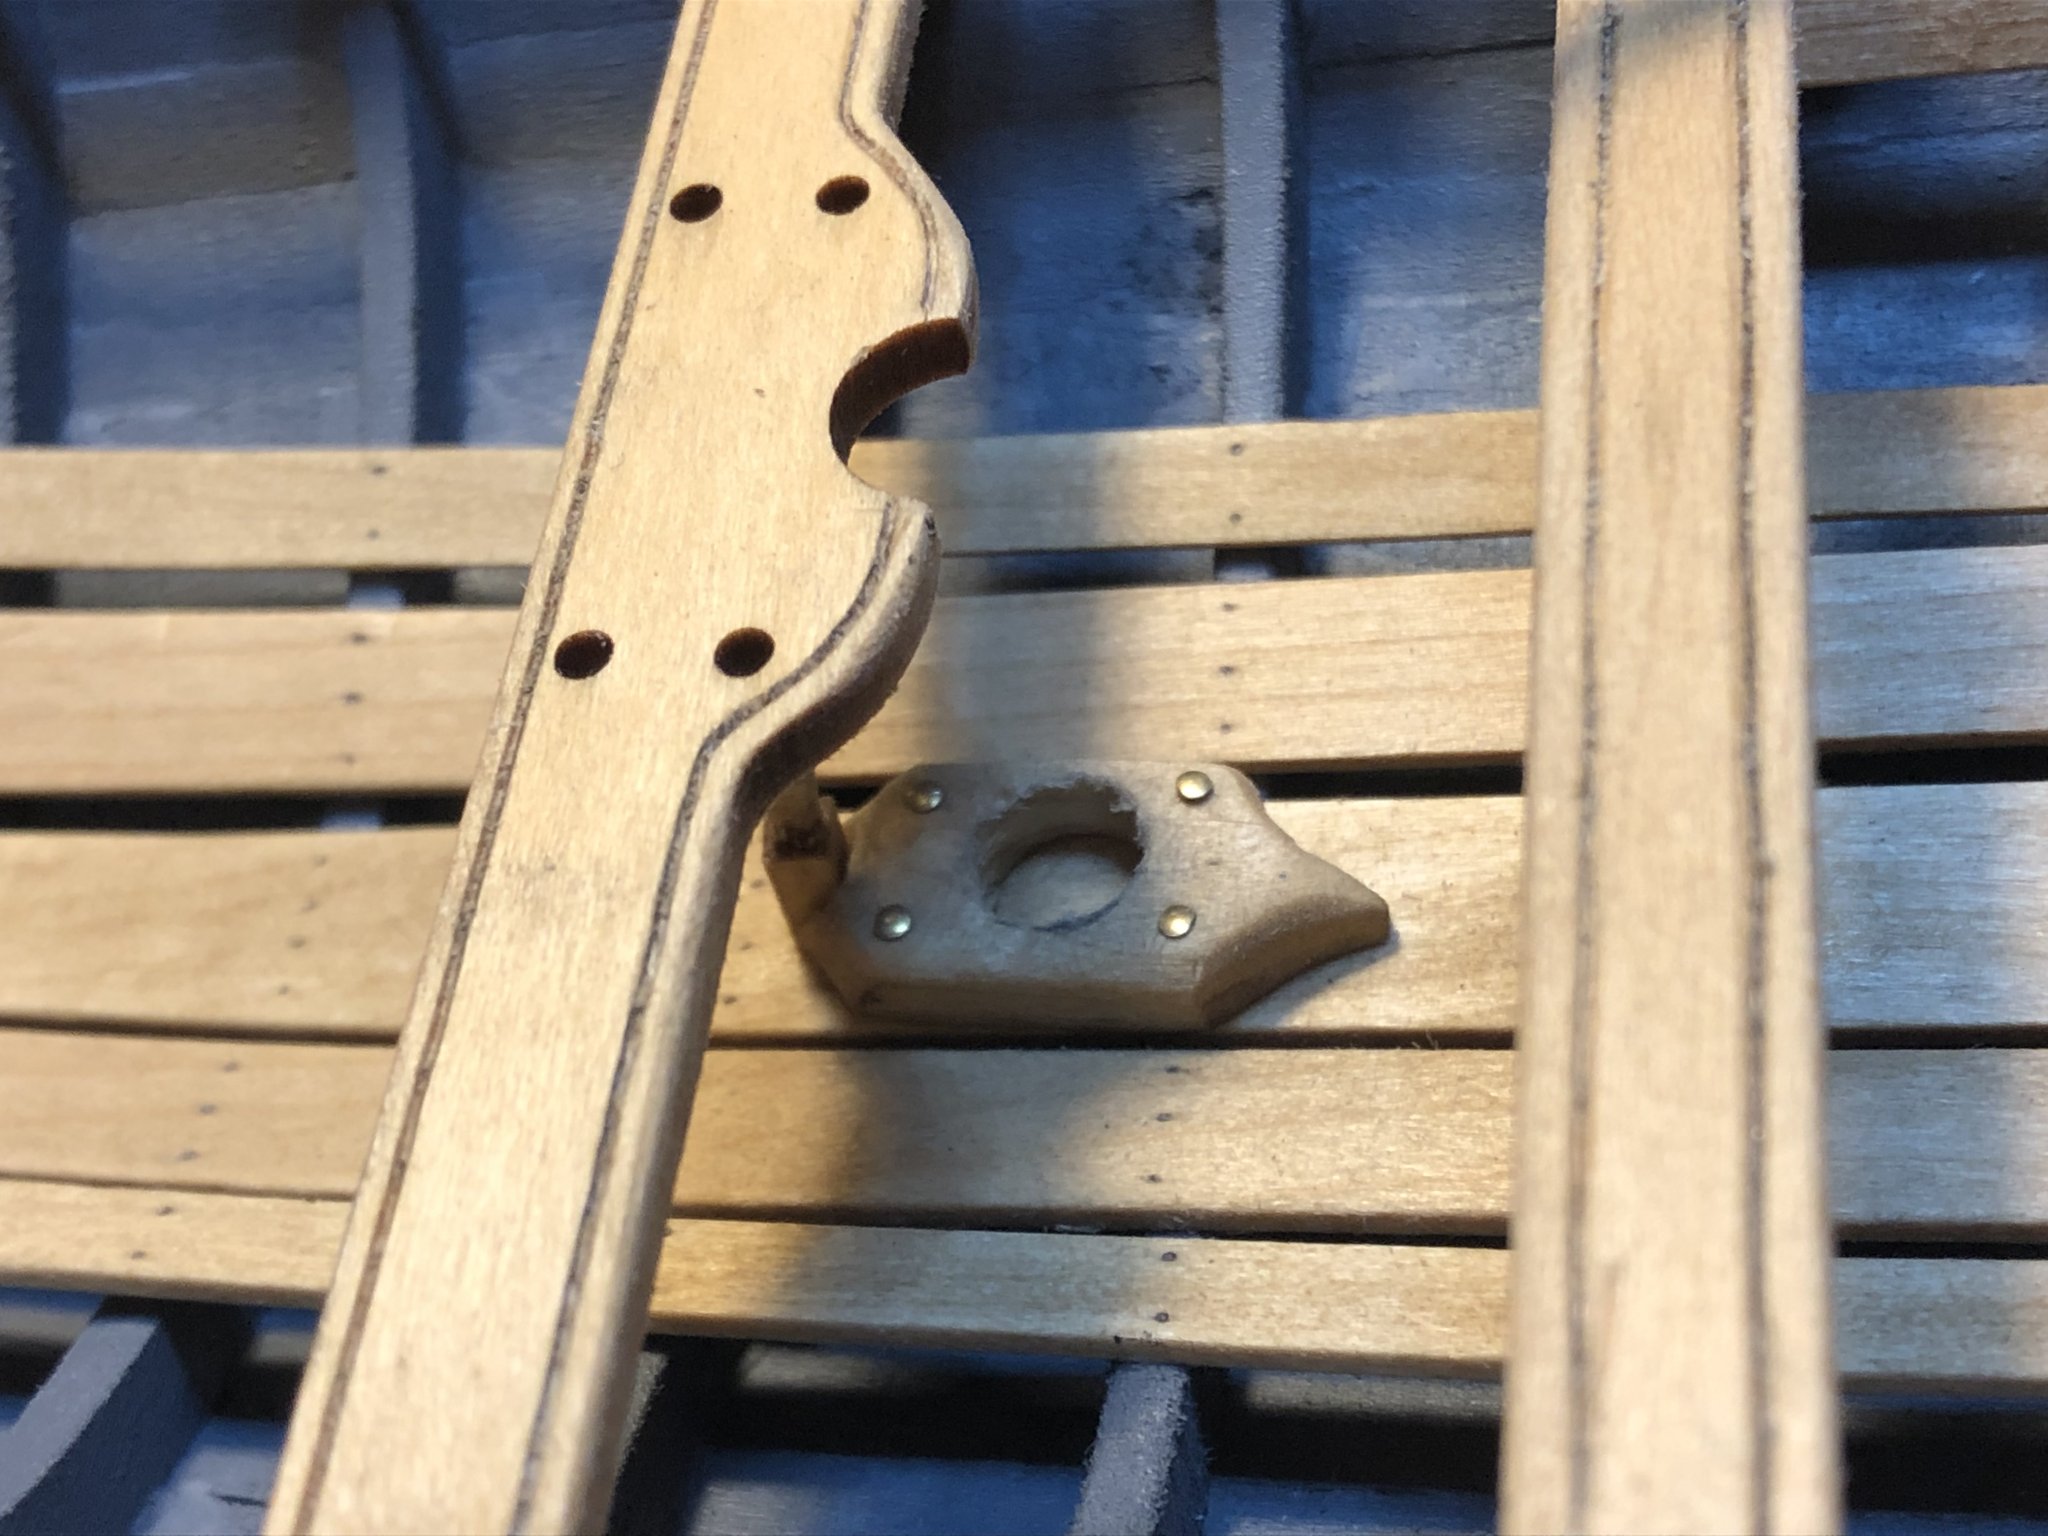
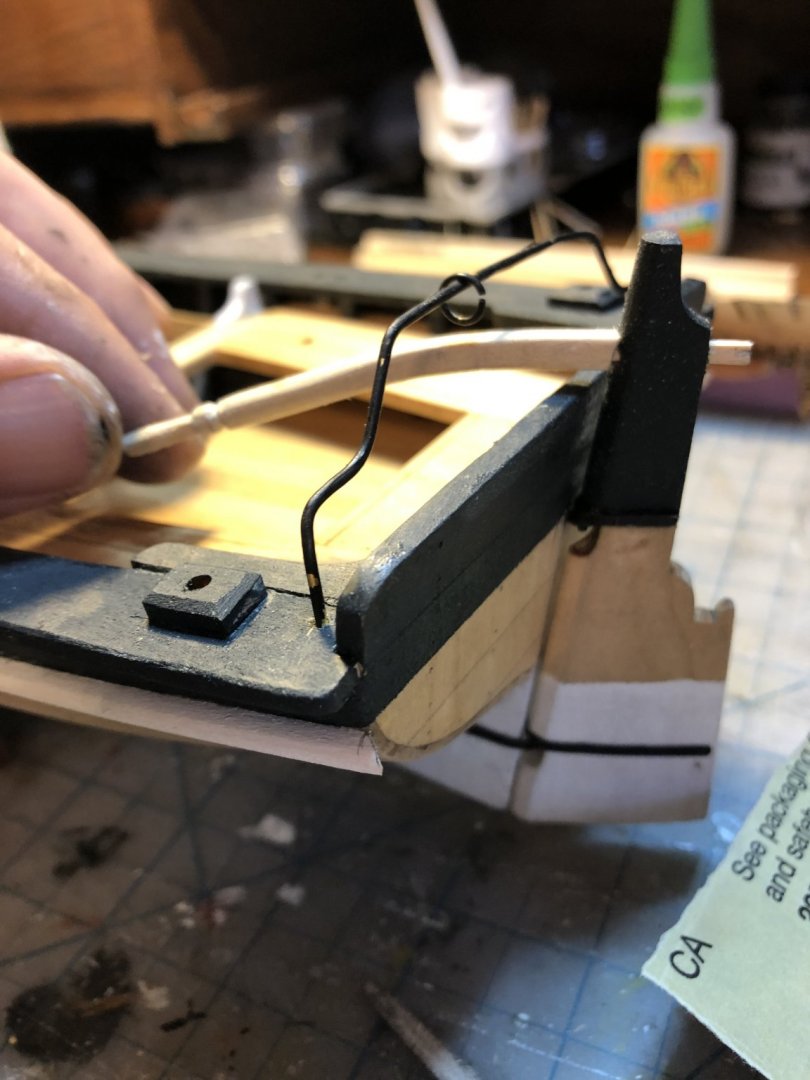
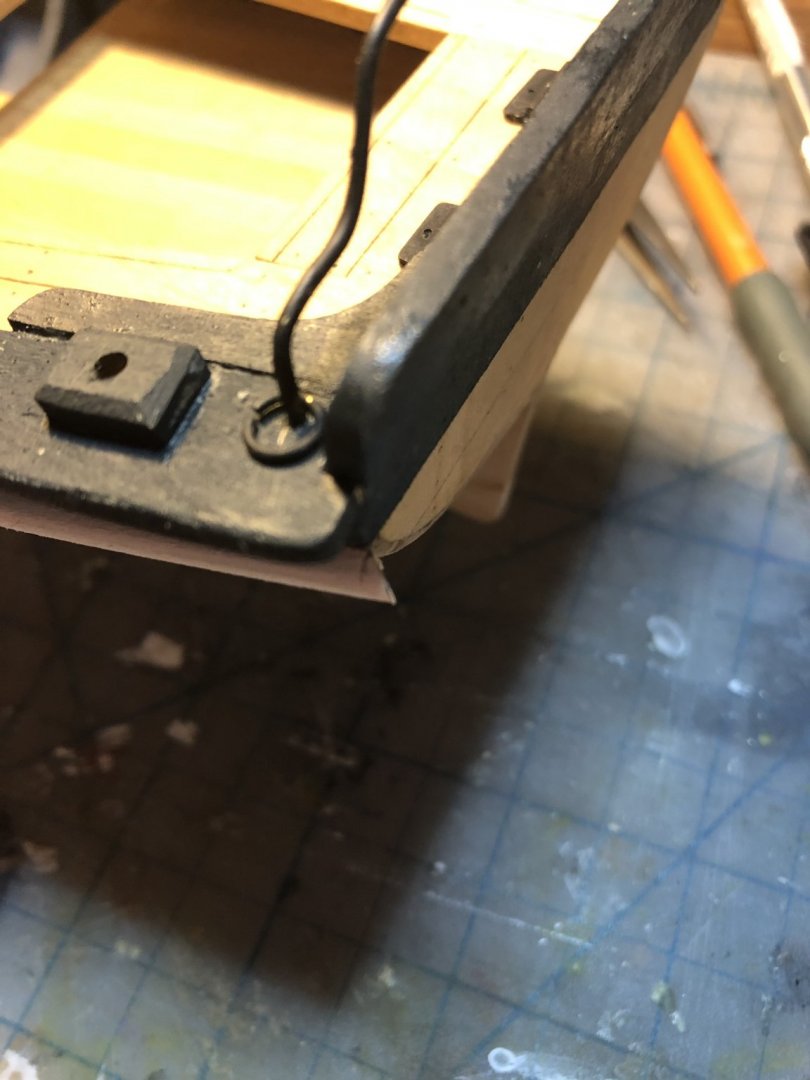
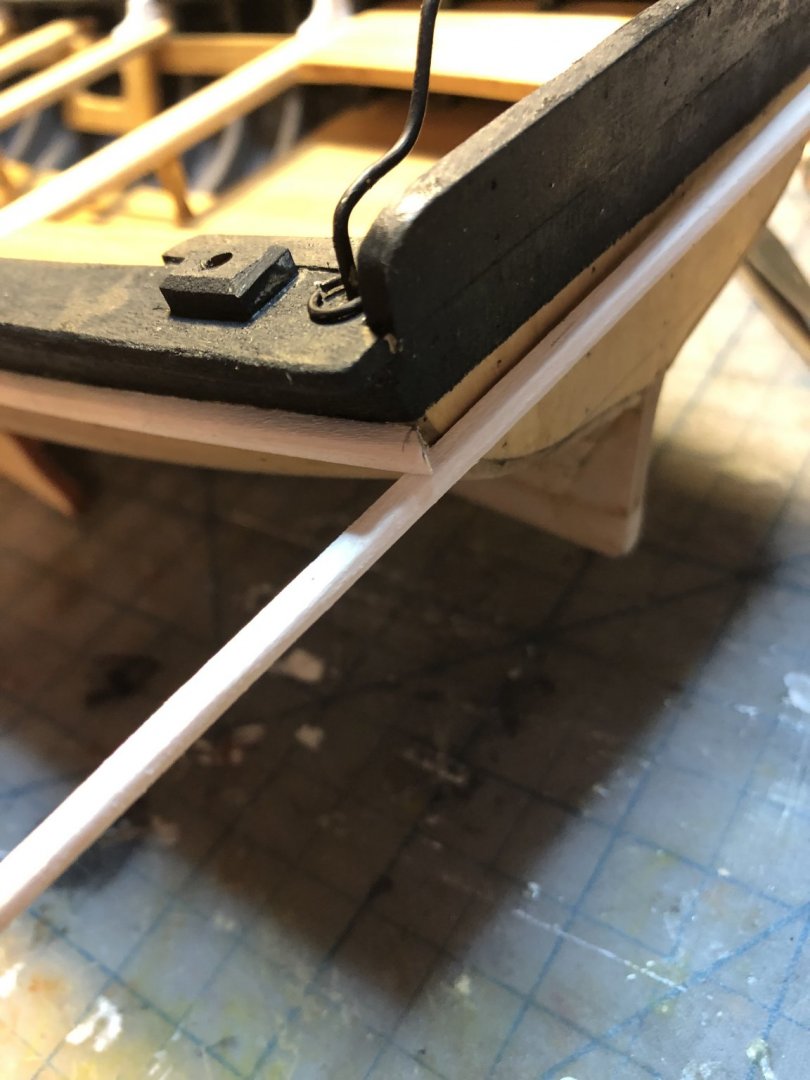
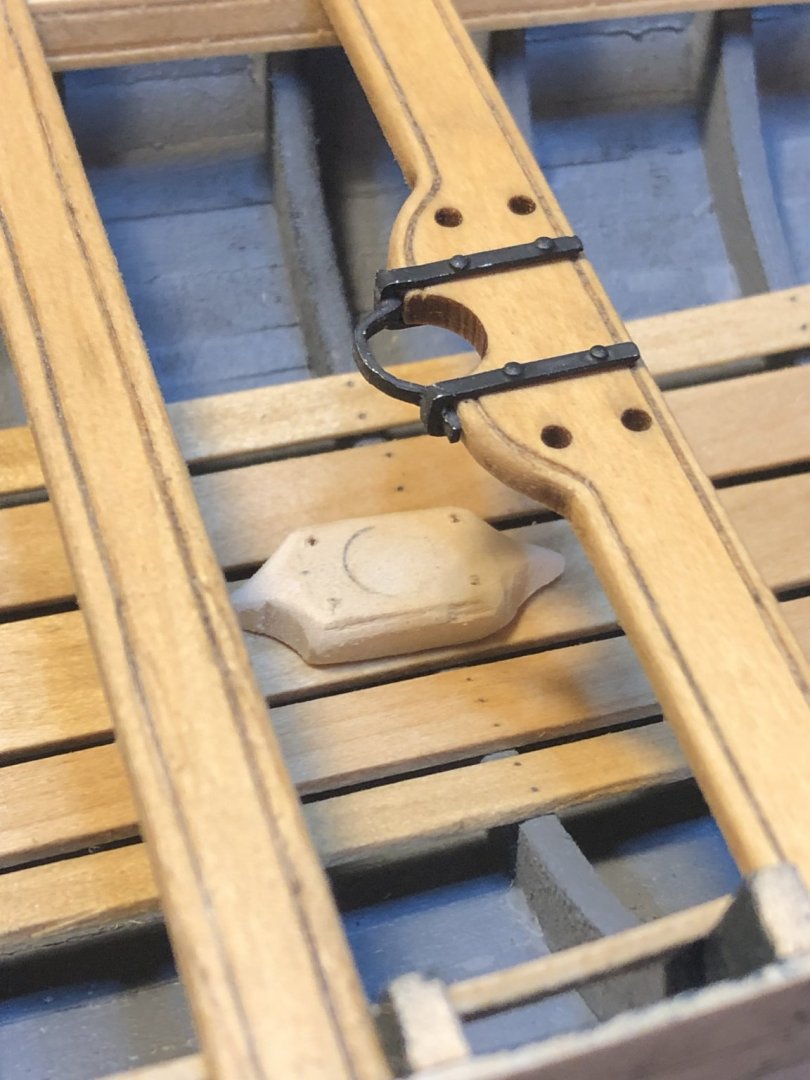
In the pic below you can see how the mast bracket does not fit around the mast very well. There is a small 1/32" gap between the mast and bracket. Not a big deal, but i didn't like the way it looked. So i cut a small mortise into the front of the thwart so the bracket would fit a little tighter to the mast. A much better fit is achieved, and thankfully I didn't destroy the thwart in the process! Thanks for looking!


- 16 replies
-
- 2
-
-
- 18th Century Armed Longboat
- Model Shipways
- (and 1 more)
-
A few more pics of the oarlocks painted and installed.


- 16 replies
-
- 1
-
-
- 18th Century Armed Longboat
- Model Shipways
- (and 1 more)
-
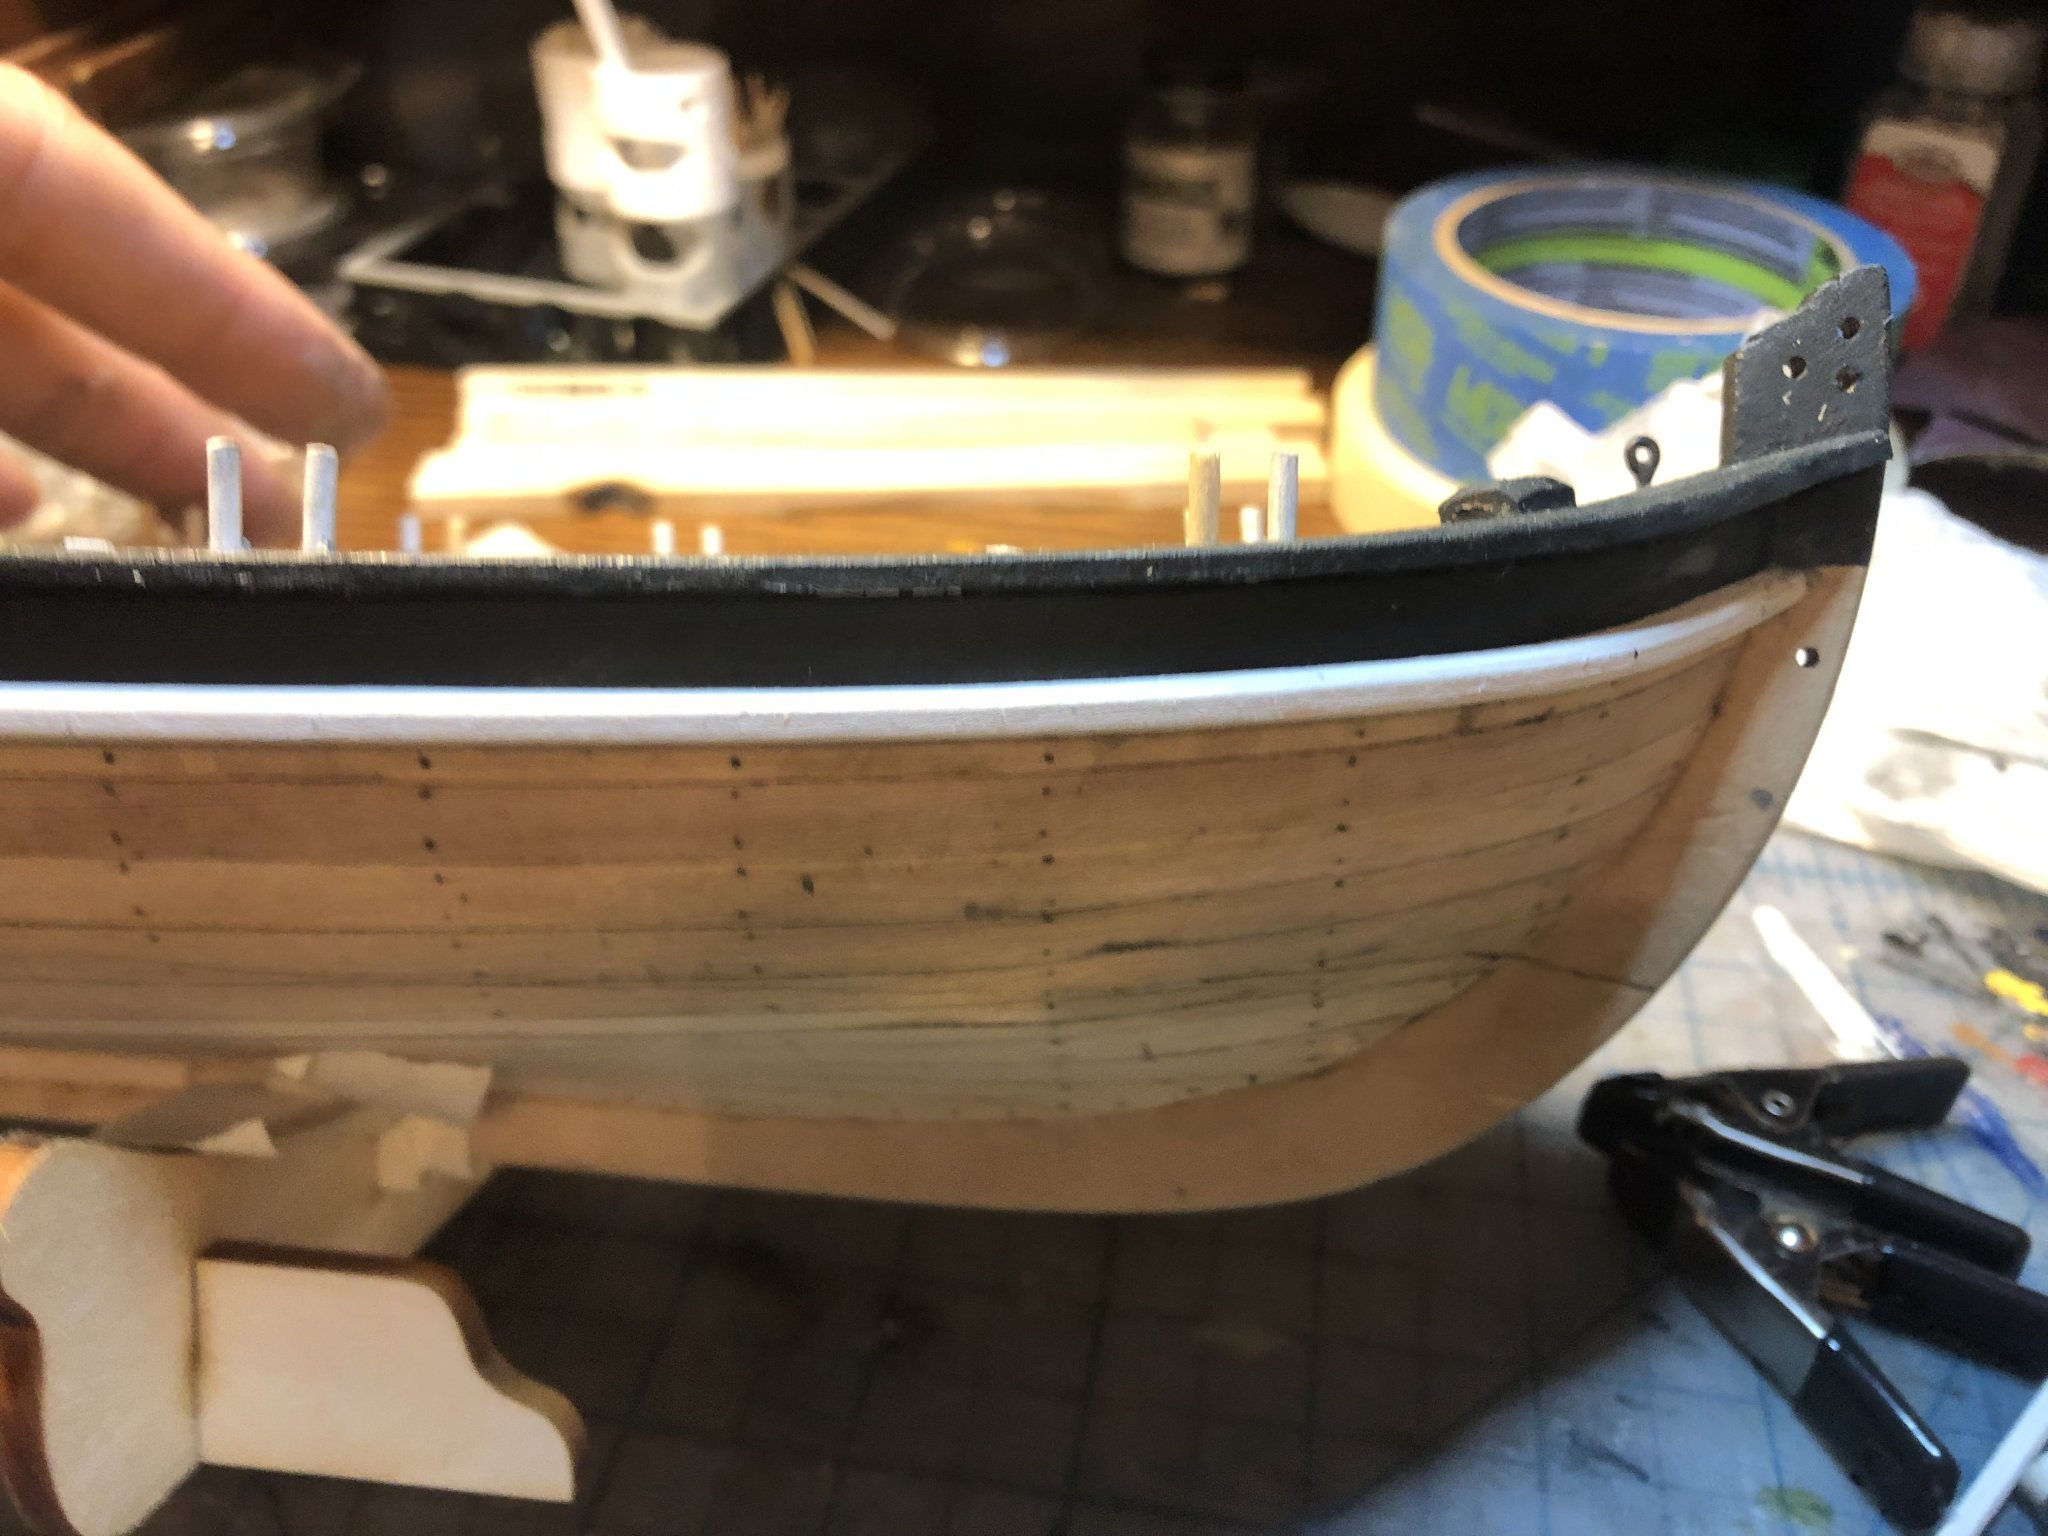
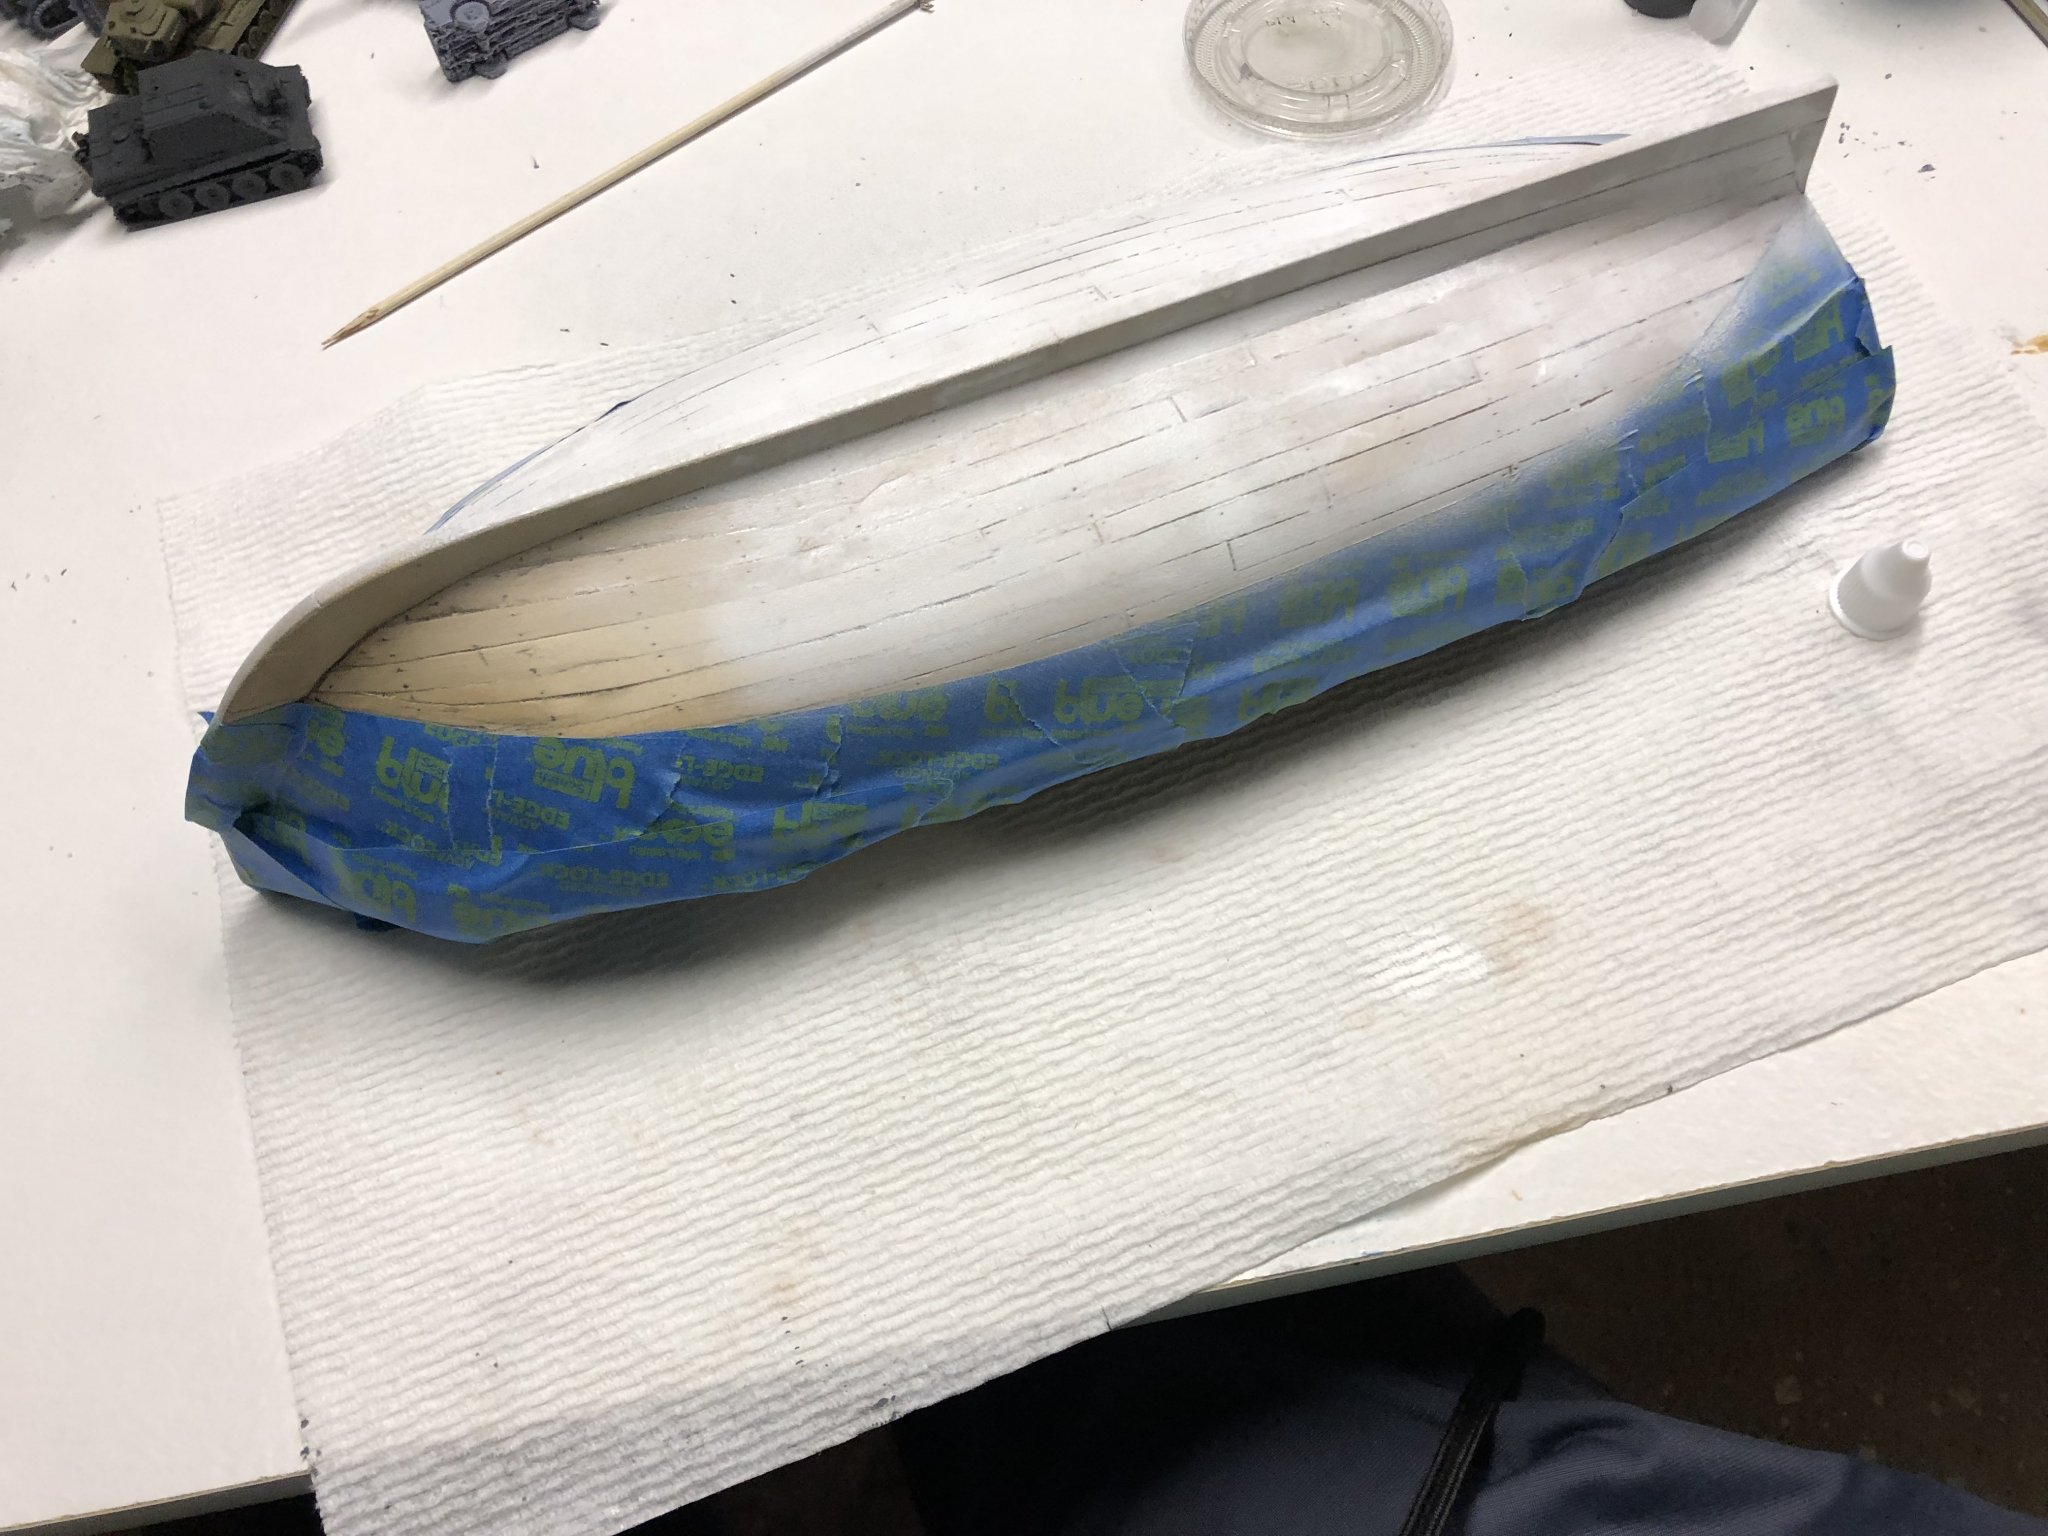
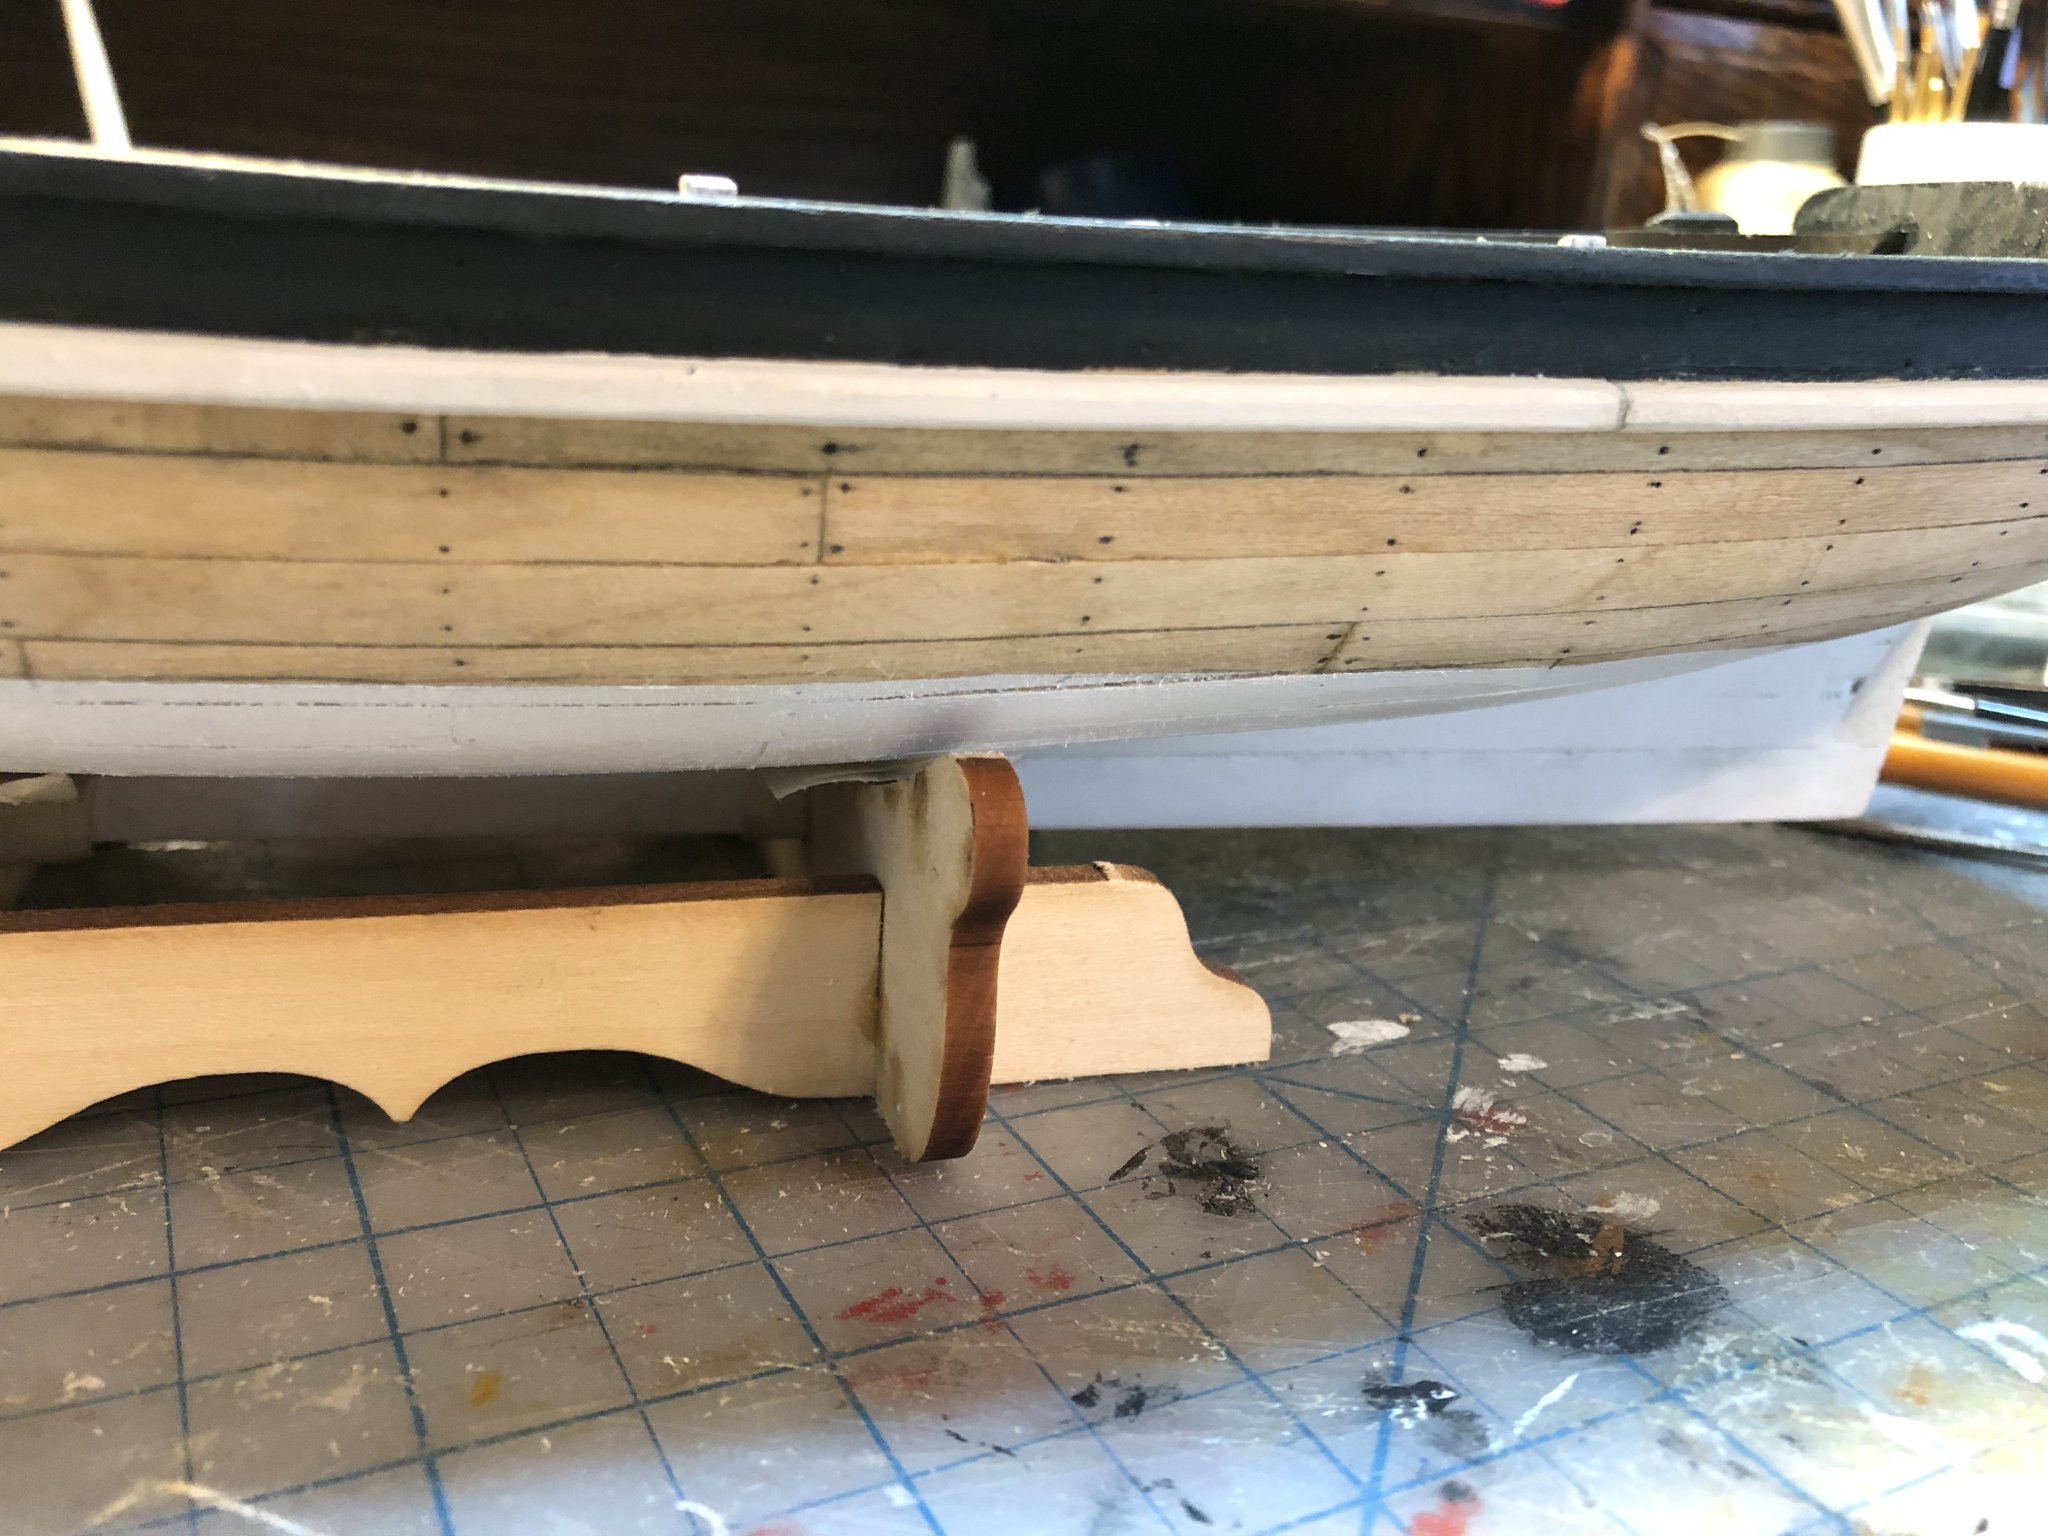
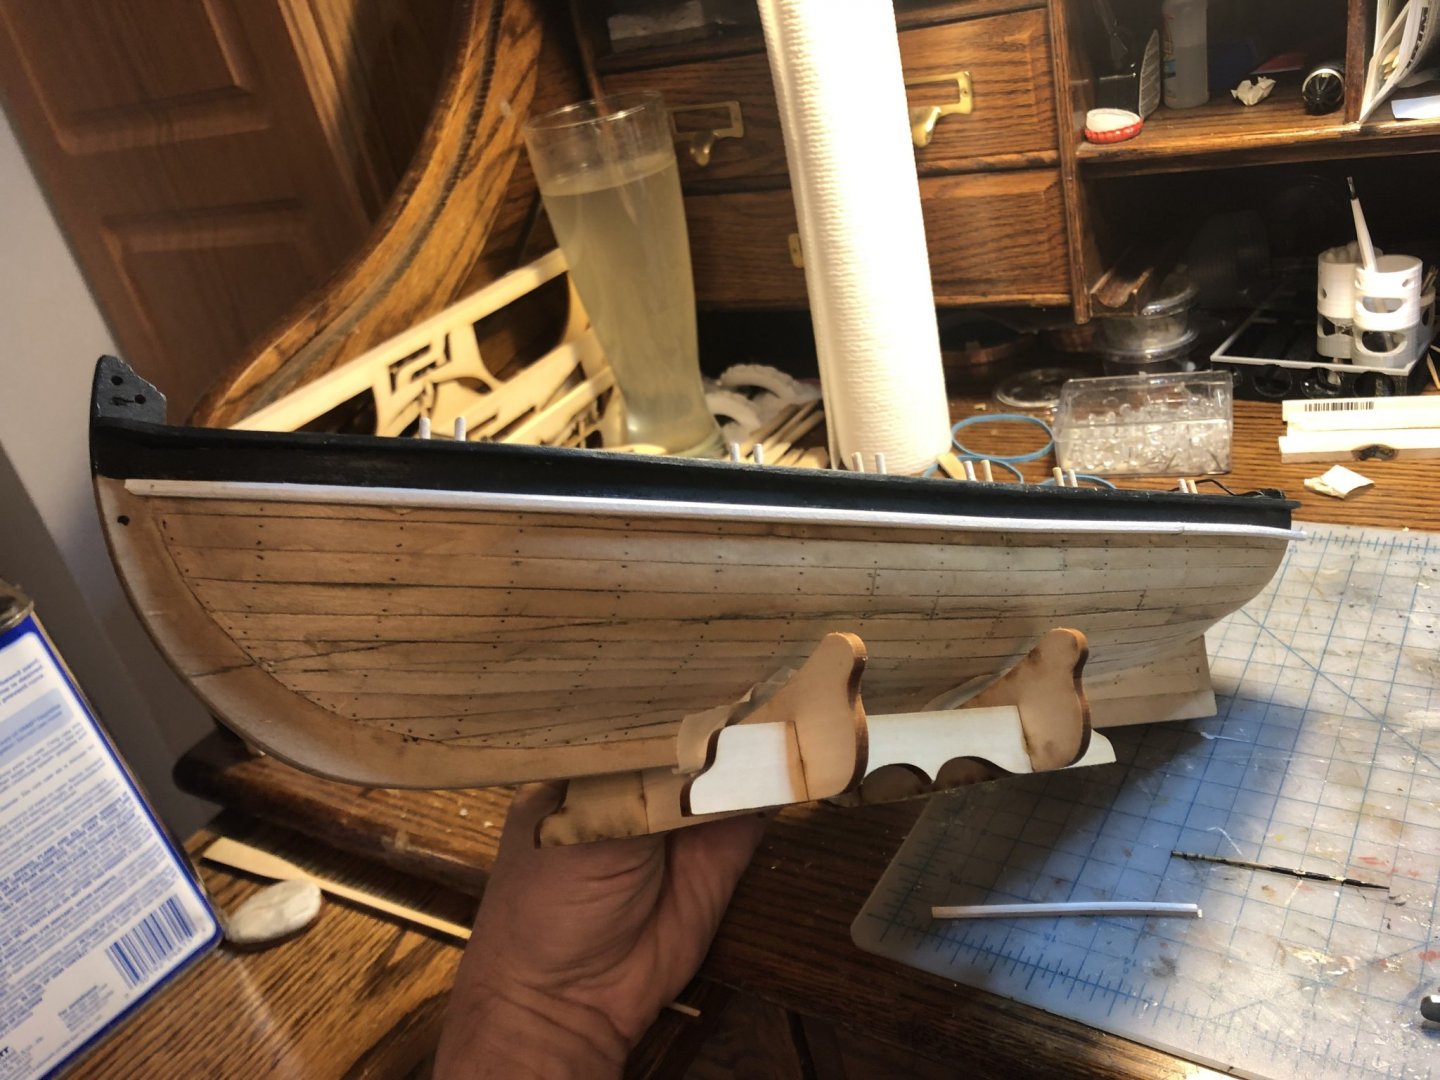
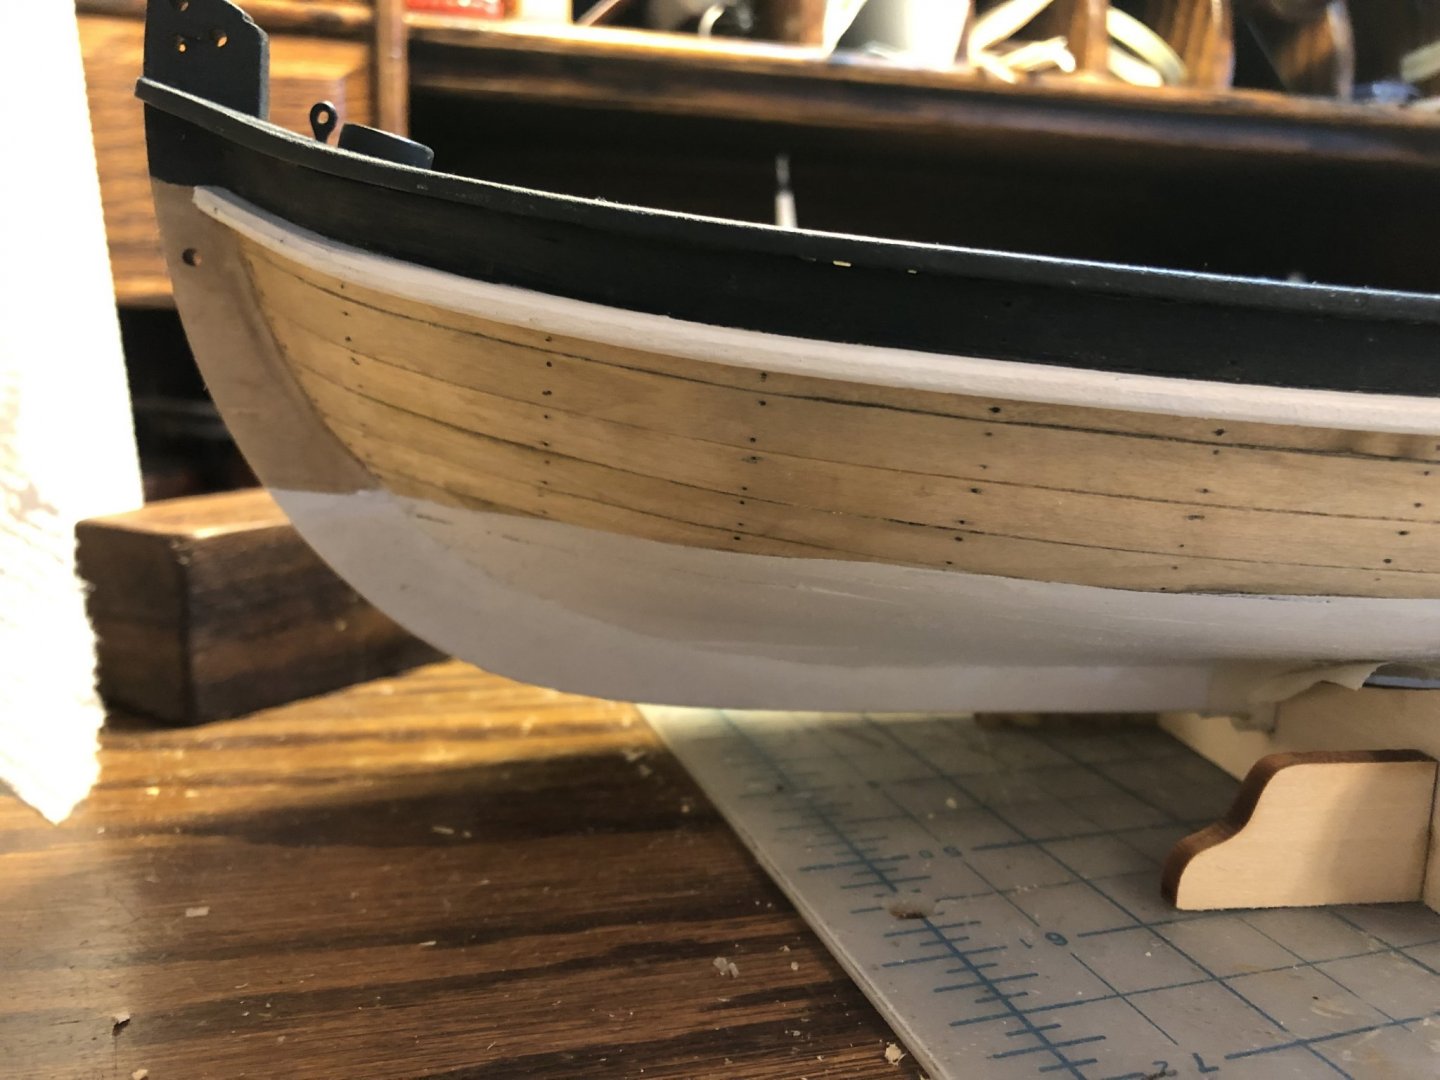
So I had a chance over the long weekend to make some more progress on the boat. I got the oar locks drilled and fit. I didn't care too much for the oarlocks as supplied in the kit. They looked to big compared to the rail. So i ditched the base plate and just attached directly into the rail. I am happy with how these look. I will need to remove and put on a final coat of paint before permanent attachment. I got the rub rails painted and glued into place. The brass cutting plate provided didn't work too well for cutting the rail profile, so i profiled with a small block plane and sanded to a nice finish. I also got the hull painted below the water line. A few coats of spray on acrylic white did the trick nicely. I am really happy with how the blue and white color scheme is turning out. Thanks for looking! and any comments or suggestions are greatly appreciated.


- 16 replies
-
- 2
-
-
- 18th Century Armed Longboat
- Model Shipways
- (and 1 more)
-
Thanks! I got the barrel and bucket off of Thingiverse. There are several types of barrels available. I could not find a correct bucket with the ears and hoops. I planned to modify the printed one with putty before painting.
- 16 replies
-
- 1
-
-
- 18th Century Armed Longboat
- Model Shipways
- (and 1 more)
-
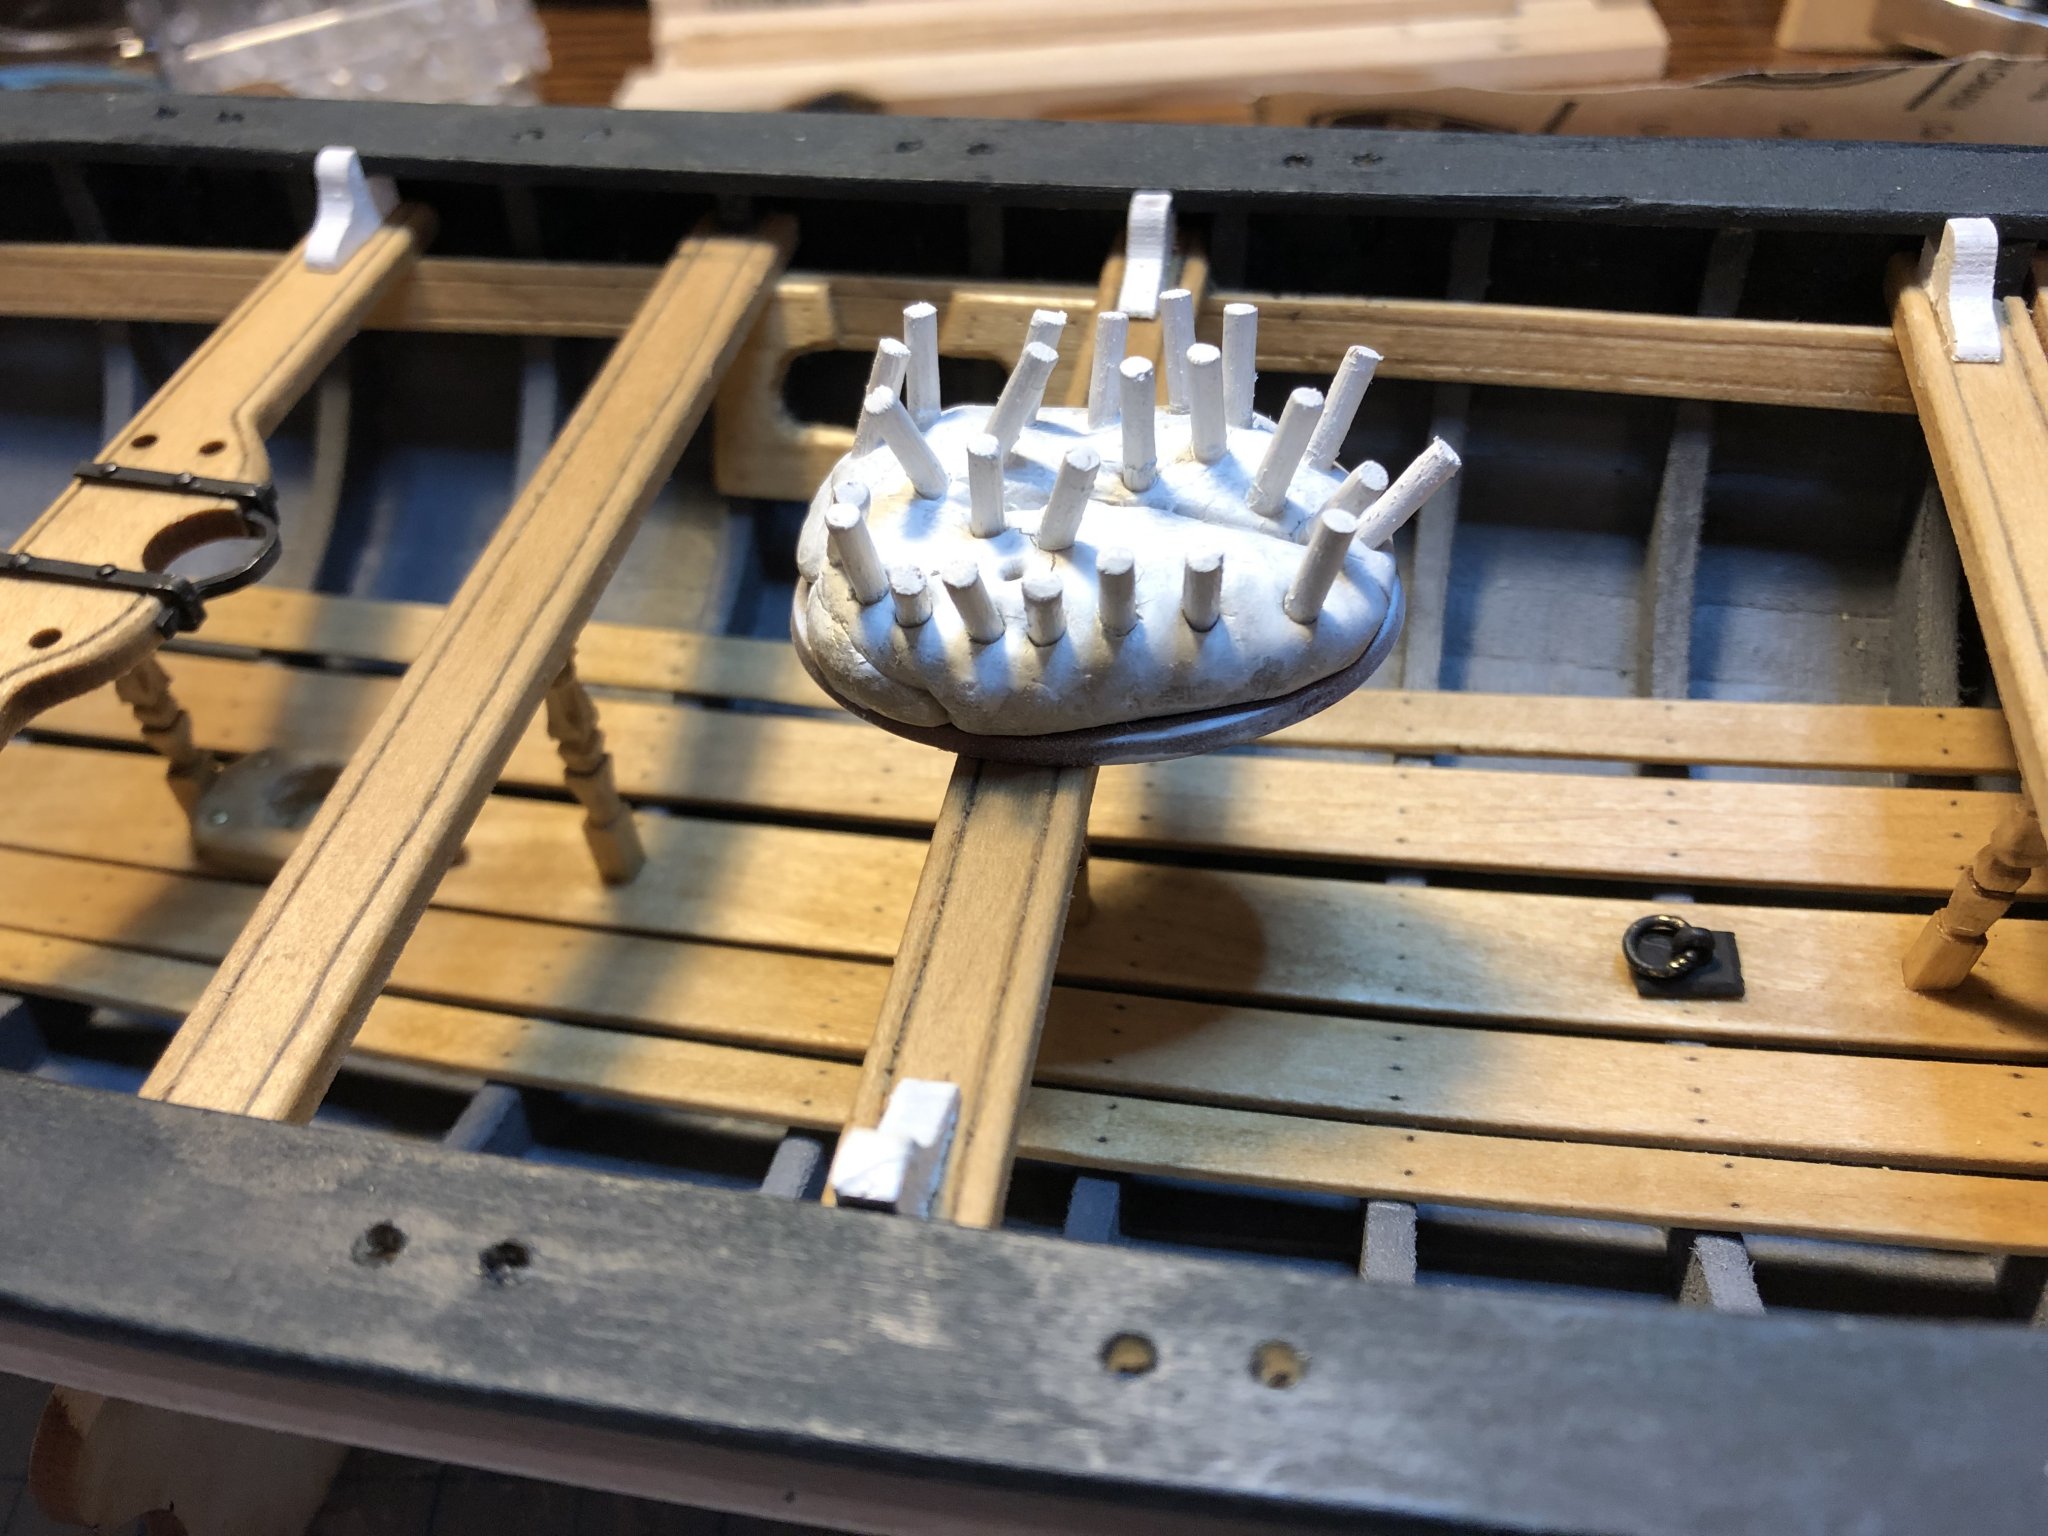
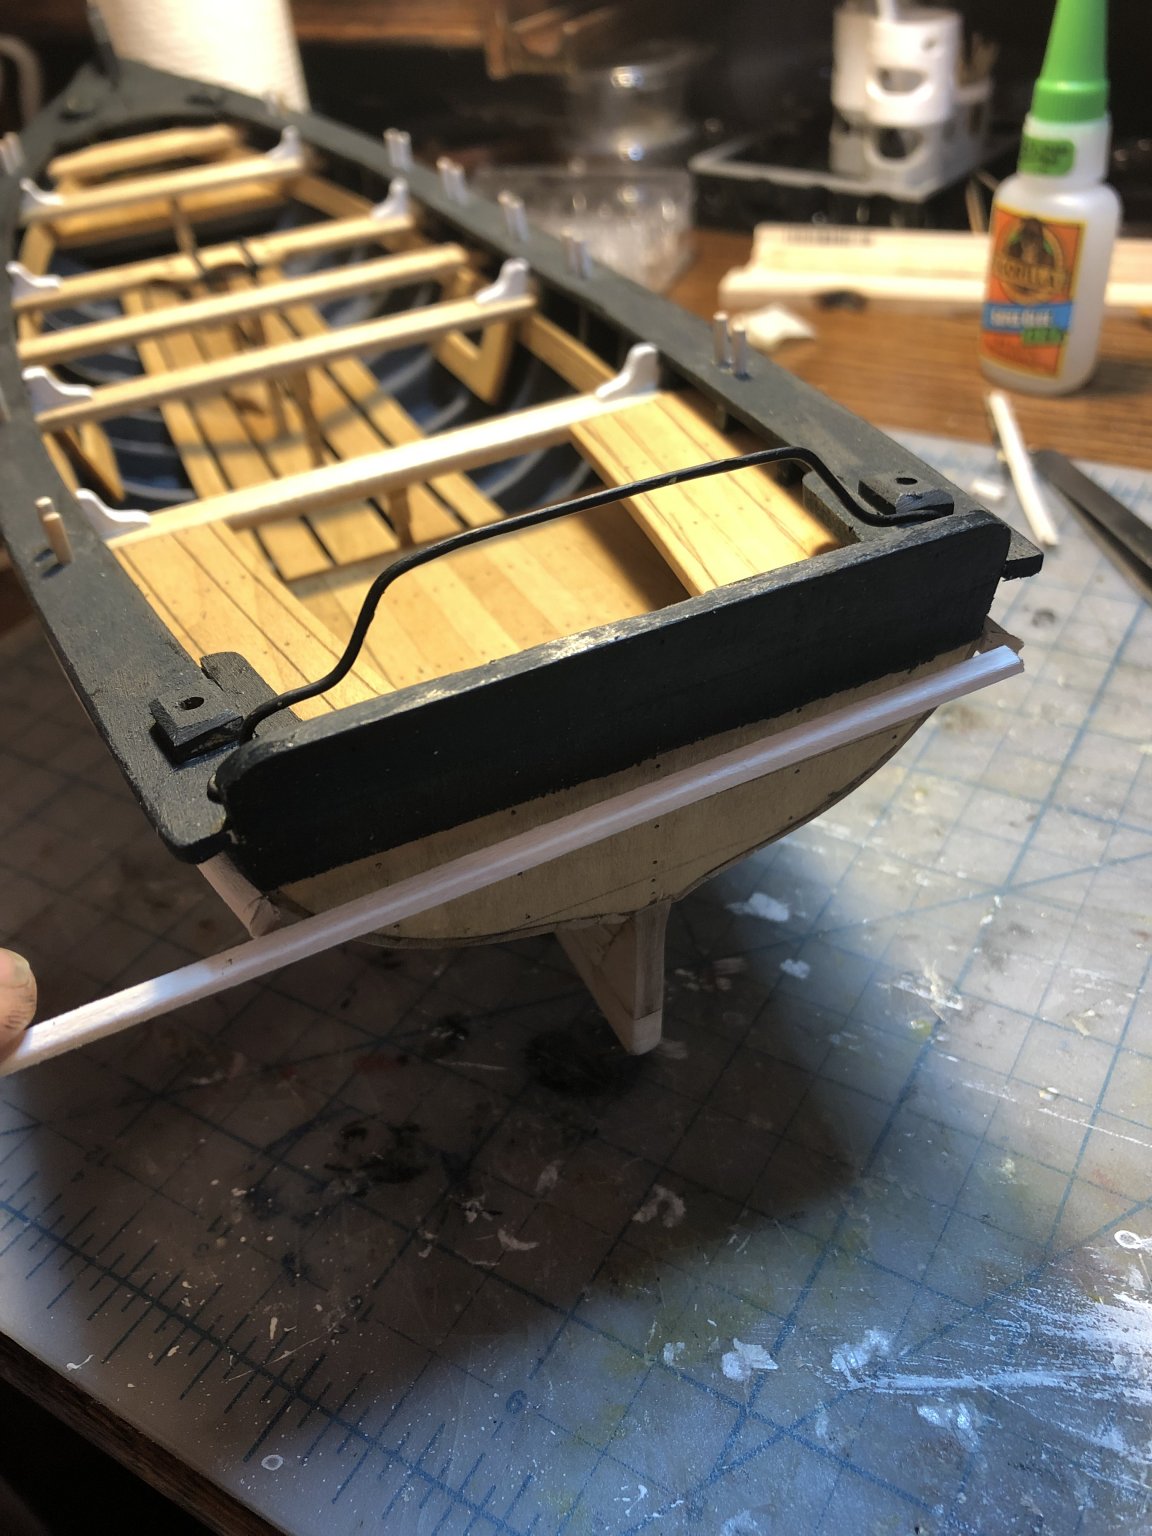
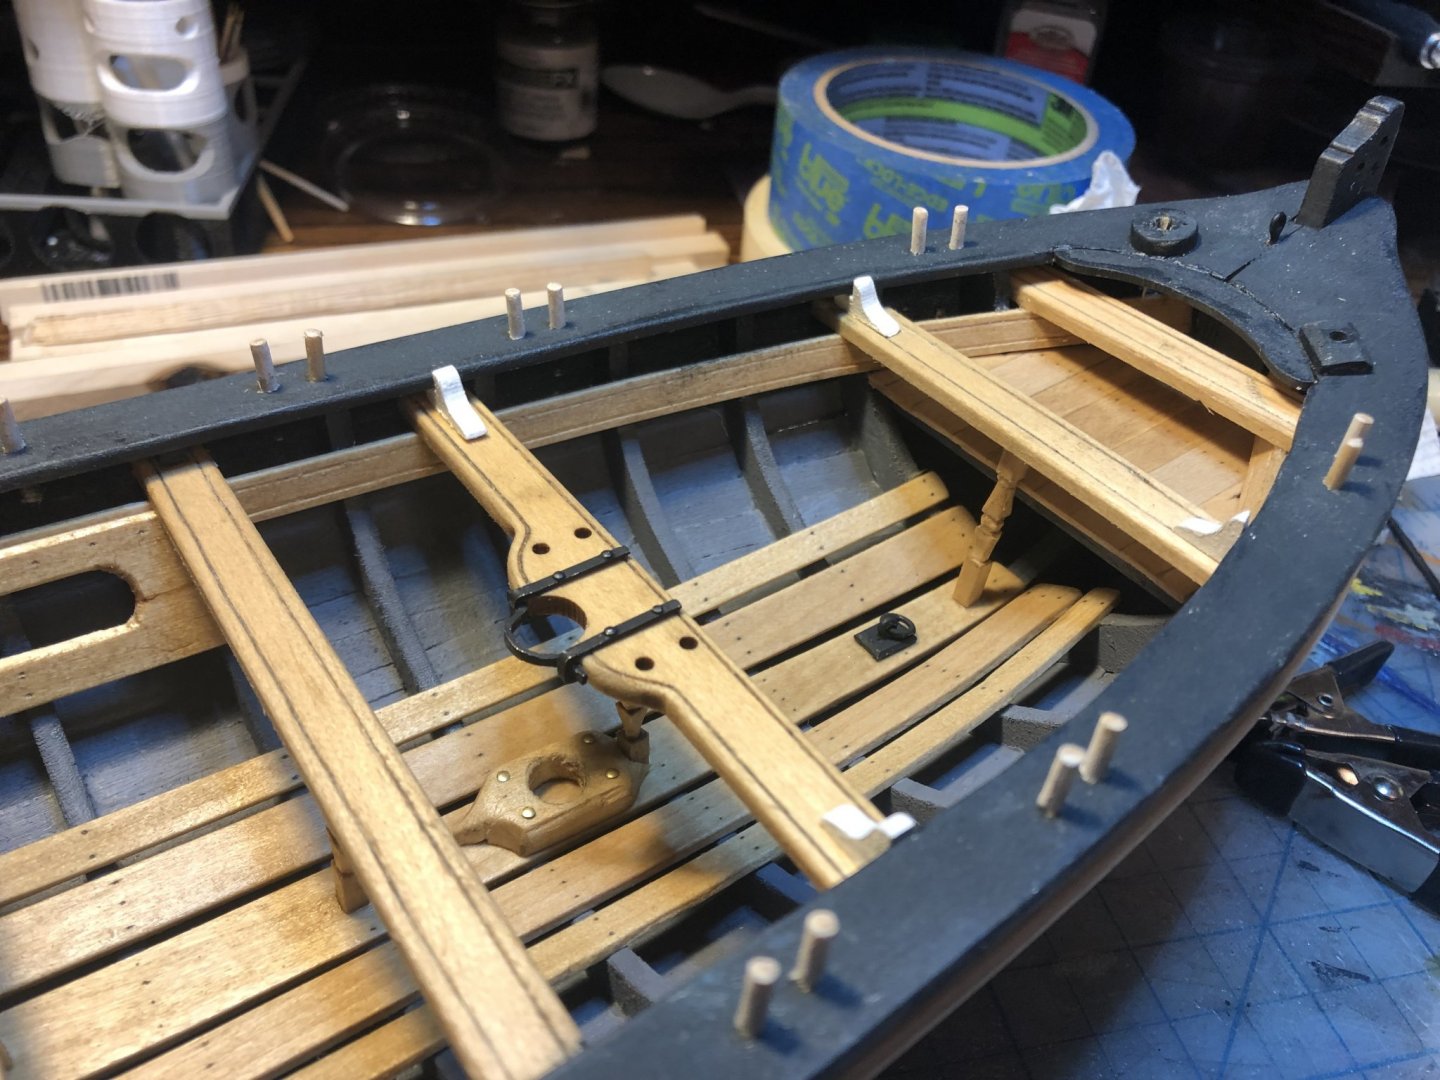
Okay, last post to get caught up with the current state of this build. I modified the windlass attachment based on the Medway Longboat and Arthur Wayne's build of this boat (but not nearly as nice as Arthurs). I feel that the windlass, as supplied in the kit would be kinda worthless. There is nowhere for the lines to run over the rail to assist in anchor work, or no hoisting boom for lifting. I may add a pawl to the end of the drum for braking, not sure yet. Im still up in the air about how to handle cargo hoisting with the windlass. My plan now is to rig a block off the boom above the rear cargo area. and down to the windlass. But im not sure the boom can swing enough to get cargo past the rails of the boat. But it will likely work for the model. I also decided to add sails. That is still up for debate, but I am researching it. Thanks for looking!


- 16 replies
-
- 5
-
-
- 18th Century Armed Longboat
- Model Shipways
- (and 1 more)
-
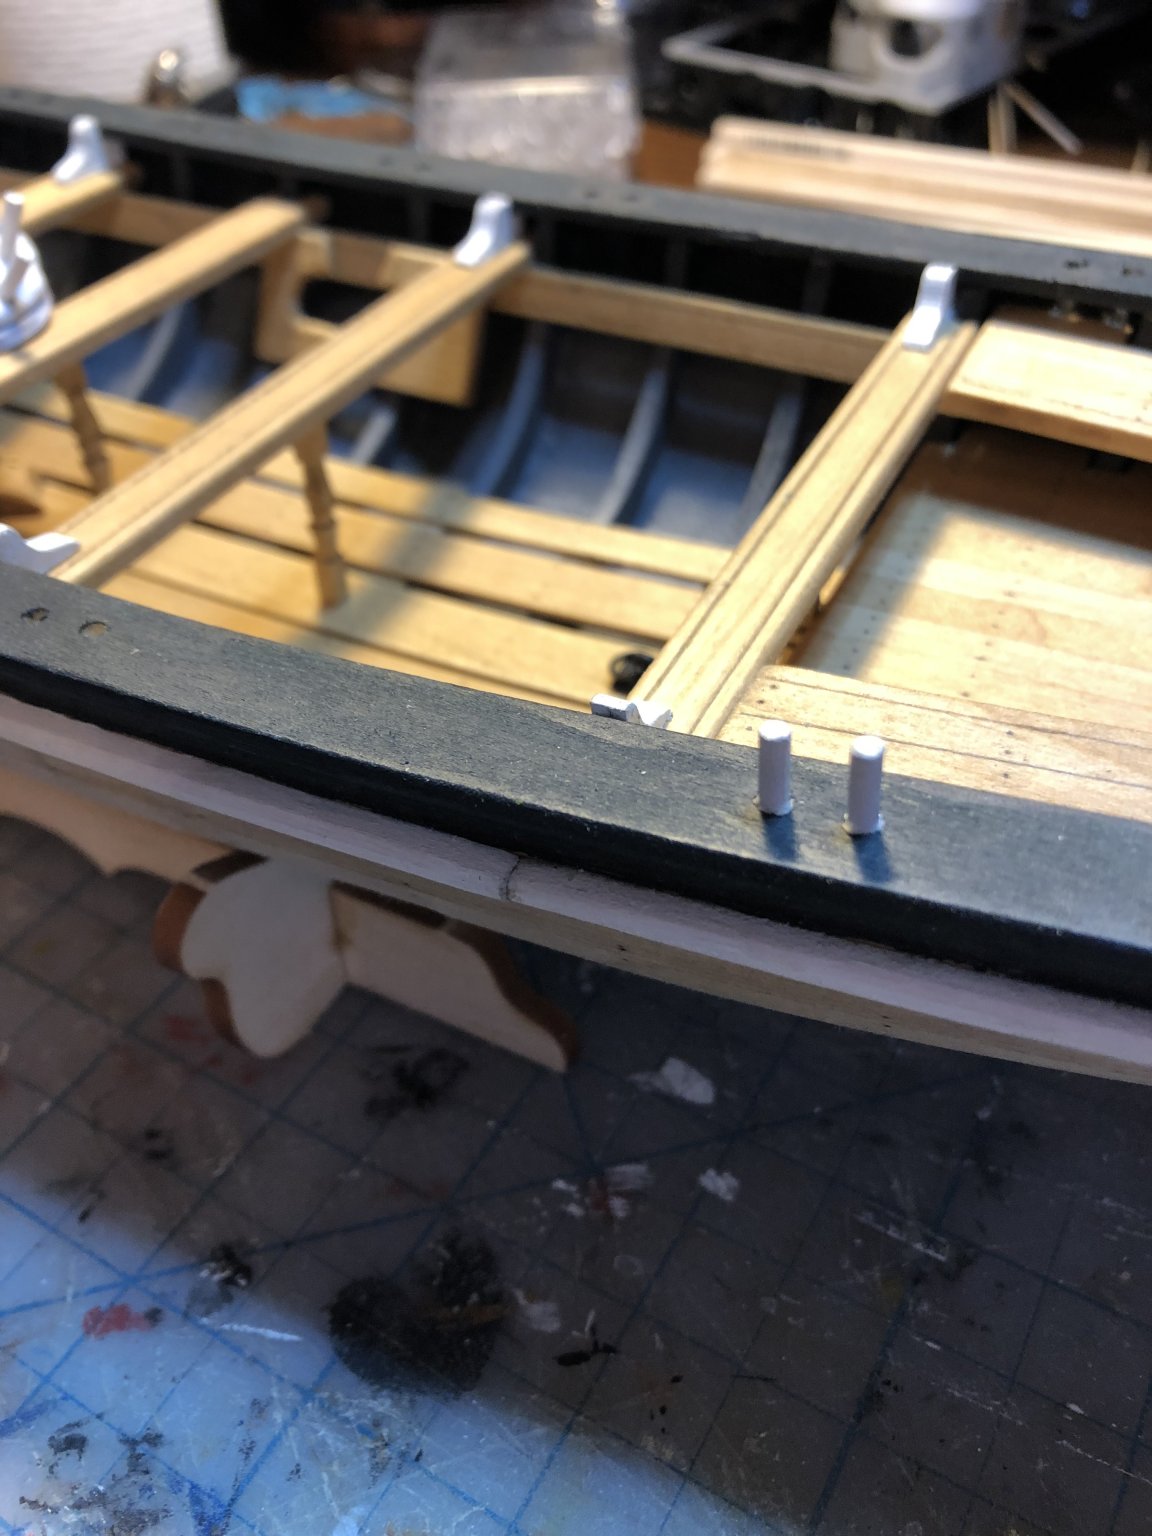
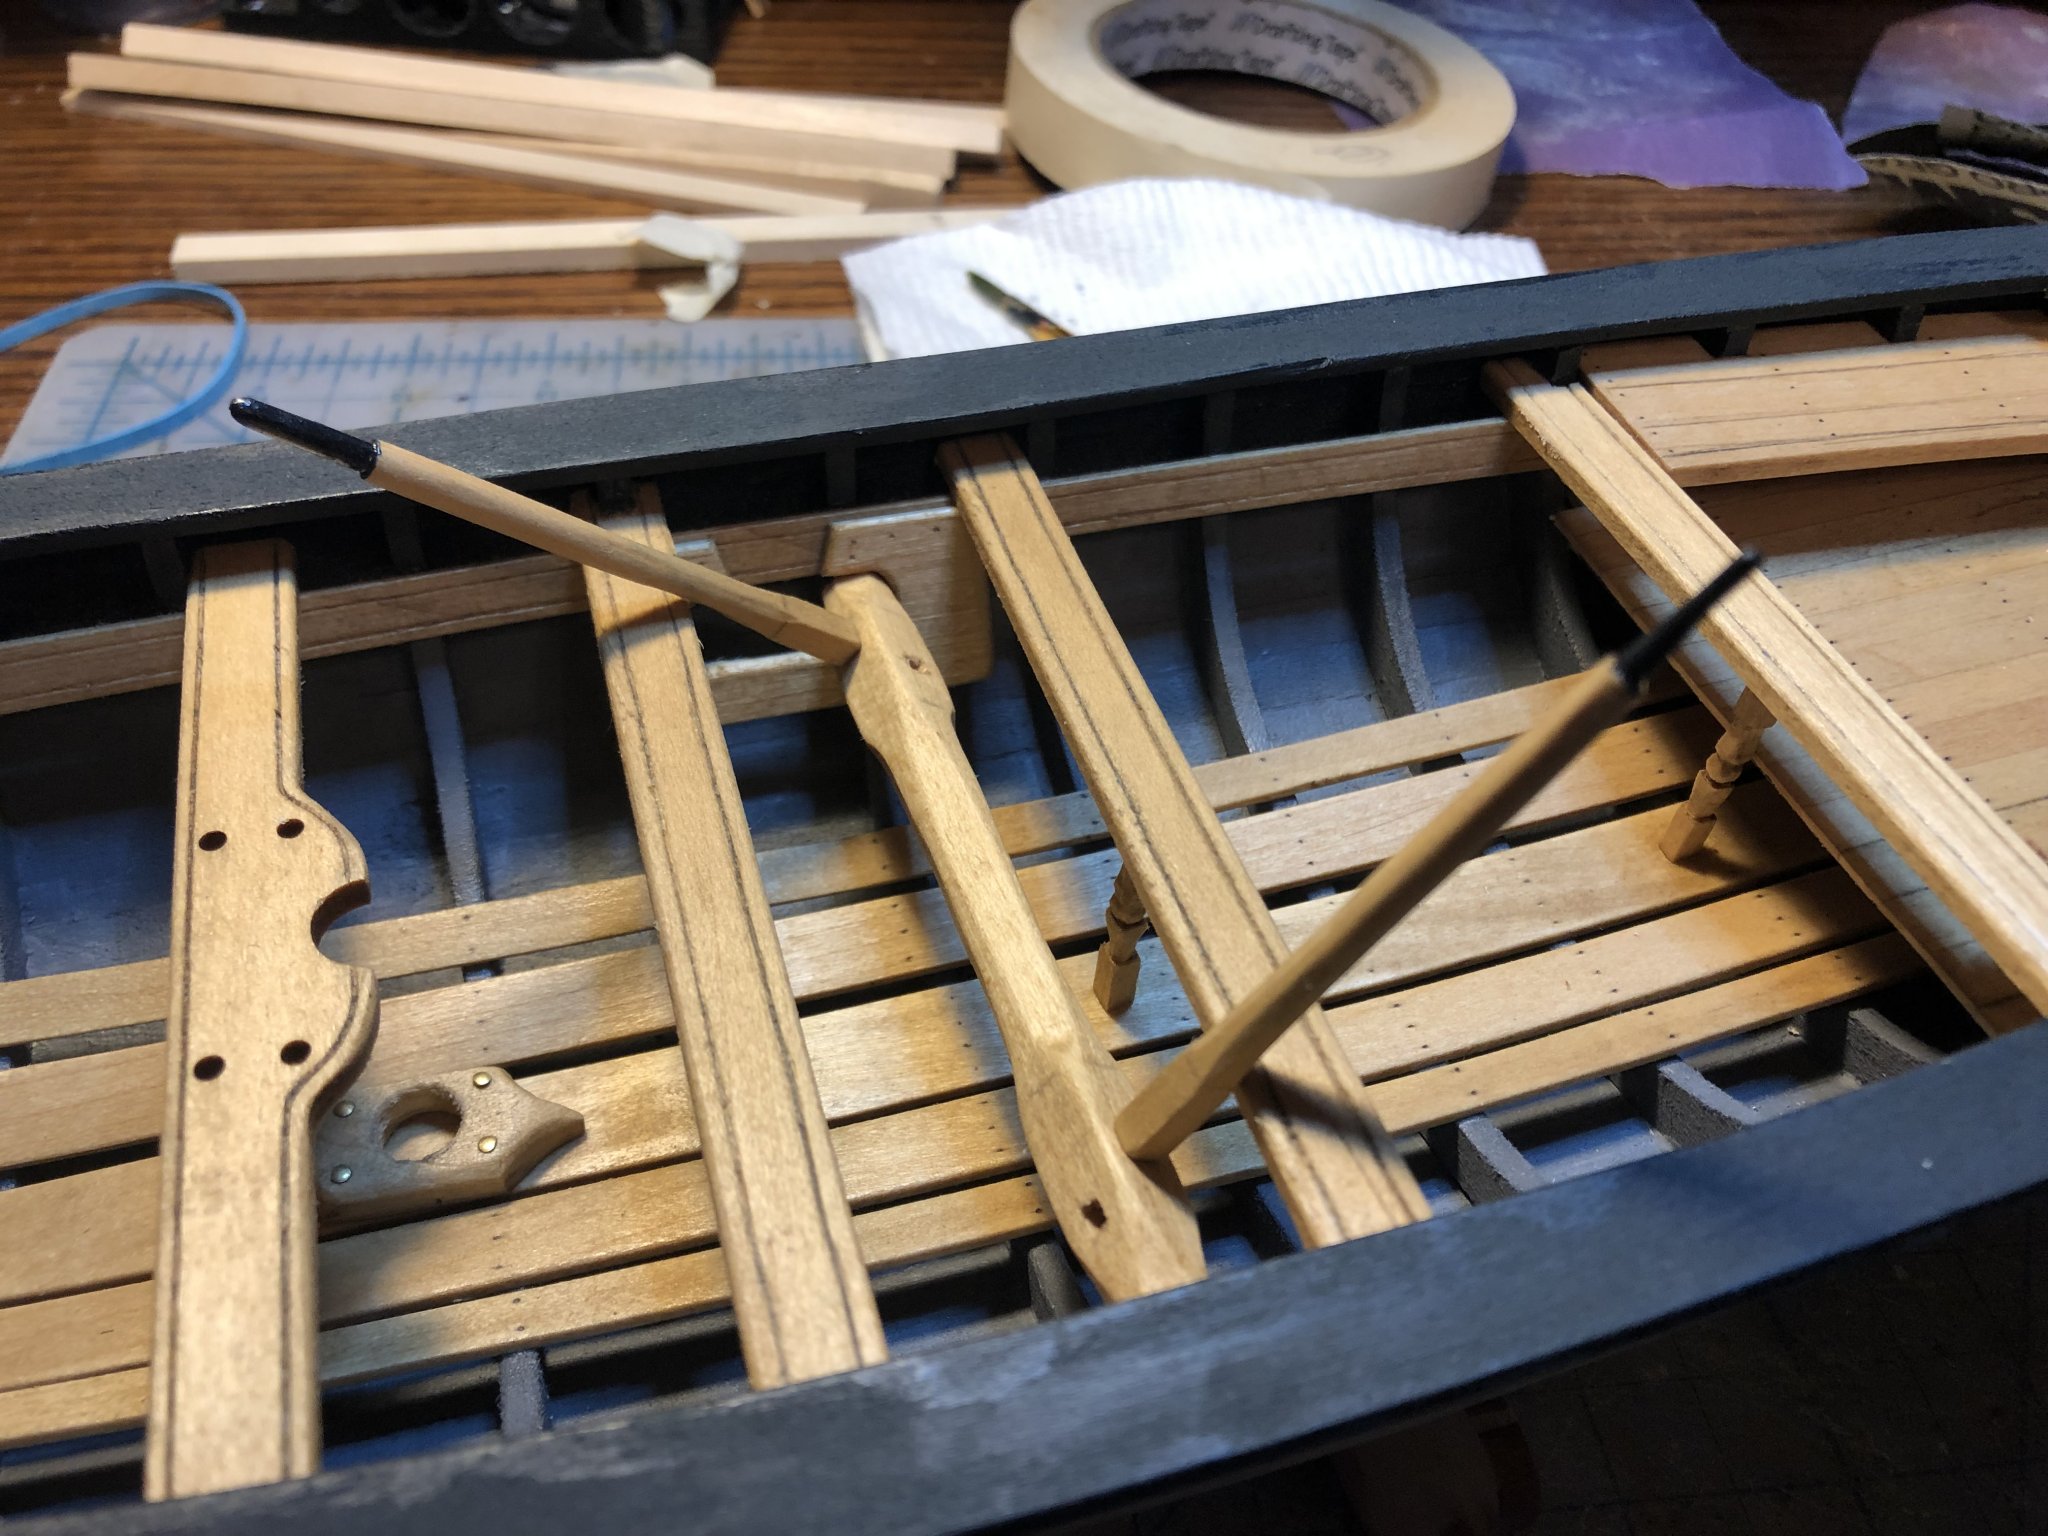
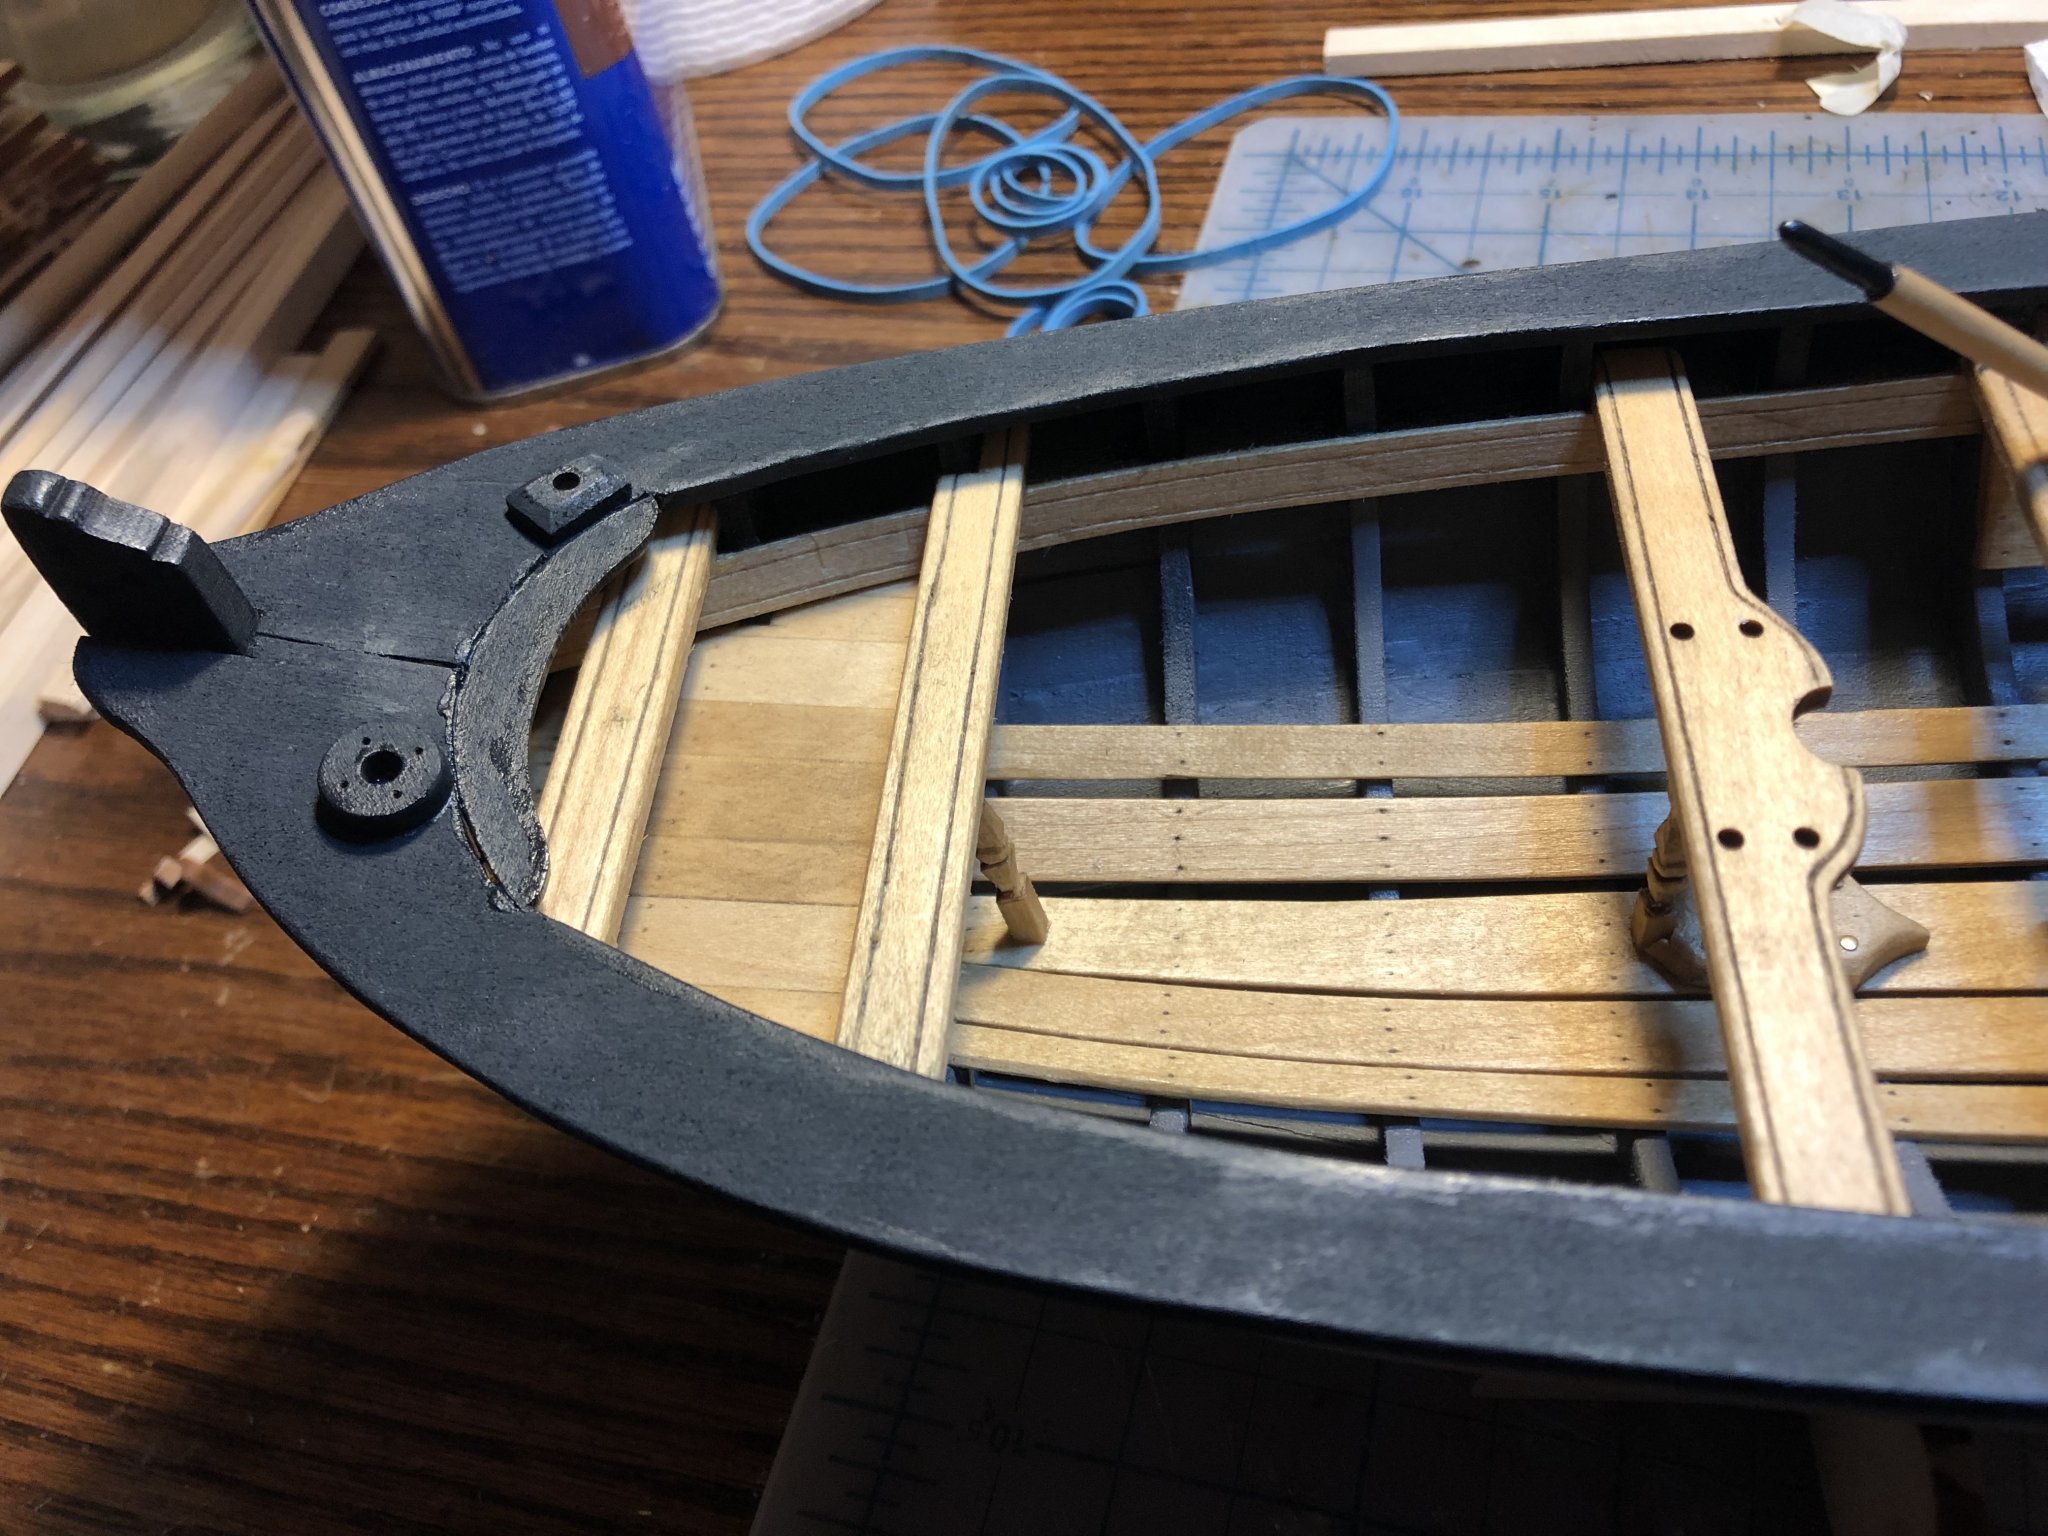
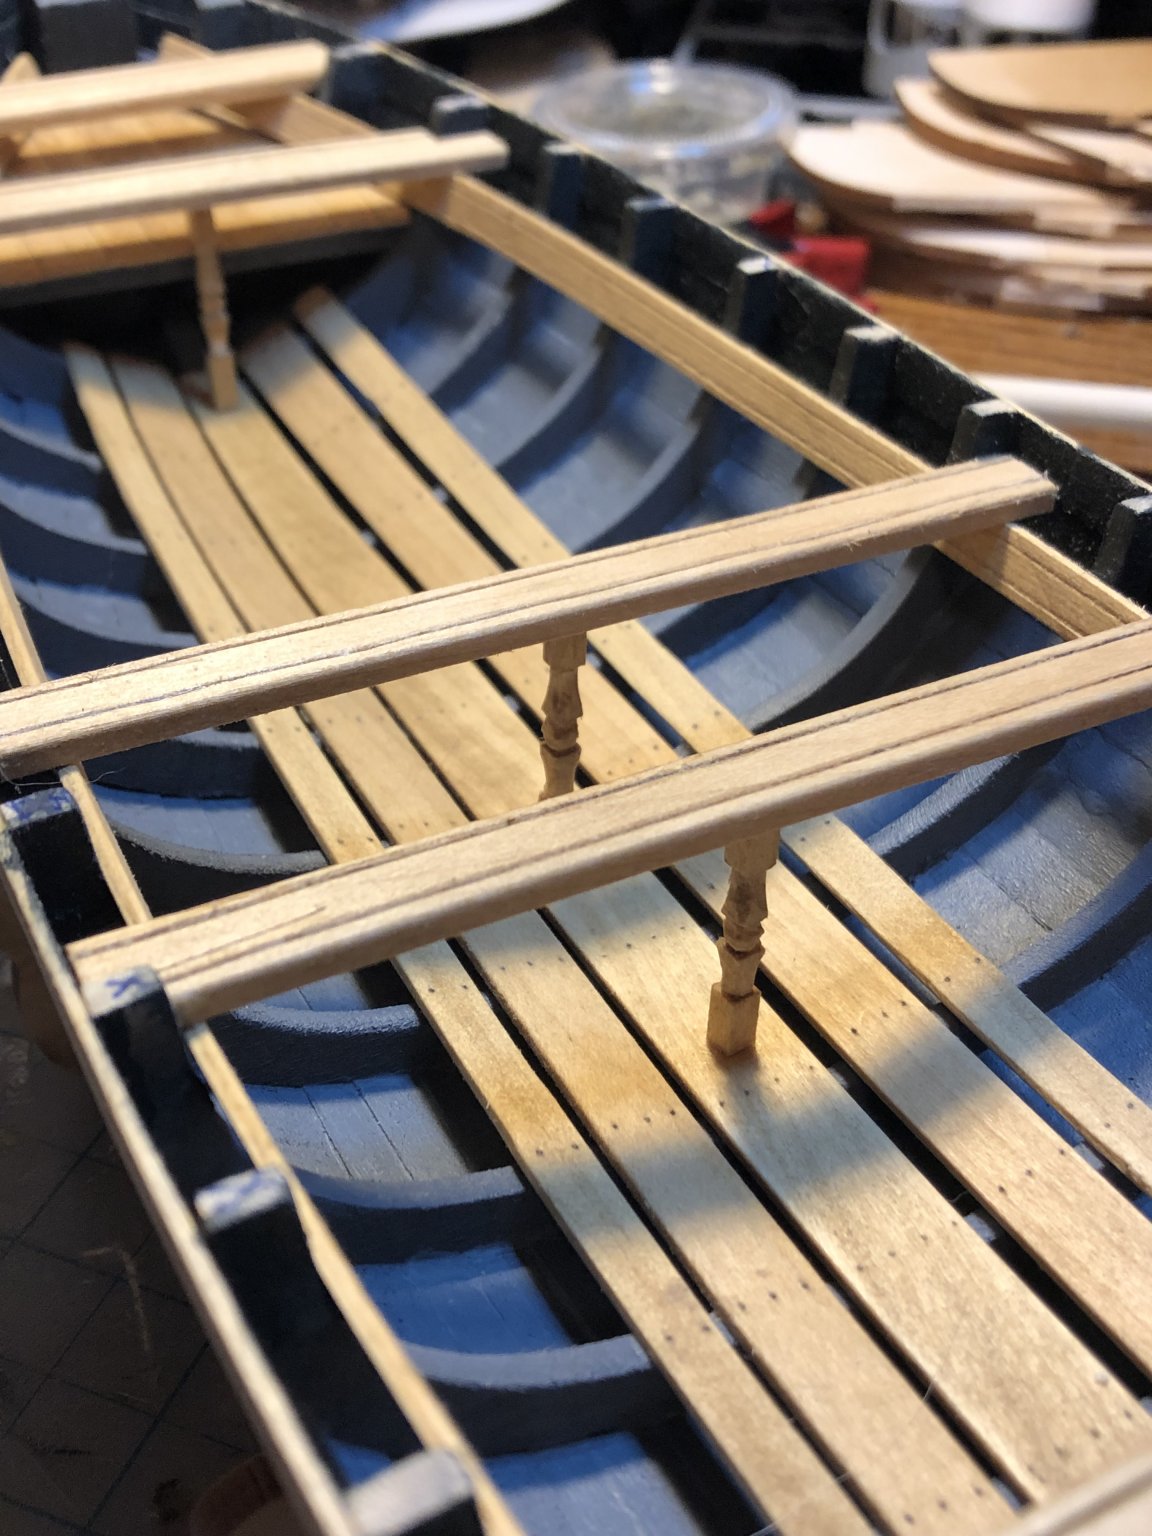
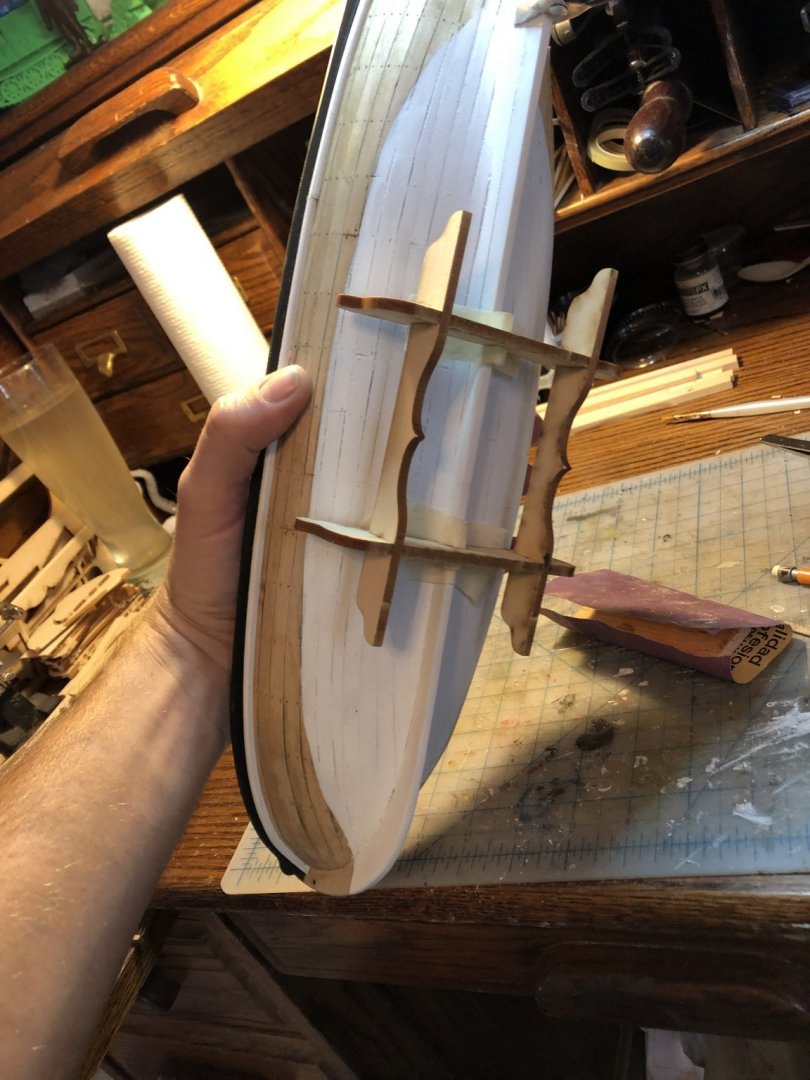
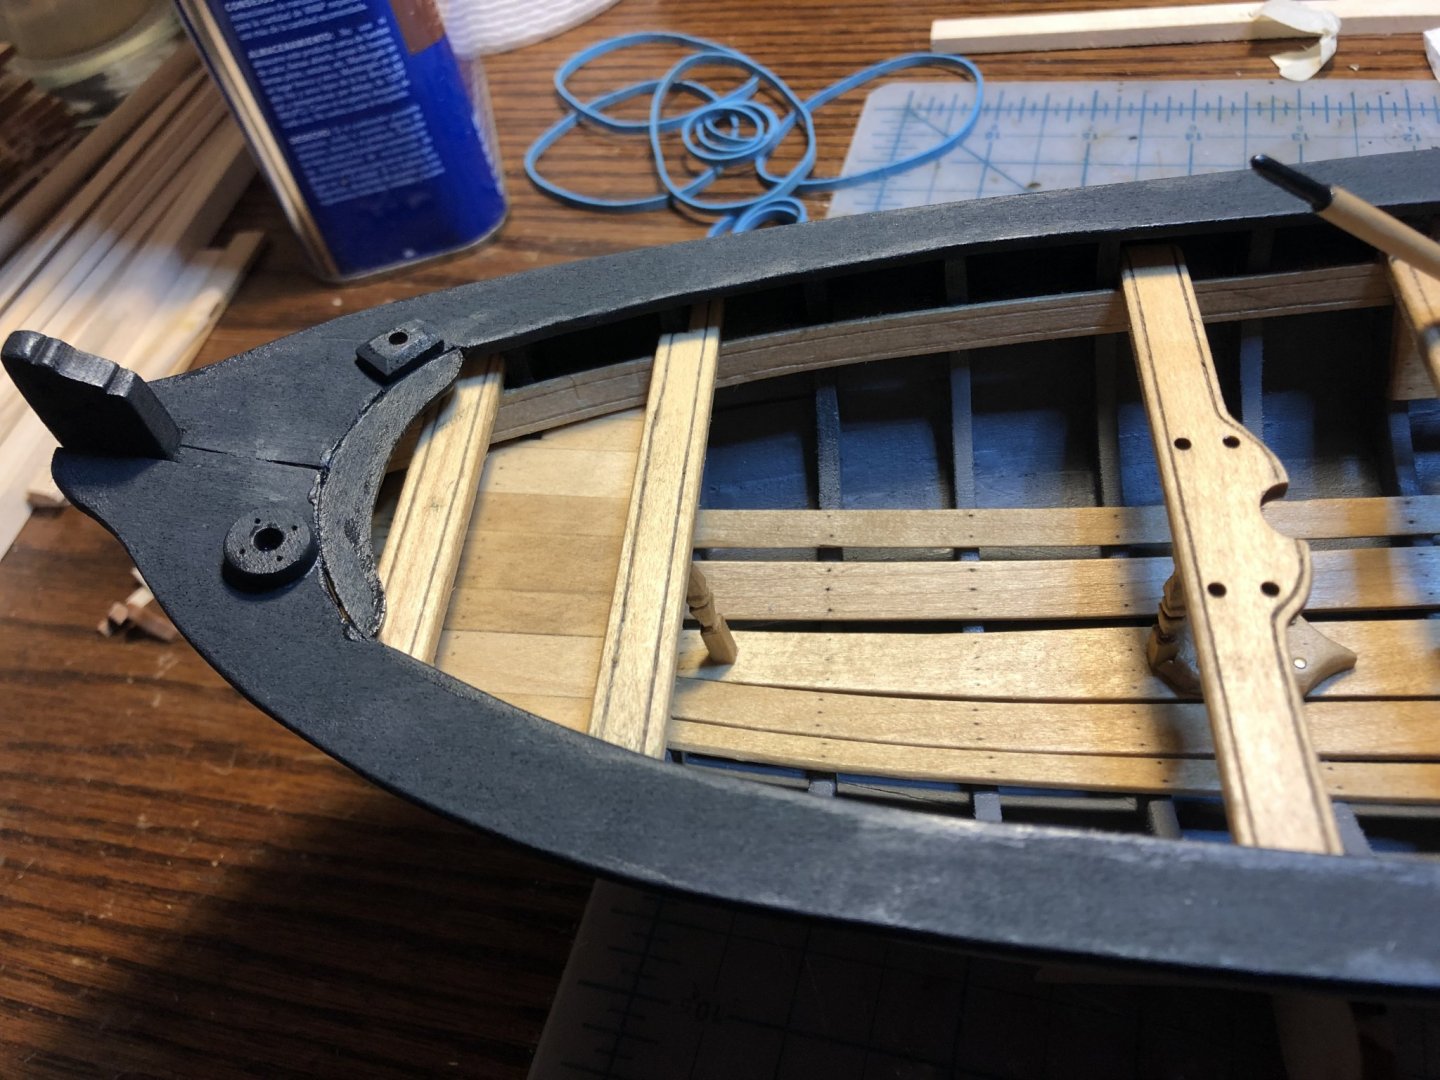
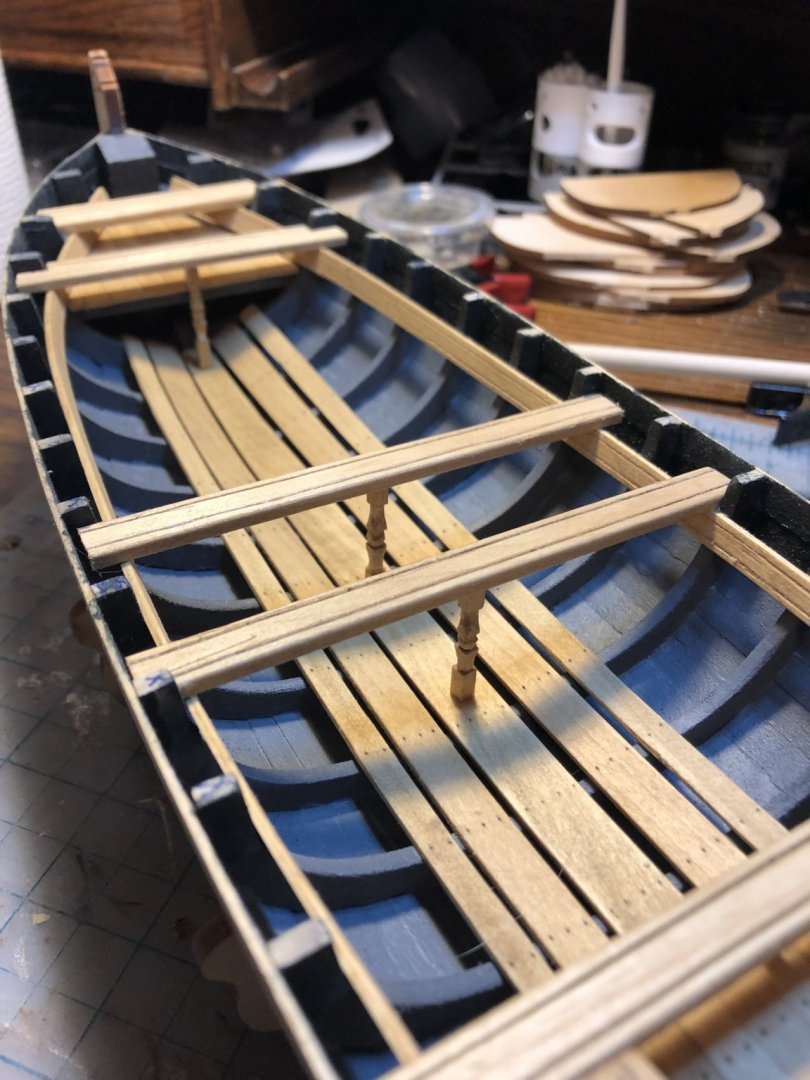
A few pics of thwart supports and hull to this point. Thanks for looking!


- 16 replies
-
- 5
-
-
- 18th Century Armed Longboat
- Model Shipways
- (and 1 more)
-
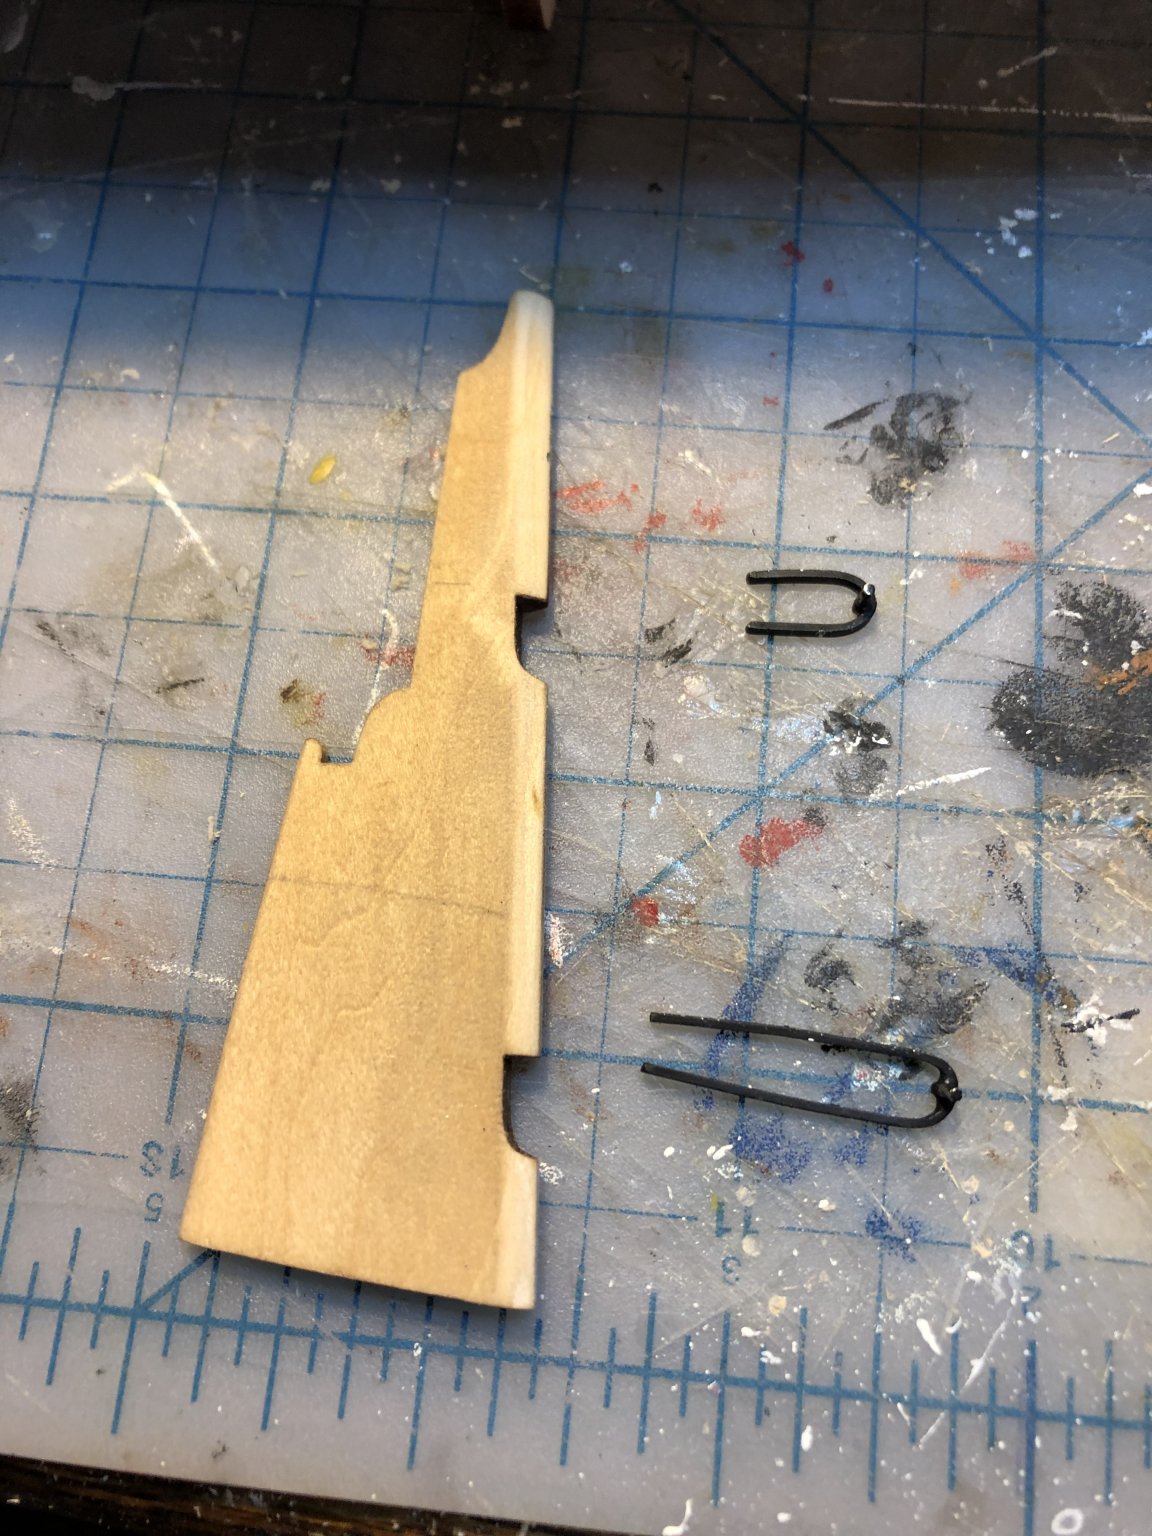
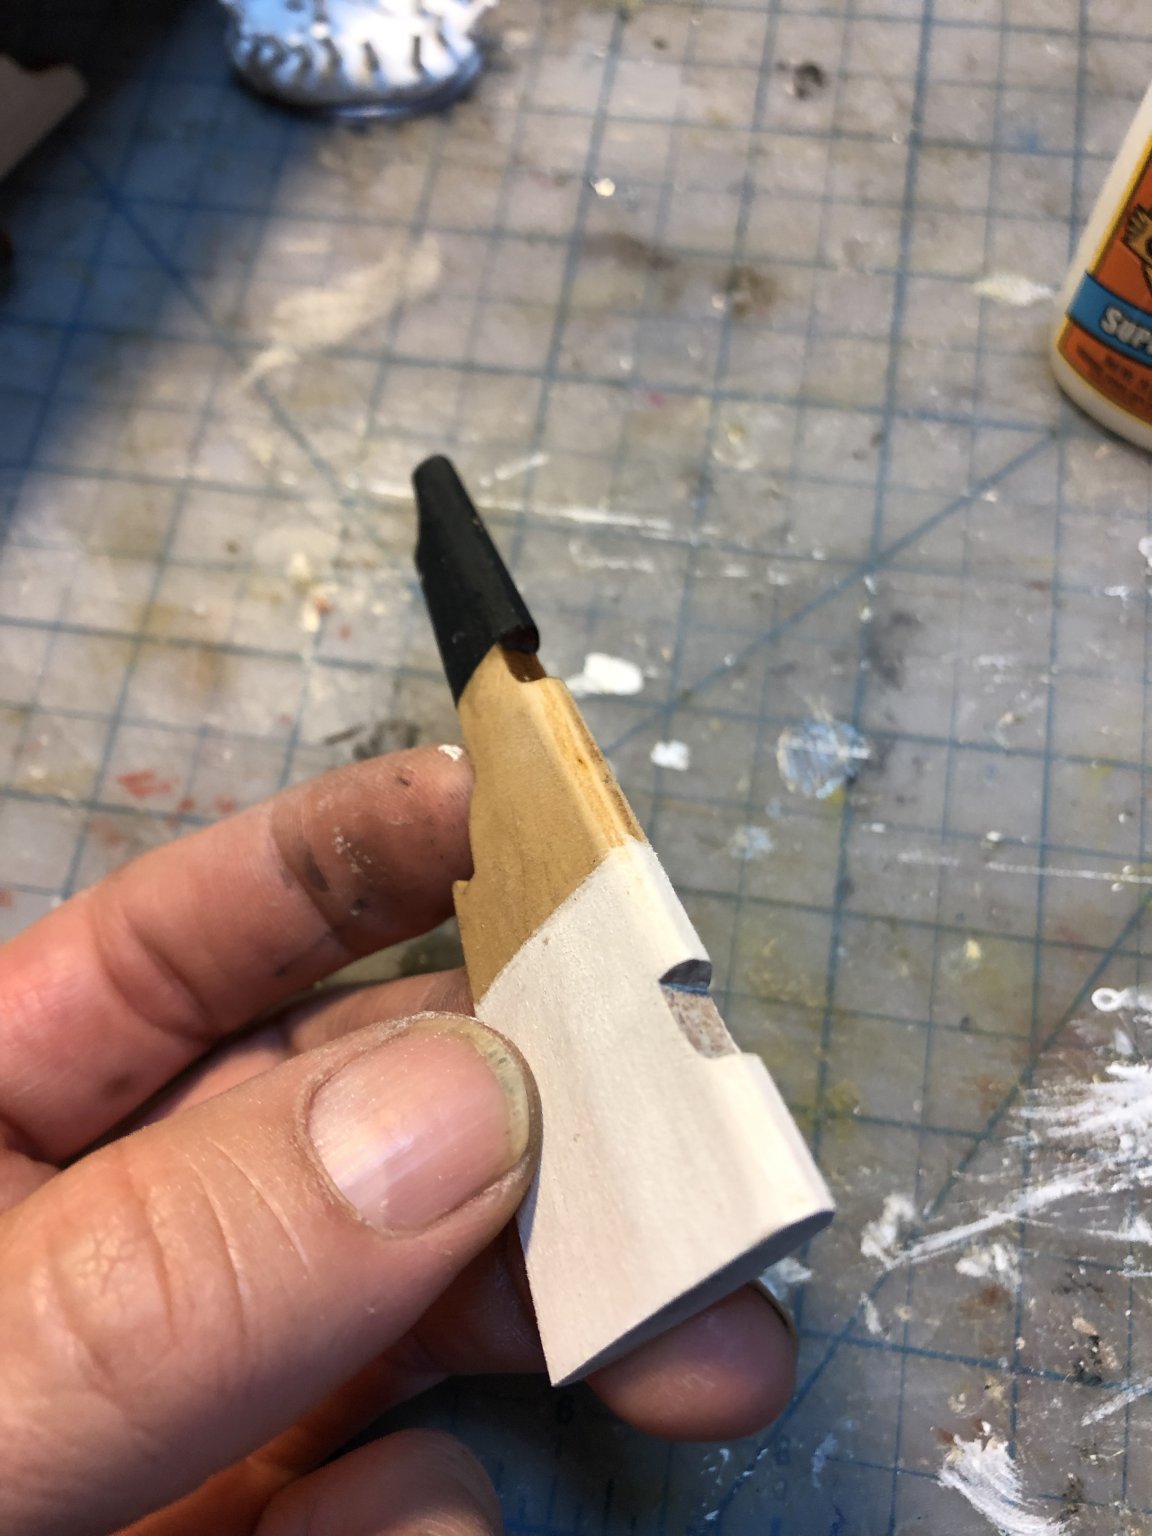
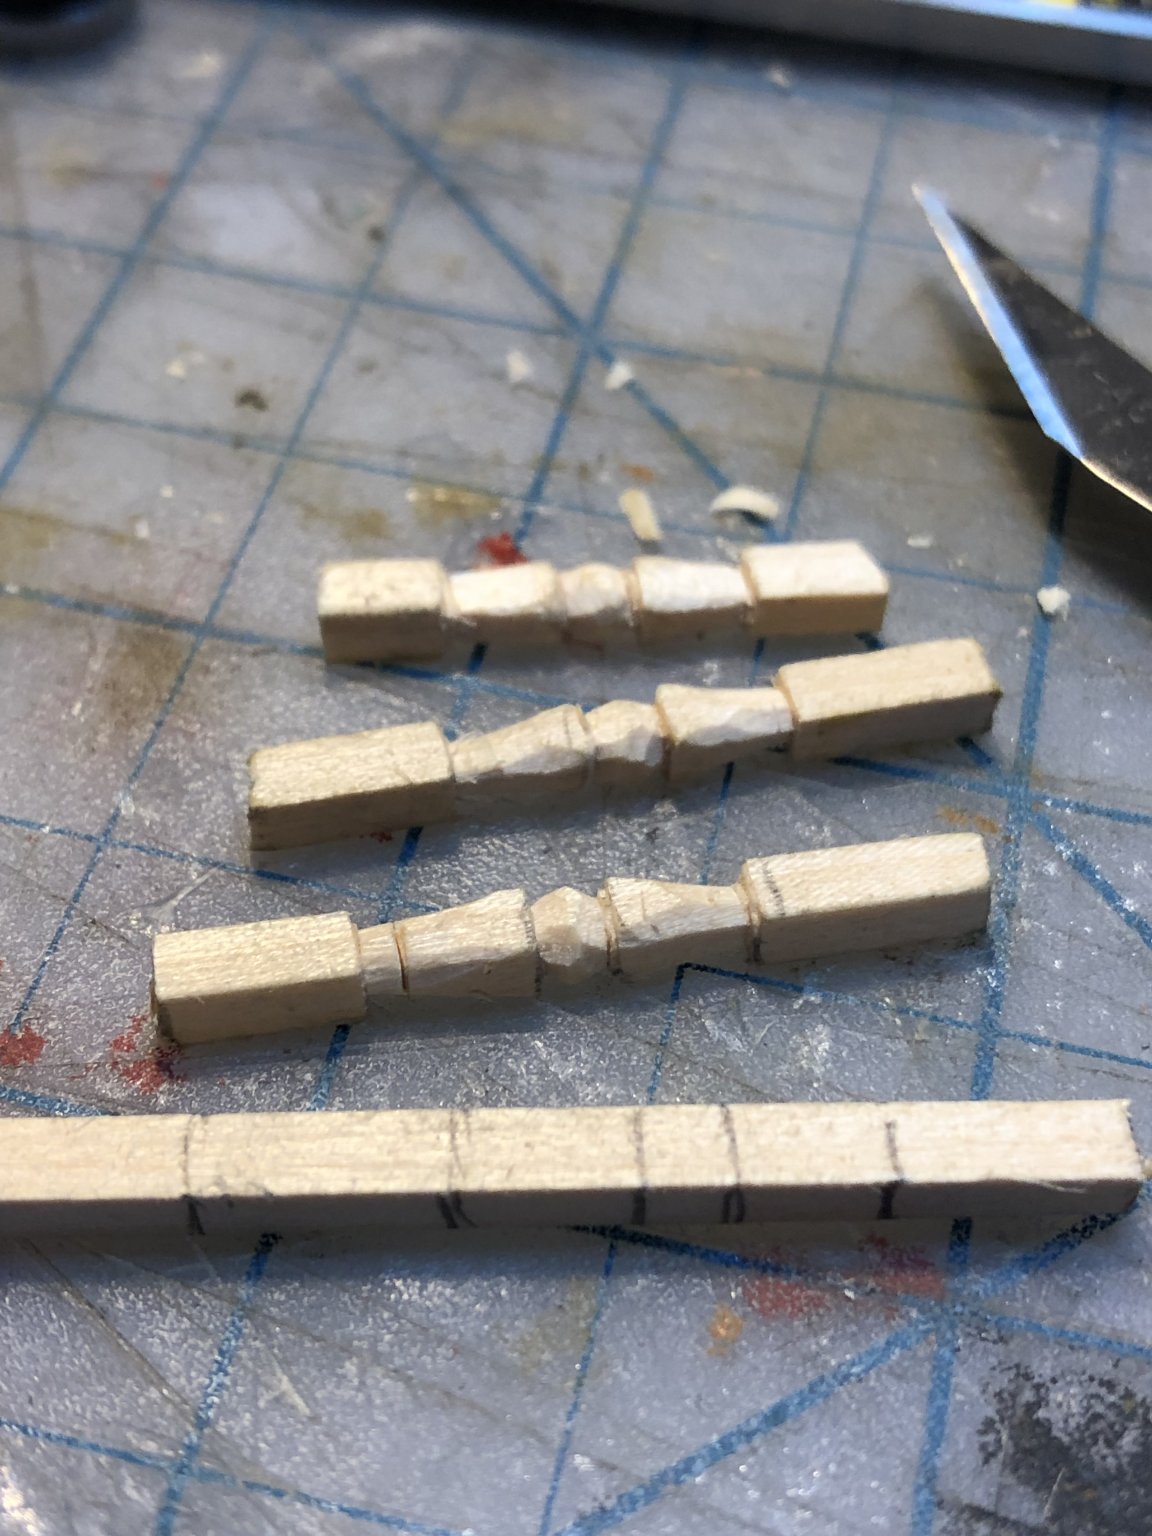
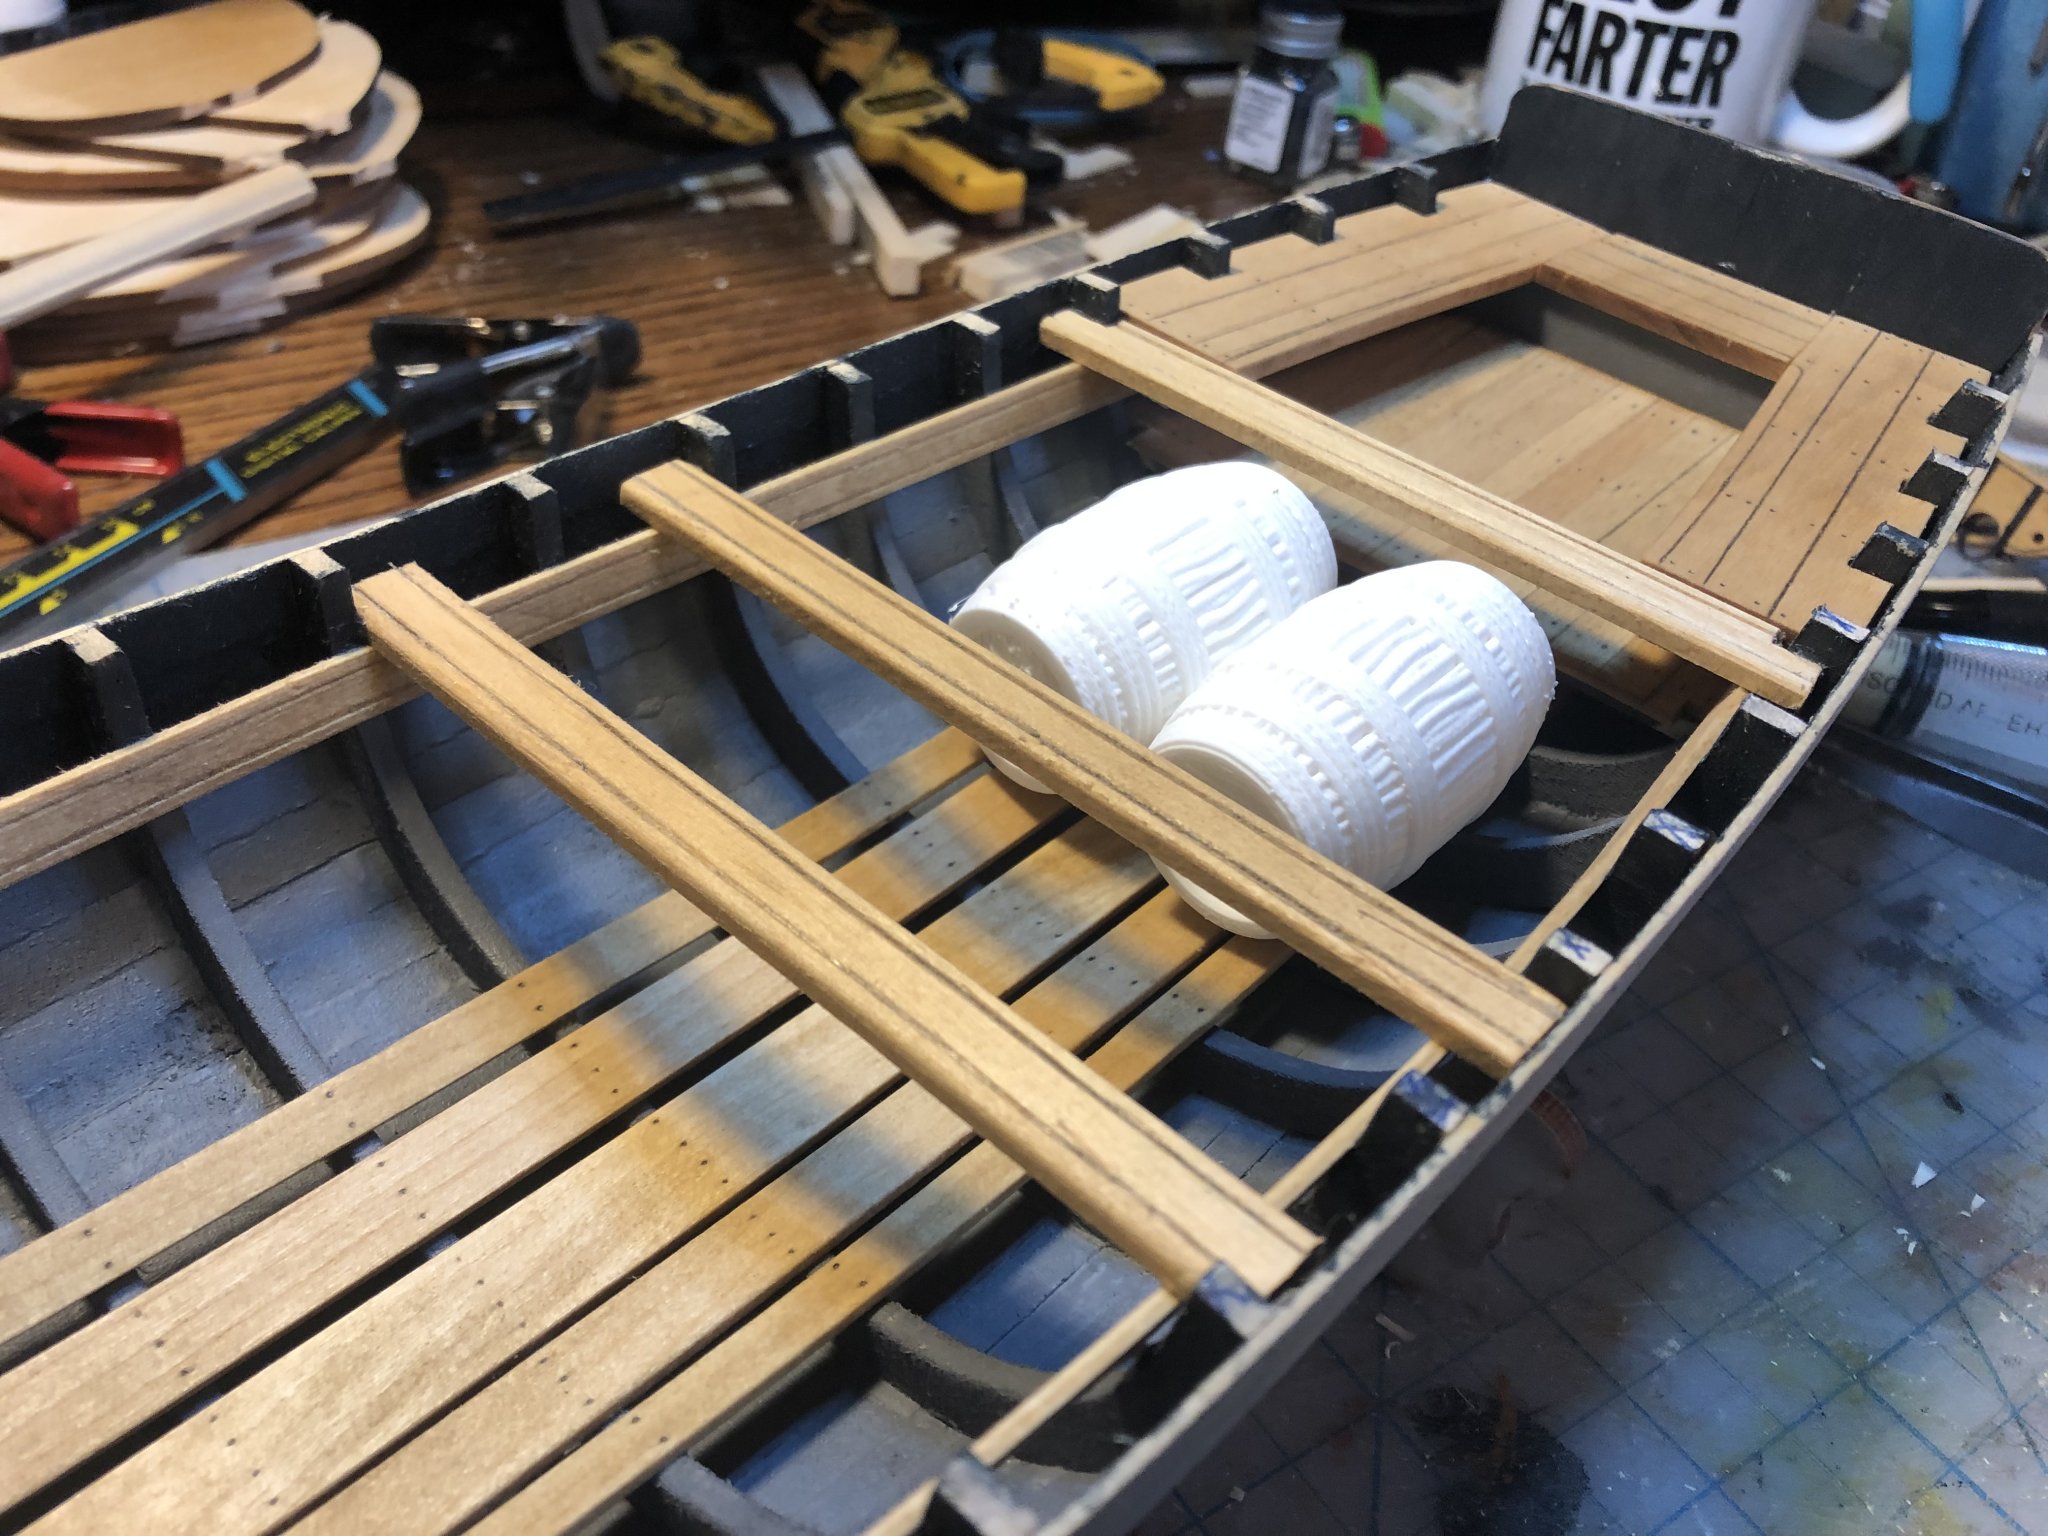
On to thwarts! I decided to leave out two thwarts so she could fit some cargo. I printed some 1/24th scale Hogsheads for cargo. Here's two in the cargo area. Not sure if this is historically accurate, but doing some research on barrels I found some good info on colonial barrel production, and the use of hogsheads made from British Tun barrels. So I ran with it for the merchant boat theme. I plan to rig something from the boom and the windlass for handling cargo. I broke the mast foot while sanding, so I made a new "fancier" one. I also fit and stained the cockpit seats and stern locker. The laser cut set that came with the kit fit perfect. I read a lot of logs that said the seats dont fit, so I was happy to find that they fit fine. Thanks for looking!

- 16 replies
-
- 3
-
-
- 18th Century Armed Longboat
- Model Shipways
- (and 1 more)
-
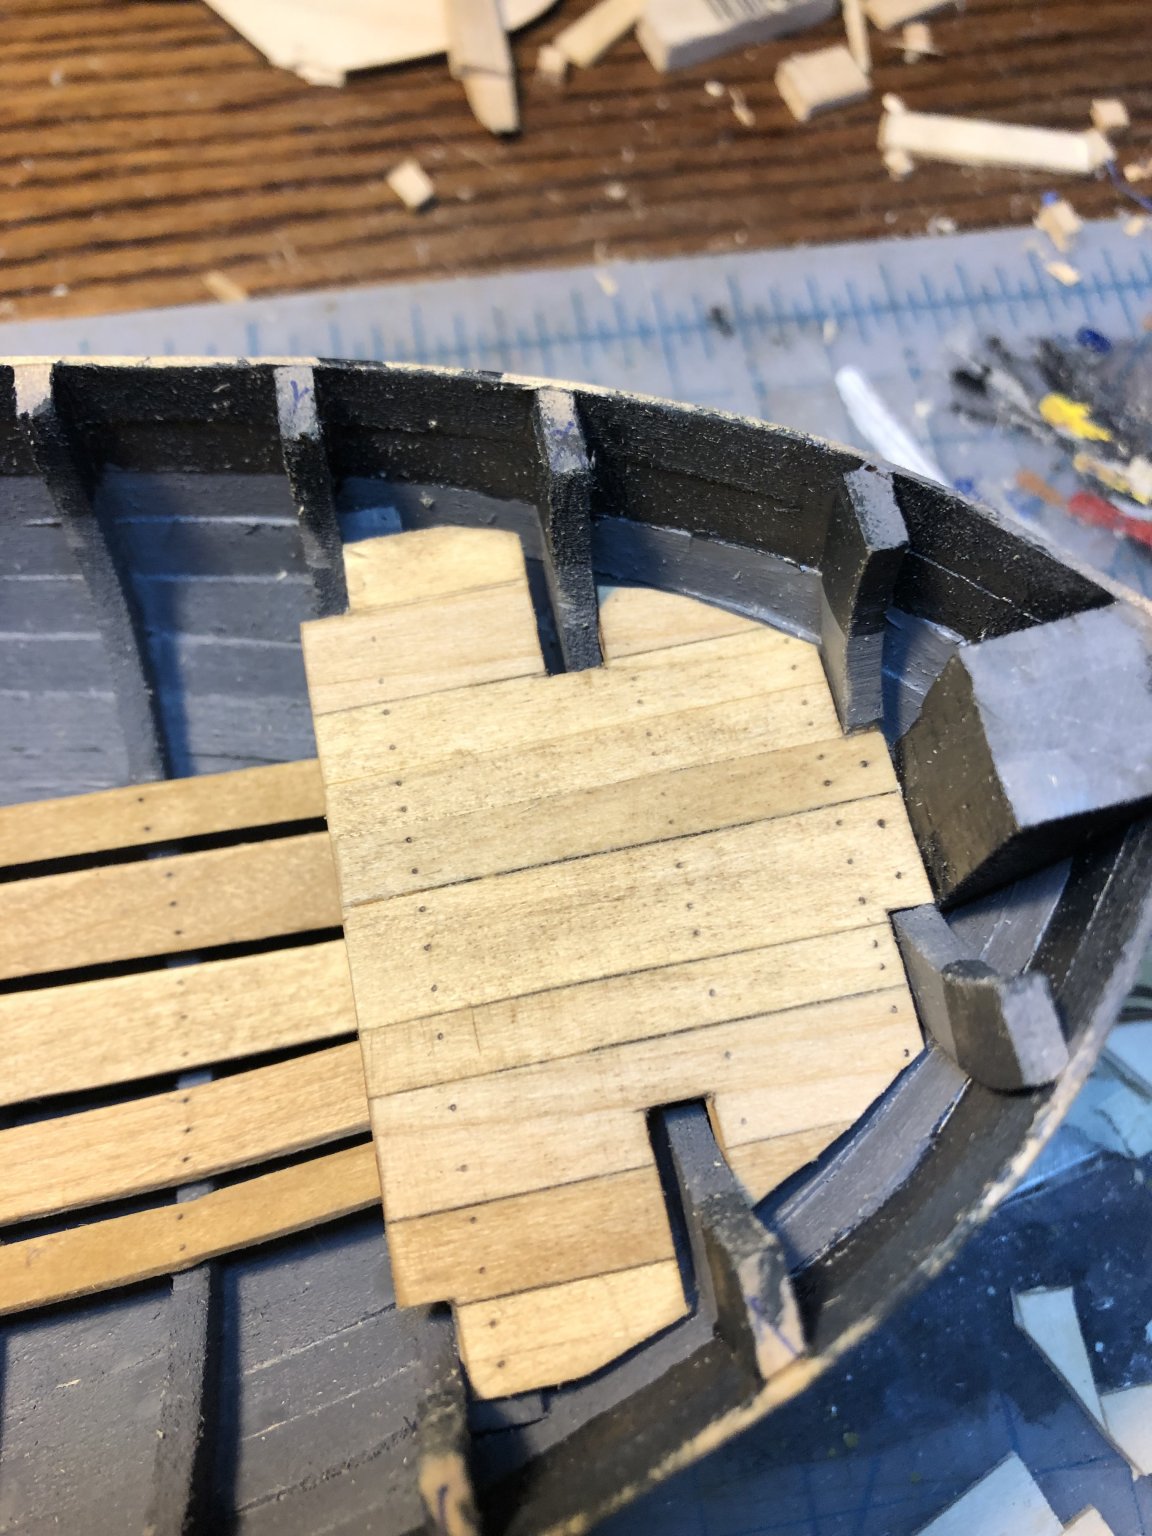
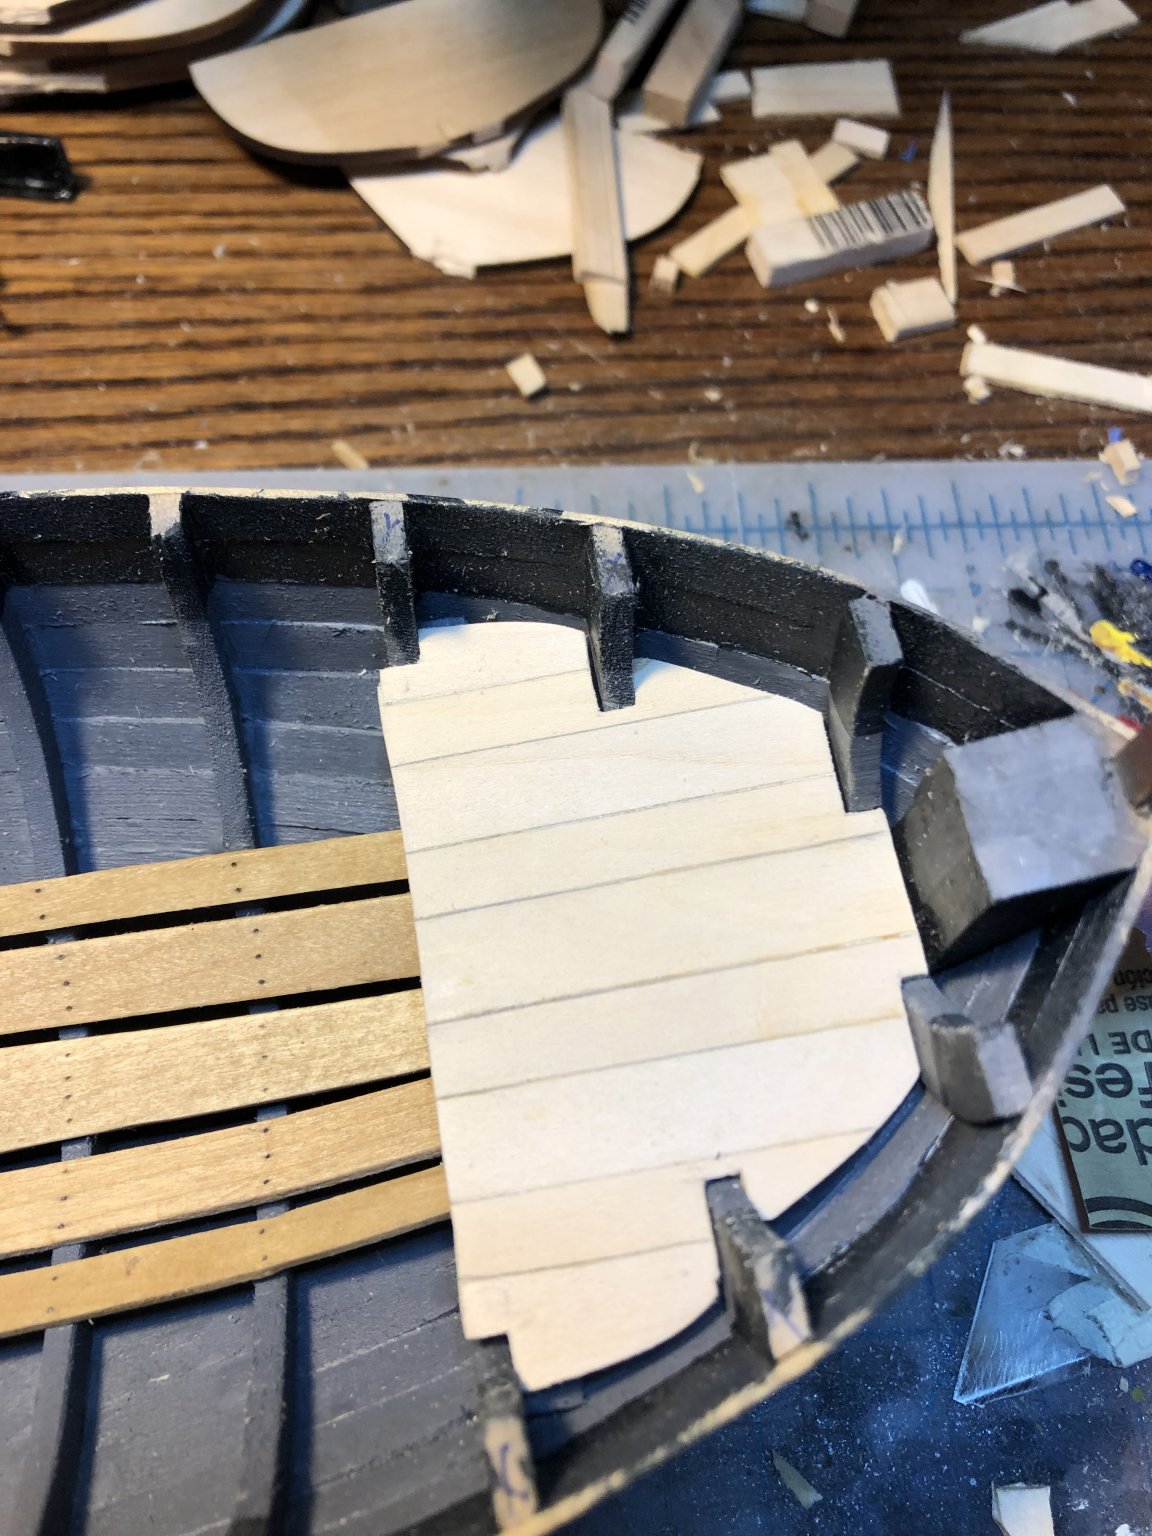
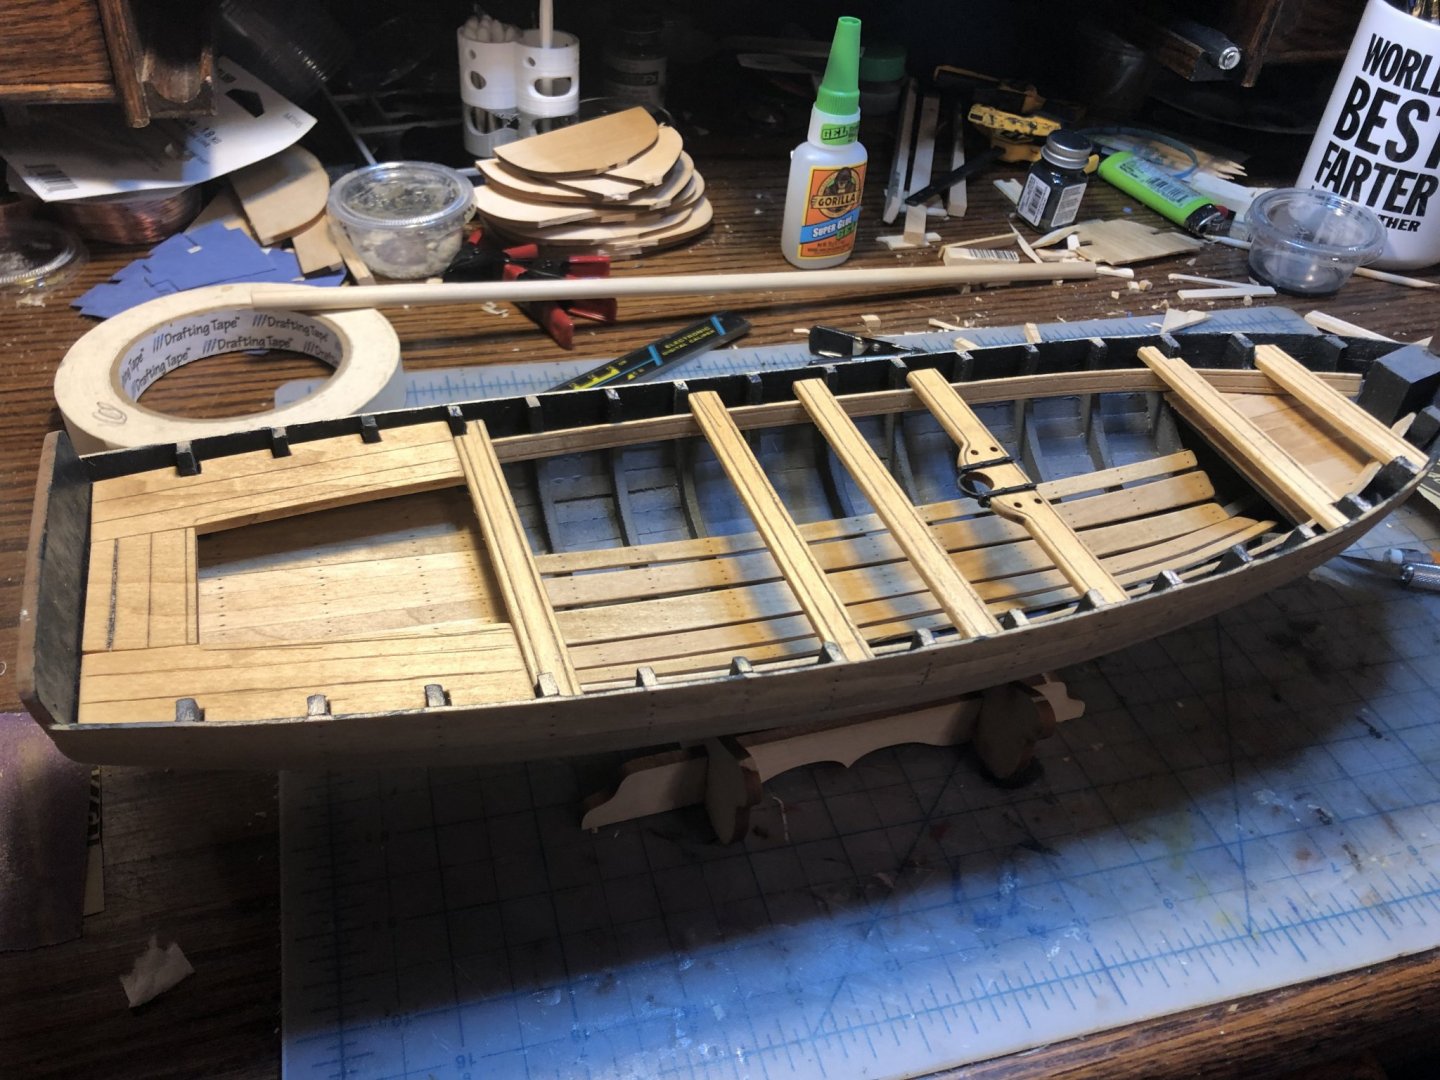
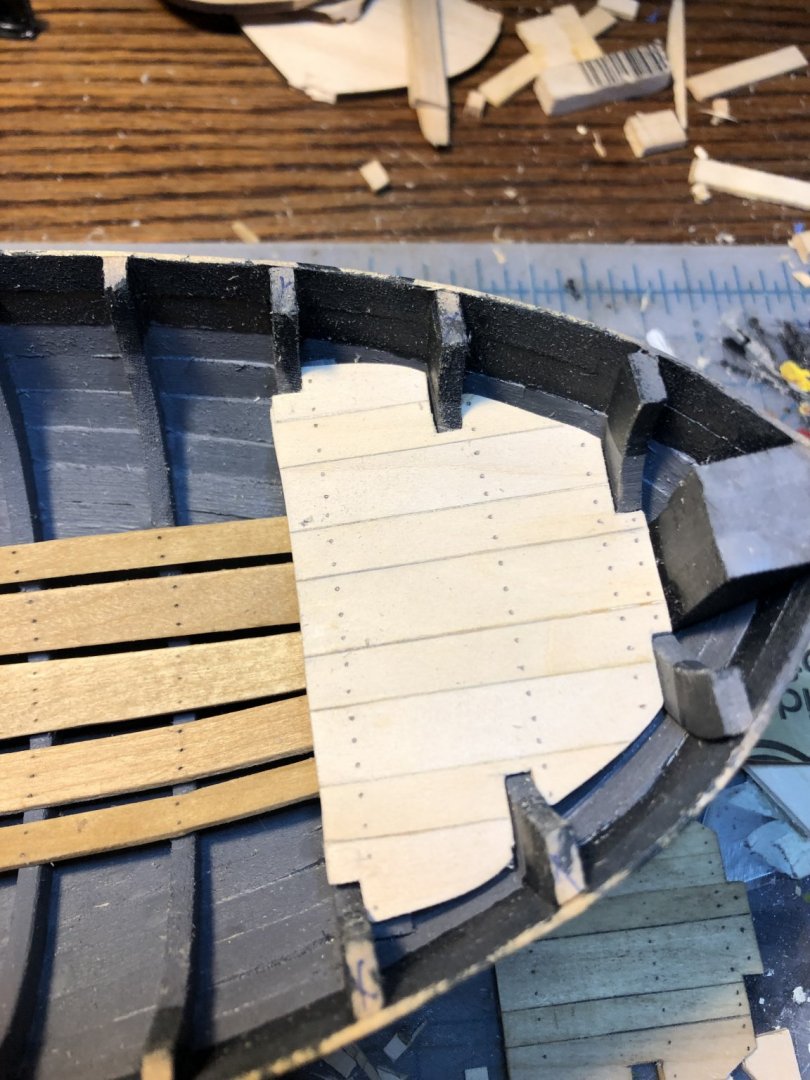
A little more work on the hull. Started platforms. I was not happy with the first attempt at the bow platform. So I made another before realizing that this is not visible on the completed model. Oh well.


- 16 replies
-
- 3
-
-
- 18th Century Armed Longboat
- Model Shipways
- (and 1 more)
-
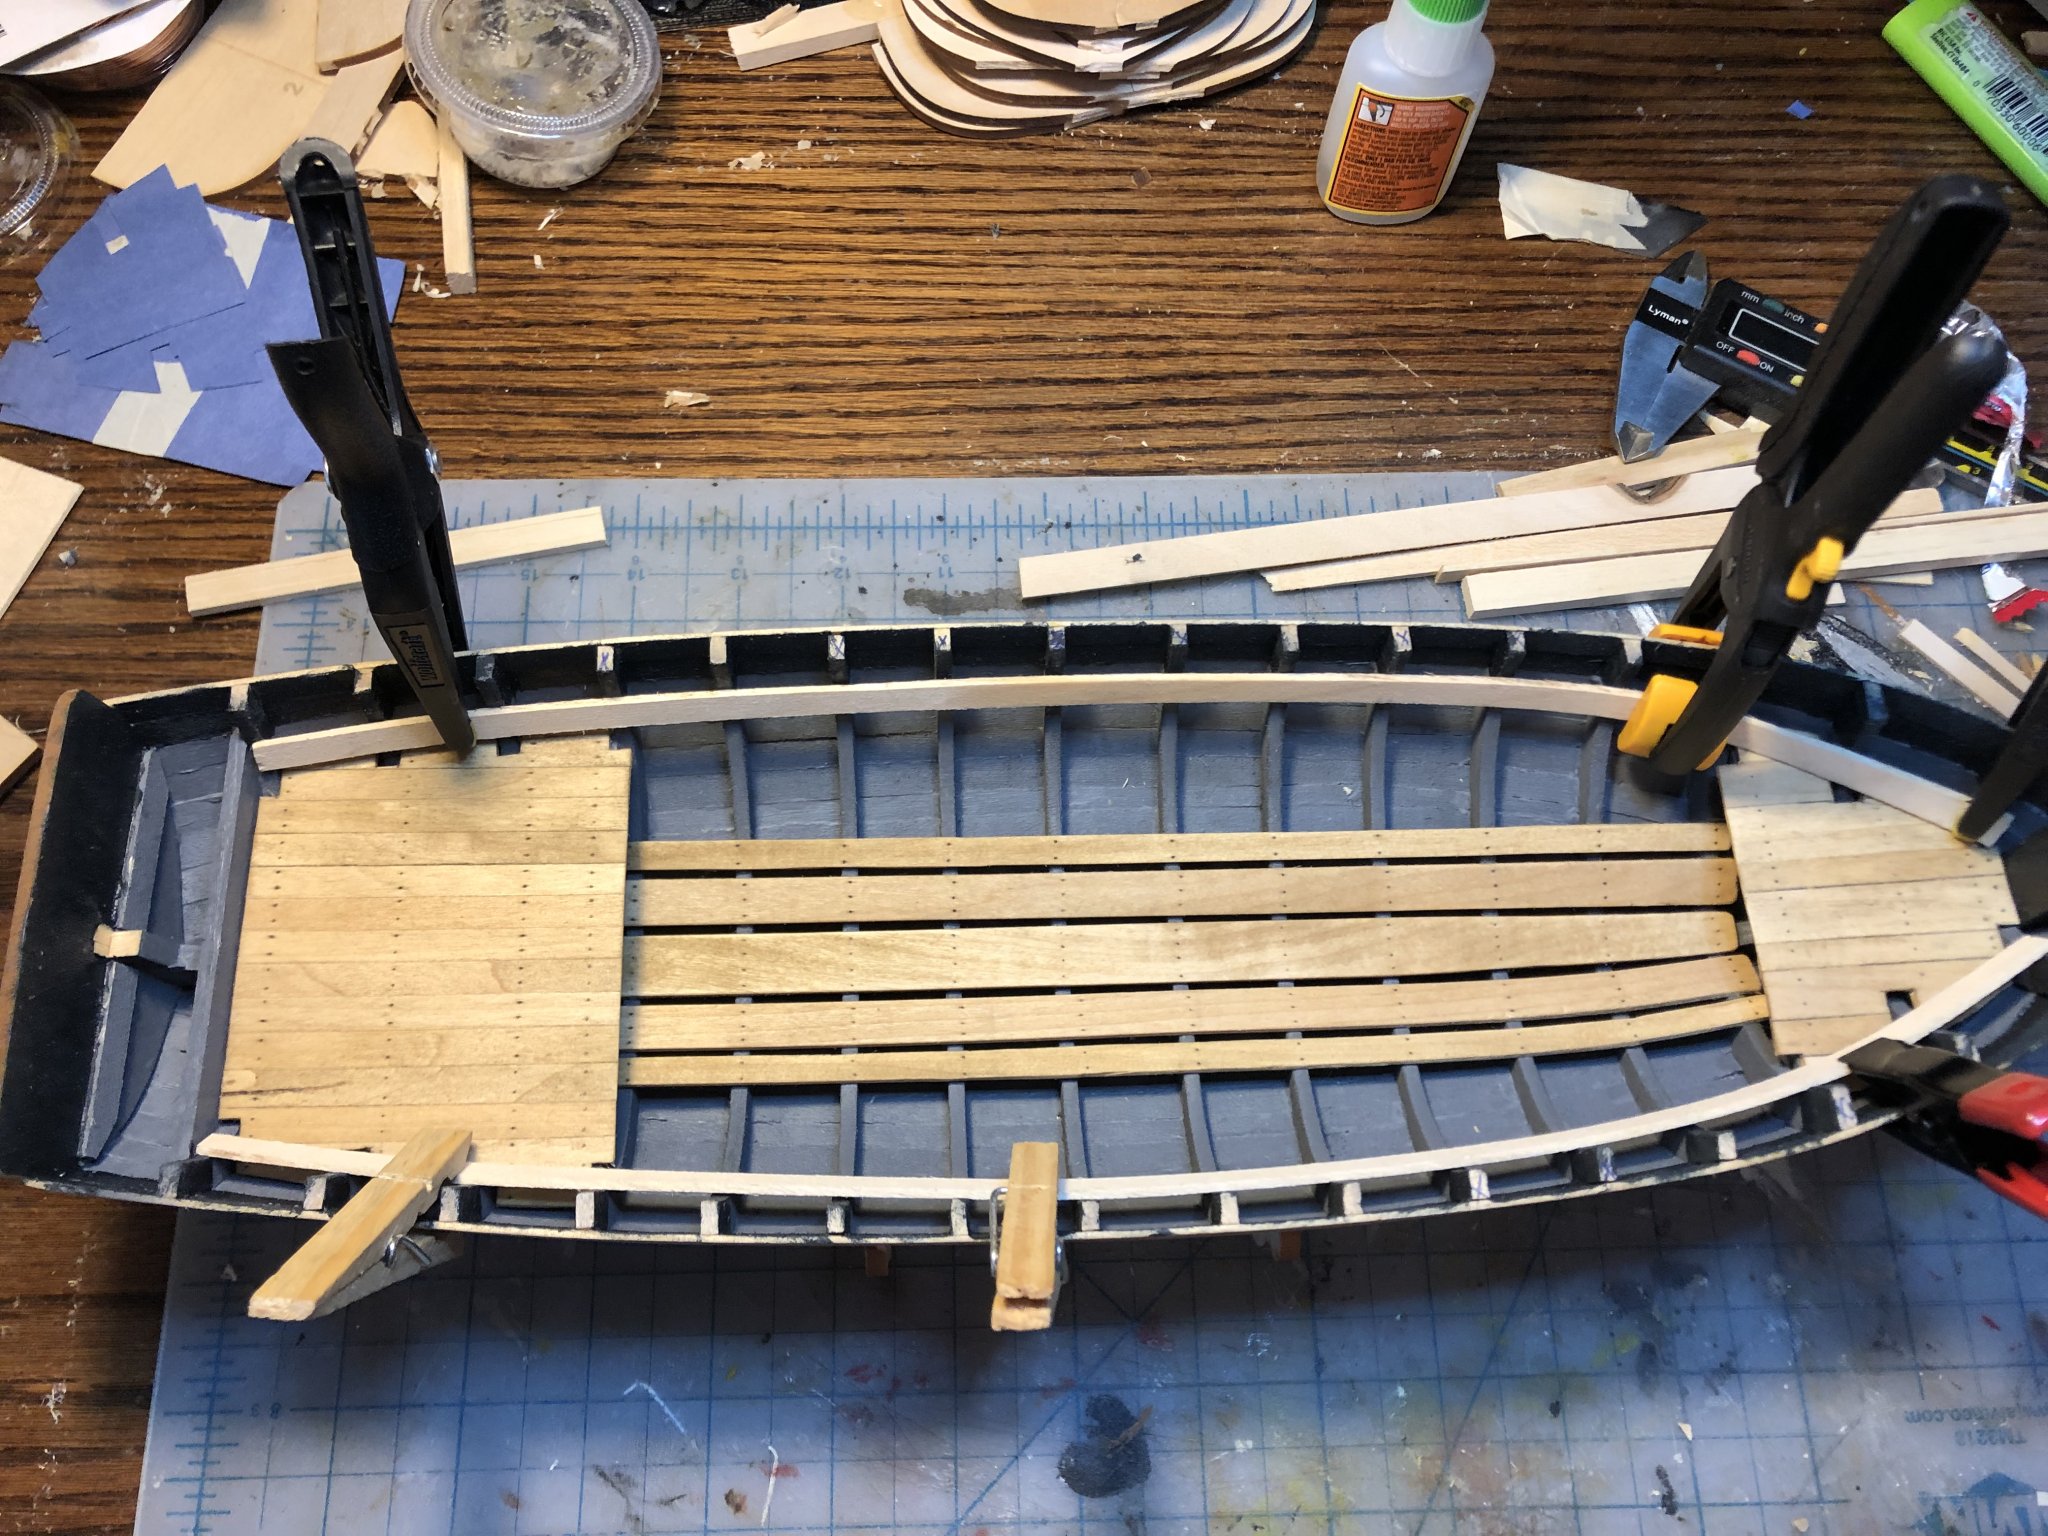
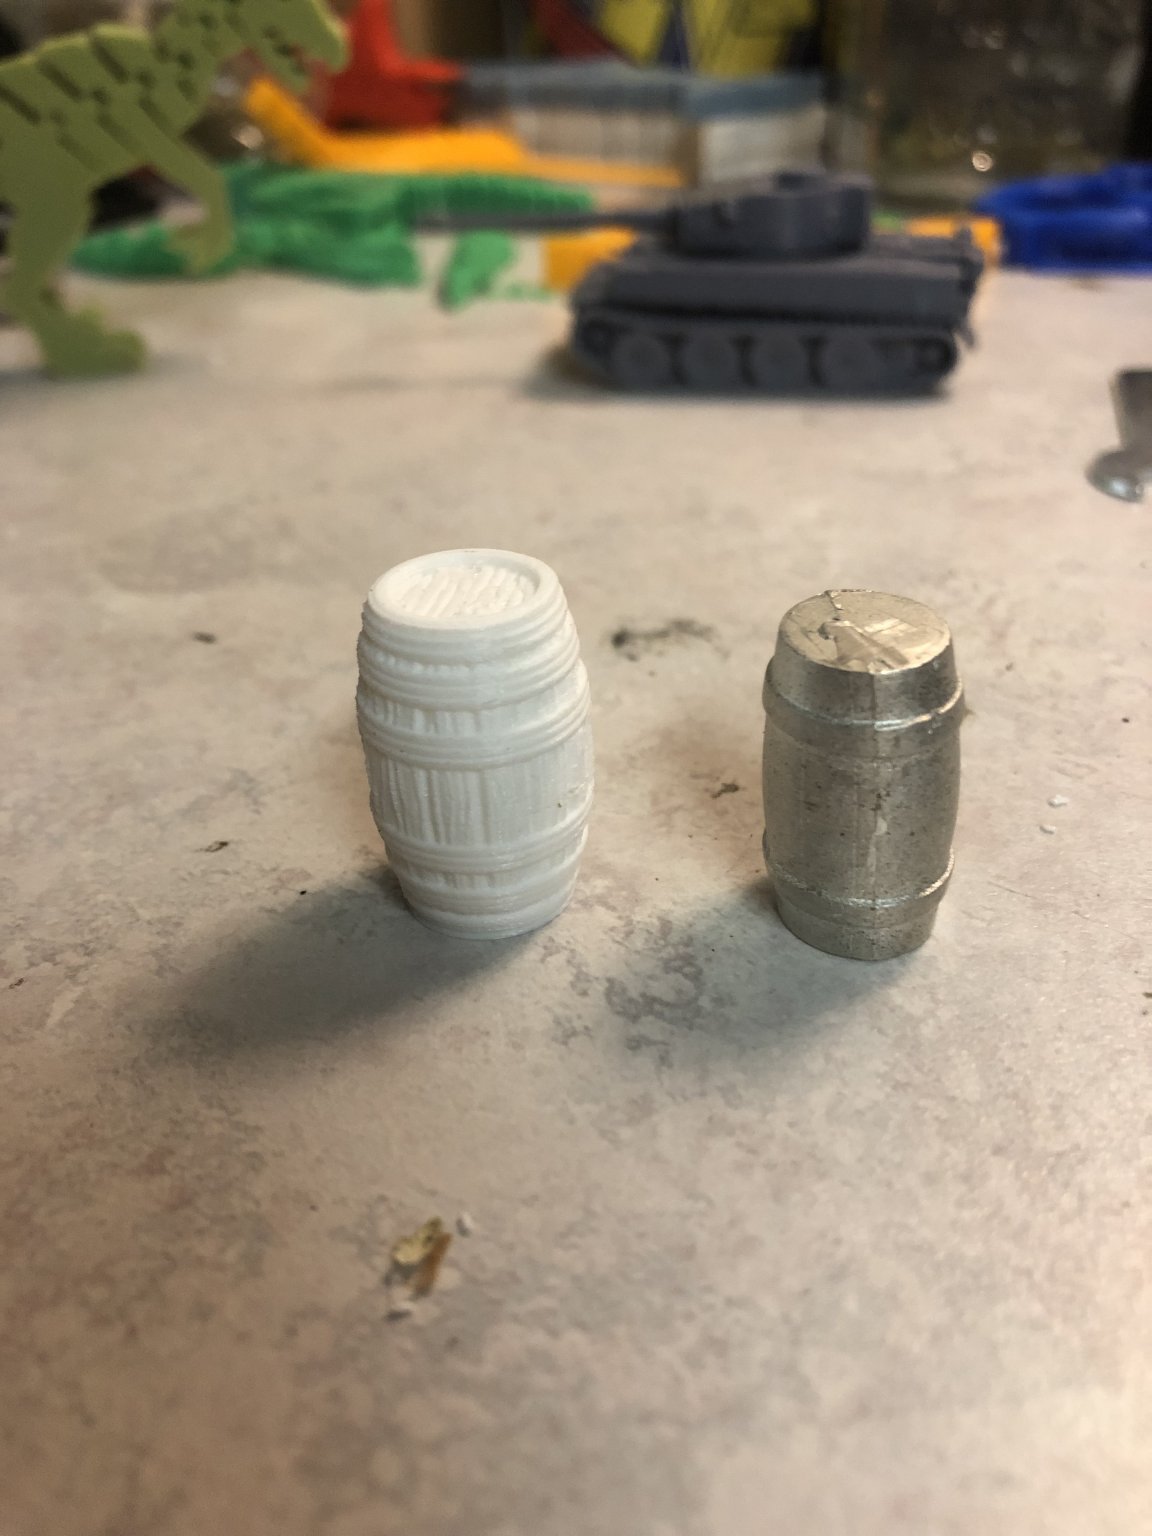
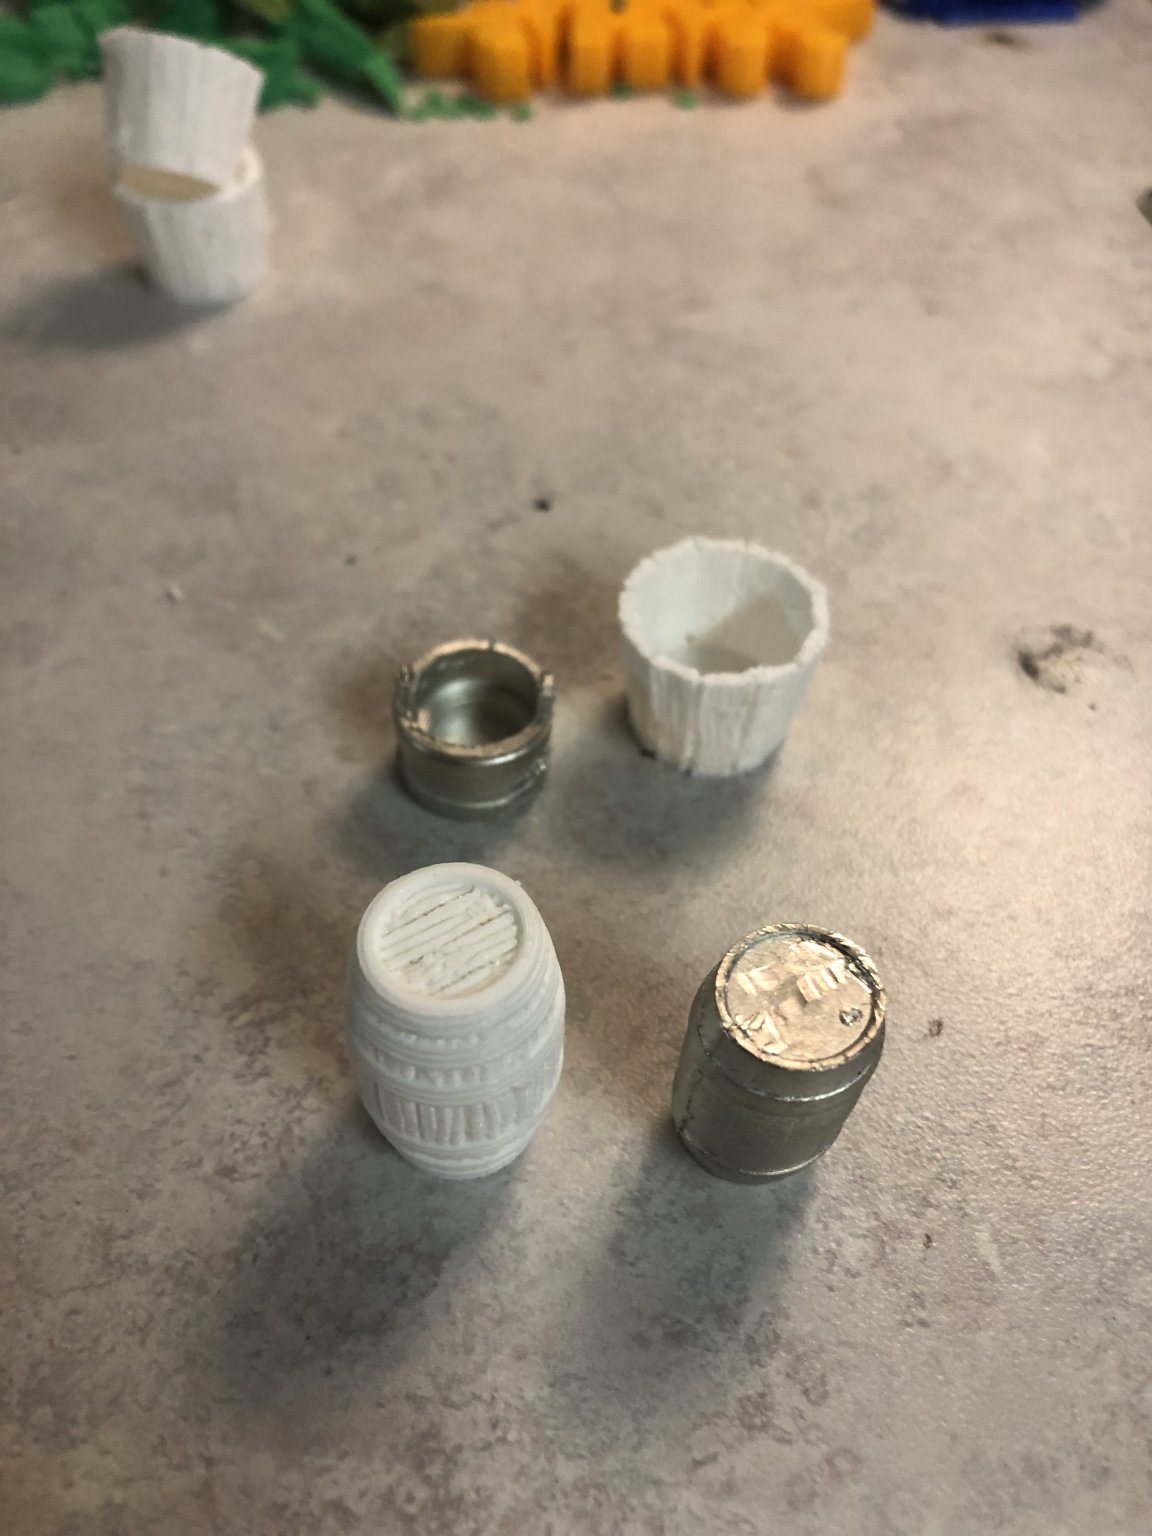
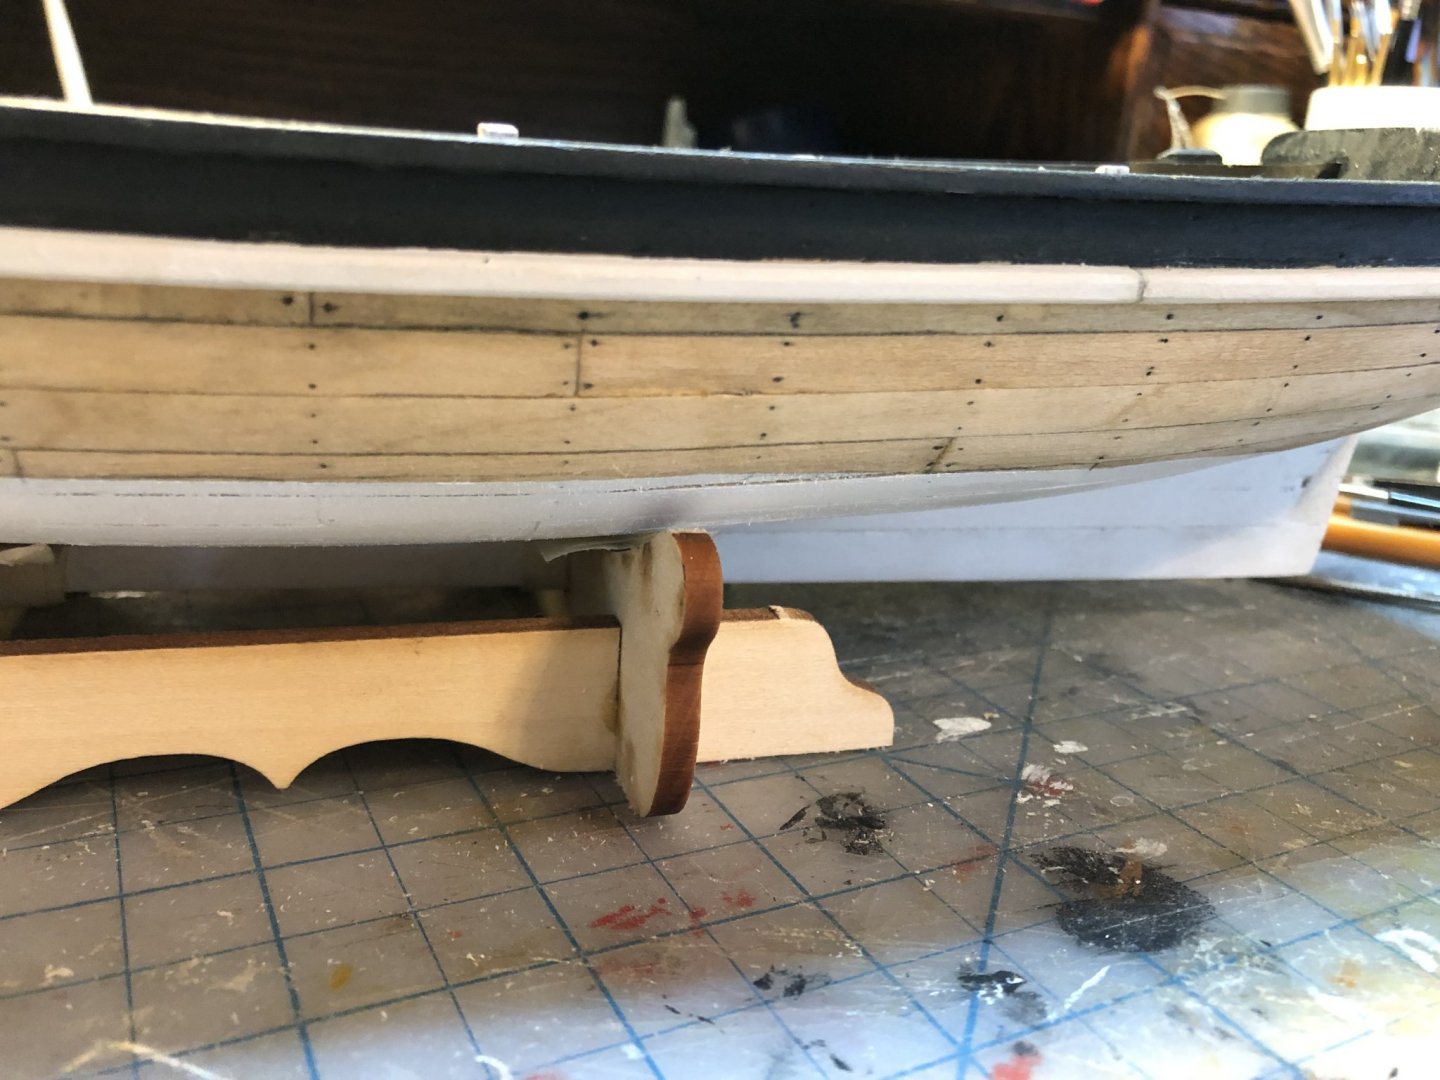
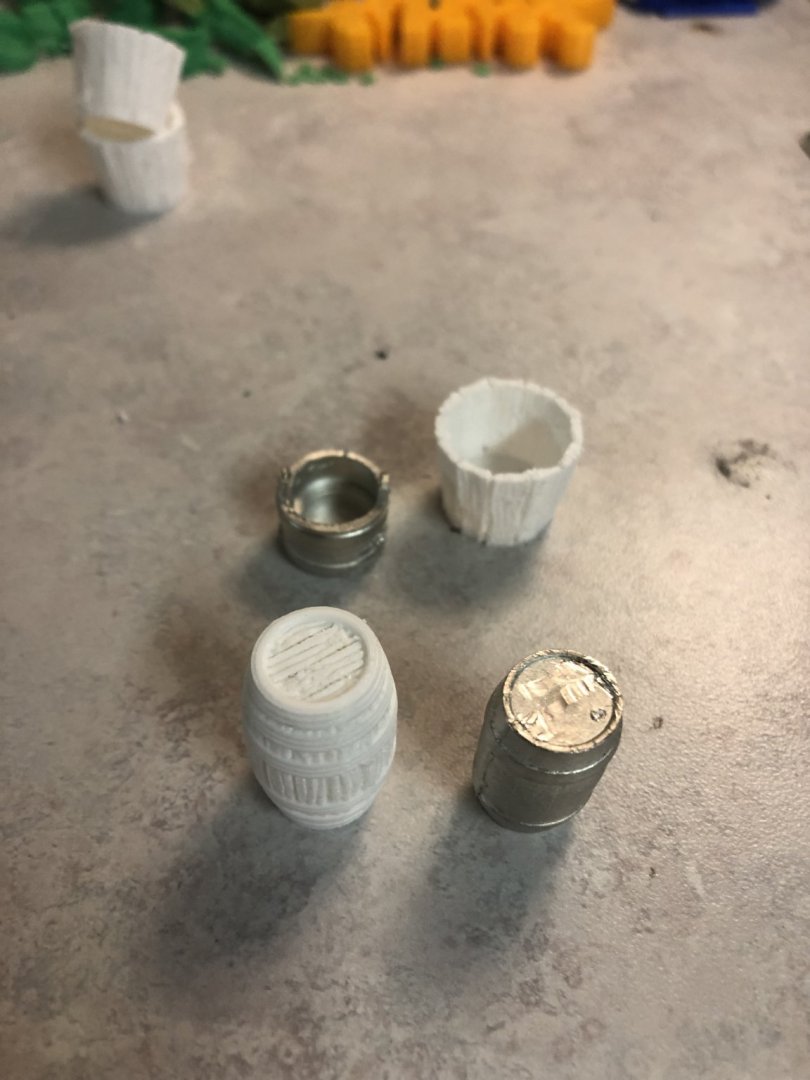
So with the hull planked, I decided to modify my build from the plans and go more towards a merchant longboat. I decided to paint the inside of the hull a medium grey and the sheer plank a dark blue color. I used Testors Gunmetal for the blue. I was never a fan of red, so I'm happy with the look of this scheme. I used a golden oak stain for the floor planks and the outside of the hull above the waterline. I also printed a new barrel and bucket. The ones included in the kit were pretty crummy. Im happy with the new barrels, and am thinking I will print some Hogshead barrels for cargo. The printed bucket shown is a little too big and will not be used. Thanks for looking!


- 16 replies
-
- 2
-
-
- 18th Century Armed Longboat
- Model Shipways
- (and 1 more)
-
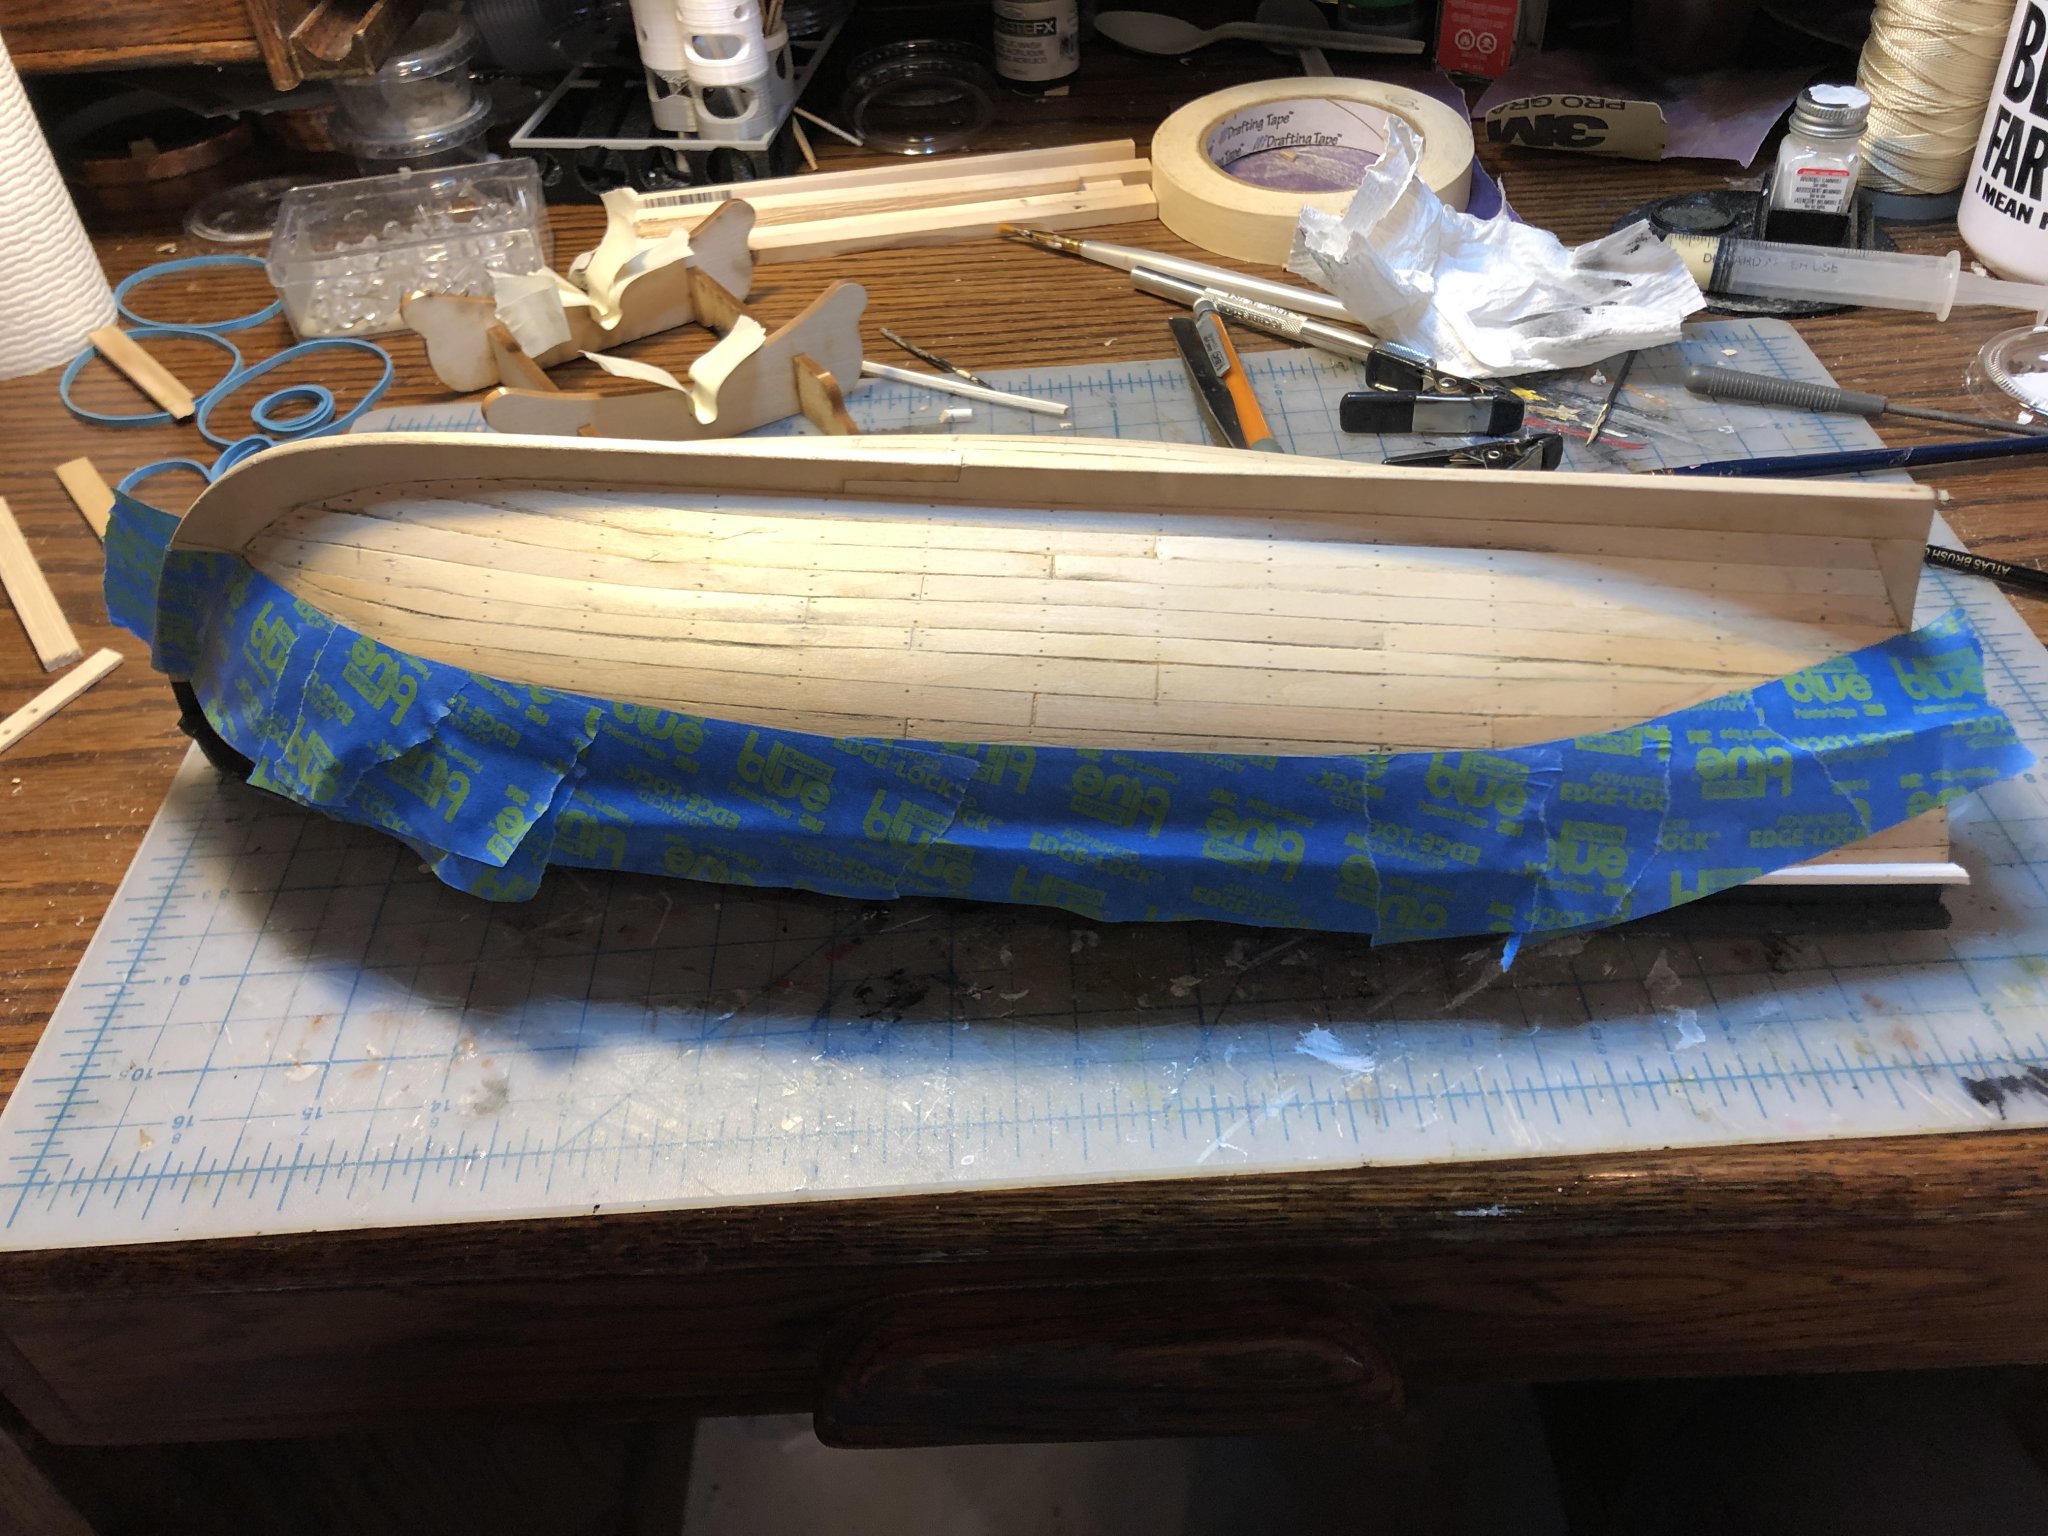
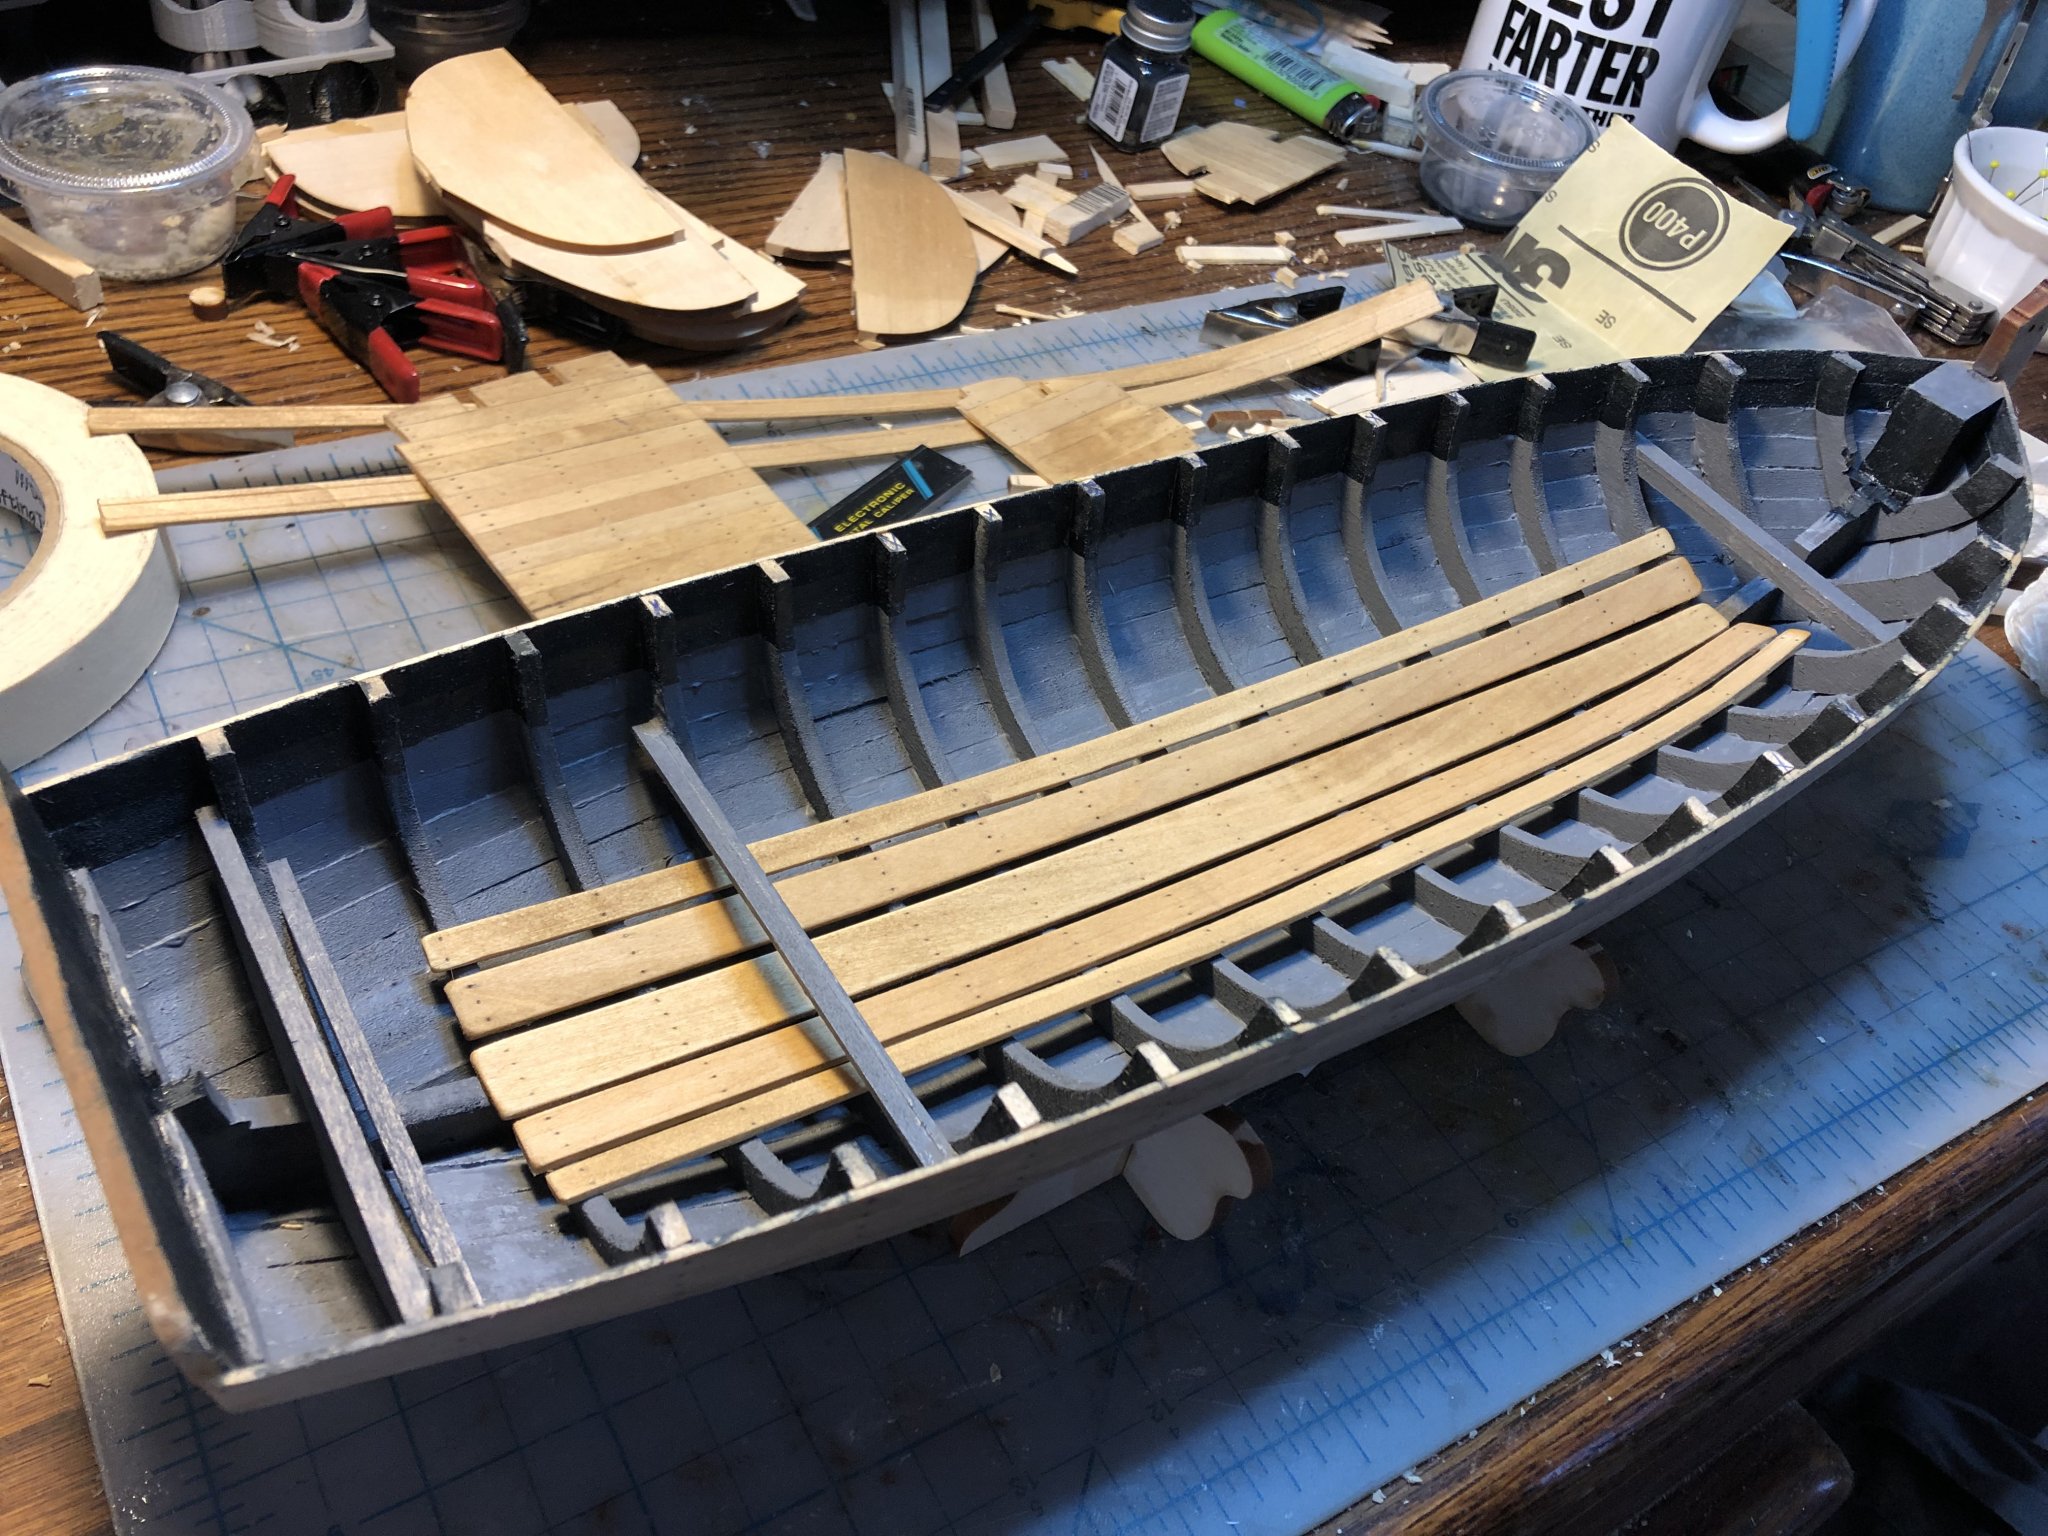
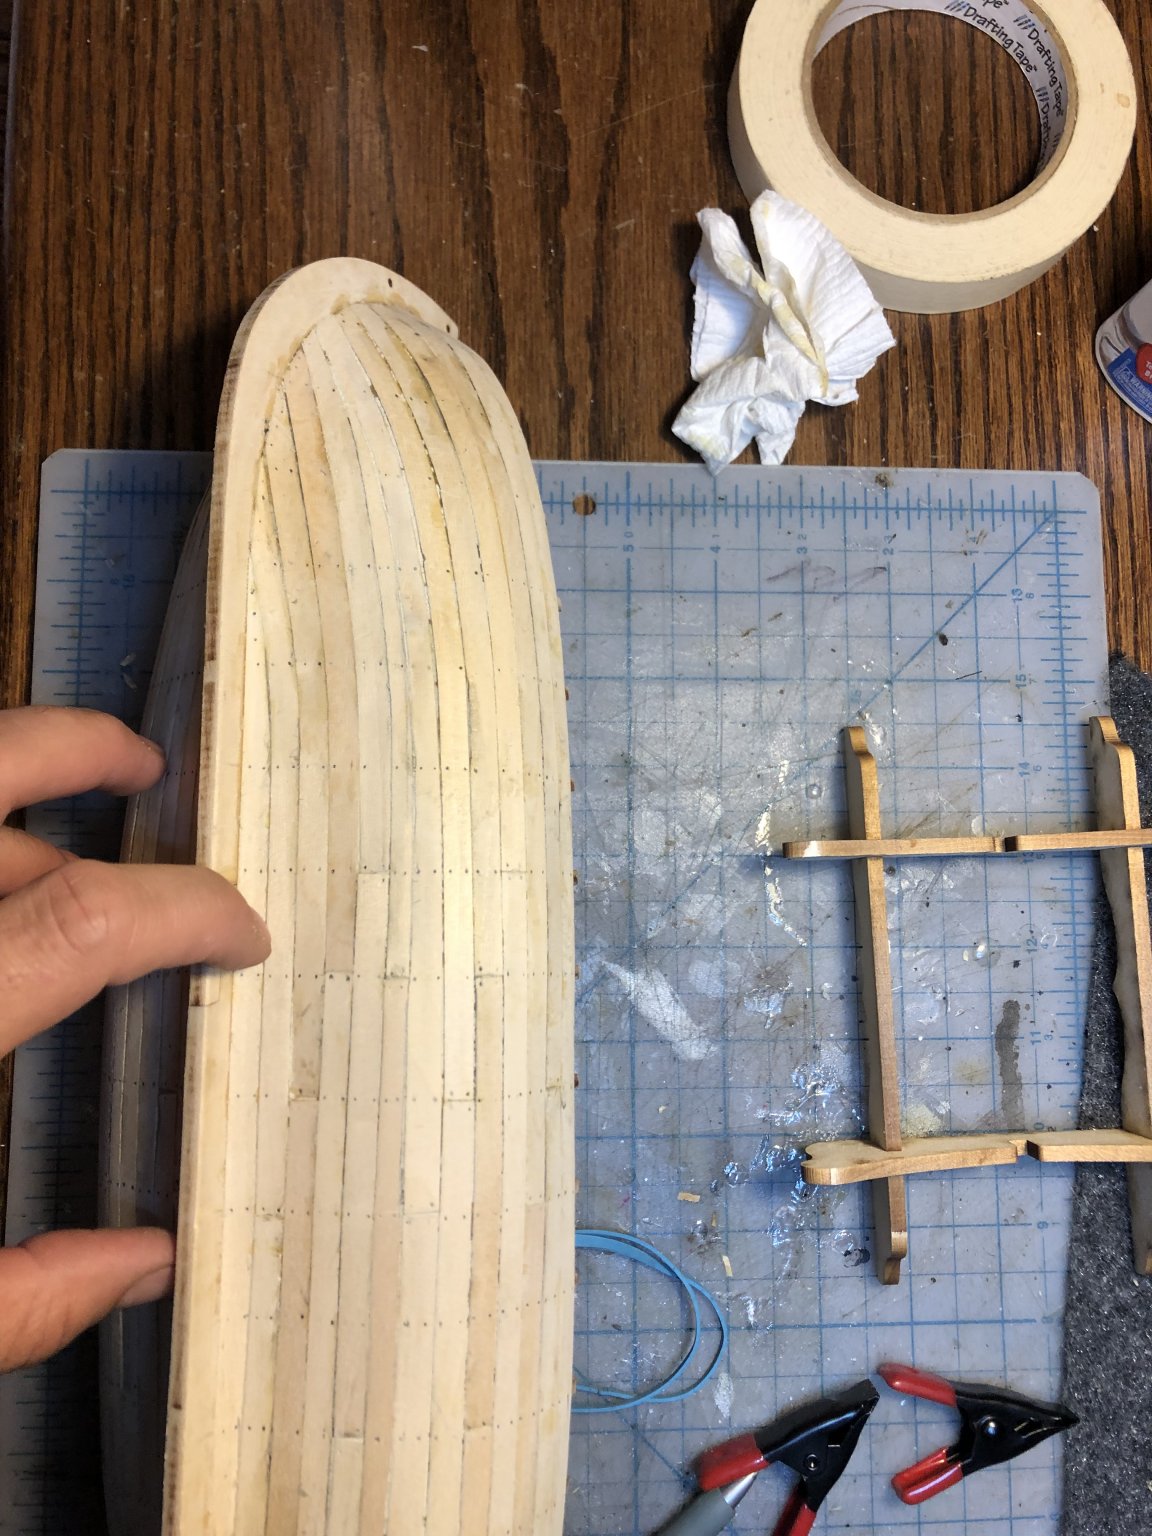
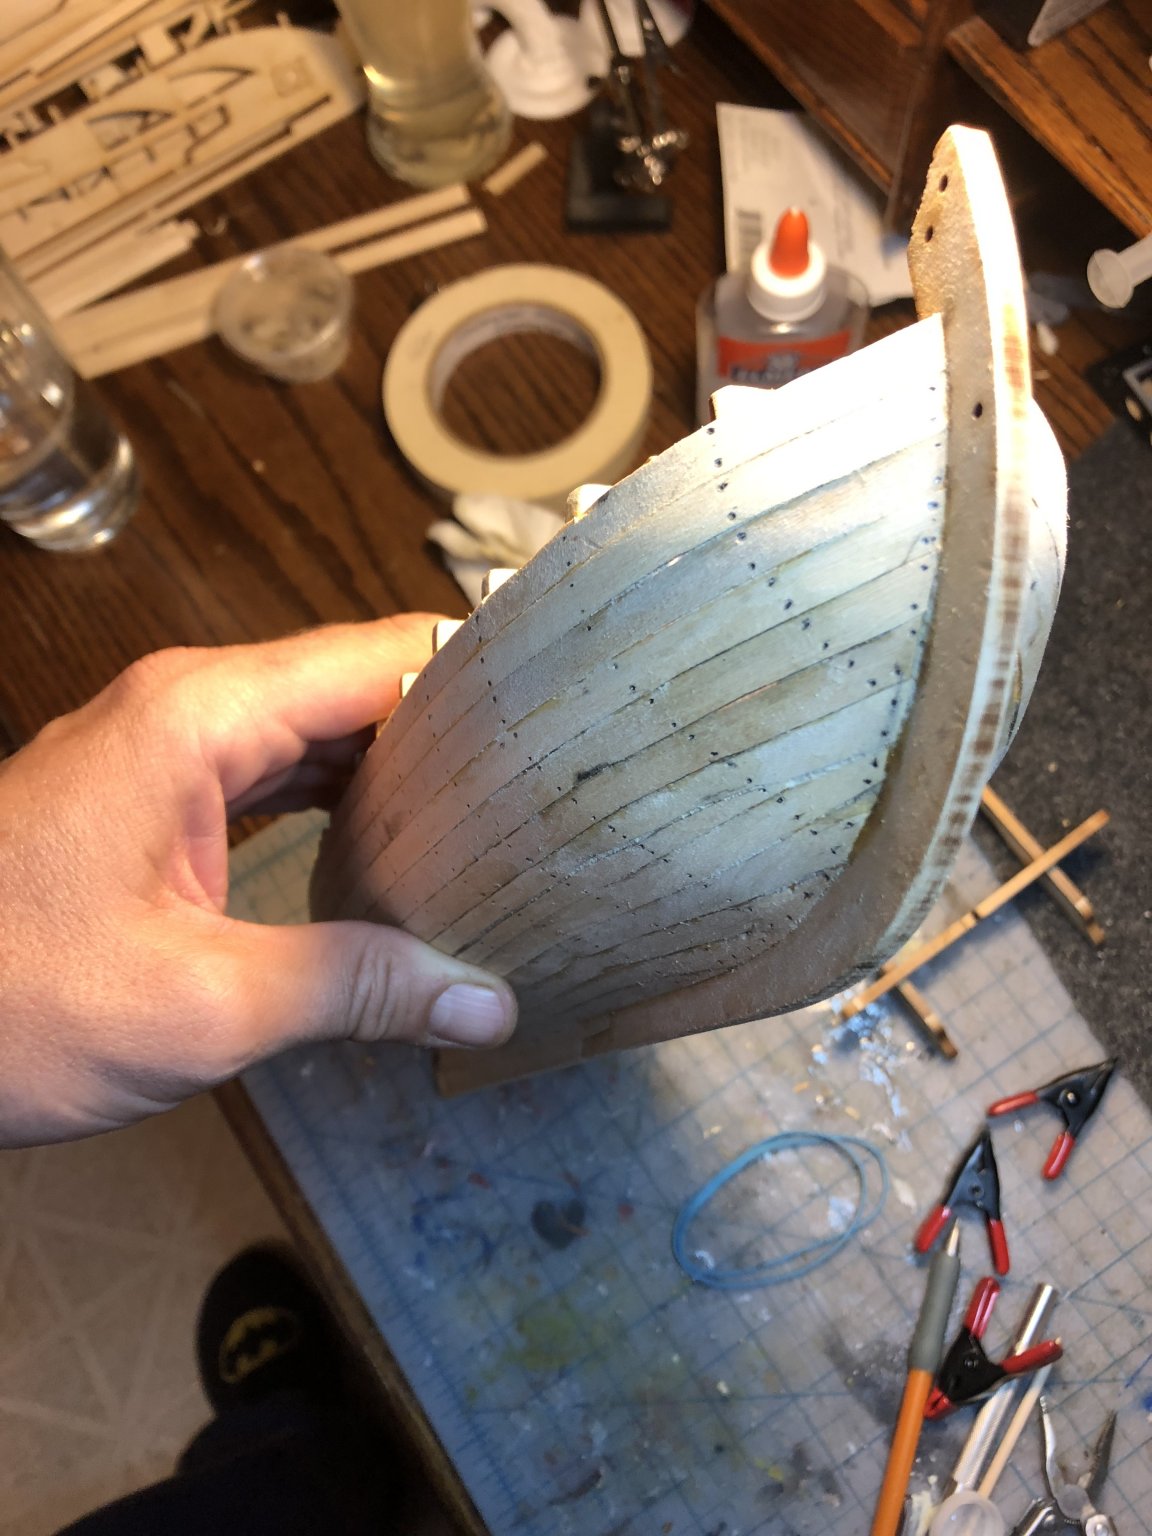
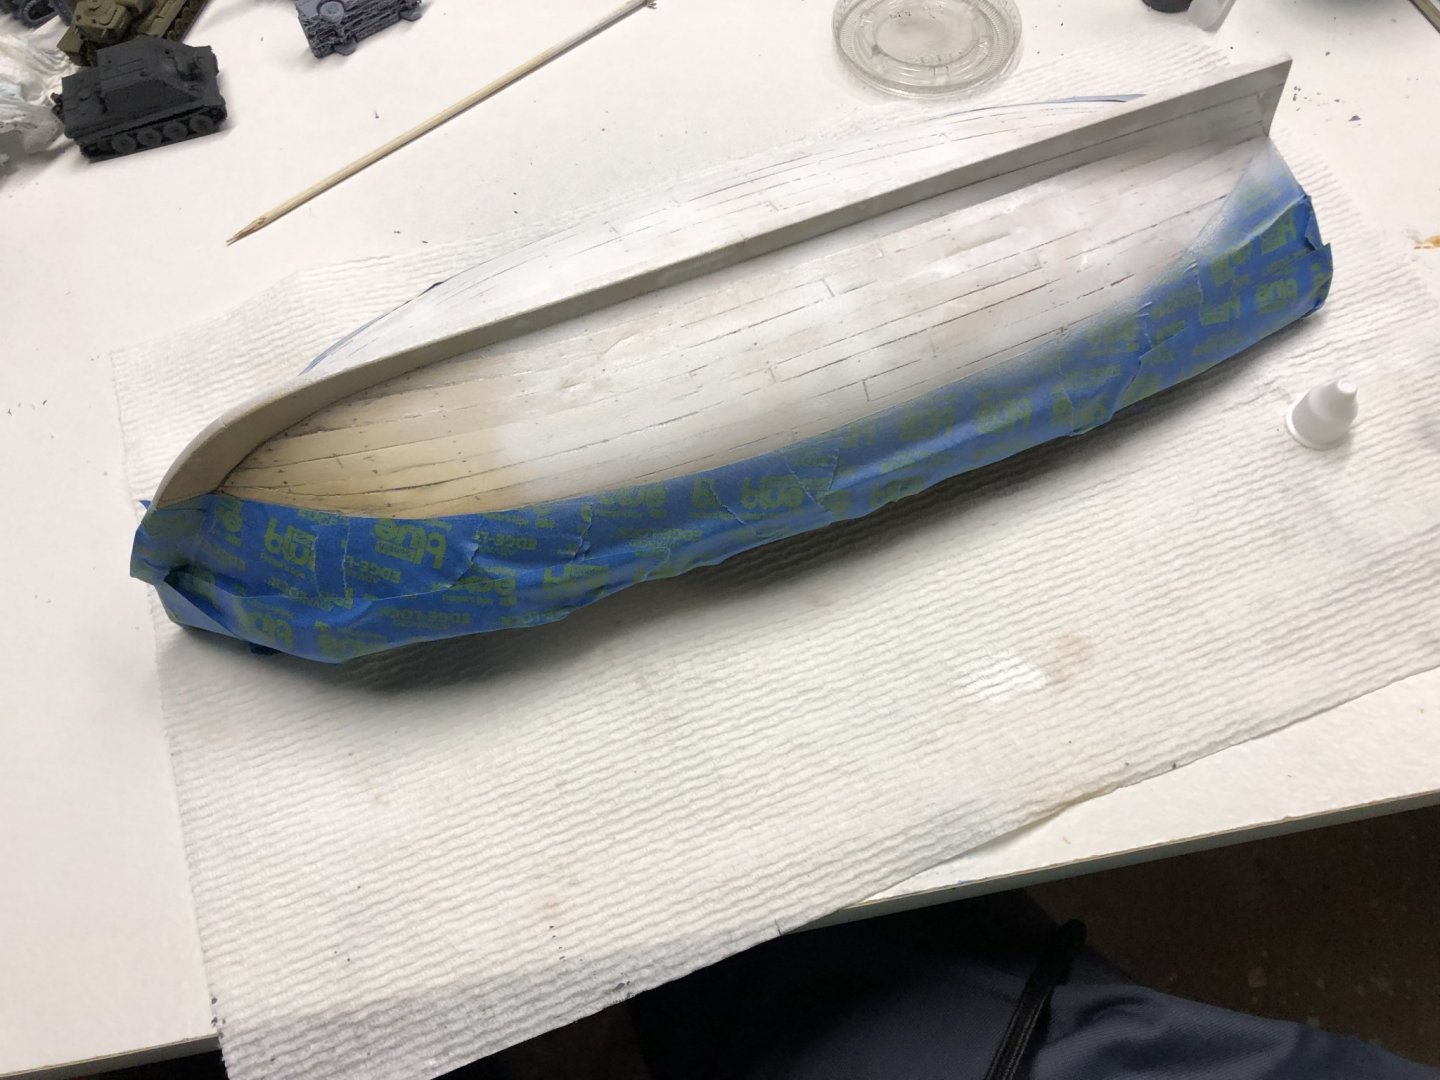
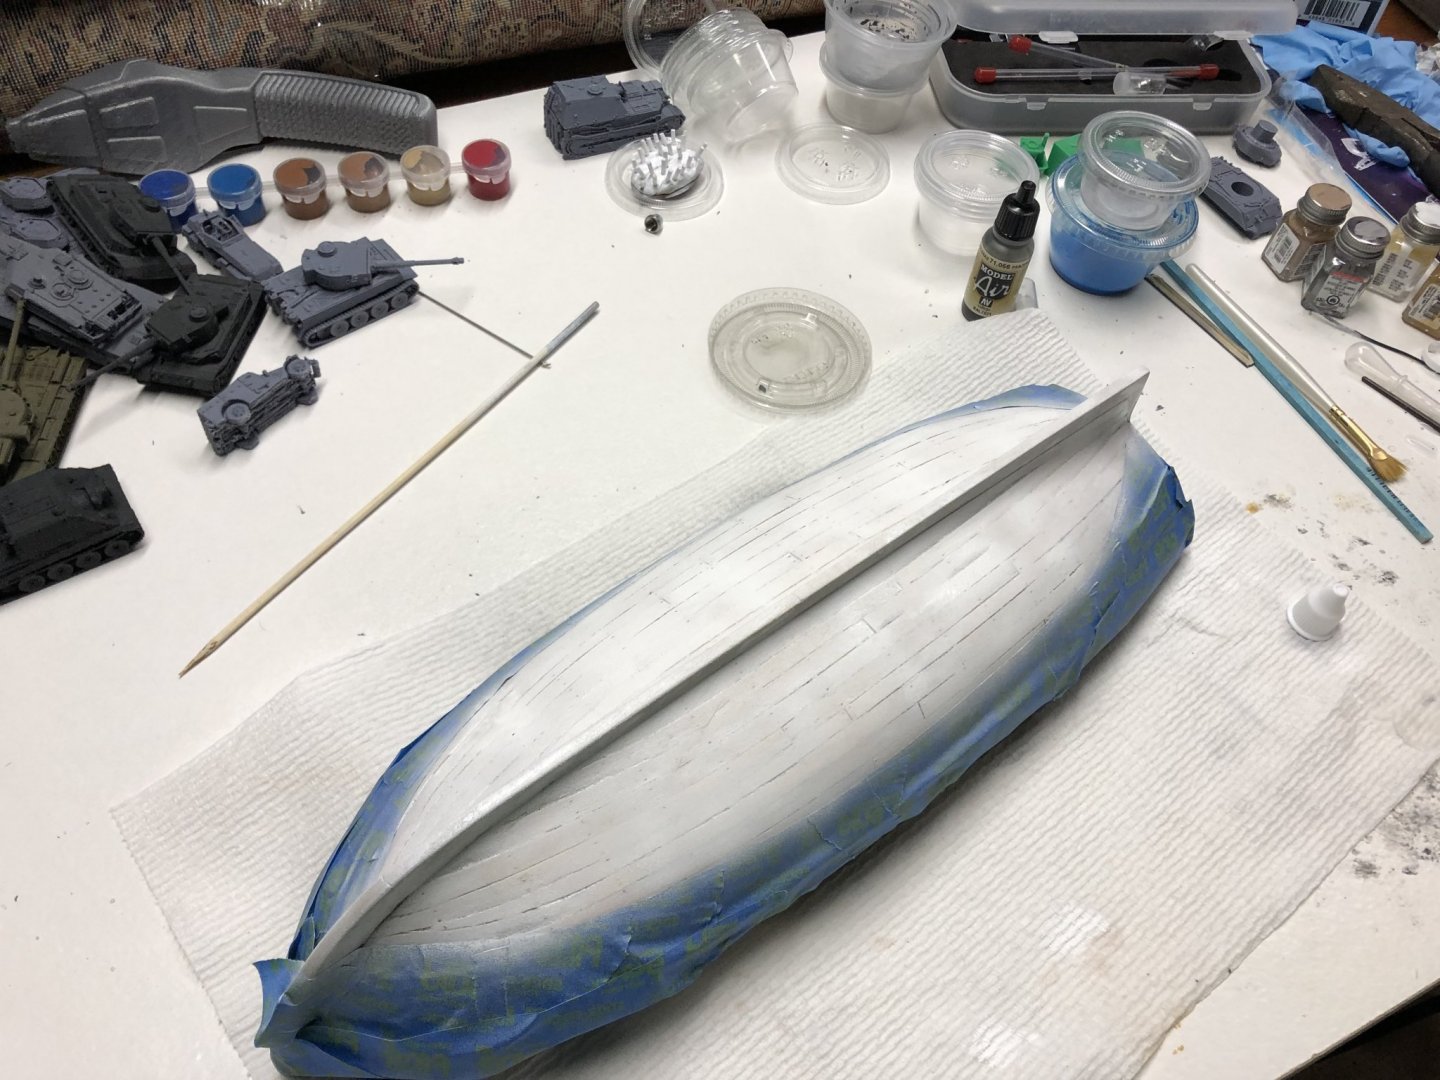
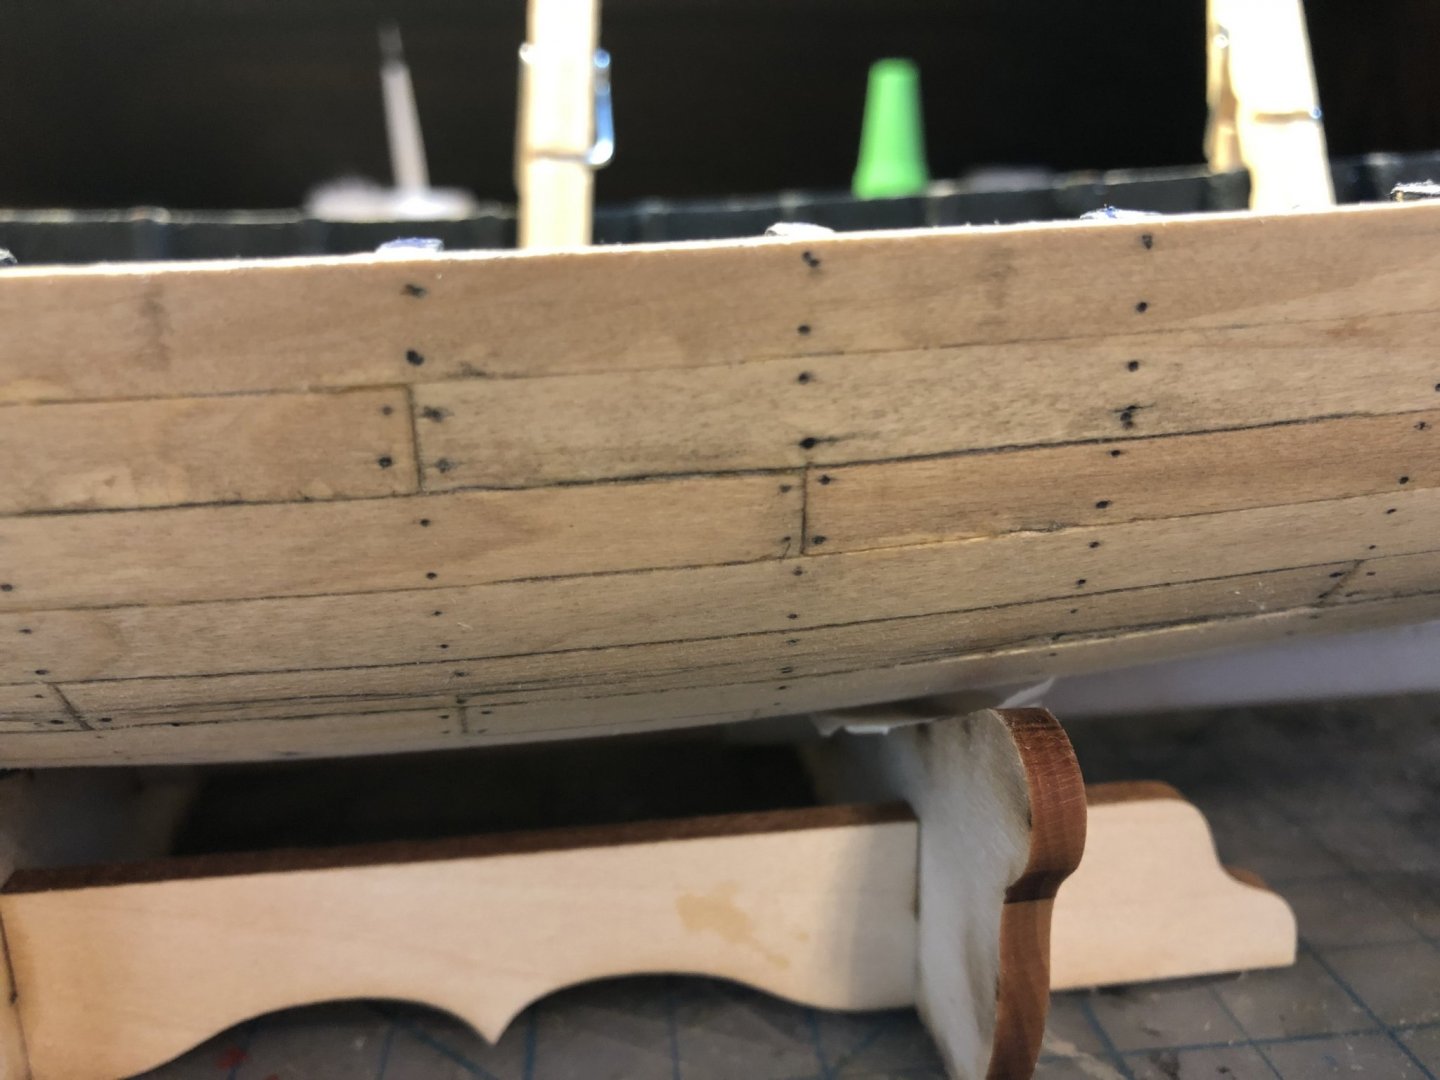
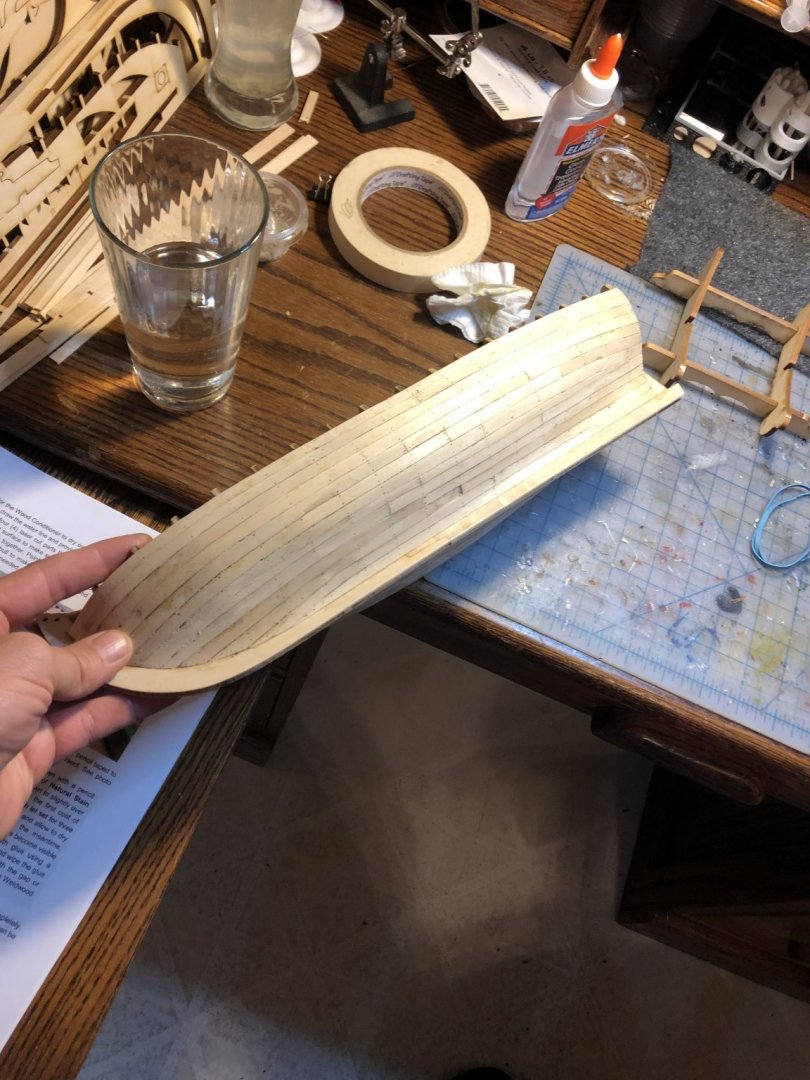
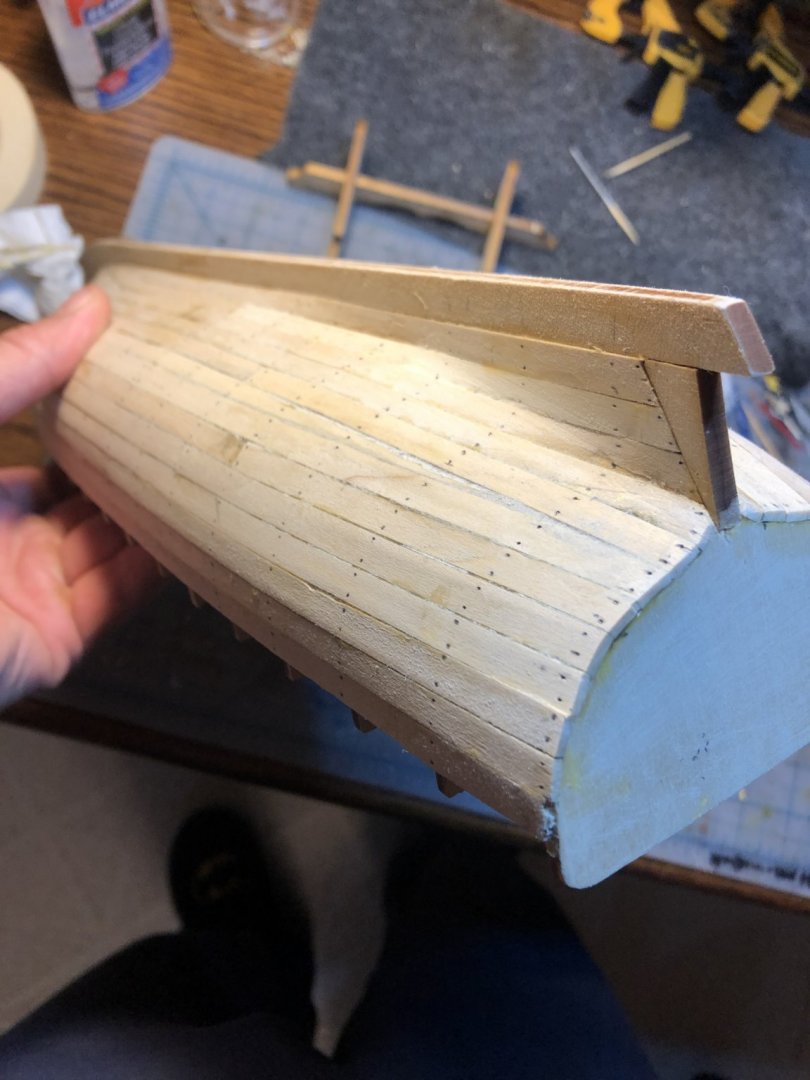
Well, this is my first wood ship model build, and build log, so I'll just jump right in. I found the 18th Century Armed Longboat on Amazon and thought it looked like a good beginner kit. Then while doing some research I found this glorious site and its great members! To my surprise, there were several completed build logs for this exact model! So after reading thru several and getting some great inspiration I decided to begin. However I did not thing of doing a build log until most of my hull was planked. I thought the process of planking was pretty straight forward, and the instructions were great and helped out a lot. I had a few problems with clamps denting wet planks, and learned a valuable lesson about sanding the rib supports to the proper angle before starting planking. Below are some pics of the fully planked hull. This was after the first rough sanding with 110 grit. I bent all the planks into place and only cut (i forget the proper term) the sheer plank and the last infill plank from a sheet of 1/16. The planking took me way longer then expected to complete. I used yellow wood glue and glued 2 planks a night, and formed and clamped 2 more. So it took a couple of weeks to complete. Time consuming, but I was pretty happy with the results, and only had minimal gaps to fill. Overall great fun and a good learning experience. Thanks for taking a look and any advice or comments are greatly appreciated.


- 16 replies
-
- 5
-
-
- 18th Century Armed Longboat
- Model Shipways
- (and 1 more)