Tarjack
-
Posts
153 -
Joined
-
Last visited
Content Type
Profiles
Forums
Gallery
Events
Everything posted by Tarjack
-
ancre La Salamandre by tadheus - 1:24
Tarjack replied to tadheus's topic in - Build logs for subjects built 1751 - 1800
well done Pawel......Gratulacje -
Tank you all for the motivated words and also for the many many like´s
- 241 replies
-
- 4
-

-
- royal caroline
- yacht
- (and 1 more)
-
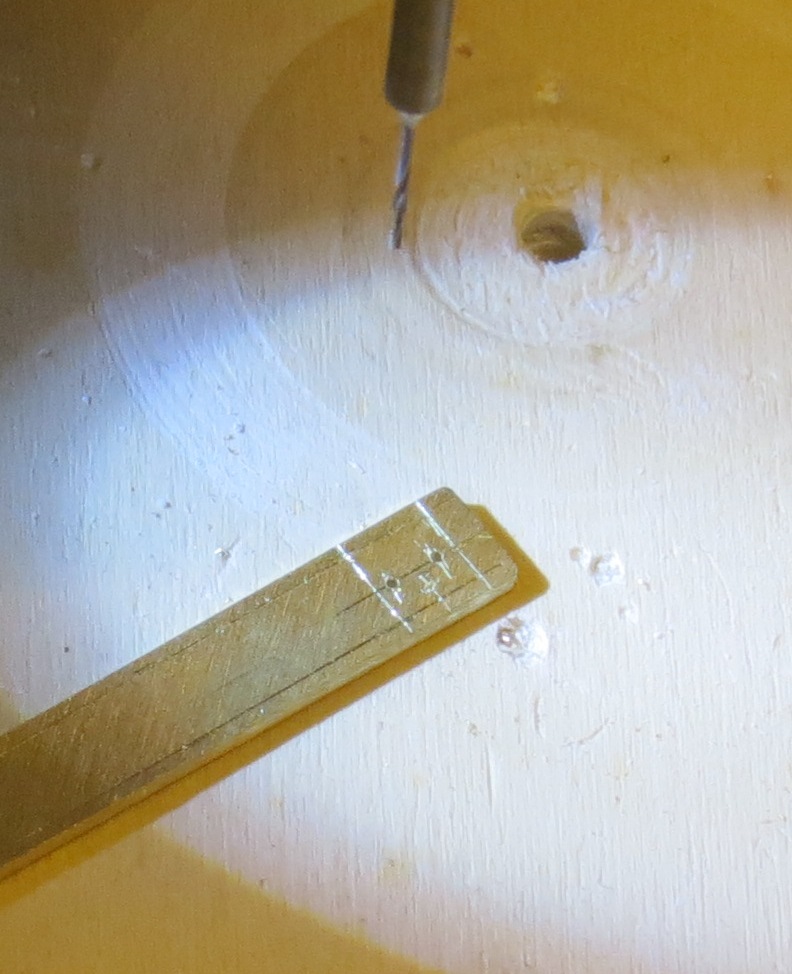
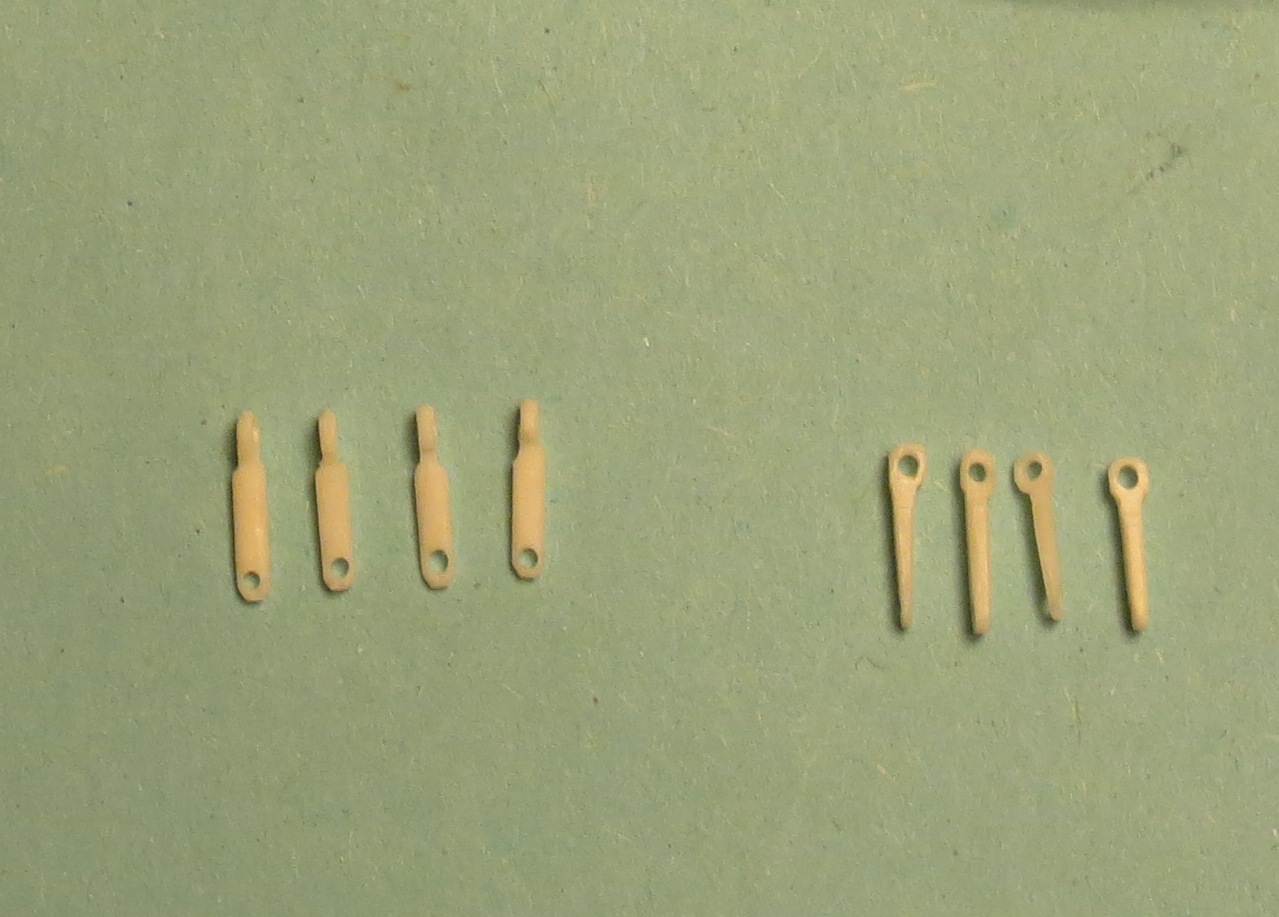
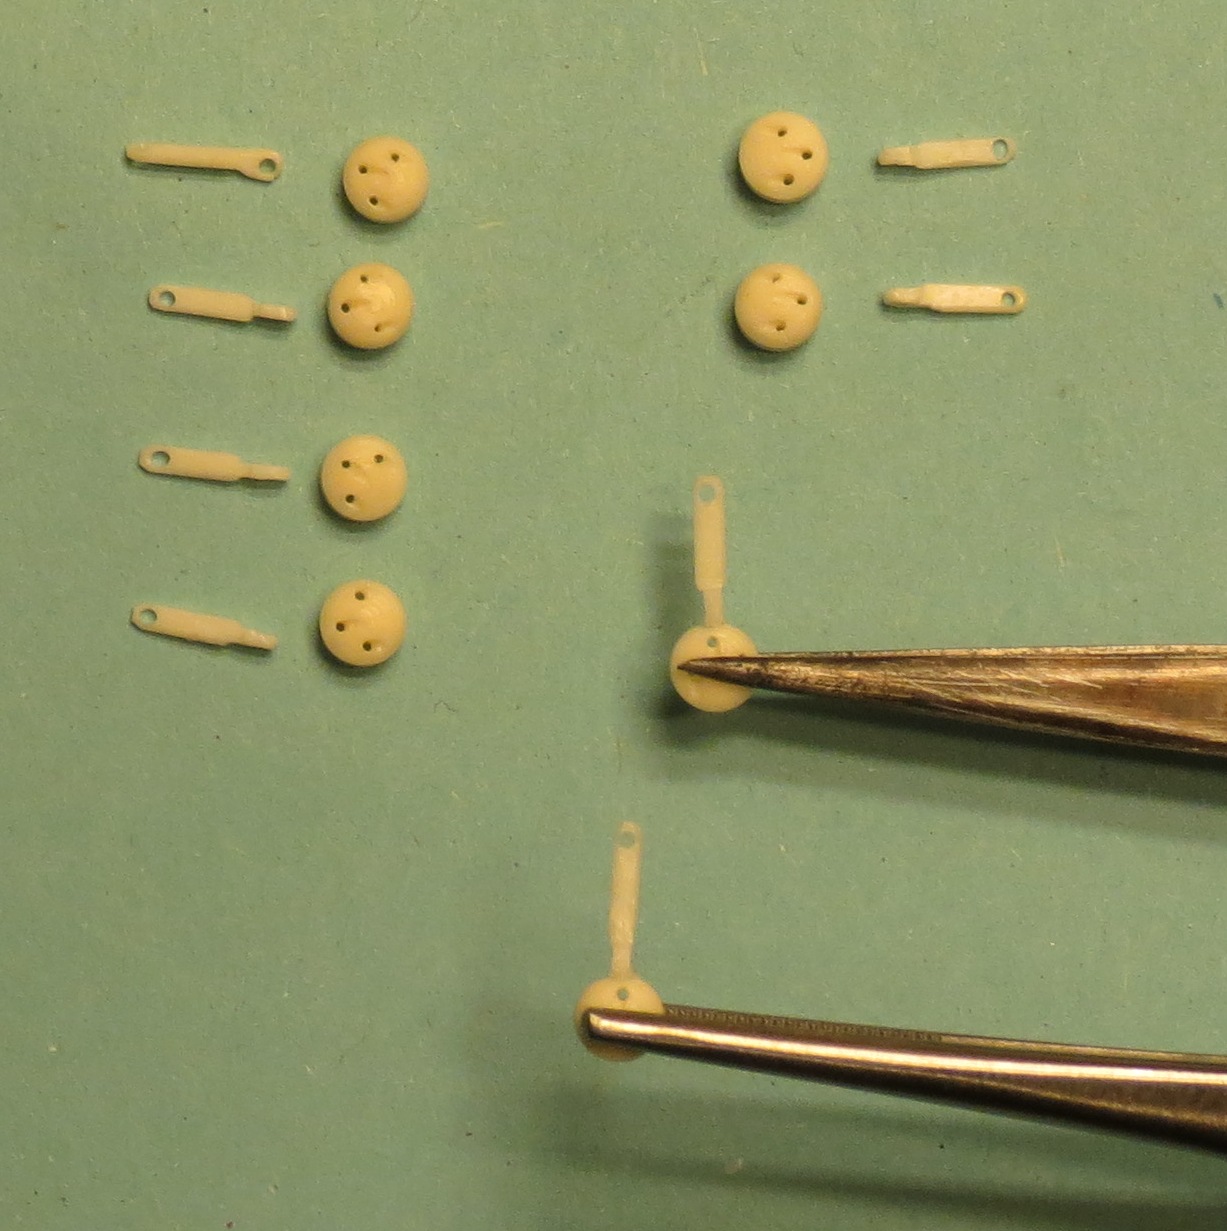
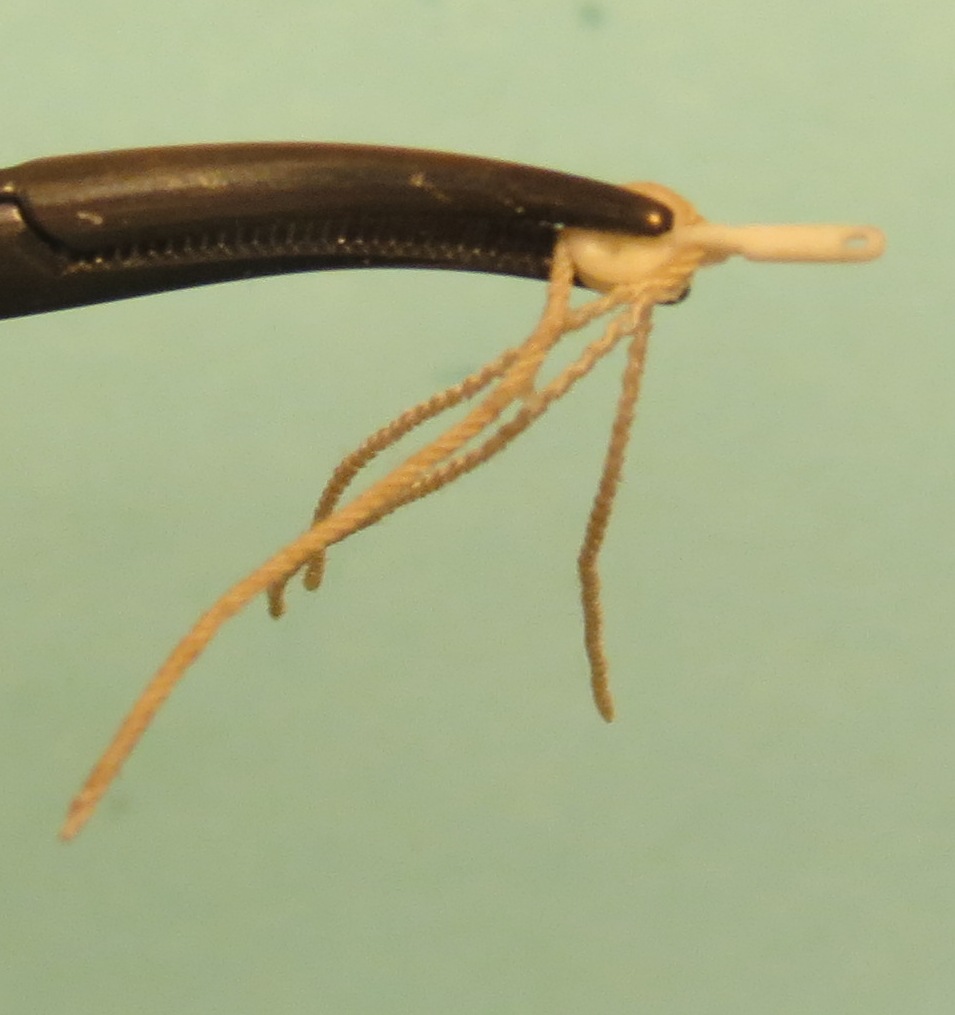
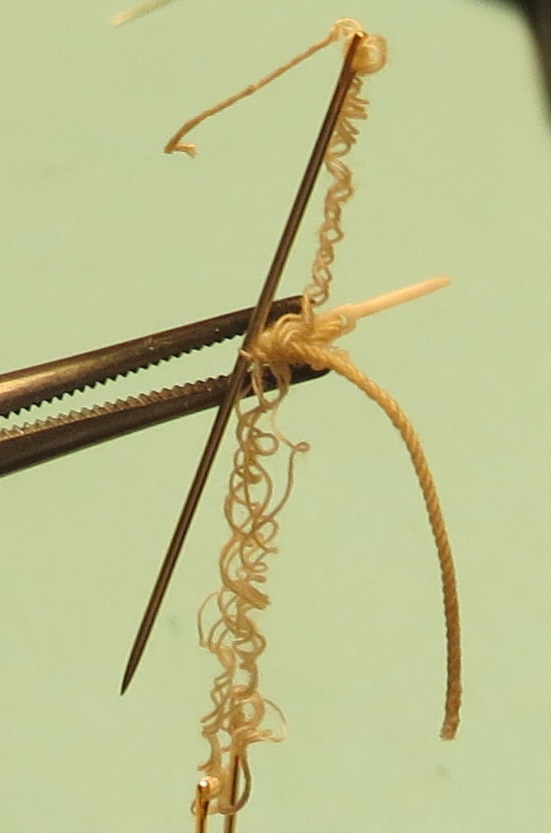
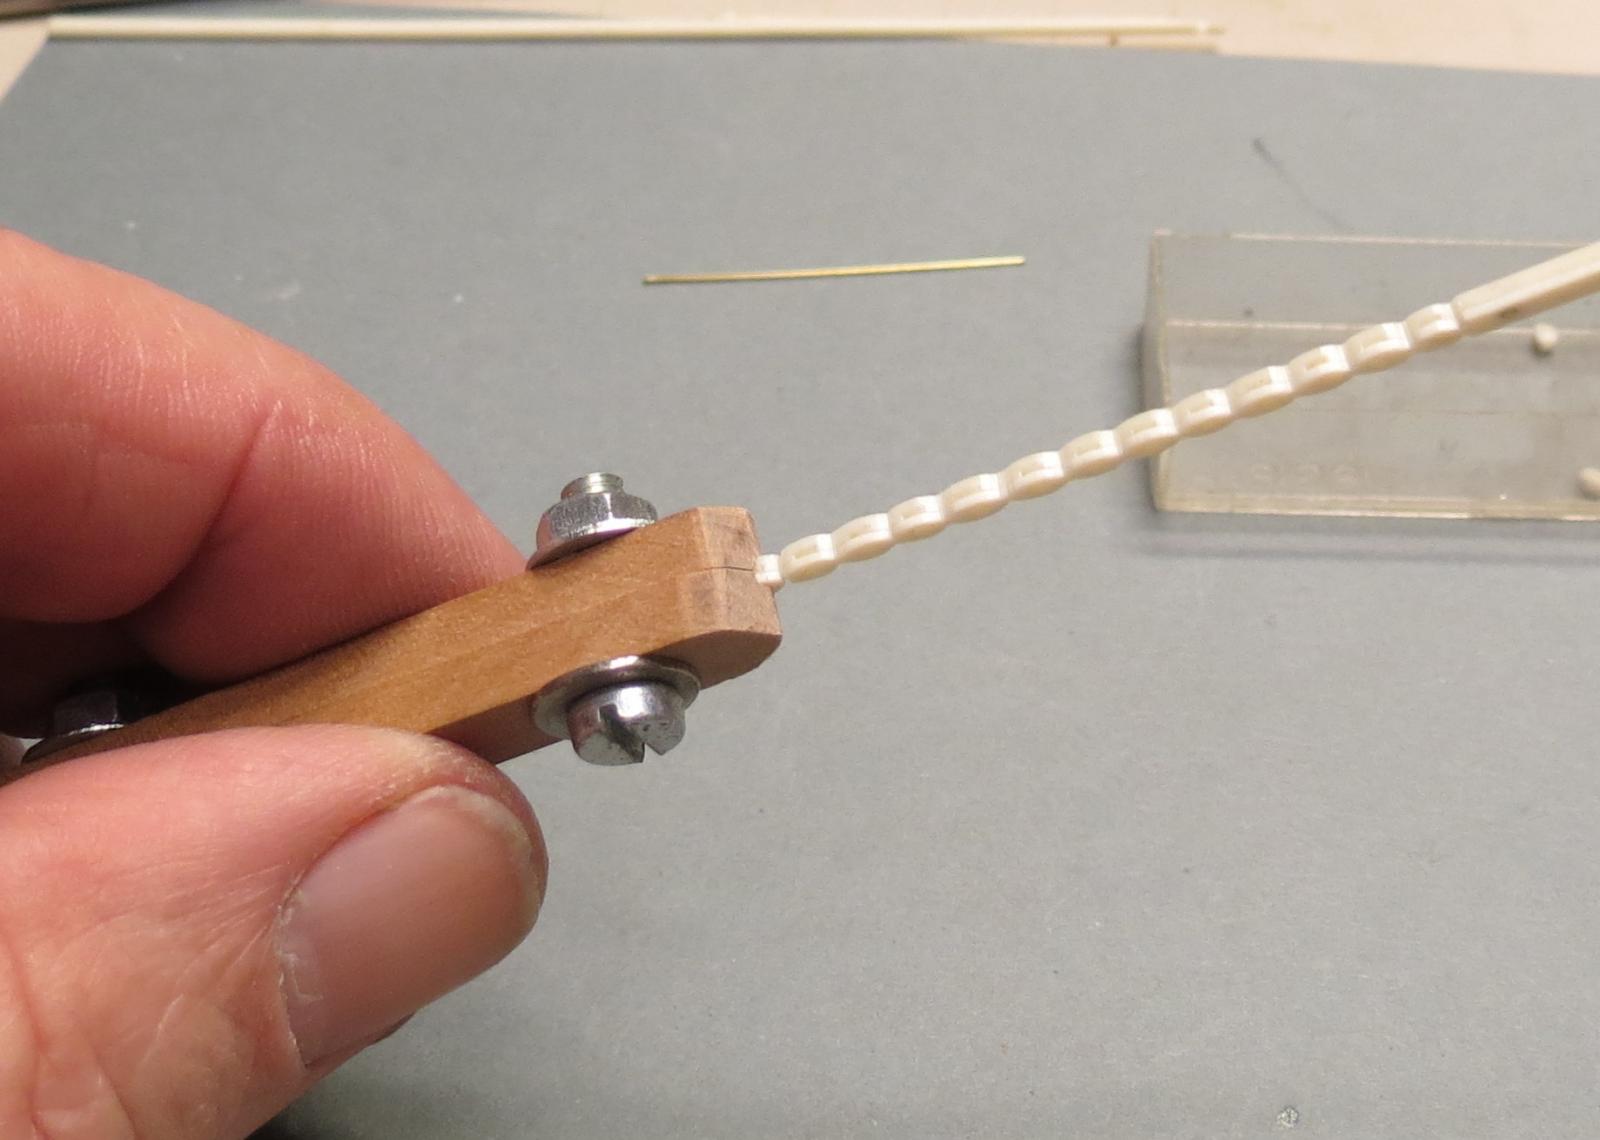
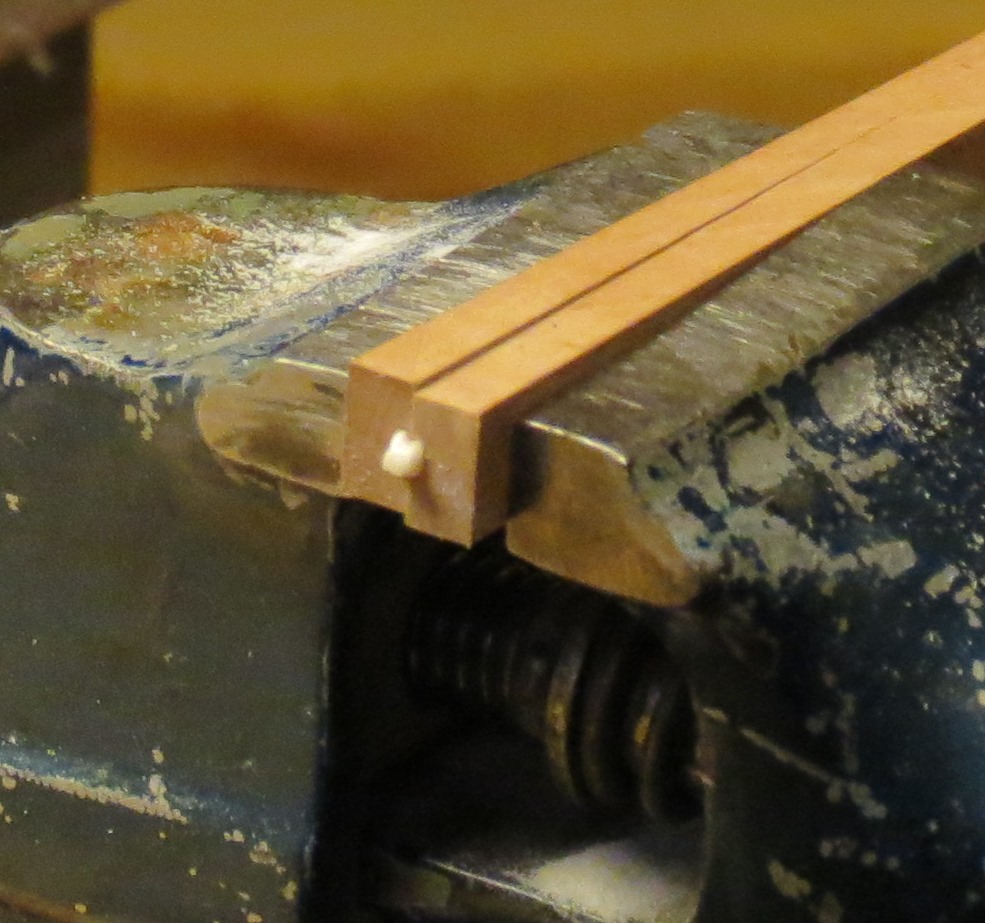
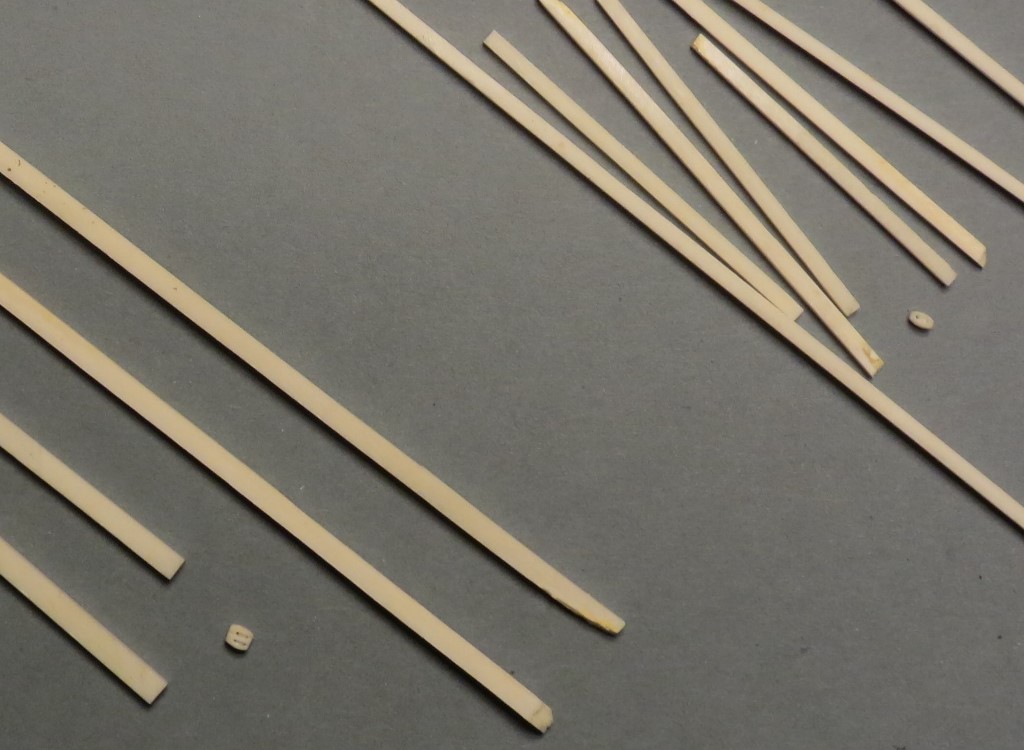
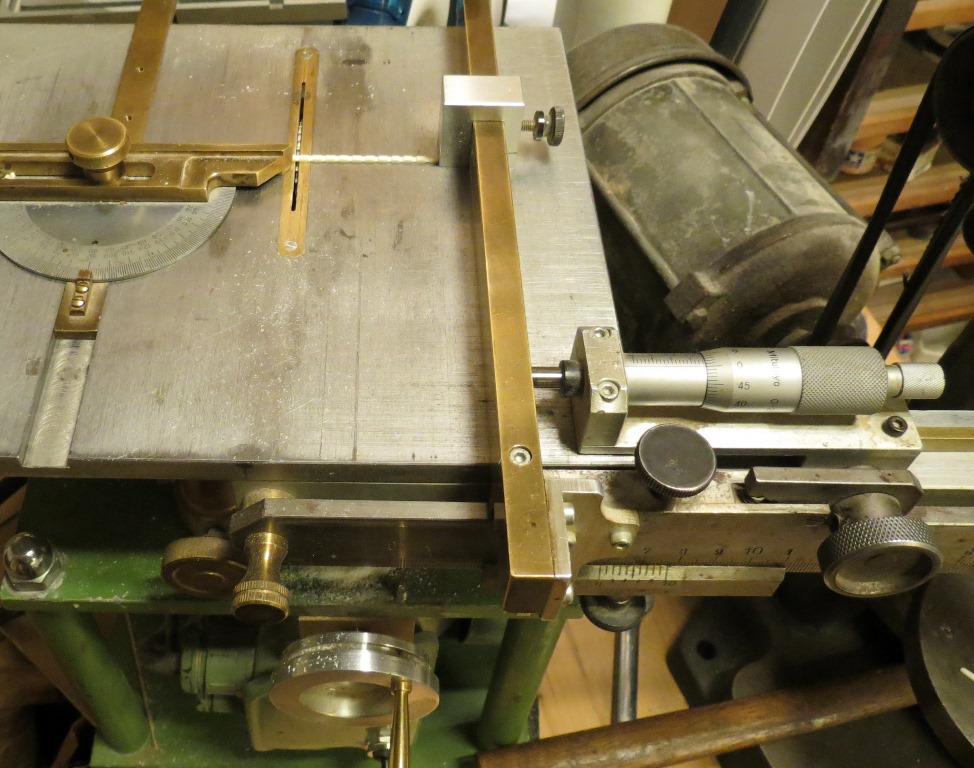
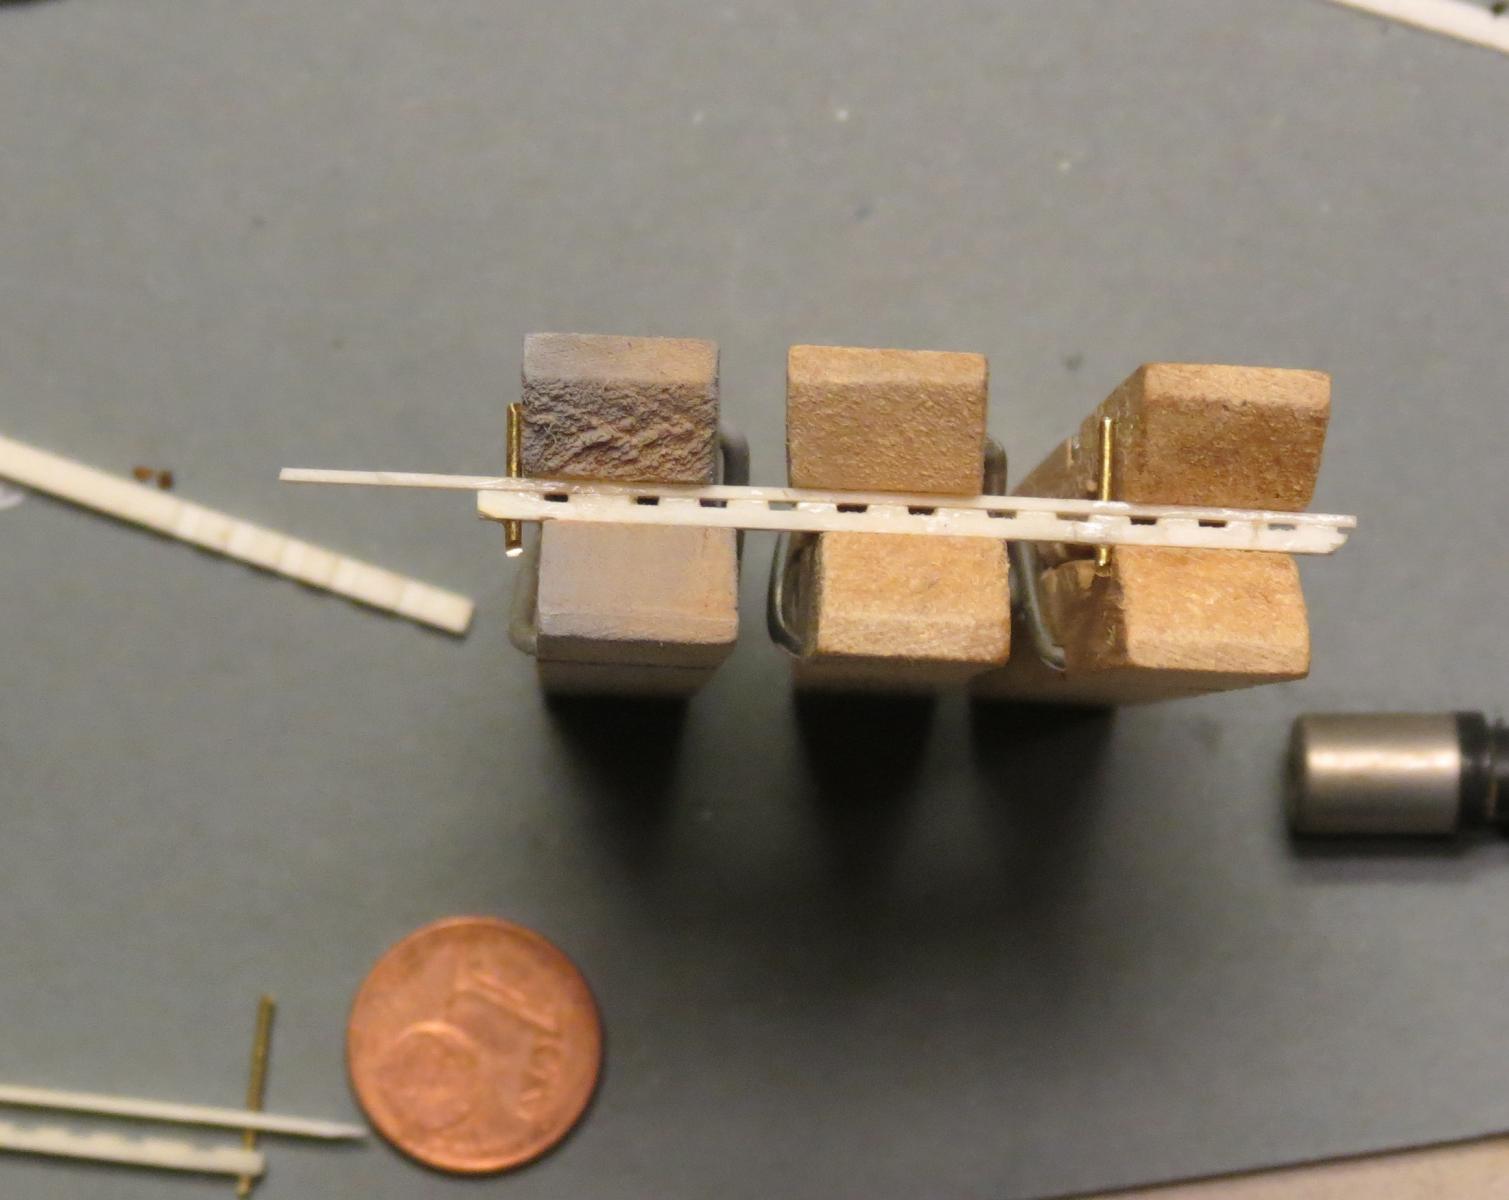
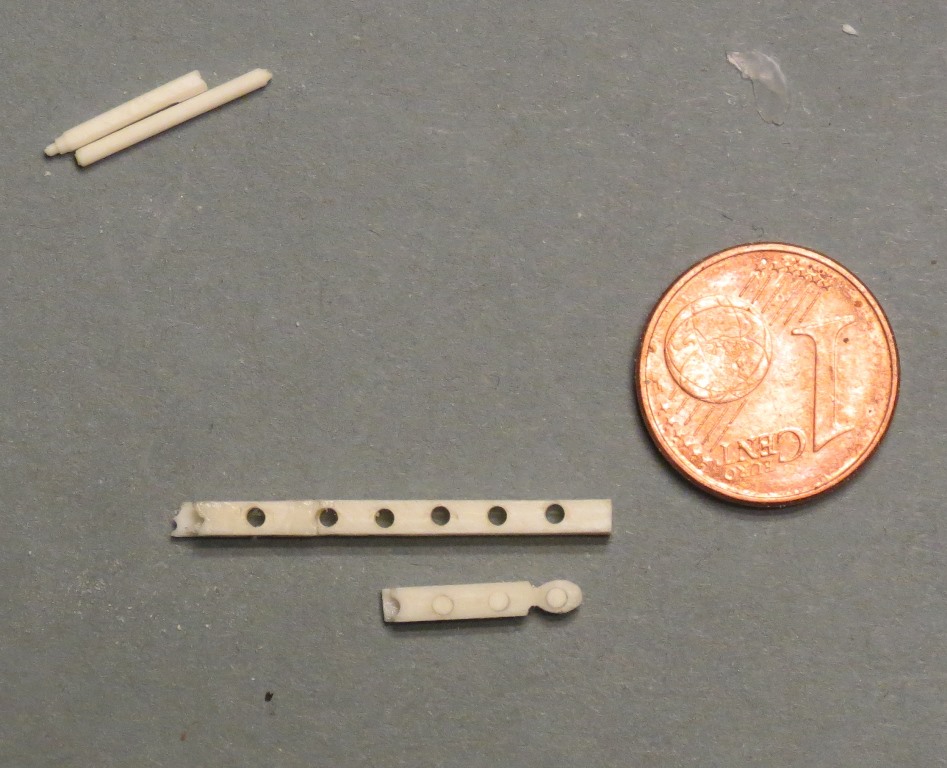
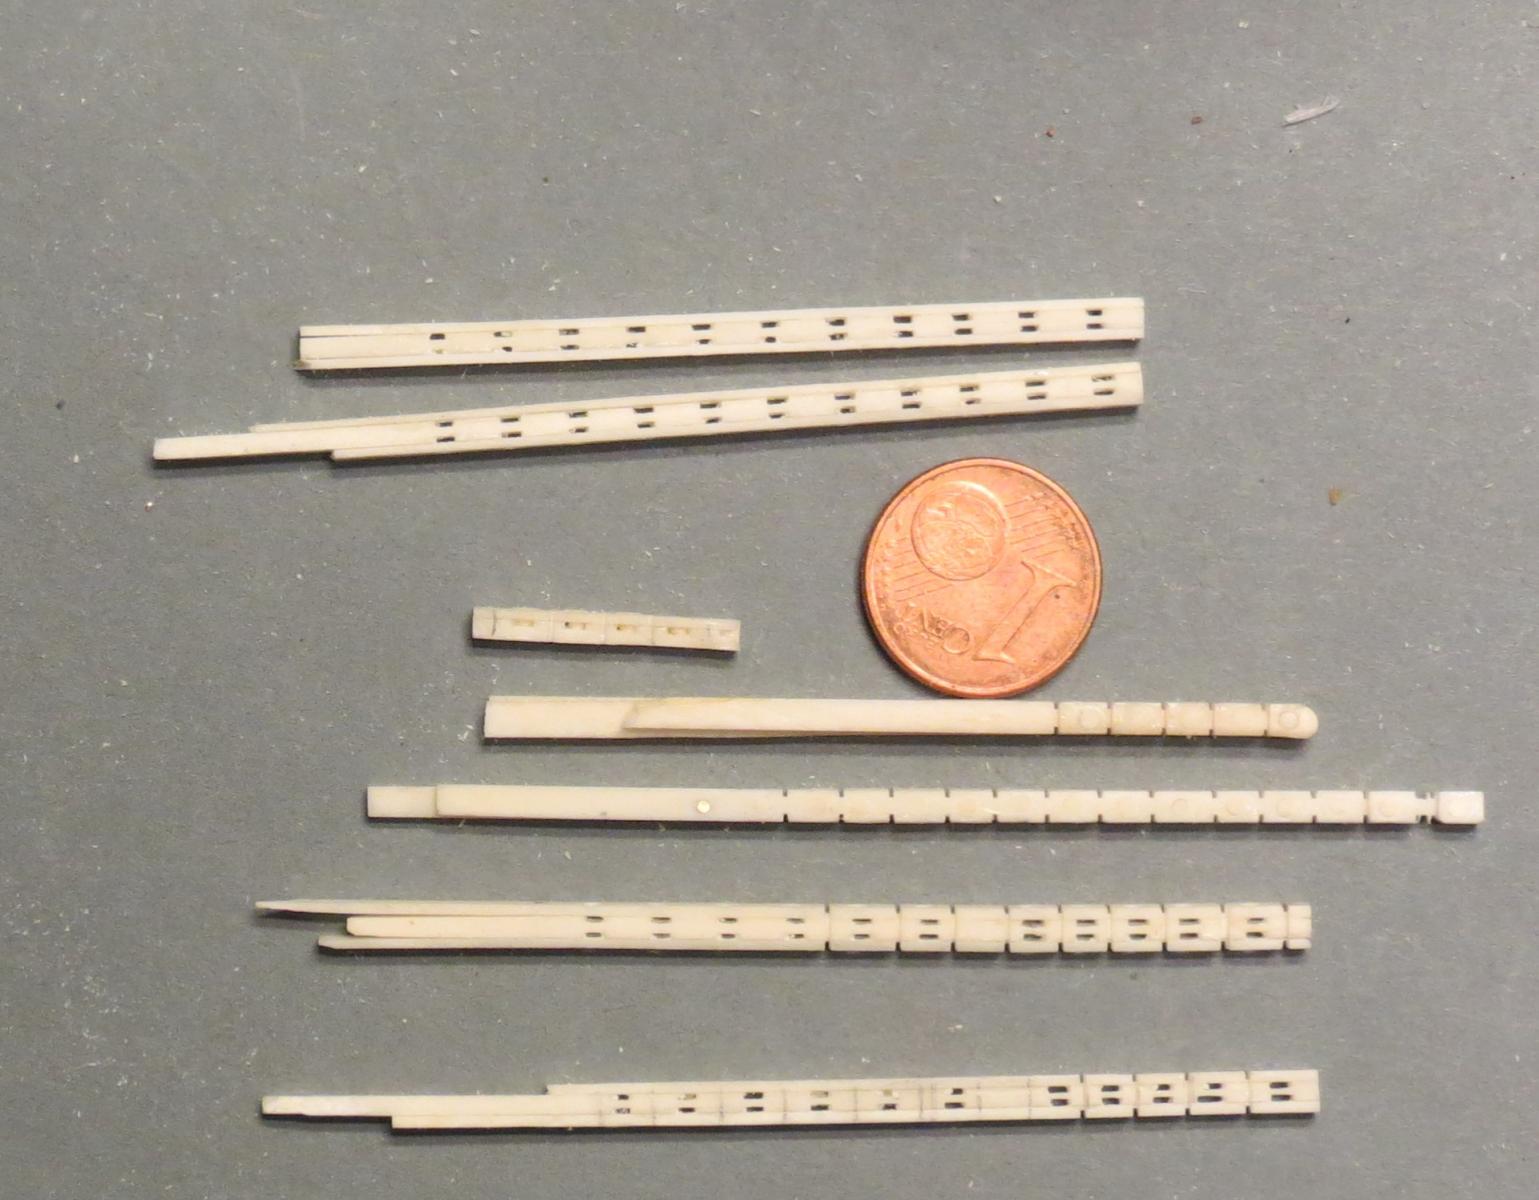
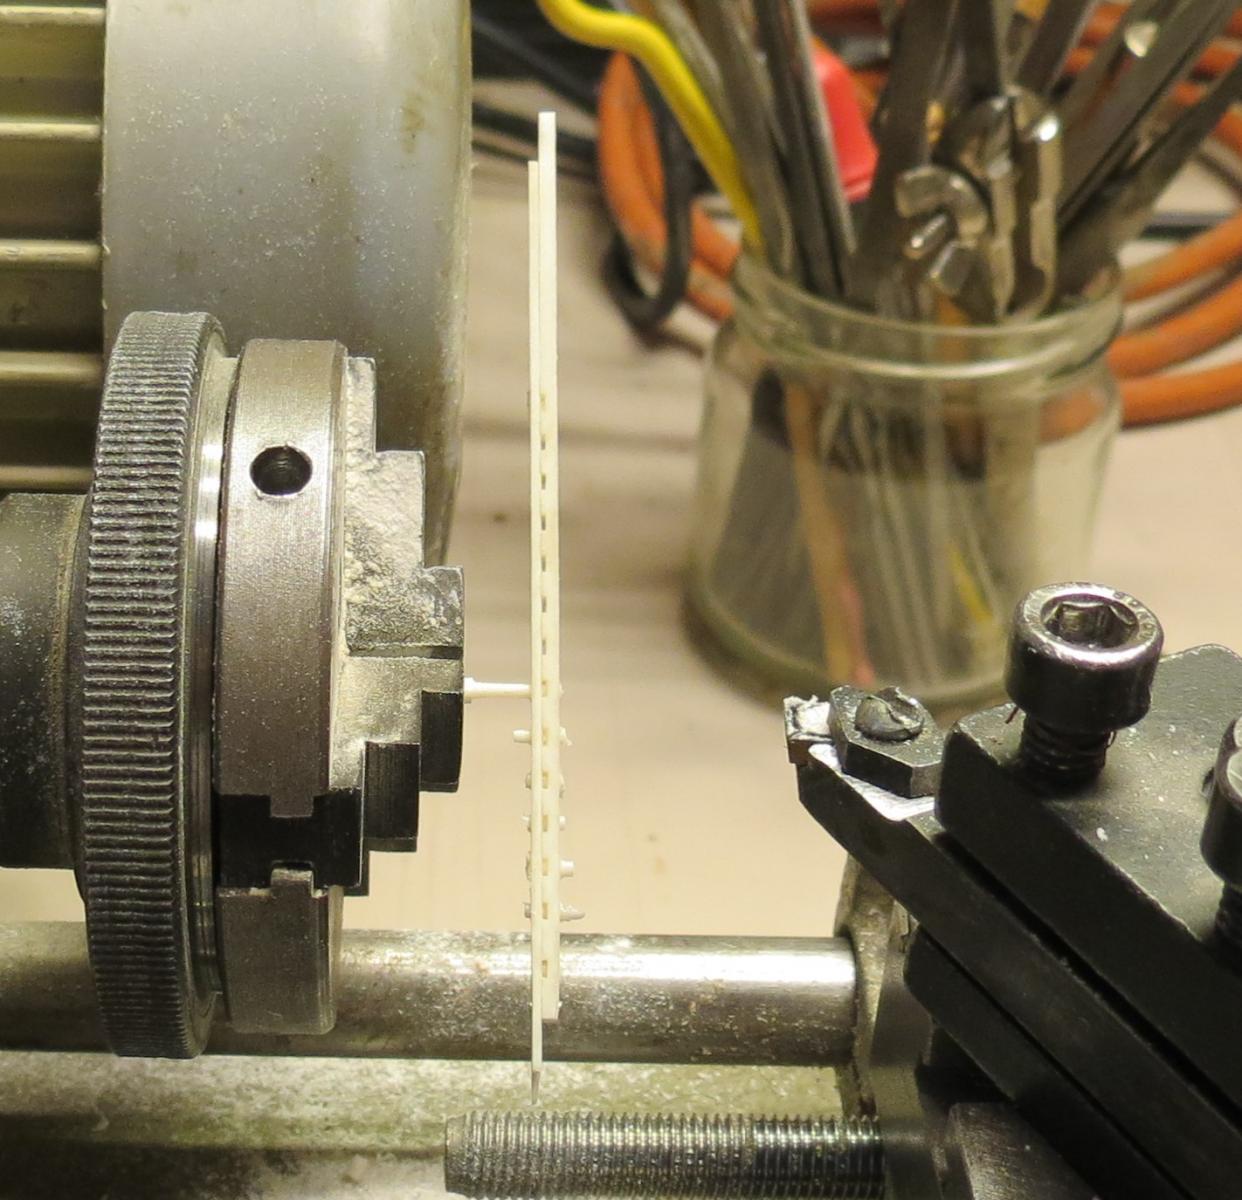
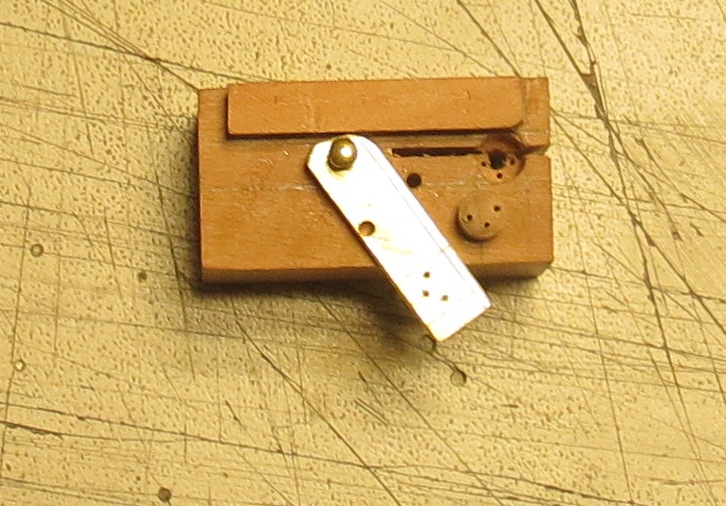
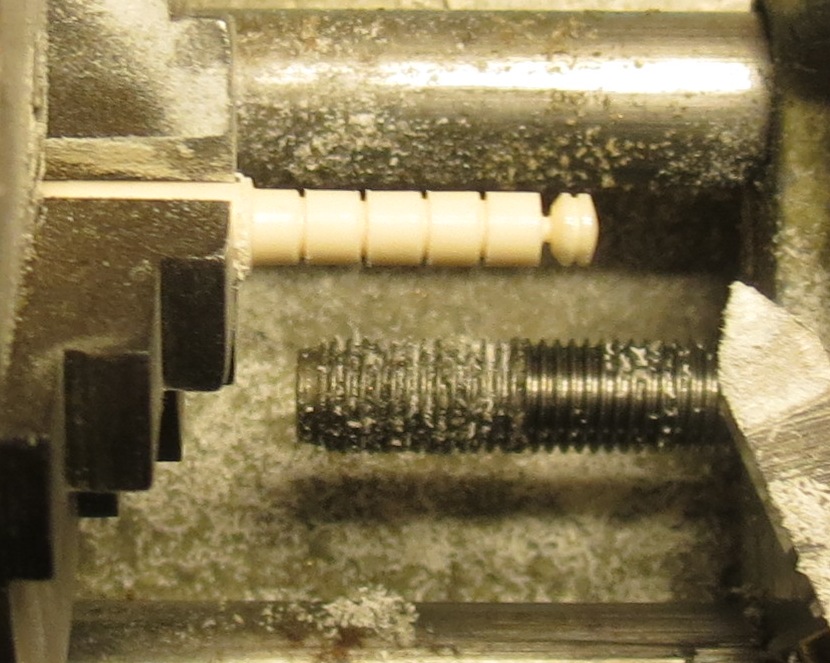
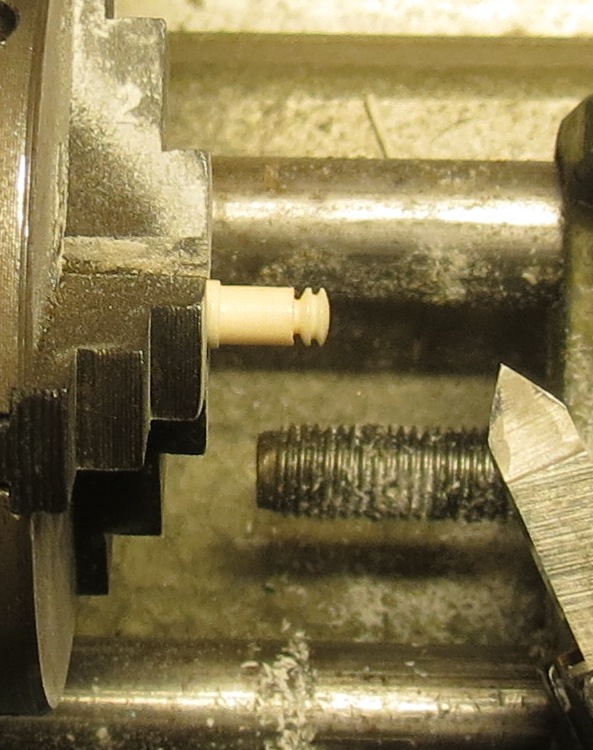
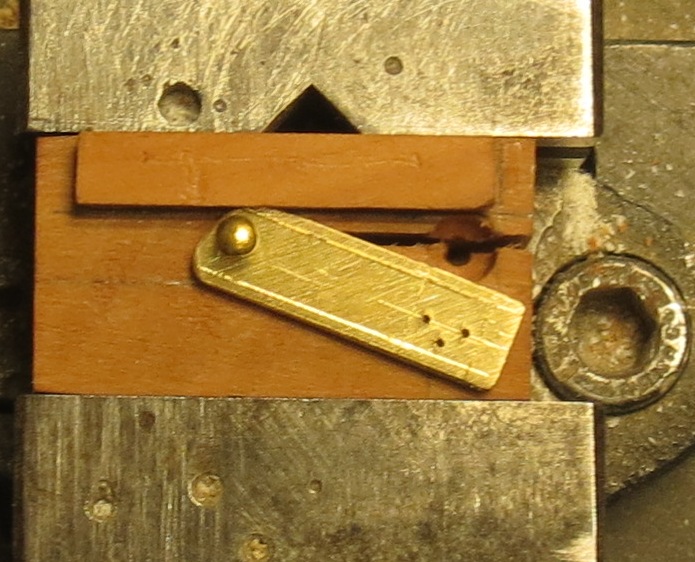
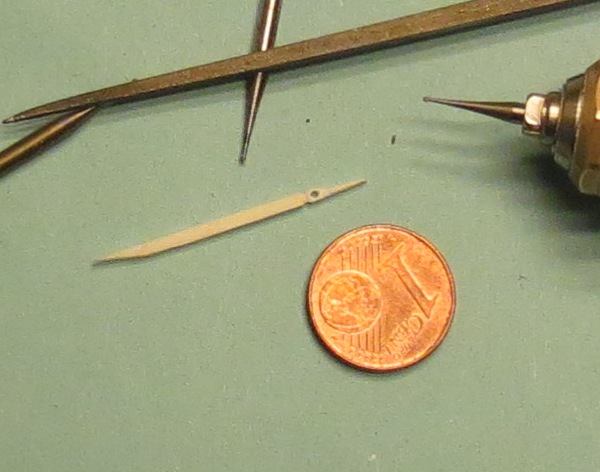
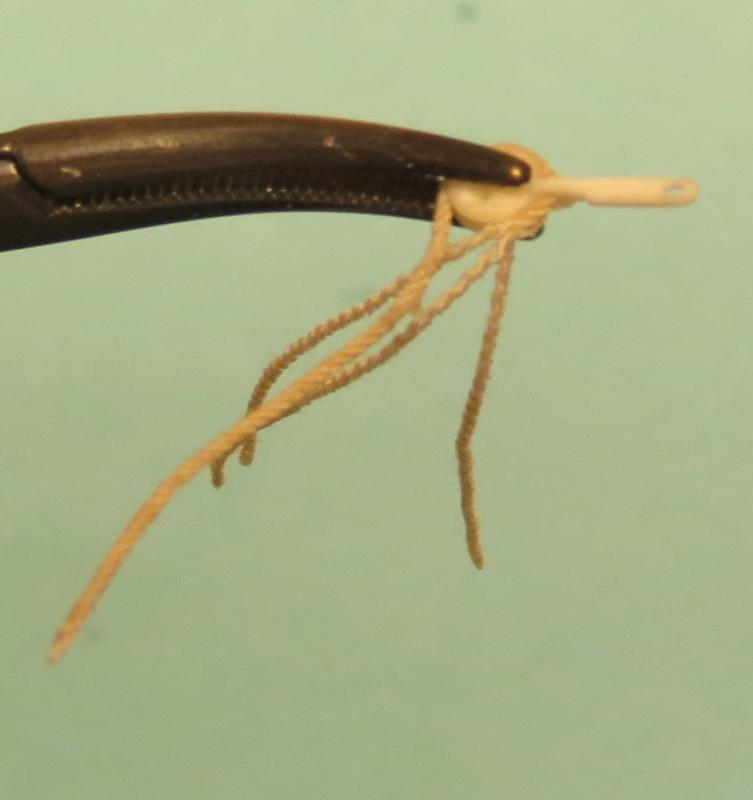
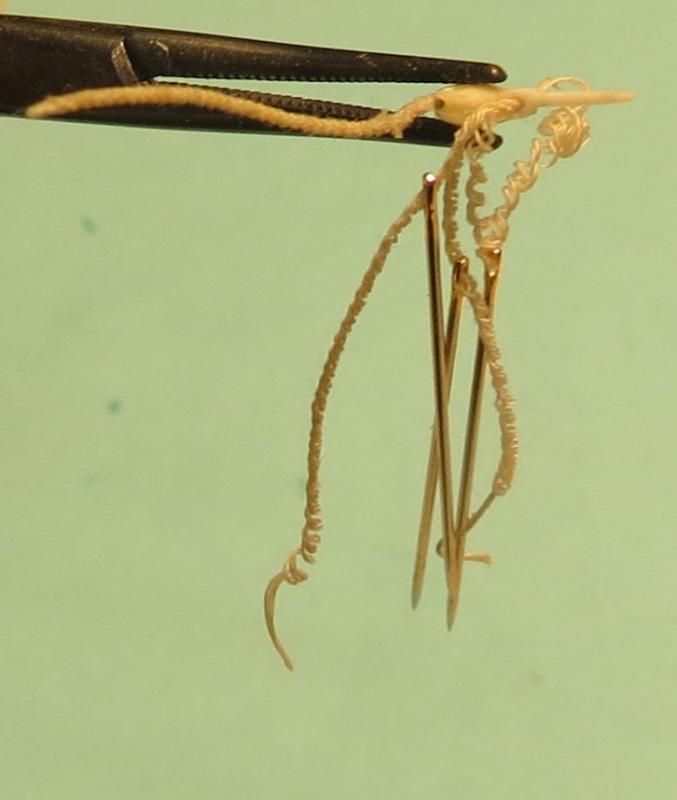
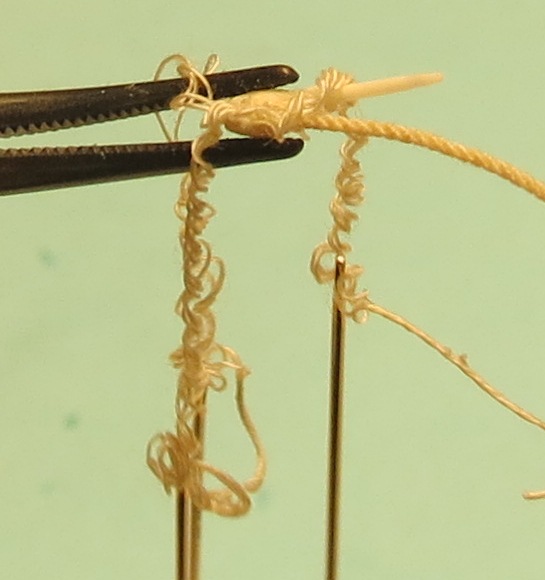
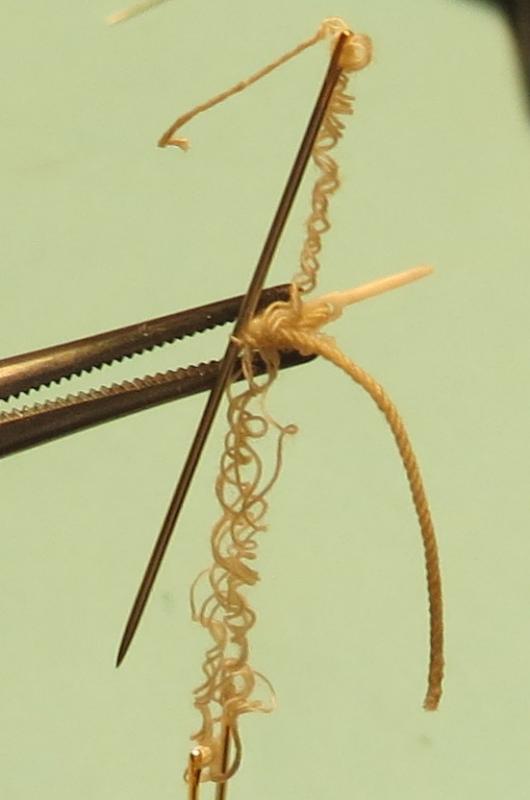
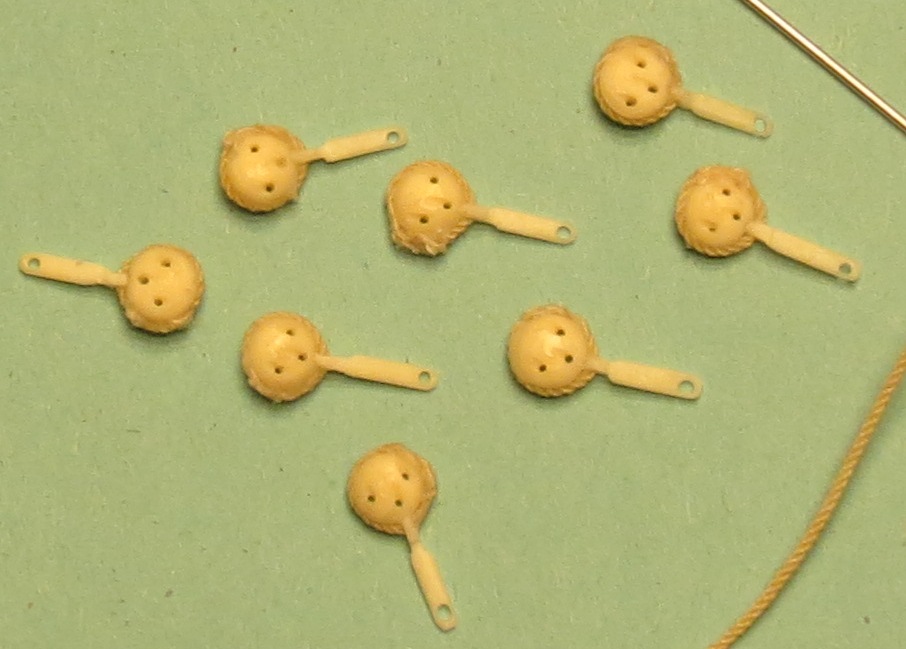
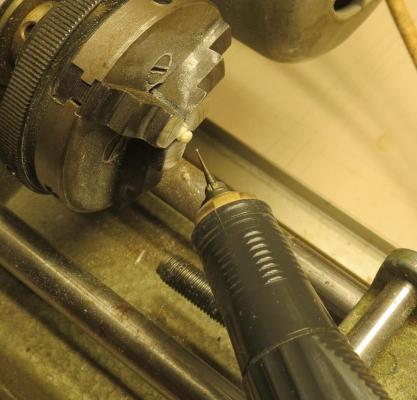
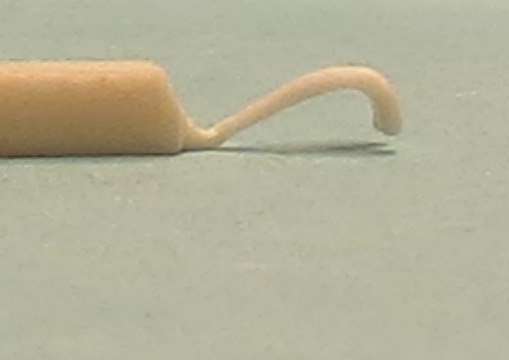
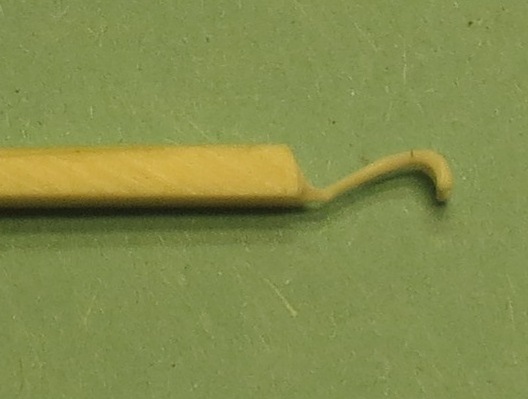
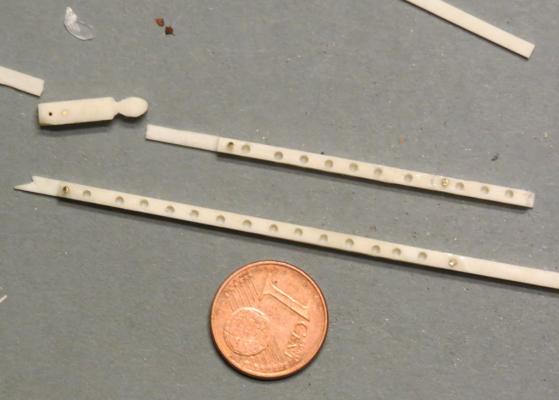
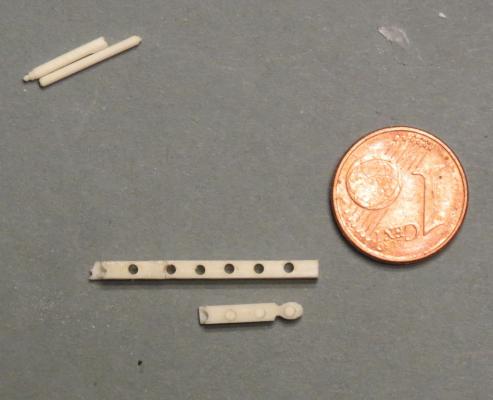
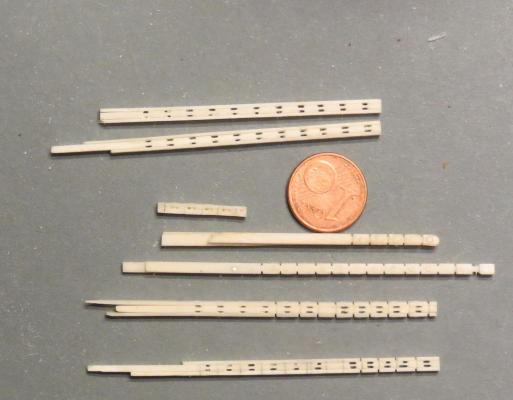
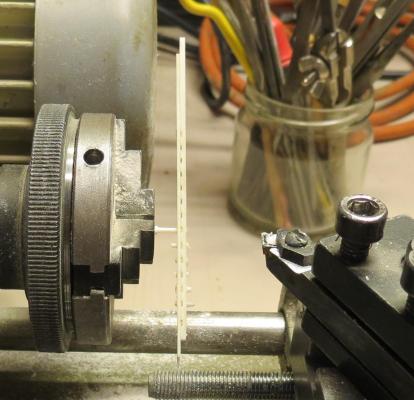
Much time has passed, but now i am back Next step was to build the deadeyes and chainplates for the main-platform. For the holes in the deadeyes I need a helpfull tool. The tool it´s made from wood and brass. The deadeyes are made on the lathe After drilling the deadeyes the edges are chamfered upward Now it´s time to made the chainplates. The plates have the dimensions of 1 mm x 0,5 mm x 12mm; above an eye and down a long hole 0.5 mm x 1 mm The plates in position The plates are fixed with glue on the deadeyes ready for stropping The stropp for deadeyes is made with a real splice The rope, made from three strands, will opend and for each strand i use a needle to made the splice. All deadeyes are finish spliced on plates Have fun


- 241 replies
-
- 23
-
-
- royal caroline
- yacht
- (and 1 more)
-
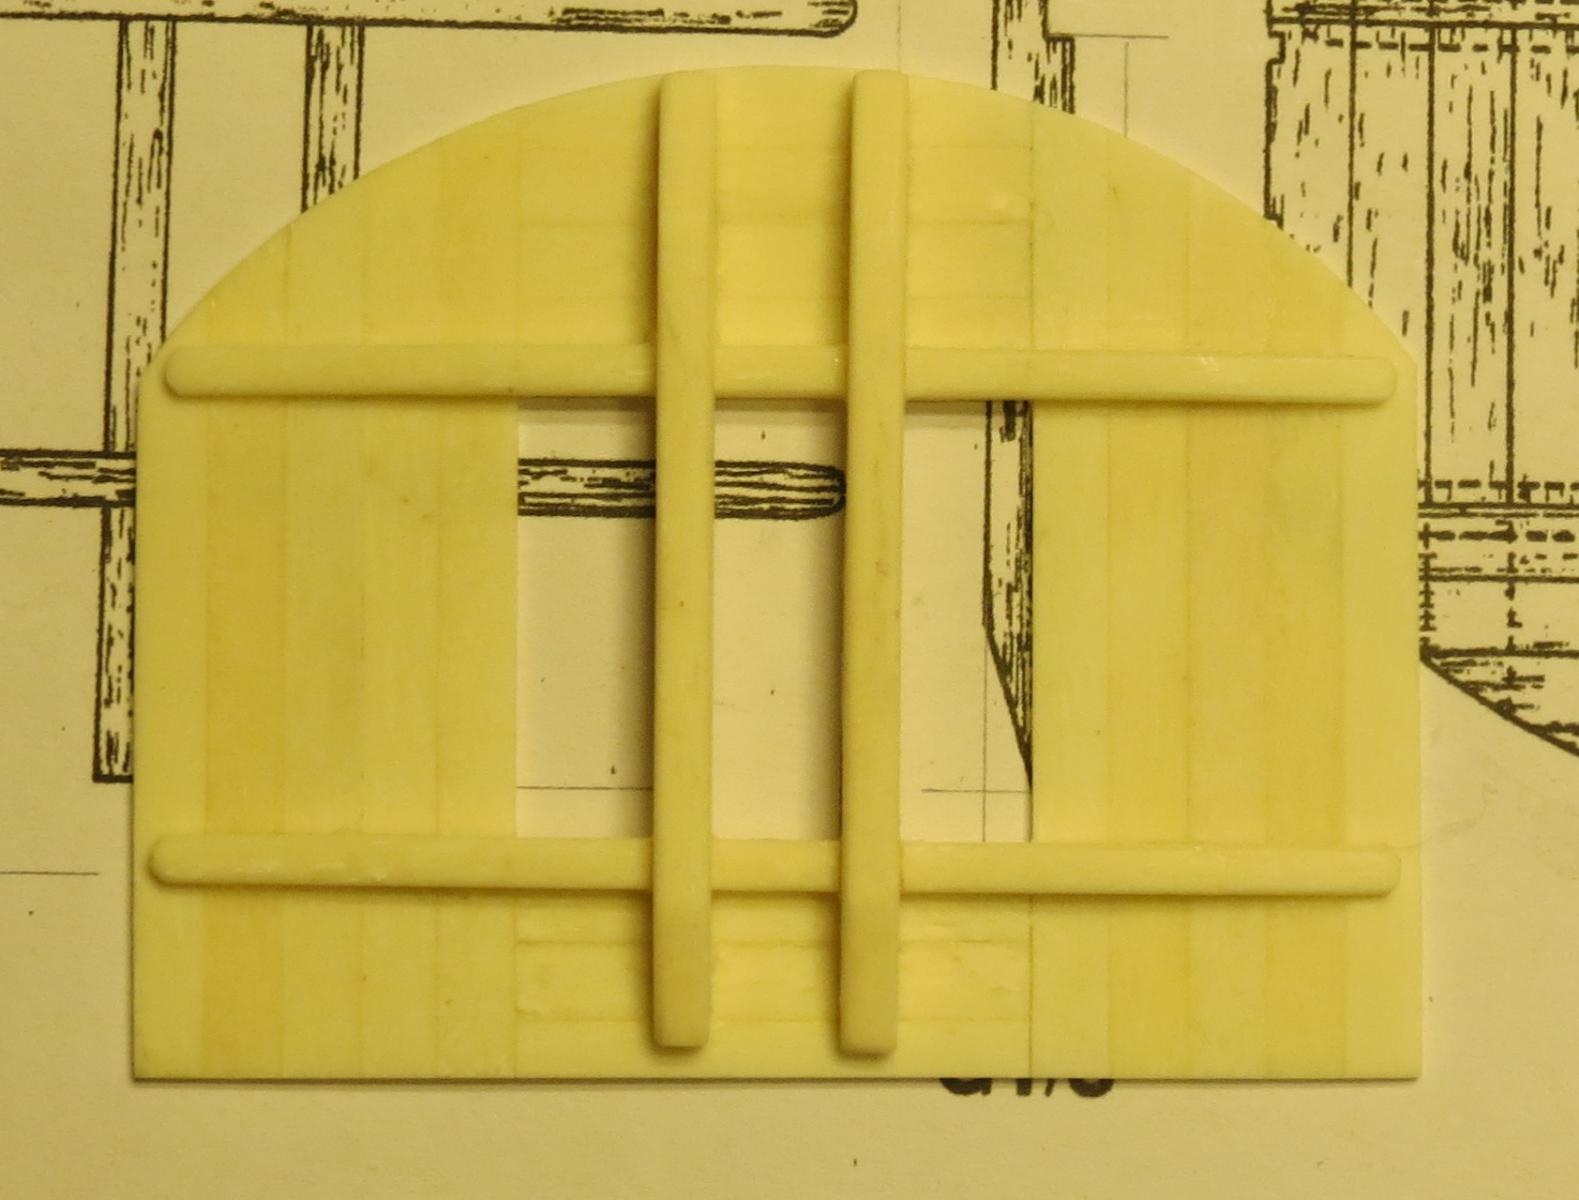
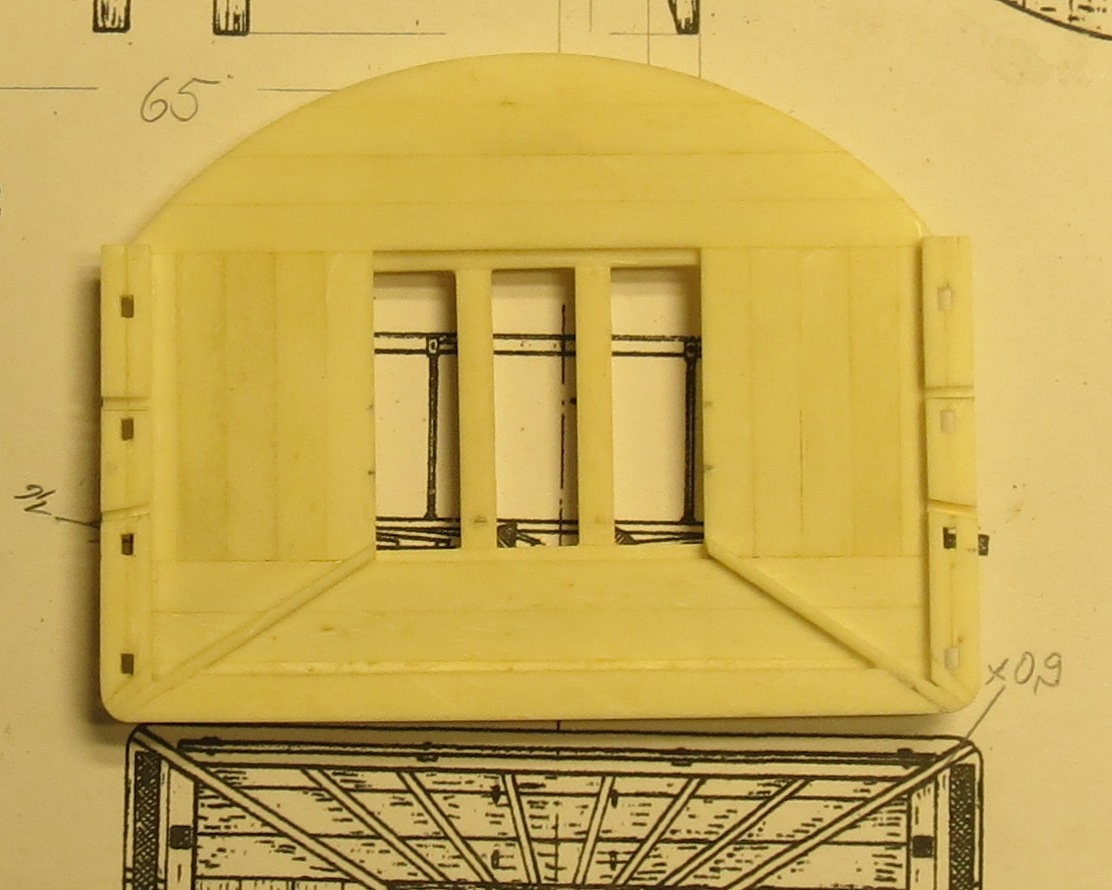
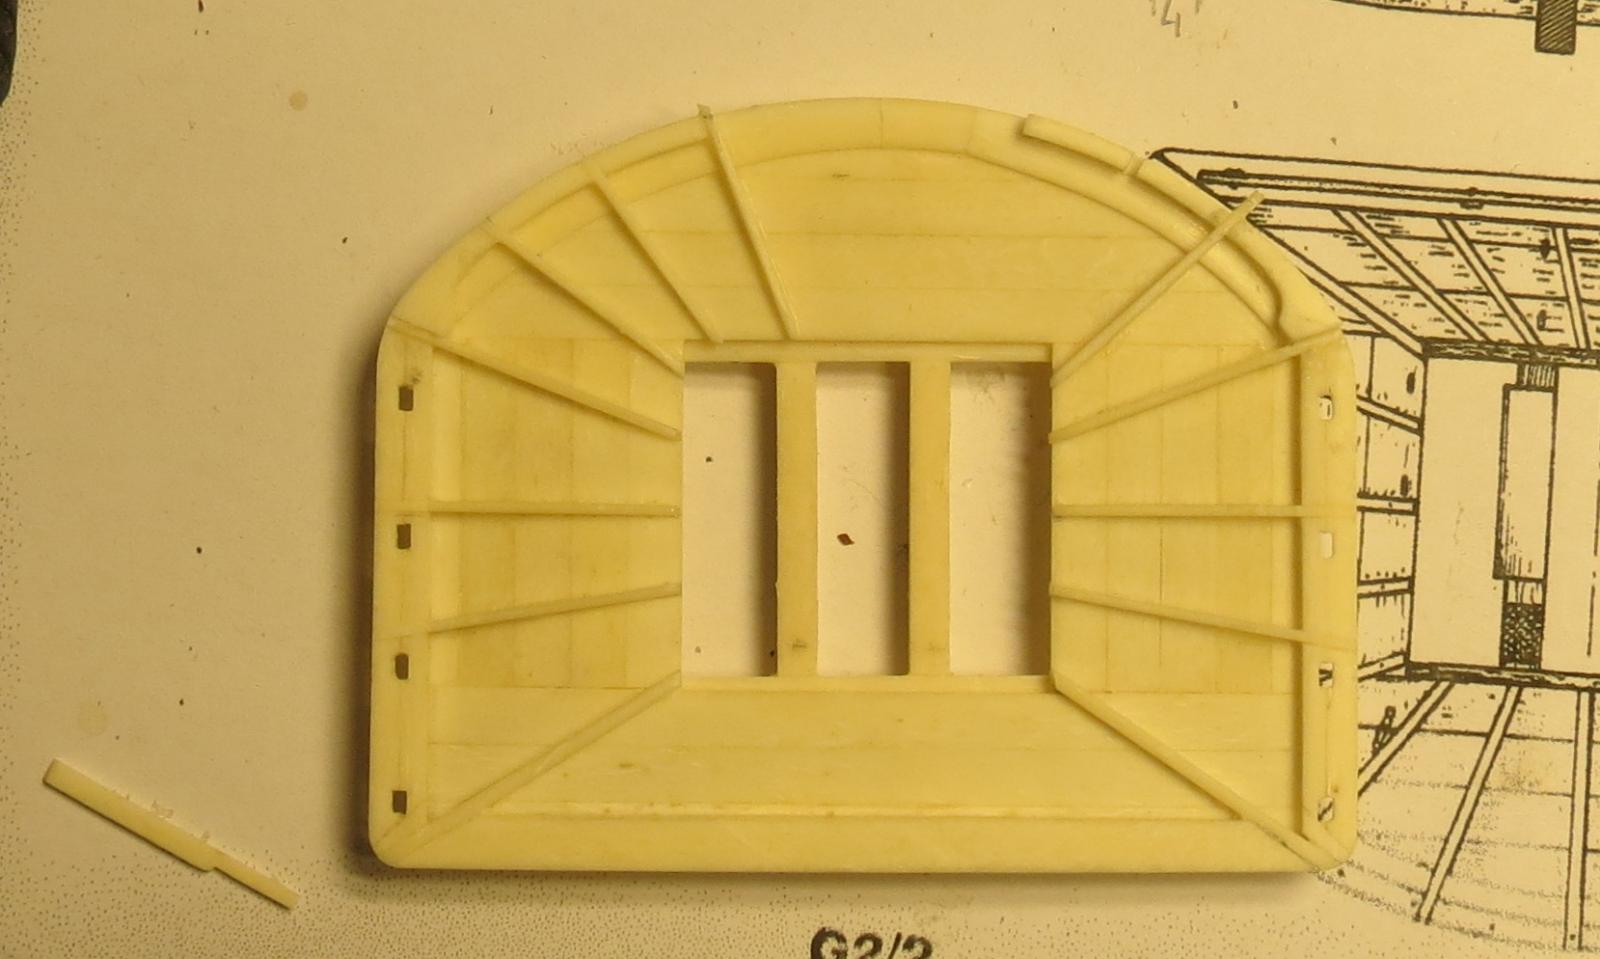
....neither do I. But they are shown on the plan ...... Swivels can be seen on the side walls.
- 241 replies
-
- 2
-
-
- royal caroline
- yacht
- (and 1 more)
-
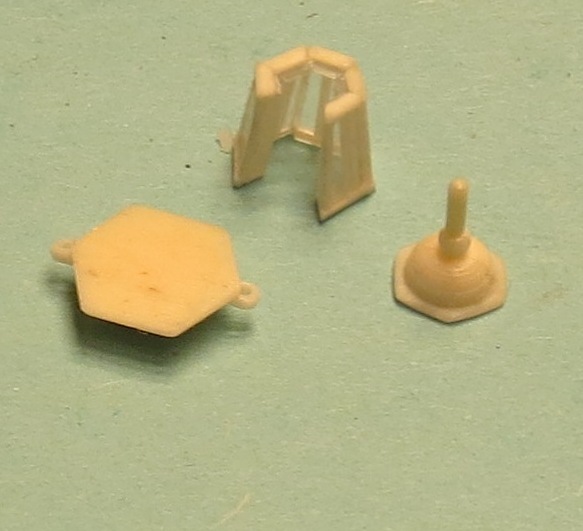
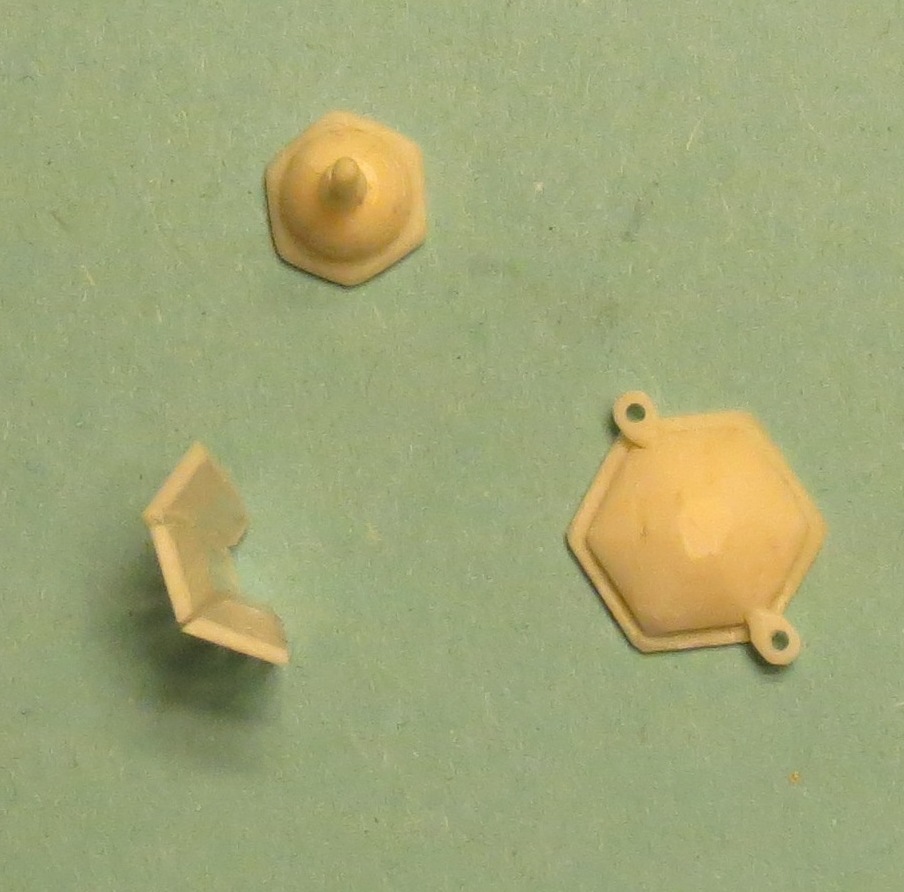
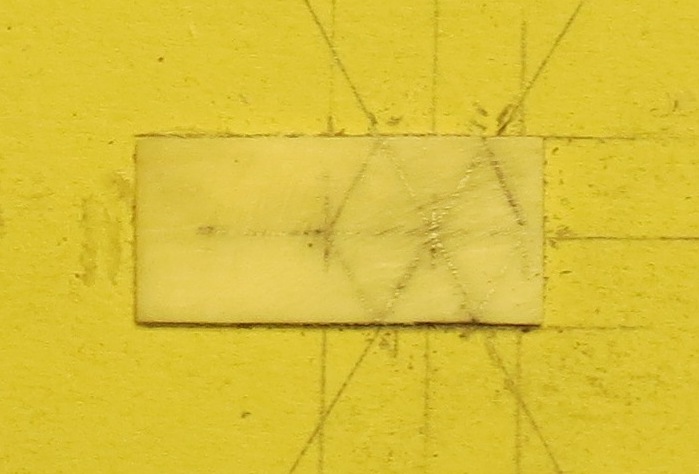
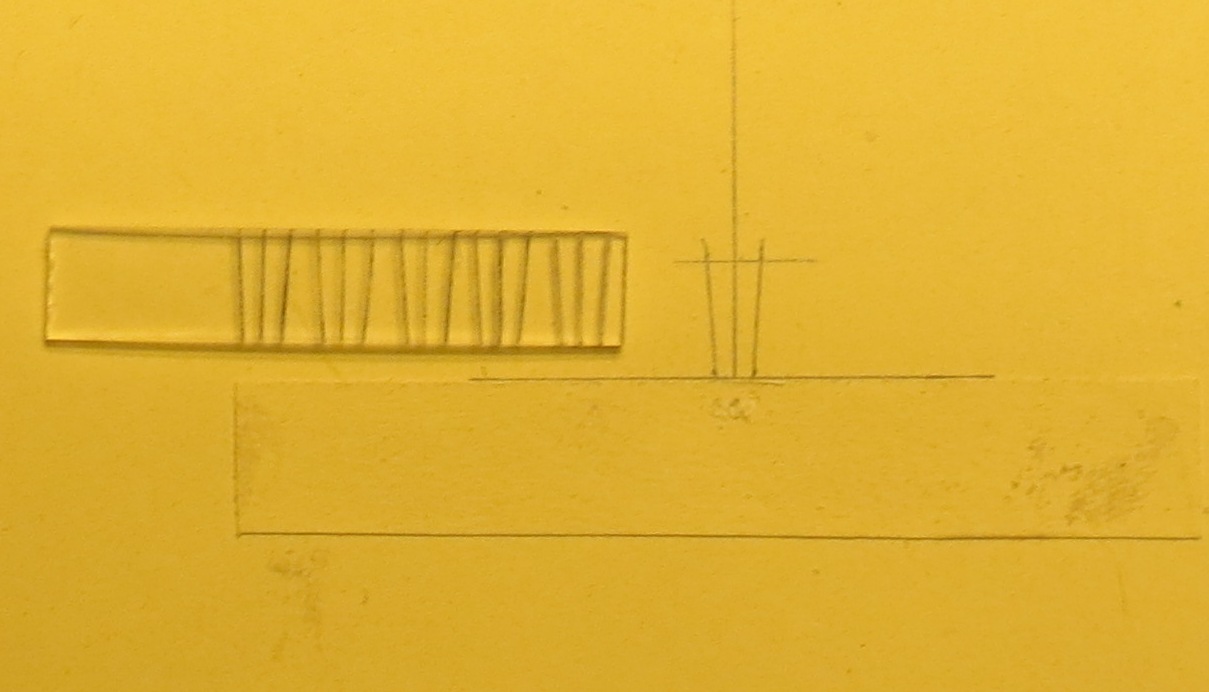
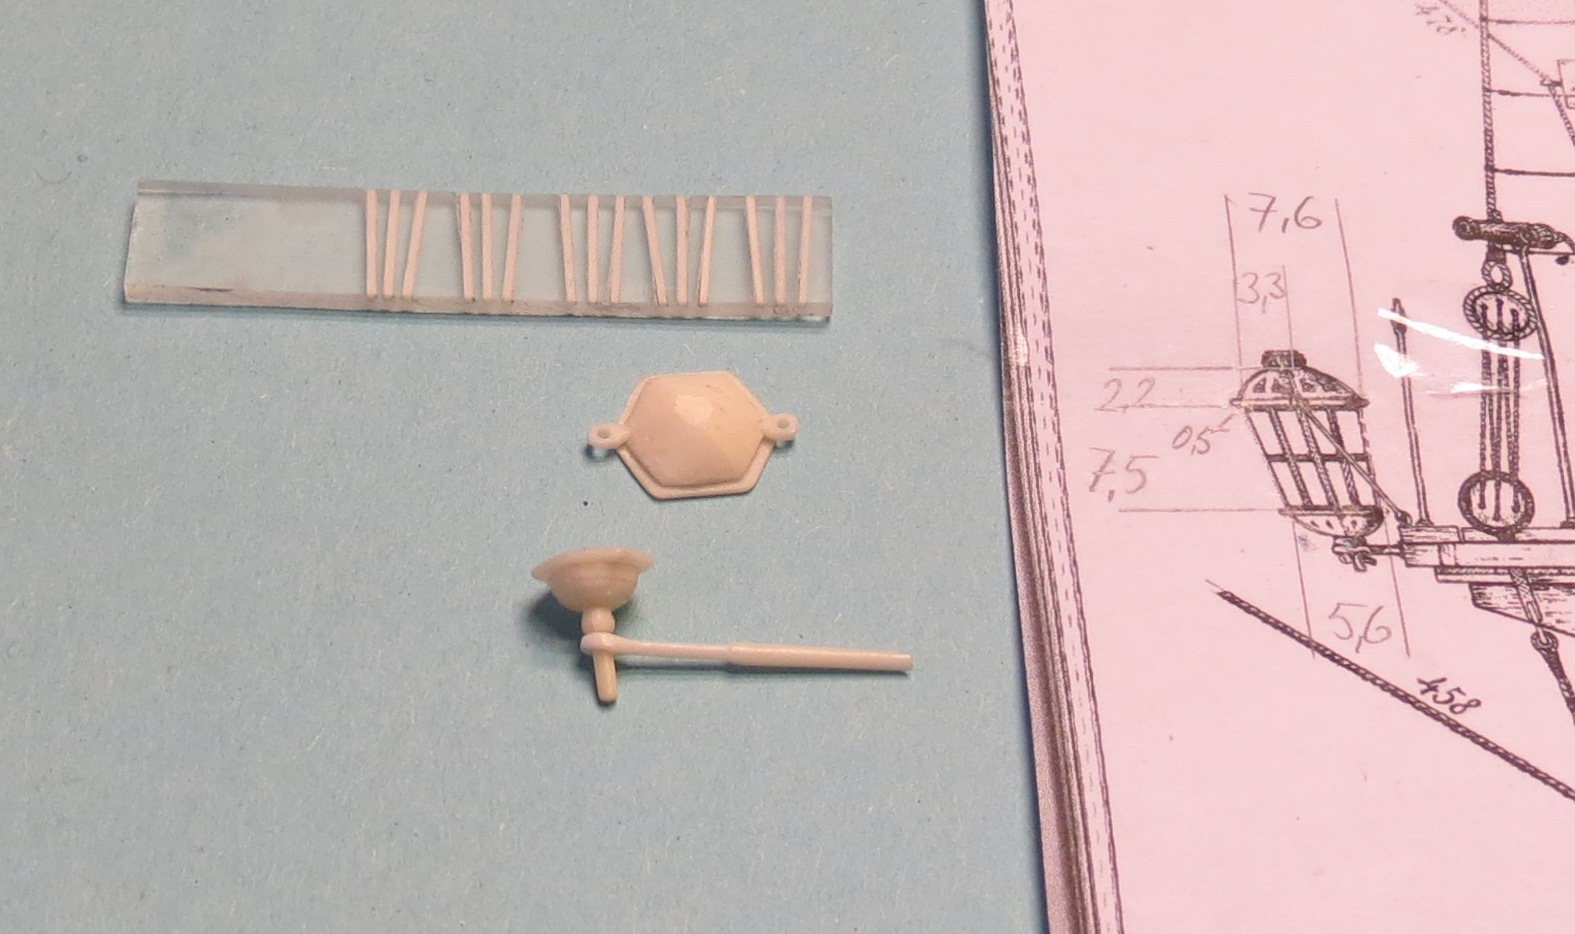
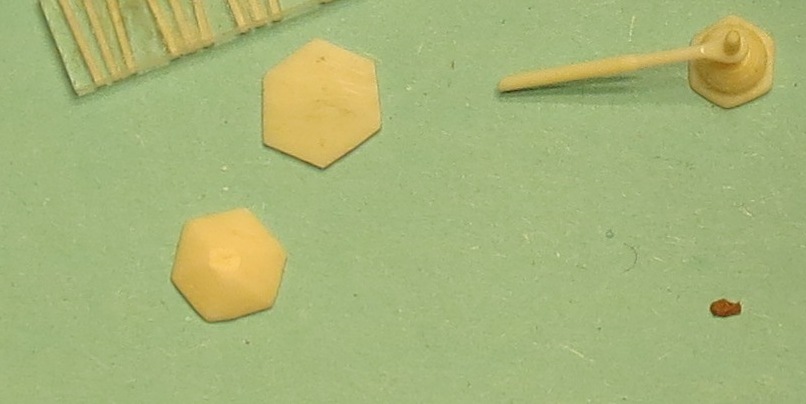
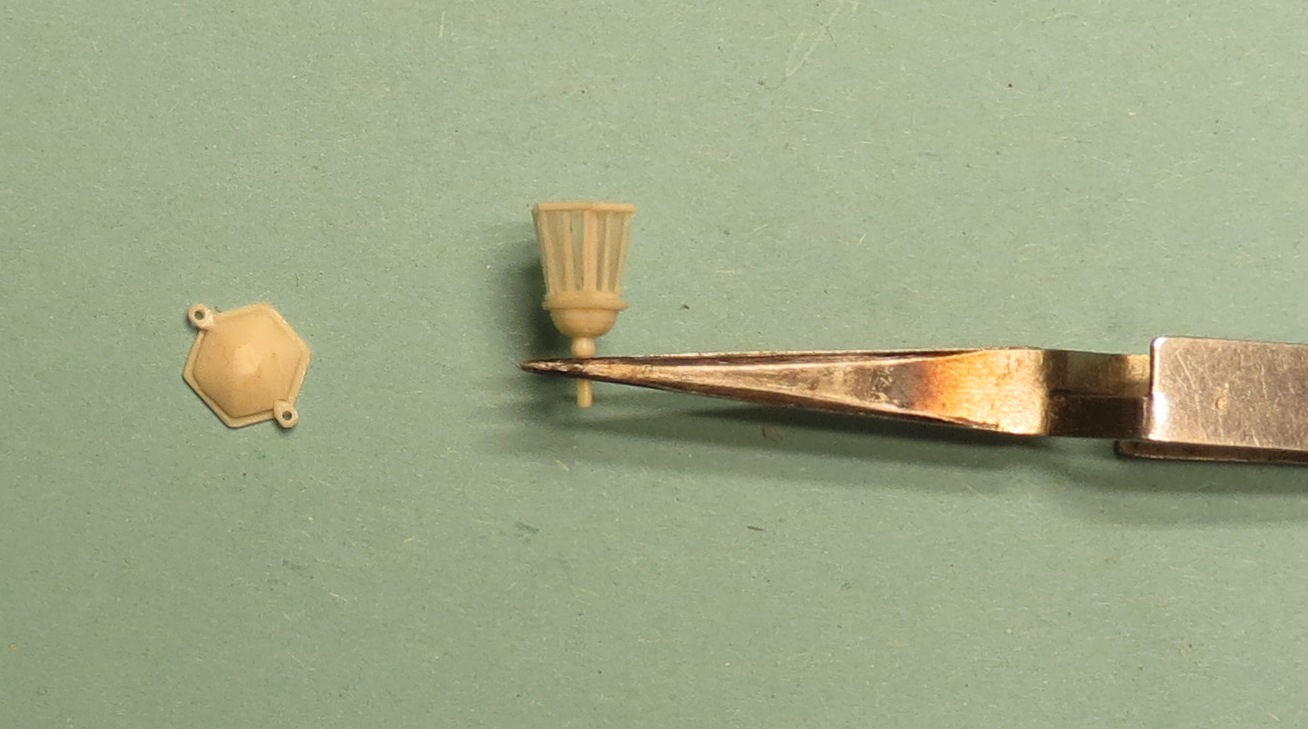
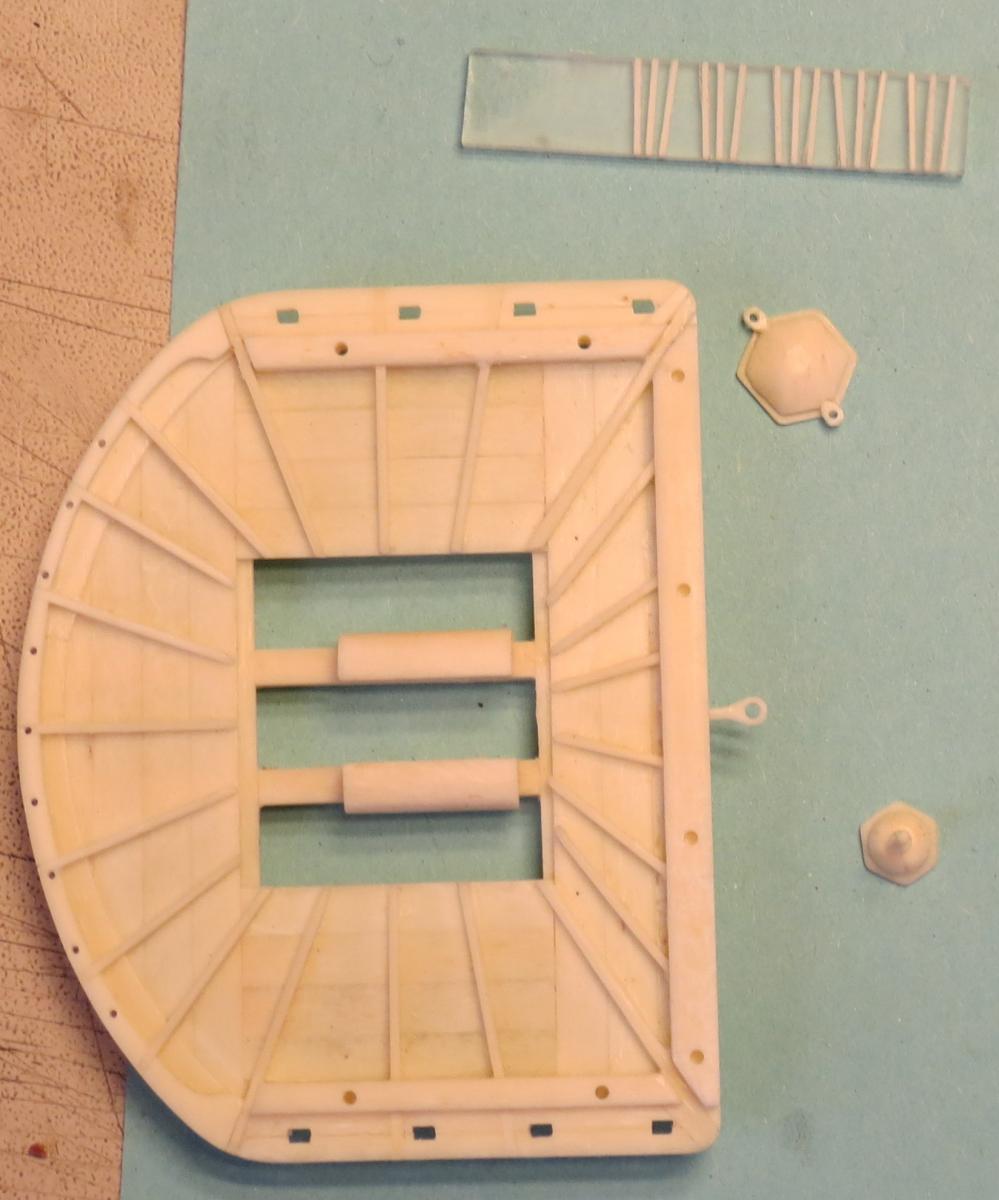
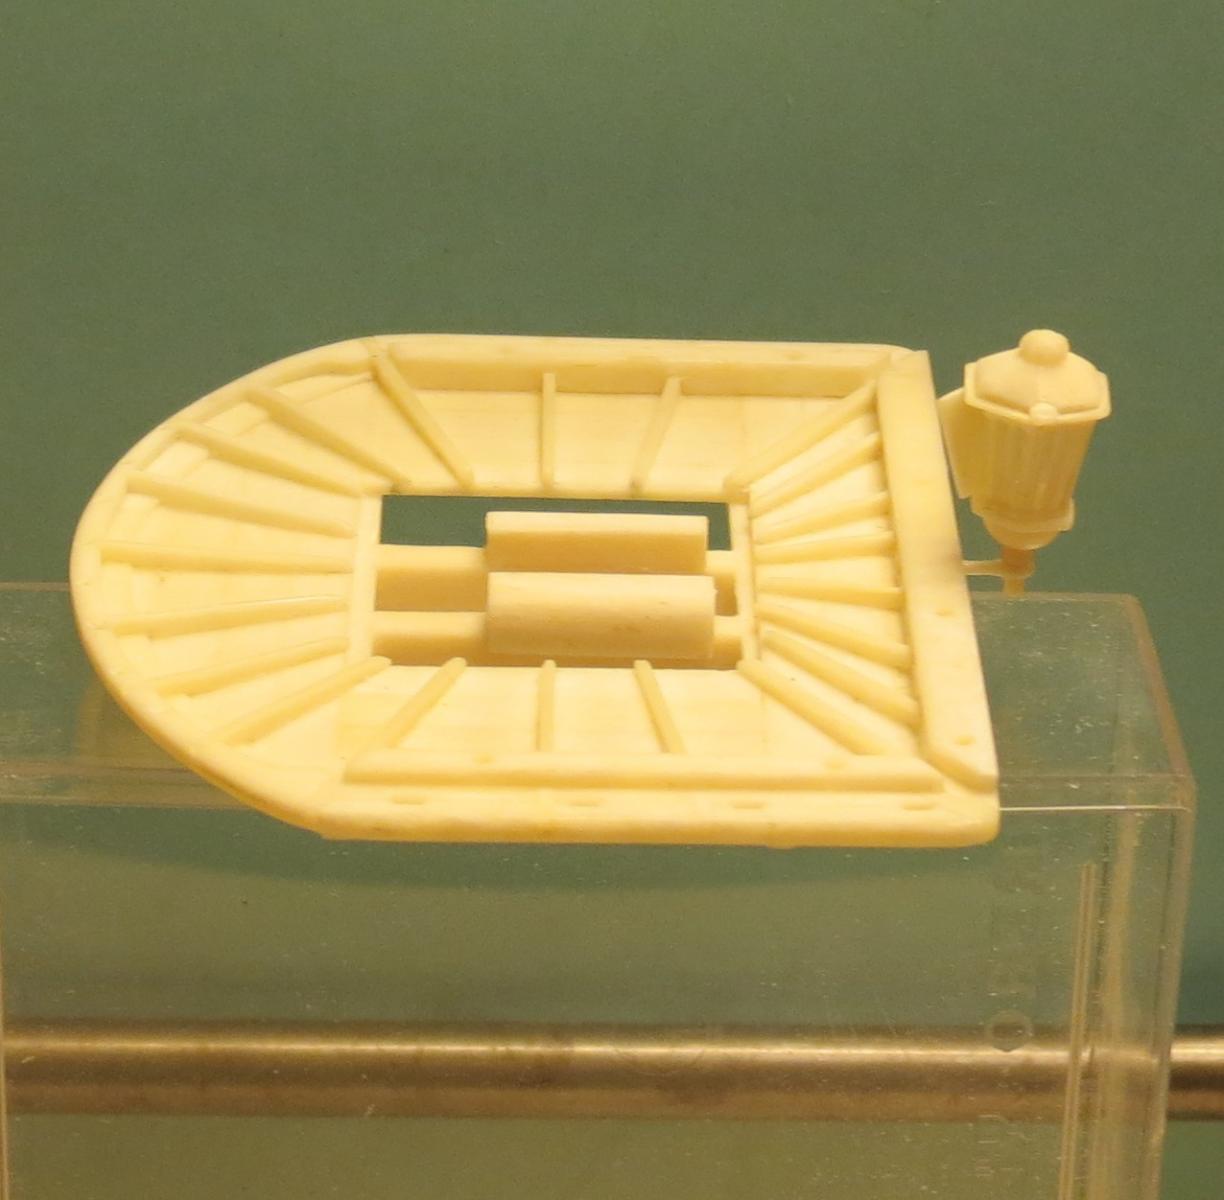
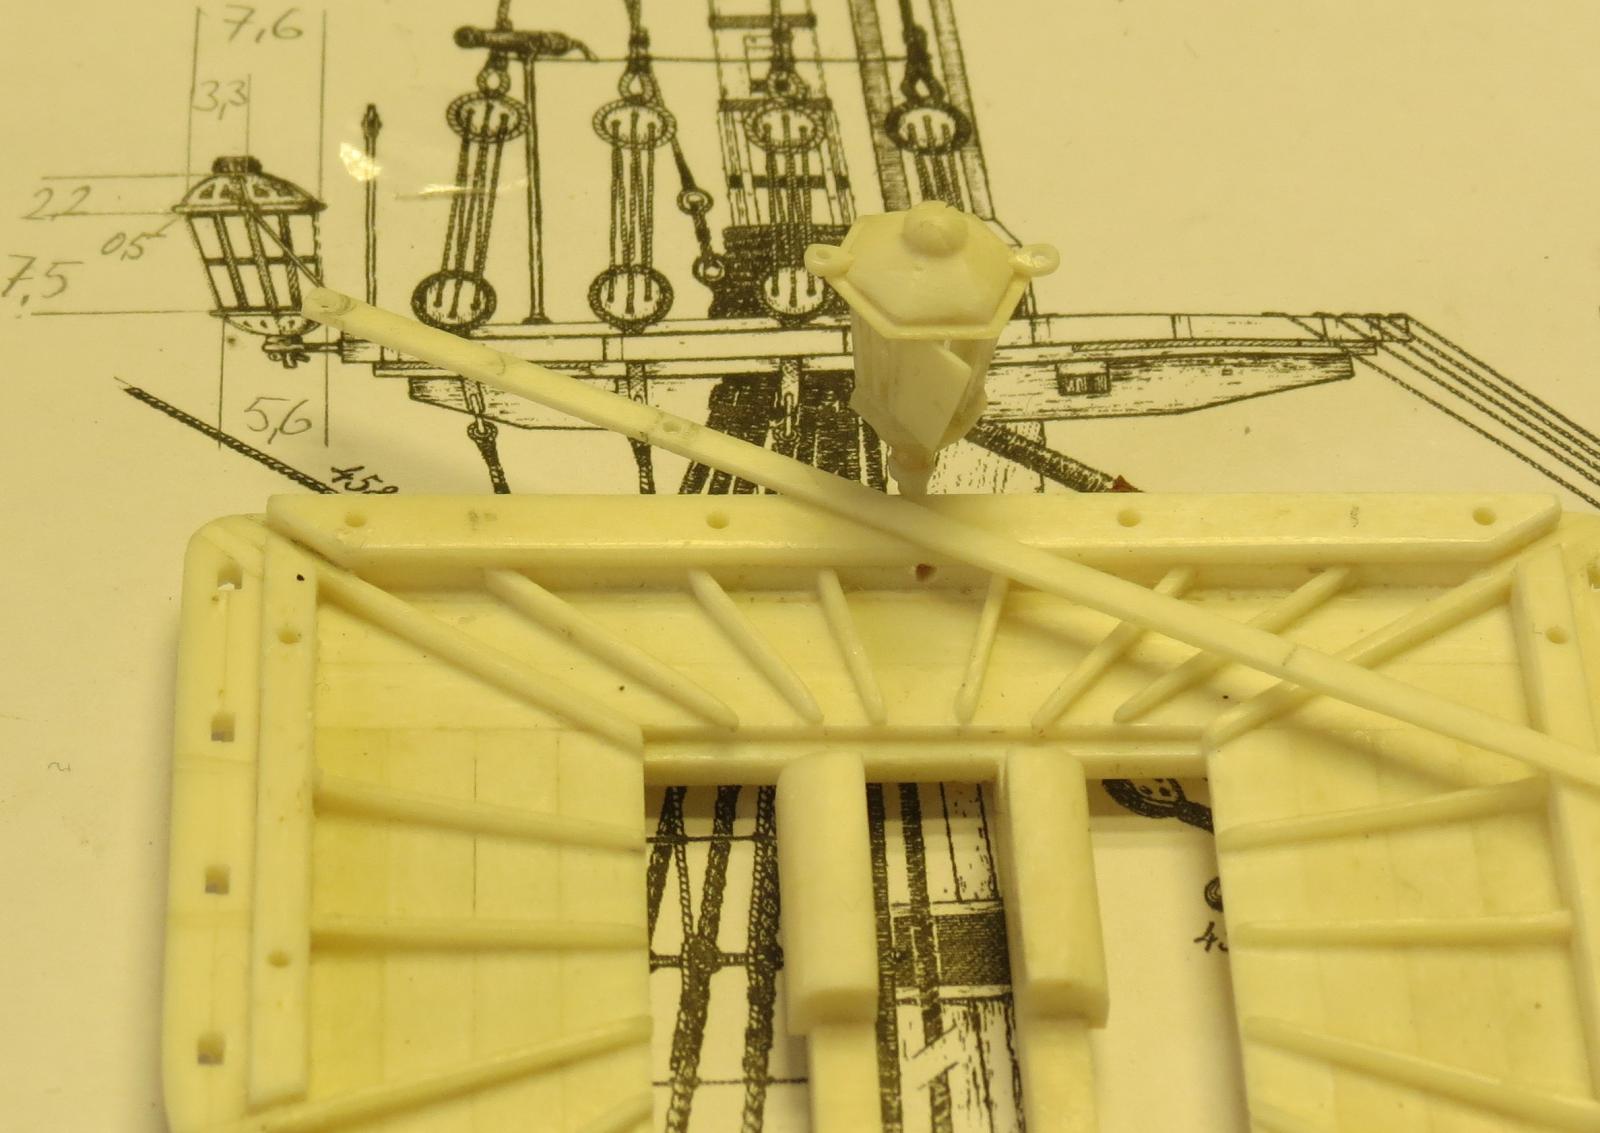
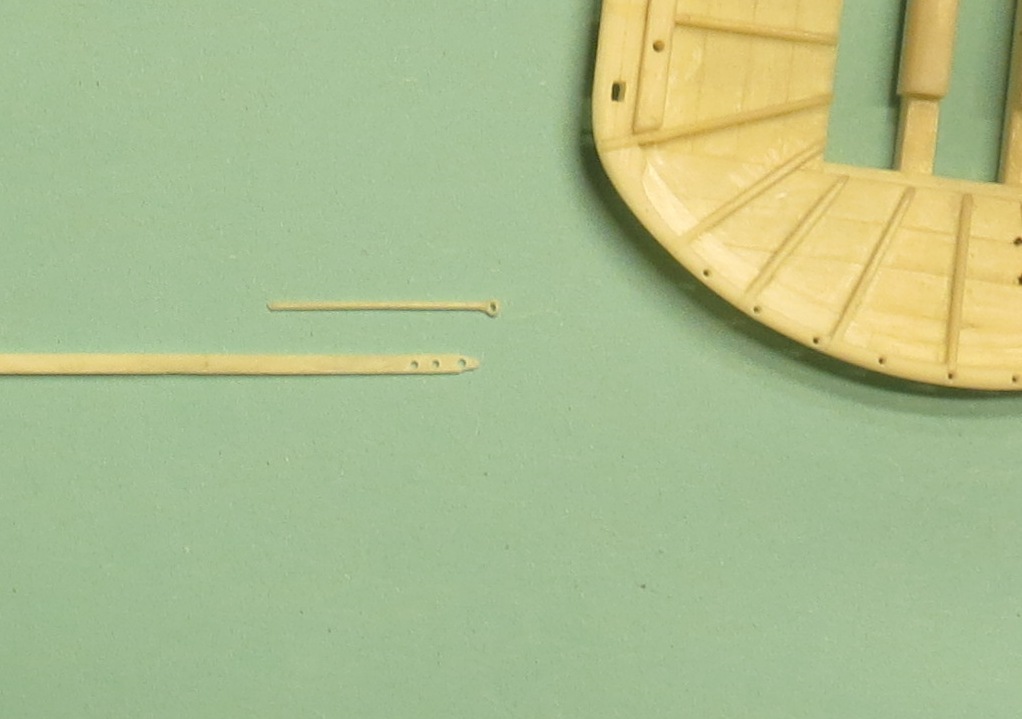
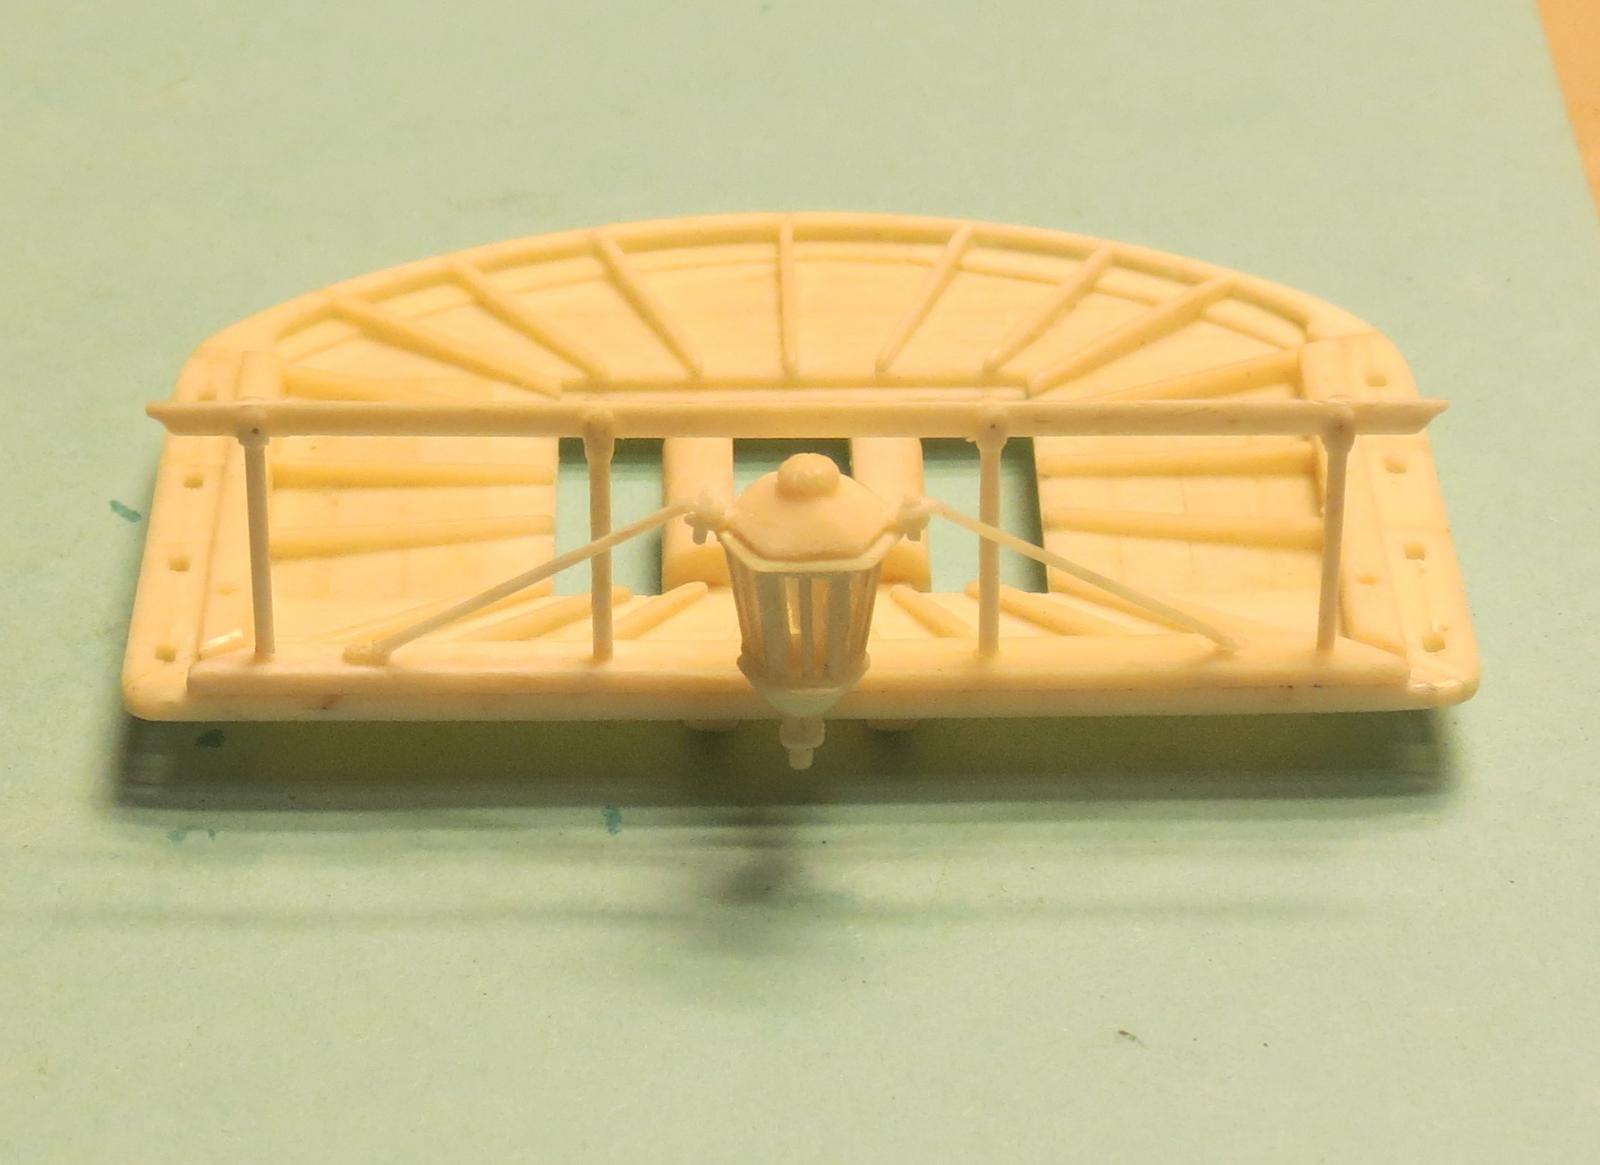
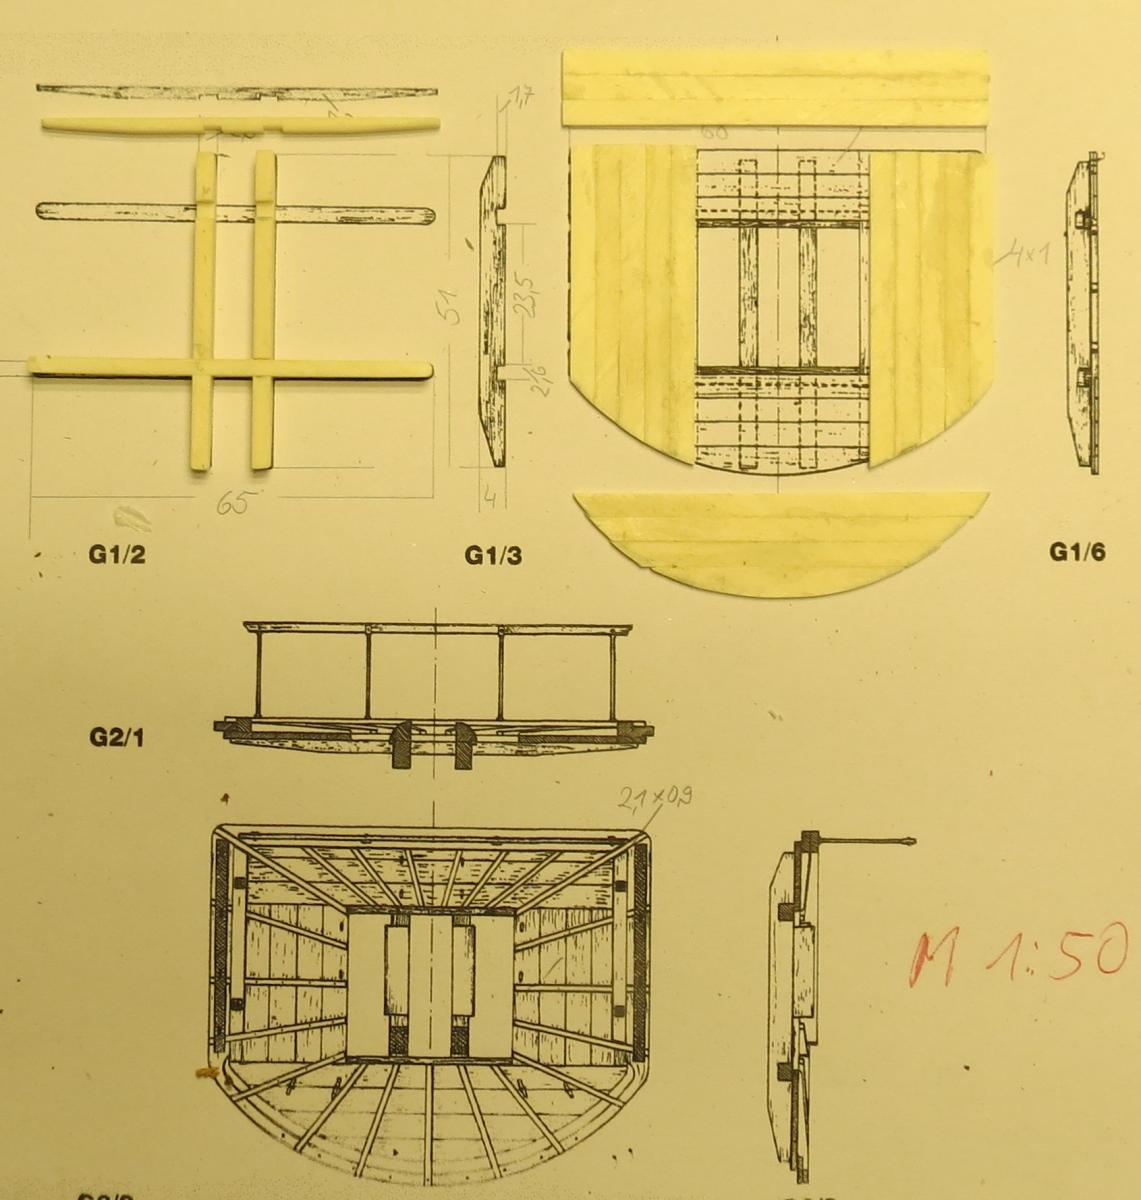
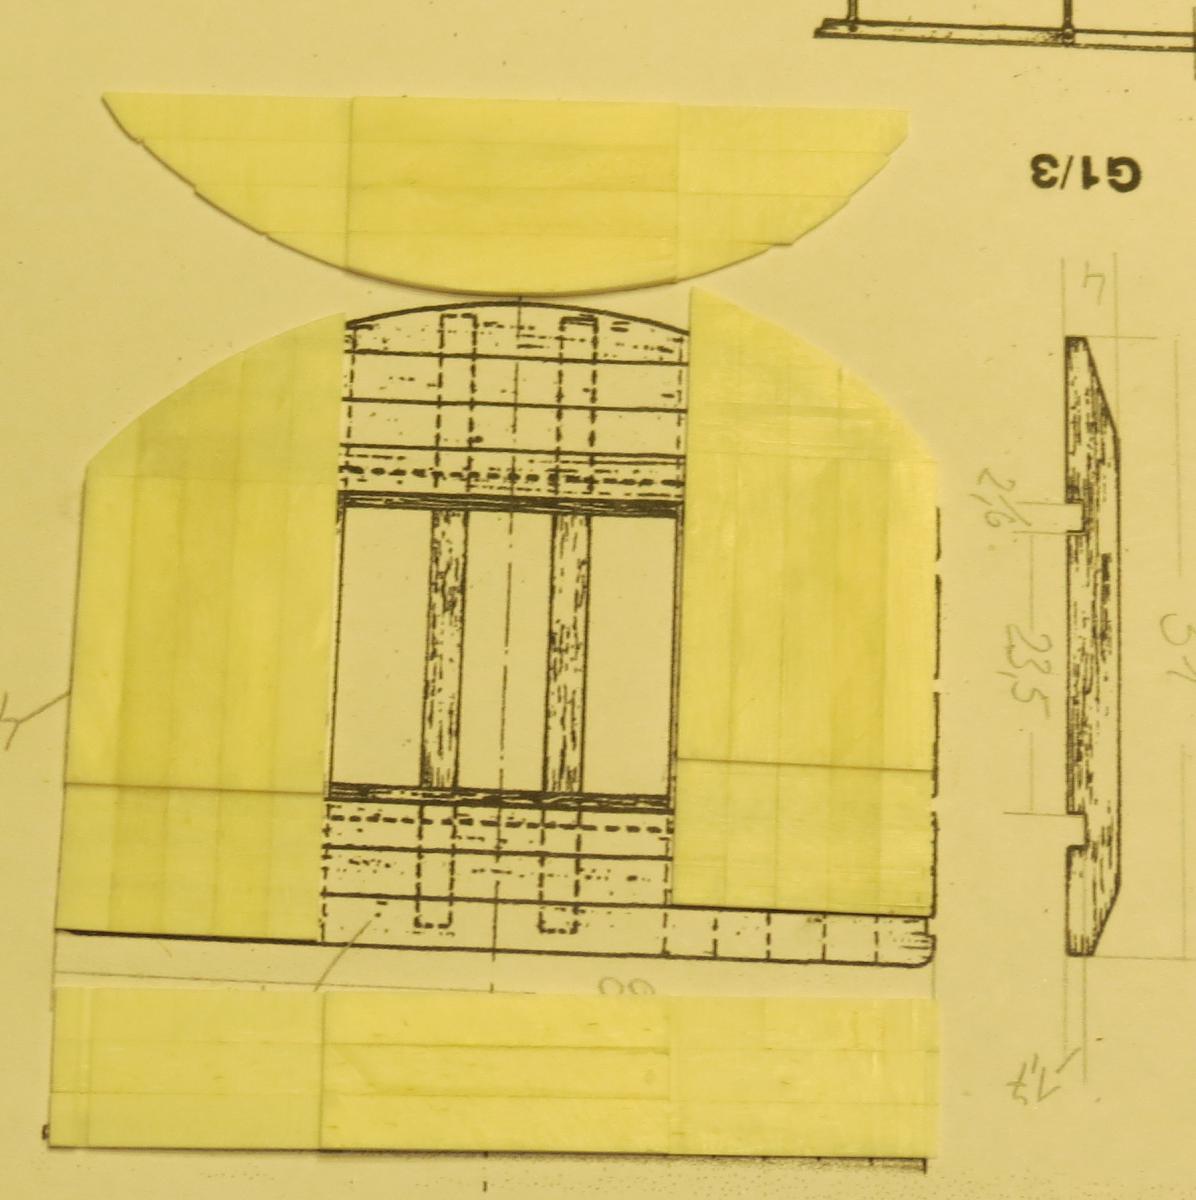
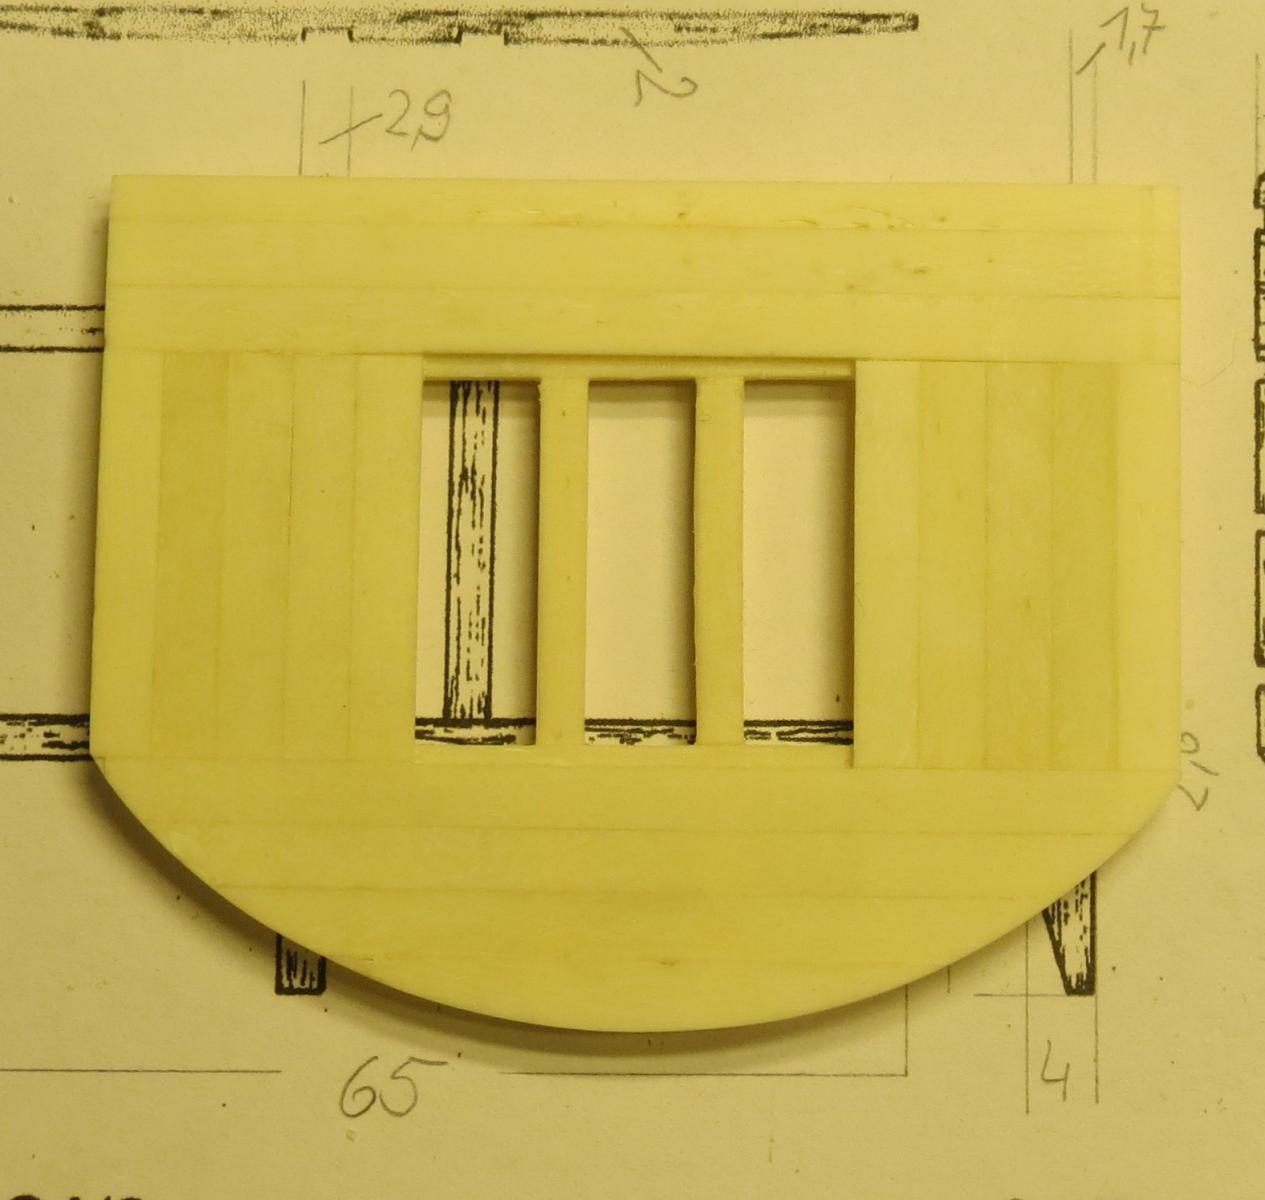
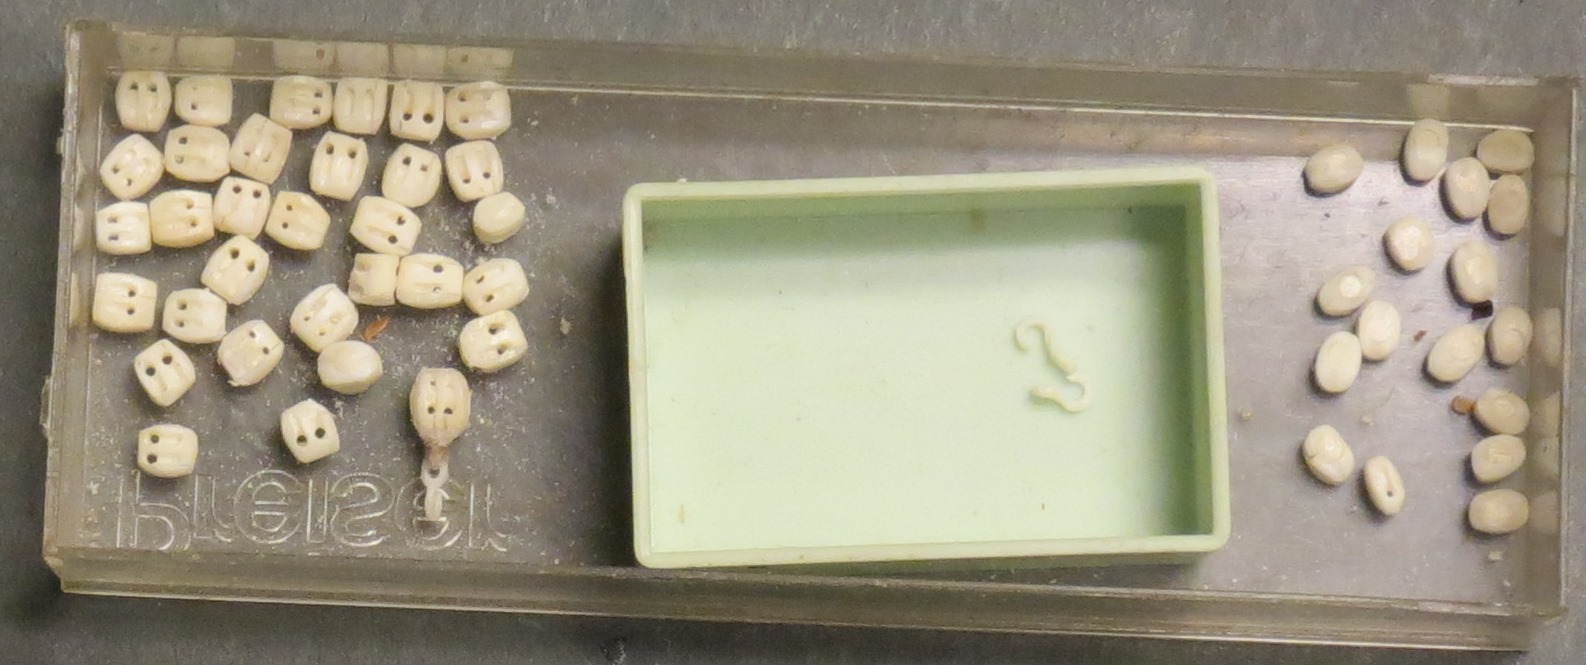
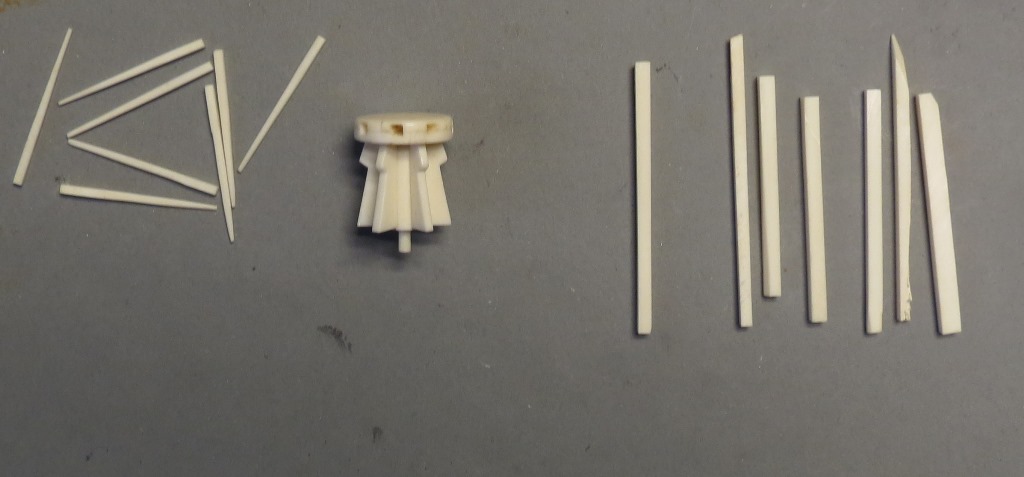
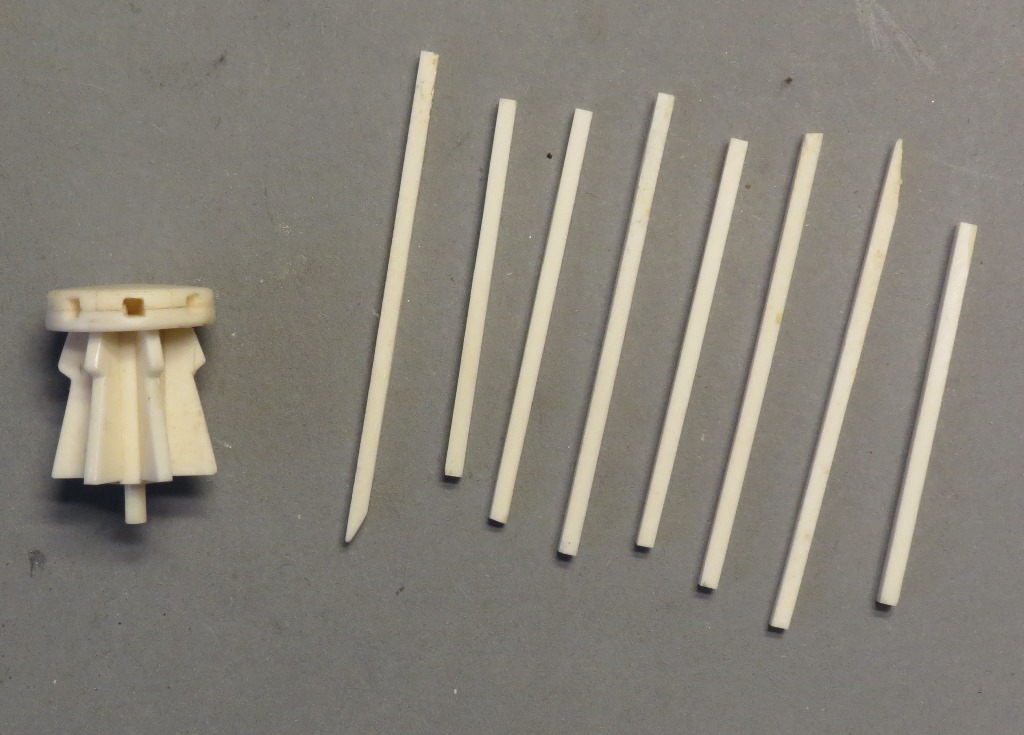
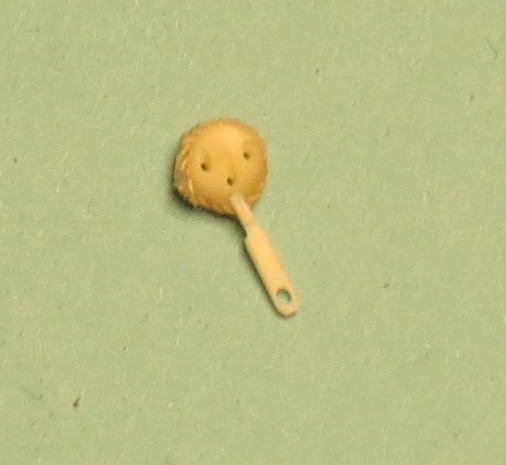
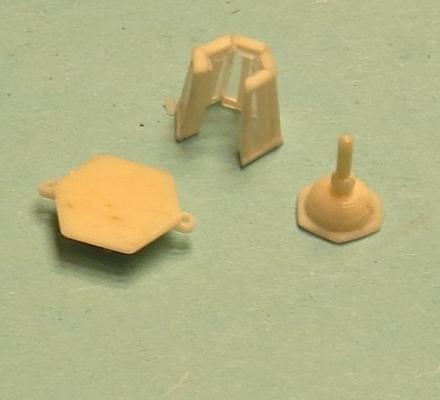
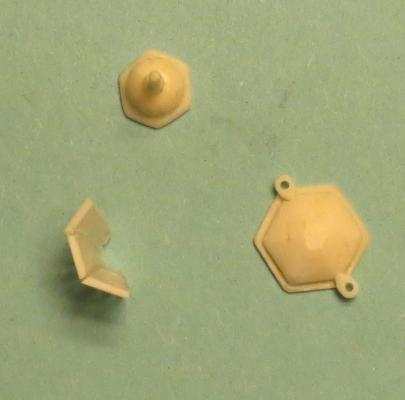
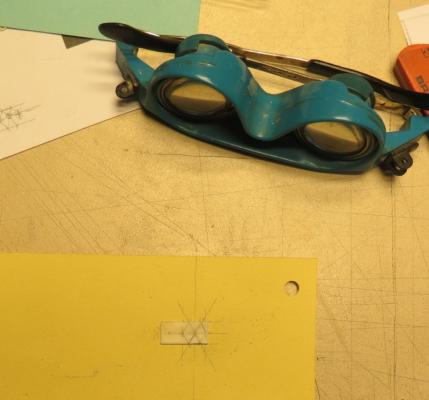
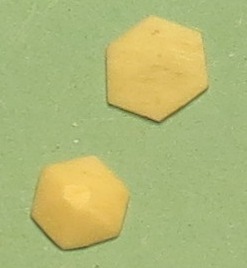
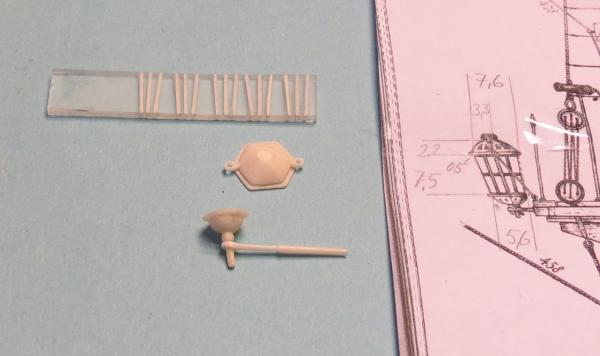
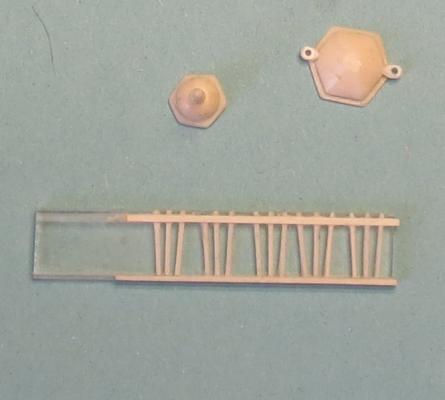
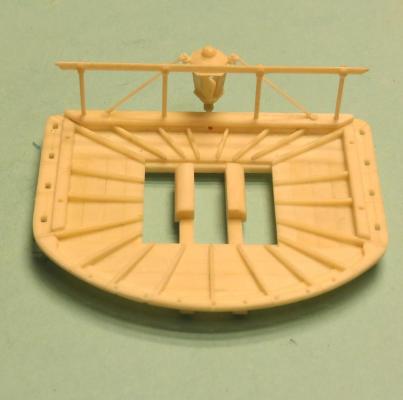
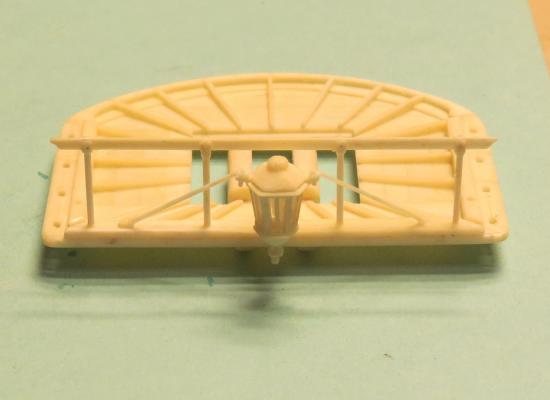
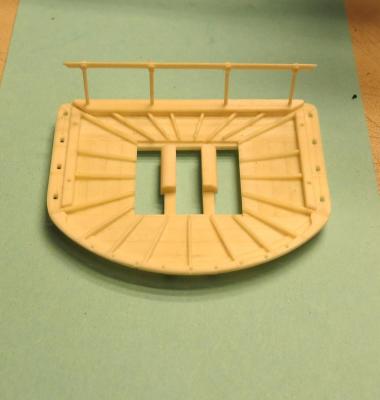
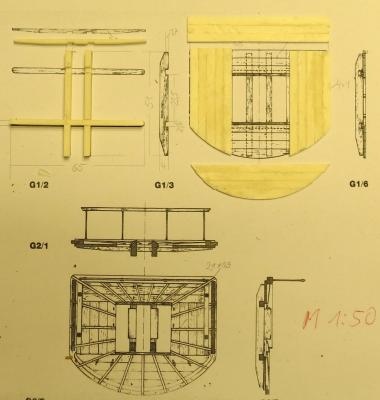
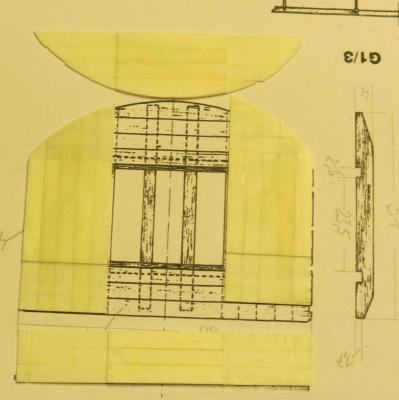
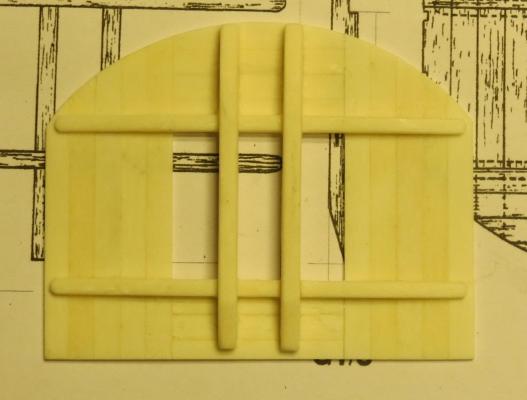
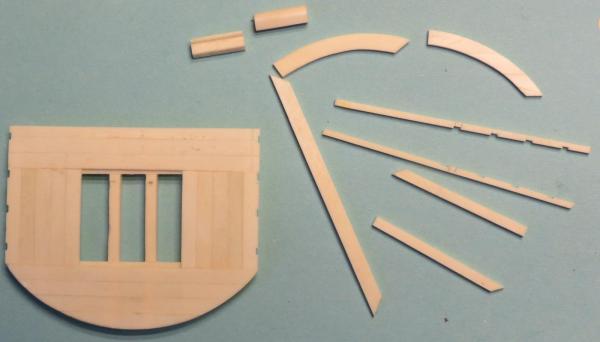
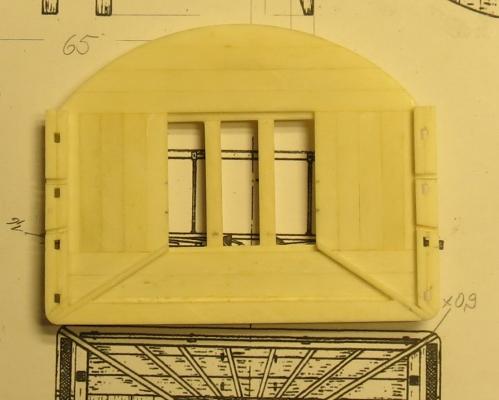
The lantern on the mainmast platform The shape of the lamp is hexagonal The floor Roof Holder for the lamp The windows of the lamp The windows were made from Plexiglas and bone struts. The struts are to be recorded on the Plexi and cut with a 0.3mm circumsawblade 0.5mm deep into the Plexiglas. After that the struts may be glued into the joints Cut and assemble the window frame The roof cap made on lathe Bracket for the lamp Lamp in position The struts of the lamp have been round and made by three parts This is what the finished result looks have fun


- 241 replies
-
- 26
-
-
- royal caroline
- yacht
- (and 1 more)
-
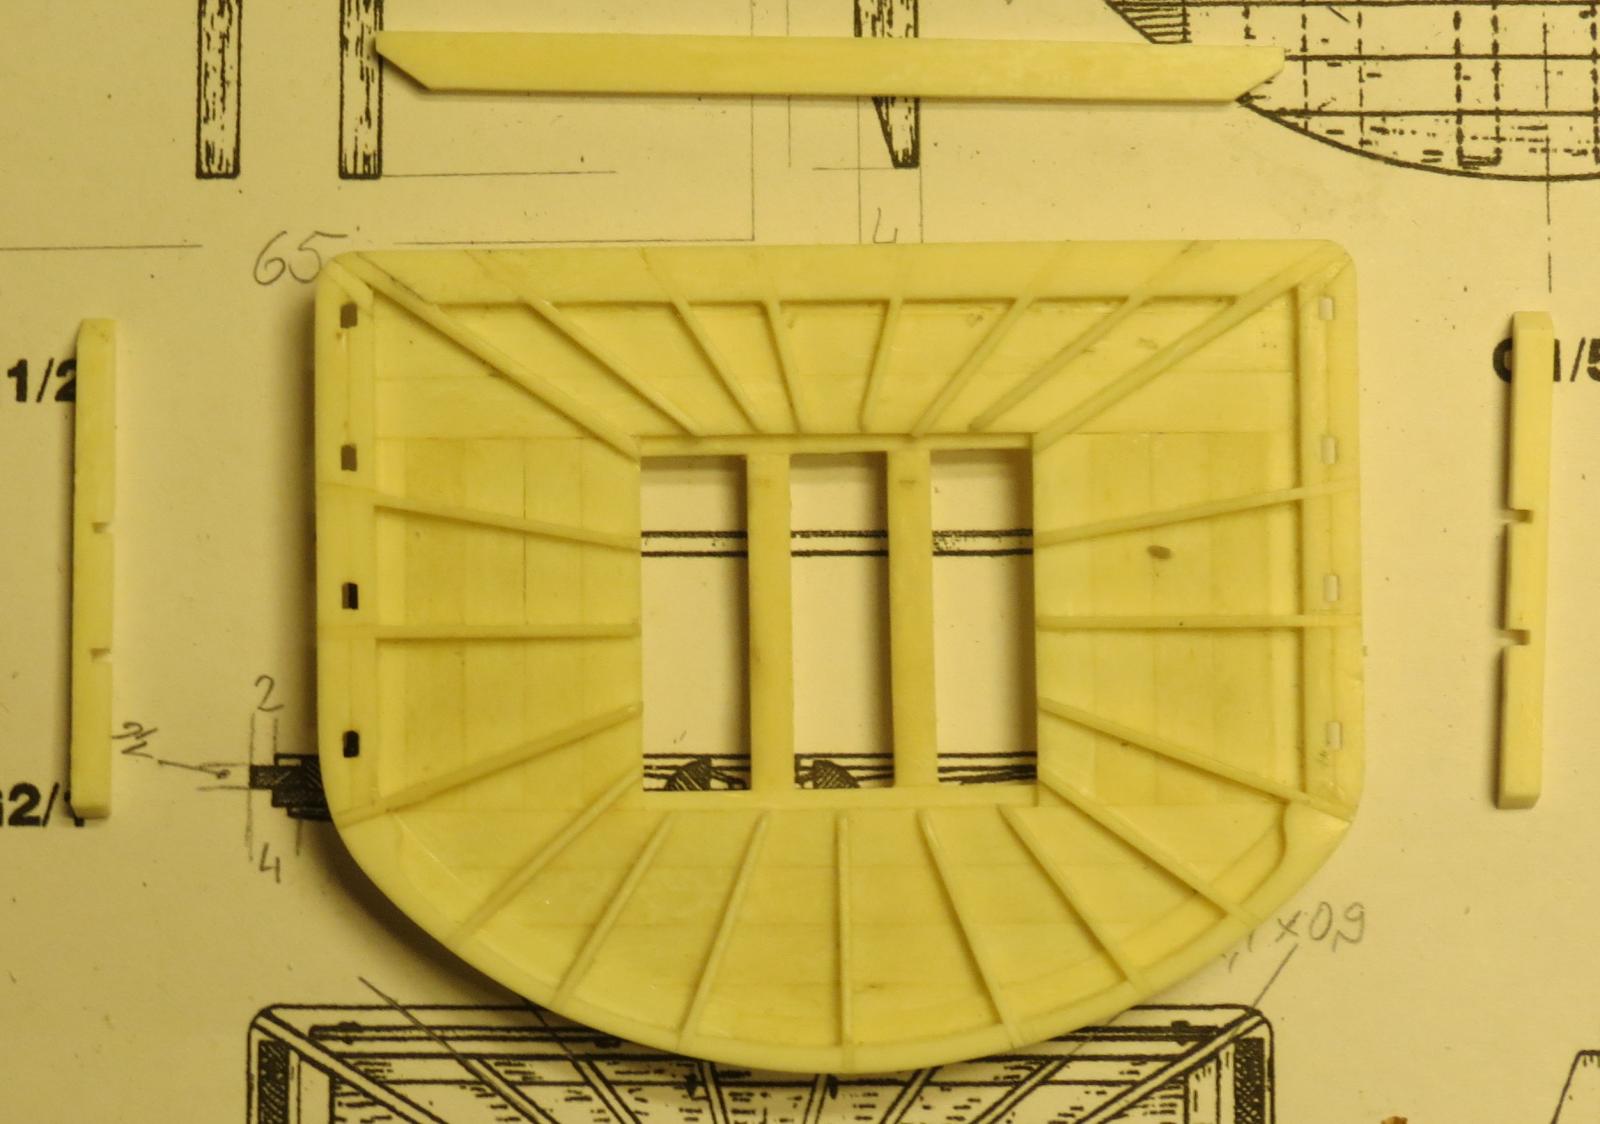
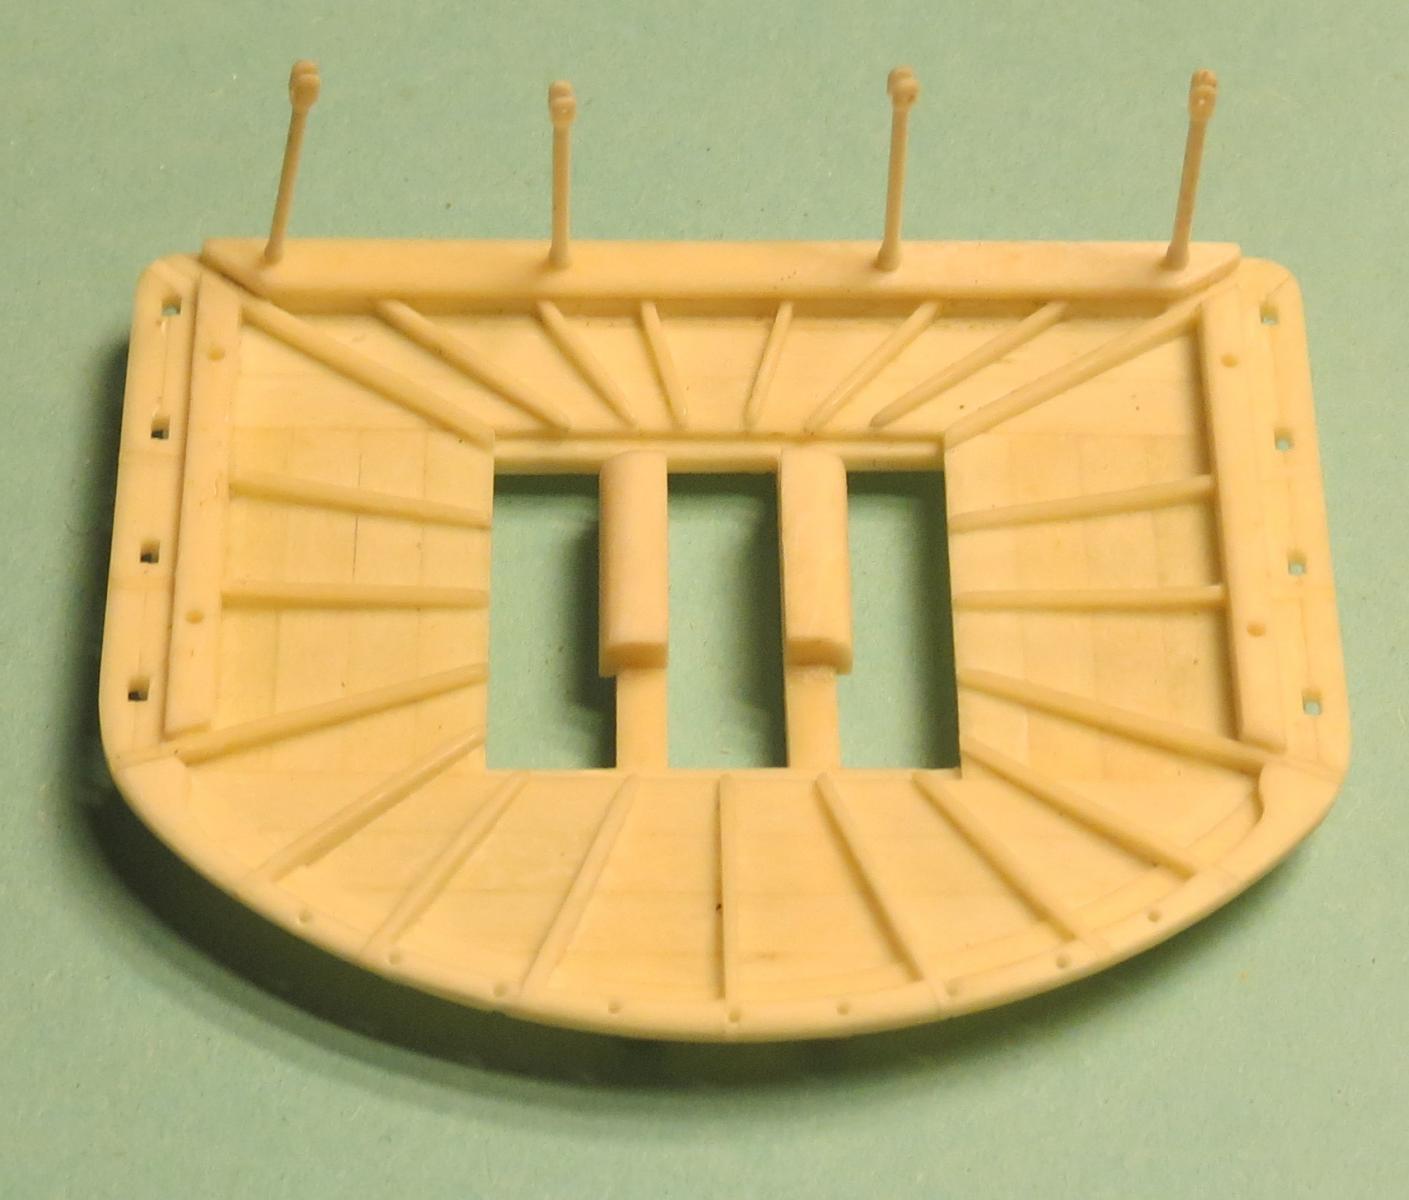
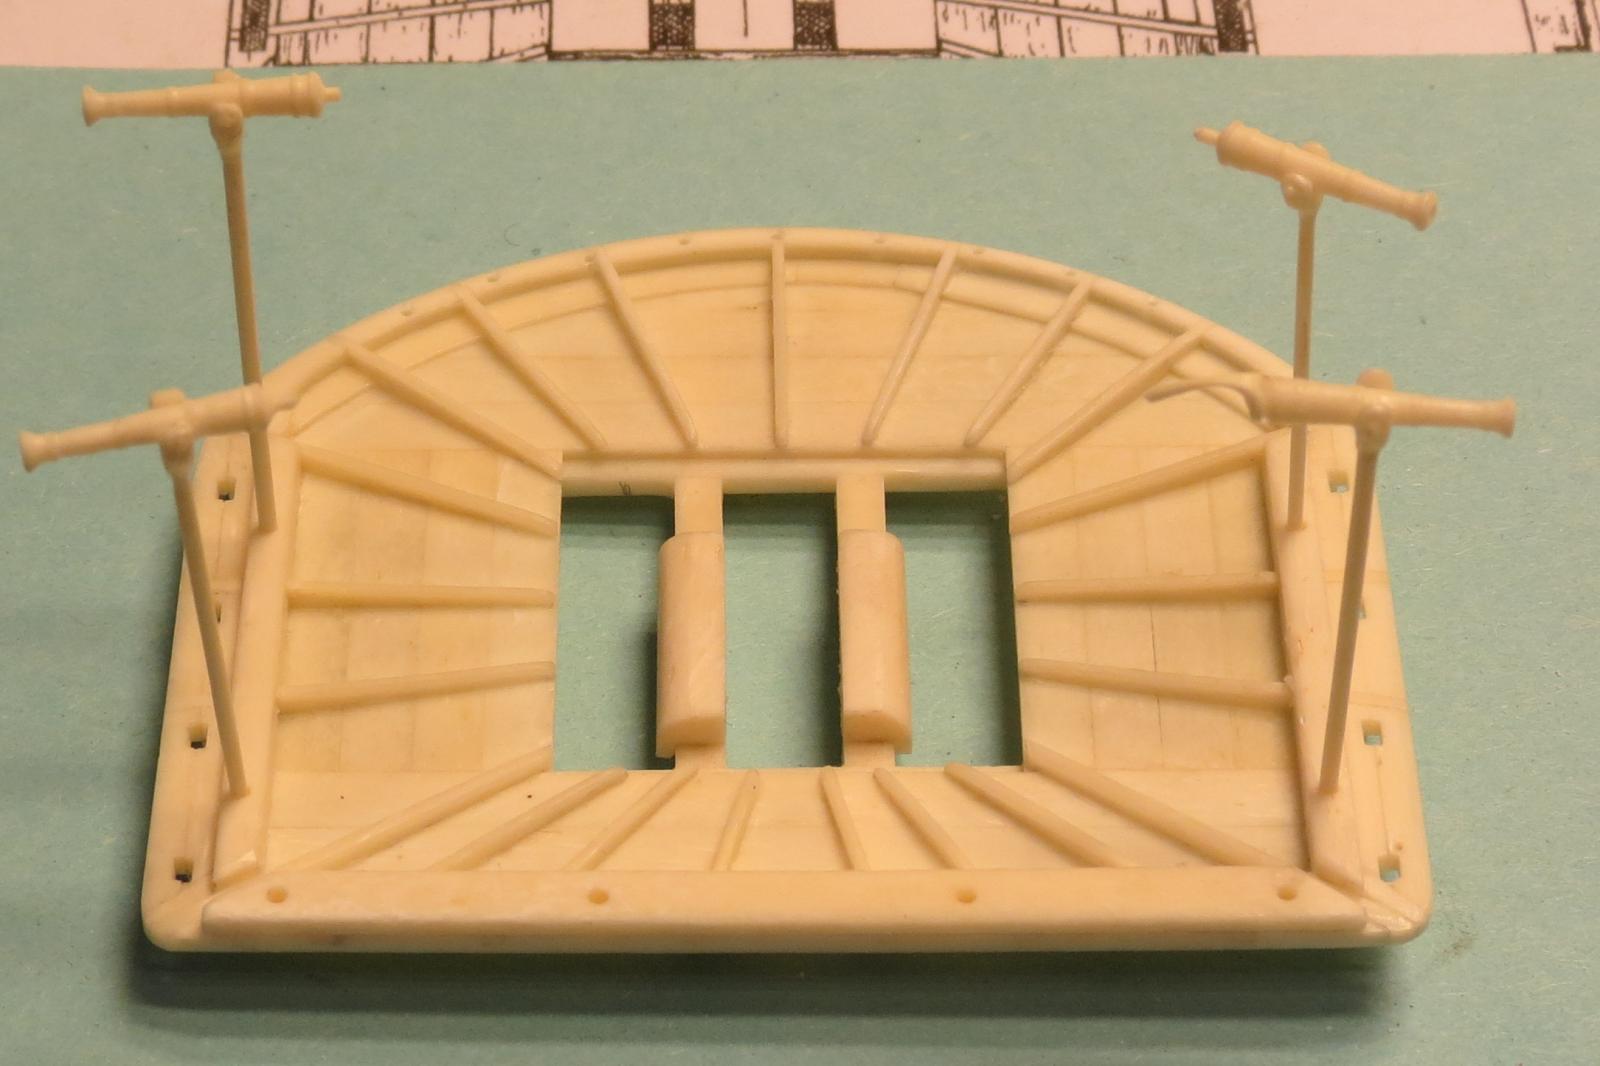
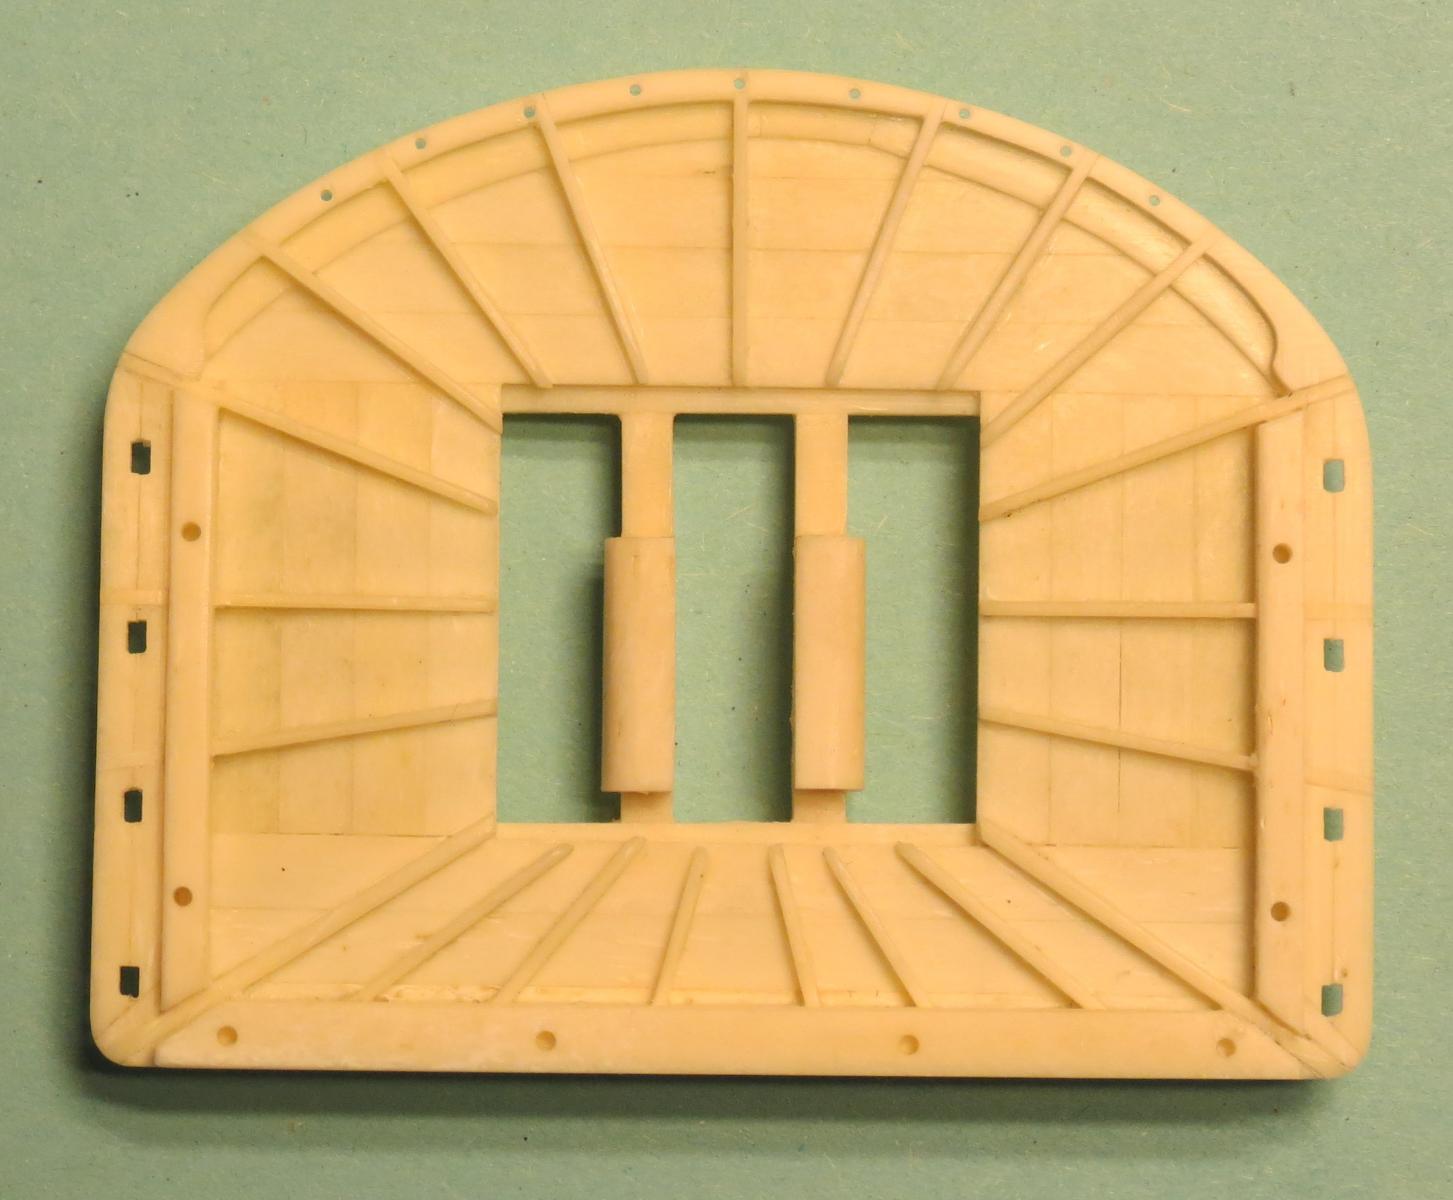
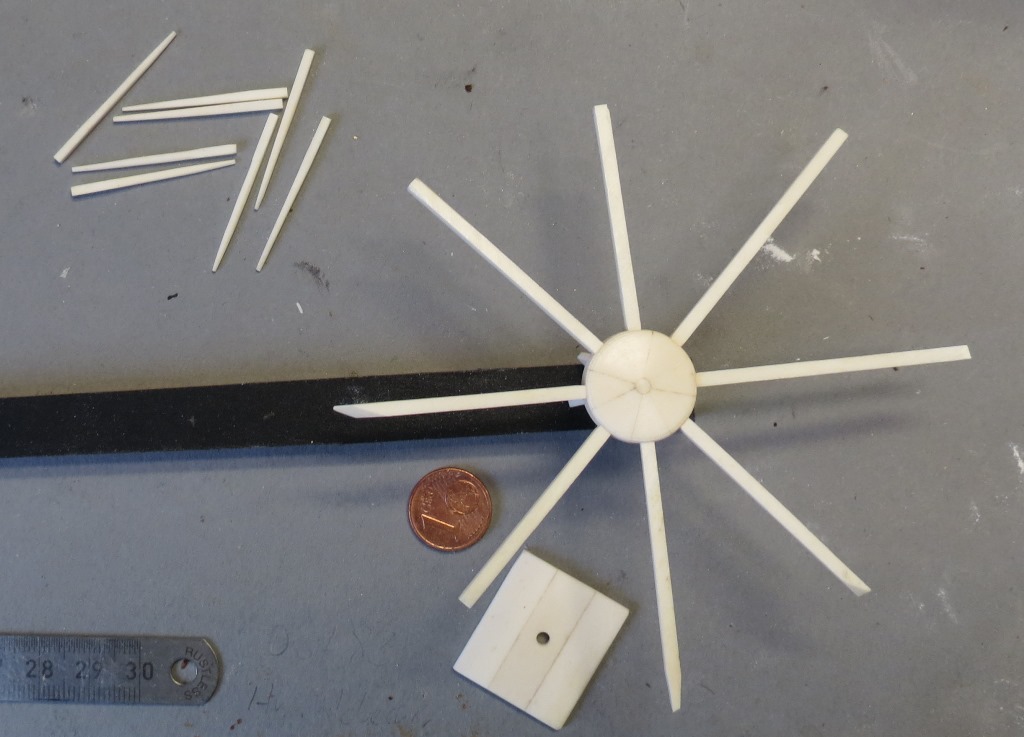
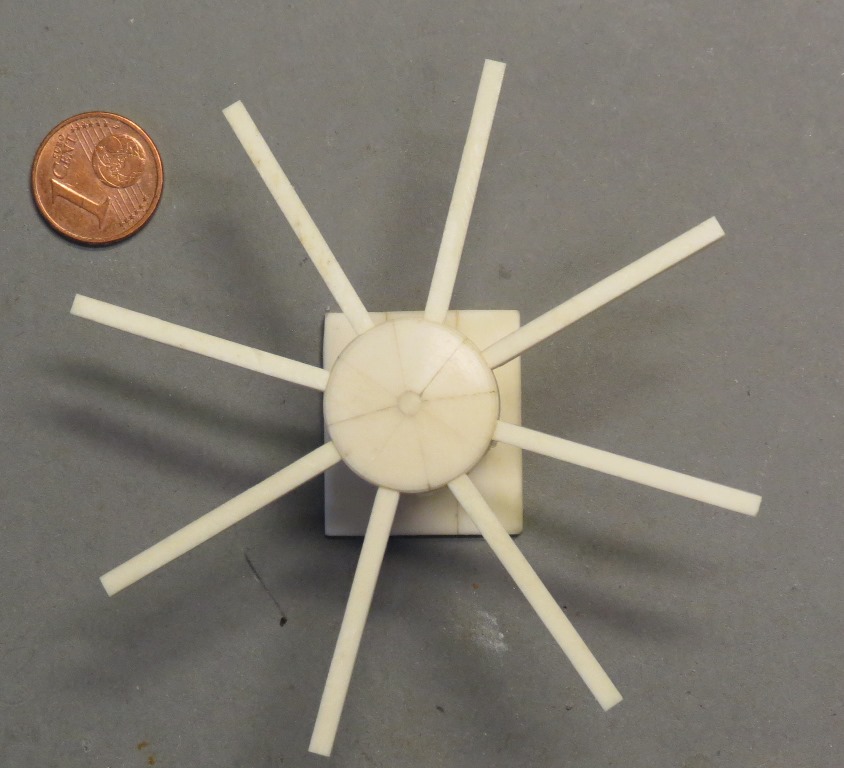
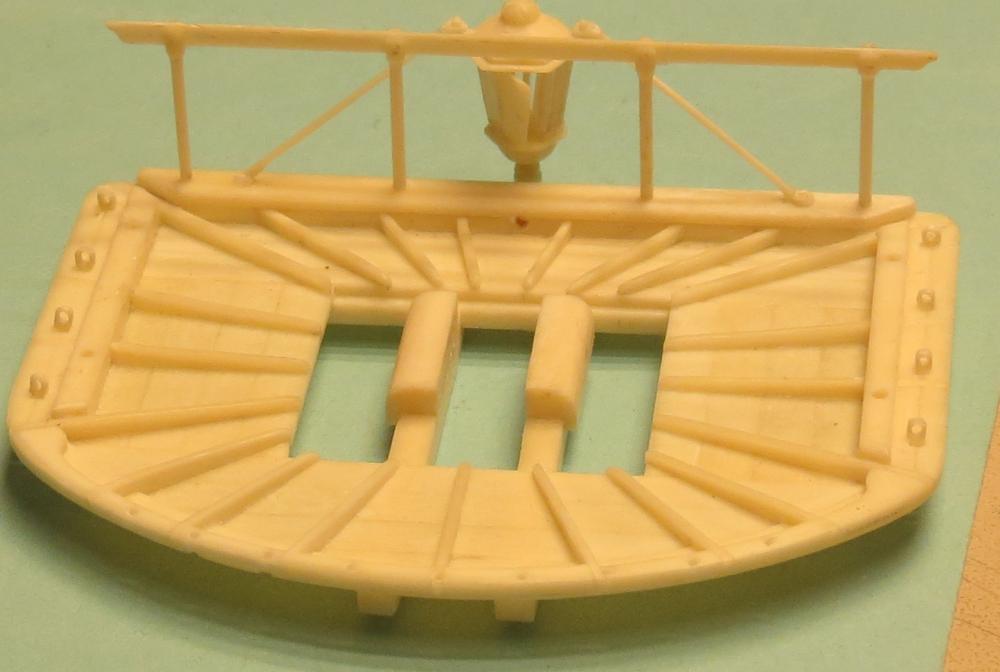
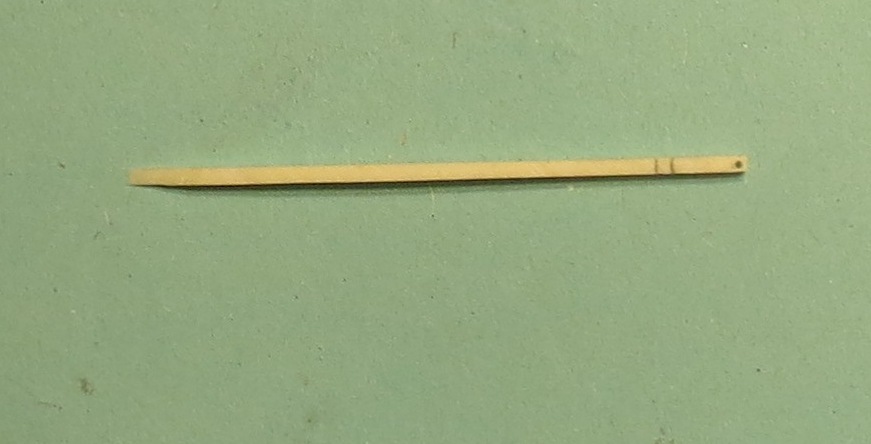
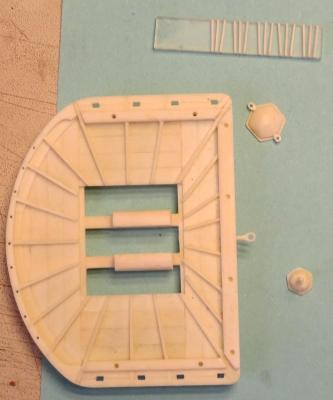
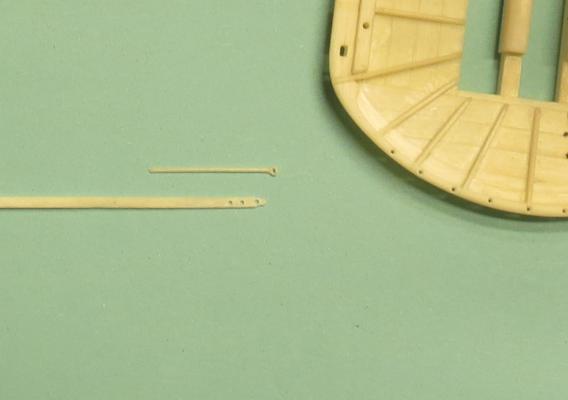
Thank you all for the nice comments After some rough forging work let us turn about the finer things. The Mainmast mars of Royal Caroline The Saling and Floor Floor Floor mounted on Saling Cover around the floor The ribs The railing and stanchions Steps for the canons Handle on the canons Complete canons Canons in position the next step is the equipment of the Main-mars.. have fun


- 241 replies
-
- 23
-
-
- royal caroline
- yacht
- (and 1 more)
-
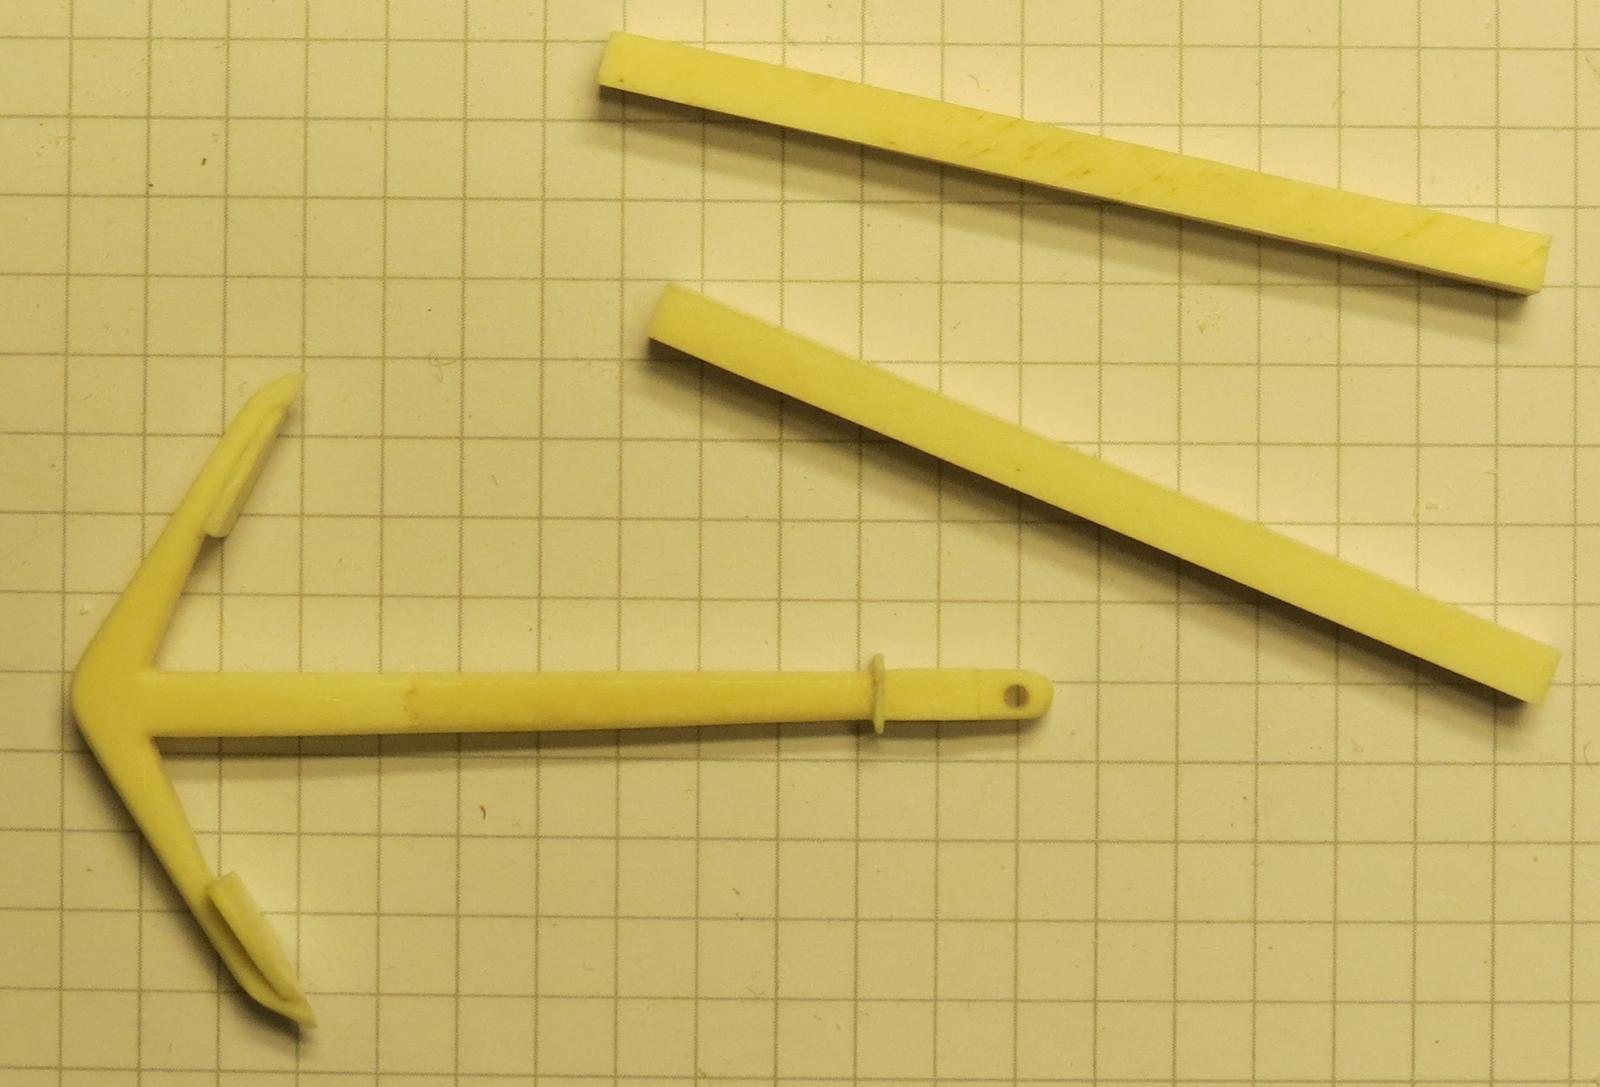
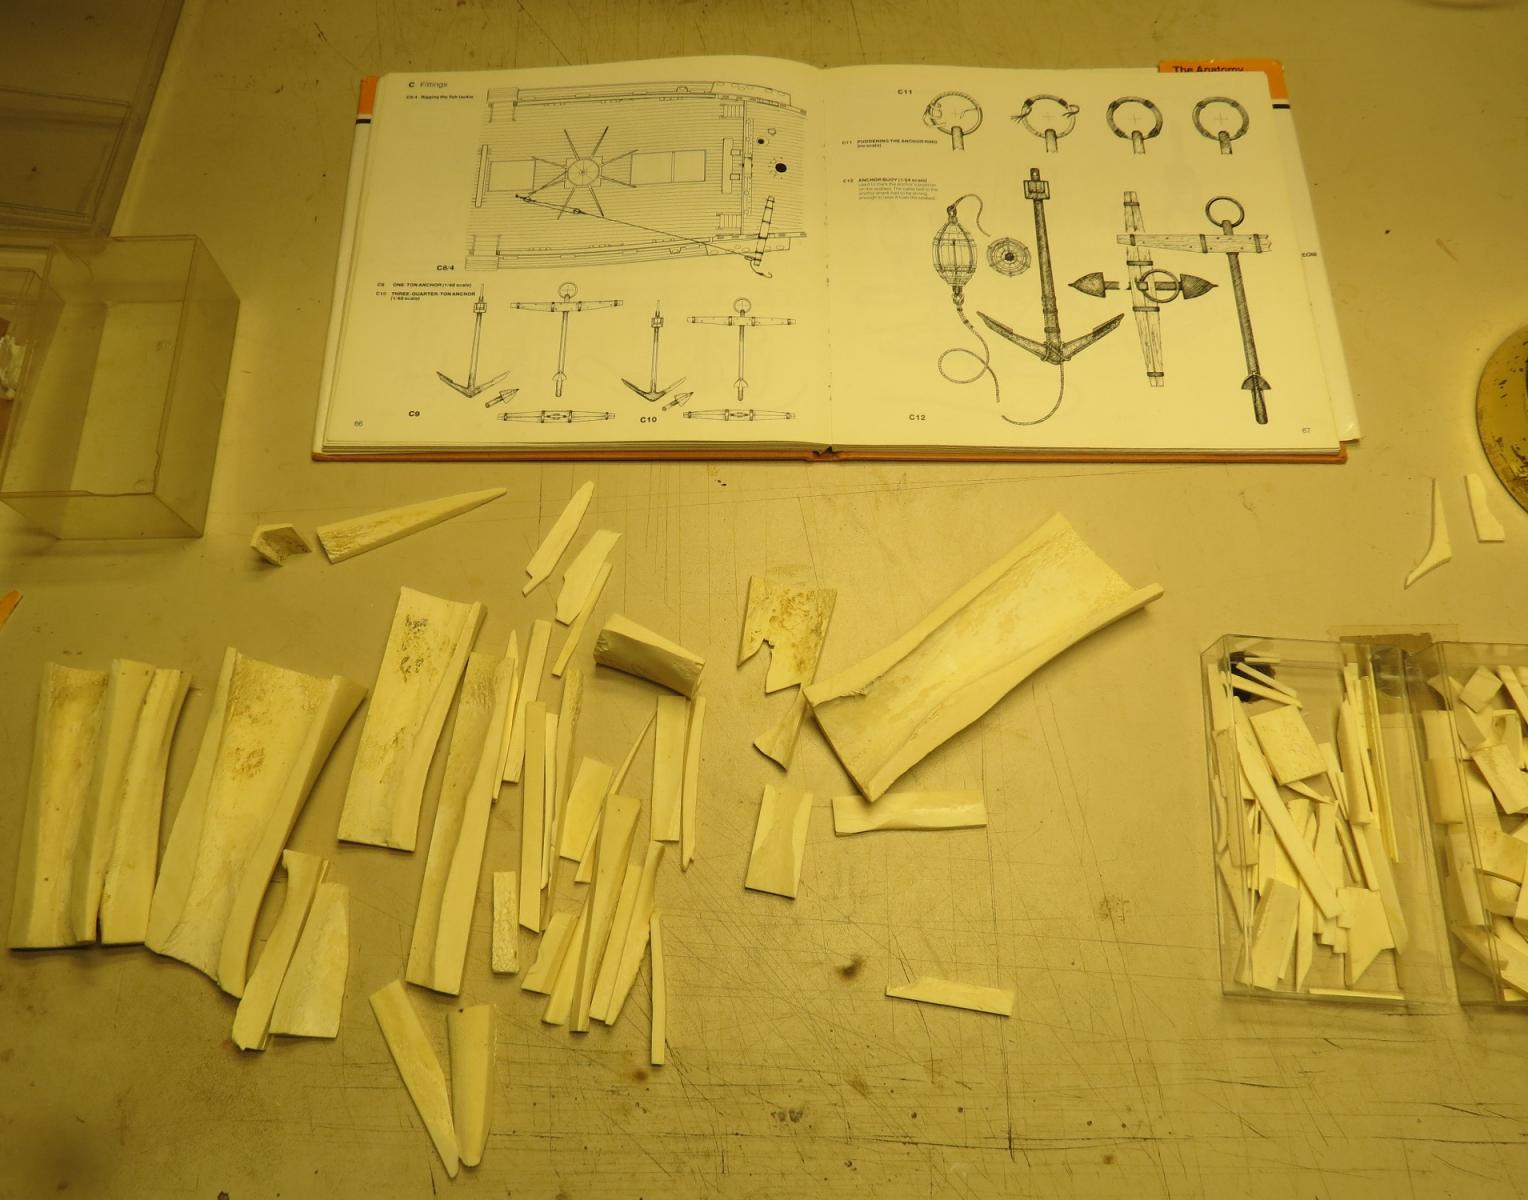
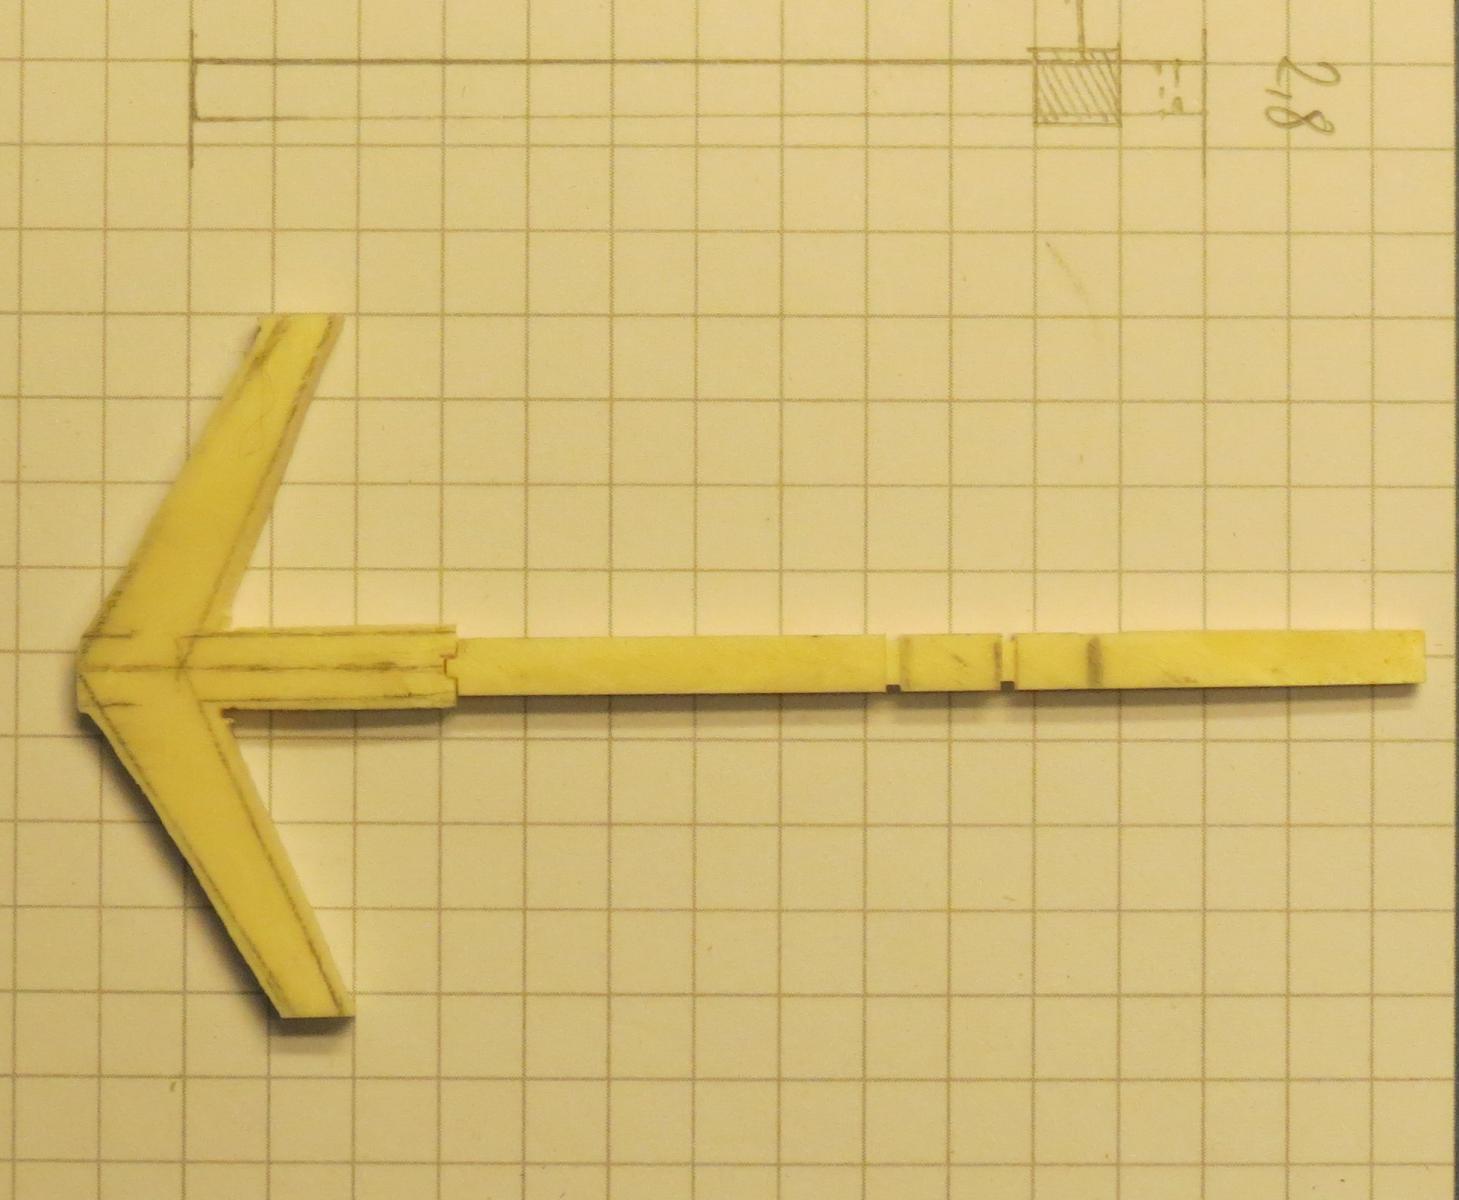
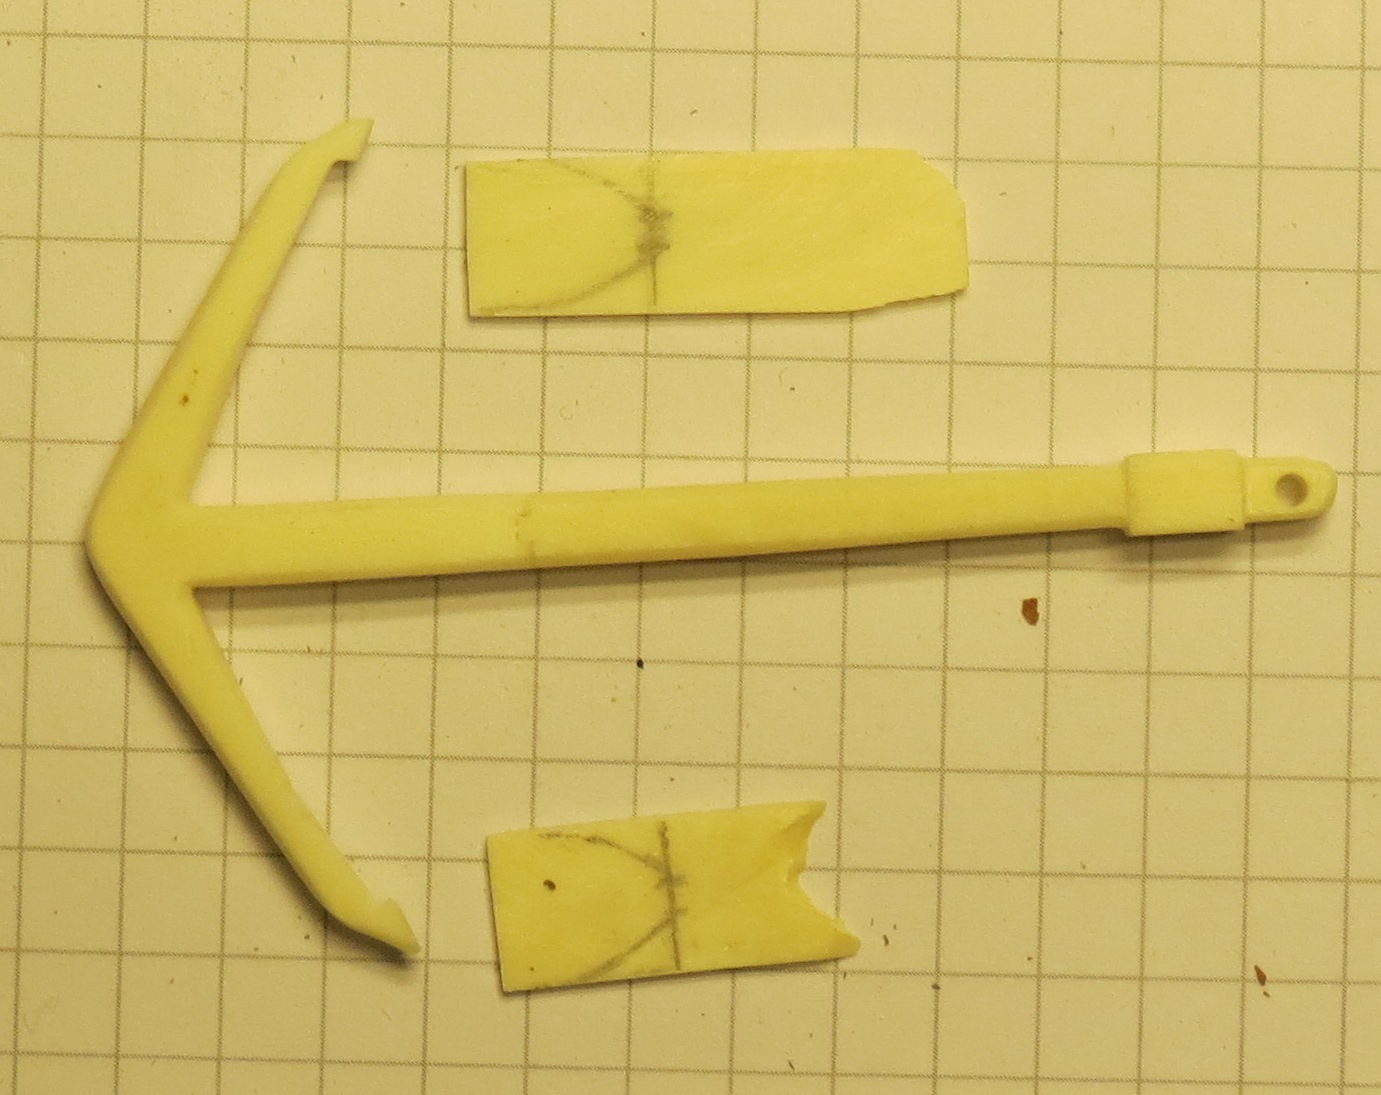
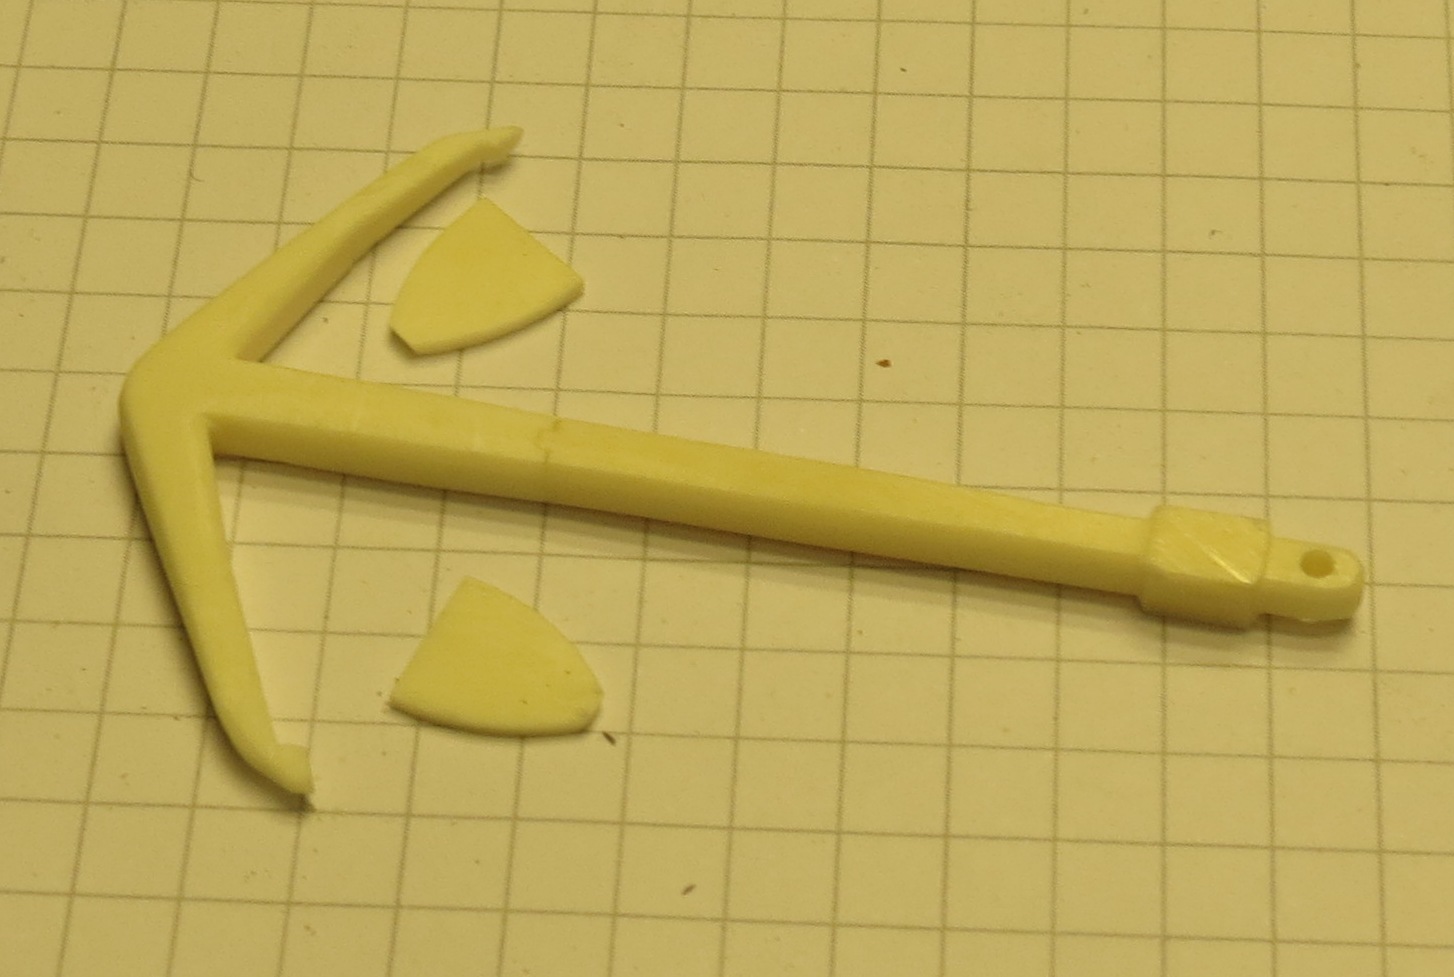
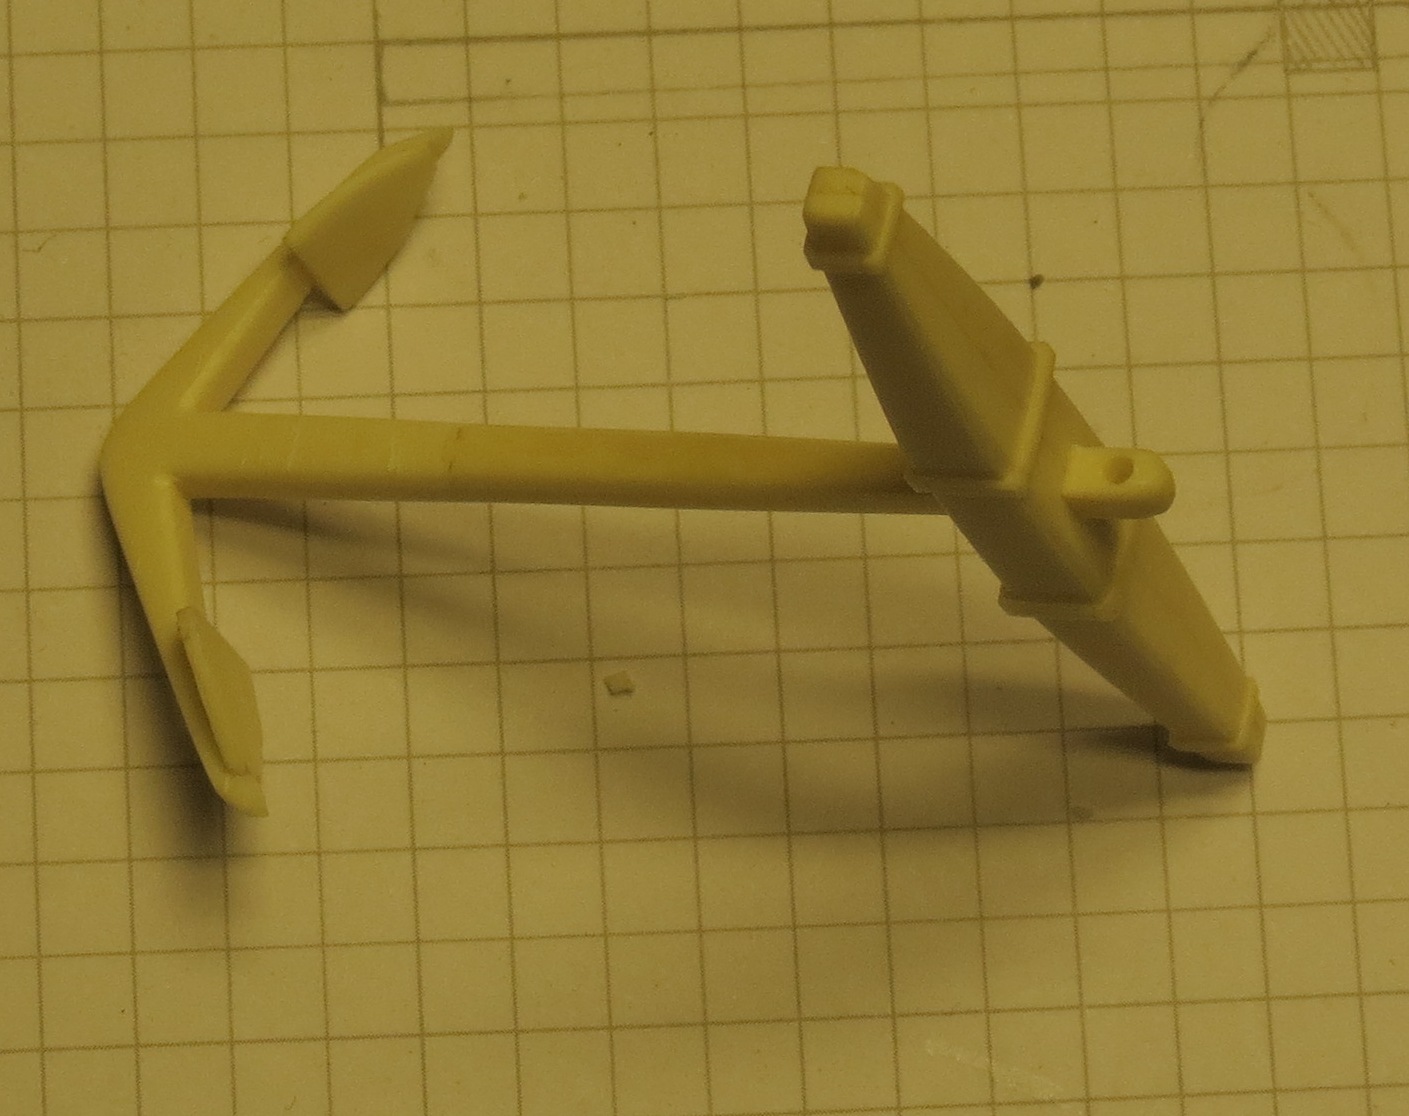
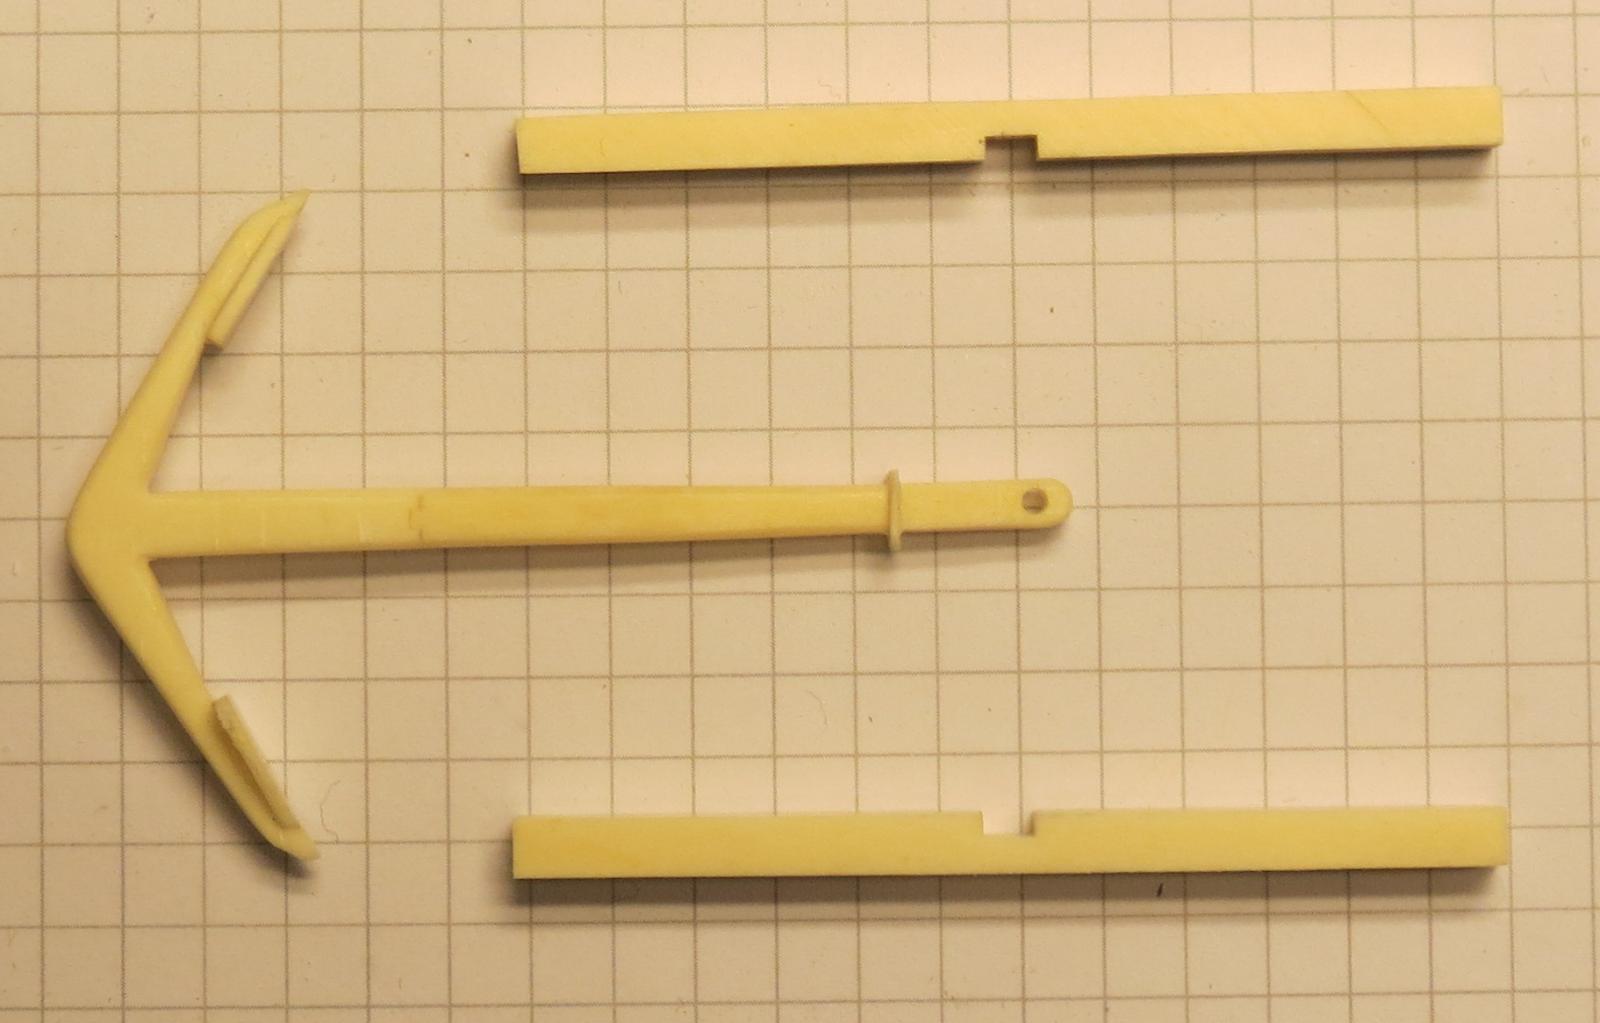
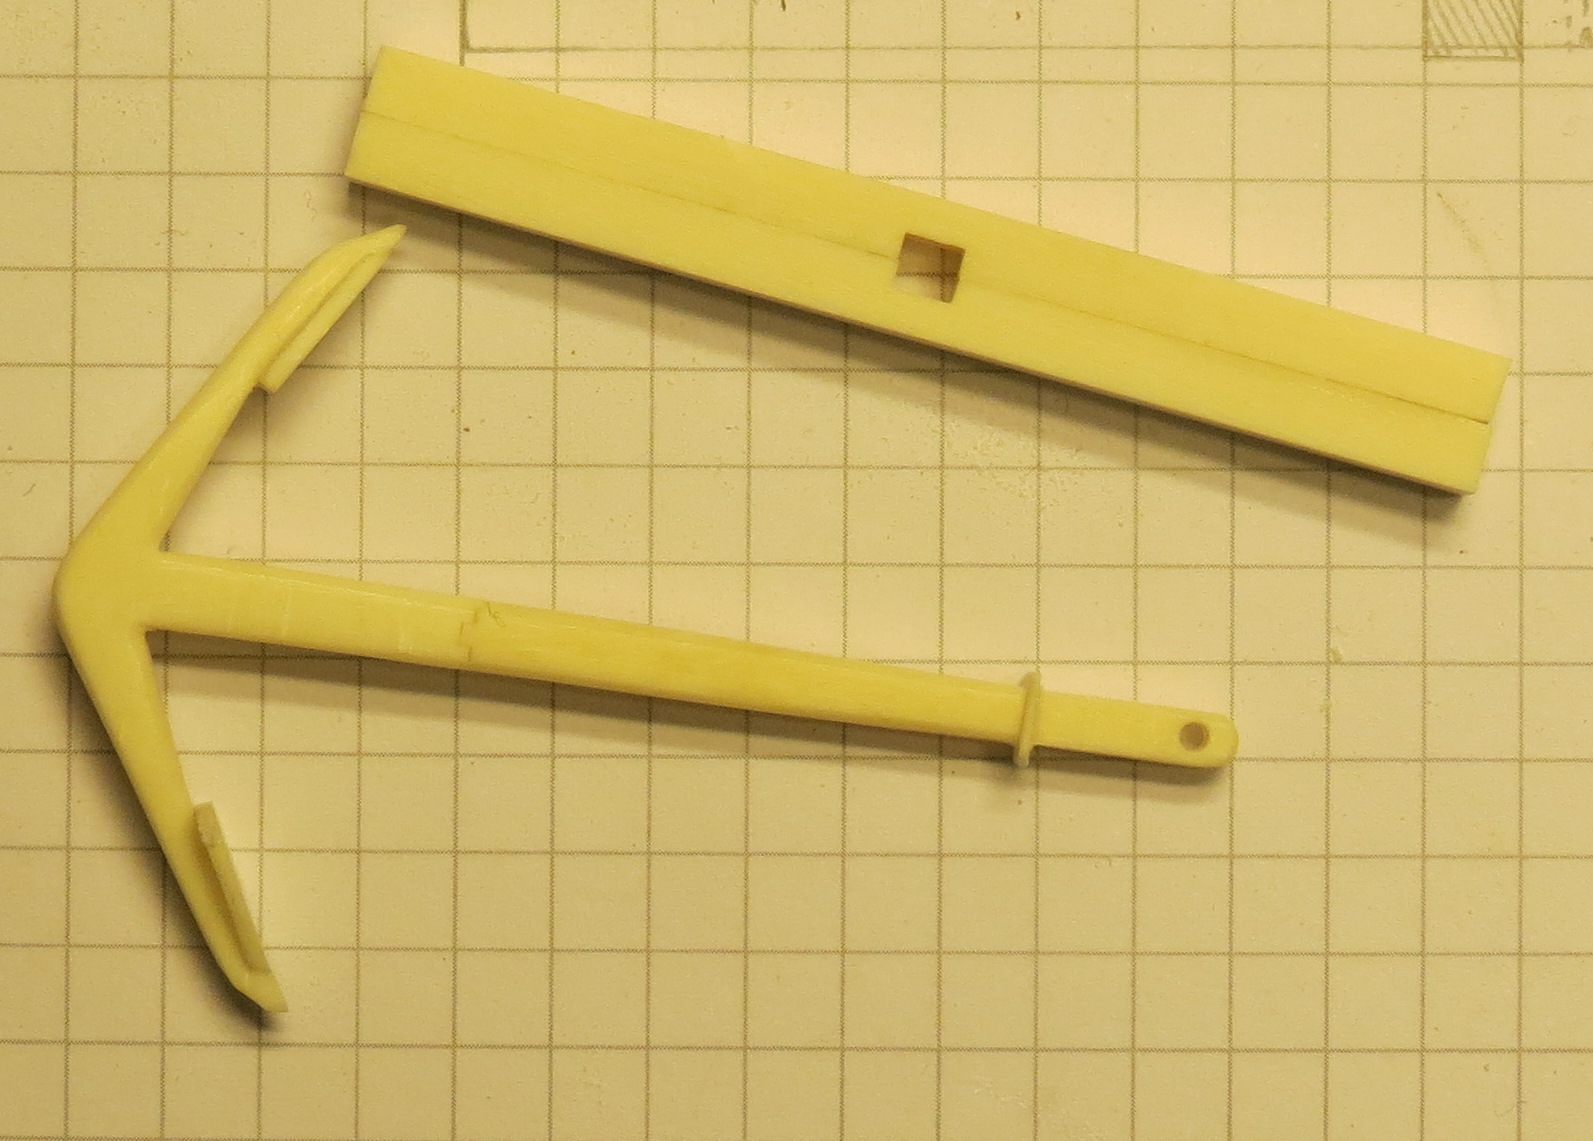
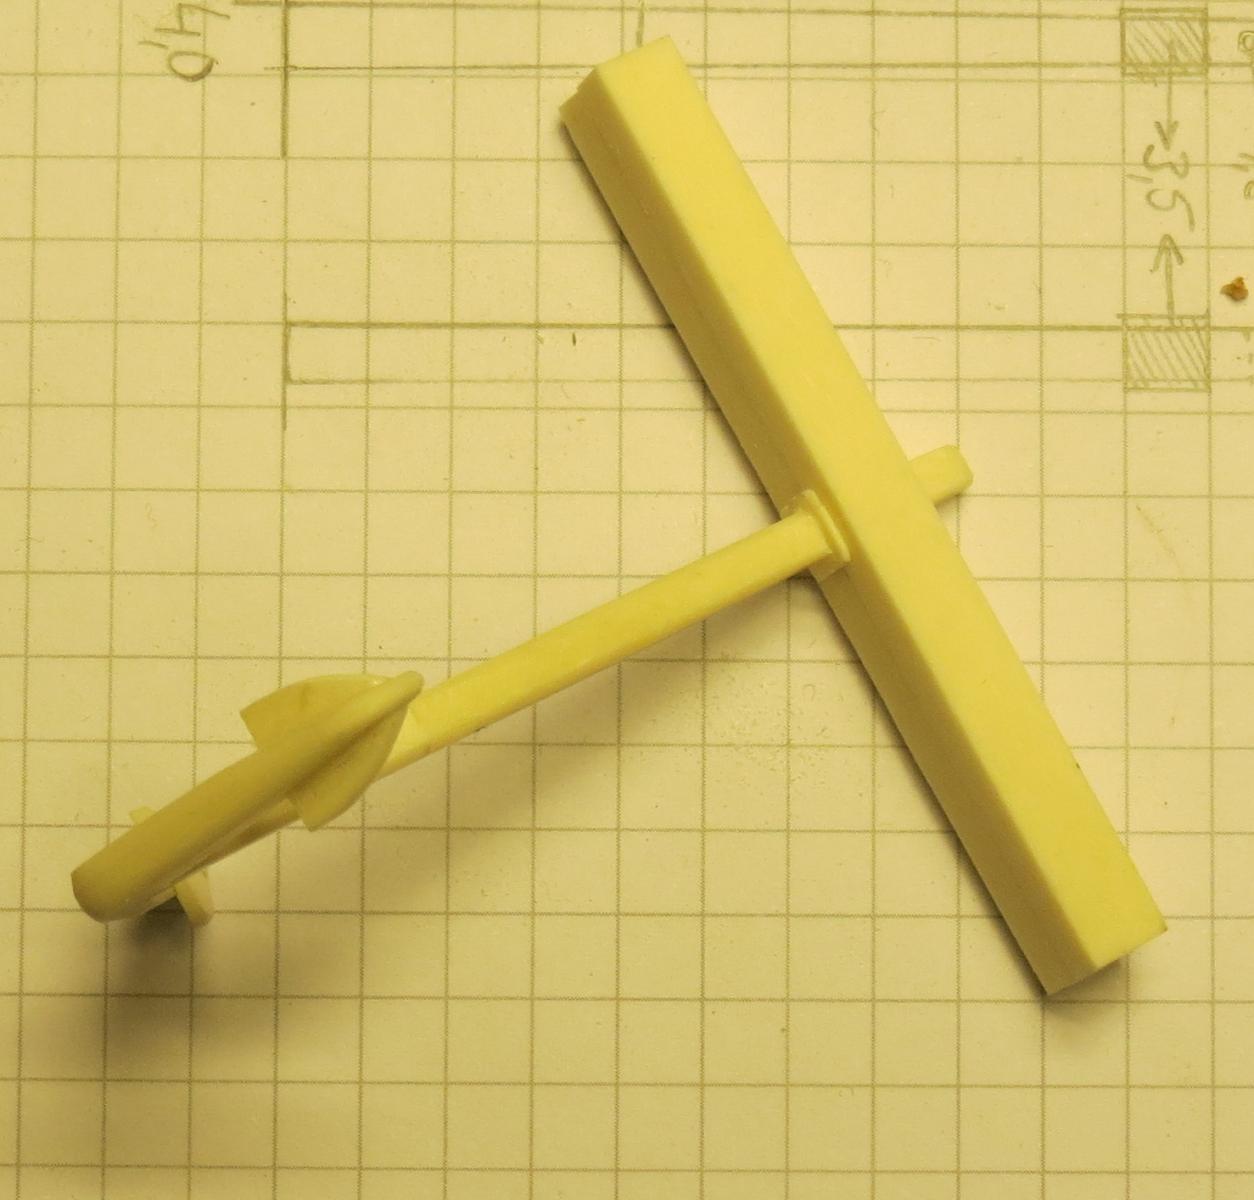
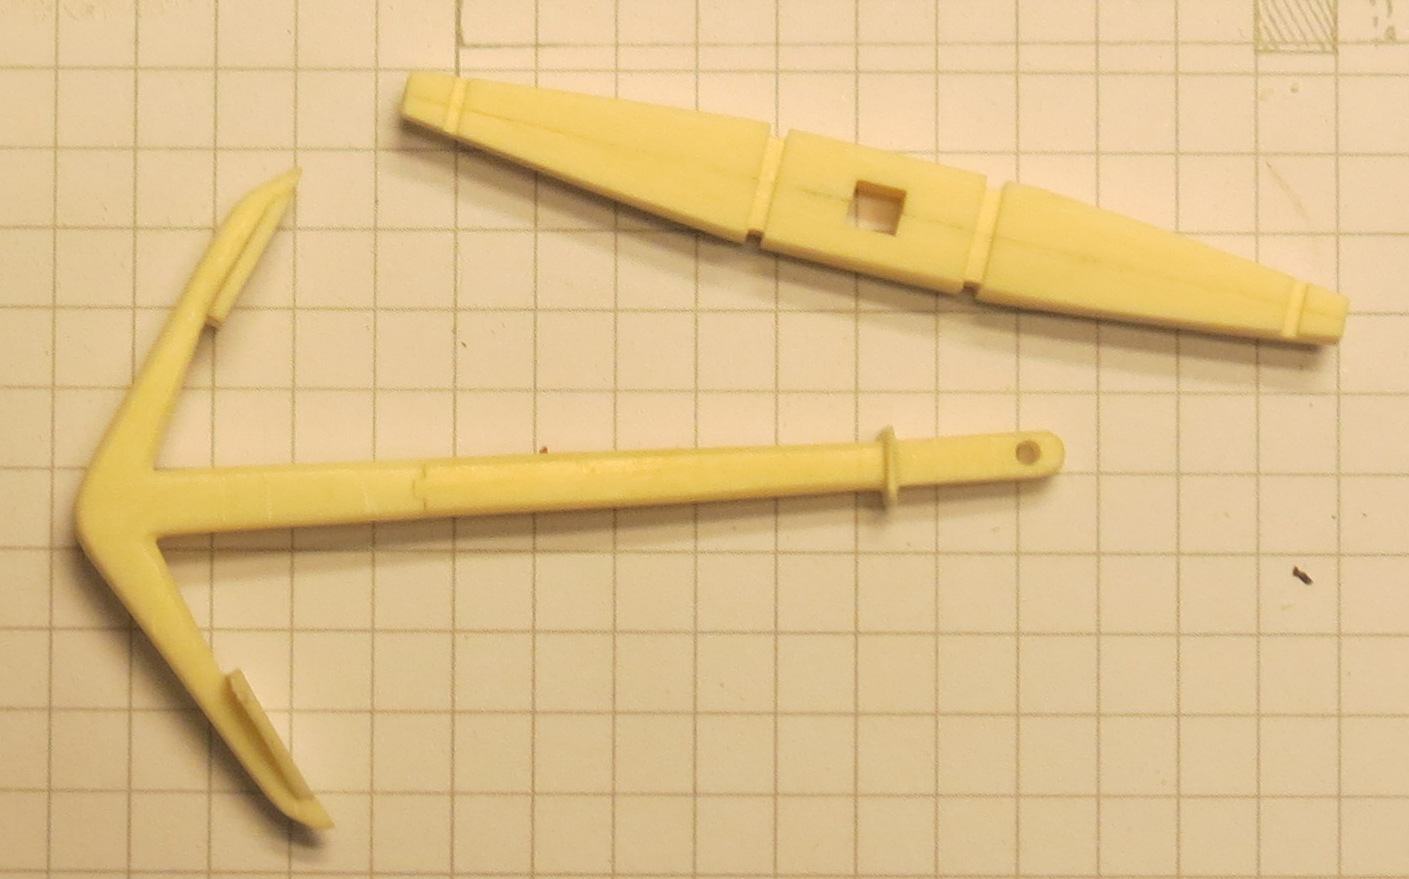
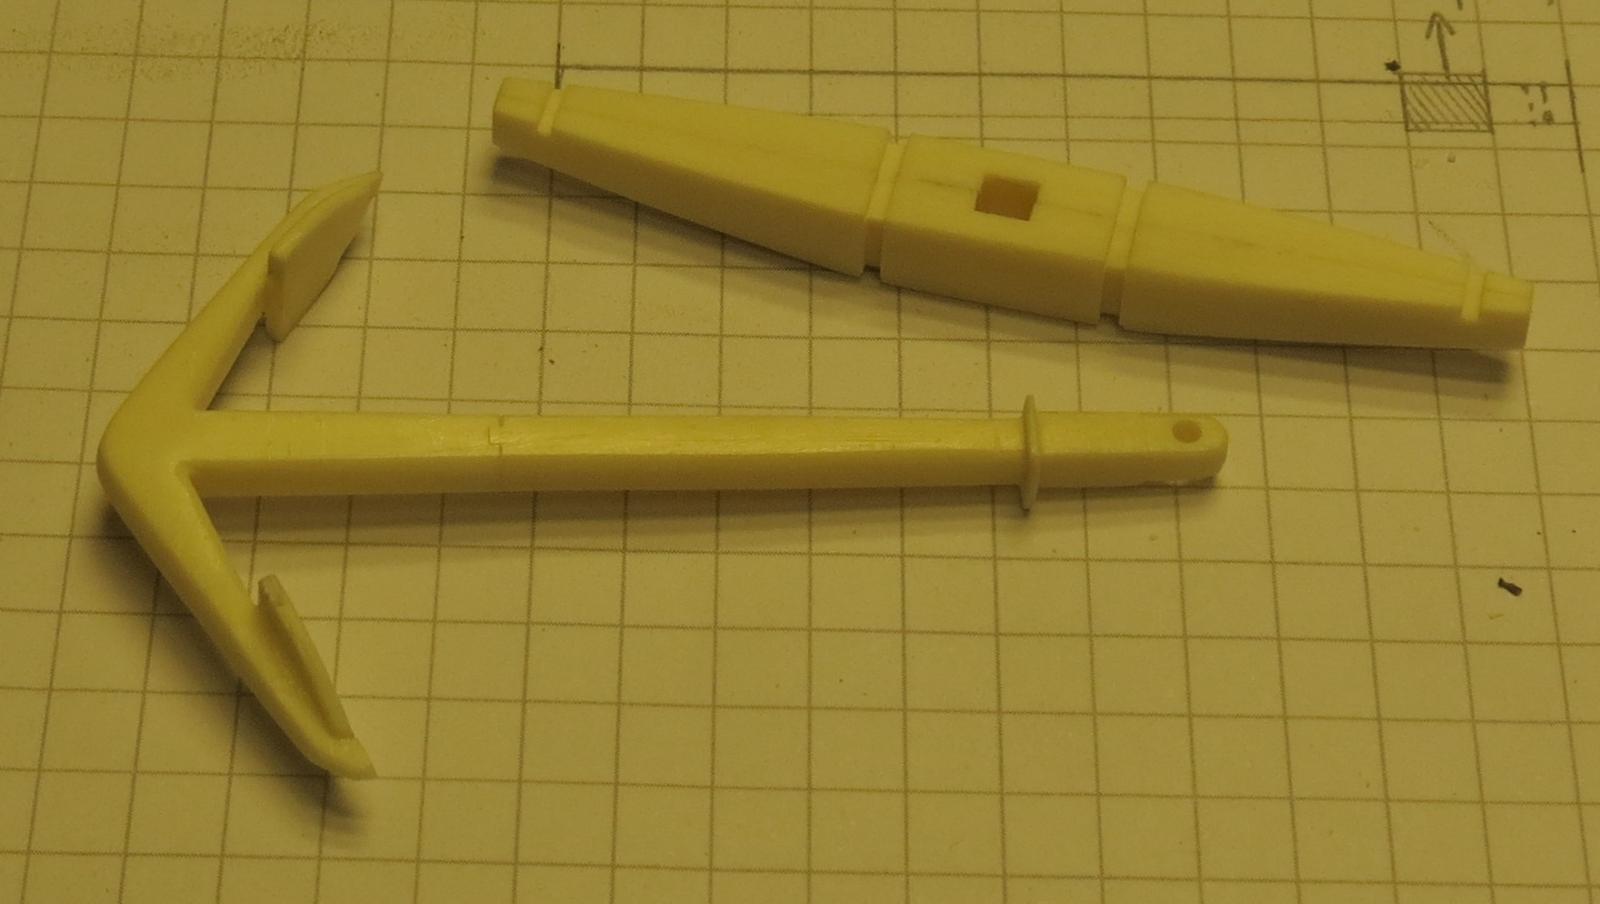
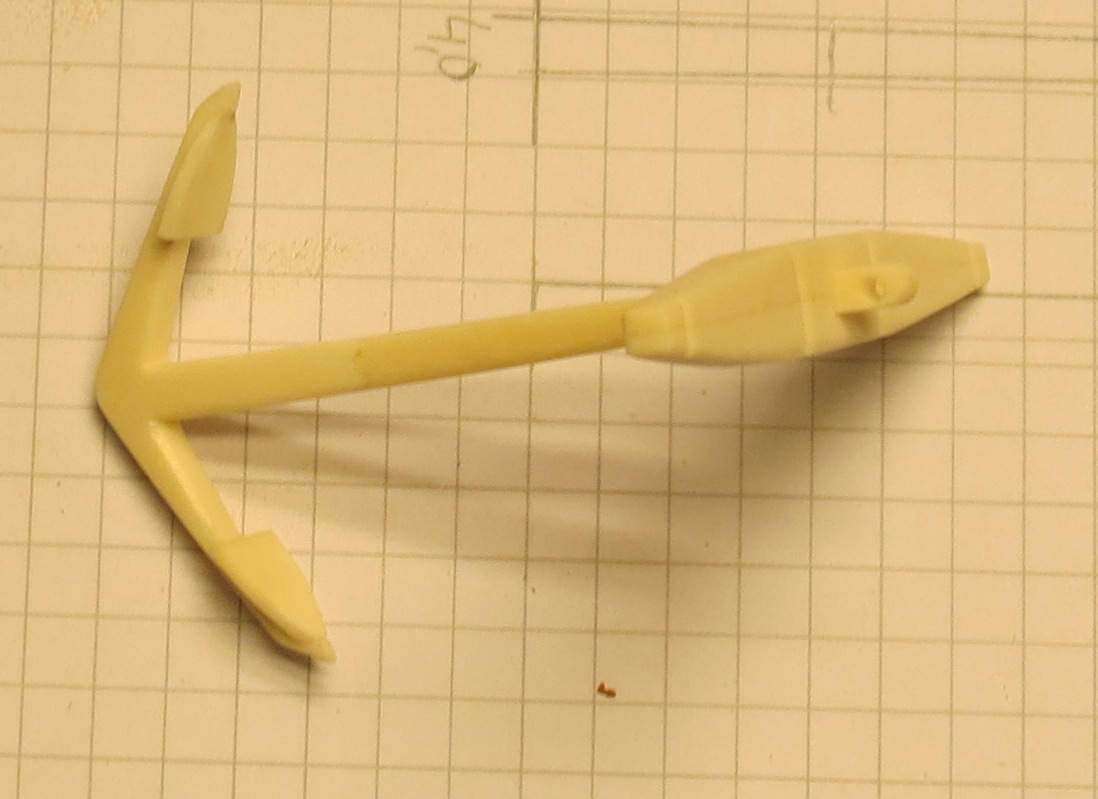
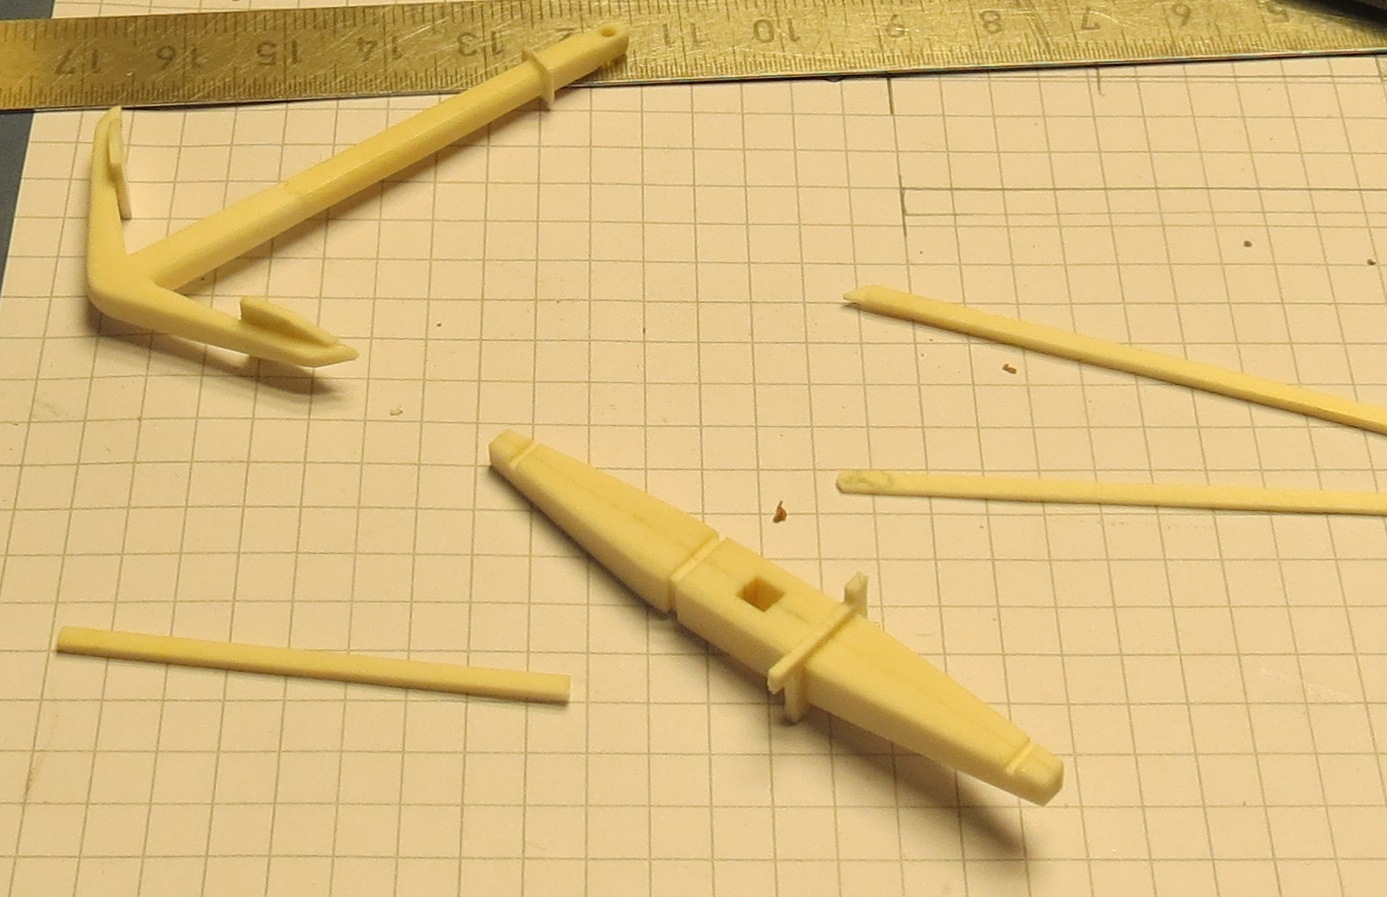
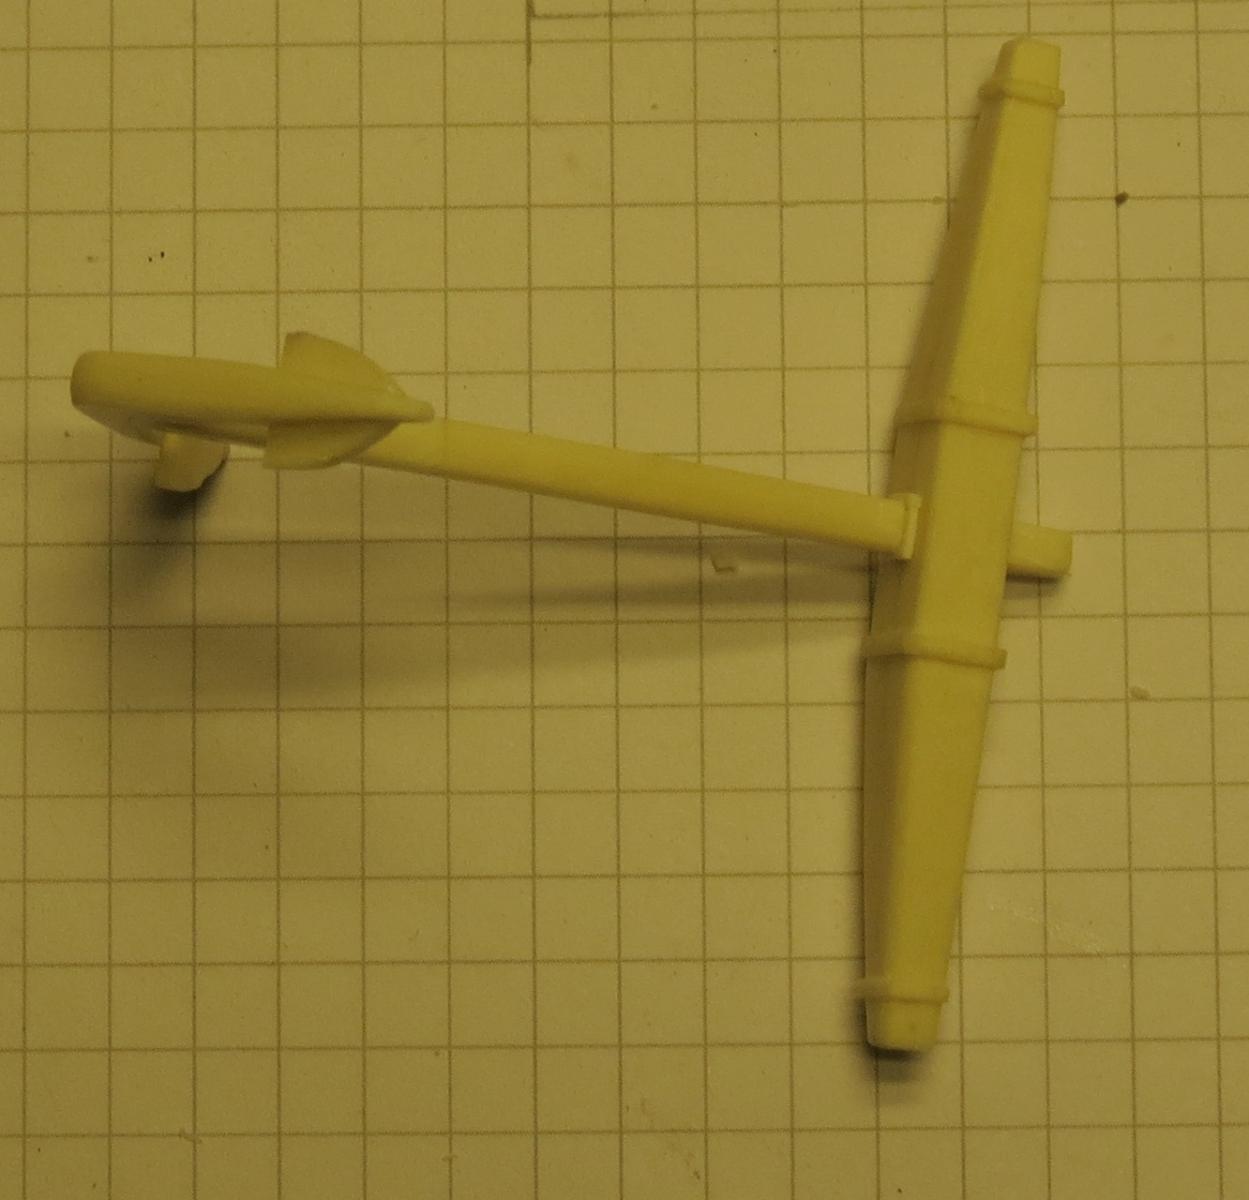
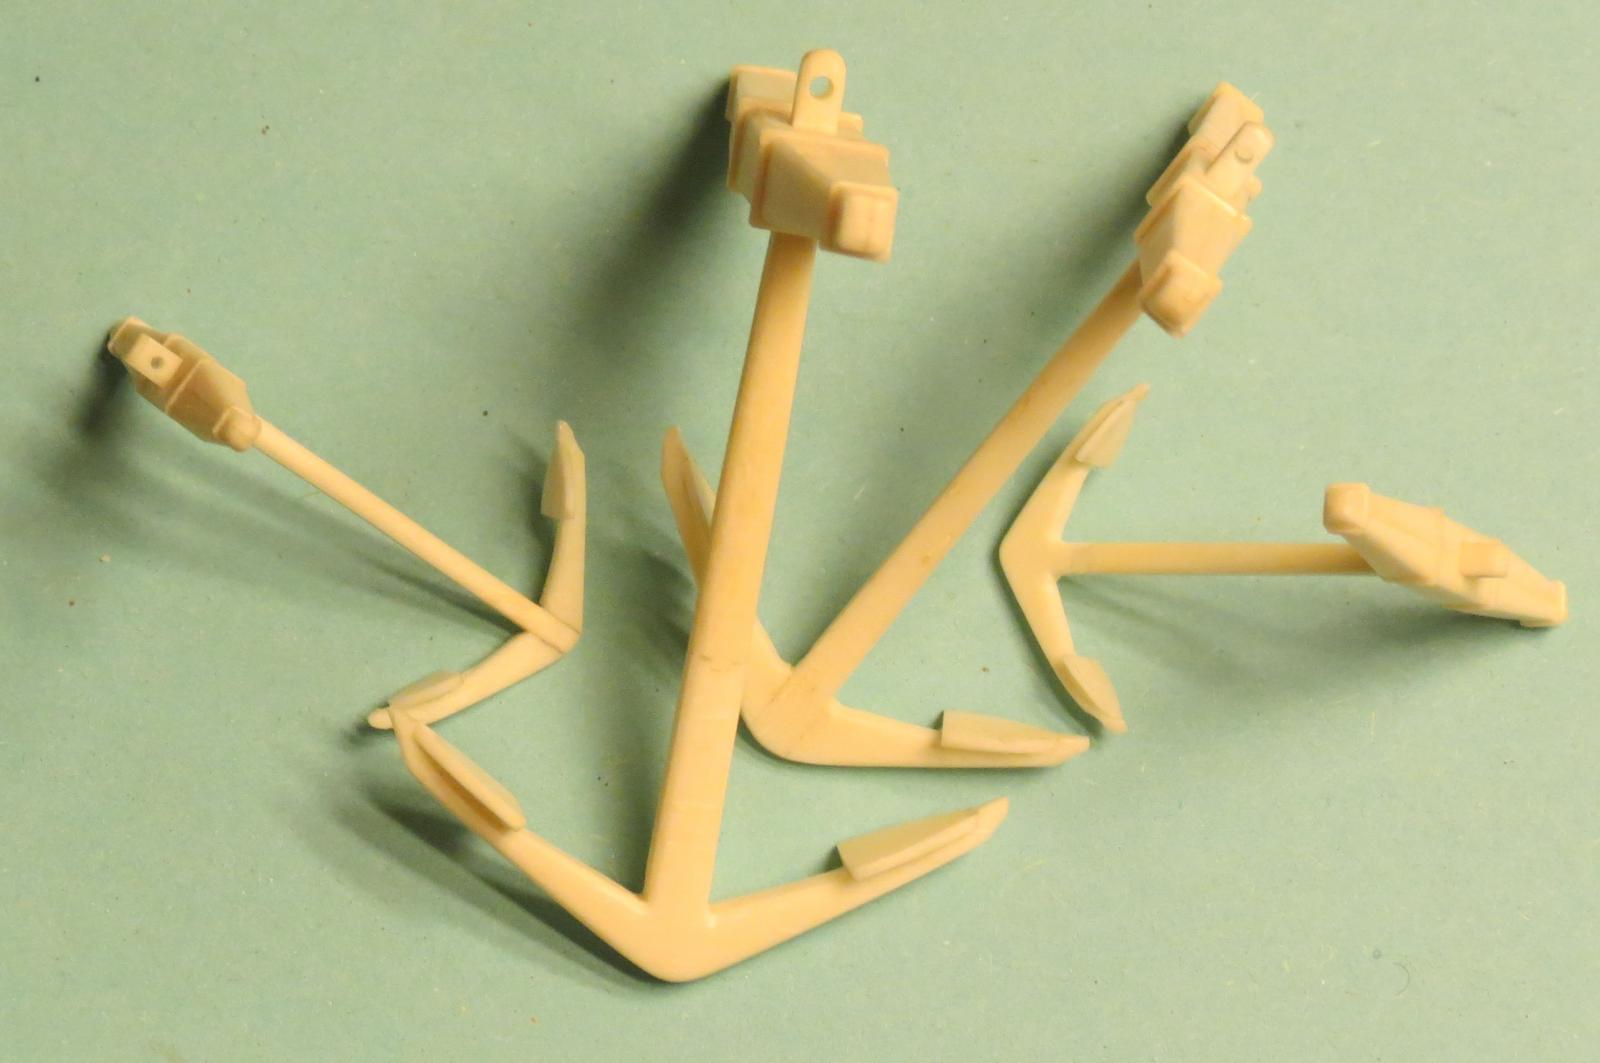
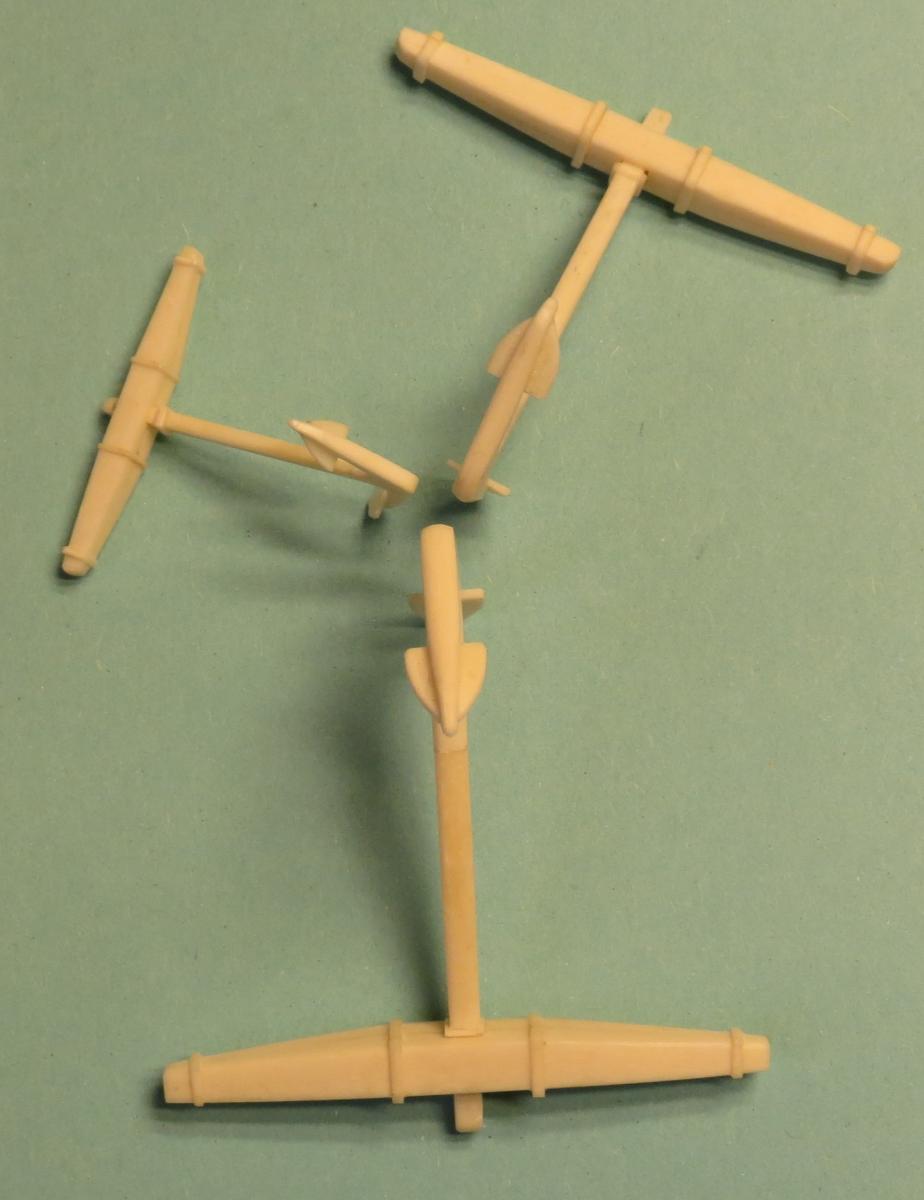
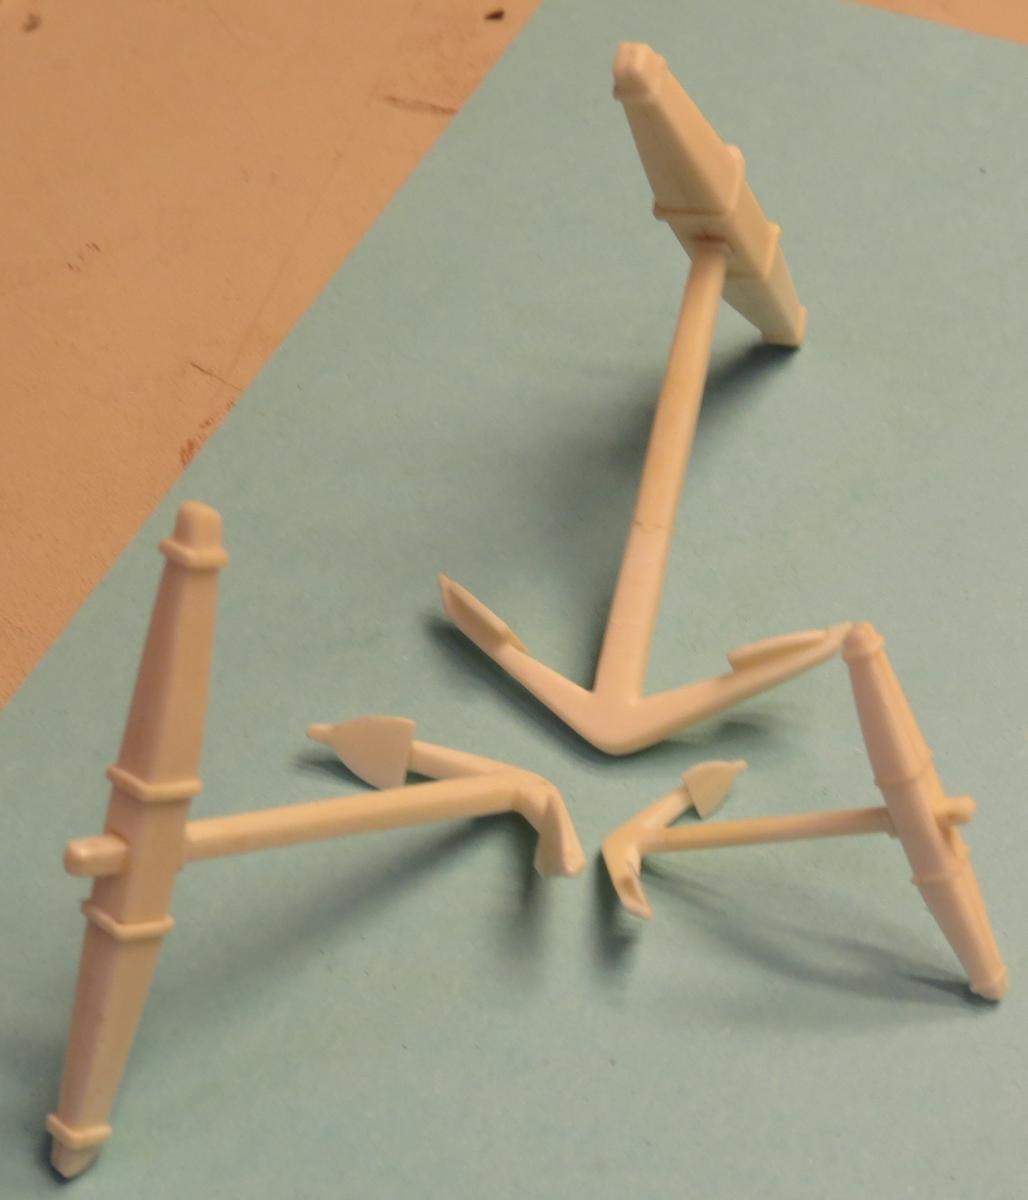
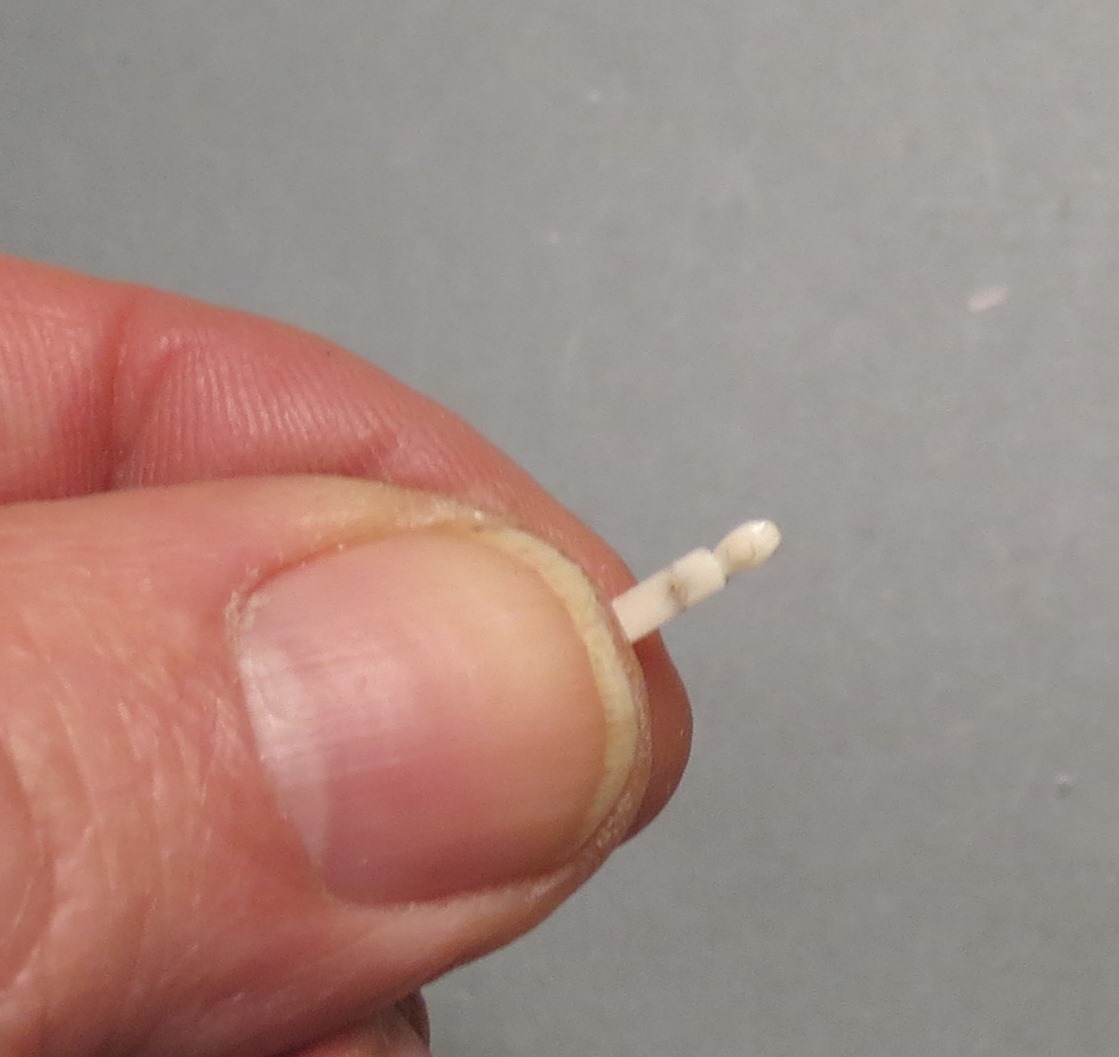
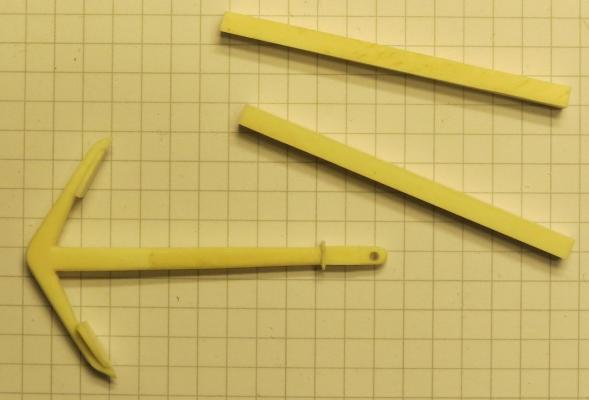
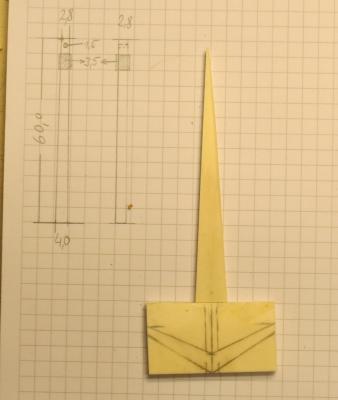
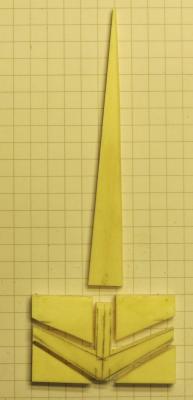
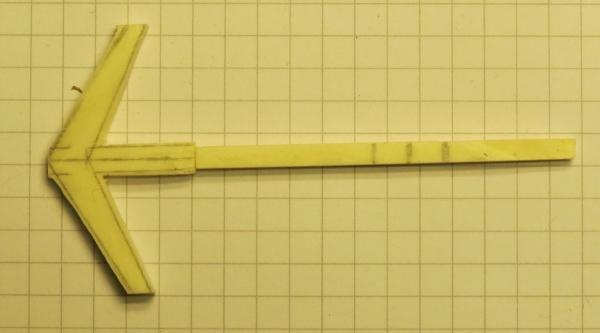
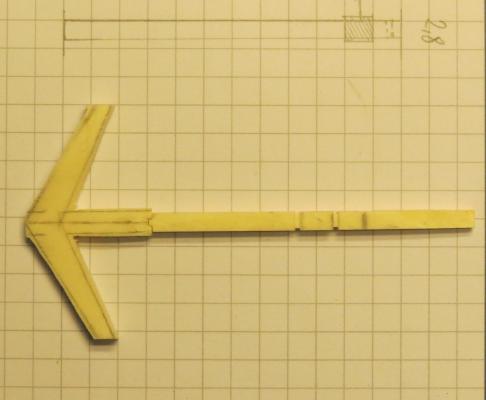
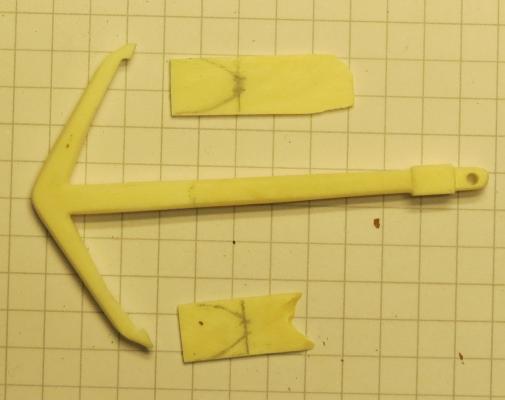
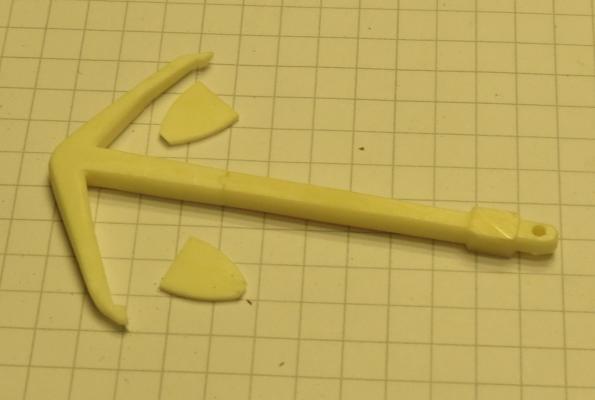
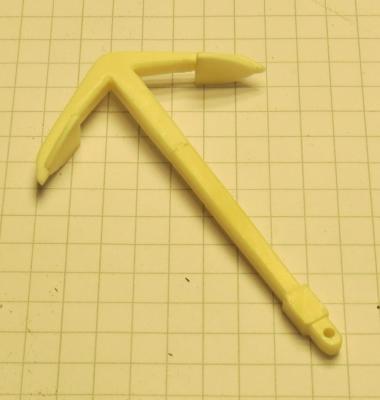
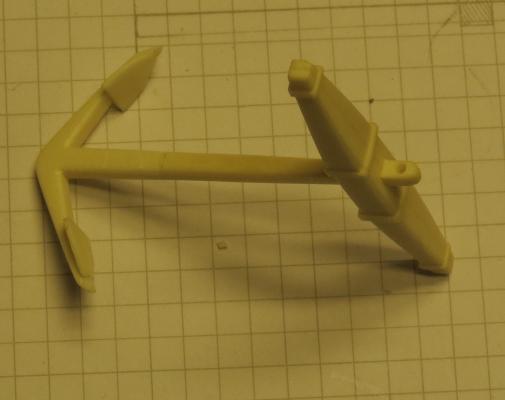
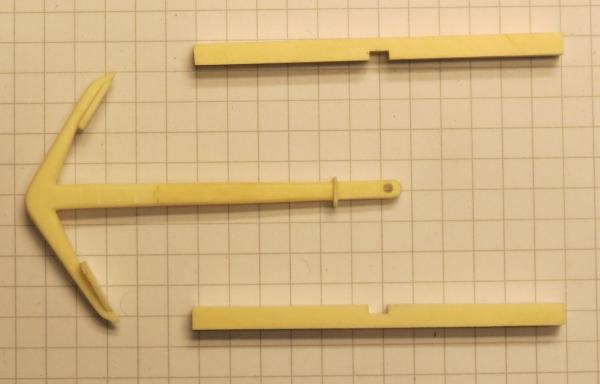
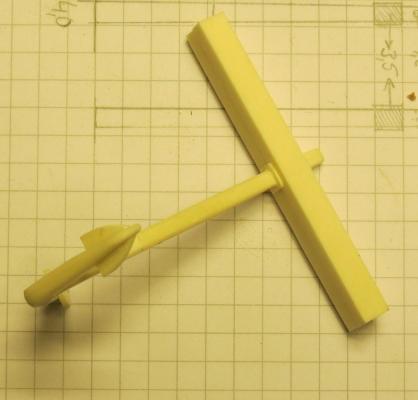
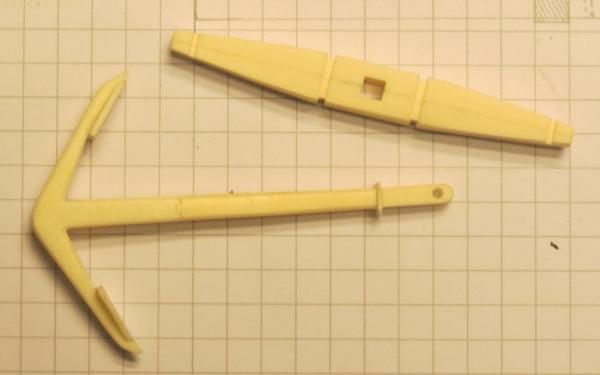
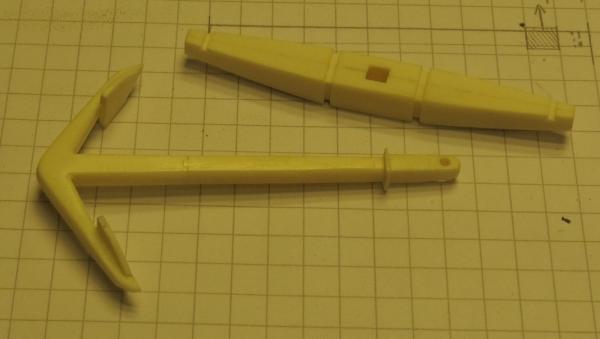
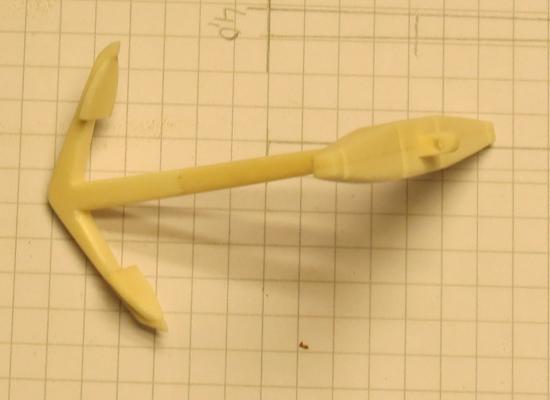
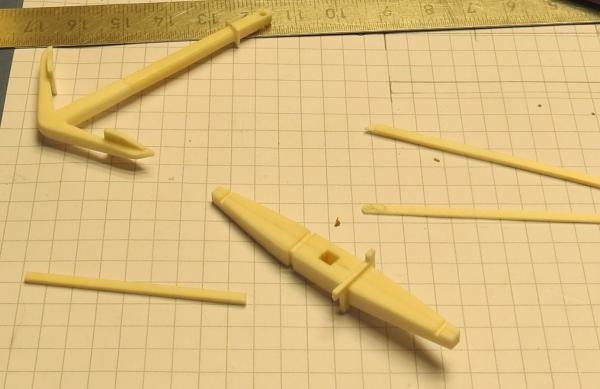
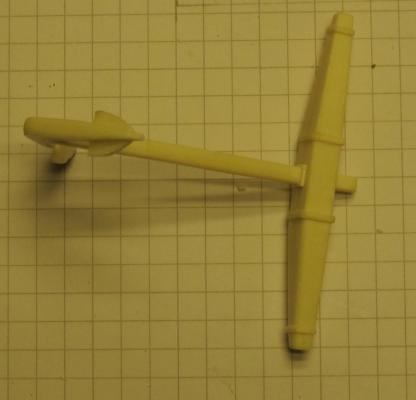
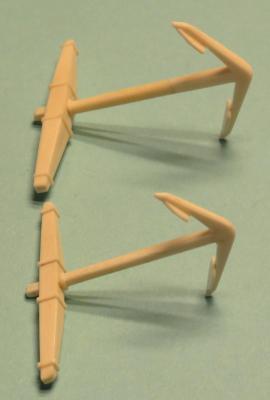
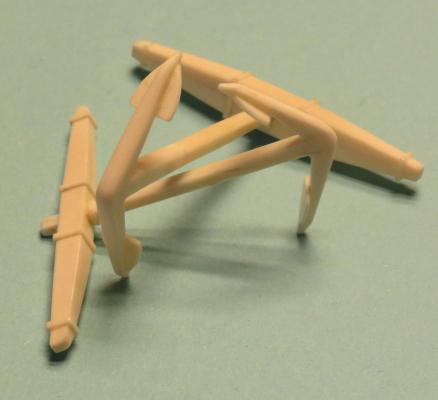
The anchor of the Royal Caroline Agent "P" has discovered a large blacksmith on one of its many rides and accurate documented as there made the anchors. First Step: The material But here we go, this time without much bla bla ..... let the pictures speaks I hope you have enjoyed the photos, the next round deals with the large Mars. Have fun


- 241 replies
-
- 25
-
-
- royal caroline
- yacht
- (and 1 more)
-
Hello friends, I'm back on deck. After a heart attack in Dec. 14 (1 Month Hospital) and pneumonia (15 Weeks), i look forward to fulfill my hobby again. The next report from building the Caroline is in progress....
- 241 replies
-
- 9
-
-
- royal caroline
- yacht
- (and 1 more)
-
ROYAL CAROLINE 1749 by Doris - 1:40 - CARD
Tarjack replied to DORIS's topic in - Build logs for subjects built 1501 - 1750
Hi Doris, fantastic work, as always- 881 replies
-
- 1
-
-
- royal caroline
- ship of the line
- (and 1 more)
-
Hallo Karl, einfach nur phantastisch just beautiful
- 662 replies
-
- 2
-
-
- bonhomme richard
- frigate
- (and 1 more)
-
Hello friends, I am unfortunately somewhat extremely busy at present. But the next report is nearly finished Bye for now
- 241 replies
-
- 5
-
-
- royal caroline
- yacht
- (and 1 more)
-
Hi Mike, I do the glue on a small disk and from there I take the glue with a narrow blade
-
Hi Michael, Yes, it is. The work with bones is a nice addition and opens the model horizon to do other things
-
because CA glue is the biggest sh......peep CA shall be taken only to attach small pieces befor glue with real glue CA did not work great on bone CA crystallises out and the component is destroyed.
- 241 replies
-
- 1
-
-
- royal caroline
- yacht
- (and 1 more)
-
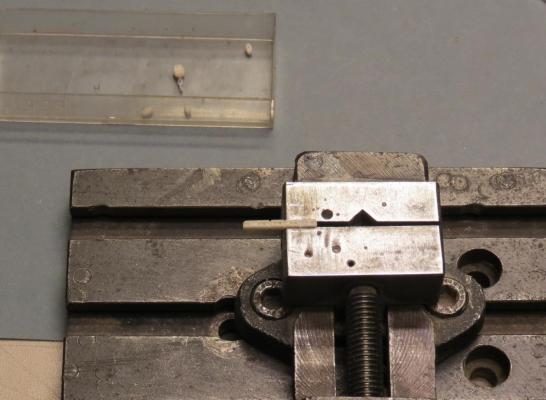
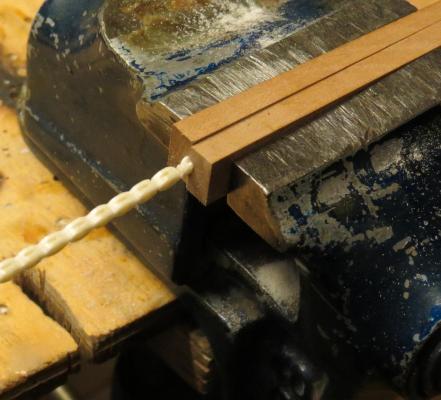
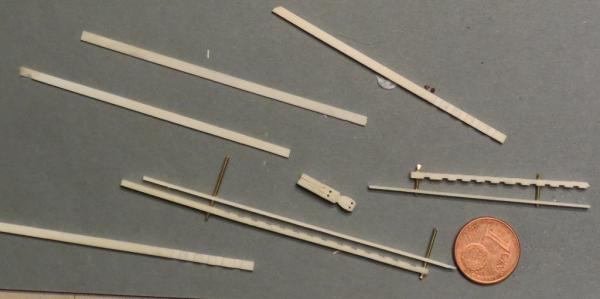
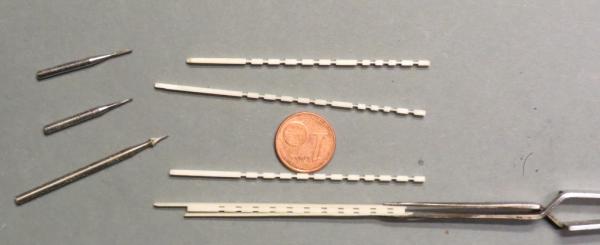
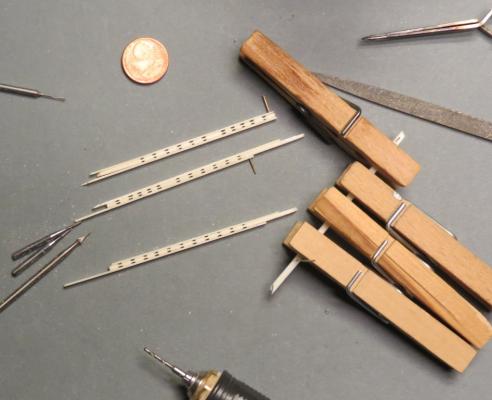
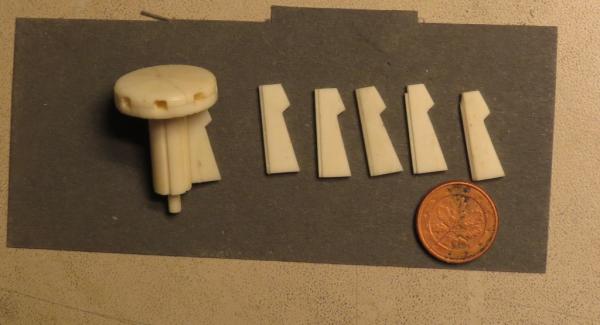
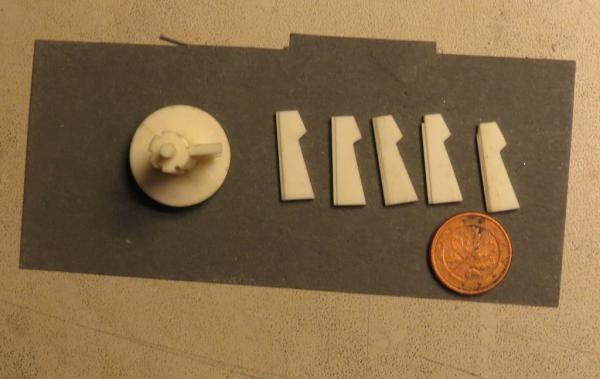
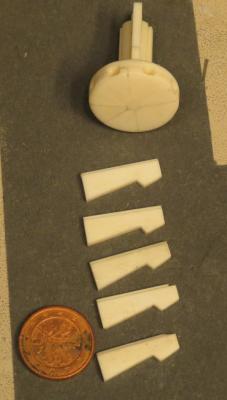
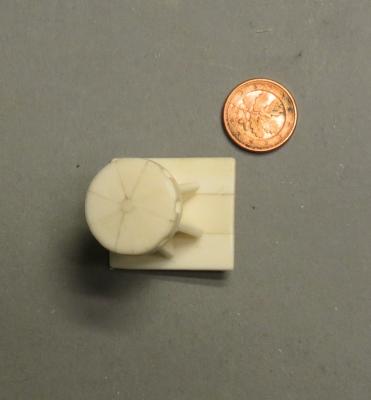
Continuation of #197 The blanks now filed Now the self-made holding tool is used http://modelshipworld.com/index.php?/topic/5248-holding-tool-for-holding-small-parts/ The result looks like this and so in wood have fun


- 241 replies
-
- 14
-
-
- royal caroline
- yacht
- (and 1 more)
-
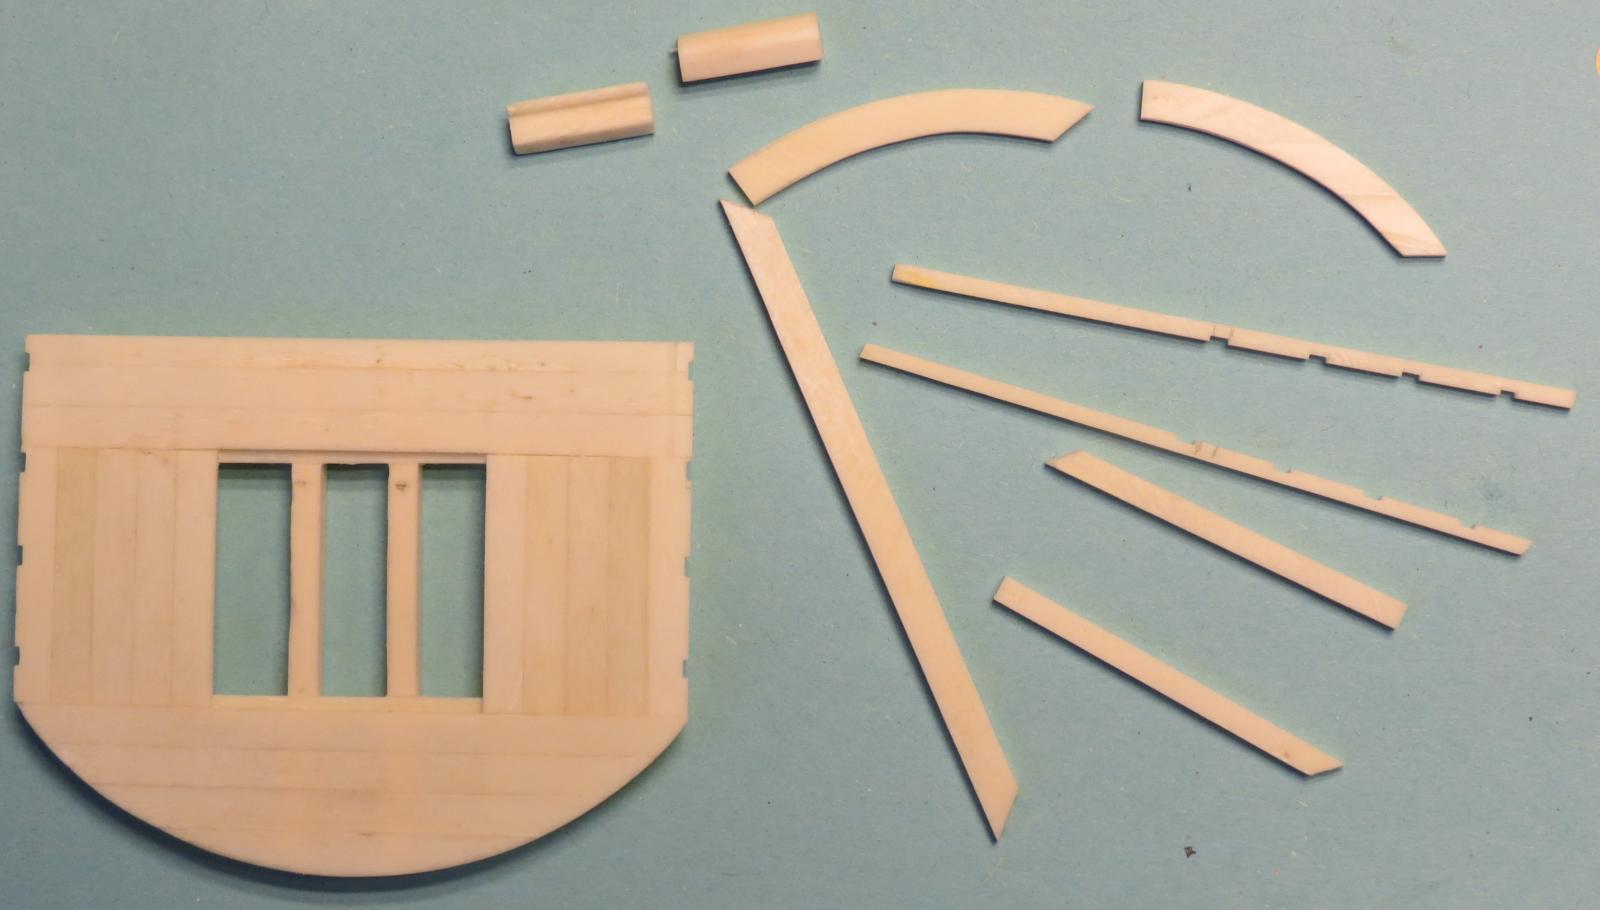
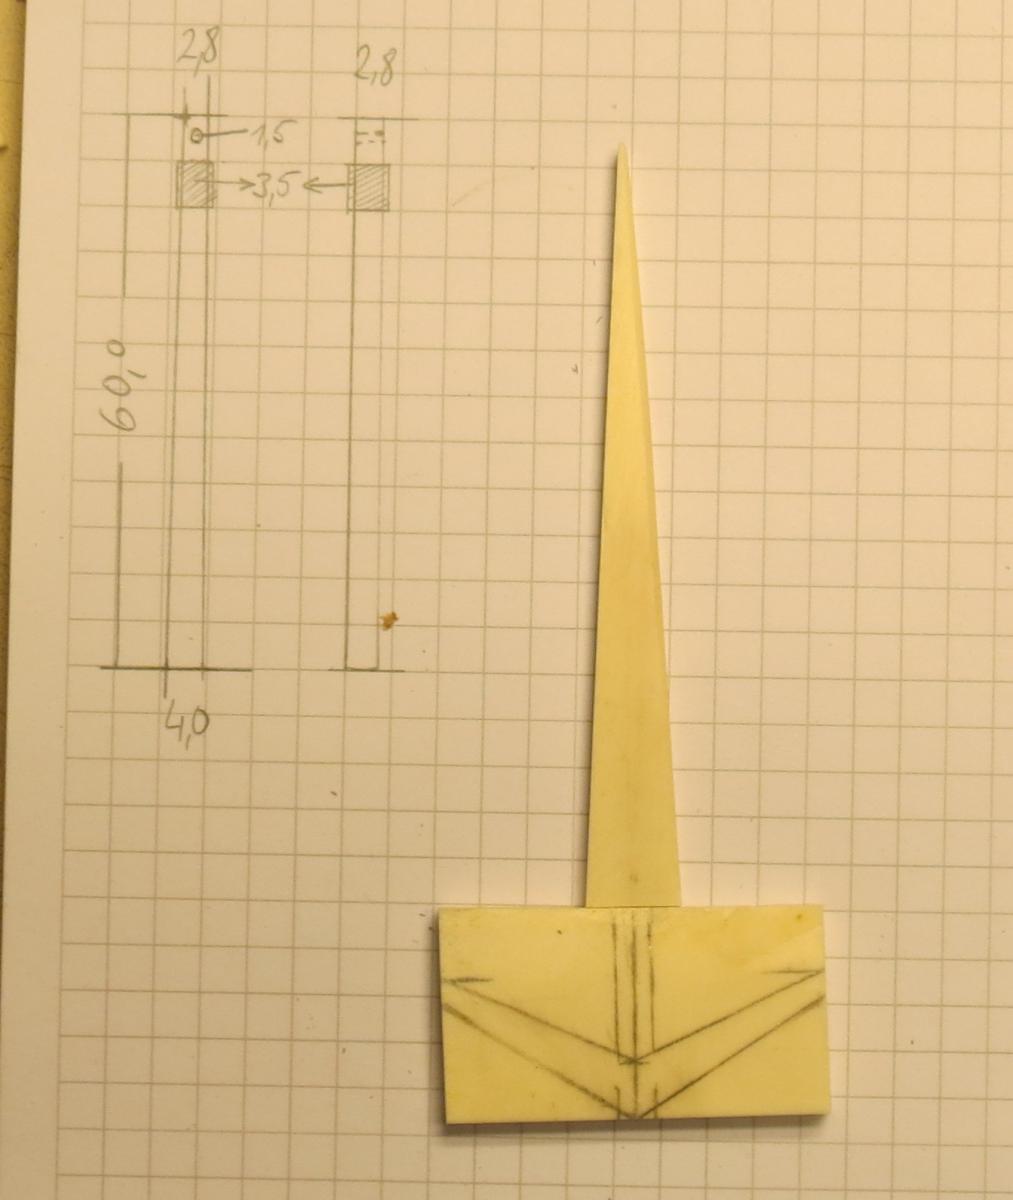
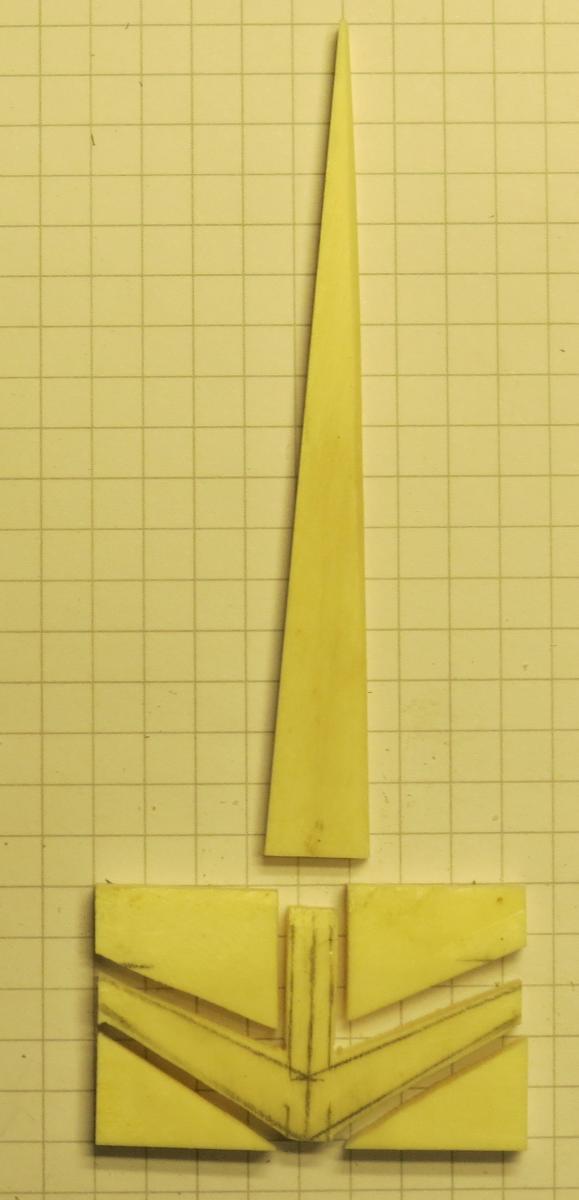
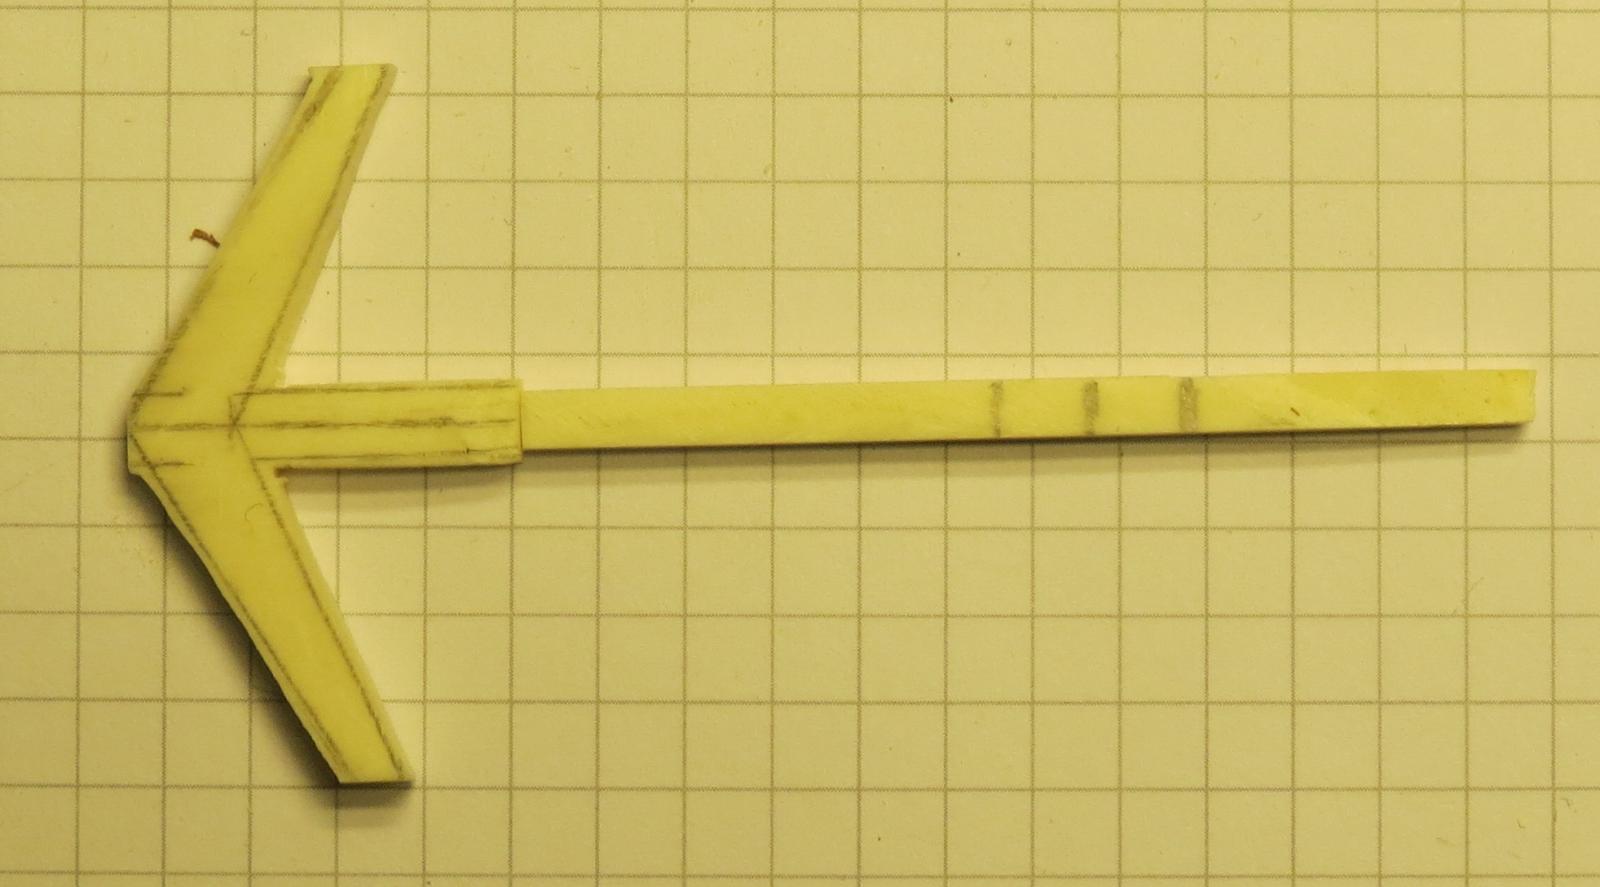
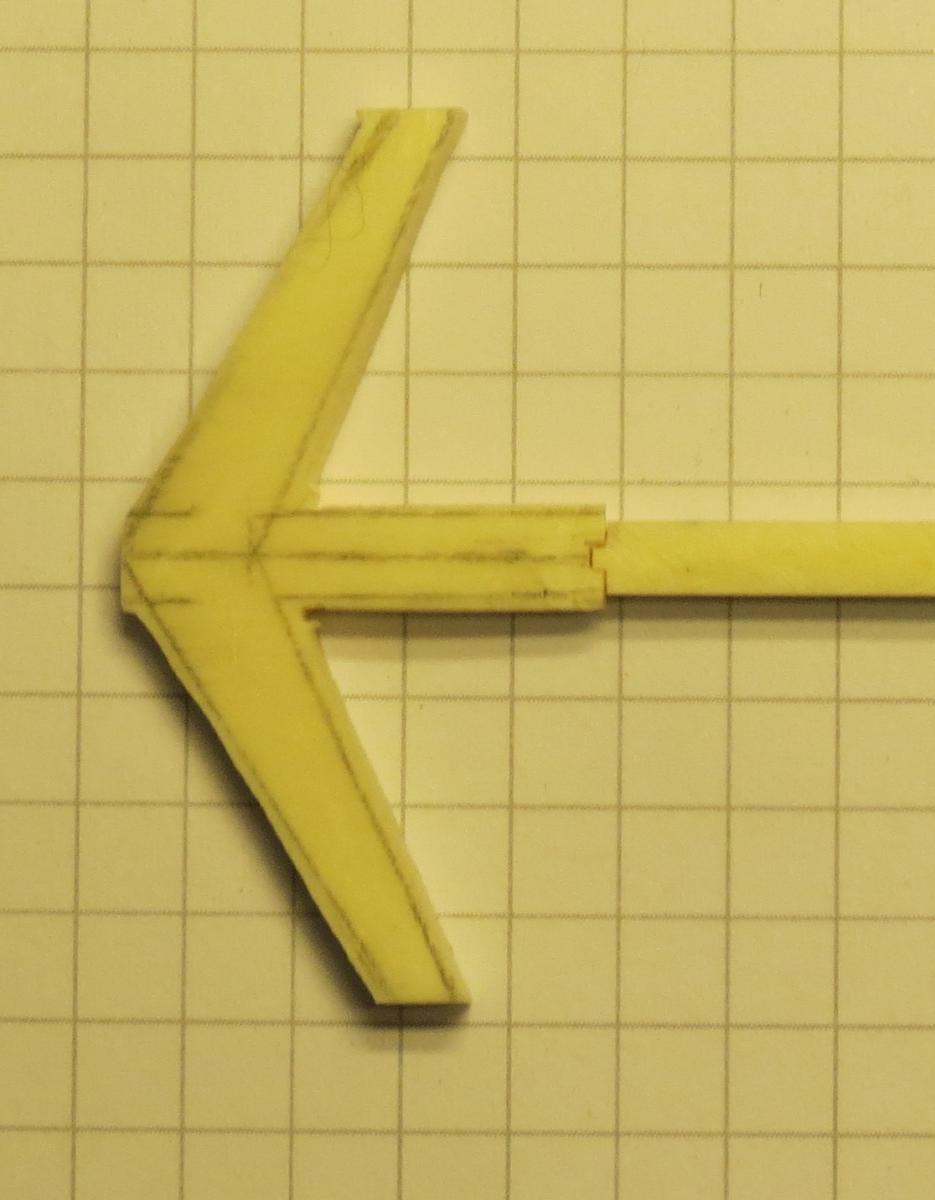
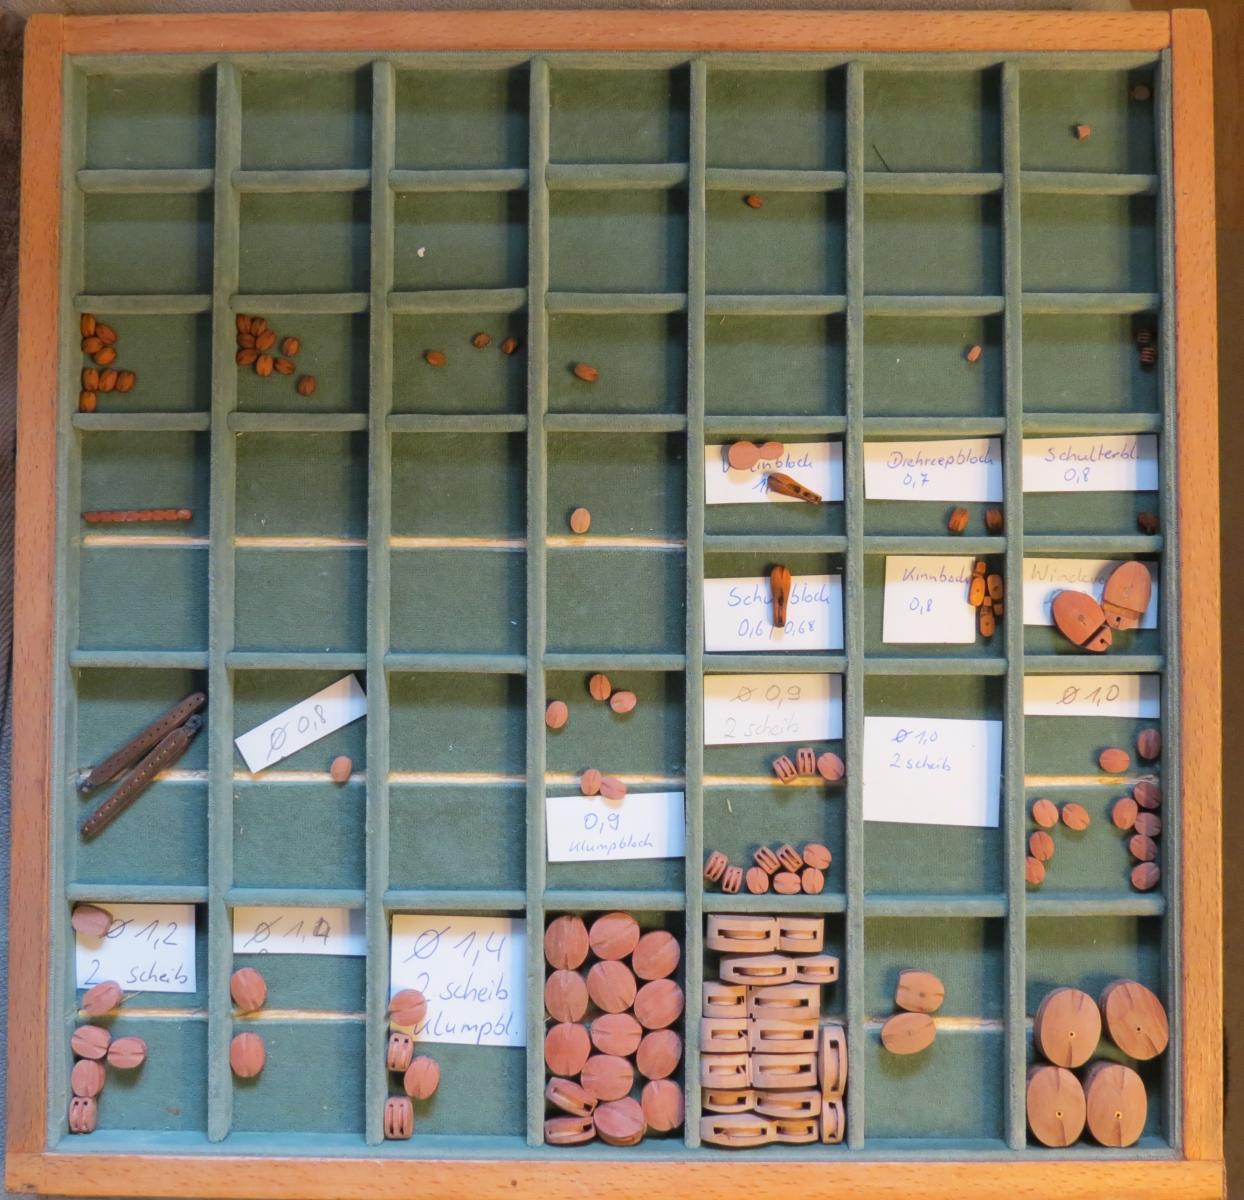
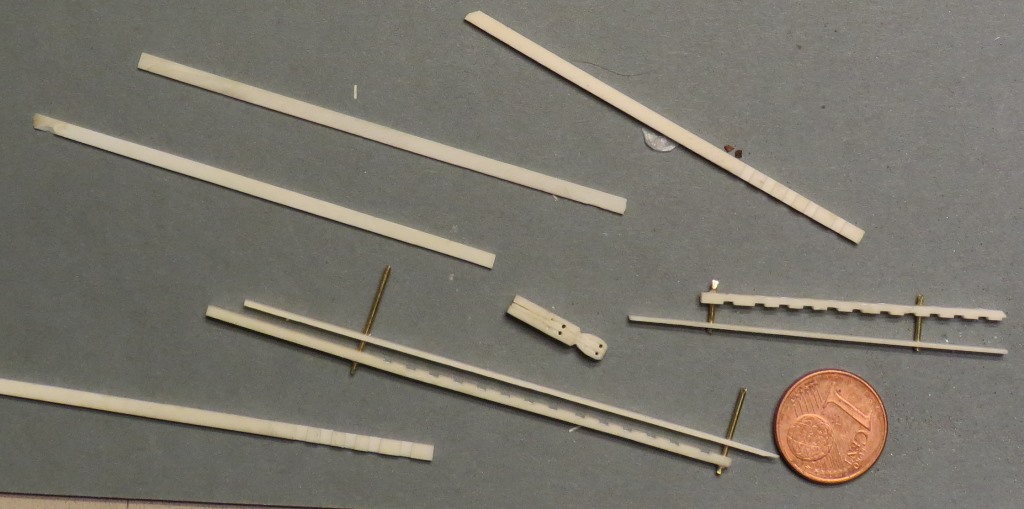
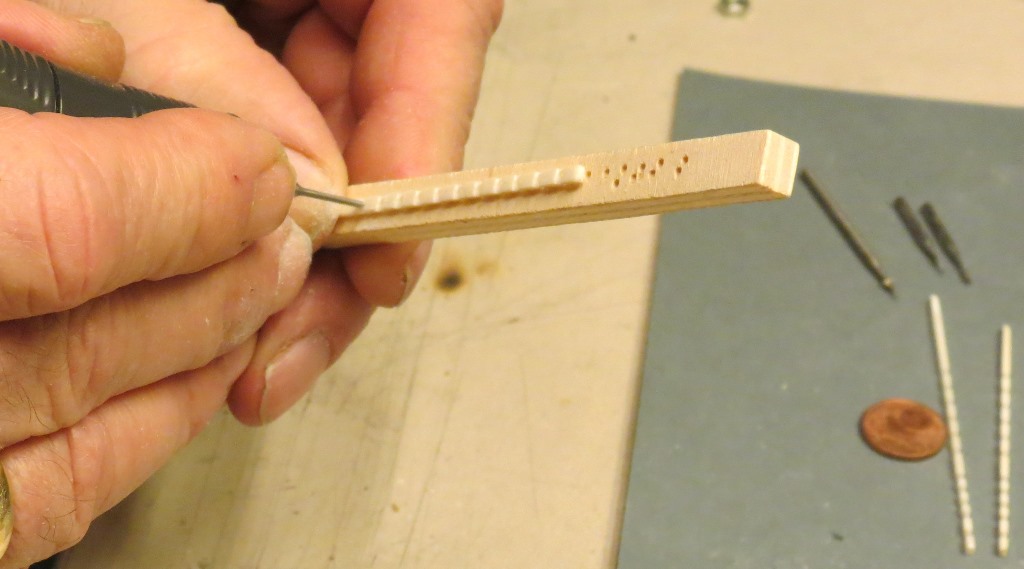
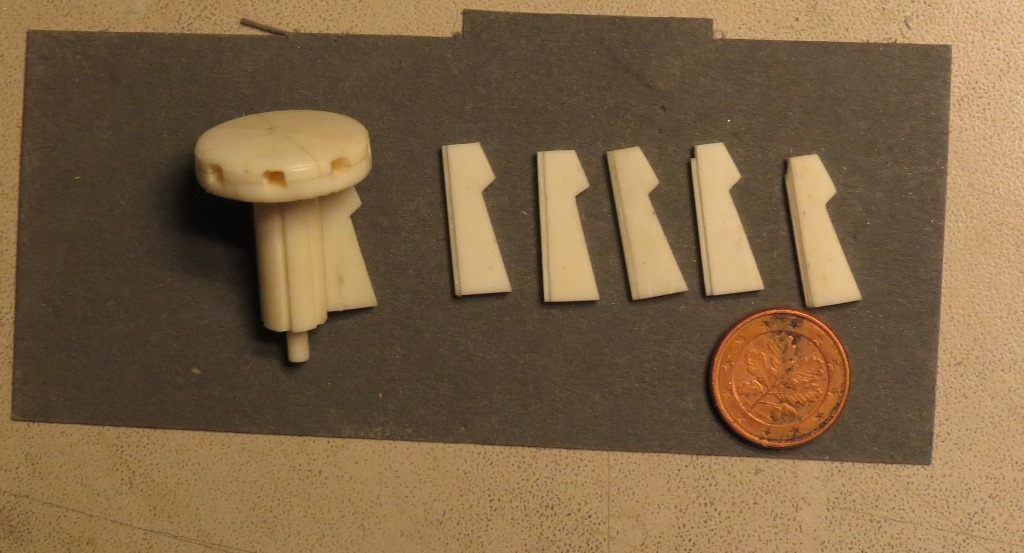
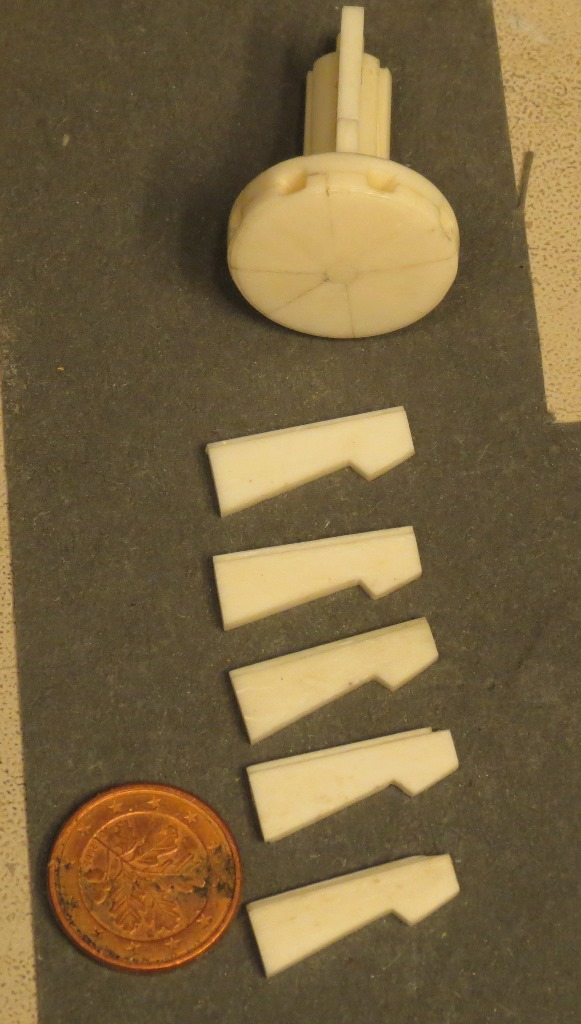
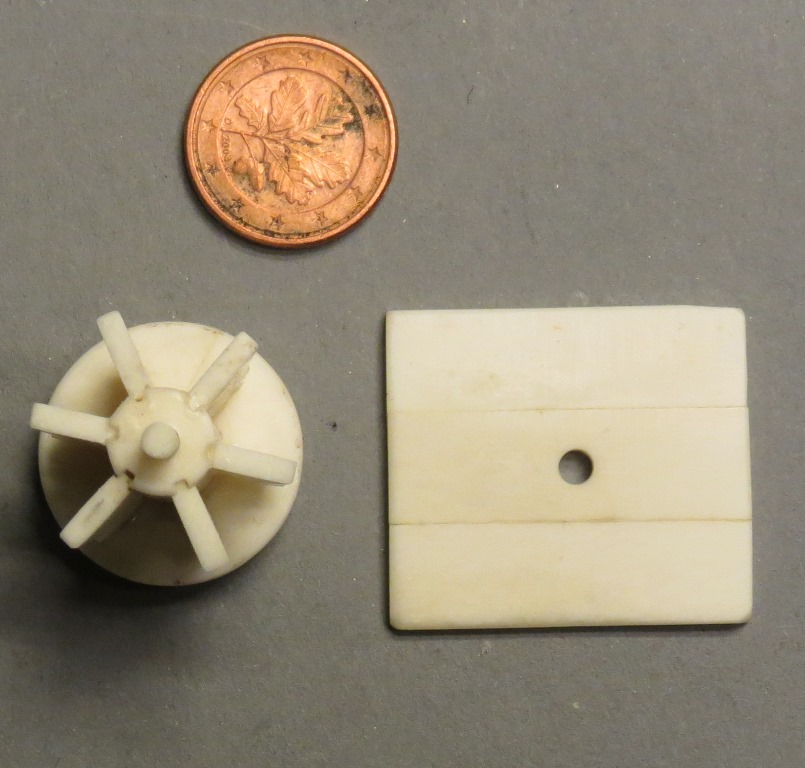
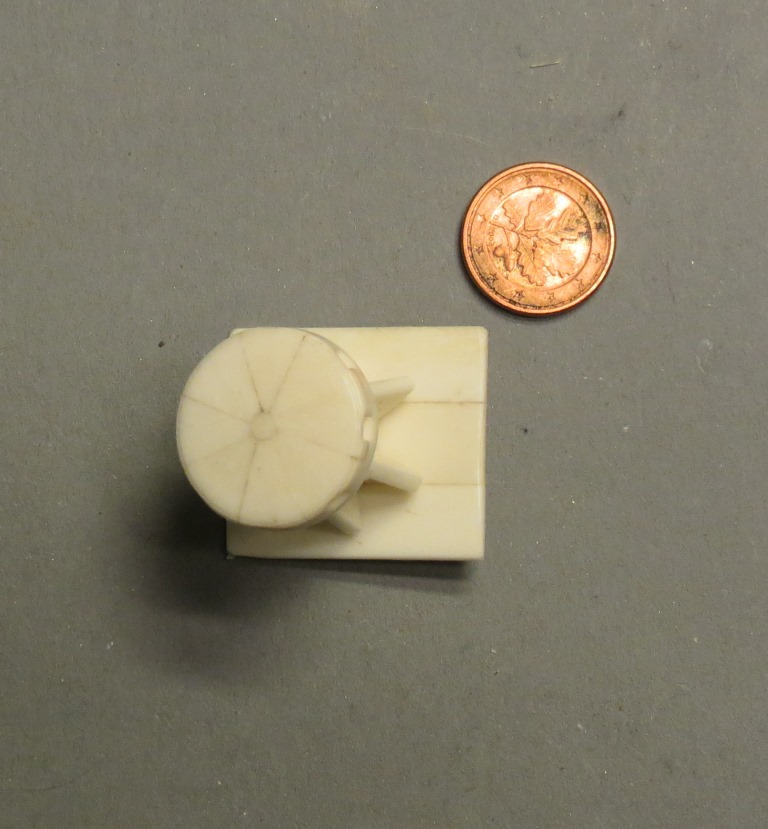
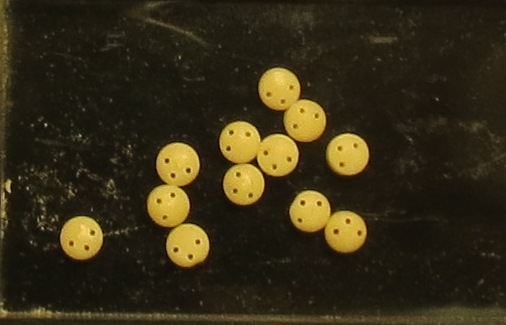
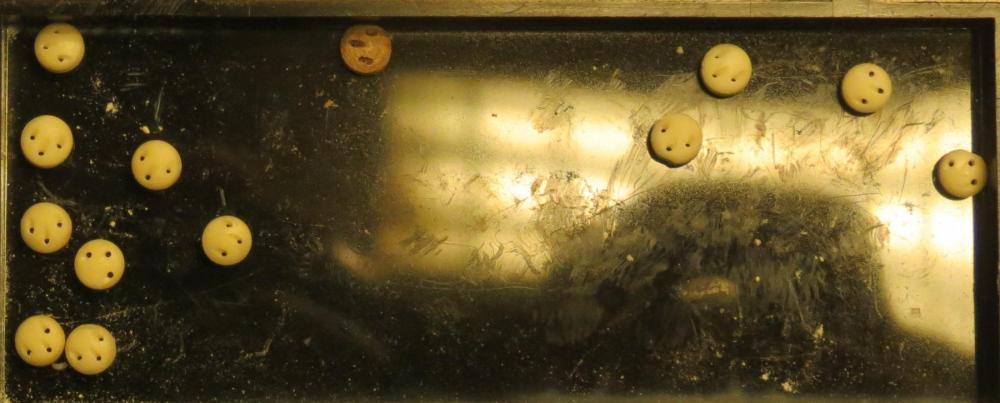
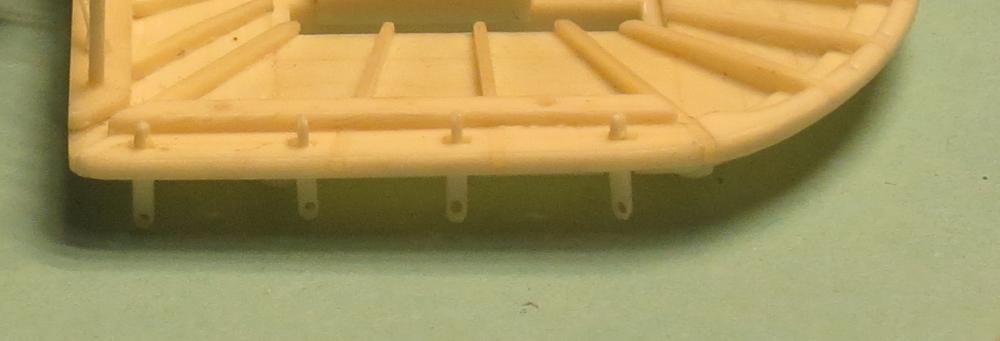
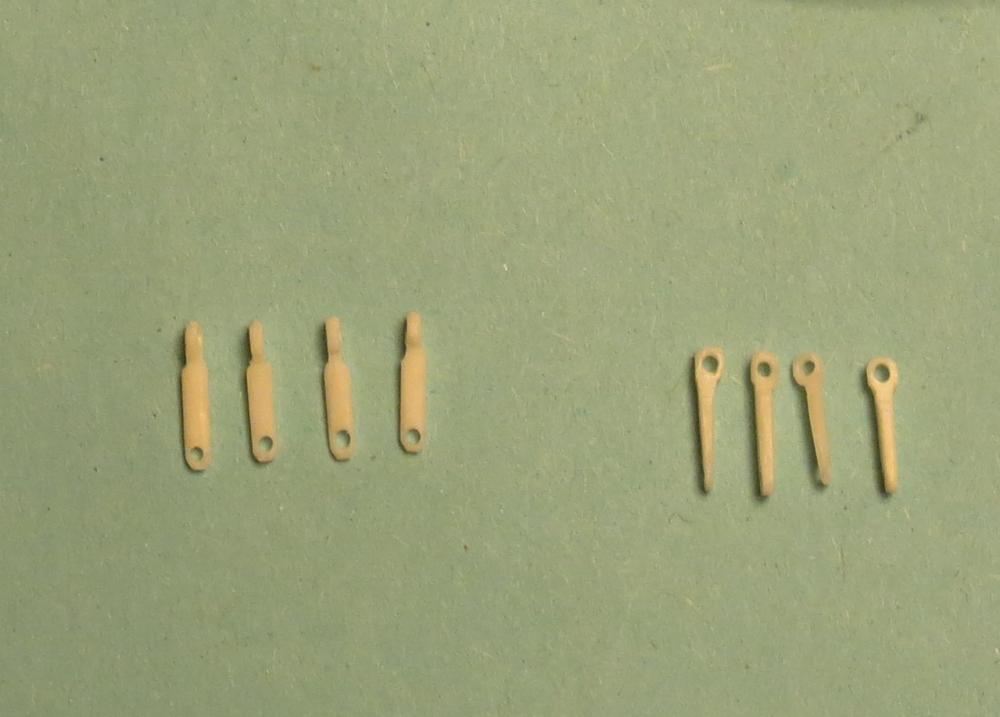
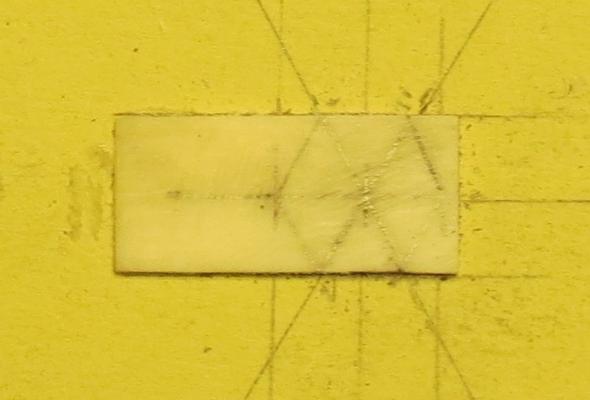
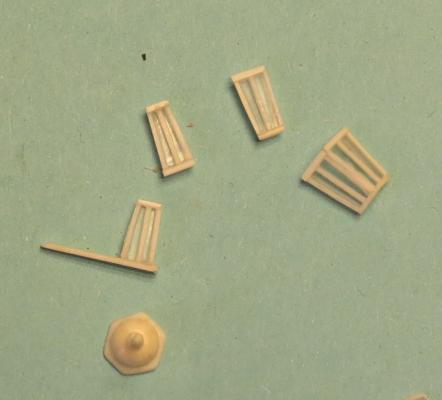
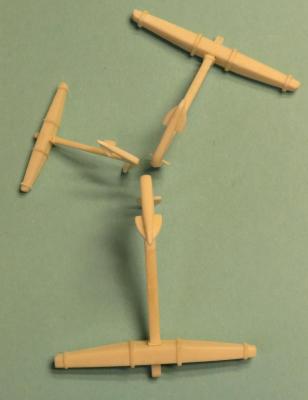
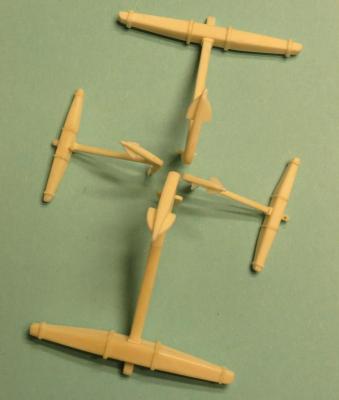
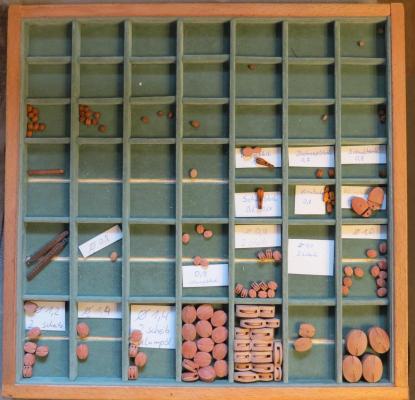
Tell me ....... have I already shown, how I've made the blocks ? .................. Not ? well then At this point should be said....... exactly the same method applies to wooden blocks First, as always choose the material The length of the blocks and the length of disk apertures are marked on the raw material and cut out on the table saw. The bar is sawn on both sides for two-disc Blocks, so it is guaranteed that both discs openings are parallel Now the parts are joined together. So that nothing can slip secured with guide pins Next step is to make the axle holes. The holes are the same diameter as the discs Bring the pieces together with bone glue. Now mounting the rotated axes / turn washers ..... if you will, that the discs are portable, leaves the glue away at this point will be continued


- 241 replies
-
- 9
-
-
- royal caroline
- yacht
- (and 1 more)
-
Hello Karl, oh boy.................. and you call me artist. I wish, when i grow up, i can make a masterpice like this
- 662 replies
-
- 2
-
-
- bonhomme richard
- frigate
- (and 1 more)
-
ROYAL CAROLINE 1749 by Doris - 1:40 - CARD
Tarjack replied to DORIS's topic in - Build logs for subjects built 1501 - 1750
Hello Doris, I think my crew is on the wrong ship. What do you think? I should keelhaul those guys very very good as allways. I wish i can do this too- 881 replies
-
- 1
-
-
- royal caroline
- ship of the line
- (and 1 more)
-
mon-key...peeeeeeeep; terrific he dude booyakascha
-
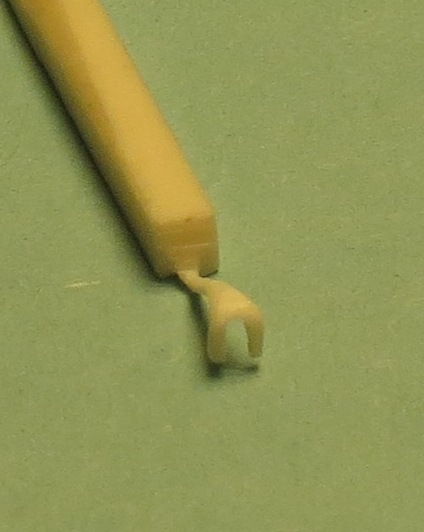
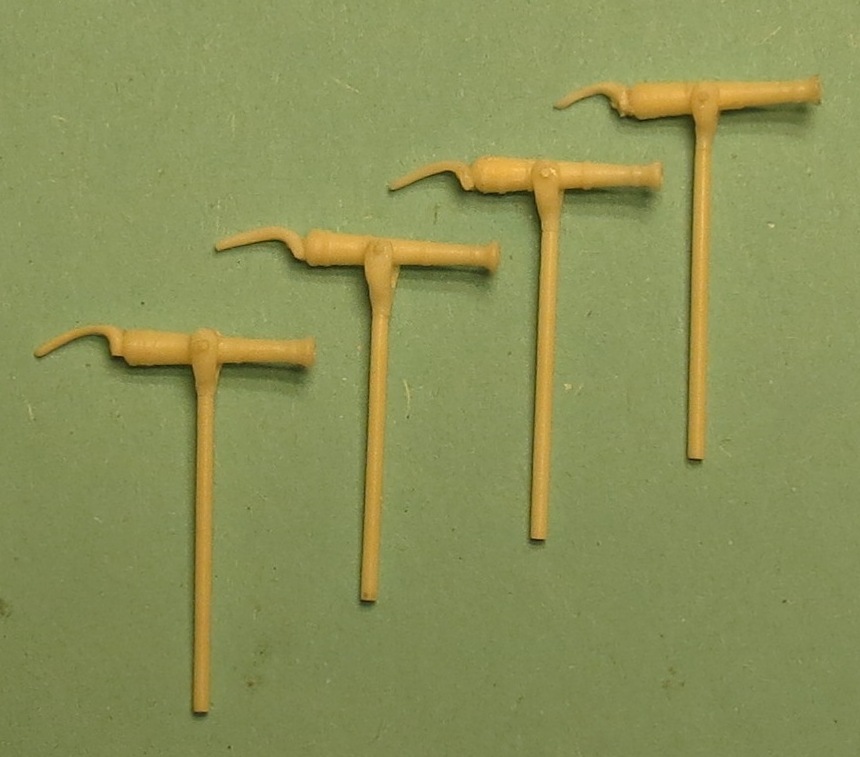
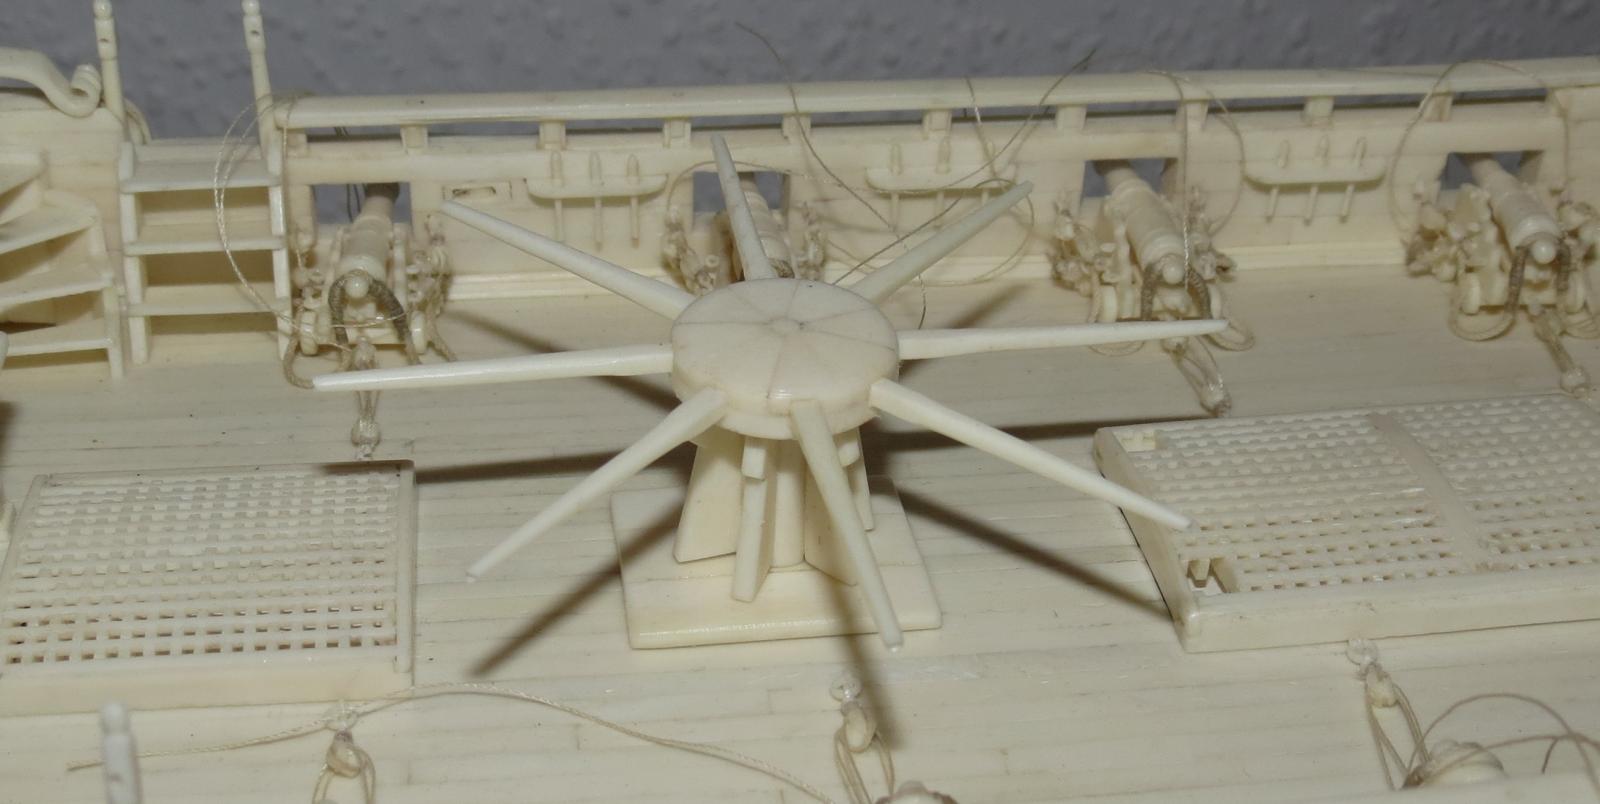
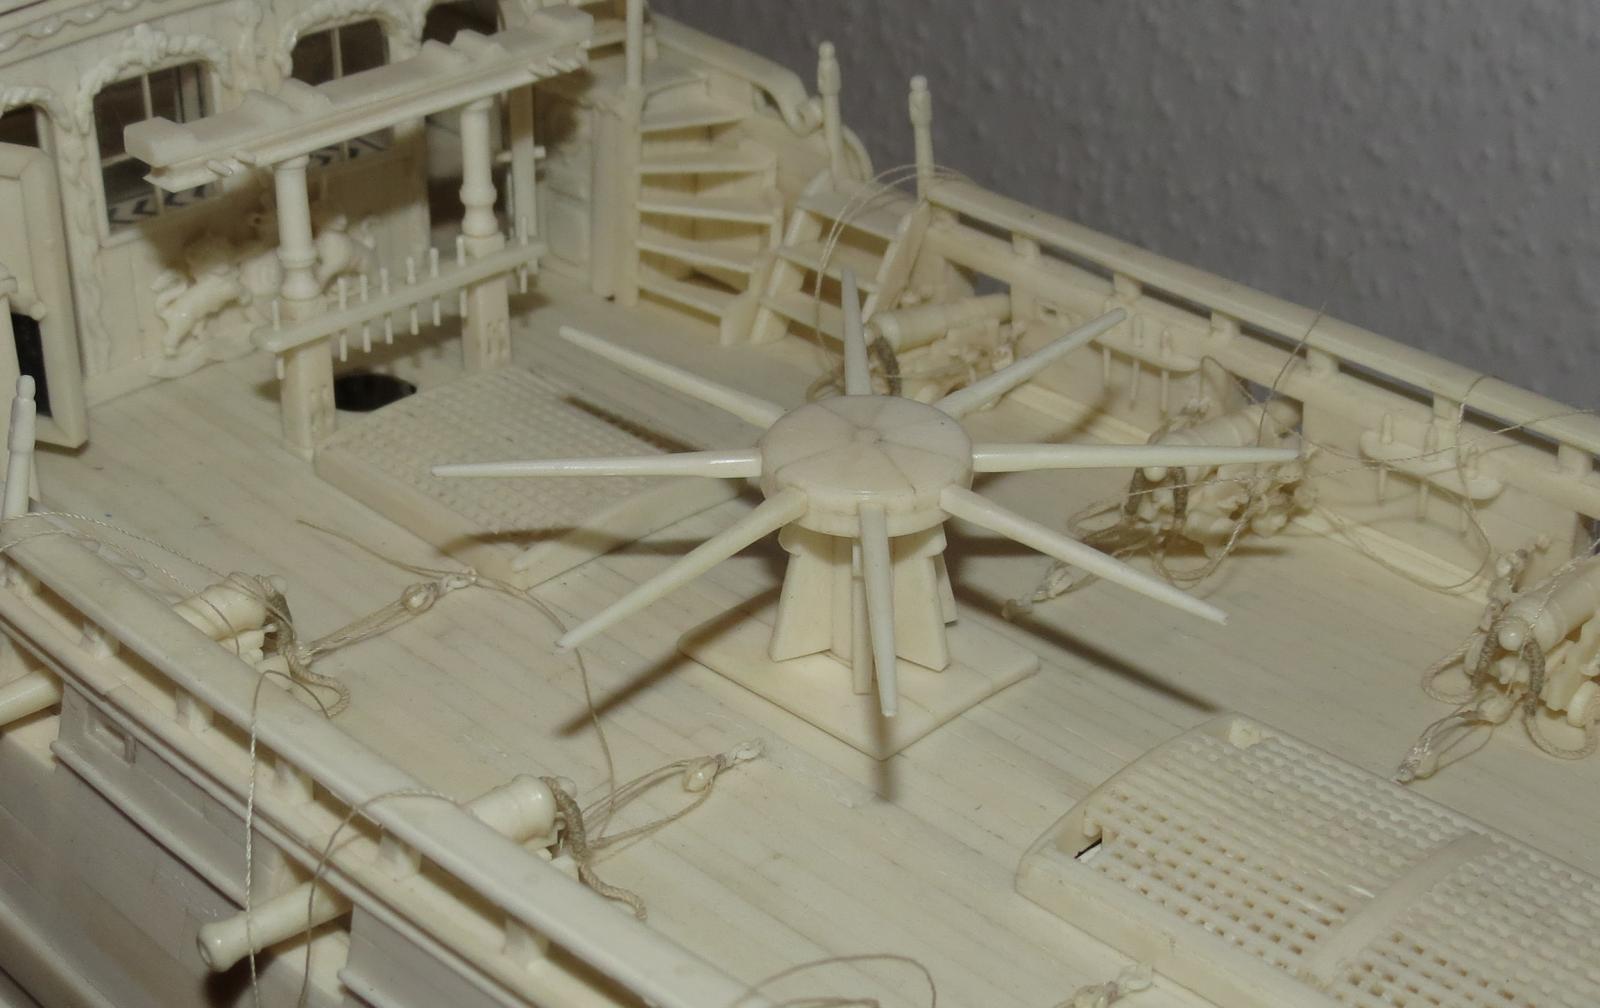
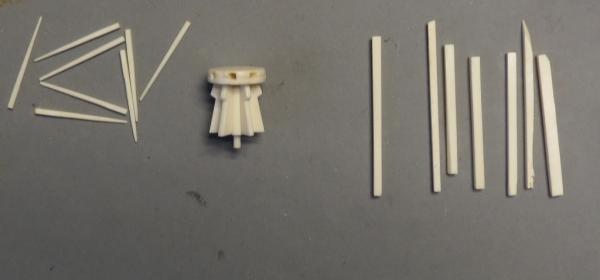
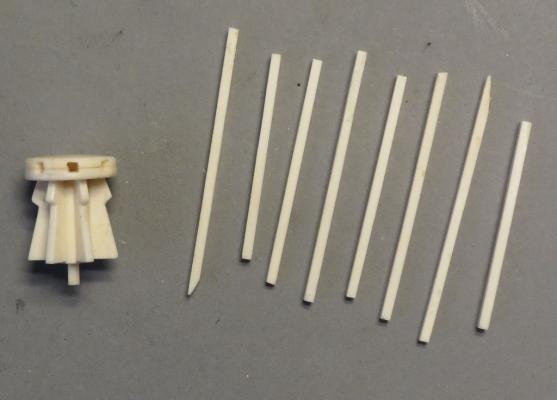
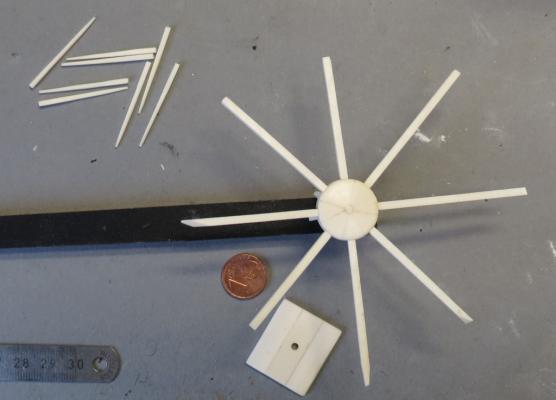
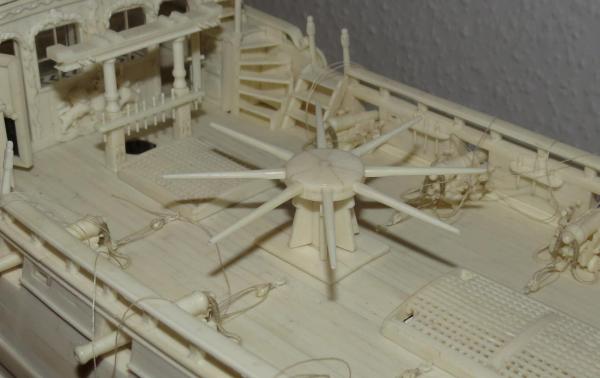
i also rebuild some pieces of the capstan the replaced parts barrel; whelps; capstan bar; Now enjoy the pic`s Now are the pawl`s, rope and whelp-chocks still missing about this I will report next time have fun


- 241 replies
-
- 14
-
-
- royal caroline
- yacht
- (and 1 more)
-
Not happy is not the proper expression. I pressed me long years before the remodeling