Alex Parker
-
Posts
28 -
Joined
-
Last visited
-
 Lt. Biggles reacted to a post in a topic:
USS Gambier Bay by Alex Parker - Hasegawa - 1:350 - PLASTIC
Lt. Biggles reacted to a post in a topic:
USS Gambier Bay by Alex Parker - Hasegawa - 1:350 - PLASTIC
-
Canute reacted to a post in a topic:
USS Gambier Bay by Alex Parker - Hasegawa - 1:350 - PLASTIC
-
Canute reacted to a post in a topic:
USS Gambier Bay by Alex Parker - Hasegawa - 1:350 - PLASTIC
-
Canute reacted to a post in a topic:
USS Gambier Bay by Alex Parker - Hasegawa - 1:350 - PLASTIC
-
Canute reacted to a post in a topic:
USS Gambier Bay by Alex Parker - Hasegawa - 1:350 - PLASTIC
-
Landlubber Mike reacted to a post in a topic:
USS Gambier Bay by Alex Parker - Hasegawa - 1:350 - PLASTIC
-
Landlubber Mike reacted to a post in a topic:
USS Gambier Bay by Alex Parker - Hasegawa - 1:350 - PLASTIC
-
Landlubber Mike reacted to a post in a topic:
USS Gambier Bay by Alex Parker - Hasegawa - 1:350 - PLASTIC
-
Landlubber Mike reacted to a post in a topic:
USS Gambier Bay by Alex Parker - Hasegawa - 1:350 - PLASTIC
-
Landlubber Mike reacted to a post in a topic:
USS Gambier Bay by Alex Parker - Hasegawa - 1:350 - PLASTIC
-
Detailed rundown of the complicated history of US Navy ship camouflage in WWII https://en.wikipedia.org/wiki/World_War_II_ship_camouflage_measures_of_the_United_States_Navy
- 49 replies
-
- 4
-
-
- gambier bay
- hasegawa
- (and 1 more)
-
Thanks Roger, As I am also a bit of a woodworker, I was thinking I would turn some pedestals out of some nice burl wood, maybe walnut or cherry, on my lathe, and then mount them on a black-painted wood or possibly black granite rectangular base. Not exactly settled on that, but at the rate the build is going, I have months to decide...
- 49 replies
-
- 3
-
-
- gambier bay
- hasegawa
- (and 1 more)
-
Alex Parker reacted to a post in a topic:
USS Gambier Bay by Alex Parker - Hasegawa - 1:350 - PLASTIC
-
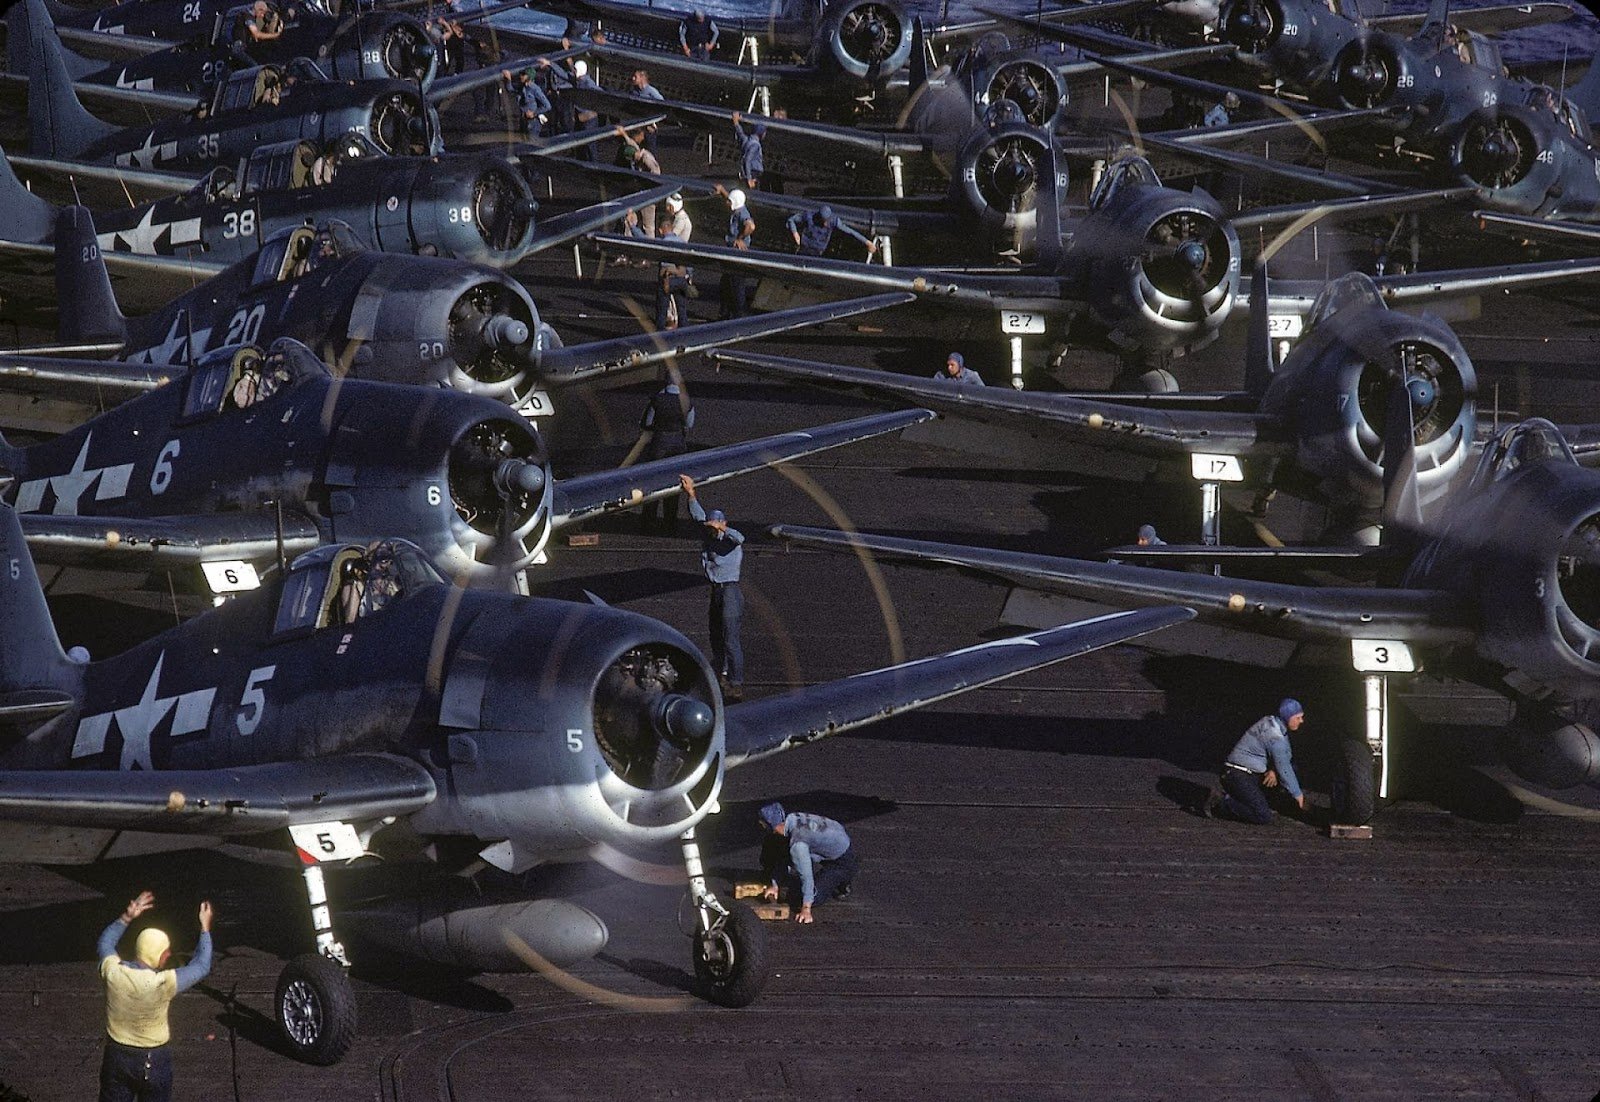
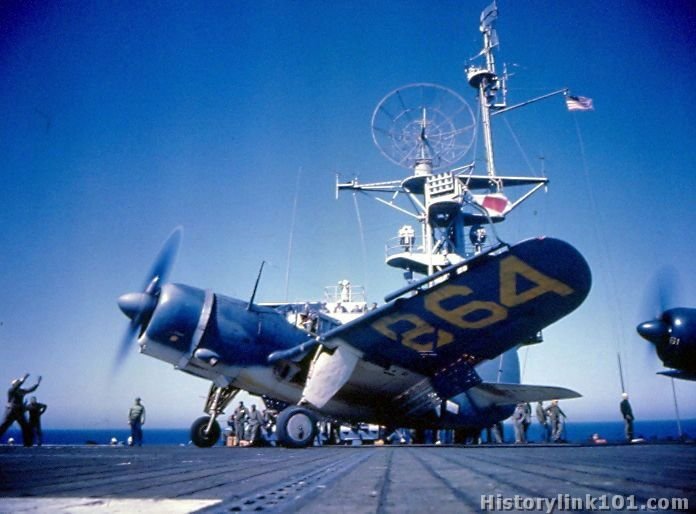
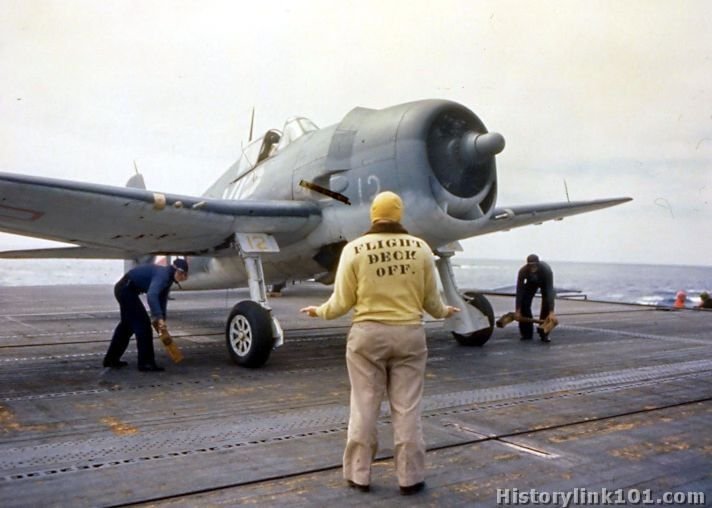
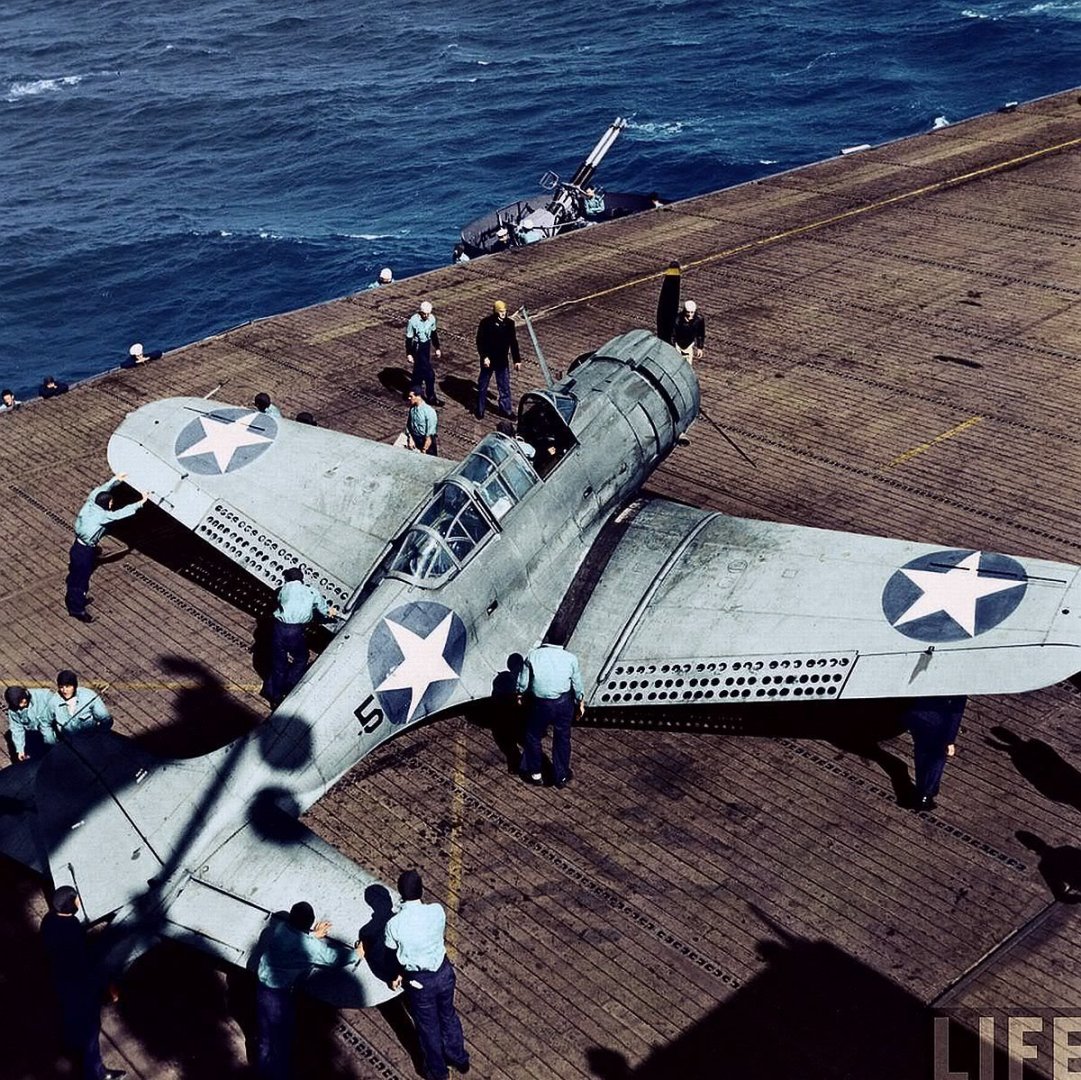
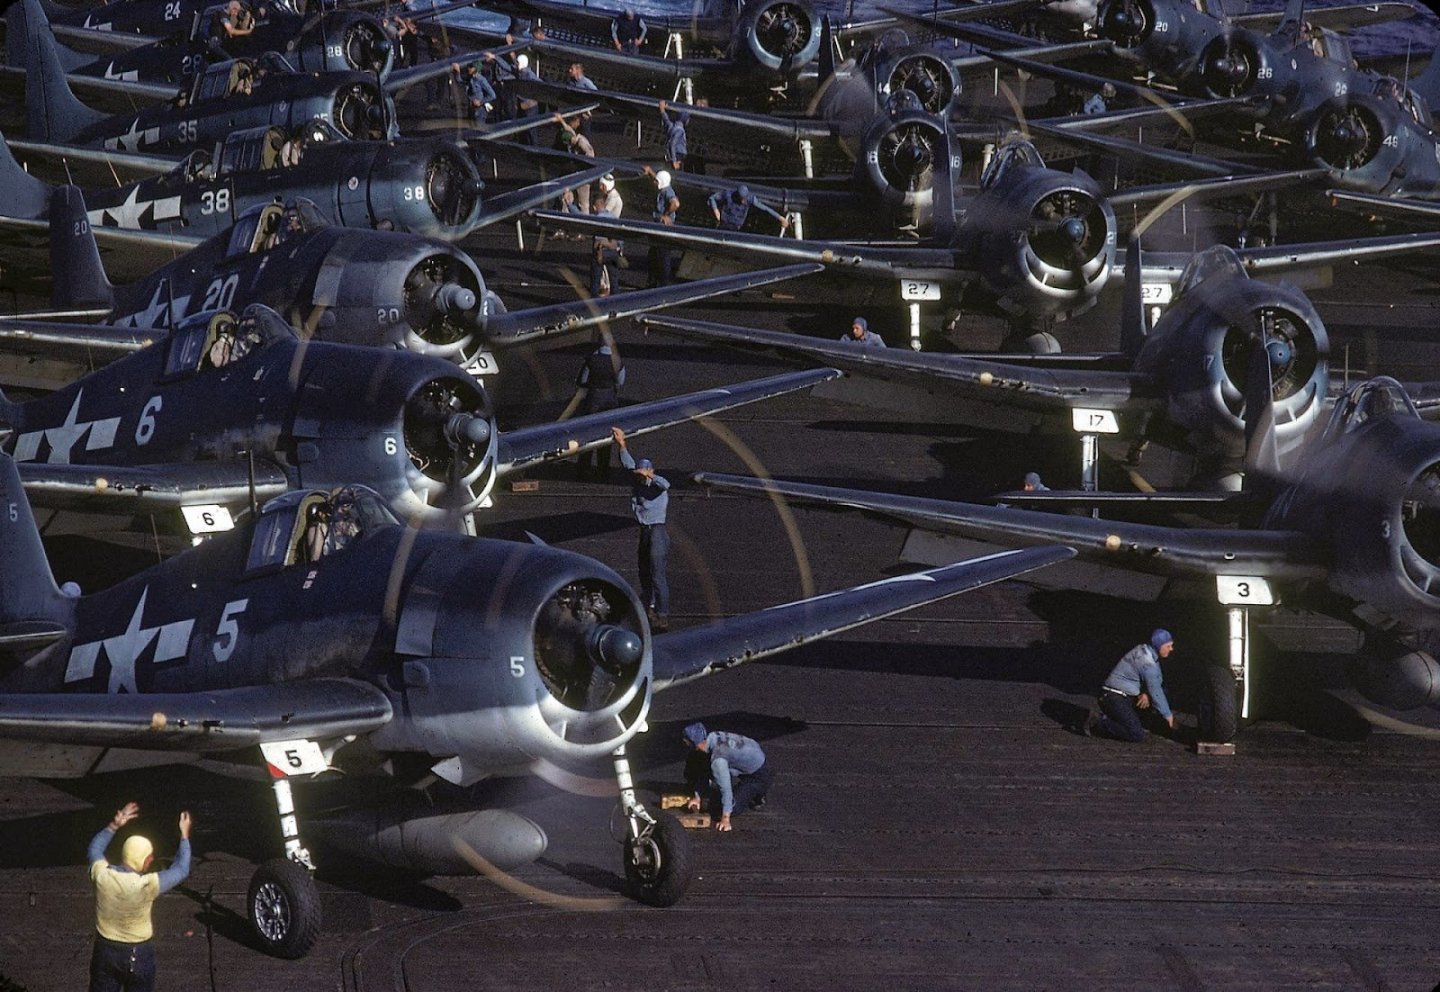
I think they are all different ships; none of them are Gambier Bay to my knowledge. Probably most of the (rare) newsmen with color photo equipment that were deployed in the Pacific were sent to fleet carriers.
- 49 replies
-
- 3
-
-
- gambier bay
- hasegawa
- (and 1 more)
-
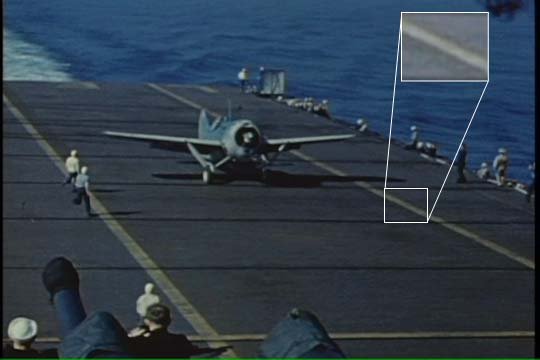
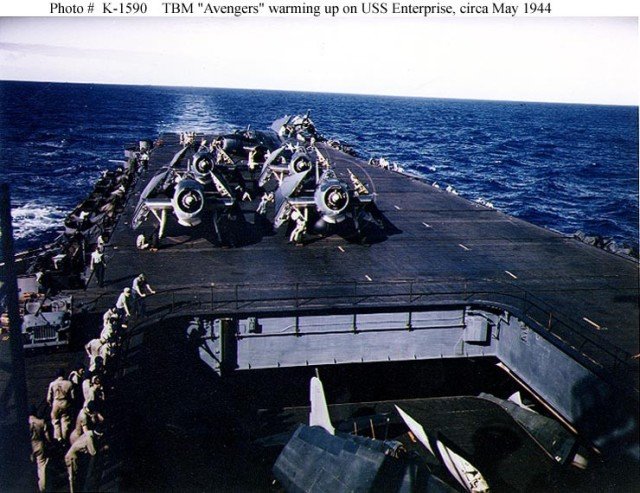
So here are some internet color photos that seem to corroborate the color I've got at least for the newly-applied deck stain. Given that Gambier Bay survived less than a year after her commissioning, and after doing a bunch of ferry service delivering aircraft to Enterprise and others only really saw about 6 months of action prior to being lost in the Battle of Samar, it's probably not realistic to show her deck as extremely weathered. I'll have to decide how much I want to try to do and how. It's a large area. Maybe with a large soft brush I could do some very light dry-brushing to reflect worn stain - probably light gray paint since exposed wood would likely bleach gray really fast in that environment. Plus the photo of the Dauntless is a great one - need to hang on to that as I have a 1/48 Tamiya Dauntless in my kit stash somewhere...
- 49 replies
-
- 8
-
-
- gambier bay
- hasegawa
- (and 1 more)
-
Alex Parker reacted to a post in a topic:
USS Gambier Bay by Alex Parker - Hasegawa - 1:350 - PLASTIC
-
Alex Parker reacted to a post in a topic:
USS Gambier Bay by Alex Parker - Hasegawa - 1:350 - PLASTIC
-
Alex Parker reacted to a post in a topic:
USS Gambier Bay by Alex Parker - Hasegawa - 1:350 - PLASTIC
-
Thanks Rick - glad you are enjoying following along. The Hasegawa kit only gives you 3 Hellcats and 3 TBF Avengers. It's possible to buy more separately, so in principle I could put the entire air wing on deck, but I'm not sure I have it in me to build and paint that many 1:350 airplanes - her maximum compliment was 28!
- 49 replies
-
- 5
-
-
- gambier bay
- hasegawa
- (and 1 more)
-
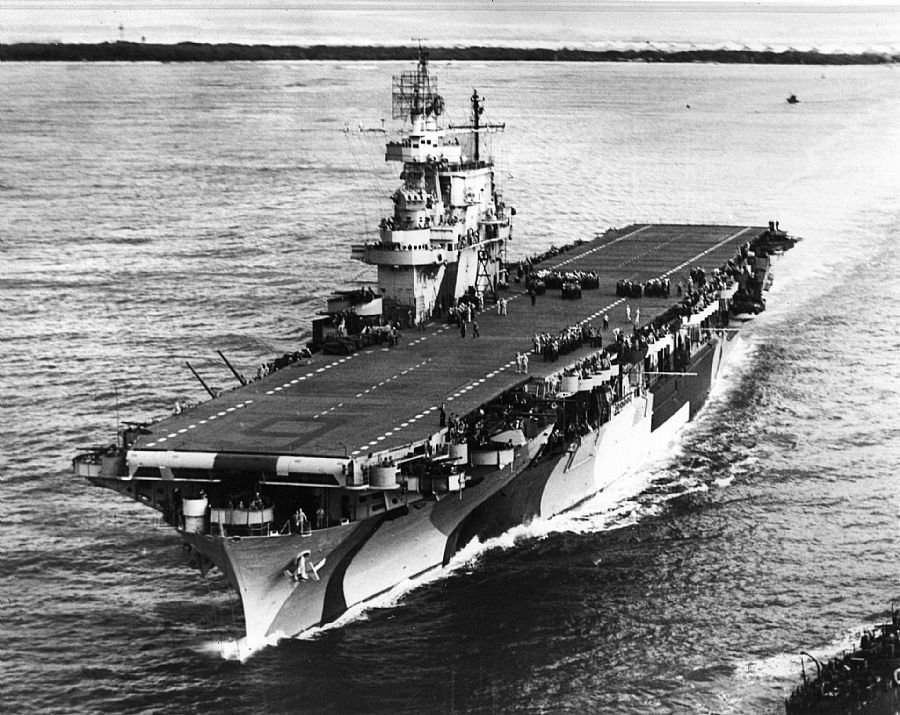
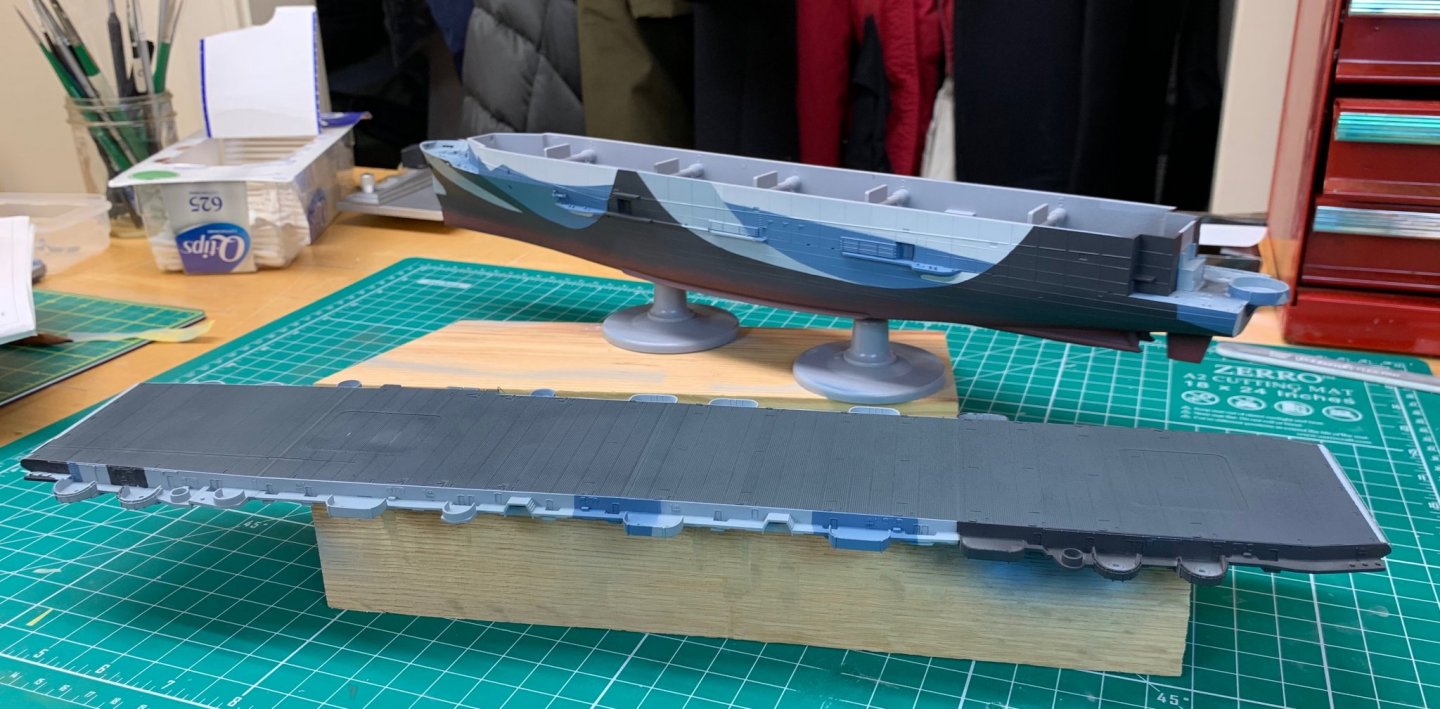
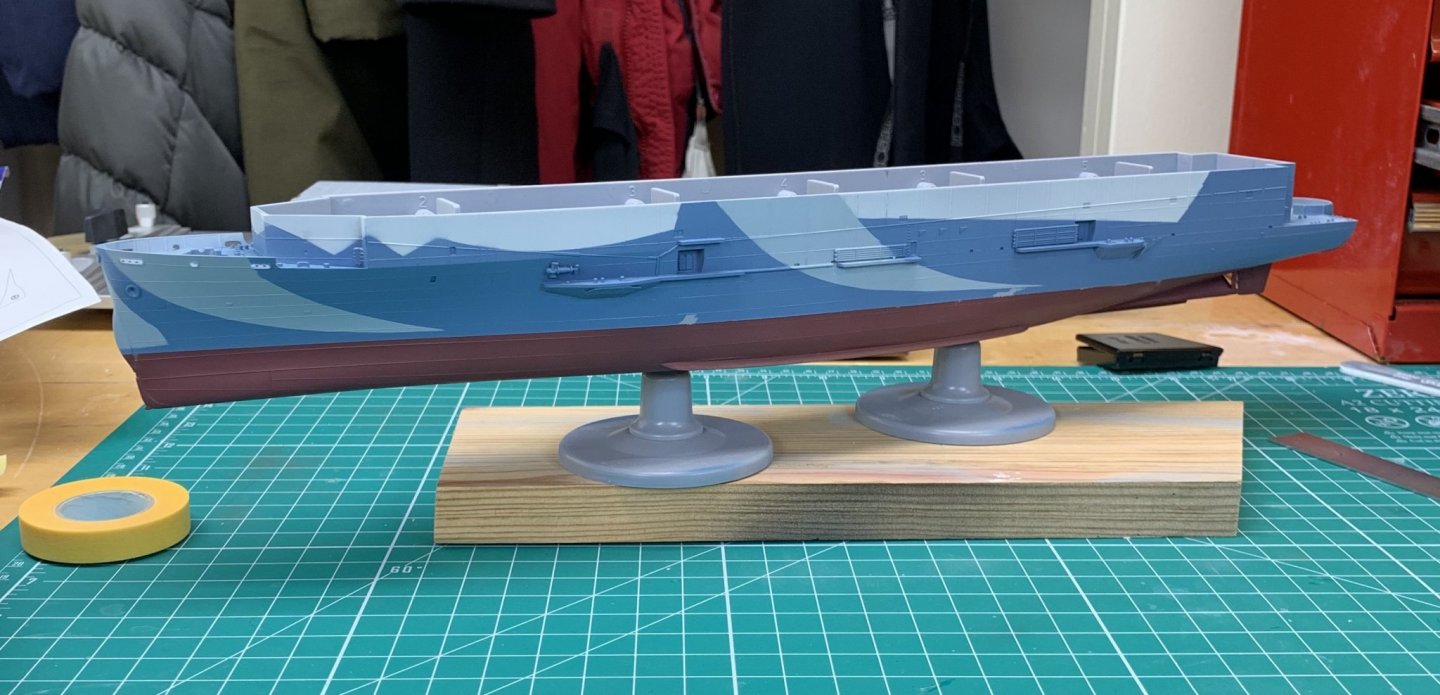
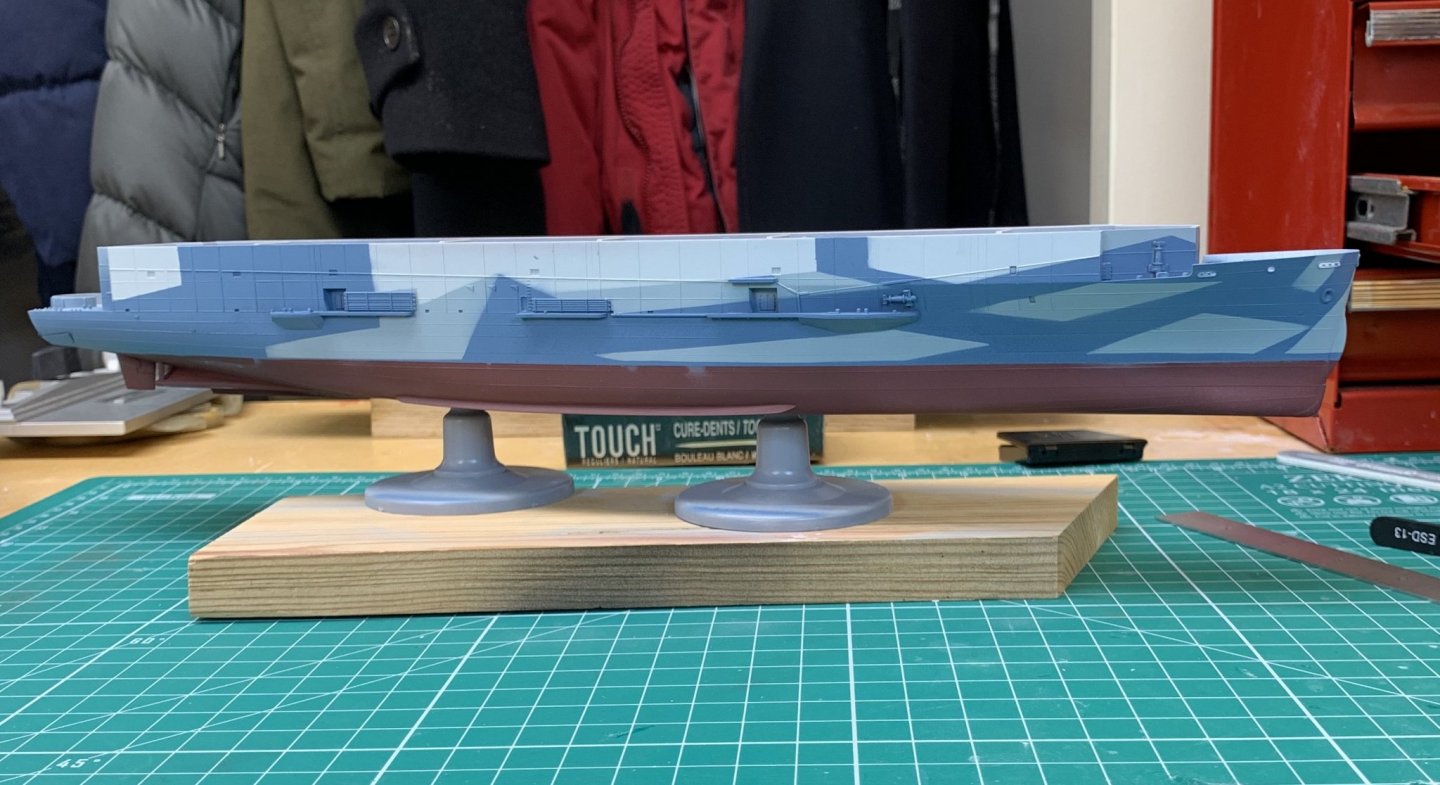
So some additional progress today, but I'm not 100% happy. The photos below show the dazzle camo scheme mostly done. Even though I lightened the Ocean Gray and the Black with 10% white, I wish I had done much more, maybe 25%. They still look too dark for that "huge object, far away" atmospheric fading effect. But I'm not redoing it at this point - file for next time. I was not happy with the location of the edge of the antifouling red as I originally painted it, so oversprayed with black and will come back next time and re-mask and re-spray the red. What is more of a quandary for me is the deck blue. I used Hasegawa's recommended mix (50/50 Navy Blue / Dark Gray) and lightened it with 10% White. It looks much too dark to me, and not blue enough. What do others think? If I am going to change it, it has to be now, before I start hand-painting all the other tiny bits of deck surface around the gun mounts, sponsons, etc. I'm thinking adding a bit of medium blue and a fair amount of white to it.

- 49 replies
-
- 10
-
-
- gambier bay
- hasegawa
- (and 1 more)
-
So that actually helped some - the worst of the grittiness is gone. I definitely will have some touching up to do where the masks didn't quite sit down over the surface features of the hull. But it is smooth enough that it should take a gloss clear coat if I decide I need one to do any significant weathering on top of. I may just punt and seal it with a matte clear and call it good ("as delivered"). Next ship model is going to be a subject that's all-over battleship gray, however. I'll stick to camouflaging airplanes!
- 49 replies
-
- 4
-
-
- gambier bay
- hasegawa
- (and 1 more)
-
One of my failings as an airbrush painter is that I tend to be gun-shy. I am nervous about putting paint down too fast and getting puddles or runs, and as a result I put it down too slow, from too far away, and get a kind of gritty surface from paint drying in the air before it hits the surface of the model. I have some of that here. In the past I've used the trick (with lacquers; if this happens with acrylics you are stuck) of re-spraying the painted surface with a LOT of Mr Hobby Leveling Thinner, which has the tendency to allow the paint to redissolve and smooth out. I may try that here, but I have to be sure I don't lay on so much that I start to blur edges...
- 49 replies
-
- 5
-
-
- gambier bay
- hasegawa
- (and 1 more)
-
After a week plus of crazy work travel and no time for models, this weekend I got a start on the splinter camoflage scheme. I used the kit paper templates by cutting them out and using 2-sided tape to stick them to masking tape, then stick the masking tape to the model. This worked kind of OK, but after the third color (so far I've done light gray, gray, and ocean gray in that order) the masks were starting to lift and not stick back down. So I pulled them all. Next weekend (the week will again be crazy with travel and a board of directors meeting) I will carefully mask just the areas that need to be black (I will use very dark gray) and paint them. Then do a LOT of touching up.
- 49 replies
-
- 12
-
-
- gambier bay
- hasegawa
- (and 1 more)
-
I think I've decided to stencil (tape around the area to be painted, then paint) rather than mask (paint the color, then cover with tape before painting the background color). I think it will be easier to get the landing strip striping truly straight if I can lay down two continuous pieces of tape for the sides, then tape across to define the dashes. Putting a whole bunch of short mask segments down in a perfectly straight line would be hard, I think. I made more progress today (assembled the plastic base of the superstructure, finished the gun decks including filling some tiny gaps), but did not take any pictures. I have a business-travel-filled week coming up (i.e. the usual) so likely won't be able to do more until next weekend. Next weekend I definitely WILL be spraying paint...
- 49 replies
-
- 5
-
-
- gambier bay
- hasegawa
- (and 1 more)
-
Alex Parker reacted to a post in a topic:
USS Gambier Bay by Alex Parker - Hasegawa - 1:350 - PLASTIC
-
Thanks for the idea, Mark. I think I actually have some frisket laying around somewhere. In the past I’ve struggled with it not being very adhesive, but for the flat deck surface that may be OK. Certainly would help to have the clear material to trace the decal numbers through. For the hull camo I an going to have to use Tamiya tape. The kit instructions include full size templates for all the hull areas that need masking; we’ll see how well designed they are to fit the complex curve of the hull.
- 49 replies
-
- 3
-
-
- gambier bay
- hasegawa
- (and 1 more)
-
Also, I need to make some decisions about how much "weathering" I want to reflect on this ship. Gambier Bay didn't live all that long, so not a huge amount, but am wondering how much at all one might expect to see the deck paint/stain worn from aircraft landing, exposing the wood below. Any ideas, or good reference images?
- 49 replies
-
- 3
-
-
- gambier bay
- hasegawa
- (and 1 more)
-
I also need to decide how I'm going to paint the landing strip stripes and hull number (big "73") on the deck. Either I paint the whole deck blue first then make stencils that outline those areas, or else I paint the colors for them (Dark Gray for the number, very light grey for the stripes) in the appropriate areas and make masks that lay over them, then paint the deck blue. I'm leaning towards the latter. Anyone have experience that would speak to one approach or the other? I'm not using the kit decals because I'm quite sure they won't lay down over the highly textured deck, no matter how much MicroSol I use.
- 49 replies
-
- 3
-
-
- gambier bay
- hasegawa
- (and 1 more)
-
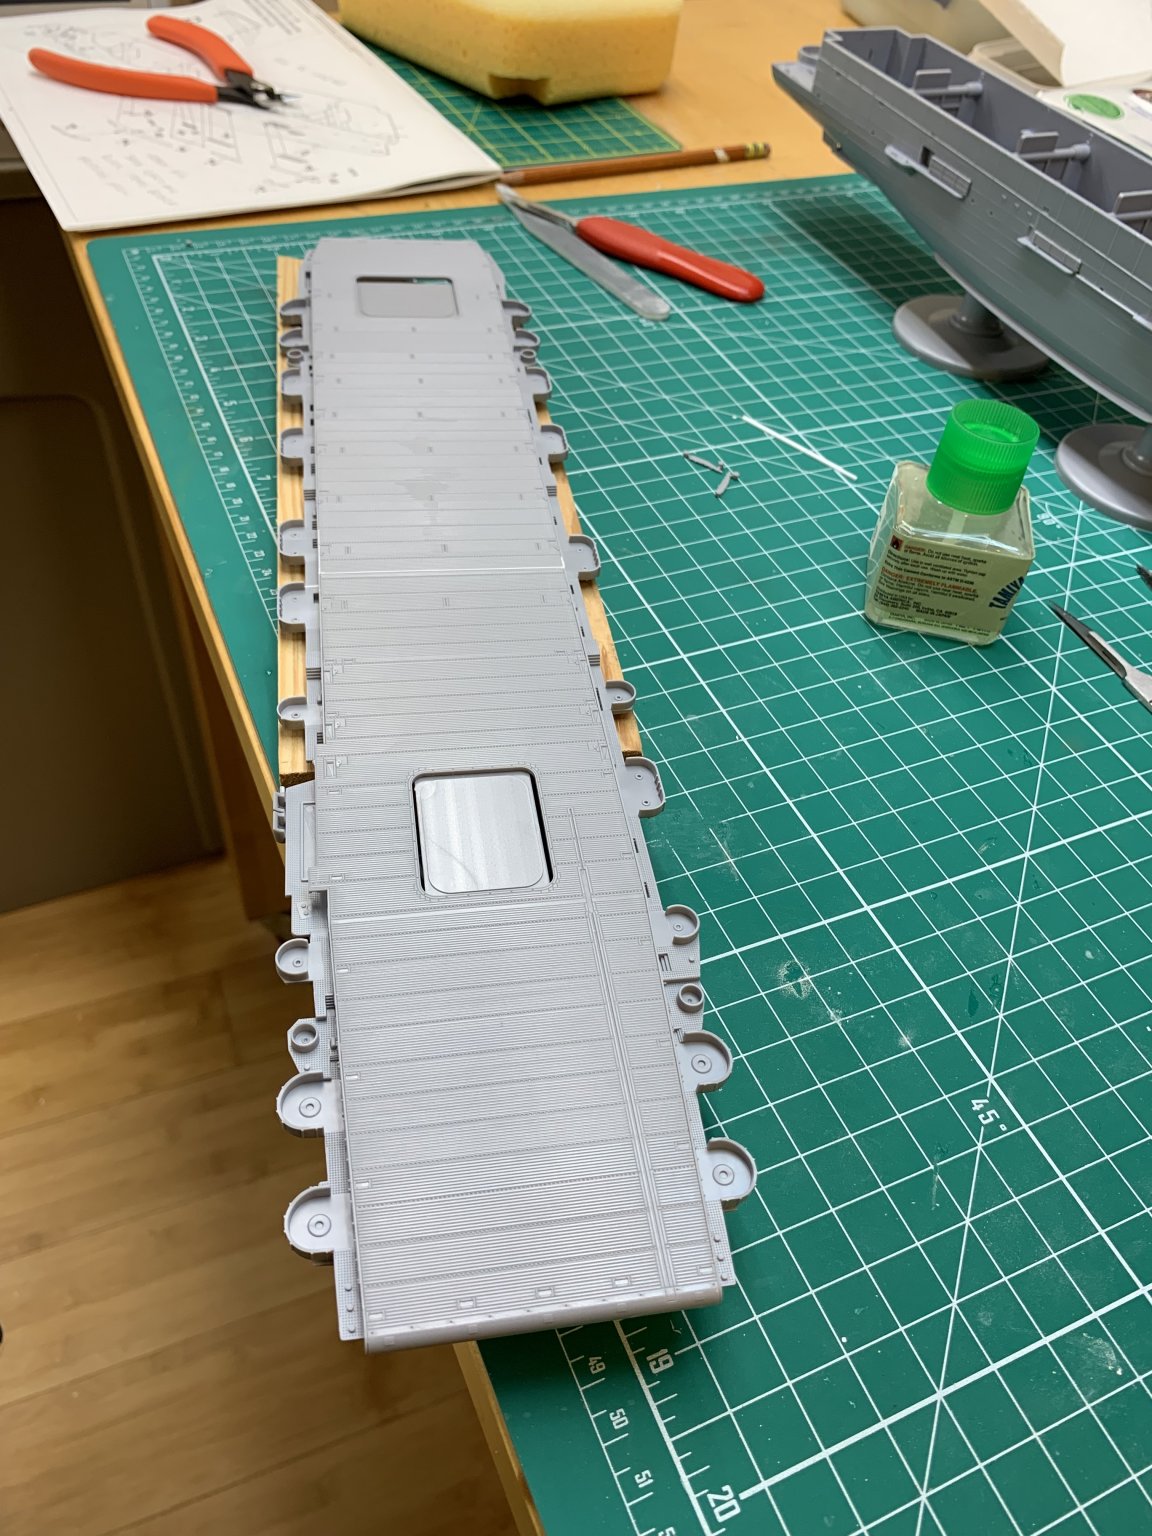
Got the gun decks installed; there was the same small gap requiring a bit of Evergreen sheet to close it on the starboard side. Also dealt with the extra deep seam between the deck halves. All that remains here before it is ready to paint is to complete installing the little cantilever supports under the larger gun tubs that house the 40mm guns. All of the guns, liferafts, and PE railings will be built and painted separately before installation. I will need to work out how I'm going to hold especially those tiny 20mm guns to install the PE bits and paint them.


- 49 replies
-
- 8
-
-
- gambier bay
- hasegawa
- (and 1 more)