
The_bitter_end
-
Posts
116 -
Joined
-
Last visited
Content Type
Profiles
Forums
Gallery
Events
Everything posted by The_bitter_end
-
 Good Morning Blue I would firstly like to thank you once again for this incredible build log. It has genuinely been a source of joy for me. It has lead me down a path of learning on my first build which goes far beyond just copying instructions on plans like building a puzzle. This was always what I was looking for in this hobby and you have helped me to find it. This leads me to my more specific question. In the quoted post you do the rigging for what I assume is the lower main mast yard, you then say that that is your sample and that you will be doing all 10. does this mean that all 10 yards are rigged with blocks in an identical manner(I assume not), and if not then do I just follow the block rigging instructions which are on the plans provided by Amati for the rest of the yards? Any guidance on this would be great. Kid Regards Haiko
 -
Hi Again BE Thanks for the input. It is always helpful. As a matter of interest, why did you decide to go with blue instead of black? I took a look at your list of sources. I was hoping for something more detailed but I realise that is an enormous ask. I will just have to order things one at a time as I come across them in your blog and need them.
-
Good Day to you Sir Sorry about the slow response, I am coming up to the end of this years orchard establishment and things have been rather busy. We planted 9000 plum and apricot trees and I may have bitten off more than I can chew. How is your SOE project going? I did find it hard to create a realistic rendition of these critical items and I think its fair to say there was a certain amount of settling taking place. Thanks for the link, I am going to get my orders in today. CHeers TBE
-
Good Morning Mr. Ensign Thank you so much for your input and again thank you for your amazing build log. I could not have done this build without it and I guarantee you that my next build will be based on whether or not you have a log I can follow. So firstly...the chain plates. I realised that I did these wrong and I am rather ashamed that it didn't occur to me that I could modify that part of the kit to resolve the issue. I do unfortunately think its too late to fix this at this point as i drilled holes in the hull for pins and I might just cause a huge mess trying to make right. I will consider it to be a lesson for next time. I have no idea how I managed to let the varnish thing happen but here we are. What are your thoughts on carefully applying boiled linseed oil? I feel like this may be slightly more forgiving or will I just make a mess. Its a bit of a scary position to find myself in because any mistake has the potential to ruin the model. Something unrelated to your kind response.... I know that this is one heck of a long shot but do you perhaps have a list of all the things that you bought to modify your Pegasus(anchors, lantern, extra wood, rigging materials etc). I am in South Africa and shipping is very complex and expensive so I am trying to make a comprehensive list of all the extra items I need to order and then order them all in one shot. This situation is made worse by the fact that this is my first build so I don't even have old bits and pieces to fall back on from other builds. I hope you have a charming day. TBE
-
Hey Mugje Thanks for the compliment, the support is always appreciated. As for the decoration I thought about it long and hard and considered the following factors before deciding not to do this. 1. I didn't feel that it was that much of a realistic representation of what this embellishment would have looked like in real life. 2. Apparently the vessel would only have had these decorations immediately after its commissioning but for the bulk of its career they would not be in place. 3. I was concerned that the provided components may not actually fit that well into the allocated area due to slight variations between the plan and my model. 4. I was told that CA(super glue) can deteriorate over time and I anticipated these parts starting to fall off in the future and ruining the model) 5. I kind of like the somewhat more traditional feel of the model without the decoration on it. This is just a personal choice but she feels a bit more "serious" without it. All this being said, I really did struggle with the choice but ultimately decided that is what would be best. I loved how they looked on the Pegasus built by B.E. but I'm satisfied with the choice on my version. One other thing worth mentioning is that I saw a model where they replaced the blue paint with black and it created a much more aggressive and sinister feel which I really liked but saw too late to make the change. It might be worth considering. I hope you are well otherwise and that this helped with your decision. Cheers, TBE
-
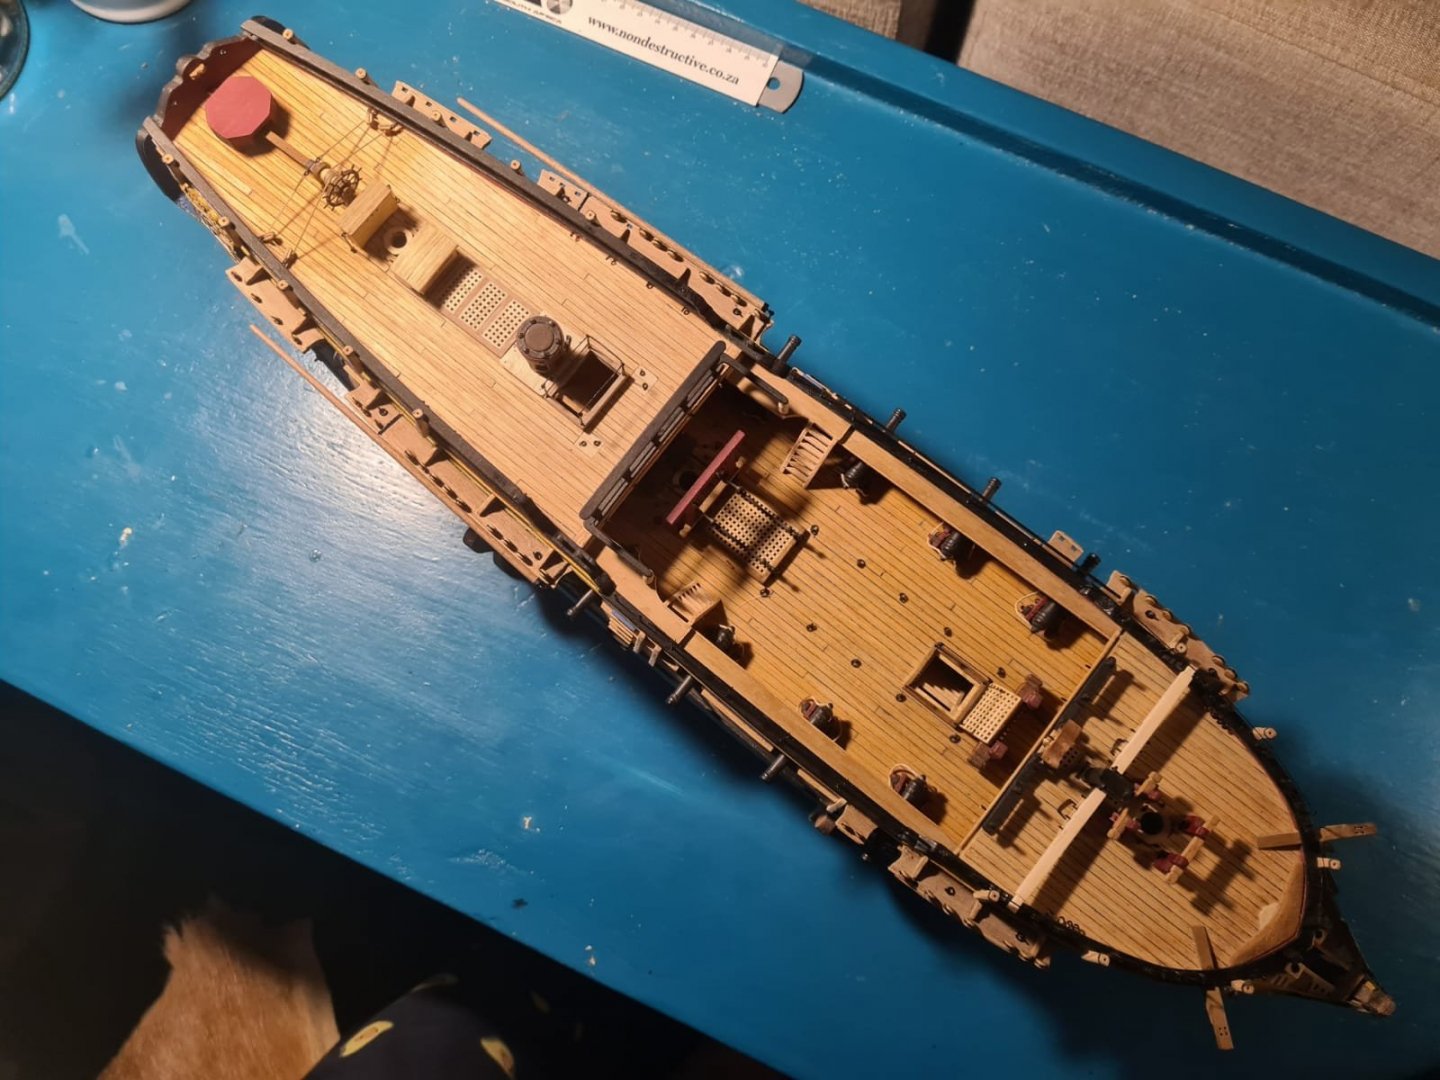
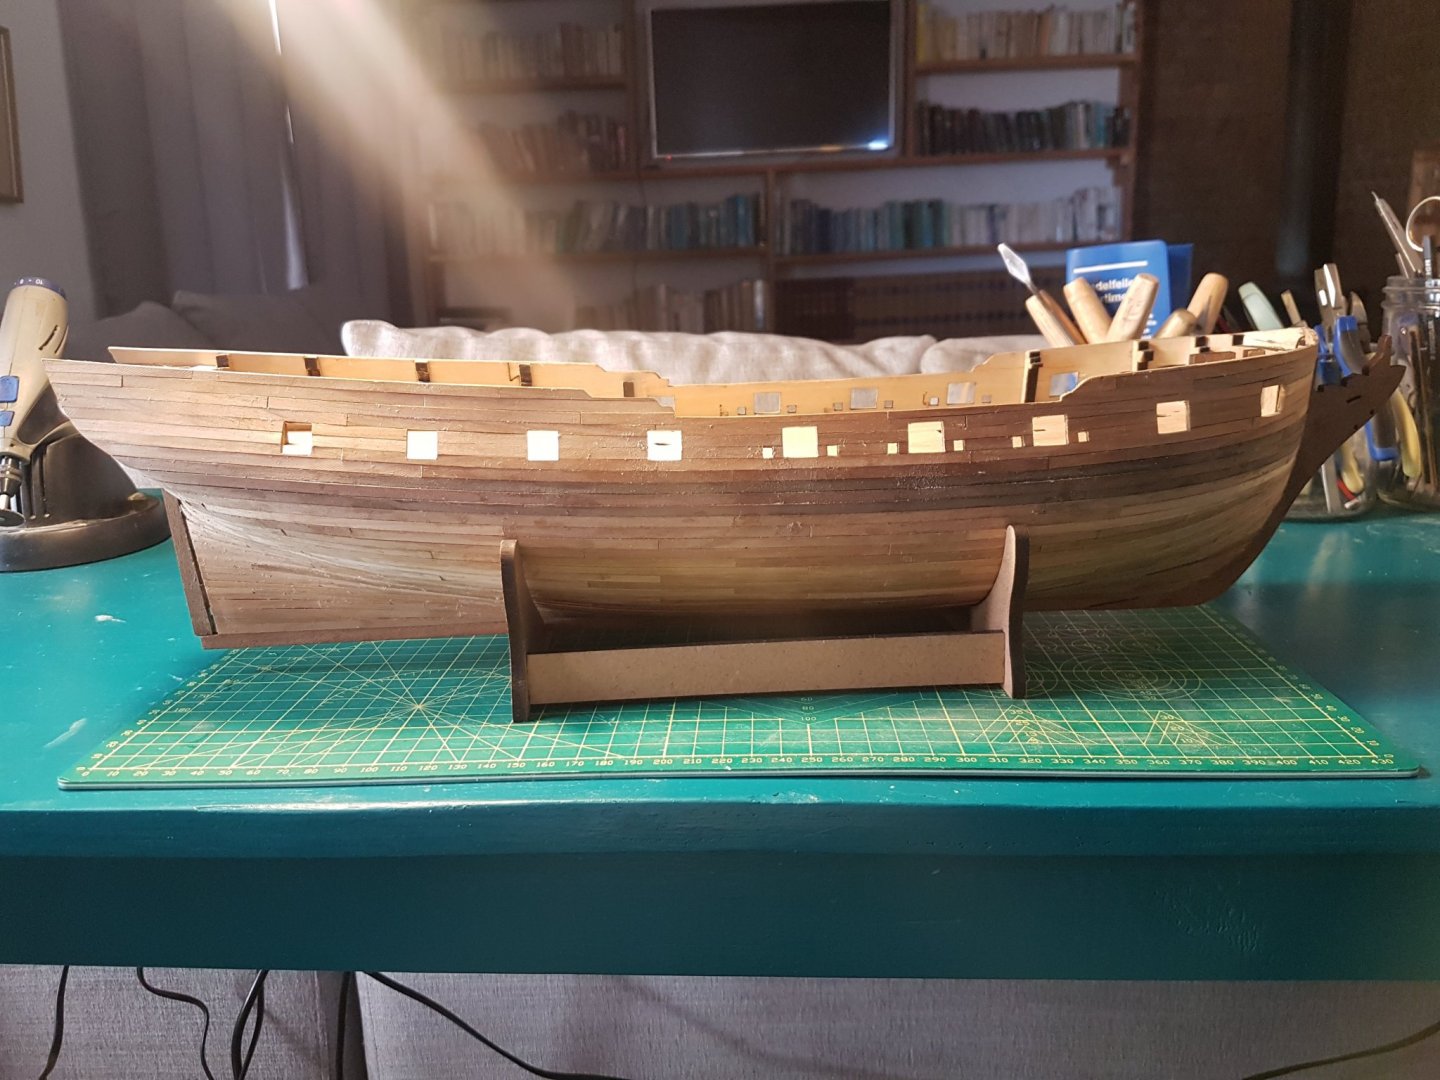
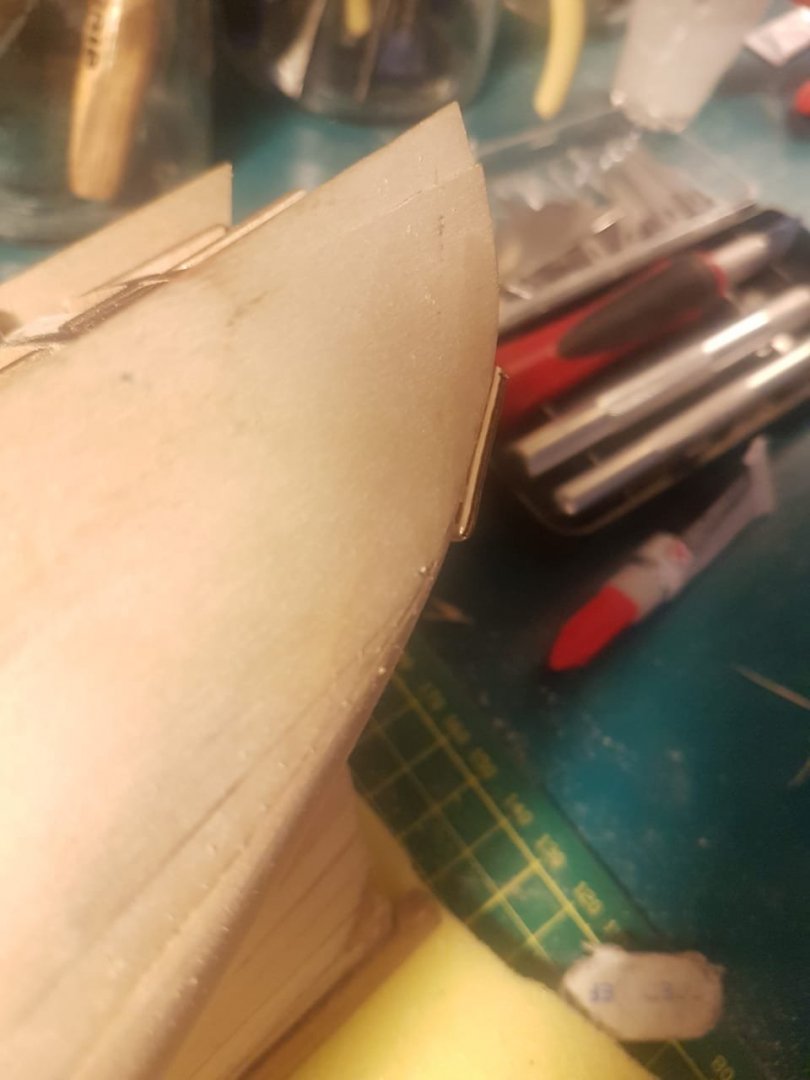
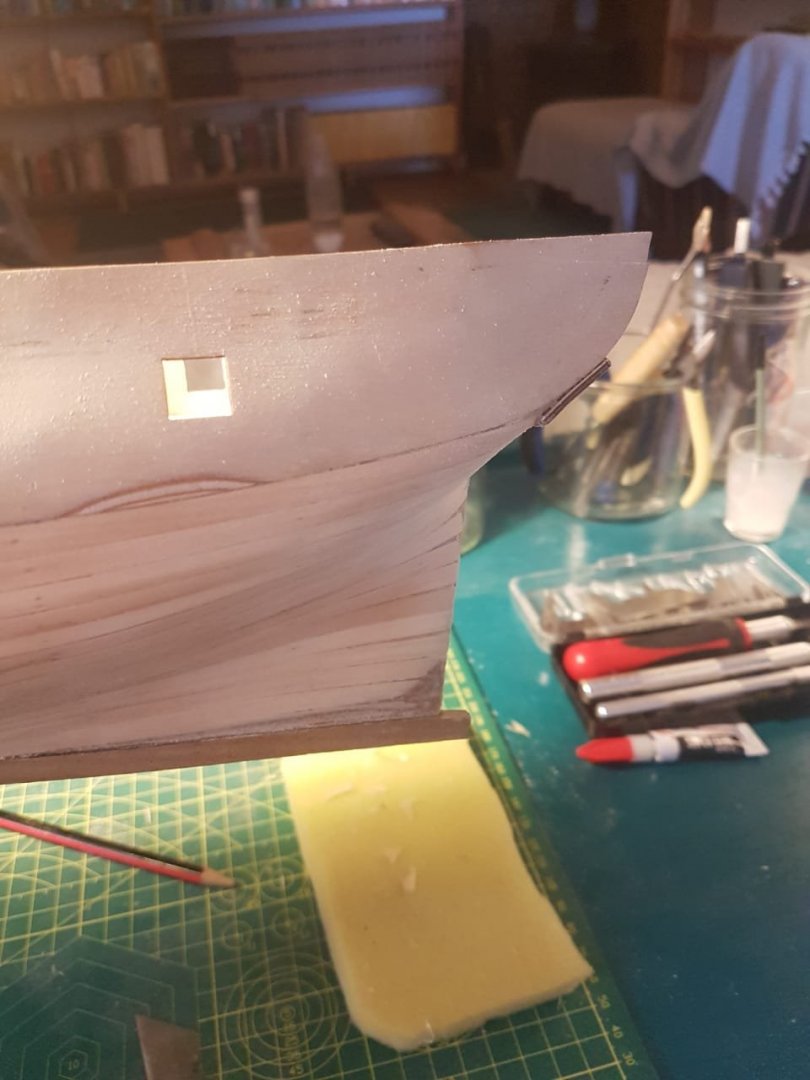
Hello Folks! Its certainly been a hot minute since I last replied. I have not abandoned my pegasus project but the demands of being a farmer meant that I didn's seem to get around to posting. I thought It was high time to give you all a bit of an update on my progress. Below are a number of photos of where I am on my build. This is essentially an exercise in copying Blue Ensign and I am eternally grateful to him for his attention to detail and historical accuracy. I has been a pleasure so far. In a couple of places I have deviated from his instructions, often due to the shortage of materials available for the suggested modifications but I like to think I have done a reasonable job for a first build. I am waiting for a number of things to continue my build which the more keen eyed of you may notice. Correct size anchors Correct size dead eyes Stern Lantern Pegasus figurehead(mine is broken) Swivel guns Wood for masts A lathe which I ordered online A converted cad drawing so that I can begin scratch building a pinnace. Never the less! here are some photos of my progress below. It might be worth mentioning that I have not put a lick of varnish or oil or anything on this model so far. does anyone have any suggestions on how to proceed with this? Should I be applying something and if so what? Any and ALLL feedback would be appreciated. I would like to improve where possible. If anyone has any questions about how I approached this project please let me know. I would be happy to help, I have made my fair share of mistakes and I think I might be able to offer fairly meaningful advice in places.
.thumb.jpeg.d3d876ed02295993af6823b82ce3fec9.jpeg)
.thumb.jpeg.2c5f20e5fe174e723fa87a4e3a3cf2f5.jpeg)
.thumb.jpeg.b9232f96d3a46a0b223c0b2a953a713d.jpeg)
.thumb.jpeg.5516c7042eaf34aea37bb29f7a1b6404.jpeg)
.thumb.jpeg.ef9e8ea867c349aed552572d4c78cbf9.jpeg)
.thumb.jpeg.166e13a731d60ebd04684acc7f027bef.jpeg)
.thumb.jpeg.c5938305870047934df7fc8b8db728c8.jpeg)
.thumb.jpeg.30db95966492e4f967b07bbe9d4c1044.jpeg)
.thumb.jpeg.72183c4b4bc6f8fb2978e91d80281a1b.jpeg)
.thumb.jpeg.f9fb85926f222d900303e12d3af48972.jpeg)
.thumb.jpeg.7eb9e404e759ce8ab053b75cb86c55d7.jpeg)
.thumb.jpeg.f14a3209c3d6b22f8d0c02e6f3f19ab7.jpeg)
-
@SpyGlass Hi there Spy Soooo i have zero lip on the bottom of the counter(I realised that this was not my finest moment) and my stern counter is made of plywood and not walnut. Do you have any suggestions? plank it and just taper things? If you look at the photo of the stern in my last post you can see how things look there. As a matter of interest do you know if hulls were ever actually planked in the way in which I did it? I somehow remember reading that it seemed wrong but was actually done this way sometimes? I must say it didnt feel very historically accurate when I did it but it was the easier option for me.
-
@The Lazy Saint I am leaning more and more in that direction lazy. Watch this space for my final indecisive decision.
-
@vulcanbomber Good Morning Vulcan! Thanks for this great response. I will follow your advice and steps. I am still on the fence about the coppering thing predominantly because this is a learning exercise. If I were to varnish the hull now could I still copper over that if I ultimately decided to? I also assume that I need to finish the wale before varnishing or the wood glue wont stick too well? I opted to plank the counter as mine is just ply wood, I hope it turns out ok. Cheers Haiko
-
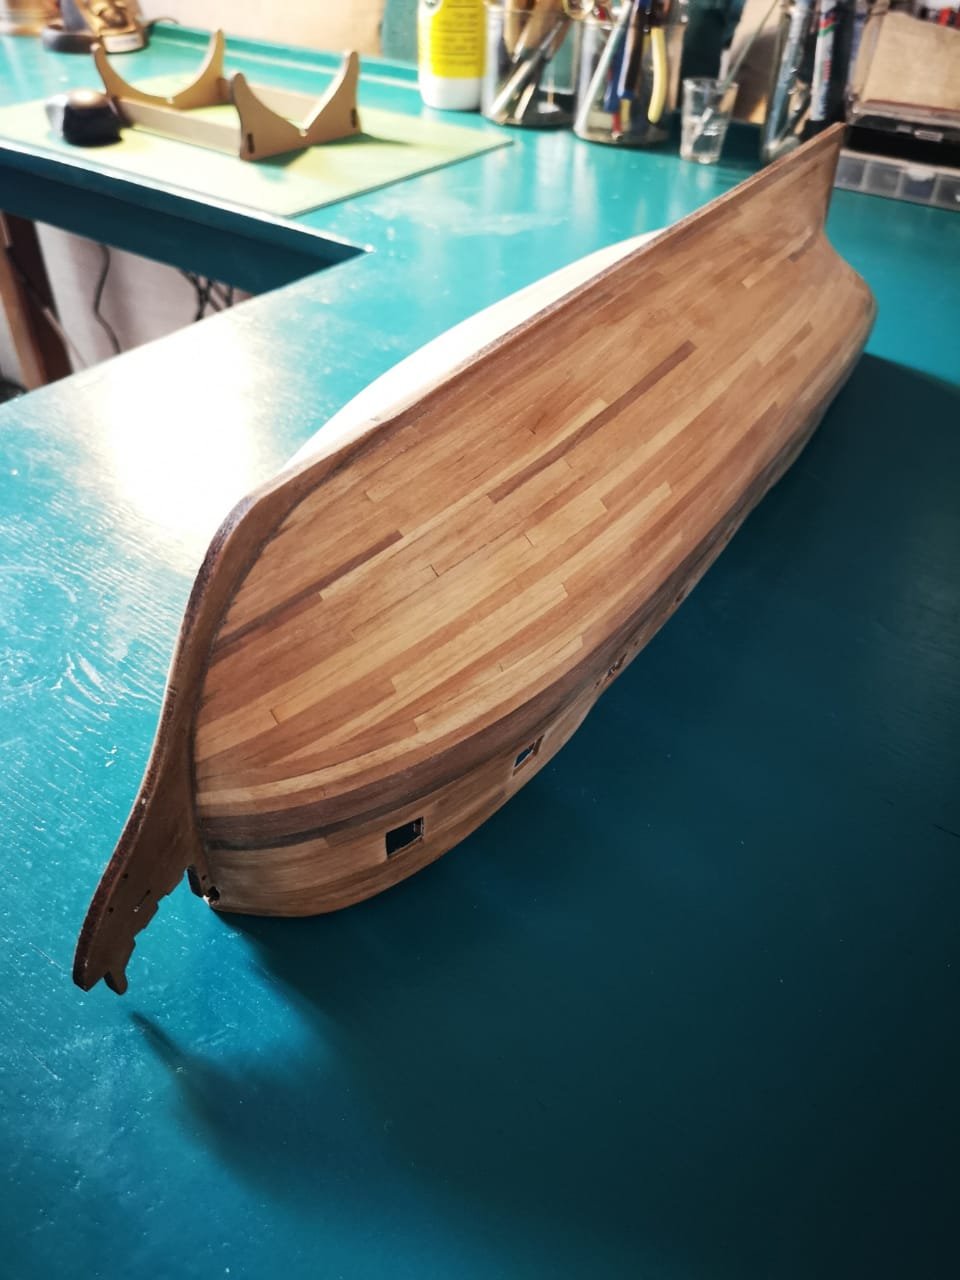
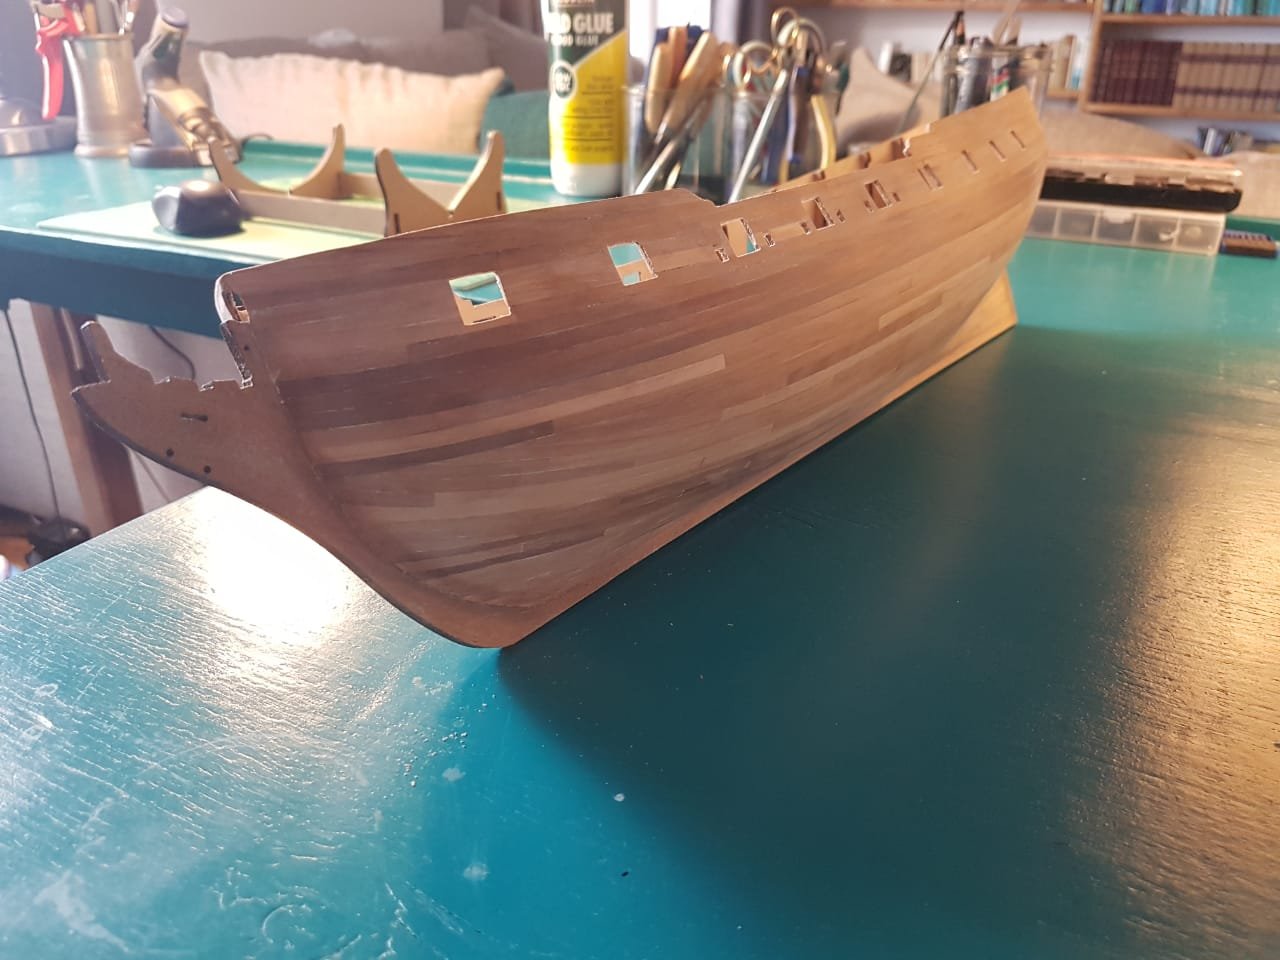
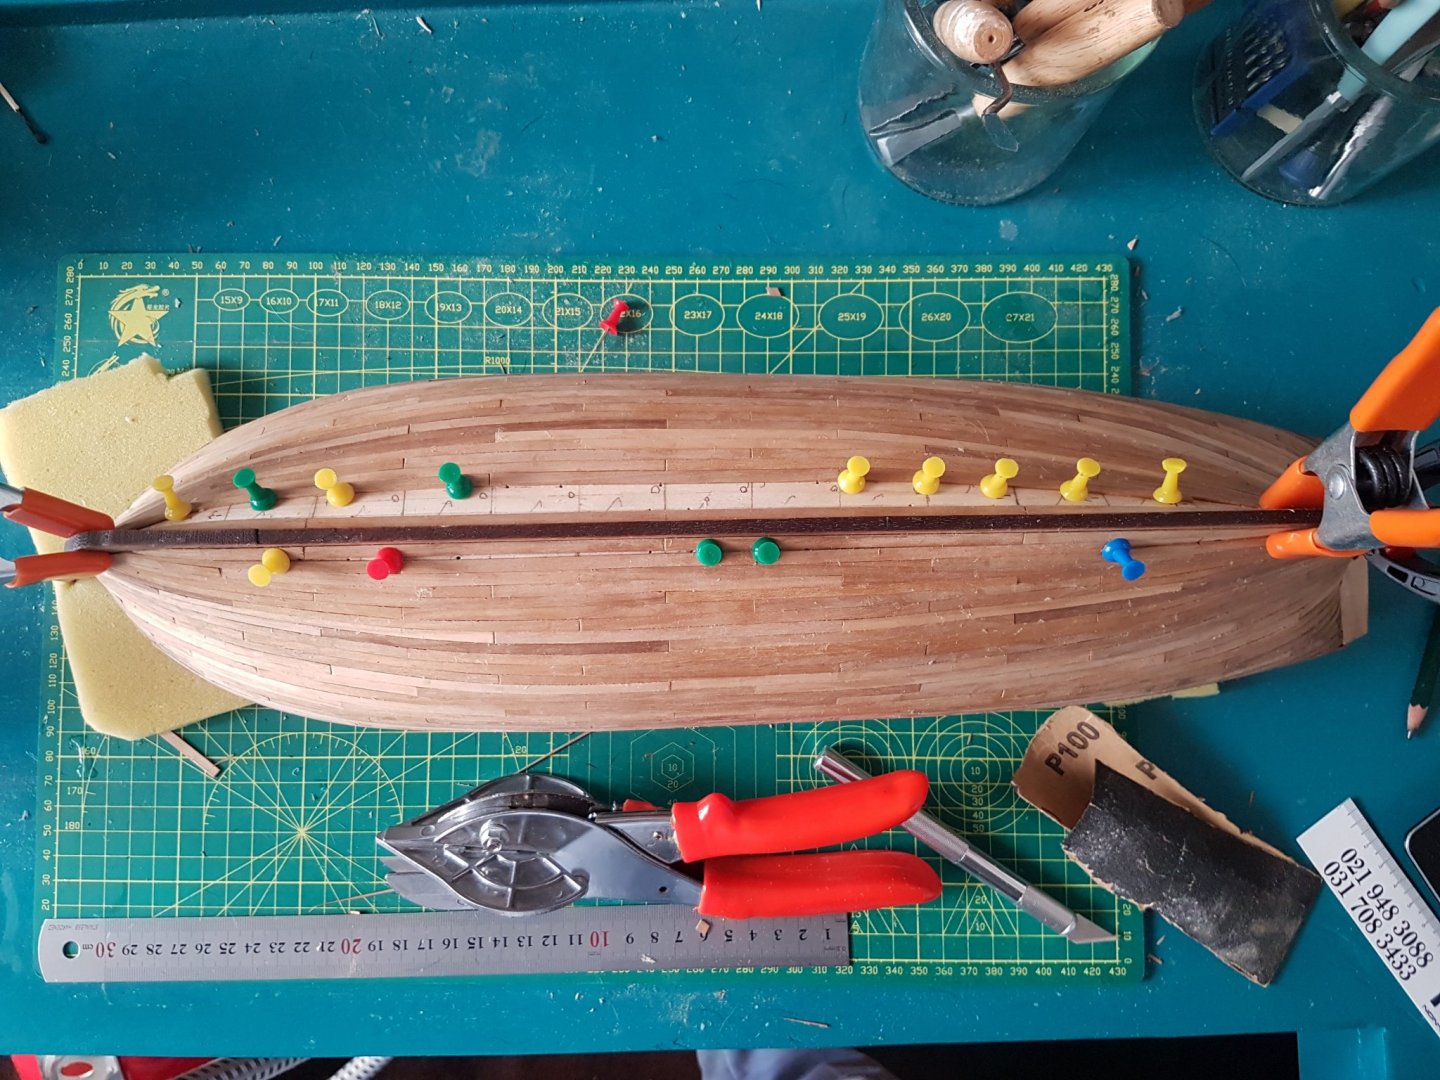
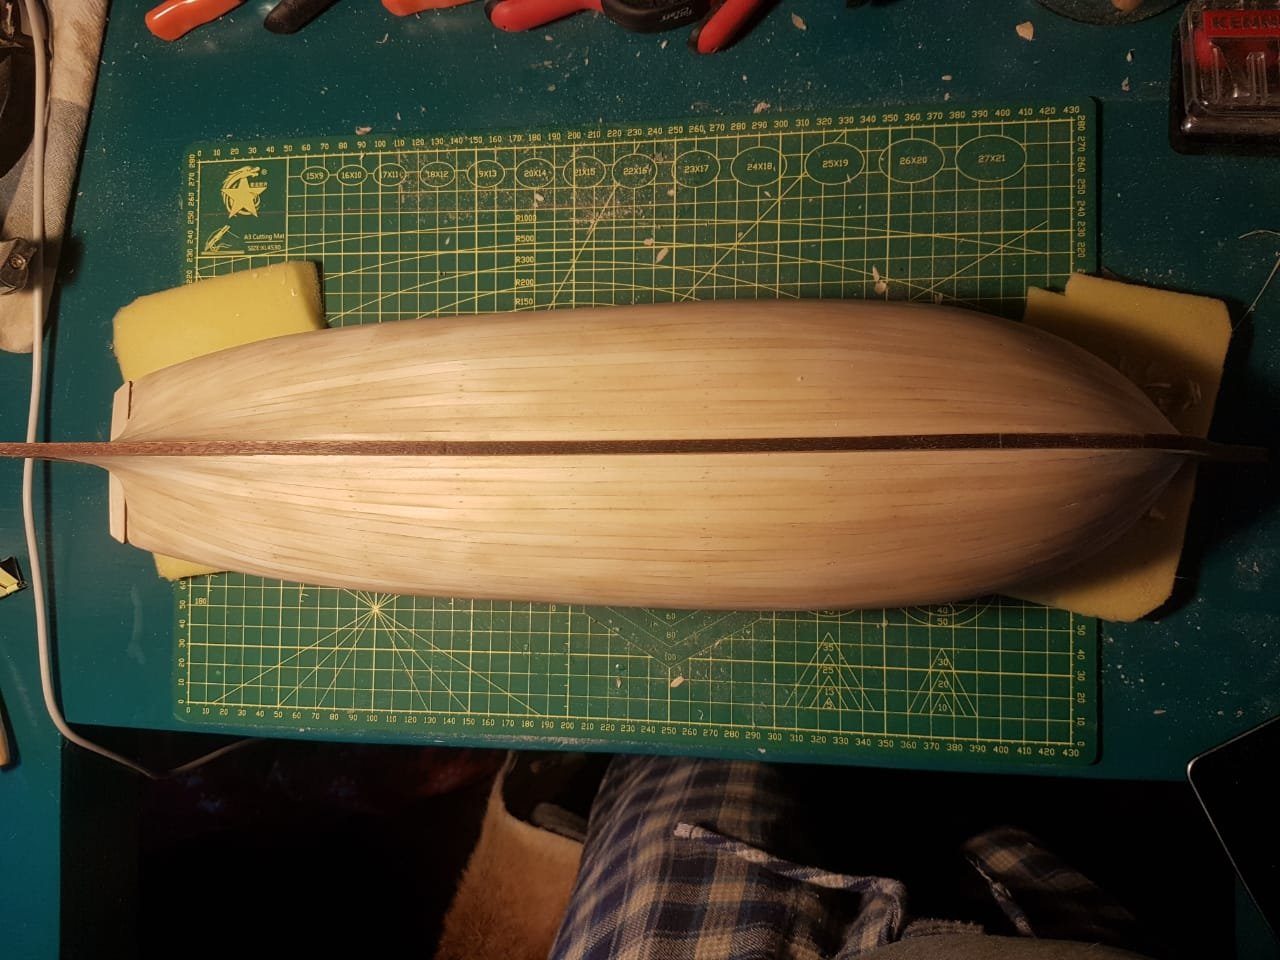
continued from above. I now sanded down the hull(with 100 grit sandpaper) and carefully saved all the sawdust. Once the hull was rough sanded I carefully applied a mixture of this sawdust and PVA glue to all the gaps and blemishes. I found that it was easiest to do this with a finger and then use a damp sponge to wipe off any excess glue(this is important as it is very hard to sand this mixture once it is dry). For bigger gaps I applied multiple layers of sawdust/glue filler as the mixture contracts when it dries. This was followed by a vigorous sanding with 300/600/1000/1200 grit paper producing the following results. Now its question time for those that wish to help. If there are any more photos needed please let me know. 1. WHAT NEXT!? Do I varnish the hull or is there some other step I should be taking and in general what is the next logical step to take. 2. Is there some way to get better results 3. Have I done anything wrong(this is a learning process so I would appreciate criticism) 4. Should I have planked the stern counter. 5. Whats the deal with coppering? It seems to me that it would be bordering on a sin to copper over this hull. It is worth saying that I really enjoyed this process! Thanks in advance CHeers The bitter end

-
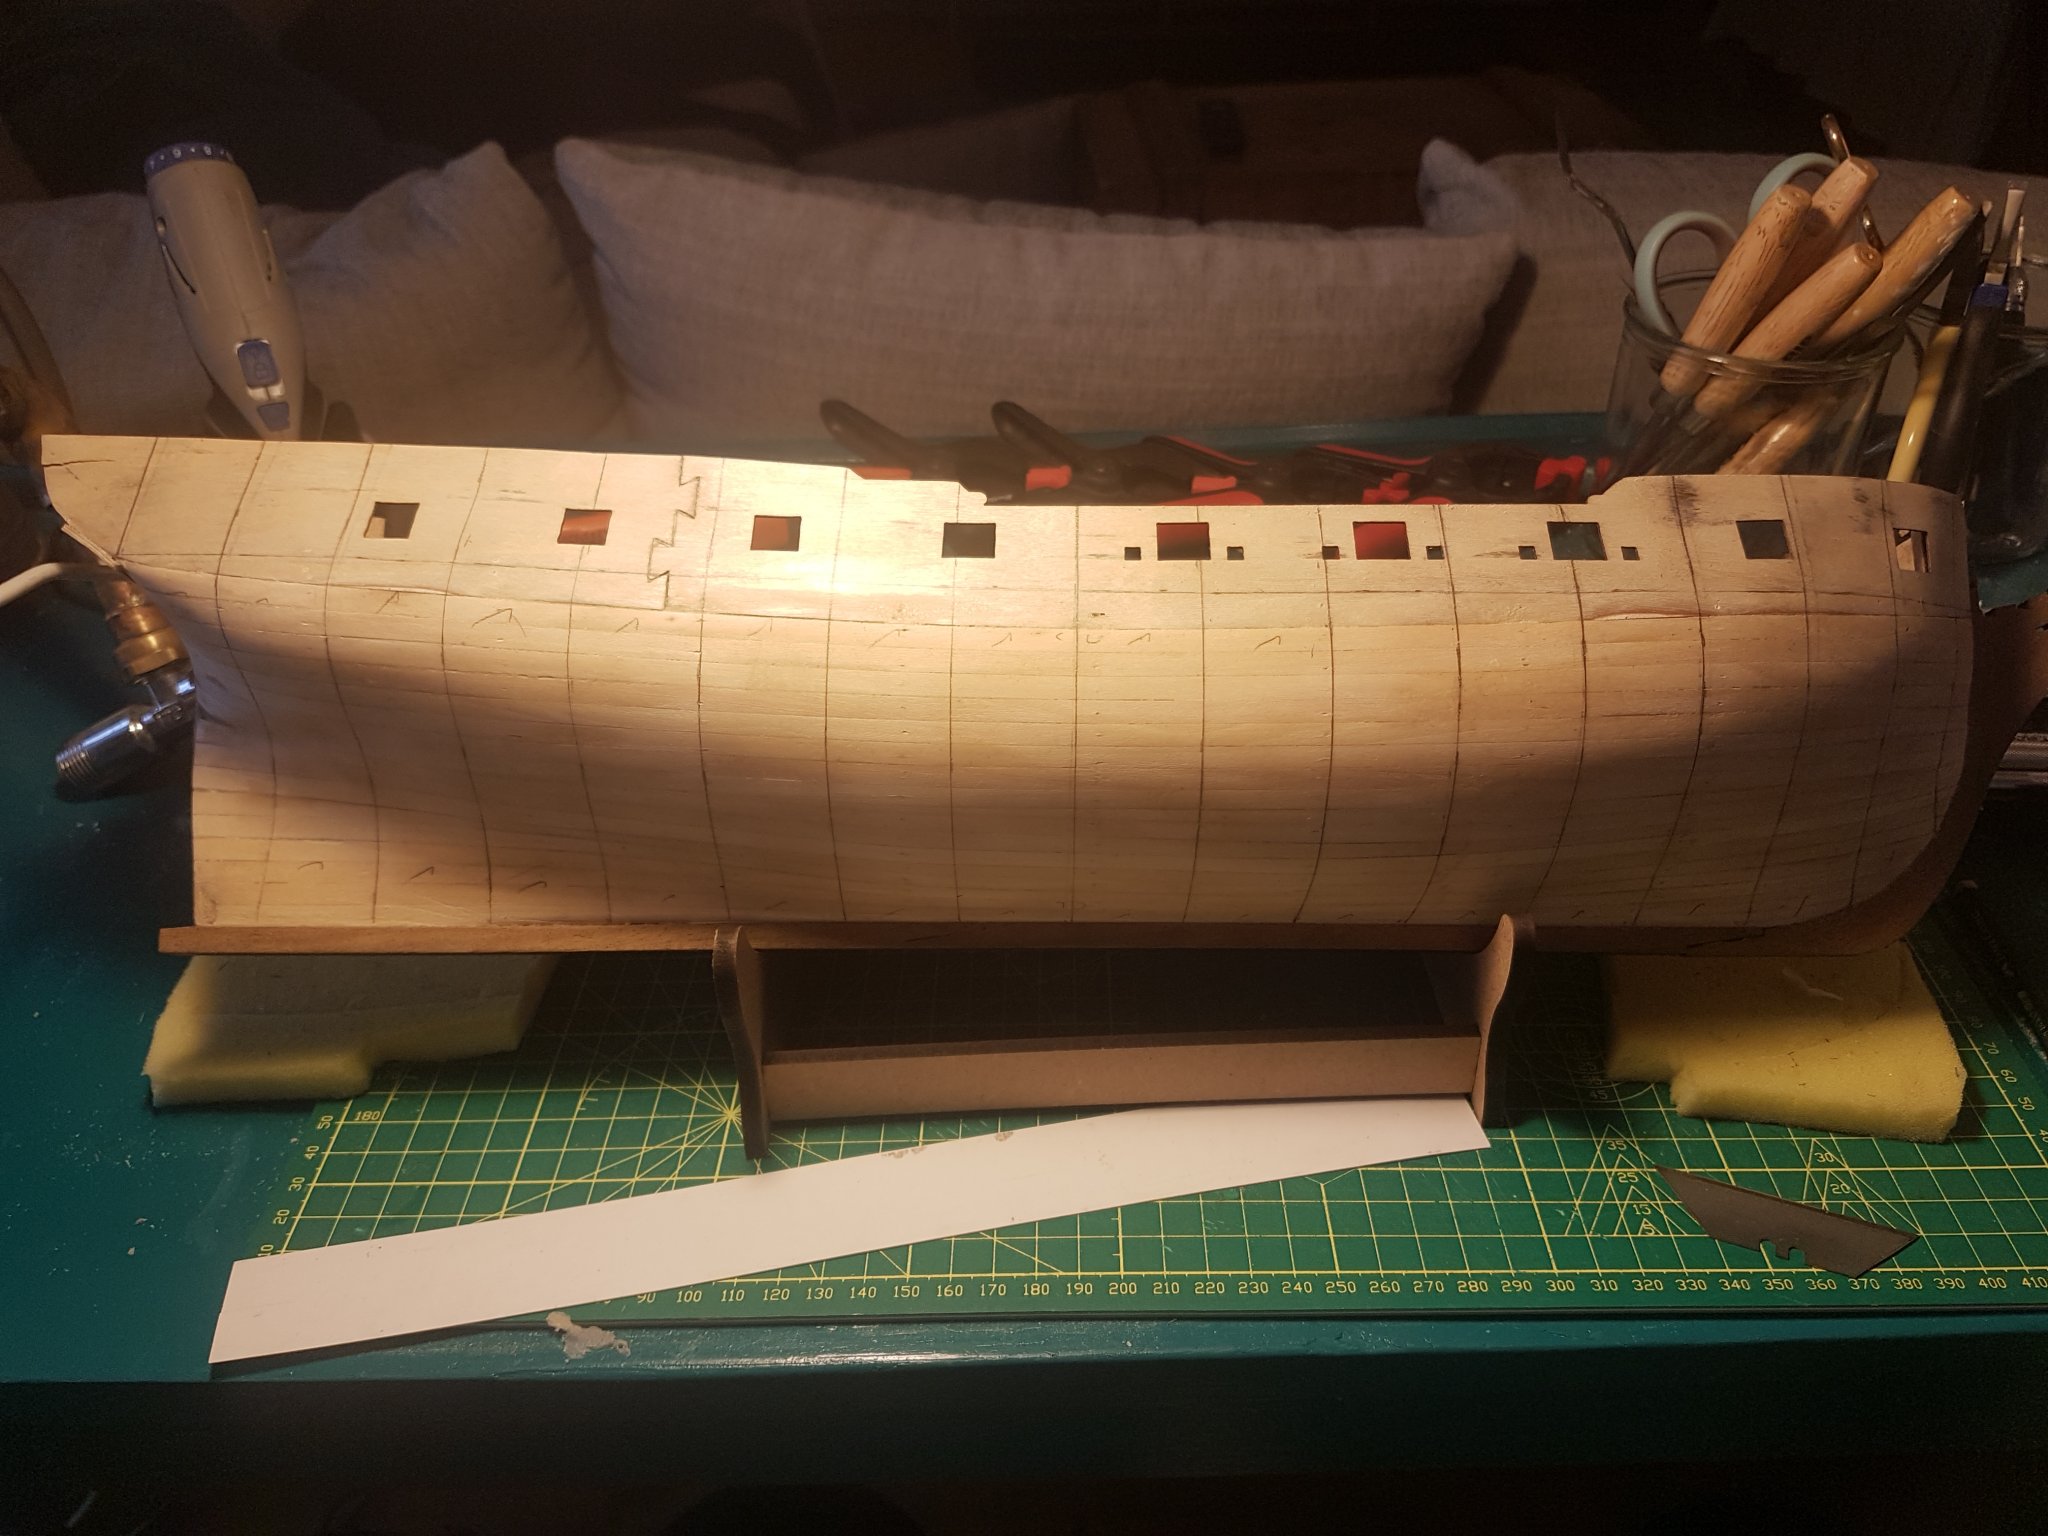
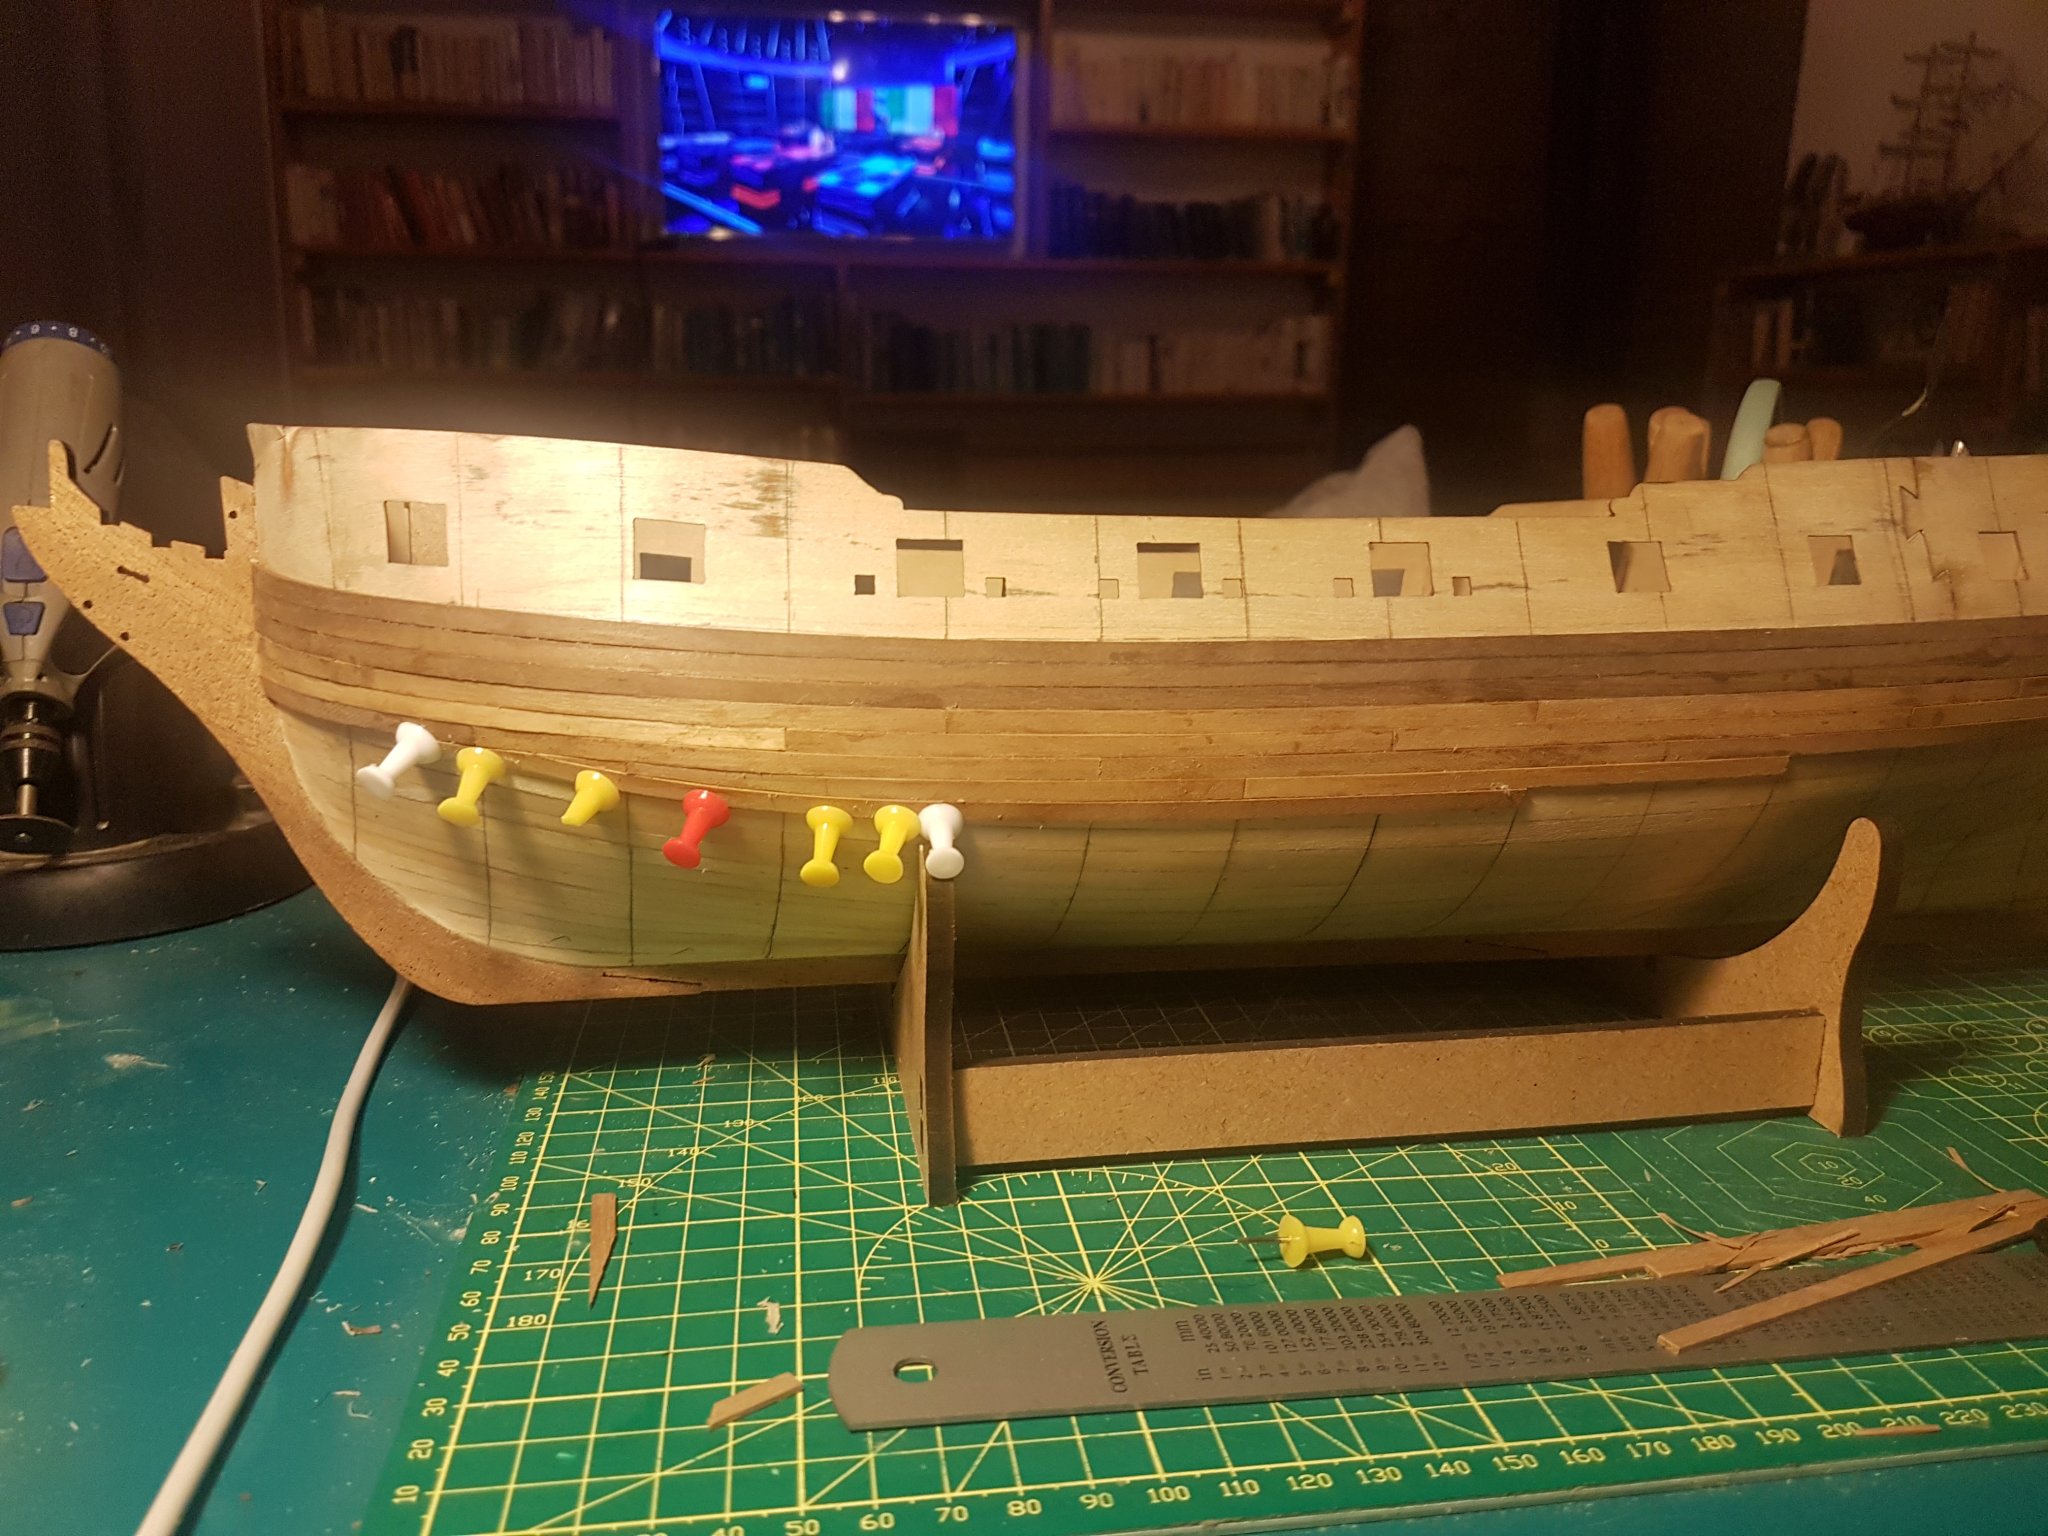
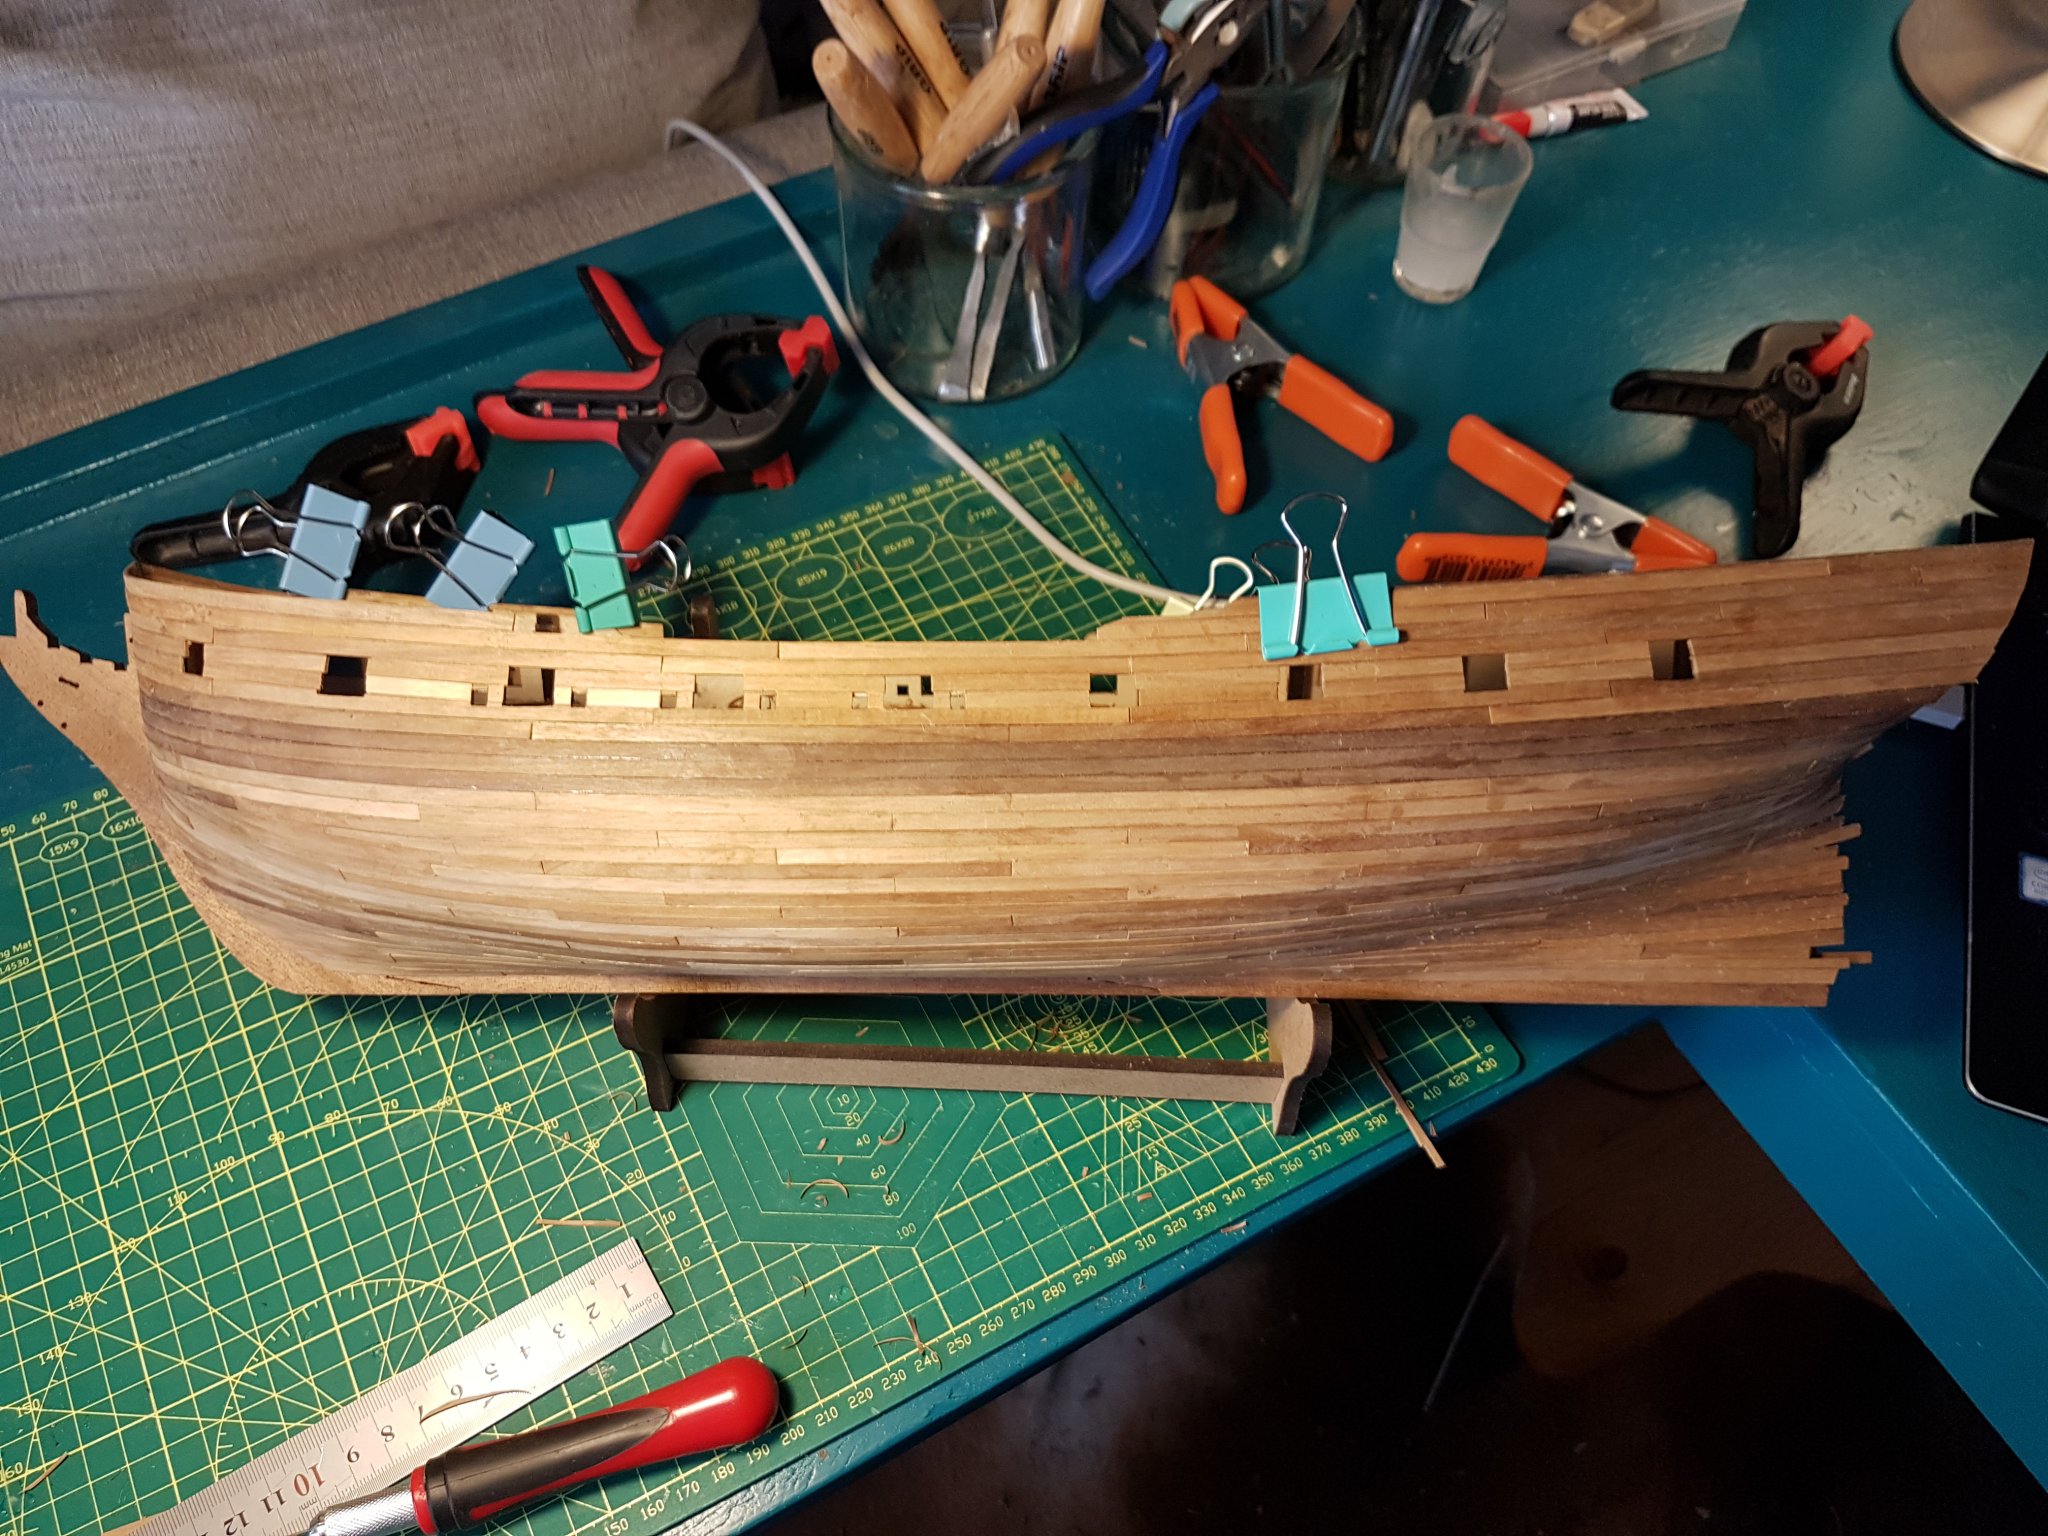
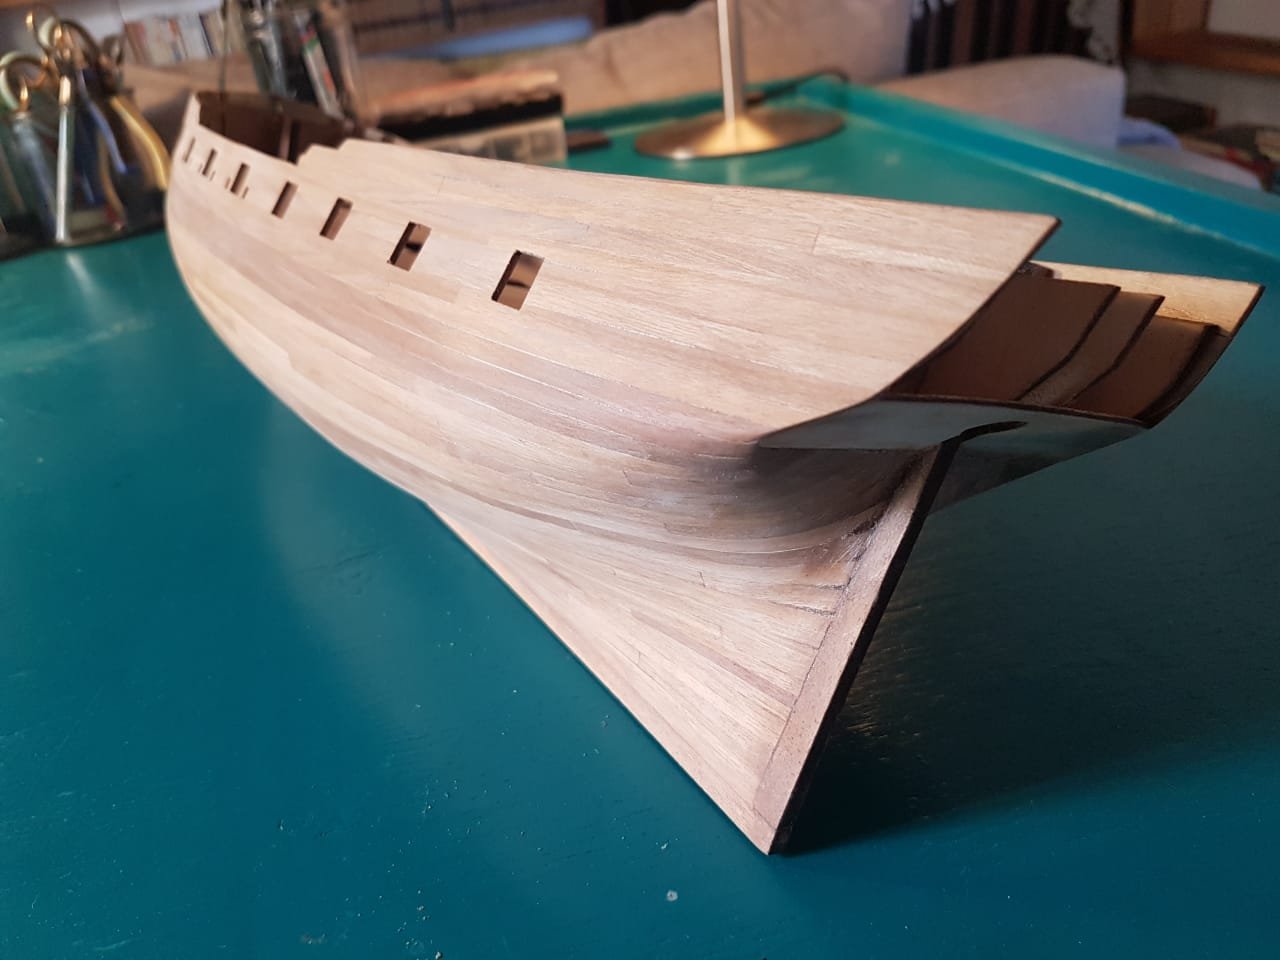
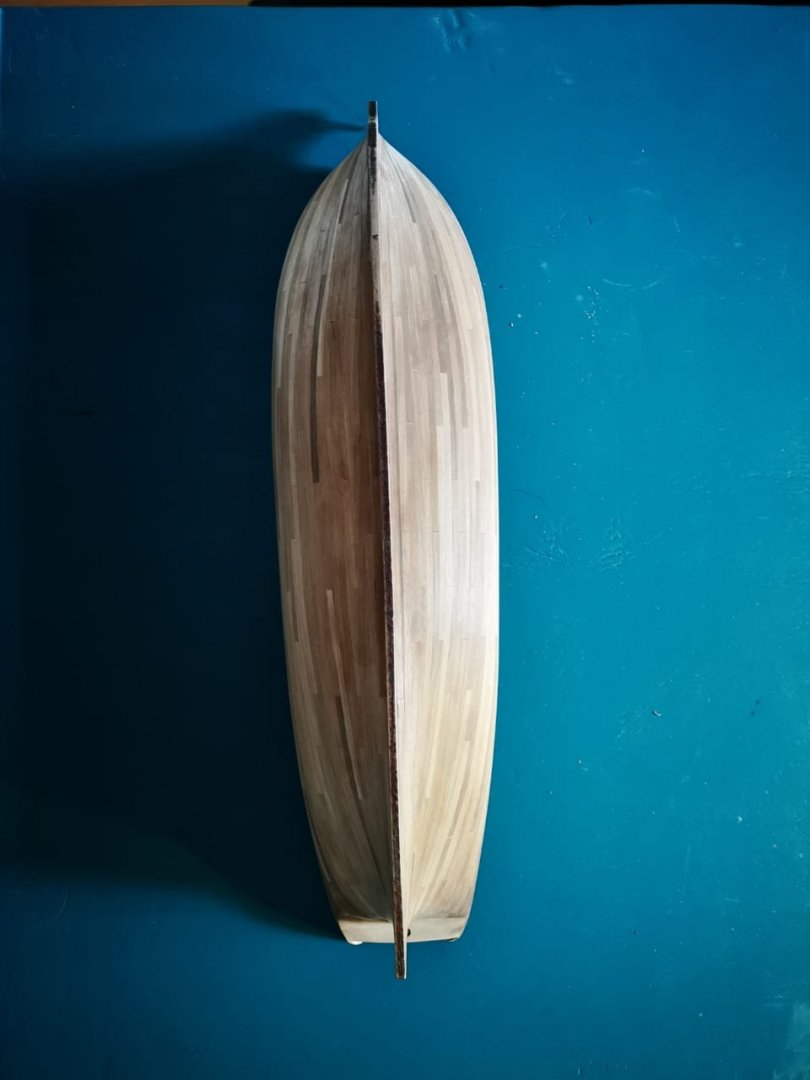
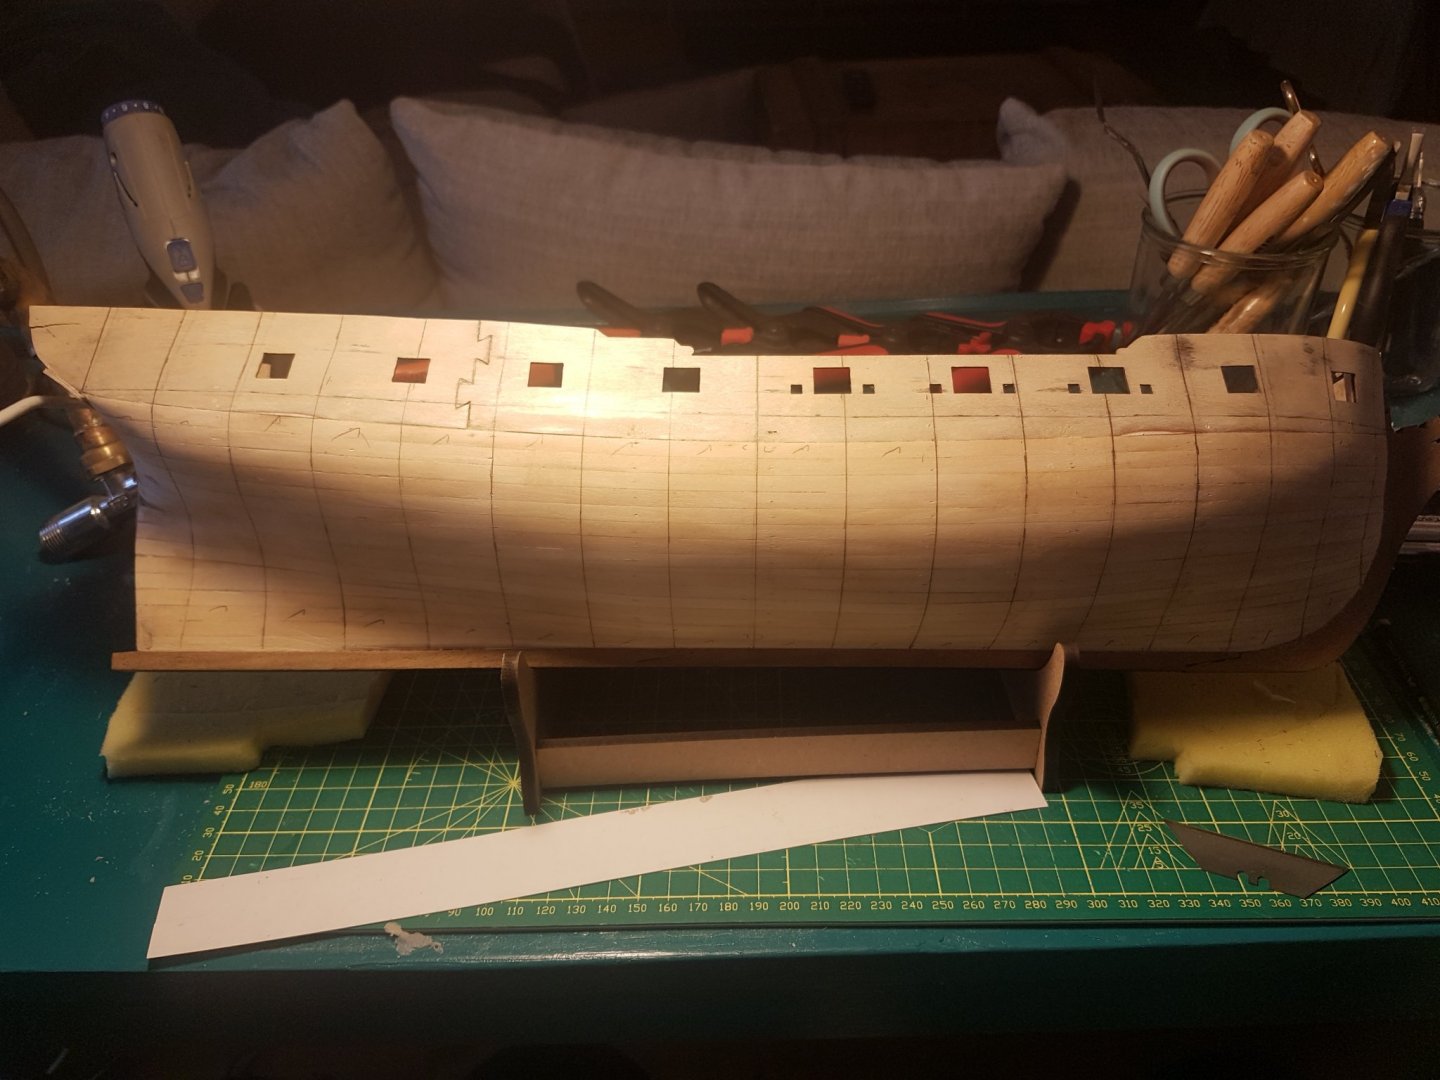
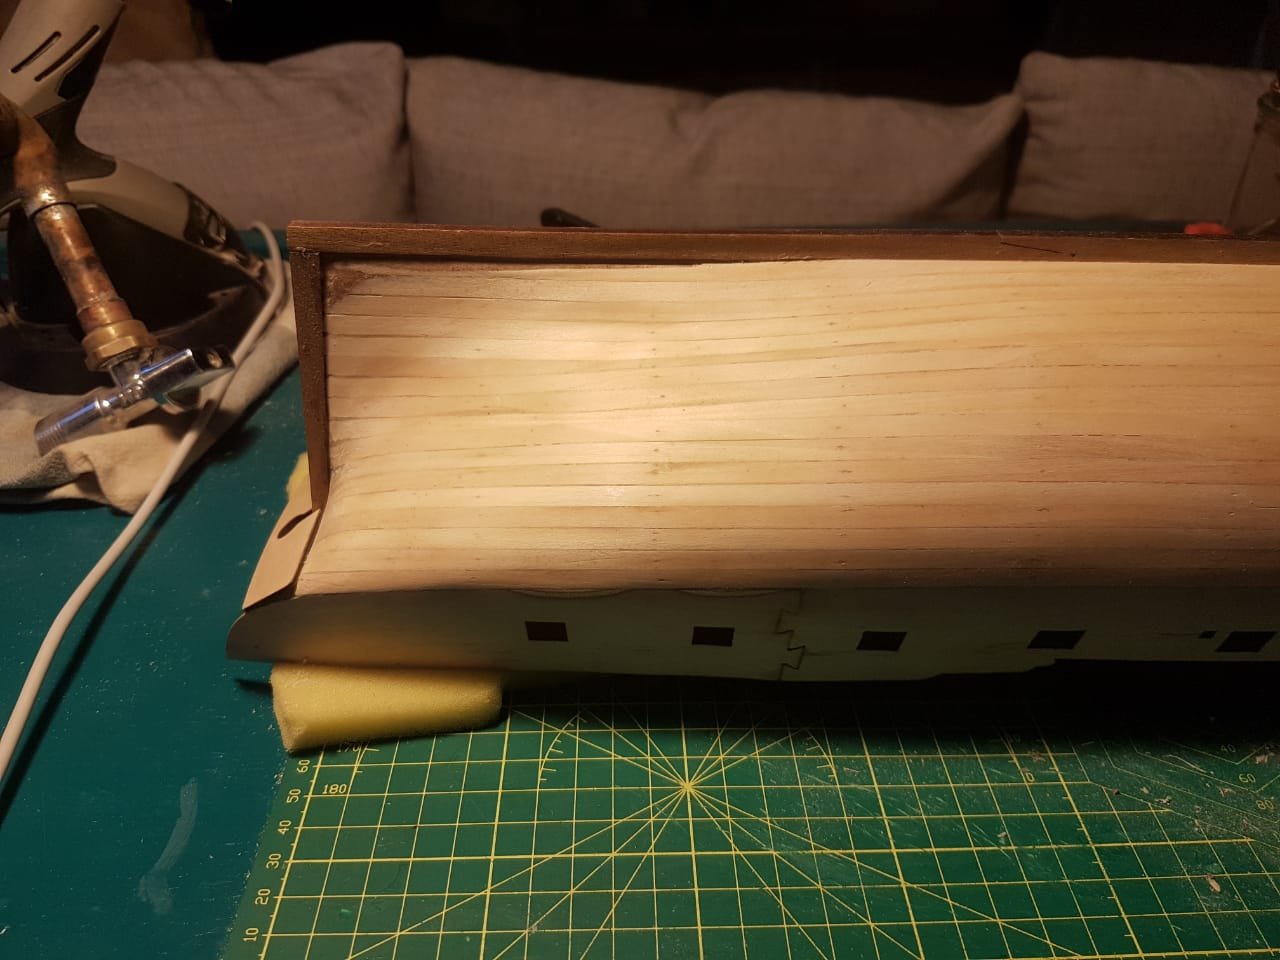
Finally...Day 39-103(that's 65 days to do the second hull planking, for those who are planning a build it is worth noting that I applied very little time to my build during this period, I was in the peak of my farming season and was going through the end of a relationship) So here goes. After trimming the stern counter so that it was flush with the bulwarks I marked the hull with vertical lines spaced at 28.5mm to plan my layout for the 4 butt planking system I chose to use(there is a post in this build log by vulcan bomber explaining this layout.). I found that it was easiest to draw a single vertical line between gun ports 5 and 6 and then set a compass to 28.5 mm and use this to mark the spacing at various points along the location for the next line before connecting the dots to create the next complete pencil line. The photo below shows the completed line layout. It is also worth giving a quick warning here about the bulwarks, I failed to protect these from breaking while working on the model when upside down. You can see the break below. Something as simple as resting the model on a piece of foam would have solved this problem. The next step was to lay down the wale line. I did this using 3 strips of the darkest wood in the planking pack. I did not cut these down to 118mm lengths as I wanted a nice solid sweeping curved line to plank from and I did not trust myself to create this using short pieces. These were steamed and pinned to the hull with drawing pins. I can suggest that one uses a flat blade to scrape away all excess glue from the edges of the plank to prevent the dry glue from getting in the way of the next strake(i hope thats the right word). I laid down 3 full planks for the bulwark line and then three additional strakes of plunks in the 4 butt pattern without any tapering of the planks. These planks and all others were chamfered slightly at the point where the plank meets the bow to allow as tight a fit as possible. Once these were in place I simply held each of the next planks in place and tapered them in such a way as to allow them to lie as naturally as possible and then pinned them to the hull after glueing. I approached this very slowly and used probably more pins than required but I found this gave pleasing results. As you can see I also opted for lighter planks for the lower planking This was continued from the bulwarks to the keel while tapering planks in the same way as described for first planking, I was left with a tiny filler plank but I was fairly happy with the final spacing. Once this was done I move up to the gunnals and planked them using the same 4 butt pattern, letting each plank overhang the gun ports slightly seemed to be the best way to get a need finish. When these were all glued and dried I simply trimmed them back and filed the edges. Once all this had been done I trimmed the stern keel pieces and tops of the gunnals and prepared for the arduous task of filling gaps and sanding the hull. I will end this post here as I fear it may be becoming too large... next post...filling, sanding and questions. The Bitter End


-
@ASAT Hi ASAT Thanks for your comment, I did as you said and trimmed the stern counter before planking the hull. It does seem like that was definitely the right choice. Cheers TBE
-
@vulcanbomber Hi Vulcan! Its great to be back! I made the decision to follow in your footsteps and plank the hull in the "correct" Length planks(114.5mm). I really enjoyed the planking process and I hope you can tell me if I did it correctly(please feel free to tell me if I made mistakes, This is a learning process for me). I took note of what you said about the height of the wale and the need to accommodate the window trim. I am still a bit worried that I may have made a mistake by not planking the stern counter first. Please take a look at my photos if you have a chance to see how I should proceed at this point. The Bitter End
-
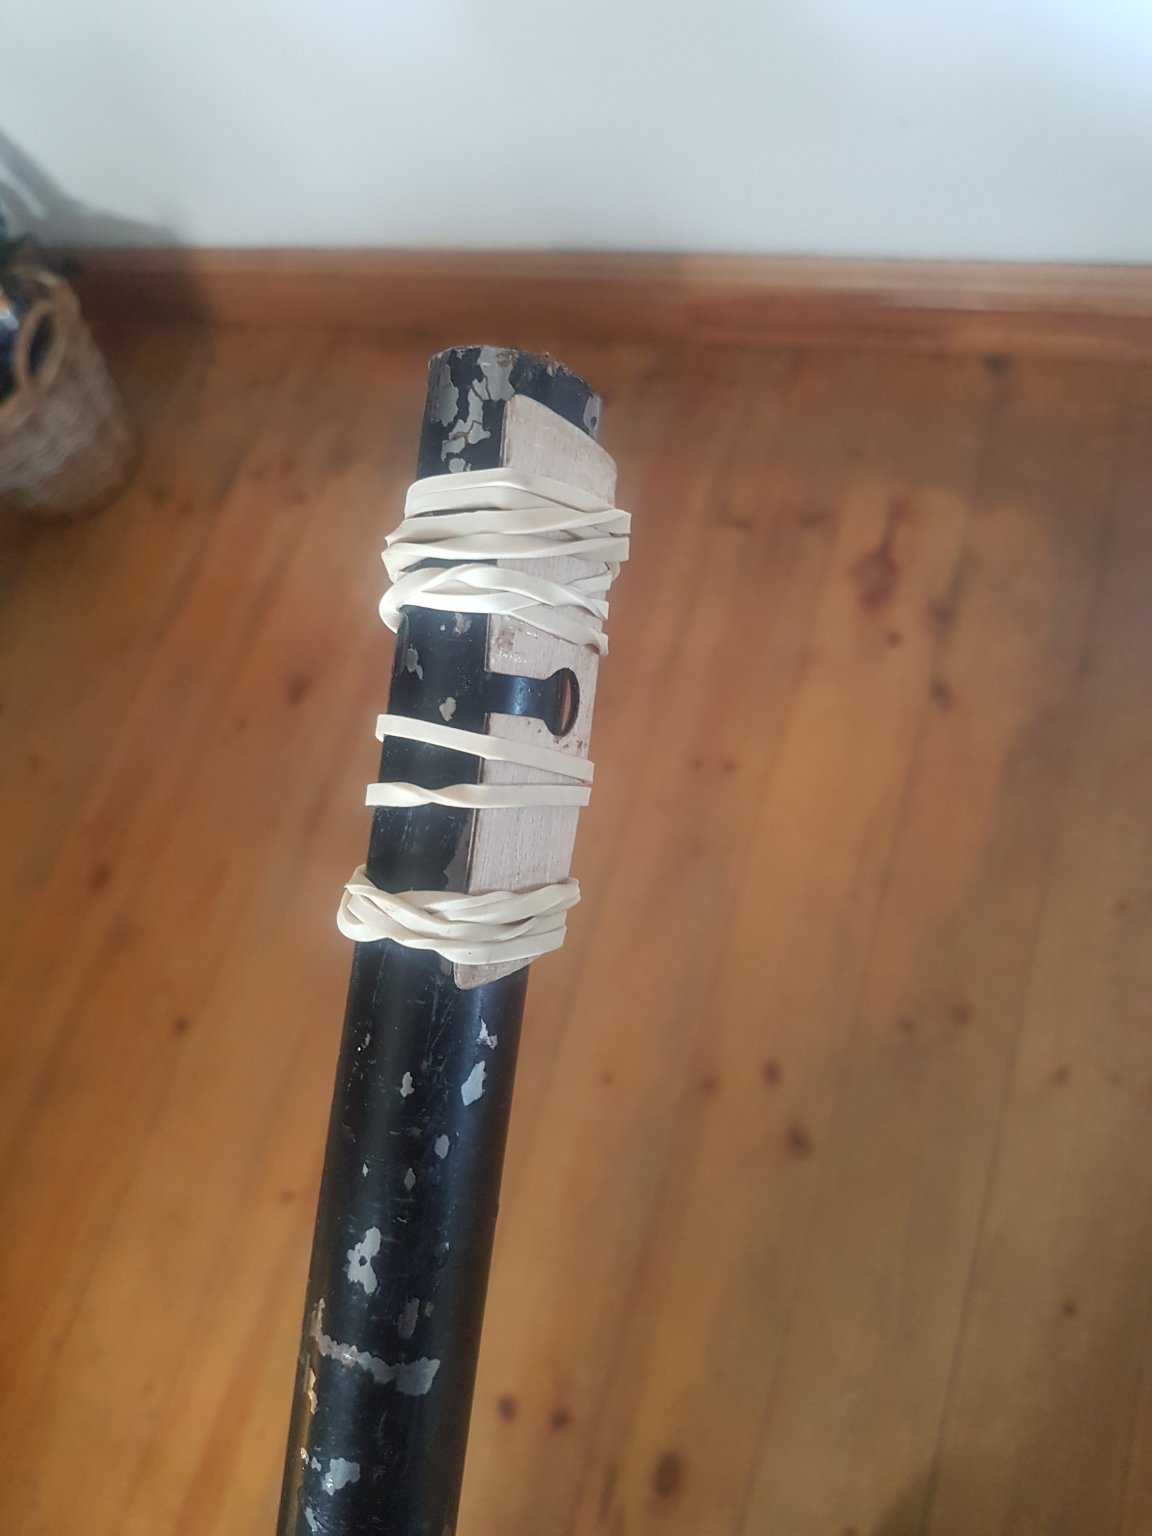
@SpyGlass Hi Spy! I made great use of your advice as always and curved the stern counter as you suggested. I steamed it well and then secured it to a pipe with elastic bands. I should probably have curved it slightly more but that ship has sailed. I also followed that advice of yours and steered completely clear of CA and stuck to PVA glue. I have completed the planking of the hull and trimmed the stern counter but i have not planked the counter yet. How much of a problem is this? The Bitter End

-
Hello All! To those of you who I have not sent personal messages to I would like to apologise for my long absence and sudden disappearance. I did not spend my time in idleness, I did manage to get my second planking done. I would like to reply to all the messages that I did not attend to when I should have and then get on to what should be quite a lengthy post about my progress(brace yourselves). Thank you all for your input, support and feedback. I really hope you will all stick around for the rest of the show. Cheers! Haiko
-
Hi everyone. I would just like to apologise for my absence and general lack of enthusiasm. I am going through the end of a 6 year relationship and it has really made me struggle to be excited about my build. BUT! I will be back in full force as soon as I am ready. I hope you are all having great success in whatever you are currently pursuing The bitter end!
-
Rookie question number 982 Th e stern counter piece sticks out slightly beyond the edge of the bulwarks. I cant quite figure out if this was a mistake on my part or the models part or if it is meant to be that way. Should I be trimming this back so that the bulwark planking can cover the edge of the stern counter?
-
@SpyGlass Hello Spy! old faithful at it again. I agree entirely that that wale line was infact far too high. I have an analog vernier that I used to measure the wale off the drawing again and I am far more happy with the results. I did then go a step further and I used a compass, set the compass to the distance between the gunport and the wale indicated on the drawing and then went over to the model. the advantage of this is that it has the pencil built into the one side so there is less fiddling. Thanks for this great representation of just how extreme that curve in the stern counter actually is. I had no idea. I think I may nave to somehow exaggerate this curve using the planking of the hull and the counter itself. I cant get a curve into the ply piece that accurately matches your drawing. Thank you for that link to the drawings. they really are beautiful. I will order a set tonight! I hope you are having a great day. cheers "bitter"
-
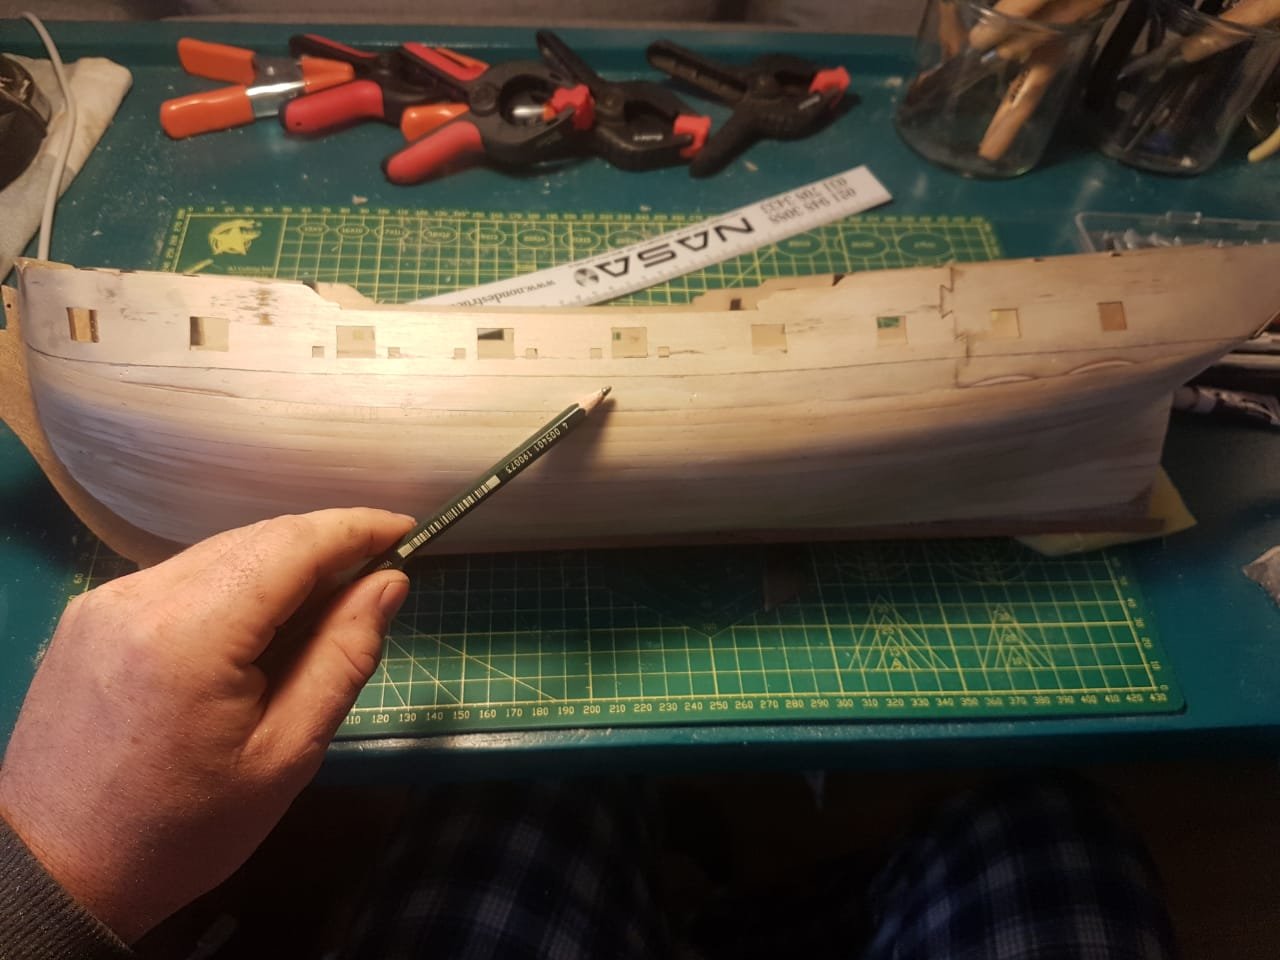
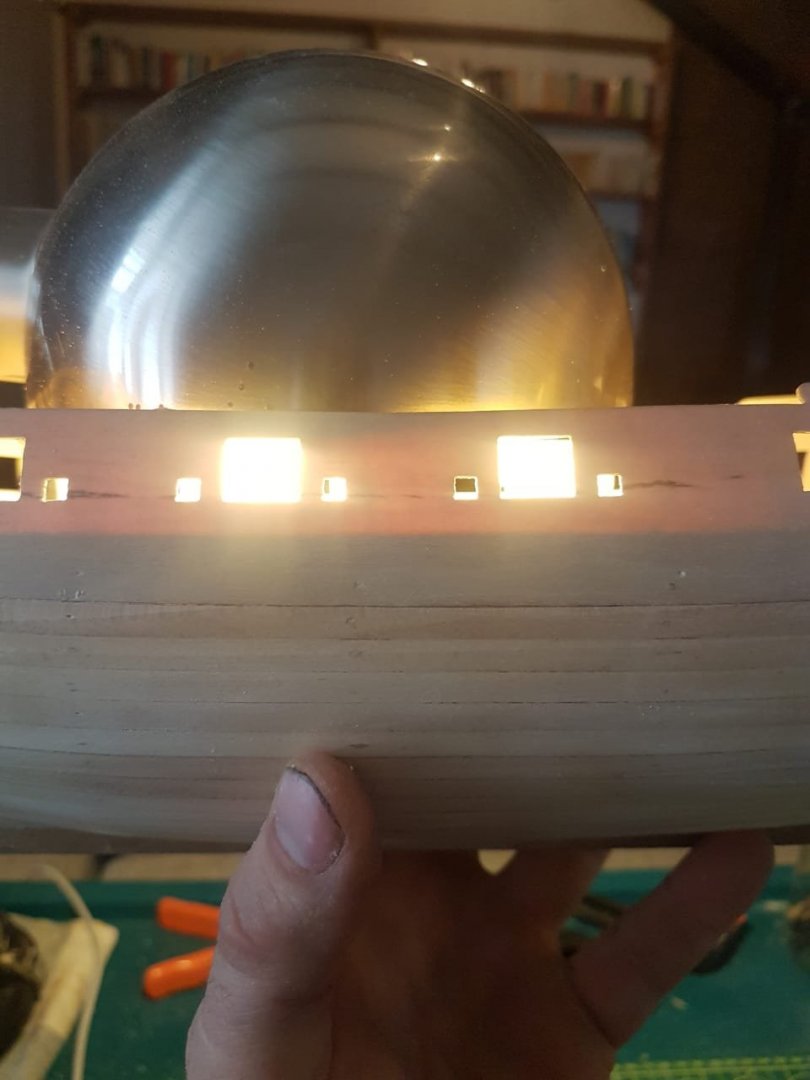
Day 38 After some great advice from fellow members I sanded back the hump that was pointed out and attempted to put a bit more of a curve into the stern counter. Please let me know if this is correct if you fine people have the time.. I then applied myself to the wale line. I measured on the drawings on sheet 4 and realised that the distance from the bottom of the gunports to the top of the wale is the same as the distance from the bottom of the gunports to the gun deck. This happy coincidence combined with the fact that the ply is pretty thin meant that I would shine a light through the ply to mark this level in pencil on the outside. My plan is to then use the 2 darkest strips of planking I can find in the bundle to mark the top of the wale and then plank down from there with lighter wood to make sure I dont get confused about whats what. Again it would be appreciated if you could take a look at the pencil line I drew to mark the top of the wale and give me feedback on its location. Please excuse my dirty nails. I am a farmer and I spend a large portion of my day either doing things that makes tour hands too dirty to ever truly get them clean
-
@SpyGlass Spy! Top of the morning to you I hope you will be pleased to see that I have moved over to tagging instead of copying the entire message you said(how fast im growing up) This is all starting to make way more sense. I did look at cutting another rabbet and I think there is a very real chance I will just do damage I cant repair so Im going to log this under experience for my next build. In retrospect it does make alot more sense to do it your way(thats what I get for trying to be clever). I understand what you mean now about the hump at the stern. Thank you for taking the time to clarify that. I will get on fixing this immediately I think the Wale situation confused me because it seemed like a big step in the whole second planking thing. when in reality its really just a fancy way of saying "make sure that you mark where you want the wale to run when you finish your planking."
-
@vulcanbomber Good morning Vulcan! This now all makes perfect sense. I did use the same 4 butt pattern when planking my deck but this explanation really simplifies the process. I am still not sure if I am going to make use of this system or not yet. It does seem like a huge amount of work for something that is going to be coppered over but the point of this build was always to build the skills I need for future builds. Between you and spys explanation of the hump i have at the stern I now know exactly what you mean. Back to the sanding block. I did also notice on Spys photo that the stern counter was curved so I took mine off, soaked it in a cup of hot water and reapplied it wit pressure to create the curve(in the process I also learned that one shouldnt put hot water in a mug that looks like it might have tea in it. i had 3 large sips out of it, thought that I should really write a letter to the Delaware Local Observer about the fact that the quality of tea in this country is going down the toilet, and then realised I was actually just drinking a cup of plywood water.) How did you adhere your planks to the hull? did you use cyno(superglue is what we members of the peasantry would call it) Have a magical day/night cheers Haiko P.S. Despite my run in with the "tea" and my somewhat rookie questions I promise I am usually a fairly competent person 😂
-
Hi Spy! your positive feedback makes me quite proud. Thank you. I dont mean to be annoying but i dont really understand your suggestion. I think the issue is my poor understanding of the terminology. Could you please help me out While im asking questions, I no longer have a rabbet. I filled it with my first planking. Should I cut a new one? Also they refer to marking a main wale? i Cant quite figure out what exactly that means(I assume it means that I should apply a single strip of planking at a specific level below the Gunports to make a sort of upper guideline. If that is correct then how do i determine what level to put this at? to answer your questions..I did not chamfer my planks. I just steamed the heck out of them and pressed them hard against each other both when shaping and gluing. I did also cover the whole hull in woodglue and sawdust and then sand it down which might be giving it an deceivingly tight effect. As for coppering...I am on the fence. I was considering coppering one half and not the other? do you have any thoughts on this? I cant decide. Thanks again for all your detail and effort. It really helps
-
You make me blush. I really hope I can keep this up. I feel like I keep getting lucky here.
-
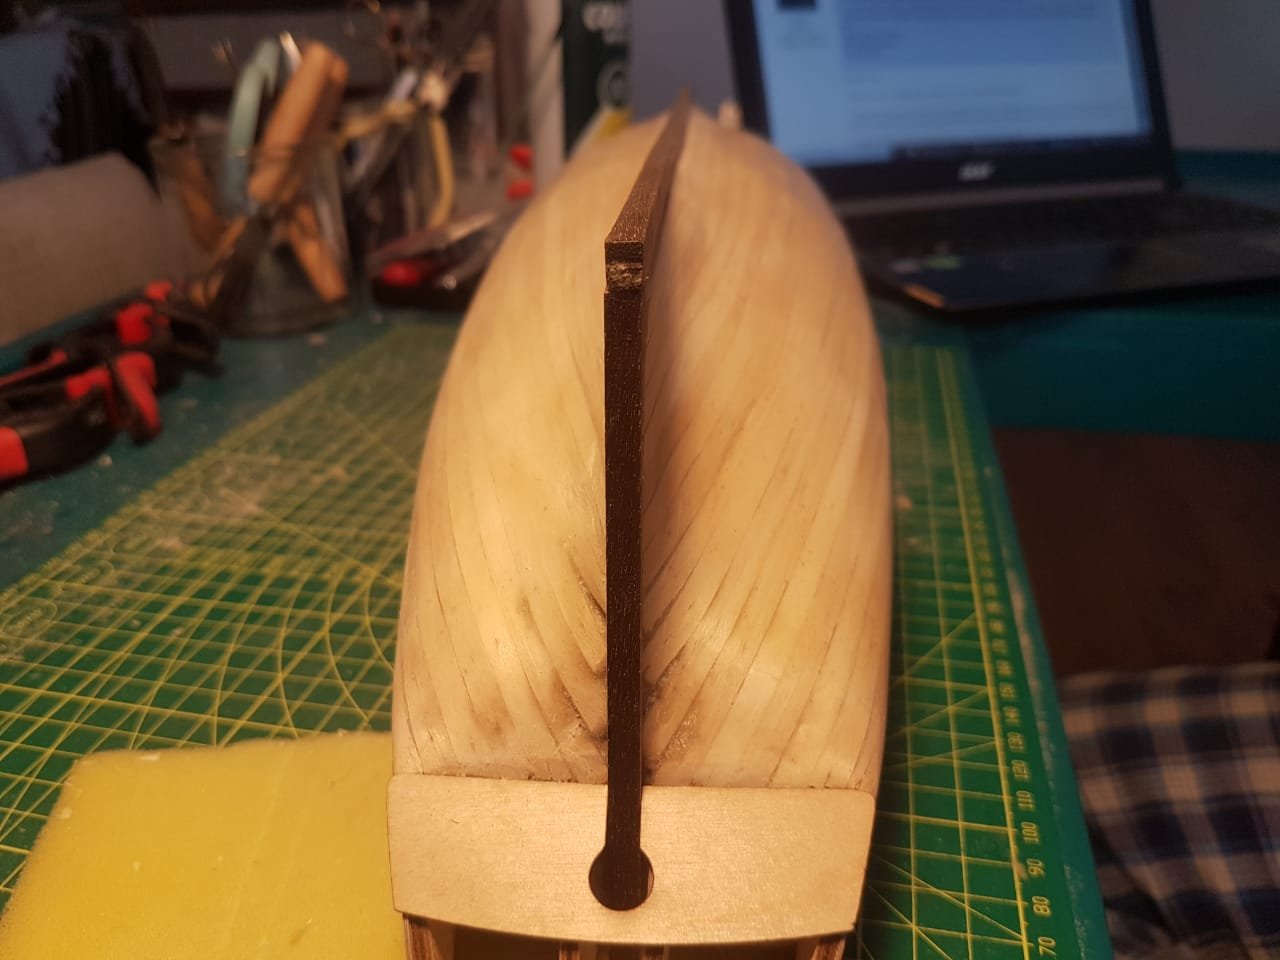
day 35 to 37 I sanded, alot. After completing the basic first planking I decided with my infinite wisdom(and handsome looks) to cover the whole hull in a layer of PVA and sawdust to fill all the minor holes in the planking and then sand it back. DO NOT DO THIS! it took me basically 3 days to sand it back to wood again. the results are reasonable but not worth the effort. During this sanding process I also sanded the stern back to allow the second layer of planking to lie just a fraction proud of the keel as suggested by SpyGlass.. I then also went and glued the stern keel piece down for some entirely inexplicable reason. Im putting it down to fatigue. I see many different methods of planking and I have a number of questions. However my first is...where do I start the planking. there seem to be at least 4 options.

.jpeg.051e3e609c6857c4c4694e538ae17604.jpeg)
.jpeg.76999cb83958fb37f931781589408be6.jpeg)
.jpeg.159ff8438a6ae1eb905b633e26027dea.jpeg)

.jpeg.5e6630cf2c4bed13d92dc2f3a50c0b67.jpeg)
.jpeg.c09ee54c1d57b37bee8a1a7b6235bc4d.jpeg)
.jpeg.c46e87057b6f9f6e6c622297fb8054ae.jpeg)
.jpeg.5ad6ab064b7f33a07faef63d5810bf29.jpeg)
.jpeg.c0fb0fe8b32178ea96e01c8c5d6765c3.jpeg)
.jpeg.e55ed2b3280a08fef7cec2c754b4f638.jpeg)
.jpeg.924917ff5f2f7bb625c7e1cb6217389b.jpeg)
.jpeg.e848708061abd3dddc55cc3dd7489318.jpeg)
.jpeg.1d69126d85c0926bb2a56640400bf7a0.jpeg)