Antti
-
Posts
15 -
Joined
-
Last visited
-
 Wacom reacted to a post in a topic:
Oseberg by Antti - Billing Boats - Scale 1:25
Wacom reacted to a post in a topic:
Oseberg by Antti - Billing Boats - Scale 1:25
-
mtaylor reacted to a post in a topic:
What's wrong with Artesania Latina Constellation?
-
Canute reacted to a post in a topic:
What's wrong with Artesania Latina Constellation?
-
Antti reacted to a post in a topic:
What's wrong with Artesania Latina Constellation?
-
Antti reacted to a post in a topic:
What's wrong with Artesania Latina Constellation?
-
Antti reacted to a post in a topic:
What's wrong with Artesania Latina Constellation?
-
thibaultron reacted to a post in a topic:
What's wrong with Artesania Latina Constellation?
-
thibaultron reacted to a post in a topic:
What's wrong with Artesania Latina Constellation?
-
What's wrong with Artesania Latina Constellation?
Antti replied to Antti's topic in Wood ship model kits
Thank you guys for the info and encouragement! Jaager, Thank you for your explanation, I already forgot the thing on a obscure self for a few years and probably should do so again. Jack, I know you are right, no-one entering my house will probably have the knowledge or even the interest to question the ships authenticity so I'm very tempted to do as you did. Bob, I am very new to modelling but at age 39 I assume and hope I have a few decades left tinkering with these things. I don't (yet) feel the need to prioritize my time too much. Mark, Thanks for the material you provided. The matter is not urgent as I'm currently occupied with other projects so I'll make up my mind later. Maybe I'll try converting it as 1855 corvette. Maybe I just assemble the kit as it is intended. Maybe I'll buy another kit, I don't know yet. -
Antti reacted to a post in a topic:
What's wrong with Artesania Latina Constellation?
-
mtaylor reacted to a post in a topic:
What's wrong with Artesania Latina Constellation?
-
Antti reacted to a post in a topic:
What's wrong with Artesania Latina Constellation?
-
Antti reacted to a post in a topic:
What's wrong with Artesania Latina Constellation?
-
Antti reacted to a post in a topic:
What's wrong with Artesania Latina Constellation?
-
Hello all, A few years ago I bought a Constellation kit from AL, started building the hull and found out there's something wrong with the historical accuracy of the kit and lost interest in the build. Now I dug up the contraption and wonder if should continue with it anyway. So my question is, what actually is wrong with the kit; what changes would it require for the model to be realistic, are the changes even possible or should I just build the kit as it is and be happy with it?
-
liteflight reacted to a post in a topic:
Oseberg by Antti - Billing Boats - Scale 1:25
-
norseman reacted to a post in a topic:
Oseberg by Antti - Billing Boats - Scale 1:25
-
GrandpaPhil reacted to a post in a topic:
Oseberg by Antti - Billing Boats - Scale 1:25
-
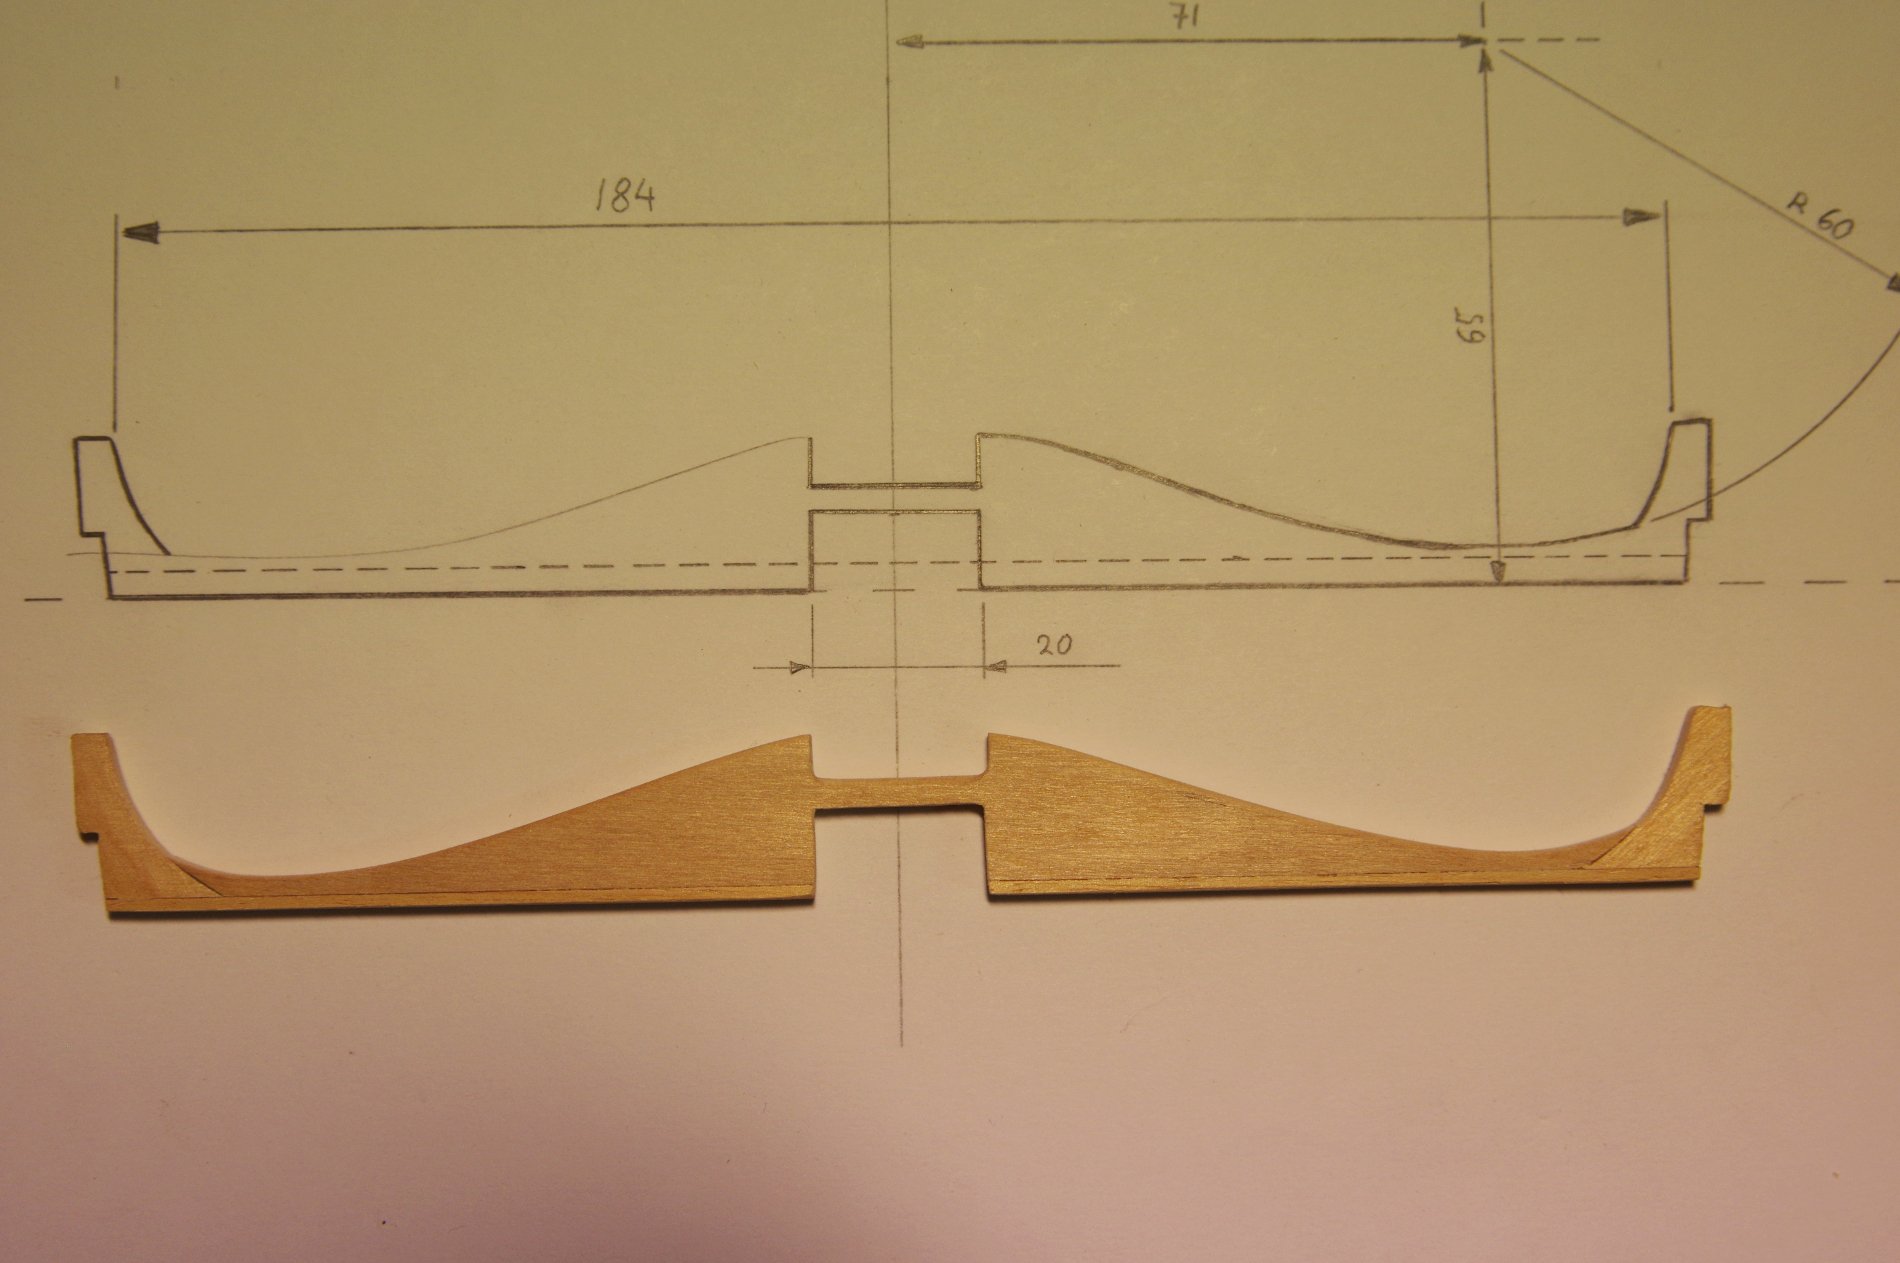
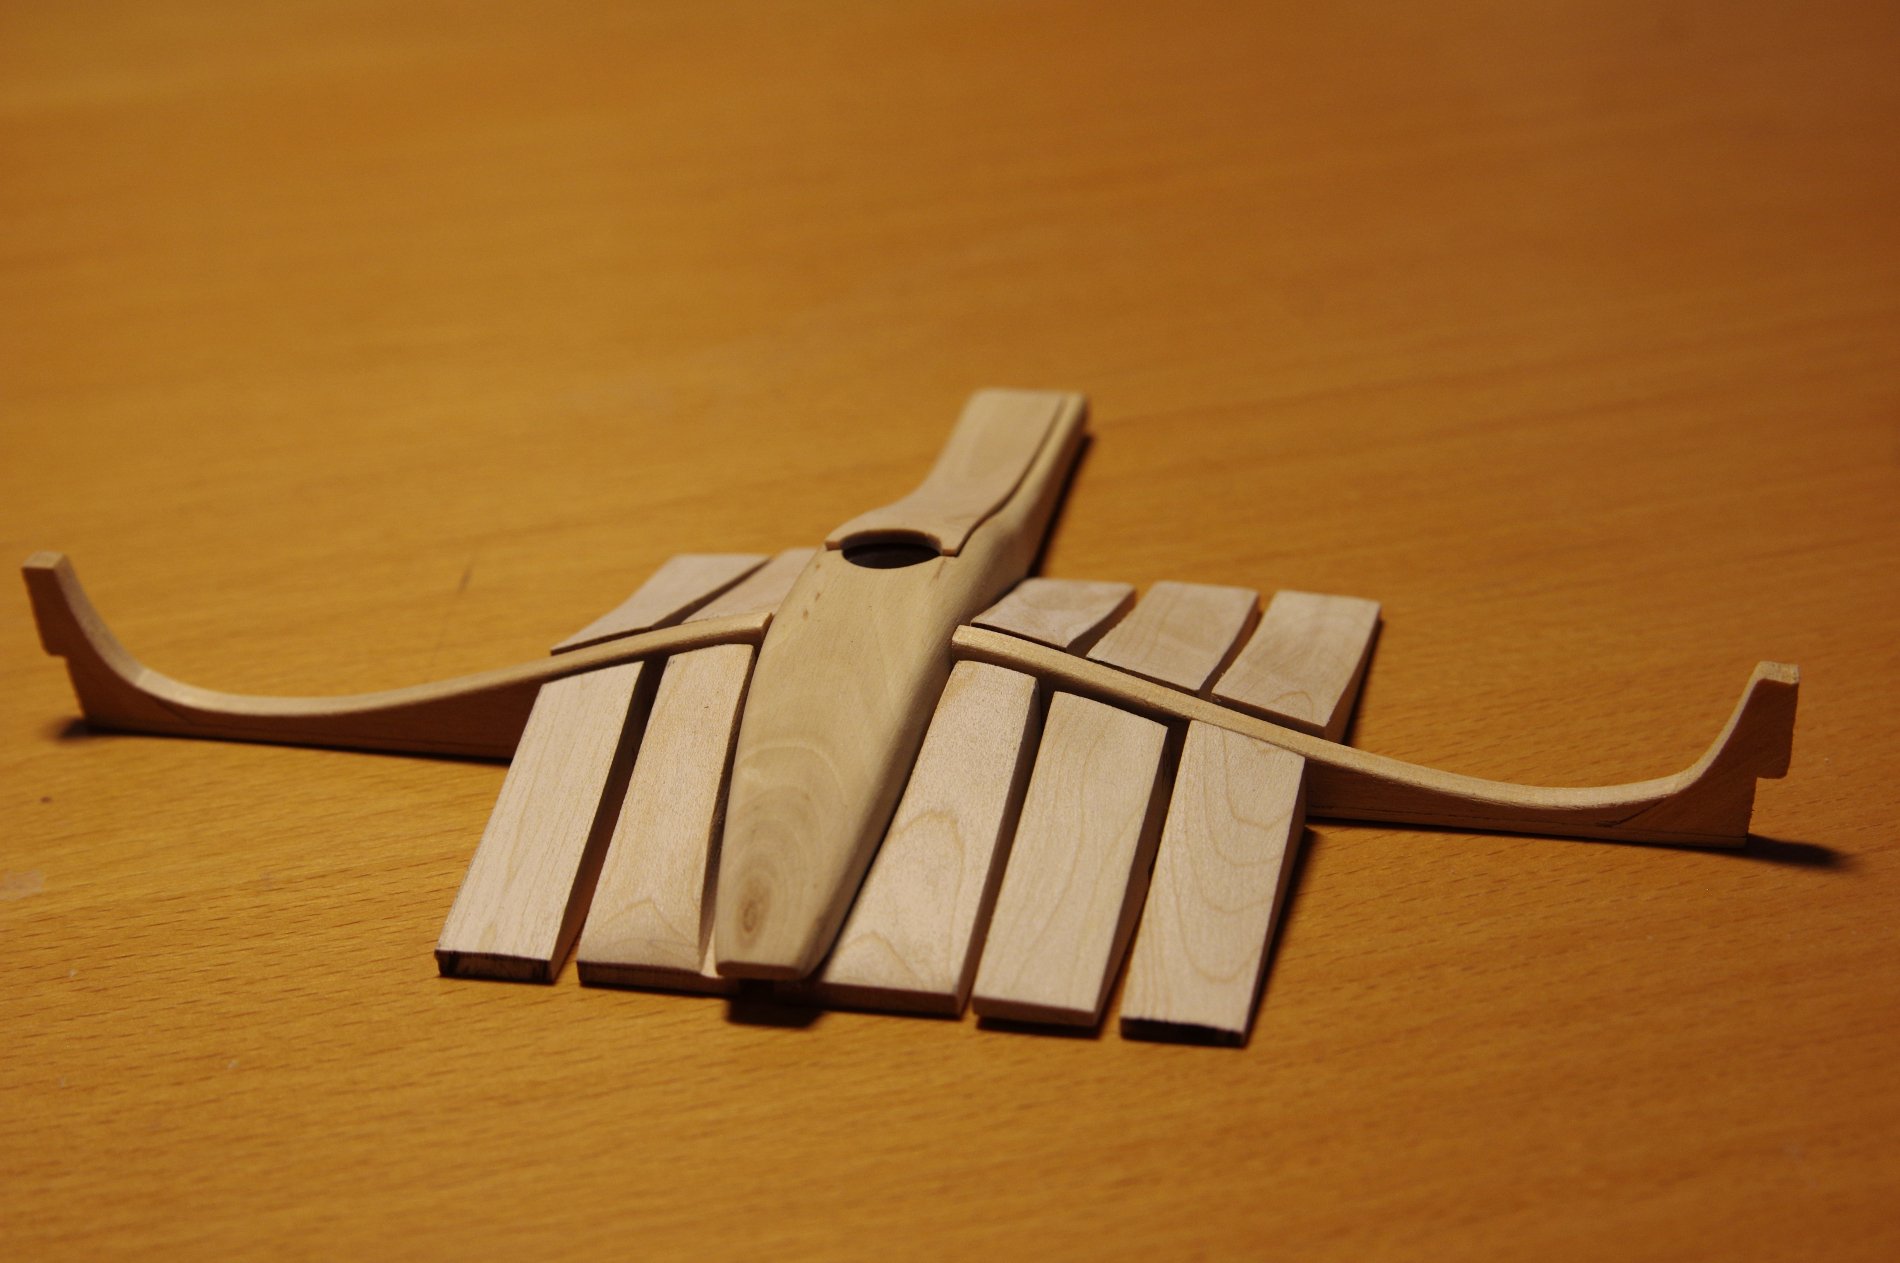
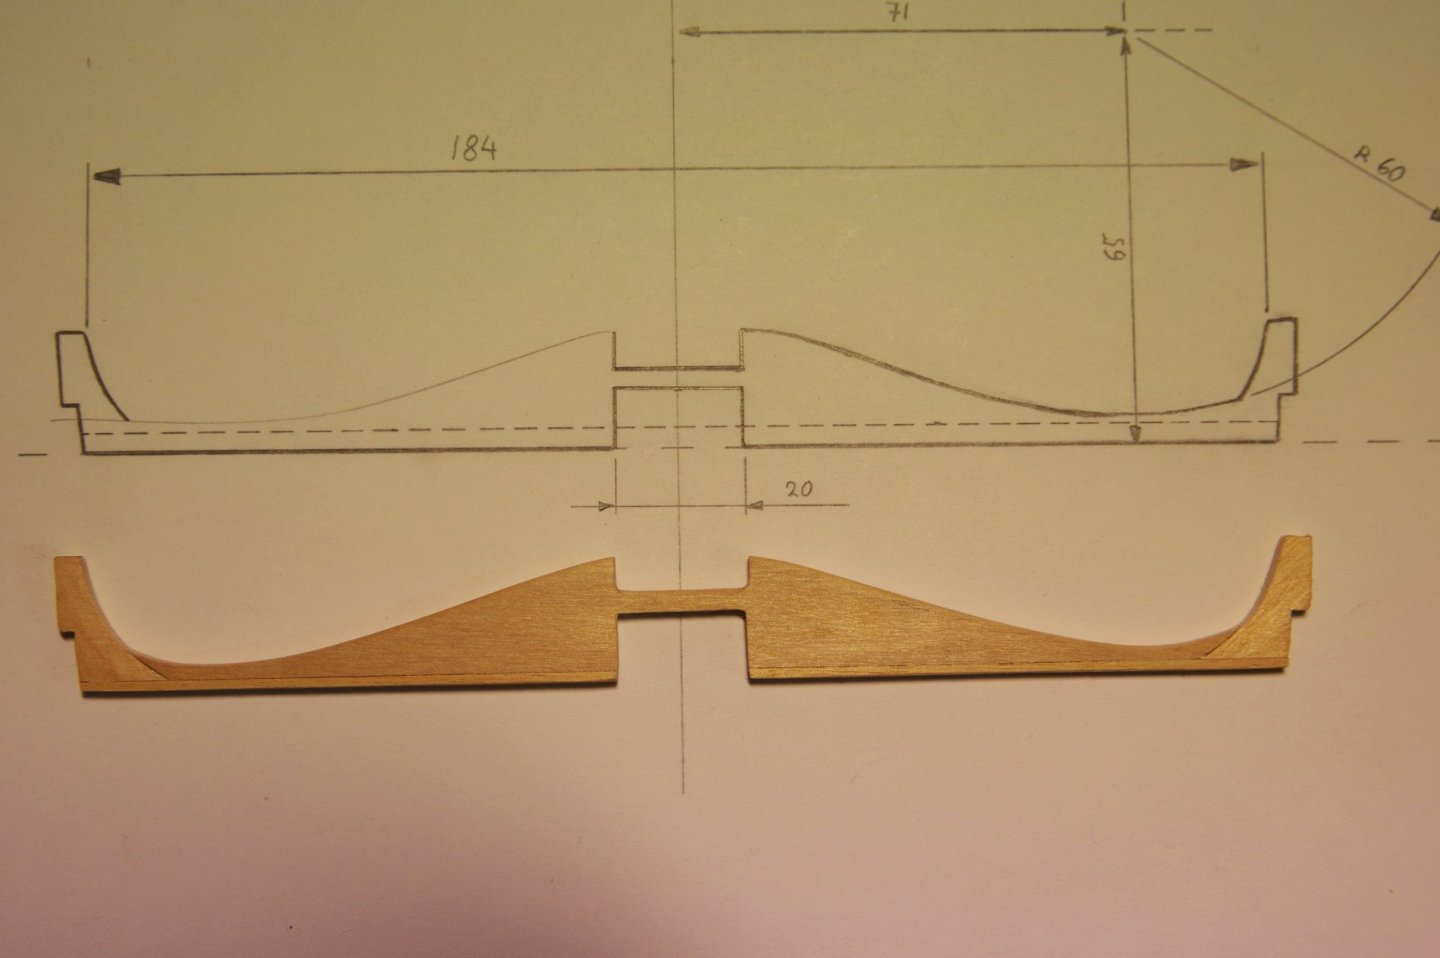
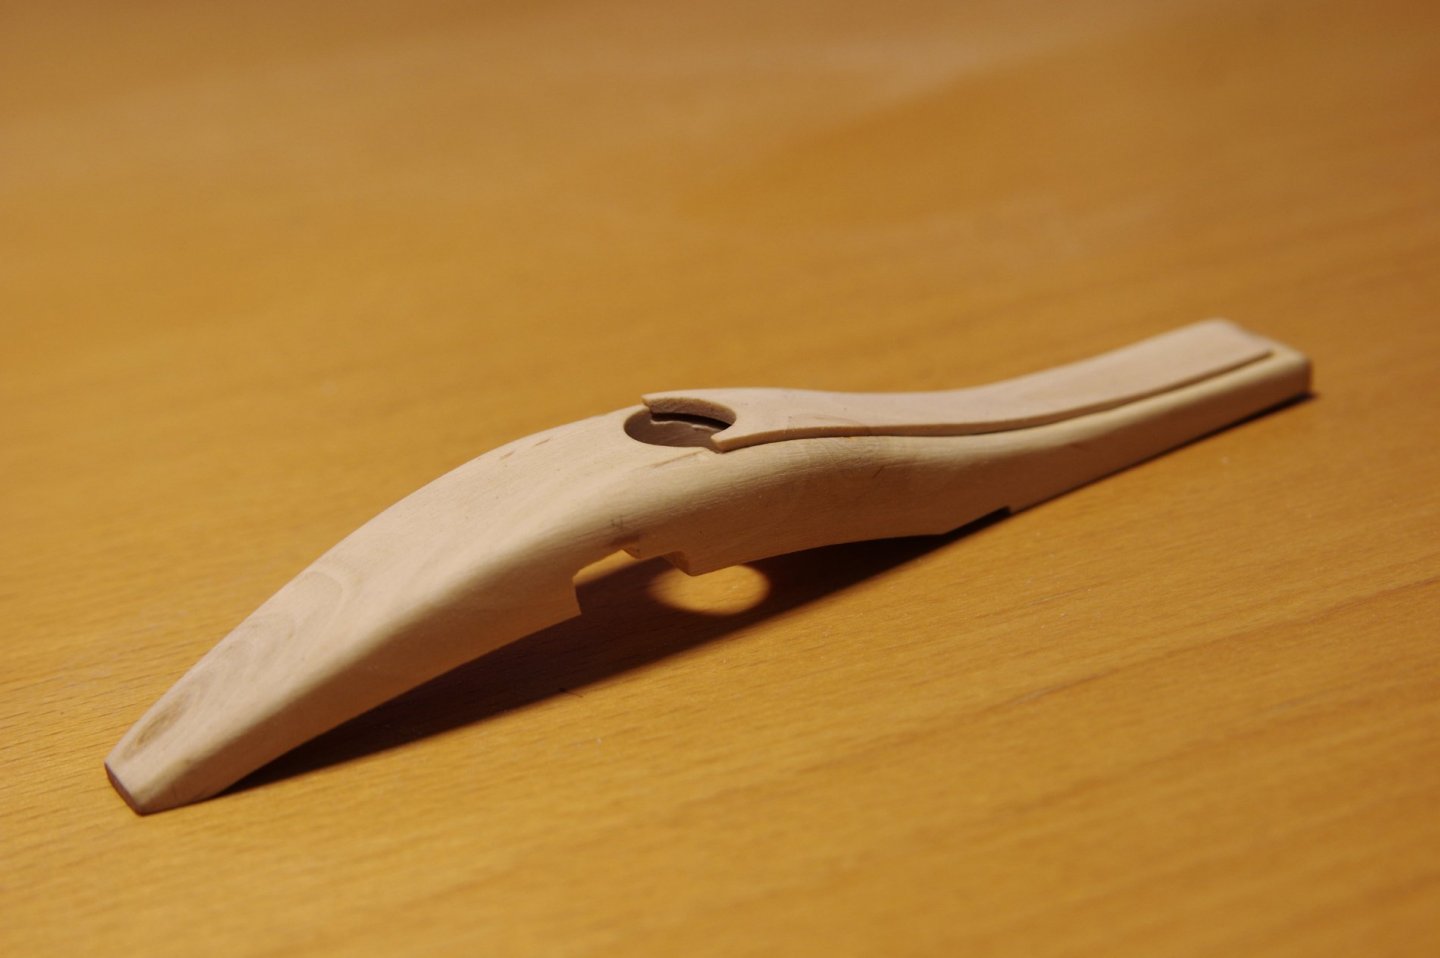
I felt like fiddling with the mast fish and the surrounding deck area for a change. The kit supplied parts for the mast fish would produce an abomination of stacked plywood so I made a new one from apple wood. (I cut down one a year ago and stored it for modelling purposes) All though I'm not 100% satisfied with the result, I'm reluctant on making another one as this one took me a full day. So I'll probably use this one. Having read the other build logs here I learned that apparently, on the real Oseberg the deck formed a "hump" around the mast fish, deck planks rising against an elevated umm... stringer? running accros the deck. The kit instructions don't mention of this, instead a normal straight deck is suggested with plywood stringer floating above the deck. So I'll need a new stringer part too, I made one out of goat willow (hah, I'm not sure about that word either but that's what the dictionary gave me ). Rather than trying to twist deck planks to match the curves of the stringer I eventually ended up making square blocks of wood and sanded the required shape on them. I think this is the way to go...

-
GrandpaPhil reacted to a post in a topic:
Oseberg by Antti - Billing Boats - Scale 1:25
-
Antti reacted to a post in a topic:
Santa Lucia by usedtosail - FINISHED - Panart - 1/30 scale - Sicilian Cargo Boat
-
Antti reacted to a post in a topic:
HMS Victory by GrandpaPhil - Mantua - Scale 1:98 - Kit-Bash
-
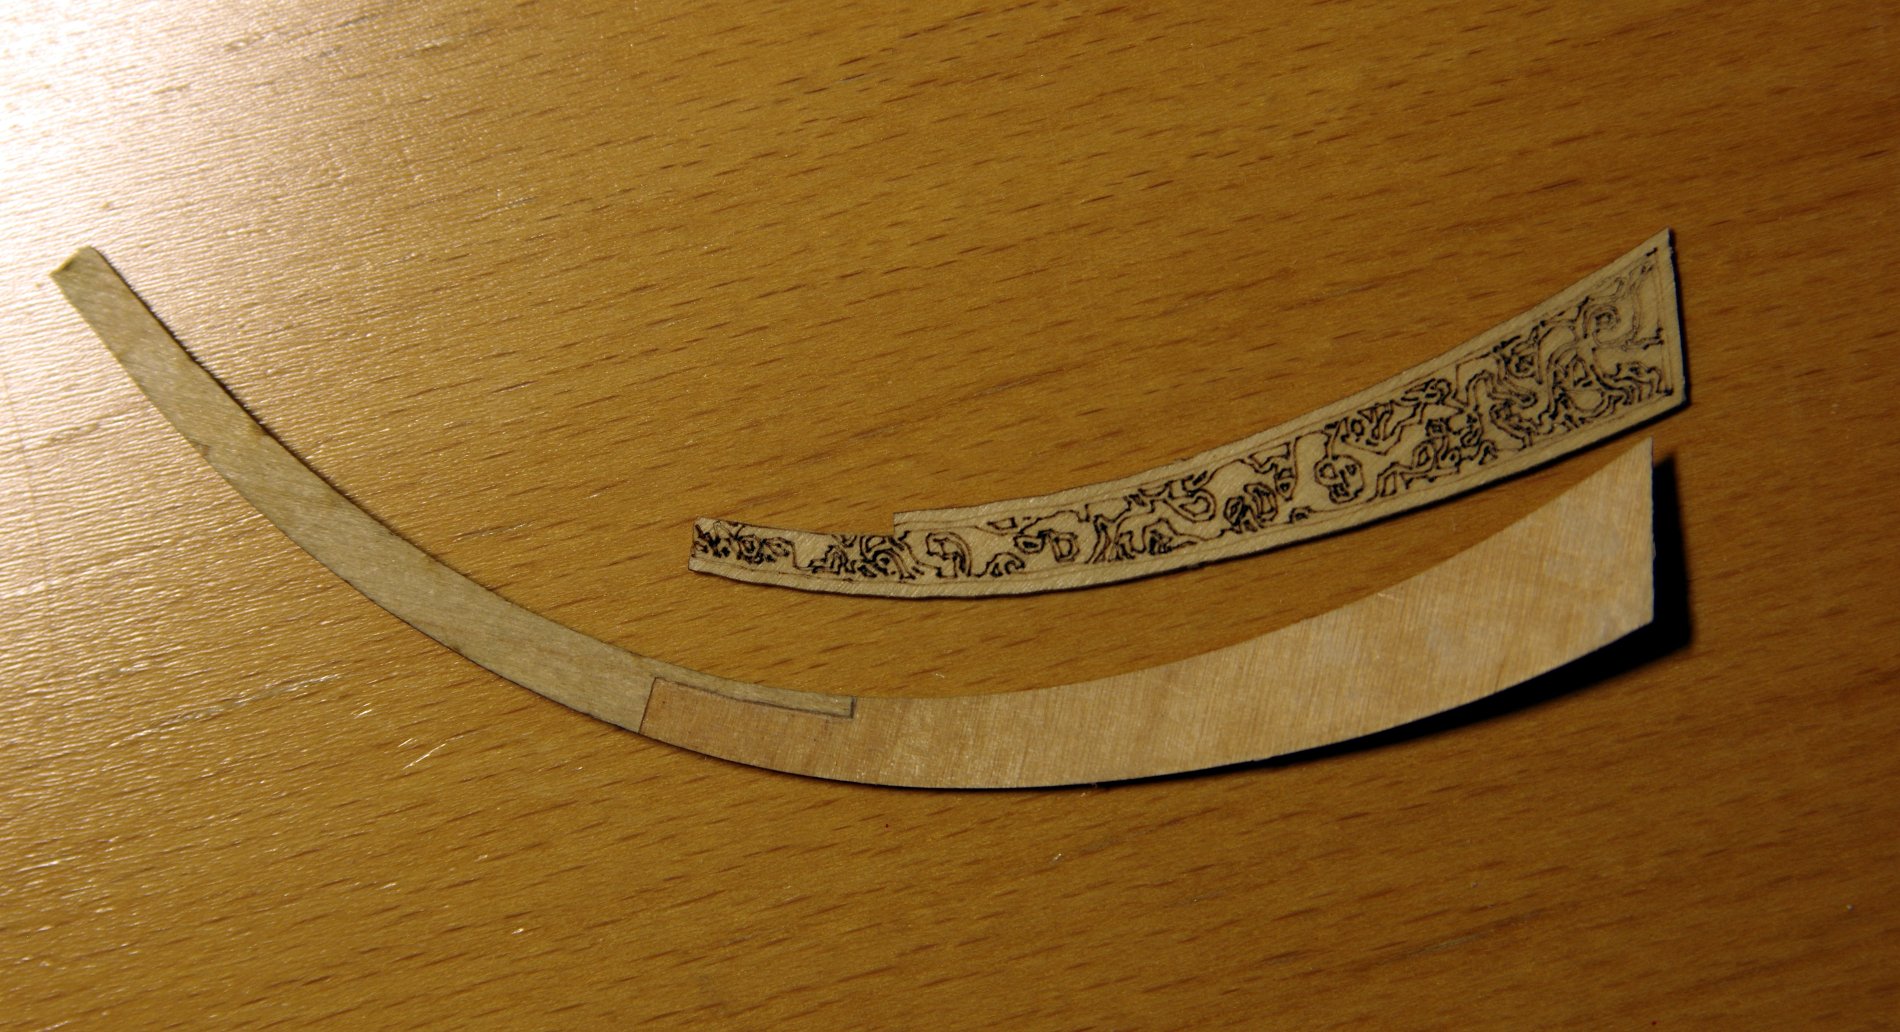
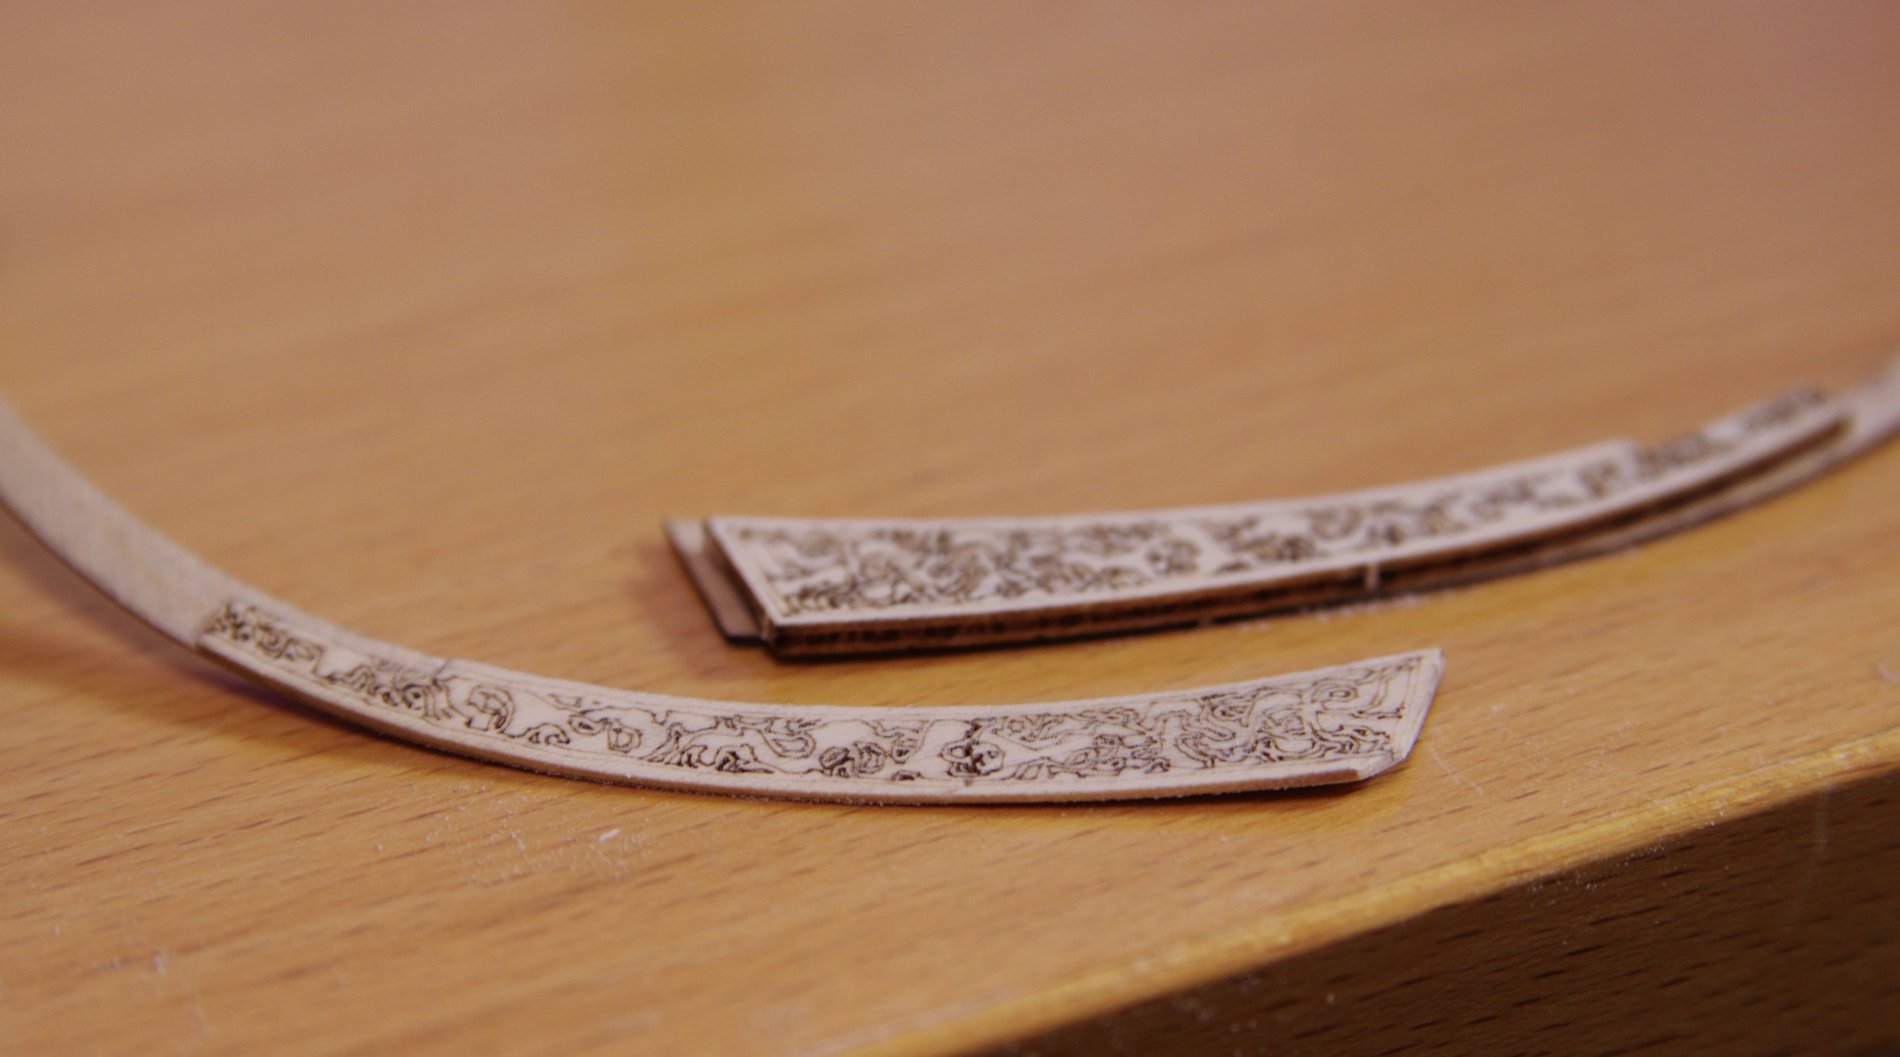
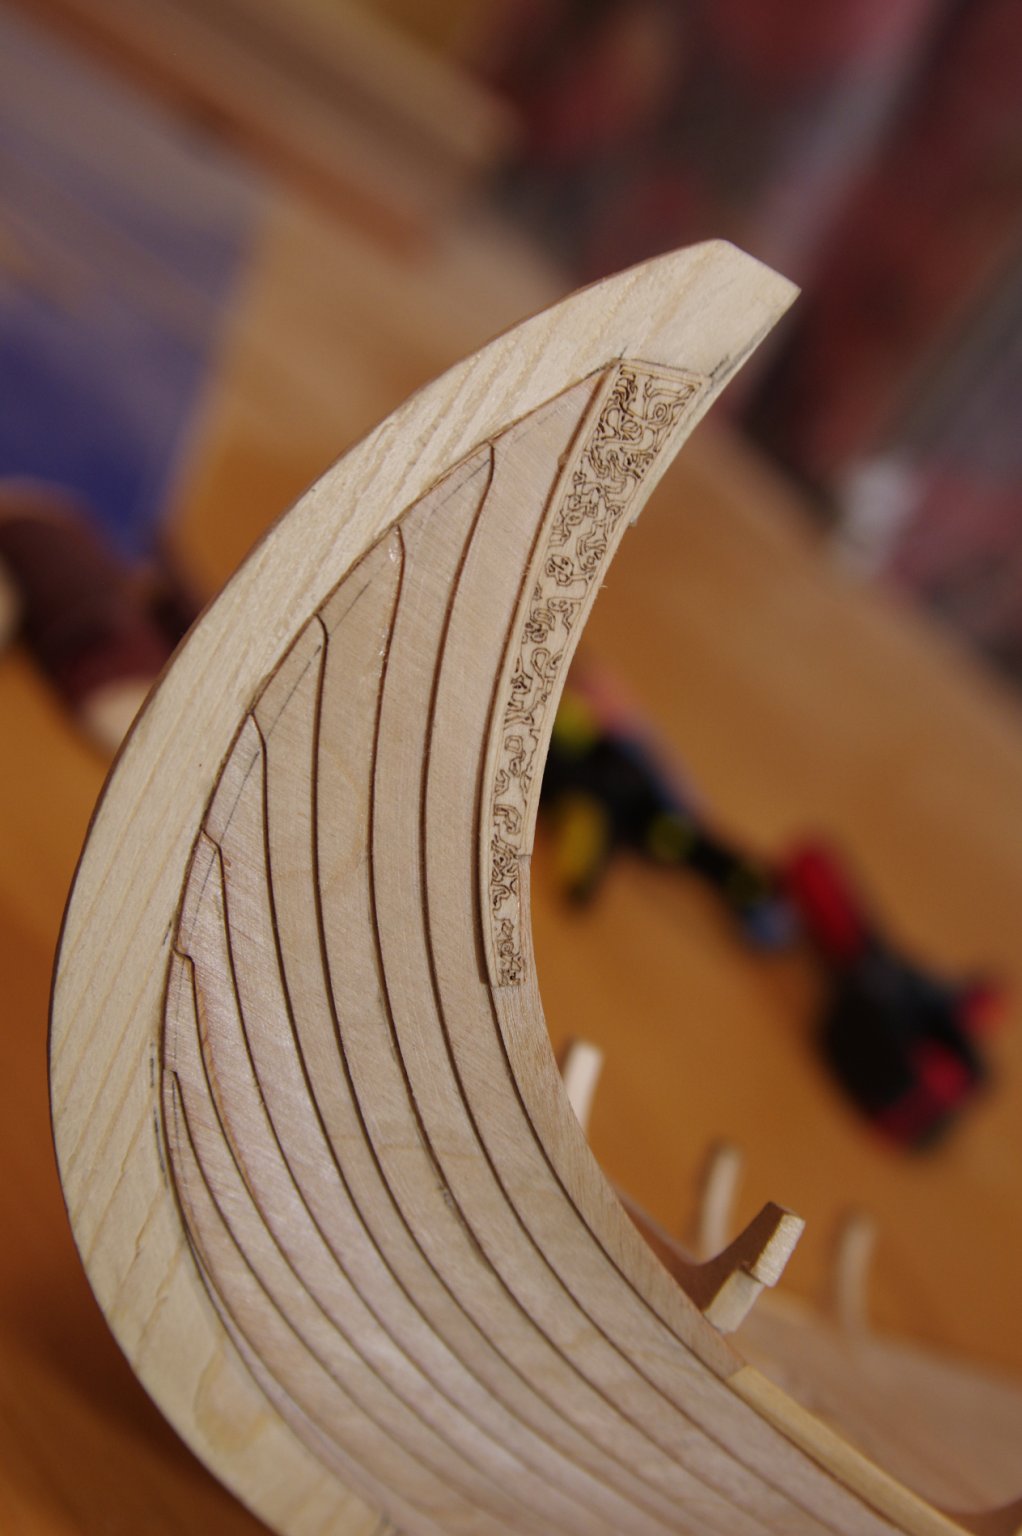
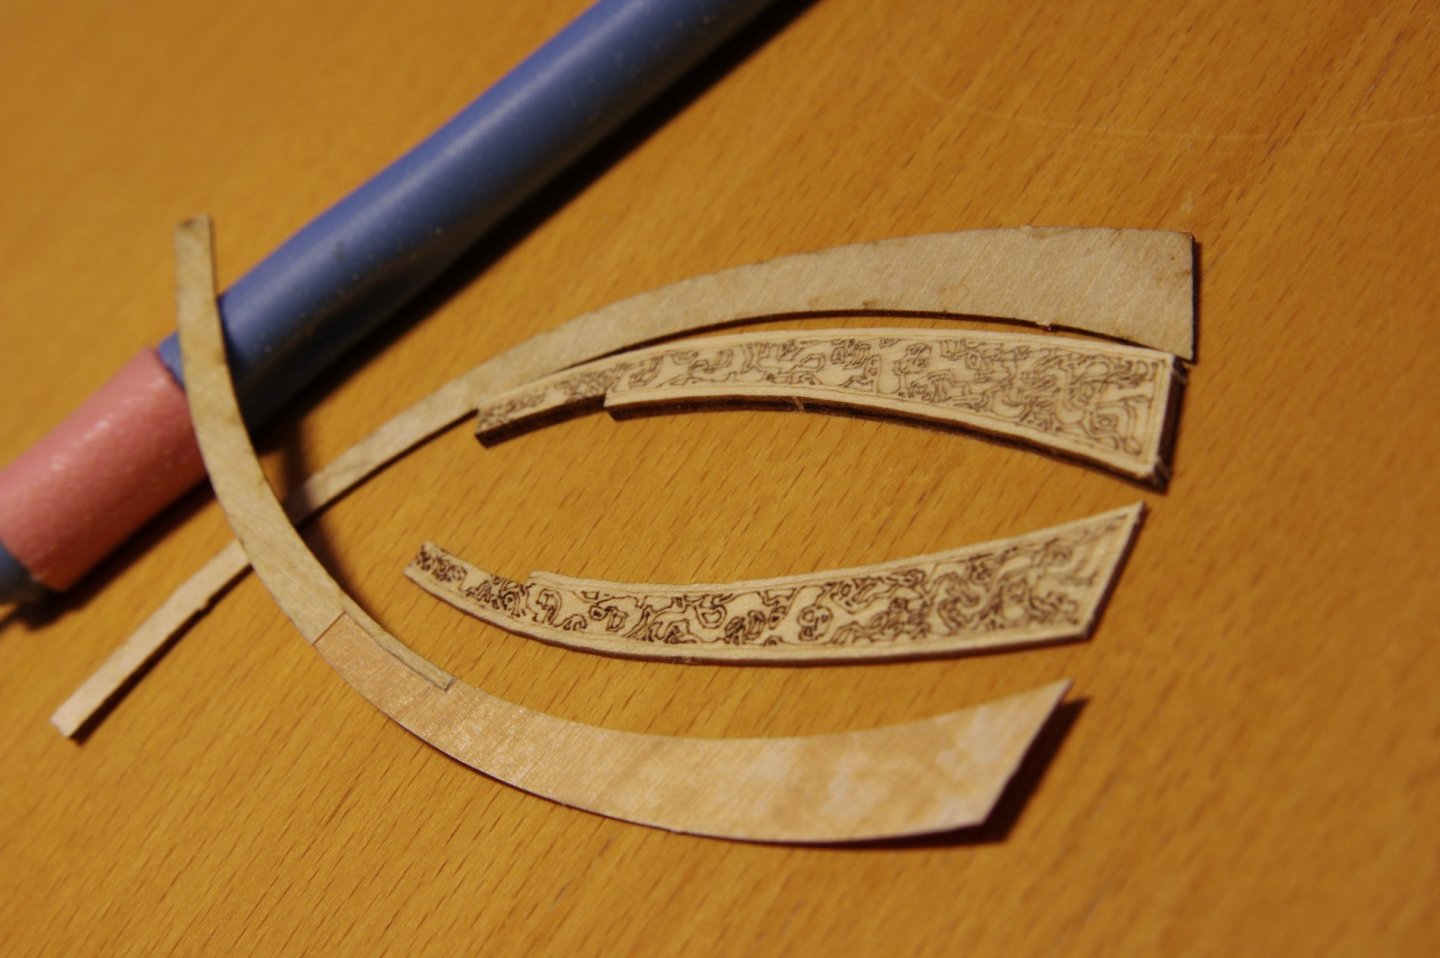
The hull planking has reached a point where it's time to make the inner scrollworks. They are laser cut plywood that is soft and brittle, the weakest material in the kit so far. Also the pattern is laser cut whereas other builders here have scrollwork parts where the pattern is cnc-milled, it seems there are different versions of this kit out there. Anyway, a scrollwork part is supposed to be glued on top of a underlying plank, but the parts combined would add up to a thickness of 3 mm. That's quite a step compared to the rest of the planking that's in 1 mm increments so the thickness needs to be reduced significantly. I traced the scrollwork on the underlying plank (1 mm plywood) and cut of the top layer: Then I removed the back layer of the scrollwork part and sanded it down further until the pattern begun to shine through. The finished product compared to the original parts: A finished part installed, now to be repeated on all sides:


-
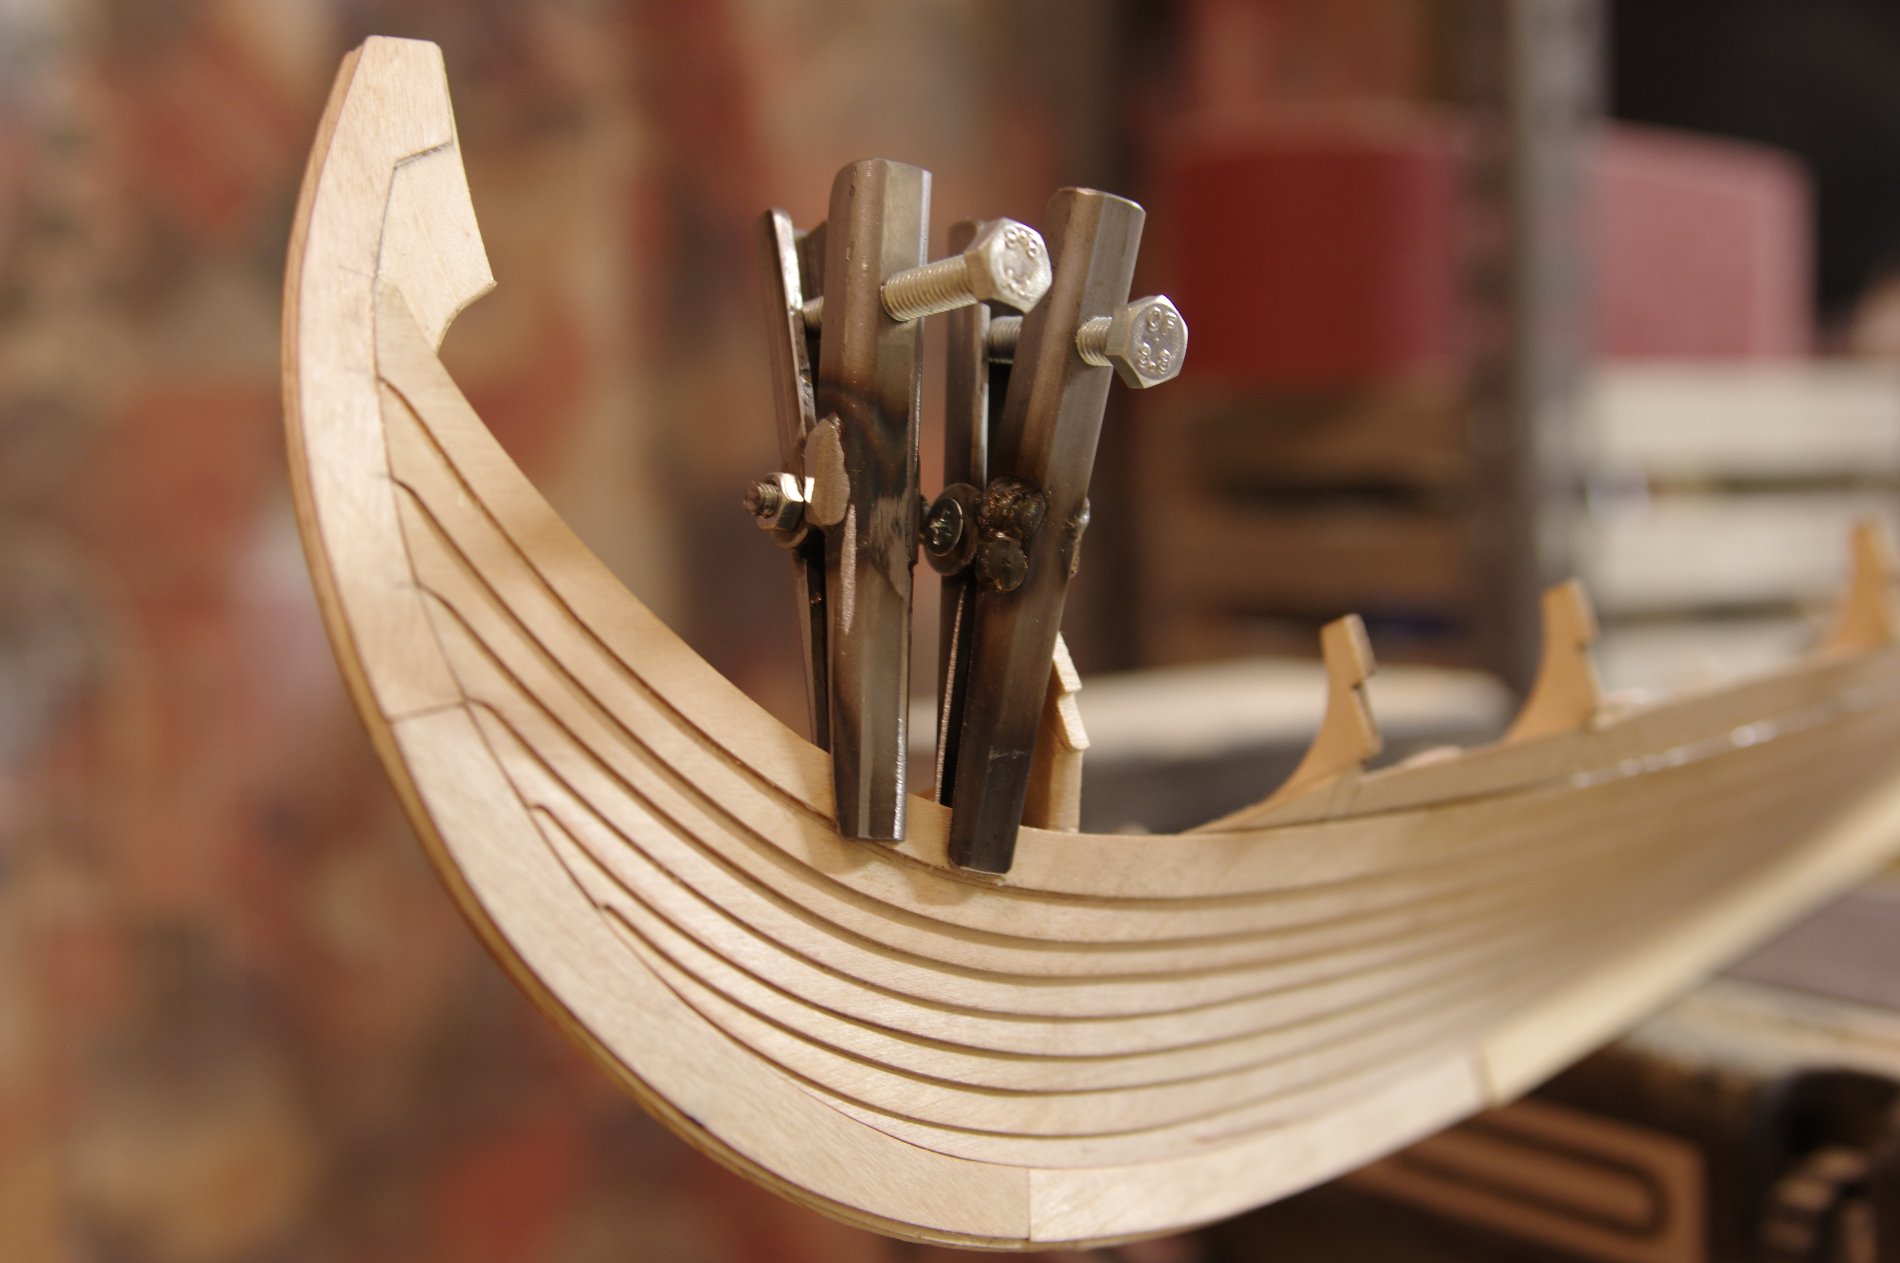
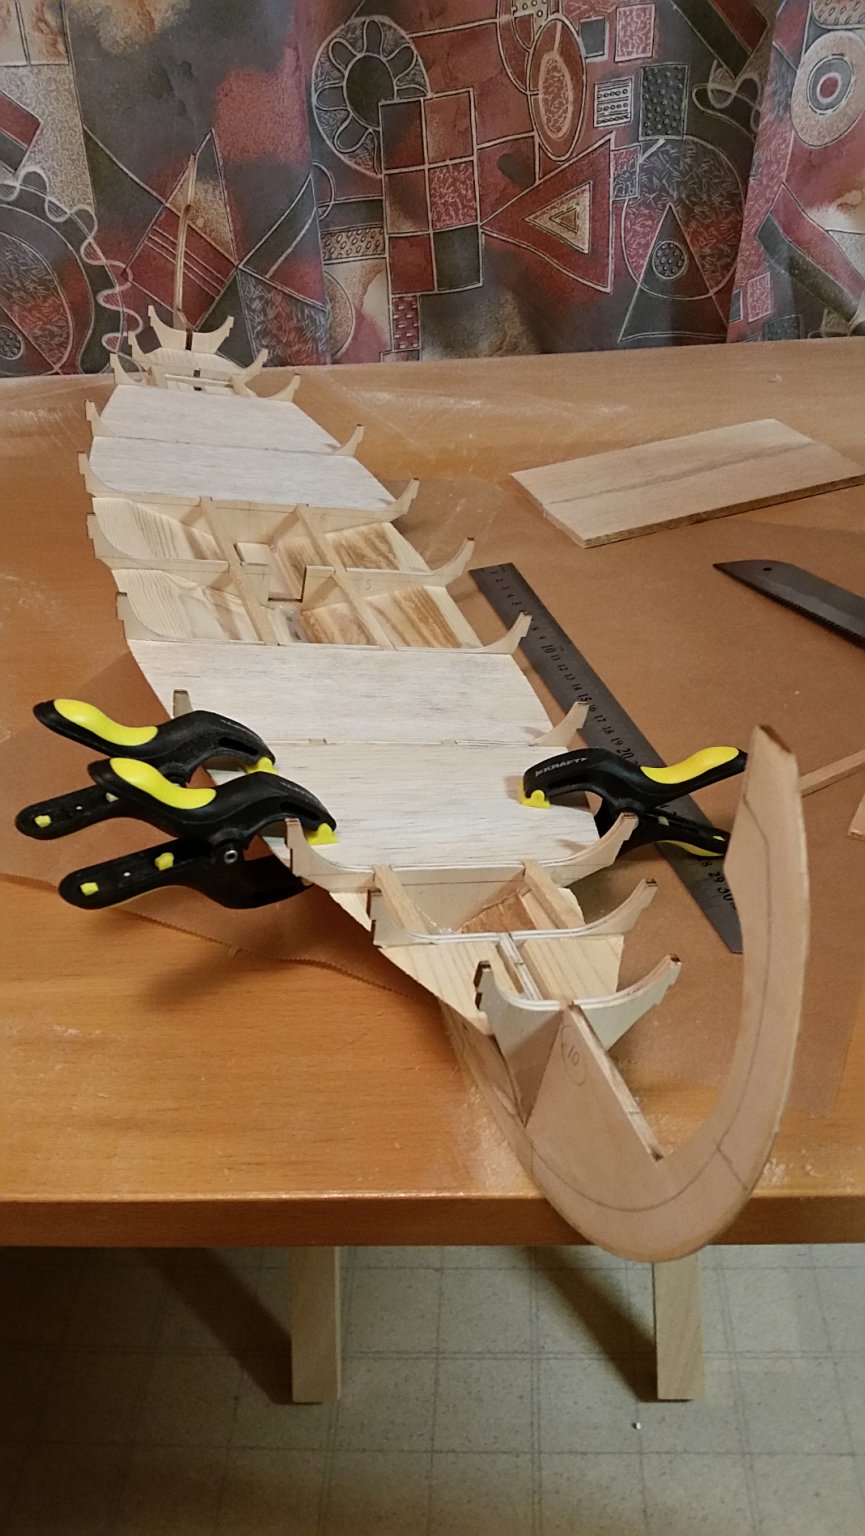
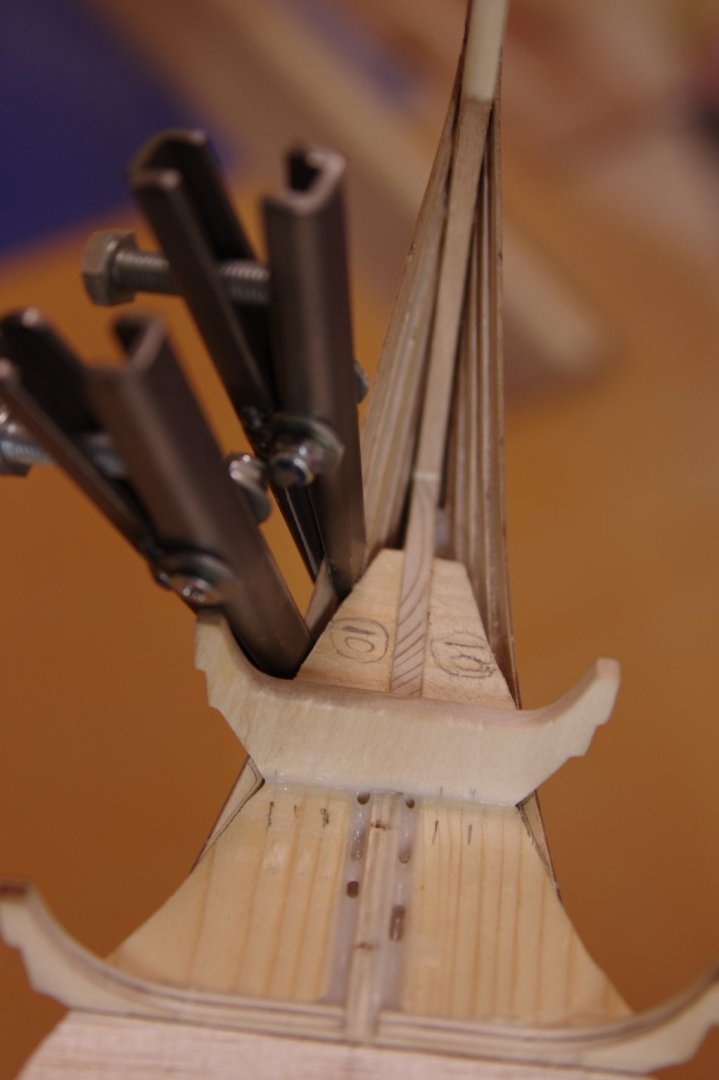
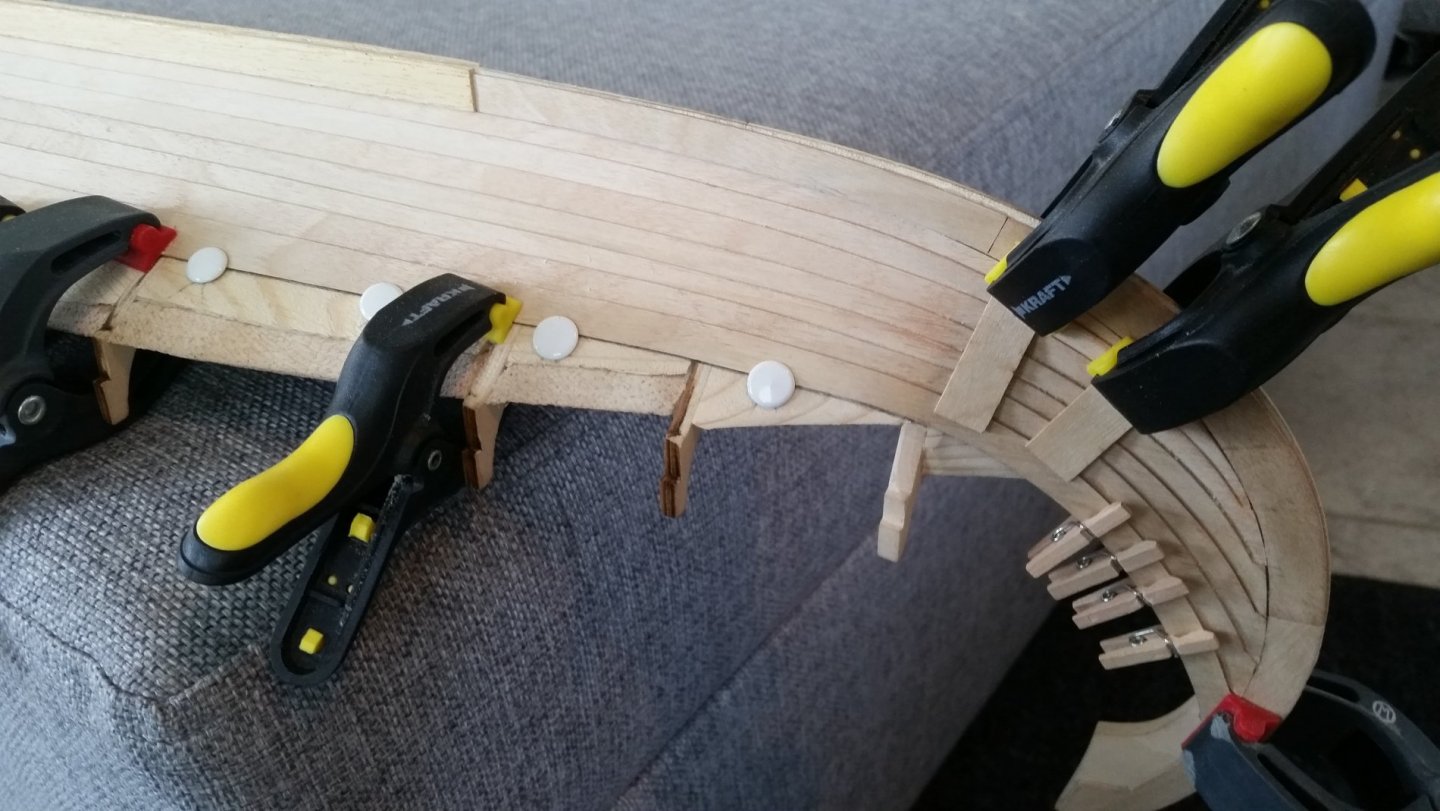
This plank put up a fight and I perhaps fiddled too long with it, the glue did not stick at one section leaving about 5cm of the plank loose. That wouldn't been an issua as such but I had a support piece in my way and I didn't have any kind of clamp that would fit in there. So I made a few of these "beautiful" clamps and was able to glue the gap shut.

-
Ok thanks, that was interesting. I'll probably go for more of a 'new' look rather than what it is now in the museum. Just to clarify, the washes after w/poly were paints, not stains?
-
Thank you Nils and RickyGene, Ricky, the strips were too narrow. I used them on both side but I stuffed some thin cardboard on both sides also to wedge it tight. I'm curious about your weathering since I don't have any experience and I've been pondering on how to do my own later on.
-
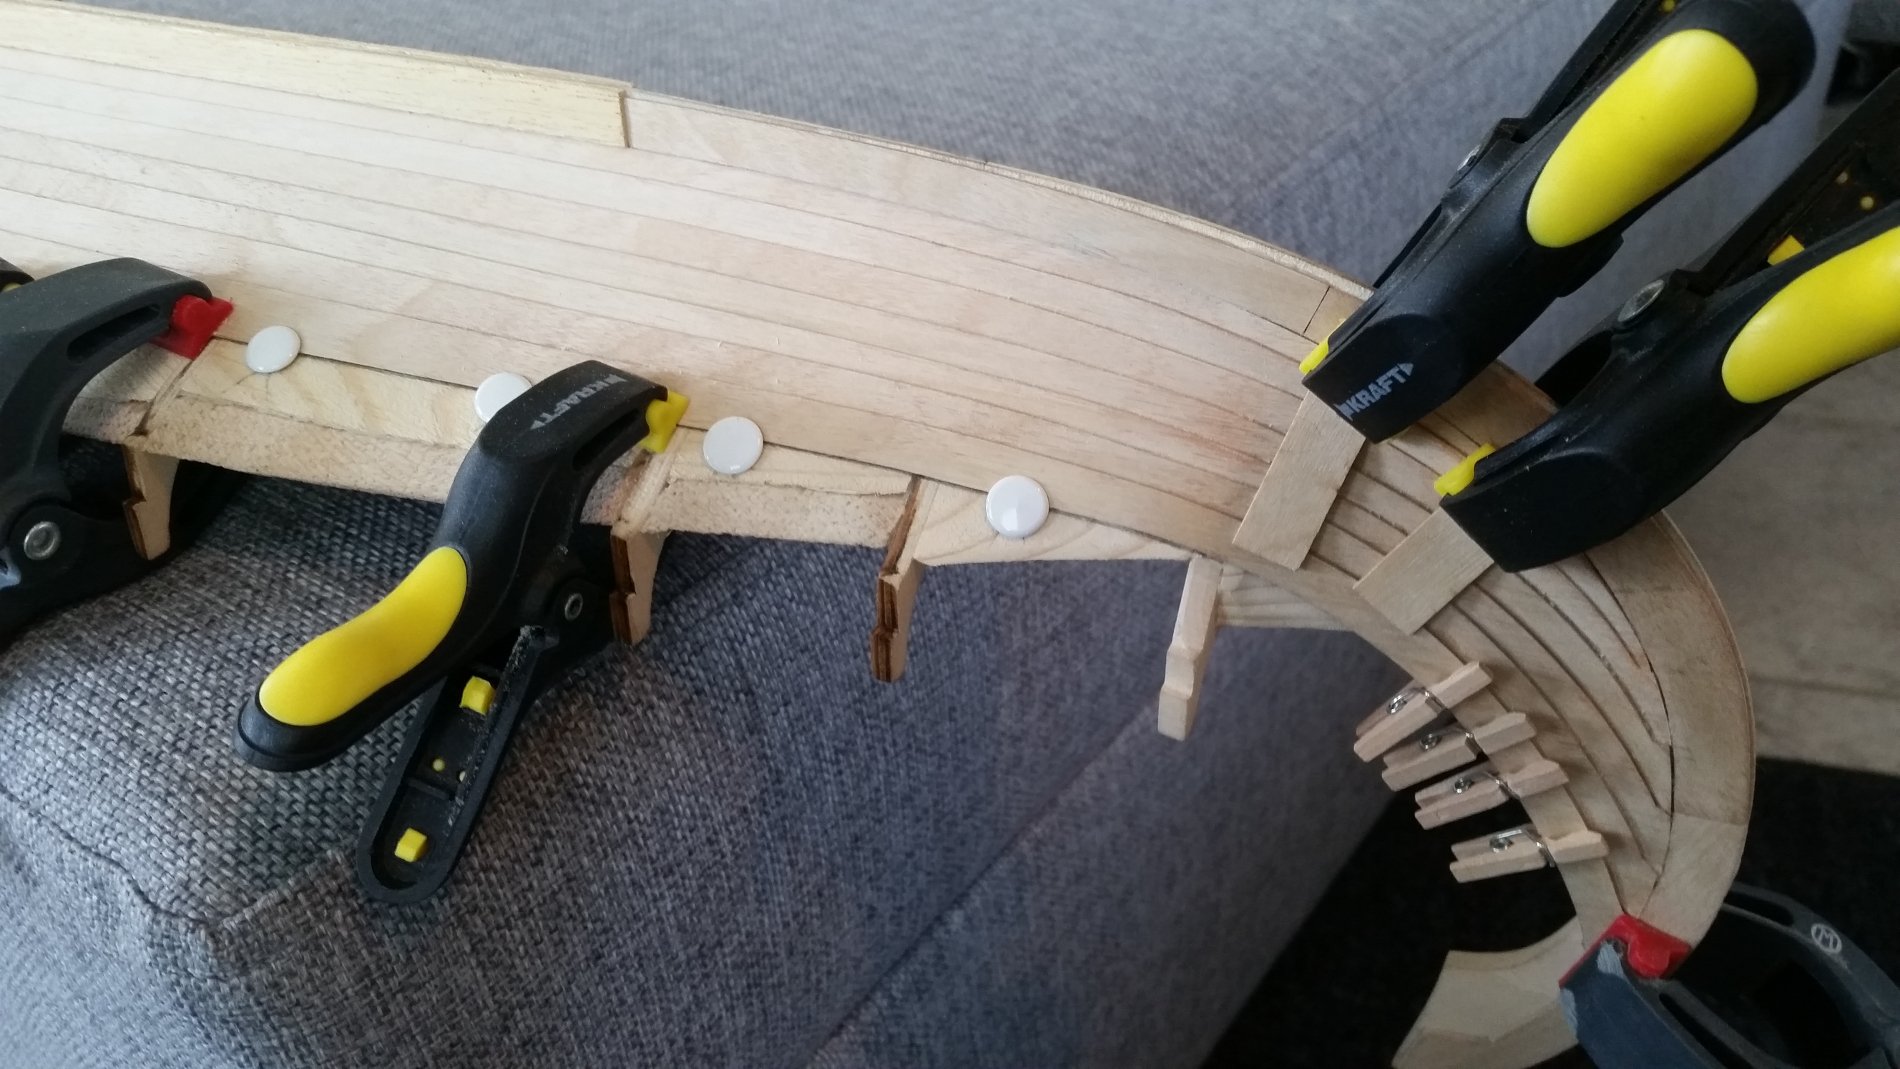
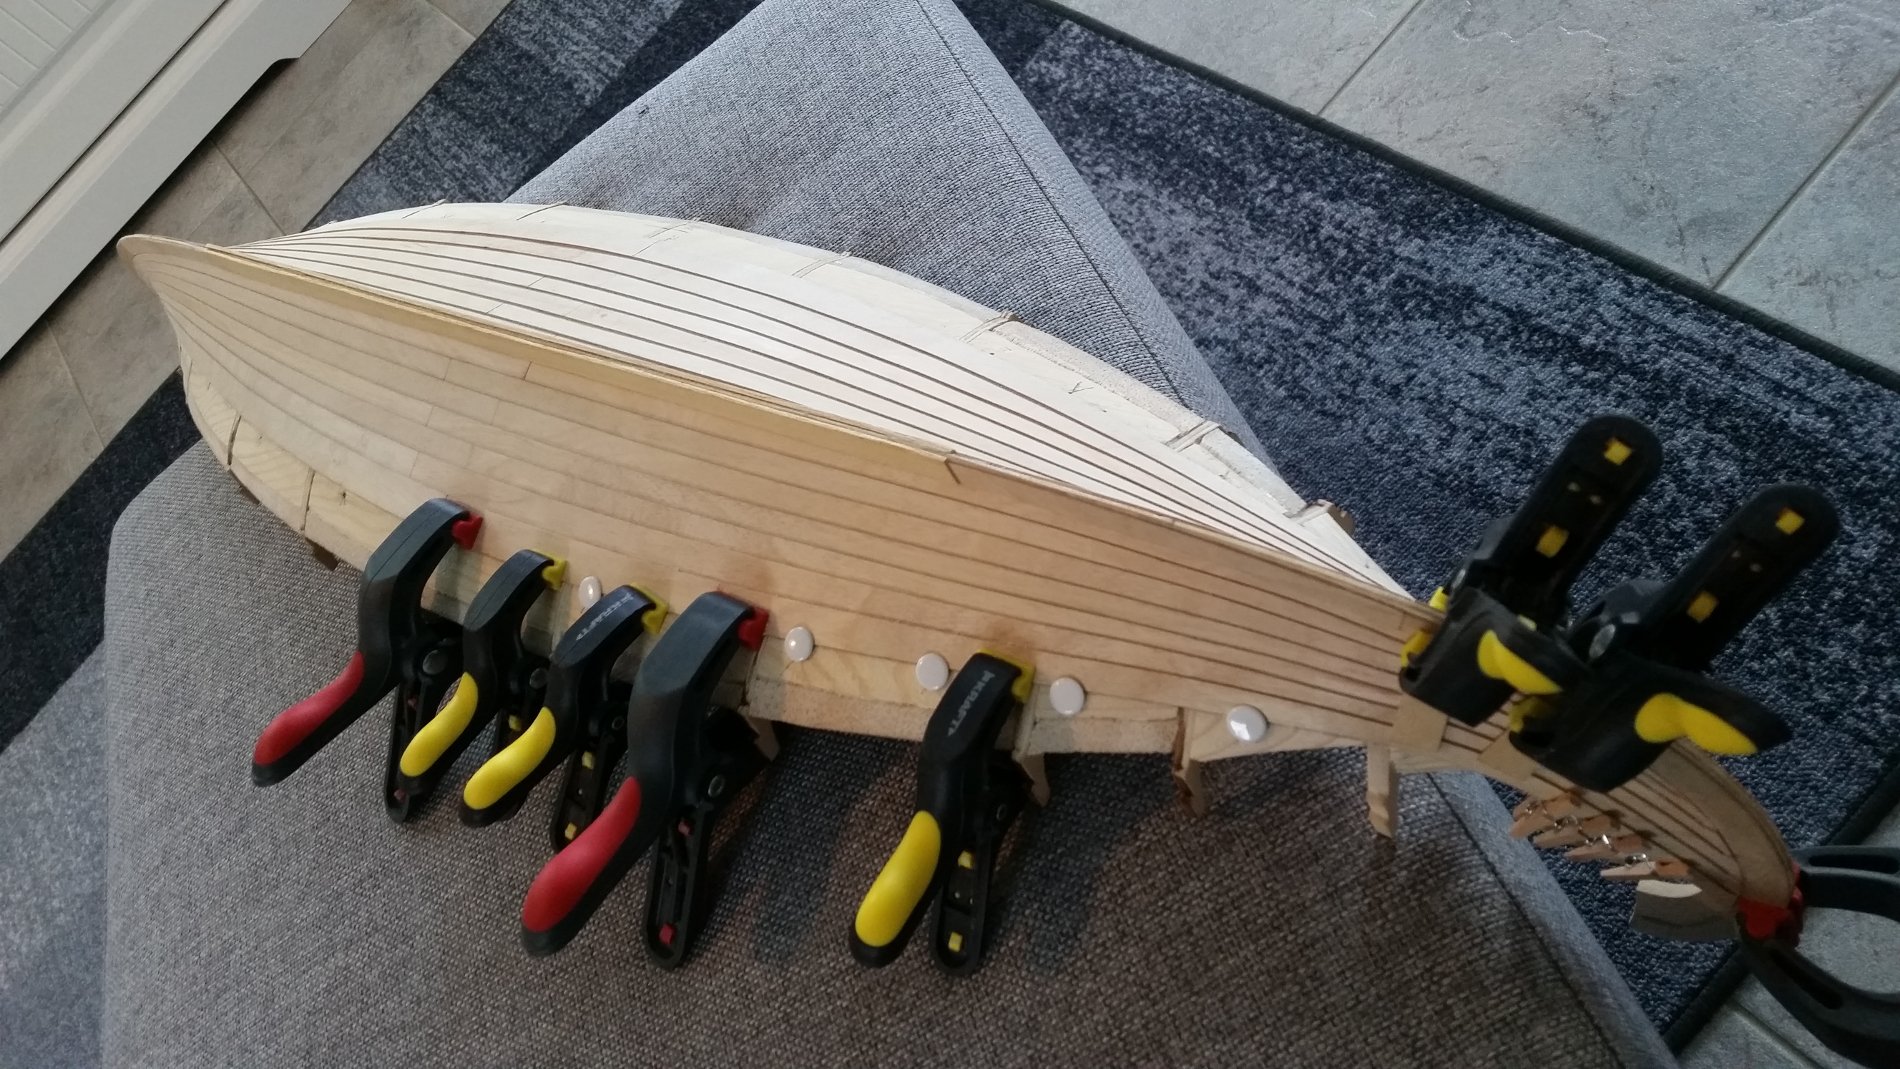
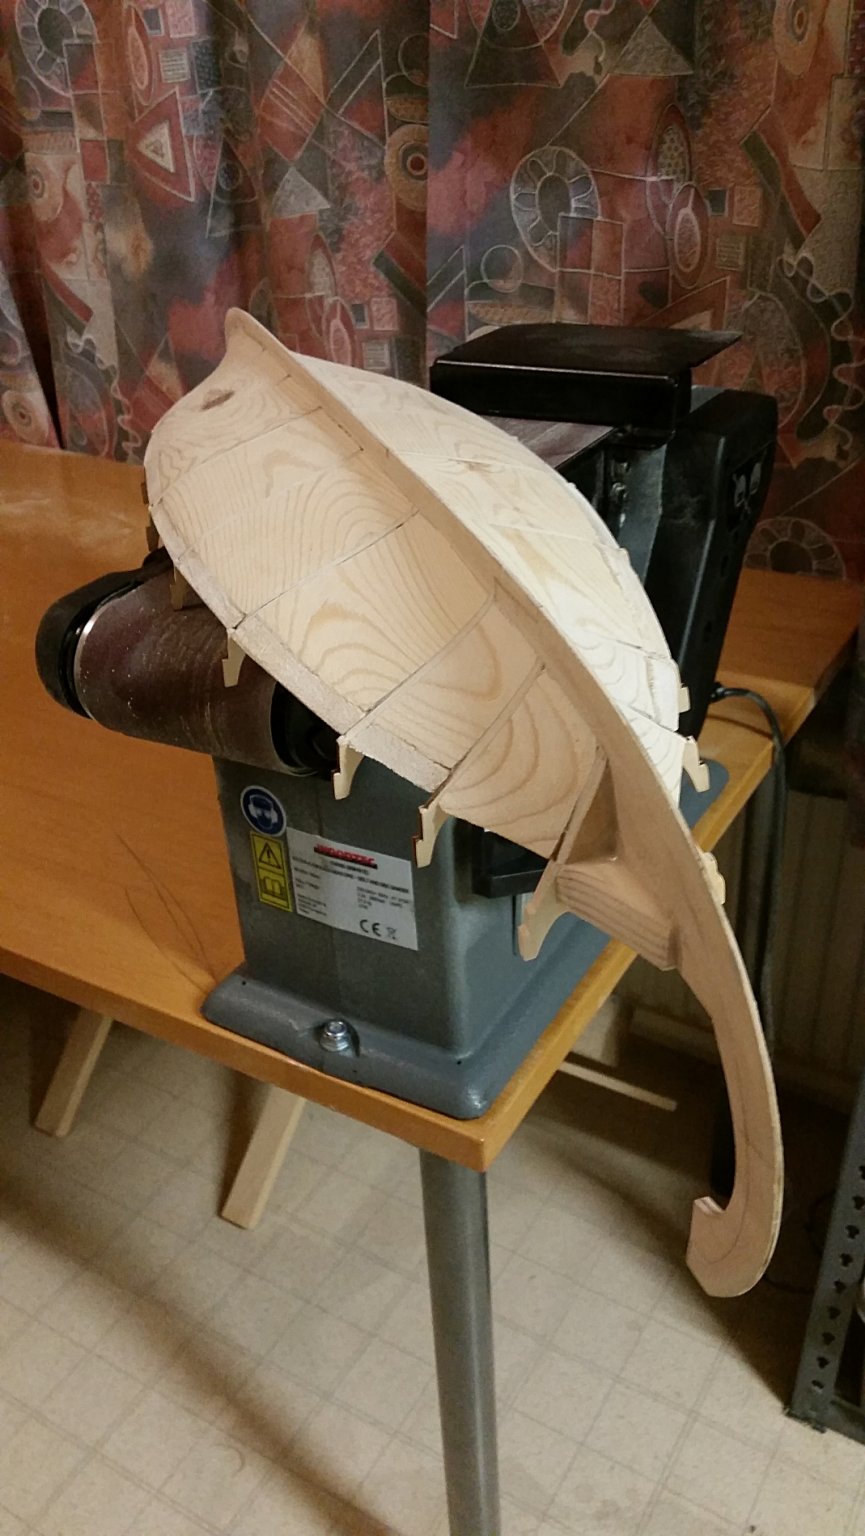
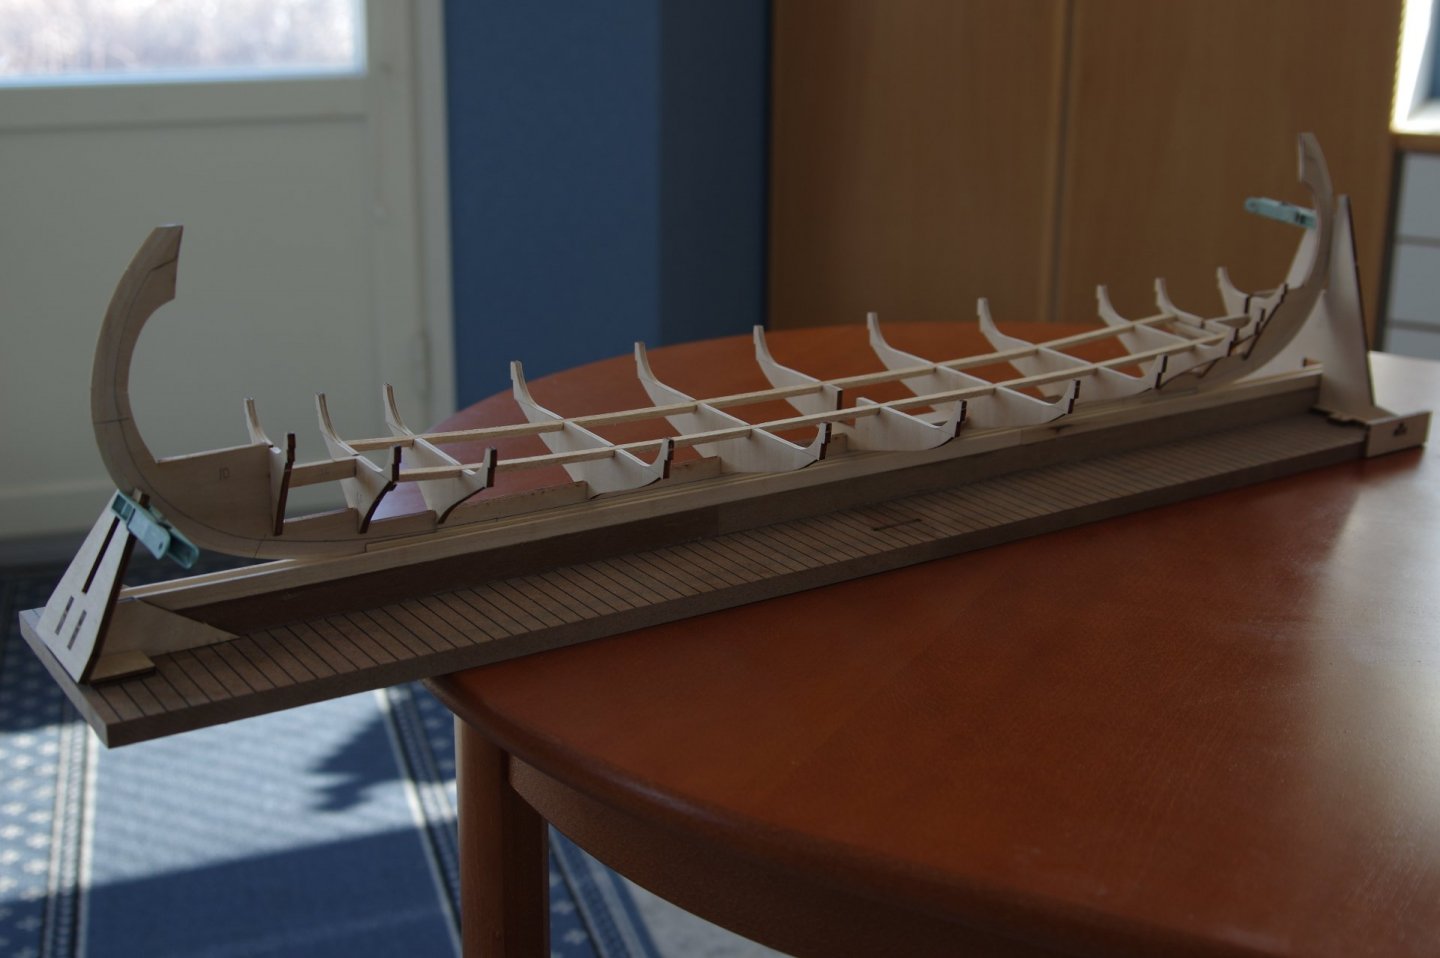
The planking consist of curvy laser-cut plywood boards that are kind of L-shaped, the ends rising gradually up towards the top of the keel. The material is only 1mm thick and while this perhaps sound a bit suspicious, they're actually quite good for the purpose. They bend easily but are strong and the surface is not easily damaged. Oseberg is a clinker-built ship where each plank sits partially on top of the previous one, so after finally deciding on the most likely starting point (not obvious), I begun my way up from the bottom hoping that when I reach the top the last plank would lay where it should.

-
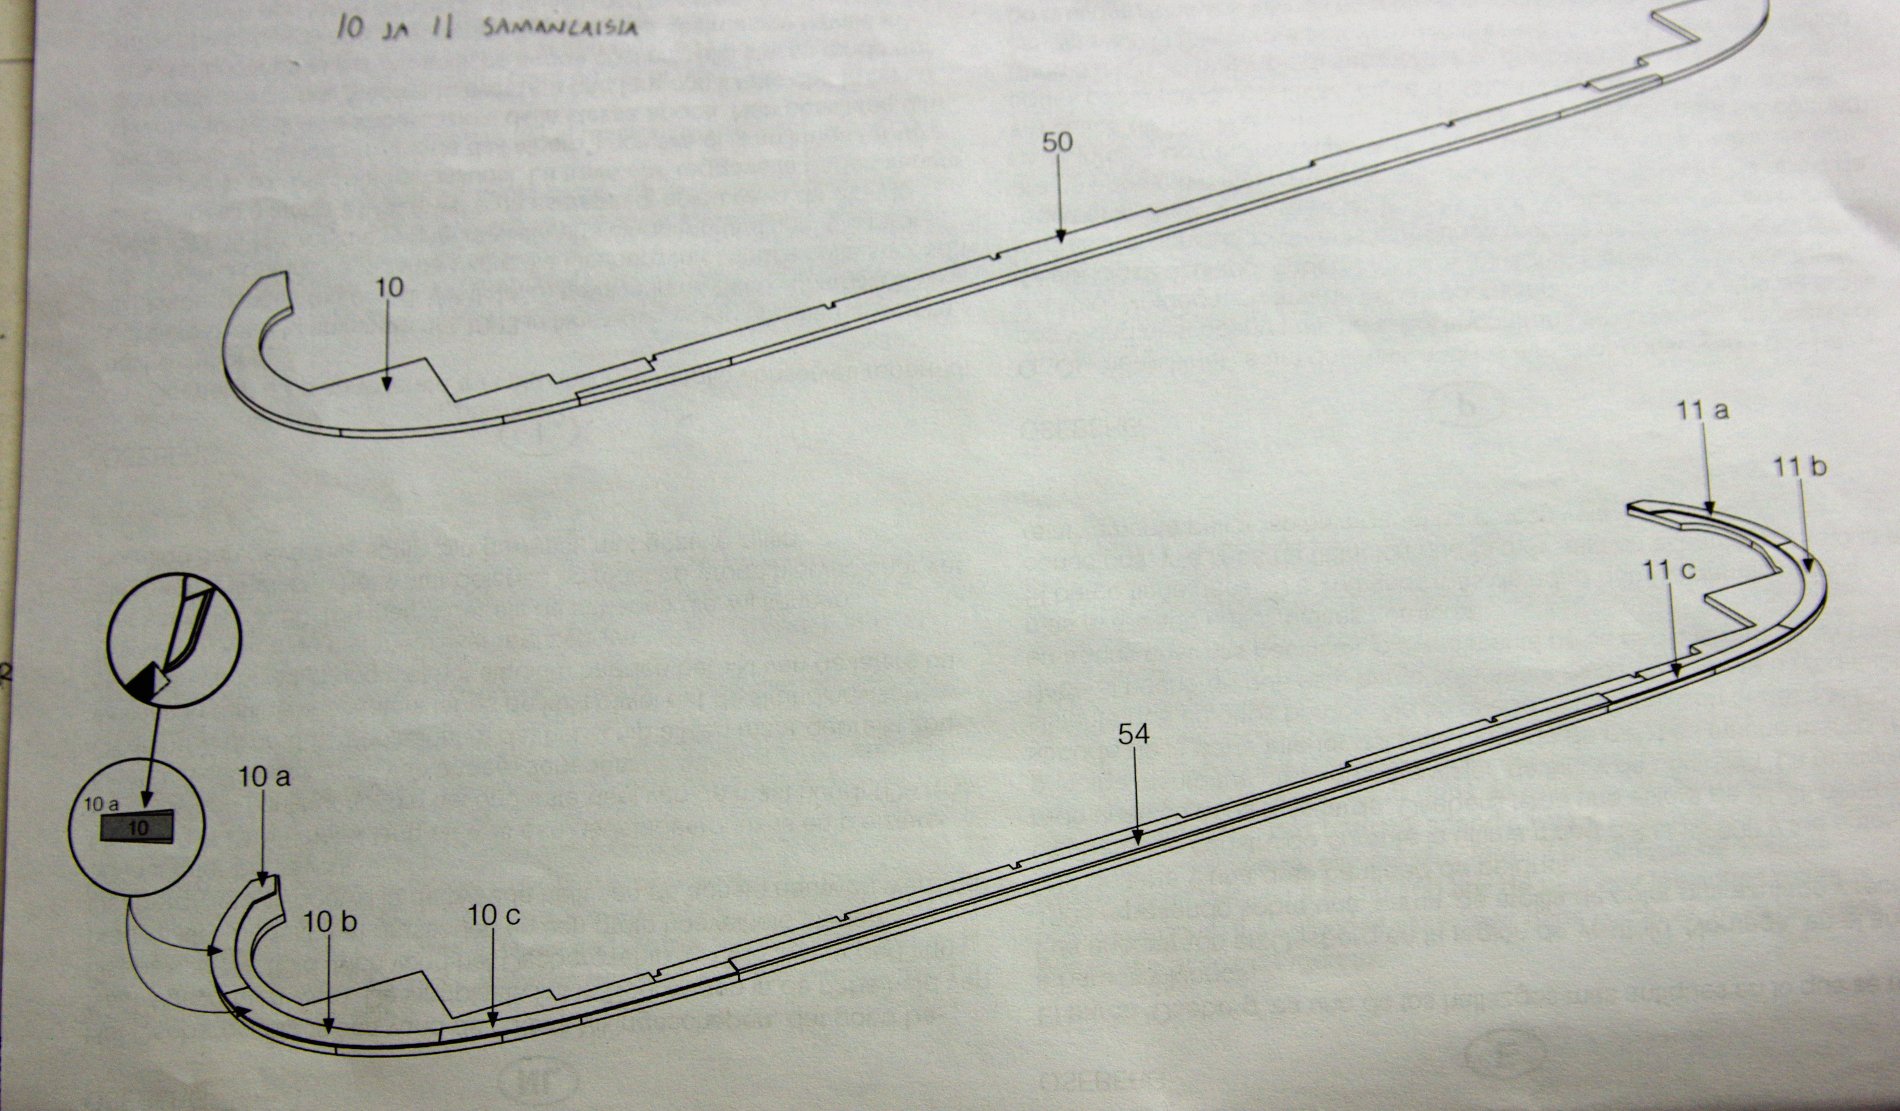
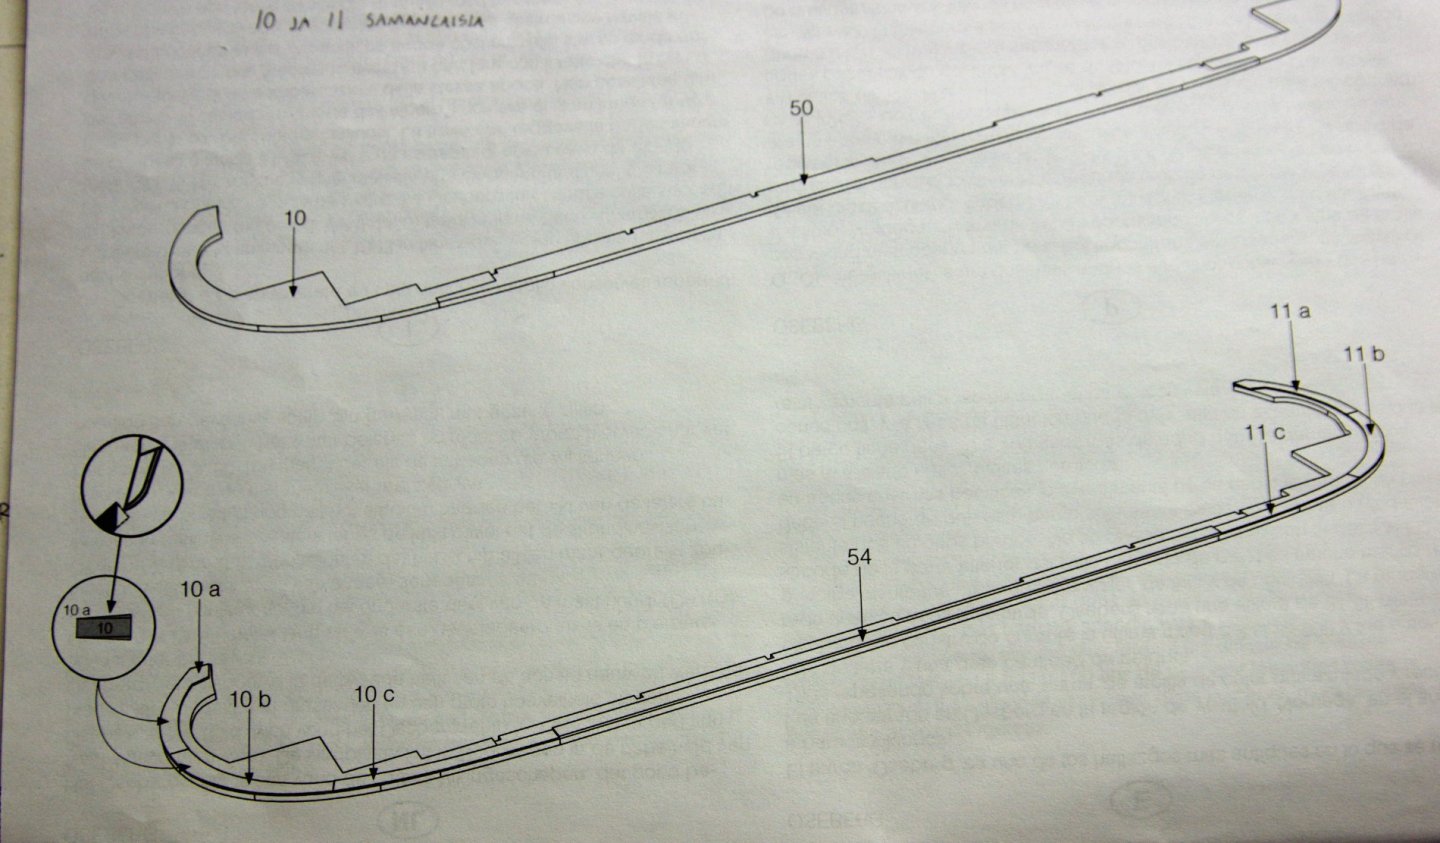
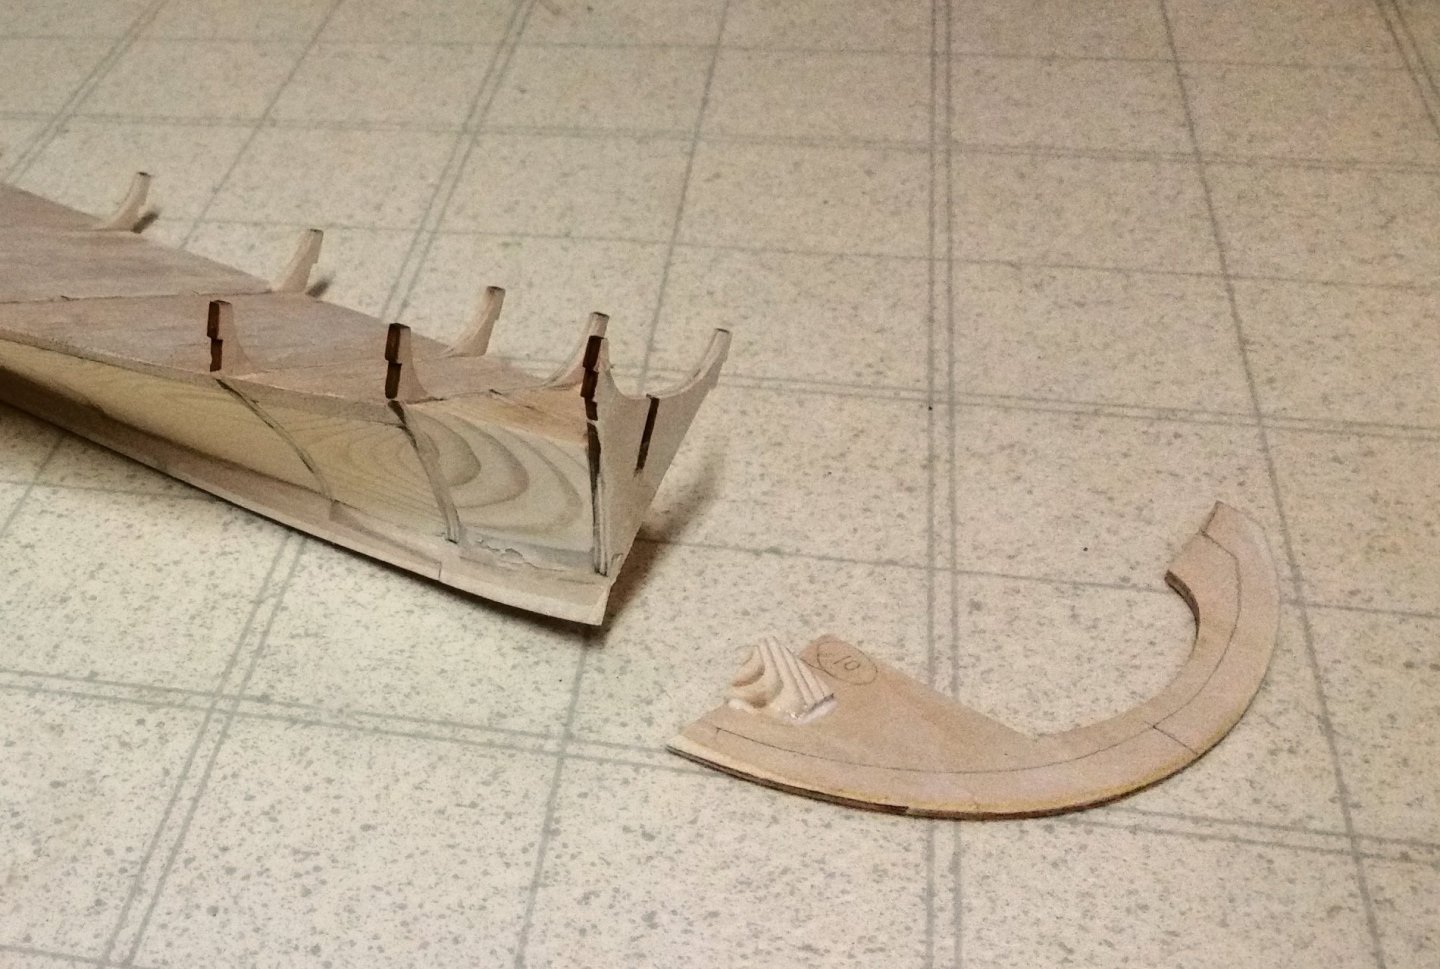
One of the first thing the manual tells you to do is glue these plywood pieces along the outer edges of the keel, they are just used as guide contour for the hull planking to be layed against later on. I must have had some reason to hold them of up until this point but I can't remember what it might have been. Anyway, they're not supposed to be glued on permanently as I learned from other build logs on this site, they are removed later on and replaced with the decorative pieces rising high above the deck. The instructions does not give you any clues of this. The long part in the middle is supposed to be the final keel that is left visible. The wood supplied is ugly but I put it on for now and maybe replace it later.
-
Whoopsie! I got carried away and the thing slipped through my fingers cracking the keel at the only weak point left. No harm done, the piece was a little warped originally anyway so I made a new one and glued it on. I've got to be more carefull with it...
-
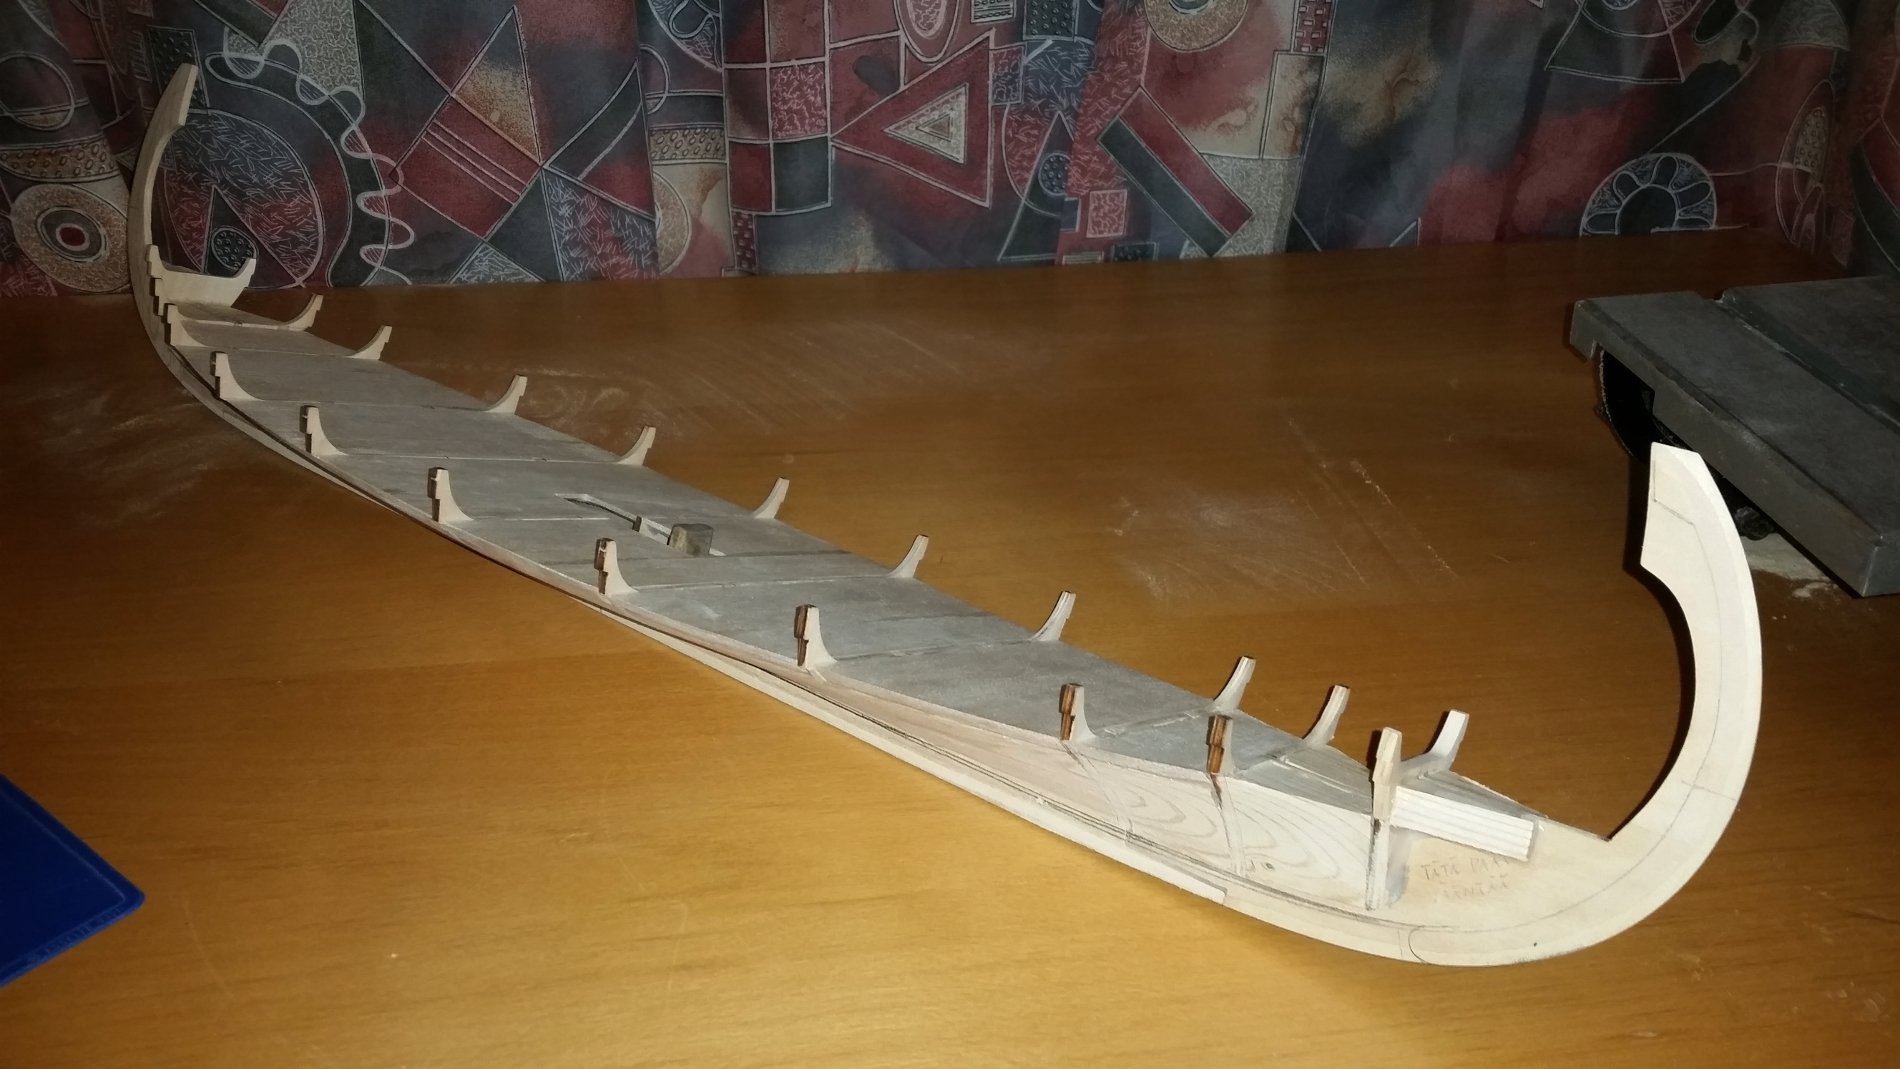
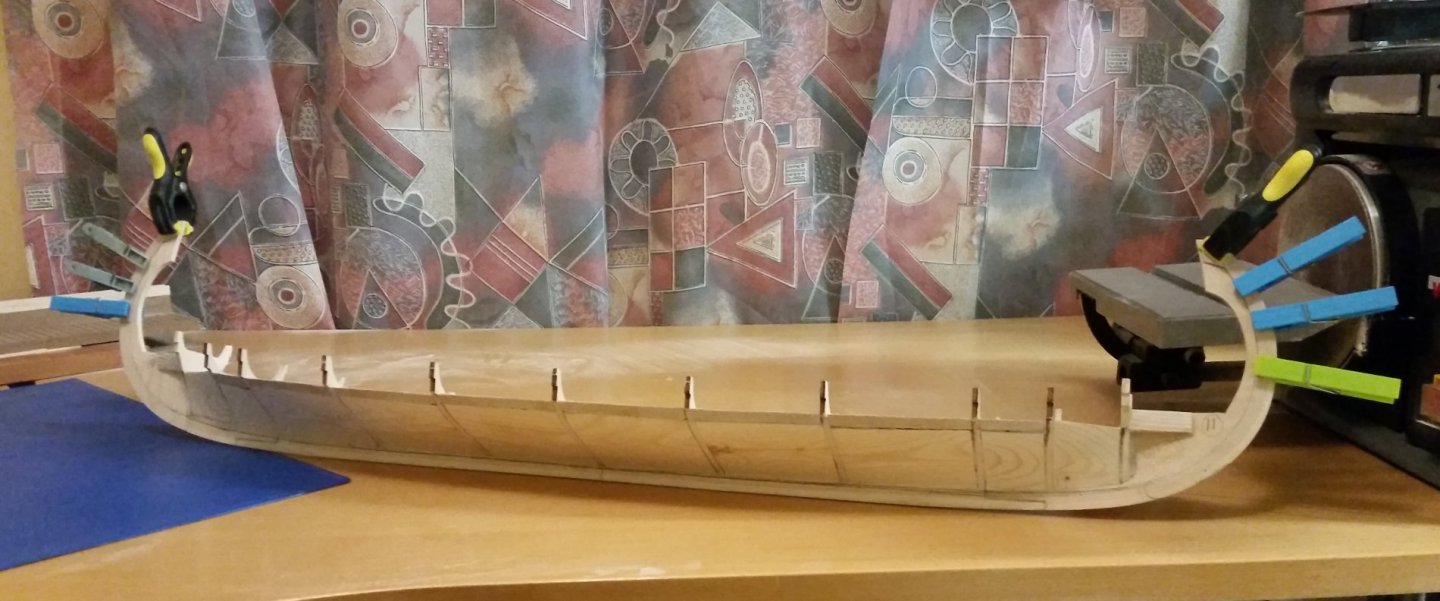
This is what I eventually ended up with, the keel is forced straight and I have more surcafe to place the hull planking. The shape of the front and stern was difficult to visualize beforehand so I left those ares without filler.

-
The keel still had a slight warp after taken out from the jig and the whole thing felt fragile and bendy so I decided to add filler blocks for strenght and to lock the ship straight. I added balsa sheets under the decking while I was at it.


-
The instructions doesn't contain any kind of written description of anything, there are only pictures that take you trough the build. The basic keel/frame construction is clear however. First a three-piece keel is glued together and bulkheads are placed on top of it with two reinforcement strips running on top of them. I was not suprised to find the keel pieces were slightly warped but I proceeded with them anyway. I bought the Billings build slip also, it is no precision tool but it helps putting those bulkheads on square.
-
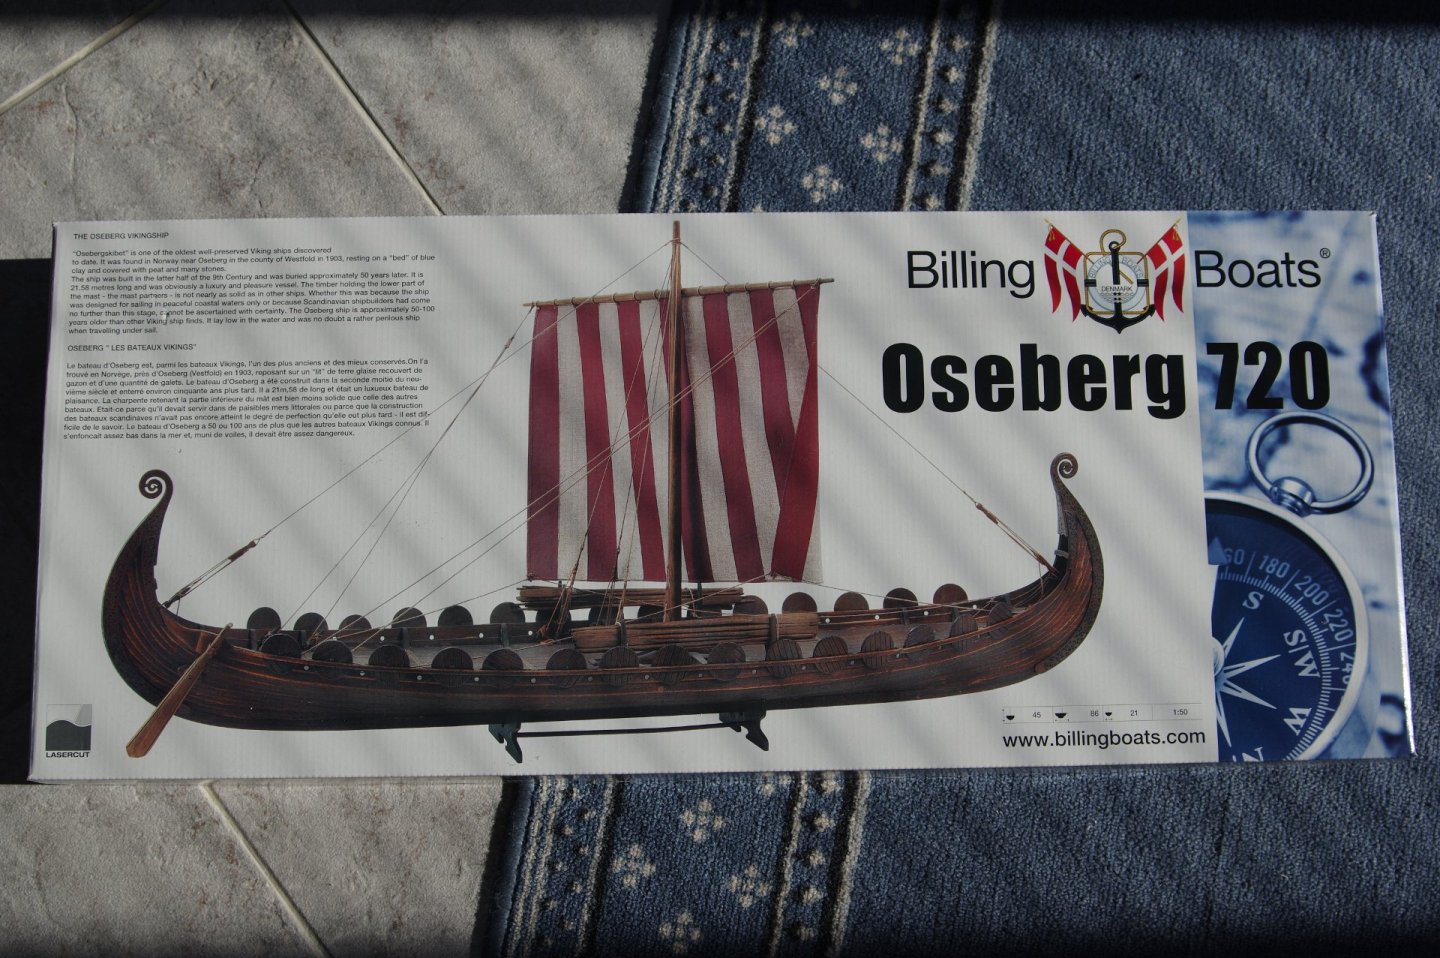
The finished model dimensions are 86/45/21 cm. As I was looking these dimensions from the box I noticed it says the model is in 1:50 scale but it should be 1:25. This might tell you something of the quality of the rest of the kit I will not take a picture of the inside of the box as it is now filled with every kind of junk that might be 'useful' at some stage. But what was originally inside was mostly laser-cut plywood, some small parts, sail cloth and more plywood. And the worst instructions / plans I have ever seen.
-
Hello everyone, This is my build log for Billing Boats Oseberg viking ship that I originally did not intend to create. As the build (slowly) progressed I changed my mind and thought making a build log would put some pressure on me to actually complete it someday. Also this is my first ship so I chose this inexpensive Oseberg kit in belief that it would be a bit easier to make than something with three masts and complex rigging etc.