raven62
-
Posts
43 -
Joined
-
Last visited
-
 GrandpaPhil reacted to a post in a topic:
Enak by raven62 - Scale 1:50 - RADIO - floating crane - Finished
GrandpaPhil reacted to a post in a topic:
Enak by raven62 - Scale 1:50 - RADIO - floating crane - Finished
-
dvm27 reacted to a post in a topic:
Enak by raven62 - Scale 1:50 - RADIO - floating crane - Finished
-
dvm27 reacted to a post in a topic:
Enak by raven62 - Scale 1:50 - RADIO - floating crane - Finished
-
wefalck reacted to a post in a topic:
Enak by raven62 - Scale 1:50 - RADIO - floating crane - Finished
-
mtaylor reacted to a post in a topic:
Enak by raven62 - Scale 1:50 - RADIO - floating crane - Finished
-
paulsutcliffe reacted to a post in a topic:
Enak by raven62 - Scale 1:50 - RADIO - floating crane - Finished
-
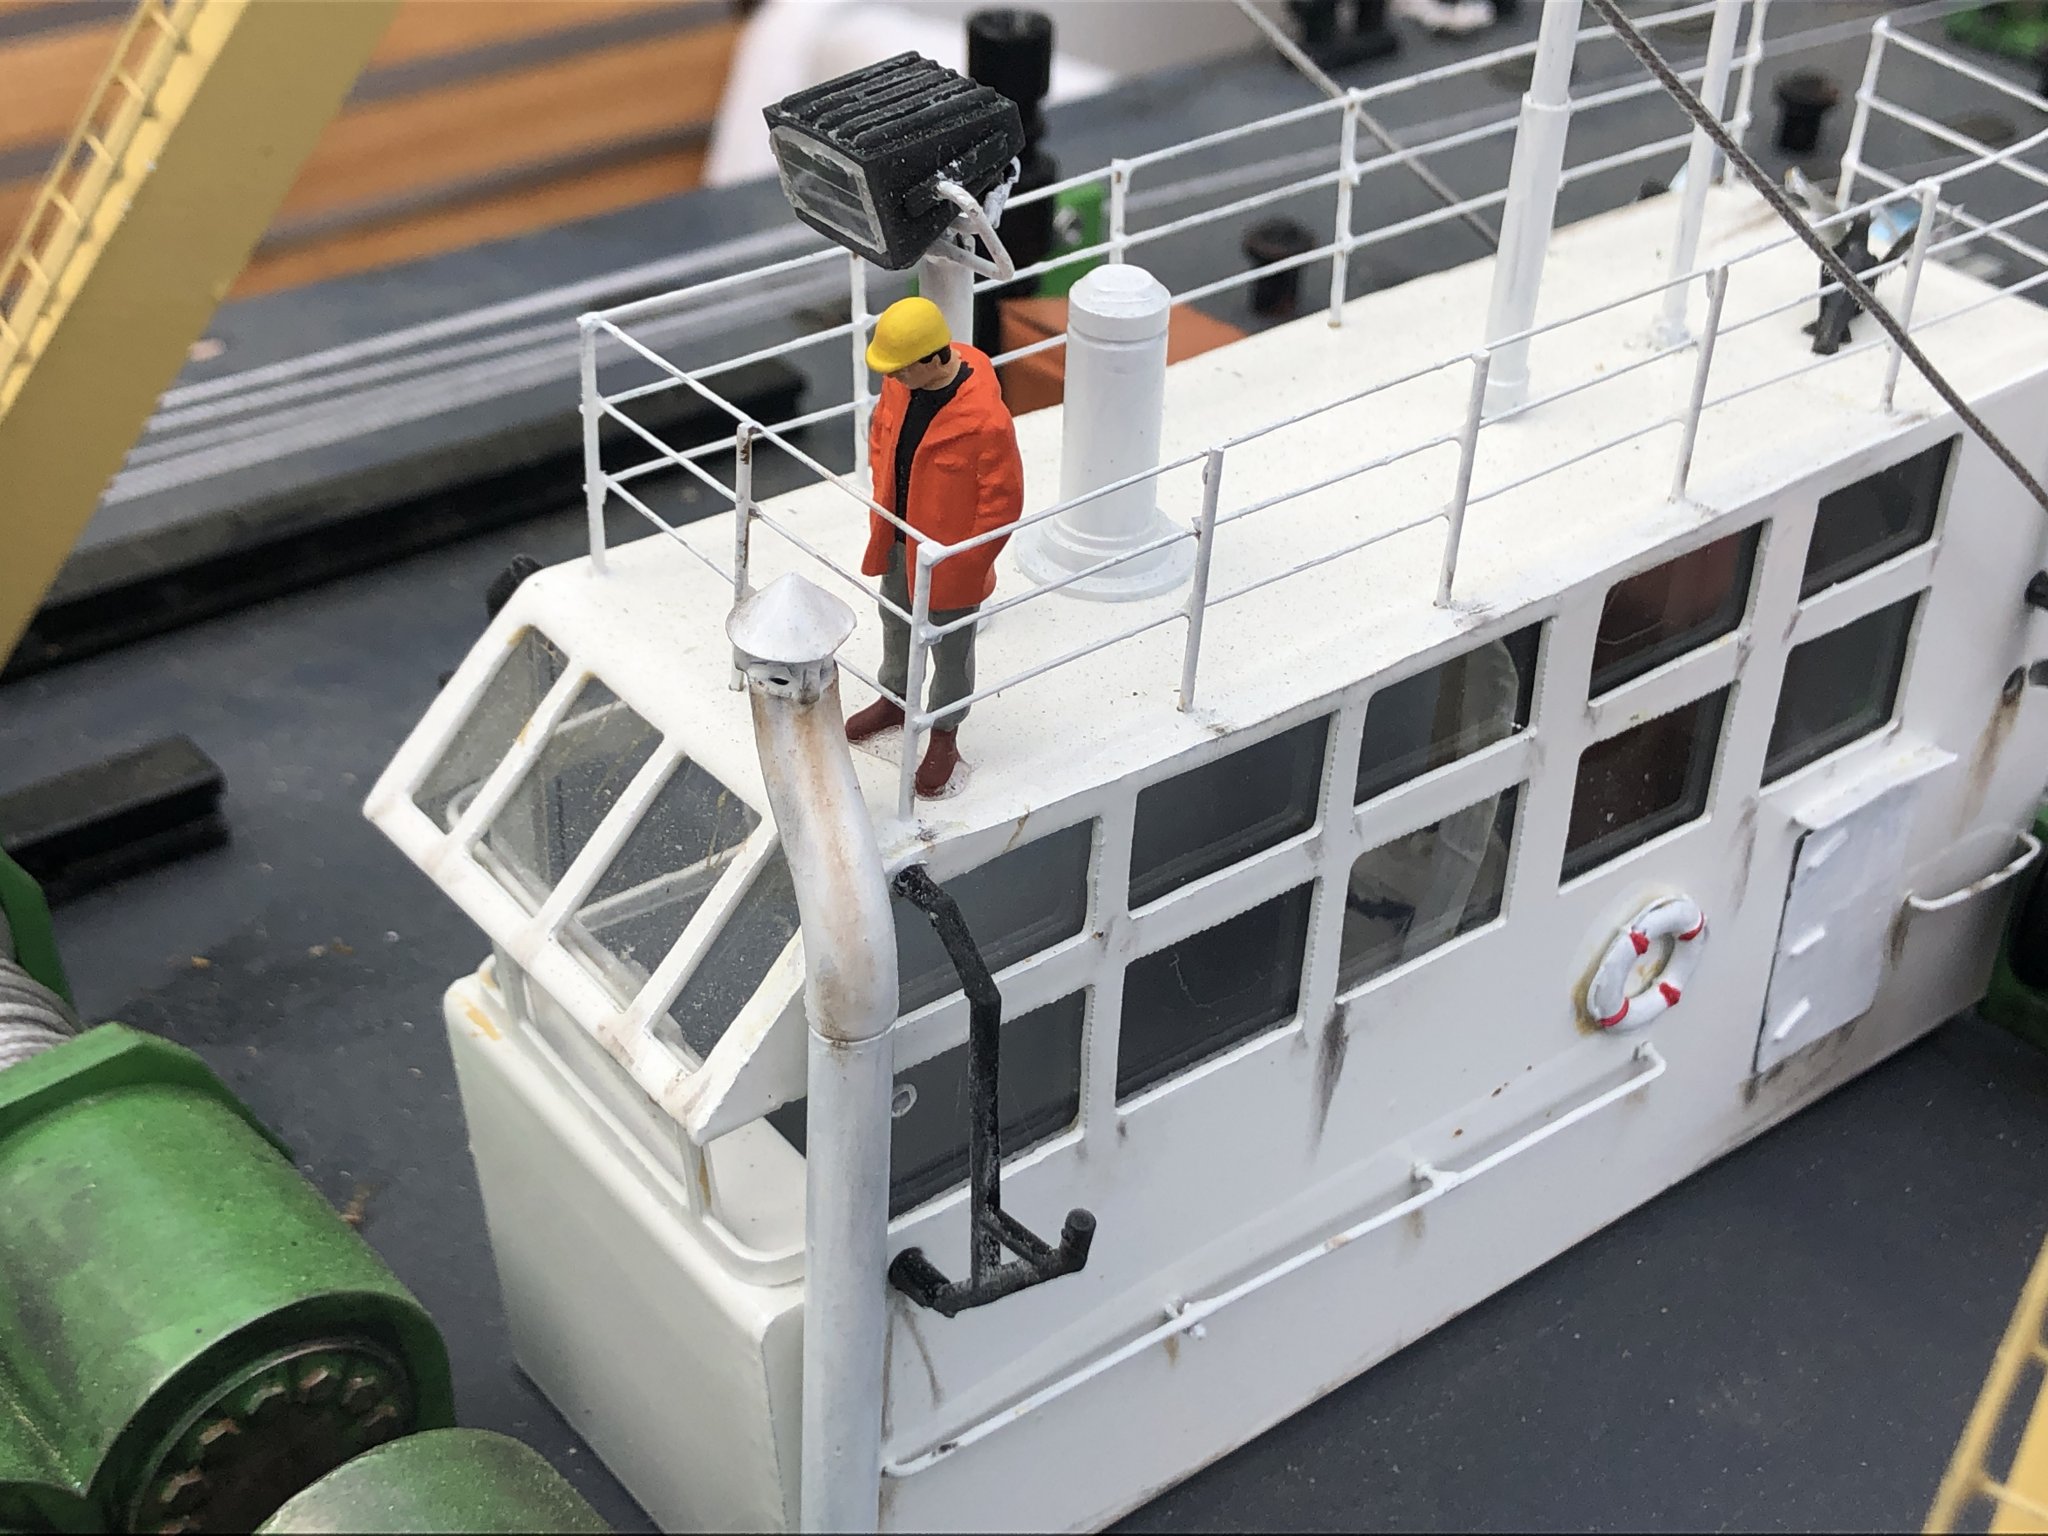
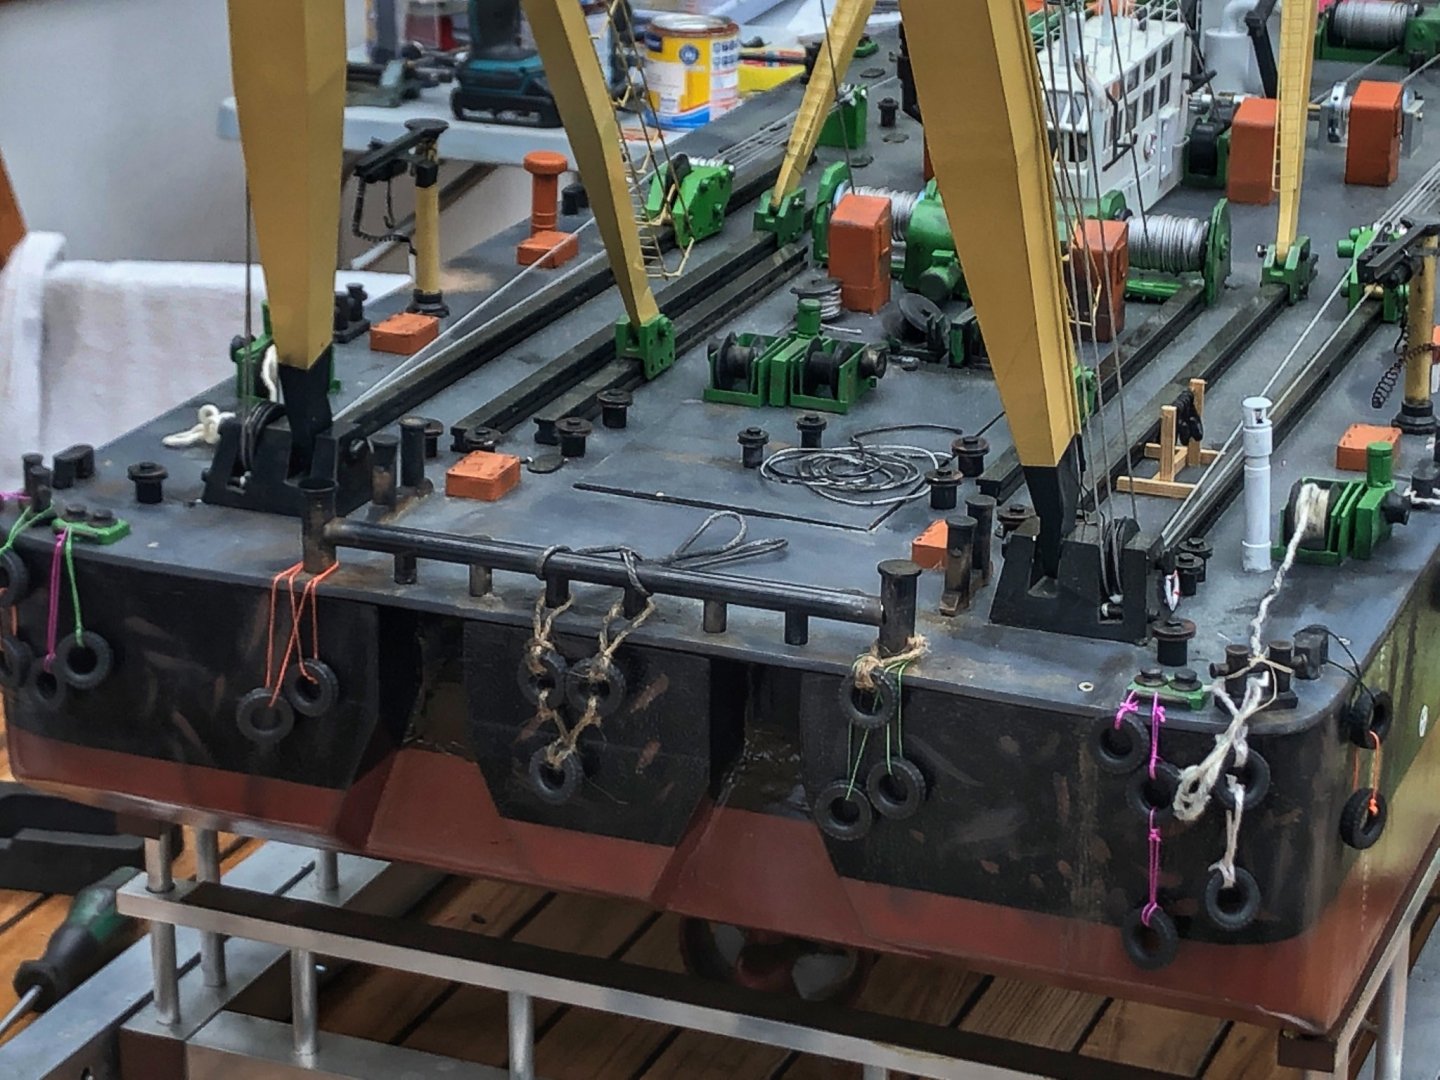
 Four Weeks later the Deck and his Details and Weathering has finished. Thanks for watching. Bye.
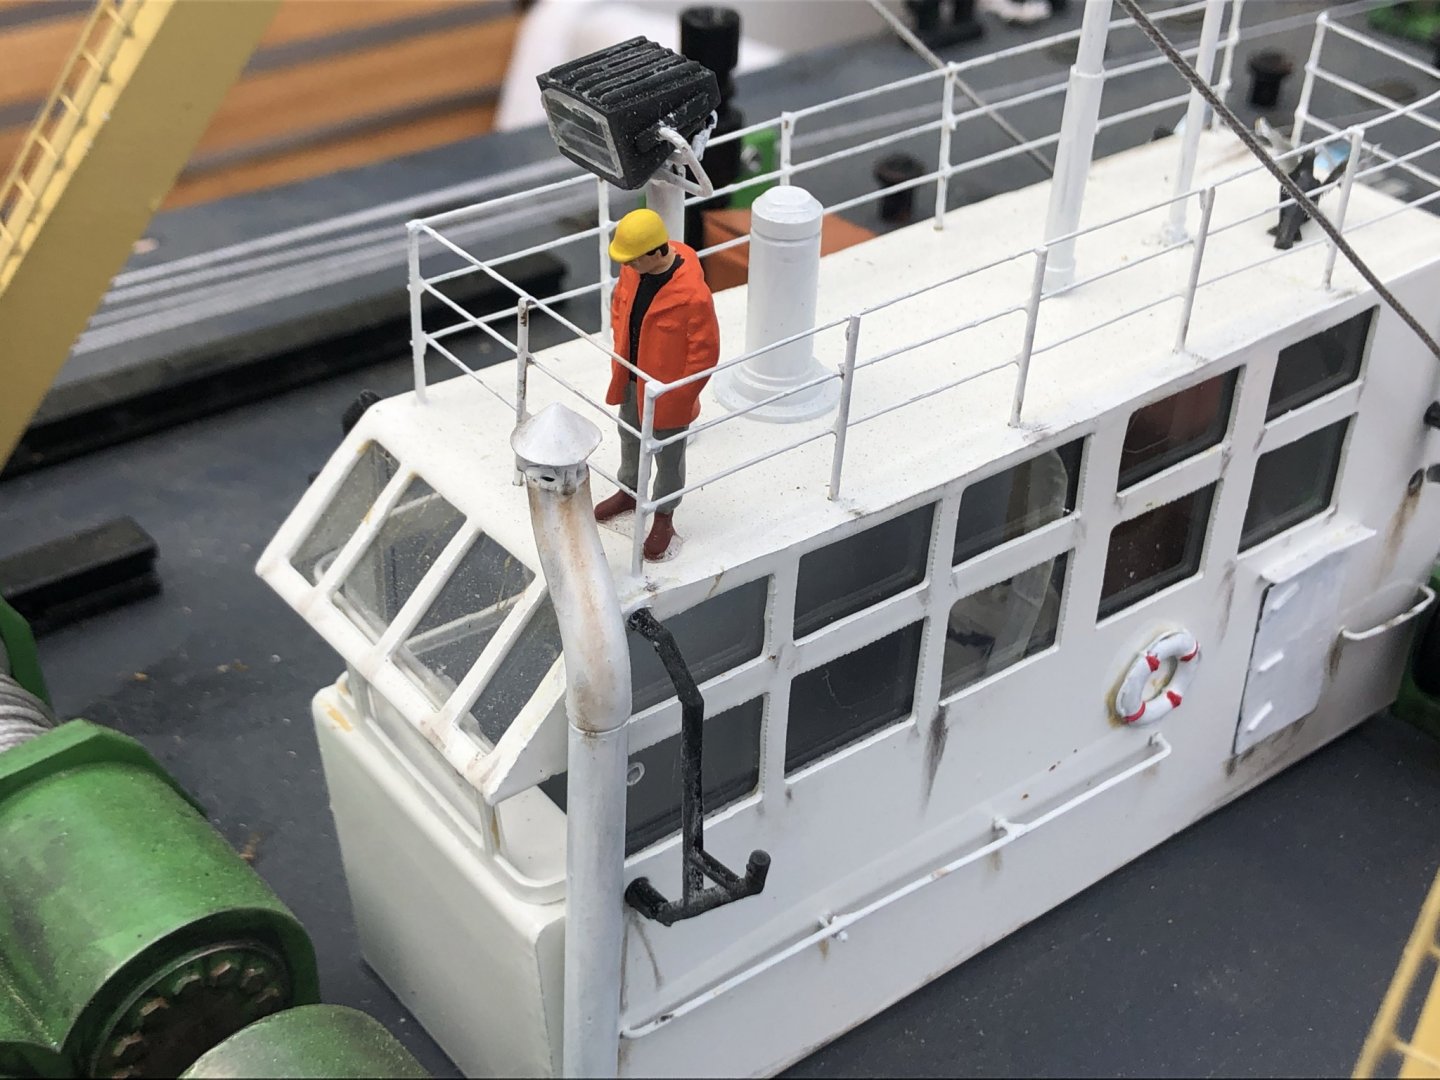
-
GrandpaPhil reacted to a post in a topic:
Enak by raven62 - Scale 1:50 - RADIO - floating crane - Finished
-
mtaylor reacted to a post in a topic:
Enak by raven62 - Scale 1:50 - RADIO - floating crane - Finished
-
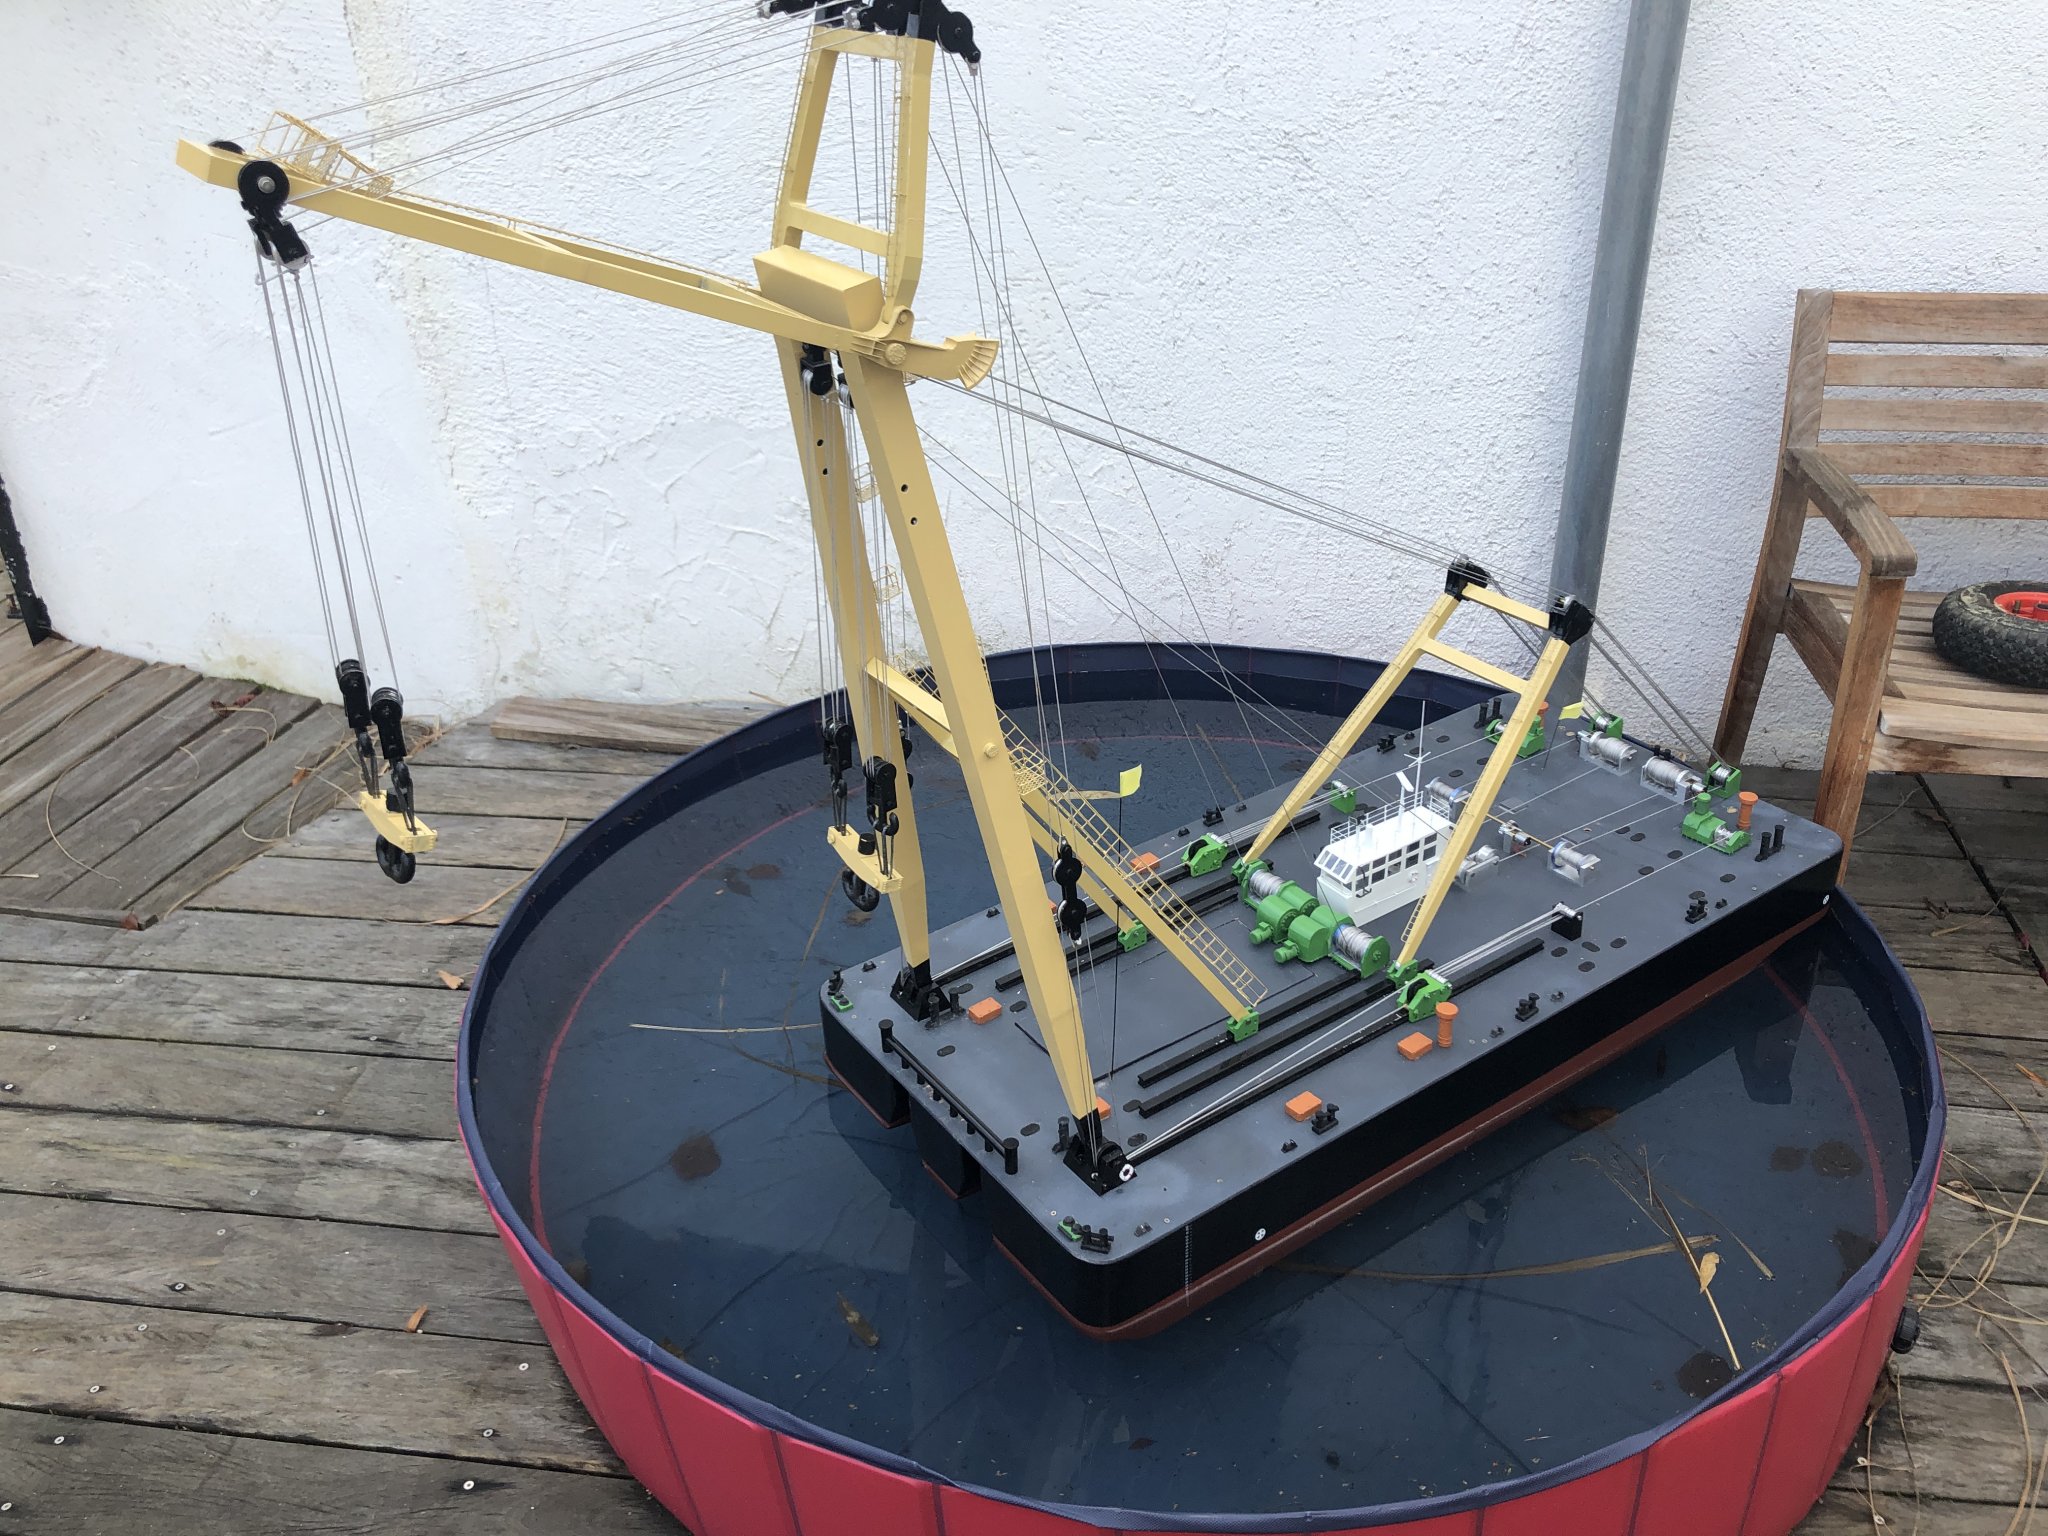
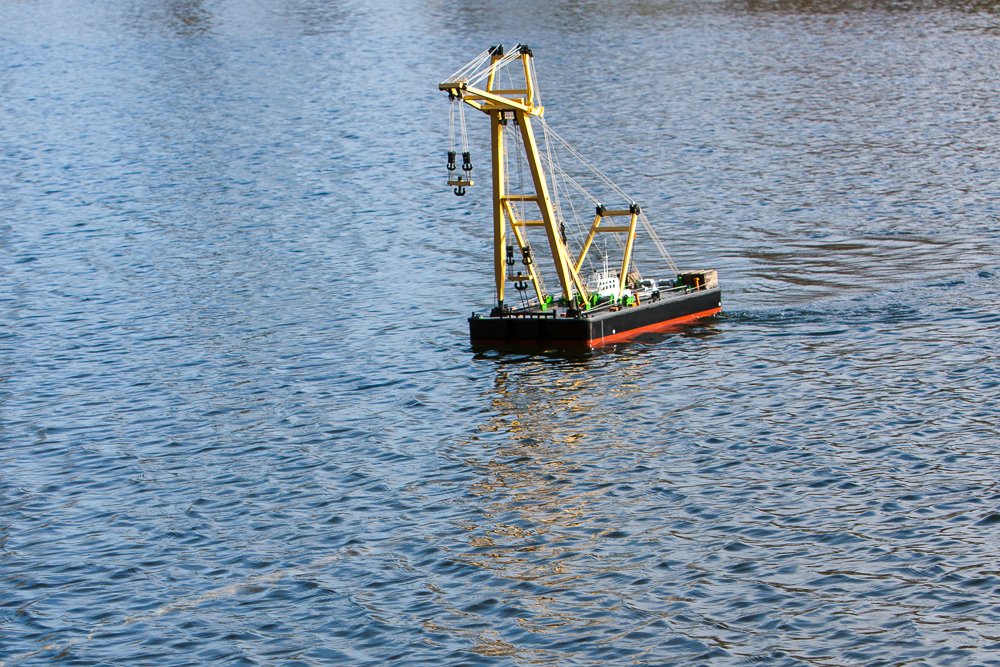
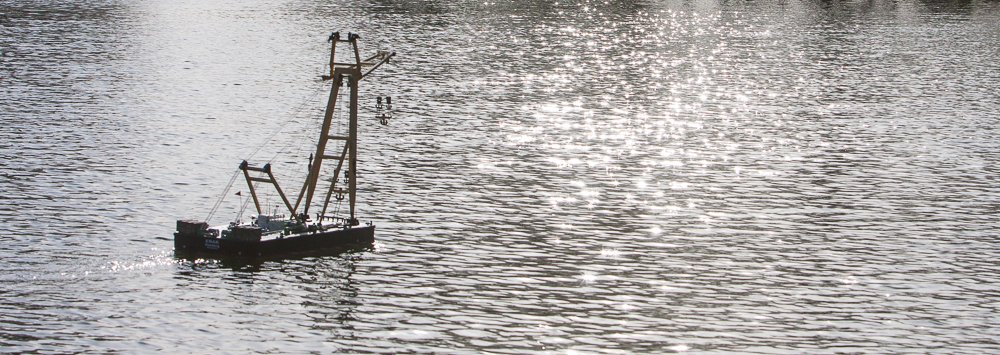
Hi there, today I can make the first real test on a lake with the crane. 90% works well. Just the steering needs an improvement. After two hours of testing and some fine adjustment I'm very happy with the crane and his behavior. As a result of that recognition and the great fun I had, I will invest in a professional rudderpropeller steering hardware. The mechanical indicators are not good enough for my eyes if the crane is too far away. A short clip And some impressions
-
GrandpaPhil reacted to a post in a topic:
Enak by raven62 - Scale 1:50 - RADIO - floating crane - Finished
-
mtaylor reacted to a post in a topic:
Enak by raven62 - Scale 1:50 - RADIO - floating crane - Finished
-
Hi hope you can see my post in another forum ( and it is allowed to post a link) Powder coating at home part one Part two
-
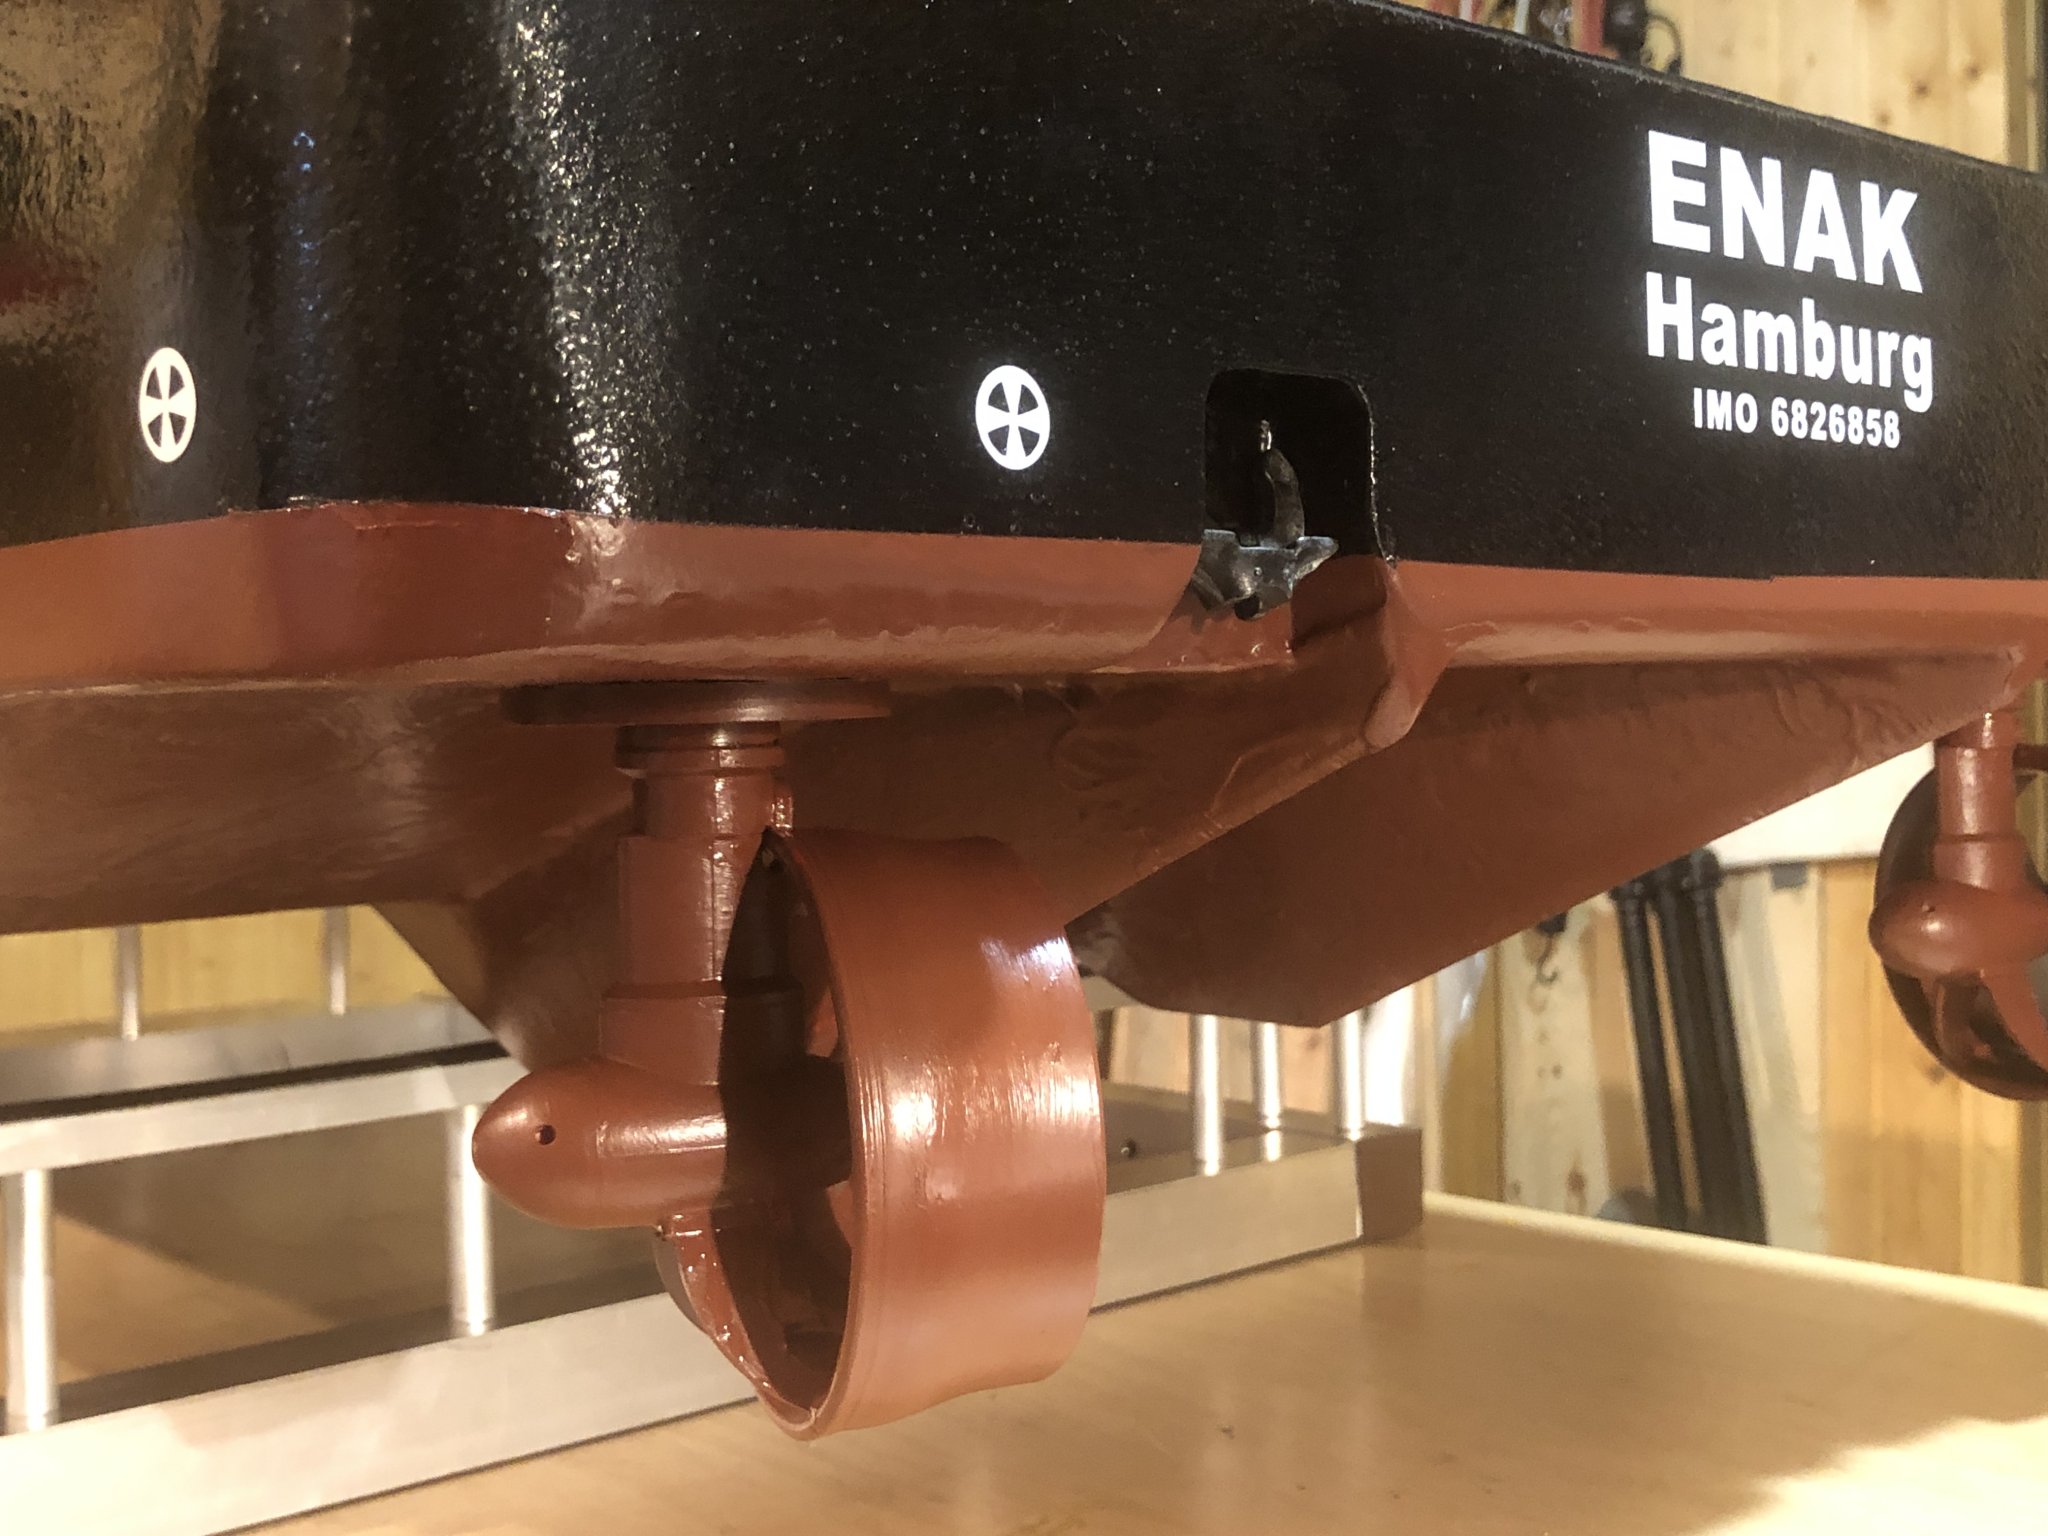
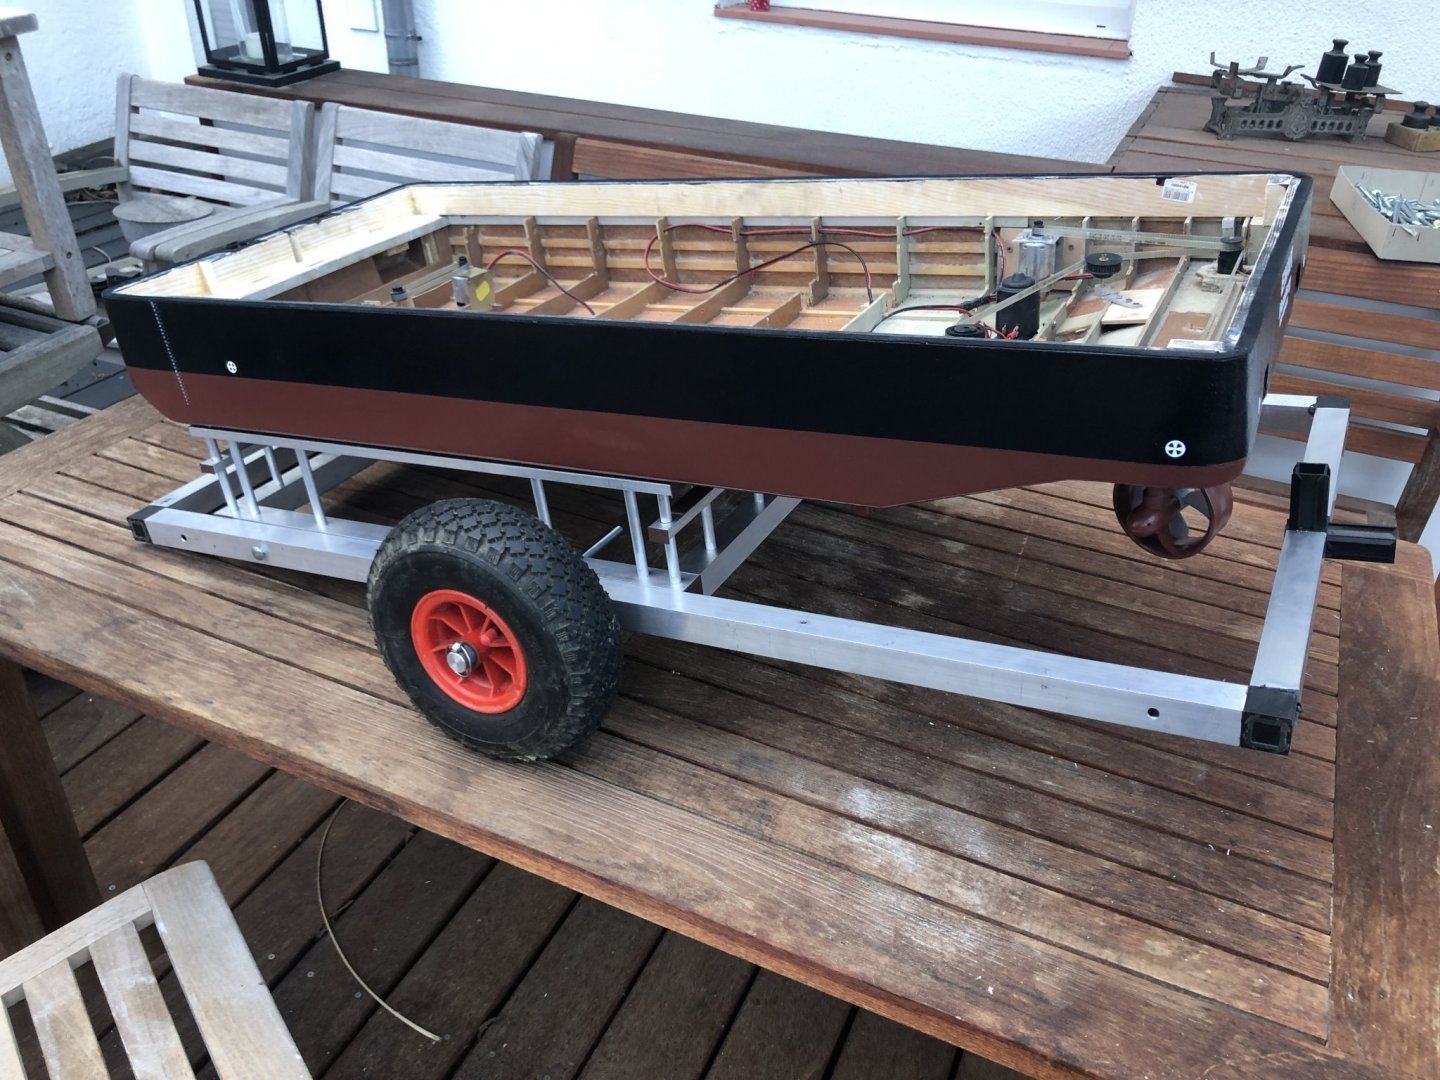
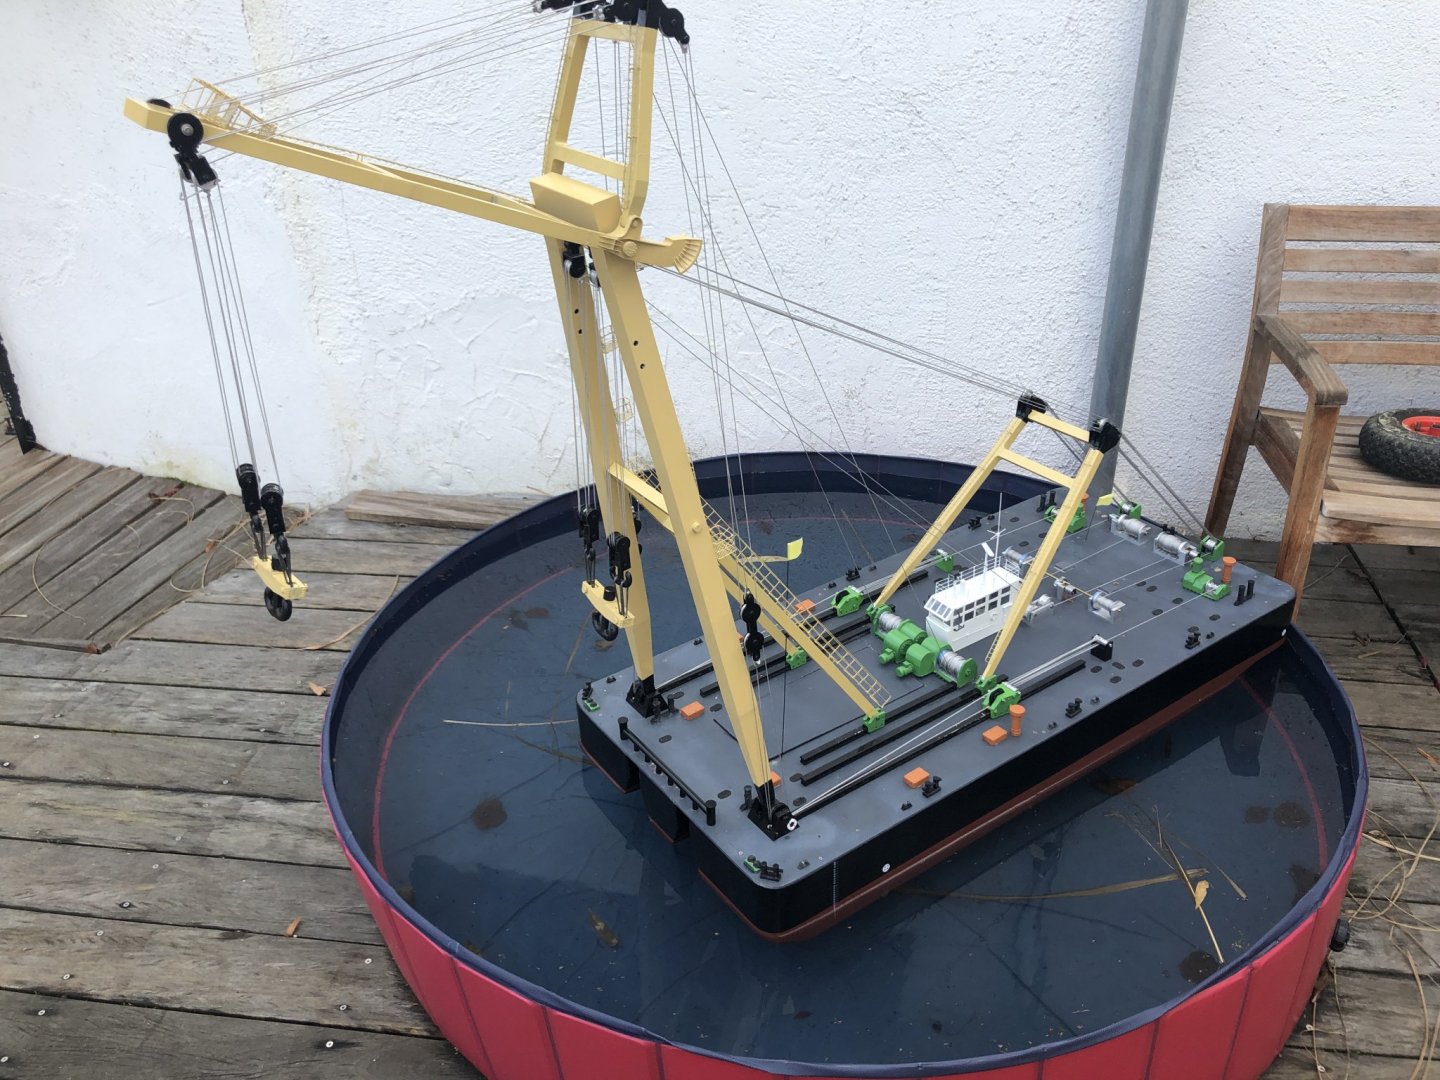
Hi there, it's been a while since the last update. Actual state is: It swims, all rudder propellers and the crane are working fine. The hull is paintend , some Scale-Details are added (some are still on the todo-list 🤗 ) and so it's time to put it in the Water. Ok. A very small lake 😂 , but really important for me. Steering with the rudder propellers is extremly unfamiliar for me. To get it on a bigger Lake I've build a combined display and transport utility. Todays work was to build a technical looking load , maybe a large silo I think, a first testdrive is coming soon, but I'm waiting for lead to made a propper trimming.

-
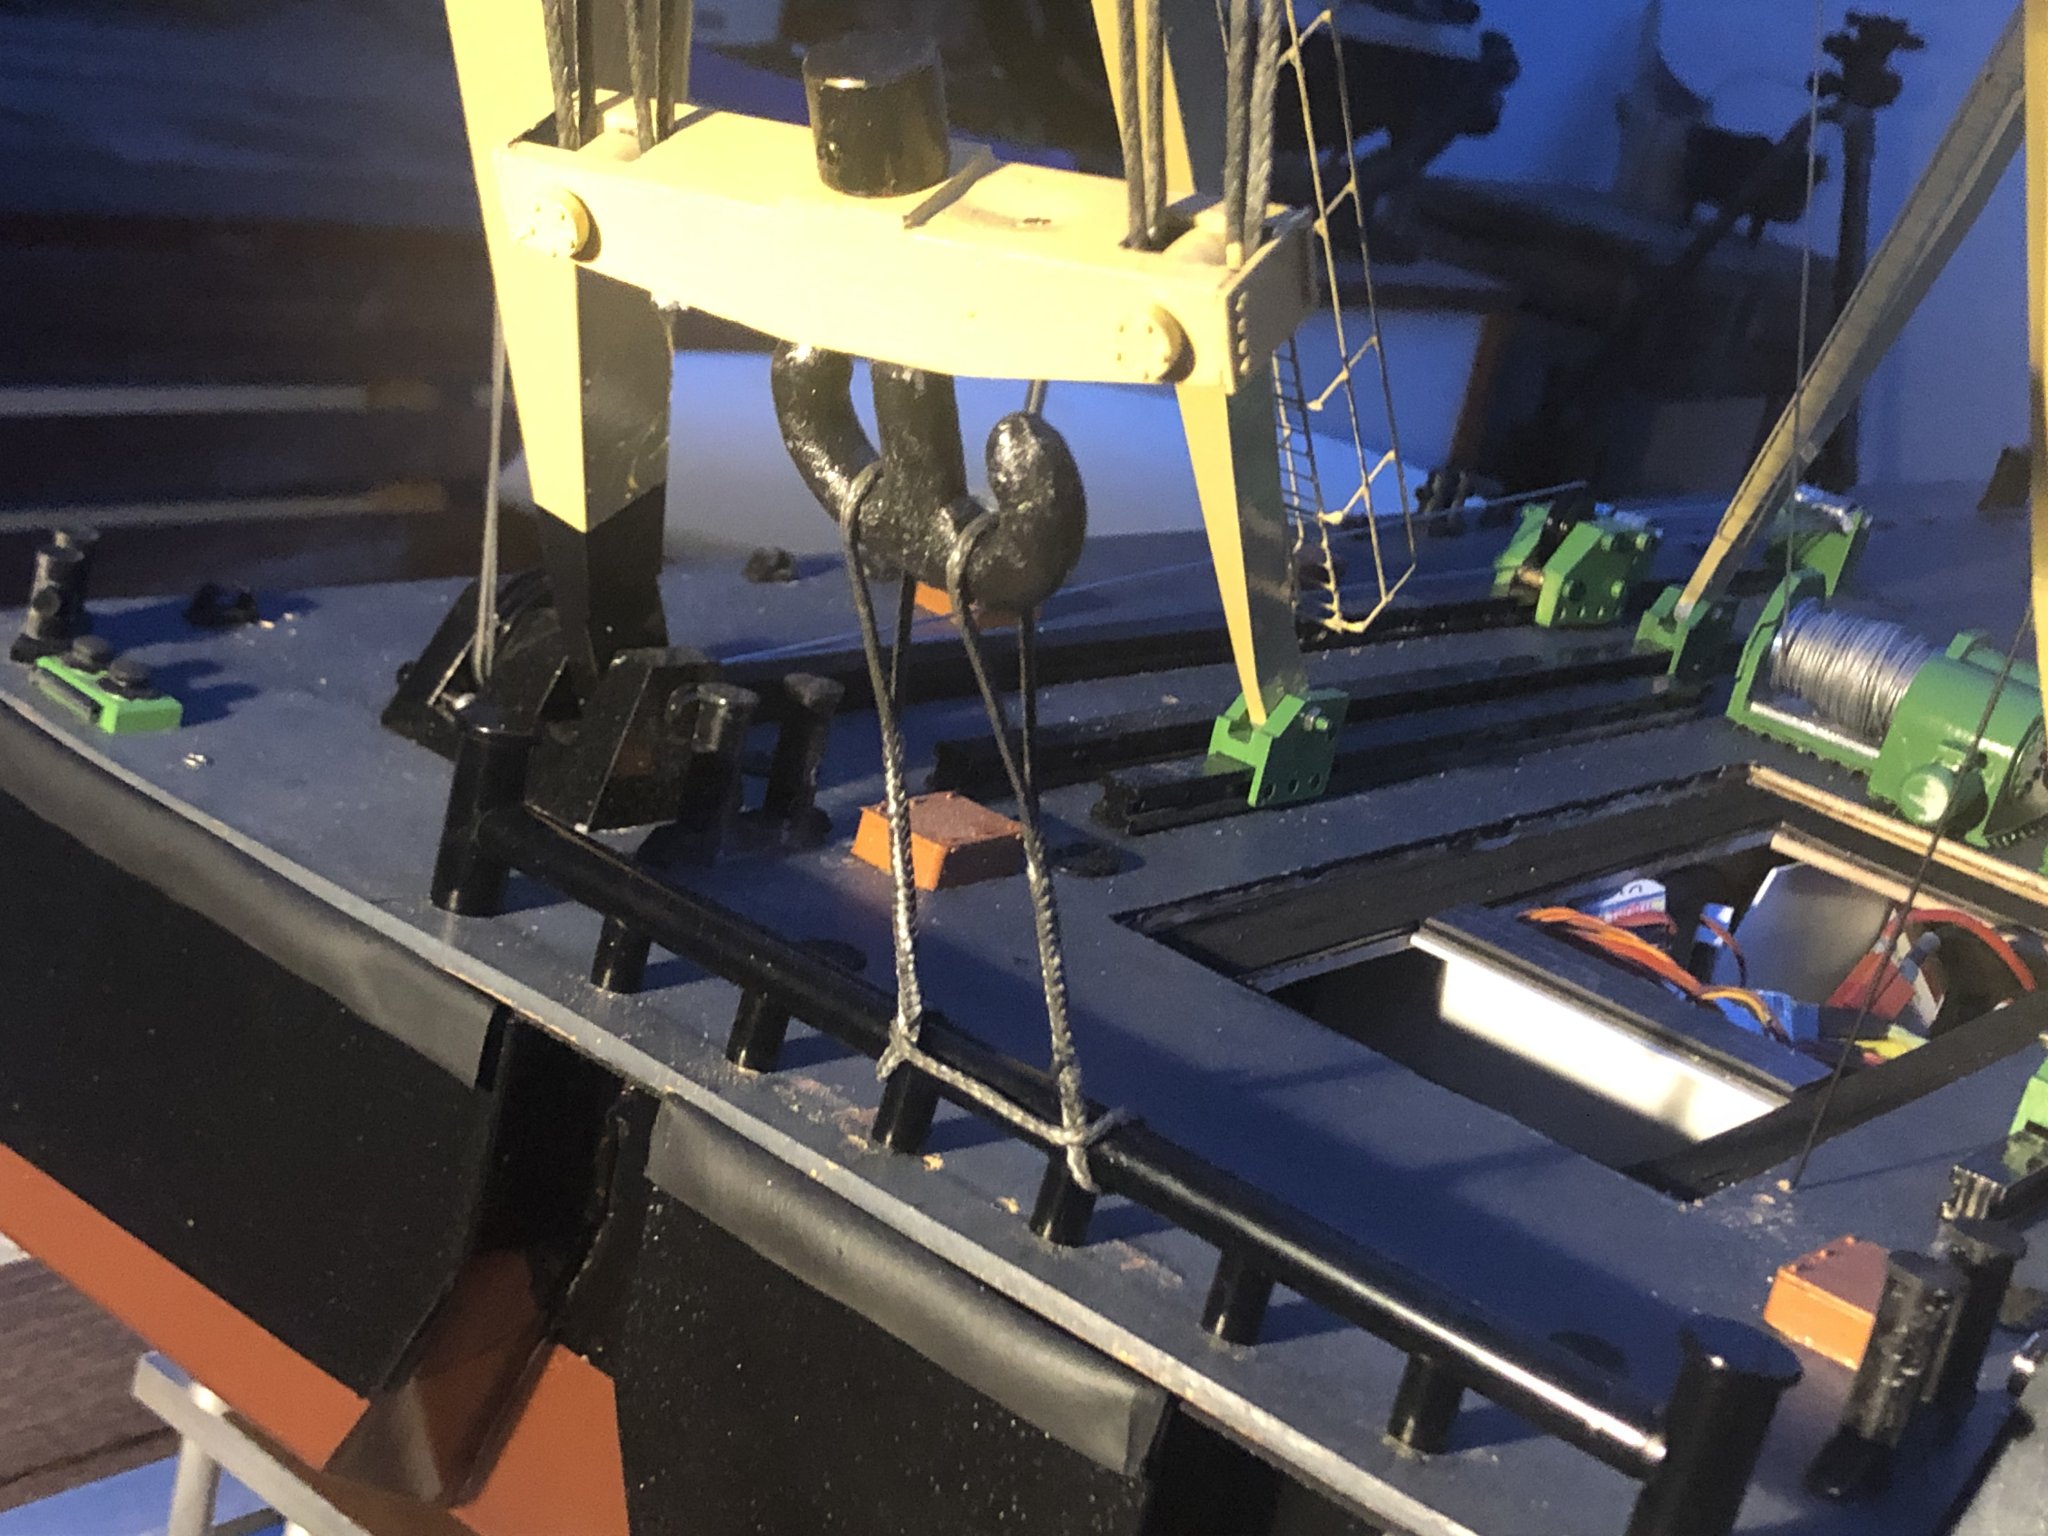
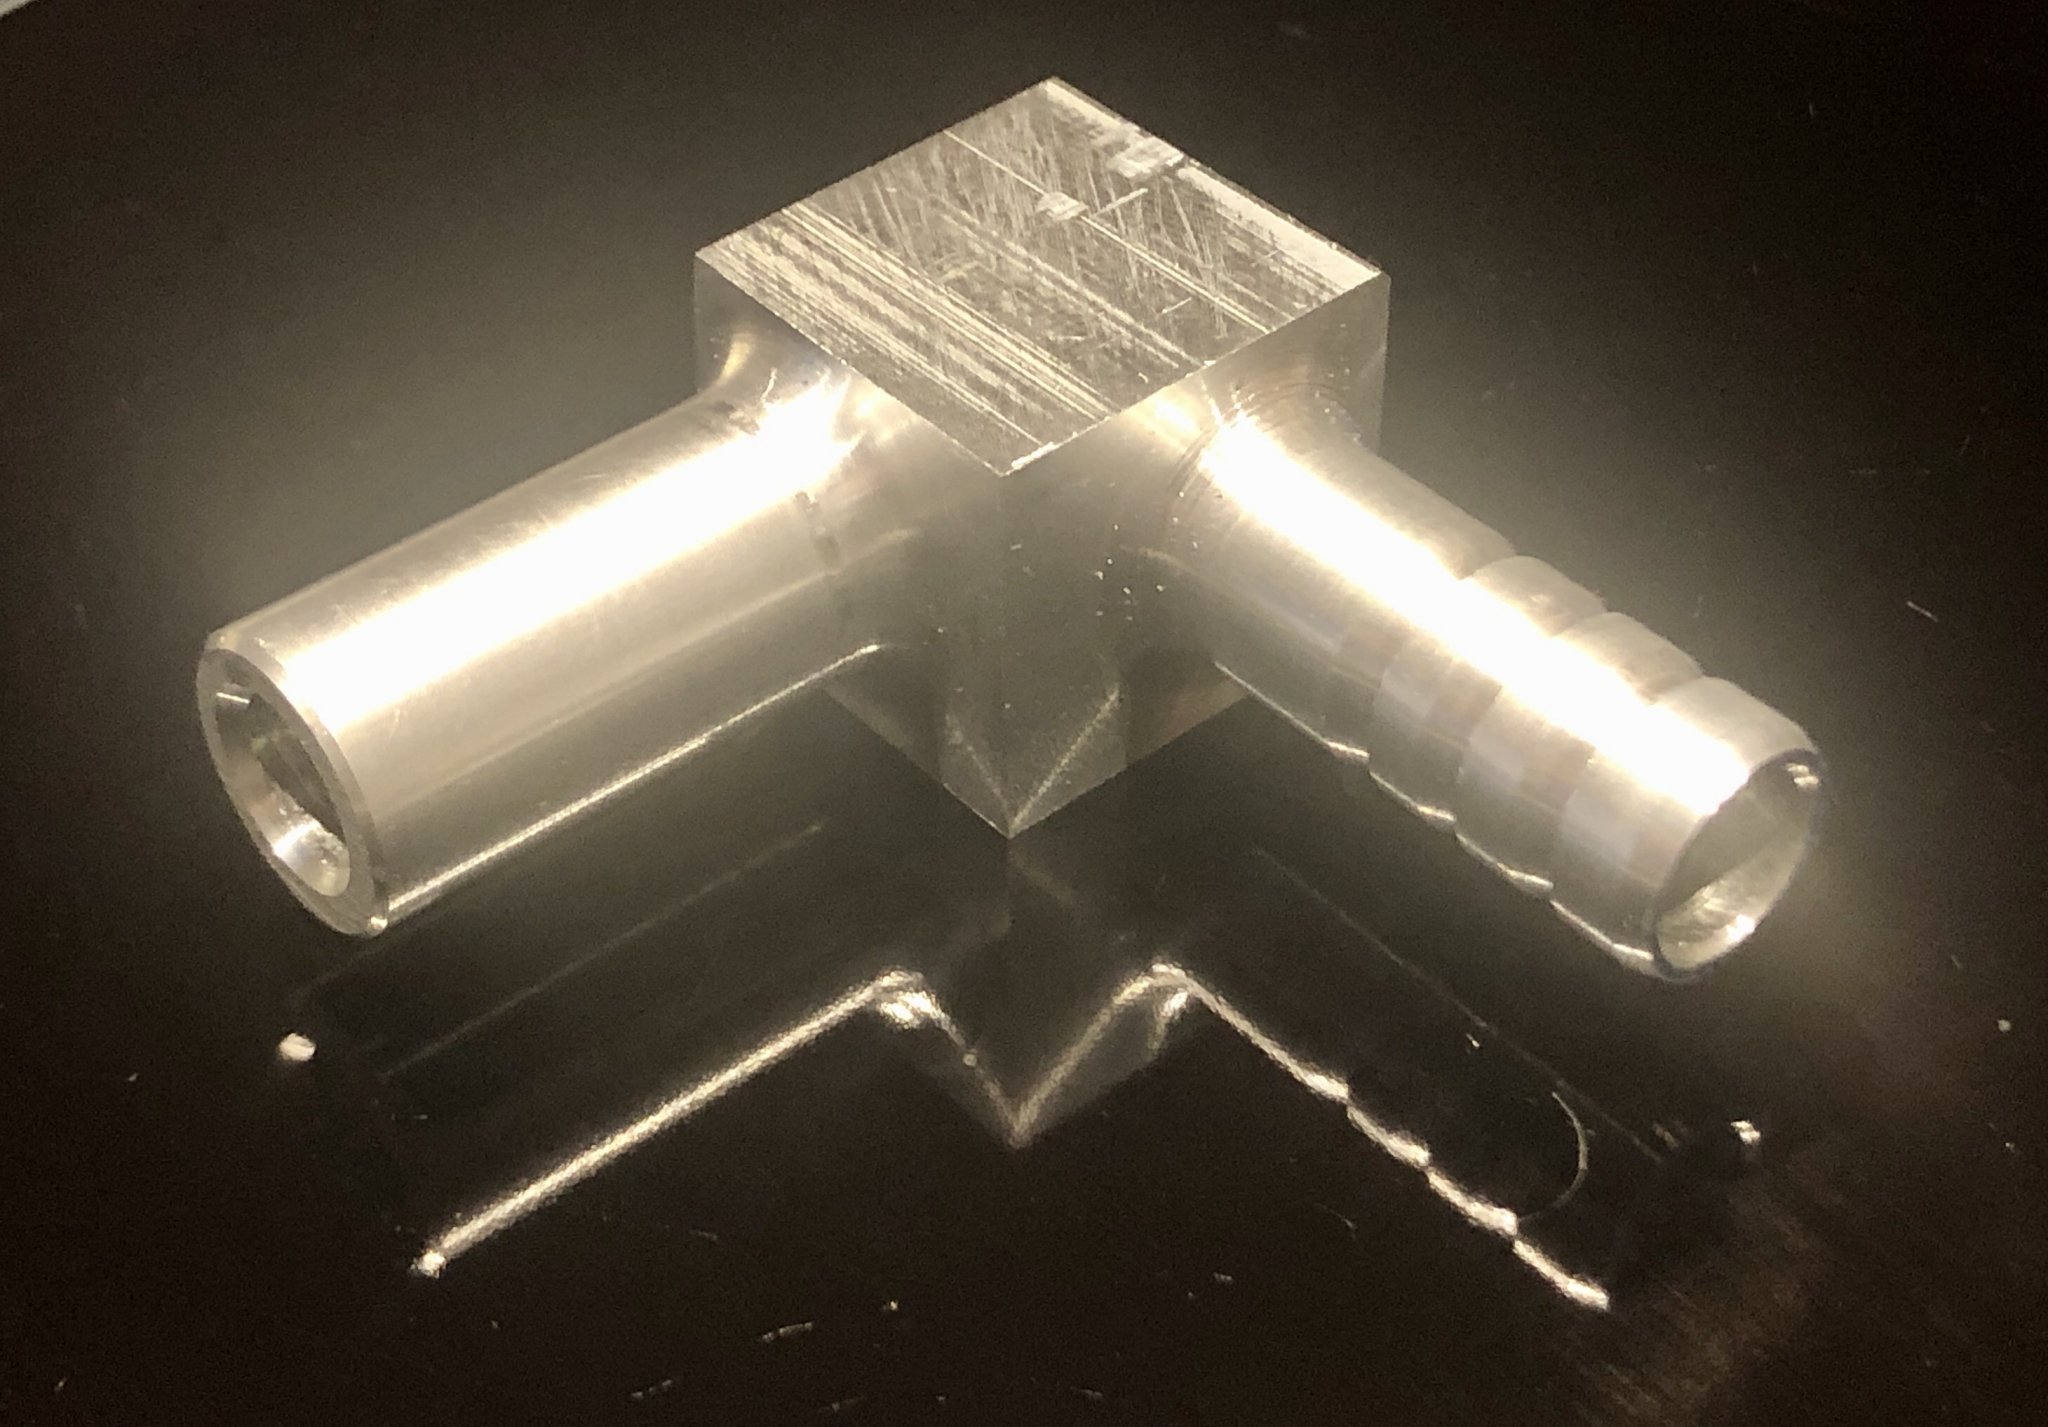
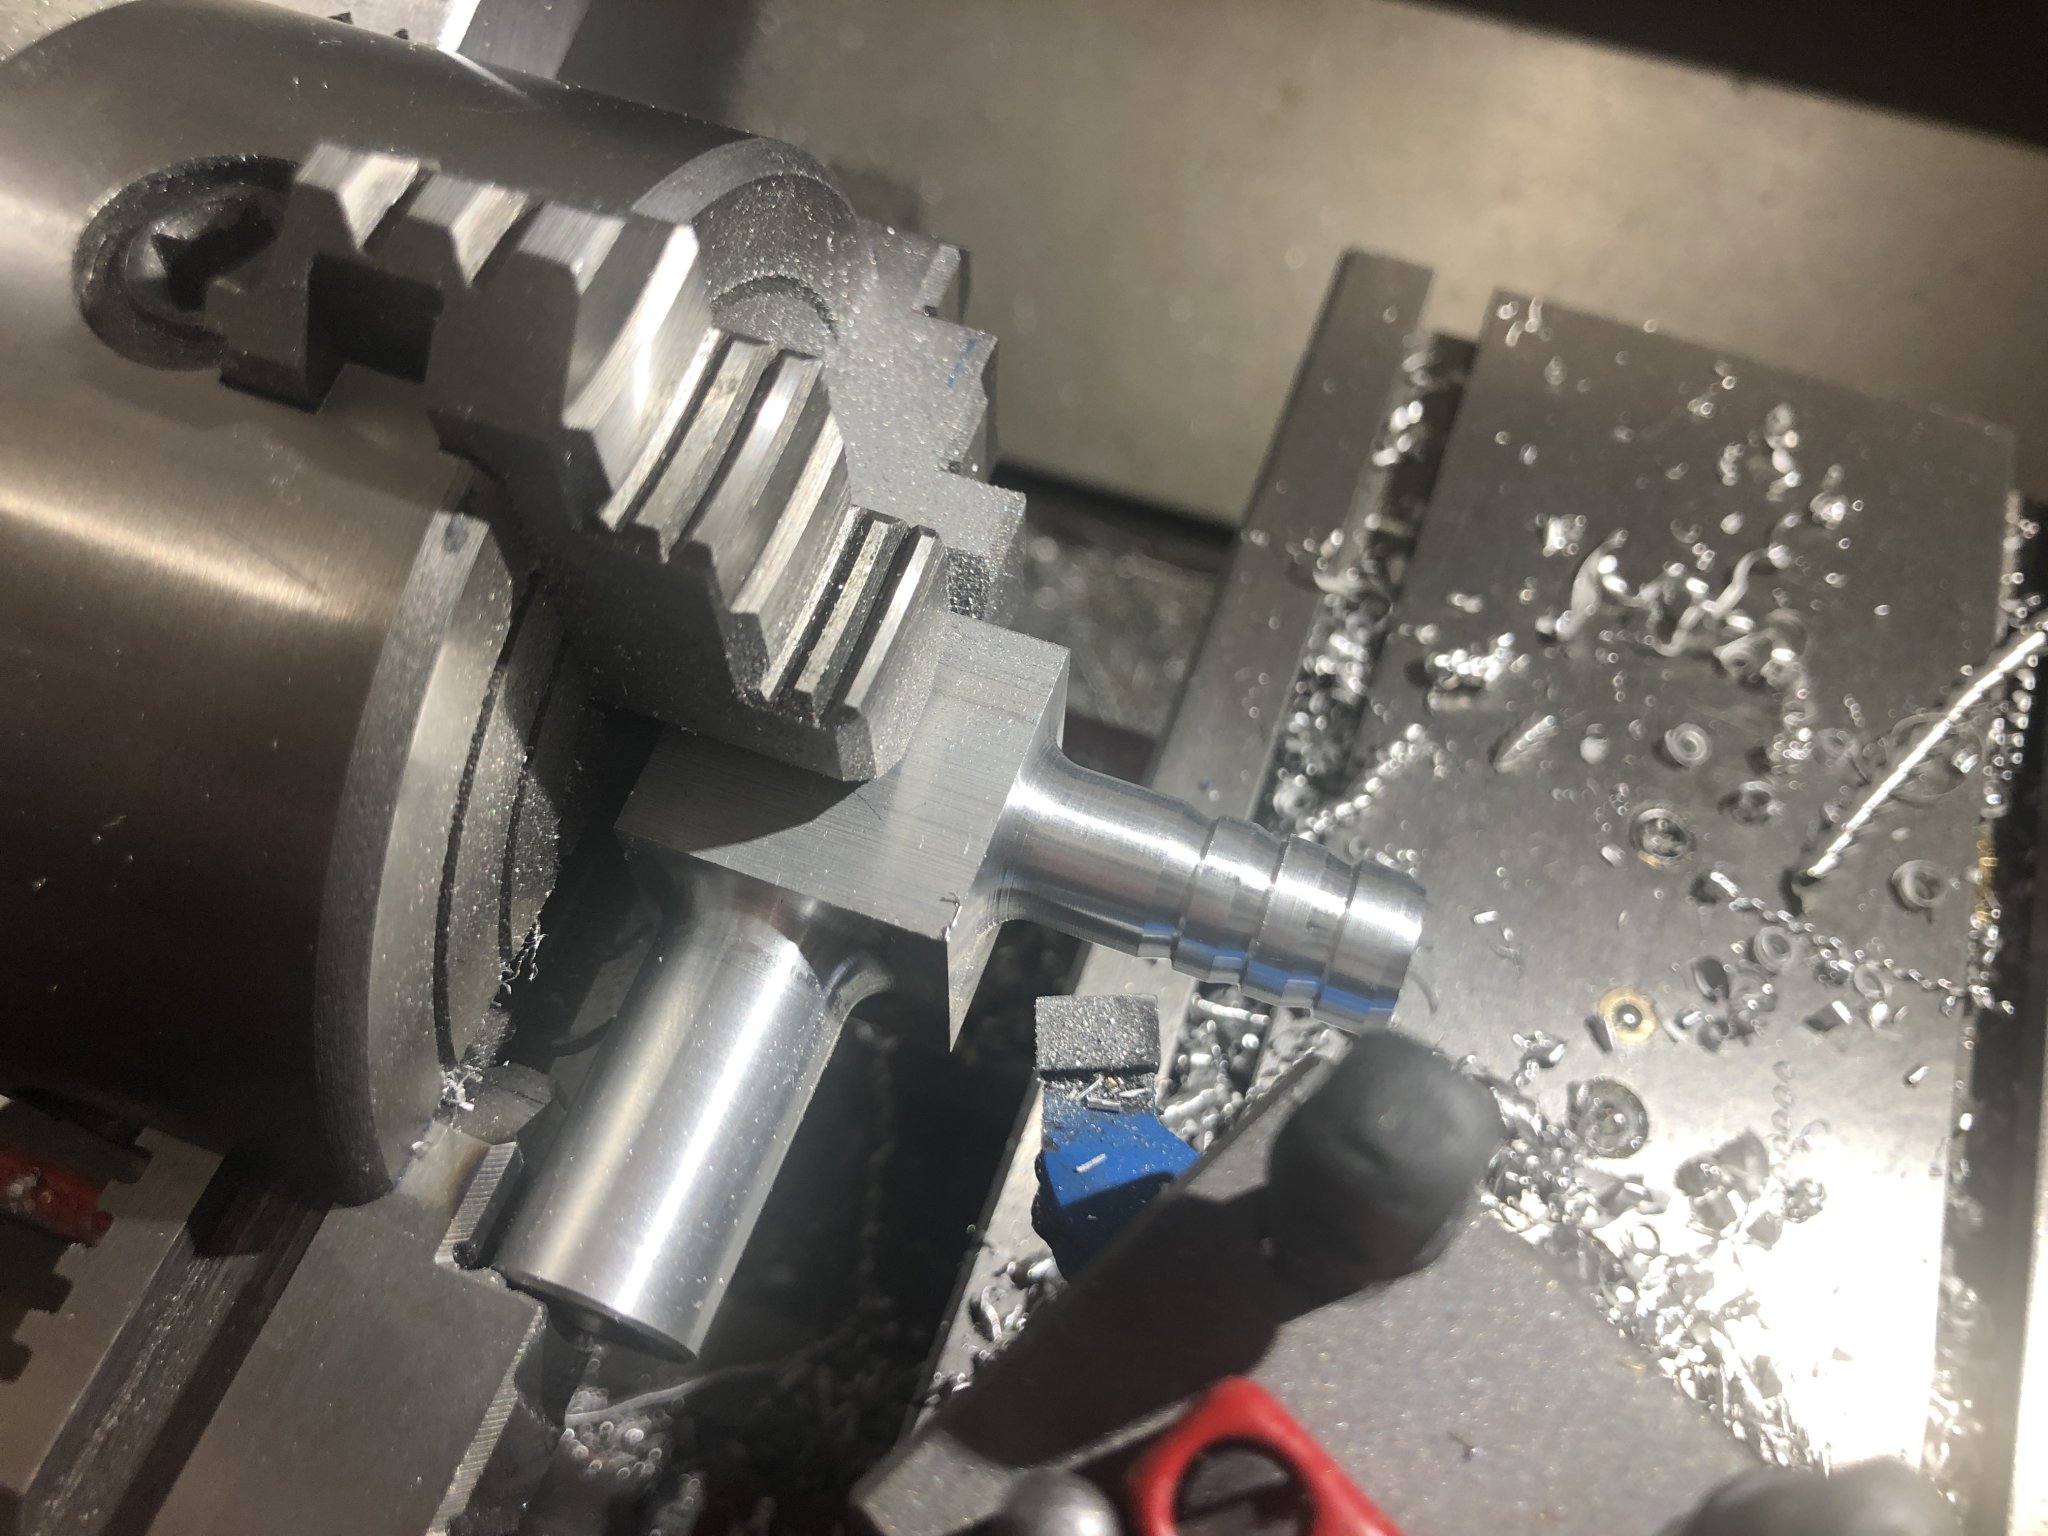
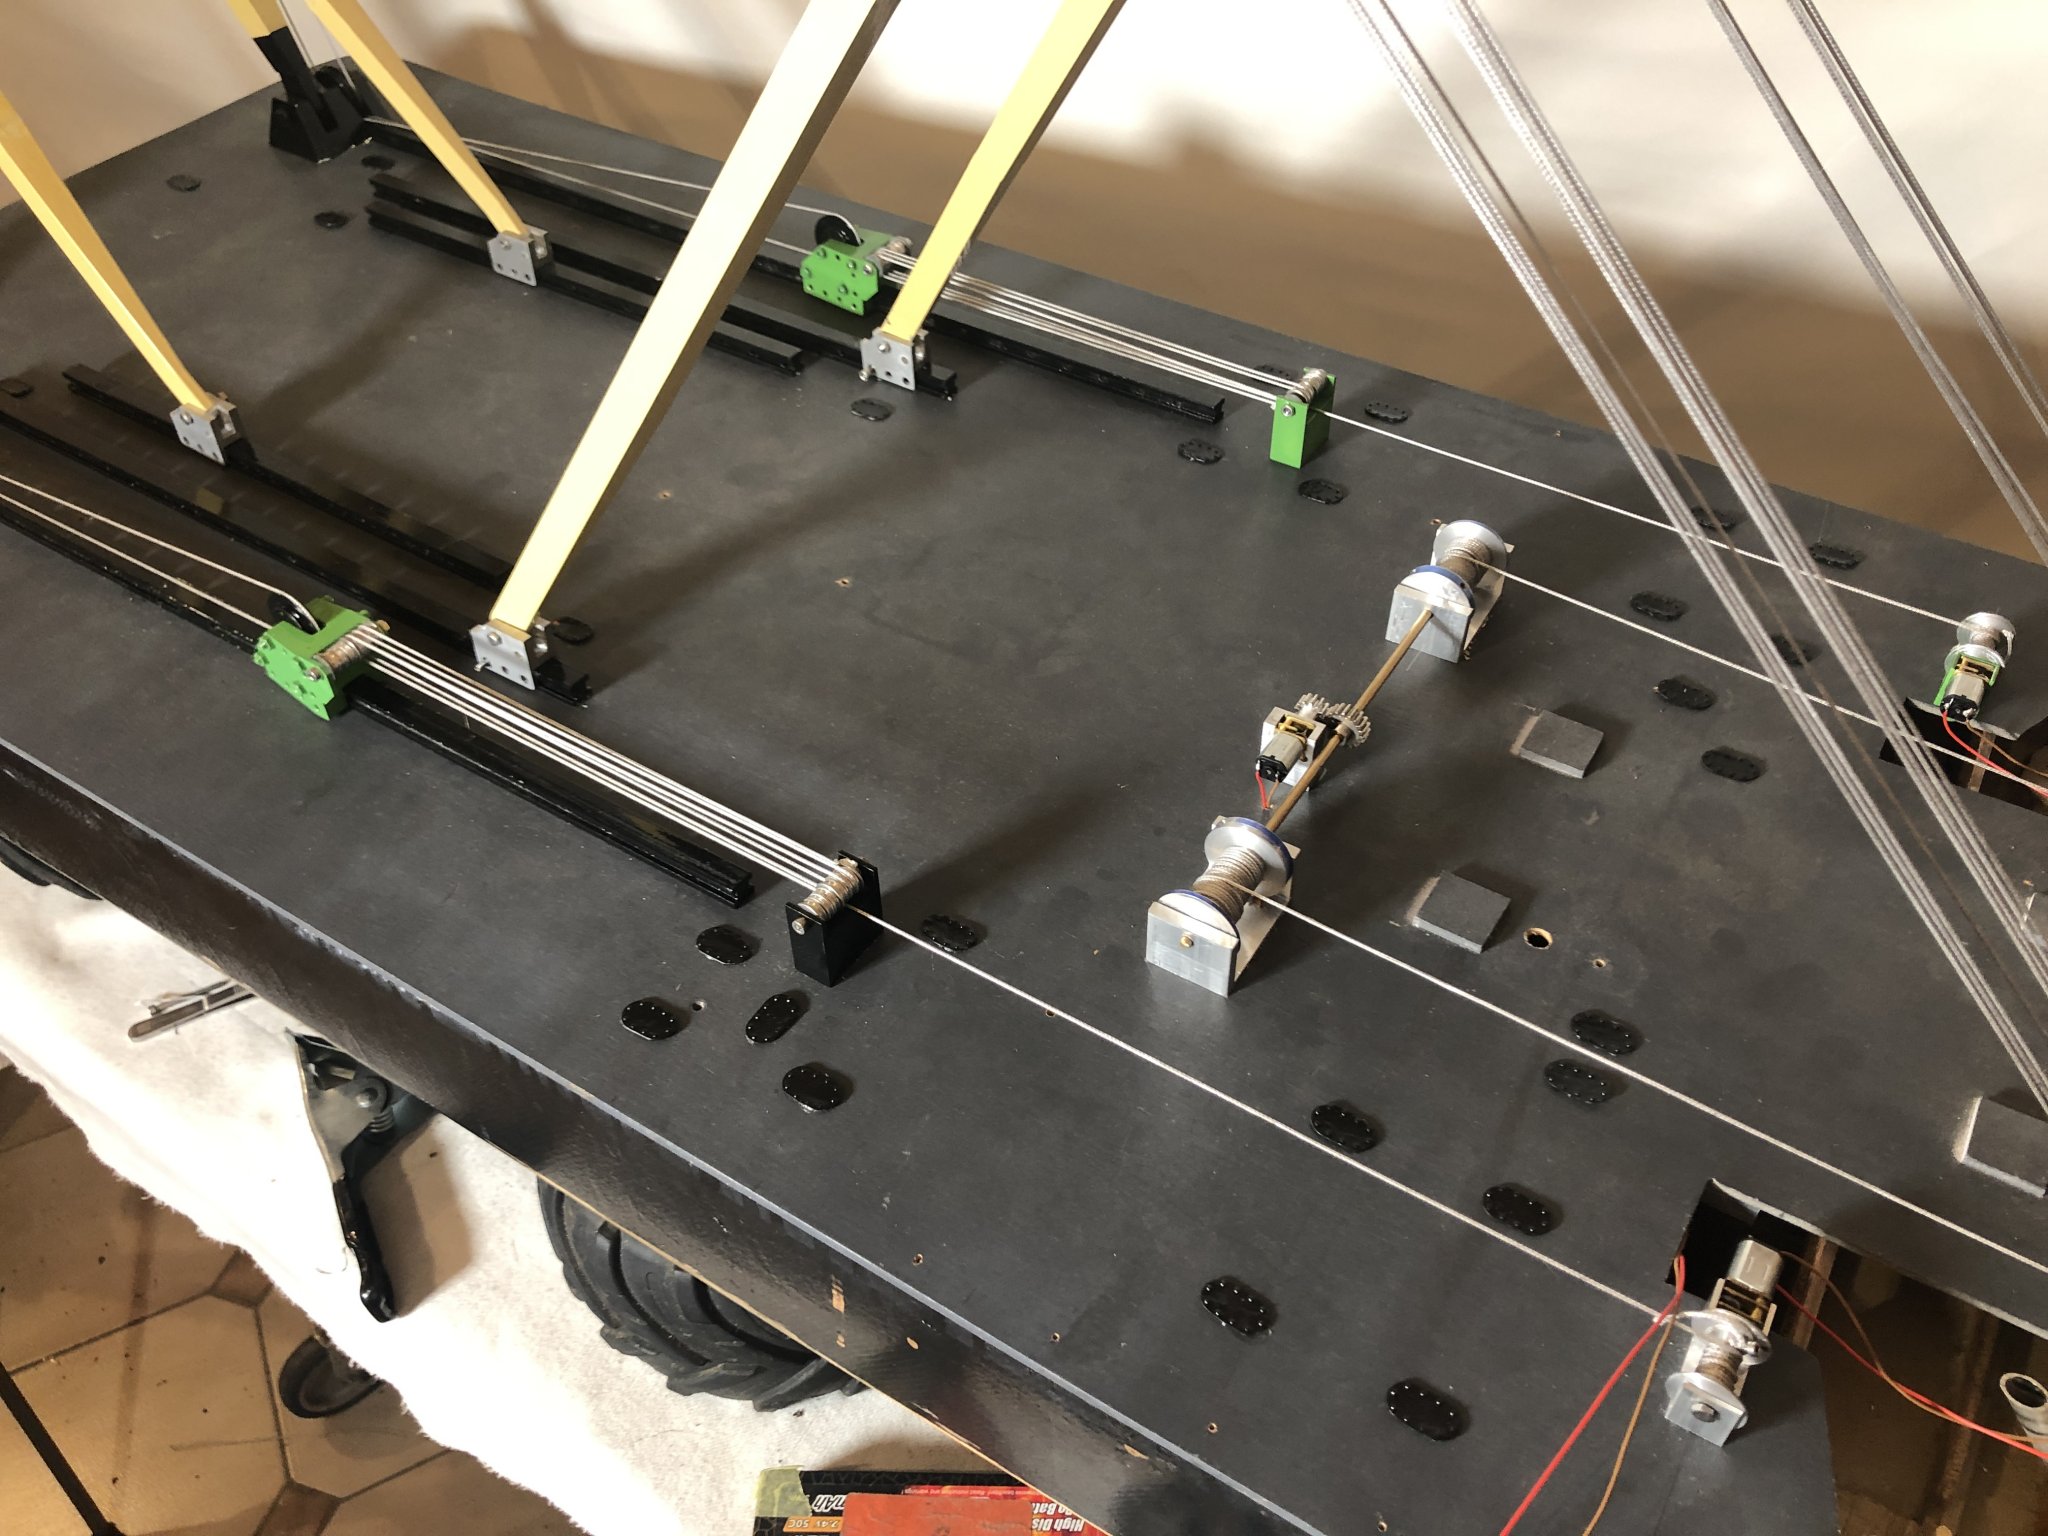
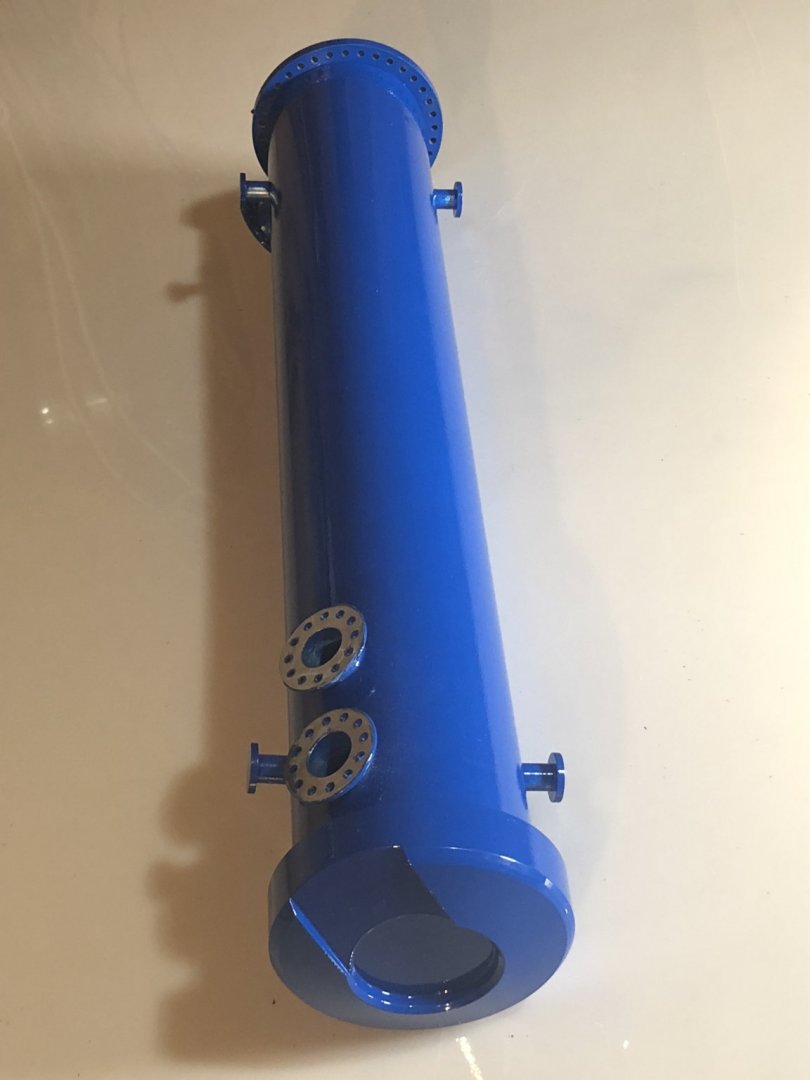
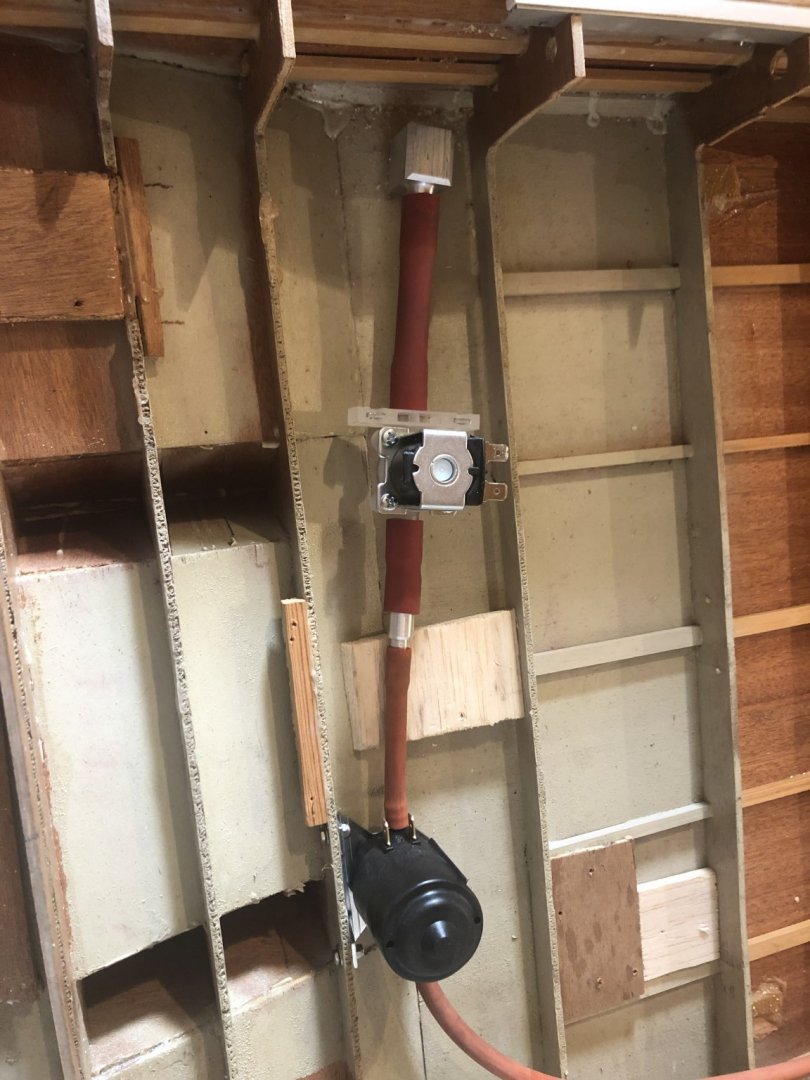
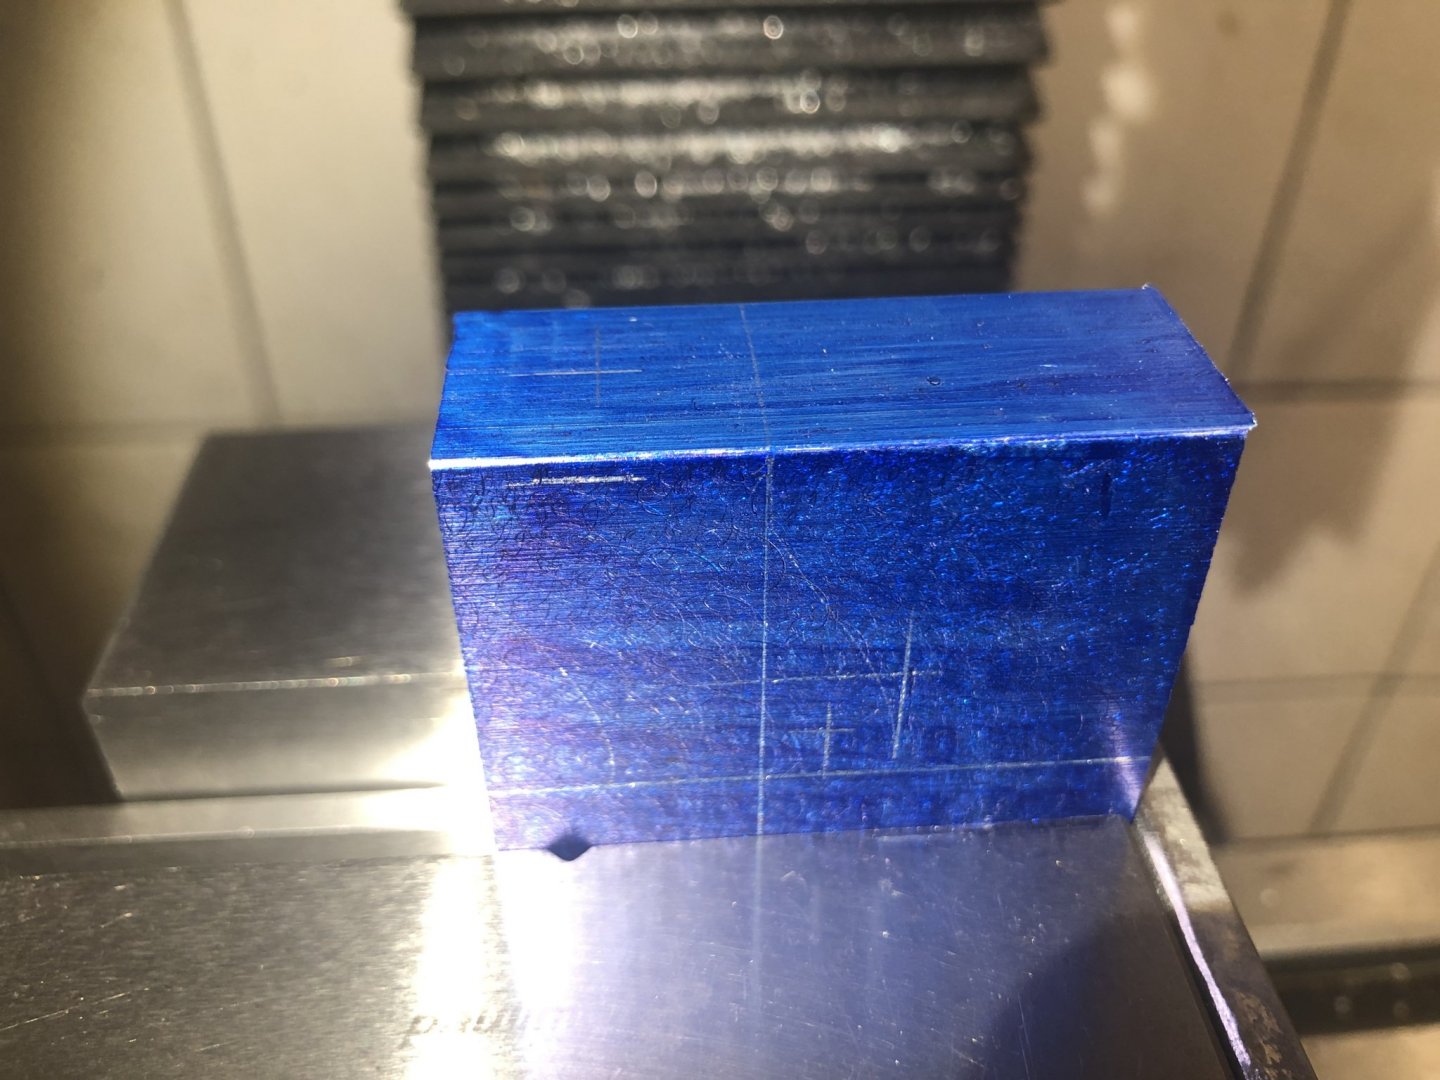
Work on the ballast tank begins. A magnetic valve and a gear pump will be use for flooding and drainage. First step is the angle adapter through the hull. It's been a while since I made an excentric turning so I use this part for a pretty practise. and the complete setup for valve and pump


-
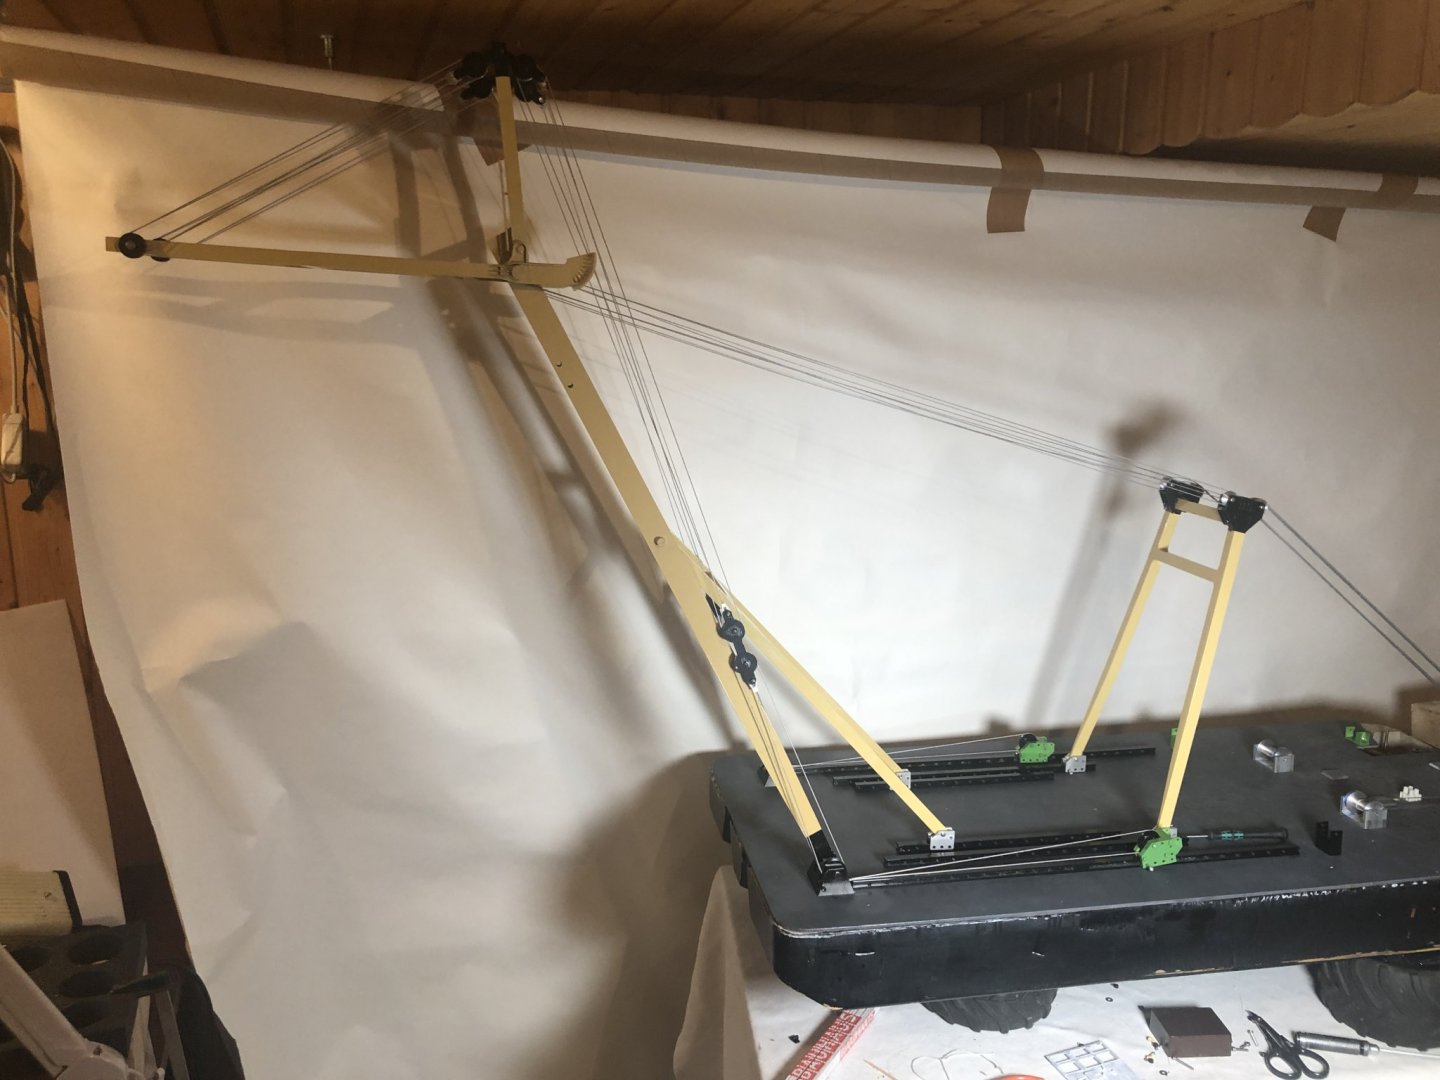
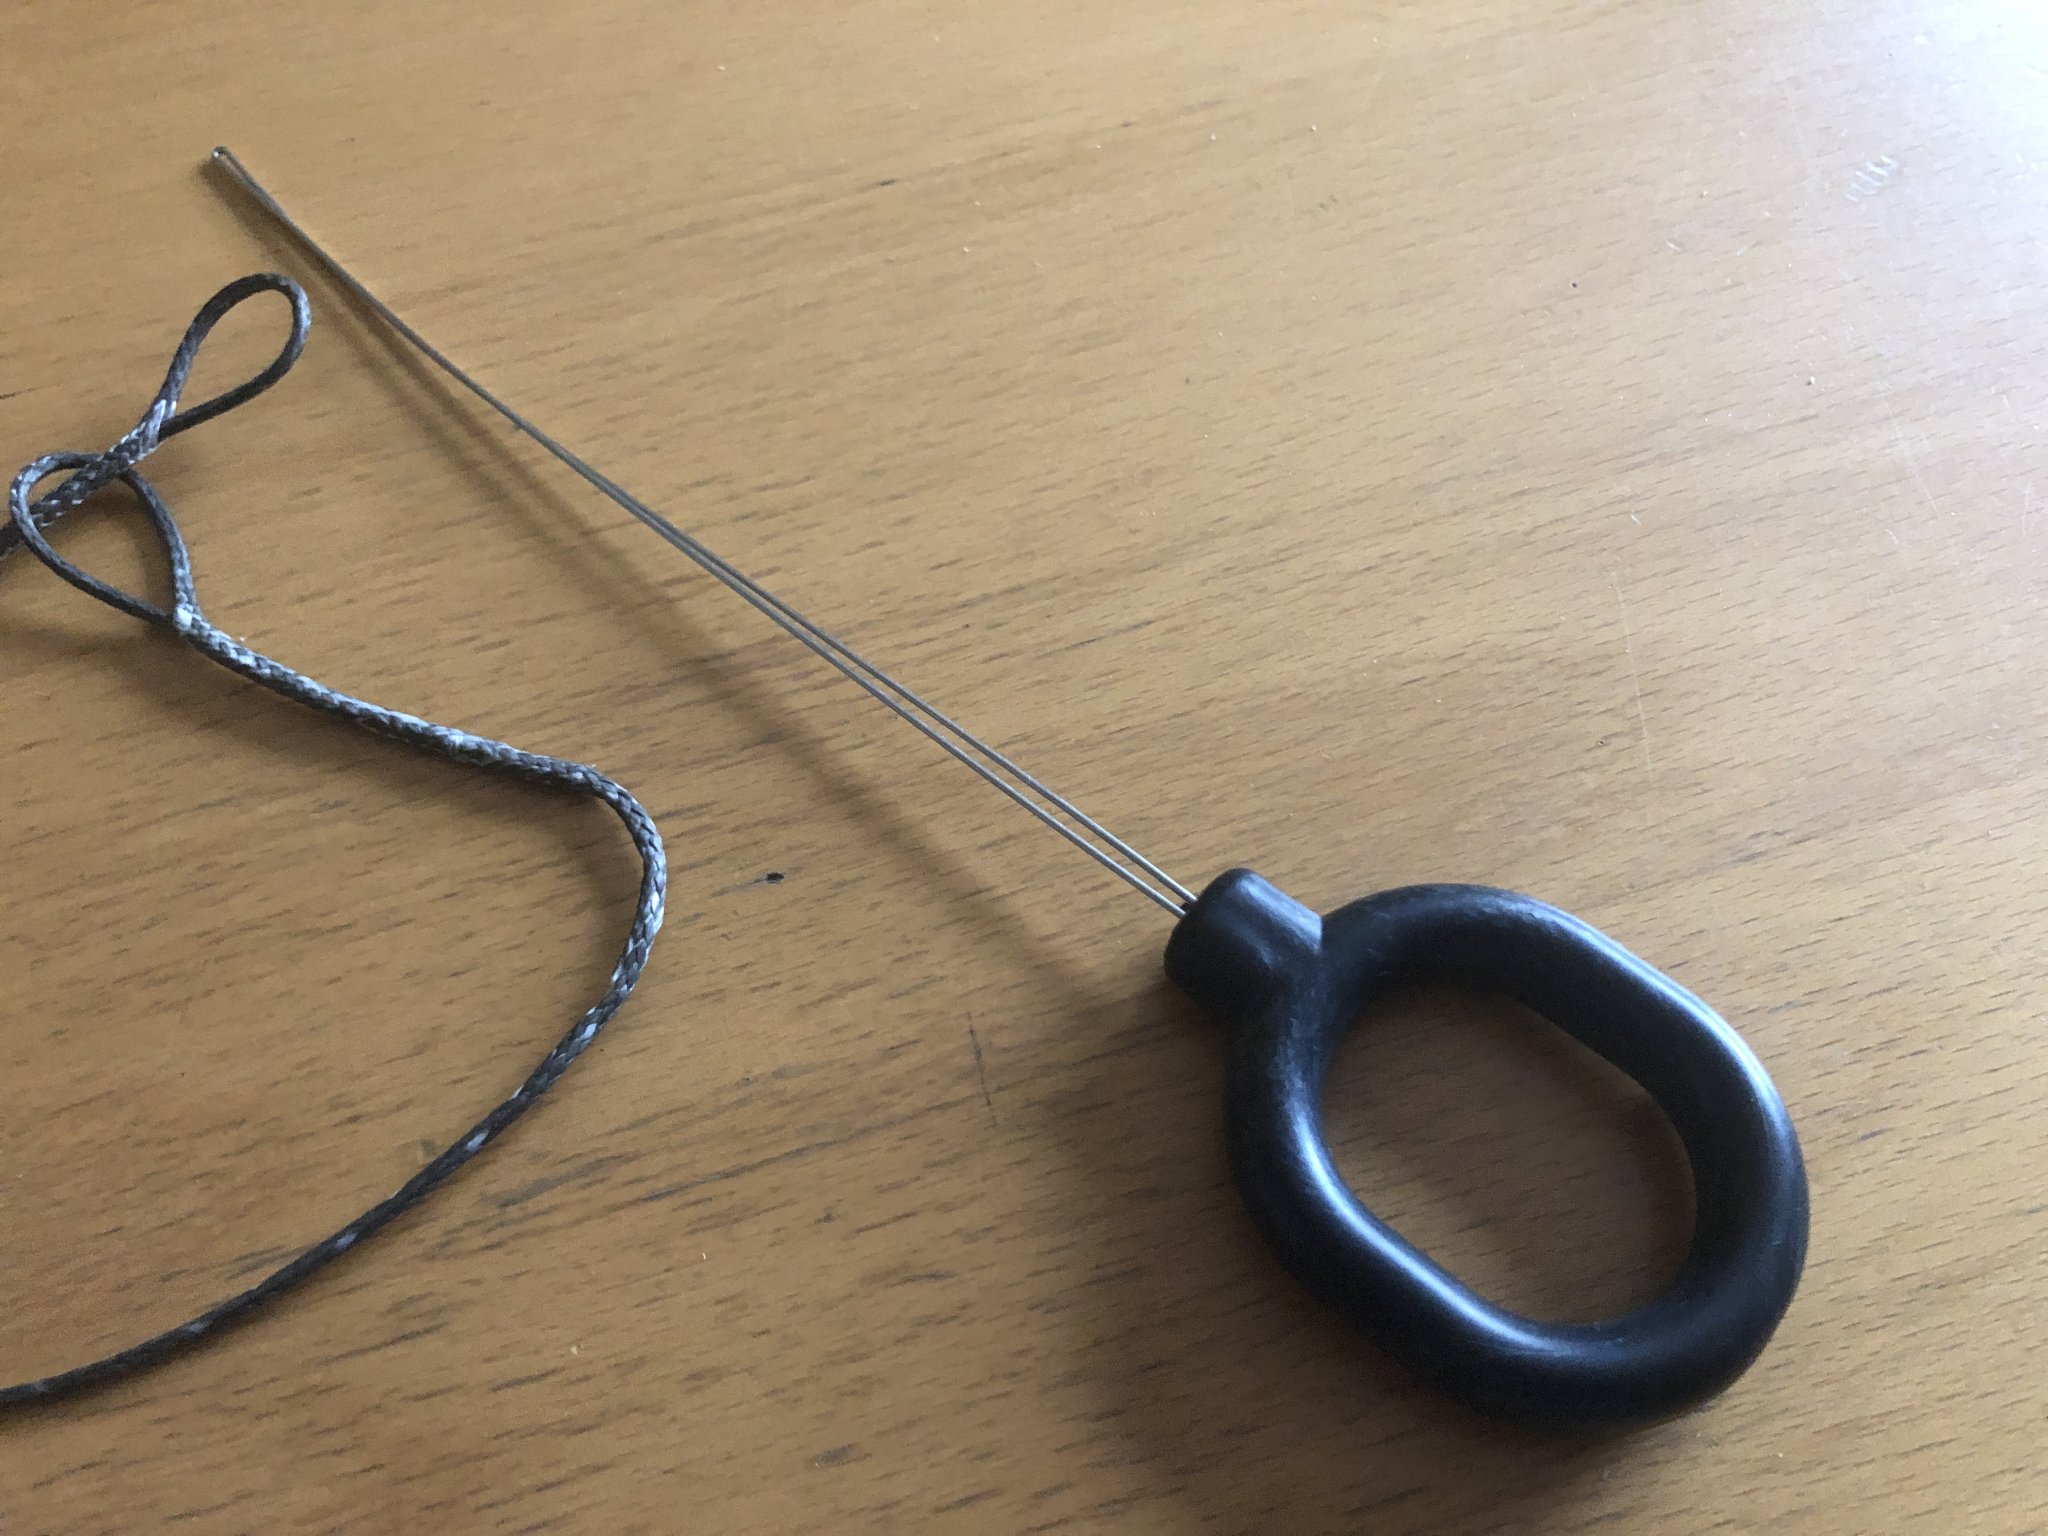
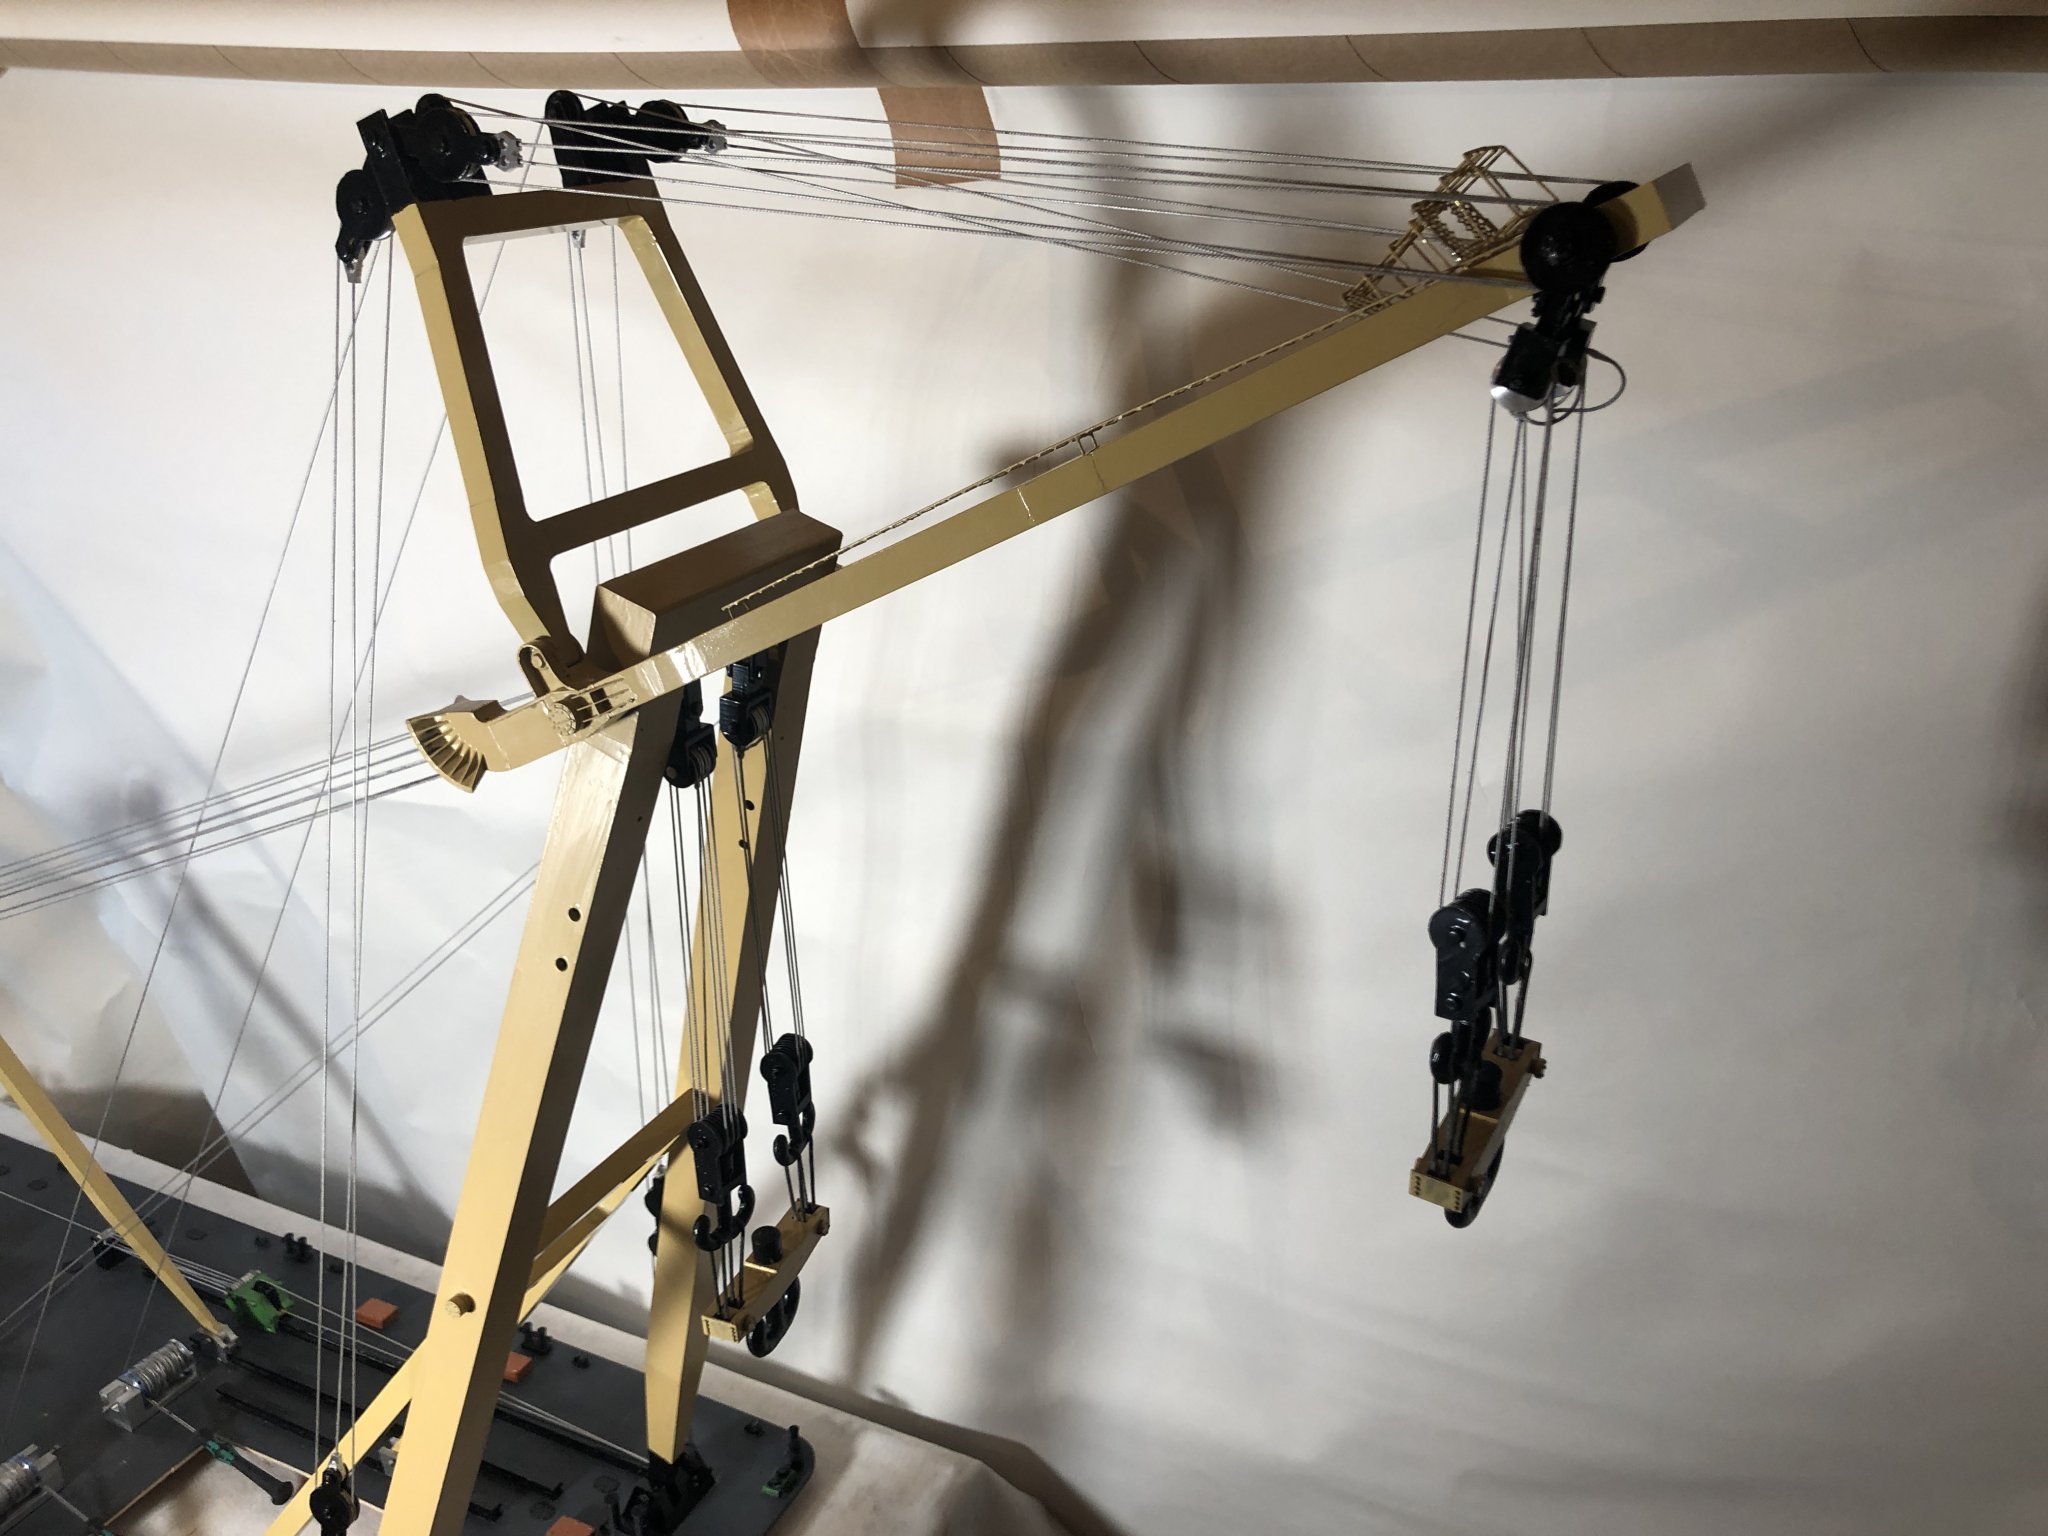
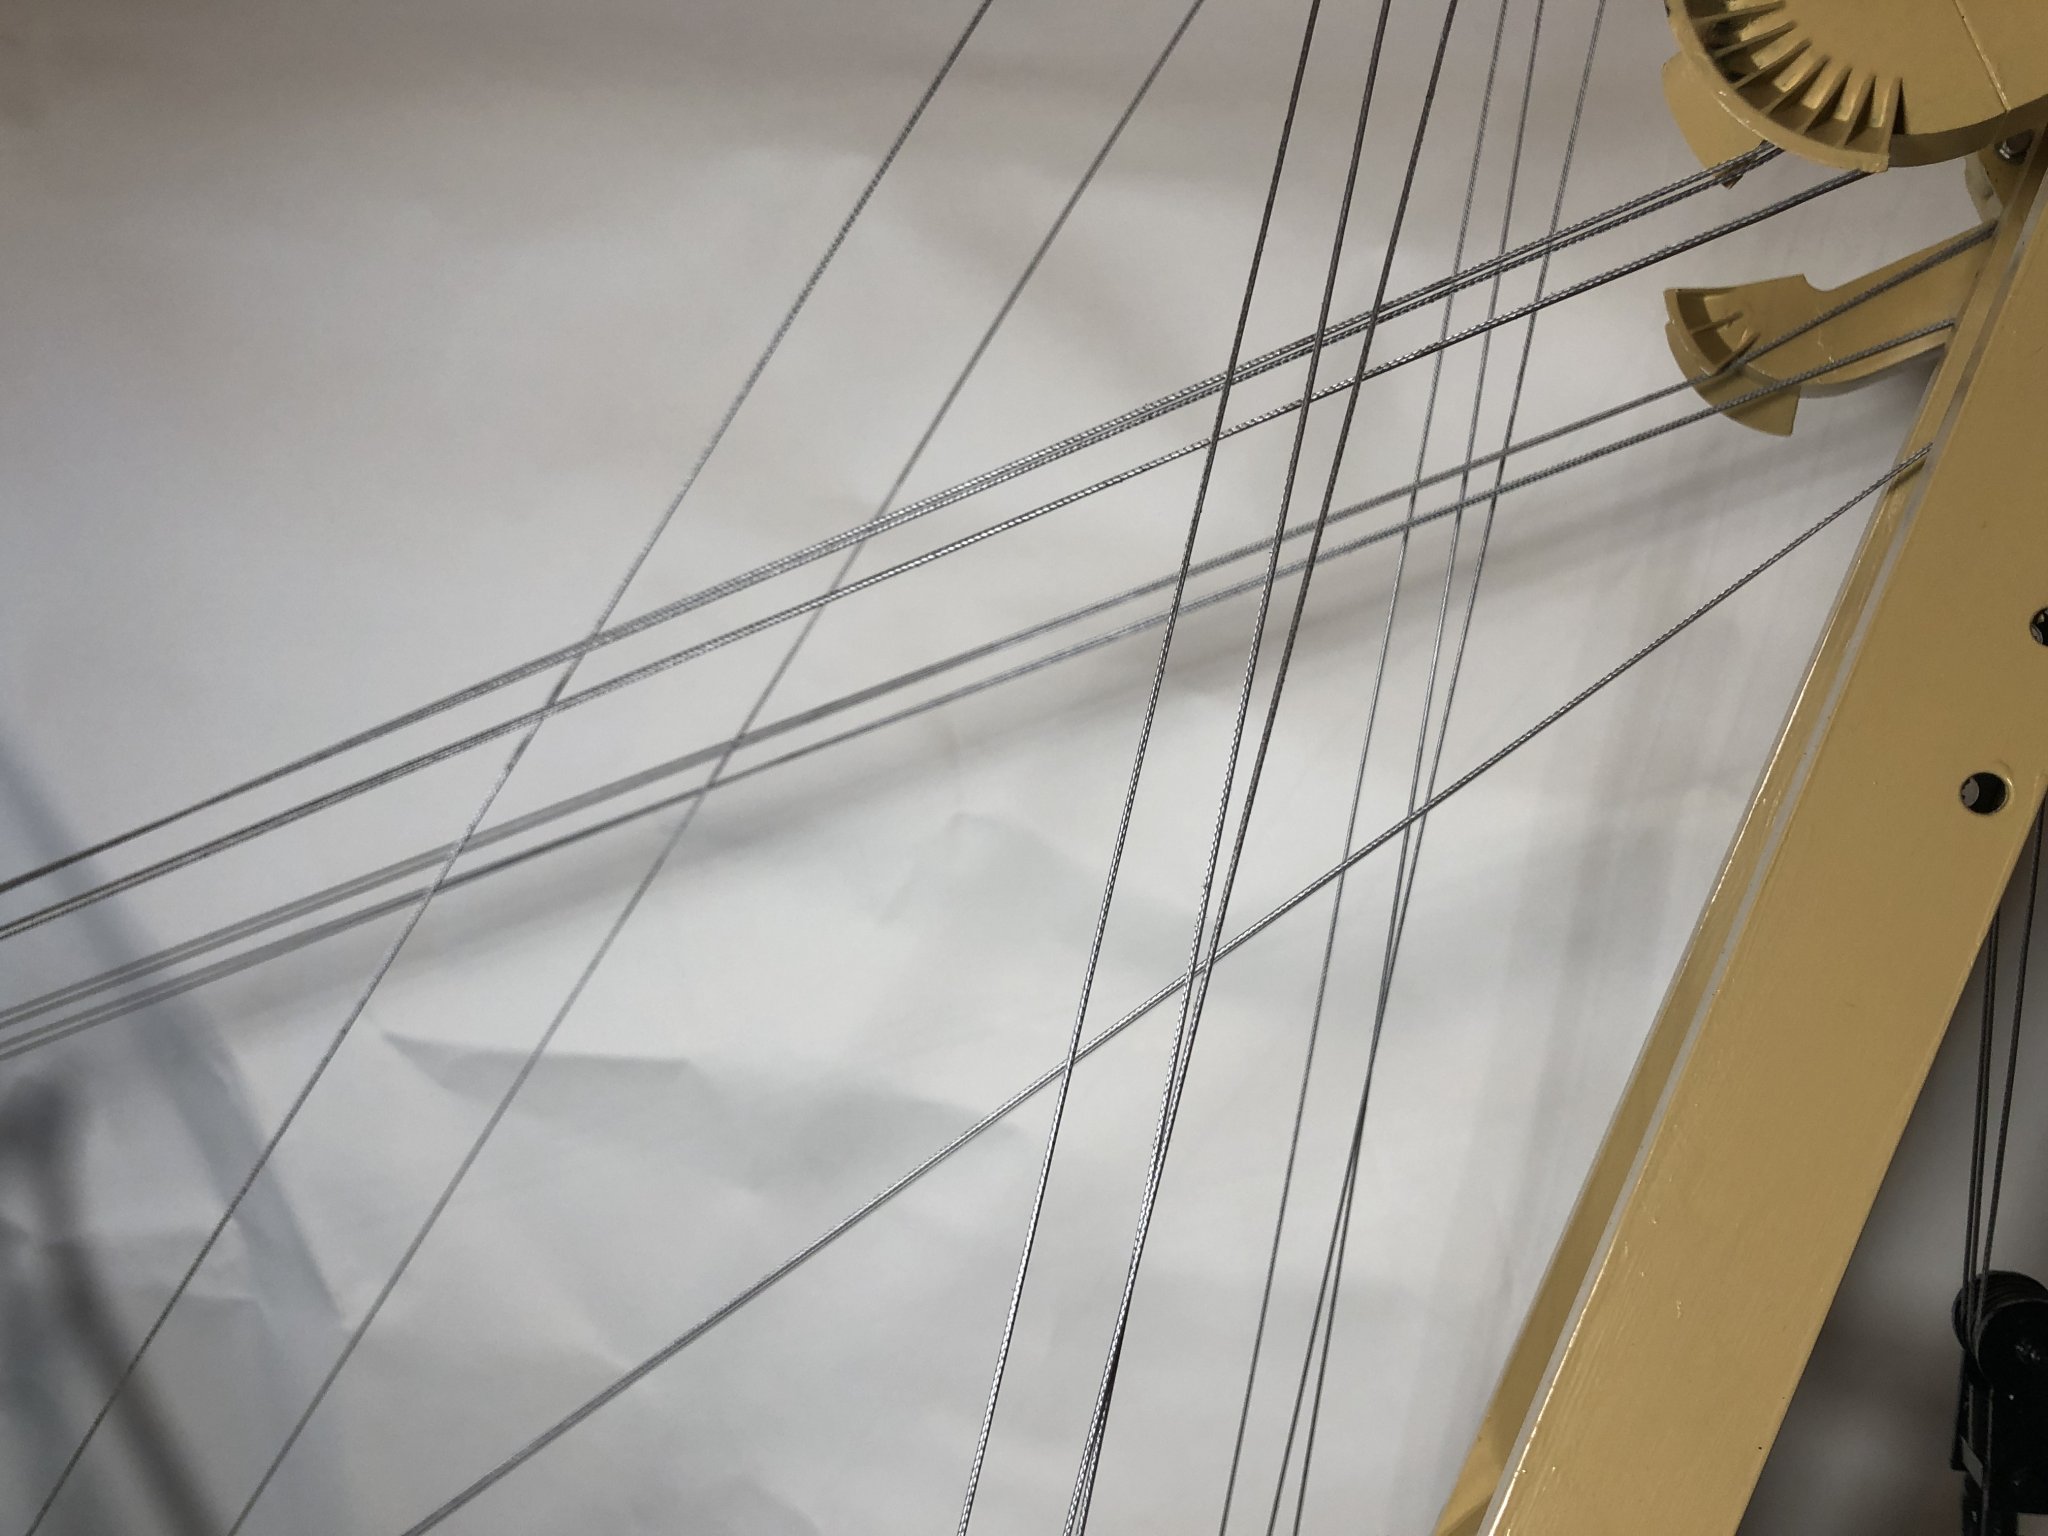
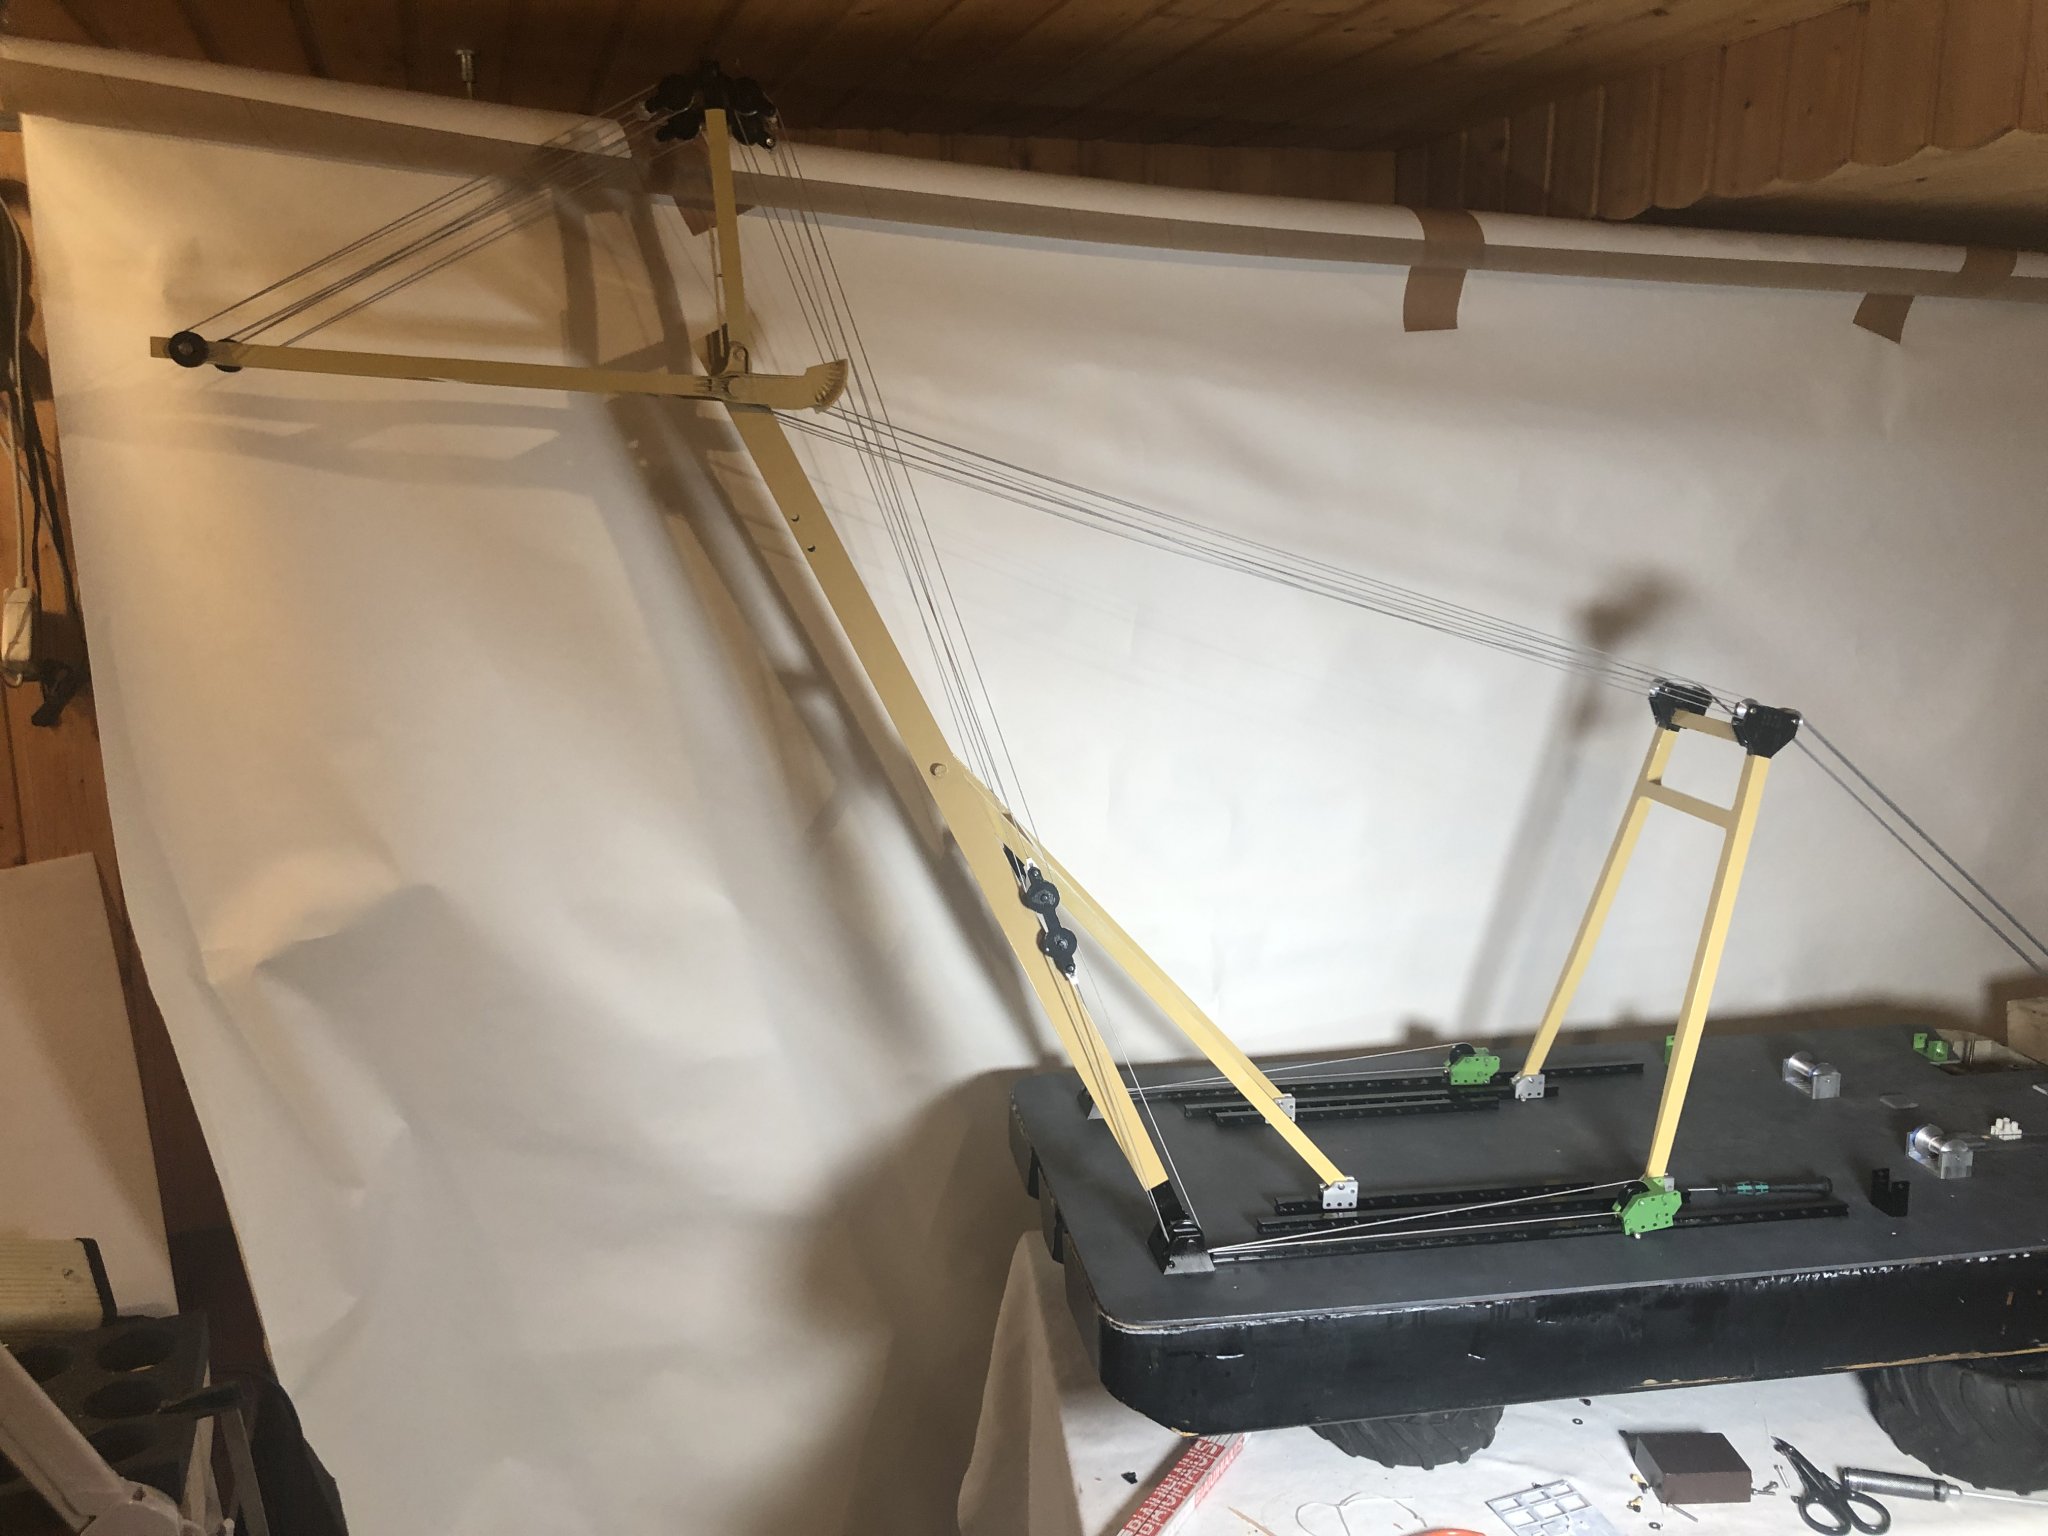
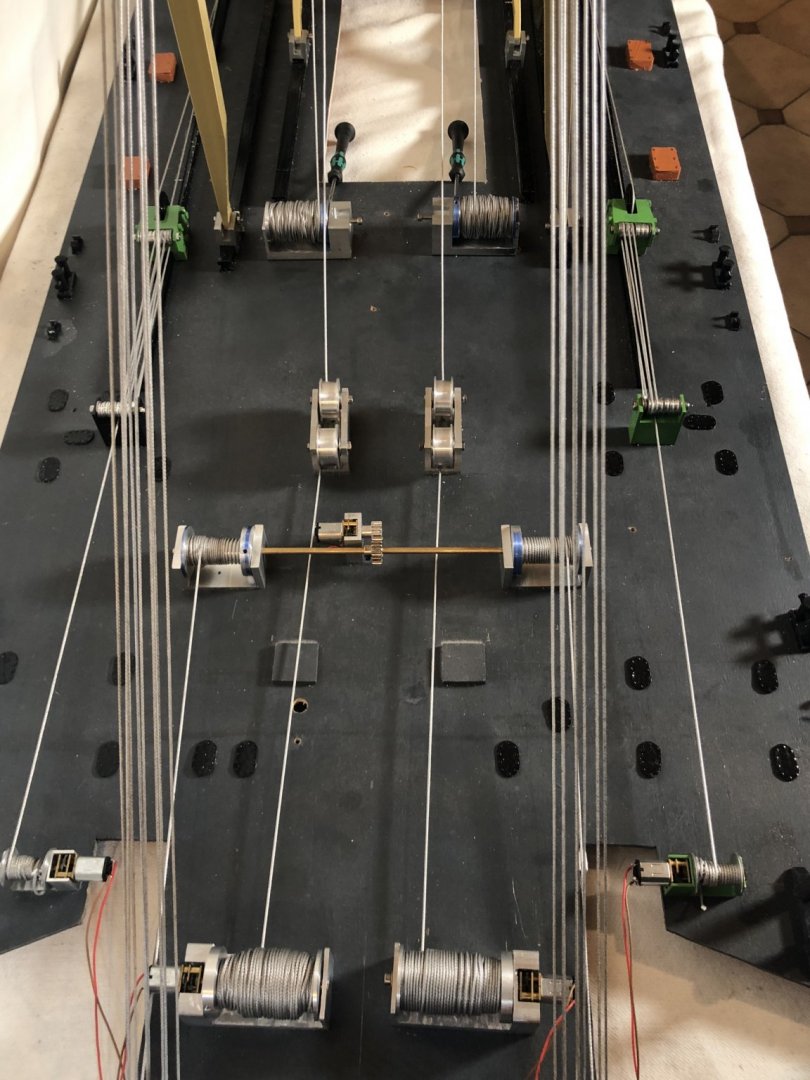
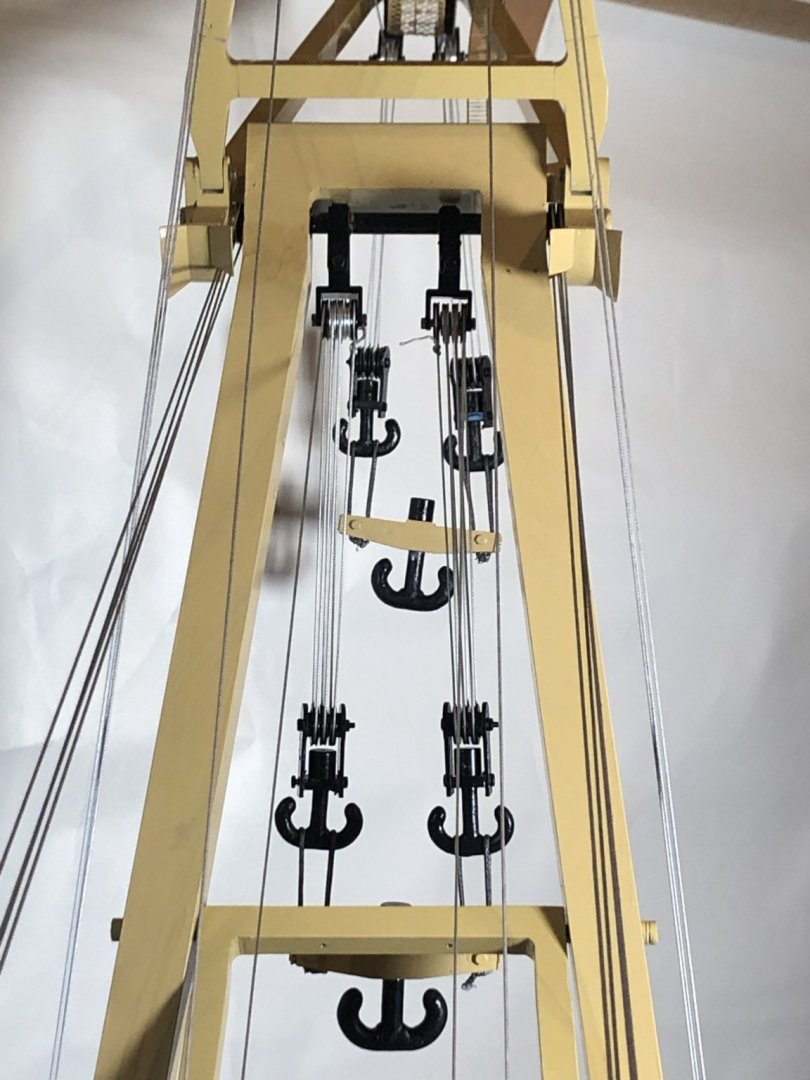
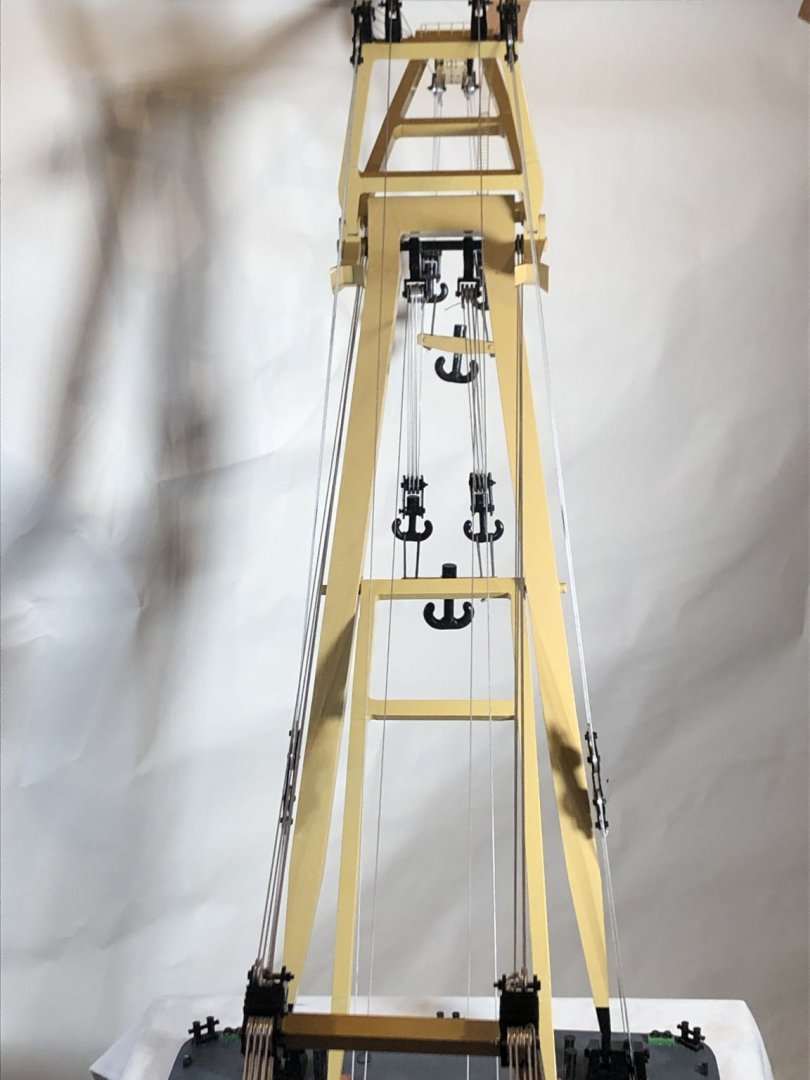
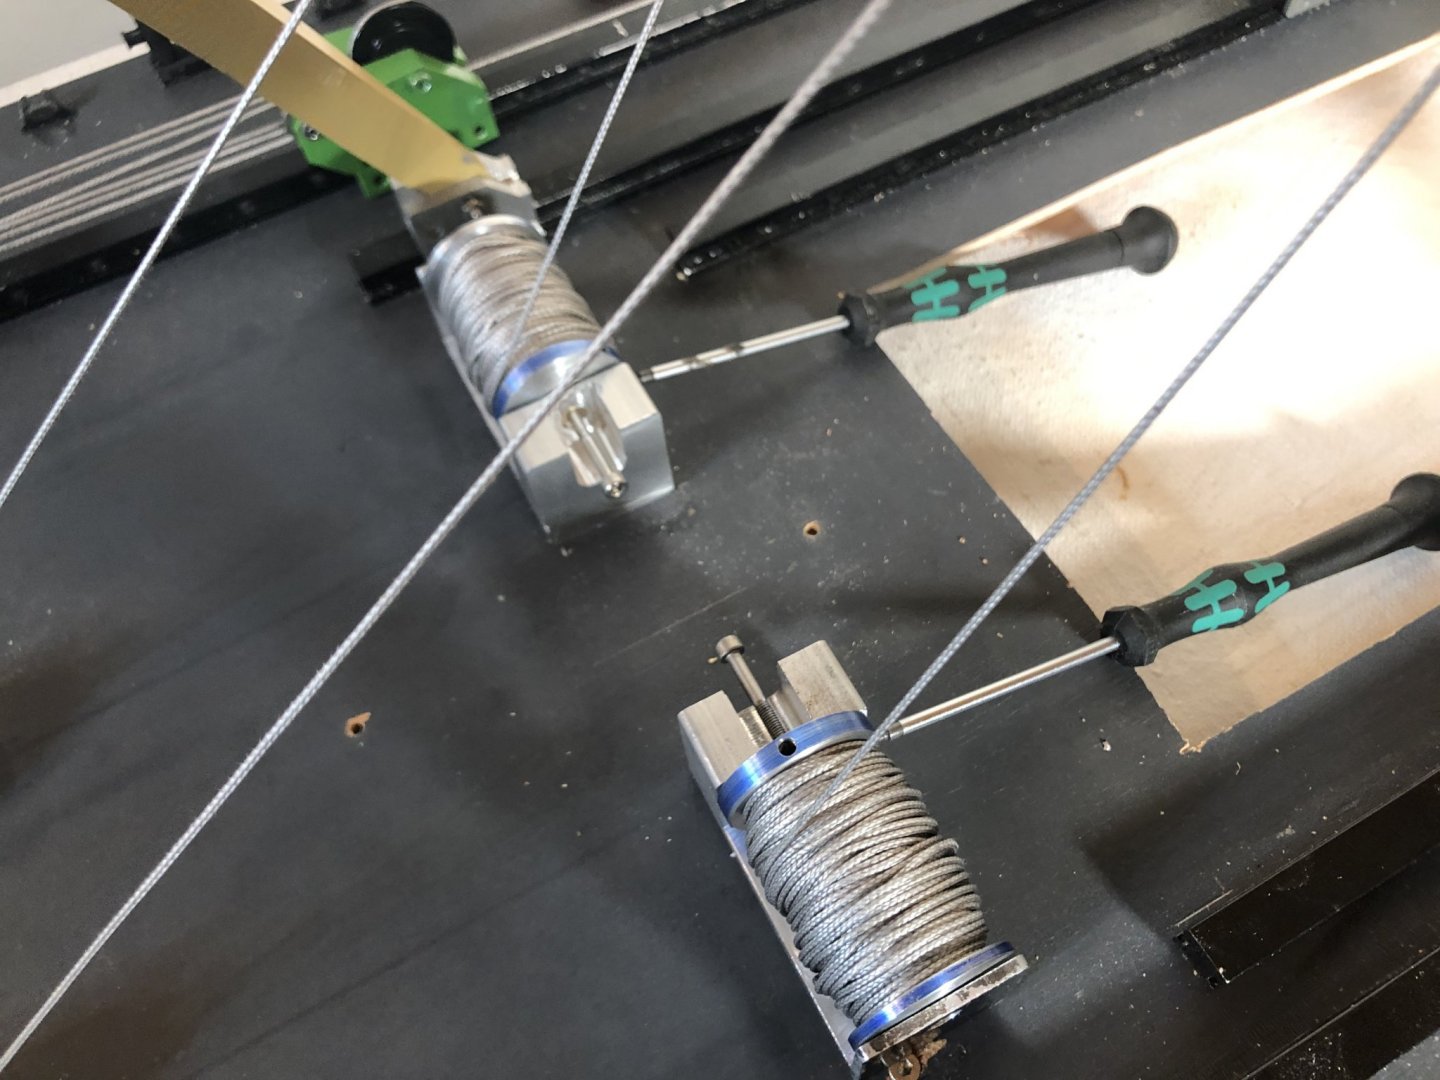
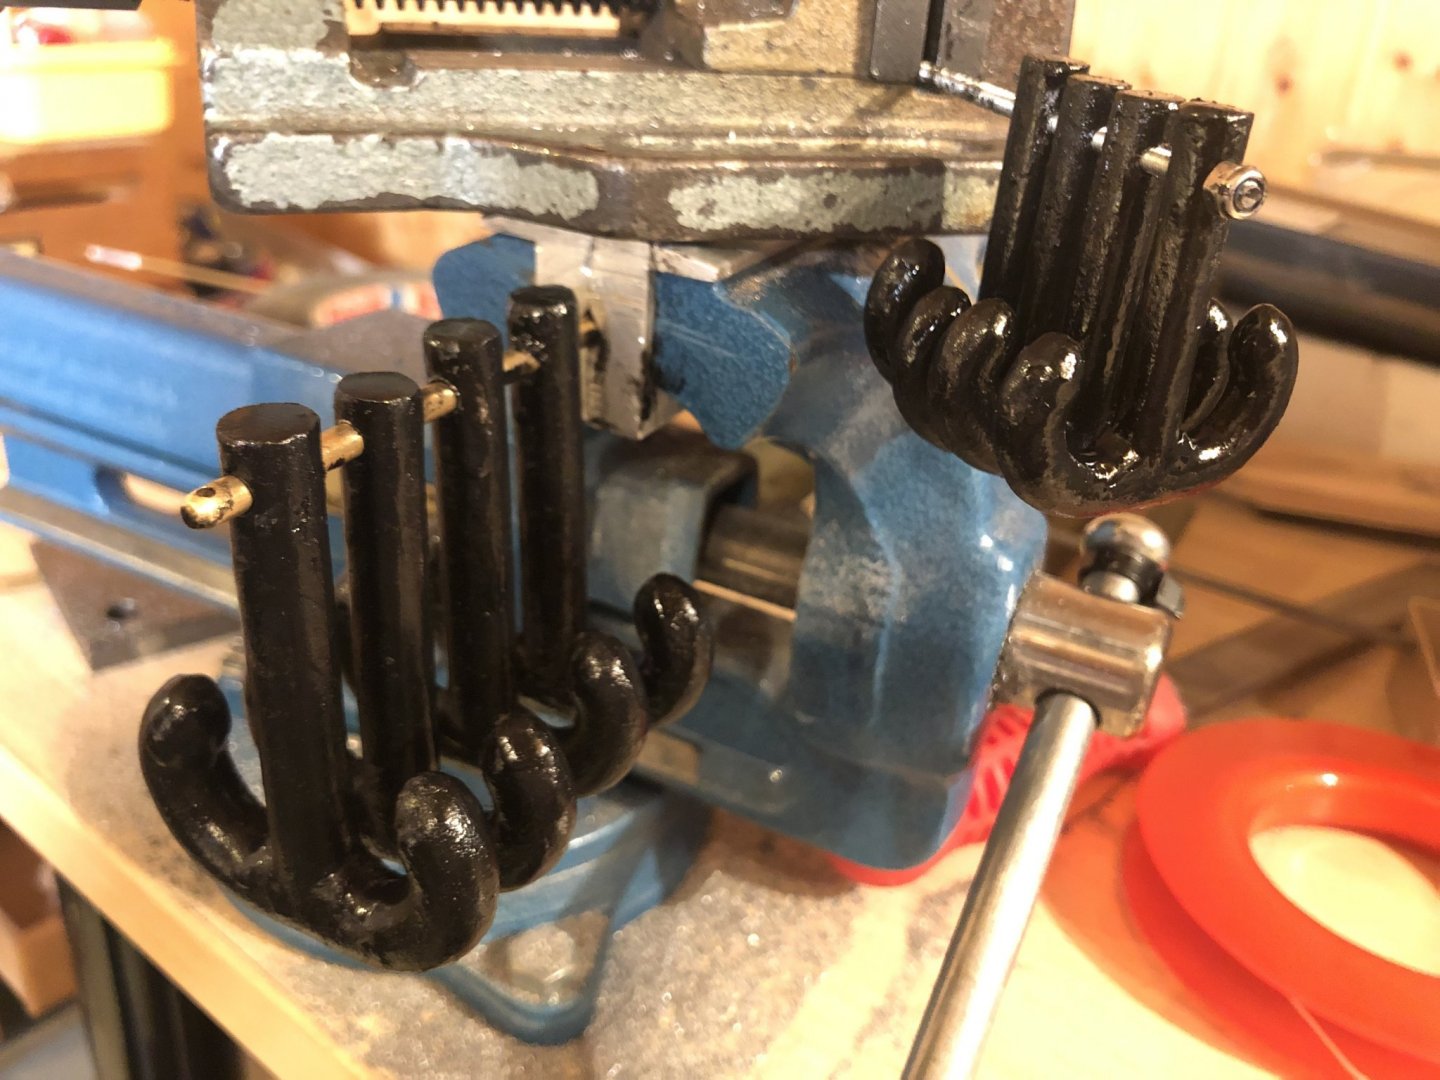
After only three months the mechanical Parts for the crane are finished. Eight winches ✅ Five booms ✅ Several hundreds of meters ropes ✅ Six self casted lead hooks ✅ About 130 pulleys ✅ Some Impressions The motors for the last winches are on their way, so i've blocked them in an unusually way.


-
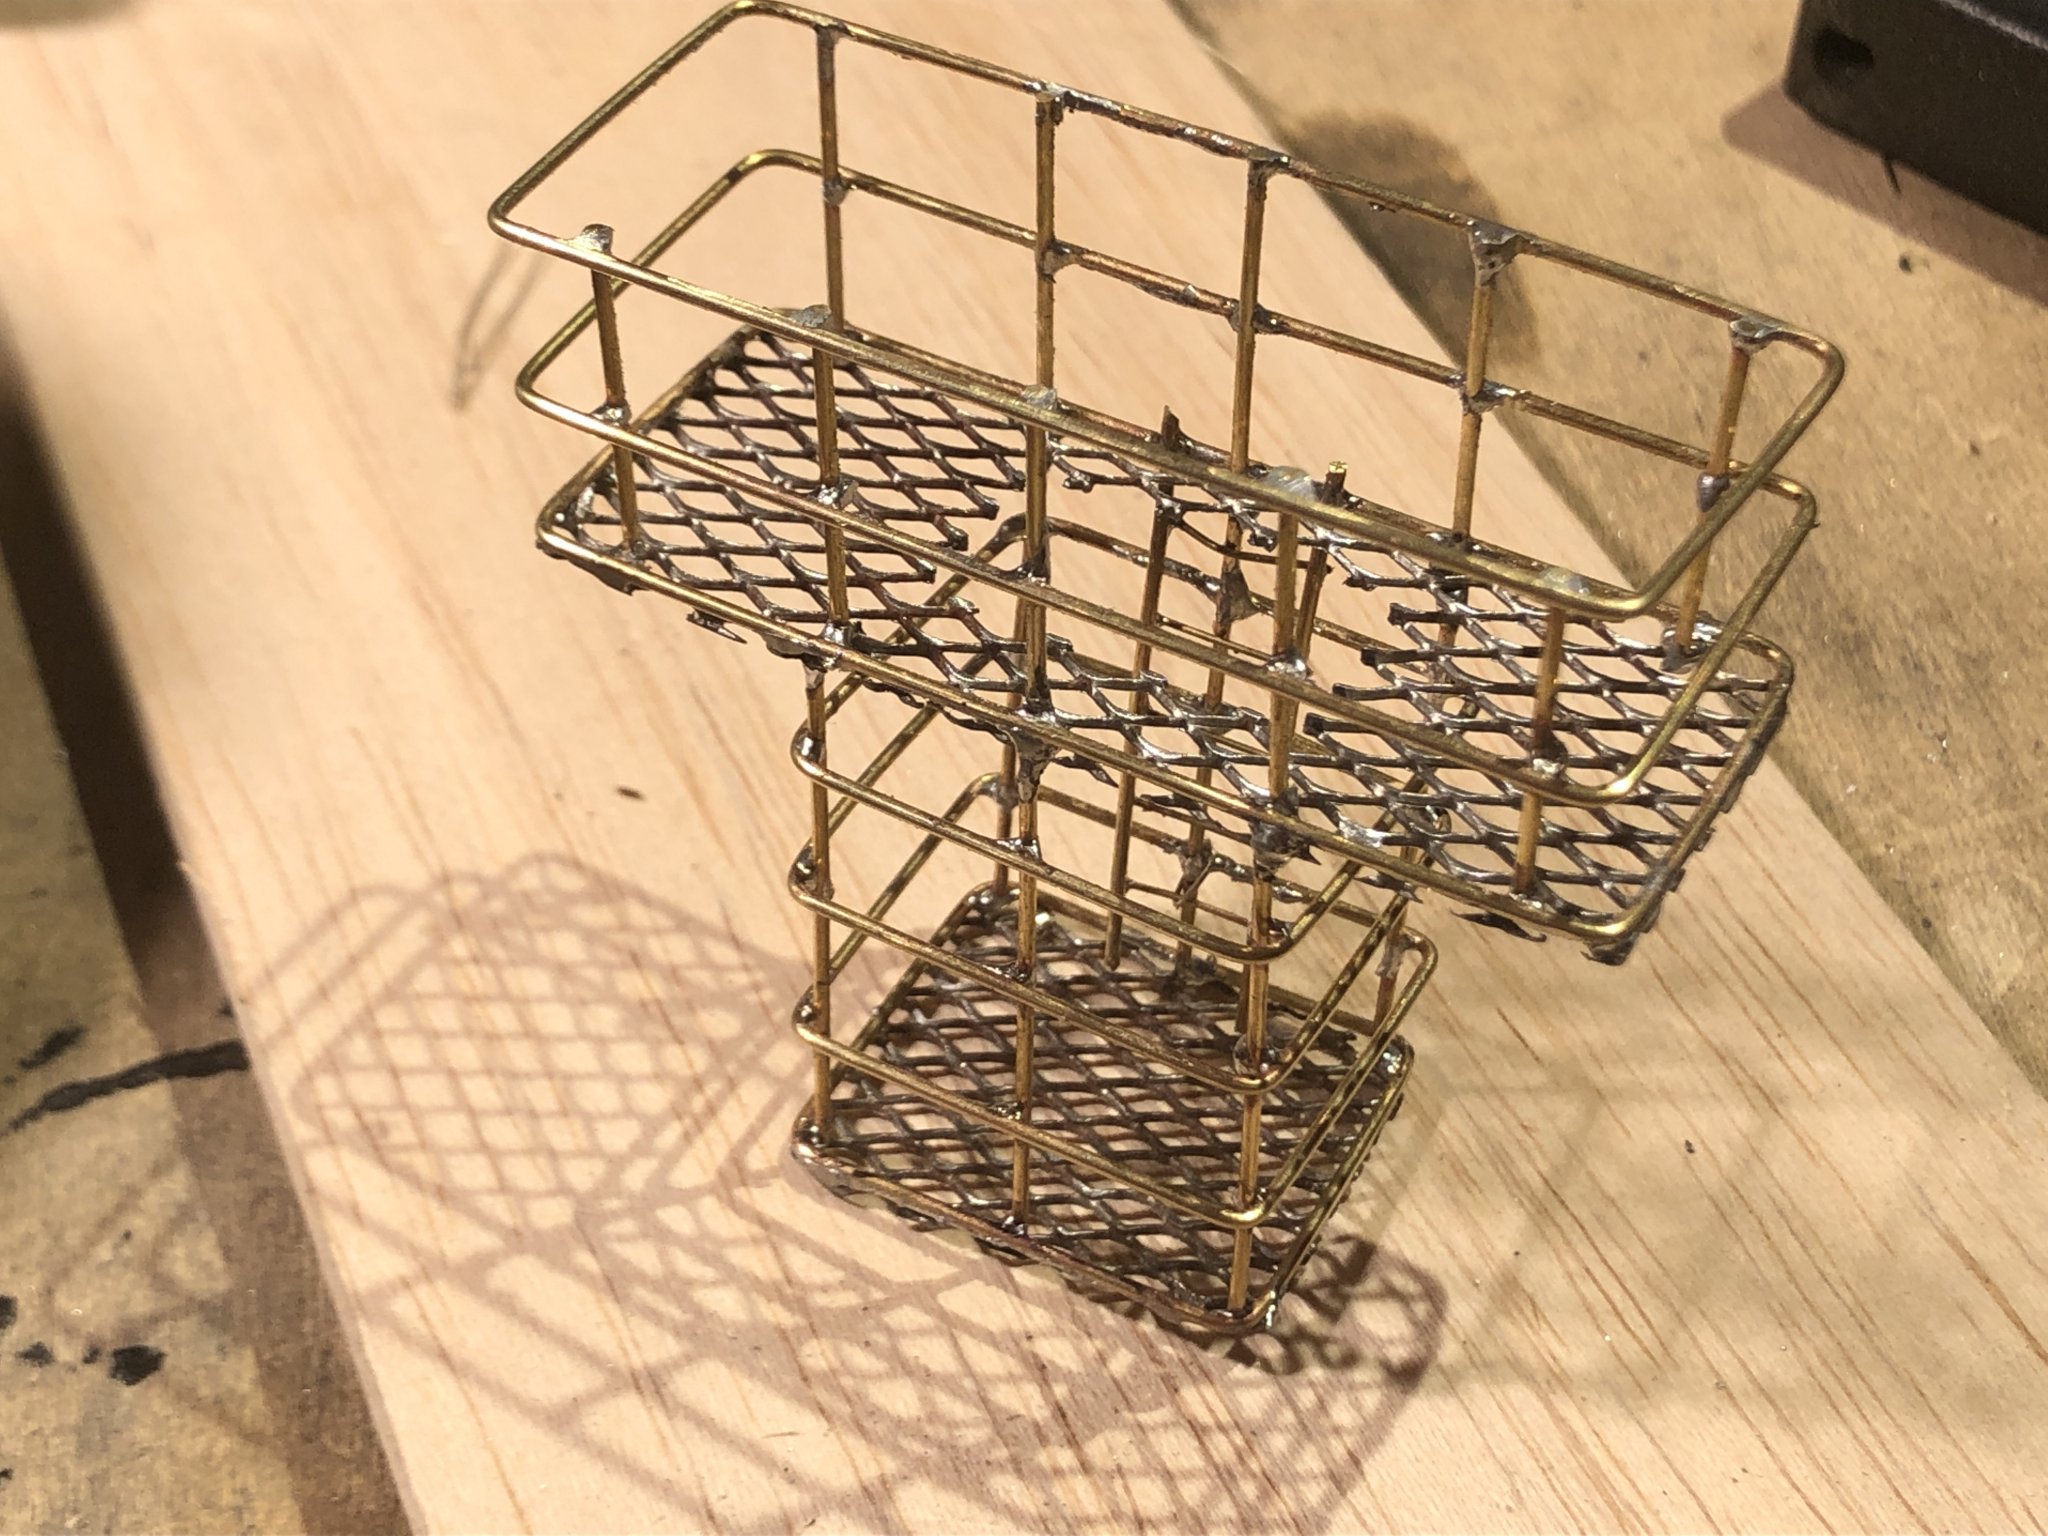
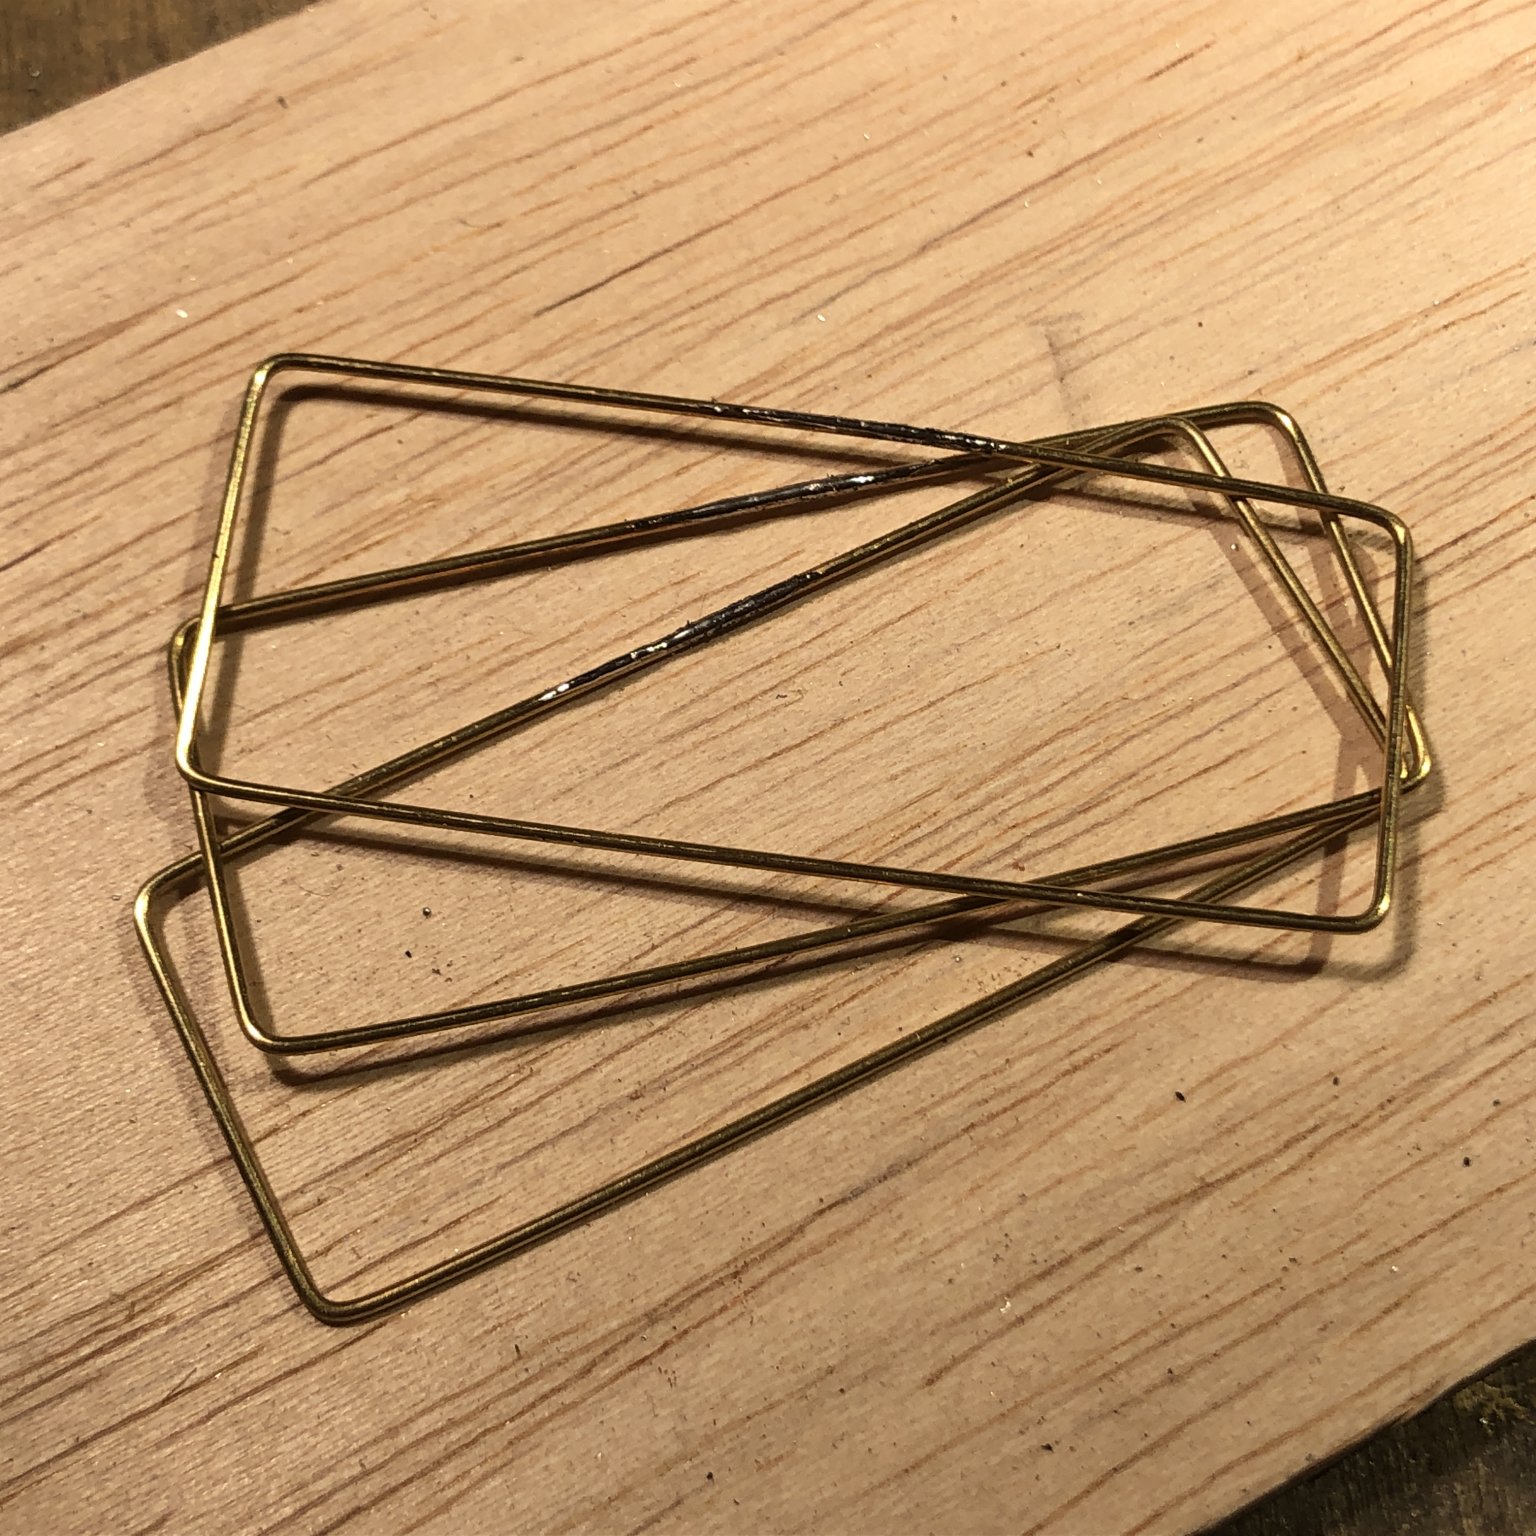
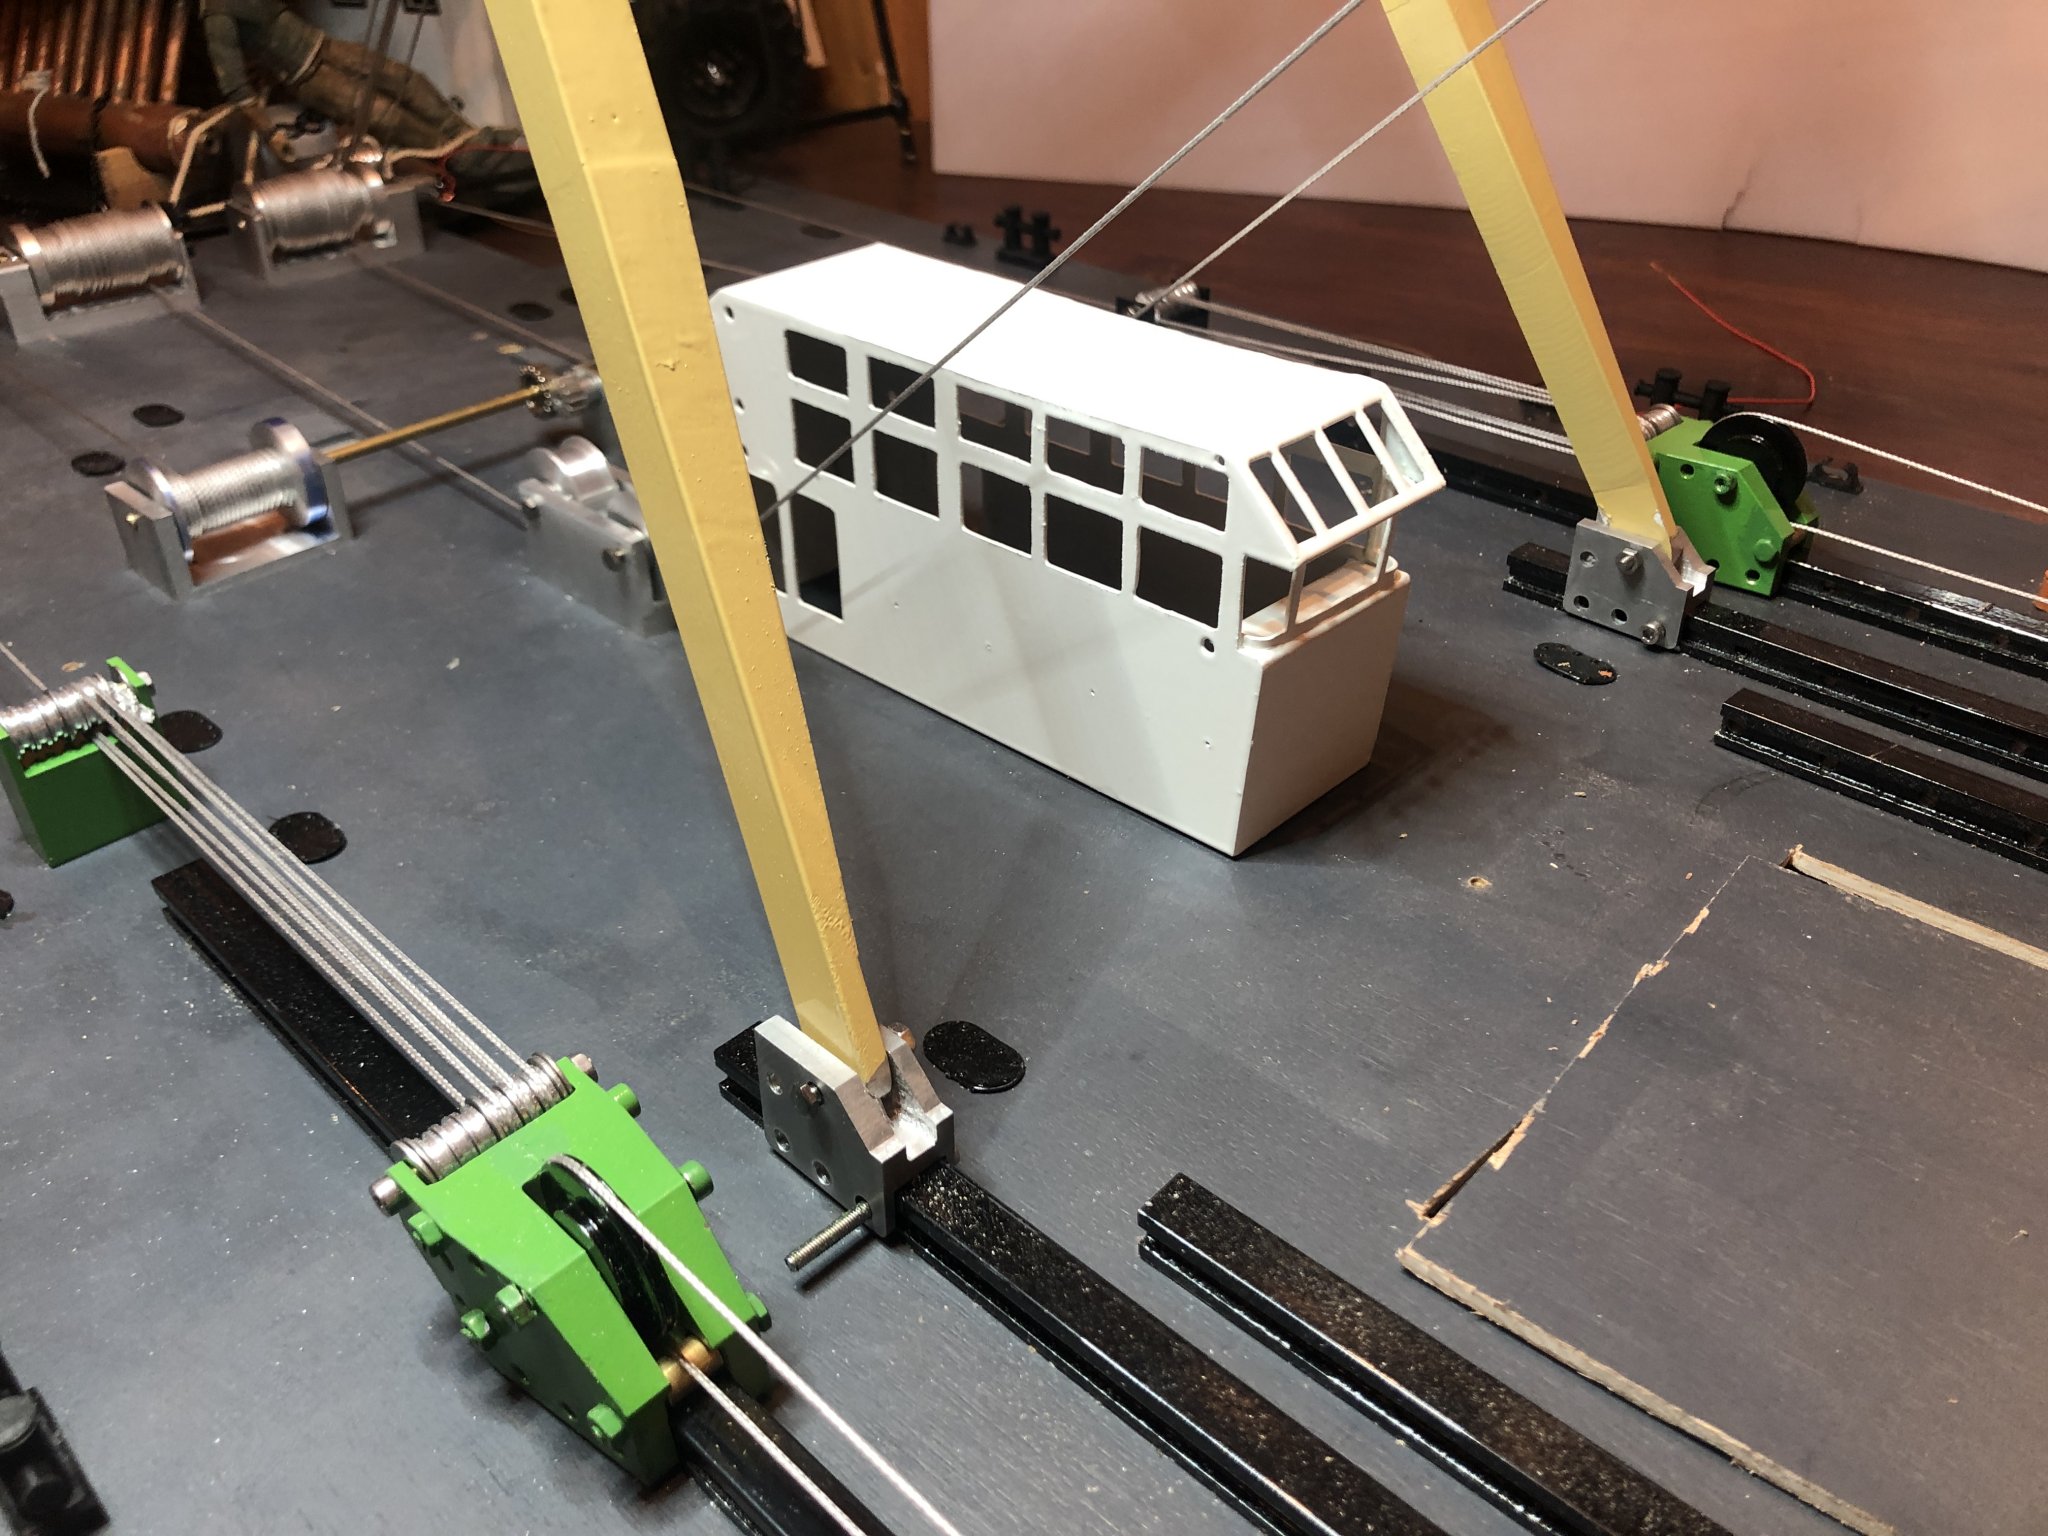
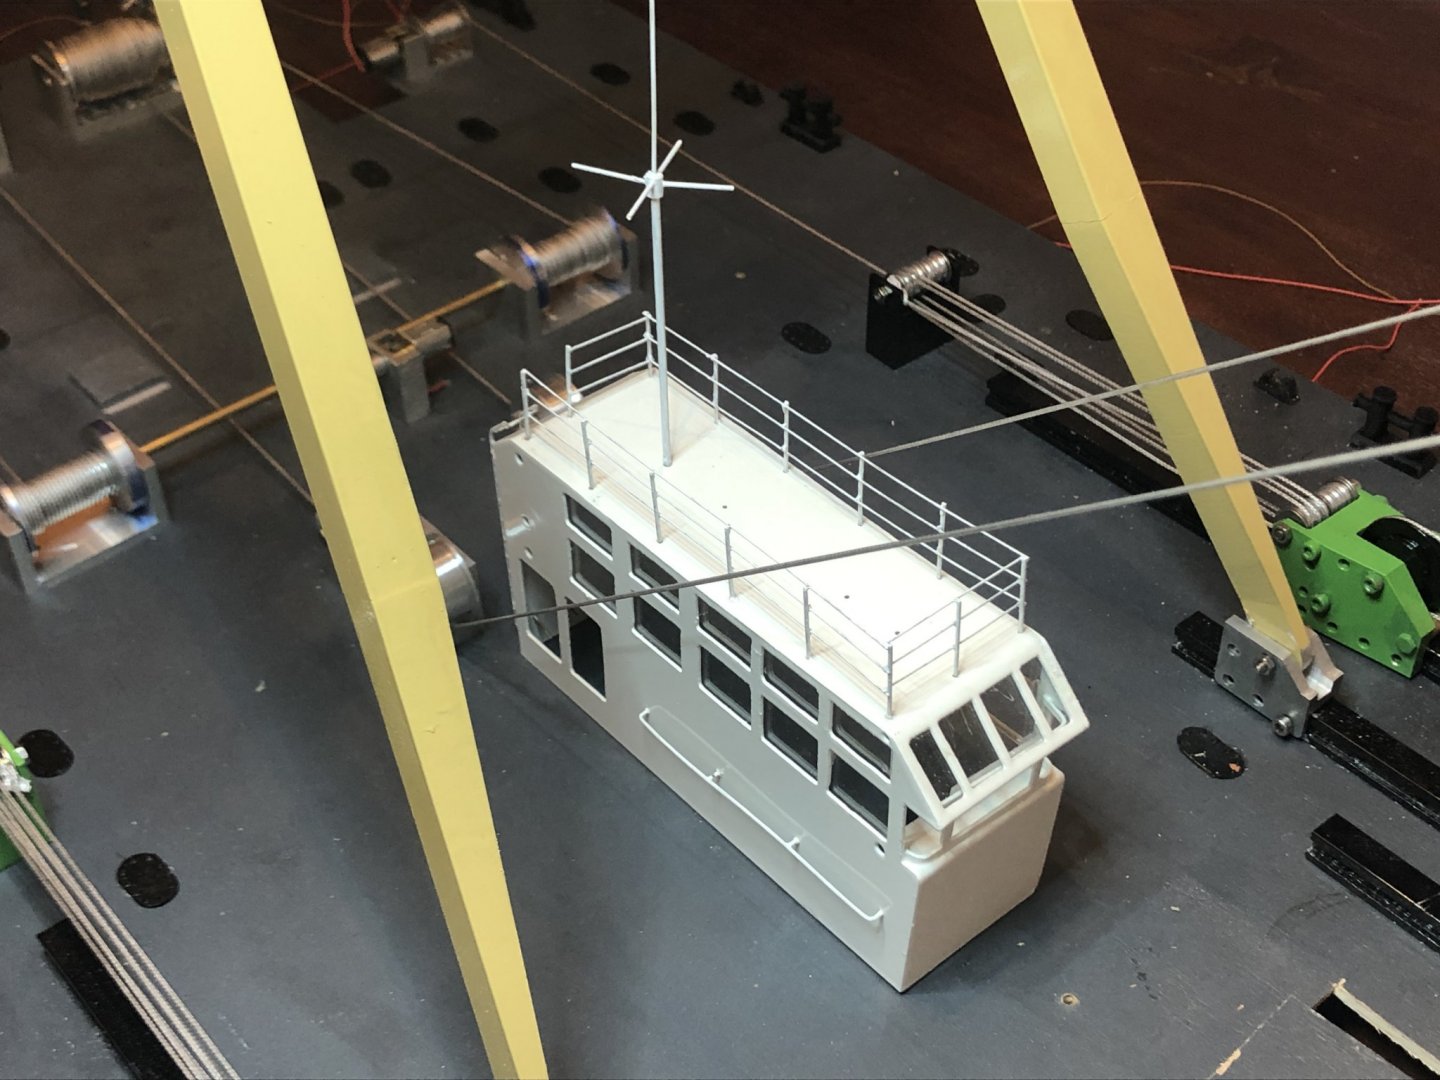
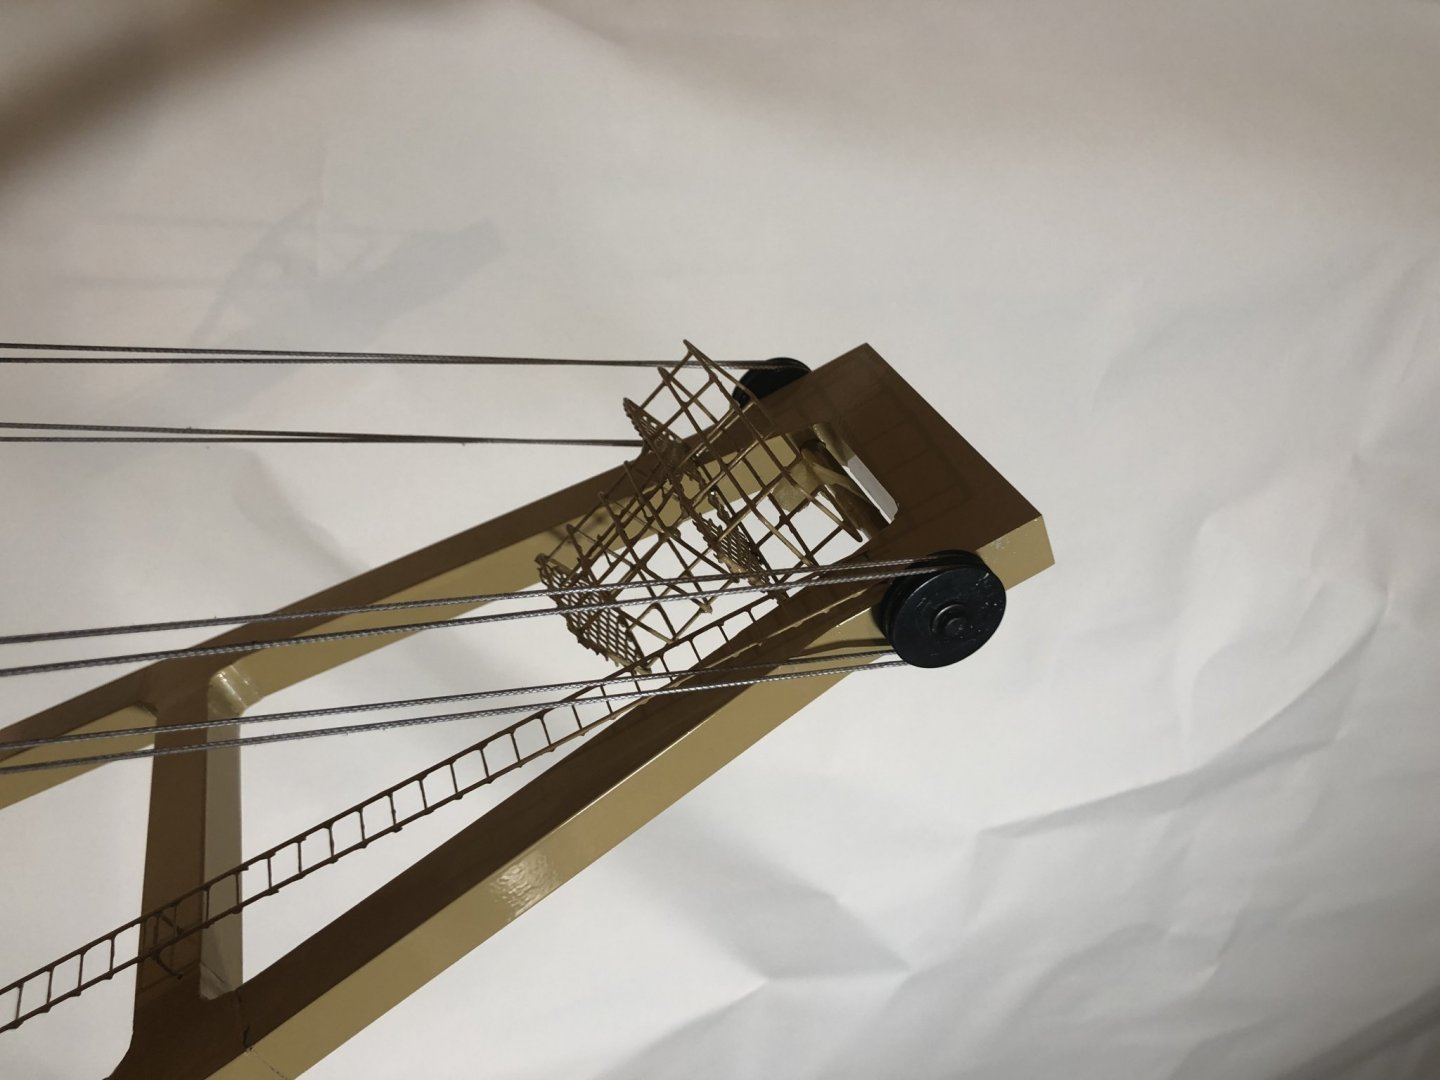
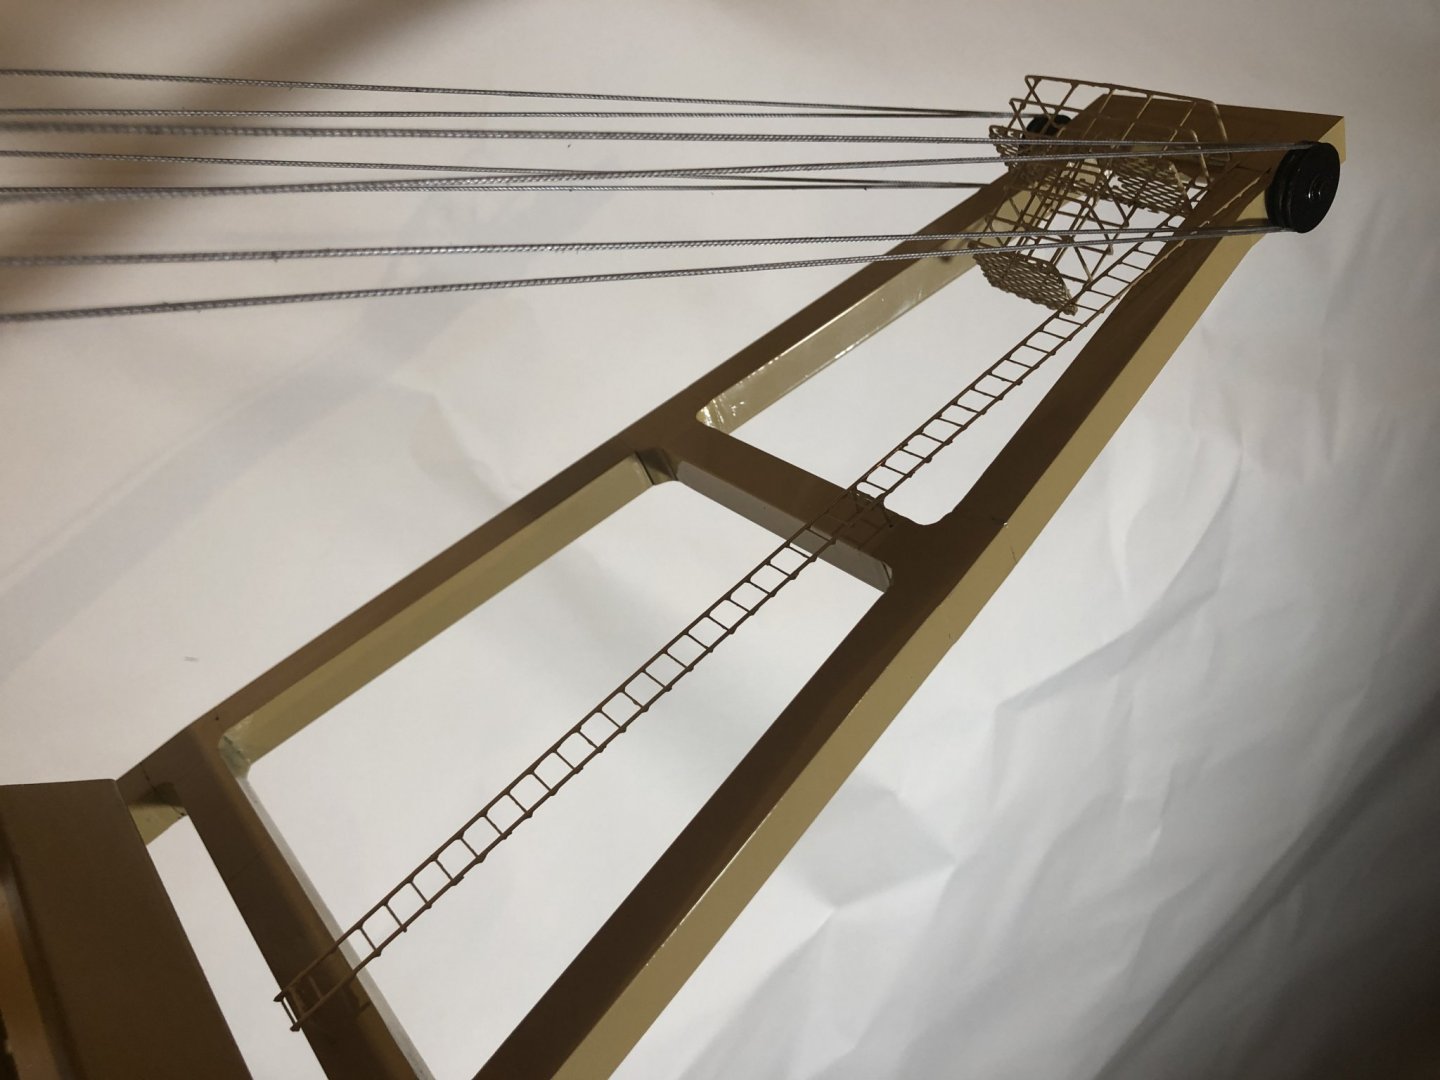
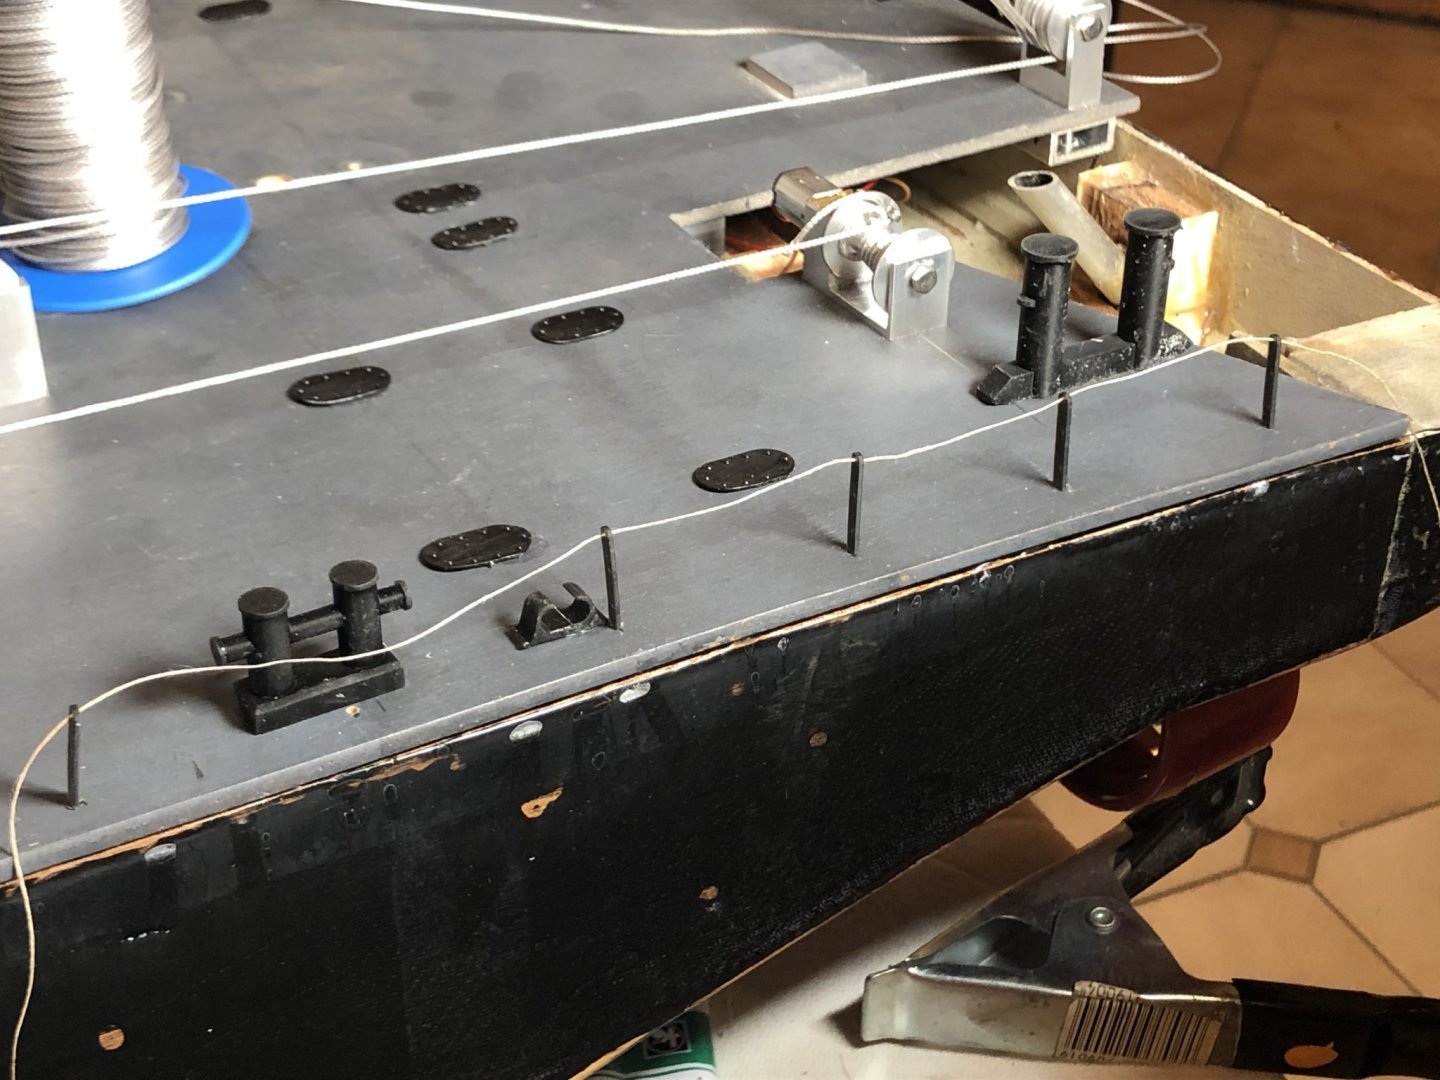
Deckshouse has get his railings. The printed ladders are too weak to use, so I made my own from brass. Together with the double basket bring they a bit life to the topboom.


-
A big motivation for the upcoming work on the crane: The first Lift was succesful 💪 A little clip of the action can you see HERE
-
Thanks again. 👍 Looking great, easy to make and not so much work to install. A little setup-test

-
raven62 reacted to a post in a topic:
Enak by raven62 - Scale 1:50 - RADIO - floating crane - Finished
-
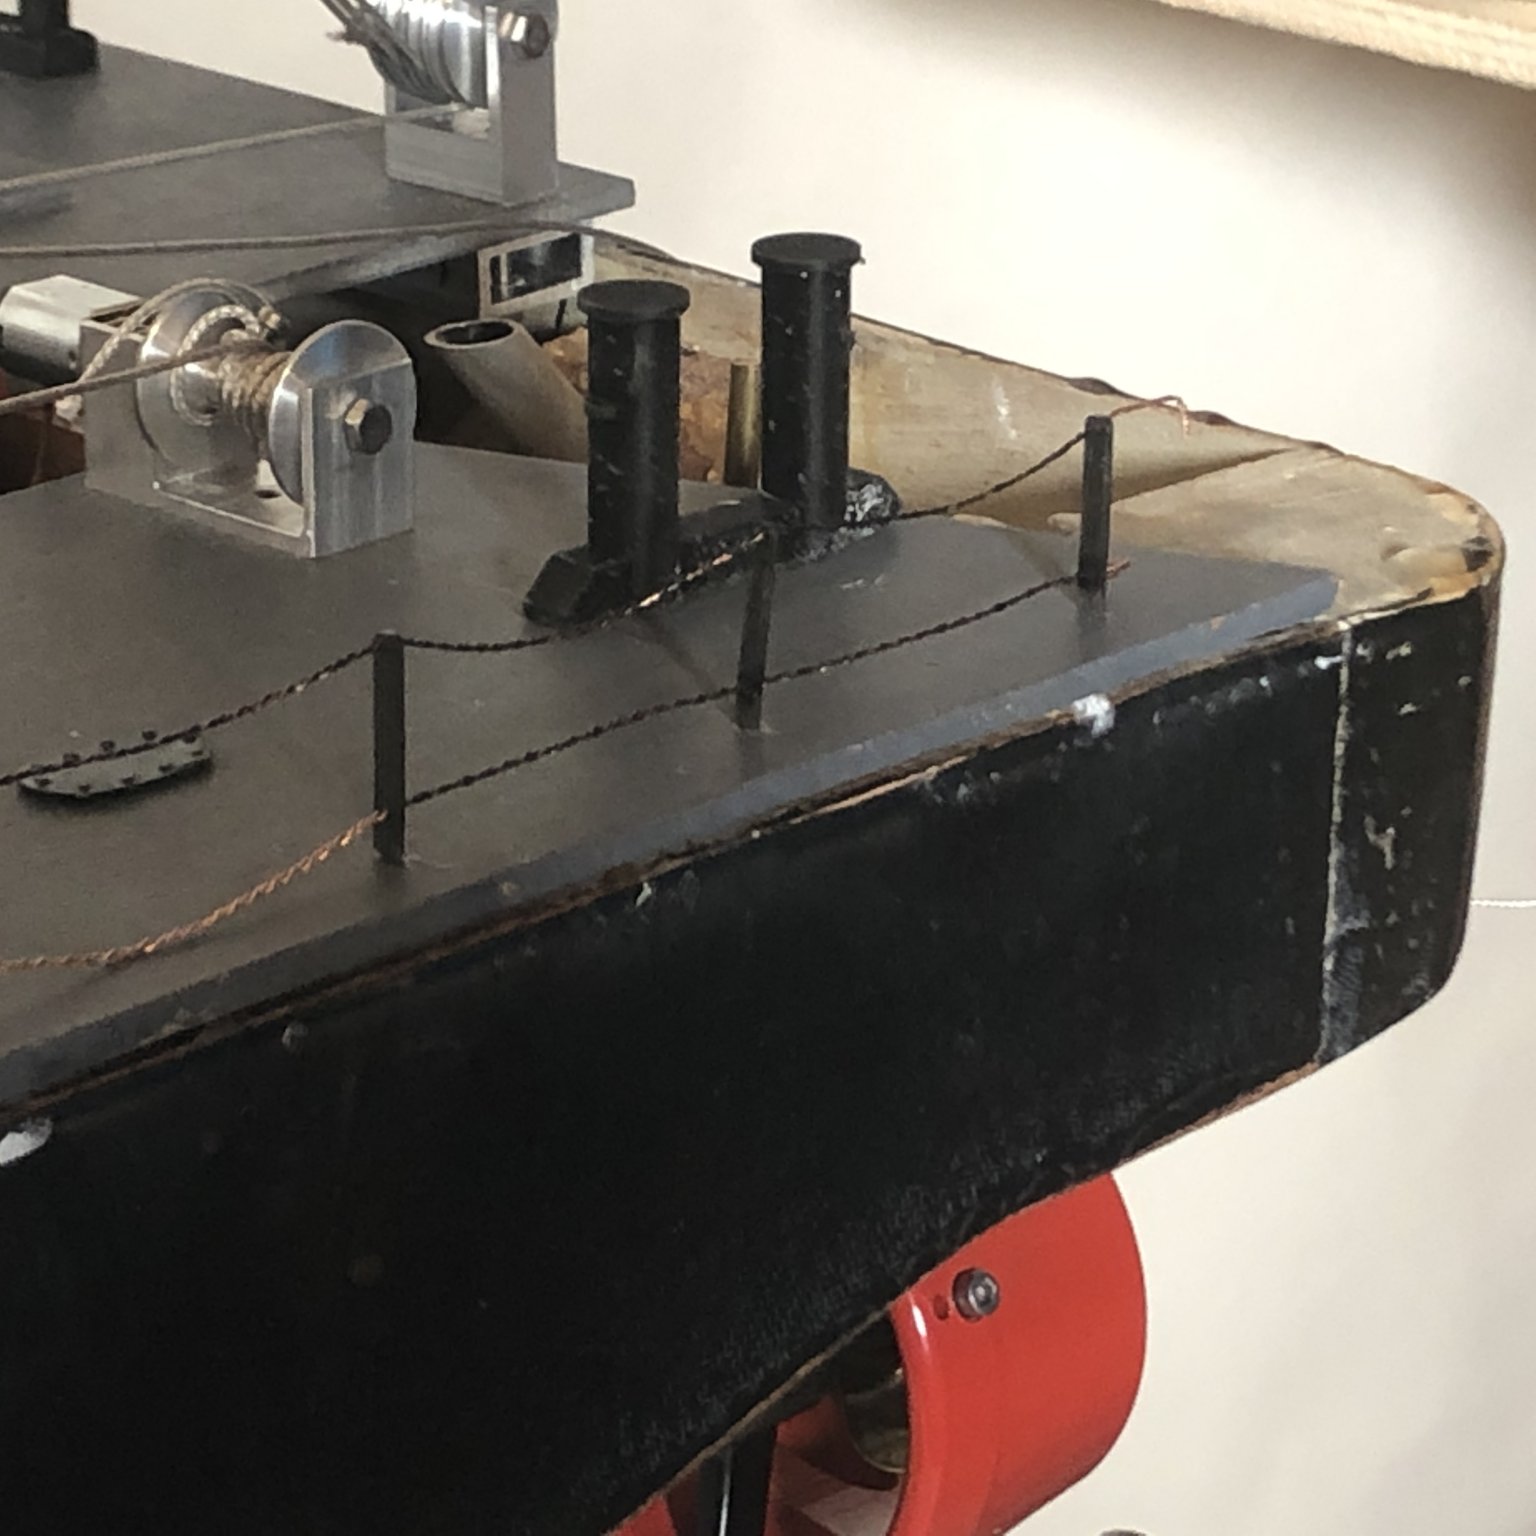
Hi there, my Original uses railing pillars with chains between them. In 1/50 the holes will be .5 - .7 mm Do you know any providers for so tiny chains? My approximate solution will be thread. But it's hard to fix it in a chain-like curve hanging between the pillars. Any suggestions?
-
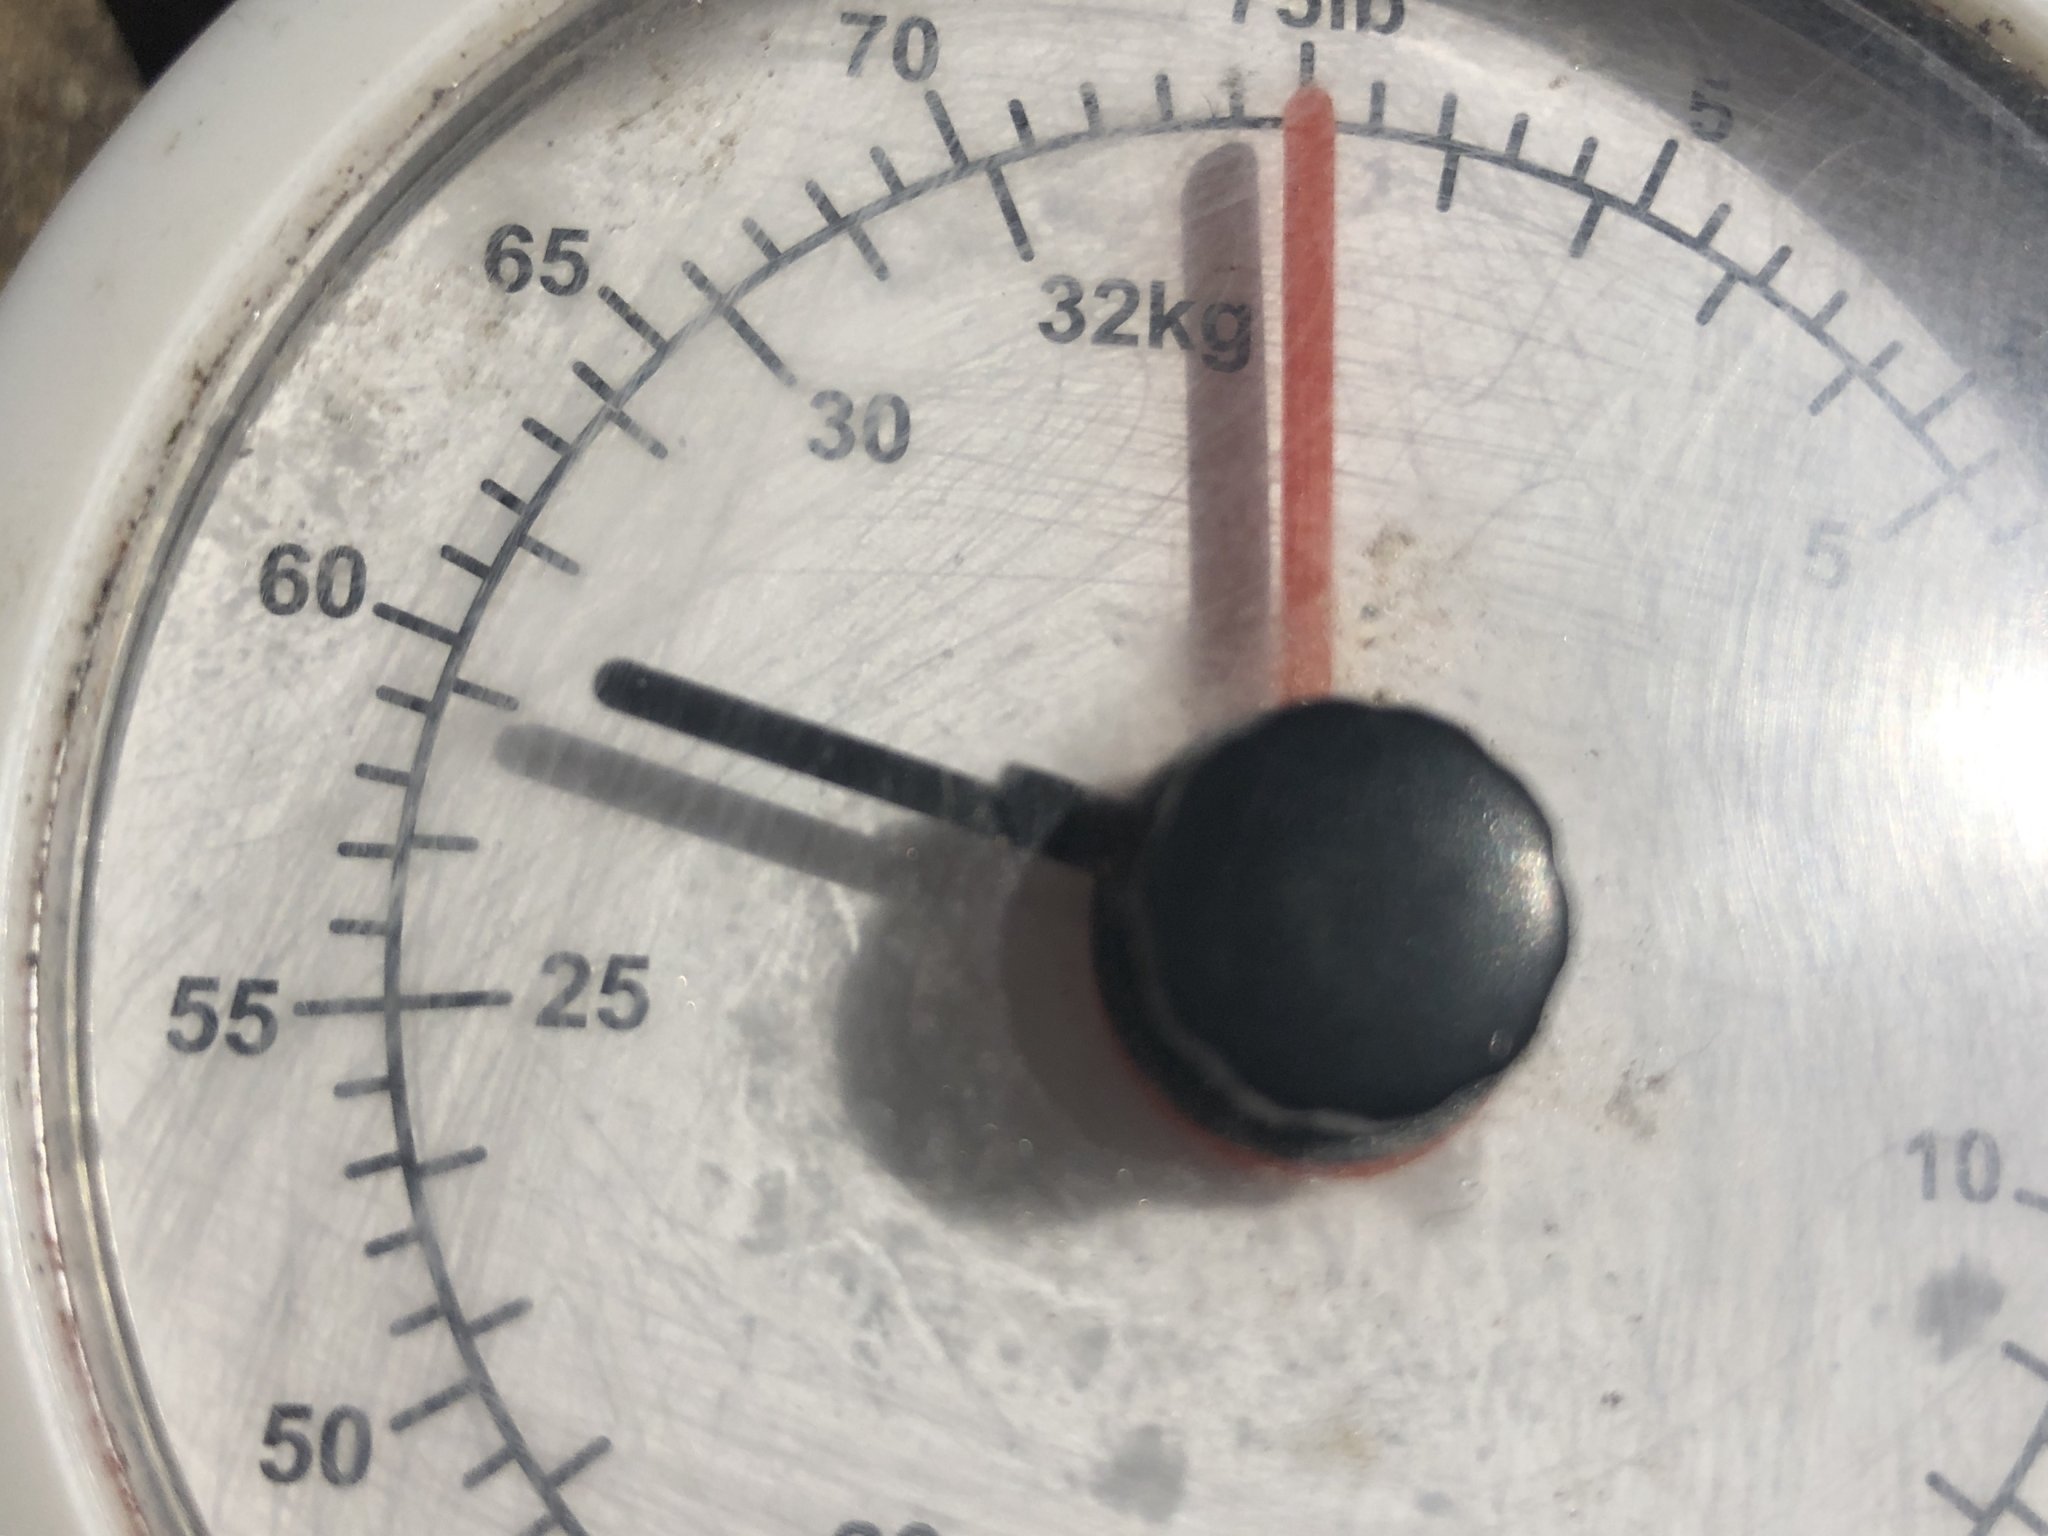
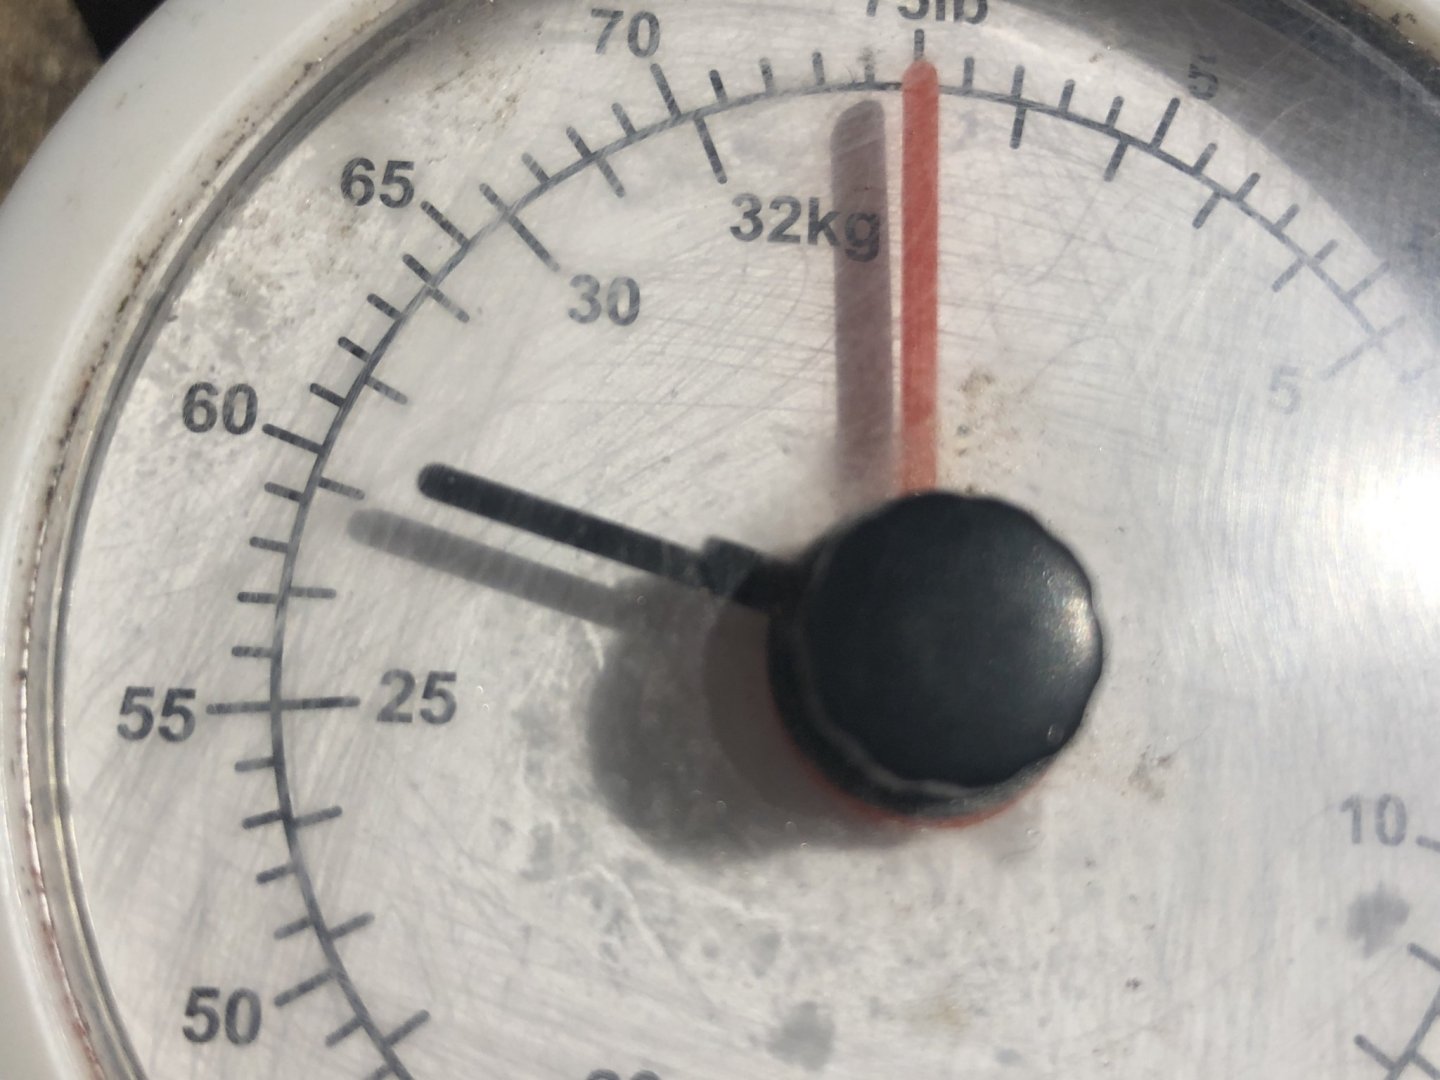
The booms are moving. Slow but steady. Here you can see a short clip -> Instagram <- Thereby I'm now sure that the crane will be work and beside the technical aspects, the optical and scale parts will get more room in my work. For example, today I've print, paint and mount the 30 manhole-covers. Additionally I've made the eight Lead castings for the Hooks. Casting was new for me but works very well and now the eigth Hooks are waiting for they blocks. Before painting I've tested the strength of the hooks. Same setup as planned. I think, it's enough.


-
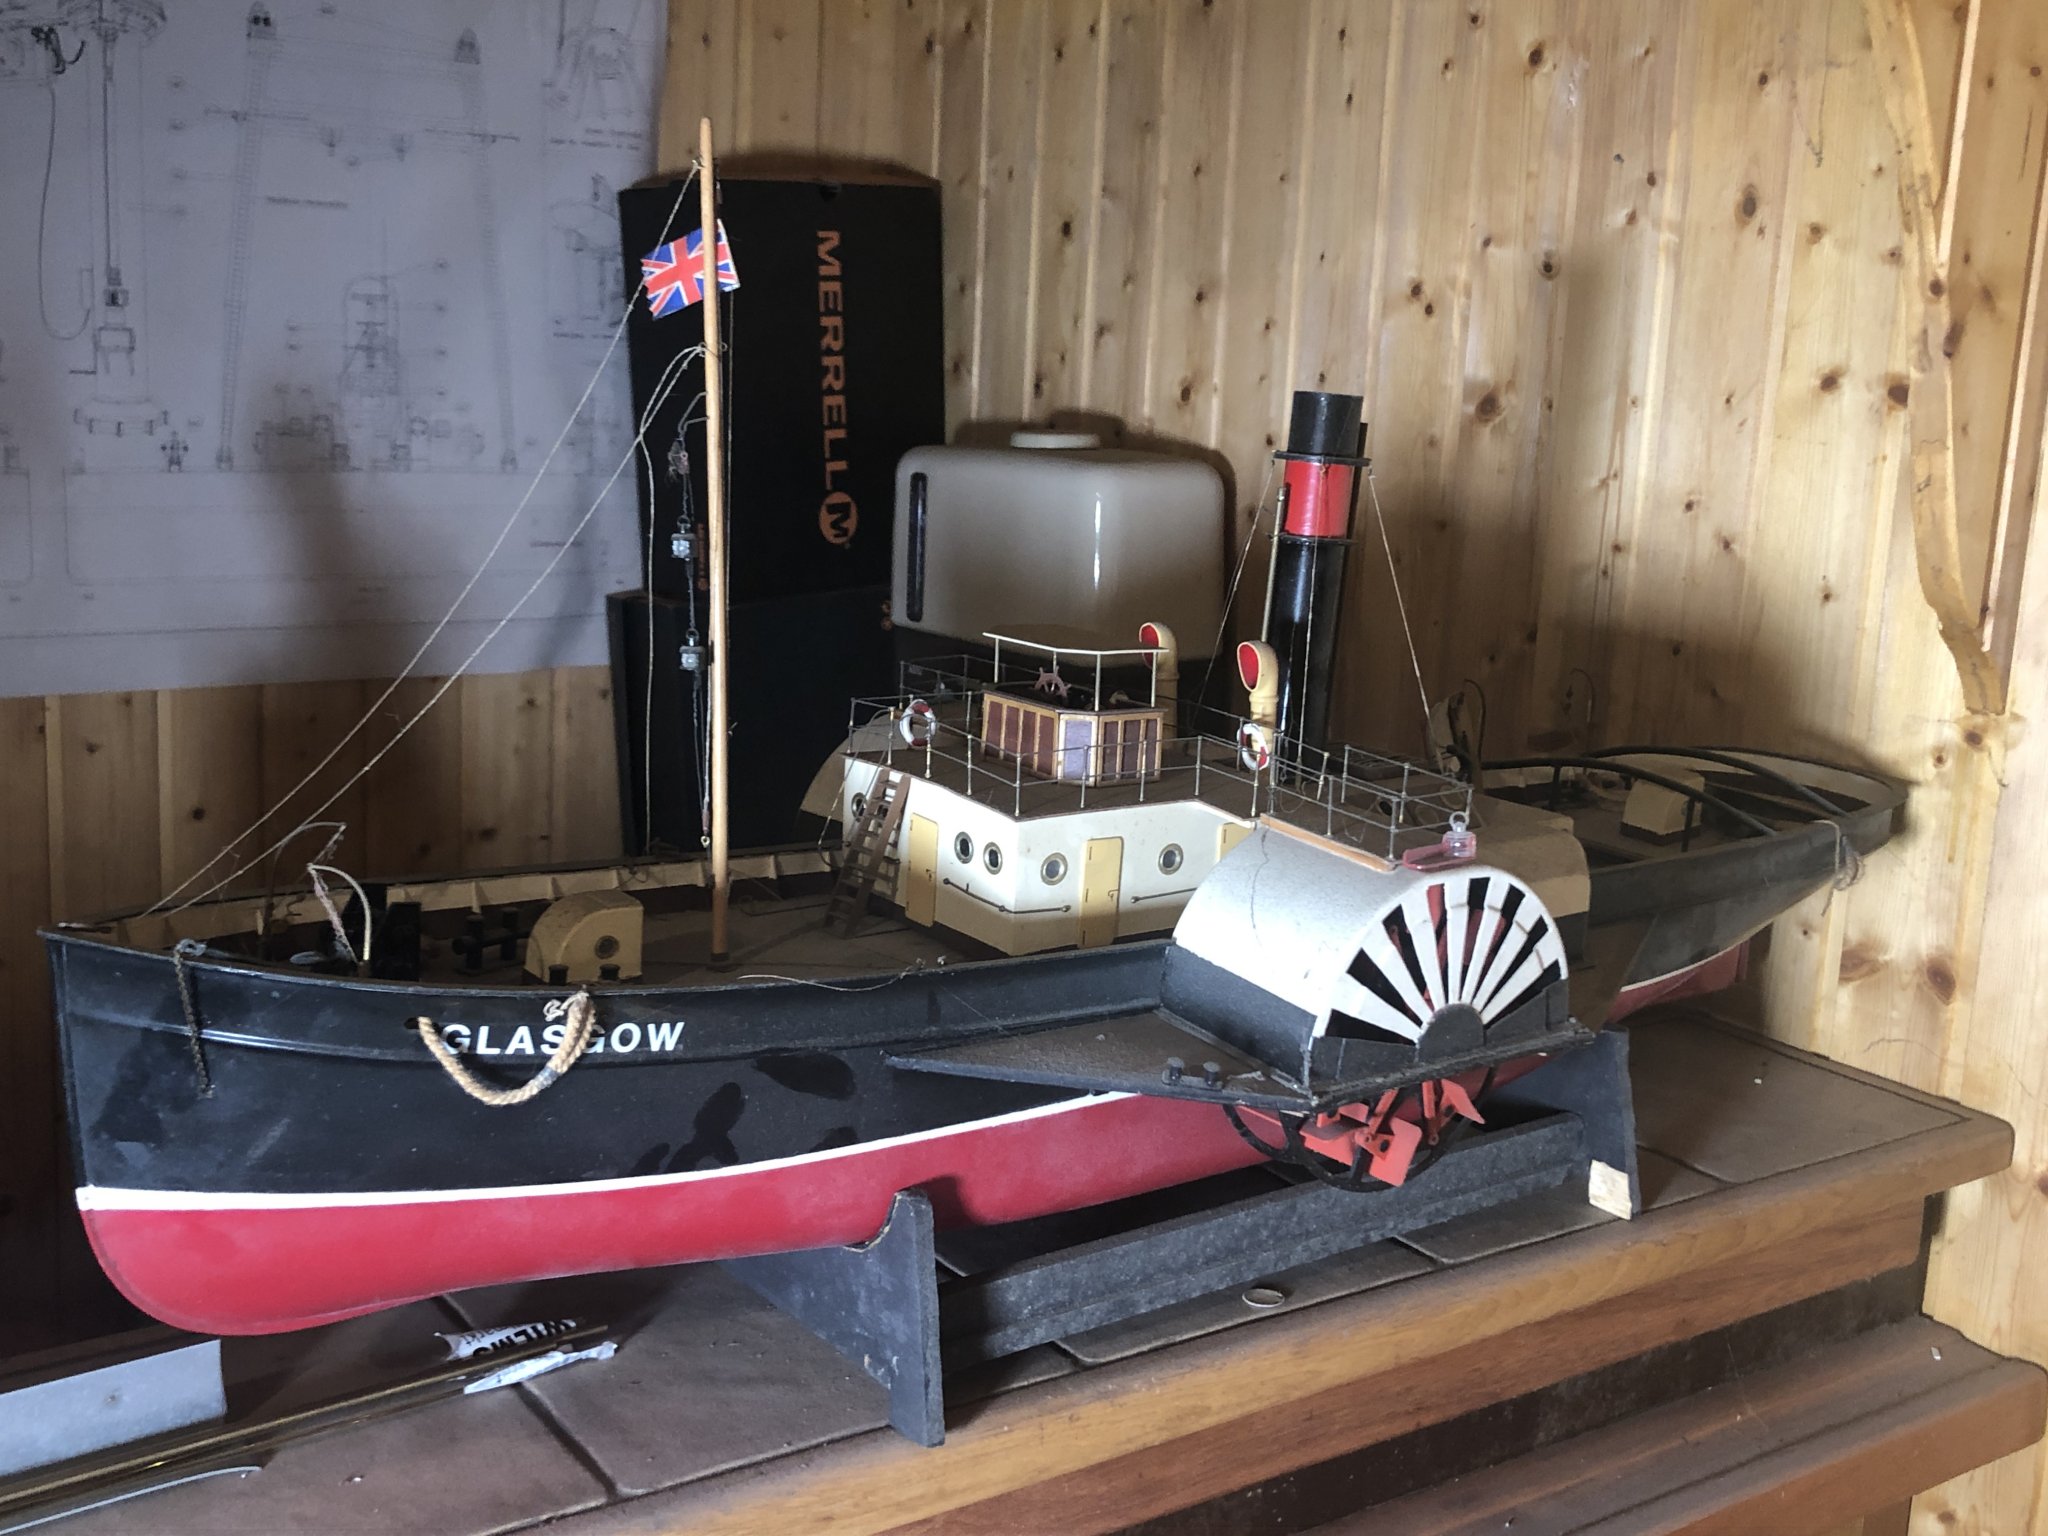
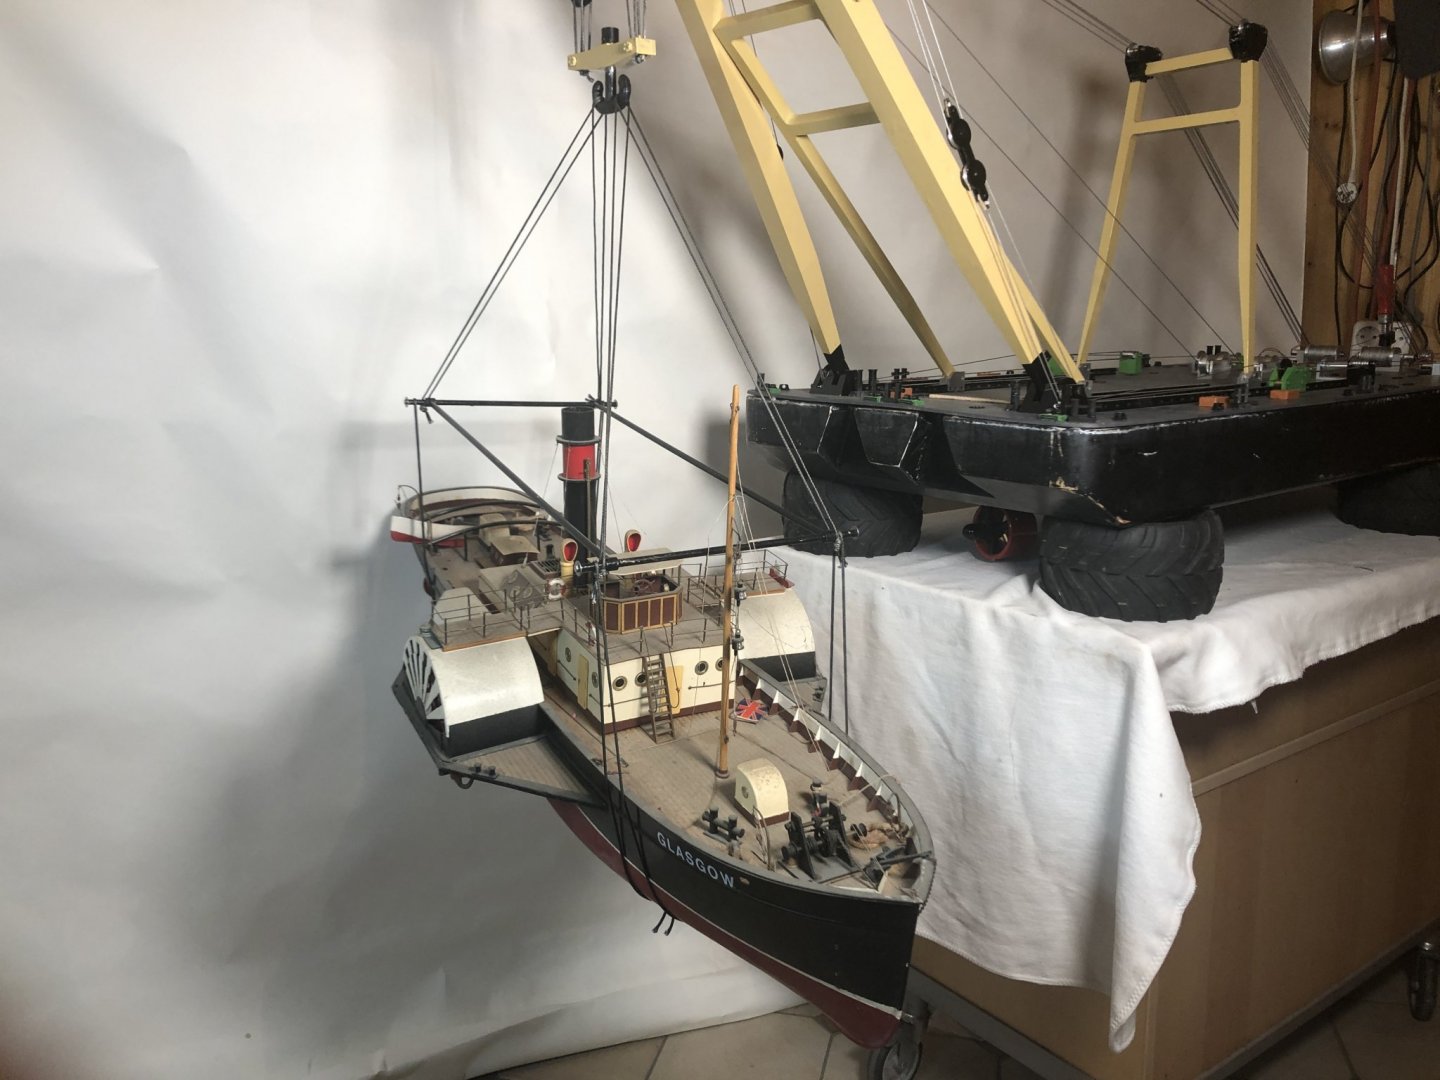
The connection between the mainboom necksupport and his winch is installed. Thereby I'm able to measure the widest overhang of my crane. tailboard <-> peak of topboom = 60cm (~24 inches) Enough to lift my 28 yo Glasgow, wich I declare to my first salvage.