-
Posts
50 -
Joined
-
Last visited
Content Type
Profiles
Forums
Gallery
Events
Everything posted by TK1
-
Funnily enough, I've decided to do cross-sections after doing full models. So I'm a bit backwards (or maybe upside-down, being from Australia) 🙃. But as others said, they are a great way to learn a lot of the techniques. I see a lot of new builders struggle with planking a full ship (especially a bluff bow), and getting it right (fairing, tapering, spacing, etc) can be daunting - and take a lot of time. With a cross-section, you get onto making fittings, doing masts, and rigging quicker - so a little bit of everything you may do in a full model. Plus not being retired yet, and doing other types of models, it takes me years to do a full ship. Also, my wife was sick of them being everywhere - they take up a fair bit of shelf space! So, cross-sections should be quicker, some of the kits out there are good, and they offer a great intro to scratch-building as said above. Plus I can display a few in the same space as a full ship. I'm working on the Modelers Shipyard HMS Sirius at present - here's the build log: Like any kit, it's not perfect and can do with some improvement - again a god way to get into modifying and scratch-building some components. I have the Hatchett (? part-series with books) sections for Victory and Endeavour, and a few scratch ones planned. I have the AL San Francisco but I'd avoid it, see the build logs on here - hull frames are weirdly thick, ladders don't fit, etc. So will be a lot of work to make it presentable. The OcCre ST looks good. I'll probably do the Model Shipways Constitution rather than the Mamoli one, as it's slightly larger. With the Anatomy of the Ship books you can do a good job of scratchbuilding the ships they cover. Dive in and give one a go - and do a build log 🙂. Darren
-
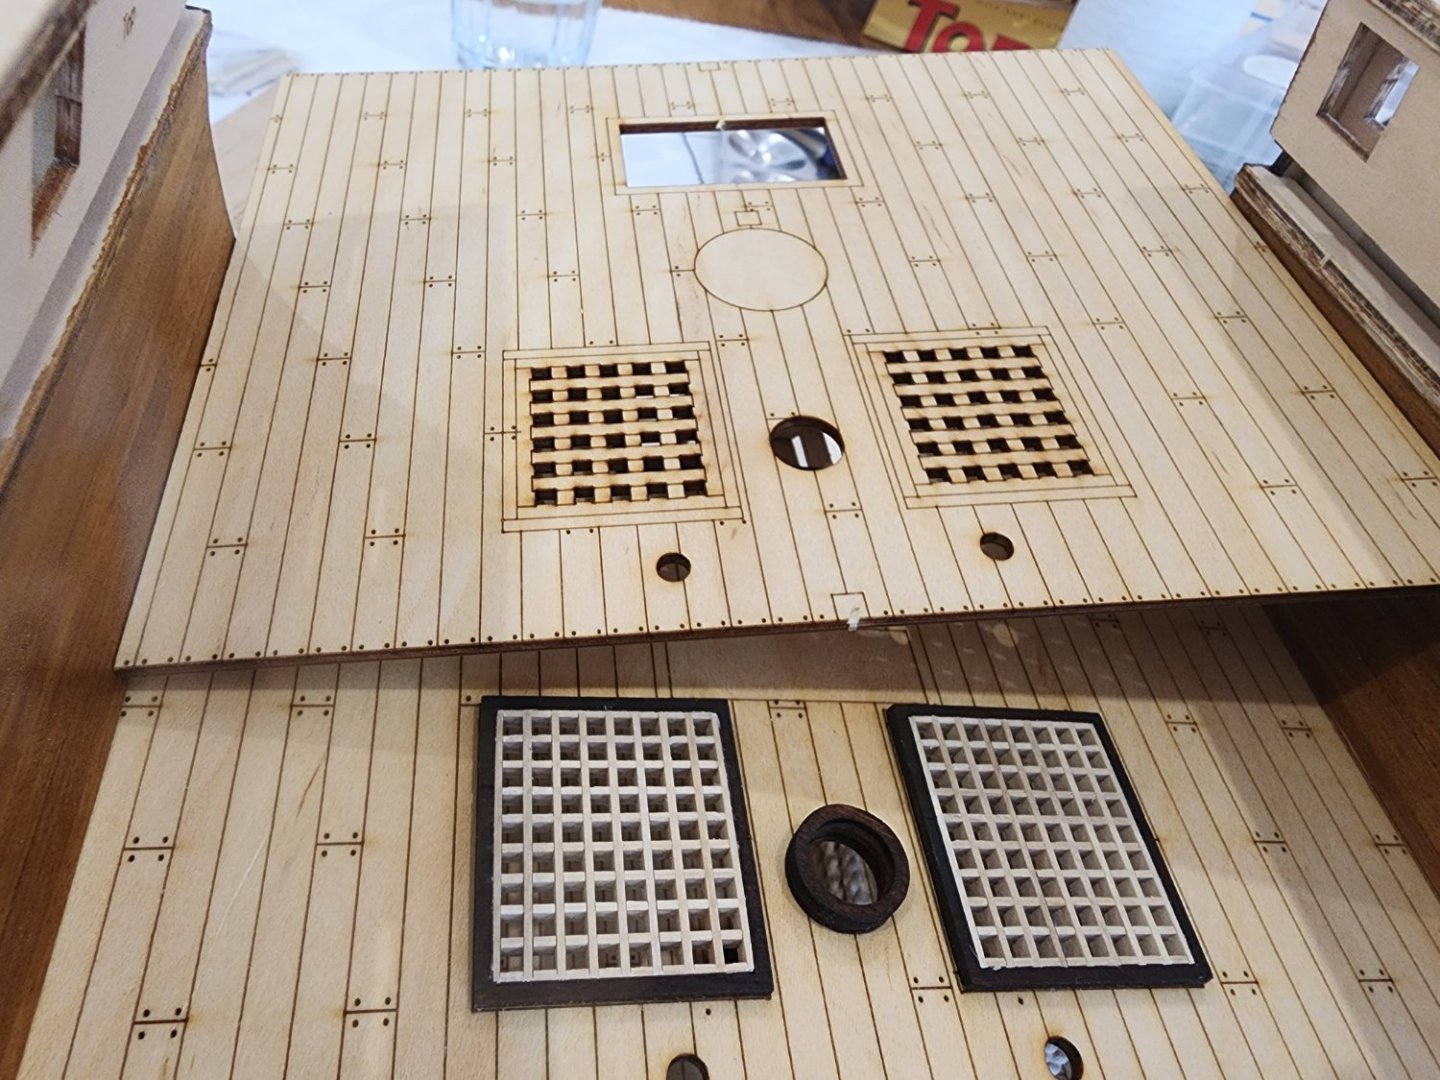
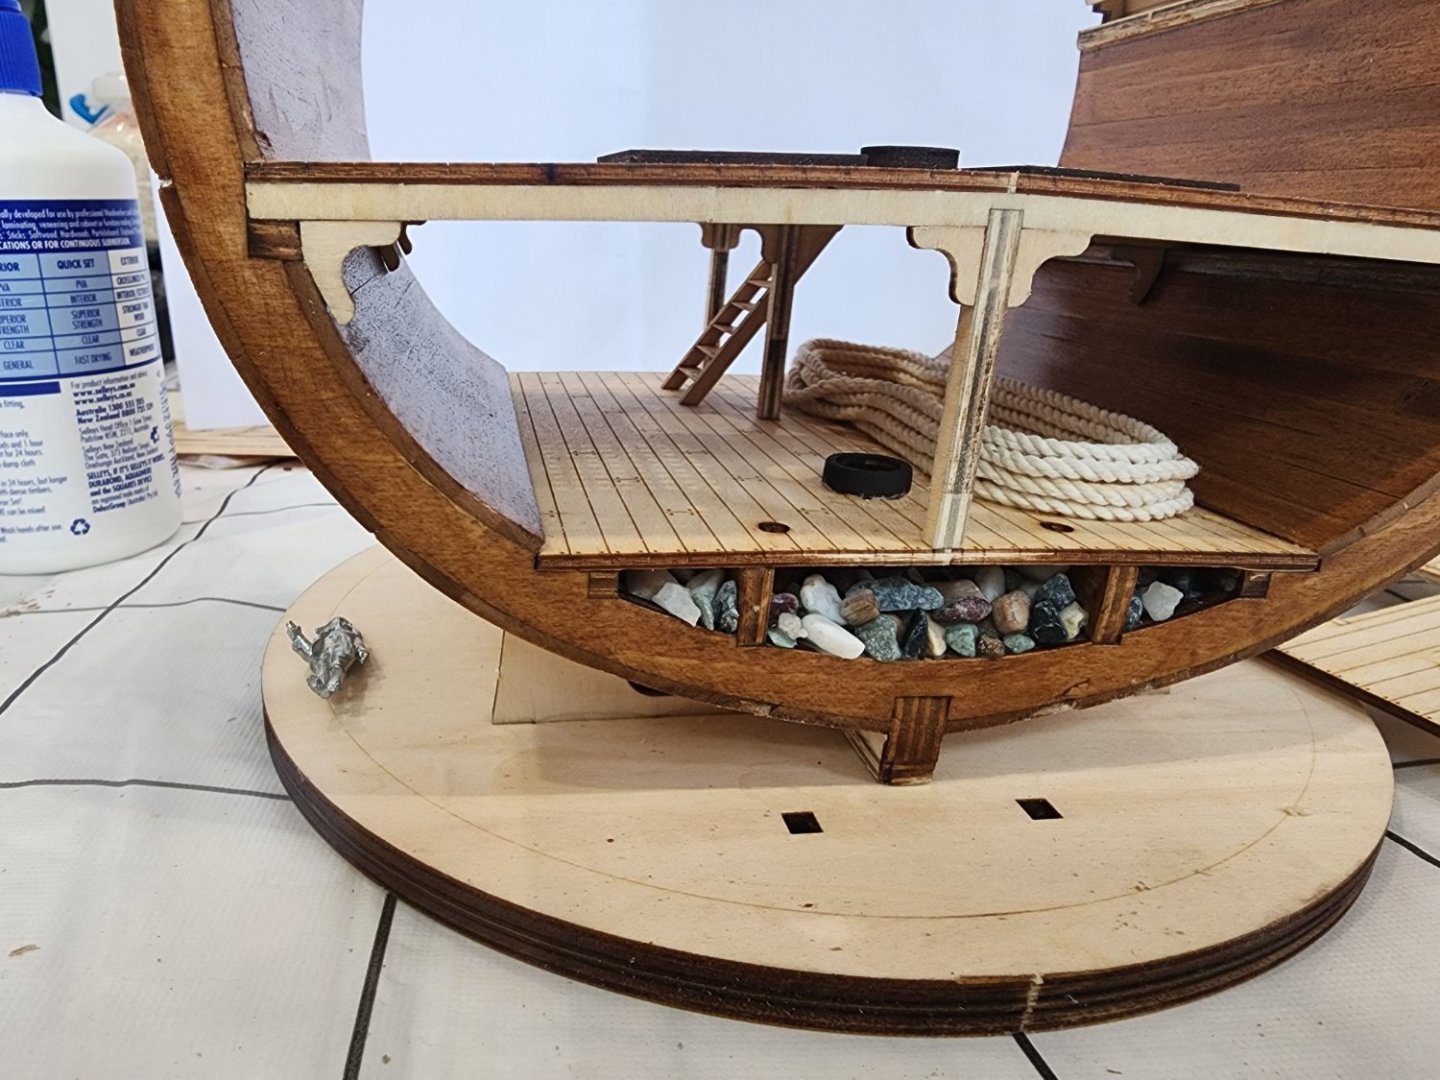
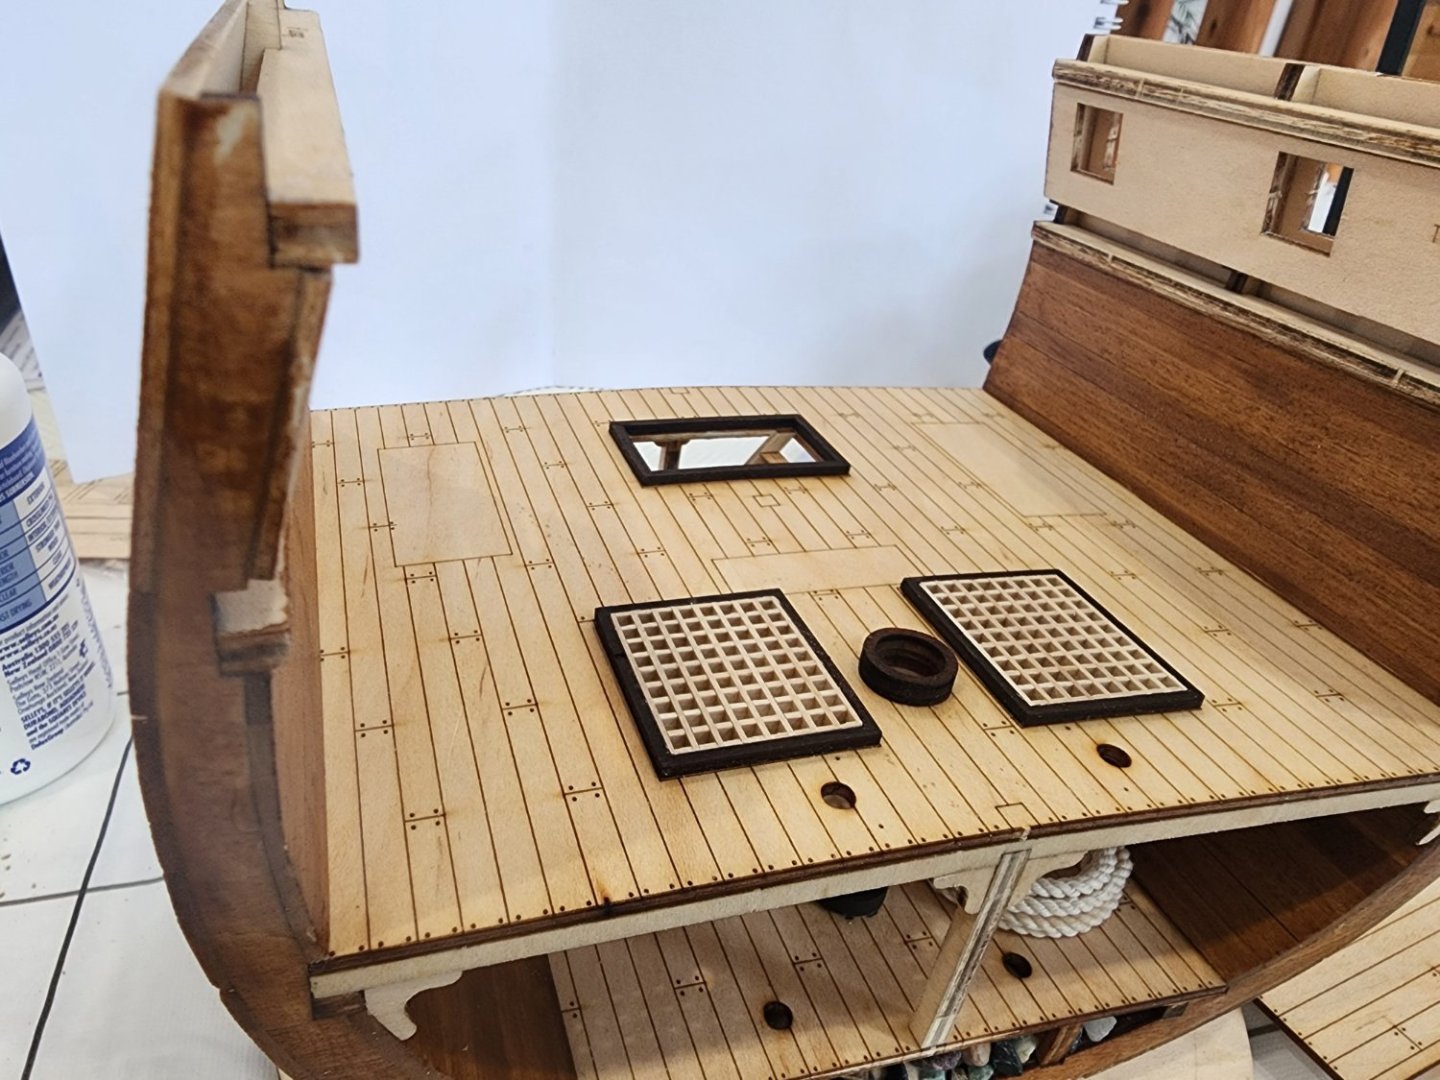
Progress continues....whilst it's summer here in Australia, more rain than sunshine combined with a broken foot allowed me to spend the day on the next steps. So, for now I've left the hold/lower deck with just a coil of rope. The only other items included were a few barrels. I'll modify them by sanding off the wooden turned bands, and replacing with black tape for a more scale-like appearance. I'll also add more barrels, plus some timbers and perhaps crates or sacks of supplies for the new colony. One item I'll add when I get home is an upright piano - according to records I found, the Sirius carried the new Governor's piano. So I should add this! Work then moved to the mess deck. I replaced the laser-etched kit gratings with new ones built up, whilst still a bit oversized, the photo shows the comparison and improvement. The hold ladder was built, and posts and knees added to the hold. These will be painted later after a bit of putty has been applied to gaps. Next step is the furniture and fittings for the mess deck - tables hammocks, lockers, etc. More updates soon hopefully! Thanks for watching, next updates should be more frequent. Darren
- 8 replies
-
- Sirius
- cross-section
-
(and 1 more)
Tagged with:
-
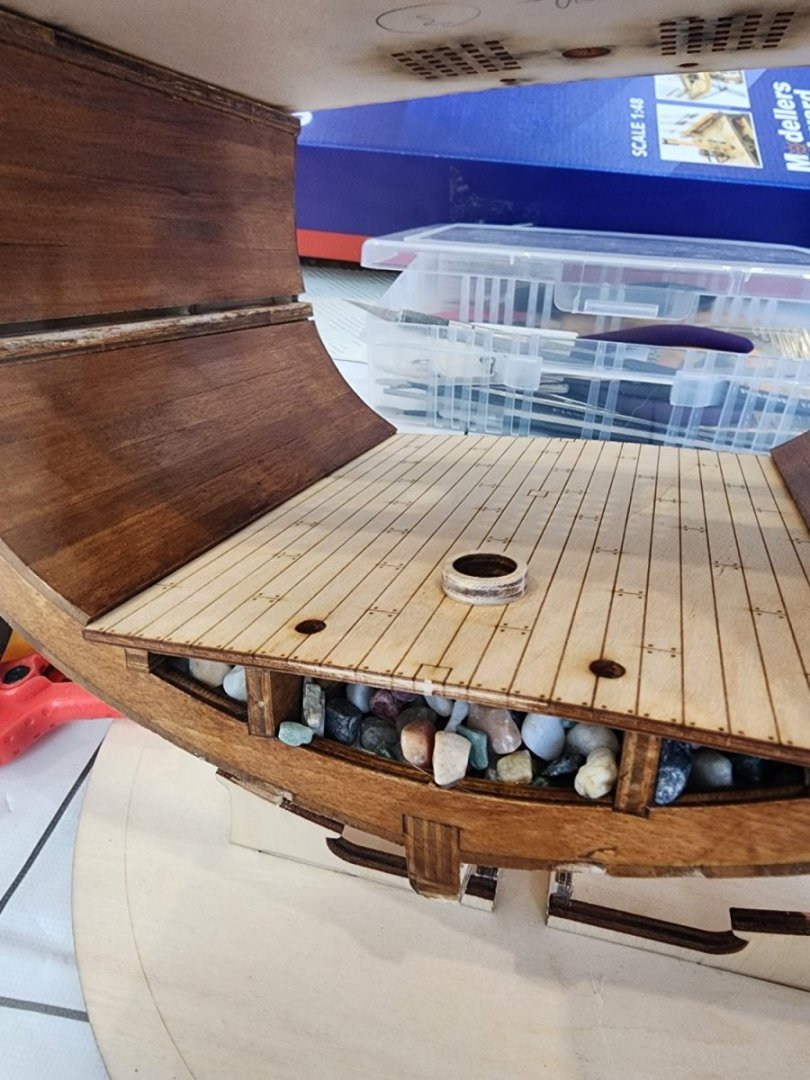
Hi Greg, Yes, good pick-up. Its definitely like aquarium gravel. I decided to go with it as I didn't bring an alternative. I do think I'll add some scale ballast when I get home. The gravel is just attached with white glue, so easy enough to remove some to replace it. Thanks, Darren
- 8 replies
-
- Sirius
- cross-section
-
(and 1 more)
Tagged with:
-
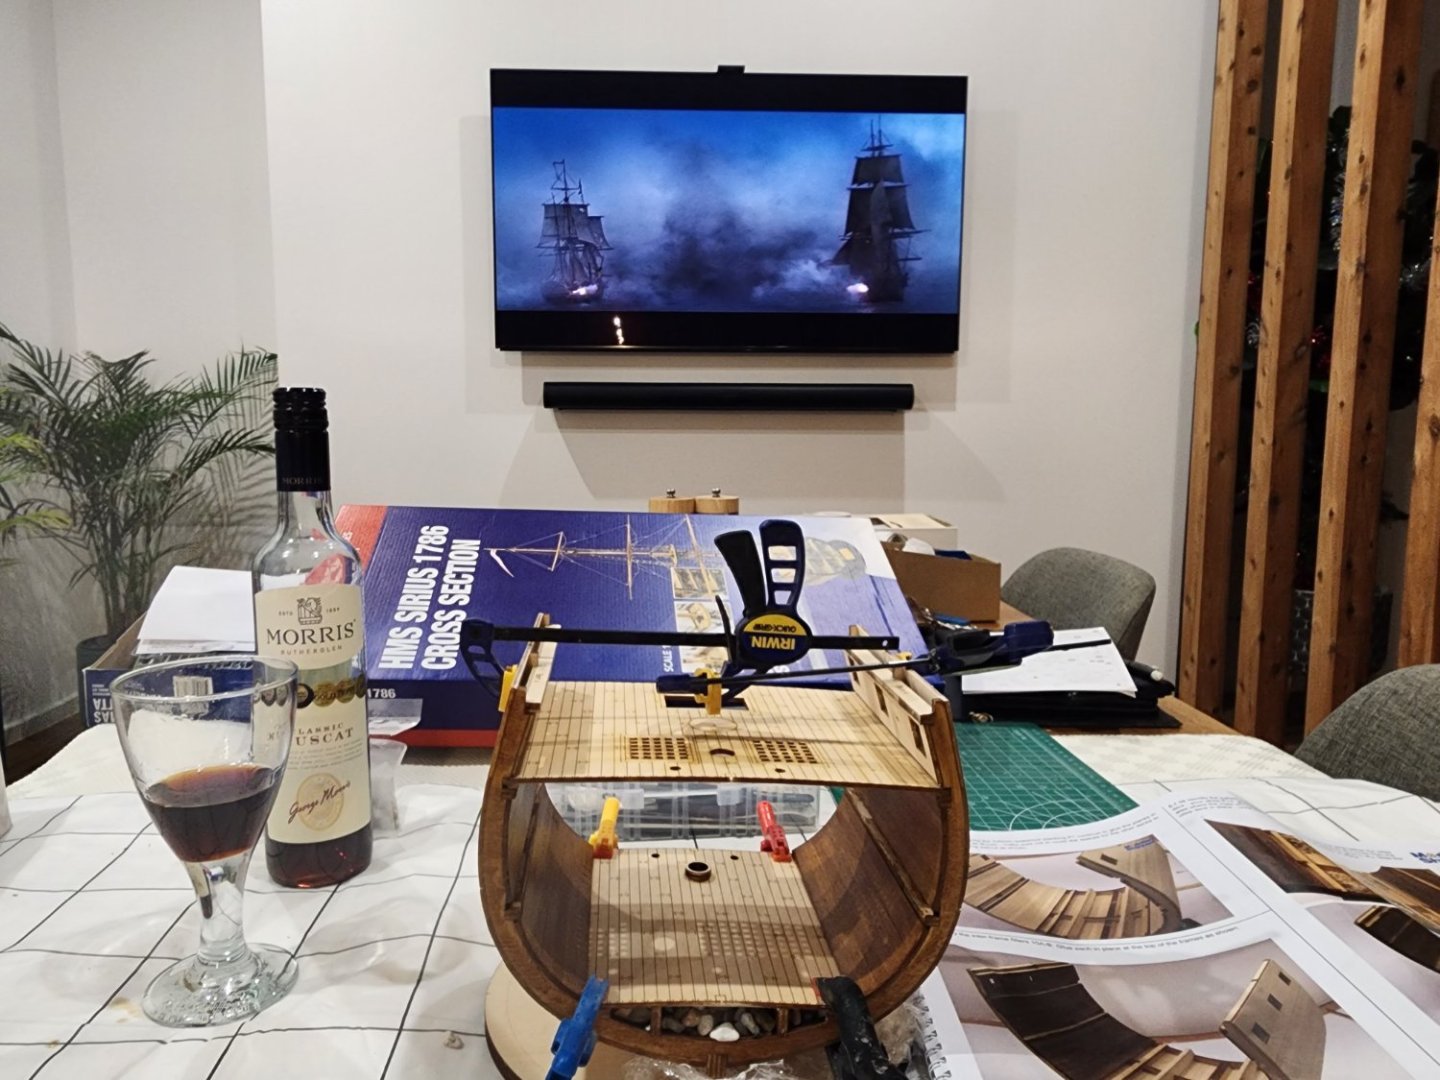
Finally an update! This was going to be a quick build, but life got in the way, as it often does. But I have a few weeks off work, and am house- and dog-sitting for a friend, so that gets me away from other demands, and leave time for some modelling at night. And why not build whilst watching Master and Commander? 🙂 So, initial progress made....the hull has been planked. First layer outside, and single layer inside. The instructions don't call for planking on the inner plywood bulwark, but I'll add that when I get the gun deck on. Interior stained with a light walnut, and I'll probably paint the frame ends to cover the ply parts. Stones (supplied with the kit) have been glued in for the ballast, and the orlop deck piece glued in place. Next step is some hold storage items including a hawse cable and barrels. I was going to add more, but bought limited supplies so may do more later. Next update won't be quite so far away! Darren
- 8 replies
-
- Sirius
- cross-section
-
(and 1 more)
Tagged with:
-
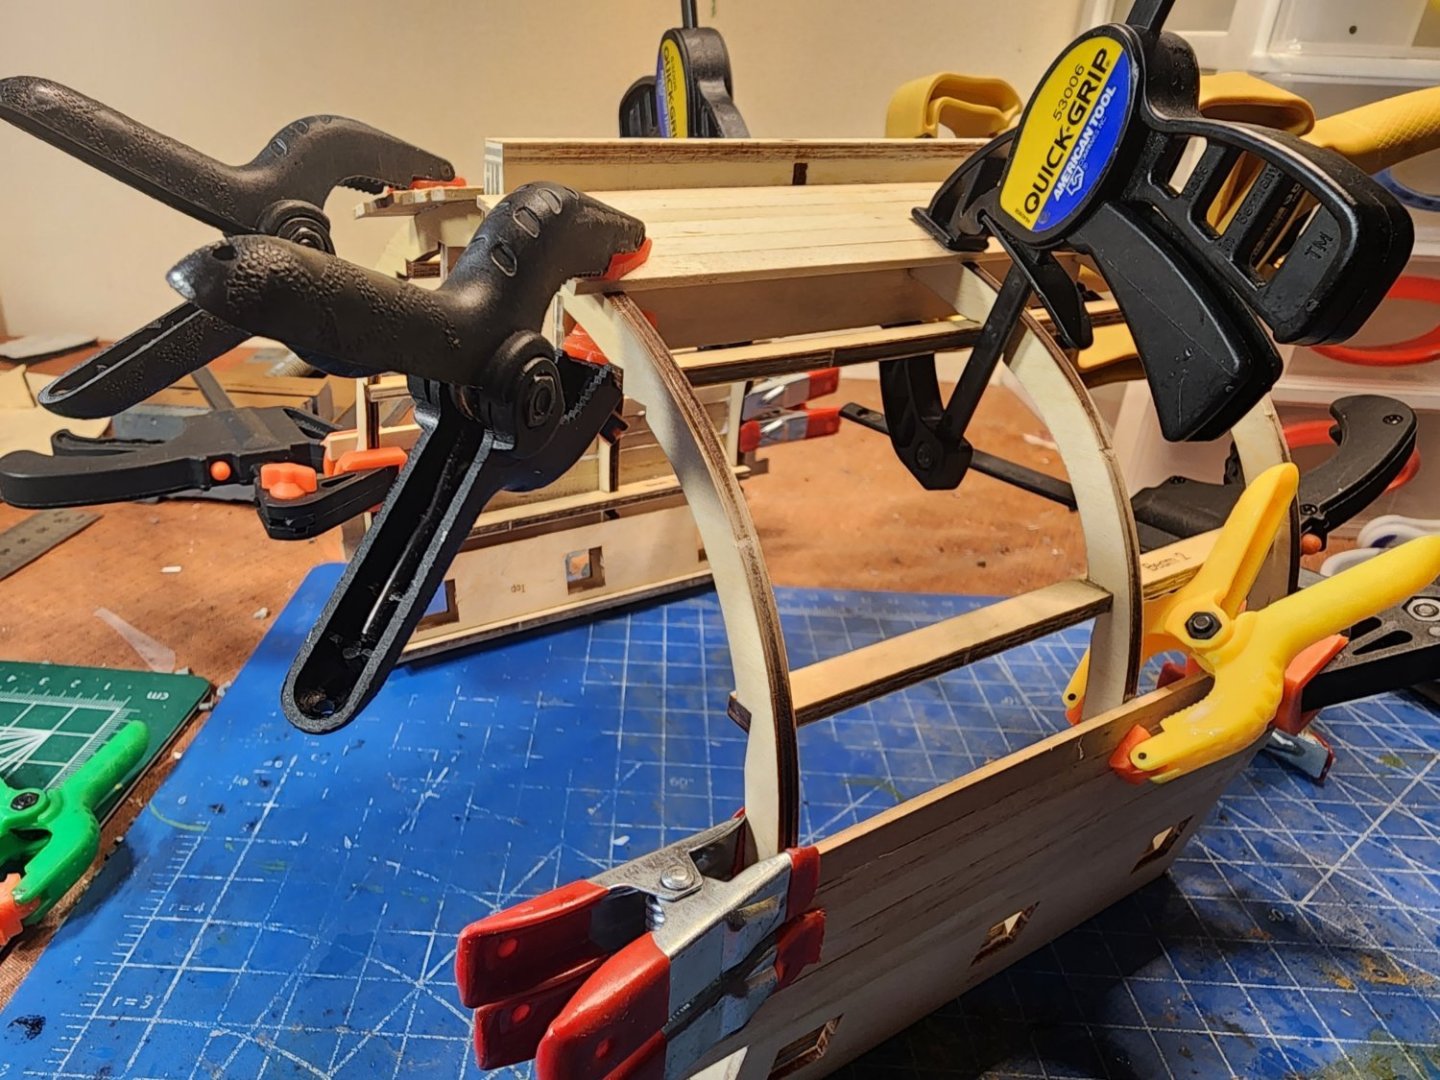
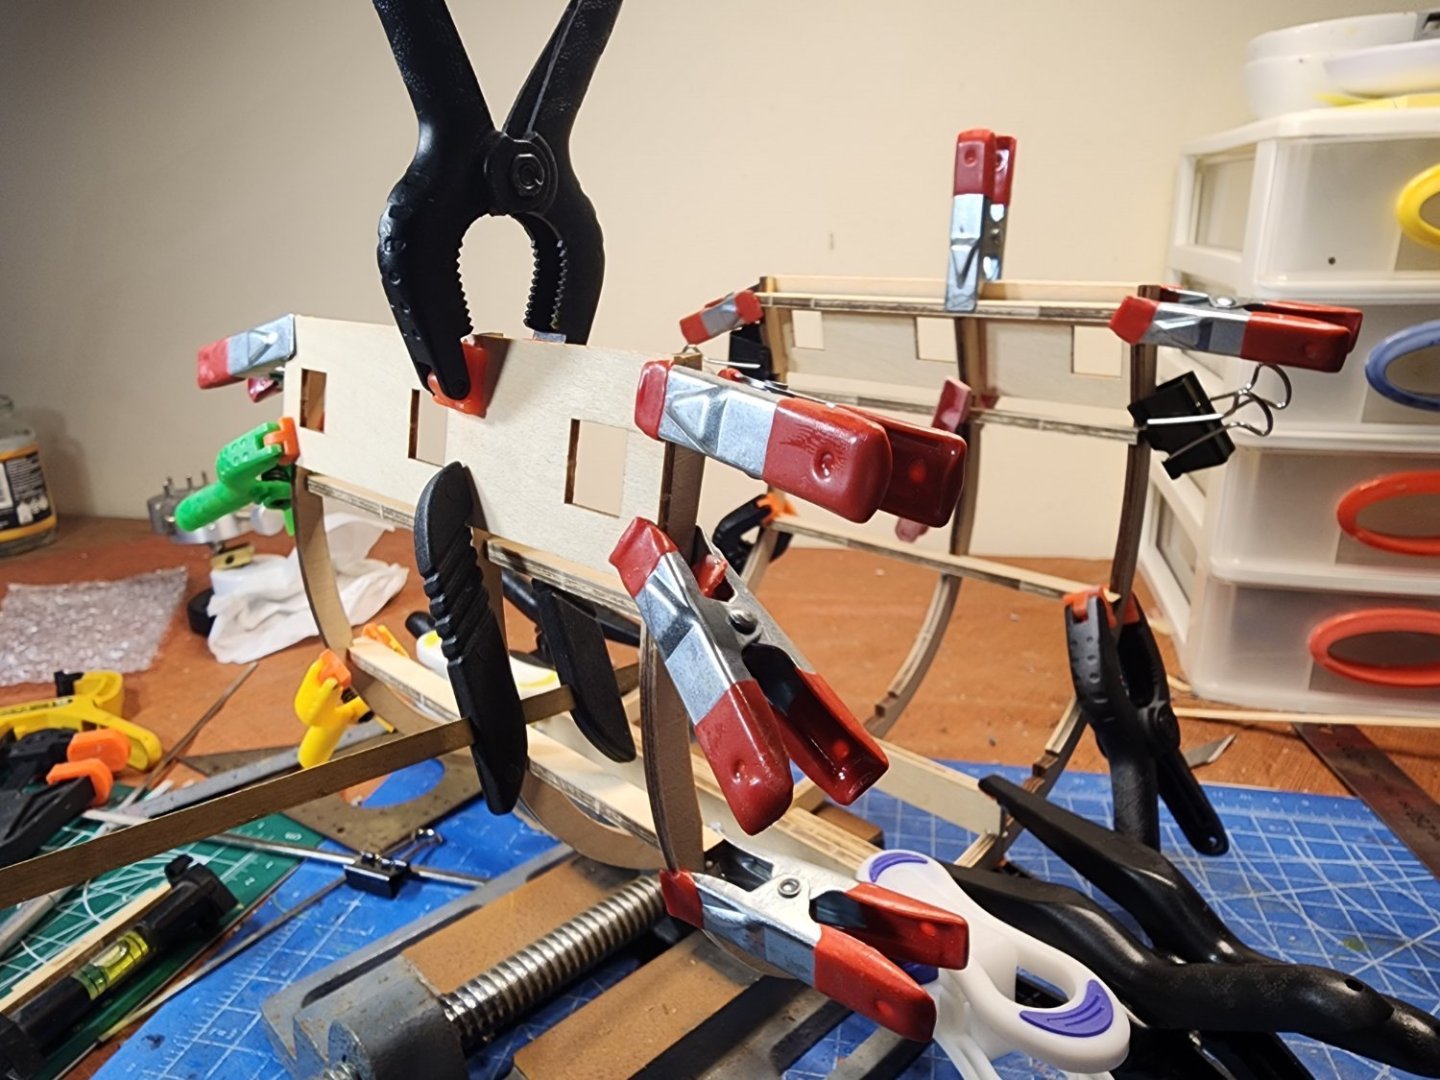
Made some minor but worthwhile process. All frames done and aligned, so I've started the first layer of planking - in limewood as is typical in kits. Cut them a bit oversize and will then trim. Still undecided on the amount of effort/detailing I'll do - depends if I'm at home or not during the build, and how long it takes. It's intended to be a practice/ease me back into it, so don't want to get bogged down in too much extra work vs focus on a neat finish. Will wait and see.... Anyway, here's the planking. You can never have too many clamps, of course.
- 8 replies
-
- Sirius
- cross-section
-
(and 1 more)
Tagged with:
-
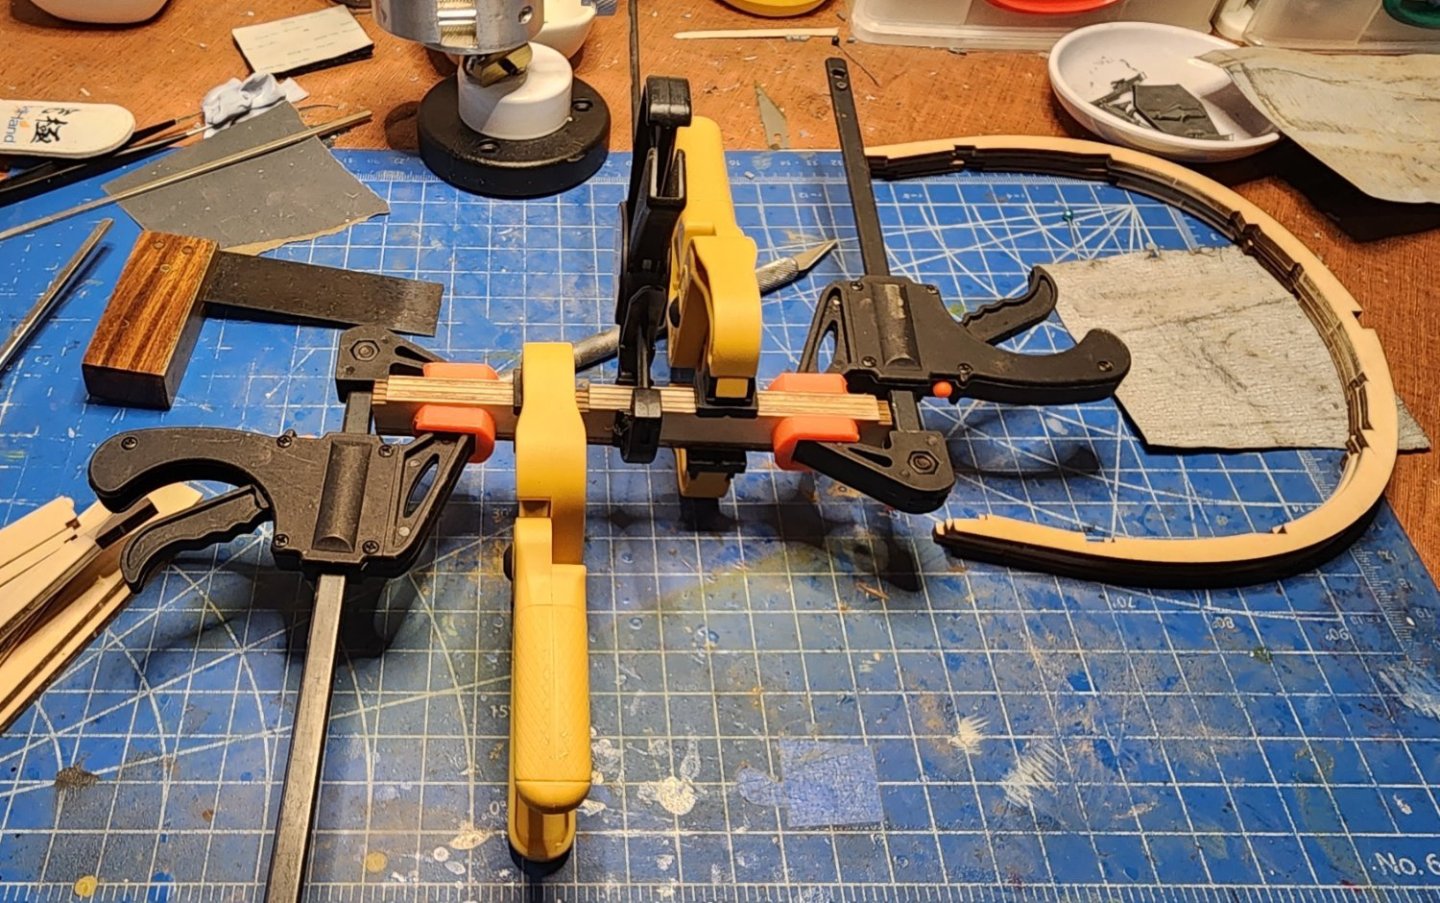
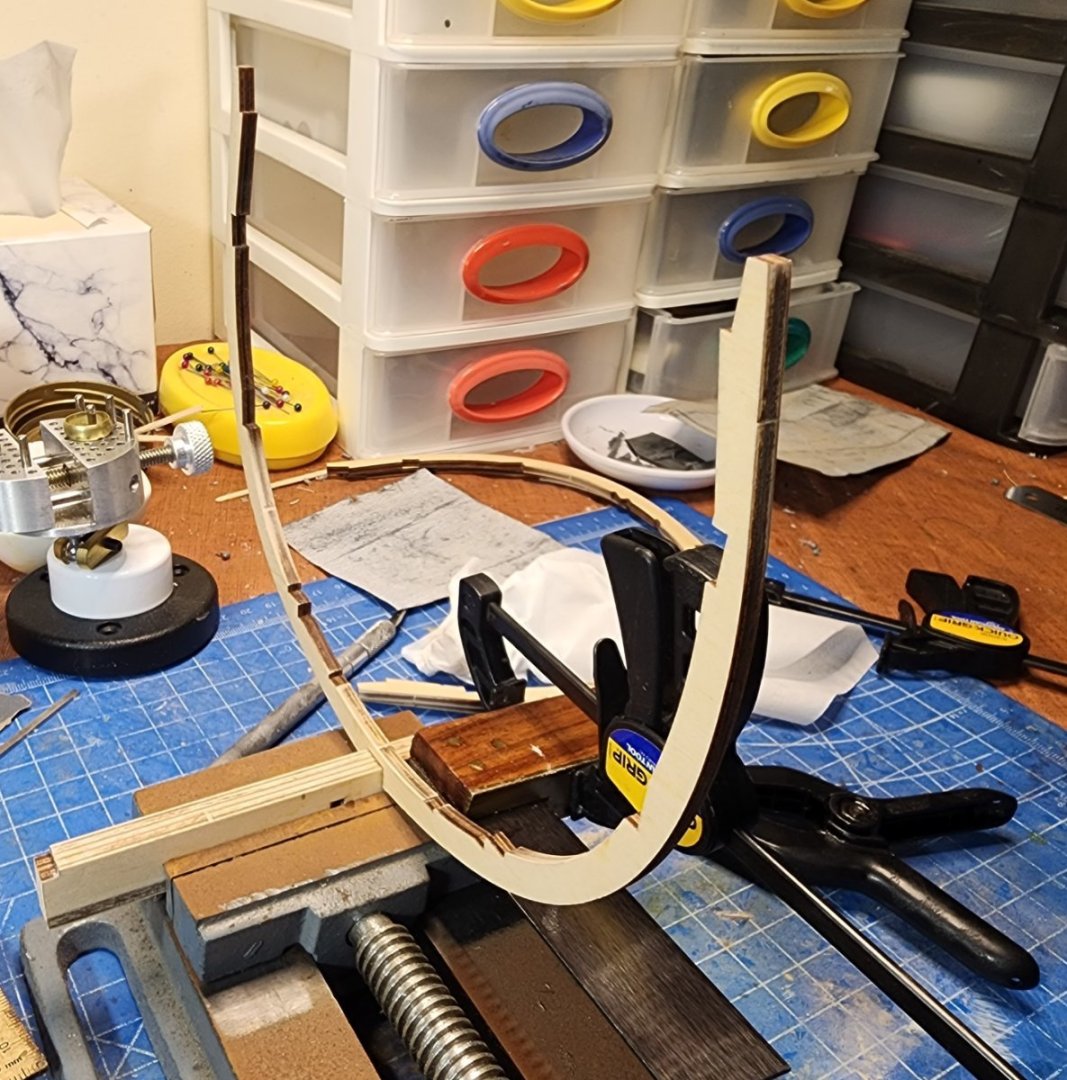
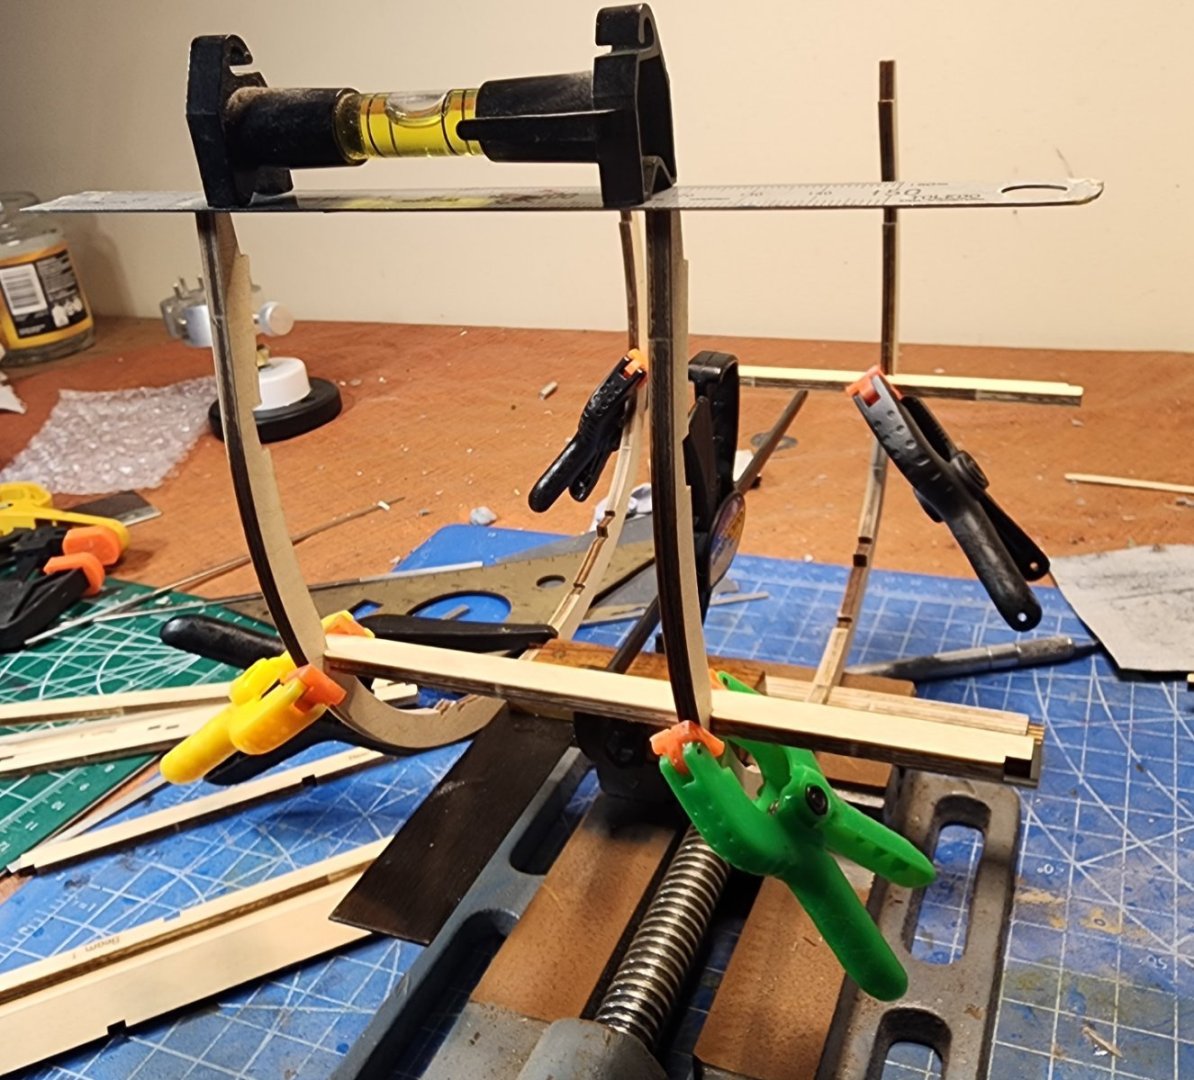
Right, finally on to the build! A delayed start, since I'm away from home caring for my parents, but got my wife to bring me a care package including the kit. And fitting as my father was a great wooden model ship builder, and this will be the last one built in his house and using some of his tools. But, I digress... The first few steps see you building up the keel from 3 pieces, then attaching the 3 frames and longitudinal beams. Finally, bulwarks with gunport cut-outs are attached to each side. All pretty simple so far, but without an alignment jig or proper baseboard, it was all a bit fiddly and required a couple of squares, a drill-press vise, a couple of levels, lots of measurements, and even more clamps. Here's the photos of the first few steps - apologies for the messy work area (he was recently doing plastic models so it's been a hunt for ship/wood tools but I'm making do!); and the large pics, I couldn't edit on his PC. Next up, the first layer of planking and on to the lower decks. Thanks for looking - early days but it'll get more interesting soon, I promise!
- 8 replies
-
- Sirius
- cross-section
-
(and 1 more)
Tagged with:
-
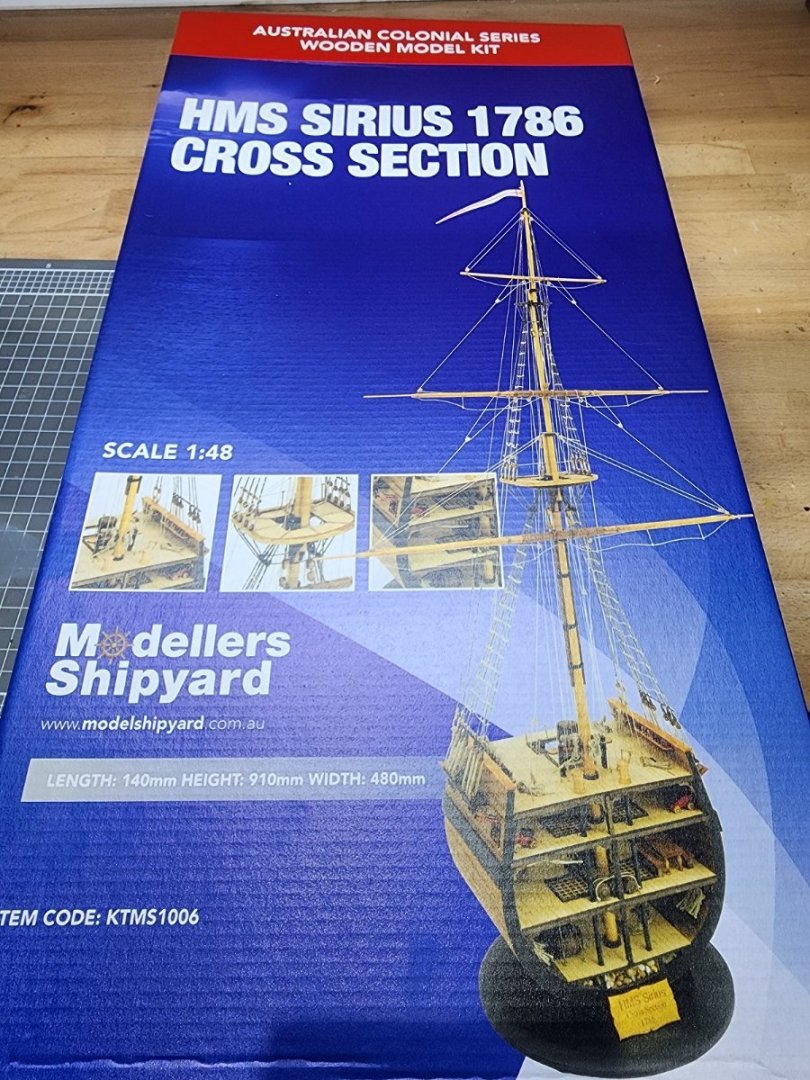
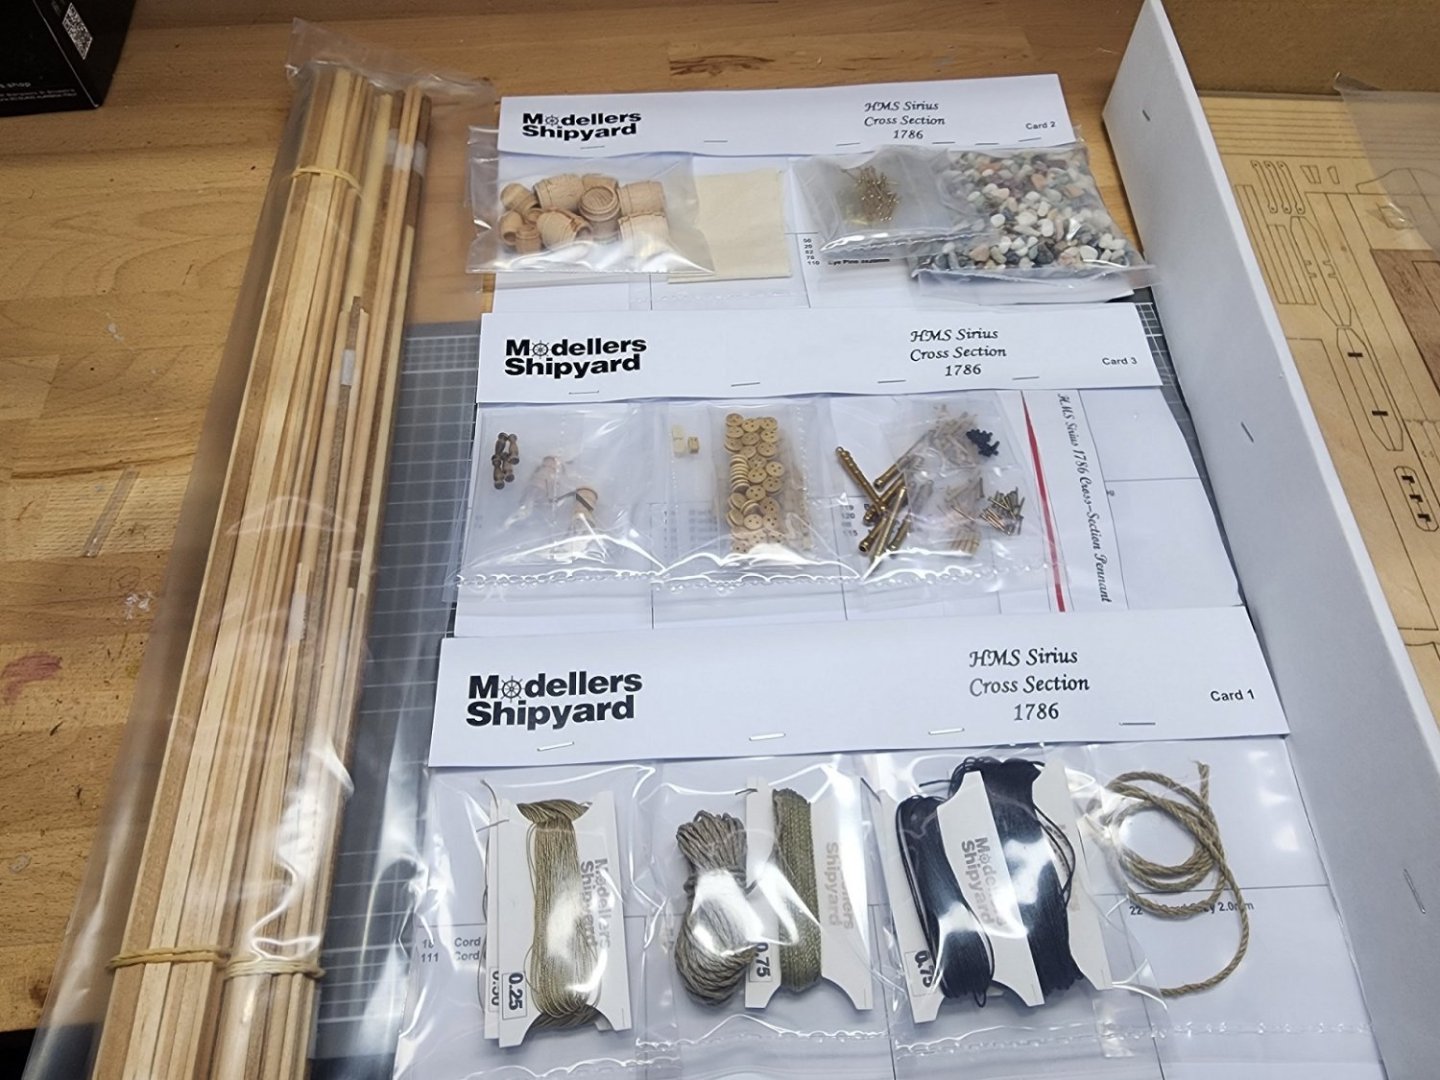
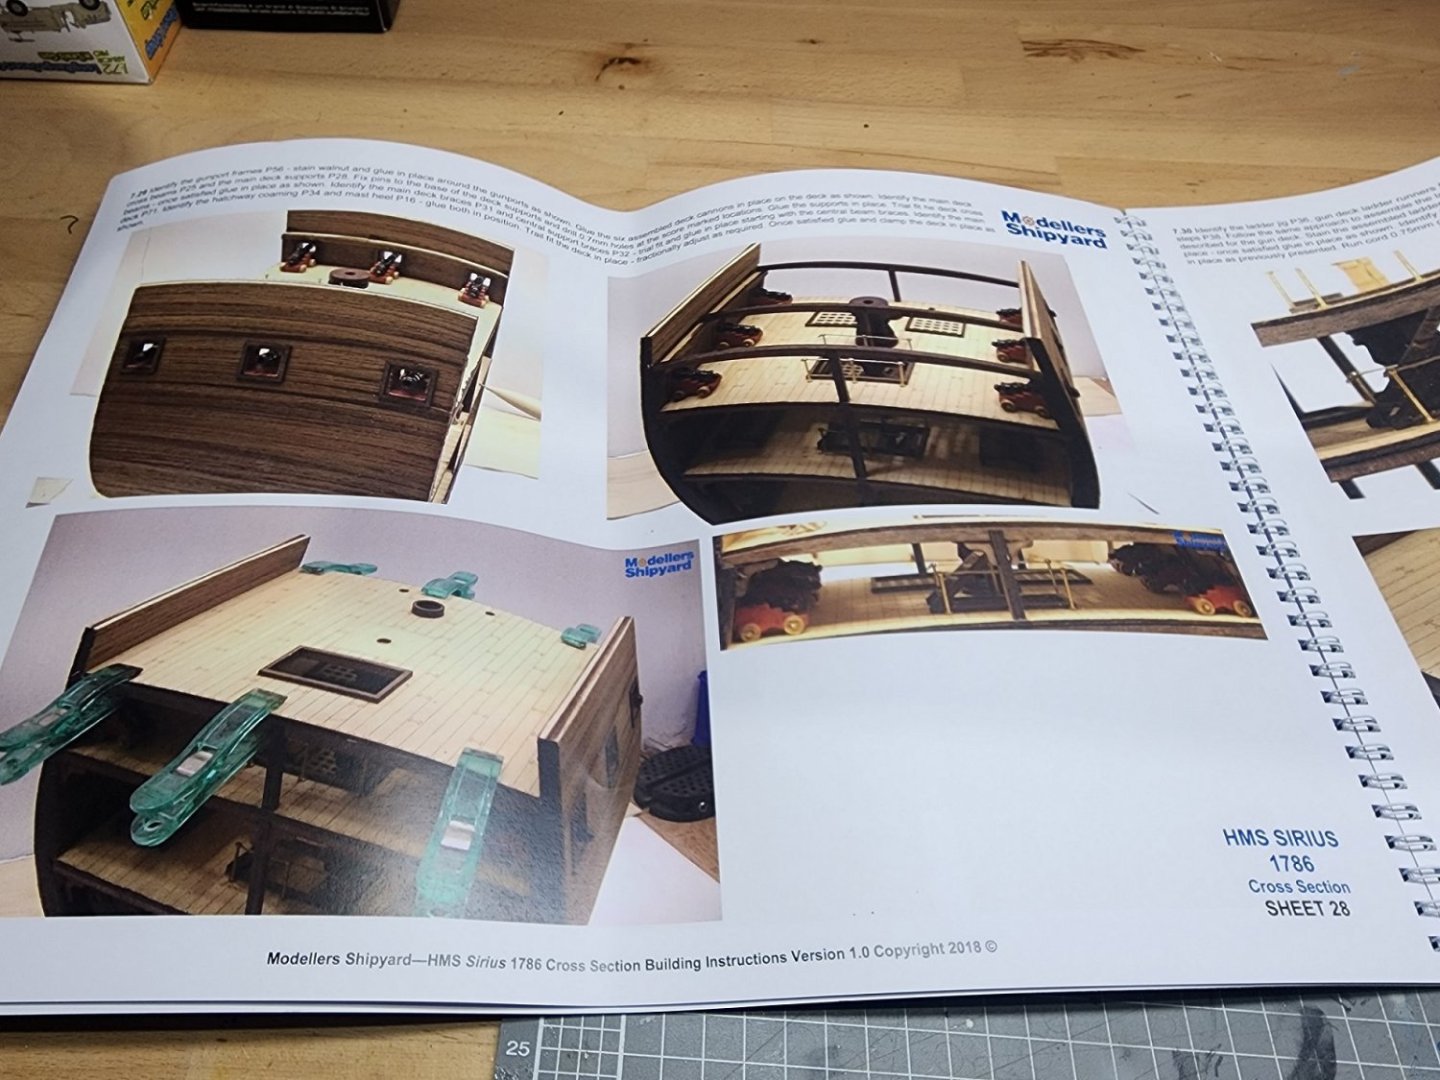
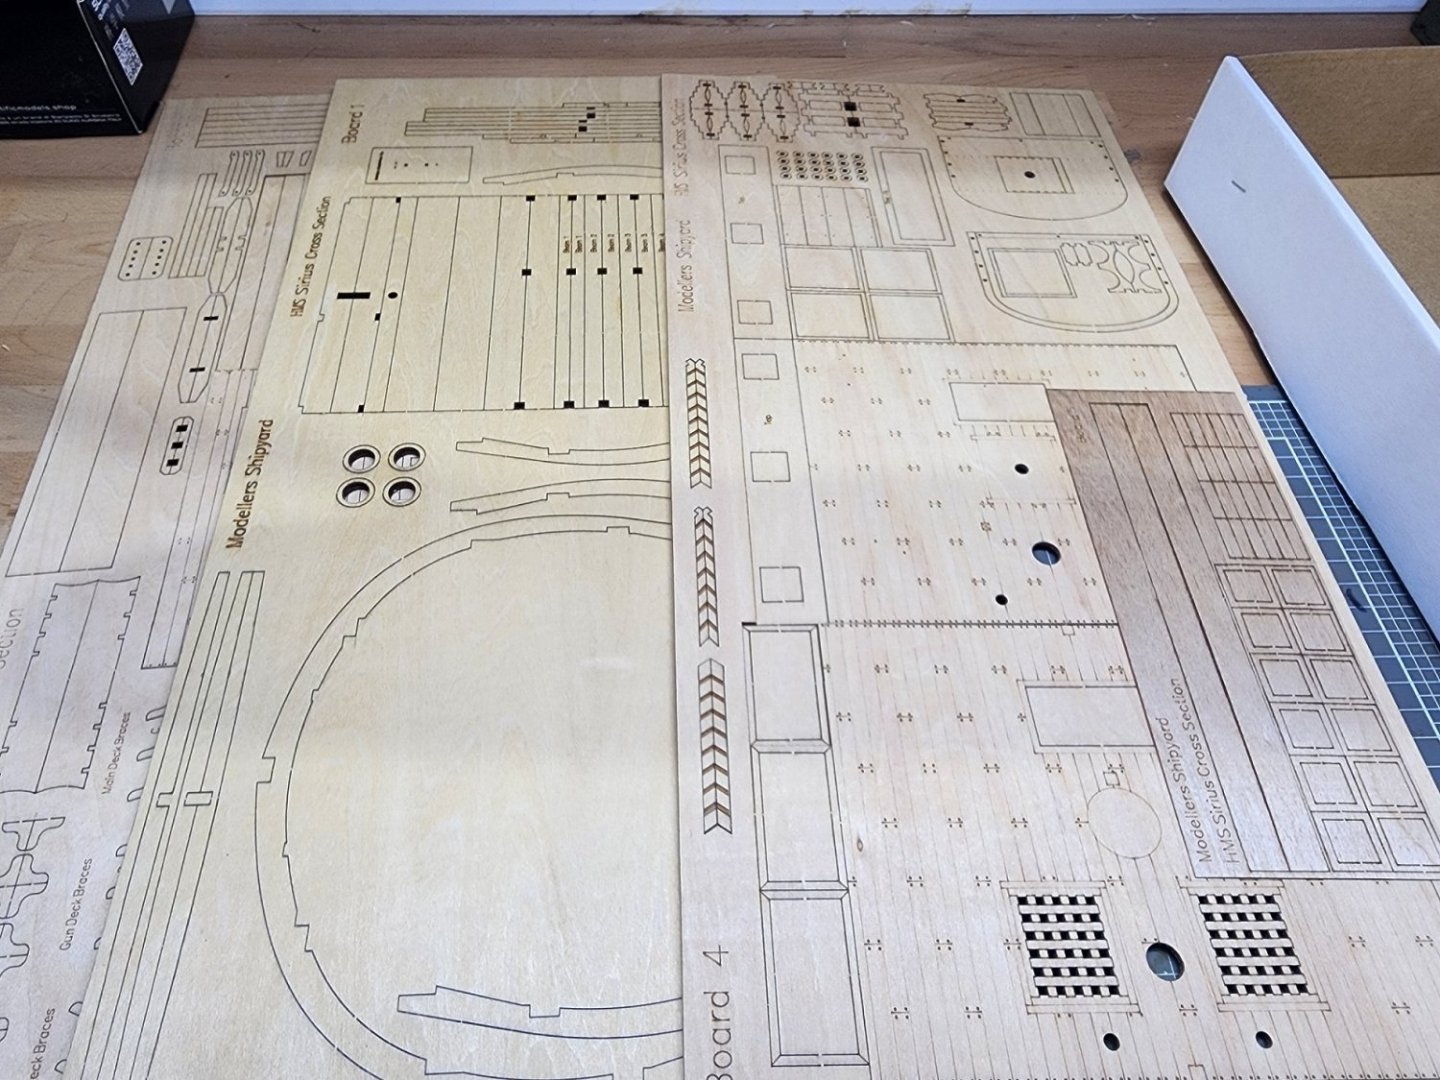
Hi all, I decided to finally venture back into wooden ship models, after a long break where I focused on plastic kits (ships and other subjects). But I have been getting into woodturning also, and love working with wood. Having built my fair share of full-hull (mostly POB) models both kit and scratch, this time I have decided to focus on cross-sections. This lets me focus on fittings, masting/rigging, and detailing a smaller model which is easier to display, won't (hopefully) take years, and less workspace to build. So I thought - where to start? I managed to pick up the cross-section kits from DeAgnosti of Victory (1/72) and Endeavour (1/48) off a builder who only did the main ship builds. And I have a HMS Vanguard (1/72) with a damaged hull which I'll use as a basis for a cross-section of that, and there's some other nice kits and pracitums out there now. But to start, I thought I'd go for something potentially simpler. Enter, the Modeller's Shipyard HMS Sirius. I won't go on too much about the ship itself, many are familiar with the flagship of the First Fleet which settled Australia. But in short it started life as Berwick, built in 1780 then bought by the Royal Navy in 1781, she had a few adventures before being renamed Sirius in 1796 as a 6th-rate and prepared for the journey to New South Wales. Wrecked in 1790 off Norfolk Island. As for the kit - some contents pics below before I get started. All timber and fittings appear nicely done, with the deck planking laser-engraved sheets rather than initial planks. I'm thinking of using these for simplicity this time around. Mine weren't engraved very well, so I'm waiting on replacements. Not as many parts as a proper kit, but all nicely packaged. I can't comment on accuracy at this point - I read some questioning of the full HMS Sirius kit by MS, but as I get the frames made I'll do a measure against drawings I have. Instructions appear very good, but no actual scale plans are included. In terms of improvements I plan, beyond individual planks TBC, I will aim to: - add copper plates, since multiple sources describe the ship as being coppered - add more items in the hold. It comes with a few barrels and an (anchor?) cable, but records state she was heavily laden for the voyage so I'll add more barrels, sacks, etc - maybe even the ship's surgeon's piano it reportedly carried! - replace engraved gratings with built-up wooden ones - improve mess deck details like the hammocks, tables, etc and add lanterns (lanthorns?), maybe some gear, etc - include additional cannon details and tools - try to make nicer barrels - and maybe other improvements like pumps, any identified missing rigging details, etc. So, thanks if you've read this far! I hope to make a start on it this weekend, along with setting up a space for "indoor" tools (any major surgery will be done in the shed). Really this intro is just to motivate me to start, and complete, a build log 🙂
- 8 replies
-
- Sirius
- cross-section
-
(and 1 more)
Tagged with:
-
Thanks Bob. Good point on it attracting dust, and weaken the rigging. Will give it a miss and stick to paint or shellacked black rigging. Just checking I wasn't missing some amazing new development in my absence from wooden ship building 🙂 Darren
-
Hi all, Does anyone have info or instructions on making model barrels from individual staves, made from glued-up wedges of wood? I recall seeing a tutorial on a scale model horse-drawn wagon forum (now defunct) many years ago. I'm sure it was using a calculation to divide a circle into the required number of staves, then working out the angle to rip these on a mini tablesaw. They were then glued up and turned on a lathe. Making the barrel shape naturally gave the 'staves' a narrow top and bottom. Looked quite convincing, and I'd like to try this vs the laminated staves on a form. I plan to try and work it out myself, but maths isn't my strong point so wondered if anyone had tried this or knew of a tutorial? A search here and on google didn't turn up anything. Will share if I work it out! Second, maybe easier question - what's best for the iron hoops? Given the shape, I imagine brass would be hard to get the flare(?) to lie flat. Perhaps black lining tape or similar? Open to ideas 🙂 Thanks, Darren
-
Hi all, Browsing an online store to see if I needed to add anything to an order, and I came across "black rigging wax". Looks like the clear/natural beeswax I'd used in the past, but a black paste. Hadn't seen it before. Does anyone use this or have opinions on it for tarred/blackened rigging? Not sure if it would dye natural rigging black enough, or end up being a messy coating. Seems like a good idea if it's suitable to give a shiny, tarred look to standing rigging. Willing to pay the price to experiment, but thought I'd ask - a search only turned up a brief mention in an old build log. Thanks, Darren
-
Thanks all. I figured it was a minefield and it would certainly vary by ship, location, age, navy vs merchant, wood, etc. So some great information so has given me some guidance and stuff to think on. As mentioned, I realised many kits came with 5mm planks regardless of scale so figured there had to be some form of real-world convention or formula. Wefalk's point about size and strength in relation to fastenings and Bob's on the amount of bend make sense too. Similarly on Steven's point they got narrower, certainly more modern ships seem to have narrower planks than records of older ones. A starting-point at least, and seems like 10 or 12 inch up to 18 inch was the norm in many cases, allowing for variables, and gives me something to go on. I don't think I have Mondfield's book, will have a dig around otherwise will order it. Off to do more thinking and research, as always! Thanks, Darren
-
Hi all, I'm returning to ship models after a break, with a couple of scratch builds (no sense starting off easy!). One thing I'll need to work out is the planking, and it got me thinking...are there any "standards" or practices on plank width? I understand a private shipyard would do what works for them, but like with hull shapes and other conventions, was there any accepted or ideal widths? Maybe even Naval yard practice? It got me thinking as it seemed a lot of kits supply 5mm wide planks regardless of scale (for most kits around the 'mid' scales of say 1/24 to 1/80 or so anyway). So this seems just convenience from a supply/parts perspective. But did any navies or Joe Shipwright down by the river work to anything that said "ideally start with a plank 8 or 12 inches wide" or "x number of planks per foot" or "the largest practica to get a bend and acceptable taper" or something? So a mix of curiosity and wondering if in say 1/48 I just grab 4mm or 5mm planks or do "what looks right to me"? May not be an answer or logic but curious if there is. Thanks, Darren
-
Hi Steven. Happy to catch up sometime. I do get to Ballarat regularly (the closest Bunnings!) or let me know if you head up this way. I've also just joined the Ship Model Society of Victoria so hoping to meet a few people through that once meetings start up again. You have a couple of very interesting builds there! Darren
-
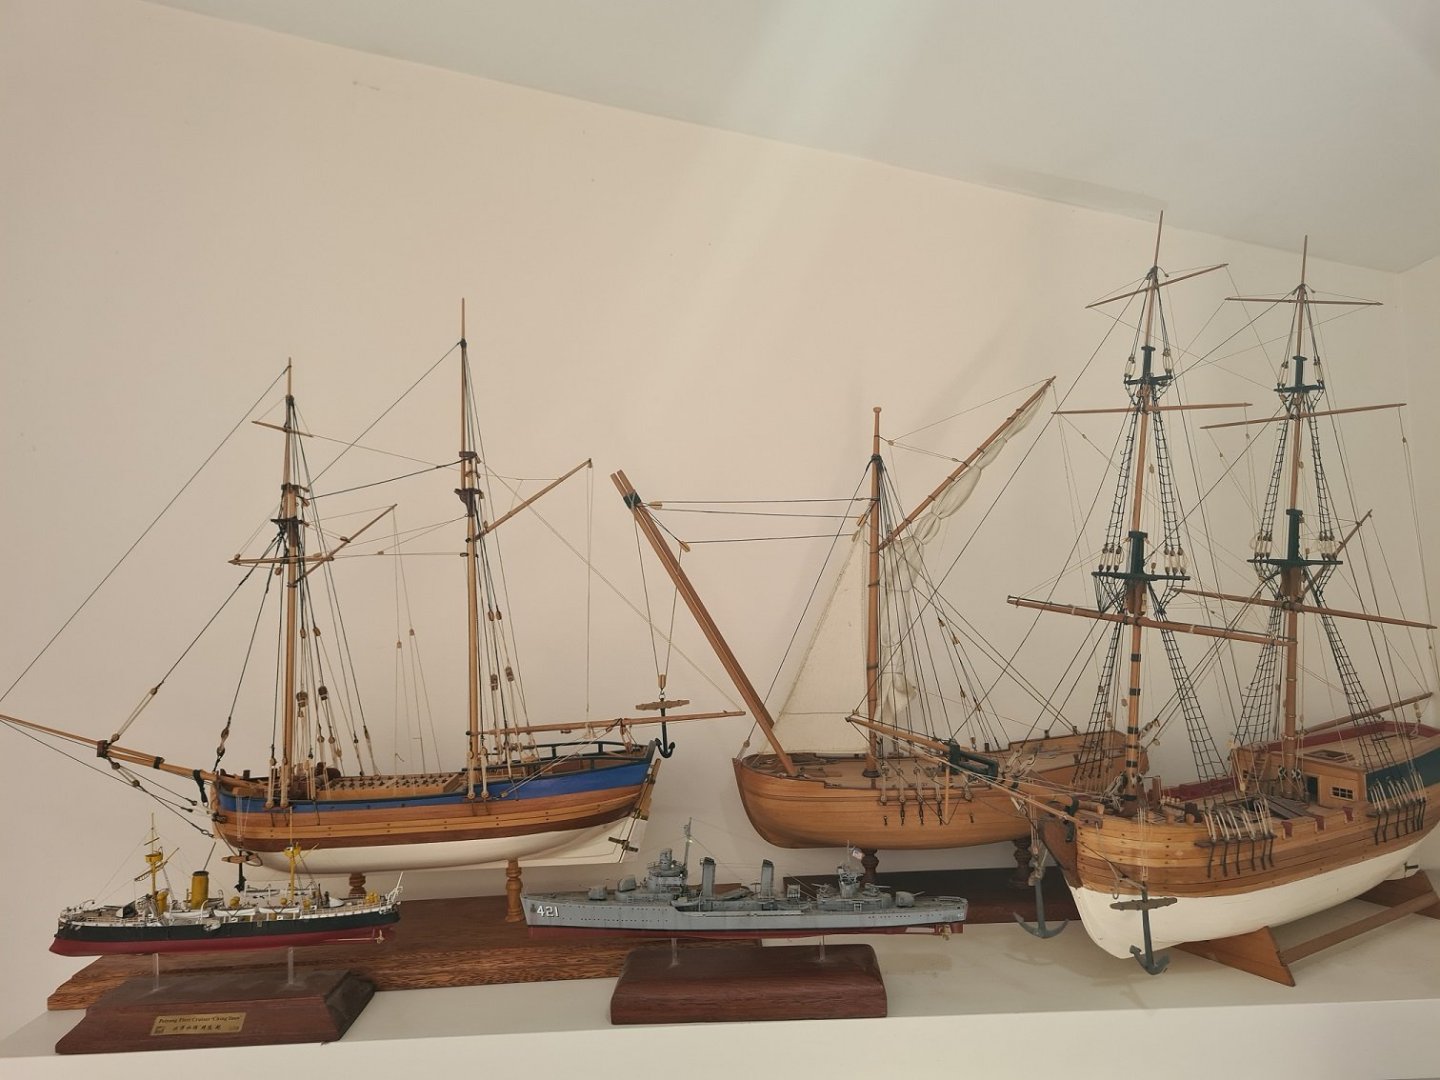
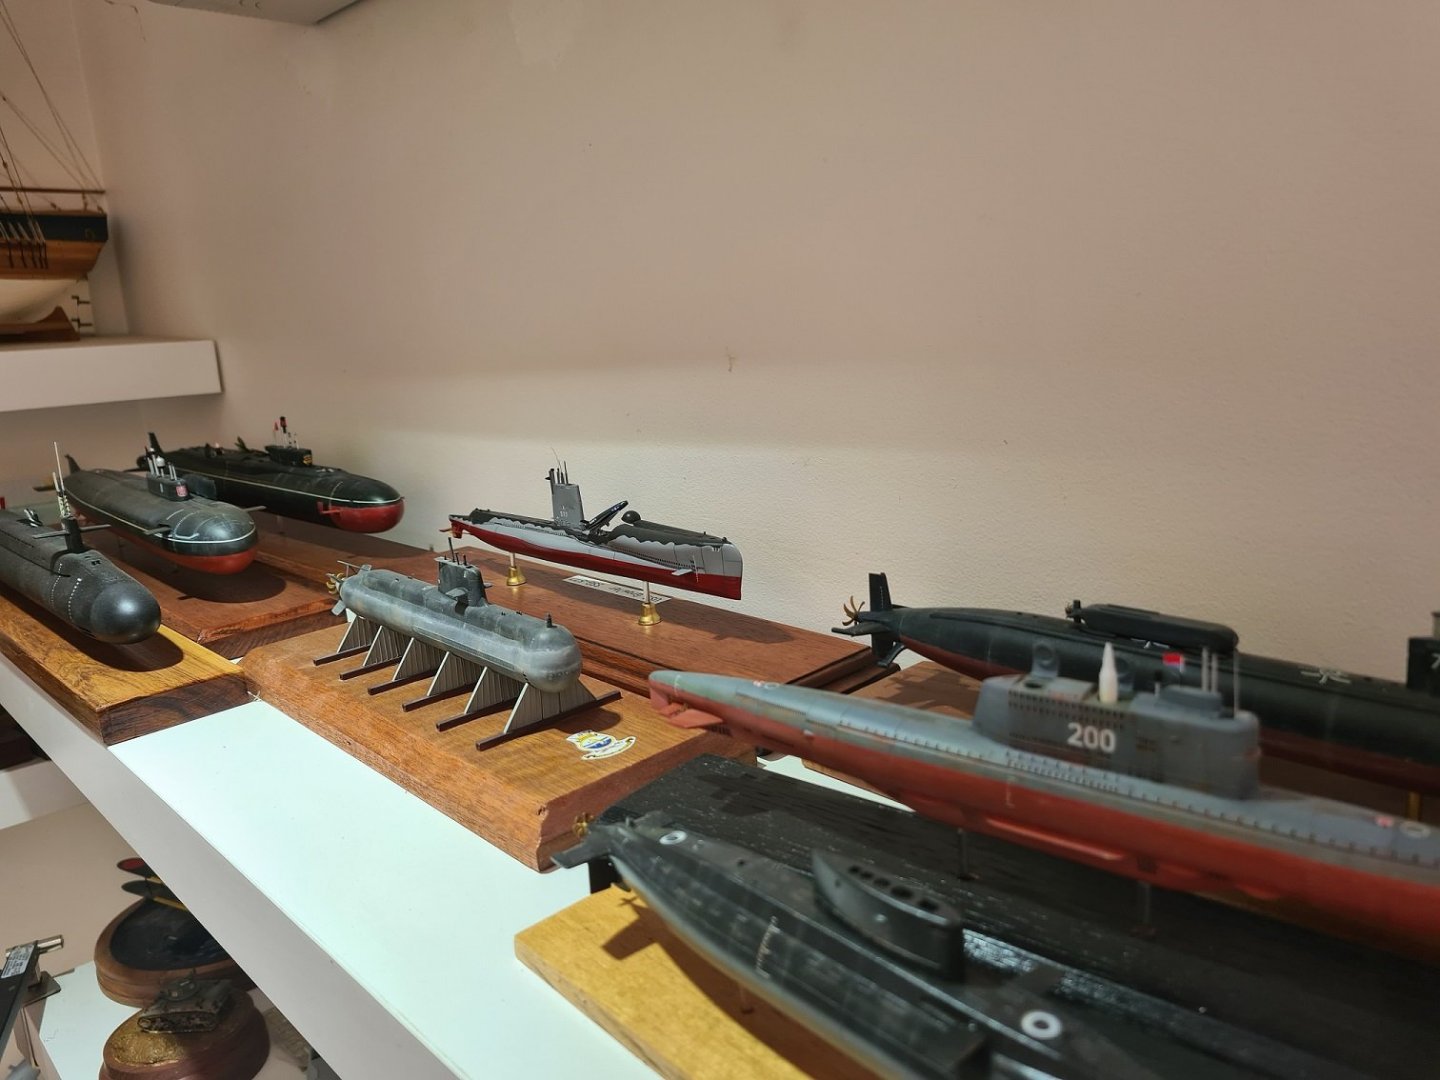
Hi all, Thought I'd say hello. I am returning to wooden model ships/boats after doing plastic kits for around 7 years... it was 2013 las time I posted here it seems, apart from a couple of posts in 2017 on plastic things. But time to get back to the good stuff! I stopped when we renovated our house and I lost my workshop - I mainly scratch-built so didn't have space in the house for tools, so picked up a couple of plastic ships and that led down the path of plastic kits for the intervening years. Now in a new place with a lot more room, I've decided to get back to wooden models. At this stage I'm starting back up with kits - I have started the Pinnace and next up is the Longboat both in 1/24 from Model Shipways. Very nice kits (thanks Chuck). But a few scratchbuilds planned in the future. A few of my past builds pictured below for your amusement - 3 wooden ships (1/50 Schooner for Port Jackson from Modeller's Shipyard, and two scratchbuilds, 1/48 Sheer Vessel and 1/64 HM Brig Supply) plus a few more recent plastic ships and subs in 1/350. Other wooden boats are relegated to the shed for now. Looking forward to learning more as always and contributing where I can. Darren Australia
-

Enamels vs. acrylics
TK1 replied to Techsan's topic in Painting, finishing and weathering products and techniques
Acrylics don't smell as much, are easier to clean up, and now offer a lot more variety of colours. I find them much easier to airbrush (thinned properly and using a retarder - and again smell less when sprayed). But generally harder to brush - need to be thinned right and again retarder helps slow drying time so you get a smoother surface. So where possible, I'll still paint details with enamels. Much better coverage and control for tiny parts. And they seem to finish better on wooden ships. So I use both depending on the situation. Still use the old Humbrol tins. -
Hoping someone here can assist. On browsing the site recently I was a WIP (in the Gallery no doubt) of a plastic ship where the lower hull was first painted white or cream, then random spray patterns were applied, before a light coat of hull red. I'm keen to give it a try but wanted to revisit the pics and comments - but for the life of me I can't find it. I've scrolled through all the fairly recent kit build logs I can see of plastic ships but none are what I am looking for. Does anyone recall this or have a link (or comments on) how to achieve this weathered finish. It looked great. I'm sure I could give it a shot from memory, but the technique and colours were described well as far as I can recall. Thanks in advance, Darren
-
Hi Kevin, I have the Pontos set and can't complain about it. It's made for the Revell kit and although I am yet to start it, all parts look excellent and well made/thought out. Can't wait to get into it after my current builds - one of which is the HMS Warspite with Pontos set, and it's excellent with good fit and really enhances the look. I haven't heard a bad review on it - the only detraction I've read is that some of the parts are tiny, and need folding/joining, so it does need a steady hand and PE experience. Worth having some PE tools too, I've picked up the PE benders and rollers from thesmallshop.com. and couldn't live without them. Regards, Darren
-
Hi, Just getting back into the hobby and thinking about the next couple of scratch-builds as well as my workshop set-up, and got thinking about the possibility of using a small CNC machine for cutting out bulkheads and some other parts. To keep it simple, I'm thinking of a 2-axis machine only, straight cutter bit, that would fir say a 300mm x 600mm (or even 900mm) piece of ply, and be able to cut thicknesses up to 6mm. Would just be a matter of plotting plans in a CAD program to then have the keel and all the bulkheads cut out. Now, it may be quicker to still trace parts on the wood and cut out with a bandsaw/scrollsaw and then sand, but CNCing would give a more accurate cut, no (or little) finish sanding and repeatability. I'd be interested to know if anyone else has looked into this, and if they consider it either worthwhile or a waste of time/money/effort (I'd probably do a kit one to keep costs down). Or do you feel it take something away from scratchbuilding (I'm focussing on POB models here). So, any thoughts on practicality, use, benefits for the ship modeller? I couldn't see any other topincs here relating to it. And if you have one or have thought of it, any pointers on plans, etc? Thanks, Darren
-
Hi, Great purchase Per. My 2 cents - I bought some many years ago and haven't picked up a western saw again. Absolute joy to use, and I tend to pick up one of these even before considering firing up the tablesaw or drop-saw for full-size wood projects. Cut through tough Aussie hardwood quickly and cleanly (So Meredith, doefinitely worthwhile for bigger stuff). I don't know anyone who's tried one and regretted it. And for model ships, clean, straight cuts with little or no clean-up of the cut needed. And small ones are relatively well-priced. Anja - the difference to Western saws is they cut on the pull stroke, so the blade can be a lot thinner (as it's not being forced through the wood from behind). Plus they have a different style of teeth, which also allows for a thinner kerf and fast, clean cut. The double-sided blade allows rough and fine cuts with one saw (although some are crosscut and ripping too). The curved/sharp tip allows plunge cuts. Check out Japanese handplanes, clamps, chisels/carving and other tools too. Wonderful to use and own. Sorry to ramble, just a big fan and happy to convert others Regards, Darren
-

Green Graphed/scaled work bench mat
TK1 replied to Bill Hime's topic in Modeling tools and Workshop Equipment
Hi, I'd recommend checking craft stores, places that sell sewing supplies/dressmaking/material (whatever those places are called) and especially larger discount shops. And/or do a Google search for "cutting mat" to buy online. I found exactly the same products as hobby shops sell - from A5 up to A1 size - much cheaper than hobby stores (at least in Australia). I managed to get an A1 mat for around $30 a year or so ago, and smaller ones are regularly $10 or less. Seemed exactly the same material and quality (I certainly don't use the lines to measure or line parts up accurately). Regards, Darren -
Hi all, I've just noticed that Proxxon has released a mini planer (jointer): http://www.proxxonworld.com.au/product/surface_planer_ah_80 New to us here in Oz but seems to have been available overseas earlier. And I'mm sure there's a Micromark or similar variant floating around. I'm interested to know if anyone has had experience with it? I've looked at benchtop planers before, but they've had issues: hard to adjust, tables not true, loud motor, etc. This looks a bit more user-firendly and accurate. But at over $400 plus delivery it's a lot for something if it doesn't work. So just keen to see if there's any feedback, or is it something you'd use or like to have? I like the idea of planing small pieces of wood - cleaner and faster than sanding, but impossible on a 6" machine! I have the Byrnes thickness sander but this could be a good complement to get one edge true for thicknessing, or for tapering planks, milling small pieces accurately, etc. Regards, Darren
-

Squaring Mini Drillpress to Work?
TK1 replied to CAd My Fingers's topic in Modeling tools and Workshop Equipment
Hi, One way I check my drill press is square is by bending a piece of wire or paperclip into a "Z" shape (but approximately 90 degree bends). Then with the drill press set up, insert one end into the collet and tighten. You should have one end held in the jaws, a length coming out at approximately right angles to the centreline of the collet, and the other end pointing down to the table. Bend wire down so the tip is touching the table at some point Then rotate the collet/drill by hand, and check the other end of the wire (pointing at the table) contacts the table all the way through a 360 degree rotation. If it does, then you're square. if not, adjust the angle of the drill so it does touch all the way around. Remove wire and insert drill bit without upsetting the drill alignment, and you have it aligned at 90 degrees to the table. Hope the above makes sense...if the wire touches all the way around, the cetral point of the wire (in the collet) will be at 90 degrees to the table. Regards, Darren -
Hi Matthew, Don't burn it (well, not all of it!). As a few others said, it's good stuff (although it does burn exceptionally well, and worth a try with the salmon). Looks like the same as I have, salvaged from a 1980's pergoloa. it was used in outdoor construction in Australia a lot in the 70's and 80's but eventually subject to rot so a lot is being replaced at the moment. Grain is coarse but could be used for an 'arty' model or larger scale boat if done well, otherwise fine for a painted model (the First Fleet models in the Museum of Sydney are all predominantly cedar, mostly Surian Cedar (Australian Cedar) with some WRC and other types). The prominent grain and lighter wood makes it look like Japanese Cedar but original pics looks like some 'red' pieces also? If you're in Melbourne I'm happy to have a look at it for you. Good for general woodworking, pens, guitars and other stuff (a little short for a canoe or kayak though ). I'm sure you'll find a use for it, even if not in a ship model. A nice base, turned pedestals, a new workbench, etc?? Or sell it to woodworkers and buy that kit you want Let us know what you end up doing with it, you've got a great pile of lumber there that any woodworker would be jealous of! Regards, Darren
About us
Modelshipworld - Advancing Ship Modeling through Research
SSL Secured
Your security is important for us so this Website is SSL-Secured
NRG Mailing Address
Nautical Research Guild
237 South Lincoln Street
Westmont IL, 60559-1917
Model Ship World ® and the MSW logo are Registered Trademarks, and belong to the Nautical Research Guild (United States Patent and Trademark Office: No. 6,929,264 & No. 6,929,274, registered Dec. 20, 2022)
Helpful Links
About the NRG
If you enjoy building ship models that are historically accurate as well as beautiful, then The Nautical Research Guild (NRG) is just right for you.
The Guild is a non-profit educational organization whose mission is to “Advance Ship Modeling Through Research”. We provide support to our members in their efforts to raise the quality of their model ships.
The Nautical Research Guild has published our world-renowned quarterly magazine, The Nautical Research Journal, since 1955. The pages of the Journal are full of articles by accomplished ship modelers who show you how they create those exquisite details on their models, and by maritime historians who show you the correct details to build. The Journal is available in both print and digital editions. Go to the NRG web site (www.thenrg.org) to download a complimentary digital copy of the Journal. The NRG also publishes plan sets, books and compilations of back issues of the Journal and the former Ships in Scale and Model Ship Builder magazines.


