mikegr
-
Posts
578 -
Joined
-
Last visited
1 Follower

Recent Profile Visitors


-
 mikegr reacted to a post in a topic:
HMS Hood 1941 by Johngr - FlyHawk - 1:700 - PLASTIC
mikegr reacted to a post in a topic:
HMS Hood 1941 by Johngr - FlyHawk - 1:700 - PLASTIC
-
mikegr reacted to a post in a topic:
HMS Hood 1941 by Johngr - FlyHawk - 1:700 - PLASTIC
-
Bill Morrison reacted to a post in a topic:
USS Curtis Wilbur DDG-54 by patrickmil - I Love Kit - 1/200 - PLASTIC
-
Bill Morrison reacted to a post in a topic:
USS Curtis Wilbur DDG-54 by patrickmil - I Love Kit - 1/200 - PLASTIC
-
TurkSailor reacted to a post in a topic:
Rebuilding the fleet by mikegr - 1/700 - restoring old plastic models
-
mikegr reacted to a post in a topic:
Fifie by TurkSailor - Amati - 1:32
-
 mikegr reacted to a post in a topic:
Type 45 Destroyer by mikegr - 1/700
mikegr reacted to a post in a topic:
Type 45 Destroyer by mikegr - 1/700
-
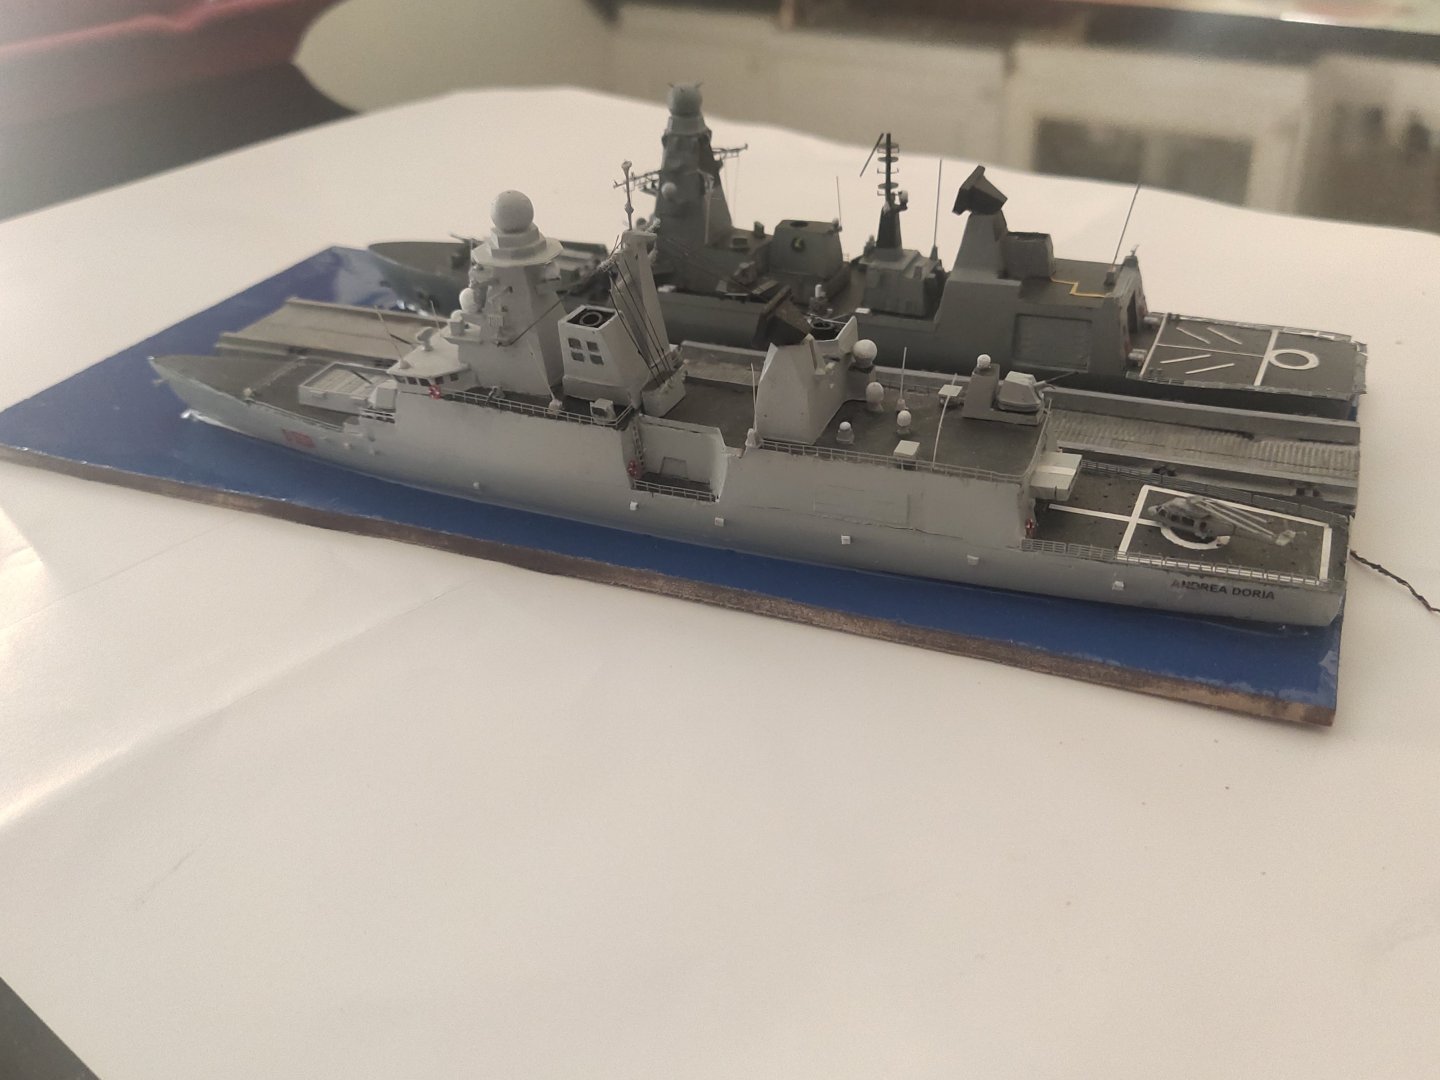
Type 45 Destroyer by mikegr - 1/700
mikegr replied to mikegr's topic in - Build logs for subjects built 1901 - Present Day
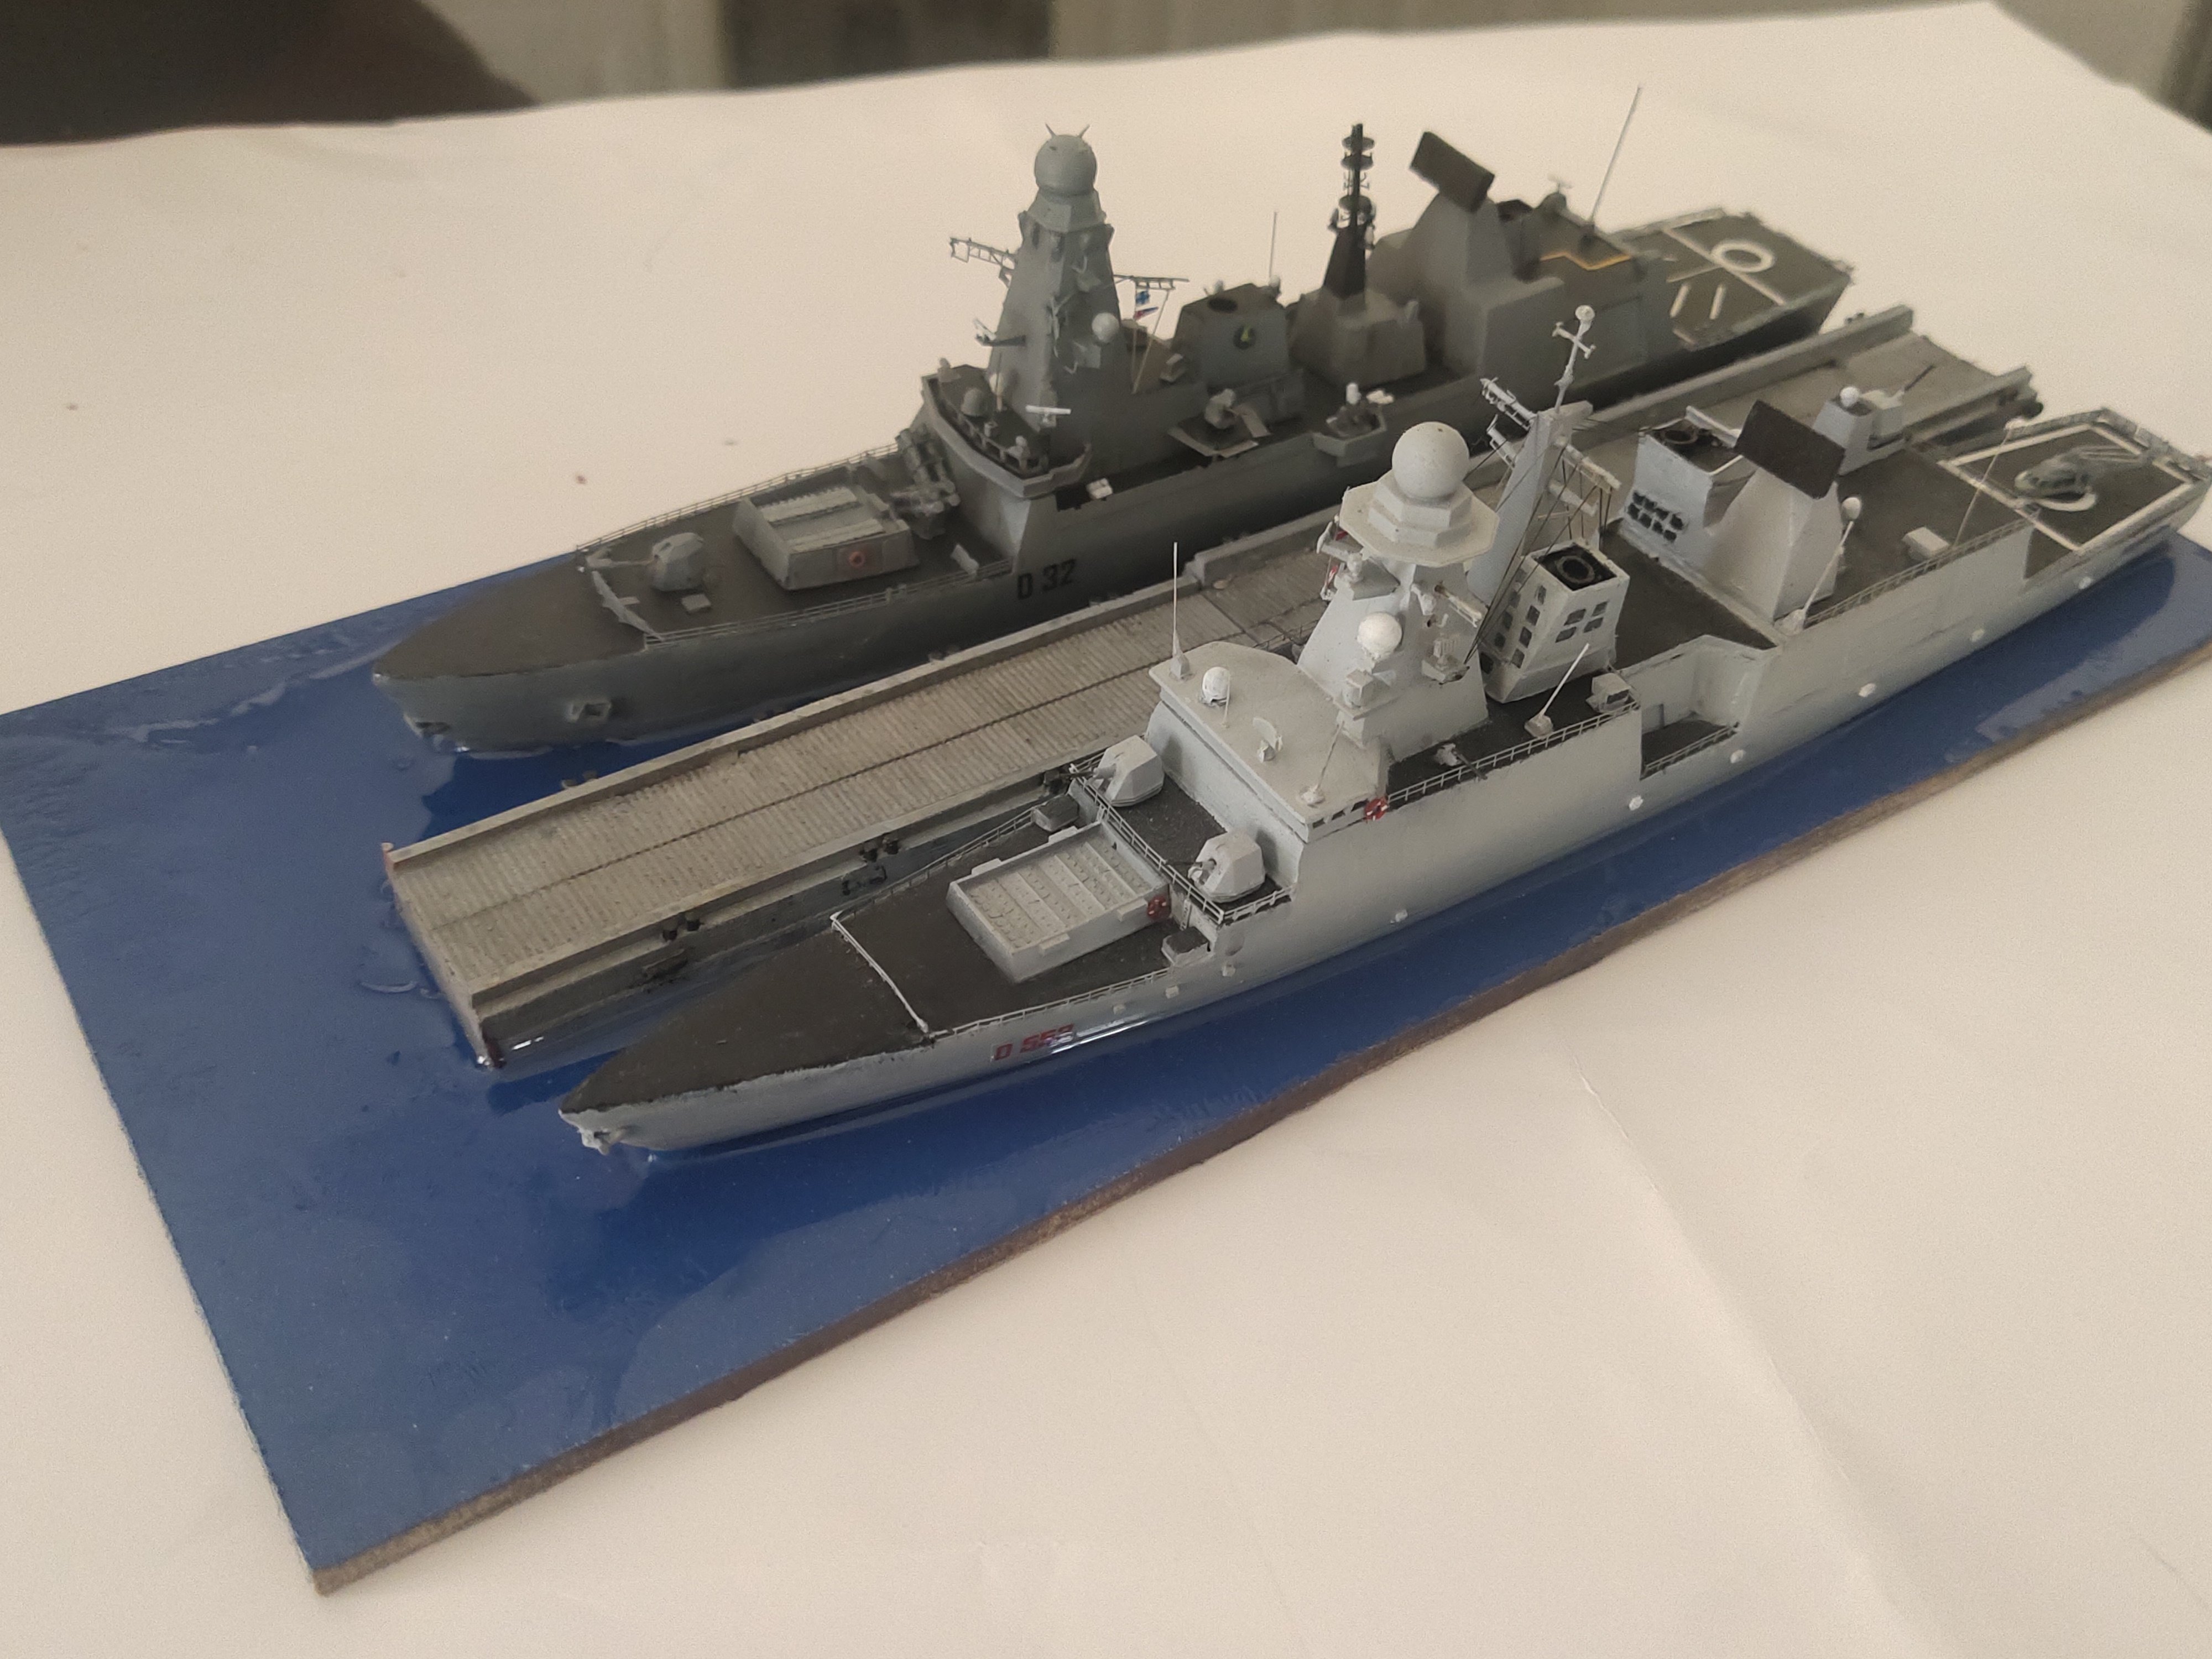
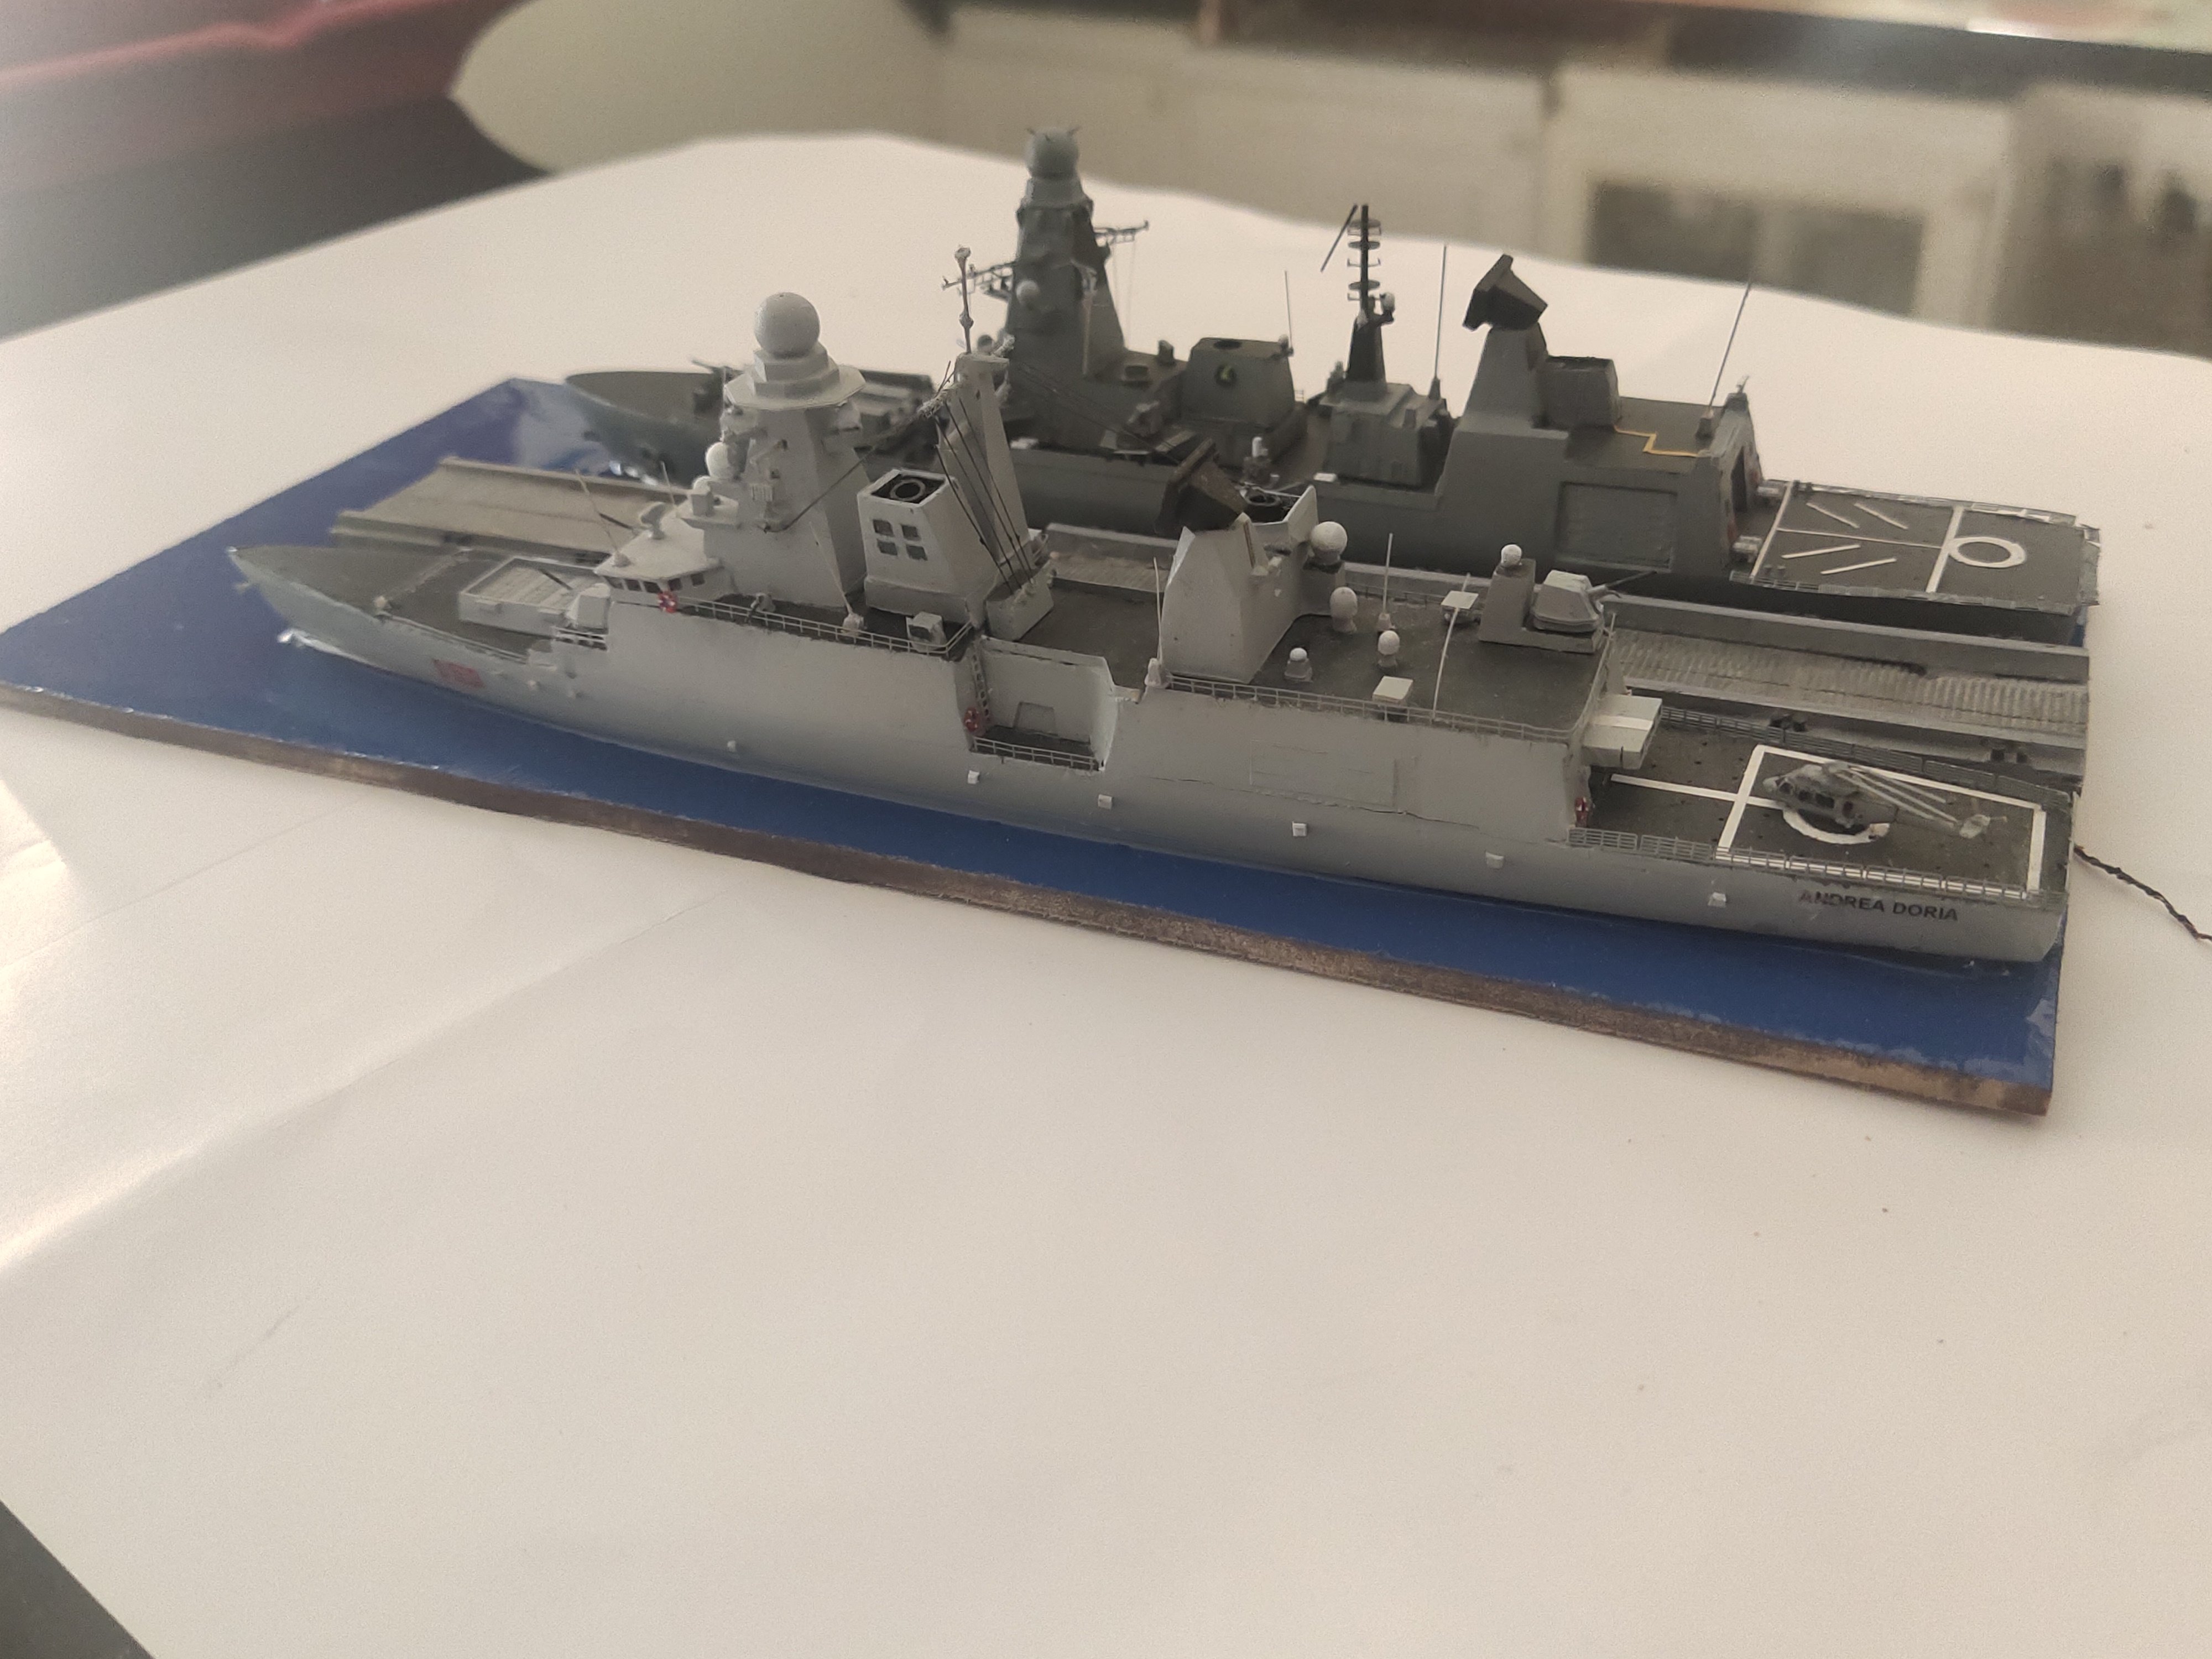
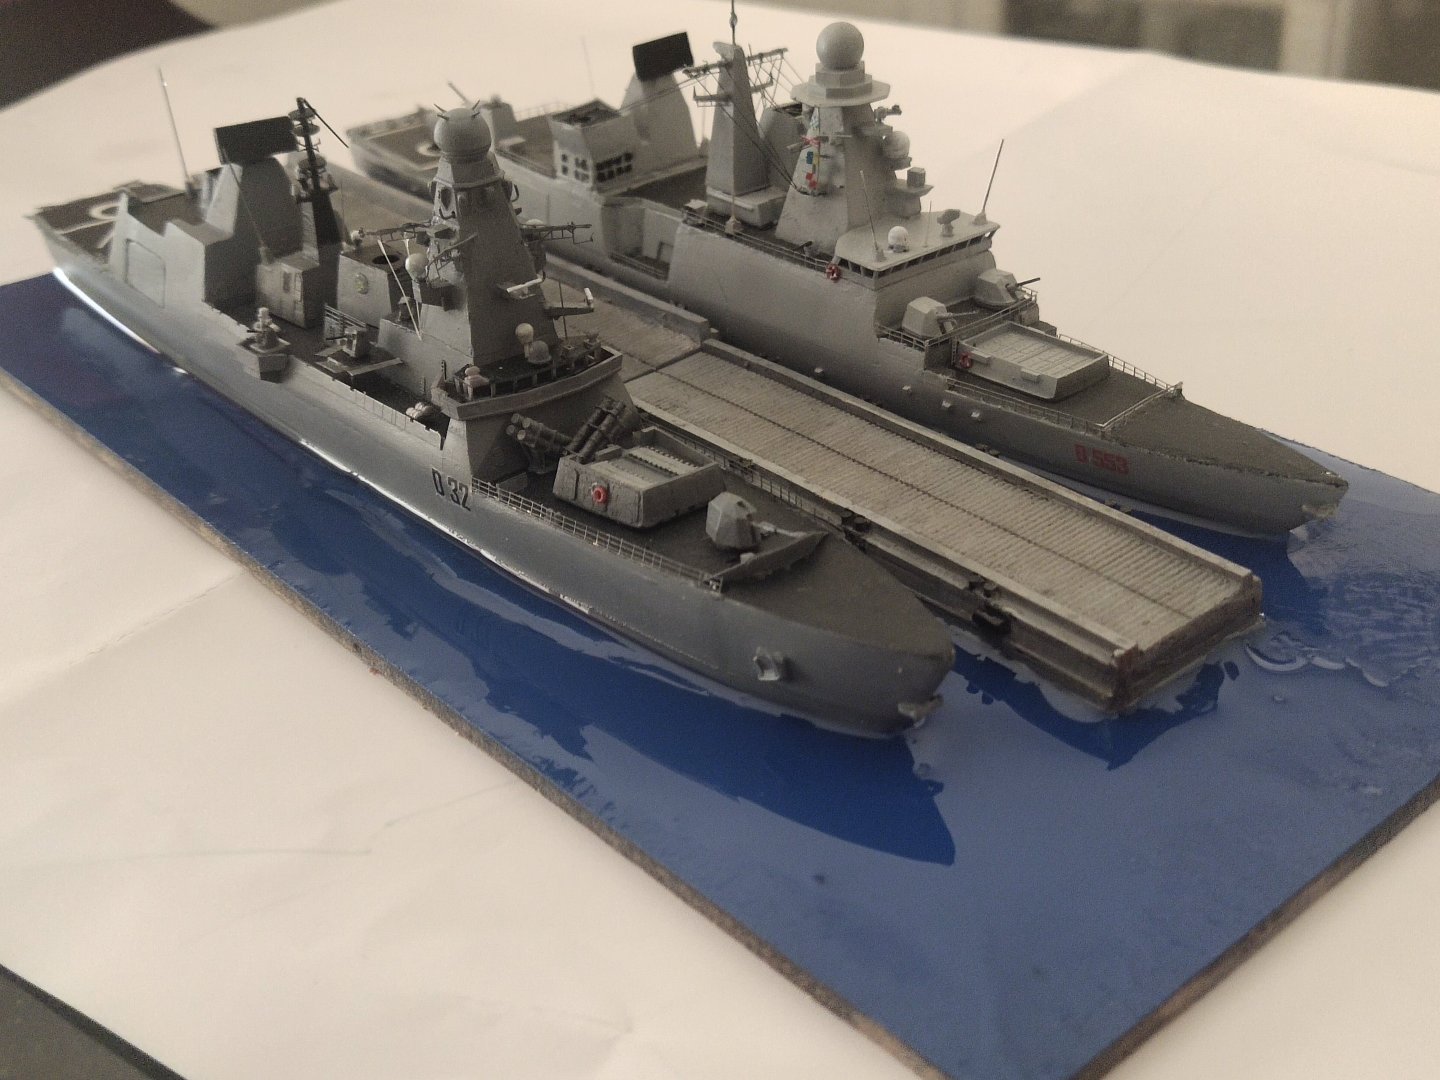
I pour the resin and added a second part of dock. In my hurry to finish it yesterday I made a rookie mistake and forgot to check it the surface was flat so the small inclination so the resin was distributed unevenly. Anyway the purpose was just to display the ships together.
-
mikegr reacted to a post in a topic:
HMS Spiraea and HMS Zinnia by king derelict - Mirage Hobby - 1/350 - PLASTIC - Flower-Class Corvettes
-
Type 45 Destroyer by mikegr - 1/700
mikegr replied to mikegr's topic in - Build logs for subjects built 1901 - Present Day
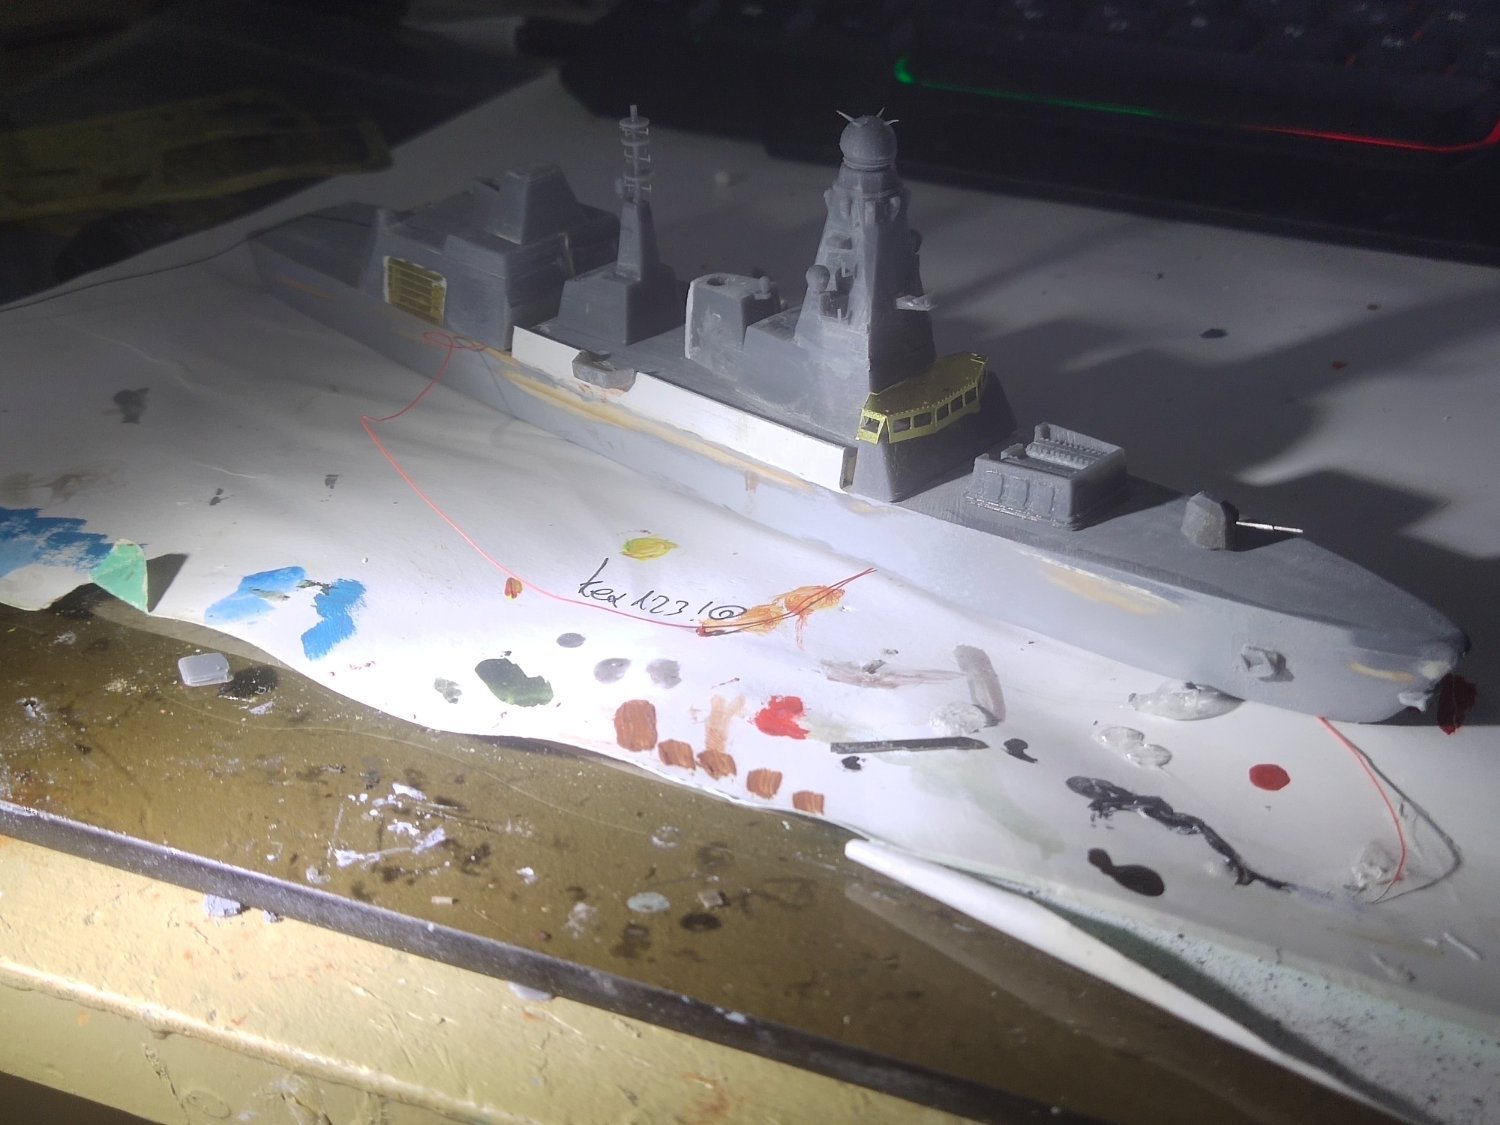
So I proceed finishing the model with final details. I put it aside with the Horizon class and add a drydock. Tomorrow I will pour the resin. It will be a simple sea representation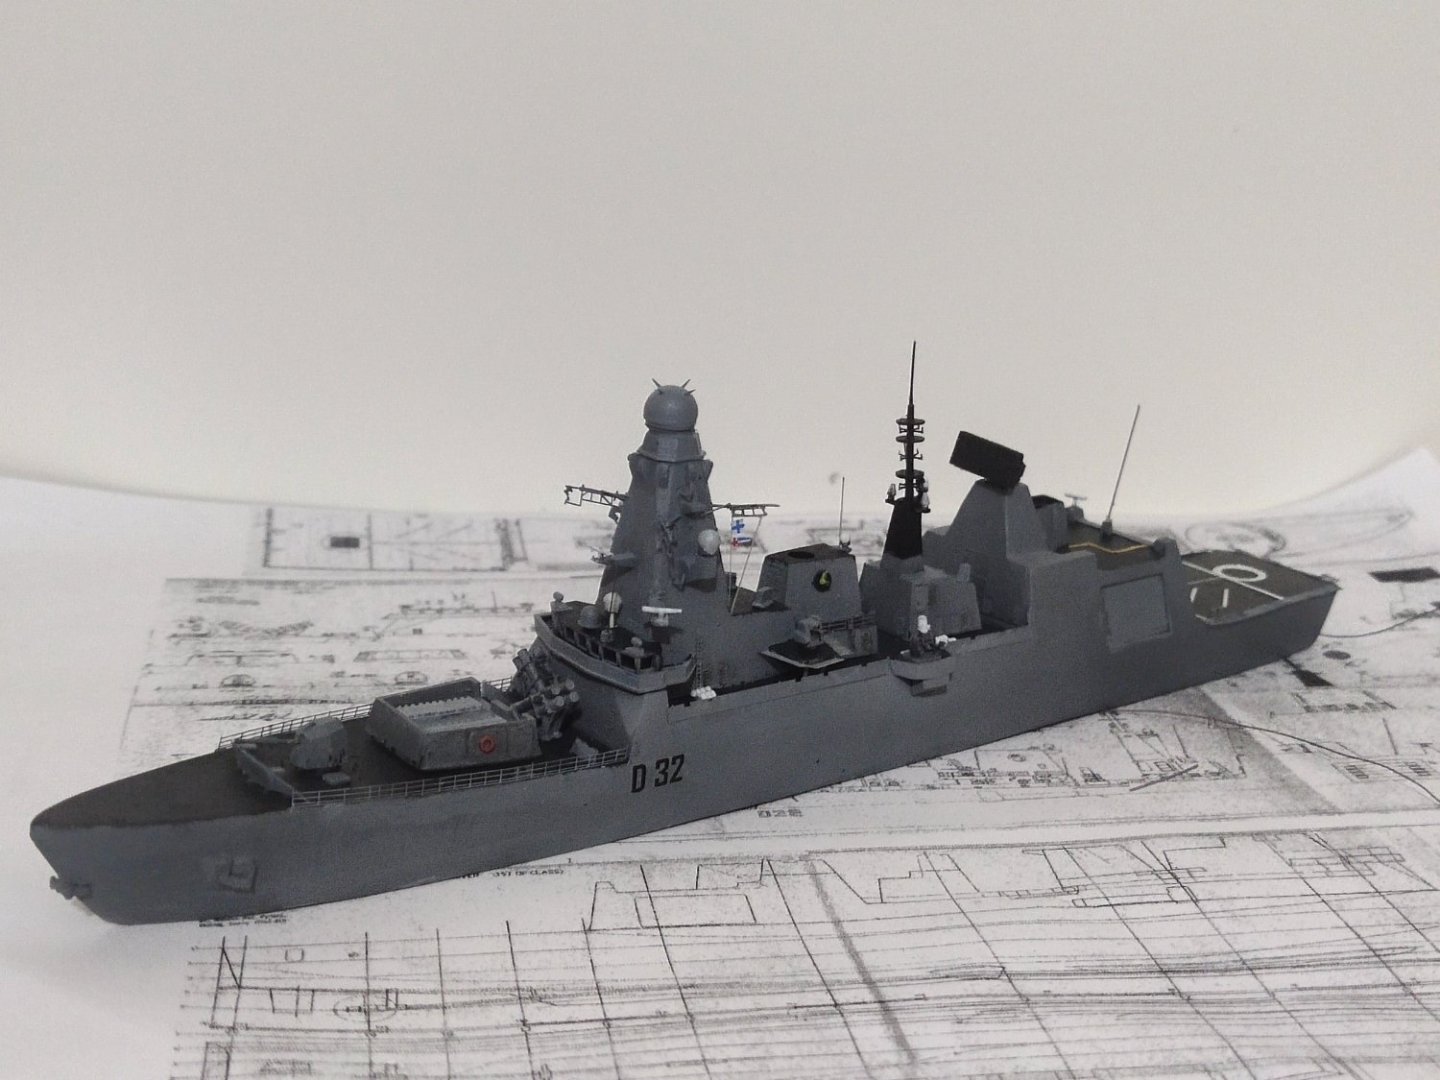


-
Type 45 Destroyer by mikegr - 1/700
mikegr replied to mikegr's topic in - Build logs for subjects built 1901 - Present Day
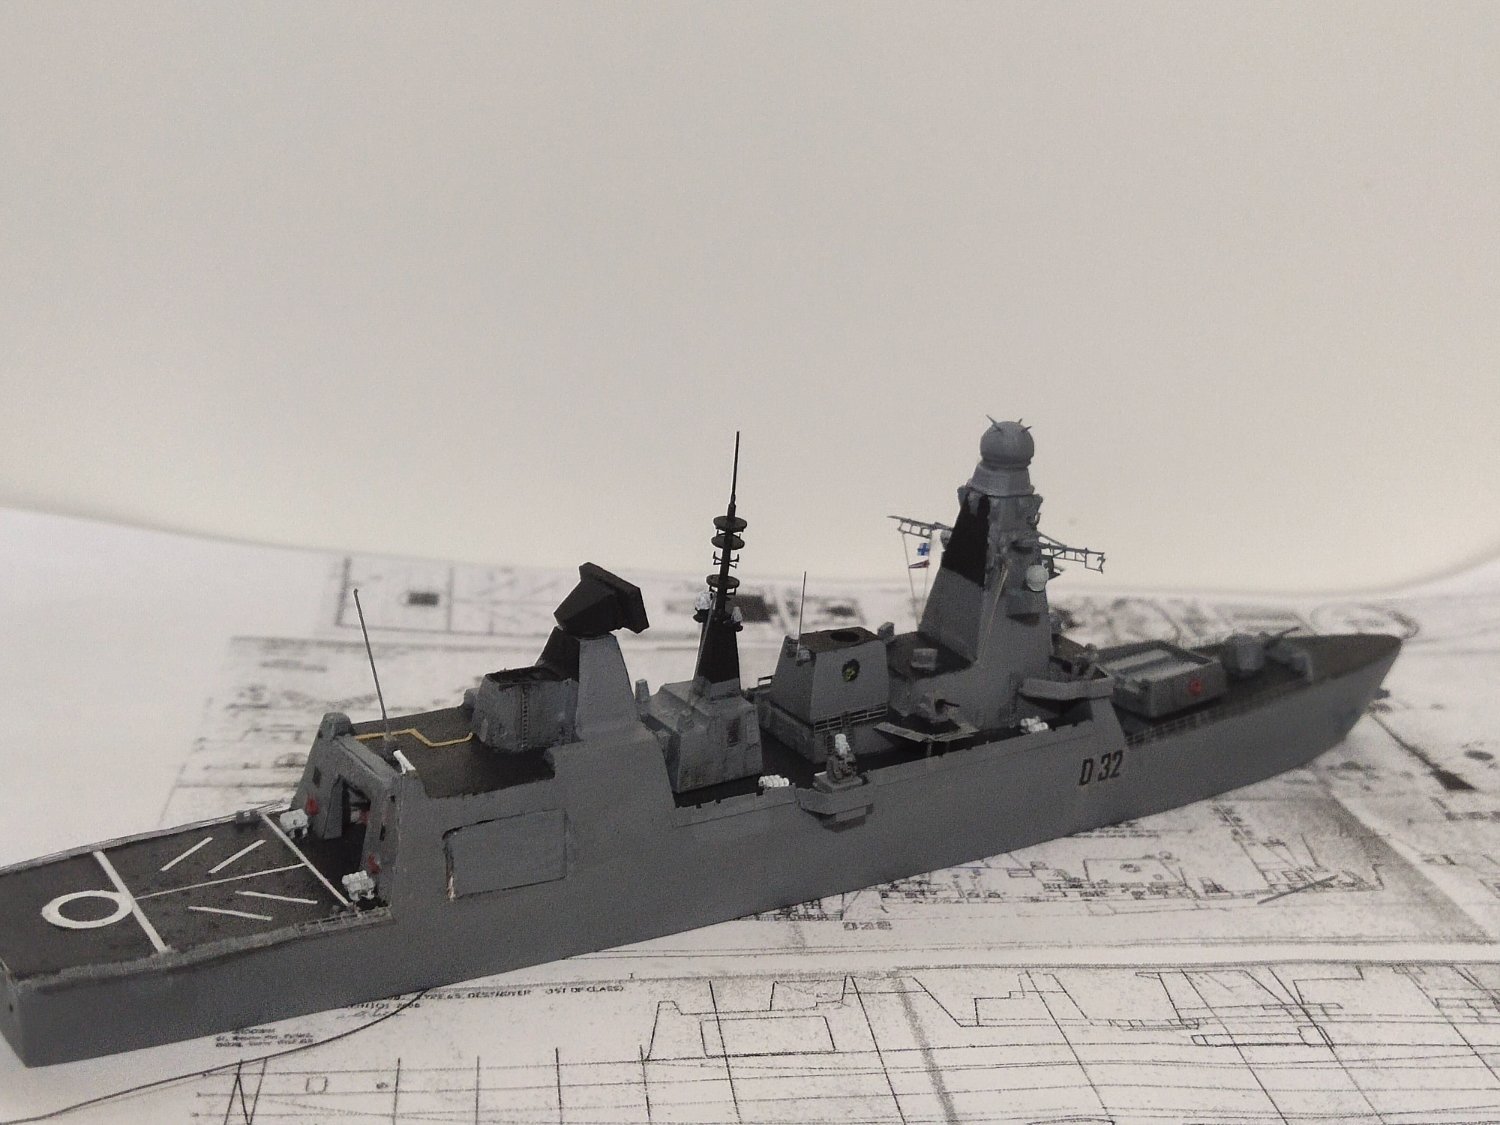
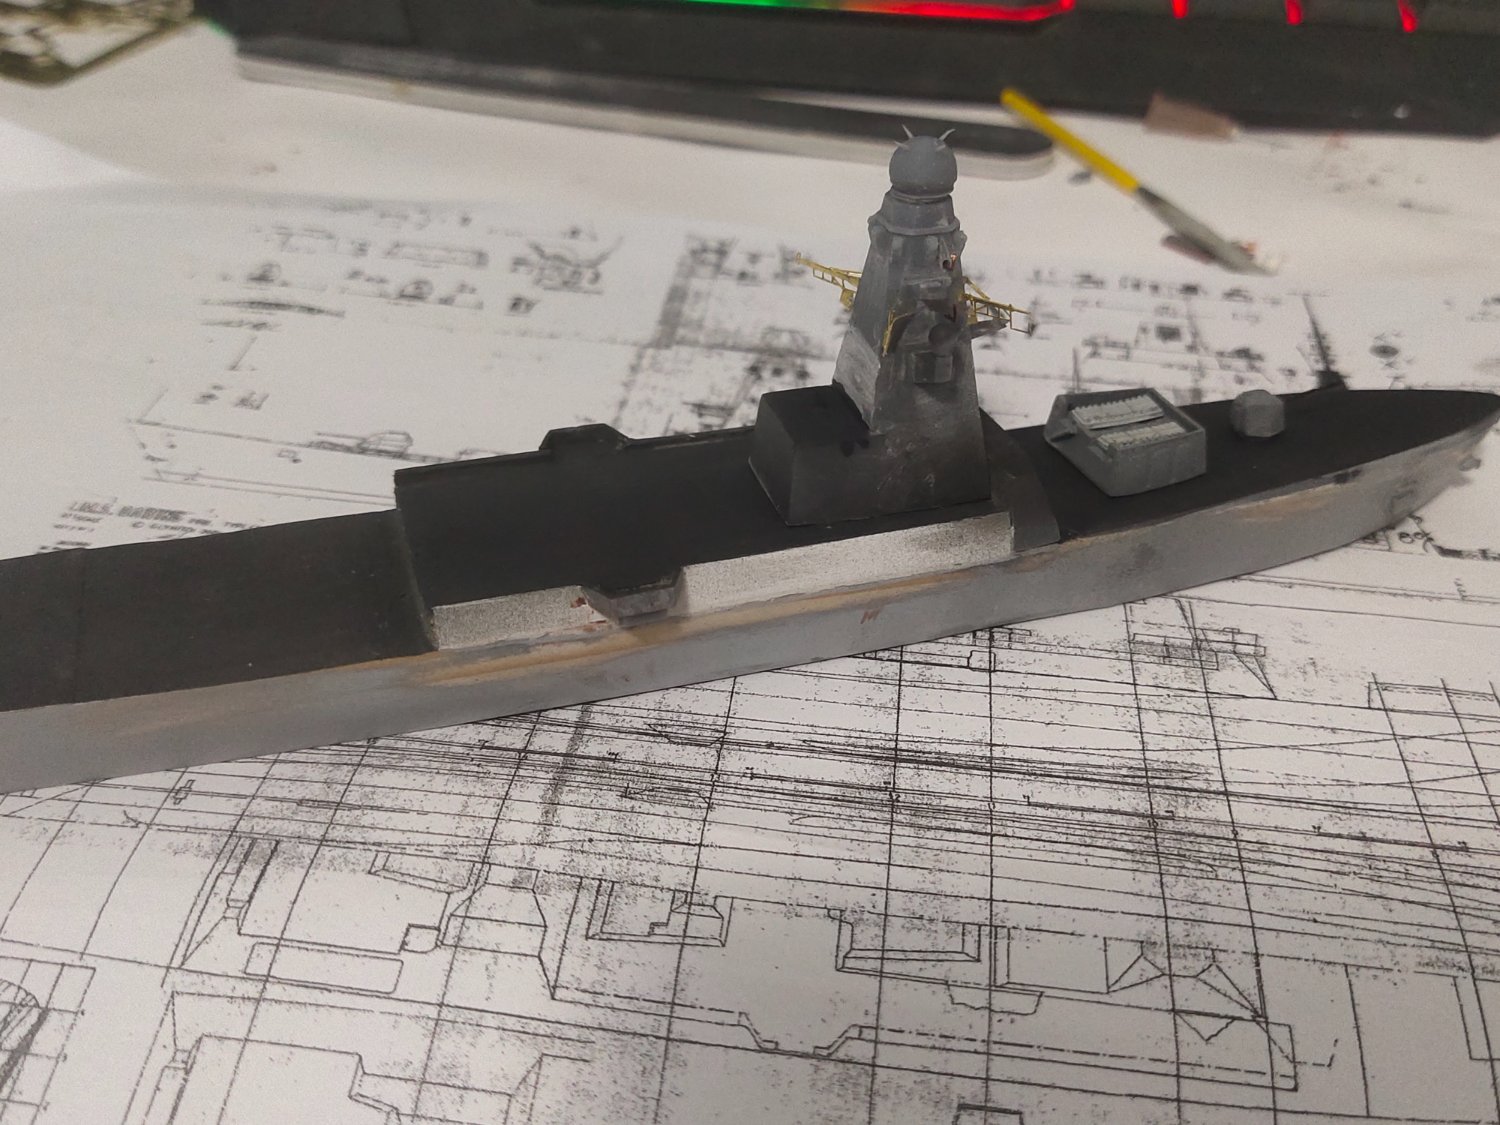
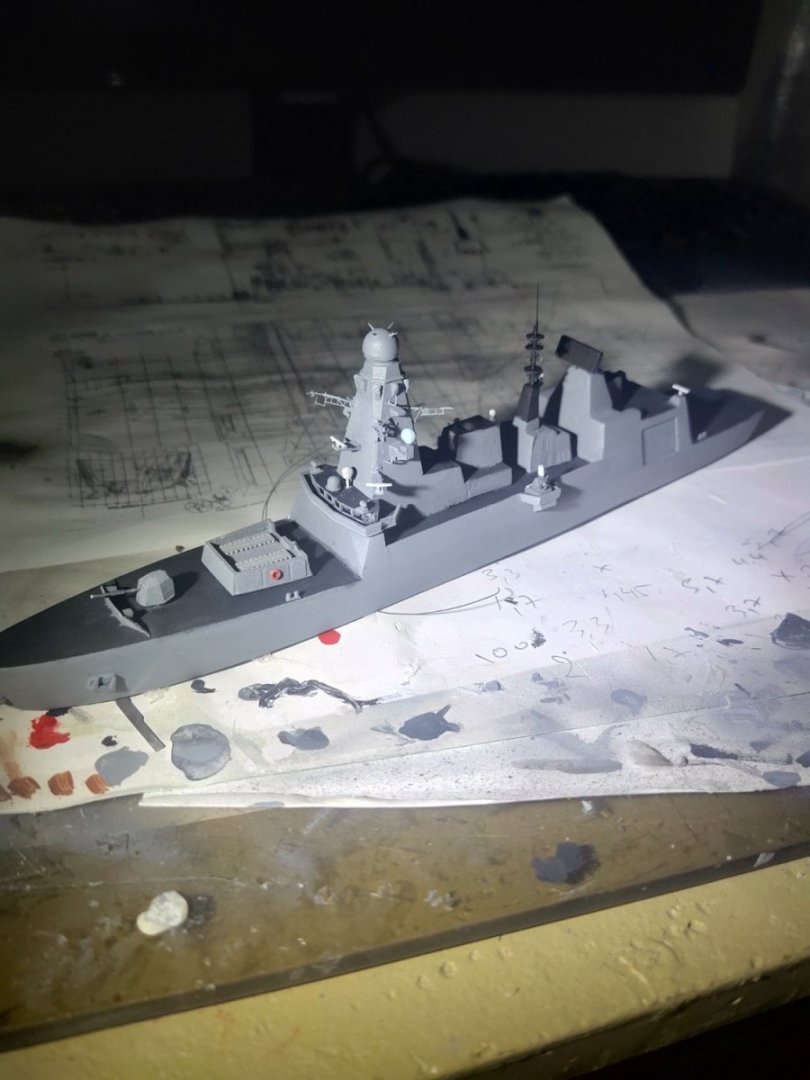
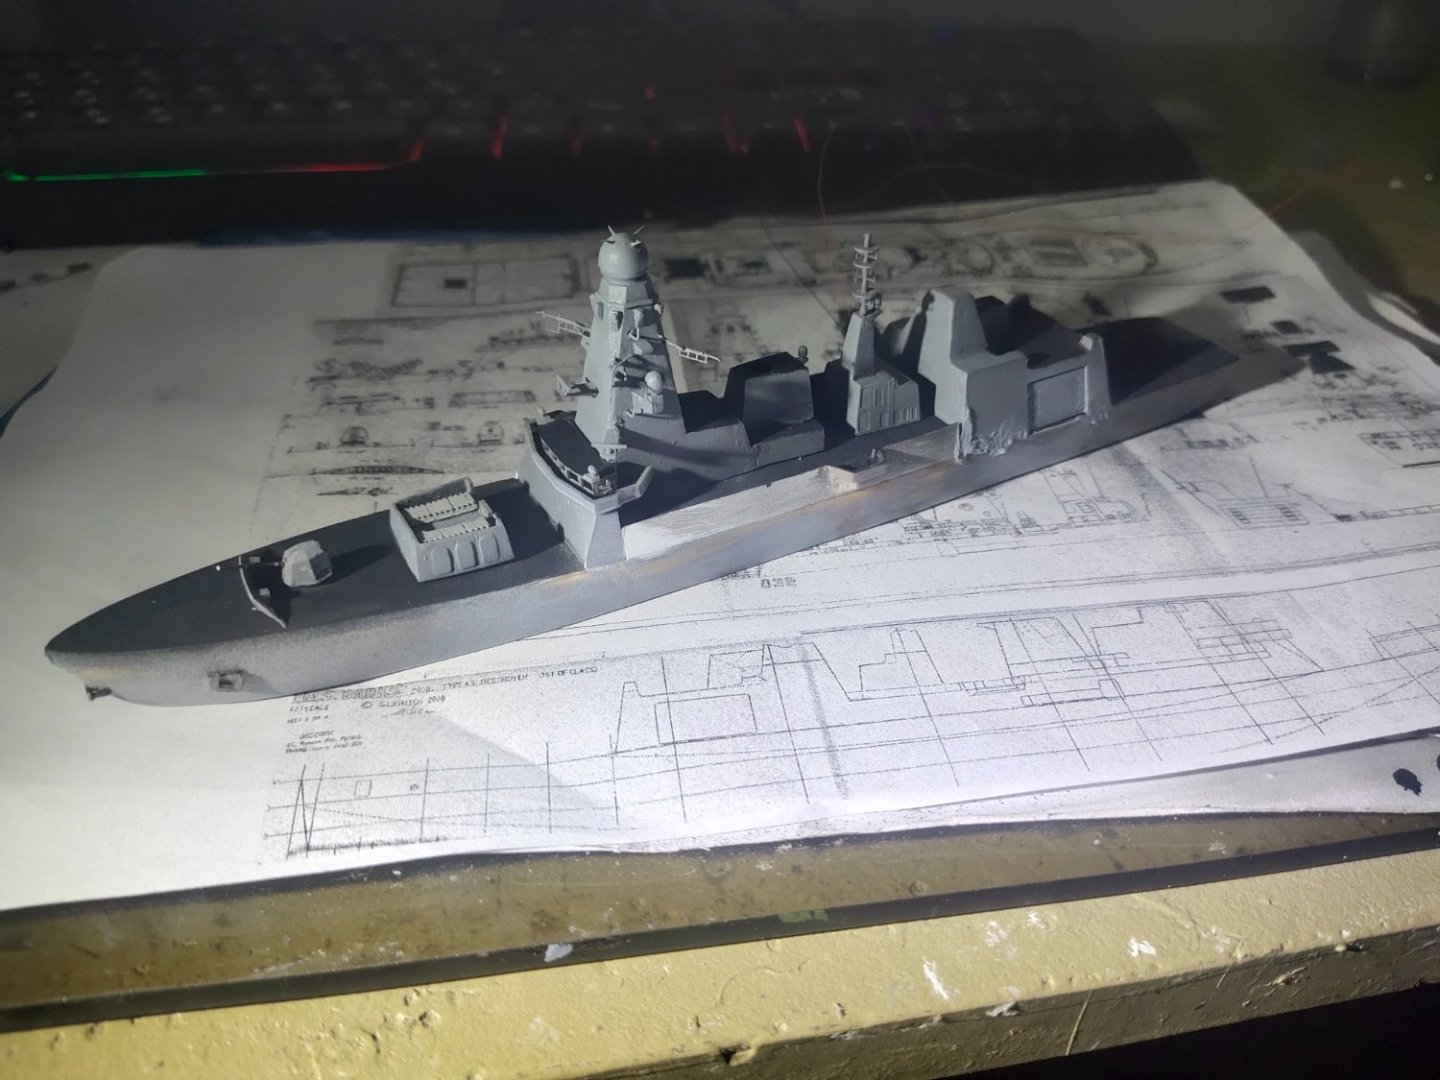
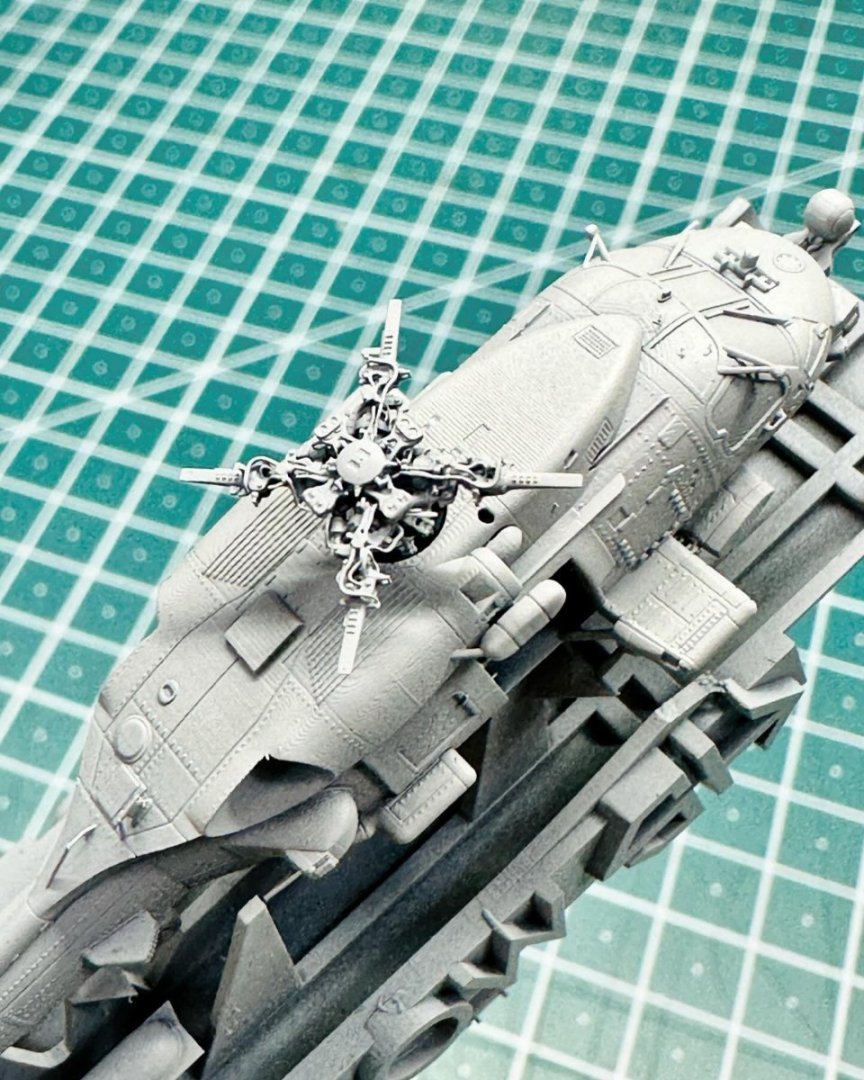
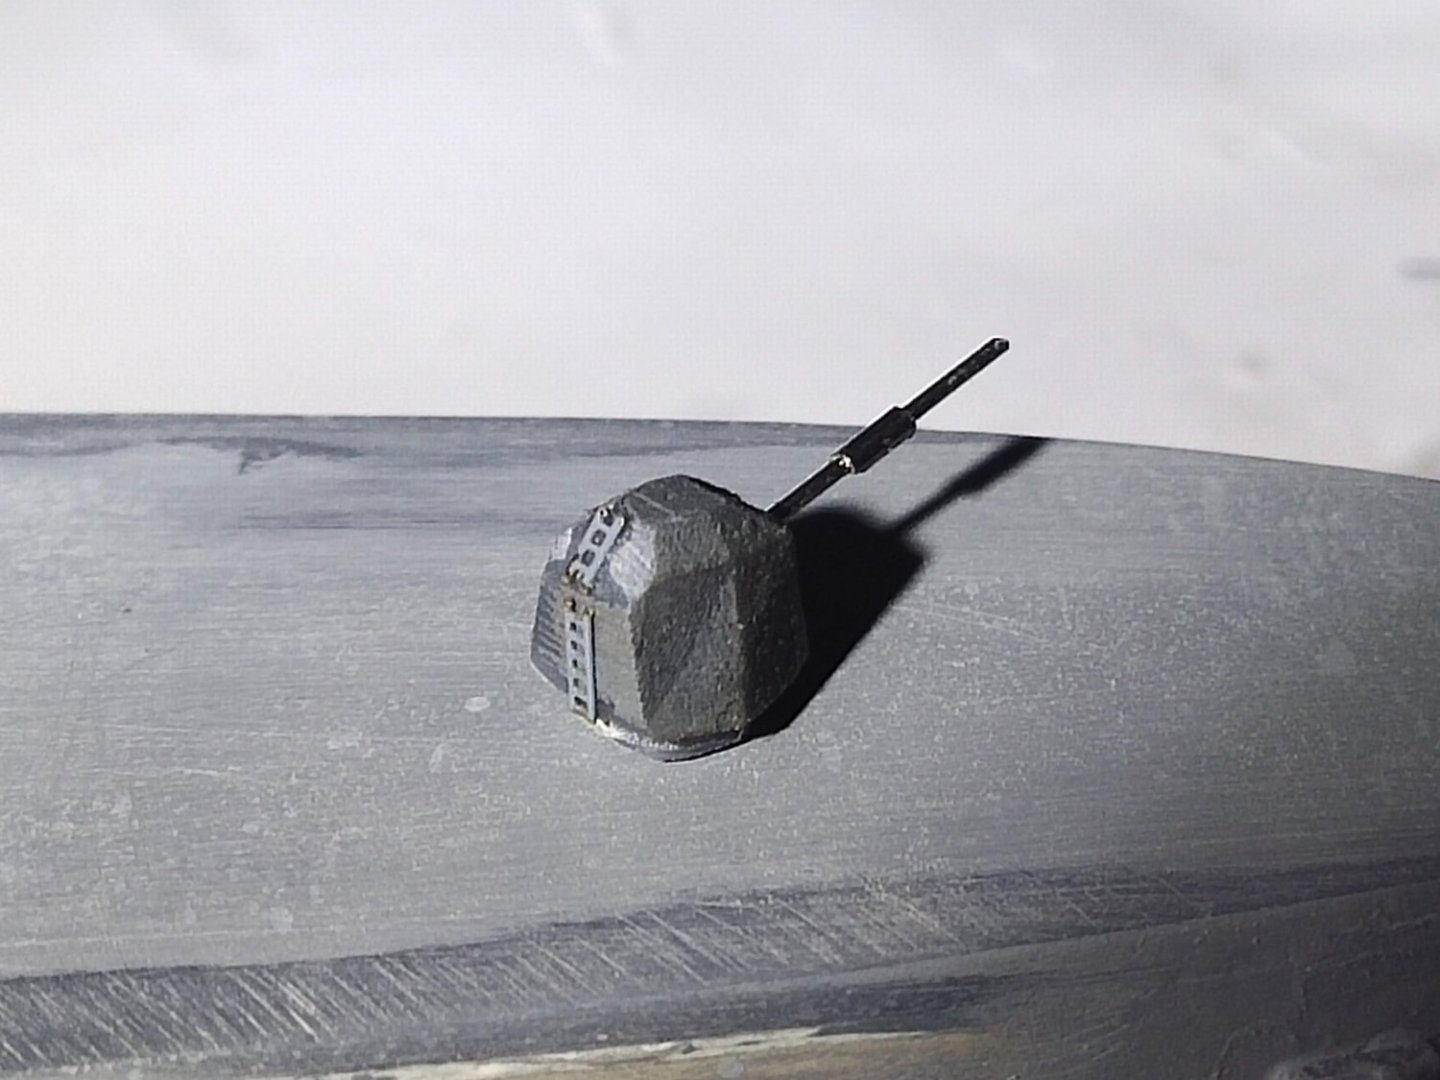
I redesigned the forward launcher in more reasonable dimensions and painted the Phalanx. Other details were added like barrel life raft and rings.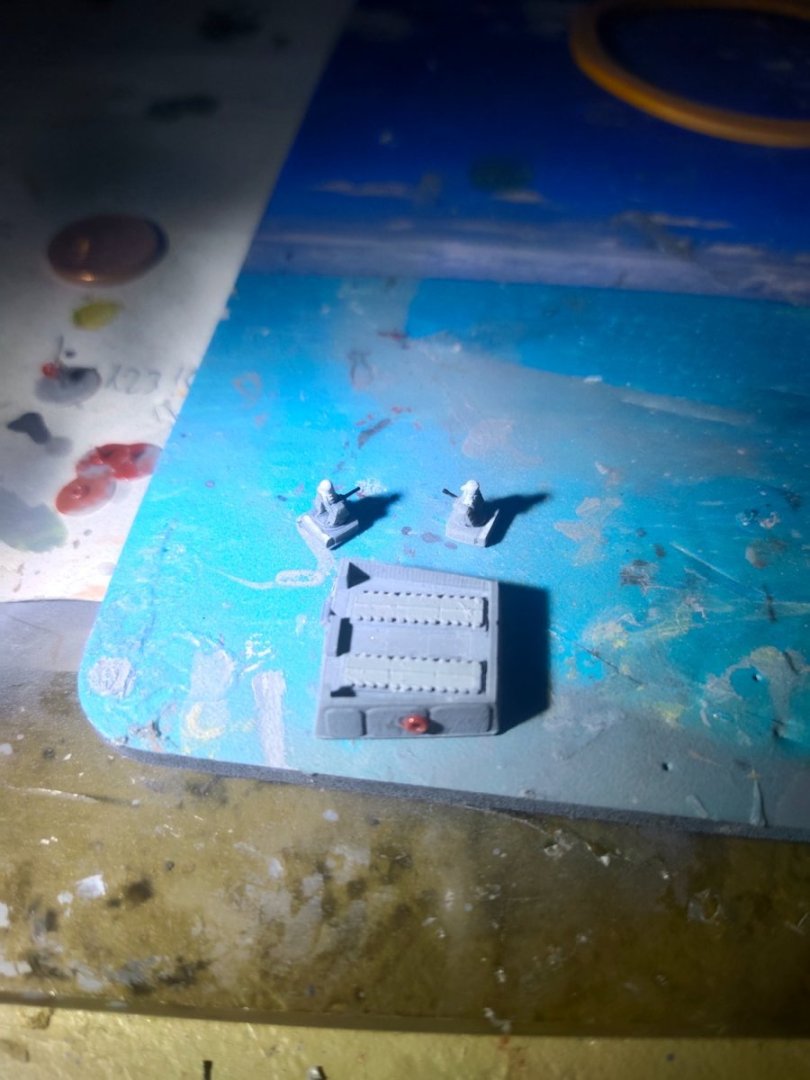

-
mikegr reacted to a post in a topic:
Prinz Eugen by CraigVT - OcCre - 1:200
-
Type 45 Destroyer by mikegr - 1/700
mikegr replied to mikegr's topic in - Build logs for subjects built 1901 - Present Day
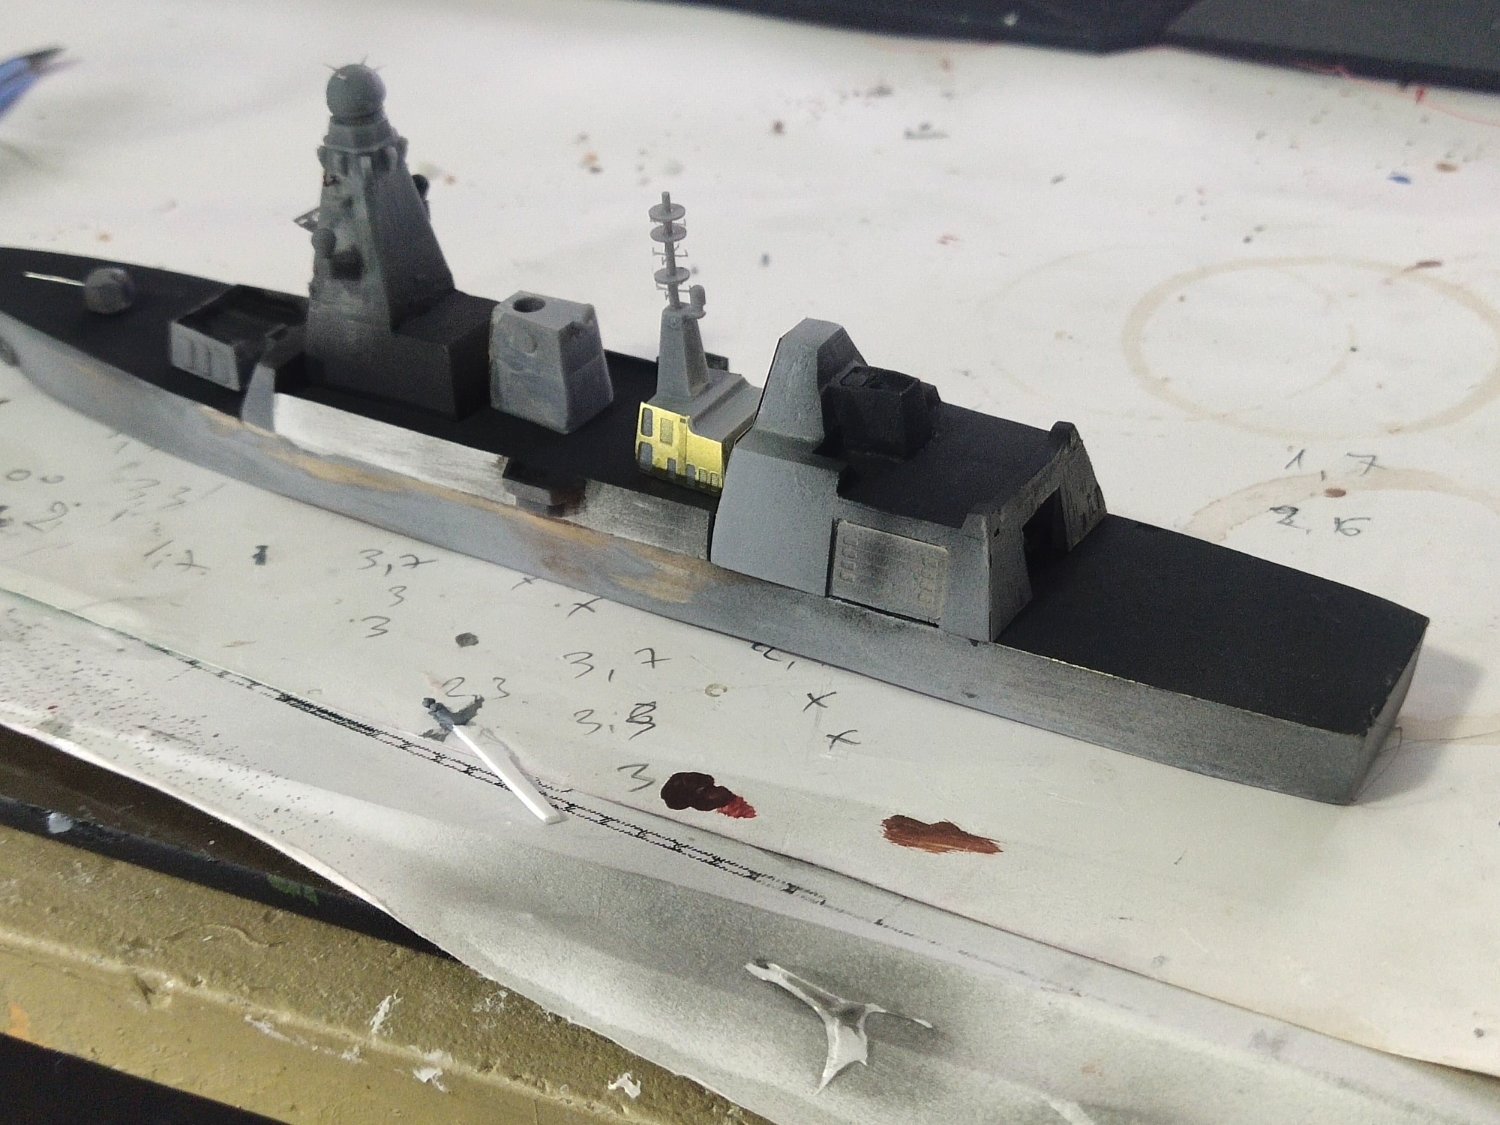
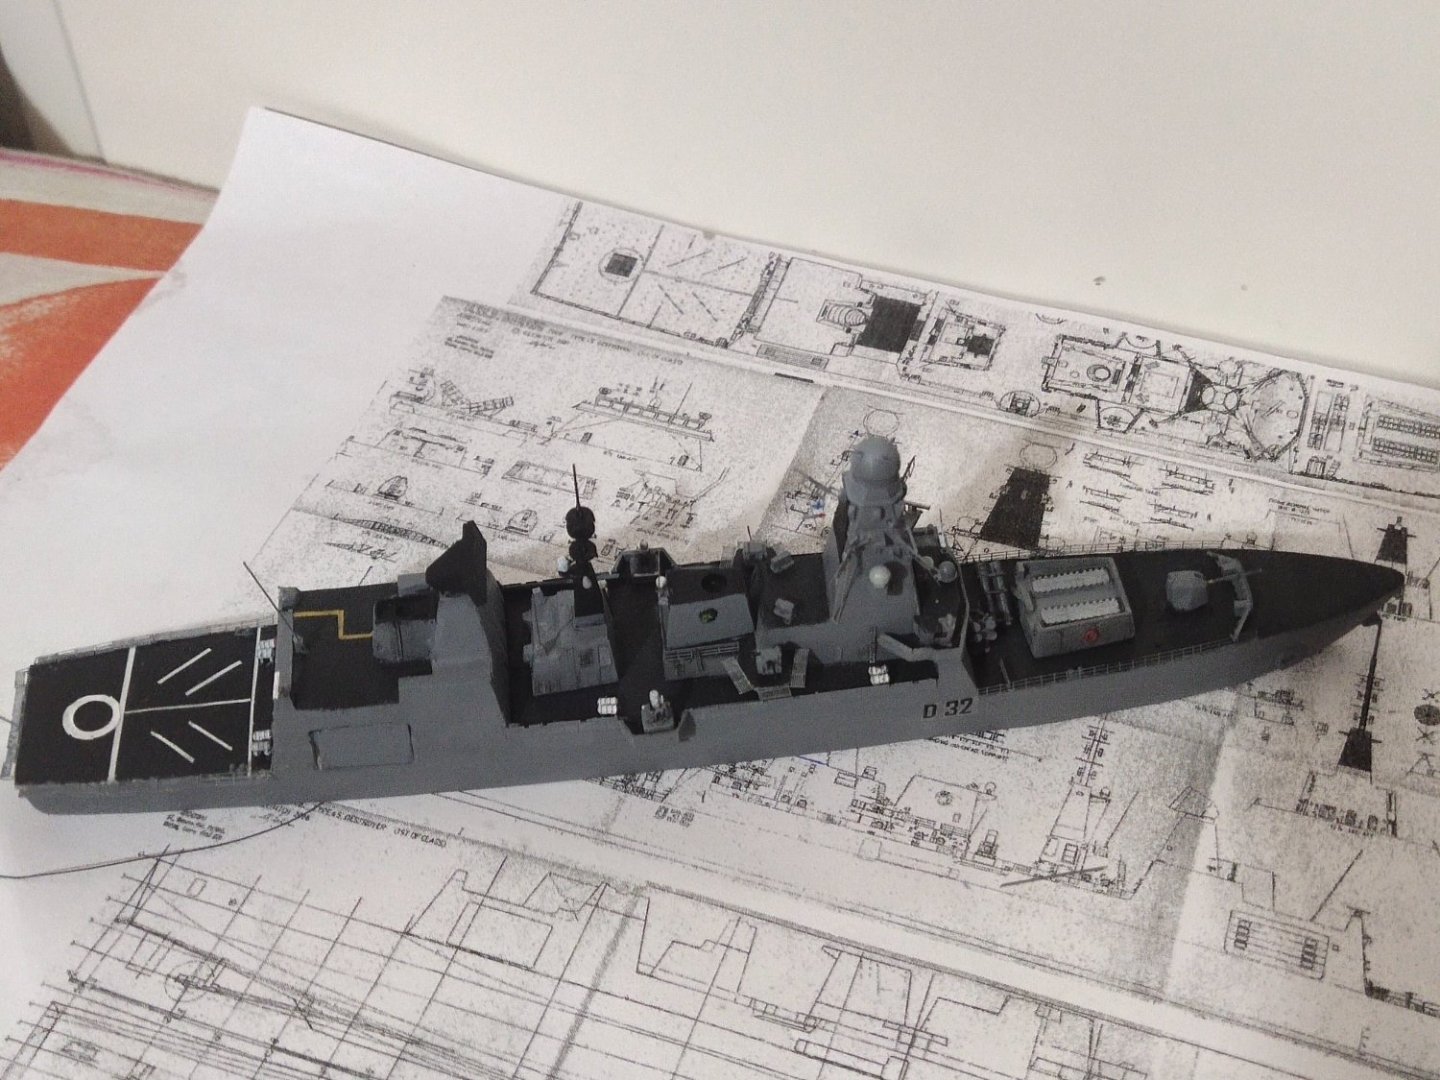
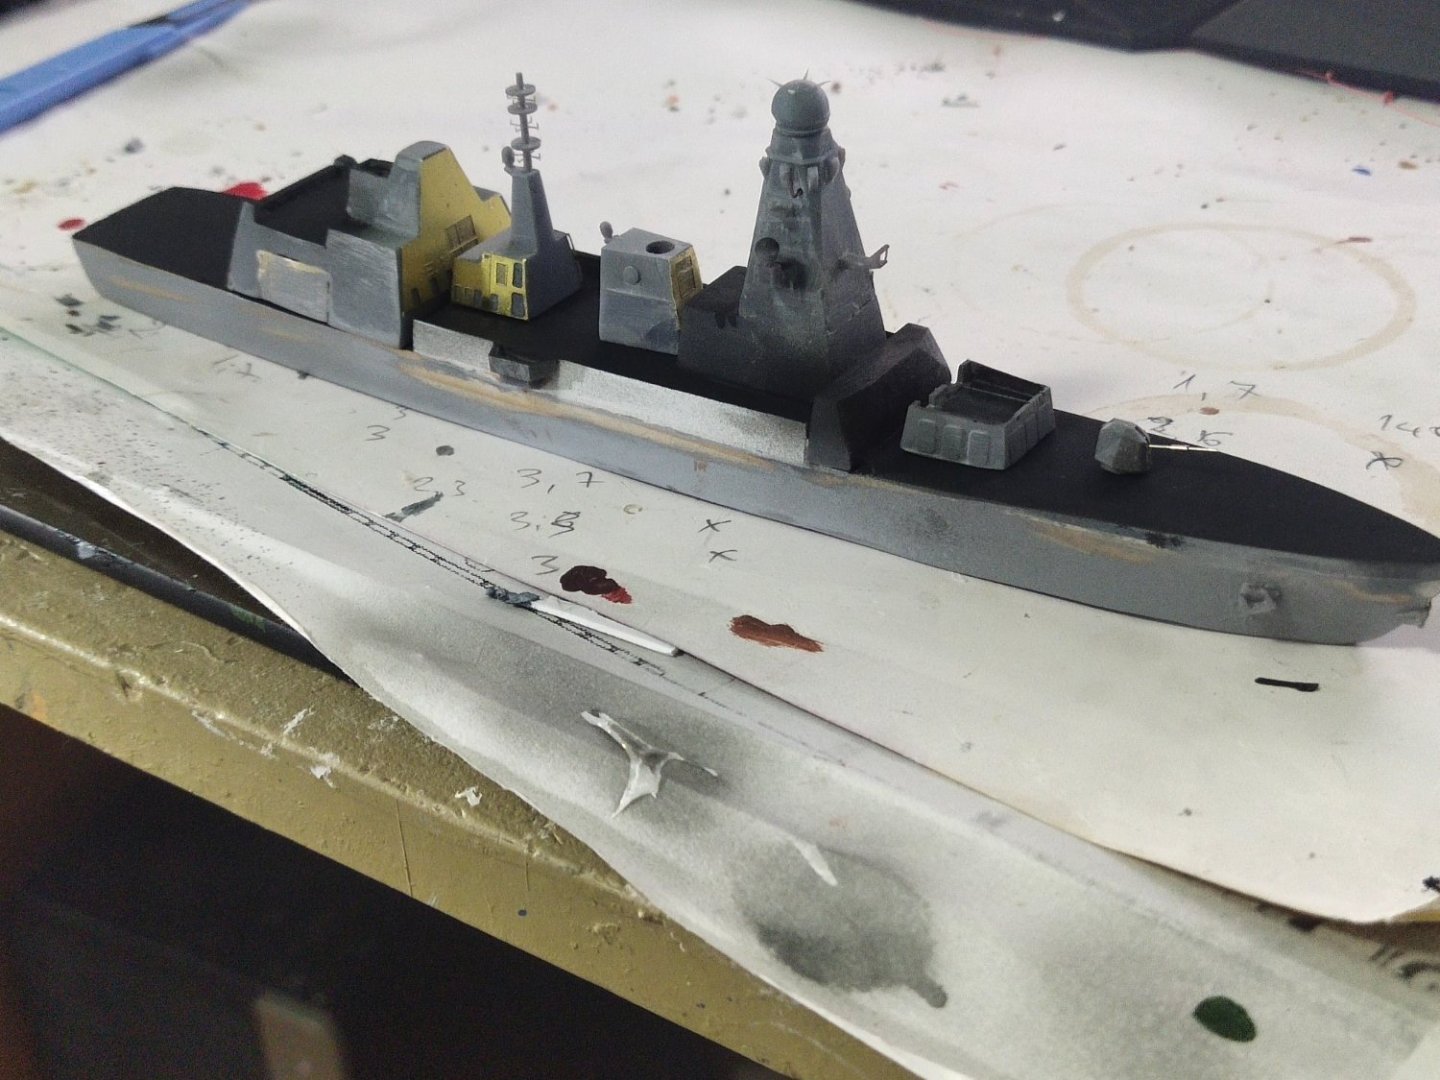
So after painting, repainting, fittings, misfittings, repairs and more I got to the point to glue all main pieces together. Now I need to add details, go for final paint job and rigging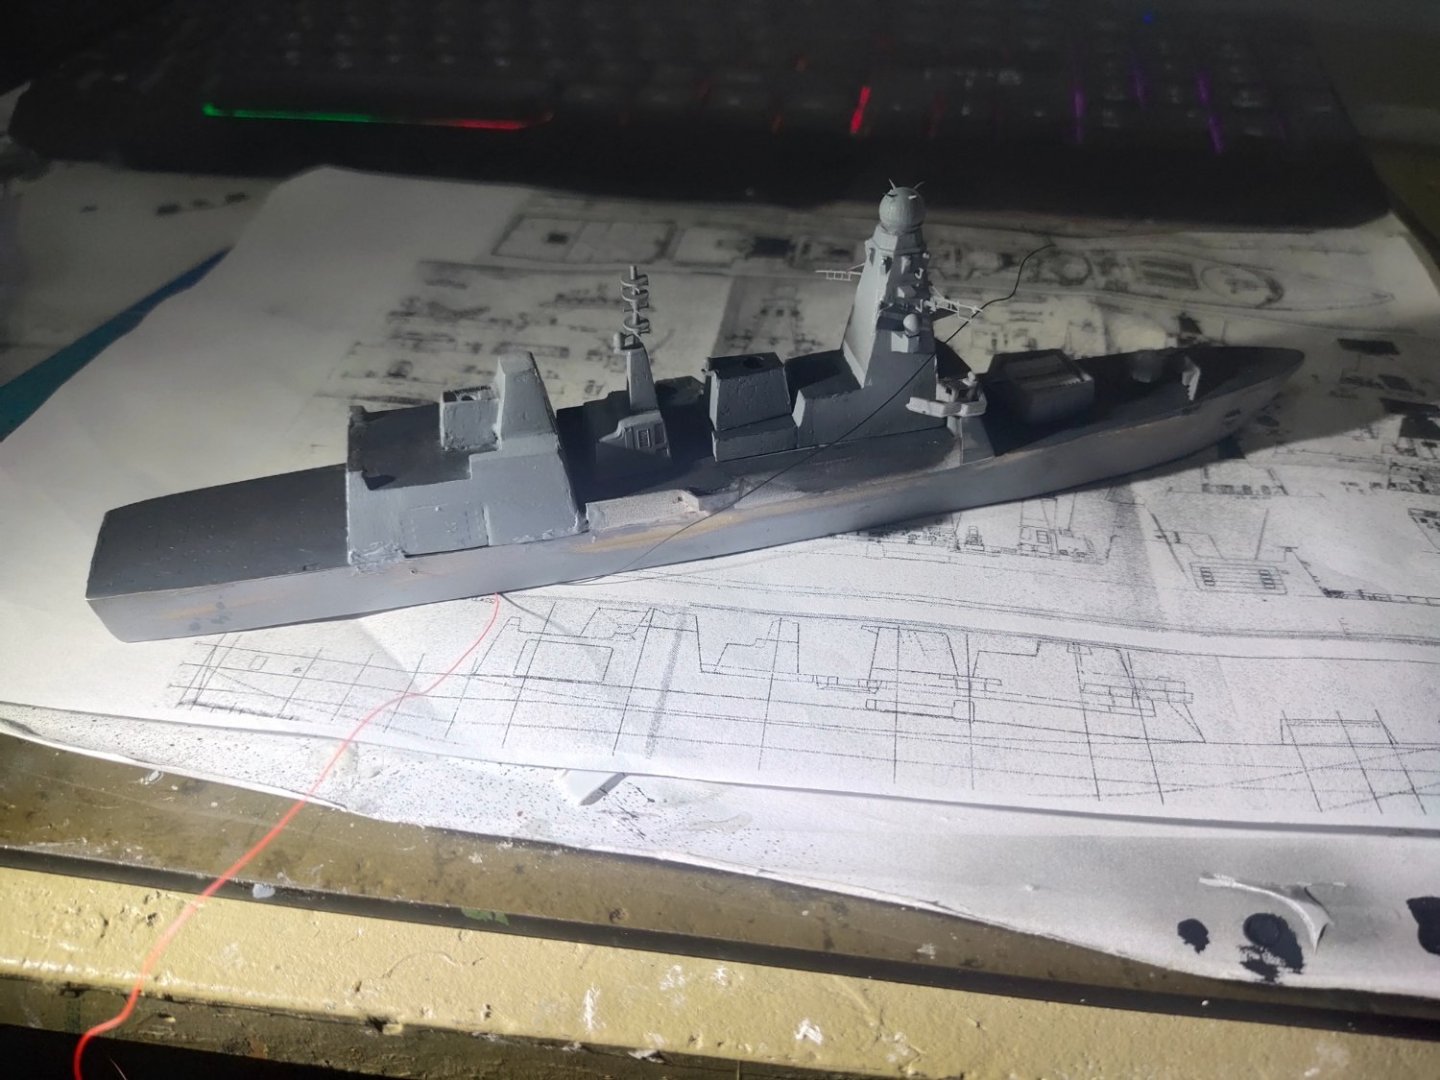
-
mikegr reacted to a post in a topic:
HMS Spiraea and HMS Zinnia by king derelict - Mirage Hobby - 1/350 - PLASTIC - Flower-Class Corvettes
-
Type 45 Destroyer by mikegr - 1/700
mikegr replied to mikegr's topic in - Build logs for subjects built 1901 - Present Day
Today's progress was some micro work on the main mast
-
Some modelers report 300$ on upgrade parts for a 50$ kit. Though I do not count my spendings, I cannot cope with that
- 52 replies
-
- 2
-
-
- Curtis Wilbur
- I Love Kit
- (and 1 more)
-
mikegr reacted to a post in a topic:
USS Curtis Wilbur DDG-54 by patrickmil - I Love Kit - 1/200 - PLASTIC
-
mikegr reacted to a post in a topic:
HMS Dreadnought 1907 by RGL - FINISHED - Zvezda - 1/350 - PLASTIC - revisited
-
For future builders there are some nice upgrades coming up

- 52 replies
-
- 8
-
-

-
- Curtis Wilbur
- I Love Kit
- (and 1 more)
-
Type 45 Destroyer by mikegr - 1/700
mikegr replied to mikegr's topic in - Build logs for subjects built 1901 - Present Day
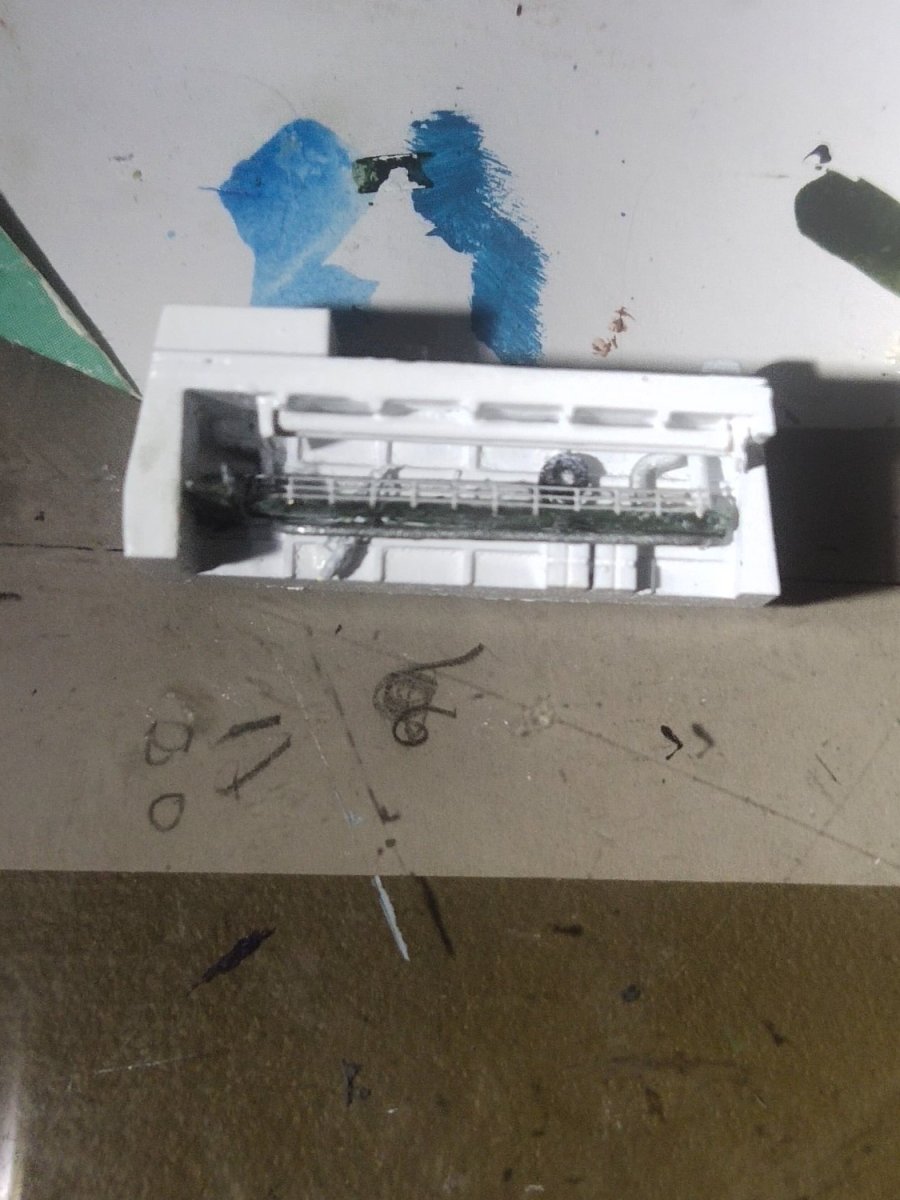
Today I painted the dark grey and added some PE after the proper adjustments
-
mikegr reacted to a post in a topic:
HMS Spiraea and HMS Zinnia by king derelict - Mirage Hobby - 1/350 - PLASTIC - Flower-Class Corvettes
-
There is no cure. Whatever the scale there always will be tiny things that have to be worked with absolute precision. Its just the amount of work that differs like painting hulls in 1/200 instead on 1/700
-
Type 45 Destroyer by mikegr - 1/700
mikegr replied to mikegr's topic in - Build logs for subjects built 1901 - Present Day
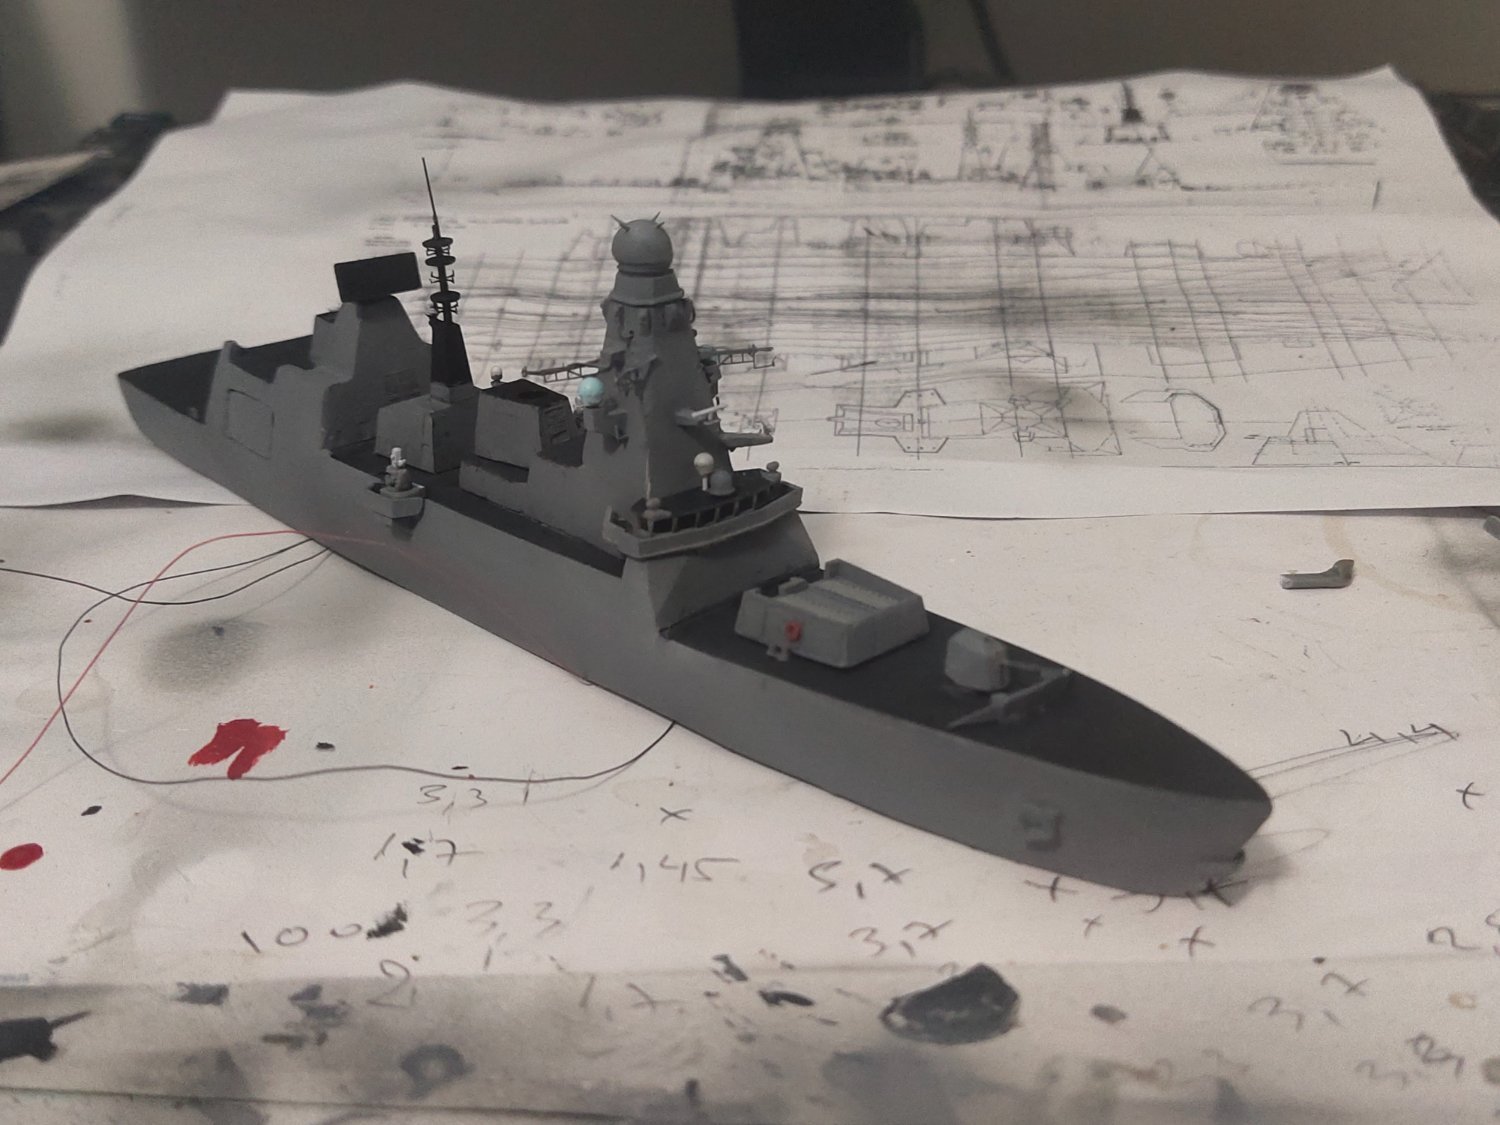
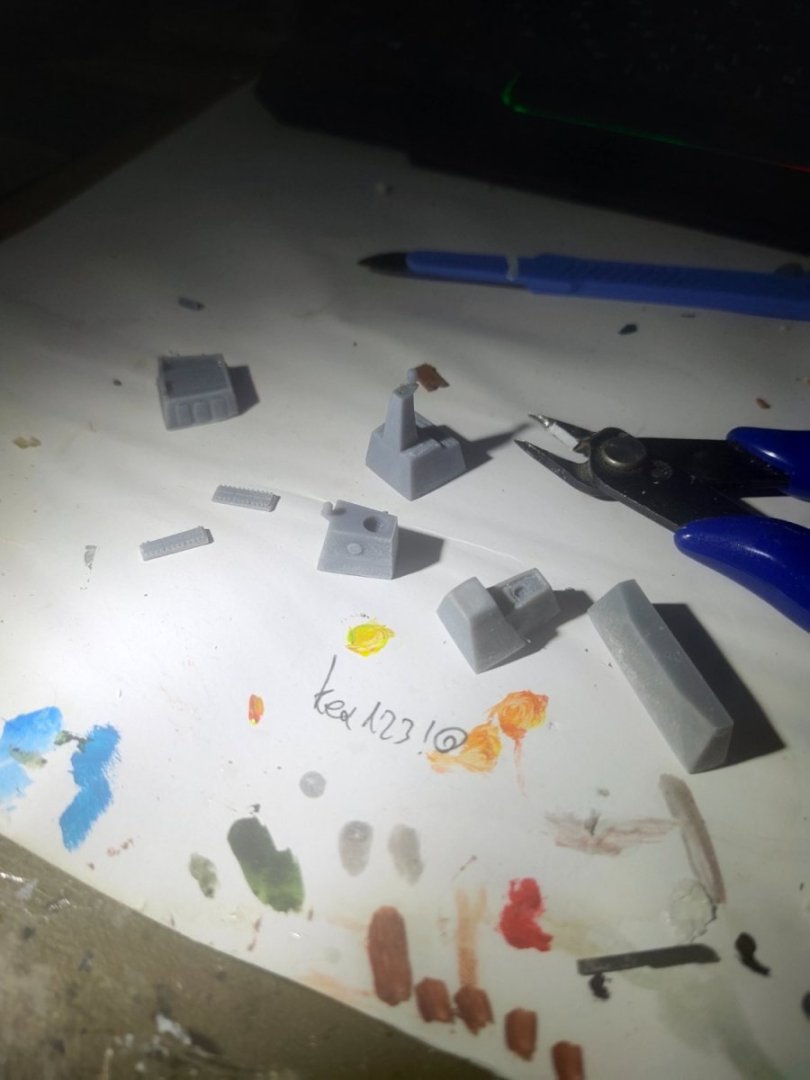
I printed most of the parts.Since I used a plan to calculate the size of the pieces and the PE parts are made to replace standard plastic parts of specific kits some misfitting is expected. Some PEs won't be used as the required details is already designed at the parts I printed.


-
Type 45 Destroyer by mikegr - 1/700
mikegr replied to mikegr's topic in - Build logs for subjects built 1901 - Present Day
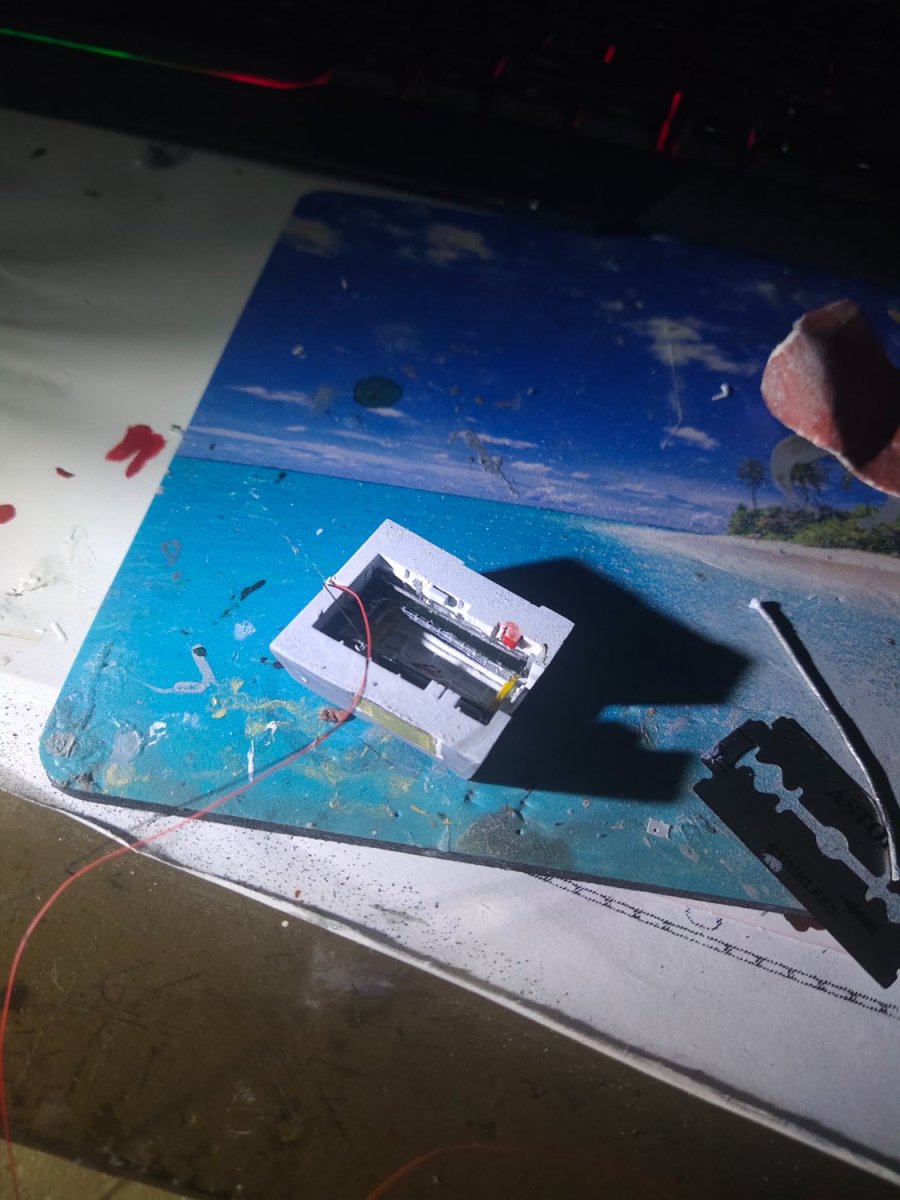
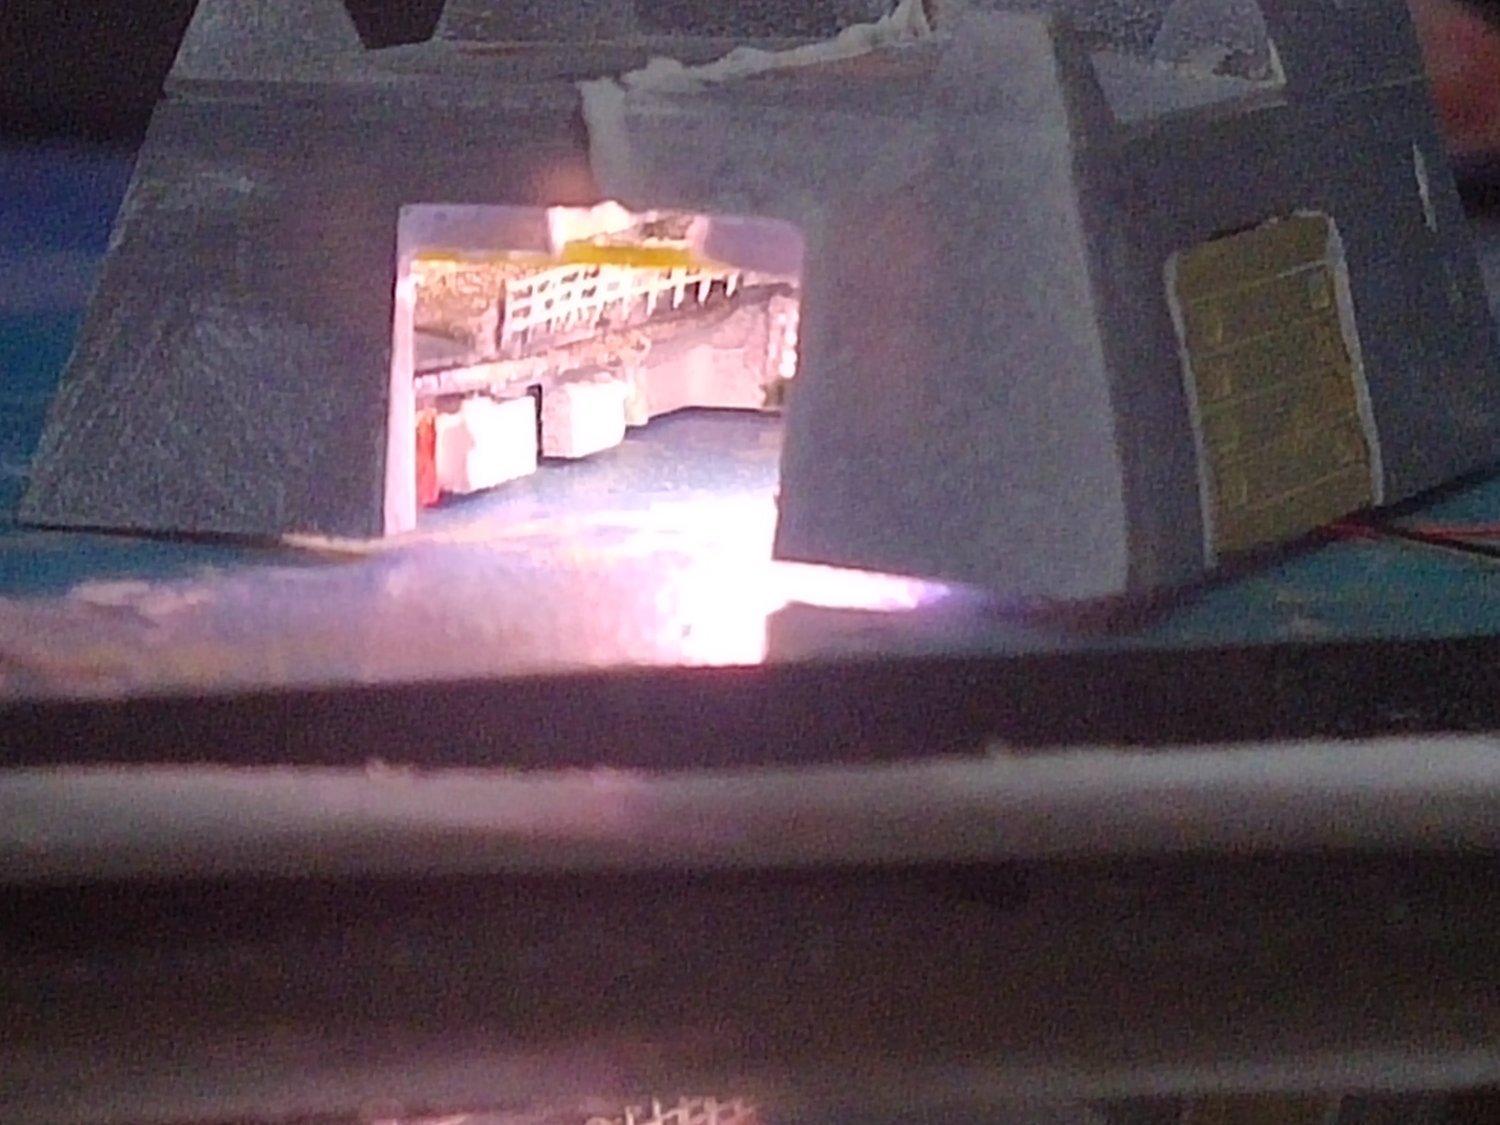
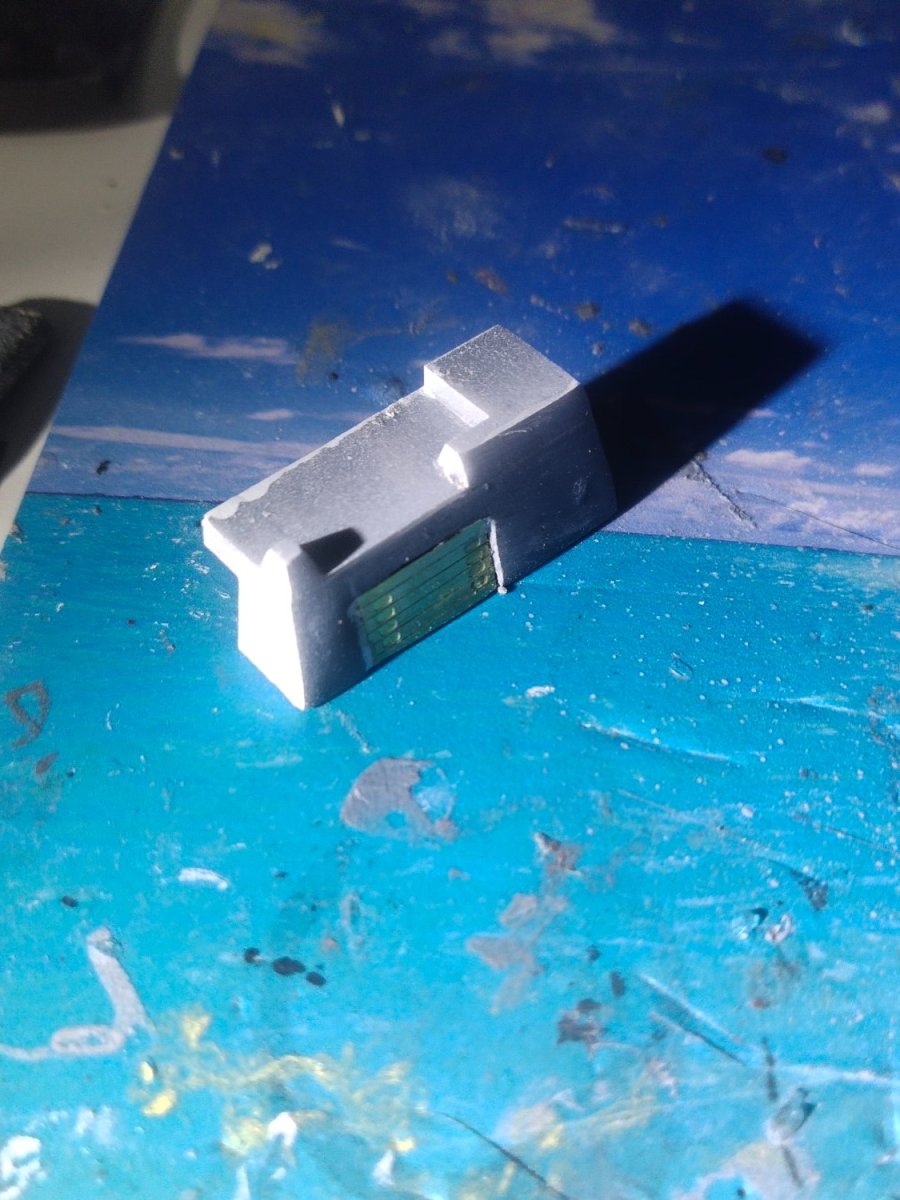
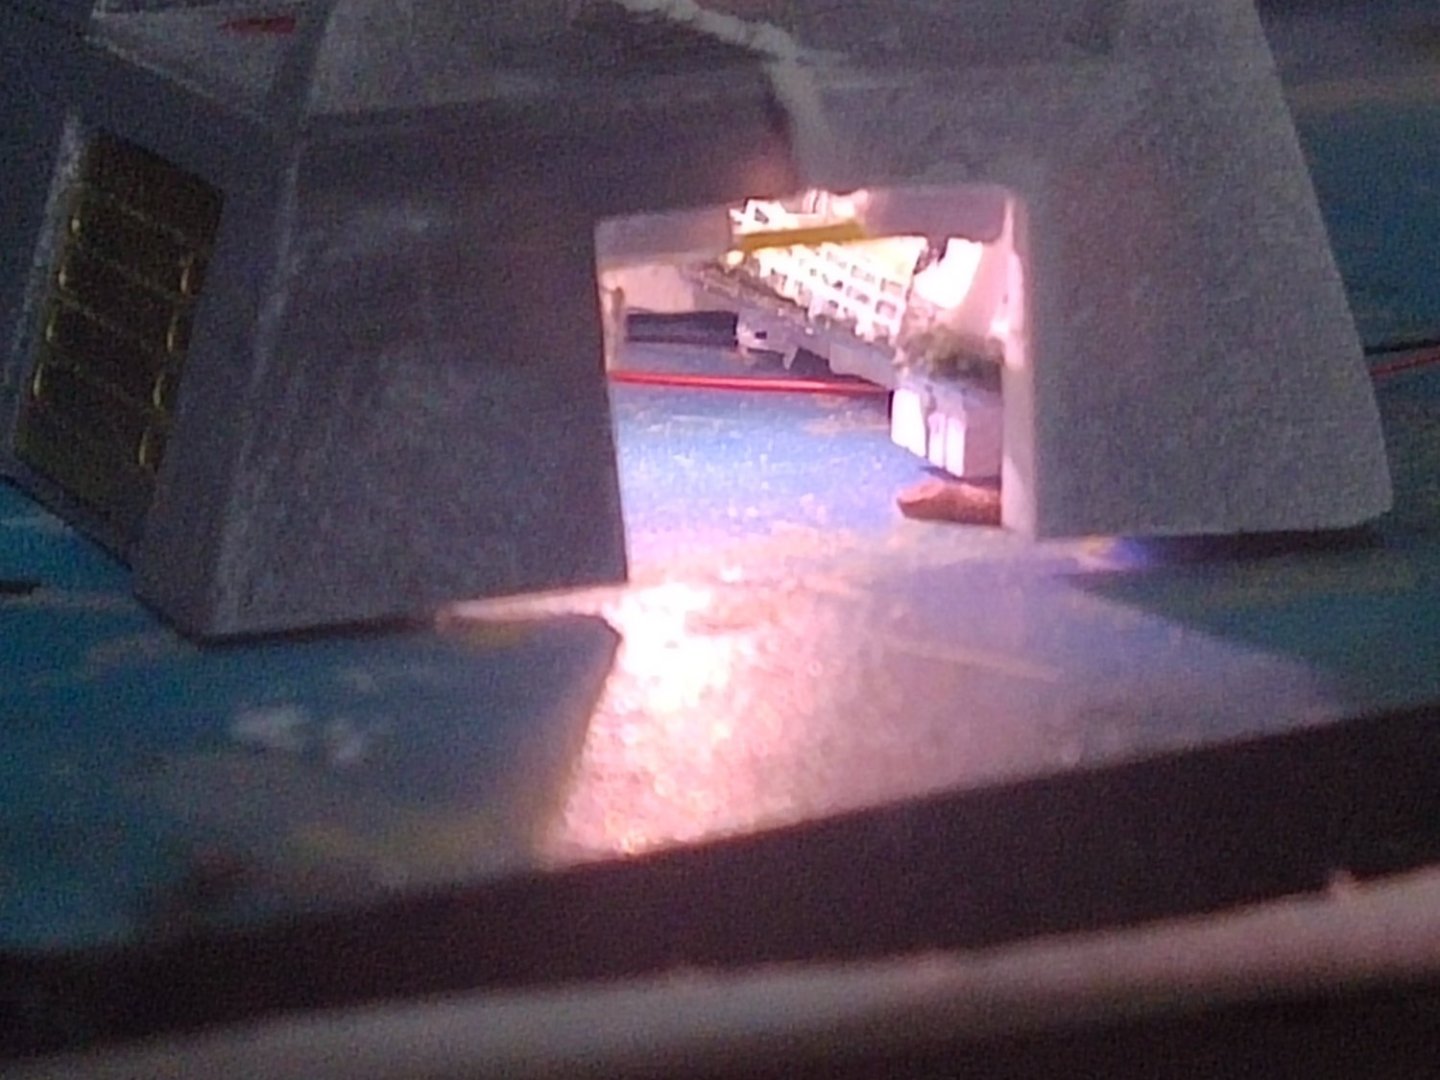
So I made the second part and glued them together. Light was tested. Some misfittings at the end of the hangar won't be visible so I don't bother.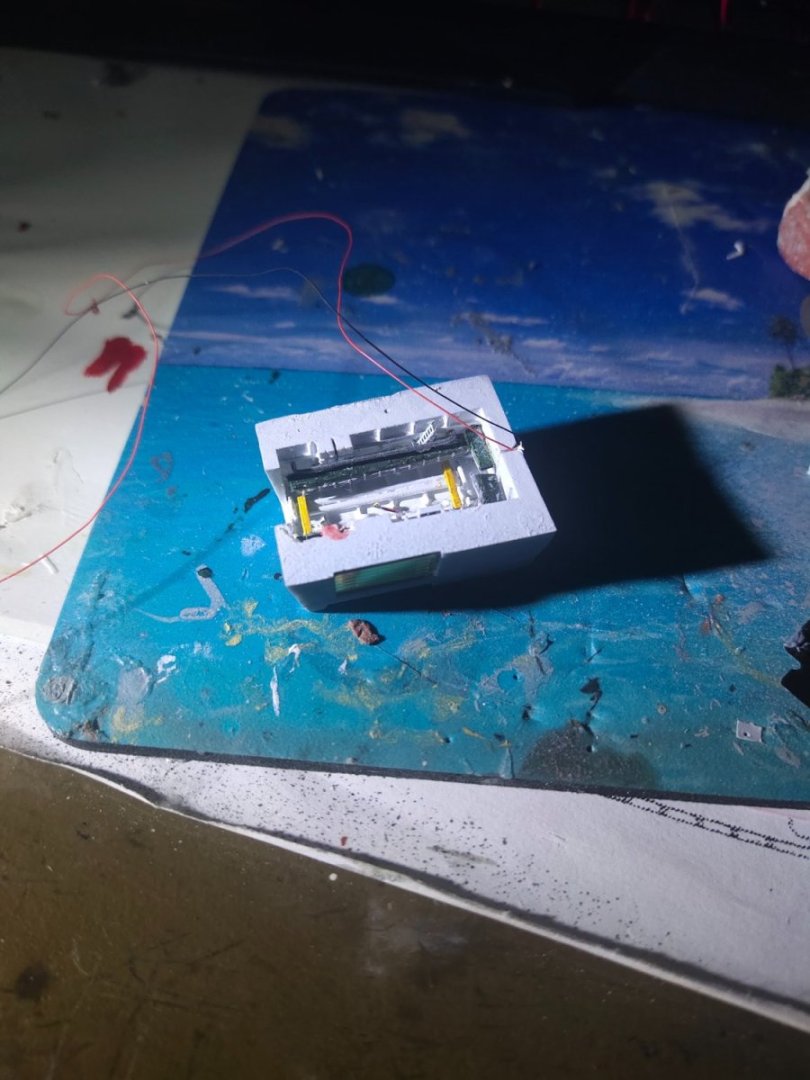


-
Type 45 Destroyer by mikegr - 1/700
mikegr replied to mikegr's topic in - Build logs for subjects built 1901 - Present Day
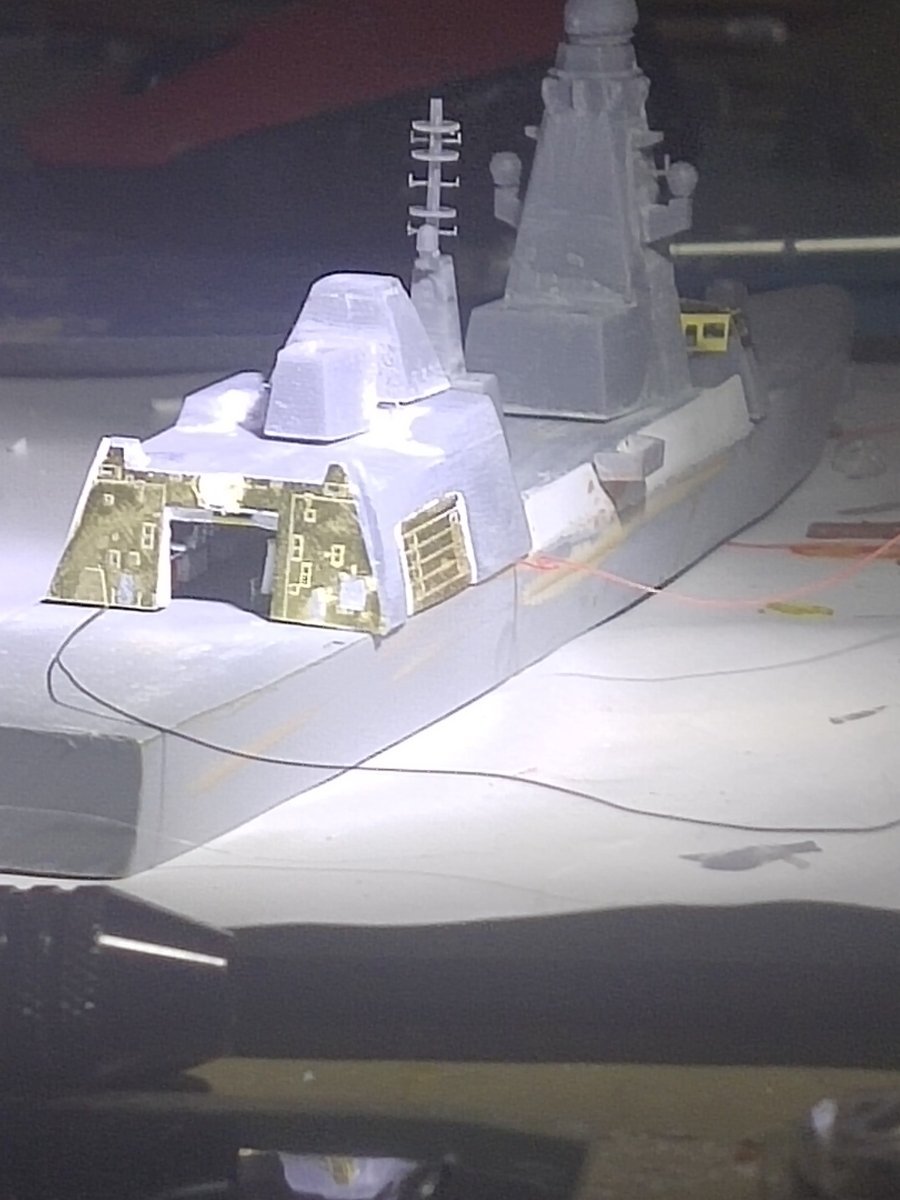
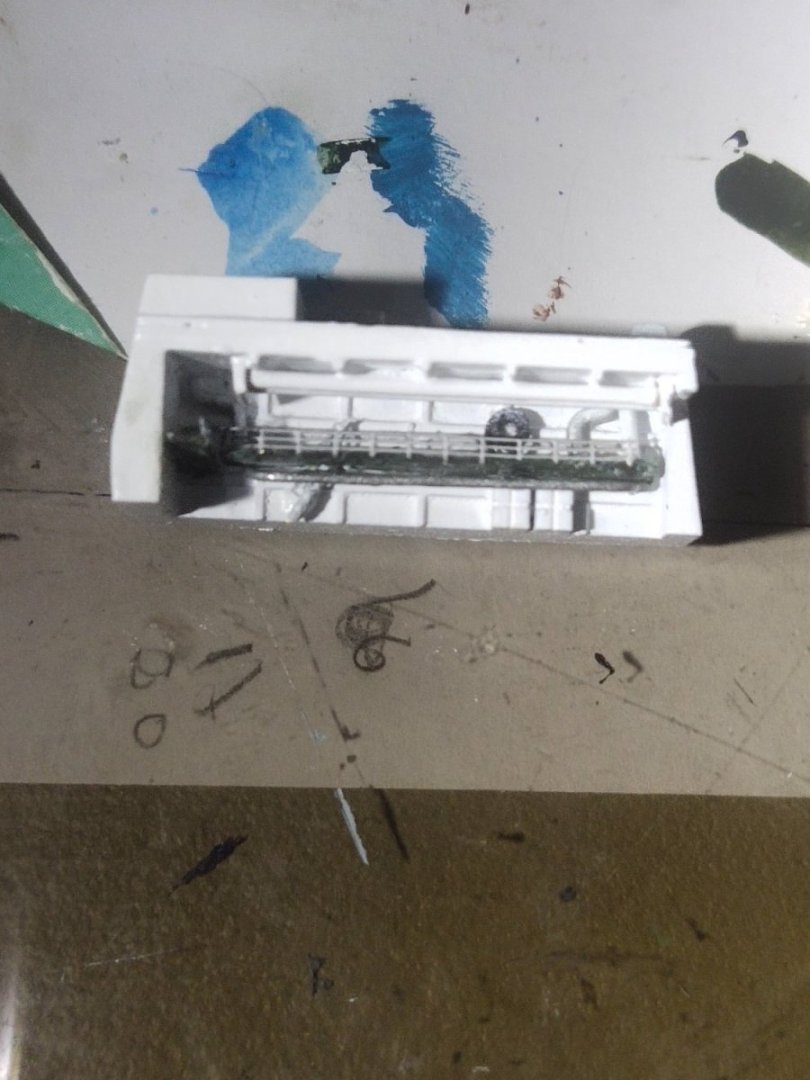
Next was the hangar. I printed the right half and made some adjustment to fit the PE externally. I made them in separate pieces so I can scratch built the interior more easily them glue them together. Like in Horizon class because of the side compartments for inflatable storage, the heli hangar is somewhat narrow.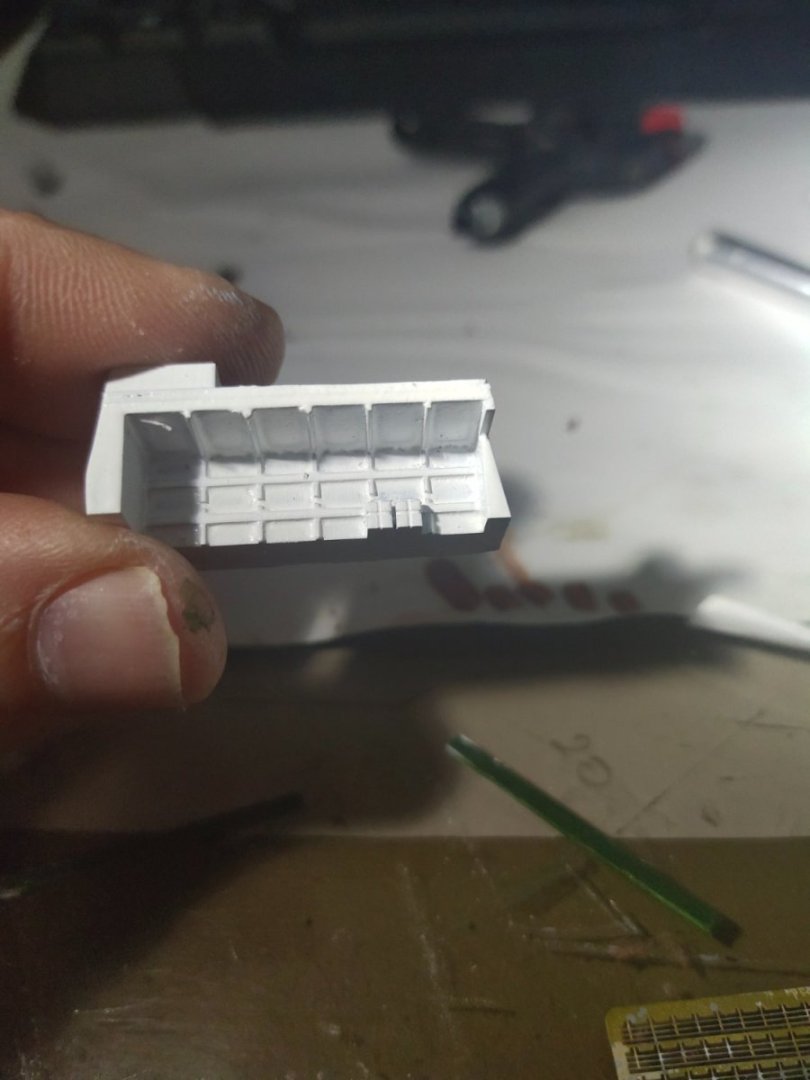

-
Type 45 Destroyer by mikegr - 1/700
mikegr replied to mikegr's topic in - Build logs for subjects built 1901 - Present Day
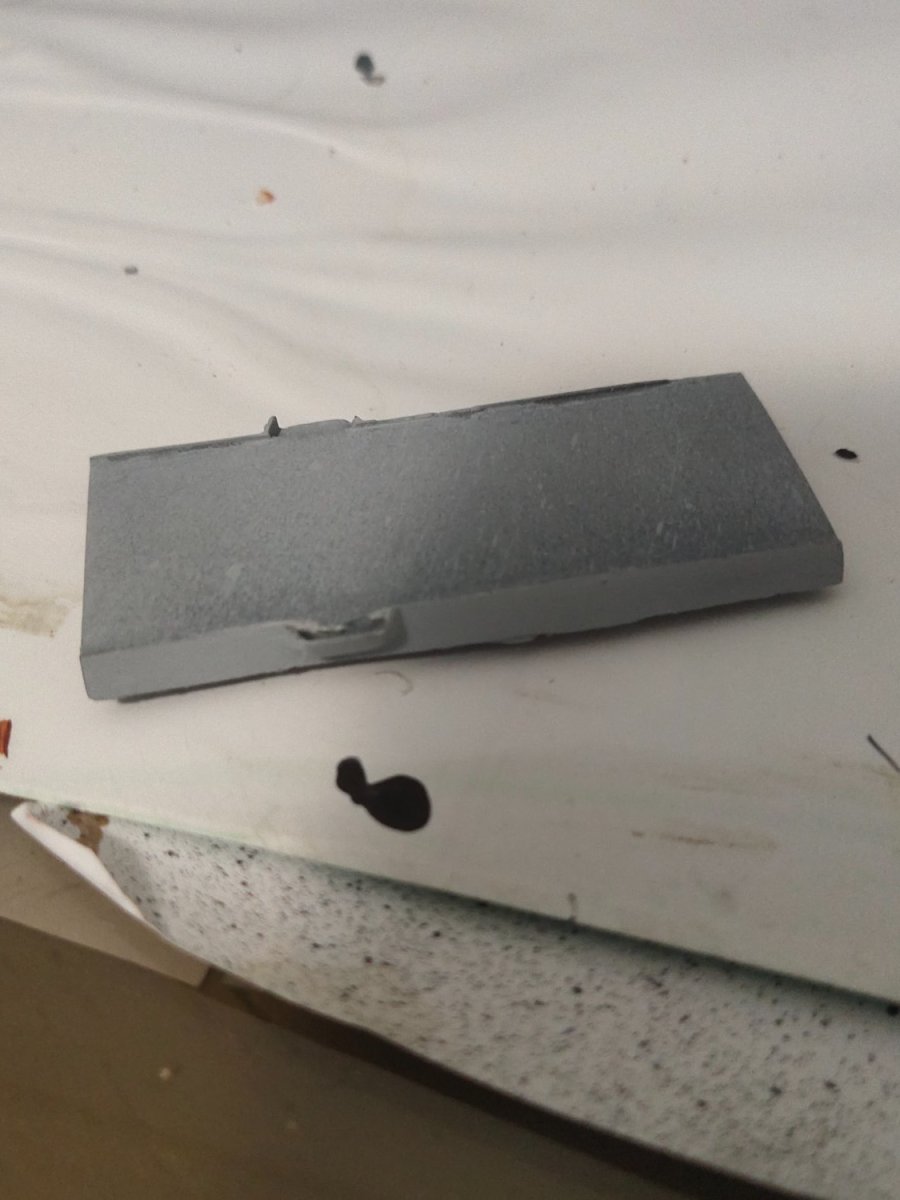
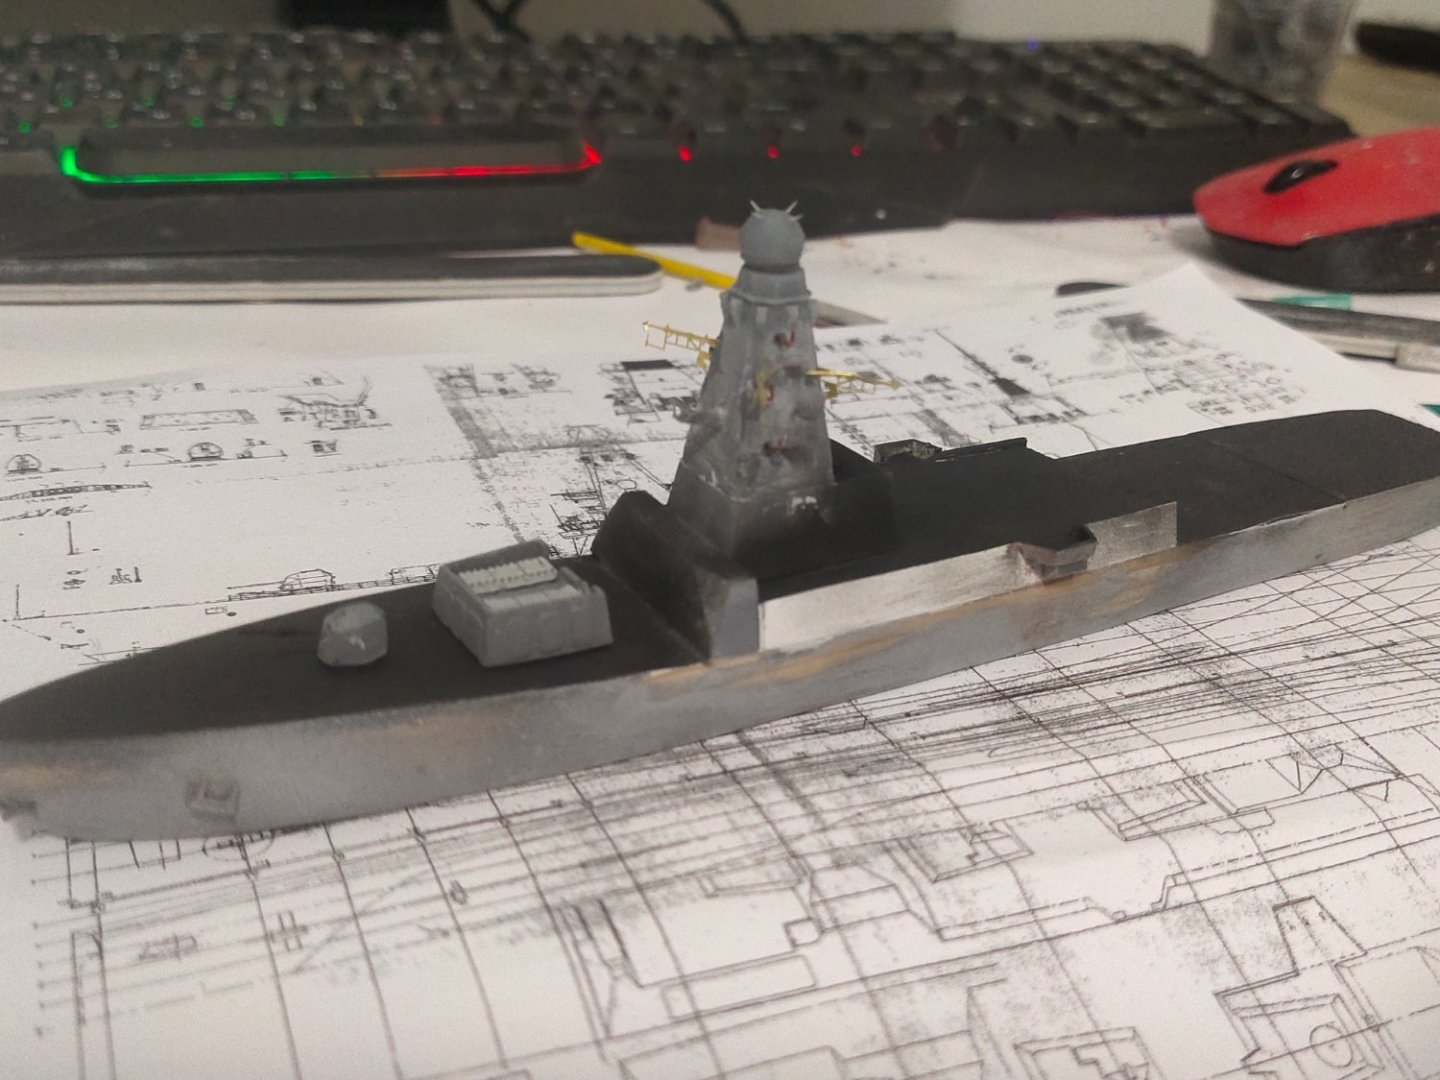
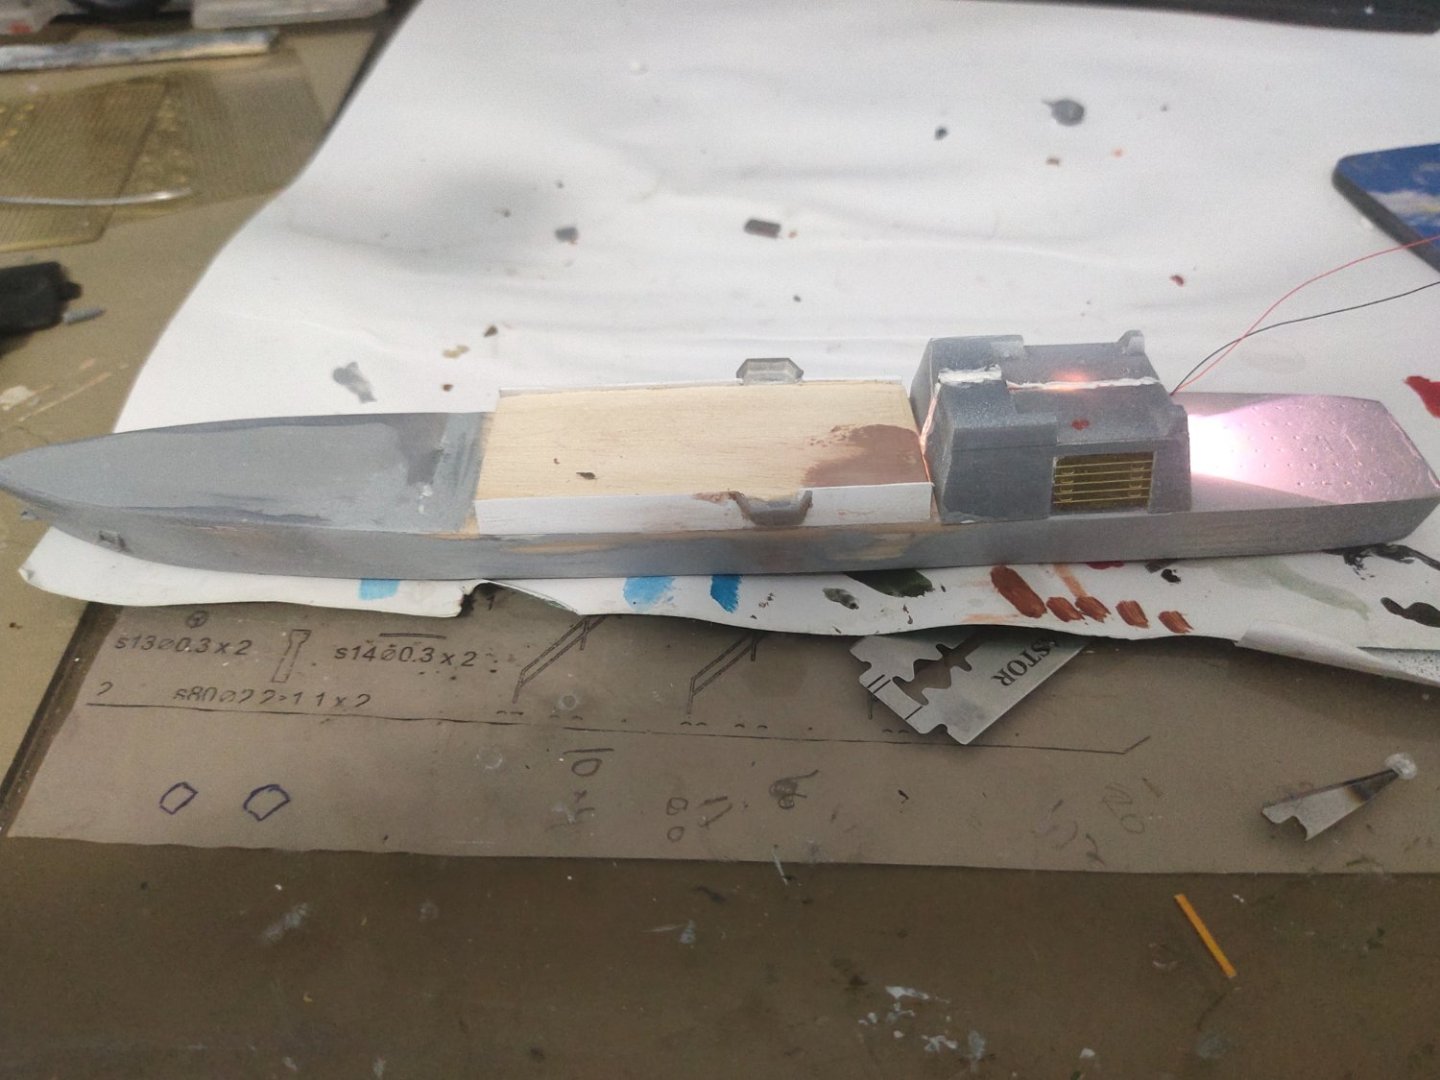
Next was to print the central area between the hangar and the bridge where funnels and towers will placed upon. However because of warping problems that I couldn't solve after many attempts, I removed it and replaced it with plywood wrapped with plastic fillets for a smoother finish. This handwork took me 2 hours instead of 2 wasted evenings, what a bitter lesson. Fortunately the other piece, the main canon printed just fine and a barrel made of needle pieces was added along with hand rails.


-
Type 45 Destroyer by mikegr - 1/700
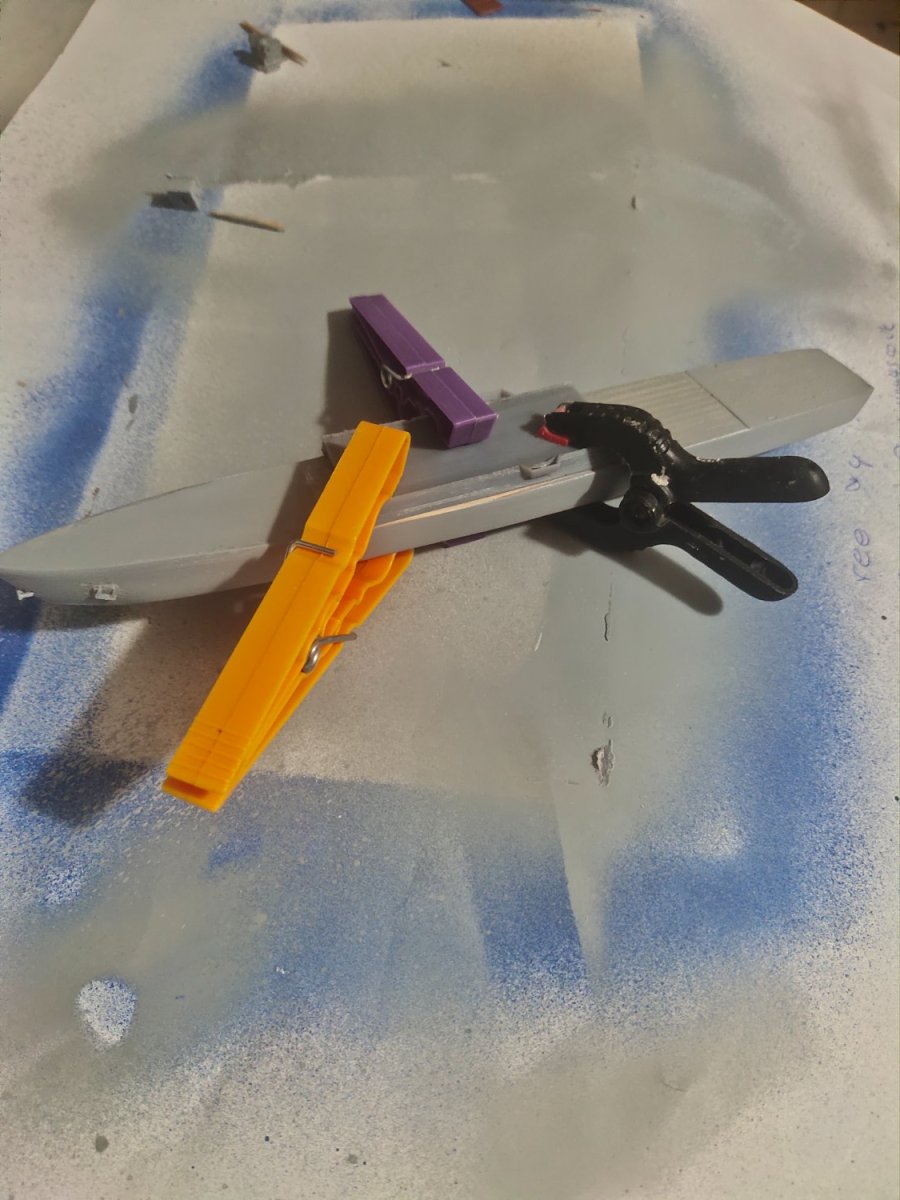
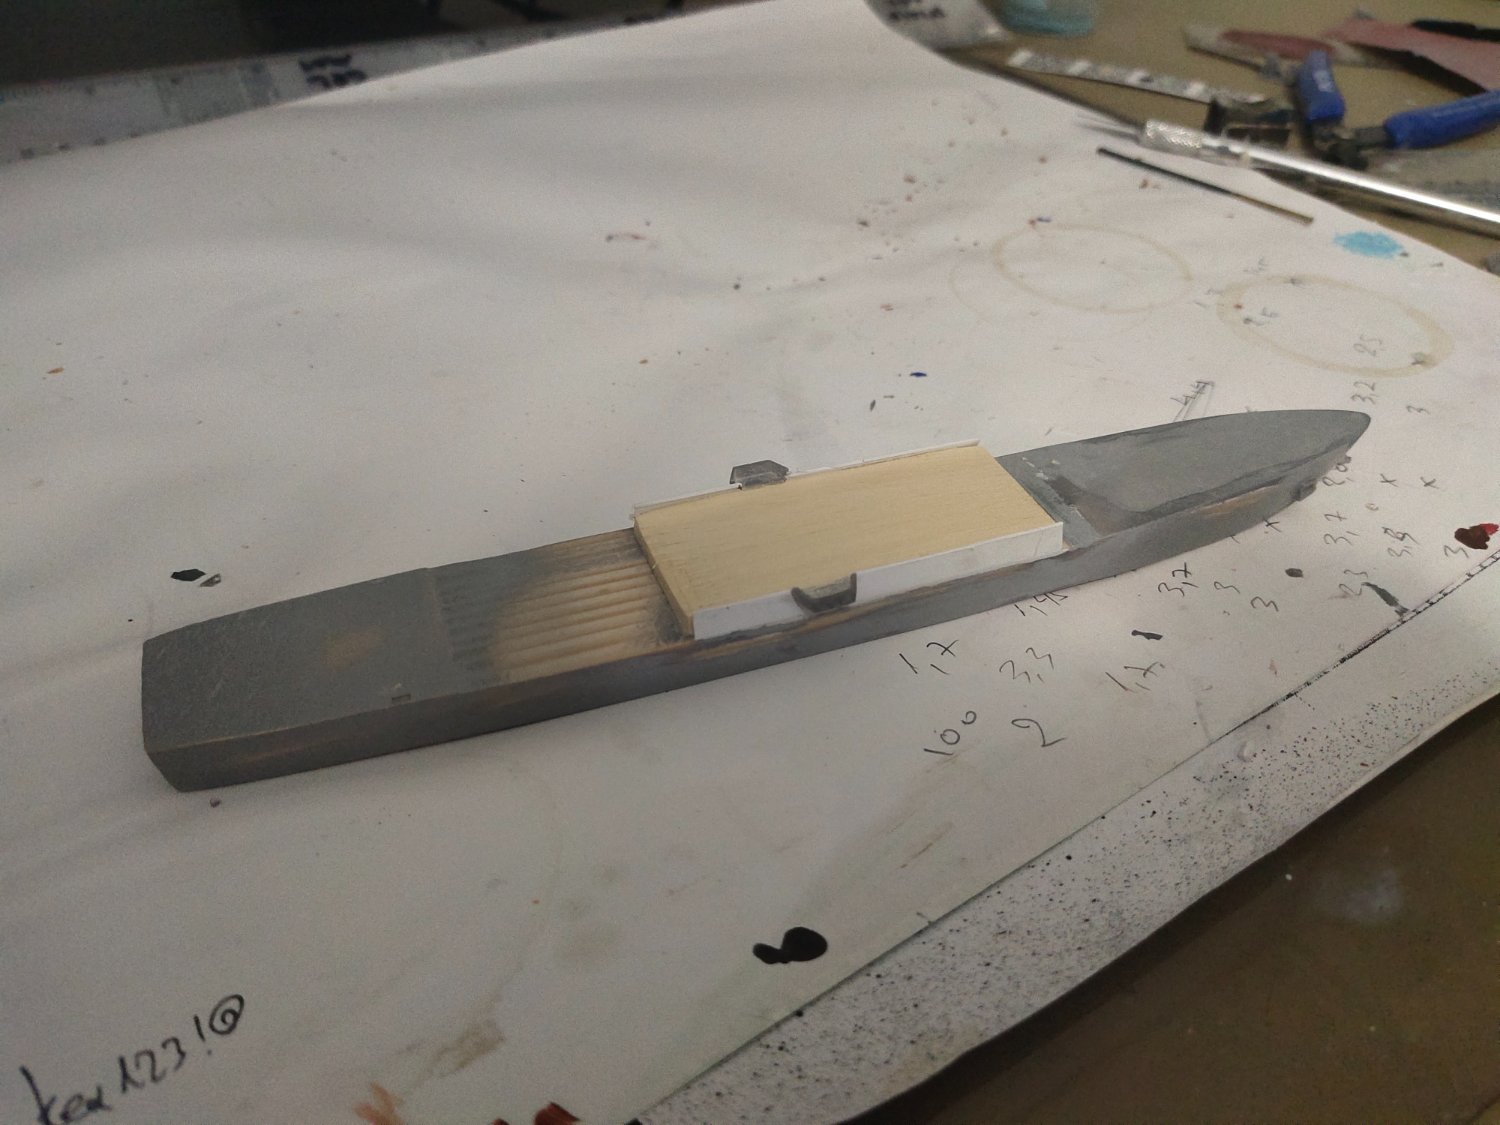
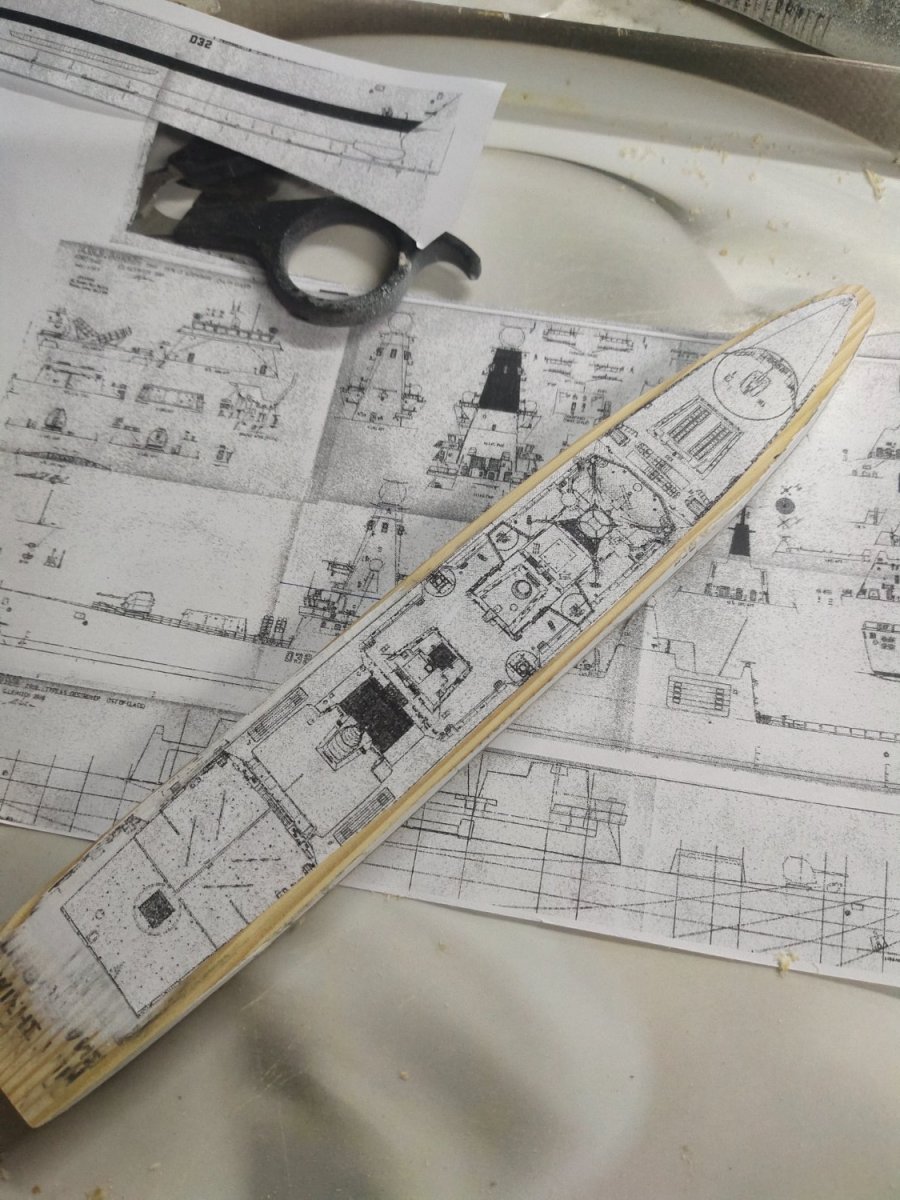
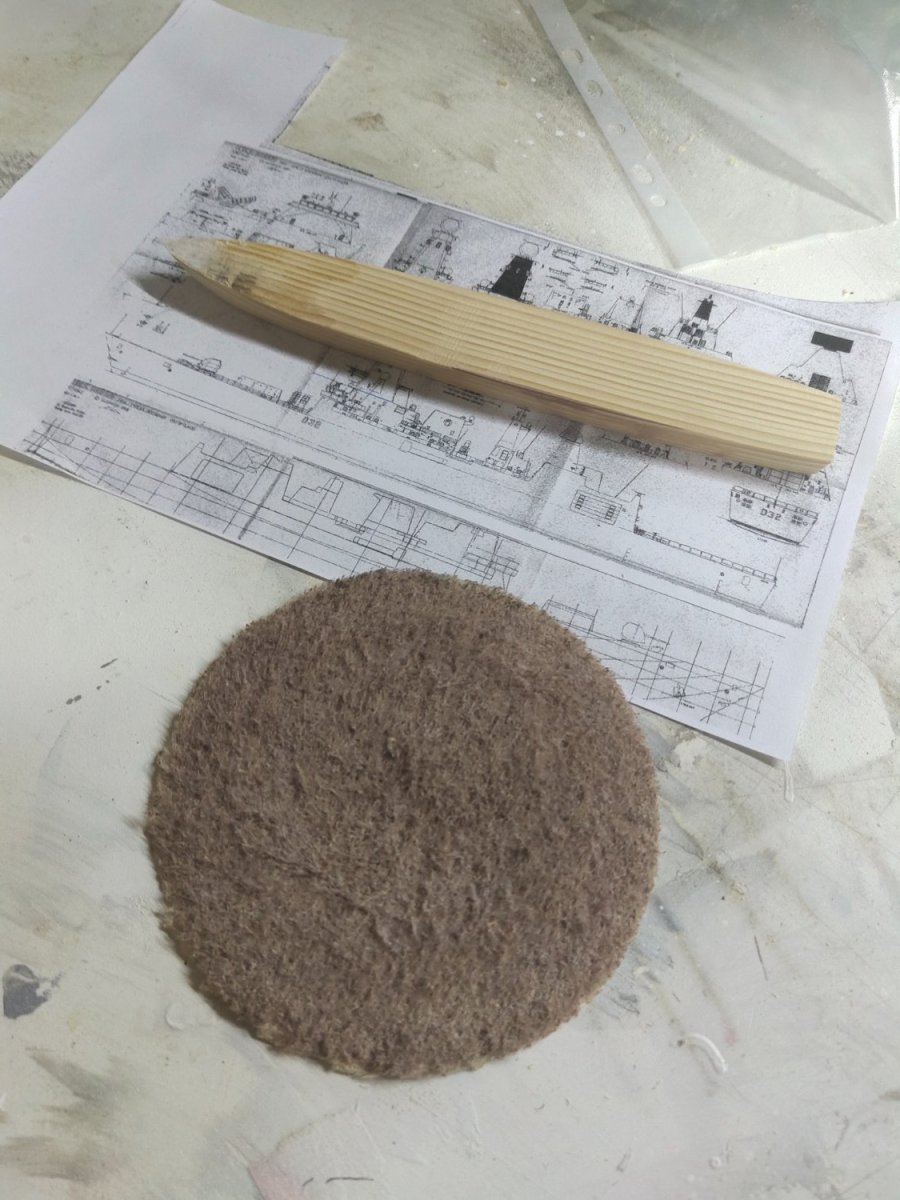
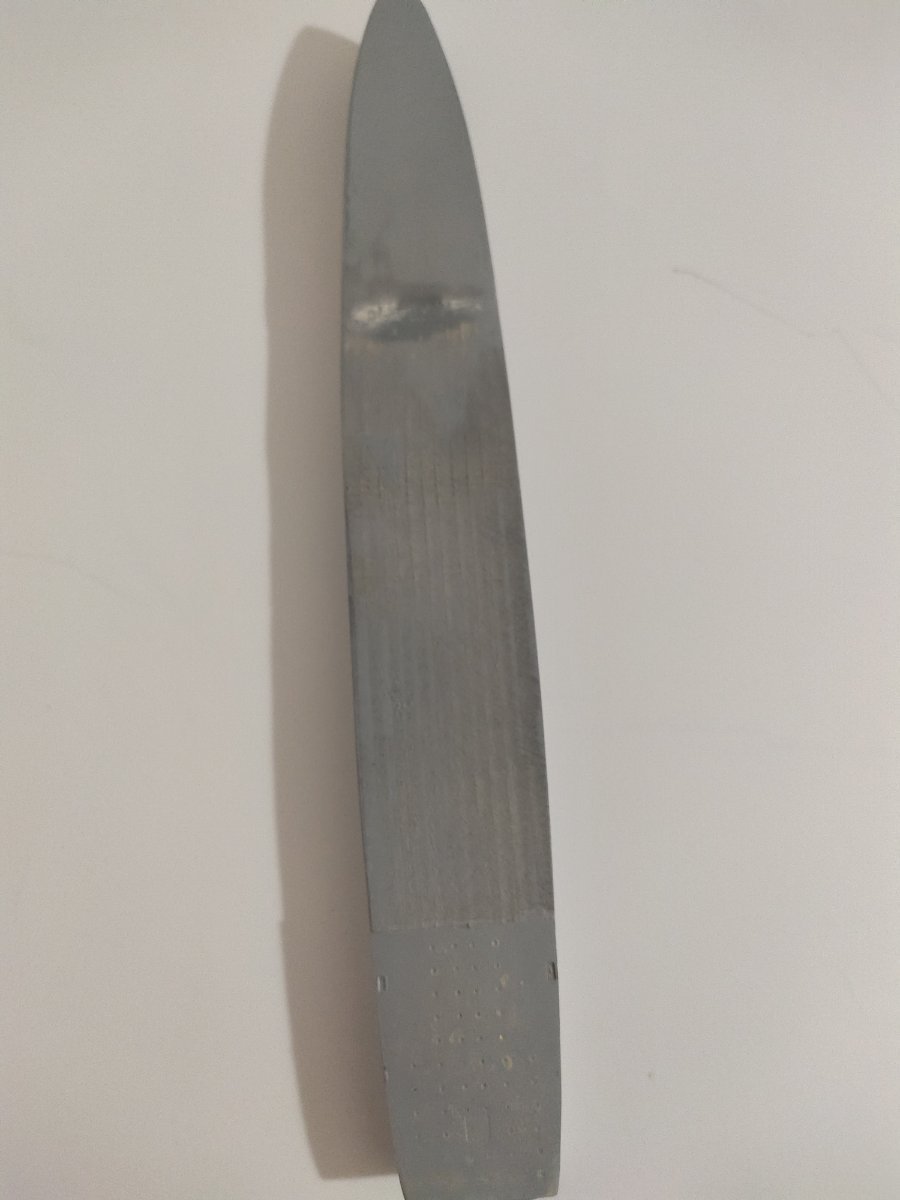
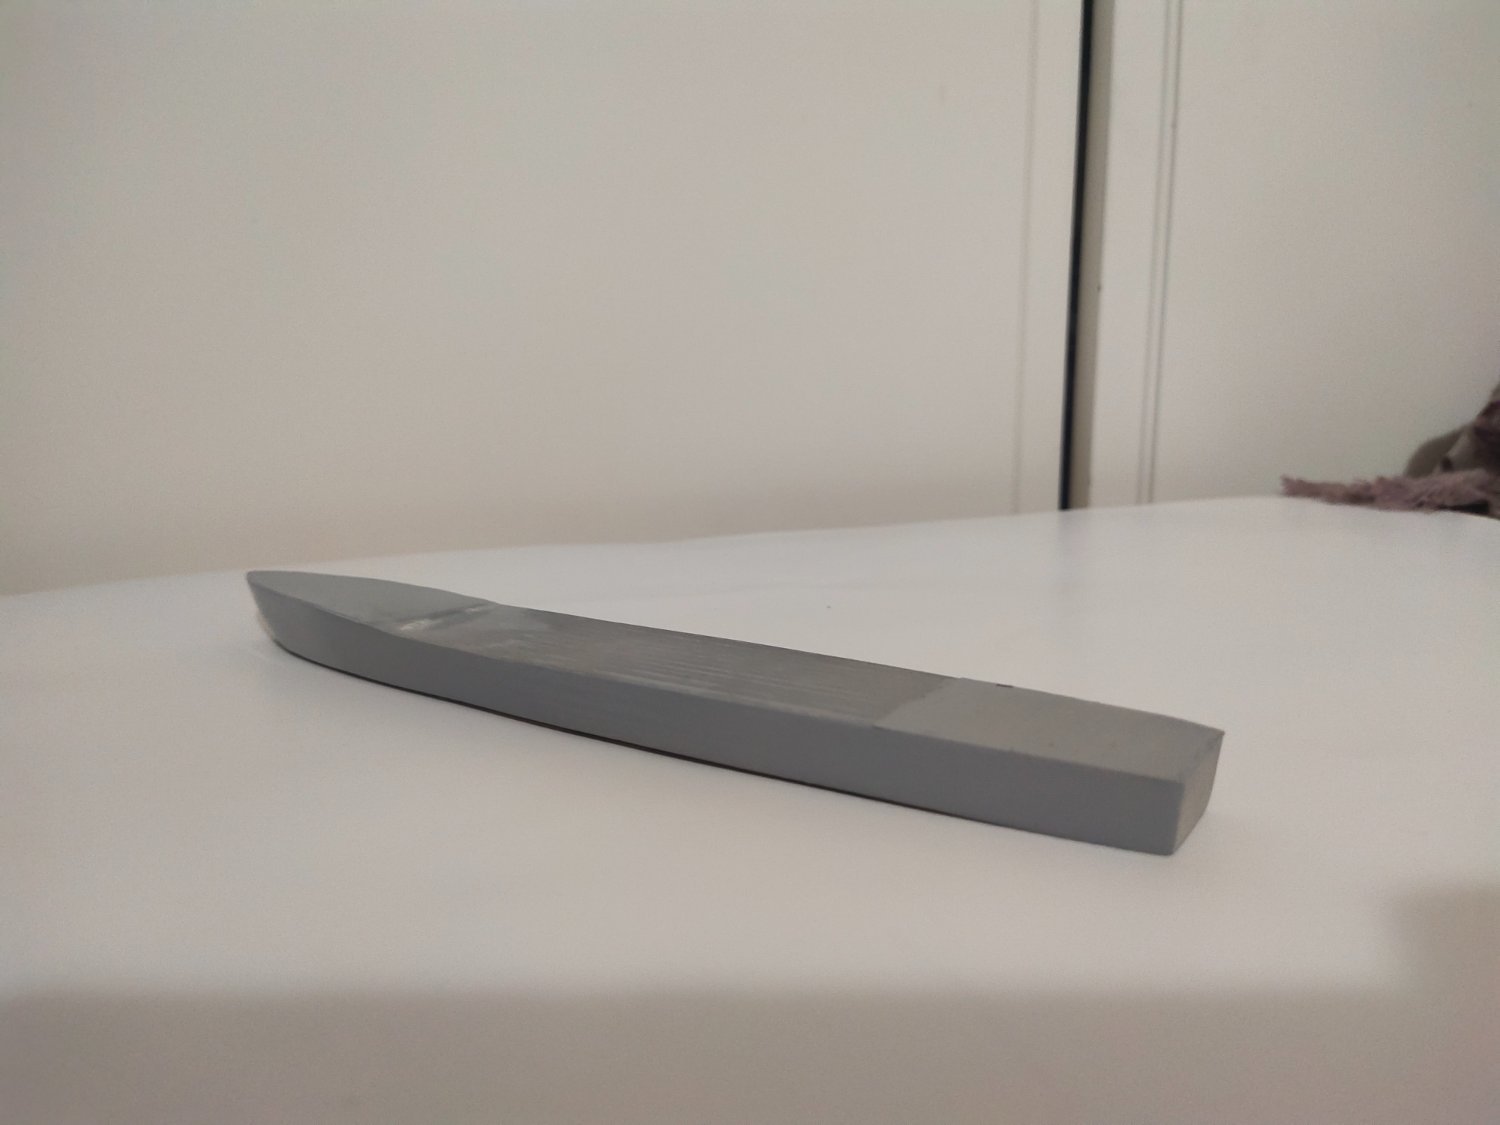
mikegr replied to mikegr's topic in - Build logs for subjects built 1901 - Present Day
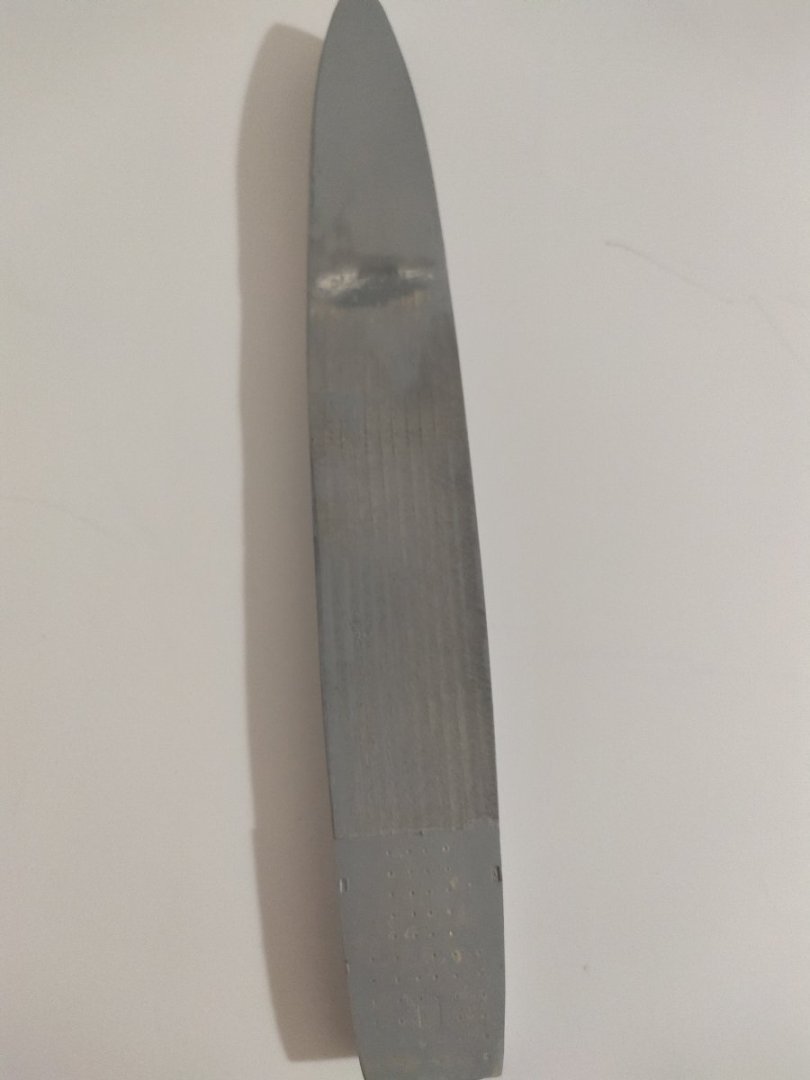
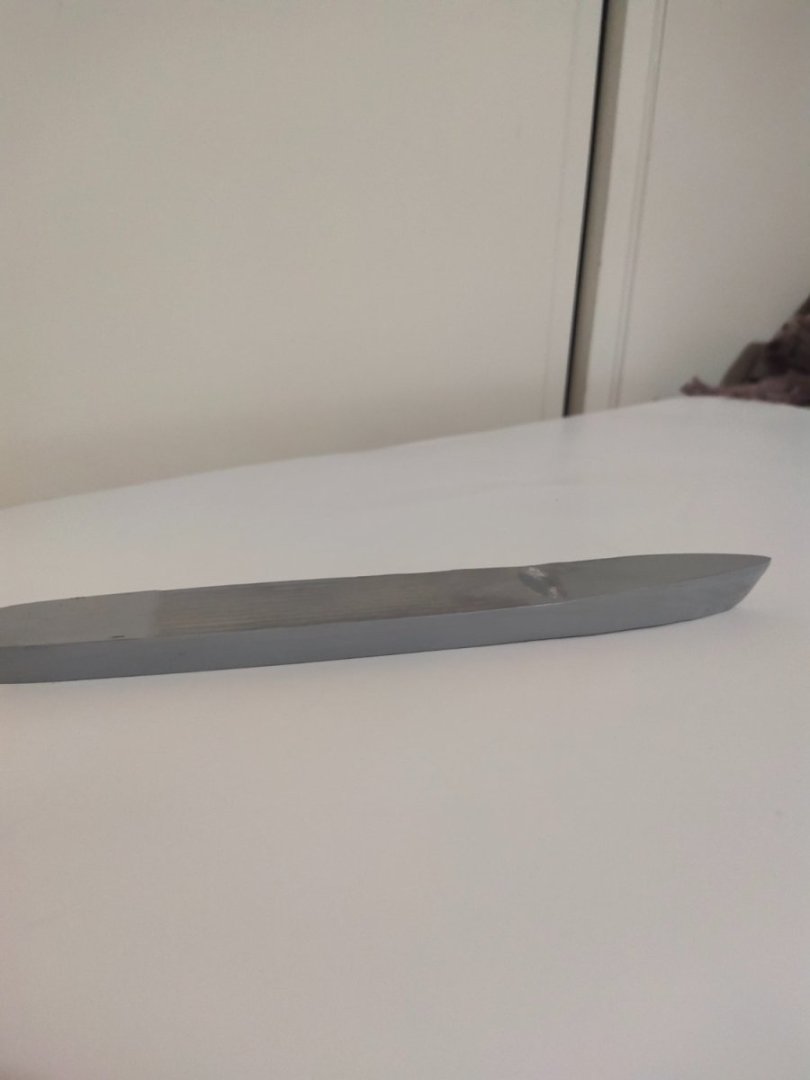
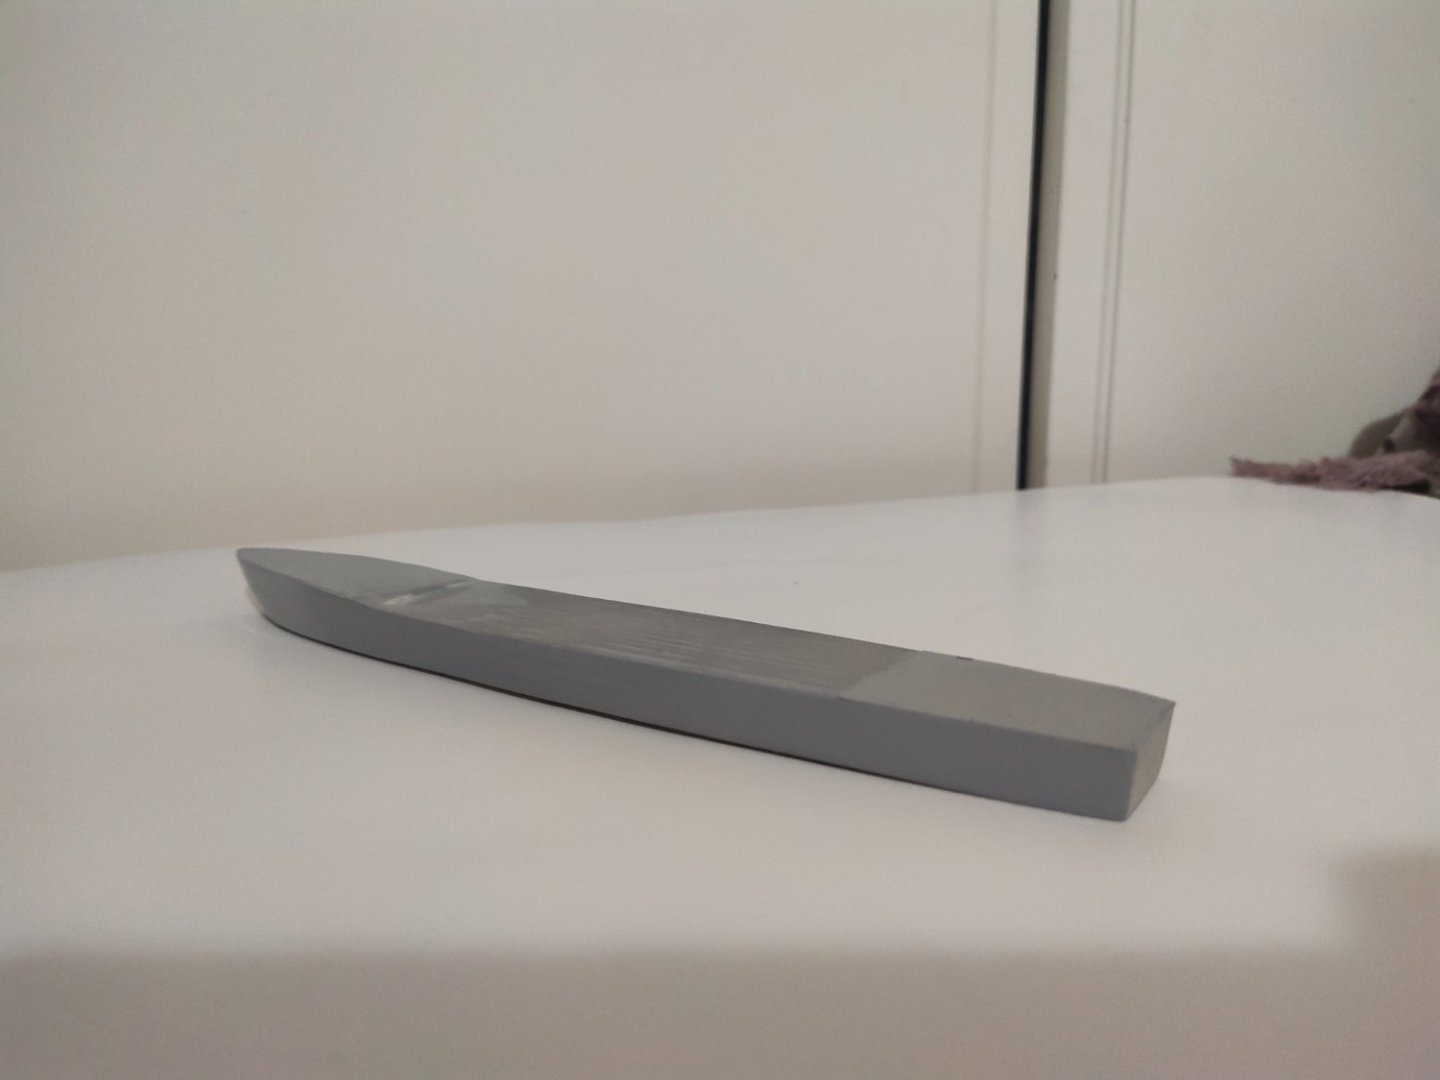
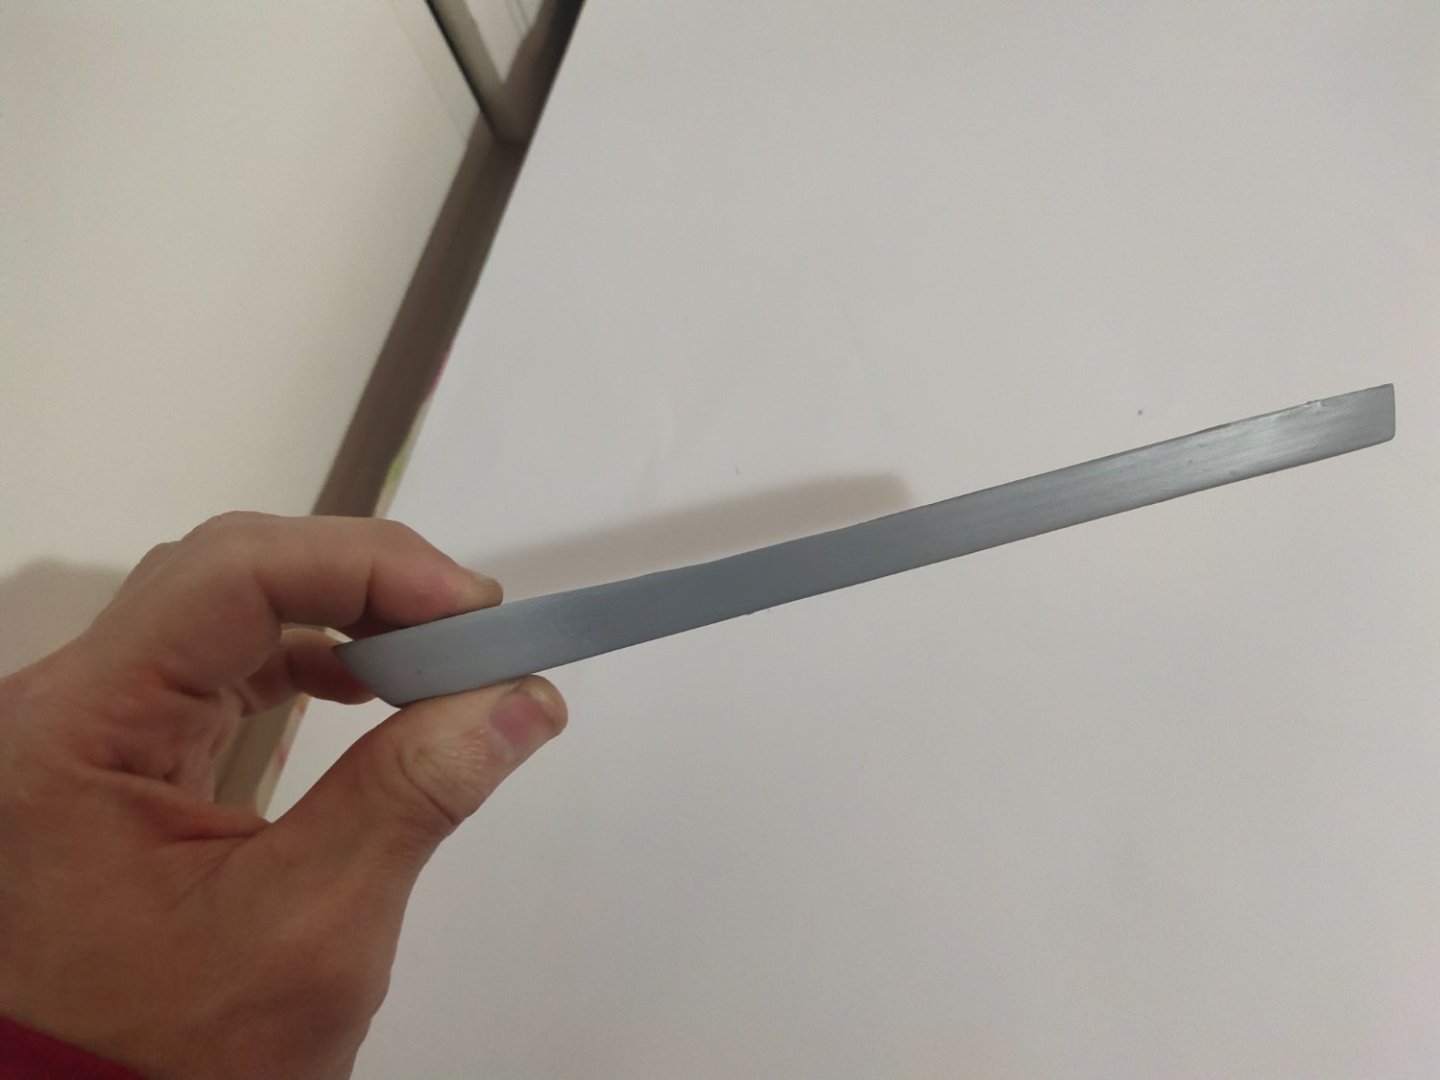
I made the hull. It looked clumsy and wide. I had to remeasure to get the proper dimensions Excess "fat" was trimmed down and it was shortened by 3 cm. After more careful work I shaped the sides and upon finish wood was polished Then, I add the PE heli deck on rear and a 2.5 mm piece of resin on bow to make the right elevation Finally priming and sanding the bow, stern and the sides, several times.