Delphic Oracle
-
Posts
35 -
Joined
-
Last visited
Content Type
Profiles
Forums
Gallery
Events
Everything posted by Delphic Oracle
-
 Following along as I hope to get back into this same kit by year's end. I chuckled heartily at the shims for the center pieces, as I had to make that exact same adjustment!
 -
Dremel rotary tool?
Delphic Oracle replied to Mark m's topic in Modeling tools and Workshop Equipment
I went whole hog on the Fortiflex rotary shaft. Mostly it has helped with detailing on some larger non-model work so far (building a desk to...work on models). This was based on, as stated above repeatedly, the loss of torque at lower speeds. The fortiflex has a variable speed foot pedal that doesn't have (as noticeable) an issue with this, as it is a proper variable potentiometer rather than a "dimmer" type of speed control. Someone more familiar with electrical theory feel free to correct me on all of that. I was an audio engineer long ago and did once have a better grasp of what I was talking about, I swear! :9 No, I wouldn't dare cut a rabbet or other critical tasks like that. Mostly it helps cut down (pun intended) on tasks that are both time consuming and highly repetitive. I imagine this is even more true when acquiring harder woods than the stock often provided in kits. This, in turn, helps prevent boredom, fatigue, and burnout. -
It is not only tragedies that delay me, but the season turning brings on competing attention of my green thumb with yard and garden work. Nevertheless, I have overcome my procrastination and put the new paper and ink cartridge to work. Now to start working on steadying my hand after about 20 years since hacking away at plastic starships. This may be a task that calls for a bottle of single malt. Or maybe I'm just making excuses to buy a bottle of single malt. Wish me luck!
-
Things are on hiatus a moment. We had a very sudden and tragic loss of a fur baby, Miska (Inuit for "Little Bear"). This is a before/after composite I made for a social media fundraiser on my birthday for Unleashed Pet Rescue where we adopted her from. Just a week shy of a year after adopting her, she went for an unplanned romp. We have learned not to chase after her, because then she thinks we are "playing" and we end up on dangerous streets and she's distracted from what's happening around her. Usually within a half hour, she is on the porch wanting back in. The odds did not favor her this time, sadly. Neighbors who heard it and came outside to investigate report that she expired very quickly, she thankfully did not have to suffer. She was very skittish with me in particular (we suspect abuse in addition to clear neglect). While many breakthroughs in bonding were made during her time with us, one of the recent vehicles for doing so was the model. I would be consumed with it a bit and she would take those opportunities to come sniff me or lay down on the bed behind me, watching with keen fascination. So it is difficult to get into working on it without "the sads" hitting me right now. I also have to give a much increased amount of attention to the other fur baby since he doesn't have his all-day play buddy, now. I have picked up some 65lb. paper stock and a new ink cartridge, so once I move through some of this grief, I will be ready to move into the initial stages of fairing.

-
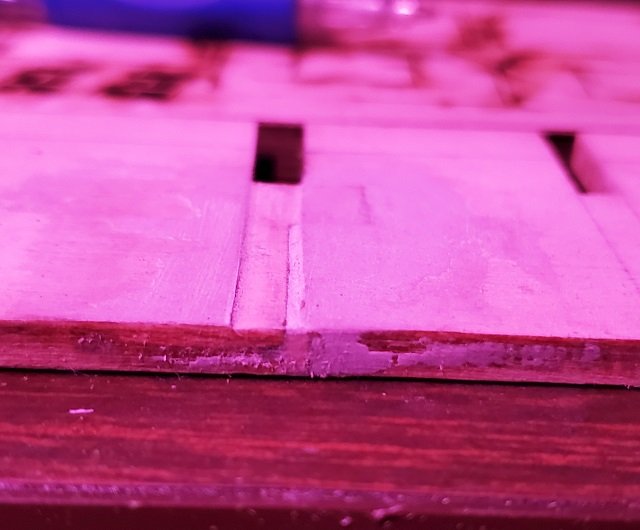
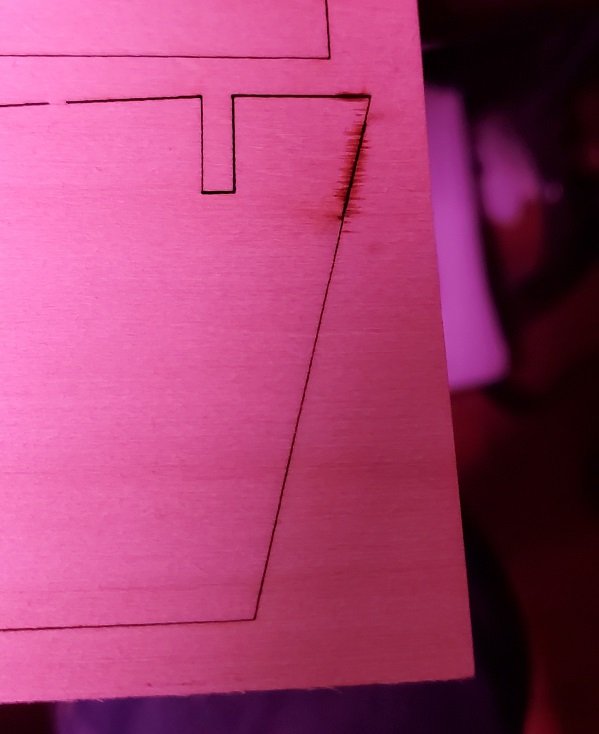
Here's a visual reference. Note all the char but you can see where I sanded the bottom right corner showing top layer, glue, and middle layer.
-
Thank you very much for that, I think that's much more within my skill (and knowledge) range and a good bit more detailed than what is available out of the box with this kit. I did take a stab at doing the cross-cut overlapping corners. I think with a little more work on technique and I'll be up to it, but the basswood is not going to hold its edges at this scale. I expect that would have some disastrous implications around the time the shrouds come into play. So I'm definitely growing more comfortable with the idea of variables desired for woods in different parts of the ship :9. ETA: upon inspection, the tops and transom windows are on a 3-ply board. Very stiff. I almost suspected a thin ceramic layer in the middle. I sanded the safest corner, there are 3 layers, the glue reminds me of liquid nail. I was already considering a denser wood for the crosses and the rail, maybe something in between seems appropriate for the planking, as well given how much torque these can end up taking.
-
Dmitry, thank you for sharing your experience with this kit. I have also seen from other build logs this level of attention is needed for the hull and also where I saw many people wisely using the time to knock out high-repetition tasks that happen down the road, as well. As to camera, I do see that this phone does have a pro camera mode and many features I am familiar with from my experience with production work. I never even hunted for it since upgrading some time ago. I have an older but versatile DSLR floating around somewhere, so I may dig it out when the time comes. Limited depth of field is one thing I notice in a lot of pictures as the builds get bigger and the shots wider. Thanks also for you words of encouragement and all of you dropping likes as you munch on the popcorn!
-
I quite enjoy seeing this build coming together, she looks supremely impressive! Since diving back into this myself, I've become quite drawn towards the 17C Dutch designs. There's a few books I have my eye on, Ab Hoving's among them. Someday down the road I imagine a scratch build, perhaps also informed by any literature I can cobble together about common pirate "hacks." Your quality craftsmanship and wealth of improvisational solutions are an inspiration for me as I cut my teeth on this hobby. I also appreciate the natural color palette, pleasant and interesting without being "busy."
-
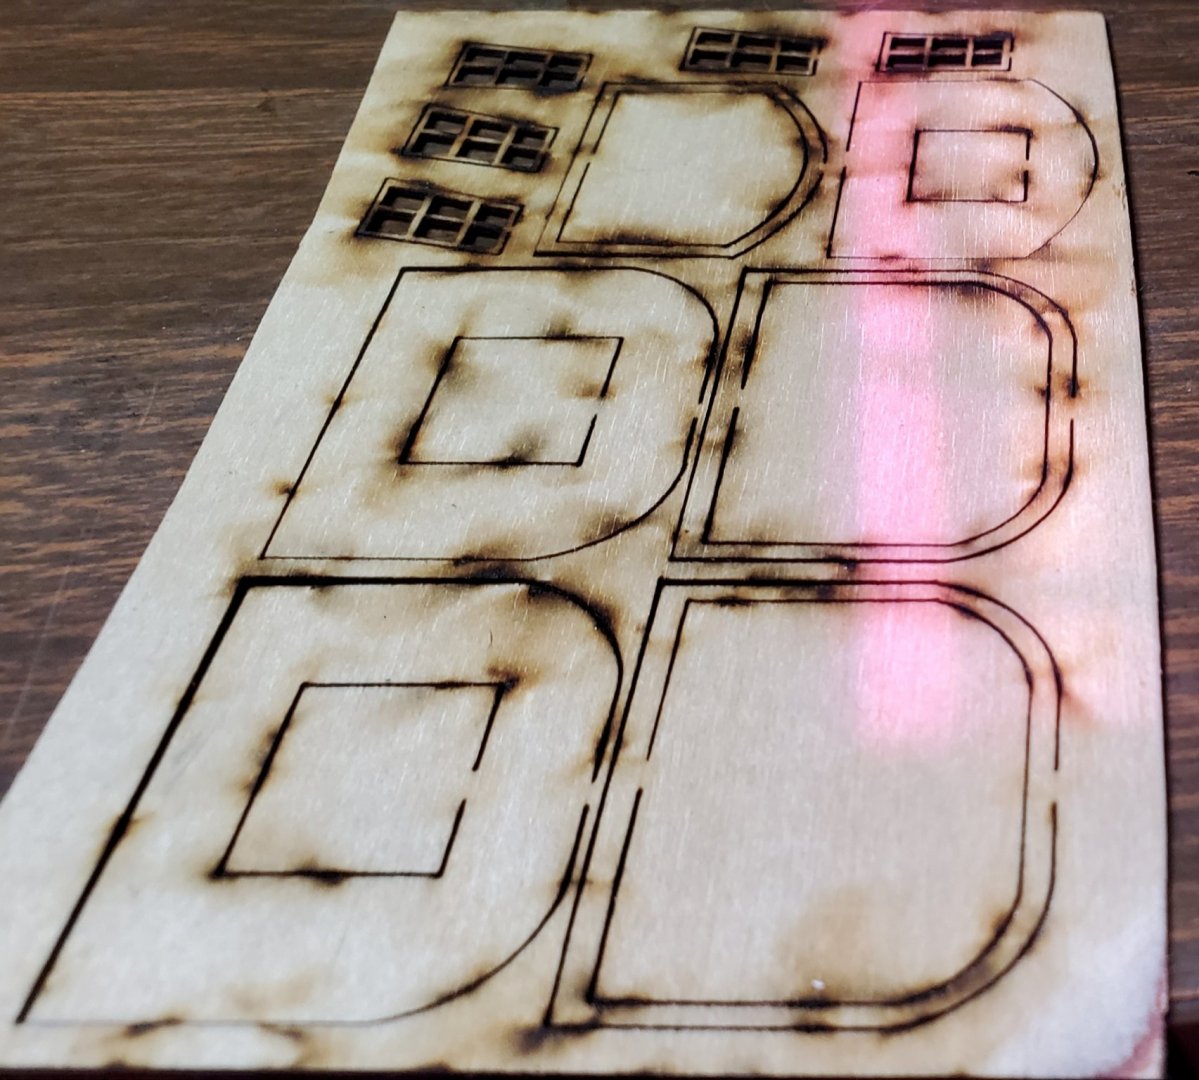
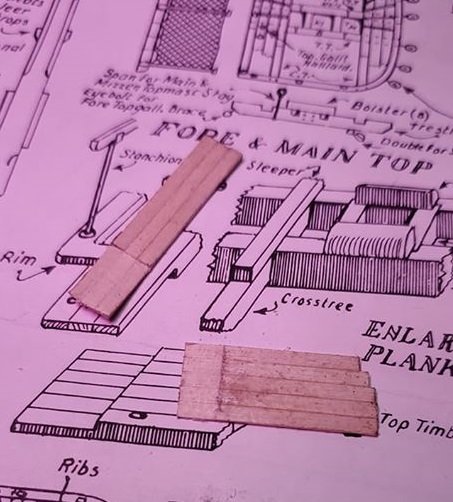
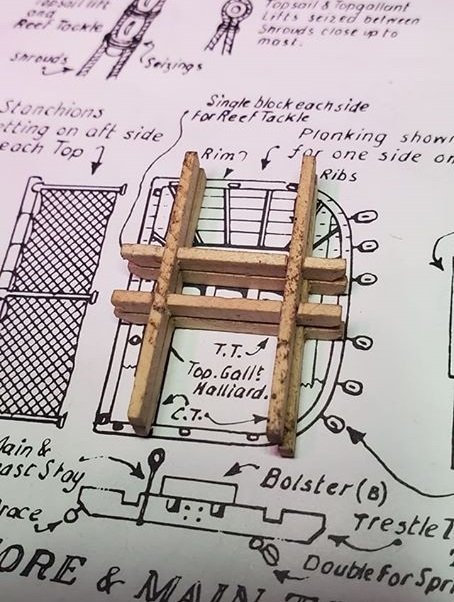
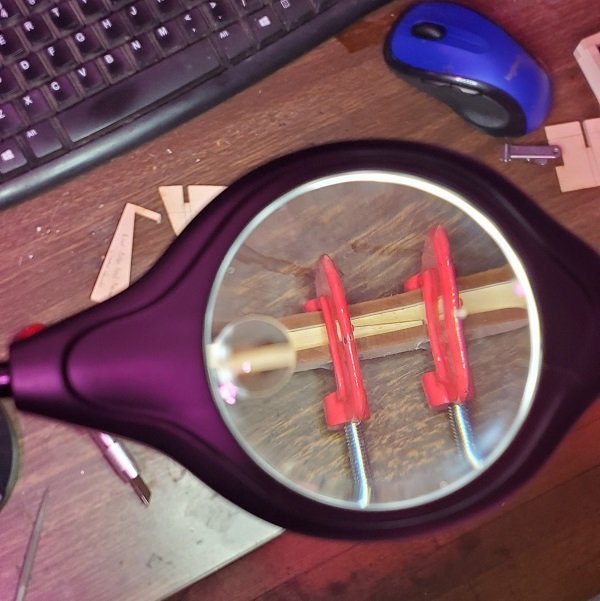
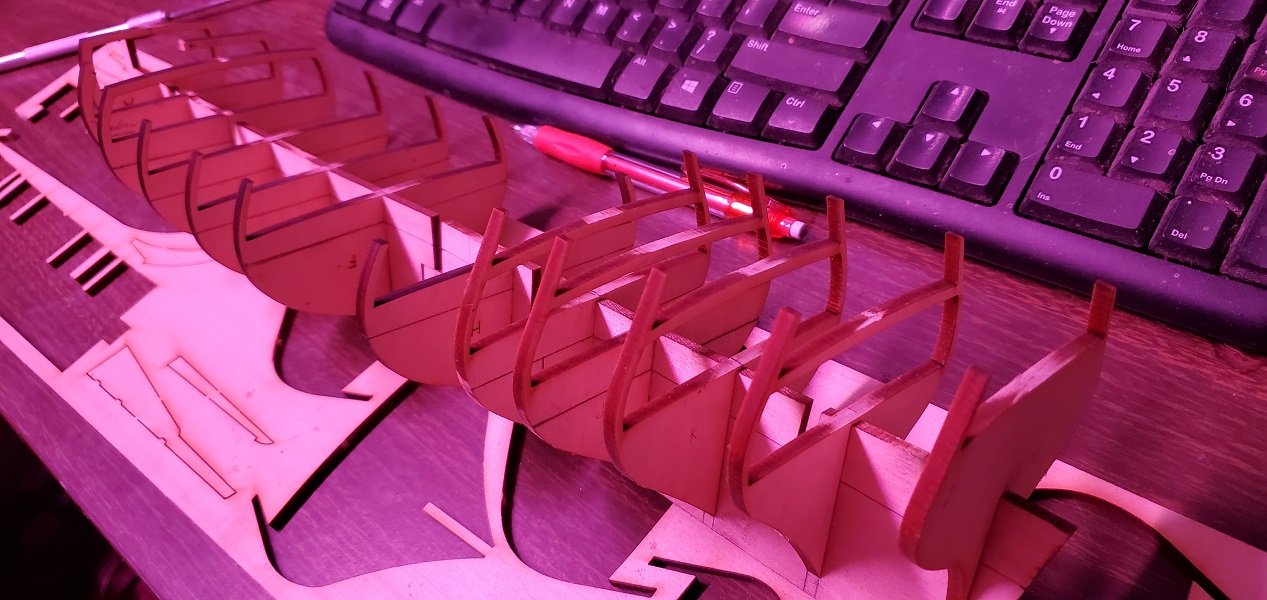
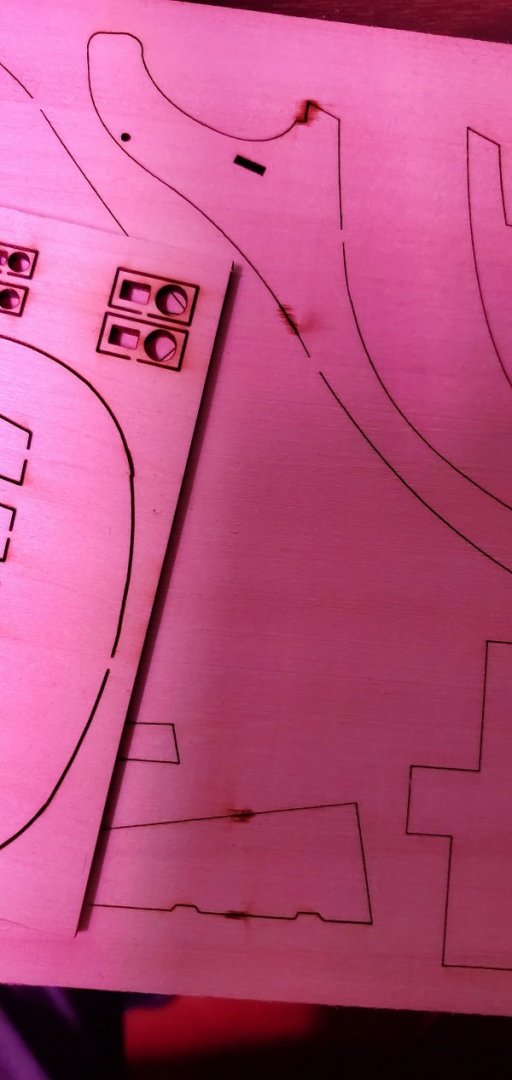
Nasty weather thwarted my plans to get some card stock paper to copy plans onto (and other tasks down the road). But, as I've read in many other logs, when fairing is proceeding slowly, use the time to knock down some later tasks! So apparently I didn't flip over the laser cut sheet that has the tops and transom windows, they got scorched pretty badly. Once again, just an opportunity to learn another scratch technique. I figure I'm going to use up a lot of stock wood from this kit on practice attempts. My next acquisitions are a stand/sit desk (long term I have a bunch of 2x6 I will make into a sturdy, stained, and sealed top) and a rotary tool. Then I'll start planning out some custom wood acquisitions. But, anyways, I've given the crosstrees and trestletrees a go. First attempt (on bottom) quickly taught me to mark and cut them as pairs so they'll run square. The second one (on top) is much better. I don't think I would have been happy with just scoring the laser cut piece, anyways. Notching the planks where they overlap in the corners is going to be quite a feat to try, though. One big question I have, however, is the rim piece. In the kit this is also a single laser cut part and lays over the top of the planking. Is that accurate? Looking at a few scratch builds I tend to see multiple pieces of wood that appear to be wrapped around the outside and oriented perpendicular to the planks (tall/narrow rather than short/wide, so to speak). Thoughts and resources welcome.
-
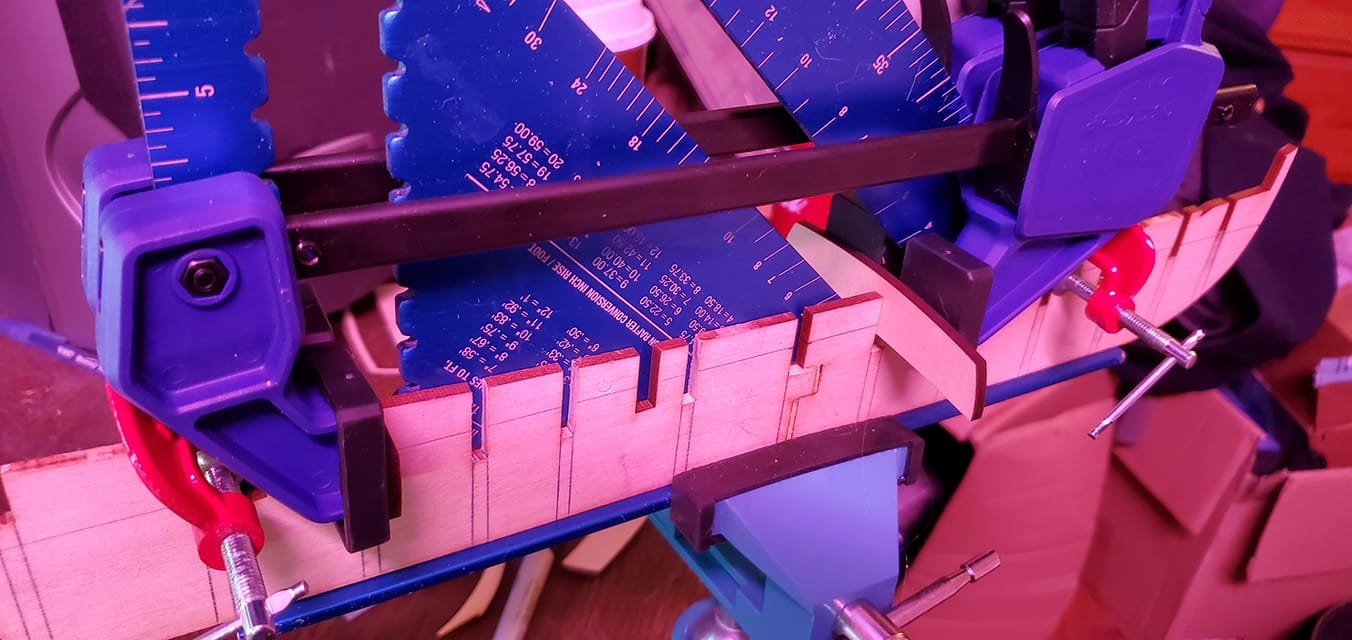
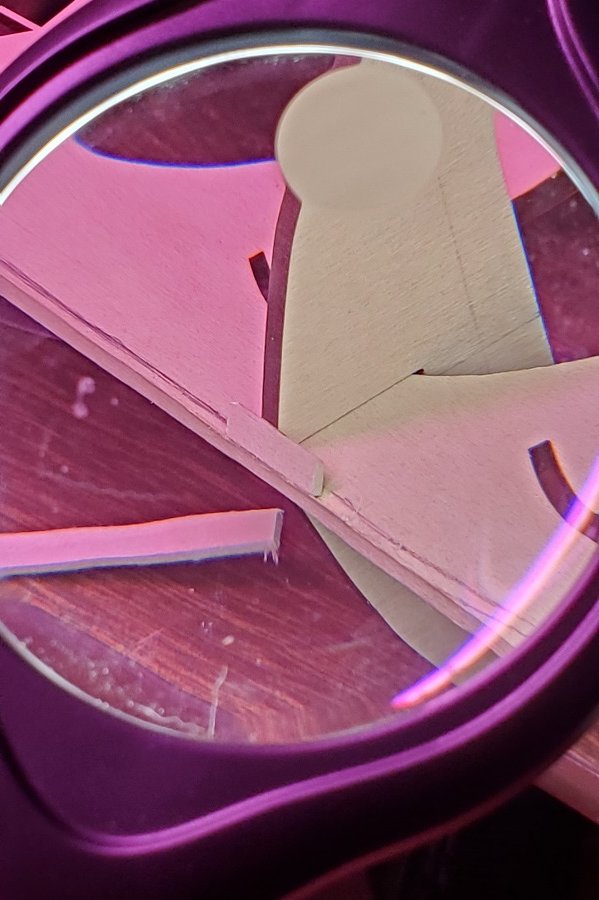
It has been a busy-ish week, so I've only had a bit of time to sand and file around the joint and clear a groove for the midships bulkhead. The vertical shims were 1/16" filed down a bit to match plan. When I added the 1/32" in the horizontal gap to dry fit test it "snapped" together and held the pieces together. Judging by eye, I will probably need a 1/32" shim in the forward wall of the channel for the middle bulkhead. I am starting to go through the bulkheads one at a time. Comparing to plan, verifying center, double-checking the reference line, testing symmetry, and other (pre-)fairing type tasks.
-
Hello All from Tom at CAF model
Delphic Oracle replied to cafmodel's topic in New member Introductions
"When a man who is honestly mistaken hears the truth, he will either quit being mistaken or cease to be honest." (unknown/various attributions) Thanks for choosing the former and welcome to MSW! -
Well I've not made it 43 pages, but you've done an amazing job. Being of similar era and same manufacturer as my current build, some of your early steps have already helped me visualize what's coming up. Good luck getting her last pieces together, it looks incredible!
- 1,306 replies
-
- 3
-

-
- syren
- model shipways
- (and 1 more)
-
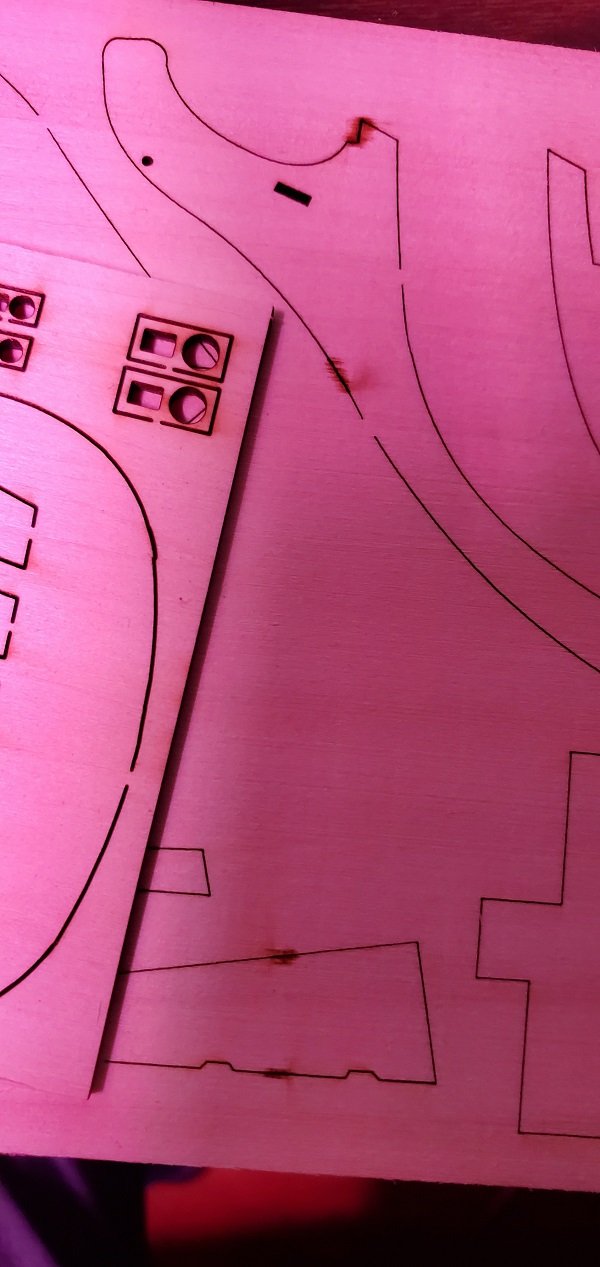
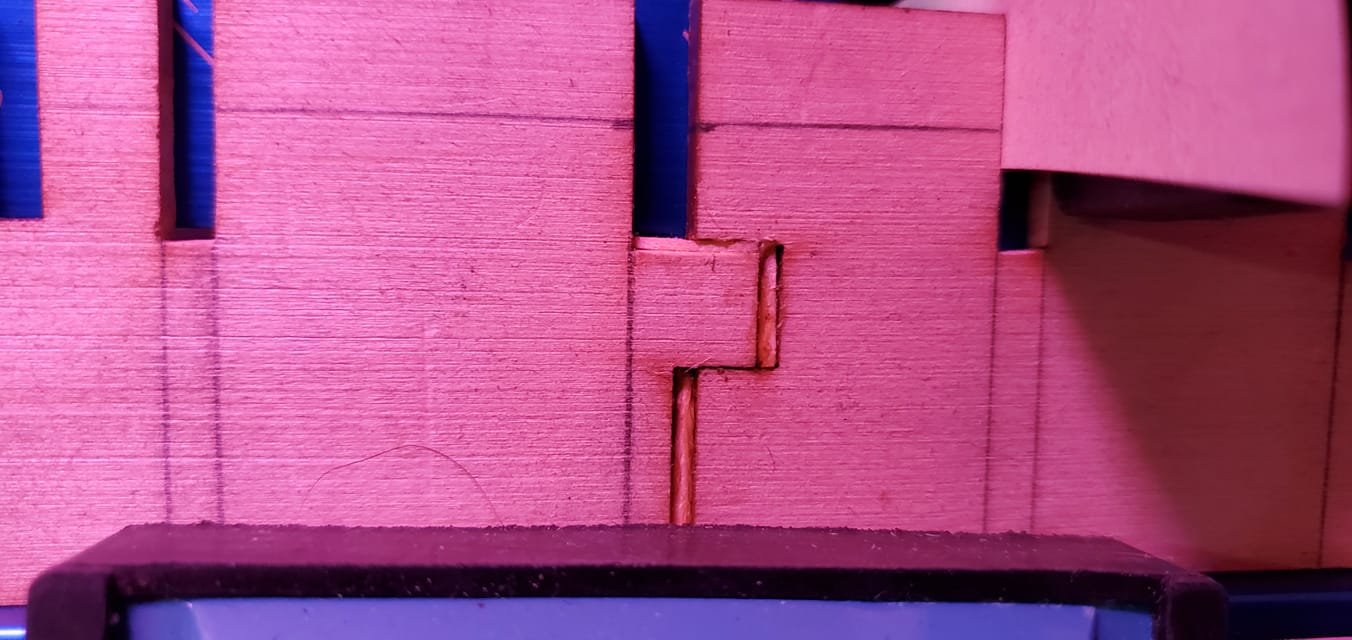
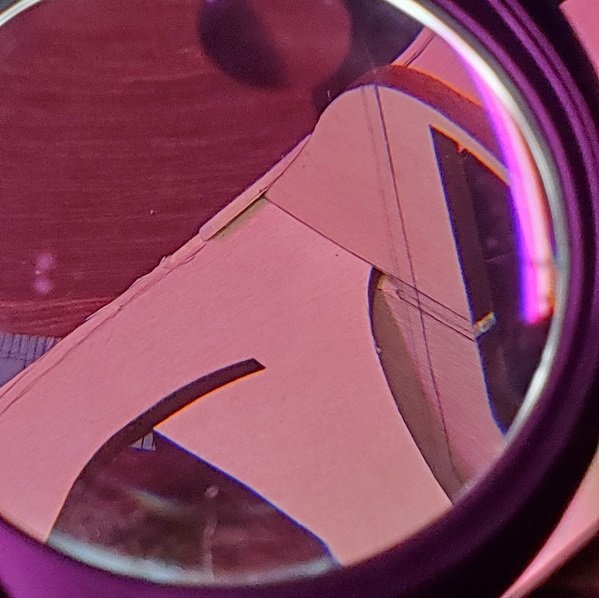
Wood filler around the joint and repairing the "B" bulkhead. I seem to have lucked out by only breaking "B" as it is the middle of the 3 forecastle bulkheads and I can inconspicuously install a brace. I tried to dab a little filler around it, as well. Alas, it got tacky on me before I made it that far, will do it properly once the brace is added later. Plus I shouldn't go manipulating (or adding potential reactants to) it while the glue is setting anyways. Patience!
-
Big thanks for the support! She is pleasing to the eye and seems to be a not-overwhelming kit for stepping up to a new level. Thanks also to the thumbs-ups out there, they are appreciated :9.
-
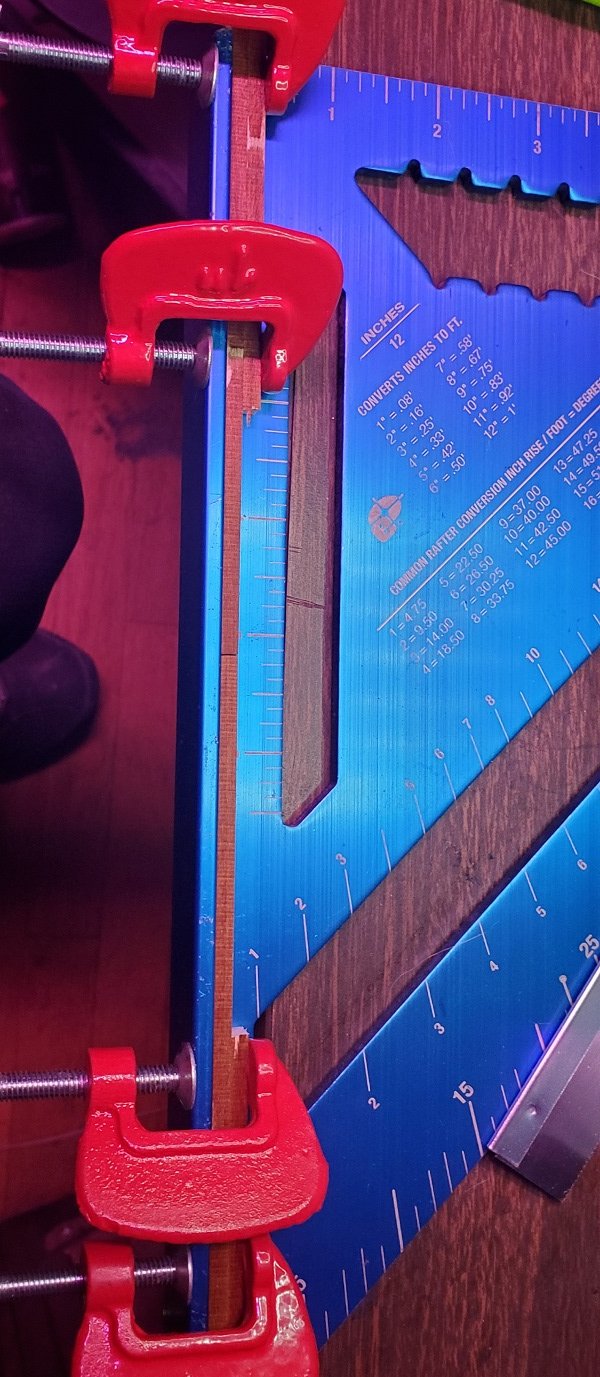
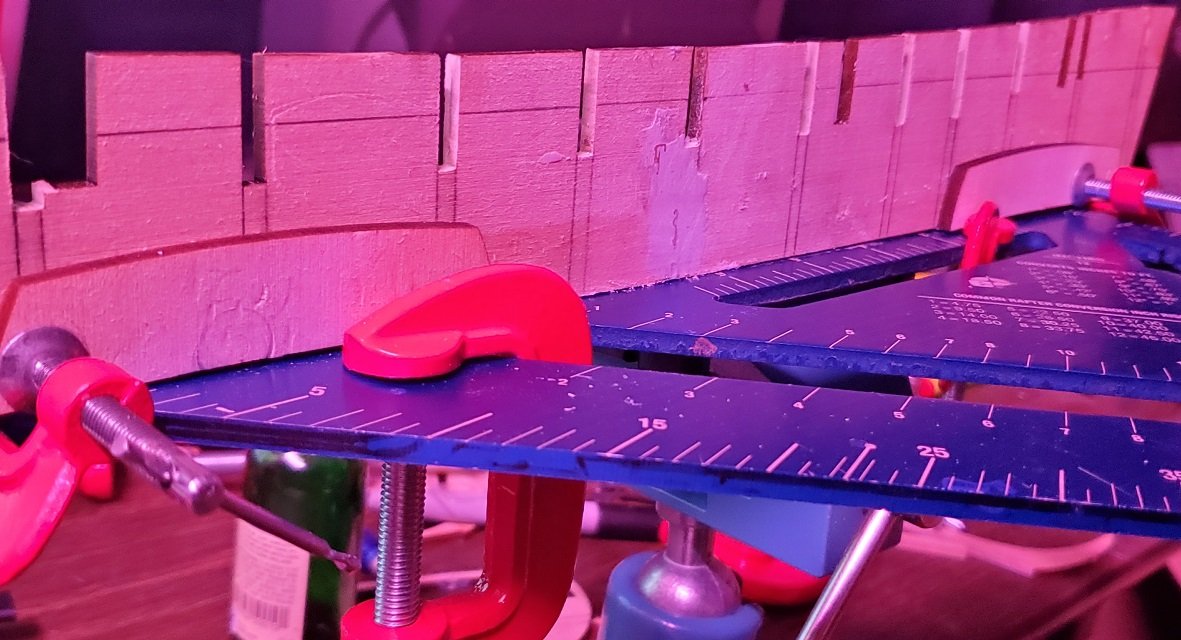
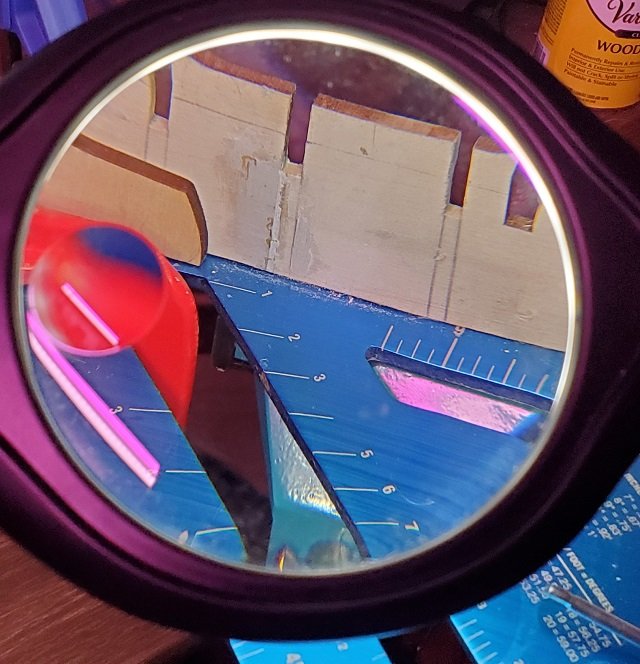
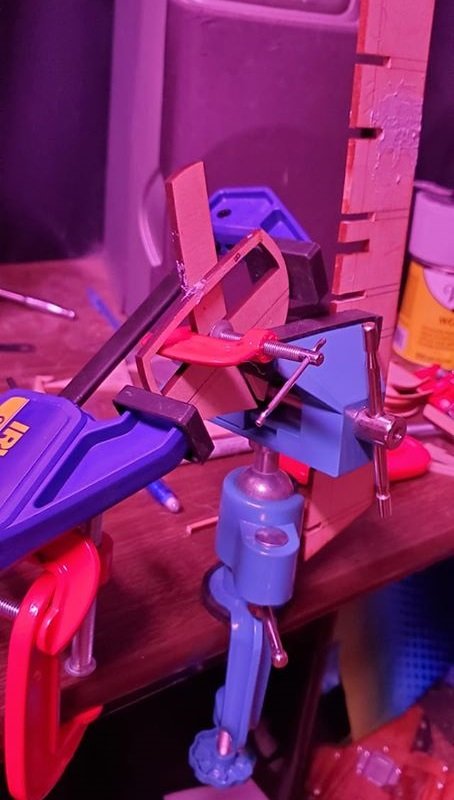
The fore frame came up notably short at the joint (way too tight bulkhead groove was the first clue), so some shims were added to allow full contact all around. trigger clamps for pressure, c-clamps to prevent twisting upwards, all secured to a framer's square and held upright on the bench vise. I gotta use what I got :9.
-
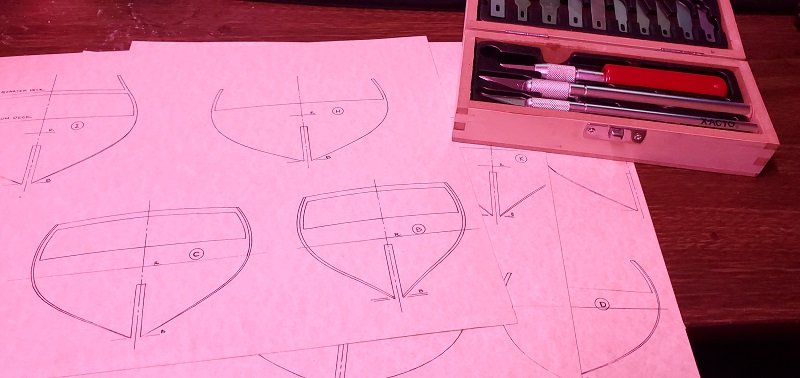
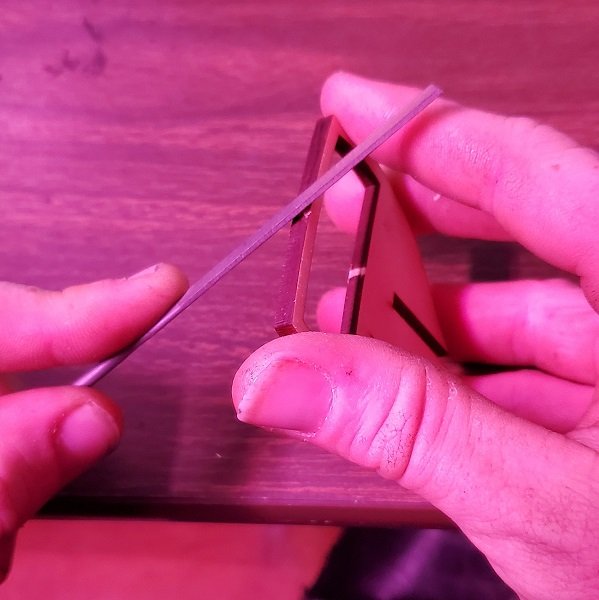
Yes, the spacing on double-plank makes this cut very interesting. You may as well fashion your inner layer garboard plank(s) to near-completion as part of the dry fitting. I have found that laying the blade (facing up) against a plank pinned to the dry fit bulkheads to be a good tactile guide. Just one bulkhead distance at a time, I first let the grip roll in my fingers as the angle of attack changes. Then I start to let it roll my fingers along with it as I pick up on the rate of change. Over and over until I get a good feel for it. Then slide the bulkheads up for room to work and repeat the motion I absorbed to lightly score the cut several times. That scoring then serves as the guide for the more aggressive blade to go for depth. I score with #11 and cut with #19. The "back-rabbet" along the keel is what I still am working on mastering, however.
-
To catch up to where I am, I've been practicing the rabbet cut on scraps. I'll call my first effort "not terrible." Not that it will matter when it comes time for the angle to have to match where the wood is, in my defense, it does a great job of being the rabbet at the "B" bulkhead (rather than the "D" according to the curve I drew).
-
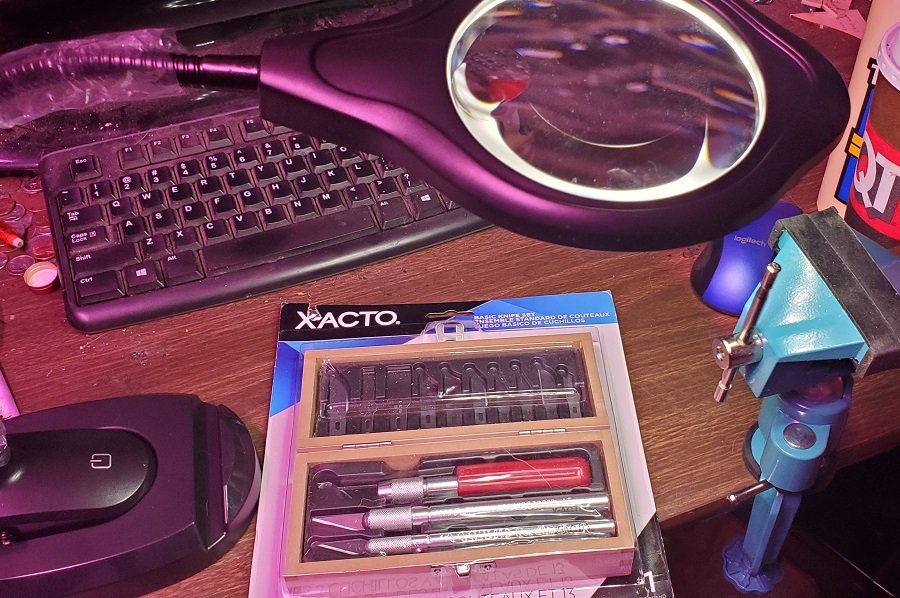
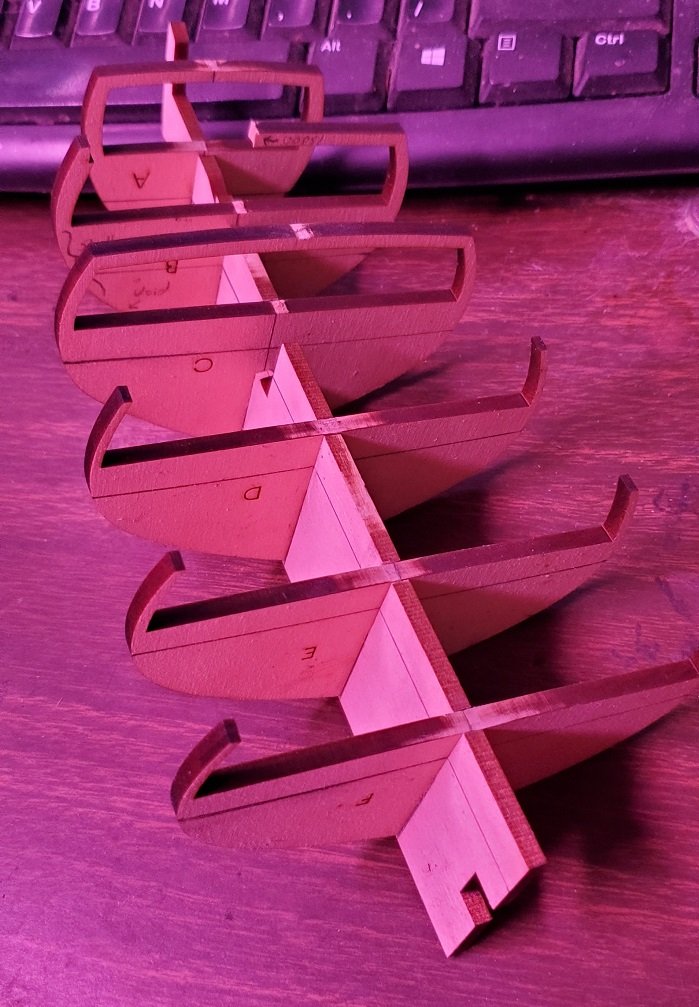
There she sat for a few weeks, though disassembled and neatly stacked. I'd put tools on my Christmas lists so I had to wait to see what Santa brung me. The family did a fine job. Clamp-on bench vise with swivel head and textured rubber jaws, Magnifier with light, Xacto basic set (not shown: trigger clamps, 1" 2" and 3" c-clamps, smooth-jaw micro clamps, hemostats, and more). Could not have done better. Finally getting into a little gluing and a little torquing.

-
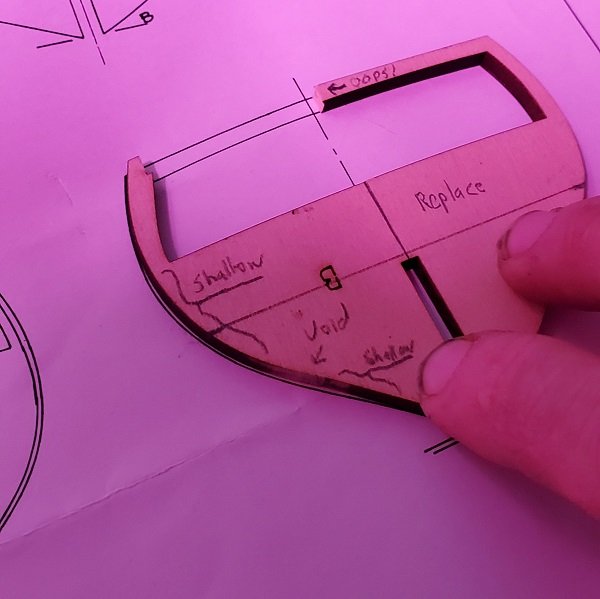
I proceeded with a razor, razor saw, and file set to extract the bulkheads, get references marked, and other steps I never bothered to learn before. Had the first oops in short order, of course. I had checked against pattern up to about halfway when I realized the very all-over-the-place errors and notes I was having to make were not there. I was aligning their bottoms whereas aligning them to the top of the pattern resulted in a more consistent coming up short. From looking over build logs, I recalled that it was not uncommon to need to shim and shave, which is far less imposing than the myriad of alterations on every bulkhead I thought would be necessary at first.
-
A few areas of irregularity in the wood got a bit of excessive laser char, but I look at it all as learning how to fix it (especially since I have my own mistakes to fix, too!). The frame where it meets the top of the stern post got hit hardest of all.


-
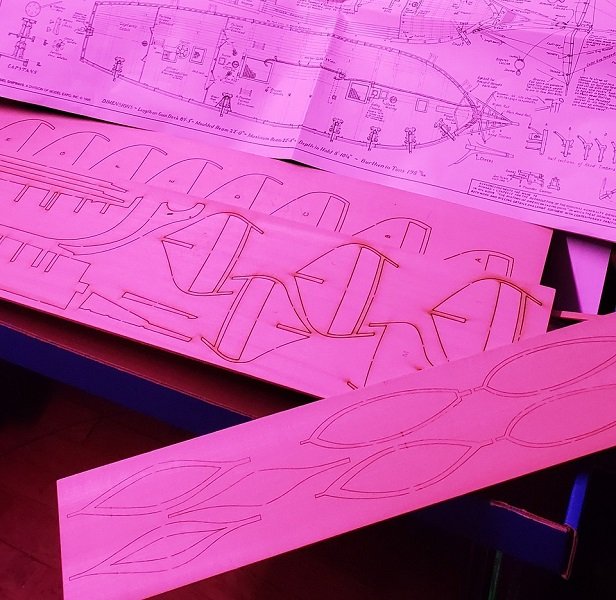
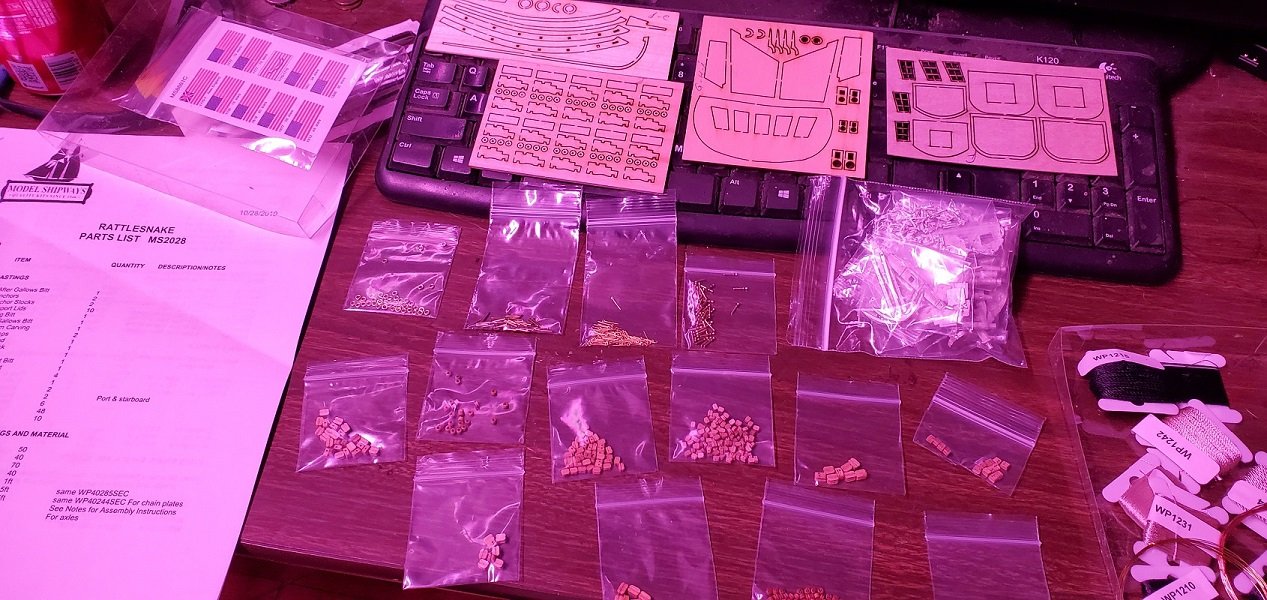
Welcome to my (second) first big build! Without much fanfare, we'll just start with the usual kit splash! Please do forgive the purple hue everywhere, I have some plants growing on a shelf above me. No, I don't grow THAT :9.

-
I do want to rework Pandora back to life, yes. It is possible I may even pause Rattlesnake to get Pandora's first plank layer down. Rattlesnake is single layer and I will want to skill up somehow first.
-
Pleased to meet you all! I hail from the Midwest U.S. and grew up building plastic model ships of both sci-fi and WW2 varieties. I tried my hand at wooden ships some decade or so ago and (as does often happen) bit off a good deal more than I could chew at some point. After a small scale galley and a fishing schooner who's names escape me now, I leapt beyond my means into the Constructo HMS Pandora kit. I lacked the toolbag or competence for such a project. I've toyed with a number of techniques on scrap woods and poured over more than a few build logs on this very site recently and, feeling a good bit more confident than in the past, have at least tempered my ambitions with the Model Shipways Rattlesnake model. In some ways the very well documented shortcomings of the kit are part of what made it seem like a better option, as I do intend to pick up some bashing and scratch-building skills along the way. I inquired with a relative I had left some things with a while back and the Pandora kit is back, though has quite a twist in her frame and skewed bulkheads (another repairing/reworking/altering skill-building opportunity). That was done before I knew anything about "fairing" and the rabbit hole that can lead down! I have great respect for the crafters here, master and novice alike. I look forward to our future interactions and will be getting a build log up, pronto! Fair winds, DO