


Mirabell61
-
Posts
7,357 -
Joined
-
Last visited
Content Type
Profiles
Forums
Gallery
Events
Posts posted by Mirabell61
-
-
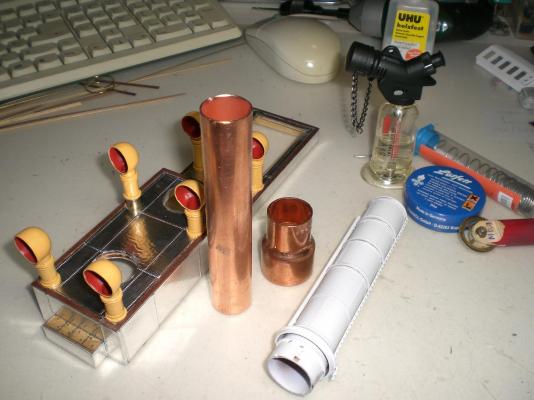
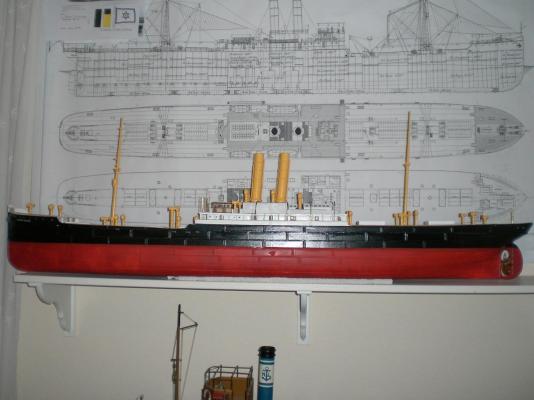
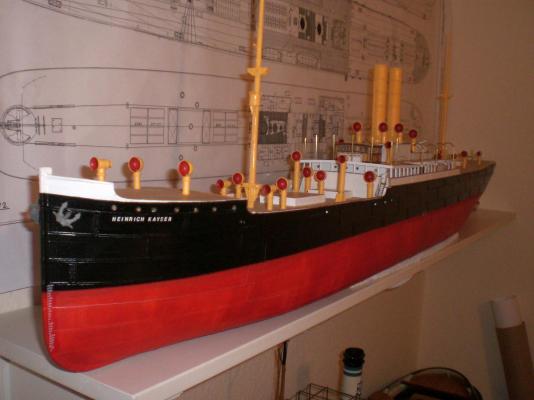
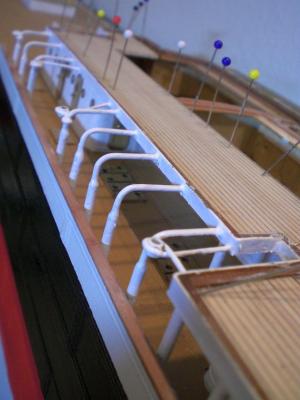
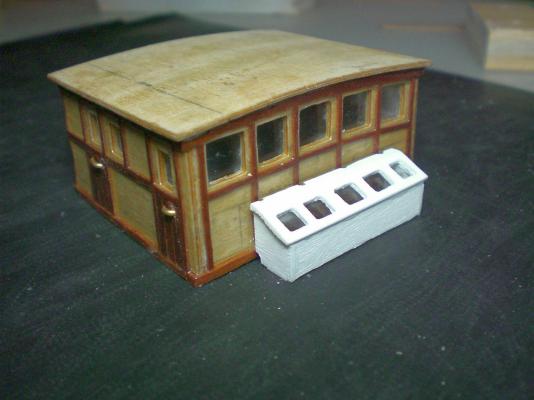
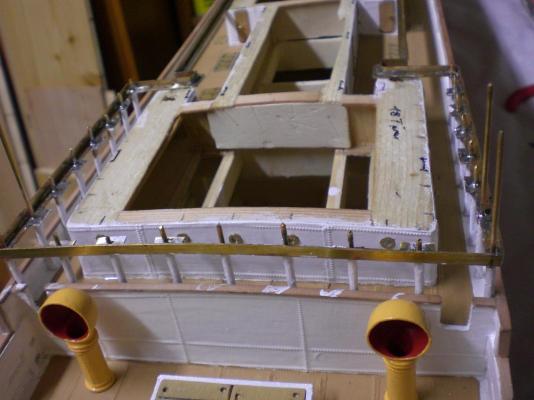
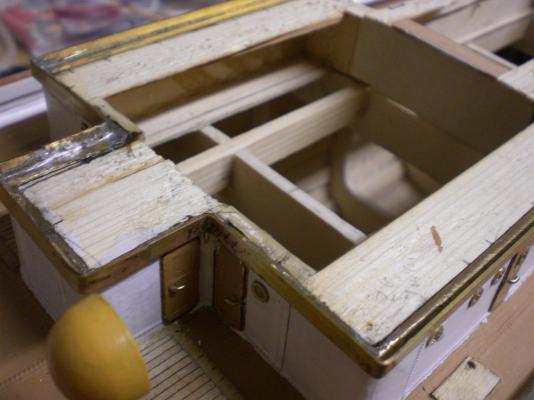
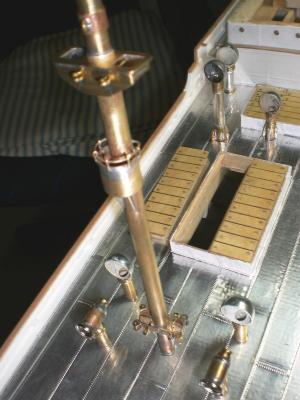
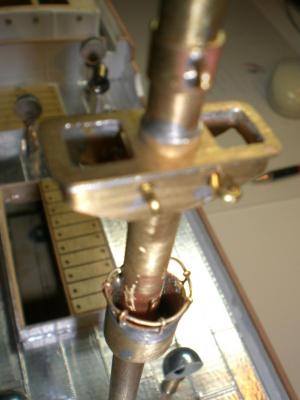
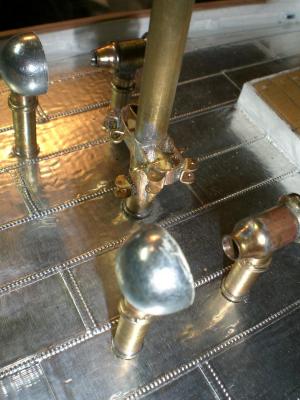
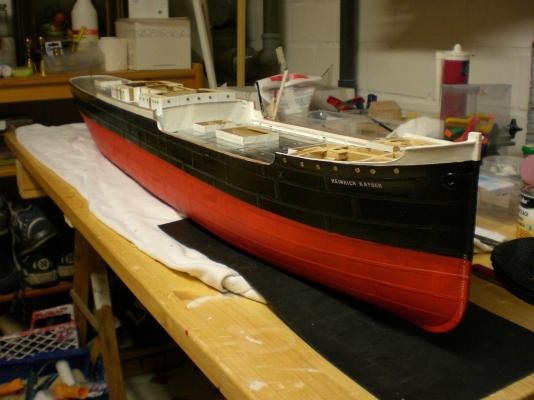
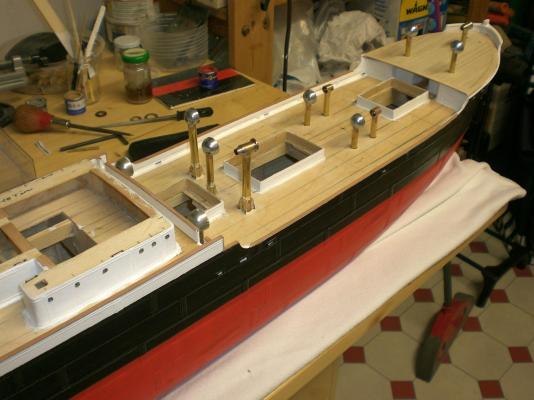
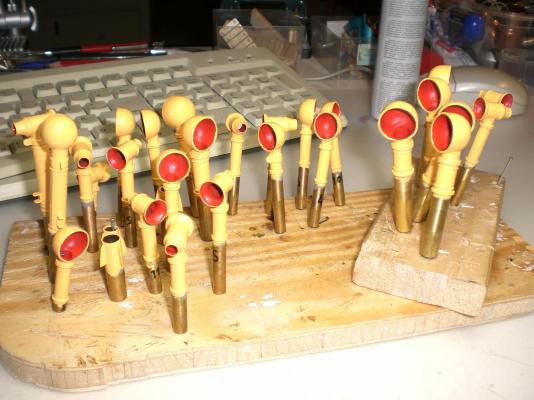
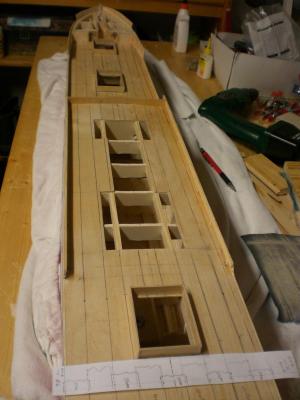
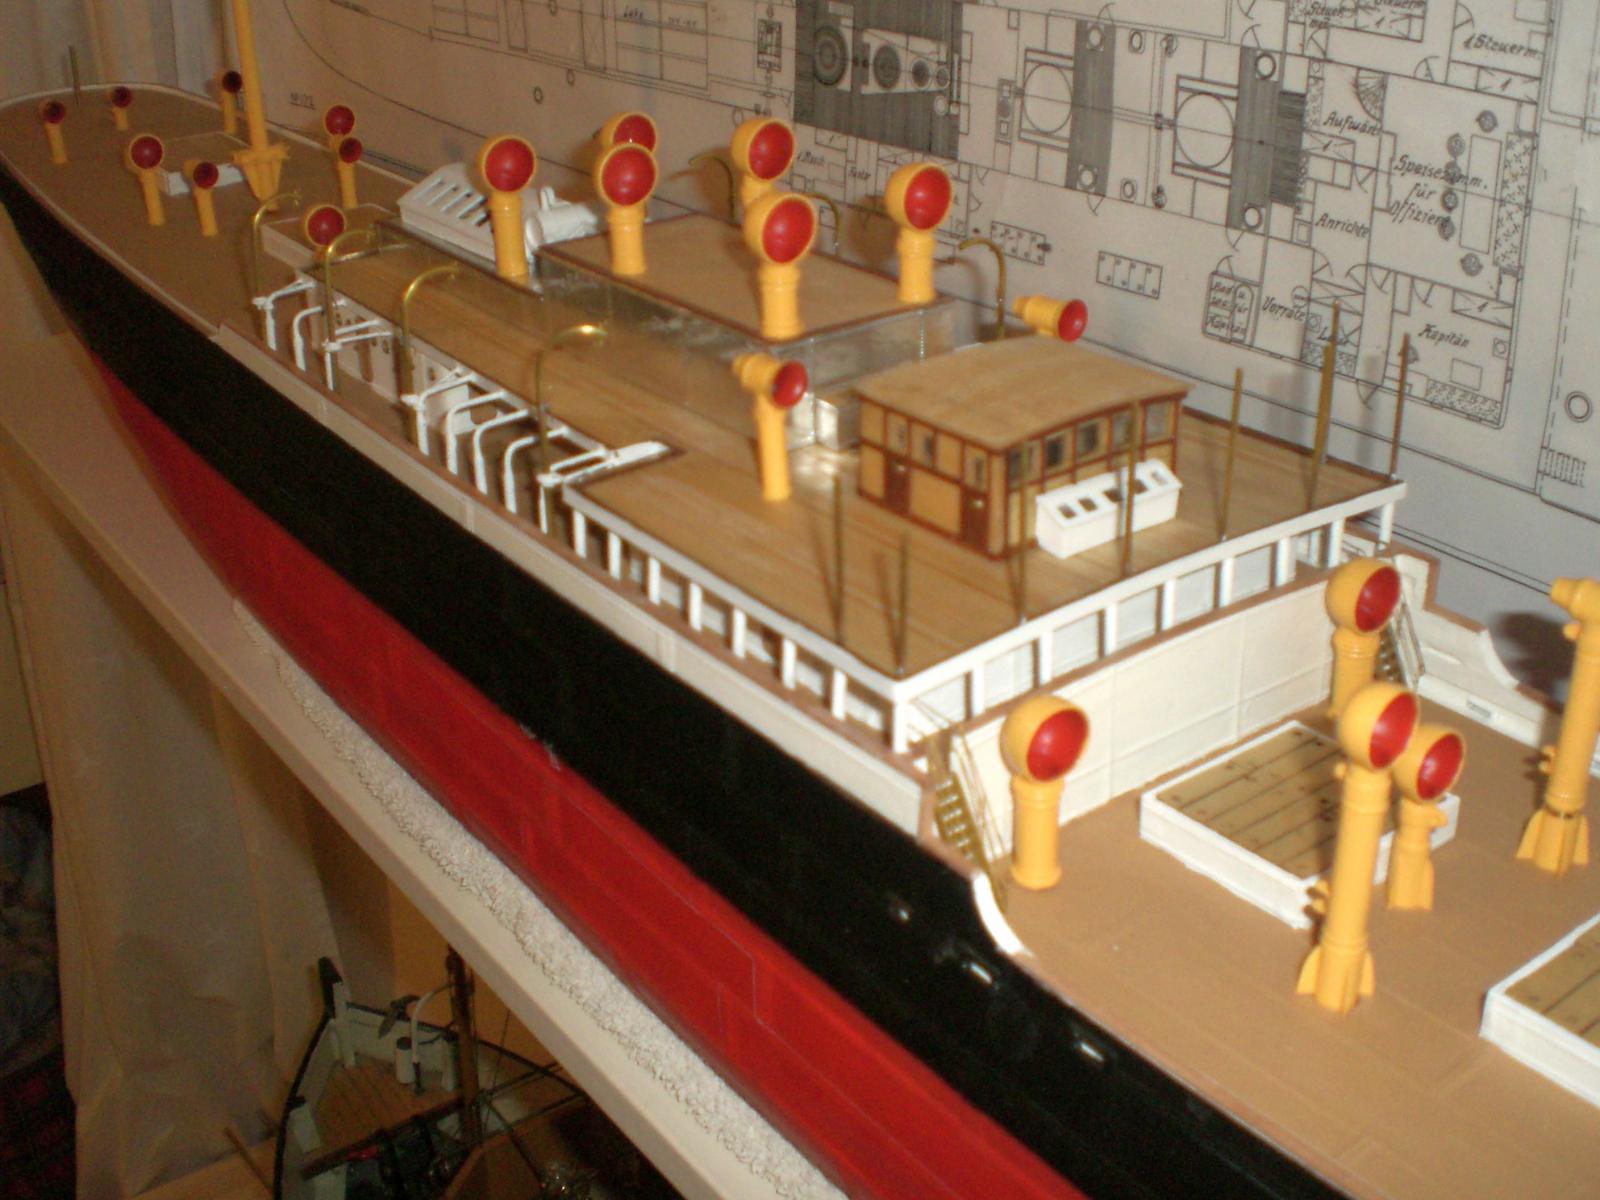
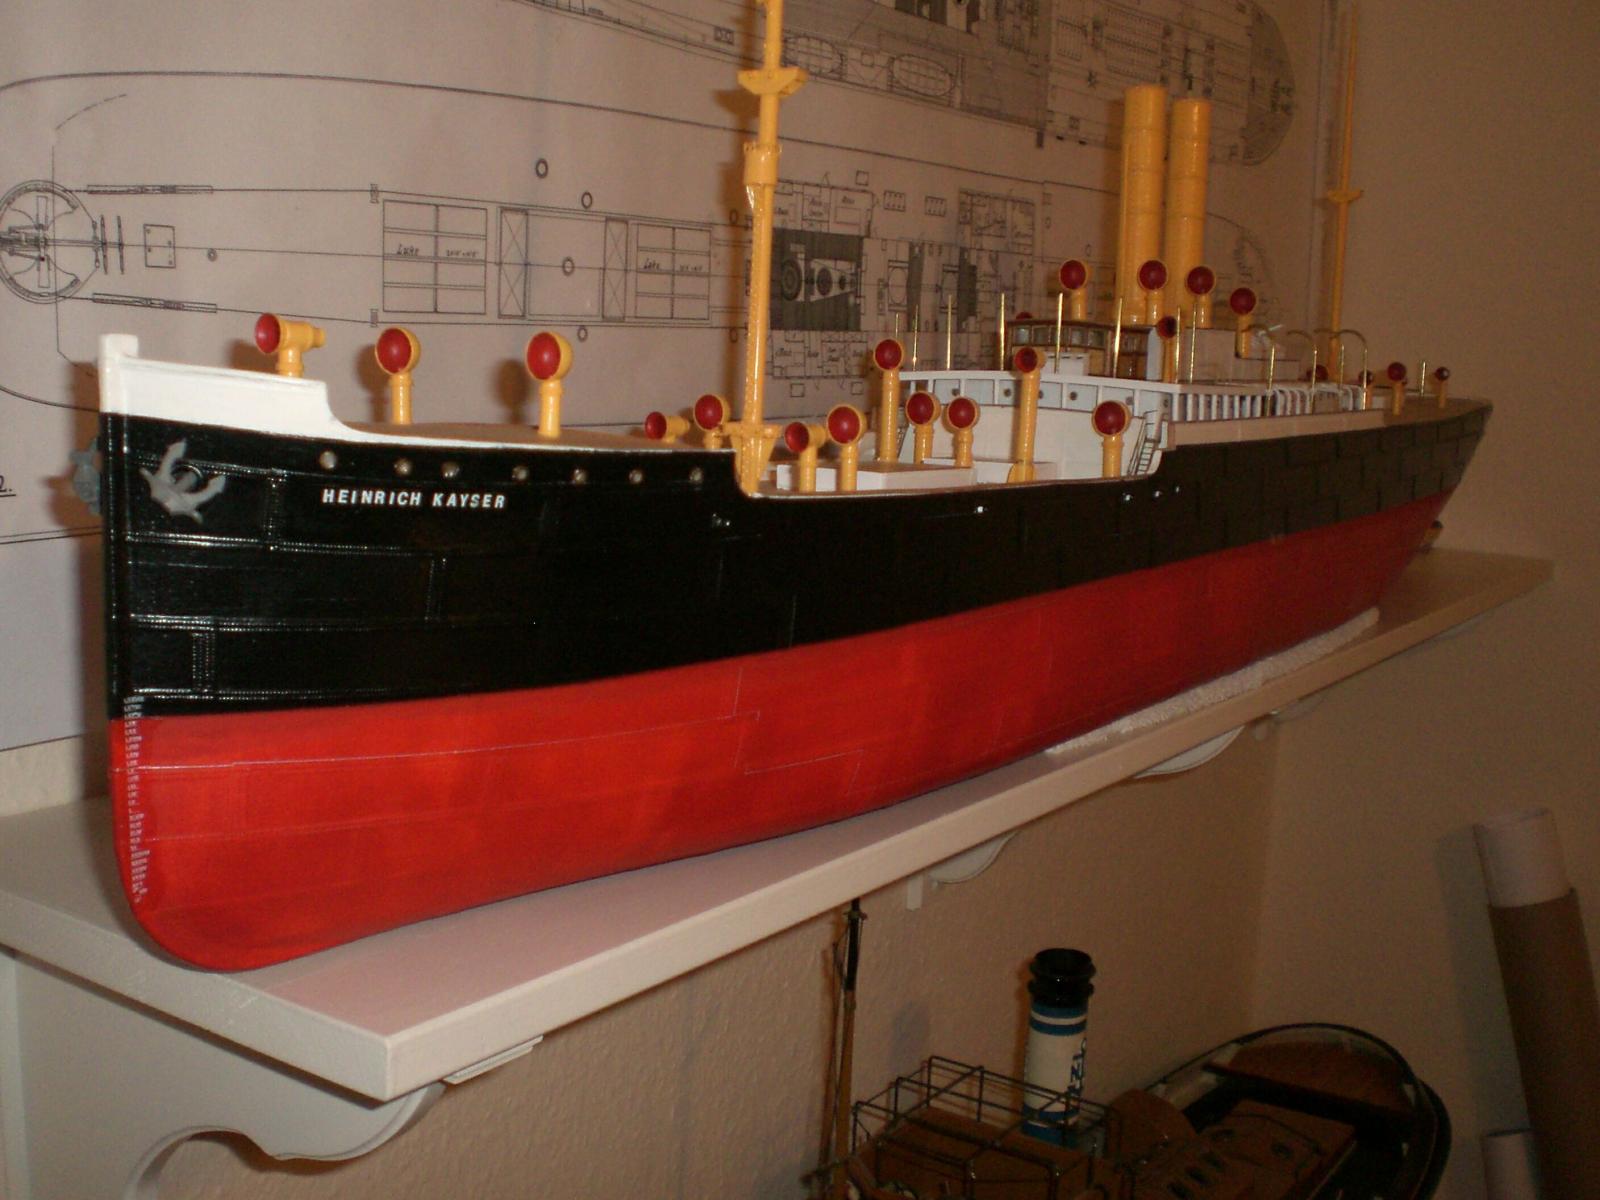
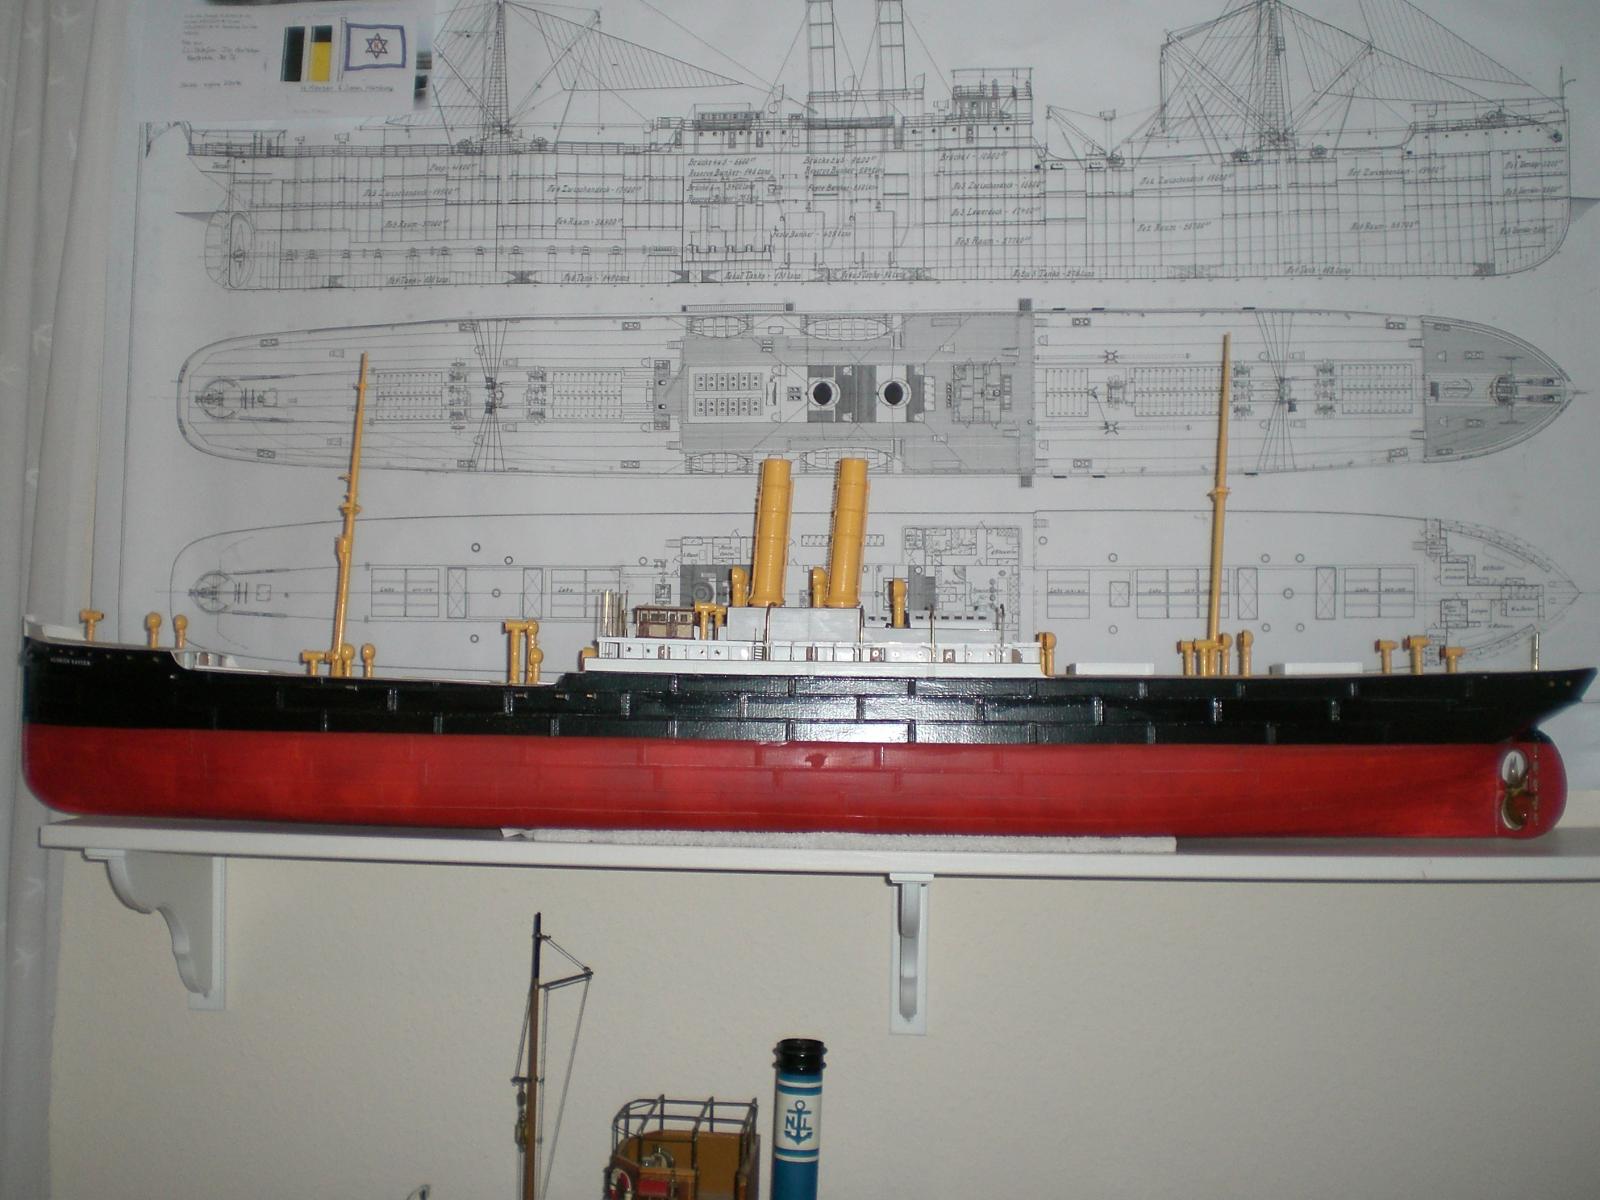
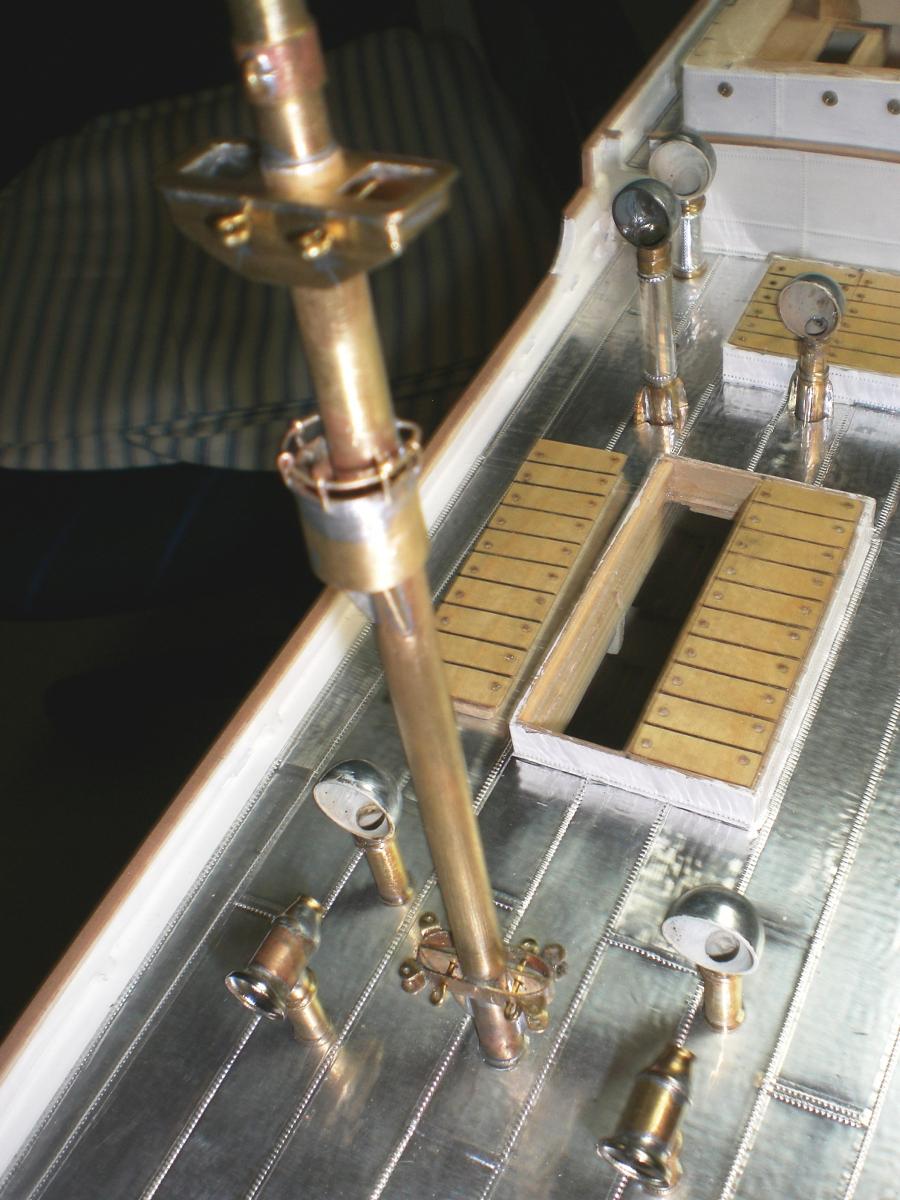
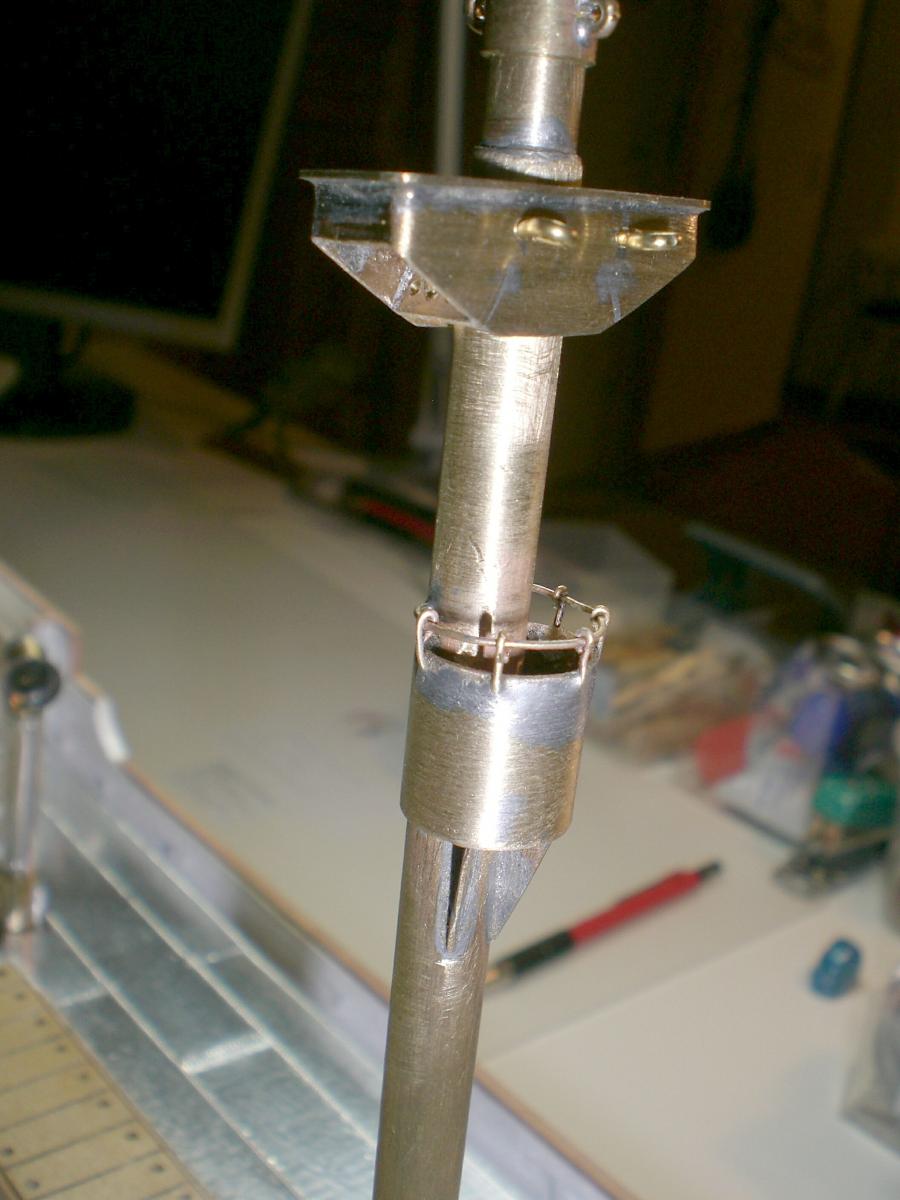
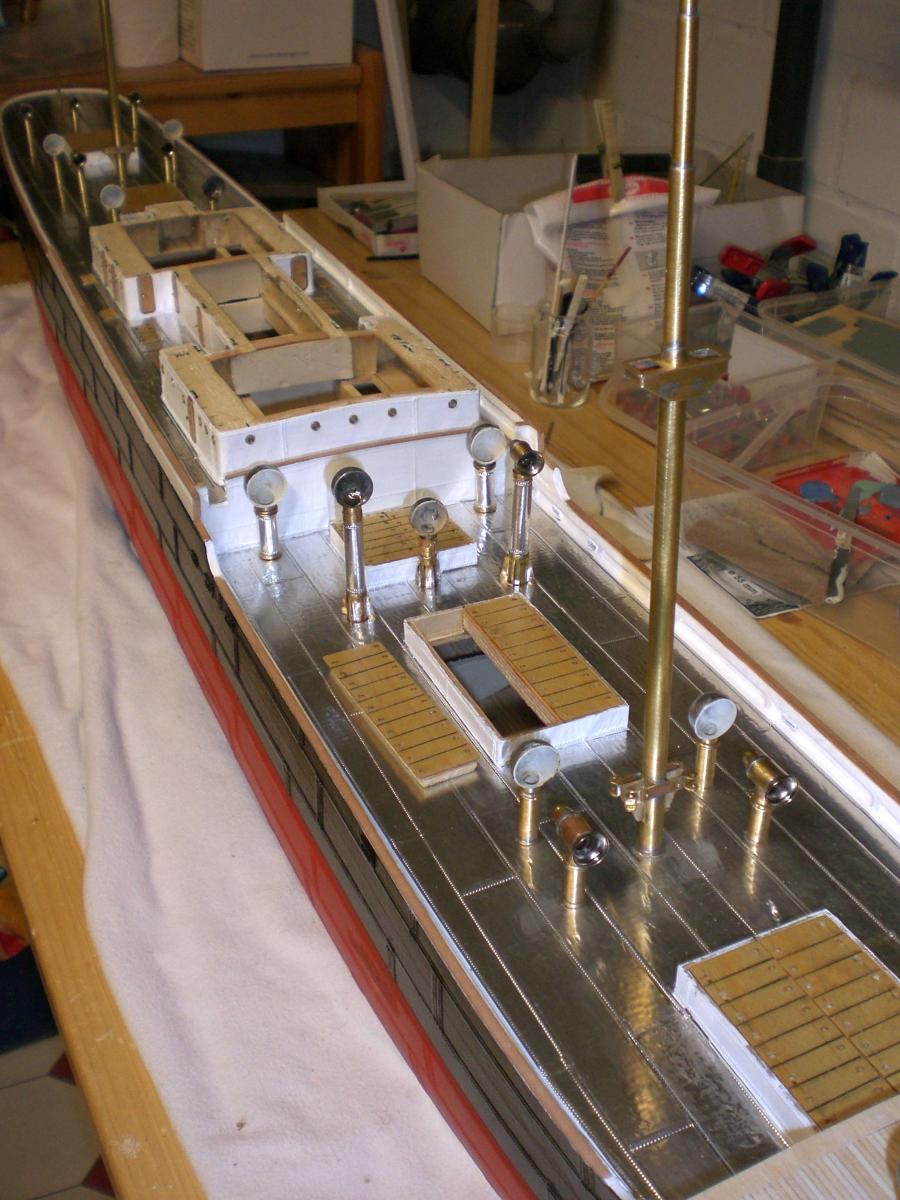
Build log part 9

different size vents
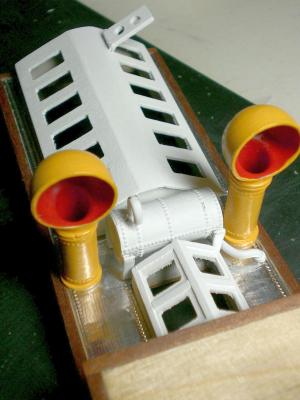
machine room skylights

ongoing Fitting out
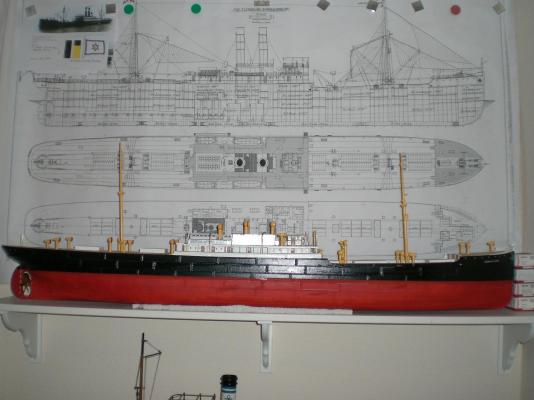
cross check with plan
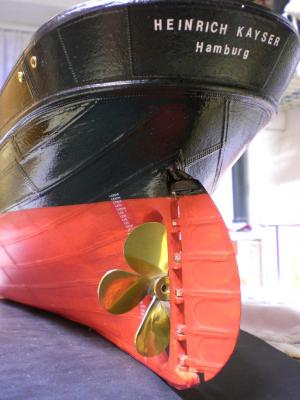
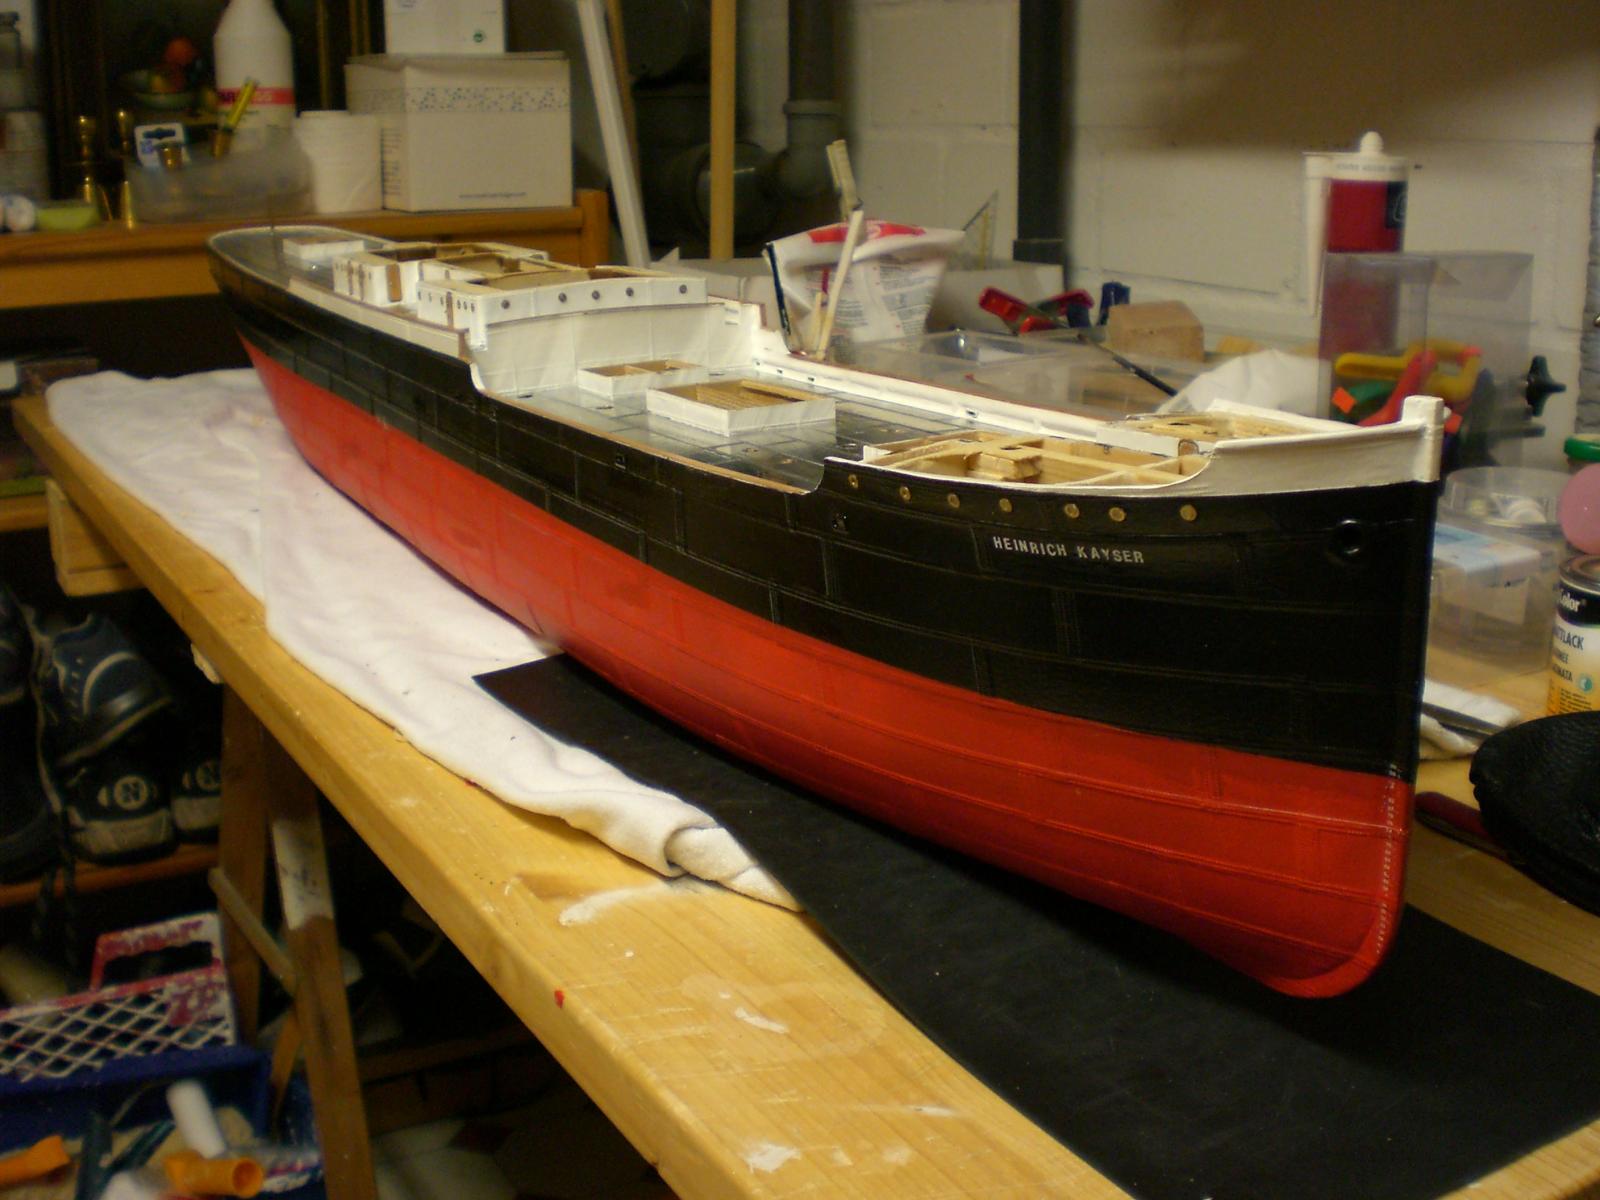
starting to look like the Heinrich Kayser
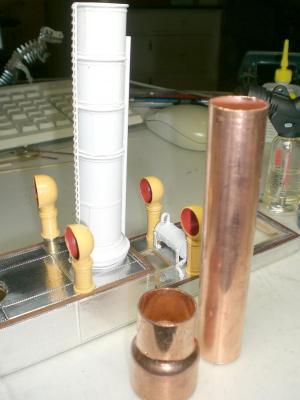
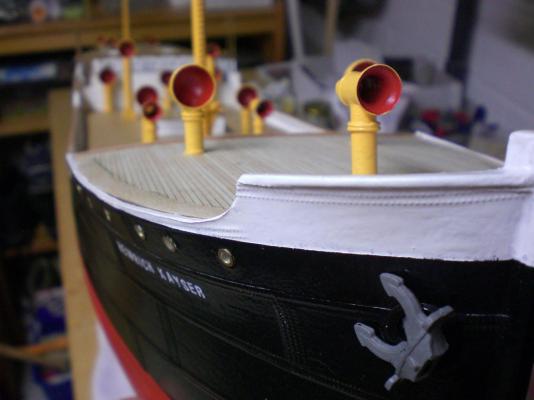
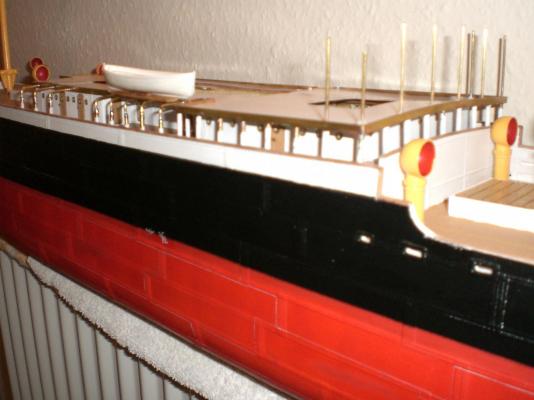
copper Fittings from the crafters used for Basic funnel construction, have to do some cutting though
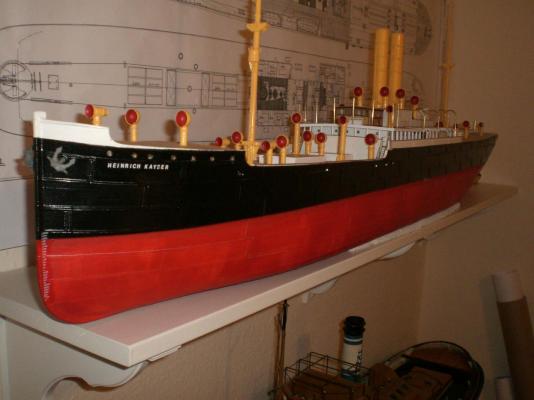
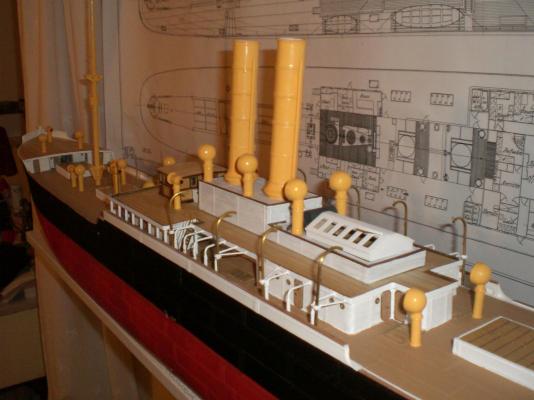
angle of funnels match mast angle
Building log part 10 to follow
- michael mott, Piet, mtaylor and 10 others
-
 13
13
-
I love the metal work. It really makes a ship.
Bob
Bob
you are right, I feel the same, and have therefore gathered quite some experience in soldering (solderable metals) with either small gastourch or with soldering iron
Nils
-
Incredible craftmanship. I am impressed with all the details. When you finish your ship model, will you donate it to a nautical museum ? Your model is of museum quality.
Montani semper liberi Happy modeling
Crackers


Crackers,
that idea is not completely out of this world, because I`m running out of space in my Hobby Office right now, I am 66 years old and I hope that they might find an honorable anchoring place in my childrens homes one day. Right now I have 2 steamships, two Tallships, and the uncompleted scratchbuilt 18th century Pegasus in Progress.
Besides that you might know or have experienced yourself, that the modelers fingers start itching when one gets mind-pregnant with the next "Project", at least the ideas Keep on sparkling...
It is since I had retired from my work that I again have time to go after this Hobby.
Cheers
Nils
-
Paul,
thanks for sharing your soldering excellent tutorial
Nils
-
Danny
I`m absolutely with Adam...
As you probably recognized, I`m taking a Little pause on my own P.Sue build, but seeing your fabulous work in process really encourages me....to get further going on it again
Nils
-
Hi S. Coleman, Tom and Daniel,
thank you for your appreciative words, I`m preparing to post Log parts 9 + 10 tomorrow morning, stay tuned
Nils
-
-
Michiel
your build is a delight to follow, I had an eye on the "Prins Willem" plan before I decided to go for the Pegasus.
Neat and tidy build, as well as splendid Quality, and handcraftship, shall follow this one further on
Nils
-
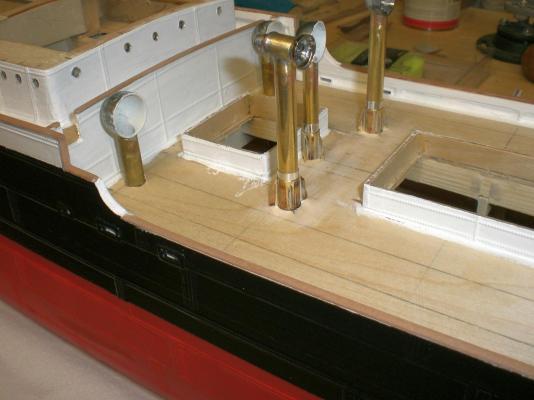
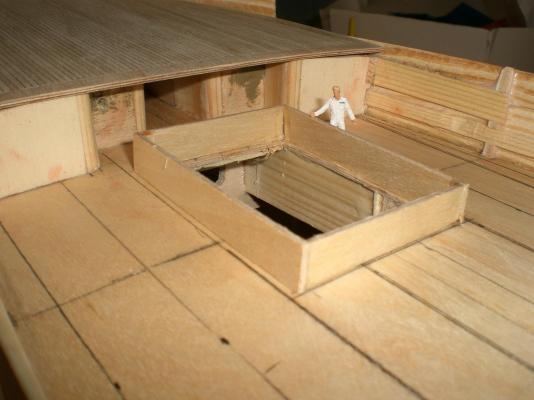
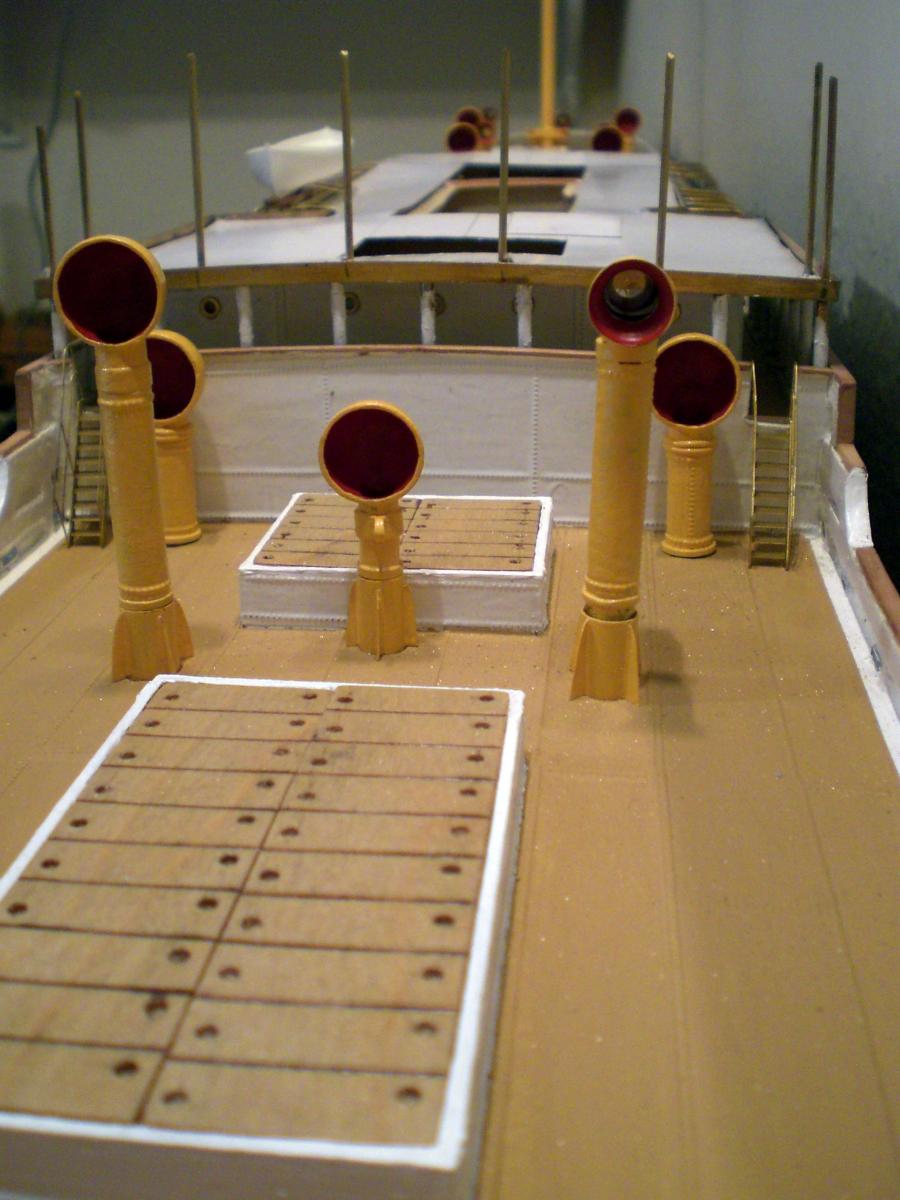
Build log part 8
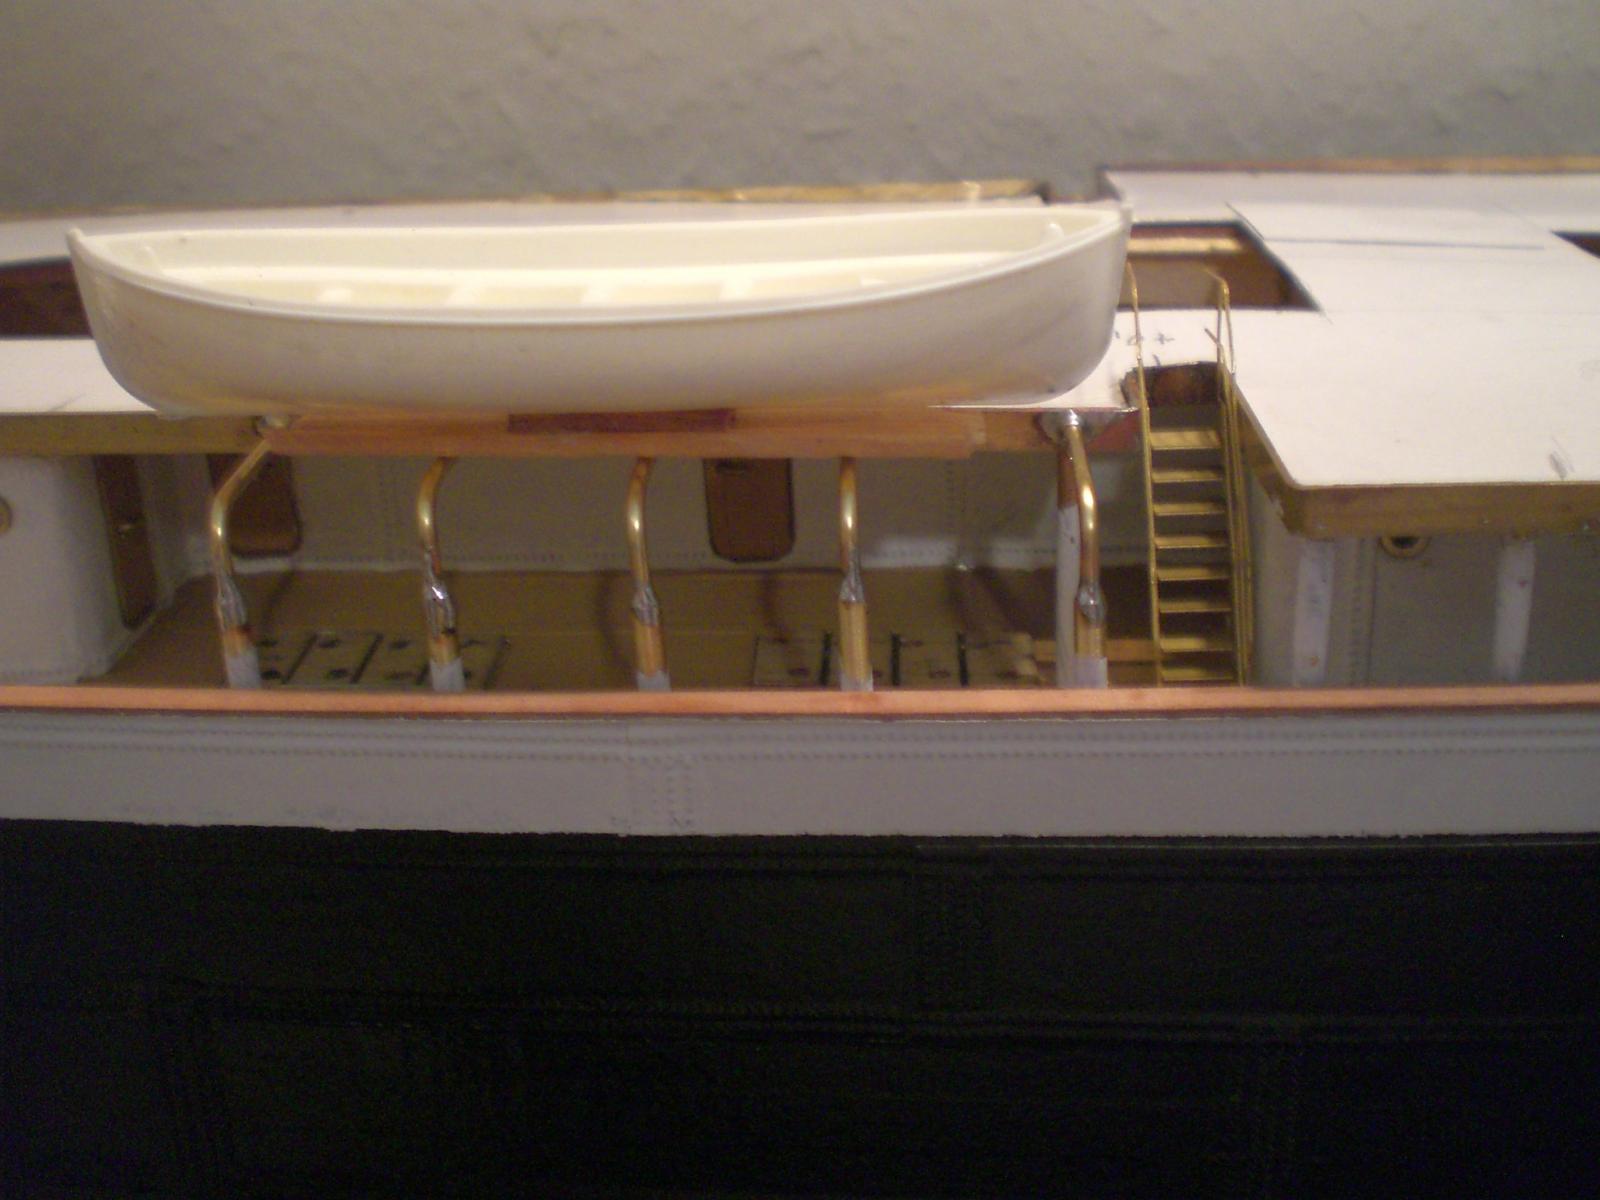
template topview for boatdeck

checking Position of midship stairs down to Forward working deck
deckhouse stairs to boatstations

aftstair from boatdeck to working poopdeck
view backwards at this building stage

wooden planking of boatsdeck, here also the bearing Support-sleeves for taking up the Davits already mounted
main wheelhouse, Navigation room and officers duty station

freshwater storage tank with vent on top
Build log part 9 to follow....
-
well done Bob !
beautiful work, a pleasure to look at
Nils
-
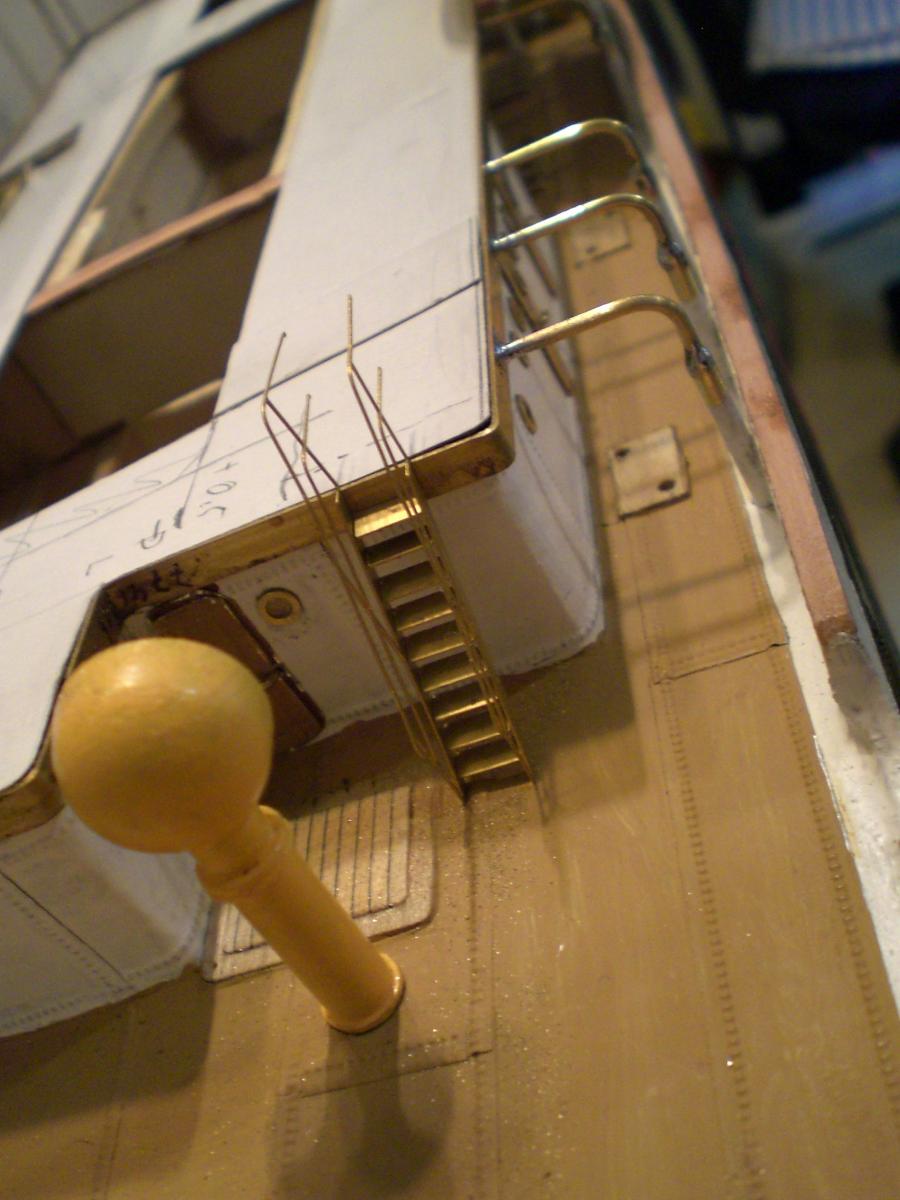
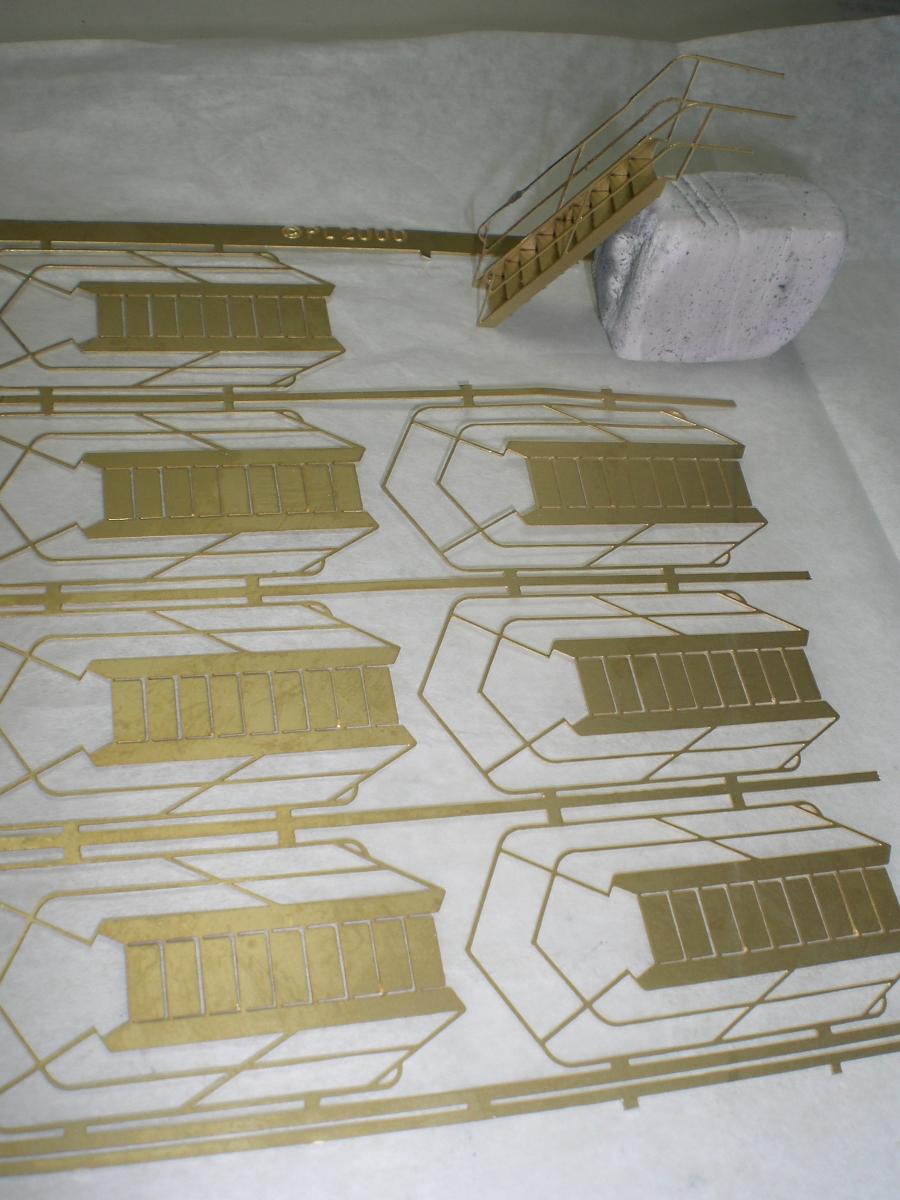
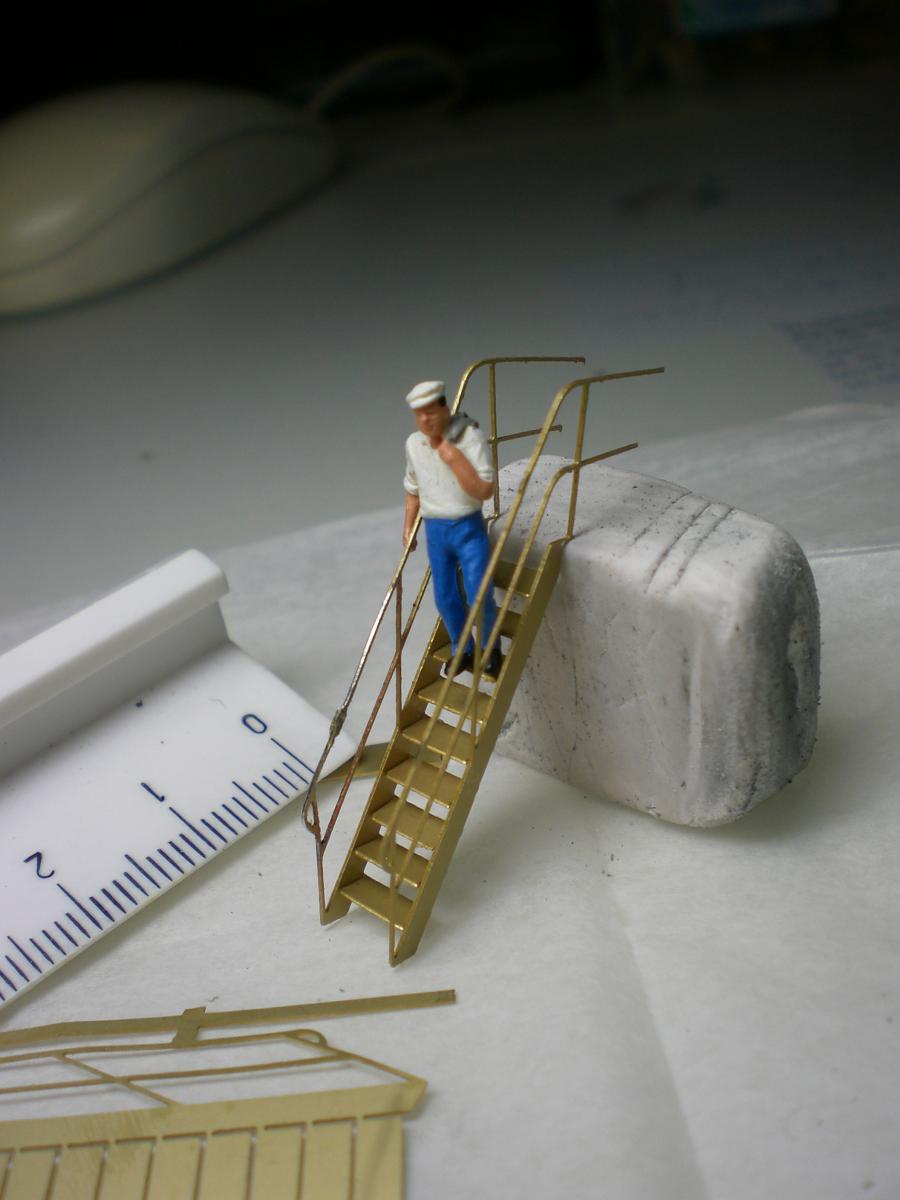
Build log part 7
ship is now tugged out alongside the Fitting out quay of the yard
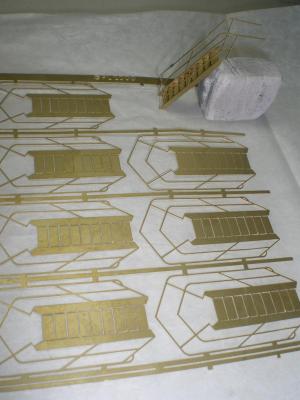
etched brass stairs

check, fit to scale approved OK
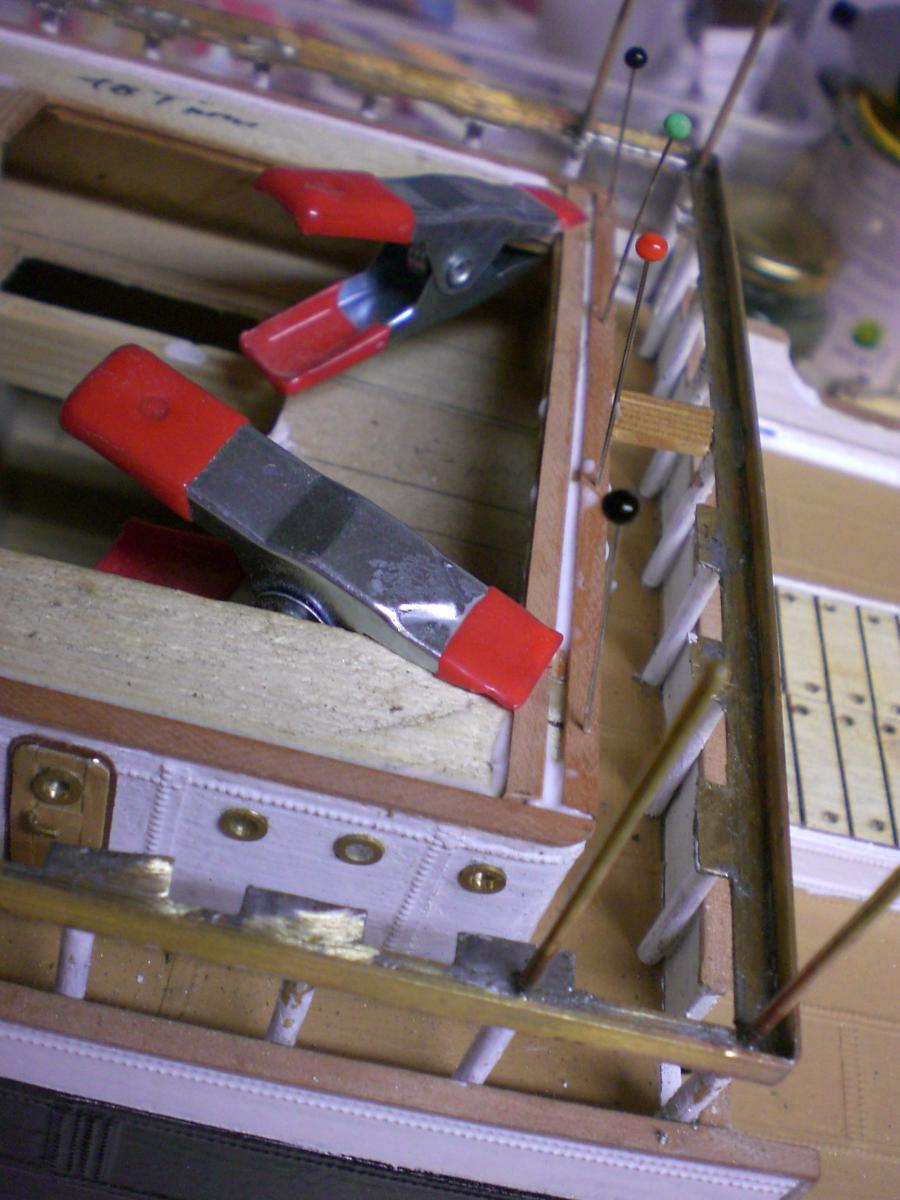
brass rim fitted to lower deckhousing, all around the boatsdeck
self explaining
in opposite to the workdecks the forecastle deck is Wood planked

the soldering Task gets a Little tricky here (too much heat in one place loostens the already tight neighbour ones again)
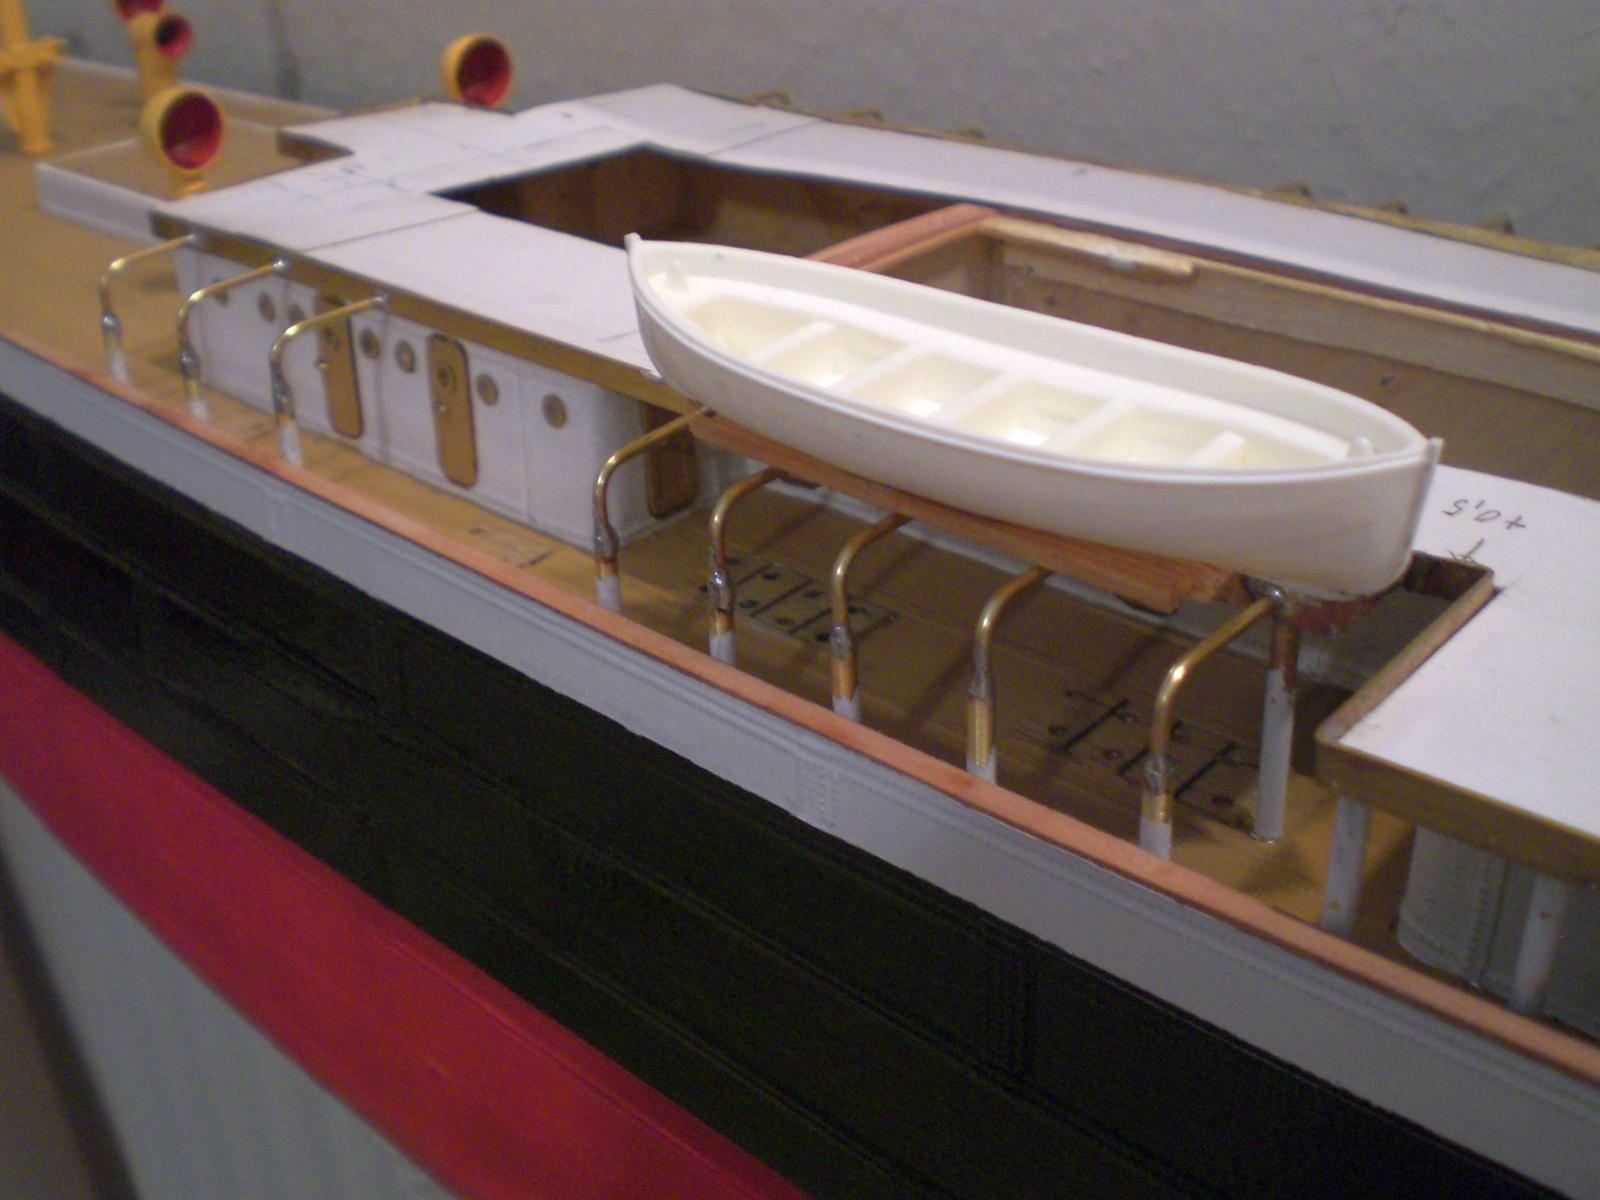
checking with plan, space requirements for boats, Davits and boat Access platforms

cardboard template for complete boat deck base

stanchions for upper Bridge fixed and soldered
note the workdecks are painted tan, "earthbrown"
self explaining...
Build log part 8 to follow....
- Elia, garyshipwright, The Sailor and 7 others
-
10
-
Build log part 6
hold rim with removable hatchcovers

raw Forward mast
crows nest, the Access ladder from deck not fixed yet
take up Points for swivel loadbeams

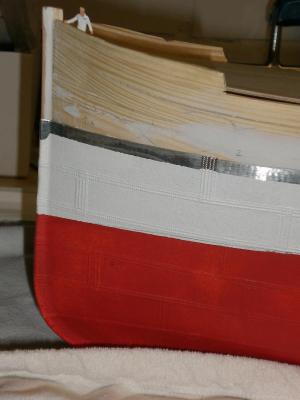
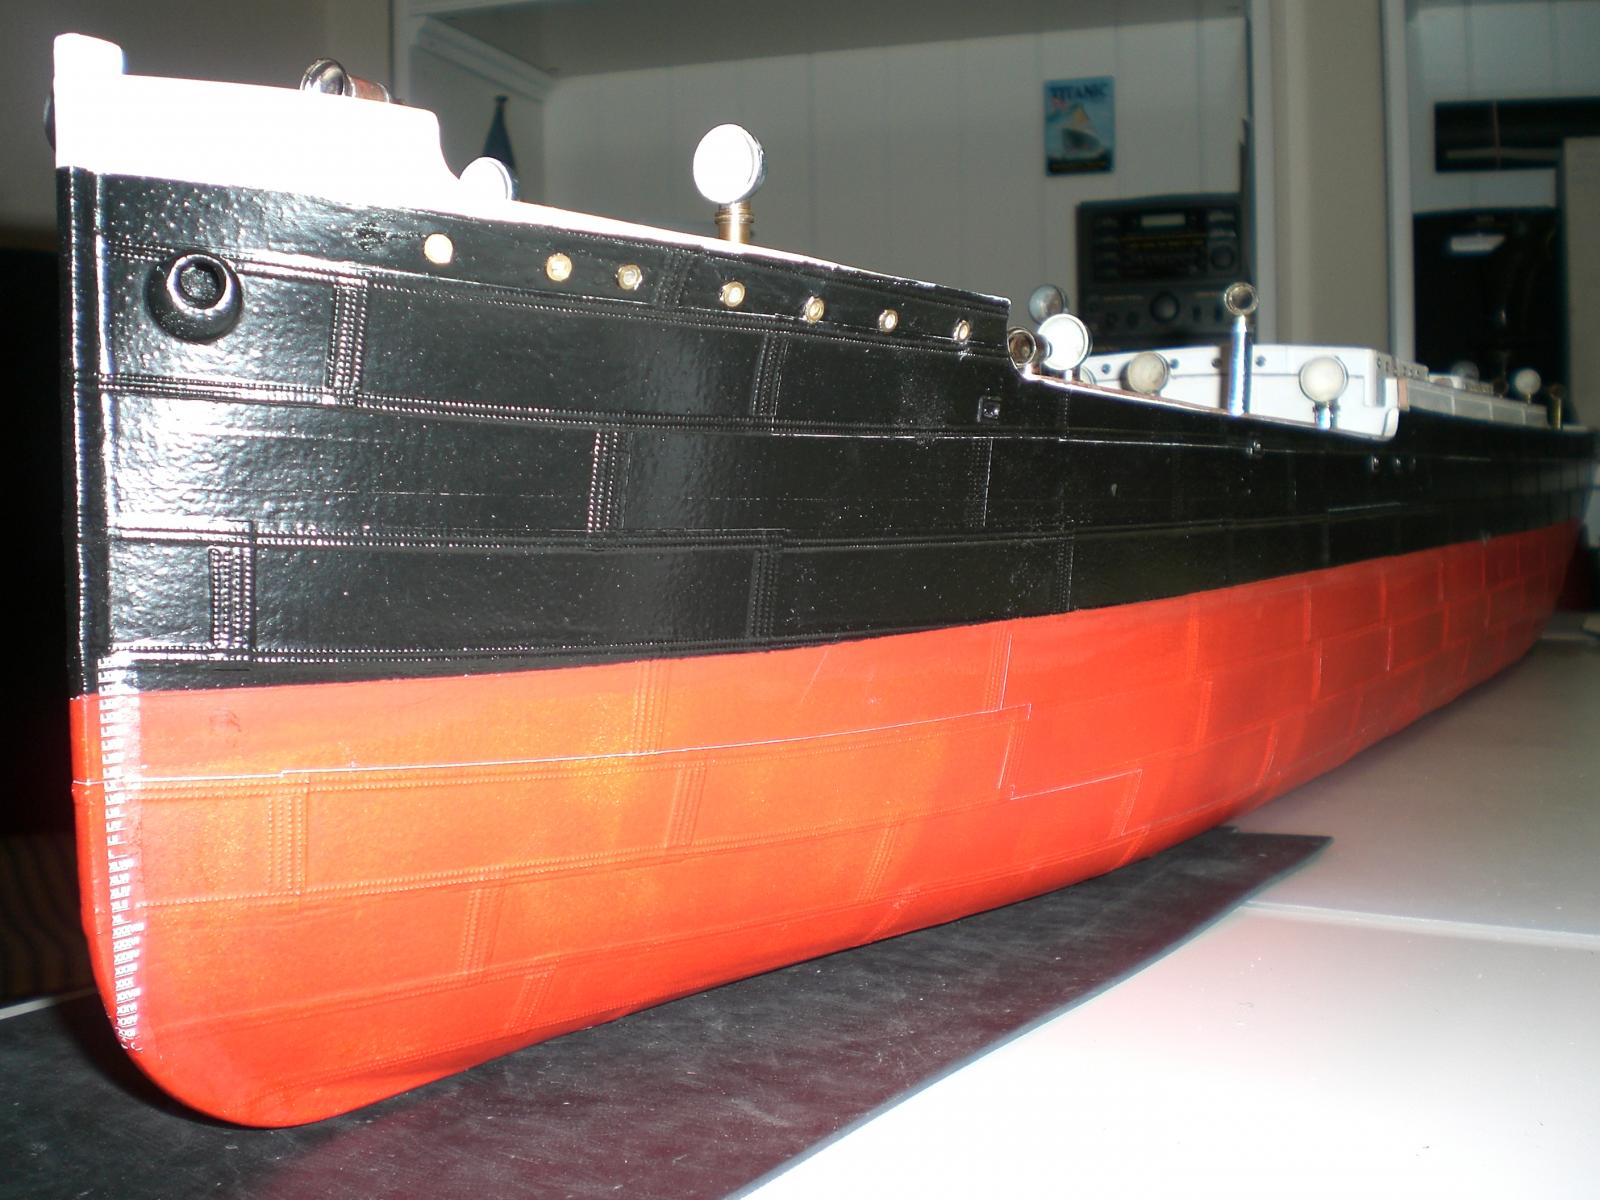
after some paint touchups ...

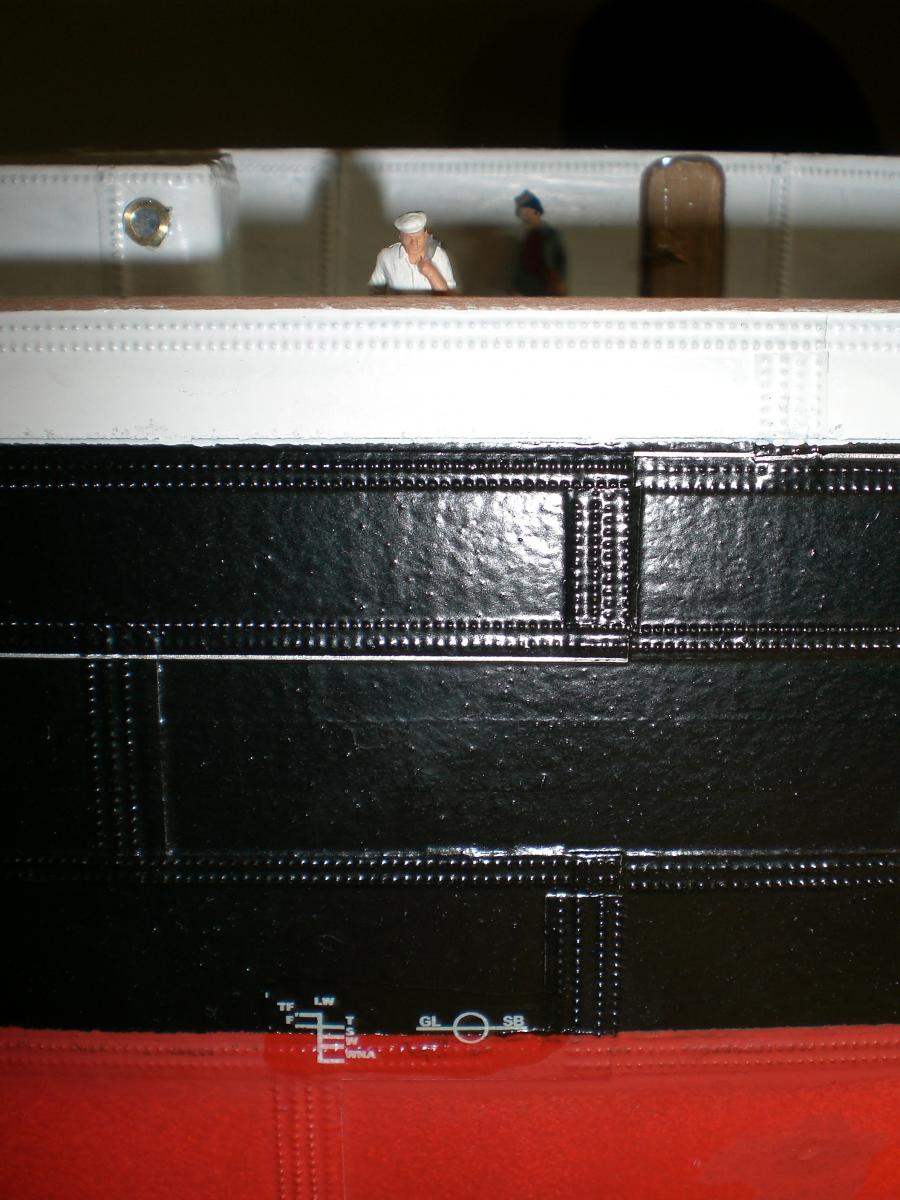
plymsol marking at waterline
marking of Name and Registration port
These 3 pics..., quite pleased with the results so far

Build log part 7 to follow
- Elia, EricWilliamMarshall, druxey and 9 others
-
12
-
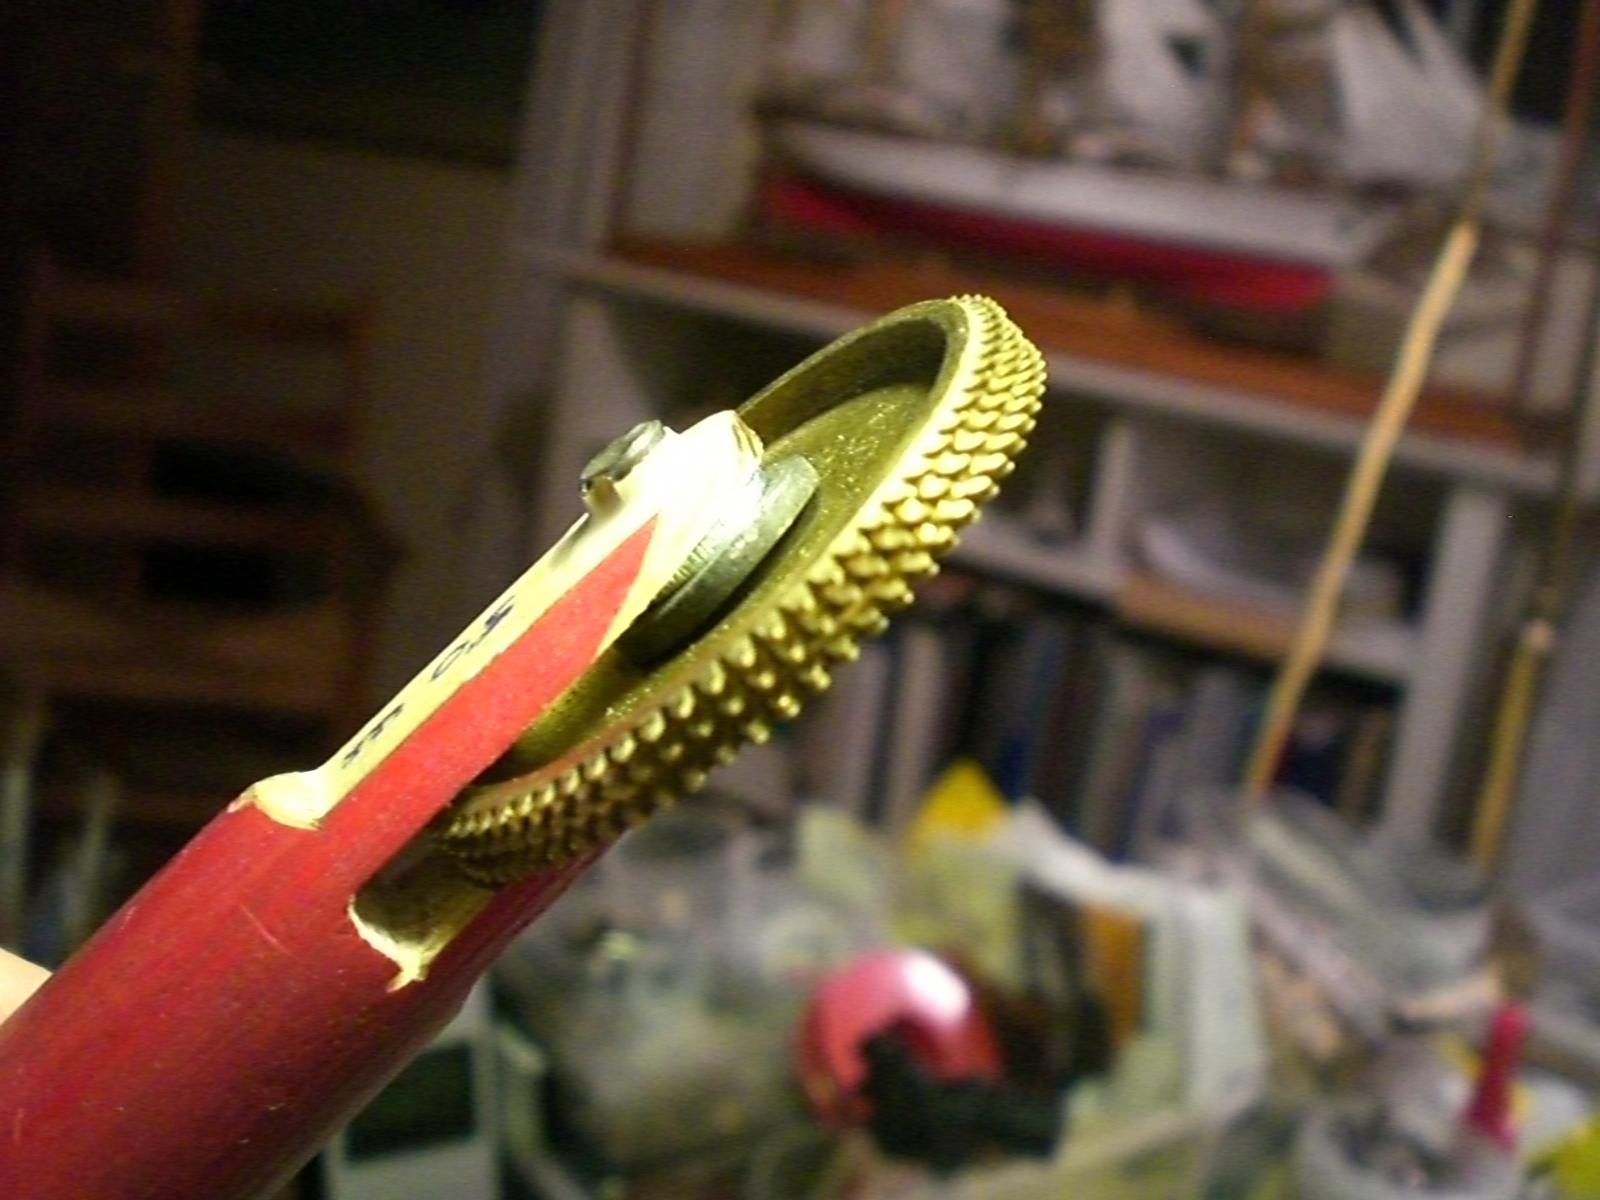
Nils, I assume you made the rivet wheel (picture 2), can you tell us more about it? OOPS I found it!, Thanks
I also like the aluminum tape use for the riveted metal plates, Great start!
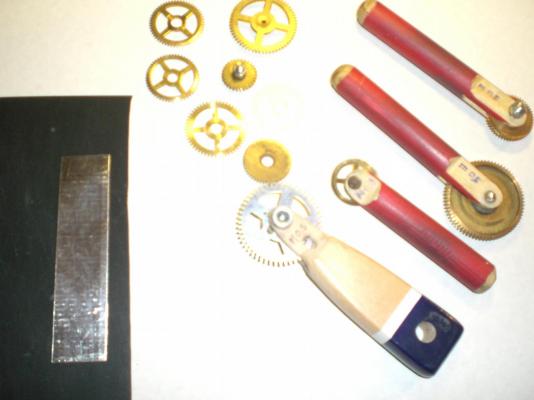
Hi Guy,
the toothwheel Comes from an old mantelclock-clockwork, obtained from a fleamarket, and so providing many individual brass toothwheels with different toothsizes.
thin wheels for single row riveting broader ones for Multi row riveting, etc...
From twinrow on upwards the toothbreadth would Need to be reduced by binging circular groves in like the Picture Shows. Provided you own a Hobby lathe and appropriate cutting chissels, no Problem..., if not, span the wheel on a Center fixed screw
span into your Drilling machine and tangentially (sturdy Hand!!) bring cutting side tooth-direction of your metalblade small handsaw into Operation, with running Drilling machine. Some Trials should be done with scrap- wheels before, to get the Feeling. The saw toothdirection must be in the "pushing mode" as if it were a chissel. Remove grit care fully and brush over with brass-brush, to slight break the sharp edges carefully.
Hope this is of help...
Cheers
Nils
-
Thank
Thank you so much for going to the trouble of making this log and sharing your incredible skills, this wonderful model, but most importantly bringing to life the history of the very real people and the ship itself!
For all of these reasons I can't wait to see the rest
Thank you Bindy for you nice words
It all was due to the nowdays possibilities via web for doing all this Research, for instance in gathering all available to myself historic US newspaper clippings, state archives, etc...
Nils
-
Hi Creackers,
this I have also asked myself many times, but it is also fact that from radiocalls received, the stearing rudderchain had broken in a full gale, making the vessel unmanouverable and probably immediately going square to the huge waves the hull rolling heavily, and fact is that the hatchcovers had been destroyed, this causing the uncontrolled take of water, until the ships superstructures could not withstand the stresses anymore. She may have sunk or suddely have broken through. We shall never really know what hapened in the last minutes
Nils
-
Richard
thanks for your word. Regarding to the plan I received it upon Special request from the birth shipyard (which does not actually sell plans of their builds), but I told about my personal relation to the ship because of a Research of the fate of itt foundering and the fate of my grandfather.
Nils
-
Bob,
thank you, I`m glad you like it
there is more to come soon
Nils
-
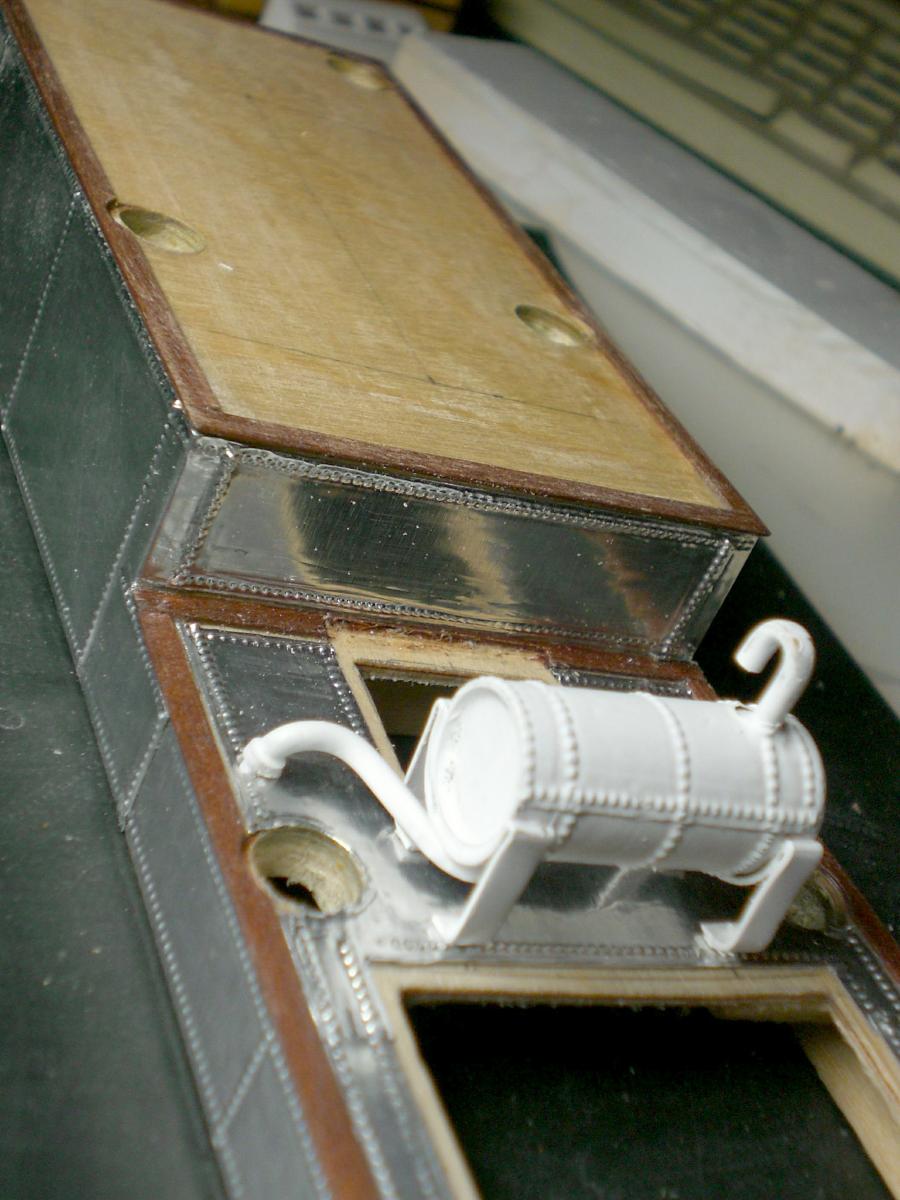
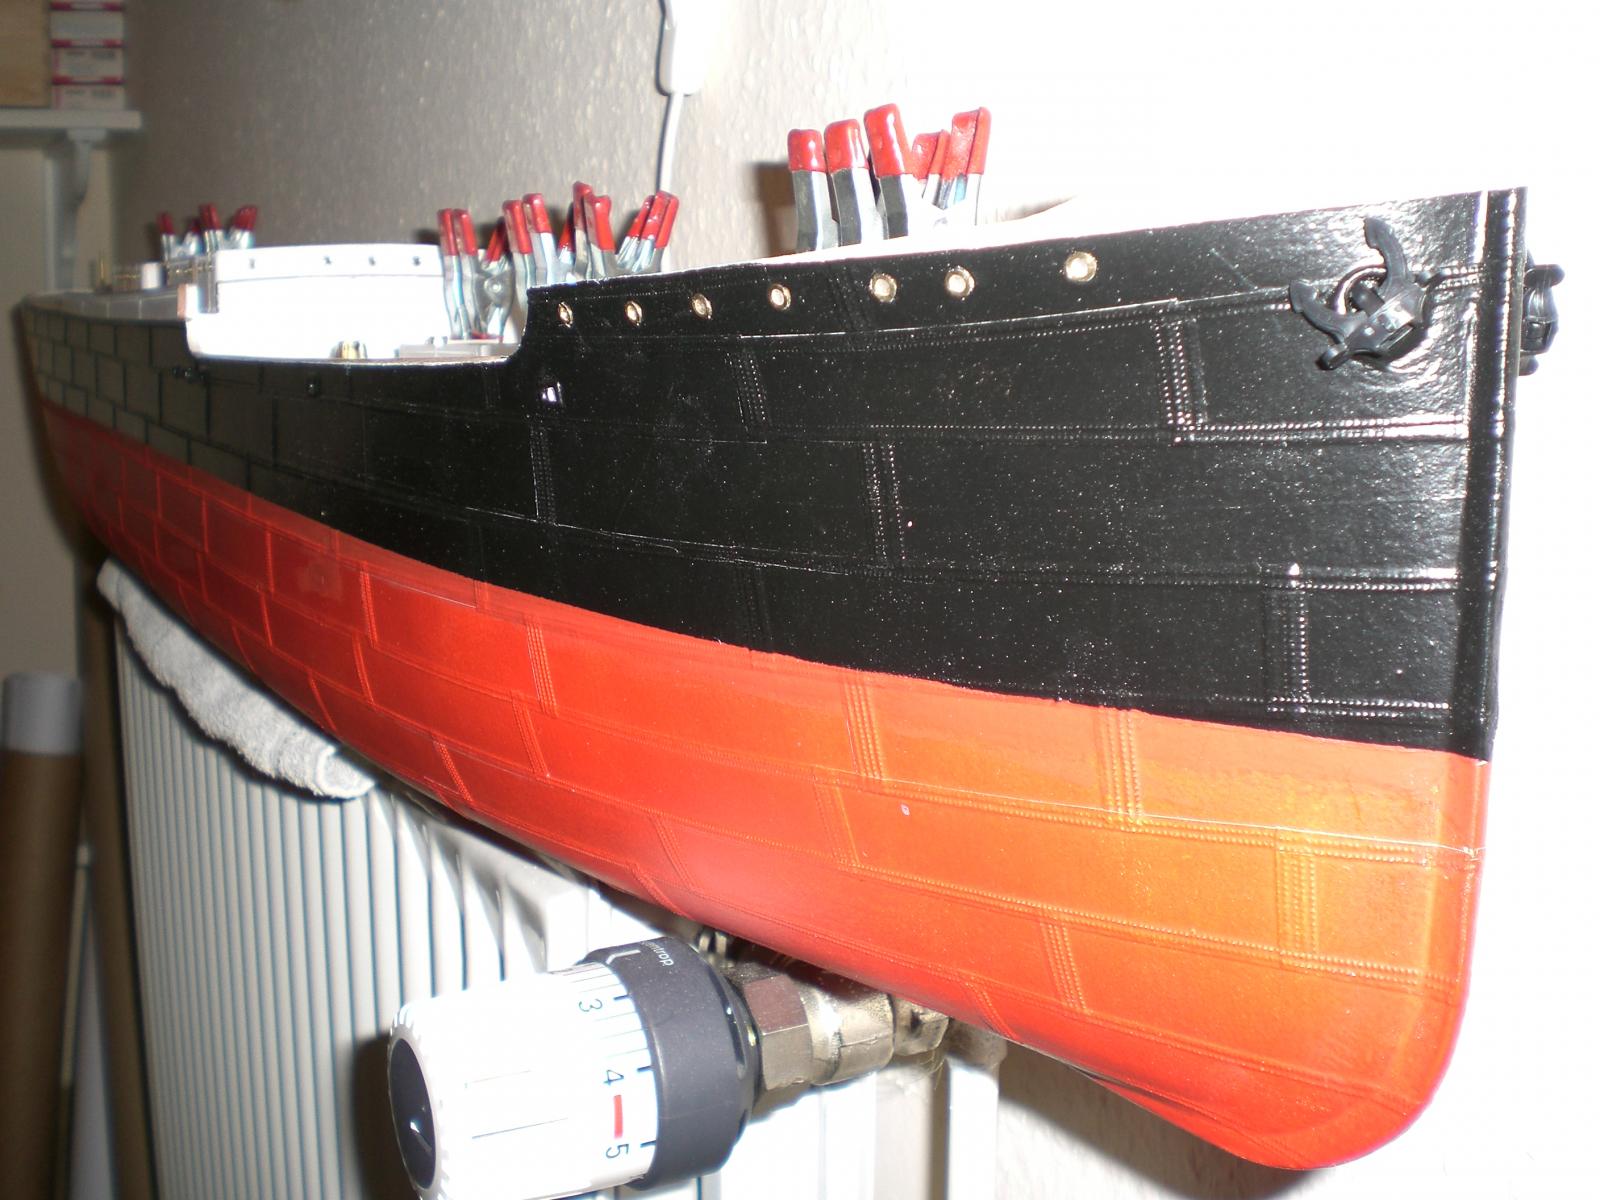
Build log part 5
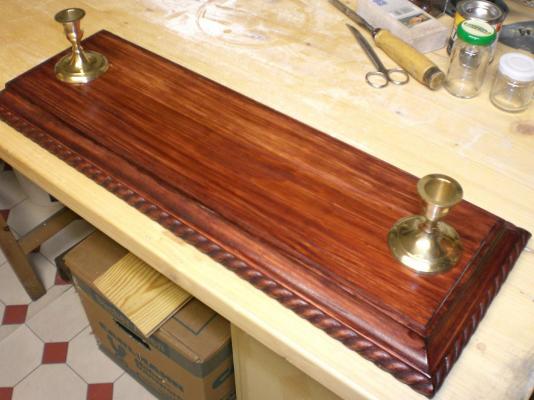
for making the stand Posts I use brass candle holders (found on flee-markets)

the anchorchain port reinforcements are fitted
begin... rivited structure to deckhouses and hatch rims
further Fitting out

midship deckhouses, on deck inbetween the coal bunker hatchcovers
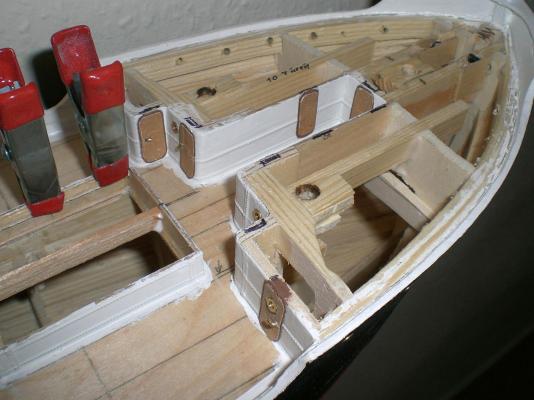
forecastle compartments

so far well under way...
workdecks ready for priming, painting
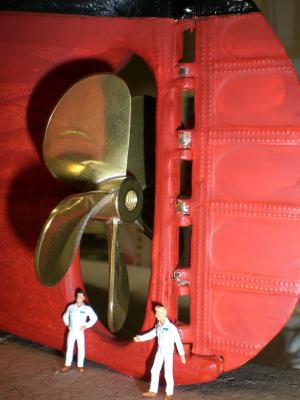
the figures are scale 1:100

the portside depth indications are in Roman figures
Build log part 6 to follow....
-
Build log part 4
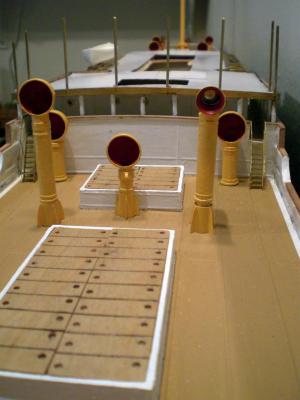
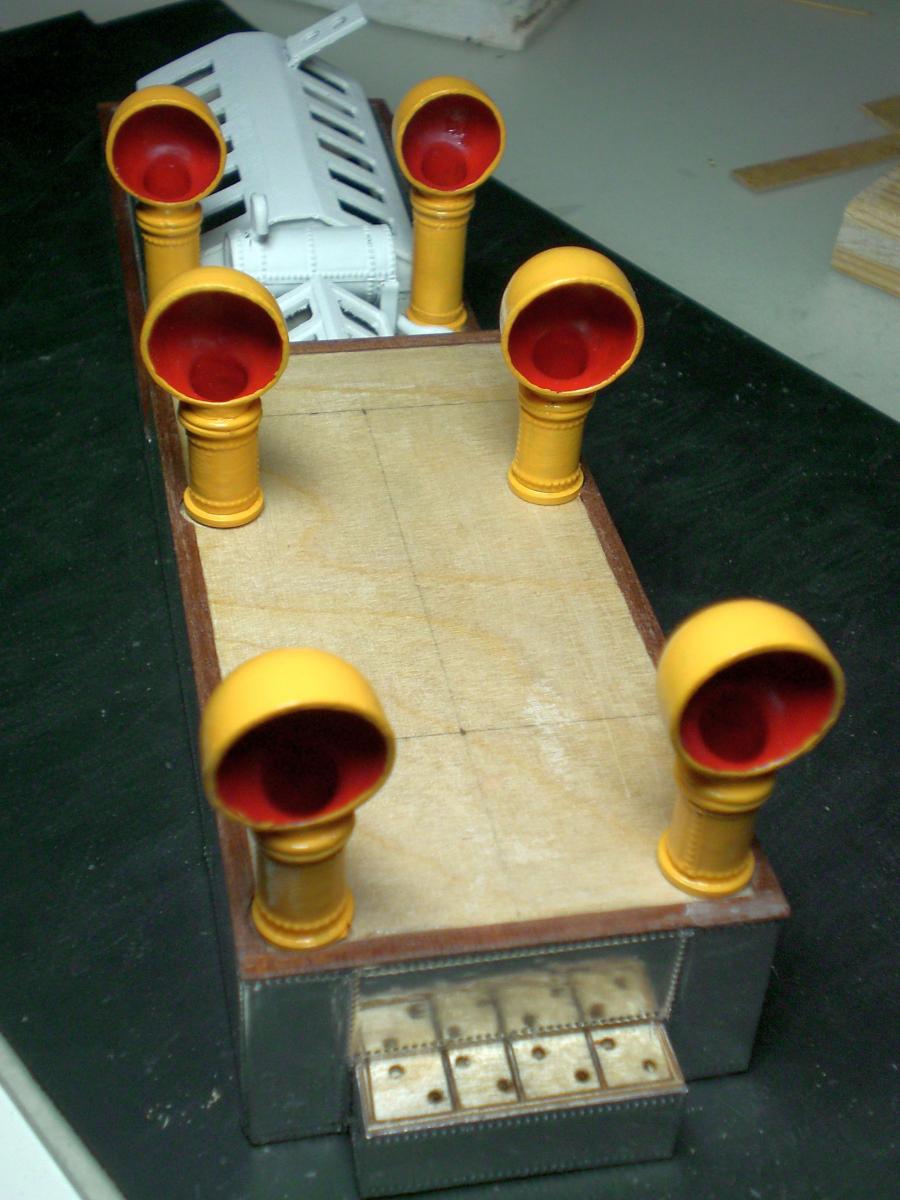
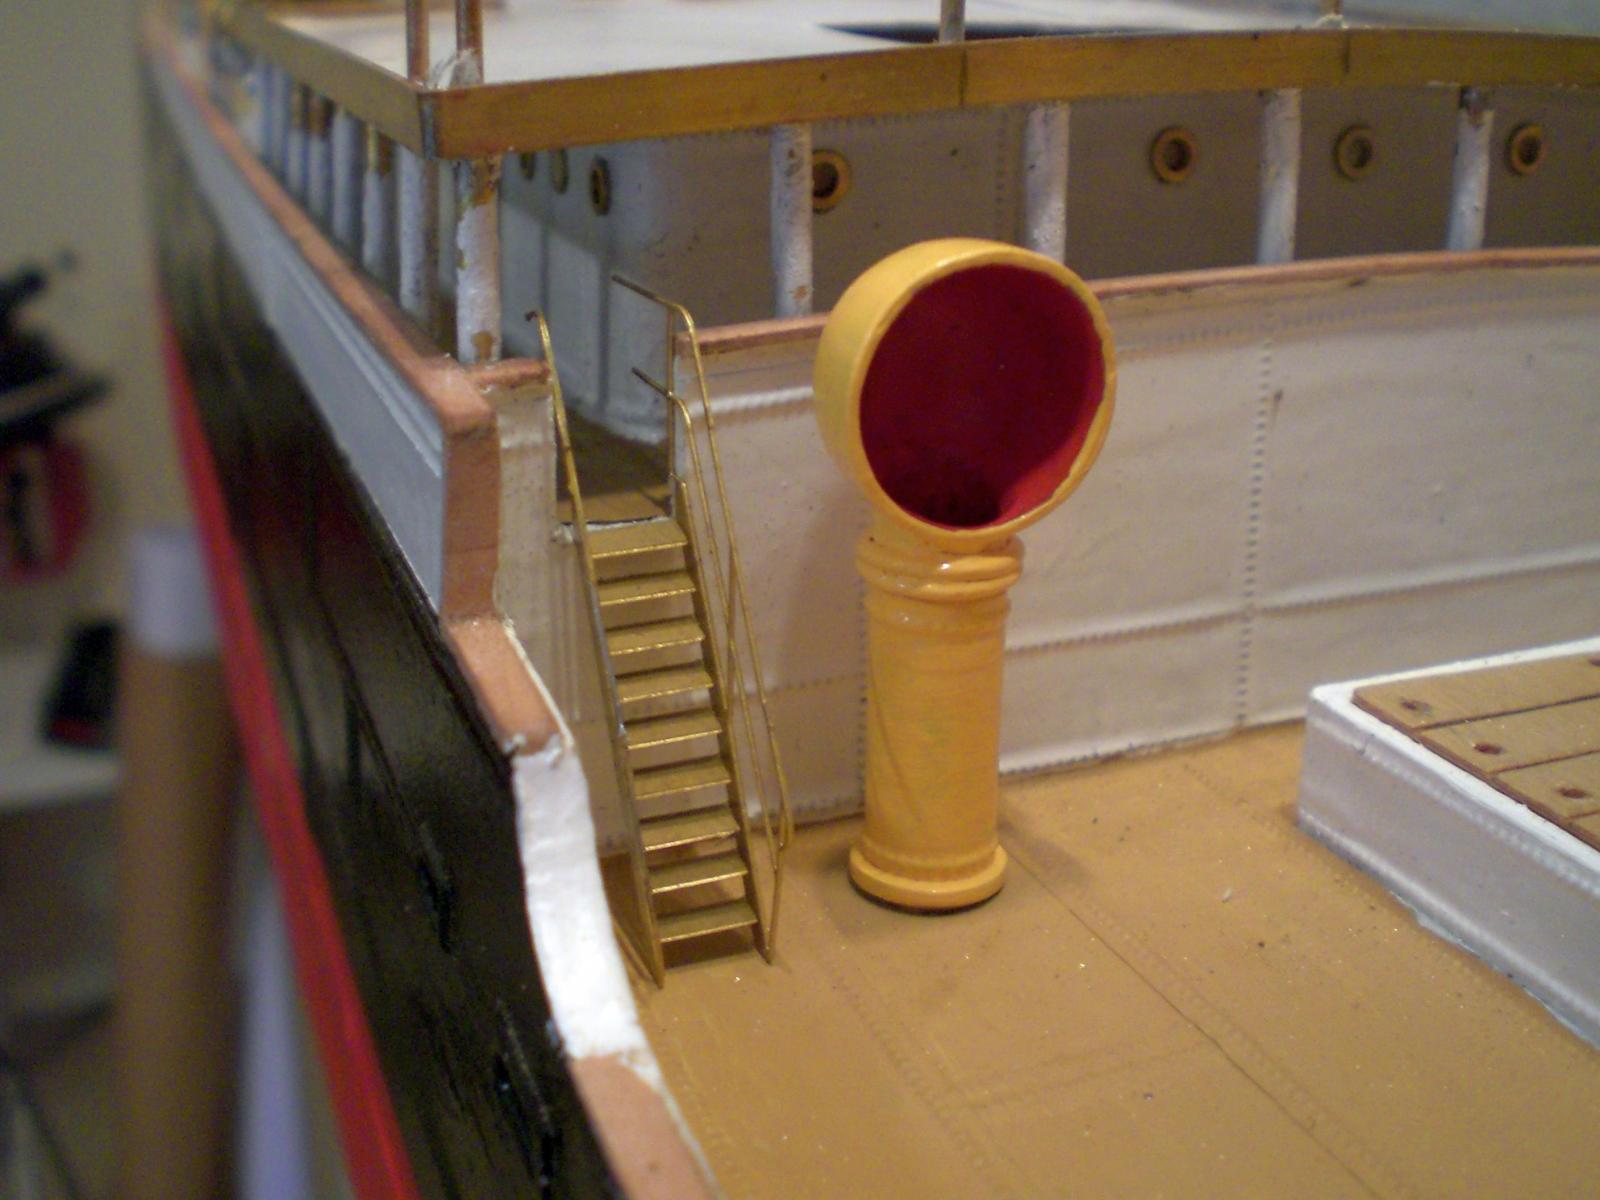
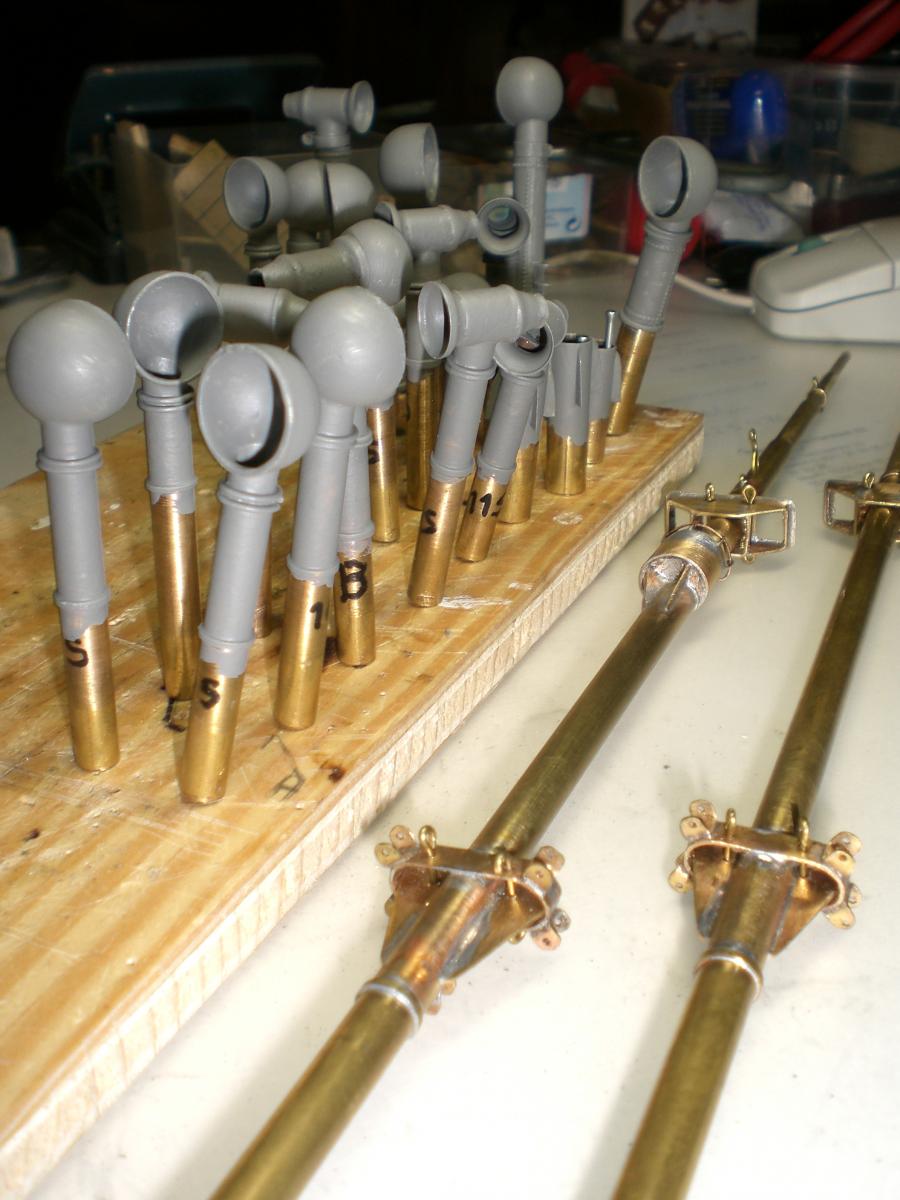
characteristic for These old steamships are the large vents, necessary more than ever when going through hot,tropical zones of calm sea...
Here is to give my Version of the vent Hood making..., and the main masts, and crows nest
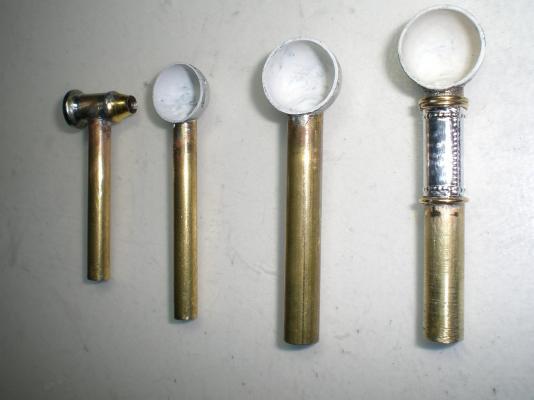
sizes and types of vents
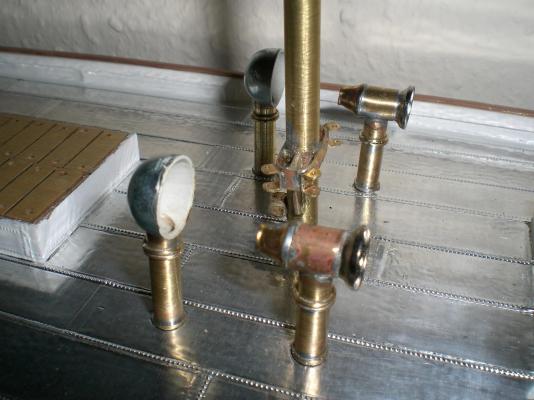
an Arrangement of inlet and outlet vents

prefit check with the decks

application of primer after soldering and cleaning the brass surfaces
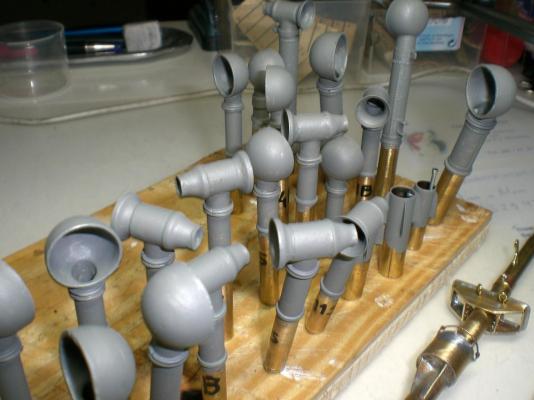
was quite a bunch of individual parts
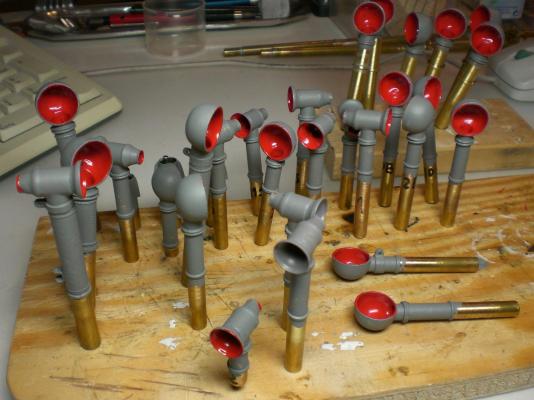
inner Hood surfaces have their own color
as well as the outside surfaces

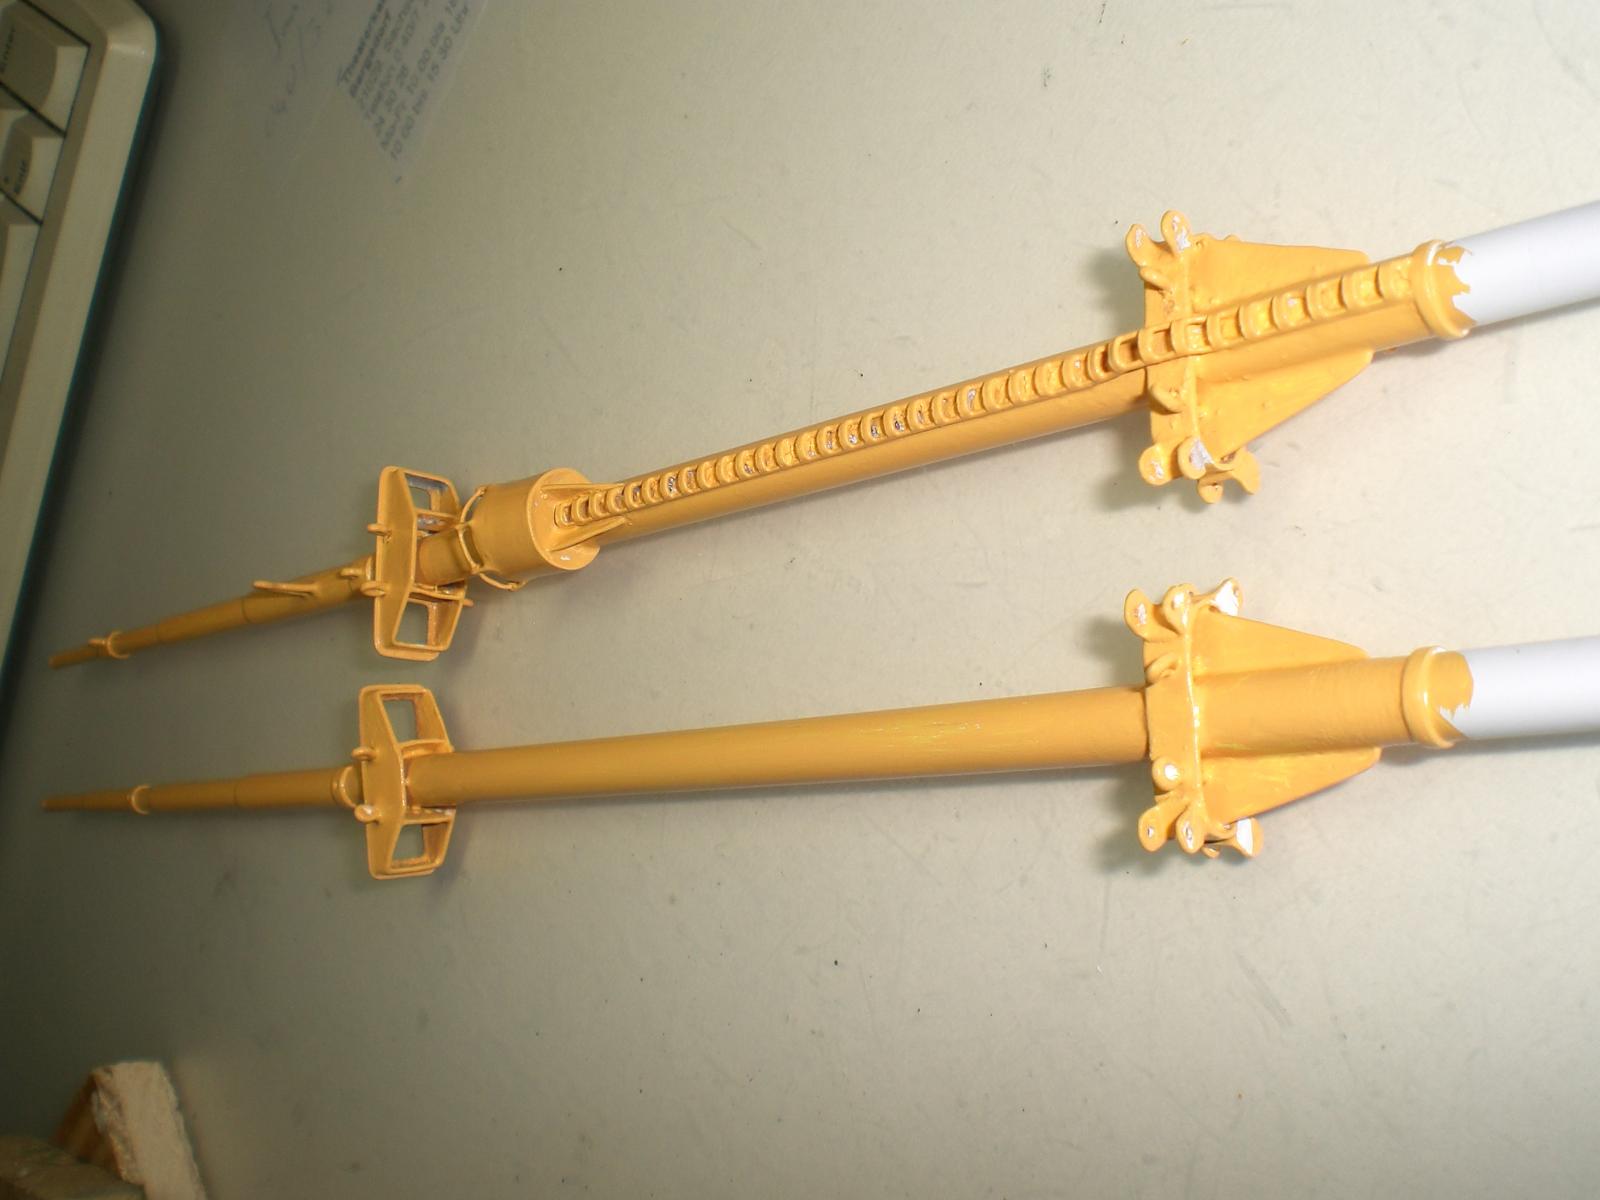
Forward and aft mast
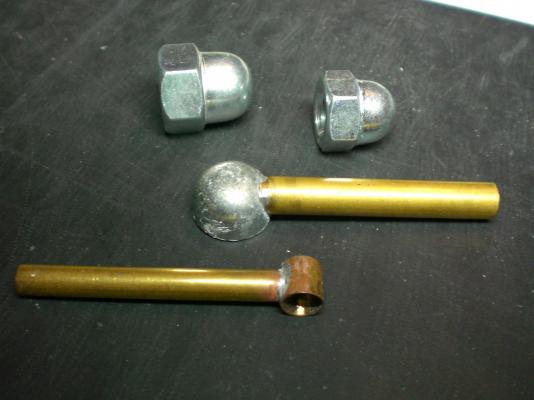
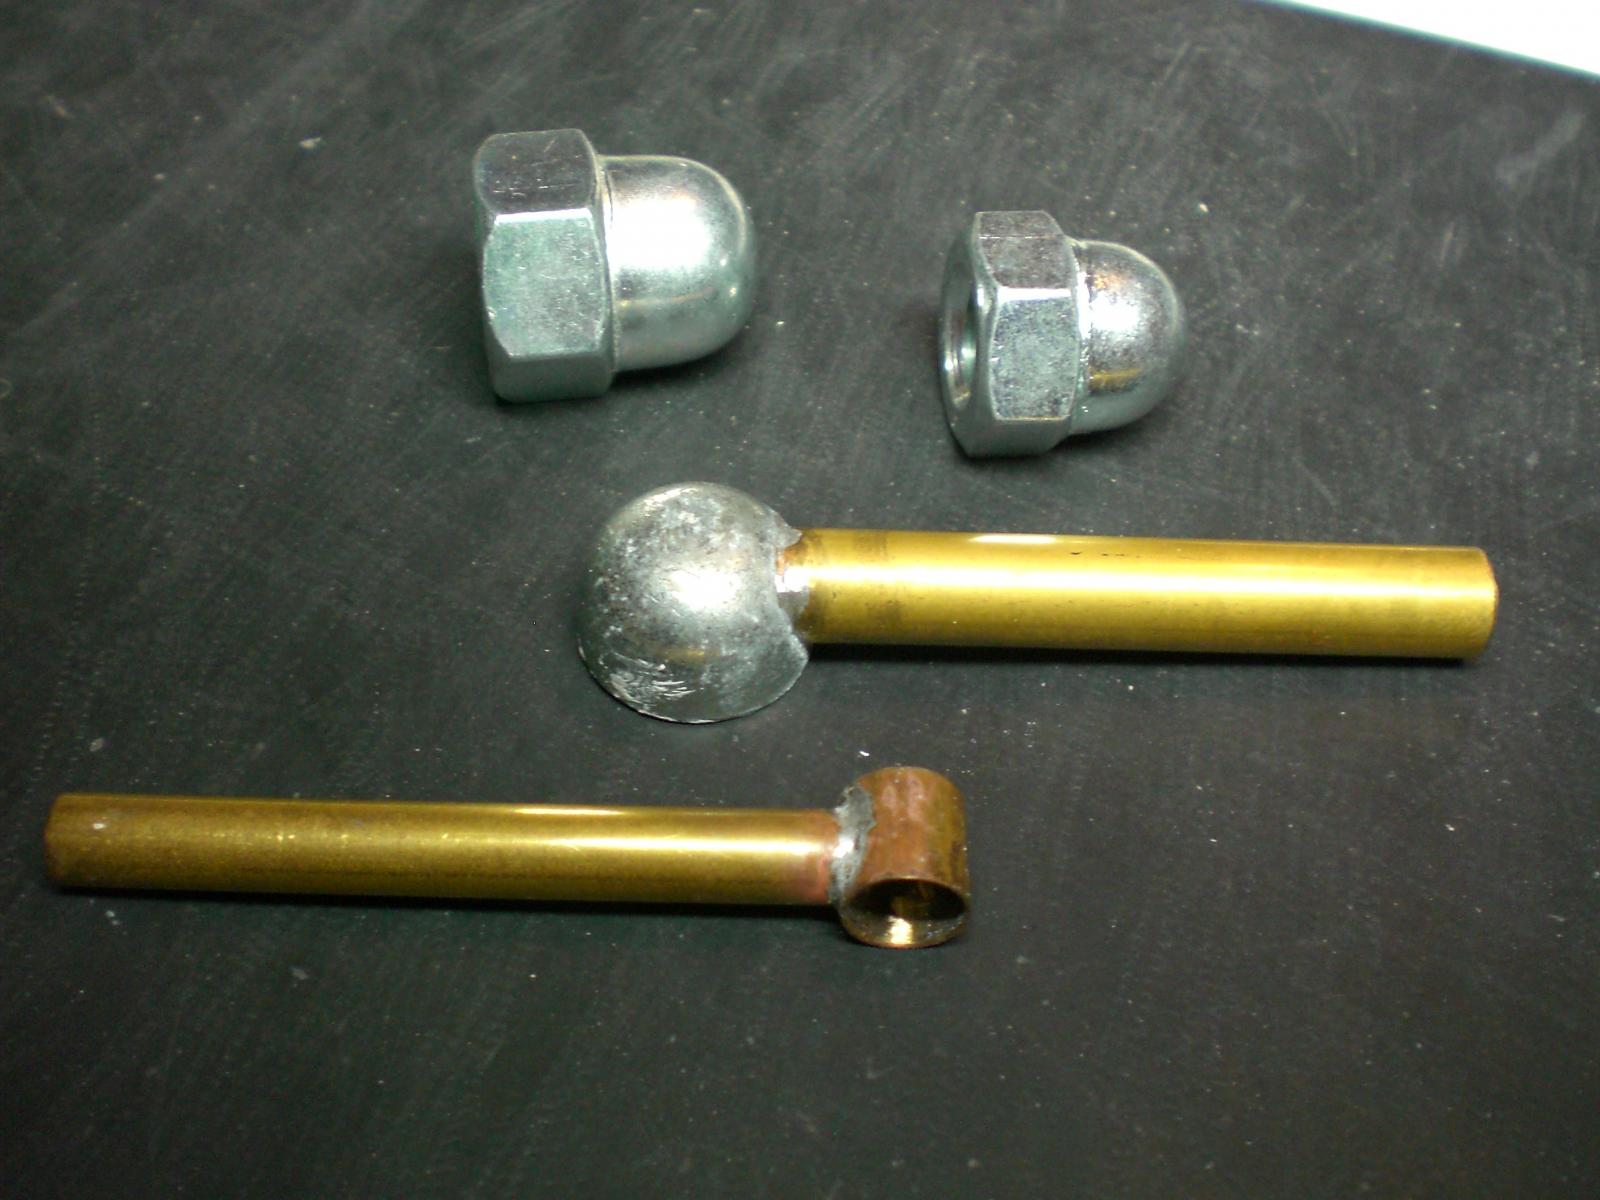
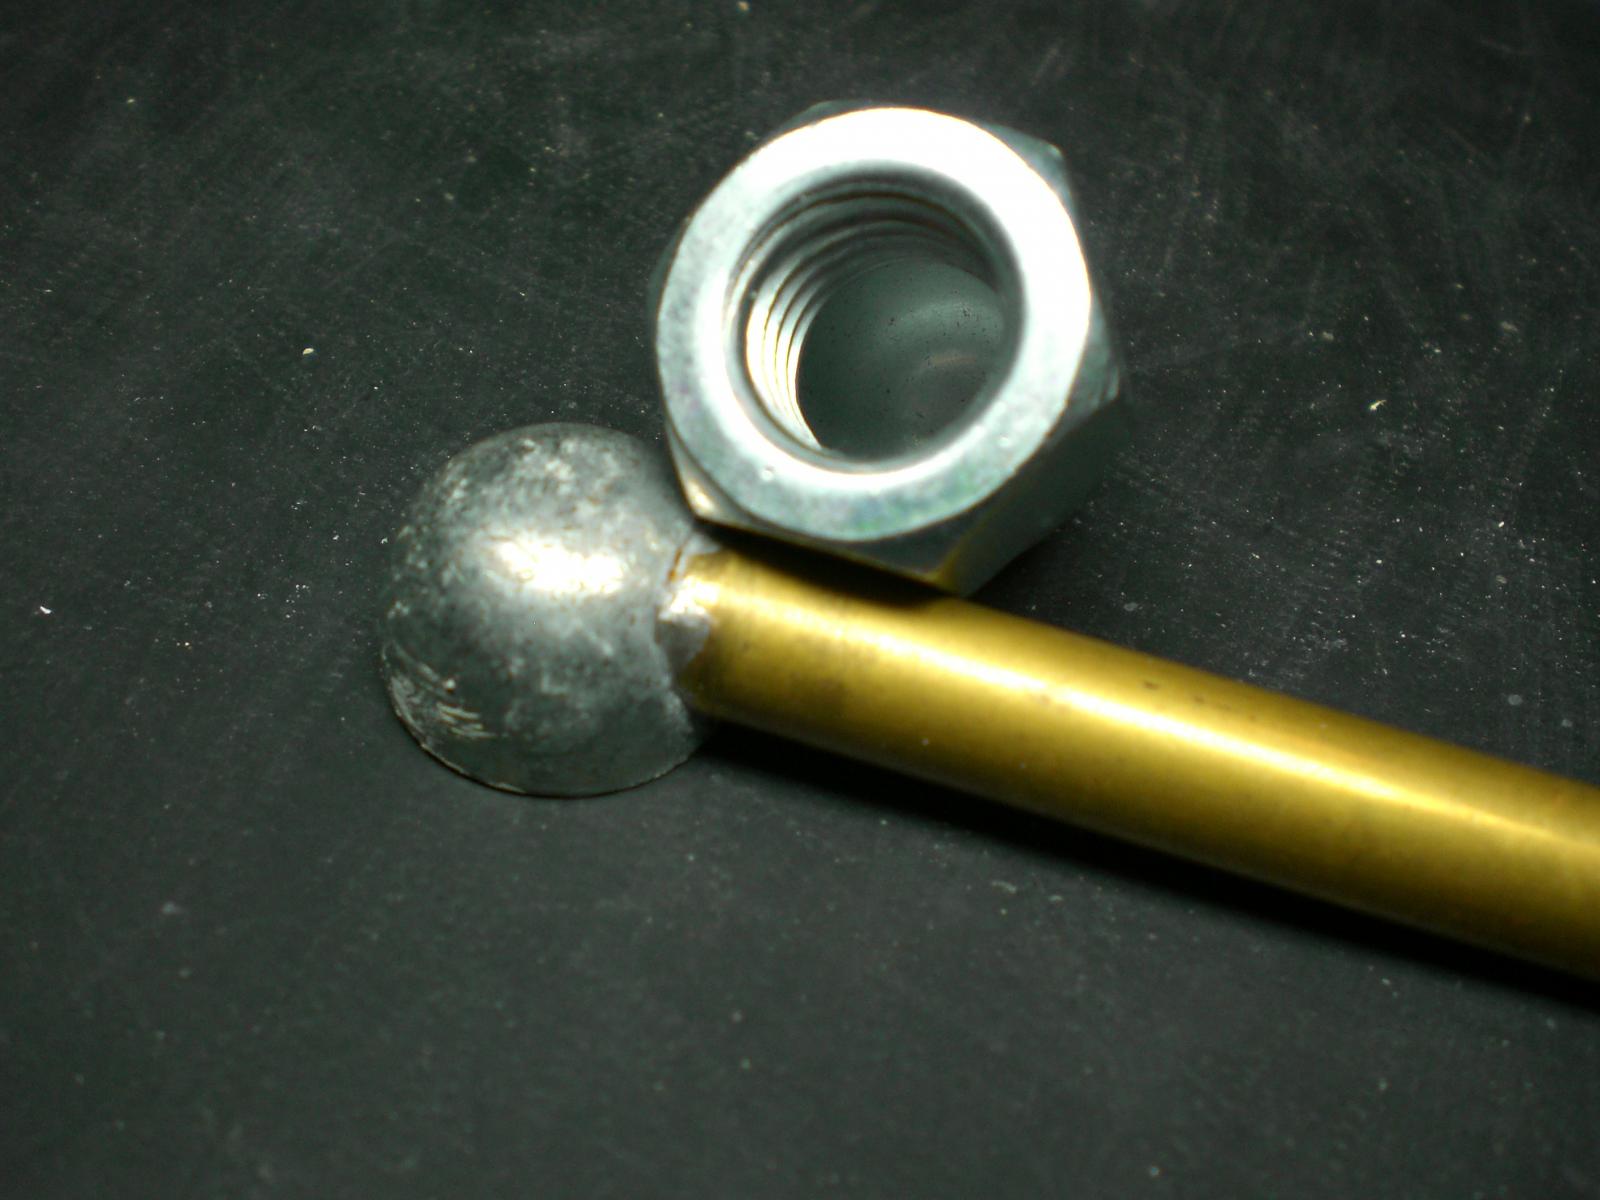
do not throw away your old dome-nuts, they serve for exellent venthoods

especially those where the dome Shell is made and brased on of thin pressed sheet
Build log part 5 to follow.....
-
Hello Nils,
I am really overwhelmed by your build... This is modelling on its top-level. I will follow your log and I am very very curious to see the progress.
Good luck and a lot of fun

Max aus Hof in Oberfranken
Hello Max,
what a cute member Icon you have, gives me a smile on monday morning. Thanks for your words, and enjoy the further parts of the Heinrich Kayser build log
Nils
-
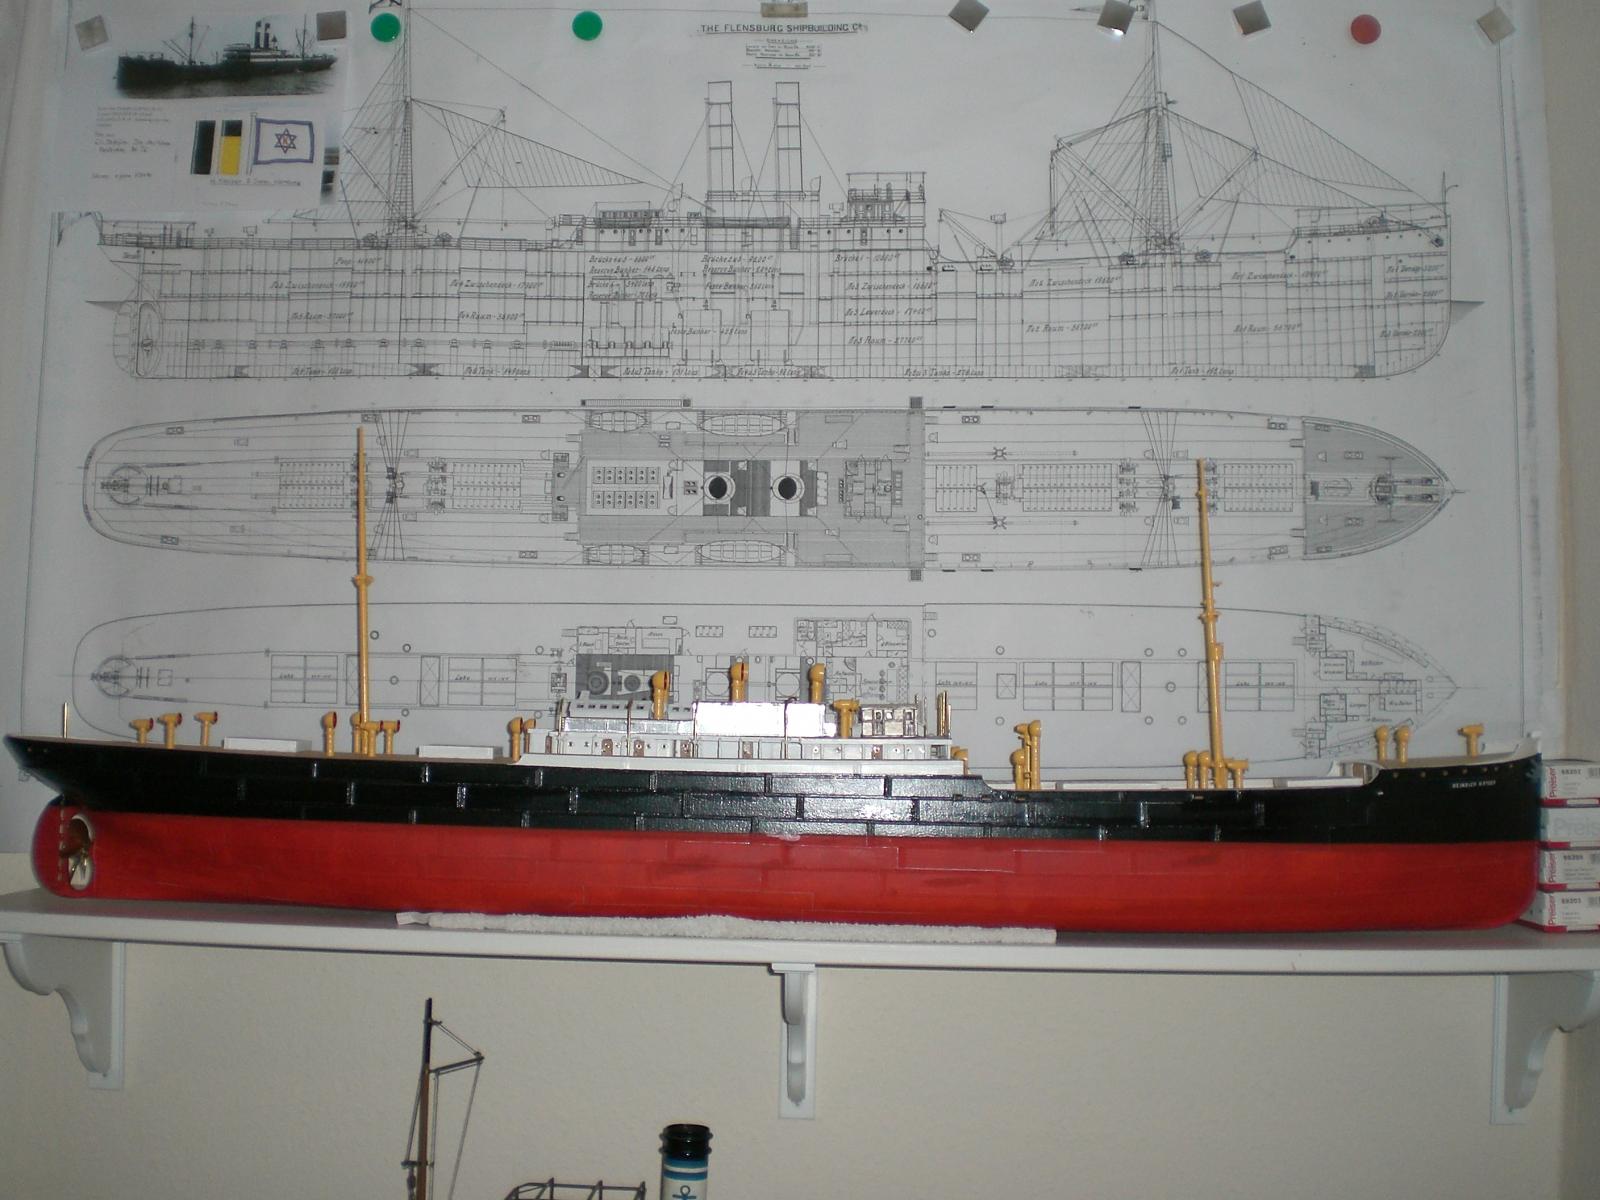
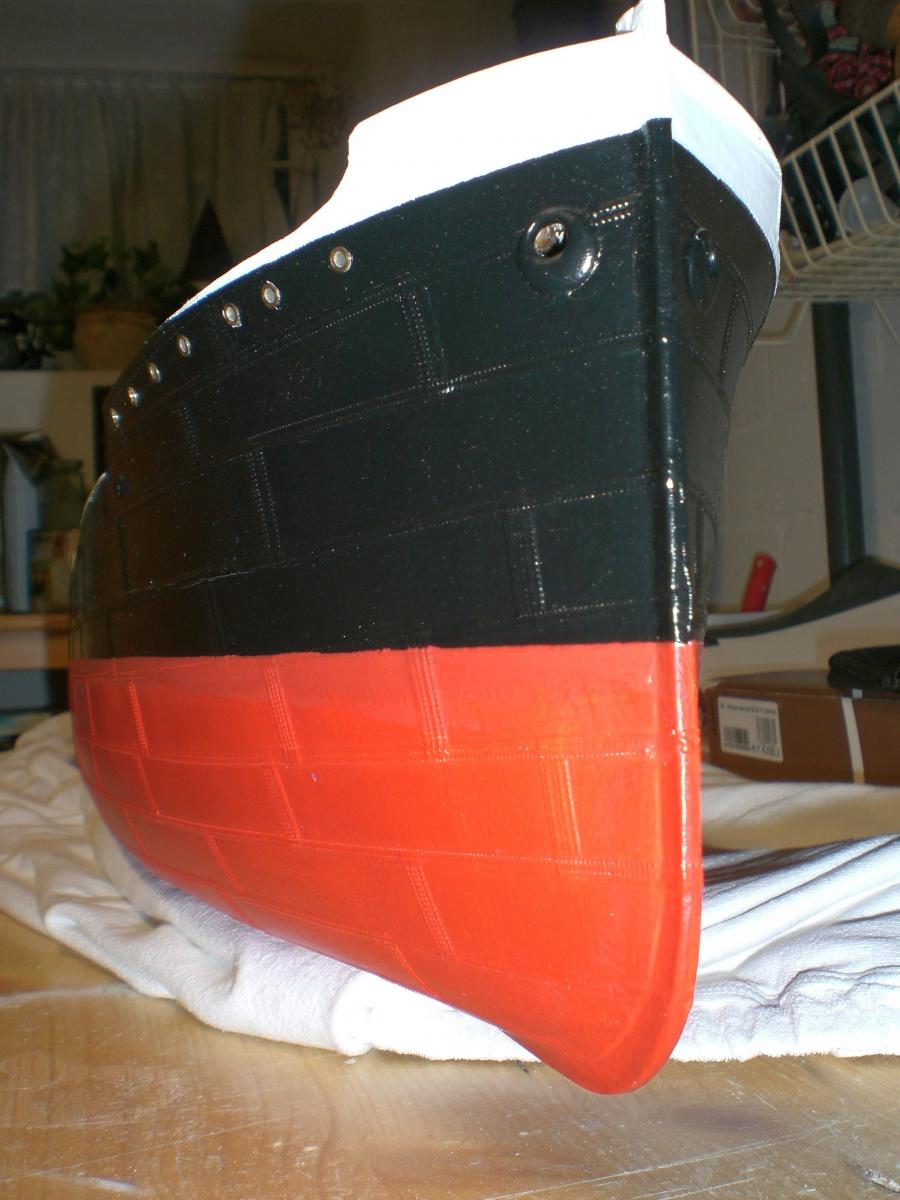
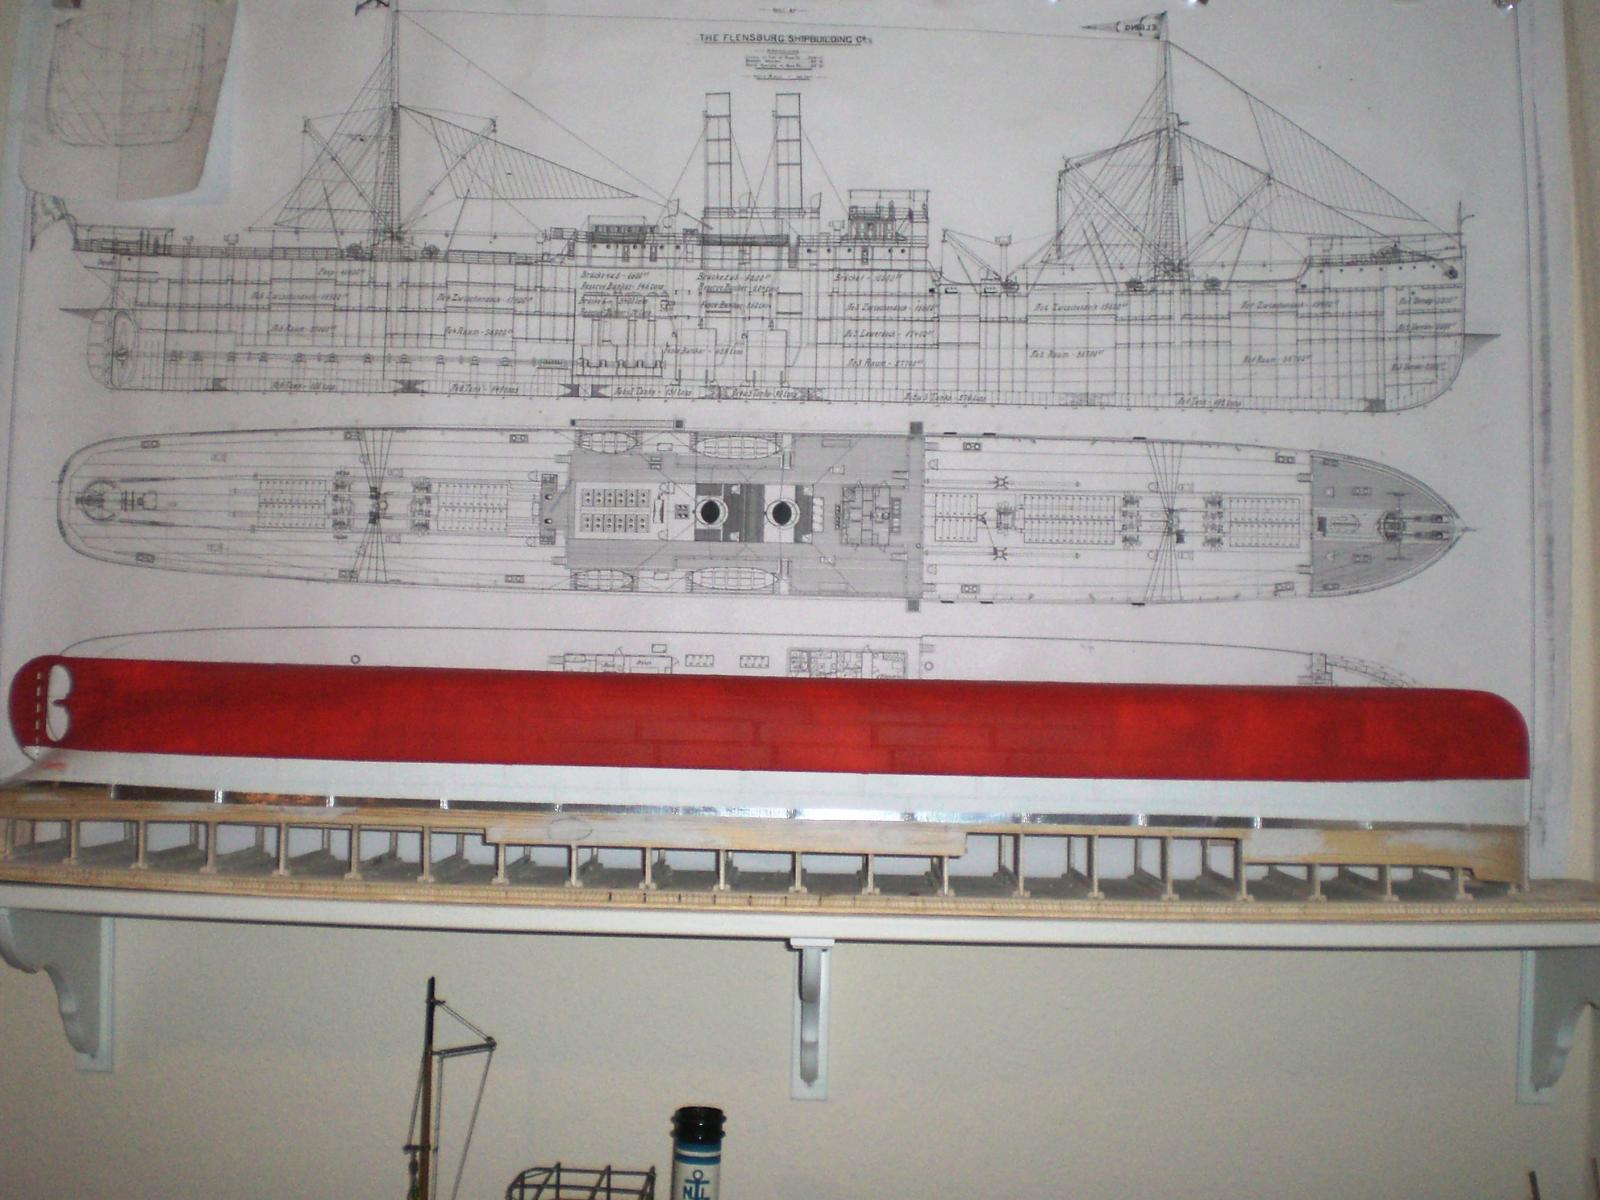
Building log part 3
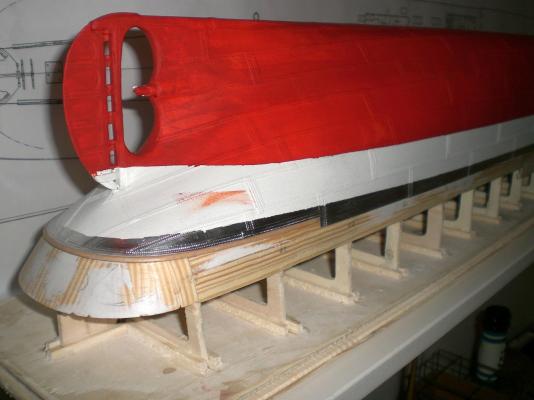
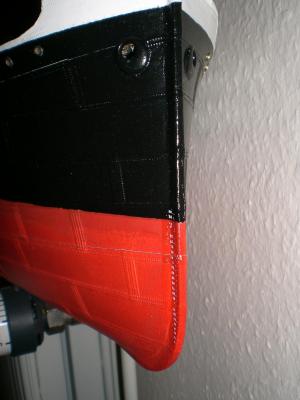
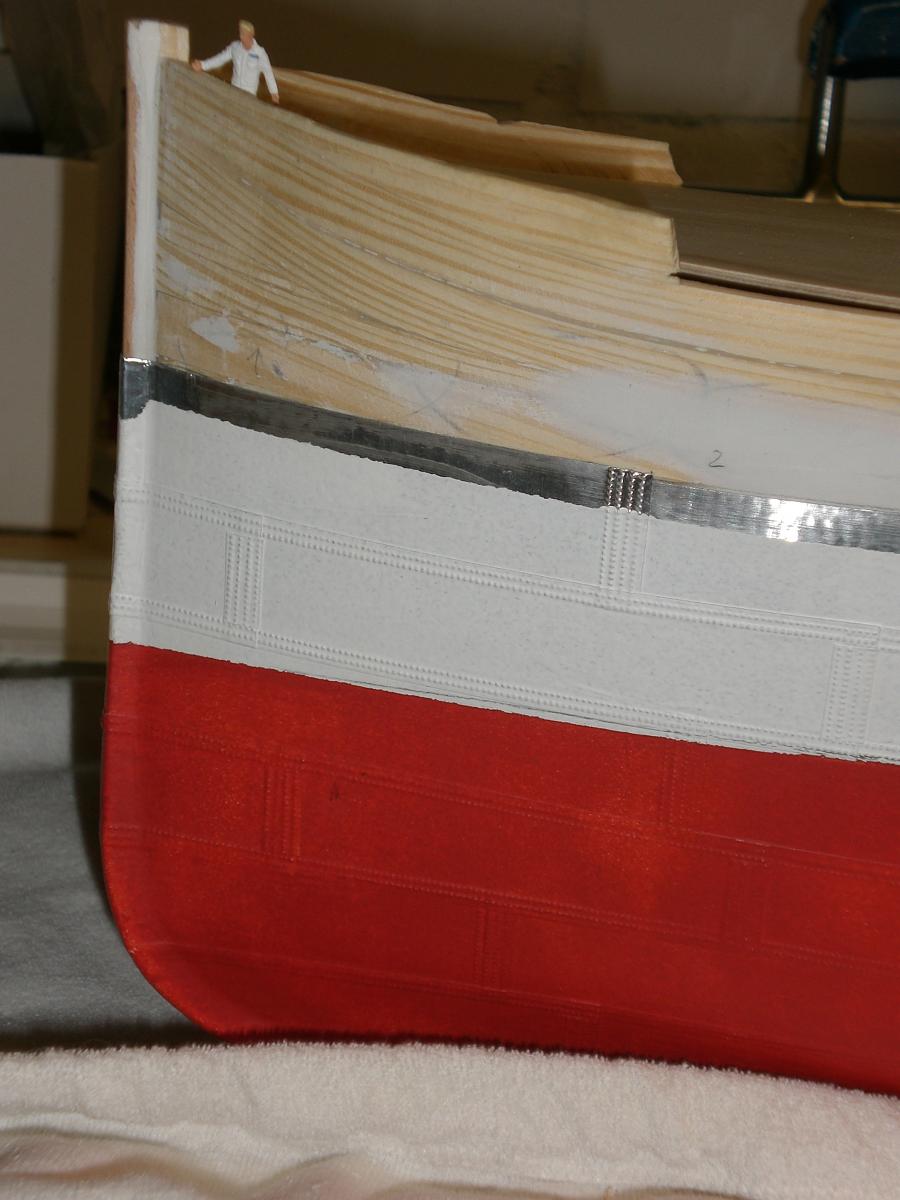
brought on White primer coating and Sub waterline red
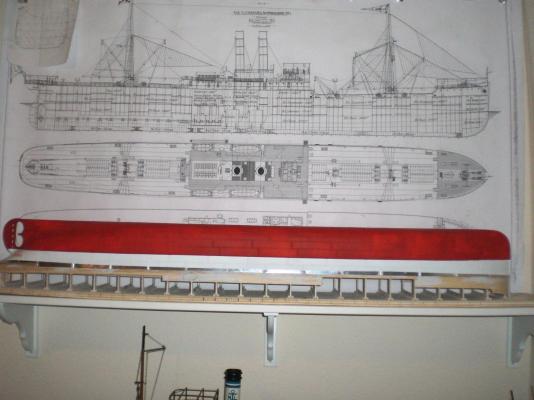
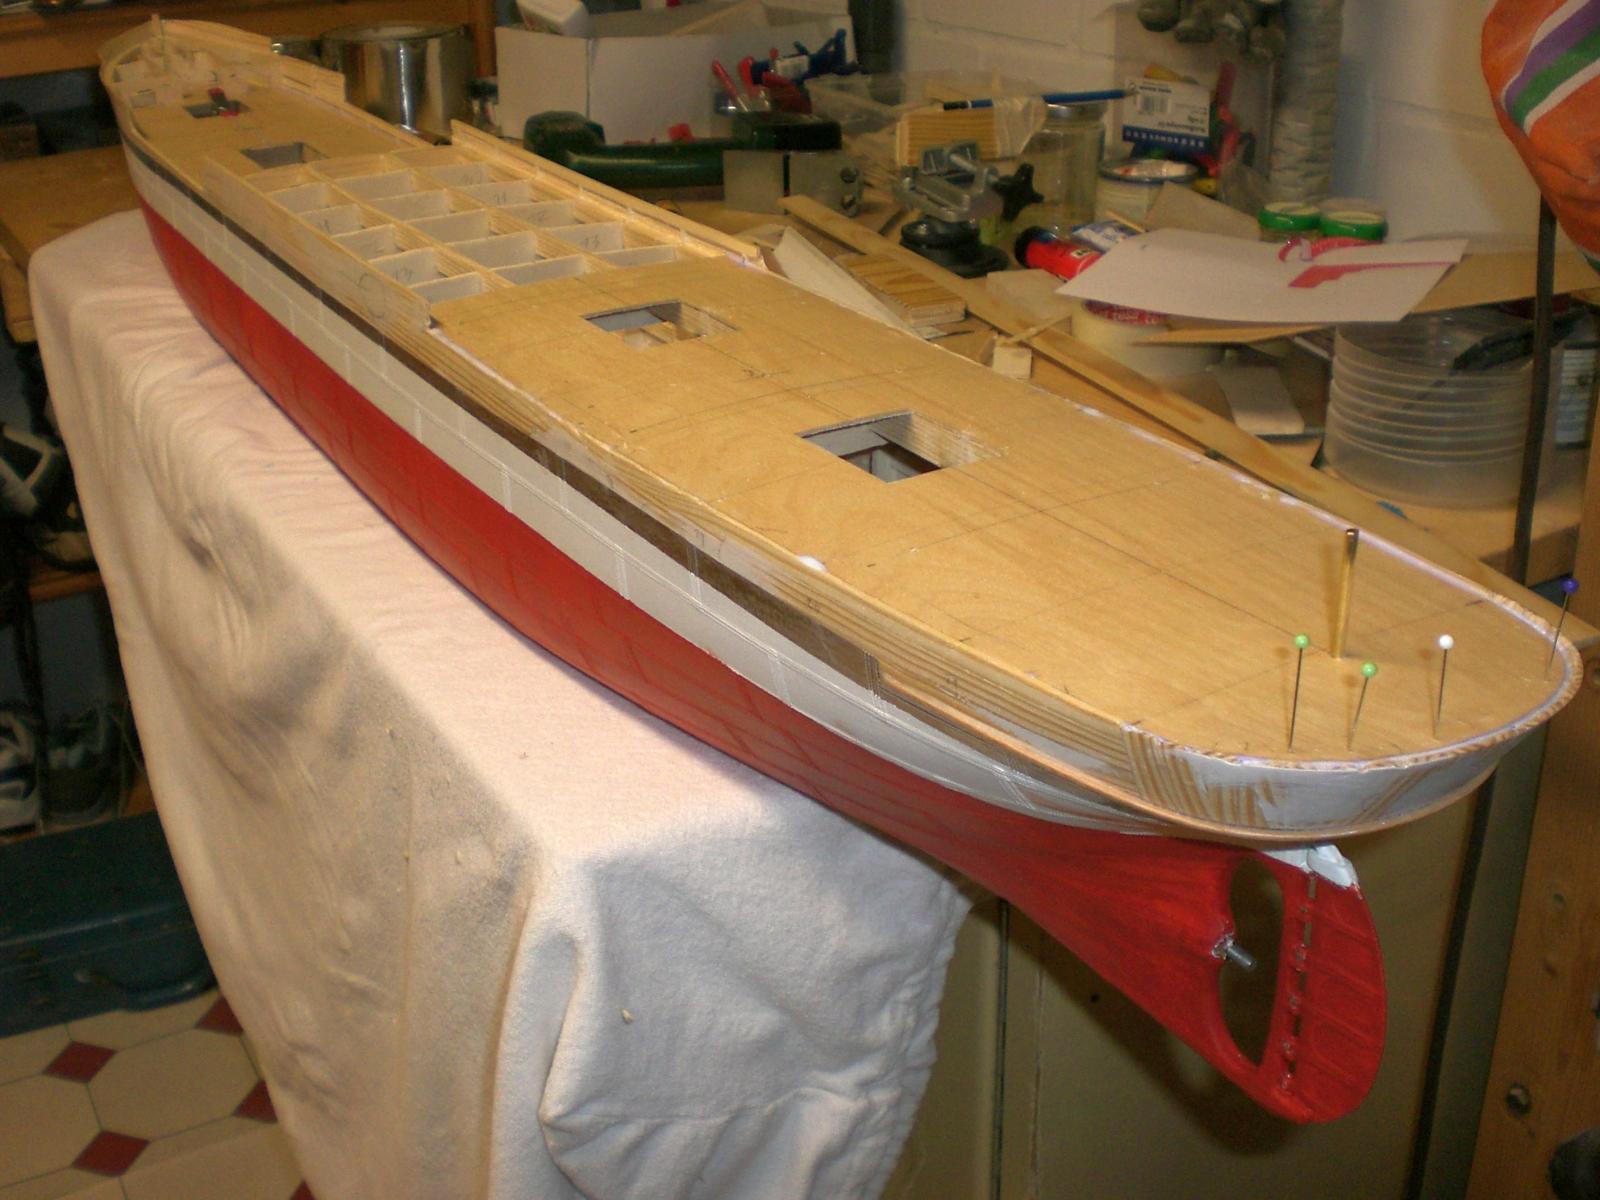
the last Picture where the hull is still fixed to the baseplate. The upper hull portions shall be plated and painted when the decks have been permanently mounted
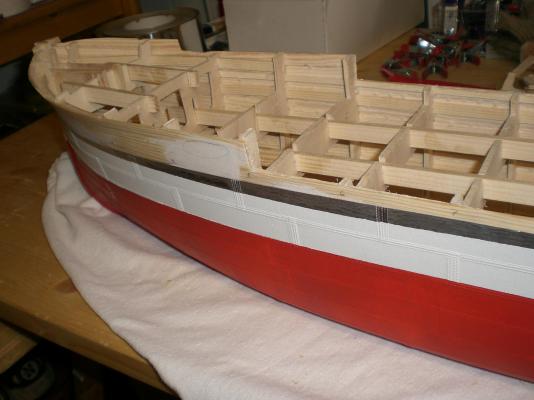
hull seperated from baseplate, all went well, no Twist, no destortions
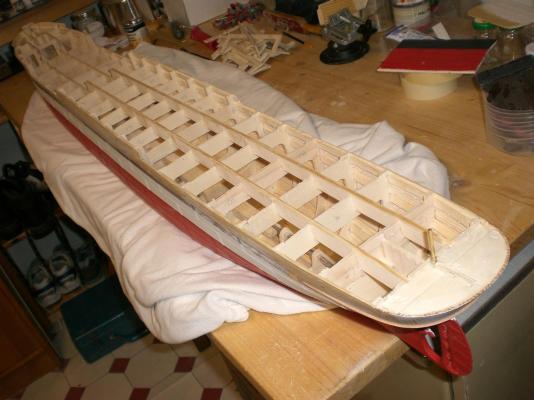
extreme lightweight hull, prop- and ruddershaft already mounted, superstructure for deck Support can be seen
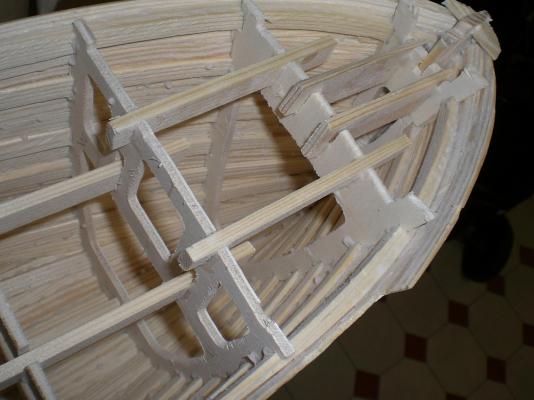
riged structure in forecastle area
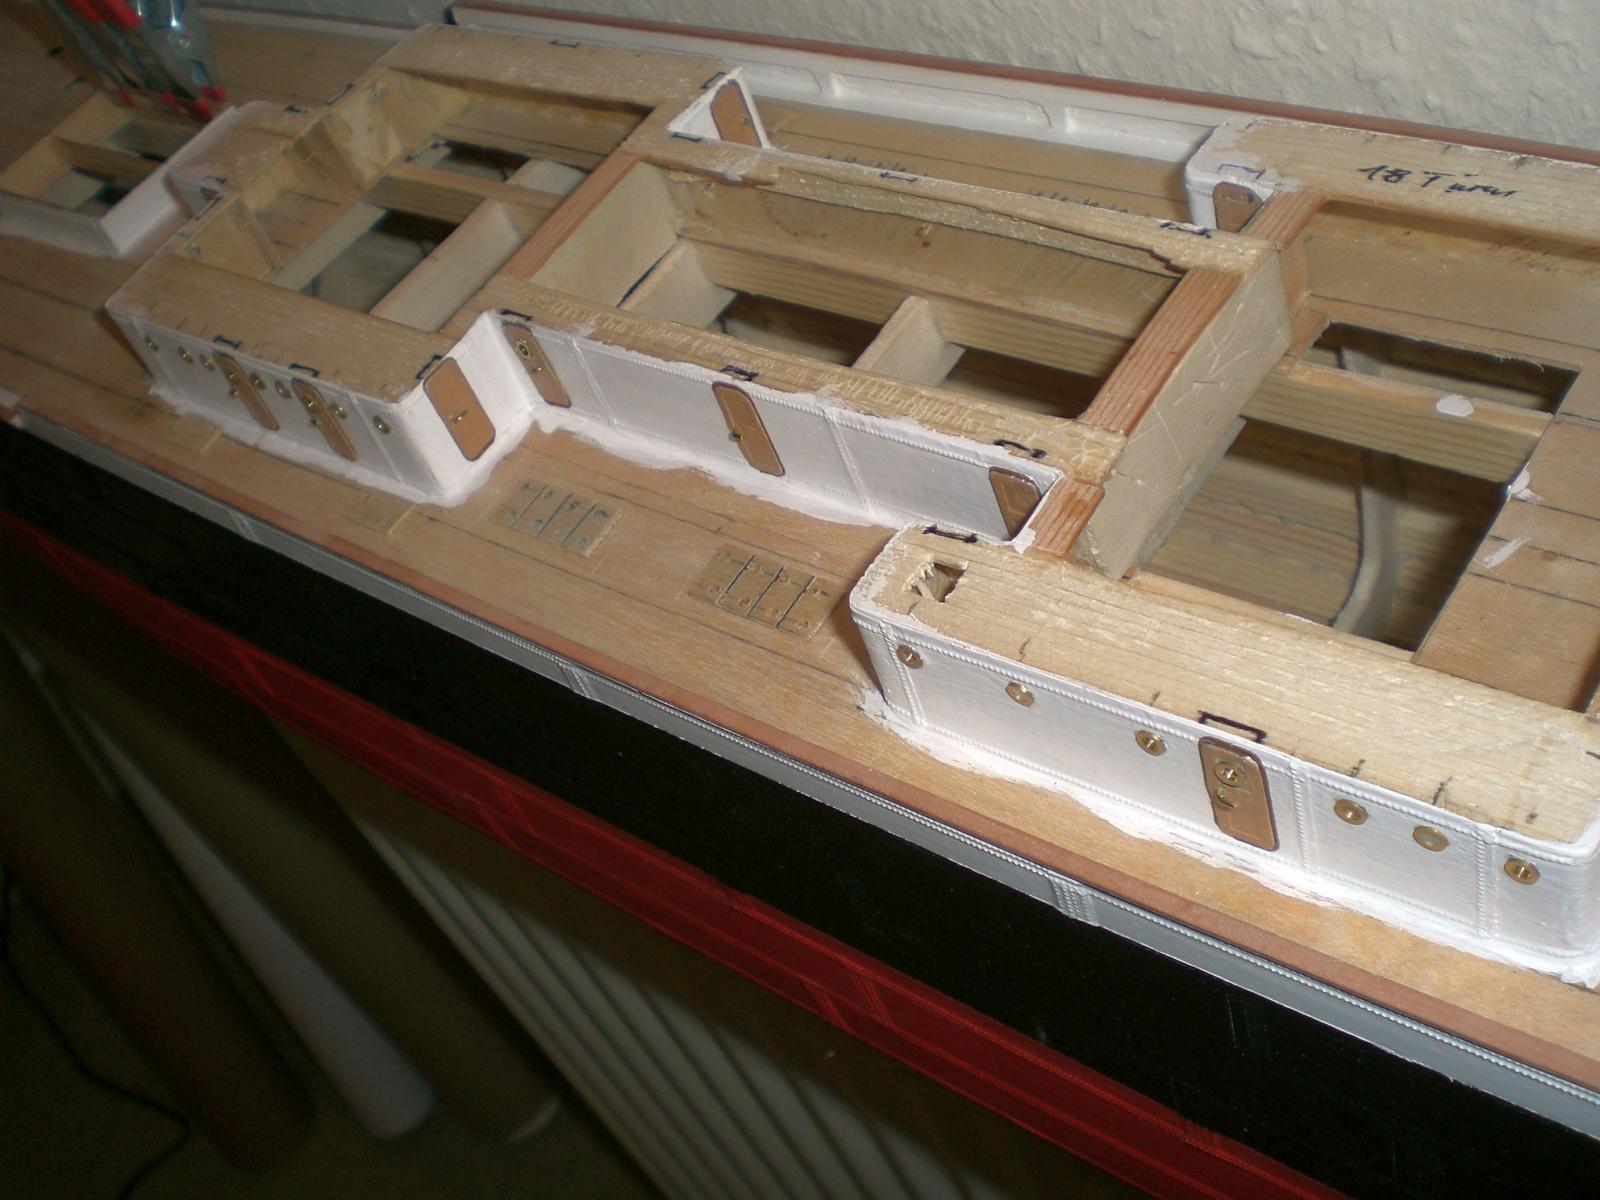
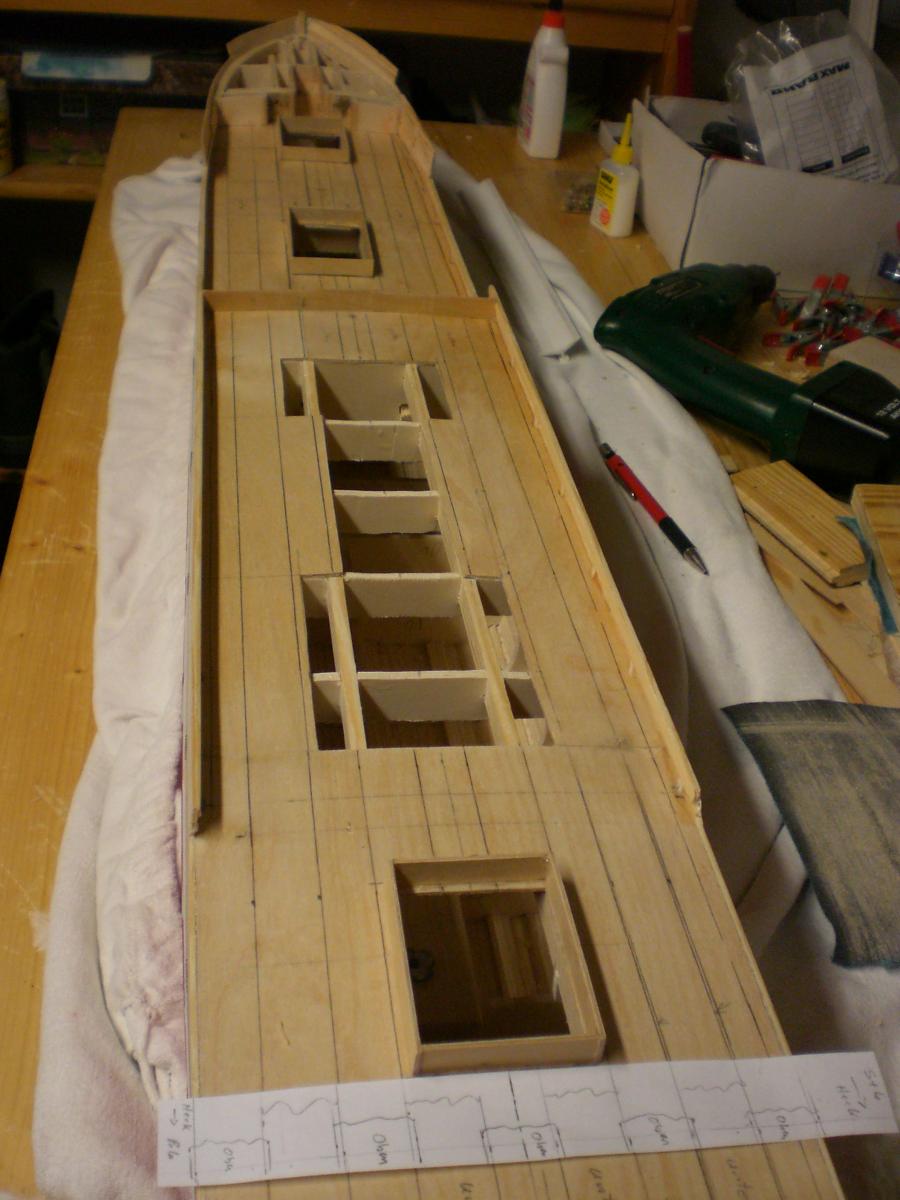
decks made from 1,5 mm thick 4-layer Aeroplywood
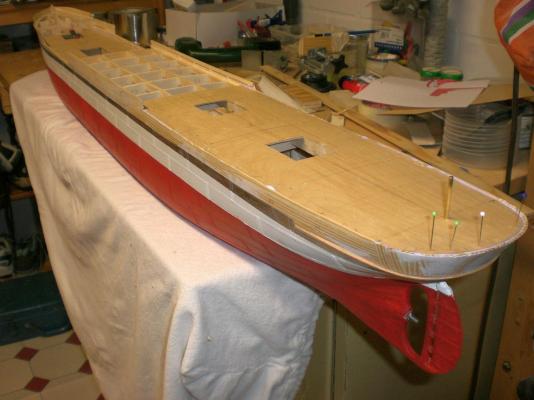
the Forward maindeck, 3 hatches, and the quite Long poopdeck, 2 hatches,(working decks) are going to be metal plated. These decks were of steel plating due to rough cargo handlingand overcoming heavy seas. The cardboard template behind hatch #4 Shows the riviting pattern for deck plating
hatch # 1 behind the forecastle bulkhead
bow section before finalizing the decks and the final plating

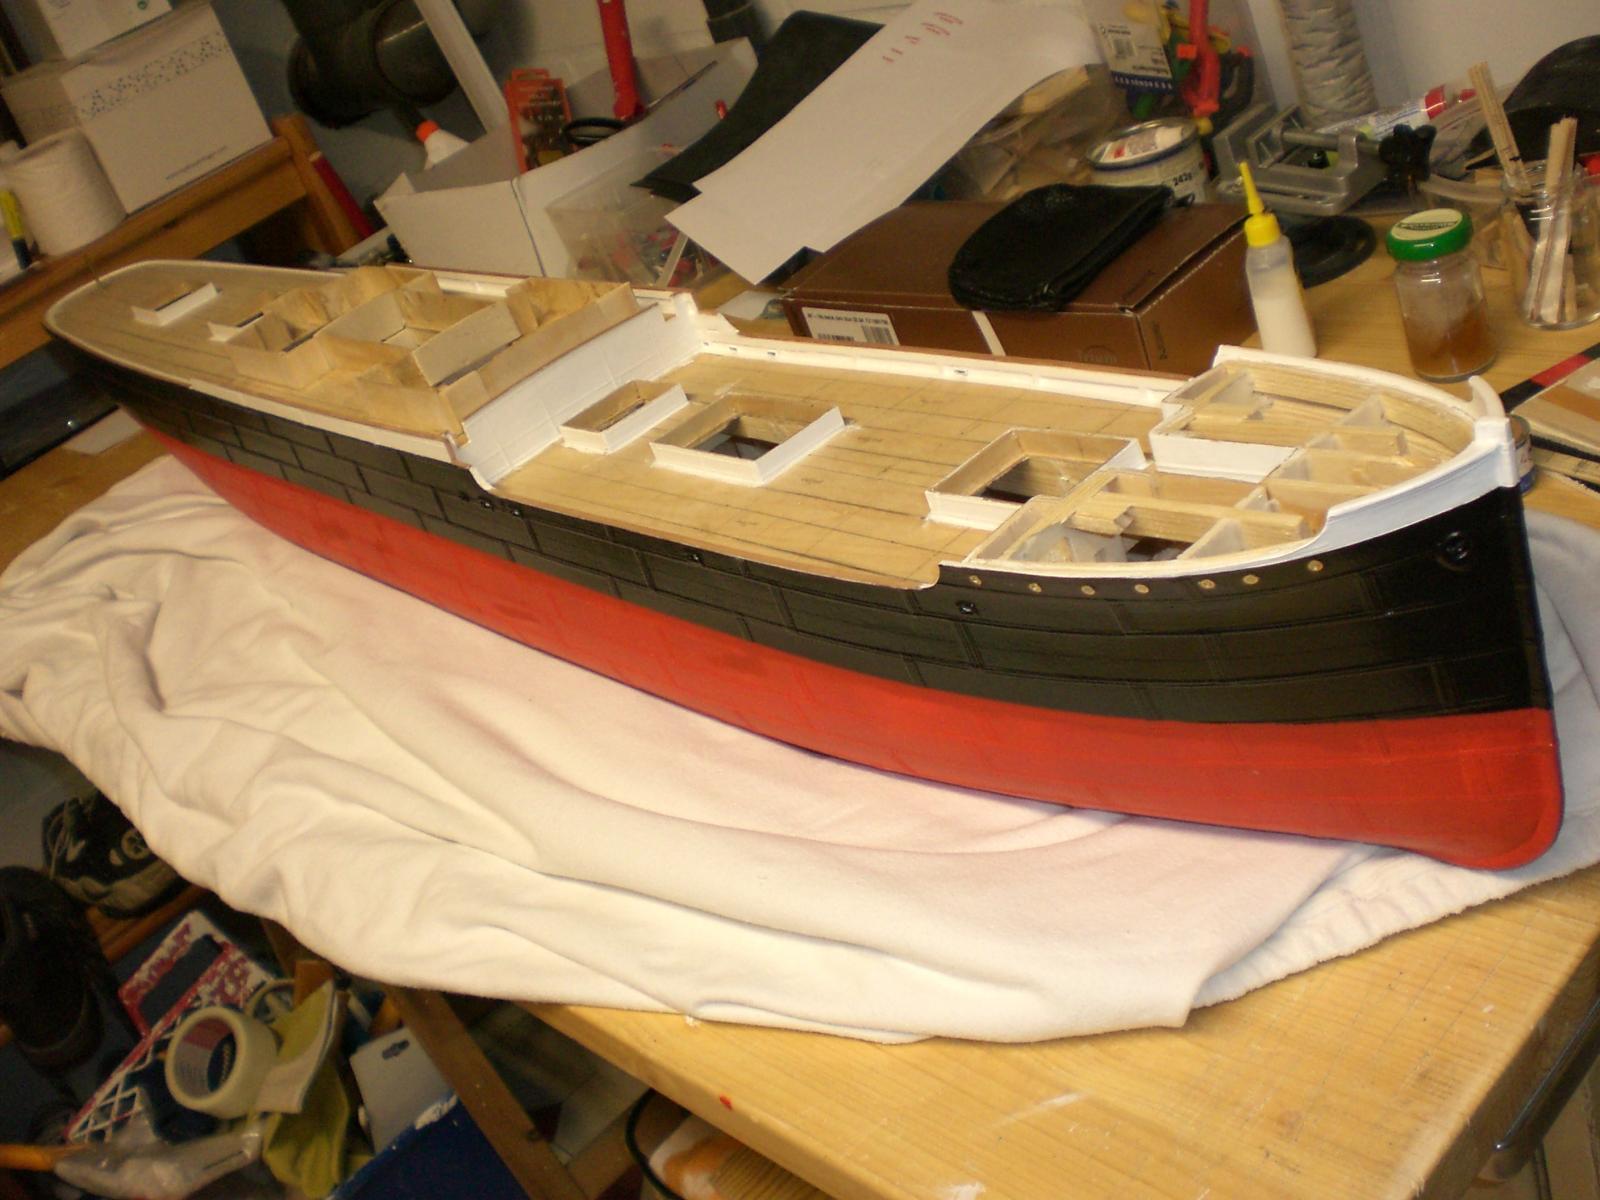
raw workdecks mounted, midship deckhouses started, hull painting done and forecastle bulleyes mounted. It`s now slowly looking like a ship should be...
Build log part 4 to follow.....
-
The anchors are made of brass.
to be continued ...
Congrats Johann,
you have delivered first class work in admirable Performance and Quality, also the photos are great, in all a delight to see
Nils
-
Well, I was hoping to see this section. Great work on metal plates Nils.
I'm curious about the tool that you used for marking plates. Can you show us ?
Thanks, Bugra.
Bugra,
upon your request, here a short intercourse and self explaining use of the plate marking tool.
By the way, I use this method on all model hulls that are of rivited structure, only the tooth modul sizes differ acc. to the appr. scale Chosen. The holders for the toothwheels are made from old paintbrushes that would go to the bin otherwise.
Cheers
Nils
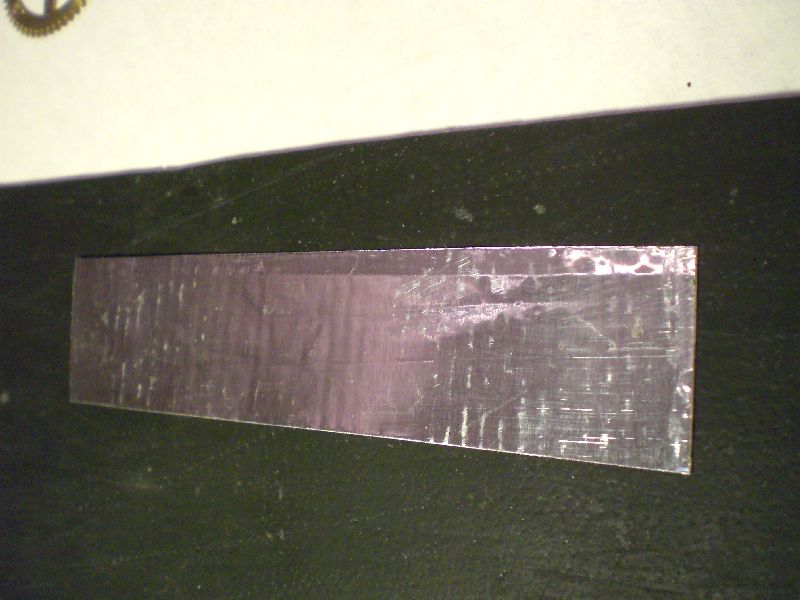
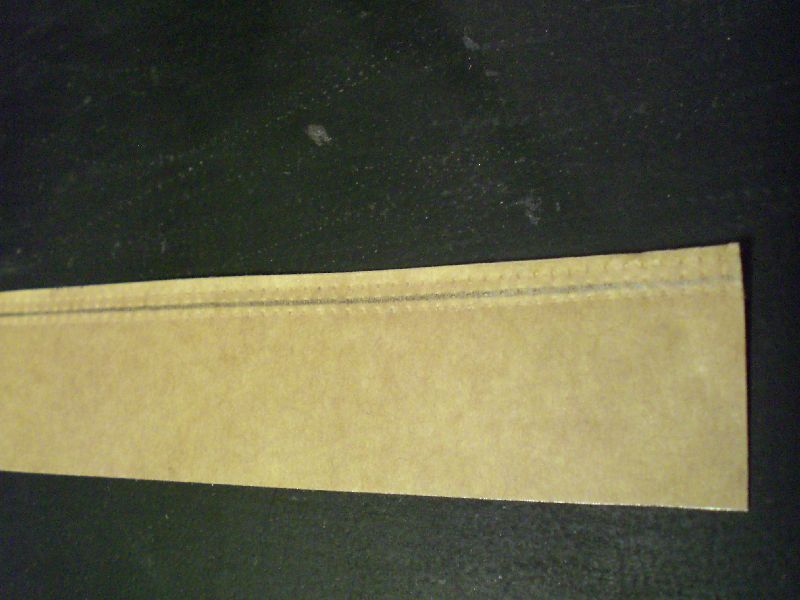
different wheel (toothsizes, and toothnumbers, also requires a semi soft rubber plate underneath and of course the precut plate
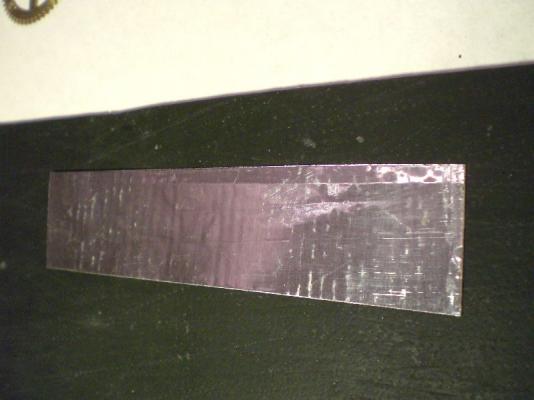
(turn around the plate, so the protection foil is up....
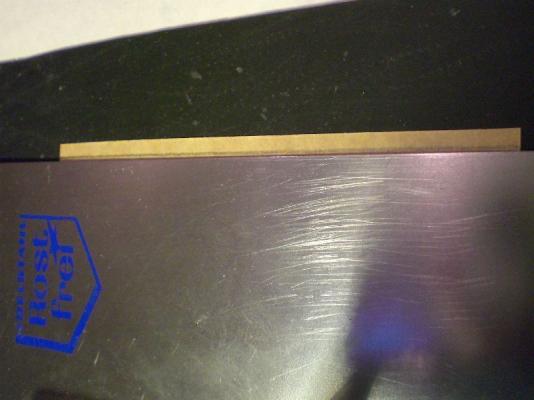
use a metal ruler, or like here a masons tool, leave plate edge free

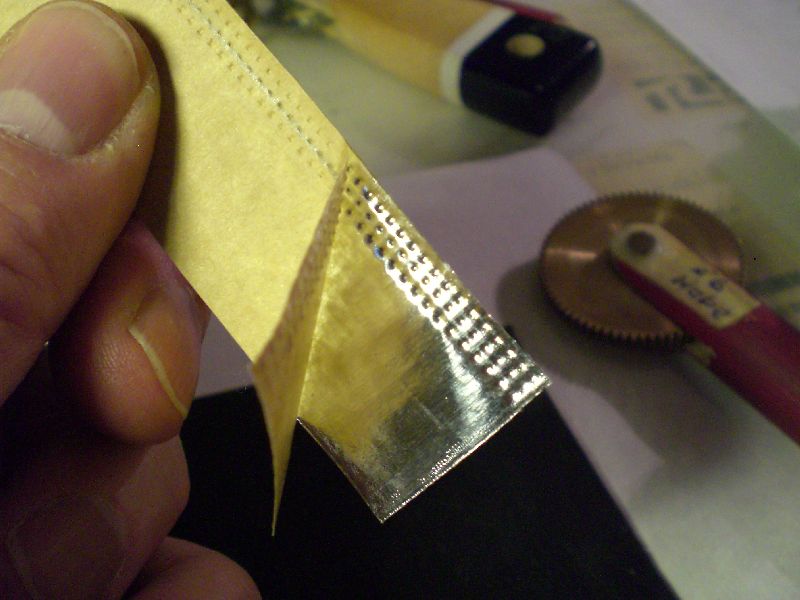
the roller tool, use Dremel with circle sawblade to cut in the two circular grooves for obtaining 3 toothrows instead of one
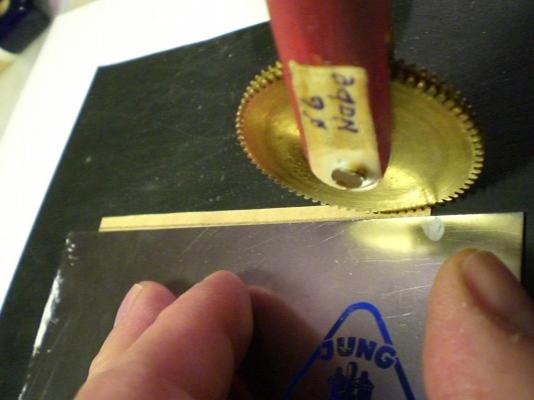
press tight down the roller tool and move swiftly Forward in one move. Same time press down the ruler

looking at the marked edge from the rear side
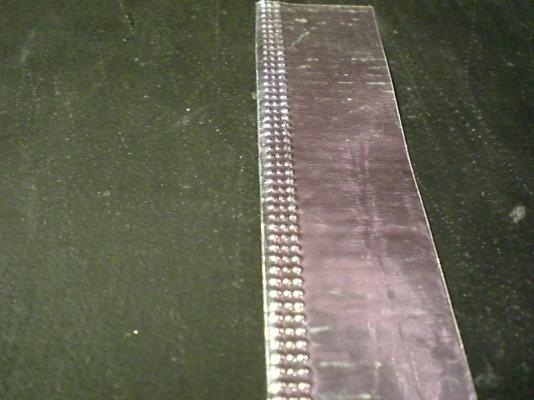
looking at the result of the rivit resembling, (here 3-row riviting)
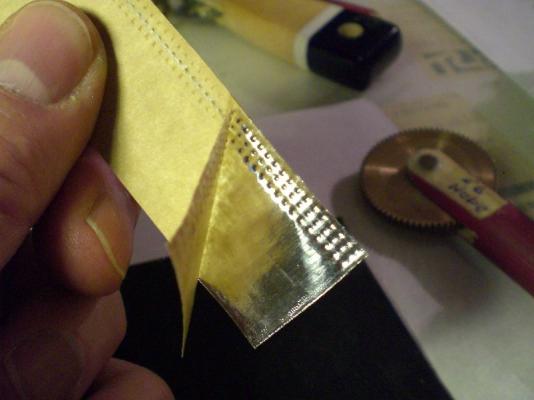
remove the protection foil, Keep the gluefilm side free from dust and debris
Happy exercising and good success
Nils
- gieb8688, Elia, Lou van Wijhe and 8 others
-
11
-
Very nice mate real nice.
:DThank you rpeteru
Nils


Heinrich Kayser 1898 by Nils Langemann - FINISHED - scale 1:96 - as she appeared in 1922
in - Build logs for subjects built 1851 - 1900
Posted · Edited by Mirabell61
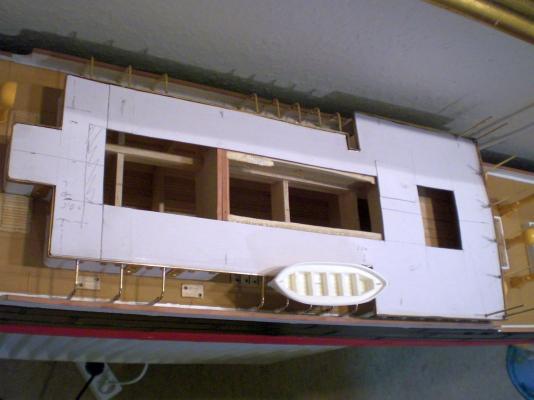
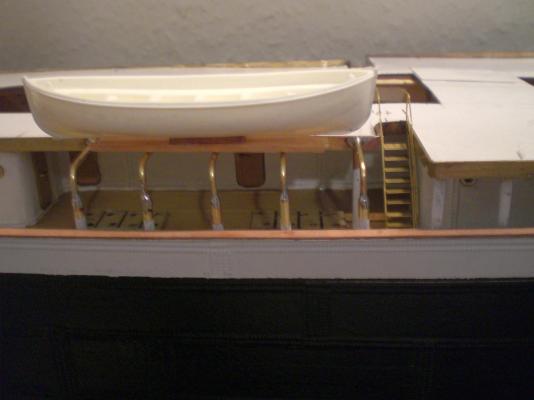
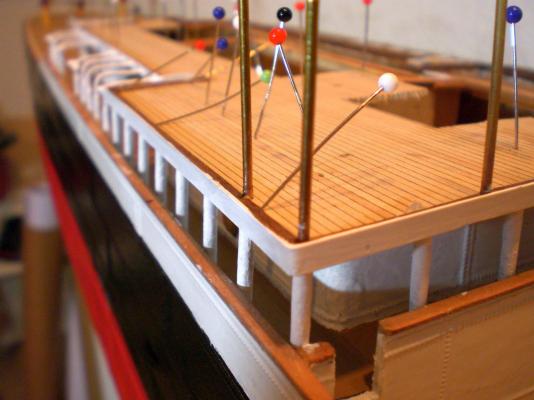
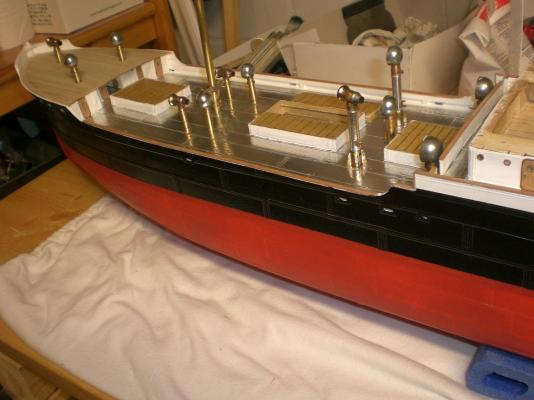
Building log part 10
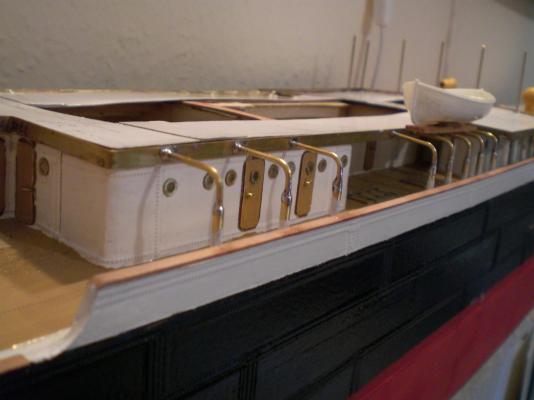
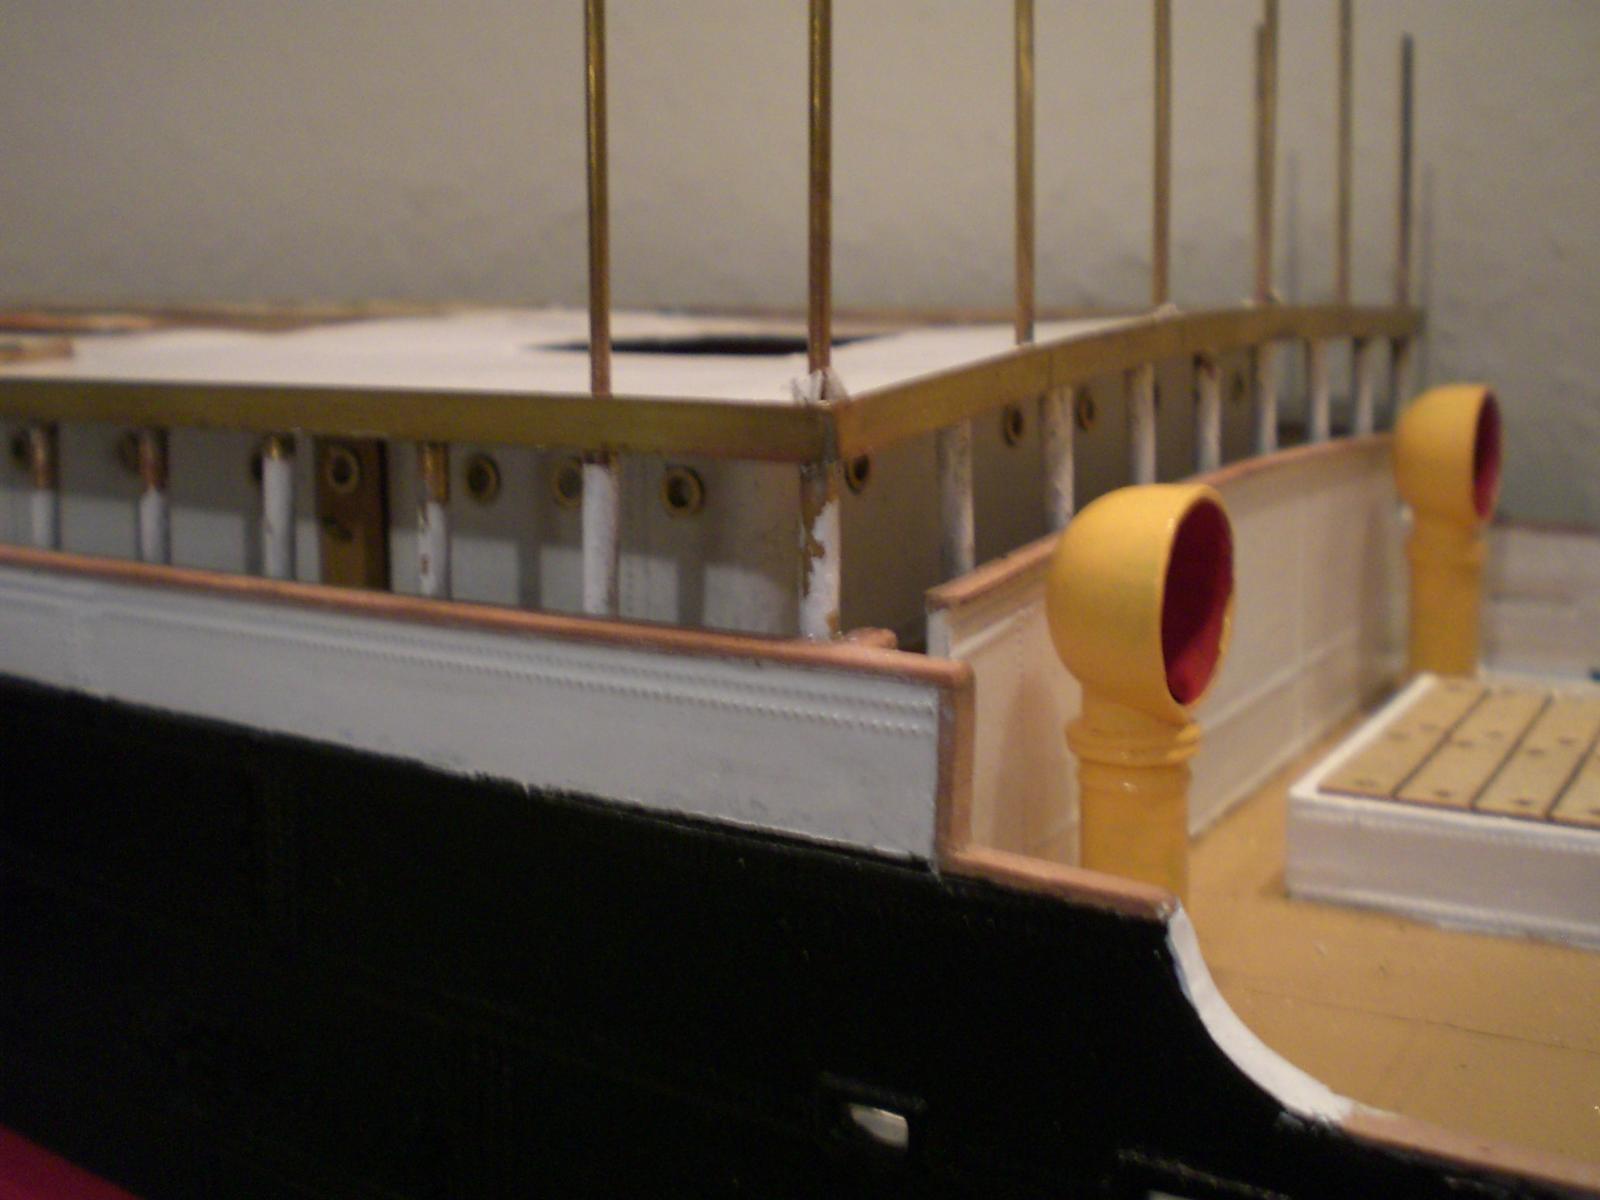
machine well Skylights done, railings on boatsdeck and started on funneldeck
forecastle railing fixed
this and next Picture railings fixed
railings, pillars for boatsdeck and upper Bridge stachions painted white
stairs to upper Bridge fitted and all stairs painted
upper Bridge rim completed
prefitting for davits
outer Bridge rim White (except for soldering area of stair)
attaching middle wires of stairs to boatsdeck and railing
Build log part 11 to follow.....