Johnny D
-
Posts
13 -
Joined
-
Last visited
-
 GrandpaPhil reacted to a post in a topic:
HMS Victory by Johnny D - Mantua - 1:200
GrandpaPhil reacted to a post in a topic:
HMS Victory by Johnny D - Mantua - 1:200
-
Edwardkenway reacted to a post in a topic:
HMS Victory by Johnny D - Mantua - 1:200
-
JayCub reacted to a post in a topic:
HMS Victory by Johnny D - Mantua - 1:200
-
JayCub reacted to a post in a topic:
HMS Victory by Johnny D - Mantua - 1:200
-
JayCub reacted to a post in a topic:
HMS Victory by Johnny D - Mantua - 1:200
-
Hi Lazy Saint, Your build is fantastic, thanks for your kind words on my build log. I am amazed at how neat your work is and how you make the deadeyes all even. Still following with great interest as I'm sure many people are. Keep up the good work, looking forward to your next post. Thanks, Johnny D.
-
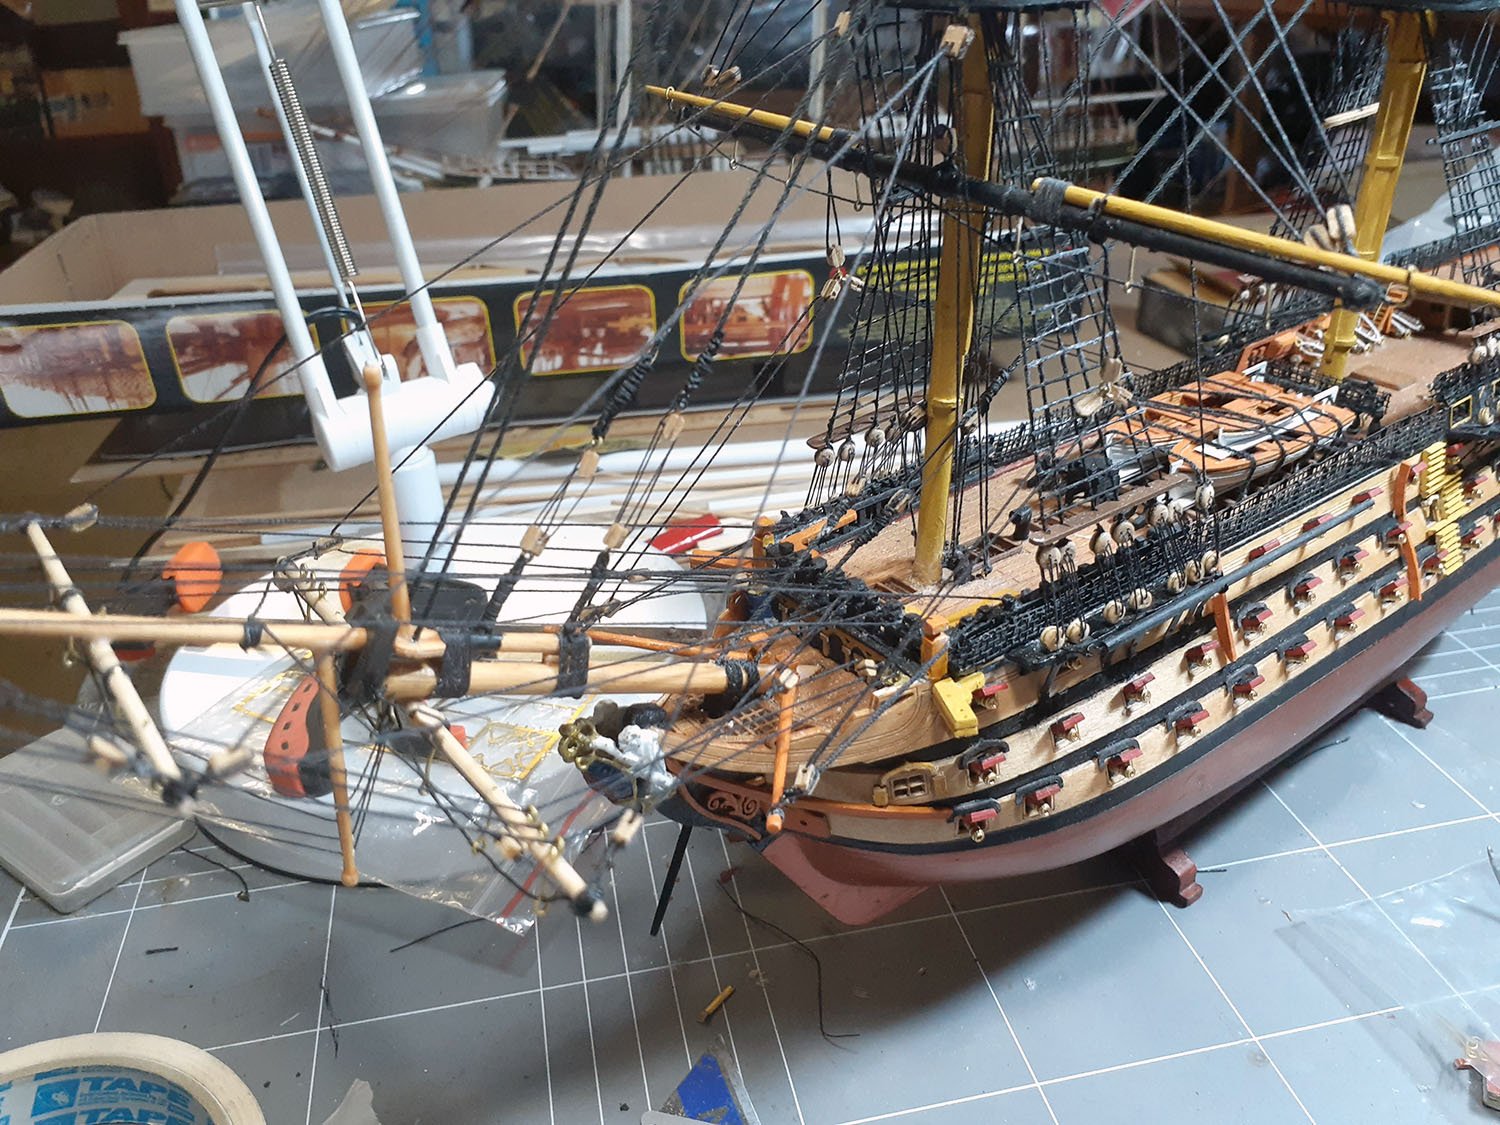
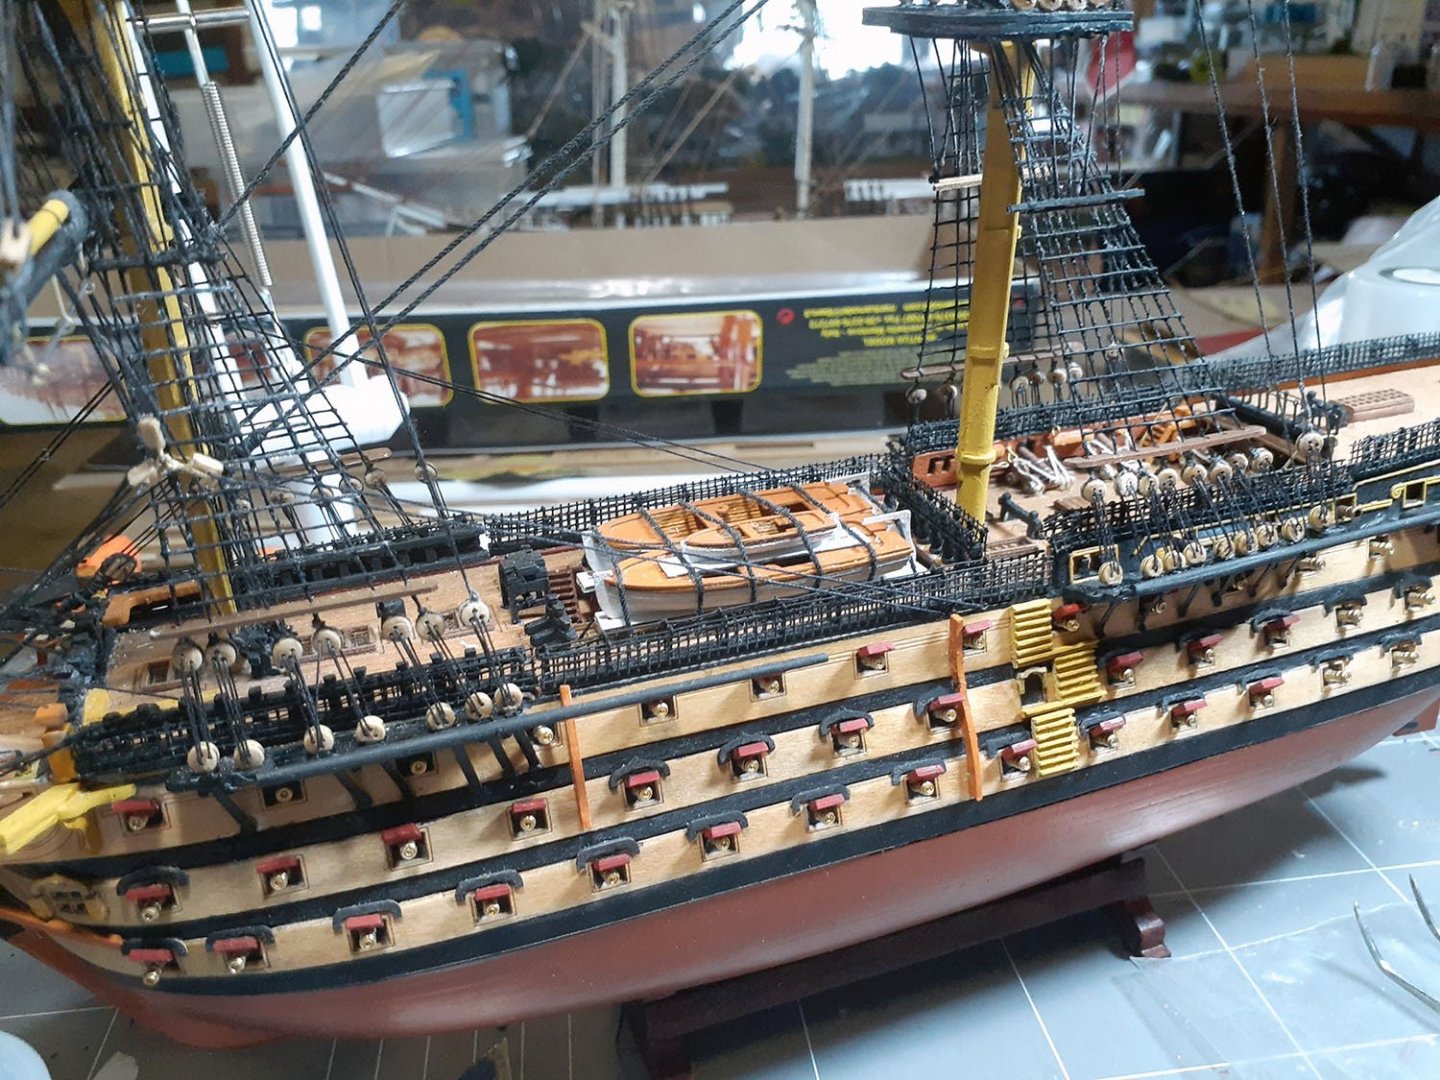
Hi Everyone, Been beavering away on the main mast. Just started the yard arms, everything is very slow going, something you have to take your time with. Finally started to fix the gun port covers, a challenge to keep them all at a consistent angle. Still many hours ahead of me with the rigging. I actually ran out of rigging thread, maybe because I was cutting off more than I needed. Will post again when there's more to see. Thanks, Johnny D.

-
GrandpaPhil reacted to a post in a topic:
HMS Victory by Johnny D - Mantua - 1:200
-
Edwardkenway reacted to a post in a topic:
HMS Victory by Johnny D - Mantua - 1:200
-
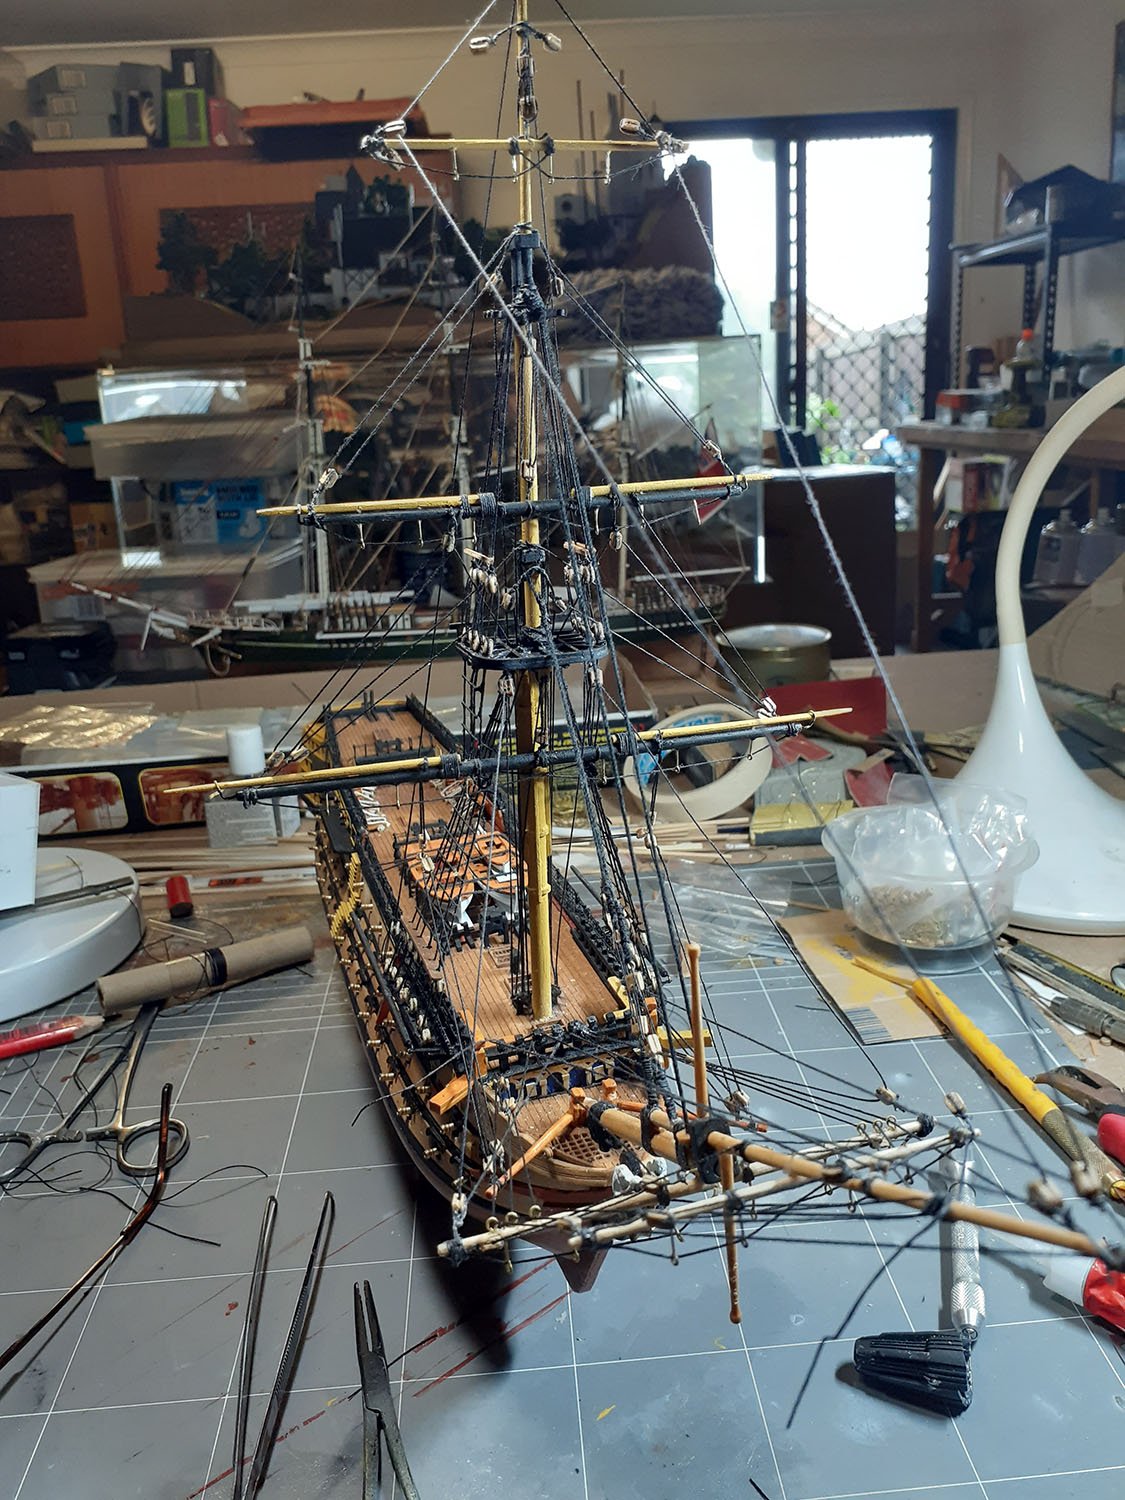
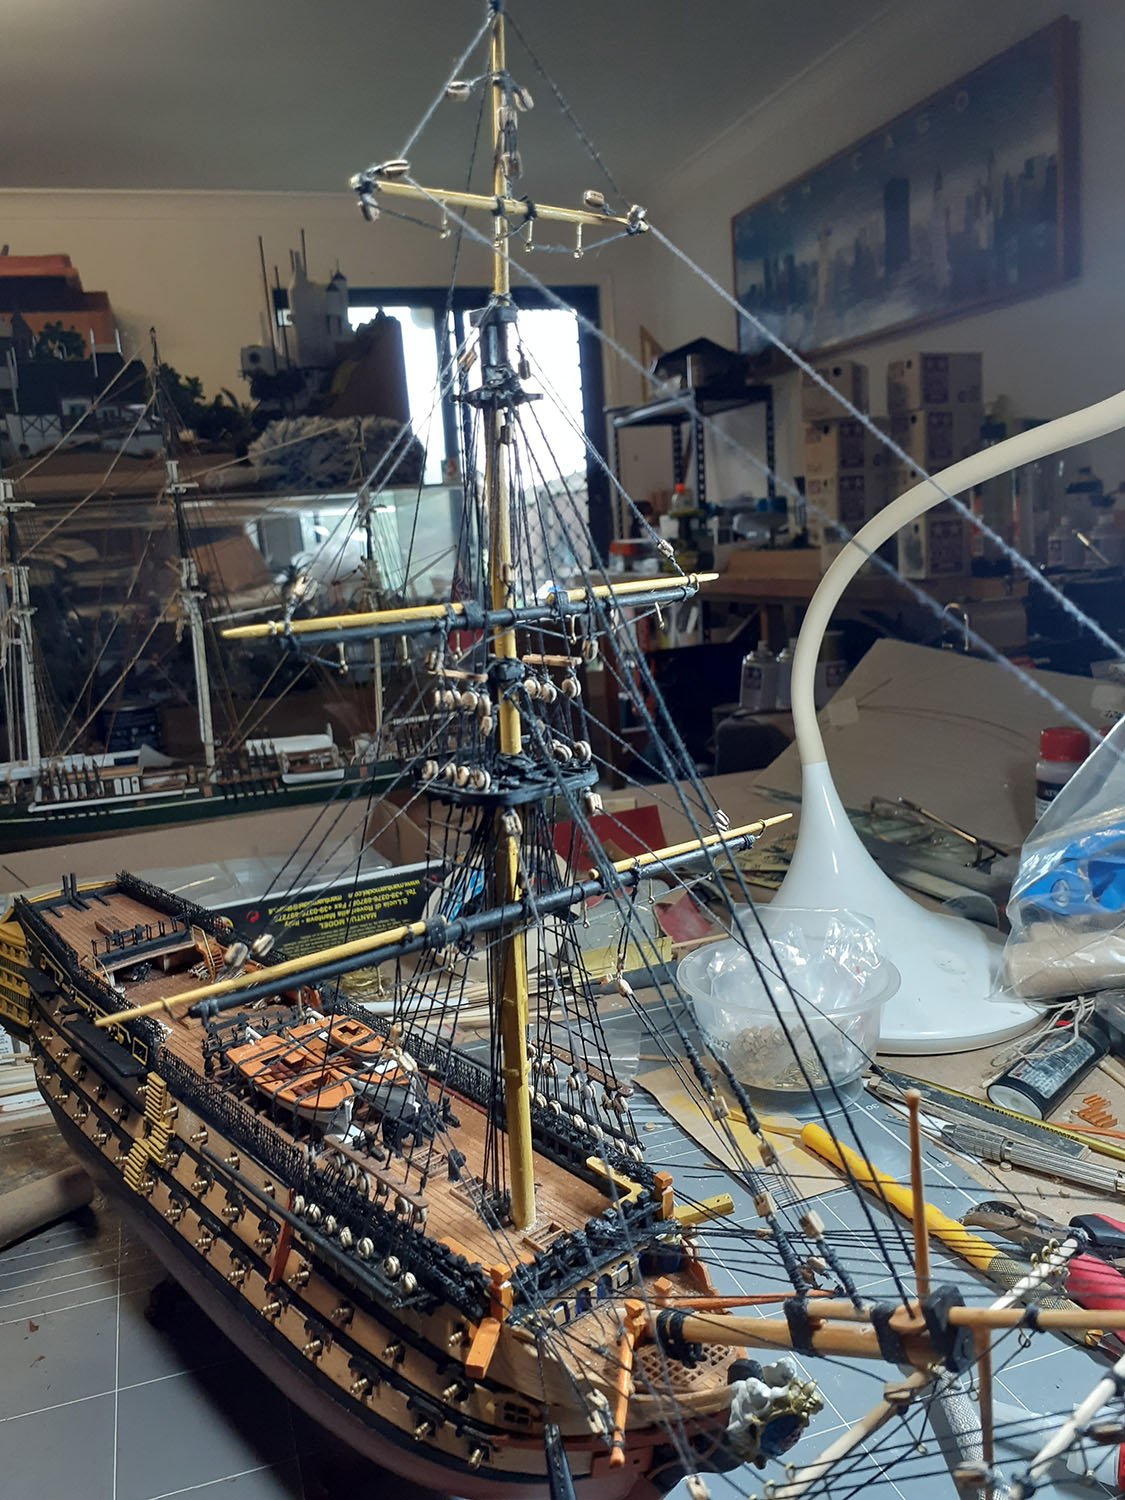
Hello, Thanks LS, rigging is very slow going. managed to find some better rigging plans as a reference, though still basing the rigging on the plans that came with the kit. Moving on to the Mizzen mast as I have rigged the Fore mast. Plan to do all the masts separately and once completed, will bring them all together. For me, installing all the masts at once and then trying to rig everything would simply do my head in, this way it allows working room and reduces the risk of knocking/snapping things trying to maneuver around the model. Still a lot of work ahead, enjoying it still, though trying not to get tangled up as I go. If anyone is interested in the method I used to build the stern, let me know. I have all the drawings I created and some build sequences I need to complete. Would be very interested in seeing how others tackled this area, as its not easy based on the kit instructions. Thanks, Johnny D.


-
Hi LS, Great you are back, sometimes a break away from modelling is good so you can recharge your batteries. You are making progress and its coming along nicely. The rigging is extremely complex and requires patients of a saint. Looking forward to see you continue to completion. I will post the method I used for building the stern as you suggested on my blog. Keep up the great work. Thanks, Johnny D.
-
The Lazy Saint reacted to a post in a topic:
HMS Victory by Johnny D - Mantua - 1:200
-
ccoyle reacted to a post in a topic:
HMS Victory by Johnny D - Mantua - 1:200
-
Hi LS, Very interested in seeing your progress to date. I have finally posted a forum of my build. Hope its going well for you. Thanks, Johnny D.
-
Thanks Kevin, There are a few shortcomings, the rigging is going to be one of them. The instructions/plans are very vague, been looking around to find something I can follow, I might need to look at purchasing one of the many books available but considering that this model is not accurate, not sure its worth putting in too much effort. I have purchased the Heller 1:100 HMS Victory and the AL Cutty Sark, both might be worth going the extra distance. In the mean time I will work towards completing the 1:200 HMS Victory. It is a challenge, but enjoying it. I had a look at your completed HMS Victory and it is amazing. I am currently working on the forward dead eyes and rat lines, will post some more photos soon. Thanks, Johnny D.
-
GrandpaPhil reacted to a post in a topic:
HMS Victory by Johnny D - Mantua - 1:200
-
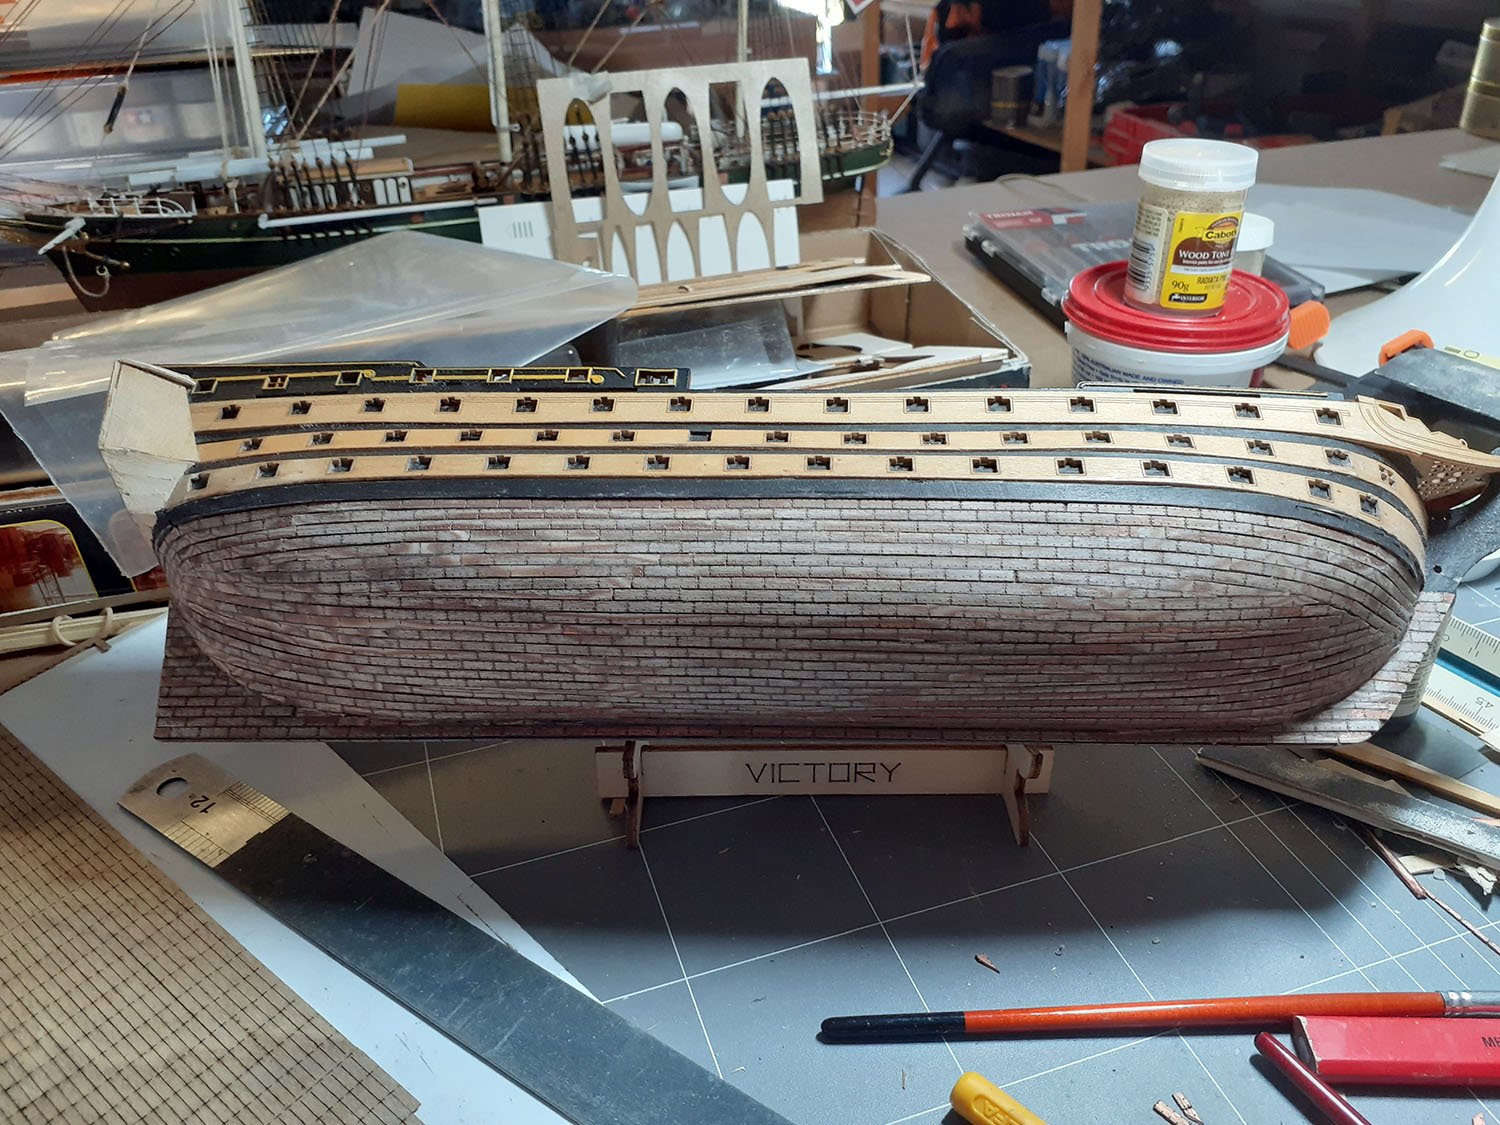
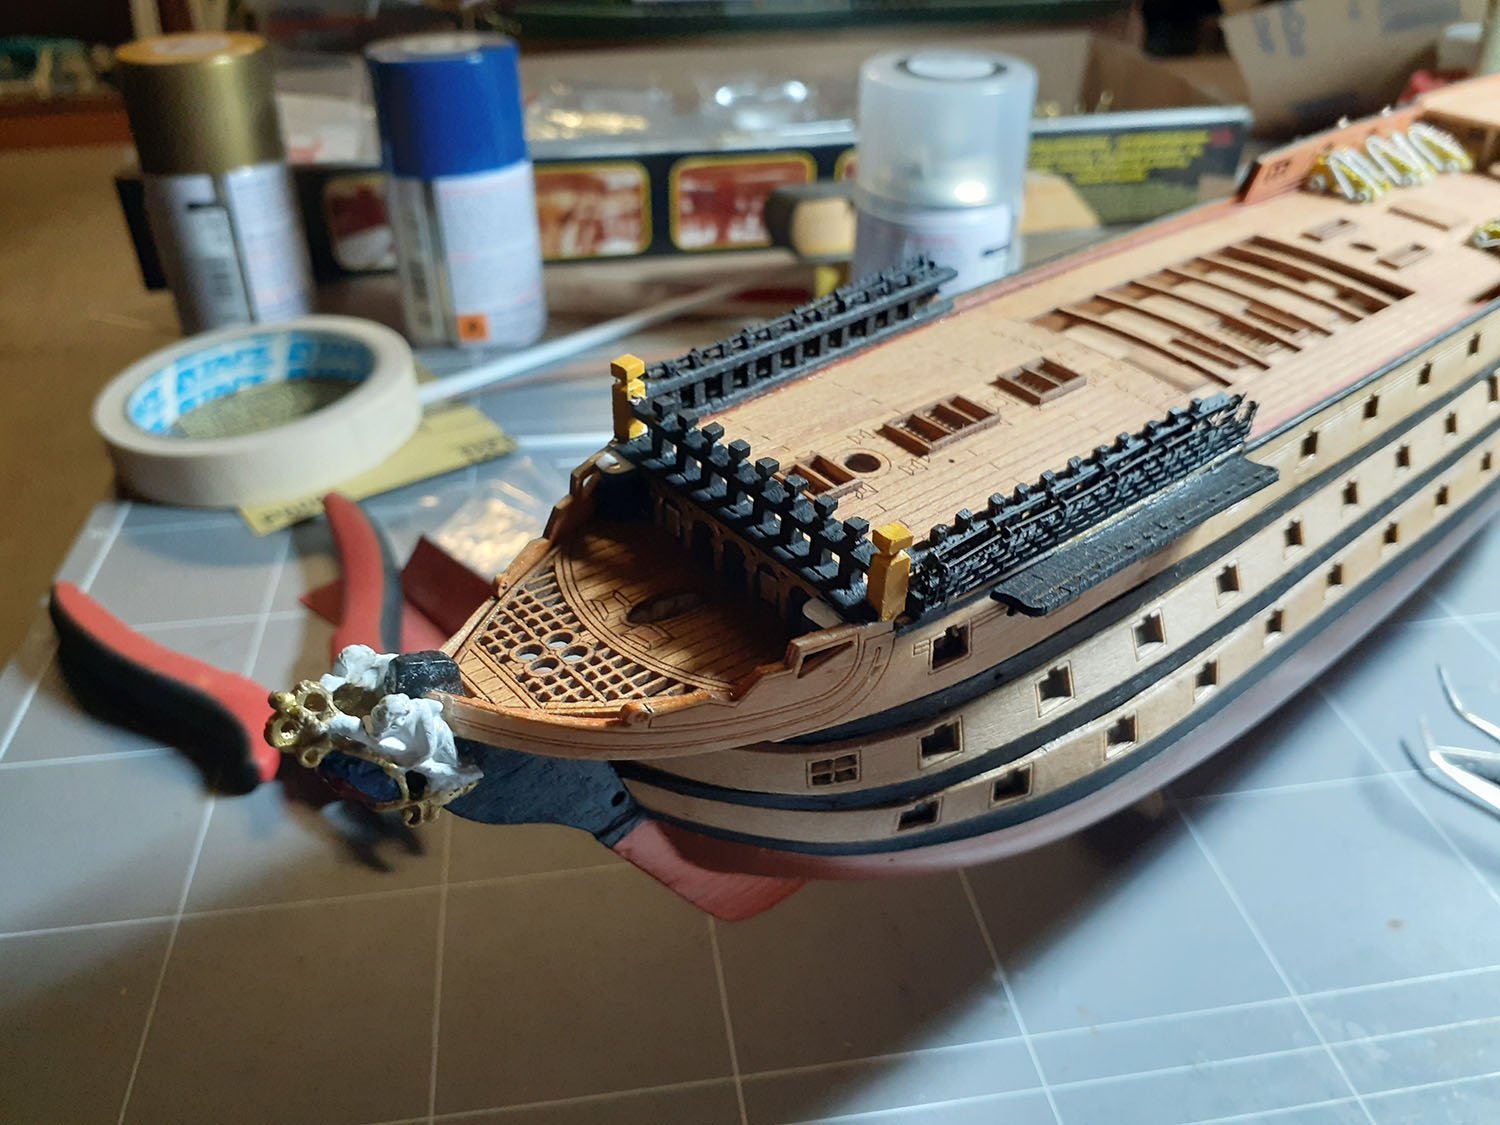
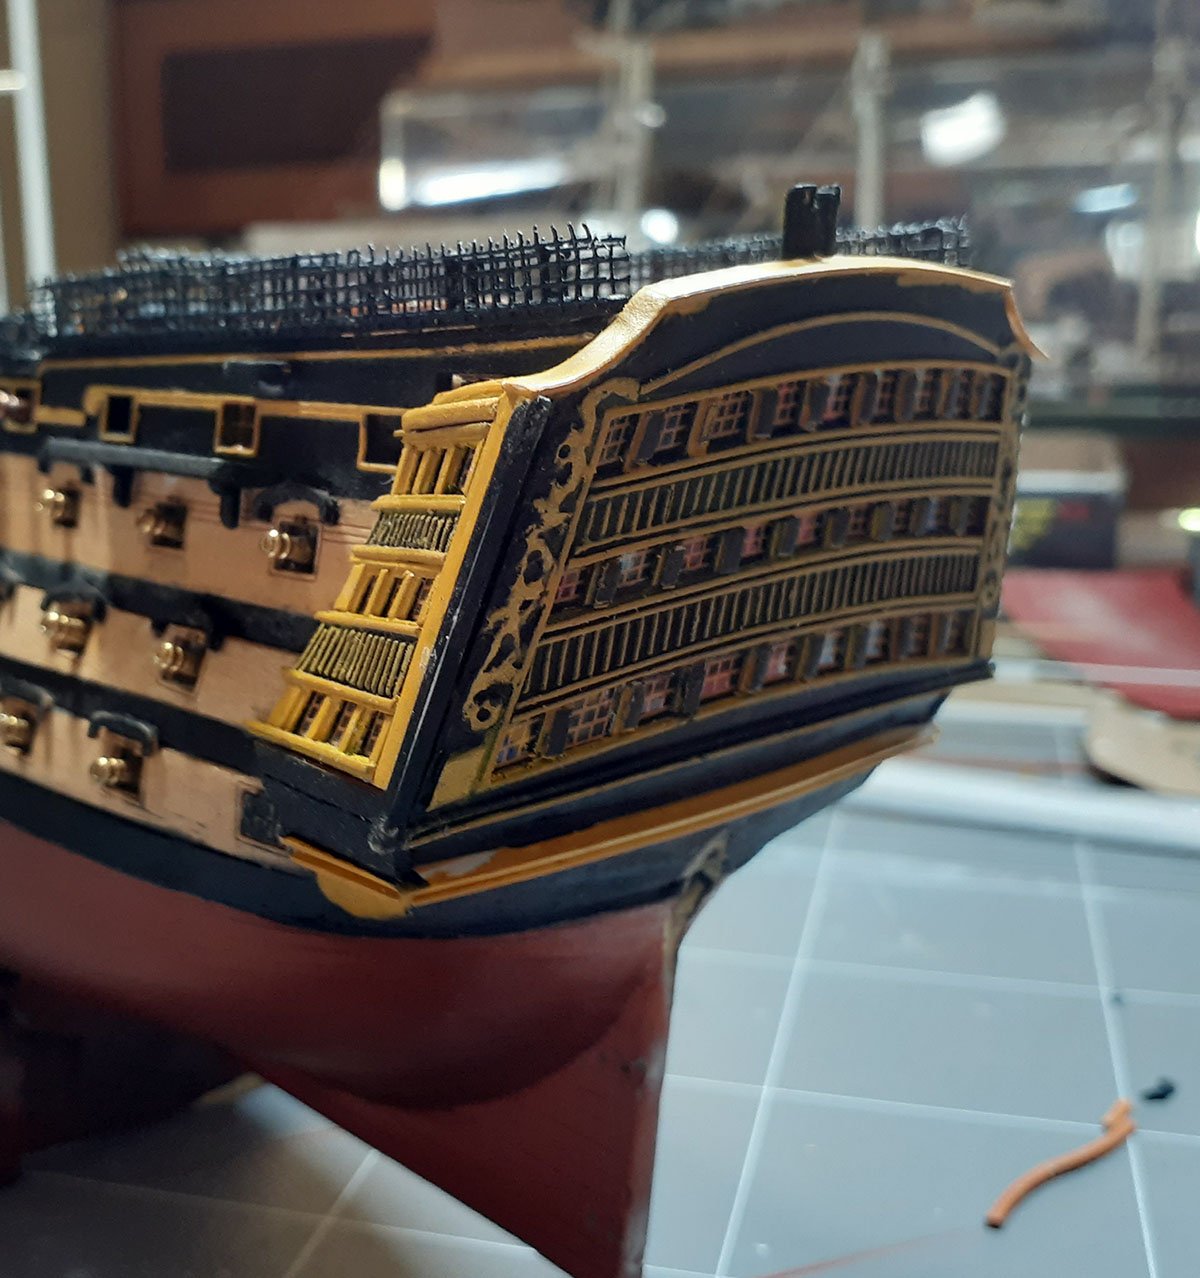
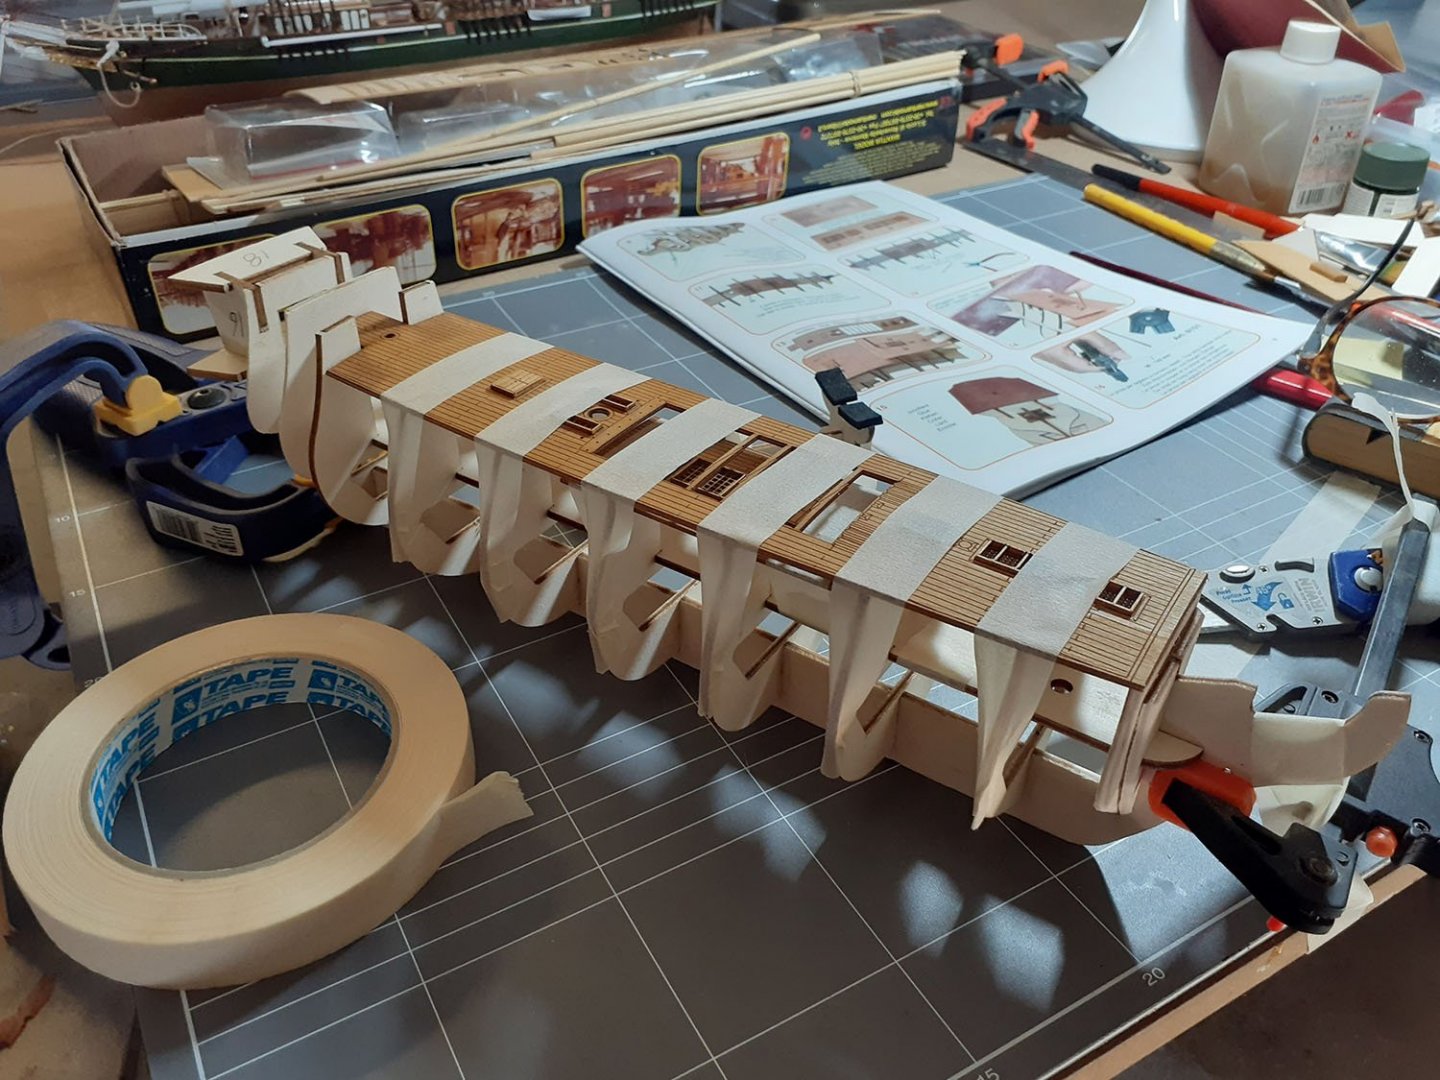
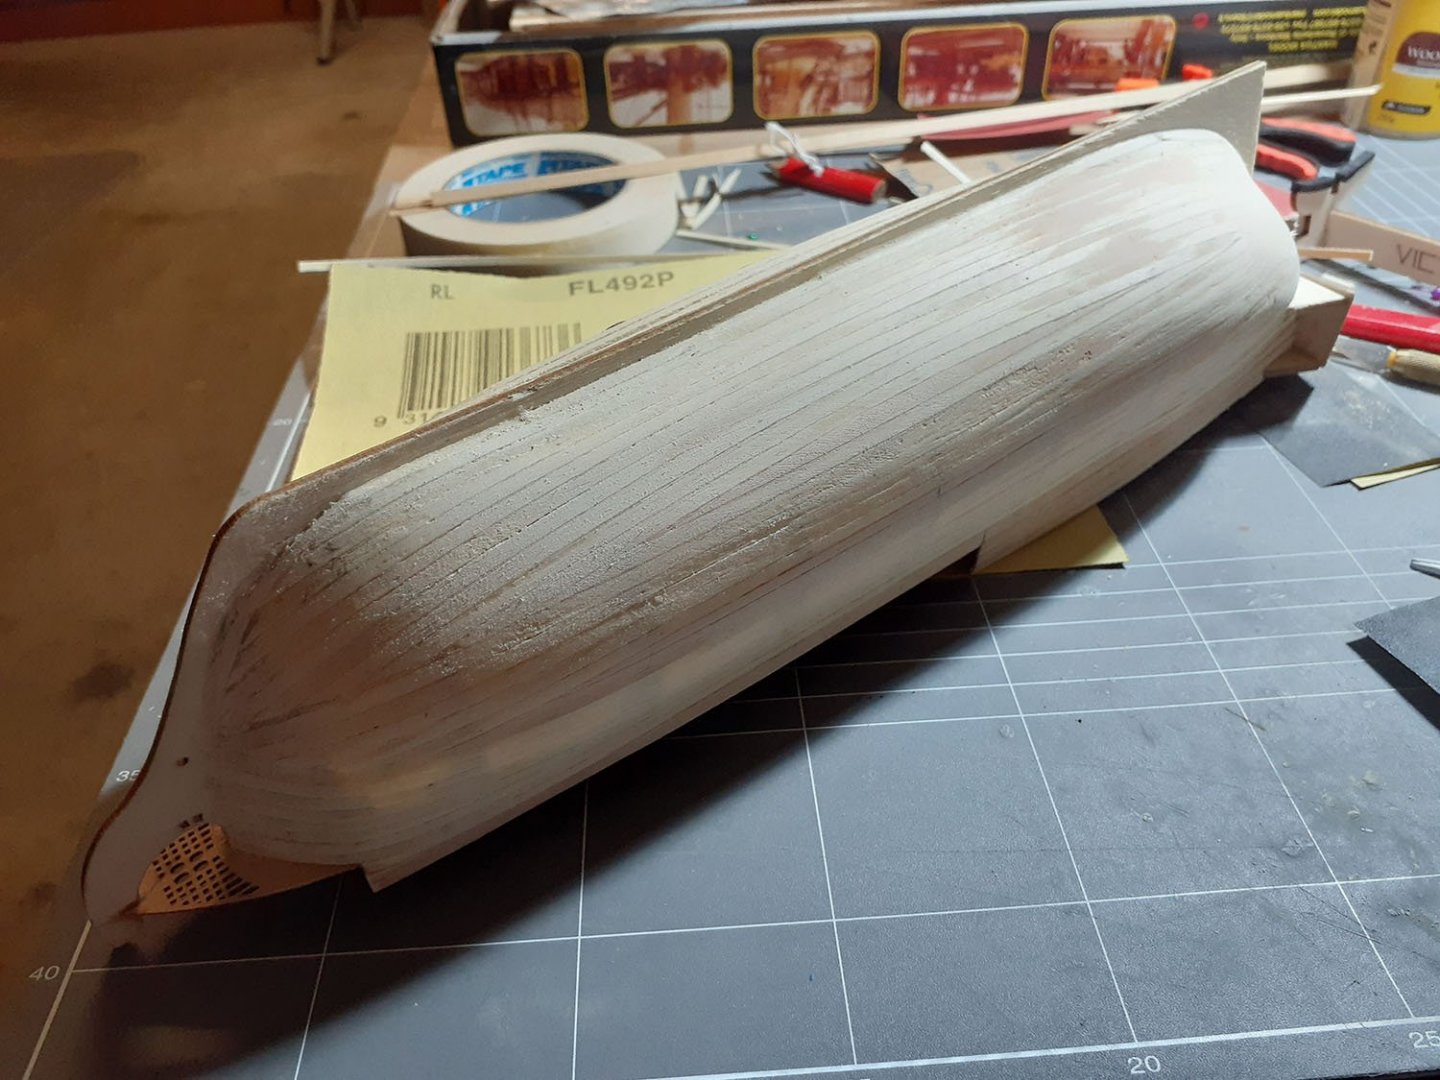
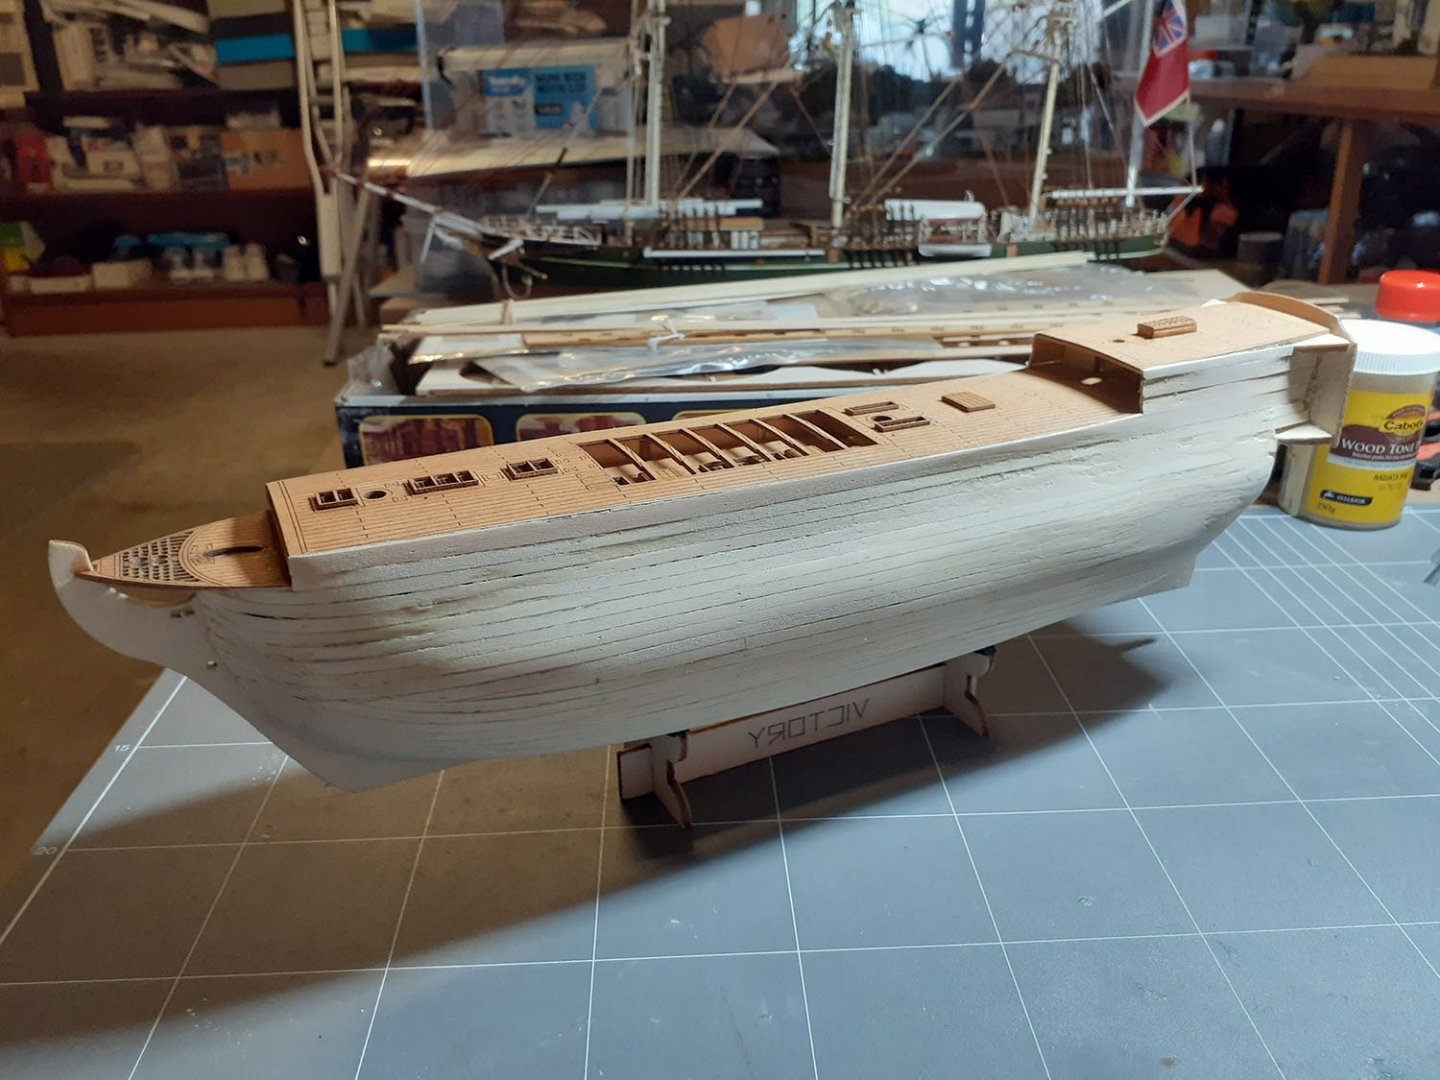
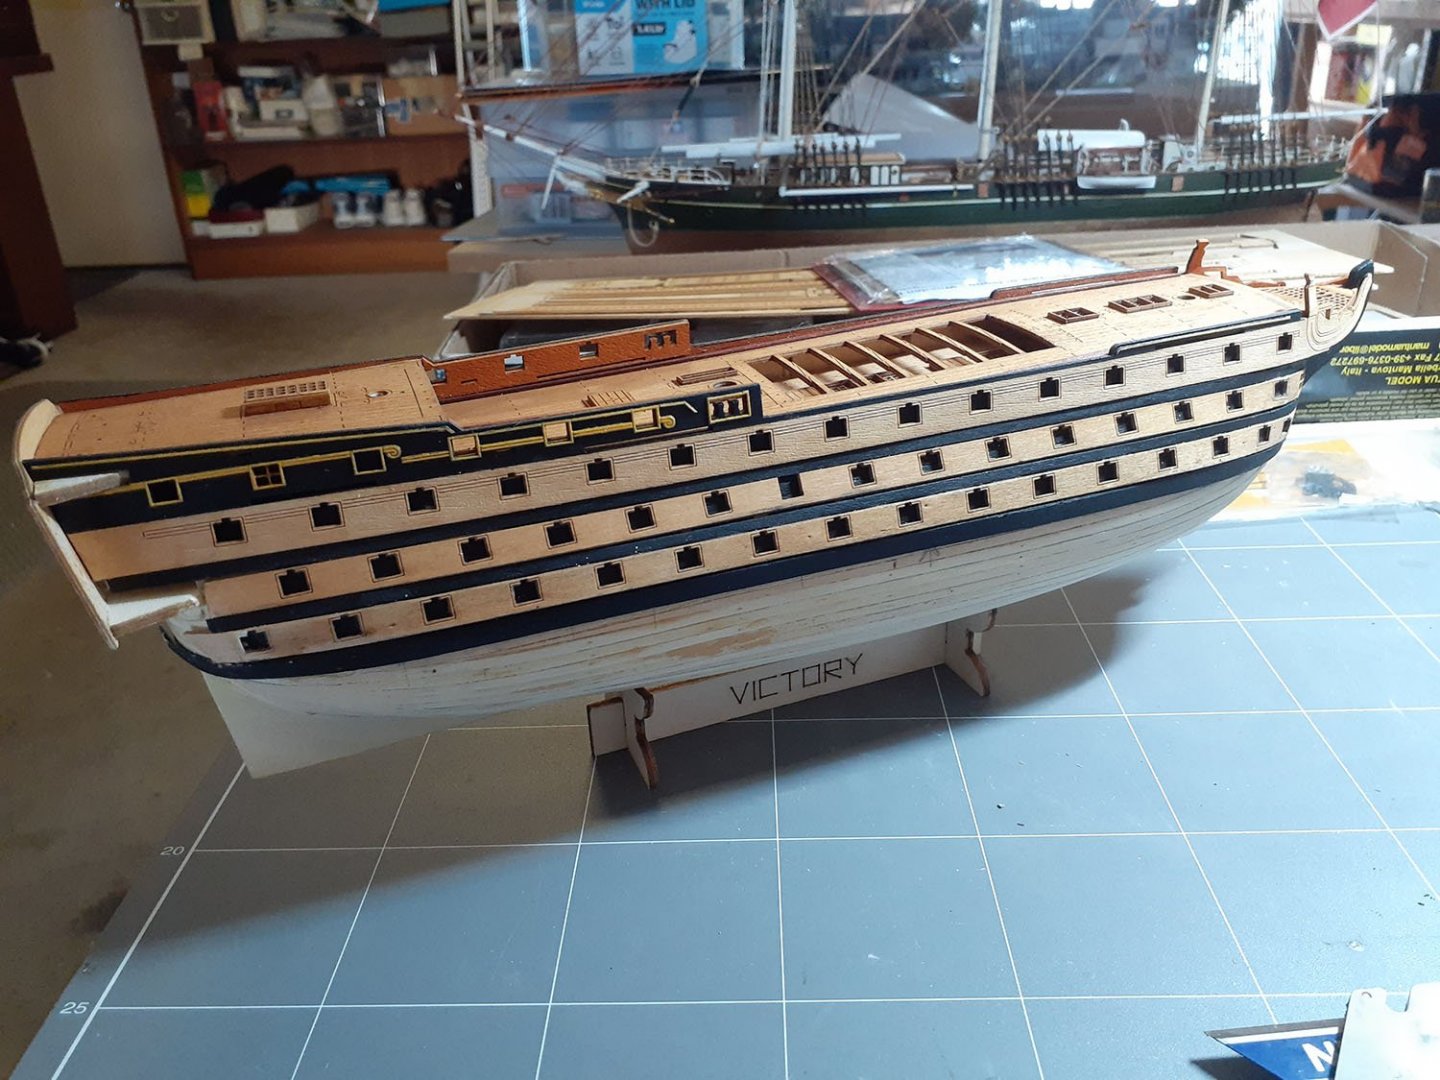
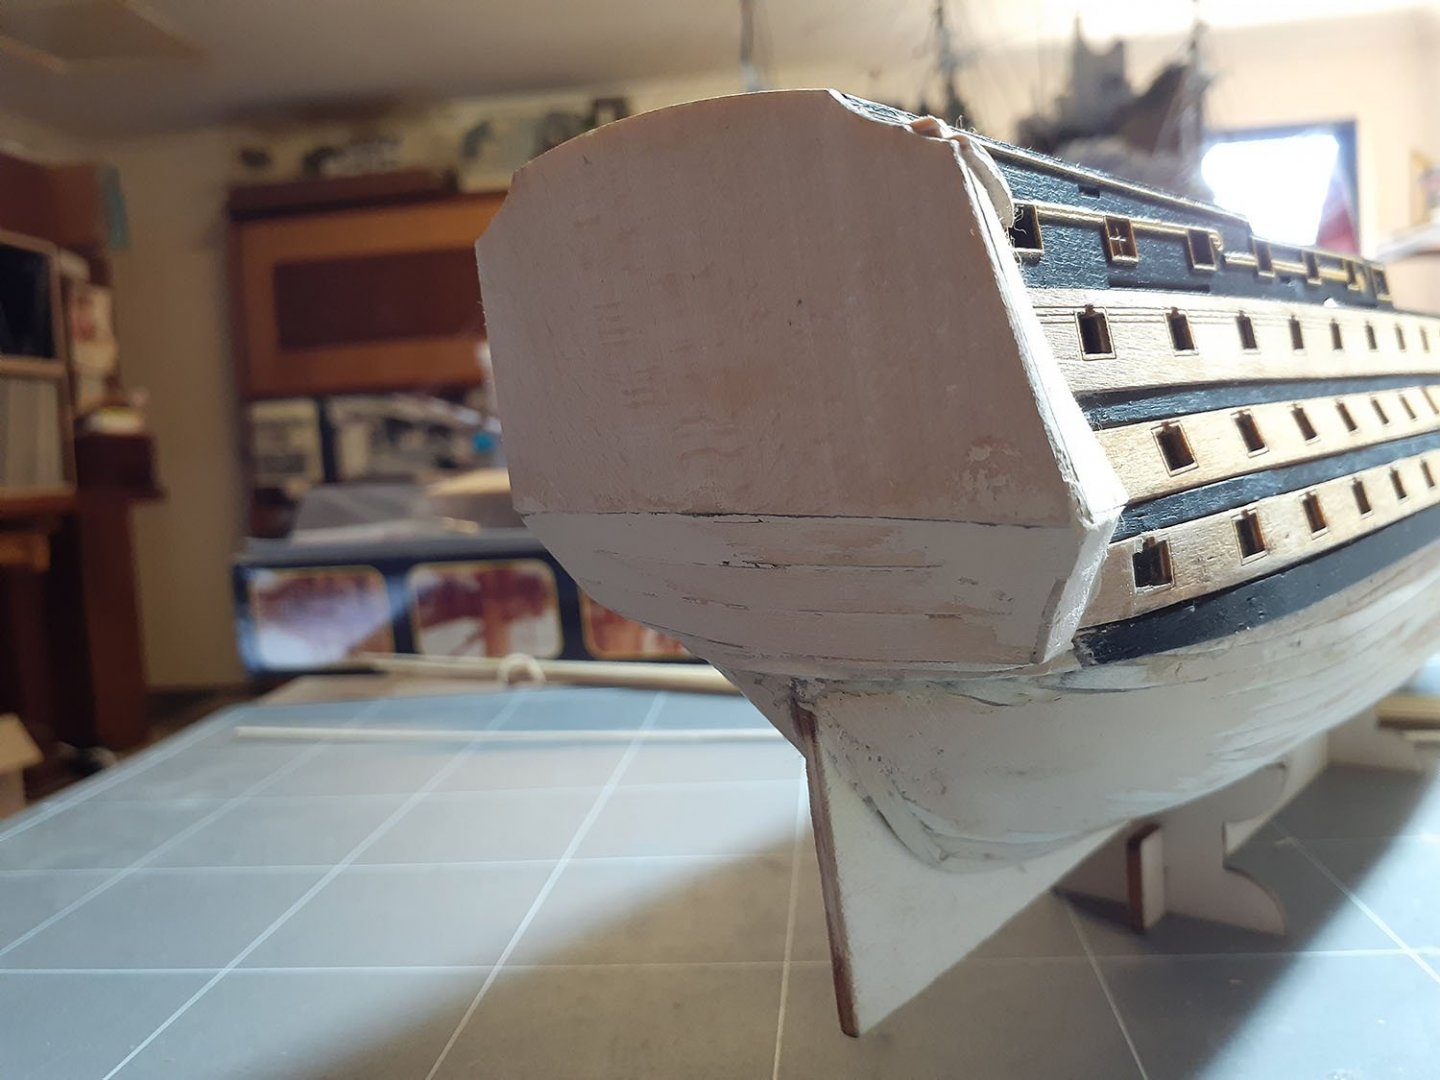
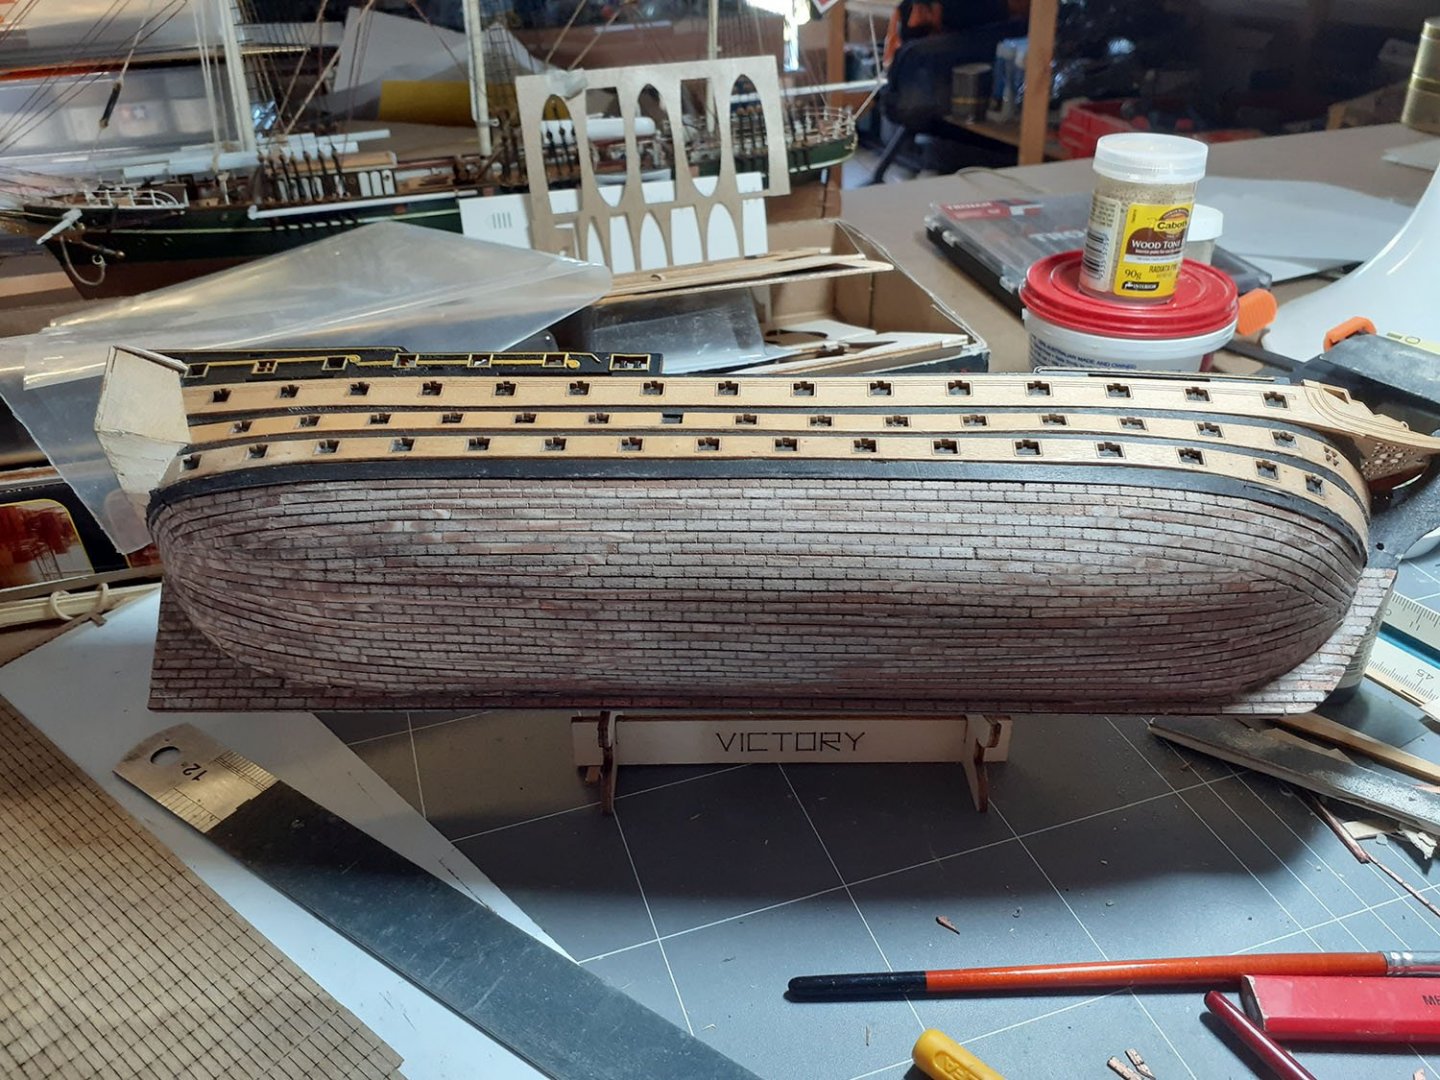
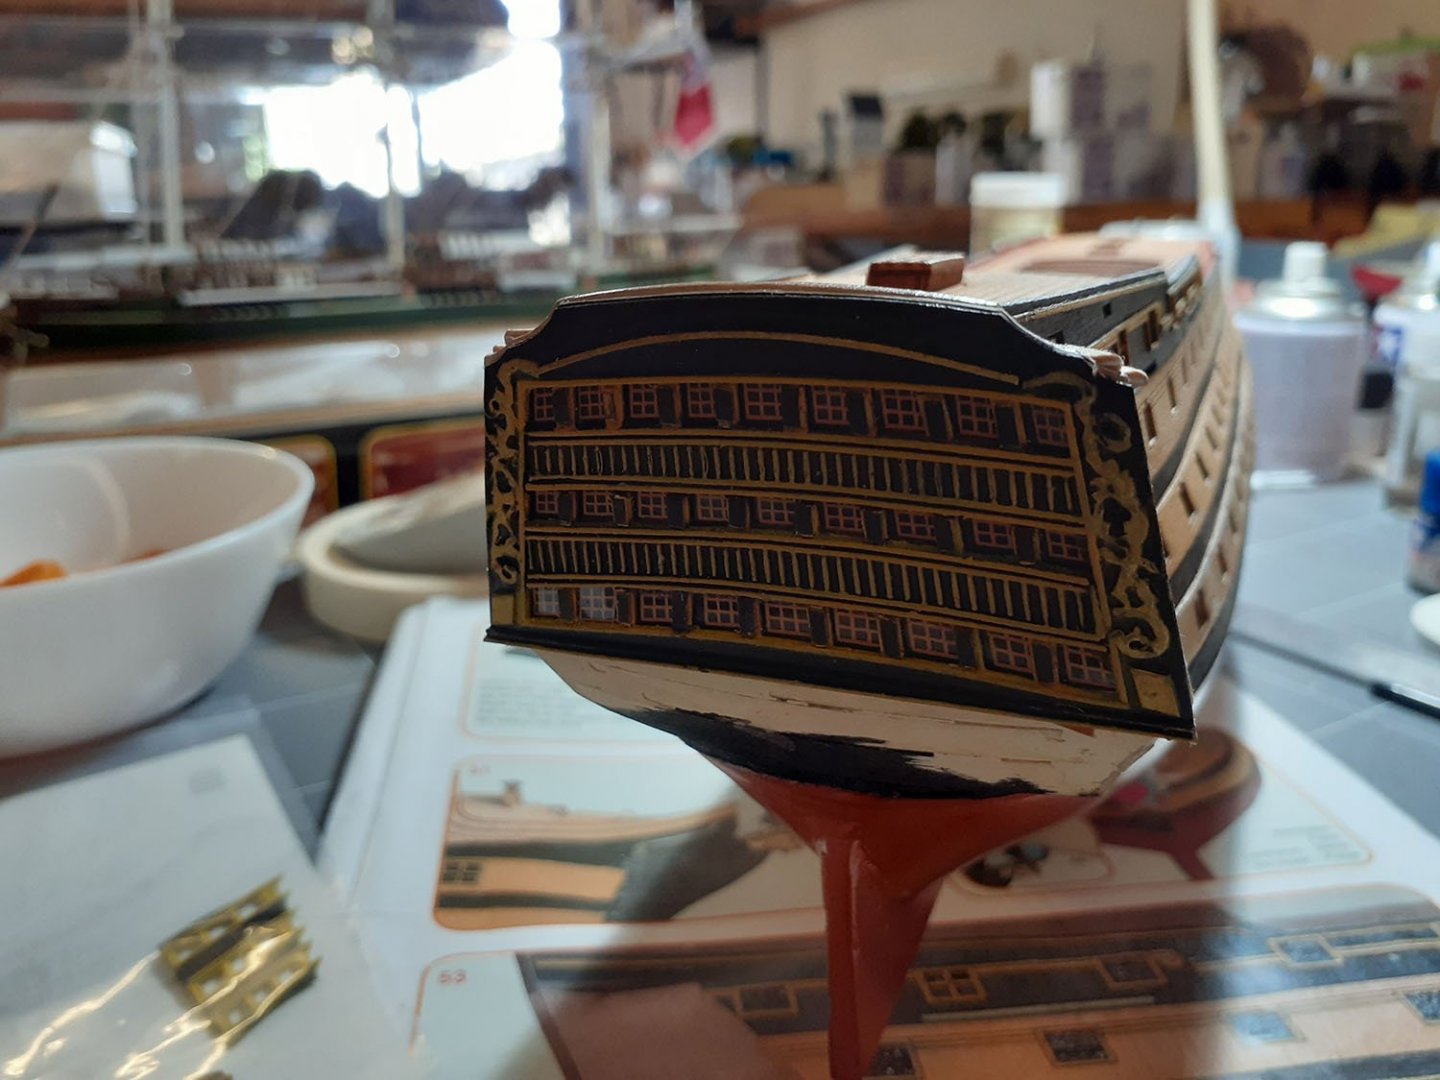
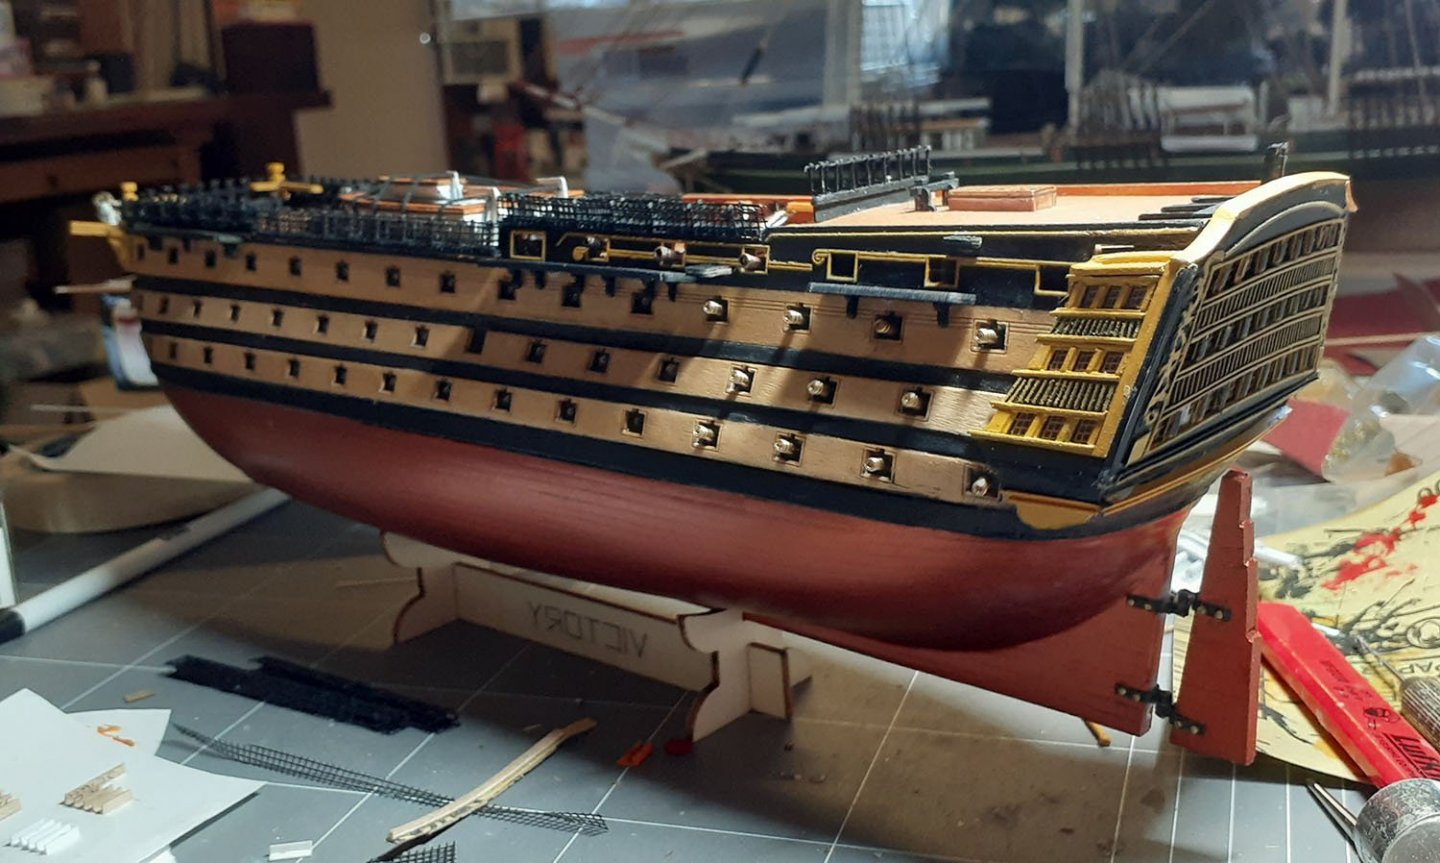
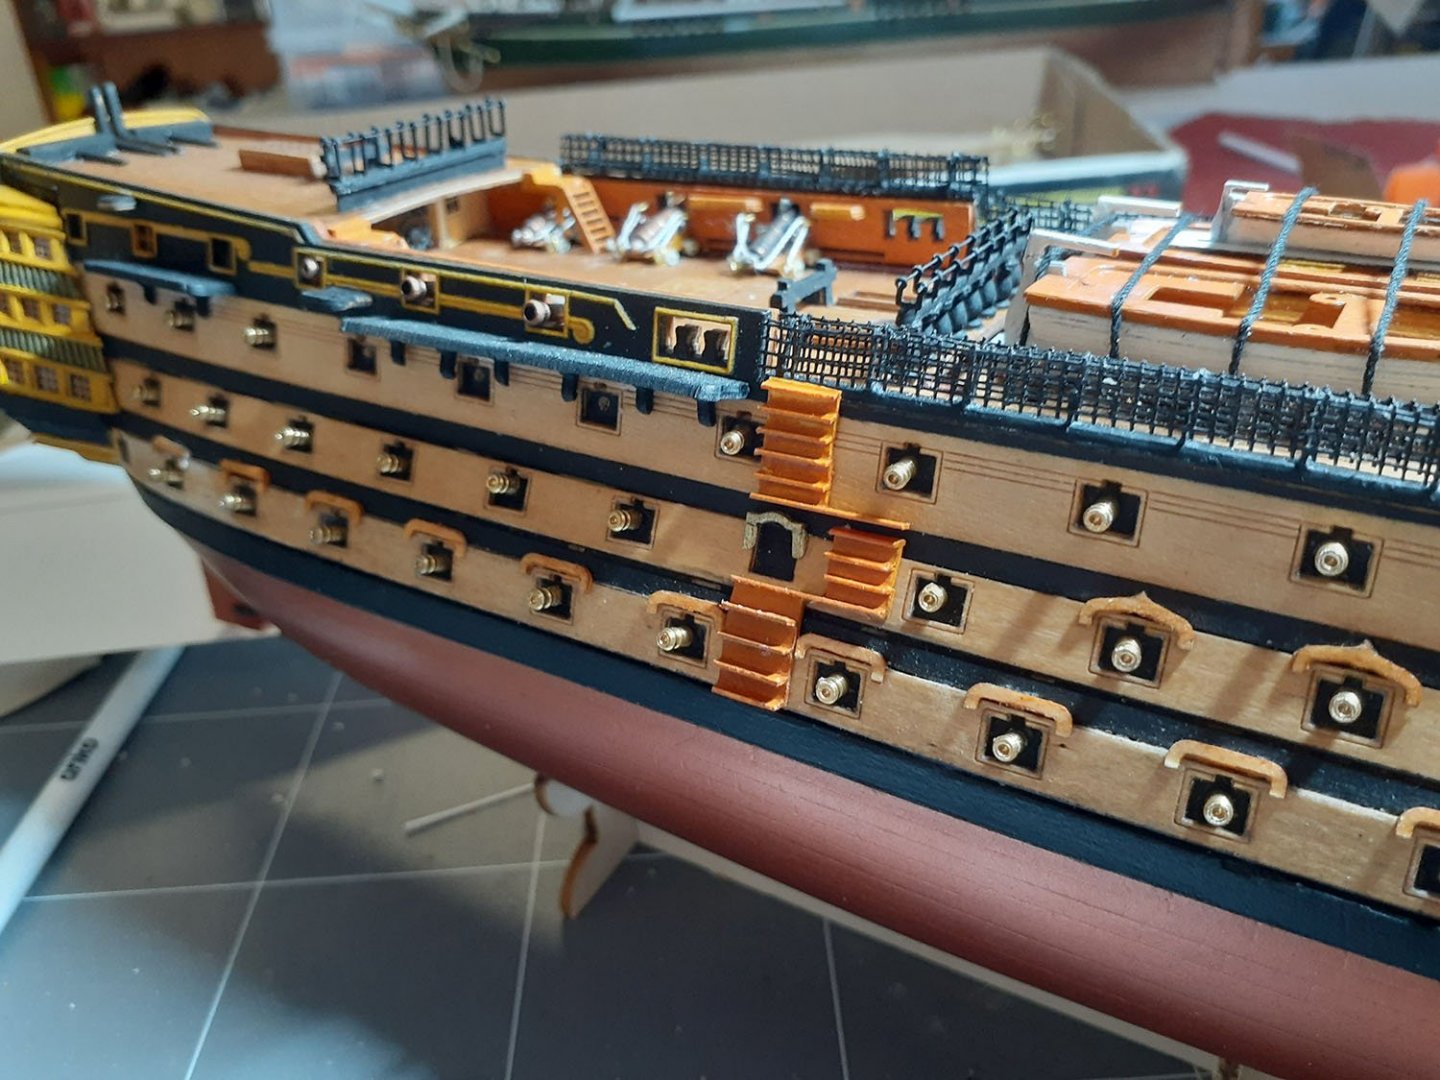
Hello Everyone, My name is Johnny D. I am originally from New Zealand but have resided in Brisbane Australia for over 10 years now. I am new to MSW but not to modelling, especially wooden ships. I have built 6 and still find them fascinating, complicated and rewarding. I recently completed the Sergal 1:125 Thermopylae. Though not perfect, was more than pleased with the result. I looked for my next project, the C.Mamoli 1:150 HMS Victory, but had not luck finding it anywhere, so went for the smaller Mantua 1:200 HMS Victory. Really didn’t know what I was getting into, but quickly became apparent that it was definitely going to be a challenge, mainly because of the size of the parts and the skill needed to build something this small. I am certainly no expert when it comes to the Victory, but realized after a bit of research that the model had a few short comings when it came to accuracy. While the laser technology is great, I was shocked to see the stern galleries were laser etched and flat without any relief (added to). I studied this and determined that trying to work with the parts provided were near impossible to get any decent result. Before I made a start, I built my own stern galleries using ‘Evergreen’ styrene extrusions. If I managed something useable I would continue with the rest of the build. It took over 3 weeks to put the stern galleries together and not super accurate, but better than a flat piece of plywood. I did not take any photos of this, probably thought it would not turn out well, however there are photos of these parts in place further down. Been at this build for almost 3 months now, will post the photos for this period and update with more as I progress. Thanks, Johnny D. I bought the optional laser-cut copper plates. Difficult to work with and looked like brick work rather than plates. Sanded them down to an even finish and then sprayed the hull copper. Looked far better and a bit more convincing. This was my attempt at building the stern galleries. Though clearly still requires some work, it can up better than expected. Have since replaced the hull steps as the ones shown are way out of scale.
-
Hi LS, I have worked with styrene for many years, mainly on architectural models. It has strengths and limitations but is a good alternative to use as a replacement for small wooden parts, which this kit certainly has. I elected to re-do the stern sections before I started the model, simply because for me, if I failed to achieve a result I was happy with, then I would not proceed with the kit knowing to stern would let it down in the end. I did not take any photos of the construction of the stern, however it is fairly straight forward (ish). I will walk you through it and if it is something you might undertake can produce a drawing outlining the build sequence, extrusion sizes etc. I created the stern by:- Scanning the 3 sections as supplied with the kit as a JPG file. Importing the scanned image into CorelDraw at 1:1 Tracing line work following the laser etched line work. All lines including window mullions – but not the rows of small columns. (Only need to do one side panel as it is copied and mirrored). Print out all 3 panels. I chose 0.4mm thick white styrene sheet as a base. Trim and spray the printed sheet using 3M permanent spray adhesive. (Apply the printed sheet on what will be the reverse side of the panels as the ‘seen’ side will be the styrene sheet side). Once dried (couple of minutes) carefully cut out each panel and cut out the entire area where the windows and columns are, this will leave the perimeter with a big hole in the middle. Repeat this for each side panel. Repeat this but only producing the shapes from the underside of the top mullion to the top of the bottom window mullion just the depth of where the columns will go. You need to stick to the vertical dimensions so it doesn’t become too big and simply won’t be the same proportions as the laser sheet. You will end up with 2 arched pieces per panel, 2 large for the rear and 2 x 2 smaller pieces for the side panels. This is where the fun starts, Now you need to remove the printed paper backing because it is not strong enough when it will eventually be fixed to the model. I feels that it would be but it is important that it is removed. To do this apply a liberal amount of plastic solvent adhesive to the paper backing, give it a minute to soak in, then just peel away the paper. The columns. I real challenge on how on earth to achieve something similar without having to place the columns individually. Solution – HO scale fences. Found some HO fences where the verticals where under 1.0mm wide. I simply cut the top rail off the fences which allowed me to bend it into to an inverted fan shape. I then overlaid this on to the arched pieces which I had glued that down so it wouldn’t move, lined up the fence over the top of the arched styrene, following the curve, gluing only the fence bottom rail down with super glue. The fence is just sitting in place over the arched styrene but held in place, both pieces were glued on to a piece of A4 paper. Then very sparingly applied styrene solvent to cement the fence to the arched styrene shape. This was trial and error as the solvent tended to melt the fence because the posts were very small. Very, very small amounts of solvent. I left it weld together for 24hours, going back and making sure all the fence posts were firmly bonded to the arched styrene shape. Once dried, I trimmed the excess fence posts to follow the arched shape. Repeat 6 times. I selected very small styrene shapes to form the top and bottom mullions on to the top and bottom of the arched shaped pieces. Making sure they are not too thick vertically, make up the mullions first (3 pieces T & and once dried glue in place. Sorry LS, but will need to call it a night, There’s a few more steps which I will post tomorrow. Shoot through any questions – no worries. Seriously considering the Heller 1:100 Victory as my next project. Thanks, Johnny D.
-
Hi LS, Yeah it’s good that we are nearly at the same place with our builds. Don't really think my one is up to the same level of workmanship as yours, but happy you think it may be of some use and that we can nut things out together. One of the biggest disappointments with this kit was the stern detail that was provided. The laser cut and marked parts in my opinion are near impossible to get to a good level of detail. I am a big fan of styrene extrusions like Evergreen, so set too and built my own stern sections. The result was okay and certainly had the 3D effect the laser version did not. It still needs to be tidied up a bit, photos tend to highlight the flaws in the paintwork. I really enjoy the rigging stage and looking forward to seeing yours evolve over the weeks to come. I will try and get a build log up and running soon, I have quite a few photos to post, but of course its finding to time. Looking forward to your progress, Thanks, Johnny D.

-
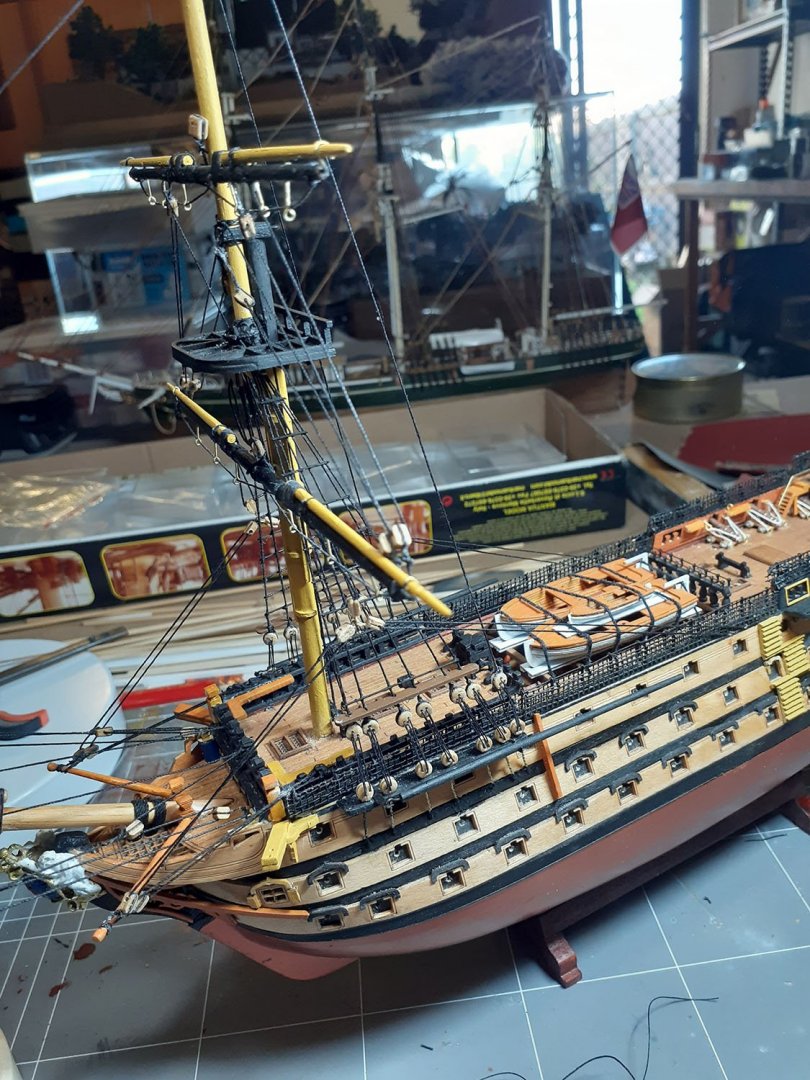
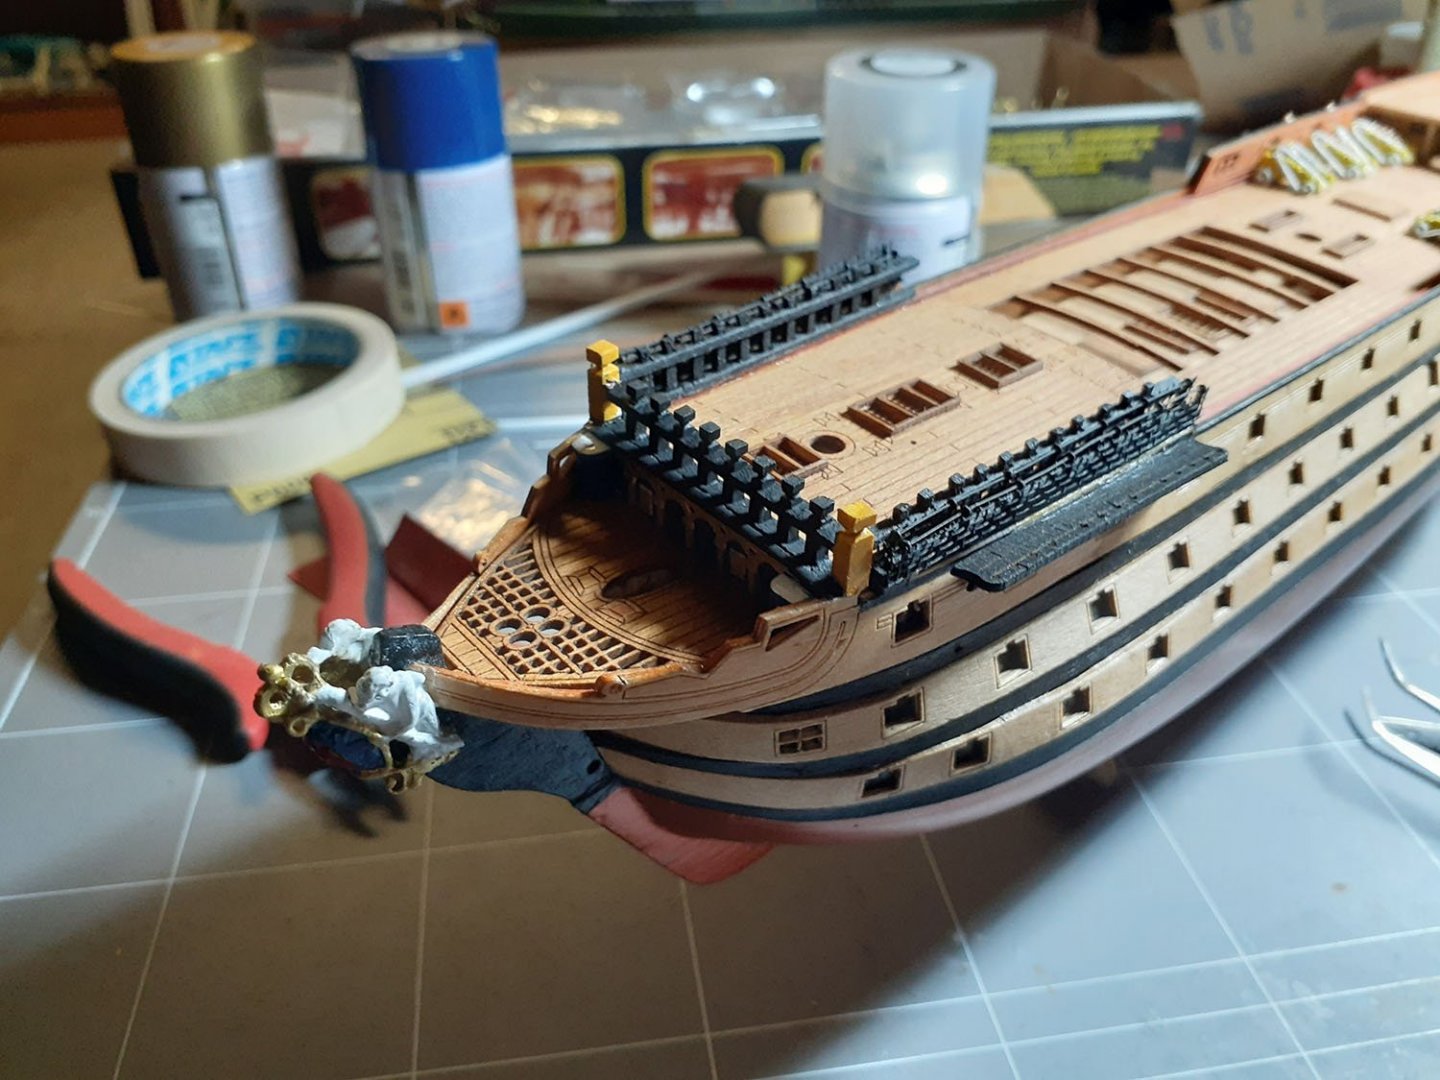
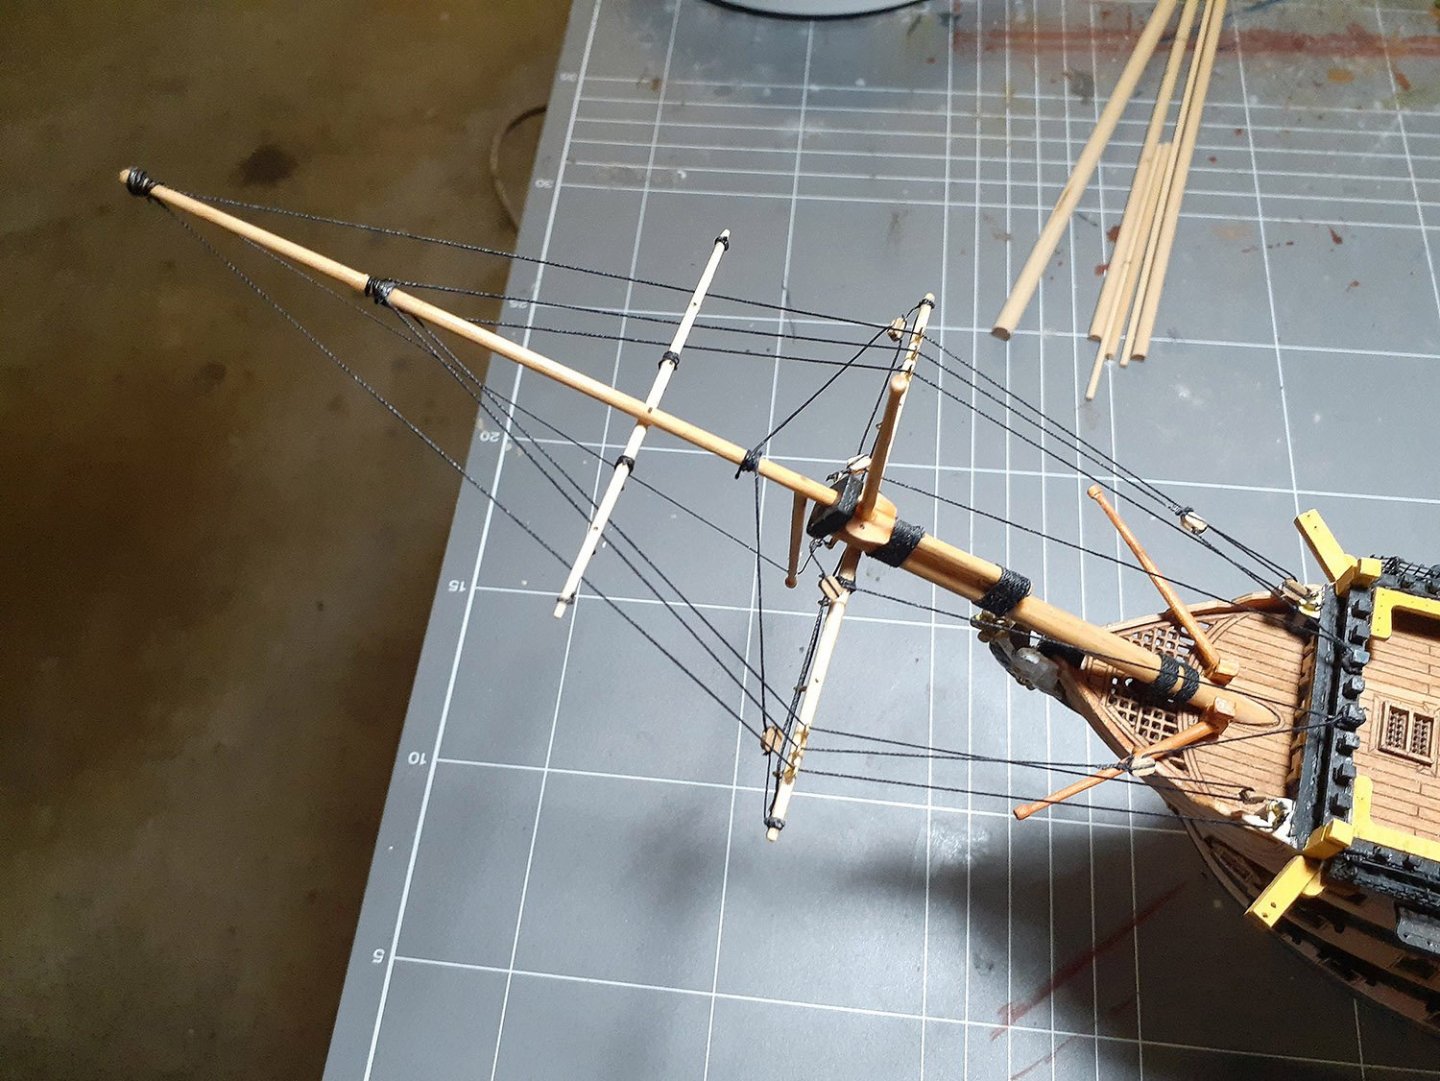
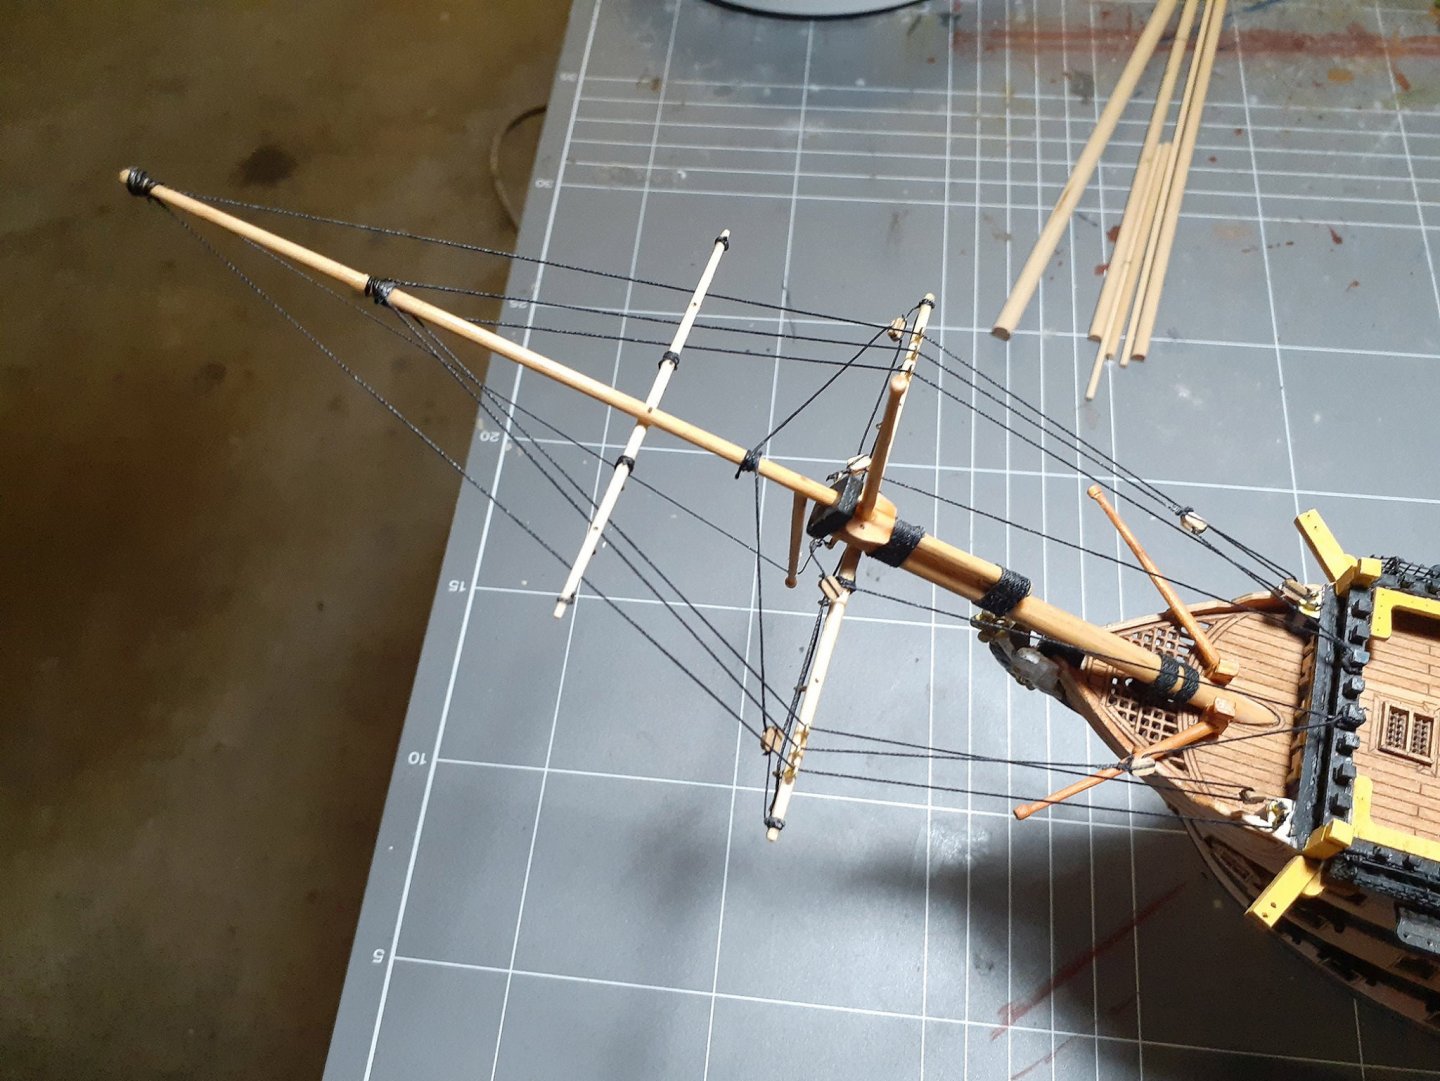
Hi LS, Thought I should drop in a quick pic of where I am at with the bow sprit. I note the colours vary from your build, but am following the kit instructions. Thanks, Johnny D.
-
Hi LS, You appear to have the next stages well in hand. I am reluctantly having to follow the steps in the instructions which are hard to make sense of. I have started to rig the bow sprint which was a challenge in itself, but has turned out okay. Getting a consistent tension on the lines is difficult and there is a fine balance required. This is only compounded with the rigging on the main part of the ship. As there is no plastic components, the wood offers far more strength in achieving this. Because there is a lot of handling of the hull, I need to be careful I do not damage parts I have already fixed, therefore have not fitted the gun port covers, the one thing I did replace was the horrible display stand with something far more sturdy, as the one supplied was far too light and not all that strong. The masts/yardarms you are working on is something I will be following very closely, as your work to date is outstanding and when complete, it will be a work of art. Thanks, Johnny D.
-
Hi LS, I am considering posting some progress pics of the 1:200 Victory. I will let you know. It will cover weekly progress, so not to inundate with too many photos. You have done a few very useful stages that are not covered in the less than detailed instructions and found that I have made some mistakes along the way. I find myself spending more time trying figure out the next step rather than time building. I am new to MSW, but have quite few wooden ship projects completed spanning many years. Still learning, one never stops and following your build gives me the incentive to carry on with it. Thanks, Johnny D.
-
Hi Lazy Saint, A quick word concerning your build - fanstastic. I am in the throws of building the same kit and following your blog with great interest. This kit is by know means easy and your craftsmanship and approach is an inspiration to say the least. Great stuff, Johnny D.