mcb
-
Posts
102 -
Joined
-
Last visited
Content Type
Profiles
Forums
Gallery
Events
Everything posted by mcb
-
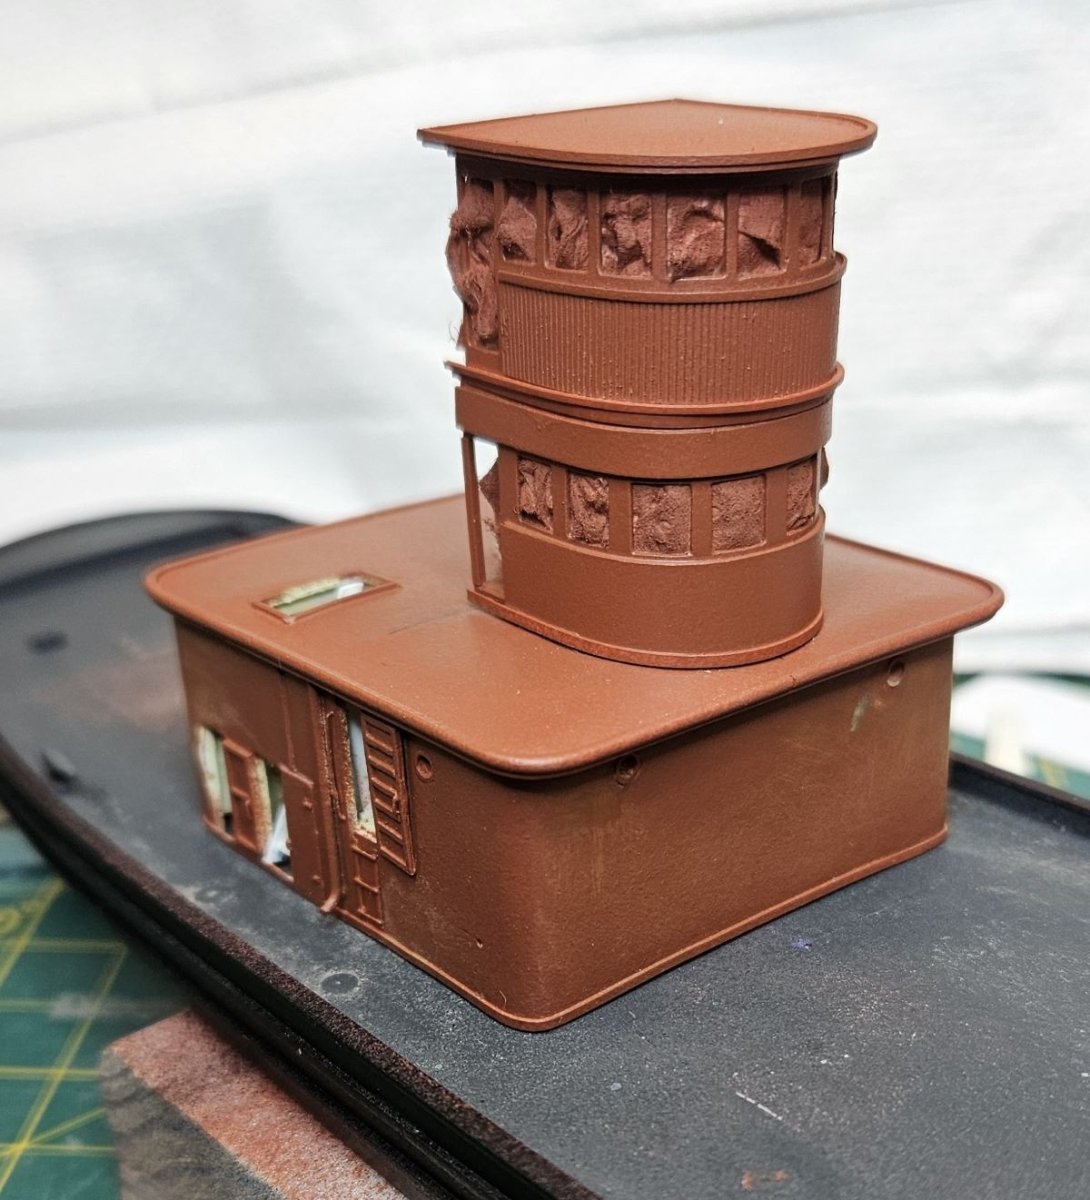
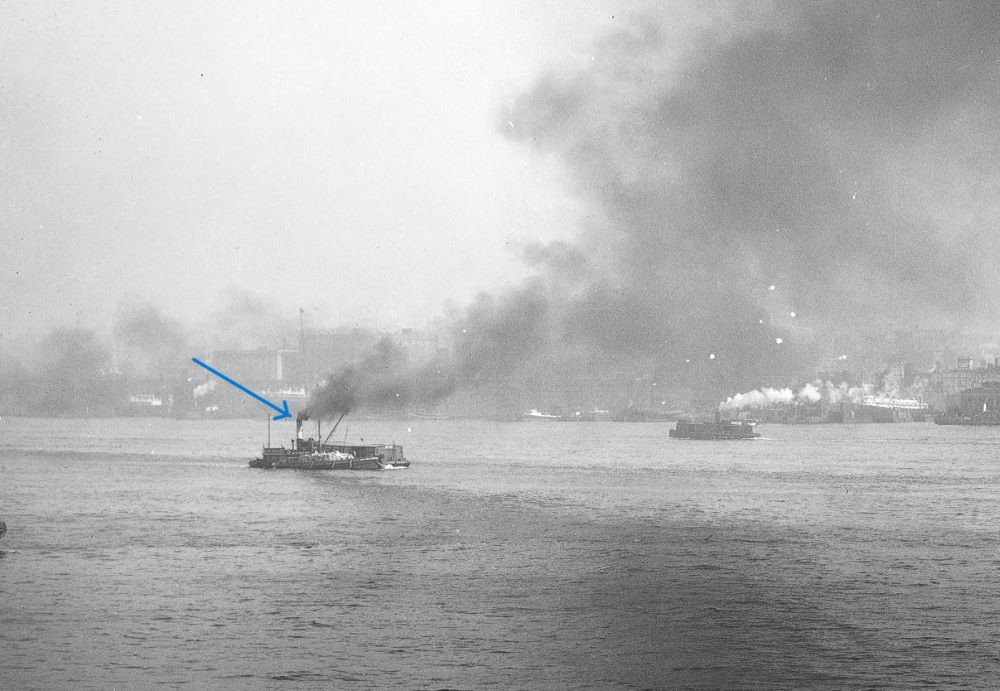
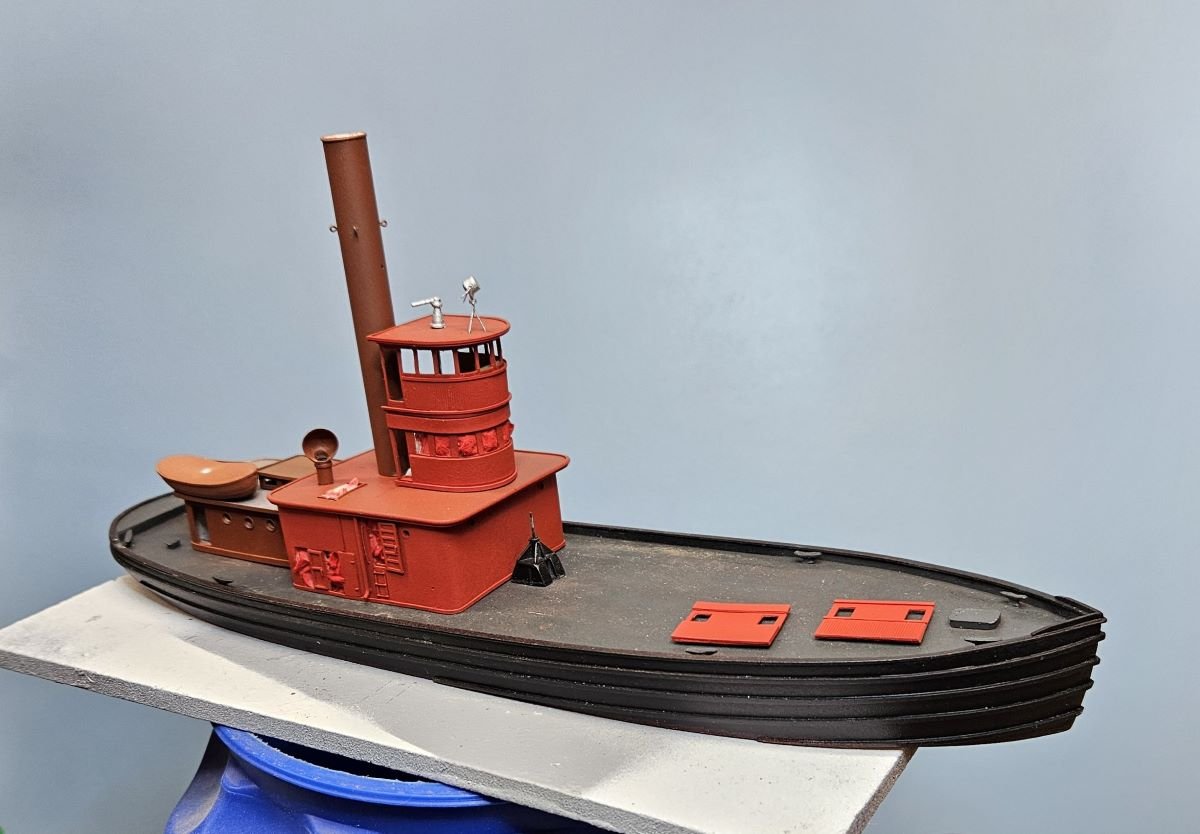
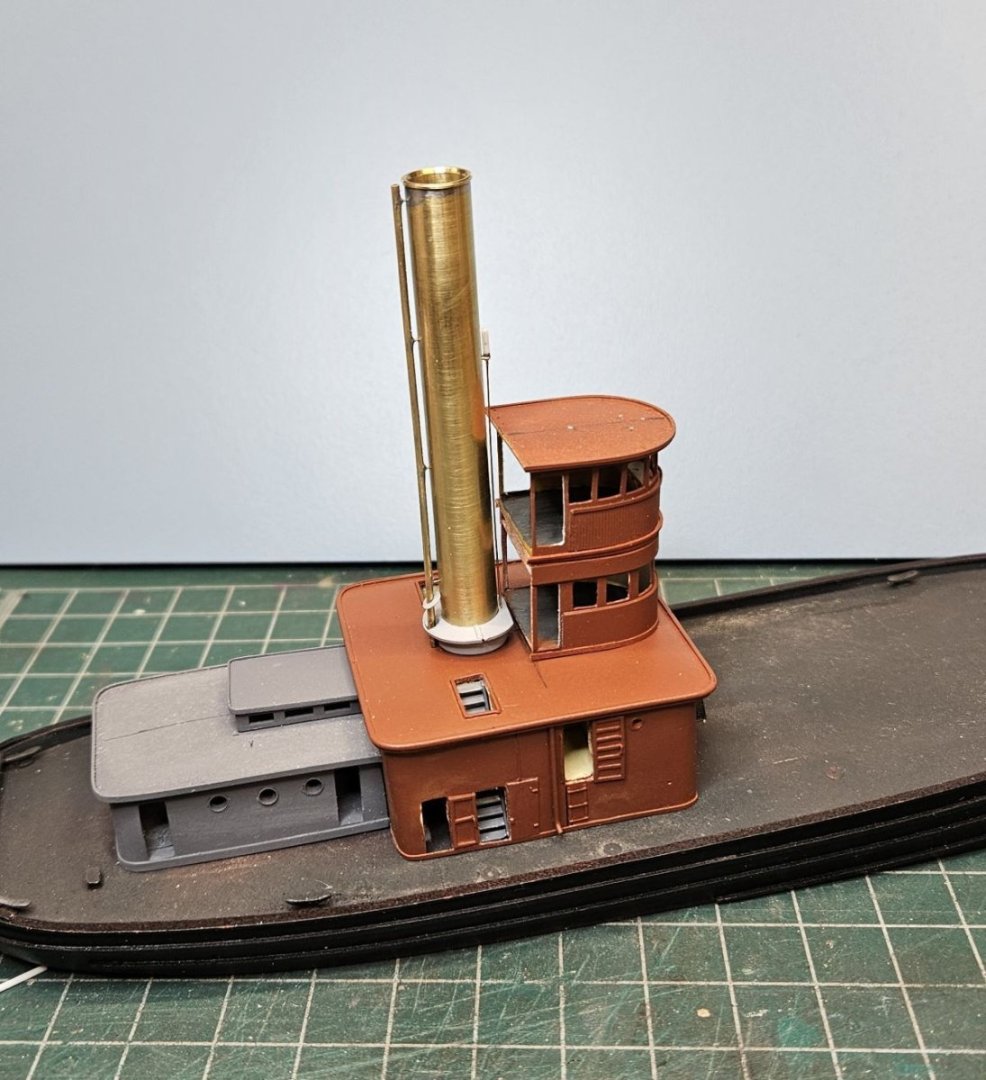
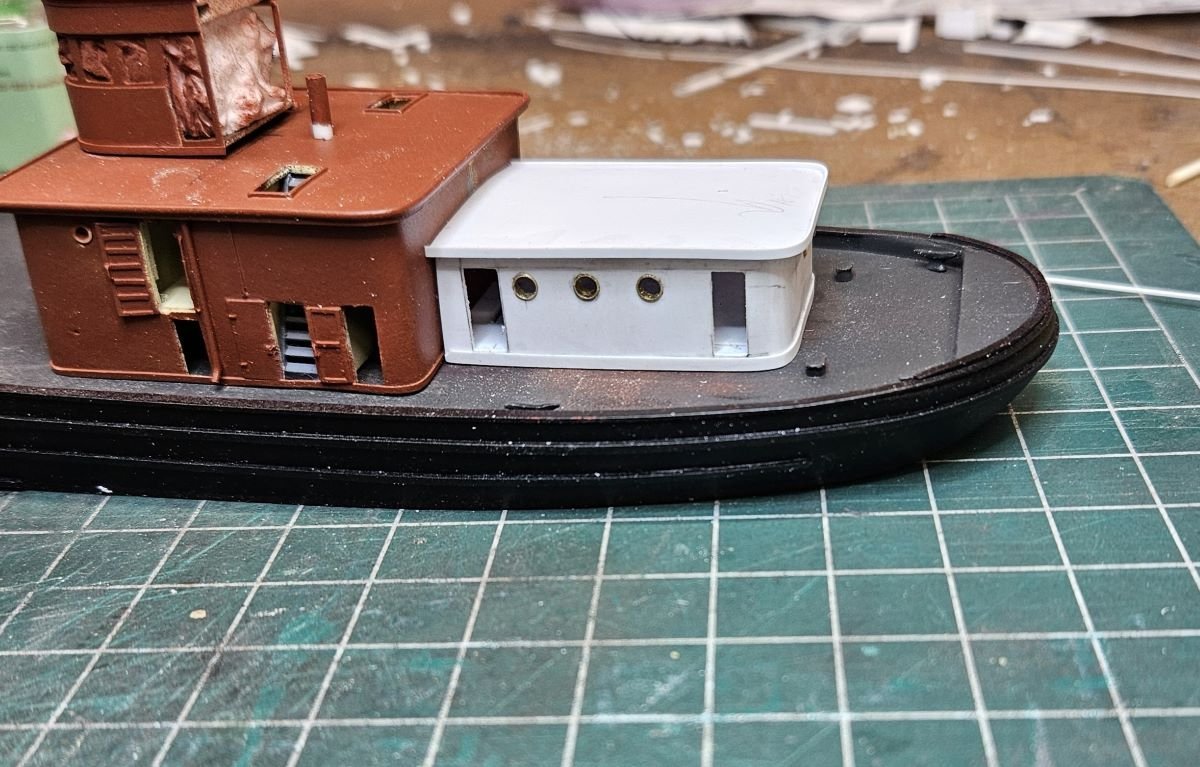
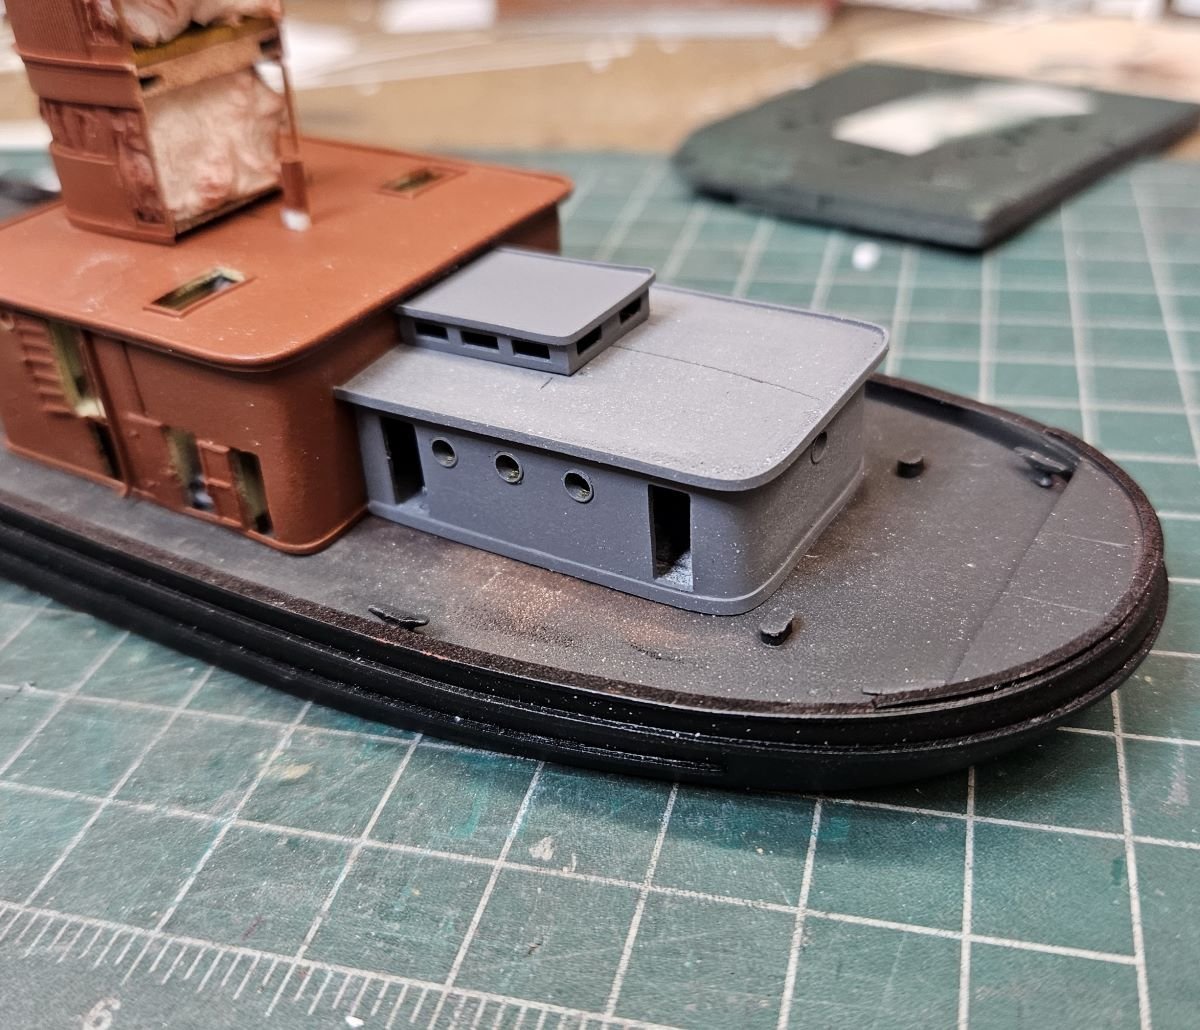
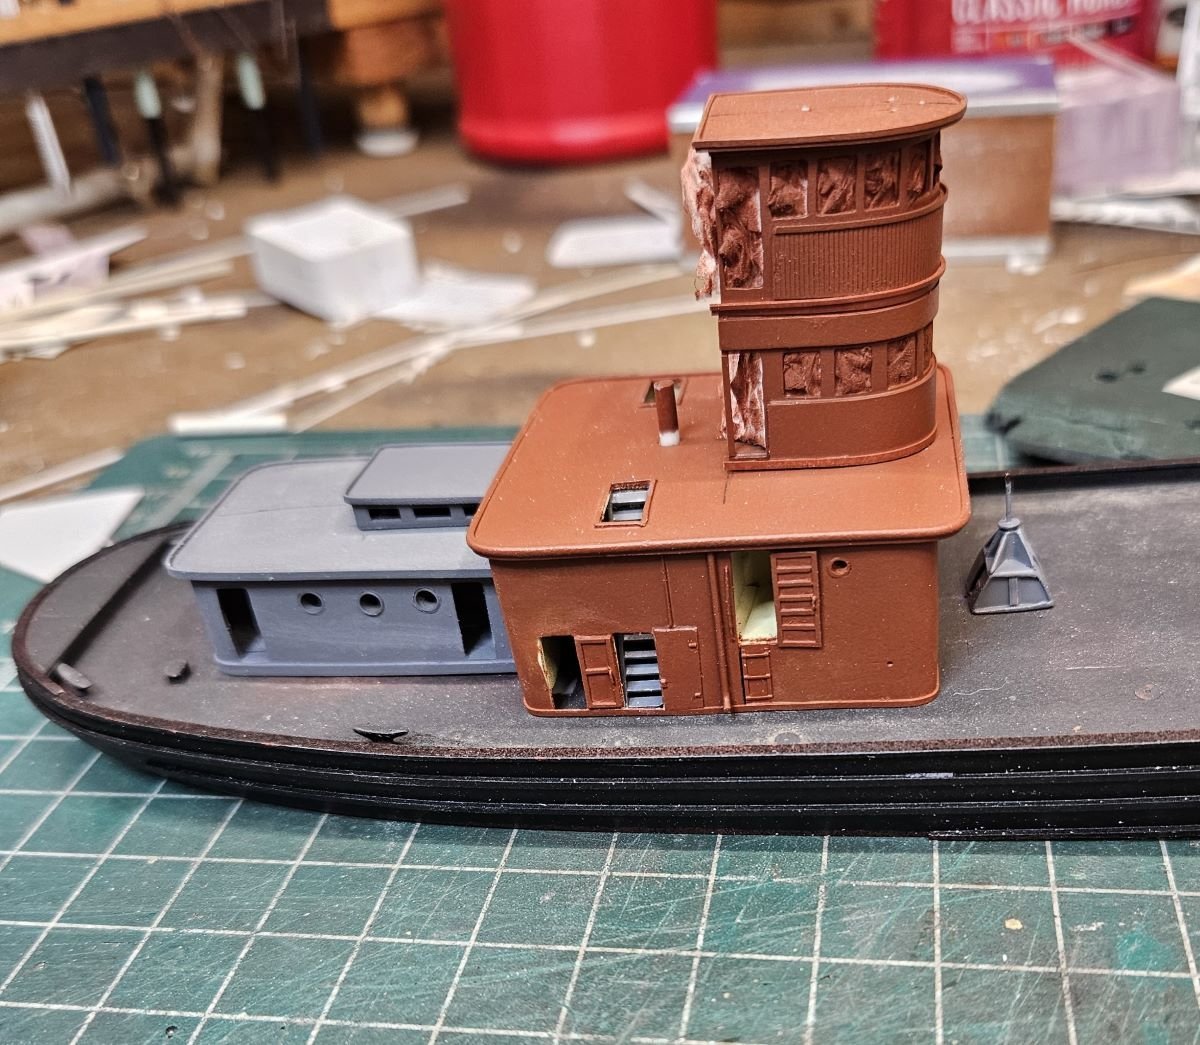
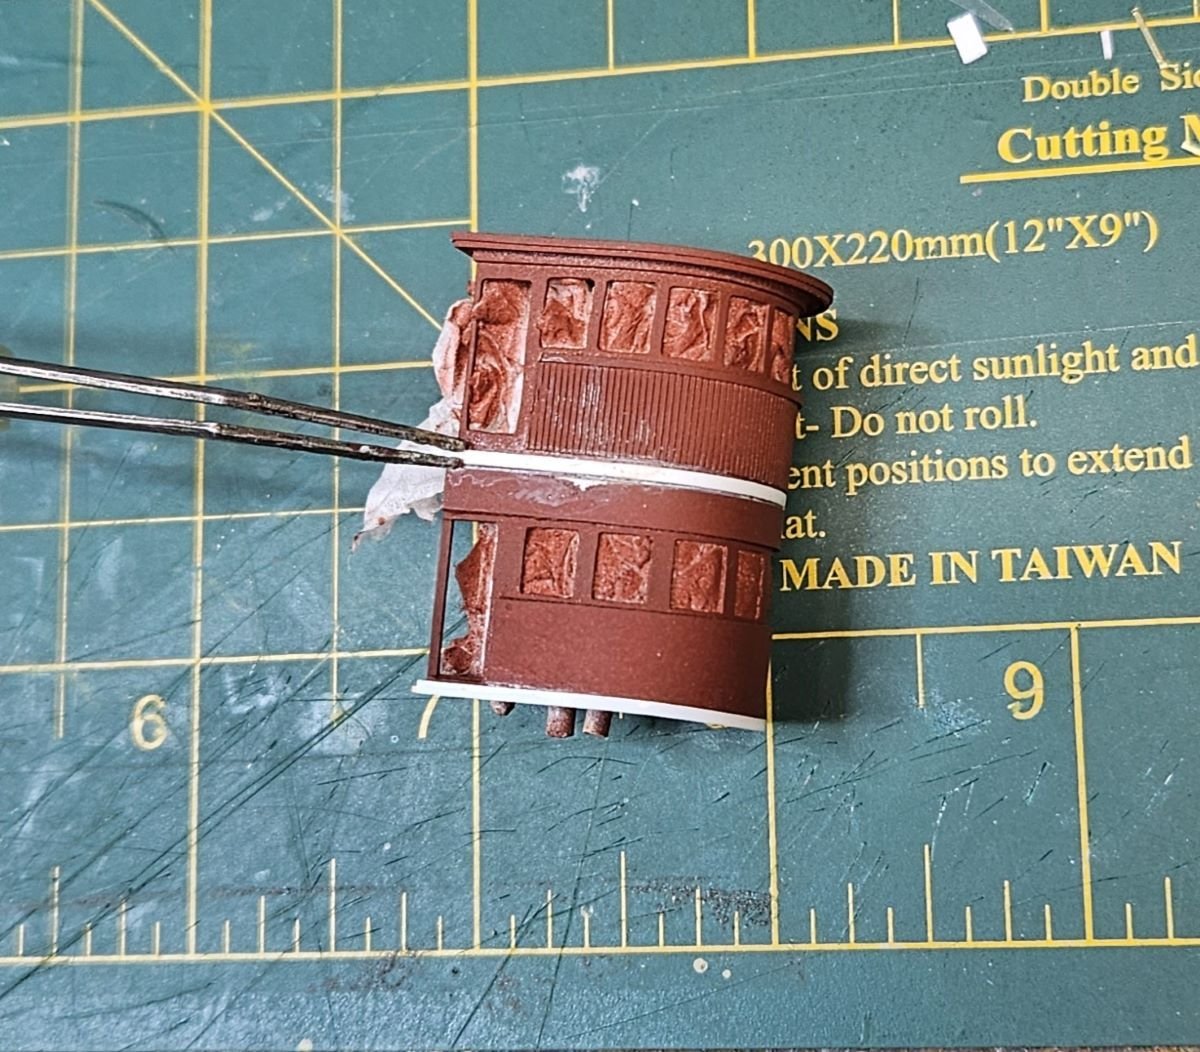
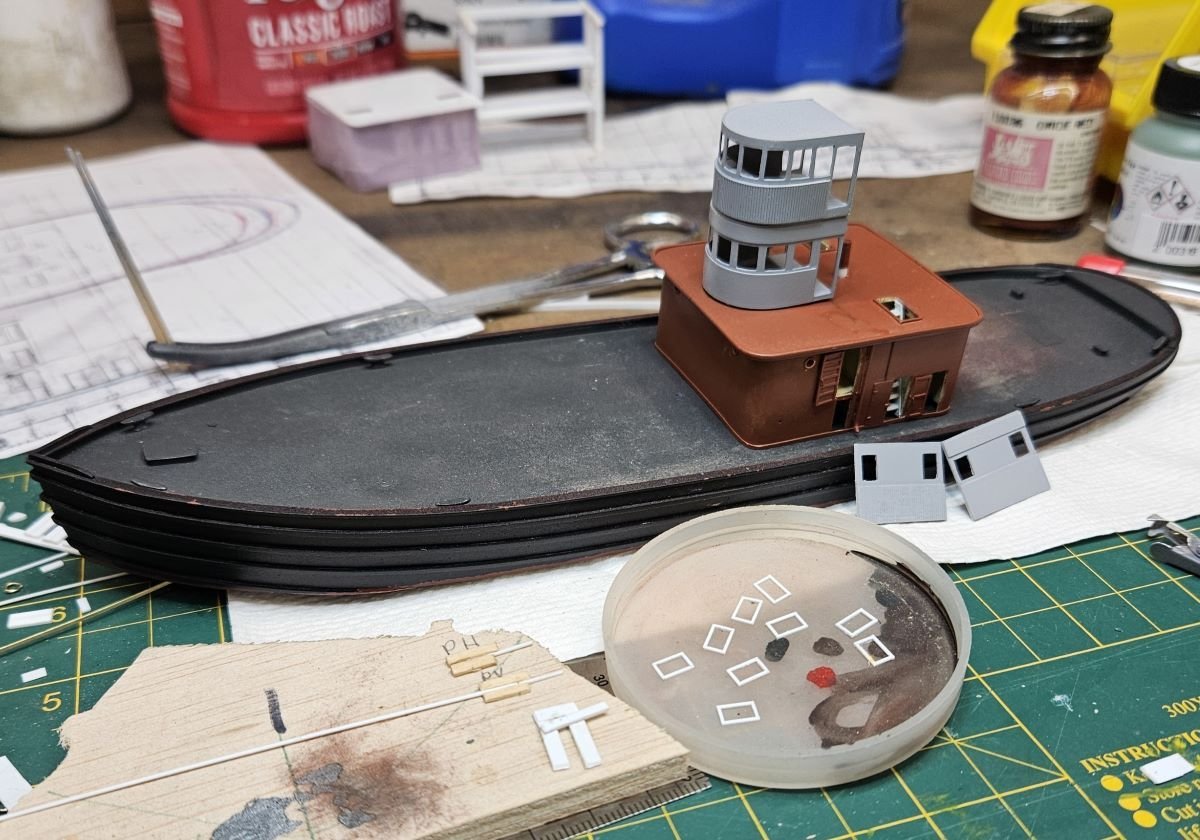
Hello All, Thanks for the comments and the likes. Keith Black, thanks, that cracks me up. My wife would hide hers if she saw that. Wefalck, thanks for the comment. All the NY harbor craft, tugs, lighters, ferries, etc. pictures that I can remember have closed pilot houses. Mine are open until I have the painting done before I install the interior parts. jerome, thanks for your comments. I also think that there would be a liner. It is difficult to tell from that cropped picture in post #7 above. There is none obvious, but I suppose that it could terminate below, out of view, or perhaps flared over the outer shell. Do you have a build log for that restoration? I may have missed it. It looks nice. Nevertheless, I still would like to know why the liner isn't filthy. 🙂 Another steam derrick lighter, c., cropped from NPS / William B Barry (Steamtown collection). This focus on the stack got me thinking about something that was bothering me. In a couple of pics I thought I could discern a faint trail of steam about 1/3 of the way down the stack. I wonder if that could be the discharge from the pressure relief valve and that the relatively large pipe attached behind the stack is the exhaust steam from the engine. I had thought that exhaust steam went up the boiler stack (as it would in a steam locomotive to improve draft) and that the large pipe was the RV discharge, but this doesn't seem to make sense the steam would condense in the tall, relatively cool stack. If so, I have some more work to do. Perhaps one of our experts can inform. Meanwhile I started to paint some of the sub-assemblies. The pilot house, winch house and forward deckhouse are in the final color now. The sub-assemblies are set in place temporarily, in most cases with pins for convenience. Thanks again for looking, mcb
-
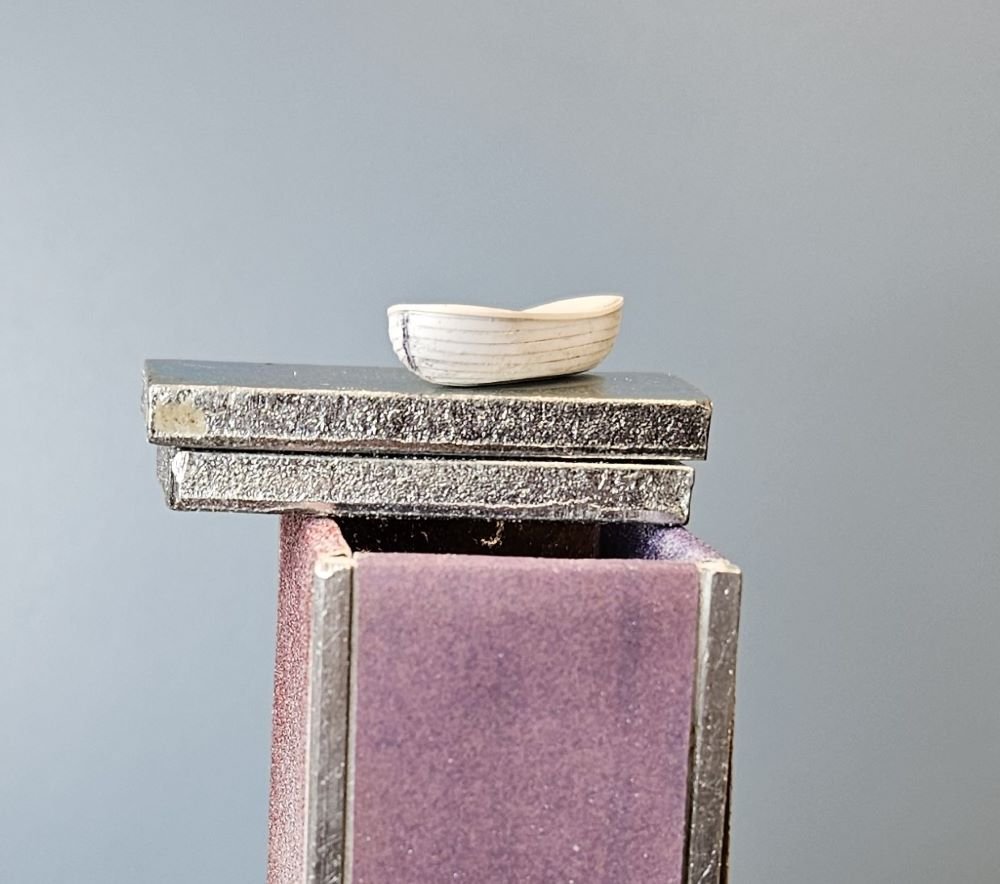
Hello All, Thanks for your comments, Jim Lad, Canute, KeithAug and Keith Black. And thanks everyone for the likes. Another short update here. Hoping to use more scratch fittings on this boat than the last one. Tried to make some cowl ventilators in brass, somewhat ratty looking. Made a ships boat in solid styrene with .010x .040" styrene strip, 'faux clinker'? Luckily its going to be covered. Still have to make engine house doors. The time is flying by on this one. Thanks for looking, mcb


-
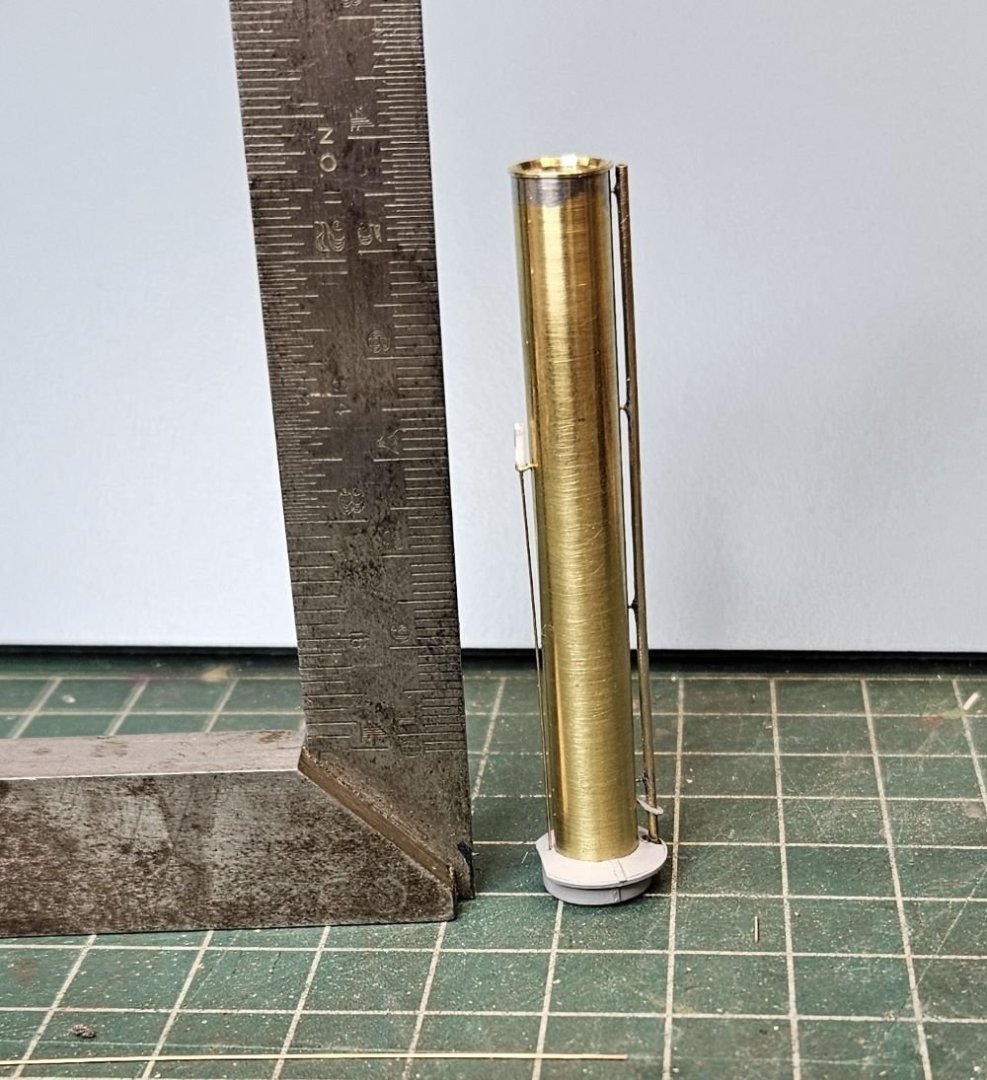
Hello everyone, Thanks for the comments Roger, KeithAug and Jim Lad. Thanks everyone for the likes. Short update here. I have the pilot house and winch house doors built; need to do the engine house doors. Working on the stack, whistle and RV discharge. I think I may have a large enough batch of parts to paint soon. Thanks for looking. mcb
-
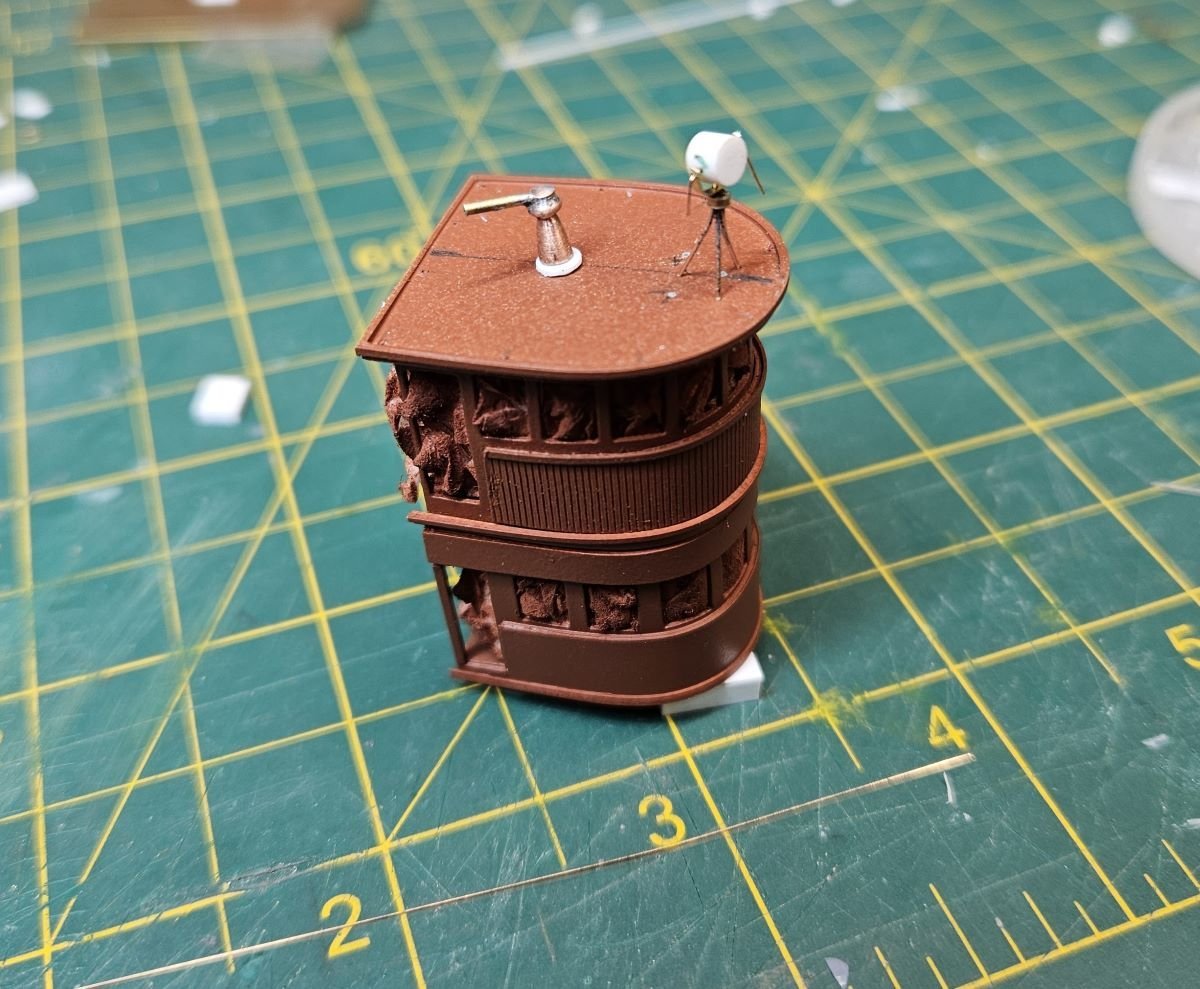
Hello everyone, Its time for another update. Thanks Keith, for your nice comments, and thanks everyone for the likes. Most of the engine house work is done. I will now have to make some doors and another batch of windows. I have received some etched brass railing stanchions in 1/192, they look as if they might not be so bad. I will have to use some fine (36 gauge) Ni-Cr wire to fit in the holes. May be frustrating. We'll see. First pic should show how the engine house walls were wrapped around temporary formers. Last pic shows the beginnings of the boom pedestal. Thanks for looking, mcb


-
The covered boats are great, the open boat is incredible. Soon I will have to read this entire thread from the top again. Thanks for posting this, mcb
-
Hi, Assuming your super glue is CA there is a product, CA accelerator, in an aerosol spray can, that will almost instantly cure the glue joint with just a slight squirt. I think the one I use (not often) is called Zip Kicker. I would test it on some expendable painted parts before hitting your model with it just to be safe. Of course, you may still need three hands to hold everything together and give it a shot. That's a nice looking ship btw. Good Luck, mcb
-
Nice photo Feathermerchant, I suppose that having the starboard side of the hull bashed in may have interrupted loading; doesn't seem to interfere with washday though. Sorry to go off track in your thread Roger, mcb
-
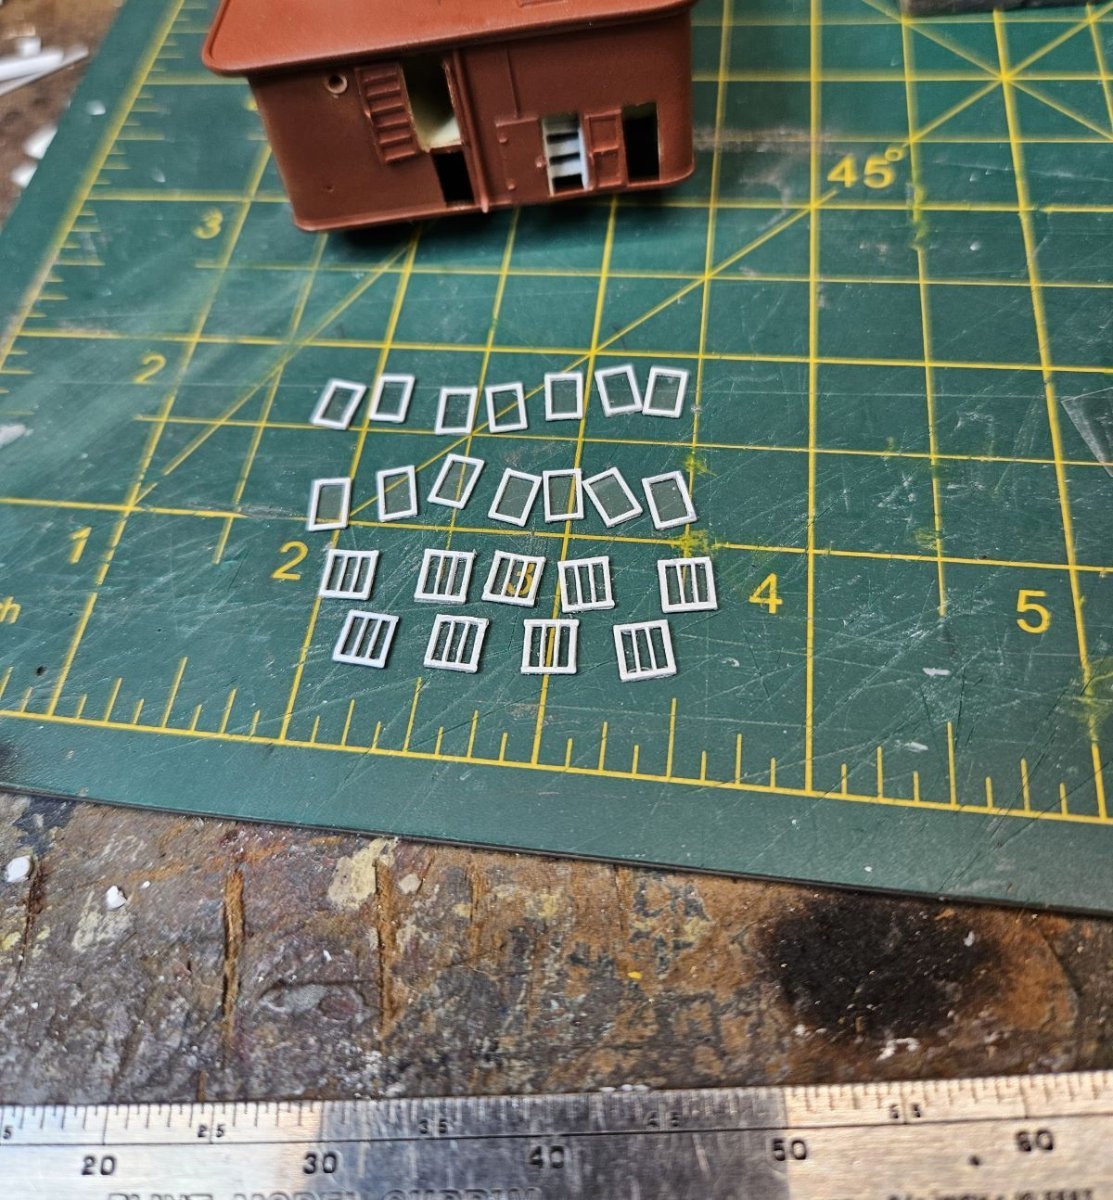
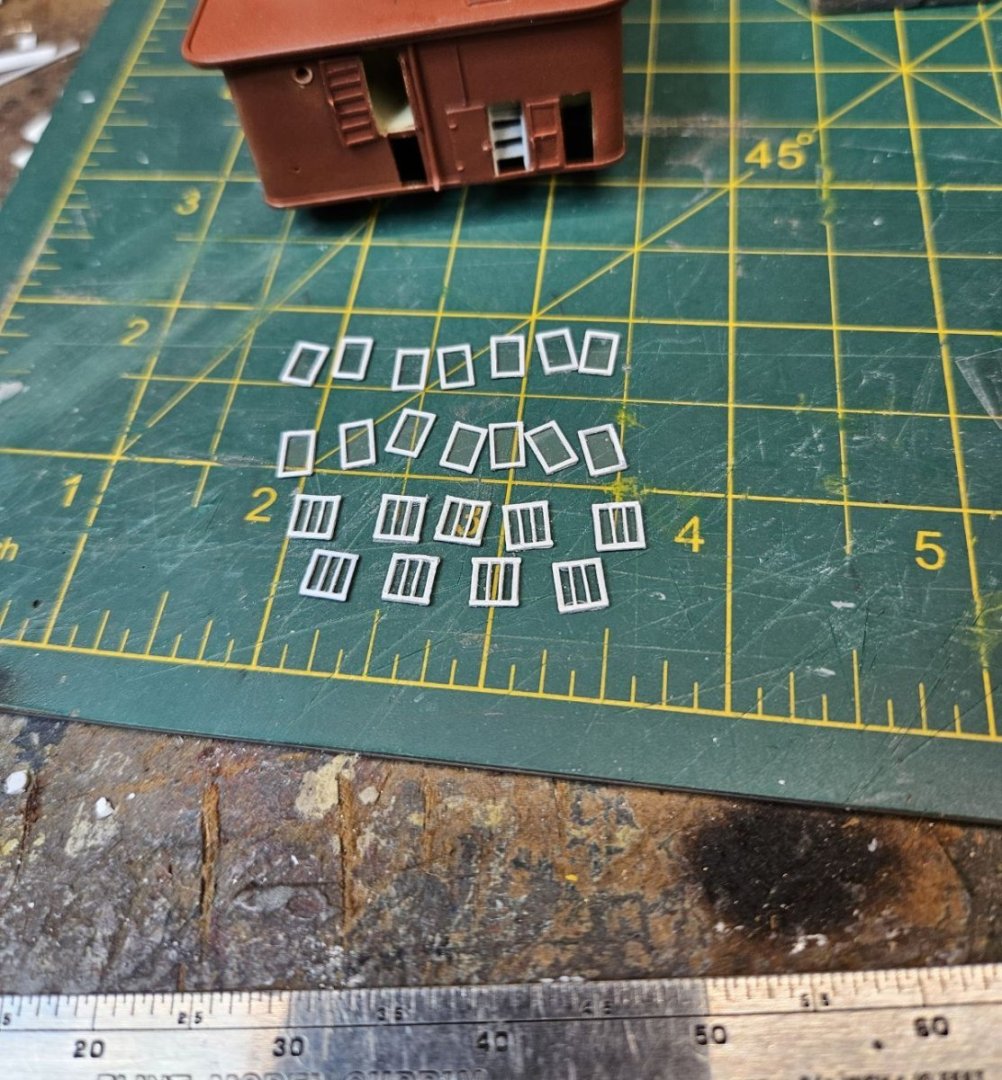
Hello All, Thanks for the likes. I have a little progress on this model. I have gotten a lot of the windows done but it looks as if I may have to make a few more. The 'winch' house and pilot house are joined up with the pilot house on top. I had to pack out the walls somewhat to at least have the appearance that the windows can slide down into pockets. The top of the main deck house, engine house and pilot house roofs need to be enclosed with railings and I wanted to try to improve on my last soldered together railings by using stanchions and wire rails. So far, my homemade stanchions have been pretty dismal. I have ordered some etched brass in 1/ 192 scale. We'll see how they look. While waiting for the stanchions I made some more furniture for the pilot house roof and started on the drawing for the engine house. When the engine house is ready, I will paint all the 'houses'. I found some Floquil paint for it. They are in primer now. Thanks, mcb

-
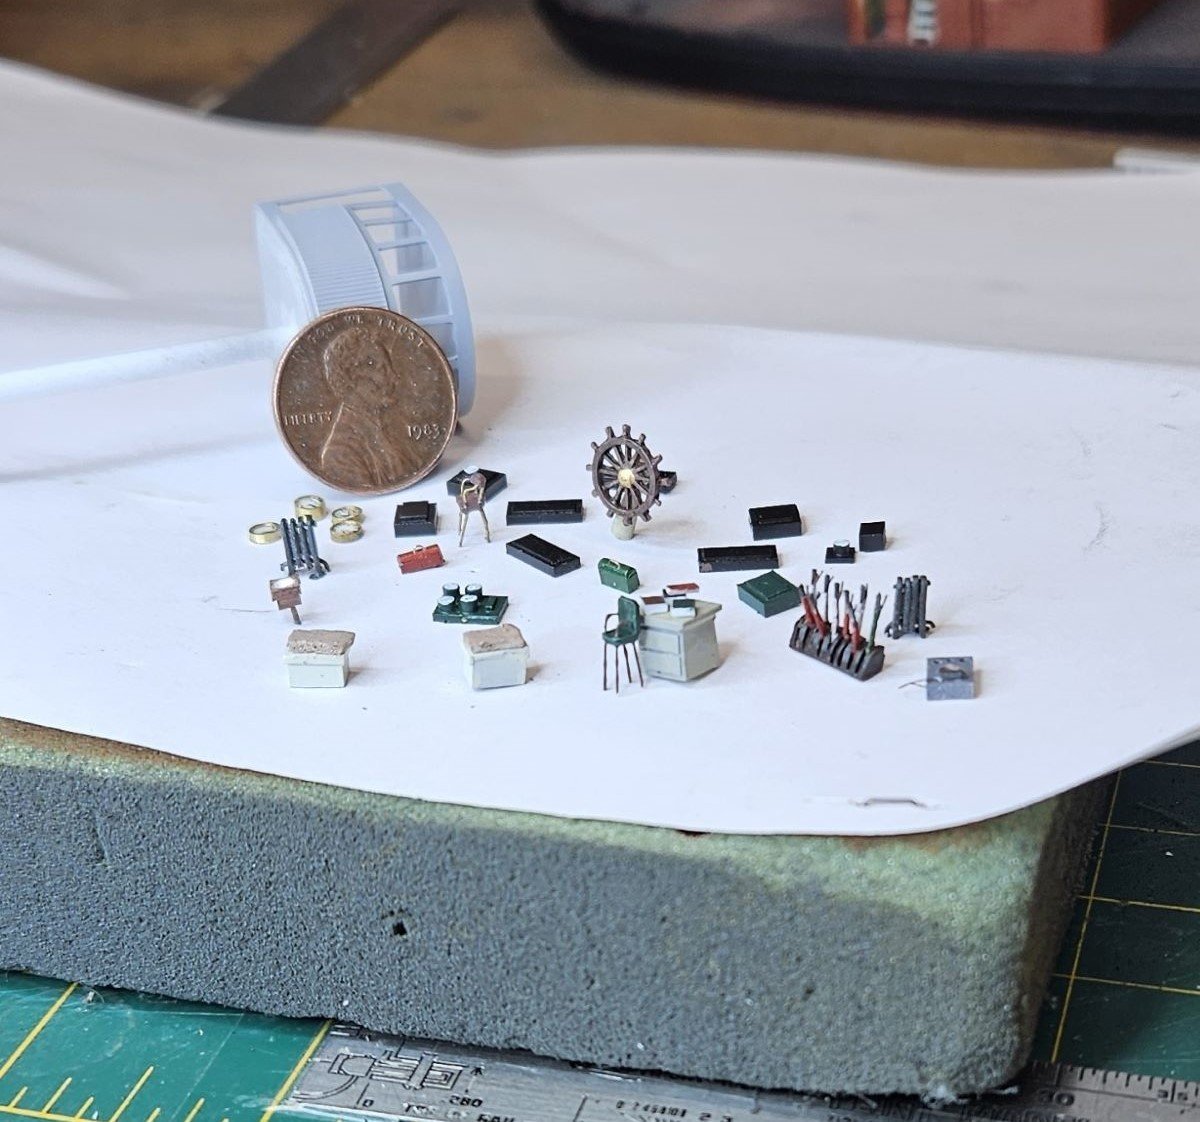
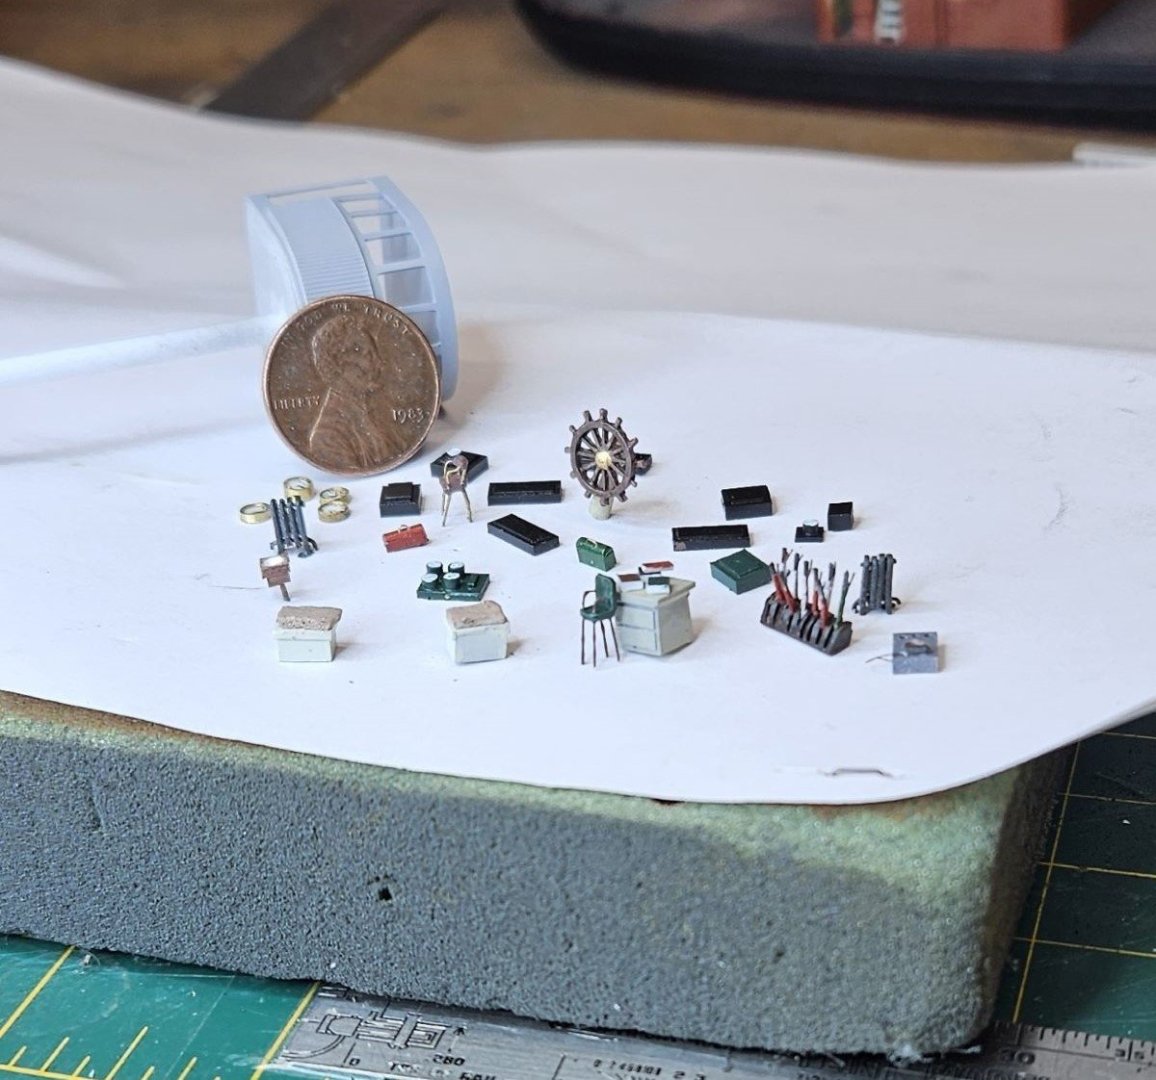
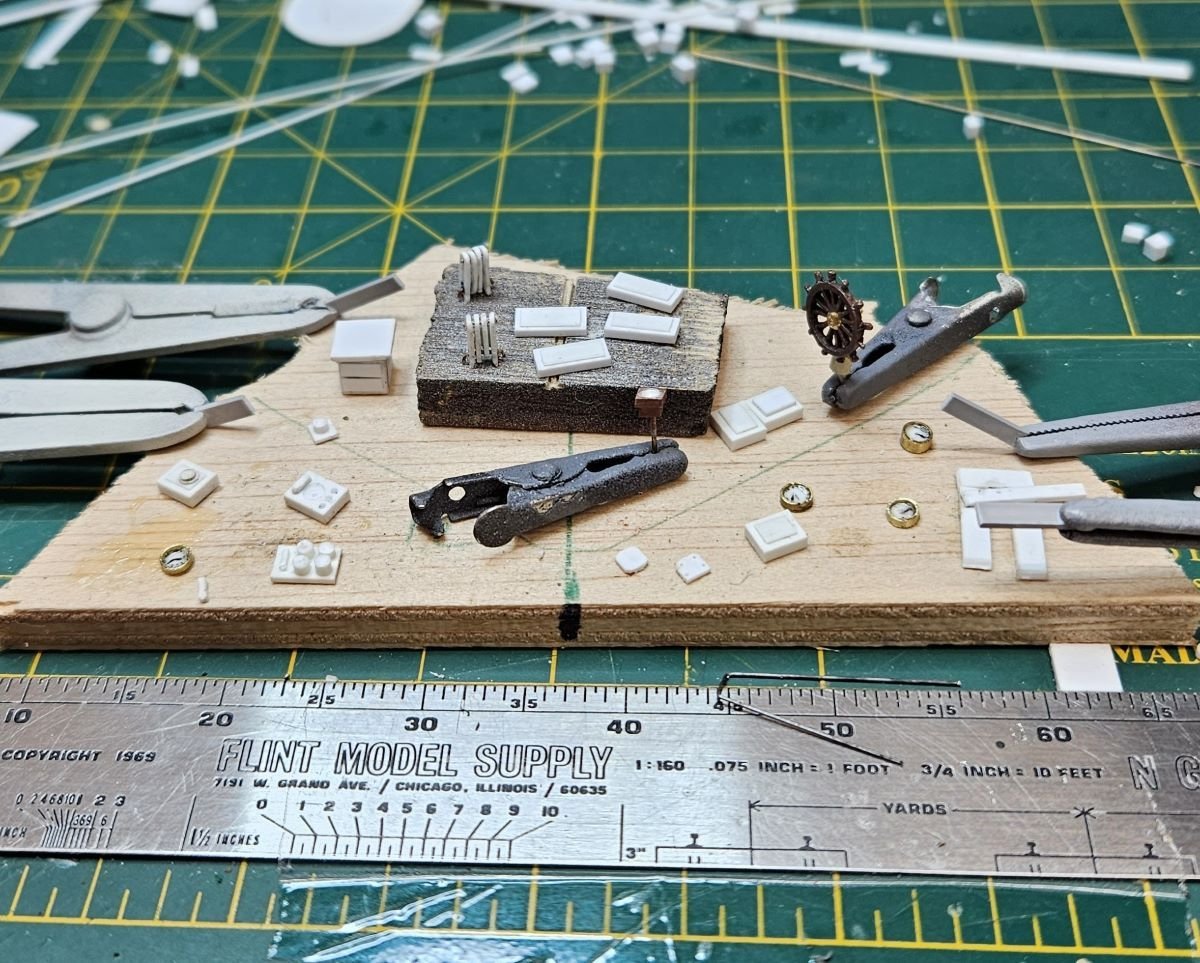
Hello All, Thanks for all the likes. I am still working on this project, about half-way through the pilot house and winch control room windows. I made a lot of 'furniture' not all of which will fit in the winch house and pilot house, but I should be able to use some of it elsewhere. Most of it seems to need a little more work as well. Here are a couple of 'work in progress' pics. Thanks for looking, mcb
-
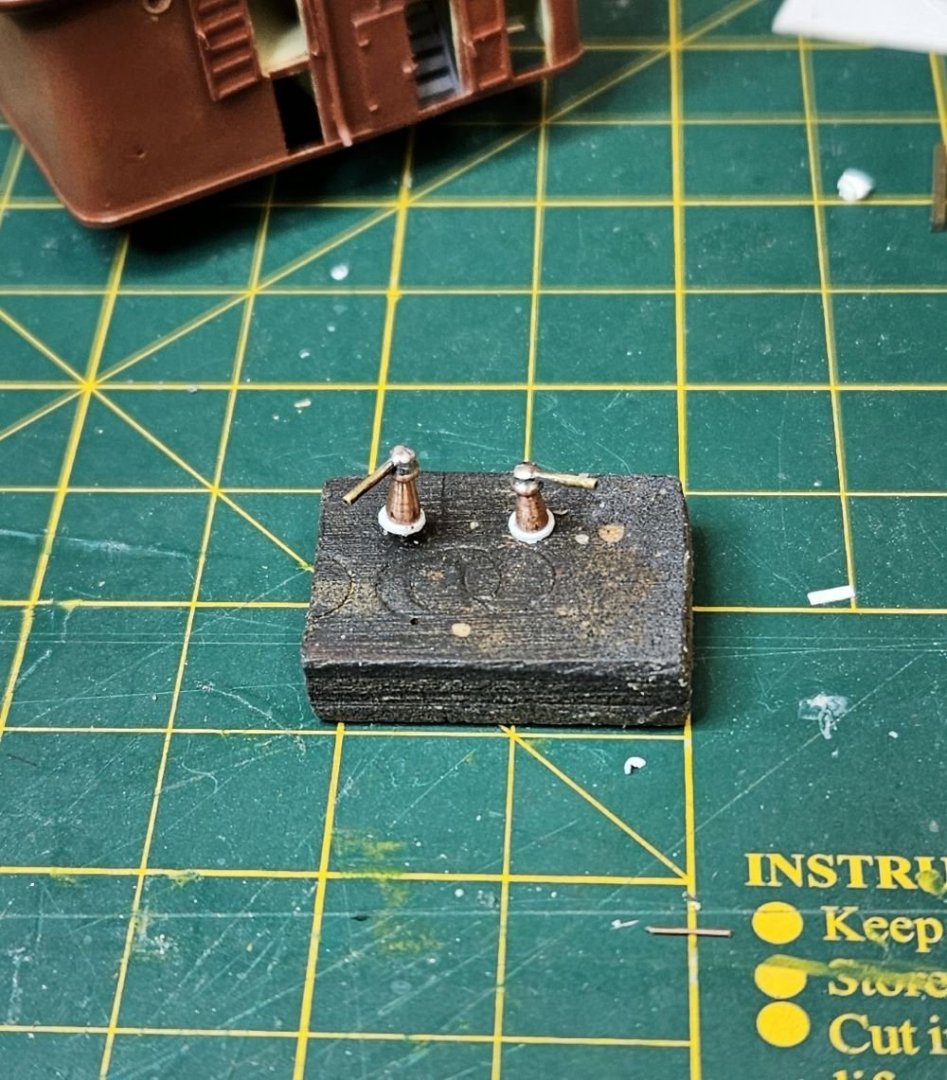
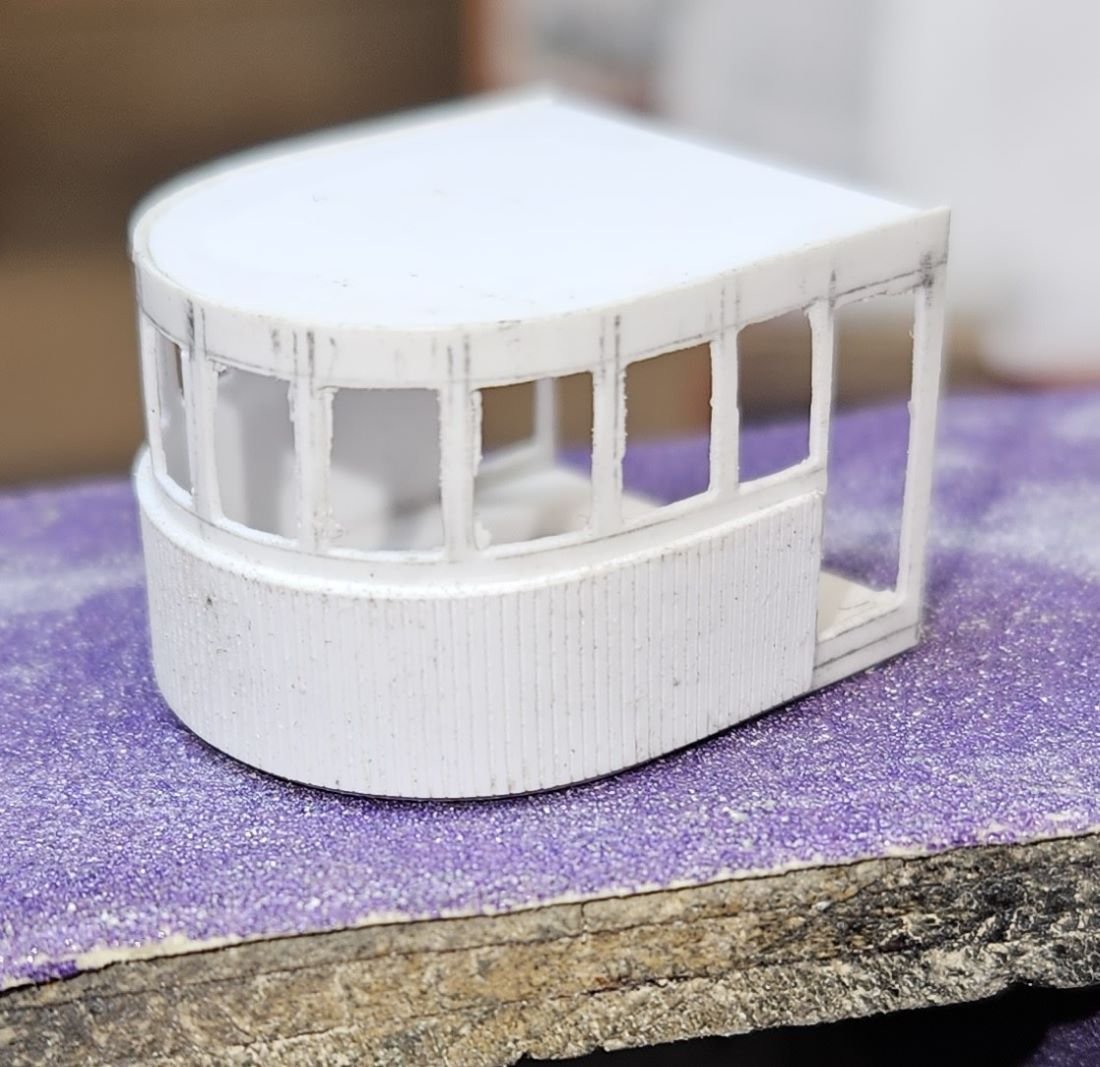
Hello All, Thanks to wefalck and Roger for the comments and thanks to everyone for the likes. In response to welfack I intend to use clear sheet for the windows. My windows will be flat, I think that Roger is correct in that the windows themselves were flat and the frames in which they slid up and down were fitted to the curve of the pilot house walls. I will probably have a few of my windows at least partially (faked) down. In order to put off, for a while, the tedium making these windows I have started to fabricate some 'furniture' for the pilot house and winch control room. At least the wheel should be visible through the windows, but I can't stop there. Thanks for looking, mcb
-
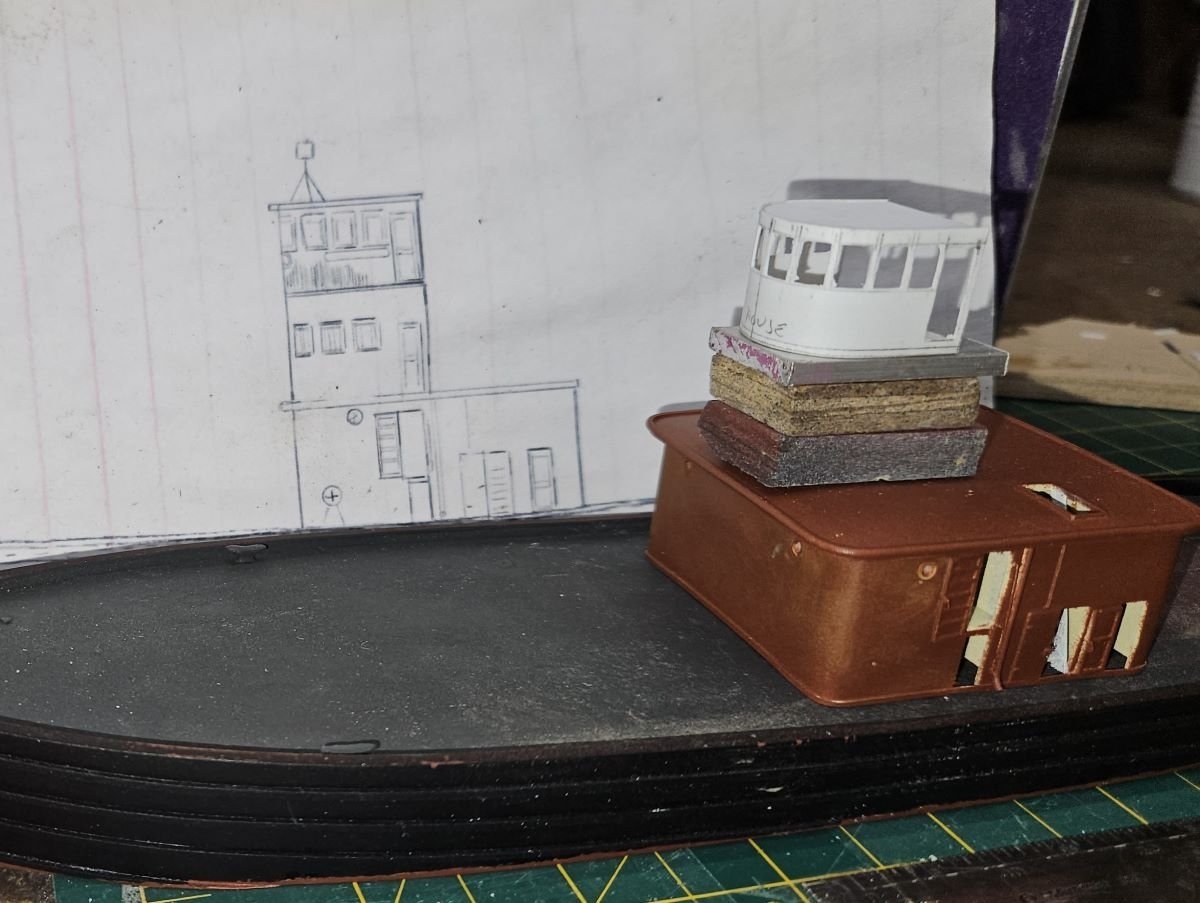
Hello everyone, Sorry to have not kept this log up to date lately. I had some long-deferred maintenance to attend to at home. Thanks everyone for the comments and likes. Thanks Al S for bringing that info to my attention. I never had any idea. It is still somewhat amazing to me that anyone else has ever heard of this obscure subject. The stairs/ladders have been installed in the deckhouse, though in the pictures they look a little clunky. I may have to build a new fixture with a lesser tread spacing. I have begun the pilot house assembly which will be on top of the winch control room. The pilot house was raised at some point (after the photos at the beginning of this thread) above what became the winch control station. I will probably put in some sort of interior details in the pilot house and winch room. The pics show the attempt at window layout and the fancy? wood siding that goes on the pilot house. I think I will have to build windows next. Not my favorite job. Thanks for looking, mcb


-
Looks great. You really get a nice square cut using your method. mcb
-
I have to agree with the posts above. Well done, thanks for posting. mcb
-
Hello all, Thanks for the comments, Keith Black, Canute, wefalck, and Roger Pellett. And thanks to everyone for the likes. I have the deckhouse almost ready for primer. I drilled locating pins down into the hull so that I can easily remove and replace it on the deck when needed. The openings in the upper deck are for a ladder way or stair well down to the main deck. I will have to make stairs for those as the commercially available stairs are not steep enough. The layout of the doors is very odd as the doors on the lower level are short and there is a rather large step from the upper door. Under the upper door there appears to be a smaller access door with steps on it. Behind this door is a grill which will be shown in the view of the port side. Any way here is how it stands now, a little rough. Thanks, mcb
edit1.jpg.667191f45e79198a2fef7389d3218a6c.jpg)
edit1.jpg.11e9b05cc30a4a4a063b88b3b3e74ffe.jpg)
-
Thanks for that Roger. It looks like there are a lot of useful items there. Good news.
-
Hello again everyone, Thanks for the comments Keith Black, Jim Lad, Canute and Wefalck. and thanks for the likes. I am sorry it has been so long since I have done anything on this model. I had begun to build the forward /main deckhouse and foolishly cut the openings in the wrong places (short attention span). I put the model aside and decided to finish rigging the old AL Blue Nose II model I had started not long ago. Well, when I started with the rigging I couldn't stop and so I finished that Bluenose II case and all. Anyway, I intend to get this Blairstown up to the point of the derrick and booms before the next break. (That would be a MS Kate Cory 1:64 and I will start a build log when I go back to it). First pic shows the deck house on the hull (reject hull in background), the second pic is the current state, needs a little clean-up. Thanks for looking, mcb
edit1.jpg.bf7f707565306800188bc68be02e92c7.jpg)
edit1.jpg.5679abfac5f40ff8da320f8f37b8b2be.jpg)
-
Hello Schaye, Its funny, I recently completed the same old kit. I had fun with it. I am pretty sure that I disposed of the cloth sails that came with the kit but I will look again. I agree with what Alan said above about silkspan. I would get more than you think you need as it is relatively inexpensive. I made about 20 silkspan sails to get 8 that I liked. The thing does look nice with sails though. Just don't look too closely. Good Luck. mcb
edit1.jpg.832bc14e641ead868f3e751d4ae99ef5.jpg)
-
Nice, neat work, As for roof paper, I have, in the past, used facial tissue AKA 'Kleenex' cut into 3' wide strips (or whichever width is appropriate for your era) and simply painted it on the roof surface with, usually, flat black. it should have more a slightly pronounced texture than silkspan. This works out in 1:160 scale for my eyes. I think it would work in 1:48. Good Luck, mcb
-
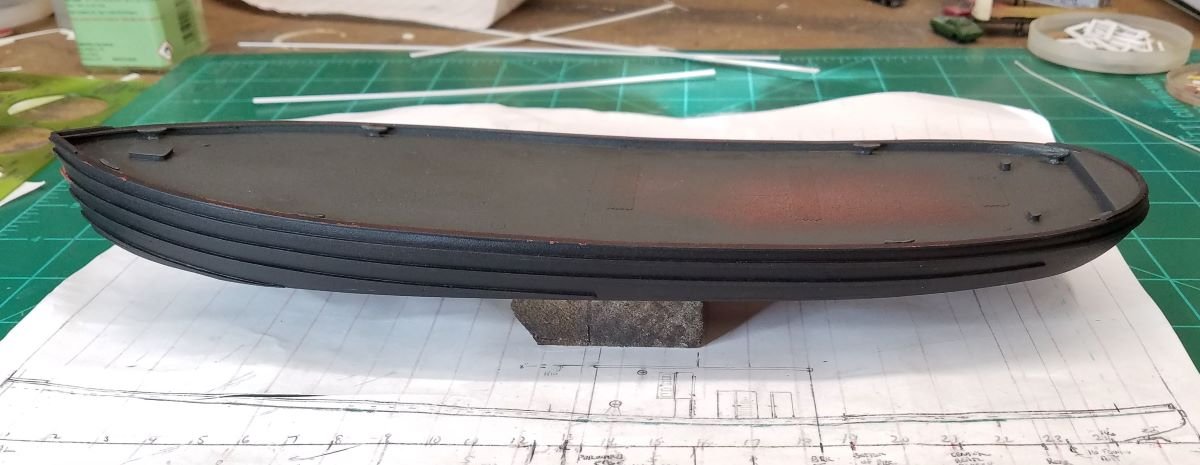
Hello again everyone, I thought I would post an update of progress on this, such as it is. I am working on the hull while trying to make drawings of the superstructure. The last picture should be as it sits today. I have to touch up some damage which was caused by the masking. Thanks for looking, mcb
edittwo.jpg.59aaed8de55dda201d42272f4c3bc91e.jpg)
edit1.jpg.3a00447c39dac0cc1a5ababaee371f27.jpg)
edit1.jpg.6aa762b52dfdbe100d7705728ebe1944.jpg)
-
Hi Everyone, Thanks for the comments Keith Black, Canute, Roger Plett and Richard R. Thanks everyone for the likes. I remain puzzled by the 'clean' stacks. It is amazing to me that someone (Richard R) turns up with a connection to this vessel. There is an encyclopedia of knowledge on this forum. I would appreciate any info or photos of Blairstown as my sources are few. The build has slowed down lately due to the climate in my basement. I may post a couple of photos of the hull ready for paint soon though. Thanks again, mcb