

.jpeg.1d7190af6e3786a2d59bfffad3392cdd.jpeg)
NewbyMark
-
Posts
63 -
Joined
-
Last visited
Content Type
Profiles
Forums
Gallery
Events
Posts posted by NewbyMark
-
-
9 hours ago, yvesvidal said:
Beautiful. I love the race cars of that era.... No computer or sophisticated technology.... Just pure driving abilities and guts.
Yves
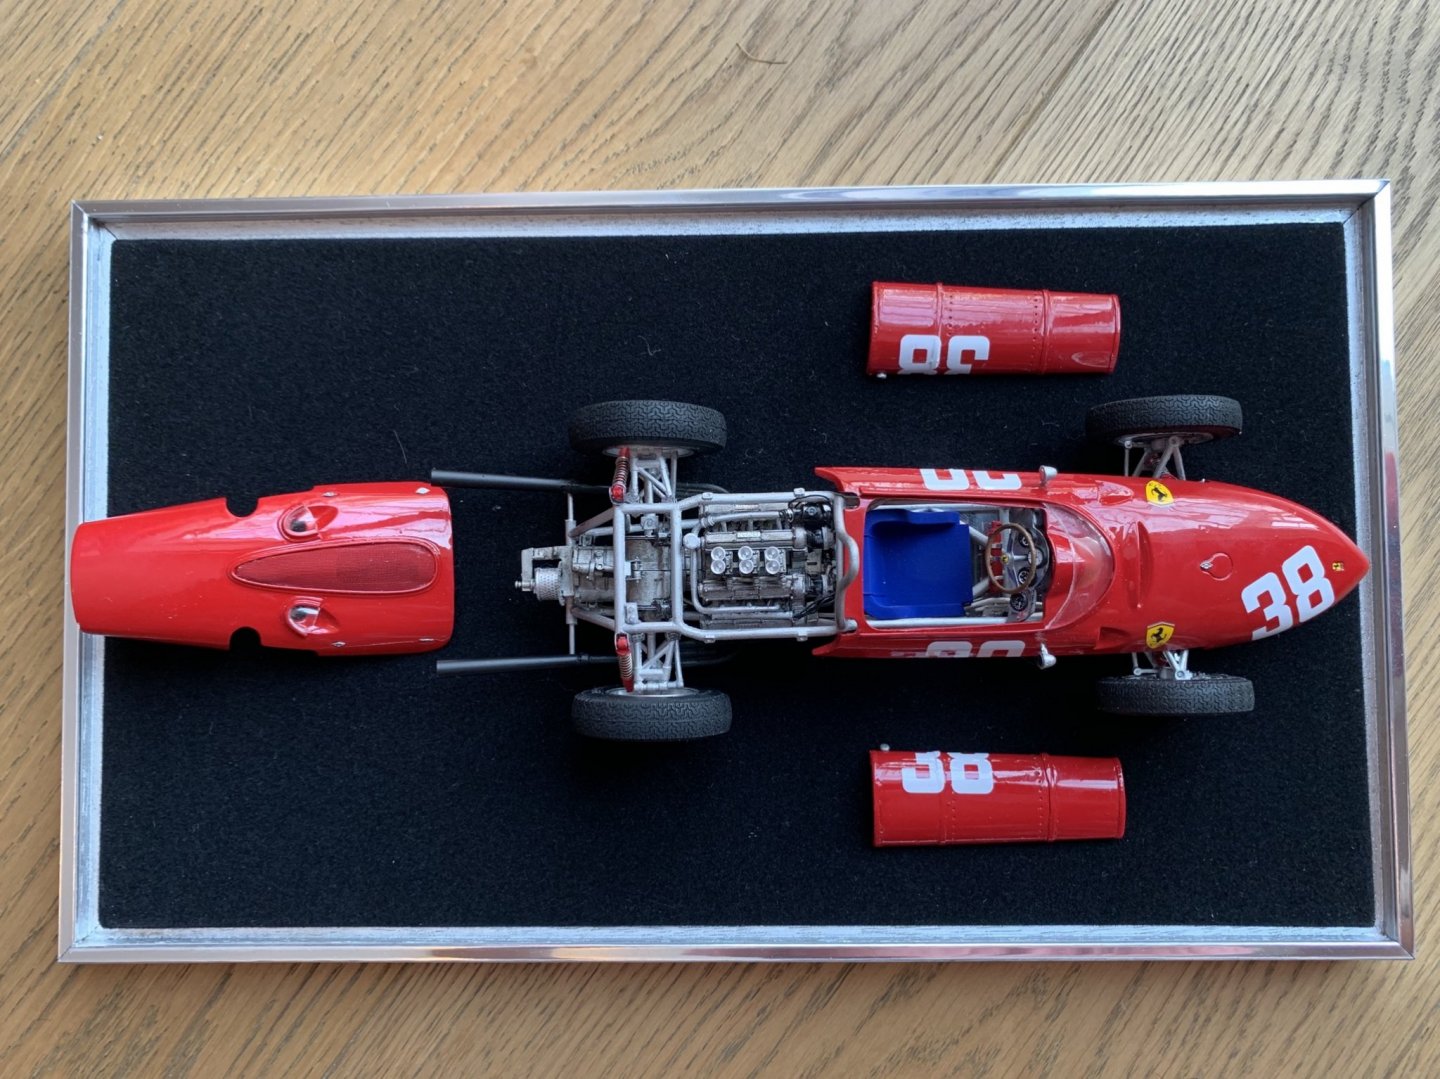
I did note the lack of seatbelts in the kit and I believe that's accurate. That takes some guts! 🙂
- Old Collingwood, Canute, mtaylor and 1 other
-
 4
4
-
Thank you. Inevitably there are a few mistakes here and there but I was happy with how it turned out. I am considering HMS Fly as my next model, determined to try again!
- Old Collingwood, lmagna, Canute and 2 others
-
5
-
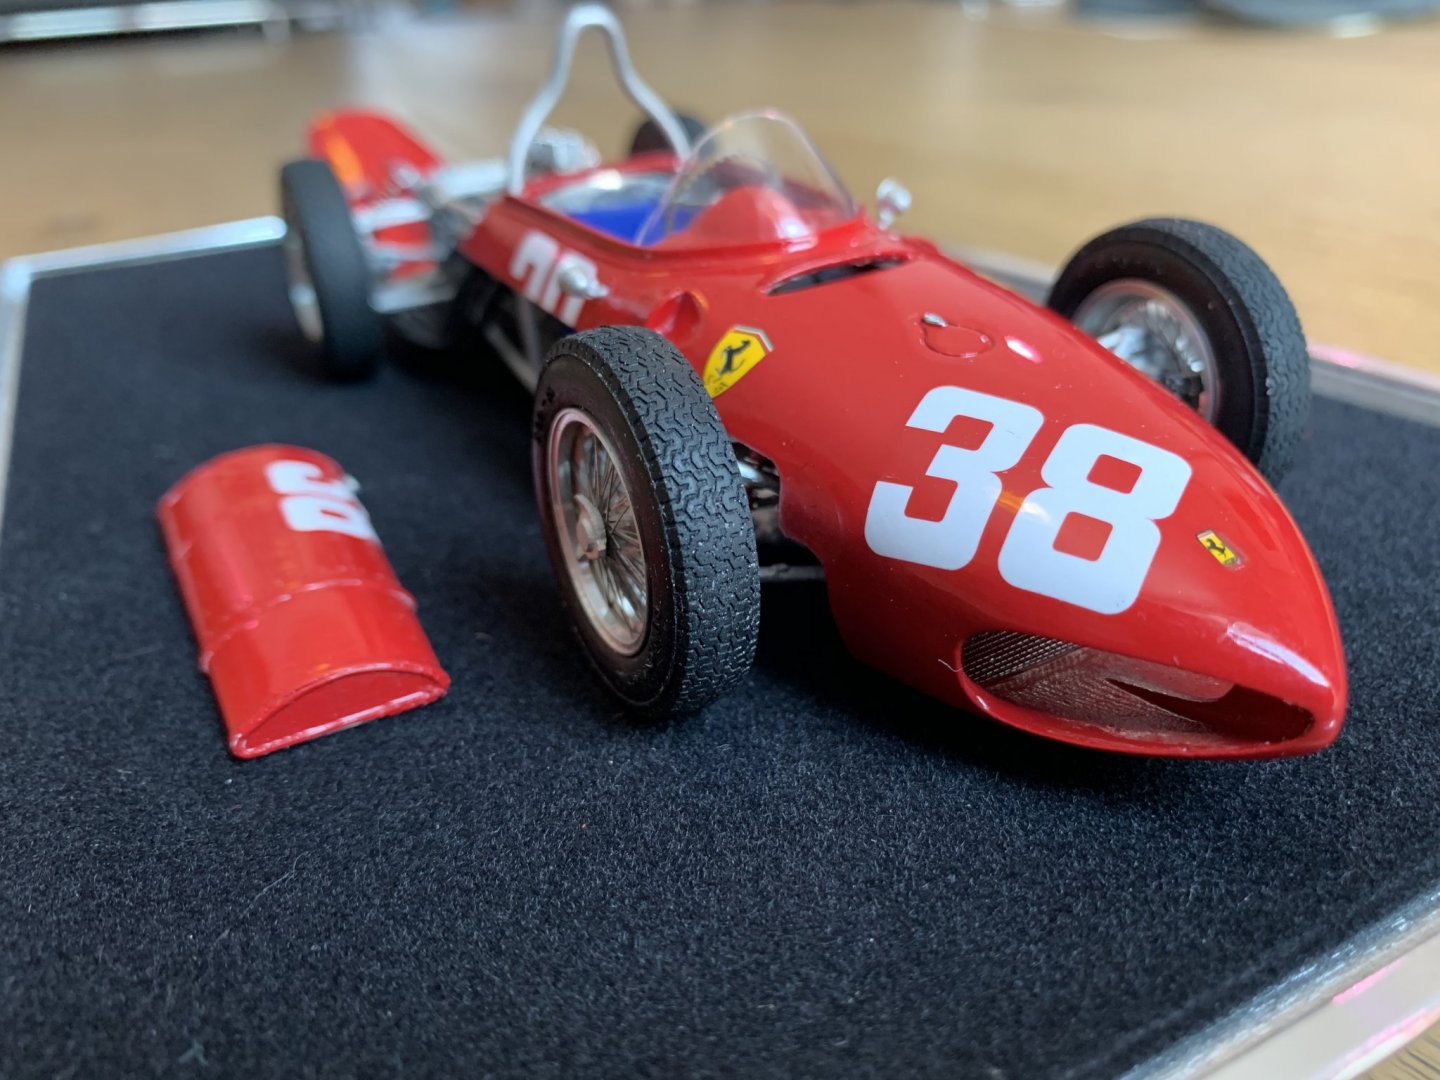
Hi all. Well after my abandoned Speedy project I decided to complete an automotive model I’ve had in my stash for a while. This is a white metal/etch/vacform kit in 1/20 scale from Japanese manufacturer Model Factory Hiro. Took me around 3 weeks working most evenings and weekends so quite a quick build compared to a ship. I enjoyed the build and now considering another ship project, only this time one without copper 😂 Hope it is ok to post this here!
-
Thanks for all the positive encouragement. This wasn't my first model and it won't be my last, but I did learn that copper is not something I am going to do again. Again, not the fault of the kit at all. Reluctantly it's gone to the great shipyard in the sky today as stripping it and sanding it yet again when the hull was already thin was not appealing. But I will try again with a different subject and would unreservedly recommend Vanguard models. But you don't need me to tell you that 🙂
You either succeed or learn. In this case I've learned!
-
35 minutes ago, GrandpaPhil said:
Why give up? Your Speedy looks good and you’ve already done the hard part.
If you don’t like the copper, remove it. An alternate paint scheme is to paint the bottom a dingy white color (the old leaded paint that was used in the 17th and 18th centuries).
Conversely, metallic copper paint also looks good on the bottom of a wood vessel, I’ve used it for a couple of models.I used copper tape for my Victory and my Prince de Neufchatel. It worked beautifully. Please feel free to check out my build logs on how I did it. The build log for the Prince de Neufchatel is probably more helpful, because I had figured it out by then.
Appreciate your comments, but I don't have it in me to strip it and start a third time. And as an experienced automotive modeller, I know I won't be able to get the base good enough to paint now it's been covered in glue, and I wouldn't be happy with it anyway. I think on balance it's better to write it off as a learning experience.
I'm ok with it. I've learned a lot getting to this stage, and I admire well applied copper in some of the ships I see on this site. I just wasn't able to achieve it here to my satisfaction. Just to restate, it was nothing at all to do with the quality of the kit and everything to do with my skill level.
Best of luck with your builds and thanks for the positive comments.
Cheers, Mark.
-
Well after completing the rest of the copper I've decided to abandon this project. Nothing at all to do with the kit, I just don't like the copper at all and can't see myself displaying this model so can't see much point in devoting more time or money to completing it. It's a great kit, really well designed and thought out and in better hands than mine will undoubtedly build into a great model. Thanks to everyone for their help, especially Chris for the support and sending more parts. Maybe I'll have a go at something else - this just turned out not to be for me.
-
2 minutes ago, GrandpaPhil said:
I just used a dry cloth and very lightly wiped it down.
Oh ok, I thought it would be more technical than that 🙂 Thanks - I will do so. Appreciate all the advice.
-
Thanks guys. What did you wipe it down with?
-
6 minutes ago, GrandpaPhil said:
Well done on the coppering!
A quick word of advice, I would wipe down the hull to remove oils from fingers and seal the copper plating. I may or may not have left a thumbprint oxidized in the copper plating of a model that I didn’t wipe down properly prior to sealing. It will still get a nice patina in a couple months.
Thanks. I wasn’t planning on sealing it at all I thought it would all just dull down regardless of fingerprints. Is this assumption incorrect?
I still have the other side to do so likely to be a fair few more fingerprints yet 😊
-
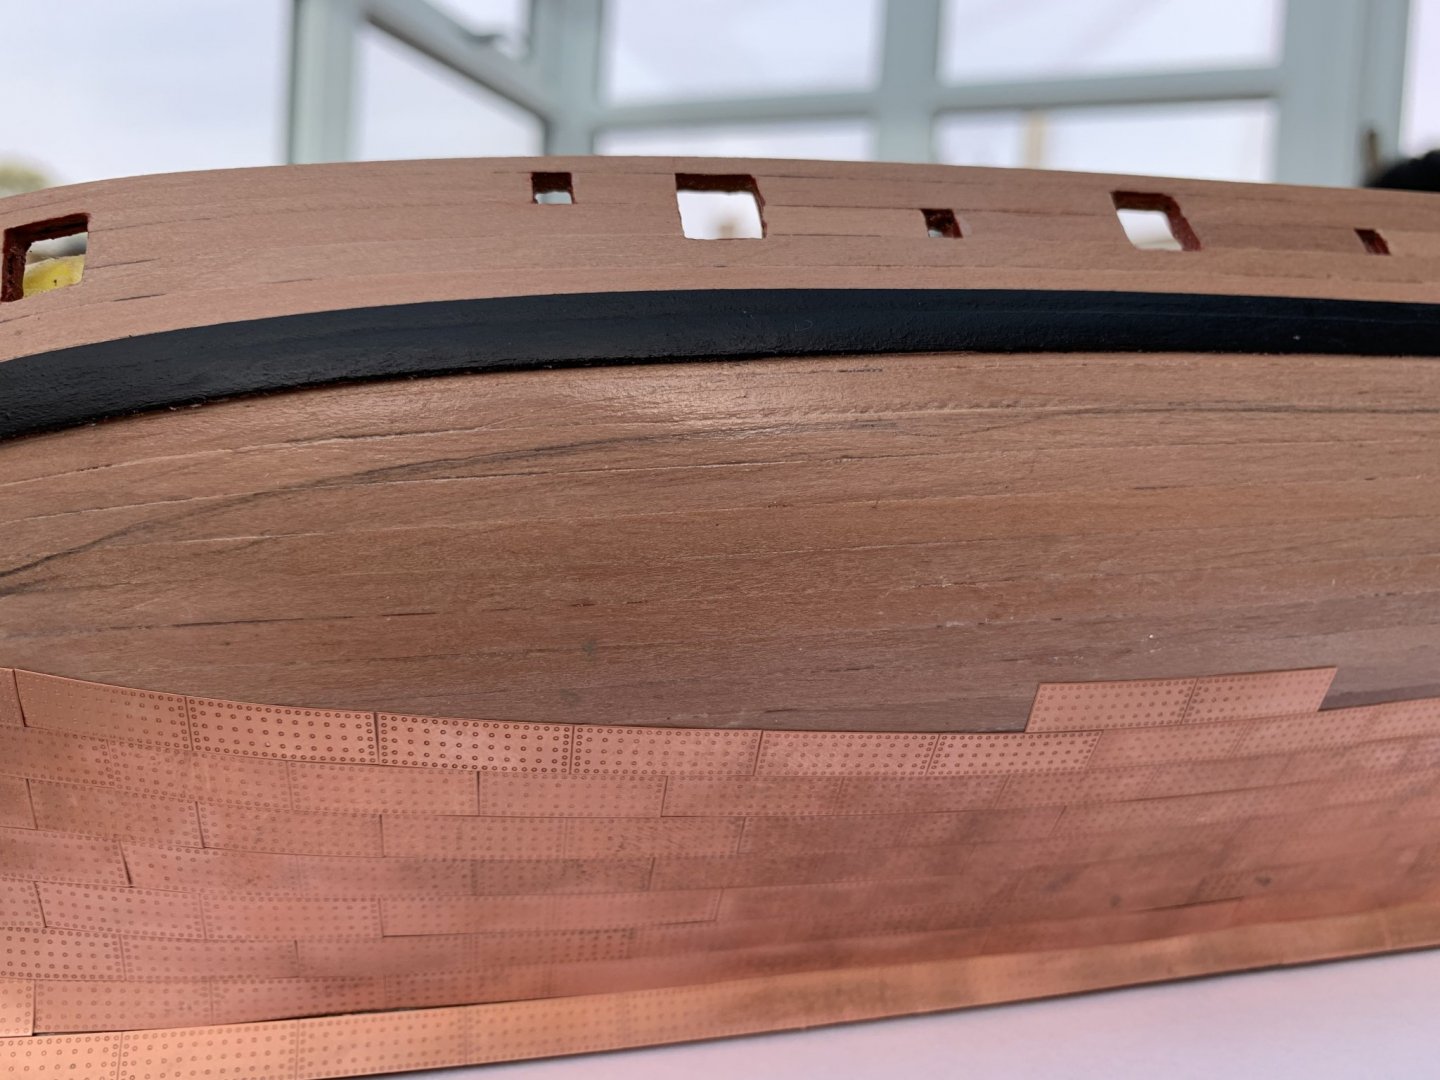
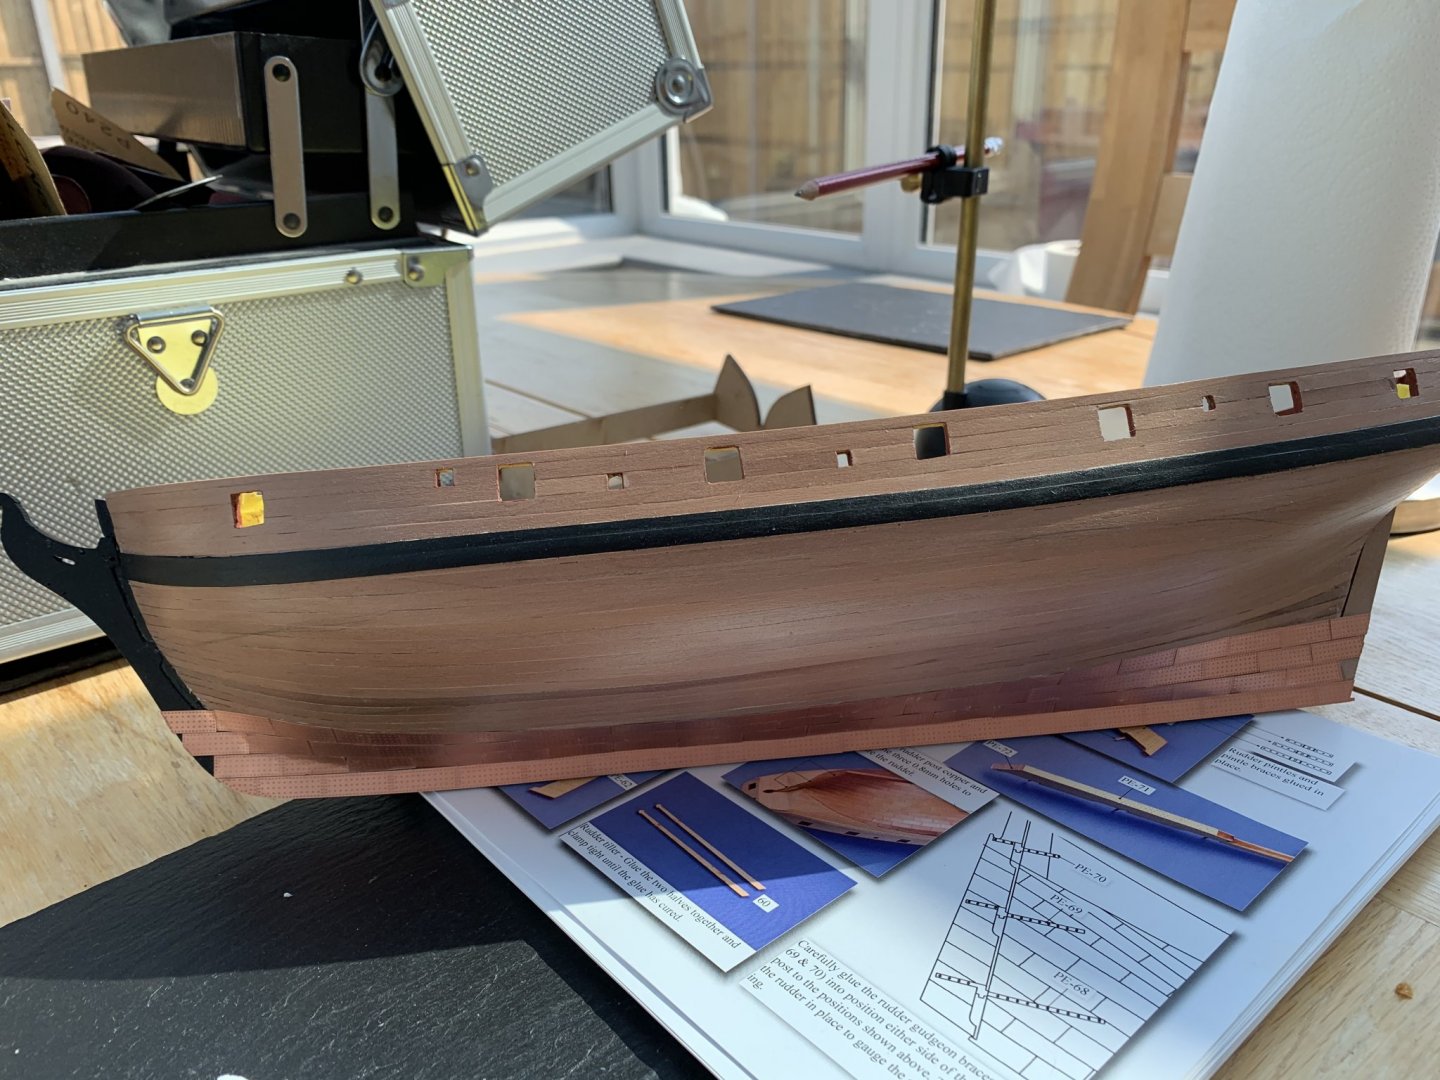
Well by comparison with some of the beautiful work on the site this isn’t the best effort, but I am ok with how this turned out in the end. I may redo some of the ‘slivers’ of copper at the waterline and I didn’t get the waterline perfect but compared to how she looked at the weekend I’ll take it! I’m not sure I would do another coppered hull though to be honest.
Anyway I won’t post about copper again just wanted to show what I managed to achieve in the end. Thanks again to everyone who provided help.

- ccoyle, glbarlow, GrandpaPhil and 3 others
-
6
-
8 minutes ago, Bossman said:
Mark, she’s looking nice!
Thank you 😊
-
16 minutes ago, DelF said:
That's looking really good Mark - well done for persevering.
Derek
Thanks Derek.
-
3 minutes ago, glbarlow said:
Copper patinas over time and it evens out. Both my coppered ships look much better with “aged” copper. Bright and shiny becomes the main focal point and detracts from the rest of the ship. I wiped off excess CA with acetone and left it alone other than that.
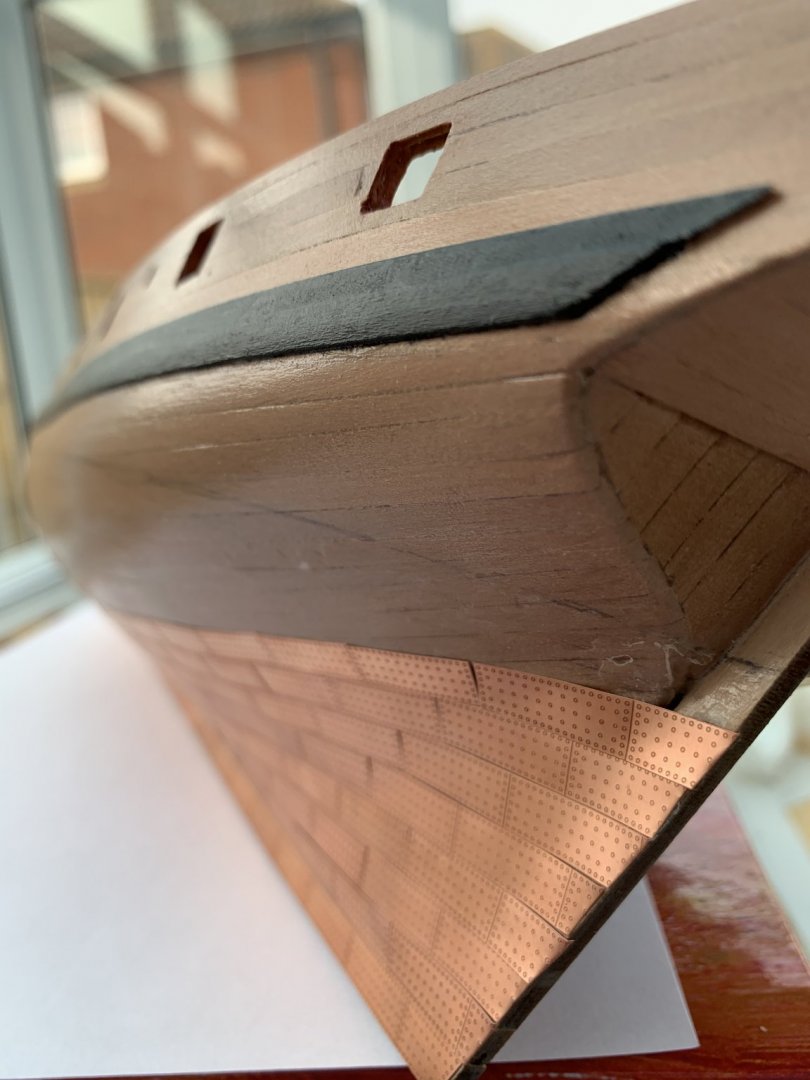
Another point is overlapped copper plates may look off up close but are lost viewing on the shelf, gaps stand out. I mentioned this because I see a gap in your photo. Just a thought...
Thanks. I think I’m in agreement about leaving it be and letting it dull over time. Yes I have a couple of small gaps. Where I seriously misplaced I took the tile off and did it again, but for some I found it hard to place the tile without any gap at all and these tiles are quite thick so the overlap is noticeable if you have one. I’ve continued further up the hull since the photos and stopped using paired tiles at the bow and stern and went back to singles which helped. I’m not going to strip any more off, but I will keep your feedback in mind as I progress. Perhaps I’ll display it from the other side 😀
-
6 minutes ago, clearway said:
attempt 2 looks a lot better -after coppering my cutty sark and victory i polished the copper and gave it a couple of coats of lacquer.
Keith
Thanks Keith. I am happier with it. I’m not sure I will polish it as I quite like the duller finish, but out of interest what did you polish it with?
-
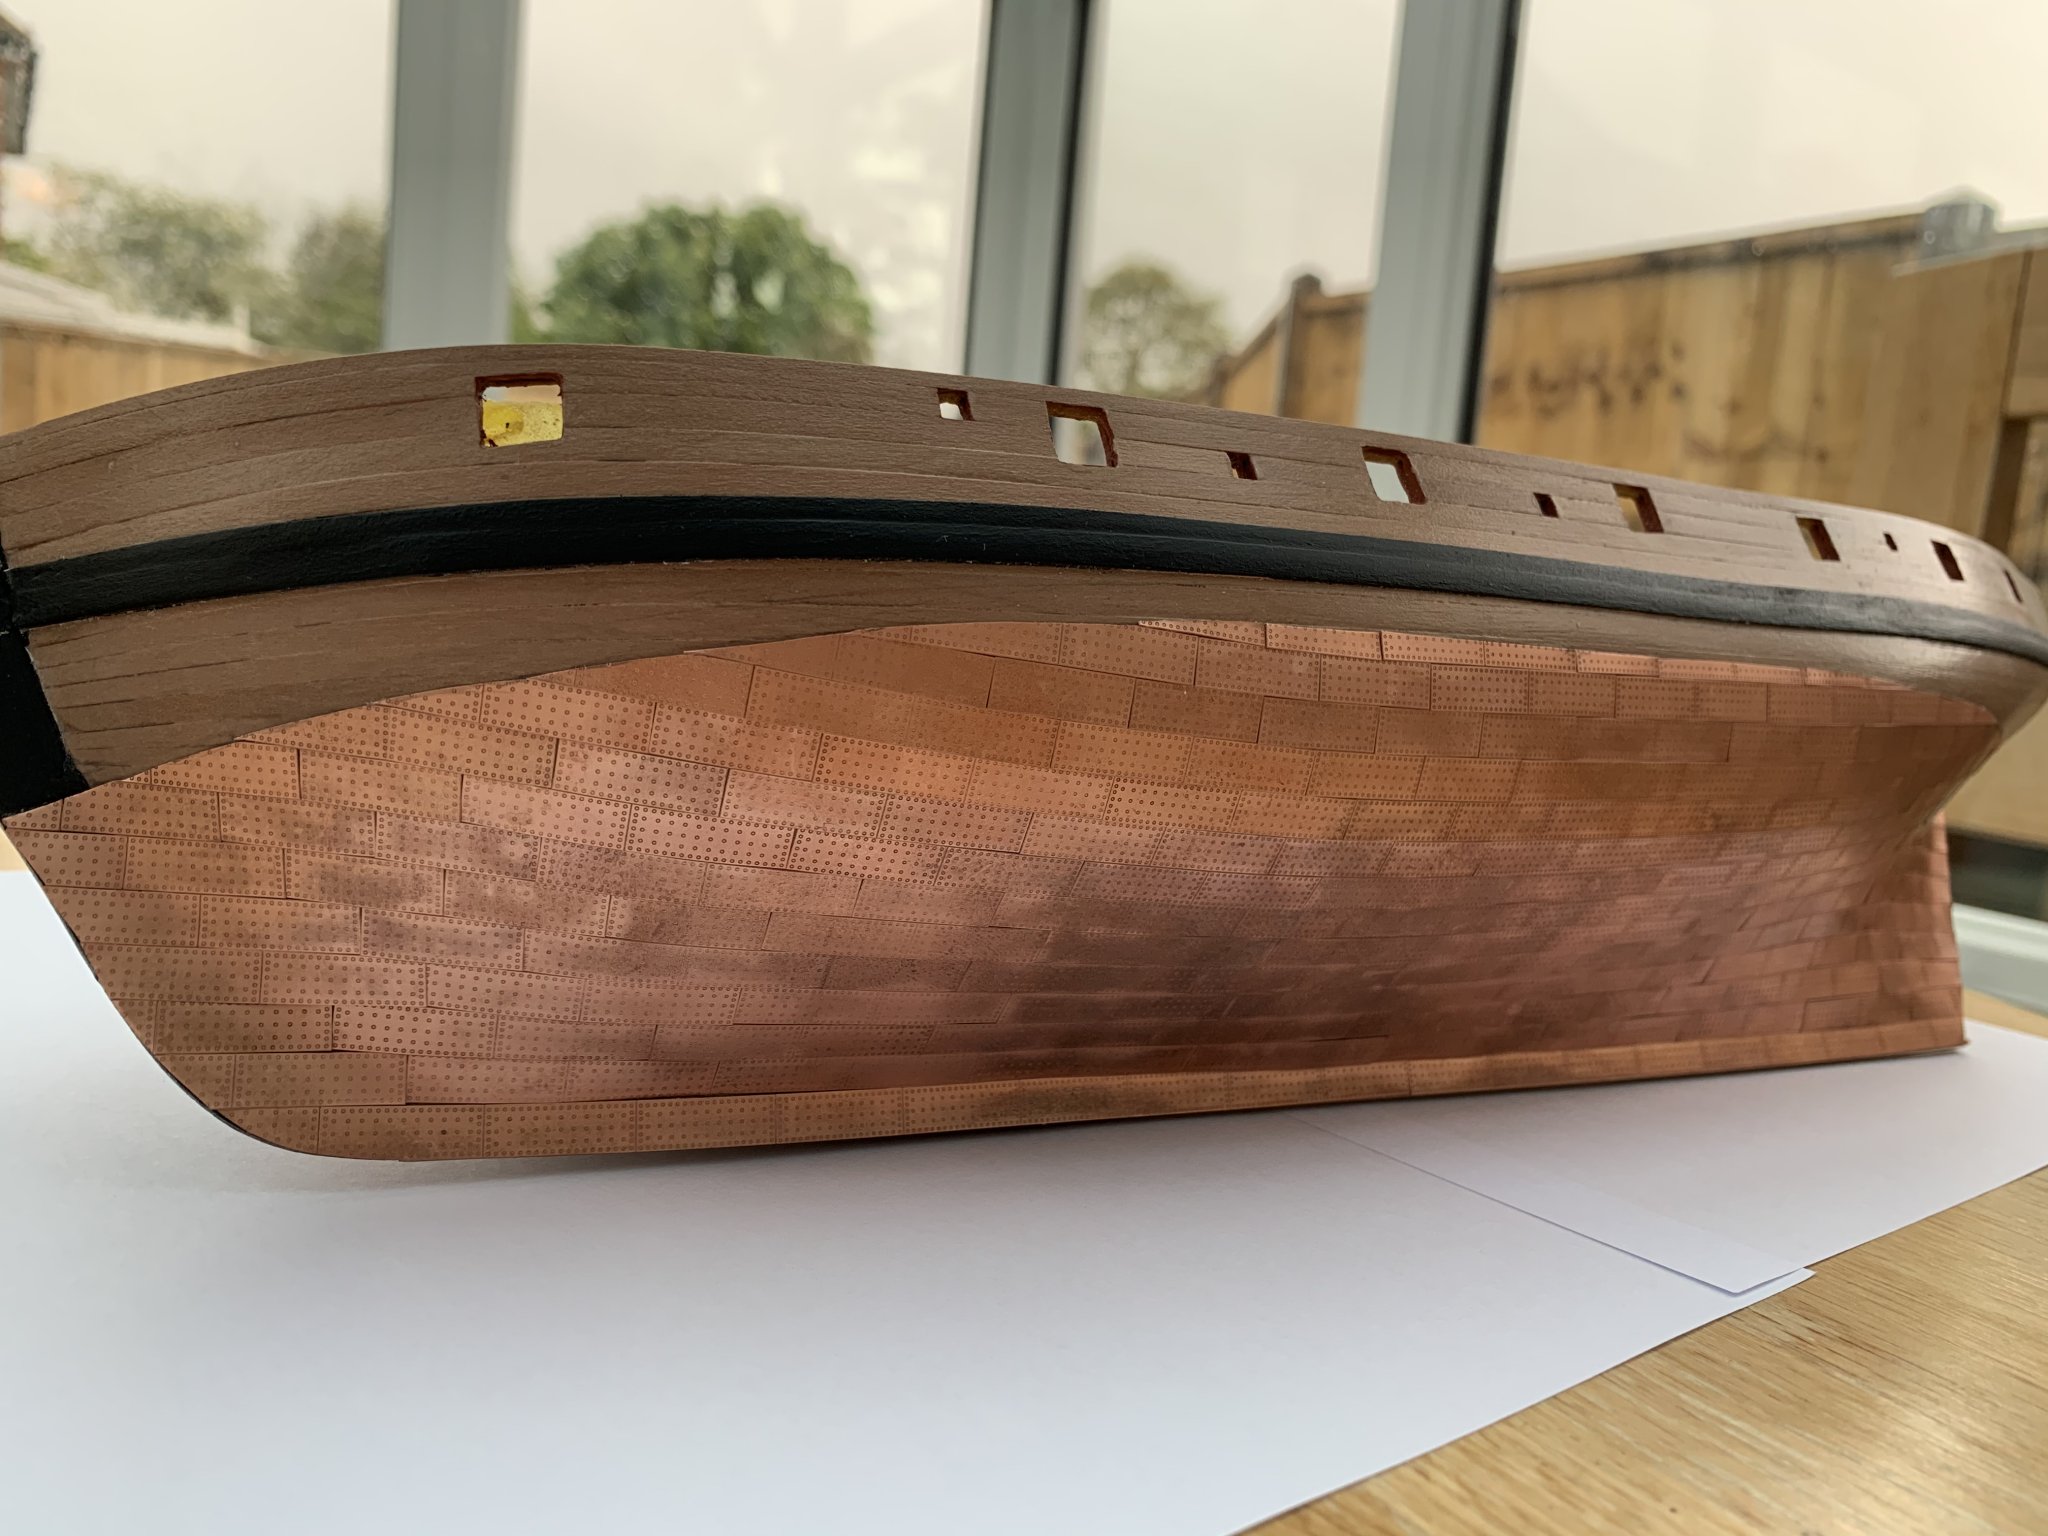
Thanks everyone for your comments and advice. Chris shipped me another set of copper to try again. I stripped the hull and resanded and finished it over the last two days and the copper arrived today. In between meetings I’ve made a start. I found I couldn’t work in gloves so I do have some tarnishing although to be honest I quite like how copper tarnishes so that’s ok by me. It was all the glue I couldn’t stand. I’m about half way and although I’m not going to win any awards I’m satisfied with the result so far. Thank you everyone and especially Chris for shipping the new parts so quickly.

- Ryland Craze, DelF, mort stoll and 7 others
-
10
-
28 minutes ago, mort stoll said:
Hi Mark,
Meant to add that since there is cement on both the hull and plate there's no issue with the corners. Should a corner rise up I gently press it down.
Thanks Mort, that's very interesting. Do you mean the sort of contact cement you use to assemble plastic models? How do you find the longevity of it? Any issues as your models have aged at all? I might look into this - the odds do seem stacked against you a bit with CA, although I clearly need to work on my skills in this area. Thanks for the comment.
-
13 minutes ago, DelF said:
Hi Mark
I share your pain - Speedy is also my first attempt at coppering and it's not easy. I got some good advice from Glenn - see the link here. I used Gorilla CA gel, applied with a toothpick. Rather than one blob in the middle, I applied five tiny blobs - four near the corners and one in the middle. Otherwise I found, like you, that the corners didn't stick well. With practice I found I could judge the size of the blobs so none squeezed out. If it did, I tried to wipe it away immediately. For that, I used acetone on a small pad made from a piece of an old cotton shirt. I found with some blobs of CA that I had to rub for quite a while to remove all traces, especially if I'd allowed the glue to dry. It will all come off eventually. I should also add that I wear rubber gloves when coppering - partly to protect my hands but mainly to prevent fingerprints tarnishing the copper.
I found Glenn's advice about how to line plates up with the leading edge of the preceding pate (I used tweezers) and adjust them with a metal pointer particularly helpful. It's worth getting this right, because if a plate is just a small fraction of a millimetre off line it catches the eye. Better to lift it and try again if you can't nudge it into place before the glue dries.
Hope this helps, and I hope you feel you can persevere with Speedy.
Derek
Thanks Derek, I will review that link. I've just stripped the lot off and Chris is sending me another copper set to try again. The hull is a bit of a mess, which I think gives away that I used too much glue. I will clean the hull up this week, review that link, and try again.
Very frustrating that I spent quite a bit of the weekend on this and got nowhere, but if I carry on with it looking like that it will end up in the bin. So I'd rather try again and get it right (or at least acceptable).
Thanks for the advice.
-
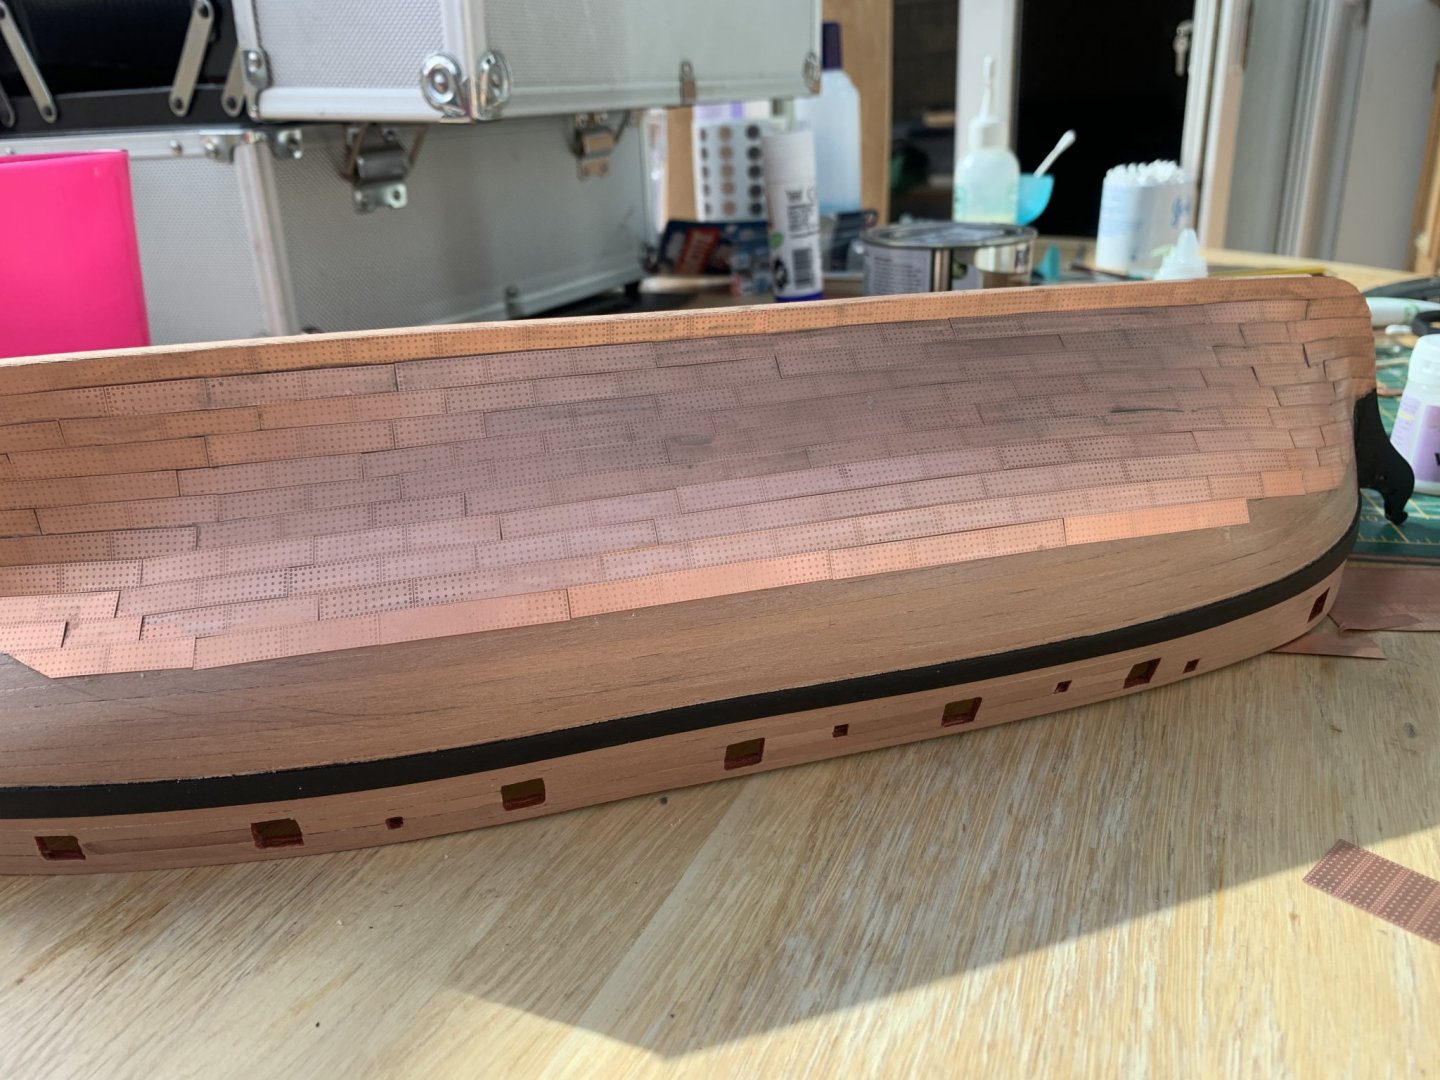
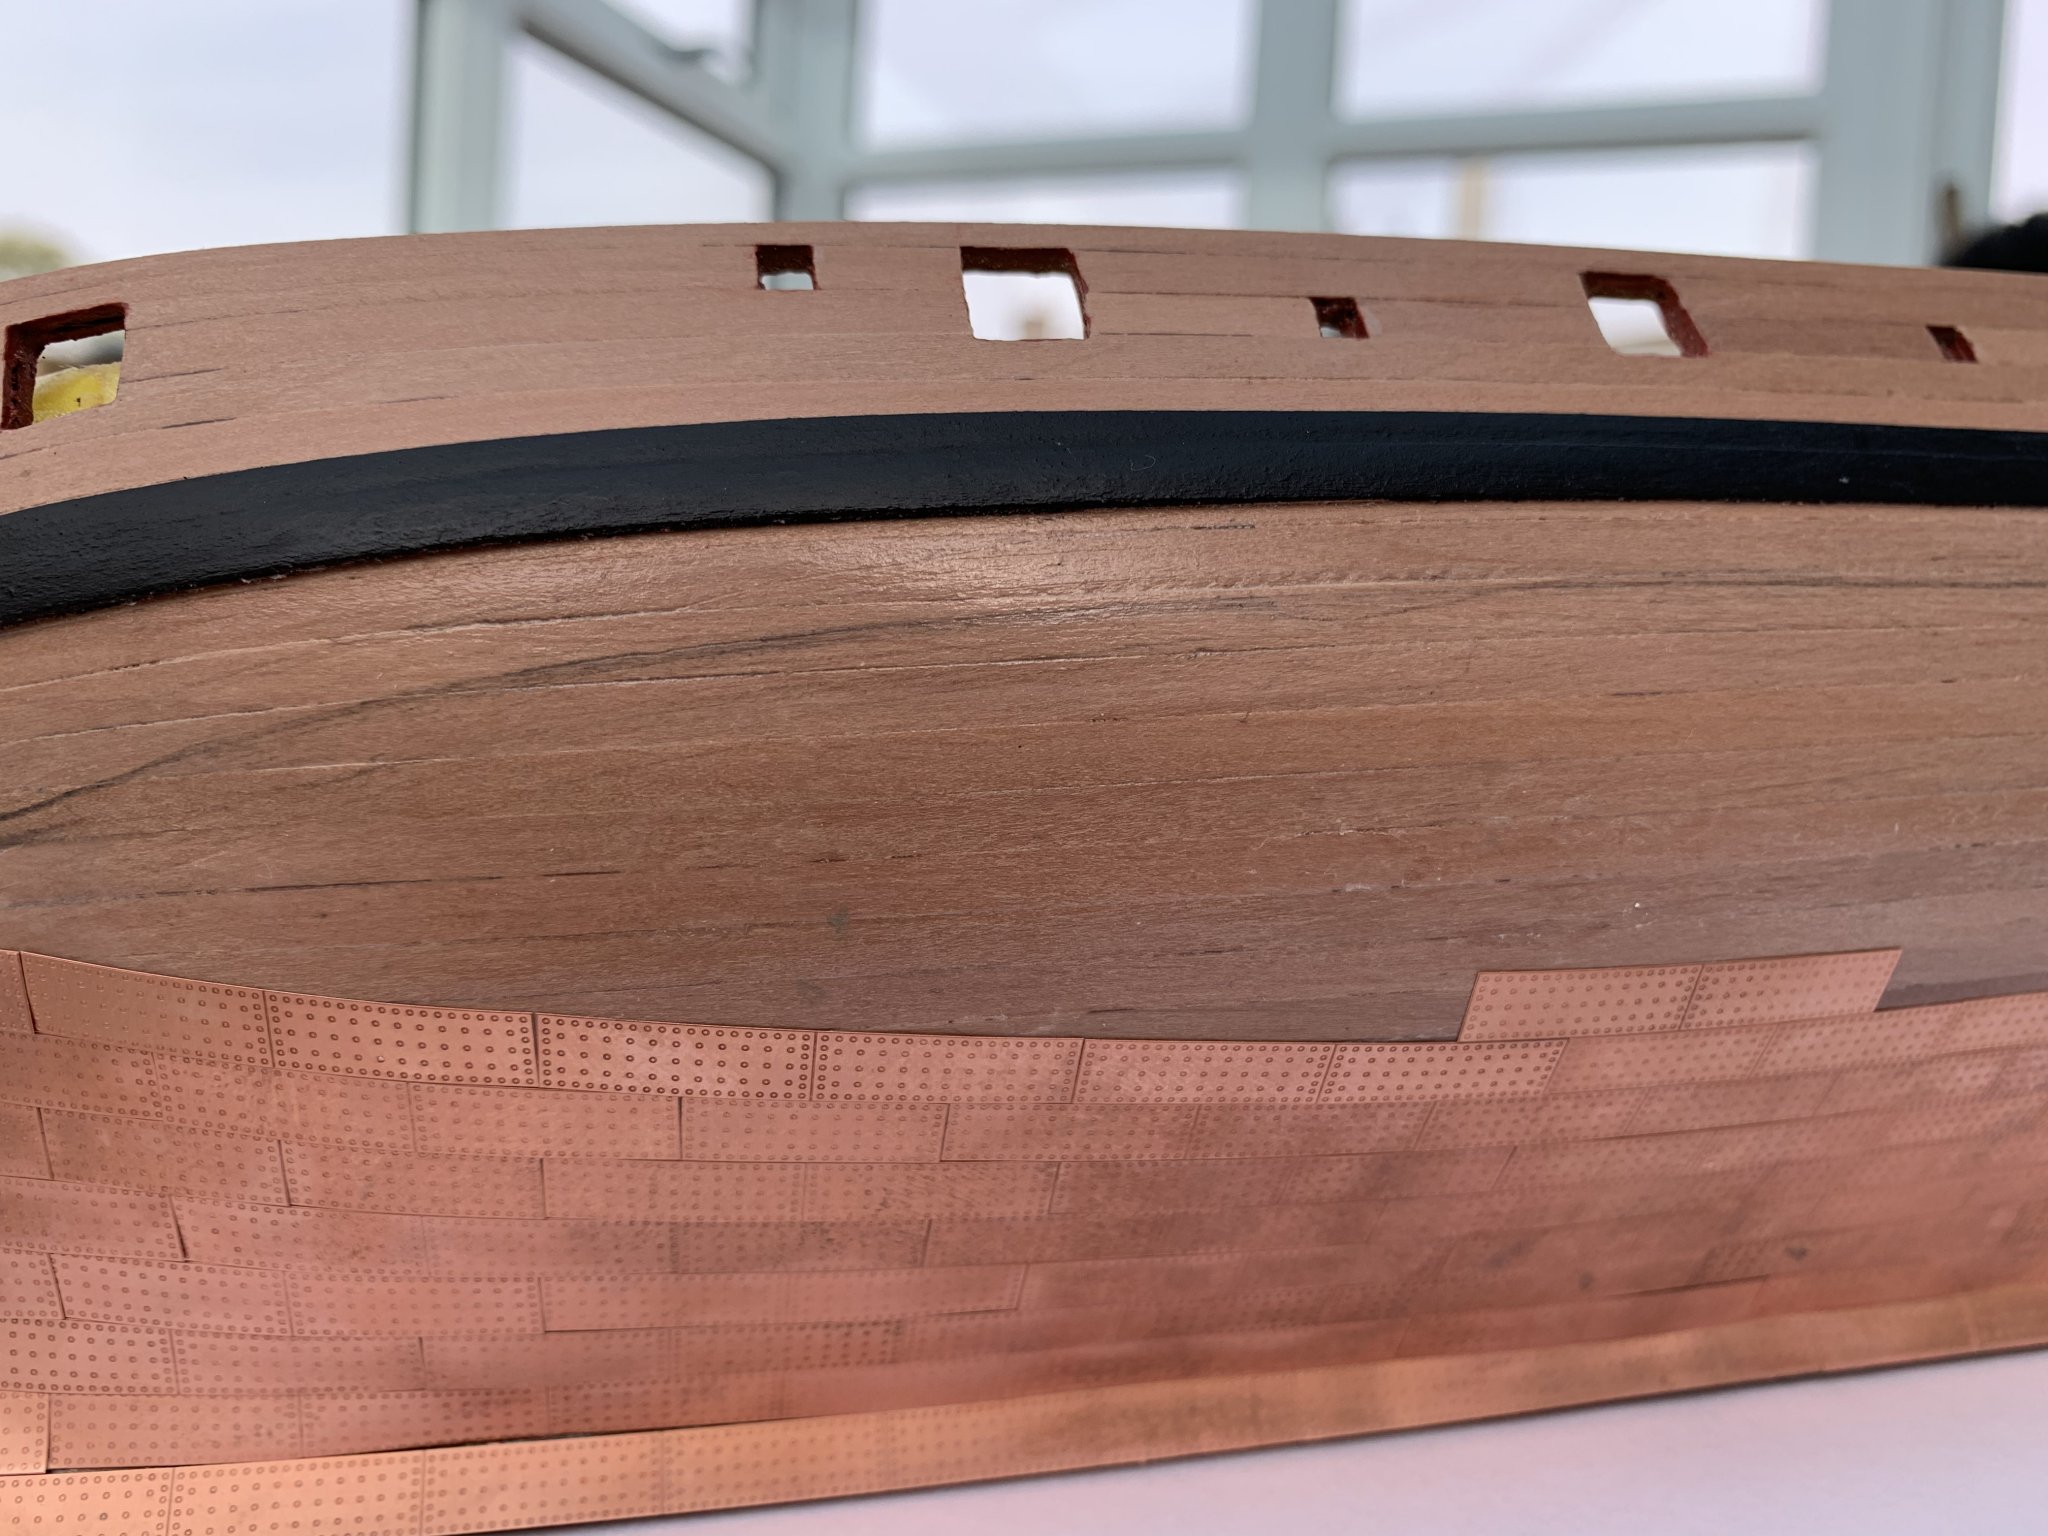
Well I think I’ve at least worked out part of the issue. I changed to a thinner glue that spread better when I pushed the tiles down. The thicker glue was leaving corners unglued and is also
harder to wipe off. I tried applying a clear coat to lessen the impact of the glue. I’m not really happy with it, but you can see the better copper further up the hull after I switched glue. I’m not sure I can face ripping it all off and doing it yet again but I think this will consign this model to a practise exercise rather than display as it’s just too much of a mess. I think I’ll leave it for the rest of the weekend.

-
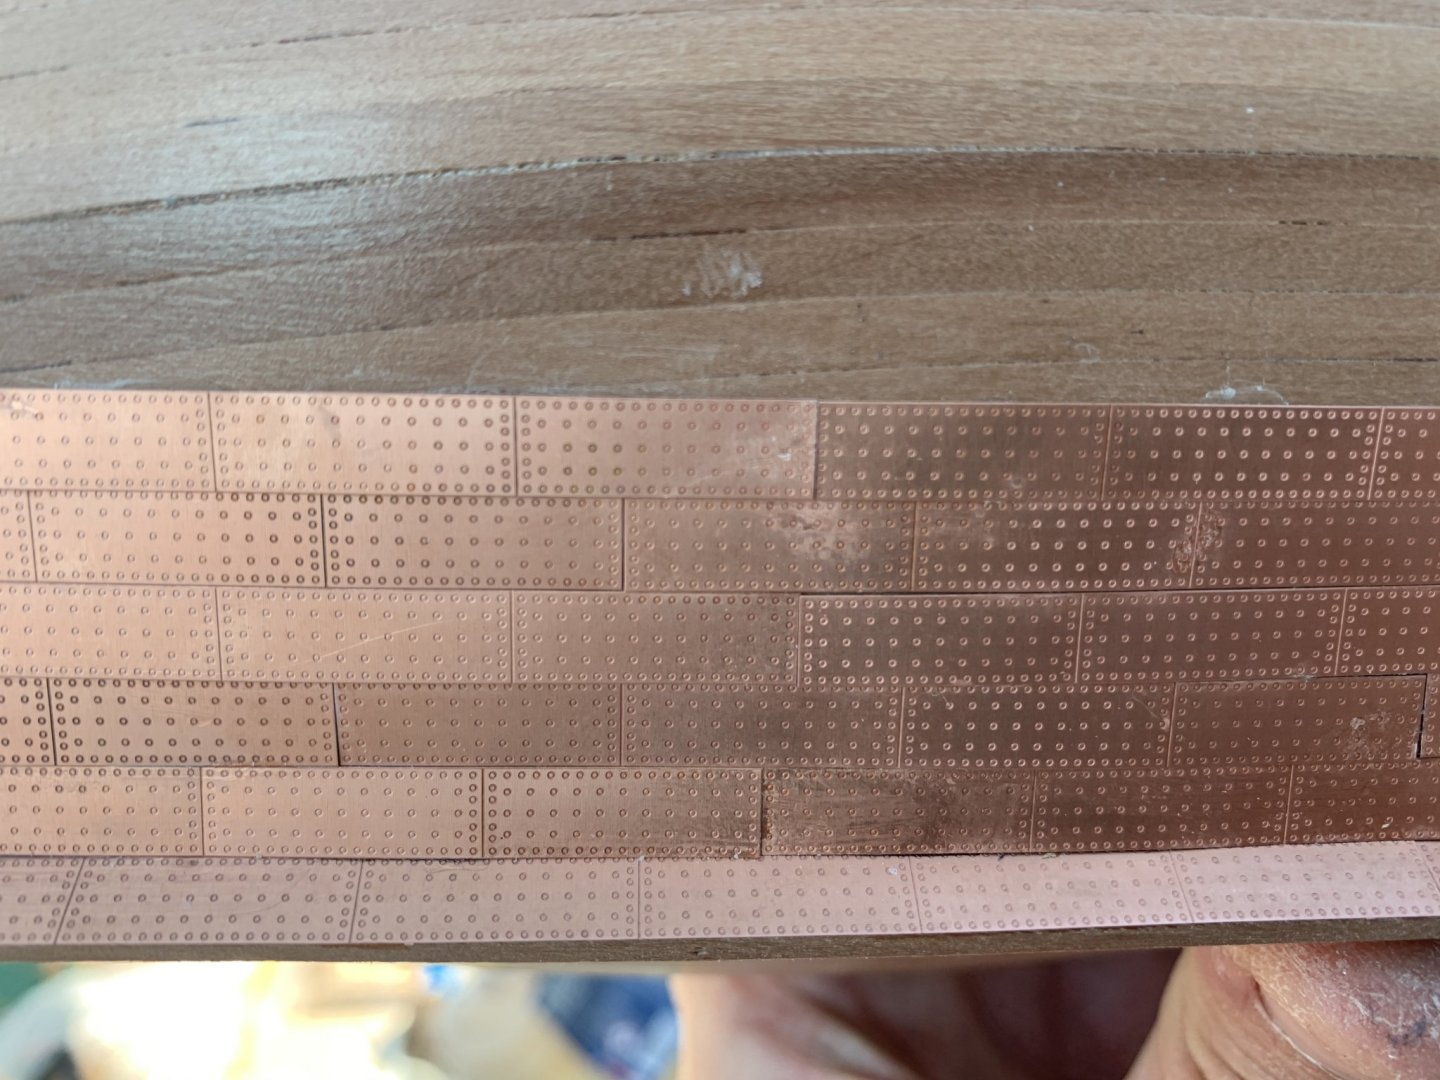
Well my second attempt isn’t much better. I am not happy with how much glue is ending up on the copper. I’ve used toothpicks to apply CA to the back of them and then placed them down with tweezers but still have quite a lot on there and feel like taking it off again. I’ve left it for today but here are some pics. Any advice gratefully received.

- KARAVOKIRIS, GrandpaPhil and clearway
-
3
-
4 hours ago, chris watton said:
I often make mistakes (still)! when copper plating and always, and I do mean always, end up removing some I am not happy with. This is the reason there are more than enough spare plates for mistakes.
Well I didn't get much further, tried to use some acetone to clean the glue up and then all the glue went white and I could see just how much was on the faces. After an hour trying to clean it up, I've stripped it back down and started again. I wasn't overly happy with the lay of the tiles anyway and it's much easier/neater if you leave them joined. I might just be on the phone for some more copper, Chris, but let me see how I get in first. We'll put that down to a practise lap!
-
2 minutes ago, chris watton said:
You will have more than enough tiles, don't worry about that (and if you don't, you know where I am). Because there are no 'dimples' like machine pressed variants, the tiles are flat, so it is no problem for some to overlap. I did the same for the Amati Cutty Sark and the 64th scale Victory.
OK thanks. In that case I will definitely remove some of the bow section and have another go. Thanks for the tip.
-
3 minutes ago, chris watton said:
Always dry fit the copper plates first, to get the general shape. Also, when you get near the ends, leave the plates connected. For example, the gaps at the bow would be better if the copper plate just short of the edge had another attached , which could be shaped to the bow profile (once dry-fitted and marked). There are very few individual plates that I glue in place, always at east two together, even if some overlap the ones below.
Thanks Chris, I think I will remove some of those and do it again as you've said. I was wondering how I was going to deal with the very small gaps. Hopefully there are sufficient tiles I can get away with wasting a few. Is it also ok to slightly overlap the tiles where needed? I have some small gaps at the bow where the angle of the tiles was starting to change and it looks poor.
-
The apparently simple act of glueing on the keel resulted in a broken part, two parts glued upside down, and a bleed on the model. I decided at that point to put it down and go have a beer in the garden instead. However I’m back on it today and have started the copper. Really found round the bow quite difficult and not overly happy with some of the tiles. I also have acetone on order to clean up the faces a bit from inevitable seepage. Will progress slowly over the next couple of weekends and see how I get on.
- JpR62, chris watton and KARAVOKIRIS
-
3
-
Crikey you work fast! I've just completed the keel on my speedy, breaking one part and gluing two others upside down. So I've decided to have a break 🙂
Fabulous build again - amazing speed and still better than anything I could turn out.


Mosquito B Mk IV - FINISHED - Revell - My next non-ship project
in Non-ship/categorised builds
Posted
I feel your frustration. I don't think microsol is going to work if you have lacquer on it as it needs to penetrate the decal to soften it. I am not an experienced aviation modeller and I don't know what may have caused that issue, but I do hope you find a solution as it's looking great. Best of luck with it.