Schooners
-
Posts
72 -
Joined
-
Last visited
Content Type
Profiles
Forums
Gallery
Events
Everything posted by Schooners
-
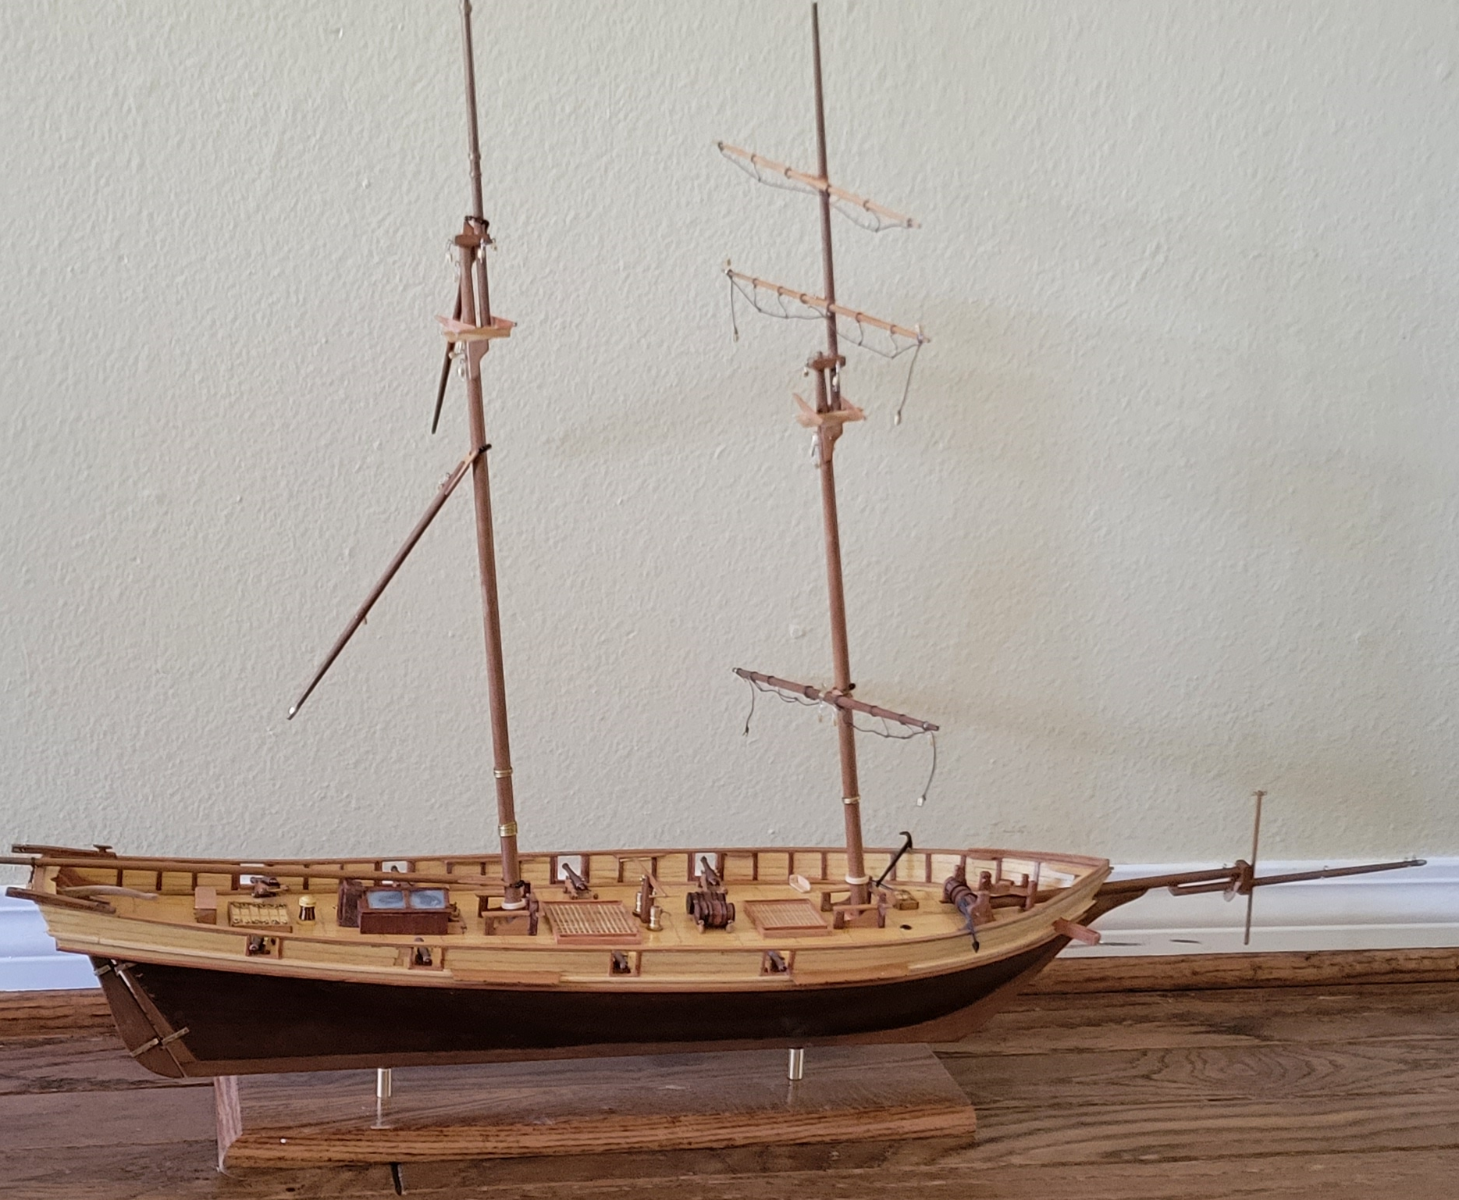
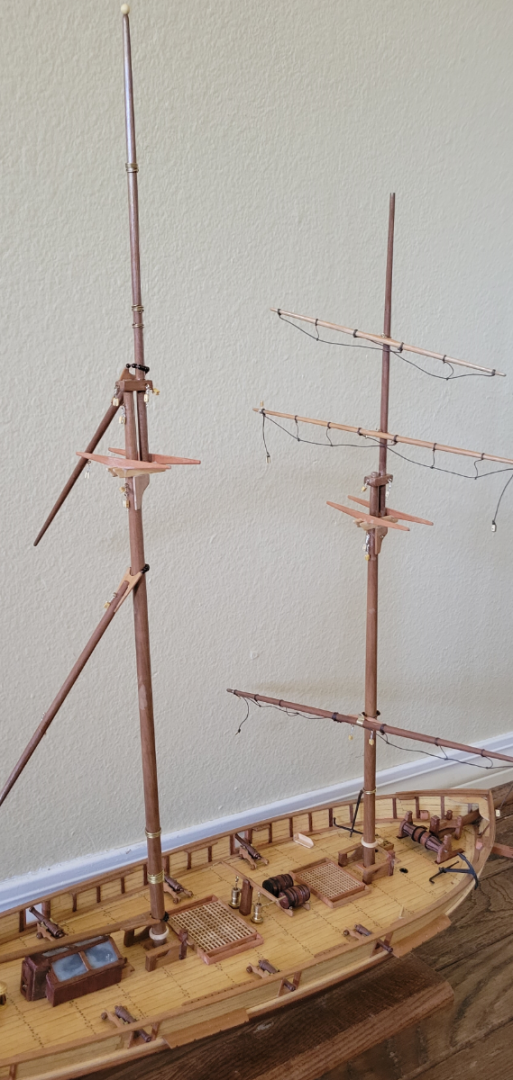
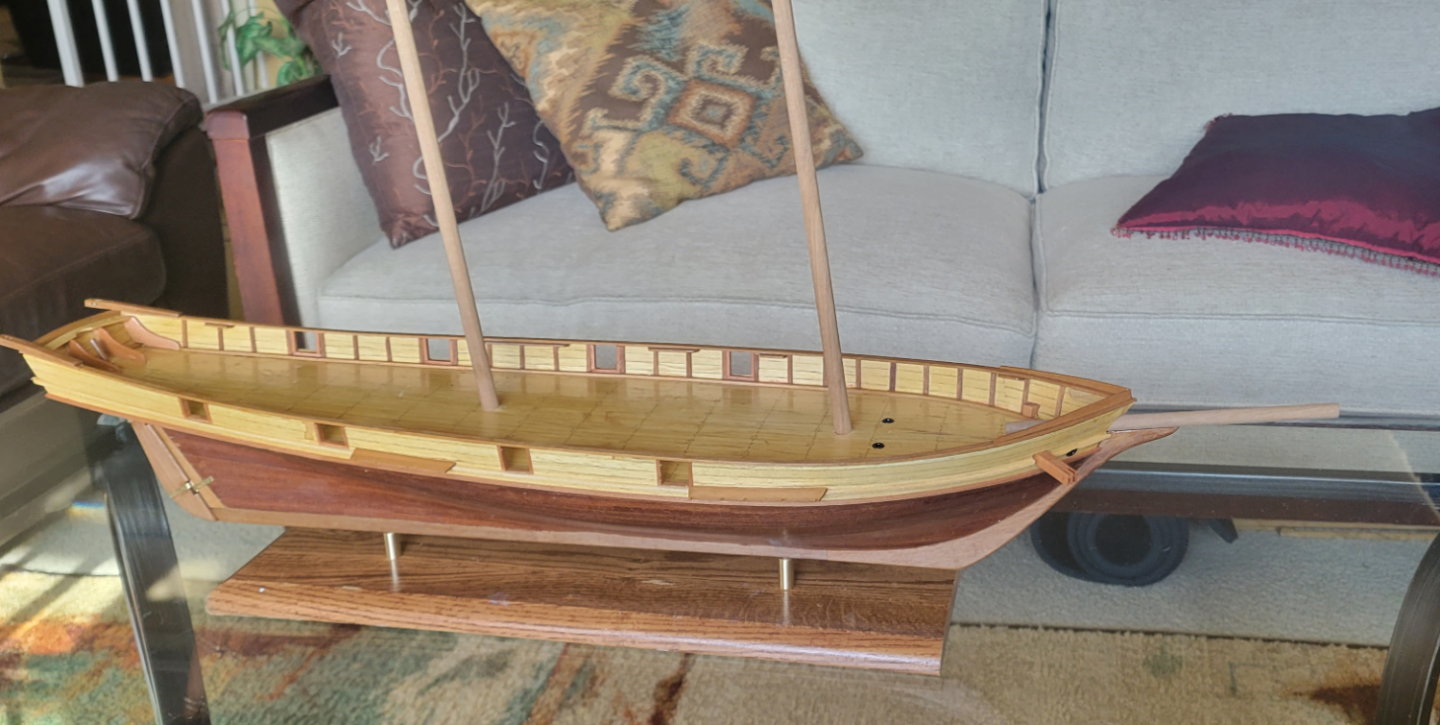
I have spent the last few days working on the masts and yards. "J Brent"'s youtube viedos have been most helpful as has Harold A. Underhill's "Plank on Frame Vol. II Scale Masting and Rigging". I have a few other books on the subject, but Underhill's is the easiest for me to understand. Many things are still not glued down, but it is time I commit to finalizing the furniture's position and bond in the masts and bowsprit. I have never rigged a model ship before; it looks really intimidating. but I felt that way about the masts and yards a few days ago, and now I look back and think that they were not that bad. the little blocks were a challenge, especially using the small steel wire.

- 36 replies
-
- 4
-

-
- Harvey
- Artesania Latina
- (and 1 more)
-
A little more work on the deck furniture, used Brass Black on the Windlass brass pieces.
- 36 replies
-
- 3
-
-
- Harvey
- Artesania Latina
- (and 1 more)
-
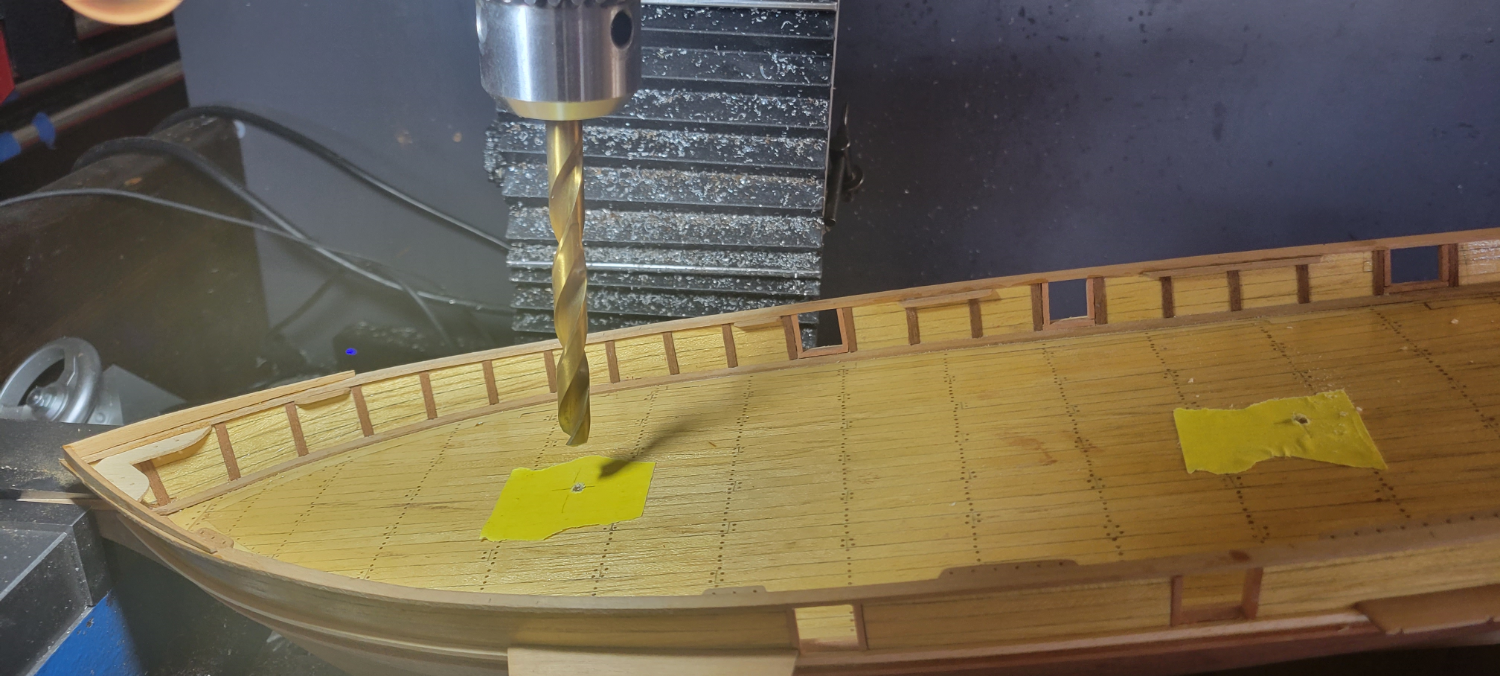
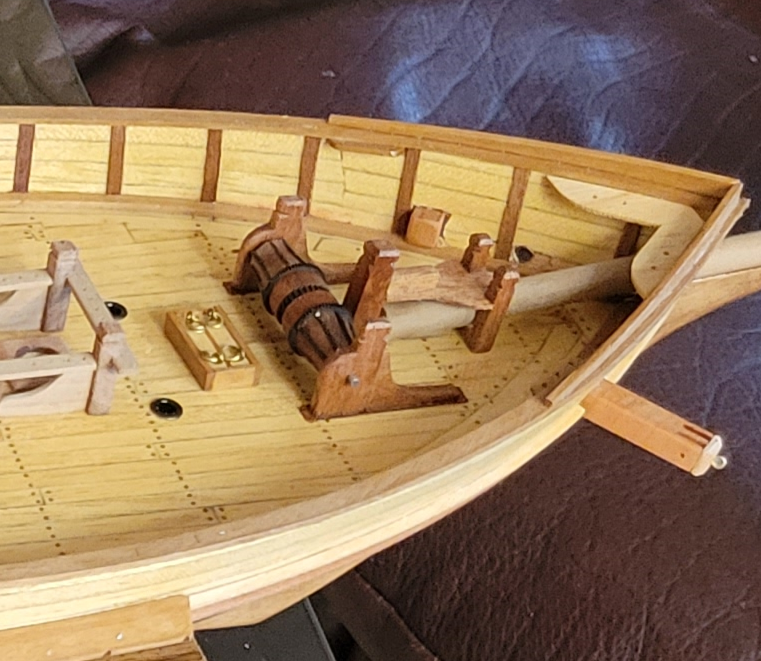
I worked on my cannon and continued with the Windlass. Below I am drilling the hole for the drum axel. This is the samson post and knight head: Then a test fit on deck. I ordered some 1mm brass wire from Amazon that will be used for the whelps.
- 36 replies
-
- 3
-
-
- Harvey
- Artesania Latina
- (and 1 more)
-
Harvey Baltimore Clipper – Windlass I am working on the deck furniture of the Harvey and I am a little disappointed in some of the kit’s smaller details; some of the parts are out of scale and others are just wrong. My biggest issue is with the Windlass. This is what the plans show: I can’t imagine seamen being able to weigh the anchor with this little hand winch. I really don’t want to go down a rabbit hole and end up not finishing the model because I redesign everything I feel is incorrect. But the Windlass is just so bad. I have decided I will limit myself to redesigning just the windlass and build the rest of the deck furniture as is. I am looking at a Windlass of this period something along these lines. I start by creating a 3D model in CAD I was thinking I would start with the simple wood parts: But I changed my mind and will make the Capstan Drum first. If I can’t make this look good, then it won’t matter how the rest of it turns out. I break the part down into smaller sections I can turn on the lathe Then use a bit of sandpaper to smooth out the cut lines. Then slice the part of the work piece with the mini mitre saw. The first two walnut pieces done. The capstan drum is no more difficult, just more points: I print the plan out and turn the stock down. Here is a close up before any sanding is done. then I take it over to the mill and use a .032″ saw to cut the slits for the iron whelps. and my progress so far. Next I will make the ratchet gears and the whelps. I take a sheet of .040″ brass and mark out the outlines for the ratchet wheels. Drill a 5mm hole in the middle and screw it to a sacrificial aluminum rod. Then I turn it down, first roughing, Then to the required diameter. This is taken over to the mill and the teeth are cut with a 30 degree engraving bit. There are 60 teeth cut to a depth of .025″ After a little finish work on a sheet of wet sand paper, they are done. The center ratchet wheel is made in the same manner, it has 30 teeth and they are cut offset to give them the ratchet profile. The finished ratchet and washers: And the rough out windlass assembled. I will use brass black on the brass and install brass wire for the whelps. I think this is the difficult part, the other components will be more straight forward.
- 36 replies
-
- 3
-
-
- Harvey
- Artesania Latina
- (and 1 more)
-
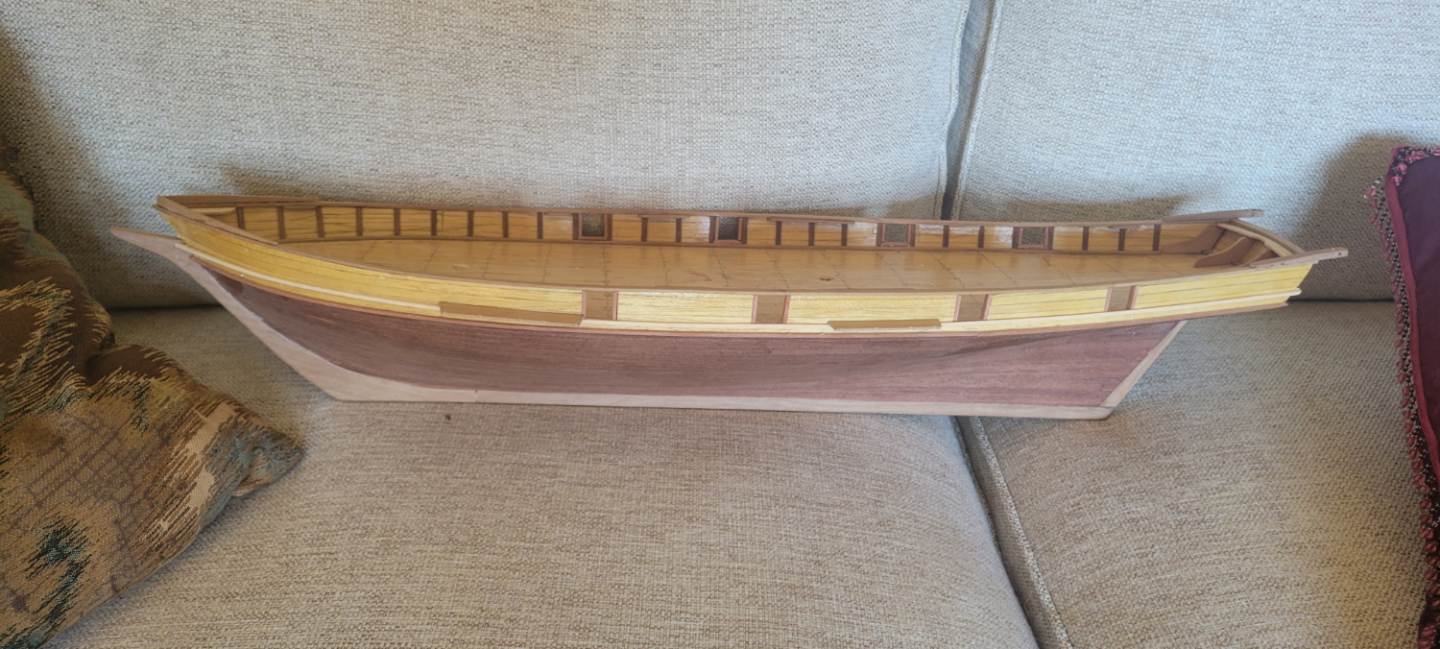
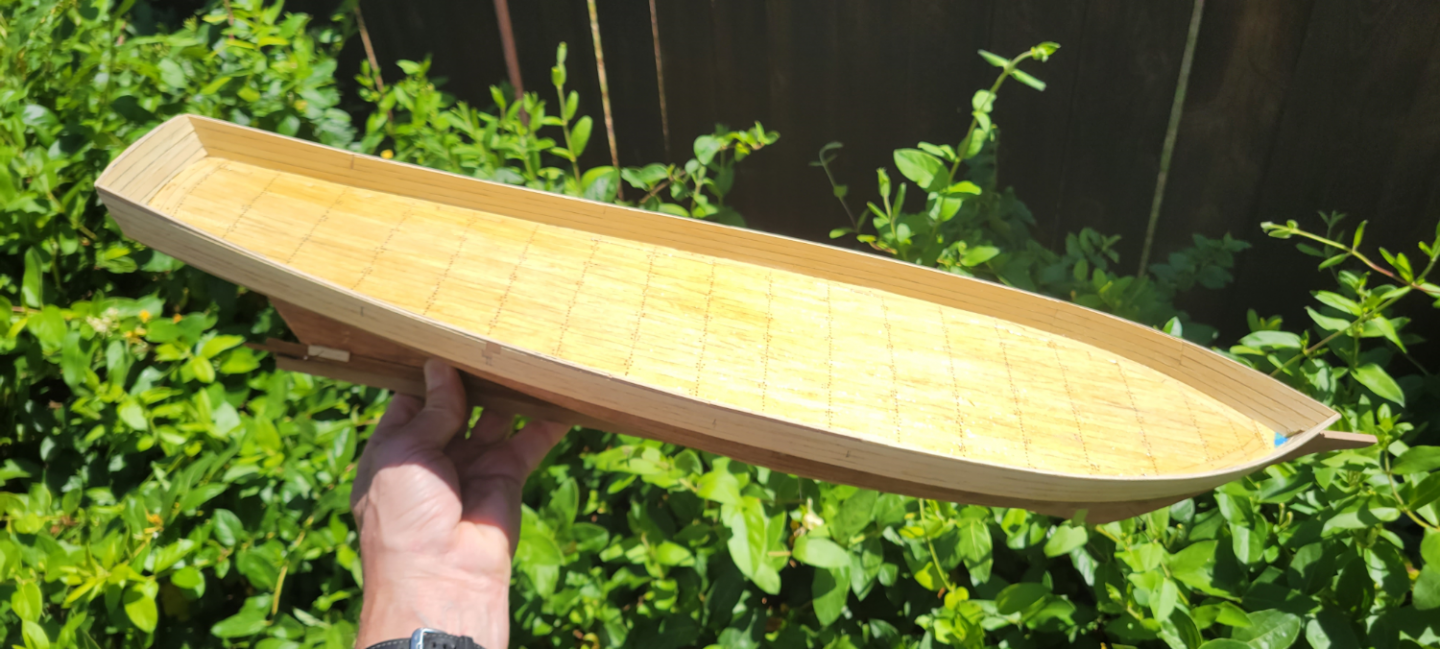
My hull is pretty much complete. Time to turn my attention to the deck furniture. the masks and bowsprit are only temorarily mounted and the base is also temporary, a peice of an old shelf, but it will serve me well supporting the ship as I add more components.
- 36 replies
-
- 4
-
-
- Harvey
- Artesania Latina
- (and 1 more)
-
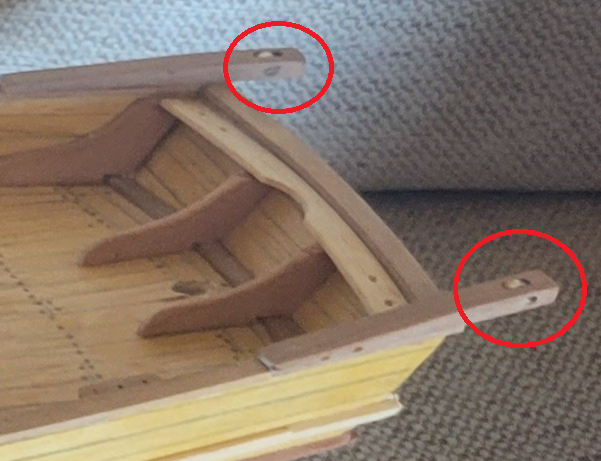
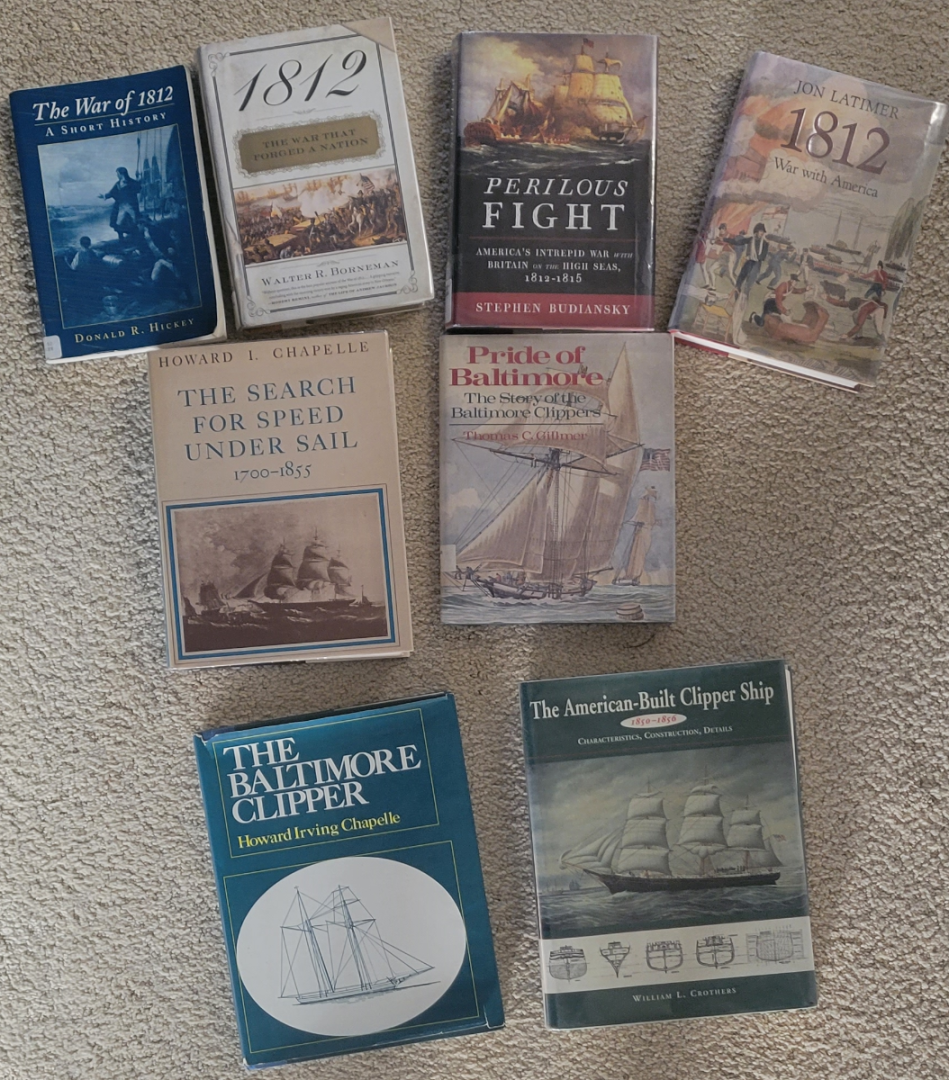
I am using the mill to drill the holes for the masts, I am striving to get no tilt side to side and 10 degrees rake. The second hole I drilled first with a smaller pilot drill and this worked better. I turned a couple of small brass pulleys for the Davits on the lathe. I need to install the rudder and then varnish the entire hull. Then I will move on to the deck furniture. I'll probably make the mounting pillars and mount the ship to a temporary stand to make it easier to work on. Below is my current reading list. I am on a War of 1812 kick.

- 36 replies
-
- 5
-
-
- Harvey
- Artesania Latina
- (and 1 more)
-
Harvey Baltimore Clipper – Bulwarks I am wrapping up the hull planking and am happy with my final side. I was able to plank the entire side with only two stealers and these were required at the stern. I hope I don’t forget the little tricks I learned here and there. I did sand the hull smooth, but sanded through in a few places and I have not decided whether I should attempt a repair or not. The area around the repair will probably get damaged during the repair of a strake and I don’t want it to end up looking worse. I am also trying to decide whether I should stain the stem/keel/stern members a darker walnut to match the hull planking. Oh, and one MAJOR lesson learned. Don’t use water to wipe off the saw dust on the hull when using this very thin veneer planking. Even a little water will soften the PVA glue and the planks will lift and warp. The glassy parts that you see on the hull are areas that I applied more glue in an attempt to reattach/flatten planks that lifted after a cursory wipe with a wet rag. Ughh. I also am getting much better at wielding the exacto knife. the first couple of gun ports I cut out from the gunnels were real hack jobs, but the last ones I cut were very precise and square (I used a square and a reverse tooth fret saw to good effect).
- 36 replies
-
- 1
-
-
- Harvey
- Artesania Latina
- (and 1 more)
-
Good day, This kit is 1:50 scale, it is 25" long as in the pictures above, just the hull. and 6 3/4" widest point abeam. The problem with the kit I am building is that it is no longer made and has not been for at least a couple of decades. You may be able to find a used one, I don't know. Model Shipways makes a kit for the Pride of Baltimore at 1:64 scale. Are you lookin for a kit to start with? or building from scratch. Good Luck.
-
I continue working on planking the hull, the second side is going much smoother than the first side. They say you are supposed to plank both sides at the same time, plank for plank. I did this for my first layer of hull planking to insure there were no offset forces placed on the structure, but I don’t think it matters with this second layer as the structure is very solid and these strips are so thin as to not impart any force of significance. I am finding that the key to get these really thin walnut strips to lay down flat is to use lots and lots of clamps. My clamps are made from a small strip of wood 1.5mm X 5mm with a .020″ hole drilled for a sewing pin. I then use strips of an old inner tube folded several times and run through the pin to provide the clamping force. I push the pin into the wood with a pair of pliers, then slide the rubber down against the wood strip. They are cheap and easy to make, so I can have lots of them. You can see that I have used filler to get a nice shape in the first layer of hull planking, and also stain to hid the cracks between the planks. I use the transparent Titebond glue. The other side is planked.
- 36 replies
-
- 3
-
-
- Harvey
- Artesania Latina
- (and 1 more)
-
Good discussion, thanks guys. I will sand enough to get a nice smooth finish. I understand about not sanding too much becasue I did sand through my deck planking in a couple of places and it was real difficult to repair--and can still be seen if you know where to look. I will not be painting the hull planking because I like to looks of the walnut. Yes this is my second layer of planking and I used wood filler on the first layer and am happy with the shape of the hull. It was good practice doing the first layer as my second layer came together much easier with fewer stealers.
-
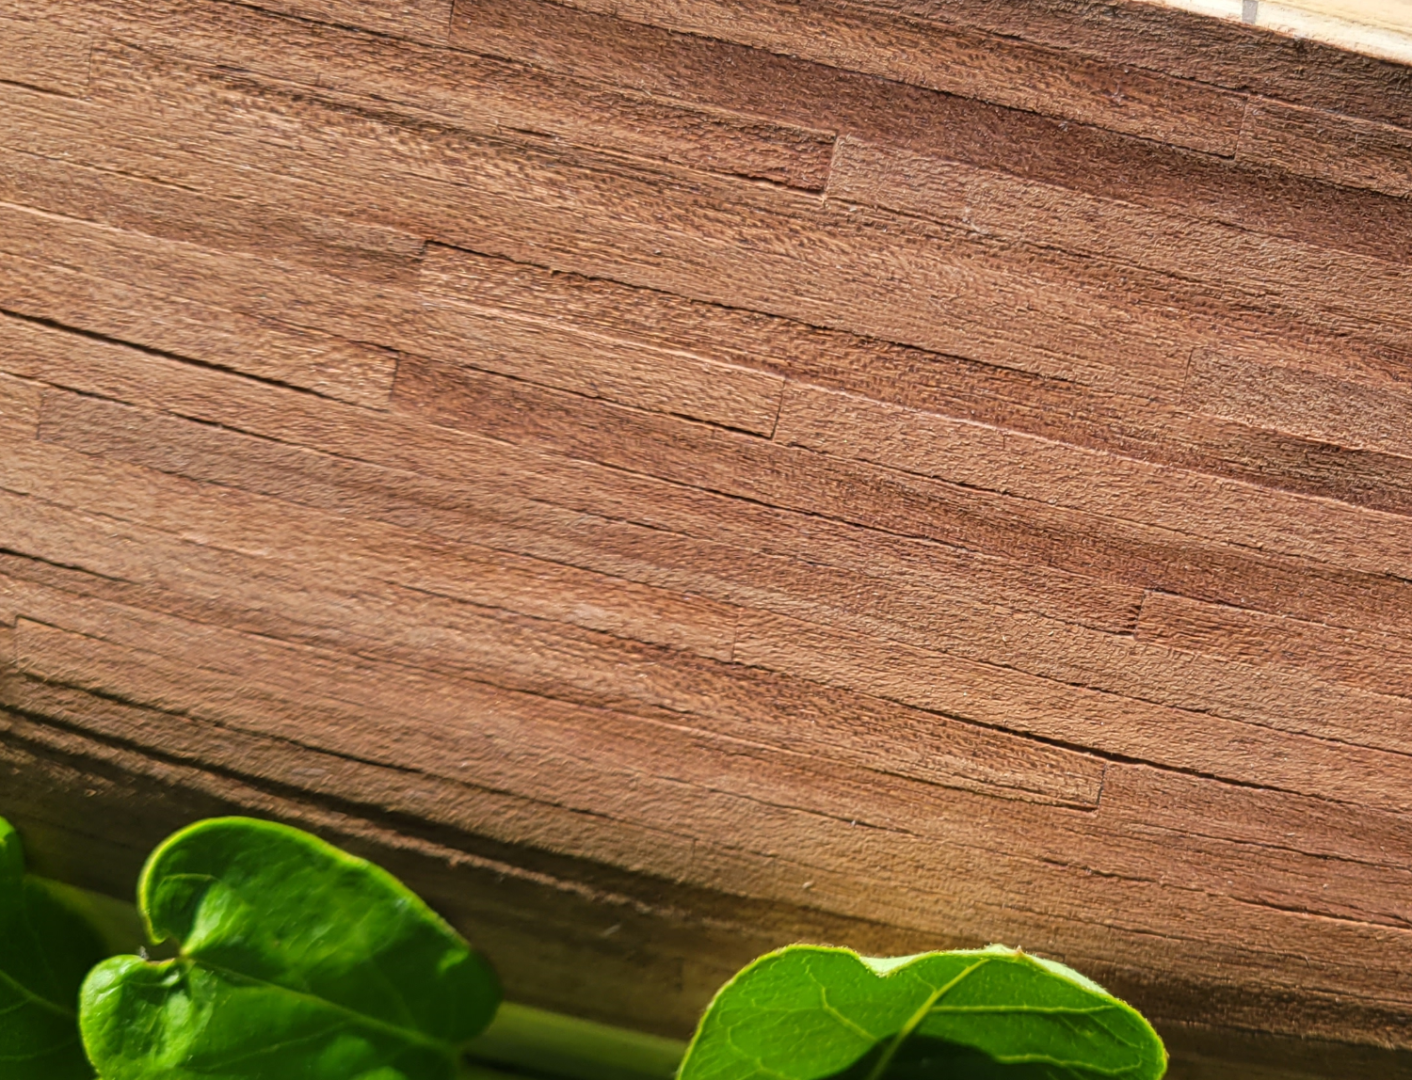
I know there is not a difinitive answer here, but do I need to be careful not to over sand the hull? Perhaps I need to do a little more than I have done, but I kind of like the look of the planks being a little uneven in their height. I think it looks more realistic when you can see the individual planks. But I also don't want the hull to look unfinished. Does anyone have a rule of thumb? Or is it just, "go with what you think looks good." My fear is later when the ship is done I will regret sanding too much or too little. Am I over thinking this? The photo above was taken with the light at an oblique angle to accentuate the unevenness of the planks.
-
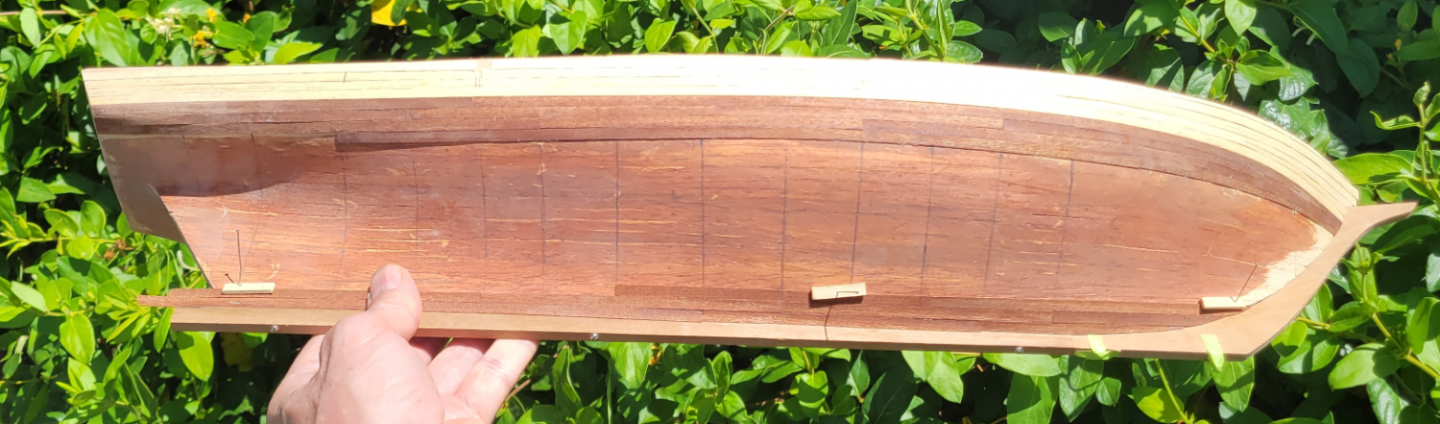
I have varnished the deck. The bulwarks are installed and planked. I have started planking the hull at both the garboard strake and at the bulwarks. The thin walnut strips that are supplied for the 2nd layer hull planking are tricky to use. I tried wetting them, but getting them to bend is very hard, but I found that if I plank in smaller strips bending is less of an issue. Also wetting them dilutes the glue and they do not stick very well. But if I apply the strips dry, they are so thin that when I apply the glue, the under side of the plank swells and I end up with curved board. I can sand them smooth, but I worry that they are so thin I might sand through. Soooo, I have found a technique that is working well for me. I wet the Outside of the plank with water, then apply glue to the Inside of the plank and apply it. This allows the plank to swell evenly and the glue adheres well. I also have stained the first hull layer under the walnut strips. the white wood underneath can show through if the planks are not absoluetly perfectly butted against each other. The dark stain allows the planking to be more forgiving in this regard. All for now................................................
- 36 replies
-
- 4
-
-
- Harvey
- Artesania Latina
- (and 1 more)
-
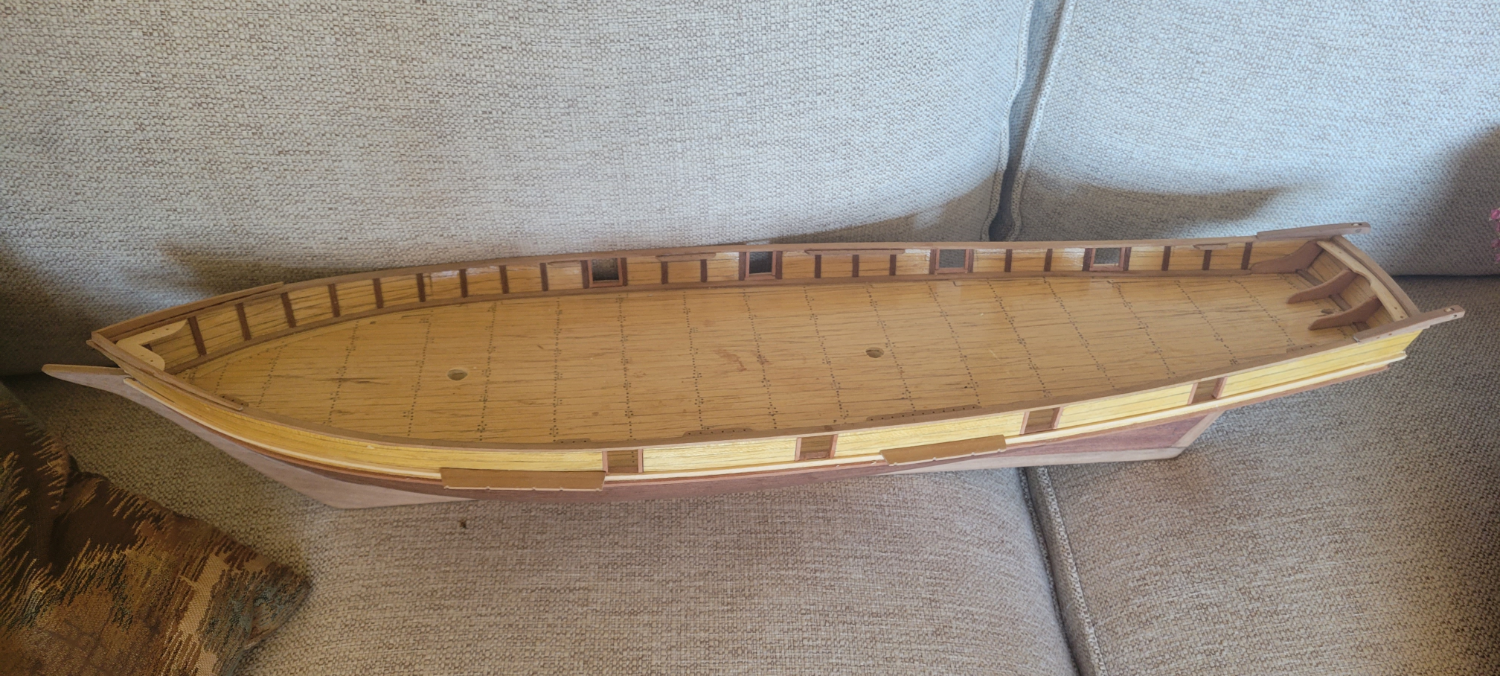
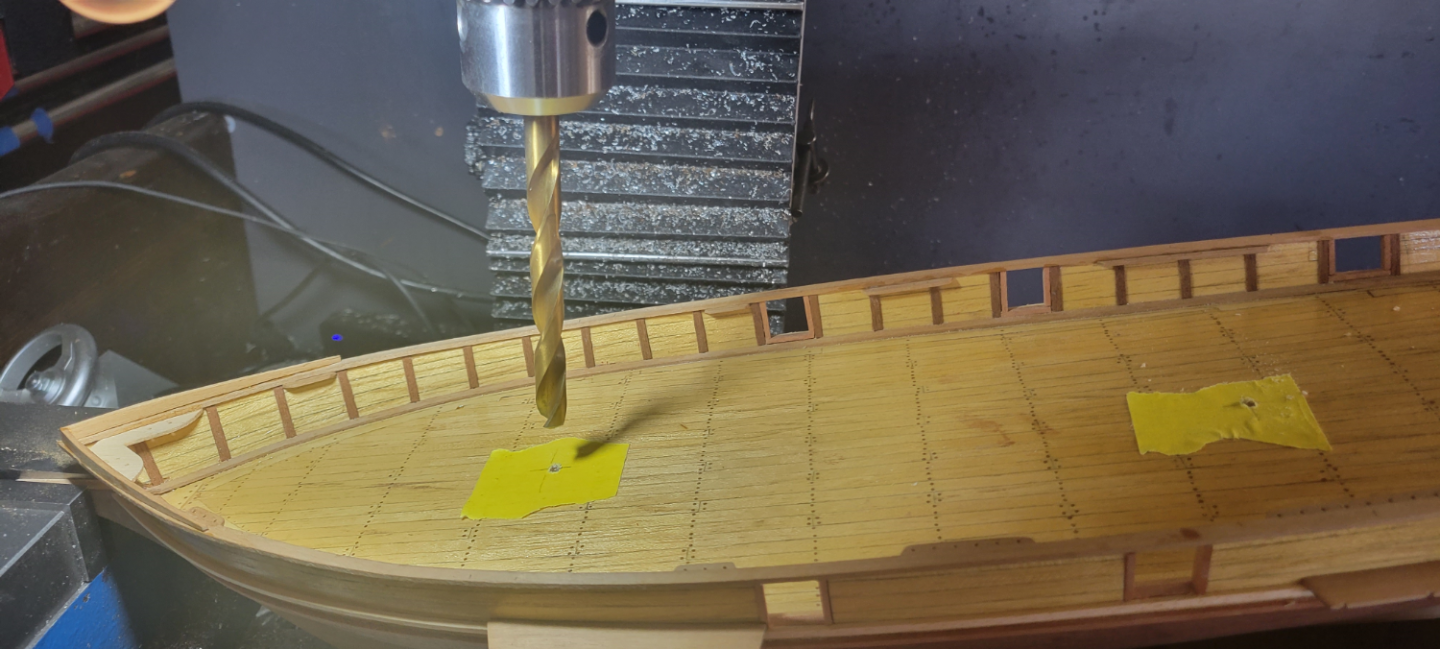
Deck is about complete after driving abunch of trennels. I am having boat loads of fun! 😁 At first I was drilling the holes, lining them up by eye. But I noticed that they were wondering a bit. So I decided to use a piece of masking tape to help keep the trunnels in line. I noticed my plank butts were not perfectly in line across the deck either. This is more noticalbe now that the trennels are in. Still learning a lot.
- 36 replies
-
- 4
-
-
- Harvey
- Artesania Latina
- (and 1 more)
-
Thanks guys this helps alot. I think what I am hearing is that you make the planks symetrical across the king plank. So at the king plank you break the rule that adjacent butts at a deck beam must have three planks between them, because to be symetrical you must have a butt on both sides of the king plank to maintain the mirror image. Also I need to rethink the order of operations when planking. I cut all my deck planks to the same length, marked the caulking on the sides, then laid all of the planking down from midships. The nibbling in the margin planks were done after all the planking was down so the deck planking did not meet them in a preplaned pattern. I like Phil's suggestion of starting at the bow and at the king plank so there are no short planks there. I would think the nib cuts would need to be perpendicular to the length of the plank as you want them to terminate parallel to the deck beam (minor point I guess). Lesson learned, thanks
- 36 replies
-
- 1
-
-
- Harvey
- Artesania Latina
- (and 1 more)
-
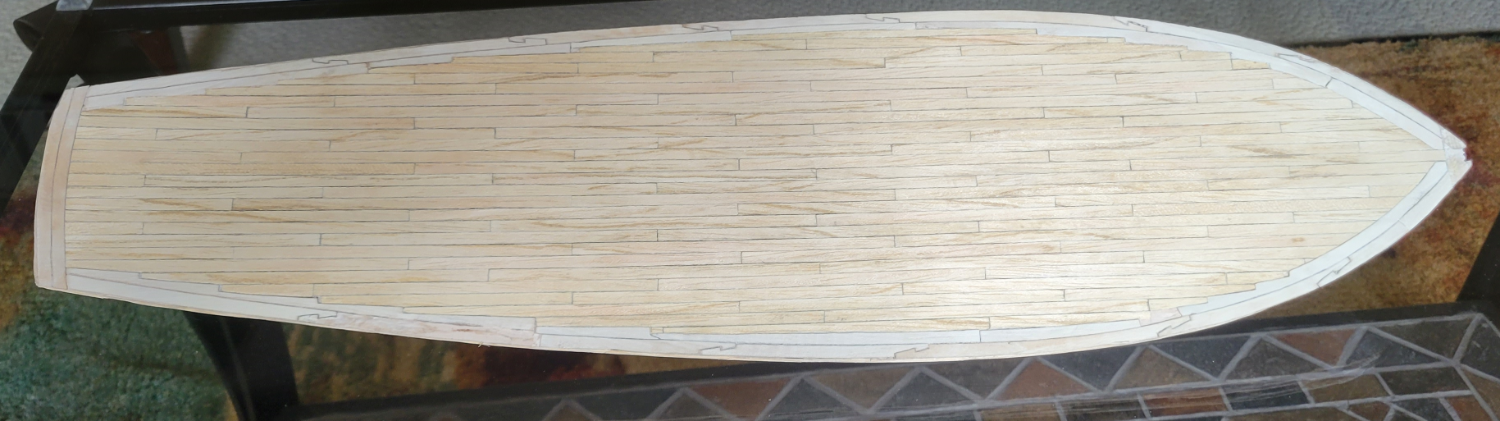
Deck Planking This is a quick update on my progress--I have been working on the deck planking. I am using the planks that came with the kit, 5mm wide and white holly for the margin planks. It's been fun practicing hook scarf joints and nibbling the deck planks. I kind of messed up my margin planks when I used my scrapper to flatten them with the regular deck planks; I took off too much in places and need to perform some rework. The white holly is a joy to work with, easy to cut to any shape, does not splinter and has very fine grain with no fuzziness. There is one thing that I do not understand about deck planking. I followed the standard decking rules (I think), three planks between adjacent butts on a beam, joggle if the snipe is more than twice the width of the plank, the 1,2,4,3 butt pattern. But if I follow these rules uniformly across the deck, the pattern is not mirrored across the king plank. And therefore the nibbling in the margin planks on each side are not mirror images of each other. I thought they were supposed to be. Are the deck patterns supposed to be mirrored across the king plank? I know the king plank is supposed to be wider than the standard planks, but then you would have adjacent butt joints across the king plank. I am not going to make any changes to this model, but I would like to understand this for the next time. Thanks.
- 36 replies
-
- 3
-
-
- Harvey
- Artesania Latina
- (and 1 more)
-
I now have found reference to the "water closets" that are prominent near the bow of Harvey. On the "Witch of the Wave" there is a water closet in the after end of each wing formed at the rear side of the open forecastle. Now I am on the fence, but at least I have historical presedence. They are pretty prominent, the first thing that draws my eye. Maybe just one? and call it a bosen's locker? Adventures in making wooden strips. I have spent the last couple of days experimenting with techniques to make wooden strips. I want to make scale decking from white holly, but have been struggling. I am also trying to minimize waste. My band saw does not make clean cuts, my little 4" blade Dremel table saw is not powerful enough to cut through very thick pieces of the Holly, it is quite hard. I ended up using my big cabinet table saw with a fine tooth carbide blade to cut the thin strips-the blade is about the same width as the thickness of my strips, that is, I am wasting 50% of my holly. Then I used a straight edge and a razor blade to cut the strips to width. This does not work that great--it is hard to get a straight cut, the hard wood required multiple swipes with the blade and the blade dulls quick. Besides it takes for ever. I can use the little Dremel table saw to make the final cut to width, but I am already turning too much of the wood into saw dust. My deck is 6 inches wide and 24 inches long, using a deck plank width of .12" ( 1/50 scale of a 6 inch wide plank) I will end up needing over 1000 inches of deck planking. What have I gotten myself into??? In the picture below, after a days work, I ended up with two 12" deck planks, 98 more to go. Phil, you are right your ship looks great with the 5mm wide deck planks, this is still only 10" wide, which is reasonable. I have read in one source the baltimore clippers deck planks are 6 inches wide, but I have seen 8 and 10 inches referenced elsewhere for other types of ships. I beleive I am over thinking this issue and need to just build to the plans and get on with it.
- 36 replies
-
- 3
-
-
- Harvey
- Artesania Latina
- (and 1 more)
-
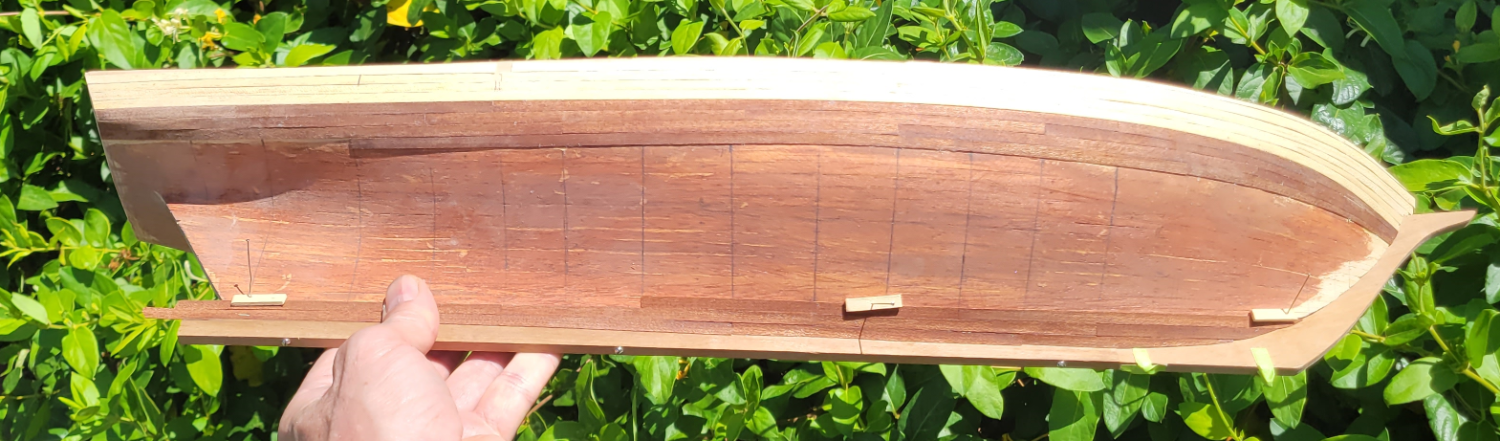
I have finished planking the first layer of the hull. Below are a few pictures of the hull after sanding. And then a couple of pictures after some wood filler and further sanding. I think I have a good base now for the final layer of hull planking, but first..... The instructions say the deck planking is up next. I have received my white holly for the deck planks. I plan to run the waterway and margin planks around the periphery of the deck and joggle the deck planks into them. I created a CAD model of the deck because I had to make my own false deck, I think I will use this to plan my deck out on the computer. I have a bit of studying to do before I glue the next parts together.
- 36 replies
-
- 6
-
-
- Harvey
- Artesania Latina
- (and 1 more)
-
Allan, I bought some white holly for my deck and will make the deck planks closer to scale than the strips that came with the kit. (I ended up spending $60 once tax and shipping was included) My plan for the hull is to plank the model in two layers per the instructions in the kit. I am not bold enough yet to deviate significantly from the plans. The second layer will be the mahogany supplied in the kit, then I will paint the hull black (lamp black 🙂) above the water line and leave the mahogany bare below the waterline. I am using the first layer of planking as a learning experience, experimenting with marking out the plank locations, bending planks, thinning them, pinning them and placing stealers. I am now comfortable with bending the planks, but these limewood planks are easy to bend and are probably not representative of a true model plank I bet. I wet and then clamp them to a flat piece of plywood (my bending station 😁) and let them dry in the sun. I take back what I said about not deviating from the plans. There are a couple of "Latrine Heads" near the bow, they look like big out houses standing up on the deck. I have not been able to find any reference to these in my reading, I think they look out of place, and I will do away with them. Usually the "seats of ease" were place up on the level of the beakhead deck grating, outside the hull, and were basically wide planks with open holes in them. I guess the term "the head" was derived from the fact that this area was between the headboards. Below are some pictures of my planking efforts highlighting the stealers. I know I am not being very efficient in my planking. I form and install a single strake, then let it dry. I assume a more experienced modeler would do multiple strakes at a time.
- 36 replies
-
- 3
-
-
- Harvey
- Artesania Latina
- (and 1 more)
-
Before I publish an update on my progress, I need to ask a question. My research on this type of ship shows that the deck planks were generally 6 inches wide, which at my scale is 3mm. But the kit supplies .5mm X 5mm X 640mm Mukali strips for the deck planks. This is too wide. I really like the look of the Mukali wood is has a sheen to the grain reminiscent of some types of maple. I am not sure I can rip them down to 3mm wide as they are so thin, and if I do I won't have enough material. The deck is about 80,000 sq. mm and the kit provides 100,000 sq mm of Mukali wood for this purpose, but if striped down to 3mm would only be 60,000 square mm. Not enough. So I am looking for recommendations. Just go with the 5mm? Use an alternative wood? I don't think I can get Mukali veneer. Strip the Mukali down and mix in some other wood? Might look cool. One problem with building such an old kit is that some of the parts are missing. My kit no longer had the 1.5mm plywood false deck. I bought some 1.5mm plywood on Amazon, then took measurements at the bulkheads and laid this into a CAD program. Then I printed the pattern out, traced it onto the plywood and made the false deck. Below I am gluing the false deck into place. Next I used a compass to mark off how much of the bulkheads needed to be removed to properly shape the hull. I used a little Dremel drum sander to remove the material. I want the full planking to blend into the width of the keel as if there were a rabbet. The false keel is 1/4" thick as is the true keel. So I needed to thin down the false keel so two layers of planking on both sides result in the 1/4" thickness of the true keel. I was not sure how to do this with a smooth taper and may have hacked the keel up too much. We will see when the planking goes on. And finally I have started laying down the first layer of planking. I started with the sheer strake. I used water to soften the planks, clamped them down to the table to the desired shape and let them dry. But when I pulled them up, they did not retain this shape and just sprung back to their original straightness. I have some work to do on my bending technique, maybe I need to use heat like an iron. Fortunately the limewood used in the first layer is very pliable. I started using Titebond Transparent white glue as I thought it would clean up easier, but it took too long to cure and was not that strong. I switched to my go to wood glue, yellow Titebond II which cures quick and hard, but is so hard to sand its a mess if you do not clean it up as you go. As I glue the strake into position I use a paper towel and a wet paint brush to get off as much excess glue up as I can.
- 36 replies
-
- 5
-
-
- Harvey
- Artesania Latina
- (and 1 more)
-
This kit is over 35 years old, is no longer available, and deserves to be assembled. This is my first ship kit--I have built some simpler scratch built ships, but figure a kit with detailed insturctions will help me develop experience with more complicated details such as the deck furnatire and rigging. Artesania Latina's Harvey is a fictitious ship representiative of the Baltamore Clippers. I have William L. Crothers' wonderful book, "The American-Built Clipper Ship" and love the sleek lines of these fast ships. I started, of course, with assembling the Hull strcture and ran into problems right away. The plywood used for the false keel and bulkheads is a 1/4" thick, but the slots used to slide the parts together were less than this; the bulkheads were an overly tight fit on the flase keel. I ended up using a rubber mallet to pound the first one into place. An assembly step requiring a hammer should have been a red flag, but I soldered on and forced the bulkhead into place. This of course warped the keel out of the straight. But, even though this was a test fit and no glue was used, I could not remove the bulkhead and ended up busting the keel in half. I repaired the keel in an equally brutish manner, widened all of the slots with a dremel, and gave assembly of the hull another go. This time I used a square to hold the bulkheads in position, and was pleased with the results.
- 36 replies
-
- 4
-
-
- Harvey
- Artesania Latina
- (and 1 more)
-
Mikael, I would be happy to share the PDFs if someone is interested in building the Bluenose a 1:48 scale.
-
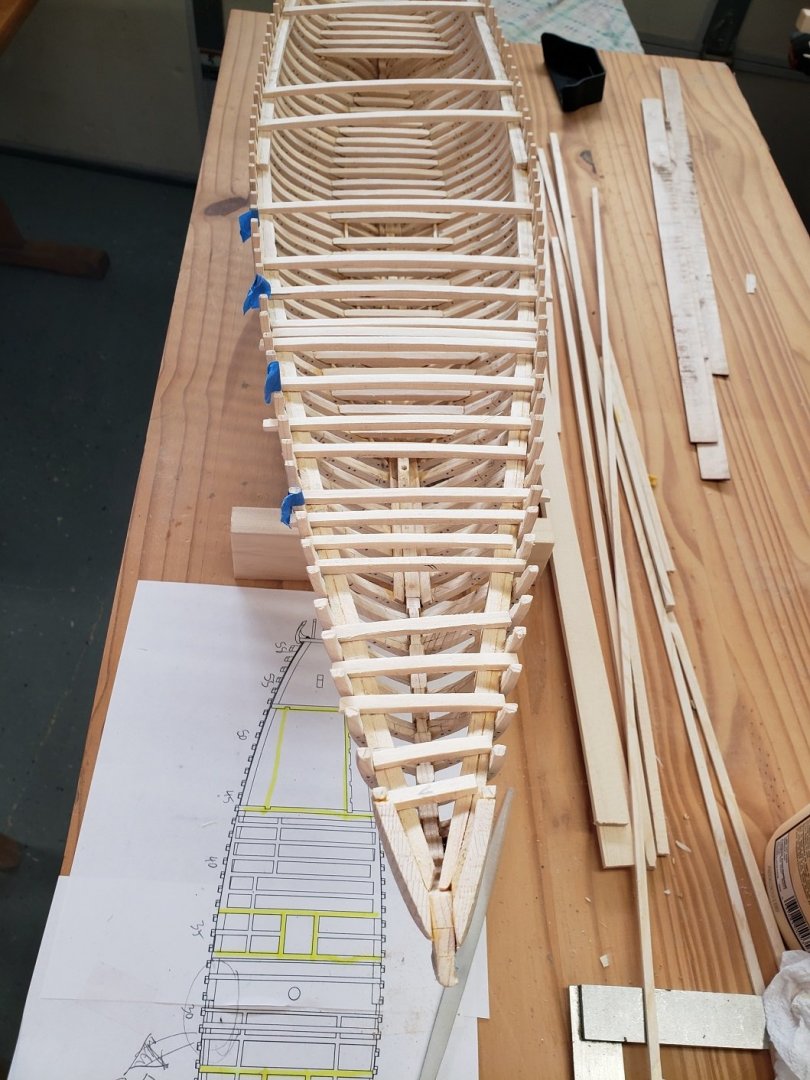
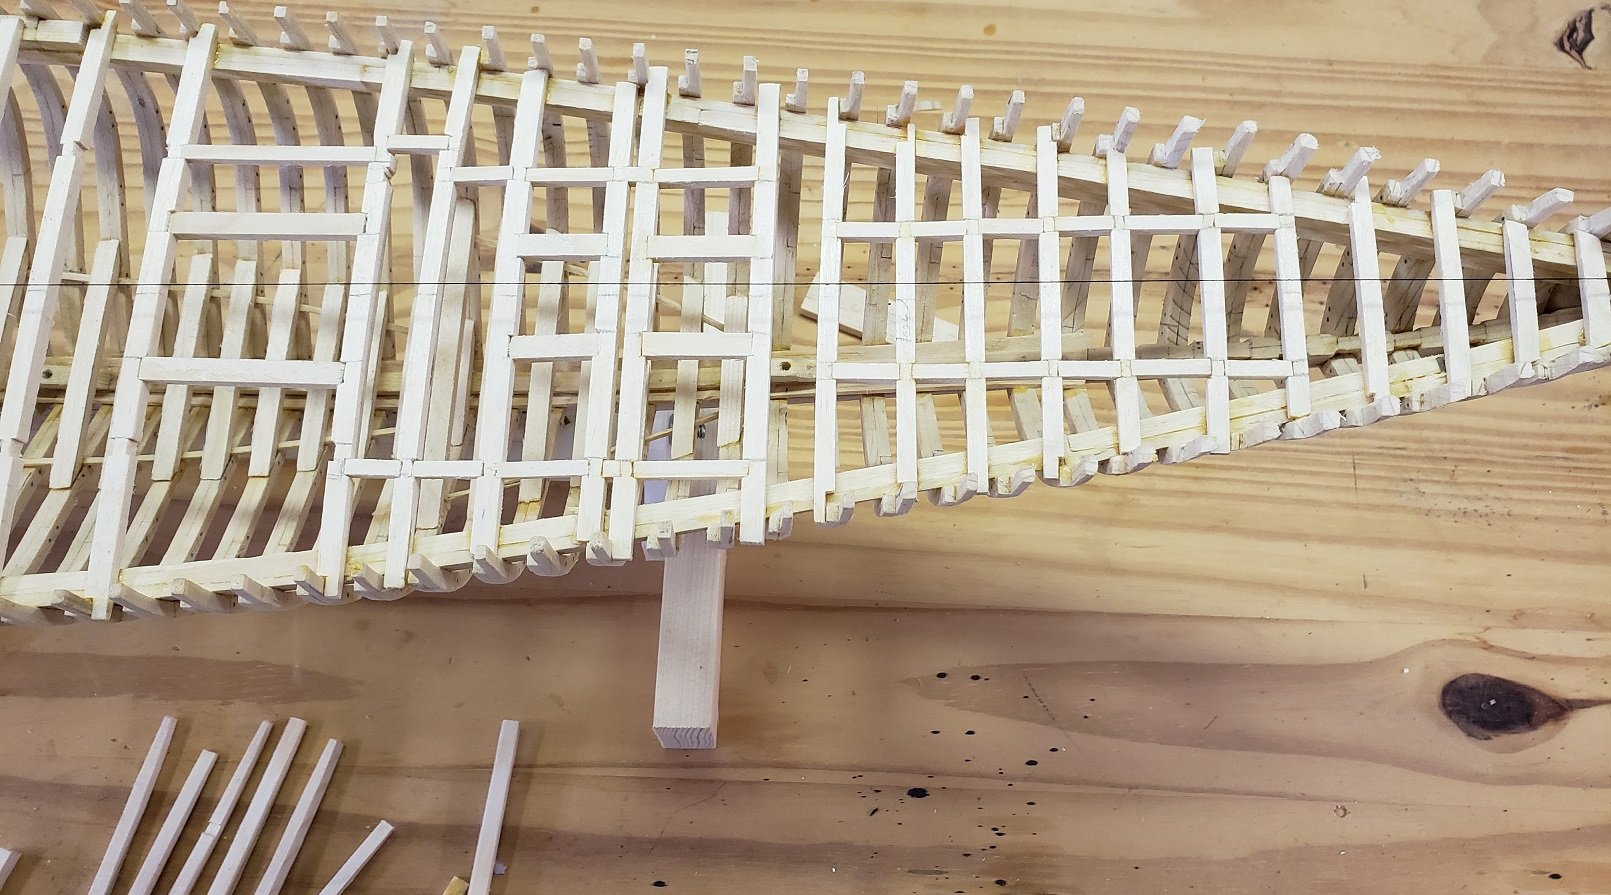
Jond Thanks for you kind words, we all bring a different set of skills to this hobby and it is fun to see the varied techniques people use. I am an engineer by trade and have been using 3D modeling software for over 20 years. I enjoy building the ship on the computer and then seeing the real deal come to shape. I echo everything Allen above has said. I would consider my adventure with the planner a failed experiement for accurate and repeatable thicknesses of thin wood strips. The thickness sander is the way to go and I have heard several people speak highly of the Byrnes thickness sander, if you have one on order, good for you. I ended up buying a real nice table saw with an excellent adjustable fence. I use a thin veneer blade that makes very clean cuts with minimal waste. The trick is to take as much time as you need to adjust the table saw and make everything true, but once it is dialed in, the cuts are nearly perfect and highly repeatable. I then use a 4 inch Dremel table saw to make the final cuts to width. As far as the wood goes, I am probably not the best person to take advice from. This is my first Plank on Frame (POF) attempt and I did not know how successful I would be so I chose an inexpensive, readily available wood for the framing. I used white pine available down at my lumber yard. I searched for quarter sawn planks with small tight grain running vertically when viewed from the end. I will use sitka spruce for my planking and hard maple for the rails. I have both of these woods here in the workshop left over from some luthier projects. Thanks for the picture of the clamps and shelves, pretty neat. You can see alot of the ship structure, the frames with their futtocks, the deck beams and the outer hull planking. Cool. Below is an update on my progress, I am working on the deck beams.

-
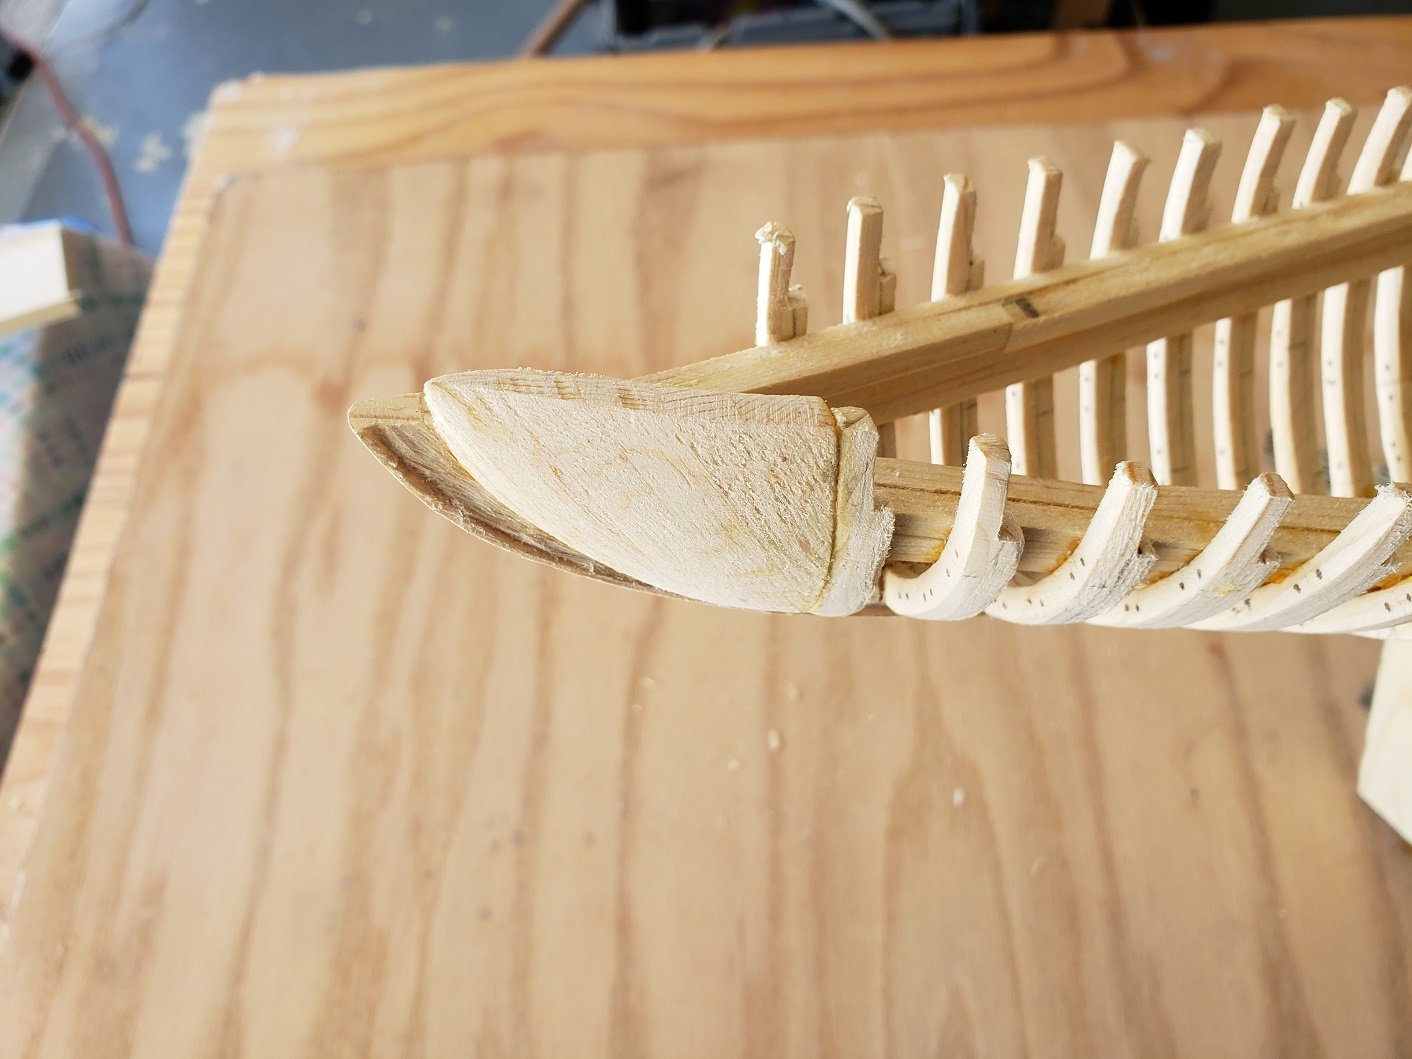
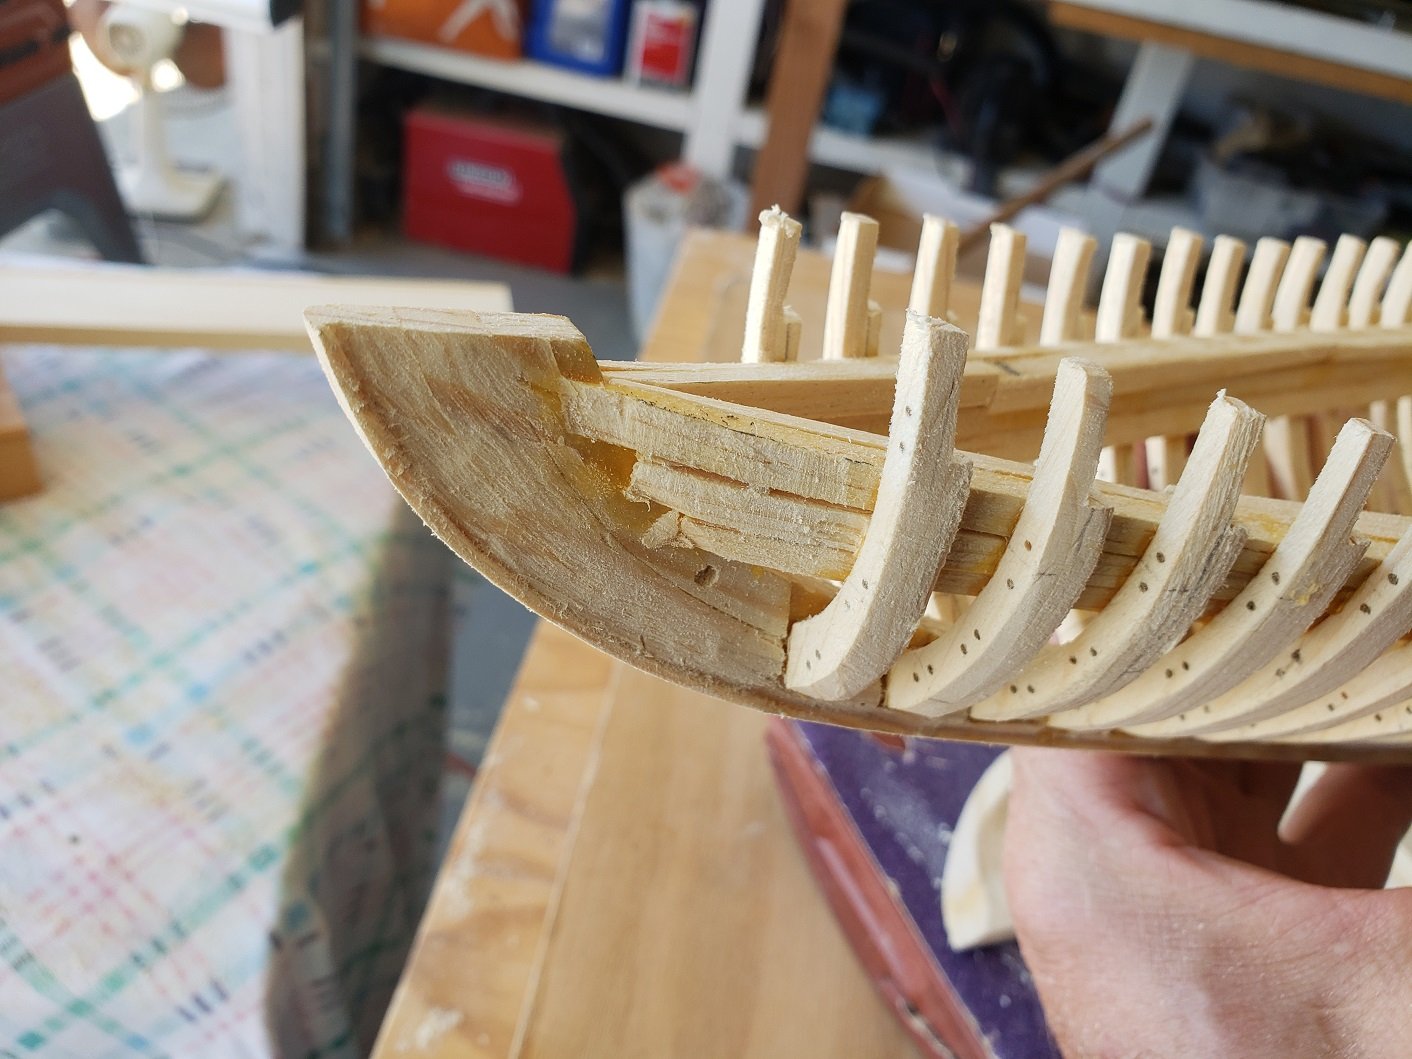
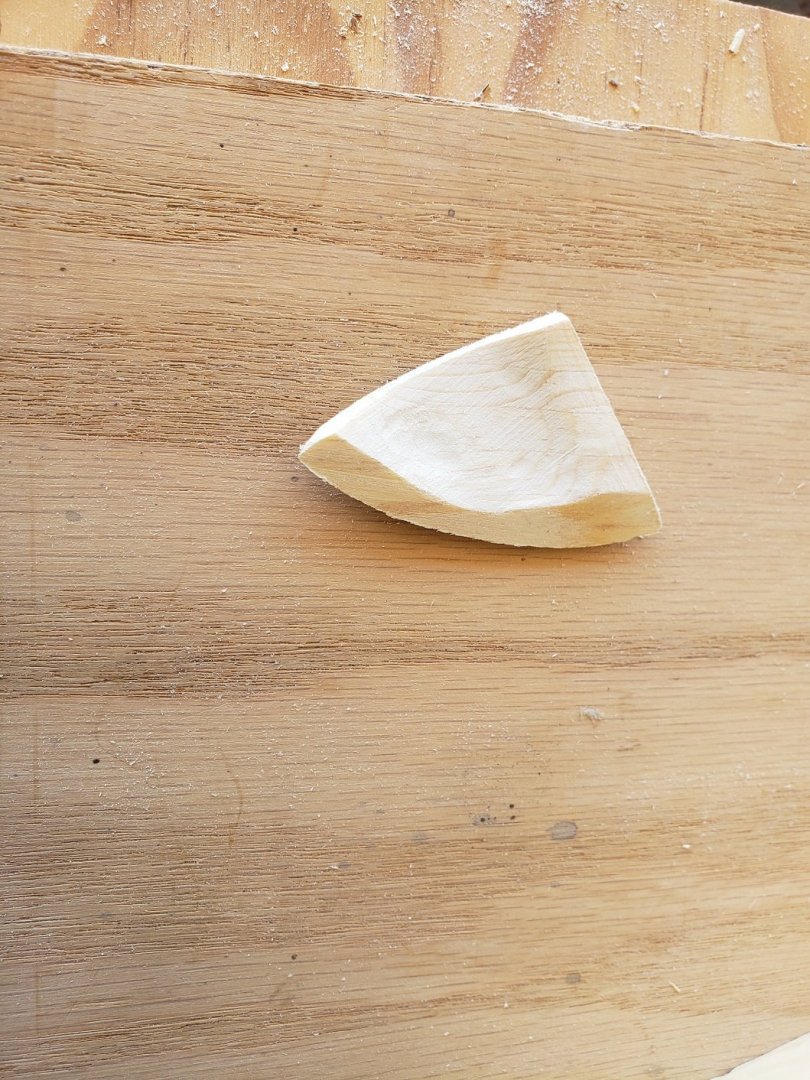
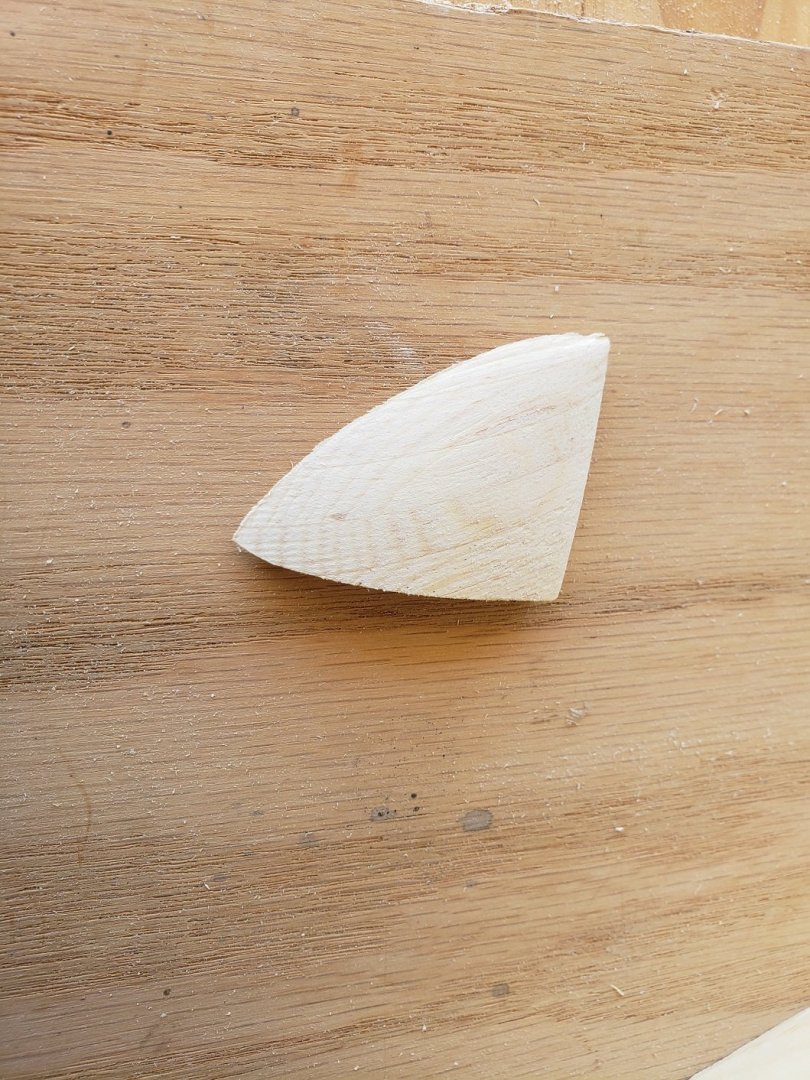
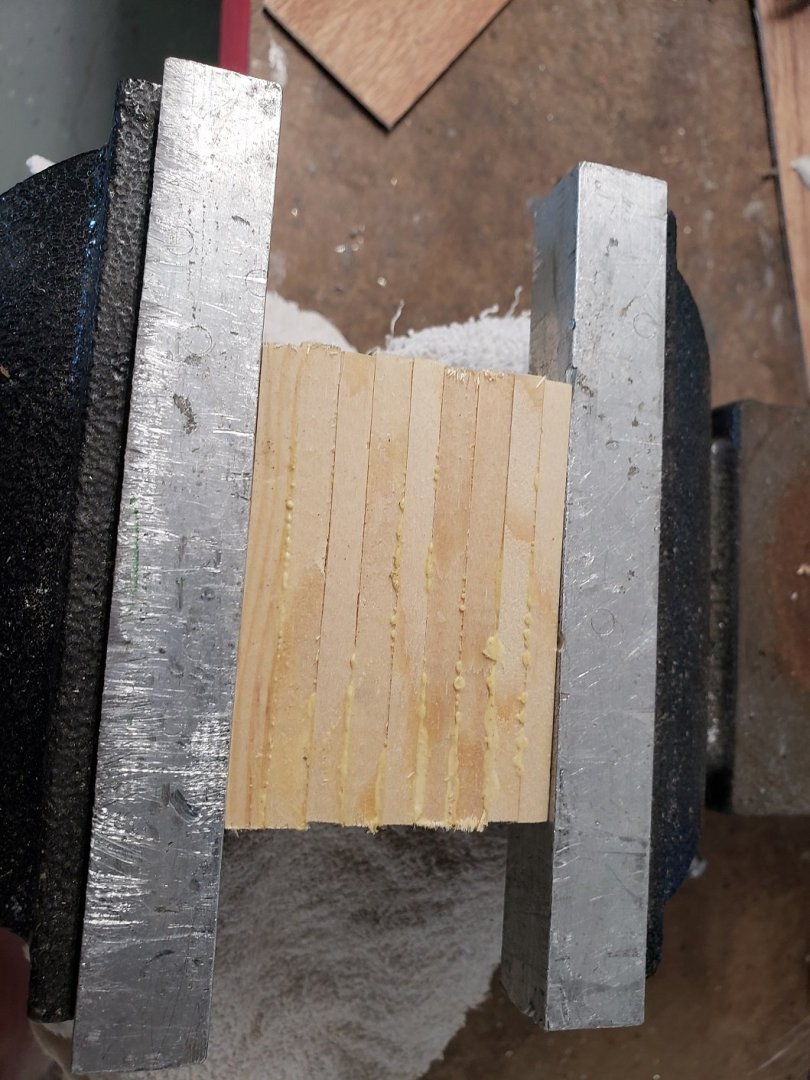
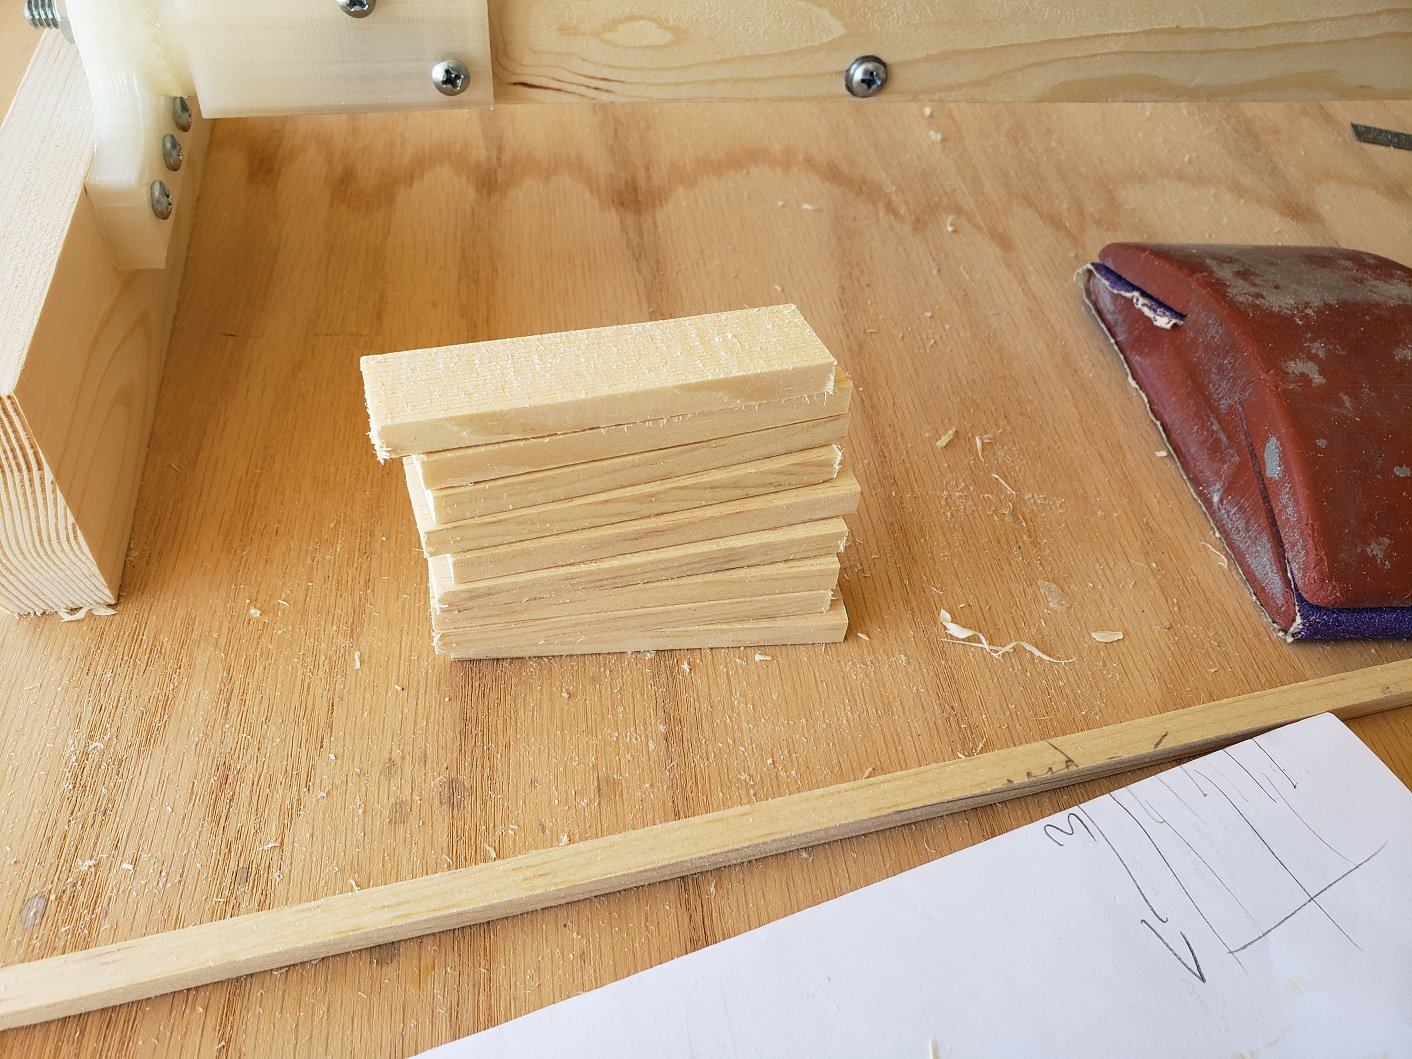
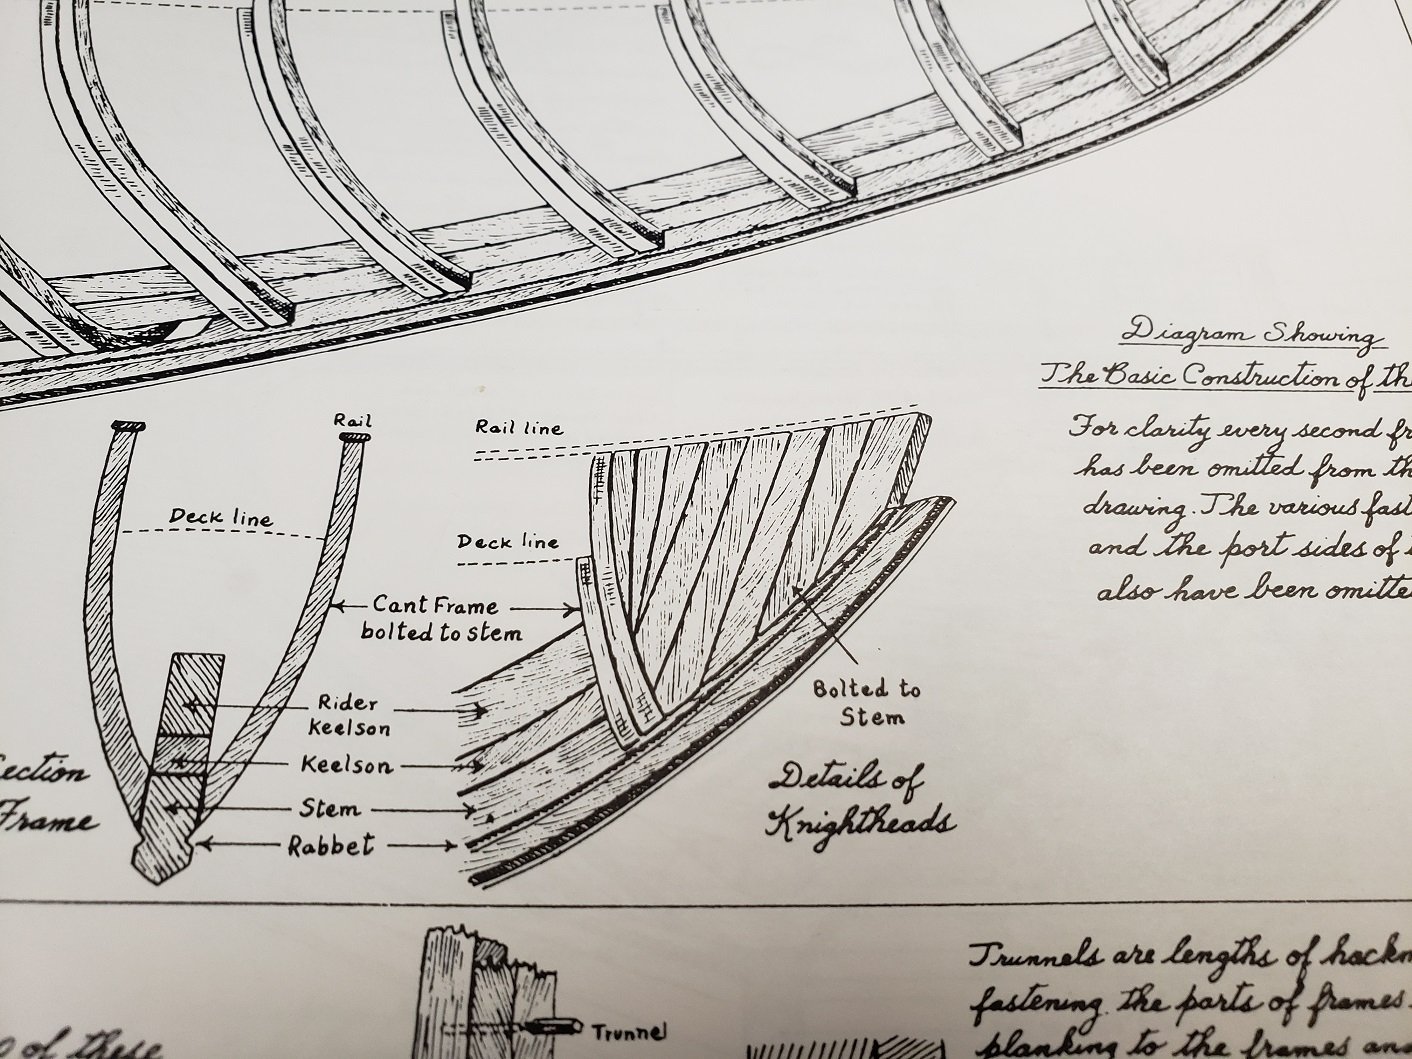
I am working on the top deck and started with the hawse timbers and knighthead. This is the drawing from LB Jenson. They are made from multiple timbers stacked at an angle. I took a stack of 1/4" wood and glued them together. Then carved and sanded the piece. View of the outside and inside. On the inside only the flat surface matters as it is glued to the keel. This is before installation and after: One small detail the LB Jenson drawings do not correctly show is the way the bearded line moves further from the rabbit as we approach the shear. this is because the shear plank intersects the keel at a flatter angle than the planks below it. Finally a shot of the deck beams I am fabricating. They are just resting in place right now, once I fab all the beams I will cut the mortises for the cross beams and carlings. It is starting to get warm here and my workshop does not have air conditioning. I have really enjoyed the spring. Take care and thanks for the kind comments.