ortho85
-
Posts
144 -
Joined
-
Last visited
Recent Profile Visitors
764 profile views


-
 Ryland Craze reacted to a post in a topic:
Armed Virginia Sloop by GuntherMT - FINISHED - Model Shipways - scale 1:48
Ryland Craze reacted to a post in a topic:
Armed Virginia Sloop by GuntherMT - FINISHED - Model Shipways - scale 1:48
-
CiscoH reacted to a post in a topic:
Armed Virginia Sloop by ortho85 - FINISHED - Model Shipways - second model
-
etubino reacted to a post in a topic:
Dorade 1931 by ortho85 - FINISHED - Amati - scale 1:20 - Fastnet Yacht
-
etubino reacted to a post in a topic:
Dorade 1931 by ortho85 - FINISHED - Amati - scale 1:20 - Fastnet Yacht
-
mtaylor reacted to a post in a topic:
Preferred support when planking?
-
GrandpaPhil reacted to a post in a topic:
Armed Virginia Sloop by ortho85 - FINISHED - Model Shipways - second model
-
GrandpaPhil reacted to a post in a topic:
Dorade 1931 by ortho85 - FINISHED - Amati - scale 1:20 - Fastnet Yacht
-
GrandpaPhil reacted to a post in a topic:
Dorade 1931 by ortho85 - FINISHED - Amati - scale 1:20 - Fastnet Yacht
-
GrandpaPhil reacted to a post in a topic:
Dorade 1931 by ortho85 - FINISHED - Amati - scale 1:20 - Fastnet Yacht
-
Canute reacted to a post in a topic:
Amati Titanic - anyone built/building?
-
Wow! That's a brave option he's taking. Thanks, Grant.
-
Hi All, I'm in the market for my next build, and top of my list is the Amati version of the Titanic. However, there is not much on this forum about her - nor anywhere else, really. Is there anyone out there with positive or negative views? Thanks, Brett
-
 Thanks, hamilton. Dave, I use 'Satin' Poly. I have sanding sealer, but, when I tested that on this timber, I decided I preferred the deeper colour that straight Poly gives. Also the Poly seems to hide the blemishes a bit better, where I have filled with strips of timber or wood filler. Cheers, Brett
 -
ortho85 reacted to a post in a topic:
San Francisco II by ortho85 - Artesania Latina - scale 1:90
-
ortho85 reacted to a post in a topic:
San Francisco II by ortho85 - Artesania Latina - scale 1:90
-
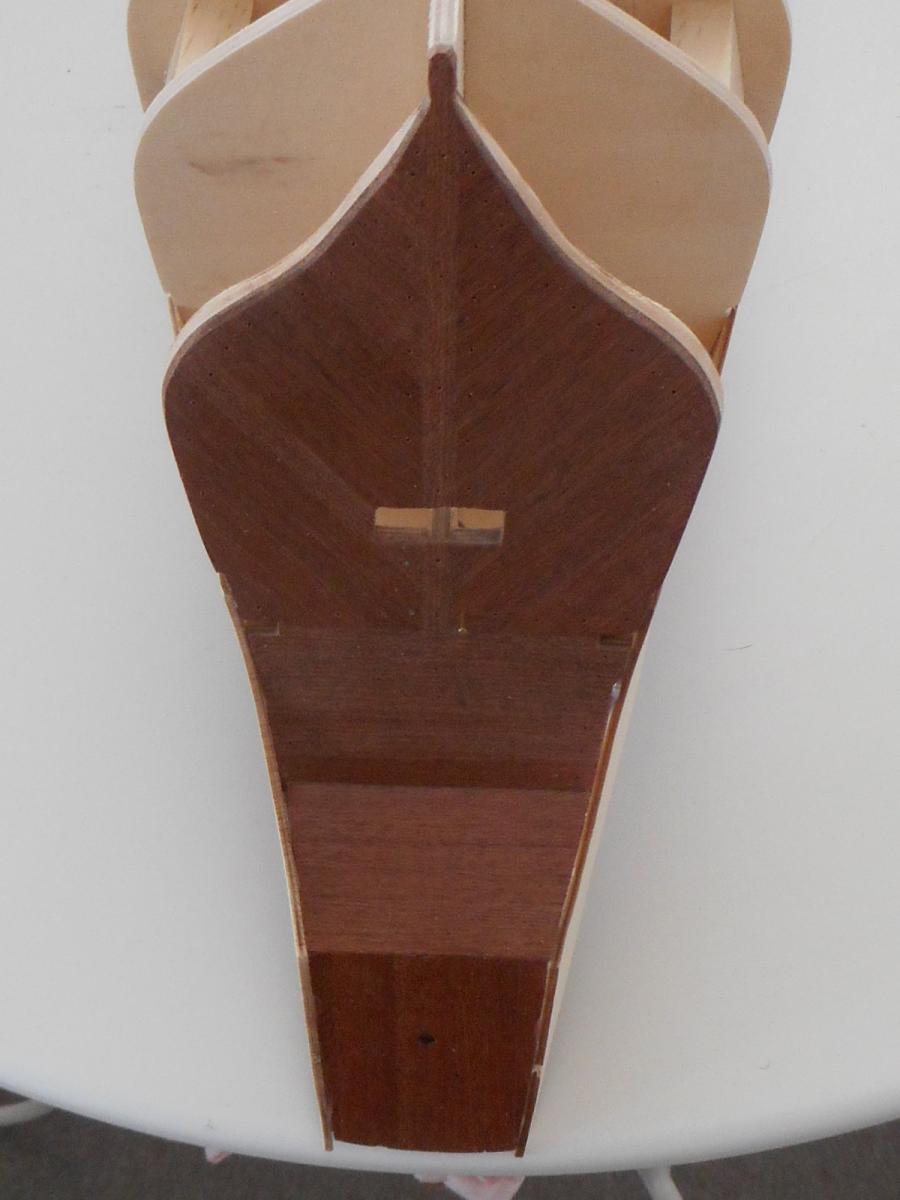
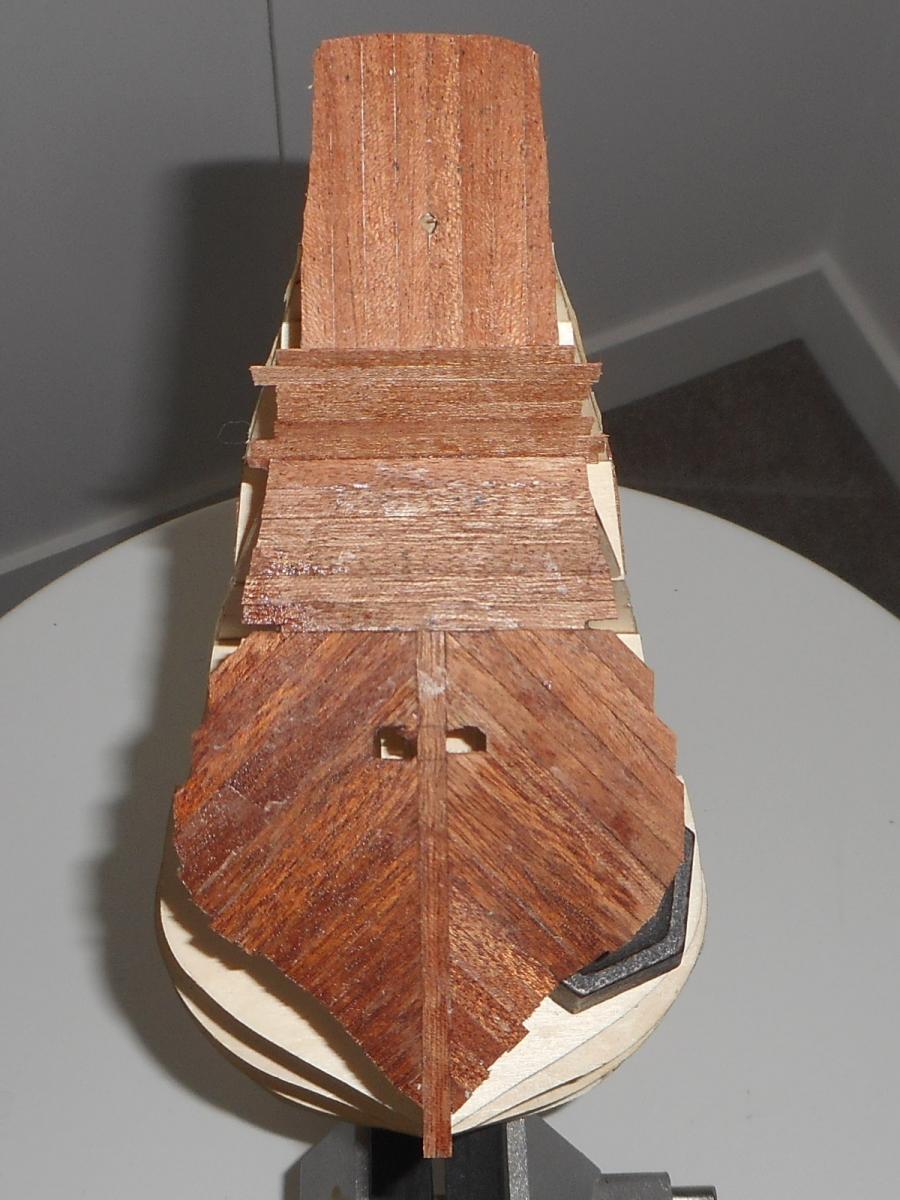
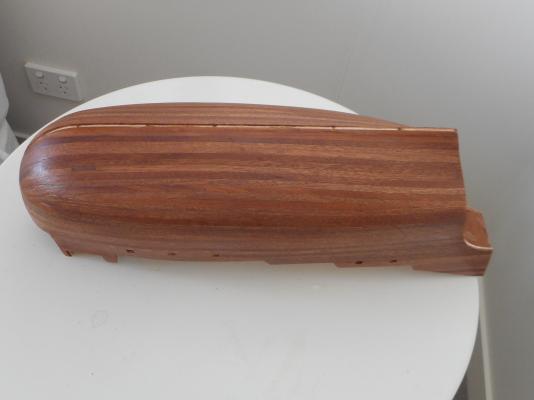
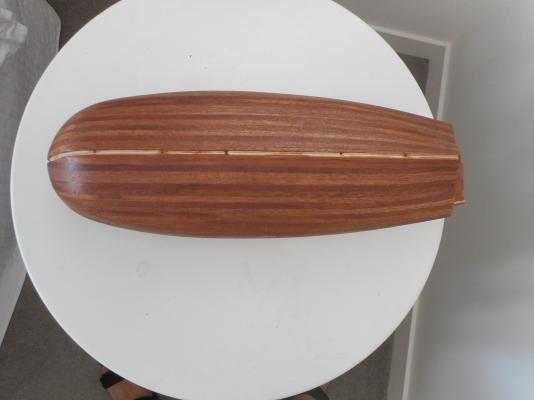
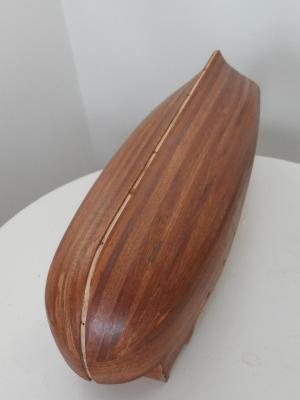
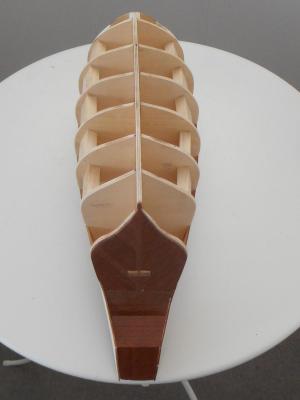
Dave's progress on his build prompted me to show a bit more of mine. After failing to find a definitive guide (I think that's the only purpose of these logs - to help those who follow), I decided to use a garboard plank that tapered towards the bow. I planned to leave the 4mm gap at the stern, and trim out the rest of the space for the keel later: In that photo you see that I was gluing a break towards the bow. I prefer to use PVA for my models (where possible), so at this stage the stern is glued, and I added glue further forward later. I tried to shape the planks in 3 dimensions as much as I could, but soon found I was useless at it. Here we are after 4 planks each side: It all gets a bit boring after that. I just wanted to get the planking finished ASAP. So we'll cut to the chase. Here are a few photos after the planking has been mostly sanded, and given its first coat of poly: If anybody wants more gruesome detail please PM me. Cheers, Brett


-
ortho85 reacted to a post in a topic:
San Francisco II by LMDAVE29 - FINISHED - Artesania Latina - Scale 1:90
-
Wow! You're racing along. I took sort of the same approach - a few up the top, then a few by the keel, then fill in the middle. That's about all those useless instructions suggest. I will have to update my log sometime. You'll be surprised and pleased when you sand and seal the whole hull. Looking good!
-
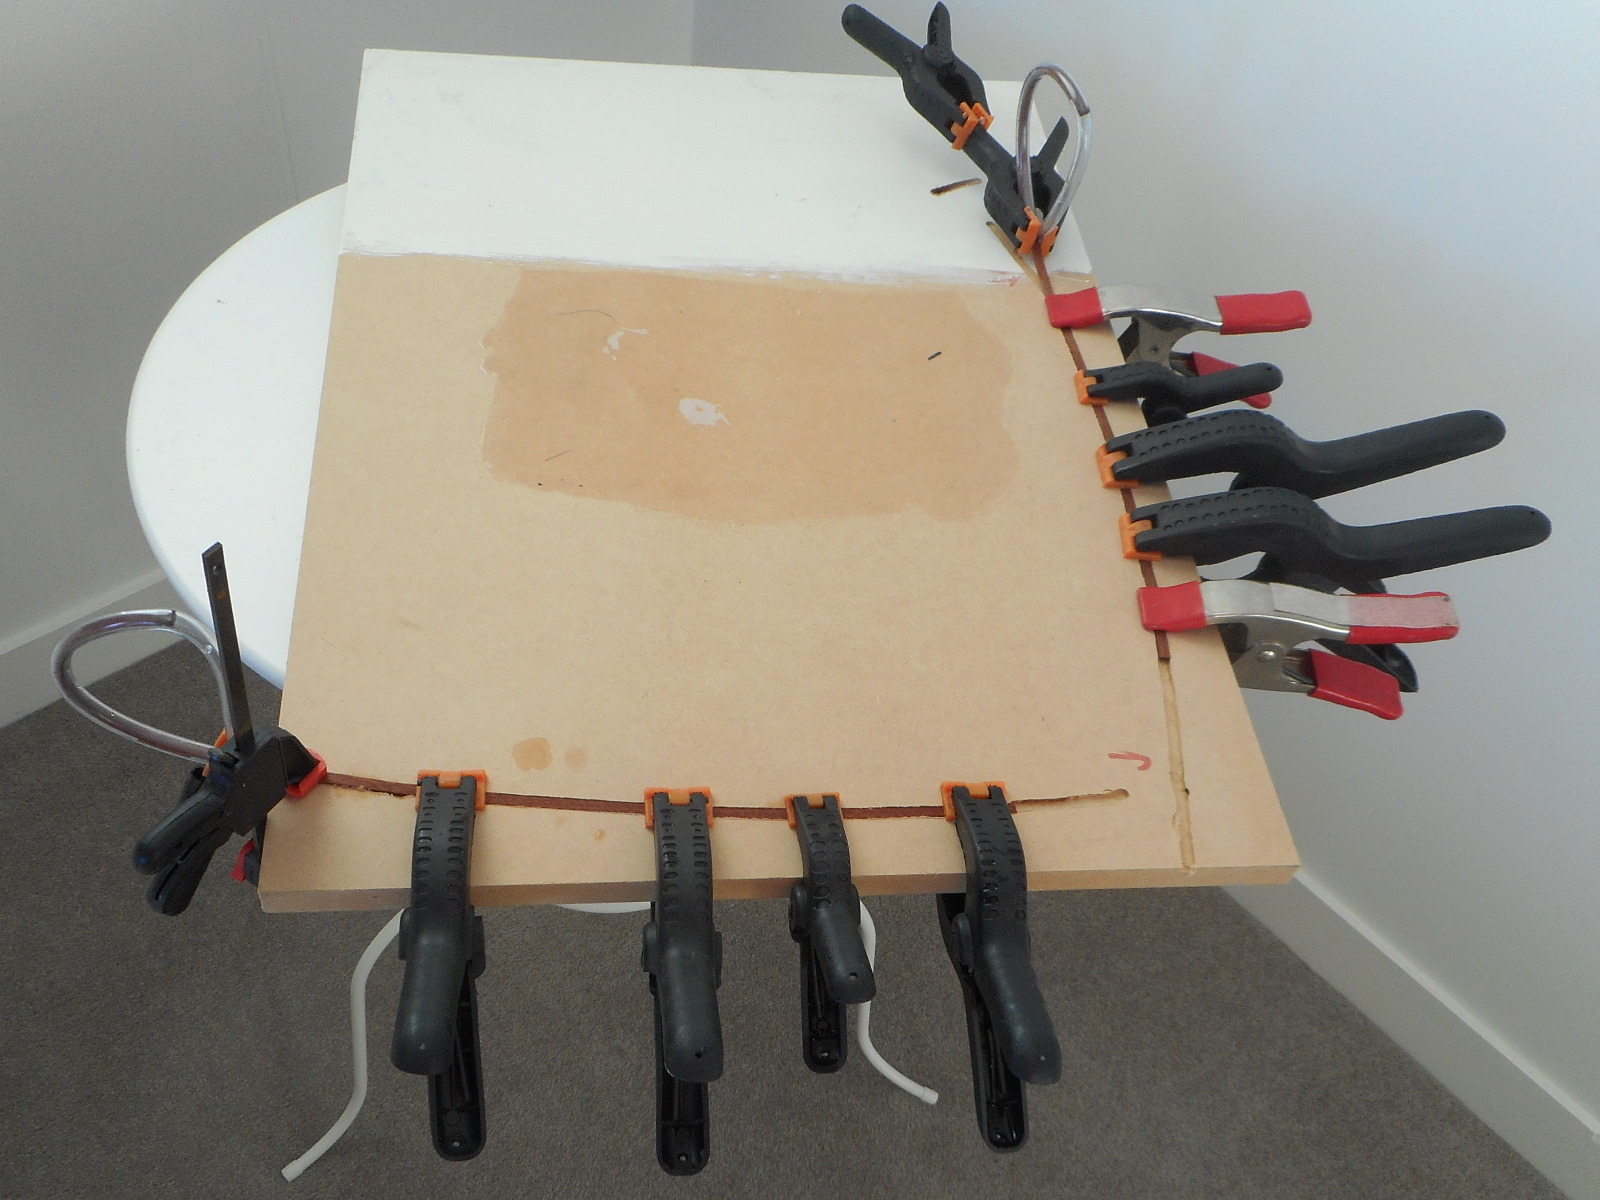
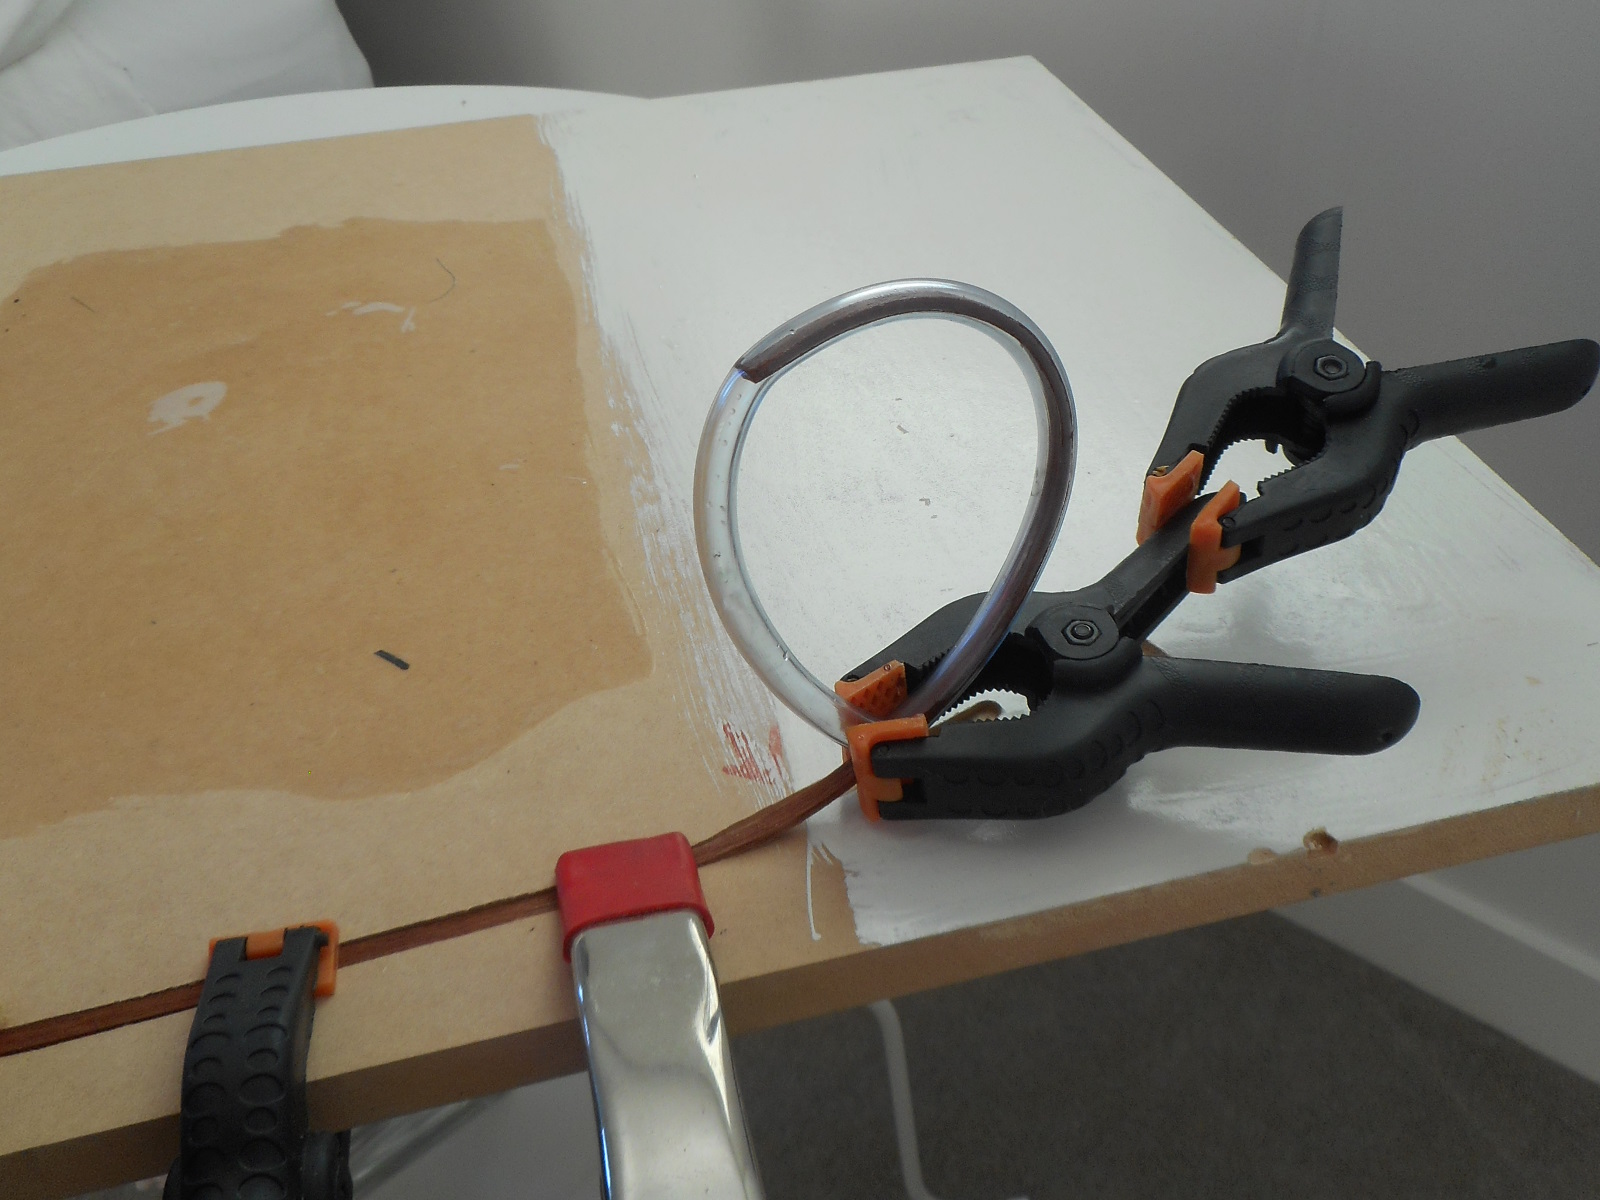
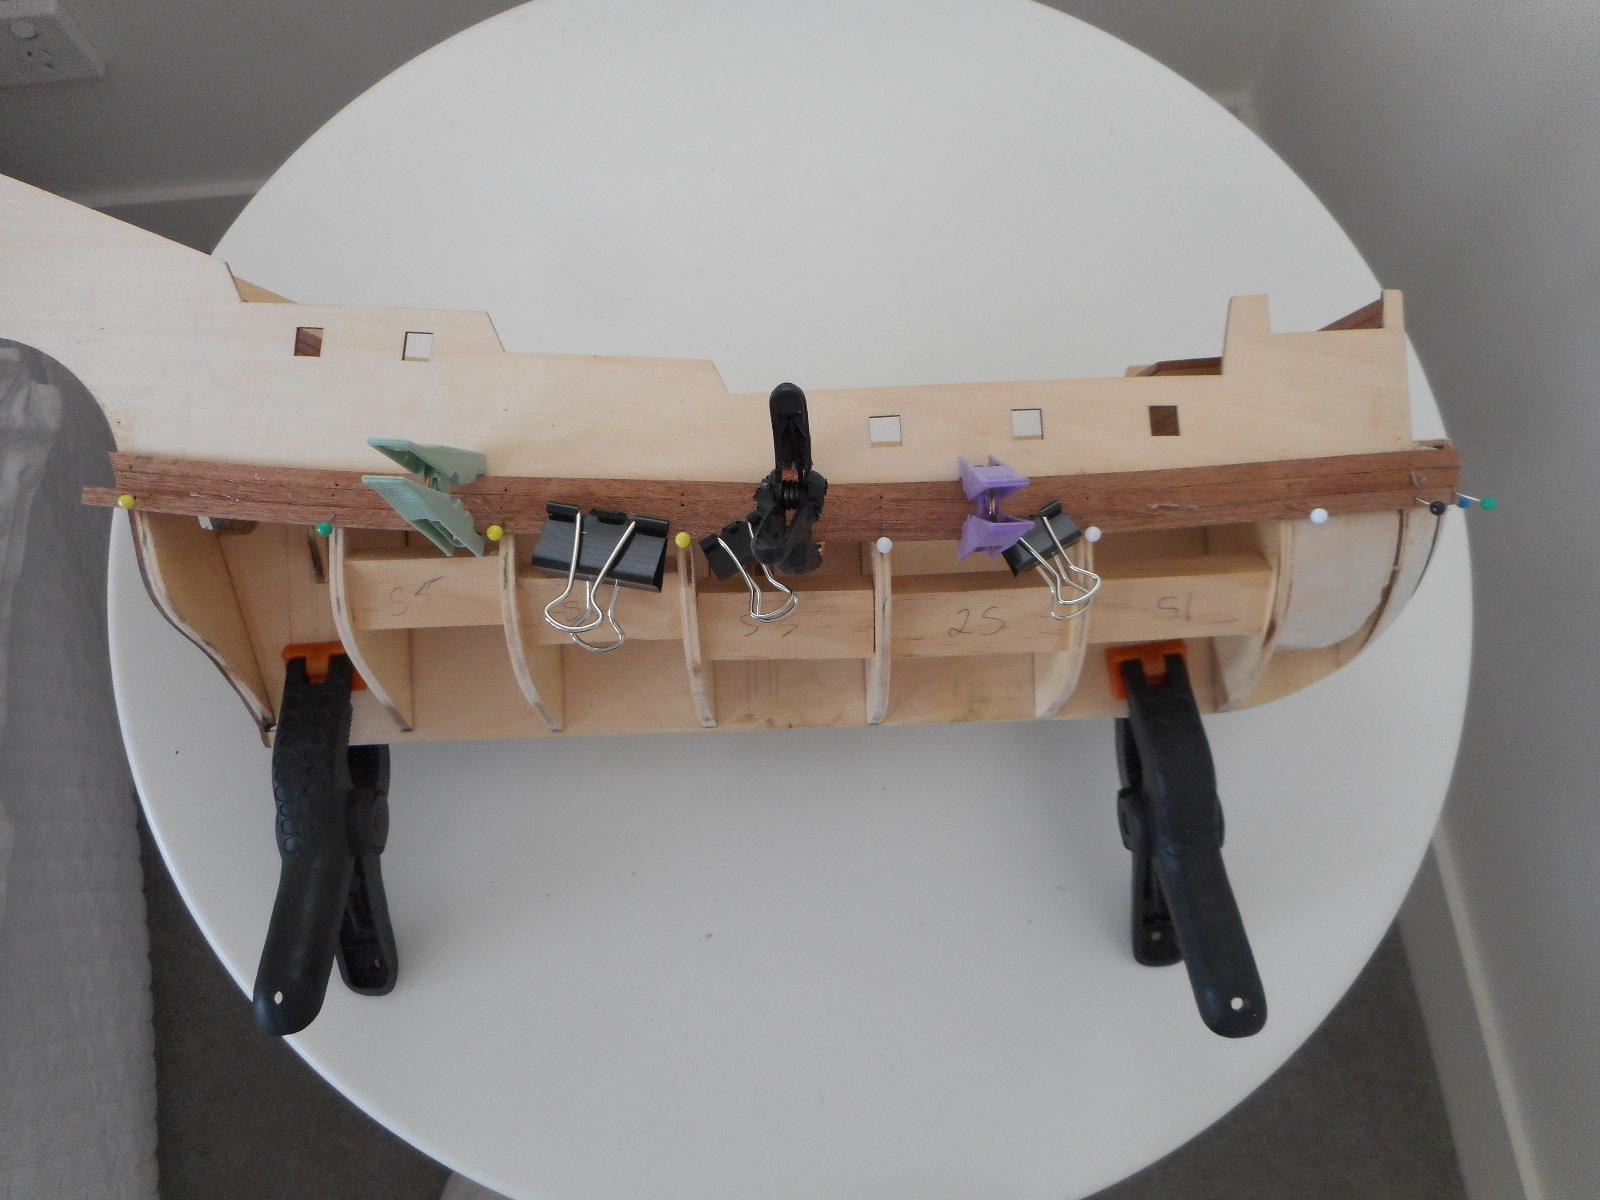
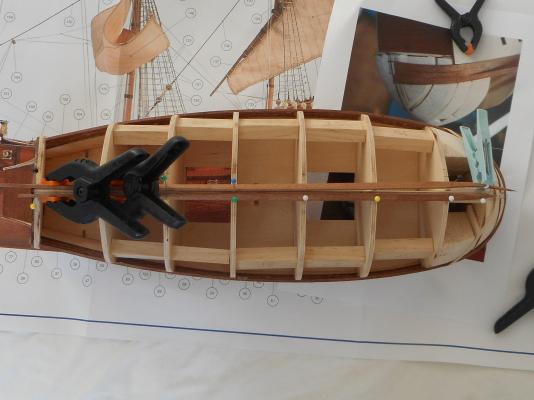
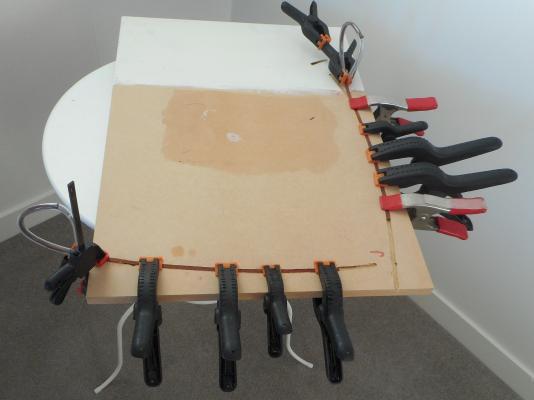
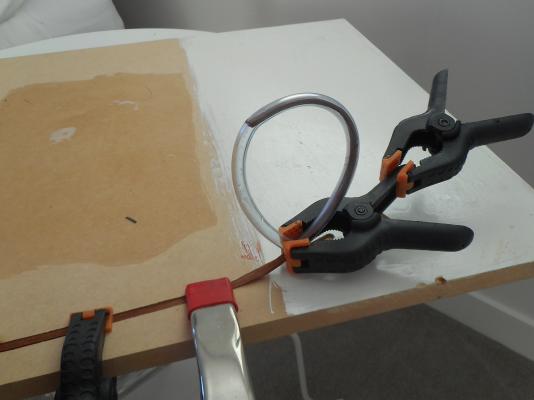
Ah well, I had sort of decided to stop my log here, but am now encouraged to continue. Hamilton - on we go! Sephirem - I know EXACTLY what you mean about planking nightmares. More later. LMDAVE - yes, I would use 2.5 or 3mm wide deck planks if I could get them. So, planking began. I asked around, and the response from another forum was that it works/looks better using full length planks, so that is what I decided to do. In retrospect I think it looks pretty, but incorrect, with full length planks. It is also proving $%@*ing impossible to bend them accurately, so I am currently experimenting with fillers to compensate for the clinker built effect on the hull. To be continued! I found most started with a plank below the pre-formed bulkhead, so, after much experimentation and agonising, that's what I did. Clamping it was a bitch, and is getting harder with each plank: The planks are 5mm wide, 2mm thick, brittle as hell, and need to be bent in all three planes. I tried various methods of soaking/heating/bending, and ended up going with an hour of soaking, then clamping around a curved former. This has to be repeated with gradually smaller curves, necessitating about 2 days to get enough bend! After all the breakages, I think I may be short of timber later. To get the edge bend, I used a router to cut out a curve in some MDF. I soon found that the curve needed to be exaggerated, but this is the first attempt: I had previously obtained the (relatively) simple curved end, but, of course, when you resoak the plank the first bend wants to straighten out. Hence the plastic tubing to hold/increase the curve there: BTW, if you use this tubing idea, remember that the enclosed plank won't dry out as fast as the exposed timber. I was doing one plank per side, for symmetry. Here we are with 3 planks each side: It soon transpired that there were differences in my bending, which did not equalise when the planks were glued on. So I experimented with some wood filler: After sanding and sealing, that looked stupid, so I am now looking for a better match. I may use strips of thin timber and extreme sanding. Next is the dreaded garboard plank (I had to look up the term!). Cheers, Brett

-
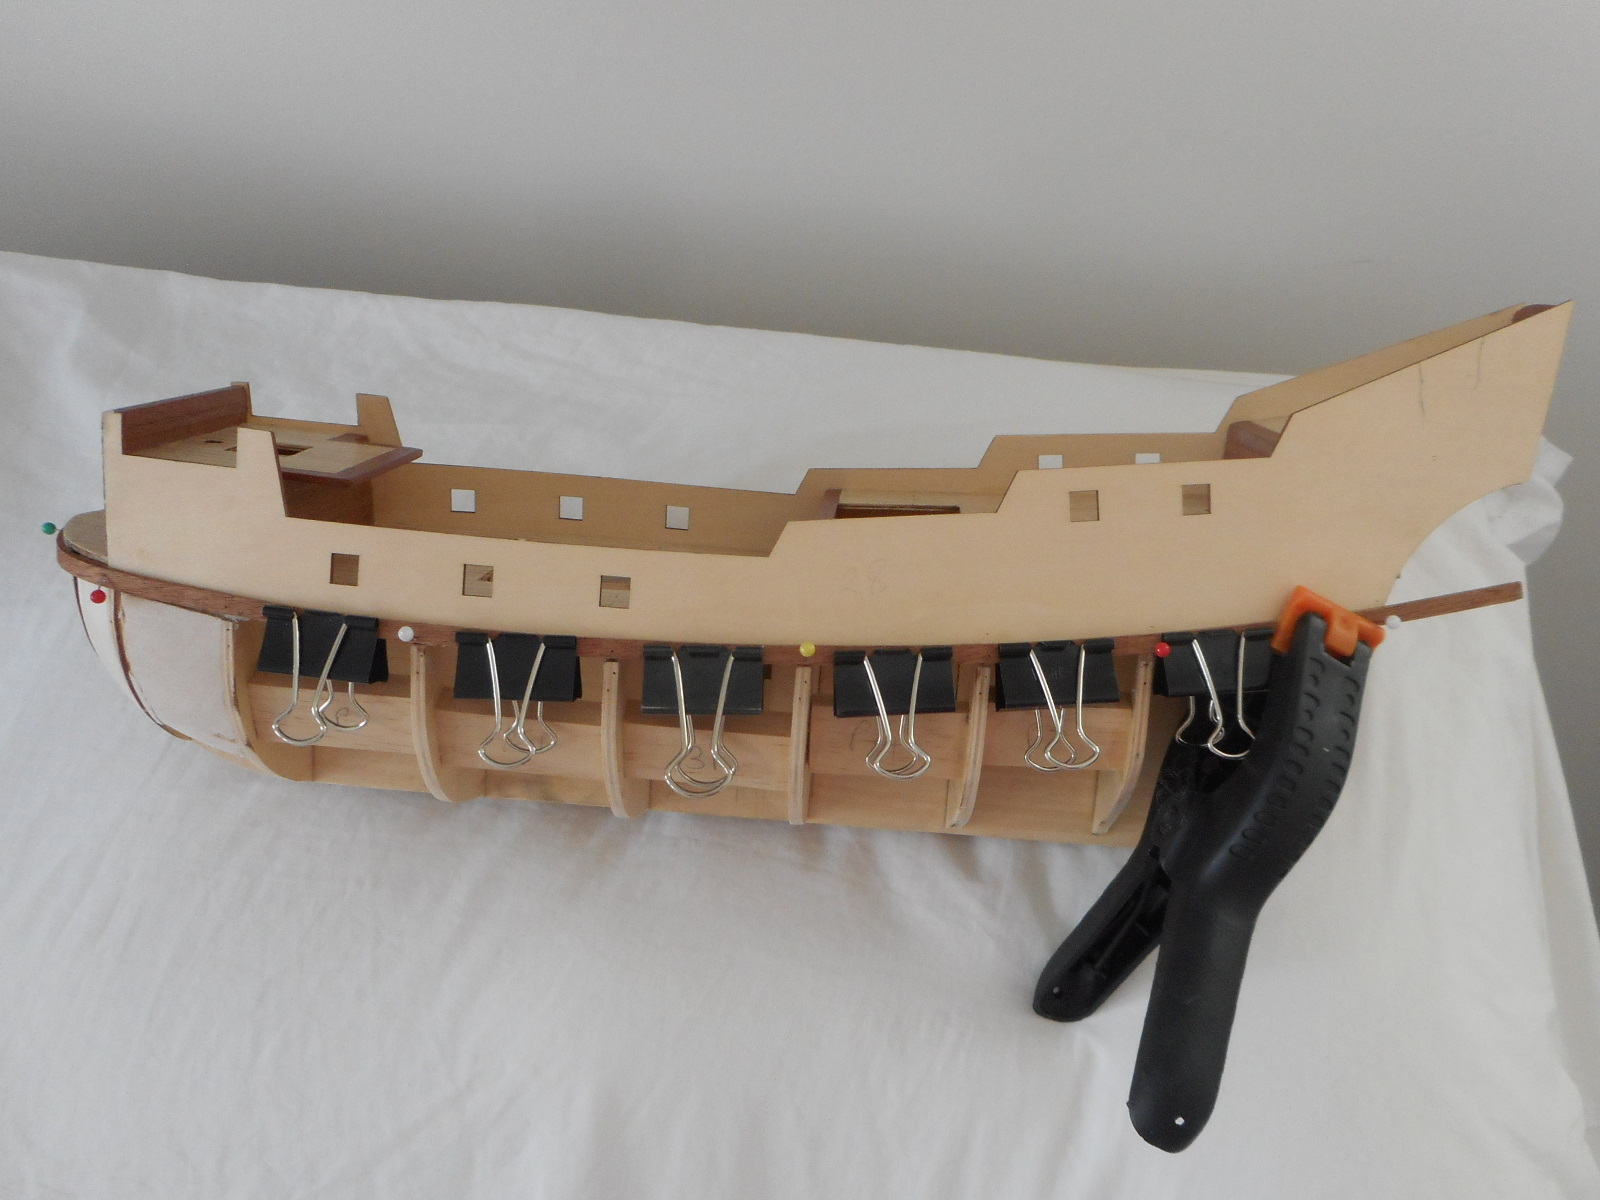
Bulwark time. These are precut thin plywood sheets, seen here pinned on: You can see they need a bit of light persuasion to fit fully: So they got it: And done: Views of the clinker built walls: And the fairing is under way: Now to finish off the stern! Then the planking begins! Cheers, Brett


-
ortho85 reacted to a post in a topic:
Planking the San Francisco II with scary planks
-
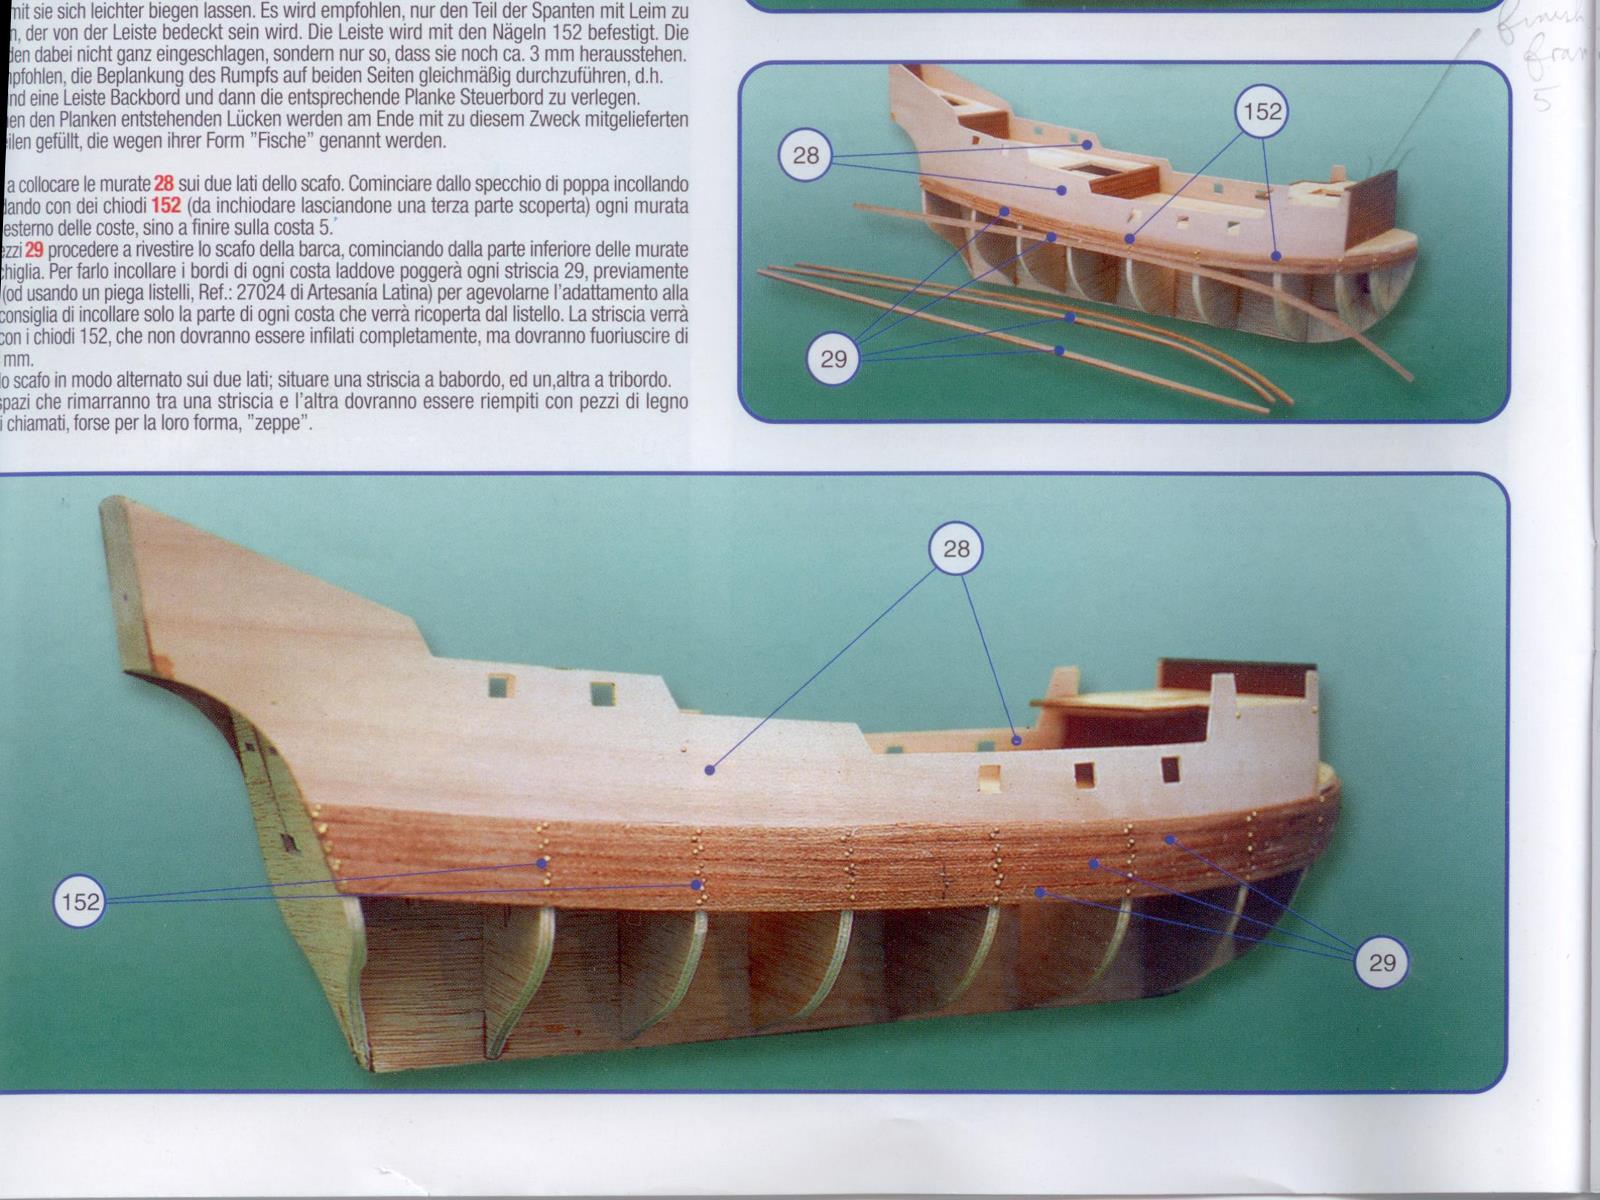
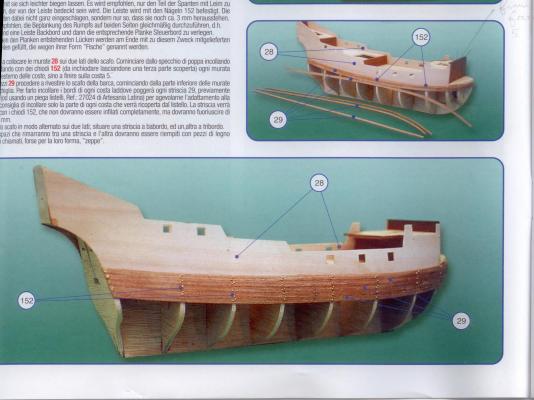
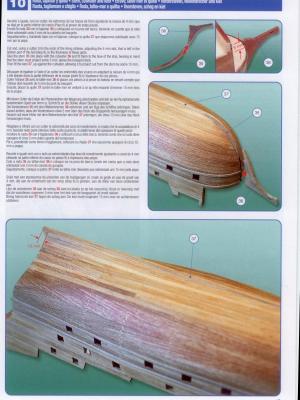
Hi all. I'm building the San Francisco II and need some planking advice. This is my first time with single planking. The planks are mahogany, 2mm by 5mm. The instructions show the planks as being laid in one length. This seems wrong to me, both because I don't believe the ship would have been built like that, and also because it will be extremely hard to do with 2mm thick planks. Here is a section of the plans: So, my question is which way do you think will be better, sections or full planks? All opinions and advice welcomed! Thanks, Brett
-
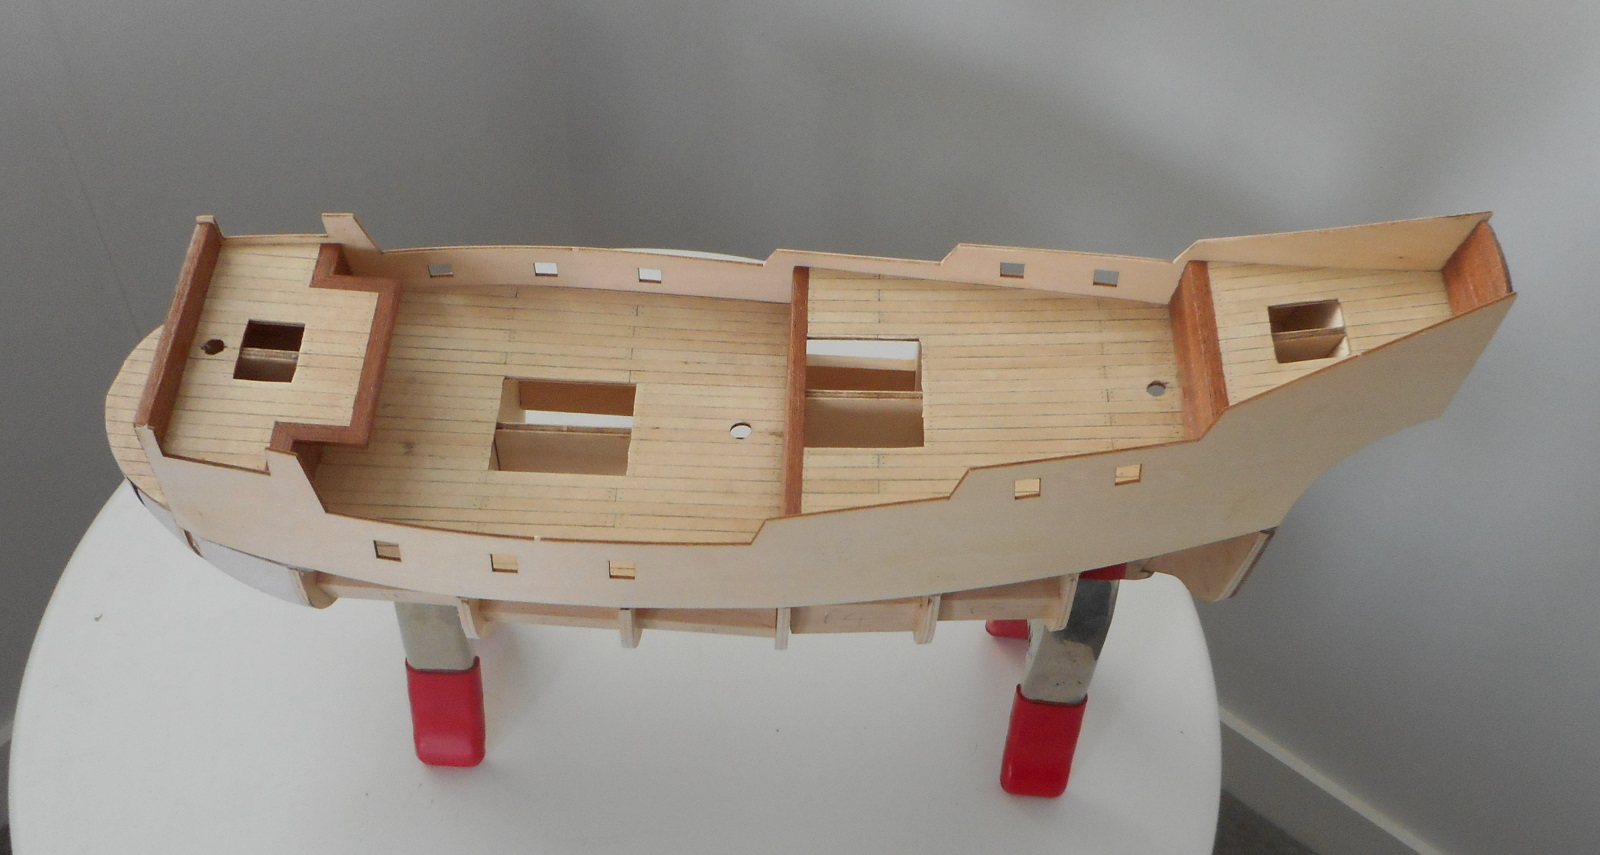
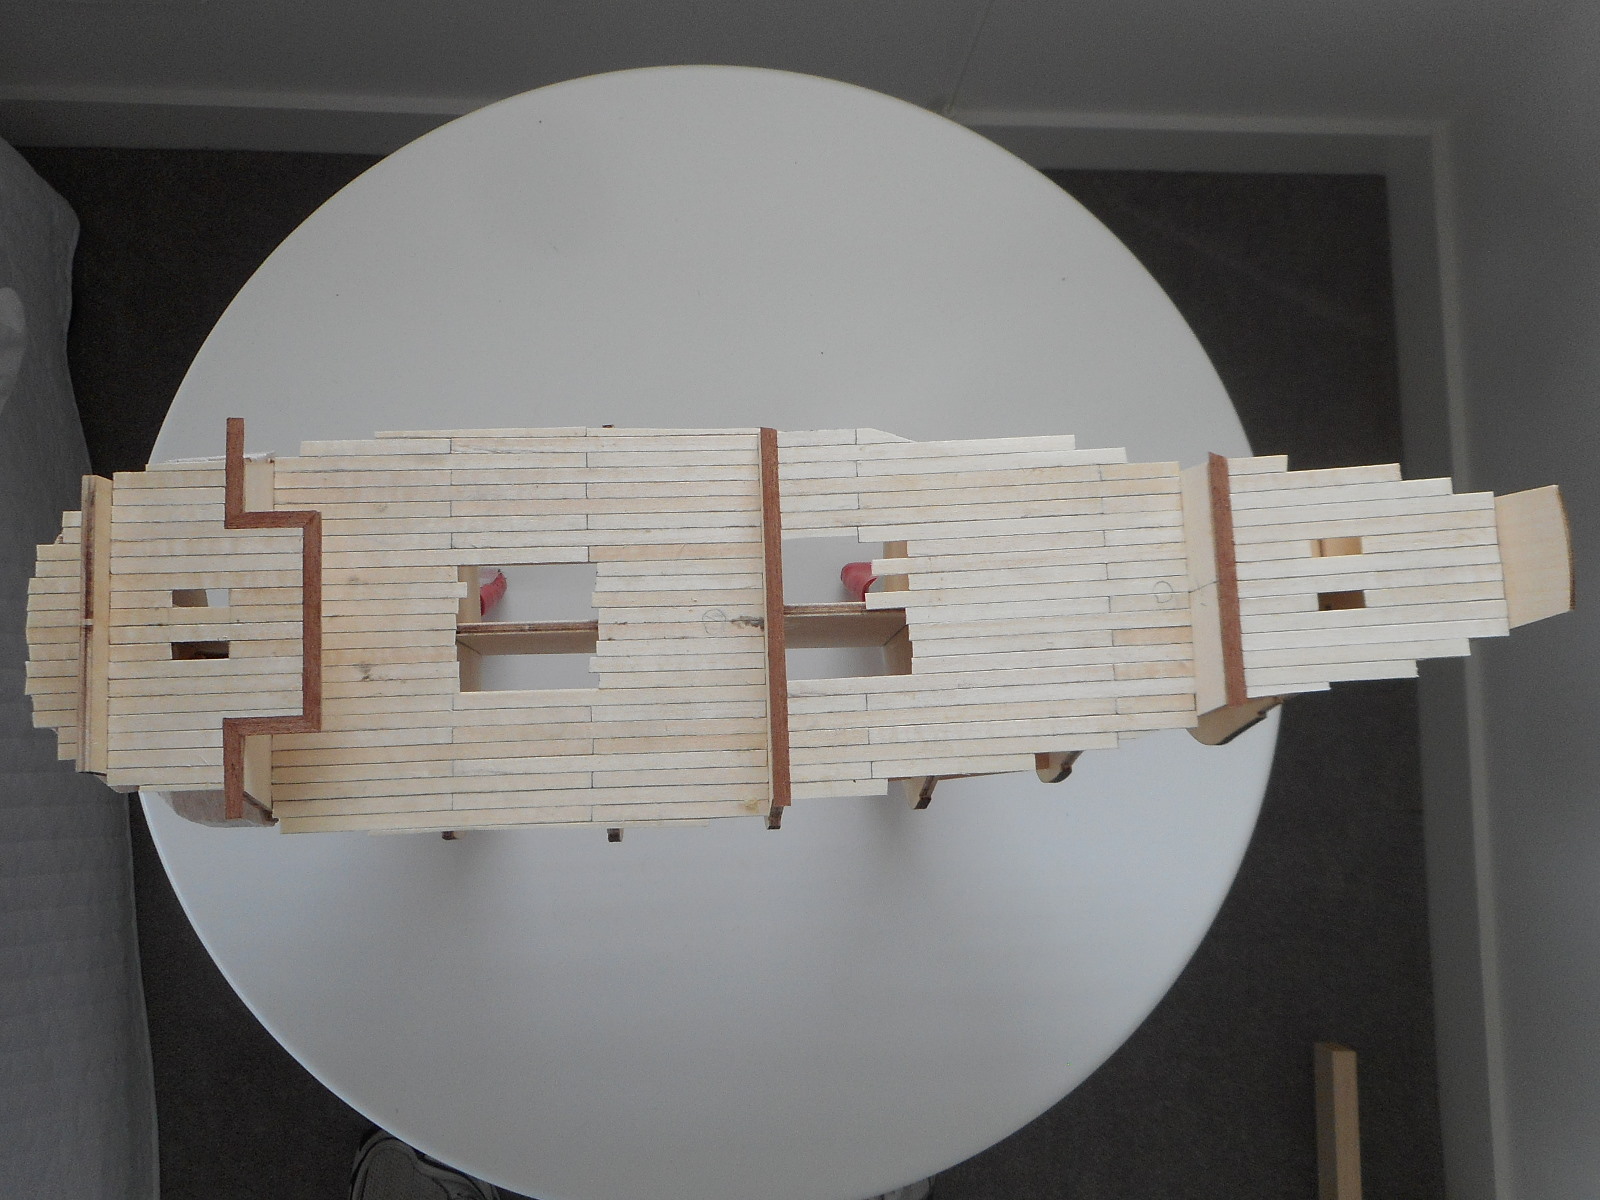
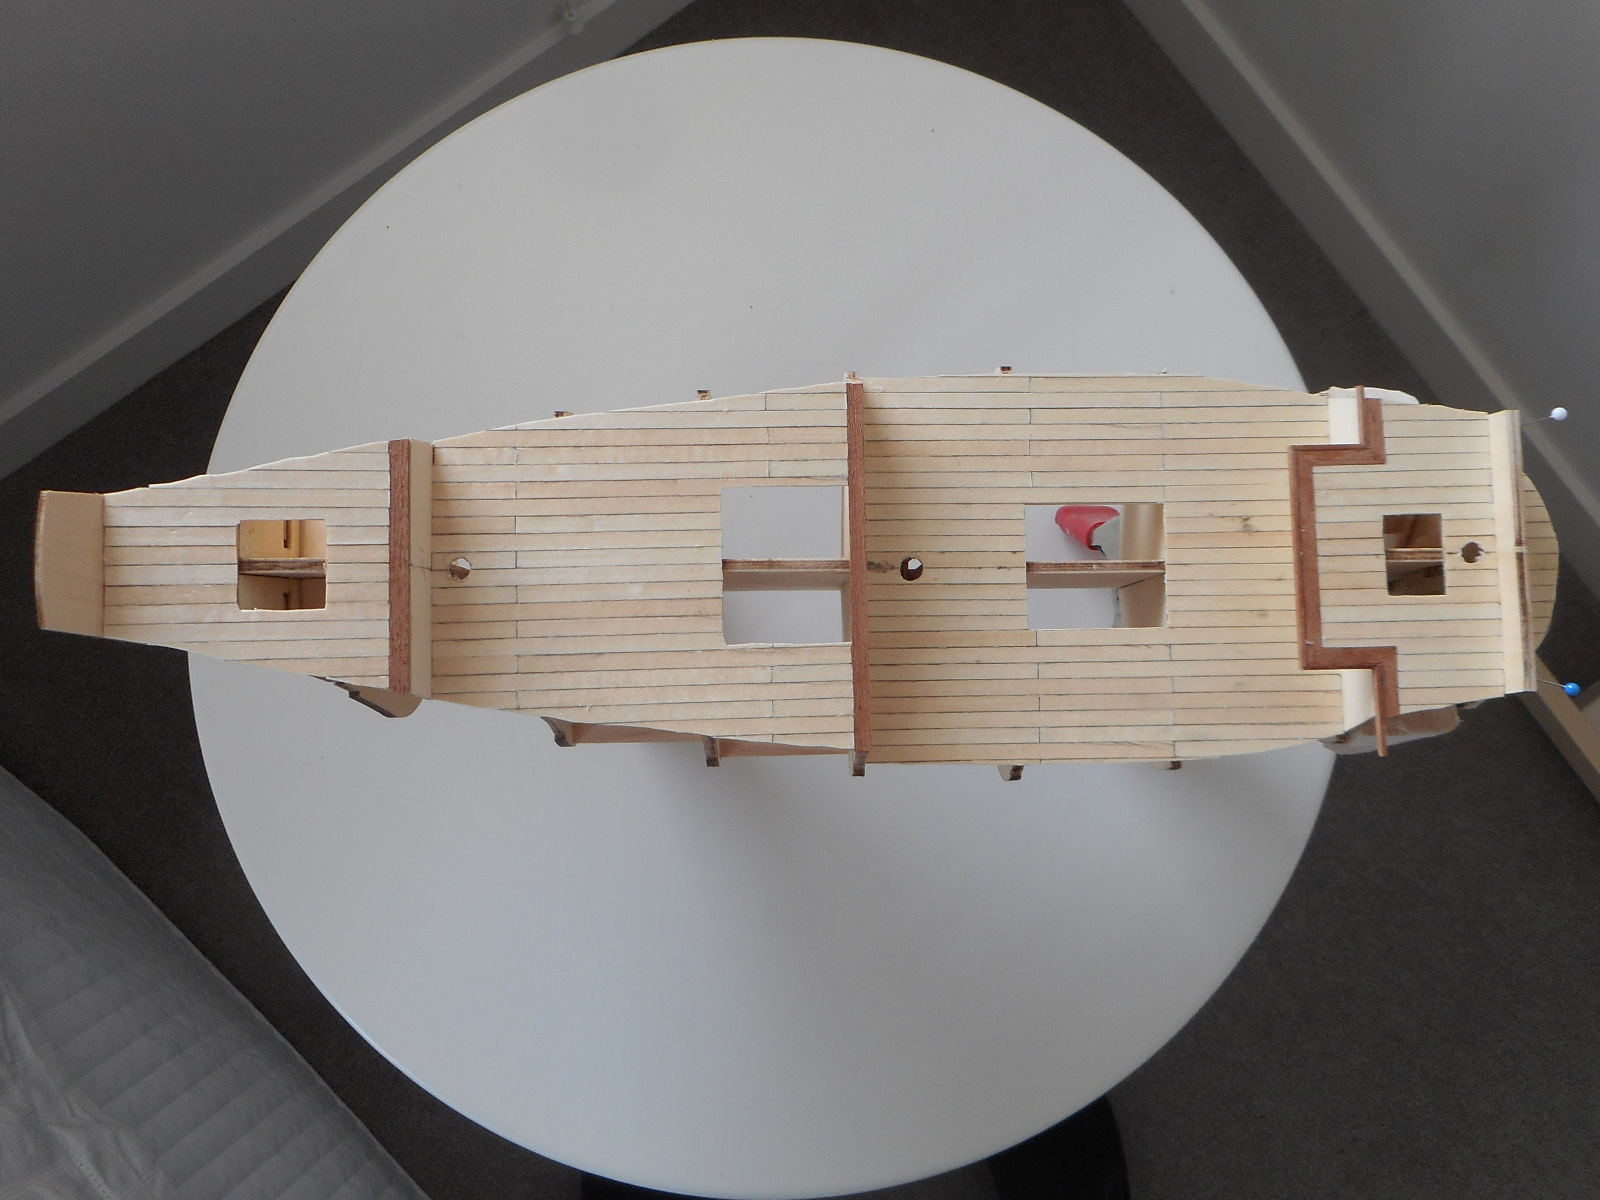
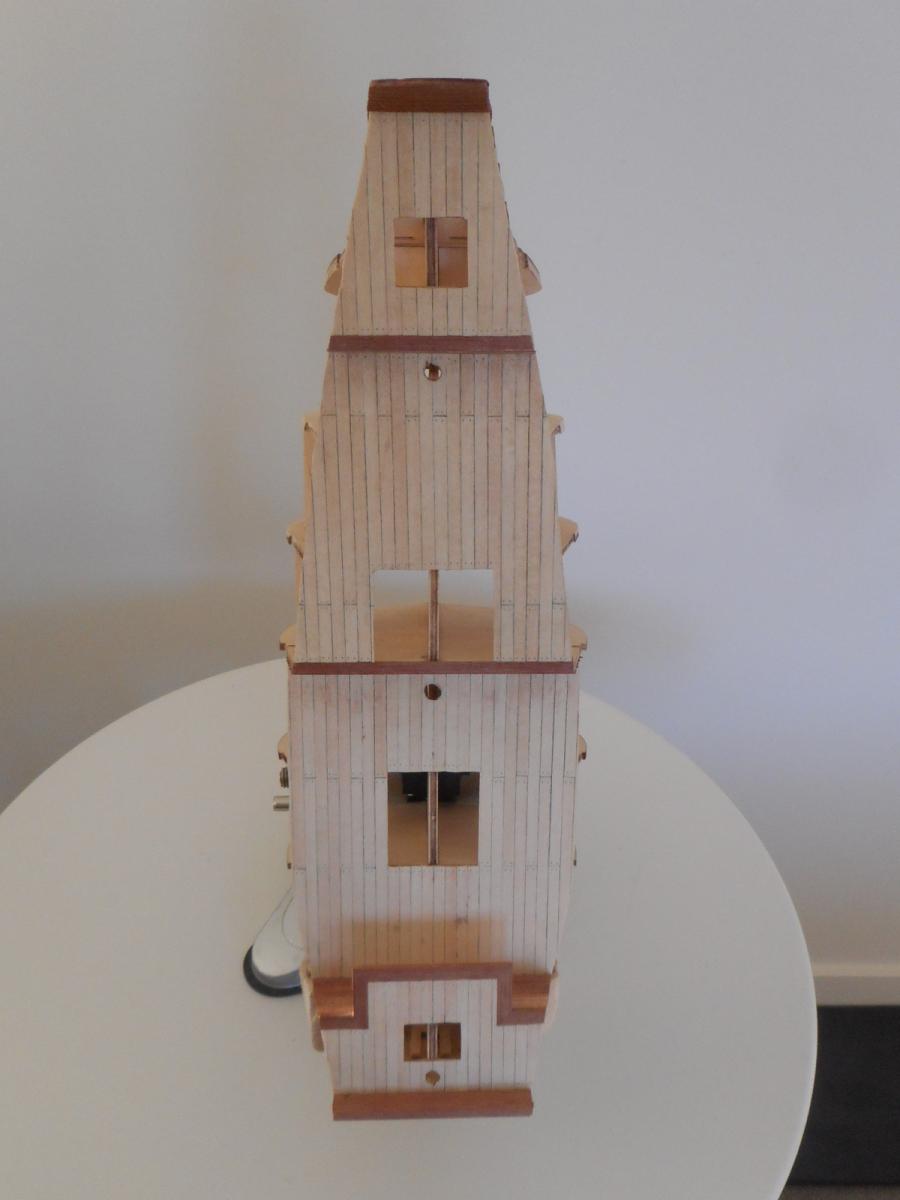
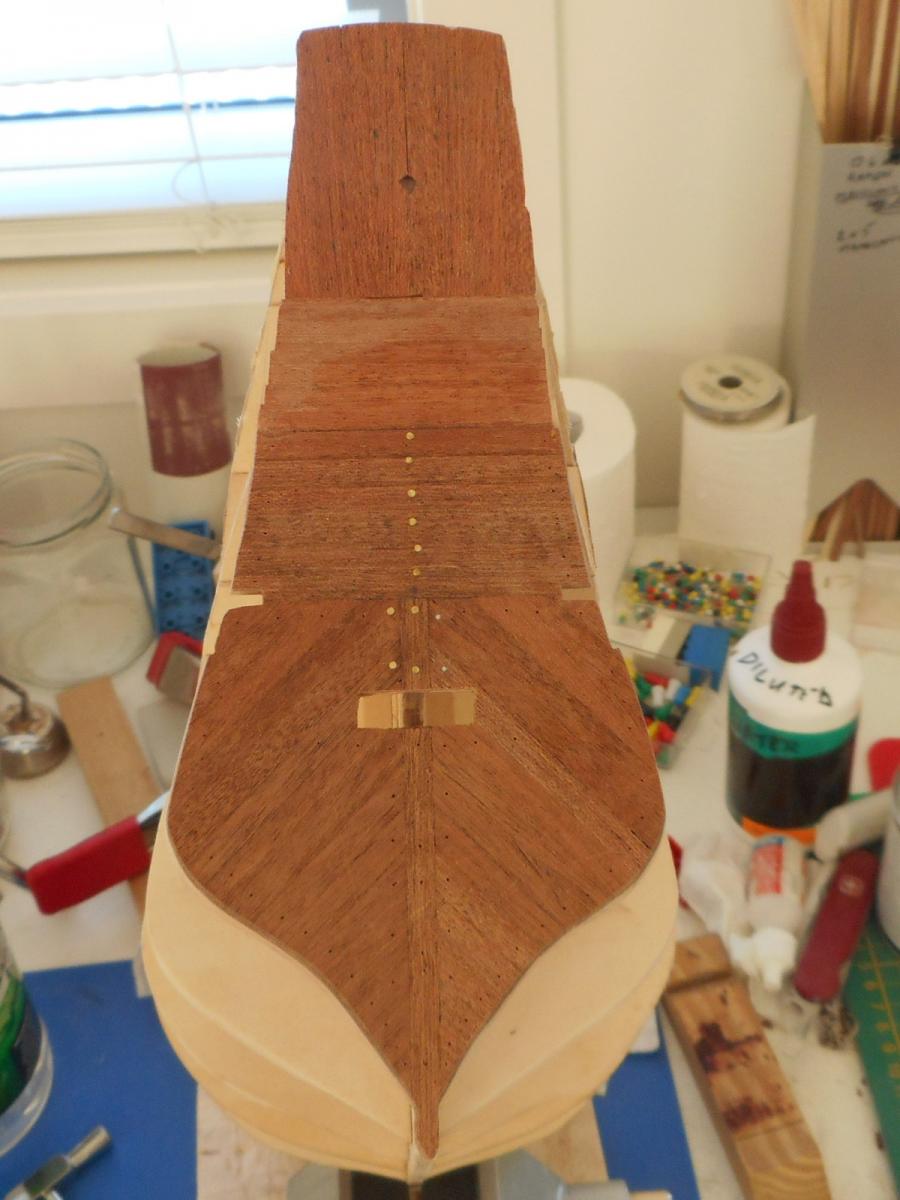
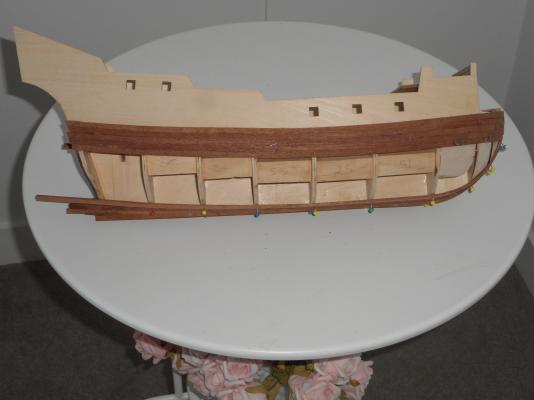
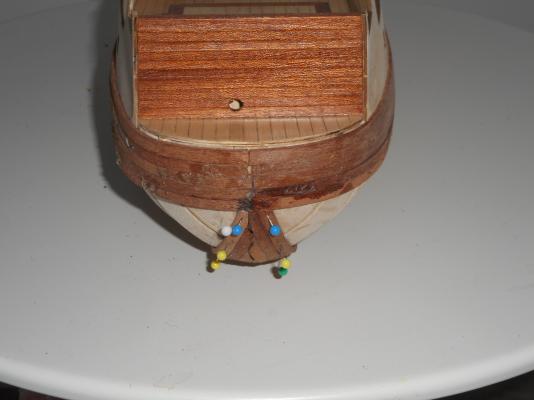
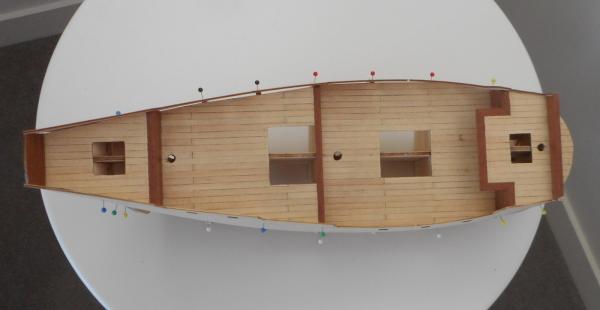
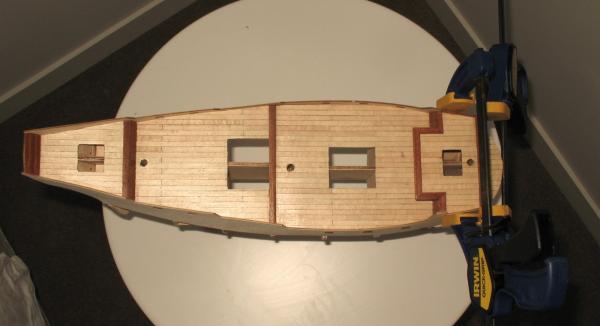
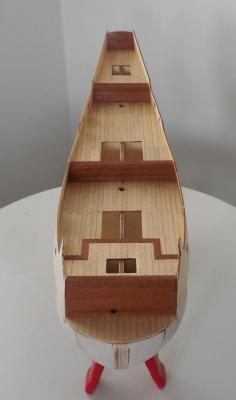
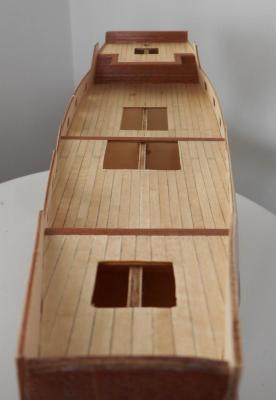
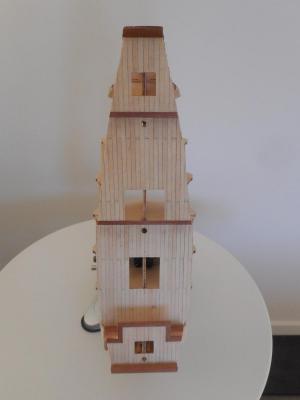
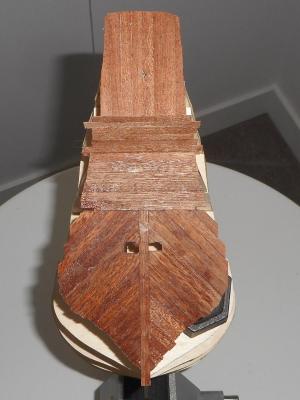
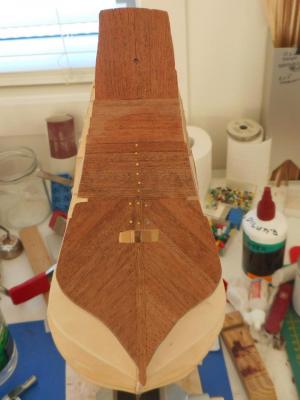
Bit of a progress report. I completed the deck planking, using 10cm max length planks. Scaled up, this makes 9m long, by 45cm wide. Not sure what the real size would have been. Here they are before edge trimming: After some trimming: And after some of the vertical walls were planked: These walls are planked in a clinker pattern, which may show up in future photos. This view from the stern shows a variety of patterns. The top 1/3rd is thin planks, butted together vertically; the next little bit is the same planks run horizontally; then there are six 2mm thick planks horizontally; finally the same 2mm ones in a 45 degree pattern: And after a bit of fairing, starting to place the nails: Currently I am waiting for the glue to dry on the bulwarks. Photos of that and more detail to follow. Cheers, Brett

-
Thanks, hamilton. I plan to stick with the single planking, just to see what it's like. If I fail, I will rethink! Cheers, Brett
-
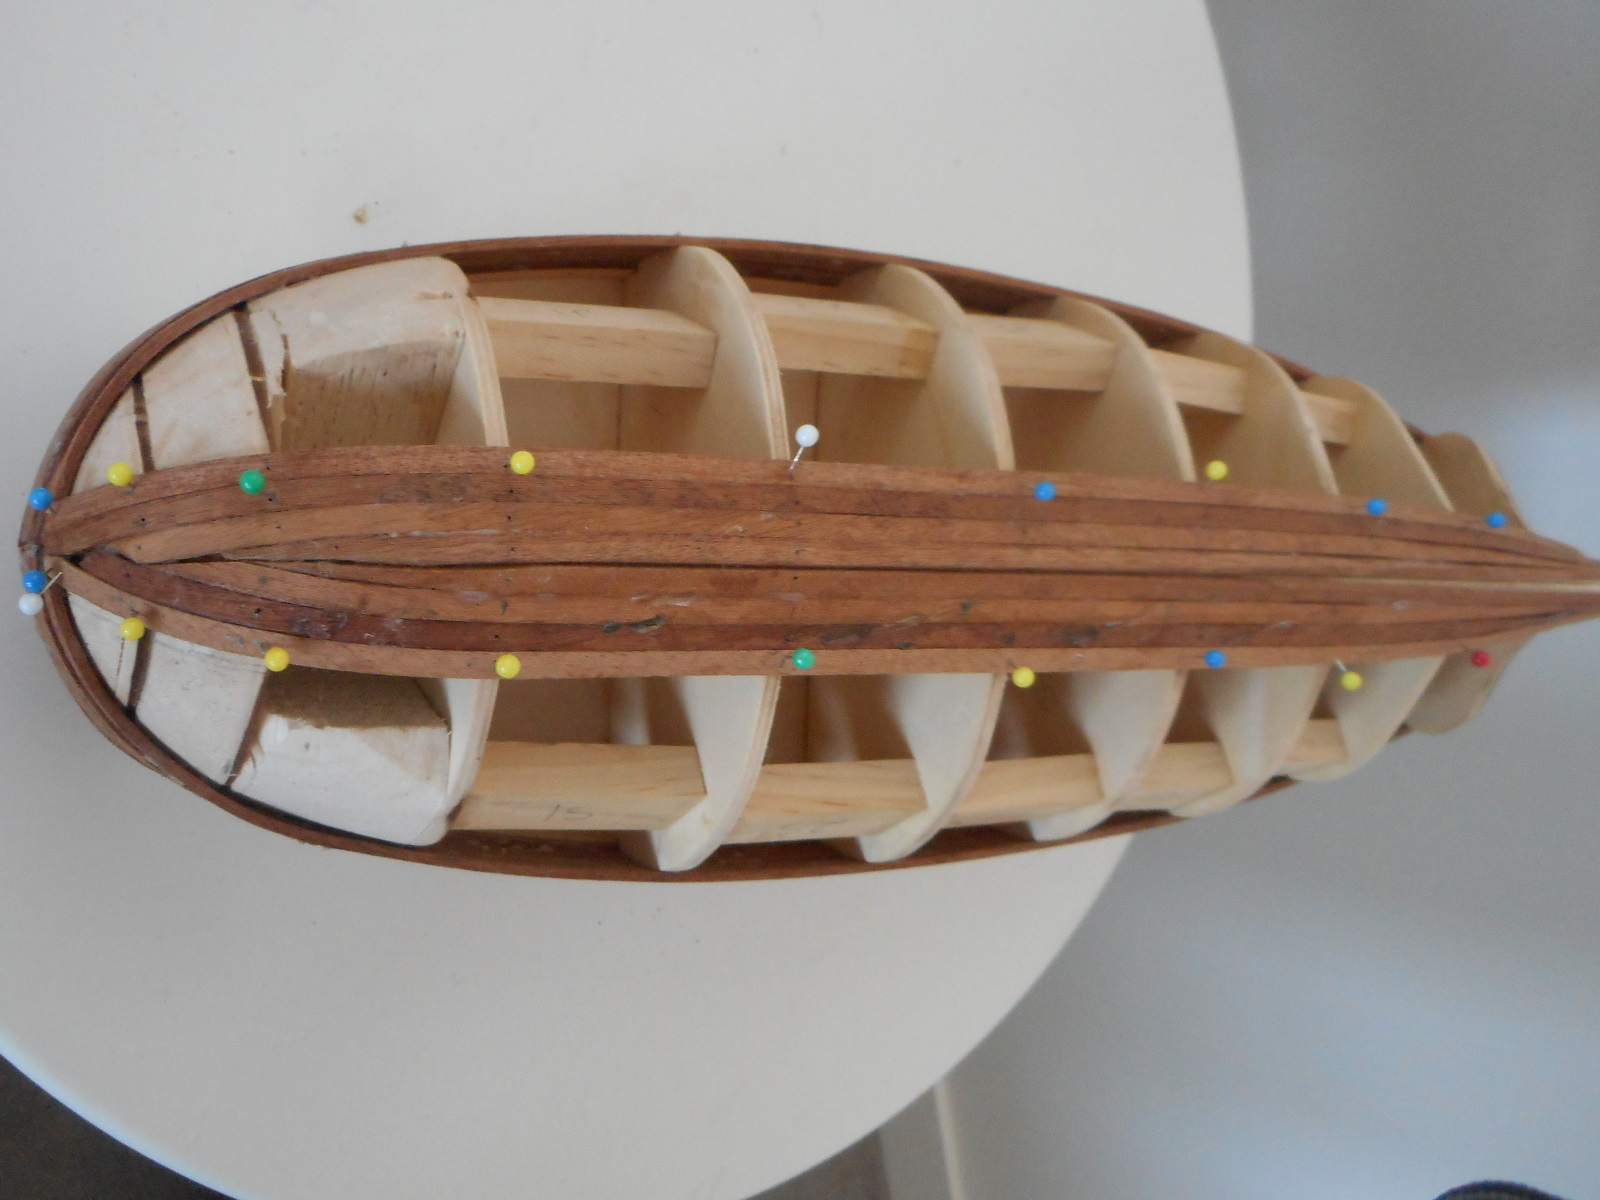
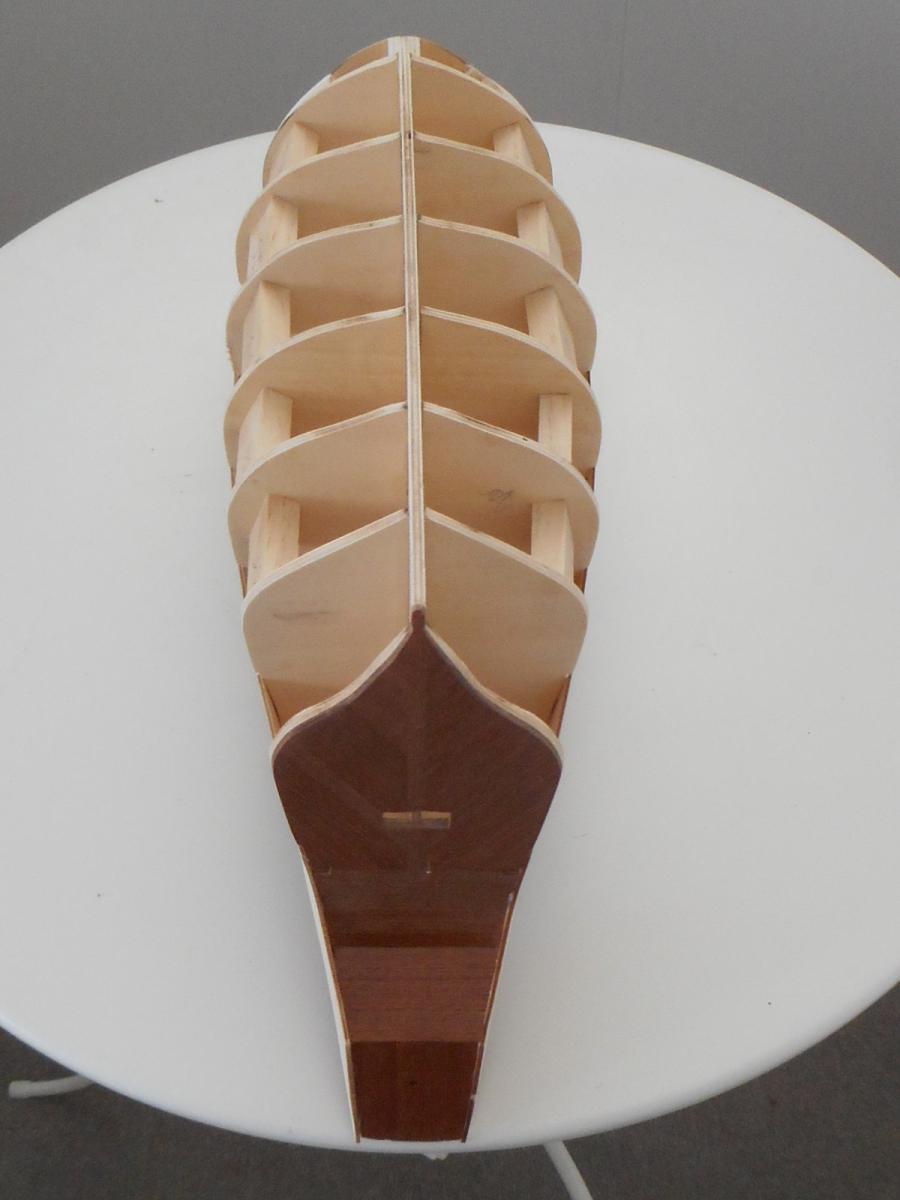
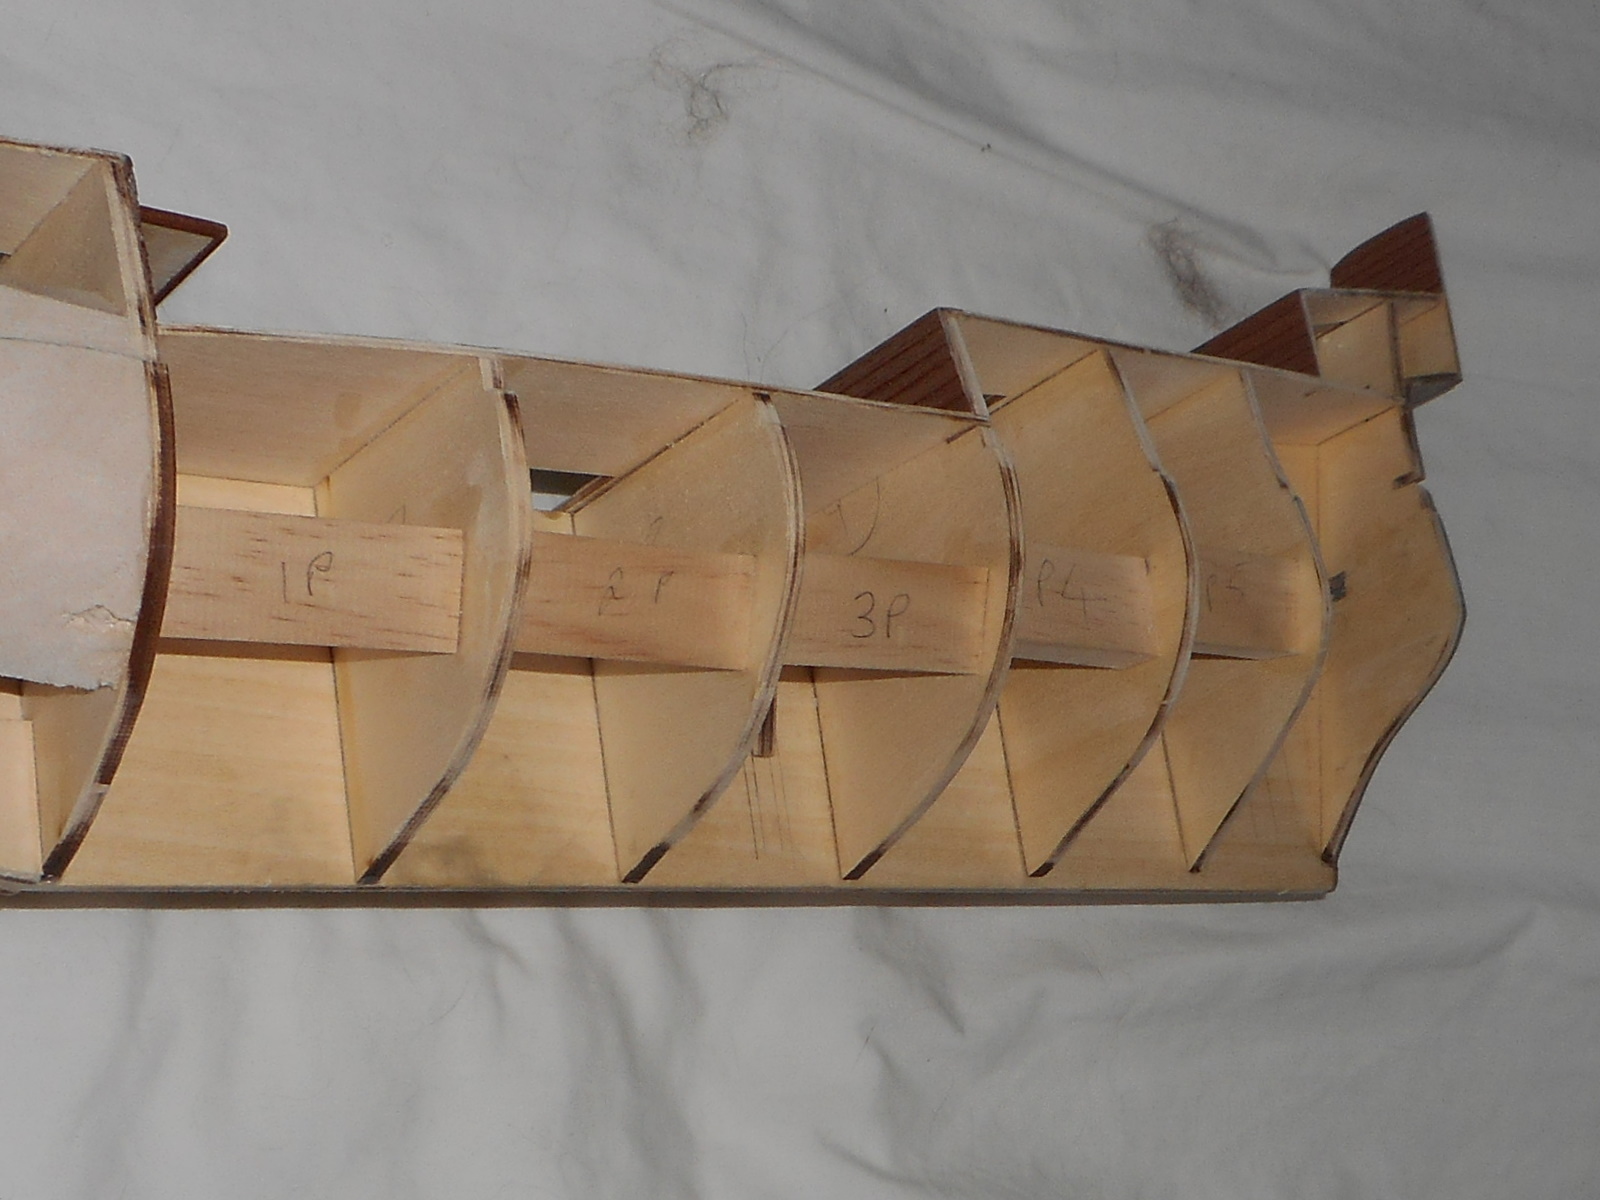
Hi Hamilton, Yes, the stem etc are added after the planking, into a slot cut to receive it, like so in the plans: Here are two better views of the way the frames sit on the false keel at present: My concern is that this is single planked, and the planks are 2mm thick! It may all work out simply by pre-bending the planks, but I just want to make sure I'm not missing something here. I think the one you did was double planked? Ah, the fun that poor plans/instructions cause! I can see why the experts build from scratch. Cheers Brett
-
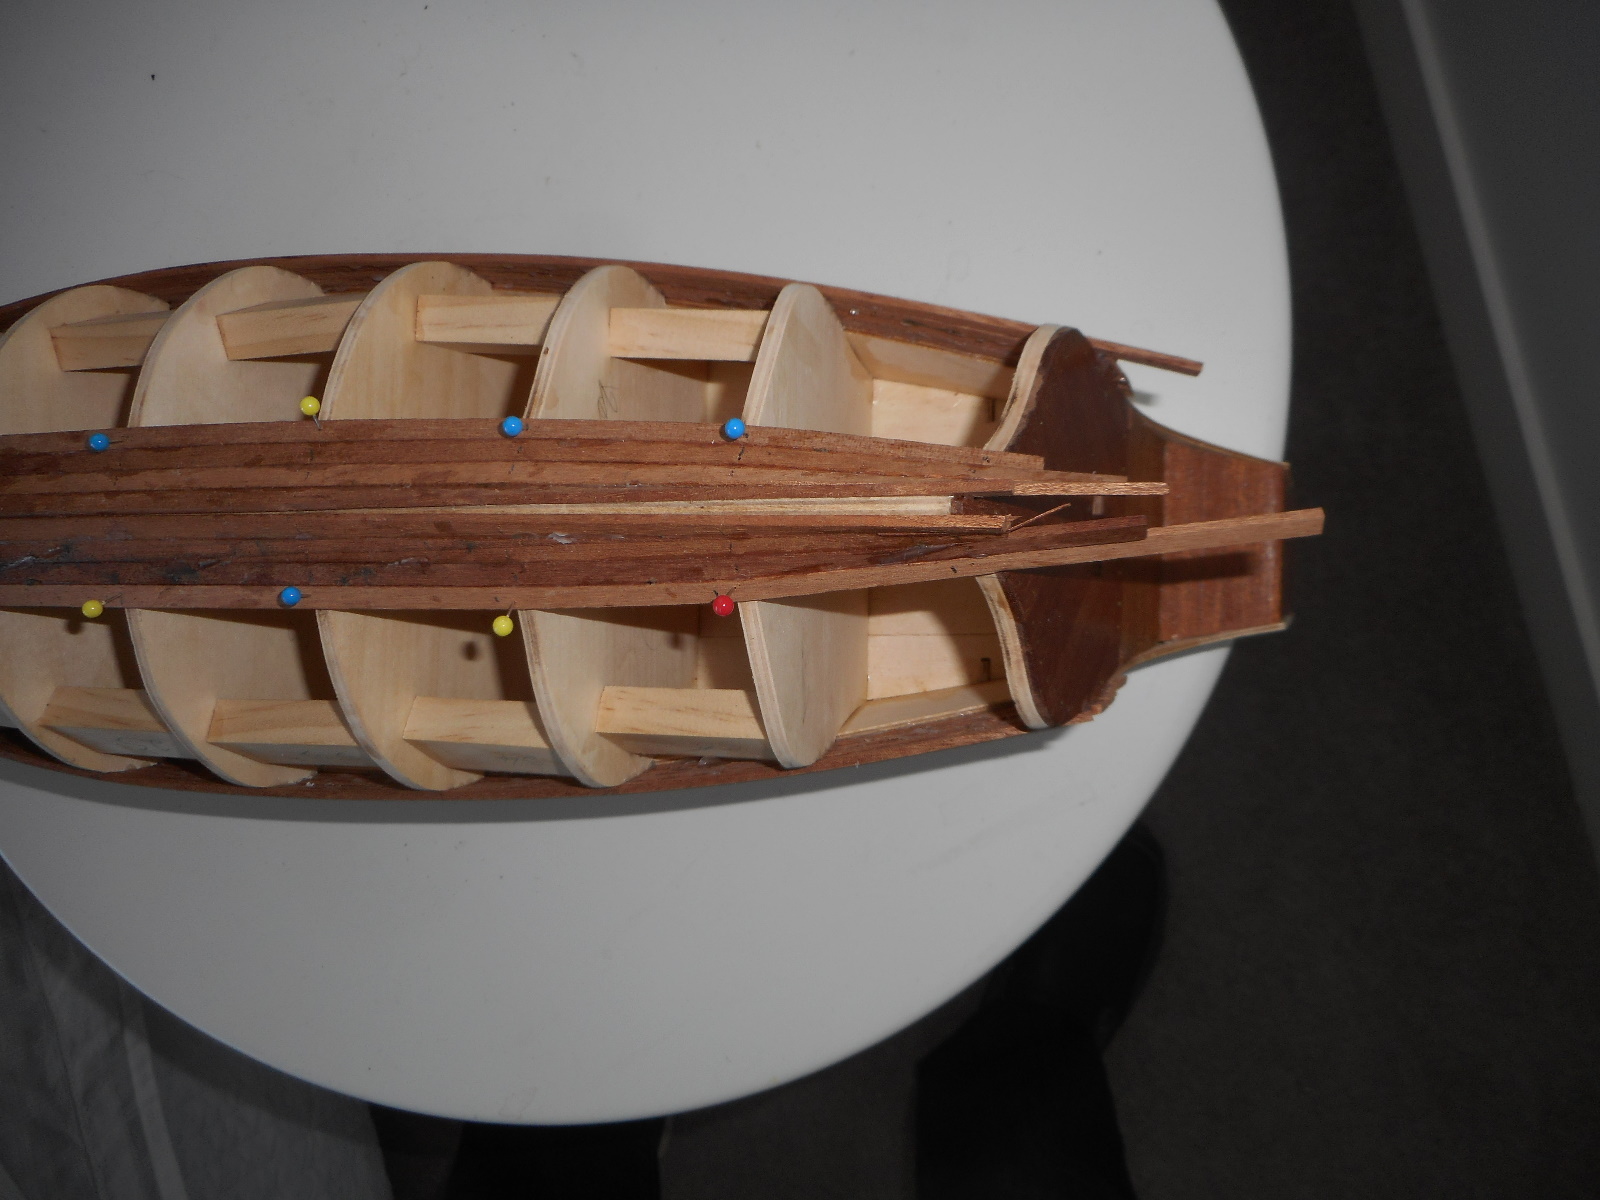
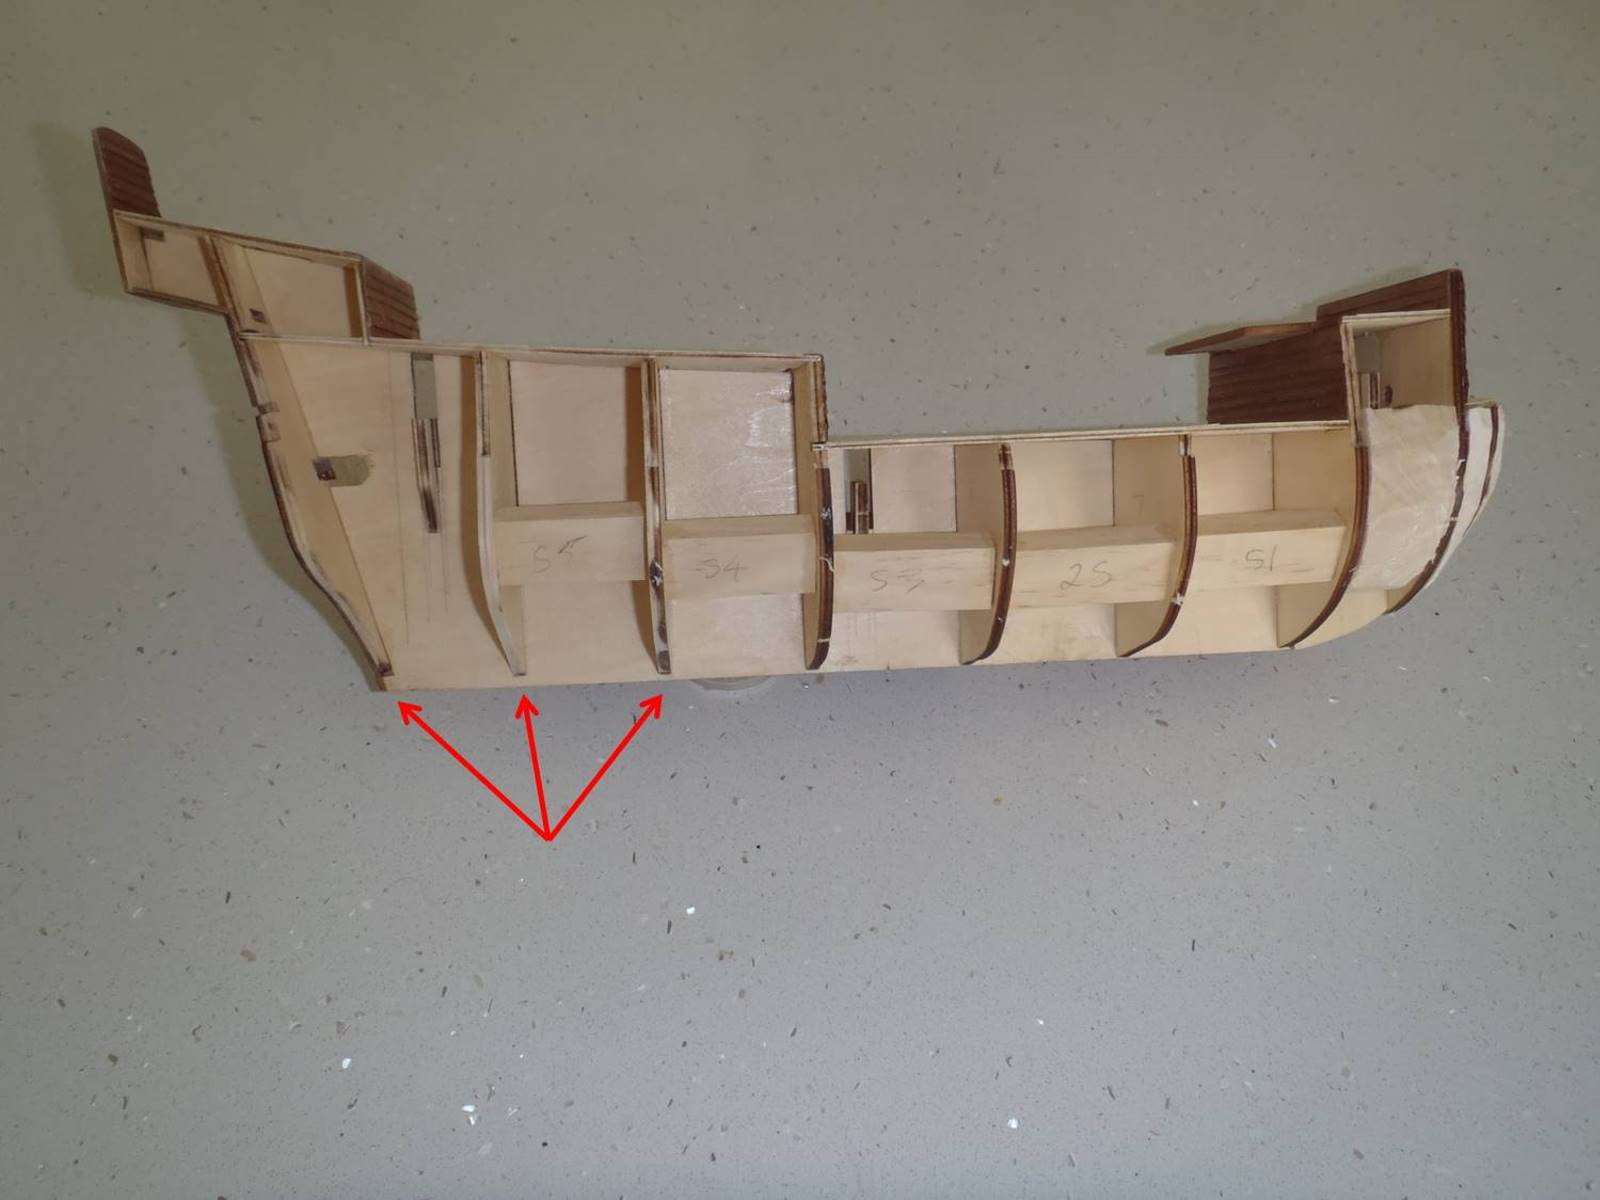
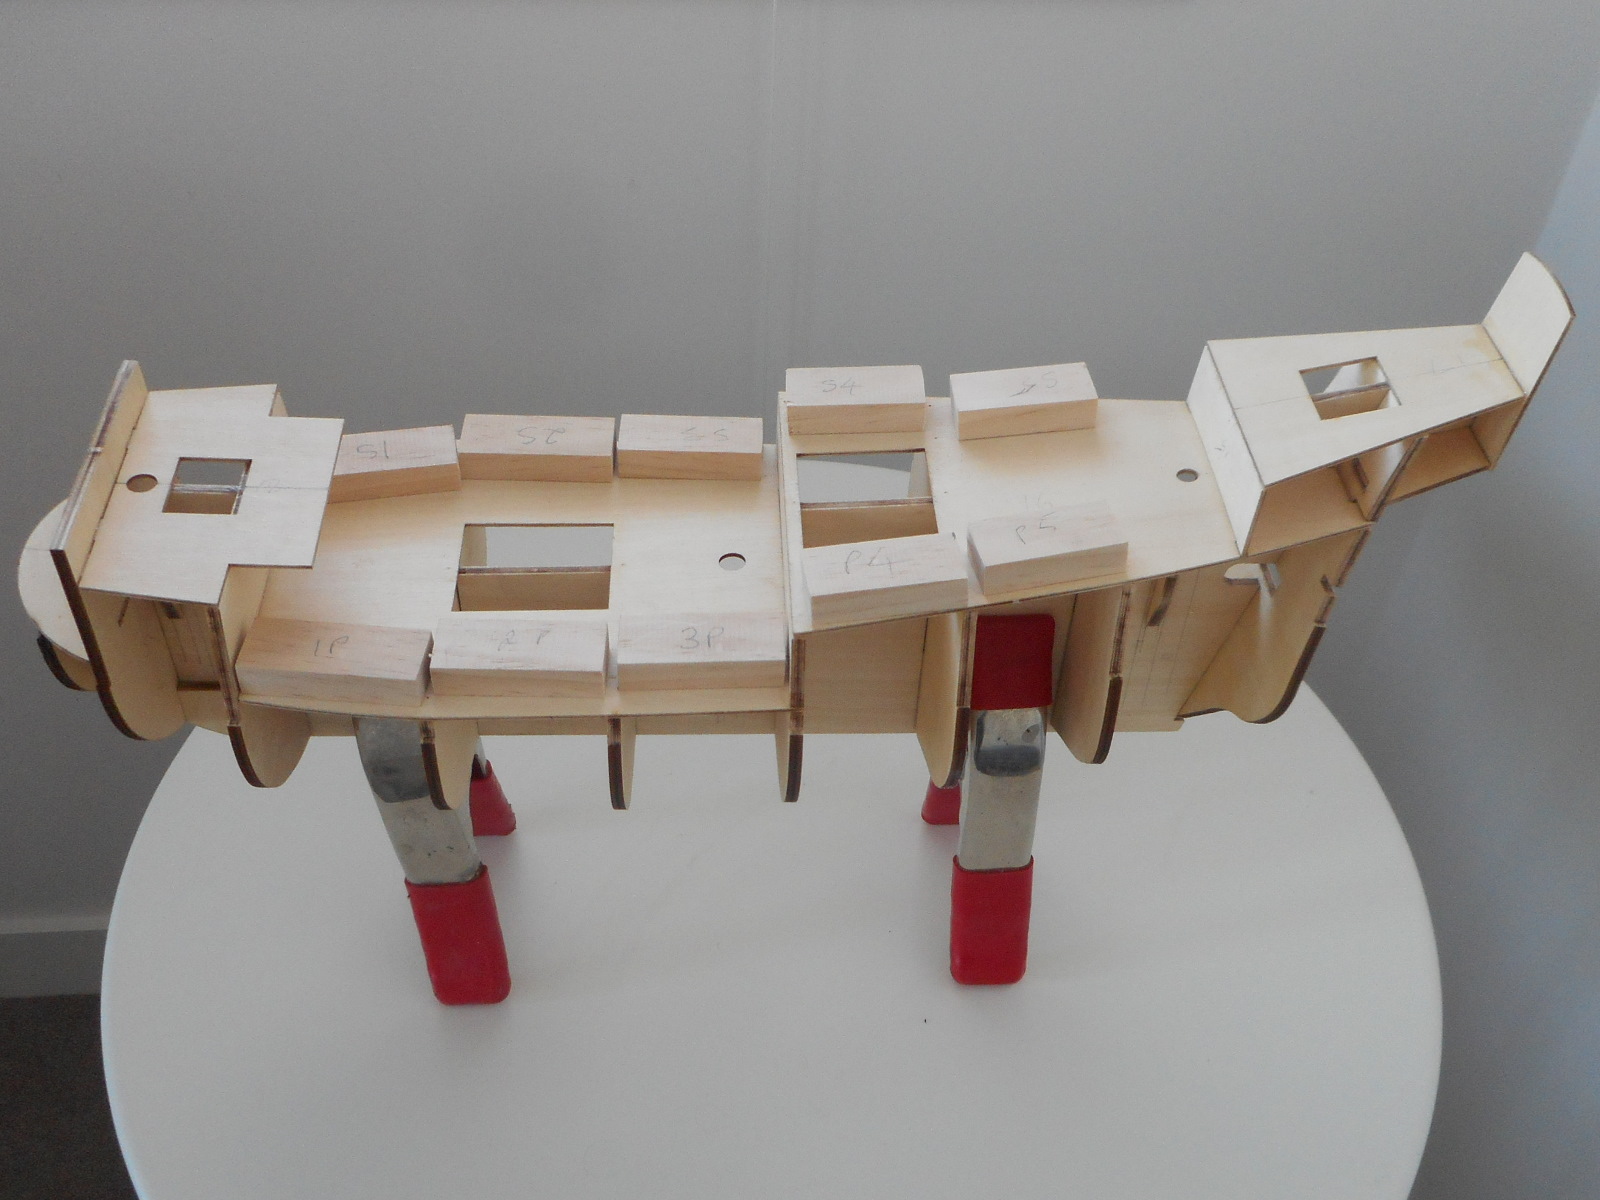
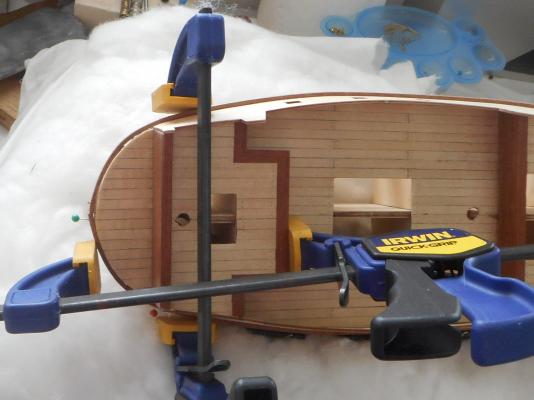
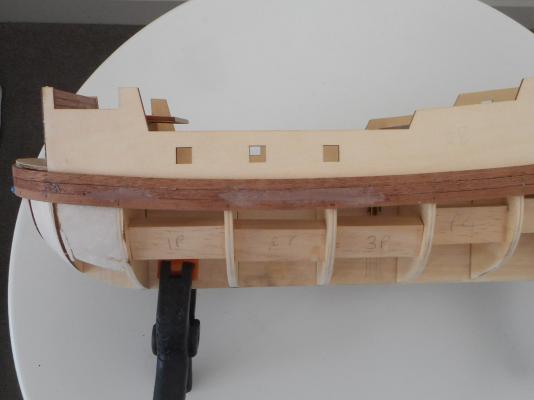
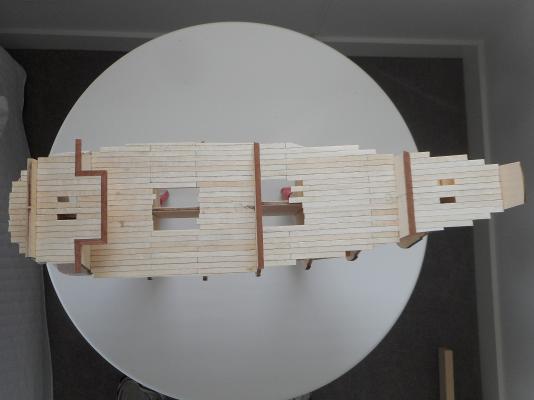
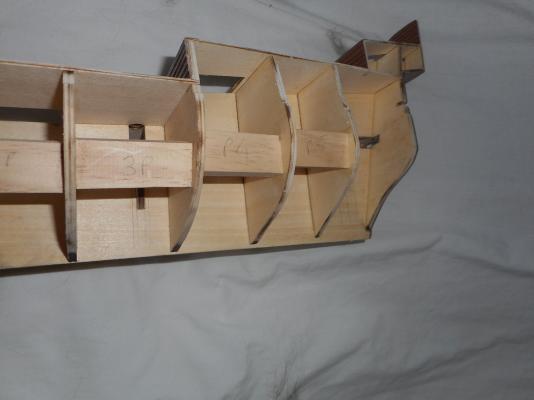
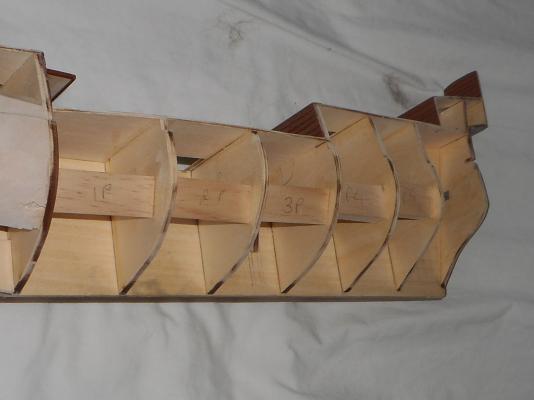
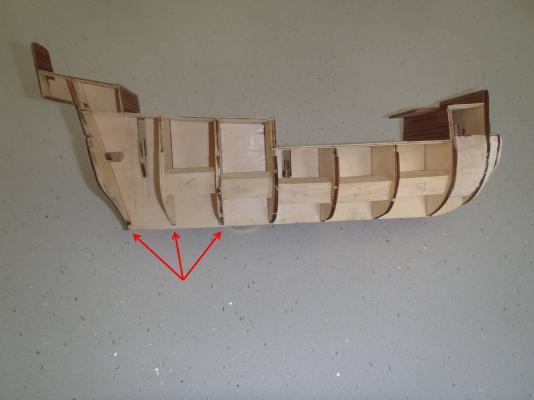
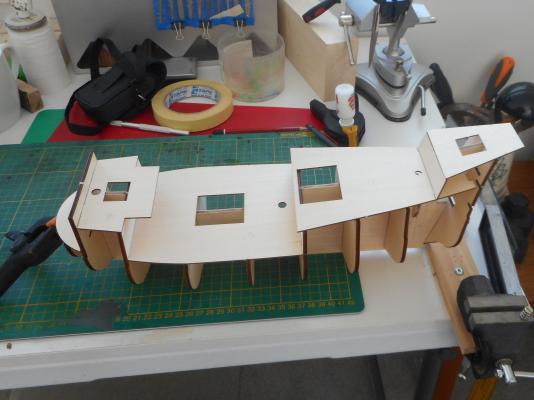
Before I post my progress photos, I have a question that I hope someone who has made this will answer. I have not been able to find out from reading logs. The frames do not all finish at the same level on the false keel. The sternmost 3 are short as shown by the red arrows, below. This seems intentional, but odd: I am ready to get stuck into the fairing, then I will be planking. Should I do anything in this area to simplify the planking? Thanks, Brett
-
ortho85 reacted to a post in a topic:
San Francisco II by ortho85 - Artesania Latina - scale 1:90
-
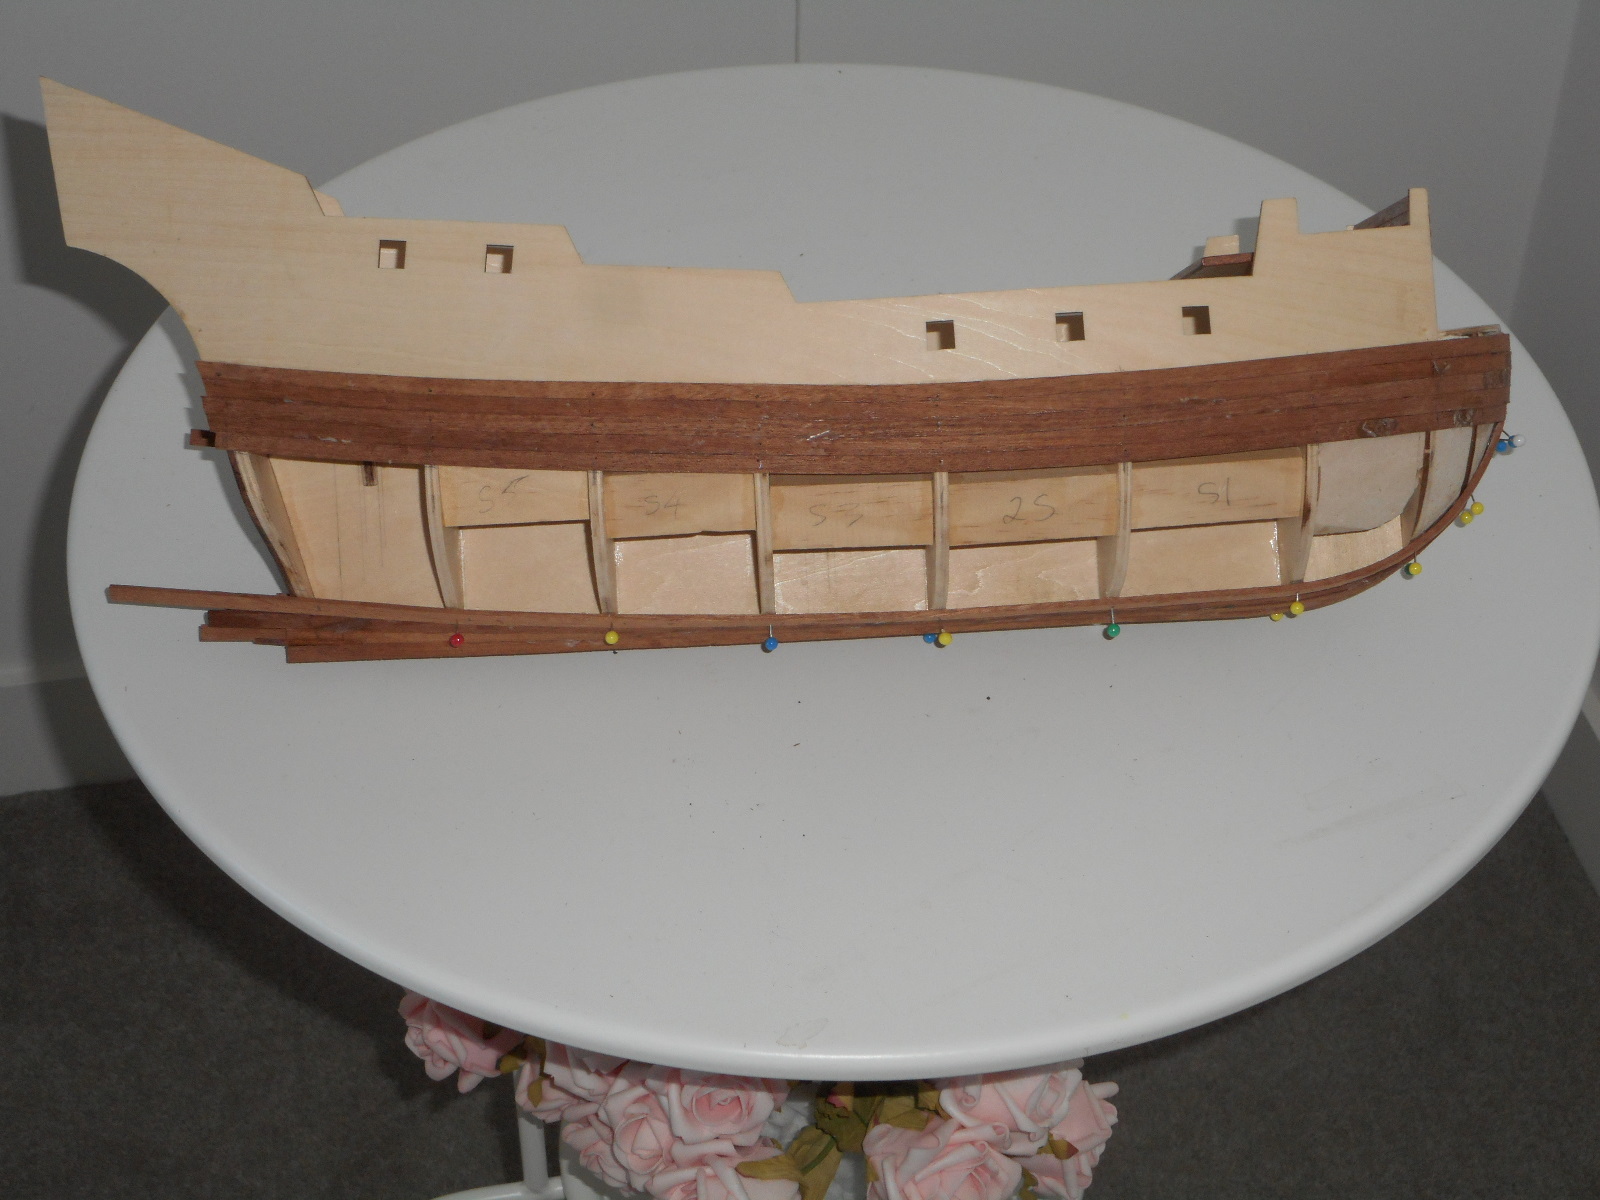
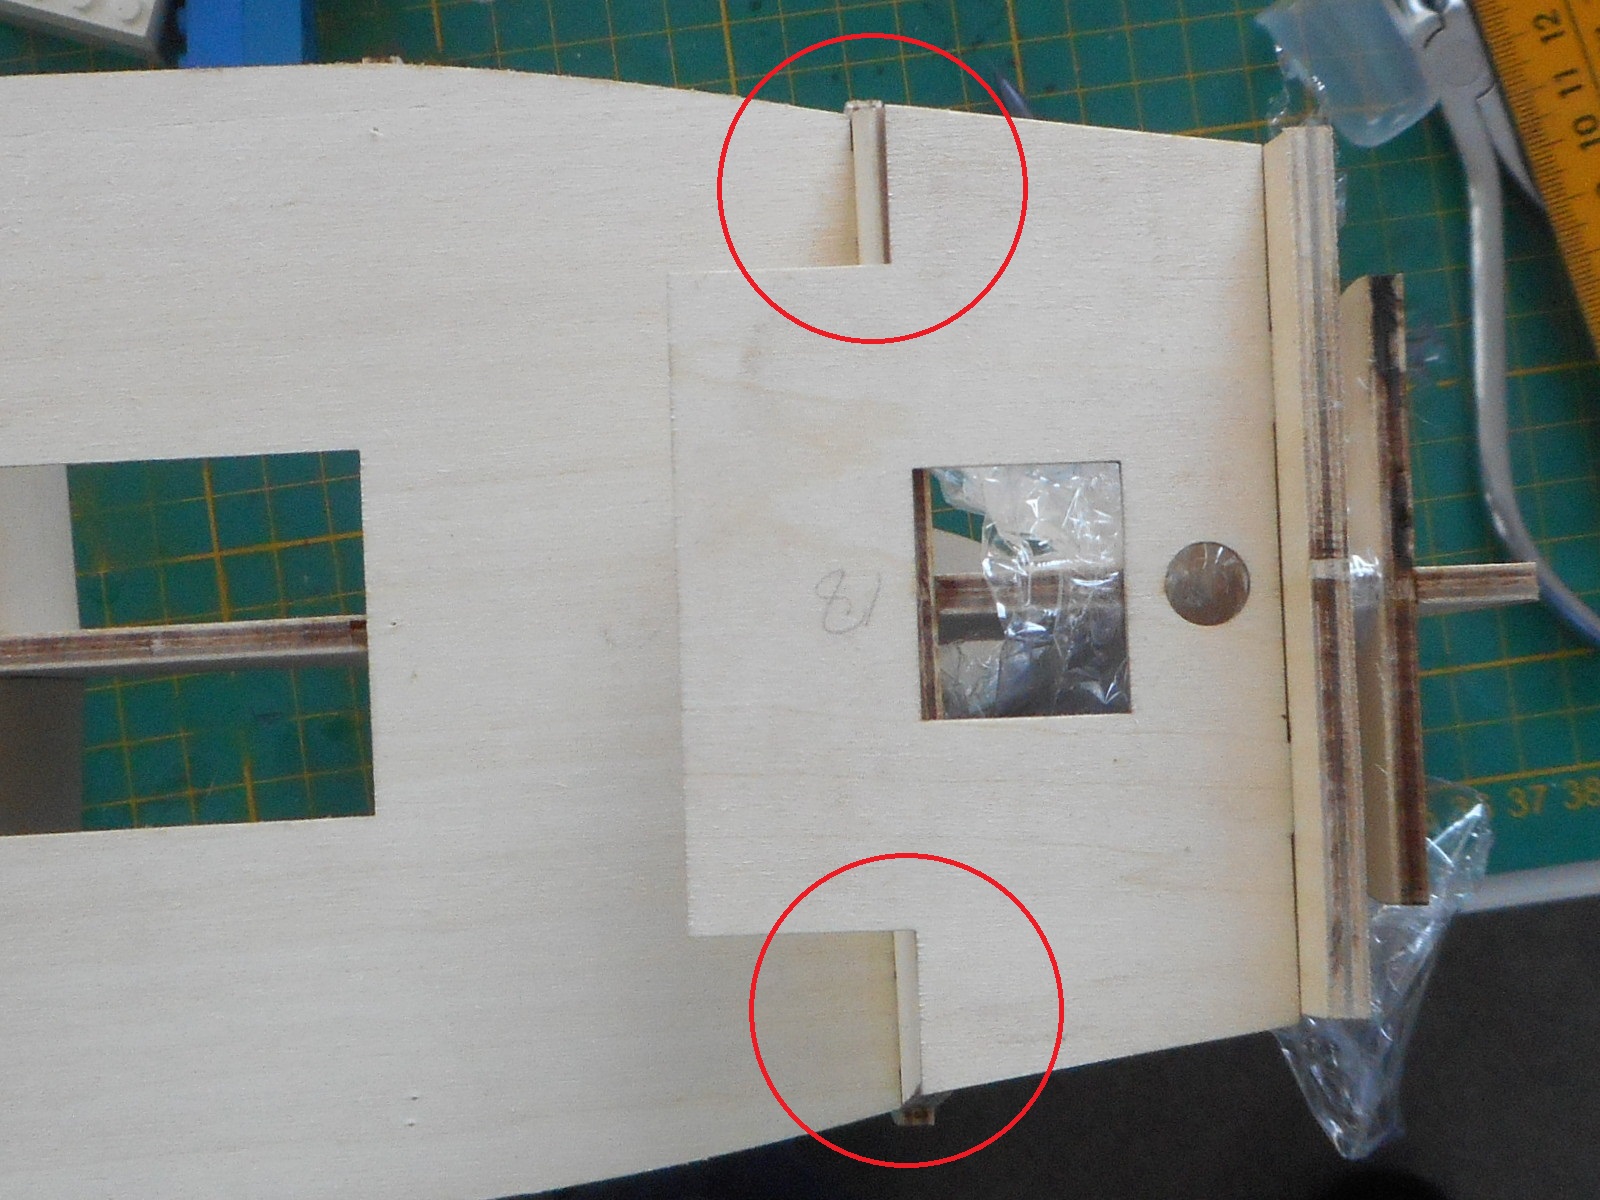
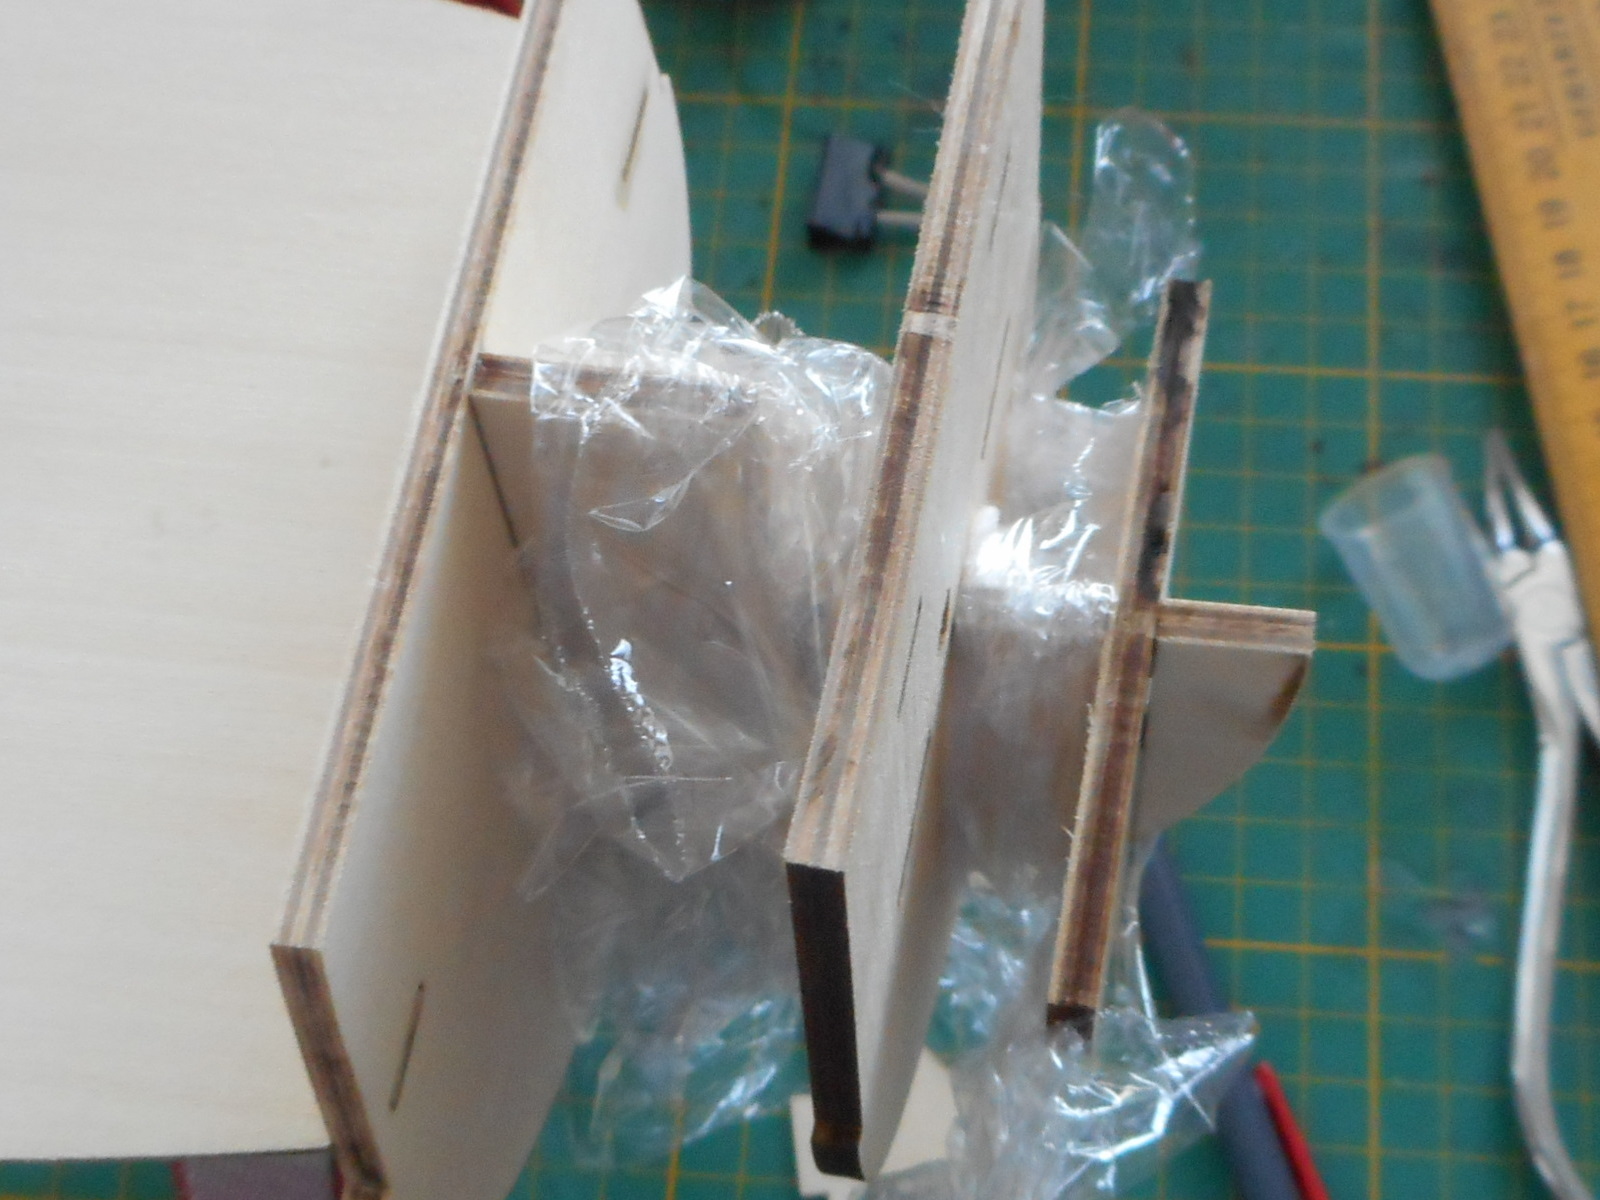
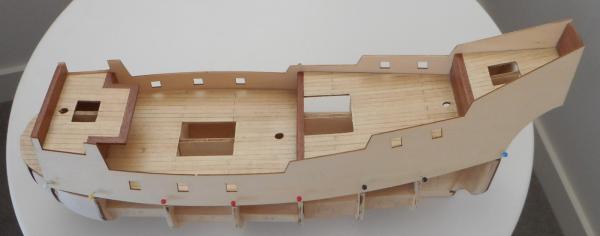
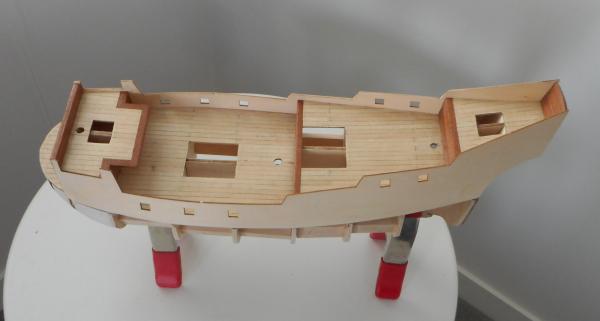
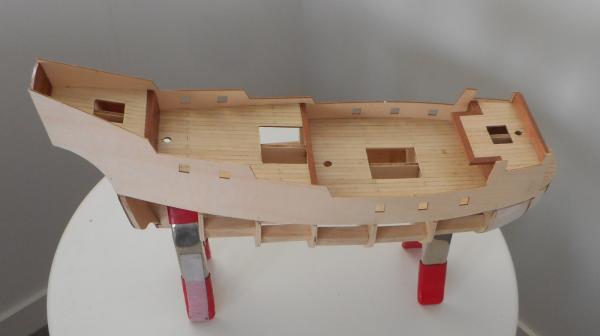
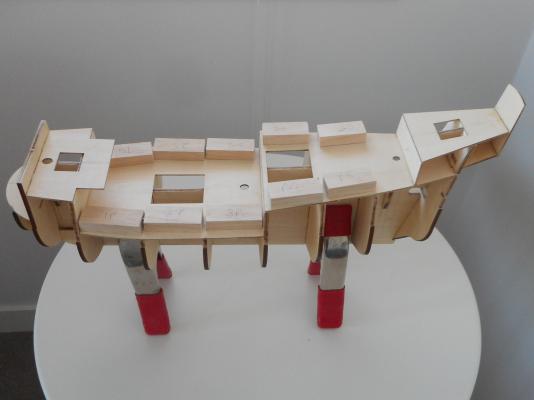
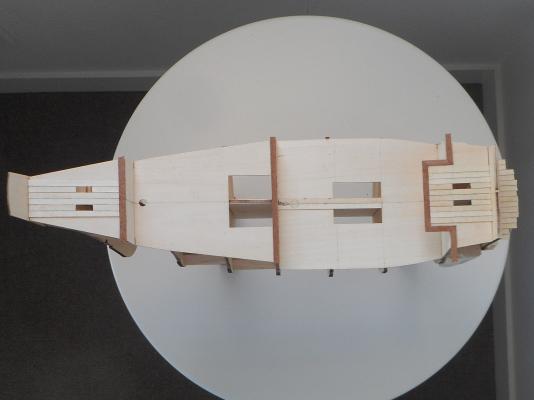
I plodded on fitting the remaining frames, trying to be as accurate as possible, then added the remaining decks. However, when I got to what I normally think of as "the sharp end" (this ship has a very blunt bow), I noticed an error of a mm or so: You can see in the red circles how the deck and frame are a bit out. So I put my ungluing skills to work: Fortunately I didn't have to remove the frame, just twist it a little. Decks all fitted, I cut some blocks to strengthen the assembly: I also added some roughly cut balsa at the bow, to aid with planking later: I'm thinking of adding some balsa at the stern, too. Any comments on the necessity of that? Now I'm on to the deck planking. The supplied planks are 5mm, which is obviously oversized for the scale. Unfortunately I could not source thinner planks locally, so I've decided to run with what I have: All comments and suggestions will be gratefully received. Cheers, Brett


-
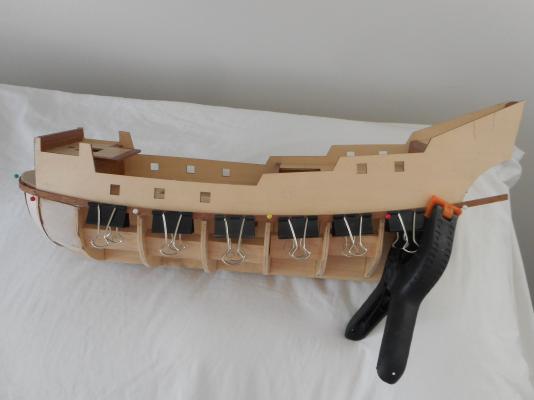
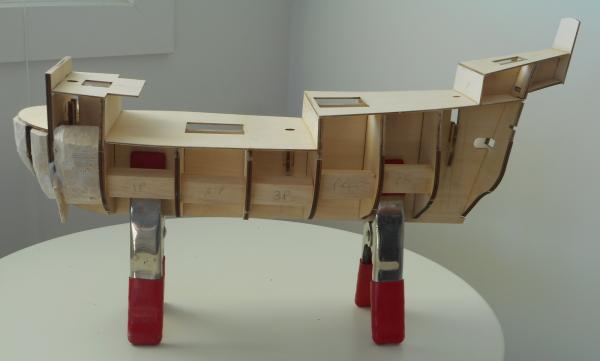
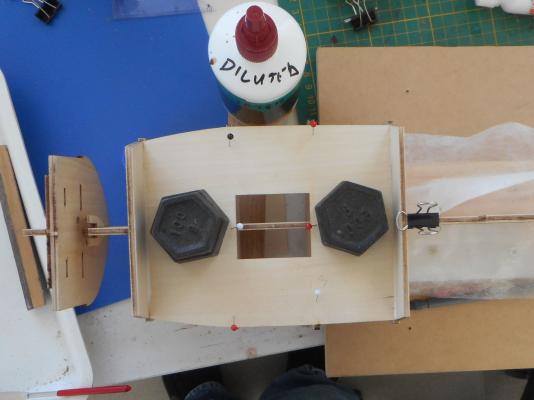
I was given this as a birthday present by one of my sons. So, despite intending to select a model with excellent instructions, I'm stuck with A-L. It will be my first attempt at single planking. I've seen a couple of brave souls attempting this as their first build - no way would I recommend that! There are surprisingly few surviving full logs on MSW, but I have found others on another forum that have more detail. After reading and asking for hints, it was time to get under way. The plans say to test all the frames and decks, so off we go (no glue yet): They then tell you to pin everything, then glue by running diluted PVA glue into the joints with a brush. I couldn't see this being successful, as the assembly would be too flimsy and flexible, and likely to distort during the glue application. So I opted to fit some of the frames before the decks. Here are frames 5 & 6 squared and glued, also you can see the mast supports glued in: Next came frames 7 & 8, then frame 9 complete with the waist deck: So, I'm off and running, and hoping for hints and comments from anyone. Cheers, Brett

-
Hi Wolf, I'm just starting this model, so I'm only now reading your log. I love the idea of laser aligning the masts. Yet another great idea to try to remember! Cheers, Brett