PJTheJet
-
Posts
12 -
Joined
-
Last visited
-
 Katsumoto reacted to a post in a topic:
Santa Maria by PJ - Artesania Latina - 1:65
Katsumoto reacted to a post in a topic:
Santa Maria by PJ - Artesania Latina - 1:65
-
Altduck reacted to a post in a topic:
Santa Maria by PJ - Artesania Latina - 1:65
-
yvesvidal reacted to a post in a topic:
Santa Maria by PJ - Artesania Latina - 1:65
-
GrandpaPhil reacted to a post in a topic:
Santa Maria by PJ - Artesania Latina - 1:65
-
GrandpaPhil reacted to a post in a topic:
Santa Maria by PJ - Artesania Latina - 1:65
-
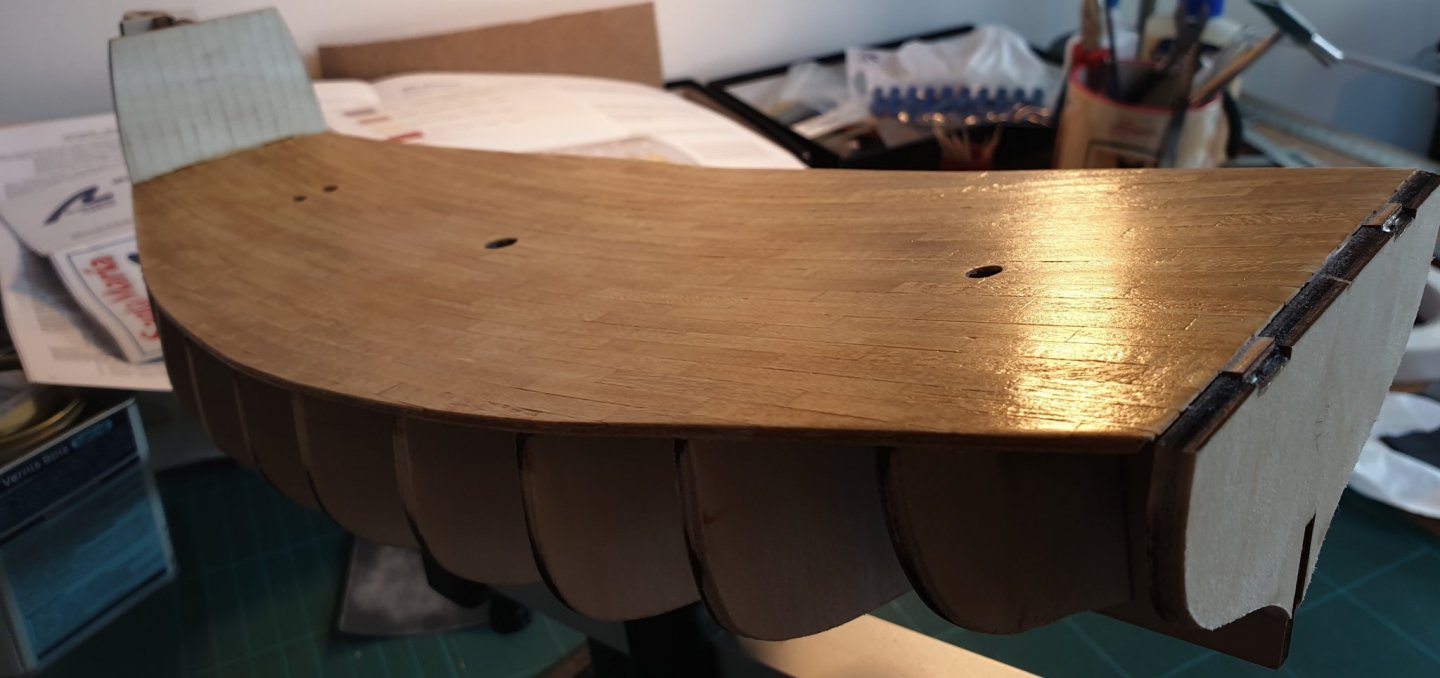
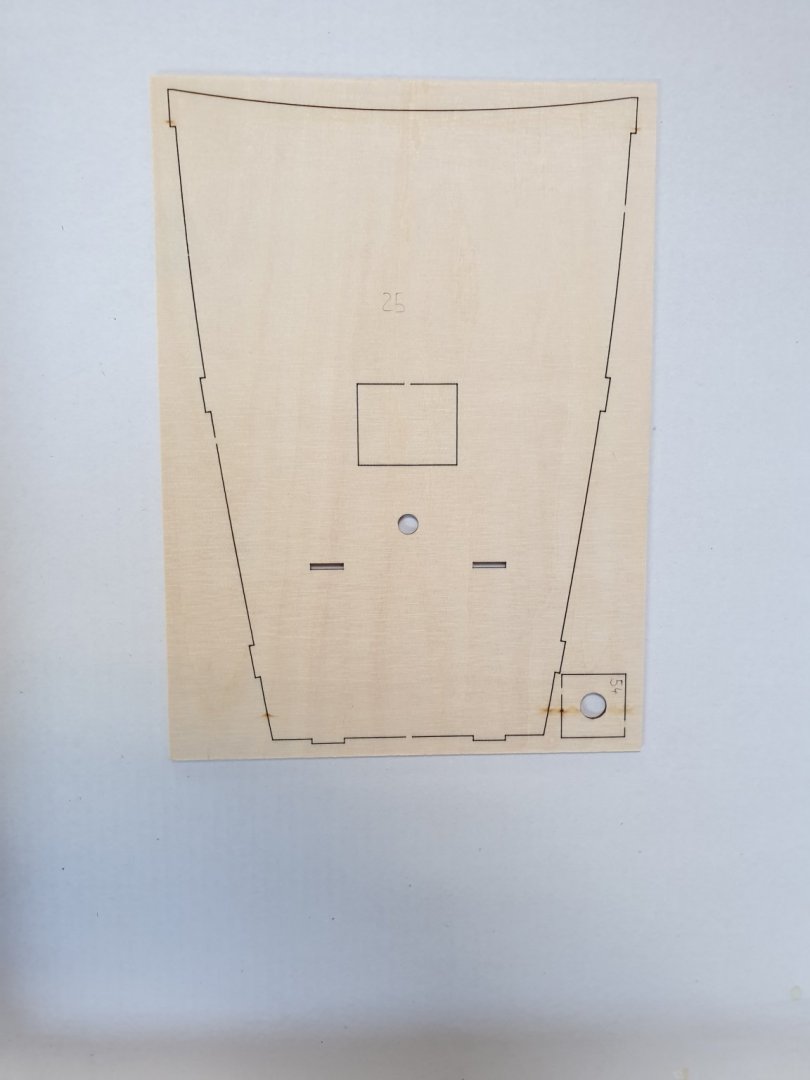
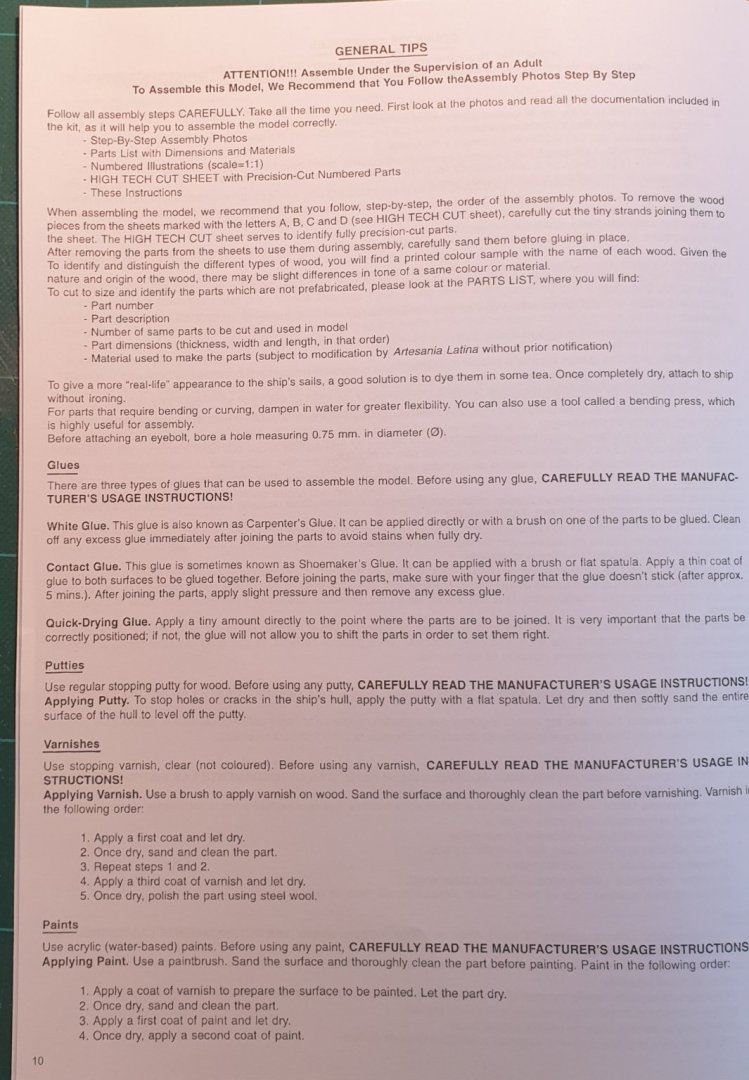
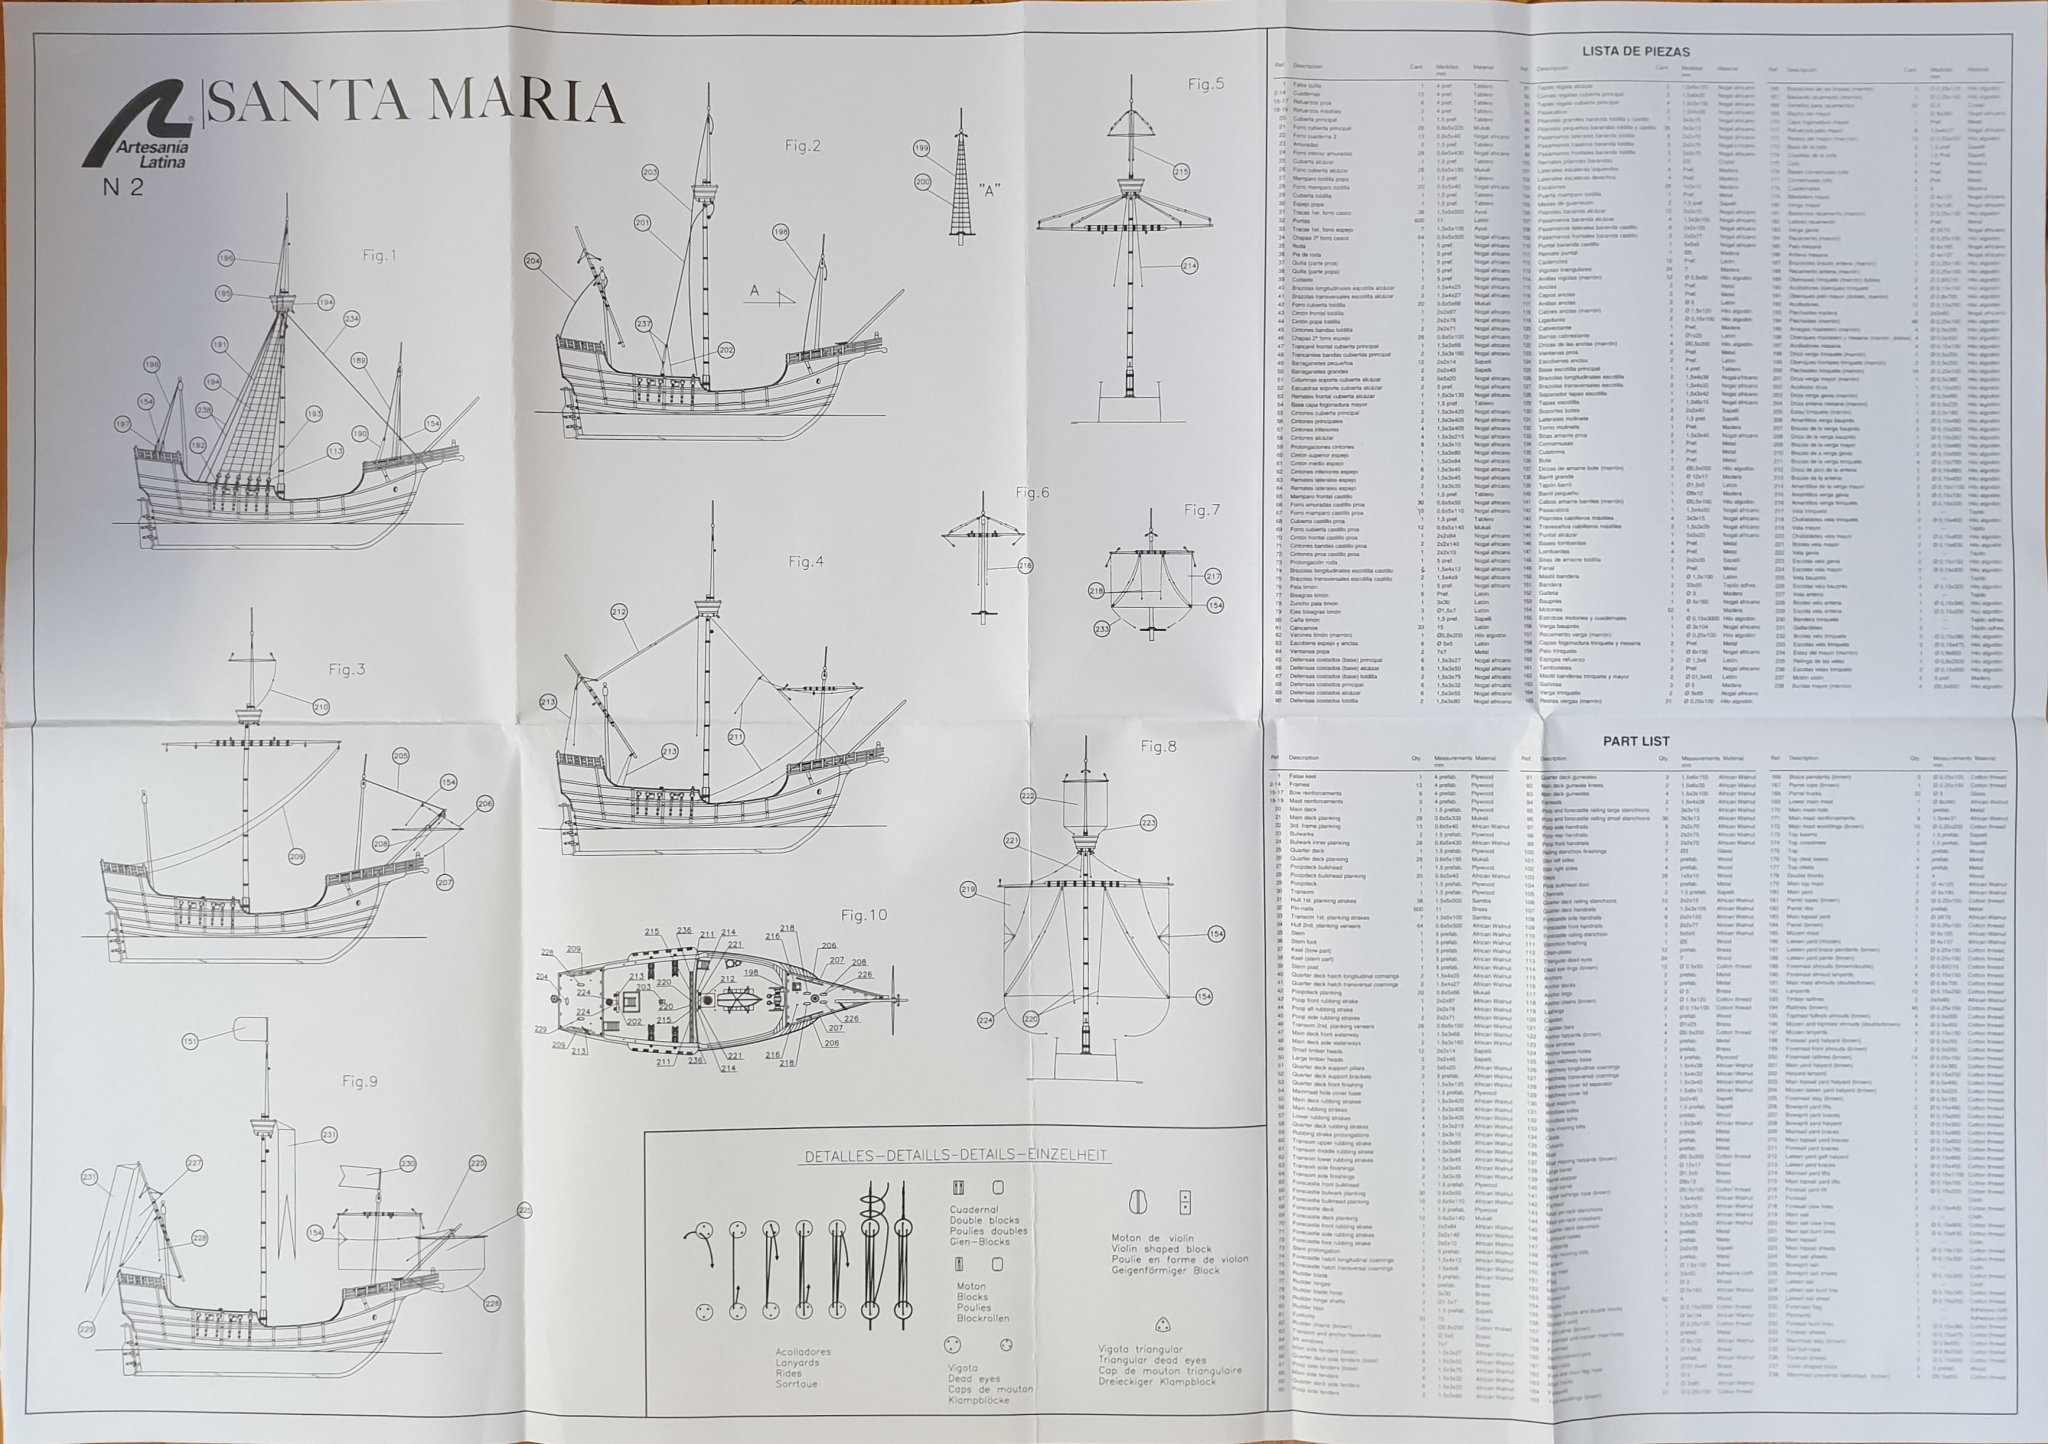
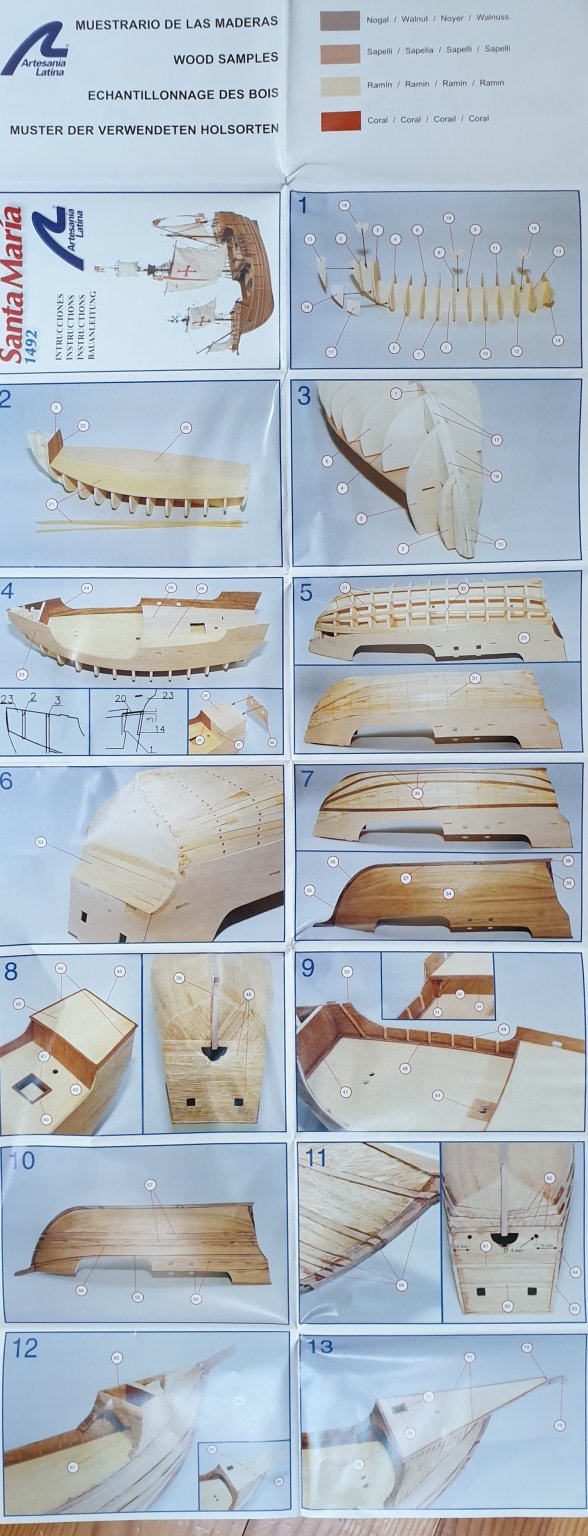
 VII. Quarterdeck AL's instructions : "Take out deck nr. 25 from the wooden slab “B” and line it with the 0.6x5 mm Mukali planks nr. 26. Sandpaper and varnish the deck before placing it into the notches on the bulwarks." I followed generally the exact same method and "three plank shift" pattern than for the main deck : Varnishing process: I stained it with light oak color stain (La teinte antiquaire chêne clair, Libéron). I fixed the stain with 'fondur' (Libéron), I sand with 500, 1000, 2000 and 5000 grit sandpaper I coat it with three layers or clear satin varnish (Syntilor, polyurethane based) Between each layer I use 500, 1000, 2000 and 5000 grit sandpaper. The final results looks like this :
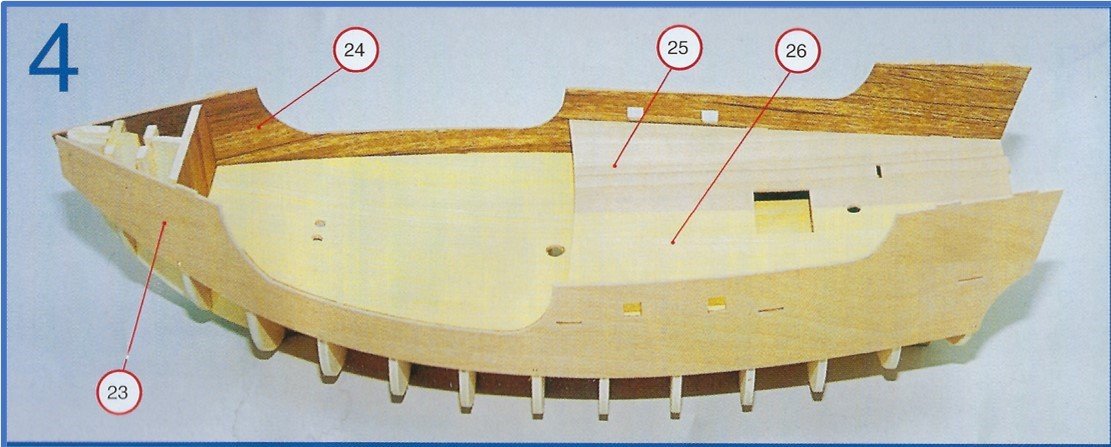

-
yvesvidal reacted to a post in a topic:
Santa Maria by PJ - Artesania Latina - 1:65
-
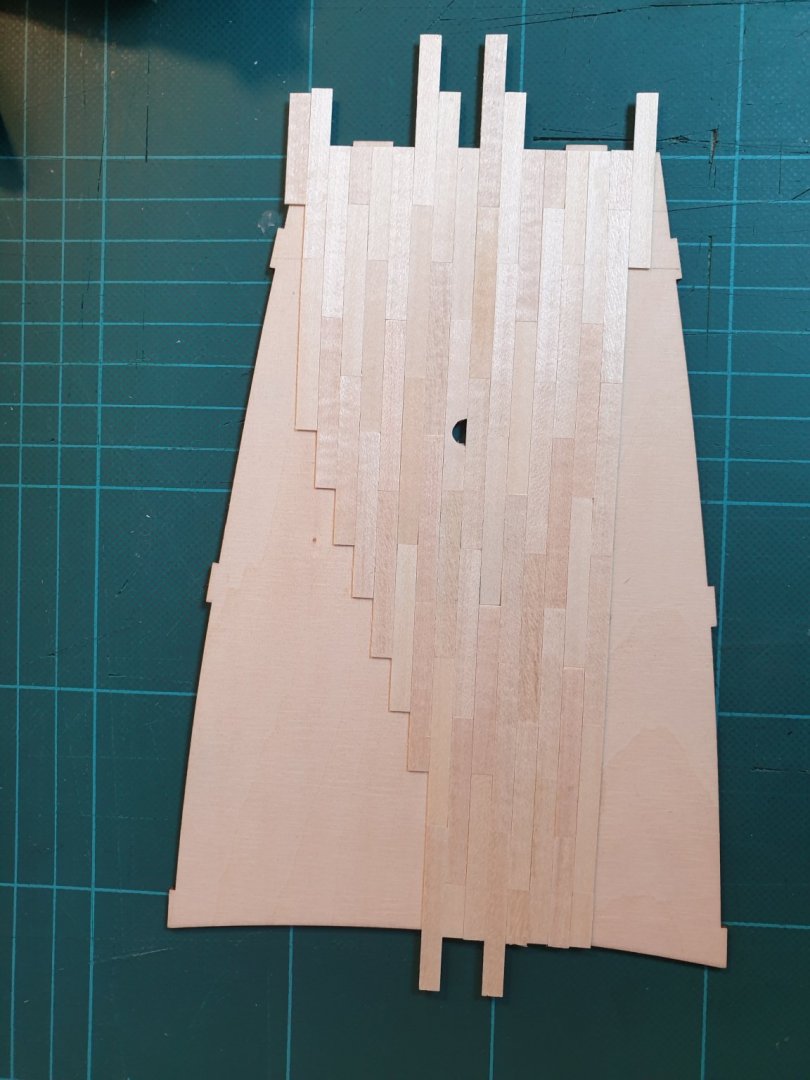
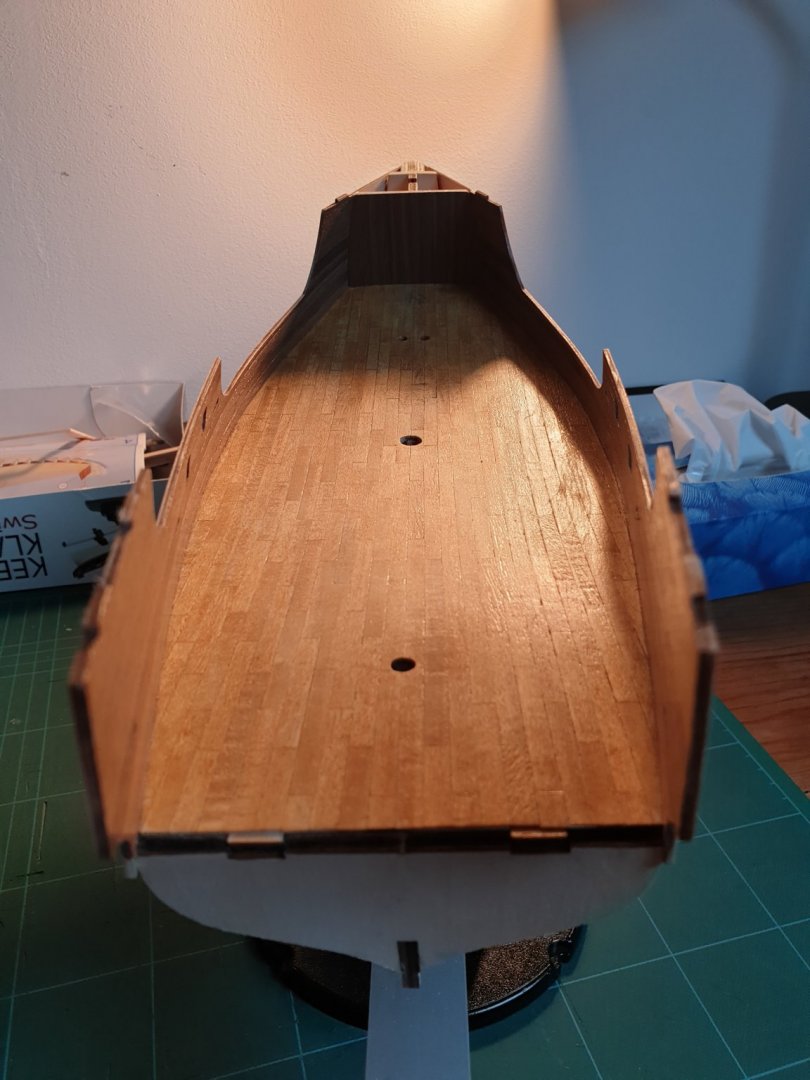
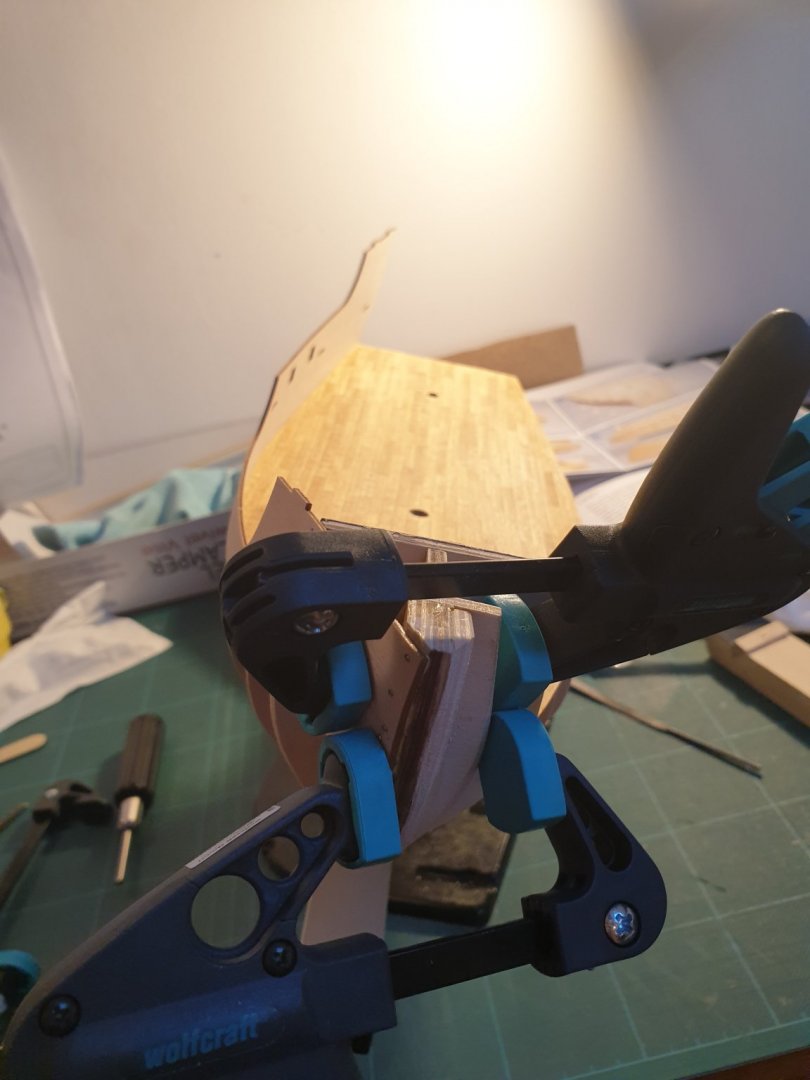
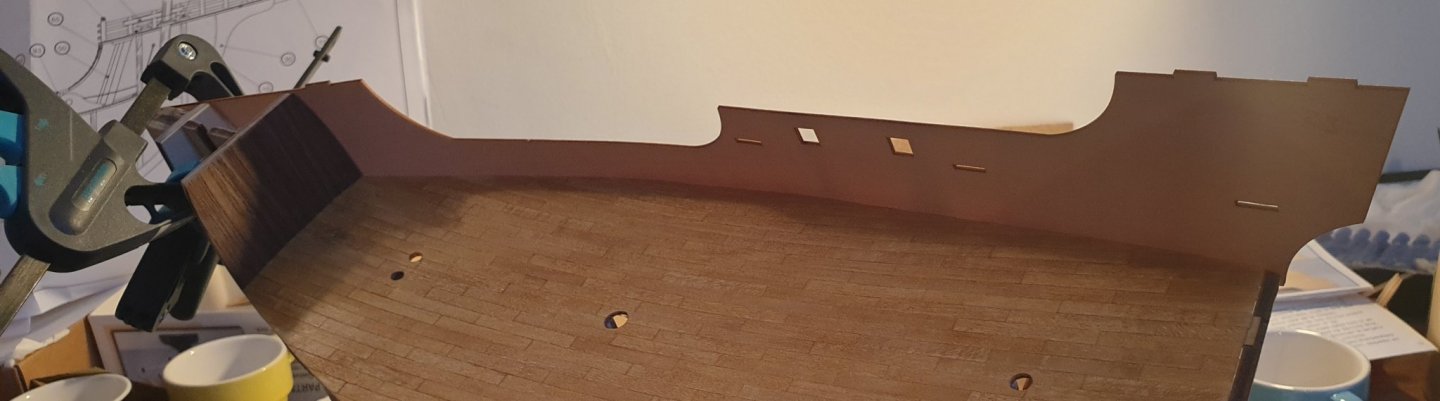
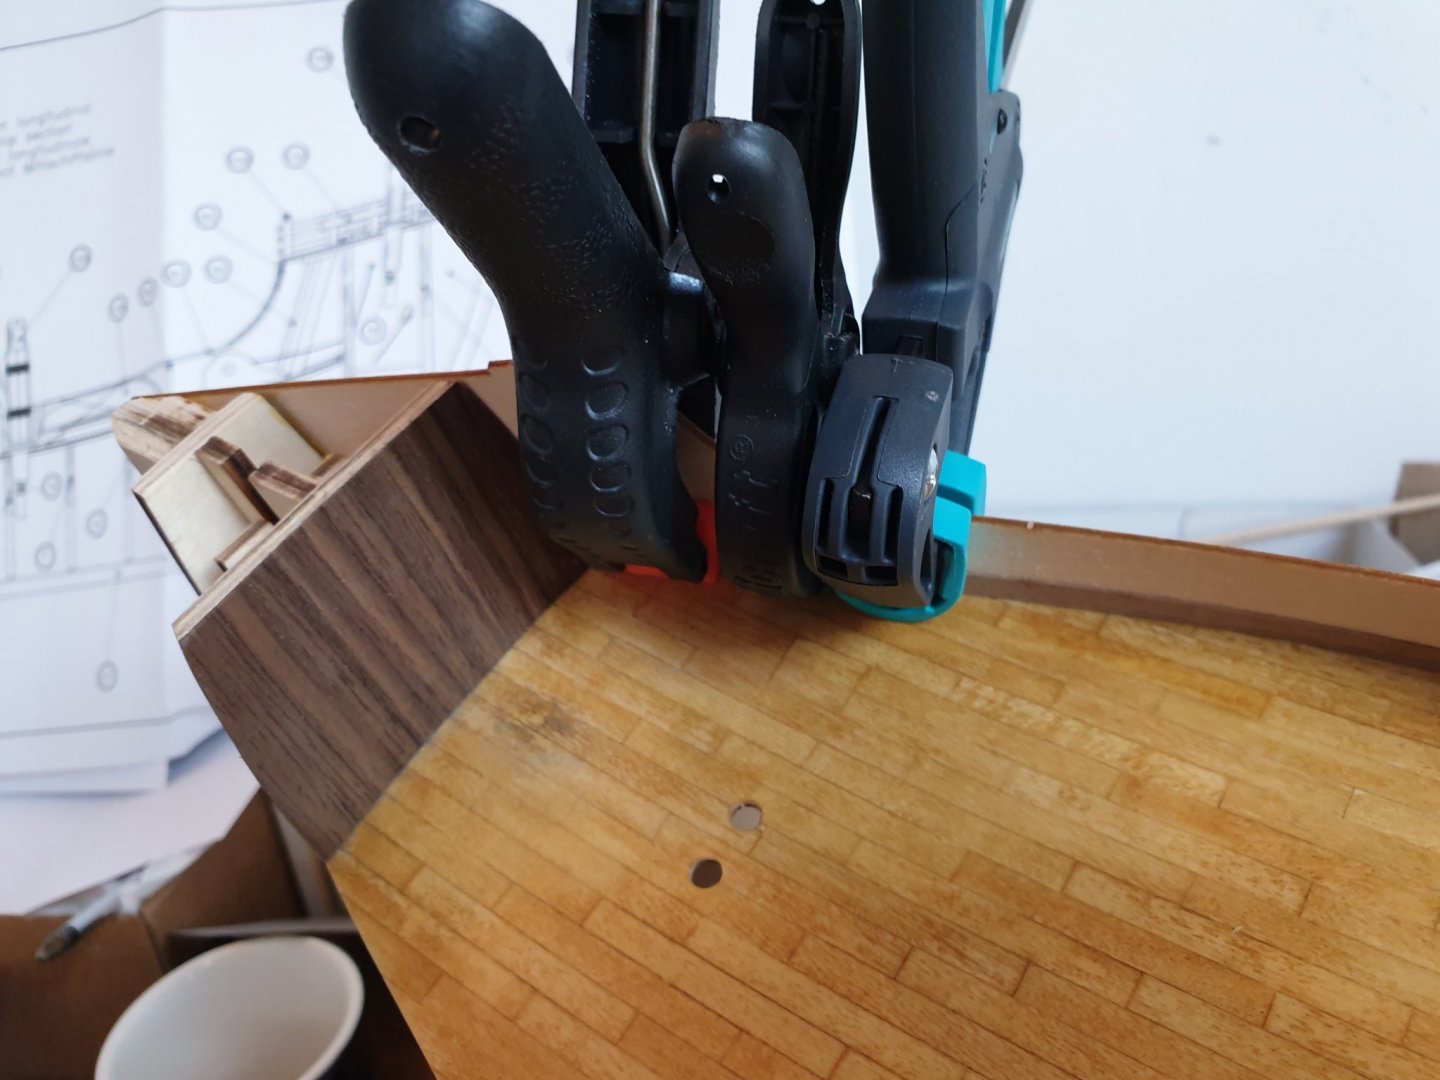
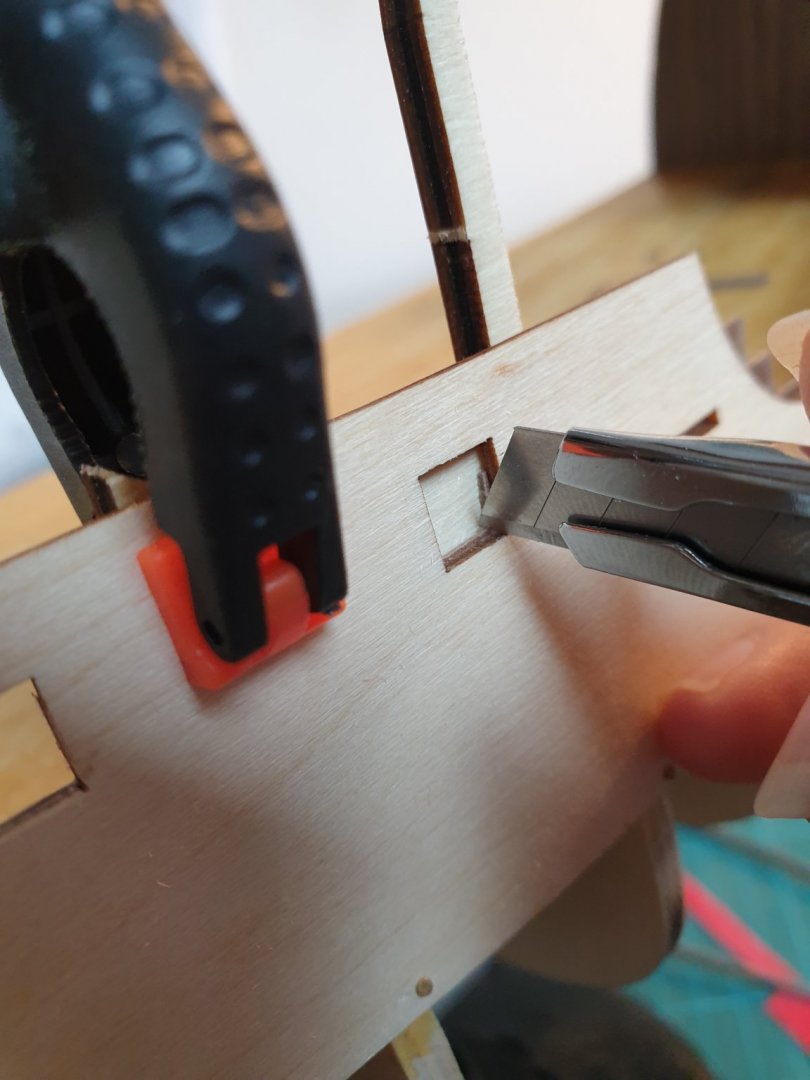
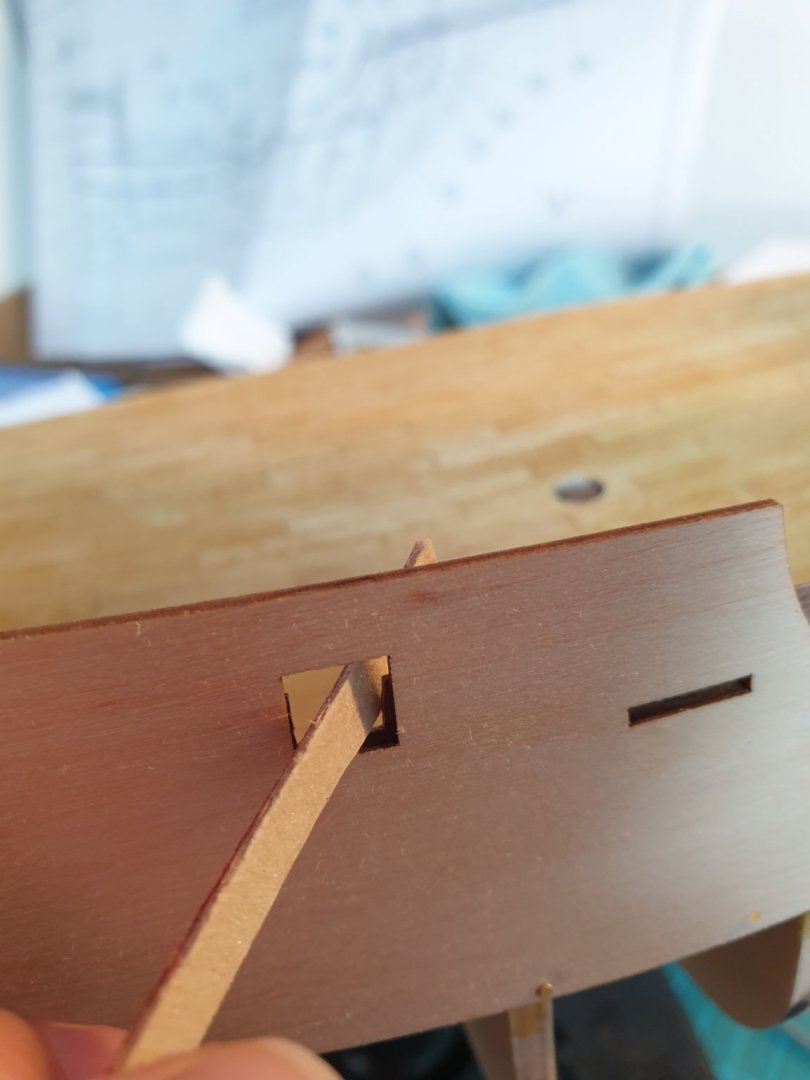
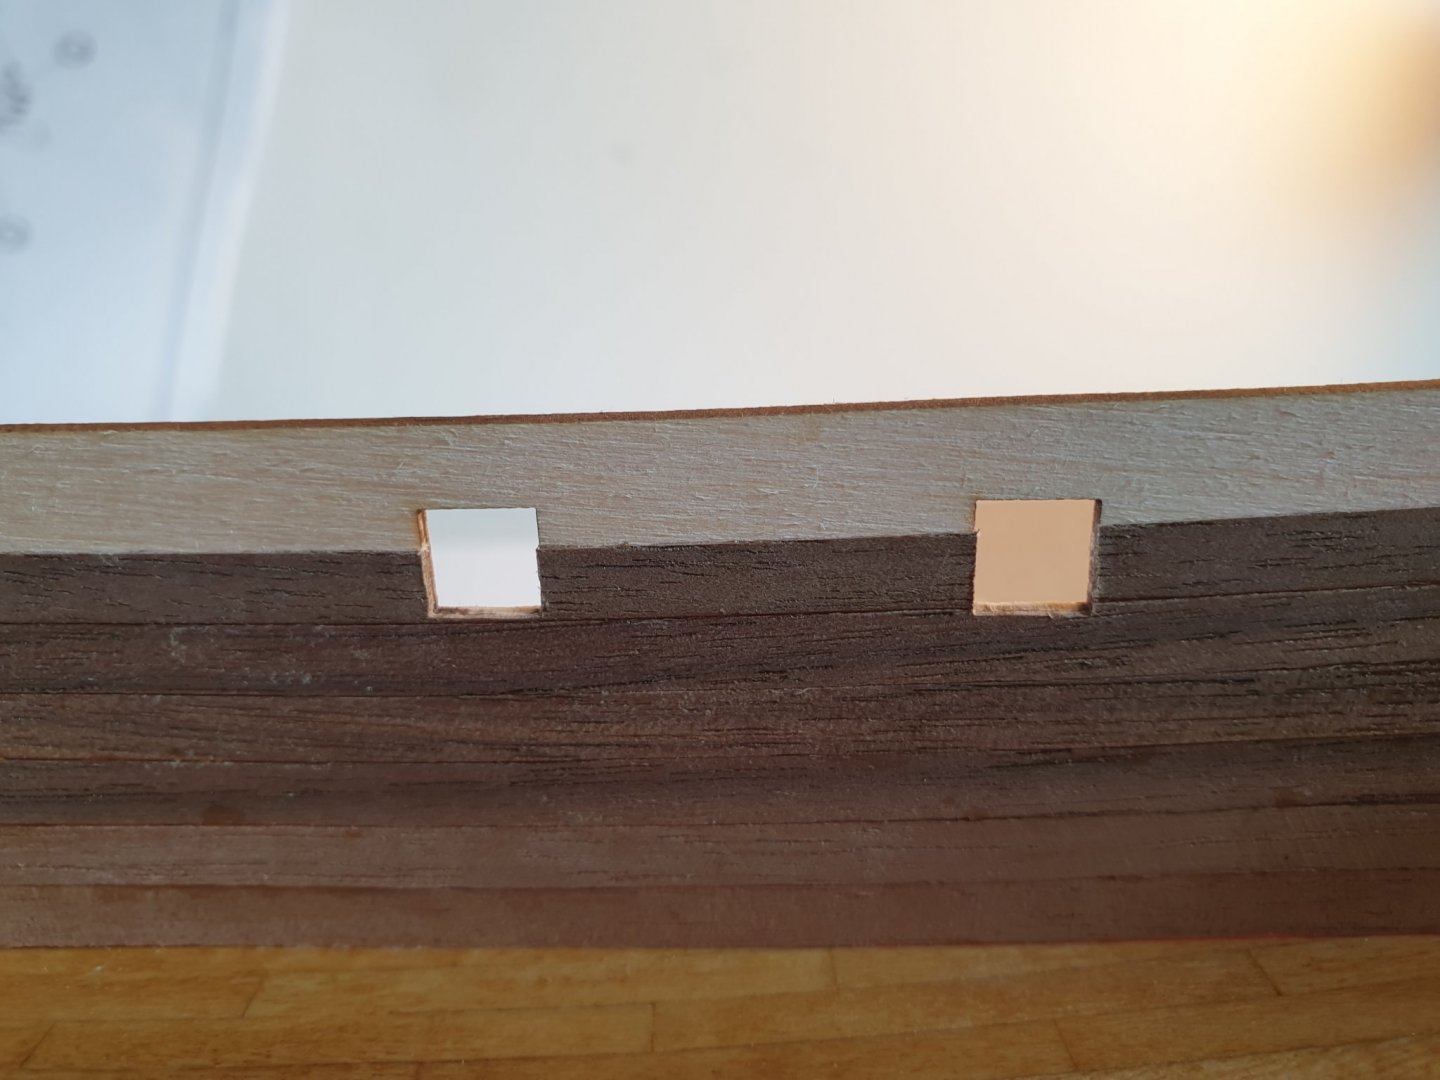
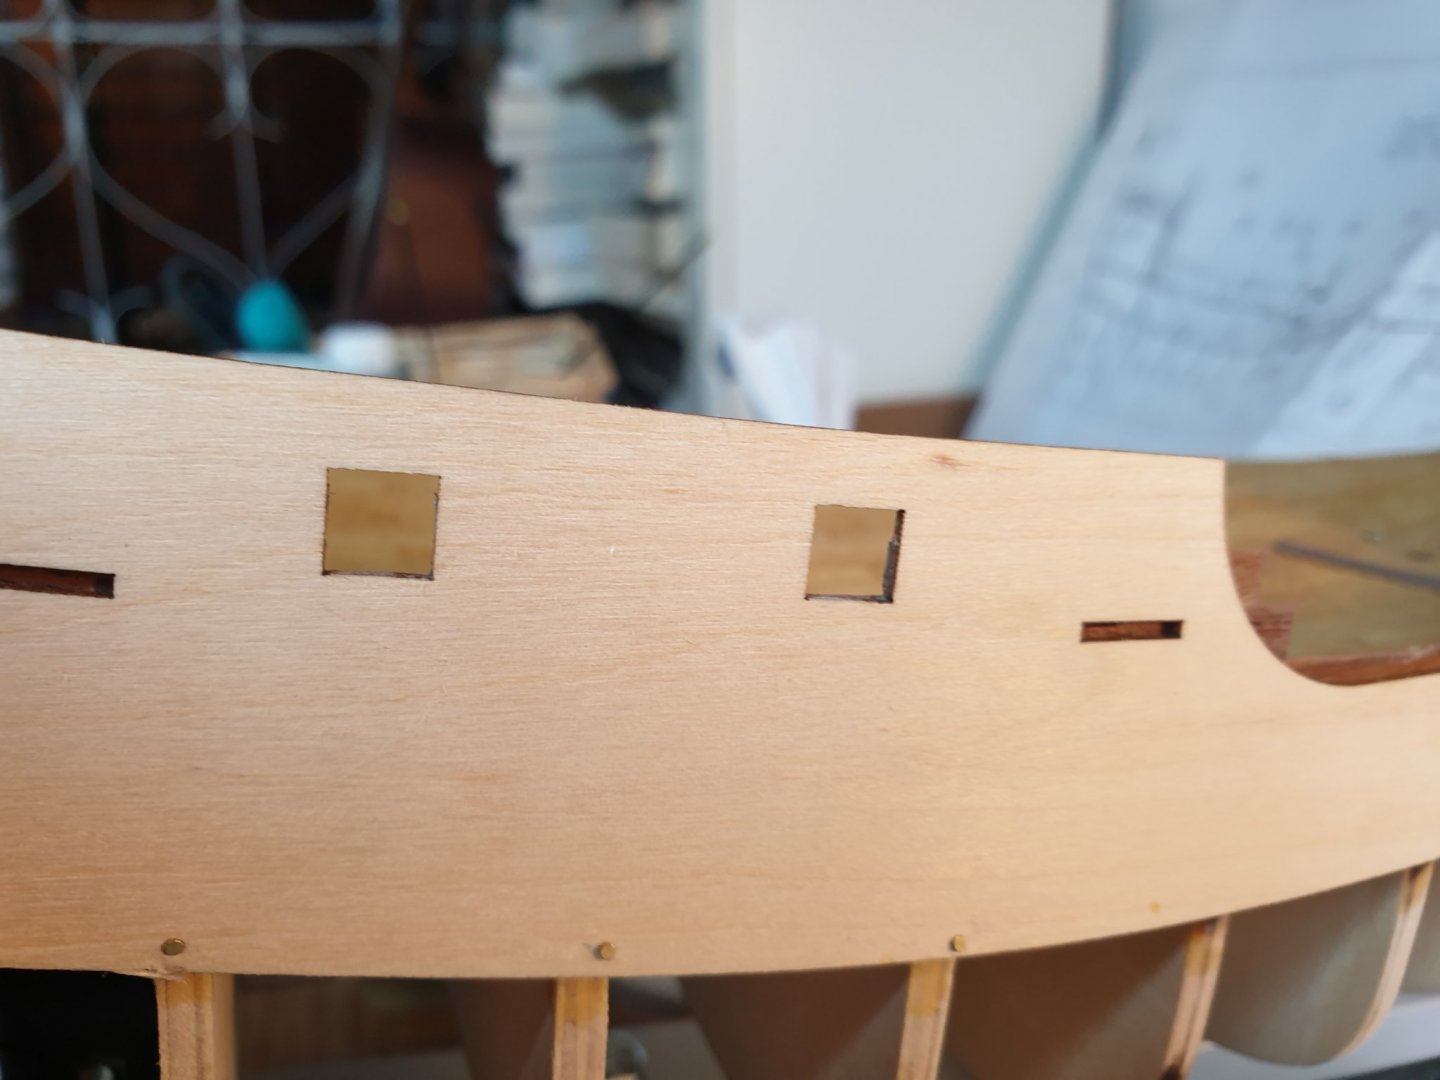
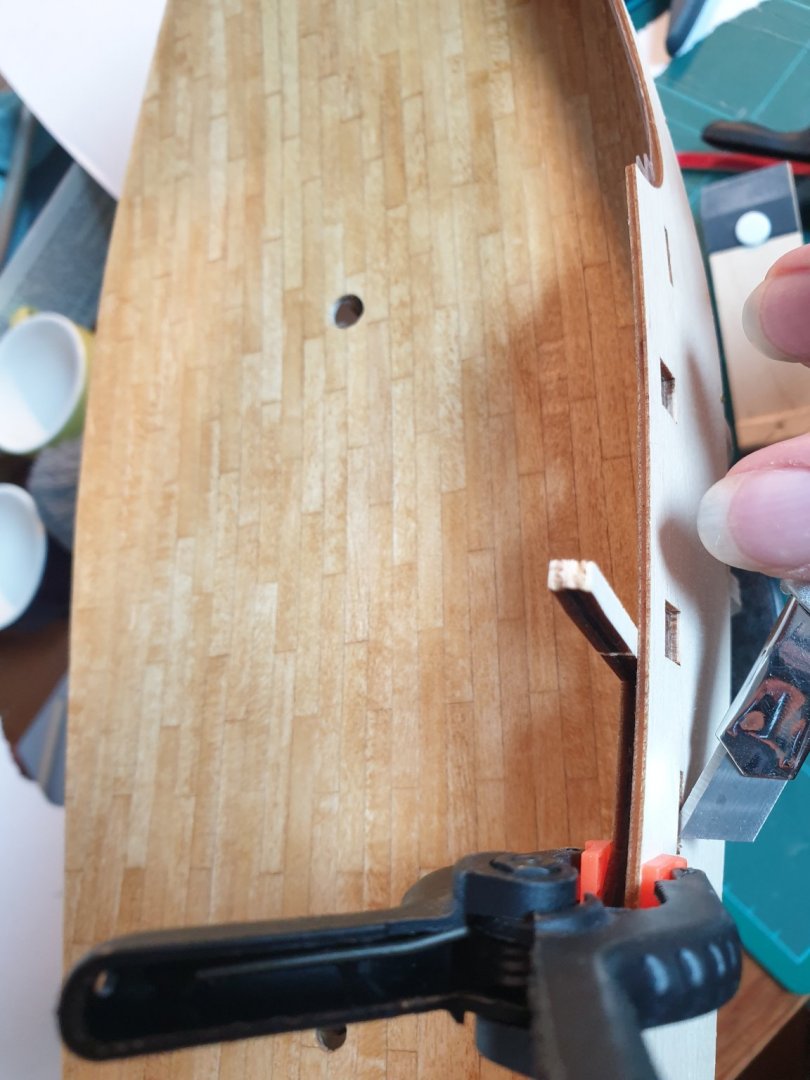
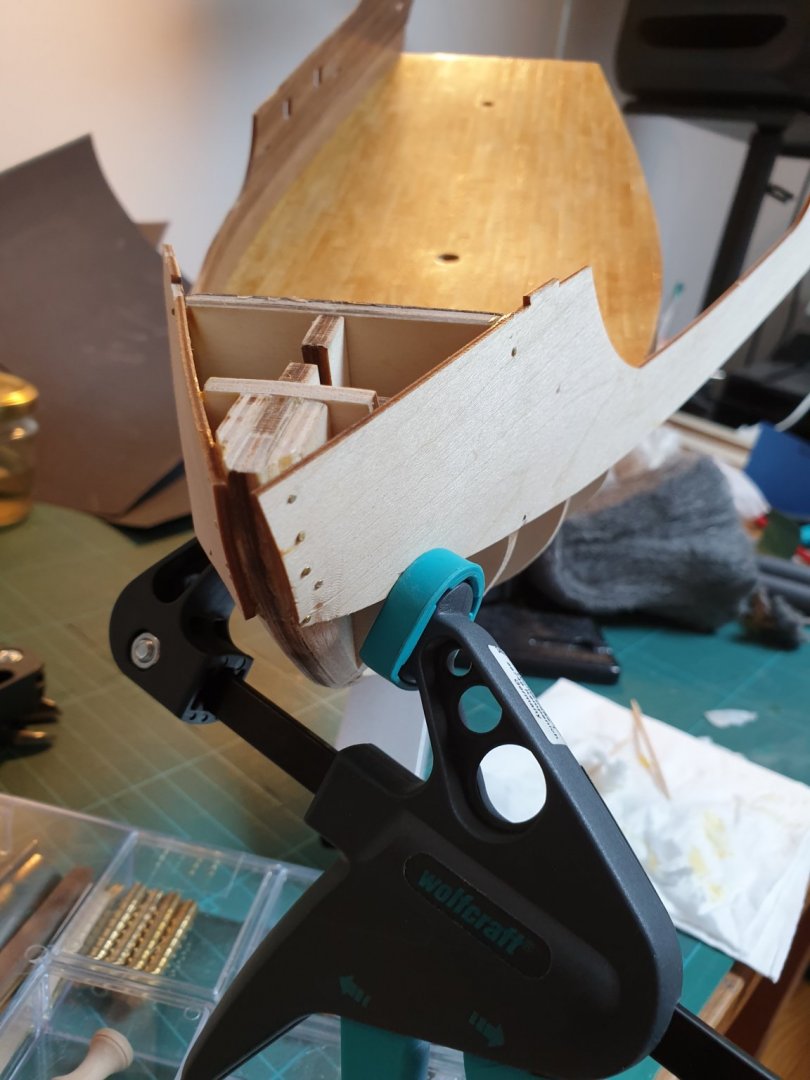
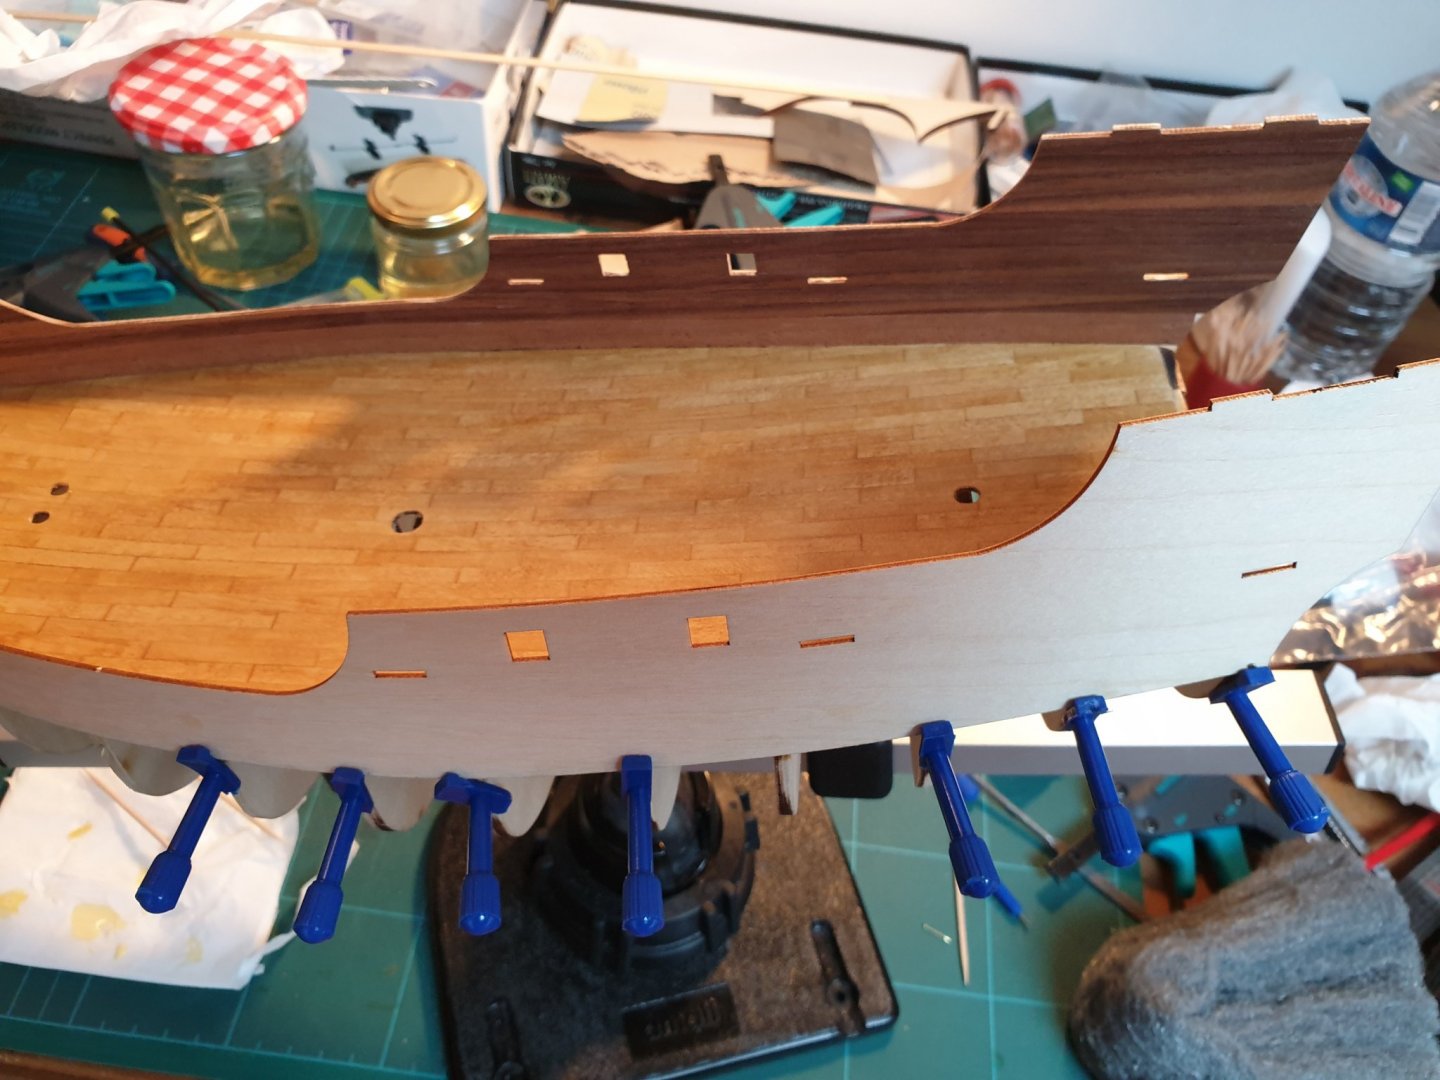
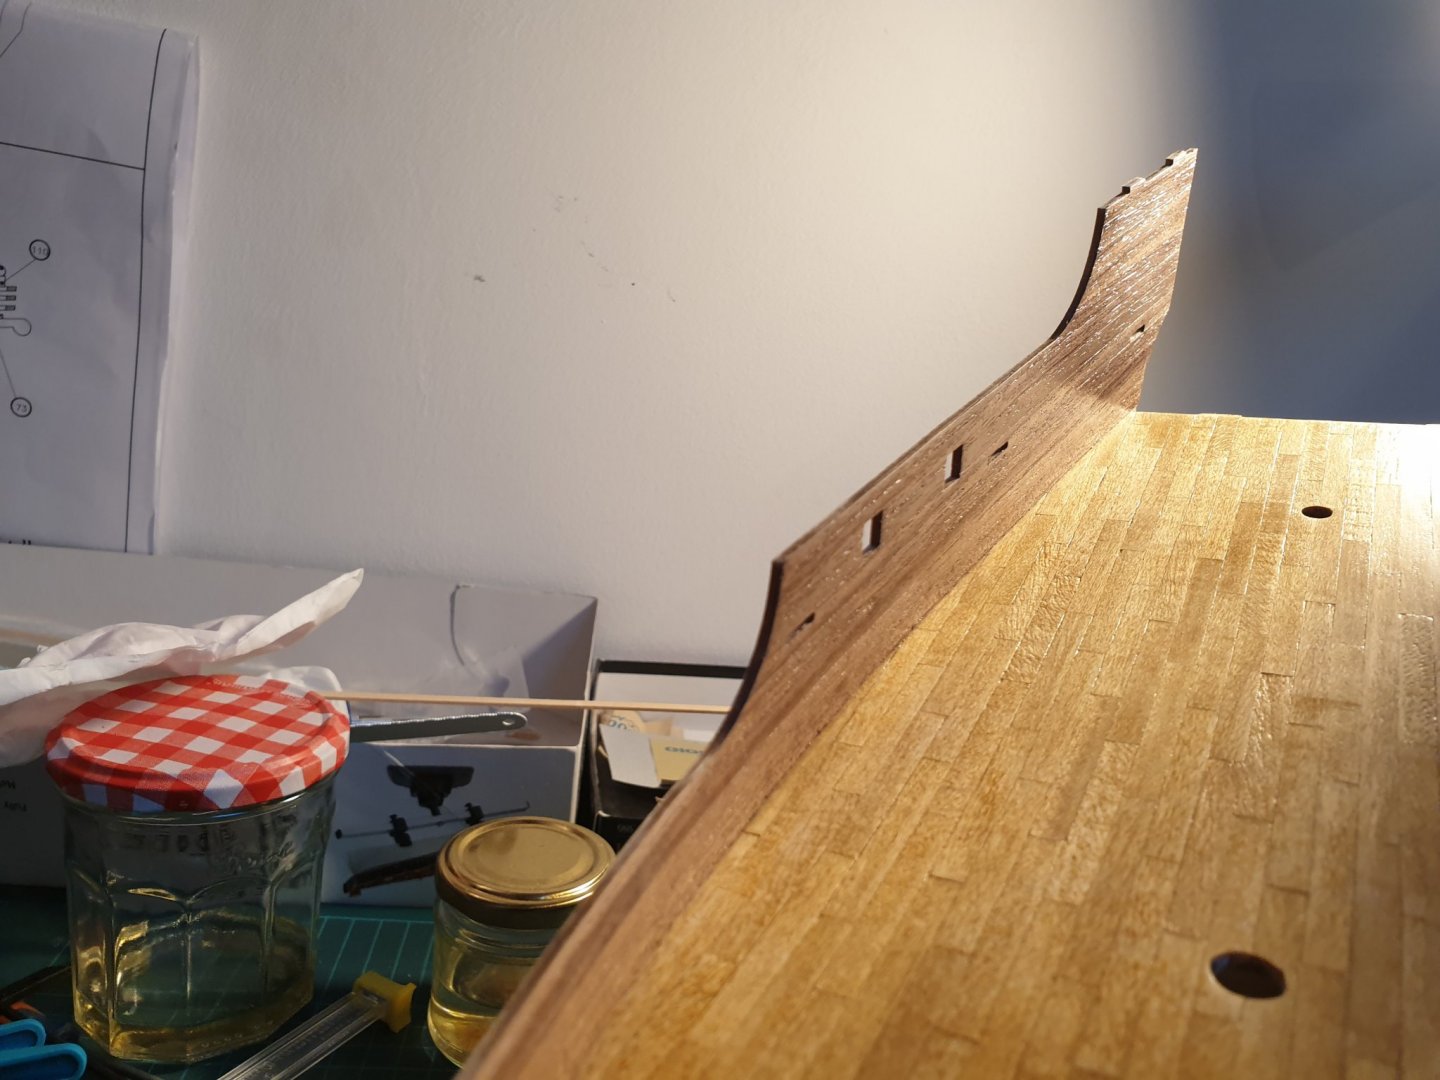
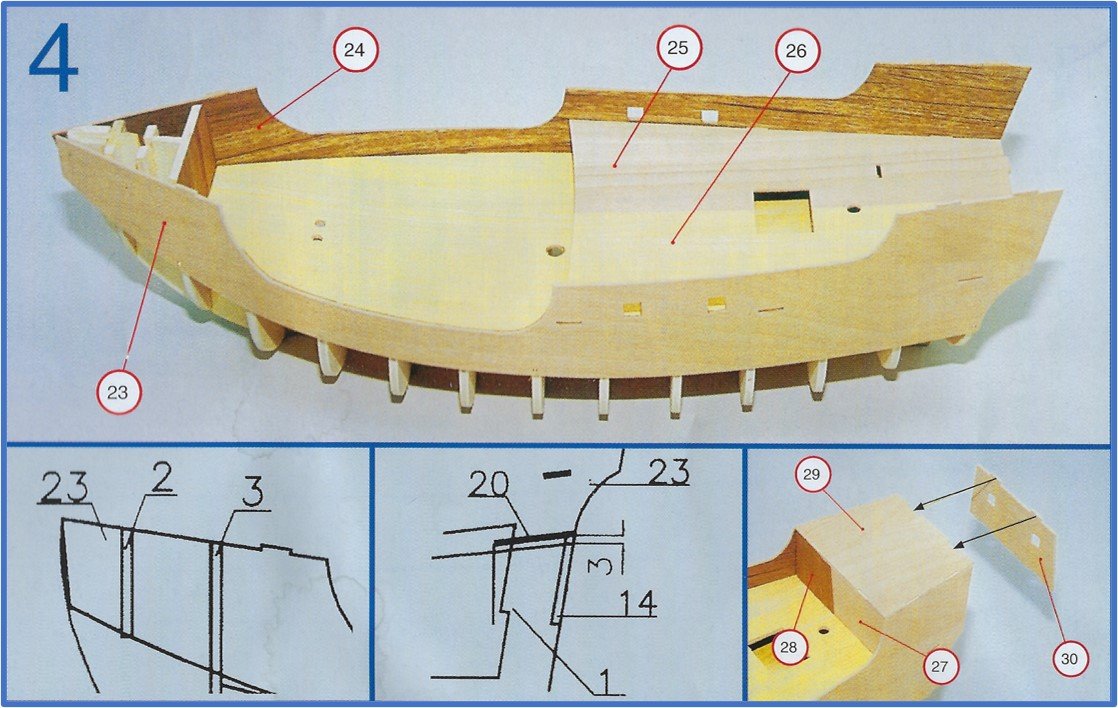
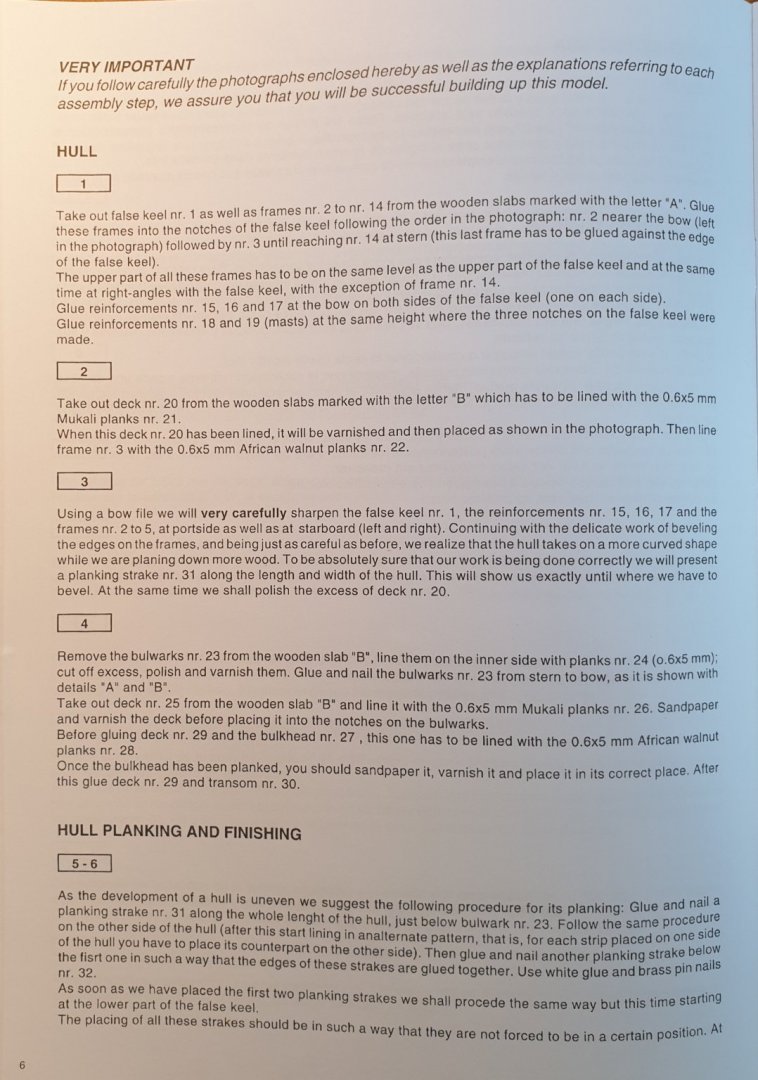
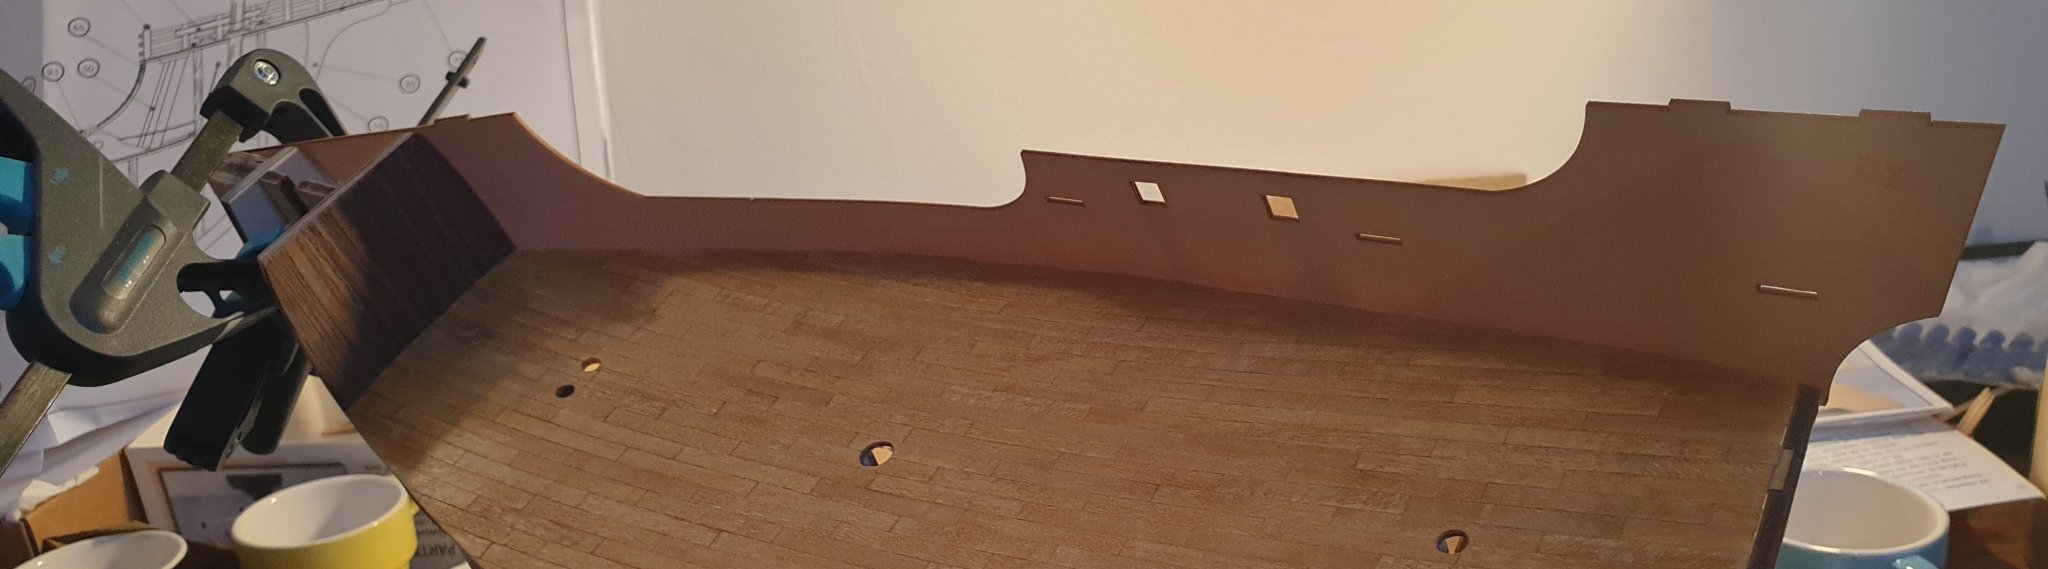
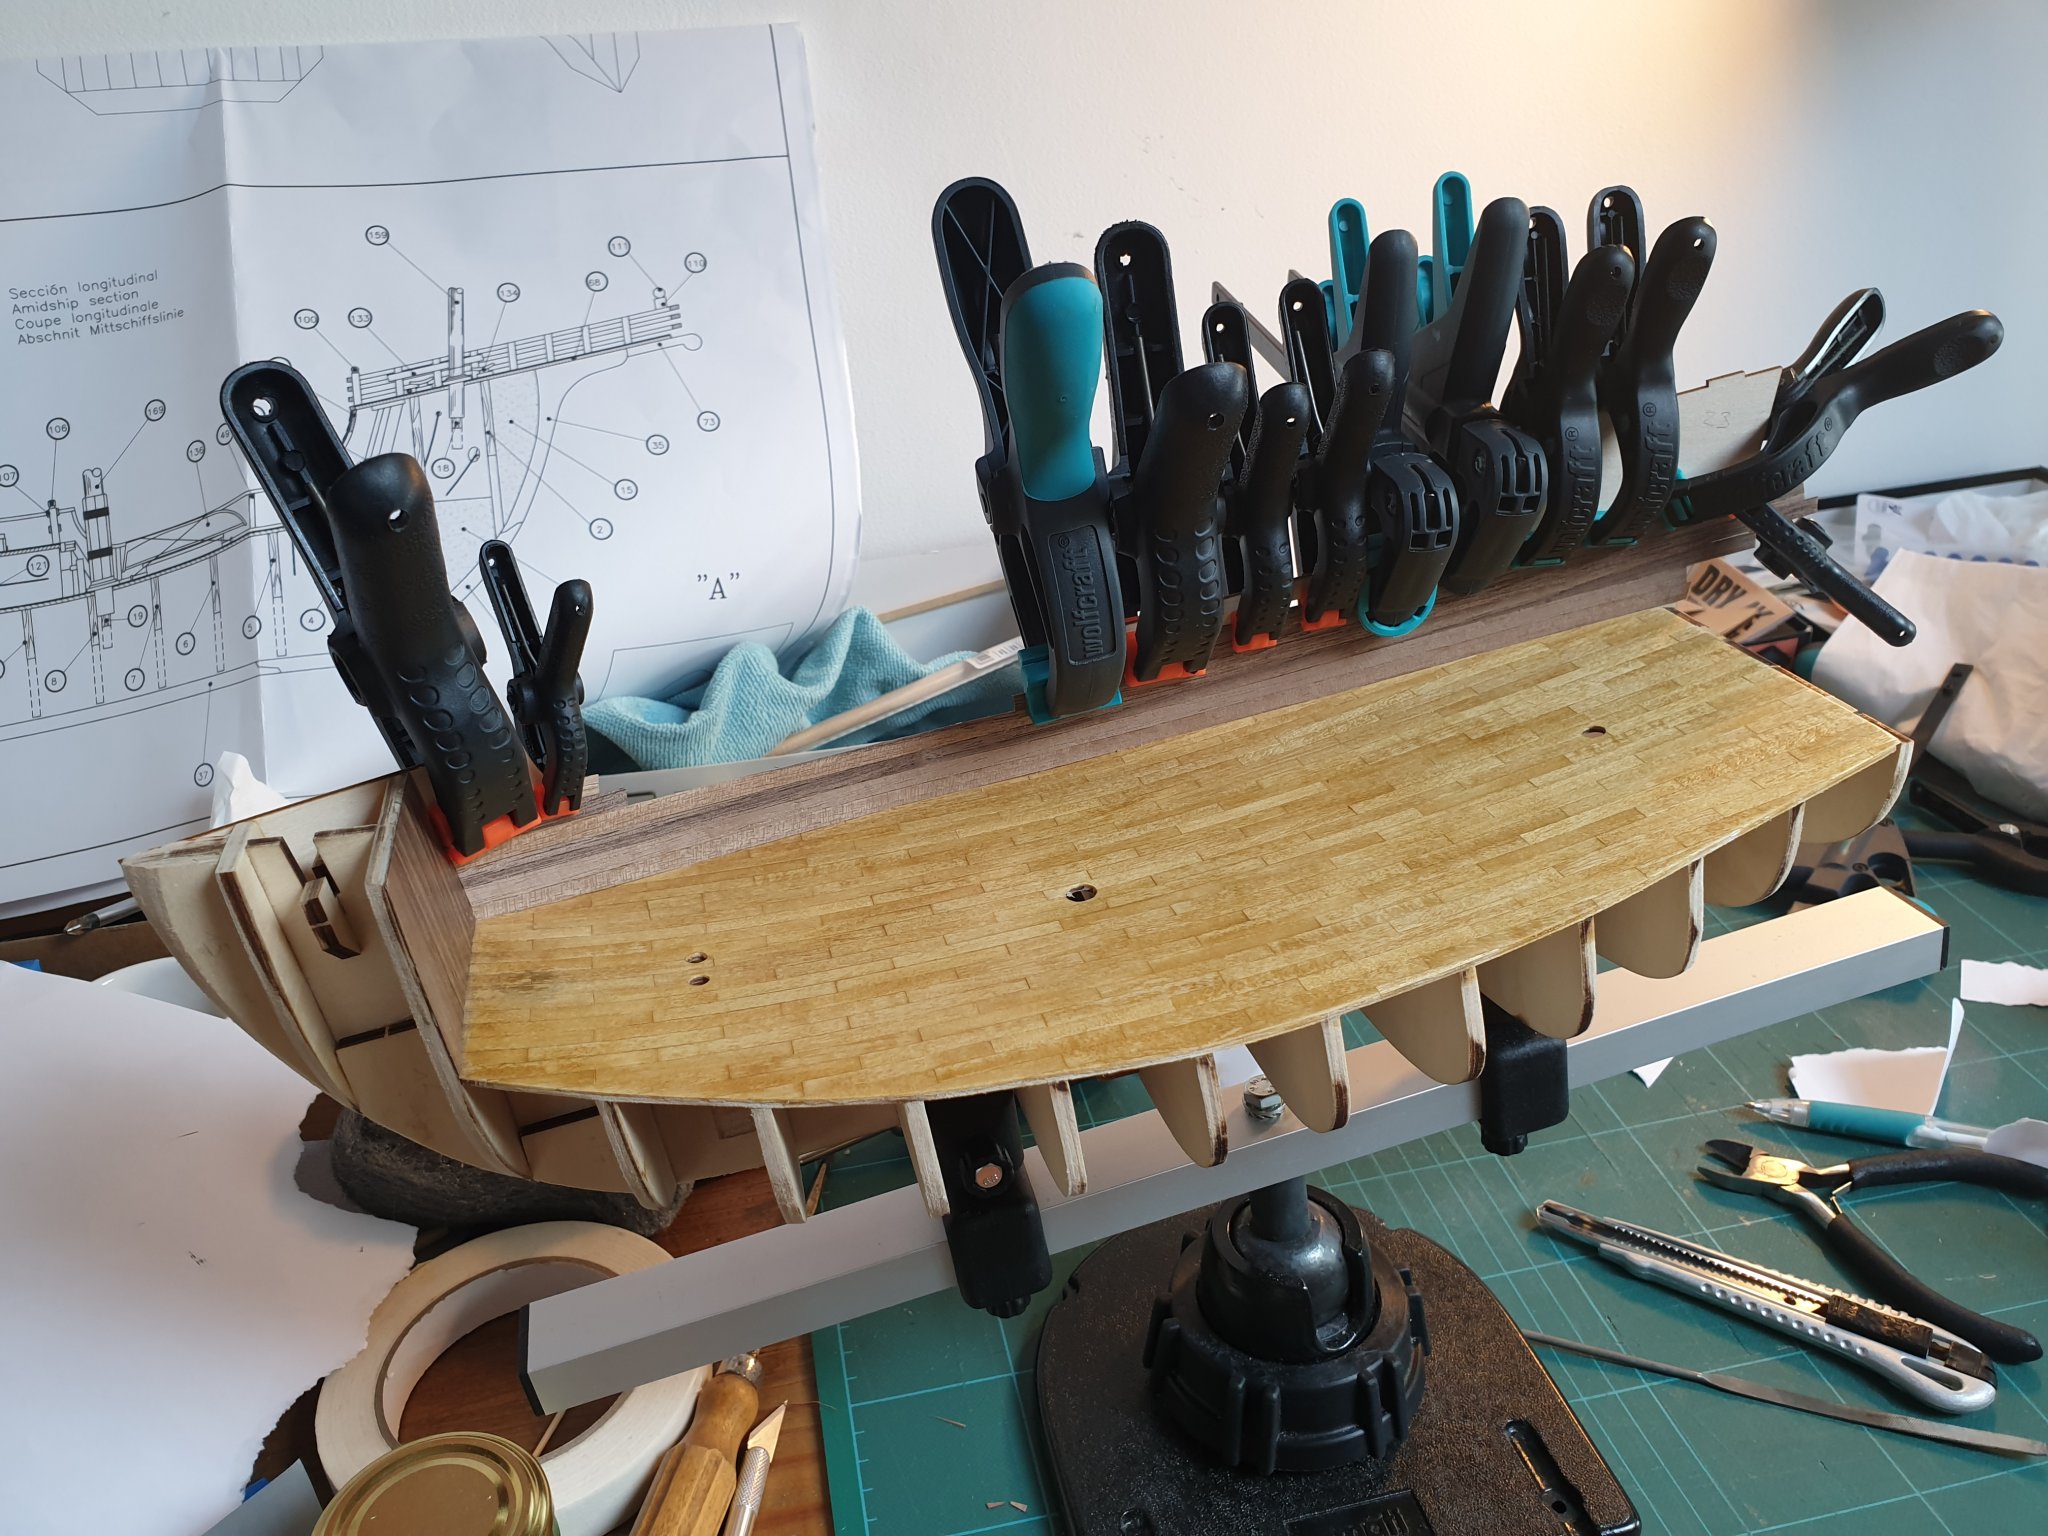
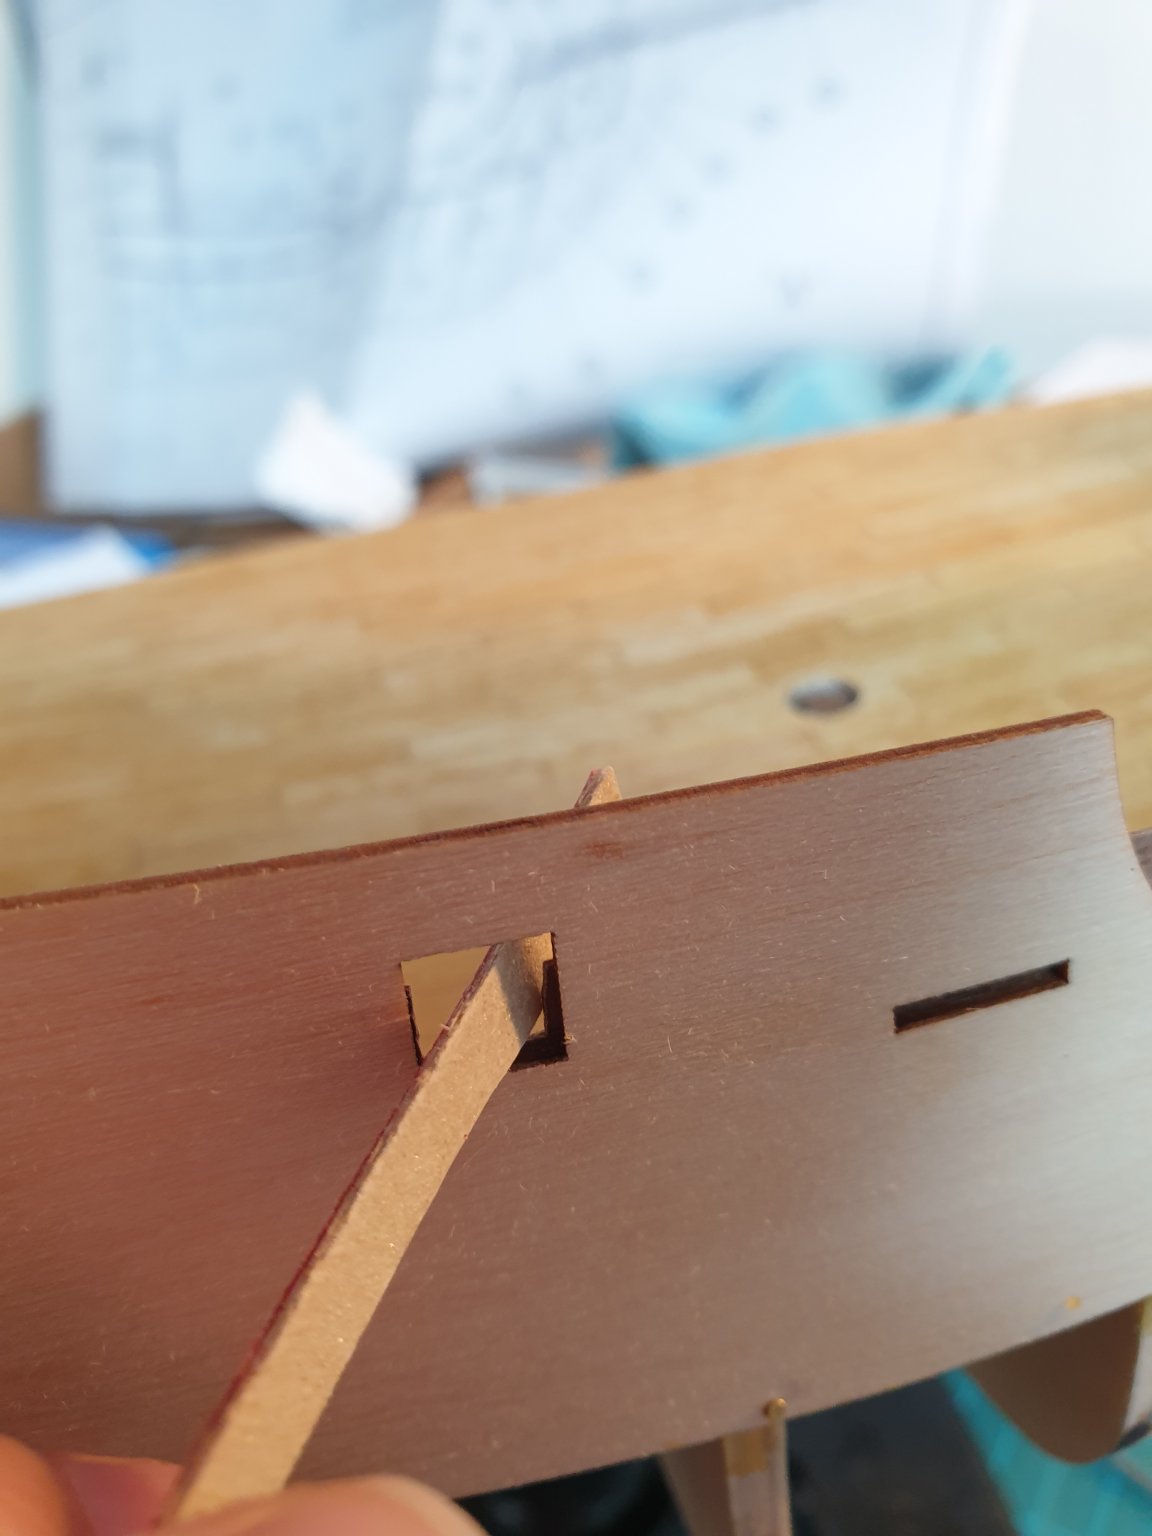
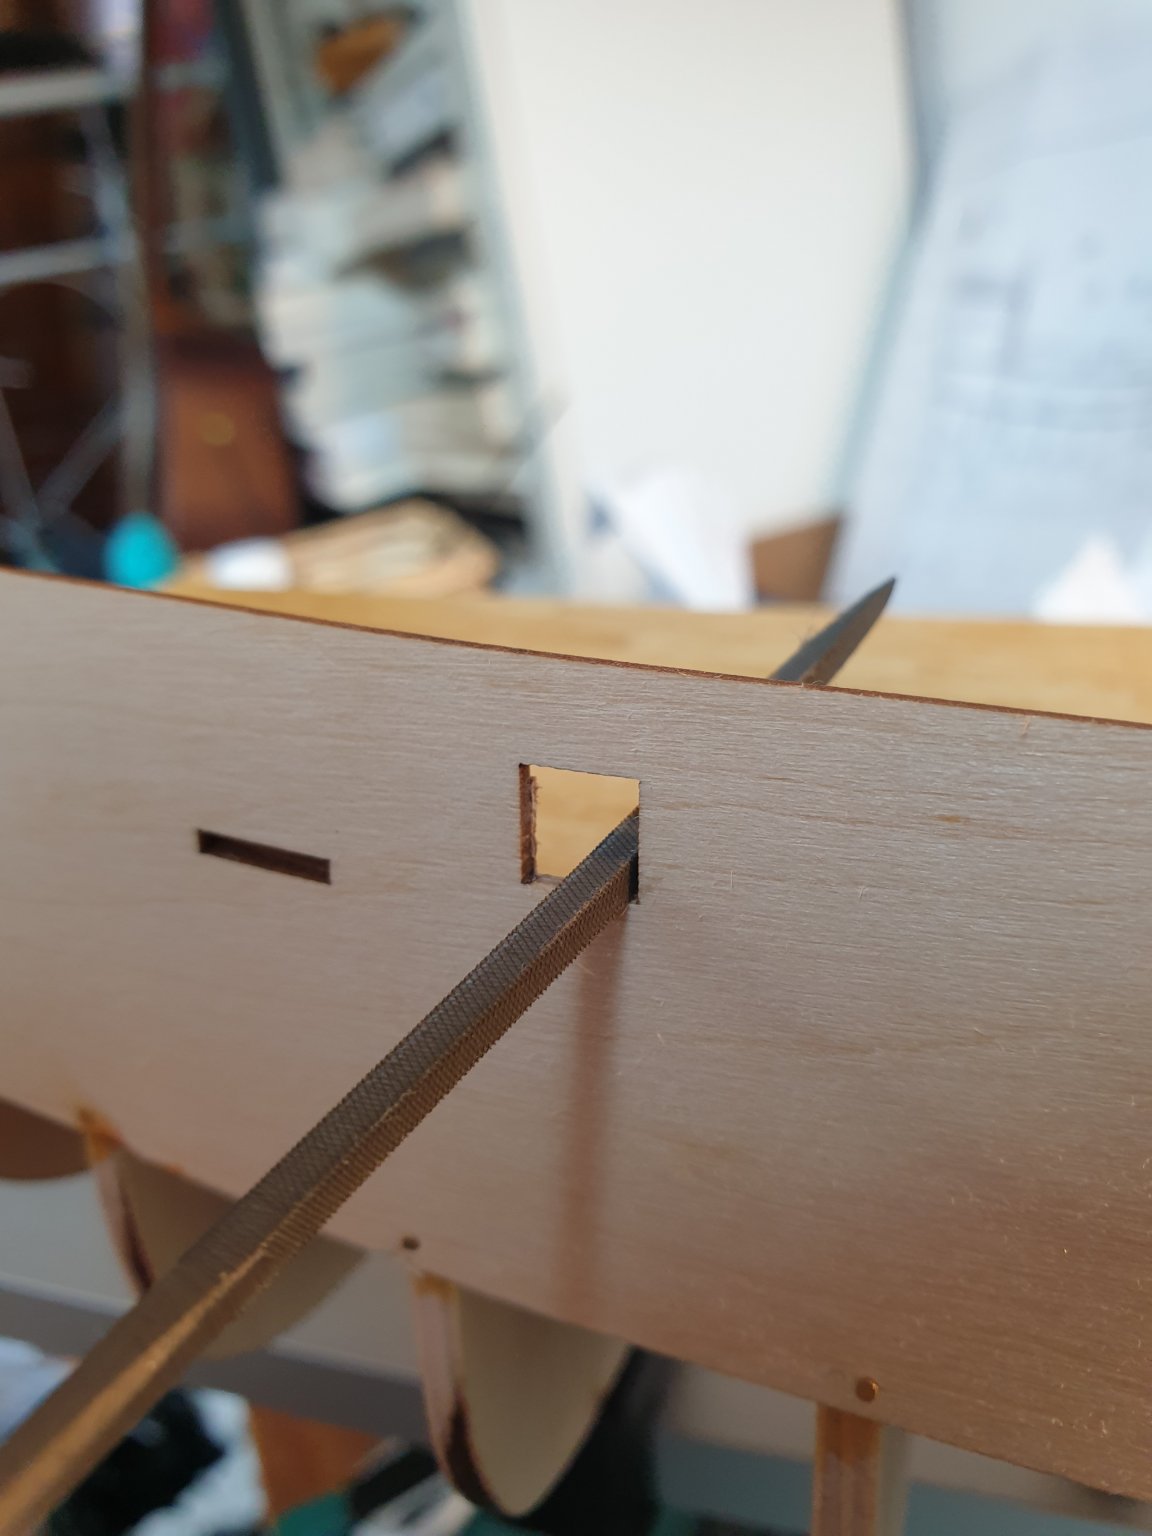
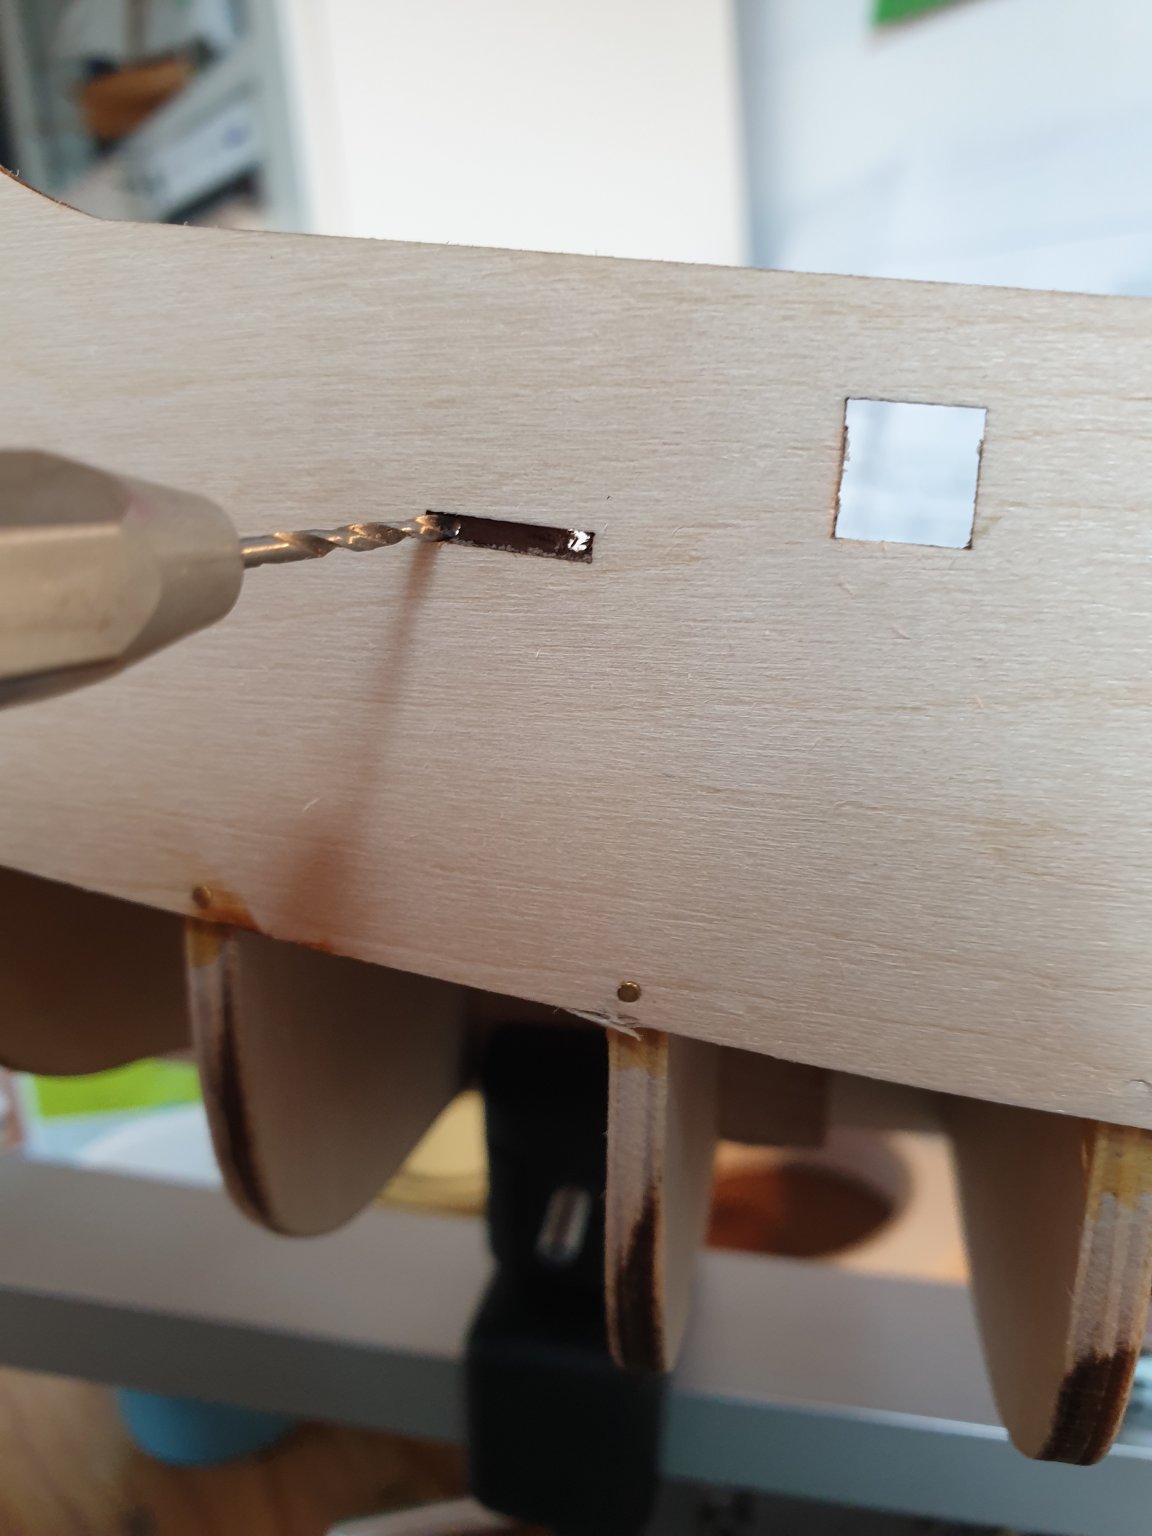
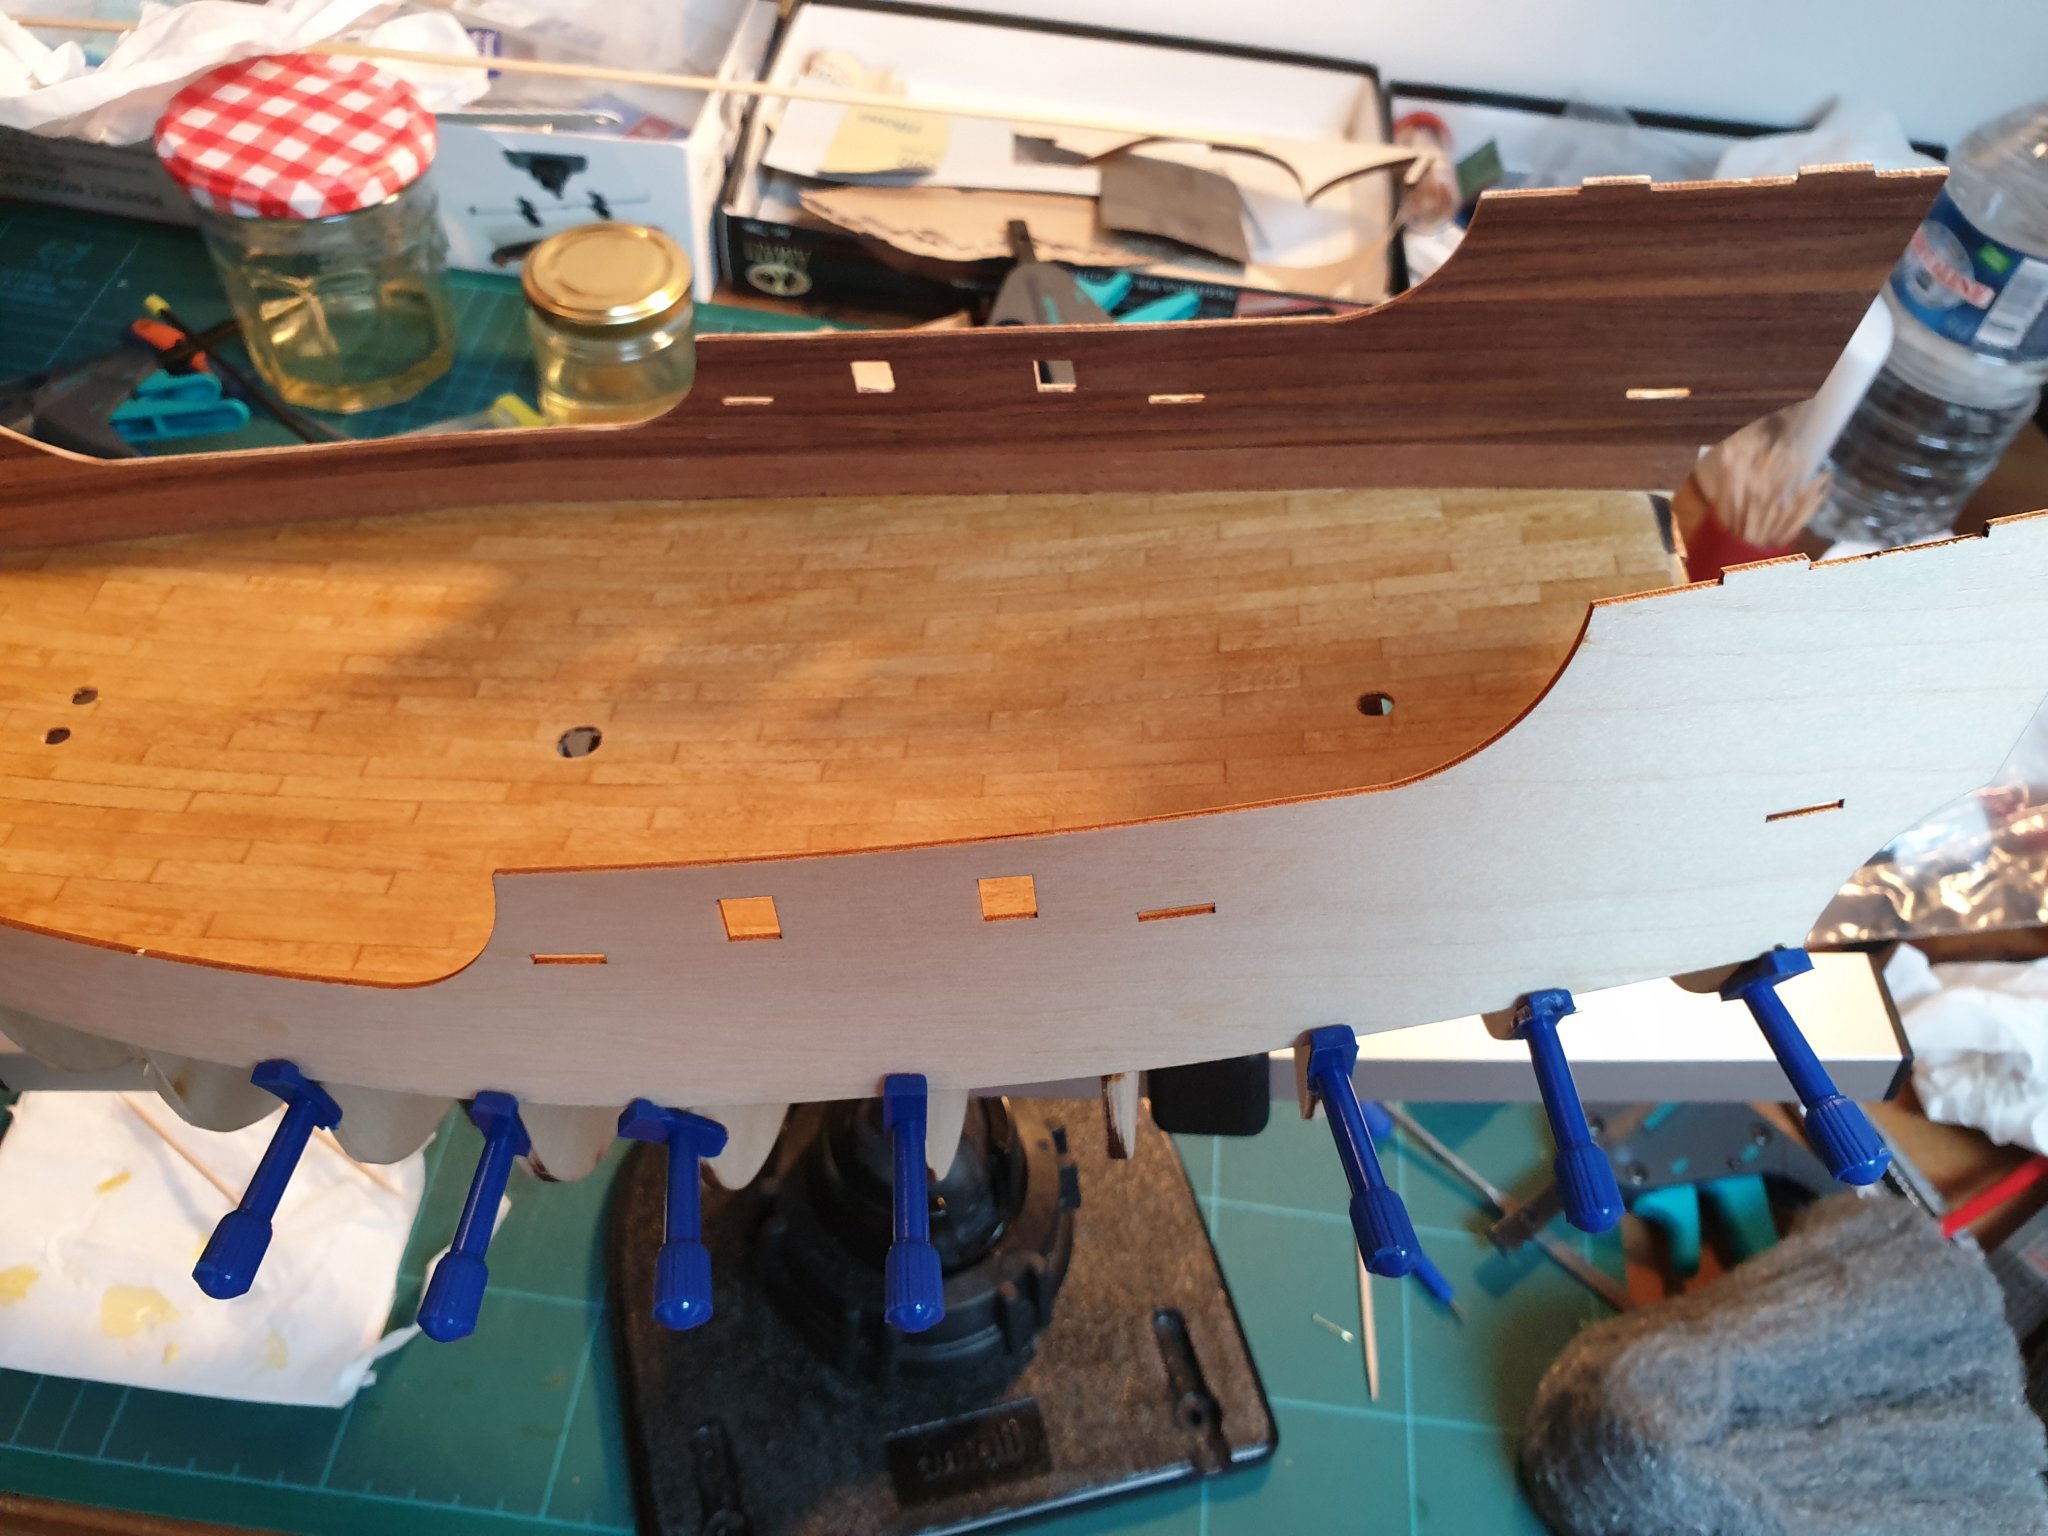
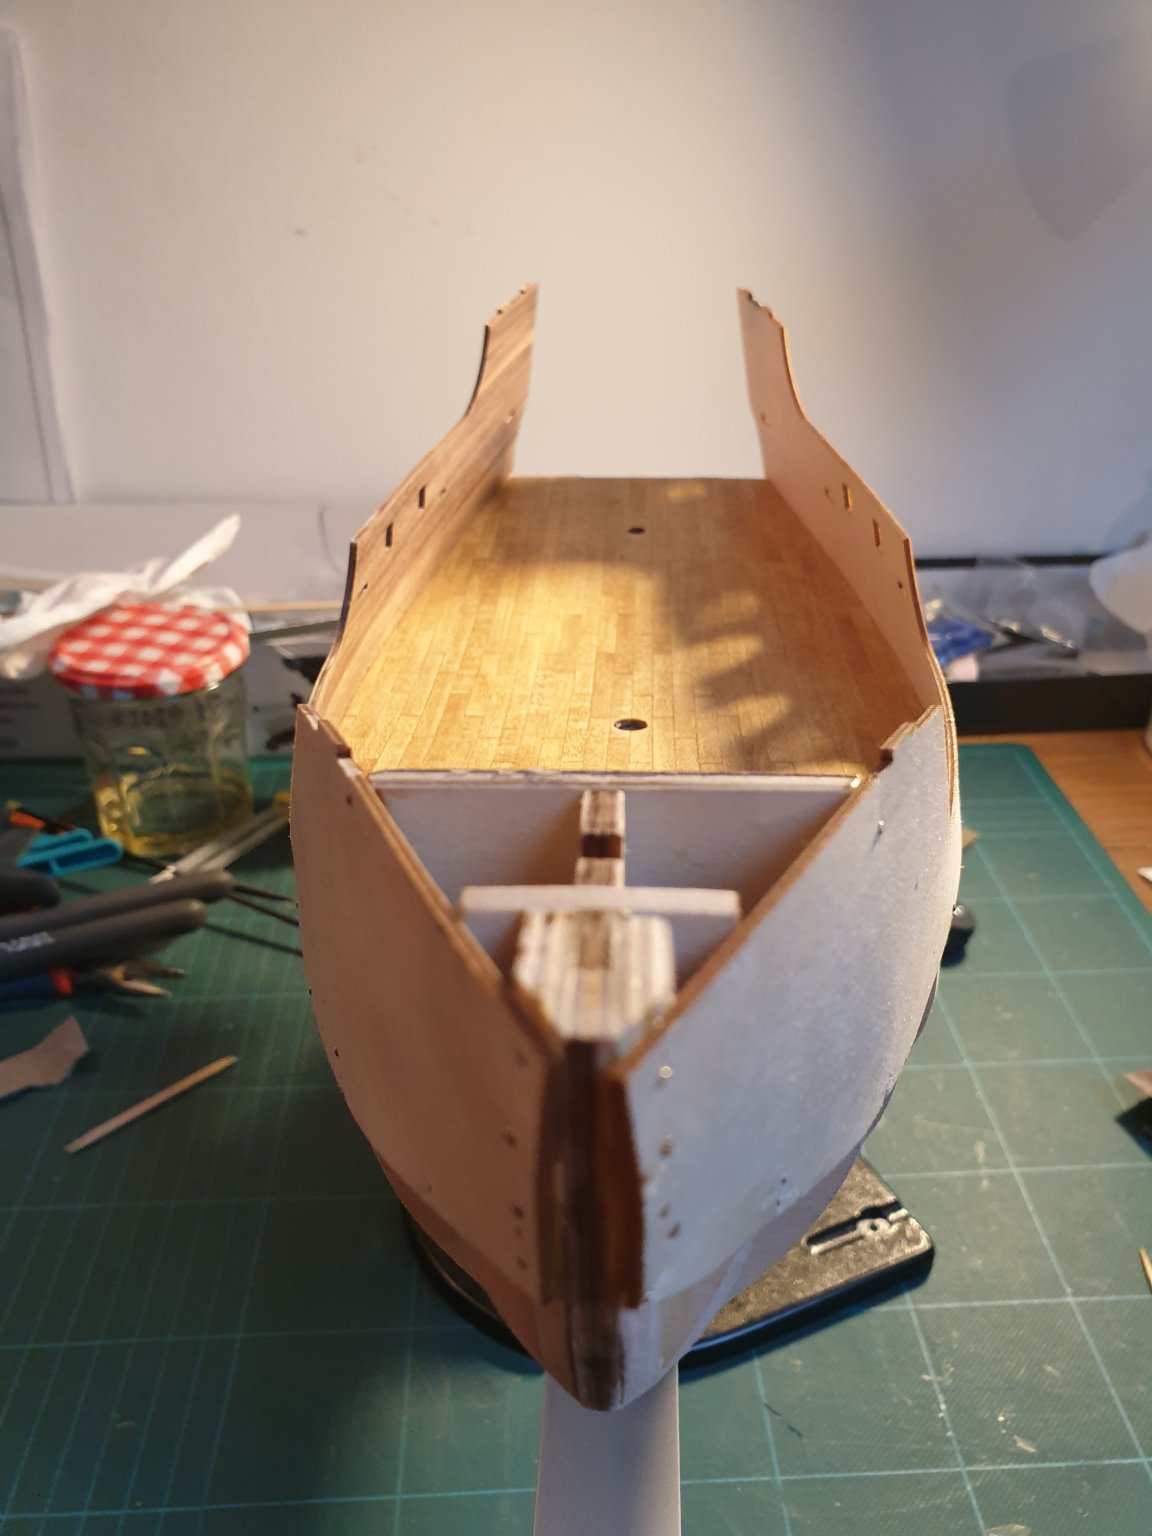
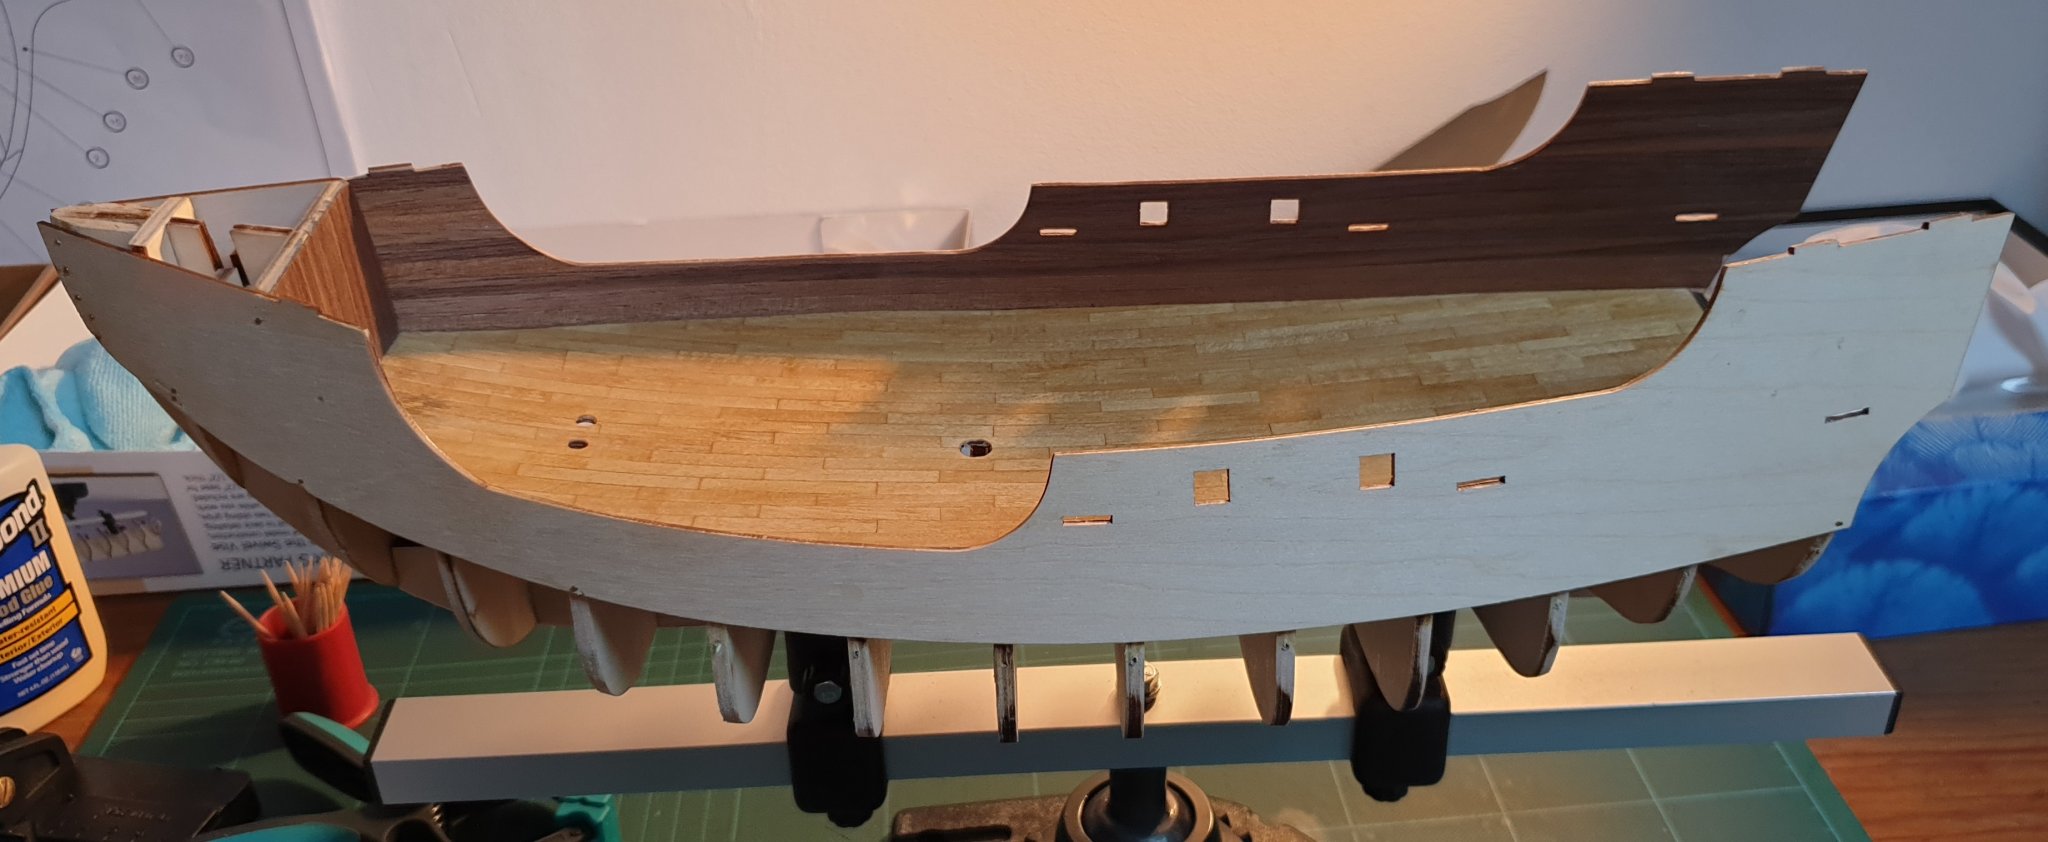
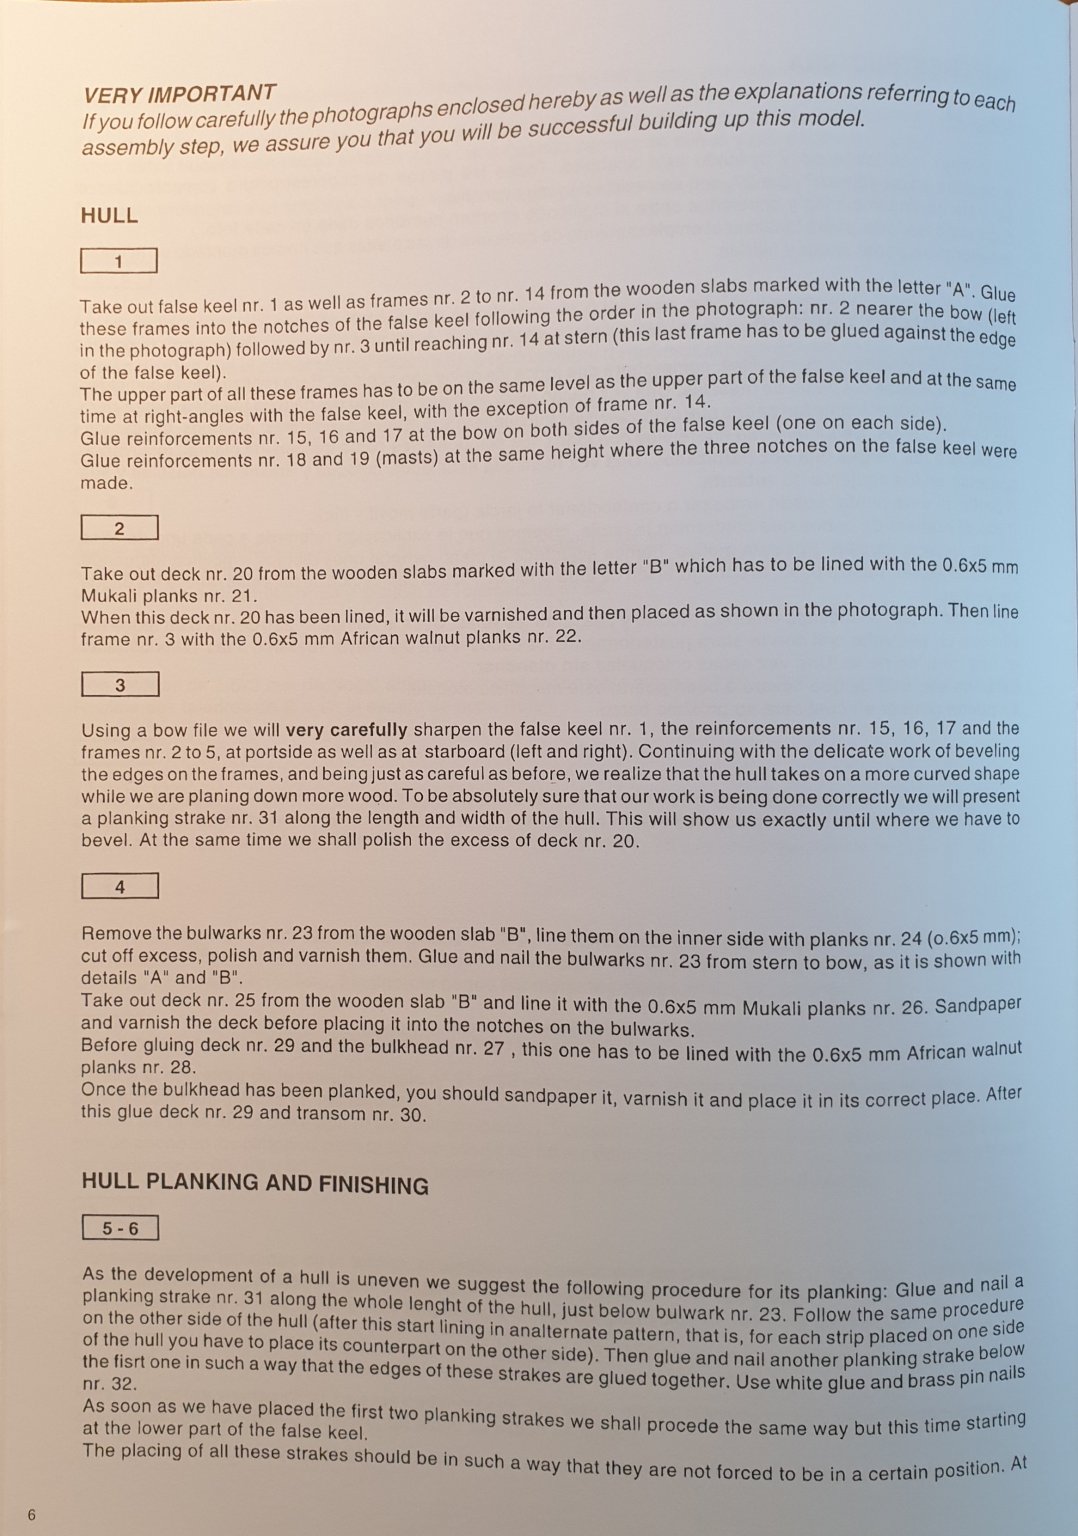
VI. Bulwarks So now is time to mount the bulwarks... It was definitely not an easy operation, since you have to make sure that they are put at the proper position, and in a symmetrical way so that all the elements which will be attached to it look right. The planking was also quite challenging for a beginner like me... Contents 1. Assembling Starboard Bulwark 2. Planking Starboard Bulwark 3. Assembling Port Bulwark 4. Planking Port Bulwark 5. Final Result Before Starting, let's have a look at Artesania Latina's instructions : "Remove the bulwarks nr. 23 from the wooden slab “B”, line them on the inner side with planks nr. 24 (0.6x5 mm); cut off excess, polish and varnish them. Glue and nail the bulwarks nr. 23 from stern to bow, as it is shown with details “A” and “B”." 1. Assembling Starboard Bulwark For the starboard bulwark, I was optimistic and applied all the glue at once on the frames and deck, before applying the bulwark, and maintaining it in place thanks to nails and clamps. I also decided to go without soaking and bending it, since this plywood has the reputation to be of poor quality and was seen on other topics to peel in its separate layers after soaking. Actually, placing it at the proper position took a lot of time, so part of the glu had started to dry, I figured that for the other bulwark it would be better to proceed step by step from the front to the rear. For the position along the longitudinal (roll) axis, I did so as to have the back of the bulwark flush with the last rear frame. Regarding the position along the vertical (yaw axis), I followed AL instructions, meaning an overlap of the rear of the bulwark of 3mm over the frame, and at the front make it flush with the top of the frames. I then applied nails were necessary to remove any gap between the bulwark and the deck. Still I am a bit worried about the nails head stacking out even after my best efforts to insert them, which could disturb the planking process later... Would anyone have any advice about how to deal with them ? I had finally to use clamps on the front since the bending radius is pretty high and nails weren't enough to maintain the bulwark against the frames. 2. Planking Starboard Bulwark I considered three planking methods (I probably forgot some, let me know !) AL Instructions : plank the bulwark when flat before mounting it (which I didn't do as you see) Planking with several separate boards, as for the deck (see Katsumoto's Build Log) Planking after mounting the bulwark, following the curve of the deck, with one single plank all along (mix of the first two) I went with this last method. Method 2 would look nice, but the task of planking the deck was already tedious and I didn't want to go too complicated for this first build. Since, for a next one I think I would consider it since the result looks pretty nice and I struggled a bit with my method. Furthermore I am not of what is the most accurate from an historical point of view ? I start with the first plank. The bending is pretty hard, it's still not breaking but I had to use a lot of clamps over the length to maintain it correctly. Then I continue to apply the upper planks. It's hard to avoid any gap because of the bending, and I had to double check several times, still some small gaps remained. Once all the planks are glued I open all the overtures. I start by drilling at the corners. Then cut along the bulwark shape with a knife, applying some plywood behind not to damage the planks. I finish the sides with a nail file which I cut into pieces, and the corners with a square file. Finishing : I apply sanding sealer I sand with 1000 then 2000 grit wallpaper, finish with steel wool 000. I apply three coats of varnish (clear satin, same as for the deck). Between each layer, I sand with 1000 then 2000 grit wallpaper, then finish with steel wool 000. 3. Assembling Port Bulwark It's generally the same method except that this time, instead of trying to glue all at once, I start at the front and finish at the back, making sure the position is symmetrical with starboard bulwark. I used planking screws to maintain the bulwark during drying, which allows to avoid nails. A very practical method to my mind. 4. Planking Port Bulwark Exact same method than for starboard bulwark. 5. Final Result


-
BLACK VIKING reacted to a post in a topic:
Santa Maria by PJ - Artesania Latina - 1:65
-
yvesvidal reacted to a post in a topic:
Santa Maria by PJ - Artesania Latina - 1:65
-
Hello Yves, thanks a lot for the feedback. Indeed it's part of the hobby for me to learn the history behind I hadn't had thought of making a collection of 1:65 ships, but now that you say it's pretty standard, I will definitely think about it.
-
yvesvidal reacted to a post in a topic:
Santa Maria by PJ - Artesania Latina - 1:65
-
yvesvidal reacted to a post in a topic:
Santa Maria by PJ - Artesania Latina - 1:65
-
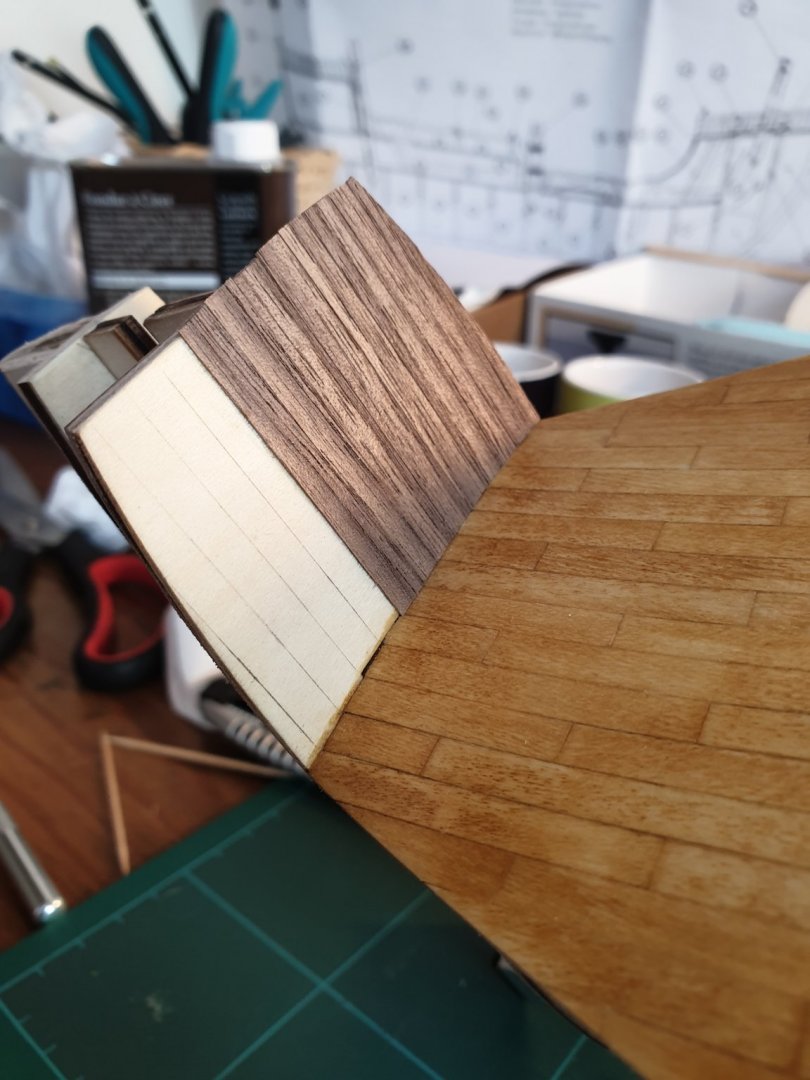
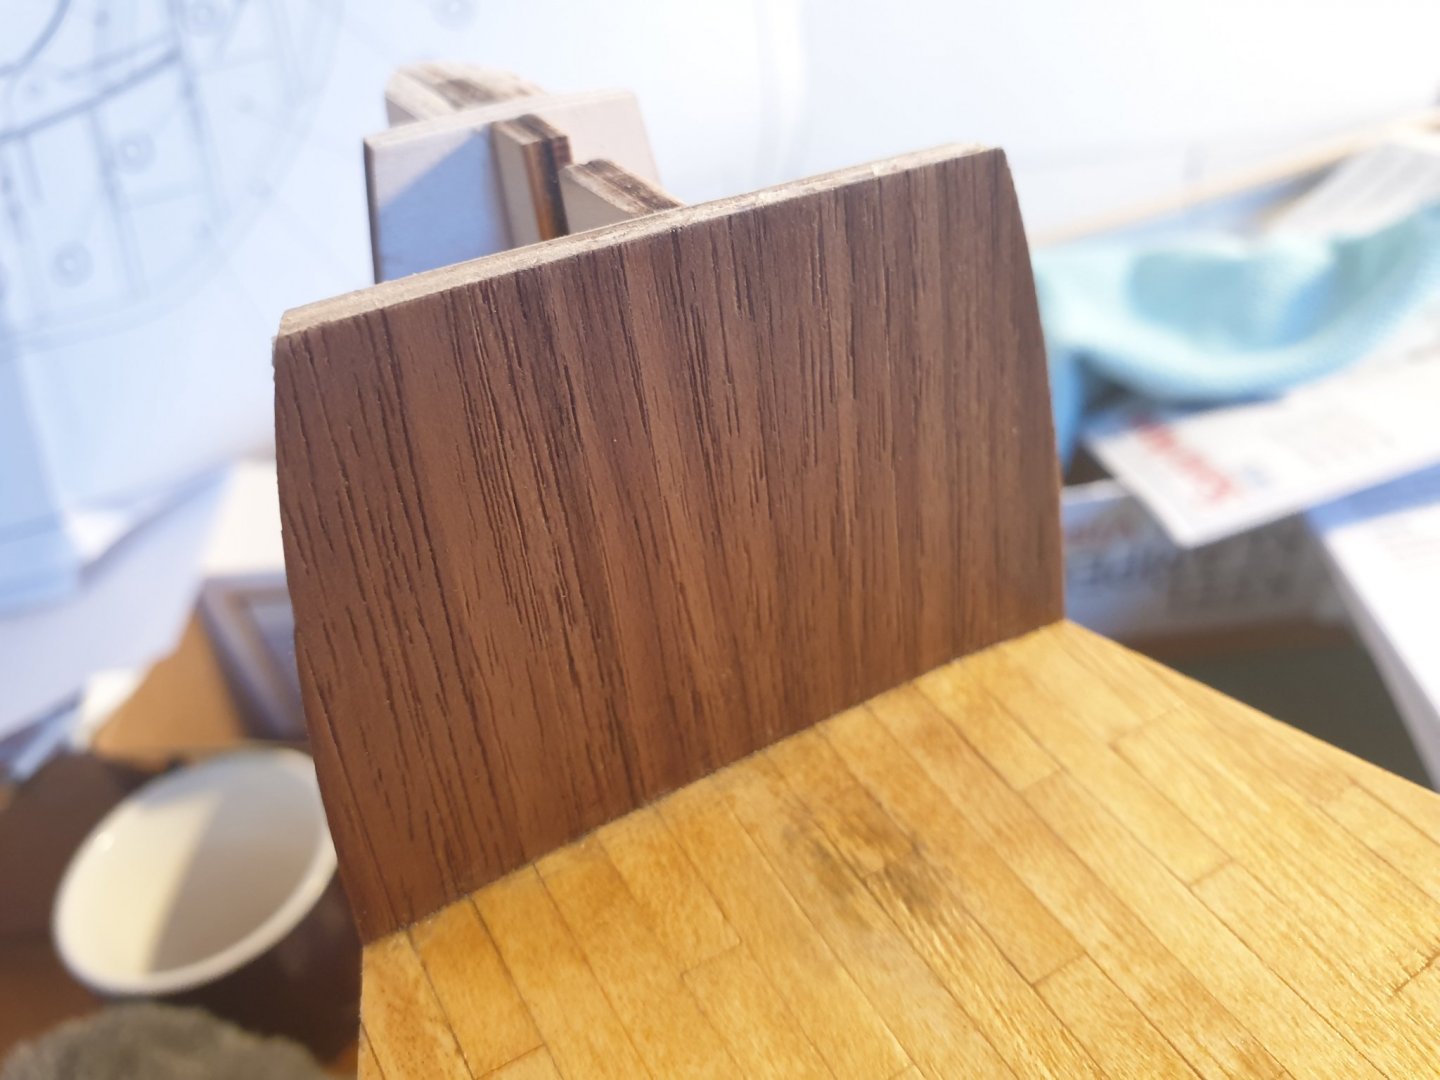
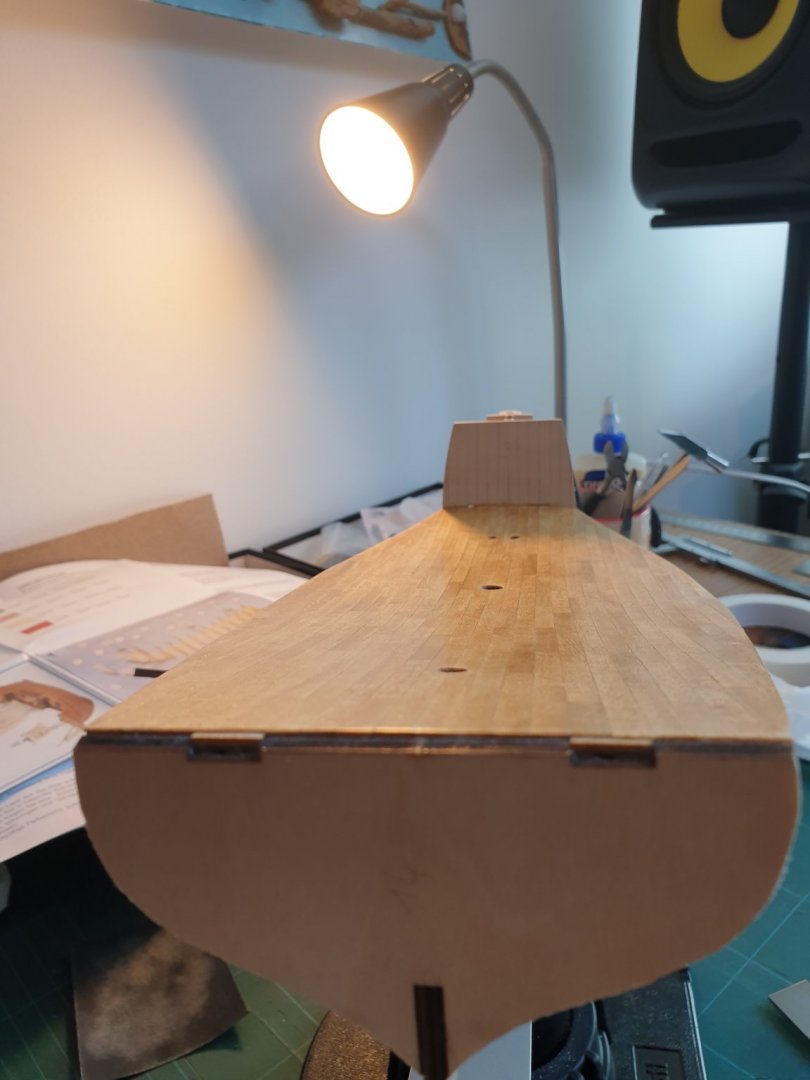
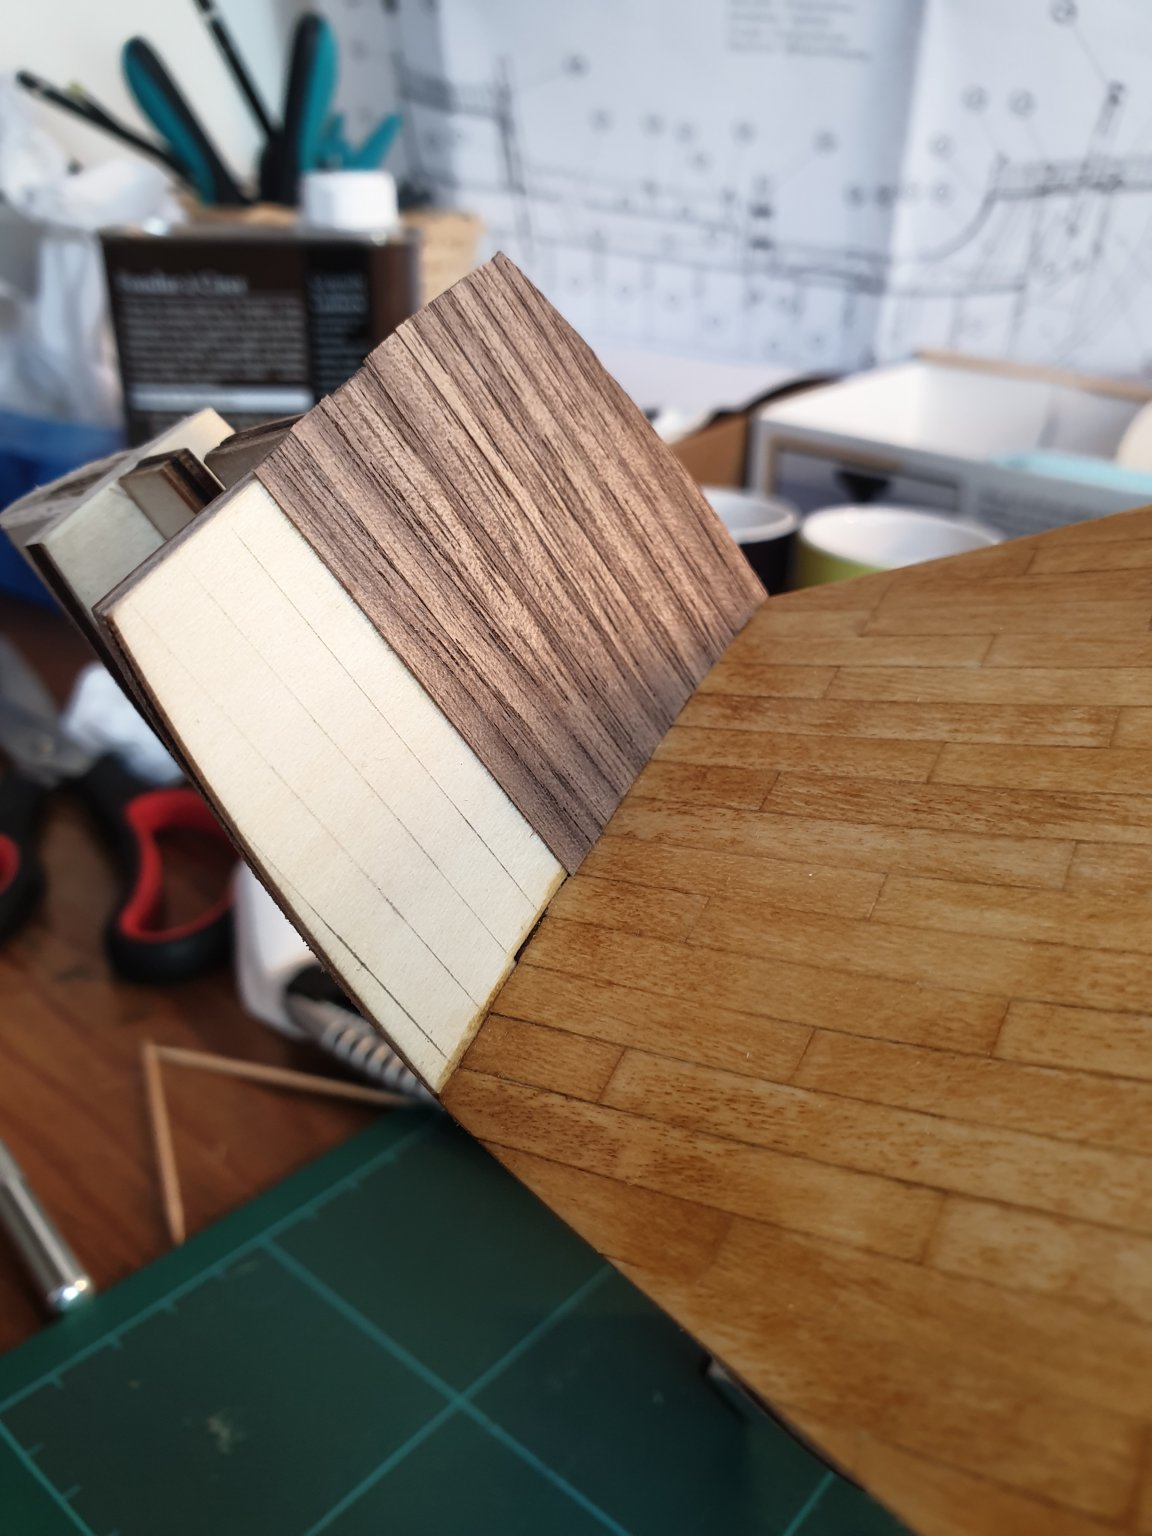
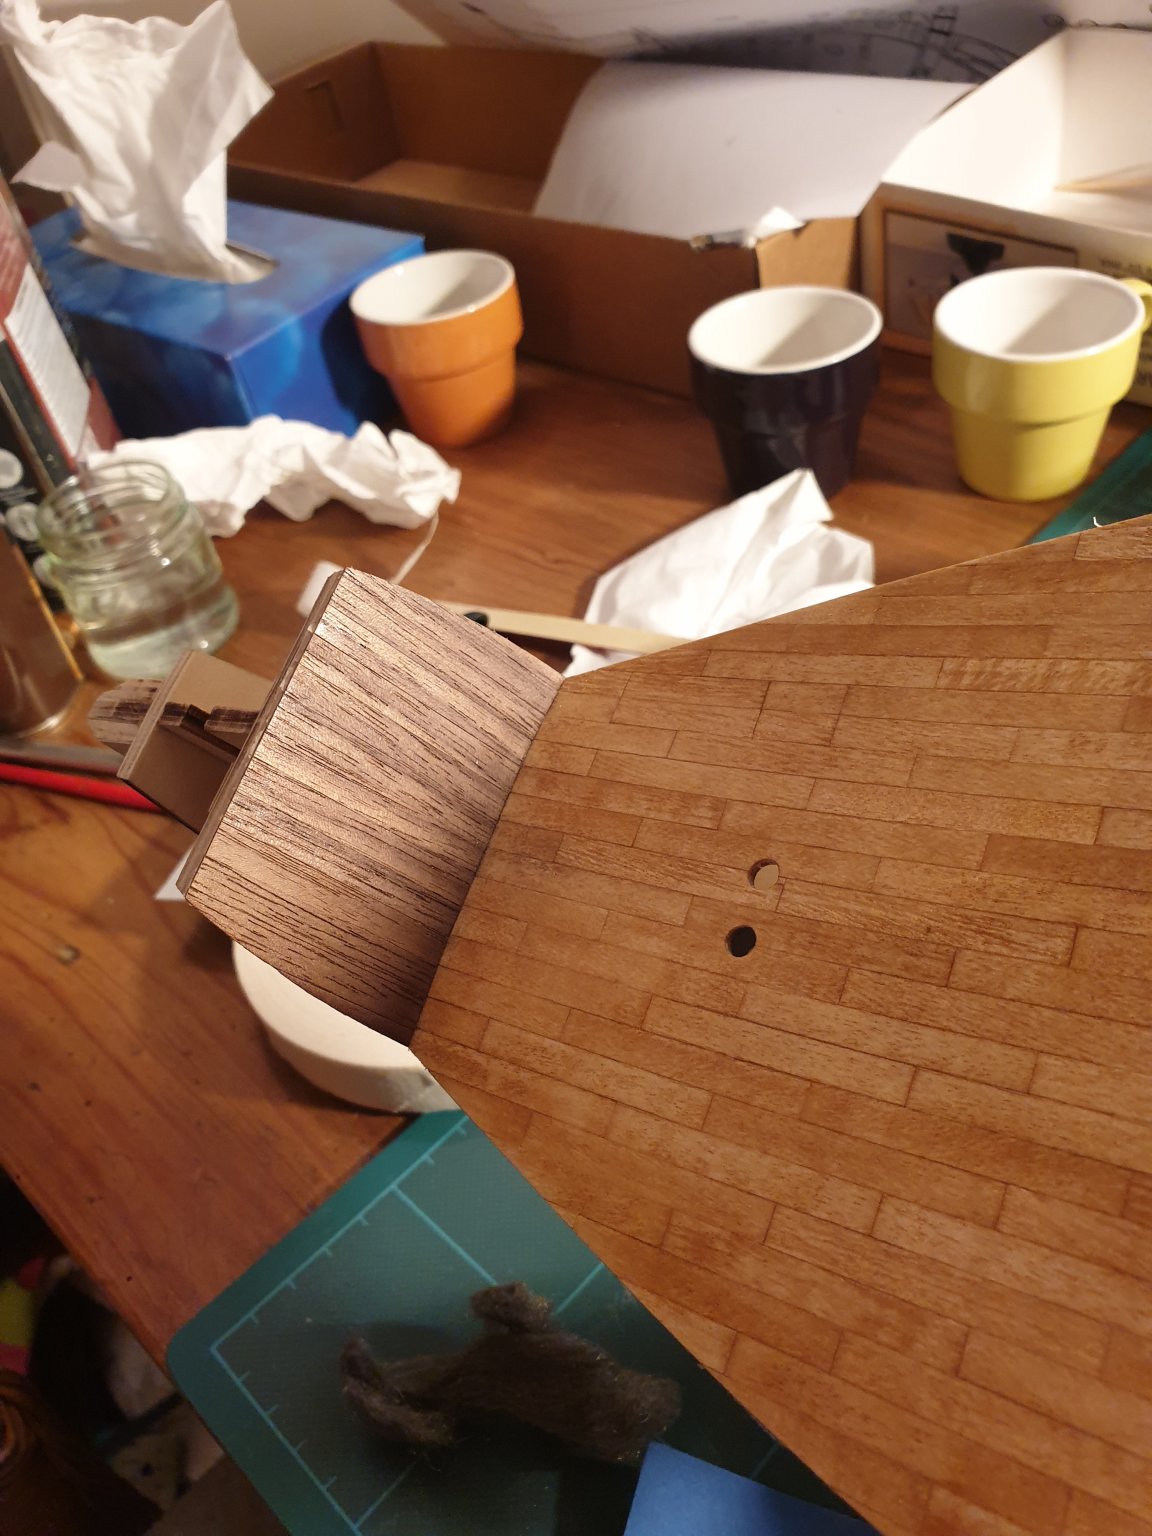
V. Main Deck Front Wall Now is time to plank the front wall of the main deck with wallnut. I trace lines so that the wall boards match the decks boards at the intersection. I cut the boards slightly longer than the wall I glue the planks I cut them and sand them to fit the exterior border of the wall Finishing I sand the surface with increasing grit from 500 to 2000, ending with a pass of steel wool 000 I apply sanding sealer ("Fondur" in French, from Libéron) and let it dry 2 hours I sand with 1000 grit wallpaper + 000 steel wool I apply three coats of clear satin varnish. Between each, let dry 4 hours and sand with 1000 grit wallpaper + 000 steel wool.

-
PJTheJet reacted to a post in a topic:
Santa Maria by PJ - Artesania Latina - 1:65
-
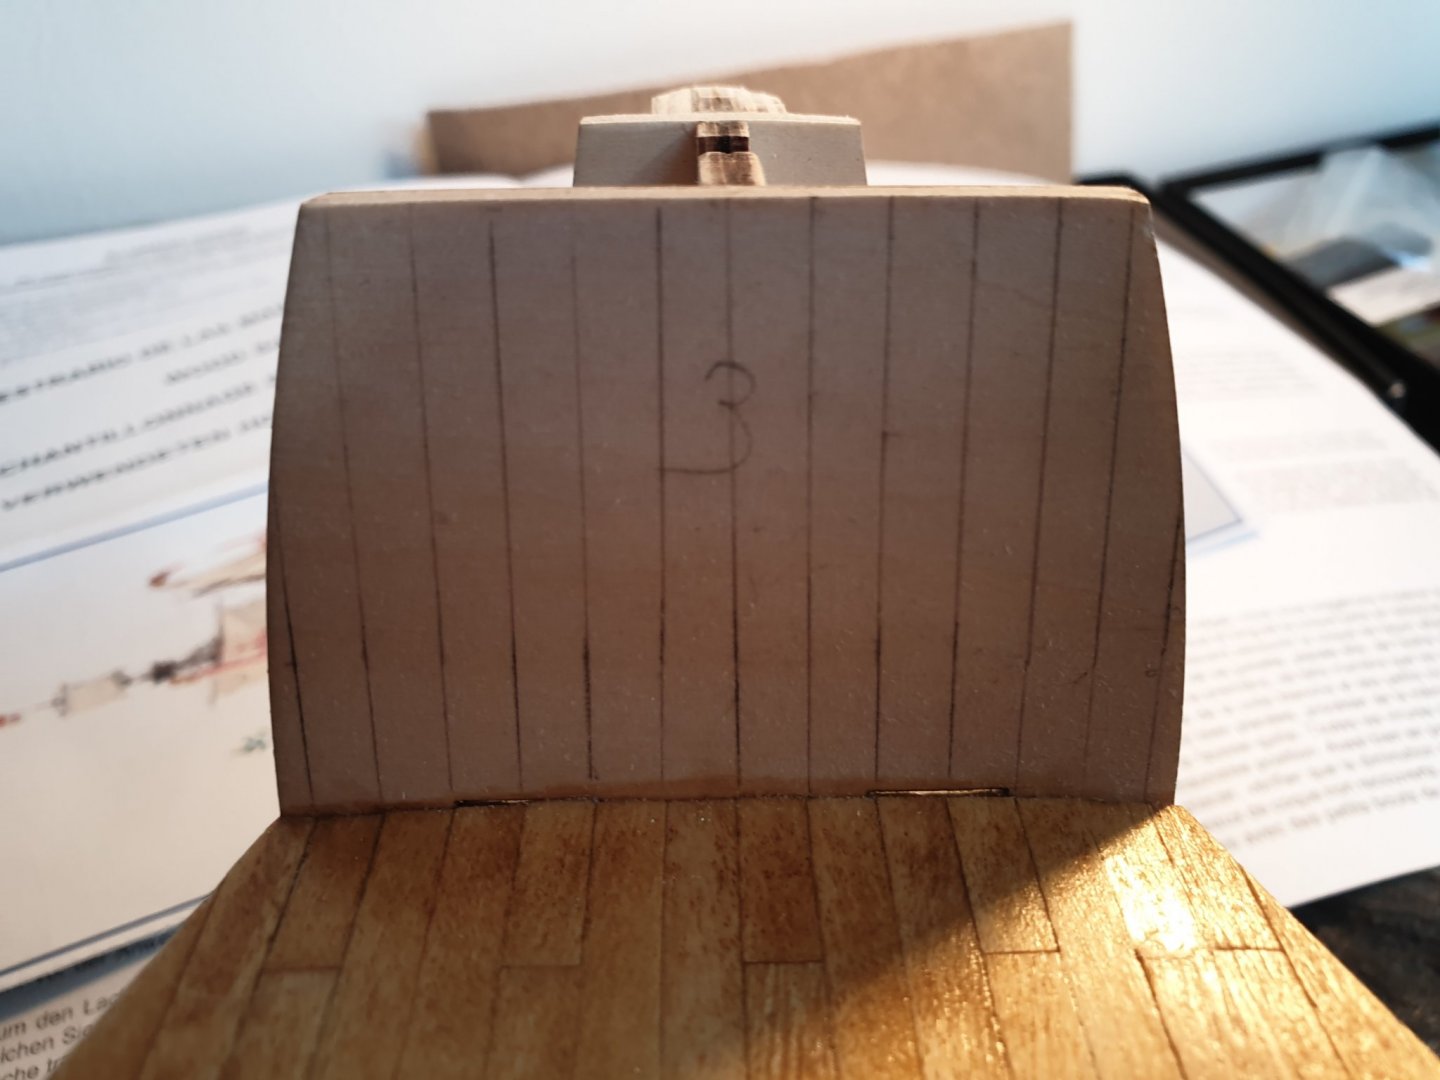
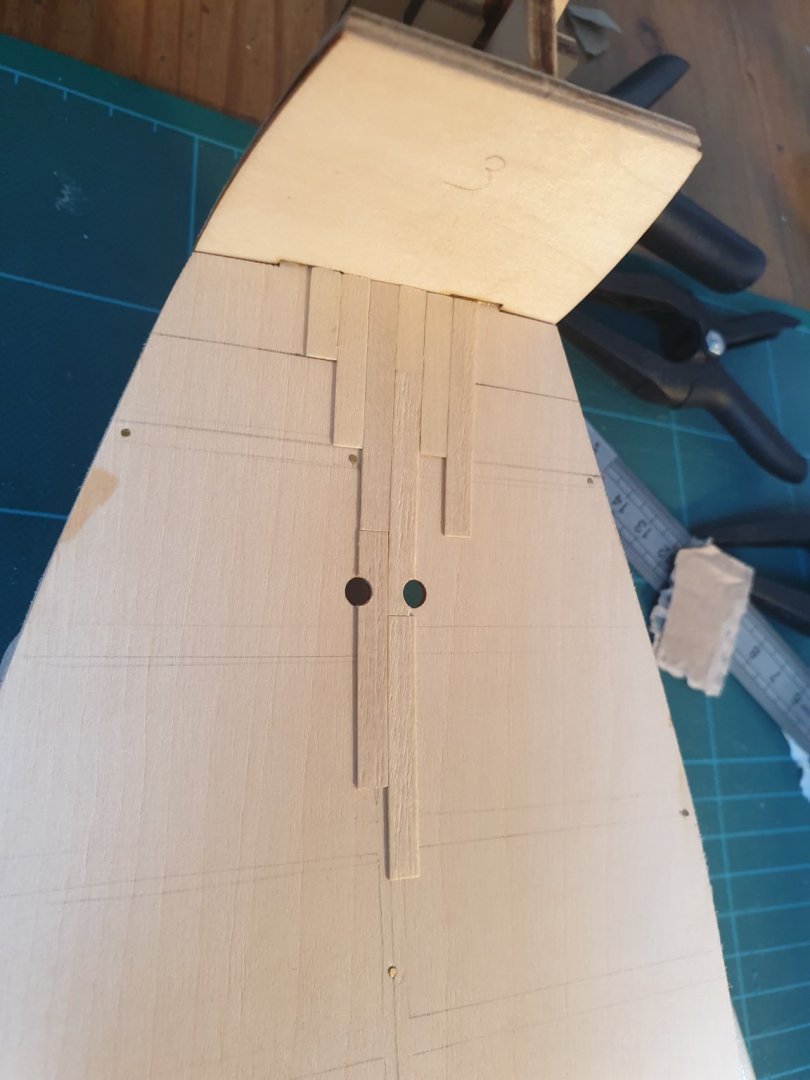
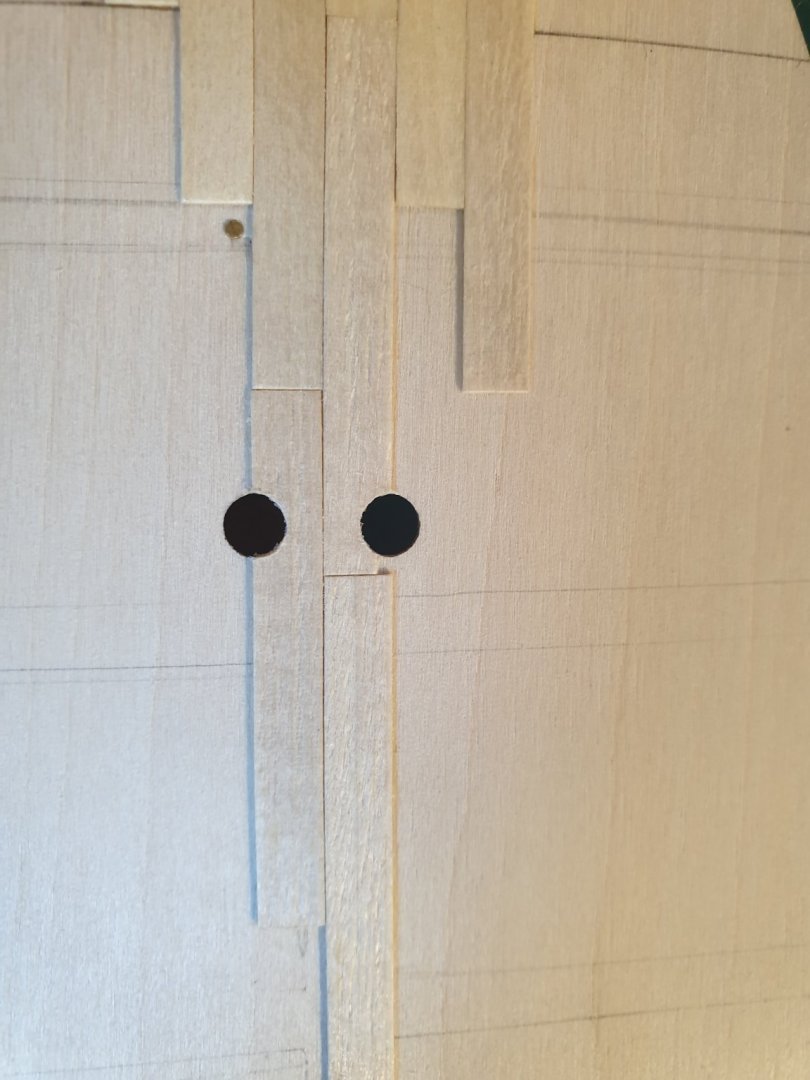
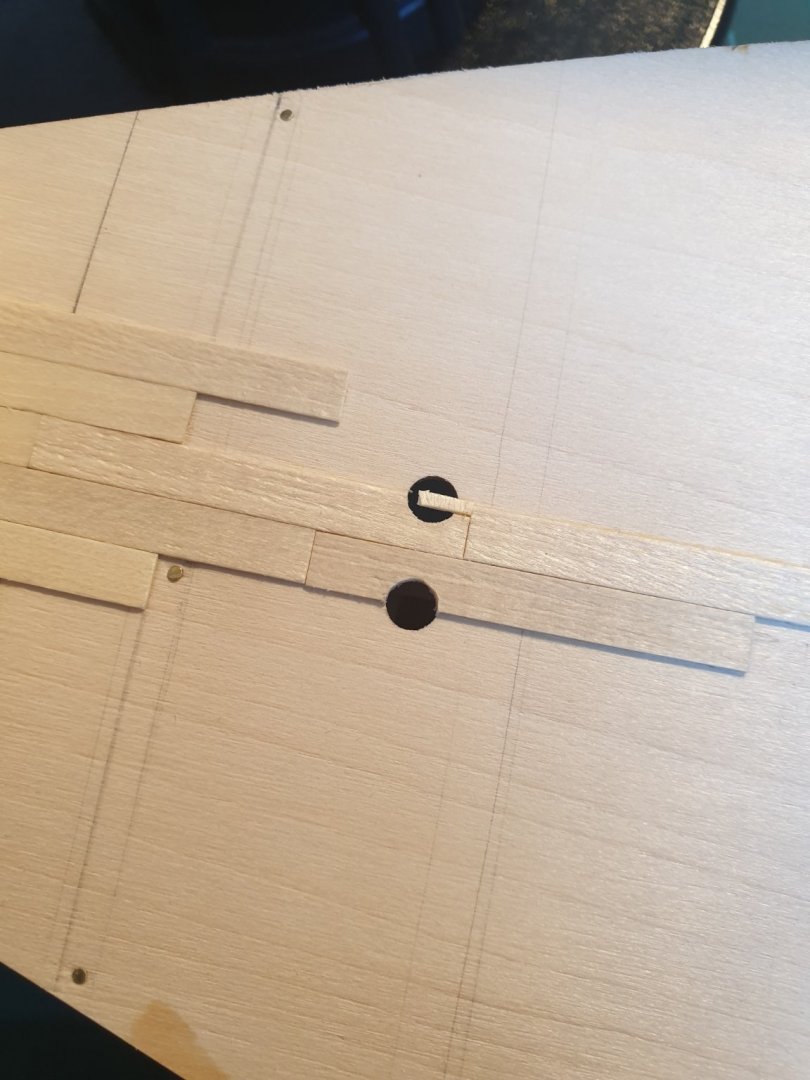
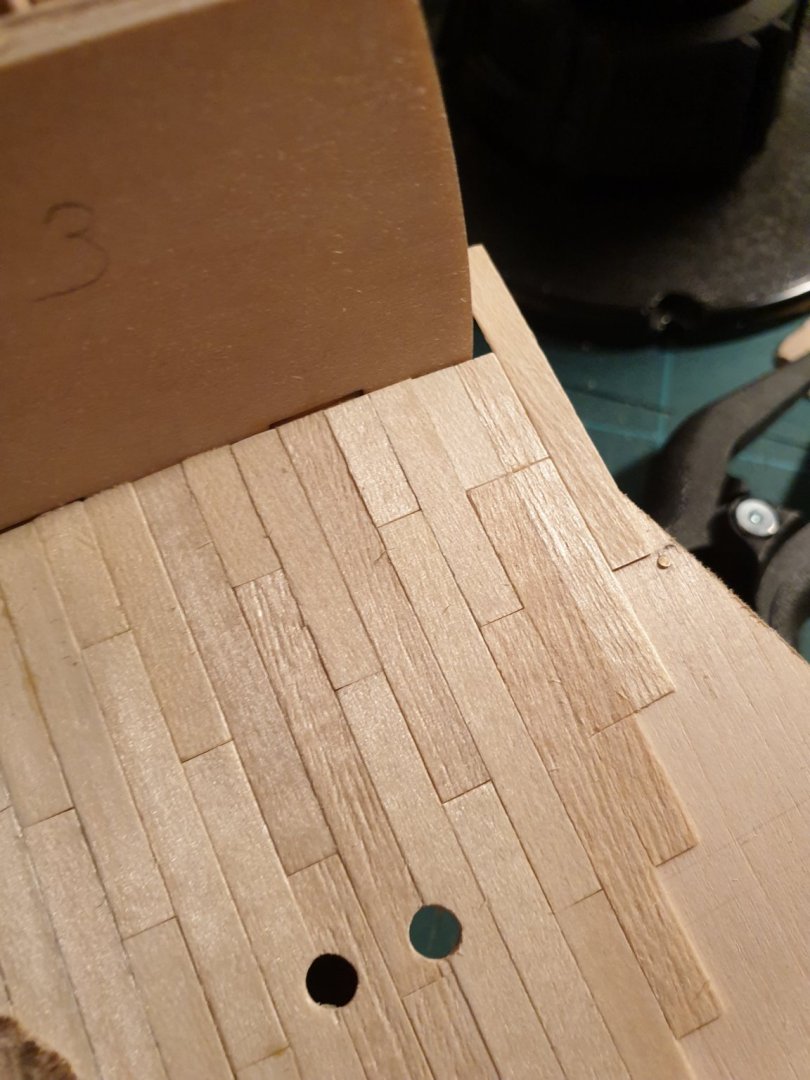
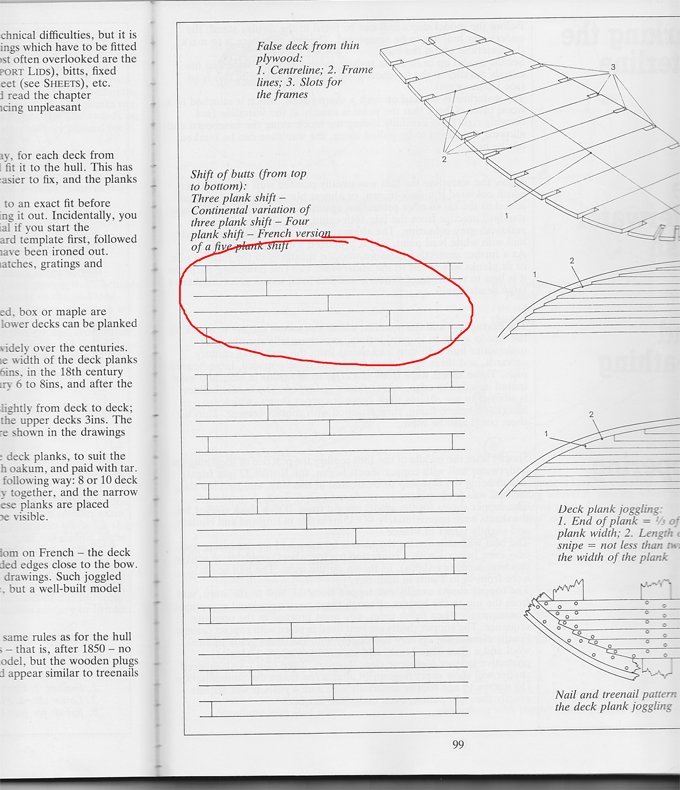
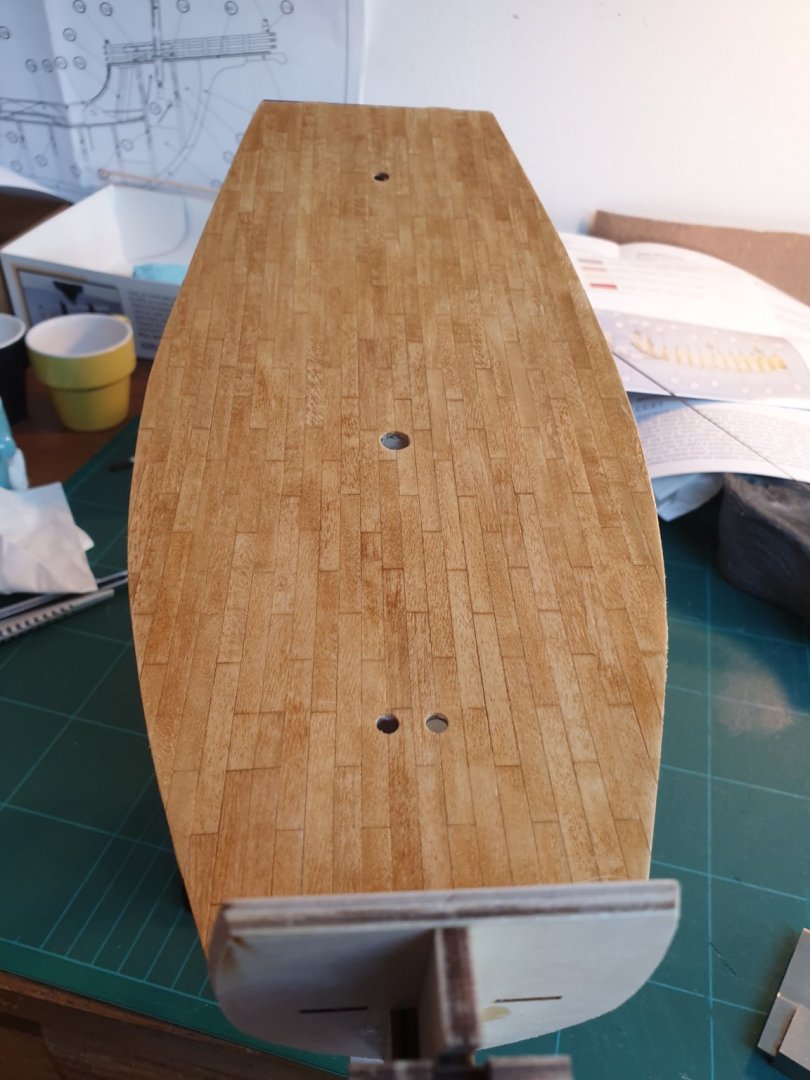
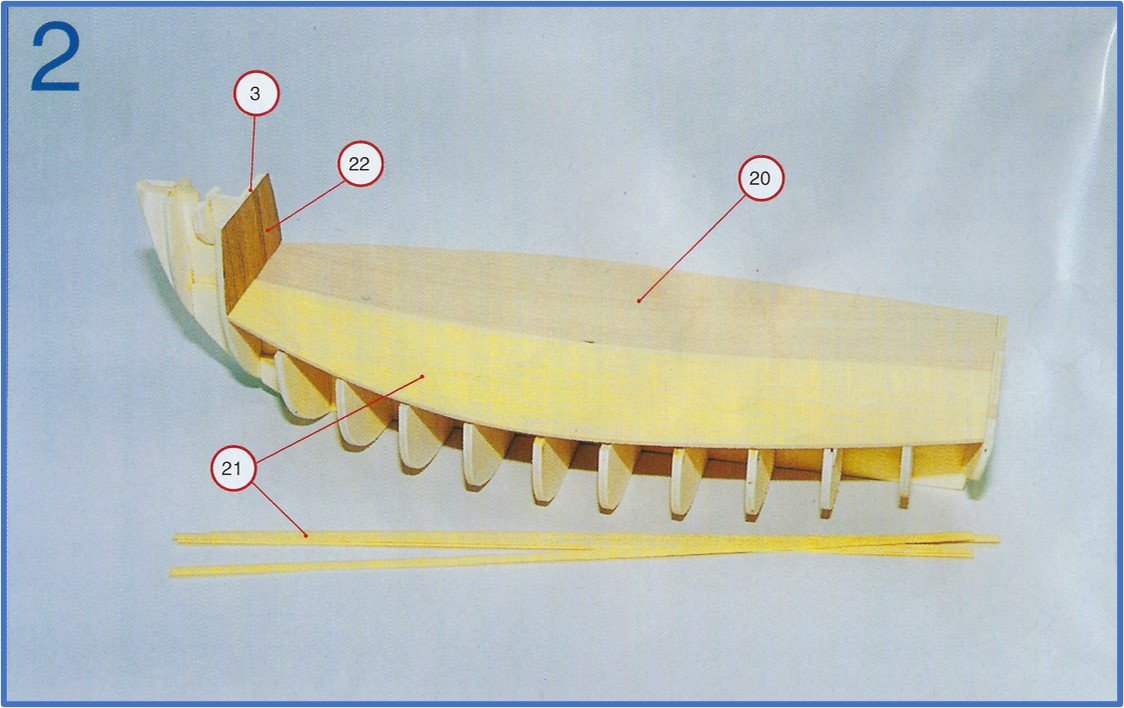
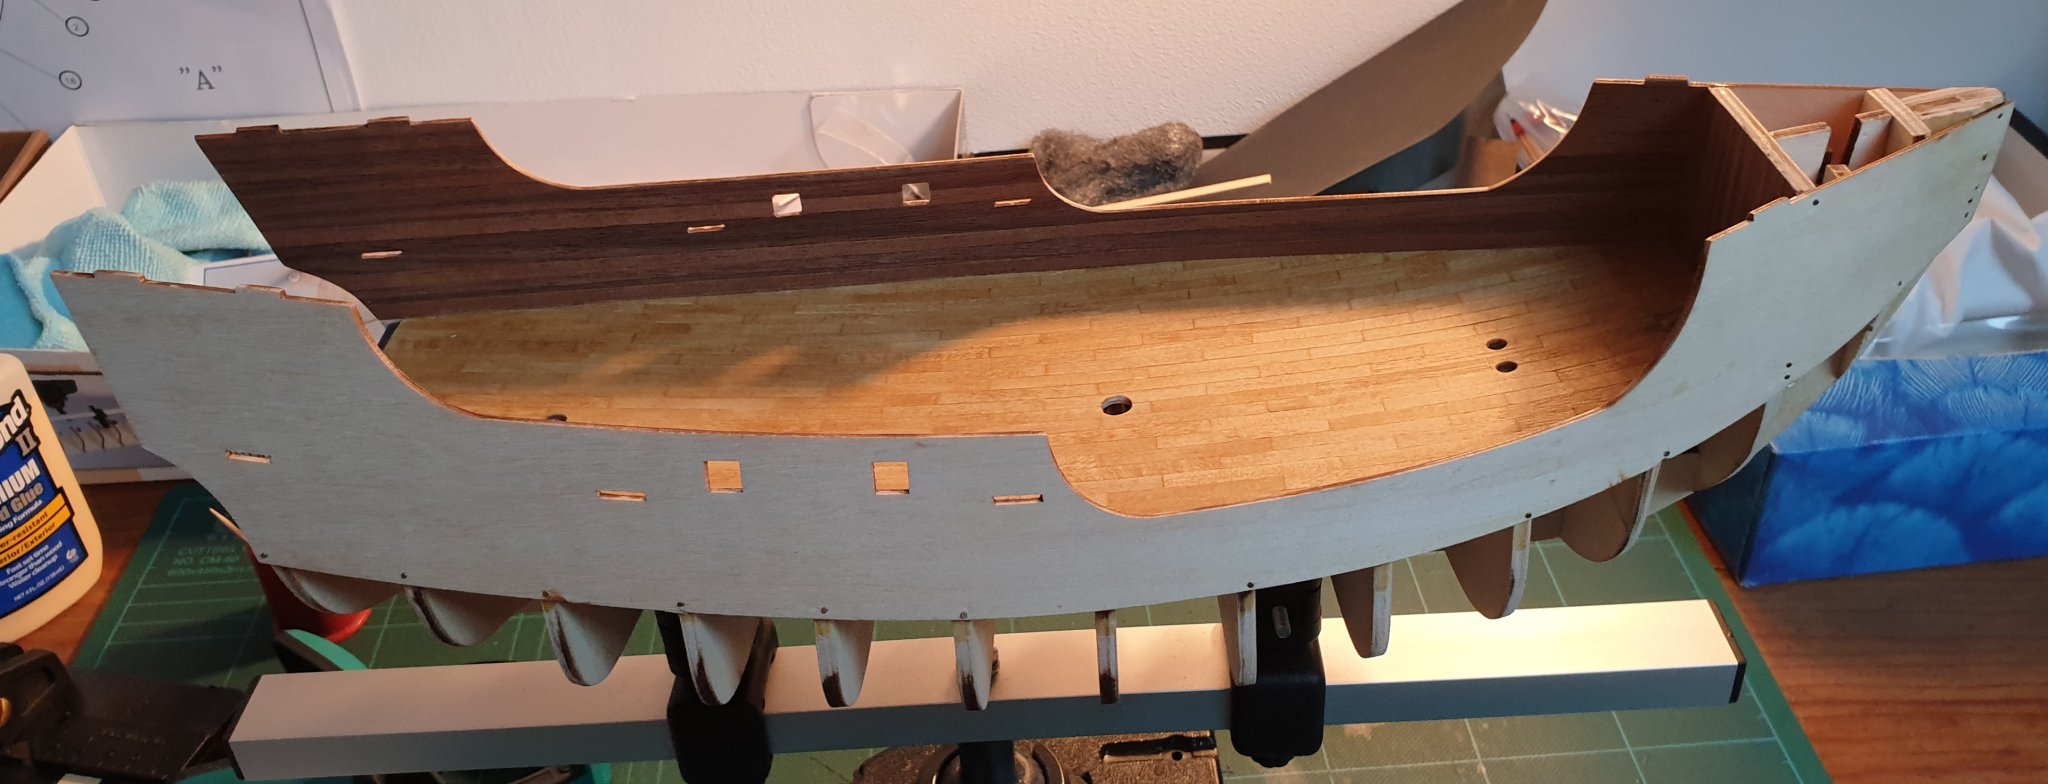
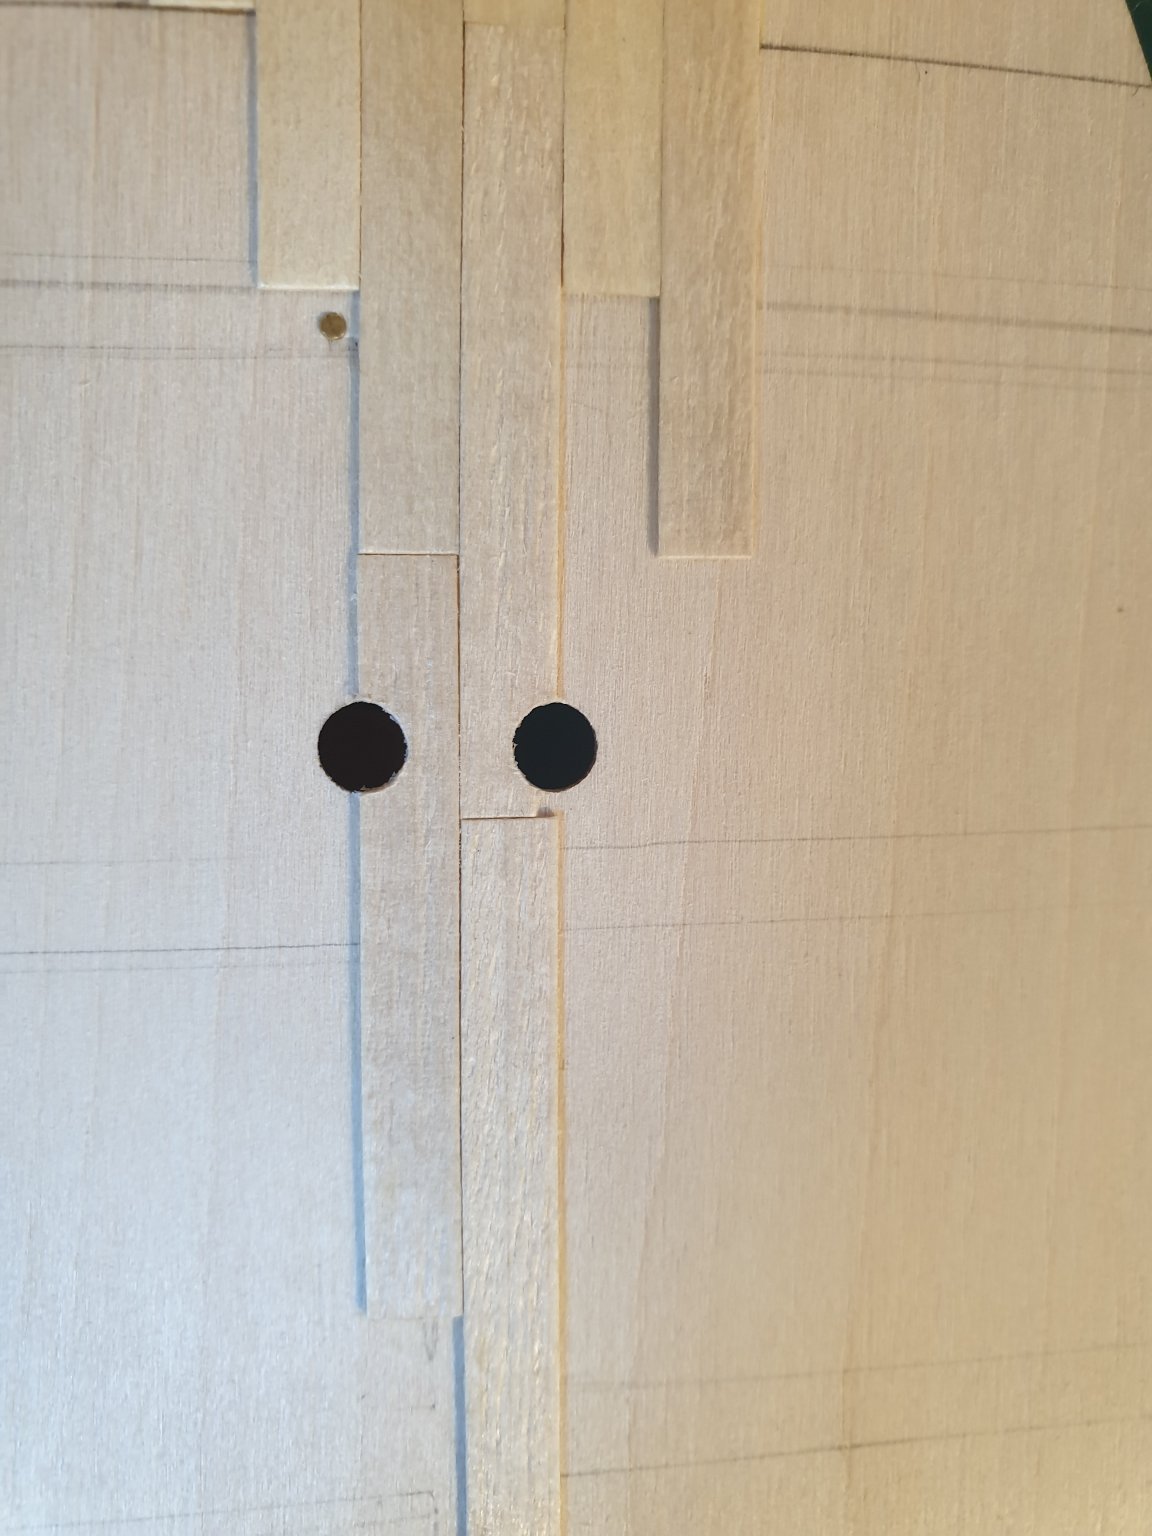
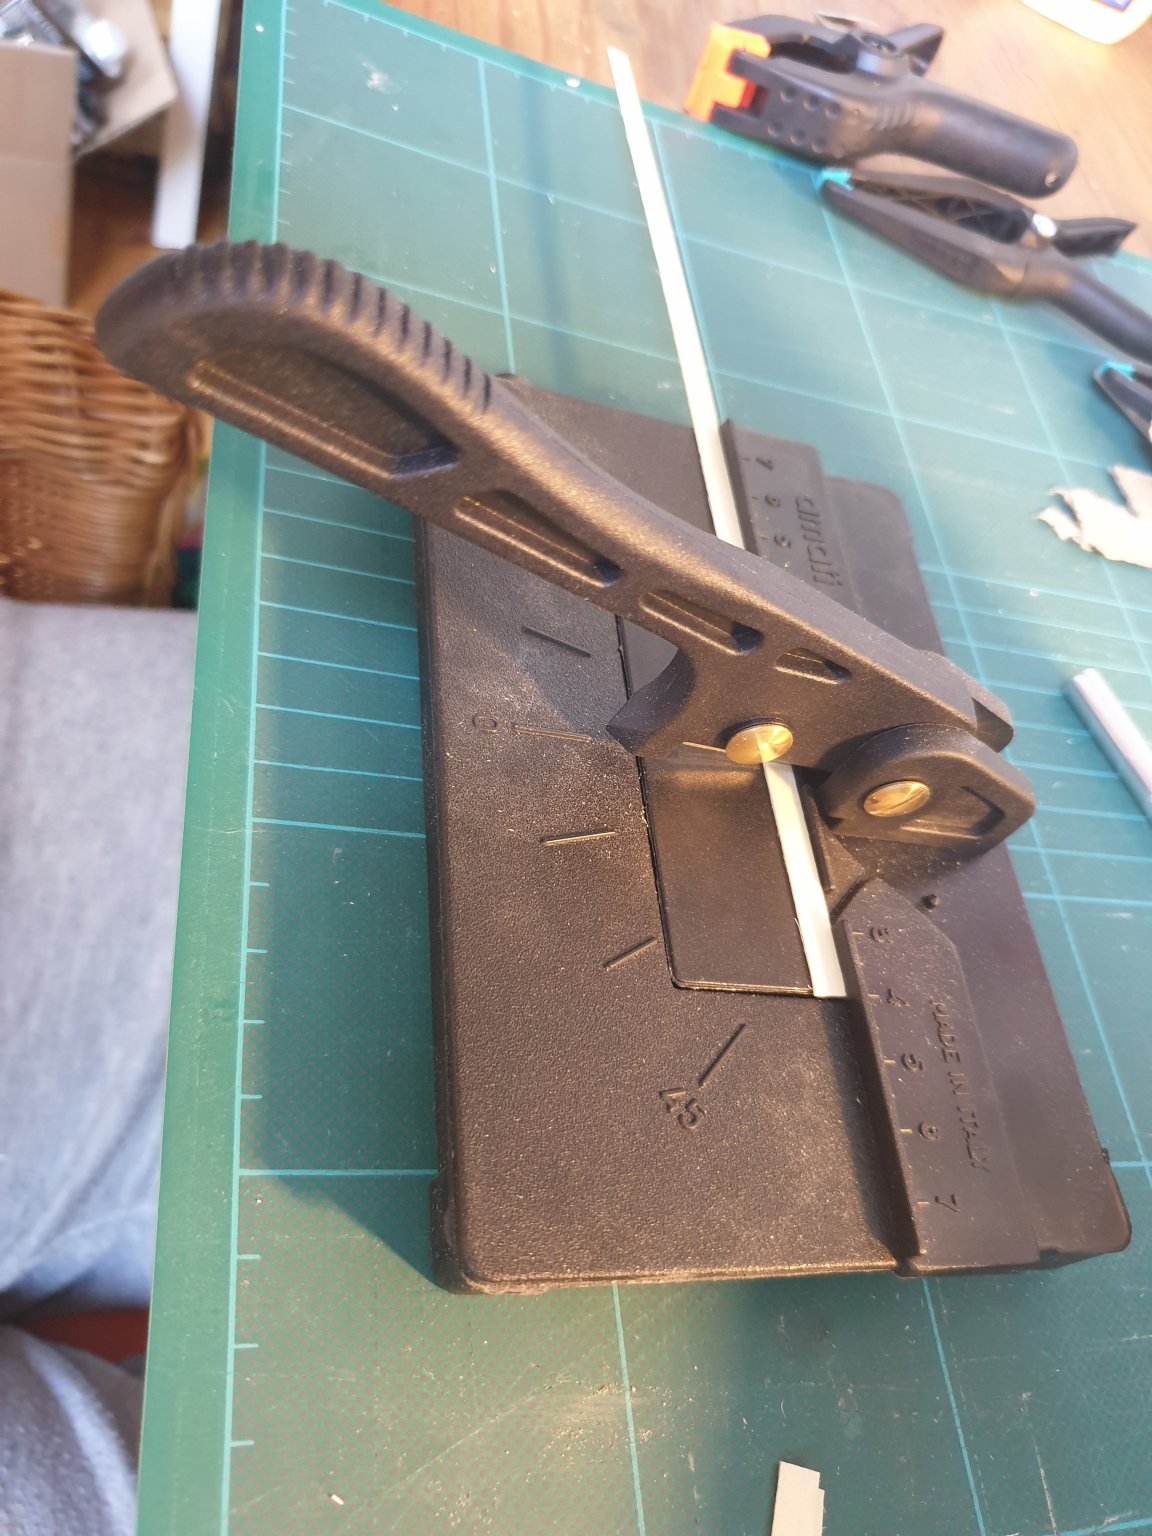
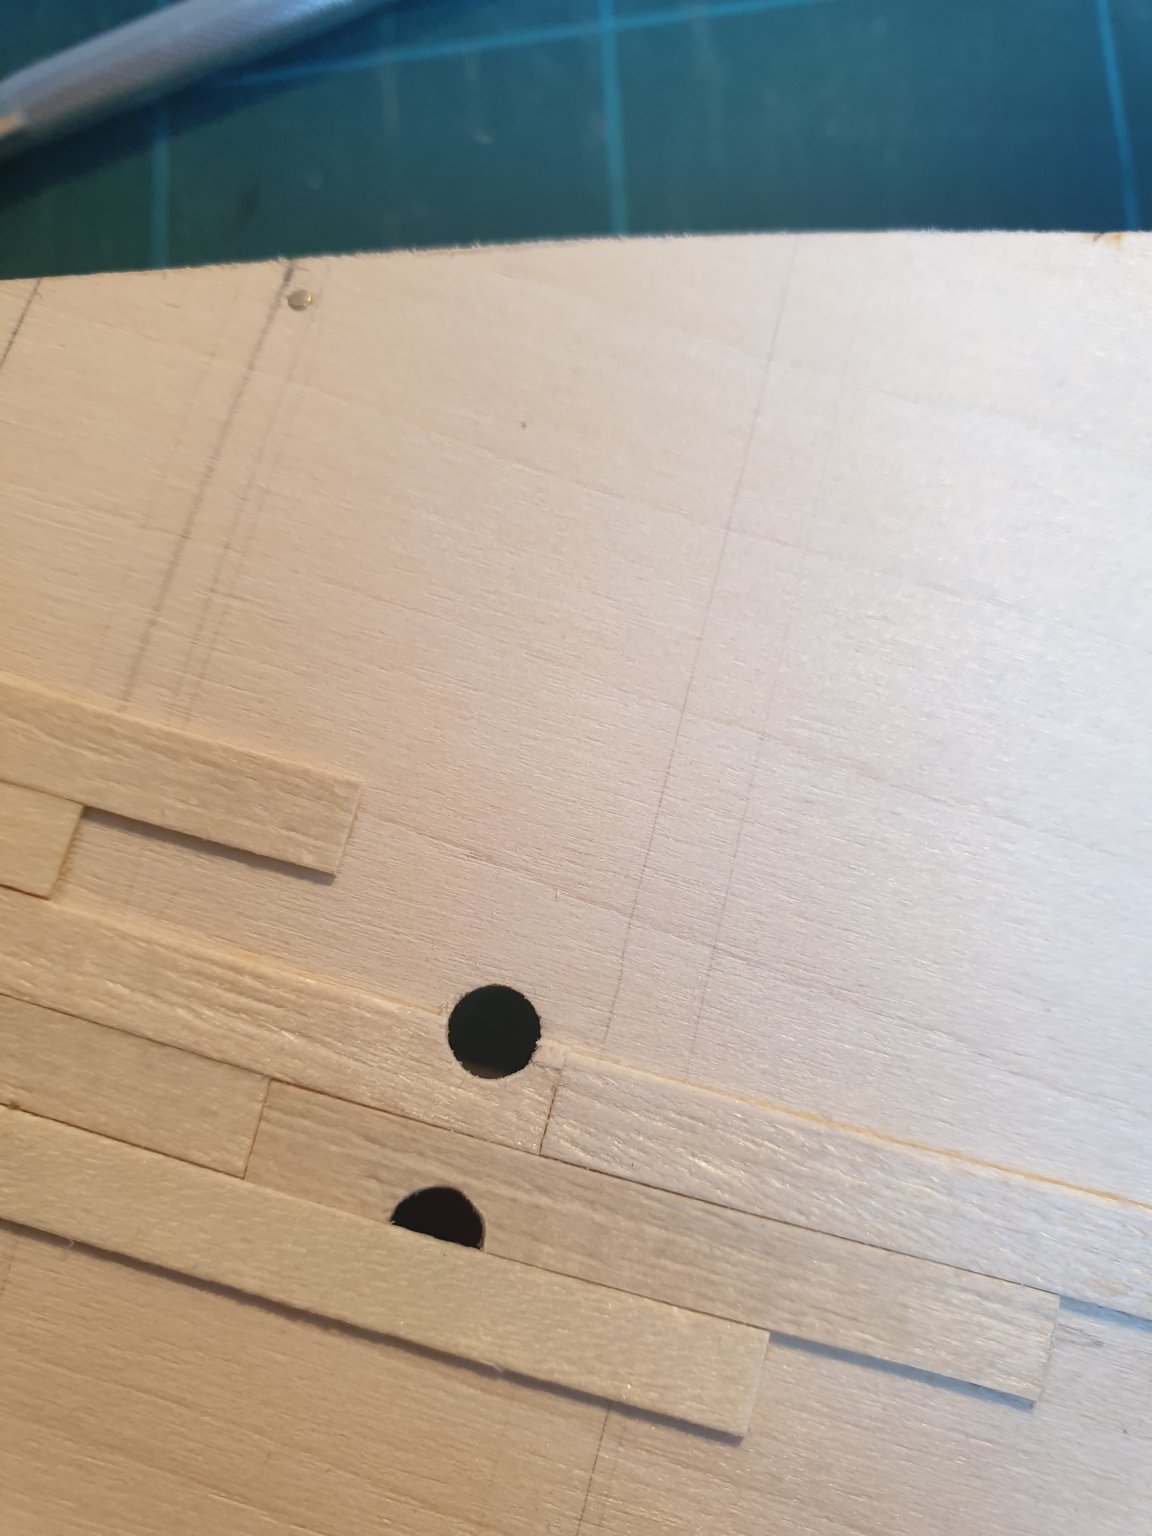
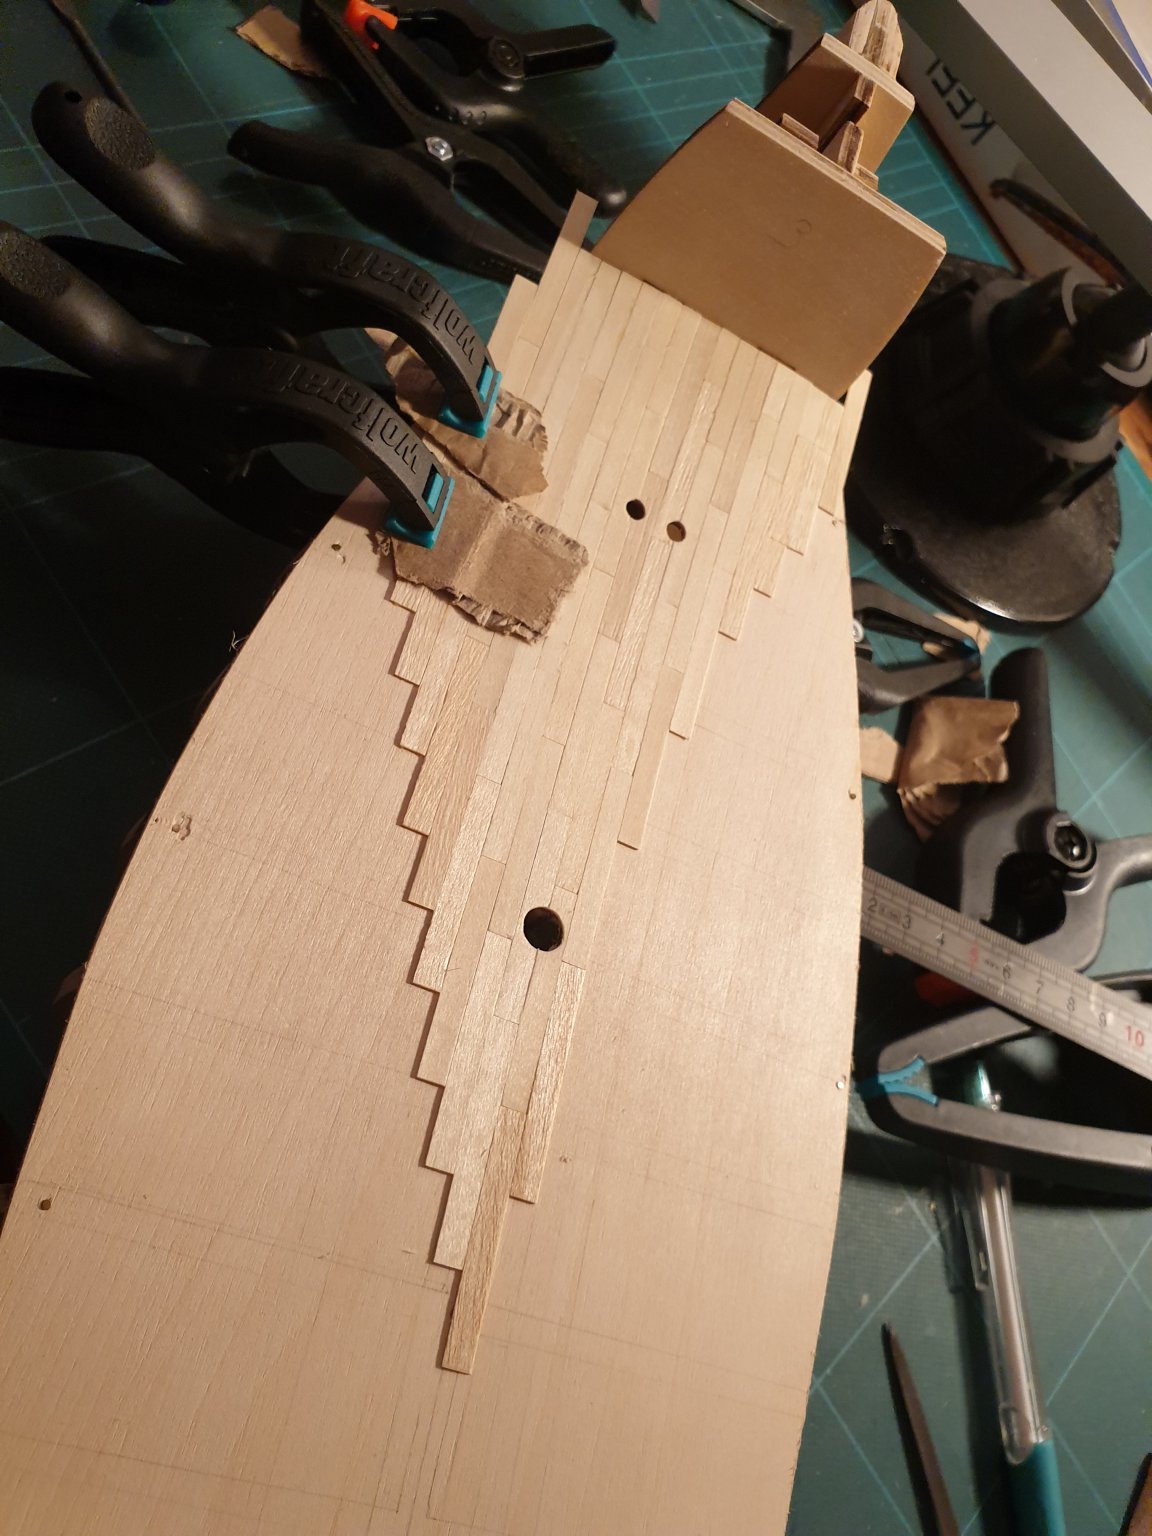
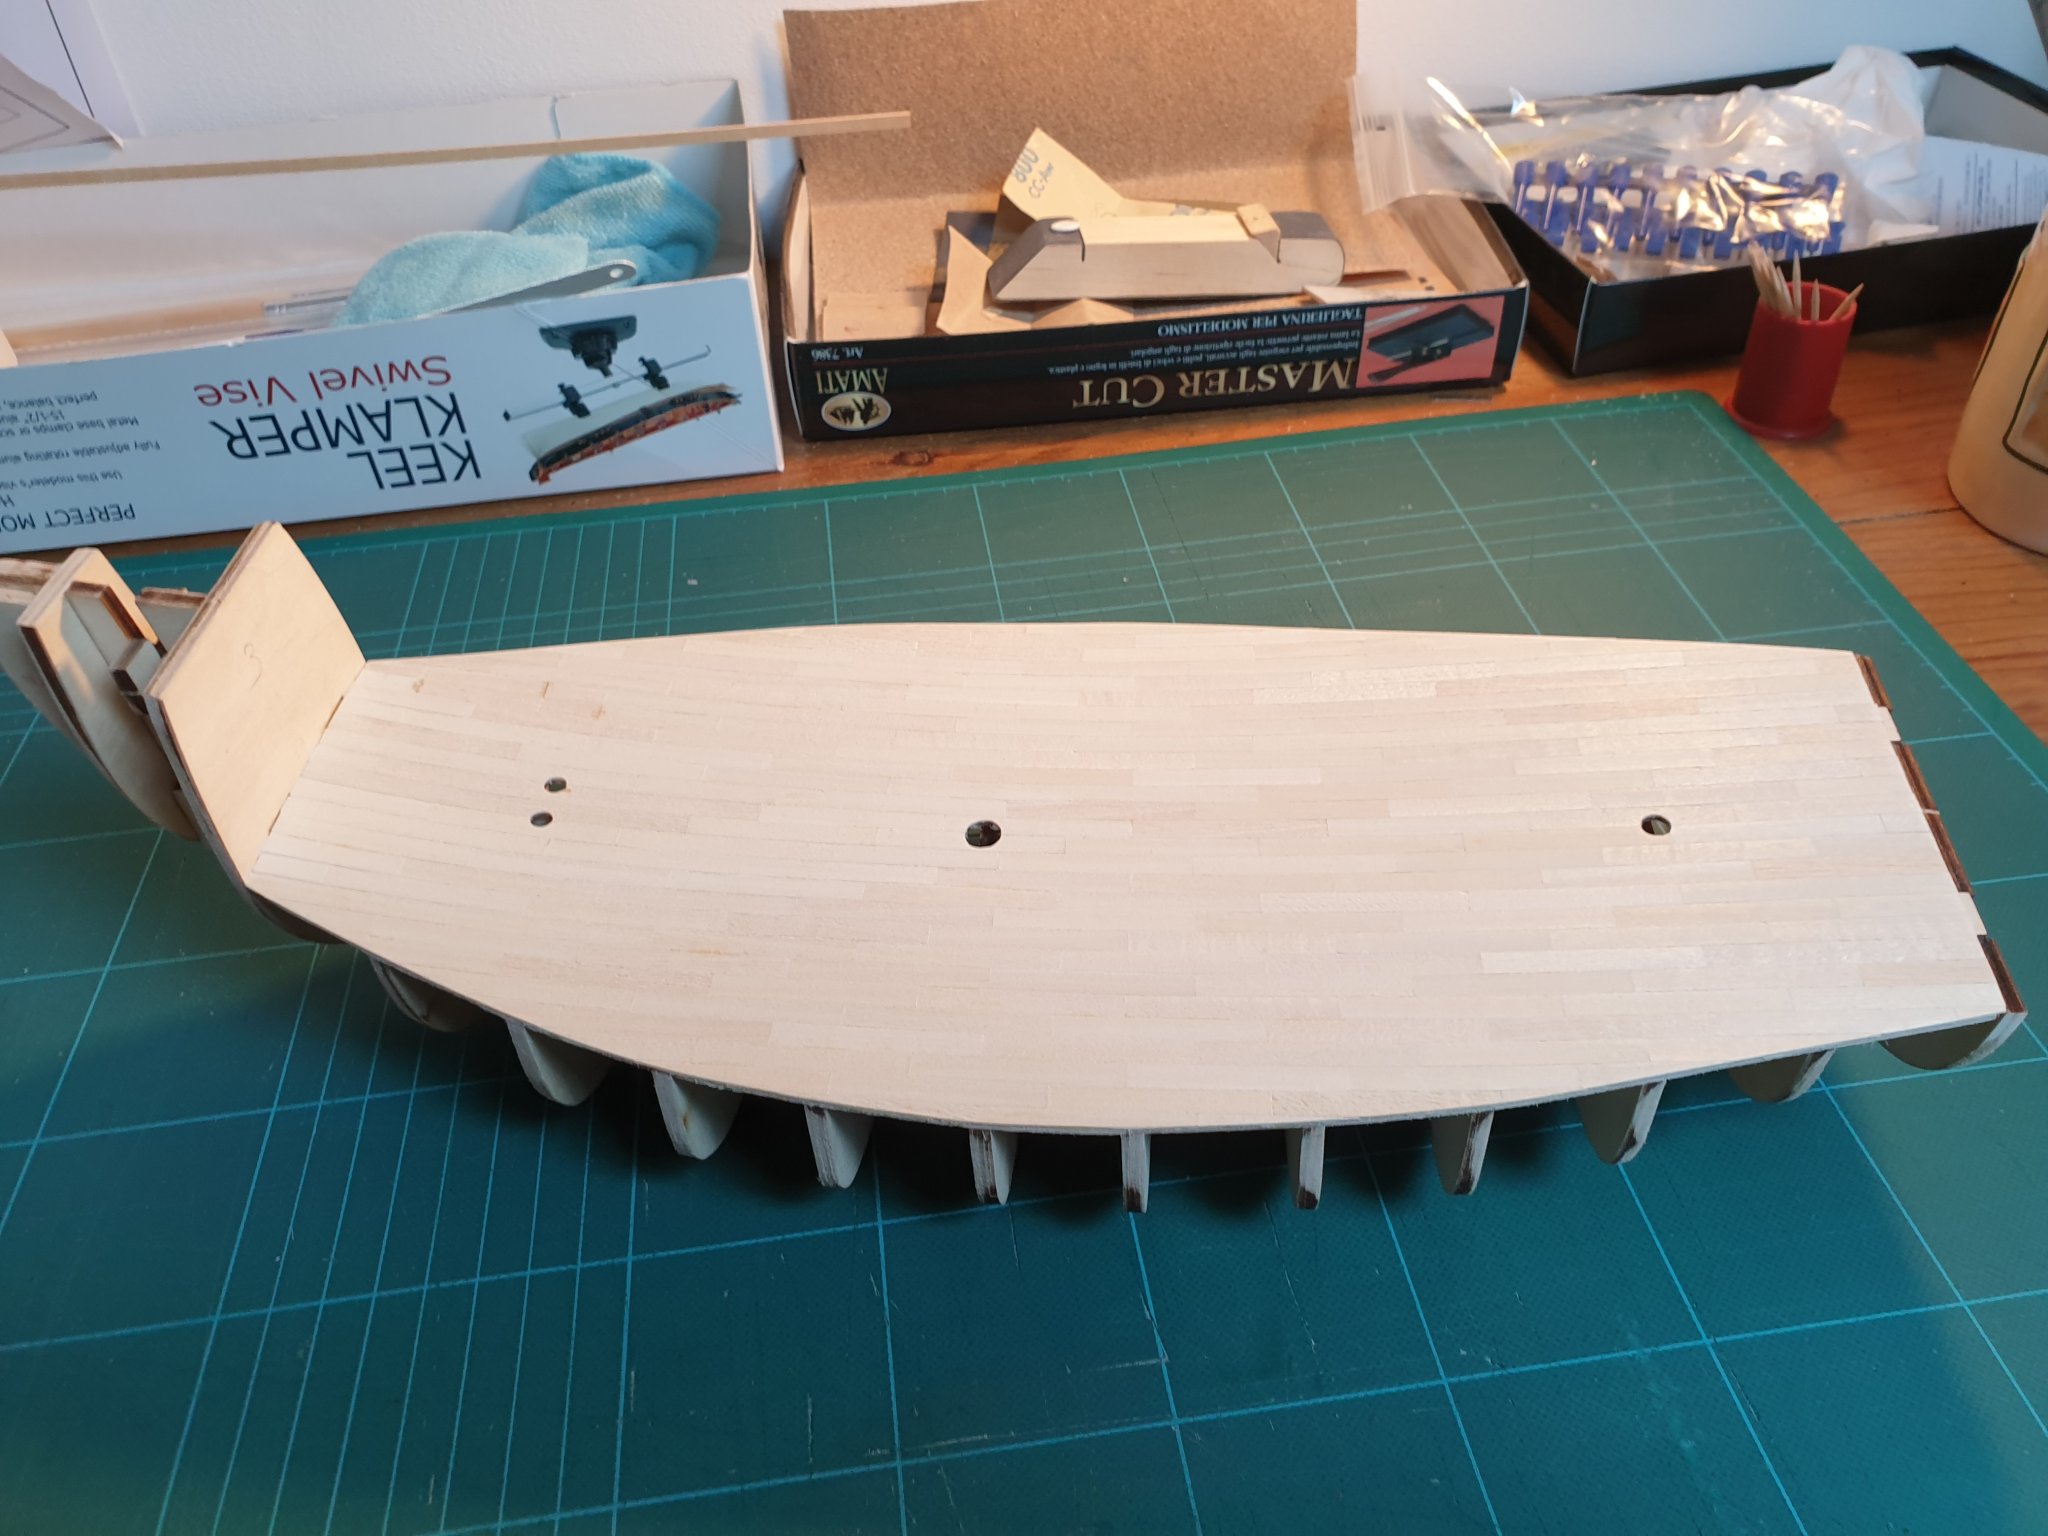
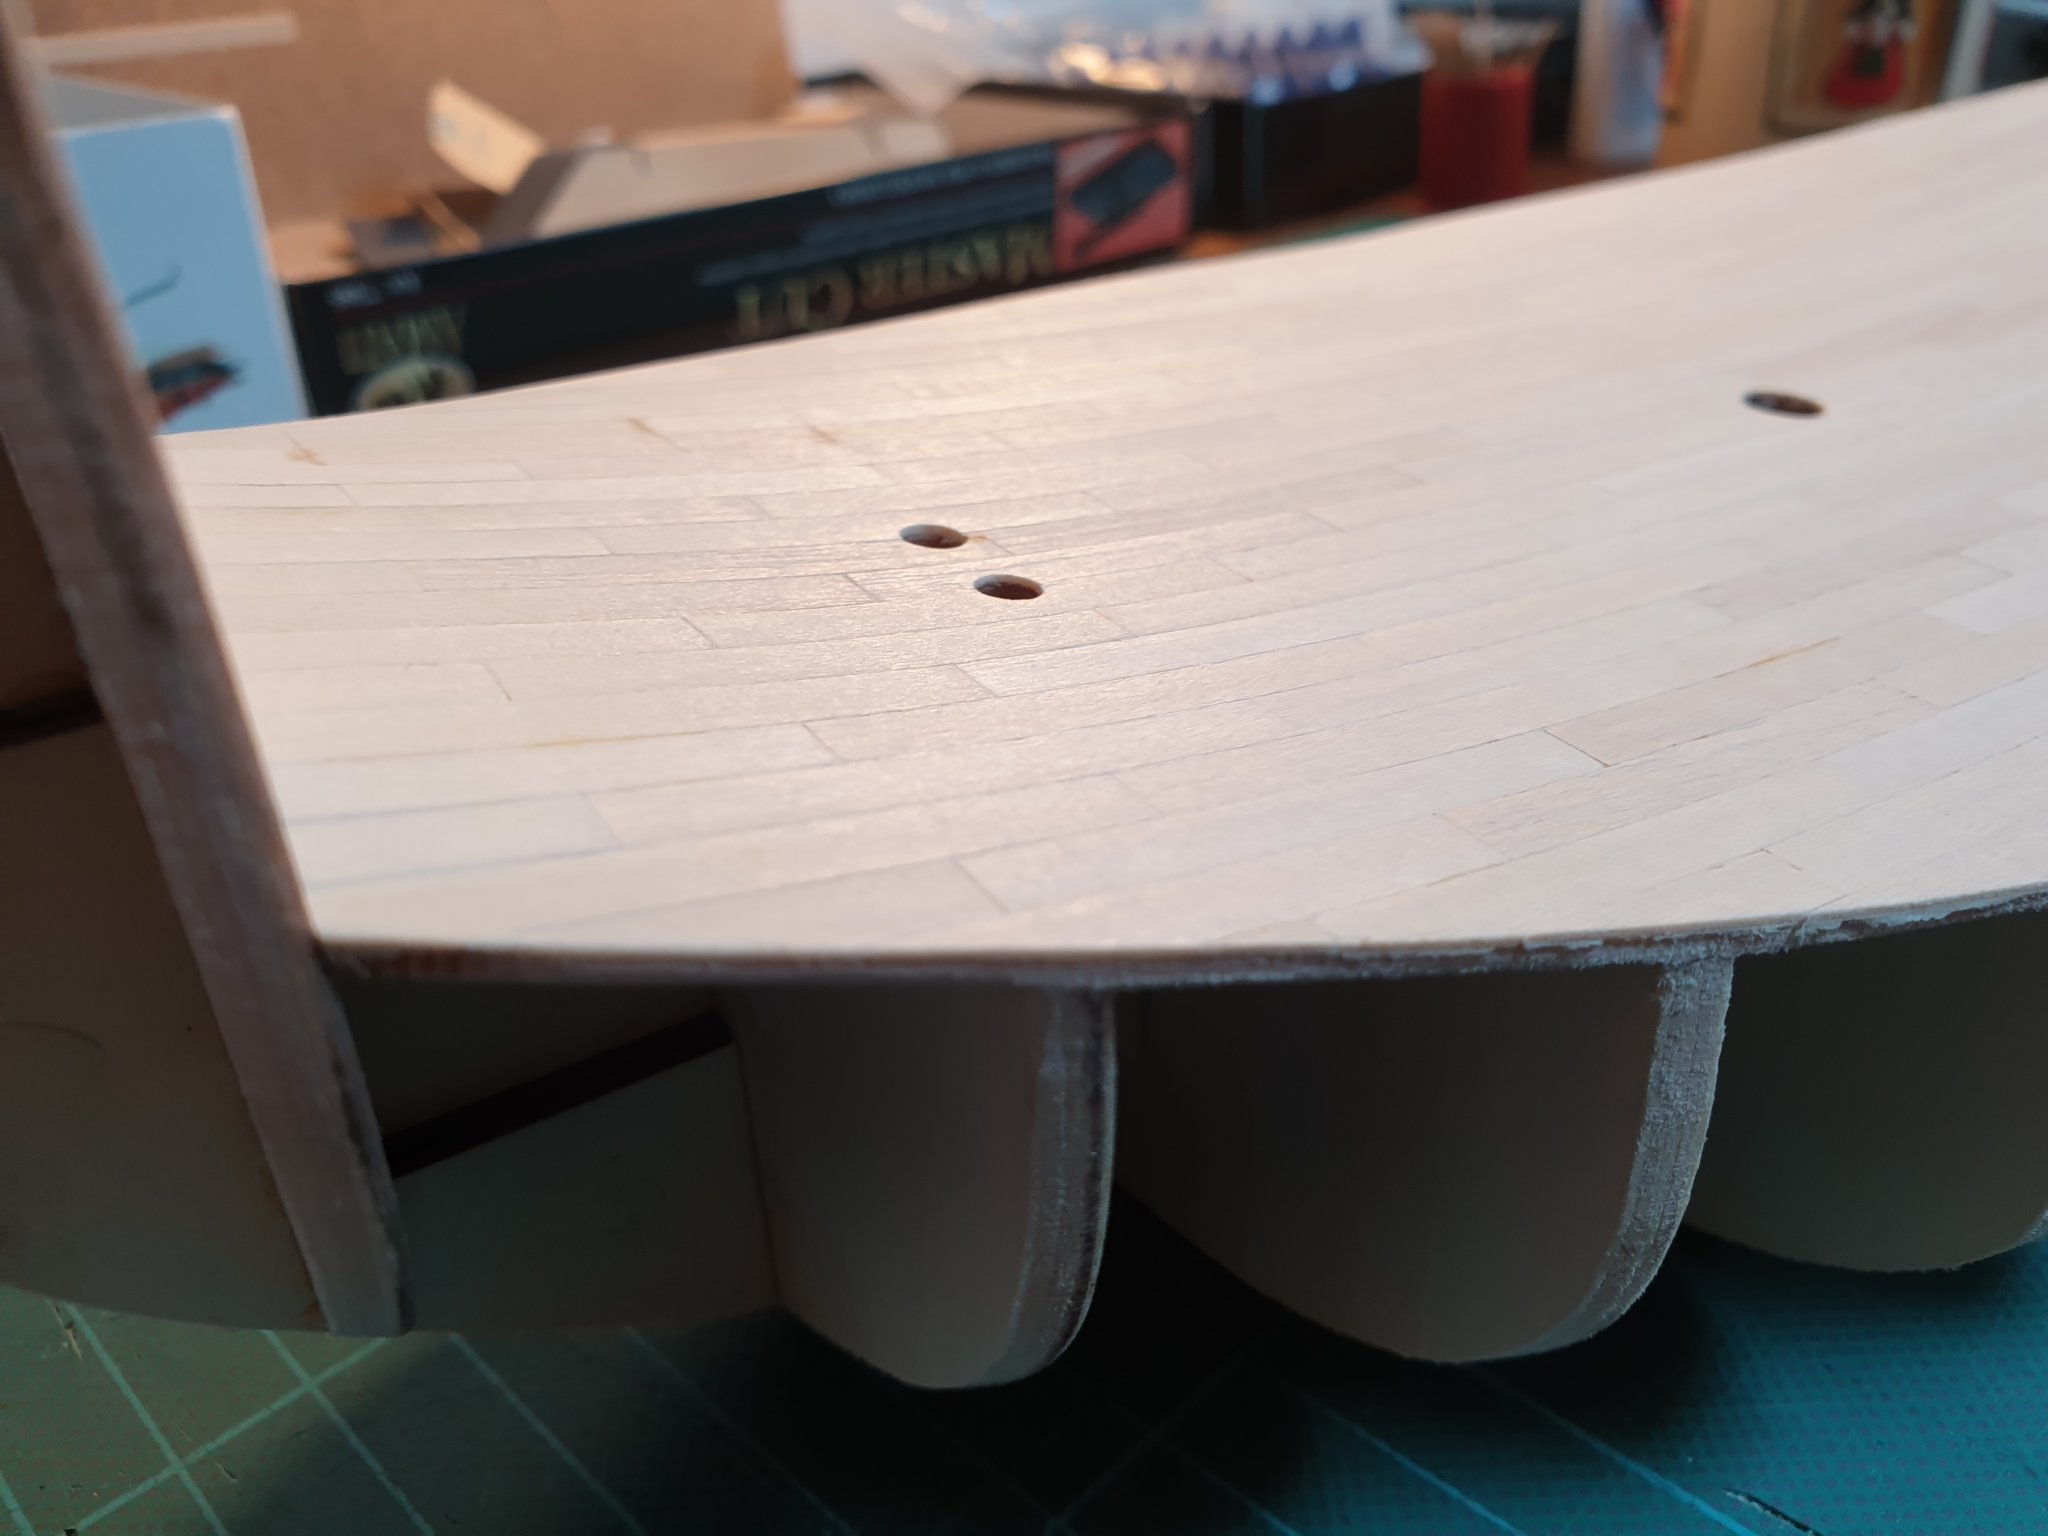
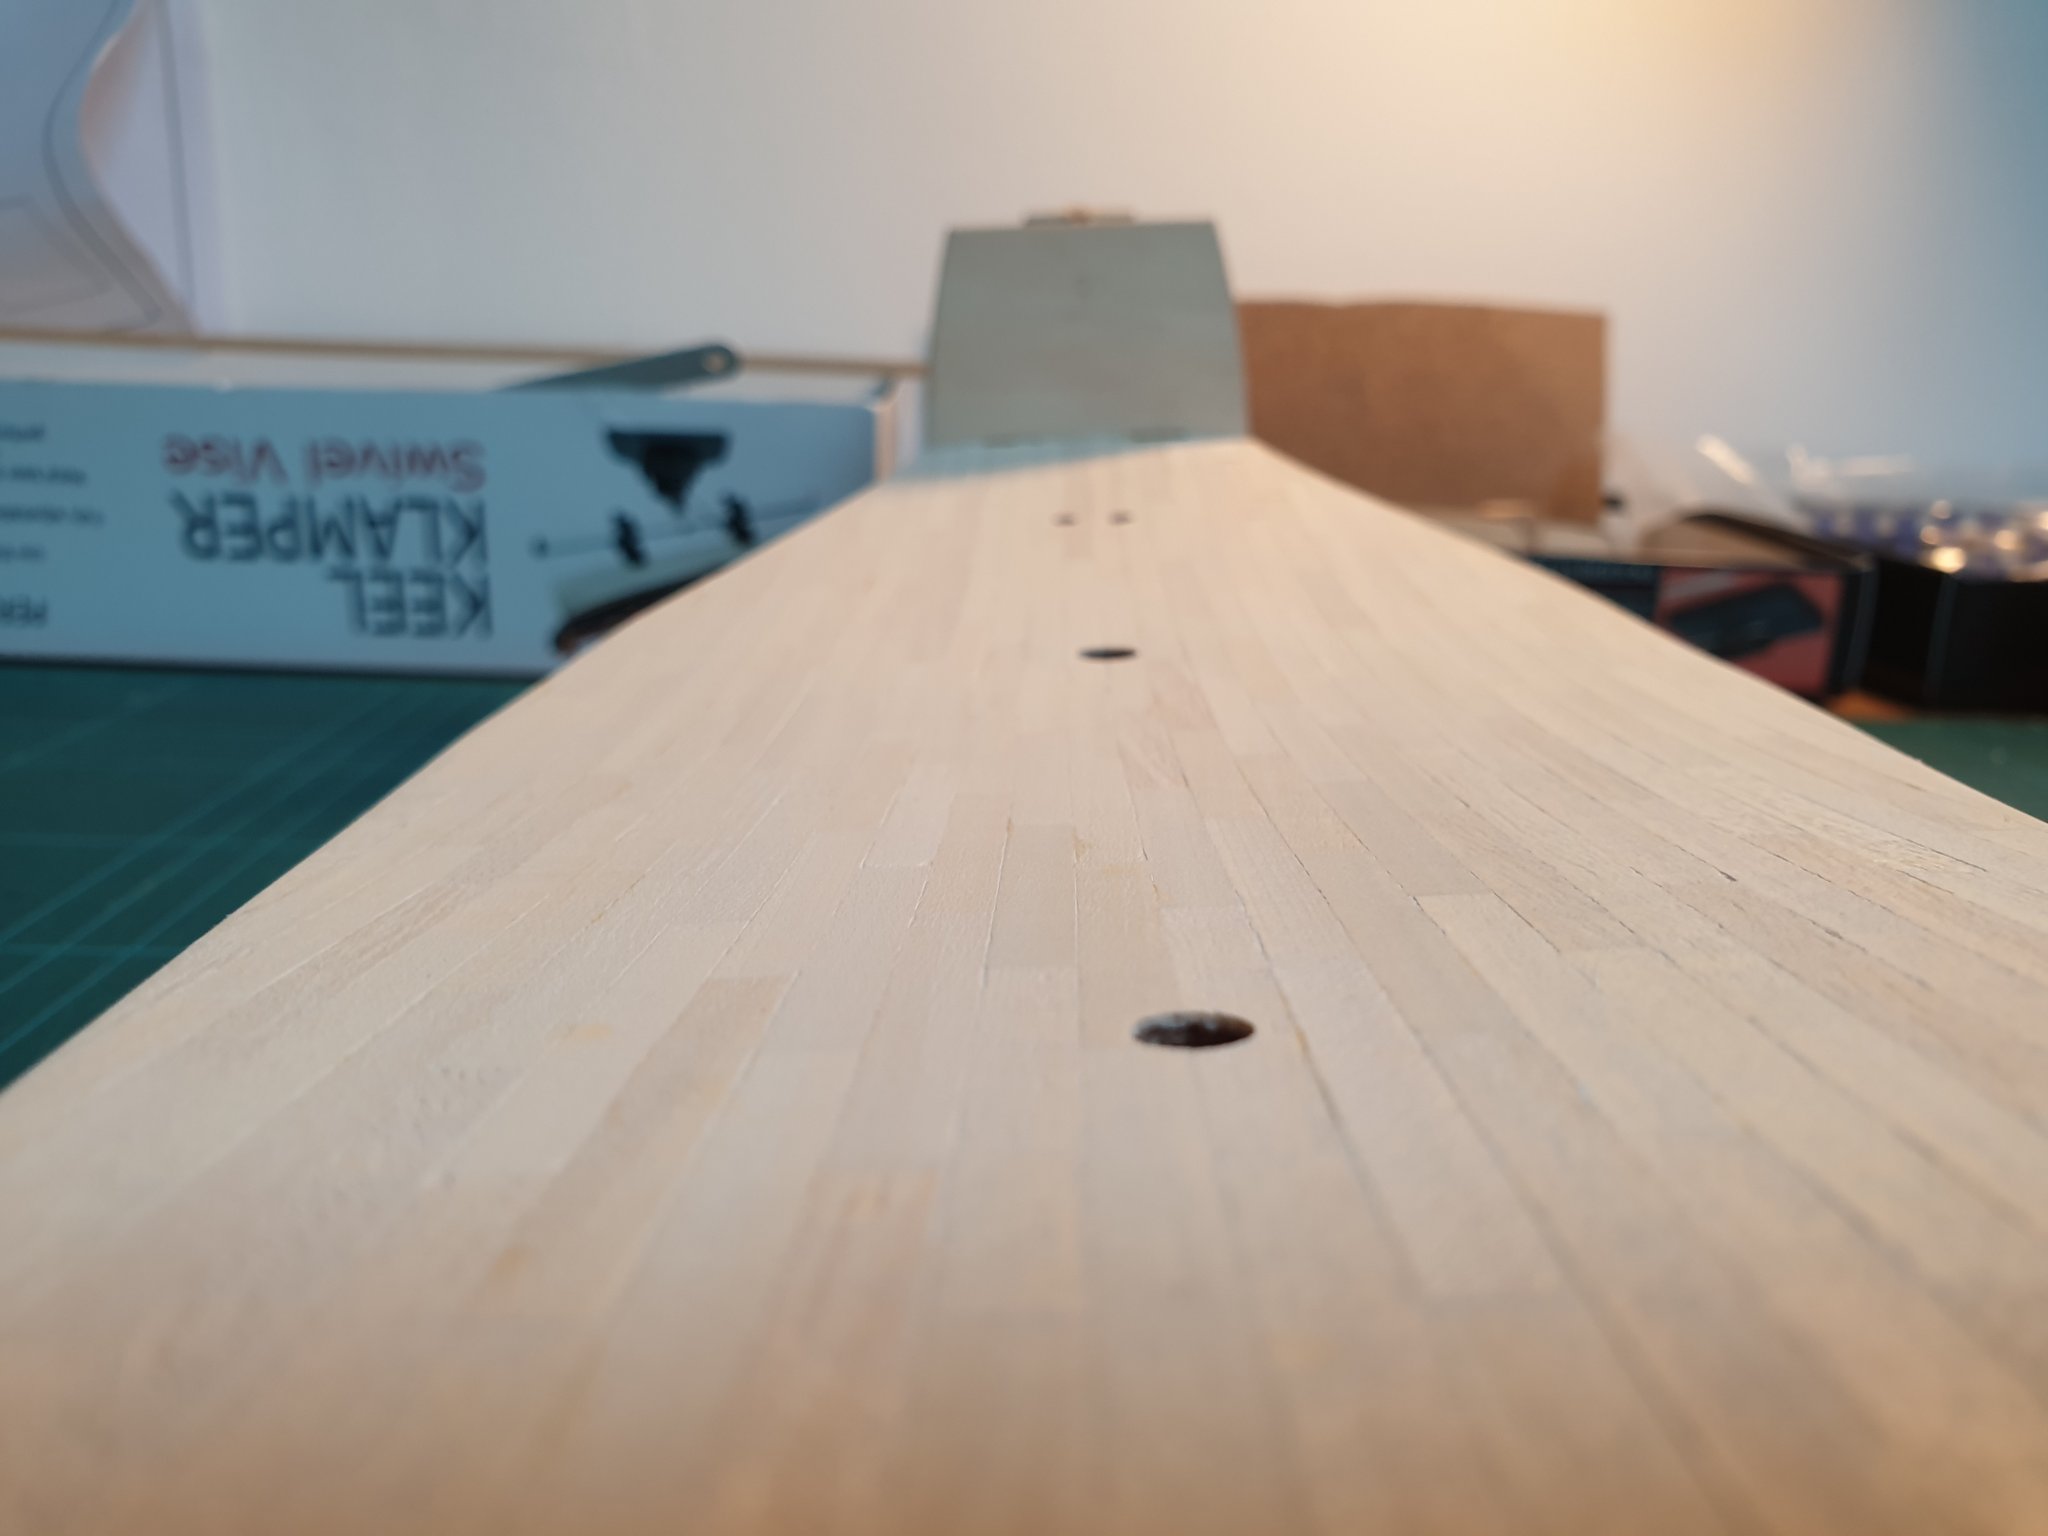
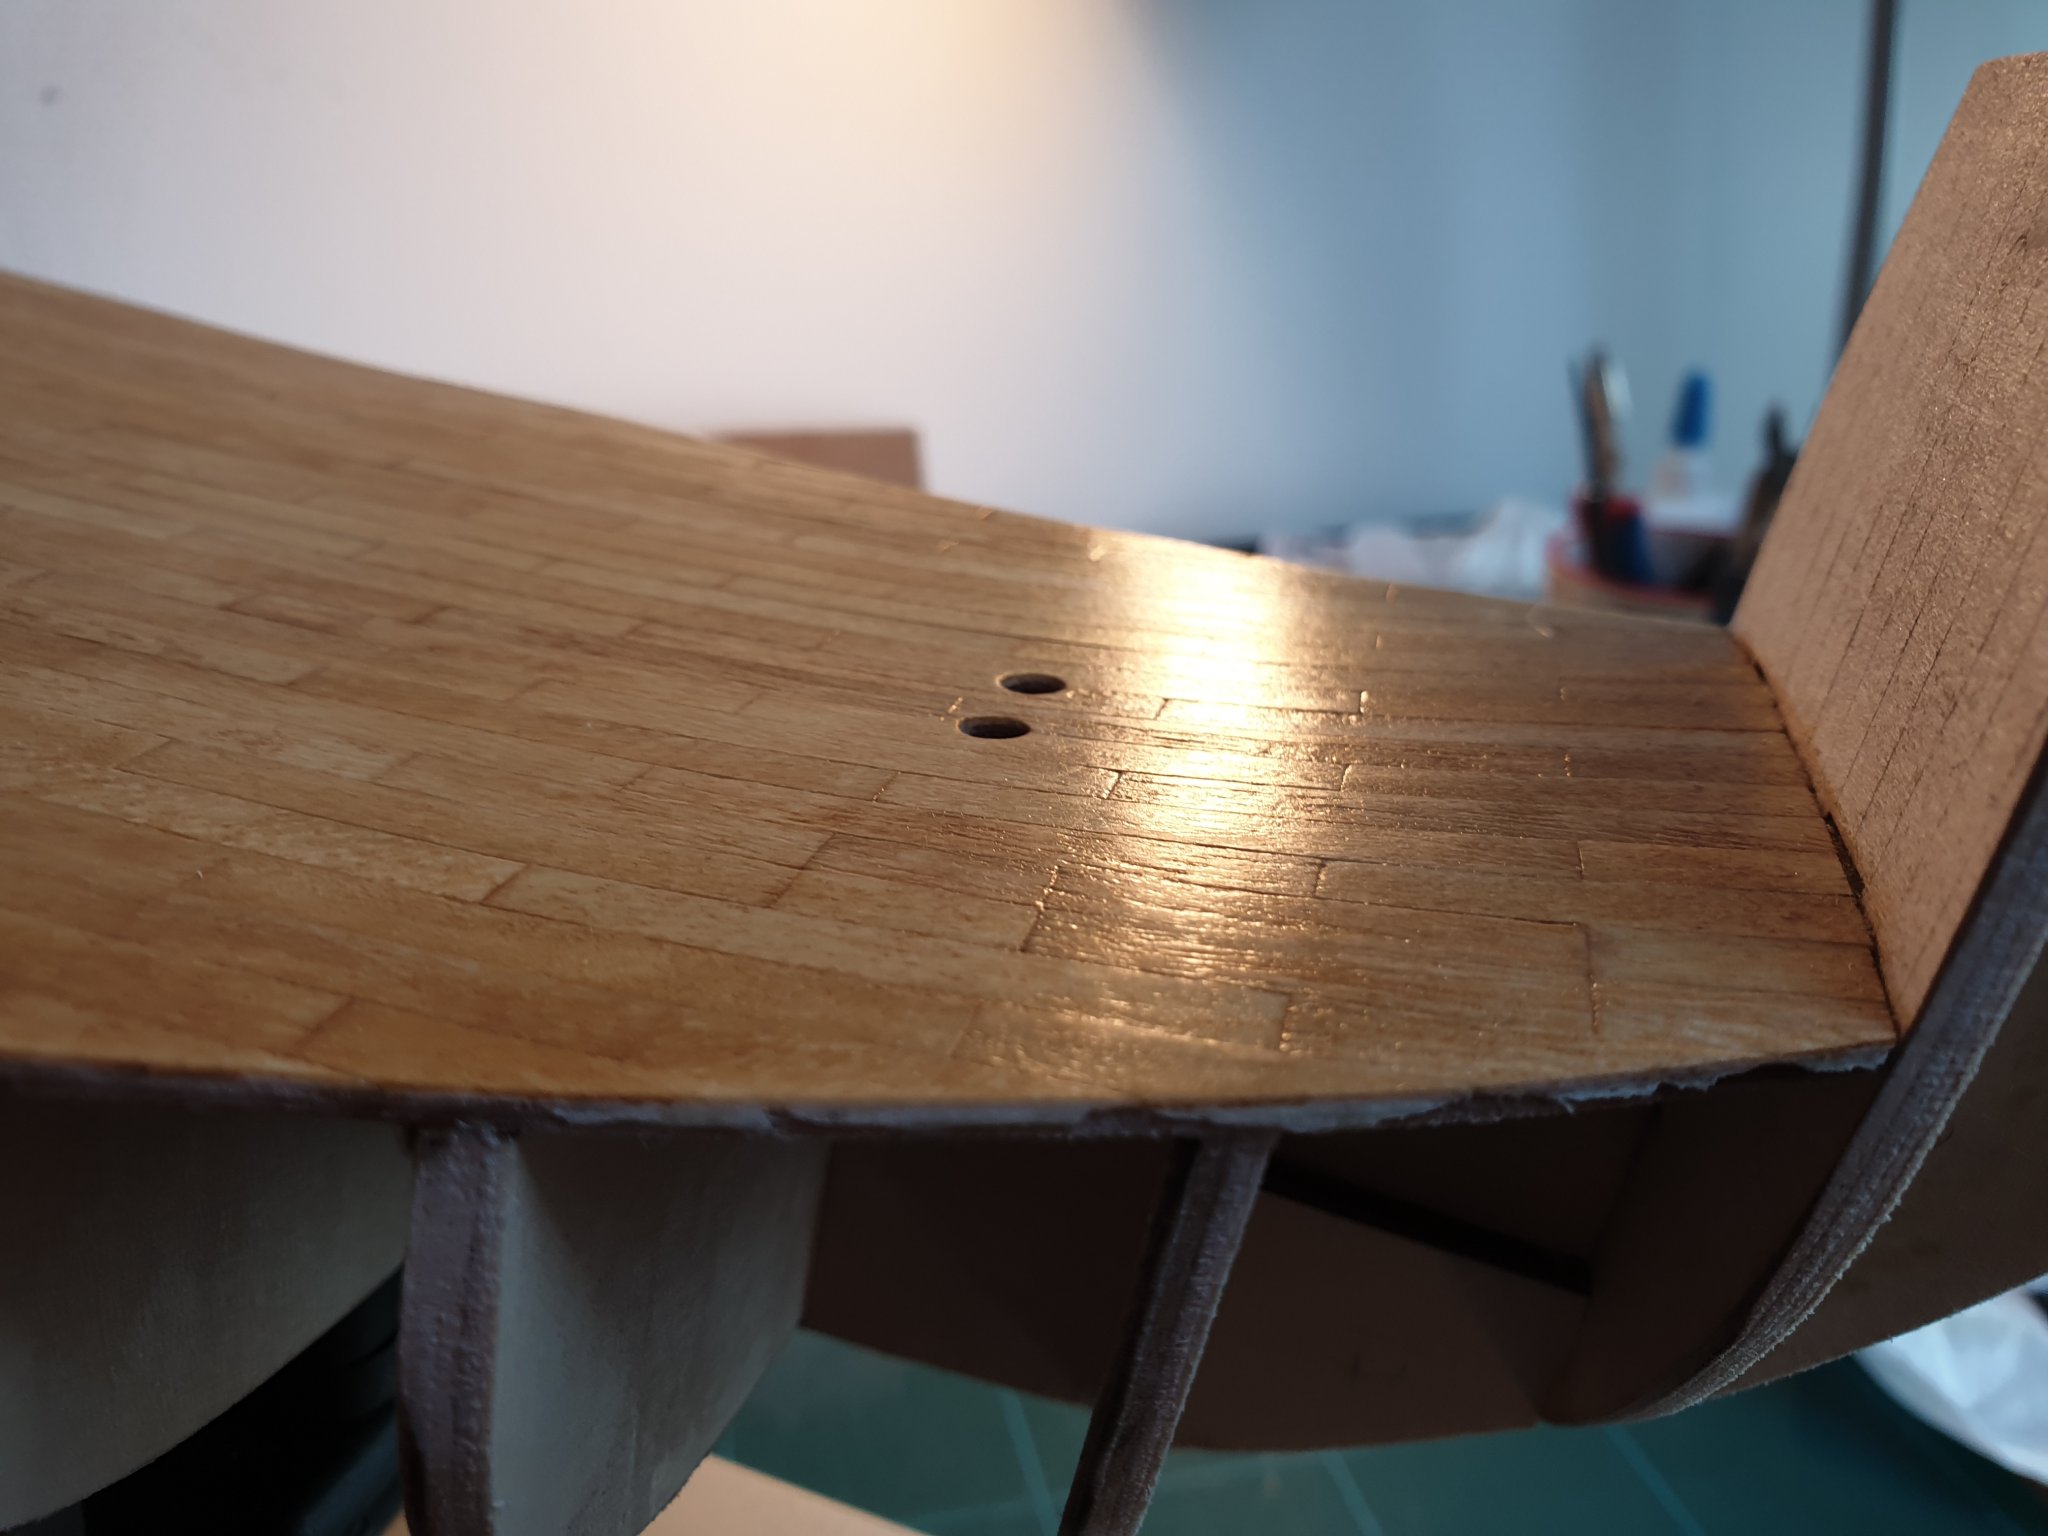
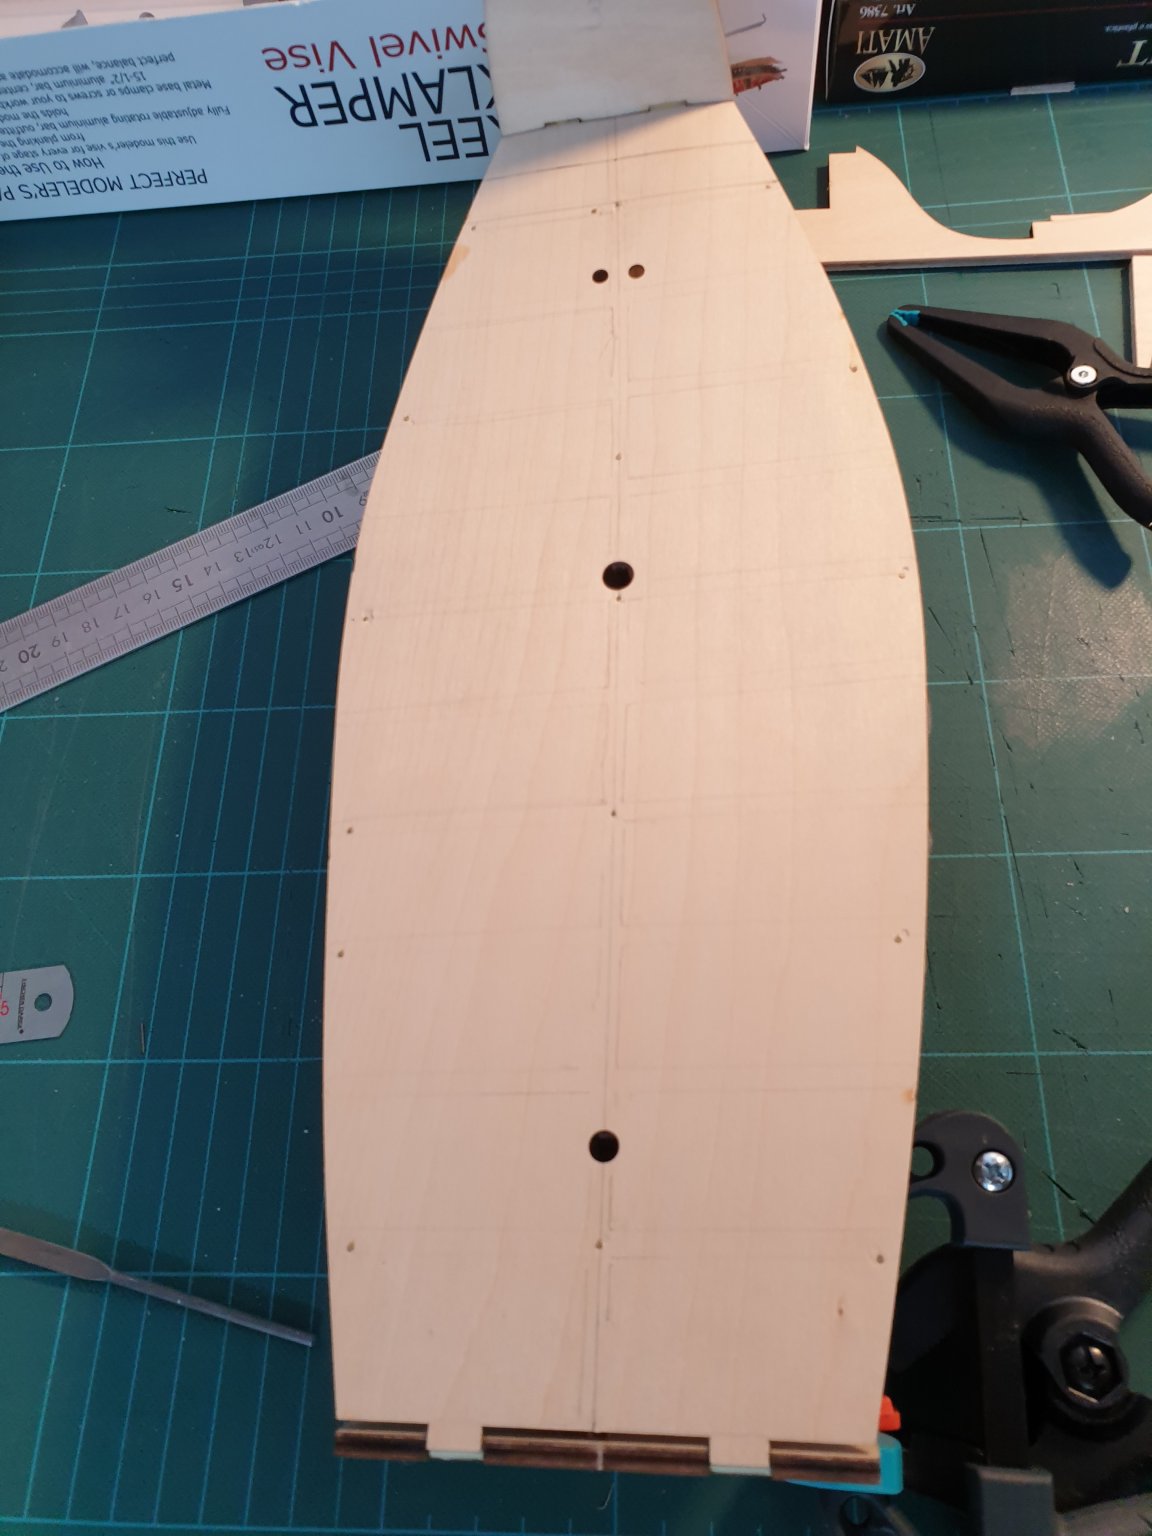
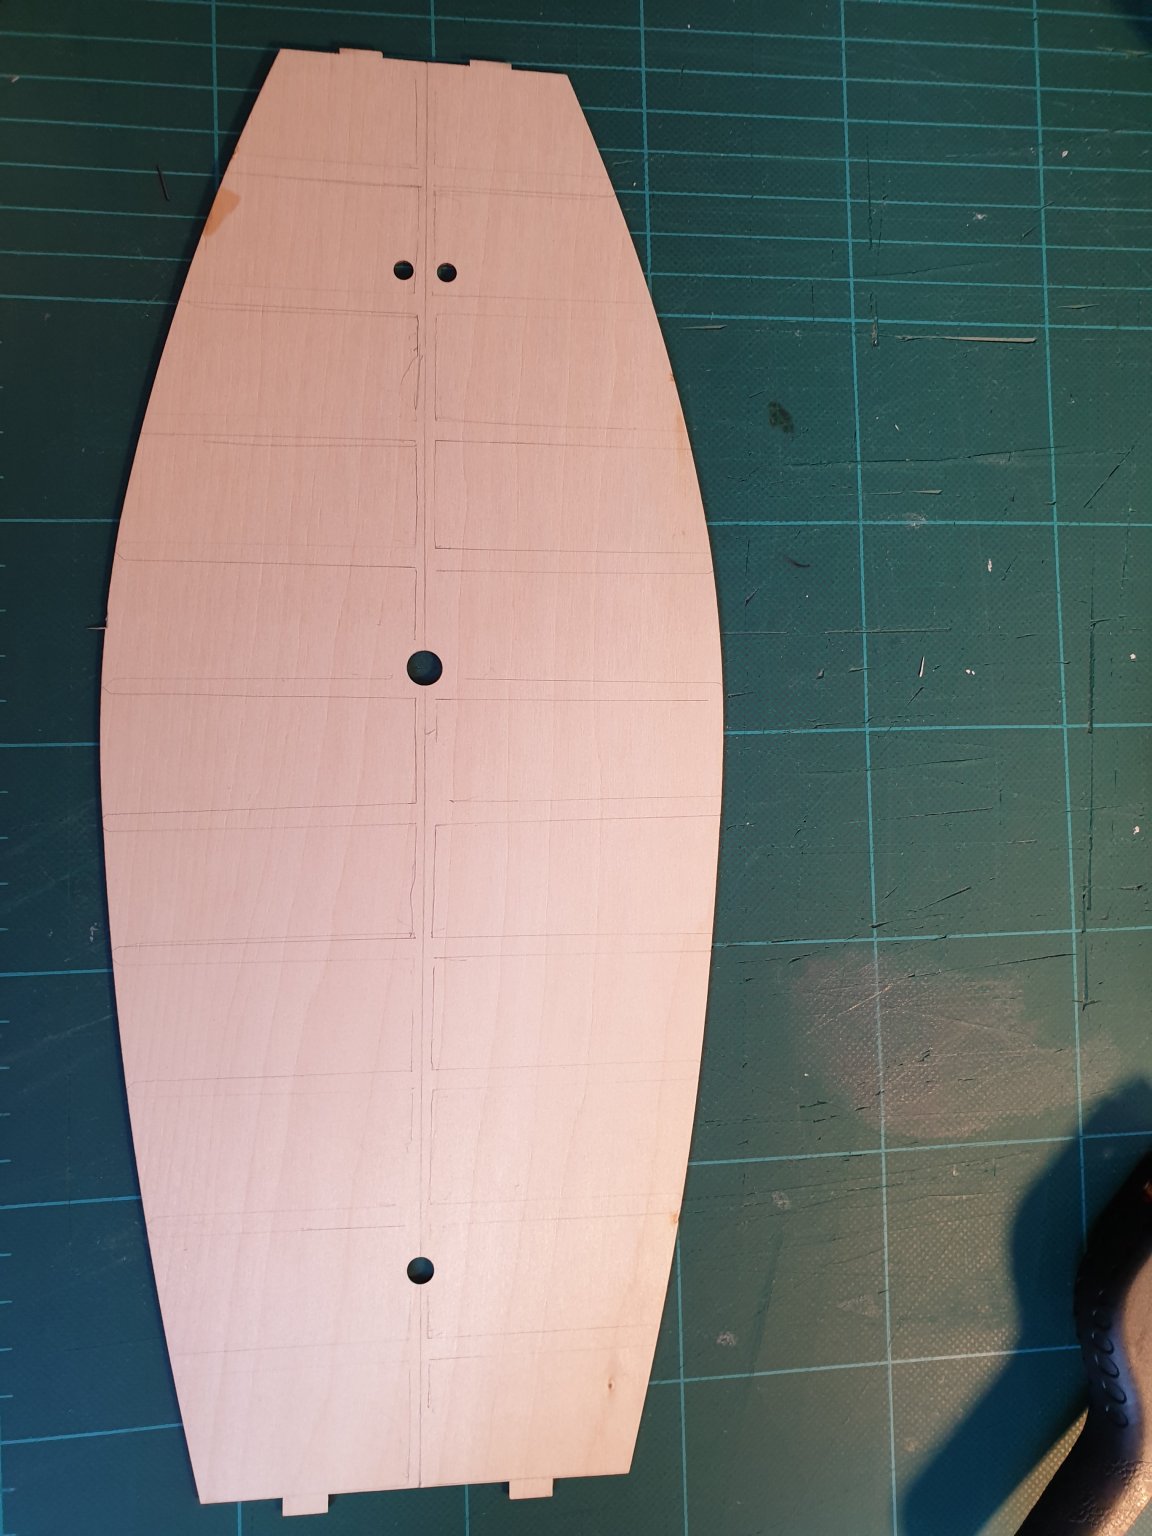
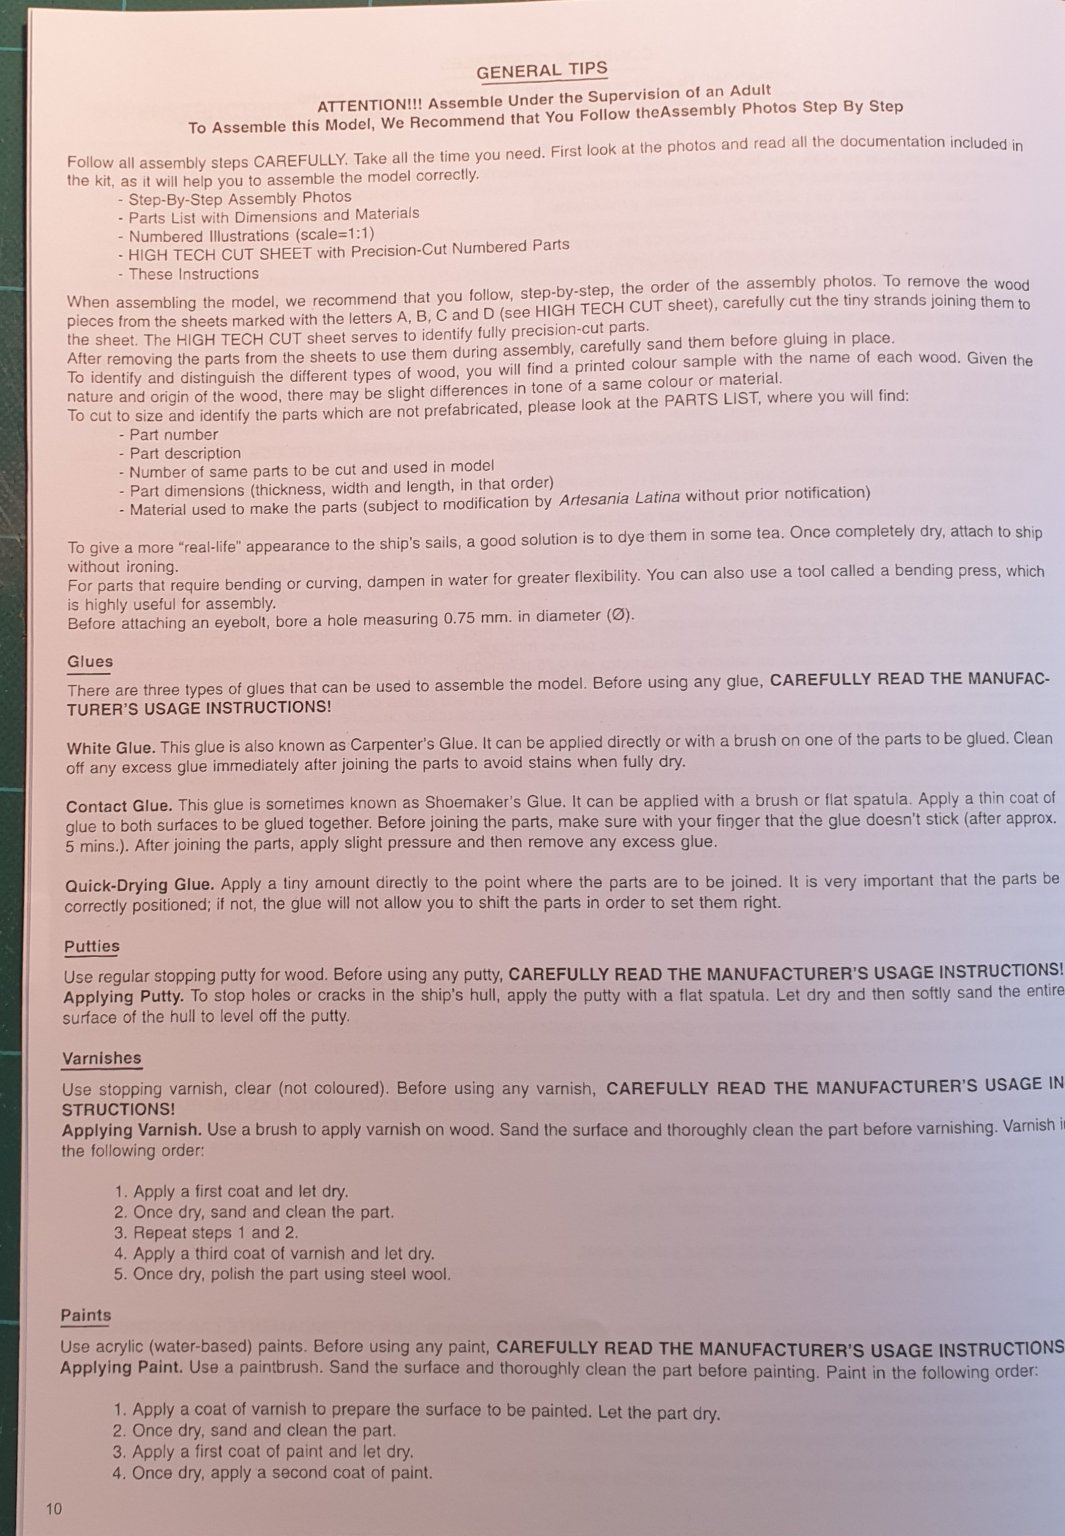
IV. Main Deck Next step : plank the false deck. I considered two ways of doing it: AL's instructions : "Take out deck nr. 20 from the wooden stabs marked with the letter “B” which has to be lined with the 0.6x5 mm Mukali planks nr. 21. When this deck nr. 20 has been lined, it will be varnished and then placed as shown in the photograph. Then line frame nr. 3 with the 0.6x5 mm African walnut planks nr. 22." I considered two ways of doing it : Cover the deck with small individuals planks (see Katsumoto Santa Maria Build log), As AL's instructions, meaning glue a single plank along the whole deck, and in addition, draw separations on it (see Moonbug Santa Maria Build Log) I decided to go with the first one, which looked the best way to get a realistic result, since I am not sure hot it would like to draw separations with a pencil... So I drew three lines showing how to start the pattern, I decided to go with a three plank shift which looks pretty nice and was the probable pattern used at the time, according to the research shared by Moonbug and his picture from "Historic Ship Models" by Wolfram ZuMondfeld hereafter. Based on the research of Moonbug (thanks again !), plank boards from this era were almost always made from oak, and in the 1400's they would have almost certainly been about 12" wide with each plank approximately 12' long, which corresponds to 42mm at this scale, so I went with that length. I could have done all the trenails marks also with a mechanical pencil, but finally abandonned the idea since it would have been pretty tedious, and since it's a first build it already takes a lot of time and it is already complicated enough for me. I cut all the planks with the mastercut tool, which is to my mind very practical to do precision cuts and make the planks match very well between each other: Around the holes : First I glue a plank over a half of the hole, Then I remove the main part of the plank covering the hole with the knife, Finally I finish with a half-round file folowing the shape of the hole from the main deck, Repeat the operation with the adjacent plank covering the rest of the hole. One one of them I had a an issue, I tore off a part of the glued plank with the file, so I decided to cut a small piece, glue it to fill the empty space and re-shape it with a file : At one moment I did a pattern mistake on the front right area (pure lack of attention...) and I corrected it as I could, by re-cutting planks and filling gaps with wood paste. Filling the gap will prove ineffective after varnishing still they will still be visible, but it's really difficult to notice it at a first glance and it will be hidden later by the front deck. For gluing the planks, I first used clamps on each of them, then realised that it was not necessary on the flat portions of the deck. Indeed the glue (Titebond II) has a strong first tack and is most of the time enough to maintain the board in place ; which allows to accelerate the process. Once all the false deck is covered with planks, I cut them on the side to follow the borders of the deck and I sand the surface using 500 grit sandpaper, then 1000 grit, then 2000 grit and finally polish with steel wool gauge 000. Varnishing process: I stained it with light oak color stain (La teinte antiquaire chêne clair, Libéron). I fixed the stain with 'fondur' (Libéron), I sand with 1000 grit sandpaper and polish with 000 steel wool. I coat it with three layers or clear satin varnish (Syntilor, polyurethane based) Between each layer I use 1000 sandpaper and 000 steel wool. Here is the final result :


.jpg.51661eb5730509485a5d94a507c41ef7.jpg)


-
Thank you very much Bob for your answers, pretty encouraging ! Your Pen Duick looks great !
-
Hello Allen, Sure, I just started the log : It's cool that you are doing the same ship in the same time, which scale is it ? Do you intend to do a log as well ? If so could you share the link ? I would be pretty interested to see how the billy boat kit looks like compared to the artesania latina one.
-
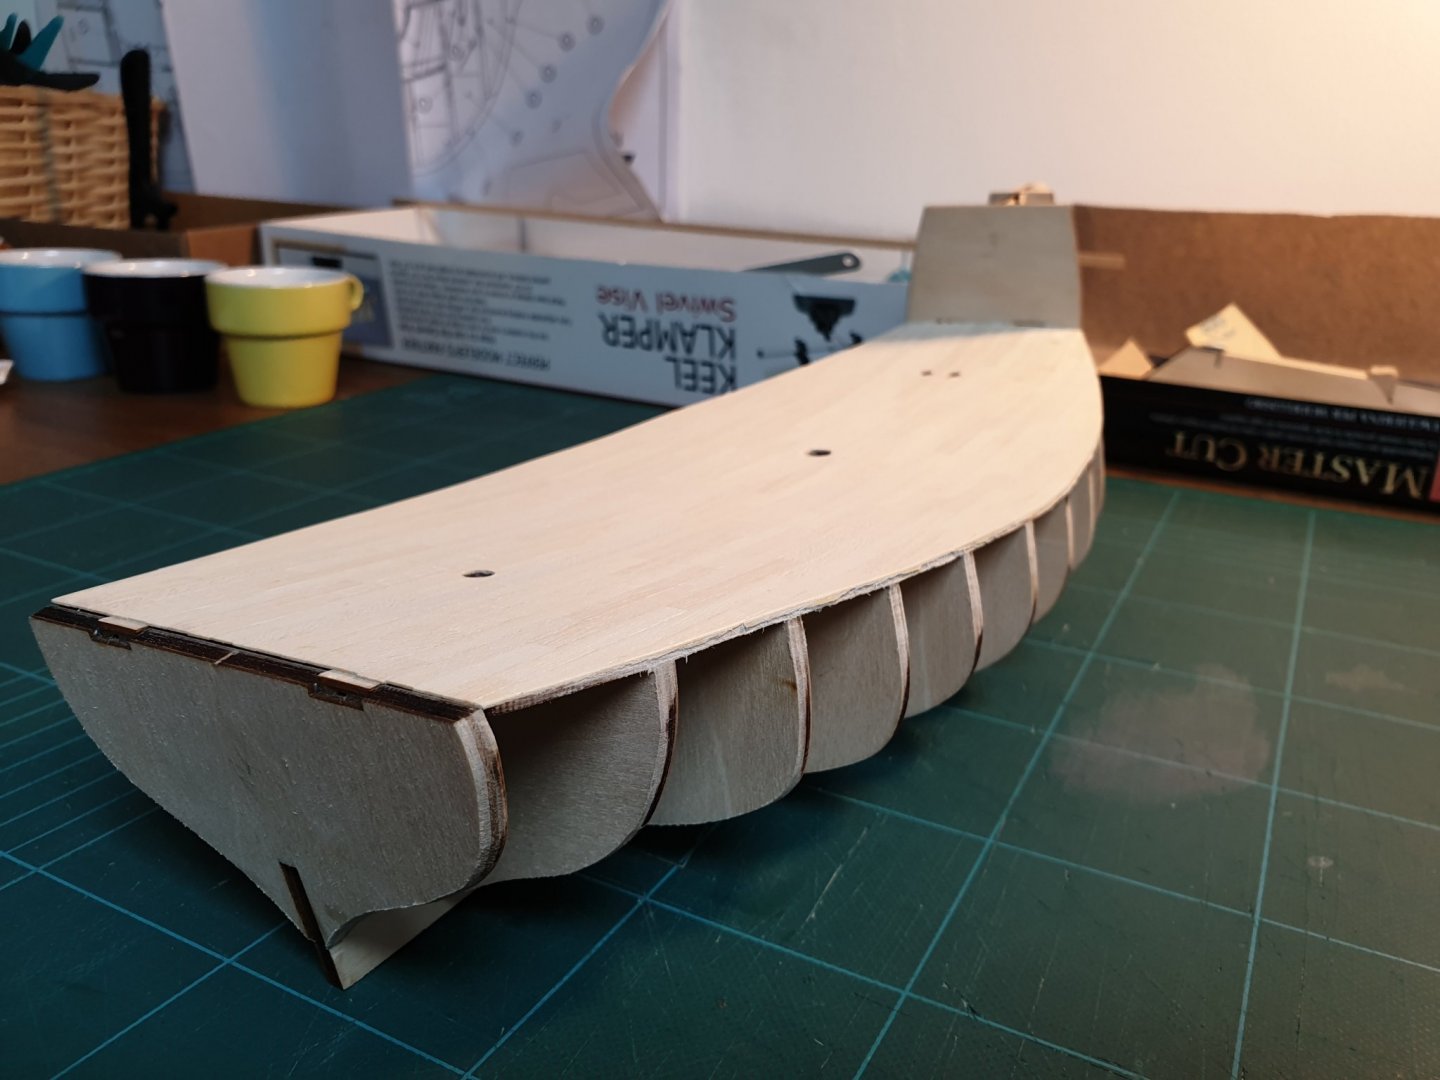
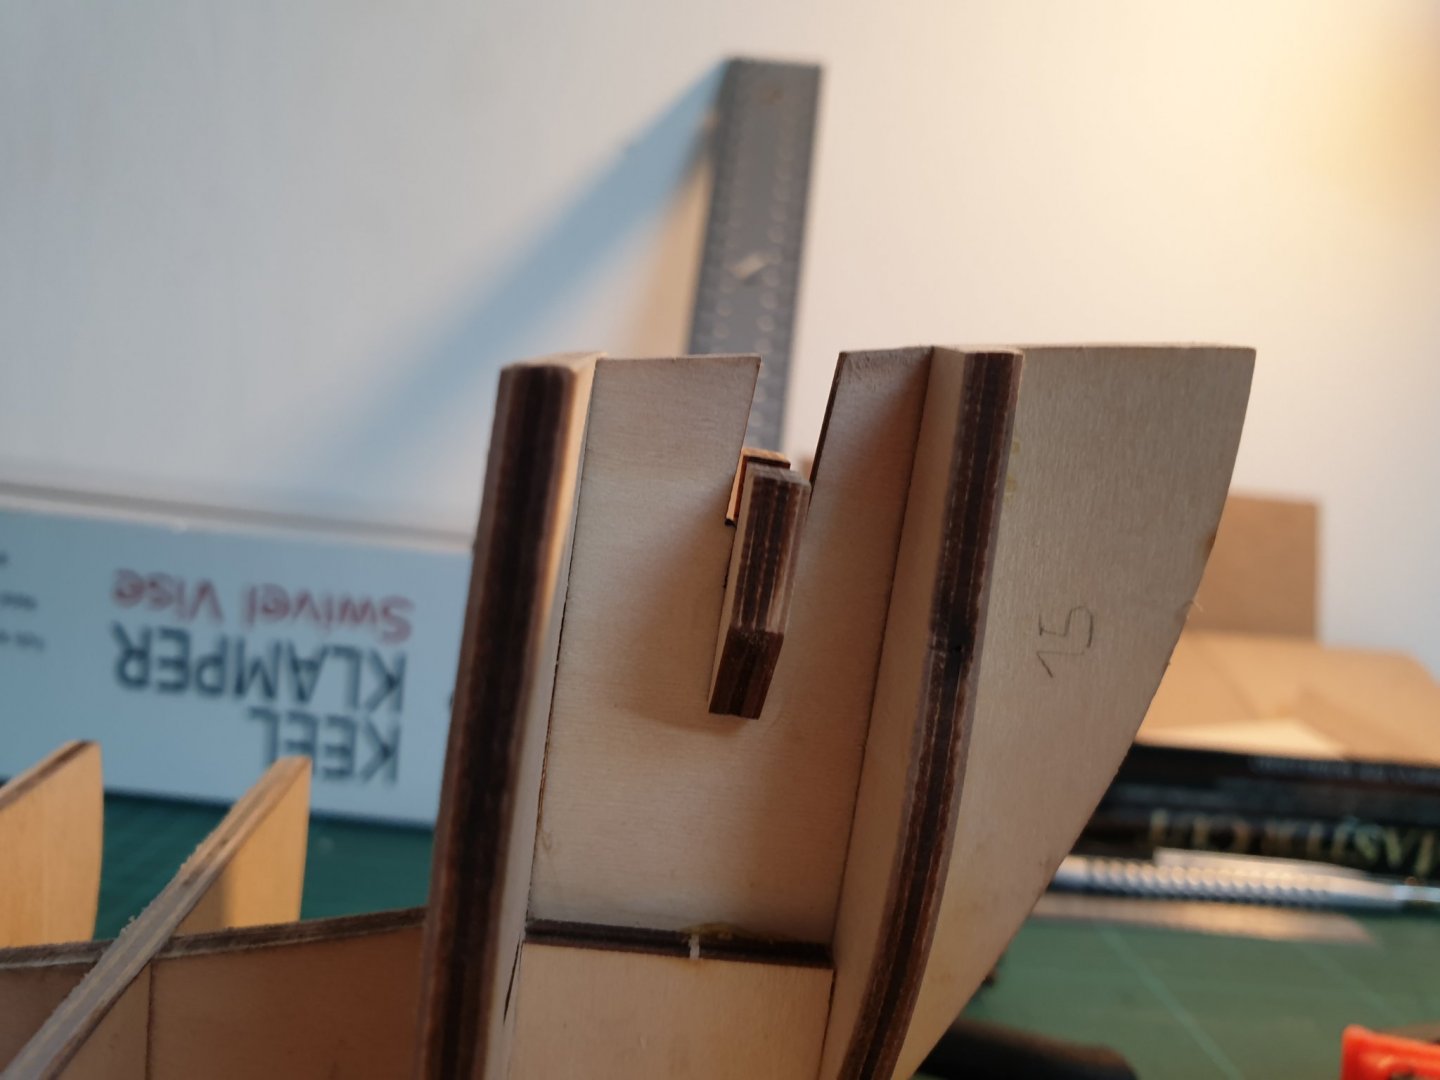
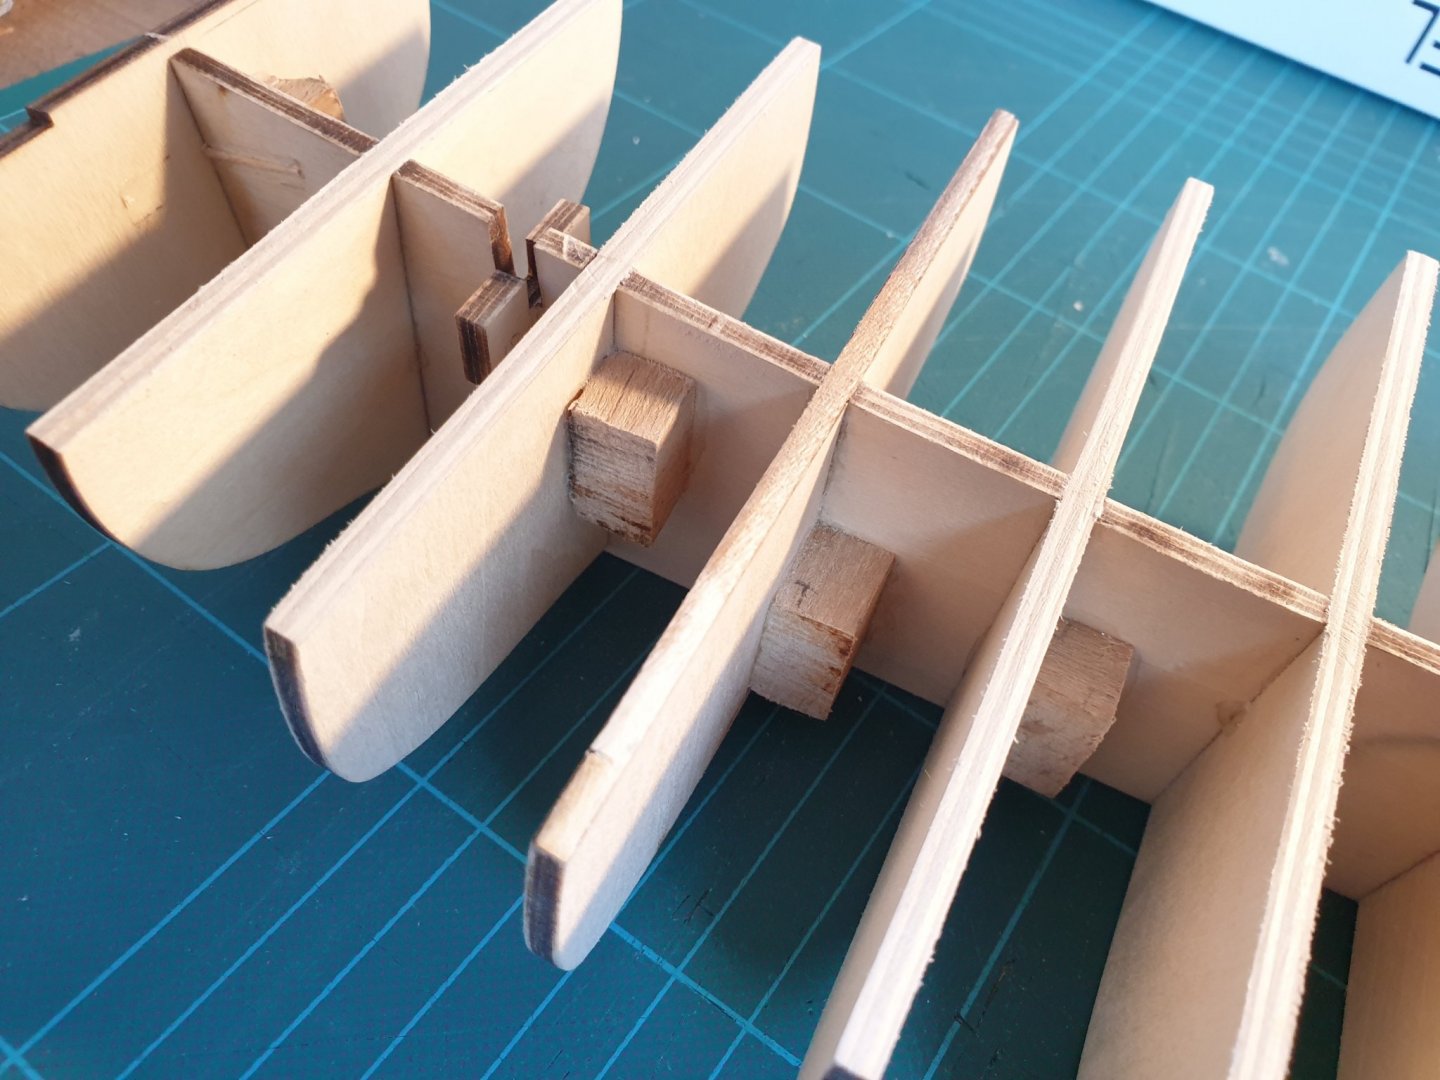
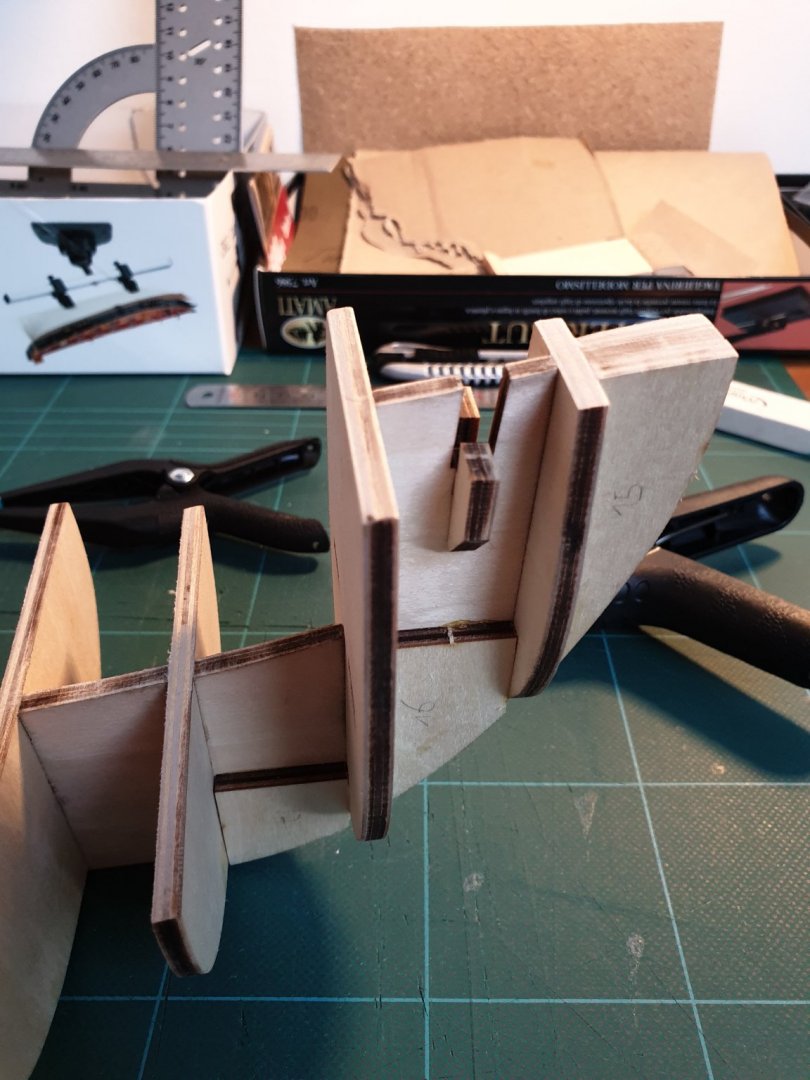
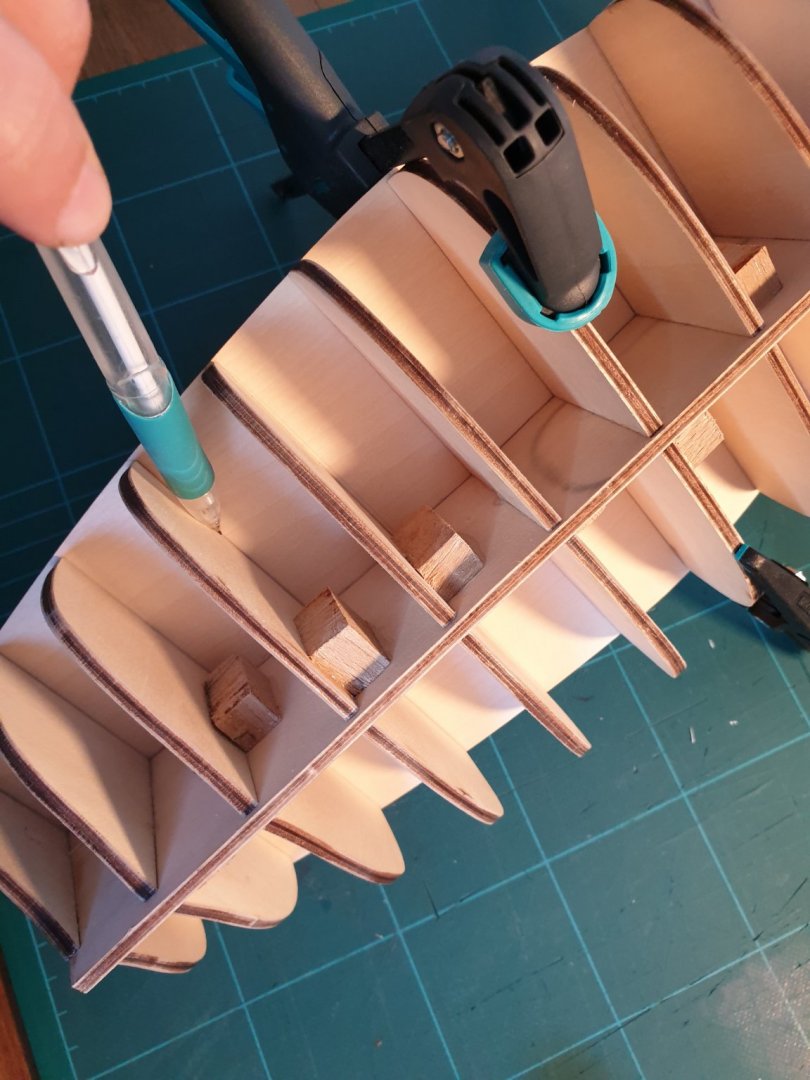
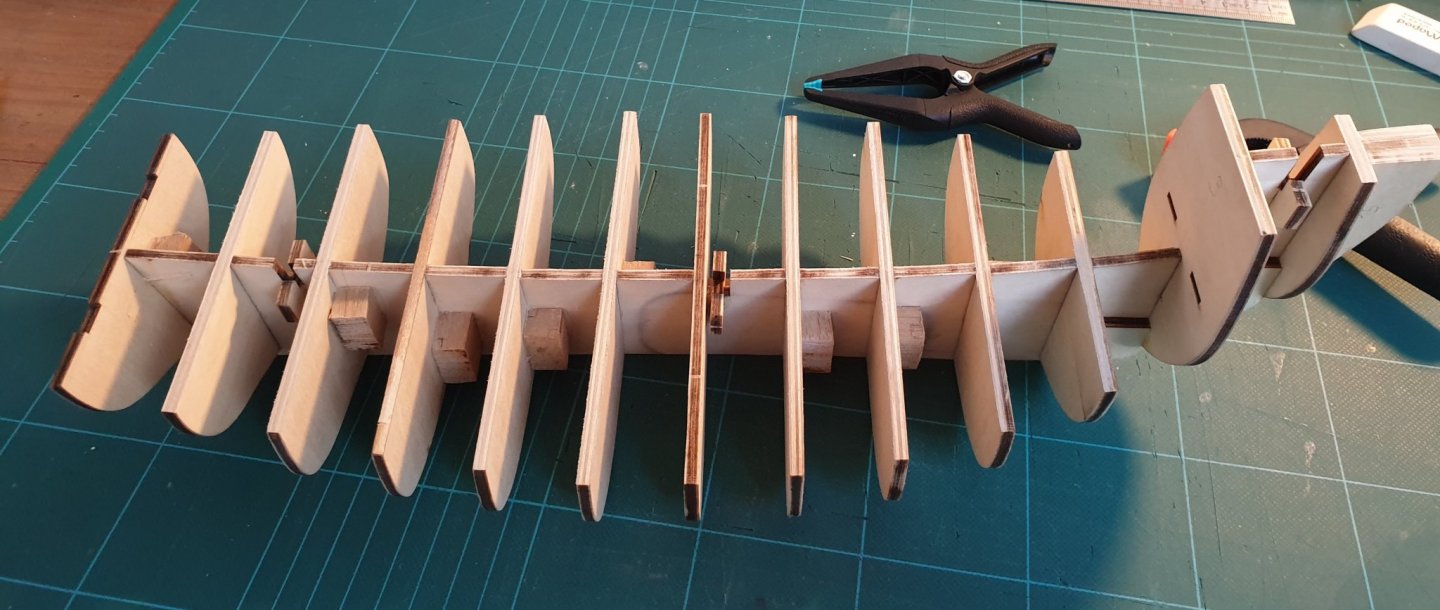
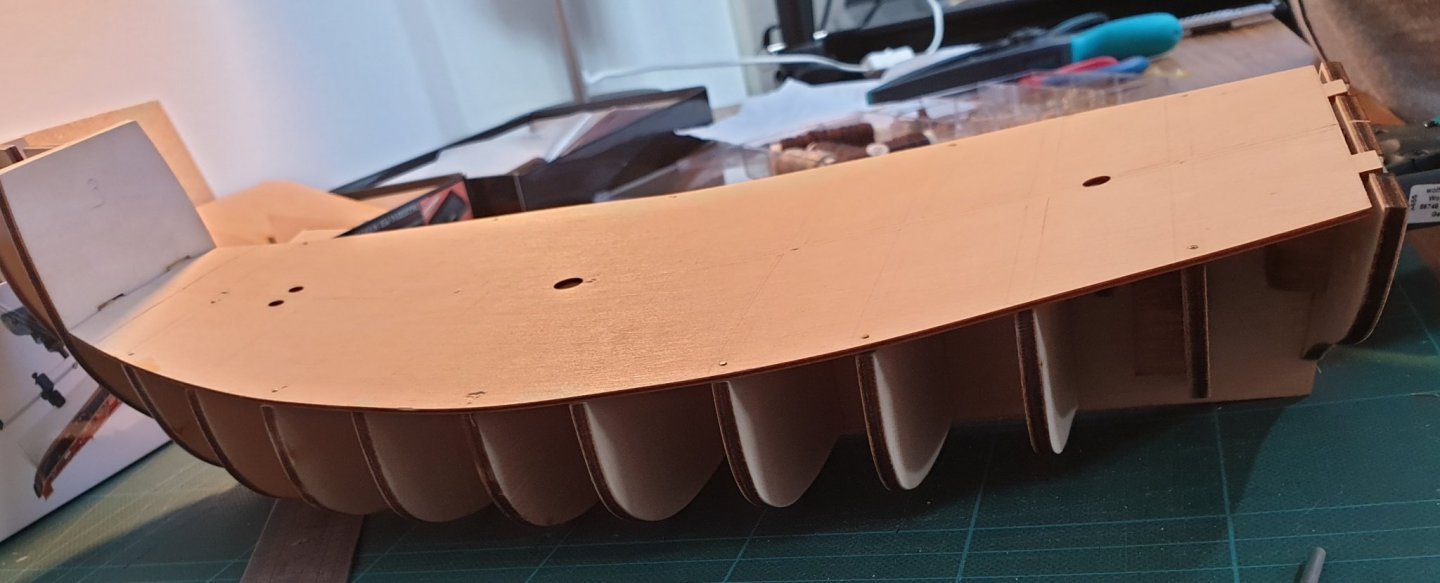
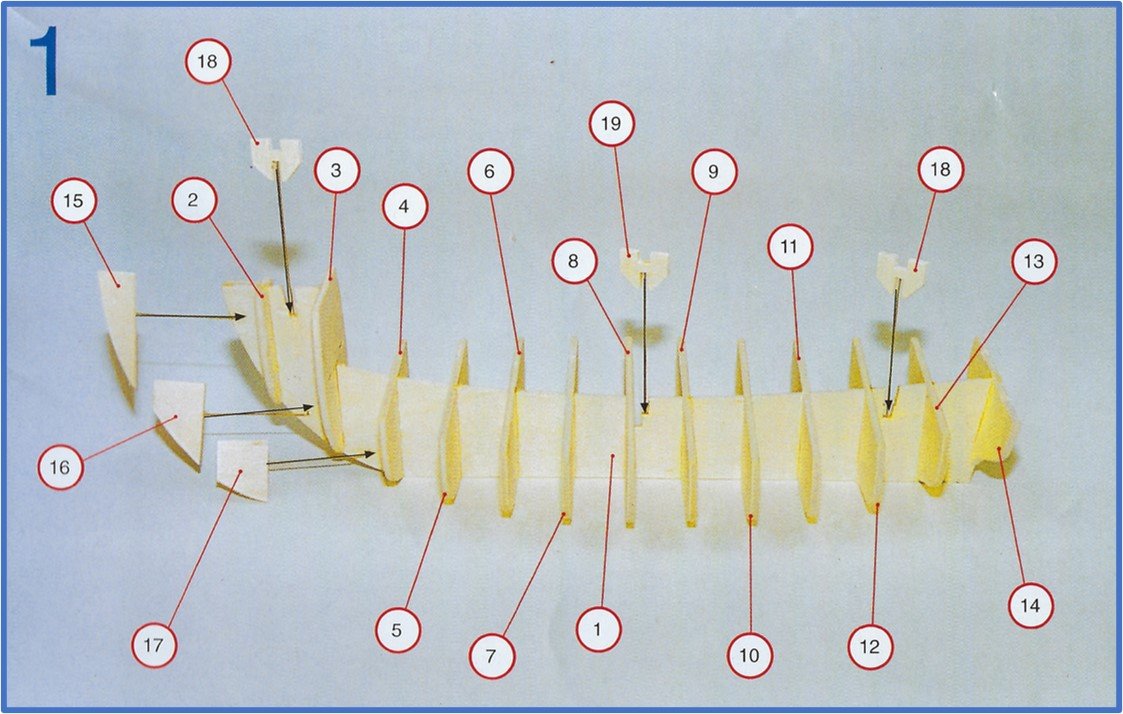
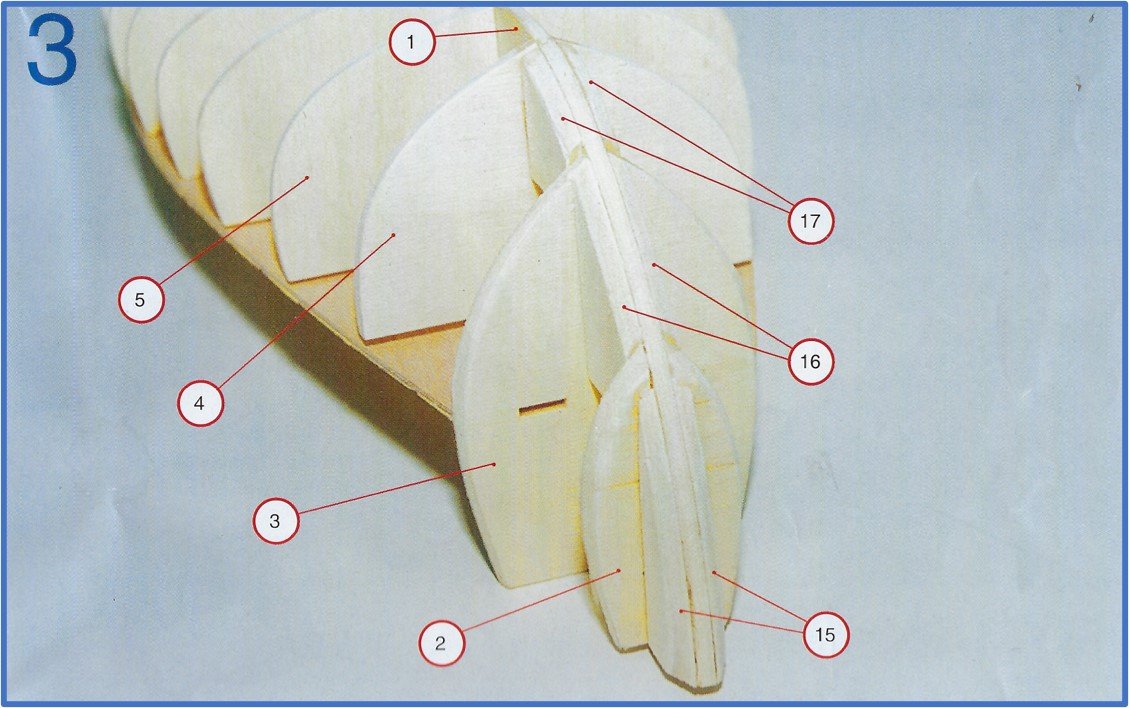
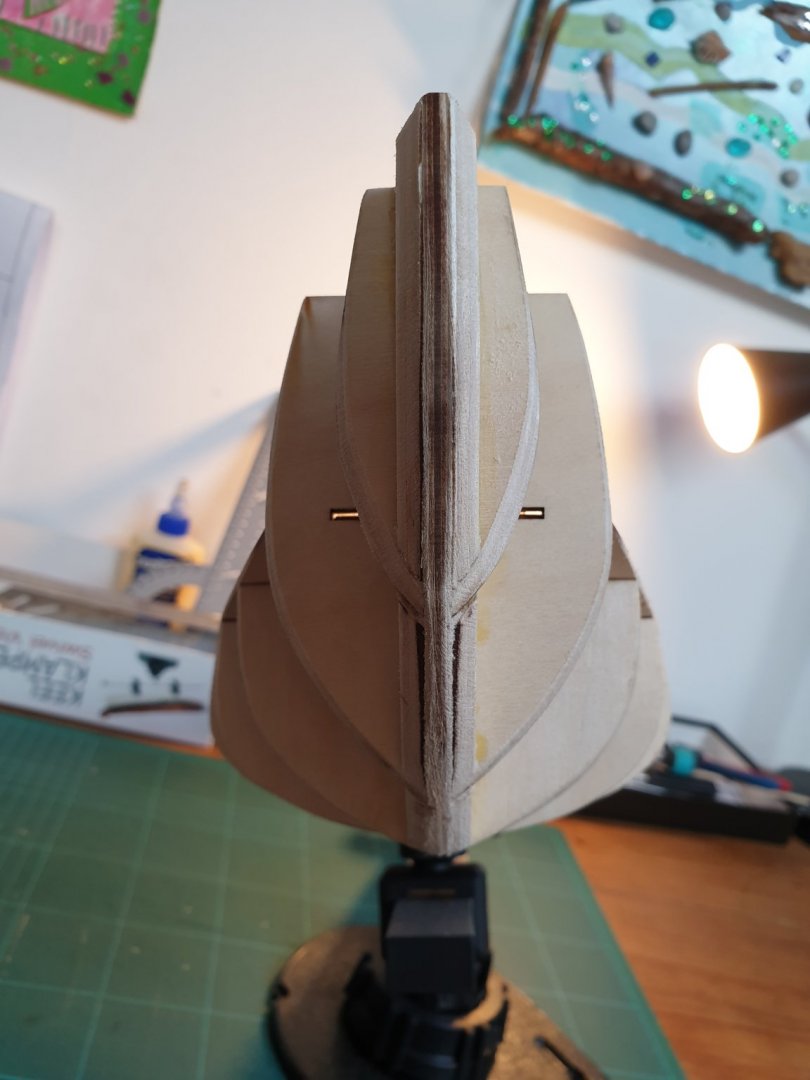
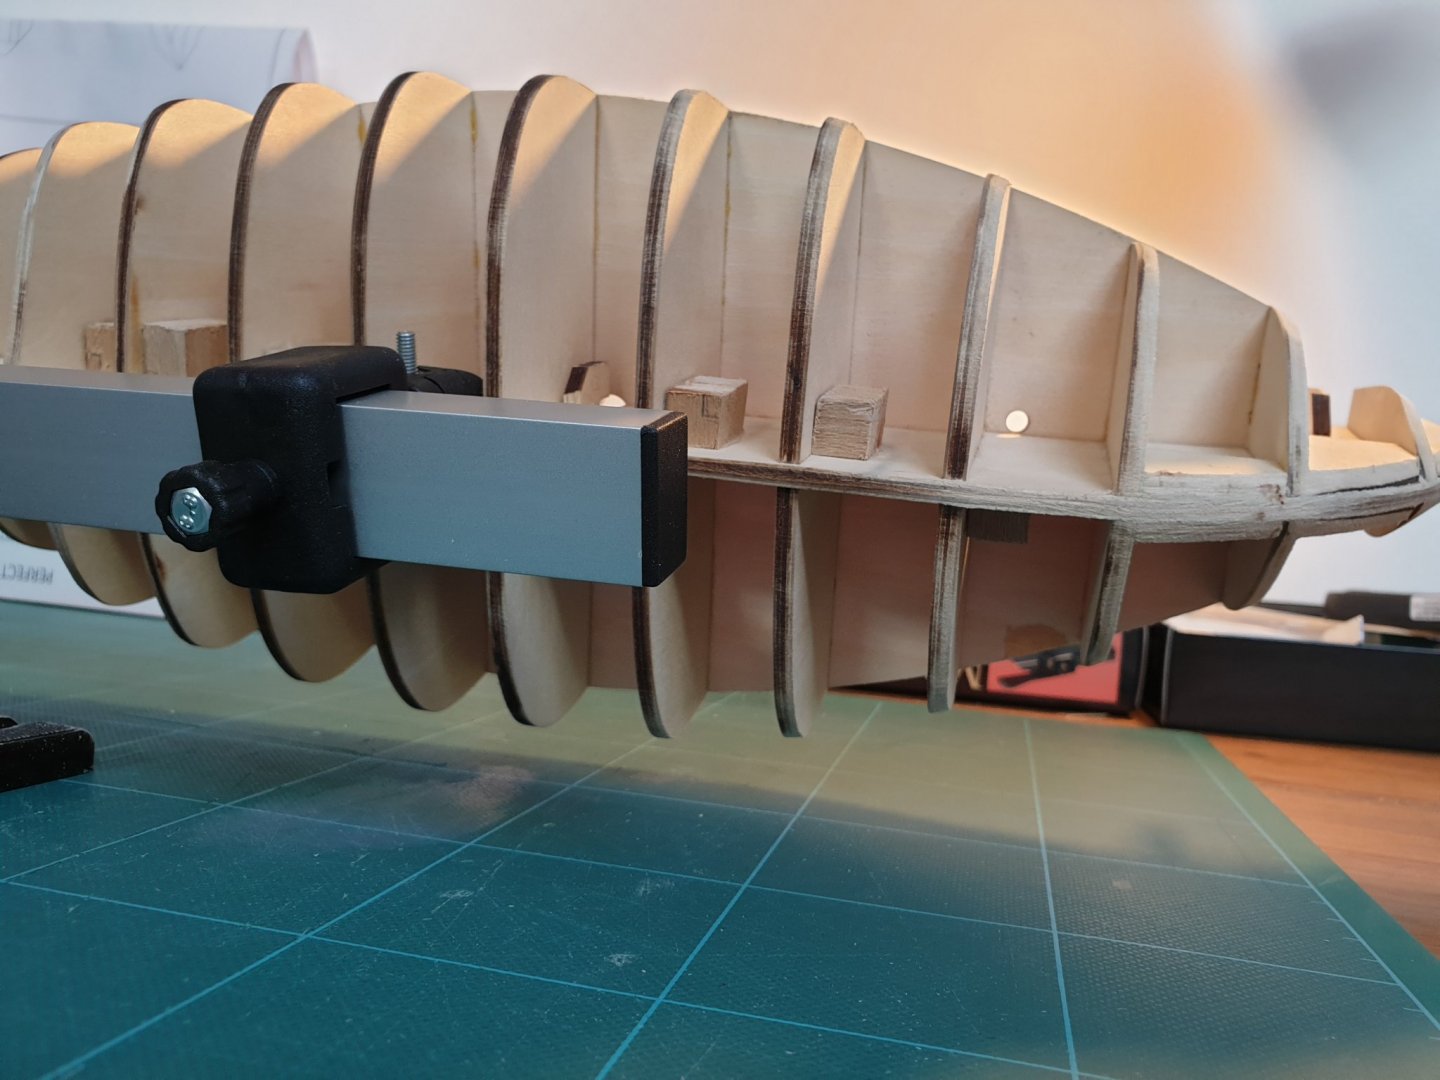
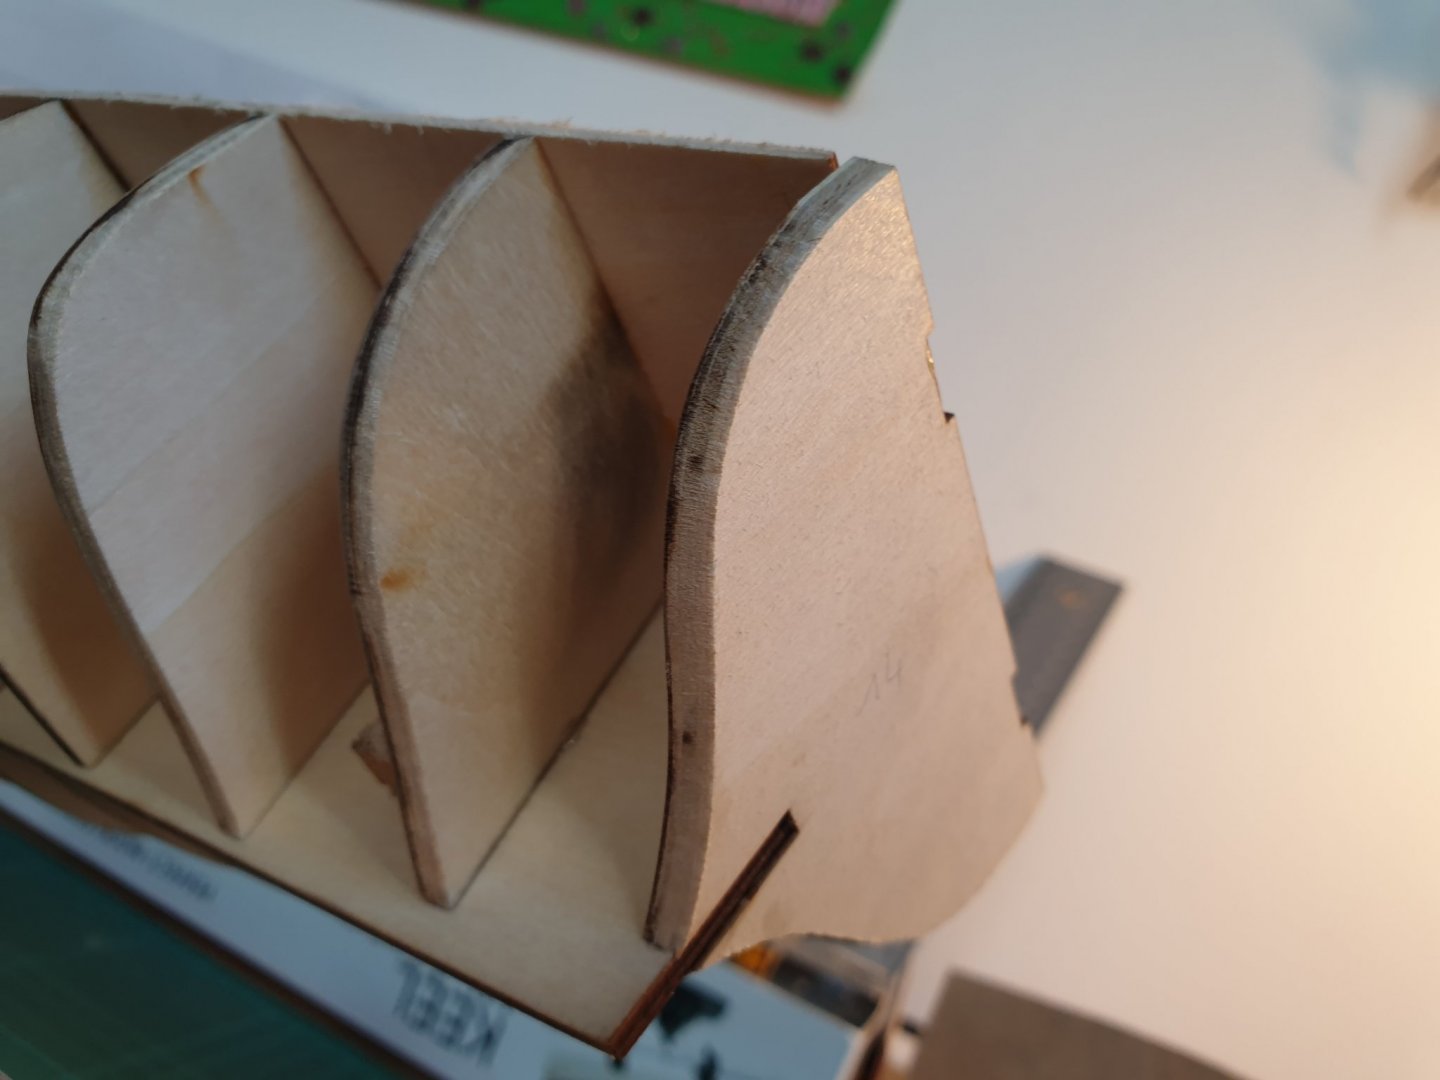
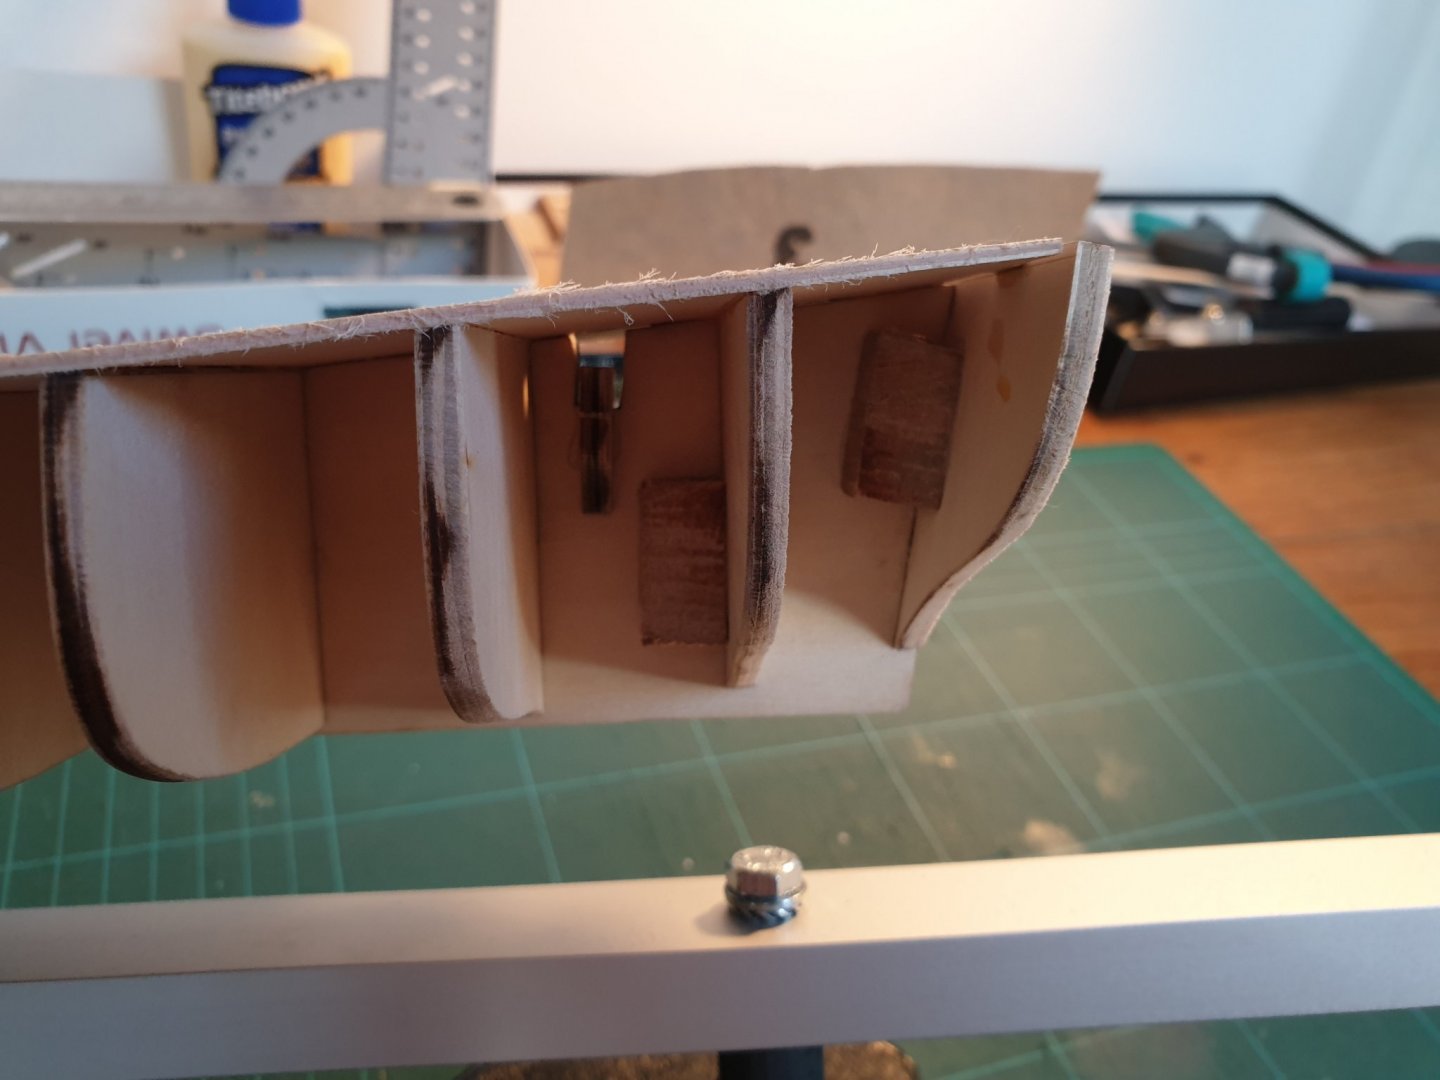
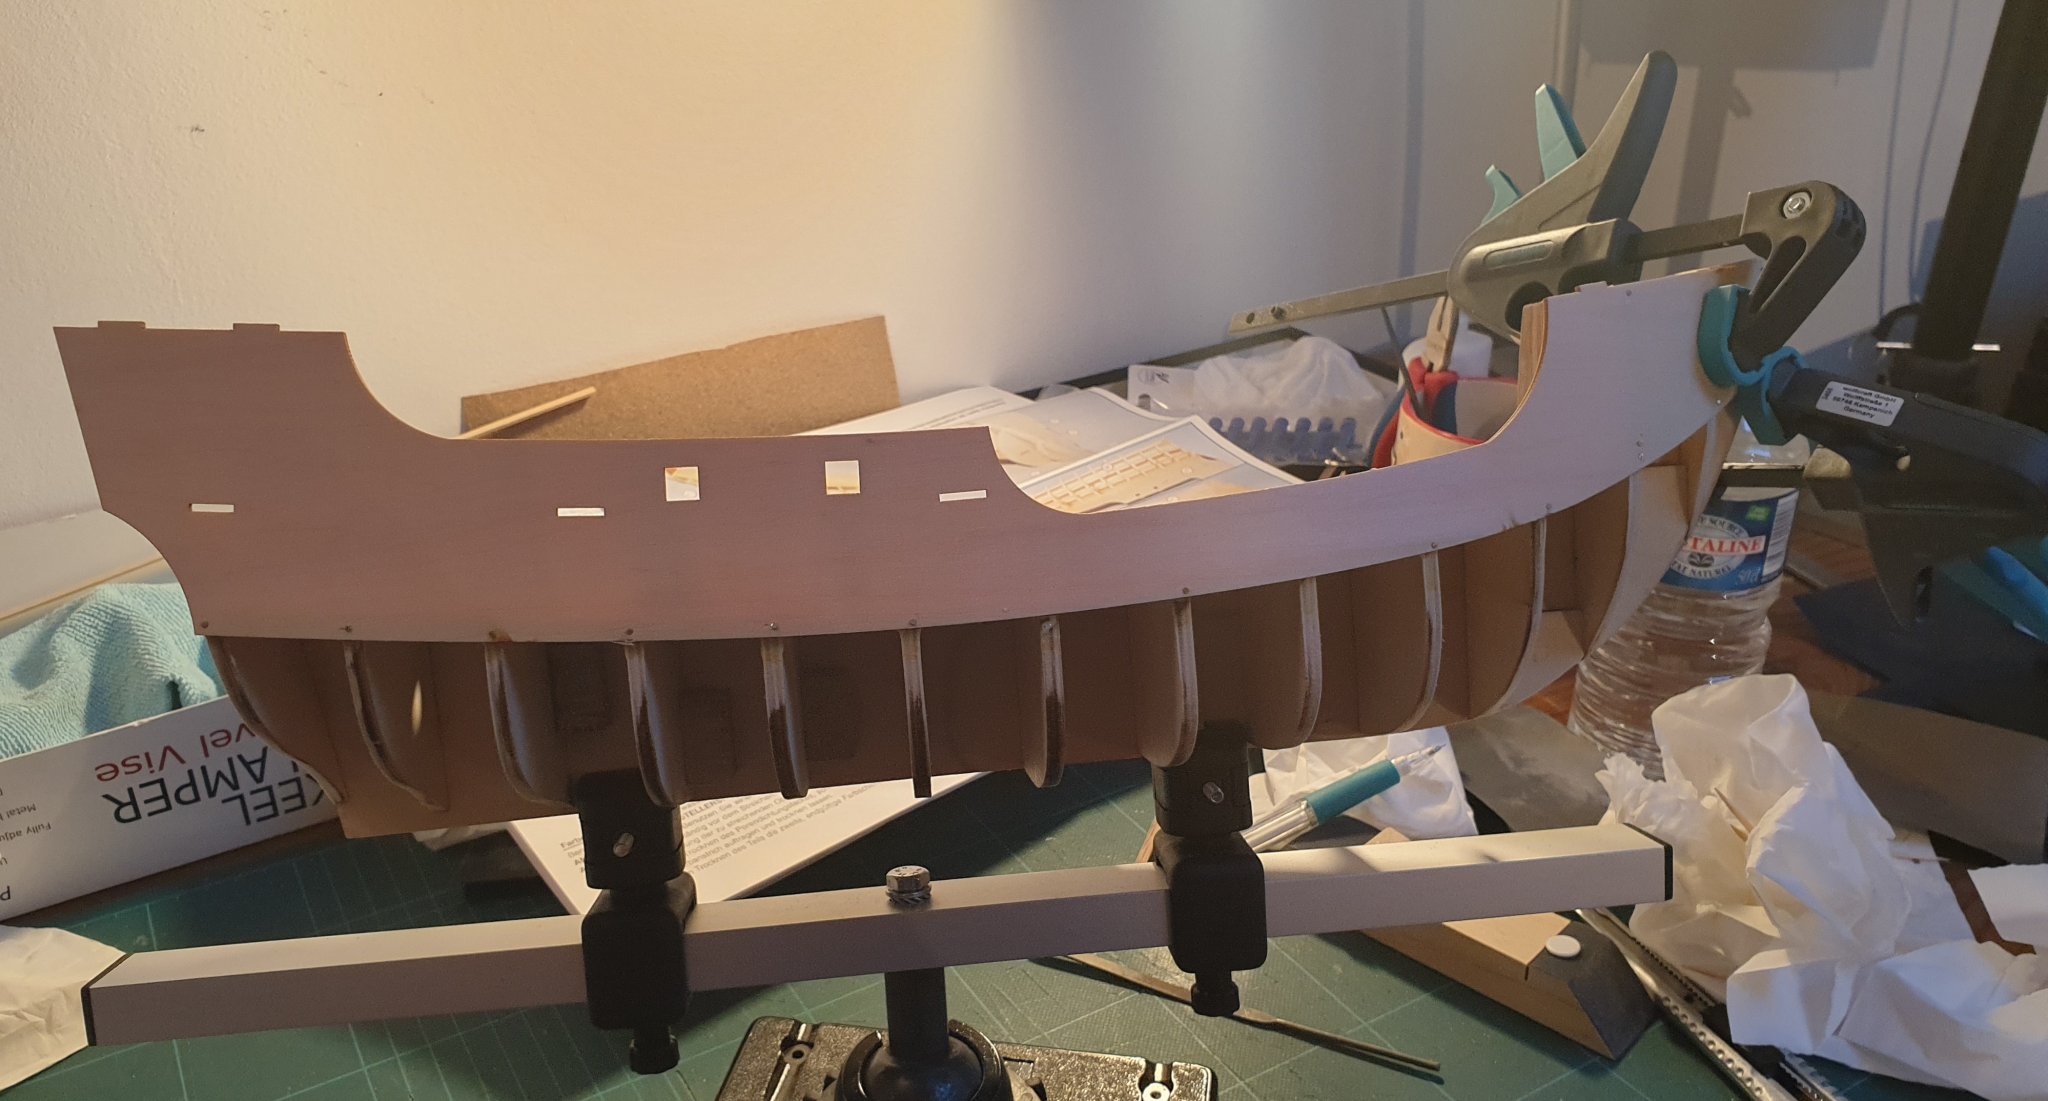
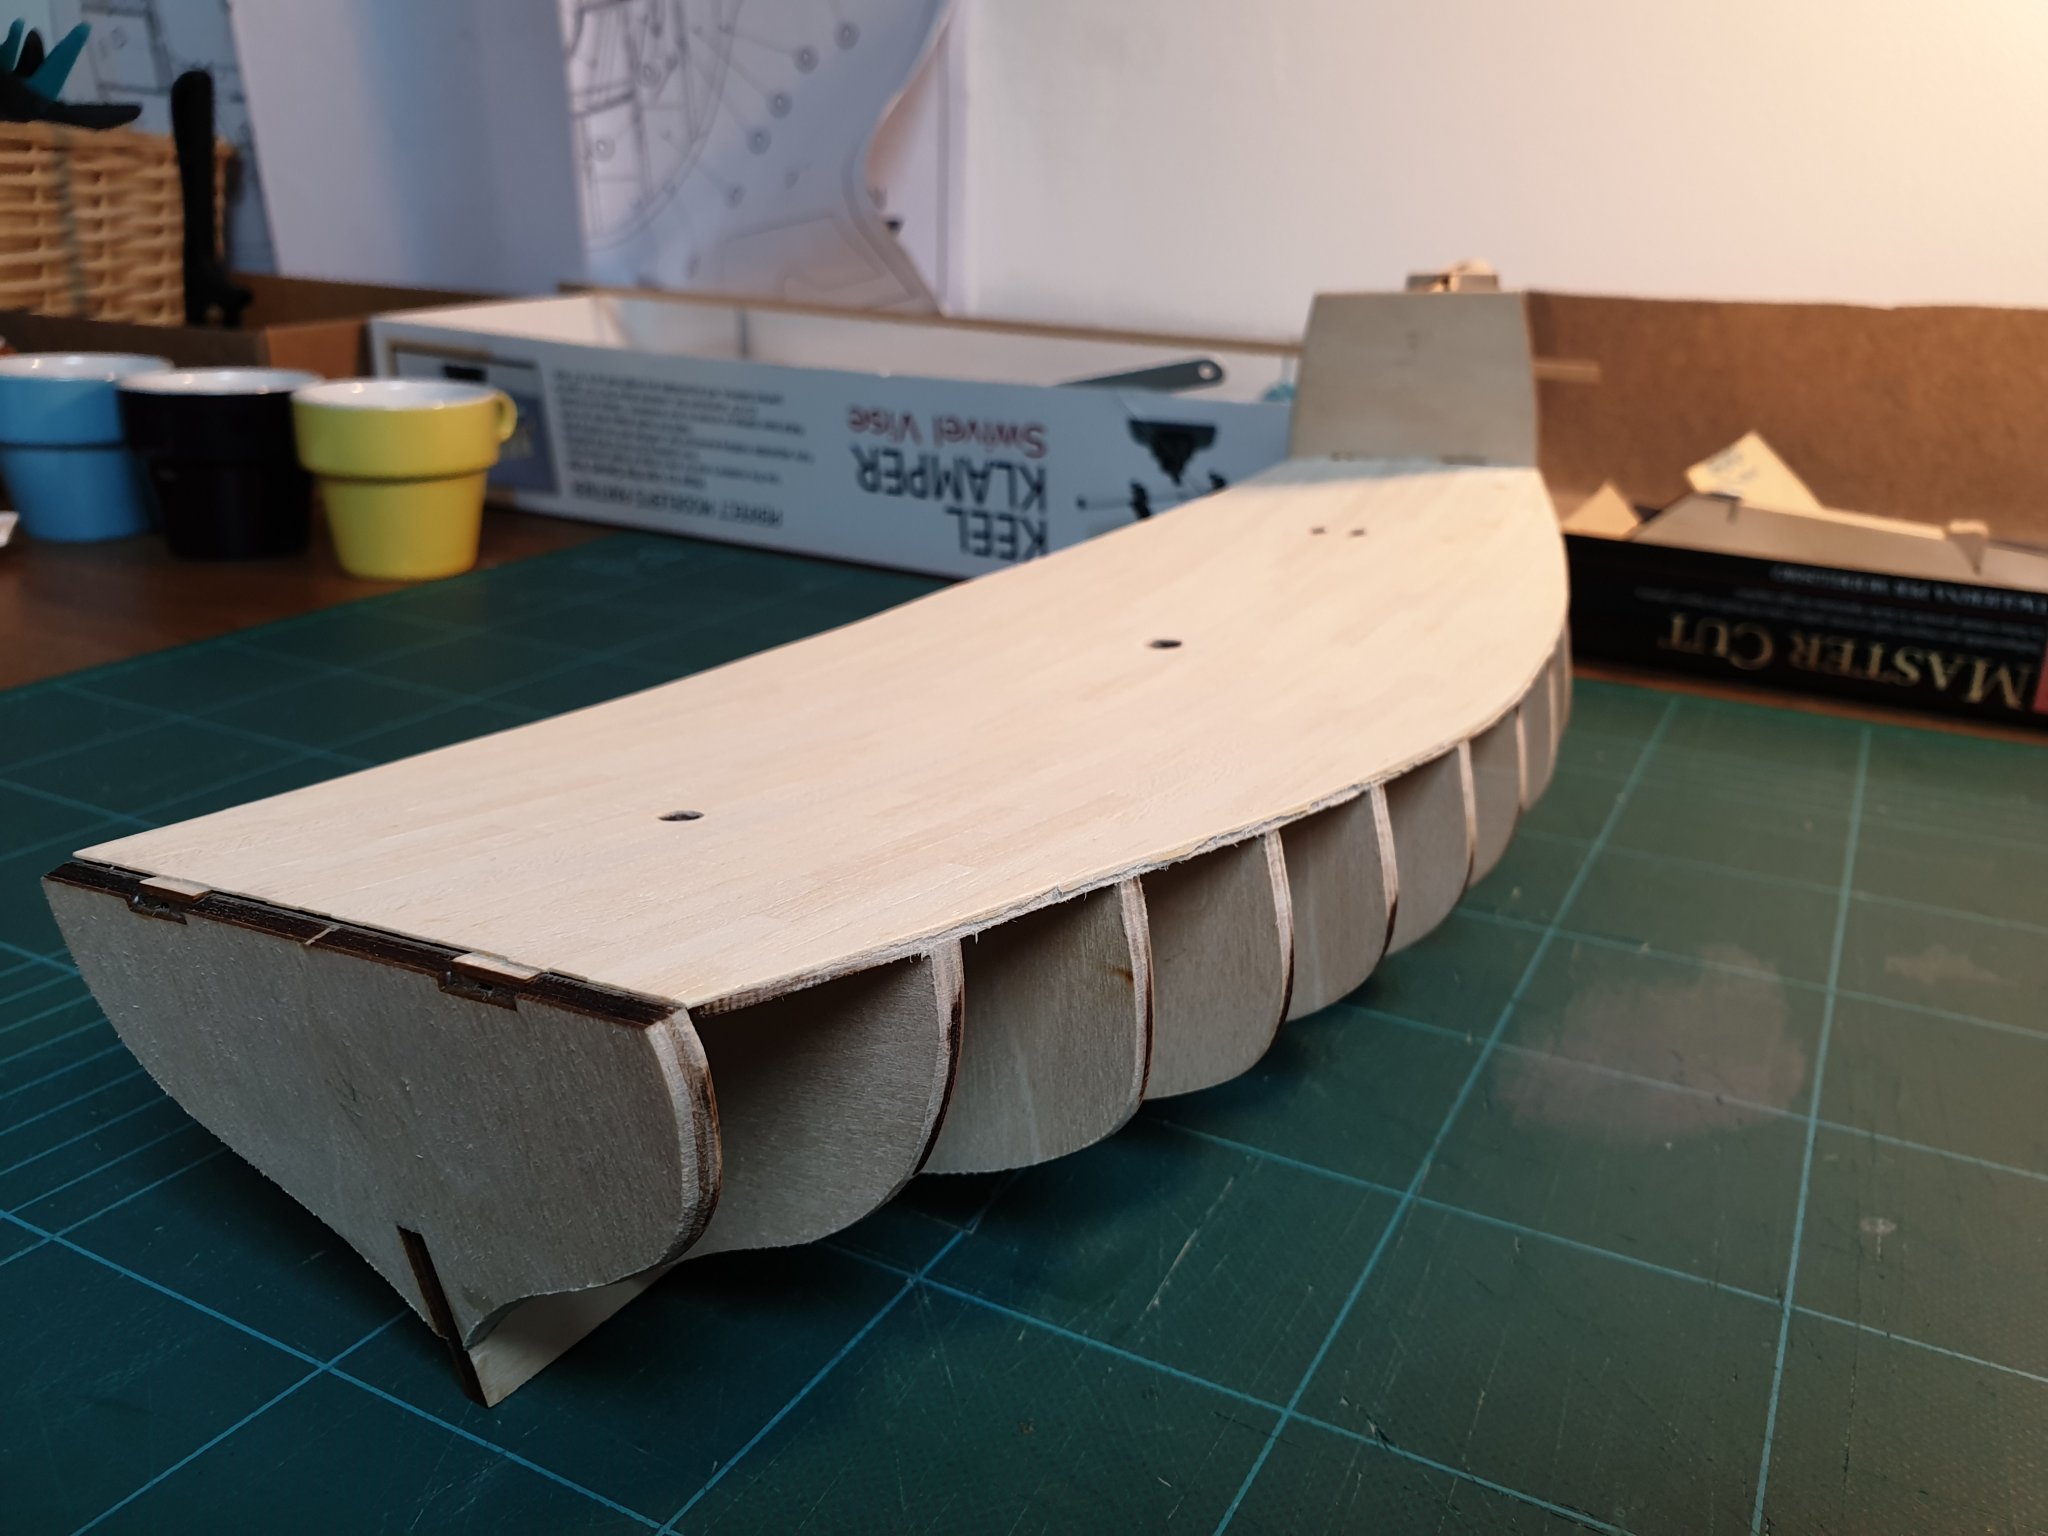
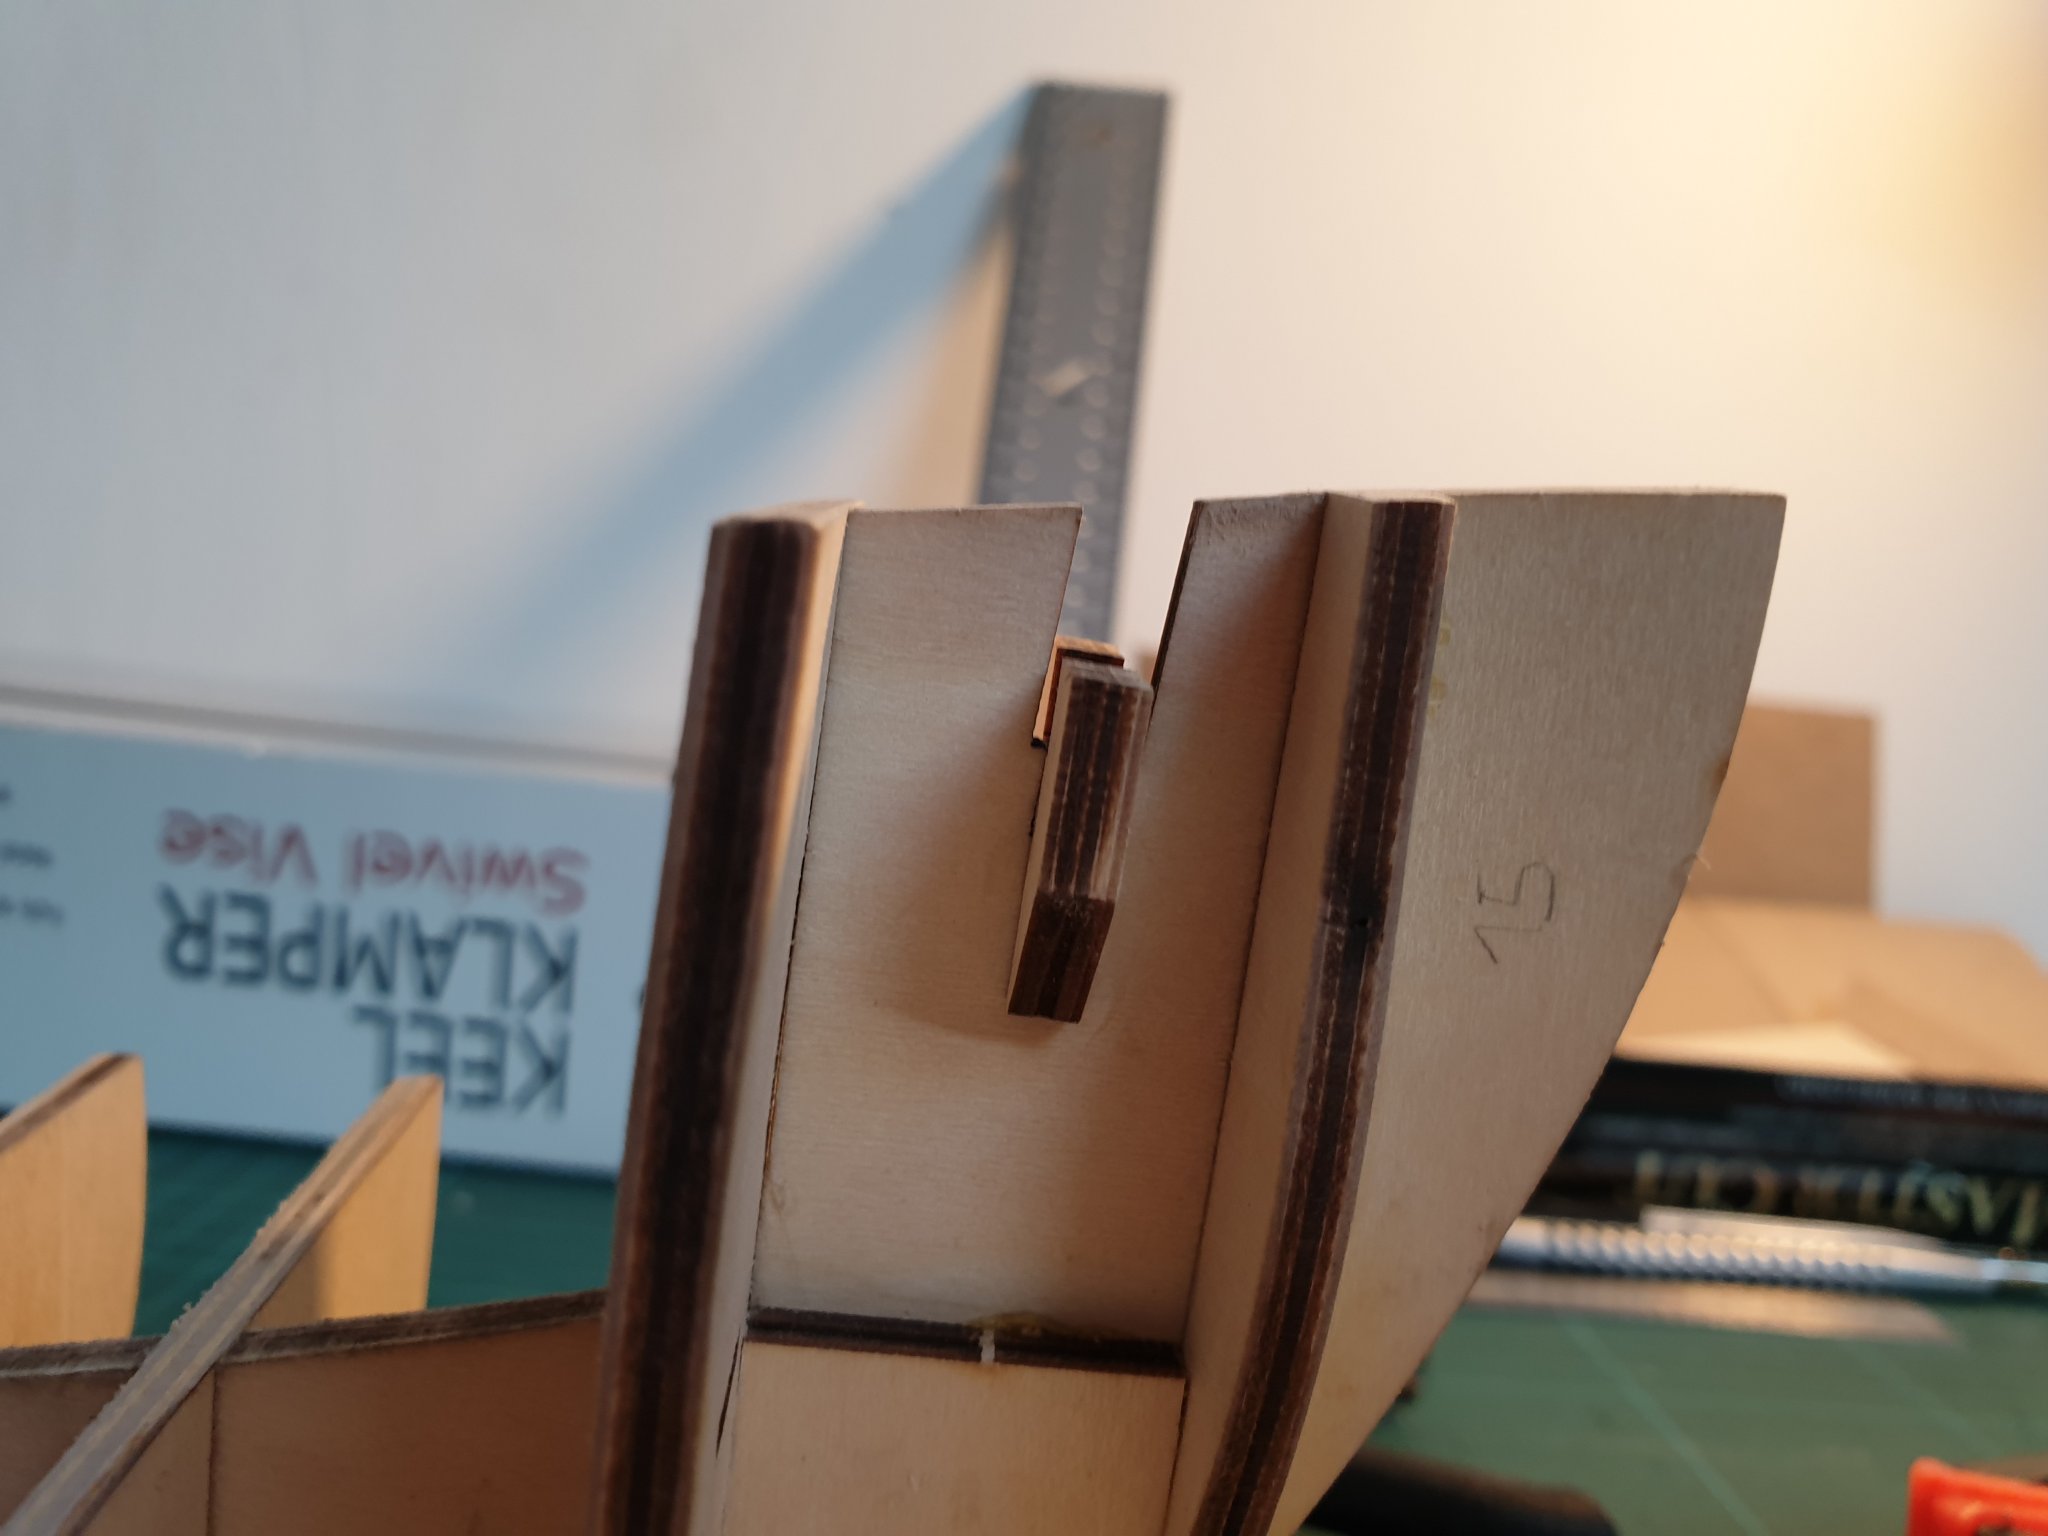
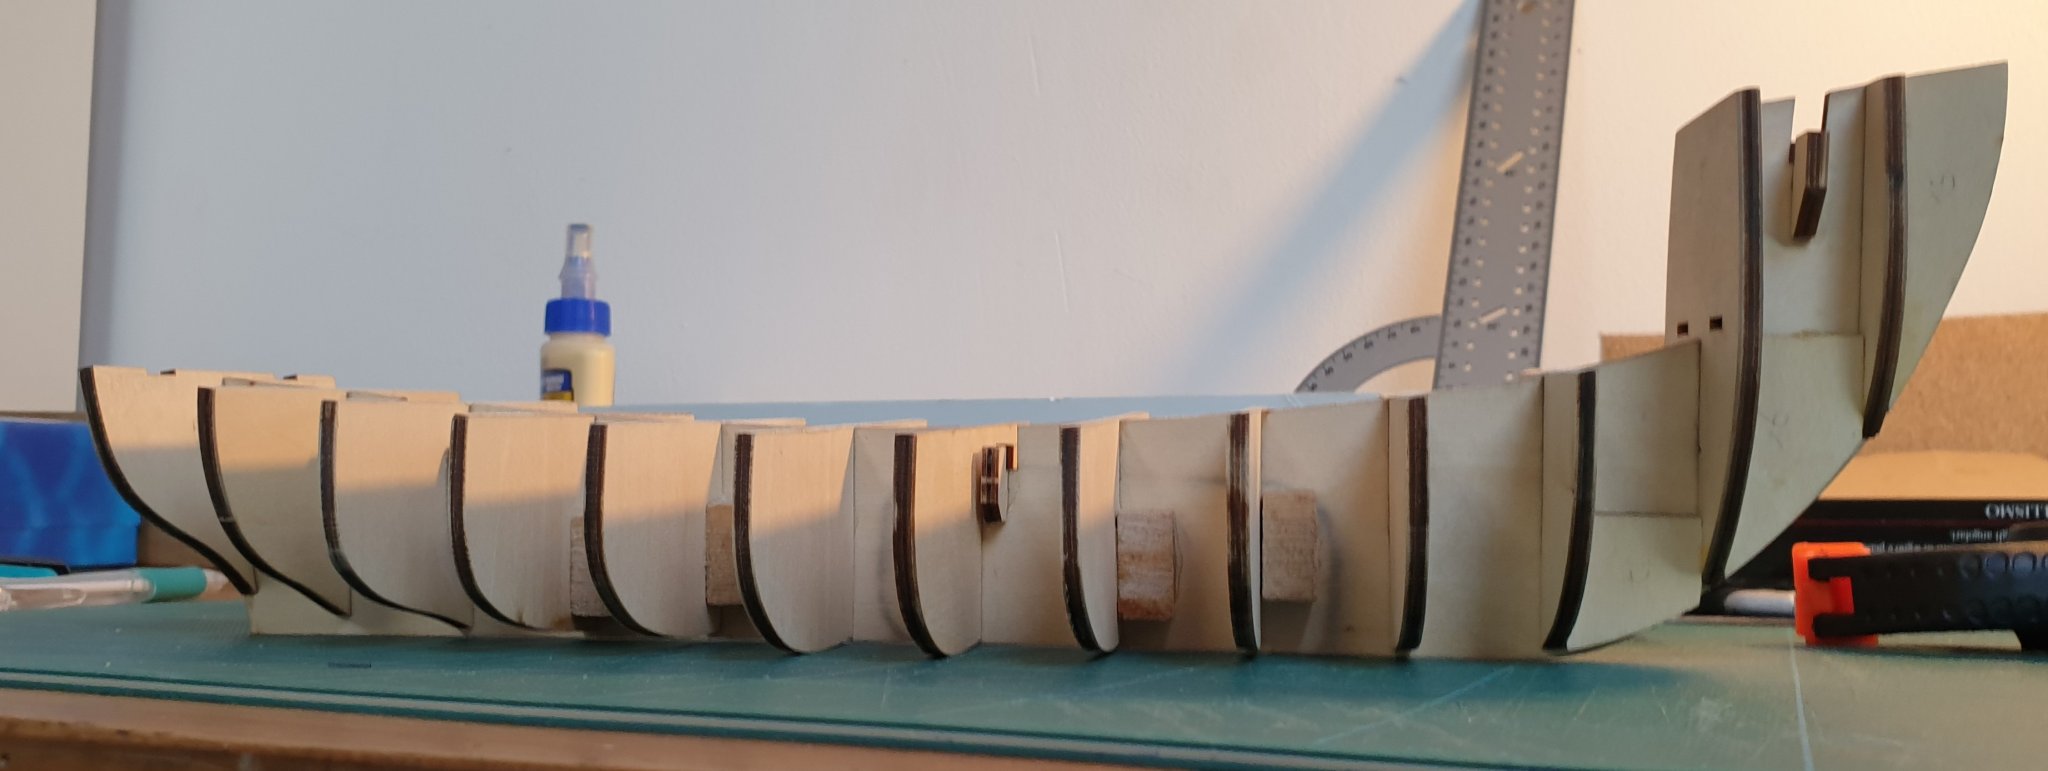
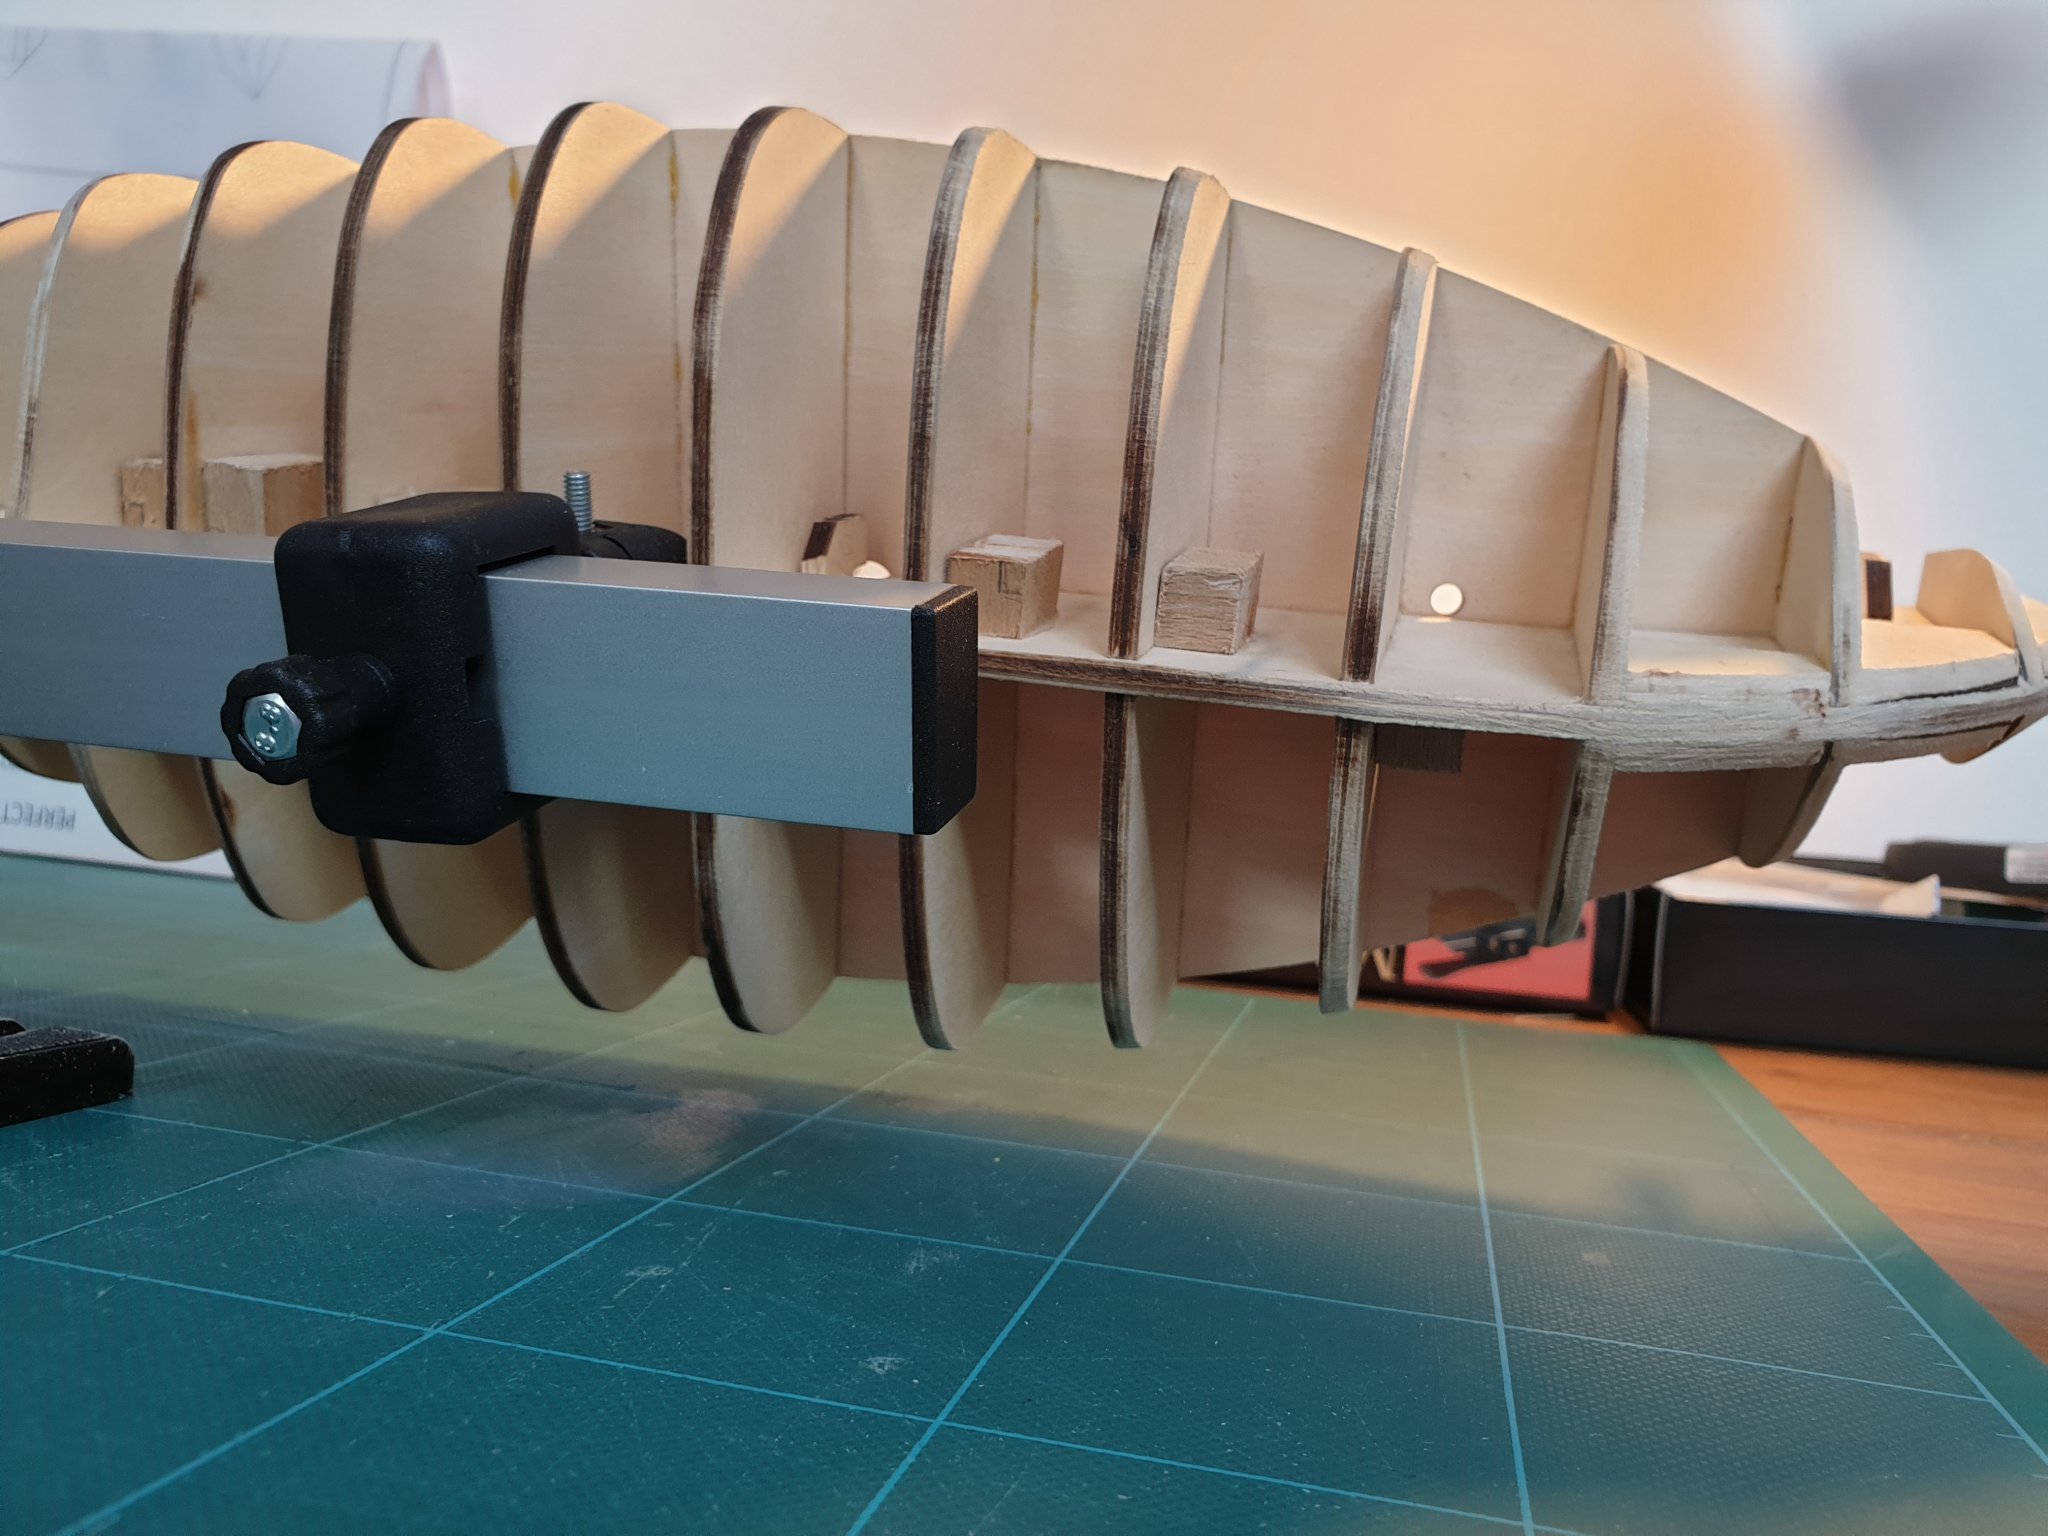
III. Frame Assembly Let's start with the frame assembly. Artesania Latina instructions are as following : "Take out false keel nr. 1 as well as frames nr. 2 to nr. 14 from the wooden slabs marked with the letter “A”. Glue these frames into the notches of the false keel following the order in the photograph: nr. 2 nearer the bow (left in the photograph) followed by nr. 3 until reaching nr. 14 at stern (this last frame has to be glued against the edge of the false keel). . The upper part of all these frames has to be on the same level as the upper part of the false keel and at the same time at right-angles with the false keel, with the exception of frame nr. 14. Glue reinforcements nr. 15,. 16- and 17 at the bow on both sides of the false keel (one on each side). Glue reinforcements nr. 18 and 19 {masts) at the same height where the three notches on the false keel were made." I separate the frames, the false keel, and start gluing the frames on the false keel. It is already important to make sure all the frames are perpendicular to the keel, and that they are inserted all the way in. It's not easy and often requires sanding in the slots... I had some questions for anyone reading this post : - How do you usually ensure the perpendicularity ? Some times there is angle but you can't force on it to make it right... The only way I found was more sanding in the slots, giving it more freedom, and gluing it ensuring a square angle by clamping it with a square... - My false keel was very slightly wrapped, I tried to make it flat by soaking it few hours in water and drying it under a press but it didn't do much. Are there other ways to do it ? I glued some reinforcements to make the assembly more robust, considering there will be a lot of manipulation during the sanding : Then I sanded the parts which will support the front deck : Next step is to temporary clamp the false deck and draw the junctions with the frames, so that when it will be glued I will know where to pin the nails, and slightly adjust the angle of the frames : Now is time to glue the false deck on the frames, clamp it and nail it : The final step is to sand the deck and the frames following the manual : "Using a bow file we will very carefully sharpen the false keel nr. 1, the reinforcements nr. 15, 16, 17 and the frames nr. 2 to 5, at portside as well as at starboard (left and right). Continuing with the delicate work of beveling the edges on the frames and being just as careful as before, we realize that the hull takes on a more curved shape while we are planing down more wood. To be absolutely sure that our work is being done correctly we will present a planking strake nr. 31 along the length and width of the hull. This will show us exactly until where we have to bevel. At the same time we shall polish the excess of deck nr. 20." I did it exactly as instructed, except that I used a Dremel on some area where large bots had to be removed. It was not easy to find the right angle for each frame, but applying dummy planks to check the proper inclination was definitely the best thing to do.


-
Thank you all for your hearty welcome. It feeks good be part of this great community.
-
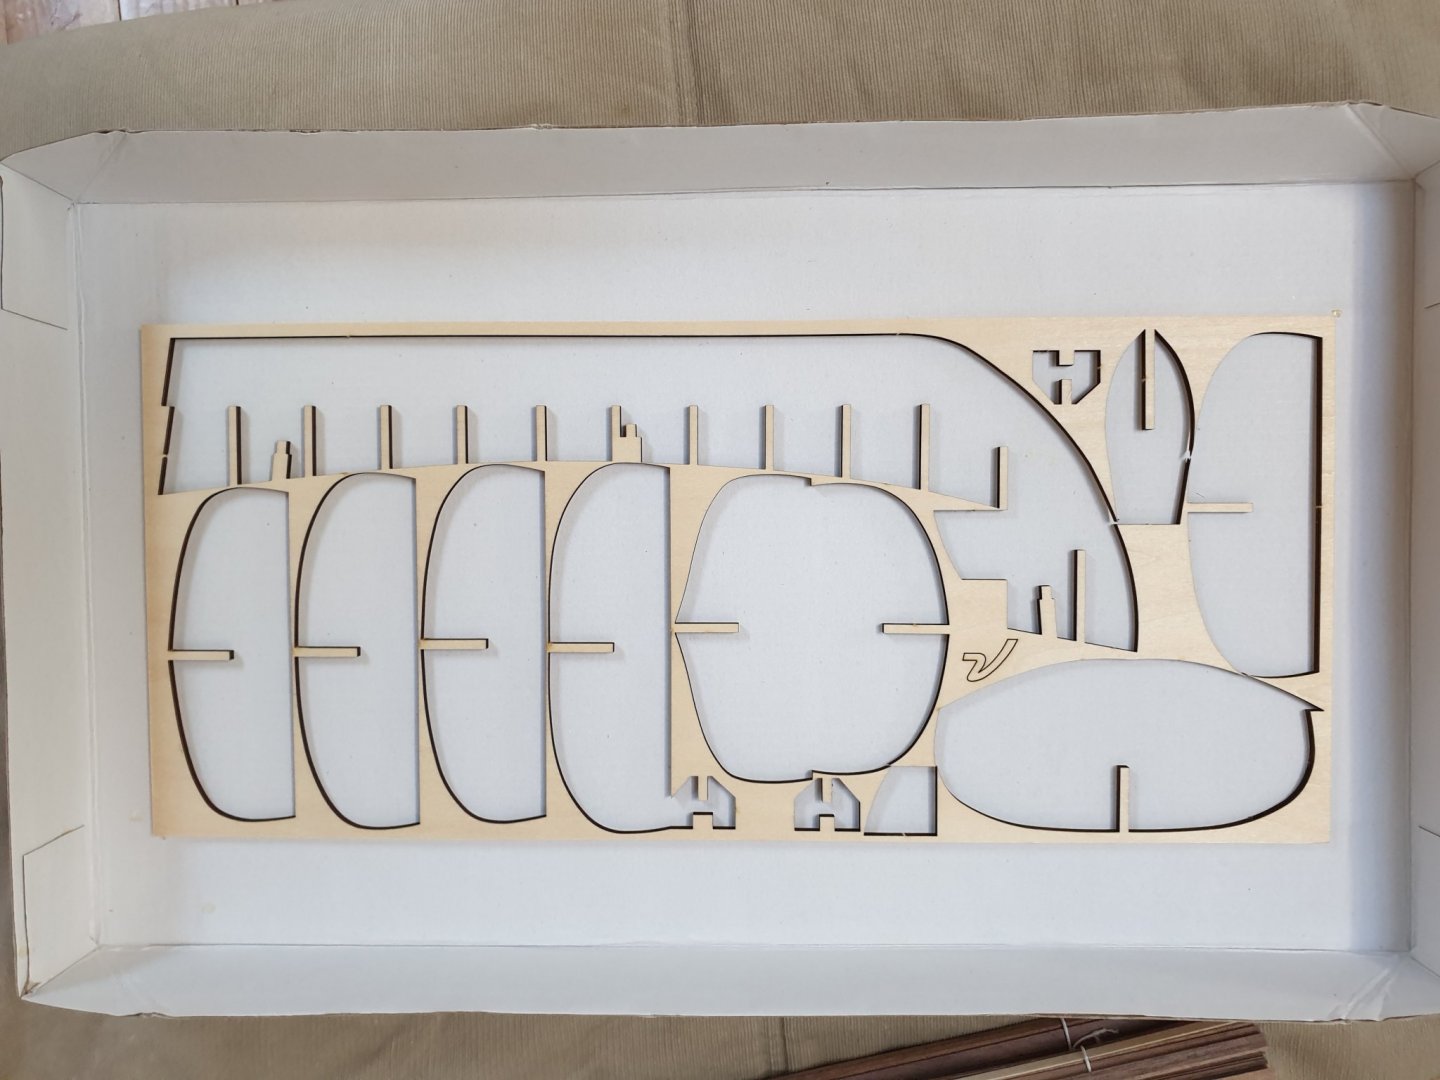
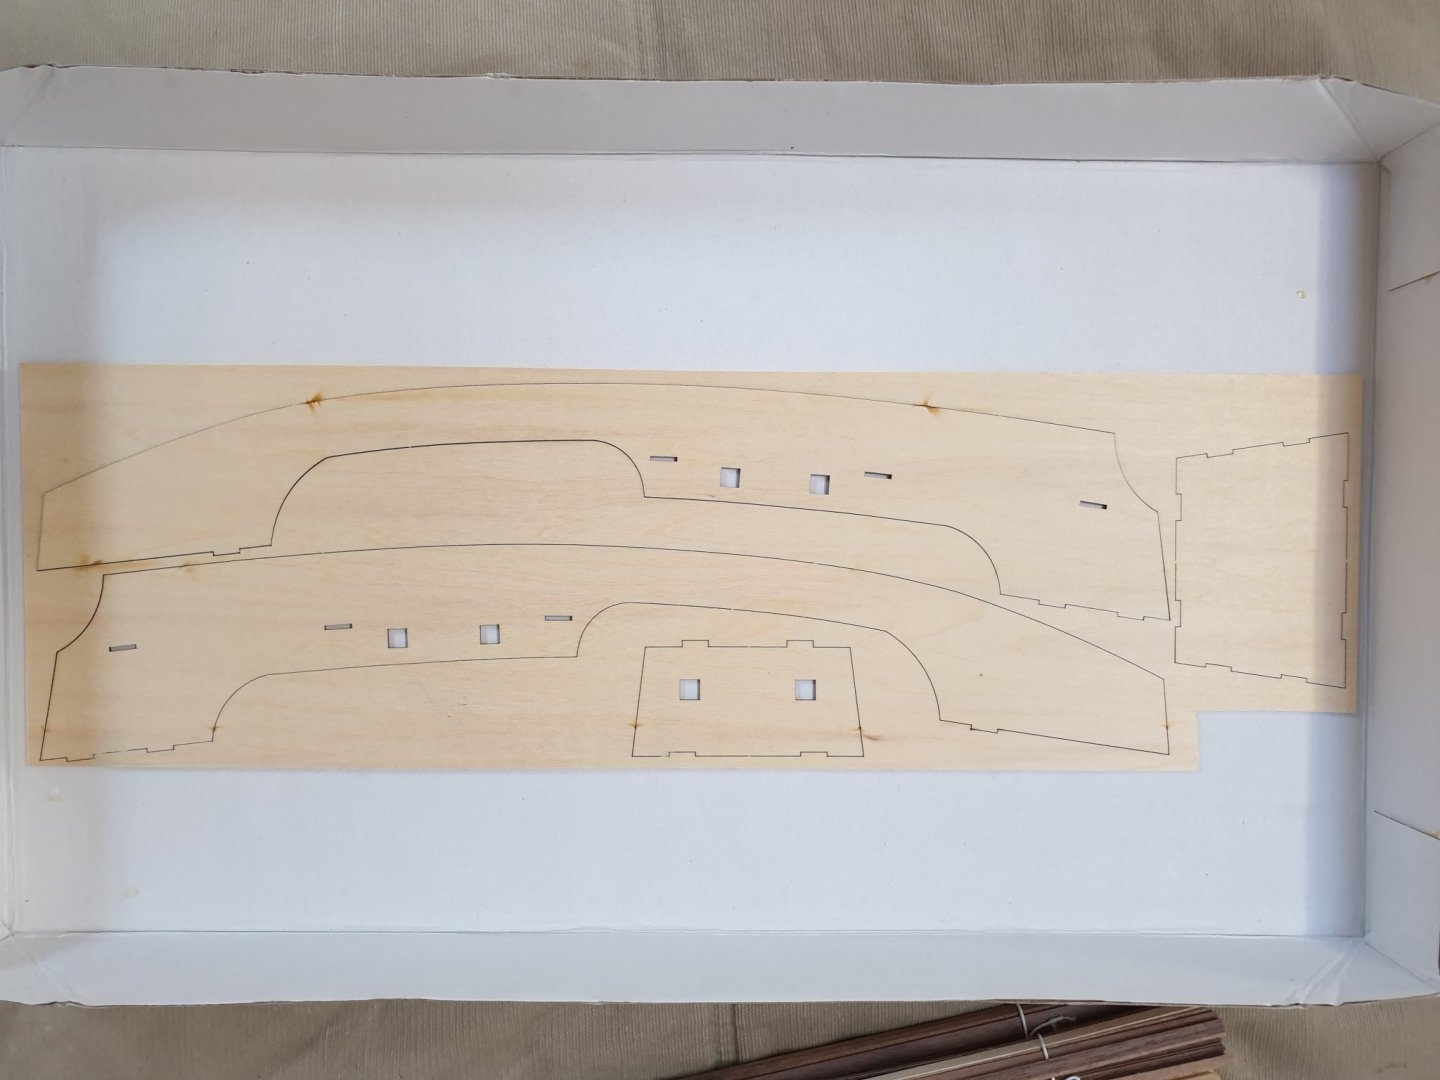
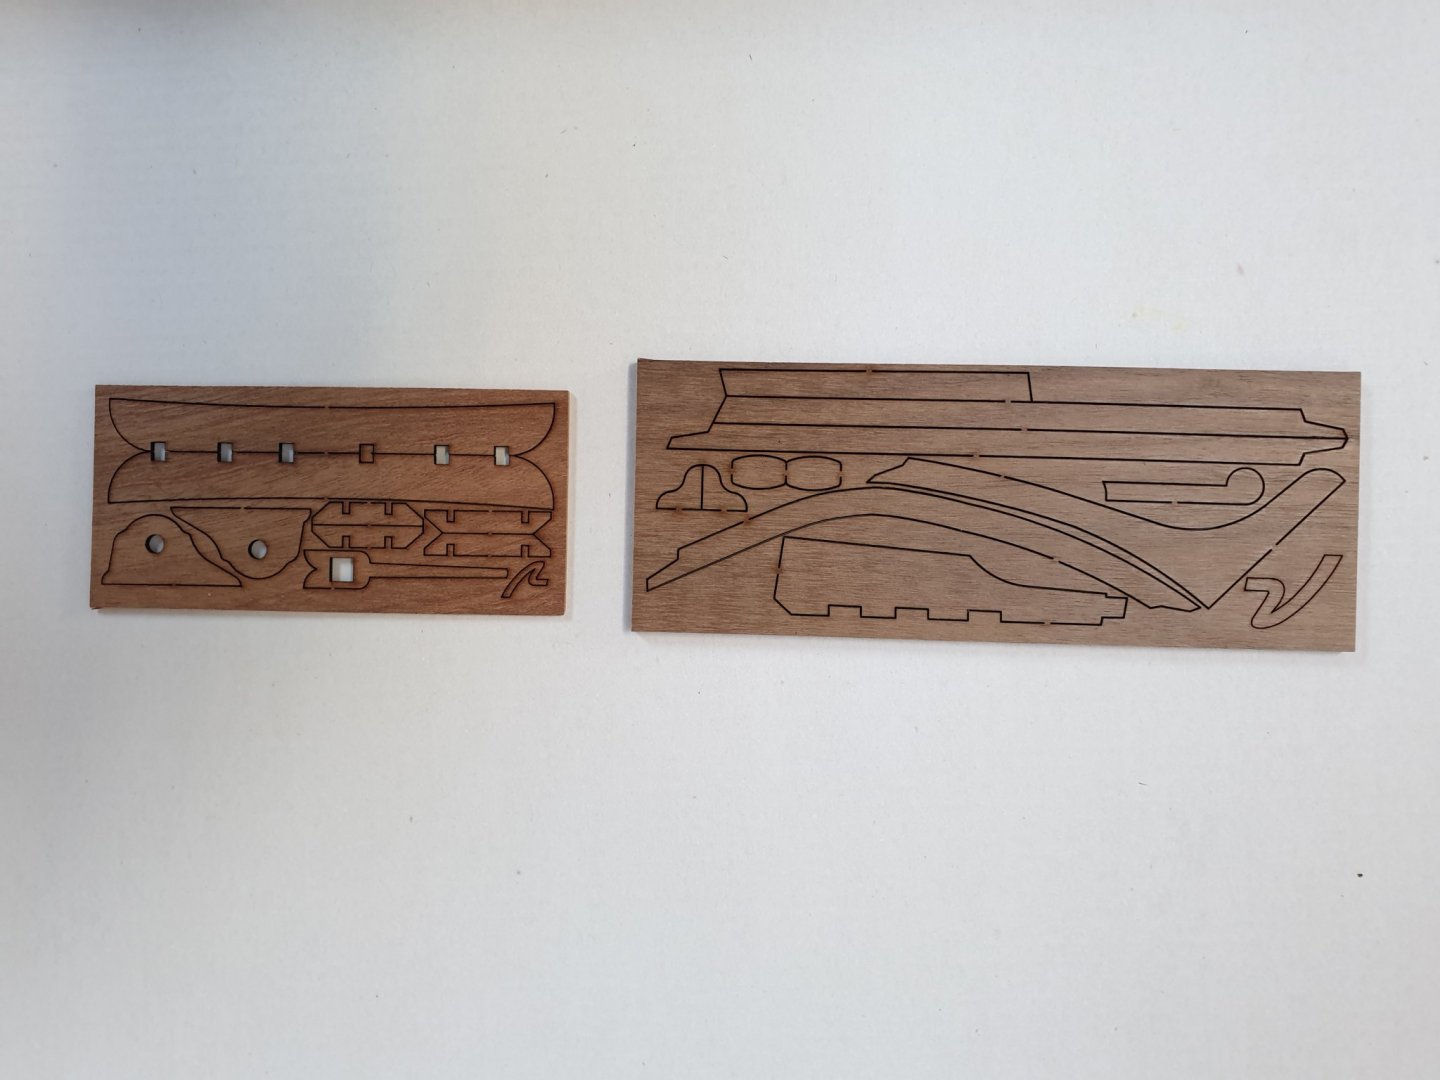
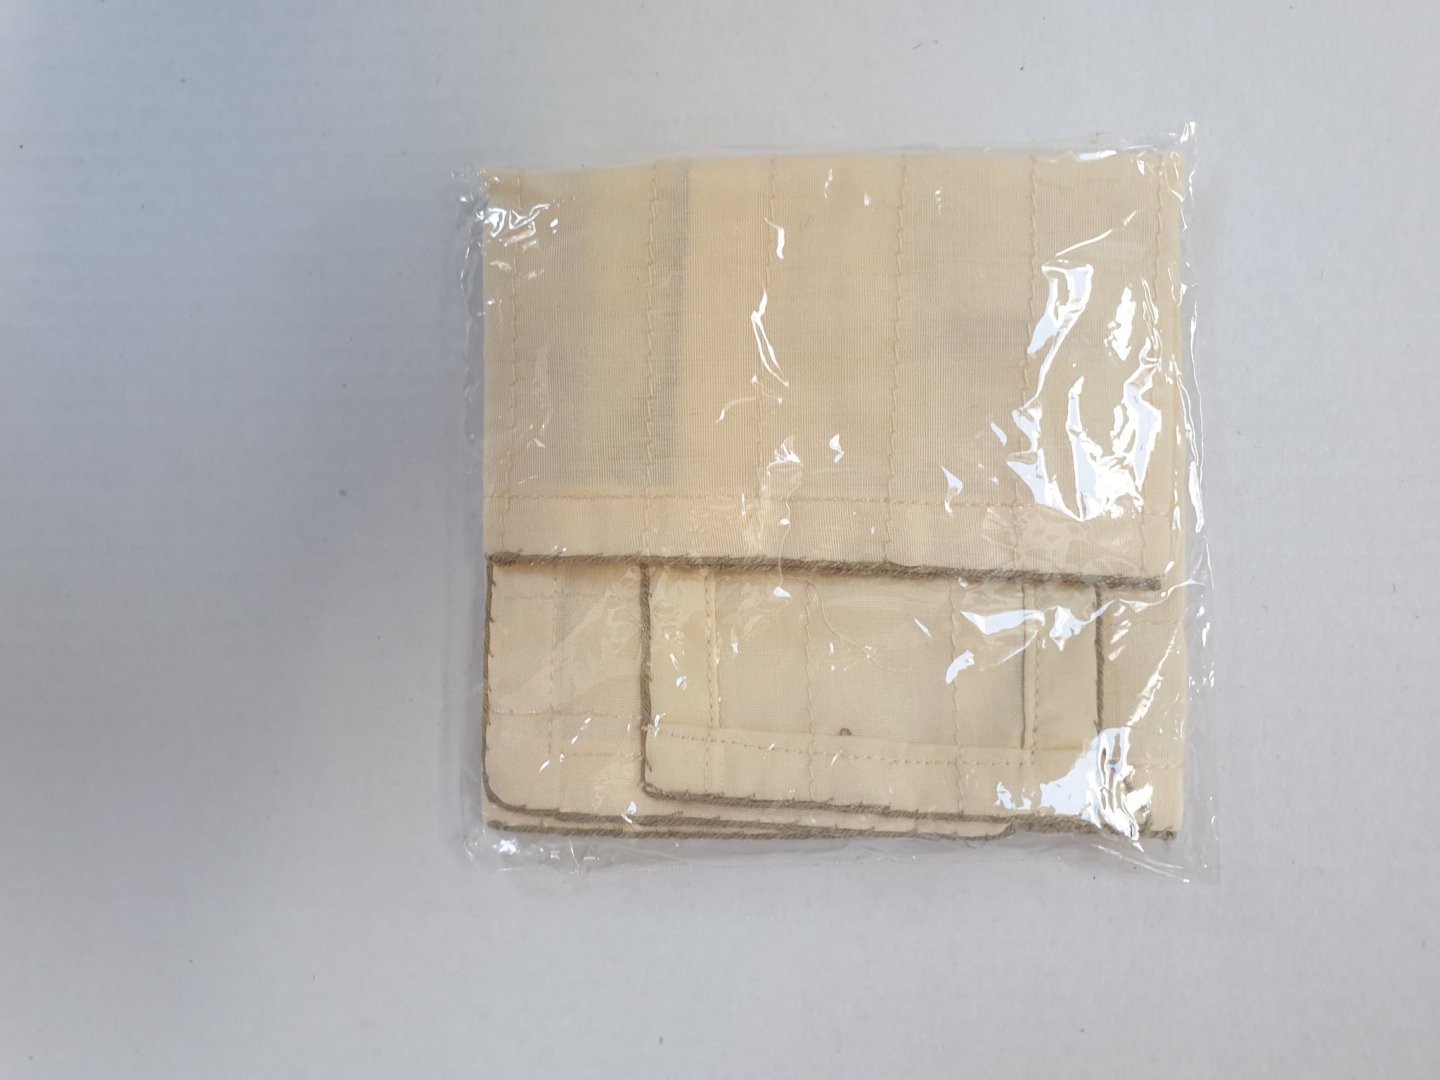
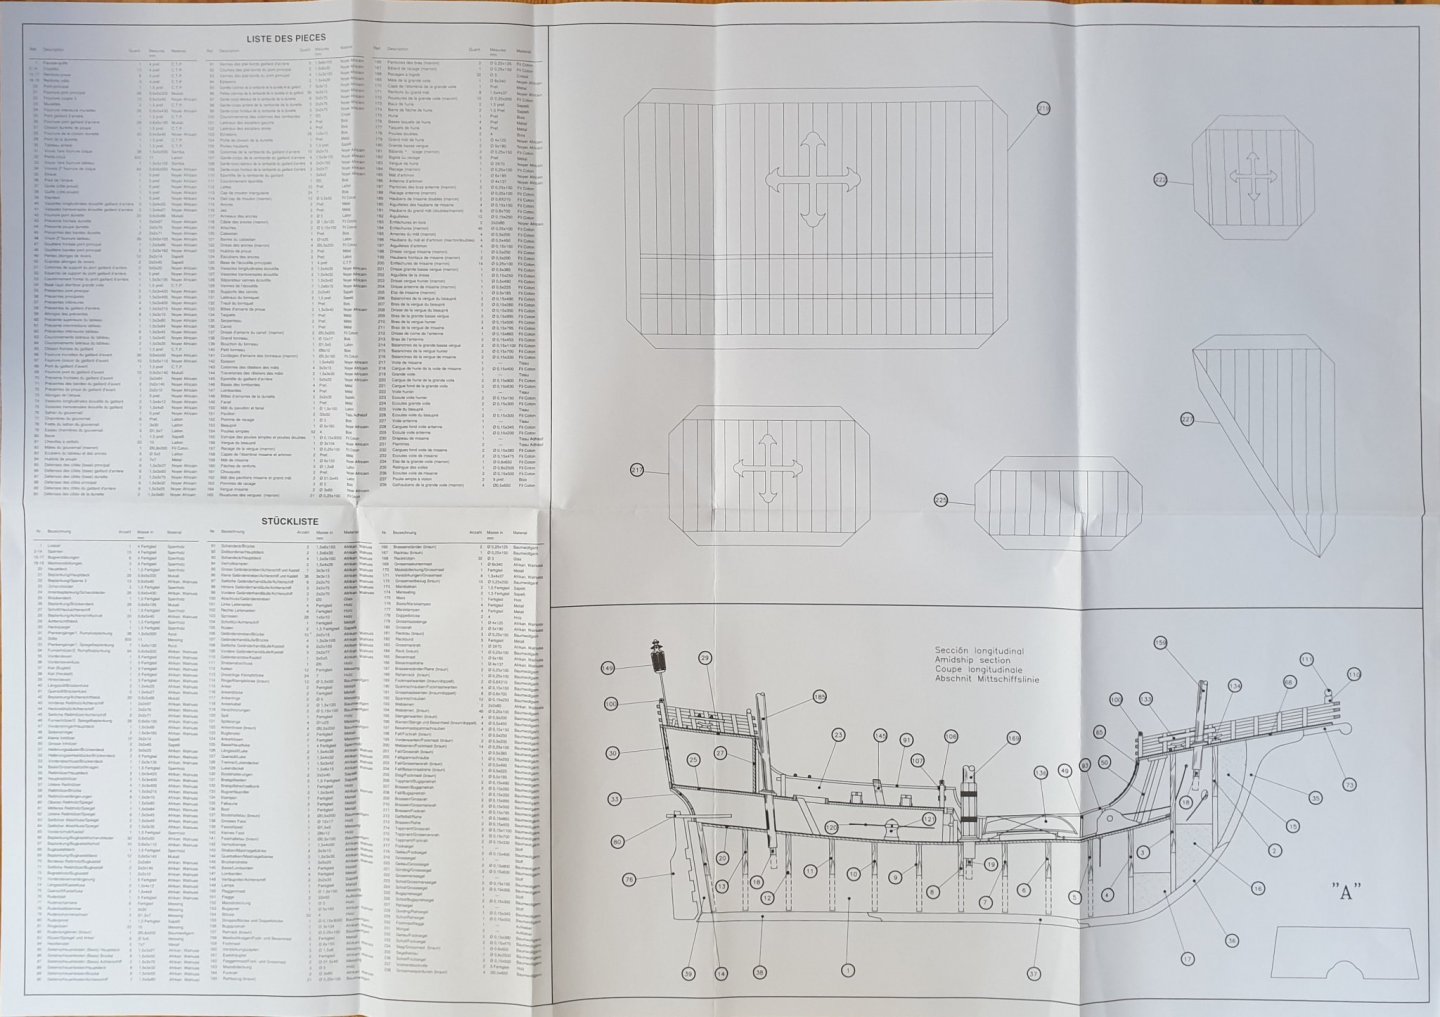
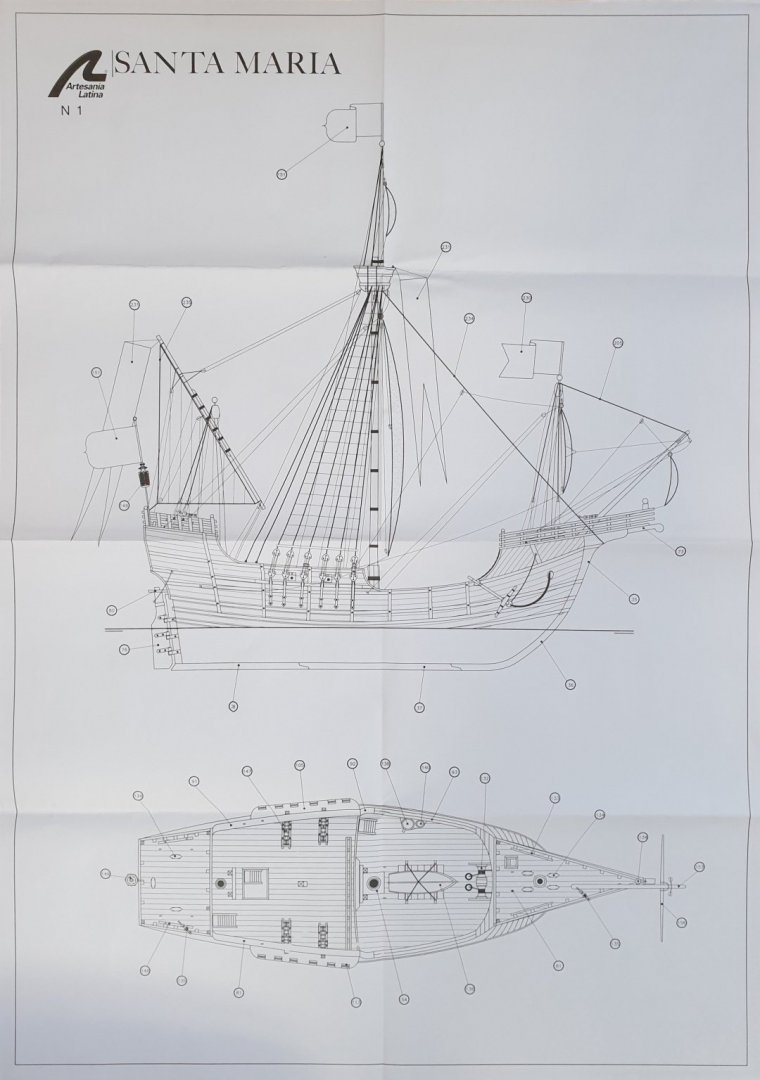
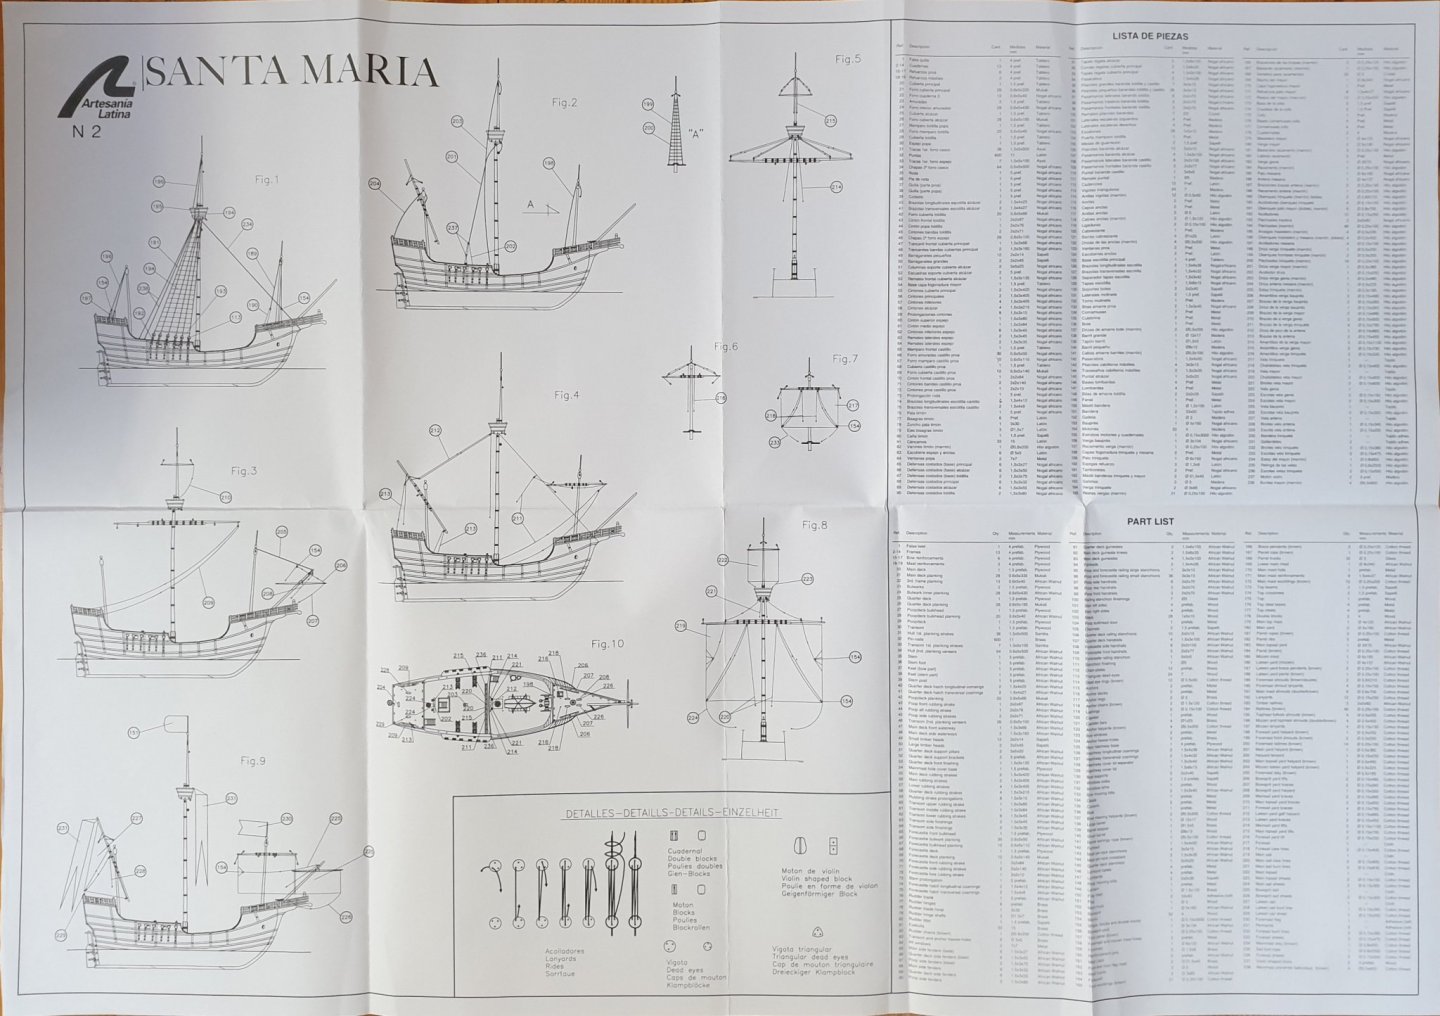
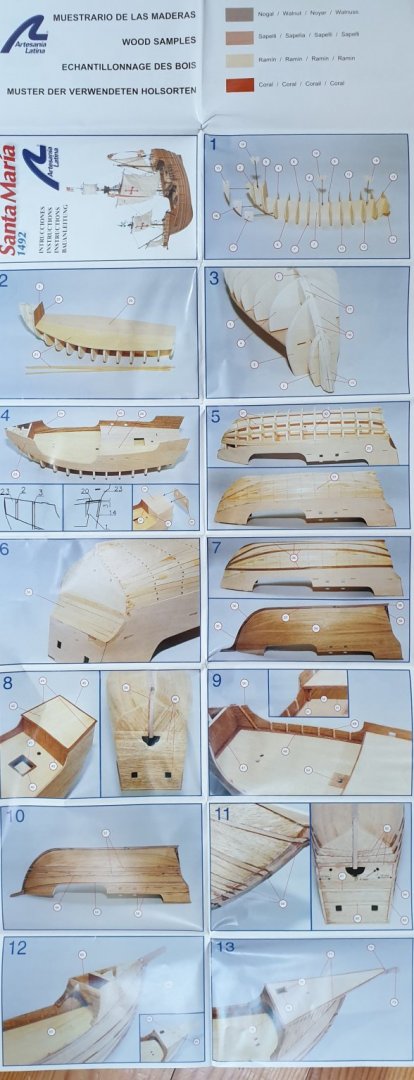
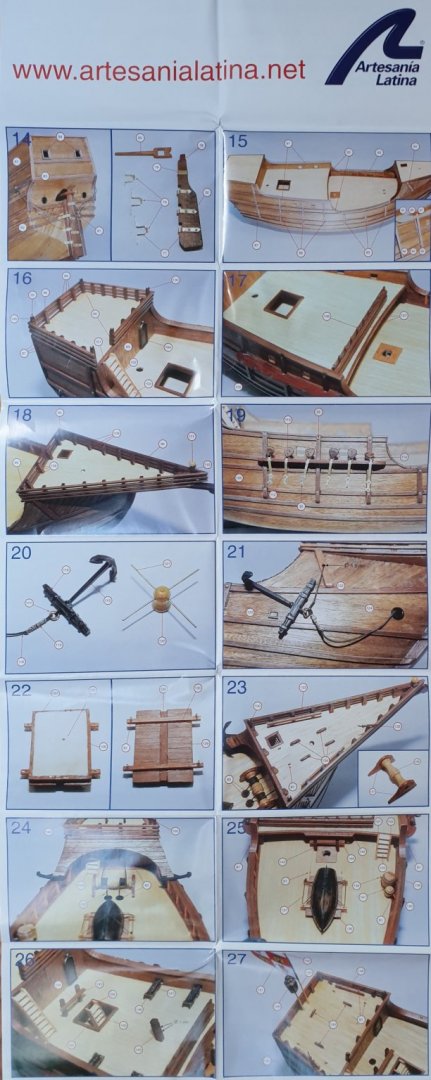
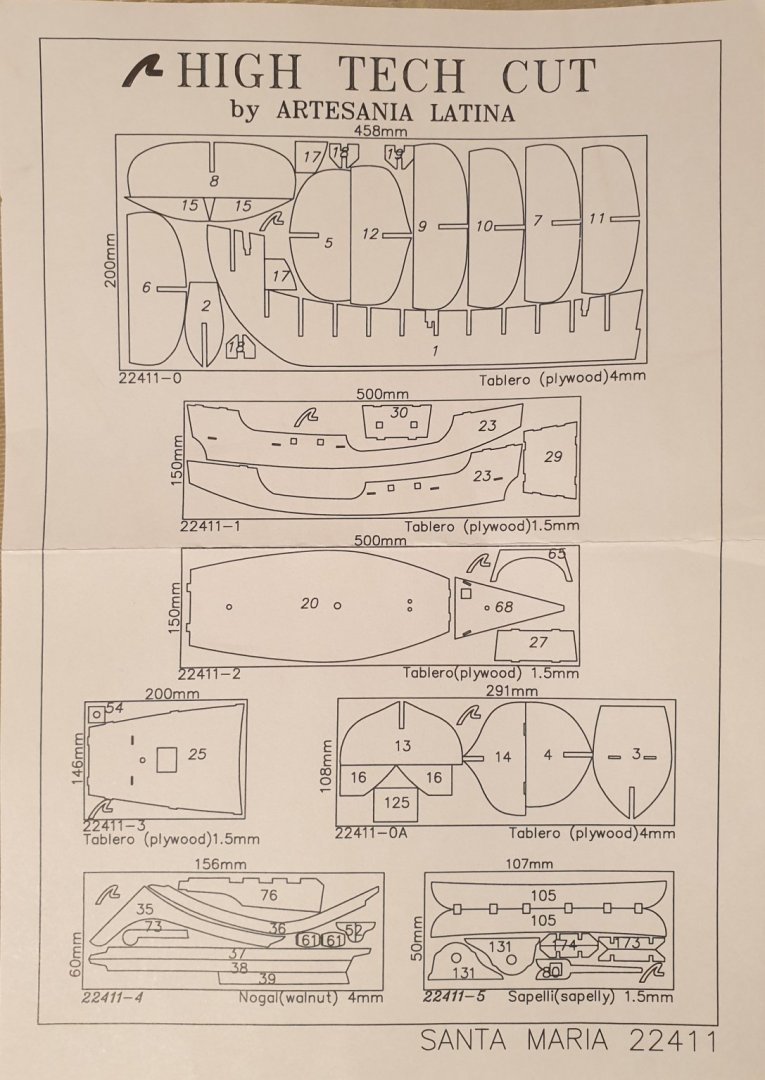
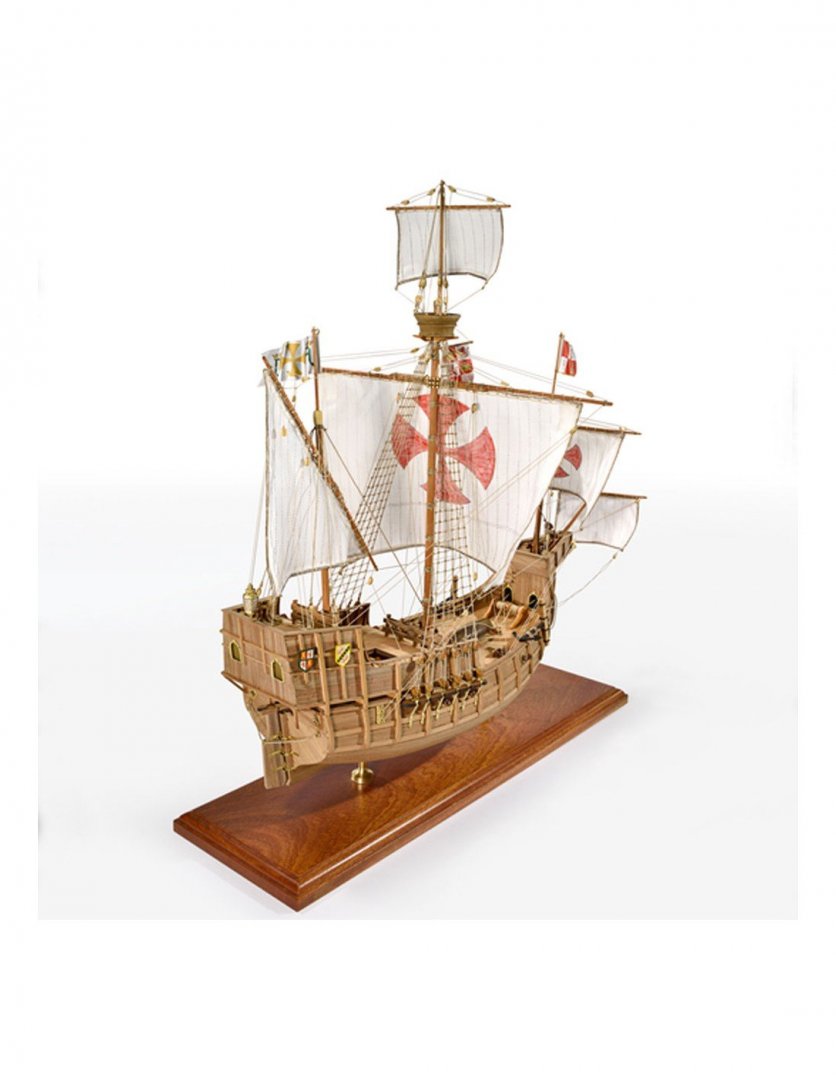
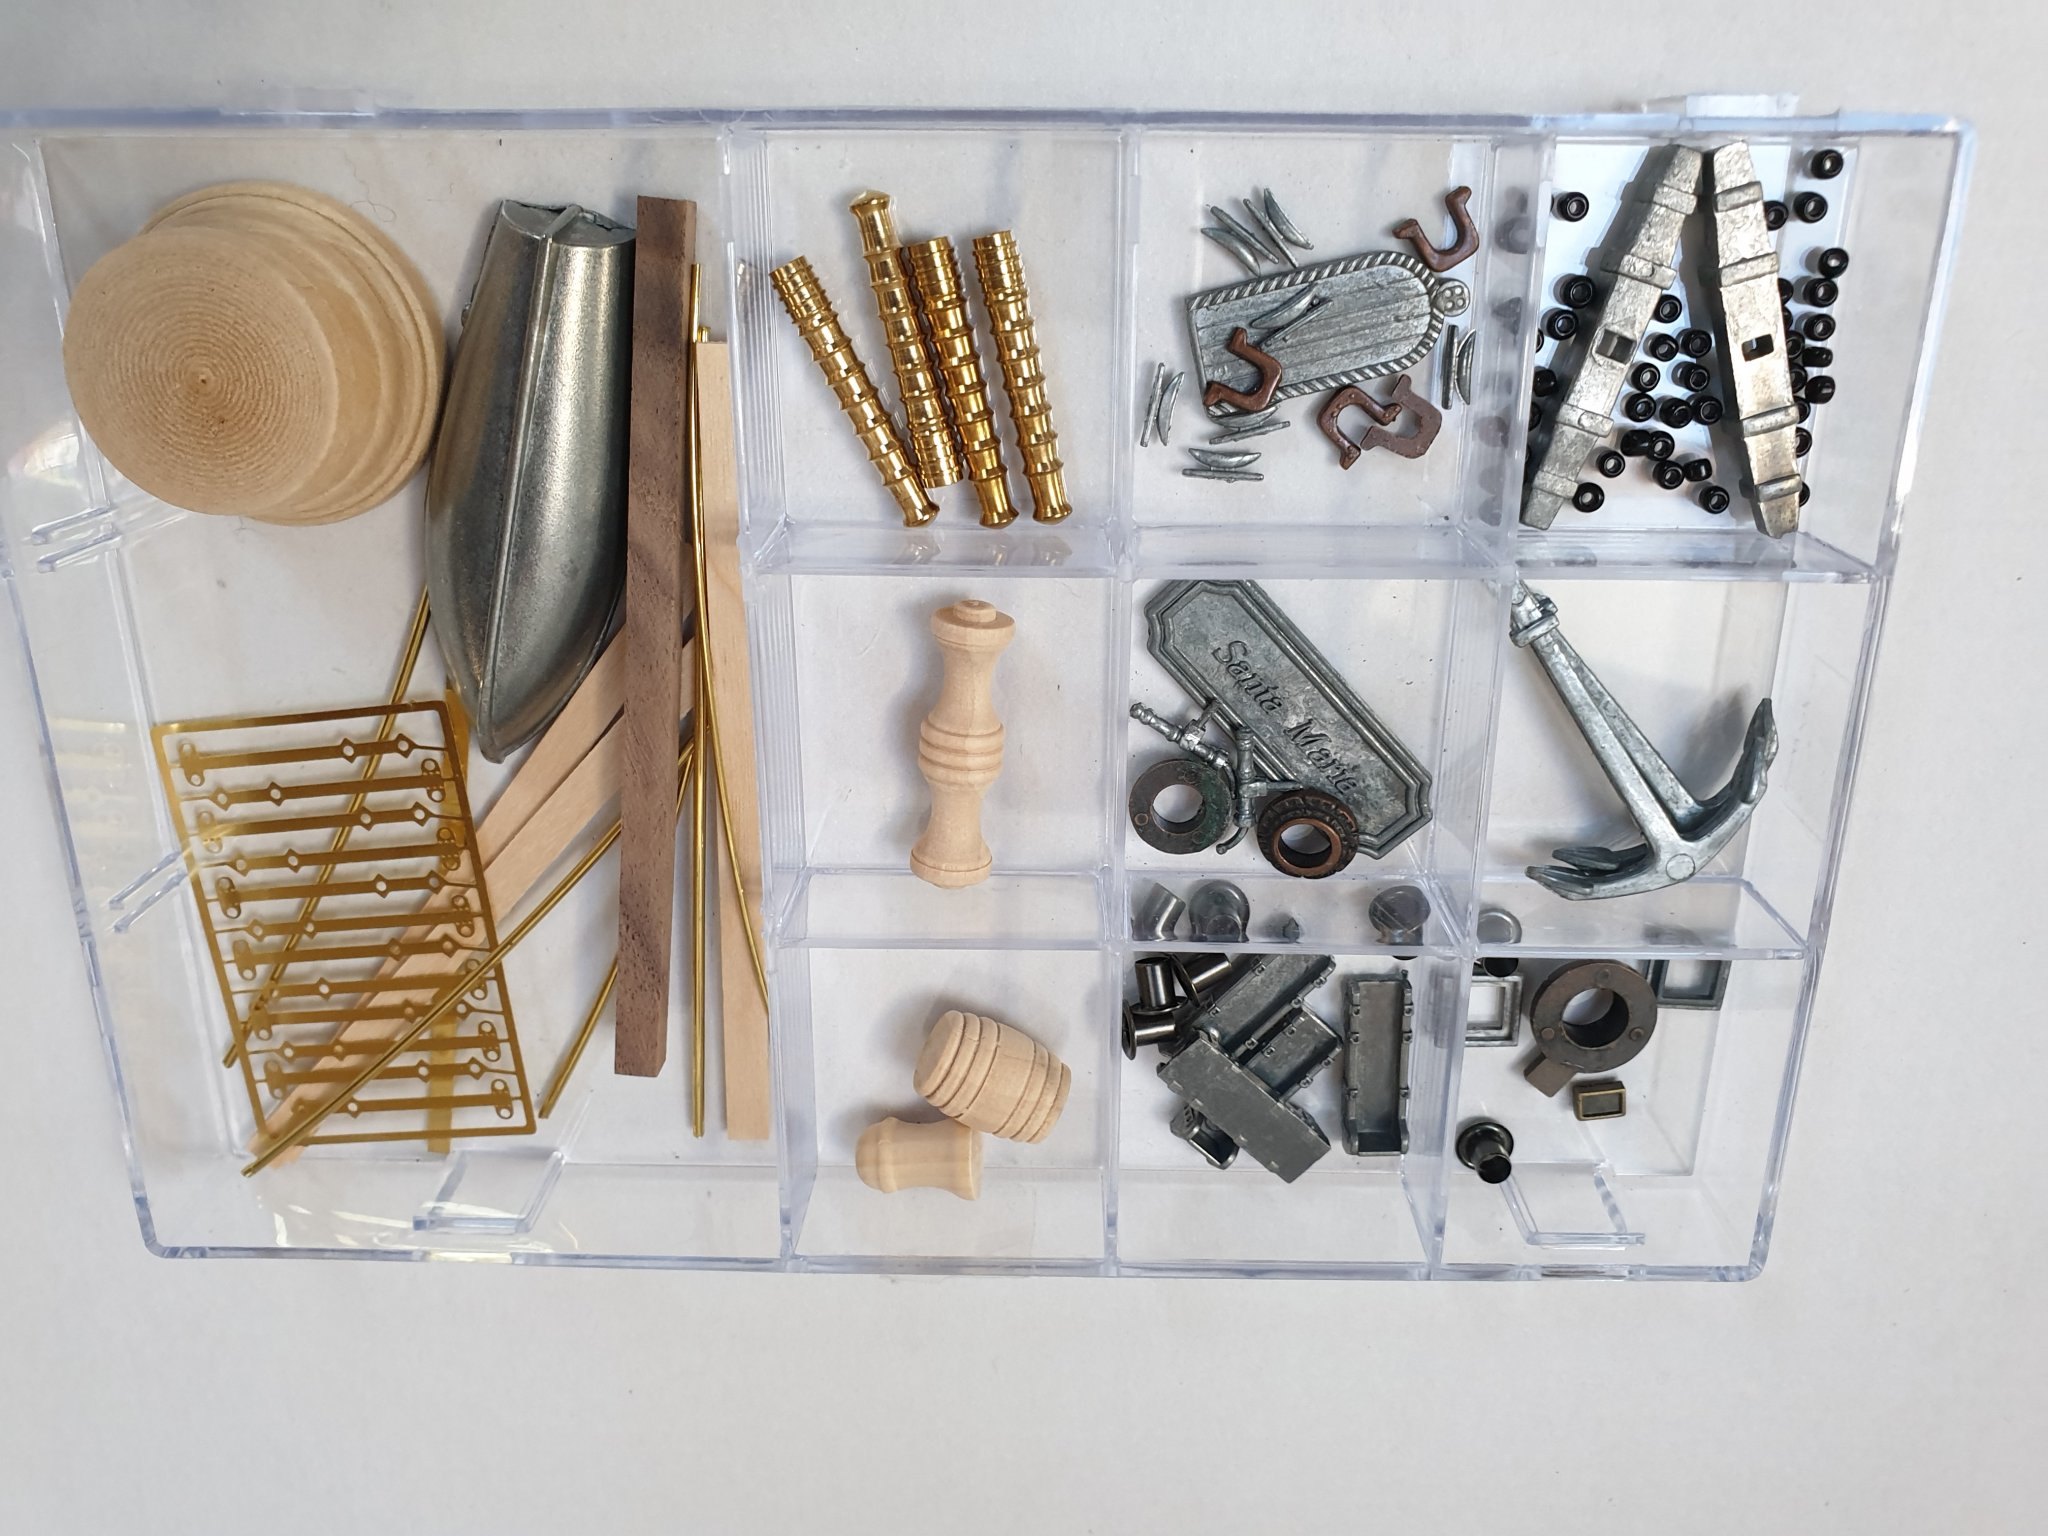
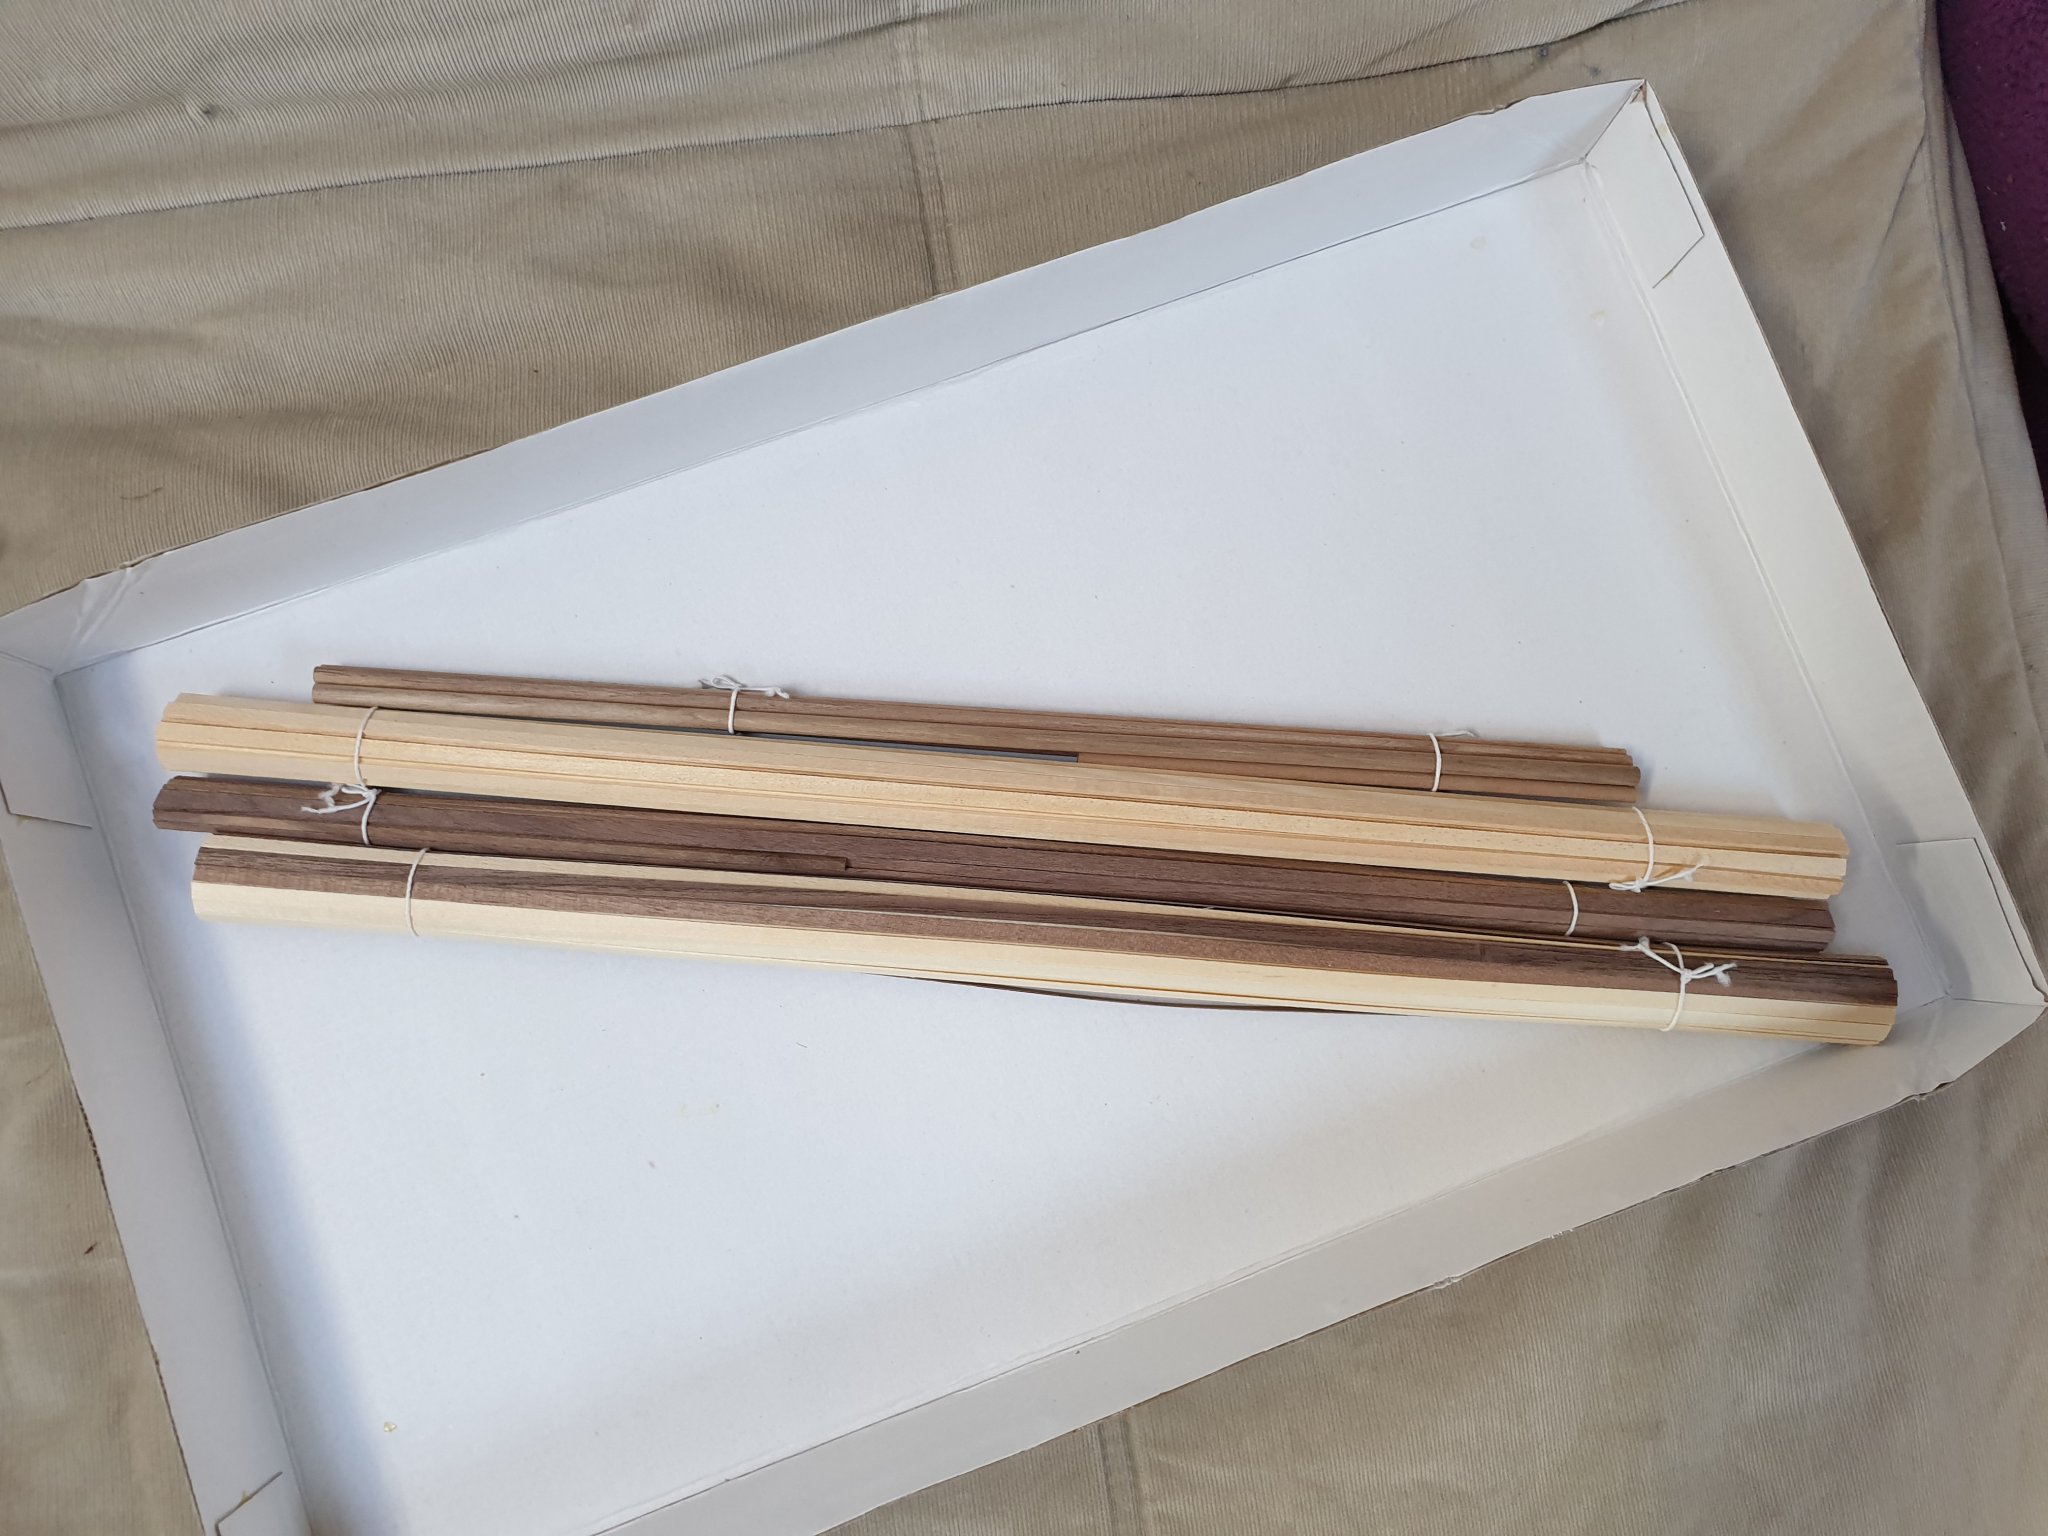
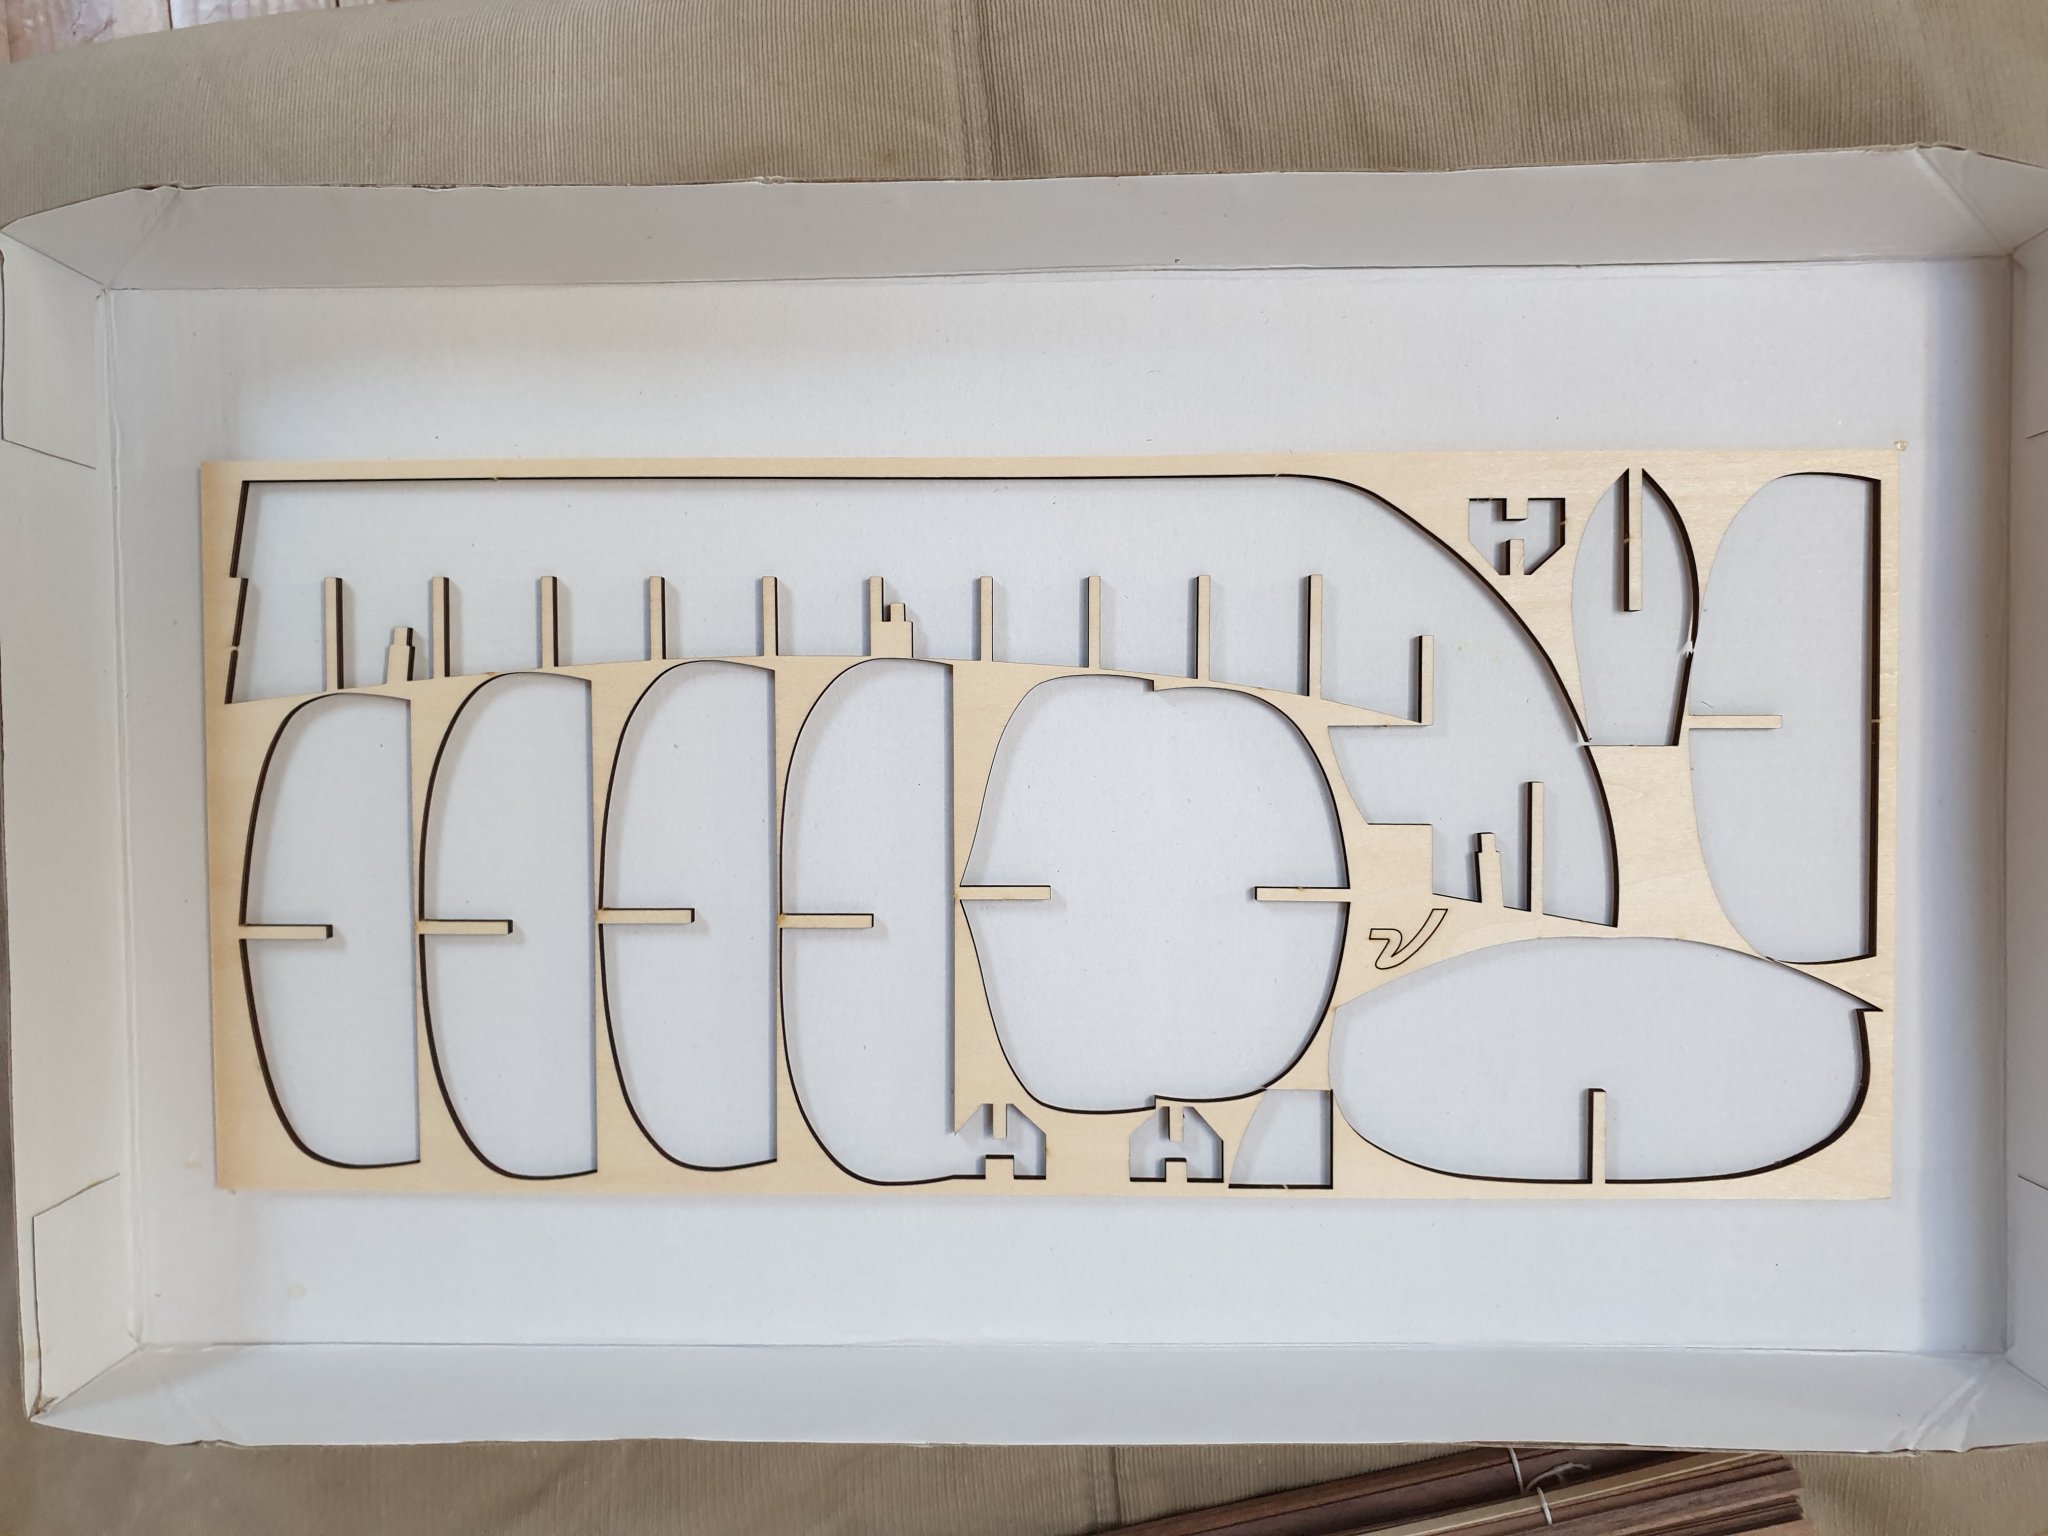
II. Kit Review So I decided to go with the Artesania Latina one, since we can find a lot of material about the builds, and people look generally happy about it. I am posting this Log a bit late, I already started the construction, so some parts may be missing. Thank you also in advance for your patience with my English which is probably far from perfect... Content: The Box Parts Drawings Manuals The Box Let's have a look at the box. The elements inside were pretty well packaged, with a thick carton to prevent warps. The Parts All the small elements are pretty well organised in strong plastic box. Only some of the metal parts look not so well finished (small boat, lantern, canons and will probably need rework or replacement, let see later. All the wood planks and masts are pretty well packed, they look rather uniform and neat : Here we go with the lasercut plywood parts... I am sorry if some of the parts are missing, indeed I had already started the build before thinking about taking pics of the box content... The decks and sides : Smaller parts and sails : The Drawings Drawings Scale 1:1 : Parts Nomenclature The Manuals I think they are good enough for an experimented builder, but for a beginner definitely not, he would, I think, more detail about tools and techniques, thus the importance of this kind of forum...


-
PJTheJet changed their profile photo
-
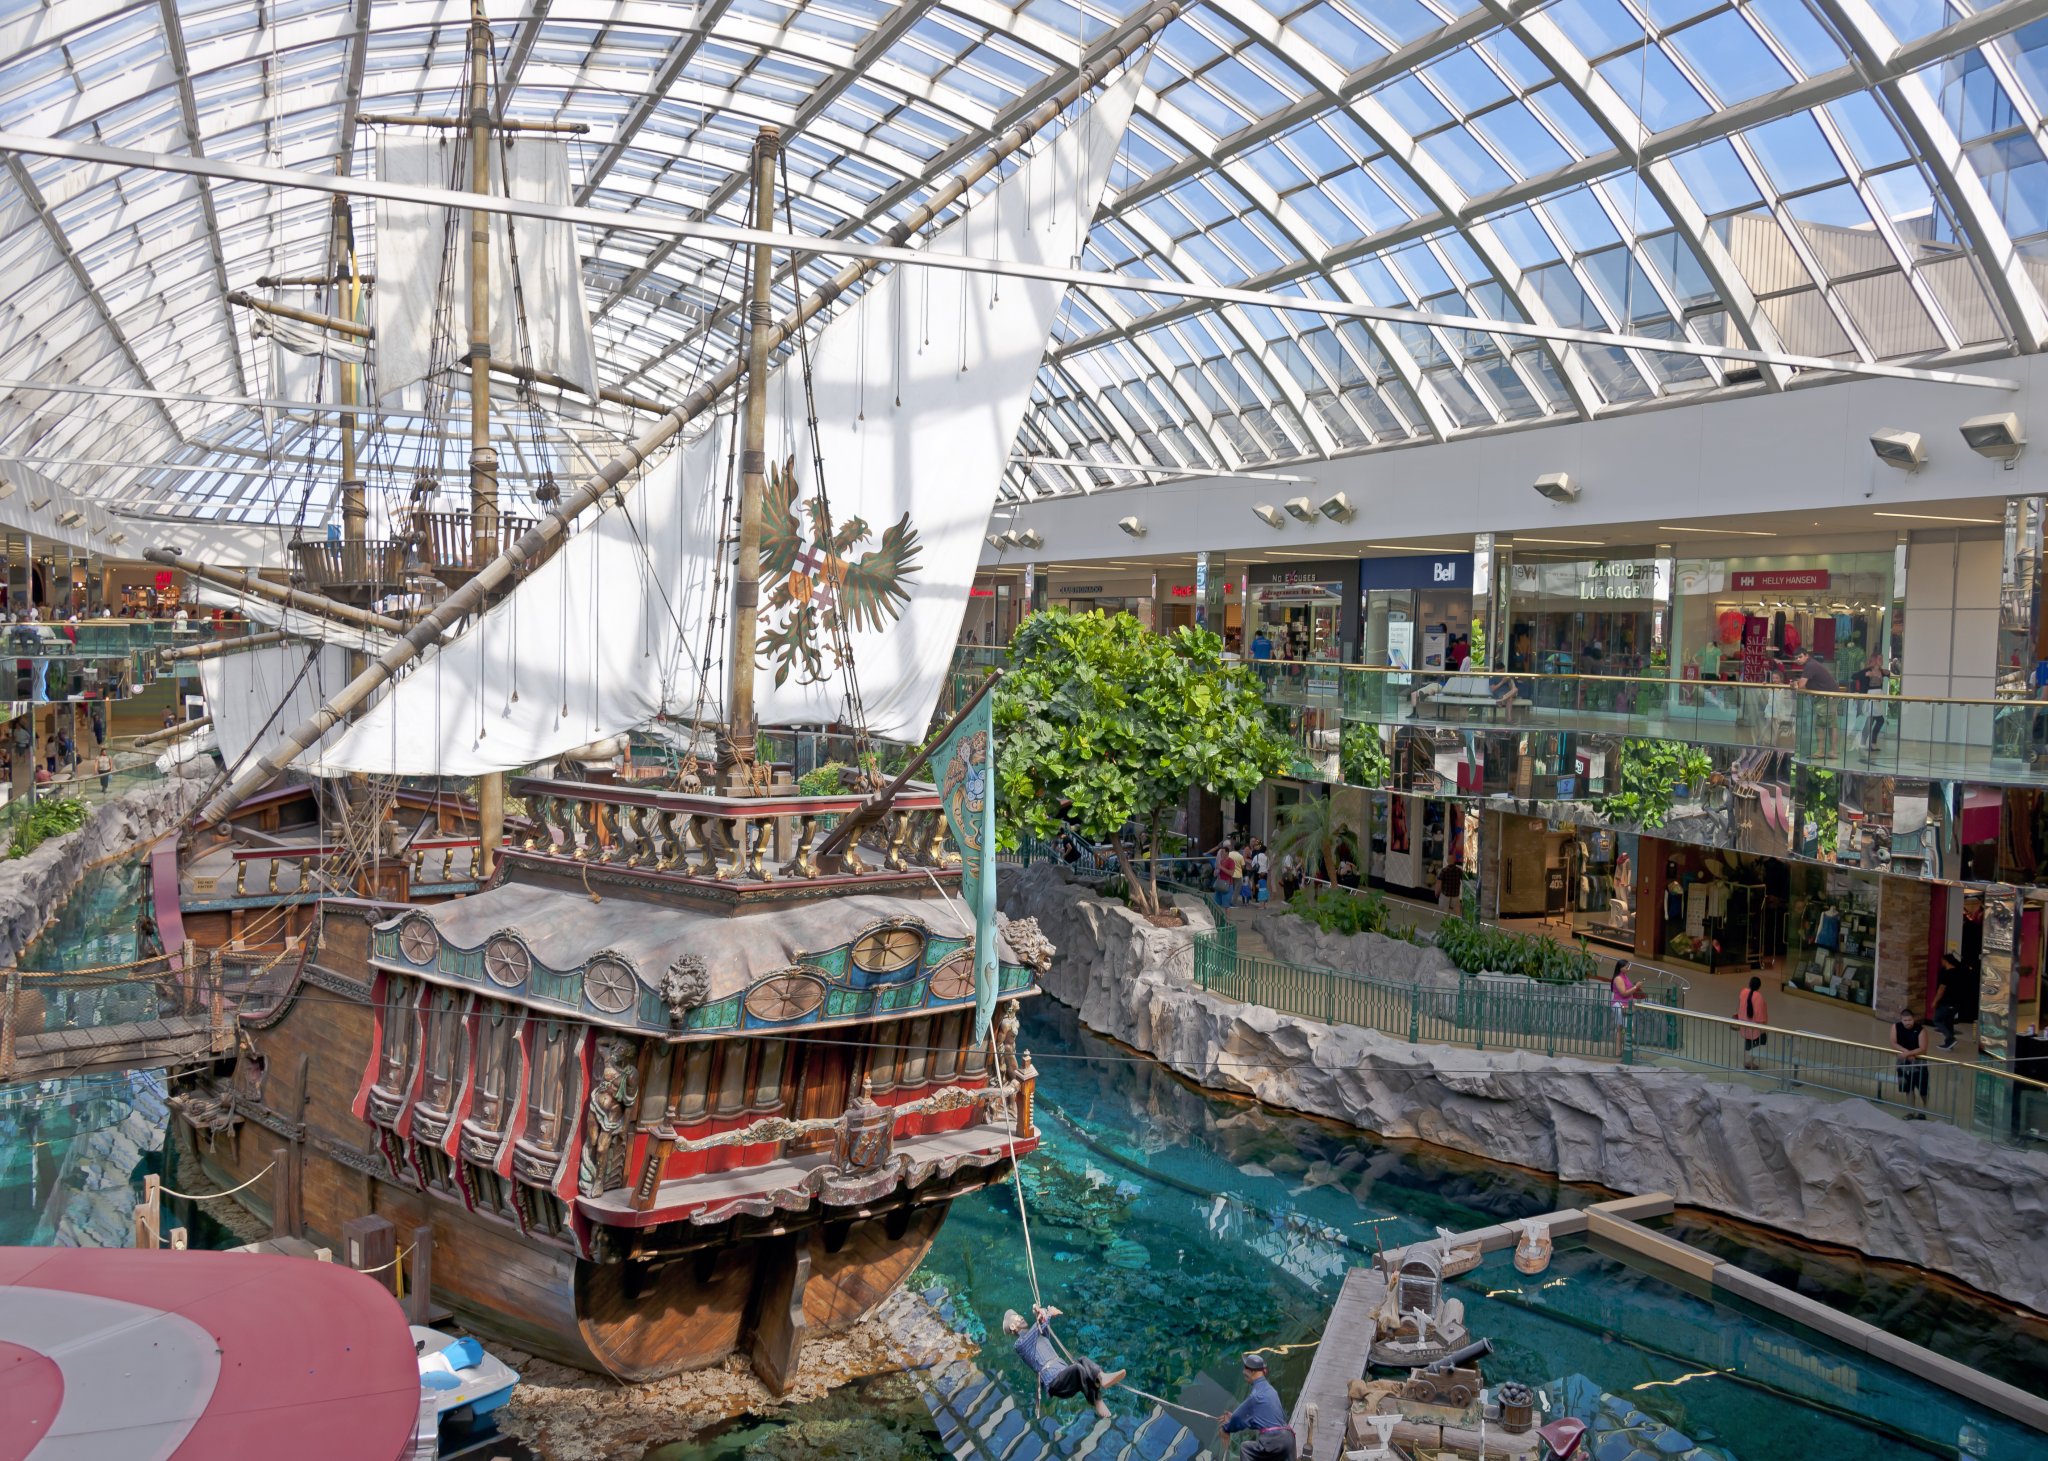
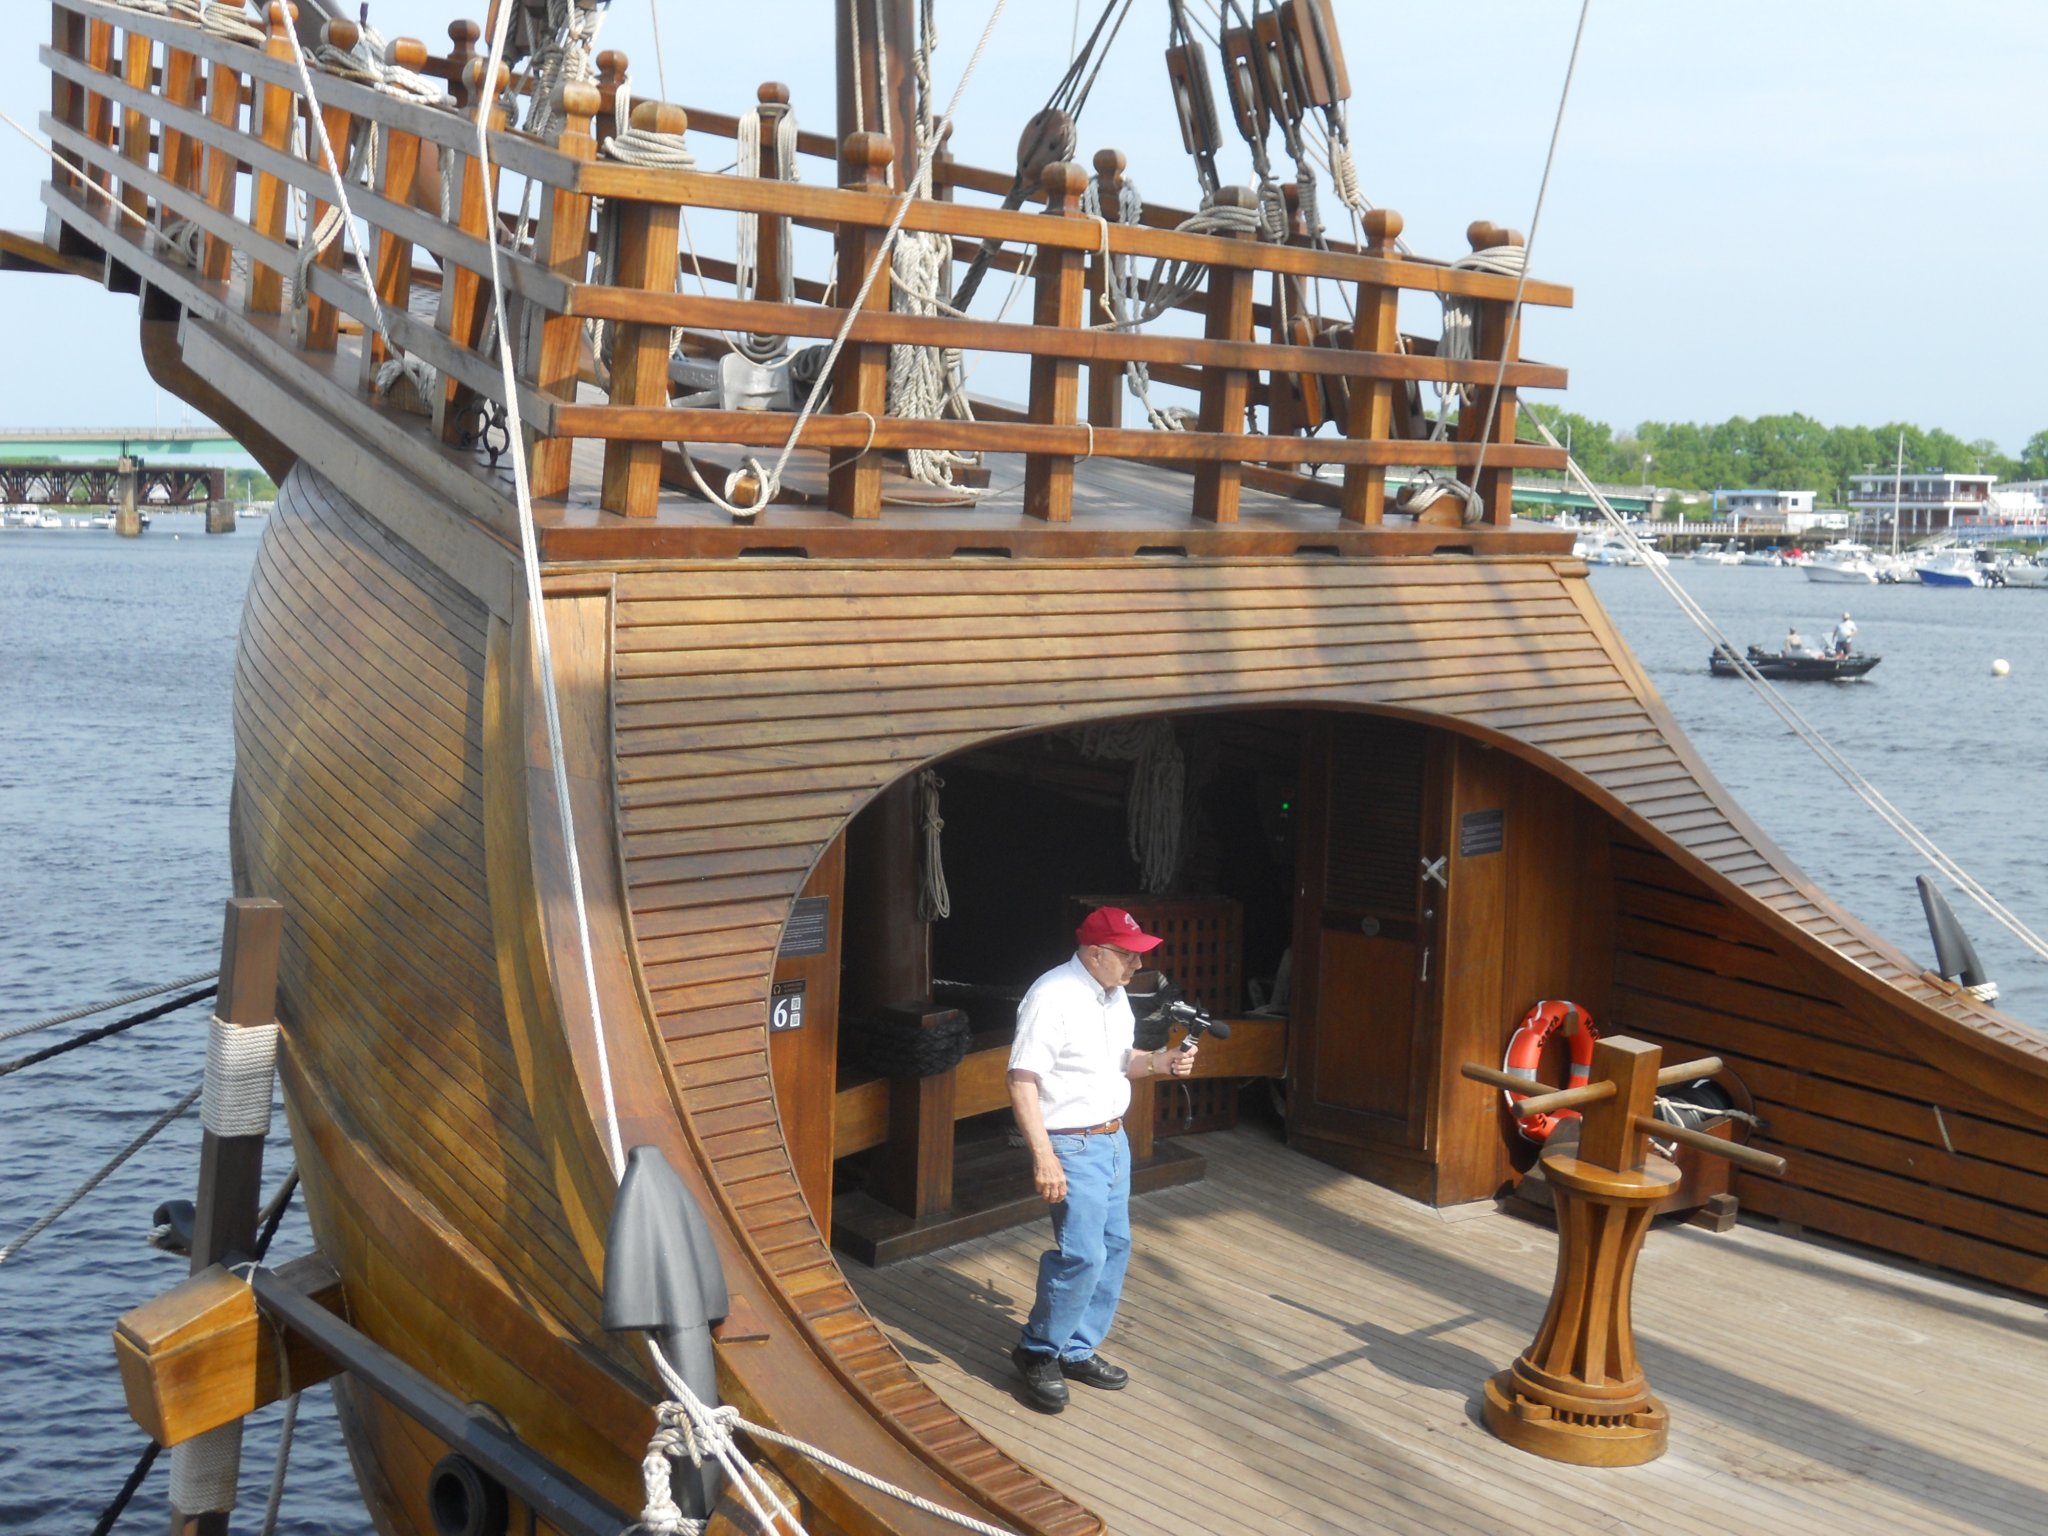
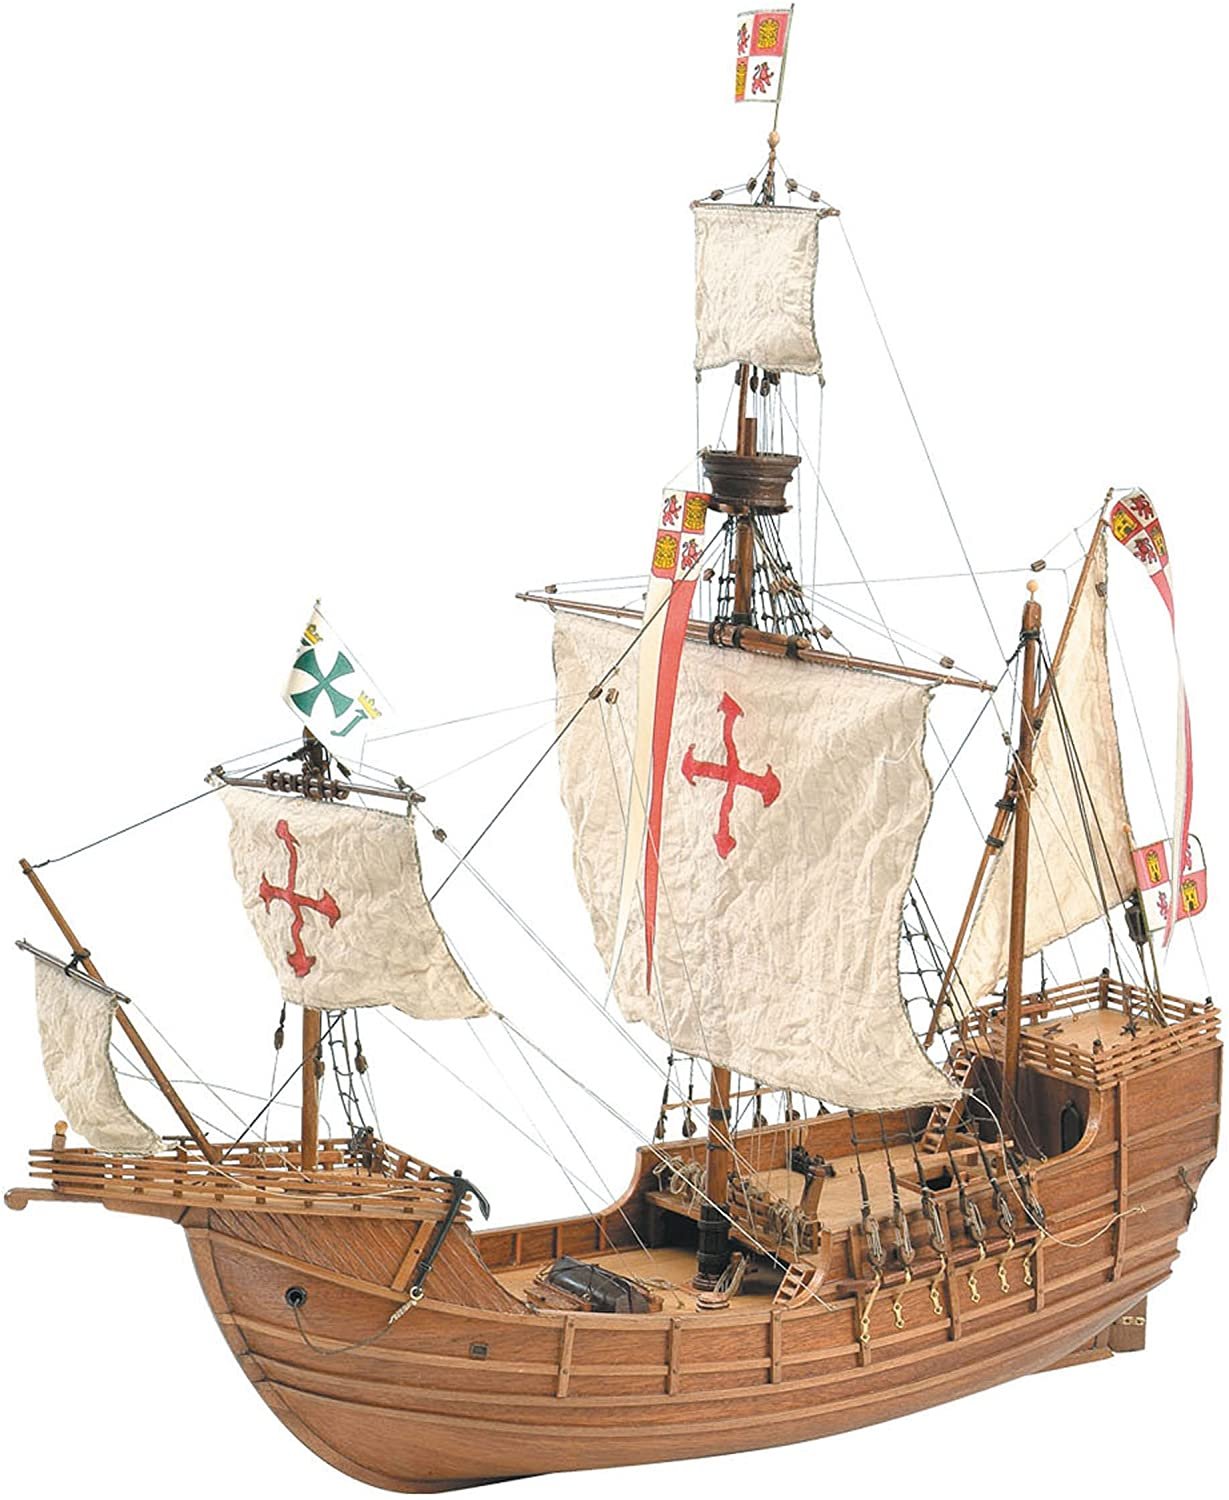
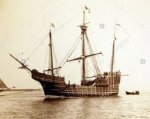
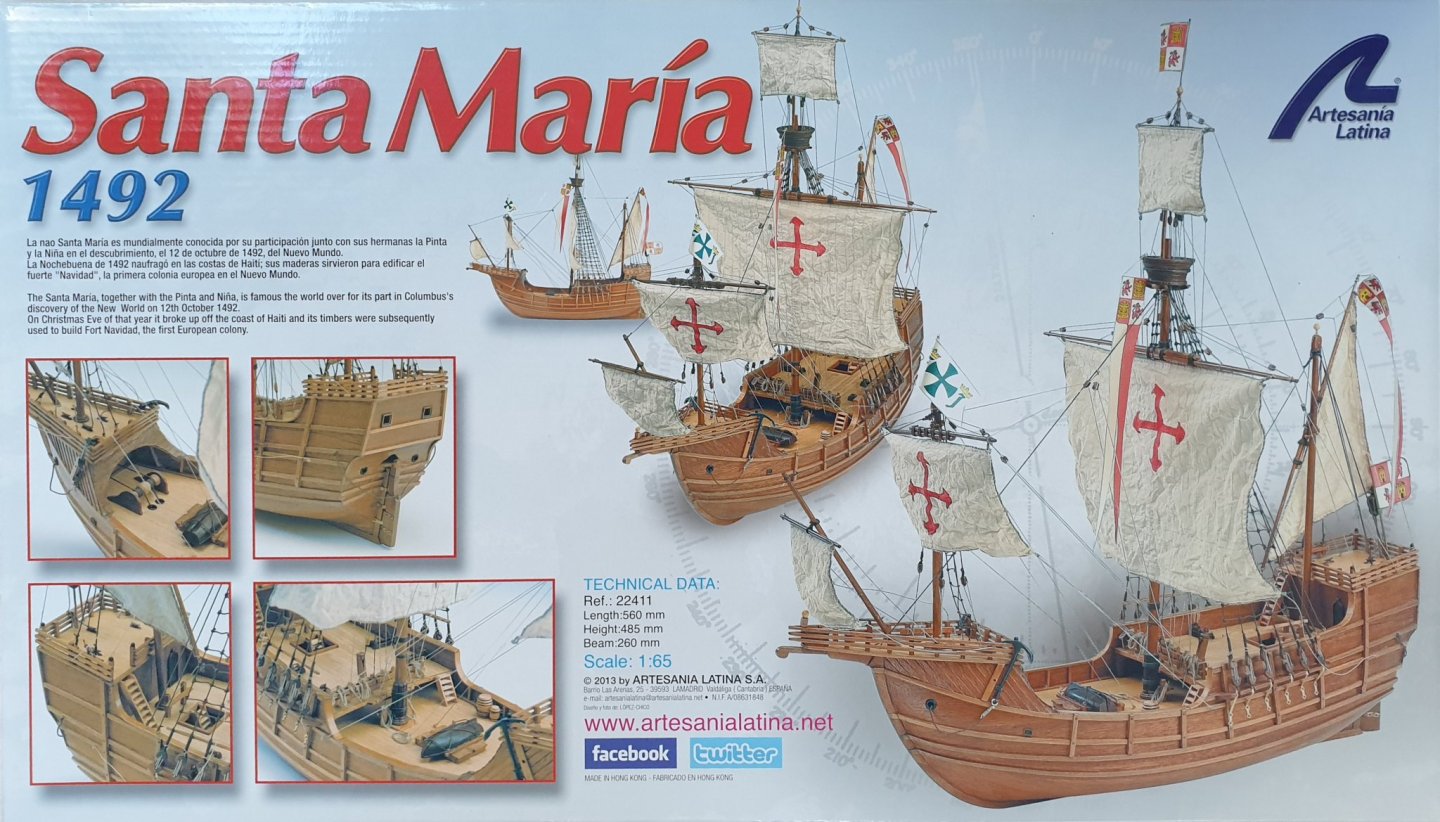
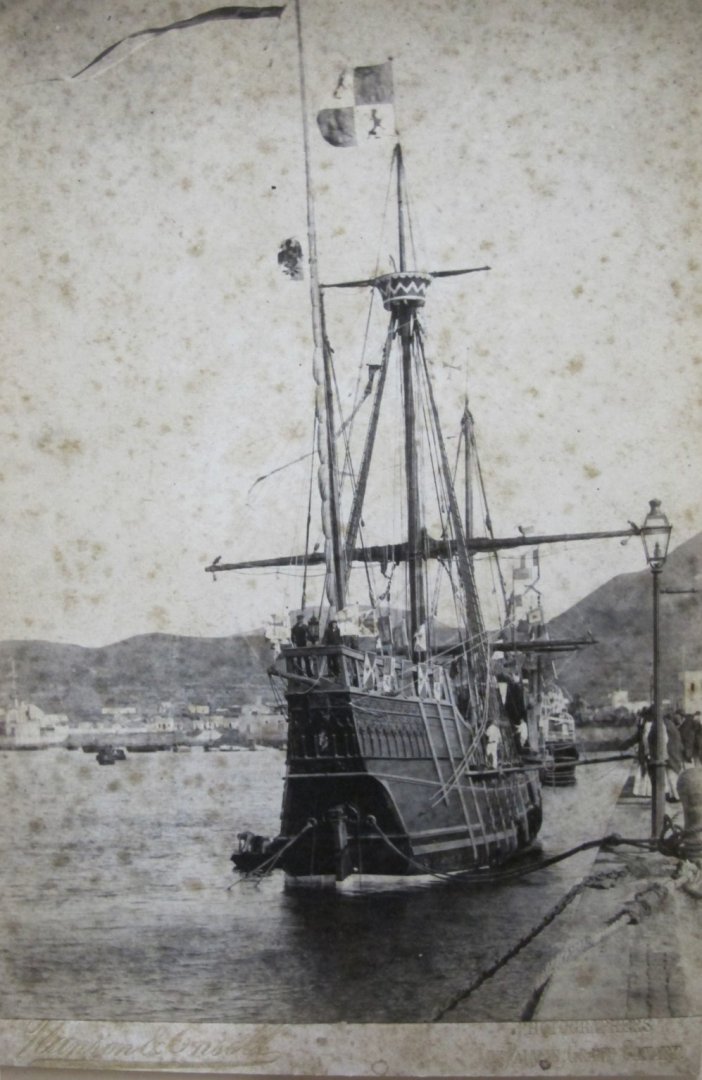
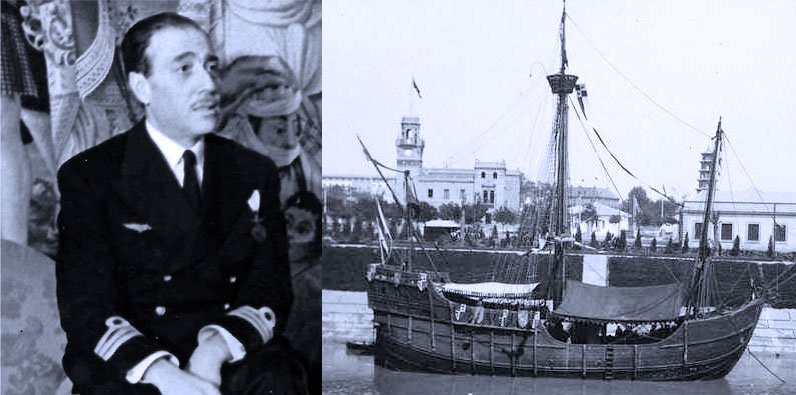
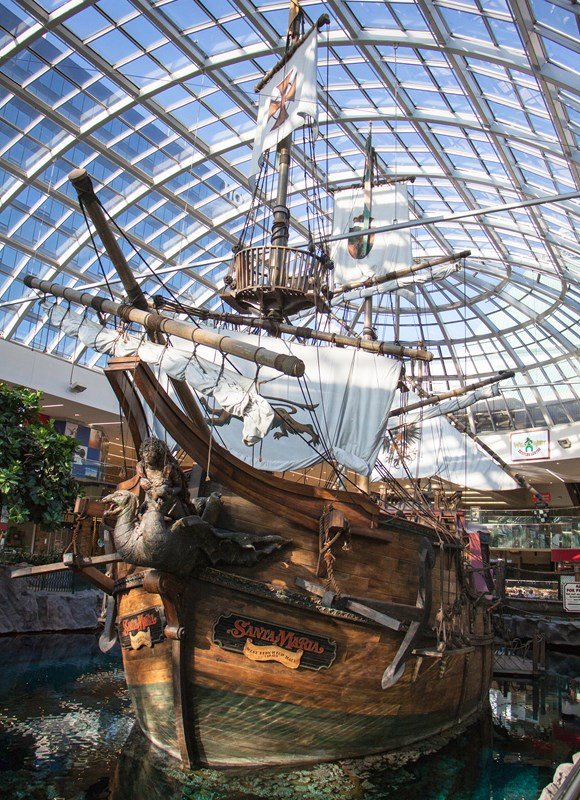
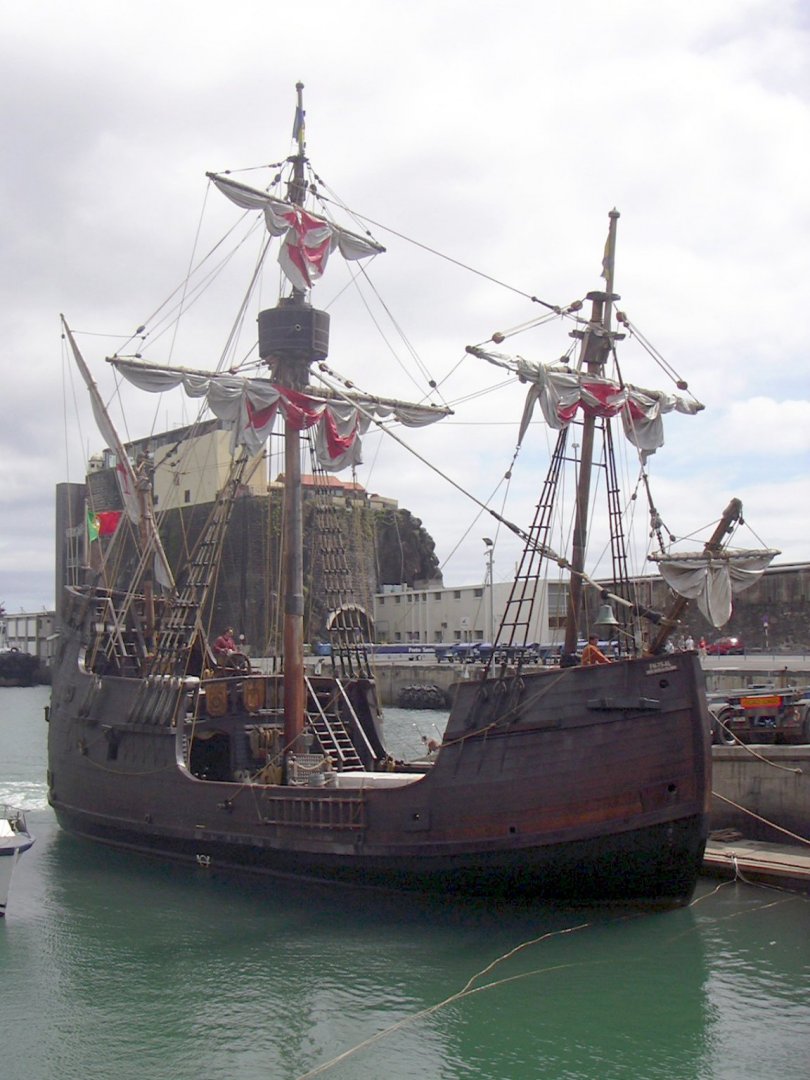
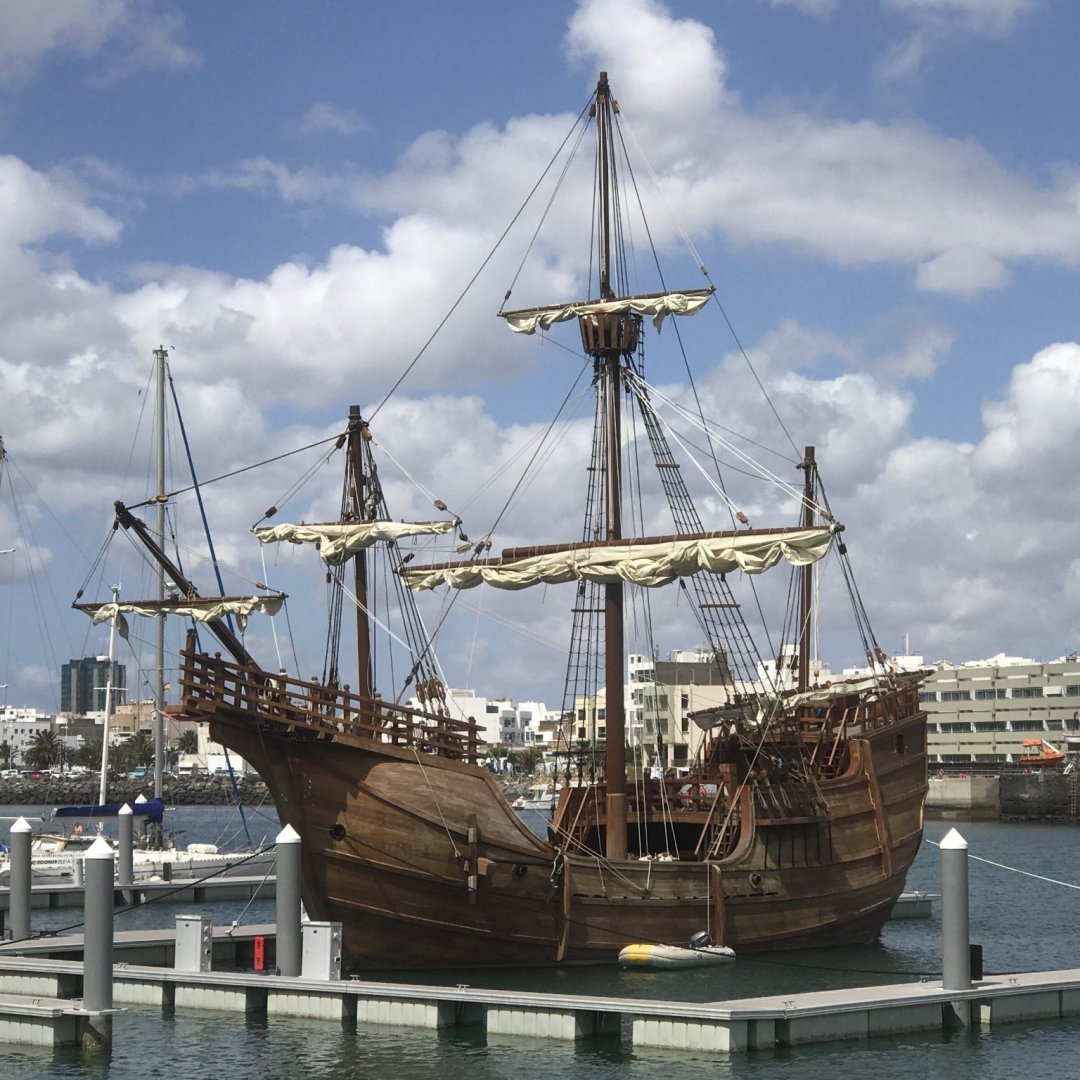
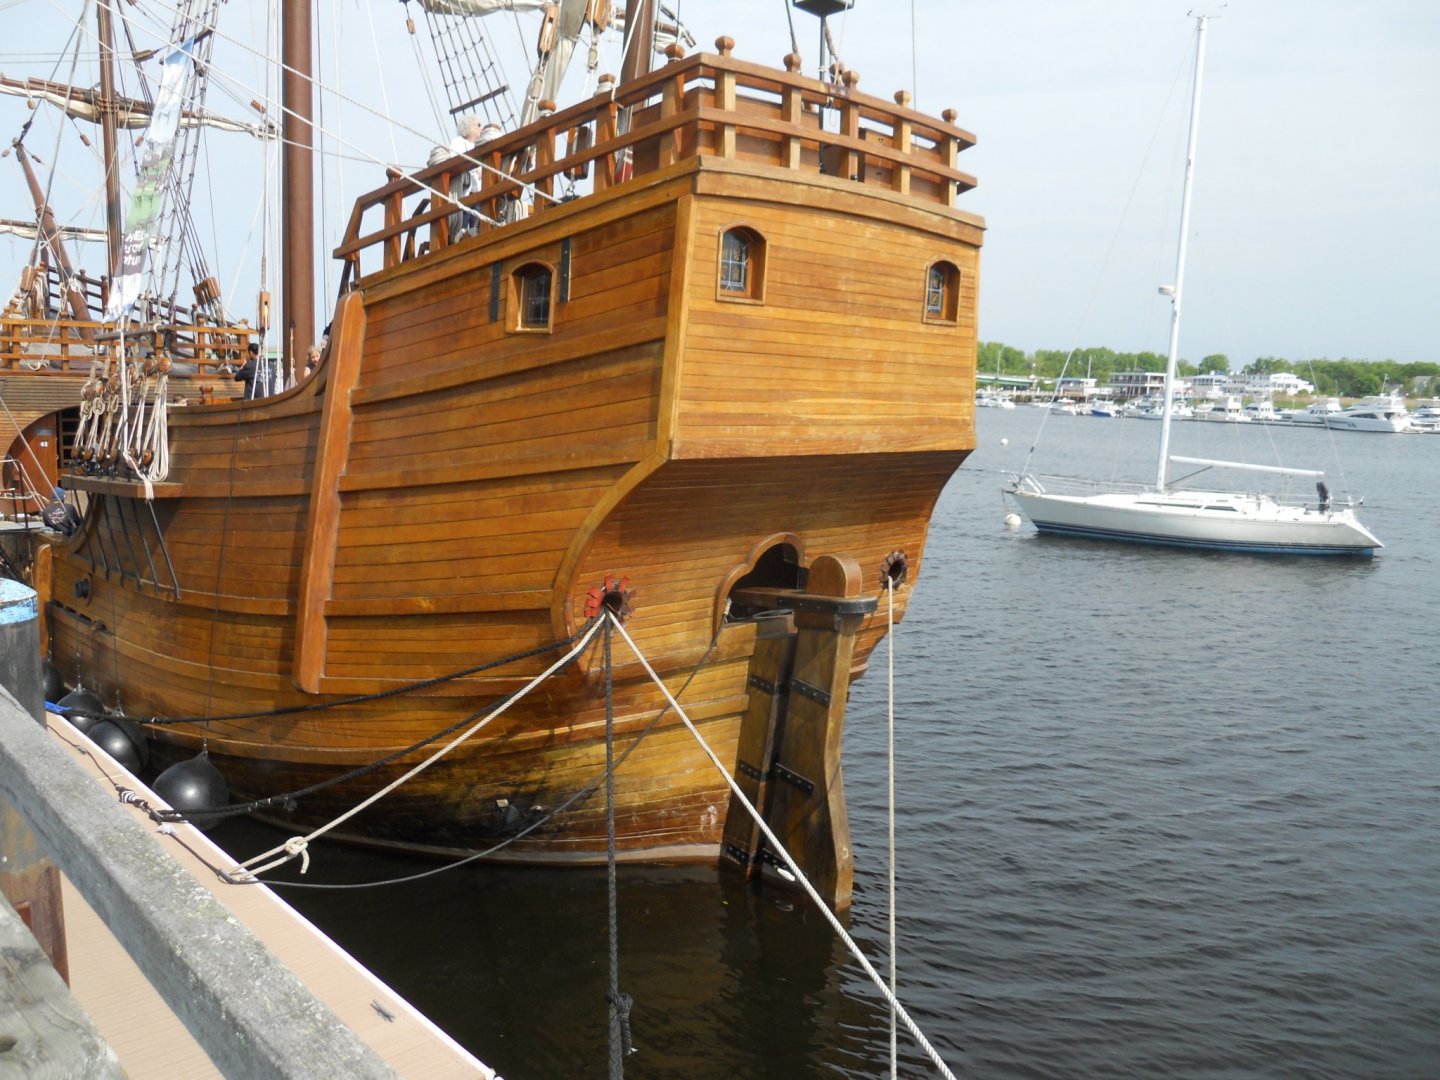
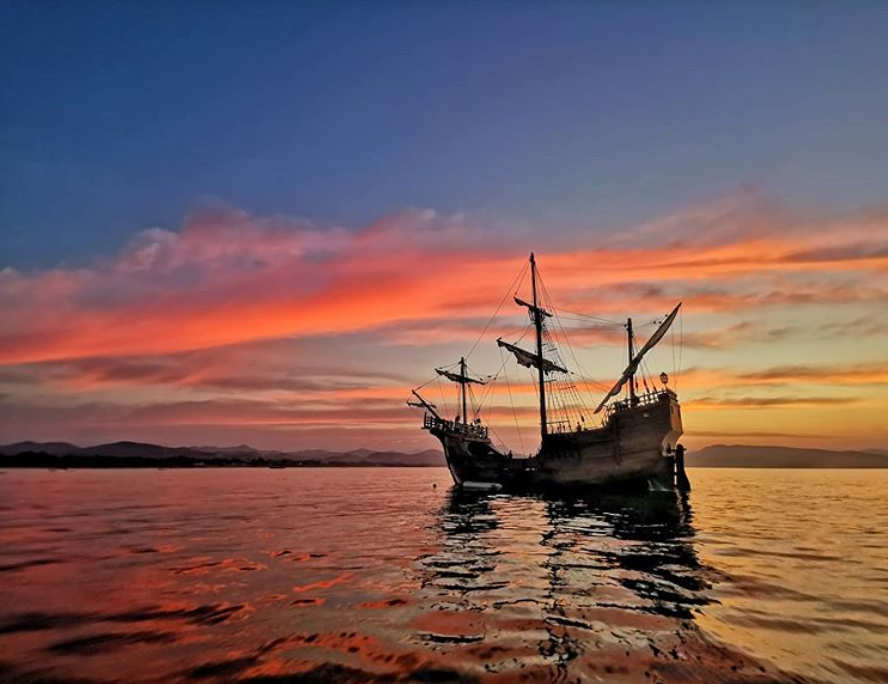
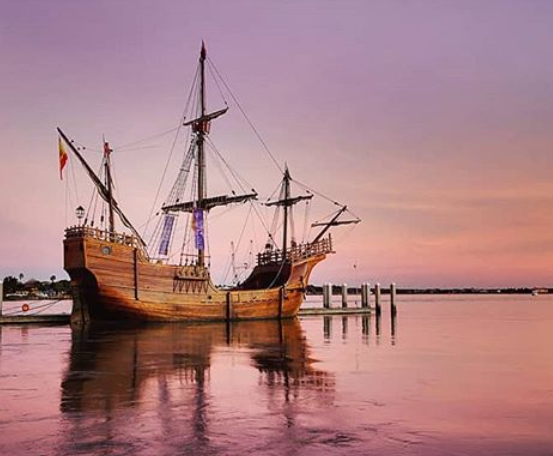
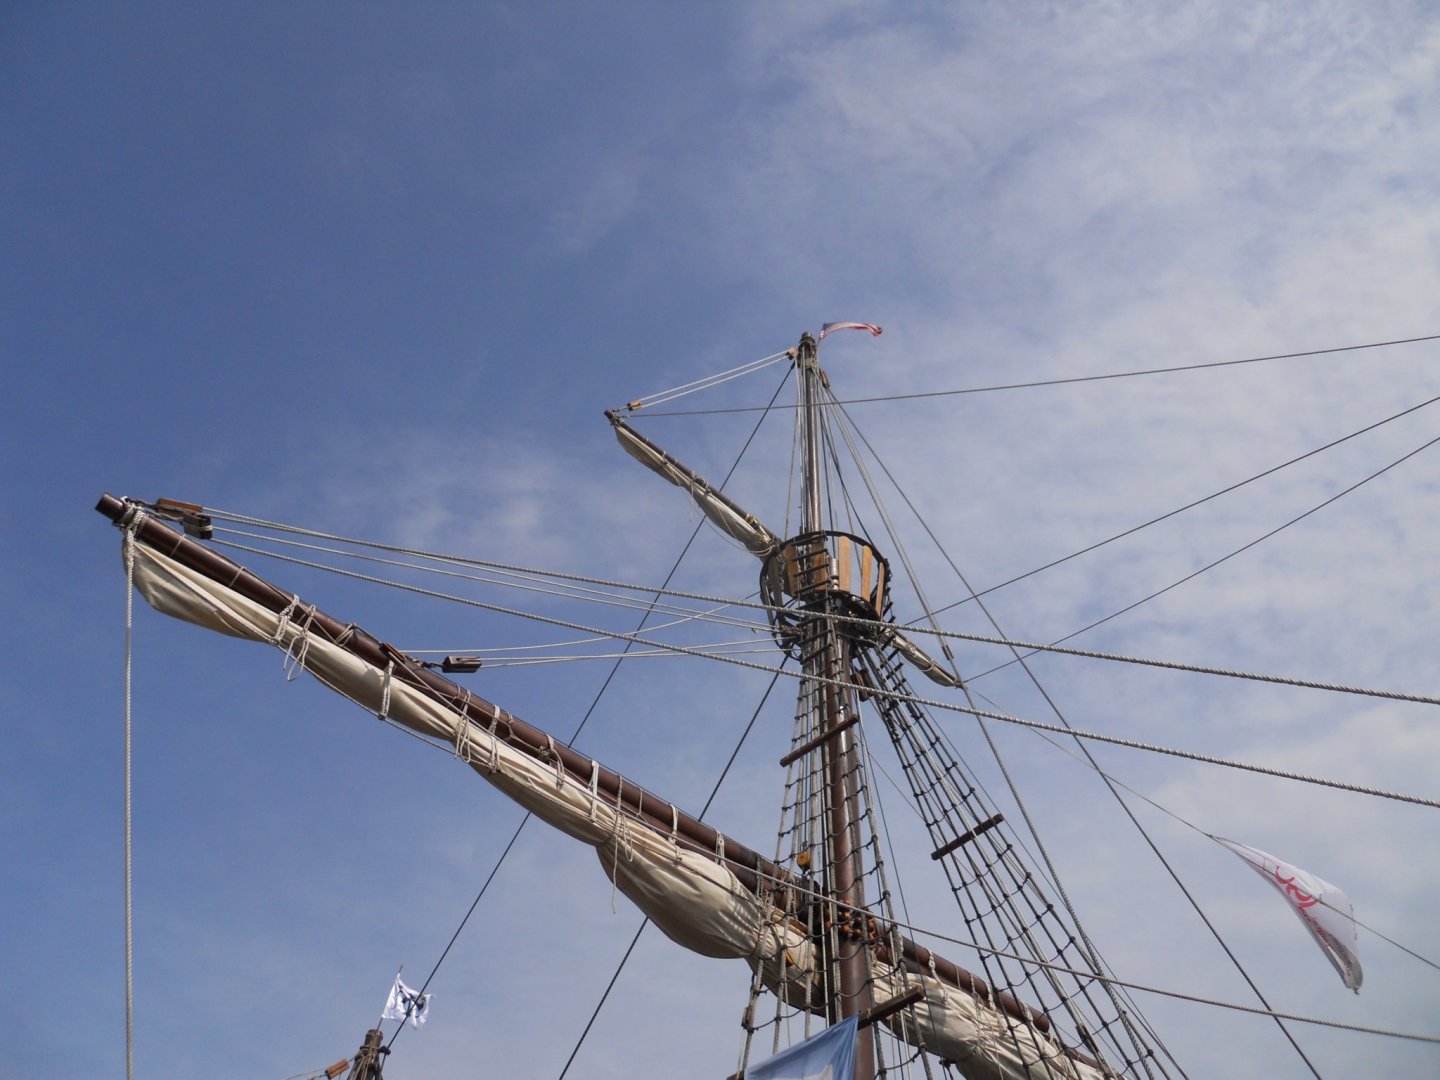
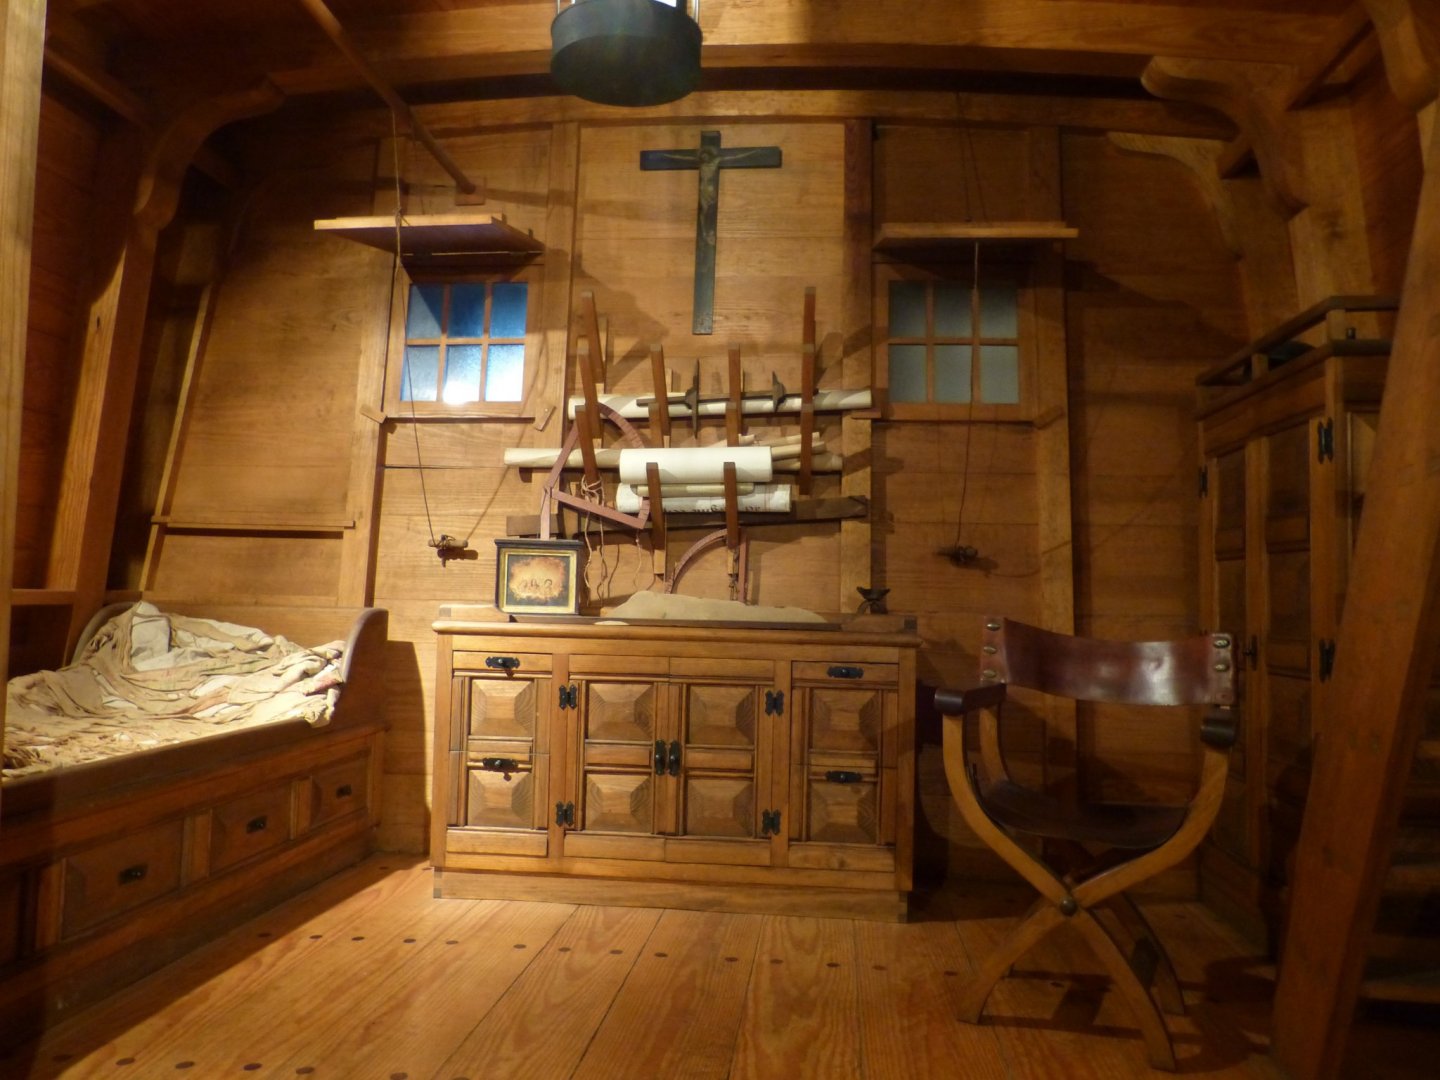
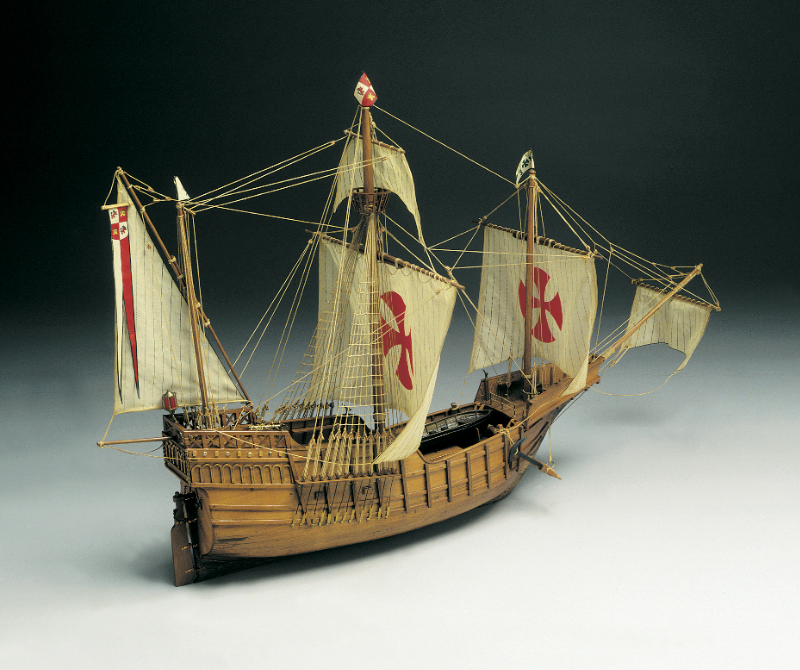
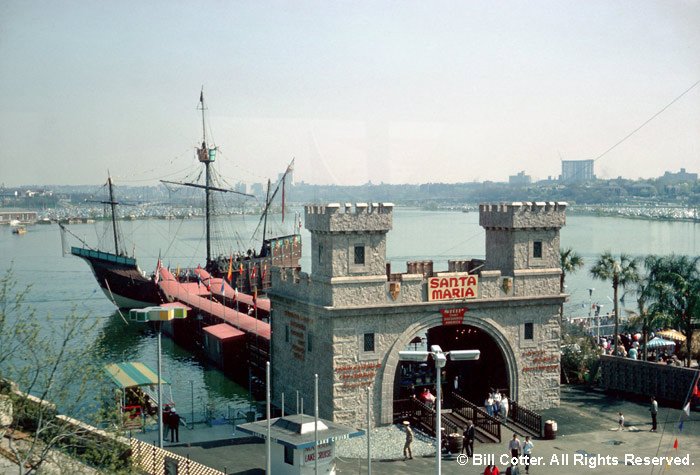
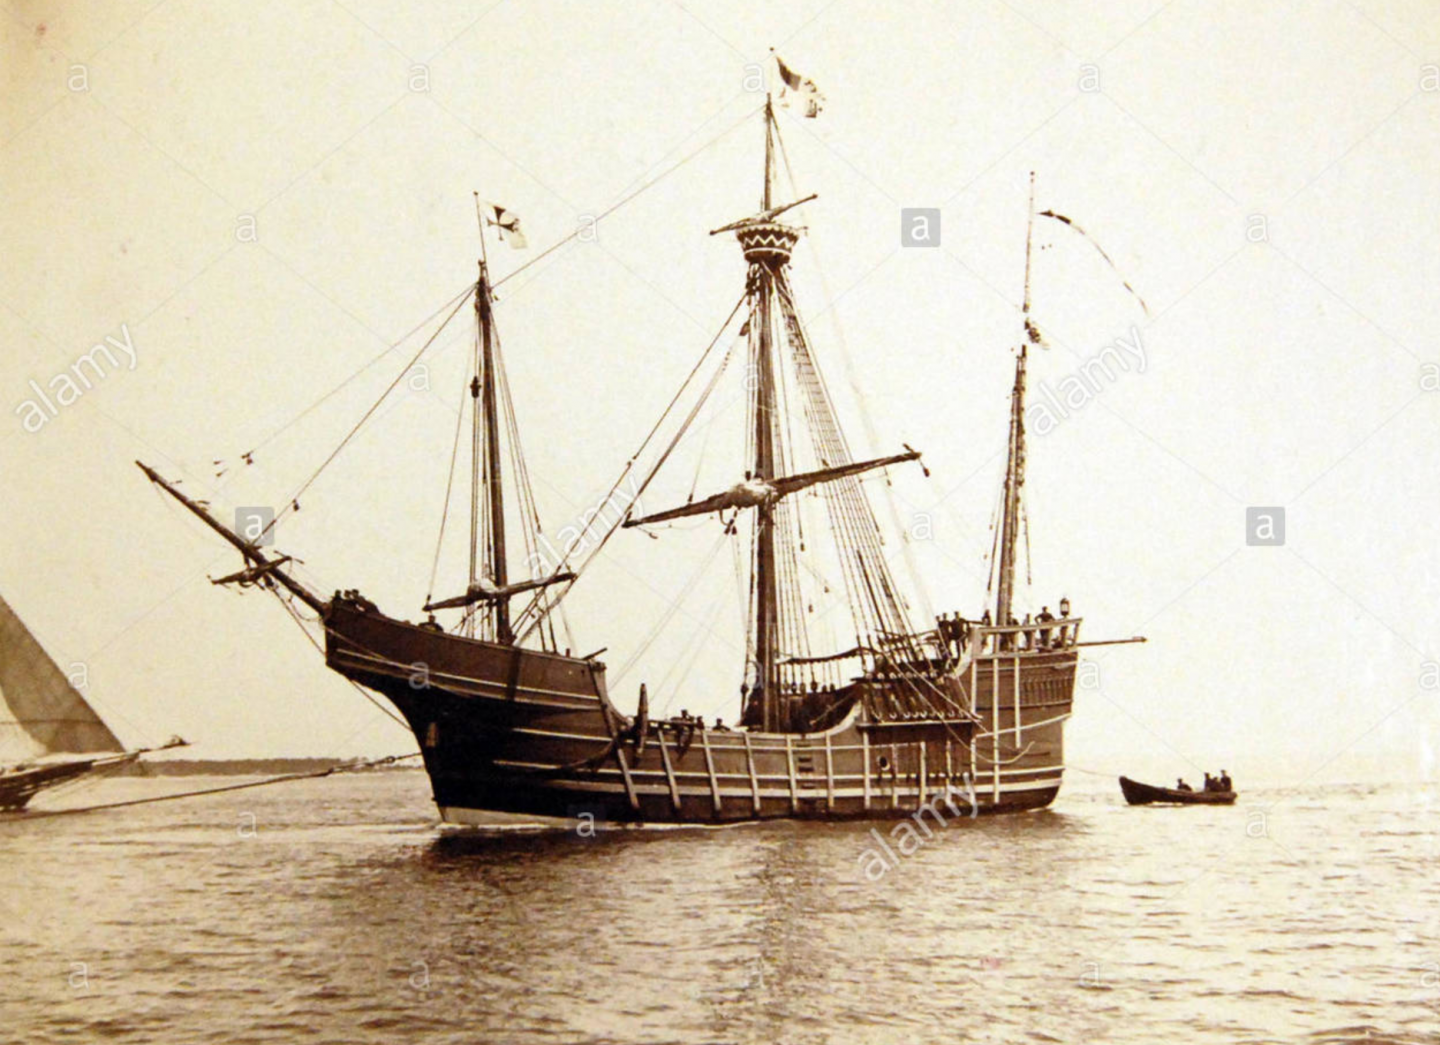
SANTA MARIA 1492 - ARTESANIA LATINA - 1:65 Topic Contents I. A bit of research II. Kit Review III. Frame Assembly IV. Main Deck V. Main Deck Front Wall VI. Bulwarks VII. Quarter Deck I. A bit of Research Content : Introduction History of the Ship Historical Context About The Ship Replicas Quadricentennial, 1892 Expo Iboamerica, 1929 New-York World Fair, 1964 West Edmonton Mall, 1986 Quincentennial, 1991 Madeira Wine Expo, 1998 525th Anniversary, 2018 Model Kits Introduction Hello Everyone, Here I start my first build log of my first wood ship model... I have some experience in modeling plastic aircraft and got recently into wood modeling with the Wright Flyer from Guillow's. I really enjoyed this wood modeling experience and decided to go to the next level with a real ship model (Covid lockdown being also a great help to find free time !..). For more introduction : So after looking on the forum and the internet, and given my modeling experience and budget, I decided to go with the Santa Maria which looked something not too complicate at a beginning but still presenting some challenges...let see if I was right... I will rely mainly on two builds completed on this forum of the same kit, one by Katsumoto and one by Moonbug : History of the Ship Historical Context In 1492, Christopher Columbus sailed a small fleet of three small ships west from Spain across the Atlantic Ocean, hoping to find a shorter route to the riches of Asia. Before his voyages, Chinese and Indian luxuries for European markets were transported over the long and hazardous overland route through Arabia. The Santa Maria and Columbus’s other fleet members the Niña and the Pinta were older ships used for coastal trading rather than vessels designed for ocean crossings. Nine weeks after the little fleet left Spain, land was sighted in the Caribbean on 12 October 1492, but exactly which island Columbus’s crew first spotted remains disputed. The fleet went on to explore the north coasts of the islands of Cuba and Hispaniola (now Haiti). On the return trip, on 24 December (1492), not having slept for two days, Columbus decided at 11:00 p.m. to lie down to sleep. The night being calm, the steersman also decided to sleep, leaving only a cabin boy to steer the ship, a practice which the admiral had always strictly forbidden. With the boy at the helm, the currents carried the ship onto a sandbank, running her aground off the present-day site of Cap-Haïtien, Haiti. It sank the next day. The ship’s timbers were salvaged and used to build a small fort on shore. Fortunately for Columbus, he was able to return to Spain on the Niña. Instead of Asia, Columbus had landed in the Caribbean islands on his first voyage. Although they were already inhabited, he claimed them for Spain. Columbus made three more voyages to the western hemisphere between 1493 and 1504. Waves of conquerors and colonists—both free and enslaved—followed. What was a triumph for Spain became a catastrophe for native peoples. New livestock, plants, diseases, and beliefs unsettled centuries-old communities and ecosystems, changing and destroying the lives of millions. About the ship The three-masted vessel Santa Maria was the largest of Columbus’s expeditionary vessels and his flagship. Measuring around 70 feet in length, it carried a crew of 40 men. Her master and owner was Juan de la Cosa. She was built in Pontevedra, Galicia, in Spain's north-west region. Santa Maria was probably a medium-sized nau (Carrack), about 58ft long on deck, and according to Juan Escalante de Mendoza in 1575, SM was "very little larger than 100 toneladas" (about 100 tons, or tuns). There is very little historical evidence regarding exactly what the "Santa Maria" looked like, or how it was built. There was little to no documentation regarding ship building in 1492, and this ship was scuttled and its lumber used for shelter not long after its initial voyage. Replicas Interest in reconstructing the Santa María started in the 1890s for the 400th anniversary of Columbus's voyage. In an effort to reproduce history, the "Santa Maria" has suffered six major Spanish versions, and one American. Little is definitively known about the actual dimensions of Santa María, since no explicit documentation has survived from that era. Since the 19th century, various notable replicas have been publicly commissioned or privately constructed. These opinions are not entirely uneducated. A number of shipwrecks of naos have been investigated, from which verisimilar general measurements could be made, and there are some statements from the literature from which dimensions can be deduced. Whether Morison, a former admiral in the United States Navy, is bringing realism to the topic, or is being perhaps slightly more skeptical than is warranted, is a matter of opinion. There is one sense in which none of the "replicas" replicate an ancient ship: the concessions to the conveniences of the modern world, especially on the ships meant actually to sail. These are well-hidden: it might be an engine, or modern rudder machinery in a closed compartment, or communications equipment. No modern sailors are expected to undergo the hardships of a 15th-century voyage. They have bunks where Columbus' sailors slept on the deck, and modern stoves instead of cooking fires on the deck. In case of emergencies, help is a radio call away. The Renaissance seamen risked life and limb, and some died on every voyage. They feared going to sea, and if they did go, feared to get out of sight of land. 1. Quadricentennial, 1892 In 1892 the naval historian, Fernandez Duro, modelled the ship as a Nao - A carrack or nau was a three- or four-masted sailing ship developed in 15th century Western Europe for use in the Atlantic Ocean. It had a high rounded stern with large aftcastle, forecastle and bowsprit at the stem. It was first used by the Portuguese (its creators), and later by the Spanish, to explore and map the world. It was usually square-rigged on the foremast and mainmast and lateen-rigged on the mizzenmast. Unfortunately, Fernandez Duro made a fundamental error as result of an erroneous reading of Columbus's log. It was also criticized as being too ornamented for the period. 2. Expo Iboamerica, 1929 In 1929, the second attempt to recreate the ship was by Julio Guillen Tato, known as the Guillen version. This reproduction for the Expo was controversially designed as a Caravel - a small, highly maneuverable ship developed in the 15th century by the Portuguese to explore along the West African coast and into the Atlantic Ocean. Caravels were much used by the Portuguese for the oceanic exploration voyages during the 15th and 16th centuries. Tato's reproduction sailed badly and ended up a wreck. 3. New-York World Fair, 1964 Ninety feet long, weighting 110 tons, the vessel was constructed in Barcelona after years of research in museums and naval archives, and brought to the United States on the deck of a freighter. Her architect was Jose Maria Martinez-Hidalgo, curator of the Maritime Museum of Barcelona, Spain; his consultant was Colonel Howard I. Chapelle, chief of the Naval and Transportation Section of the Smithsonian Institution in Washington. 4. West Edmonton Mall, 1986 A replica was built during 1986 World Exposition held in Vancouver, Canada, the theme of which was "Transportation and Communication: World in Motion - World in Touch". It was anchored in "Deep Sea Adventure Lake" at West Edmonton Mall. Built at False Creek in Vancouver, British Columbia, the ship was hand-carved and hand-painted, and then transported by flatbed trucks across the Rocky Mountains to Edmonton, Alberta. 5. Quincentennial, 1991 A replica, depicted as a Carrack, was commissioned by the city of Columbus, Ohio. It was built by the Scarano Brothers Boat Building Company in Albany, New York, who later cut the ship in half and transported it by truck to the Scioto River. The replica cost about 1.2 million dollars. The ship was constructed out of white cedar as opposed to an oak wood used on the original to give the ship a long life in the Scioto River and to reduce cost. The main mast was carved out of a single douglas fir tree and was equipped with a top sail (since removed). The replica was declared by Jose Maria Martinez-Hidalgo, a Spanish marine historian, to be the most authentic replica of the Santa María in the world during the ship's coronation on 12 October 1991. Dana Rinehart, the 50th mayor of Columbus, christened the ship as part of the 500th anniversary of its voyage. The ship was removed from its moorings in 2014, cut into 10 pieces, and stored in a lot south of the city, pending funding to do repairs and restorations. 6. Madeira Wine Expo, 1998 A functional replica was built on the island of Madeira, between July 1997 and July 1998, in the fishing village of Câmara de Lobos. The ship is 22 m (72 ft) long and 7 m (23 ft) wide. In 1998 Santa María represented the Madeira Wine Expo 98 in Lisbon, where she was visited by over 97,000 people in 25 days. Since then thousands more have sailed and continue to sail aboard that Santa María replica which is located in Funchal. 7. 525th Anniversary, 2018 The Nao Victoria Foundation has built in 2018 the replica of the historical Nao Santa María. The construction of the ship has been carried out respecting its forms and details with historical rigor, applying an innovative and revolutionary system in the shipbuilding sector of historical replicas of these characteristics, which combines the construction in fiberglass and its lining of wood. It is a novel technique that represents a huge advance in terms of environmental impact, costs, durability and maintenance of the ship. The work has lasted approximately 12 months, and the launching is scheduled for the beginning of March 2017 Built in the Punta Umbría shipyards, it employs about one hundred professionals of different profiles: workers from the Puntaumbrieño shipyard, craftsmen, carpenters or rope makers, mechanics or electricians, forming a large multidisciplinary team of work, together with historians, engineers and builders, who are involved in the planning of the first plans of the replica designing the forms and measurements of the ship. Sources : Wikipedia https://en.wikipedia.org/wiki/Santa_María_(ship) Fundation Nao Victoria https://www.fundacionnaovictoria.org/replica-nao-santa-maria/ Fundation Larramendi http://www.larramendi.es/fundacion/guillen-tato-estudio/ West Edmonton Mall https://www.wem.ca/play/attractions/marine-life/experiences/santa-maria New York World Fair 1964 http://nywf64.com/sanmar01.shtml Model Kits I recense below the most famous kits available in scale 1:65 or larger, but there are a lot of ther existing. I decided to go with the Artesania Latina one, since there was a lot of material and build logs available for this version. - Amati, 1:65 - https://store.amatimodel.com/fr/modeles-amati-classique/produit-santa-maria-b1409.html - Mantua, 1:50 - https://www.mantuamodel.co.uk/products/ship-kits/mantua/459/santa-maria-1492-detail - Artesania Latina, 1:65 - https://www.amazon.fr/Artesania-Latina-Santa-22411-65-Véhicules/dp/B000L4IKV6
.thumb.jpg.a5f8253136734c3b174f1a81a597e0ce.jpg)
.thumb.jpg.f19d6977ef3e27243f6f563ea6b11f66.jpg)

_(2).jpg.81fc9e572bda7d13cf5eac6772219ed2.jpg)


-
Hello Everyone, I live in Toulon (south of france), I am 28 and I discovered Model Ship World while looking for info on the Santa Maria by Artesania Latina, which I just started building (will post a log asap). I have done modeling since my childhood, plastic aircraft mainly (since I have always been into flying stuff, and now work in aviation) : however some times ago I built the Wright Flyer wood model kit from Guillow's, and I was really seduced by the natural aspect of it, to have to use less chemicals, and I enjoyed workind with wood more than plastic generally. In the mean time I have been more and more attracted to nautical stuff lately (even if I have always been close to this domain, my father working on ships and submarines of the navy) thanks to multiple 'modern' references (series like black sails or vikings, games like assassin's creed) or more traditional ones (documentaries, books). Because of (thanks to?) the Covid-19 lockdown I had a lot of "free" time and this logically led me to building my first wood ship model, the Santa Maria, and buying tools for it. Thank you to all already for all the very useful information that we can find on this website, and in davance my apologies for the english mistakes... PJ.


.jpg.fa231a73eae92341ef637480d8d2eb33.jpg)
.jpg.fb4dea0f8229f4f327f4e6a541a5c061.jpg)