


Jim in KC
-
Posts
33 -
Joined
-
Last visited
Content Type
Profiles
Forums
Gallery
Events
Everything posted by Jim in KC
-
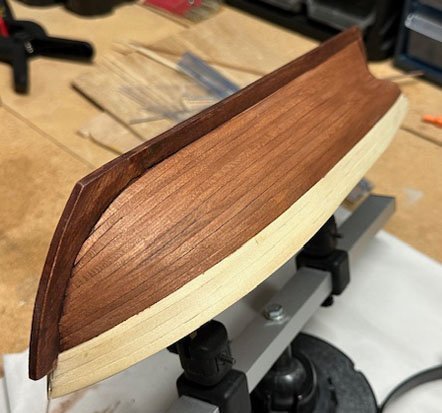
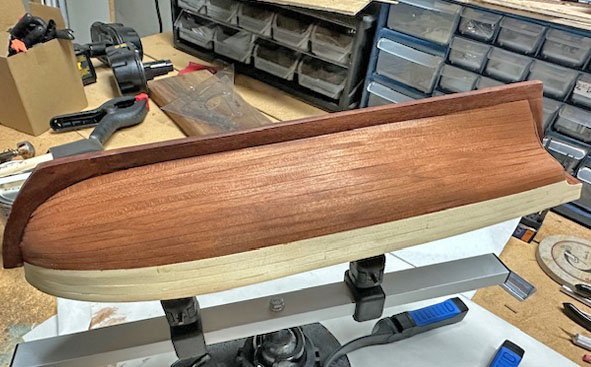
Well I've finished staining the hull, and I'm pleased with how it came out. I'm about done with the waterways. Getting the right curvature has proven much more difficult and time-consuming than I thought. Next, on to the stanchions. I got an answer to my question about waterways - among other things, since the stanchions ride on top, they prevent water from accumulating between the stanchions. I planked the deck over a year ago - I was pretty happy with it then, but my standards have increased considerably and it could be a lot better. Oh well, live and learn.

- 16 replies
-
- 1
-

-
- artesania latina
- first build
- (and 1 more)
-
Did 18th and 19th century ships have flat weatherdecks?
Jim in KC replied to Rushdie's topic in Nautical/Naval History
Thanks again - I really appreciate the information. So they are there for structural strengthening as well as for shedding water, and to have a gap would undercut the strengthening function.. -
Did 18th and 19th century ships have flat weatherdecks?
Jim in KC replied to Rushdie's topic in Nautical/Naval History
Thanks again for the information. I have another question. My kit has the waterways running unbroken from the stem to the stern. It seems to me that the waterways should be gapped at the scuppers so water can run out there. In looking at the completed logs for this build, two did gap the waterways at the scuppers while 3 or 4 did not. What do you think? By the way, I really appreciate you taking the time for this. -
Did 18th and 19th century ships have flat weatherdecks?
Jim in KC replied to Rushdie's topic in Nautical/Naval History
Thanks for the information - I think I get it. Since the waterway planks run inside the stanchions, it channels water to the scuppers, preventing it from accumulating between the stanchions, right? -
Did 18th and 19th century ships have flat weatherdecks?
Jim in KC replied to Rushdie's topic in Nautical/Naval History
I'm a newbie building n 1850 Swift pilot build. The deck definitely has a camber. Which leads to a related question. My kit calls for waterways - thin strips that run along the inside of the bulwarks. I'm not sure what these waterways are or were for in real life. Obviously it has something to do with draining water off the deck through the scuppers. But the deck is already rounded and the scuppers will be placed at the lowest point on the deck, so water should drain anyway. I was on a destroyer in the Navy - the weather decks were indeed cambered and water drained naturally through the scuppers - I don't remember it needing anything else. Can anyone enlighten me? -
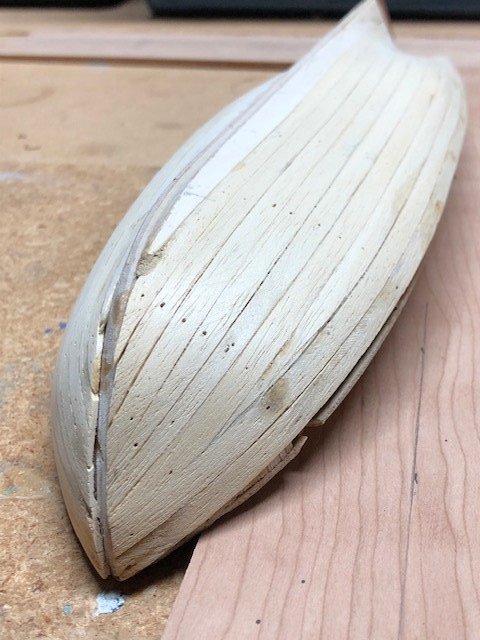
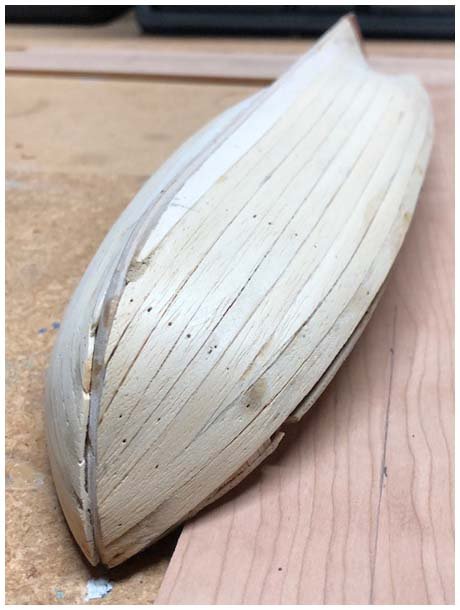
Well, I've finished the final planking, and sanded the hull down to get a smooth finish. I'm still working on the stern however - that's going to take some fitting of small carved pieces and probably some filling. Obviously I've made some mistakes but I'm satisfied with how its going in general for a first build. My plan is to stain the cherry wood with a dark cherry stain that I have tried out on scrap pieces. It will give the hull a color closer to the color of the keel. I have some cherry wood putty that I can use to fill where needed. After that it's on to waterways, bulwark stanchions, cap rail and belaying pin racks. I'm not sure what the waterways are or were for. Obviously it has something to do with draining water off the deck through the scuppers. But the deck is already rounded and the scuppers will be placed at the lowest point on the deck, so water should drain anyway. I was on a destroyer in the Navy and water drained naturally through the scuppers - I don't remember it needing anything else. Can anyone enlighten me?

- 16 replies
-
- 1
-
-
- artesania latina
- first build
- (and 1 more)
-
Hi Gregg, thanks for the heads-up. Im' going to edit them some to try to get them sharper.
-
Thanks Gregg. I guess there's no easier way to taper the planks. What I have been doing is to shave off the plank to where it's close and then sand from there. I have messed up a few plank by getting the taper uneven, with a bump or dip. If I try to fix it I usually taper too much, and if I just install it, the next plank won't fit all that well. I appreciate your advise.
-
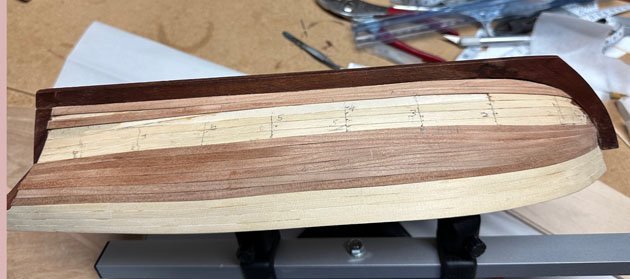
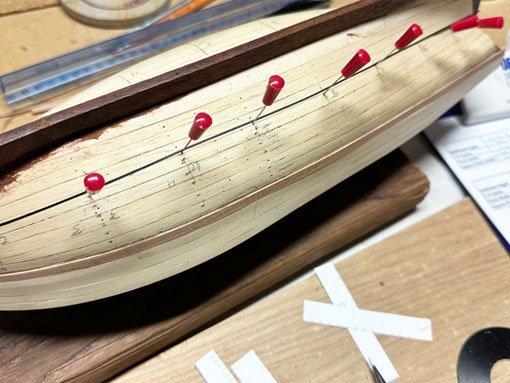
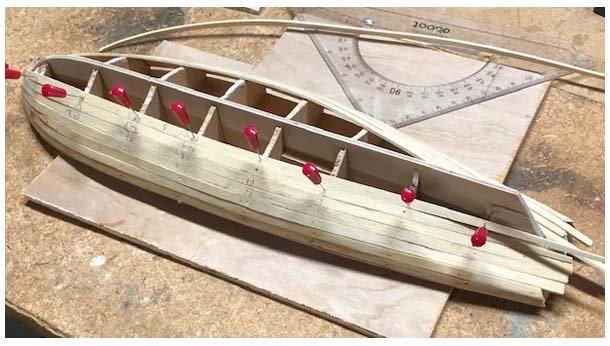
Well, planking is in progress. I'm using cherry wood 3/16" planks instead of the walnut veneer that came with the kit. I started by dividing each side of the hull into two sections, upper and lower. I also drew 8 vertical lines along the hull roughly corresponding to the frames. I calculated that at midships, frame 3, 4 and 5, twelve 3/16" planks would be needed on each side (excluding the garboard strake), six in each section. I calculated that frame 1 near the bow would need planks tapered to 1/8" wide. Consistent tapering has required some practice, and I still struggle with it. I am using a miniplane to shave the plank, but getting the plank installed in the vice with just the part that needs to be shaved above the vice is tricky, at least for me. After I installed six planks in the upper section on both starboard and port sides, I installed the garboard strake and one additional strake, which is where I am now.
- 16 replies
-
- 1
-
-
- artesania latina
- first build
- (and 1 more)
-
Thanks Gregg for responding to my log. Your Bluenose looks beautiful. I really like the look of your hull planking. I'm currently planking my Swift and I've been tapering the planks like you, but not as well. I've been using a 31/2 "miniplane. I fix the plank in my vise with with soft jaw pads but getting the plank positioned just right is difficult. As I've progressed, I have had to bend planks crosswise more. How did you taper your planks? I plan on not painting much if any - I want to show off the beauty of the wood. I am using cherry planks I bought instead of the thin walnut strips that came with the kit. But I am clearly going to need to do a lot of sanding and at least some filling. I saw that you used a Tamiya putty filler. Does that take stain? I know nothing of fillers - I've been thinking of using a Minwax wood filler. Any suggestions?
-
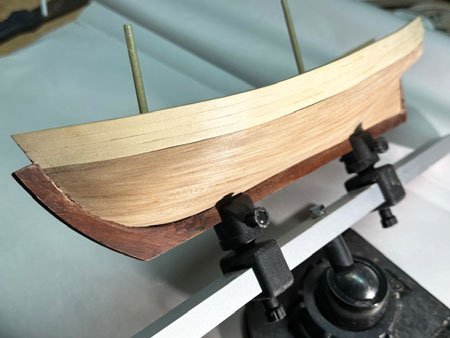
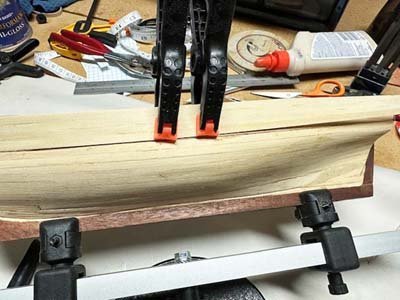
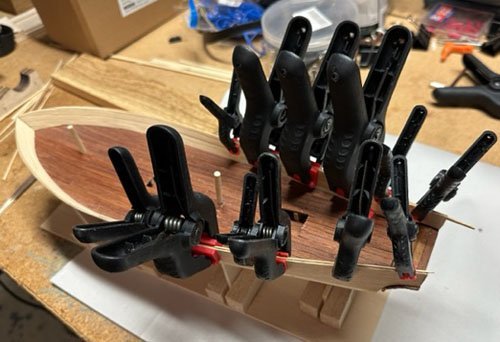
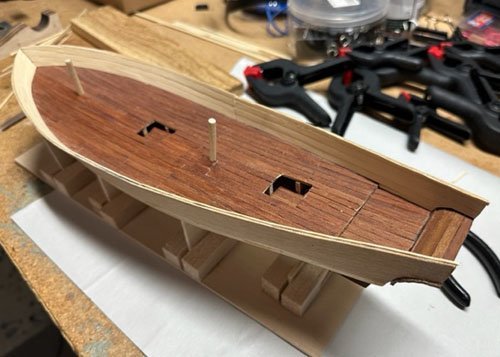
Well I'm back after almost another year. I just finished planking the outside of the bulwarks. I didn't like the cheap wood that came with the kit - it doesn't show the grain well and looks unnatural, so I'm using some 1/32 X 3/16 cedar planks I purchased, which I also used to plank the inner bulwarks. I used the techniques described in Chuck Passaro's planking videos to taper and bend the planks - thanks Chuck! I think it worked pretty well although I have some finishing sanding to do. Next I plank the hull. Again I don't particularly like the veneer strips it came with so I will try using 1/32 X 3/16 cherry planks stained with a black cherry stain.

- 16 replies
-
- 1
-
-
- artesania latina
- first build
- (and 1 more)
-
Thanks for the input. I have been thinking about using scrap wood to fill in where needed. The reason I thought of putty is that several finished 1850 Swift boats have mentioned using putty. See particularly the Swift by Stripehunter - I really like the way his hull looks after the second planking.
-
Thanks barkeater. I was thinking of some kind of modeling putty that would dry hard, could be sanded and also something that you could glue a plank to and would hold. Any ideas anyone?
-
I'm a newbie working on a 1850 Swift Pilot Boat. I'm about ready to do the second planking. The first is not terrible but there are some places that need evening out or smoothing the transition between the hull and the bulwarks. I've looked at all the finished models of this kit and several have used putty for this purpose. I've read ahead in this section about a year but didn't see anything specifically on this topic. Any recommendations?
-
I know it's been a lot of years since you finished this model so maybe you don't monitor this anymore, but I'm hoping I can still hear from you. I am really impressed with your final planking (among other things). You used some clear tape to make a template for curving the planks. What type of clear tape did you use and what did you write on it with - a marker? Could you tell me more about the process. I'm about to do the final planking on my first build, the early version of the Swift kit. Your hull looked really great. Here's my log: https://modelshipworld.com/topic/24292-swift-virginia-pilot-boat-1805-by-jim-in-kc-artesania-latina-150-scale-first-wooden-ship-build/
-
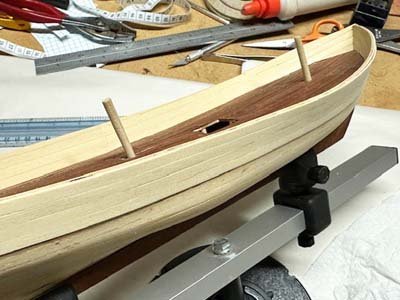
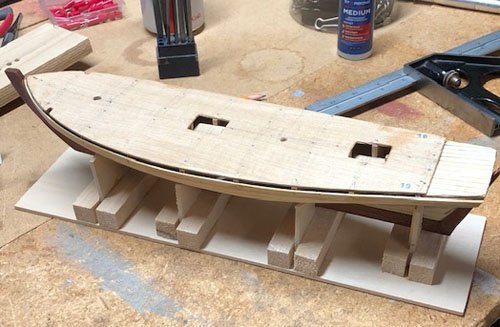
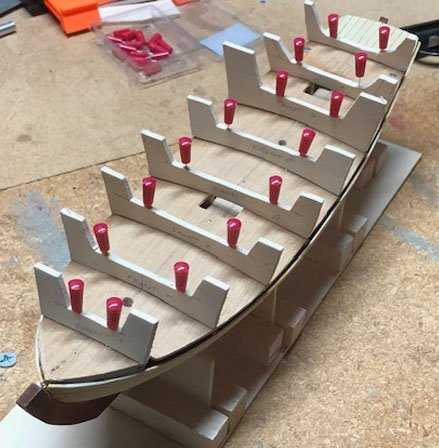
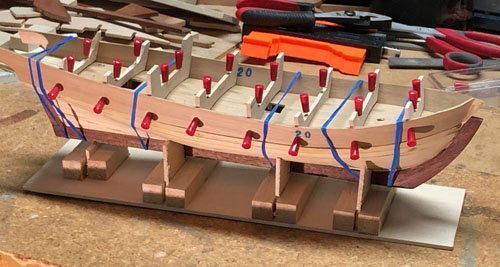
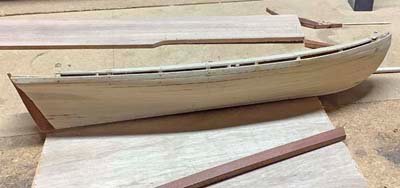
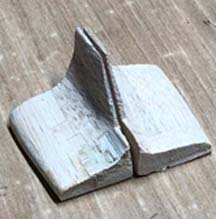
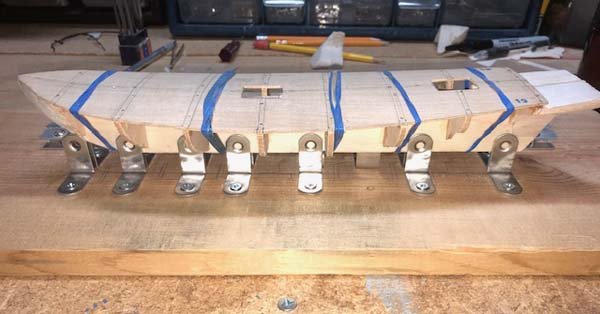
Well it appears that it's been well over two years since I updated my log. I have been busy with other projects but I haven't lost my enthusiasm for finishing the pilot boat. In the intervening time I did manage to attach the bulwarks, plank the deck and build the transom. One weakness of this kit is that there is only a narrow purchase to attach the bulwarks. See below. So I built temporary supports for the bulwarks and attached them with pins to the frames below. Then I glued the bulwarks and when the glue dried, removed the temporary supports. I then planked the deck. Frank Mastrini, in his book on ship modeling, talks about the narrow purchase of the bulwarks and among other things, suggests planking the bulwarks, inside and out. I am just finishing that. I need to sand the inner planks down now and fill the spaces.
- 16 replies
-
- 5
-
-
- artesania latina
- first build
- (and 1 more)
-
Thanks, I appreciate your feedback.
-
I completed the first planking (Swift Virginia Pilot Boat 1805 by Jim in KC), and learned a lot. After sanding, the hull feels pretty smooth. I've been using the forums and the book "Ship Modeling Simplified" by Mastini to help me along. I was hoping that the second layer would go on relatively easily and cover up any slight irregularities on the first planking. However, apparently not - any problems will show through, right? Mastini recommends applying a coat of modeling paste to smooth out imperfections and provide a base for the second planking. Nothing else I've read mentions this. Anyone have any advice about this?
-
PS I'm a rank amateur and this is my first wooden boat build. I'd sure appreciate any comments from those more experienced - I'm more than willing to hear that there are simpler ways to do this or even that I really screwed something up.
-
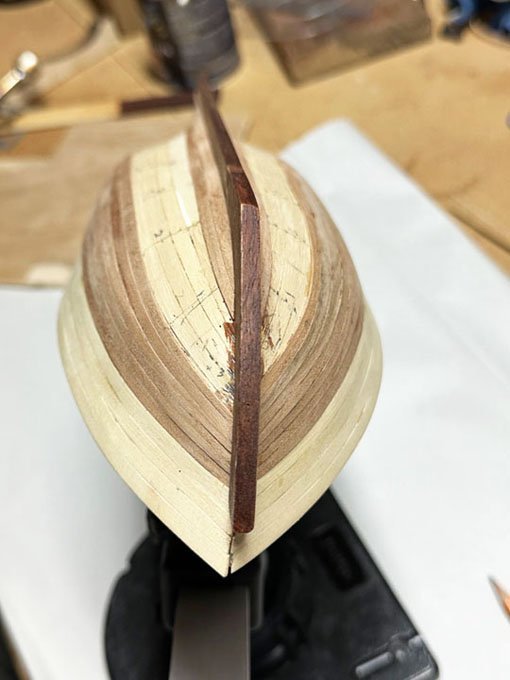
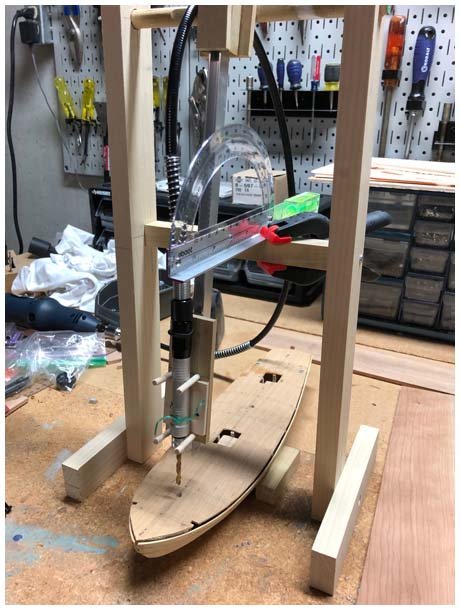
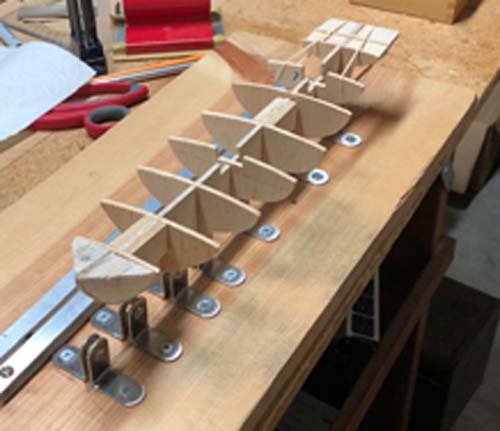
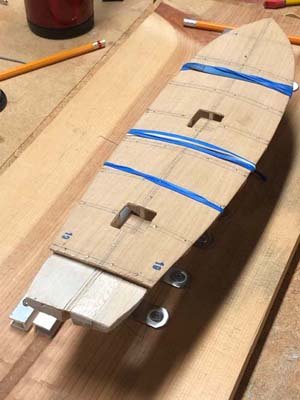
I forgot to mention in my previous entry that before planking, when the model could be held firmly in the jig by the false keel, I built another jig for precisely drilling holes for the masts at a 9 degree cant. I used a hand-held Dremel-type tool on a flexible shaft. The jig required a lot of set-up fiddling, but I think it worked well - I'll be able to tell more when I install the masts. The attached picture was shot after planking, so not exactly as I had it set up, but close enough to convey the idea. Next: The kit instructions don't say when to attach the keel, so I'm going ahead with that. I'm using a carving tool to cut a groove along the length of the long keel piece so it will fit over the top of the false keel and I'll get a solid bond. I'll prepare the bow piece but probably not glue it until I've done the bulwarks. I then need to make a cradle for the boat to steady it when working on the deck, and using the mast holes, build a jig to hold it upside down for the second hull planking. Plank the deck. Install the bulwarks.
- 16 replies
-
- 3
-
-
- artesania latina
- first build
- (and 1 more)
-
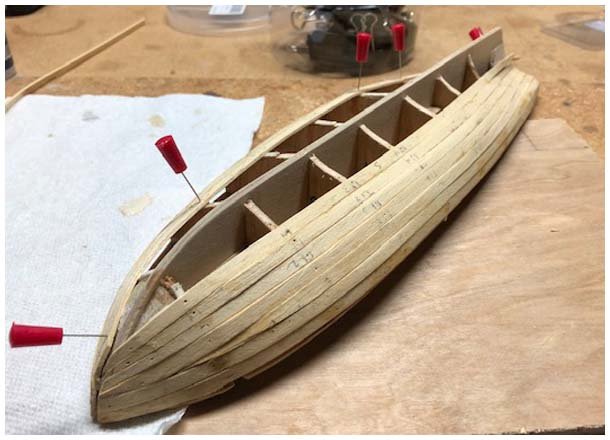
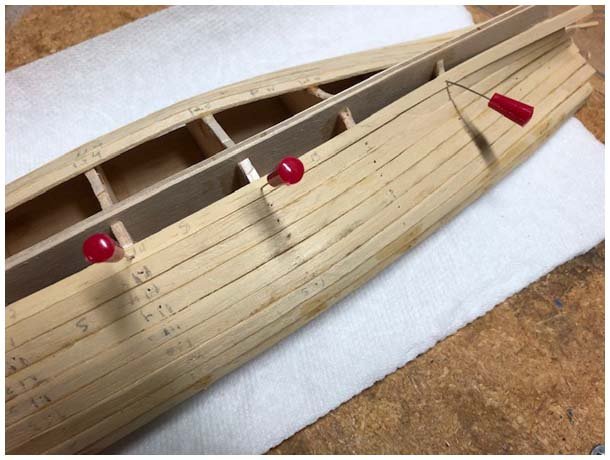
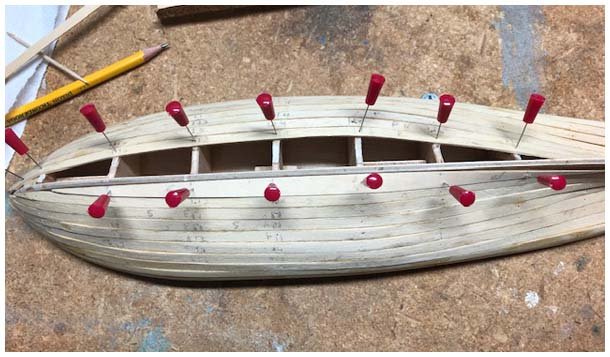
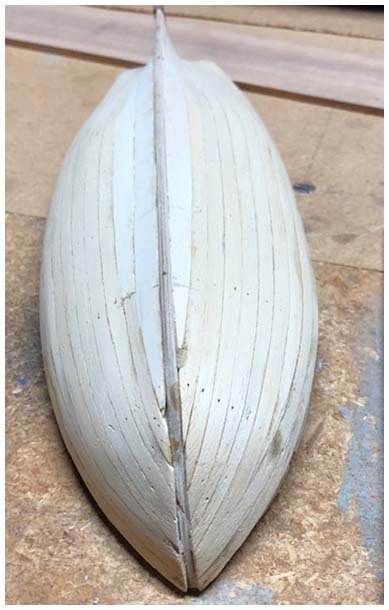
===I completed the items listed above, then completed the first hull planking, which turned out OK. I followed the kit instructions and began at the top and worked down, one or two planks on one side, then one or two on the other side. That allowed me to apply lessons learned on one side to the other, and also to experiment back and forth with different techniques. As a result, the planking scheme is different from side to side, but I still ended up with a fairly symmetrical hull. Since the first planking will not be visible after I complete the second, there's hopefully no harm done. Here's what I learned: I had read several articles on planking, including "Simple Hull Planking Techniques for Beginners," by DeBakker and Brooker, and a book, "Ship Modeling Simplified" by Mastini. I should have paid more attention and calculated more precisely. I should have spent more time on fairing the bulkheads - I corrected potential dents by gluing thin balsa strips on the bulkheads to improve the shape when needed. That worked but would have been unnecessary with better fairing. I also think next time I will segment off the hull with monofilament line or batten strips, and work one segment at a time. I think tapering planks near the bow looks better if you trim from the bottom of the plank. The kit instructions didn't mention anything about the garboard strake. By the time I got close to the keel, the starboard and port gaps to be filled were quite different. So I followed the recommendation of DeBakker and Brooker and shaped garboard strakes out of some thin plywood I had on hand. It should be obvious from the attached pictures that left and right planks near the keel are quite different. I think that in addition to starting at the top, the garboard strakes should be planned out and laid at the beginning, and included in calculating the necessary tapering. When the planking was done it was pretty rough, but I was able to sand it smooth to where it doesn't look bad, at least to my unseasoned eyes. I did have to do a little filling.

- 16 replies
-
- 3
-
-
- artesania latina
- first build
- (and 1 more)
-
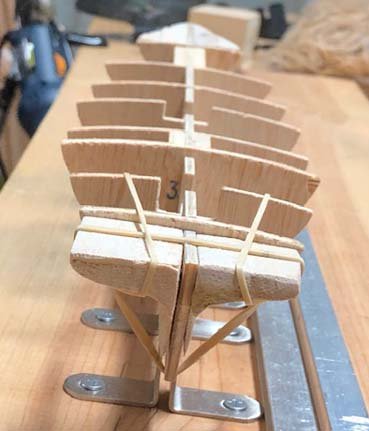
Sequence of build so far: 1. Cut thin balsa strips and glued them in slots on frames or on the false keel where needed, then filed them so frames (bulkheads) fit tightly and evenly on the false keel. 2. Glued blocks on false keel against frame #2 and #5 per instructions. Looking ahead, these will anchor the masts. 3. Carved bow and stern blocks to provide a platform for planking. Glued them in place. 4. Glued hold floors in place. 5. I had worried that the deck would not bend over the curved tops of the frames because of the age of this kit. That turned out to not be an issue, as advised by another member (Thanks!). I had carefully drawn lines where I thought the deck would cross bulkheads so I could accurately place the attaching pins. However, when I positioned deck on the frames, I found the lines were a little off on some frames, so I redrew the lines. Then drilled guide holes through the deck into the top of each frame using a #72 minidrill and fastened the deck to the frames. This actually went pretty smoothly. Then applied wood glue on all seams. Next: 1. Work on stern blocks to make them more symmetrical. 2. Glue down stern deck. 3. File frames so planks can lie flush on each frame. 4. Begin hull planking.
- 16 replies
-
- 1
-
-
- artesania latina
- first build
- (and 1 more)
-
Welcome Genocon. I love your B-17. I'm a 70 year old newbie but built a B-17 as a teenager, but it wasn't as nice as yours.
-
Newbie Keel Problem
Jim in KC replied to Jim in KC's topic in Building, Framing, Planking and plating a ships hull and deck
Actually I was worried about that - it warping in an unplanned way and ending up looking like it had been soaked. I'll try flexing it. I'm also thinking about cutting out a new false keel with a fresher more flexible 1/16th inch basswood board. Thanks for your input. I'll update after I try flexing, and also I have a build log going.