


Arild Moland
-
Posts
14 -
Joined
-
Last visited
Content Type
Profiles
Forums
Gallery
Events
Posts posted by Arild Moland
-
-
Good to see that you prevailed, Harley! I'll get mine back on the bench again eventually, but numerous other projects have snuck in as they are wont to do...
- popeye the sailor, Canute, Egilman and 1 other
-
 4
4
-
-
Sorry if I confused you. Let's blame it on me not being able to wrap my head around imperial measurements. My tabs ended up at 6 and 10 mm respectively. You do the math
 (Actual, not scale, width.)
If the tabs in your kit looks fine, they probably are. When I followed the instructions, which says that the planks should sit next to each other in the front, the gap in the rear end of the model was so great that the keel plank fit inside the gap with room to spare on both ends. And as the bottom planks cannot be bent sideways, I figured the tabs were off. I found no other explanation, and trimming them narrower solved the issue for me.
If you're not having this difficulty, please ignore!
I actually curved my planks around the smoke stack of my wood burning stove. A much smaller radius than the planks needed, but it offered heat which helped the process, and I just slowly worked in the curve in the plank until it was just about right and left it to dry.
Btw, have you checked your kit for completeness? I was worried mine would have issues, as every one who I've seen build this kit, has found parts missing or broken. In mine, it turned out that only the inwhales material was off. Rather than two square strips of wood, one was correct, and the other rectangular. Luckily I had some spare material which fit. Being new to wooden kits, the idea that kits seems to often miss or have the wrong parts, is a new experience, as I've rarely seen this in my many years of plastic modelling.
Arild
")
-
Looking good thus far! I'm at the painting stage of this one myself, and for the planks I just soaked them in warm water for a while, and then bent them manually against a curved surface until I got about the right curvature to them. I let them dry before adding to the model. Worked pretty well.
Hard to tell from your pictures if you will need to, but I had to trim the center tab on the formers, as they were way too wide on mine to get the proper distance between the bottom planks. I found out that the numbers 2.5 and 4 actually had to mean that the tabs should be 2.5/10 " and 4/10" respectively. In my kit, they were a lot wider than this, and this caused a bit of confusion for a while on how the planks could possibly fit both ends of the pram. After narrowing the tabs, stuff started making a lot more sense.
Good luck on the planking!
-
-
26 minutes ago, DanielD said:
Be sure to read through (and’s follow) Clearway and KeithS Terror builds as I have learned much from them. While you are going for more out of the box build, there are a few easy changes you can make to be a more realistic representation of this great ship.
Again, welcome aboard.
Thanks! I'm following all of you, while reminding myself not to be carried away with all the nitty gritty details and errors in the kit.
I think I remember one mentioning having to take a break from the project, as all the research and corrections made him neurotic. I know that feeling only too well...
Having read the Dan Simmons book, and currently watching the TV series helps set the mood for my own project, which I hope to start fairly soon.
Arild
-
11 hours ago, DanielD said:
Daniel, I'm following your build (as well as the other Terrors on here) with great interest, as this kit somehow managed to fit under the Xmas tree
I pick up lots of good advice on stuff to look out for, although I intend to do a pretty strict OOB project, as I have a few too many plastic model projects where the AMS has taken over. I don't need that for what will be my second wooden ship project.
After seeing your latest post here, I'm curious as to what happened to the yellow on the insides of the bulwarks? Is it just a weird trick of the light in the above photo? Just so remarkably different in appearance to the picture previously with the lights on inside the ship.
Arild
-
As Harley has mentioned, we've been sharing thoughts privately on it. I agree with most of what he says, especially on the quality of the instructions. Now, I've never built a wood model in "modern times", and my only experience in the field was a couple of Billing Boats efforts in my teens (I'm pushing 50 now), but I have built plastic models for the past 15+ years, and I've come to regard instructions from most model companies as guide lines, not gospel. Joy Yard also follow a long tradition of giving you very scarce paint instructions, but as far as I can tell, the one sheet you get is at least quite accurate rather than pure fantasy (which isn't at all uncommon for armour subjects for instance).
I still think this kit is great however, for these reasons:
- It is this company's first effort and the use of slide moulds is impressive
- The kit is designed for the PE that comes with it, eliminating the need to shave off plastic detail to be replaced
- You really do not need aftermarket to get a great level of detail (even other kits I've seen with an abundance of PE, leaves out important stuff like the railing along the full hull for some reason)
- Given point 3, I think it is great value for money. The comparable Pontos upgrades easily cost as much or more than this kit cost me, delivered.
However, the marketing of the kit could easily lead one to think this will be an easy kit to build. Joy Yard makes a point out of the use of slide moulds to save the modeller time. Well, time saved to spend on mounting minute parts of PE, I suppose. You will need to love working with PE, solving instructions riddles, and have a set of very fine tipped tweezers to get through this project.
Now, would I recommend this kit to a friend? Now, that depends very much on the friend.
")
My take on the kit is based on building up the hull and having started on the superstructure and guns. The rest of my impression of the kit is based on the same as any other in-box review. Also bear in mind that my previous ship modelling effort in modern times, was an aborted attempt to upgrade Tamiyas 1979 Yamato to a decent standard, at which I failed, mostly because I started it way too early after rebooting the hobby, and being overly ambitious (you've all heard that one before!). So I guess I'm easy to impress
Arild
- Canute, Hitechnomad, Dadeo911 and 4 others
-
7
-
I guess I ought to, but after years of build logs on our national IPMS forum, I haven't done any for a few years and must admit I enjoy not doing them at the moment. Also, I tend to switch projects every couple of months, so a build log would sit idle for prolonged periods of time.
I'll chime back in here if there's anything useful to share about the quality of the kit not already covered, but as far as I'm concerned I'd easily recommend it.
- Egilman, popeye the sailor, lmagna and 1 other
-
4
-
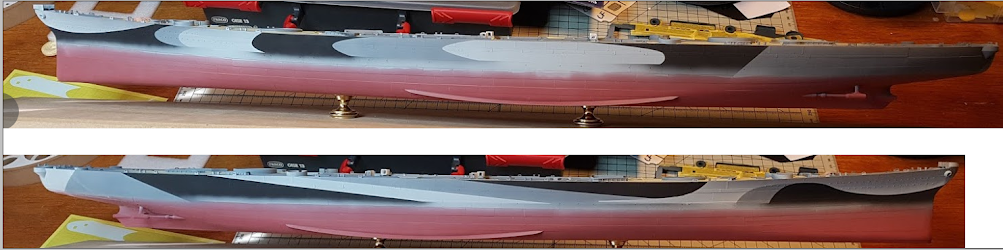
Just a quick note to show that I haven't quit on this project just yet, and I'm sure Harley hasn't either. There's not a whole lot to add to what has been said about the kit already, other than that we've both found the instructions still to be lacking in some respects. Quite a few errors in the printed version was sorted in the online version, but there are still mislabelled parts etc, especially with the PE. Nothing that is impossible to figure out, but one needs to plan ahead and be patient. Some of the parts, both plastic and PE are crazy small. Joy Yard do supply spares both in plastic and PE for many of these, though.
I've been fiddling around painting the hull for a while. Next is masking off the top edge of the waterline, touch up the red, before finishing the waterline, followed up by more touch up. Slow going, but fun still.
Arild
-
I use Tamiya Extra Thin QuickSetting, the one with the translucent green cap, for almost all my gluing these days, if I can hold the pieces together before applying glue to a joint. If I need to apply a bit of glue before placing a part, I use Tamiya Extra Thin, the one with the solid green cap. And every once in a blue moon, I use regular Tamiya glue, with the white cap. The Quicksetting stuff evaporates very fast, and leave hardly any residue at all. It is very similar to Mr Hobby Mr Cement S, which I like even more but which is harder to get where I live.
I haven't put the breakwater on yet, but I have cut if from the sprue to check how it would go along with the desk masking. I didn't notice the mis-labelling, as I went by its shape
I'm planning to be cruel to myself, and go for the 32/22D scheme, and I've modified the kit deck masks, and are going to produce masks for the hull sides. Time will tell how I'll tackle the superstructure.
Will you do the kit scheme? It will be my plan B.
-
Yes, the plastic is rather delicate, and the amount of flash is surprising. There's a little bit of it that must be removed from just about everywhere, and sometimes it can be confusing what is flash, and what is actual detail. As you say the plastic is quite soft. I'm still finding minute traces of flash on the hull sides which needs removing. But, I've got say that the mould quality is quite impressive, and the amount of slide moulding required must have been staggering.
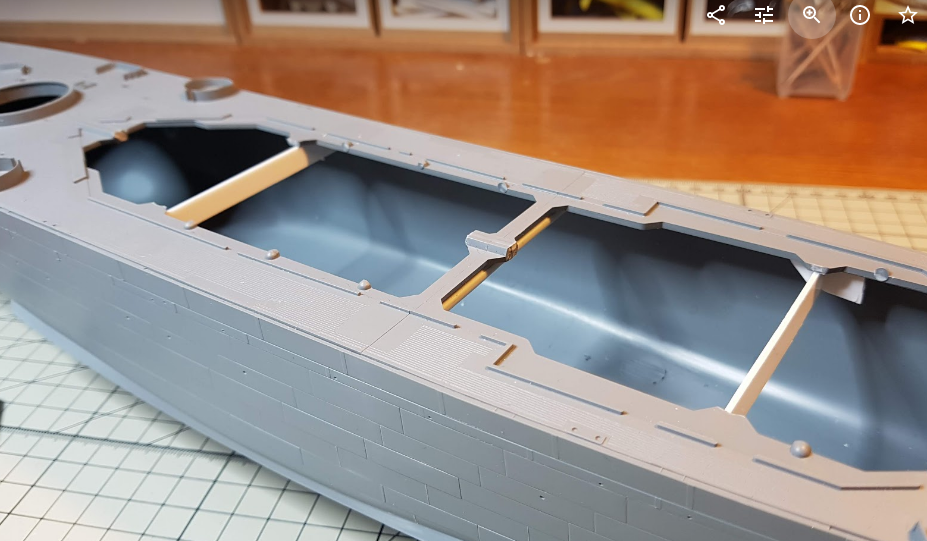
Btw, my part B has quite a bit of "warp" in it, ie it won't lay flat on its own. I figure it will settle when I glue the upper decks to it, applying some pressure.
Also, I found that the main deck got a bit flimsy in the middle after removing the sprues attached to it, so I added some supports from plastic card to make it sturdy again. Worked well.
Overall I think the fit and detail is mostly superb, with some exceptions. The range finders on the main turrets are a challenge. There's a frame around the opening in the finder that I found impossible to get to be nice, so I cut it out and am replacing it with pieces of a PE ladder I had in the spares box.
As you can tell, I have been fiddling with parts all over, but I will try to be disciplined and return my attention to the hull, and get this detailed and painted up before moving on. I'll follow this thread and chime in if I have something you would want to know.
Arild
- GrandpaPhil, mtaylor, Hitechnomad and 2 others
-
5
-
Harley, I began this kit a while back, and it is indeed awesome. Thanks also for the hint of an updated instruction manual. I had the railing along the main hull figured out from the box top, but I see that it is pointed out in the instructions now. Luckily I had it all sorted out, as it needs to be to get the bollards placed correctly.
Can you check the milled main gun barrel parts in your kit? I find that one of the barrels are a wee bit shorter than the rest, about a mm or so. Not much, but enough to notice, so I'm debating if I'm adding protective hoods to some of the barrel ends, or using the plastic part. I feel however that the plastic has an ever so slightly different profile than the brass part.
Look forward to see your progress on this. Build threads on this kit seems to be as rare as hens teeth.
Arild :)

USS Missouri (or any Iowa class) 1/350 by Joy Yard
in REVIEWS: Model kits
Posted
I don't think this has been linked to before in here, so here's a link to the corrected instructions for this kit. They will not solve all the riddles and confusion involved with figuring out where all the bits and bobs go, but they're certainly an improvement over the printed one. And it actually mention the stanchions.
http://cdn055.yun-img.com/static/upload/yard/news/20200409131527_58533.pdf
Arild")