Fuji
-
Posts
56 -
Joined
-
Last visited
-
 yvesvidal reacted to a post in a topic:
Pride of Baltimore II by Fuji - Model Shipways - 1:64
yvesvidal reacted to a post in a topic:
Pride of Baltimore II by Fuji - Model Shipways - 1:64
-
yvesvidal reacted to a post in a topic:
Pride of Baltimore II by Fuji - Model Shipways - 1:64
-
BobG reacted to a post in a topic:
Pride of Baltimore II by Fuji - Model Shipways - 1:64
-
ccoyle reacted to a post in a topic:
Pride of Baltimore II by Fuji - Model Shipways - 1:64
-
JacquesCousteau reacted to a post in a topic:
Pride of Baltimore II by Fuji - Model Shipways - 1:64
-
berhard reacted to a post in a topic:
Pride of Baltimore II by Fuji - Model Shipways - 1:64
-
BobG reacted to a post in a topic:
Pride of Baltimore II by Fuji - Model Shipways - 1:64
-
BobG reacted to a post in a topic:
Pride of Baltimore II by Fuji - Model Shipways - 1:64
-
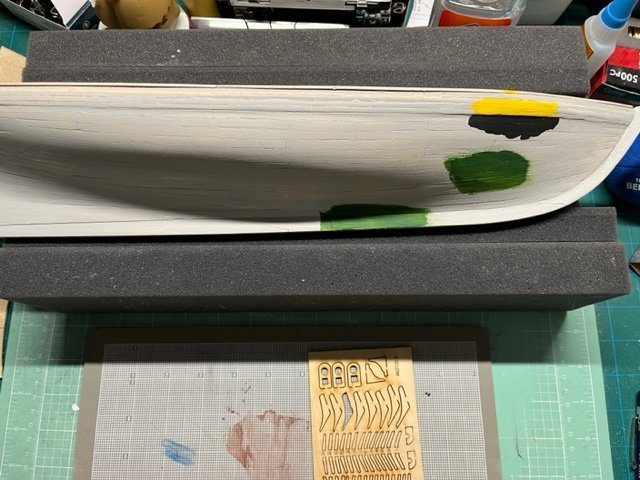
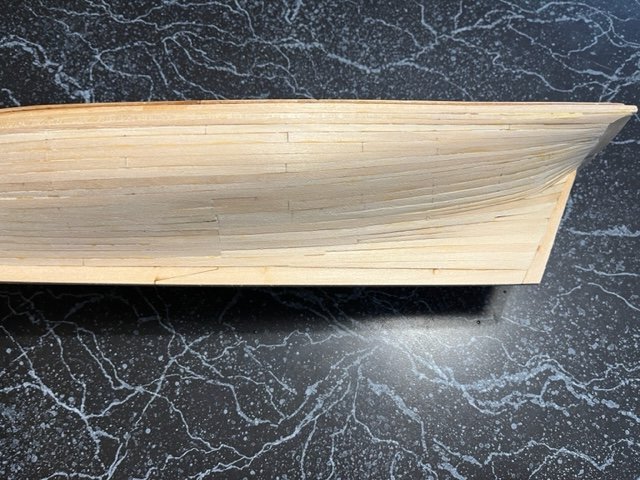
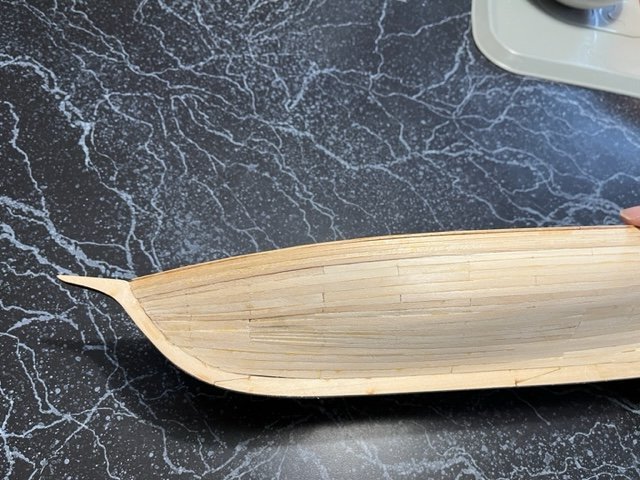
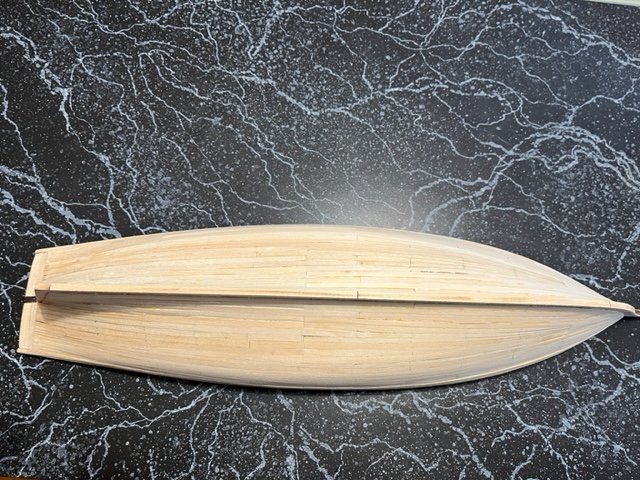
Hello! Although I haven't posted much on my build, I have been progressing albeit slowly for the past few months! I struggled with the hull planking for a bit until I read about using dividers to more accurately divide up the spaces between the battens. Brilliant!! I took my time to make sure the planks on both the starboard and port sides matched up relatively close at the bow and stern. I even tore out a row or two when the difference between the starboard and port side was too visual! Side note: Boy is balsa wood hard to find nowadays! I even used stealers for the first time. Talk about a game changer! My only "Hmmm..." moment came when I was trying to lay the hull planks at the very top near the transom. I sanded and fiddled with those last two planks but eventually ended up with something I was happy with. After a bit I thought... well... that was a lot of work for something nobody would be able to see once it's completed! I need to use some wood filler on some of the planks to close the gaps and to help smoothen out some "dips" in the hull where the plank when placed sagged due to not having the plank long enough to properly bend to match the hull curvature. Next on the bench after that is to add the bulwark stanchion and battens! Wish me luck! Fuji
-
wemattson reacted to a post in a topic:
Calypso by Fuji - FINISHED - Billing Boats - 1:45
-
Snug Harbor Johnny reacted to a post in a topic:
Calypso by Fuji - FINISHED - Billing Boats - 1:45
-
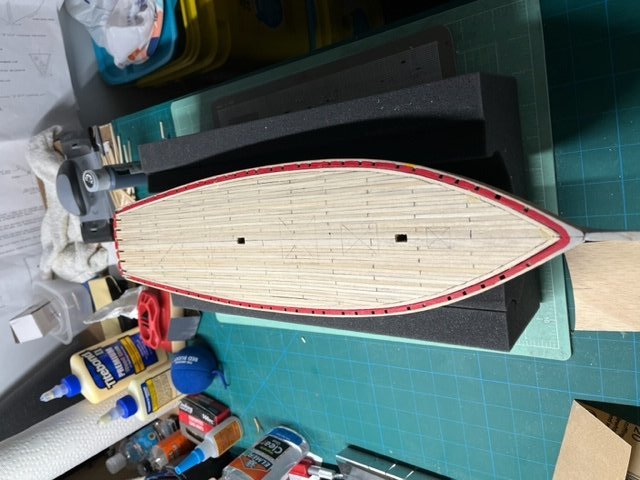
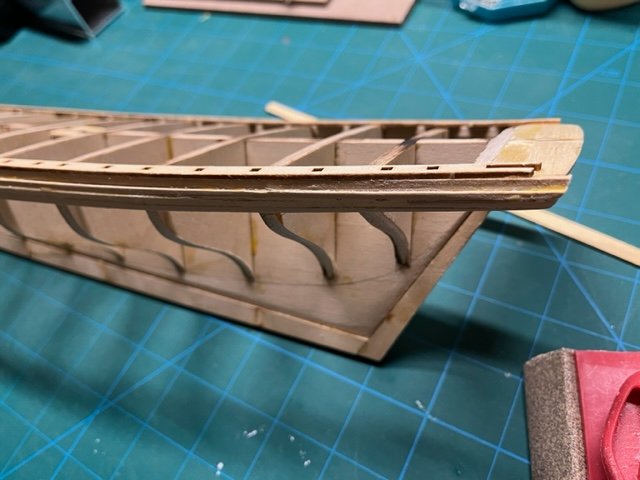
I was able to get some bench time, so I added the planksheer to the top of the bulkheads. I've read where some builders had the planksheer come up short, but for some reason my planksheer is long enough. Maybe Model Shipways fixed the tooling problem? After attaching the planksheer to the bulkheads I built up the wale planks. these were pretty easy to install although after I glued everything together I noticed some gaps between the wale planks. Nothing a little wood putty won't take care of! I will be planking the hull next, but I will need to hold off until my balsa cutter arrives since I need to trim down all the 3/16" wide planks down to 1/8". Yes, I could have trimmed all the planks down 1/16" the entire length, but between my eyesight and having mild arthritis in my hands I'd rather use a tool than trying to free-wheel something like this! More to come! Fuji

-
I have my cordless Dremel Tool to thank for that!
-
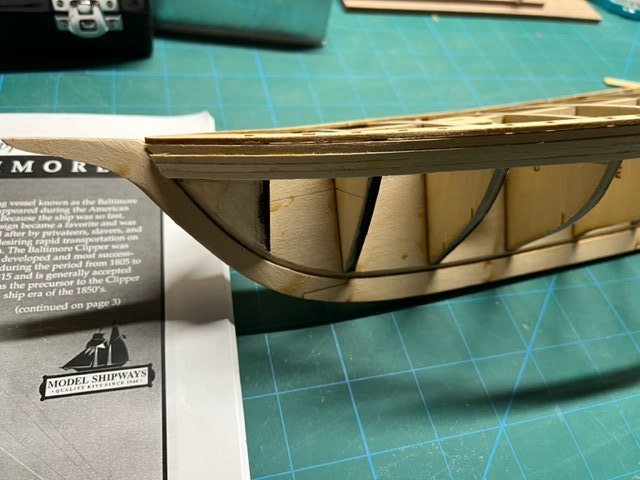
Had more time to work on the POB II since the weather turned cold and snowy. Cut and carved out the filler block at the stern and once I was done with that, I had enough stock left over to make filler blocks at the bow. After quite a bit of sanding I was happy with the curvature of the filler blocks. Did I tell you that I love my cordless Dremel tool? Next, I added scrap wood to cover the mast mortises on the center keel as per the instructions. Finally, I laid down a plank in preparation of adding the planksheer. This will have to wait until later as I need to figure out how to modify the planksheer to more accurately follow the curvature of the hull. More to follow! Fuji
-
Thank you Bob!
-
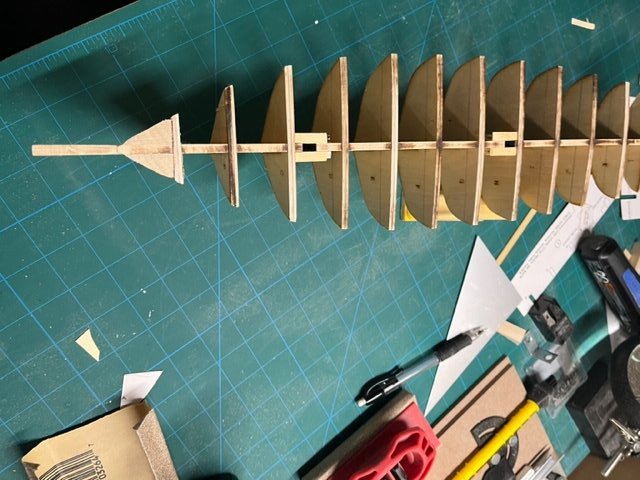
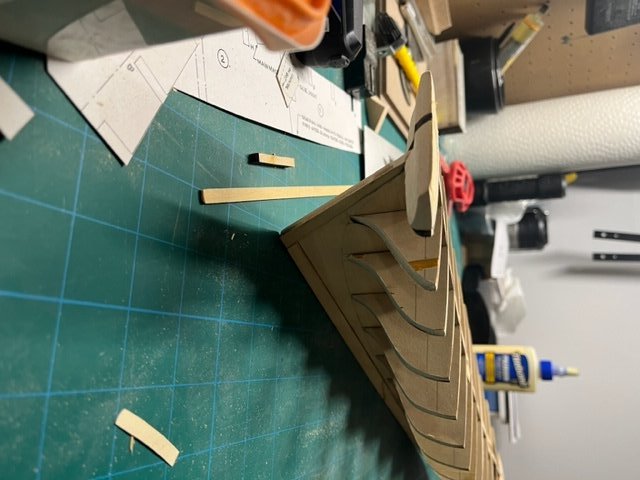
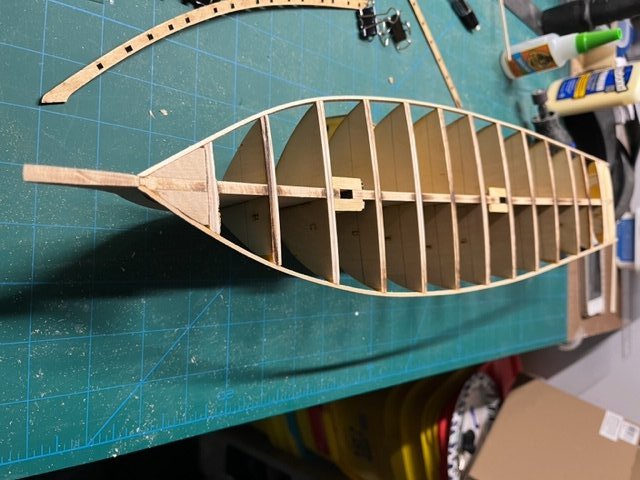
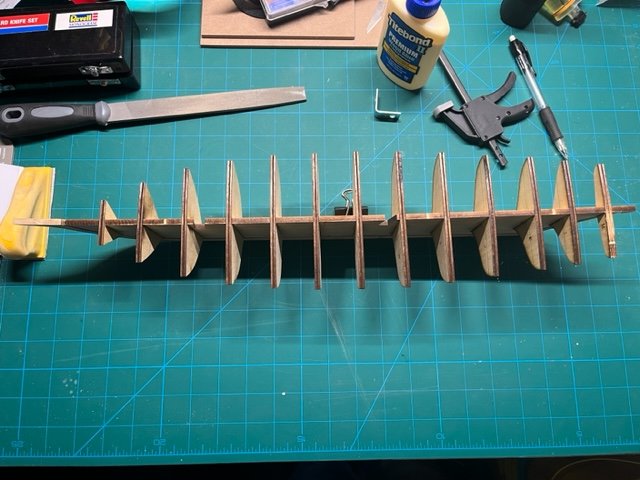
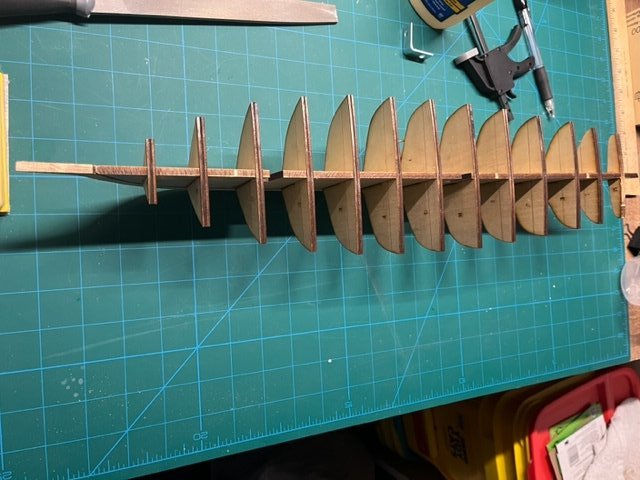
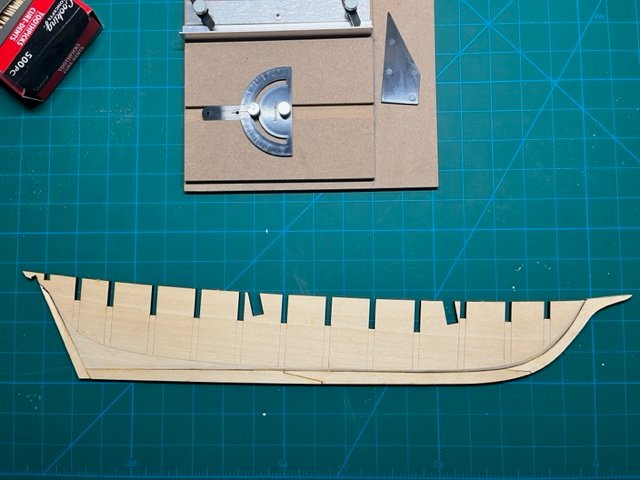
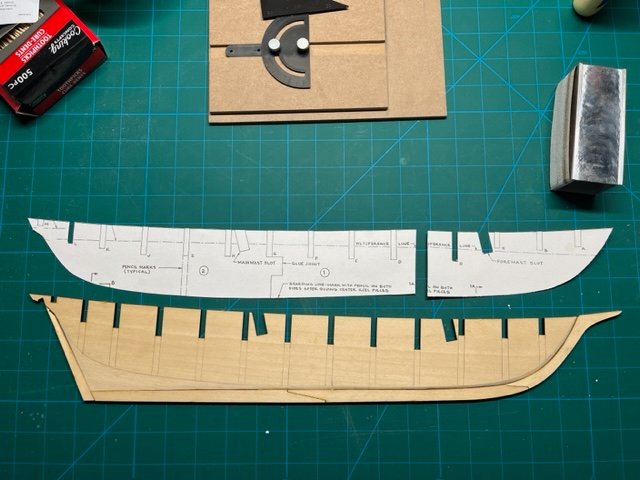
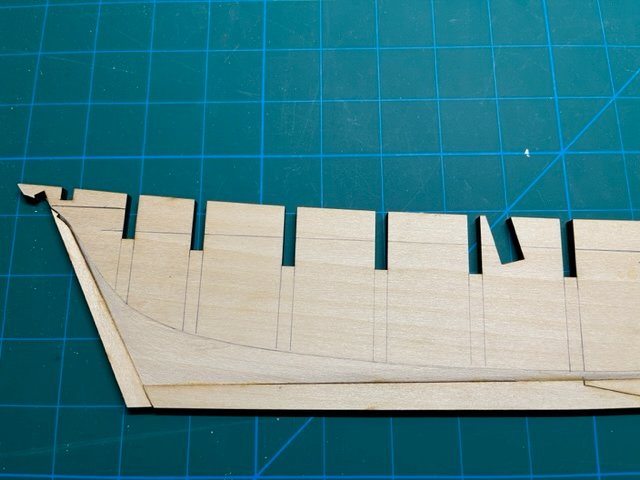
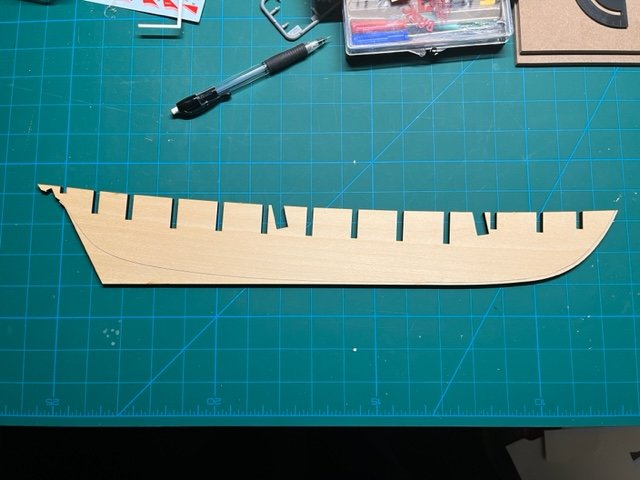
Got some bench time in this evening! I was able to place the bulkheads to the center keel. Quite honestly the hardest part was gently filing the bulkheads so they were perfectly perpendicular to center keel. Takes a lot of patience and a good machinist's square. Overall, I am happy with the results. Only one bulkhead isn't perfectly perpendicular to the center keel, but it is quite odd why that is. On the starboard side the bulkhead is perfectly perpendicular to the center keel, but on the port side it is out about 1/16". Both the center keel and the bulkhead appear to be flat and true, so I really don't know what happened... but I figure that 1/16" difference once the bulkhead is shaped to match the hull contour won't make a much of difference! Next, I'm going carve the stern filler block. Doesn't look too complex, but then again, nothing seems to complex until you get into the task at hand! More to come! Fuji
-
Made some progress this weekend. I have a sick cat at the moment that requires my attention throughout the day, but I was able to grab some bench time in-between medicating and feedings. I completed carving the rabbet joint on both sides of the center keel, then cut out and installed the sternpost, false keel pieces and the stem pieces being careful not to get glue where the rabbet joint meets the pieces. I also used the same photocopy template that I created to define the bearding to define where the WL (wale line?) is. Going to start cutting out the bulkheads next and will dry fit the bulkheads to the center keel once I give the wood glue time to cure. More to come! Fuji
-
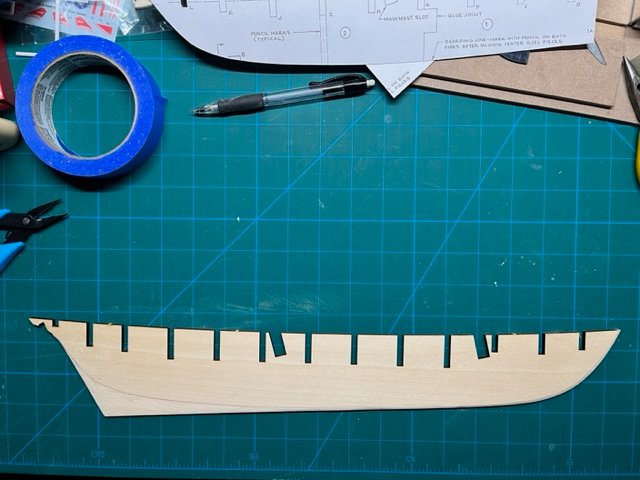
Now the Holidays are over it is time to hit the bench again! Separated the center keel and sanded the edges where the false keel will be attached. Transferred the bearding line onto both sides of the center keel and chiseled/sanded 1/16" below the face of the center keel towards the bottom of the center keel on one side. This wasn't too easy for me as I've didn't chisel the bearding line on my last build. I chiseled/whittled small sections at a time and sanded the larger area towards the aft. Maybe I made it harder for myself, but I didn't trust that I would be able to whittle the surface down 1/16" over such a large area in a controlled manner. So here are the results... a before and after photo if you will! Now on to the other side of the center keel... More to come! Fuji
-
Hi Halit - I'll check it out!
-
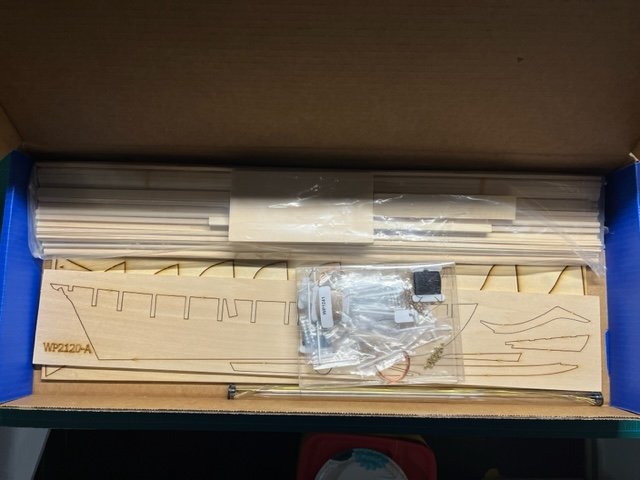
After taking a few weeks off after building the Calypso I'm off on a new build! I'm going to tackle building the plank on bulkhead model of the Pride of Baltimore (POB) II by Model Shipways, inc. In preparation of this build, I read the book Pride of the Sea by Tom Waldron. This book gave me insight into how the original Pride of Baltimore was conceived and built by the city of Baltimore, and the tragic sinking during a sudden squall on May 14, 1986. More to follow! Fuji

-
Thank you!
-
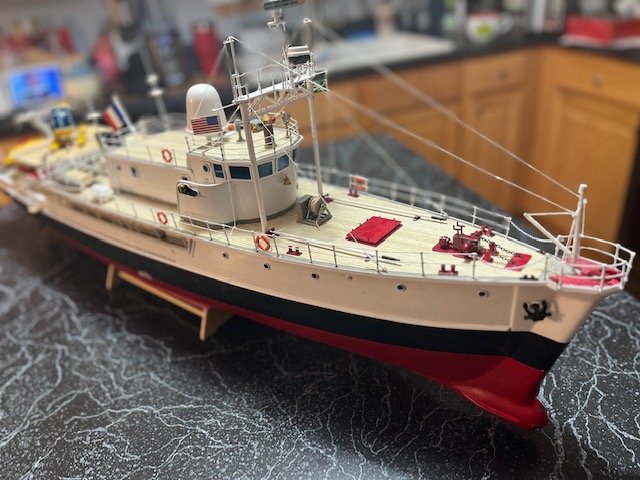
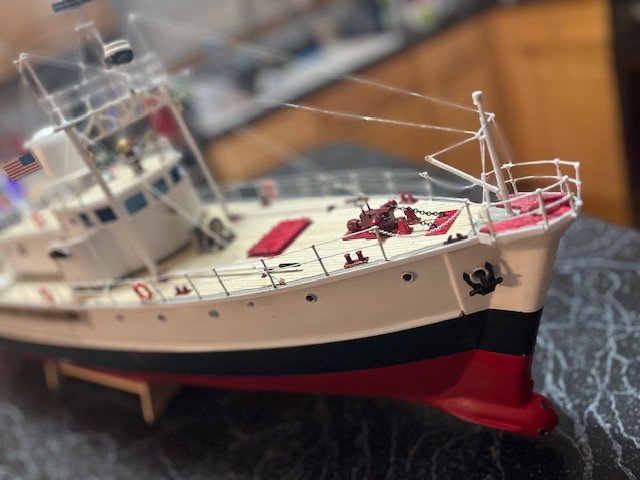
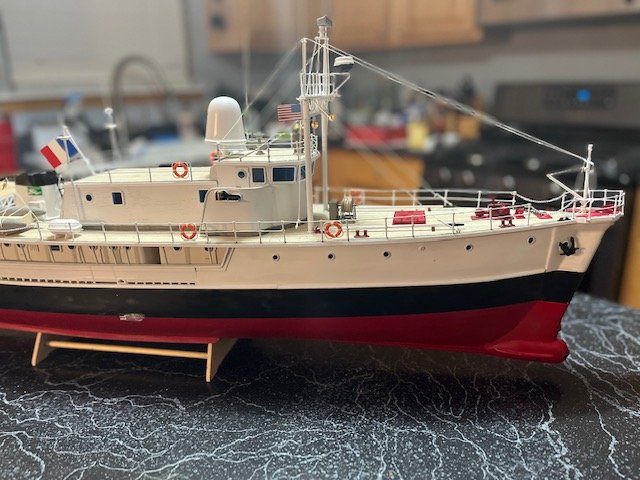
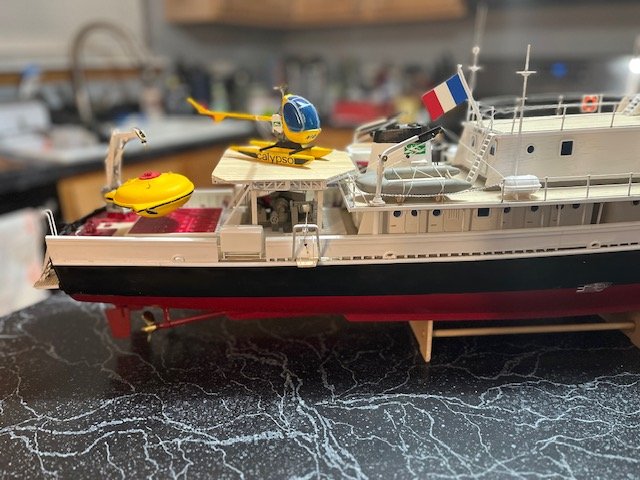
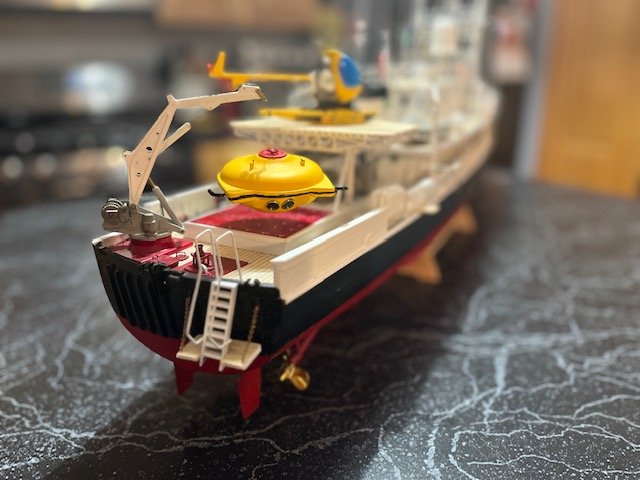
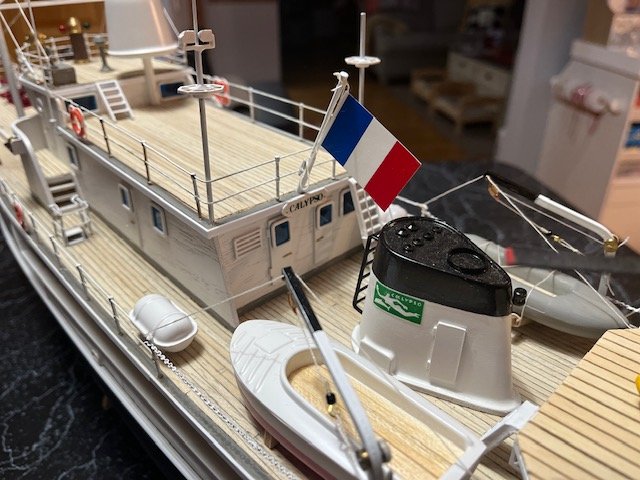
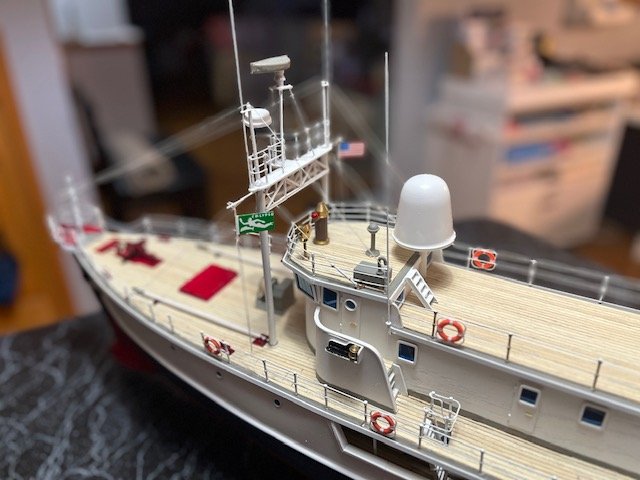
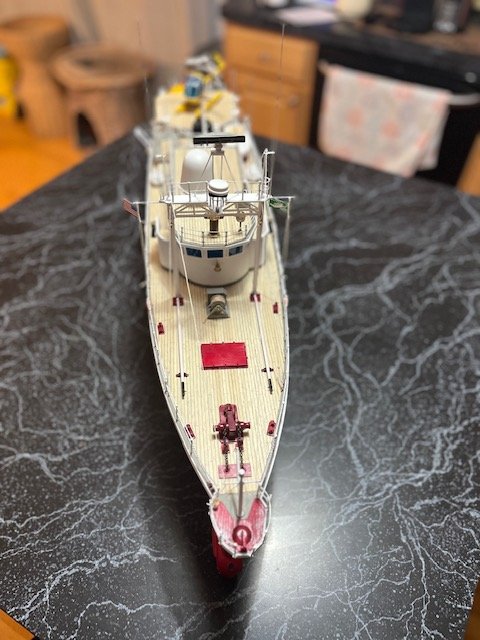
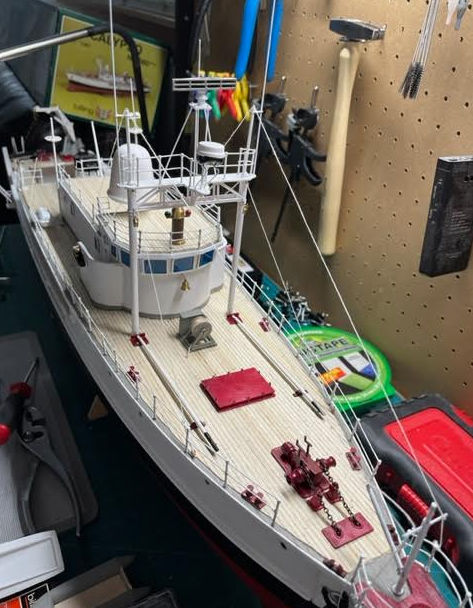
Well 844 days later the Calypso build is completed! I skipped installing the 55-gallon drums on deck (for a marine research vessel I could not see the reasoning of having 55-gallon drums of oil or fuel being lashed on the deck) and am still contemplating adding the "widgets" and wooden boxes for which they are kept in. As of right now I just look at them as clutter. Now to figure out how to get her off the workbench onto something large enough to hold her so I can start my next build... The Pride of Baltimore II!
- 68 replies
-
- 11
-
-

-
- calypso
- billing boats
- (and 1 more)
-
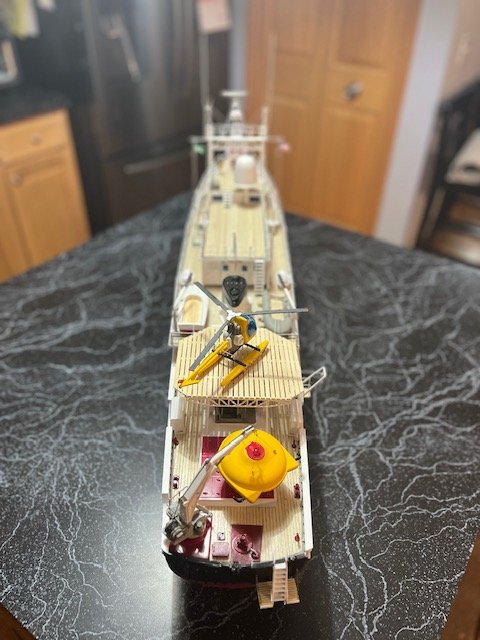
Made some progress today! I finally added the Calypso's brass props! I think they look way better than the plastic props that came with the kit! Next, I worked on adding the crane booms which attach to the ship's superstructure and adding the rigging... Next will be the small skiff and the zodiac inflatable boats. More to come! Fuji

- 68 replies
-
- 4
-
-
- calypso
- billing boats
- (and 1 more)