mpk73
-
Posts
24 -
Joined
-
Last visited
-
 GrandpaPhil reacted to a post in a topic:
Virginia 1819 by mpk73 - Artesania Latina - Scale 1:41
GrandpaPhil reacted to a post in a topic:
Virginia 1819 by mpk73 - Artesania Latina - Scale 1:41
-
GrandpaPhil reacted to a post in a topic:
Virginia 1819 by mpk73 - Artesania Latina - Scale 1:41
-
GrandpaPhil reacted to a post in a topic:
Virginia 1819 by mpk73 - Artesania Latina - Scale 1:41
-
GrandpaPhil reacted to a post in a topic:
Virginia 1819 by mpk73 - Artesania Latina - Scale 1:41
-
GrandpaPhil reacted to a post in a topic:
Virginia 1819 by mpk73 - Artesania Latina - Scale 1:41
-
Matt D reacted to a post in a topic:
Virginia 1819 by mpk73 - Artesania Latina - Scale 1:41
-
Matt D reacted to a post in a topic:
Virginia 1819 by mpk73 - Artesania Latina - Scale 1:41
-
Keith Black reacted to a post in a topic:
Virginia 1819 by mpk73 - Artesania Latina - Scale 1:41
-
Many thanks, @Keith Black! I will be finishing up the fiddly bits like rope coils in the coming weeks.
-
mpk73 reacted to a post in a topic:
Virginia 1819 by mpk73 - Artesania Latina - Scale 1:41
-
Keith Black reacted to a post in a topic:
Virginia 1819 by mpk73 - Artesania Latina - Scale 1:41
-
Keith Black reacted to a post in a topic:
Virginia 1819 by mpk73 - Artesania Latina - Scale 1:41
-
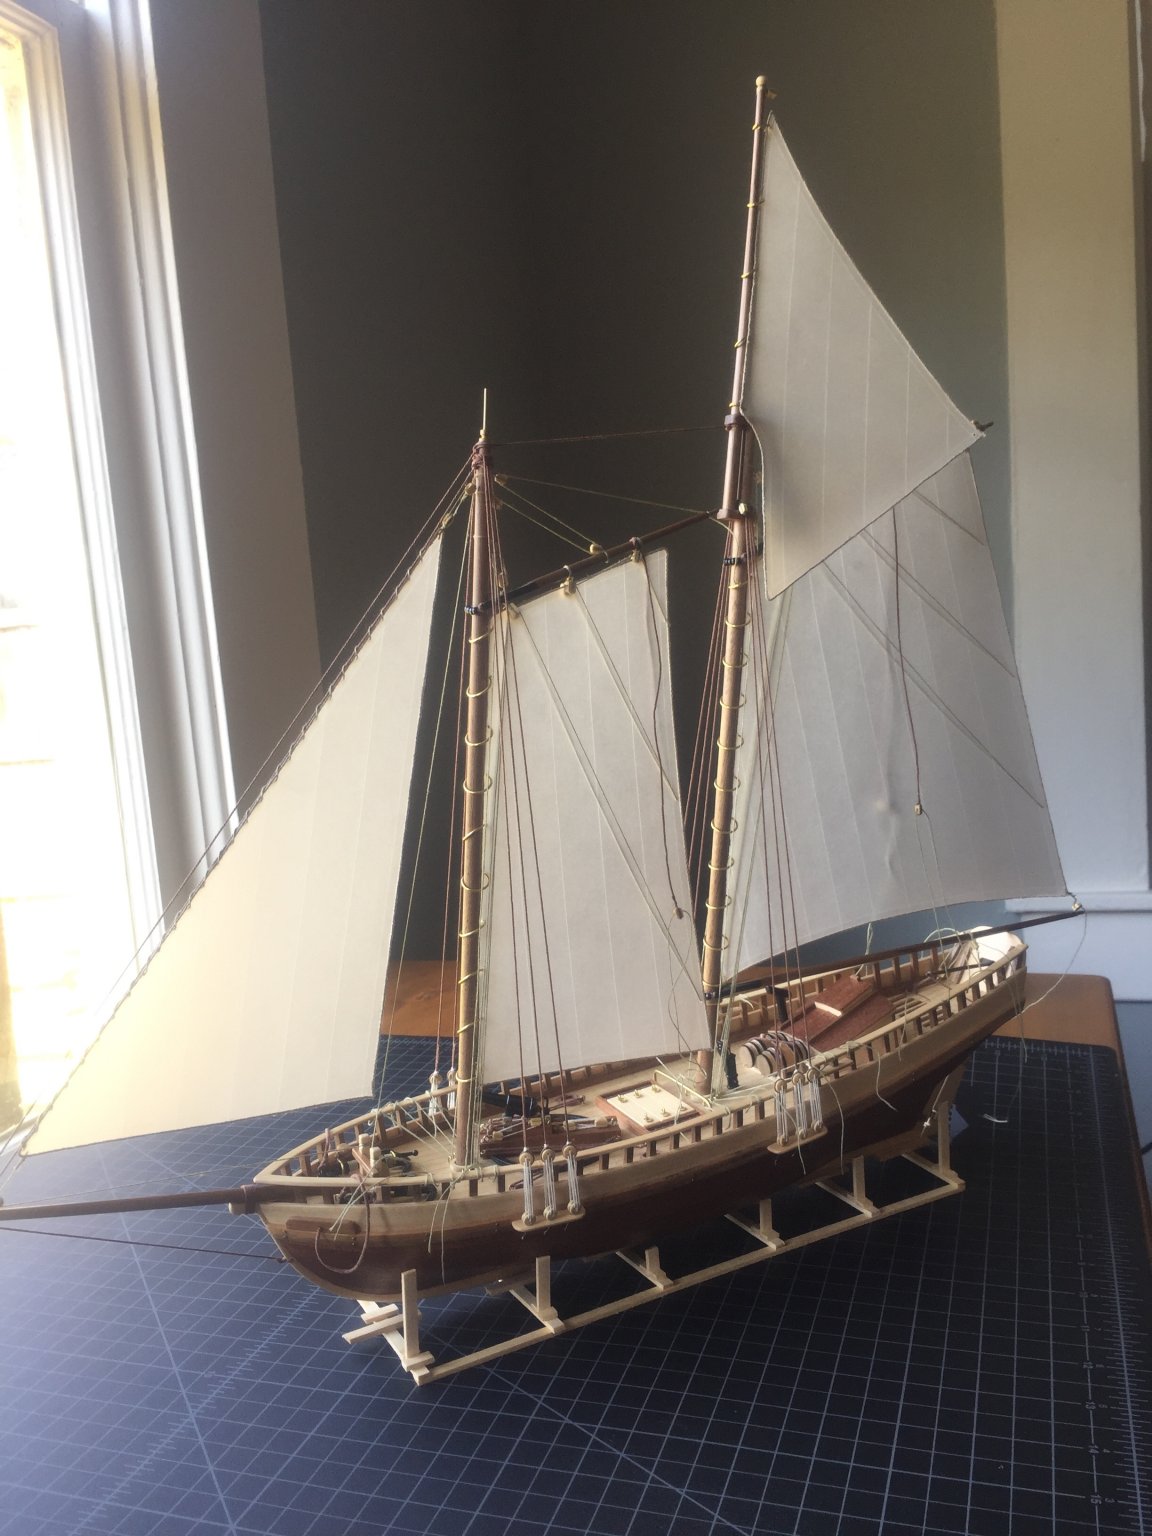
Got some thread! All the rigging is complete, and I'm now working on coils around the deck. As you can see, I've finished the coils around the foremast.
-
Well, got to this stage and then ran out of thread 😂. Does anyone happen to have Artesania Latina 0.25mm cotton beige thread (looks more like olive green, but beige it is), and can ship to US? If so, message me!
-
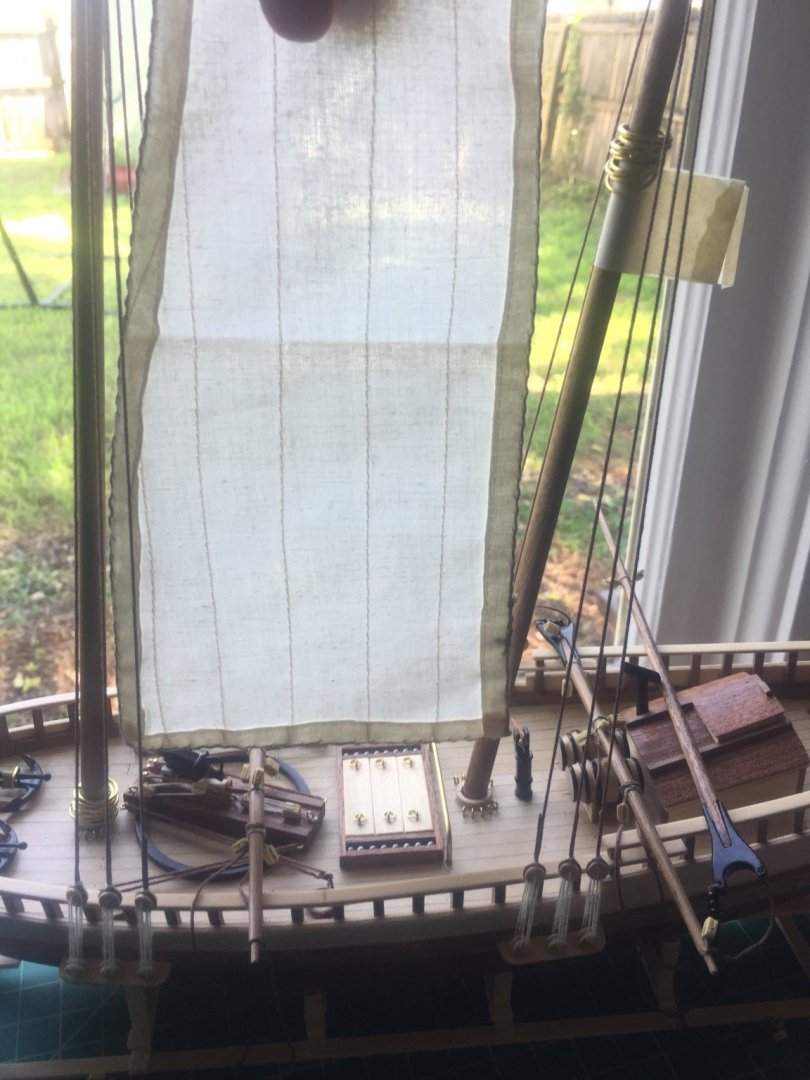
So, after a bit of a hiatus, I've come upon a reasonable method to make passable sails. This method is courtesy of @Tim Curtis. I'm using 115 gram/m2 weight vellum tracing paper. To dye the paper, I soak 1 earl grey teabag in 5 cups hot water for 5 minutes. I then soak the paper in this hot liquid for 30 minutes, after which time I blot dry with paper towels, and then transfer to a heavy book (with weight on top) for two days. I cut the sails to shape directly, and scribe (gently scrape) lines to mimic seams. I glued thread along the outline of the sail (using Elmer's white glue - very tedious) to give it a bit of fabric-like dimension. Here's where I'm at right now. Still a bit messy, but you get the idea I'm sure. I am hoping to have this finished up within the next week or so.


-
These look very nice - I think I'll give this a try before buying some more fabric.
-
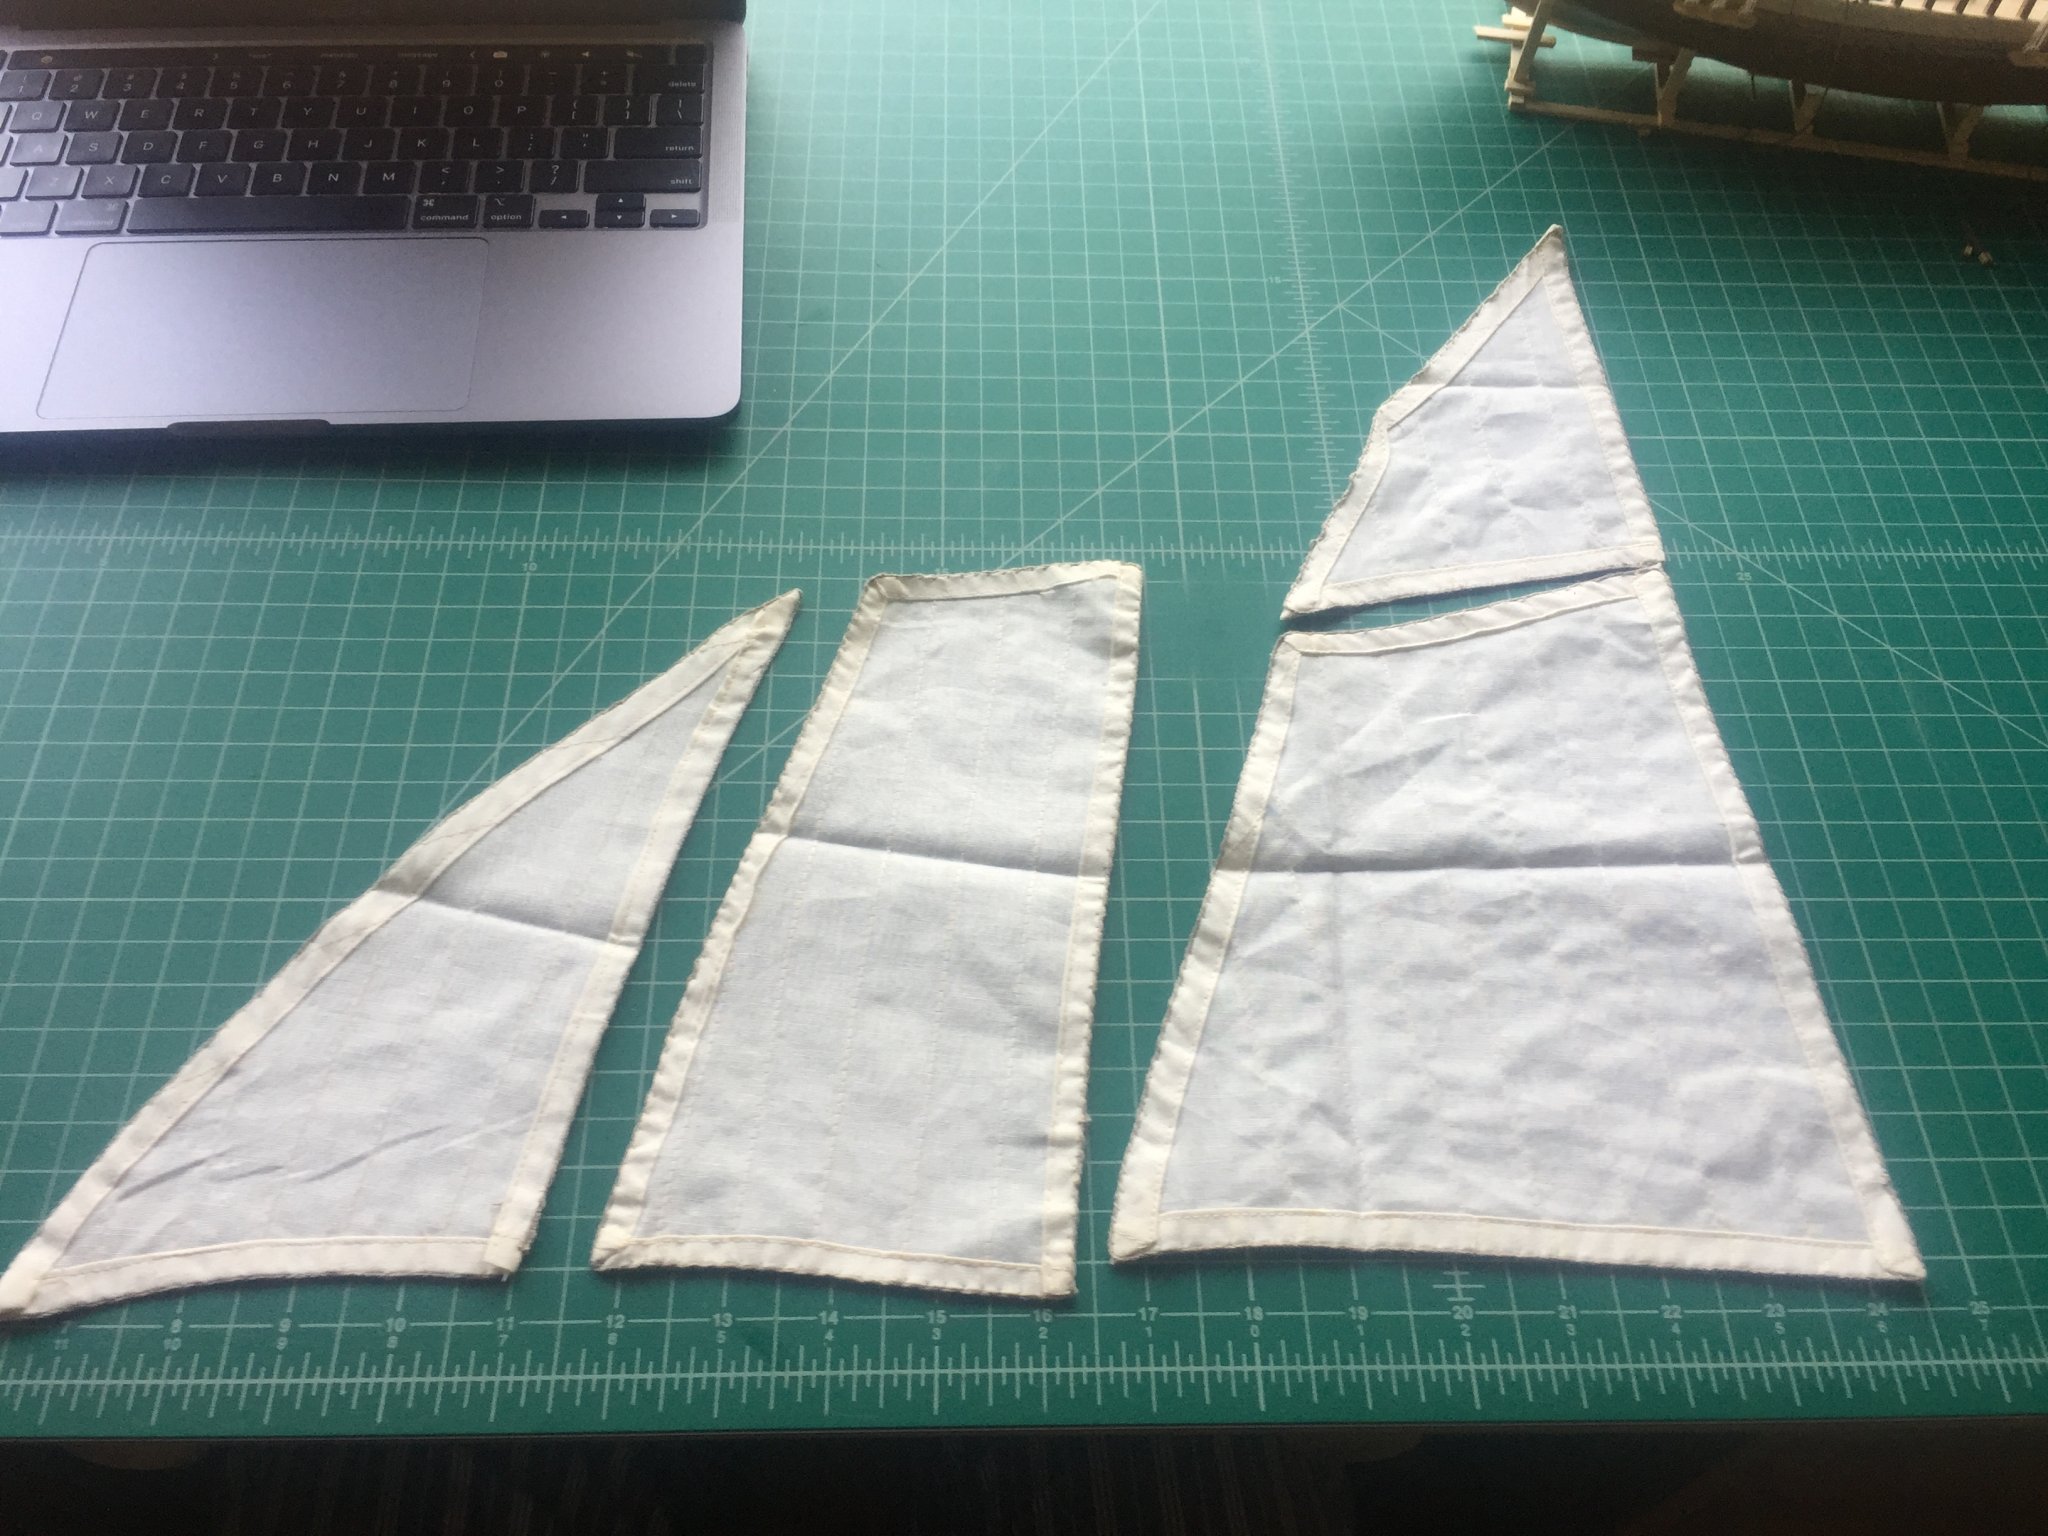
So - progress has come to a bit of a halt. The supplied sails were far too warped and would have required more tension than the provided thread could handle to even come close to straightening out. I attempted to order some cotton/linen fabric and make my own sails (I have a bit of sewing experience), but they too came out warped (perhaps the fabric was too sheer?). Any suggestions? Does anyone fabricate their own sails and can point me in the direction of some quality fabric?
-
Thanks! Exactly what I was looking for. Gives me a good sense of how to shape the sails.
-
mpk73 reacted to a post in a topic:
Virginia 1819 by mpk73 - Artesania Latina - Scale 1:41
-
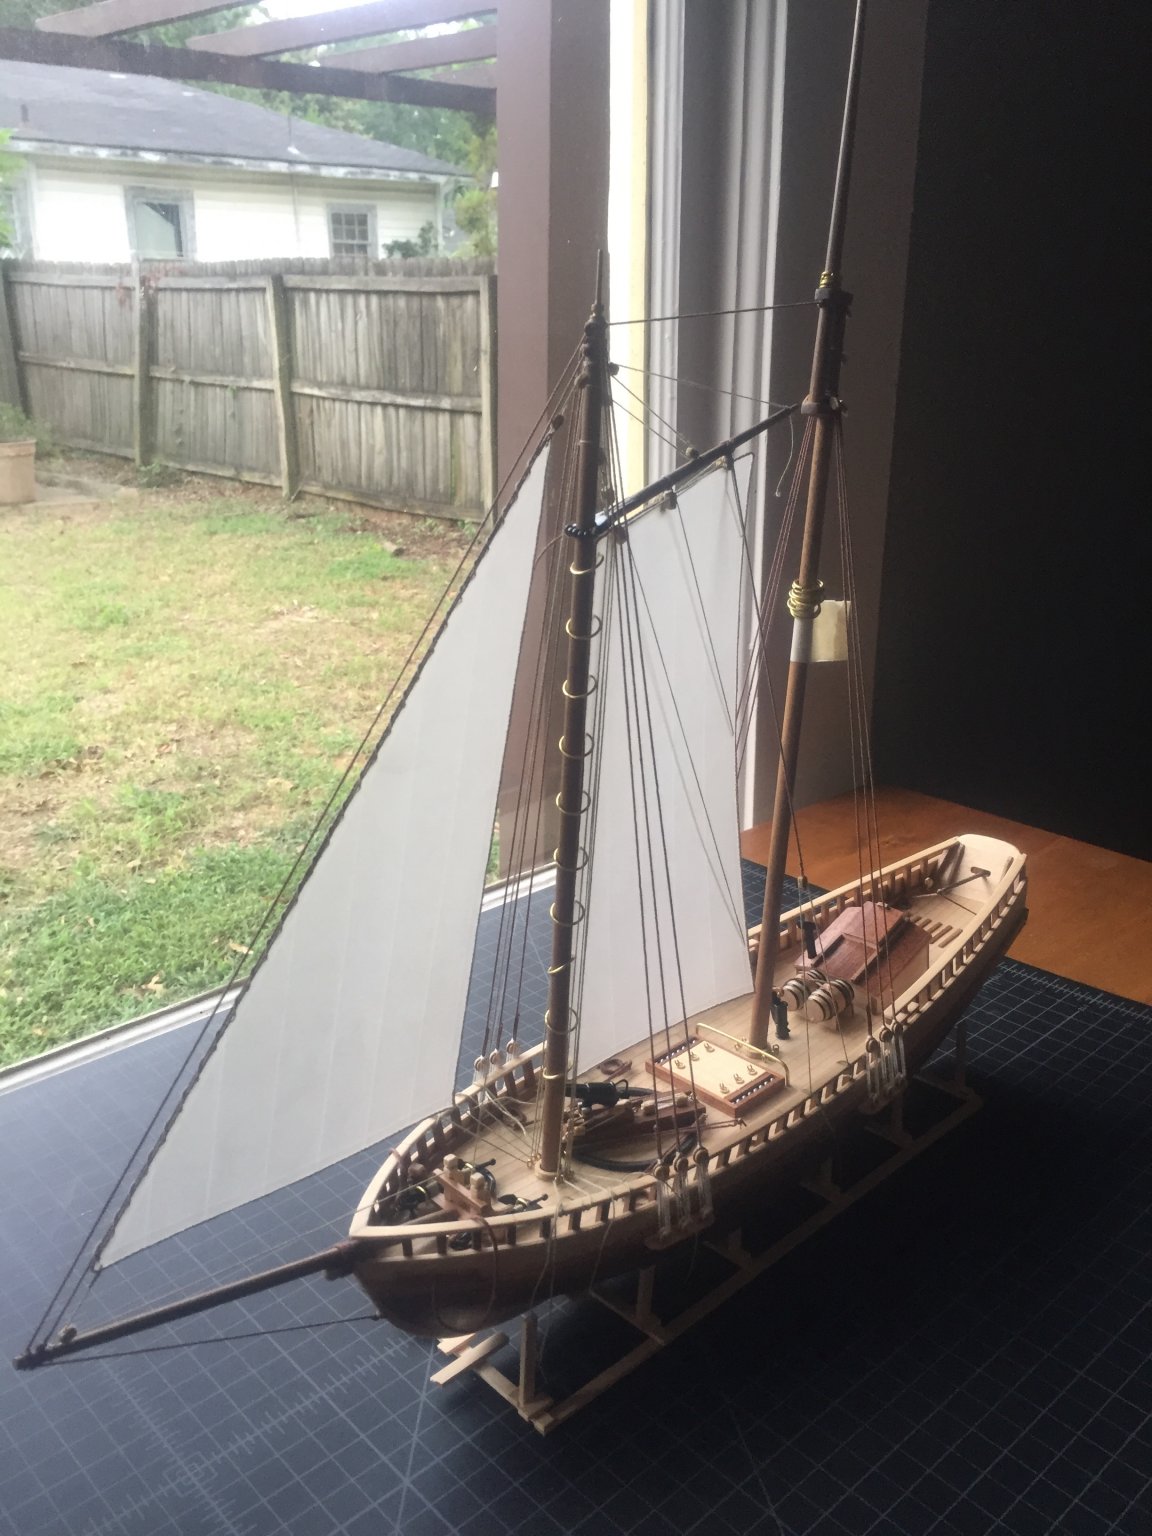
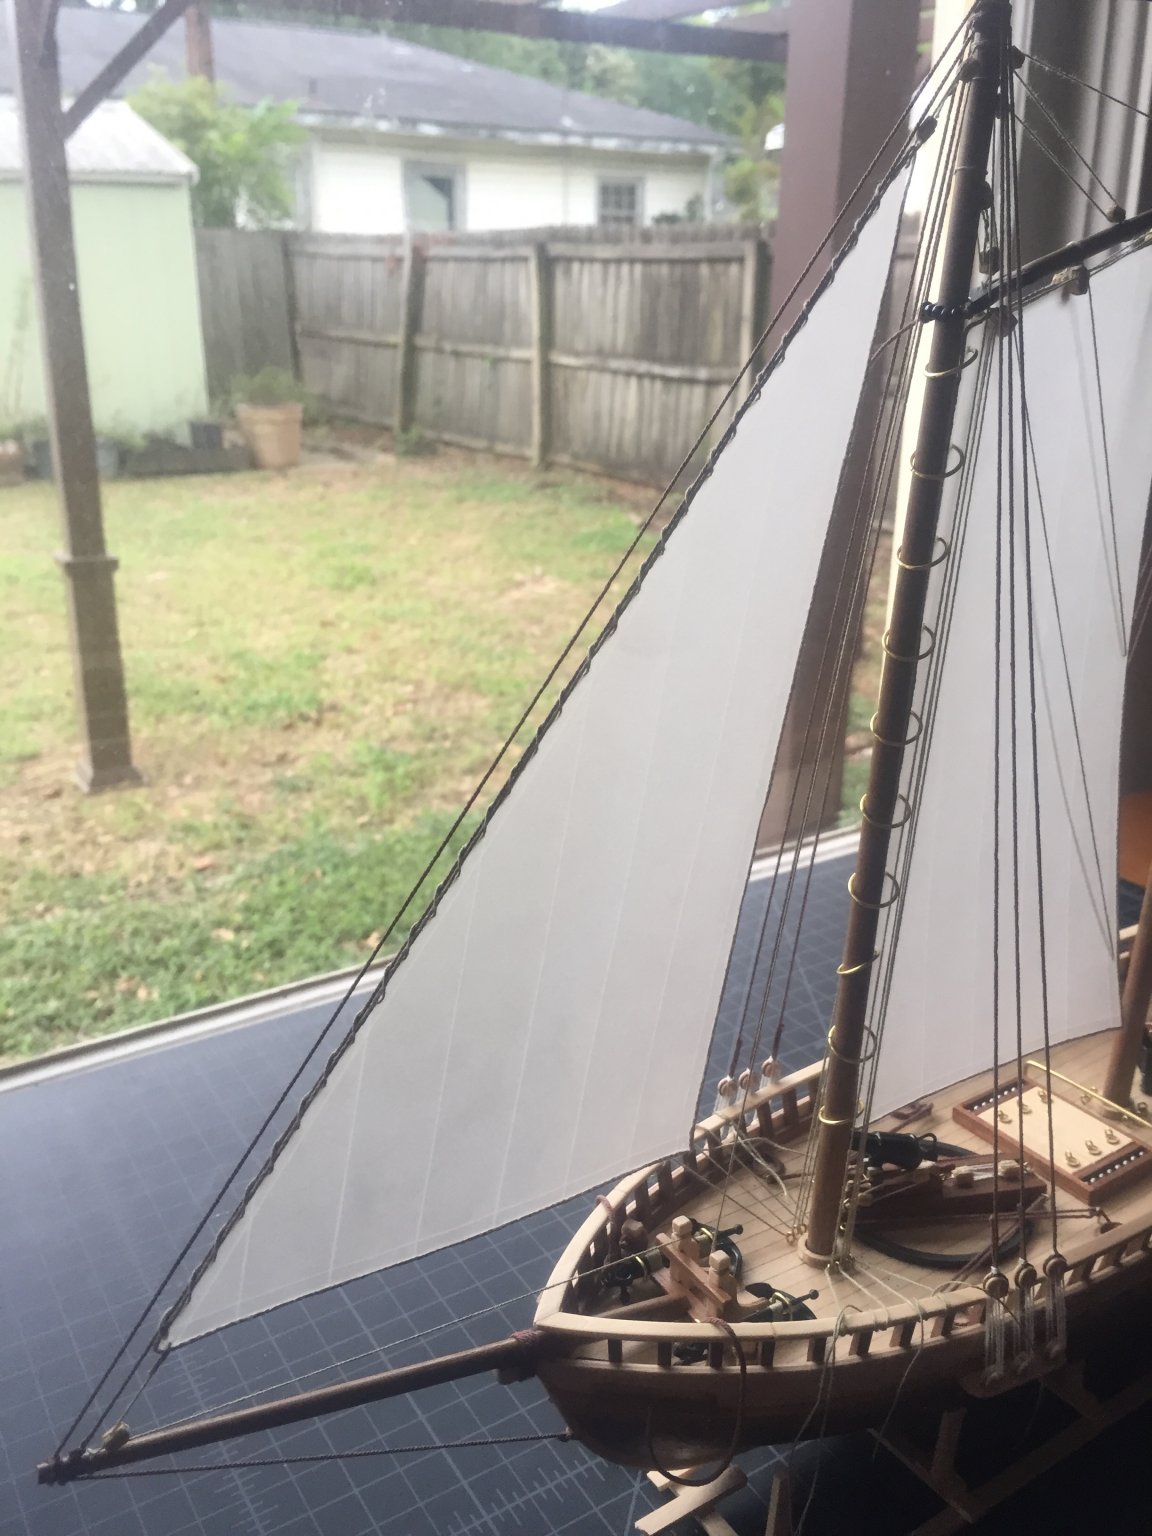
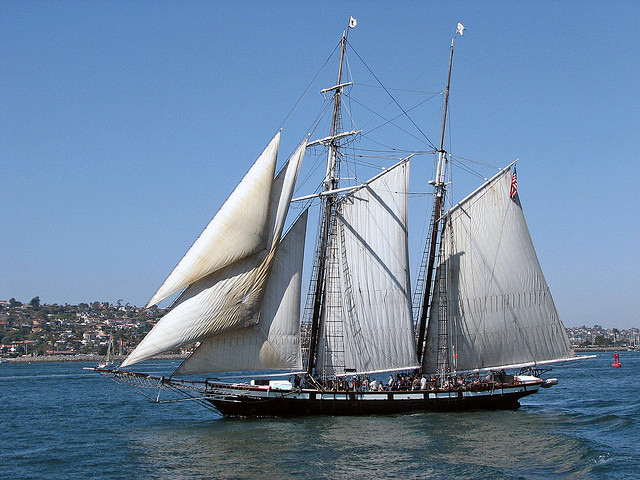
Well - I'll give it an attempt using the linen/cotton I purchased first... I suppose I was looking for someone to confirm to me that the foresail is too large! I imagine it's supposed to be able to swing freely between the foresail and the mainmast without hindrance? Same with the jib - the fact that it is so curved makes it difficult to stretch linear (as in the picture below). Another question: Does anyone have a good picture of a similar style schooner with wind in the sails? I think I'd like to style it as though it would if it were catching wind, though I have no idea what way the sails are intended to catch wind on a schooner. A diagram would certainly be helpful, as well (how are the sails / boat positioned with respect to a straight line wind??).

-
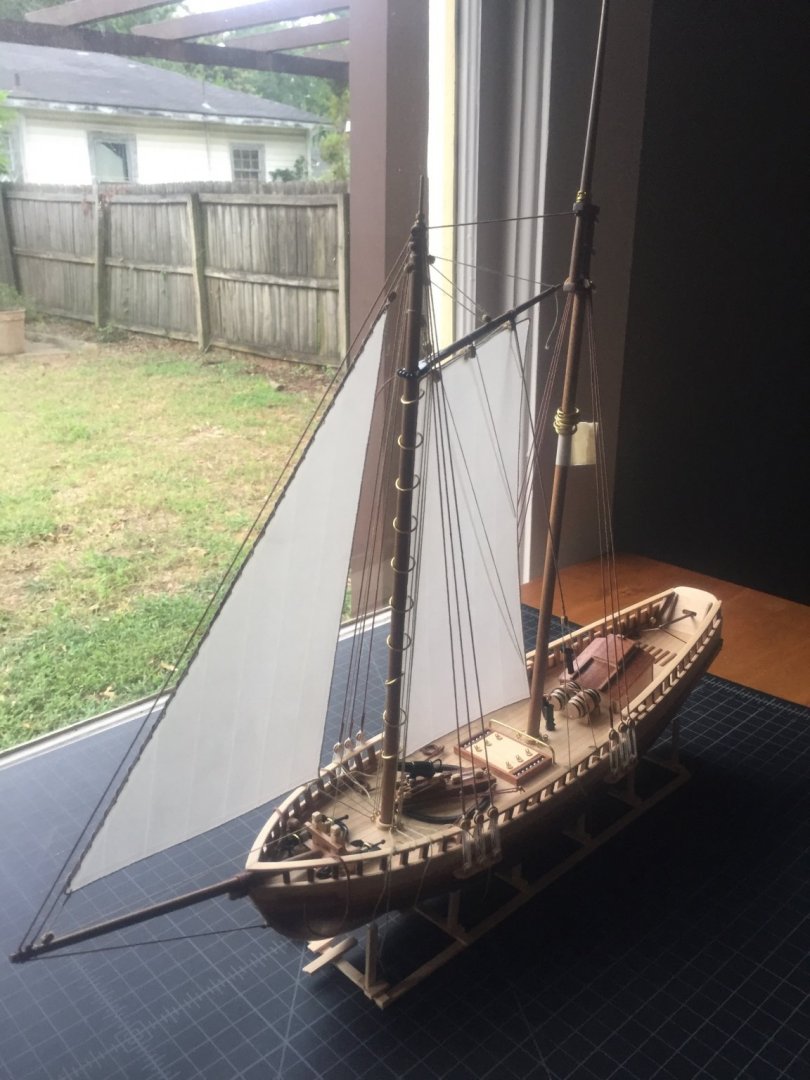
Thanks! I come the world of guitar making - bending wood, precision, and details are common needs. Here are the supplied sails. I've tried to hold up the foresail to show how it is too large (it hits on the main mast!). Does this seem correct? Also, the jib has such a profound curve on it that there is no way to ever straighten it out - it would require a degree of tension that would tear the sail. This seems like a more obvious error to me than the foresail. I've preemptively ordered some lightweight cotton/linen blend to potentially make my own sails, pending what you all have to say.


-
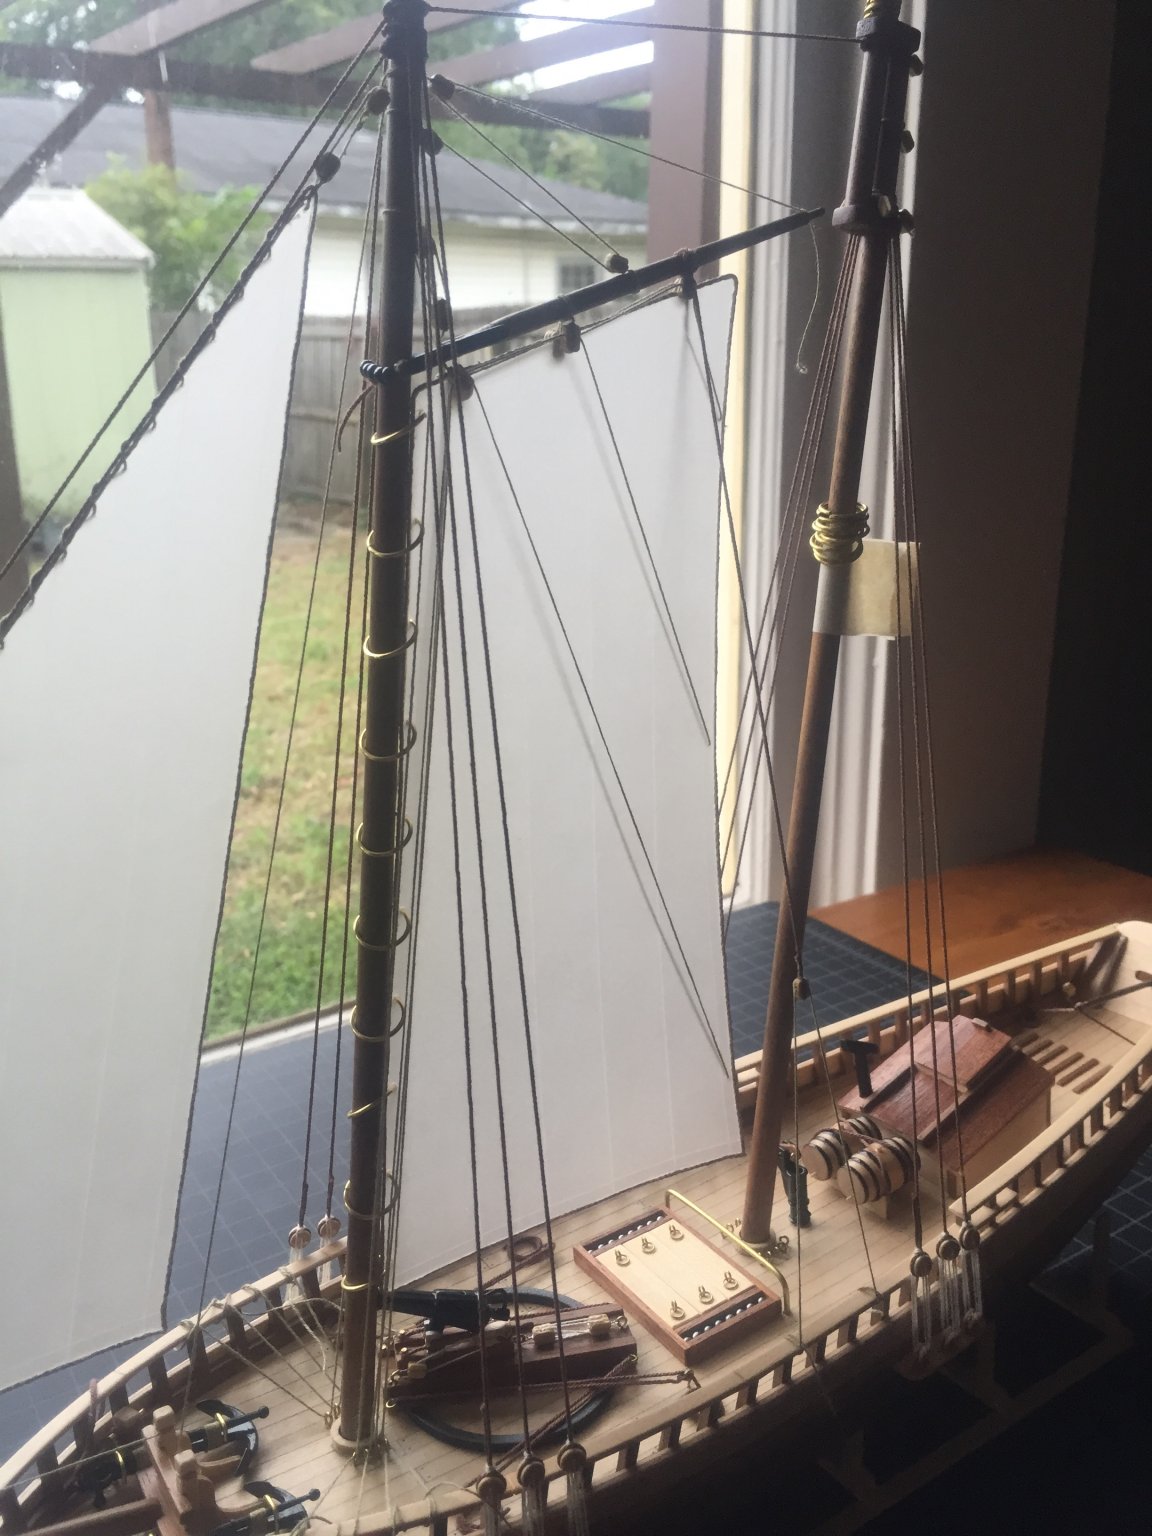
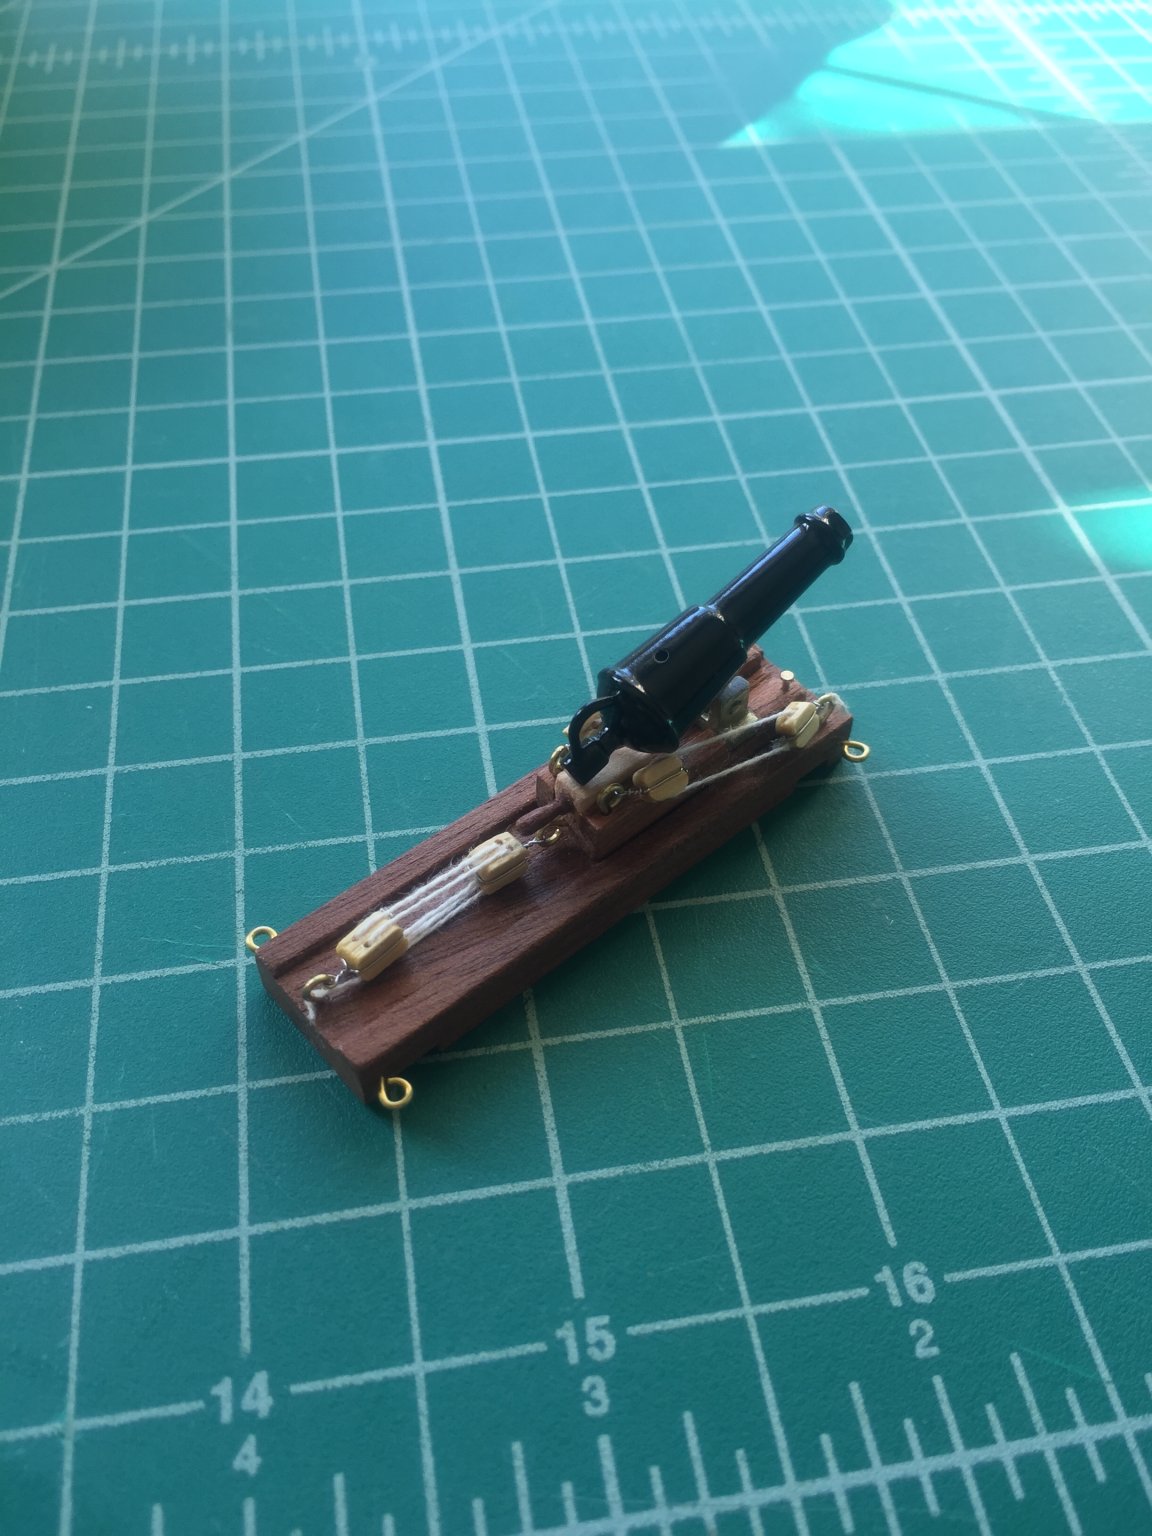
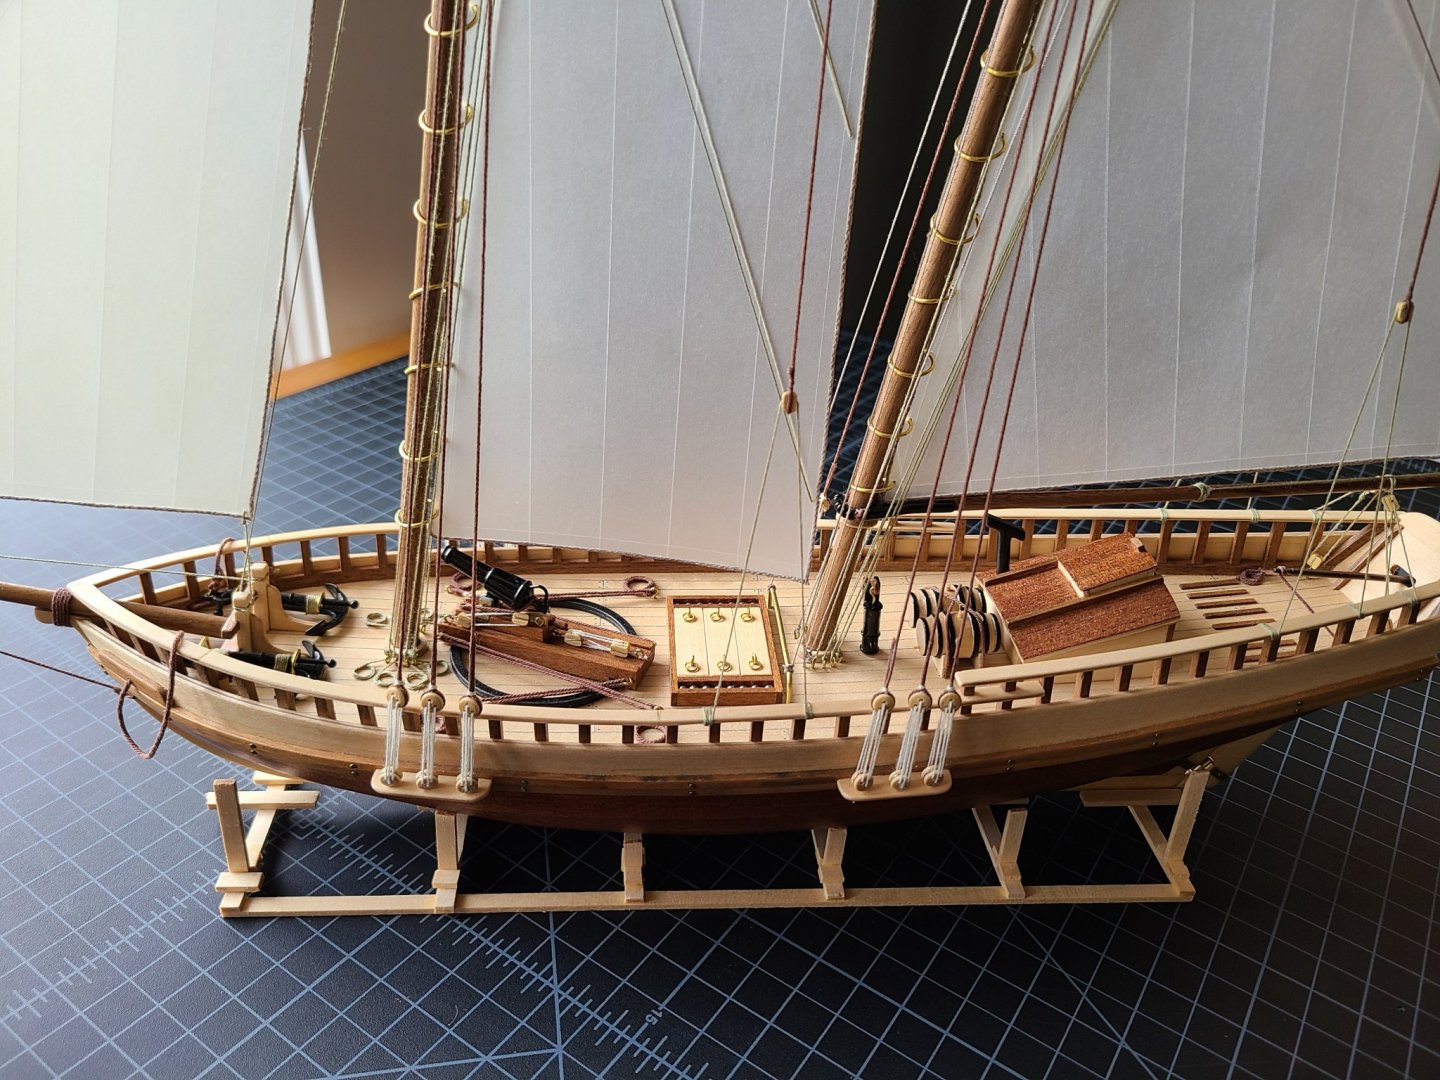
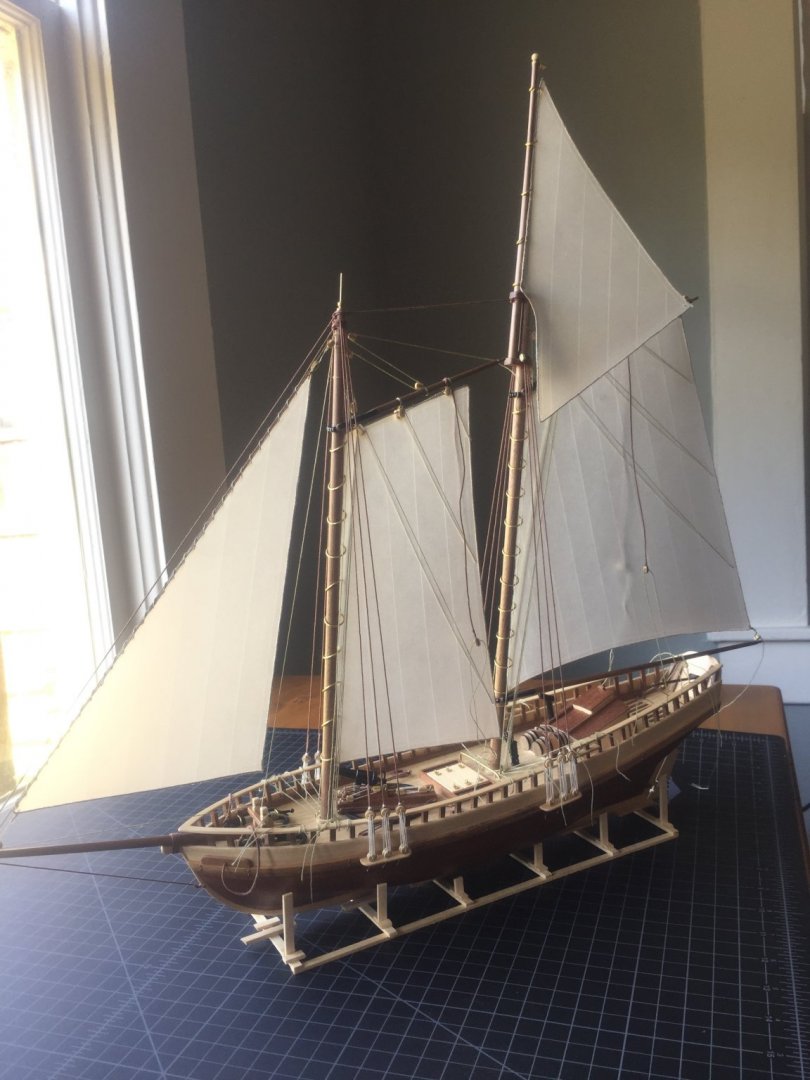
I've attached all the blocks on the ship and the gaffs and boom. It's now ready to accept the final rigging and sails. Problem is (and I've seen others comment on this) - the sails are of rather poor quality. They are misshapen, and sometimes too large. The foresail, for example, is too large to fit between the foremast and the mainmast. Is this intentional? Can anyone comment? Is it meant to sit askew of the line of the ship, either port or starboard? Anyway, here are some pictures with blocks:

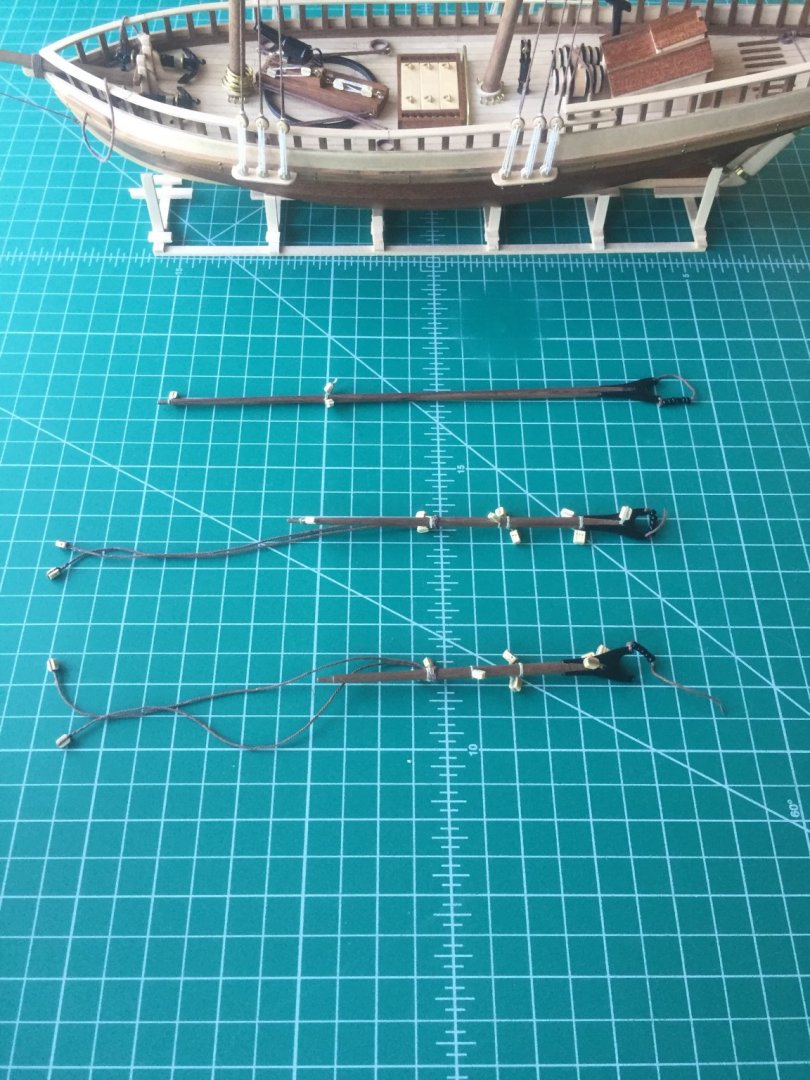
-
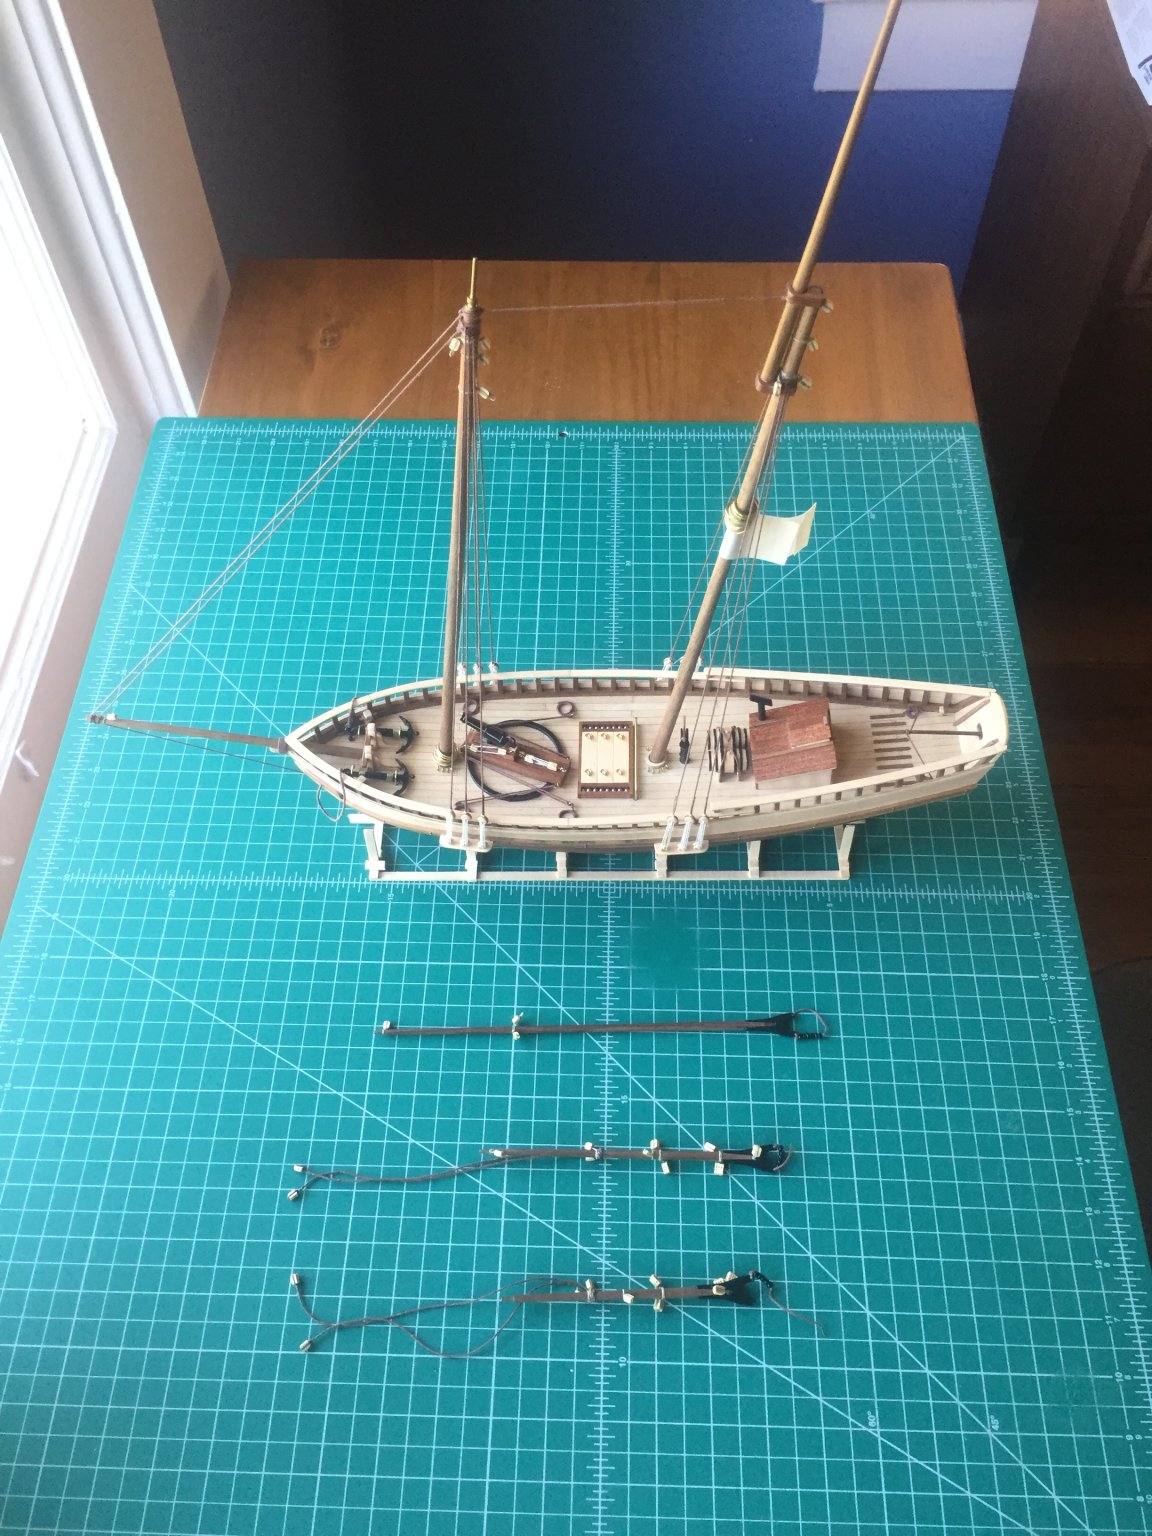
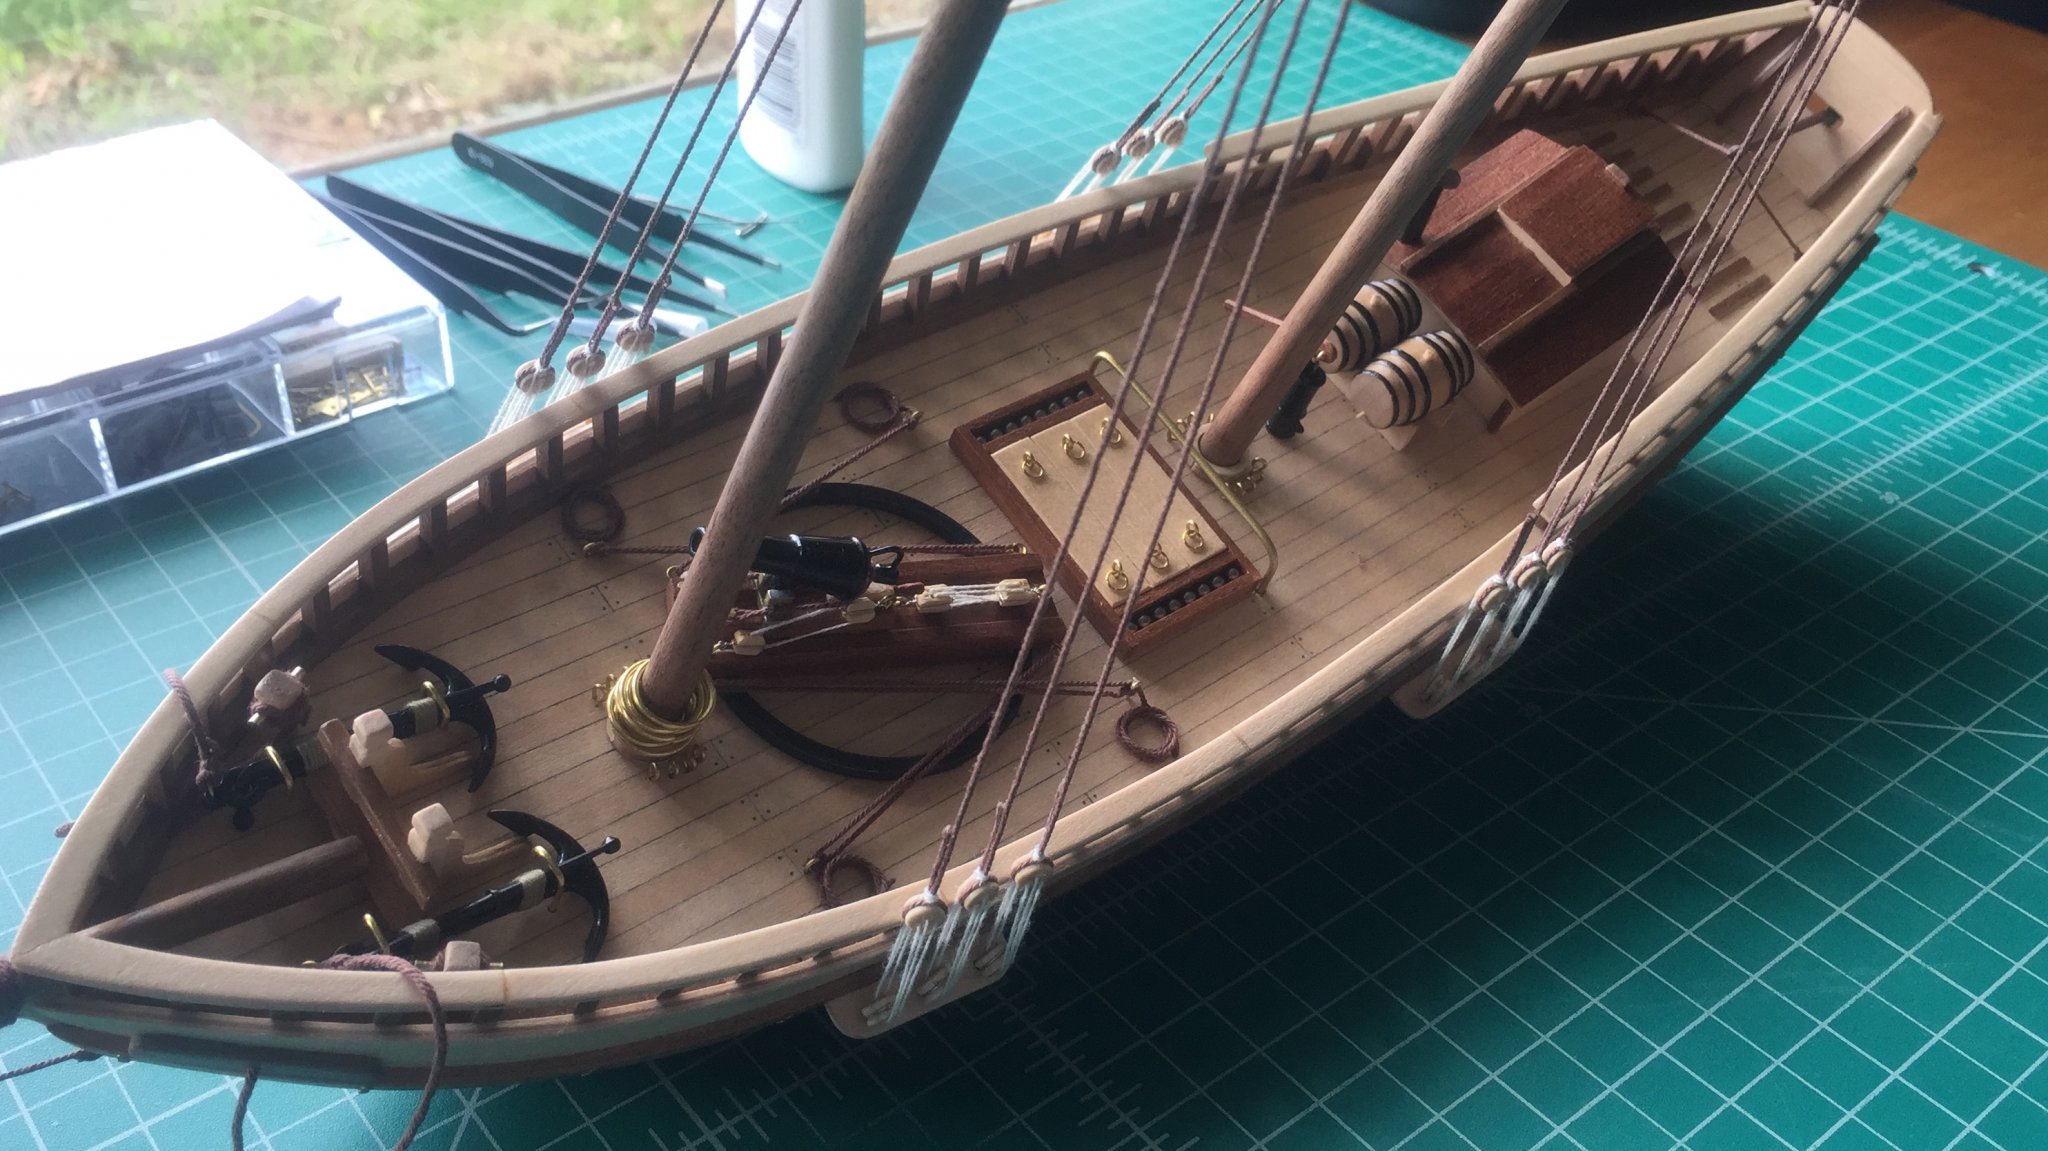
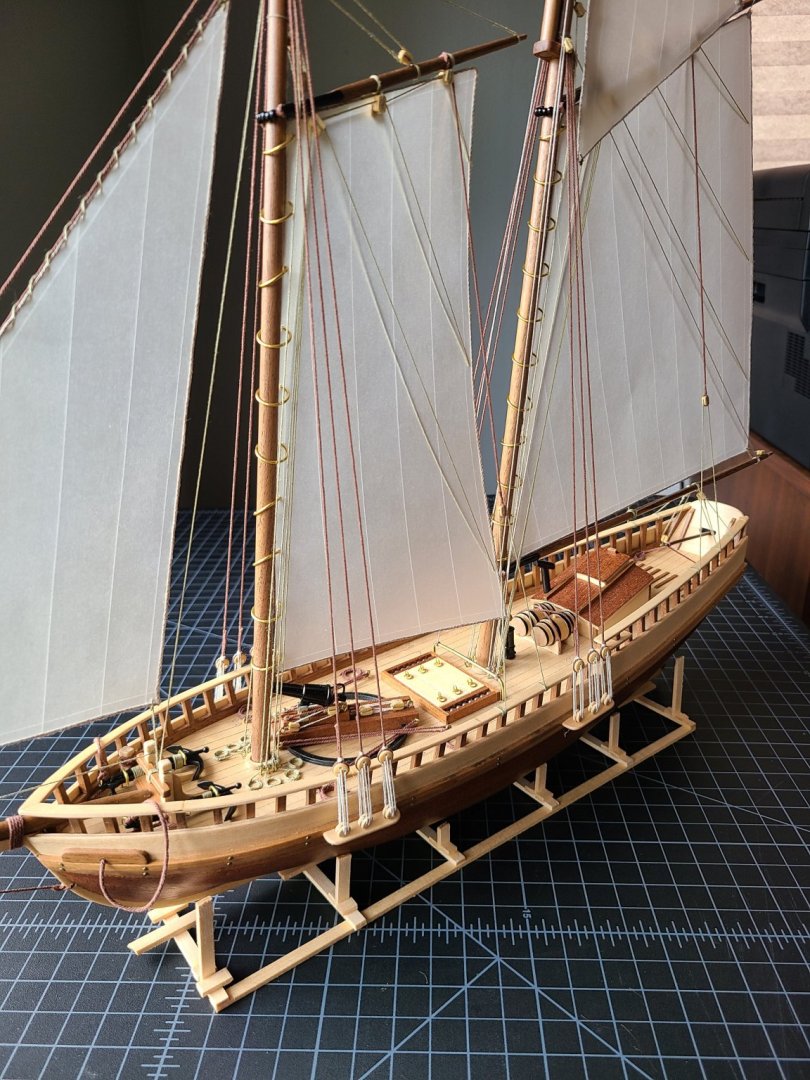
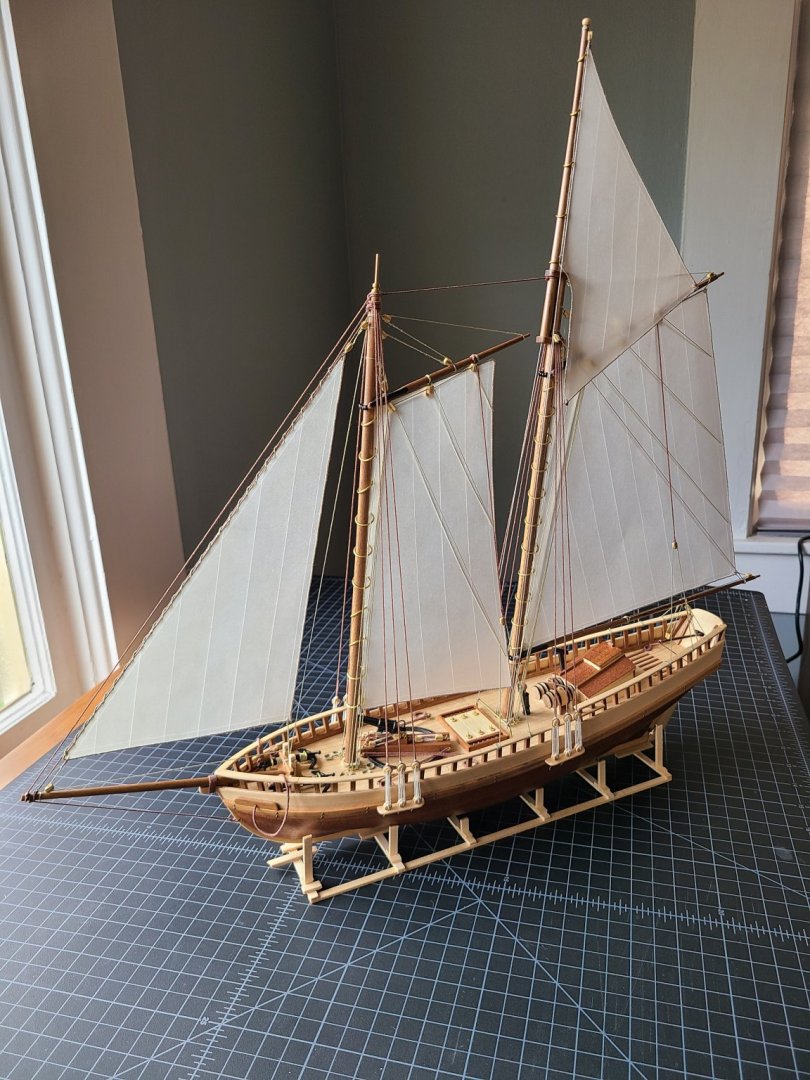
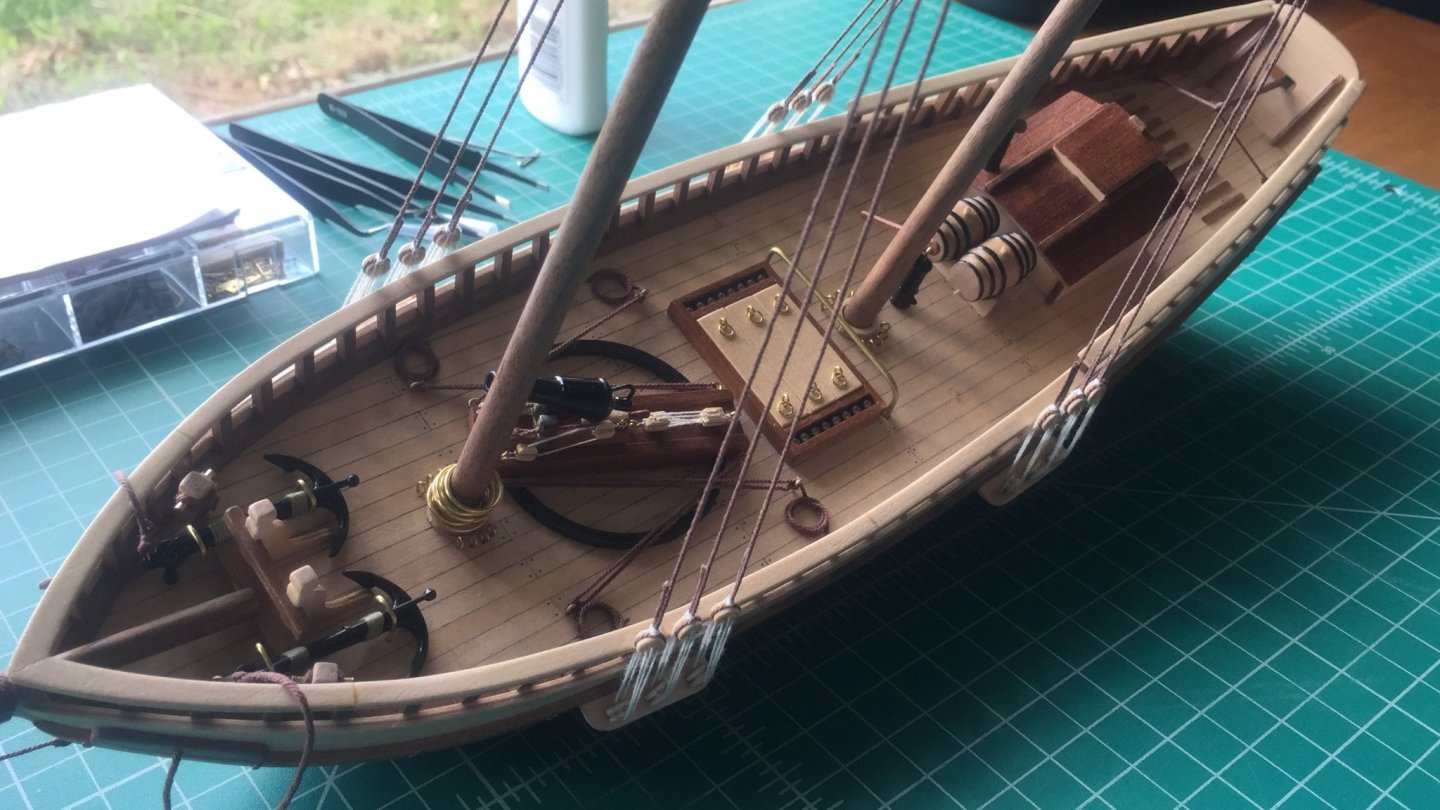
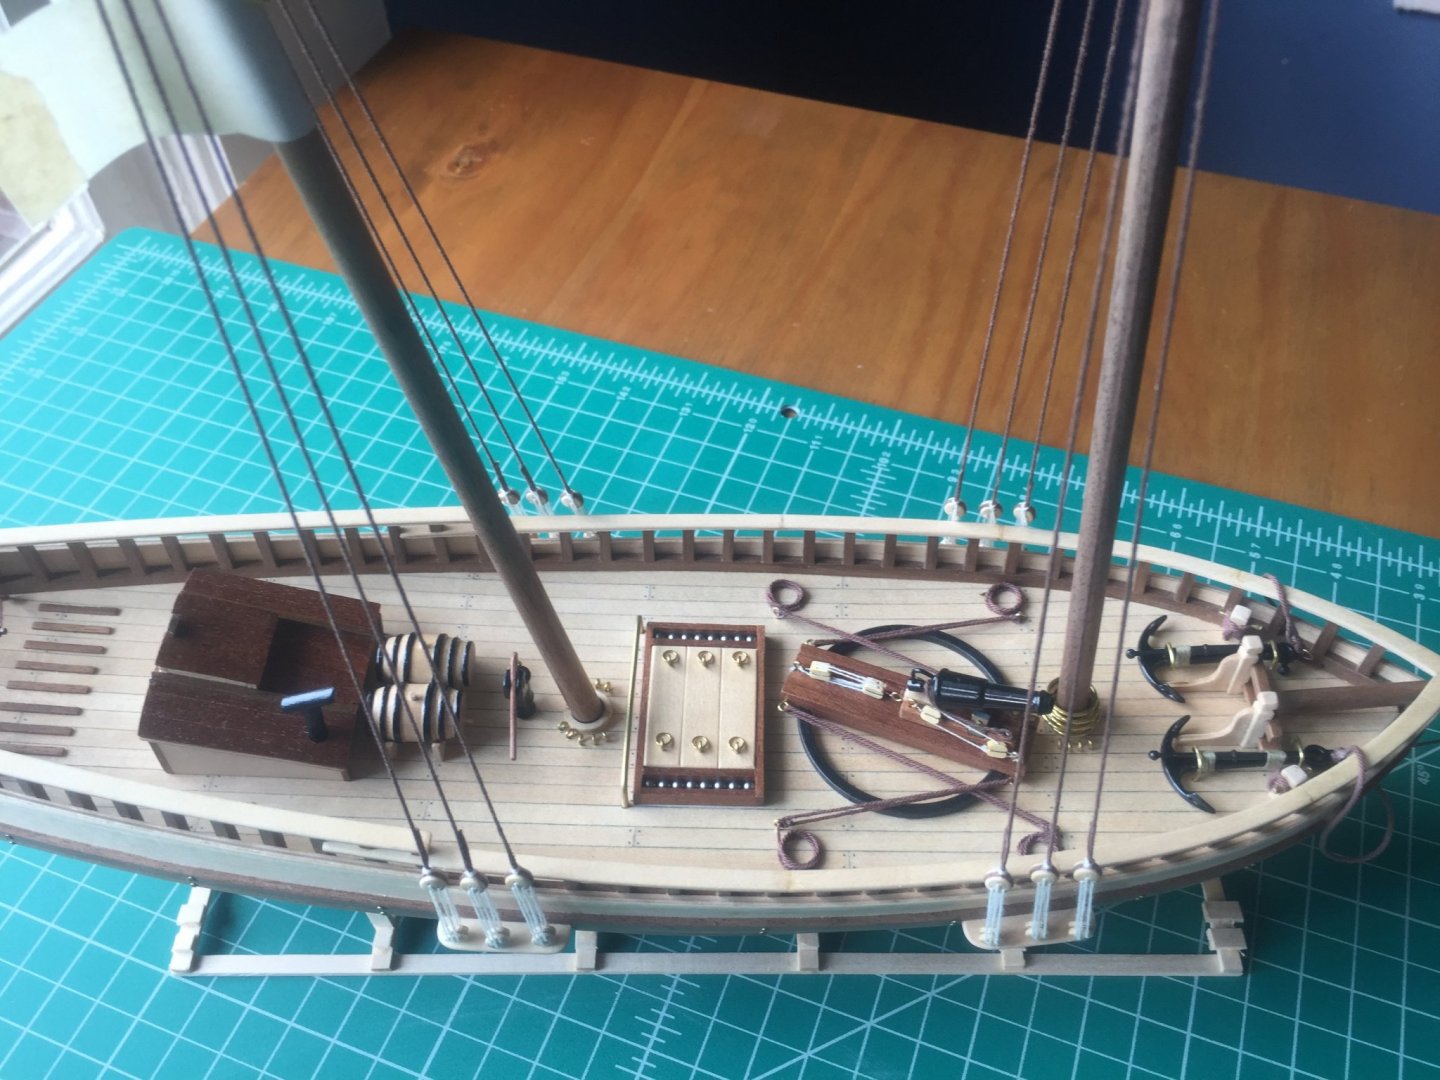
I had accidentally glued most of the deck fittings on before putting on the polyurethane - this didn't turn out to be much of a problem. If you're using spray finish, there wasn't a problem with gluing the fittings before finishing. The water based polycrylic from Minwax gave good coverage, and got into most of the corners (the spray cone is wide and even). I went ahead and glued rest of the (finished) fittings onto the deck and began rigging. I completed the standing rigging over the course of the weekend, as well as most of the deck riggings. Here are some (blurry) shots:
-
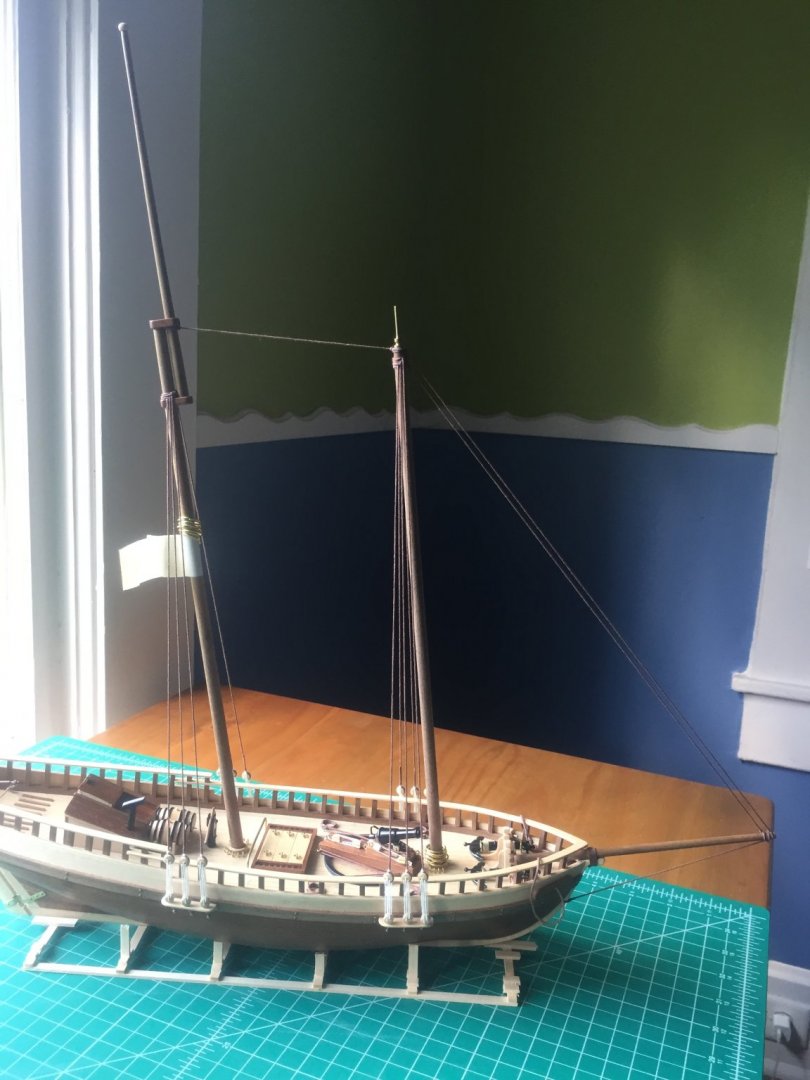
I decided to go with a water based satin finish spray polyurethane - polycrylic from Minwax. I spent today spraying, leveling, and respraying the hull. It's easy to use, though it does sputter a bit (works out during level sanding). Here are the results of the hull. The satin finish is perfect for what I was looking for - I didn't want a high gloss or a perfectly matte look. I've additionally begun working with the thread... Results below.

-
Poly after gluing to deck...
mpk73 replied to mpk73's topic in Painting, finishing and weathering products and techniques
I have decided to go with a water based spray poly for most surfaces, and will touch up any bare surfaces on the deck not reached by the spray carefully with a wipe on water based poly. I will update in my build log (https://modelshipworld.com/topic/24468-virginia-1819-by-mpk73-artesania-latina-scale-141/). -
Poly after gluing to deck...
mpk73 replied to mpk73's topic in Painting, finishing and weathering products and techniques
Unfortunately, we just moved back to the US from Germany, so I've yet to build a proper wood shop... -
Poly after gluing to deck...
mpk73 replied to mpk73's topic in Painting, finishing and weathering products and techniques
@vaddoc - I'd like to protect the deck and deck fittings. I do not plan on building a case for this, so it will be exposed.