


manic8479
-
Posts
55 -
Joined
-
Last visited
Content Type
Profiles
Forums
Gallery
Events
Everything posted by manic8479
-
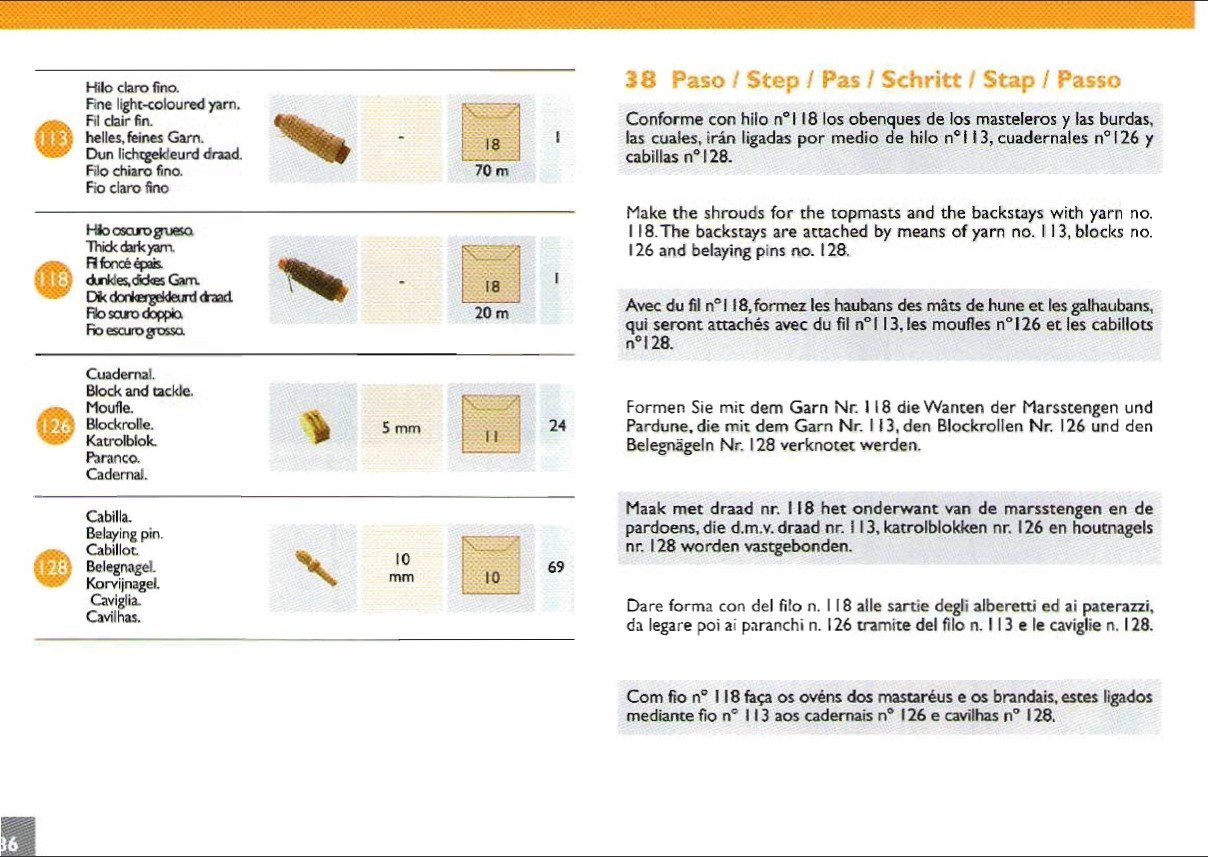
thanks for the advice - I will be sure to follow it. My name is William
- 89 replies
-
- 1
-

-
- Enterprise
- first build
- (and 2 more)
-
If this build has taught me anything it is that I should spend a lot of time and energy choosing my next ship. I have had some great advice from fellow members and I am looking at ships from victory models or vanguard models. what ever I choose I would like to paint the next ship and make her as accurately as possible.
- 89 replies
-
- 2
-
-
- Enterprise
- first build
- (and 2 more)
-
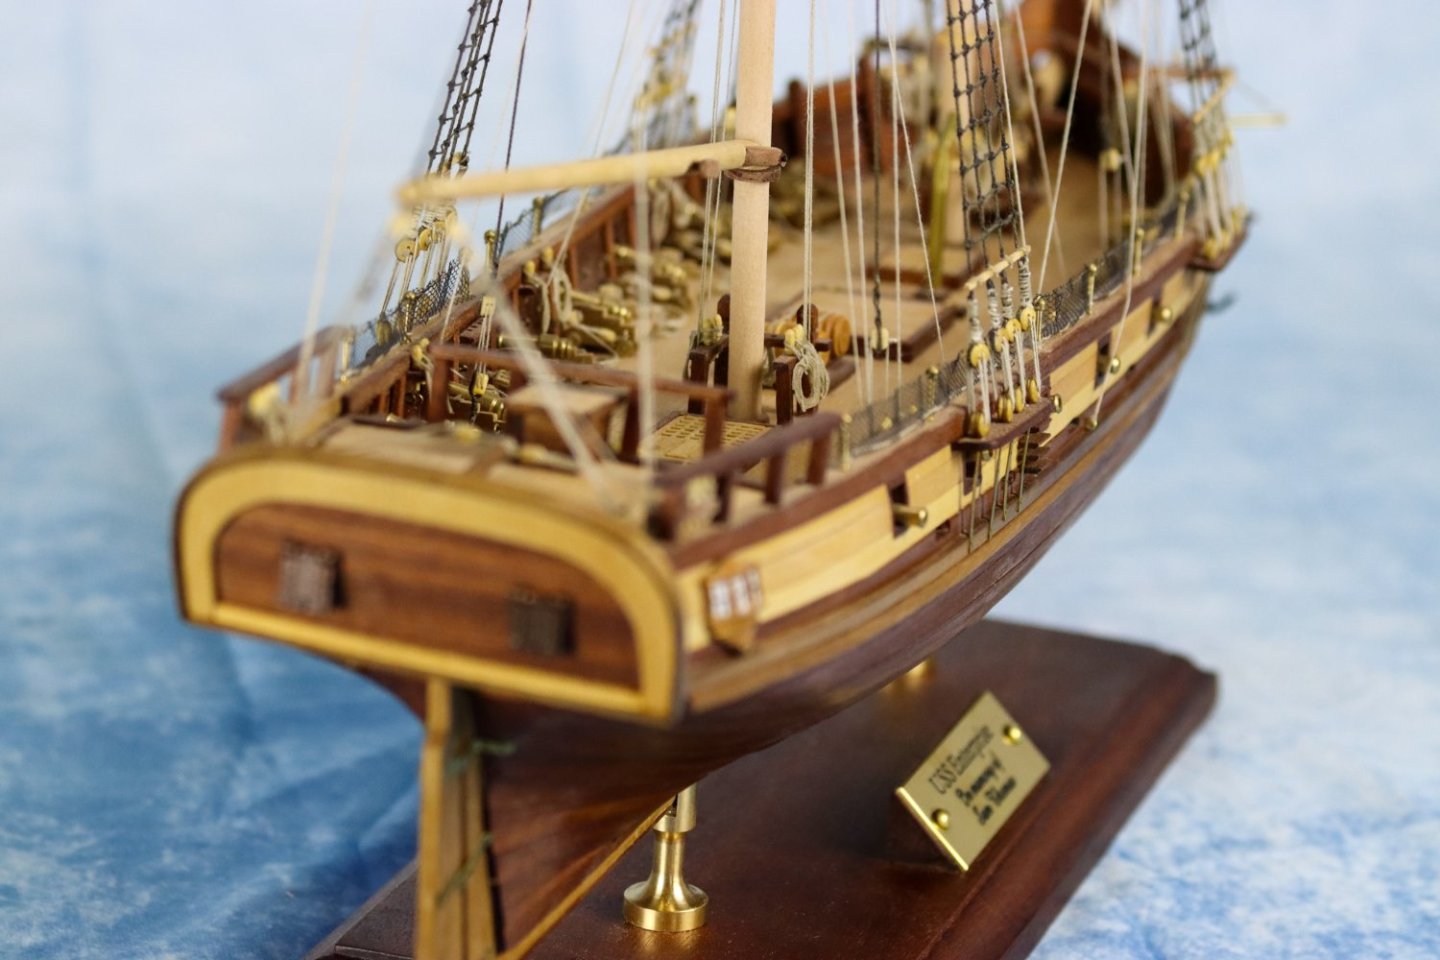
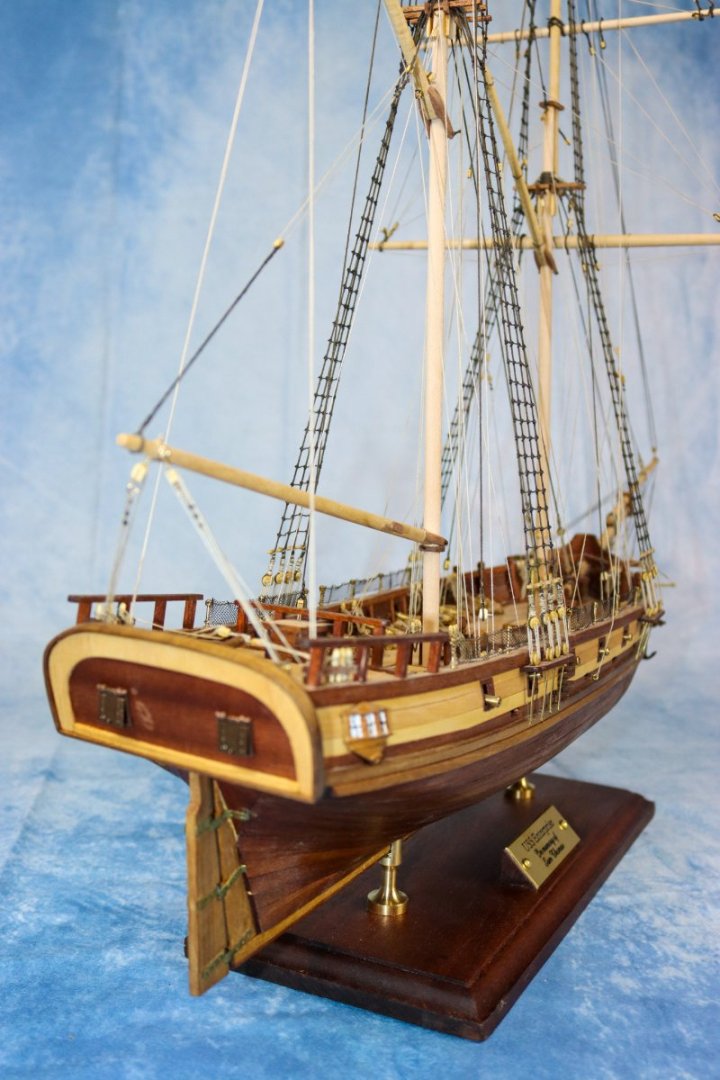
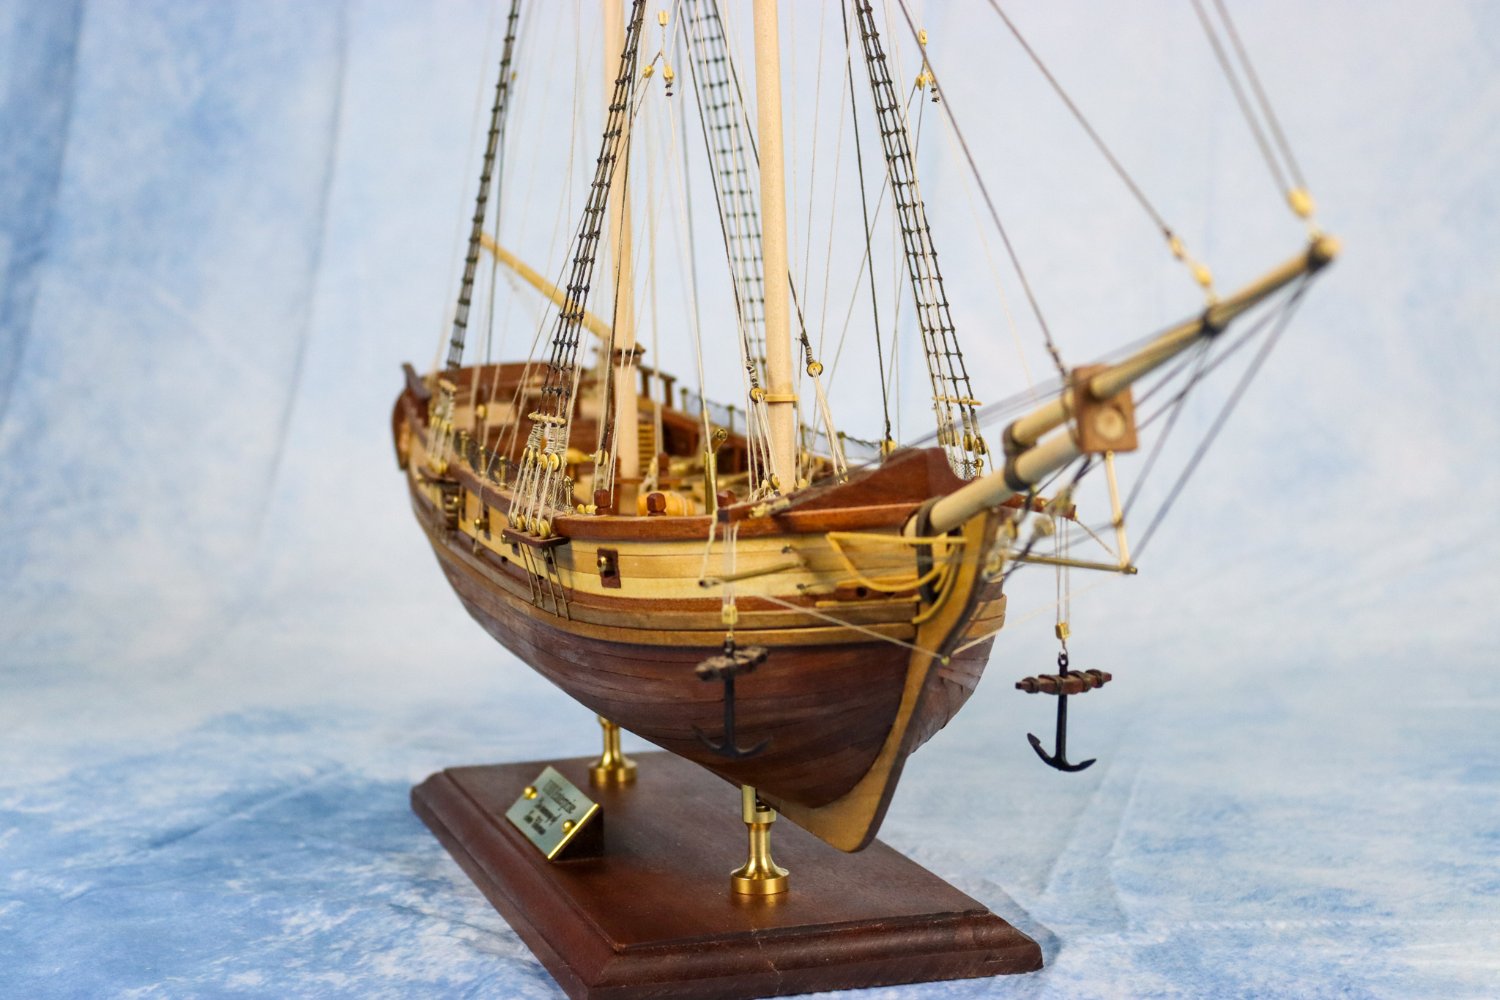
Well I think I am done - this is the my final result It has been a fantastic Experience and one which I hope to repeat in the future. Needless to say, when I do get another ship to build I will start a build log and share the journey. I honestly don't think I would have - or even could have - completed the build without the advice and support of this group. Thank you all very much, your support has been greatly appreciated.


- 89 replies
-
- 11
-
-

-

-
- Enterprise
- first build
- (and 2 more)
-
Thank you The Syren 'rope'rocket', looks fascinating - I have just looked at several videos and it looks like a great and possibly simple (although it may take some practice) solution Thanks.
- 89 replies
-
- 1
-
-
- Enterprise
- first build
- (and 2 more)
-
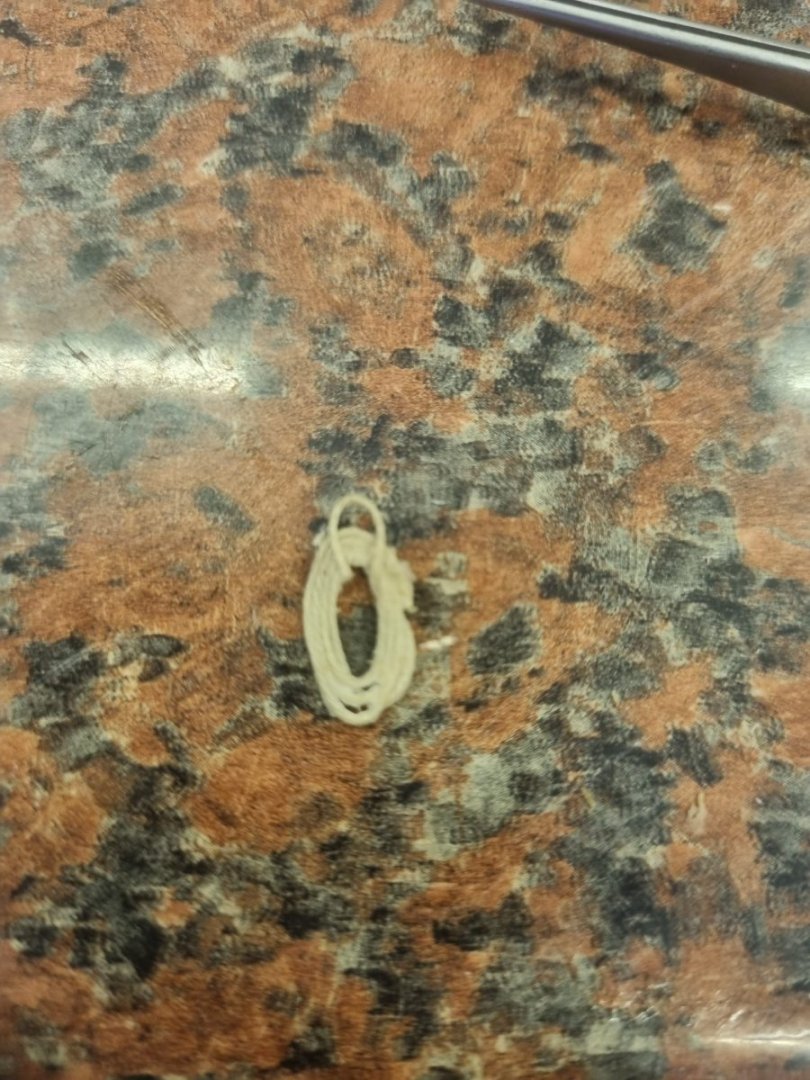
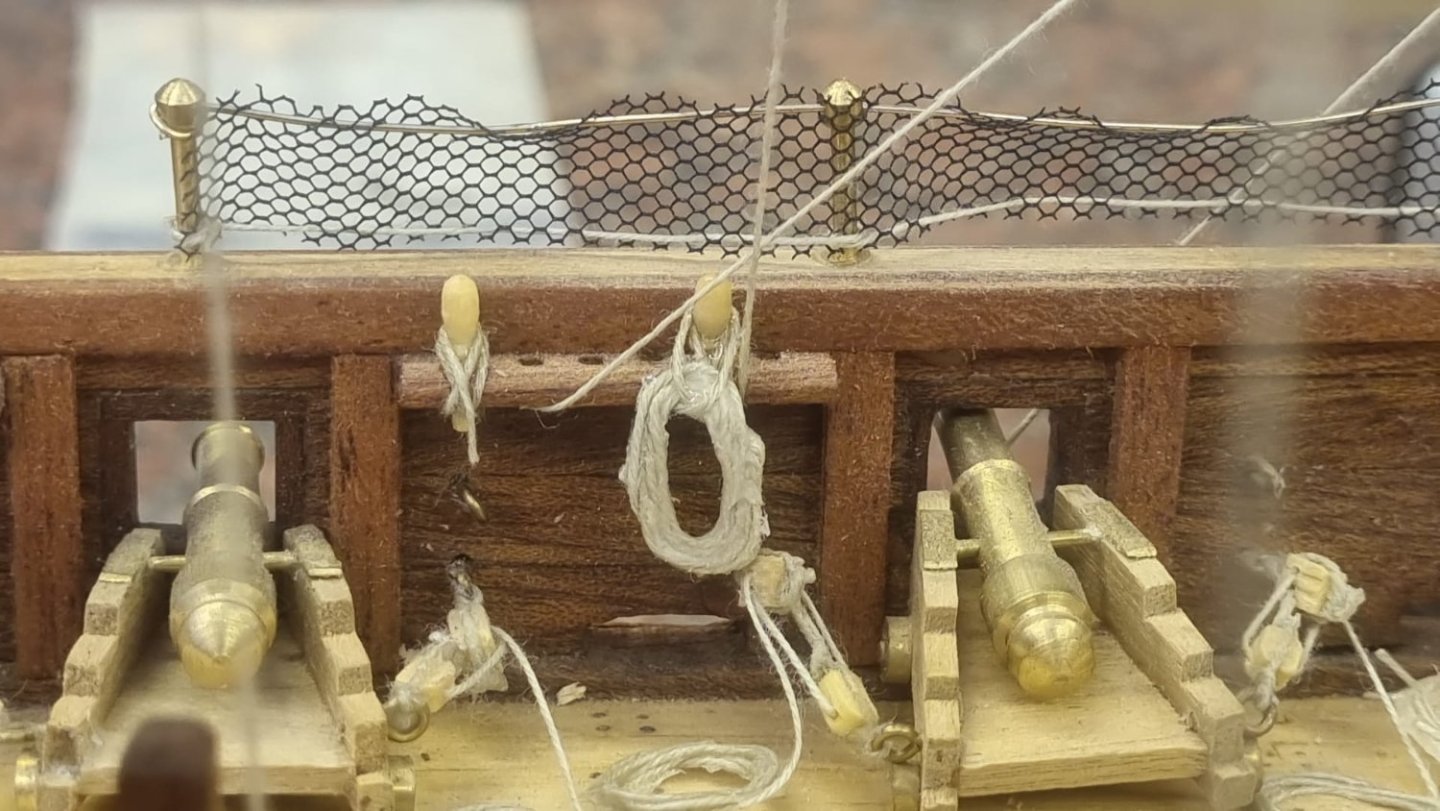
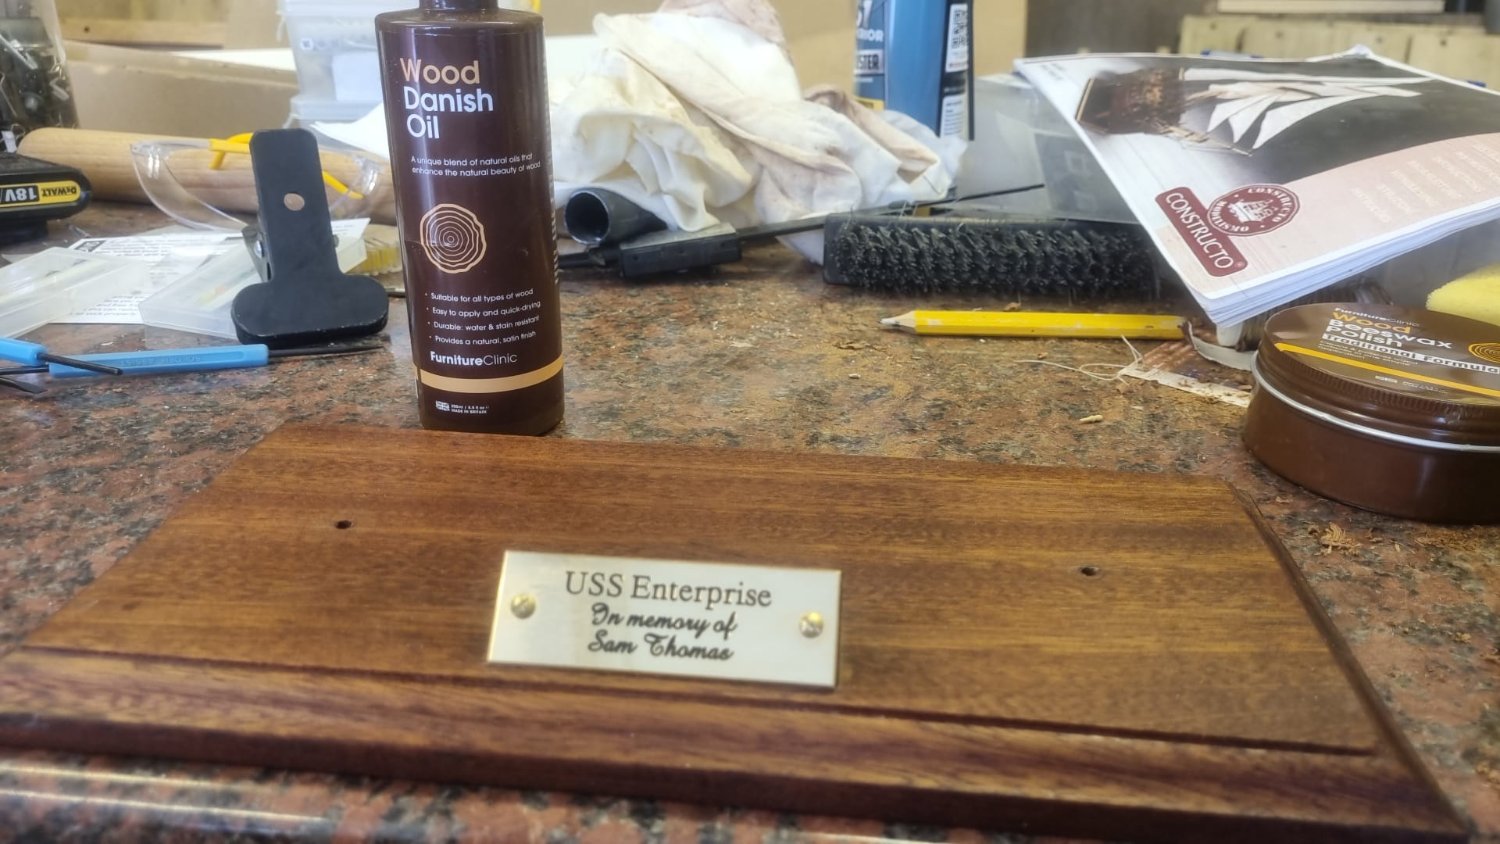
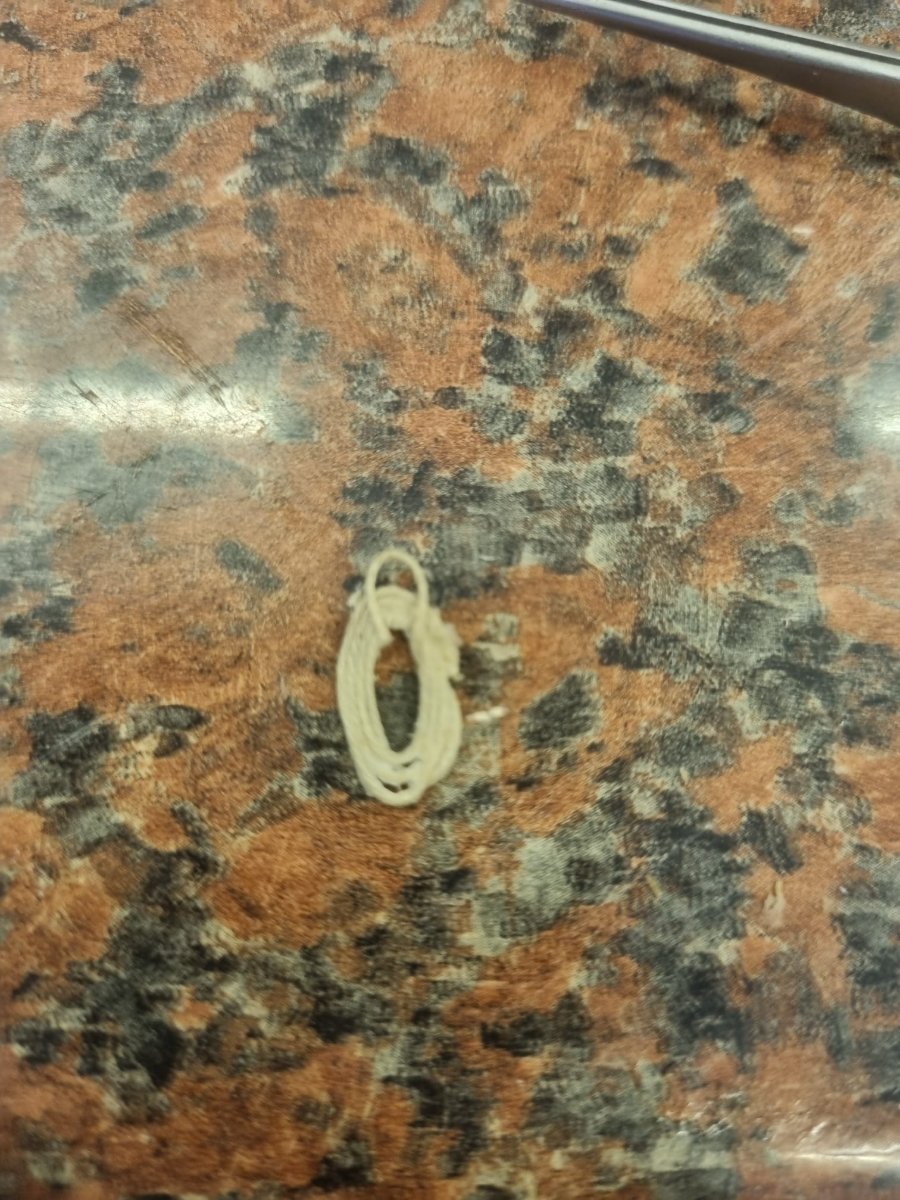
Slow and steady, gradually getting deeper has worked wonders. This second attempt looks much better. I have already sanded it and have applied some Danish wood Oil. I will say it looks really nice. The holes are drilled ready for the brass pedestals but I need some new washers. I figured since I was buying washers I would by some extra thread as well. I have been trying to make the lines and belaying pins look more natural. This is the solution I have devised... I made a coil of 'rope' and what I hope looks like a hitch (I have been watching some you tube videos which show this being tied on a real ship) and then just hook the hoop onto the pin. There is a lot on deck I need to straighten out and make tidy - I which I had done it before creating a spiders web of rope - it is not easy to access the deck anymore. I hope these are lessons learned for when I make another ship. there are a great many things I would do differently were I to star over - but I suppose that is the same for most people starting off. Anyway, I hope this will look more realistic.

- 89 replies
-
- 5
-
-
- Enterprise
- first build
- (and 2 more)
-
I am almost finished. There is just some touching up to do. I have tied most of the lines, and now want to prep some coils of rope to each of the belaying pins. I hope I can get them all to look uniform - I recon that would look neatest. I am thinking about making a sort of false hitch to hang them onto the belaying pin making it look like the real thing. We'll see if I can pull it off.
- 89 replies
-
- 1
-
-
- Enterprise
- first build
- (and 2 more)
-
Thank you Sam - the router is a triton I think it's 1400 watt. I will try again making several passes as you suggested going deeper in stages, I have another piece from the same stock as the first and would rather do it again so it looks as good as possible.
- 89 replies
-
- 2
-
-
- Enterprise
- first build
- (and 2 more)
-
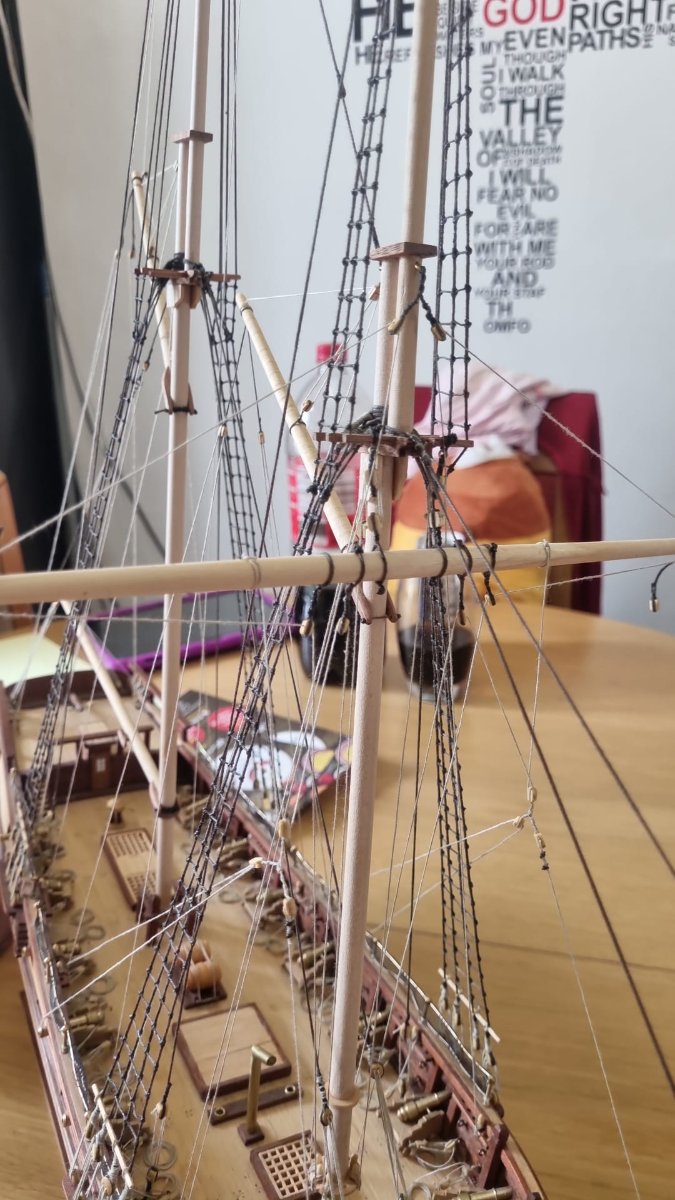
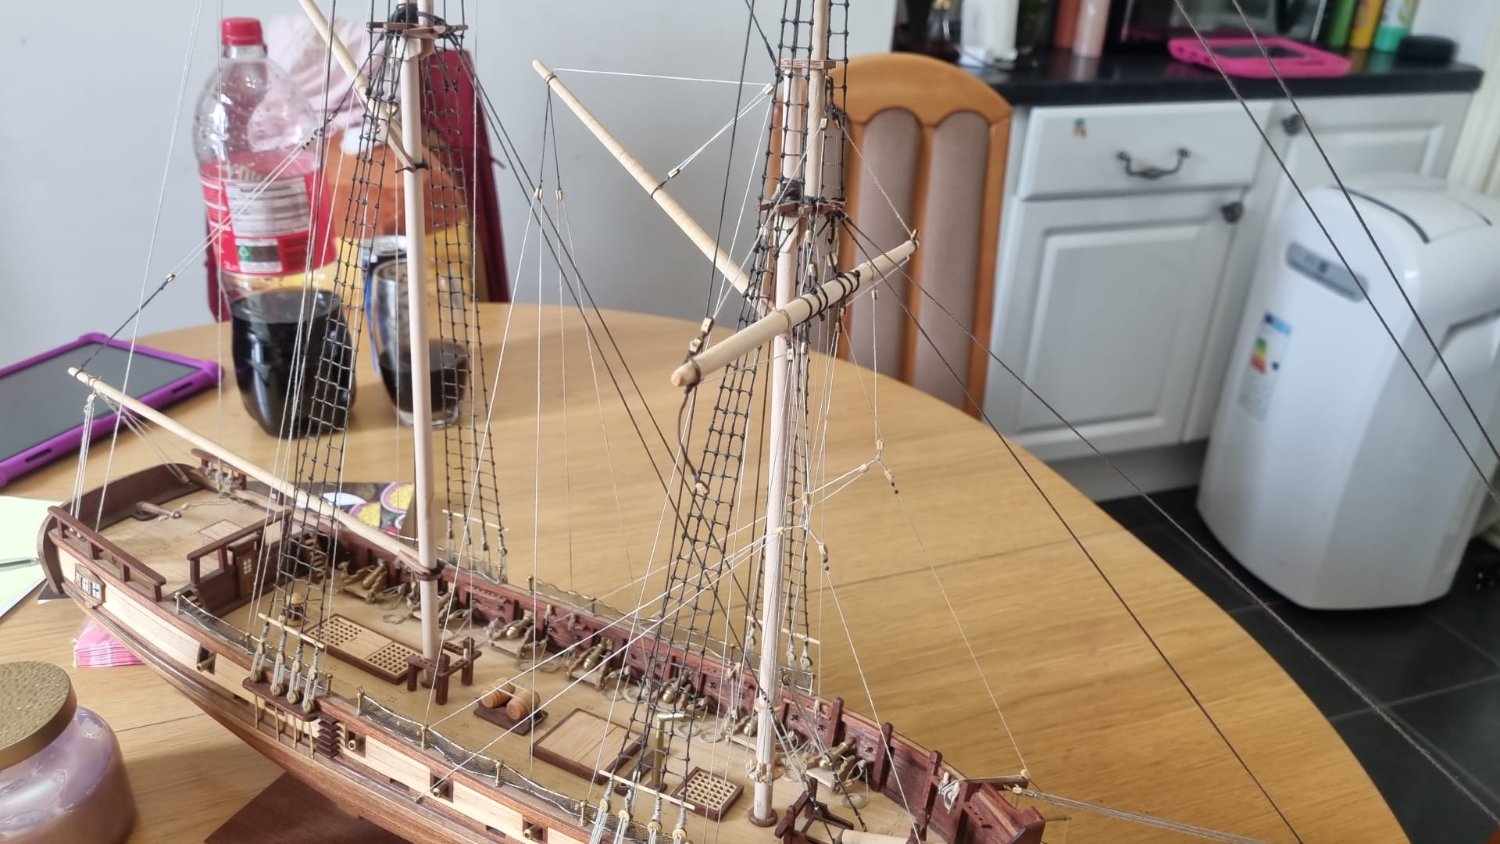
I have been ploughing away and must say I am loving this part of the build. It seems that even running 1 line makes a huge difference to the overall appearance of the ship, making it very satisfying indeed! She is not complete, by any stretch of the imagination, but she is looking great - If I do say so myself. My only frustration is I seem to have run out of the thread I should be using. It is a shame that more wasn't provided - but my wife has forbidden me to spend any more money on this particular build☹️ I have been reading through some of the threads on how to take photos of the ships once they are finished, and So will produce come better pictures of the completed ship, once I get to that stage.


- 89 replies
-
- 7
-
-
- Enterprise
- first build
- (and 2 more)
-
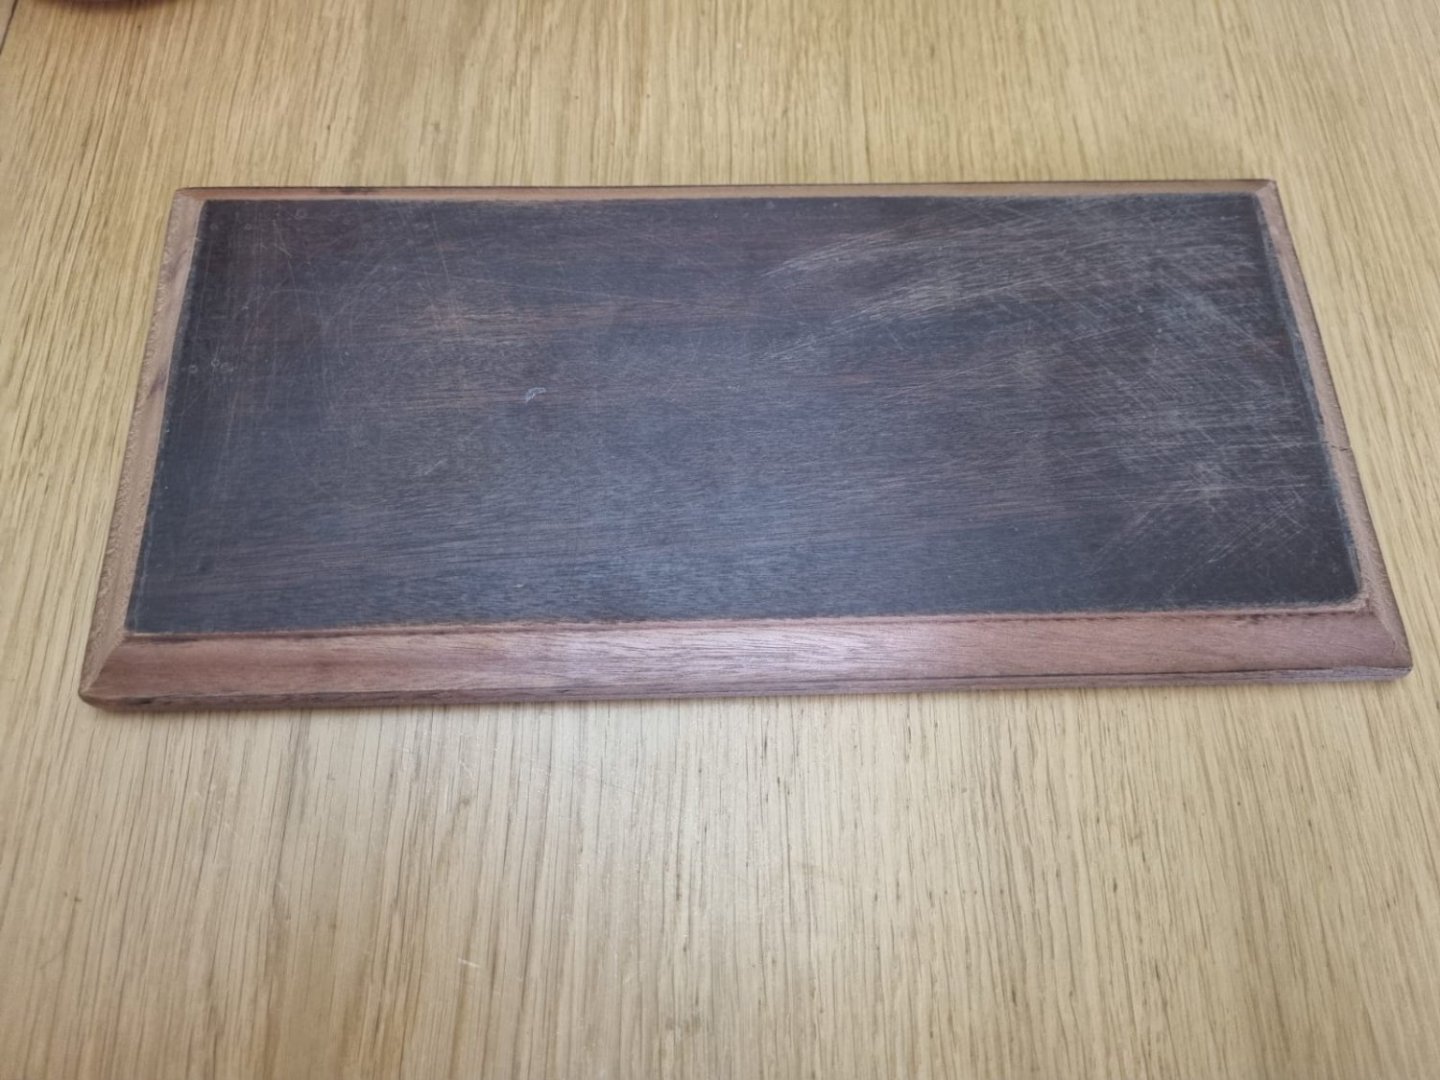
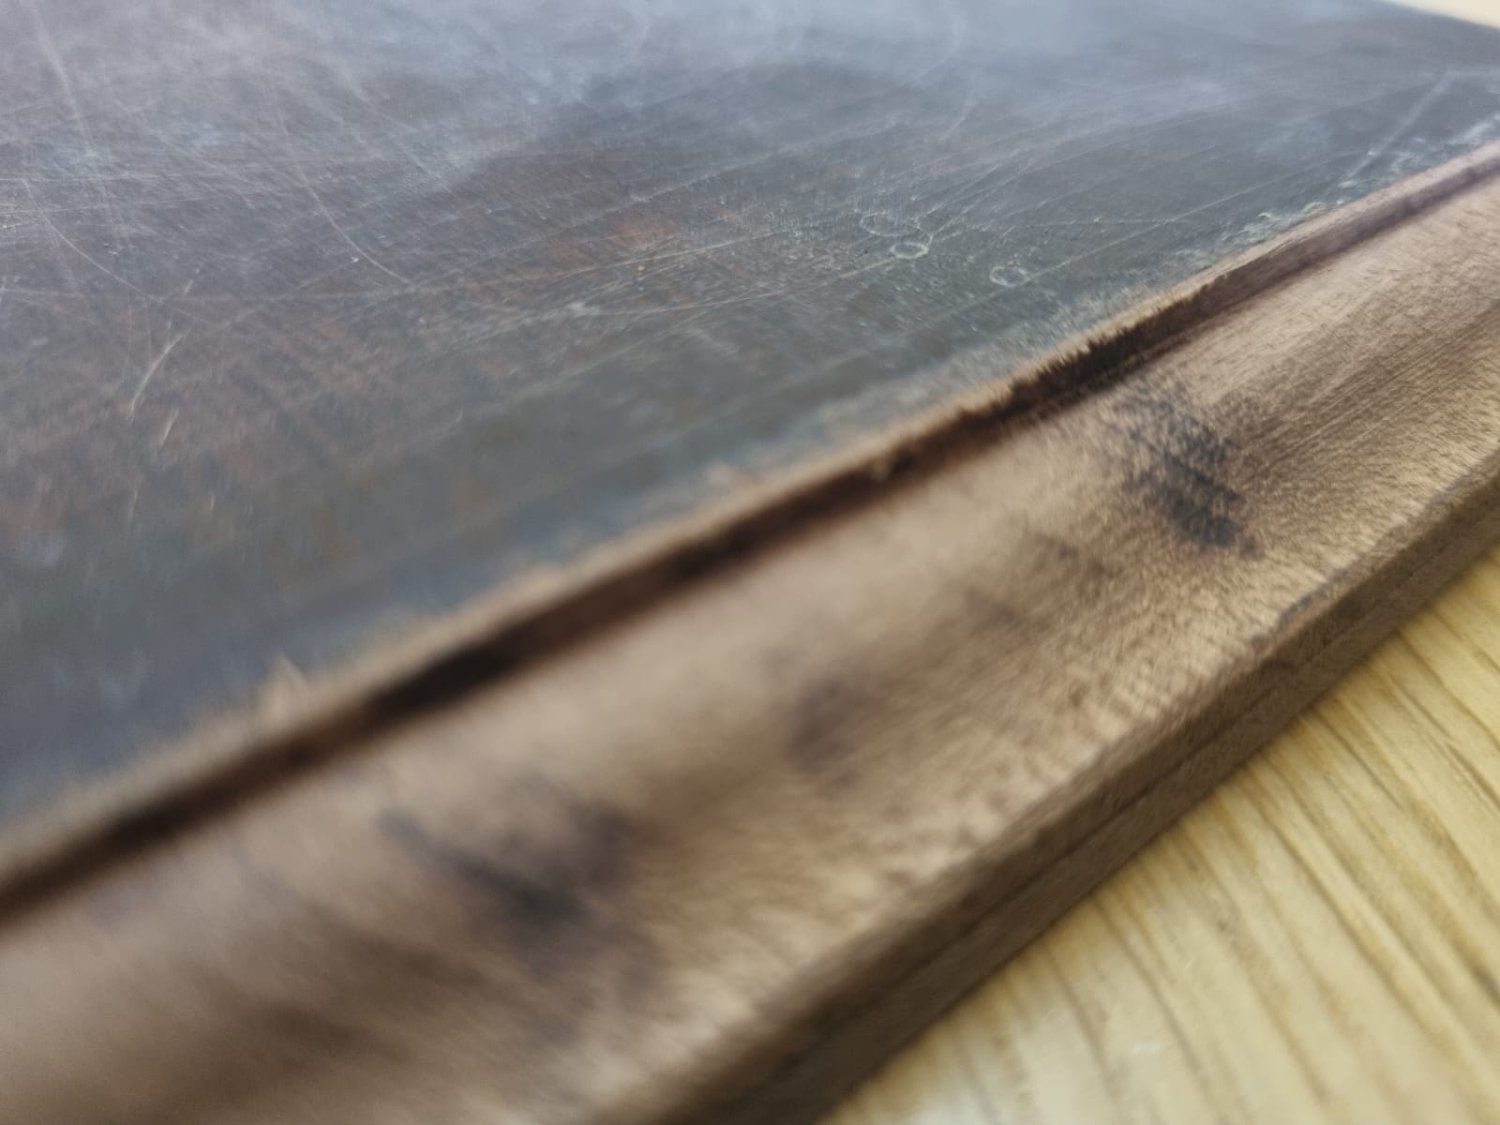
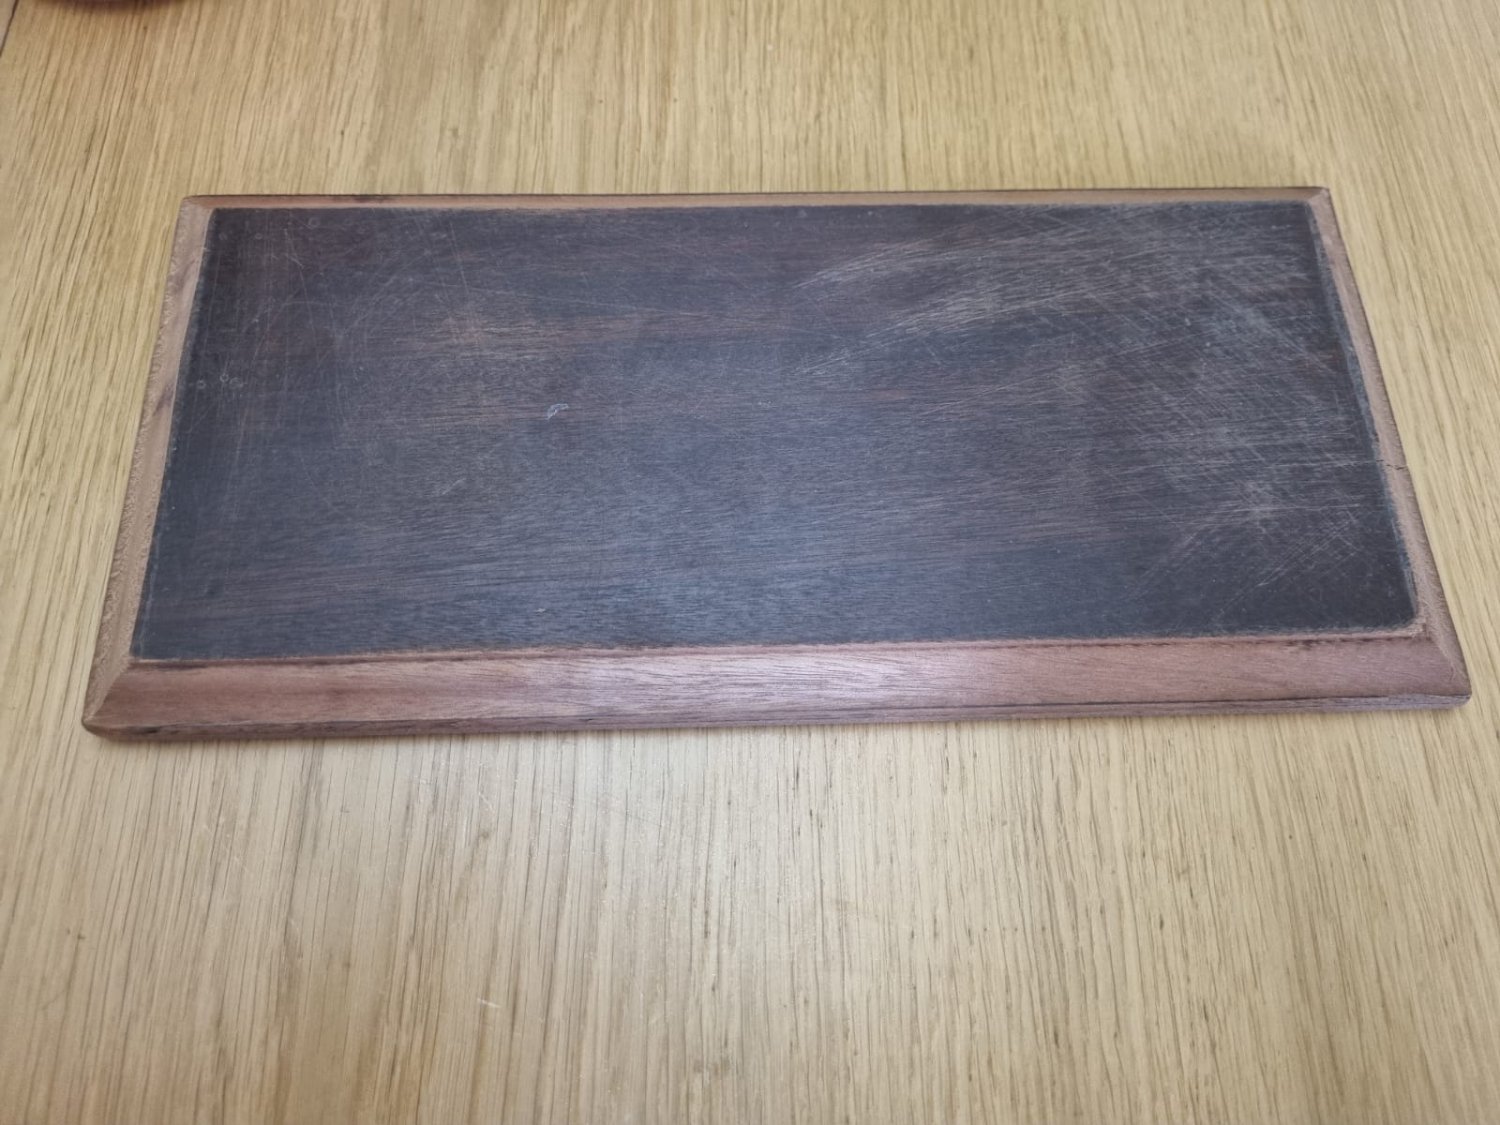
so I have began turning my attention to the stand on which the ship will sit. I was helping Michele sort through Sam's shed and came across a piece of ?mahogany? Michele commented that he used to collect all sorts of things and I asked if I could have the wood. I used the router Sam gave me years ago to shape the edges but I seem to have some burn marks. I am not sure if its because I went to quickly, or too slowly, or whether I had it too fast or too slow. I have another piece but don't want to make the same mistake again - does anyone know why this would have occurred??? is it something I can just sand out and then varnish/oil?? The whole thing needs a lot of sanding!, but I want it too look good. I have also ordered brass pedestals for the ship to sit on.

- 89 replies
-
- 2
-
-
- Enterprise
- first build
- (and 2 more)
-
I am opting not to have sails on the finished model based mainly on my complete inability to sew. I tried a few stitches this afternoon and failed miserably. I saw a lovely model ship today in the window of the local adult learning centre and was amazed by how great it looked even without her sails, which has given me the confidence not to include them on this build. So I have continued with the build. This is where I am up to so far.
.thumb.jpeg.db3a29843d60a478cc68cfd8f2feaaee.jpeg)

- 89 replies
-
- 3
-
-
- Enterprise
- first build
- (and 2 more)
-
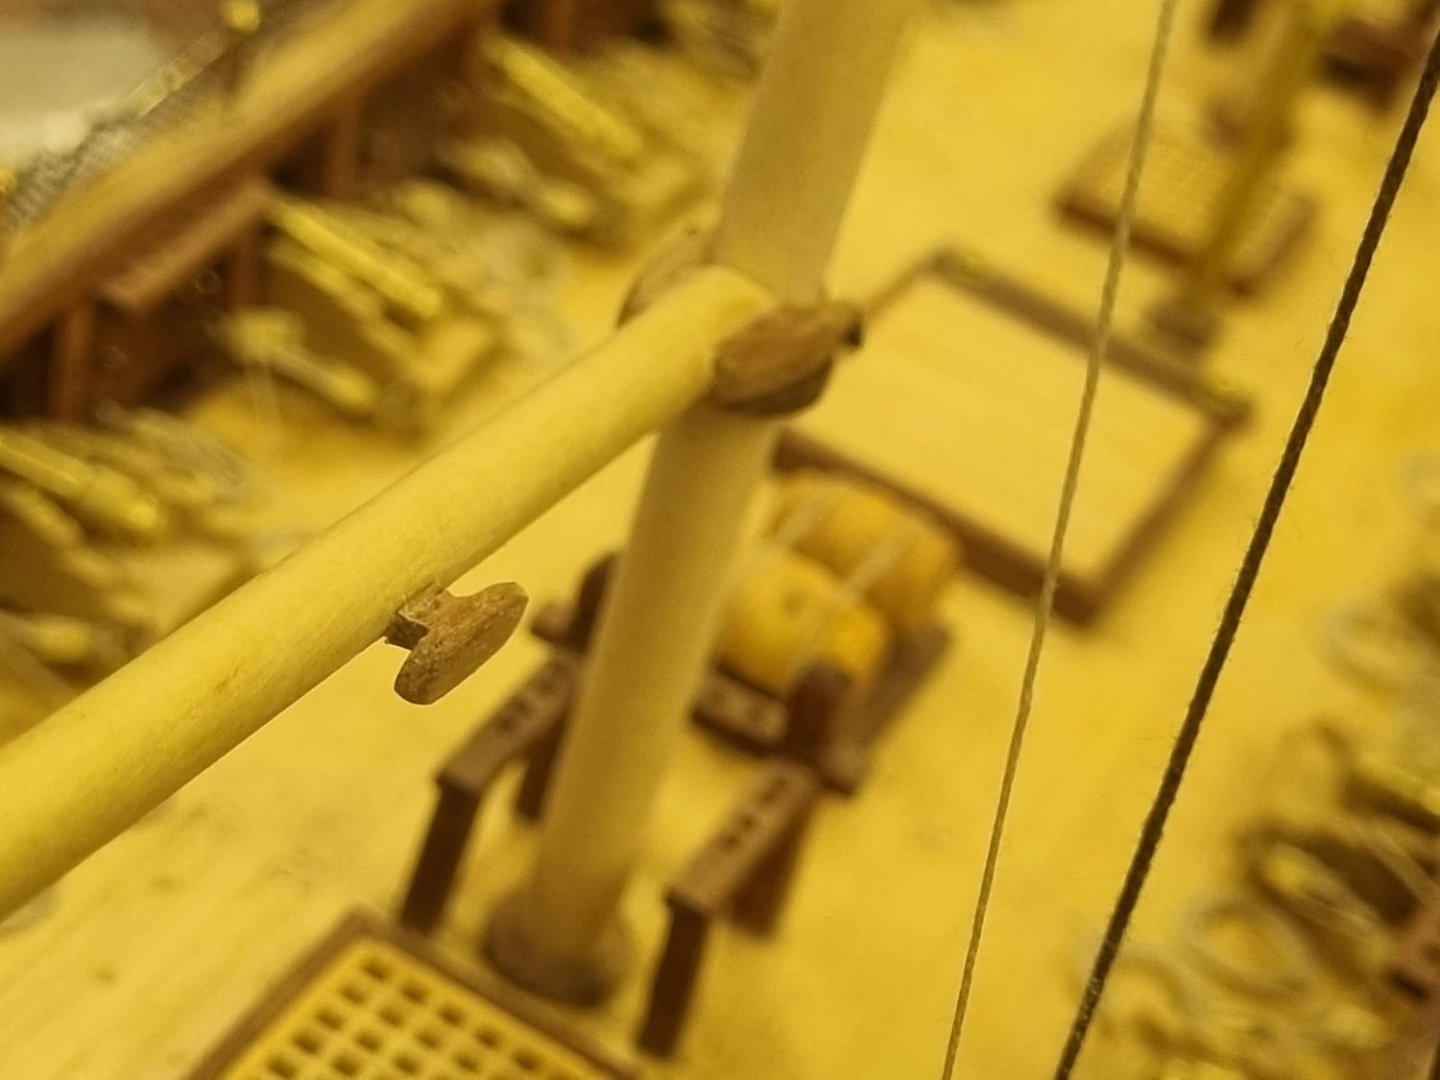
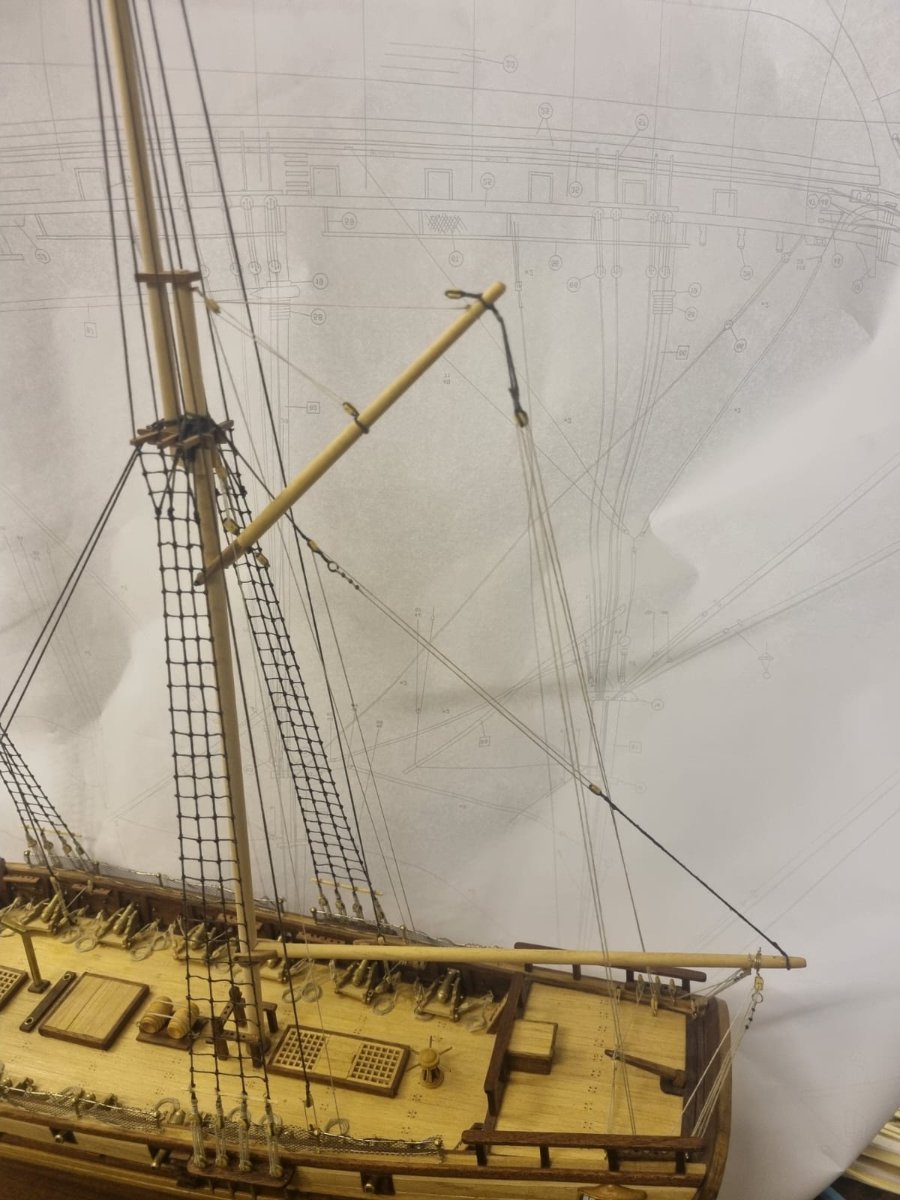
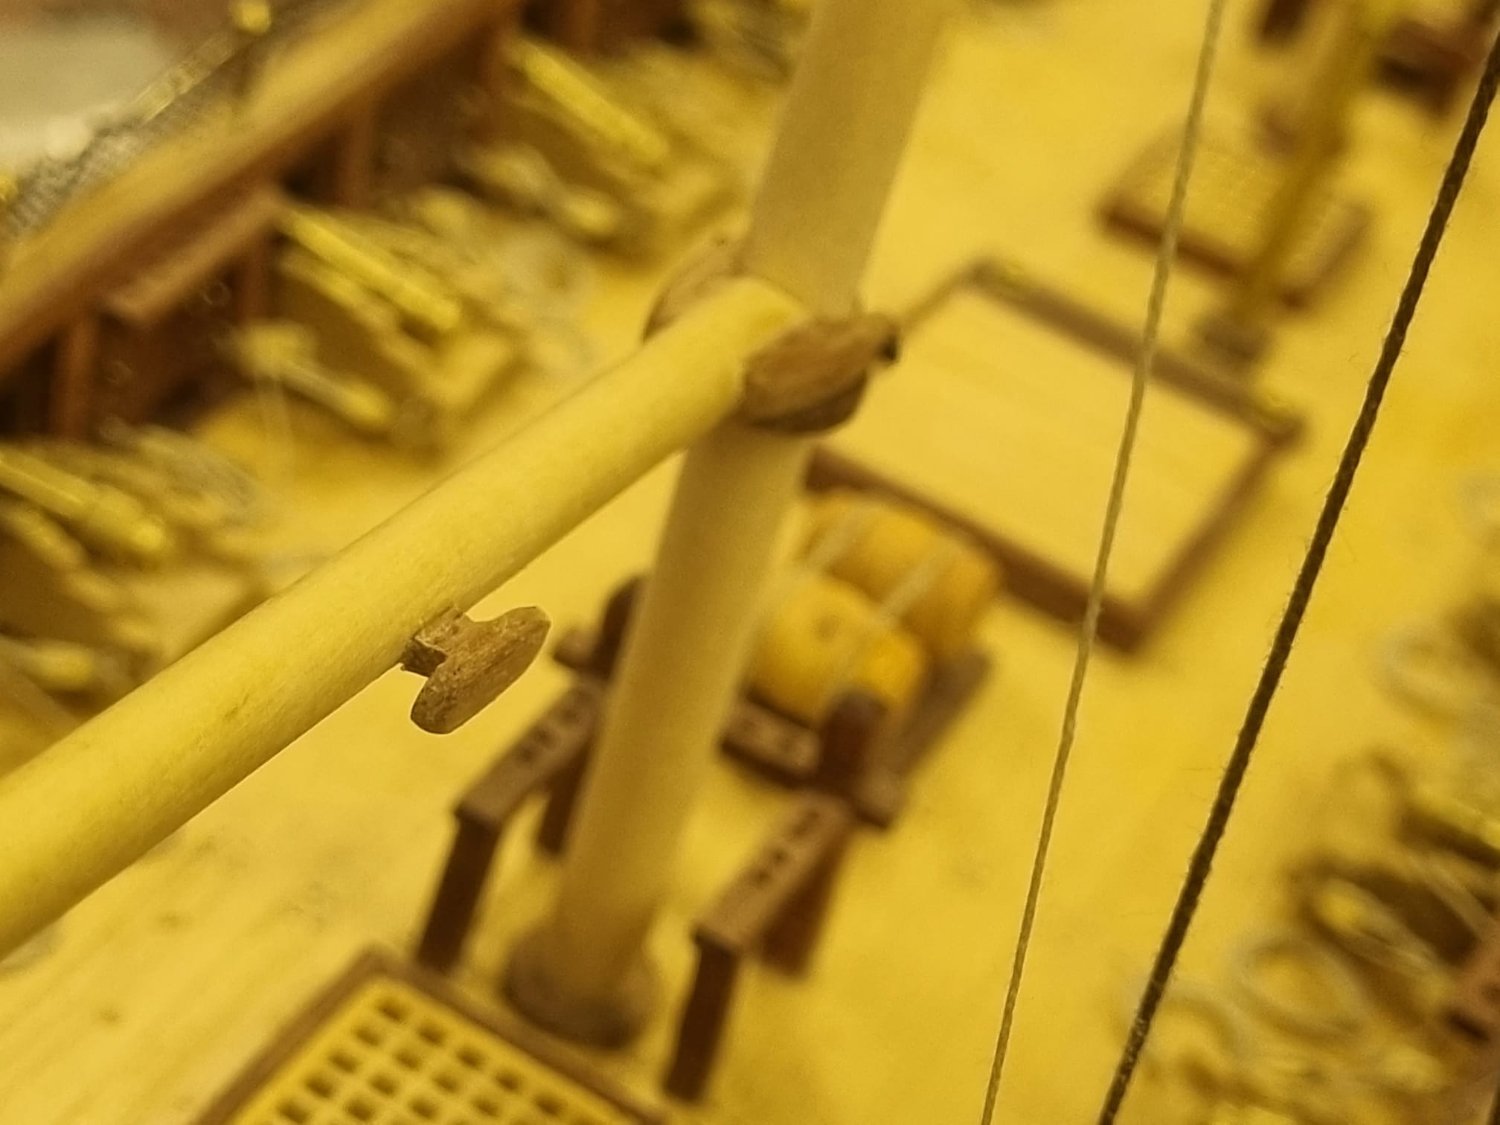
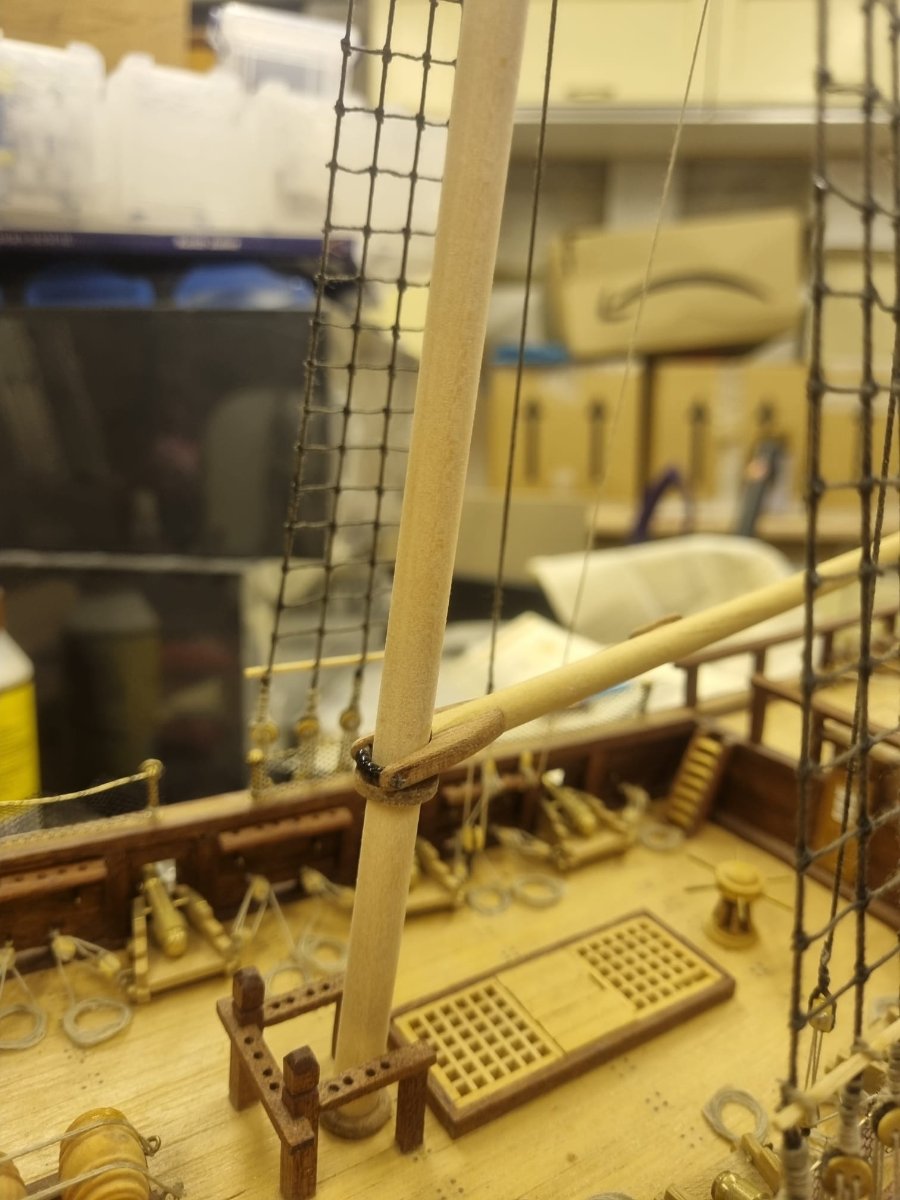
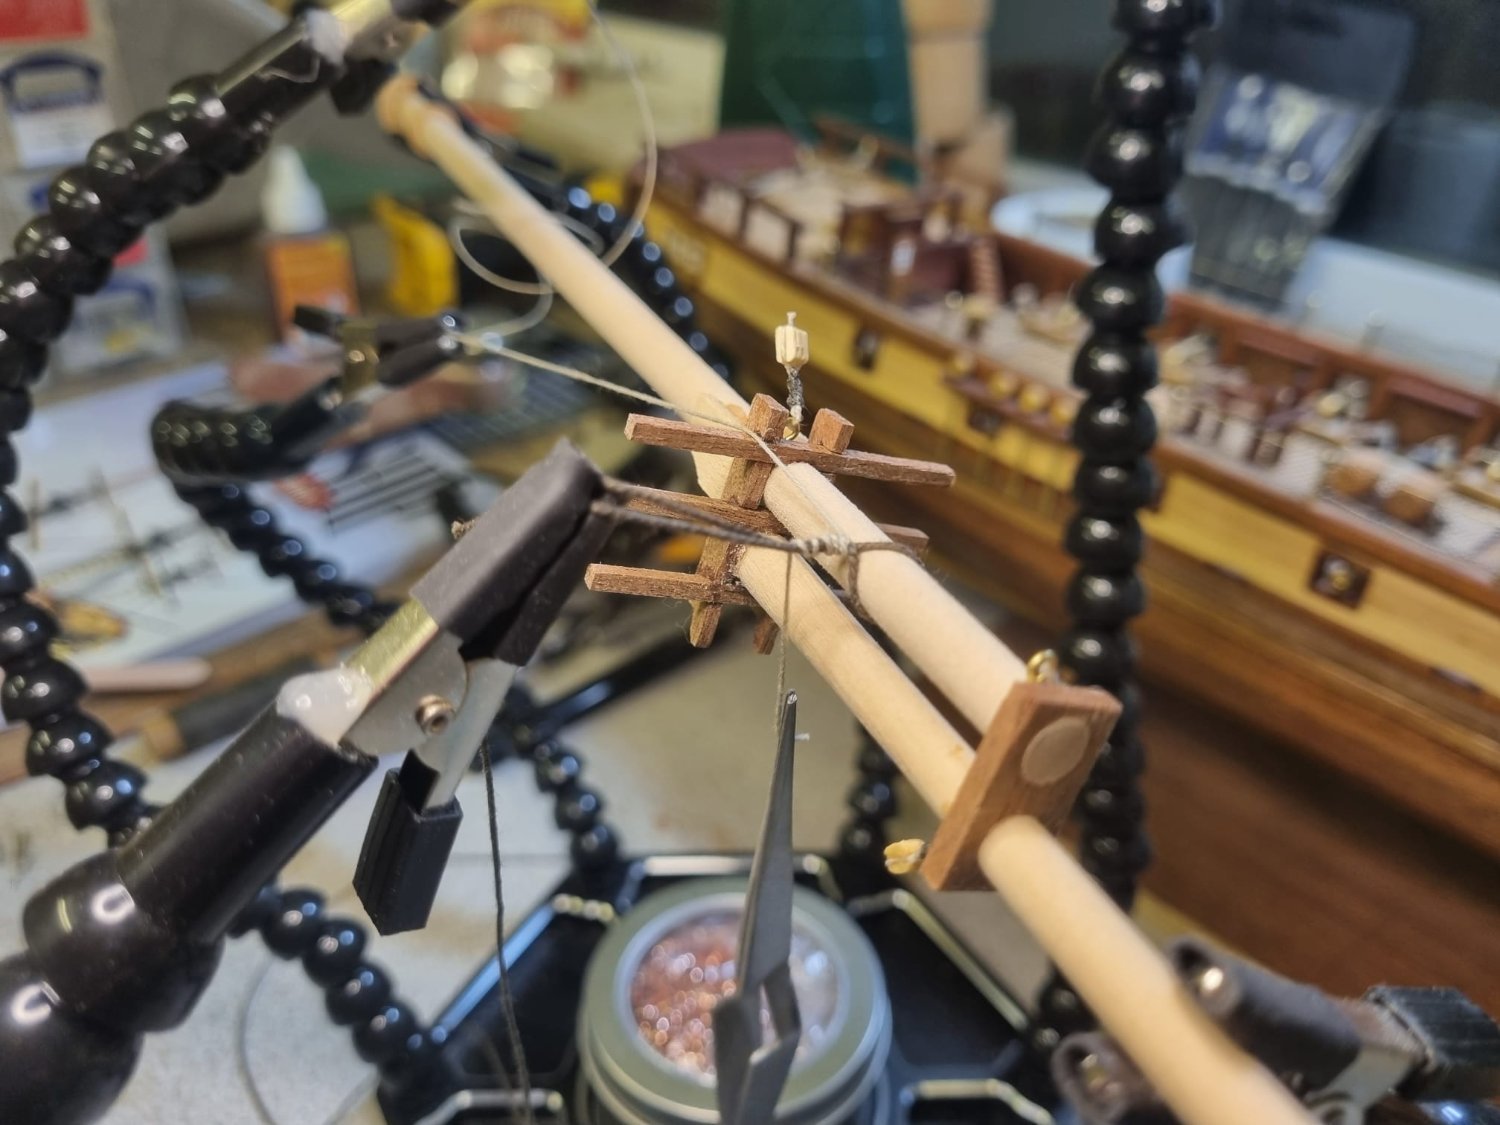
As I had hoped I was able to spend much of the afternoon on the boom. I made a cleat by filing down a small piece of wood to the approximate shape needed. I seem to have lost the cast metal one which came with the ship - which in retrospect was a good thing, because I like the contrast of the woods I have used - as well as the simple fact that wood, in my opinion, looks better. Forgive the picture quality - I cannot fathom why this photo is yellow?!? I was able to get the boom completely installed before Michele, Sam's wife, came round for a chat and a coffee. I was able to show her the ship for the first time which was really nice and emotional. We have agreed that Michele will keep the ship, as it was originally intended for Sam. I was comforted to hear from her how much he would have loved it, had he lived to see it. And I am generally grateful for the encouragement from several MSW members to complete the ship in memory of Sam. I hope to get the all the booms on the main mast completed soon and will keep you apprised of my progress.
.thumb.jpeg.ddf00be85a52758d4555fd60f63c475f.jpeg)
.thumb.jpeg.b2a9b5b7dcb6b68a3e49b6a1af8ab0b7.jpeg)
.thumb.jpeg.3064165d4193f0229dbc558399bd5503.jpeg)
.thumb.jpeg.dd5a1cd60e23aaa1c9530491cb8a9b77.jpeg)
- 89 replies
-
- 5
-
-
- Enterprise
- first build
- (and 2 more)
-
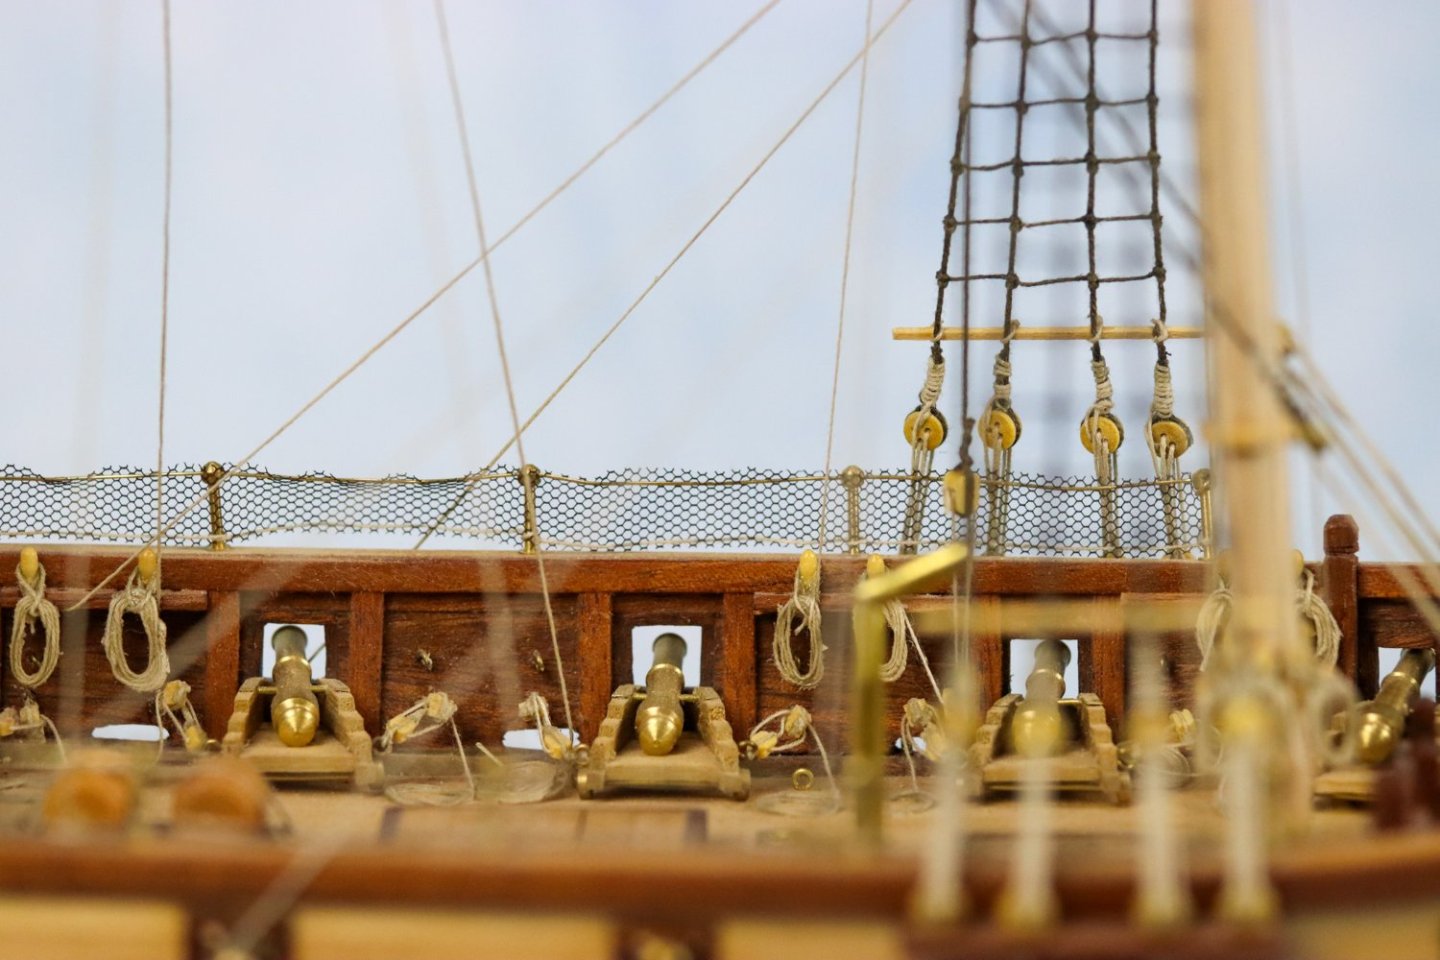
This is a shame, I hadn't realised that the carriages were too wide, but now that you point it out it is obvious to me. This whole build has been rather frustrating, in fact there is another build log for the USS Enterprise on MSW titled something like "lessons in, adapt and overcome" relating to the inaccuracy of this build. It is a shame this kit is not that good - The warning signs were all there - the sealed kit I brought didn't even have any instructions, and some of the plans were missing! The PDF I got from Constructo is actually for a different version of this ship build, so I don't have half the parts they are referring to. It is a shame that so many aspects of this build are not accurate - but at the time of building I was ignorant (and still am in many cases) of the correct way a ship of the period should look. My only other experience of ship building was of plastic model space ships as a child. I loved Star Trek and my family would buy me various models which I would paint and assemble. I would have preferred her to be more accurate, but I have researched (with the help of other MSW members) a few companies (including Vanguard models) who I am assured make much more accurate models. I plan to buy one of these as my second attempt. I hope that as I learn and develop some of the wood working skills I need I will be confident enough to make changes in the future, to kits that may not be so accurate.
- 89 replies
-
- 2
-
-
- Enterprise
- first build
- (and 2 more)
-
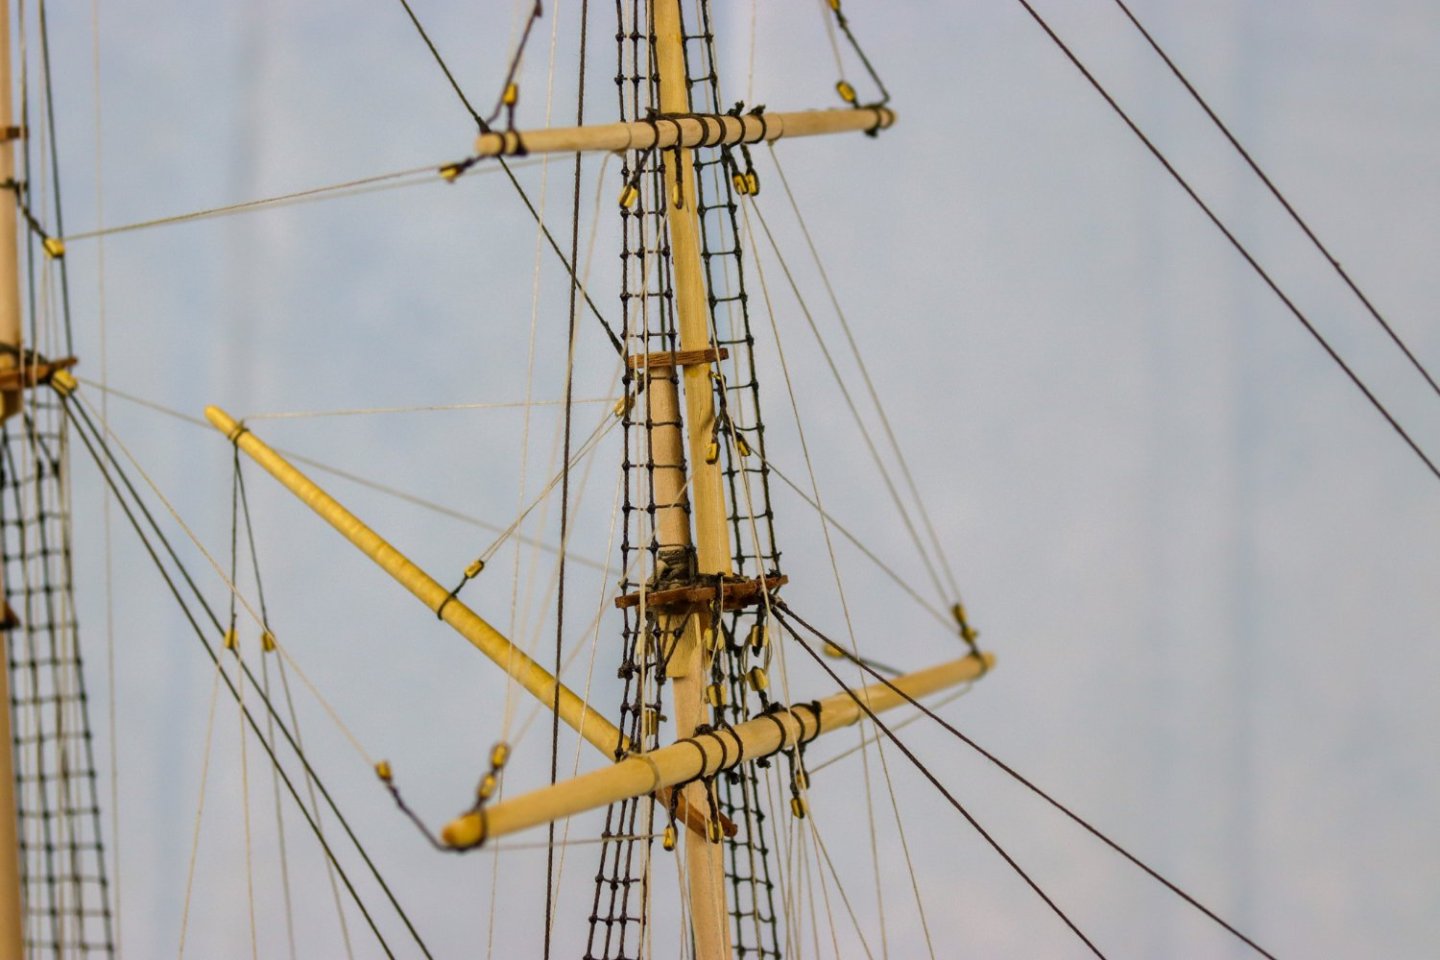
Well - I know its been a while since I posted anything, and in truth its been a while since I did anything new on the ship. I don't have any pictures but I have tied the stays and all the ratlines (that took a while!)Well - I know its been a while since I posted anything, and in truth its been a while since I did anything new on the ship. I don't have any pictures but I have tied the stays and tapered all the boom's and one of the Yards. I still need to add all the blocks, and belaying cleats, but the end is in sight. Tomorrow I will finish the spanker boom and hoist it into place which will be a good time to take a photo and share. I am still not sure about adding the sales or not? Done well it can look amazing - miss the mark and it looks flat and immobile. to make it look as though it is sailing on a westerly wind, would be great.... but almost certainly out of my comfort zone, and probably beyond my abilities.
- 89 replies
-
- 2
-
-
- Enterprise
- first build
- (and 2 more)
-
I have been looking at the instruction manual for the HMS Flirt on Vanguard models website - their manual is so much more detailed and helpful then mine and although I know the 2 ships are very different I have noticed that the "stays" (I think) for the masts are use a hart shaped block to tie them to the bowsprit (I think). This seems to be the same as what 'Sam SRC' did in his build. I can only find 7 or 10mm blocks in wood online, and I am worried that they would be too big for the ship and look disproportionate. they also have card ones at 4, 5 or 6mm. Which should I go for? smaller but card, or larger wood to match the wood in the ship? Any advice would be really appreciated. The block I have used so far in the build have been either 3mm or 4mm.
-
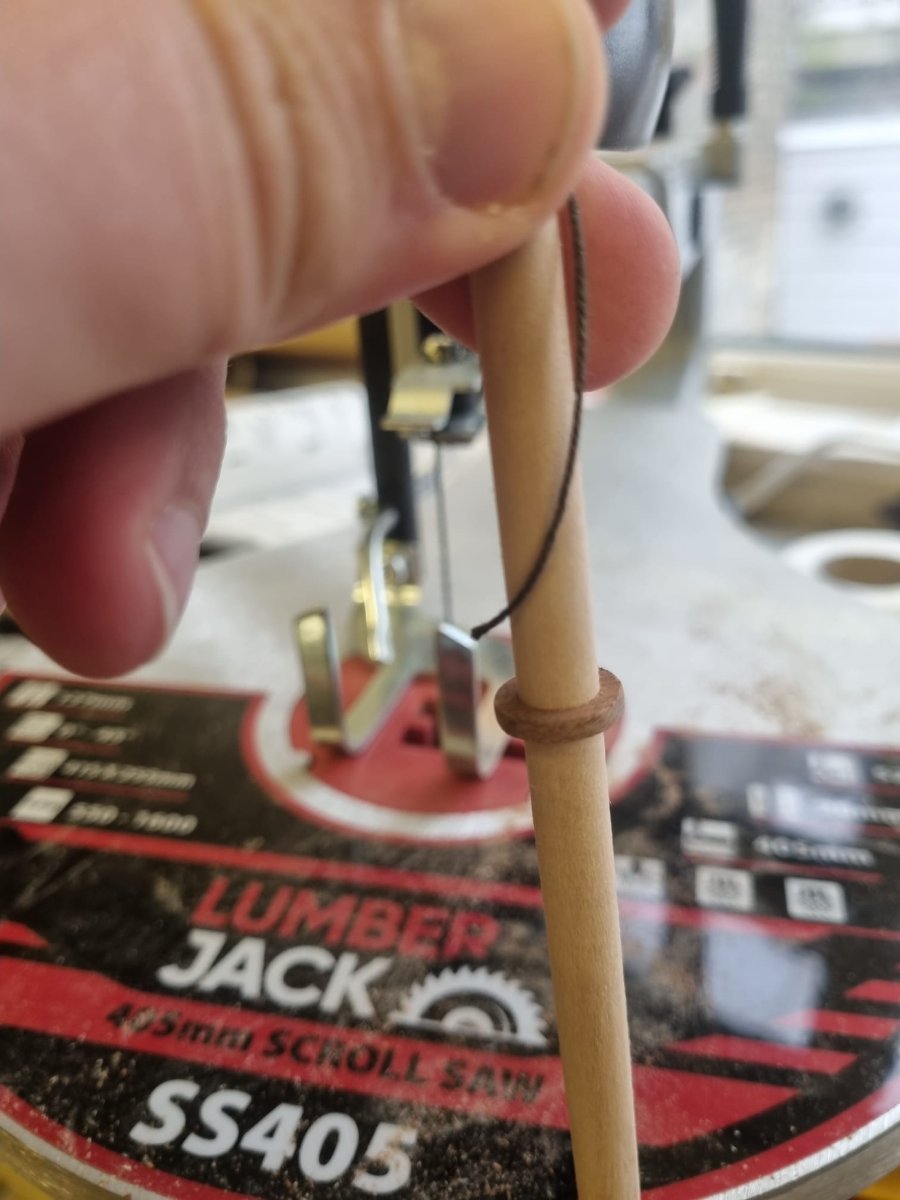
I have been thinking about buying a scroll saw for some time as a hobby, and potentially to make the family some homemade Christmas presents. It occurred to me that a scroll saw would also help a lot in making a missing shoulder for the mainmast and a ring between the mast and the deck, and so I went ahead and ordered the saw. Today it finally arrived and having set it up I was eager to try it out... I predrilled a 7.5mm hole and drew the 12mm wide outline of the ring. a little sanding later and it was ready to test on the mast. Although probably not historically accurate I love the contrasting colours of the wood. I will make another and cut it into 6 or 8 sections to place around the foremast - I will then decide whether to cut this one as well or not to more closely mimic the wedges that would have been used. I will also smooth and round the edges - I might decide to just score it at intervals rather than cutting all the way through - but that will depend on how the foremast ends up looking. Hopefully I will have the mast installed by the end of the weekend.
.thumb.jpeg.e92224eeeb8364efe324ce7b230dcd4f.jpeg)
.thumb.jpeg.8e45135f3ffc2d9fb5ef0708b1560712.jpeg)

- 89 replies
-
- 3
-
-
- Enterprise
- first build
- (and 2 more)
-
Cathead - thank you - I do want her to be as accurate as possible and appreciate the advice. I will admit I don't think I have all the plans etc which go with this build - in fact I didn't even have the instruction book. I am working off a PDF that constructo sent me and photos of other peoples plan that they have kindly posted to me. it means that I have had to improvise a little as you will see in the next images I post. I cant wait to start my next build with proper instructions and manuals - I was planning one from vanguard models and was even wondering about buying it first and then using the rigging plans from that model to assist me with this one. But with the price of everything ever increasing, I think my wife would kill me! Gregory - the build log from Sam (SRC) is amazing! Thank you. I am a little in awe of his achievements. I would love to go on a real ship and see how the rigging looks and interacts with each other. I have already taken an idea from his build to do ratlines up the second section of mast - it seems like a much more practical idea then just leaving them. Sailors would have needed a way to get to the top so it just makes sense to add it. The shoulder is on the plans for the foremast, but it is not the first time the plans and instructions have let me down, having said that the instructions I was sent are not actually the plans for the model I have, they are the plans for the revised version of the ship, and sadly the plans and instructions don't always match up. ... it has been a very steep learning curve for sure 😀
- 89 replies
-
- 2
-
-
- Enterprise
- first build
- (and 2 more)
-
I discovered that I hadn't drilled holes in the crossbeams on the mast. I steadily drilled a very small hole in each of the crossbeams and then made the hole progressively larger until it was wide enough for the thickness of string I will need to thread through it. It would have been much easier to do this before assembly, and my hand was trembling the whole time. I was so worried that I would split the delicate wood - fortunately it turned out well. I then tied the ratlines on both sides of the mast. 208 knots later I was exhausted. I understand how it could have been so tiering, but it really was exhausting, perhaps it was more the fact that I didn't finish until gone midnight - but there was no way I was going to stop half way through a job. It is beginning to take shape and I am getting a feel of how she will look - and how truly huge she will be - when she is finished. My next plan is to make the second mast and install her in the same way as the first. The I can start work on the rest of the rigging. I am still uncertain as to whether I will add the sails or not. And if I add them I don't know if the will be furled or unfurled. I certainly don't want them to be flat and lifeless, and I am worried that if I include them, they may obscure some of the details on the ship that I have tried so hard to include. ... but there is plenty of time to make that decision since I am some way away from hoisting the sales.
.thumb.jpeg.97c97bff258ca2091450683500d56c86.jpeg)
.thumb.jpeg.4e3a534e13bd507172294a5955047884.jpeg)
.thumb.jpeg.b20717b689349e090ca880f3299837f7.jpeg)
.thumb.jpeg.3b0ff2720275d66993bdbb1c13e838ec.jpeg)
- 89 replies
-
- 1
-
-
- Enterprise
- first build
- (and 2 more)
-
That's really interesting, thank you Gregory I might be able to do something like that on this build.
-
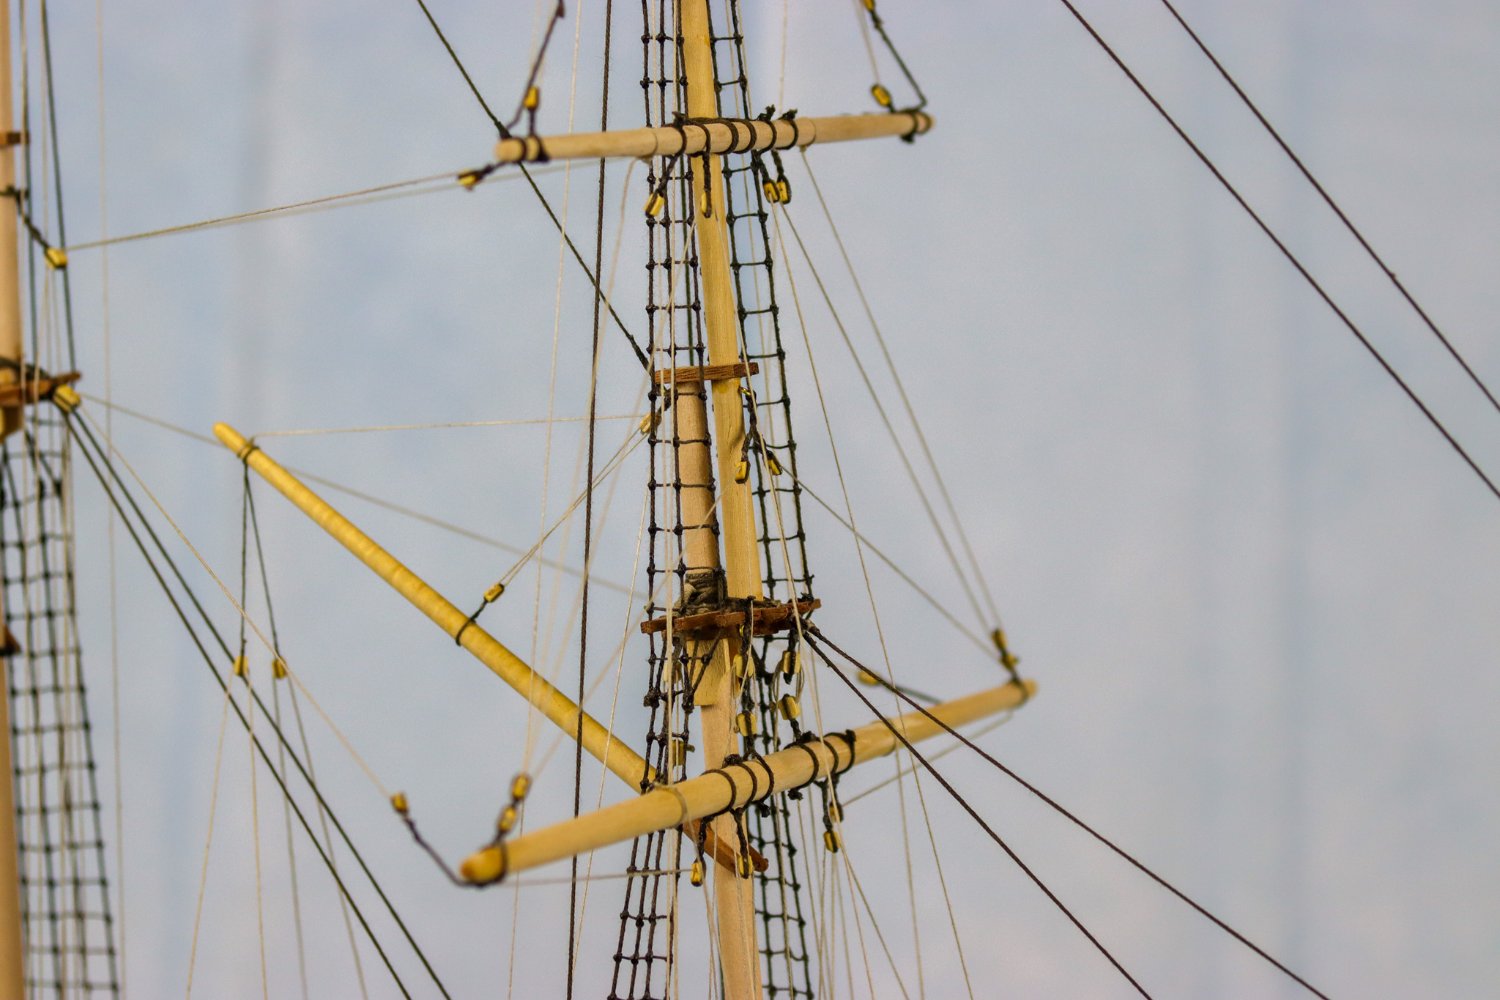
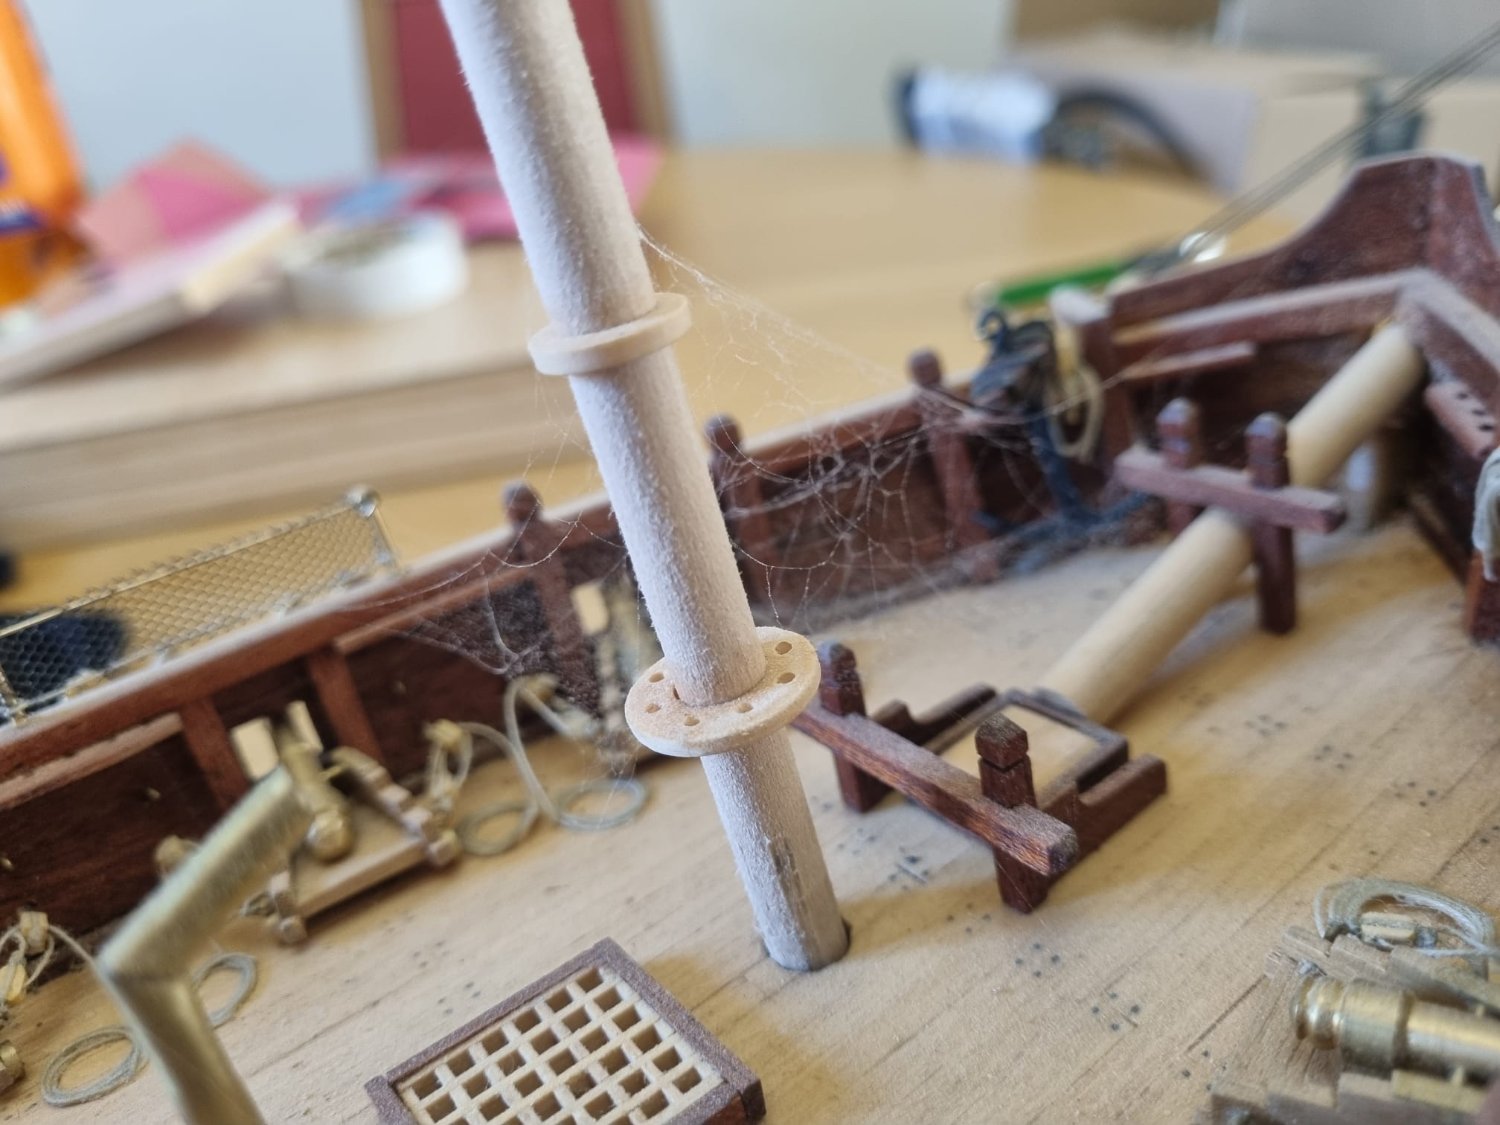
It has been a really long time since I posted anything - or even did any work on the ship - but last night I finally went back to work on the build. There were a few stowaways that I has to remove first, and a lot of dust has accumulated which I still cant fully remove. The 6 months alone in my dusty garage have not been kind to my little ship. But once the stowaways were removed I was able to carry on where I had left off - I wont lie, it took a while to figure out where I had finished and what I needed to do next. This is the end of the evenings work. I didn't realise how long it would take to do just those 4 lines. I will do the other 4 later on today and then make the second mast ready for install. There are a could on those wooden rings missing, so I wont have them for the second mast, and one is missing from the base of this mast. I think I will end up having to use a filler of some kind. The good news is, I am back on it and this ship will be completed at some stage.
.thumb.jpeg.4ed3fee9f26e33ca5a1c8c538b3db0bf.jpeg)

.thumb.jpeg.71d8cbf7ca16660be9be6f47d037199a.jpeg)


- 89 replies
-
- 2
-
-
- Enterprise
- first build
- (and 2 more)
-
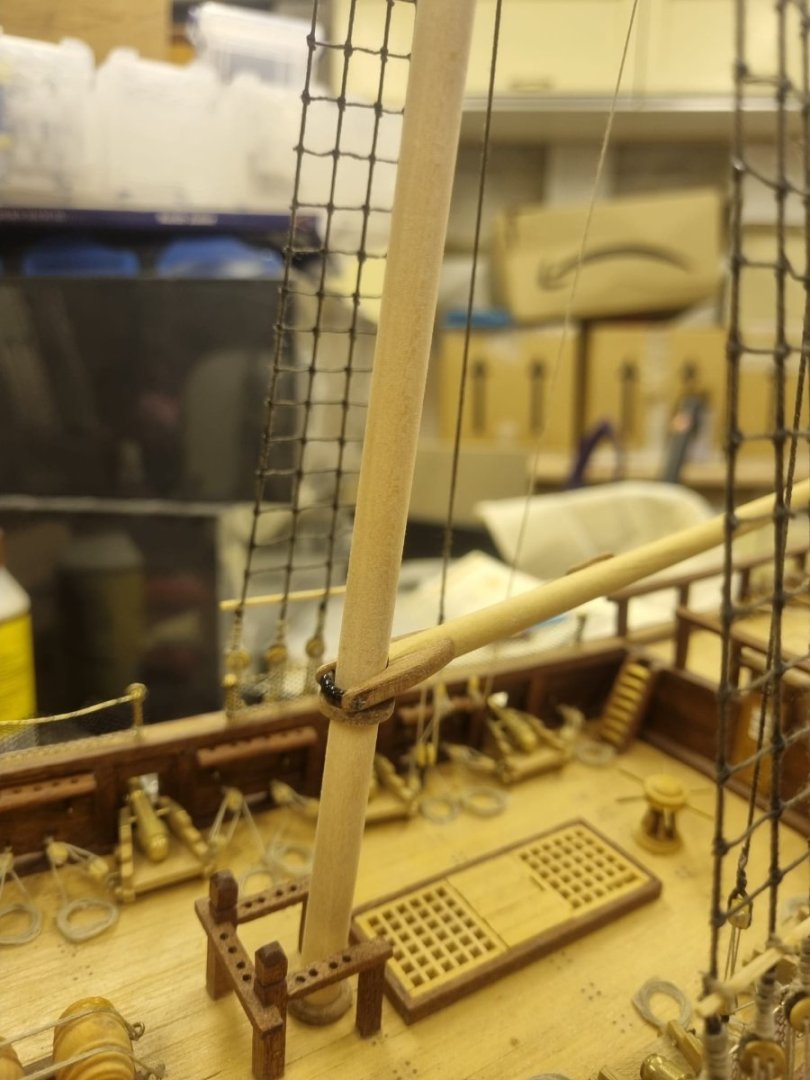
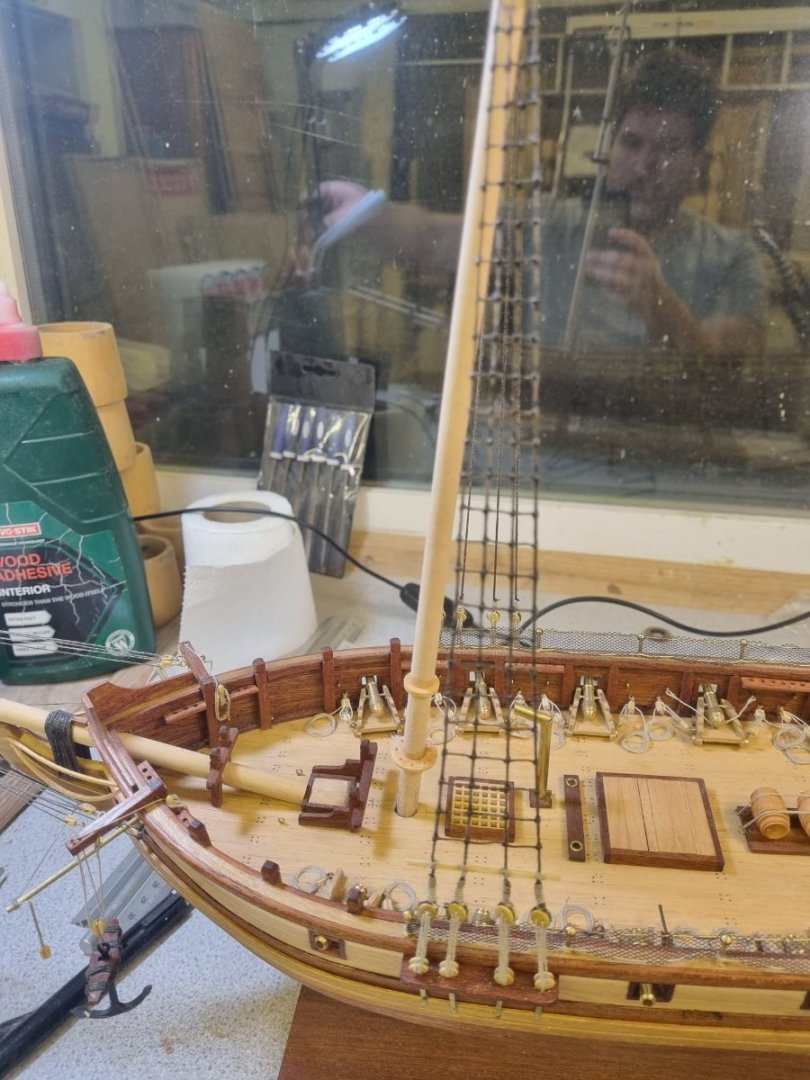
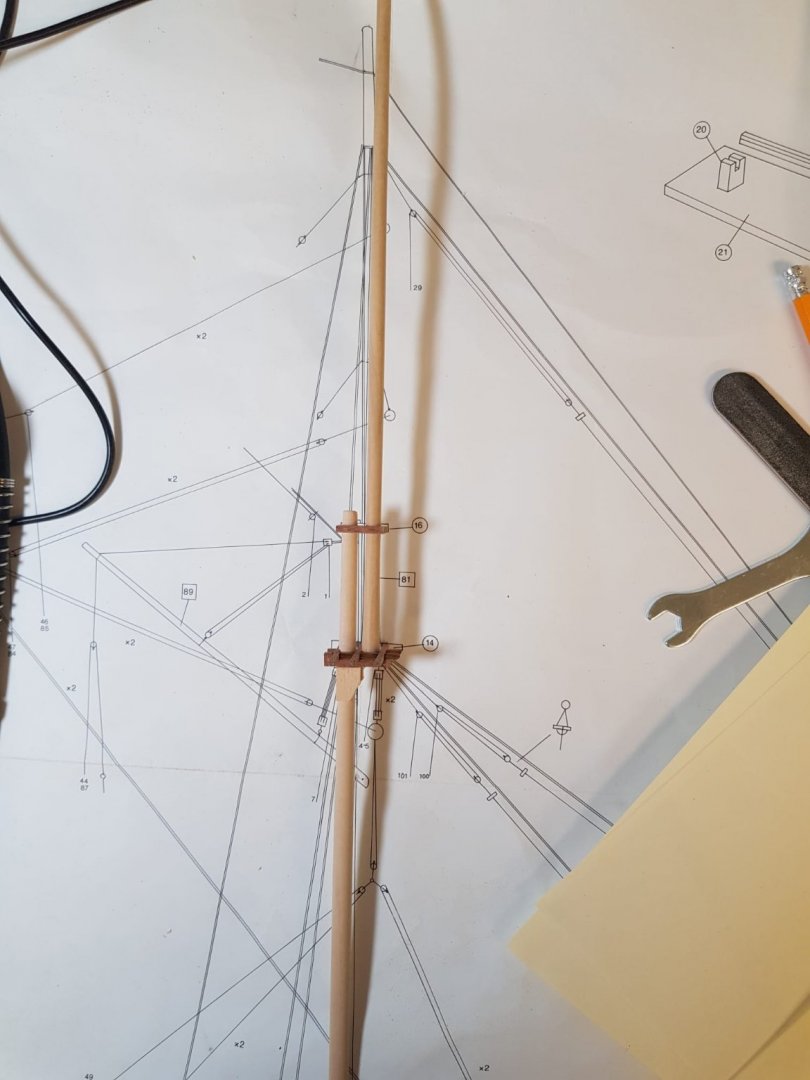
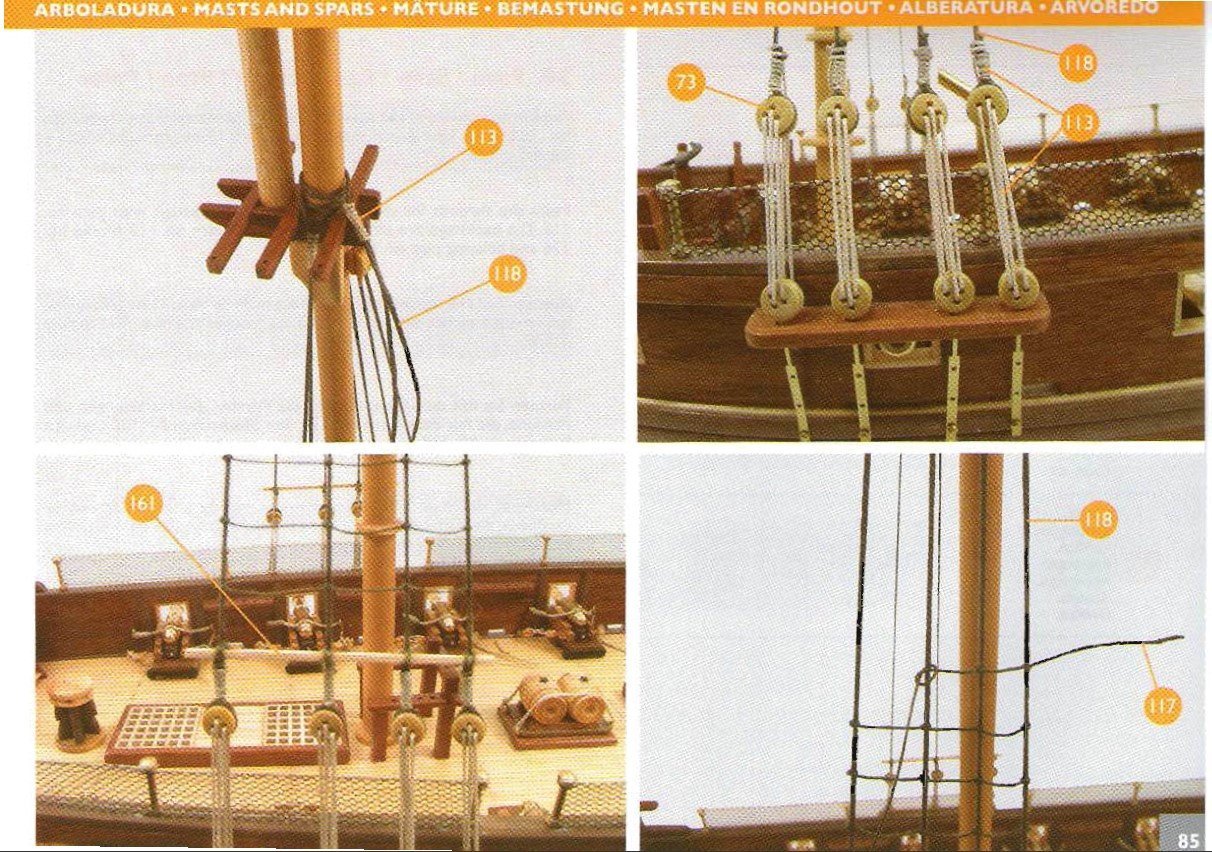
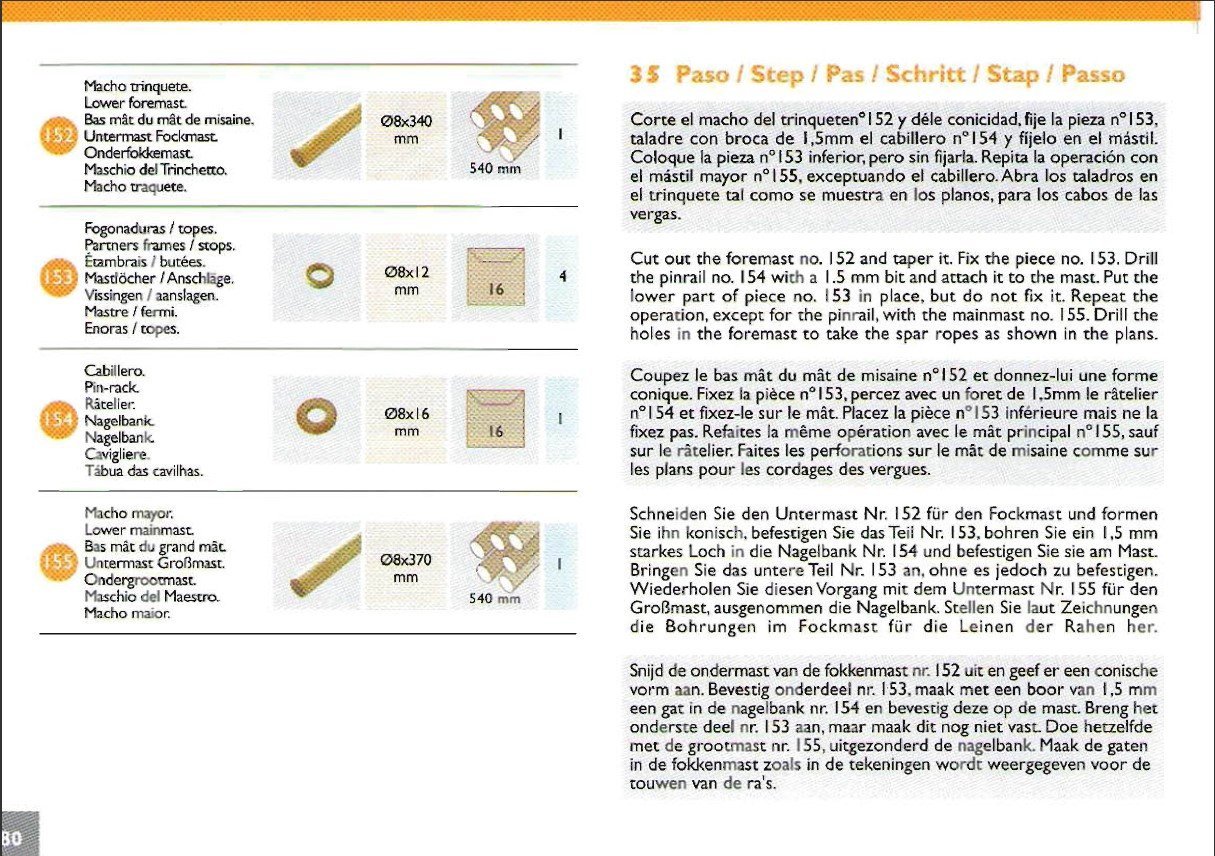
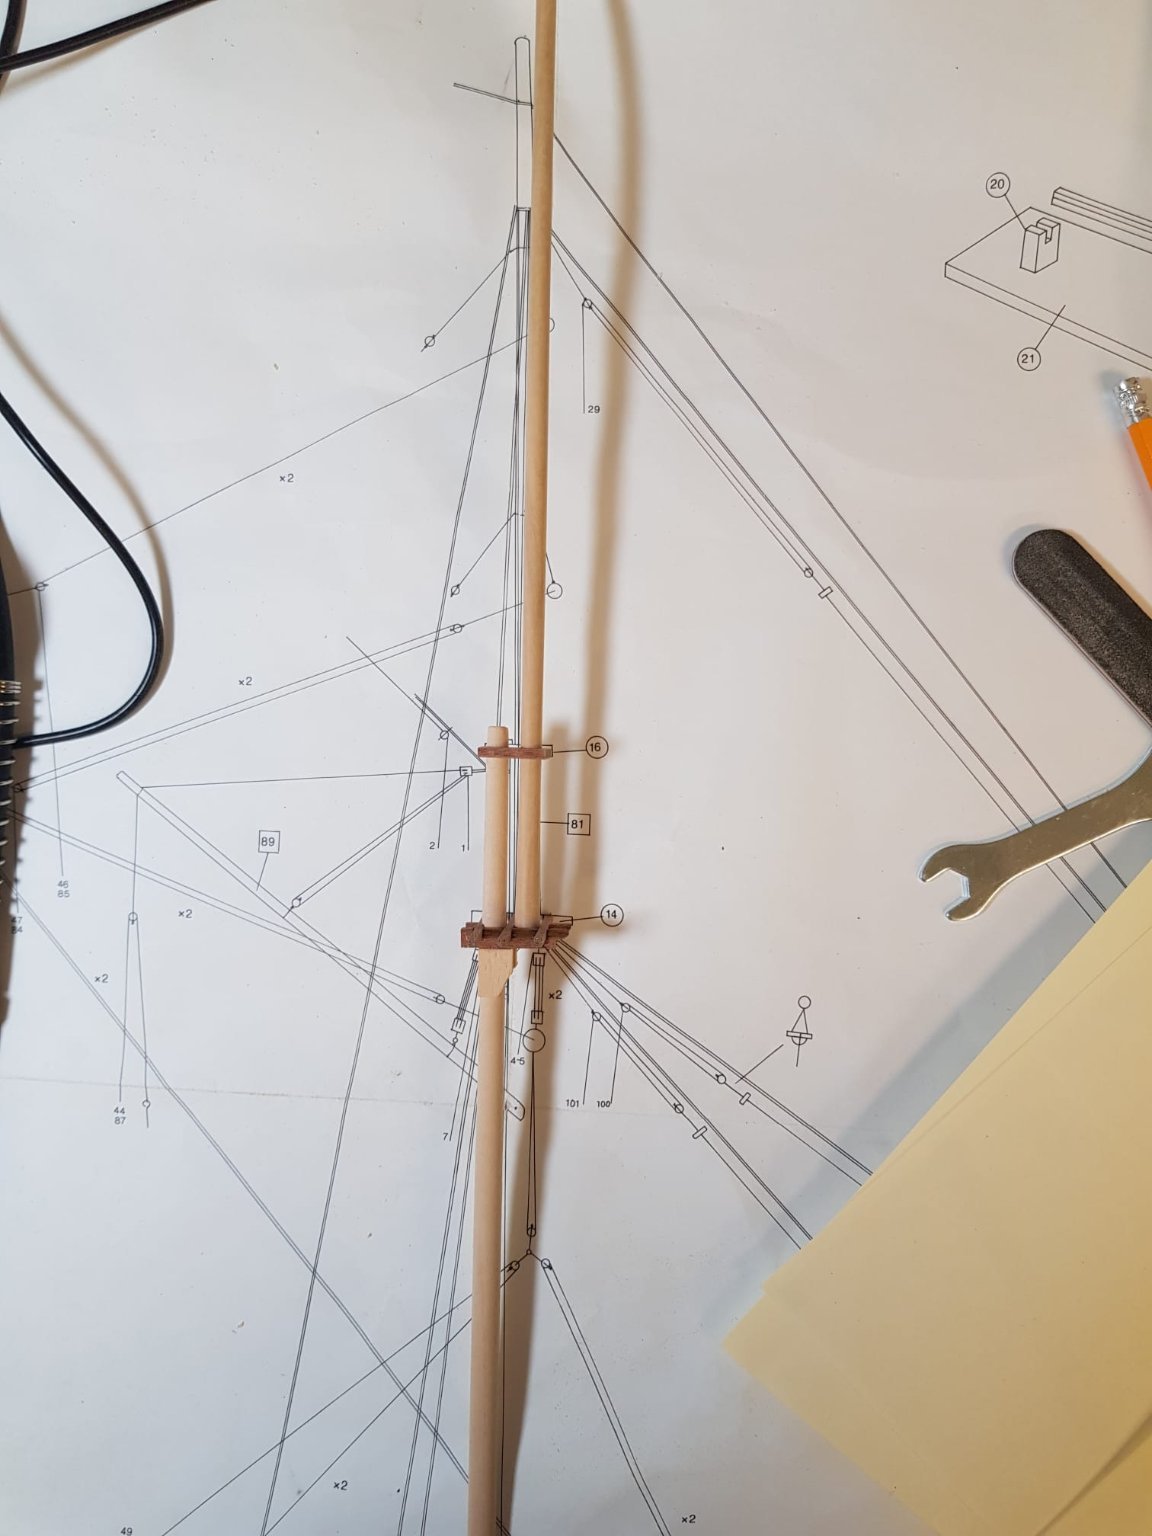
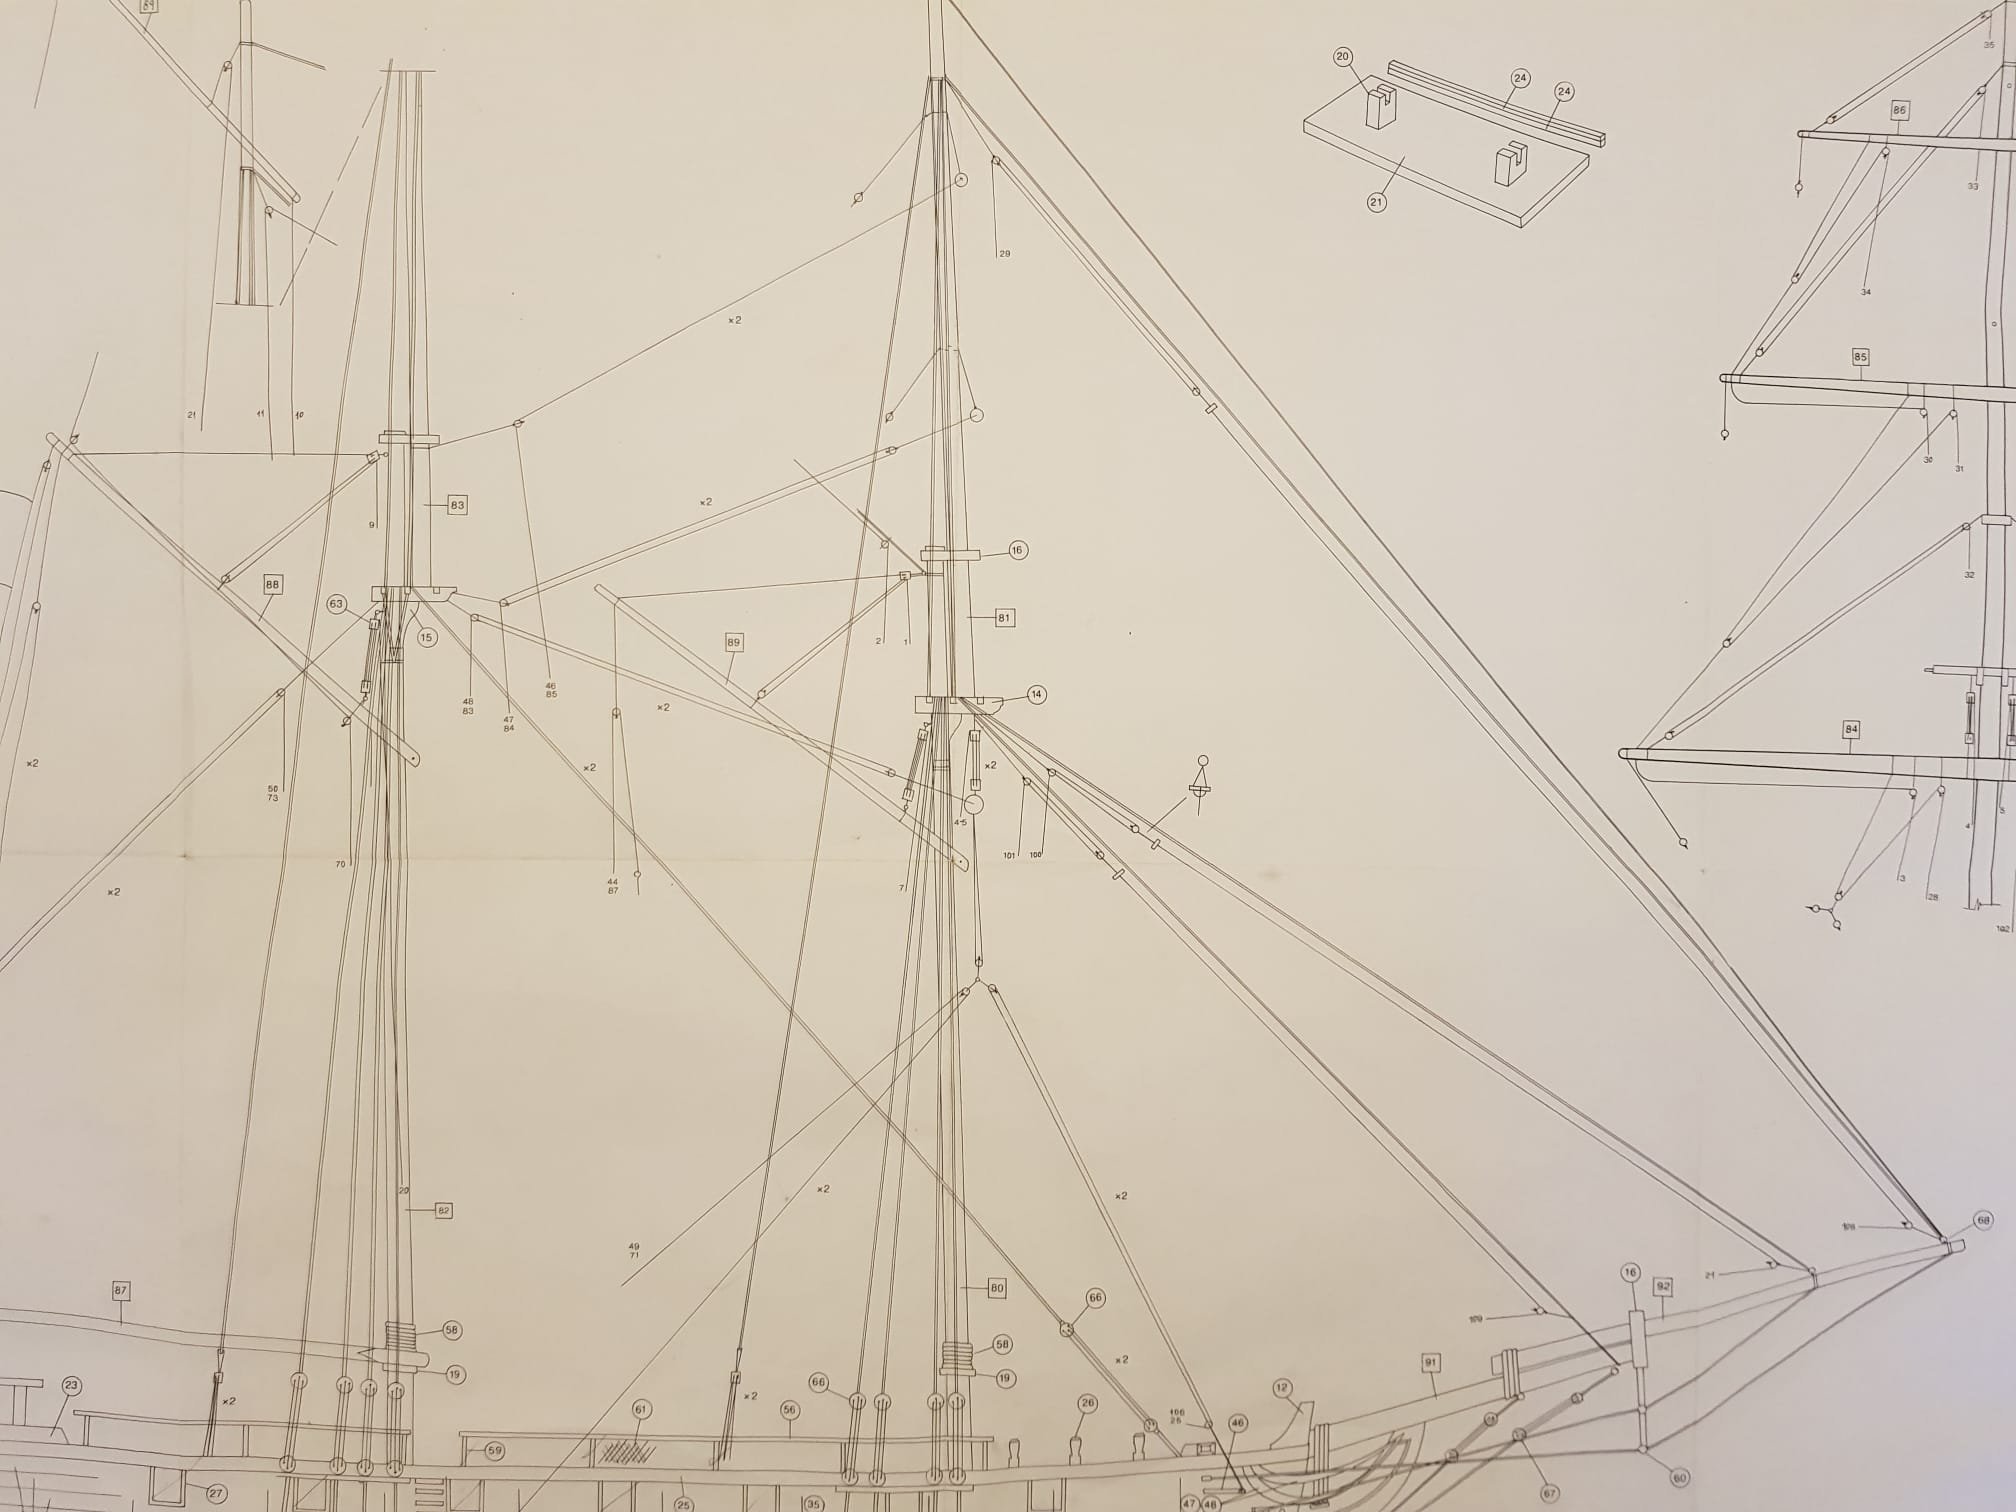
I am a little lost.... I have been trying to make the Foremast according to the plans. This is what I have so far. I know it doesn't look like it but it is actually the same length as the plan. It just wasn't on a flat surface when I took the photo. what I don't get is which blocks need to be attached to it and where and how. Do I use hoop pins and thread, and drill it in, or do I wrap around the mast. What are the circles I keep seeing. The instructions seem to assume I understand the plan - unfortunately I neither understand the plan or how sailing ships work. I have taken photos of the plans and will include them in this post what I assume are rope lines don't attach to anything. They draw half the line and leave the rest to my imagination - which is a dangerous thing to do! here are some close ups - although that didn't seem to help my understanding at all. I am sorry for the orientation of the images. I did rotate them on my pc before posting but they seems to have rotated back and I cant seem to change it. I know this may be obvious to some but I cannot seem to make head or tails of this and I want to make sure I have made the mast correctly before I start to install it since adding blocks and hoops and stuff to the mast will be really hard once I get started on the rigging. here is what the instructions say to do Forgive me If I am being really dim, I just want to make sure I know what I am doing before I progress. Thank you and sorry this is yet another mammoth post.
.thumb.jpeg.c4e9c567bfa6851f004cb0df20773d00.jpeg)

.thumb.jpeg.1caa324f3558f610eee69fc21aa54712.jpeg)
.thumb.jpeg.a55fa669b7e4efdfbb3452e027bcb93b.jpeg)
.thumb.jpeg.eea5d687fb085e9c0b3645ce1bfdb119.jpeg)
.thumb.jpeg.3fd922546e68c6e339ce3bade08042fa.jpeg)


-
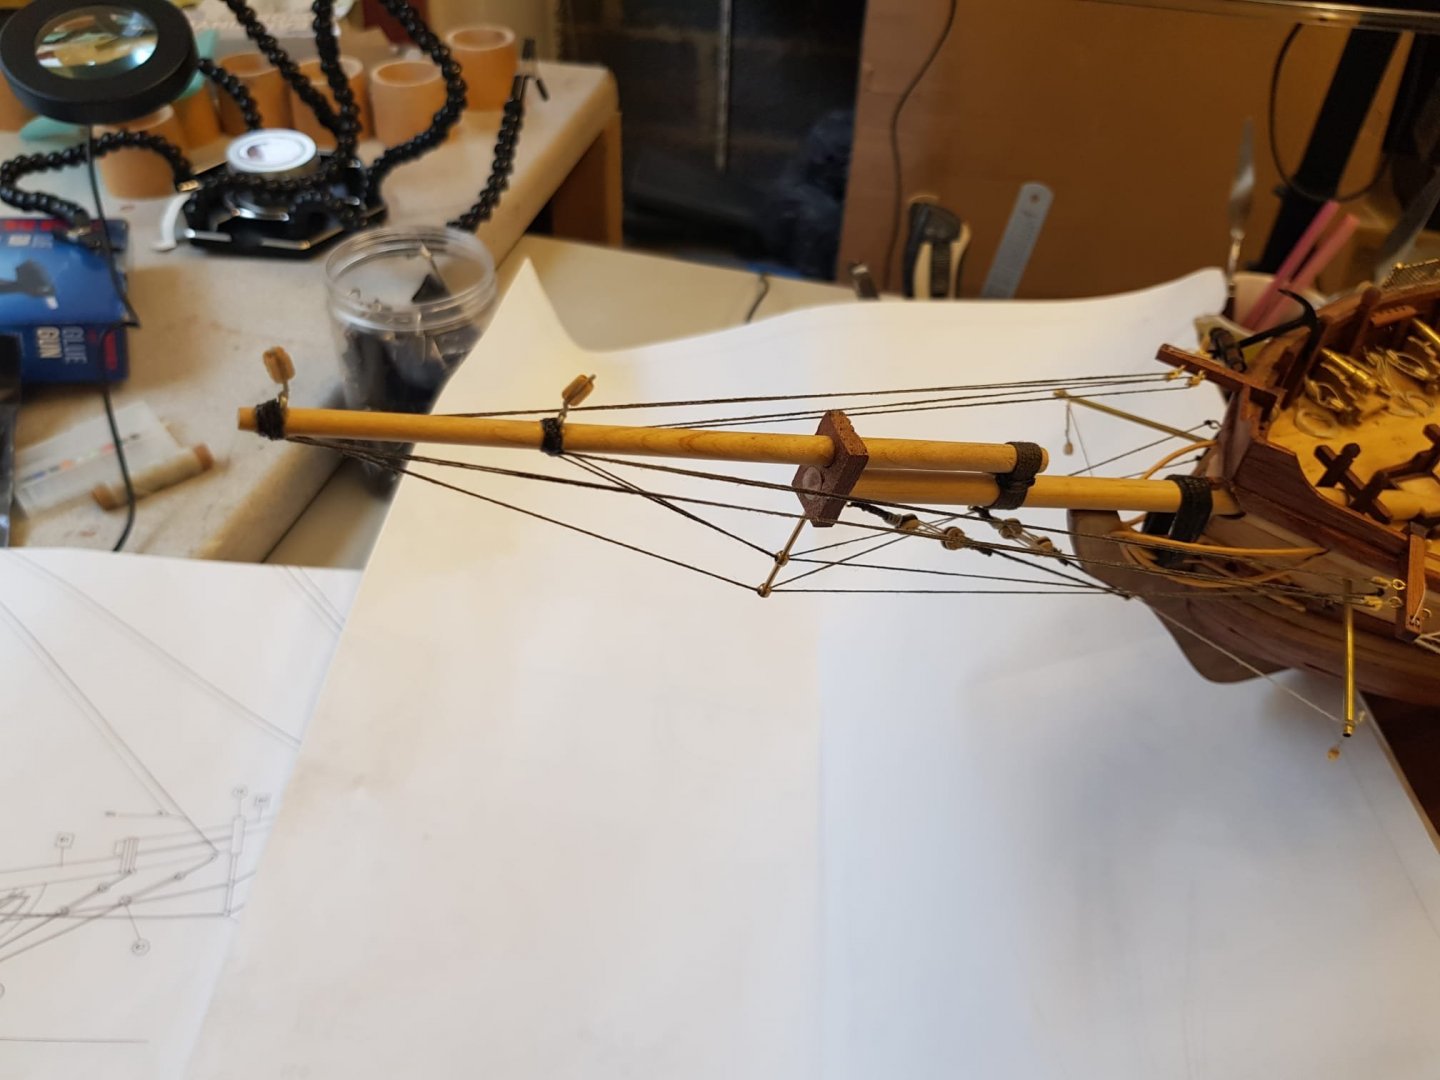
I have been ploughing ahead with the build and have completed the Bowsprit. I saw the someone had used an electric drill and sand paper to paper their masts and so I tried this approach and was really impressed with the results.... and also surprised at just how hot the sand paper got. It felt like it would burst into flames at points and I decided to take regular breaks to let it cool down. I have seen some logs for the USS Enterprise where they have added a lot of detail to the bowsprit and masts which are not in the plans or instructions, and although this makes the model look seriously impressive, I am not yet confident enough to start deviating from the instructions just yet. Perhaps in future builds. I read in a different log about a guy using a "helping hand" thing while doing the rigging and so I brought one. It has been a real help... I completed the bowsprit and it looked odd. Turns out I had done the rigging all wrong and so I dismantled it, added some eyes to the hull and re did all the rigging. I don't have any photo's of the failed attempt but here is the completed bowsprit. Hopefully I wont find any more problems that I need to redo. I took "GrandpaPhil's" advice and ran the thread through beeswax and the effect is great. It was also so much easier to thread and work with. I used some furniture bees wax I had in the cupboard but I have a tailors device arriving tomorrow which will be even easier to apply. My next task is to start work on tapering the masts. I saw a cool idea for a jig allowing you to file the square bits of the mast with relative ease and so I think I will construct one.
.thumb.jpeg.496c19c55e7c5f471cb89a78301c89ad.jpeg)
.thumb.jpeg.e7fe03082681df6a14276e9f17b811d5.jpeg)
.thumb.jpeg.5235fce846ff89a2b04ce9450f348178.jpeg)
.thumb.jpeg.b9b5c58e3126c7c3bdc4e94818fb784f.jpeg)
.thumb.jpeg.34e7a7f6e0628977d56cc6557f62ef3d.jpeg)
- 89 replies
-
- 2
-
-
- Enterprise
- first build
- (and 2 more)
-
Thank you this is really very informative and a fantastic resource. It is great how much you can learn about sailing ships through the process of building a model.
-
Thank you. I was at Sam's house today helping Michele clear out the shed and I found 2 pieces of Mahogany which he had saved for something. I have taken them and I plan to make a stand for Sam's ship out of Sam's wood. It seems very fitting indeed.
- 89 replies
-
- 1
-
-
- Enterprise
- first build
- (and 2 more)
-
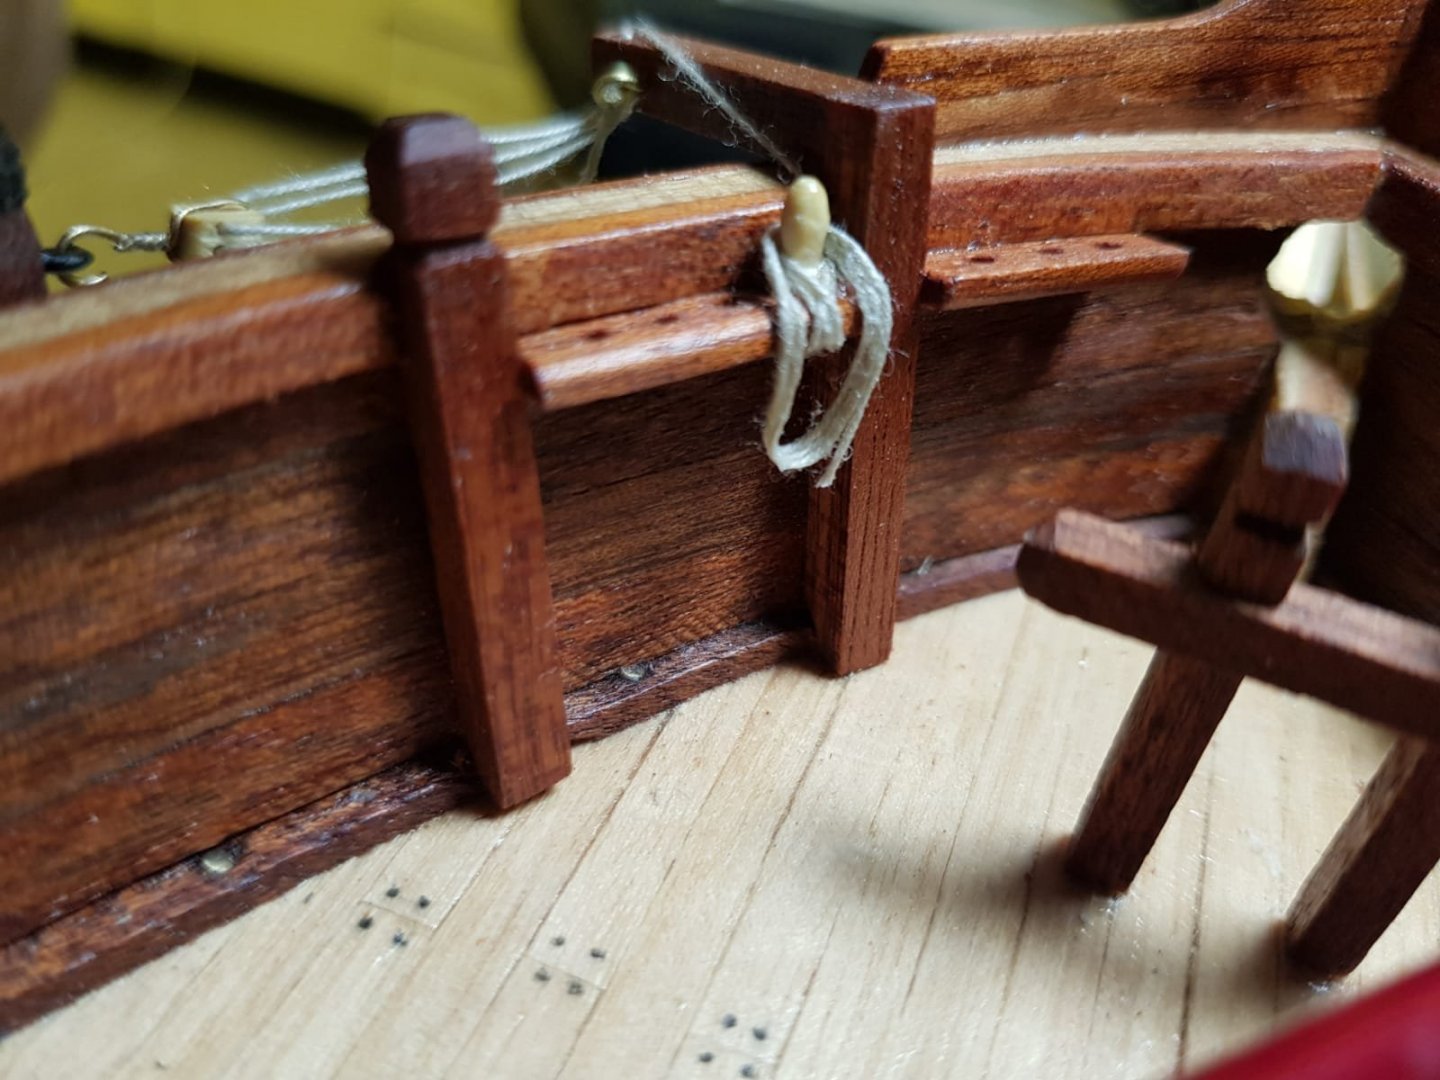
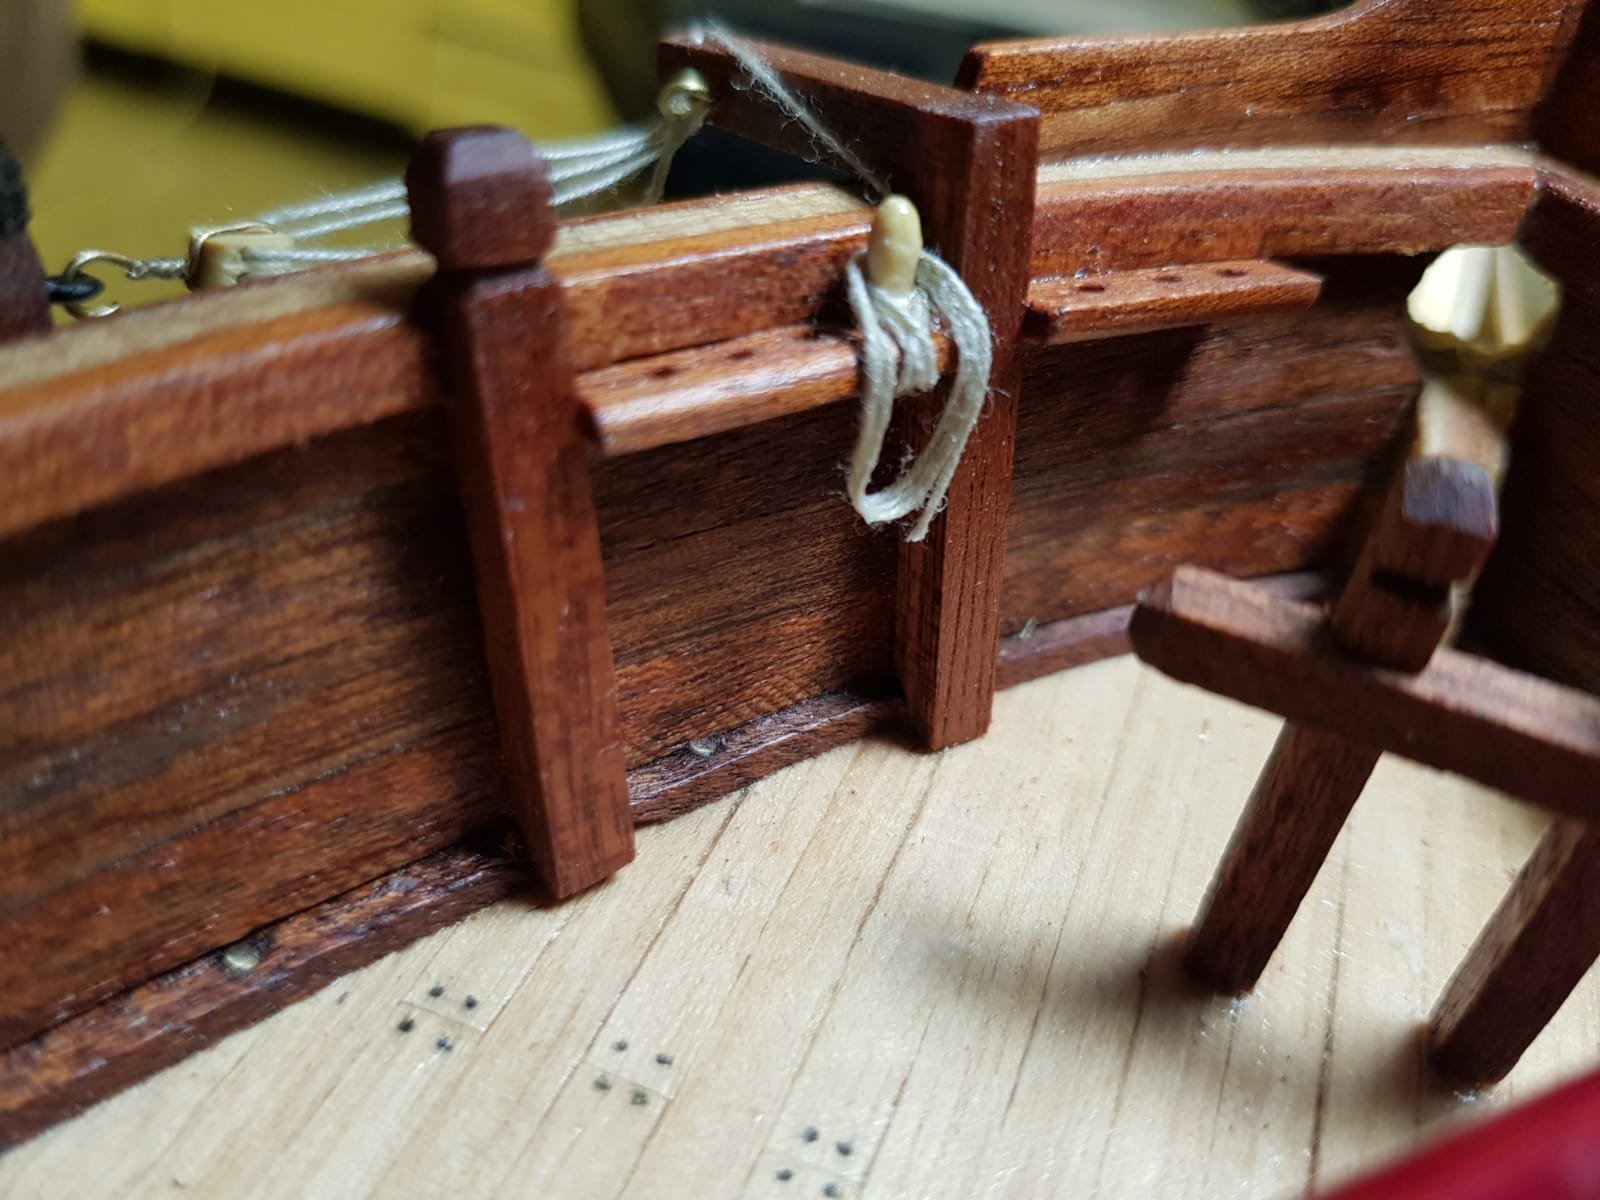
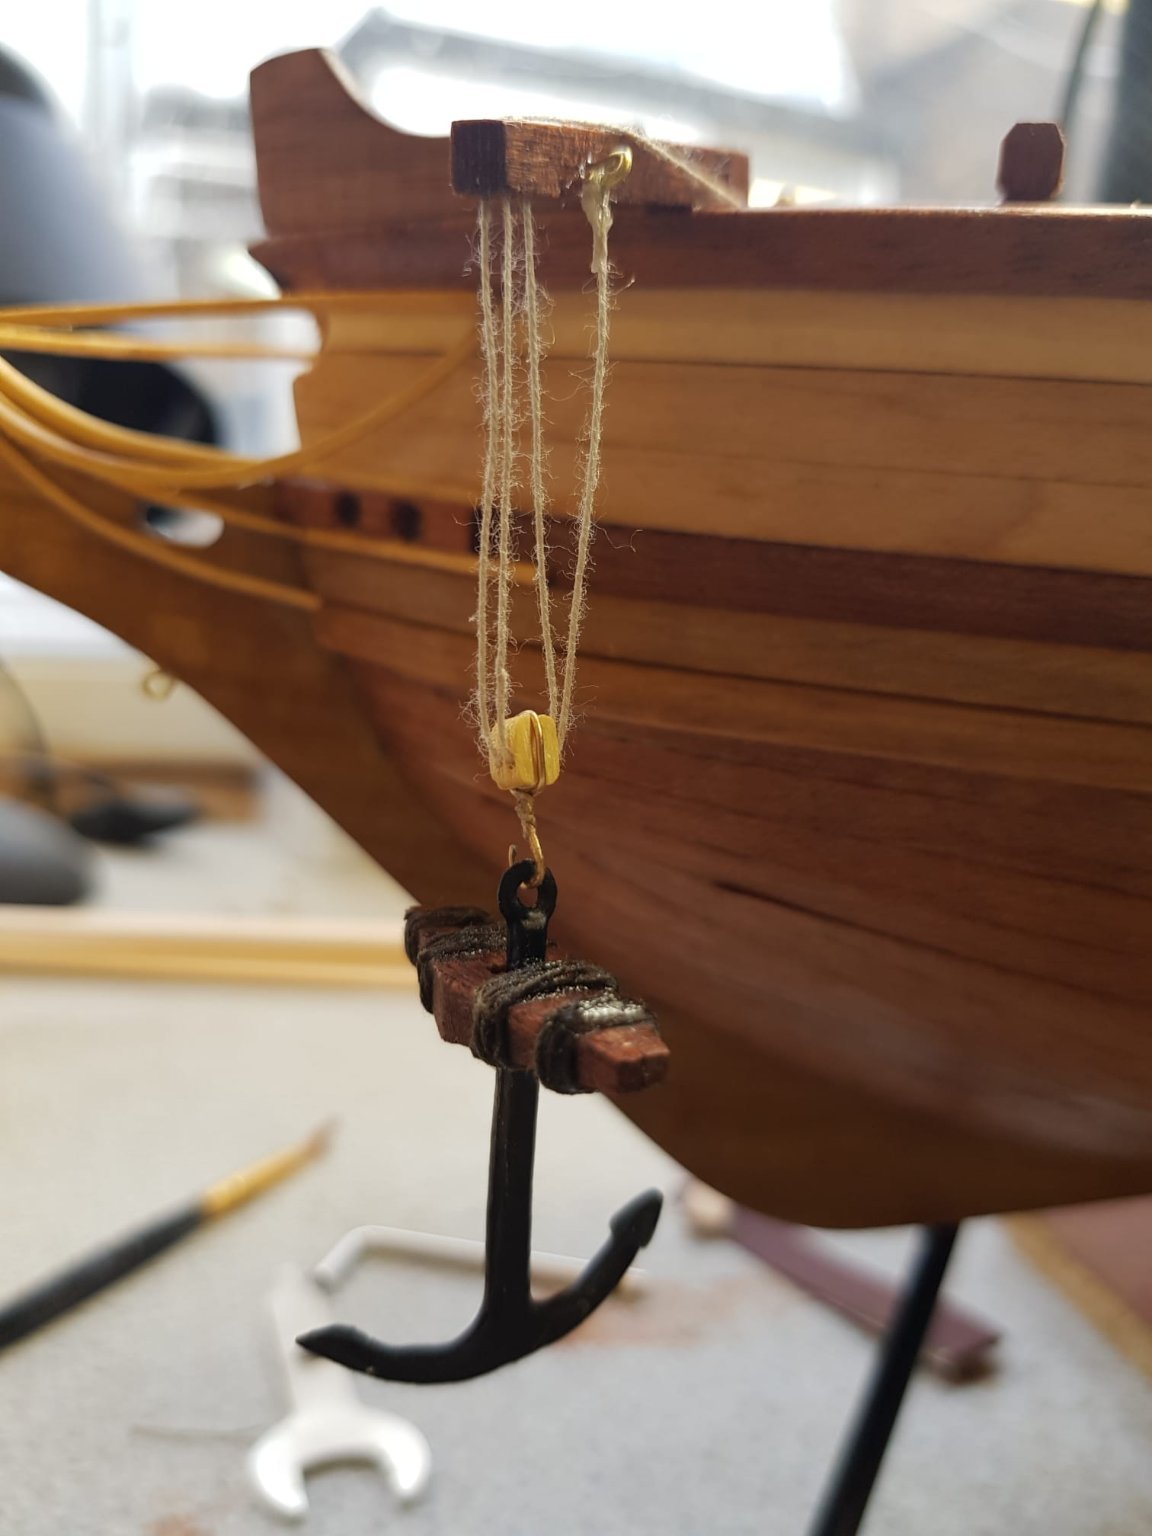
I have been working on the anchors. Having painted and assembled them I temporarily attached them to the cathead as shown below, I know there is meant to be another brass hoop, which has the anchor rope attached to it and I will get to that in a minute... My first question is, when the anchor is tied to the side of the ship, what type of know should I use and how should it look. Do I tie the rest of the rope to a belaying pin, or does it hang loose. The photo in the instruction's isn't particularly clear and I have tried to google it - and to search specifically for the answer on this forum, but haven't found it yet. I was pleased with the way I attached the rope from the cathead to the belay pin. I know the rope coil should somehow be in front of the pin, but that confused me too. And lastly - this is turning into a mammoth post - the thread provided in the kit looks terrible, it is frayed and ugly. I was wondering about trying to run it through a wax candle or something - I tried a lighter but I just set it on fire 😞 . I have some wood wax if that would work. Or is it a lost cause and I just need to buy some new thread. If so what type so that I don't end up with the same problem? Thank you in advance

.thumb.jpeg.bdc9d5a4a17c9883754b019106078c88.jpeg)
- 89 replies
-
- 2
-
-
- Enterprise
- first build
- (and 2 more)


.jpeg.5c5e500d66a3143660252b43e05d2fe7.jpeg)
.jpeg.b000e93f5512644ad21fbe3edf7896f2.jpeg)
.jpeg.7d50535c52d11ca608a2b7d63cd3338b.jpeg)
.jpeg.84ec318f21c0ef424d82bf28174b0012.jpeg)
.jpeg.dd9106691e892ecbb541b30842bde6a5.jpeg)
.jpeg.4d18efe81ee604a2cd5b7206683744e4.jpeg)
.jpeg.fcd9eb9eac39a37713add2d7a19766af.jpeg)
.jpeg.c83a466de6717fe5c338352cdacac07e.jpeg)
.jpeg.0fafb78298e874fb3e02a388d3eb439b.jpeg)
.jpeg.841d5f1638e043e269634f21fcf5363d.jpeg)
.jpeg.8287475308d4be4737d77448804590bc.jpeg)

.jpeg.edf84fbd12dfd725c7e8e7c4e1d68168.jpeg)
.jpeg.eacbb5cd0900232ae07505f703b28ab0.jpeg)

.jpeg.091054b00b059523b47ee639a4d2783e.jpeg)
.jpeg.10631a20ab5cd05f1d80027fc6d24660.jpeg)
.jpeg.f87c7e453782e710dd66bbfbf54e7141.jpeg)
.jpeg.6c0a368c554c190cf6bc935c3b89d7e2.jpeg)
.jpeg.333a4e5fce7b8339db533807bd2a64e1.jpeg)
.jpeg.0043acc544696563a728ec885c86b51f.jpeg)
.jpeg.154c6ac8089804a247e20e984a2a83d6.jpeg)
.jpeg.7836c7690ff8925bcb3641f0d85c2540.jpeg)

.jpeg.96b084d9e81311fa41e50a6d1b7d9374.jpeg)
.jpeg.1048d5a899508f95a0e555a8da9979ff.jpeg)
.jpeg.a9e7f44b37101e1536e8d3d7d4fcd551.jpeg)