bwood
-
Posts
11 -
Joined
-
Last visited
Recent Profile Visitors
252 profile views

-
 vetman8953 reacted to a post in a topic:
HMS Vanguard by bwood - FINISHED - Model Shipways
vetman8953 reacted to a post in a topic:
HMS Vanguard by bwood - FINISHED - Model Shipways
-
 teloo reacted to a post in a topic:
HMS Vanguard by bwood - FINISHED - Model Shipways
teloo reacted to a post in a topic:
HMS Vanguard by bwood - FINISHED - Model Shipways
-
GrandpaPhil reacted to a post in a topic:
HMS Vanguard by bwood - FINISHED - Model Shipways
-
GrandpaPhil reacted to a post in a topic:
HMS Vanguard by bwood - FINISHED - Model Shipways
-
zappto reacted to a post in a topic:
HMS Vanguard by bwood - FINISHED - Model Shipways
-
coxswain reacted to a post in a topic:
HMS Vanguard by bwood - FINISHED - Model Shipways
-
coxswain reacted to a post in a topic:
HMS Vanguard by bwood - FINISHED - Model Shipways
-
Pierretessier reacted to a post in a topic:
HMS Vanguard by bwood - FINISHED - Model Shipways
-
Jörgen reacted to a post in a topic:
HMS Vanguard by bwood - FINISHED - Model Shipways
-
Barbossa reacted to a post in a topic:
HMS Vanguard by bwood - FINISHED - Model Shipways
-
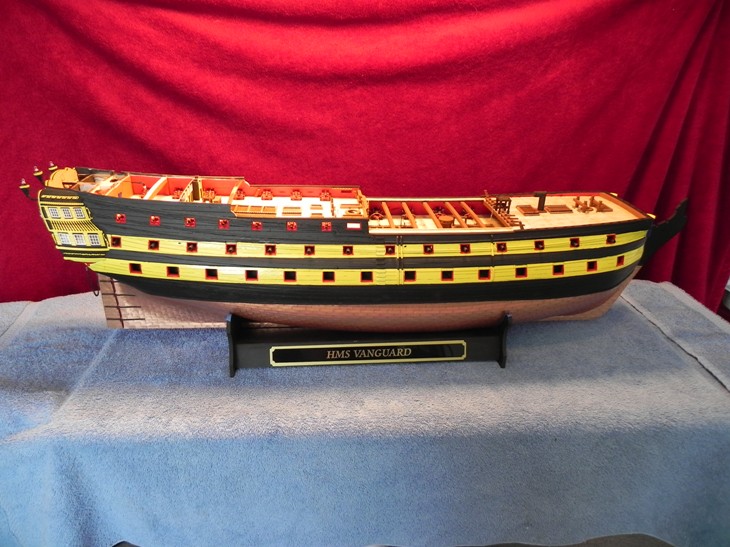
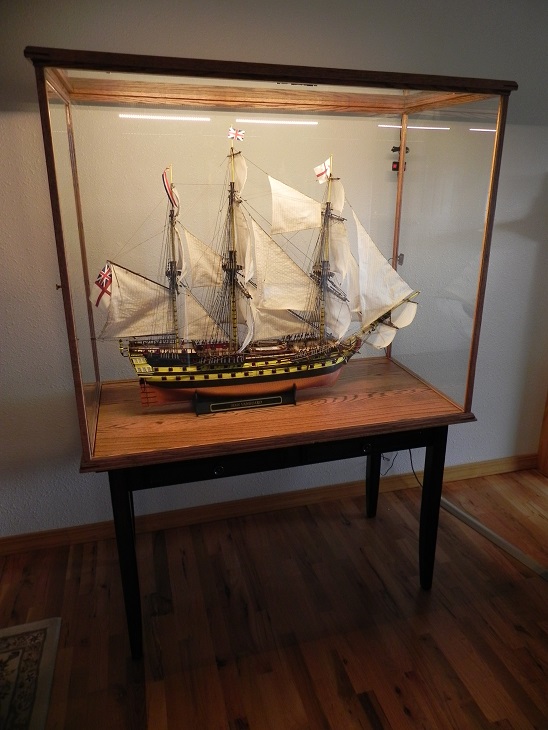
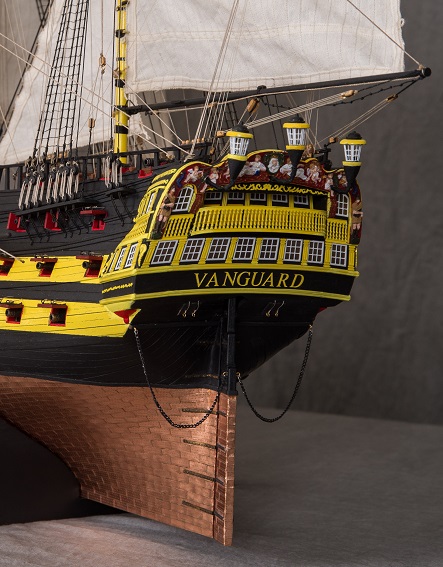
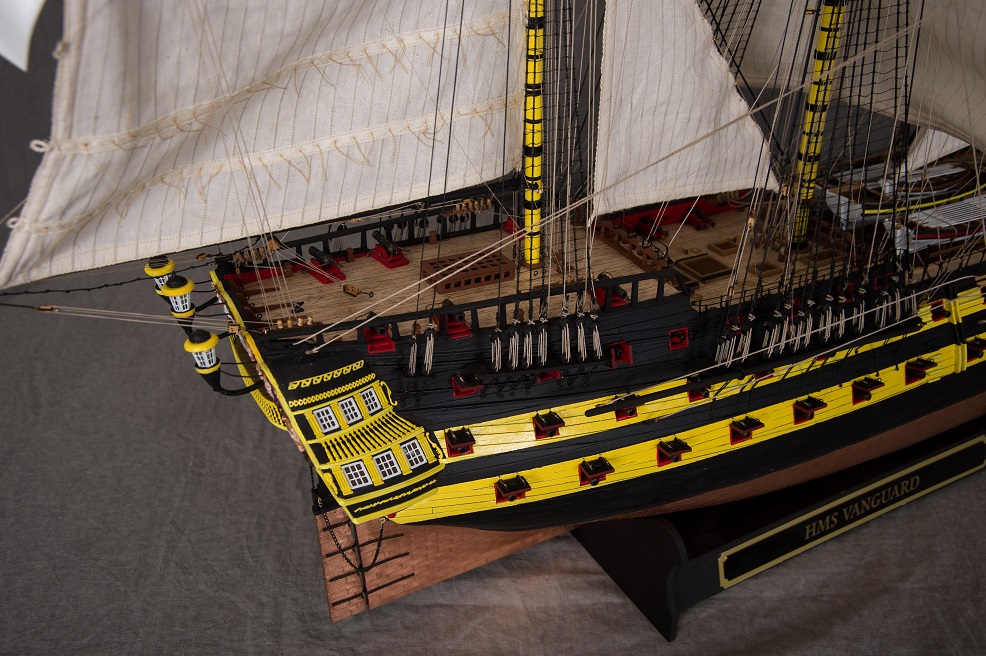
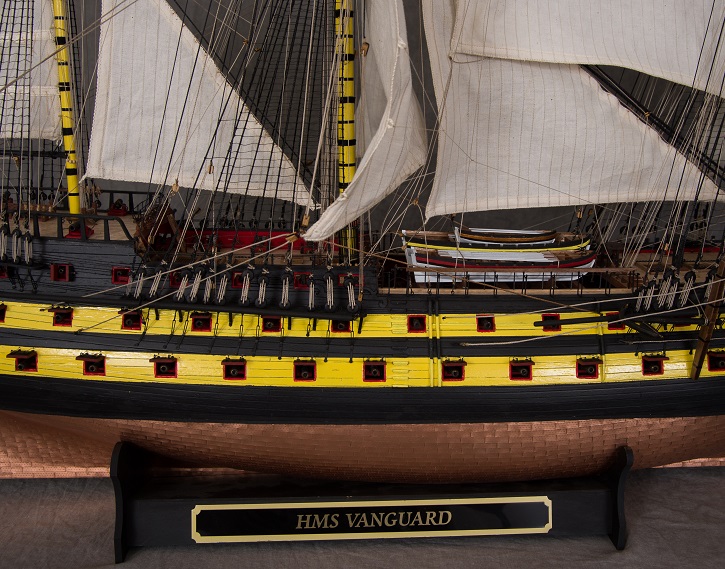
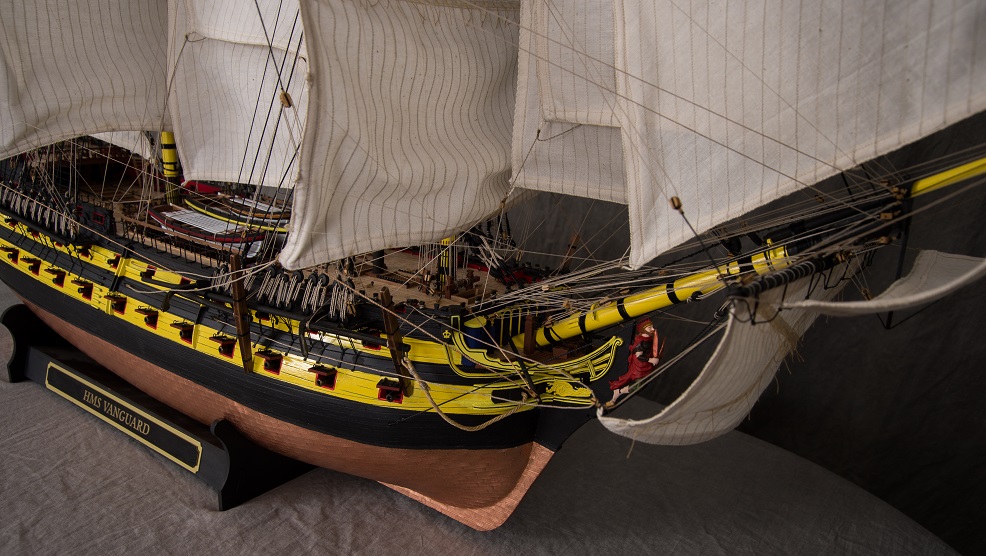
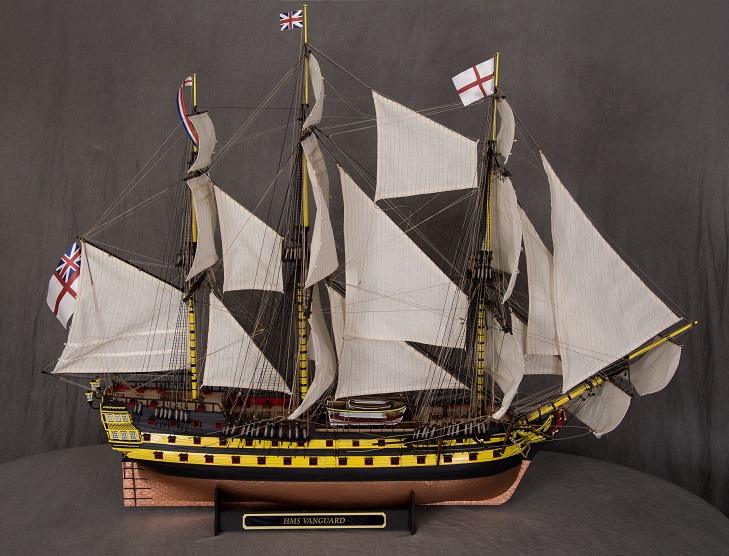
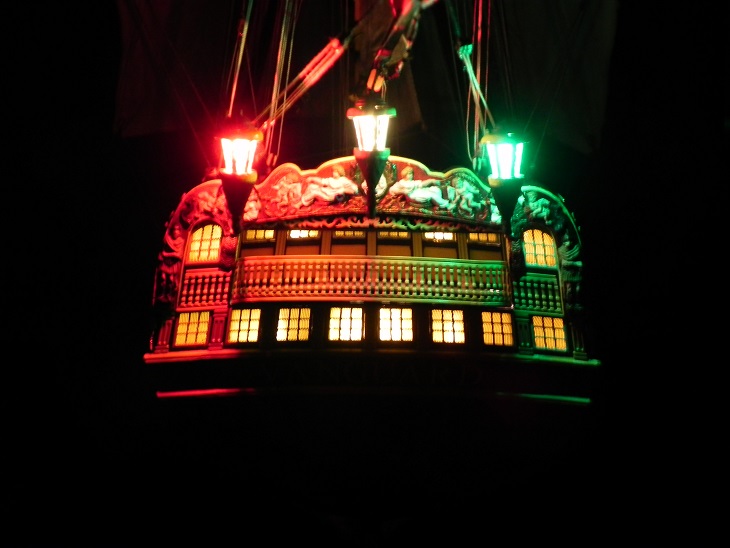
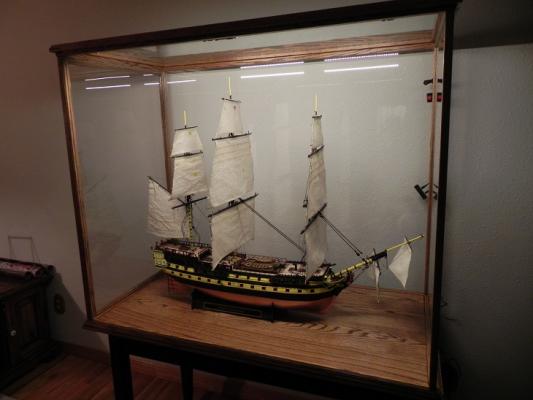
DONE! FINISHED! IN THE CASE! After a little over 6 years, the HMS Vanguard is complete. Since September the push was on to finish the rigging and sail installation and after that a few details to wrap it all up. Even the internal and external LED lights work. Next ship on the table is Mamoli's 1:96 scale Flying Cloud.
- 14 replies
-
- 15
-
-
-
- vanguard
- model shipways
- (and 1 more)
-
Plan Sheet 12 of the HMS Vanguard plans indicates that the sails shown on that sheet are to be tied to mast stays using thread at each stitch line. If this was done to the fore and main stay sails (L5 and Q7) how would the sails be run up and down with the cross stitching between the fore and main stays and preventer stays being in the way?
-
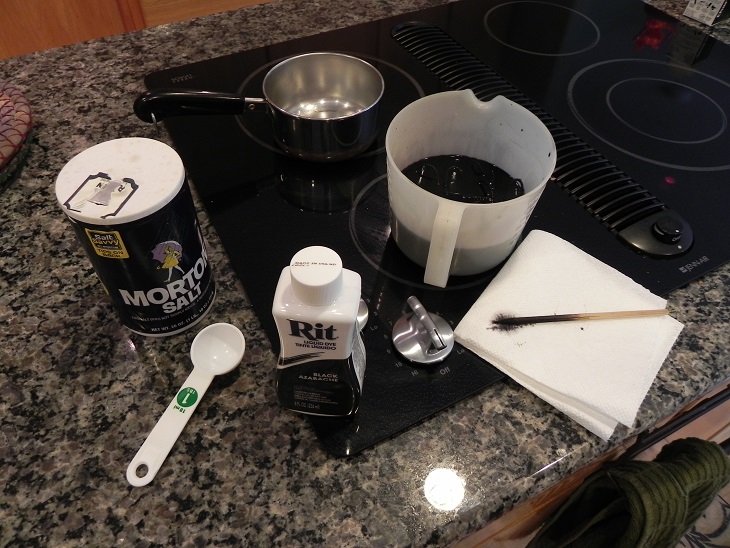
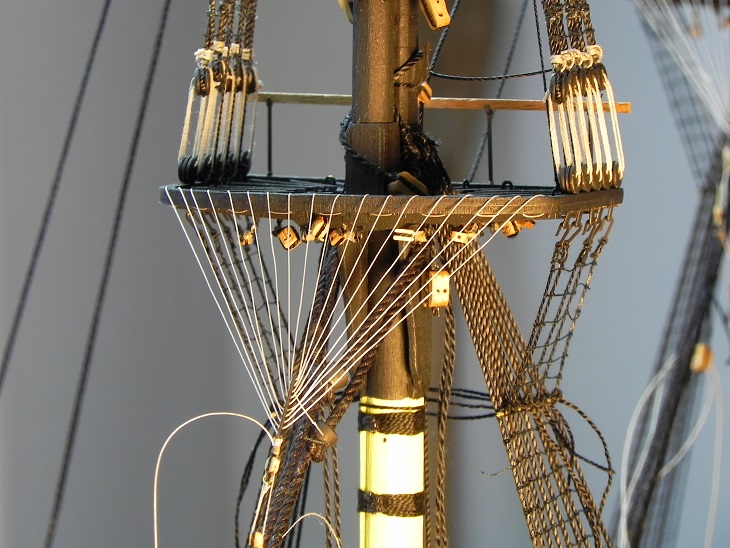
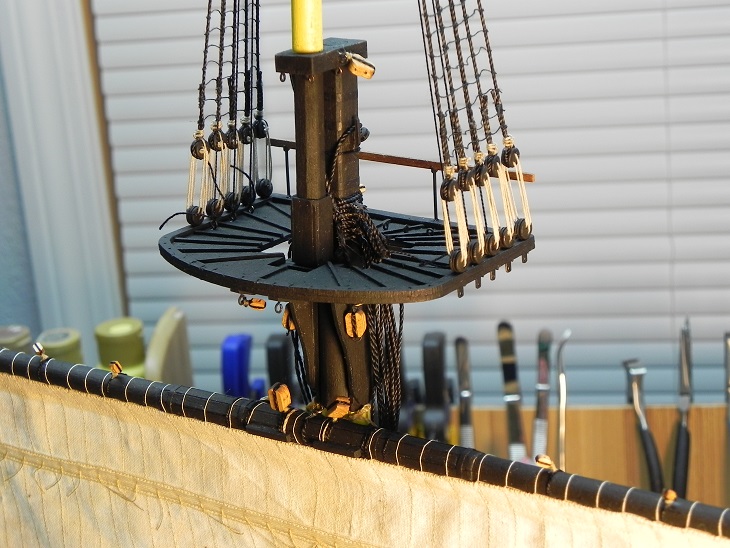
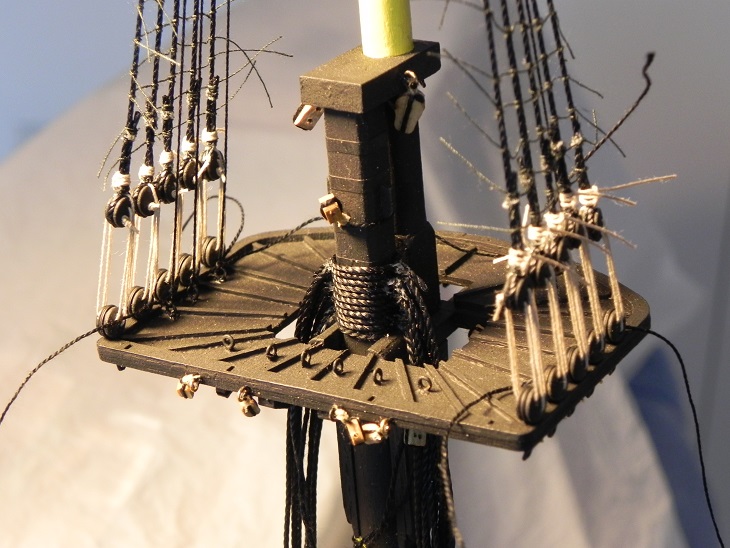
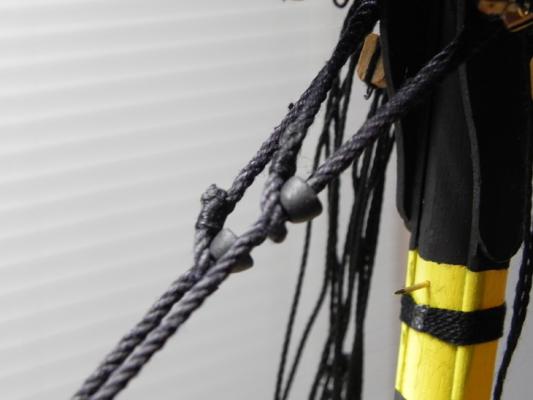
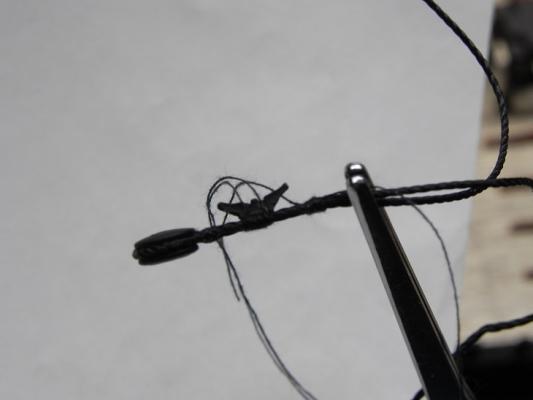
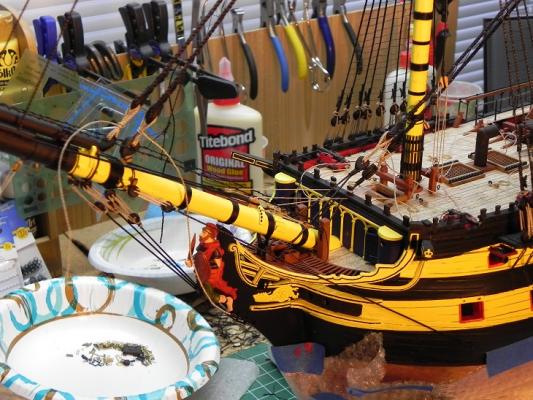
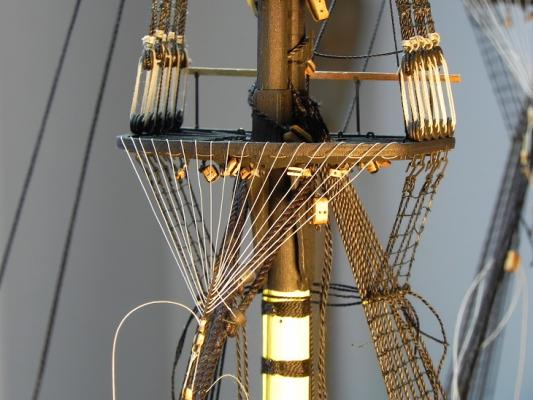
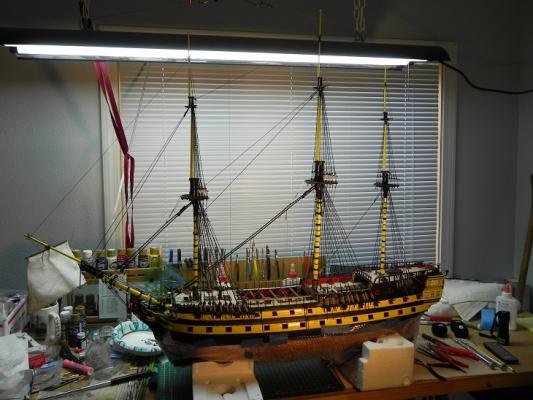
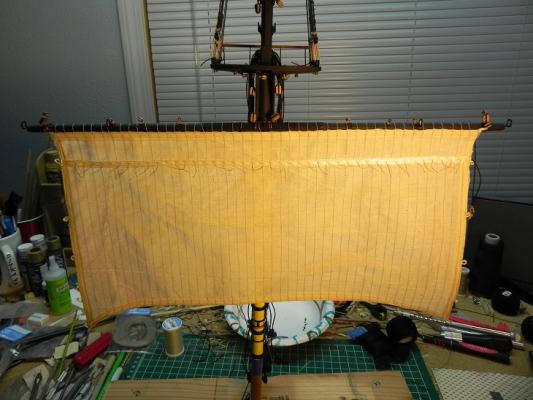
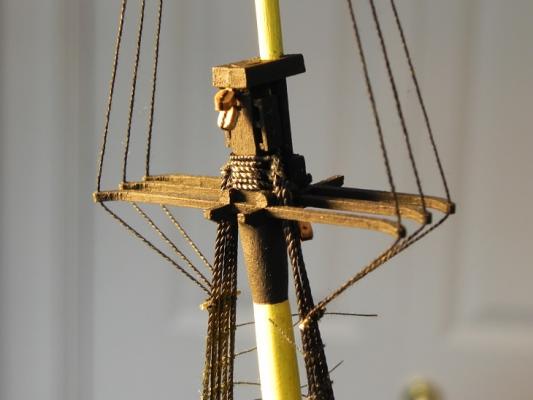
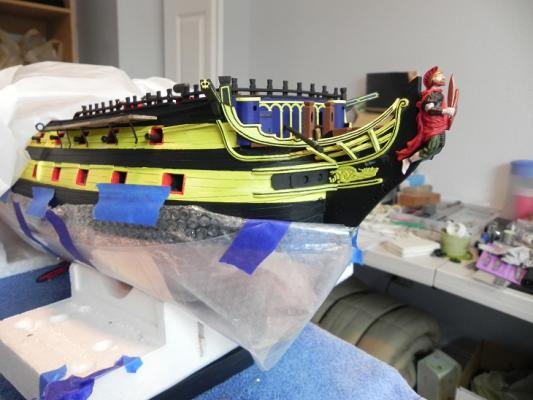
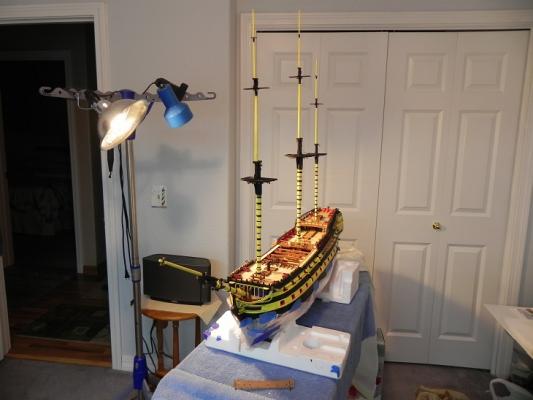
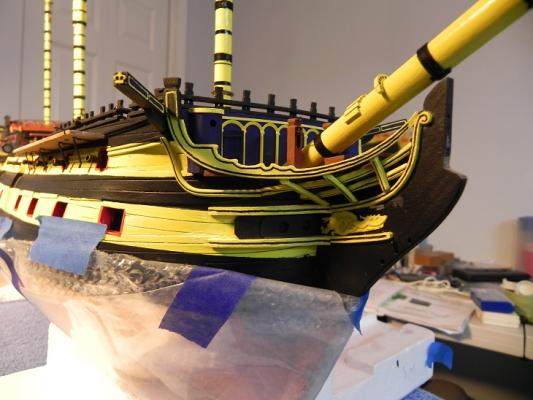
Since March I have been concentrating on the ship's rigging. I have completed the bowsprit rigging along with the fore, main, and mizzen mast shrouds. The foremast ratlines are completed and am nearly finished with the main mast ratlines. Some of the stays and preventer stays have been installed as well. The pictures I am including today are of the rigging line dying set up (the 2mm rigging line that came with the kit needed to be dyed black), the beads I used for the mouses on the 2mm line stays which were wood beads purchased from Joann Fabrics and cut in half and painted, how I used the extra seizing line to attach the shroud cleats, the bowsprit rigging, the foremast crowfeet rigging, an overall view of the ship as it appears today, and the ship with the sails temporarily mounted to the masts inside the display case I purchased and finished. The case was fabricated by Houston Display Furniture and shipped to me unassembled and unfunished. The next few months will see the completion of the mast shrouds, ratlines, and stays. Then on to the yard ties and lifts. I really can't say the end is in sight but I am headed in that direction. Bruce

- 14 replies
-
- 8
-
-
- vanguard
- model shipways
- (and 1 more)
-
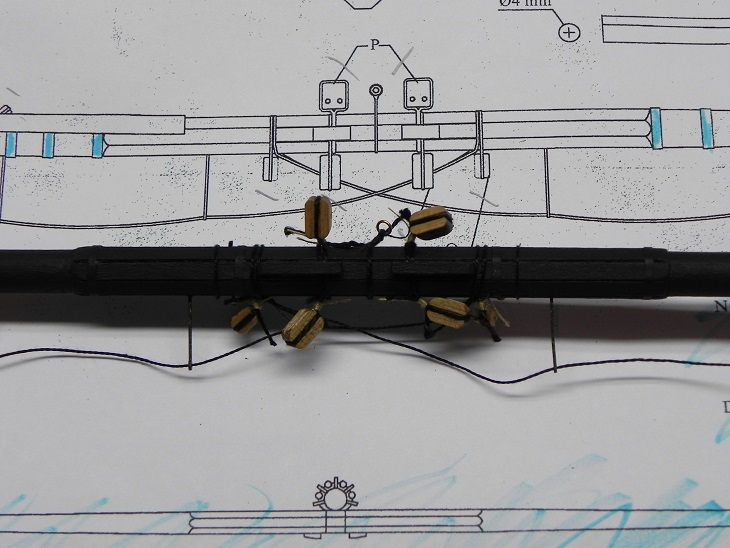
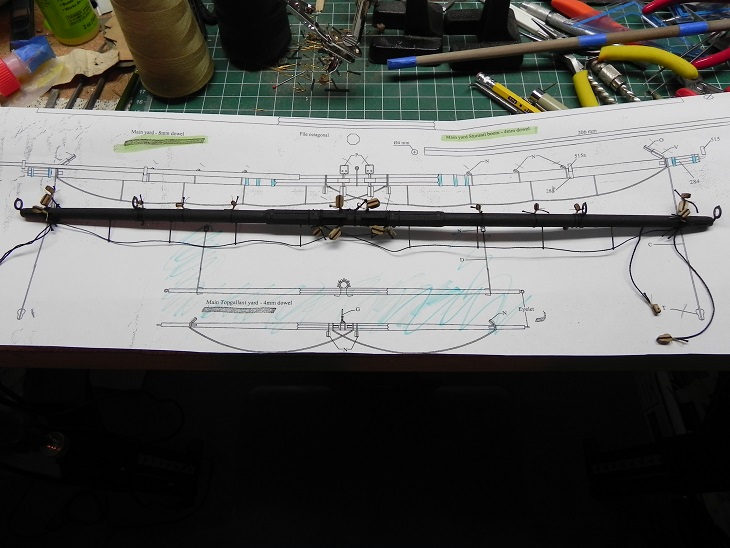
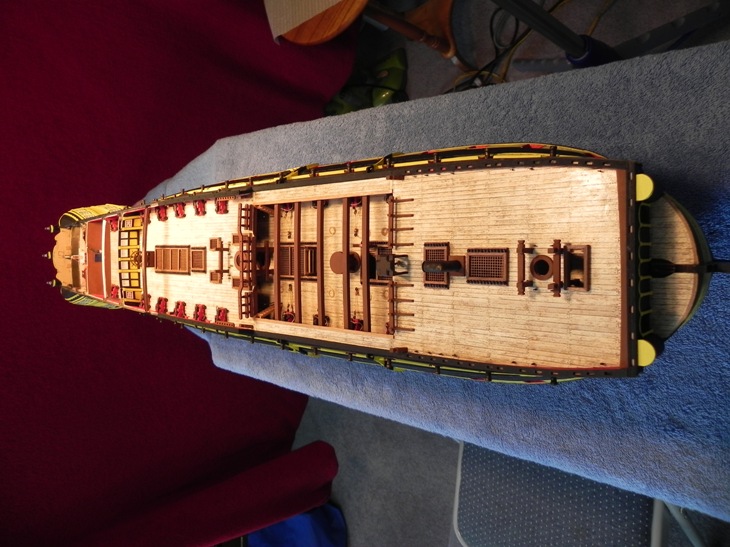
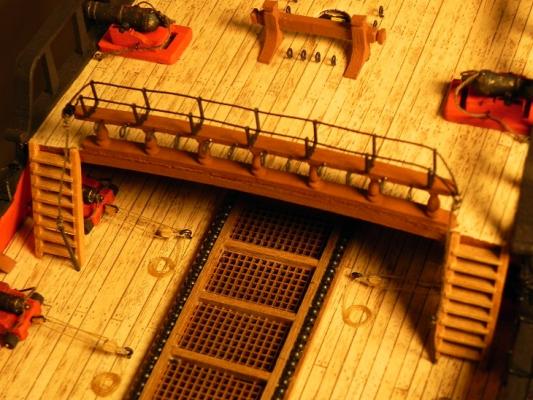
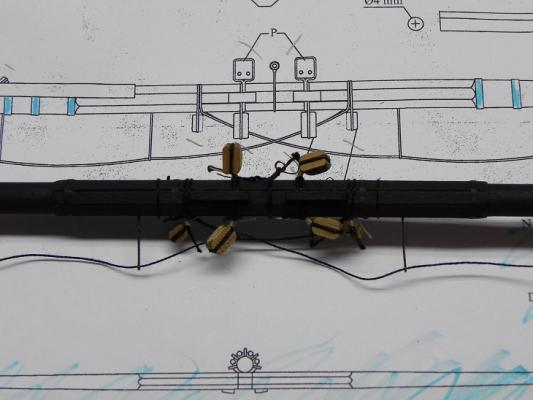
In the past two months I have completed the hull chain plates and deck hammock cranes and stanchions. I then turned my attention to the mast yards and sails. So far I have sewn the main sail to the main yard and temporarily pinned that to the main mast. I've also sewn the main top sail to the main top mast and temporarily pinned that to the main mast as well. There are a couple of details that are not explained very well on the plans. The first is the fore and main jeers are shown on a detail on Plan Sheet 9 but are not detailed far enough. A blow up of a sample jeer would have been nice indicating the tread size and configuration. The other is the truss pendants for the fore and main lower yards shown on Plan Sheet 7. Both these details were completed with the help of Lennarth Peterson's "Rigging Period Ship Models". So, for the foreseeable future, I will be sewing sails to yards and temporarily pinning the yards to the masts. Bruce


- 14 replies
-
- 6
-
-
- vanguard
- model shipways
- (and 1 more)
-
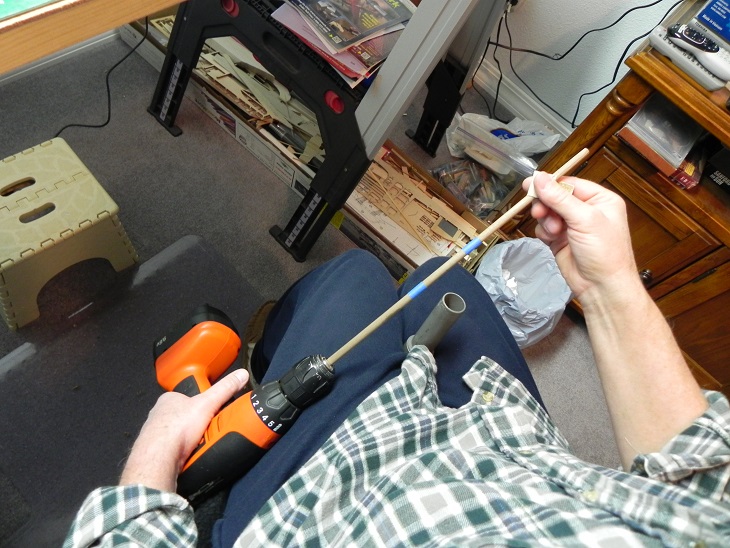
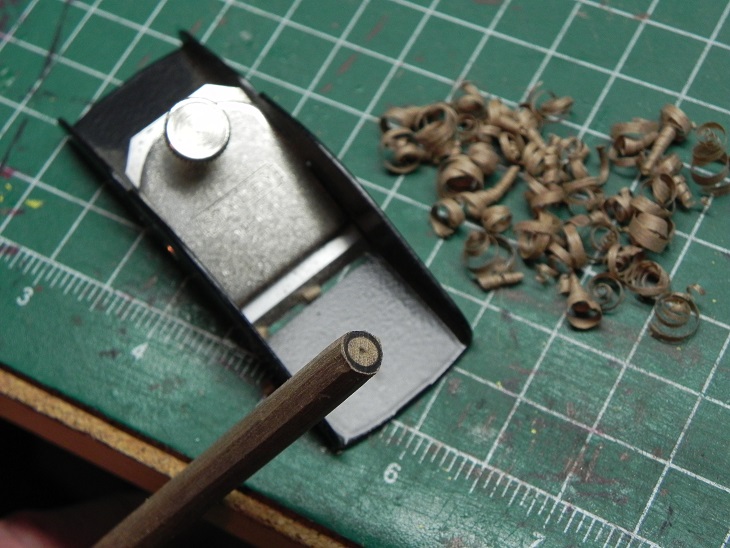
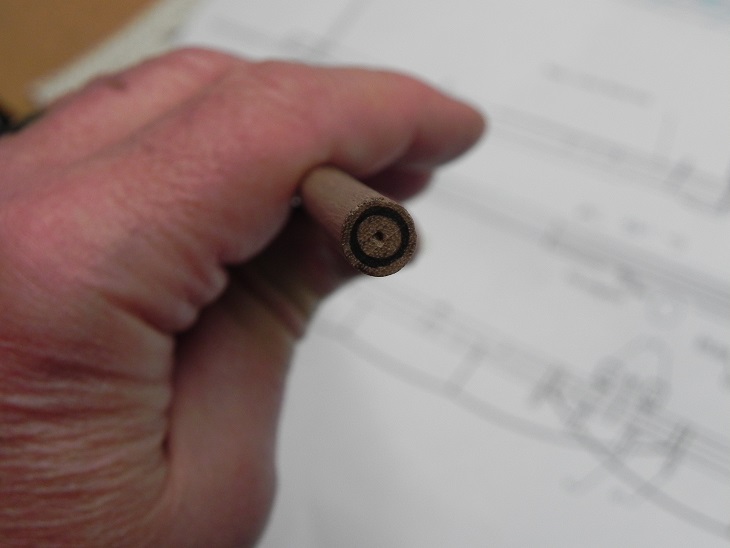
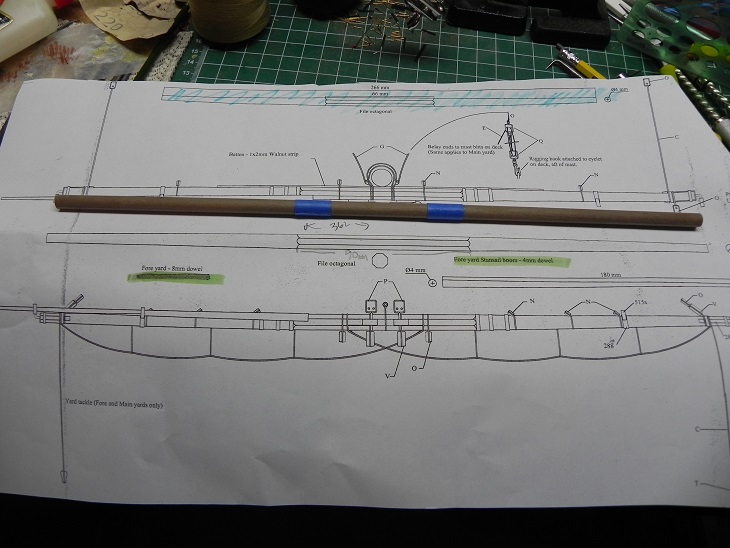
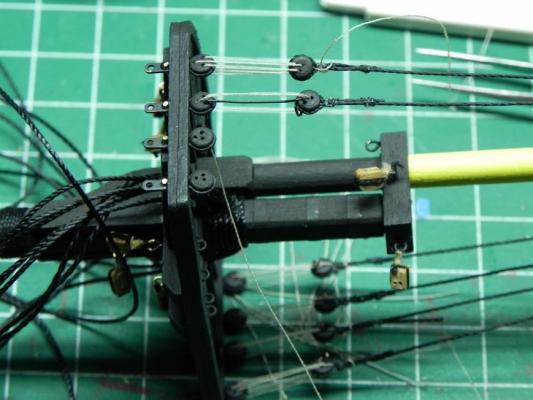
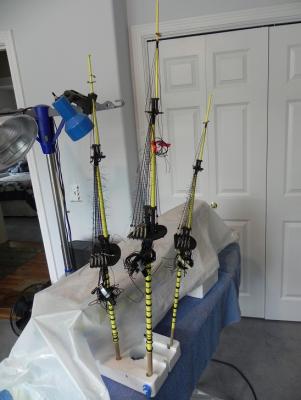
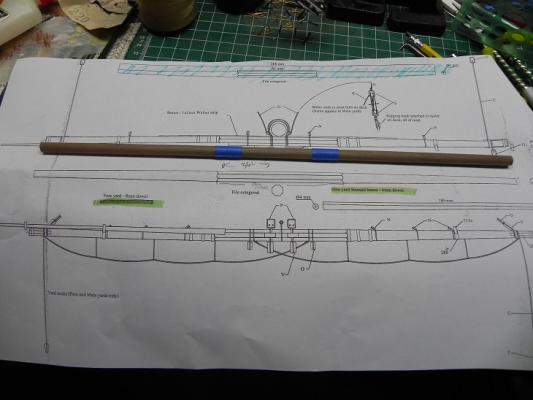
Since February, I have completed the yardarms and began the standing rigging on the masts. The photos that follow show the process used to taper the yardarms (masts, too) as well as the completed yardarms. I first cut the yardarm dowel to length, marked the start of the tapers, marked the end finished diameter, removed the majority of the material with a plane, completed the taper with the dowel in my cordless drill using sandpaper to remove the remainder of the material and a vacuum cleaner to keep the dust down. Other photos show progress on the standing rigging on the masts. I'm almost done with the ratlines and will be working on finalizing the channel plates and lower mast shrouds. One of the photos shows the use of a wire template used to set the shroud lengths to a consistent distance between deadeyes. Bruce P.S. - I can't seem to get the software to display the photos in the proper order.


- 14 replies
-
- 3
-
-
- vanguard
- model shipways
- (and 1 more)
-
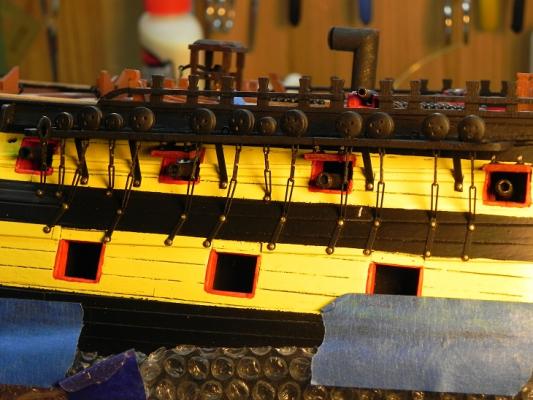
More progress to report. I've finished the bow detailing and the masts. Am working on the yardarms and having the sails prepared by a local seamstress. After I have completed the yardarms, I plan to secure the life boats, install the hammock cranes and stanchions along with the chain plates on the hull. And then, the real fun starts - the standing and running rigging. One thing I wanted to mention is that instead of the card stock glued to the masts to simulate the metal banding, I used 3/32" black Pactra Trim Tape. I am keeping a close eye on the tape to make sure it doesn't come undone. If that happens, I'll try a drop of CA glue on the end to fix the problem. So far, they are holding just fine. Until next time...
- 14 replies
-
- 4
-
-
- vanguard
- model shipways
- (and 1 more)
-
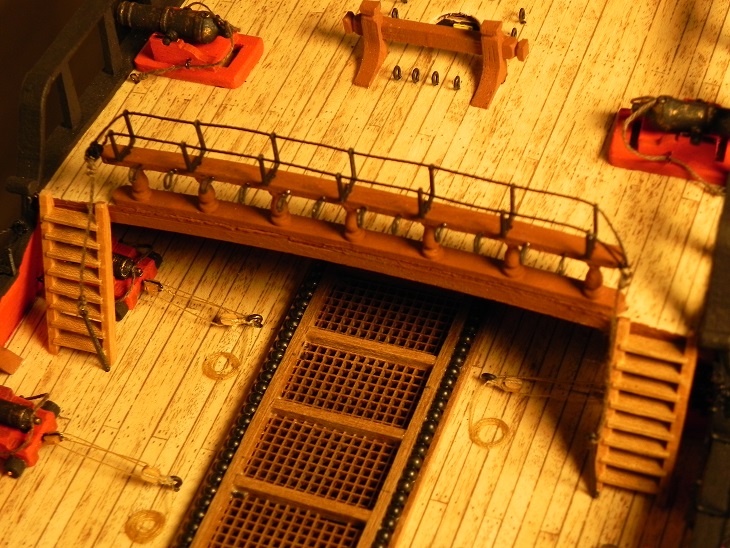
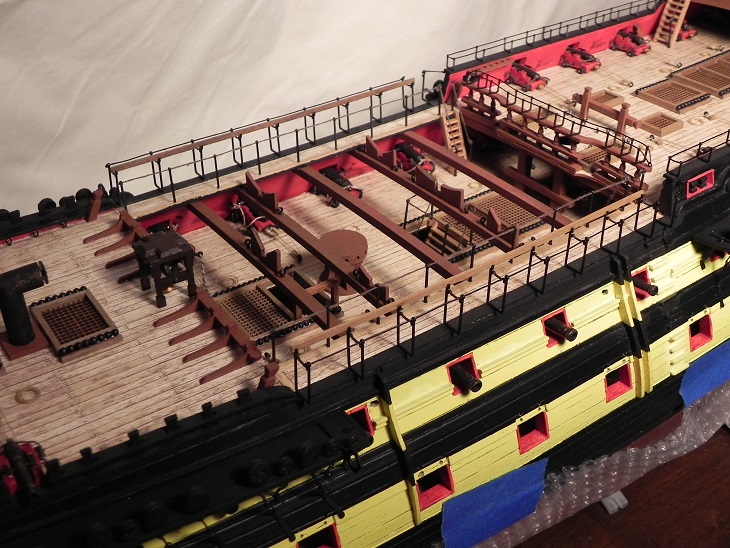
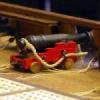
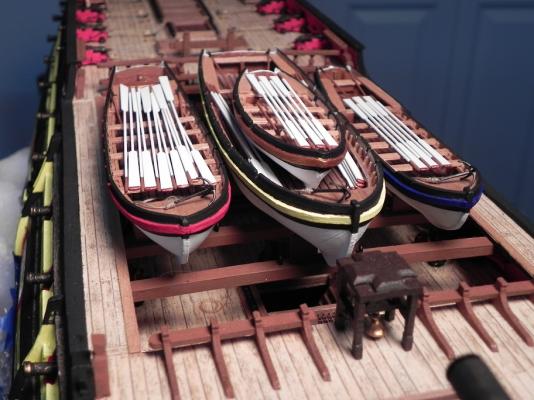
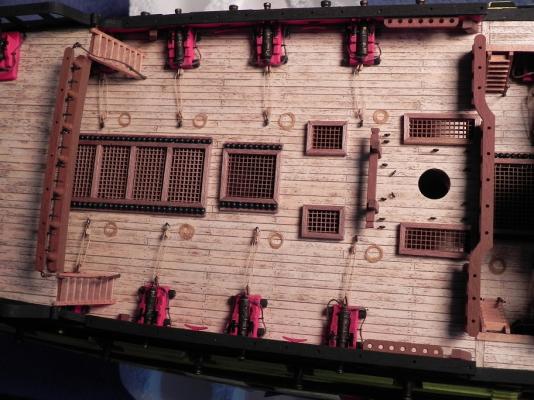
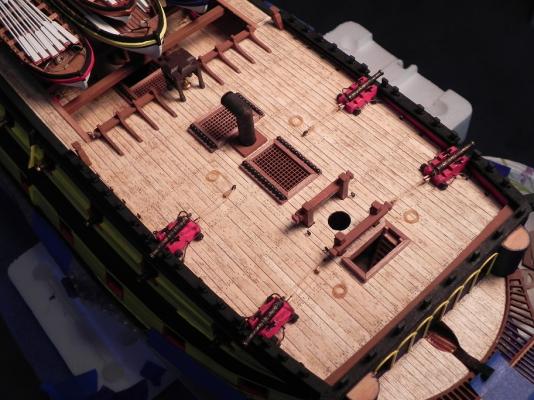
I just reached a major milestone on my Vanguard build, i.e., completing the ship's boats as shown in the picture below. Those little guys took a considerable amount of time. Next will be the front of the ship. I have most of the parts and pieces dry fitted and painted for that area but it's still a pretty complicated portion of the ship and will also take a lot of time. I've also included a couple of pictures of the deck to show progress there. Until next time...
- 14 replies
-
- 10
-
-
- vanguard
- model shipways
- (and 1 more)
-
I was about to post progress on my Vanguard in February of last year but found your site had crashed. Sad. Have been working diligently on the model this winter and have completed up to the adding of the Poop deck. After that will be the bow area then the three launches, the deck railings, and the chain plates and channels. I have been using a Bob Hunt practicum on building the Vanguard and have found it to be very useful. Here are a couple of pictures to show the ship's progress so far. Will try to add more as more work is completed. Glad to see the site is back up and running.


- 14 replies
-
- 7
-
-
- vanguard
- model shipways
- (and 1 more)