JerryGreening
-
Posts
51 -
Joined
-
Last visited
Content Type
Profiles
Forums
Gallery
Events
Everything posted by JerryGreening
-
 So far I am pleased with how it is turning out. May was a bit of a busy month for me which left little time for inside actvities. My wife came down ill with complications stemming from diabetis requiring a week long stay in the hospital. She recovered well. I also completed my open water scuba cert two weeks ago and did my first boat dive towards my advanced open water just last Sunday.
 -
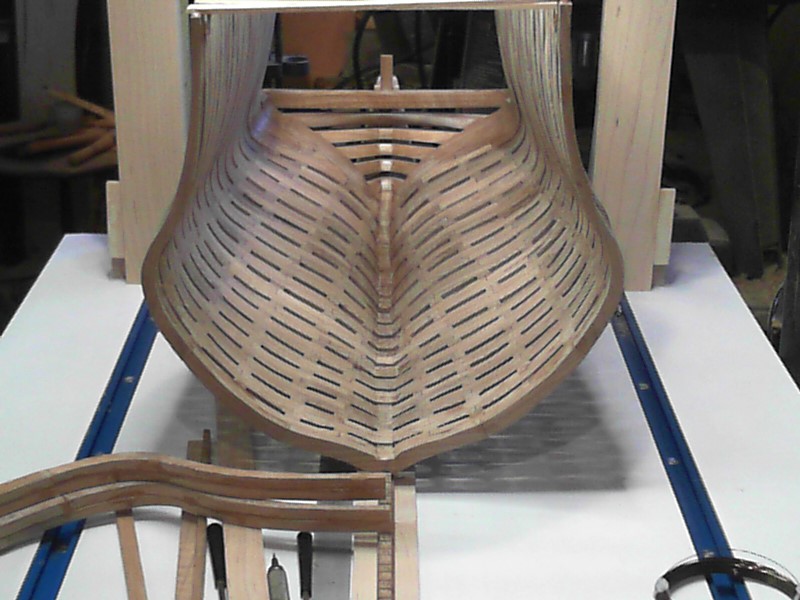
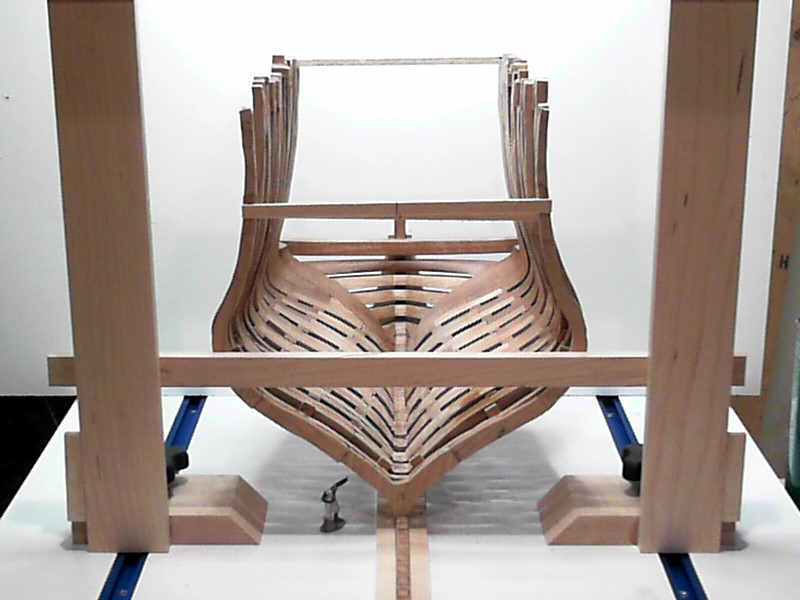
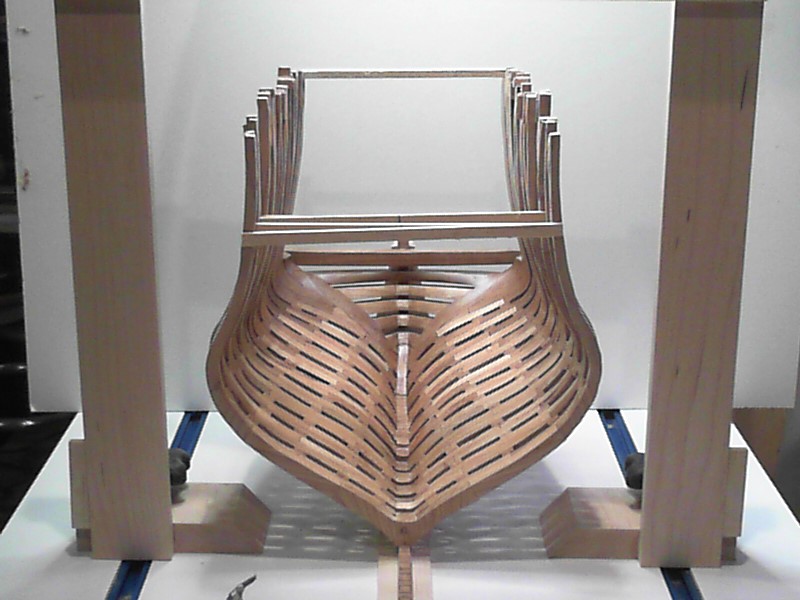
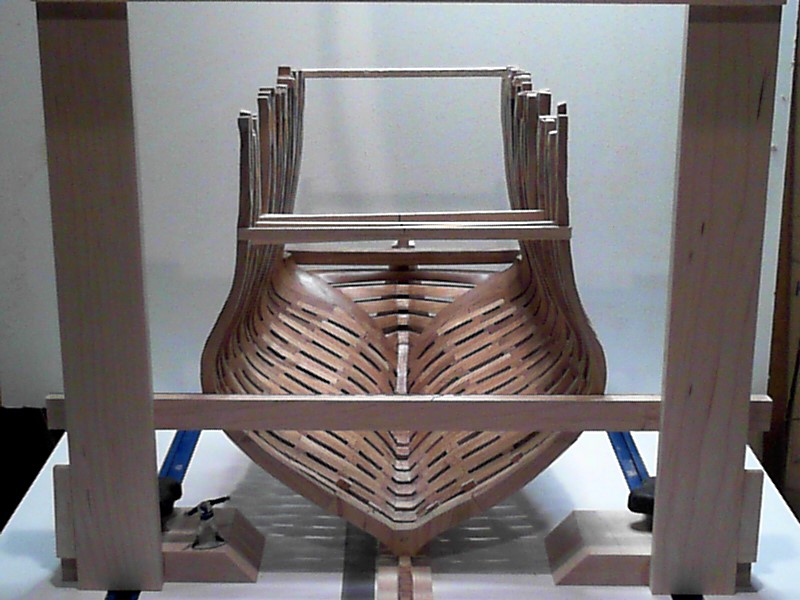
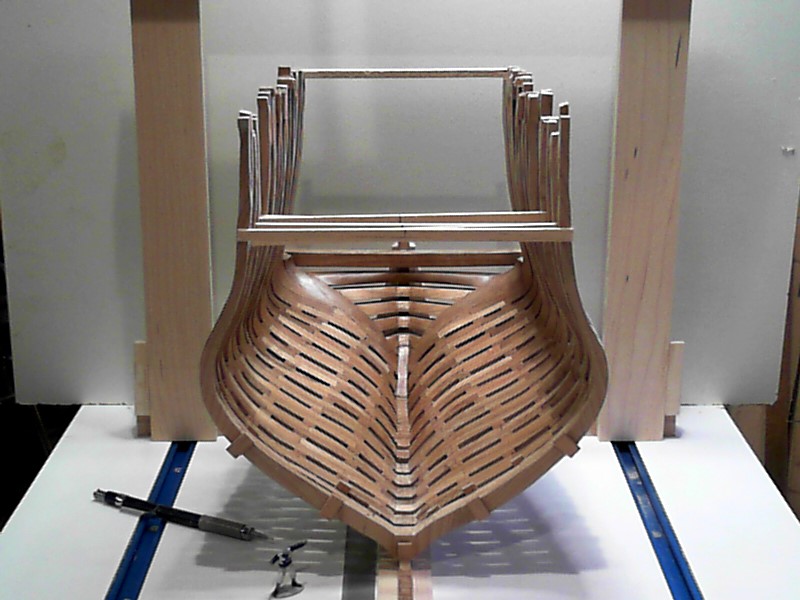
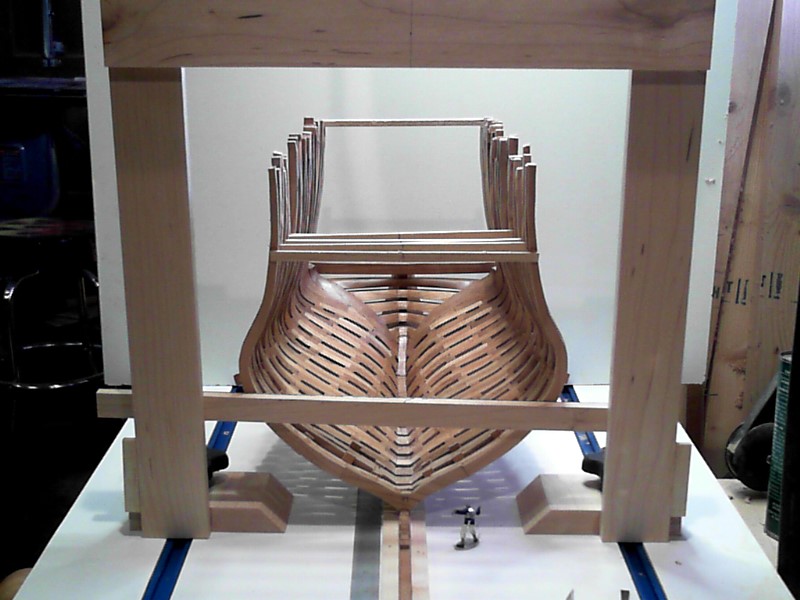
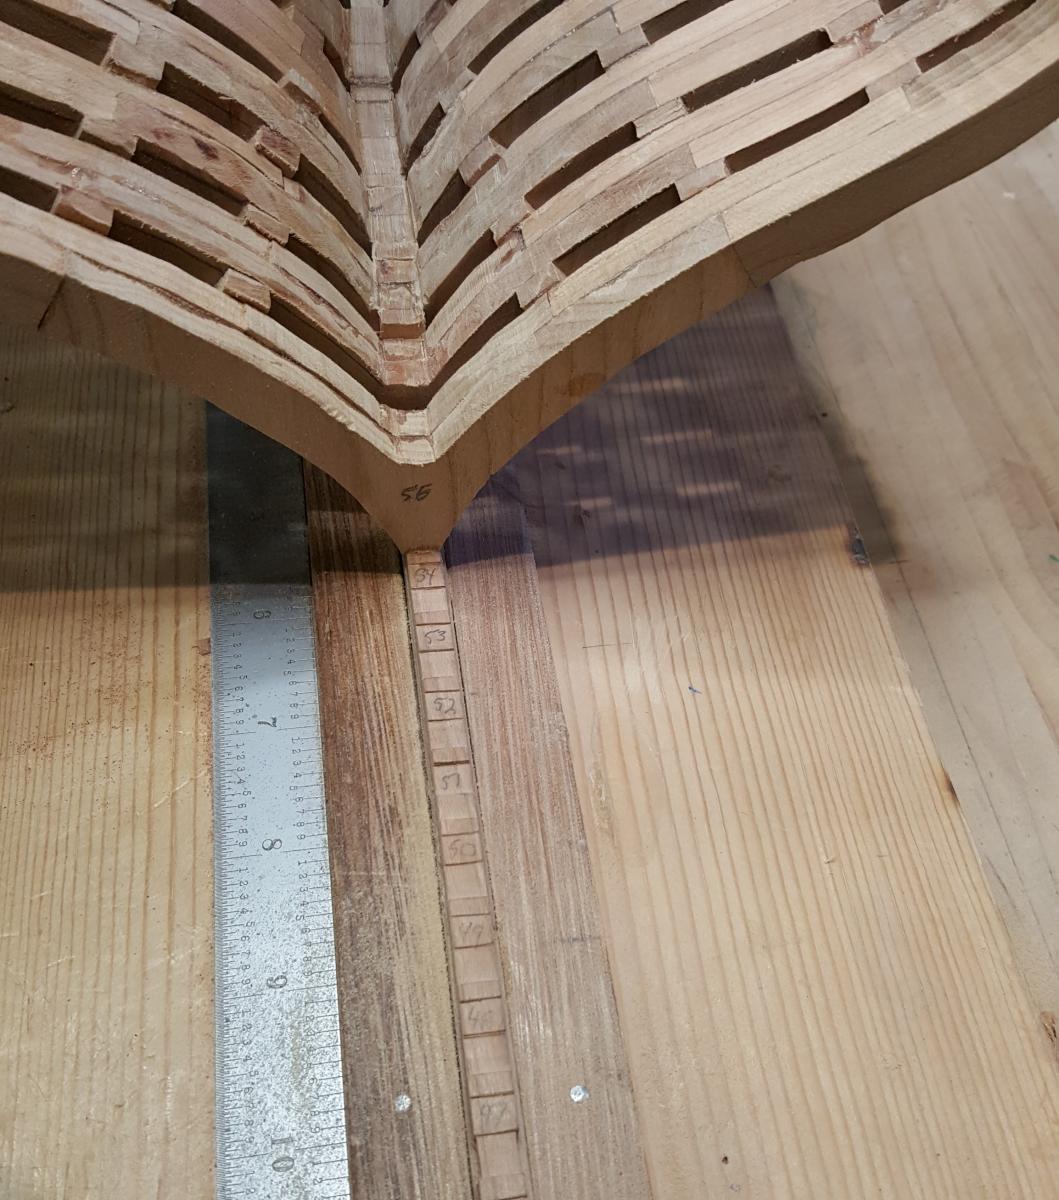
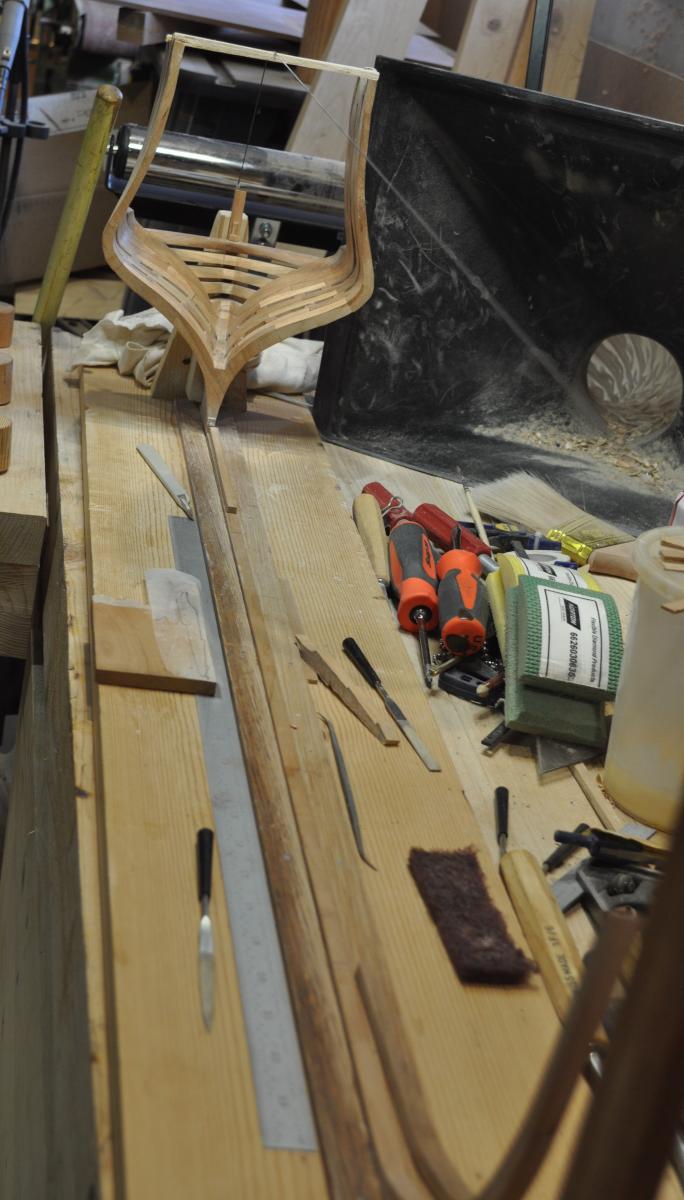
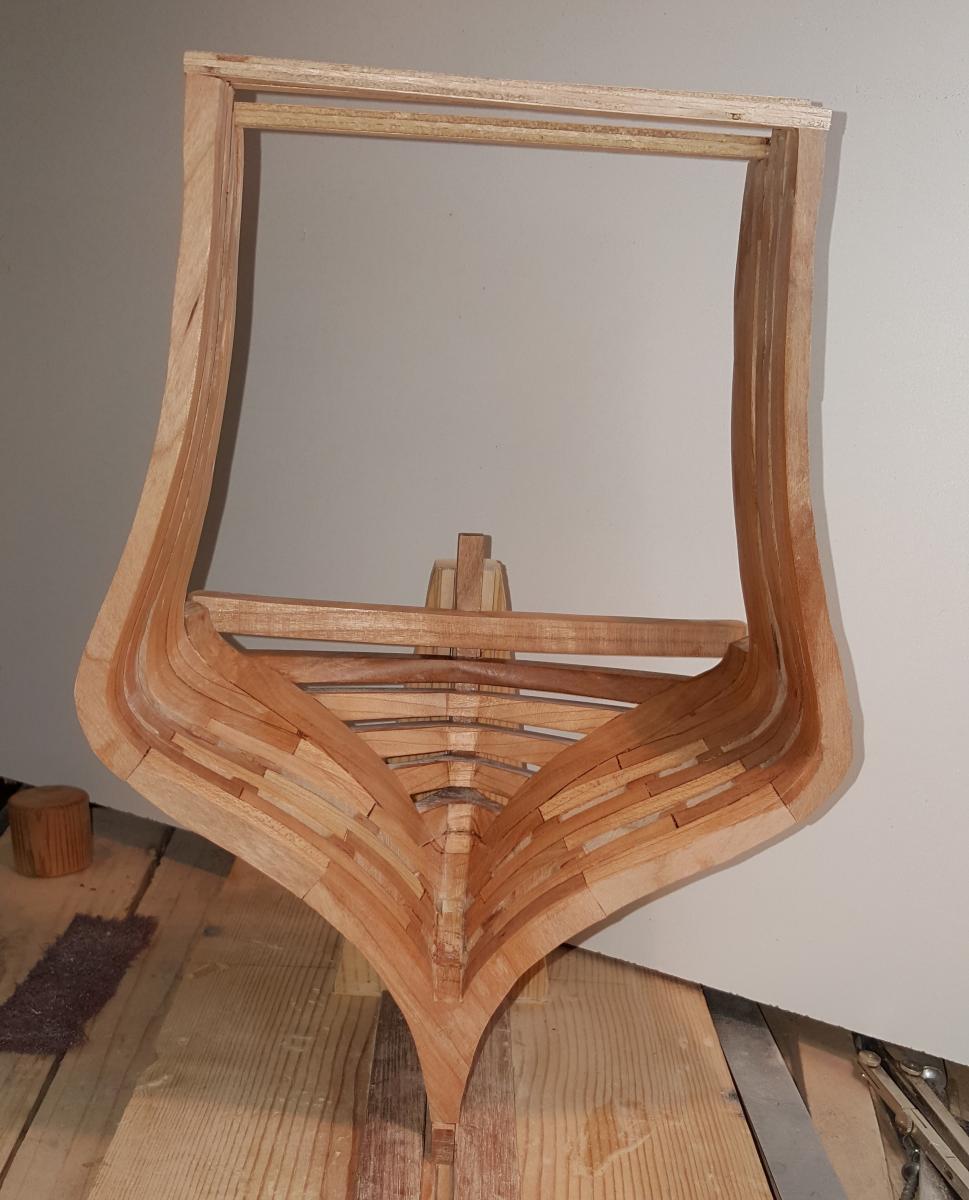
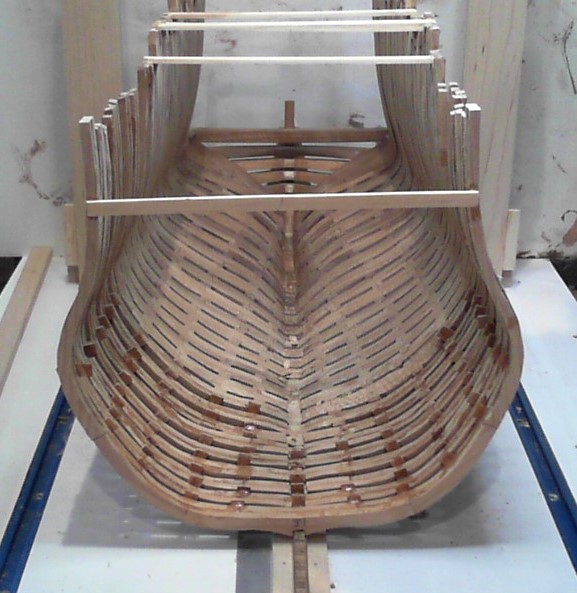
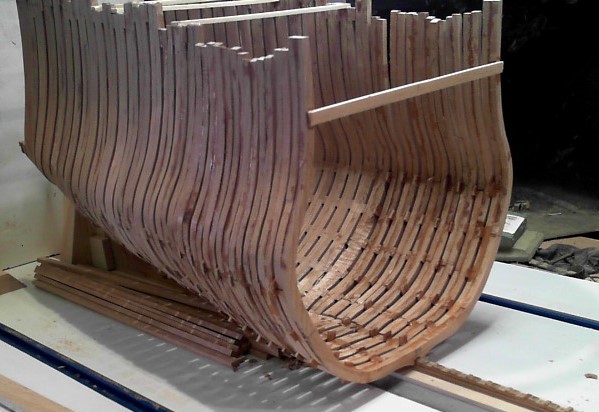
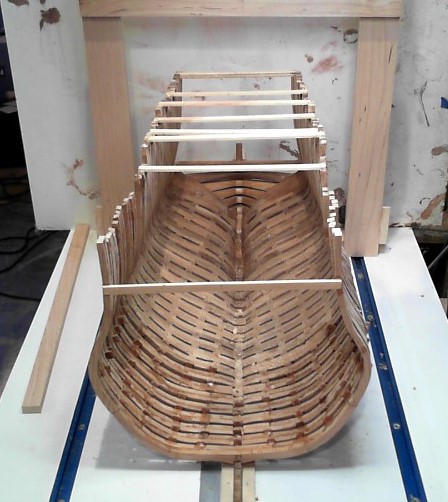
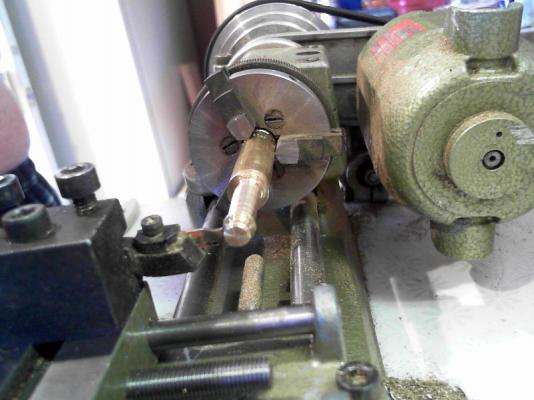
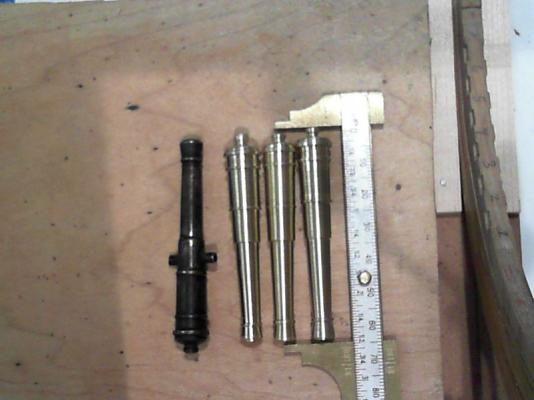
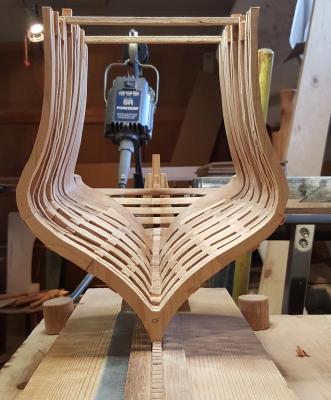
Little update because I haven't posted in a while. I took a break from framing and tried my hand at machining some cannon barrels. I turned out 5 so far before returning back to the task of framing. So, the hull is roughly halfway framed, still needs the stern framing yet. I am going to move on to the bow and begin framing that in the coming weeks.
-
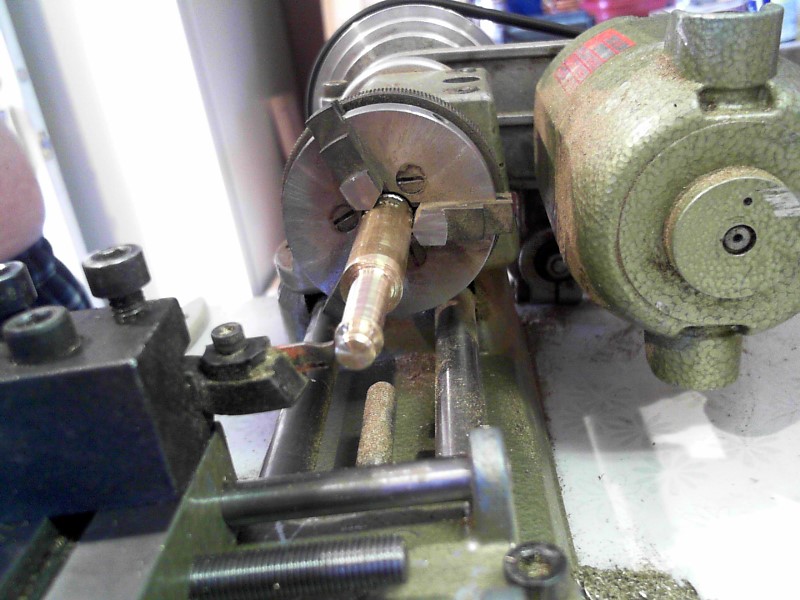
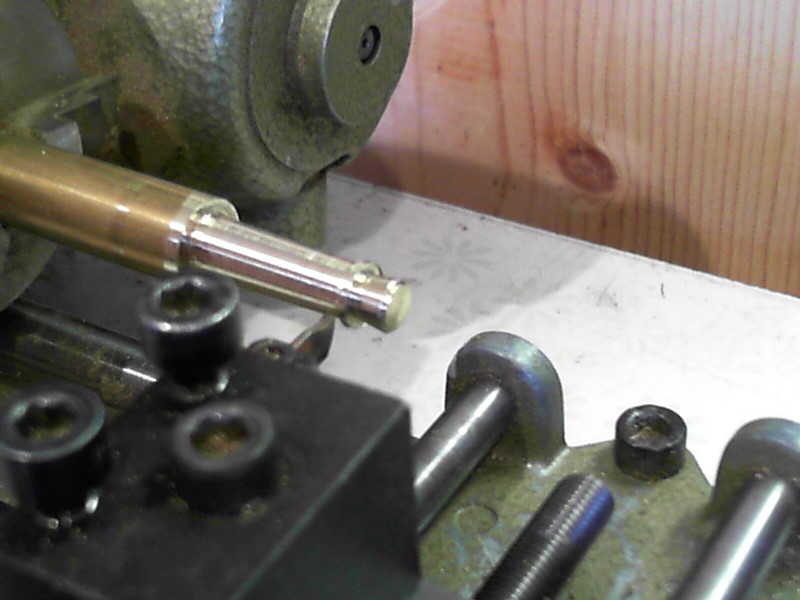
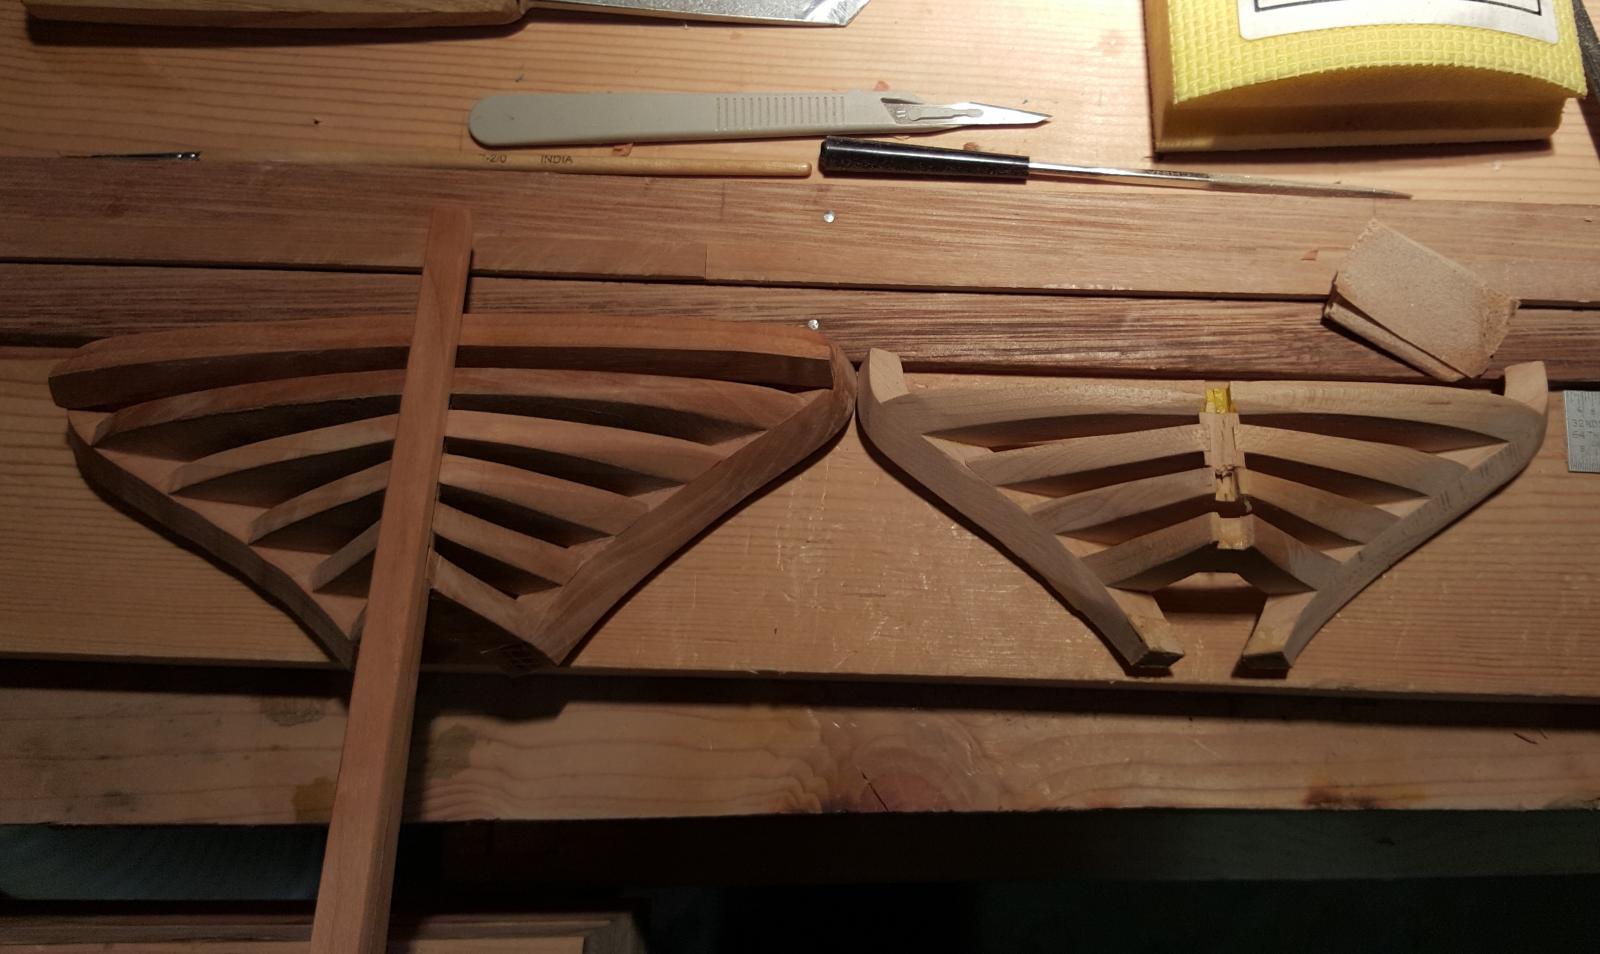
So far I have machined four barrels with the fifth still in the lathe. I did drill the trunion on one barrel and darken it first with Liver of Sulfur. The Liver of sulfur solution didn't seem to color the surface any. I had much better results with some bits of copper tubing with that. I ultimately went back and used some of my "Blacken It" solution on it. So that is kind of my master barrel. It is actually the third barrel I made. The first ended up being oversized diameter wise. The second went much better until I was almost done with it when it came loose in the chuck and jammed against the slide and bent the barrel. Little bit of sequencing issue there. So, chock two barrels up to a learning curve. Now that I have a rudimentary idea of what I'm doing I'm thinking about doing a little video tutorial on how to machine cannon barrels on a lathe. What do you guys think???
-
Yes. I begun this project by pretty much drawing, cutting, and assembling each frame before proceeding on to the next. That's kinda really slow I suppose, though it does make for many update photos. I've moved to drawing, cutting and assembling groups of frames before attaching them to the hull. I find myself getting the absurd notion that I must build faster to provide more updates. I have to remind myself I don't need to do that so I'll probably skip around a little.
-
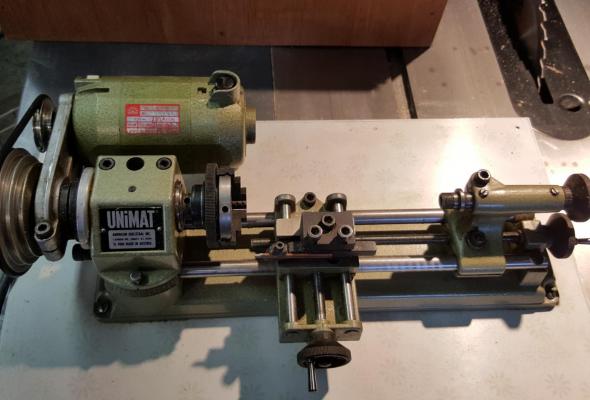
The framing continues, though I took a little break from working on the hull to play with the little Unimat lathe a bit. I gave turning some cannon barrels a go.


-
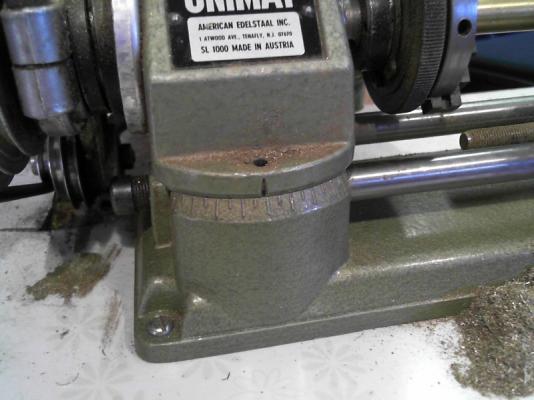
So many build logs to peruse, I have neglected to really update my own log. Thank You all for the comments. I promise I will utilize Swiss Pear on a subsequent build. I haven't even gotten the framing done on the Richard yet and already I'm thinking of what I would like to model next. Being a Navy guy I do have a desired plan of action concerning the ships I would like to build and add to my collection. The first of which was the ship in which I was stationed aboard - U.S.S. Jarrett FFG-33. That model is a 1/350th scale plastic model. I have always intended to build a much larger version of her. I would like to remain in the 1/48 scale range which would make that model about 9.5 feet long. We'll see about that one though as I have to negotiate berthing space with the admiral for that. In keeping with the U.S. Navy theme I should of course add the U.S. Navy's first frigate. So I am leaning towards a USS Constitution build as my next project. At this point I am just gathering research data here and there. I will do that one out of Swiss Pear. First back to the Bonhomme Richard. I am still cutting out frame pieces. Lots of frame pieces I. I should have probably added in my previous post a note concerning my use of Tung oil. Ed is very much right about holding off on applying it until your sure that all gluing has been completed as the glue will not adhere to it. I went ahead and applied it to get a better idea of what the grain would look like. Since the inside of the hull hadn't been sanded yet I knew anything I applied would eventually get removed. Also, I use a product called Formsby's Tung oil finish, some of you may be familiar with it as it is a common furniture finish. What's not so commonly known is that it isn't really Tung oil, It really a wipe on varnish. It also doesn't penetrate the wood like a true oil rather it sits on the surface. Knowing that I would be sanding the interior yet and removing what I had applied I 'm fairly confident I won't be running into any glue adhesion problems. So, far I have used the Unimat to make some example's of Ed's clamps. I'm pretty happy with it. I have purchased some spare belts for it and am currently eyeing a compound cross slide for it to make cutting tapers on cannons a little easier. So far I suppose my only gripe with it would be that the motor does seem to run a bit on the hot side. The motor probably could use a bit of a freshening of the brushes and bearings. Still curiously the motor is not vented or finned so I would expect it to run slightly hot.
-
ancre La Salamandre by tadheus - 1:24
JerryGreening replied to tadheus's topic in - Build logs for subjects built 1751 - 1800
Wow!!!! Nice work!!!! -
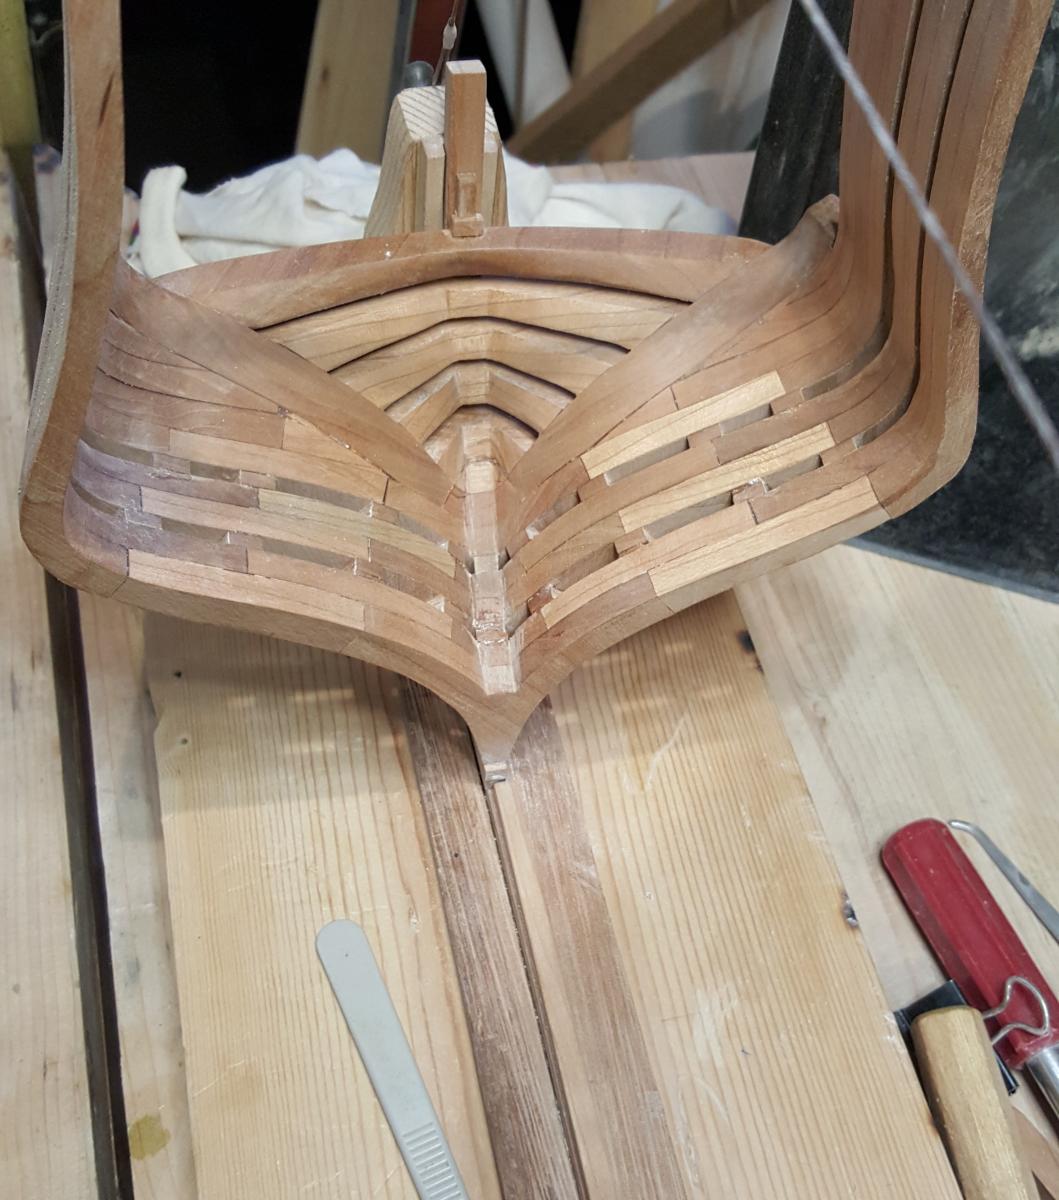
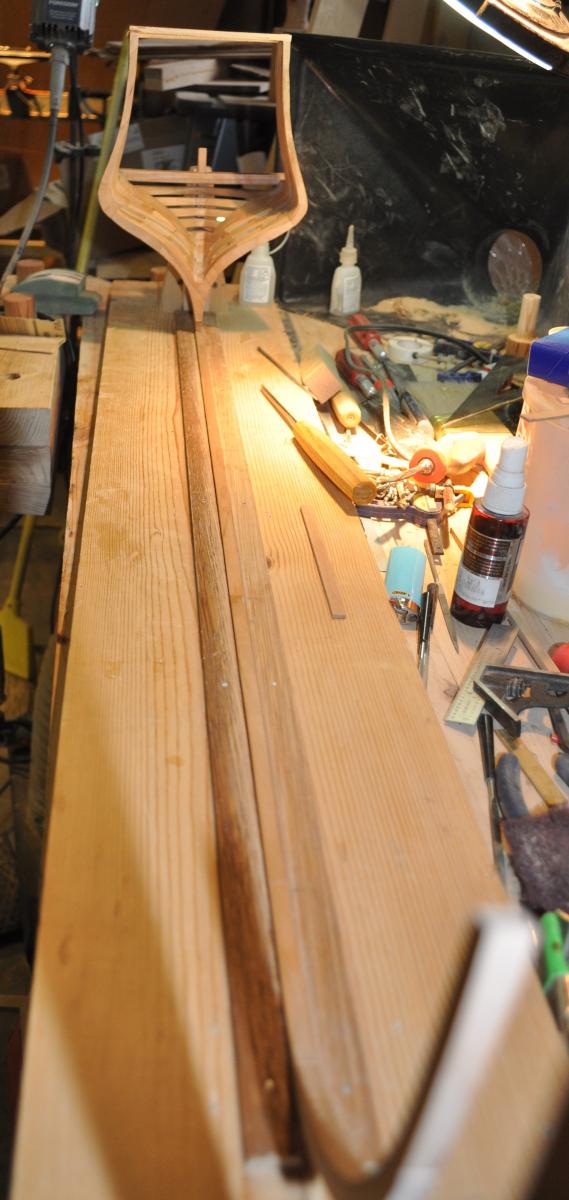
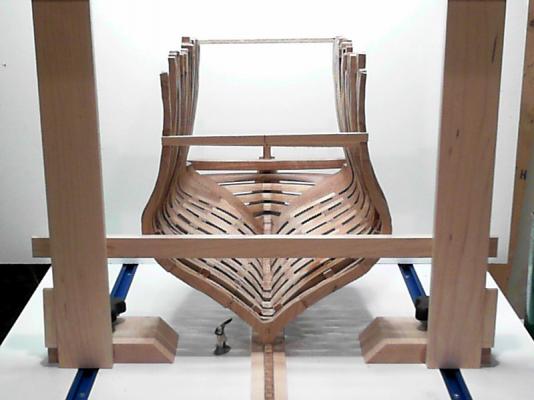
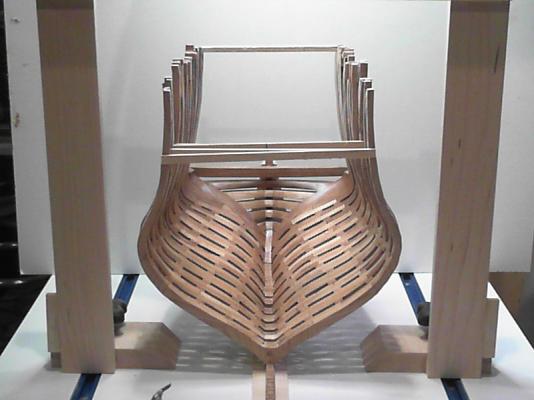
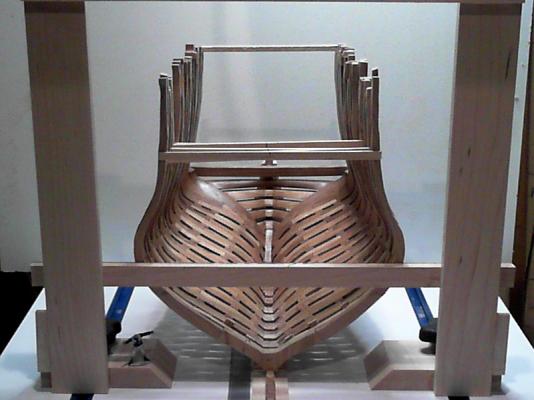
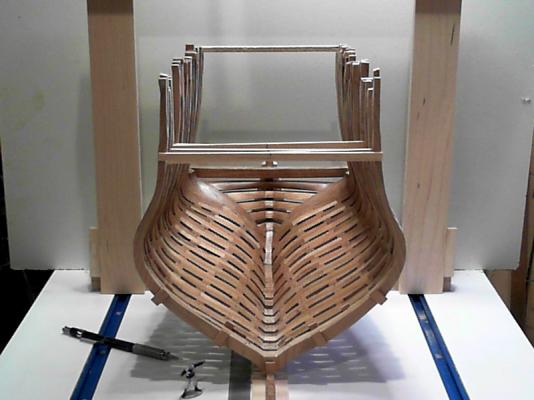
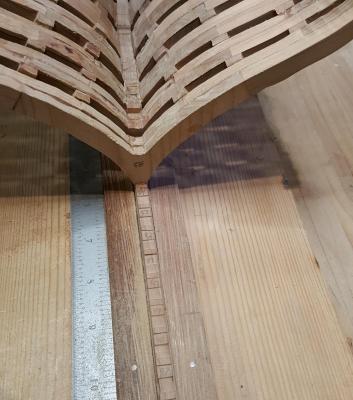
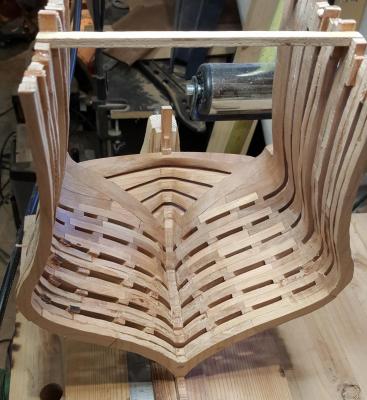
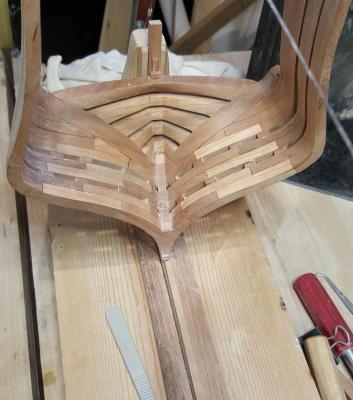
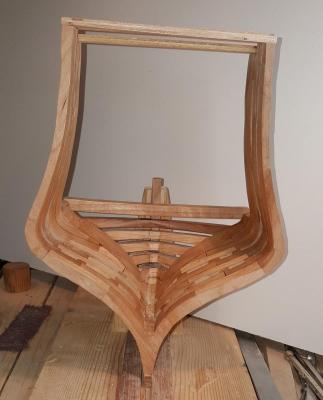
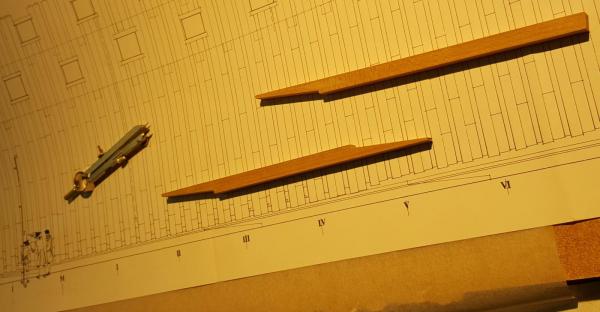
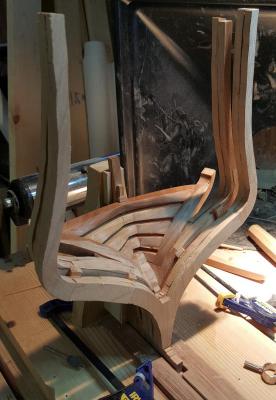
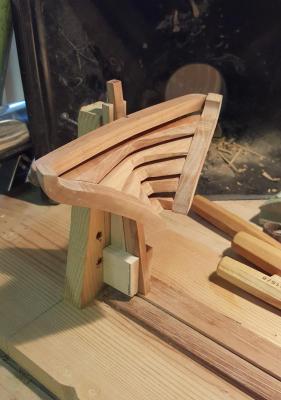
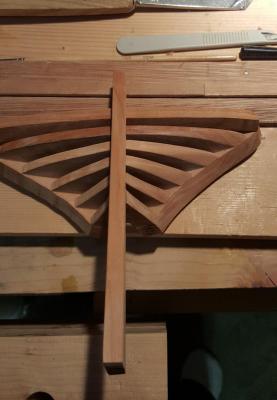
Framing continues. I have installed from frames 49 through 61. I have also begun fairing the frames from the stern forward as I go. I also applied a coat of Tung oil finish to the frames to help show off the grain and also to show the low spots a little better. It's starting to look a little more like a hull.

-
Thank you for the comments guys.
-
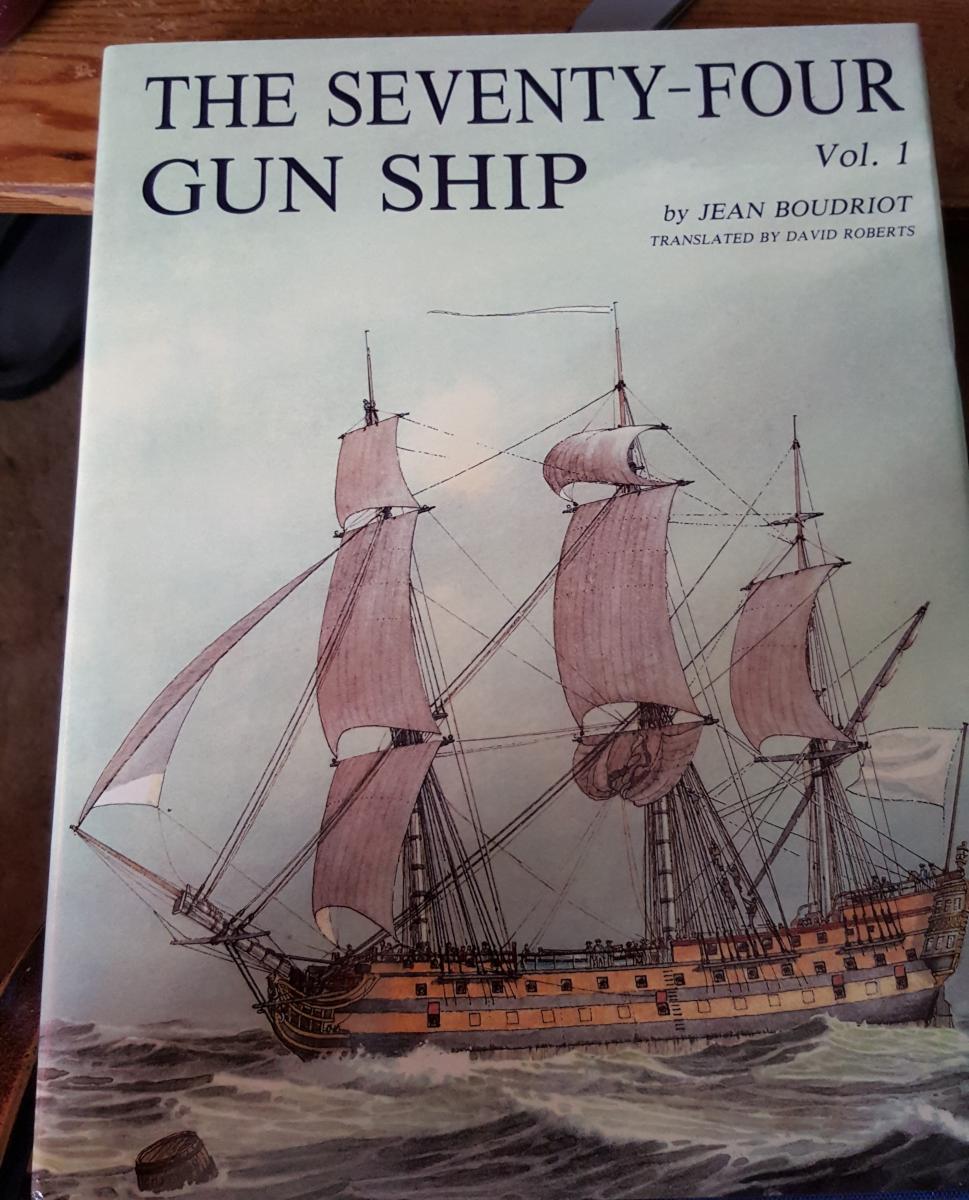
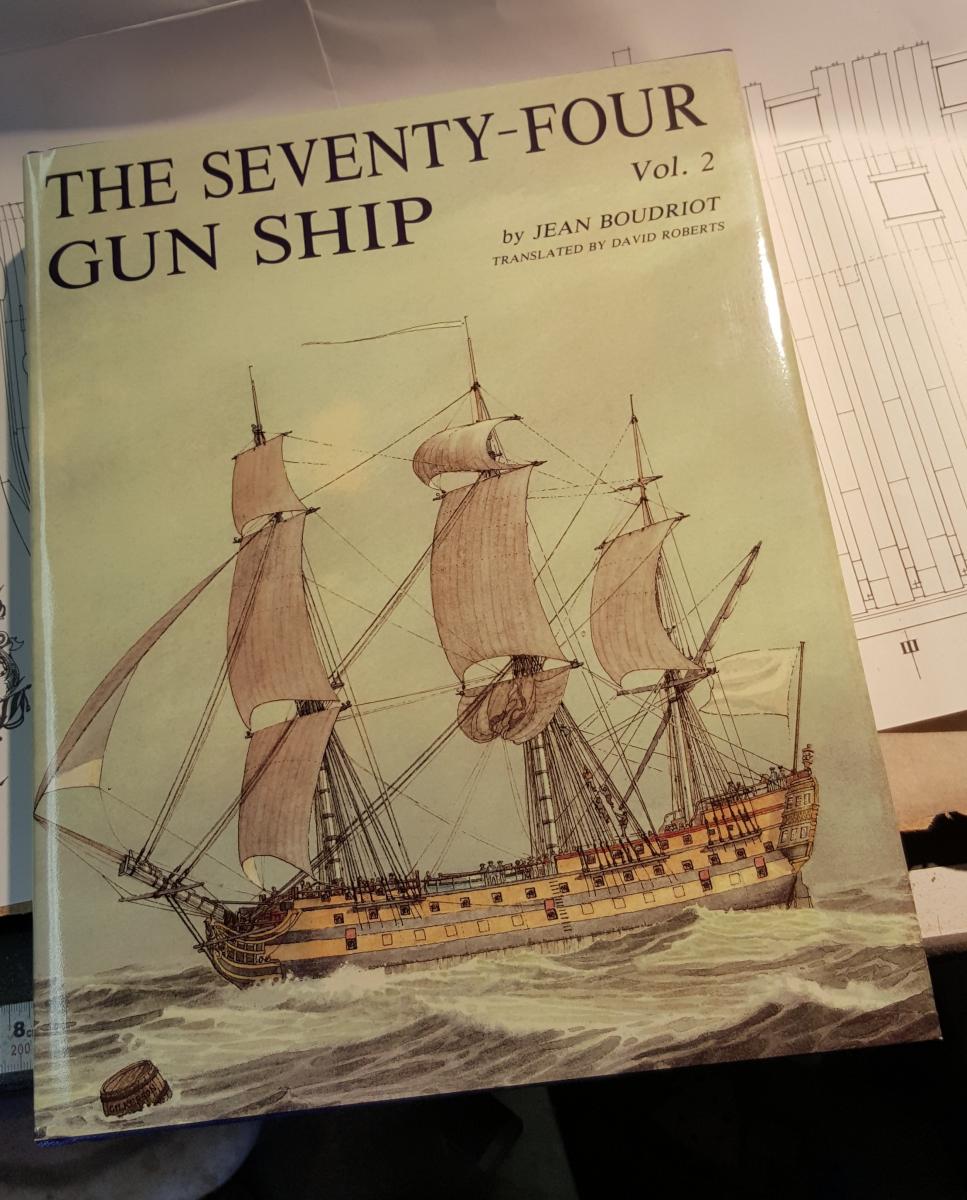
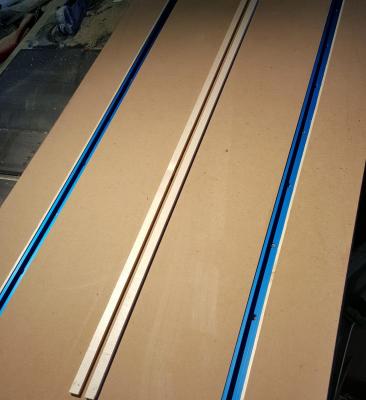
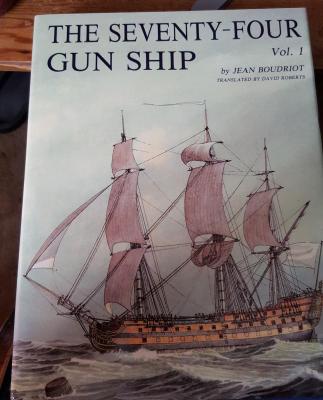
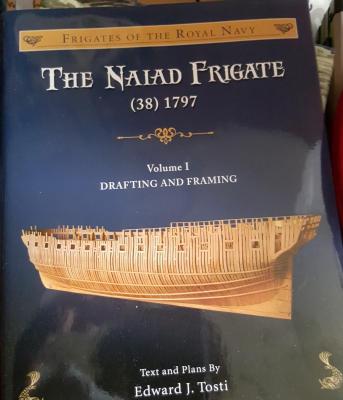
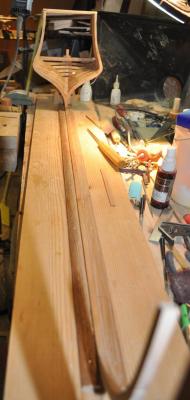
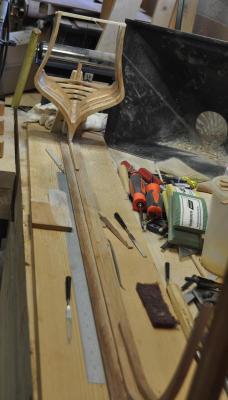
Update. Keel is mostly done, it still needs bolts. I wanted to wait on installing bolts until I got Vol. 1 of the 74 gun ship series. I mistakenly ordered the second volume first. No big deal as I intend to get all four volumes anyway. I did move onto the framing since there aren't many visible bolts there. Ever since I laid eyes on Ed Tosti's Naiad build I have wanted to build those tools, his Ship Ways is superb. So, I ordered his first book on the Naiad build. I have been reading through it for a few days now. Gleaming Ed's little pearls of wisdom from it's pages. Unfortunately, Ed the pages of your book is now covered with sawdust as I spent the day building an Ed Tosti style Ways for the Bonhomme Richard. I sourced my T-track from Rockler woodworking supply. They sell a universal T-track kit that comes with one 4 foot track and a bag of knobs and T-bolts for $31.99, the track alone is $25.00 for a 4 foot section. If I were to buy just the track I would get it from Woodcraft Supply. So, I bought 2 universal kits giving me plenty of bolts and knobs. I still have to build the gantry and probably another height gauge. Each of those will be fabricated from maple since I have a good stock of that in the shop. I also added a Unimat Lathe to the shop. I purchased it on eBay. The first of two boxes came today, luckily it was the lathe itself. I powered it up and played with it a bit. Its used obviously but is still pretty tight throughout. Overall, I am impressed with the quality of this little machine.


-
ancre La Salamandre by tadheus - 1:24
JerryGreening replied to tadheus's topic in - Build logs for subjects built 1751 - 1800
Looking nice tadheus -
So work on the keel continues. Rabbet is cut so onwards we go. Also, new lighting for the shop.


-
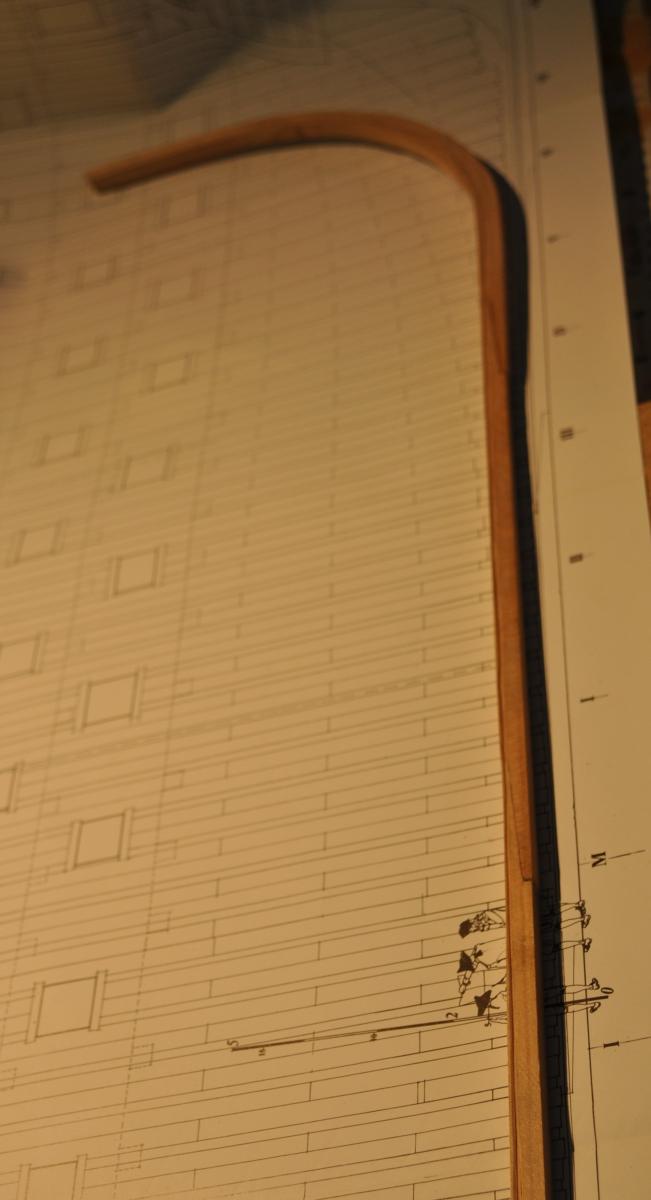
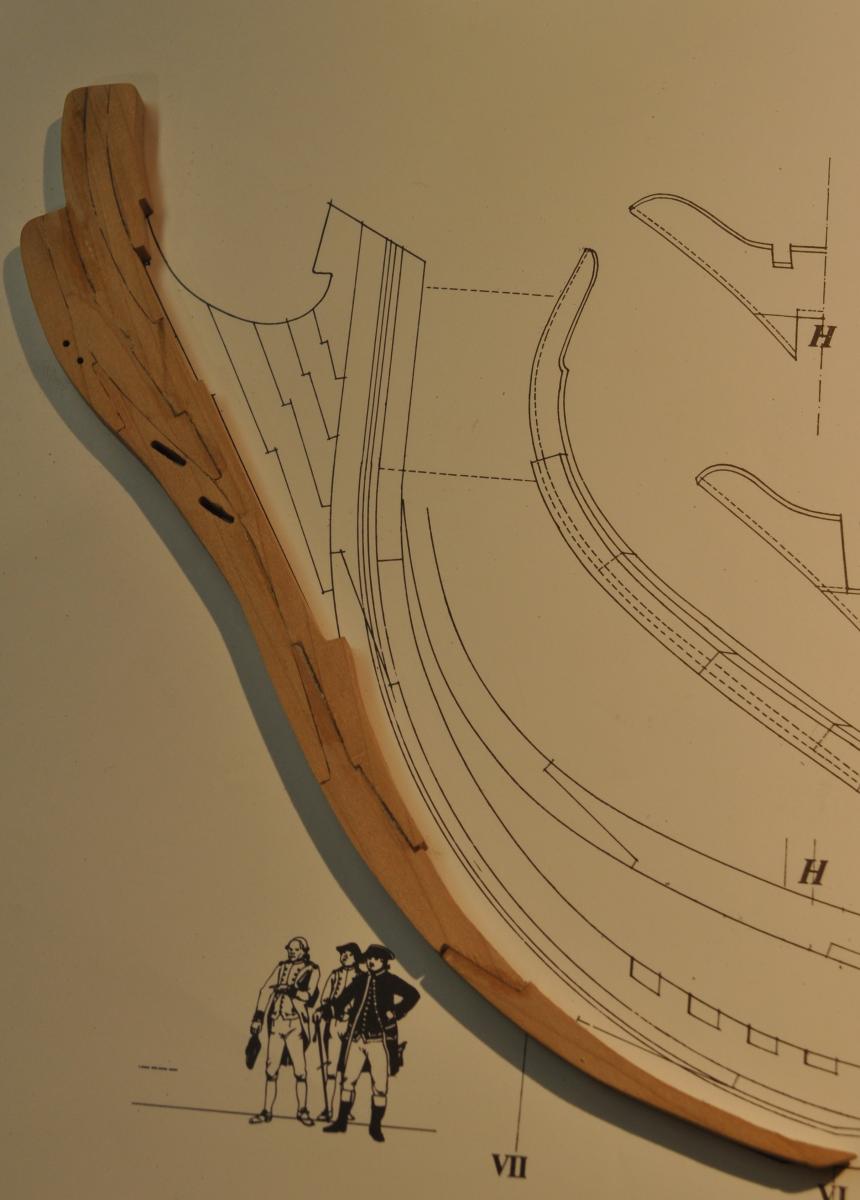
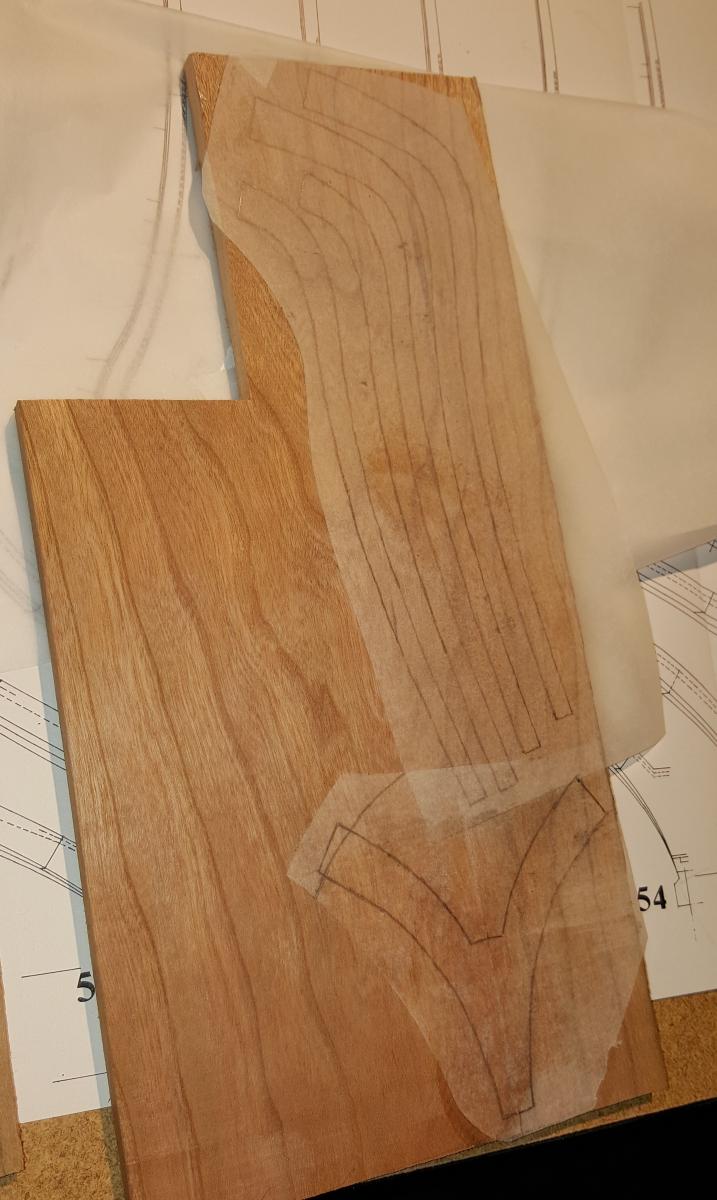
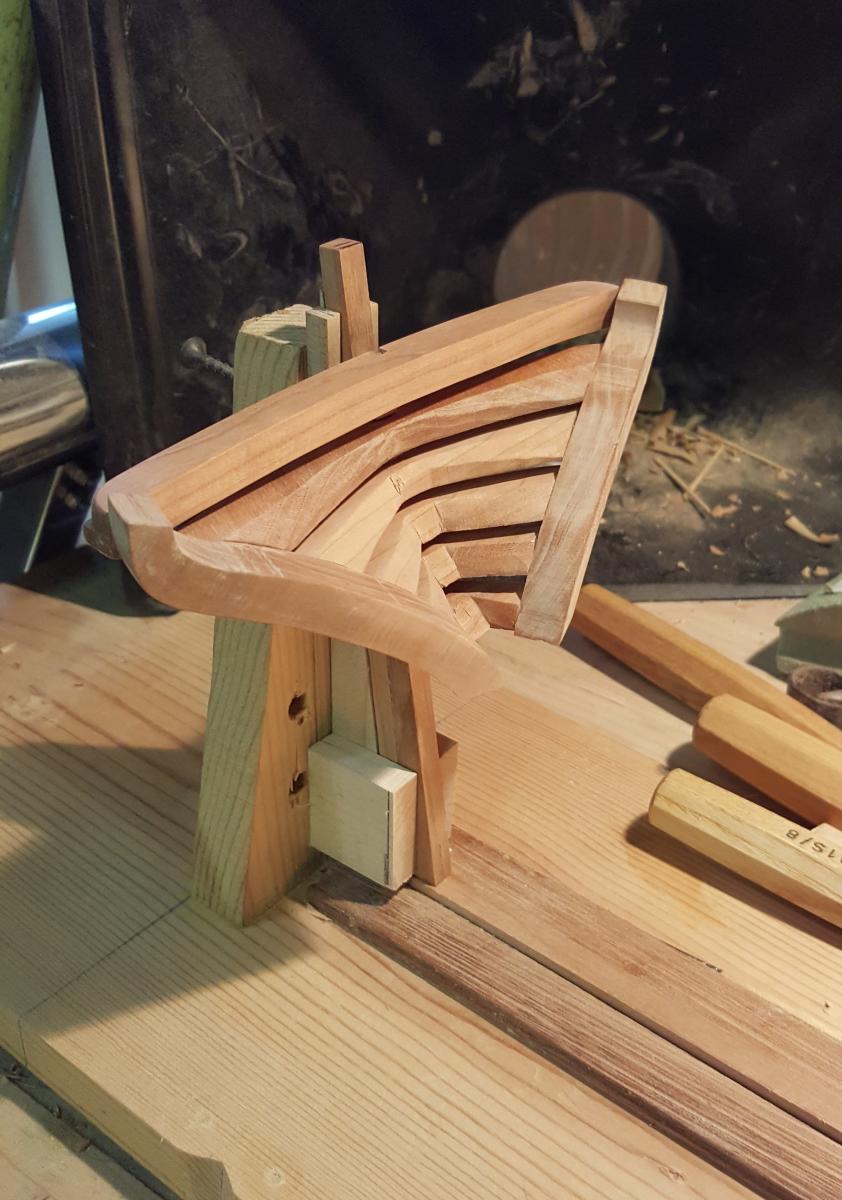
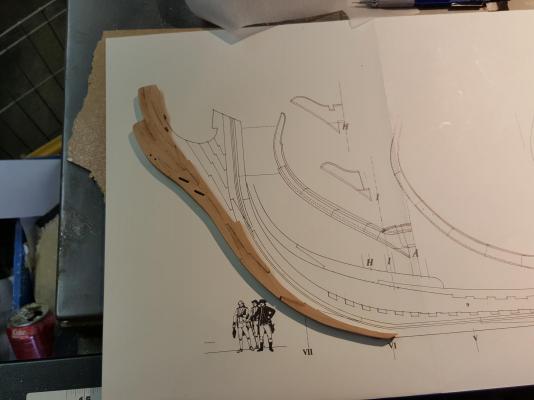
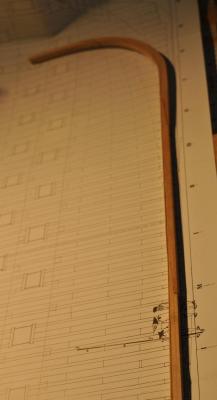
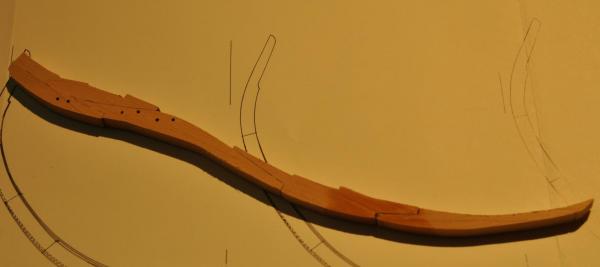
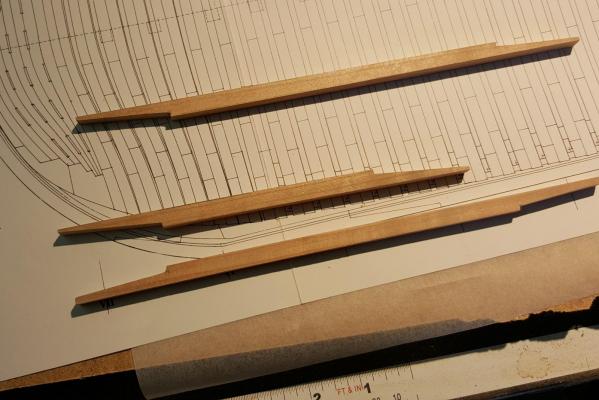
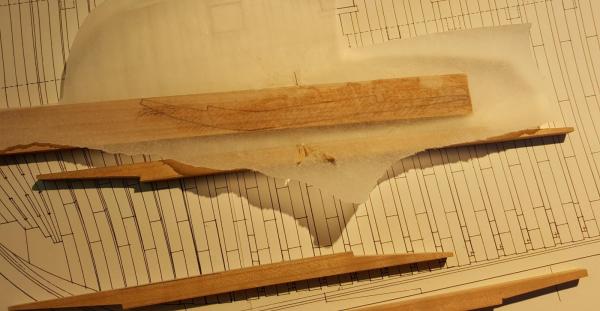
Progress, The stern is coming along nicely. It's pretty close to the stage from version 1. I've started cutting the sternpost and keel. I also cut the rabbit into the sternpost as detailed in the pictures. This was done using a Pfiel 3mm V-chisel. You can see the small cuts I made working the rabbit down to it's final dimension. I have not as of yet cut the rabbit in the keel itself, that will be done once I have all the pieces cut out and glue together. Another word of note for those of us living in the U.S. Upon my return to this project I was pleased to find that ANCRE has redone their website, It is much friendlier as they now have shipping options for the U.S. listed directly in the order process. So, we don't have to email them and wait weeks to hear back. Also, You may or may not know the Ancre publishes a 4 volume set pertaining to the build of the 74 gun ship. This is kinda THEEE authority on French shipbuilding.As with most Ancre products it has been a little difficult to get here in the States. I think I've seen volume 2 priced between $150 and $300 on the used book market. Well, good news!!!!!! Because the dollar is strong against the Euro at the moment and with the new an improved website. I jumped at the opportunity to purchase Vol. 2 of the 74-gun ship series directly from Ancre. It is priced at 103 Euros or about $120 US, Shipping was another 5 Euros. I received my copy this morning 11 days after ordering it. I'm so jazzed right now because I've been wanting this book for 3 years now and beating myself up over the cost of buying it used. Now I have a new copy hot off the press. I will be adding the rest of the volumes shortly to round out the collection.


-
THE 74-GUN SHIP by Jeronimo
JerryGreening replied to Jeronimo's topic in - Build logs for subjects built 1751 - 1800
Beautiful work Karl -
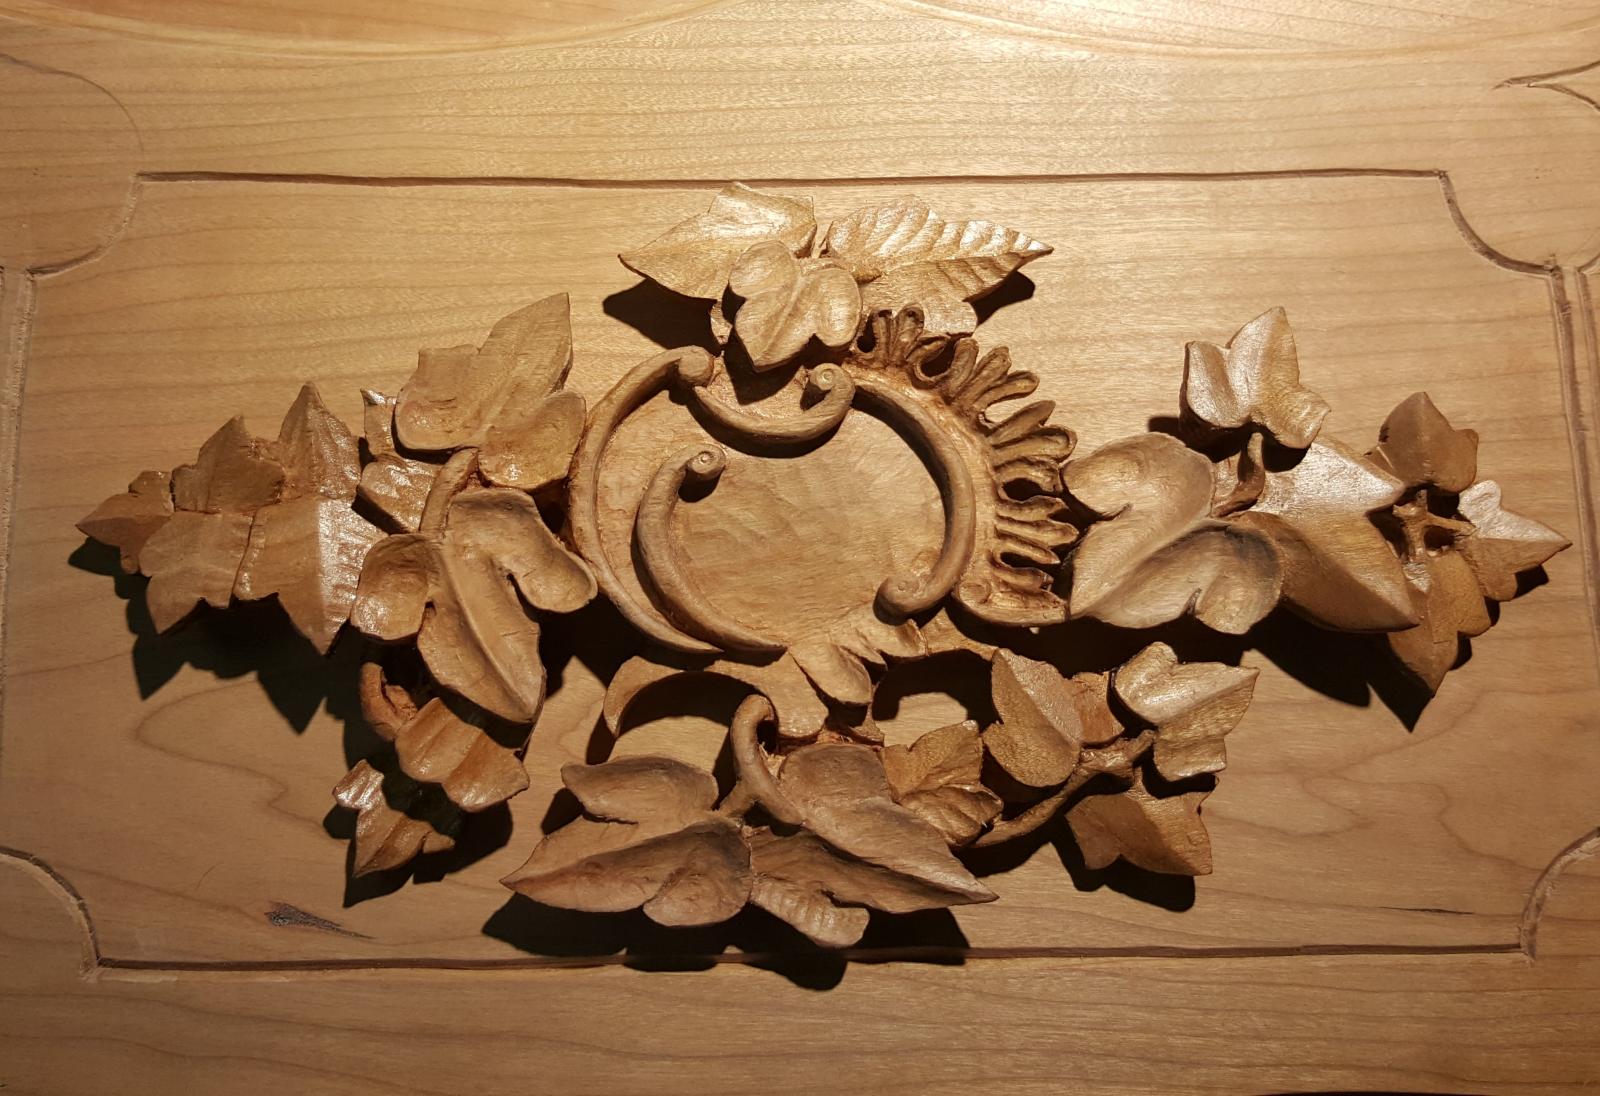
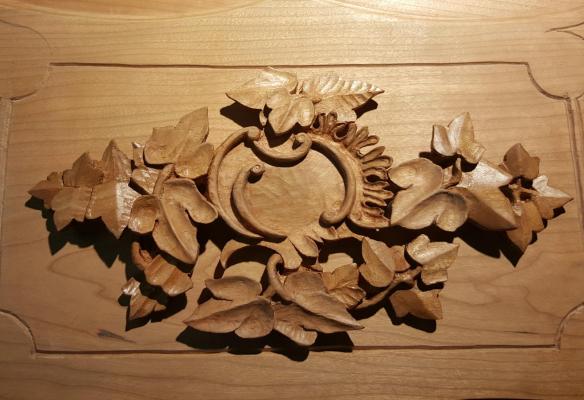
Not only am I using cherry for my Bonhomme Richard build I use cherry for ornamental carving and furniture work. Overall, Cherry shares many characteristics as pear. It is very workable, carves well, it does have a more pronounced grain then pear and requires some sharp tools when working cross grain. The other benefit of cherry or pear is it's cost, at least in my case. Cherry is much less expensive than pear like 10 times less expensive from what I'm finding on the internet. As others pointed out Cherry is darkens when exposed to light. On my build log I posted a picture of a carving I did in cherry some months ago. It started out as a tan color and now has deepened to a nice deep reddish brown, I like it very much. In my opinion it gives the model a more "antique" or old world look. As far a finishing goes, the smoother you get cherry the shinier it gets. Carving it with sharp tools results in a buffed shiny surface almost a plastic look. Sanding and buffing with steel wool results in an extremely smooth shiny surface with a lot of depth. From there I finish nearly all my cherry projects with Tung oil. Actually, Formsbsy's Tung Oil, which is more of a varnish.
-
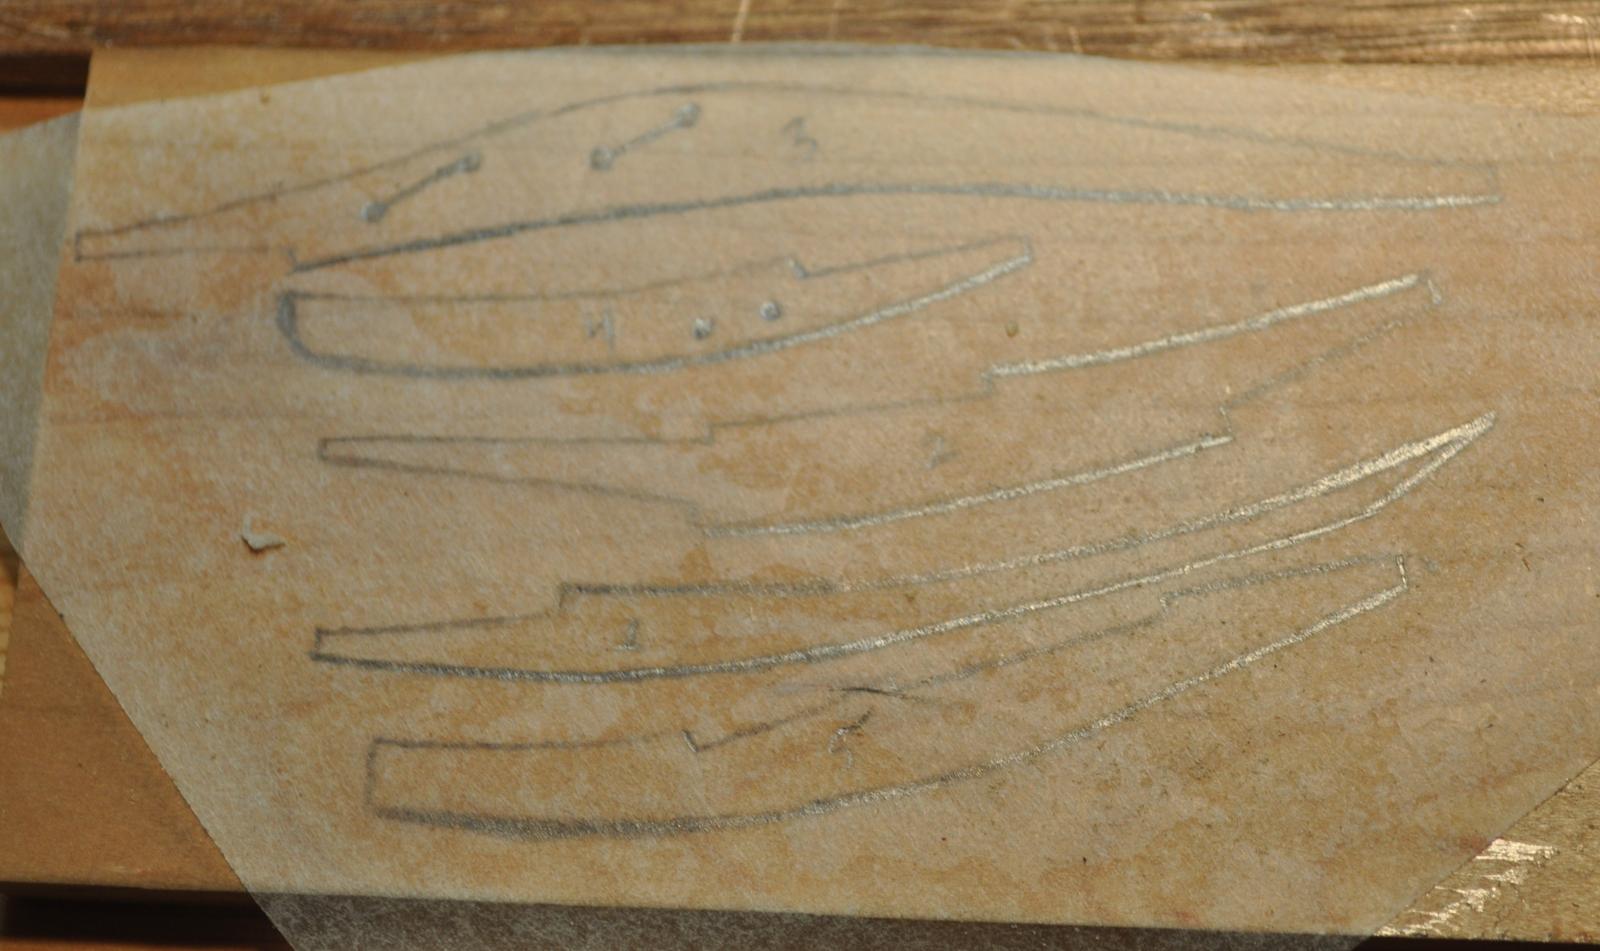
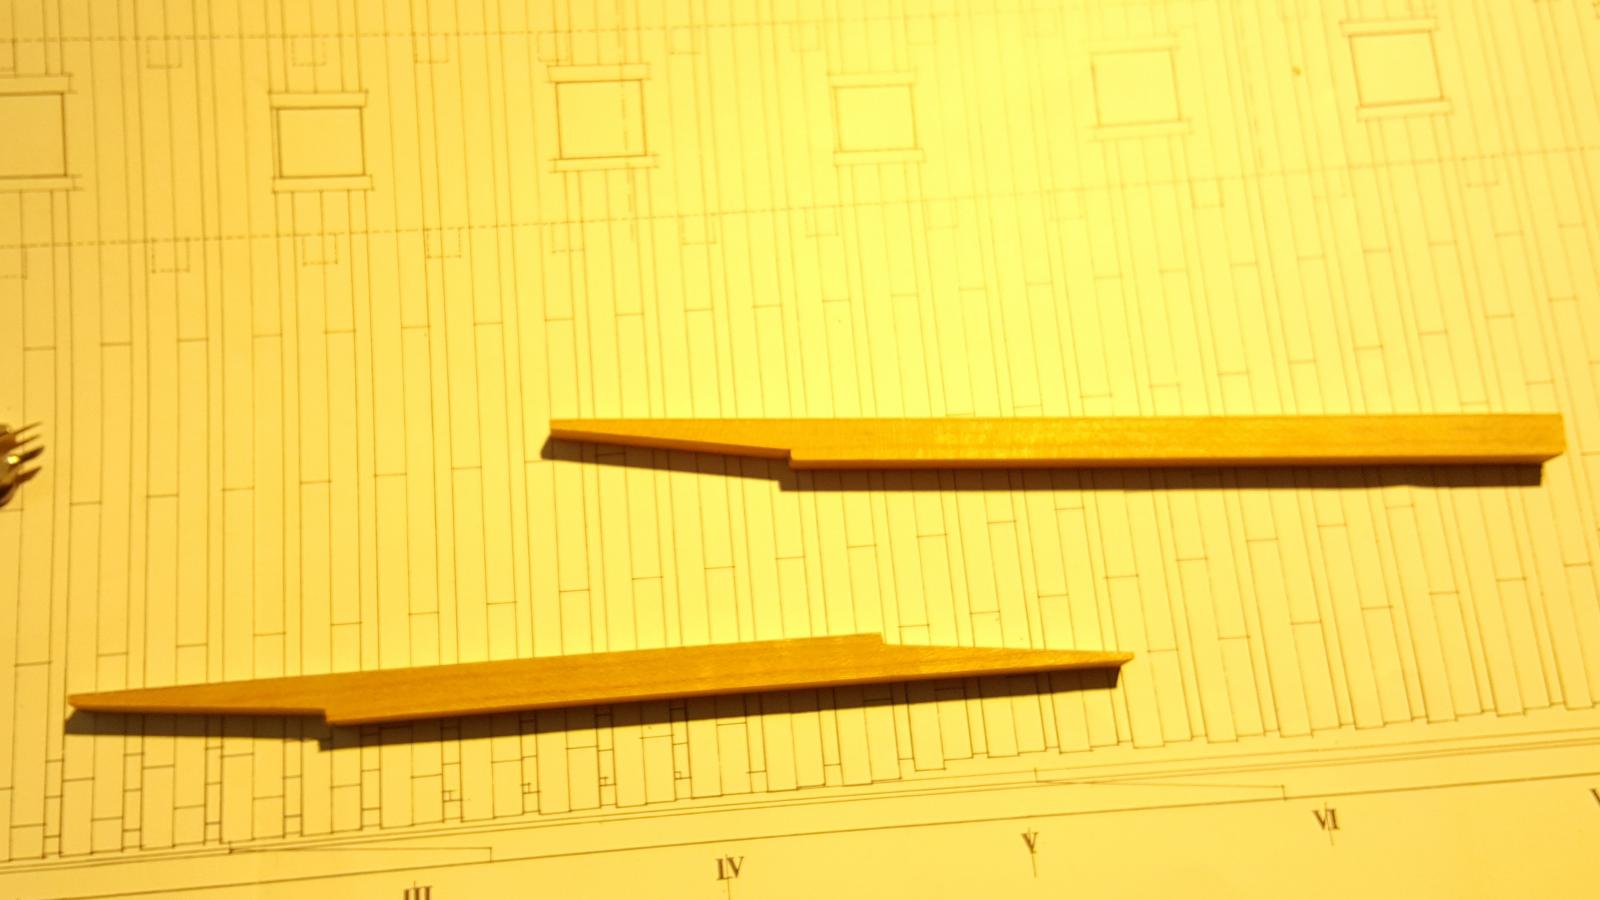
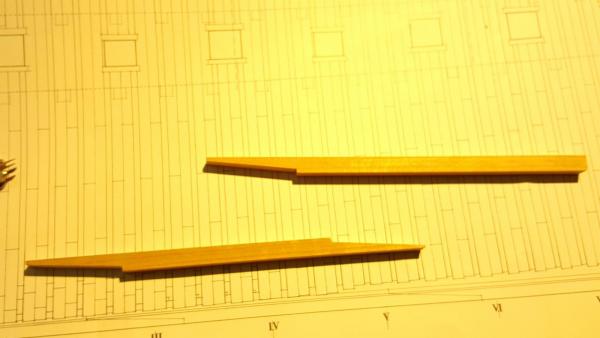
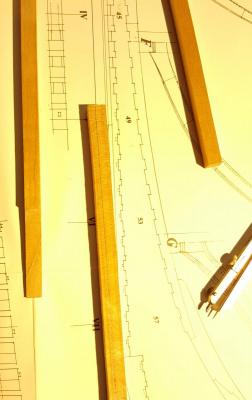
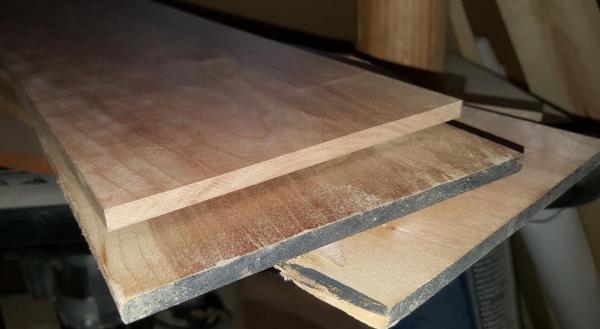
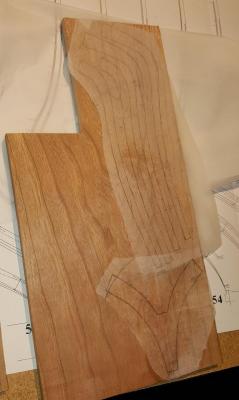
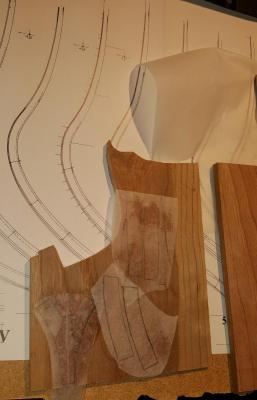
Cherry boards - resawn and planed down to roughly 1/4" thick. My first build went awry when I scanned my drawings and then printed them out to use as templates. I did spend some time checking for scanner distortion and initially everything checked out. However, going back over the maple version I could see where things were slightly over size. So, in Version 2 I transferred the required profiles directly to the wood using drafting vellum and spray adhesive. I cut out each piece on my scroll saw leaving a slightly over size edge for later fairing.

-
Edt - spent the last few day catching up on your build. Once again you have set the benchmark for modeling and build logs. Well done. beautiful simply beautiful
- 3,596 replies
-
- 4
-

-
- young america
- clipper
- (and 1 more)
-
druxey - That's a great argument. But change over to cherry instead of maple and call it 2c for the cherry. Pear seems to be more like 6c to 8c plus shipping cost. Considering how similar pear and cherry are I would probably lean to the cherry because I get it right down the street. That's all I'm saying. We're aren't really talking a huge sum of money either way....LOL I don't have another project in mind anyway at this point, but that's what I said after the last one.
-
wyzwyk - A large part of the reason why I choose to undertake my humidor project is because I am really not that good at carving. So realizing that at a certain point in the future I would need those skills to finish the ornamentation on the Richard. I took up that project in order to start building those skills. As far as whether I ever use Swiss pear. I would have to answer that unless I stumble across a considerable amount of Swiss pearwood I seriously doubt I'd ever use it. Not because it is in any way inferior to anything else. On the contrary it is because Cherry and Pear have very similar work characteristics. It has to do with the availability of the wood in my area. Aside from the normal spruce, fir's, and pines here in Washington state. We have considerable amounts of Maple, Cherry, and Apple trees. My reason for initially doing the model in Maple was purely an economic one. I can get 2" x 6" by 72" planks of Maple for around $20 a board. Well, I also found a lumber store that stocks Cherry lumber for not much more than the Maple. To get Apple wood I need to go over the mountains a bit to the apple growing region here in Washington as it is not stocked as a lumber here in the Seattle area. With Pear I would have to mail order it and it would cost a lot more than cherry for the same amount. I can't see spending the extra money for a wood that is so similar nature to what I can get locally at half the price. But who knows, that's how I see it now. That might change in the future.
-
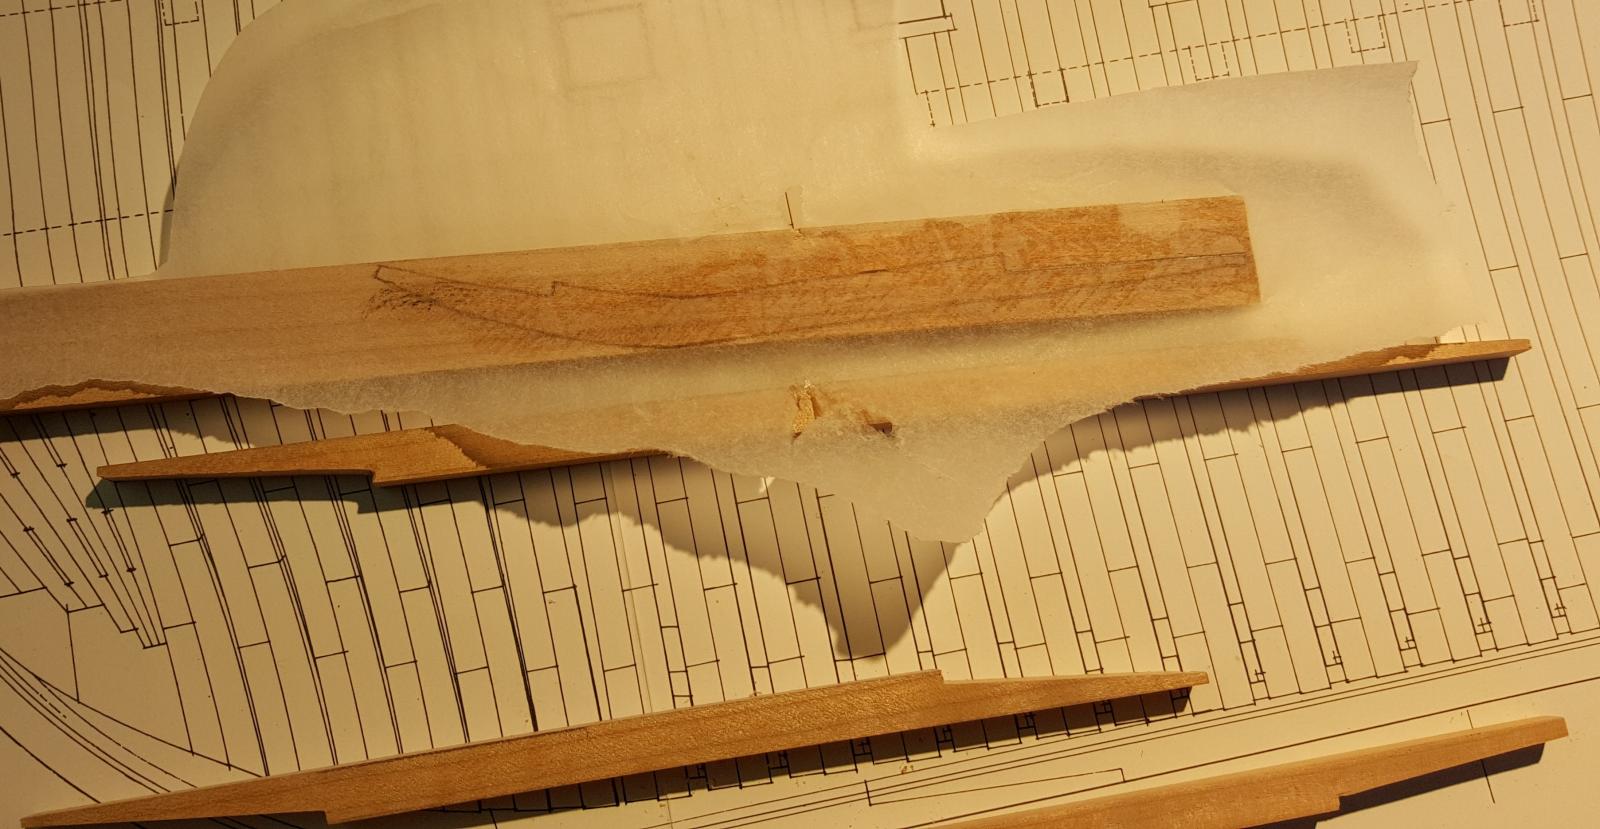
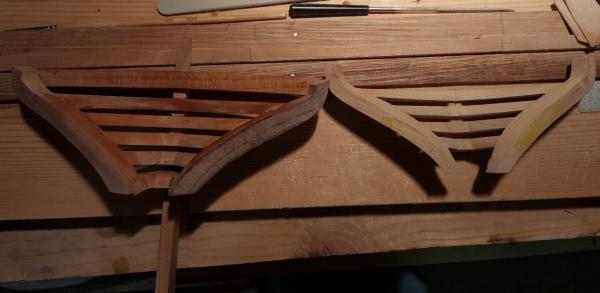
Ok I'll post a few teaser pics. So the first one doesn't involve shipbuilding at all. It is a carving that I did late last year. The carving is done in cherry. In doing this carving I found I really liked how it carved and really liked the figure and finish of the wood. The carving is on the lid of a humidor that is sitting on my workbench. It's pretty much what convinced me that I'd rather have such a fine model in Cherry rather than Maple. The rest of the pictures are of the stern. I am doing some rough shaping and contouring on these pieces. I have included a couple pictures with the original maple stern alongside the version 2 Cherry stern. Hopefully you can get an idea of the difference in wood figure from these. I'll have to work better lighting for photos in the future.

-
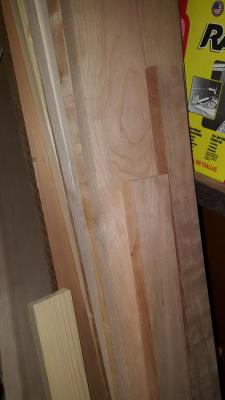
Hello Everyone, Wow, it's a little over 2 years since I've posted anything. So, here's a little update. One of my other life long hobbies is R/C aircraft - large R/C aircraft. Back in April of 2013 my dad approached me with the question of whether I could build a replica of the TBM Avenger torpedo bomber in which my grandfather was a turret gunner aboard during WWII. I informed him that it was indeed possible and that yes I could do it. My Grandfather just turned 90 years old last Dec. Due to his age such a project required immediate attention as I wanted to get it finished before he passed on - we just don't know how long we have. So, that meant putting the Richard on the shelf and shifting focus to the Avenger. I am happy to report that last summer we fired the engine up and taxied the plane around my Granddads backyard. There is still a lot of work to do on it yet, painting for one - which due to the size of the model (little over 9 foot wingspan) must be done outside. Basically, I need to wait until spring when it stops raining here in Washington State. So, I am taking a little break from the Avenger for a couple months. More importantly, I started the Bonhomme Richard as a long term project. Back when I started it I really had no place to put the model once it started reaching finished dimensions. My home was too small to house a 4 or 5 foot long model ship. So, I am happy to report that as of November of last year I purchased a house large enough to house the Bonhomme Richard in its yet to be built case once completed. A fringe benefit to the larger house is that I now have a larger shop. I went from a small table in a single car garage to an entire two car garage. This has allowed me to expand my collection of shop tools. Things like a new 48" lathe, 14" bandsaw, planer, and one heck of a nice delta table saw. I had one of those little Craftsman table saws and one day I was trying to rip a full size sheet of plywood for some storage cabinets in the garage. I got tired of chasing the table saw across the shop floor and down the driveway. Plus the thing is insanely loud. Since I was on a mission to improve my tool inventory I also took the opportunity to improve my wood carving tools. I years ago I had looked into quality woodcarving tools and choked at the cost of them, as a result I turned to low quality Chinese wood carving tools from Harbor Freight - I hated them. They took hours of work to put and edge on them only to have it lost 5 minutes into carving. Advice DON"T BUY THAT JUNK. I finally bit the bullet and started buying Pfeil gouges and I now have about 30 different ones. I am still simply in disbelief at the quality of these gouges They take a razor sharp edge and they hold for a long time cutting through oak, maple and cherry. When they do dull all they really require is a couple passes on a strope to bring back that razor edge. I'm not kidding about how sharp these are either, they are like scalpel sharp. So do yourself a favor and don't skimp on tools. Now for a bit of bad news - well good news then bad news, and then good news. Last weekend I finally located the box in which I had packed away the Monography for the Bonhomme Richard. Finding it got me eager to jump back in a work on her some more. The hull had been sitting on a shelf in my office in the state I left it in two years ago. I brought it in to shop and laid out some of the plans to figure out where I left off and that's when I noticed problems. Alignments where off due to certain parts getting cut wrong. I began to realize that when I started this project I was making little errors here and there and trying to compensate for them as I continued one. I spent the better part of last Saturday going over the hull rechecking everything thinking that I could pull the bad parts off and remake them and drive on. Honestly, I could have done that but sometime last Sunday I decided to scrap the entire hull and start over only this time instead of using maple I would switch to cherry. In addition to the stock of maple I have in my shop I acquired roughly 500 board feet of cherry that I used to make some cabinets inside the house. I really like the figure and character of the cherry wood and decided it would look nicer than the maple on the model. So, I am in the process of rebuilding the model in Cherry at this time. I'm not going to post pictures just yet because it would really be just a rehash of the ones I've already posted just with a different wood. Once I get caught up to where I was I start posting pics again.
-
Welcome back!!!!!k Gaetan!
-
Nice work...I like seeing examples of family owned vessels....something to pass on to the next gen.
-
ancre Le Fleuron 1729 by rekon54 - 1:24
JerryGreening replied to rekon54's topic in - Build logs for subjects built 1501 - 1750
It is so nice to see your work again Giorgio. I look forward to see Le Fleuron progress.