


OT1138
-
Posts
37 -
Joined
-
Last visited
Content Type
Profiles
Forums
Gallery
Events
Posts posted by OT1138
-
-
-
And I'm missing some brass rings for the sails as well. The kit only came with 9 but I need at least twice that many.
-
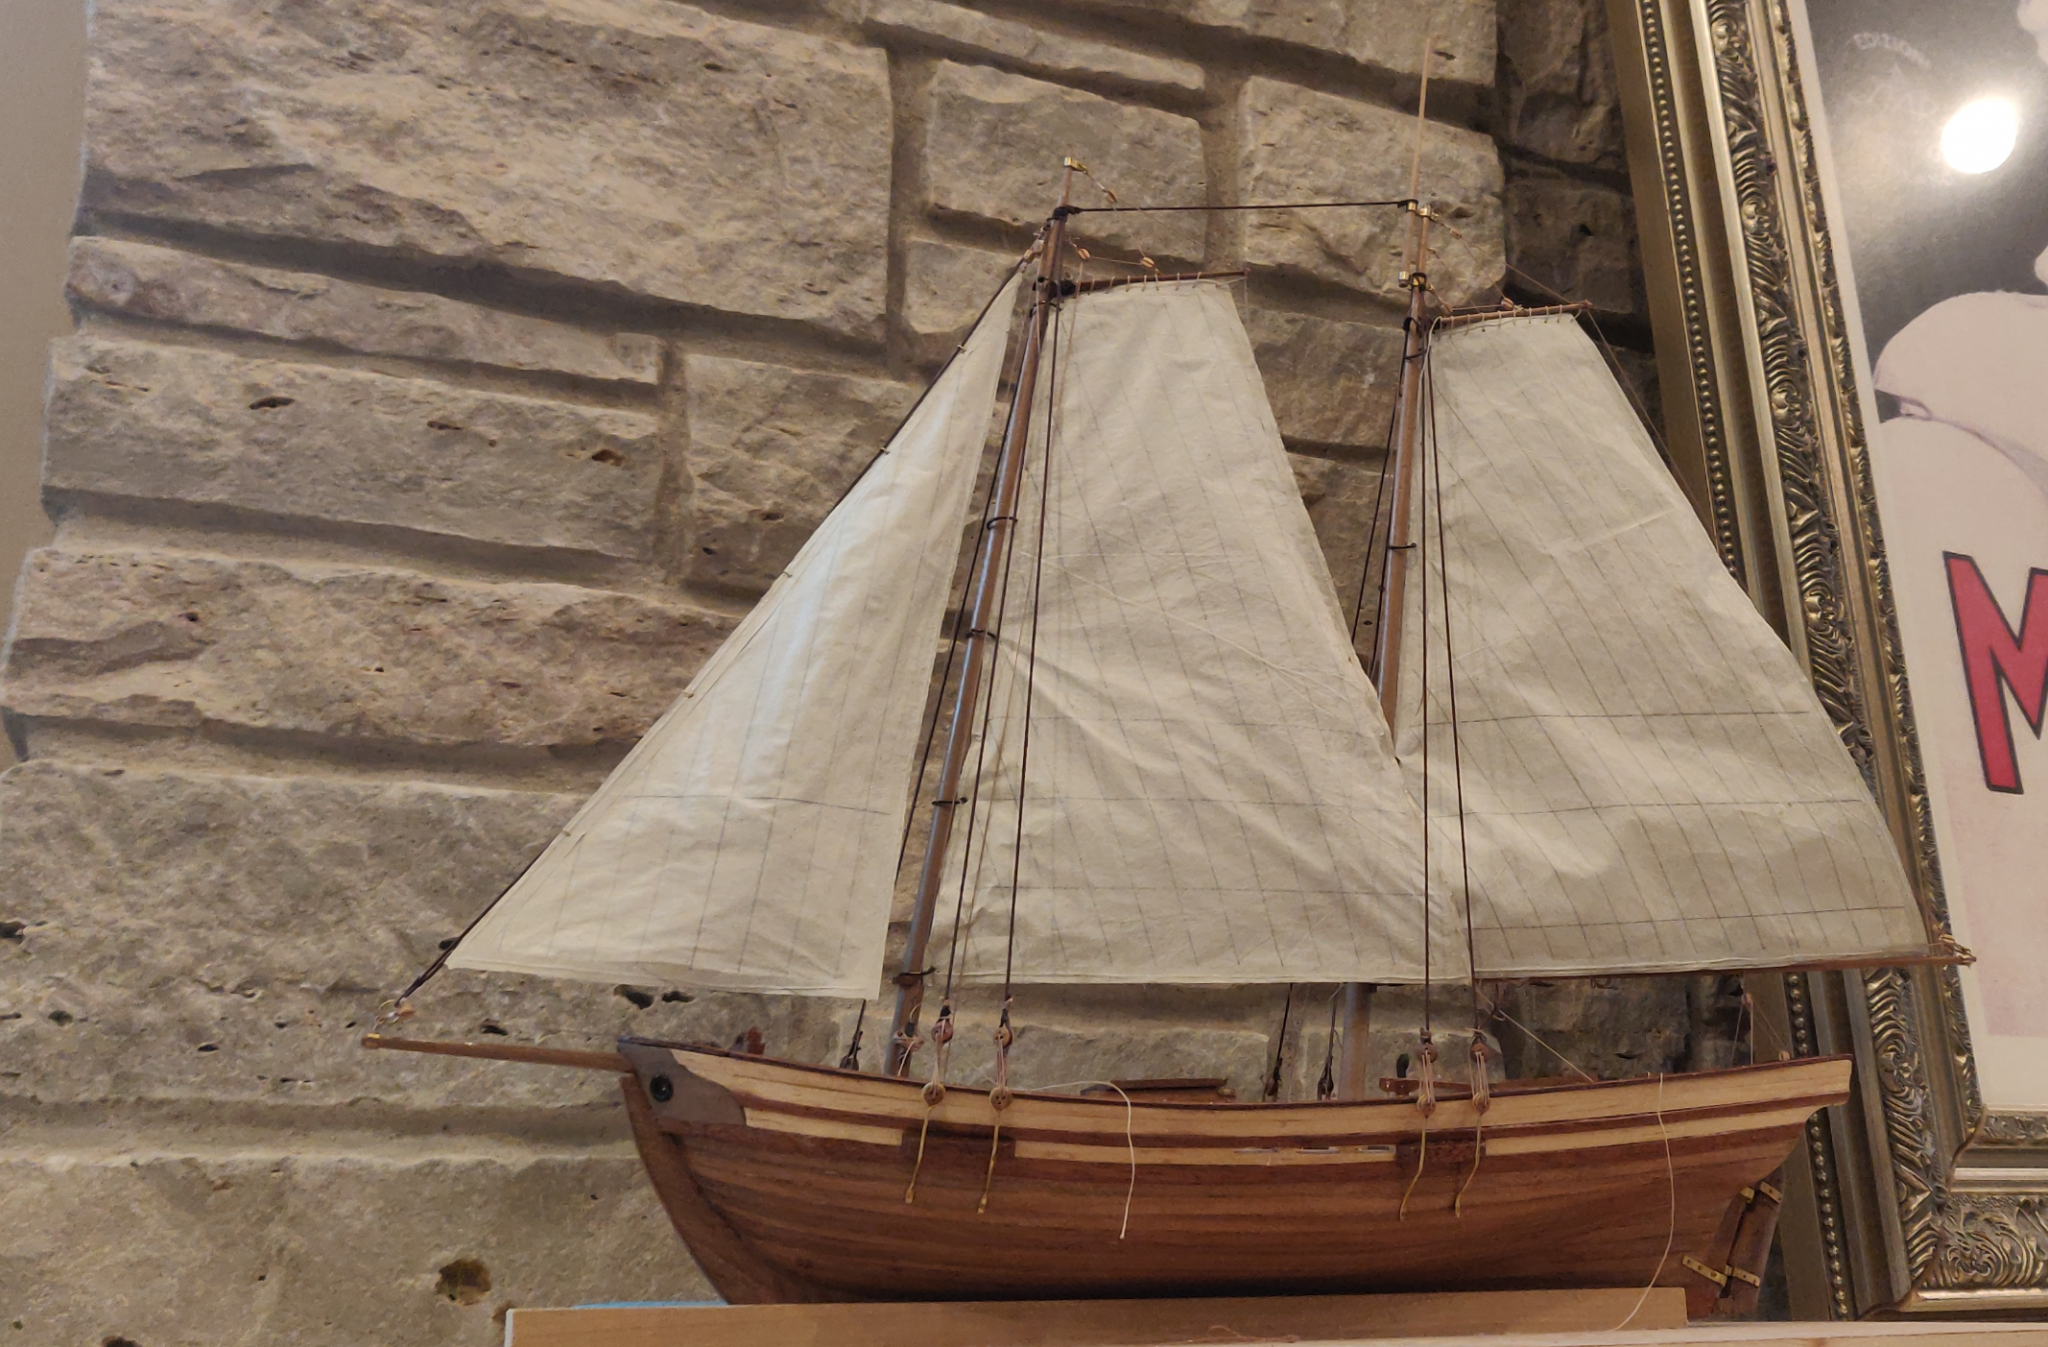
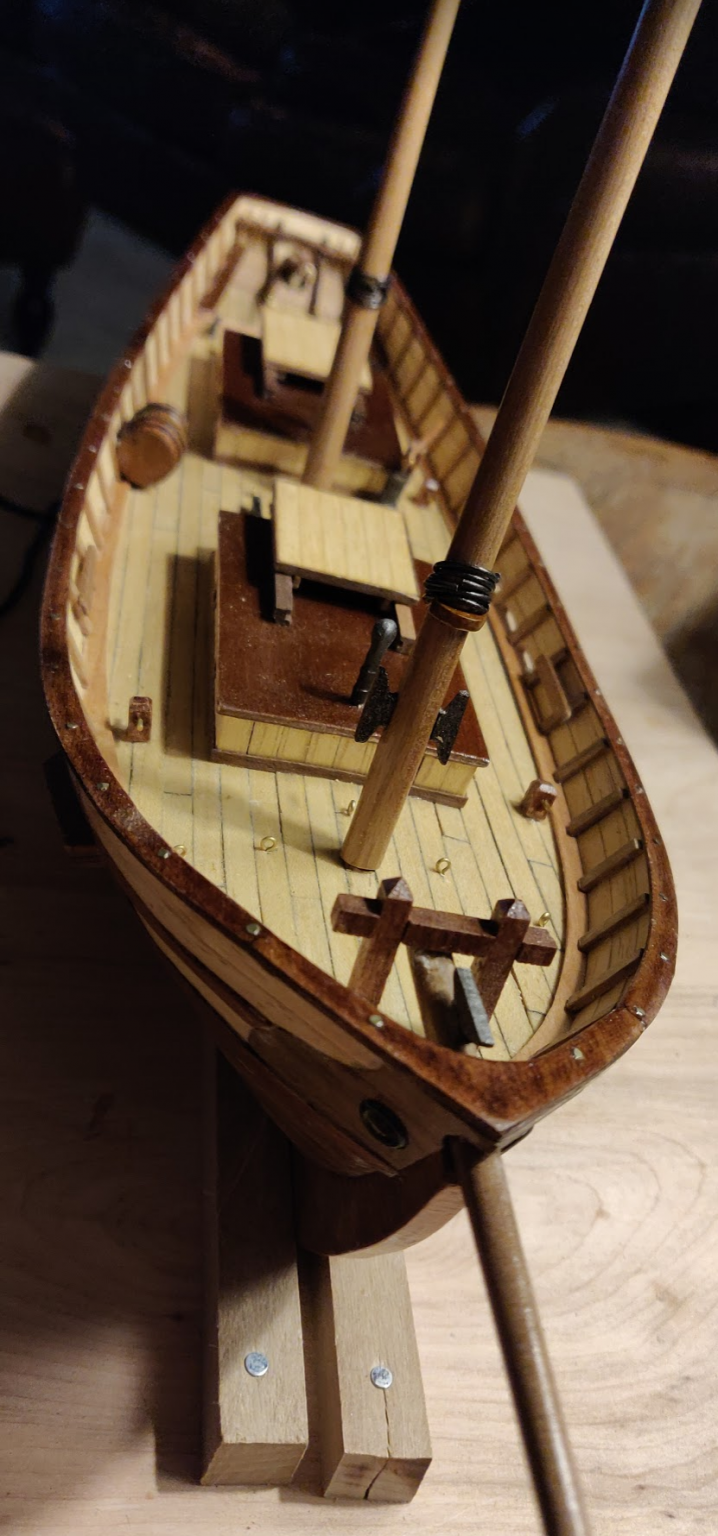
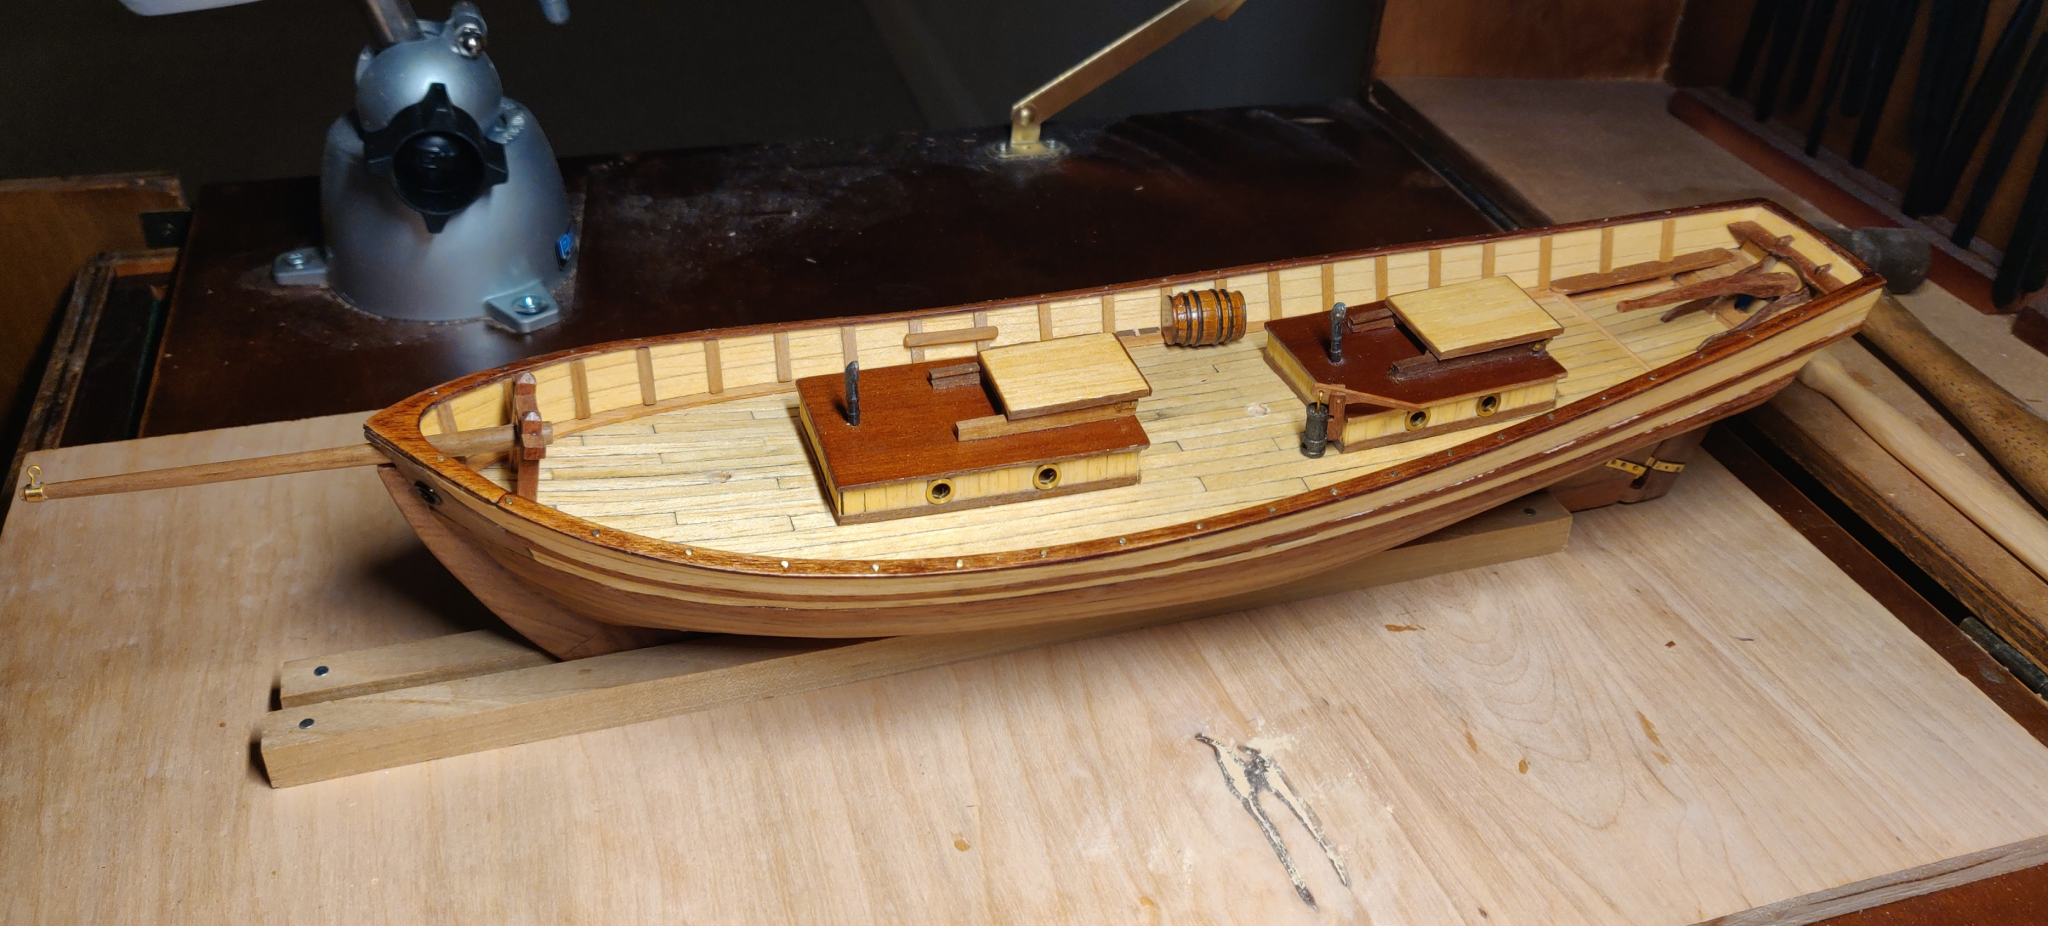
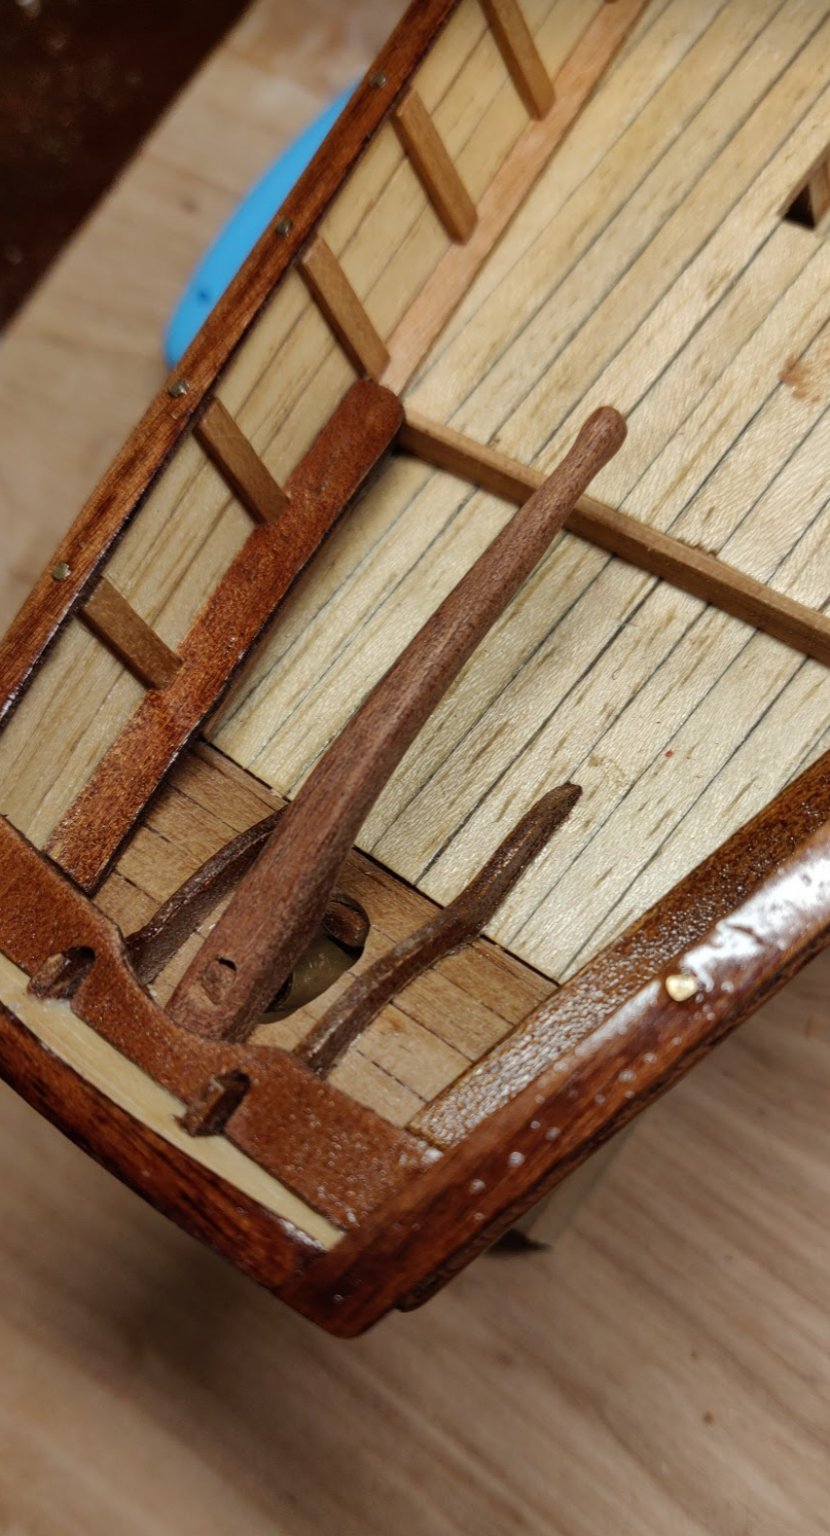
Tons of progress! I'll post more photos at some point but here's where the build currently stands. Almost finished, but still have the top sail, anchors and loose ropes to clean up. Oh yes, a flag!
I've managed to billow out the sails but they don't stick out convincingly so I'm considering mounting the boat in an epoxy "sea" at an angle, like some others have done. A 15 degree angle or so gives them a dramatic look.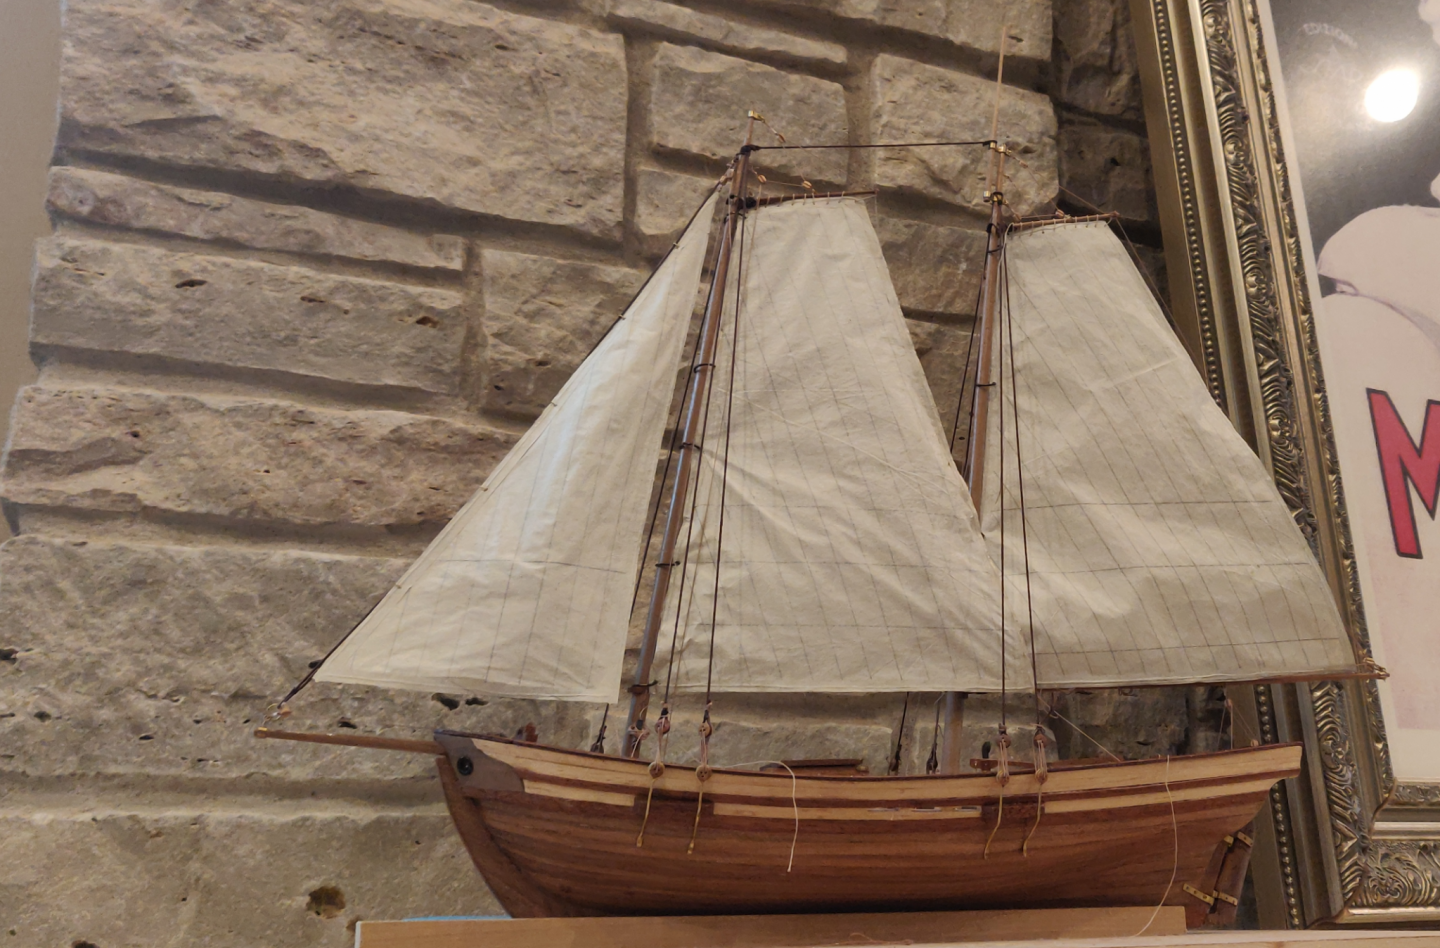
-
Was wondering if anyone has them? My 1982 version of the kit does not.
Thank you!
-
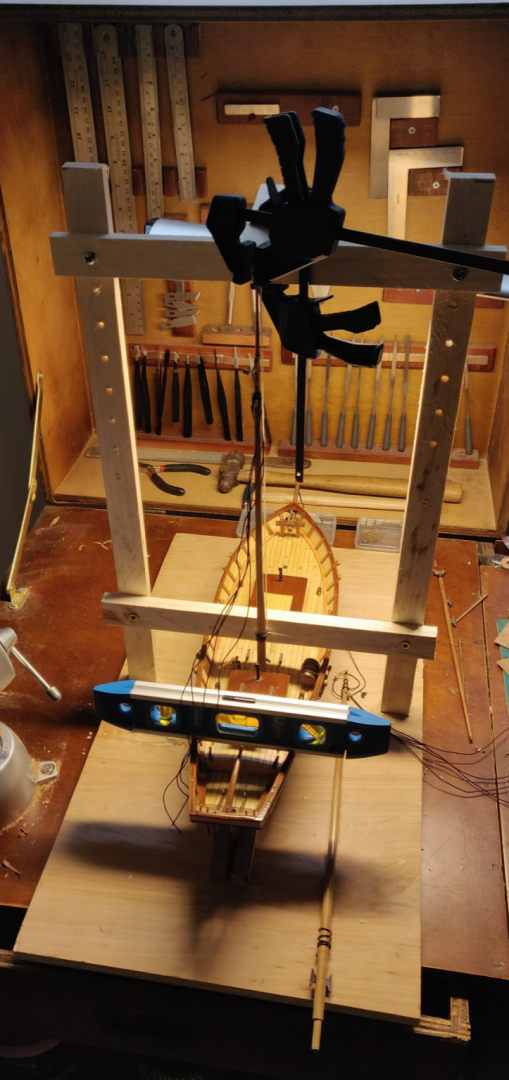
Mastini Masting Machine at work!
- GrandpaPhil and Cabbie
-
 2
2
-
Lots of progress though I've been slowed down because the kit is missing a gaff and two cleats. Also, my only set of sharp drill bits (purchased from Amazon) were super brittle and all the bits broke pretty quickly.
I really dislike the stock brass mountings for the boom and gaffs, so I purchased some 2mm beads to make proper trucks. I also hand carved a couple of boom cleats from basswood and hope they'll be an acceptable match for the ones in the kit.
While I'm busy waiting, I ordered some replacement rope and blocks from Chuck. Should give the model a nice look.

- RichardG, Cabbie and GrandpaPhil
-
3
-
Dilute some wood glue and spread it into those planks. Then give it a light sanding. The sawdust will likely help to cover it up.
I think you are right though, the waterways will cover up most of it... maybe all. -
-
If you look closely, you'll notice I drilled the mounting holes for the mast. I wasn't particularly exact about this. Instead I plan to trim the bottom of the masts a bit undersize and use shims for alignment. I'll measure this with a home made Mastini masting jig.
-
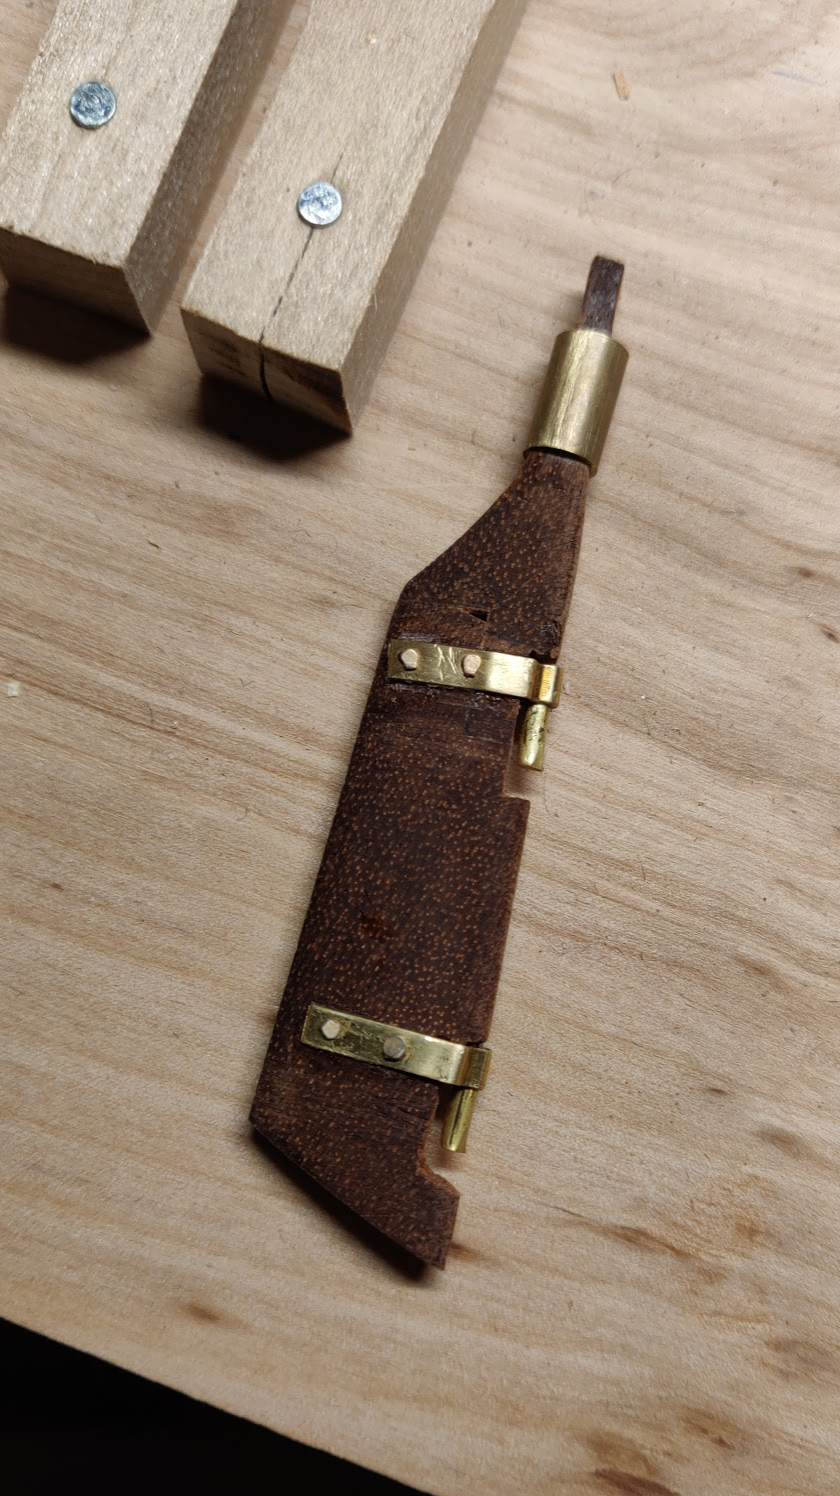
Coming along nicely. Thinking about replacing the brass clips for the boom and gaft with
parrels. Wonder what size of beads I could use for that?
Ropes are another detail I'm starting to learn about as well. The kit comes with some beige twine but I'd like to have both standing and running rigging (with sails), so I may need replacements.

- Cabbie and GrandpaPhil
-
2
-
-
-
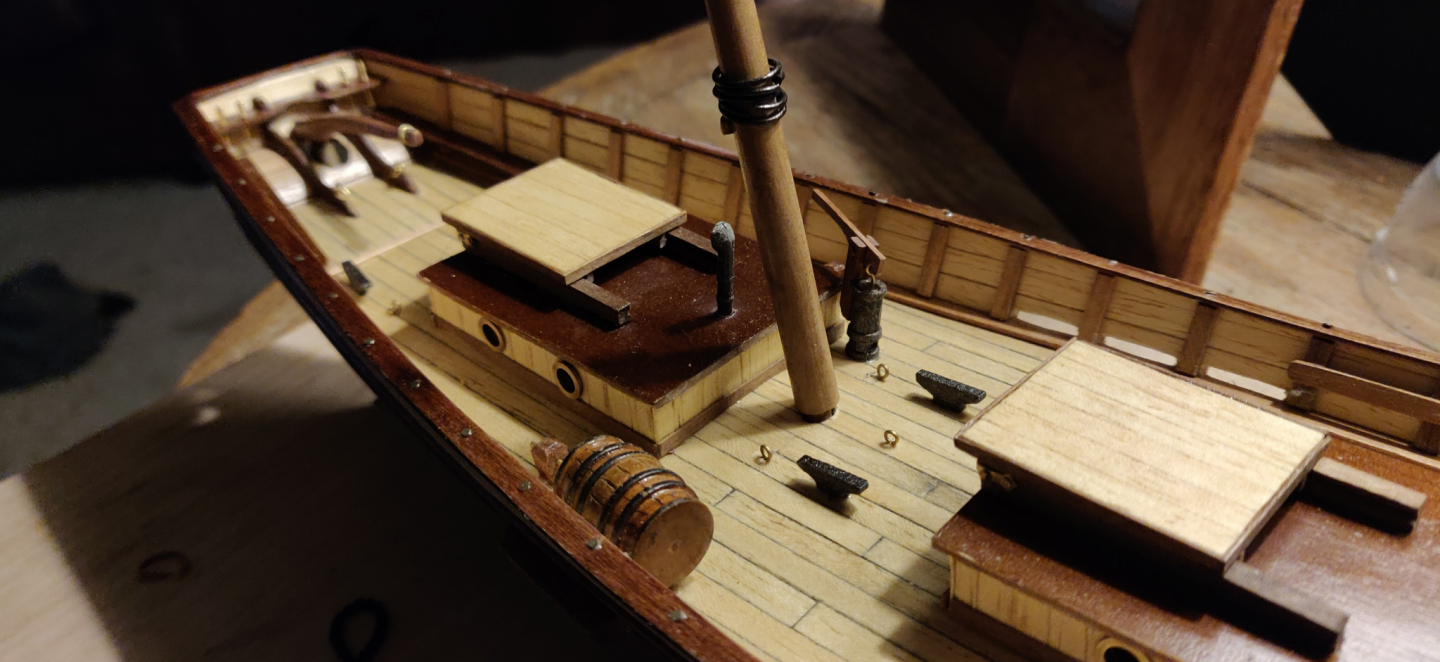
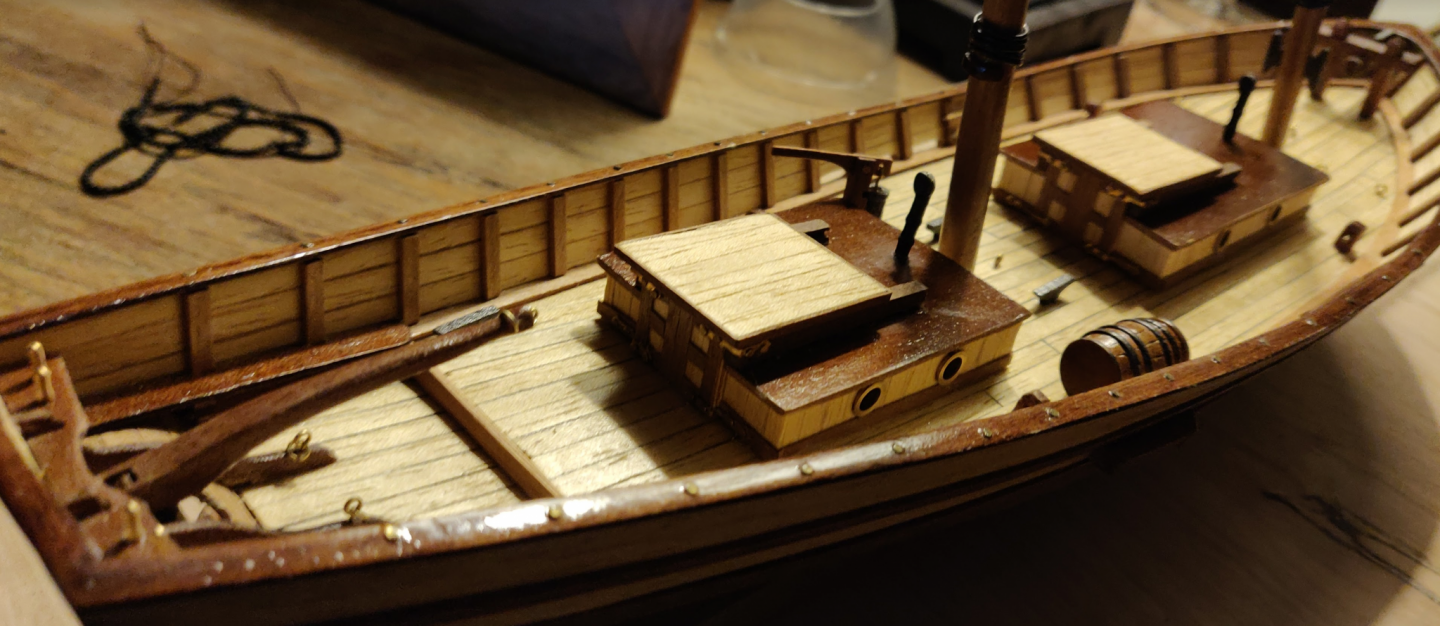
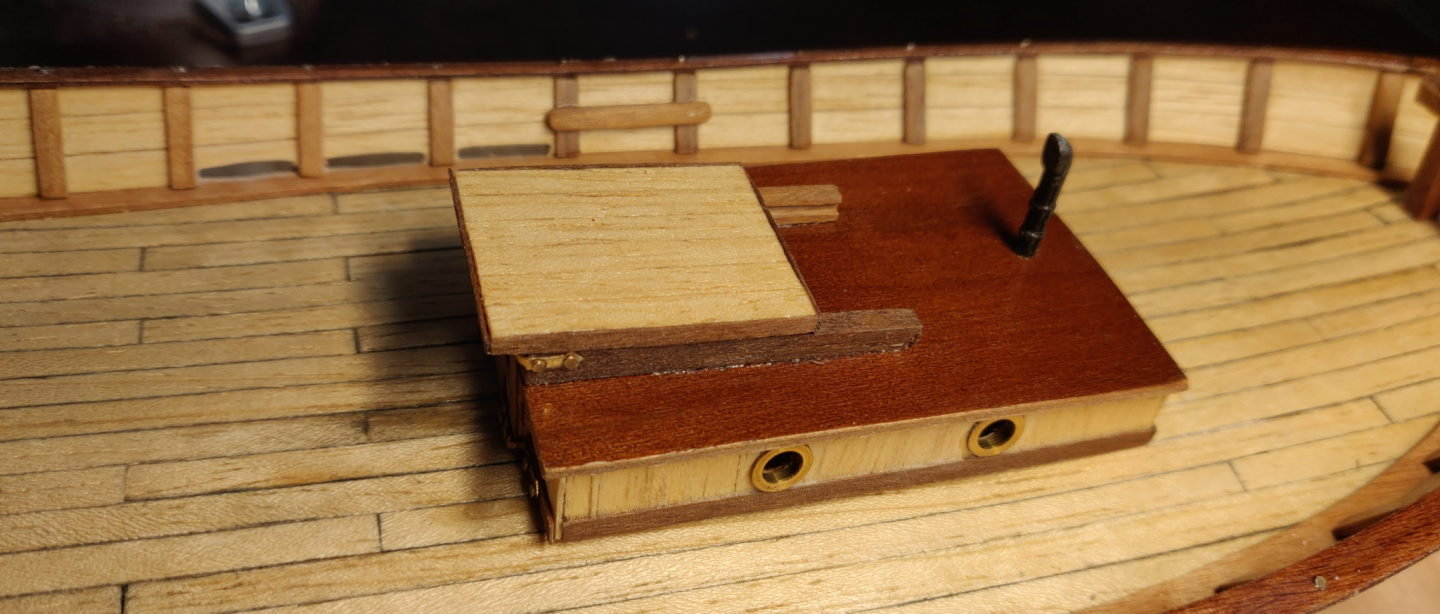
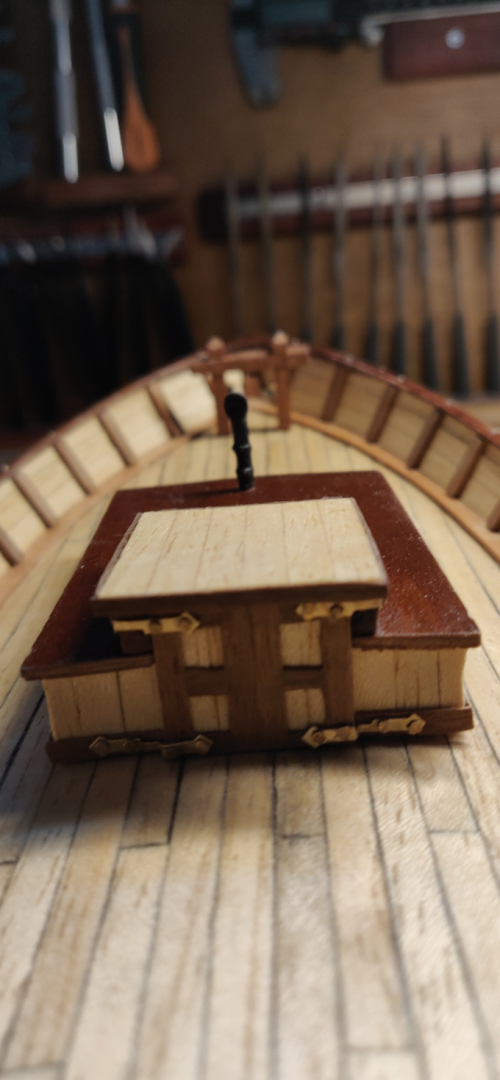
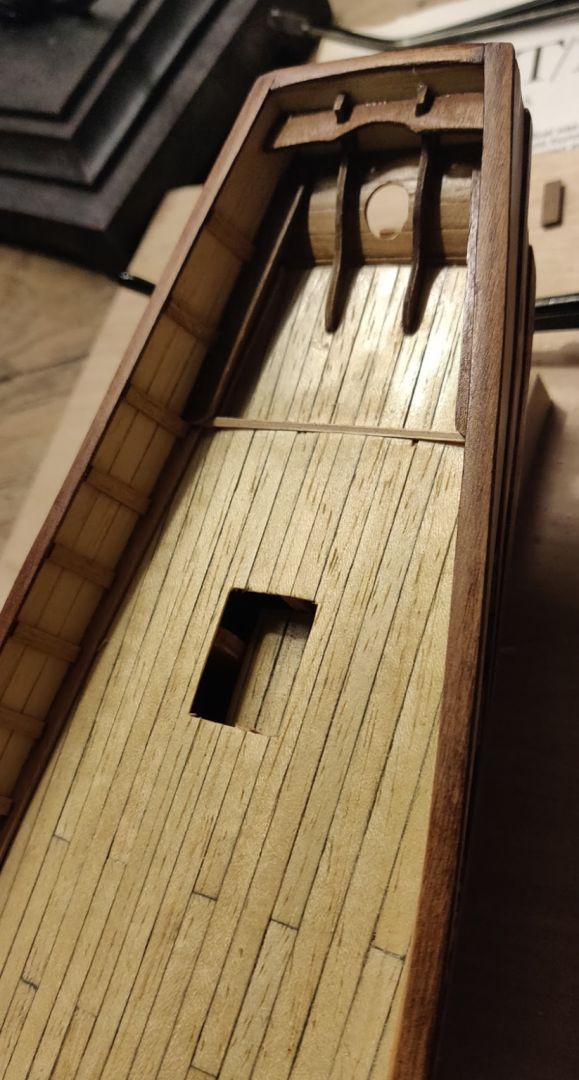
The cabins were a lot of work, mainly due to having to make the hatches and doors twice to get things to fit right. The kit provided parts were nowhere near the right size and the rails for the sliding hatch were not pre-cut, so this took a lot of work as well. The air/smoke/ventilation pipes were made from old lead and required brittle flashing to be sanded off. Finally, I found some 7mm brass portholes on eBay, so added two on each side.
I found it interesting that the plan indicates that doors were only about 3' tall.
- Cabbie and GrandpaPhil
-
2
-
-
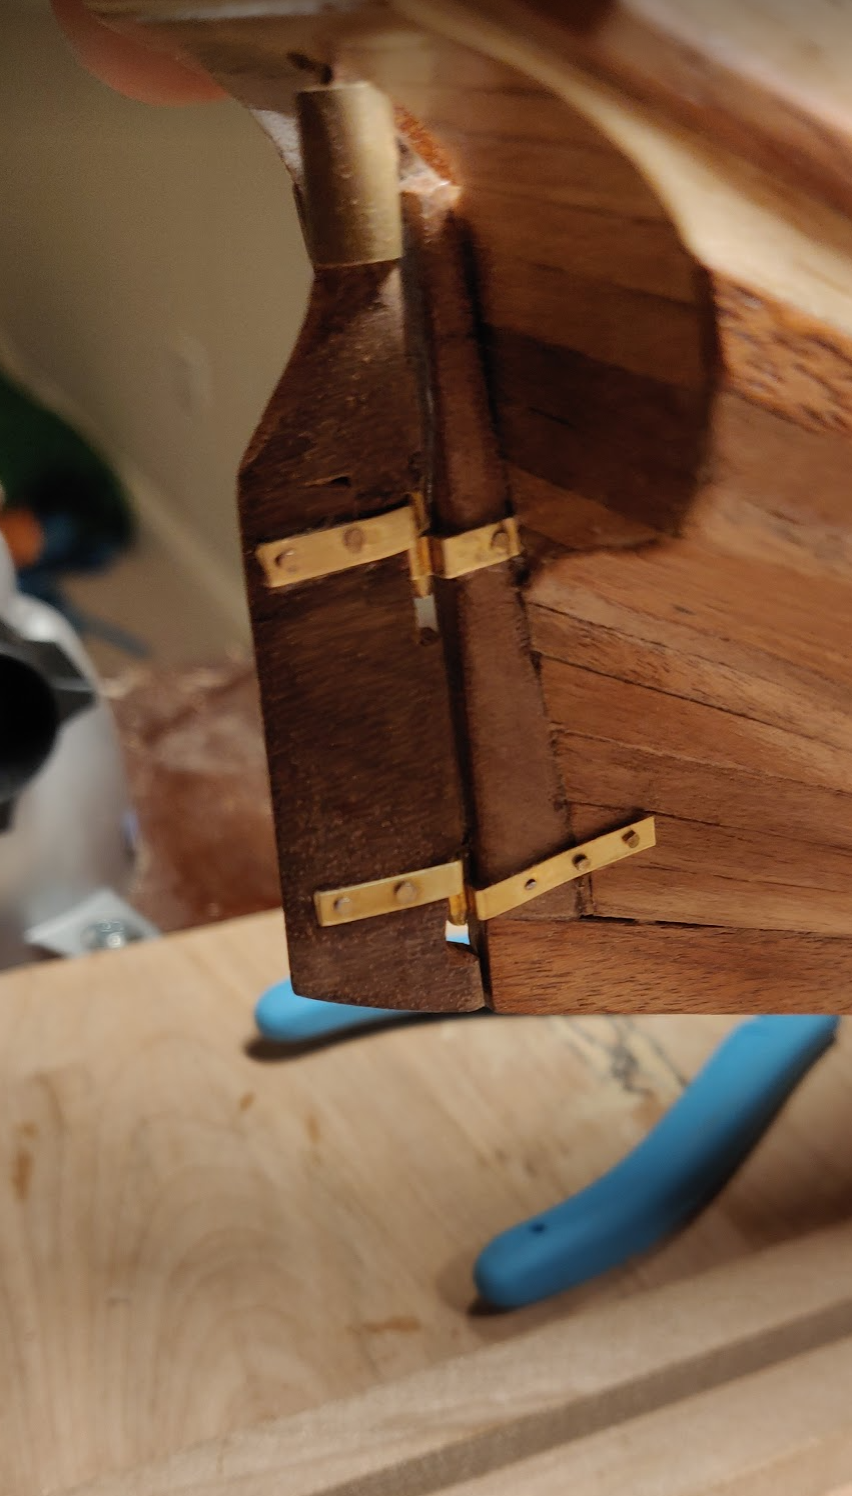
Rudder up next...


This was not so easy. Took a couple of hours of gentle sanding and fitting while watching TV. But eventually everything came together. The plan doesn't indicate how wide the tenon cuts need to be made, but I eventually figured out it had to be ~3x the width of the brass joints.
-
Thanks! I thought about marking nails but they never seem to look that great IMO. They tend to look out of scale and too dark for my taste.
-
Never seen nail heads in the rails before but it looks great. Was suggested in the AL instructions, too.

- GrandpaPhil and Voyageur
-
2
-
-
I soaked the bulwarks for a couple of hours, then held them in place overnight using rubber bands. They kept jumping out of place, so I ended up using a short piece of scrap wood on the bow to hold them in place (otherwise they would slip downwards).
After drying, they held their shape readily and were not far from where they eventually needed to go.
-
Hey, has anyone inserted the brass nails into the rail at each stanchion like the AL instructions state? I can't find a single photo online of an example.
-
So this part ended up being kind of a mess. I still didn't like how dark it was, so I brought it down almost to bare wood. I left a bit of the toner in place to give the wood some depth. But that was far too light.
The rails were already glued in place so I attempted to brush more toner on and it came out blotchy. So I relented, stripped it down again and masked her off before giving a light spray of Perfect Brown. Finally, a color I liked!

I then ended up having to fabricate new parts for the stern as none of the premade ones fit. These were sprayed with 90% Perfect Brown and 10% Red Mahogany. They came out pretty good, I say!
A little thing that tripped me up were some builds that put the benches half way up the bulwarks. The 1982 instructions clearly show that they should lay flat, supported by the counter and the main deck. I presume these were provided for seating and if you think about it, placing them halfway up the bulwarks would be far from comfortable!
-
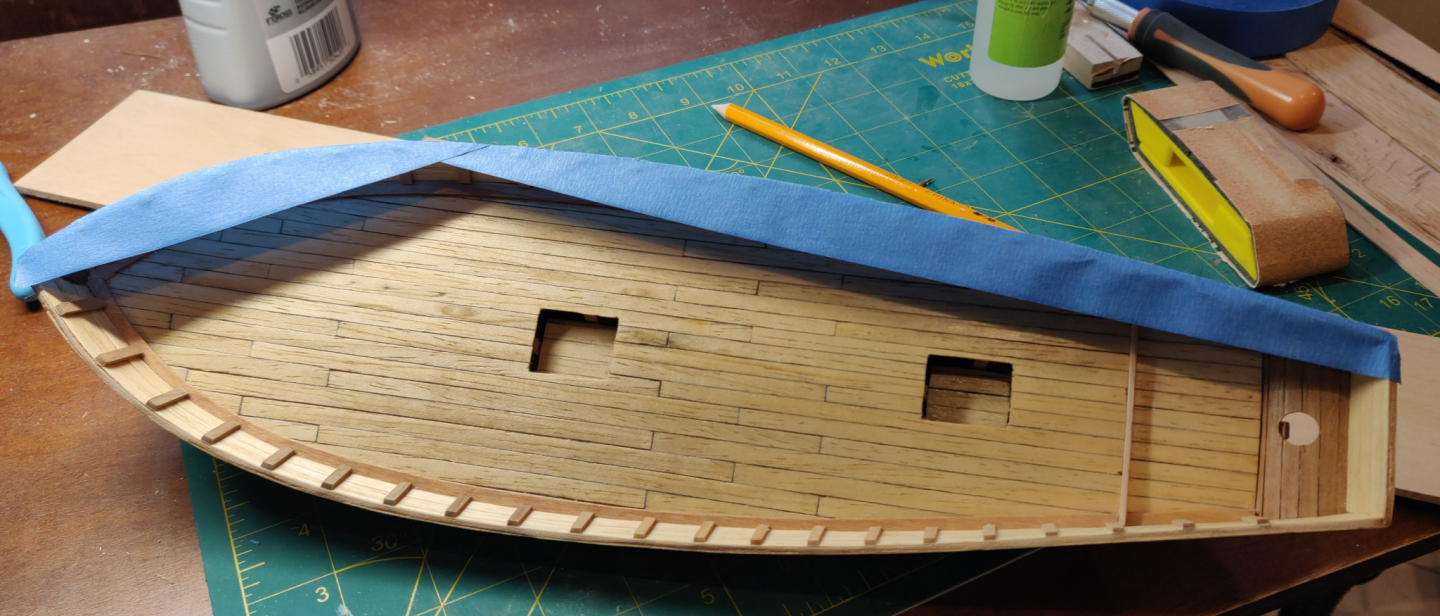
I think I'm confused about the term "stringers". If you look at Fig 5 in the plans, part 19 is the waterways (I think that's what they are usually called but I could be wrong). There is a die cut part for this on the plywood. The walnut strips might submit being bent this far laterally but I would be surprised if they lay flat without a lot of persuasion.
I was referring earlier to the rails and caprail, which sit on top of the bulwarks.
-
I was just literally looking at that and thought it made no sense at all. I used the plywood pieces, applied toner and a bit of weathering.
To be fair, I've only looked at a few other Swift builds but as far as I recall, none of them planked the rails. Looking at Moonbug's build (open in another tab) right now and see that's the case there.
-
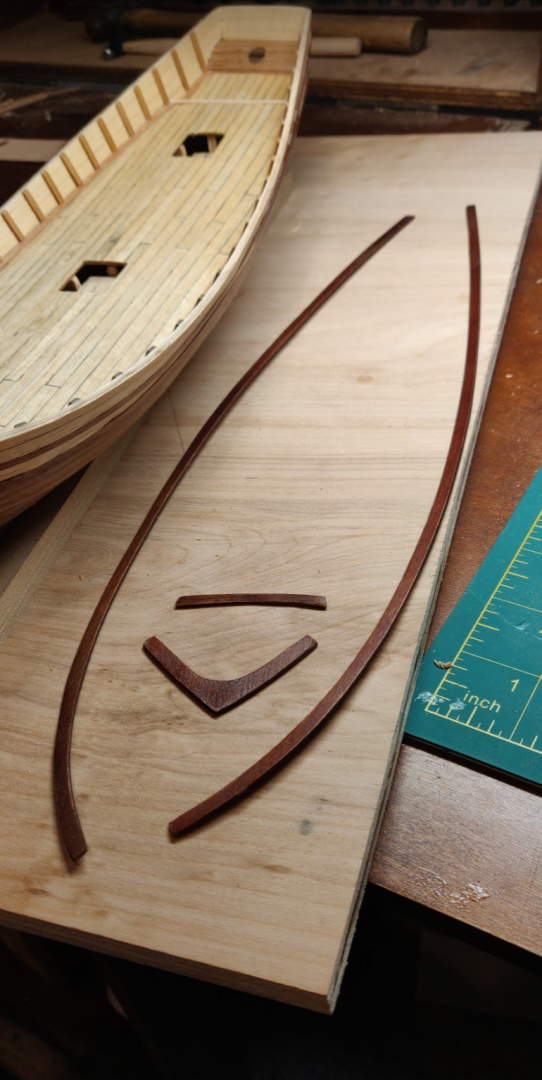
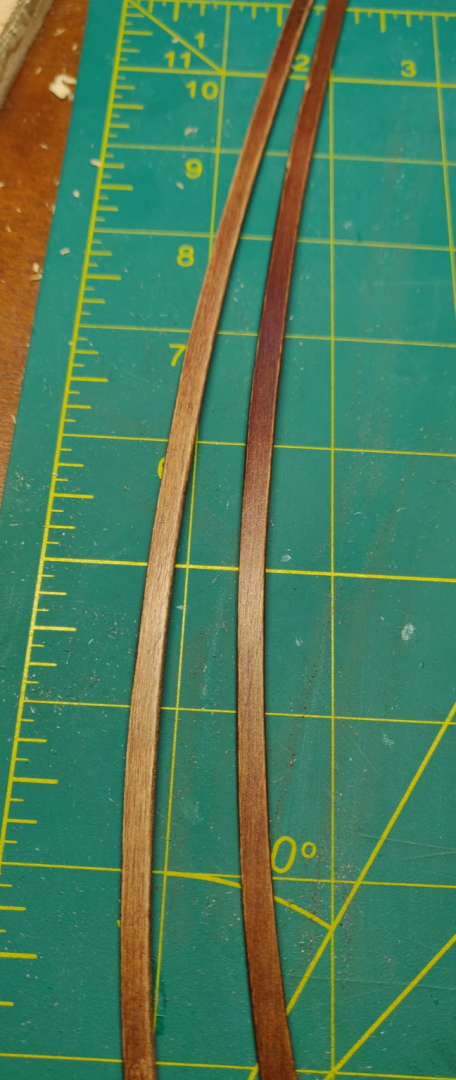
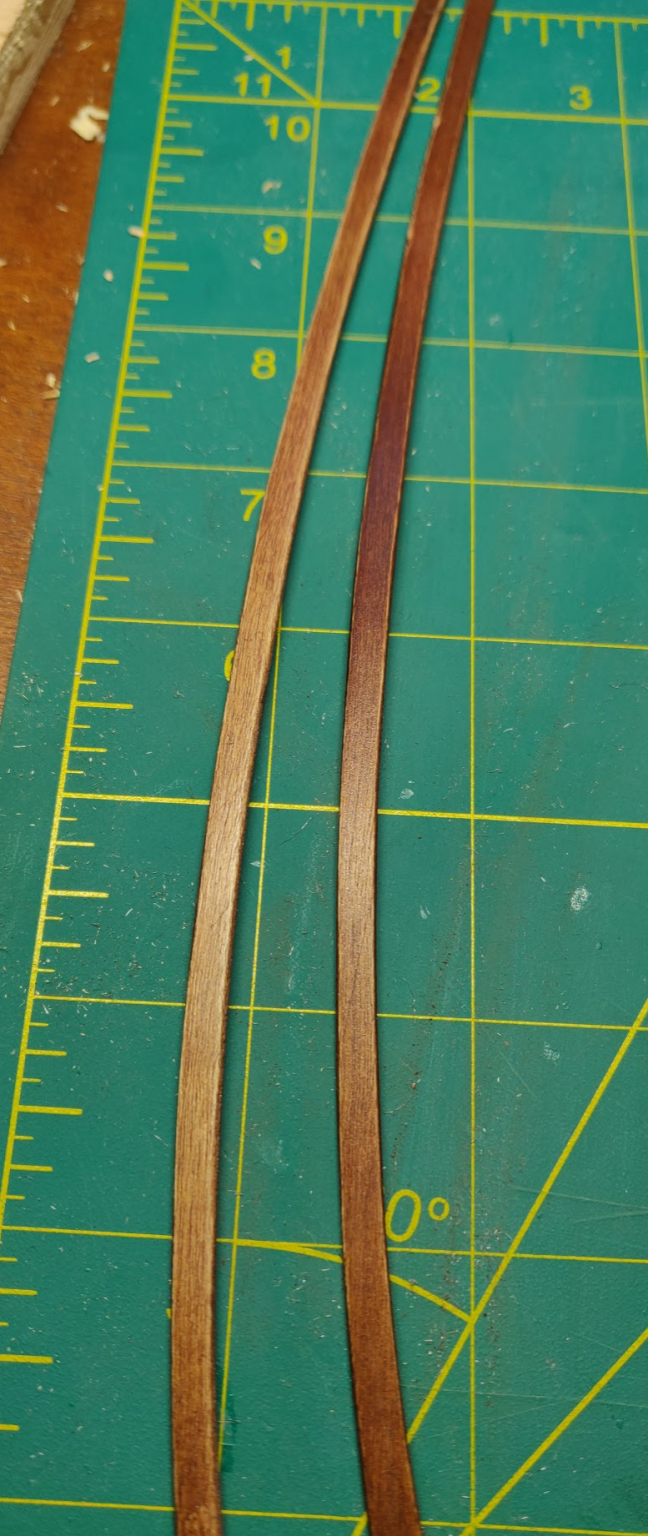
So my cap rail didn't fit at all and the longer rails were curved out of shape as well. I was still thinking about fabricating new ones so I transferred the curve using painter's tape.
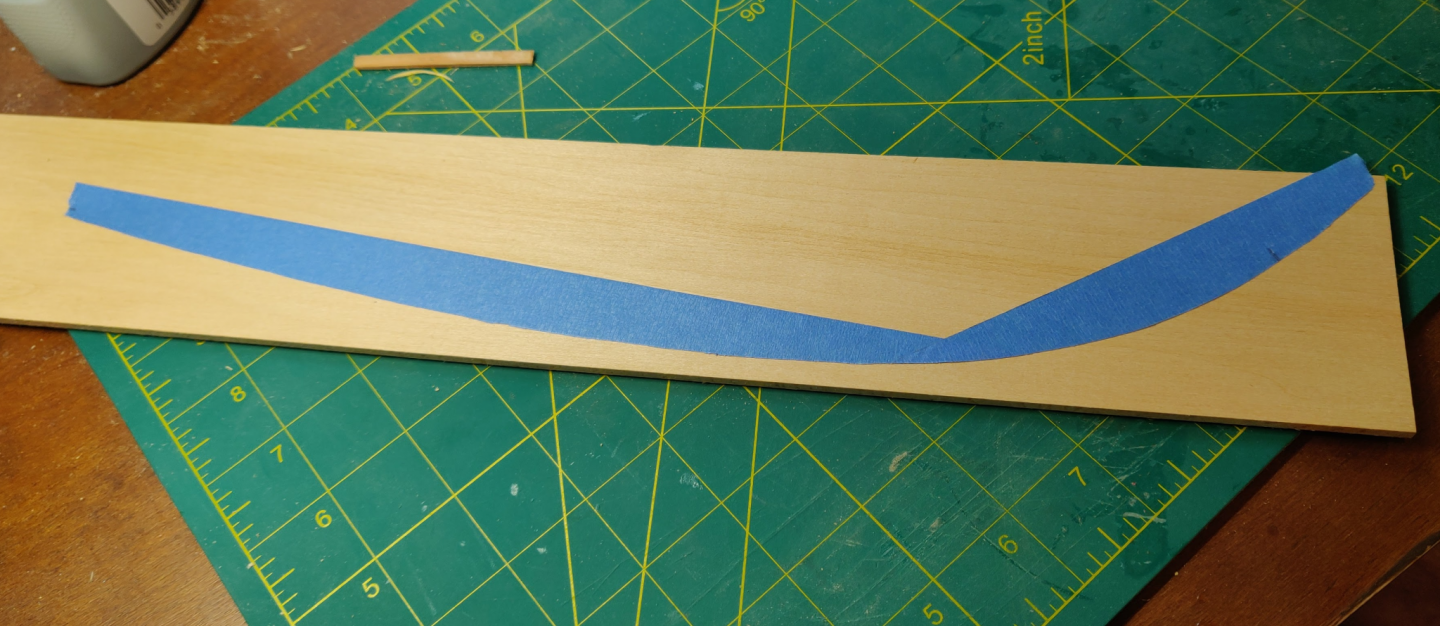
Hmm... once flattened out, the provided rail didn't seem so bad after all.
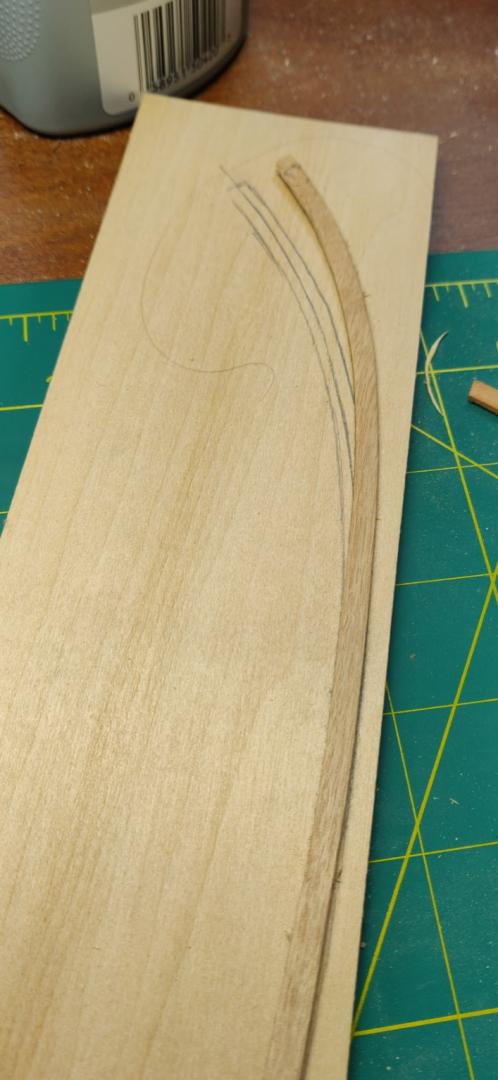
A little trip to the bending station was in order.

And voila!
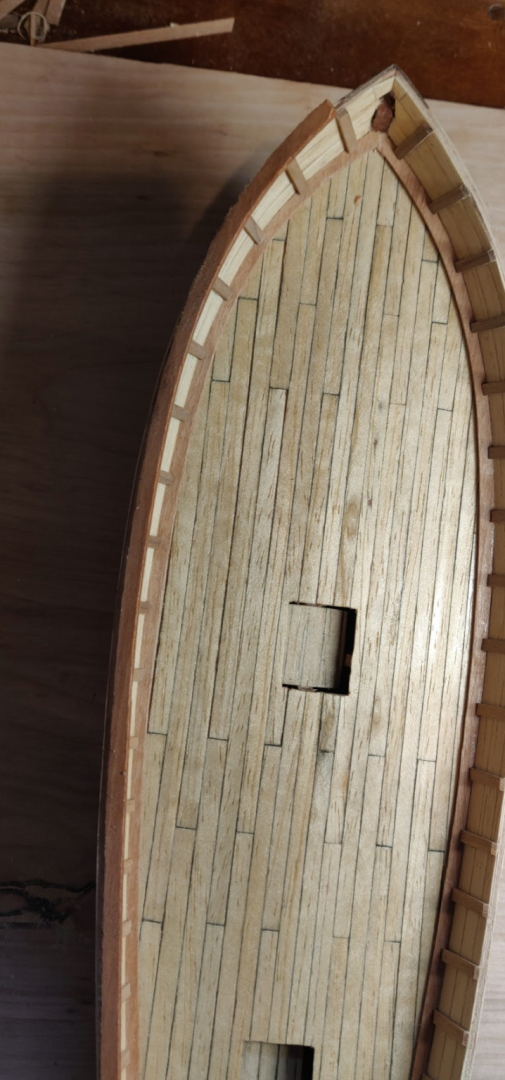
The cap rail was too short so I fabricated a new one from some scrap plywood provided with the kit. Now about those colors. I am not a fan of the plain plywood. The final color can be seen with the waterways. They are just so-so. Not a finish I would particularly prize in such a prominent spot.
I decided to emulate a mahogany color using Mohawk Perfect Brown and Red Mahogany.
Unfortunately, this came out too dark. So I took some of the color off with steel wool, giving it a more brown appearance.
I'm still not happy with this so I'm noodling on options.


Swift by OT1138 - Artesania Latina - 1982 kit
in - Kit build logs for subjects built from 1801 - 1850
Posted
That's great to hear. That is one of my favorite parts of this model. Who knew such a little tiny detail was buried in the original AL instructions?