


OT1138
-
Posts
37 -
Joined
-
Last visited
Content Type
Profiles
Forums
Gallery
Events
Posts posted by OT1138
-
-
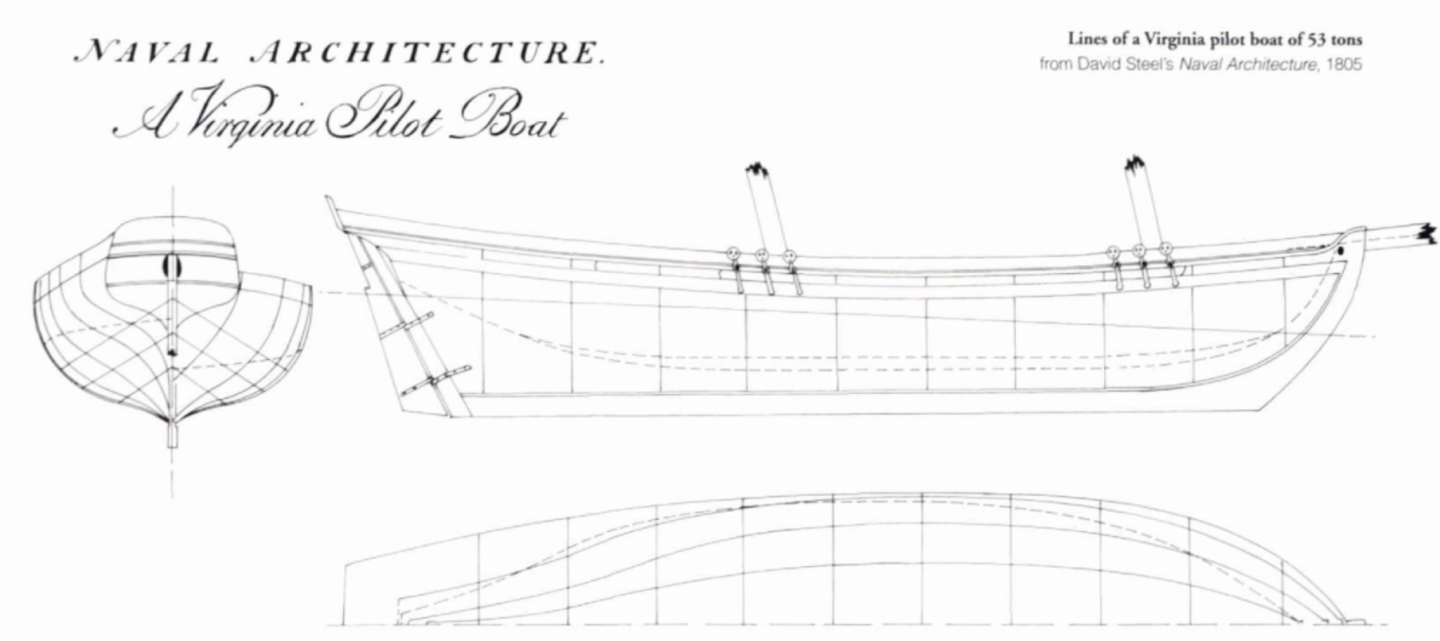
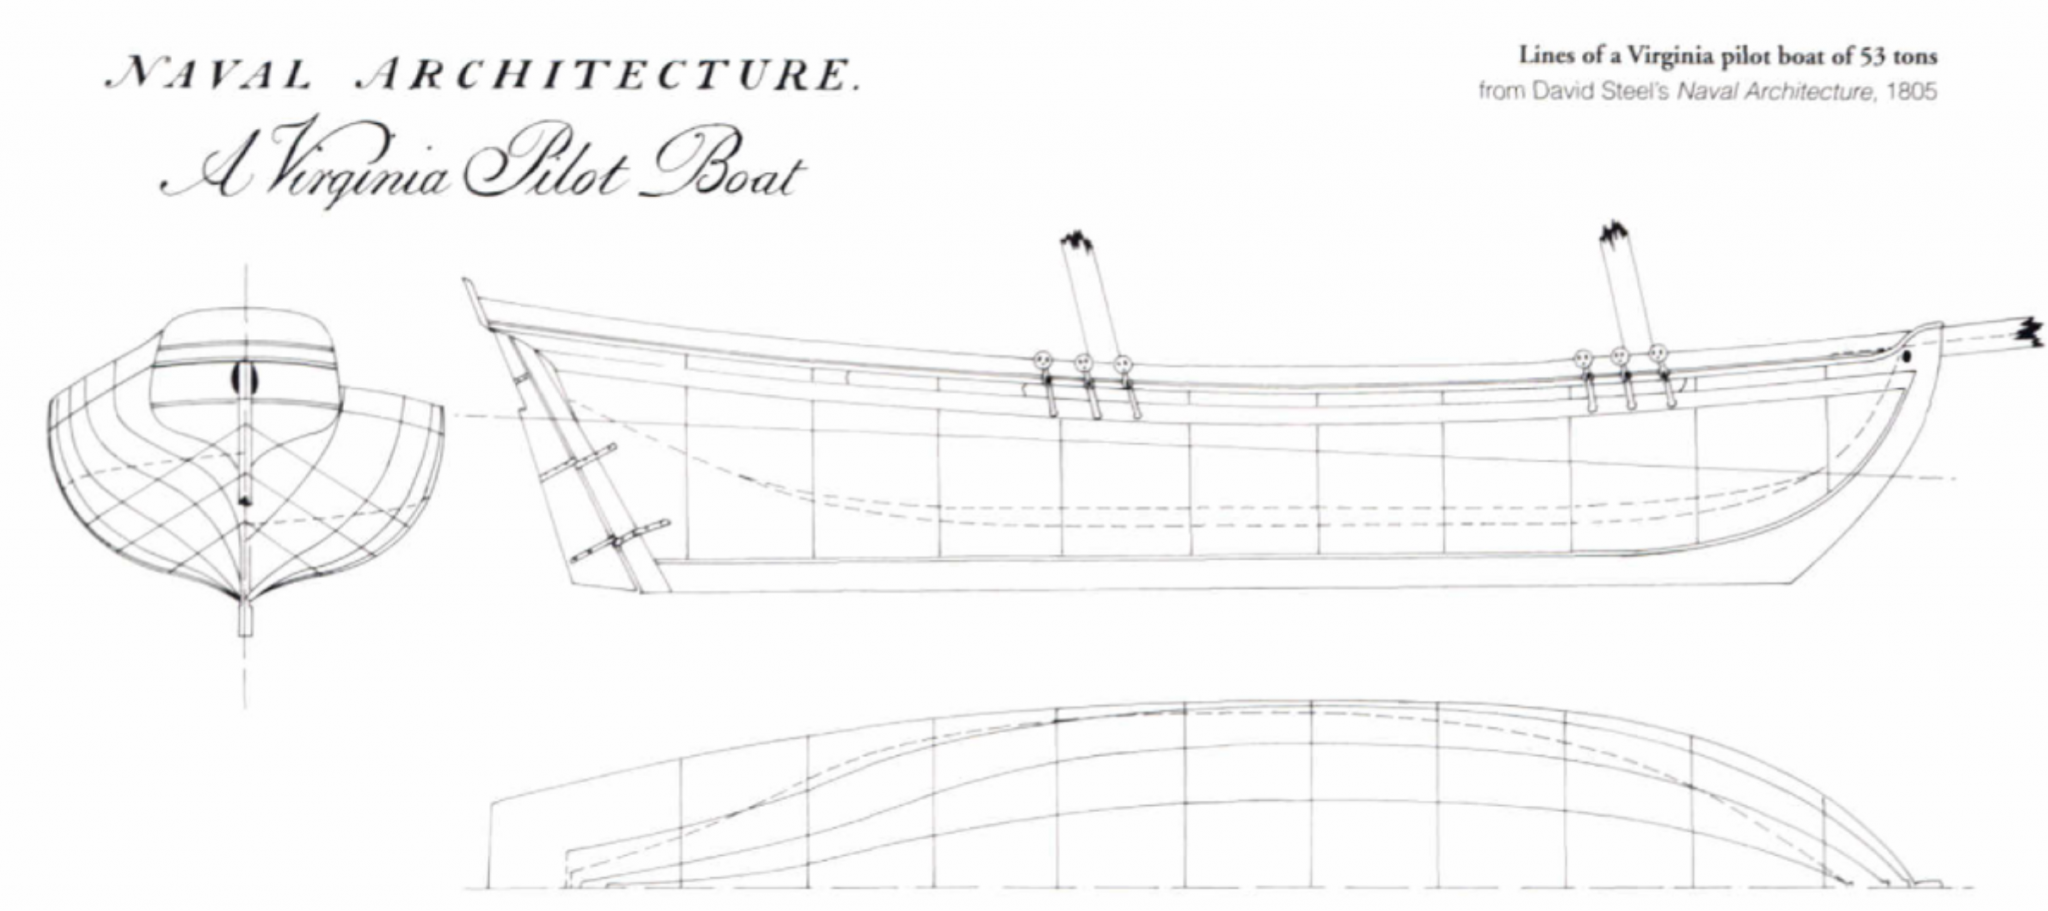
Remember how I said I cut the stern filler block in a convex shape rather than the concave one usually seen? I was quite pleased to find the original plans for this exact model which shows the convex shape, not concave.
-
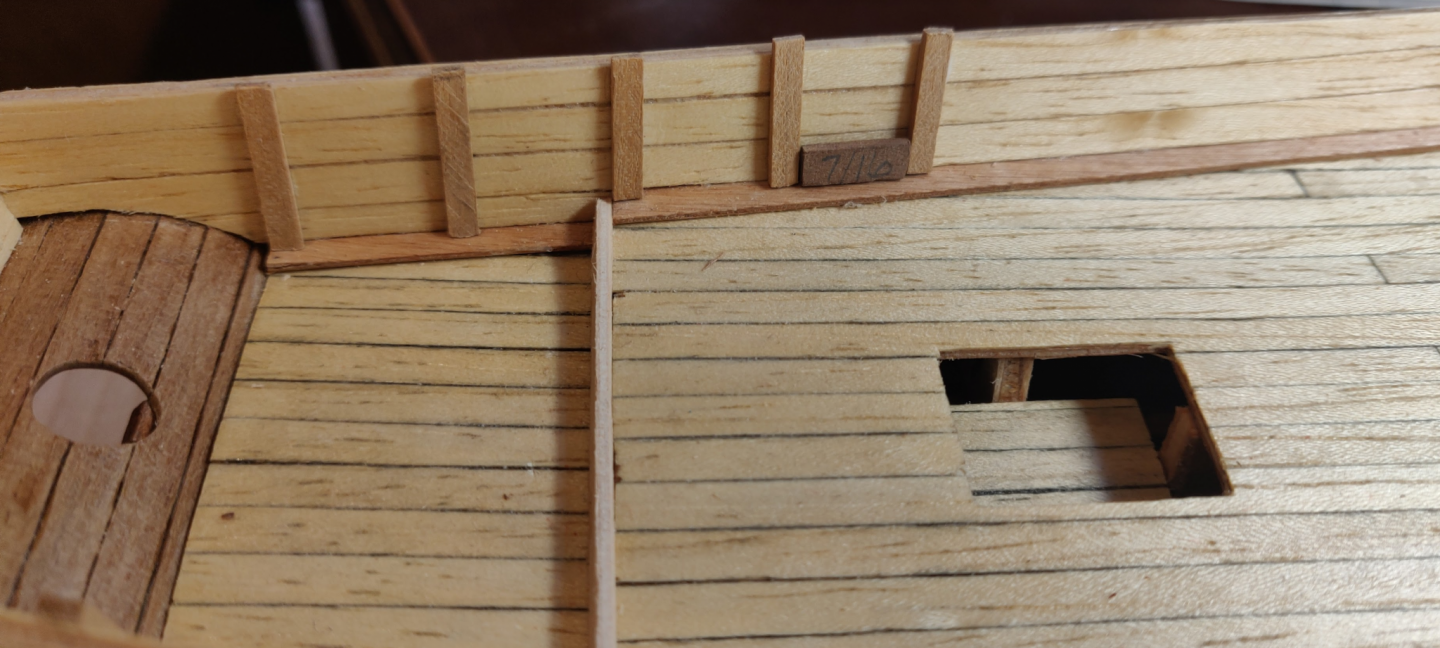
Oh, almost forgot about the stanchions (is that what they're called?). These are made out of a brown wood which didn't look too impressive when I put it on. But I later applied some wipe on poly (glossy) and they darkened up a little. I have seen several different patterns for laying this out but I decided to go with the instructions. The gaps came in three different widths - 7/16", 1/2", and 9/16" (approximately). I cut these straight from the pattern and used them to space the stanchions out.
Worked great. Ended up with both sides perfectly symmetrical.
I also cut out a little vertical deck from some spare plywood provided with the kit, which was laid between the main deck and the quarterdeck in back. Fun little exercise in wittling to get it fit right.
Oh so now about that experiment. I cut out the rails from the provided plywood and they did not fit. Not even close. So I figured, why not make my own.
But what will I make it from?
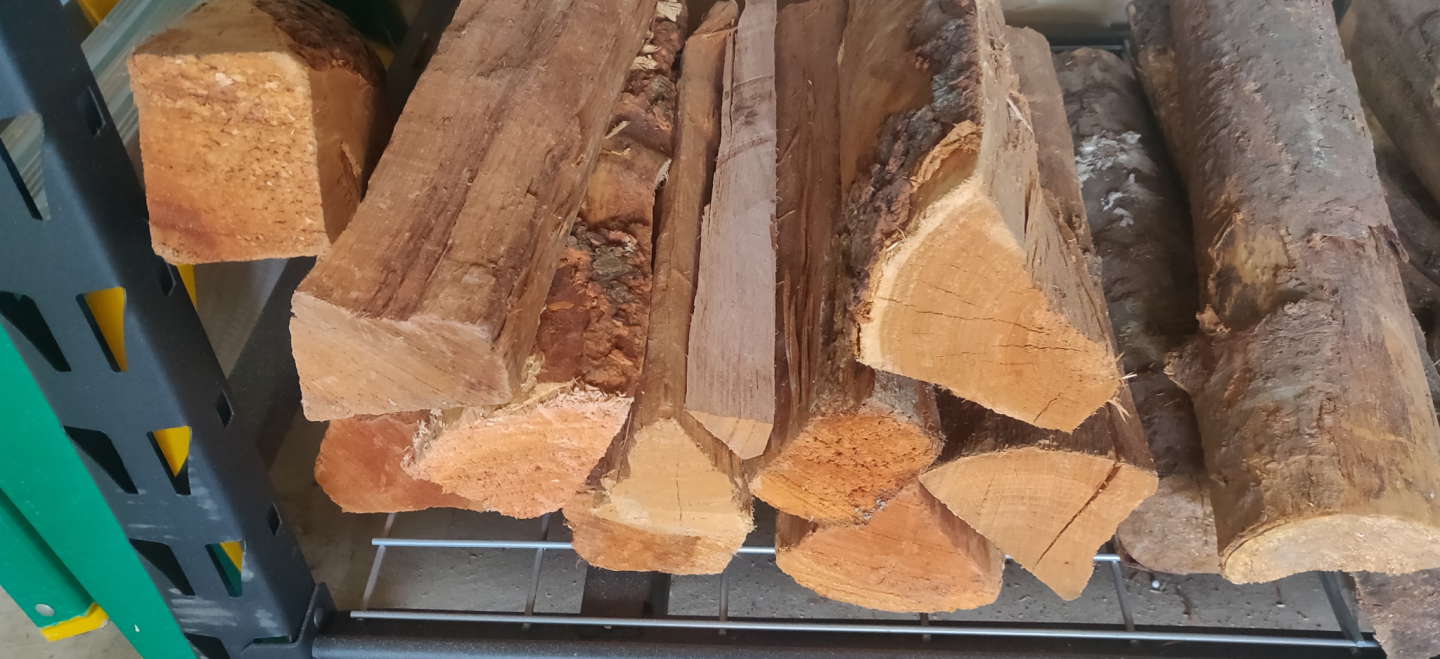
Well, here's some cherry sitting in the garage... why not try that? I rough cut and planed a couple of sides with a WW2 Stanley #7 and squared up the rest. This little board was super heavy... 3-5 lbs maybe.
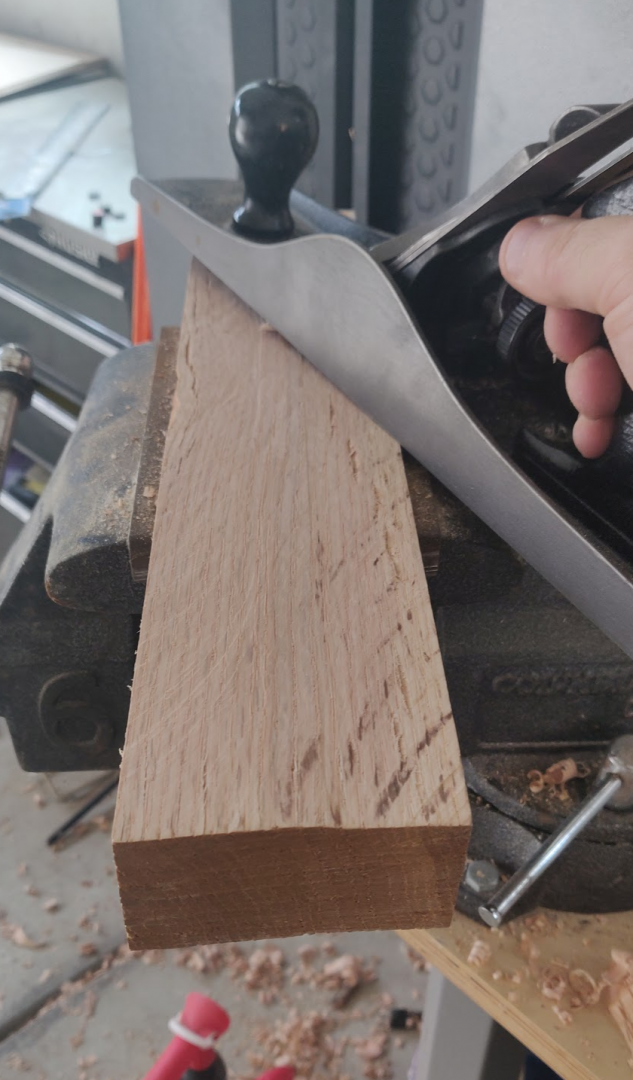
Then I used a very low end (bottom end) Ryobi table saw to slice off some 1/8" "boards".
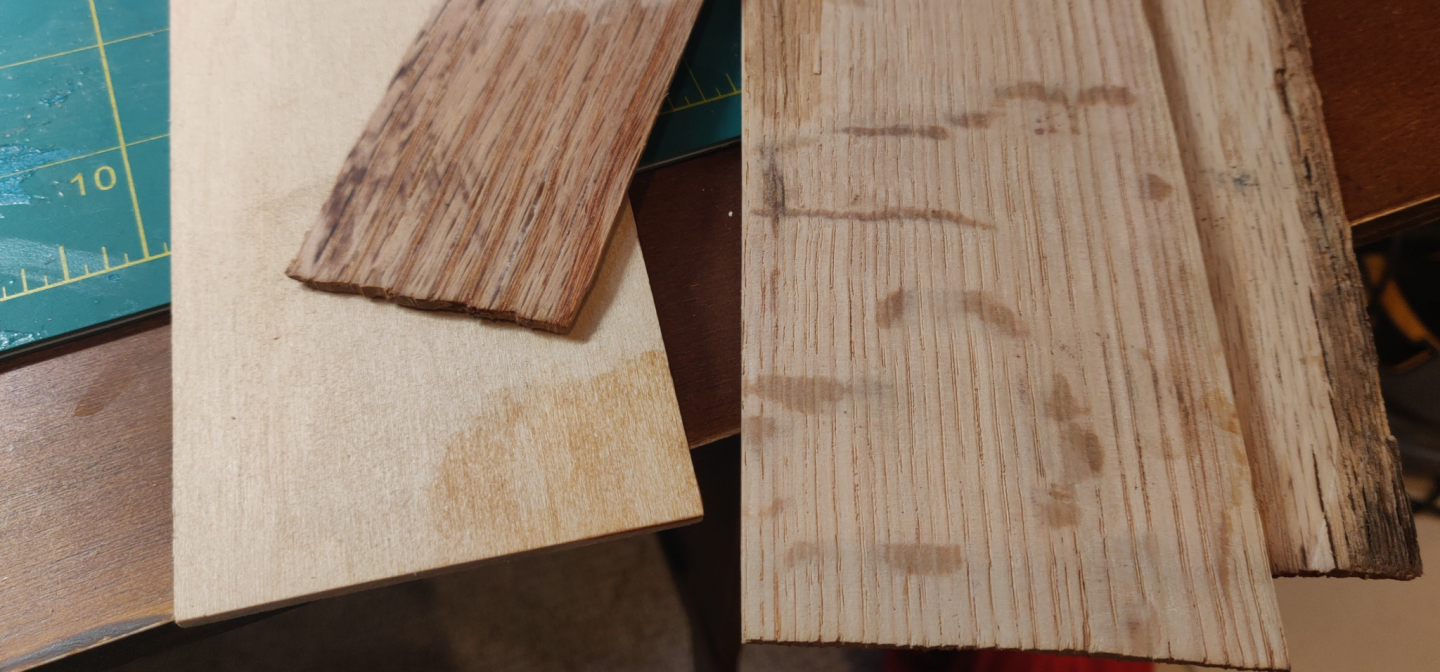
I was rewarded with some horribly cruddy wood! Lots of splits and inexplicable stains which I couldn't get out. I sanded it down nice and smooth, applied some poly and it looked like complete garbage. I picked cherry because I thought the grain would be tight but it's really large and out of scale.
BTW, that is basswood shown underneath on the left (you can tell because it's cleaner and has a tight grain). I didn't like the looks of that.
So I sat back and waited for Father's Day, hoping inspiration would strike.
-
I've seen builds of the Swift which don't have planks on the bulwarks. This seems odd to me. The instructions state to plank it in walnut but as mentioned previously, there was precious little remaining of that. So I applied some of the planks used for the deck instead. Pretty straightforward and the planking is thin enough where edge bending wasn't a problem. I was careful to only use CA for the occasional clamp and Weldbond for everything else.
I went slow, leaving each 4" section to set for about 20-30 minutes before moving on. No issues with warping or gaps.
I did have an issue with the fact that the planks were about 1/4" too short to reach the tip of the bow. Oh well, most of the little section I spliced in will be drilled out for the bowsprit and the remaining bit will be covered with the caprail.

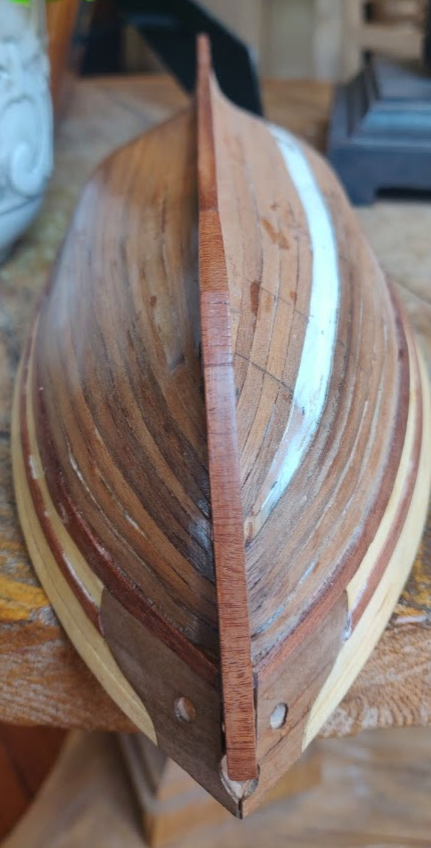
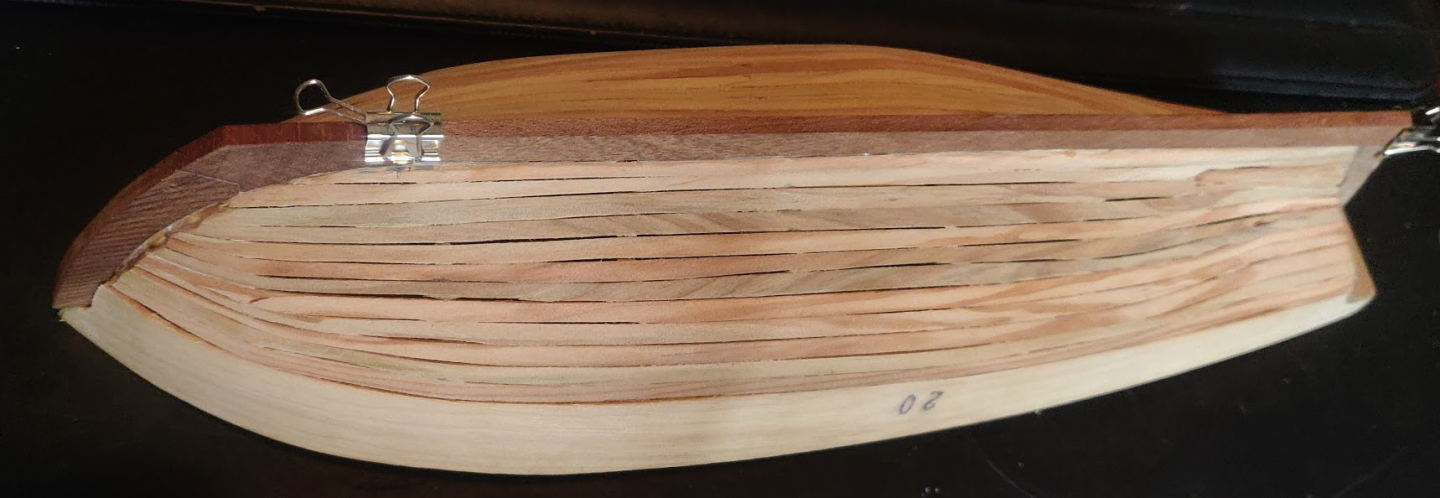
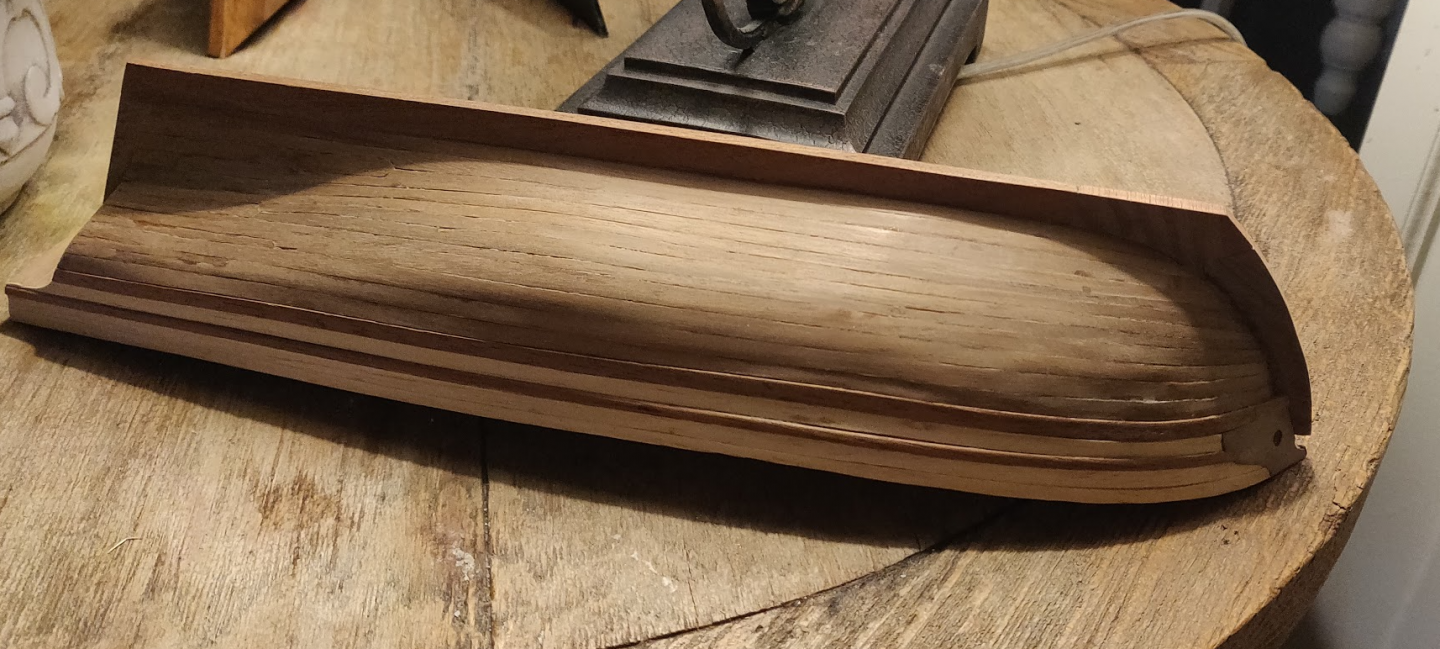
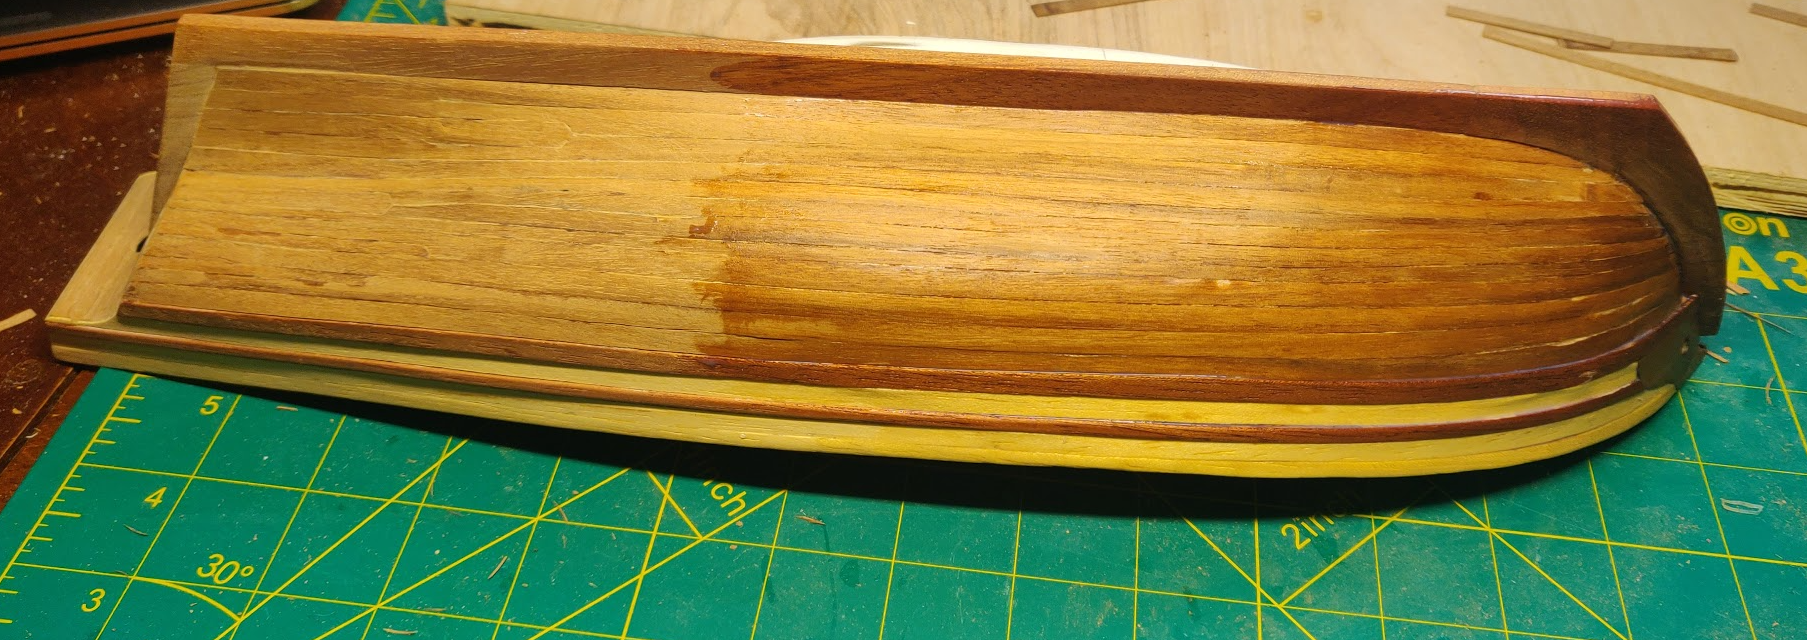
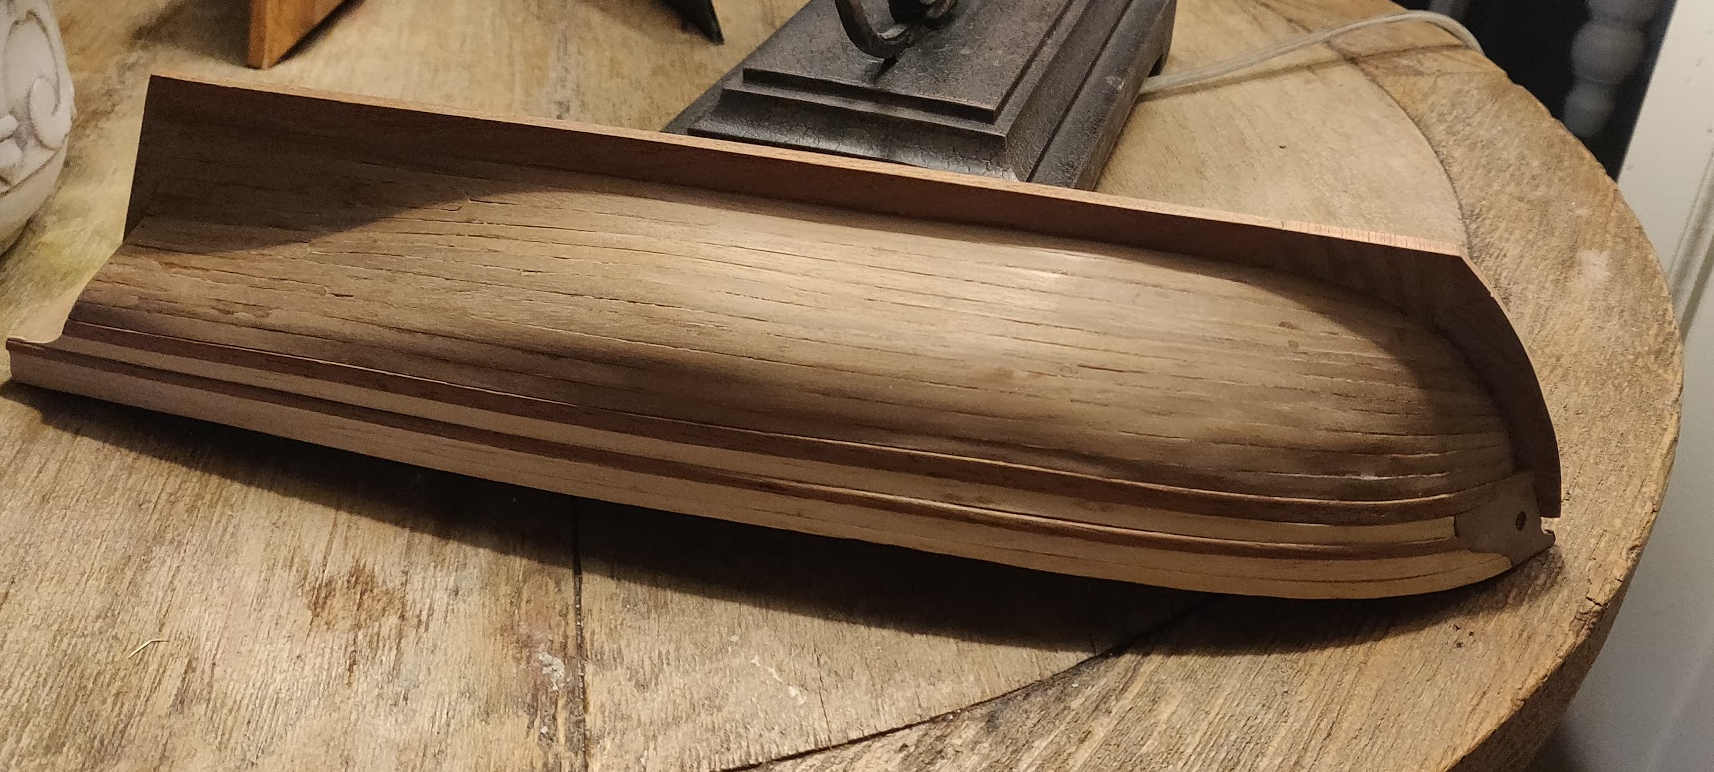
Here's a lengthwise view after applying some Satin polycrylic. The waterways have browned a little bit but they look uniform and plain. It's unconvincing to me.

Rails are up next. This began the big experiment...
-
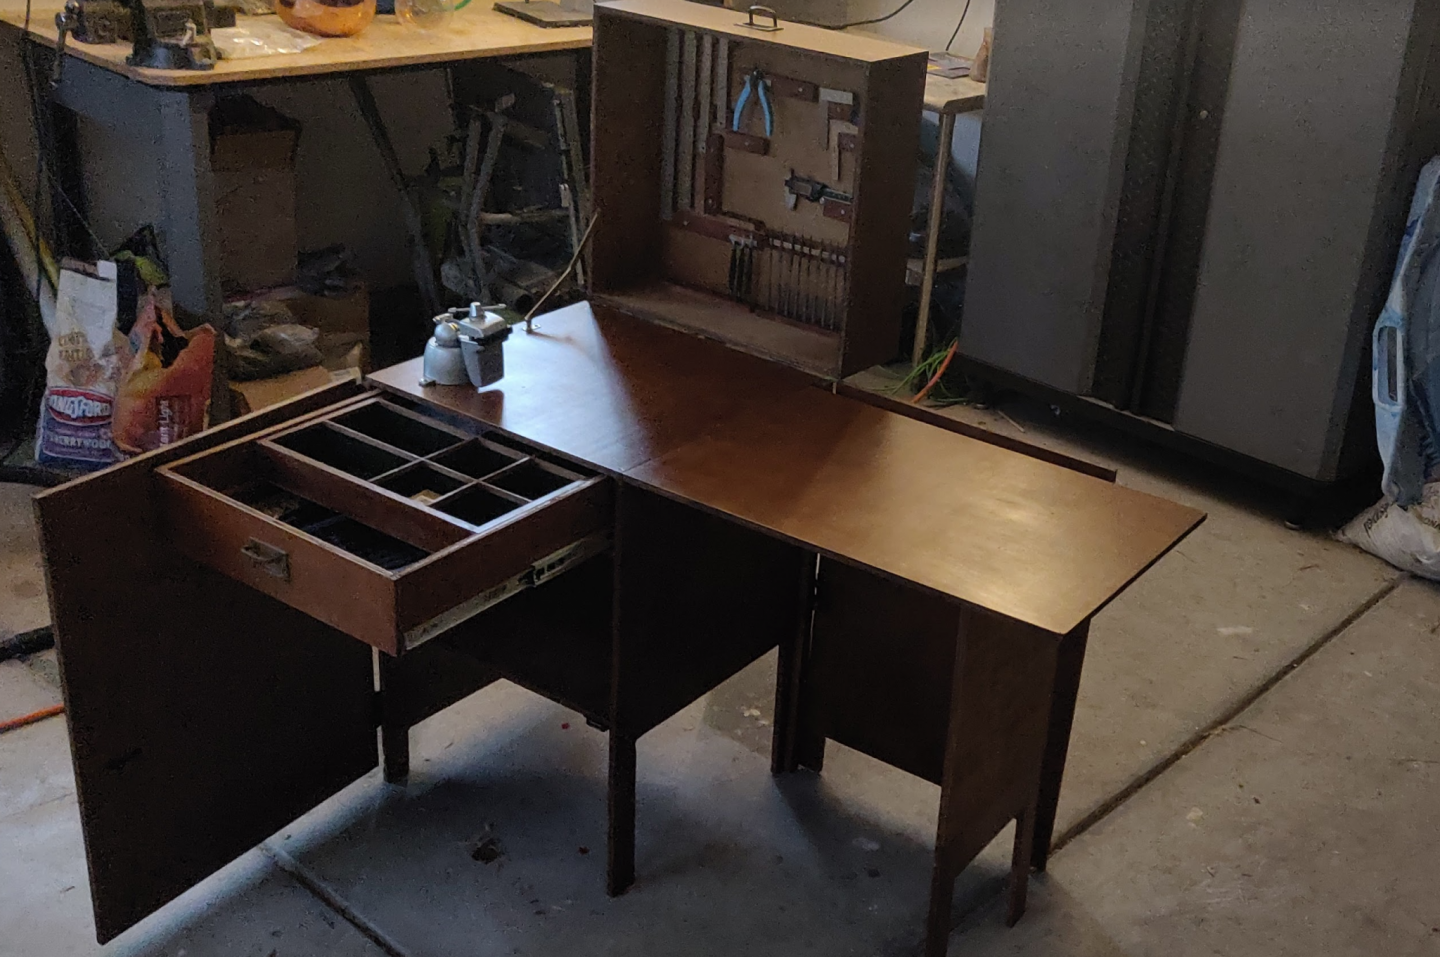
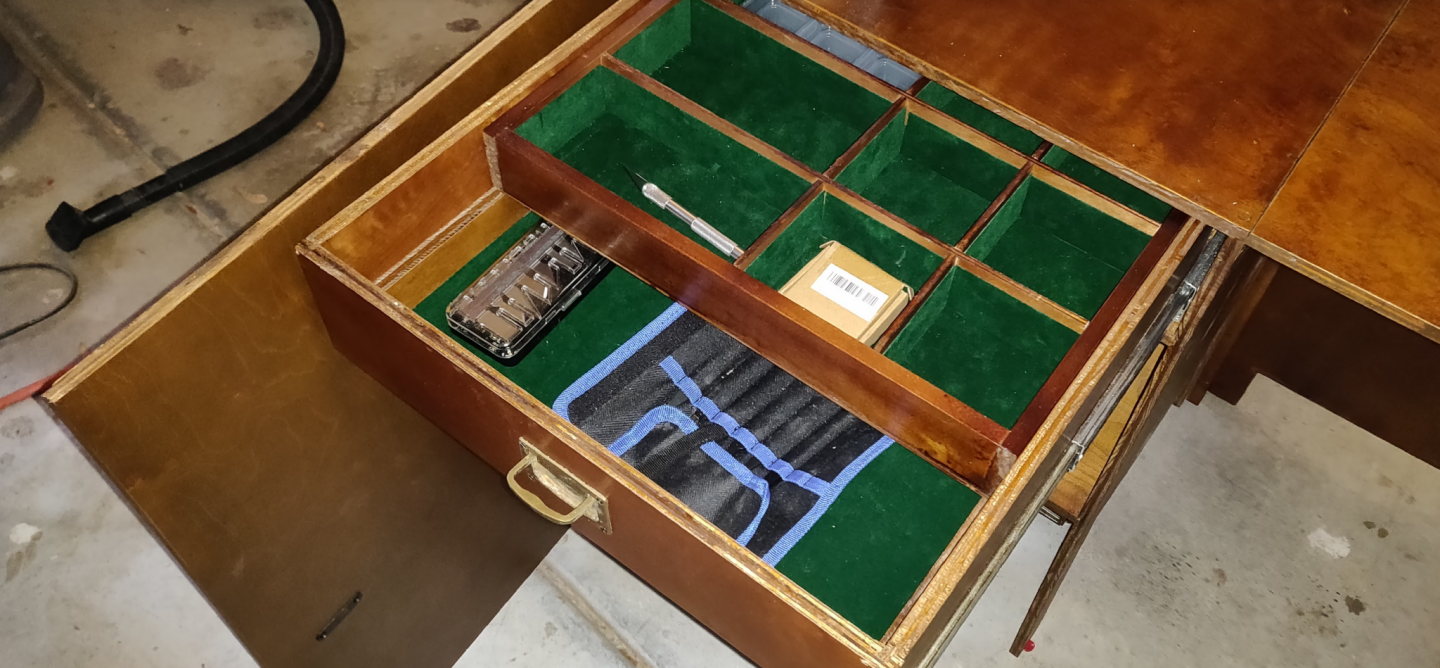
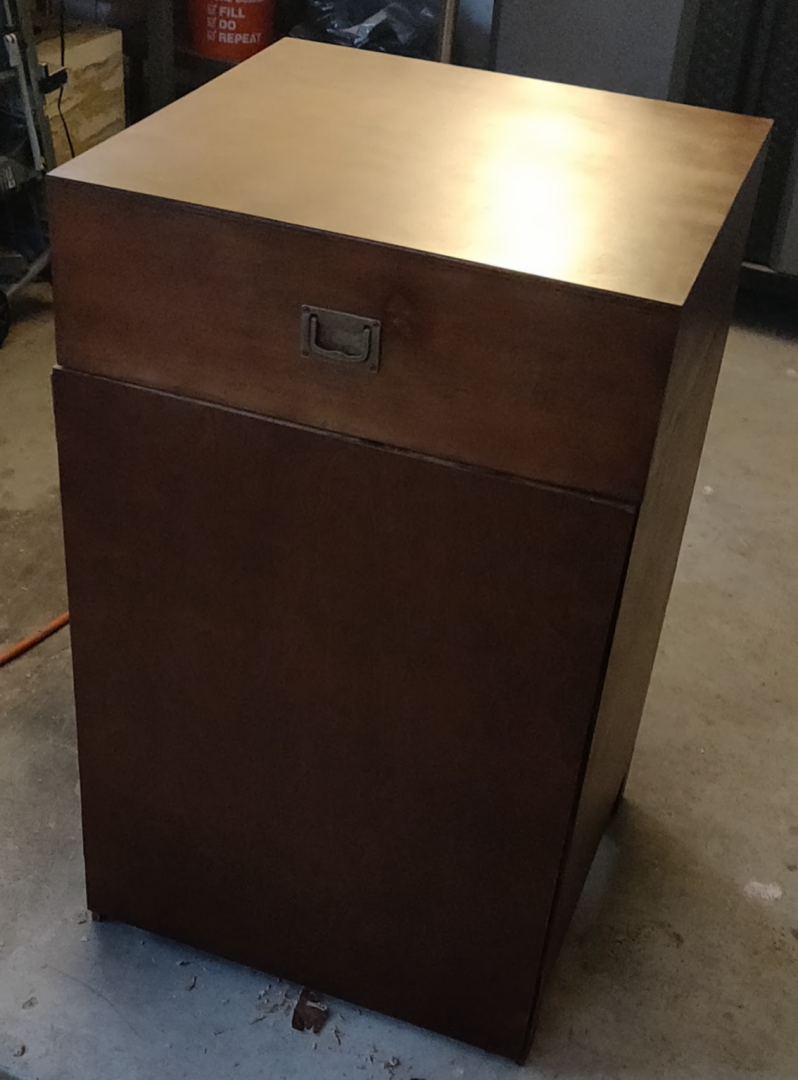
So made some progress this weekend but before I post photos, check out my modeling workstation! It's made from big box plywood and collapses down to a nice little cabinet.
Huge props if you can you guess where it's from? Hint: it's a Russian design.
-
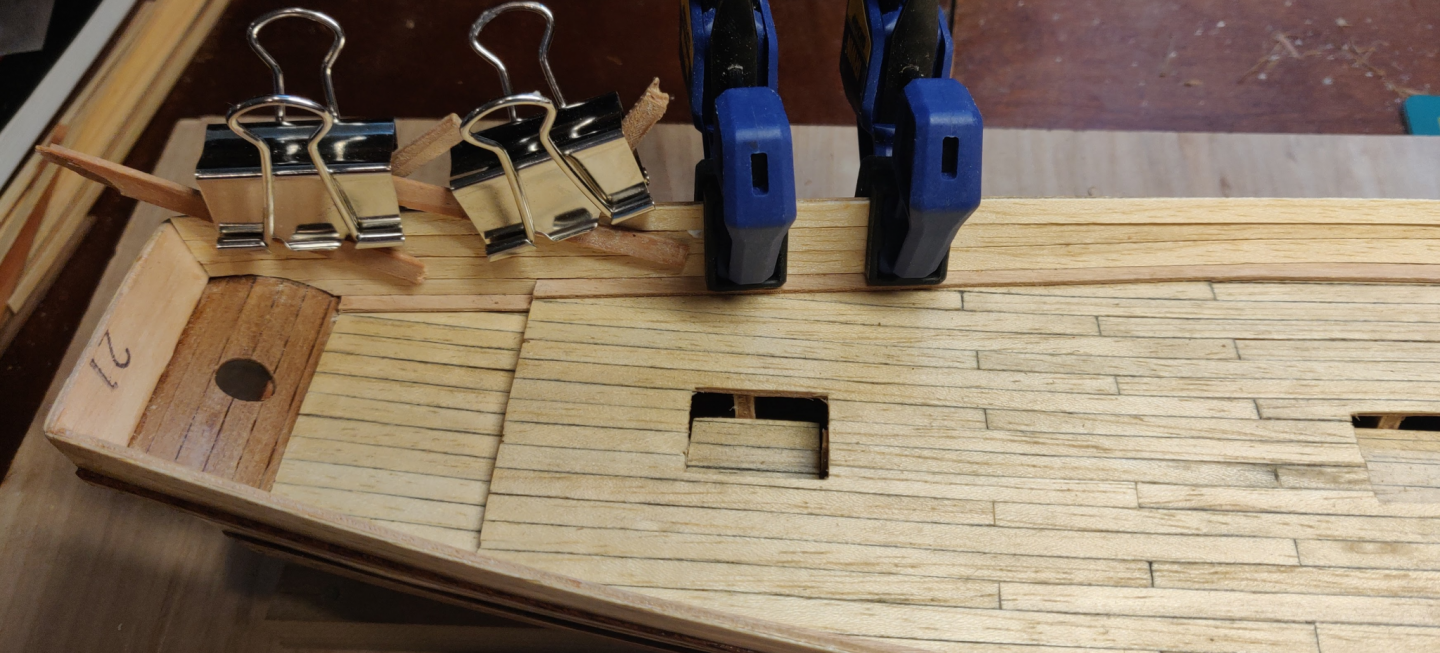
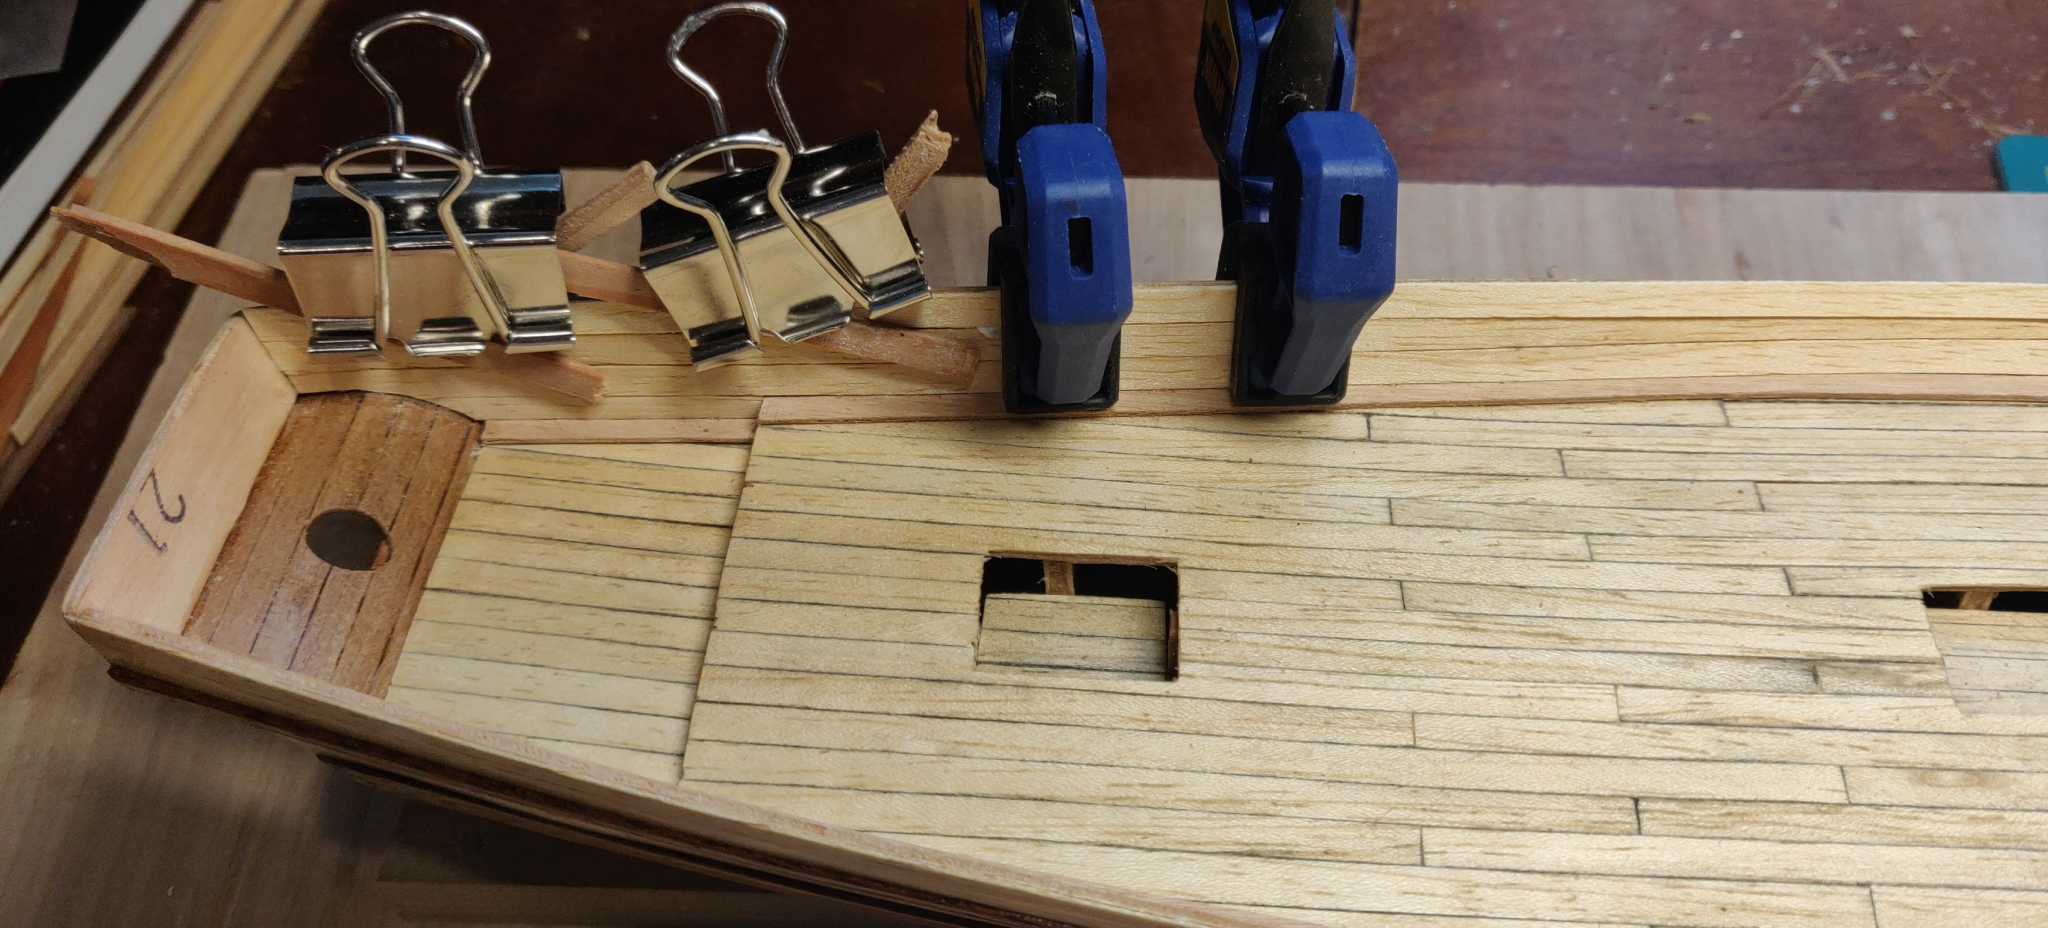
The planking behind the stanchions is going on next. Interesting that some builds install them on the raw plywood which comprises the inside portion of the bulkhead while the instructions state to use the thin walnut planks from the 2nd layer. That's not going to be possible because there are only two left... Artesania Latina included no extras in case of mistakes!
That's a shame because I think walnut might have provided some attractive contrast. I'm using some of the copious amounts of extra yellow deck planking that provided with the kit.
-
Thanks! I have been reading build logs and have discovered a few good tips but I find the best way is to just build and gain experience.
-
June 16, 2020
I spent a few hours sanding things as smooth as I dared without going through the planks. There were four spongy spots and 13 other minor errors (which only I will probably ever notice but will haunt me forever).
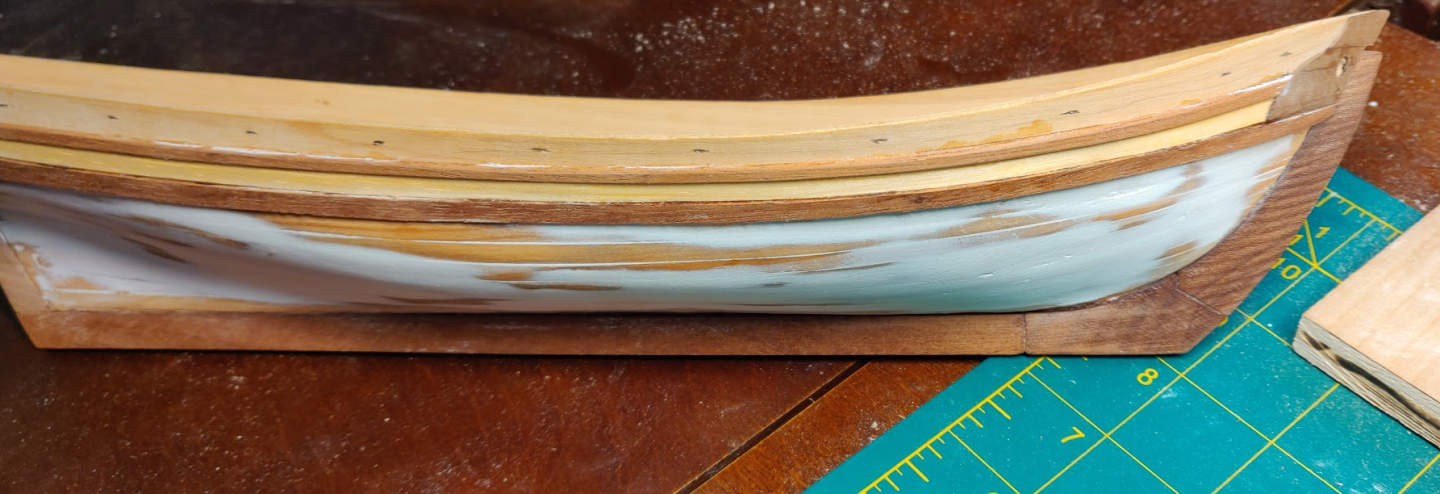
I thought about Tung oil but was not impressed with how it looked, so I opted instead for Wipe-On Poly. I wanted a semi-gloss look to the boat. I could have used lacquer but that would probably have taken a lot longer and I've been pleased with how it appeared in other builds.
 I was worried when I saw the first coat... it was darker but not what I was hoping for. Fortunately, the next five coats brought the colors out nicely. I sanded the first two coats with 220 grit, then used 400 for coat 3, then #0000 steel wool for the following three coats.
You can't see the spongy planks in this photo but you can see small areas where the spackle is peeking through the planks. There was also a bit of CA glue on the other planks that I missed.

I then proceeded to planking the starboard half. This time, I followed a tip from Mastini and instead of using CA for the entire plank, I used Weldbond and left a small gap every 1/2 - 1", where I applied a dot of CA to hold the plank down. This worked out well in that it gave me time to push the planks together tightly and close the numerous small gaps that appeared on the port side. I was also very careful to scrape out the spackle/glue globs that formed where the planks bowed. I filled these with CA and tightly pressed down. This eliminated all of the spongy spots on this side.
Well... almost all. It turns out that I missed a major one, which was not discovered until final sanding. The sand paper ended up going entirely through the plank. There was no way I was going to be able to pull it up without doing some serious damage to the boat, so I left it.
You can see how uneven the holes are for the anchor ropes above. I later expanded these by filing so they aren't so out of whack now.
All in all, my planking skills improved noticeably between the first and second attempt. I counted 17 visible errors (4 serious) on the port side. On starboard (my second attempt), there were just four visible errors. There are a few tiny bowed planks on the 2nd side but they are only visible if you shine a bright light tangent to the surface, so I'm not going to count those.
Here's a close up of the spots where I sanded through the hull on the 2nd side. The photo looks worse than it really is. It's kind of a pleasant imperfection. My wife likes it as it gives the boat a little bit of a weathered look and makes it look more hand crafted. Then again, she's my wife and has to say nice things.
Ah... another thing which is now only obvious with the poly on. The keel pieces (Ramin) were cut along different axes. The stem pieces look brown while the bottom keel piece has a proper red color. I initially thought that they were replacements or cut from different wood, but when viewed from the side, the brown pieces have an identical red color to them. The kit was made in 1982 so there's not really much I could do about this, but now I know to look for it in future builds.
A final note. I had considered using a pore filler for the surface but in the end, opted against it. I like the plank lines that are still visible through the poly. They separate this boat from what might otherwise appear to be a plastic model. Also, the pore filler would have given the hull a near mirror finish which was undesirable to me. But something I might consider in the future.
-
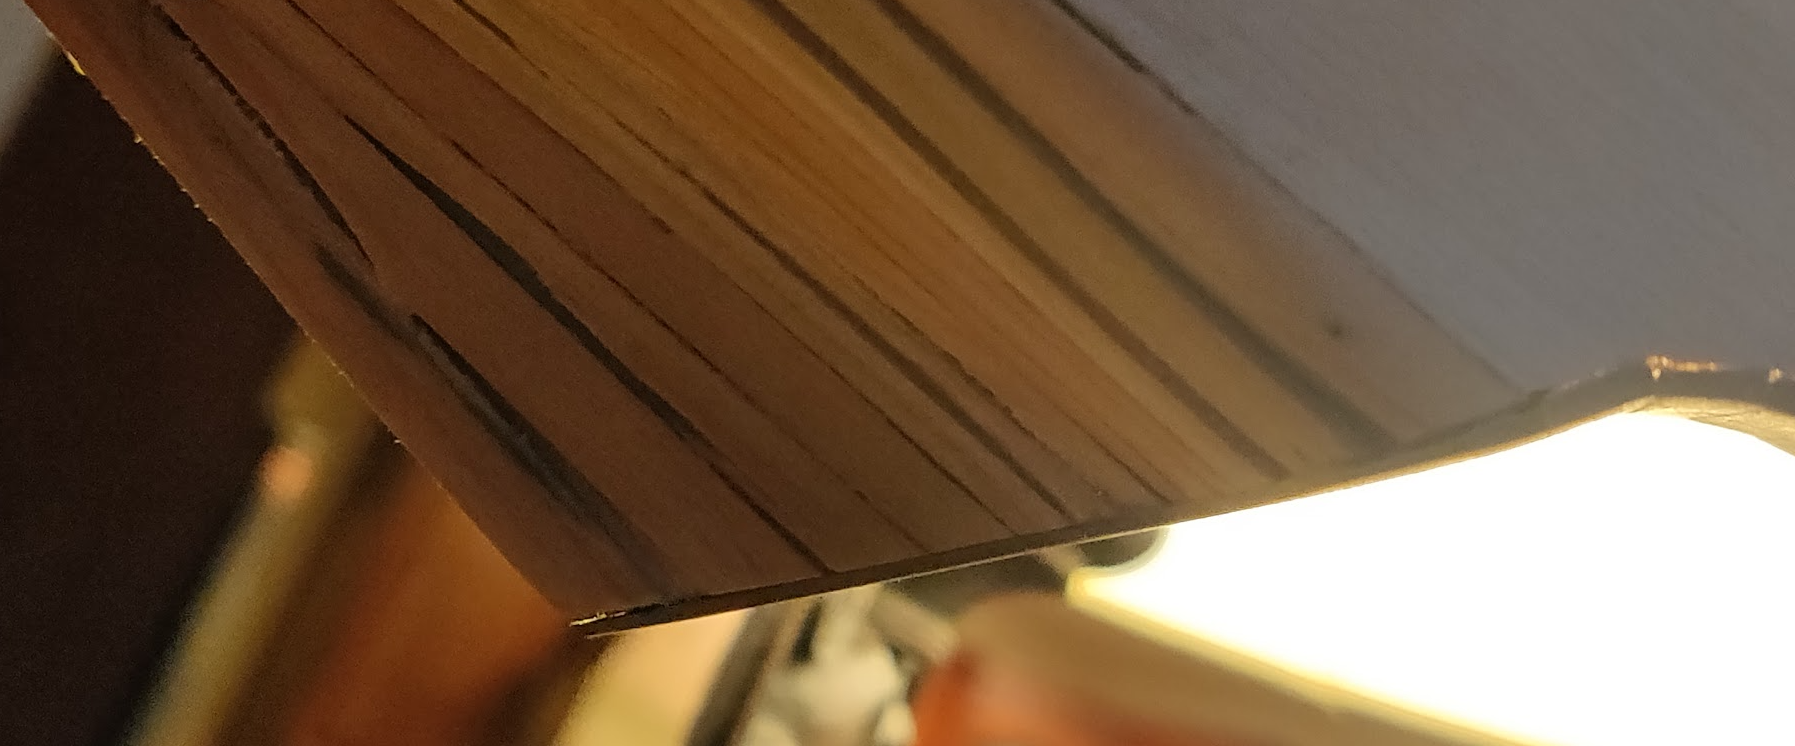
Next up was the transom, which I planked with thicker walnut strips. I really like the materials in this old version... they seem to be considerably better than the newer kits I've seen.
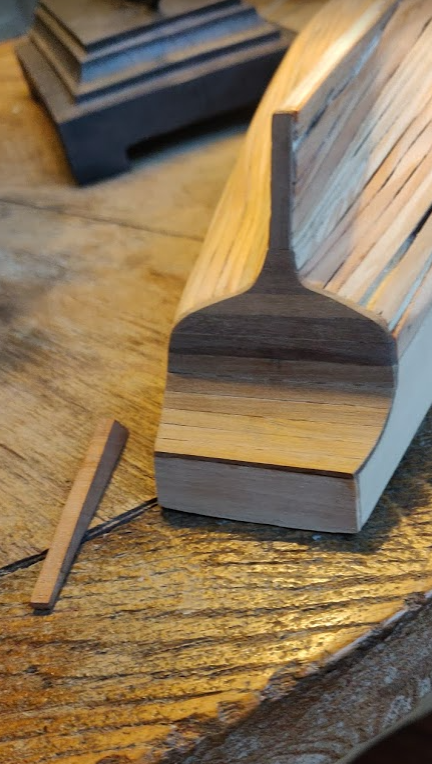
Later I found that the second layer of planking ran over the edge of the transom. This layer is made from a thin, fragile walnut and the ends don't sand very well at all. If I were to do it again, I would probably consider sanding down the first layer of planking that runs up to the transom and making the 2nd layer flush with it. This would show the edges of the transom but the wood there is much thicker and it is very flat.
I did exactly this with the the planks on the bottom running to the stern. This was very tedious... I whittled them down with an xacto blade and smoothed everything out with sandpaper.

I also cut a hole for the rudder at this time. Started with a small drill and expanded it with tiny files. I wasn't sure what size to go so I stayed conservative. Later, I discovered the instructions state to make it 8mm but I'm probably pretty close to that (maybe smaller).
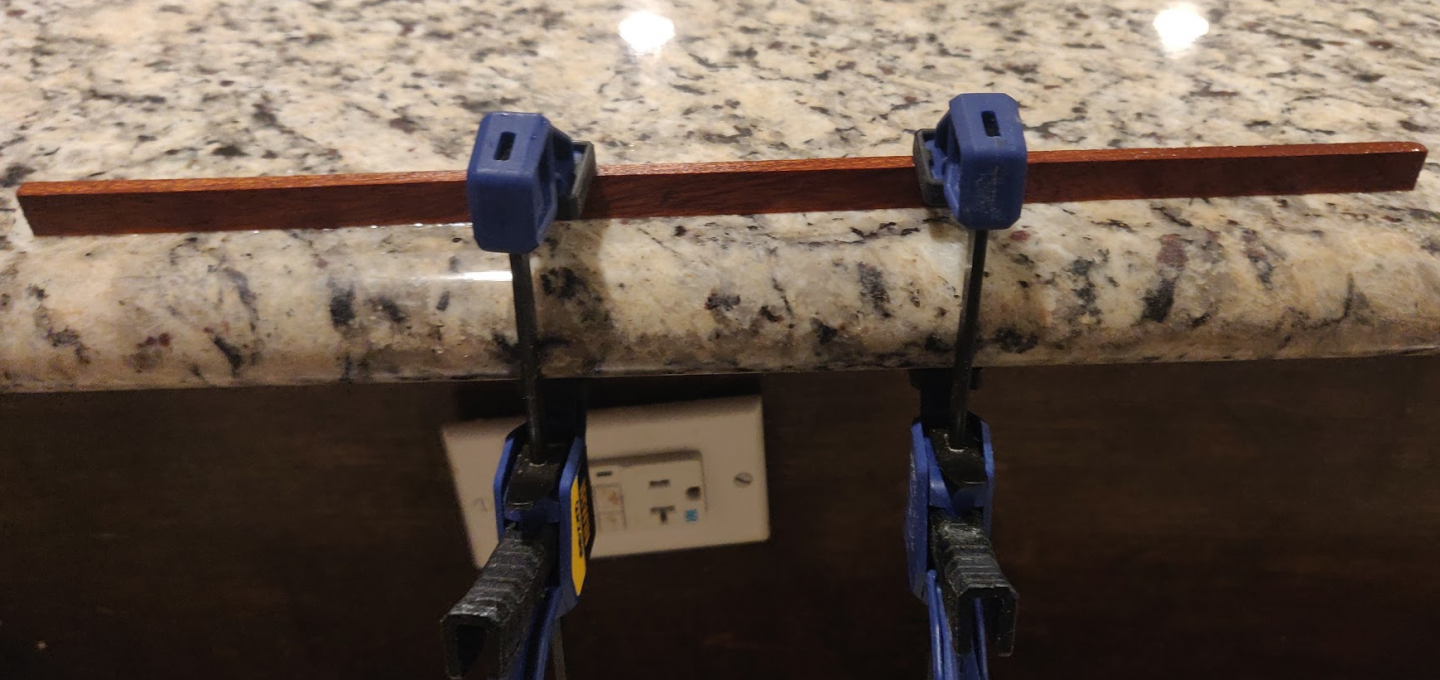
I then worked on fitting the (real) keel. Sadly, I found that the main keel had a slight (< 1mm) warp in it. This was the only piece I found in the kit so far with any warping issues. I soaked it for about an hour, then clamped it to flat marble surface. It dried overnight. The warp was much improved. I ended up just sanding it manually until it was flat with the hull. The bottom was still slightly warped but this was easily fixed by running it over flat sandpaper once it was attached. The warp is totally invisible now.
I fit the stem to the bow, which took quite a bit of nerve wracking work. I had to cut into the bulwarks at the front. I ended up with a slightly oversized gap (0.5mm) but you can only see it if you look straight on from the bow, so it's unnoticeable for all practical purposes. I used this opportunity to expand my rabbet joint using an exacto blade and sand paper, as this would be much harder to do once the keel is attached. Finally, the pieces were glued and clamped.
After this, I found that my longest keel piece had a little bit of a twist to it. I realized at this point that I am seeing things that nobody else on the planet ever will. Nevertheless, I covered it up by sanding the keel at the ends to make it appear perfectly flat.
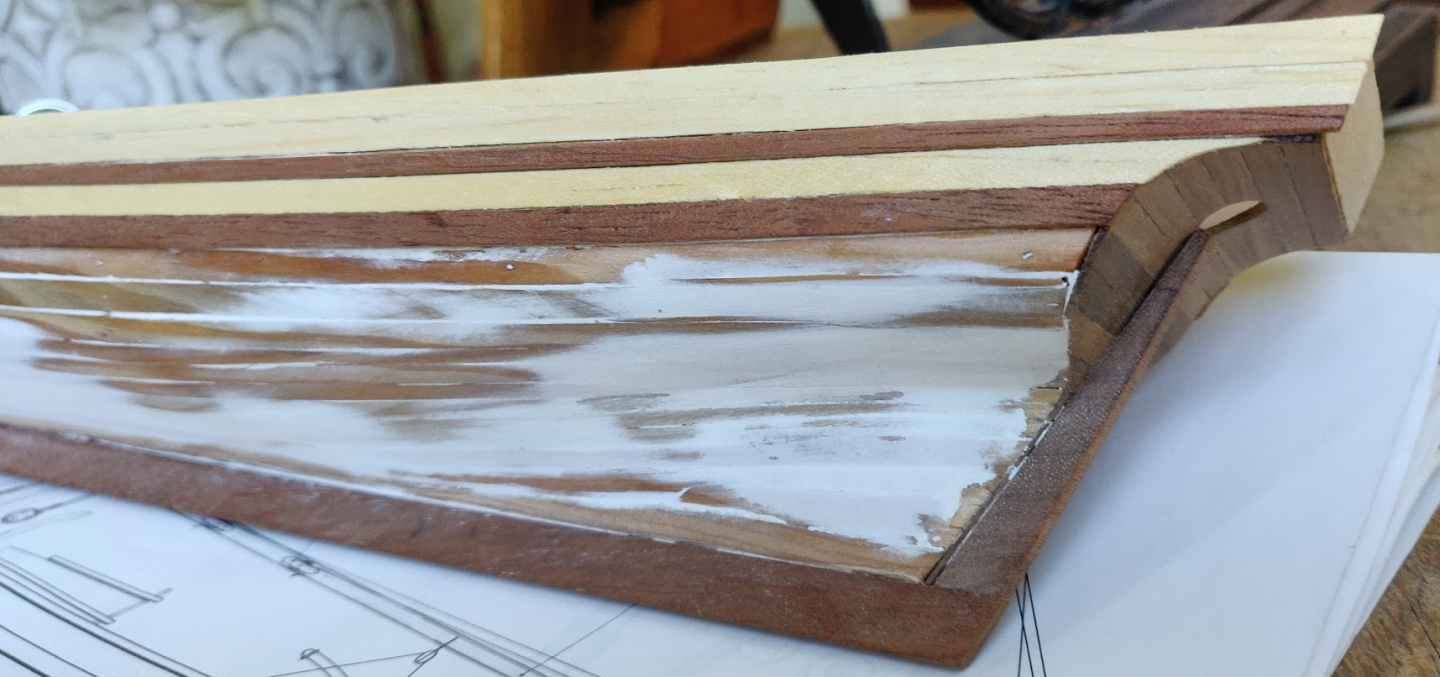
So on to my biggest regret with this boat: the filler. I followed someone else's suggestion and used spackle for this. Don't do it! While it does sand easily and fills the gaps pretty well, I later found that the spackle does not make a firm gluing surface for the 2nd layer of planking. If the planks have any resistance whatsoever, the glue will stick to the spackle and just pull it up. Then you have a gluey mess sitting underneath the surface of the plank which has to be scraped out and dealt with. The biggest imperfections in the 2nd layer of planking were all due to this.
I think a vinyl based filler would have been much better for this. Either that, or I would have sanded it down much more to where the filler made up no more than 10-20% of the total surface area.

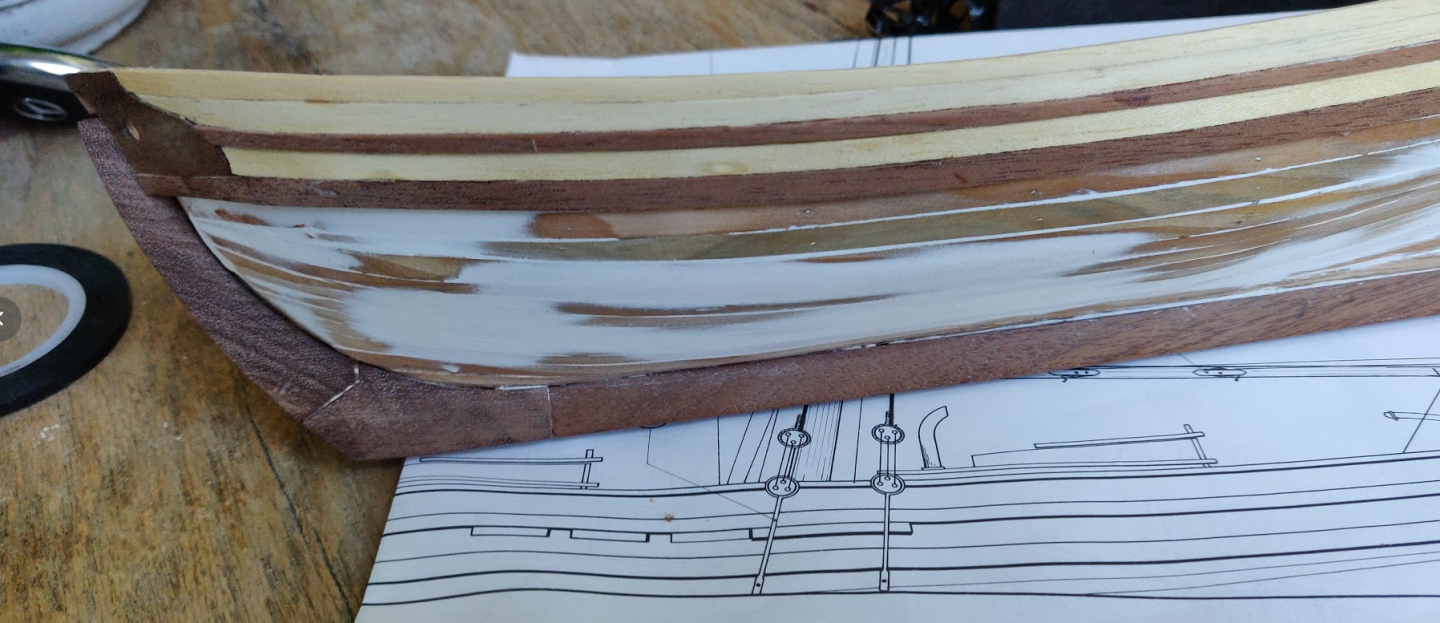
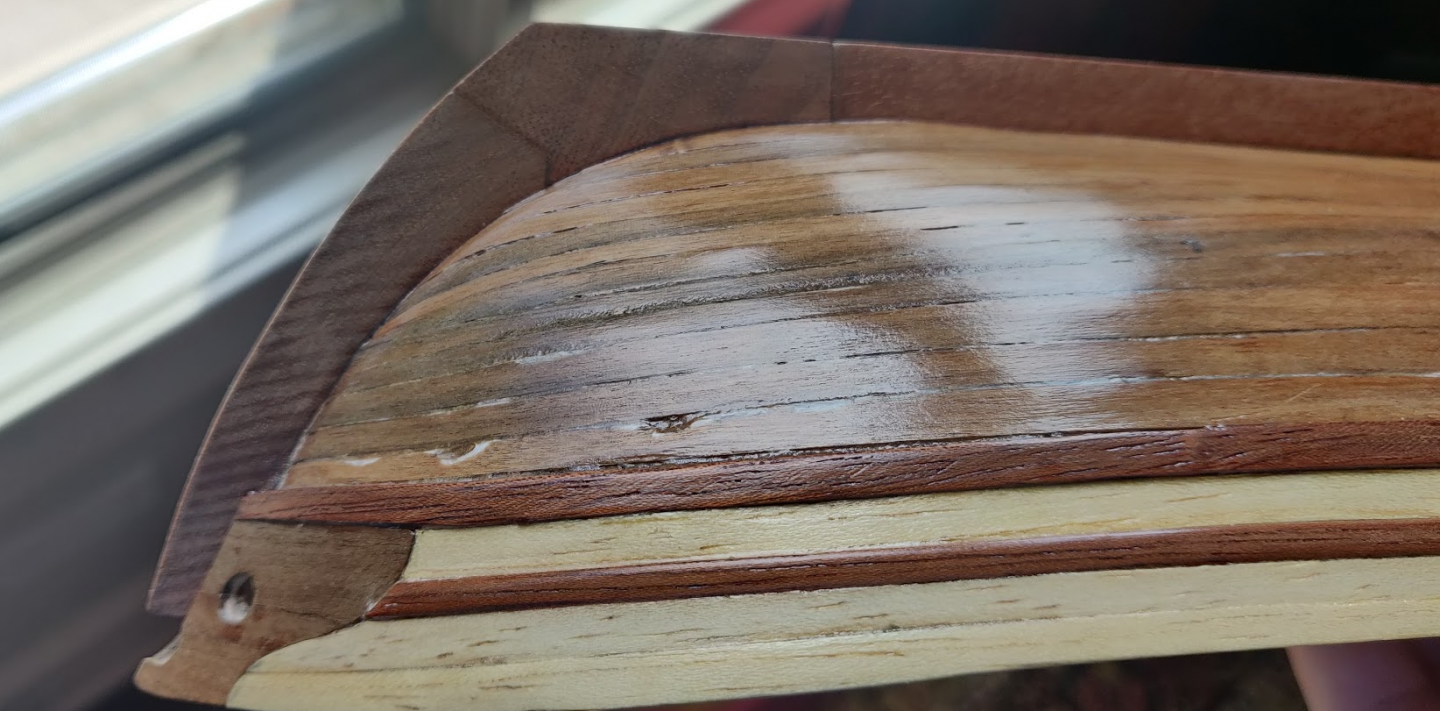
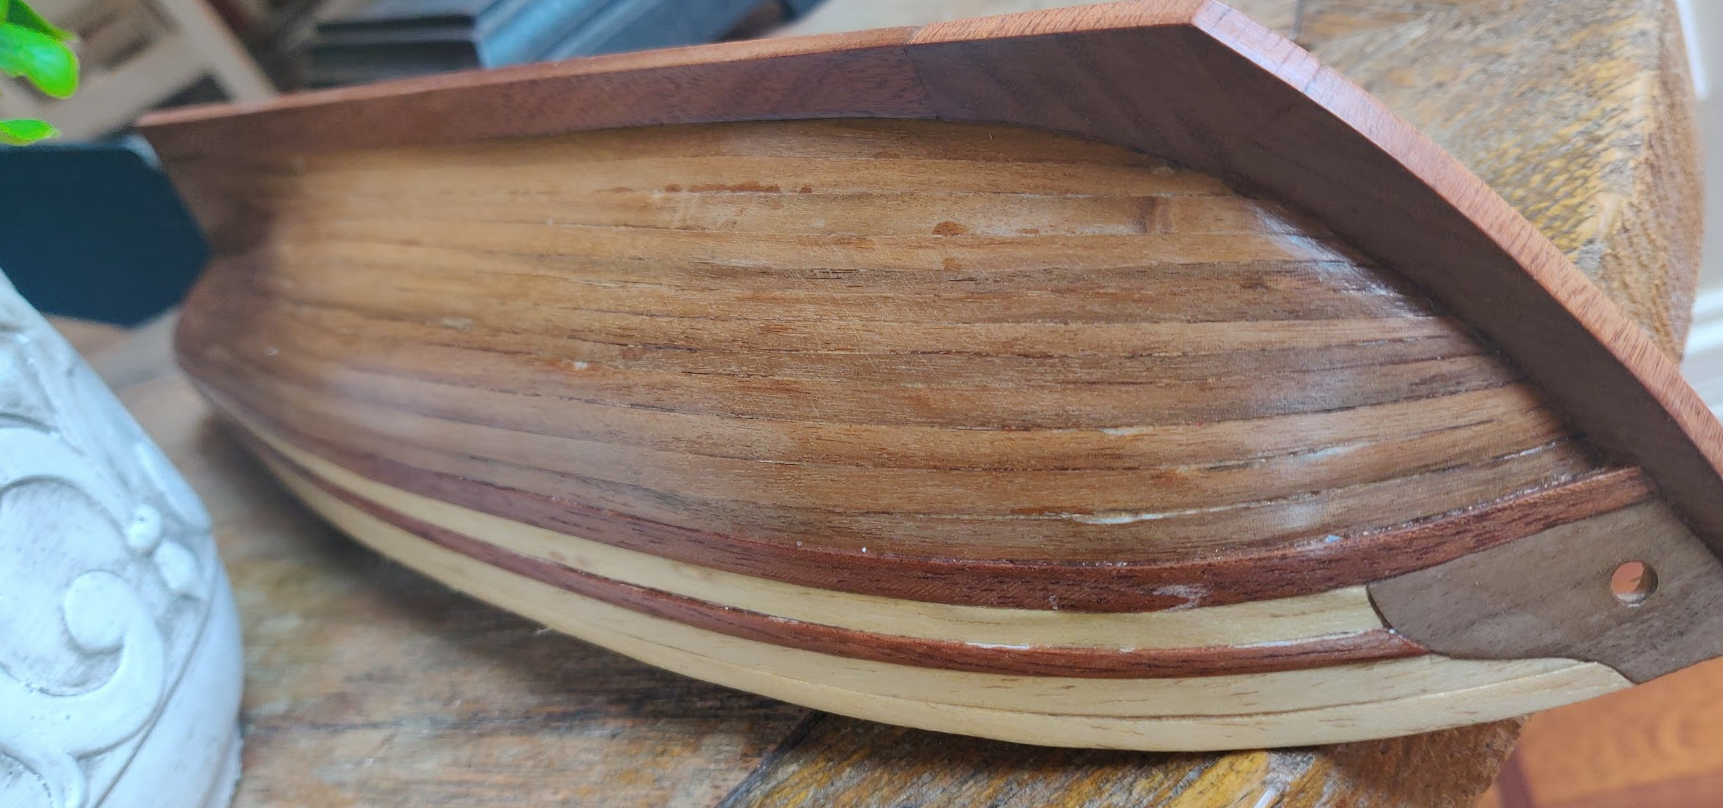
So next up, I applied the darker red and light yellow ones to the bulwarks. Pretty straightforward. The top one was easiest because there's no need to measure anything. I just glued it on, then shaved off and sanded the excess flat with the bulwarks.
I really liked the walnut pieces at the bow. I did find these a little difficult to fit though and the starboard side cracked laterally not once, but twice. You can see the AC glue marks there in the photo below. I had a lot of fun carving the lighter planks to fit this. It wasn't a perfect fit on my first attempt but my second one was.
Not shown here, but I made another pretty big mistake here. I cut the holes for the anchor ropes before fitting the walnut bow pieces. It started off perfectly positioned but the hole ended up shifting as a result of other adjustments. So my two nose pieces are set at different horizontal distances from the keel. There's a little brass fitting that goes in them, so I ended up filing the hole a little bit oversize (horizontally) and will glue the fittings to minimize that distance (the rims of the brass fitting will cover up the excess). Not perfect but hey, it's a first build. Live and learn.
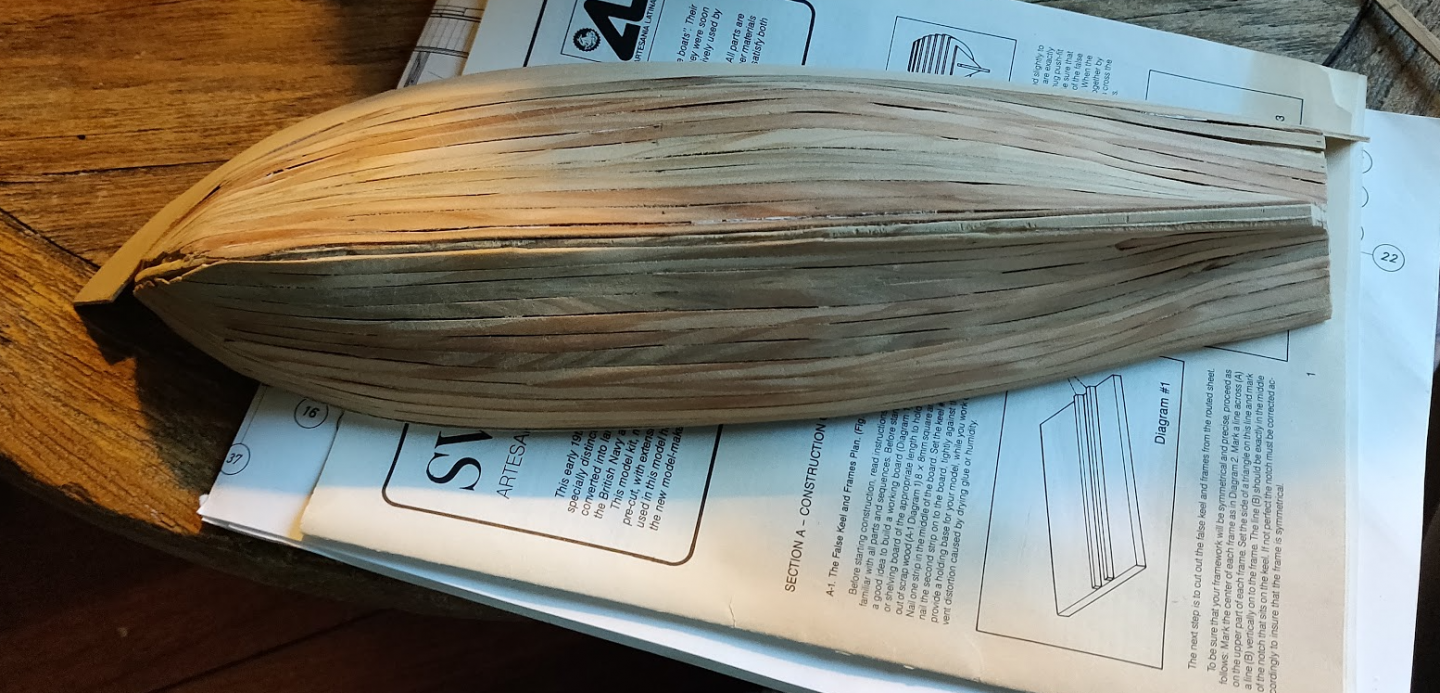
This was my first attempt at a second planking. I discovered that edge bending sucks. The planks bow and leave little gaps. I though I could sand those down but the planking is so thin that you can't, without risk of going through them completely. That in conjunction with the fact that the spackle lifts up means that I ended up with some unsightly bowed planks.
A casual observer will probably not notice but I'm sure most people here will.
But hey, in my favor is the fact that I started to get a little better at lining off the hull. The planks don't taper to splinters and while the do have a somewhat upward slope at the bow, it actually came out pretty decent.
-
So now about those pesky rabbet joints. I found the plywood provided with the kit to be quite hard to sand down from the end grain side. I ended up resorting to files and eventually a dremel. The joint came out ok though I'm sure there's lots I could learn to do better.
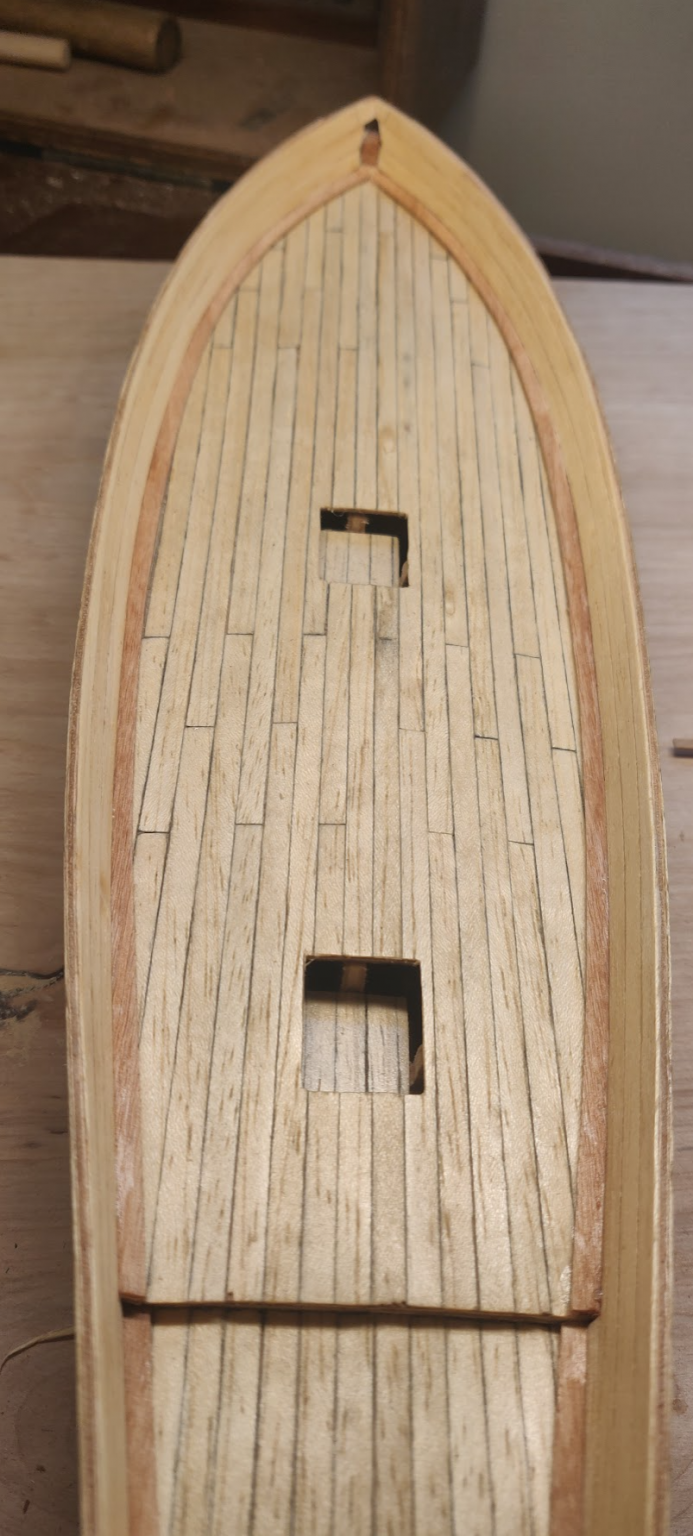
I then proceeded to plank the upper deck. I thought this would be a LOT easier to do now than to wait. It was again, pretty straightforward. I drew two sets of lines spaced 1" apart on the deck and cut the plants to fit in a repeated pattern 1"-2"-3" down starting from the centerline. I ran a little piece of charcoal from the grill down the sides of each plank (which was difficult and time consuming) and this gave me a discernible gray line. I don't like the heavy look which results from pencil that I've seen in other builds.
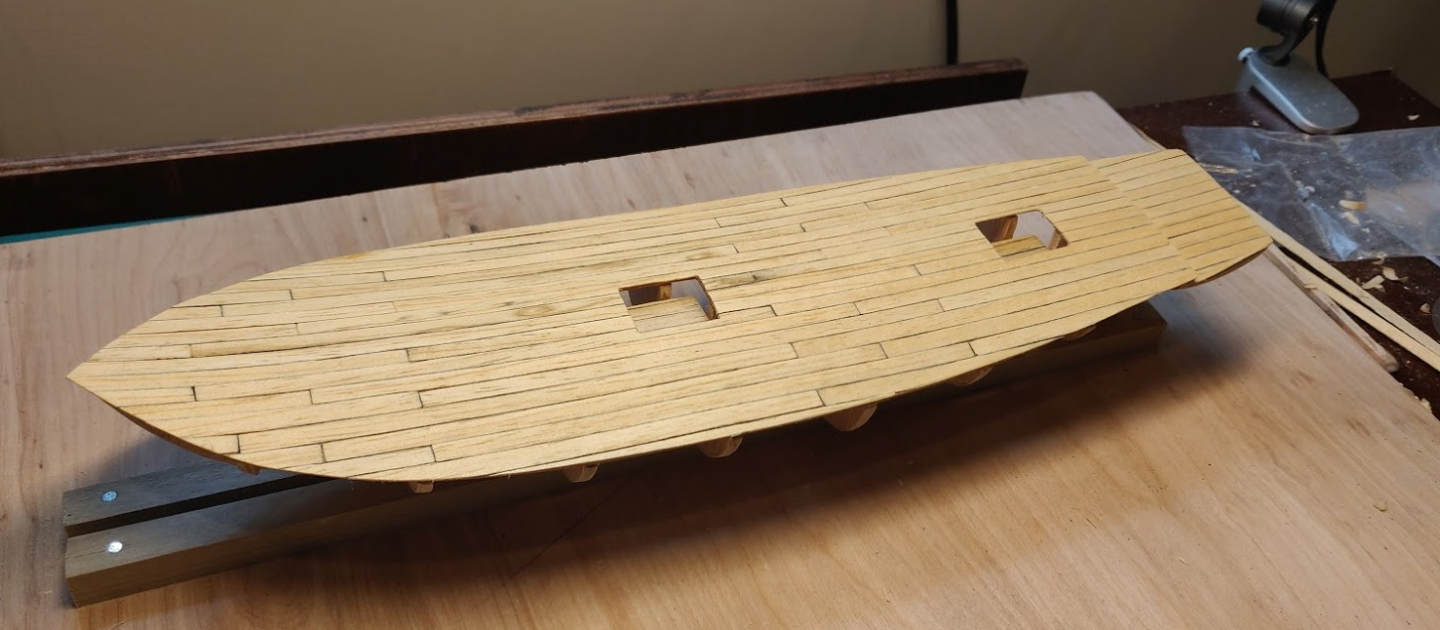
You'll probably notice that I got a little smear of charcoal on the deck near the front cabin. Fortunately I found out early that this doesn't sand out. Oh well, gives it a nice look I think!
June 6, 2020
On to the first layer of planking. I had no idea of what to expect here. I did the first side using the typical beginner's method... Just attached the planks and tapered as necessary. I found out pretty quickly that this results in planks which come to a point and leaves lots of unsightly gaps. I knew I would be using filler but I didn't like this one bit.
So I started doing some research and decided to try my hand at lining the boat. I tacked up some strings with a bit of weldbond and got them where I thought they would look good. Then I used a fan template to measure out some planks in each belt.
Then I tapered each plank with an xacto knife to fit and glued them down with Zap-A-Gap. This side was much, much better than my first. This was my first attempt at making a stealer... it came out ok but there were some gaps. Better than most of the other gaps on the boat at this point LOL. I didn't find out until later that the stealer wasn't firmly glued down so I ended up with a sanding problem later on, nearly going all the way through.
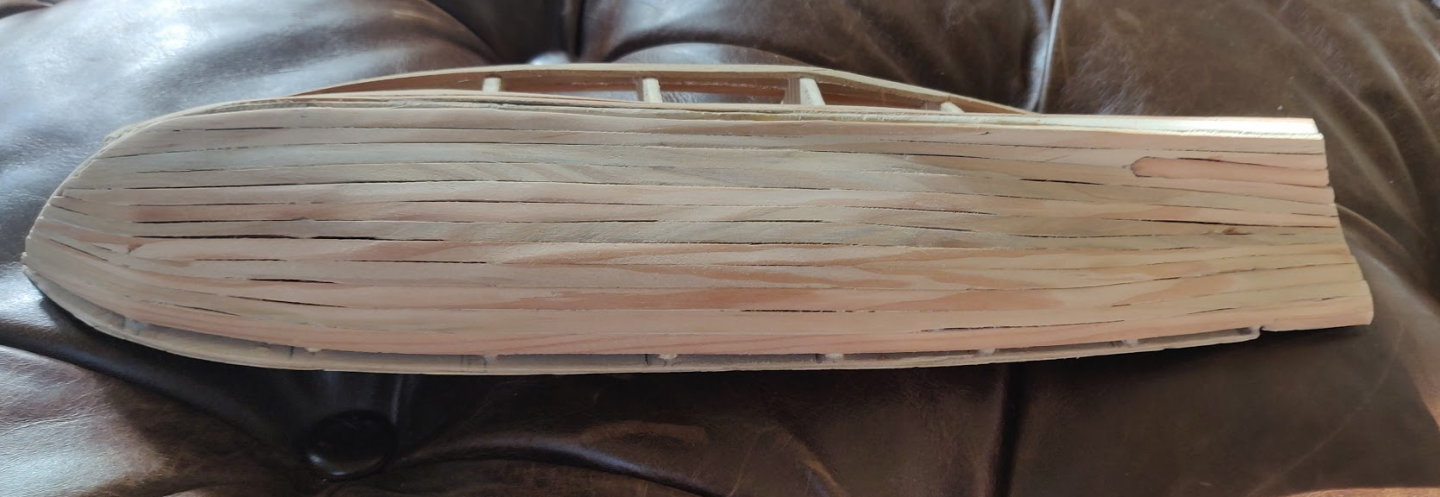
The planks at the bow were pretty much a mess but by the end, I managed to get them fairly close to the rabbet joint. Anyway, this is the sum total of my first attempt. Ummm... it's boatlike!
- BLACK VIKING and ccoyle
-
 2
2
-
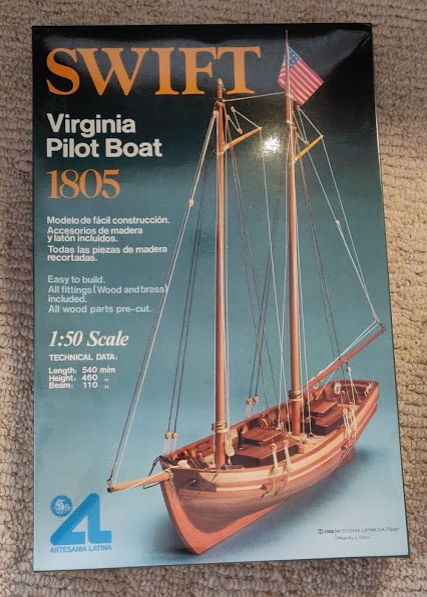
Given the copious amounts of free time afforded by the Coronavirus lockdown, I decided to try my hand at building the Swift by Artesania Latina. I've just finished the planking, so I'll share some photos of my progress and a few brief comments.
May 30, 2020
I purchased the kit on eBay from someone who had been carrying it around with them for 30 years or so. They included some old catalogs and tools from the 1980s which were a curiosity but this is what I was after:
The kit was in perfect shape. No missing parts or warped wood and the bags were all sealed.
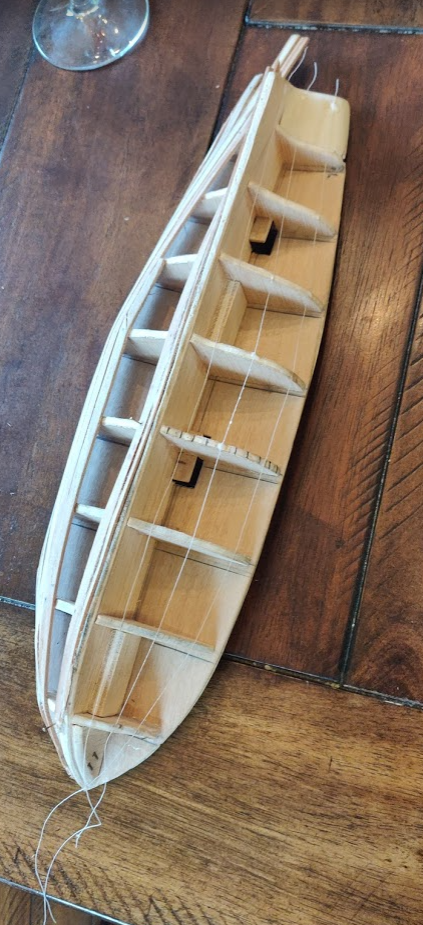
I wasn't terribly scientific with the hull. I checked that all pieces were flat and extended pencil lines on the bulkheads from the slot to the top, checking for squareness. I then test fit all pieces, ensuring they were level with the top. I used some pretty high end tools to get everything nice and square:
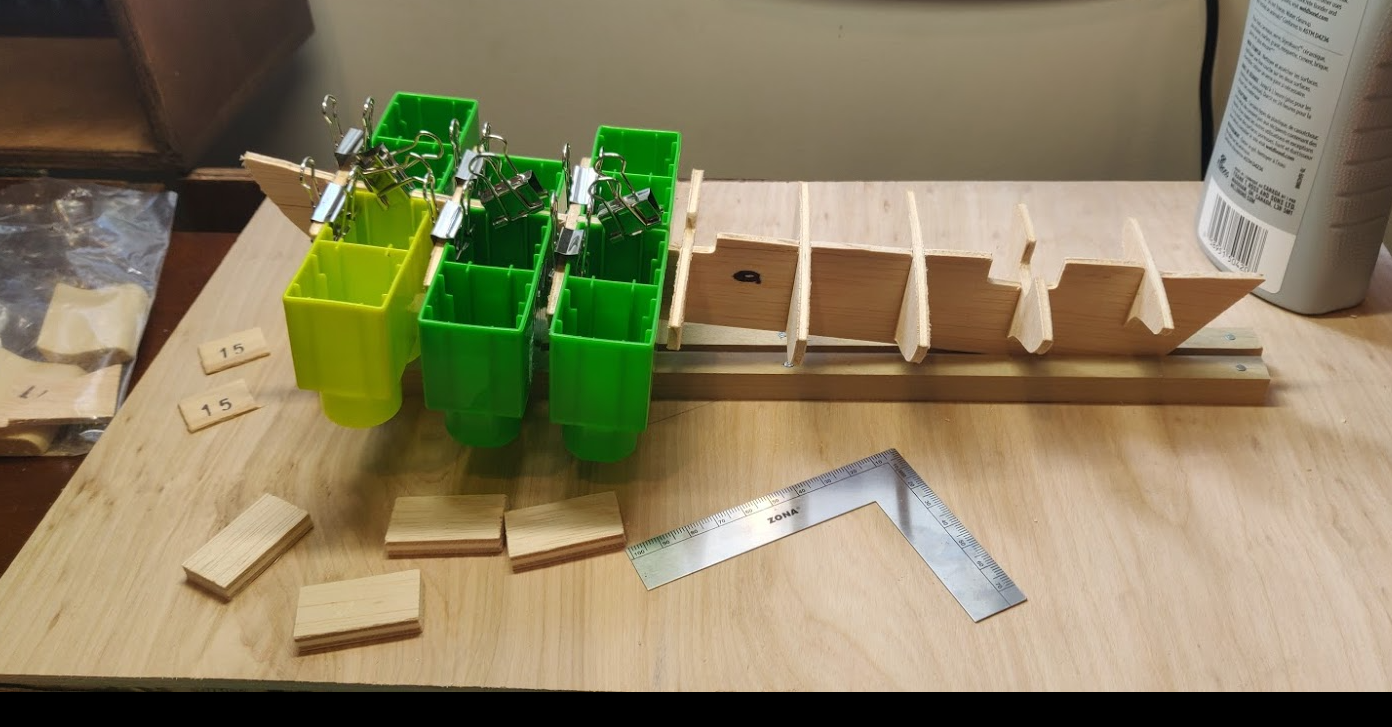
So here I made a bit of a mistake, which I didn't find out until later on. Bulkhead #5 was flush with the deck but the bottom bit closest to the keel was slightly above the hull line formed connecting bulkheads 4 and 6. I didn't realize at the time that this would cause a dip in the planking. We'll see how this plays out later.
The provided small inner decks and filler blocks were no problem and were useful in ensuring squareness of the bulkheads. I took the opportunity to test some Satin minwax and did not like it at all (maybe because I only did one coat). I sat on this one for awhile.
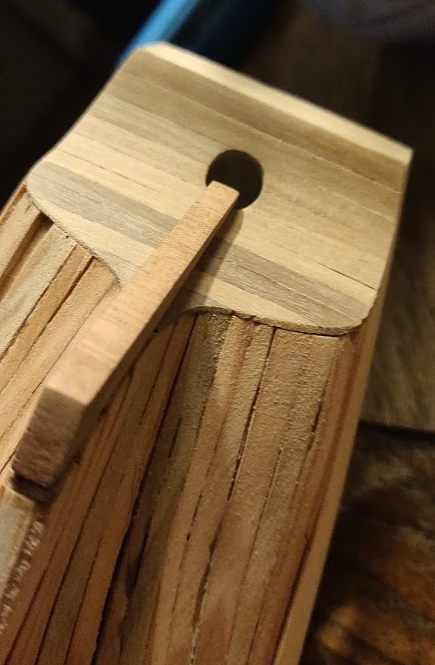
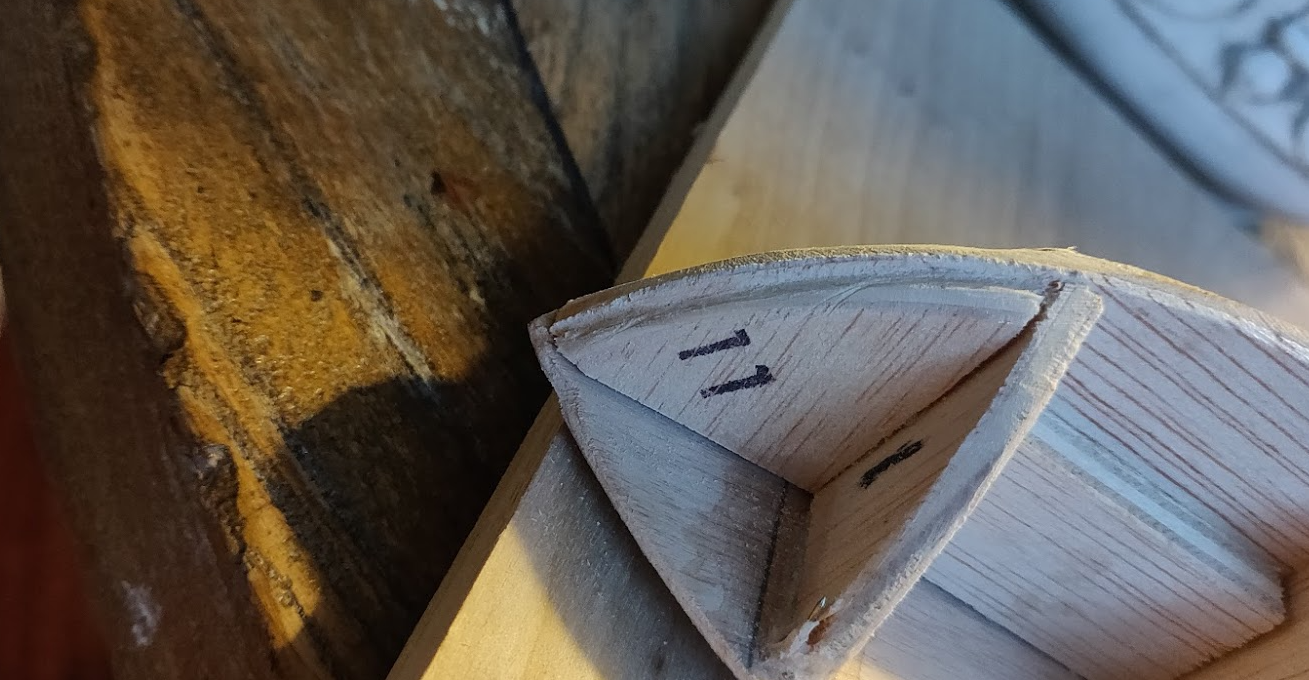
The stern filler block was a real bear. I didn't understand how to find the shape of this block from the plans, nor did I know about the old line plans available online. So instead of making these concave, I made them convex. It looked good though it was a deviation from other builds.

With the hull structure (mostly) satisfactory, I then attached the upper deck. I saw some other build logs in which people had problems with this. I found it to be very straightforward by following the instructions included in the box. I traced a centerline on both sides and carefully marked out perpendicular lines for each bulkhead, then transferred those to the top. I then used the little brass nails provided with the kit to clamp the centerline and let the Weldbond dry overnight. This was pretty important because the upper deck bends in two axes, so it needs to be attached firmly before proceeding to the second bend.
The next morning, I glued and nailed down the sides and used some rubber bands to help keep the shape. This was challenging because the rubber bands weren't all that strong. A couple of small clamps helped. I also managed to go through the sides of a couple of the bulkheads with my nails. But in the end, the deck laid flat with no gaps between it and the bulkheads.
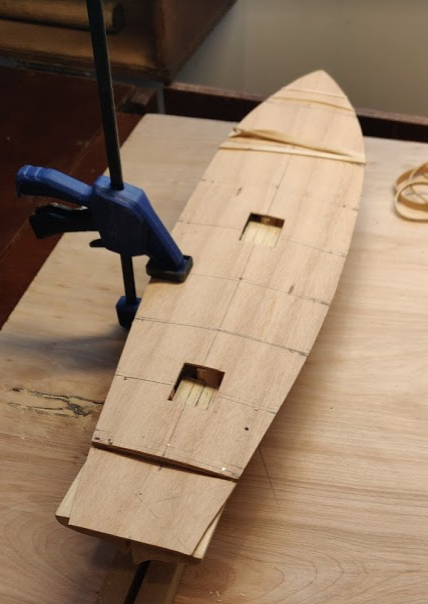
You'll notice that the quarterdeck has been attached as well. I was careful to bevel the stern filler block down, following the horizontal curve of the main deck. This enabled me to keep a consistent 1/8" distance between the two decks at all points. It's a small detail but it looks nice.


Swift by jeffBoats - Artesania Latina (older version) - First model build
in - Kit build logs for subjects built from 1801 - 1850
Posted
Nice work! And funny that two of us have started on such an old kit at about the same time.
I'm not following what you mean about using walnut planks on the cap rail... maybe I missed that in the instructions? I ended up creating a new caprail and steam bending the longer ones to fit. I do not have any intention of planking over them but I am experimenting with a weathering technique. I will put some photos up in my thread soon.