TheDane
-
Posts
29 -
Joined
-
Last visited
Recent Profile Visitors
245 profile views


-
I found some good videos on youtube that explain the different steps Search for: "Traditional Maritime Skills" and "Clinker" and they should pop up. Regards Peter
-
 aykutansin reacted to a post in a topic:
Oheka II Dinghy by TheDane - Scale 1:20 - Finished
aykutansin reacted to a post in a topic:
Oheka II Dinghy by TheDane - Scale 1:20 - Finished
-
aykutansin reacted to a post in a topic:
Oheka II Dinghy by TheDane - Scale 1:20 - Finished
-
druxey reacted to a post in a topic:
Oheka II Dinghy by TheDane - Scale 1:20 - Finished
-
druxey reacted to a post in a topic:
Oheka II Dinghy by TheDane - Scale 1:20 - Finished
-
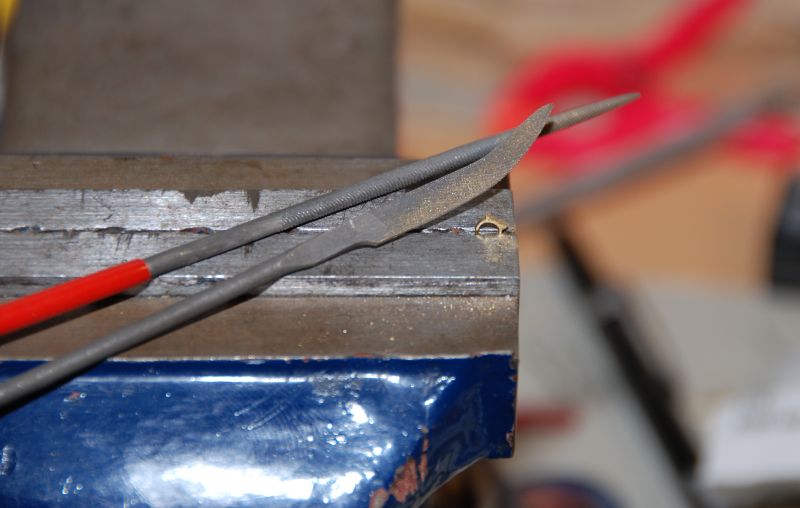
Hi Peter, Hey thanks for showing your step by step progress on making your oar locks. You know when I made oars for the first time it was on my Lobster Smack. But on my Dinghy build I made a better effort. Go to page 4 of my build and you can see how they turned out. It's on my signature. I also made a turkshead knot for each oar. I practiced at first with larger scale thread. Then I used the correct scale. The whole process of learning to tie the knot and placing it on the oar about 3hrs. I'm a slow learner. Plus I also found a couple of sites on the internet that helped me out on making knots and the leather protection or you can use thread to simulate rope. The site will give you info on what size to make the leathers and where to place them on the oar. Thats a good idea using paper to simulate the leather. But by white spots do you mean after cutting your paper. I use card stock. That way when I cut it for example if I use black, it's black all the way thru. HERE ARE THE SITES... This one shows you how to make the knot... http://www.animatedknots.com/knotlist.php?LogoImage=LogoGrog.jpg&Website=www.animatedknots.com This one shows you where to place the leather and make the leather... http://www.woodenboat.com/wbmag/getting-started/pdf/Leathers-Revised12-10.pdf another on the leathers... http://www.boatdesign.com/postings/Files/leather.pdf info on oars... http://www.shawandtenney.com/wooden-rowing-oars.htm i hope this helps you Peter. Good Luck........................Mario HI Mario, Thanks for the nice comments and the links to the sites with info. I just took a quick look and there is a lot of information there I have not found myself. I went to your build log and saw how you made your oars for your dinghy and they came out great. The paper method I tried still needs some improvement. The white spots I mentioned are where the layer of color is broken so the paper underneath shows through. I agree that using colored paper is better but I did not have any. I may end up using colored paper though, if I can't control the white edges. Card stock is too thick for my oars though, unless I file down the diameter where the leathers will go so that the diameter of the leather surface is just a bit larger than the original diameter. This would be trickey, I think. The diameter at that location is only about 2.8mm or 7/64inch. I haven't decided what method I will use to ensure that the oars don't slip out of the oarlocks: turkshead knot or several layers of "leather". But I will learn how to make turkshead knots anyway Regards Peter HI Peter, I have been following your build and am enjoying the learning experience. Thanks very much for sharing your techniques. Bye for now! Cheers, Hopeful aka David
-
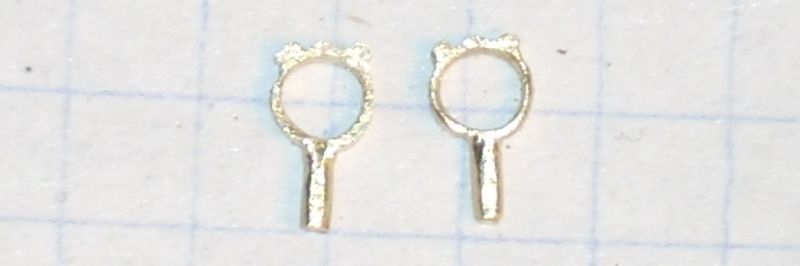
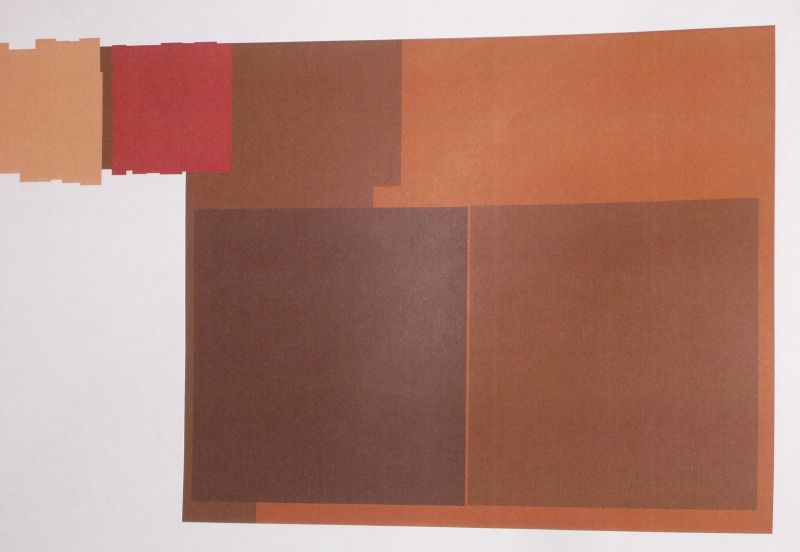
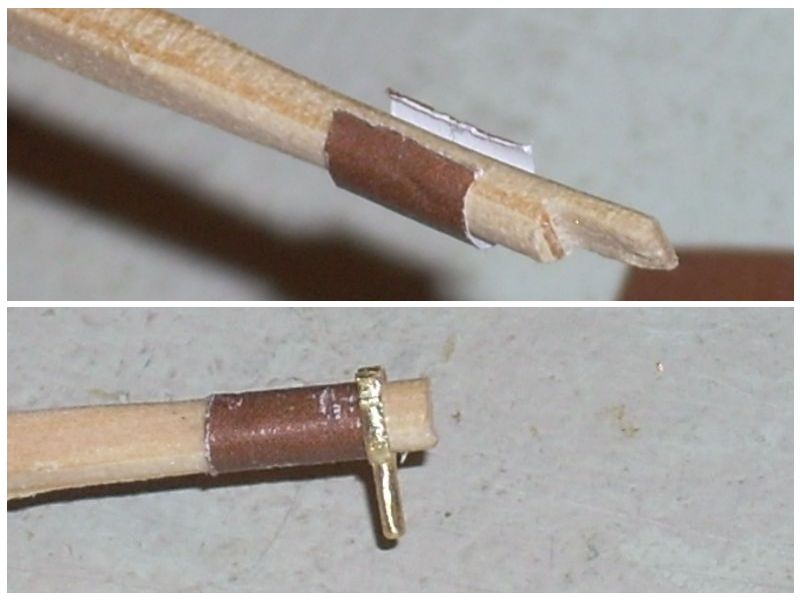
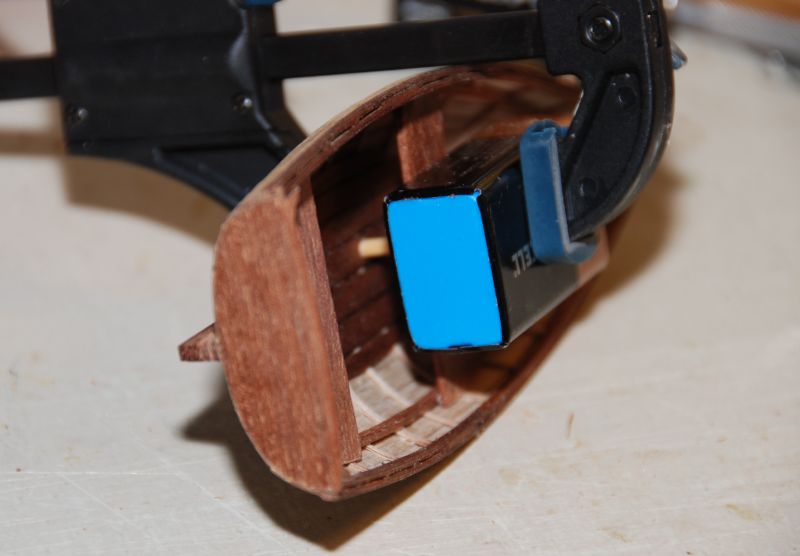
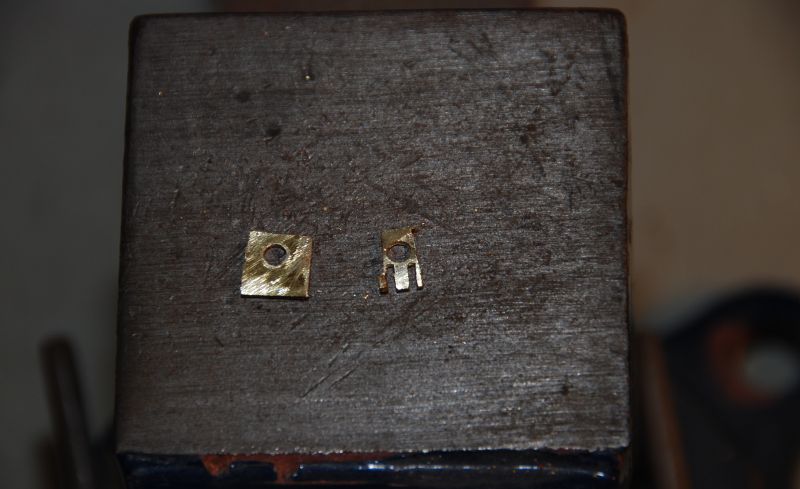
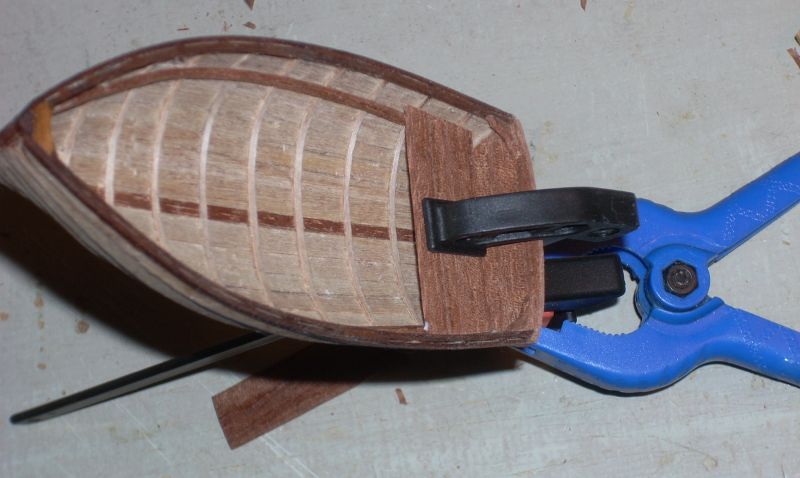
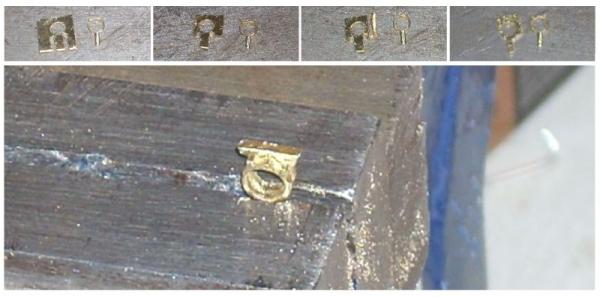
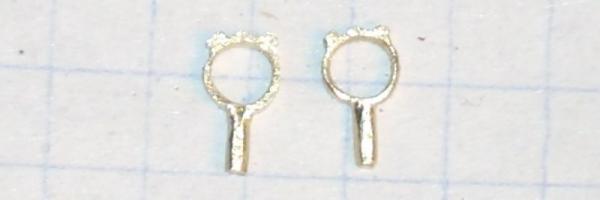
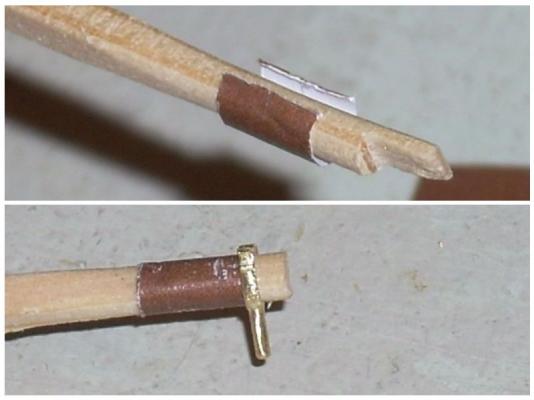
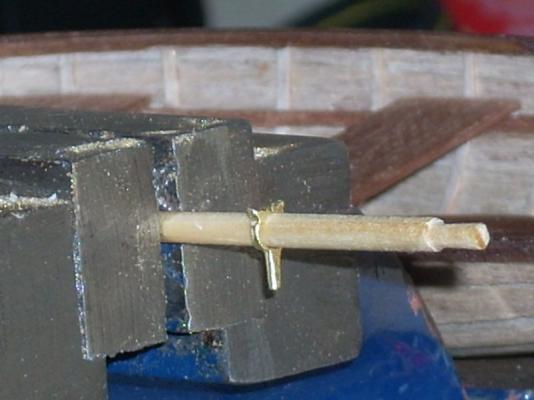
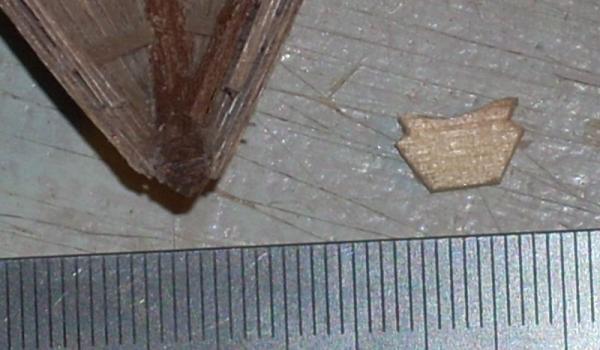
Hi Peter, Your little boat is coming out really nice. You installation of the floorboards looks great. I like the way you went about making your oar locks. Very clever. Mario Mario, Thanks. I desided to make the oarlocks like this beacuse I could easily get the inner diamer to fit bu just selecting the right size drill. Afterwards I just removed everything around the hole that did not look like an oarlock I did go out and bought a set of needle files before making the second oarlock so that went much quicker. My wallet felt it though Some of the steps. Almost finished and nearly identical. To give an idea of the size the squares on the paper are 5x5mm. (3/16+1/128 inch+0.0099inch) I decided that the oars needed leather protection so I printed several colors on a sheet of paper so I could choose. Because I have not done this before I made a test oar first. I wrapped the paper around the test oar twice and cut through both layers. This left a close fitting strip of paper. After gluing on the paper I tried the test oar in an oarlock. There are a few white spots on the brown area but with more care they won't happen. Does this look right?
-
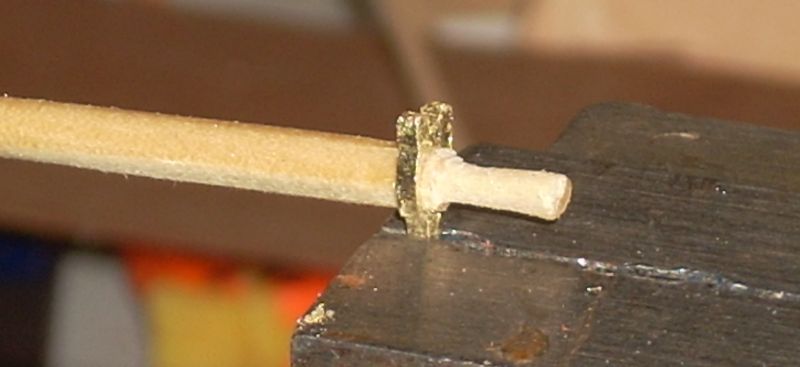
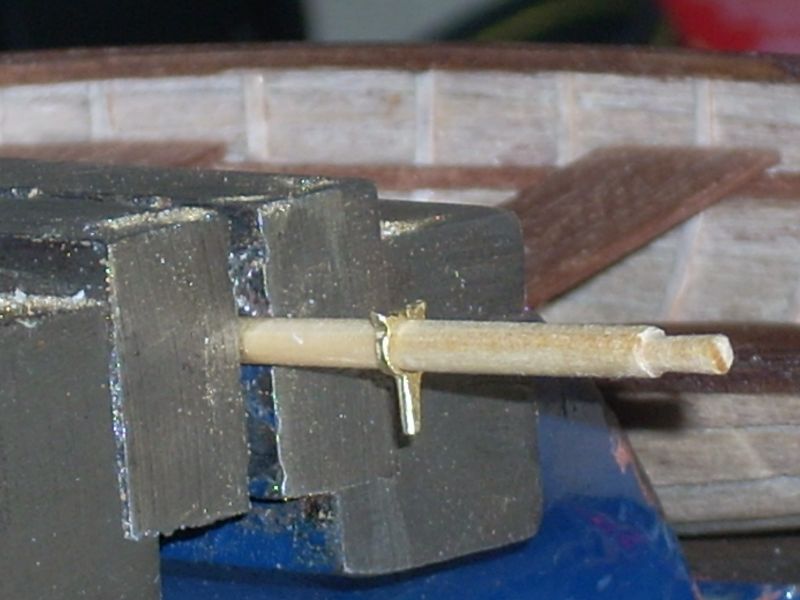
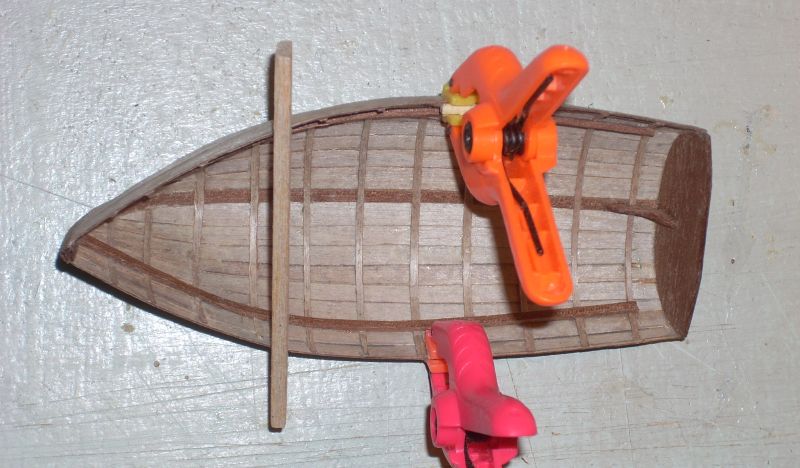
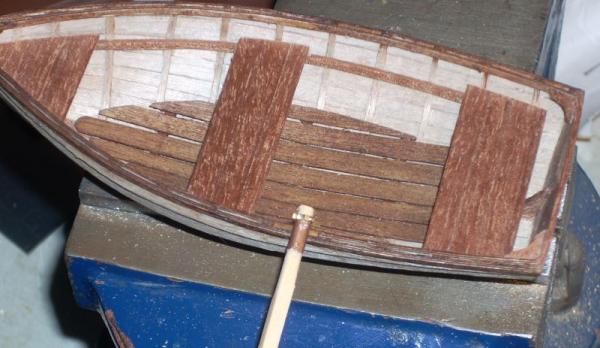
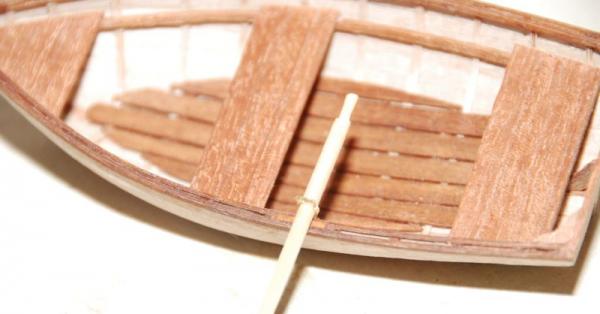
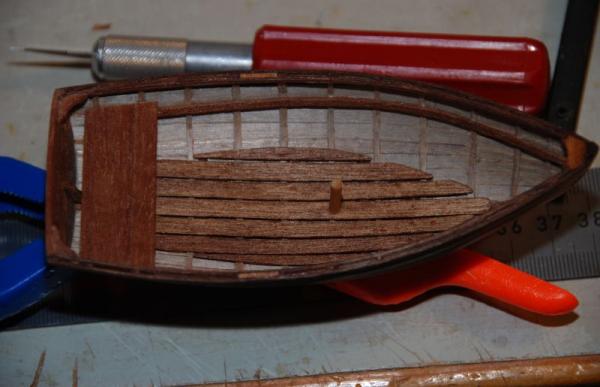
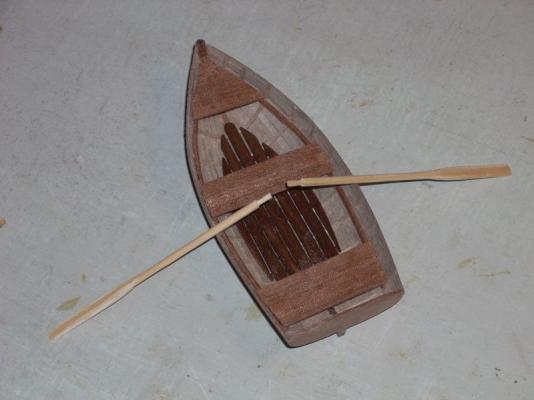
Testing the hole size with an oar during the process. More filing to shape. Making progress. I have left material at the top of the hole deliberately. It adds strength, making it easier to file without breaking it. One of the last steps will be opening the oarlock to an U shape. The pin at the bottom needs more work. Its not round yet. This is the current state of the boat. I still need to add 6 knees to support the twarts.


-
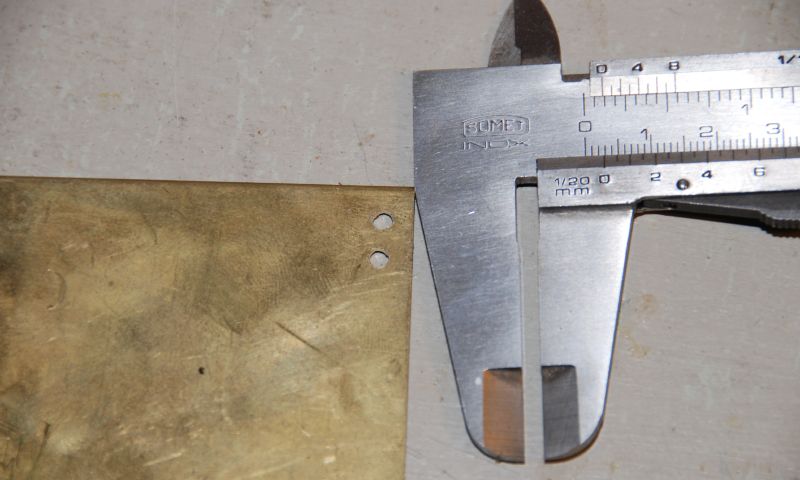
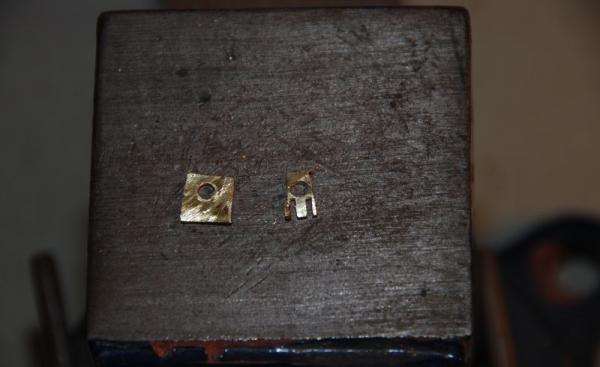
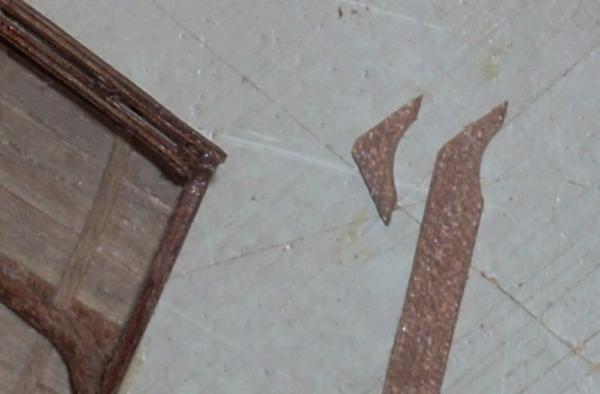
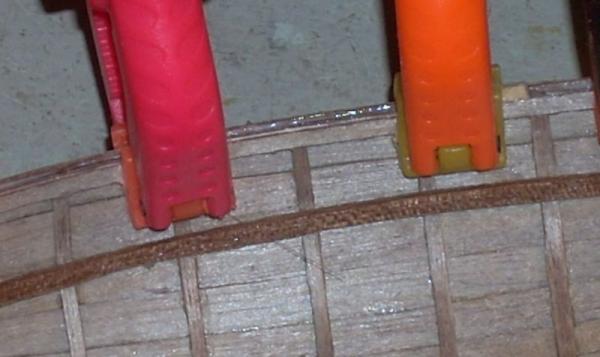
Hi Peter, Very nice progress going on with your little boat. Your showing that everything under your roof is subject to being turned into a jig. Nice idea with the plate. I see no food stains so I'm guessing you served your dinner afterwards. Mario Mario: Yep, I picked a clean plate A little update. The floorboards were glued in and after the glue dried the support under the center twart was added. Followed by gluing in the center twart itself. After adding the front twart the oars were tested for fit. They are placed about 30 scale cm. behind the twart center. The next step is making the oarlocks. I began with drilling the holes that will become the inside of the oarlocks in a 1mm thick piece of brass. Then the industrious use of a hack saw gave me this. I decided to finish one oarlock at a time in case I make a mistake.


-
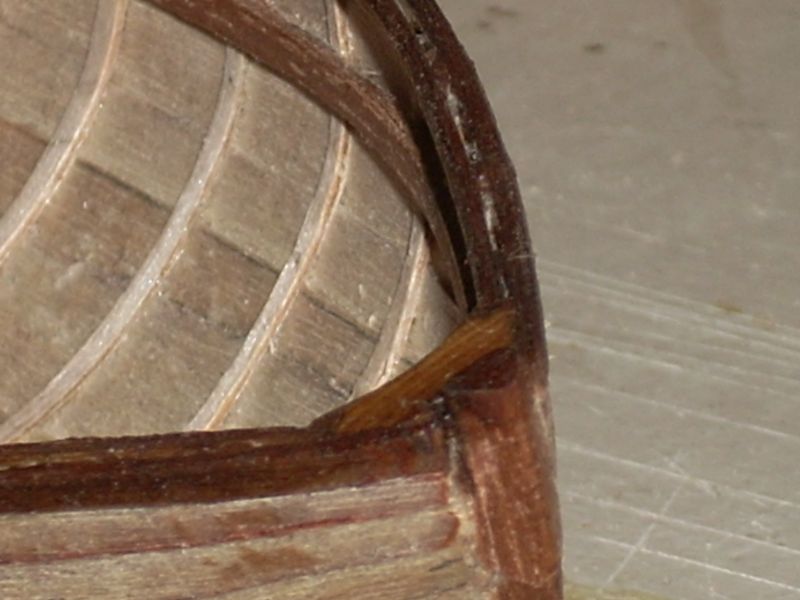
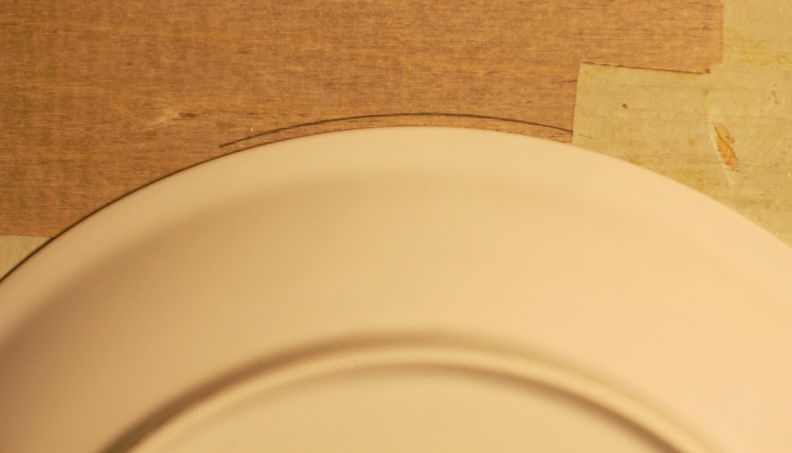
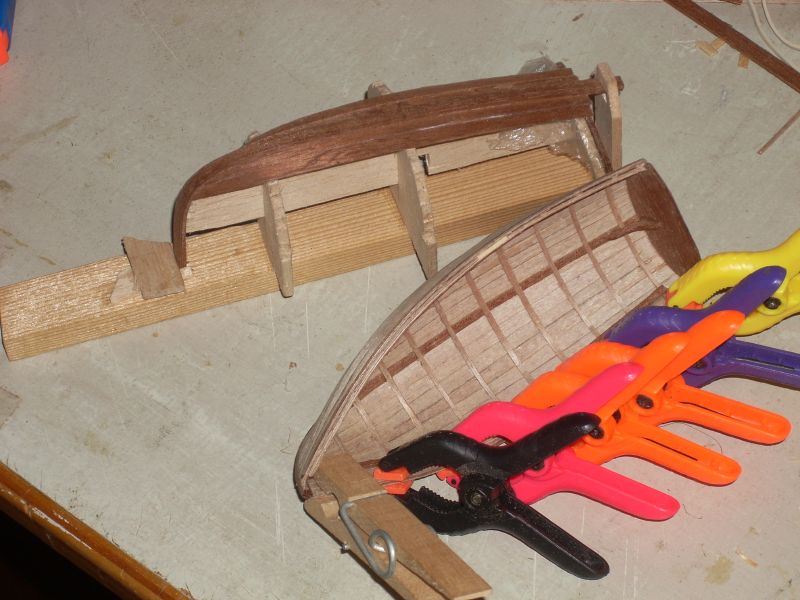
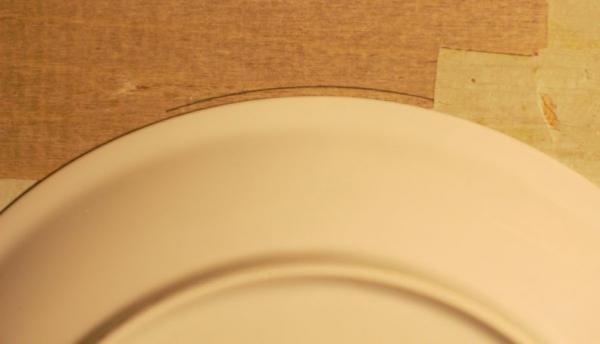
A little more progress. Stained the breasthook, inwales and rubbing strips after sanding/ filing into shape. Made two knees for the transom by wrapping sandpaper around a round pencil and sanding a curve into a 4mm wide strip of Mahogany. Then cutting the sides. The first one was used as a pattern for the second so they are identical. These were then glued in place. The top of transom should be a nice curve so I made a template using a dinner plate to get a large curve. After finishing the template, the transom was marked and sanded/filed to the final shape. Gluing in the aft twart.


-
Hi Peter, Nice progress on your little boat there. You mentioned the inside support. I'm building the Bounty launch and the book refers this support to be the sheer clamp. I hope I am correct on this. I am still learning n have along ways to go. Since you are glueing it across from the sheer plank of the hull. Mario Hi Mario I think this piece of wood has several names I did a Google both on both "inwale" and "sheer clamp" and found that they both mean a horizontal reinforcing strip of wood holding everything together. Inwale 1. (in an open boat) a horizontal timber binding together the frames along the top strake. 2. a strip of reinforcing material within a gunwale. Sheer Clamp a heavy beam running along the sheer strake inside the frames of a small wooden vessel and connecting the upper ends of the frames. The sockets for rowlocks may be fastened to the sheer clamp of a launch. So I think we are both right. Regards Peter
-
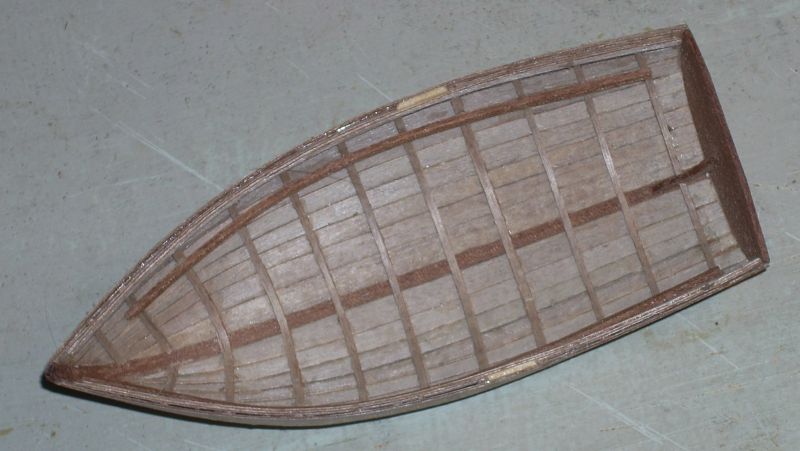
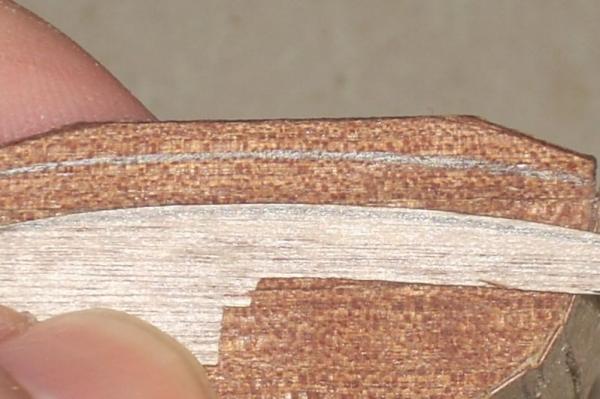
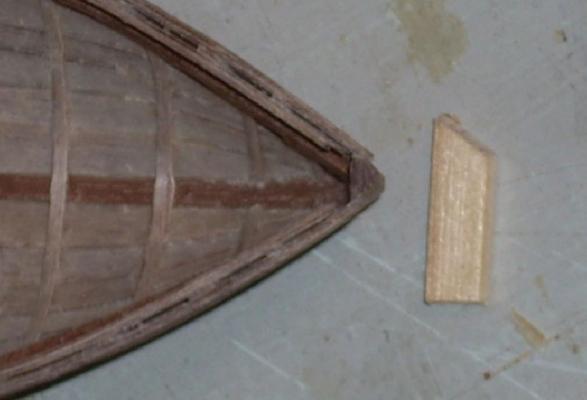
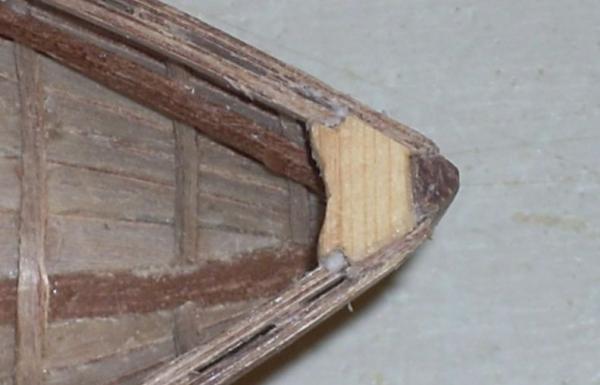
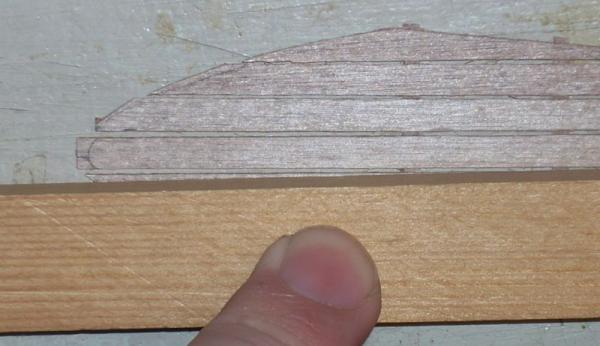
The framing all looks good. Very neatly done. Russ Thanks Russ. I am glad you like it. Now for the breasthook. The first cut. Ready to be trial fitted after cutting the in-wales to the correct length. Gluing it in. It is too thick on purpose and will need sanding down to the correct level. Close-up view. Ready for final sanding to shape. The curve at the back still needs more work. I haven't decided whether to stain the rubbing strips and breasthook or not, yet. The next step will be making the oarlocks themselves. Regards Peter
-
Some more progress. Working on the oarlock supports and inwales etc. Gluing the supports to the inside gunwales (I think that's the name). Adding the starboard inwales Adding the port inwales and outside rubbing strip then letting them dry. Finished result.


-
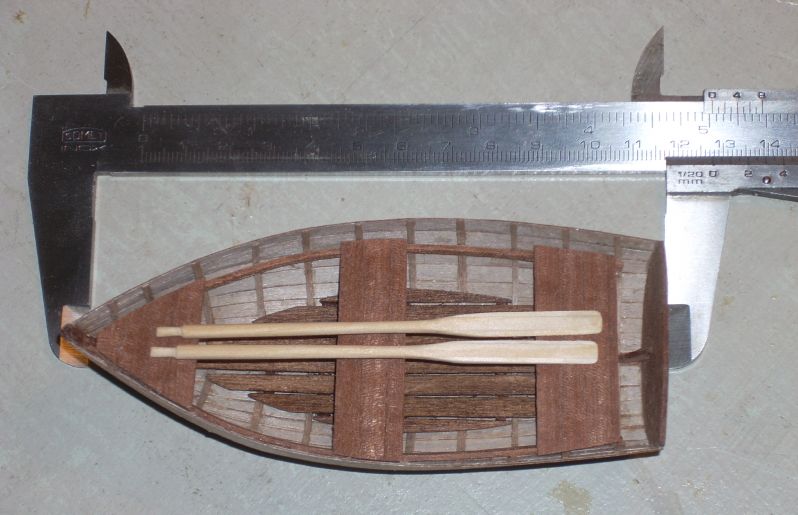
The oars came out very well. Nice work. So long as they are the proper length for this boat, they will work well. Russ Russ, Thanks. I was going for classic oars I did some research first regarding oar length inside/outside vs boat width, hand grip diameter, hand grip length etc. Most of what I found was for modern oars, not oars made in 1927 when composite meant different types of wood glued together There are many opinions for the correct length. These are 1.7 x distance between oarlocks. That may be a little short, but then it is easier to maneuver in tight spaces and they fit inside the dinghy. Hopefully I can find a 1:20 scale person to test them (and crew the Oheka II) Now for some oarlocks. Regards Peter Hi peter, Your little boat came out nice. The oars look great. when I built my oars for my Lobster Boat. Blue Ensign if I remember right told to set up a scrap piece and just look to see how it looked. Thats how I decided on the length. It's on my thread Regards Mario Hi Mario Glad you like it. There are still a few finishing touches to add though. I went through your build log for the Lobster Smack. That is a very nicely built boat and the method of hiding the mounting screws is ingenious. Regards Peter Thanks Peter, I hope you saw how I worked out the length on the oars for the Lobster Smack. Because the kit had me add oarlocks , but no oars. So a little help from my friends here on MSW helped me out with that situation. PETER THANK YOU FOR KIND WORDS. Regards Mario
-
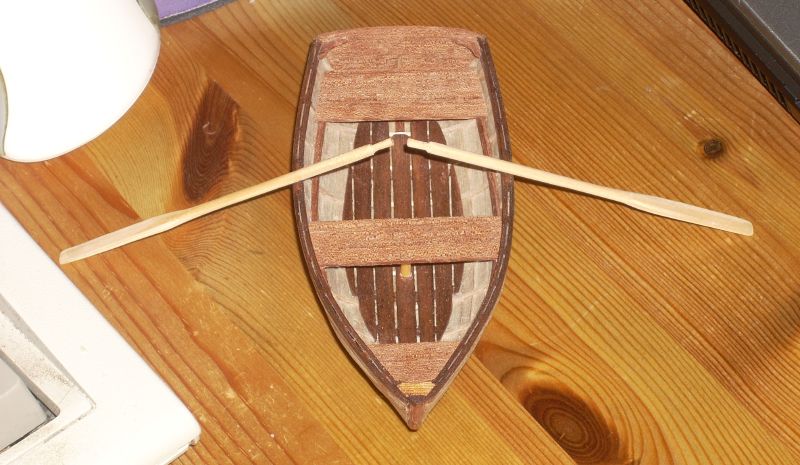
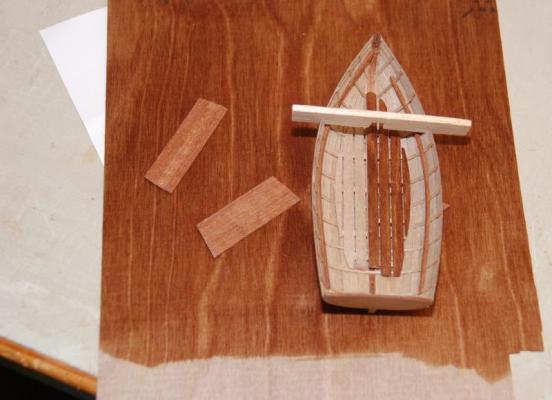
I think the color looks very good. The look of the floor boards inside the boat is good. Russ Thanks Russ. The color came out a little darker that I thought it would. however it is that same color as the partial floorboards in the previous post. I compared them side by side. Regards Peter I stained the finished floorboards and they took the stain quite evenly. A friend of mine suggested wetting the wood first to raise the surface so the stain could penetrate more. It seems to work. As a way to postpone the decision between staining this one or making one more from pre-stained wood, I made a set of oars Here the oars are at rest. Along with a size indication.

-
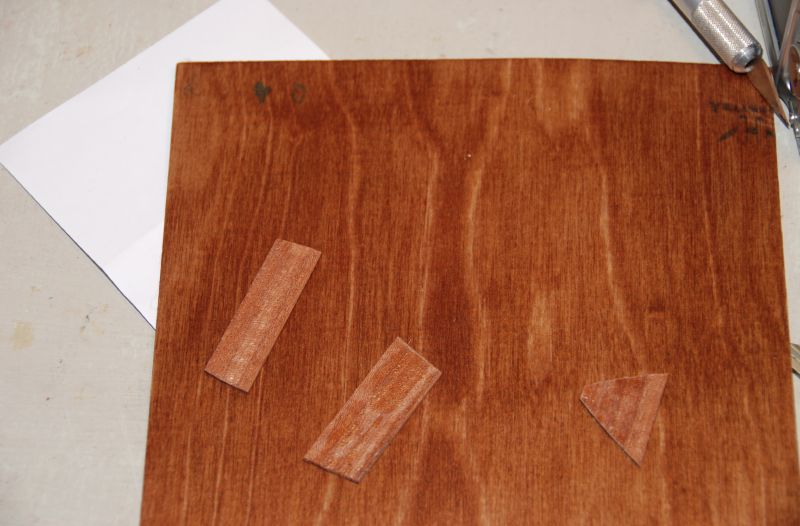
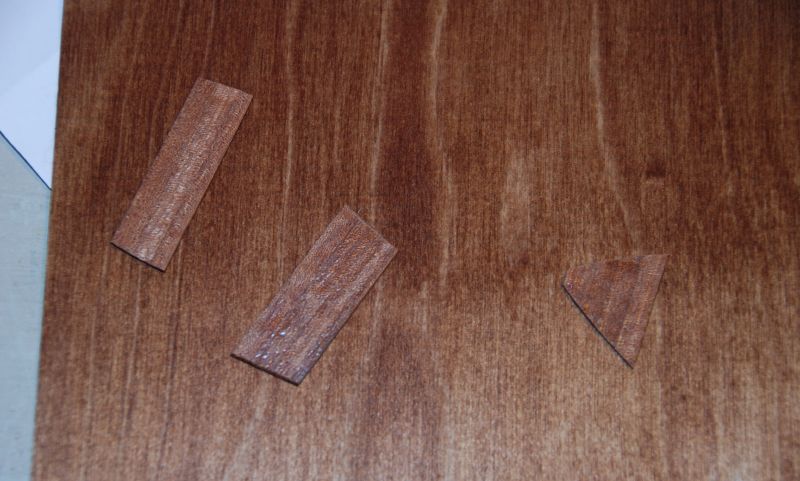
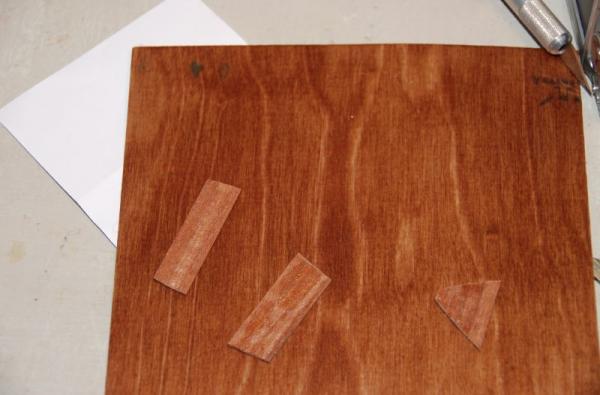
Staining test I bought some stain and tested a piece of the ply the dinghy was built from. On the color chart the stain is a little darker than cherry and between the dark mahogany and regular mahogany so it should be close. Photographed indoors with a flash with a white sheet of paper sticking out. The three wood parts on top of the ply are the mahogany twarts placed there for color comparison. From a different angle the colors changed. I also tested by doing a quick and not very thorough staining of the floorboard template, which is placed on top of the finished floorboards in this photo. Just to see what it would look like. From the way the ply looks I can see that I should have stained it first so I could cut the parts from the areas where color of the stain is consistant, even if this wastes some wood.

-
Hi Peter, A lot of detail in that little dinghy. When you mount it to your RC, will it be right side up so it can be seen? Very nice progress. Regards Mario Hi Mario Thanks for the nice comments. Yes it will end up in a cradle, right side up, on the roof of the aft cabin under a single david/crane. If not, I might have been tempted only to do the planking and keel. Regards Peter
-
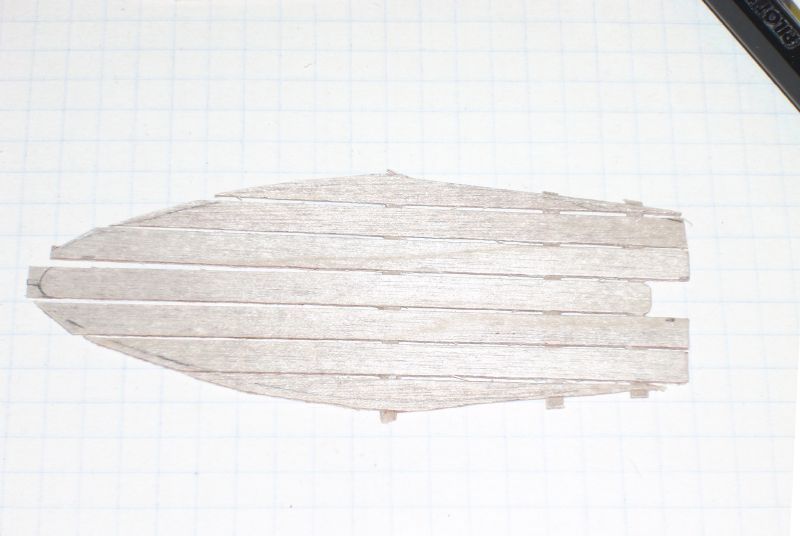
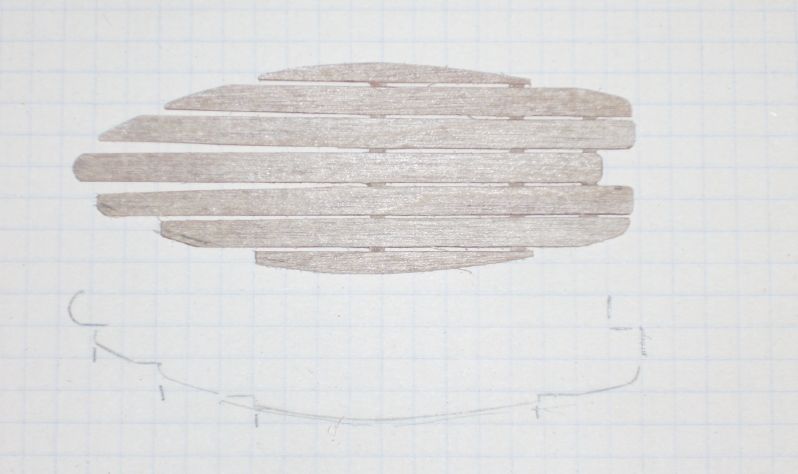
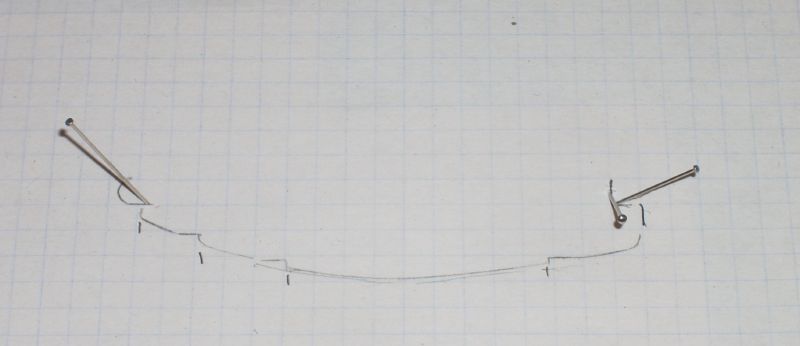
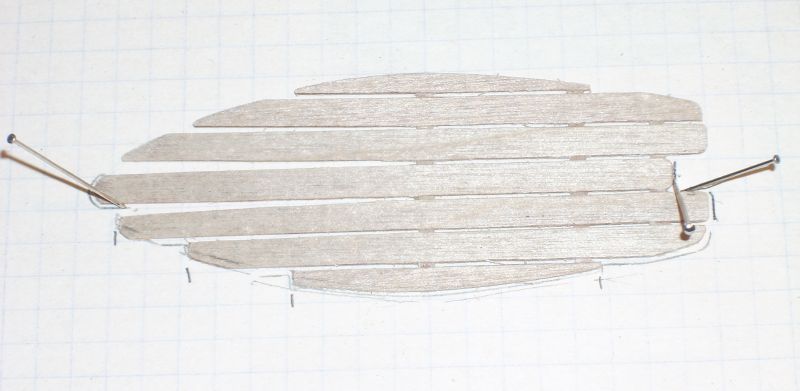
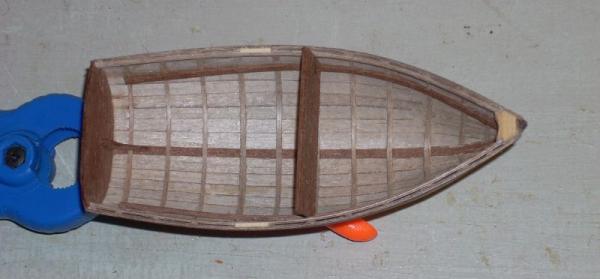
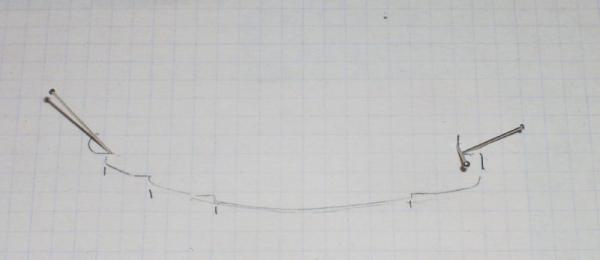
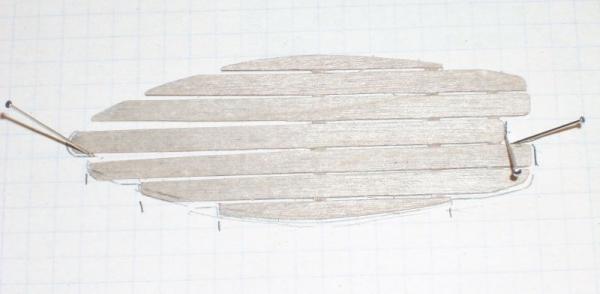
Russ: I agree on the semi gloss finish. I will ask for a compatible finish when I get the stain. Regards Peter meanwhile the build continues: The floorboards after rough shaping. At this point supports have been added only to the rear so the front is free to move. They have been placed so they do not interfere with the frames already in the dinghy. In order to get the floorboard slots parallel when they are pushed down on the curved bottom planking and keel it is necessary to open the slots at the front. Pushing the floorboards down will make the front plank ends move towards the center closing the gap. After sanding the starboard side of the floorboards to the finished size it was flipped over and the outline was drawn on the paper. Needles were added to create stops so the floorboards could be placed precisely when checking the shaping of the port side. This shows that the lowermost plank is shaped correctly and that the front of the two inner planks still need more sanding. The short vertical pencilmarks show where the planks should end so they match the other side. Getting the starting and ending points lined up is more important that the outside shape because any misalignment here will be noticed.


-
Mahogony will be a little more reddish in color. They have a nice cherry stain that I have used with some success. It is not quite as reddish in color as the mahogony. Also, see what their natural stain might do for the wood. It will not really change the color as much as it will darken the wood. Like other stains, it will bring out the grain of the wood. Also keep in mind that stain will not adhere to any glue marks. Make sure everything is sanded down and there is no glue left on any exposed surfaces. Russ Great, now I have some alternatives to compare that I know might work. The full size yacht was varnished with a shiny finish, if my comprehension of the German article I found from 1927 is correct, so the dinghy was probably done in the same way. On photos it has the same dark color as the cabin. (if you can call it color on a B/W photo) If possible I think I should go with half shiny / half matte finish after staining it, so it does not look to shiny and toy like. Regards Peter Peter: See what you can find in semi gloss clear finish to go on top of whatever stain you use. A little shine will be fine for a yacht like finish. Russ