Havelock
-
Posts
71 -
Joined
-
Last visited
Content Type
Profiles
Forums
Gallery
Events
Everything posted by Havelock
-
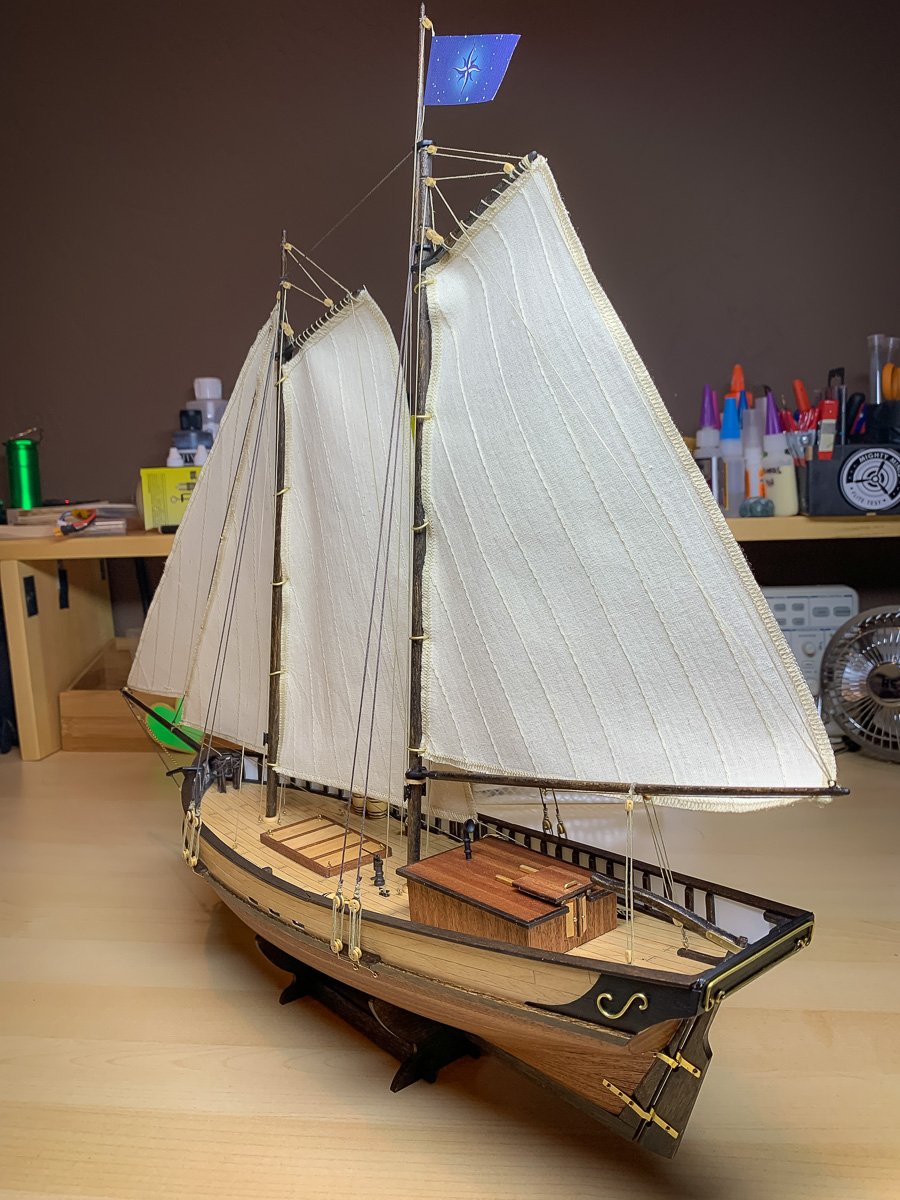
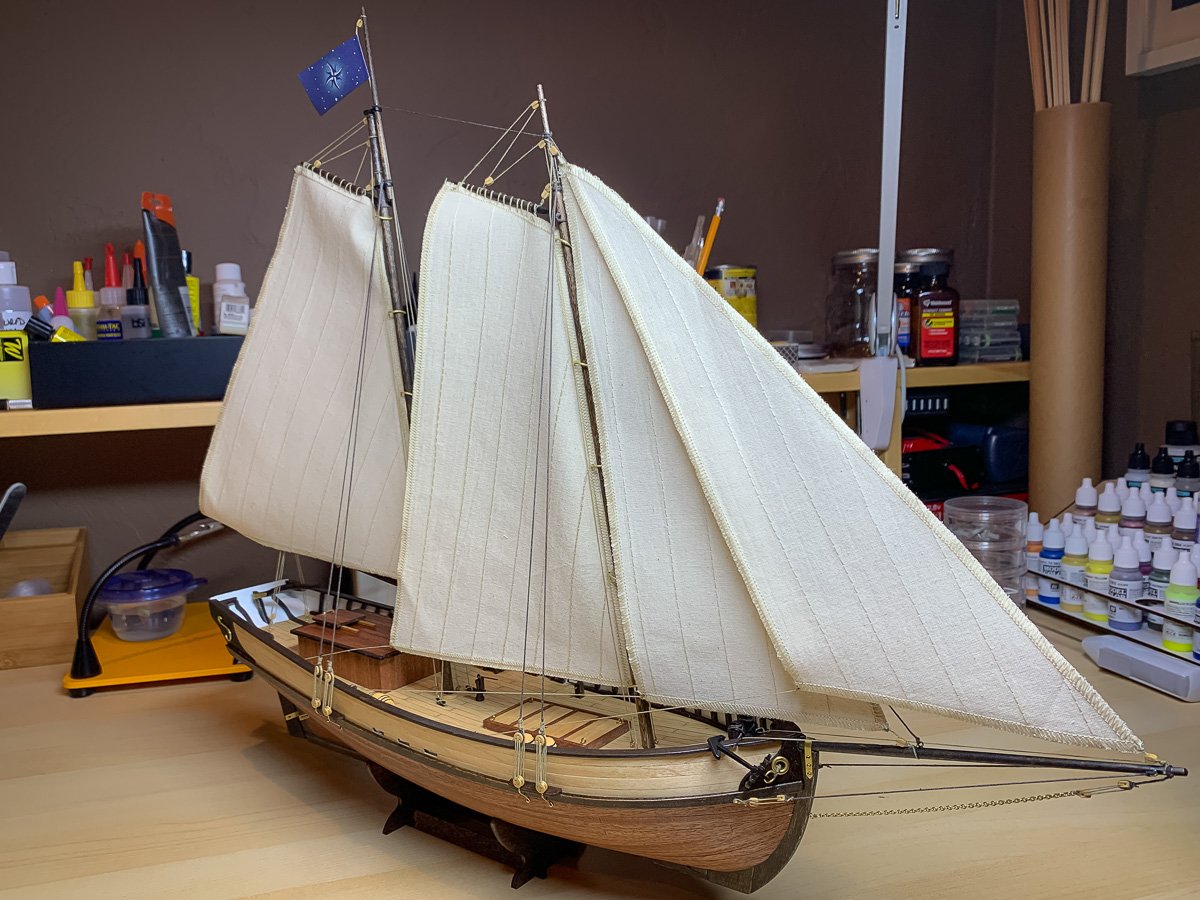
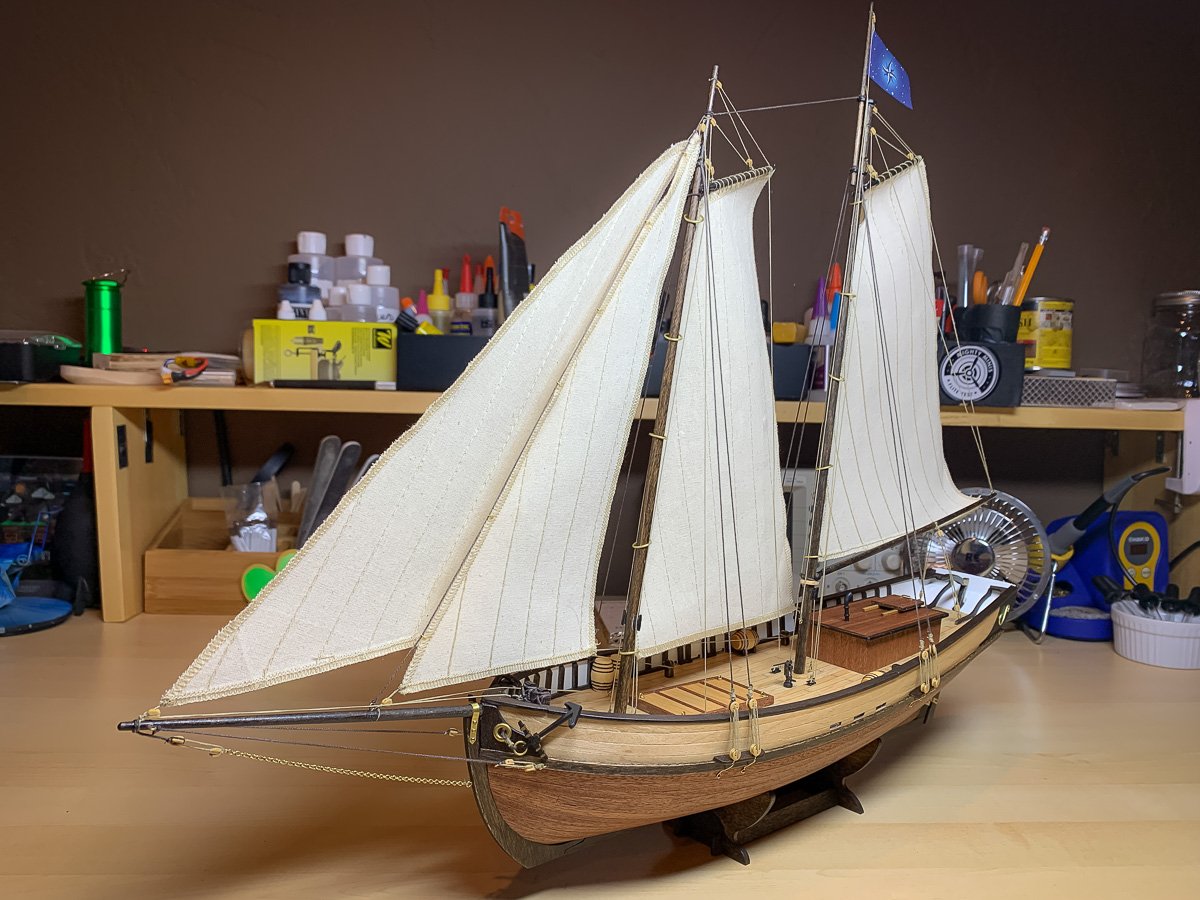
 And done! (Well I still have some rope coils to make): I added a little summary of my build experience to the first post in this topic as I feel that will be more helpful to people who might be browsing the finished build logs and thinking about building this kit.
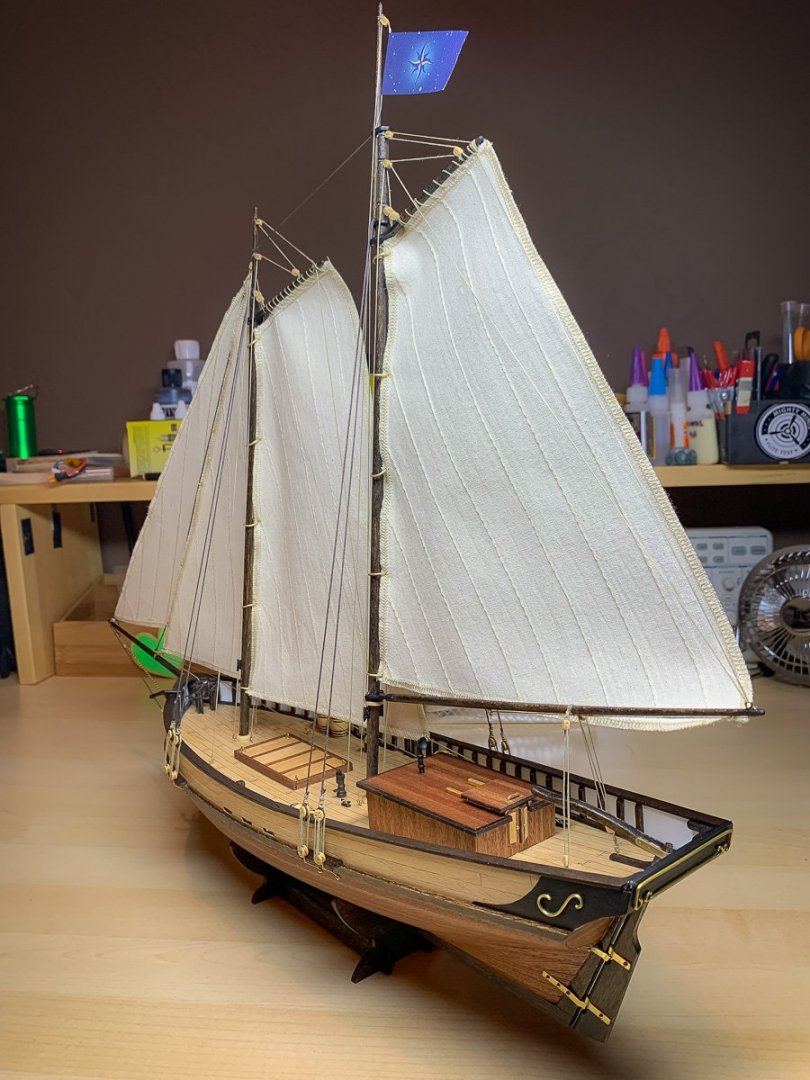

- 64 replies
-
- 11
-

-
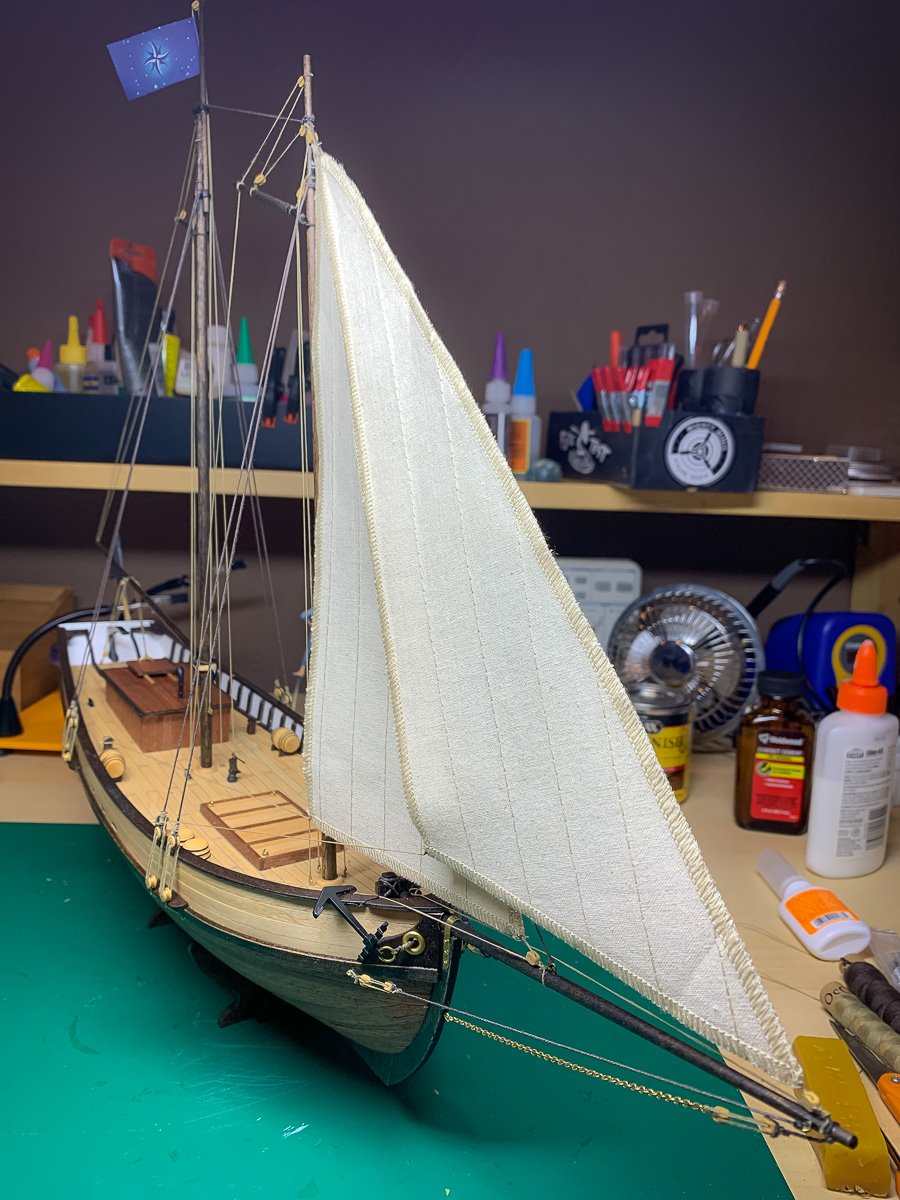
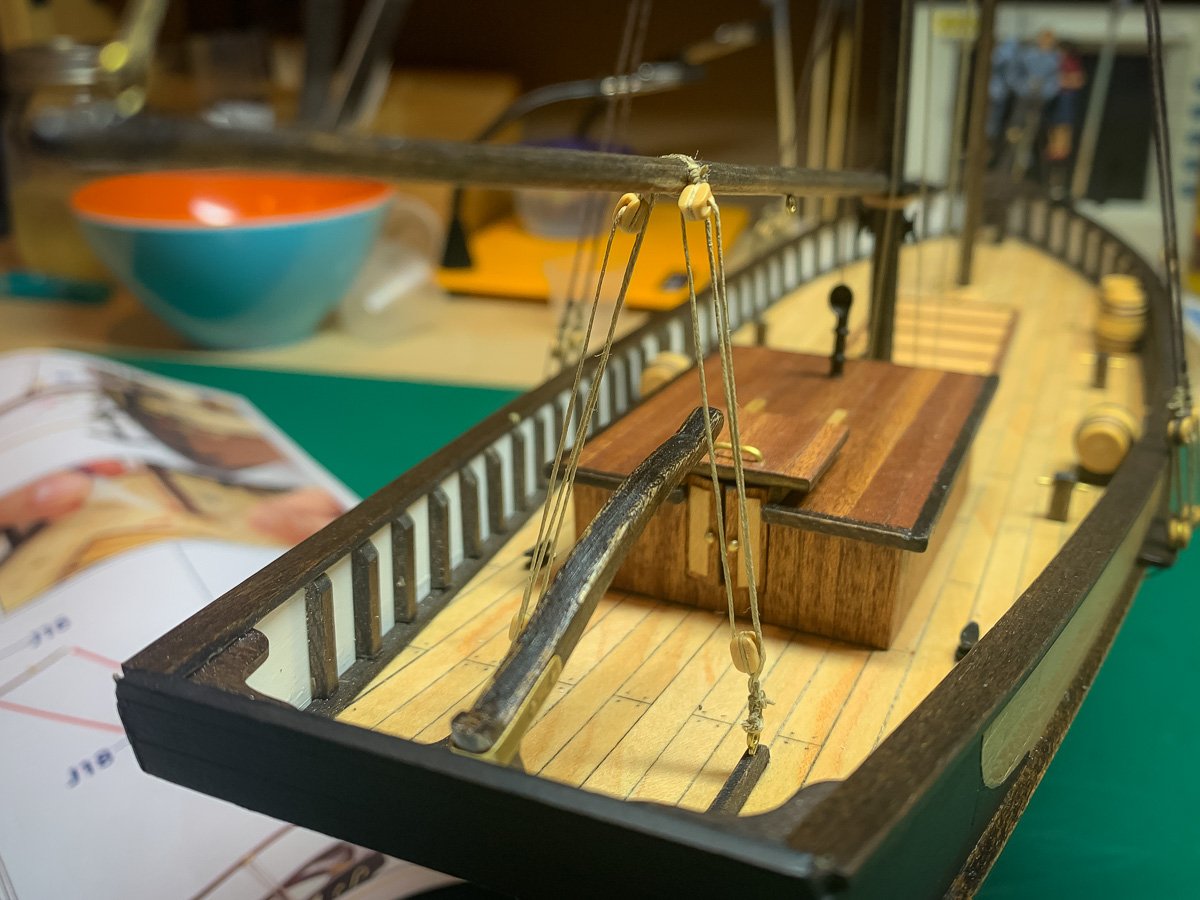
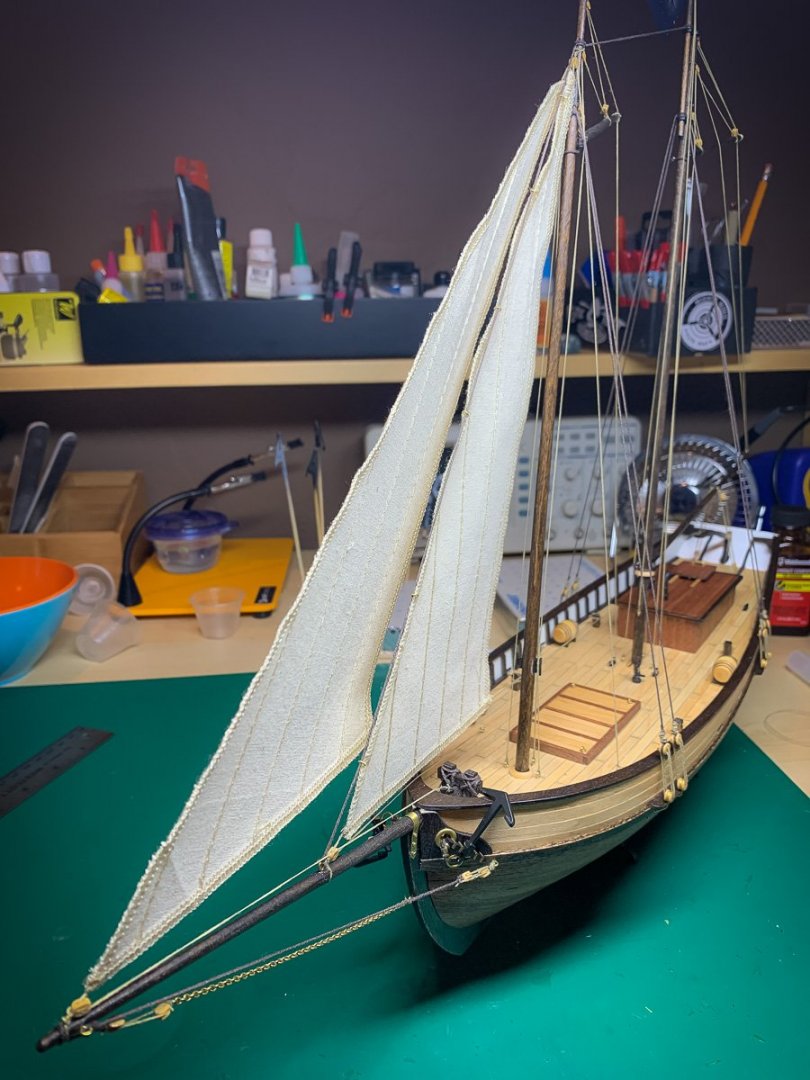
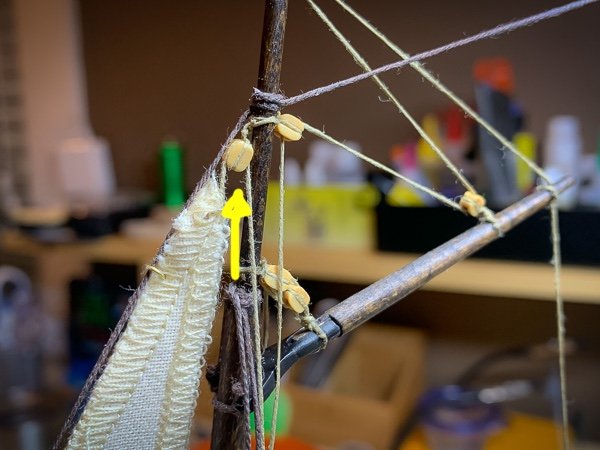
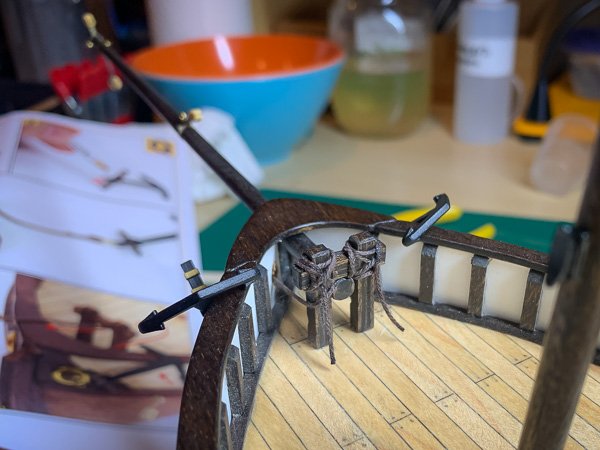
Got the Jibs on: I had to make an adjustment to the block used for the Jibs. For whatever reason it was too low. Probably shouldn't have pushed the mast all the way into the hole. There where measurements in the plans on how high the masts ought to be but I didn't check them. Anyway I simply moved the block higher:


-
I have the Taurus still to do and at some point I'll get back to the longboat (probably when winter comes and I'm stuck indoors). I'm definitely going to do another more substantial kit but going to take my time about choosing one as they are so time demanding and I want a boat/ship that I'm really excited about. Half the fun is the hunt/acquisition, right? Also have a bunch of plastic kits on hold that need some TLC. And I promised a friend to build a Tamiya Tiger I tank (with remote control) that he was given but doesn't build models himself. But I'm guessing I'l like 99% of model makers.... way too many kits, way not enough time...
-
Thx, Wahka. I've spent just over 60 hours so far. Been able to work on it in spurts but mainly on the weekends and in the evenings when I had the energy.
-
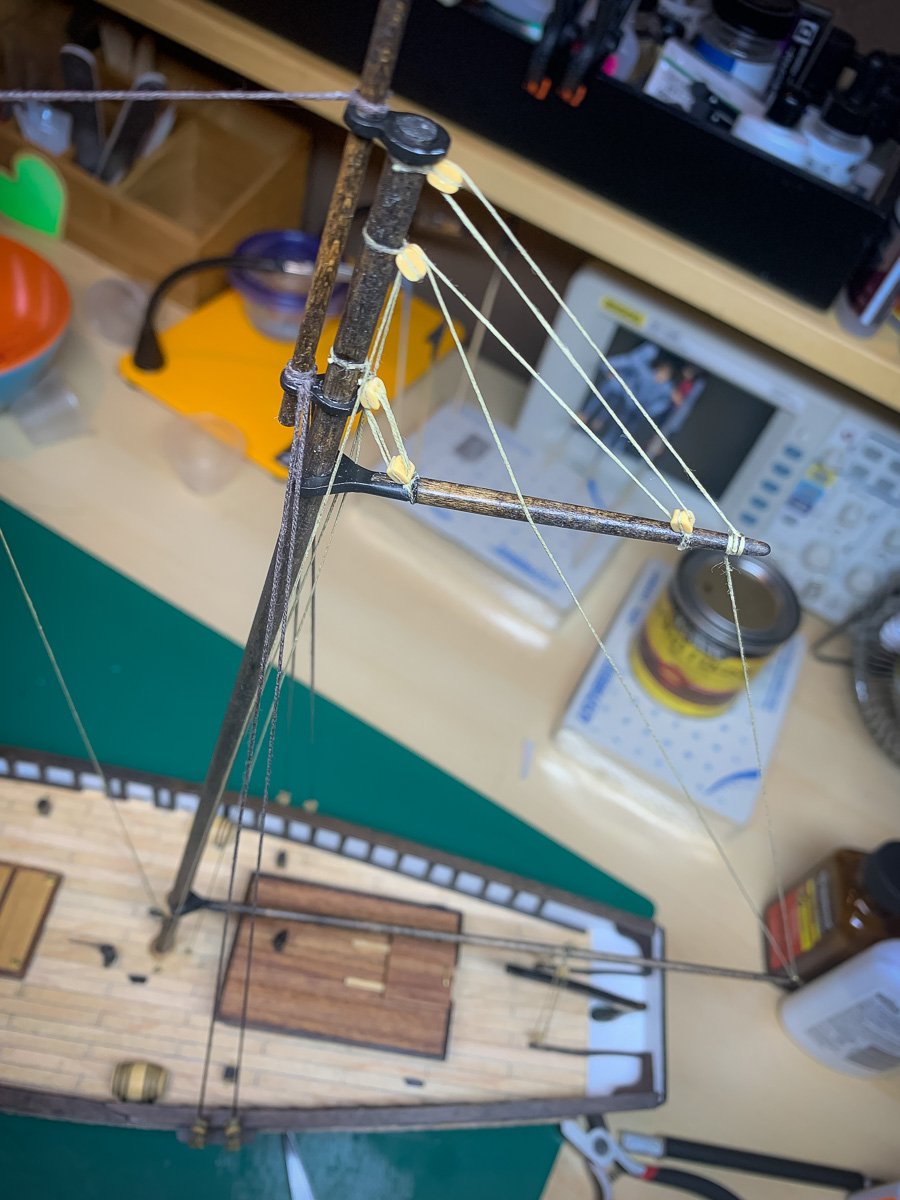
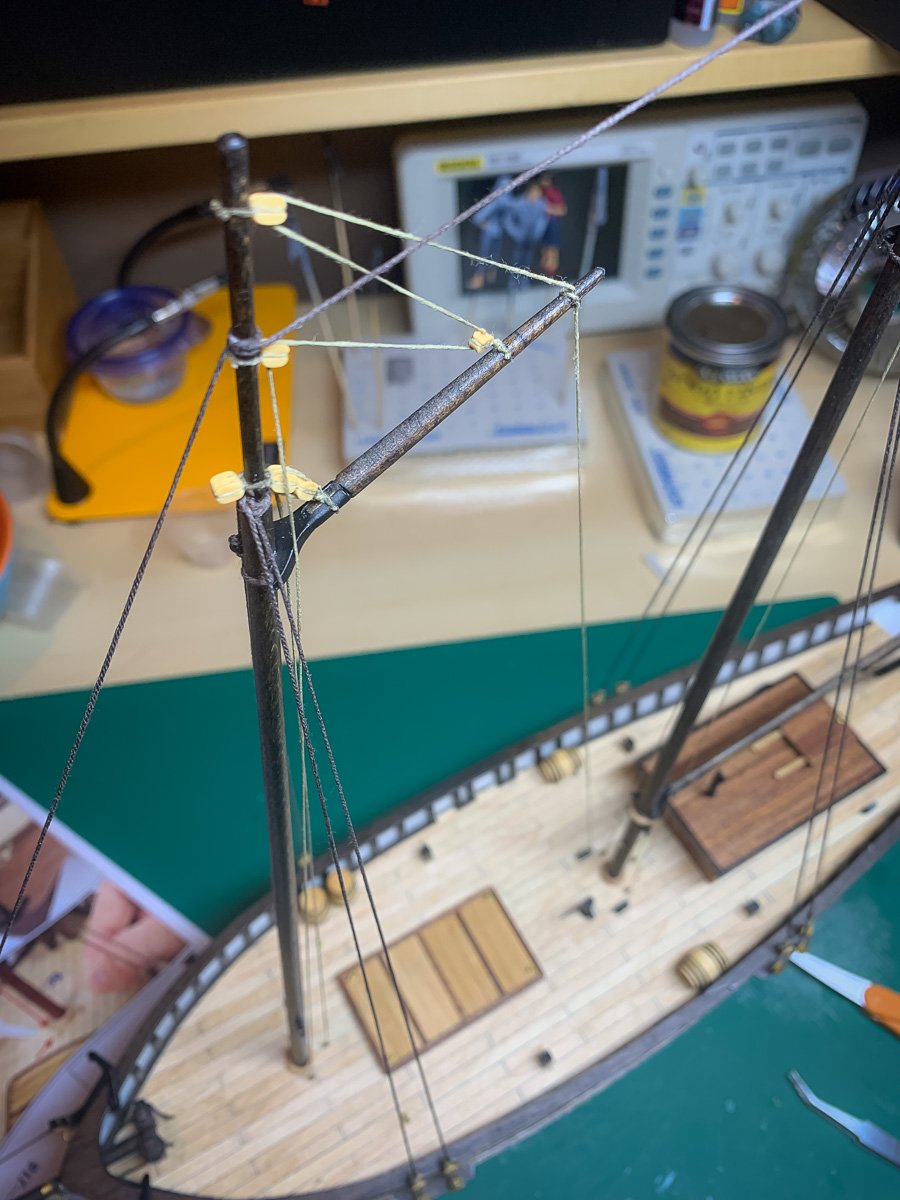
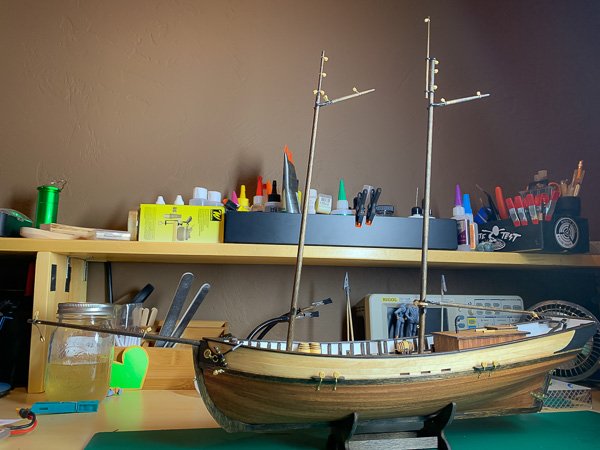
Did a better job of the aft shrouds so re-did the fore shrouds too: Not the best job ever but happy enough with the results.

-
Arg! so annoying!
-
Got started on the rigging: Didn't do a great job on the fore shrouds but they are passable. I'll see how the aft shrouds look and if they are much better I'll redo the fore ones. I'm glad I got the beeswax. Definitely makes the lines look better.
-
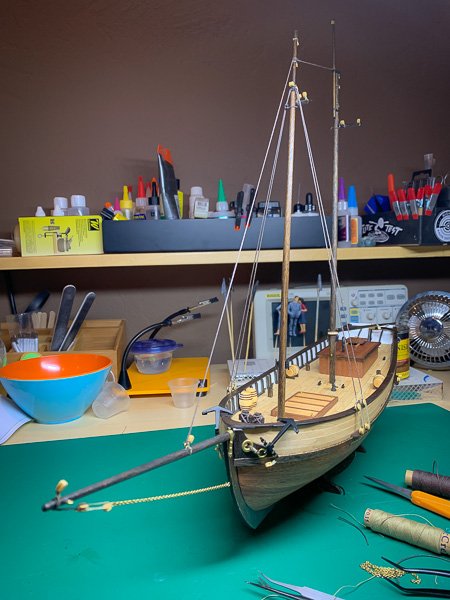
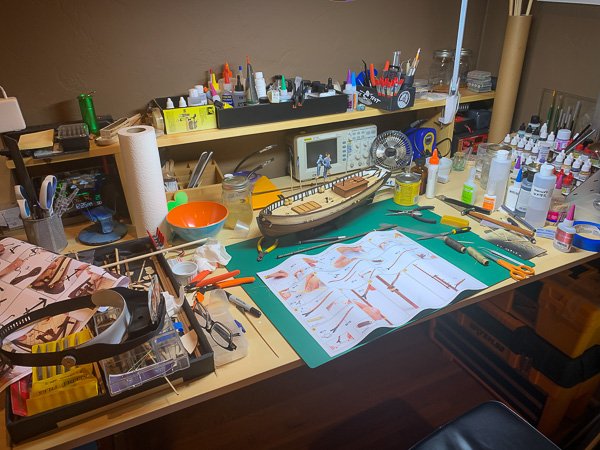
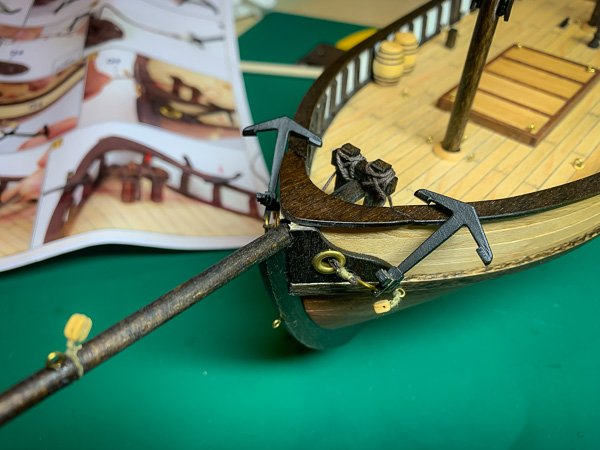
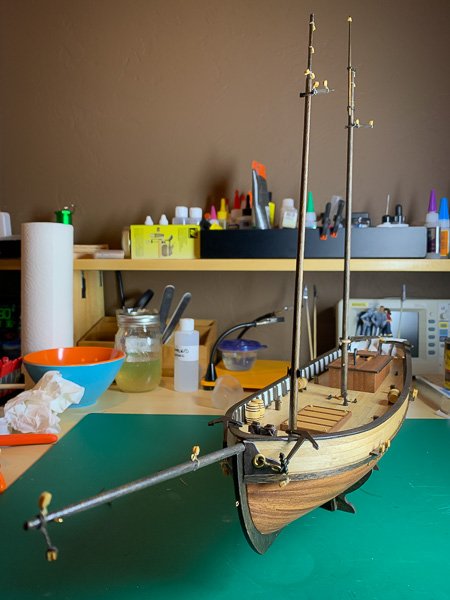
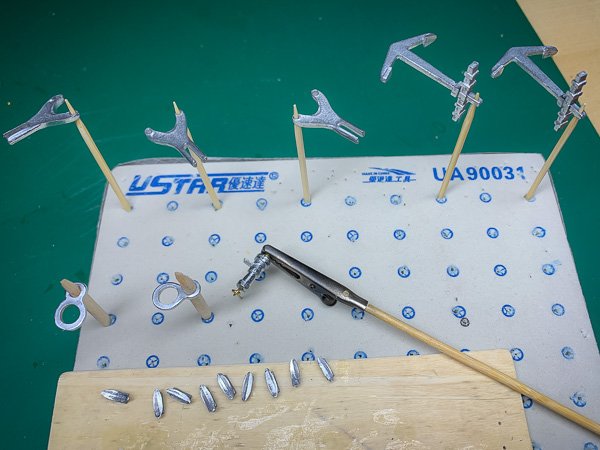
Gotta not let the workspace get out of hand: Got the masts, bowsprit and anchors installed: [Noticed after the fact that I used the wrong thread for the anchor rope. 😧 ] Forgot to do the metal work for the bowsprit. After that it's a lot of rigging.
-
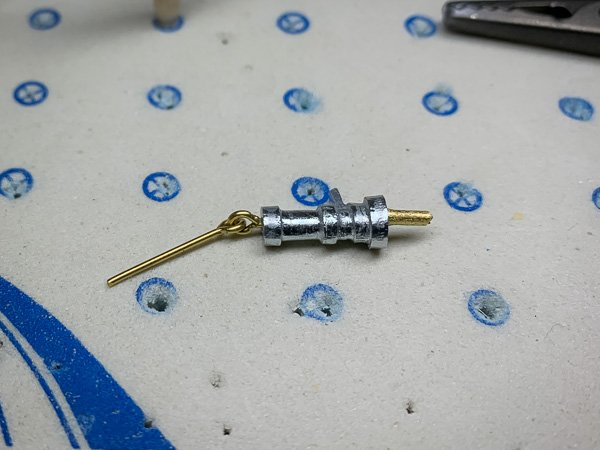
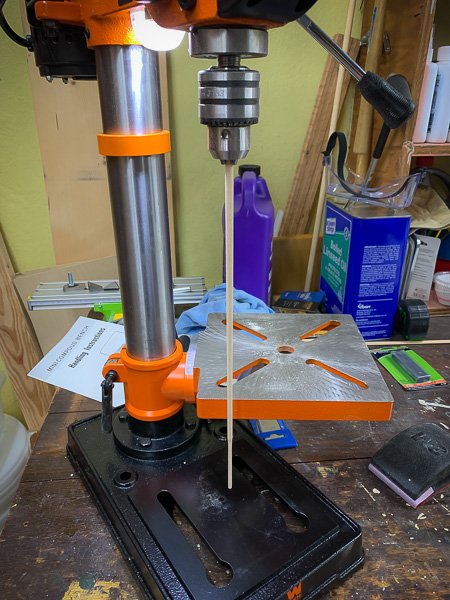
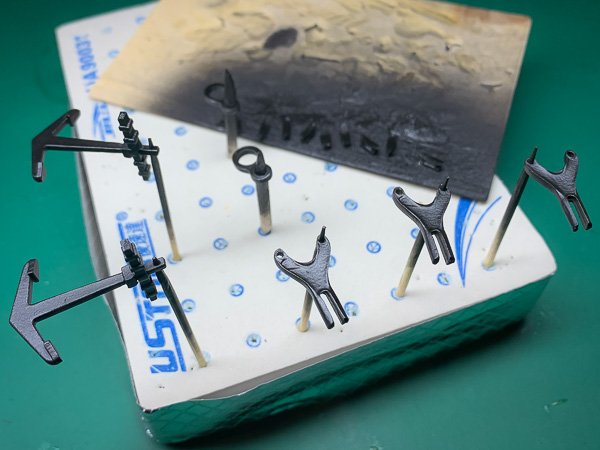
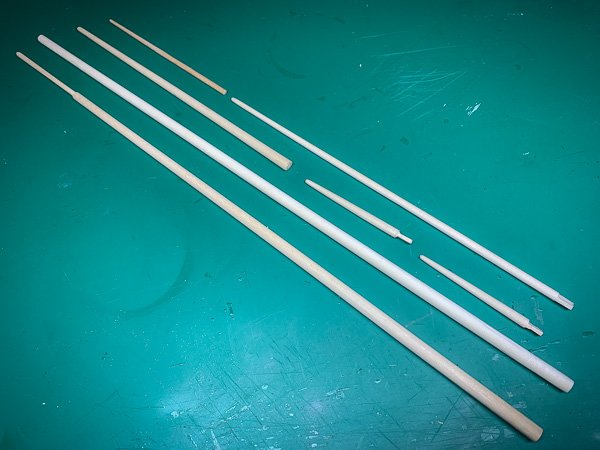
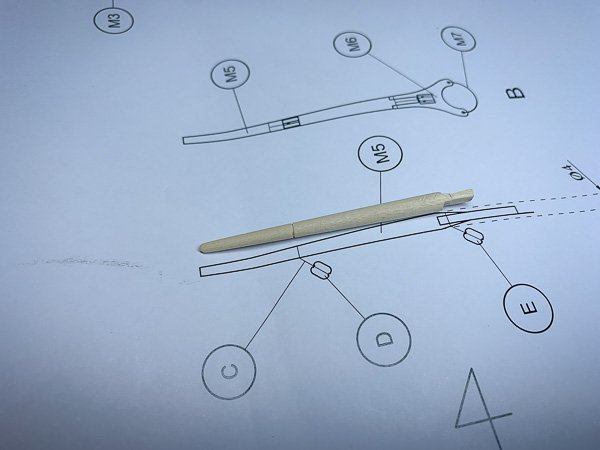
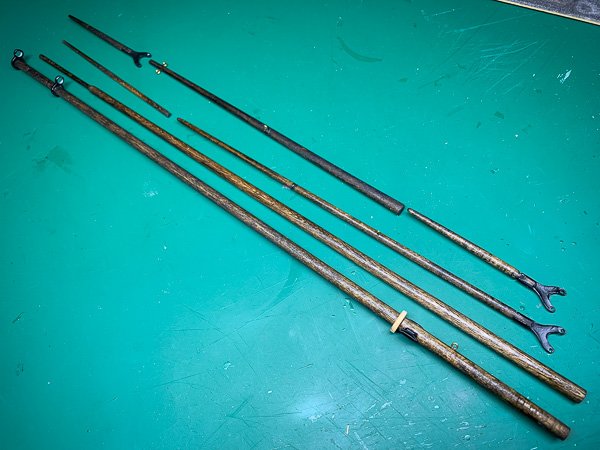
Thank you, guys! It's not too bad so far but now that I'm doing more of the small pieces I'm finding that precision and attention to detail is getting much more demanding, and my mistakes and inexperience are alarmingly exaggerated at scale. I've only done plastic models before this and there the precision is built into the molds (mostly). Really have an appreciation of the work others achieve here on MSW... On with the build. Got all the metal pieces prepped (lots of filing!) and painted: Not at all happy with the acrylic primer. Next time for sure going to use an enamel based one, like Tamiya's Surface Primer. For now just going to soldier on and hope I don't ding them too much during the rest of the build. For the bilge pump I drilled a hole for the top ring to have something to fit into. Made another hole in the bottom so I could add a piece of rod to better secure the pump to the deck later: I don't really have the proper setup for small metal working so it was difficult to drill the holes. Another area of hobby tools to look into... Next I worked on getting the masts and boons milled (? if that is the correct terminology). Used the drill press as a lathe: and it worked out well: I did have one major screw up. Used one of the 6mm dowels for the bowsprit which meant I didn't have the correct size dowel for the main mast. Went to the hardware store and got two 1/4" dowels and was able to find a section to cut that was reasonably straight. But then milled the top of that too much and had to find another straight section and do over. Not sure if this is a good idea or not but I decide to put notches in the masts where blocks get tied on: This should make it easier to tie them on and secure with CA. I guess we'll see soon enough. Finally got the pieces stained and various hardware attached: Before moving on to the masts and rigging, I got the chainplates and all the deck pieces installed. Going to leave the bowsprit and anchors till last. Also not sure if I want to add the sails... have to wait and see. At this point I'm 60 hours into the build.

-
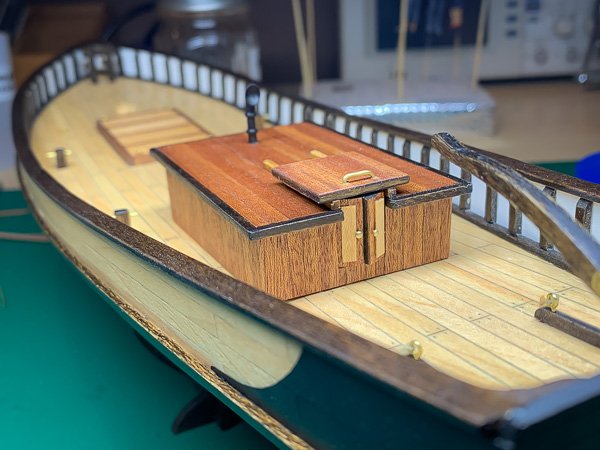
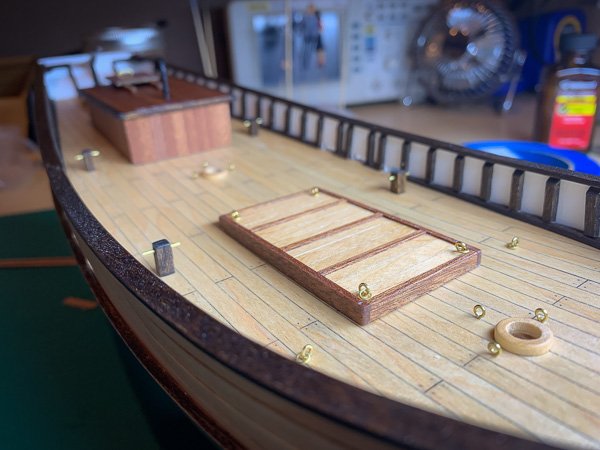
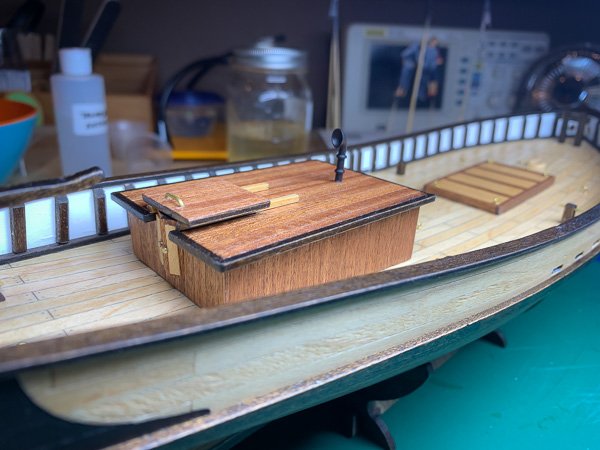
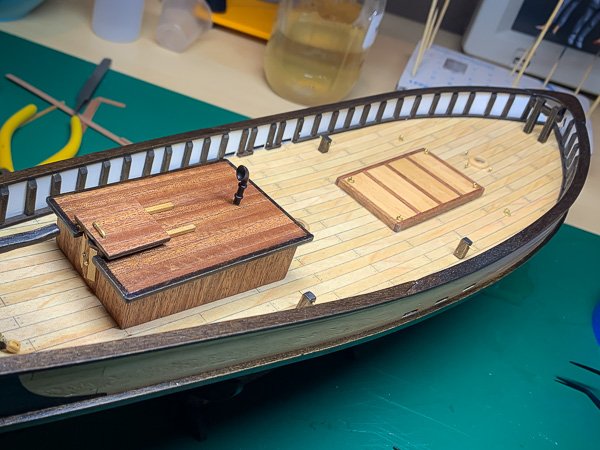
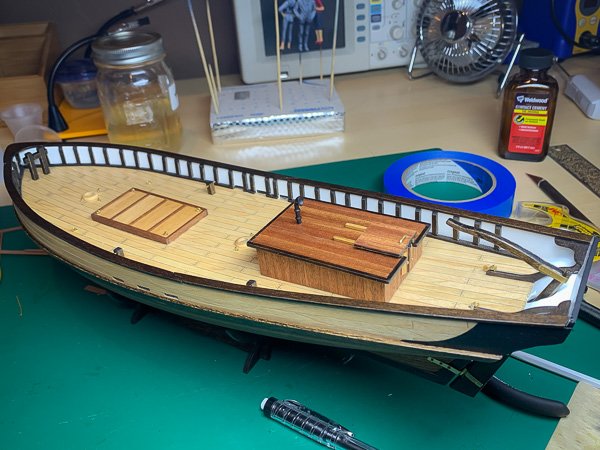
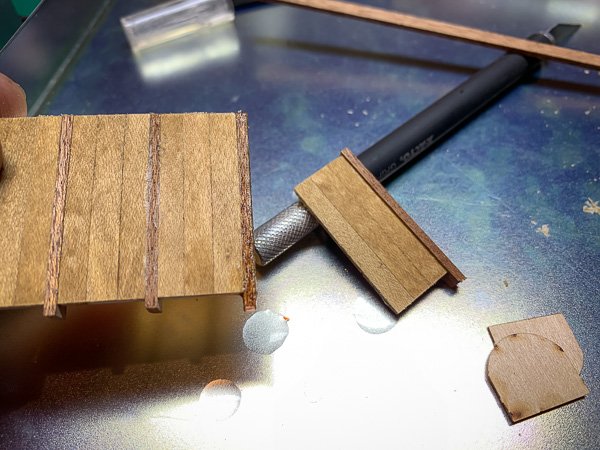
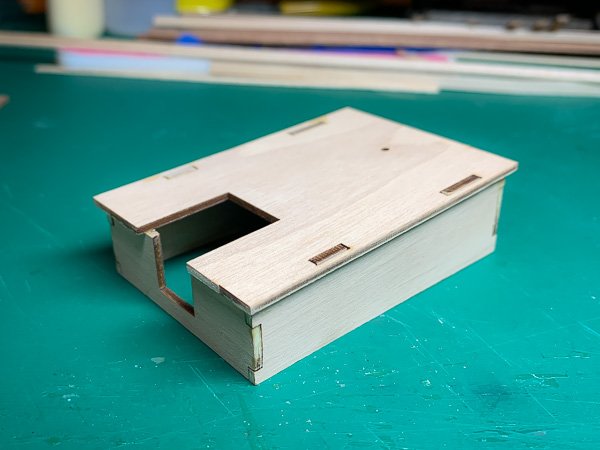
Got the deckhouse and hatchway completed: That was actually quite a bit of work, more than I thought it would be. Interesting how the smaller more detailed work takes so much more effort and time...
-
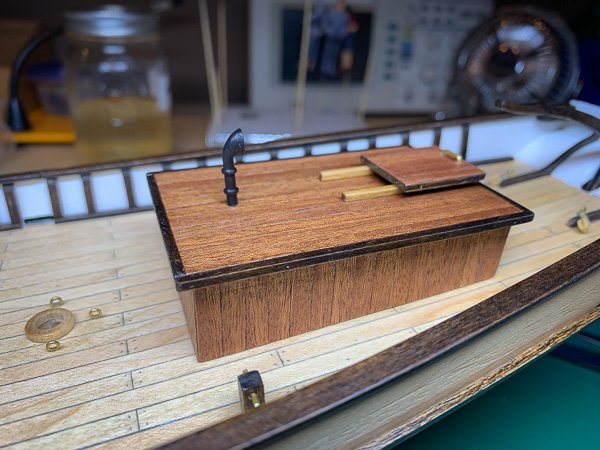
Nearly completed building the hatchway but decided to redo it. Good exercise in unbounding the wood glue: The main thing I didn't like was the color of the wood stain. I used golden oak but would prefer a lighter pine color. The other thing I wanted to do was raise the framing, like I did for the rightmost piece in the photo above, but do it for all the framing not just the edge ones. So it's off to the hardware store tomorrow to get the pine stain. In other news... bought some beeswax for coating the threads... and got the deckhouse assembled and ready for planking: Some progress at least.
-
Went out to buy beeswax... came back with wood strips and brass rods too. Thought it might be good to have an assortment of materials on hand. Oh also got a miter box and ordered an X-Y table for my new drill press.... hmmm, seems half the fun of hobbies is acquiring stuff... 😬

-
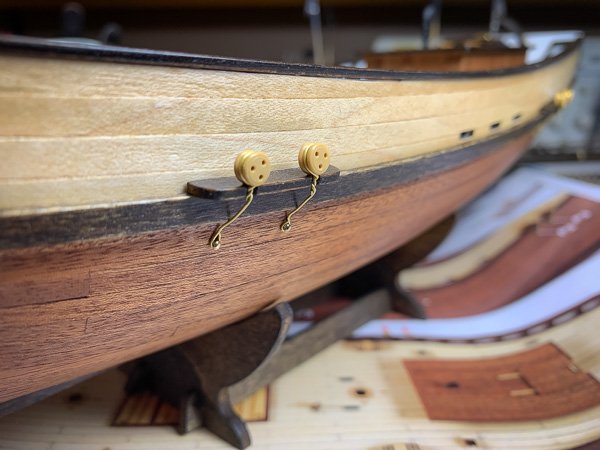
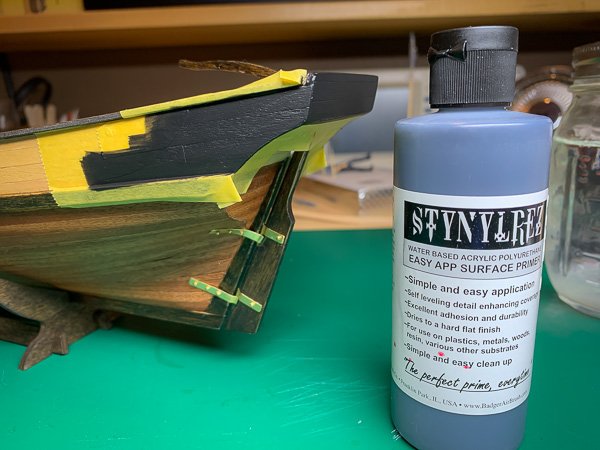
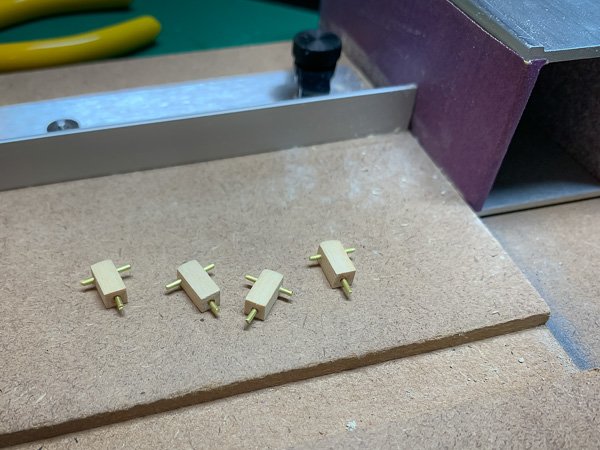
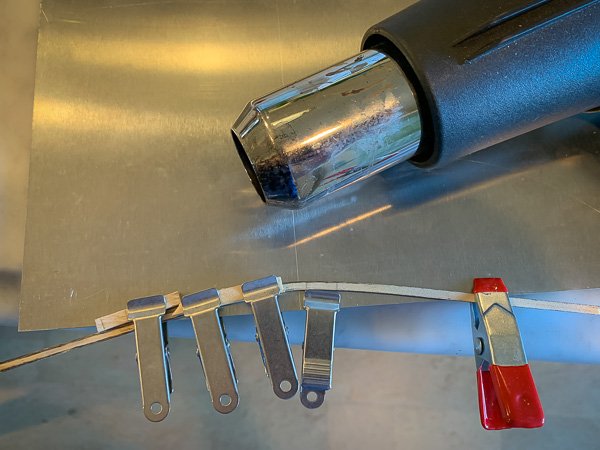
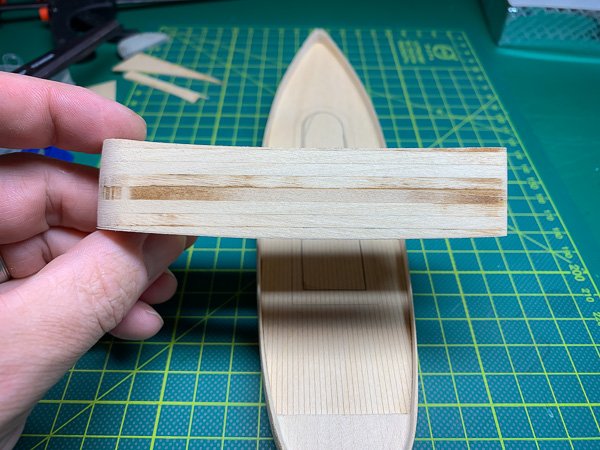
Painted the stern section. Masking was simple enough: Primed with Stynylrez: Which is what I used for all my plastic and metal models. Was going to paint with Vallejo acrylics but decided the primer was good enough as is. However....: I believe applying the wipe-on-poly first was a mistake. The primer came away easily as you can see. I'm going to put the metal decorations on at the very end as I'm sure any pressure will pop them off. Next started with the deck attachments. Not sure what these blocks are called but I was really glad to have Micro-Mark's "Sand-It" tool to get the blocks square: However, I did hand drill the "crossbars" so they were not so square:

-
Just watched Captain Courageous. Amazing to see actual footage of these boats. Following your build for sure, Bill!
-
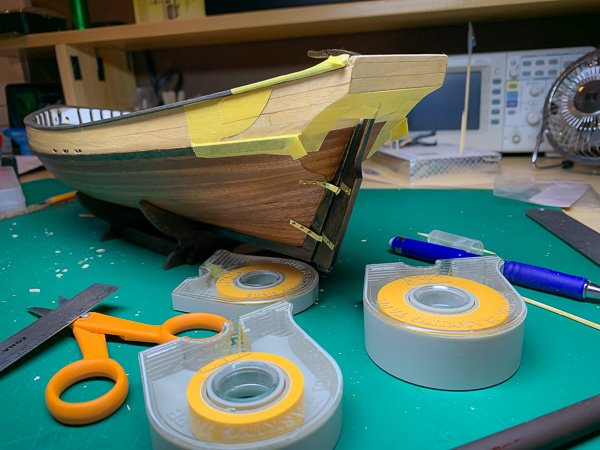
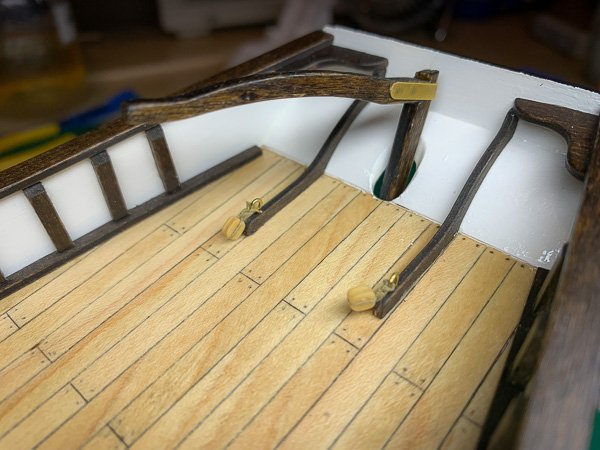
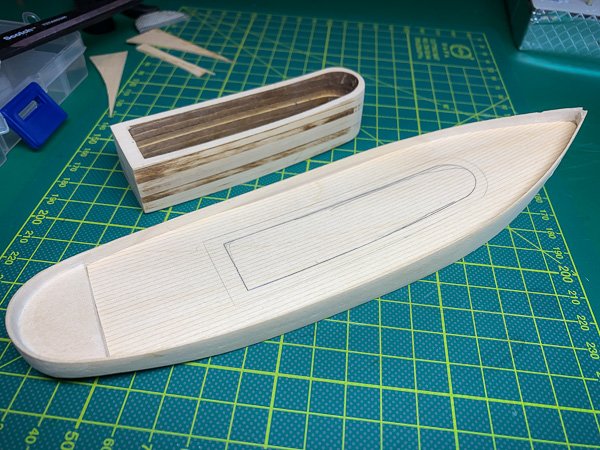
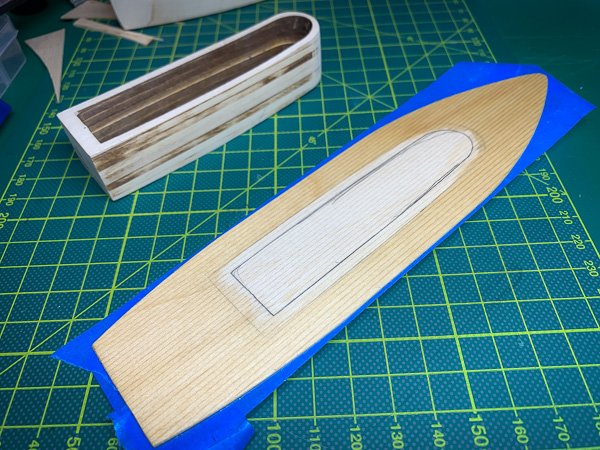
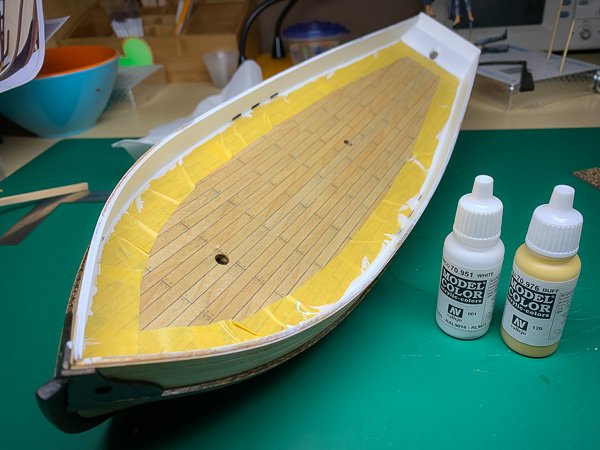
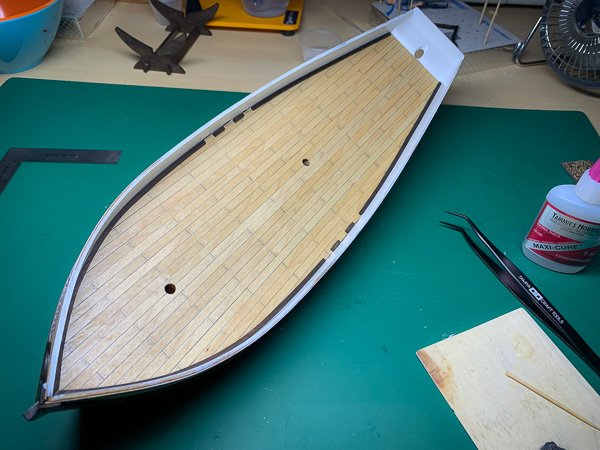
Thanks, John. It's coming along. Not too happy with the fit of the stern grating: Decided to try shape it better with the sander: A little better and at least it doesn't overhang the step at the stern: For the bow stem I wanted something that looked more like the figures in the instructions, so I took a larger plank from the Polaris kit and made a slot for it to fit into: And shaped the plank accordingly: Not going to install it till I'm adding the rubbing strakes as I'm sure I'm going to break it off while still sanding the hull. Which brings us to what I did all today... sanding, and lots of it, to get the deck ready, the bulwarks thinned, the bow point finished and the main cabin shaped for the deck and roof. Also got the decking cut out and treated with wipe-on-poly: Of course I managed to over do it with the bulwark thinning: Not the end of the world. Can fix it with a little wood filler and the rubbing strake will be along that line. Moving forward I have to plan the next few steps. The instructions are a little too brief and I need to figure out a proper construction and painting order. For example, I don't want to install the deck until I finish painting the hull, as I'm going to be airbrushing it, and also need to figure out exactly how I want the main cabin to look.

-
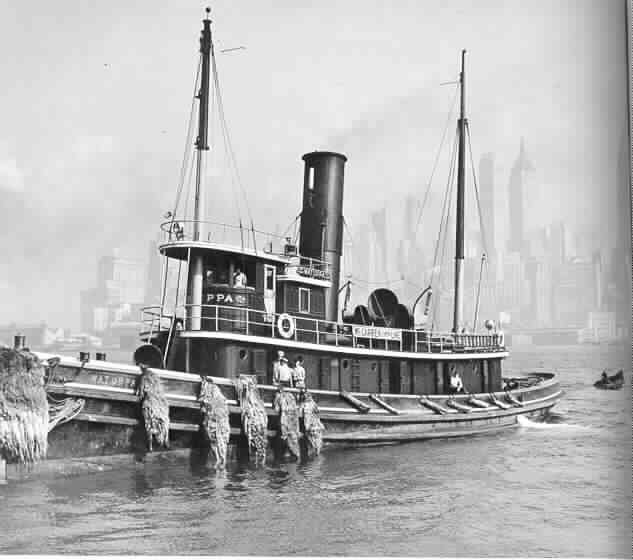
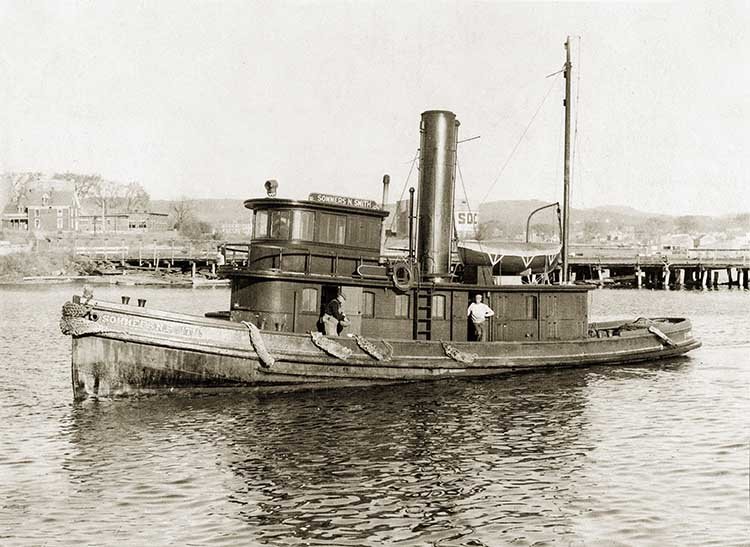
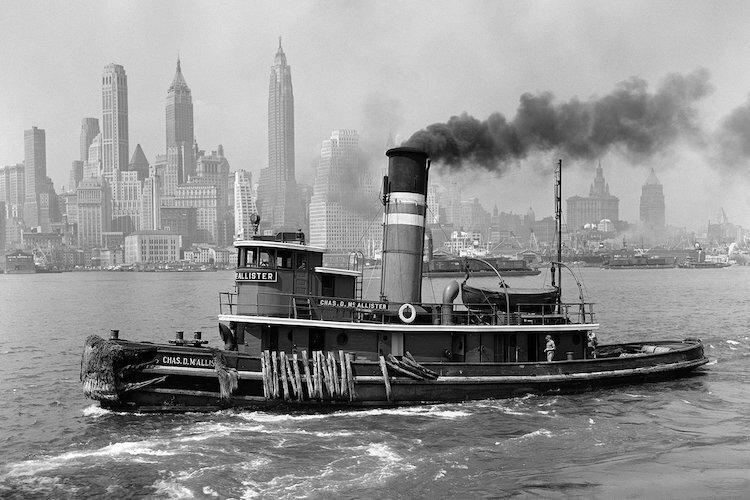
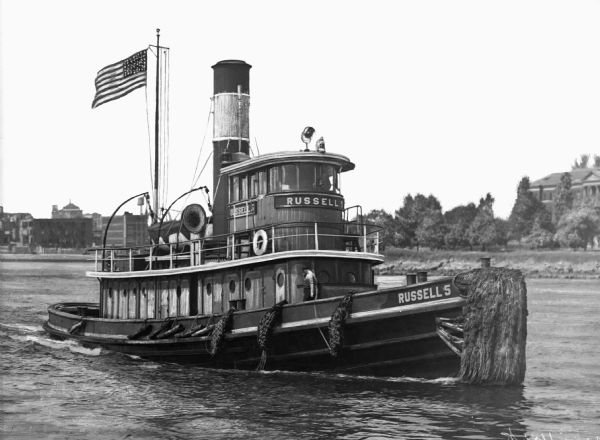
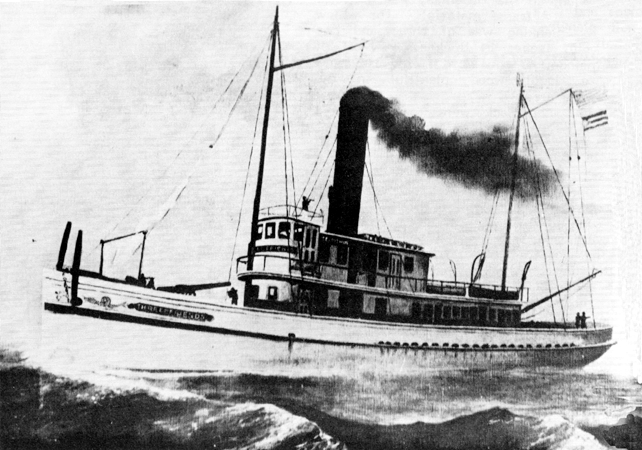
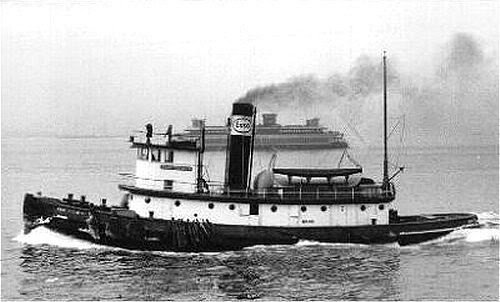
Trying to get some ideas on a paint scheme and possible modifications so went browsing around google images. Thought I would post a few examples here: If I ever do a scratch build I think it will be one of these kinds of tugboats.
-
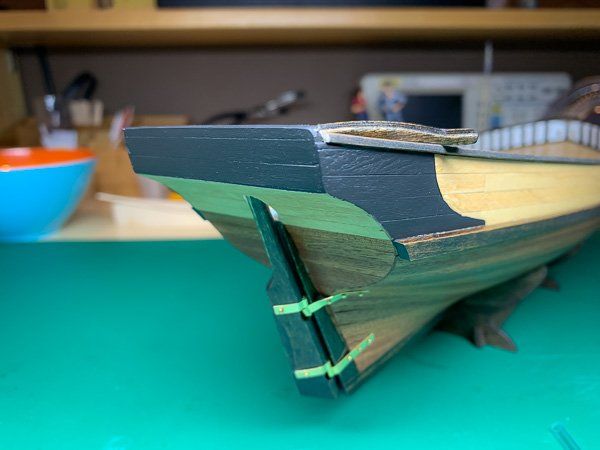
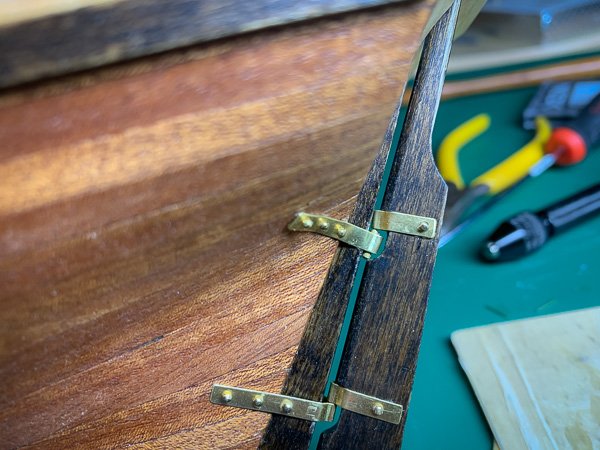
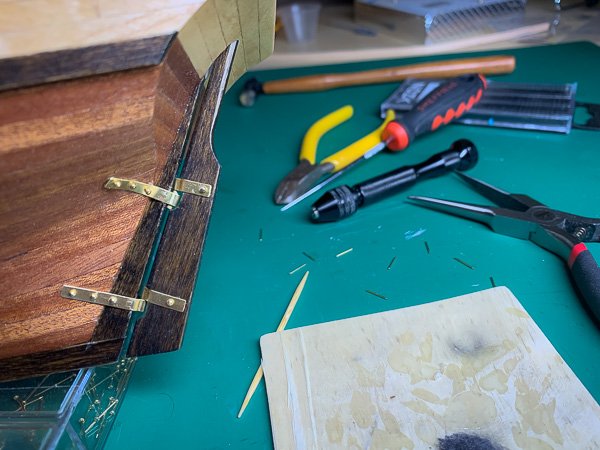
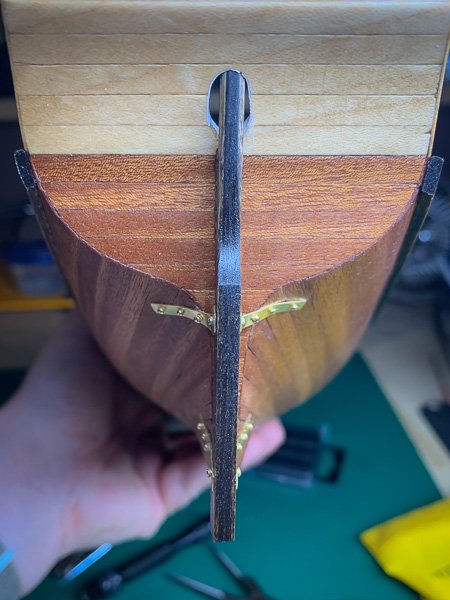
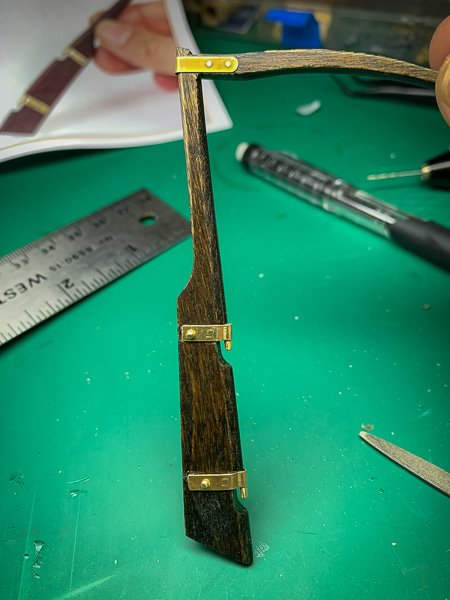
Attached the rudder: The lower hinge (?) was easy to do. The upper one I messed up: It was not aligned correctly and resulted in the hinge pin breaking off from the rudder's metal brace. Not sure how to fix this. Might just leave as is. The alignment of the rudder is a little off too. Not sure I could have done better at this point.
-
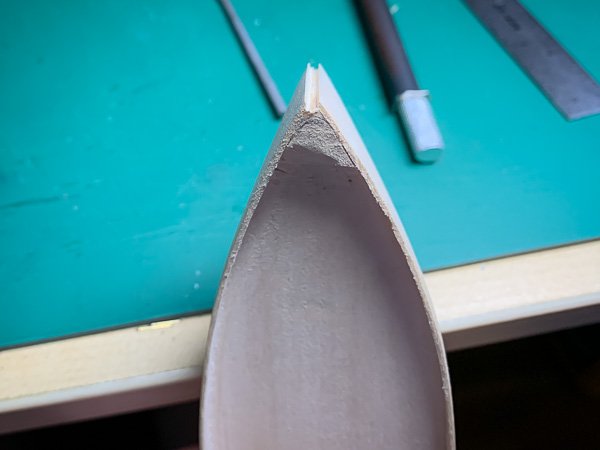
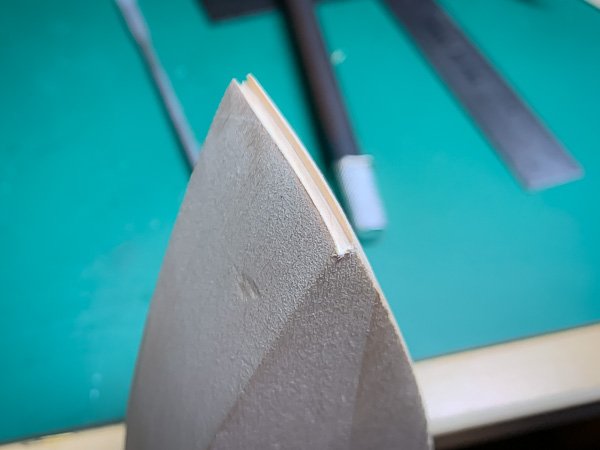
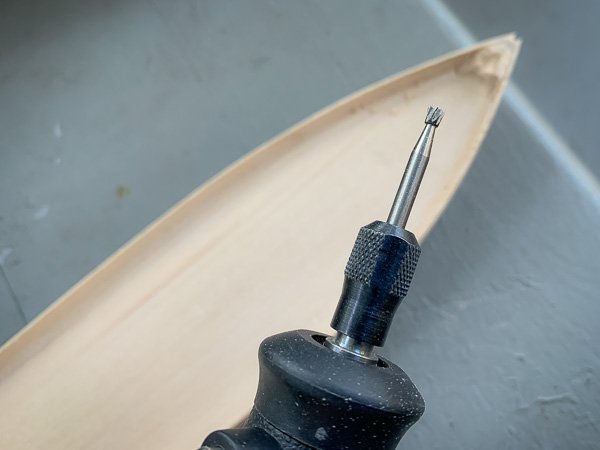
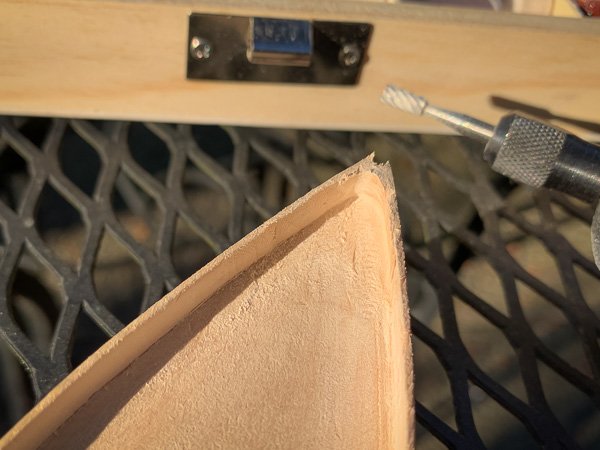
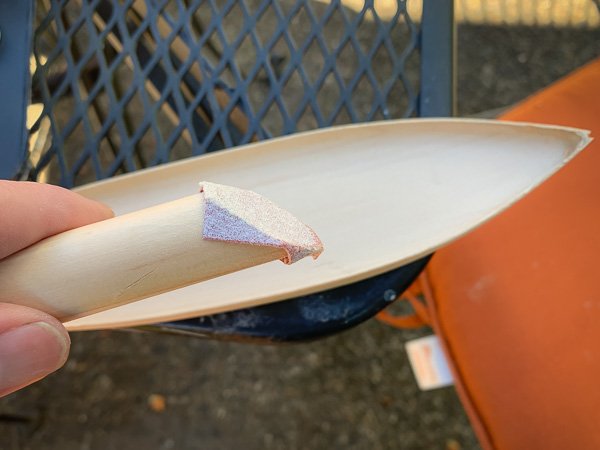
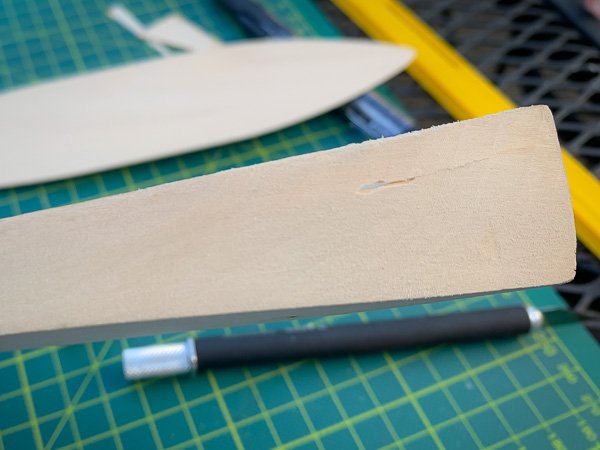
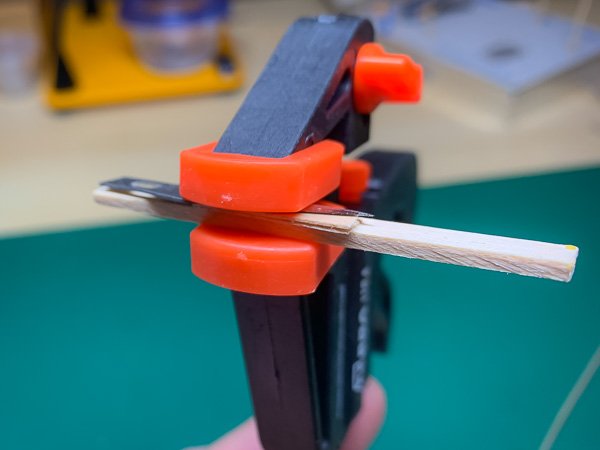
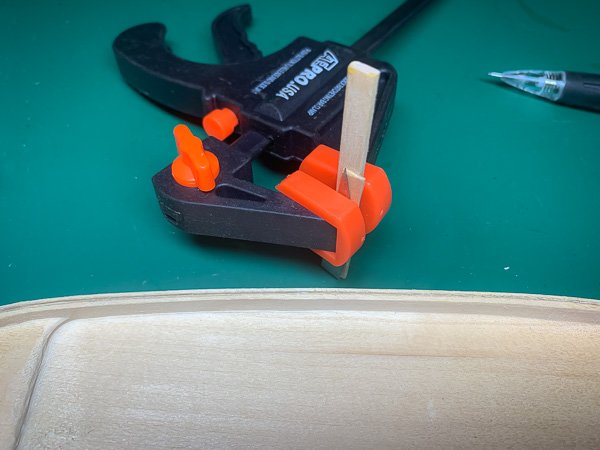
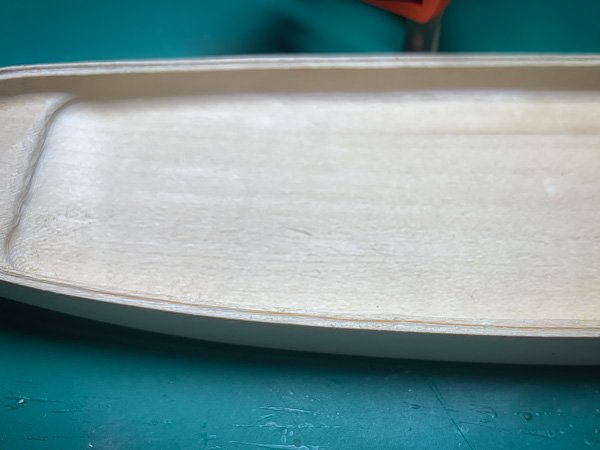
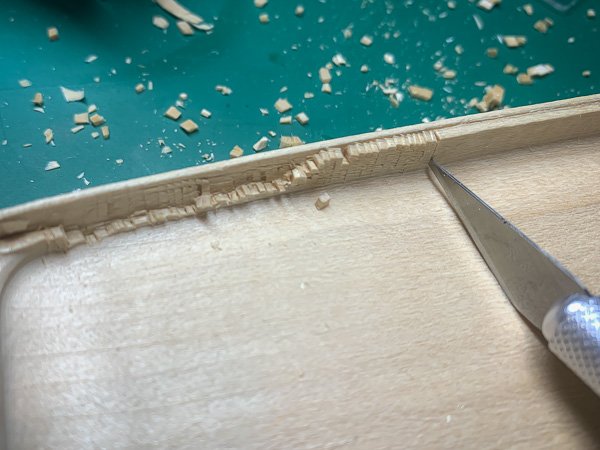
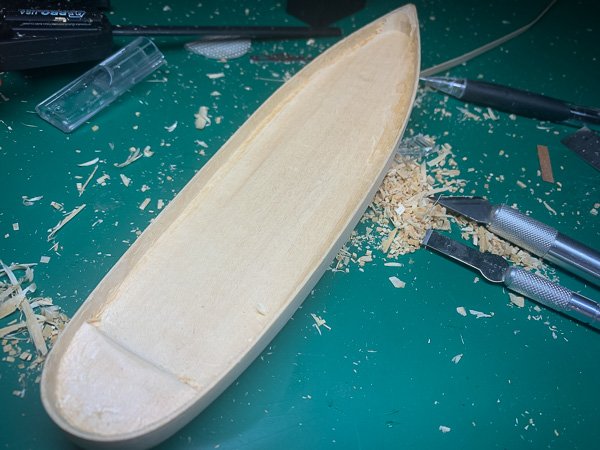
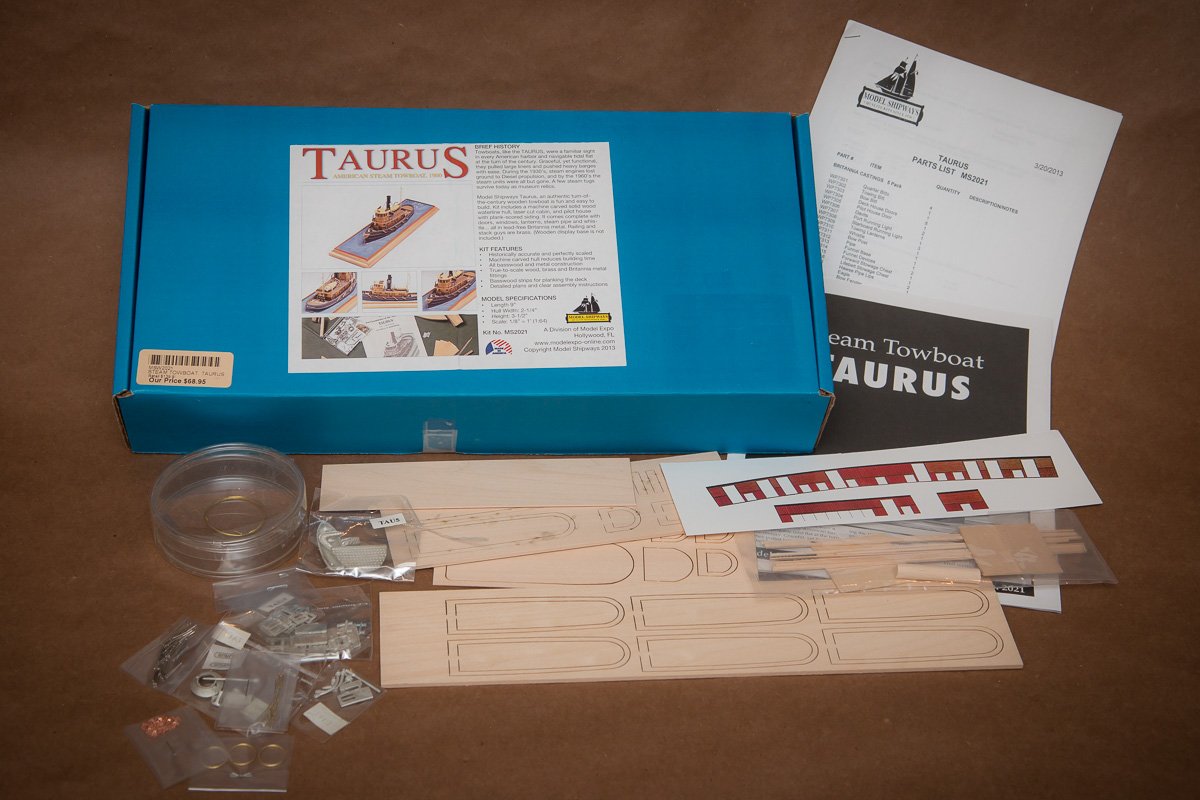
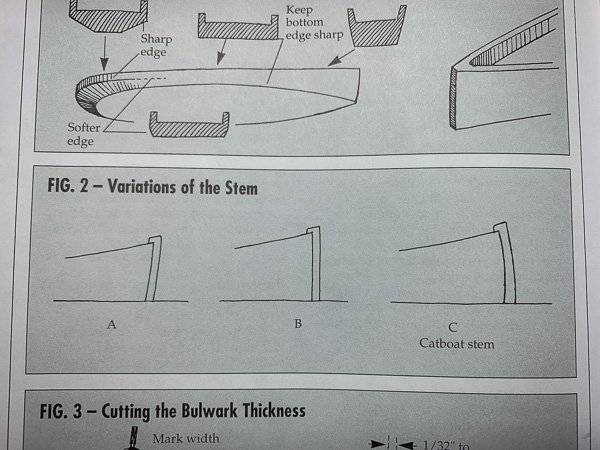
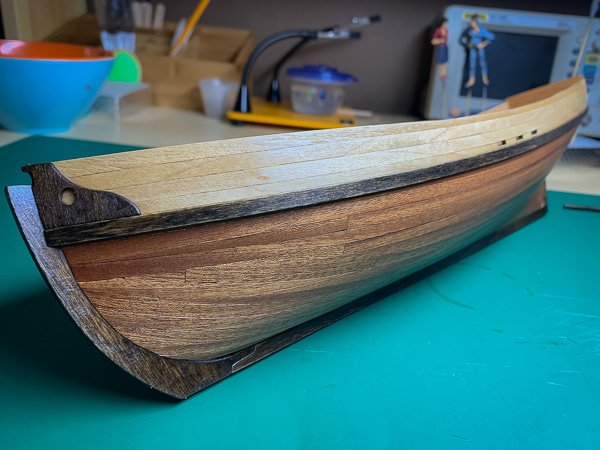
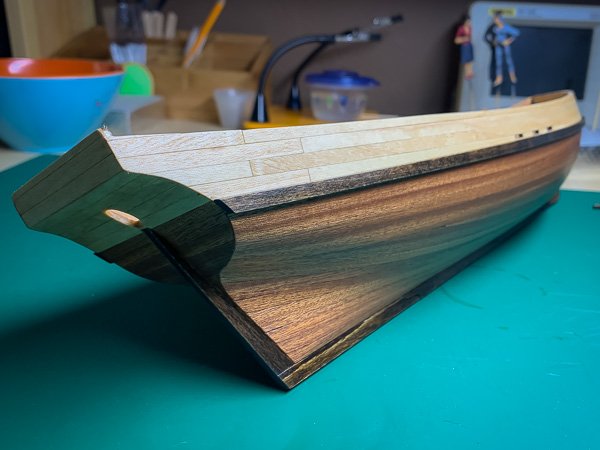
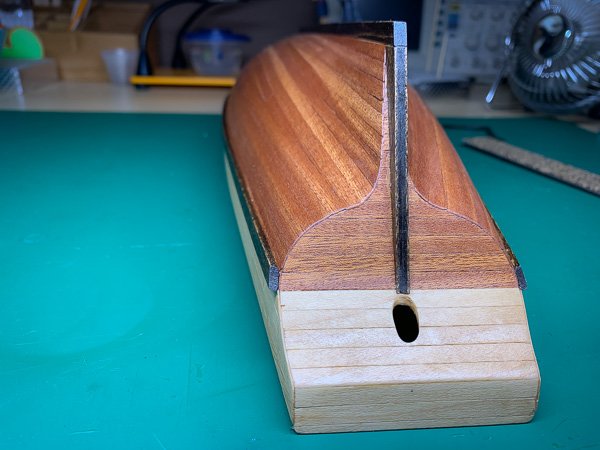
I initially purchased Model Shipway's 18th Century Longboat as my first wood boat project and, shortly after, this kit as an alternate starter. The longboat proved to be more advanced than I'm comfortable with so I've put it on hold till I get more experience and confidence. I replaced the longboat with OcCre's Polaris kit that's specifically designed for first time builders and am currently about halfway through that build but have decided to start building this towboat in parallel. There is only one other build log of this kit that I can find at present: Taurus Steam Towboat by Duanelaker Here is the kit... minus the solid wood hull I managed to leave out of the shot 😕 : Be aware that the cabins have been changed from solid wood to a new laser cut version. The build manual is still the original, with instructions for the solid wood cabins, however there is a separate sheet with instructions for the new laser-cut ones. First step is getting the roughly hewn solid hull into shape. The stern was relatively easy: However, the bulwark needs to be thinned down from 1/8" to between 1/32" and 1/16". I created a makeshift scribe using a #11 blade and a clamp with thin wood strips: This worked out pretty well: Was then able to hack away with the x-acto: To get down to about 1/16": Still a lot of sanding and cutting left to do. However.... one mistake I managed to make was not shaping the bow prior to thinning the bulwark. On my hull the bow required a lot of sanding if I wanted to get the "Catboat" stem look (fig. 2c in the manual) which I did want. However because I have already defined the bulwark it wasn't possible to sand back the top of the bow as much as was needed so I was forced to go with fig. 2a. Not the end of the world but annoying all the same.
-
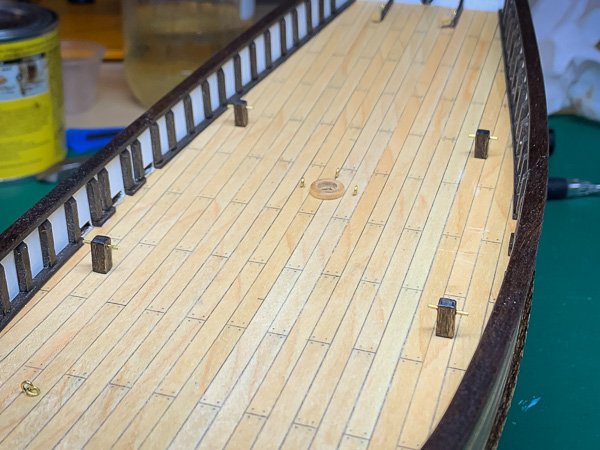
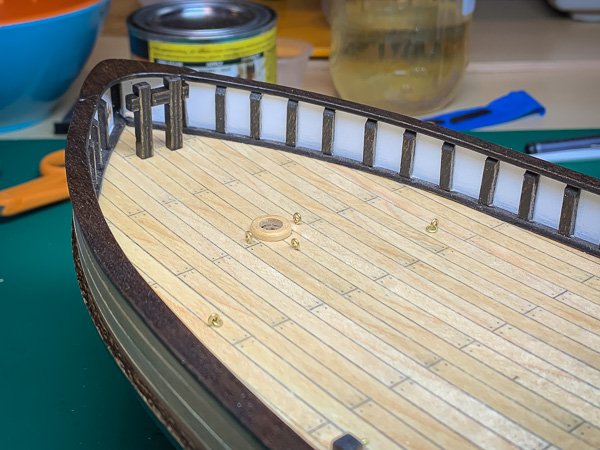
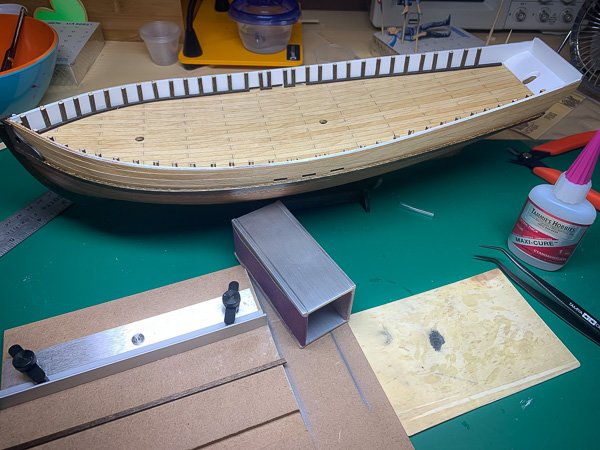
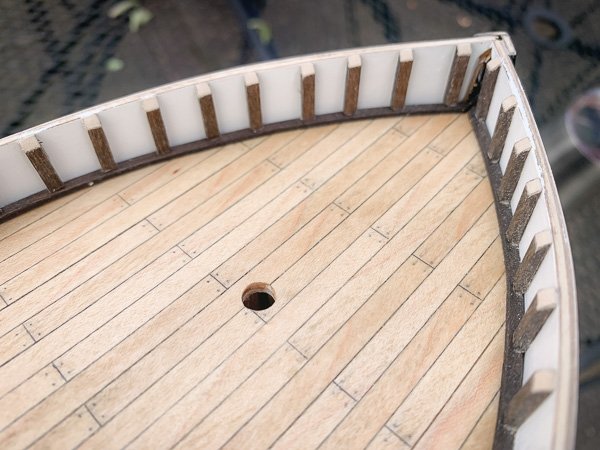
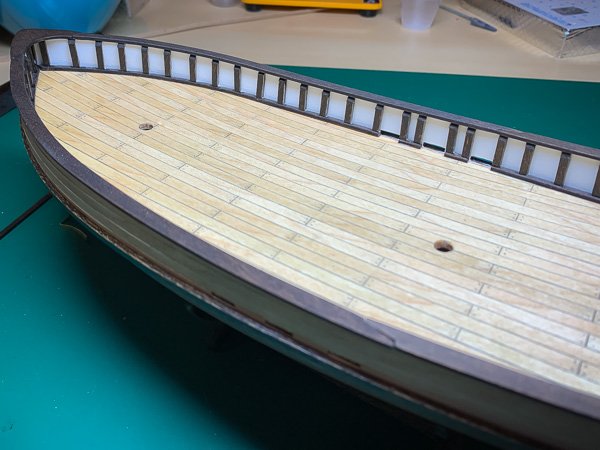
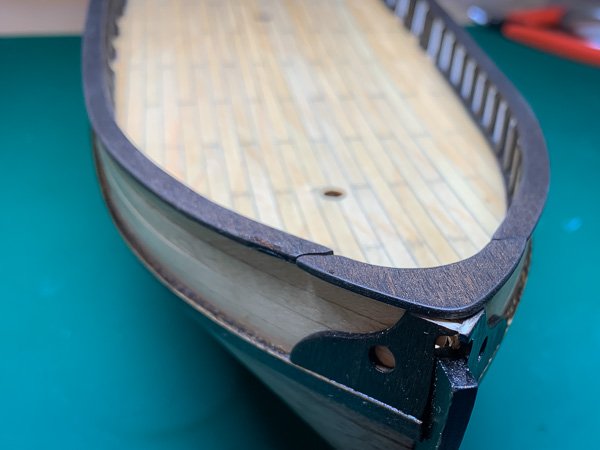
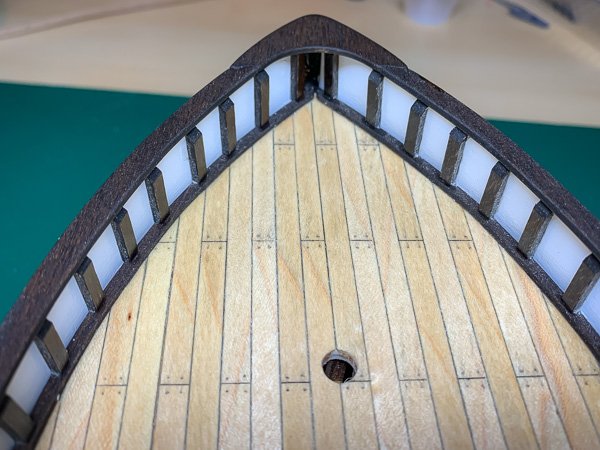
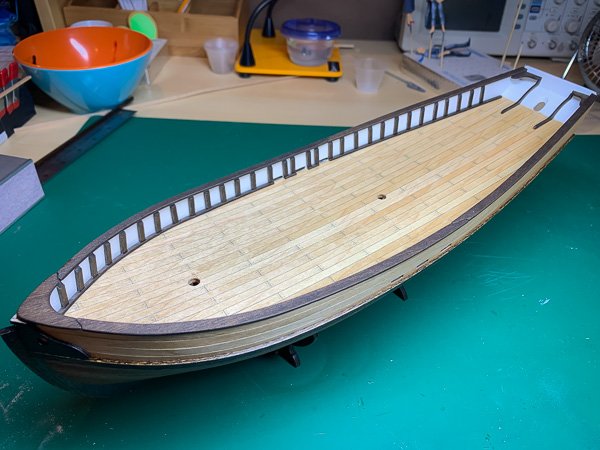
Got the bulwark stays in... all of them: Not as tedious as I was expecting. Sanding down the tops was not terrible: but I did have some stays I "popped" off in the process. Thankfully the clear coat I put over the paint meant that there was no damage as the CA came away cleanly. However, putting on the rail cap and the stern trim was a nightmare. I hate using CA. It's so unforgiving. You can see one of the stern trim pieces is not seated well. I had such a hard time of getting those corners in. The other main issue I'm seeing is at the bow: I'm at a bit of a loss as to how this came about. Here is a final shot of the whole boat: Anyway, thankfully this part is over. Also managed to get the rudder fully assembled: and ready for installation....

-
Actually, get a second kitten! That's what we did. They play together all the time. And yes it's usually at night
-
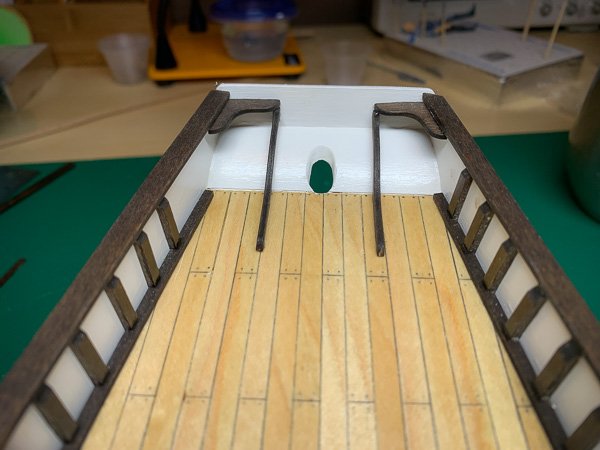
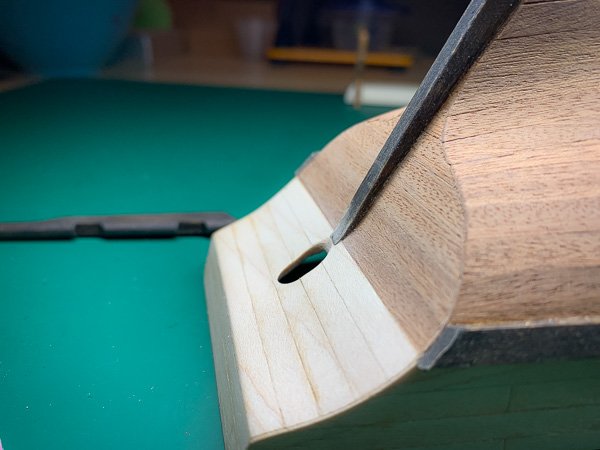
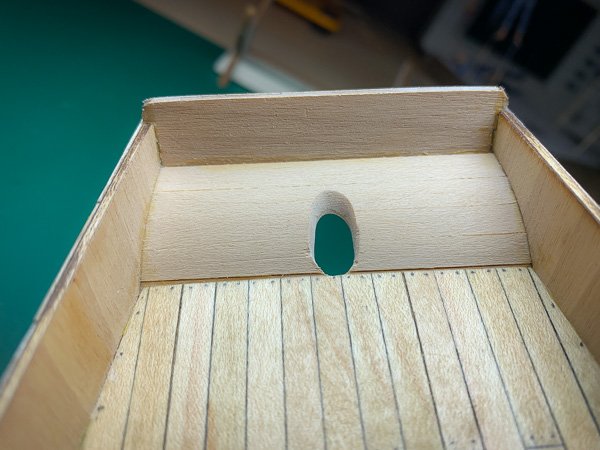
Created the opening for the rudder: Not quite as long an opening as in the instructions but I'm able to get the rudder in and out no problem. After that it was a few coats of wipe-on-poly: Then painting the inside of the bulwark: I brushed on Vallejo White acrylic with a touch of Buff to make the white not so stark. I mainly build plastic models and always airbrush large areas. Here I wasn't bothered to do more masking and Vallejo acrylics go down really well with a brush if you water them down a little and do many thin layers. I think I ended up doing 6 passes. Finally did a clear coat of Future/Pledge to protect the paint. Also managed to get the baseboards (?) glued down, using CA, without messing up too badly: Not a perfect job in terms of alignment but not too bad at all and thankfully very little CA showing at all which is great! Next up is putting in all the 40 or so bulwark uprights which is going to be a process in itself, but once I can get the rail caps down and the rudder mounted I'll be starting on the above deck stuff which I'm very excited to finally be getting to. Up to about 38 hours in the build so far.
-
Sorry Wahka, not sure what you mean. I plan on making the hole next actually. In the instructions they leave it till much later but I'd rather do it now as I need to sand down part of the sternpost and want to make sure the rudder fits correctly before moving on.