


having-fun
-
Posts
44 -
Joined
-
Last visited
Content Type
Profiles
Forums
Gallery
Events
Posts posted by having-fun
-
-
-
Hello! I have finished the Black Pearl. I can not show a photo because my son-in-law, which is the individual who asked me to build it, took it to his home. What I have is a U tube short movie (about 1 minute) that he, being a computer graphics expert ) made to advertise his business. following is the link to the movie, it has sound and and other computer generated effects, it also has his advertising.
Have fun
Joe
-
I was trying to add a new post to my Black Pearl build log which include a link to a utube site, and, by mistake, I attempted to upload a mp4 movie, the upload did not complete, now i need to remove this last post and re-issue it with the proper link to Utube, I do not want to erase the entire topic, just the last entry.
Can you help?
Thanks
Joe
-
Hi!
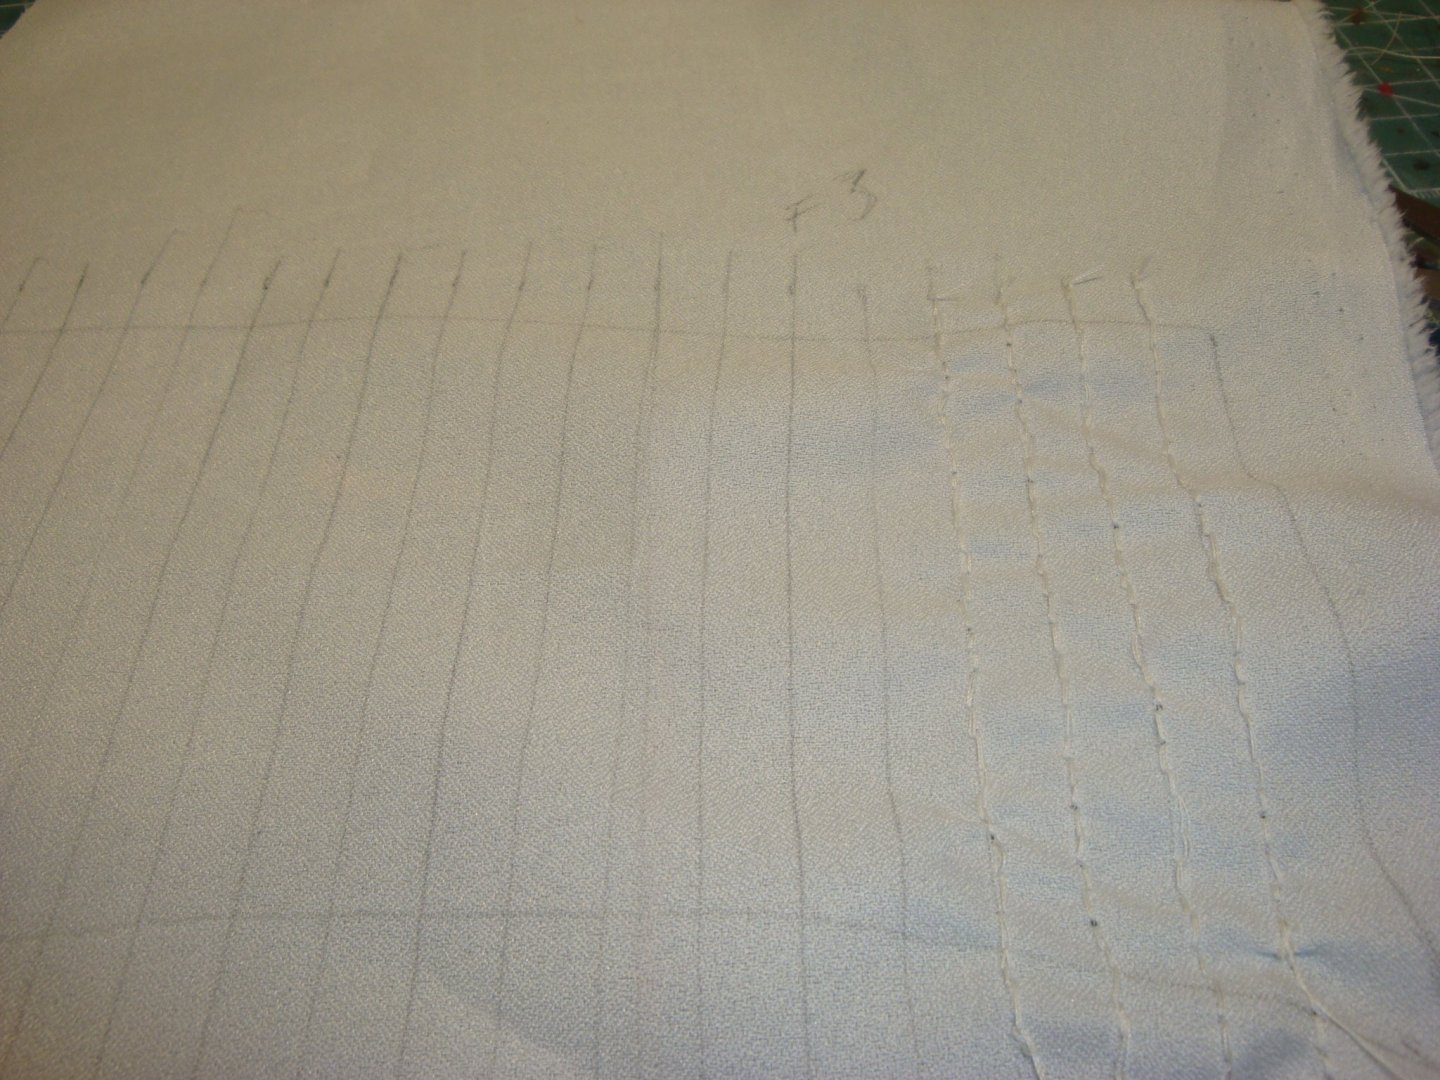
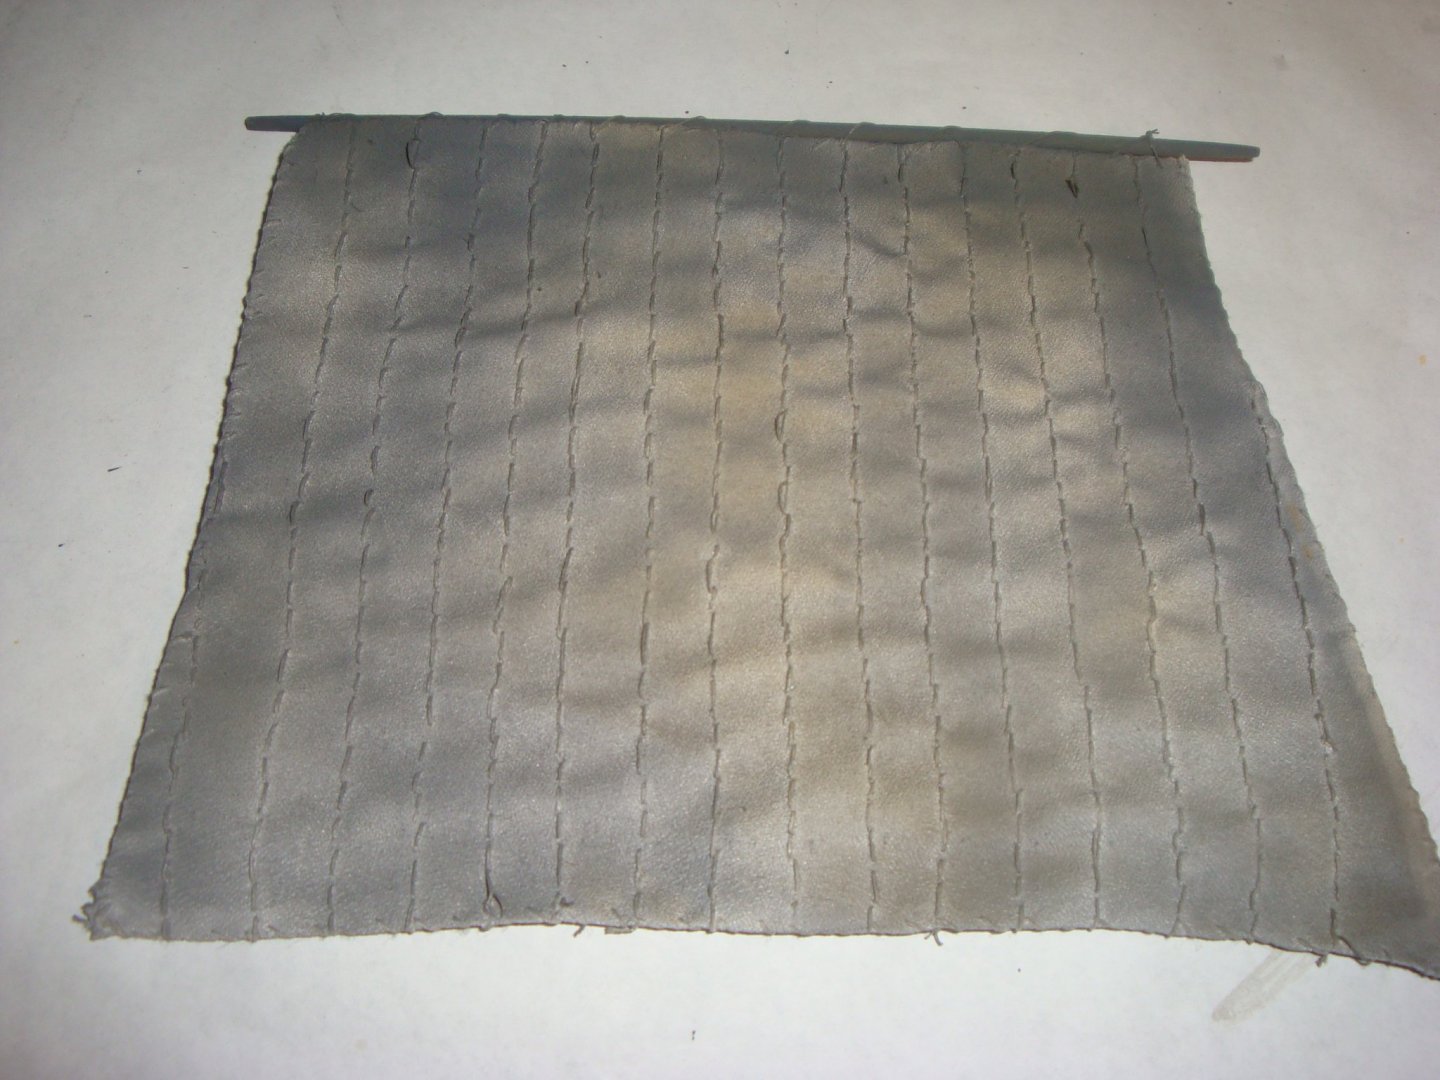
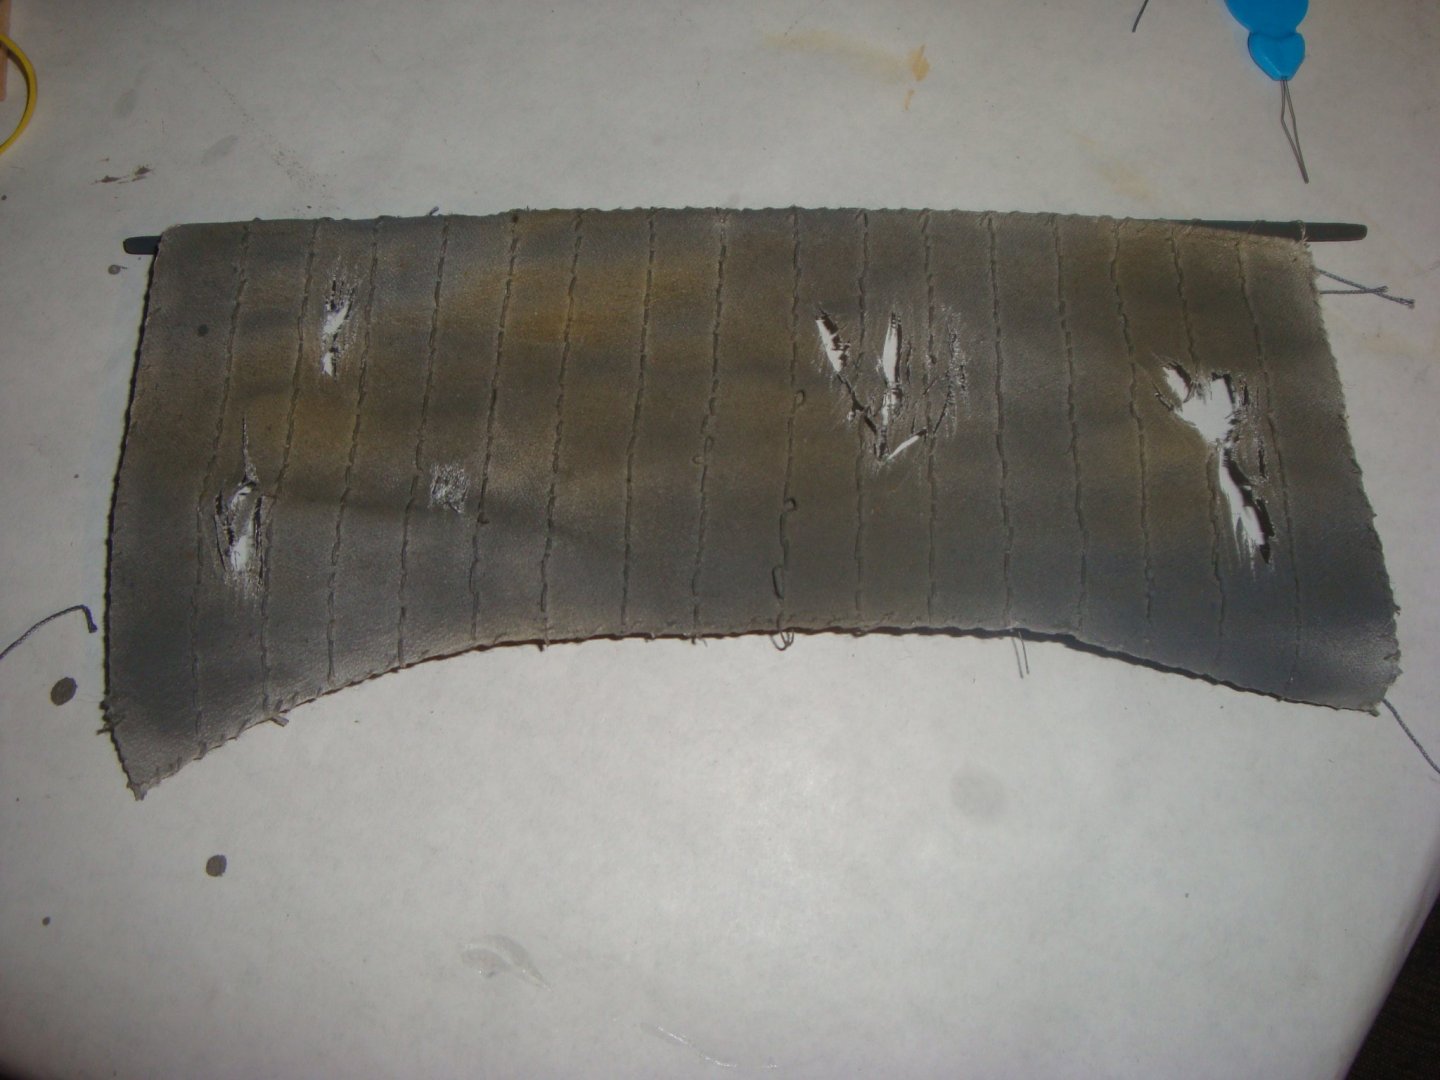
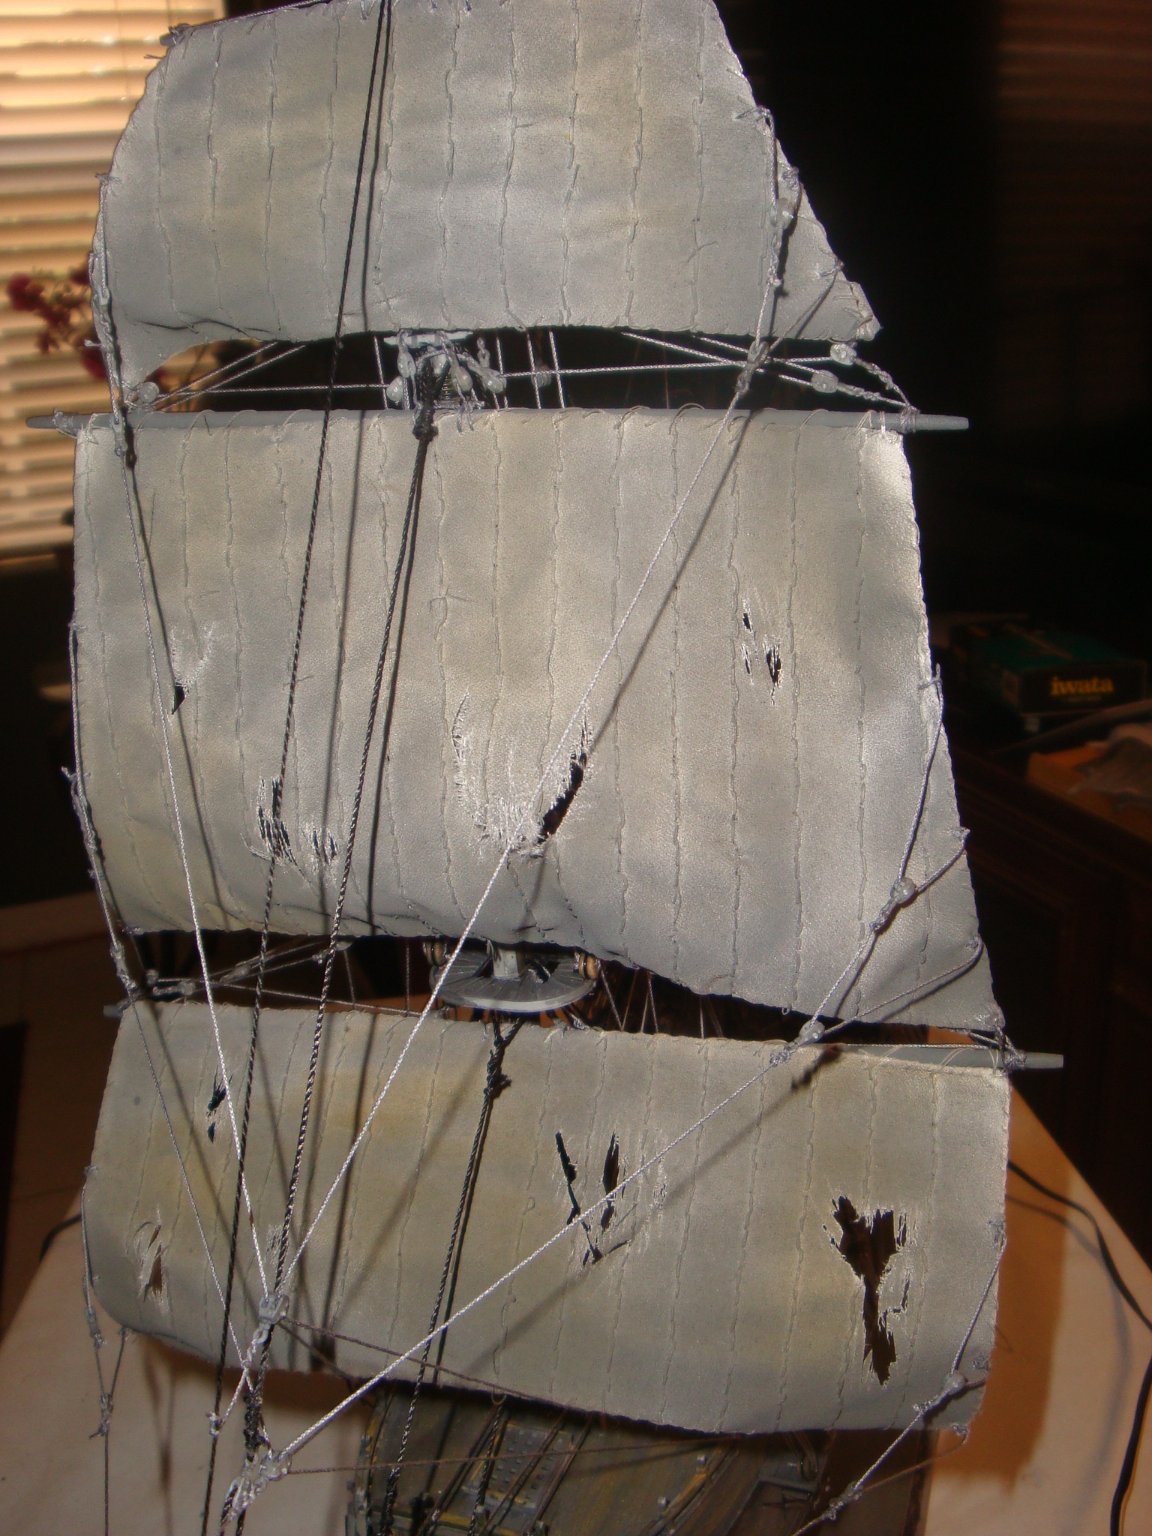
I have completed the manufacture of all sails, first I sew the sails to make the lines on them, then I added a border to the sails. After that. I airbrush Tamiya dark grey followed by a light spray of Vallejo ochre. finally I distressed them with a hobby knife to make then look tattered and worn out.
The following photos shows the sequence I used and also show 3 of the sails already mounted on the ship. This particular model has a rather complex rigging, it takes me anywhere from 1/2 hour for the smaller sail to over 2 hours for the bigger ones.
The photos may not be in the correct order, because I have not figure out how to put then in order for his blog.
Enjoy!
Joe

- Jeff T, GrandpaPhil, Gregory and 1 other
-
 4
4
-
Well, I am back! I have been busy working on the ship and doing other things which is the reason I have not been keeping up with the blog.
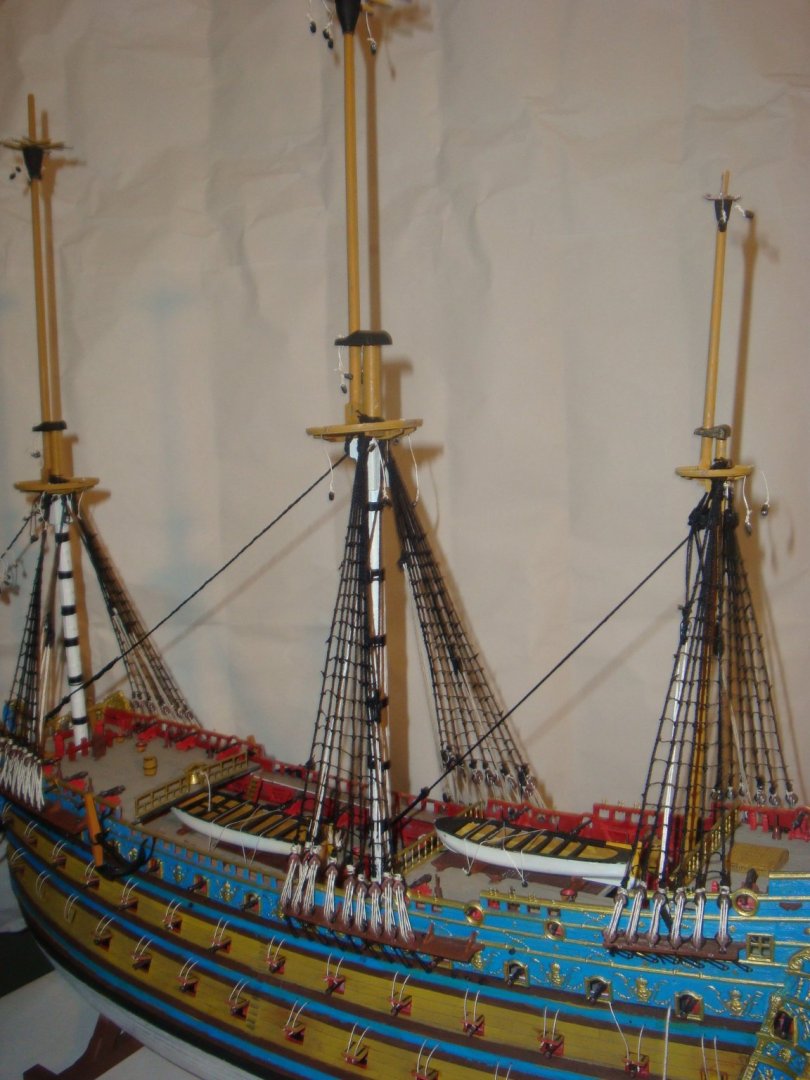
I have completed the hull work and I just finished doing the shrouds and getting ready to start doing the rag lines. As I stated before, I am not using the shrouds that came with the kit, I am doing my own, attached here are photos that shows the completed shrouds, I have started making the rag lines an have dome general clean up and adding additional details to make the ship look more ancient and distressed.
I also plan to use fabric sails, that is when I discovered that the crossbeams (I am not sure that is the proper name, I am referring to the wood bean that holds the sail) are also molded to the kit sails, they are not a separated part. I went to Hobby Lobby and found a dowel of the same size which I will be using to fabricate the crossbeams. Here are the photos as the ship stands today:
Well, until next time
Joe

- BLACK VIKING, lmagna, GrandpaPhil and 1 other
-
4
-
I had the opportunity, back about 5 years ago, to go to the actual museum were the original ship is displayed, but I can not remember if they had the model completed. The real ship was fantastic, is to bad it was not seaworthy.
-
Well, here is another progress report on the Black Pearl. First I like to thanks Ryland Craze and ccoyle for fixing the title, I am know for being a lousy speller.
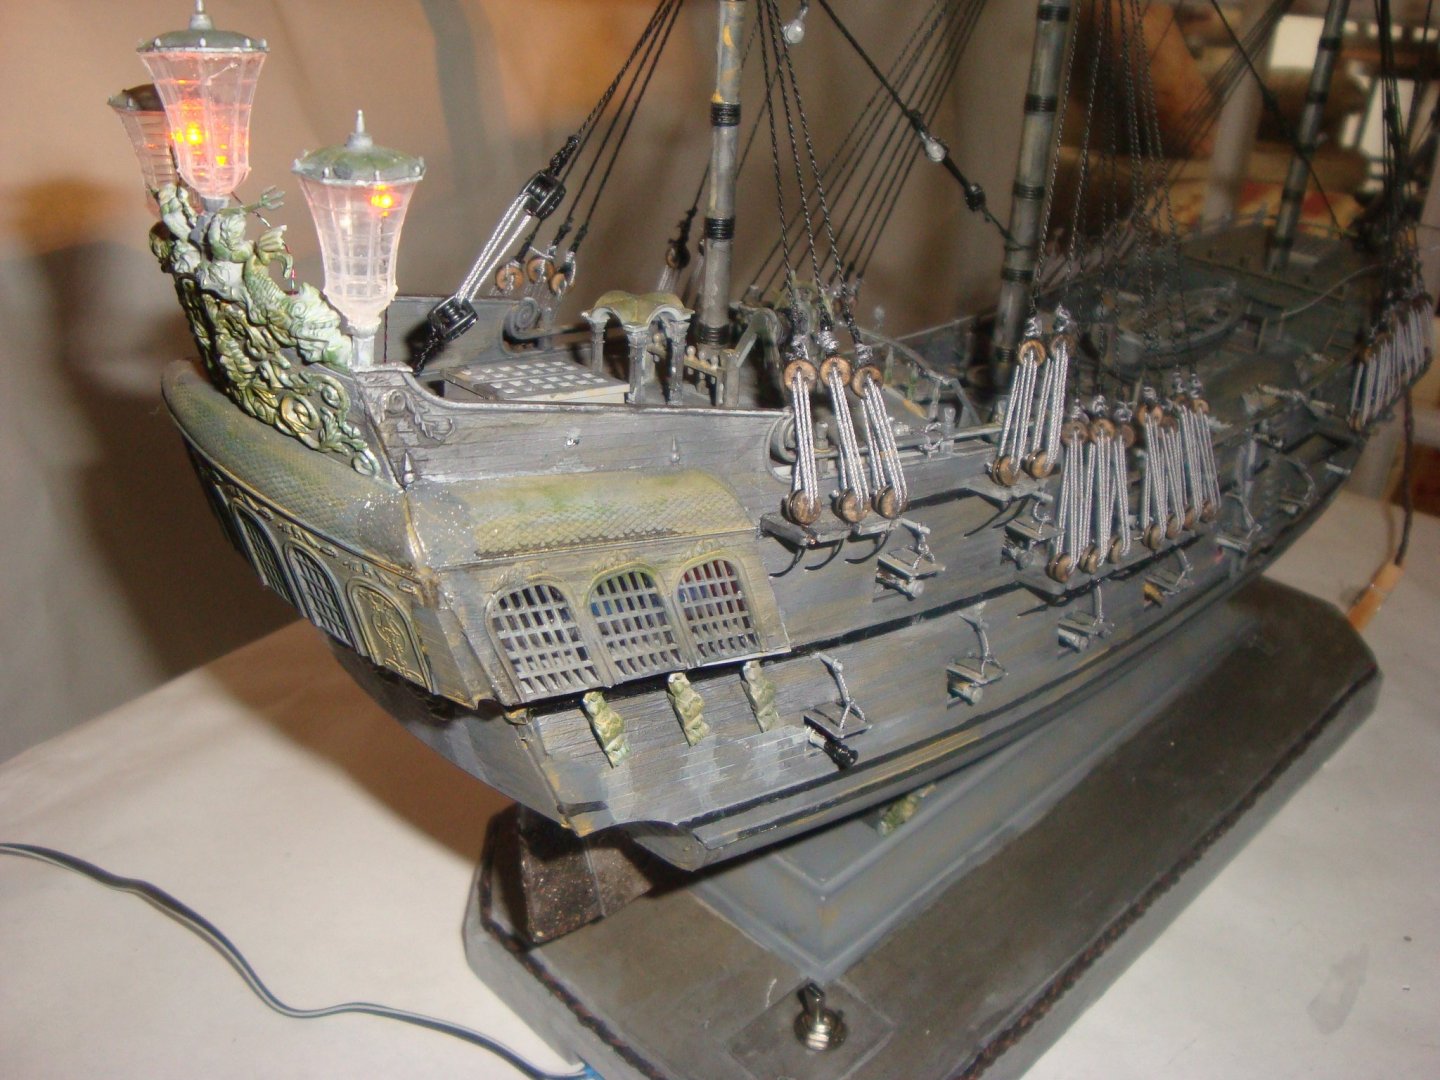
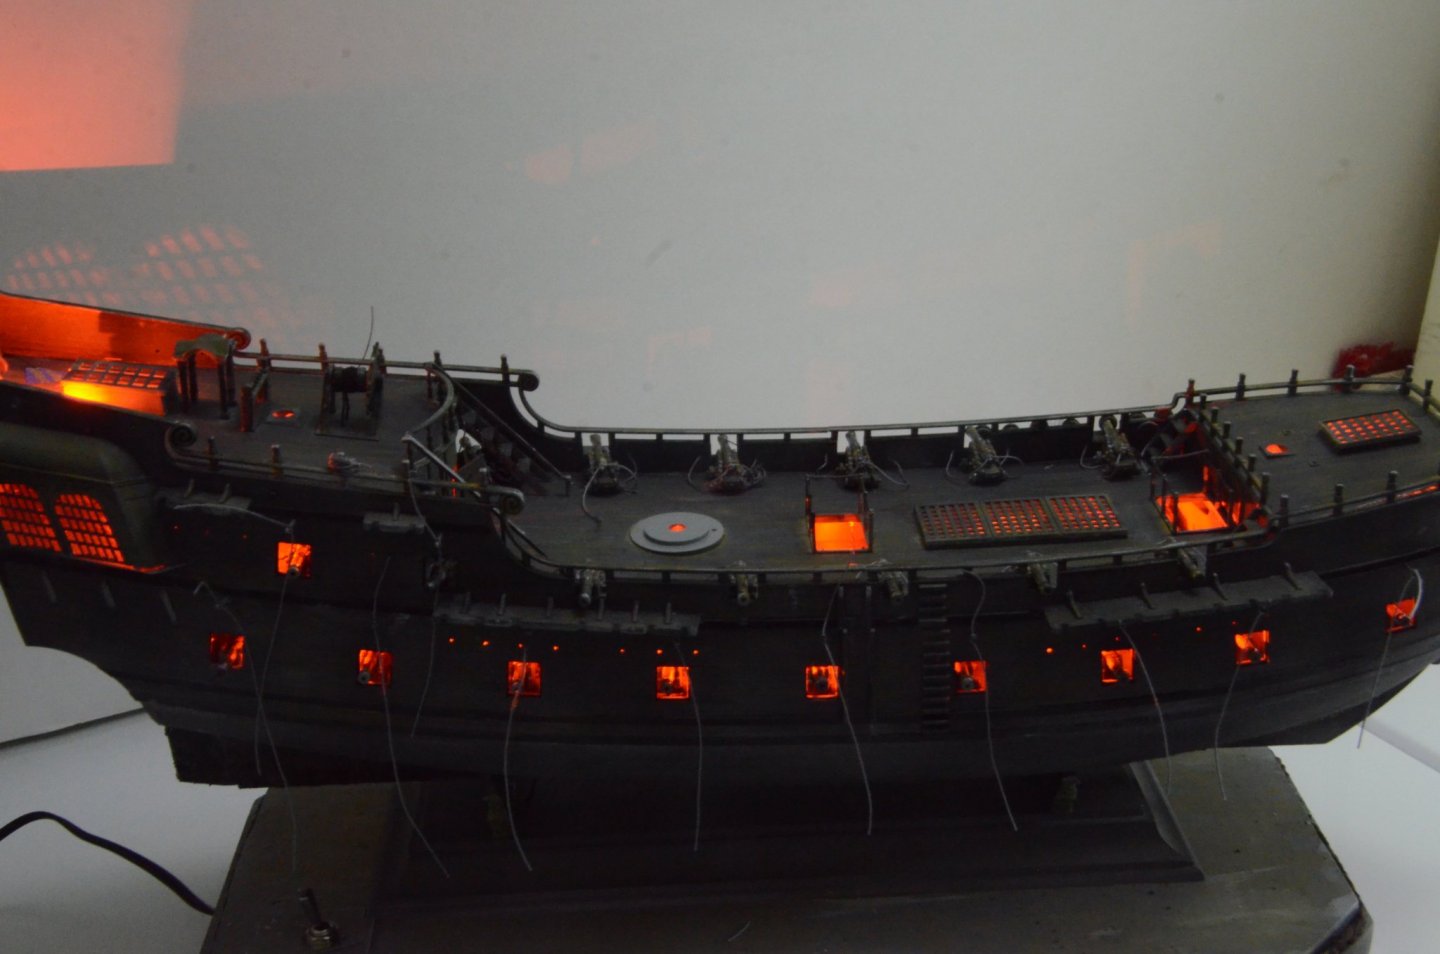
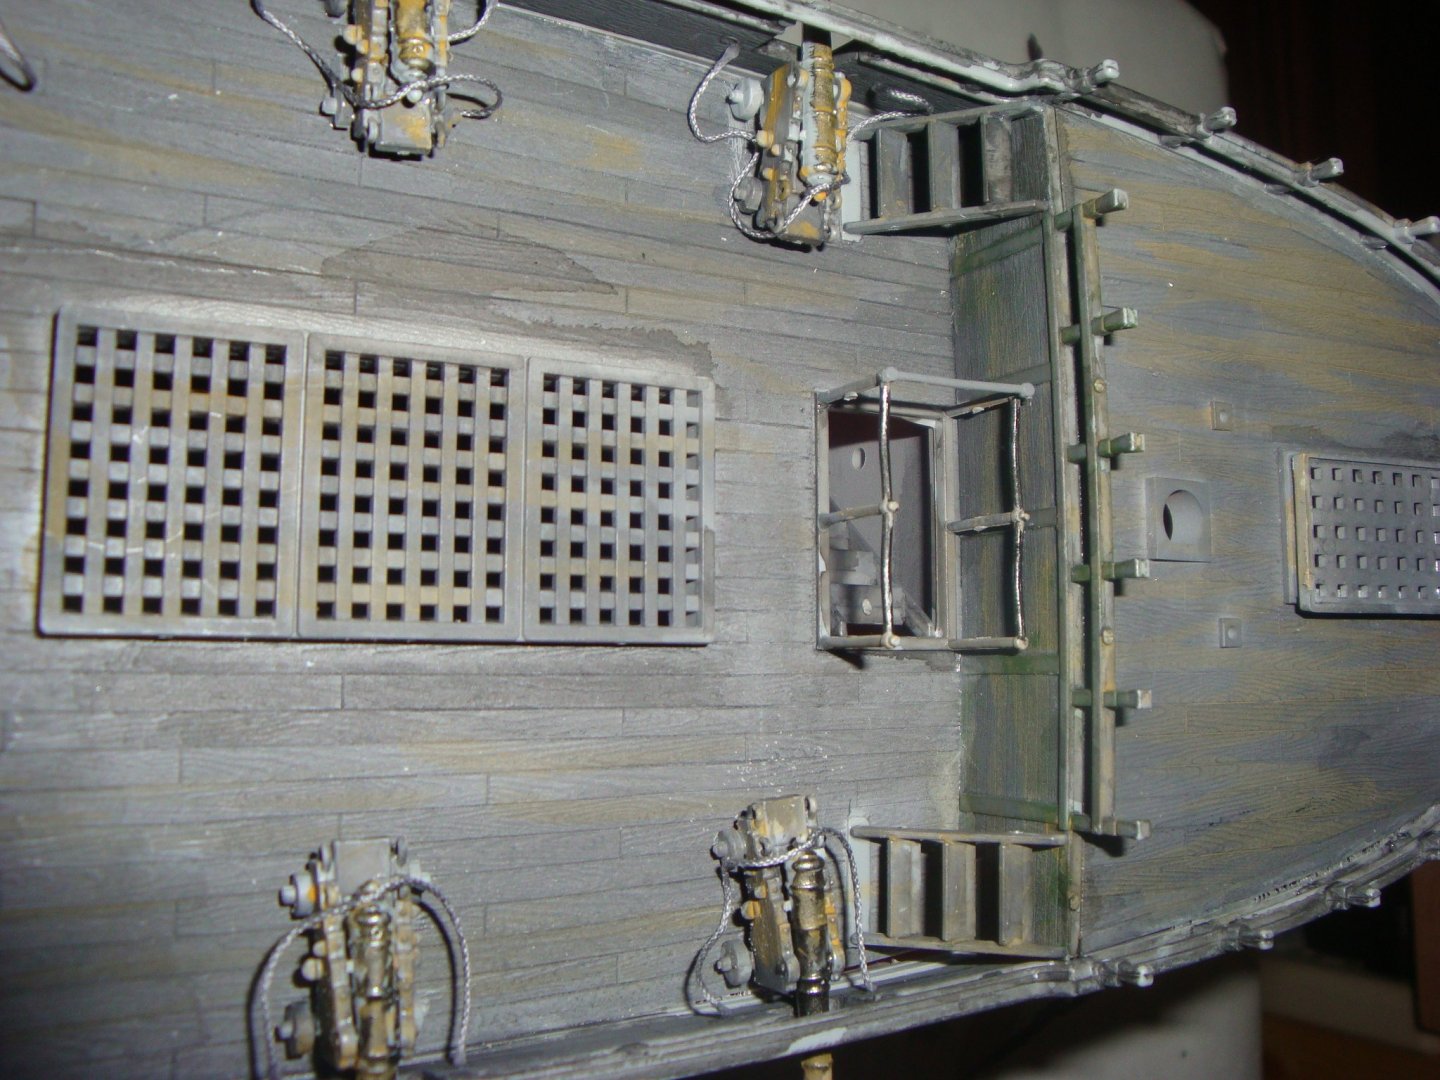
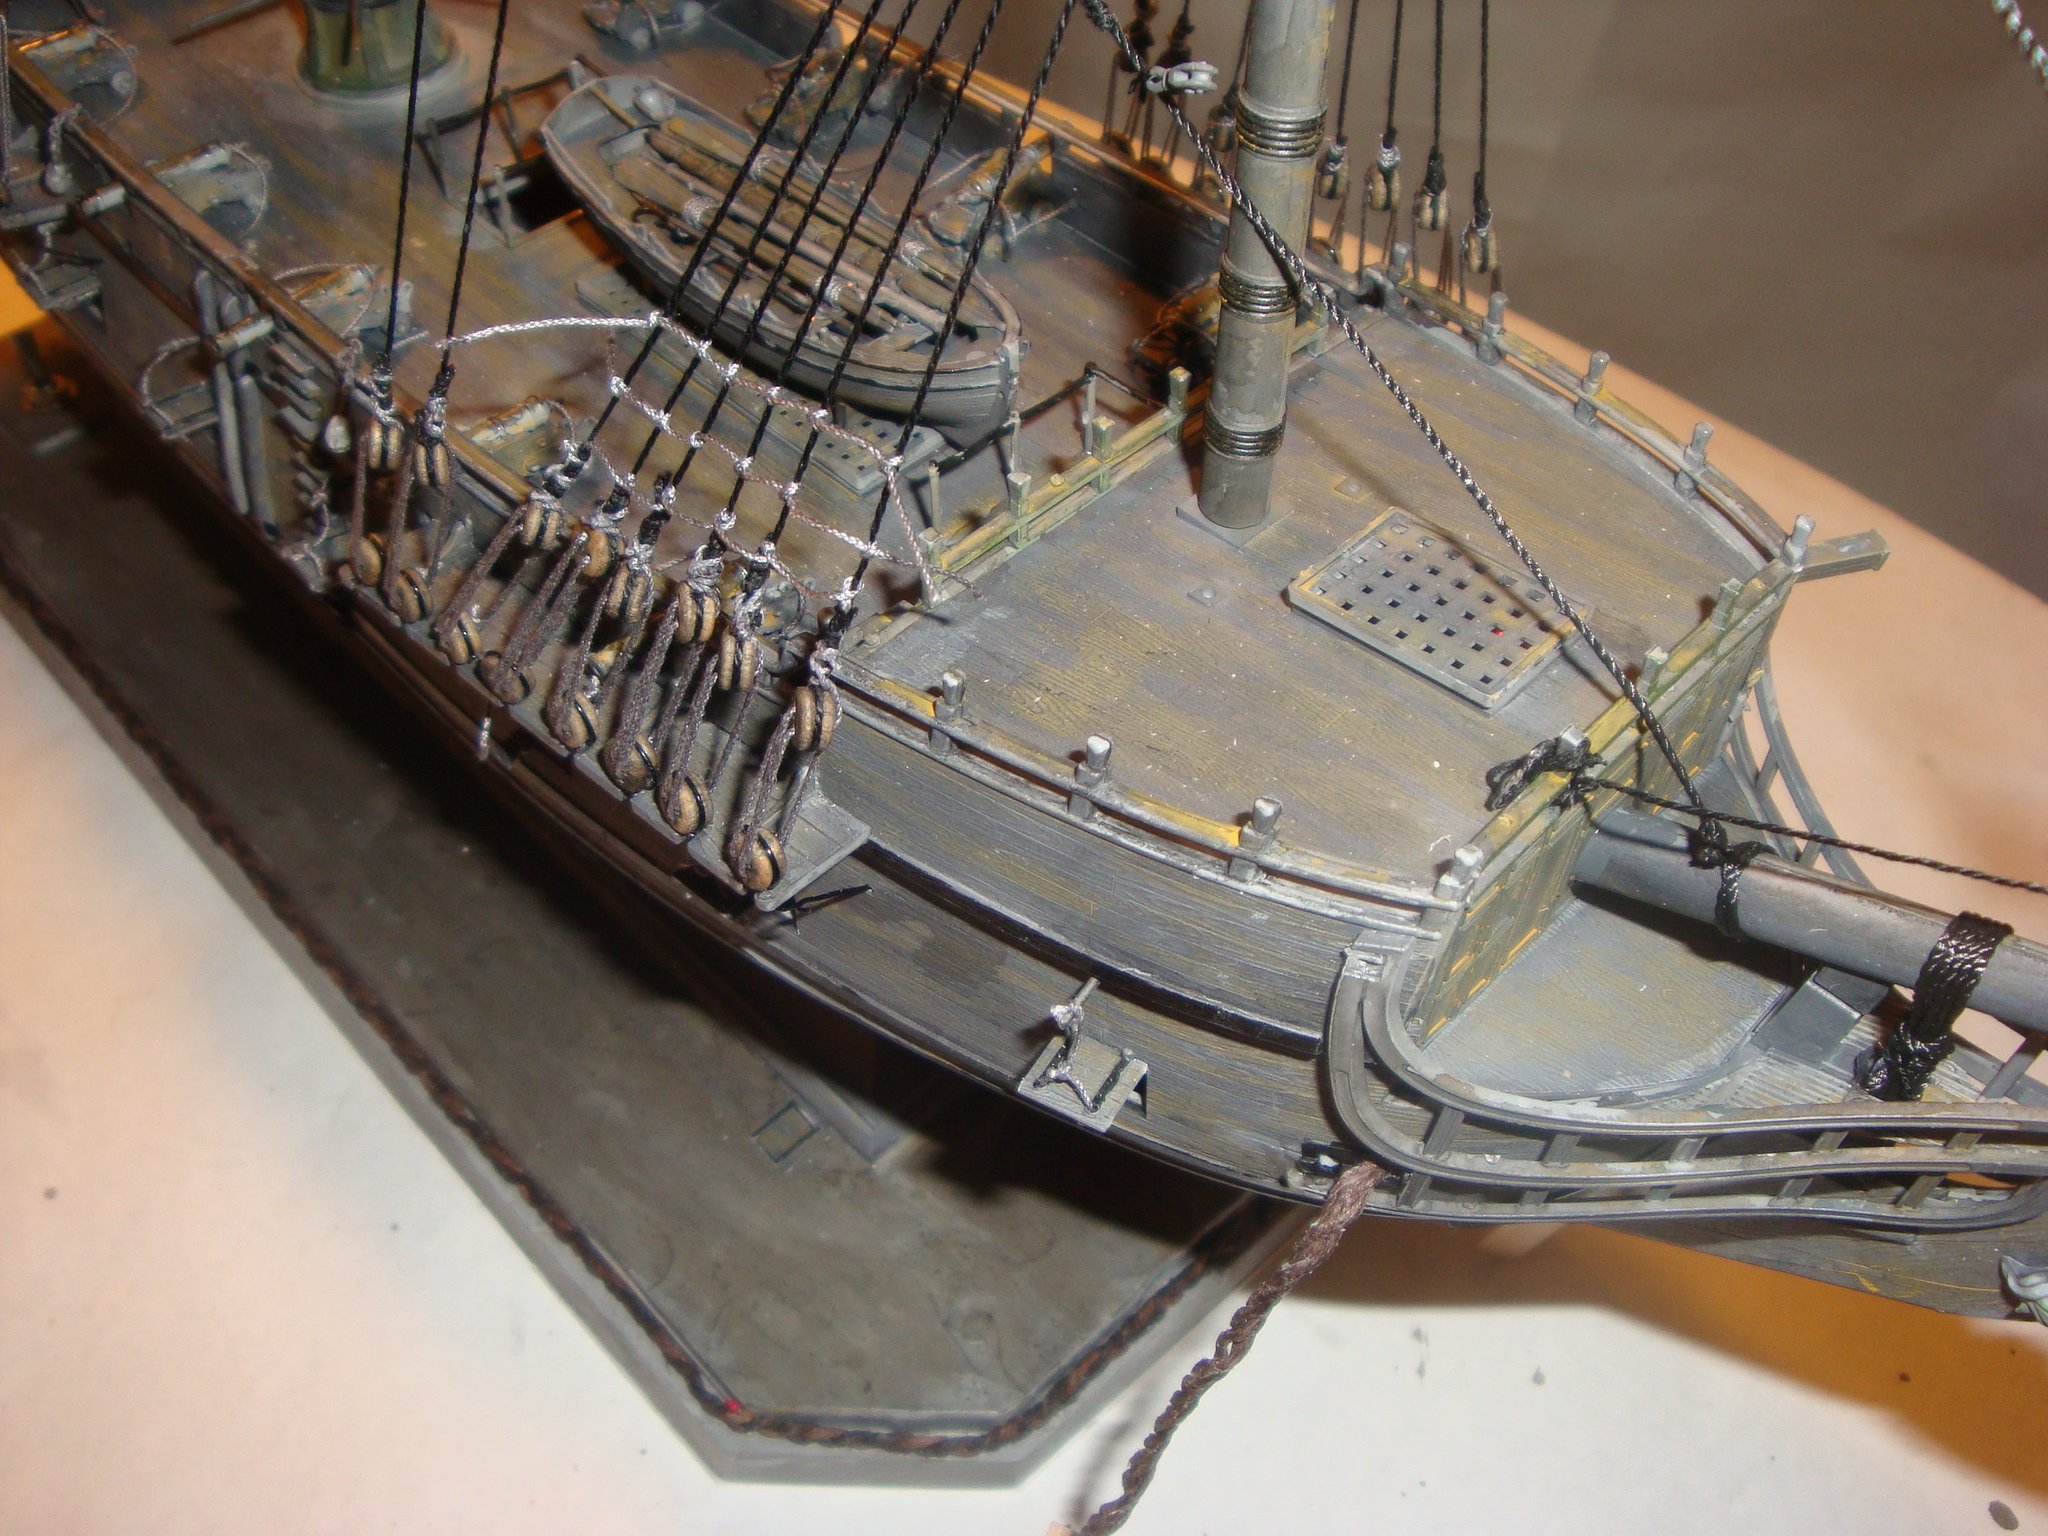
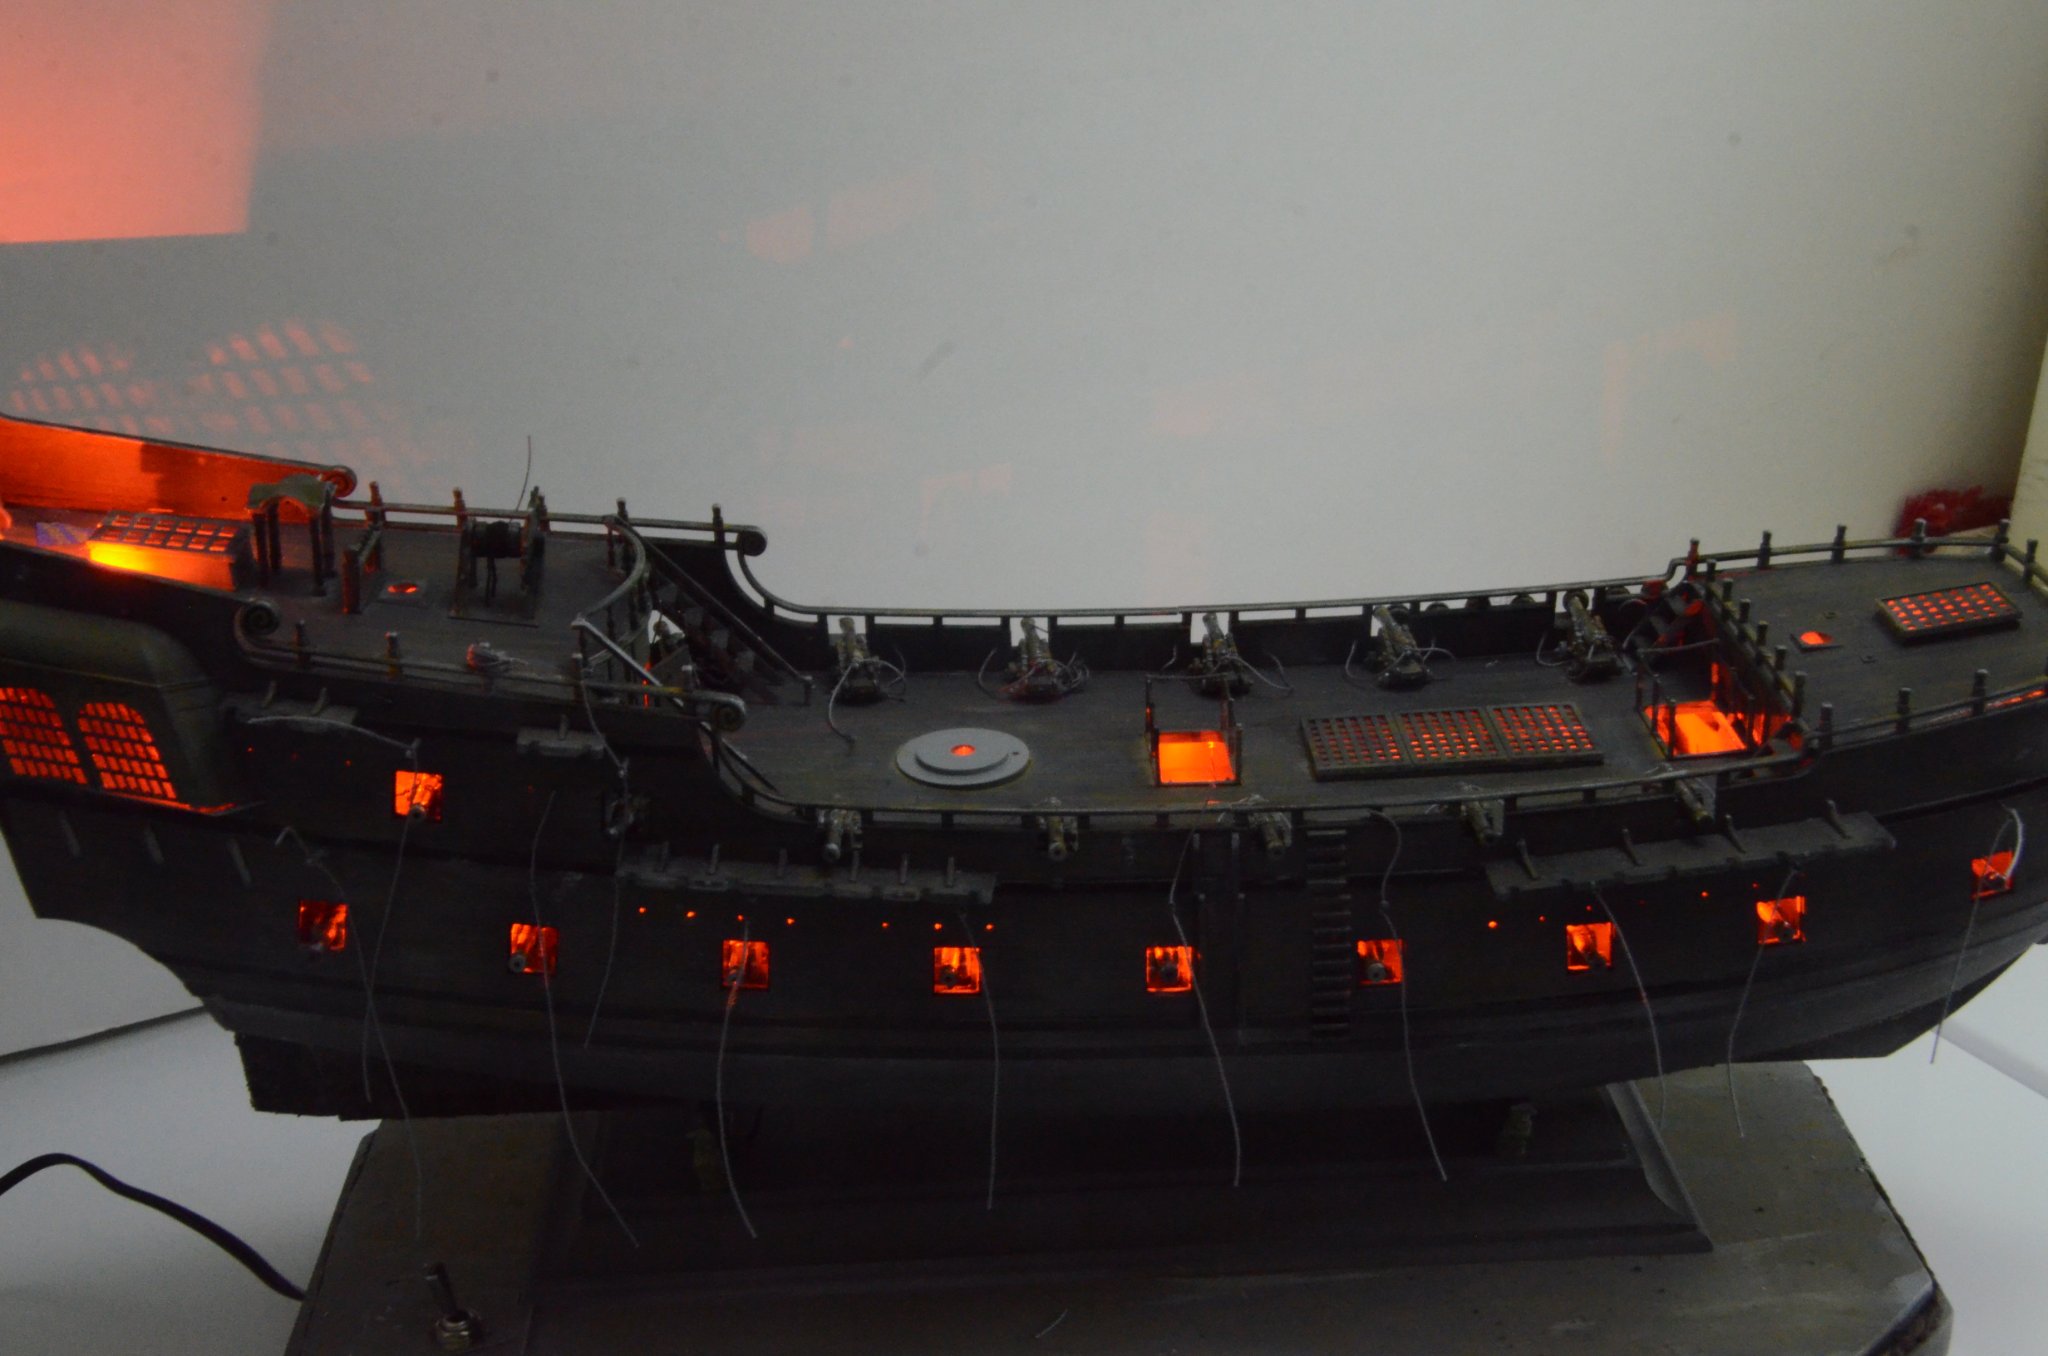
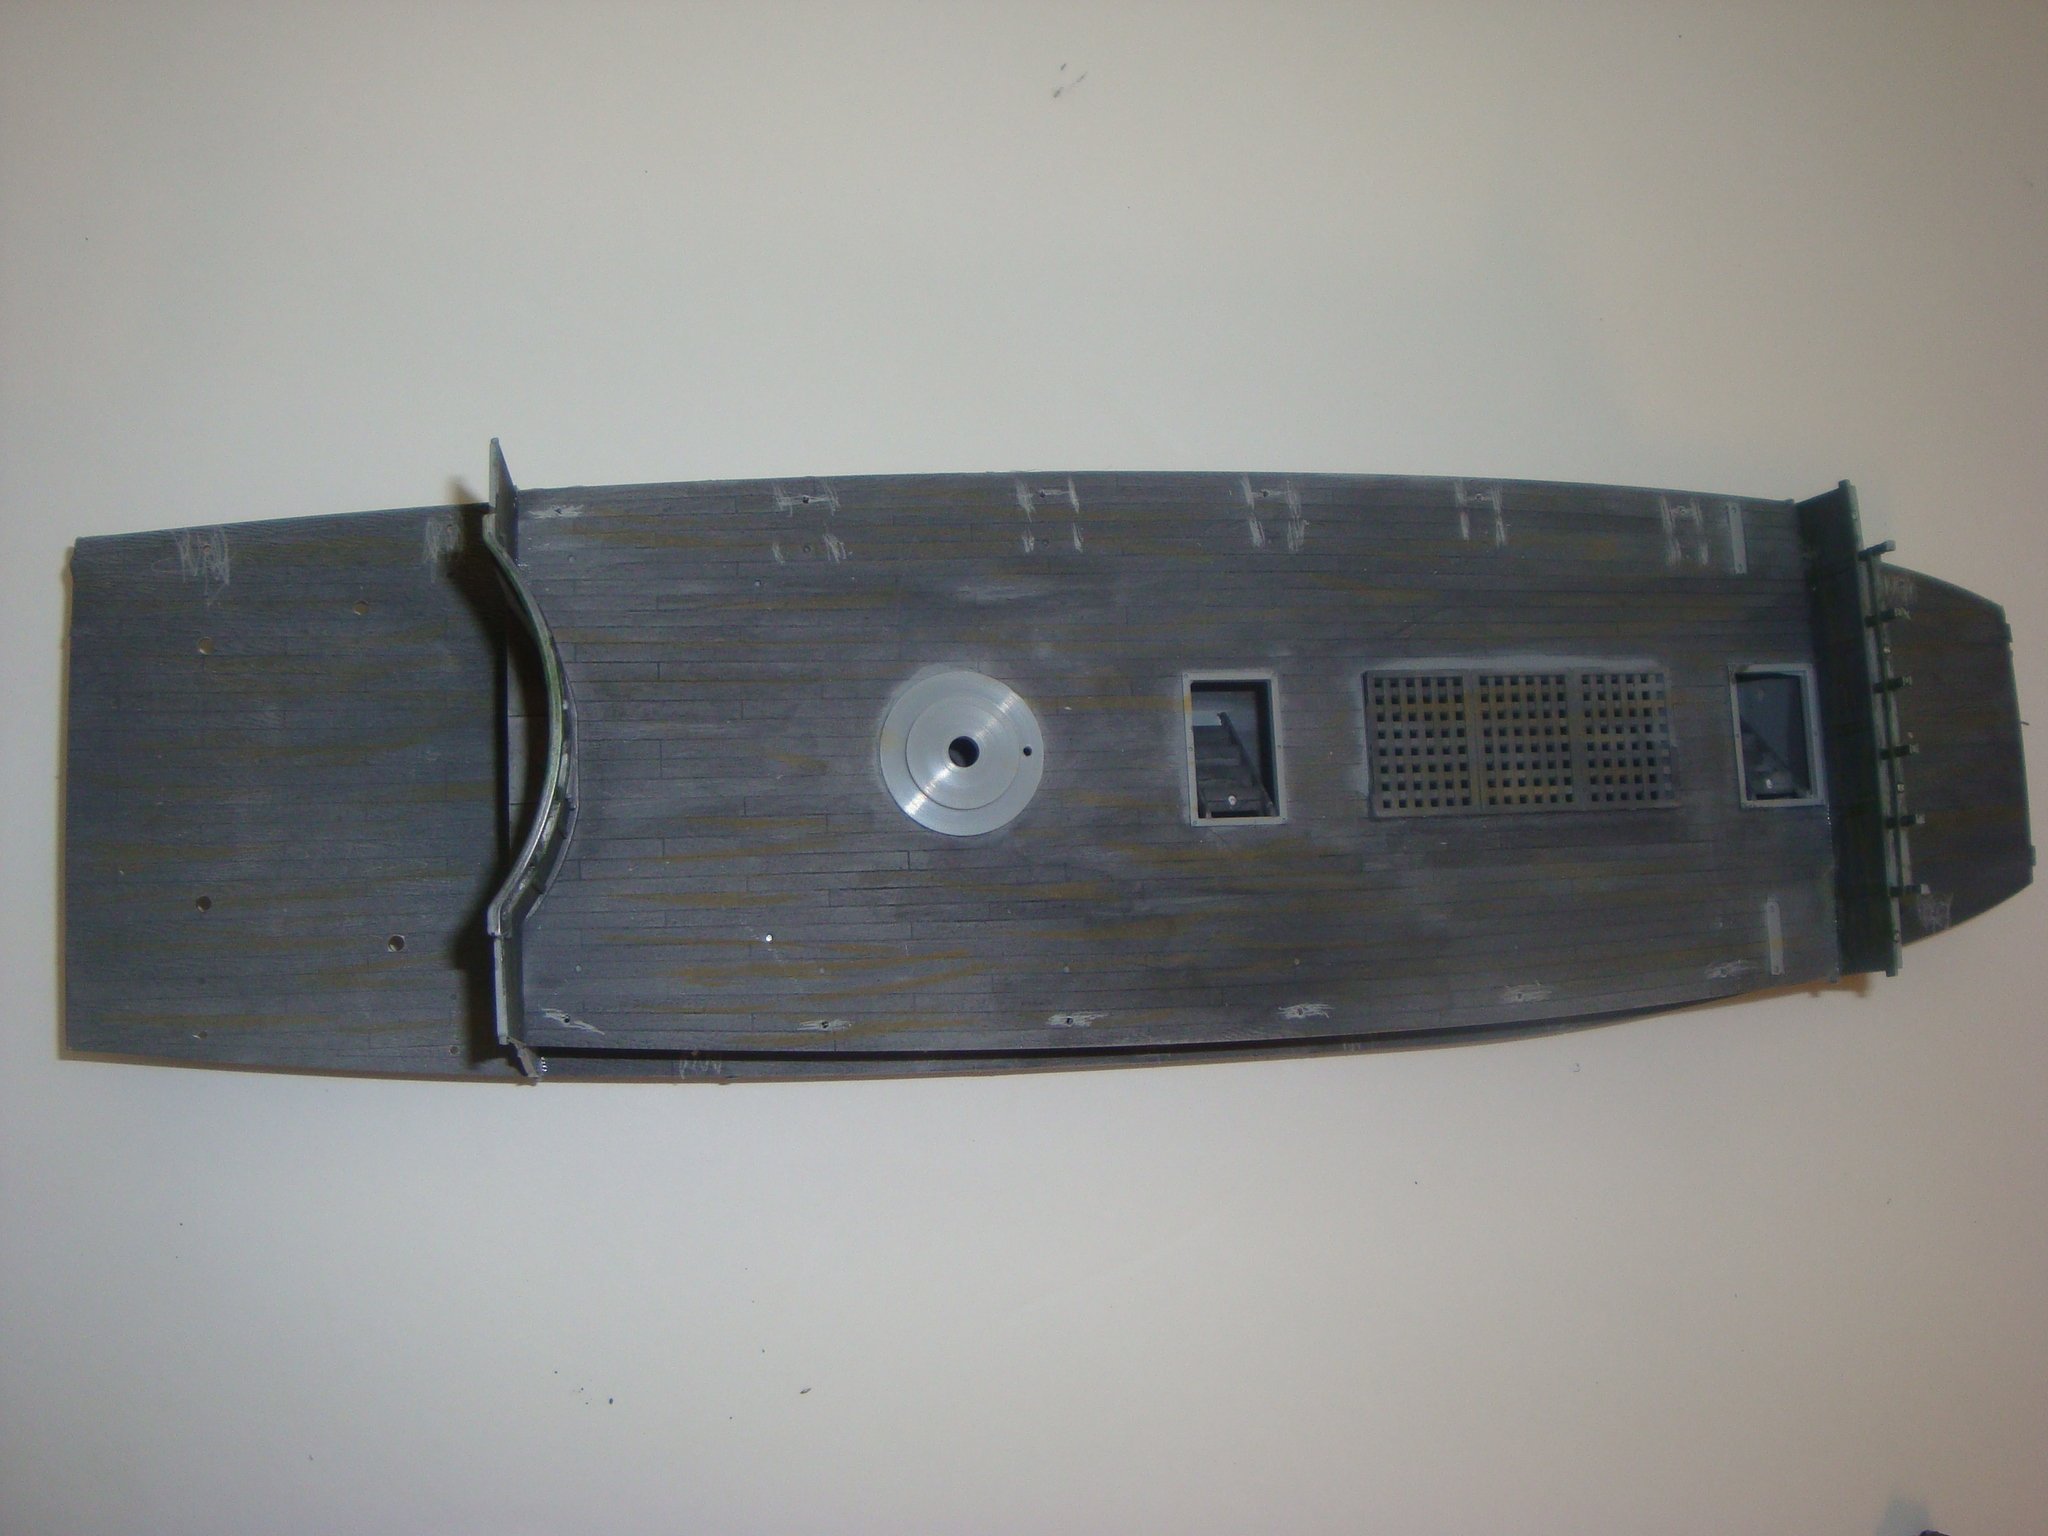
The ship is moving along I have added some 22 LED flickering lights purchase from Evans Design to it to make it look that there are candles burning at nigth, I also getting most of the furniture installed on the ship.
I am planing to use cloth sales, I found this material used for wedding gowns and I am hoping it will make a good sail material. (I went looking for Egyptian cotton but my local Joann Fabrics did not carry it) The shrouds and dead eyes will be made by hand, I have purchased wooden dead eyes which I have dumped in a black wash to give it an old look and they came out nice.
Following are some photos, the one with the lights, have a very bright light on the back, those are the lights that are going to be installed inside the lamps.
The lights are powered by a 7-9 transformer and on the base there is a switch to turn them on or off. That is the main reason I added to wooden base, to hide the wiring.
Until next time
Joe

- Jeff T, GrandpaPhil, lmagna and 1 other
-
4
-
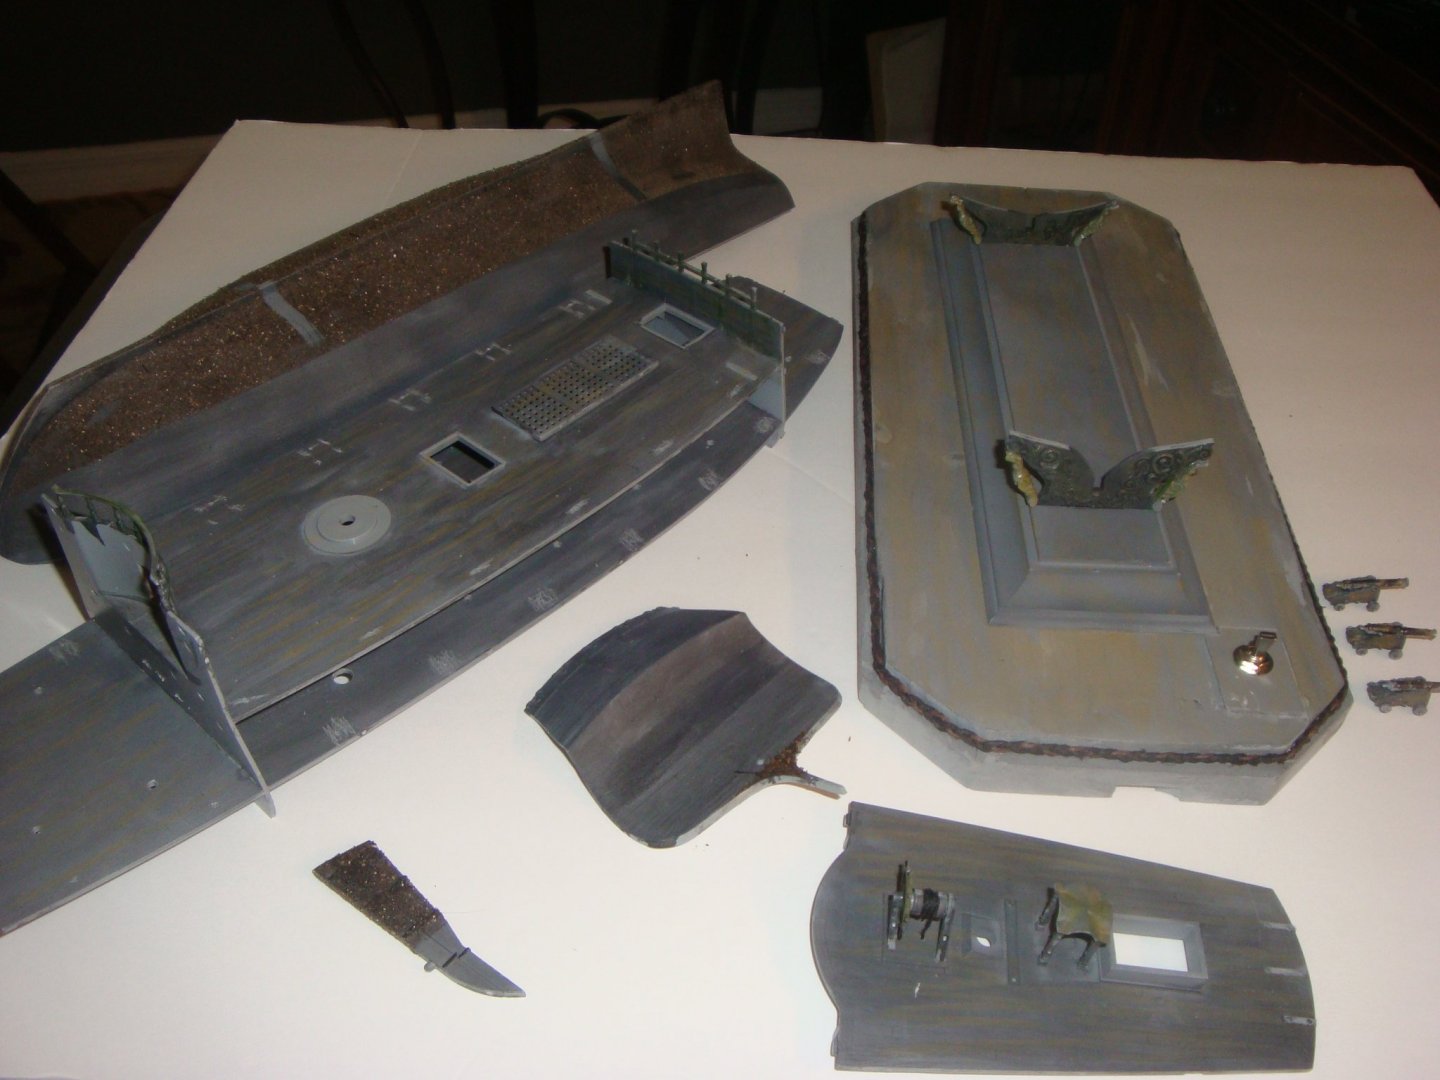
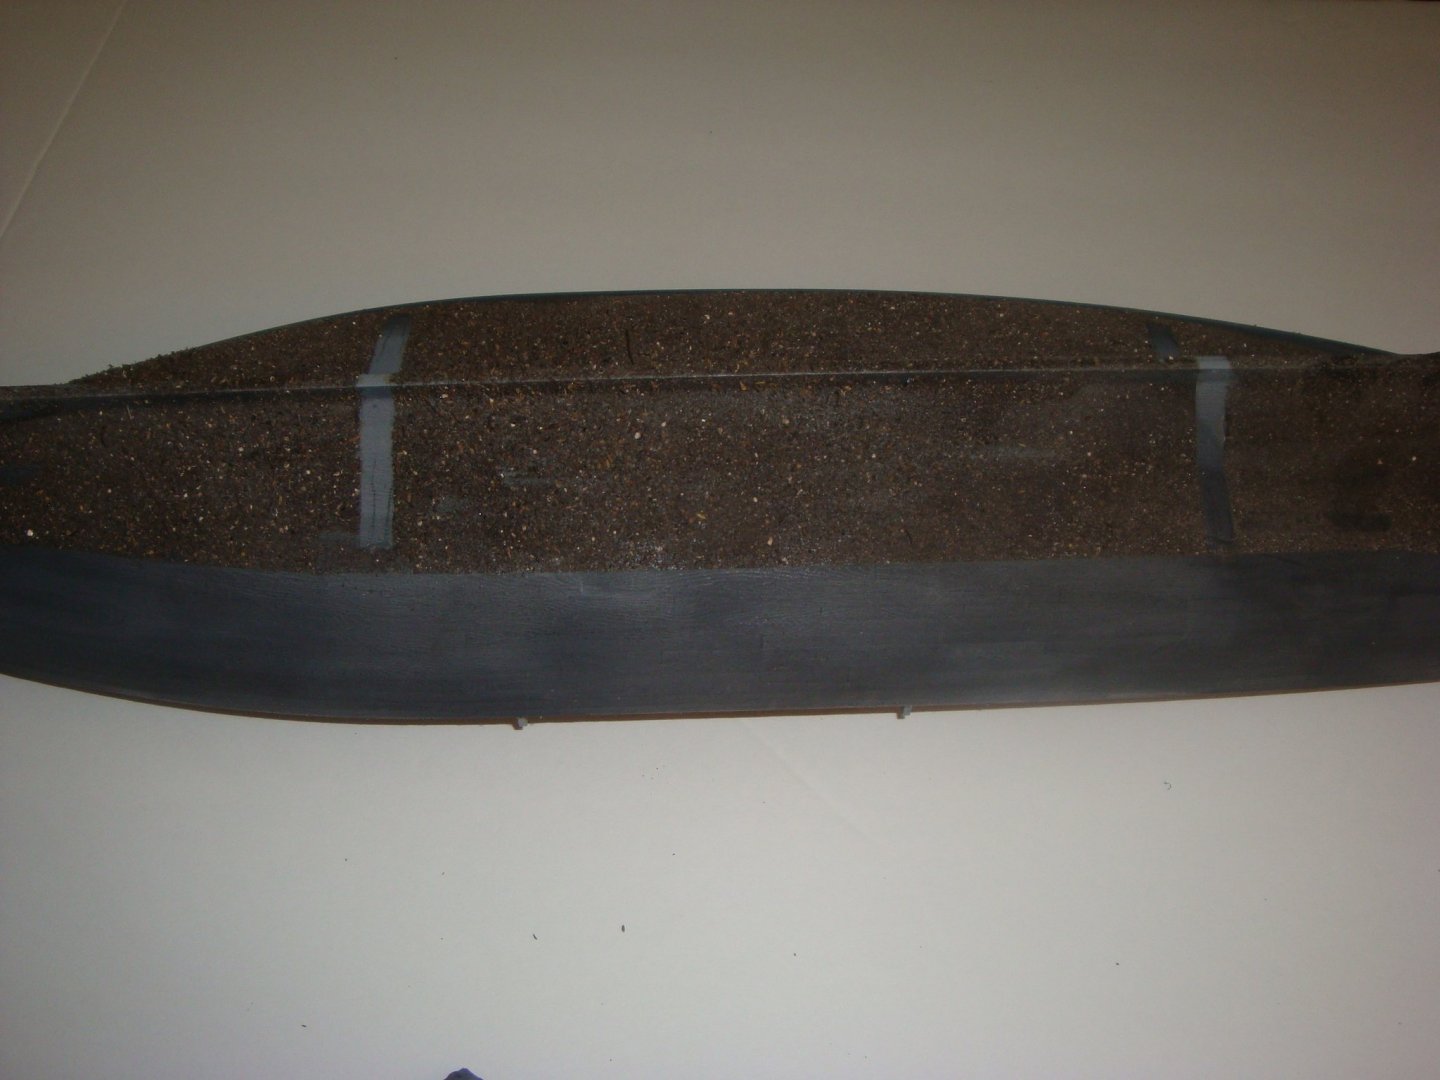
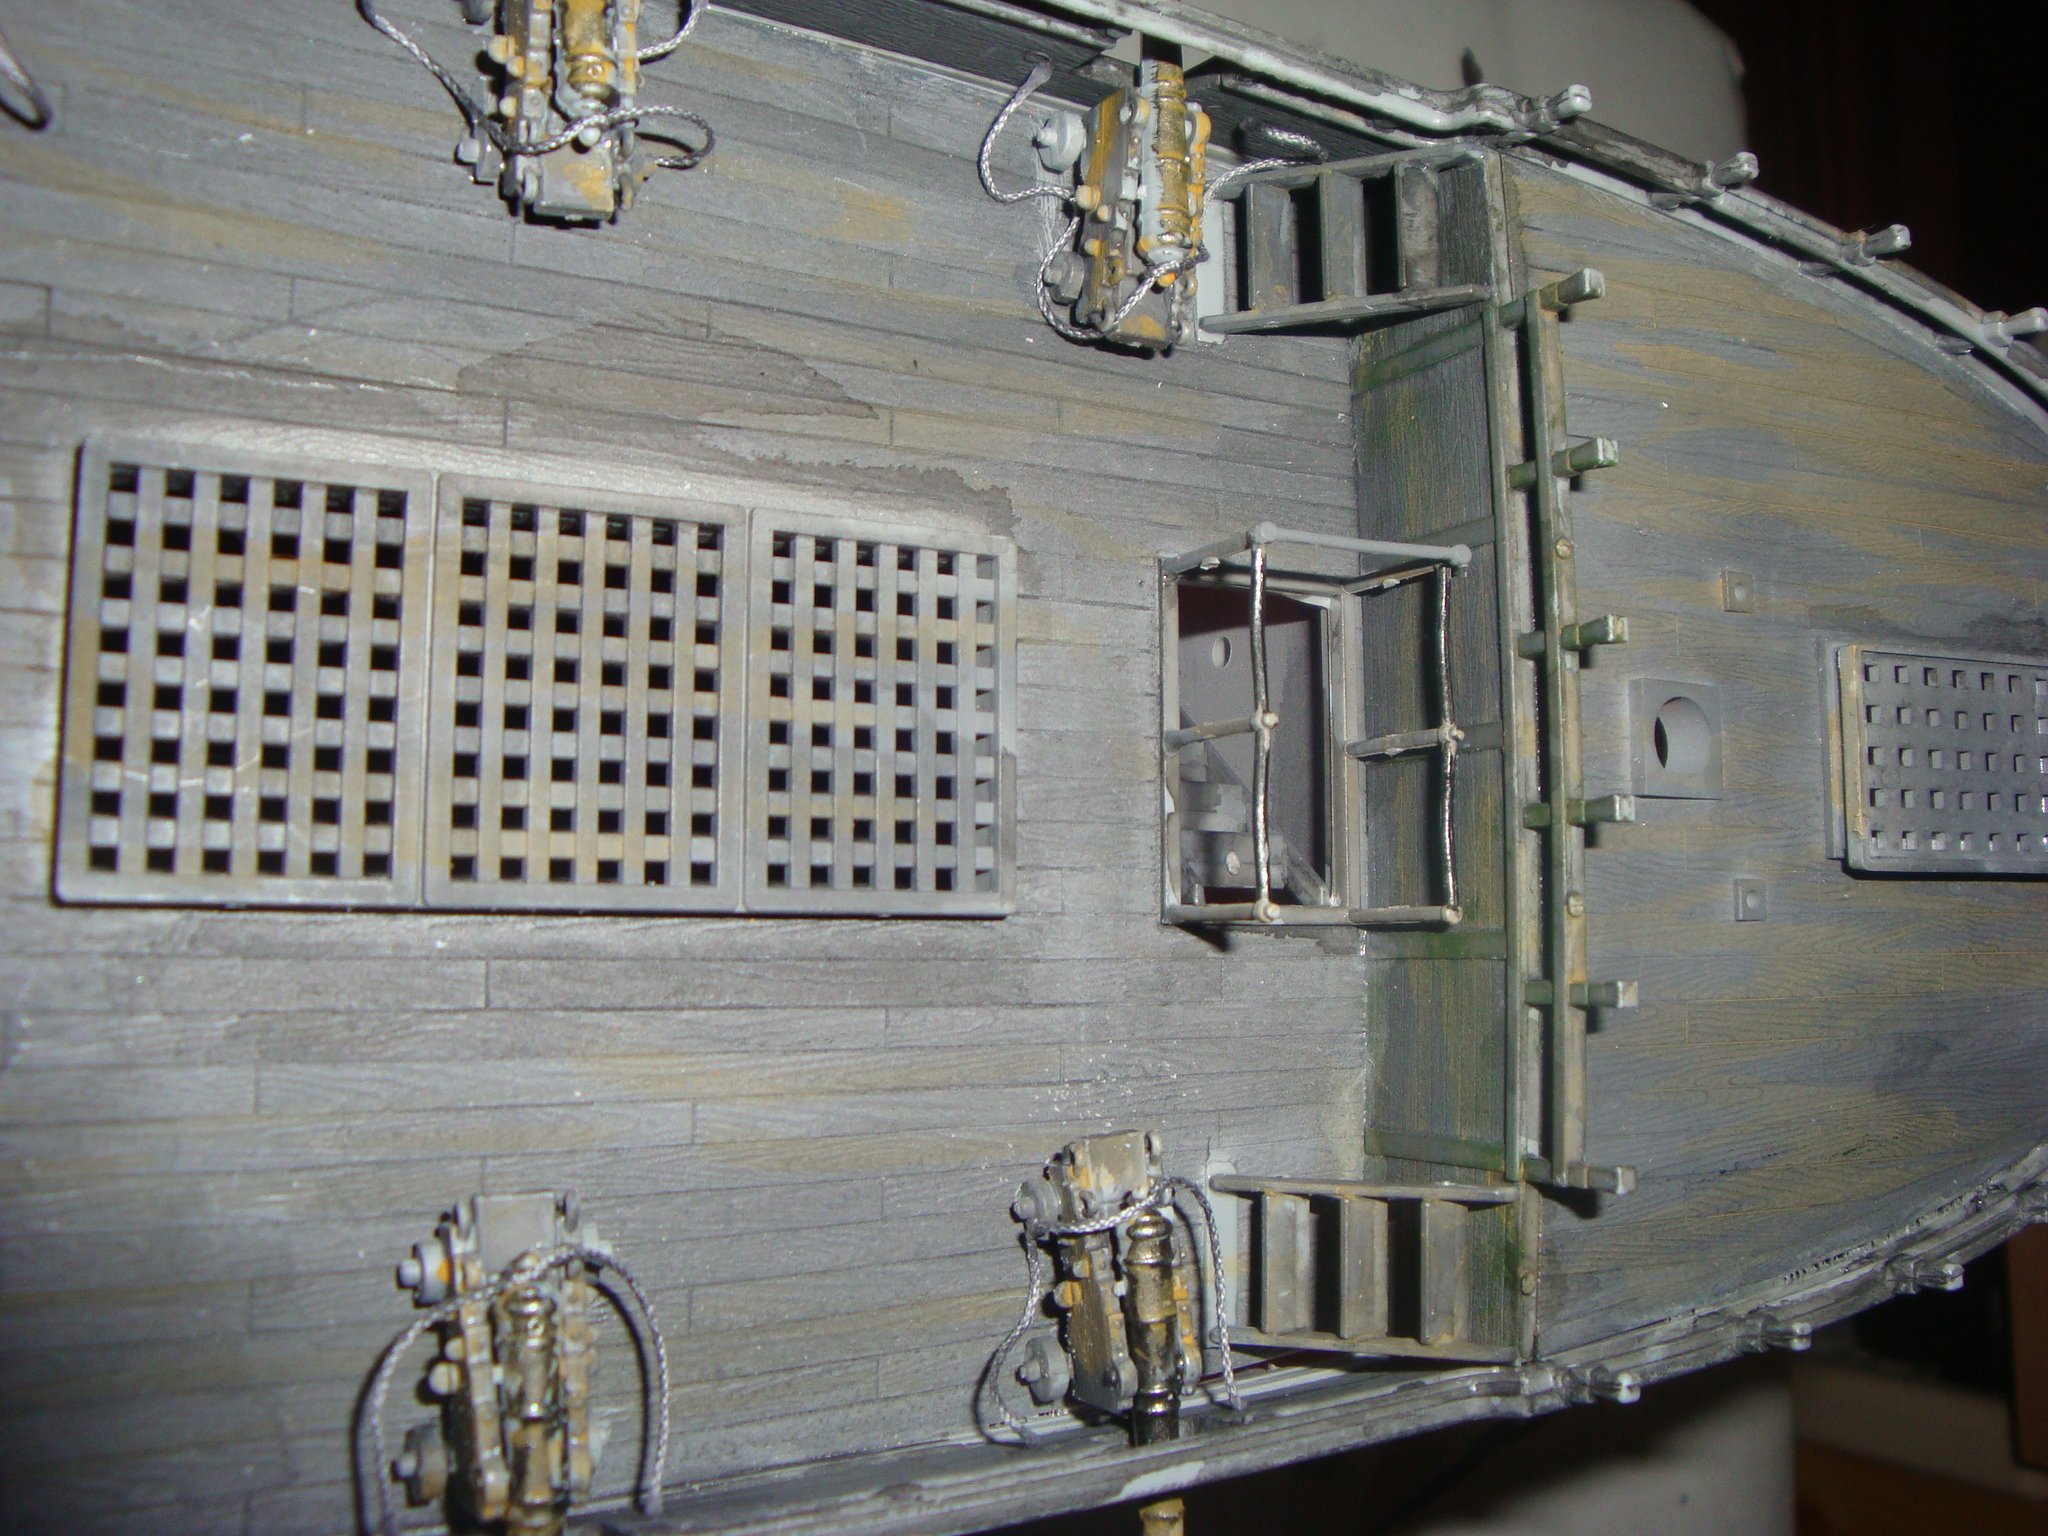
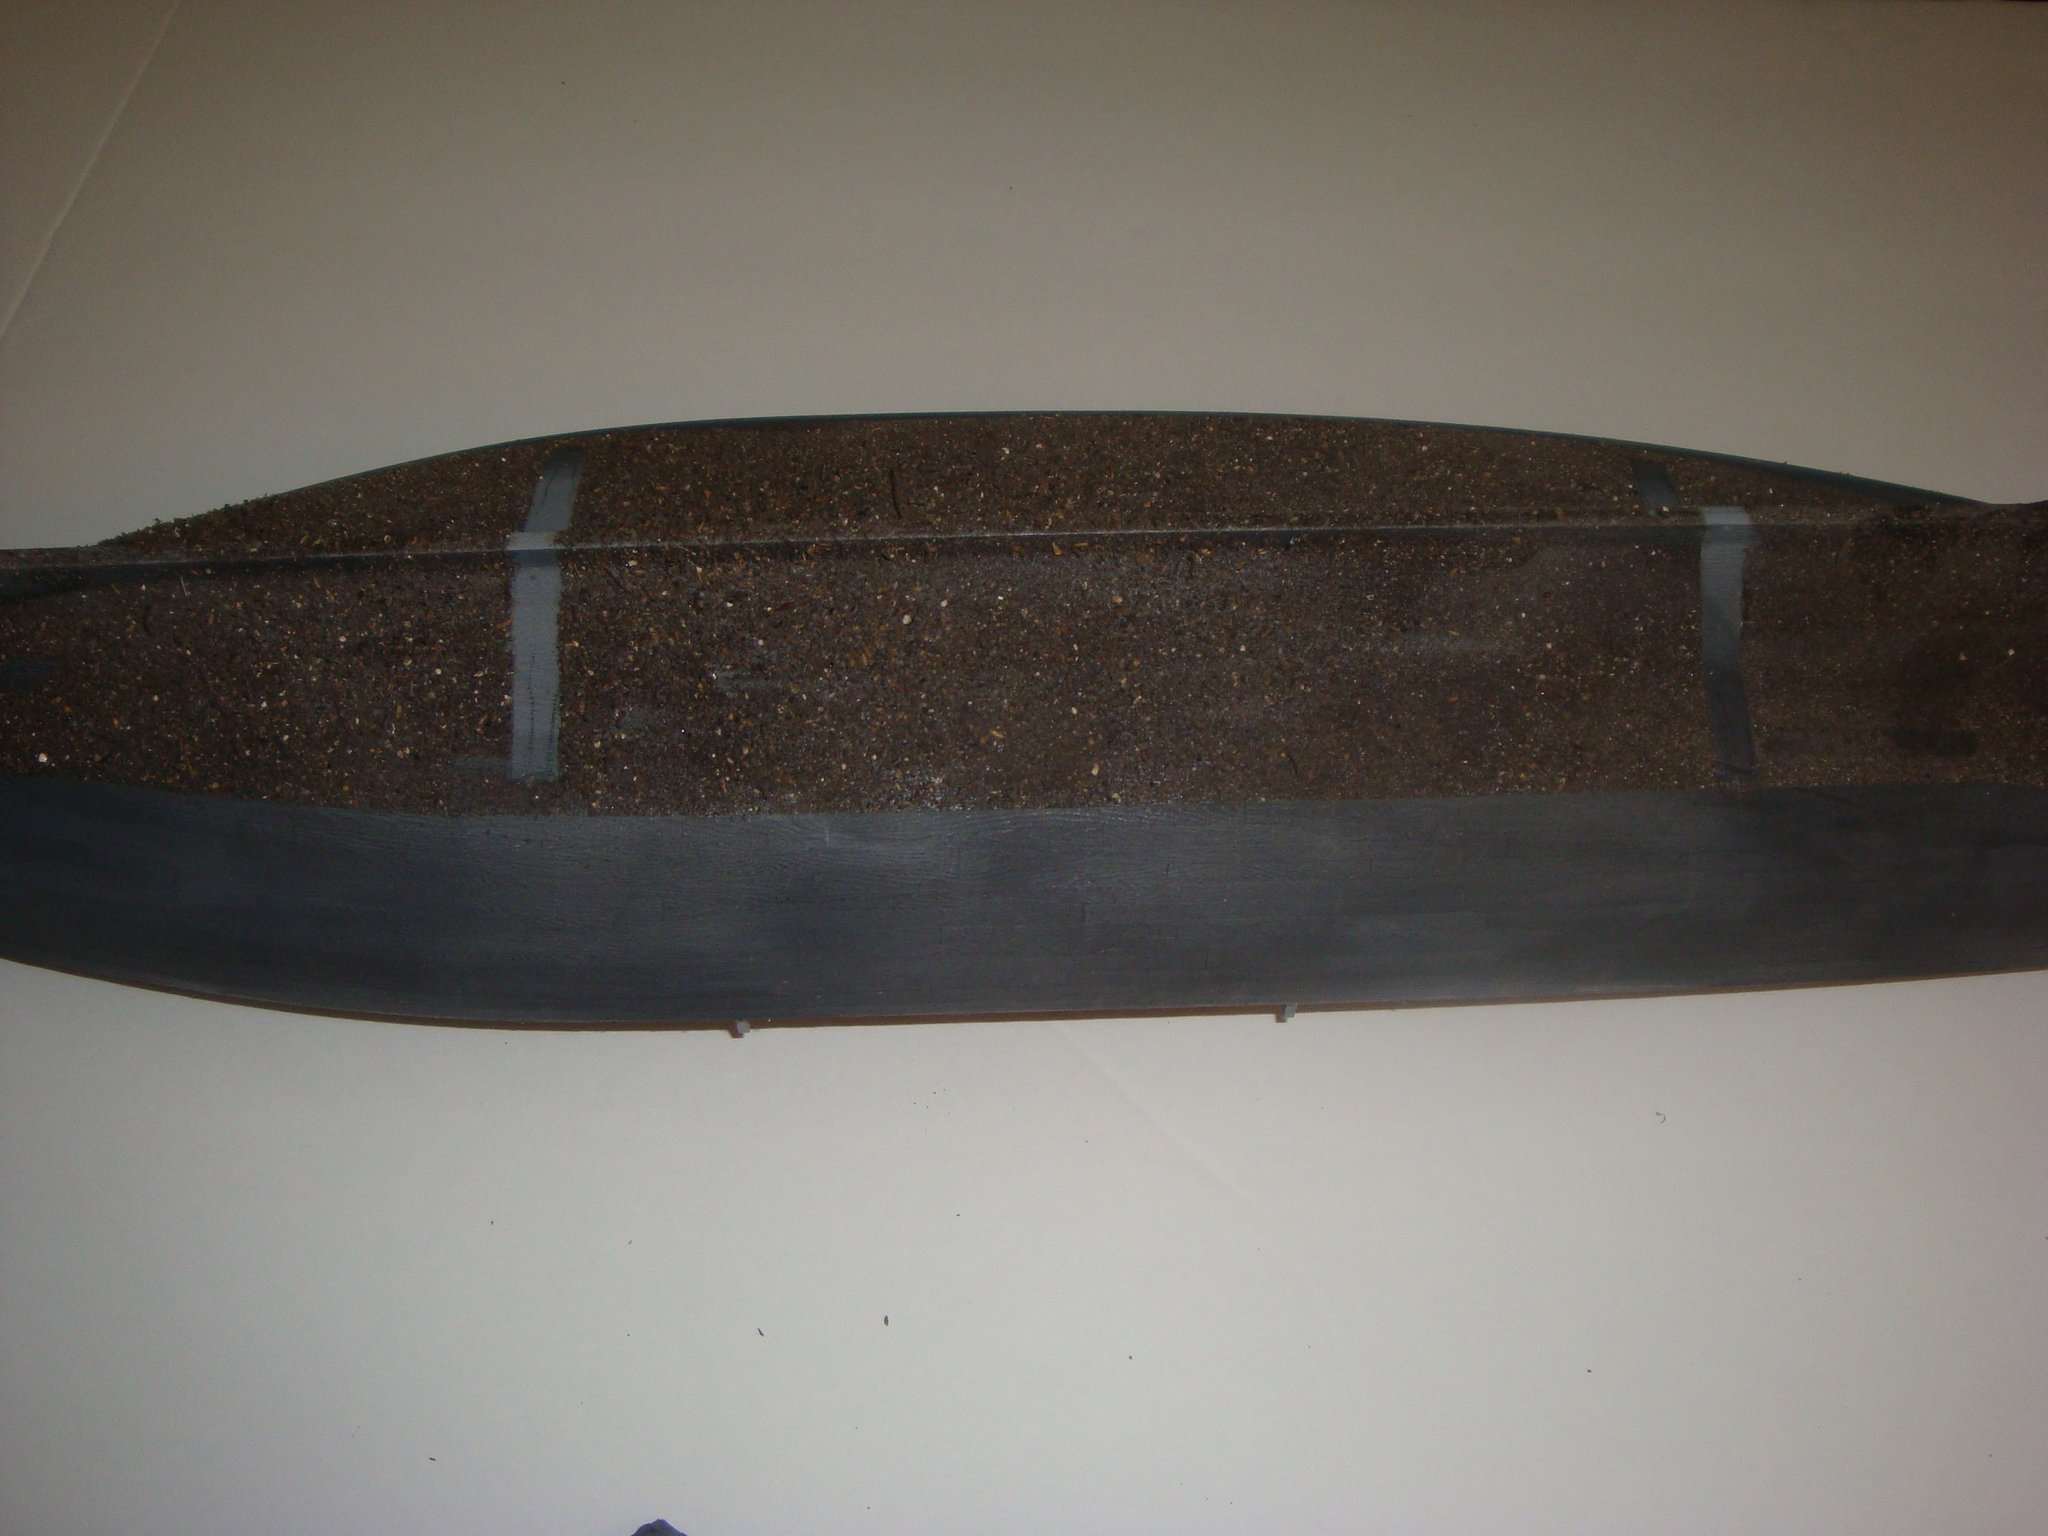
Well, I have started the building of the Black Pearl, first thing I did was to have son-in-law order the lights from Evan Design , while waiting for the lights I started to weather the ship to look old and battered by time and weather, including adding to the hull something that hopefully looks likes barnacles.
Received the lights, however I found out that my-in-law has mistakenly order the flashing lights instead of the flickering ones. Called Evan Design and talked to some nice people who immediately understood the problem and worked with my in exchanging the wrong ones with the proper lights, they should be arriving shortly.
Attached are 3 photos of the progress I have made:

- ccoyle, lmagna, GrandpaPhil and 2 others
-
5
-
Well, my son in law decided to buy the Black Pearl from Zvezda. Since I do not have any 3d printer equipment, most likely I will try to build the boat using most of the parts that comes with the kit. He agreed to purchase what ever lights I need from the Evan Design site, thanks to the moderator, ccoyle and you, Chilliard, for letting me know about this outfit.
Well Chilliard I hope you do not get offended if I copy some of your ideas on how to build the boat, obviously, you are more experienced than me and I do need all the help I can get. I will be starting a build log as soon as I get the kit box.
Thanks
Joe
- Chilliard, Old Collingwood and lmagna
-
3
-
I am going to make another attempt to upload the photos, here it goes:
Well, this time it worked. Hope you like them.

-
Thanks, I will check out Evan Design
Joe
-
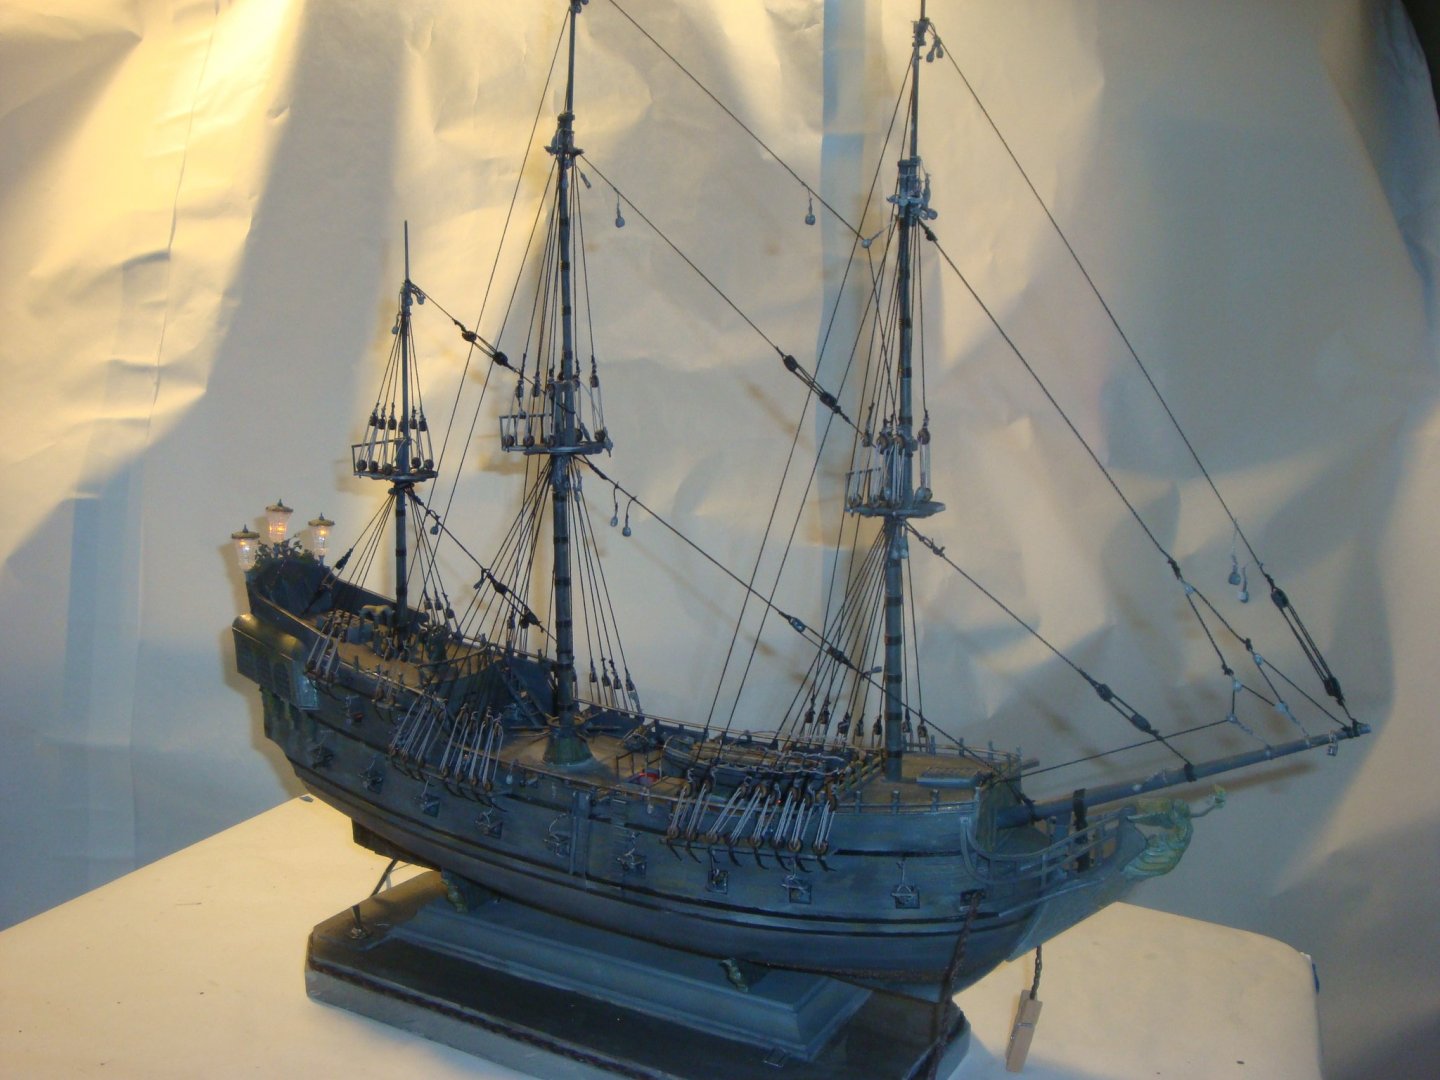
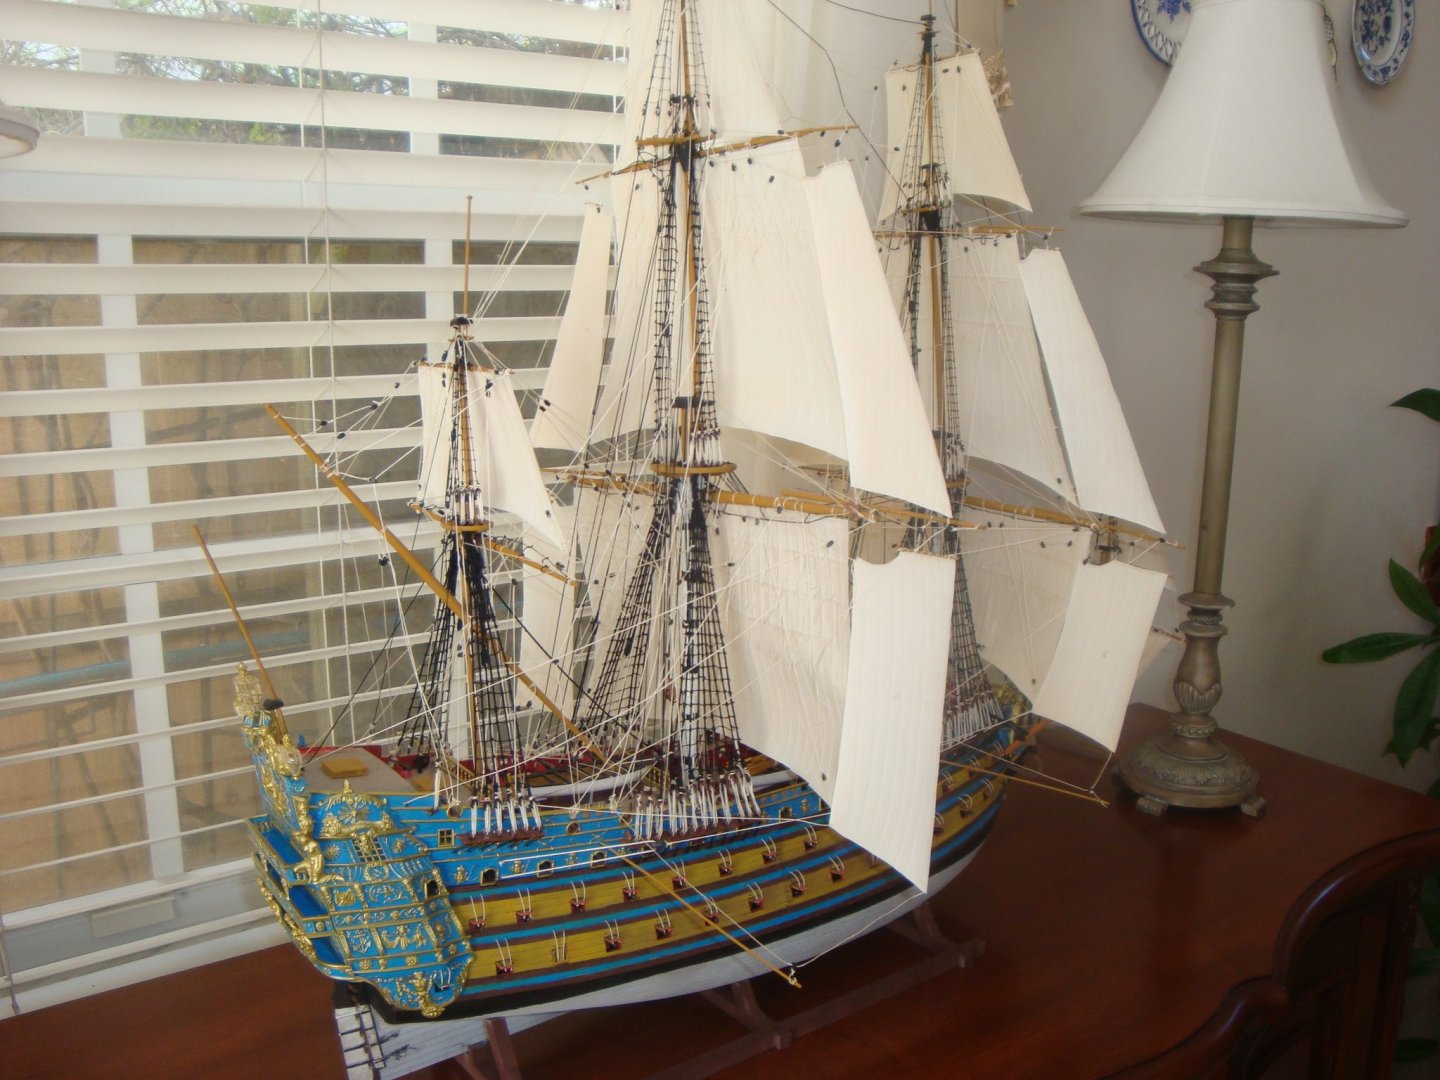
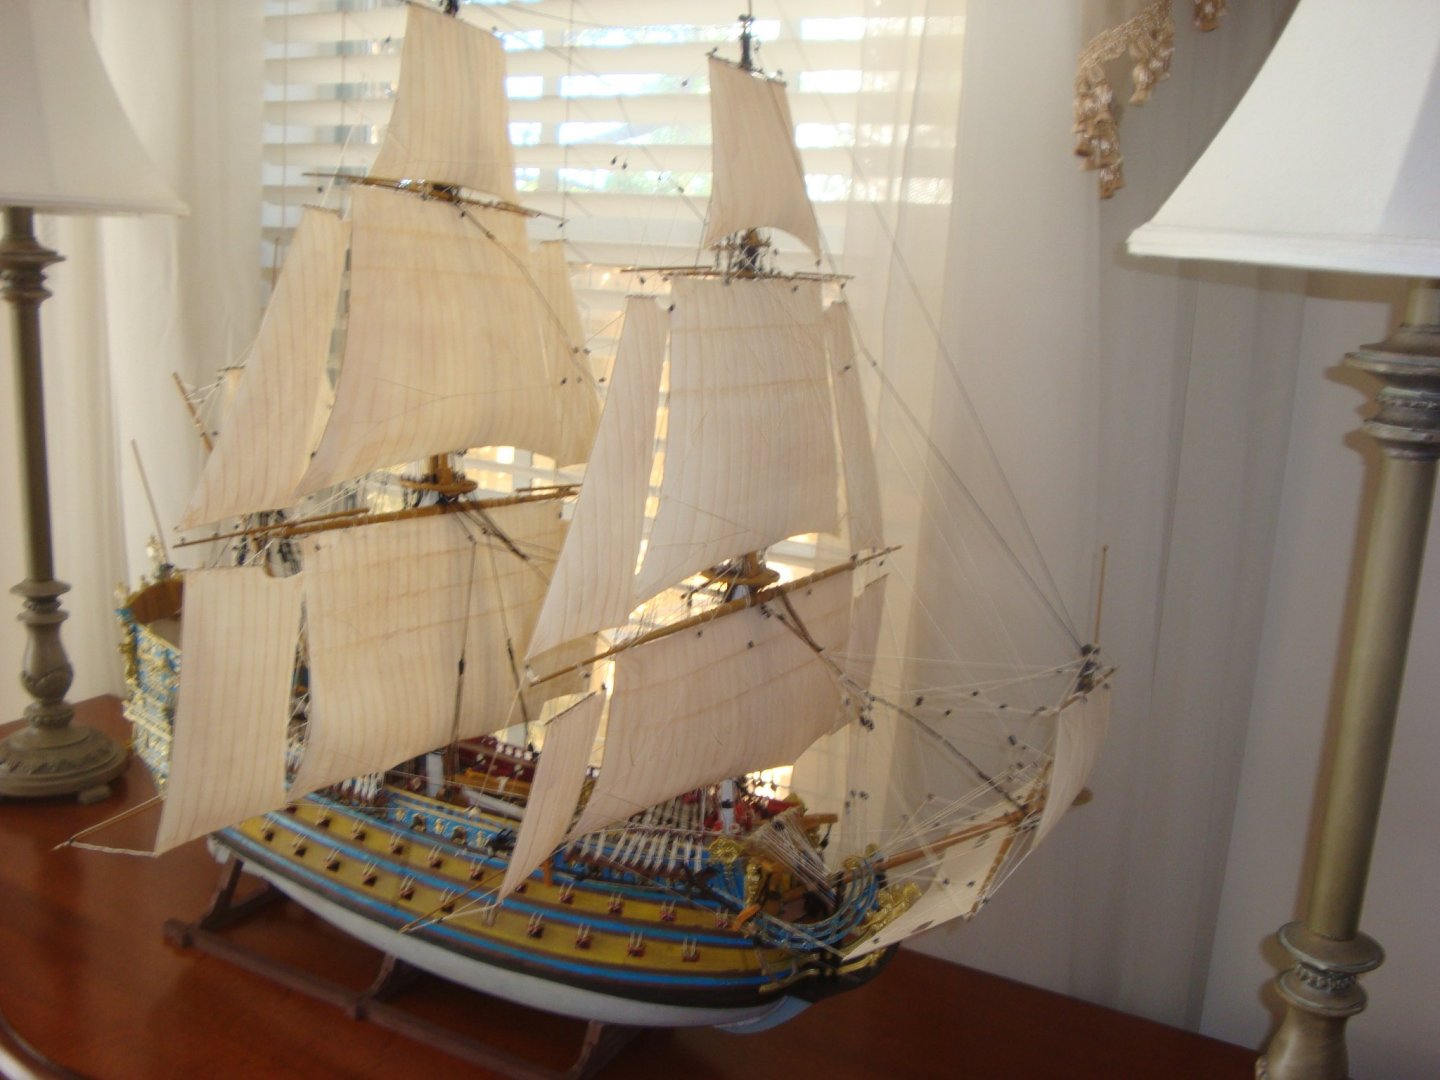
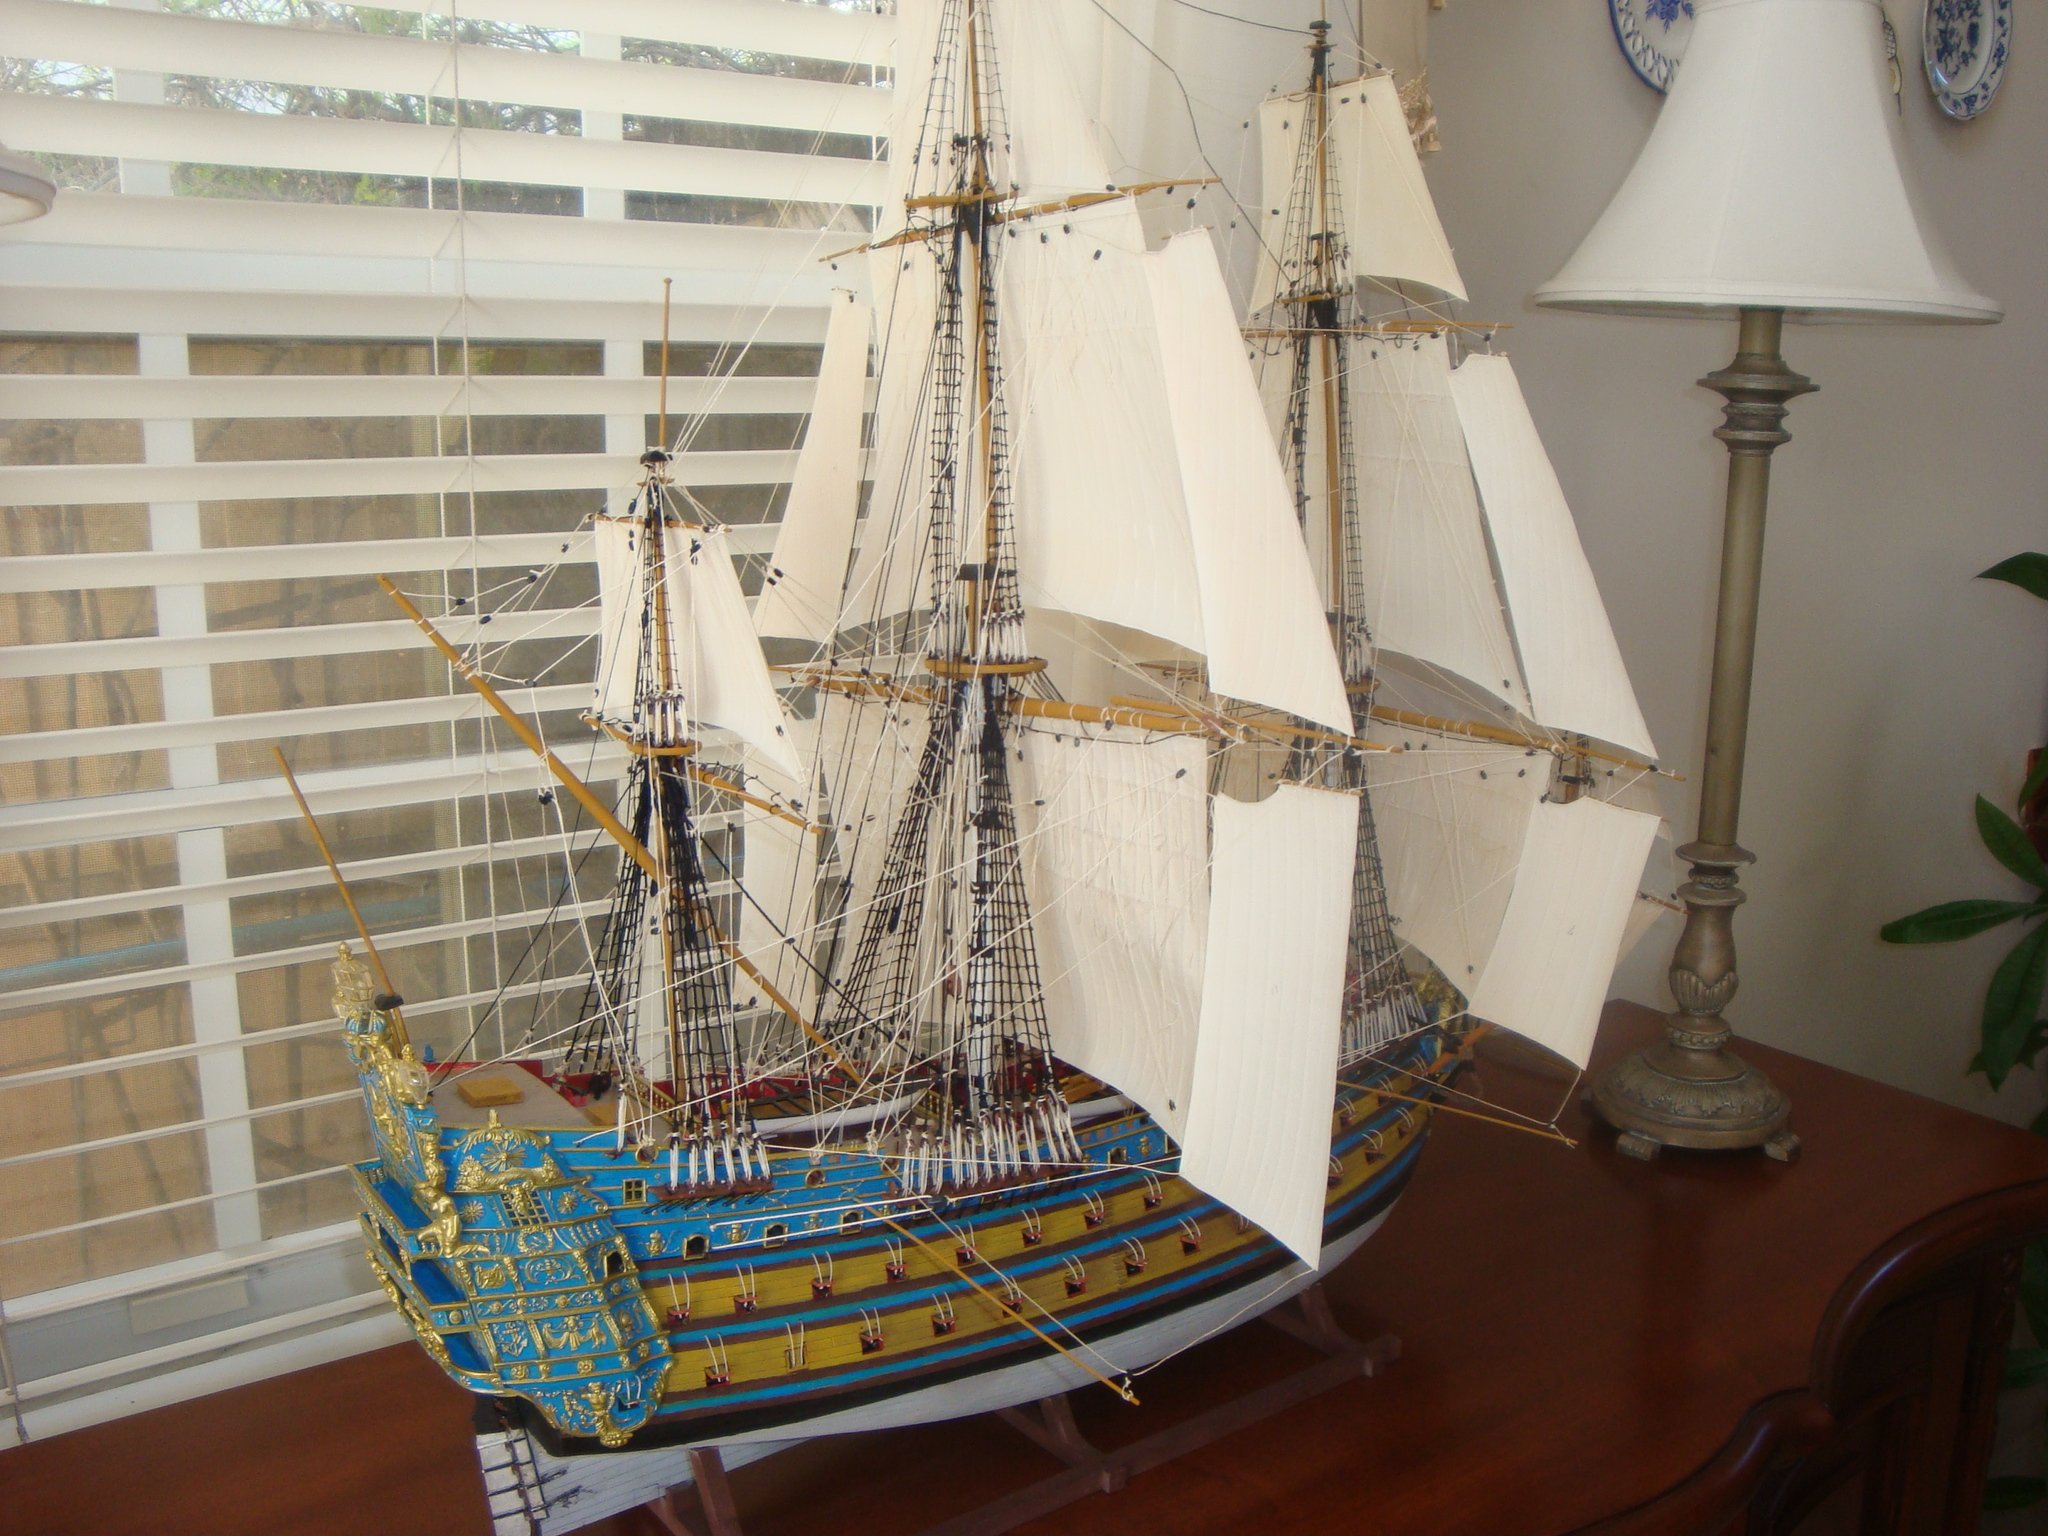
Well, It is finally finished!!! I have completed the build, I had to use 3 different sets of documentation: the original French version, a Japanese. and an English version. I will think twice before buying another Heller model!
I am fully aware that the ship is not to the standards of the more experience modelers of this blog, but, this is only my 5th old ship model, and the biggest and more complex one, I started on Aug 8 of 2020, today is February 15th of 2021, so it took me 6 months and some days. I have learn a lot, now I am looking for another challenger. Will see
Attached are some photos of the completed ship (without the flags, in my rush to take the photos I forgot to put in the flags)
Thanks to all of you who offered guidance, provide hits and guidelines, and motivation on this build.
Joe
I seem to be having a problem uploading the photos, I will try again later.
- Baker and Hubac's Historian
-
2
-
Excellent work! My Son-in-law wants me to also build a Black Pearl, and he wants it with lights, would you mind disclosing were you got your lights?
I also would appreciated if you could provide any hints as to how to wire them, I have never worked with led lights.
Thanks
Joe
-
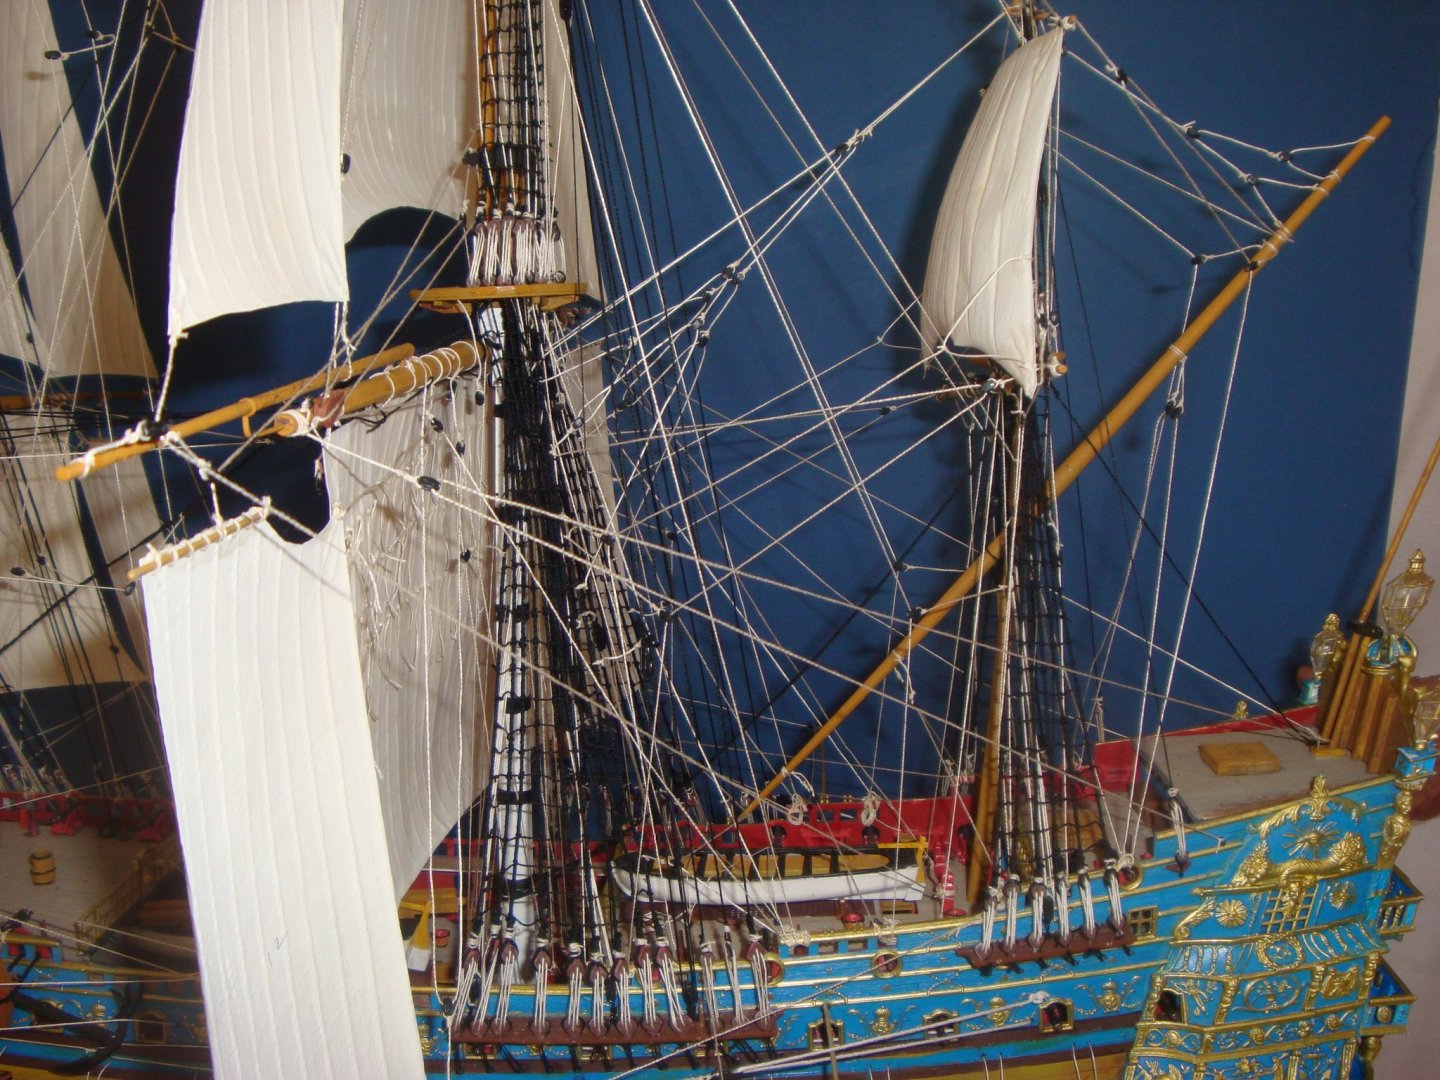
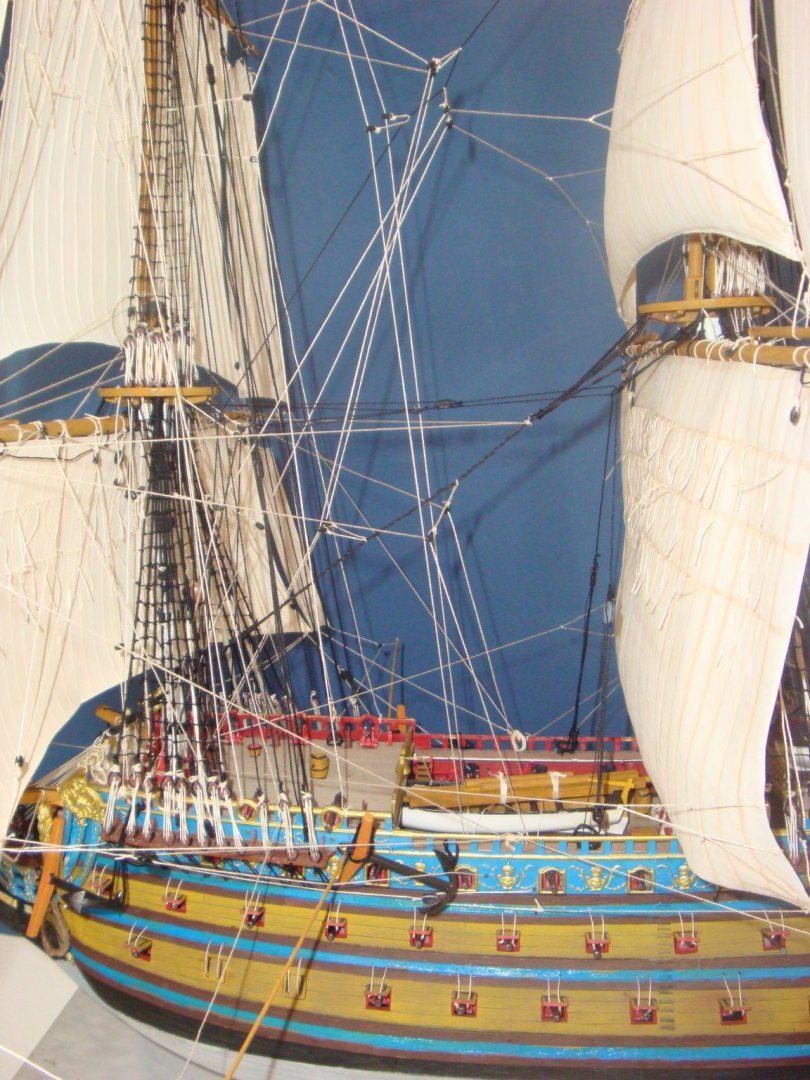
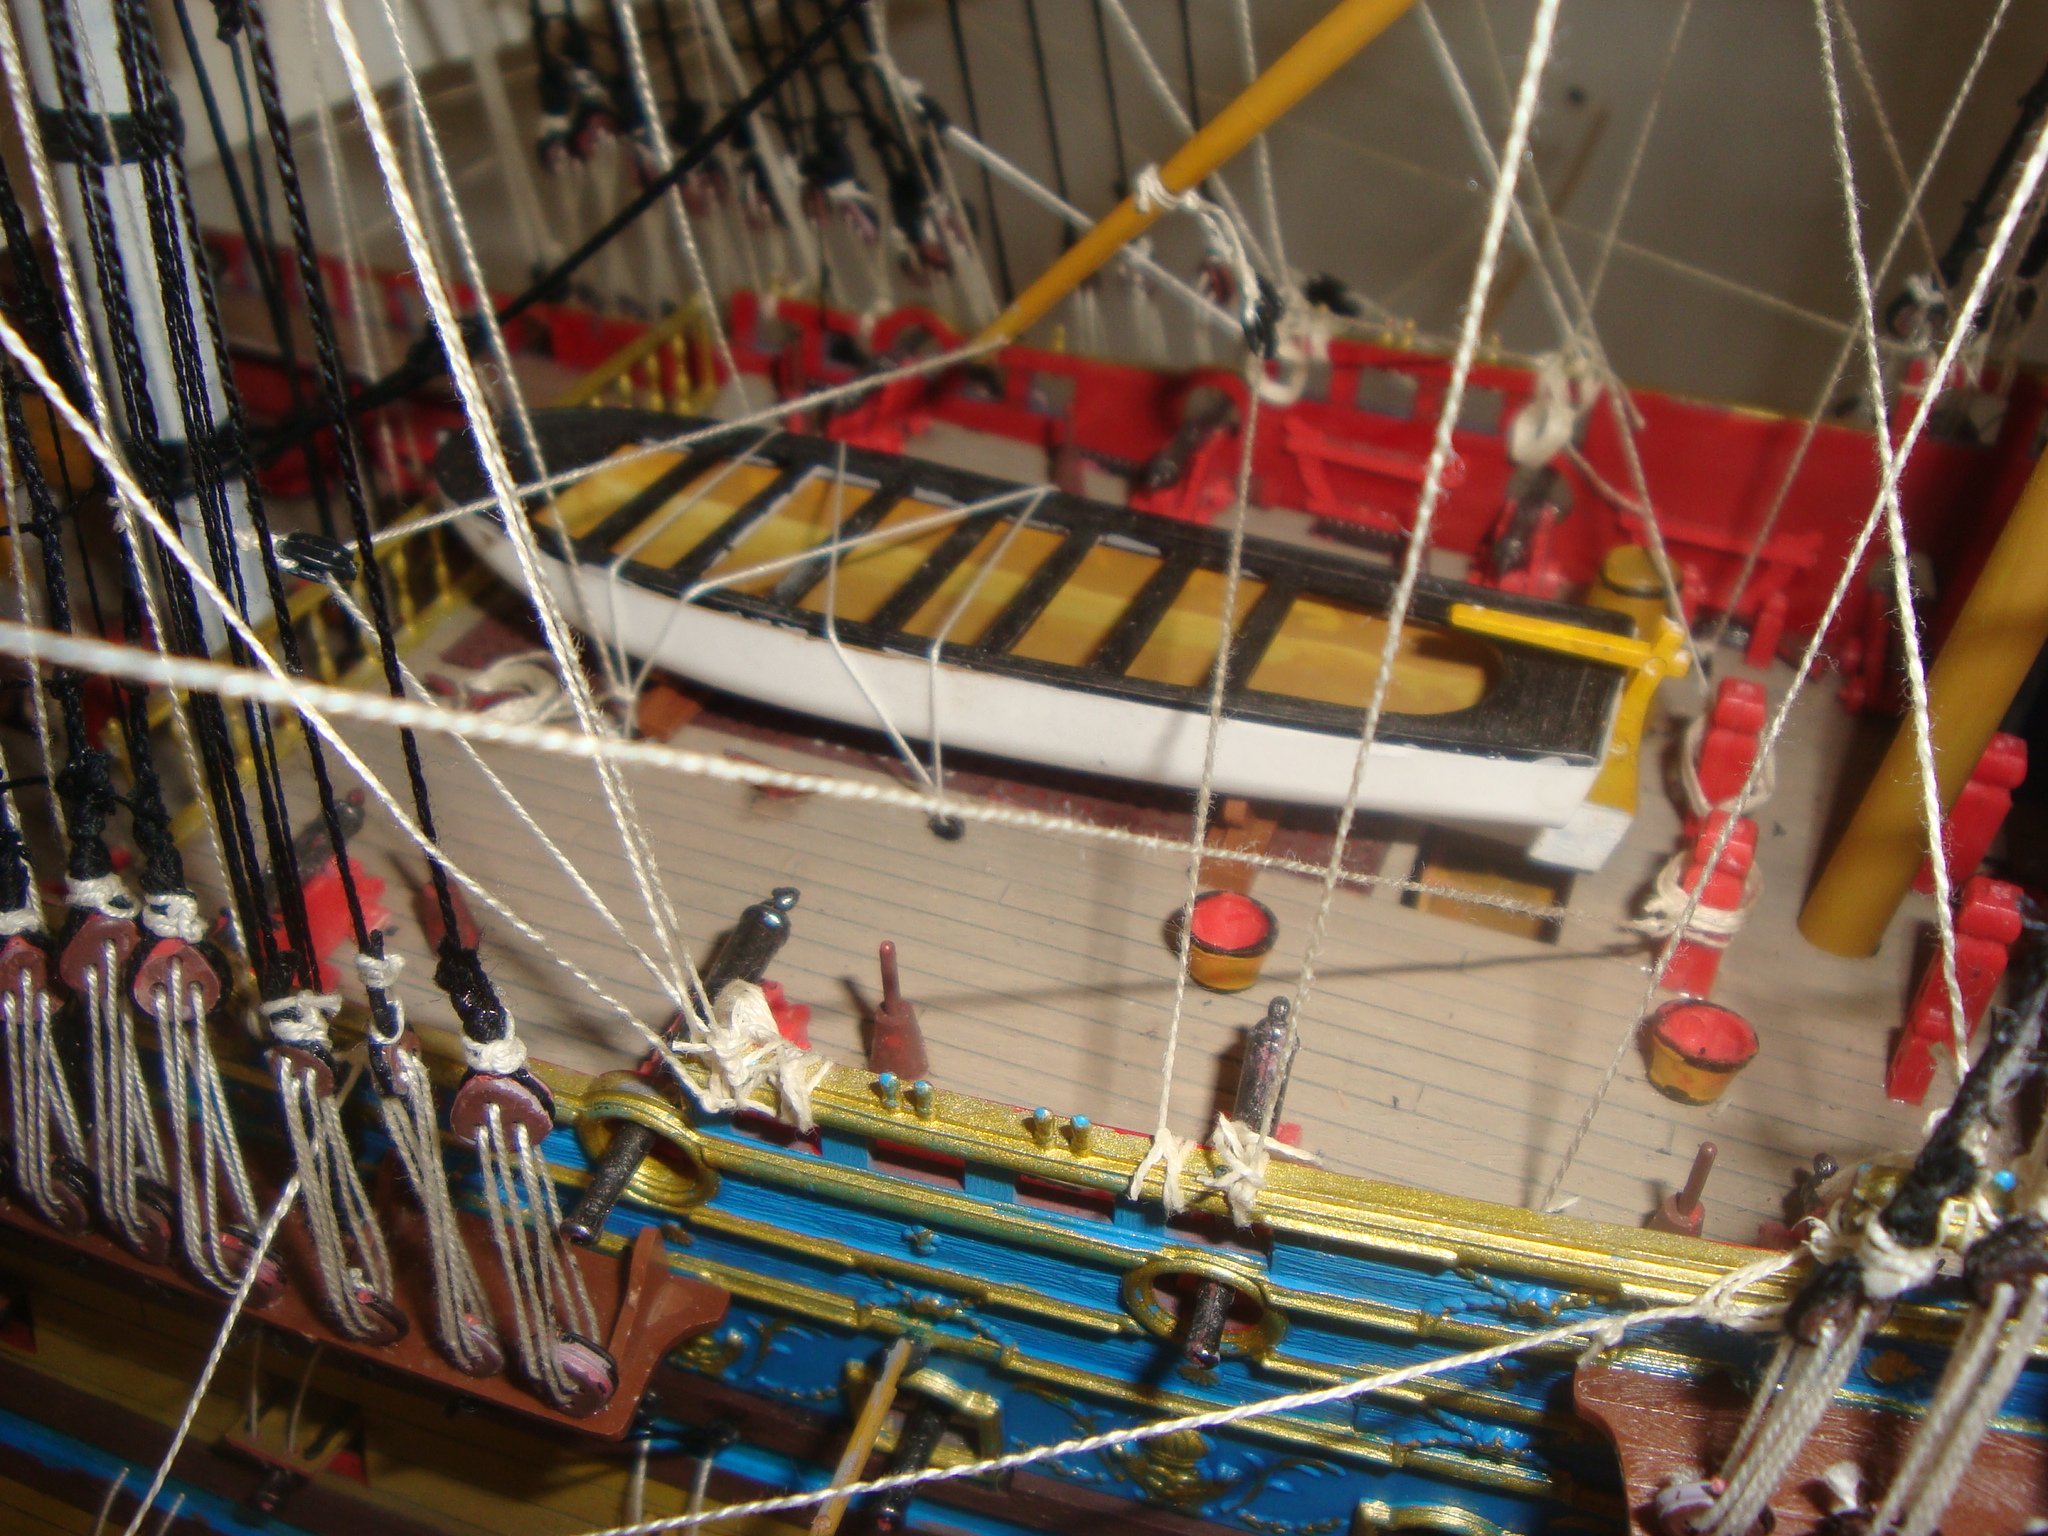
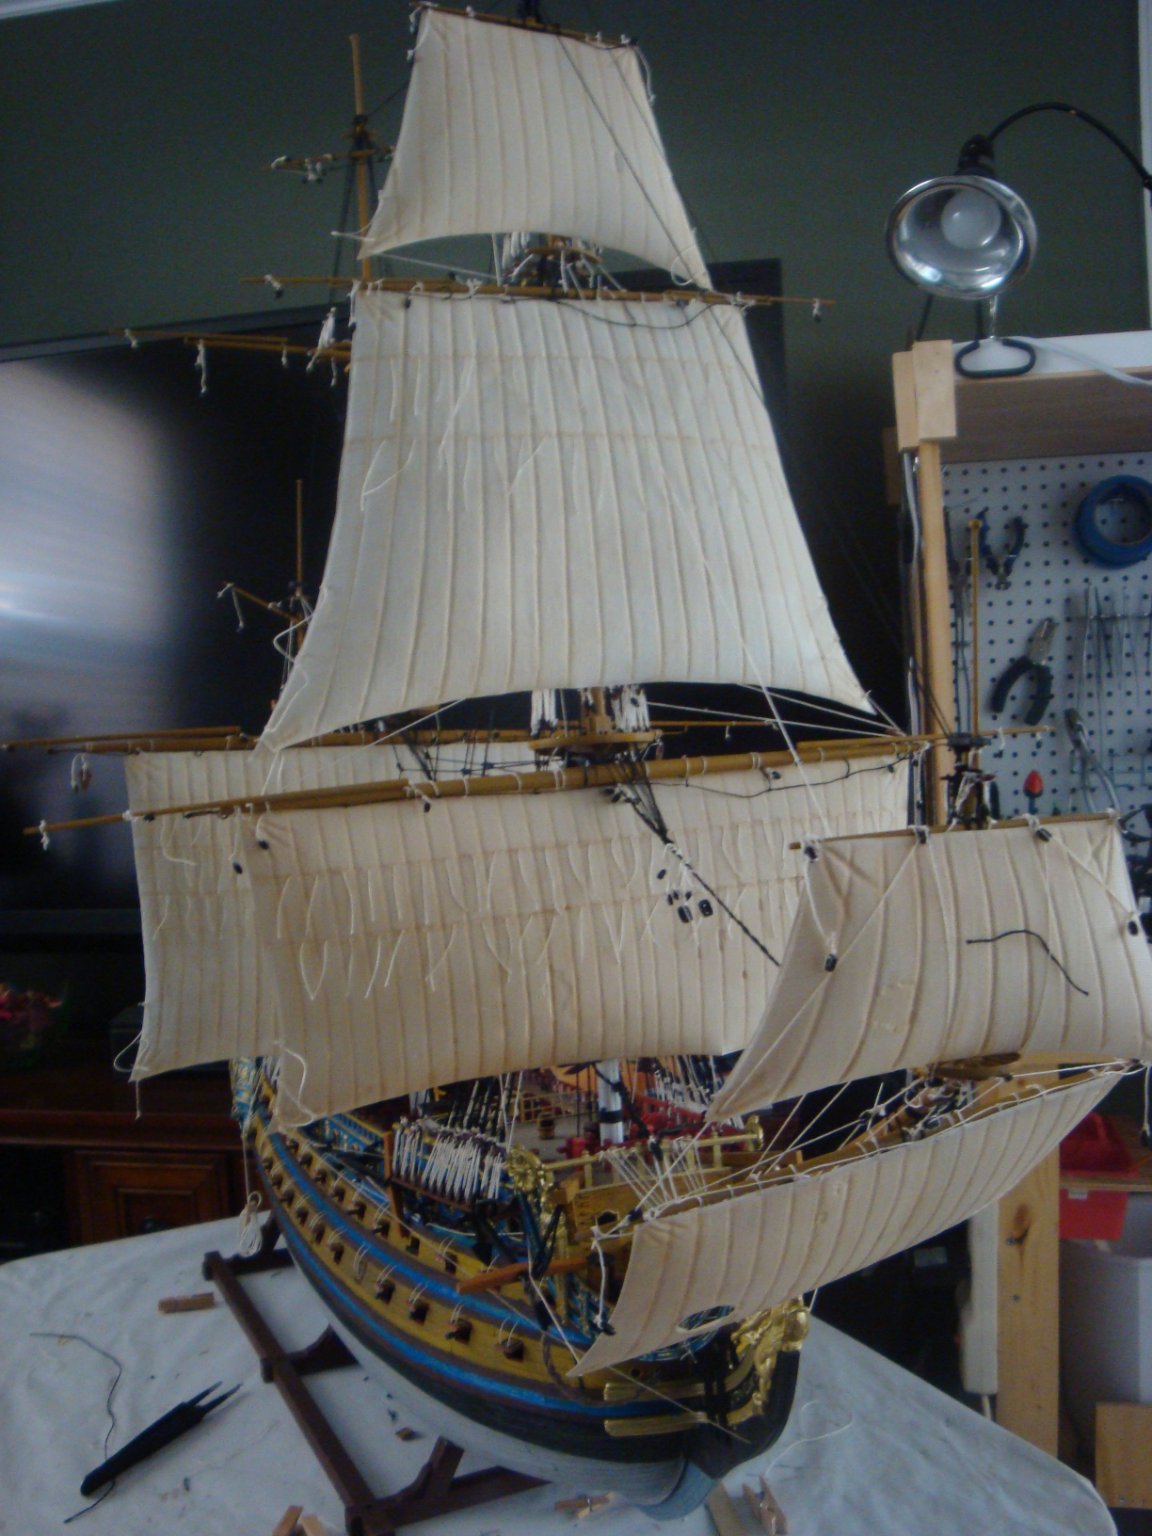
I have started to add the sails to the ship, I originally stated that I was going to use my own hand made sails, but, after I painting them, they did not look very real and the look and texture of them were off. I had a high level meeting with the Admiral about the subject, and, after a review of my sails and the plastic ones that came with the ship, we decided that the plastic ones looked more real that my own, so I painted them then I did a wash and they came out pretty good, not having anything else to use, we decided that I will use the plastic ones. The color I used for the sails is deck paint, from Tamiya, heavily mixed with white for the base color, then, wash the highlights with the same undiluted color
Attached I have a photo of some of the sails mounted on the ship, they look decent so I have decided to use them.
In my next build, I will take more time to properly research a better material for sails. will see.
Until next time
Joe

- dvm27, Baker, Hubac's Historian and 2 others
-
5
-
Ok, I have completed the preliminary rigging of the ship and getting ready to add the sails, as I previously stated, I am planning to use parchment paper for the sails, ( see a example of a sail made with this material on this tread) as to the color for the sails, I am playing with the idea of leaving them unpainted since this paper has a light shade of brown that looks like the color of a real sail. Will check with the Admiral to see if she agreed.
Following is a photo ( not a very good one, sorry ) of the ship as it stands today.
Until next time
Joe
- Rach10199, kirill4 and GrandpaPhil
-
3
-
On 1/5/2021 at 5:31 PM, Hubac's Historian said:
The shrouds look terrific, Joe! Whatever my carving talents may be, all bets are off when it comes to the rigging; that will be a huge learning curve for me, personally.
I also like your treatment of painting the hull with the blue band between wales.
She’s looking very good.
Thank you sir. On the topic of the shrouds and rat lines, be prepare to expend quit of bit of time doing them, they took me over a month because, due to the work been so tedious, I only could work on them for maybe an hour a day. I am a hipper individual, so having to so such a tedious work is very difficult for me.
The work on your ship is magnificent, but, I do not think that I would have the patient to do what you are doing. I do not think that I could expend several months or years doing the model the way you are doing it. Wright now, I am hoping to finish this model in 3 or 4 moths,
I saw another modeler who had painted those areas in blue, I liked it, so I went ahead and painted them also in blue.
Thanks again
Joe
-
On 11/27/2020 at 8:32 PM, Hubac's Historian said:
Joe, you are doing a fantastic job with the Heller kit; it is difficult to build, without modification, as few parts fit together easily.
I really appreciate your kind compliments, and would like you to know that my project is the beneficiary of time; I have almost a life-long obsession with this vessel and my patience in building her knows (almost) no bounds. The main thing about any of this hobby, in my opinion, is to take your sweet time - as you have, so far.
Keep on going! Don’t be discouraged by the ambiguities and fit problems of this kit. You will get there!
Thank you sir for your encouragement, coming from some one with your expertise, is very valuable to me.
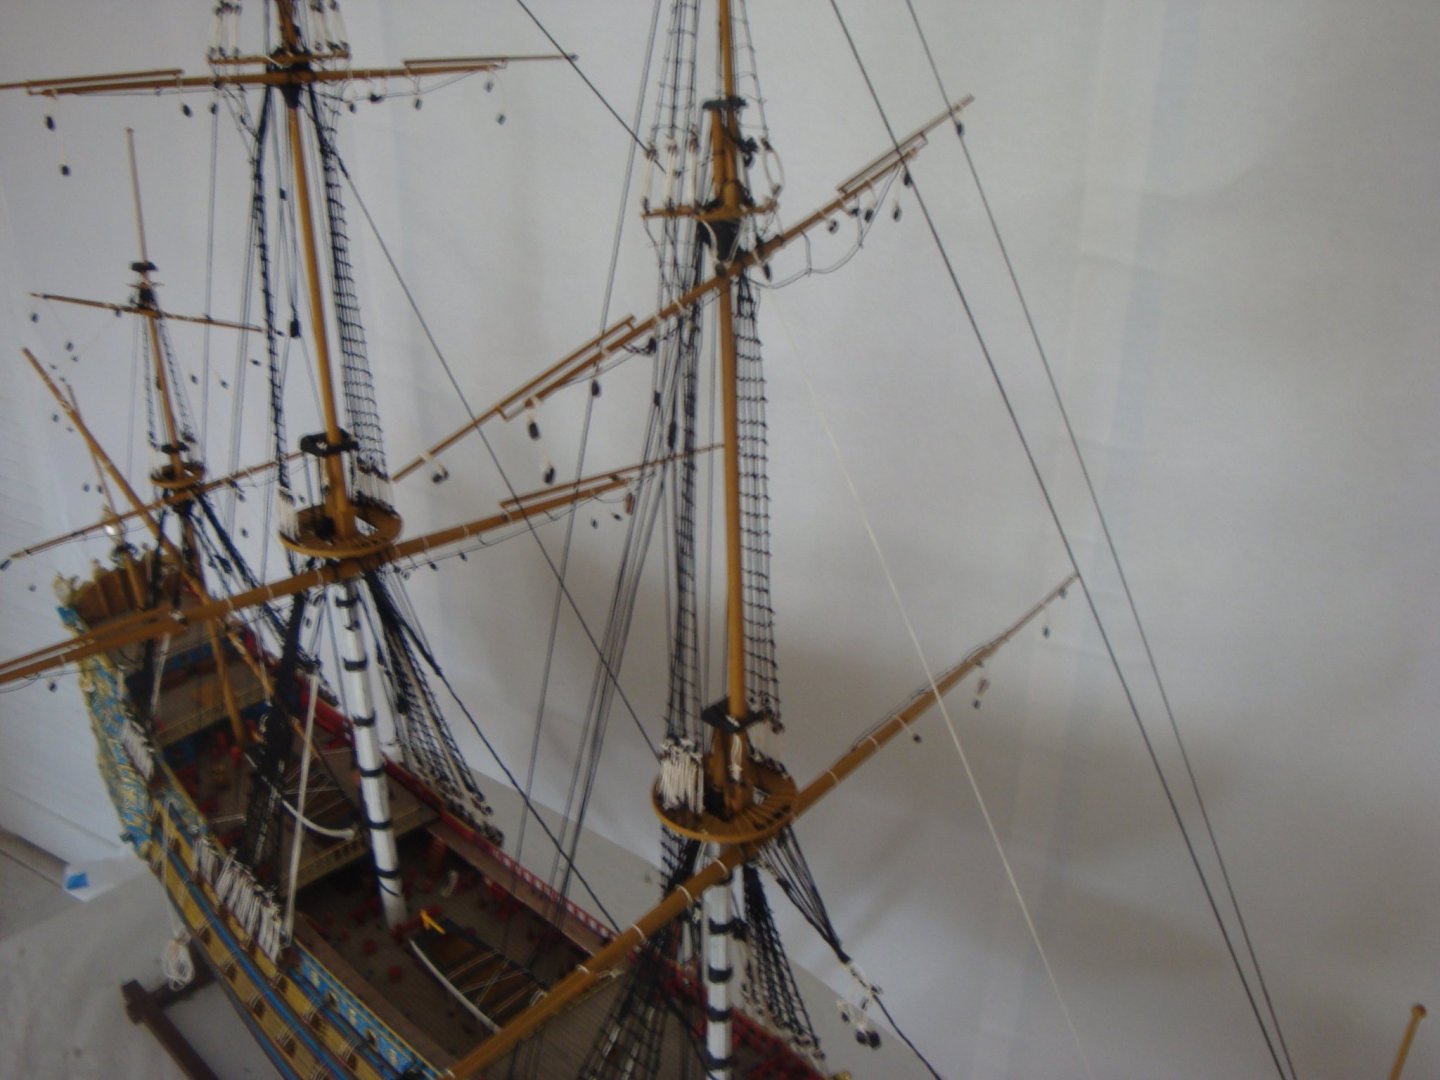
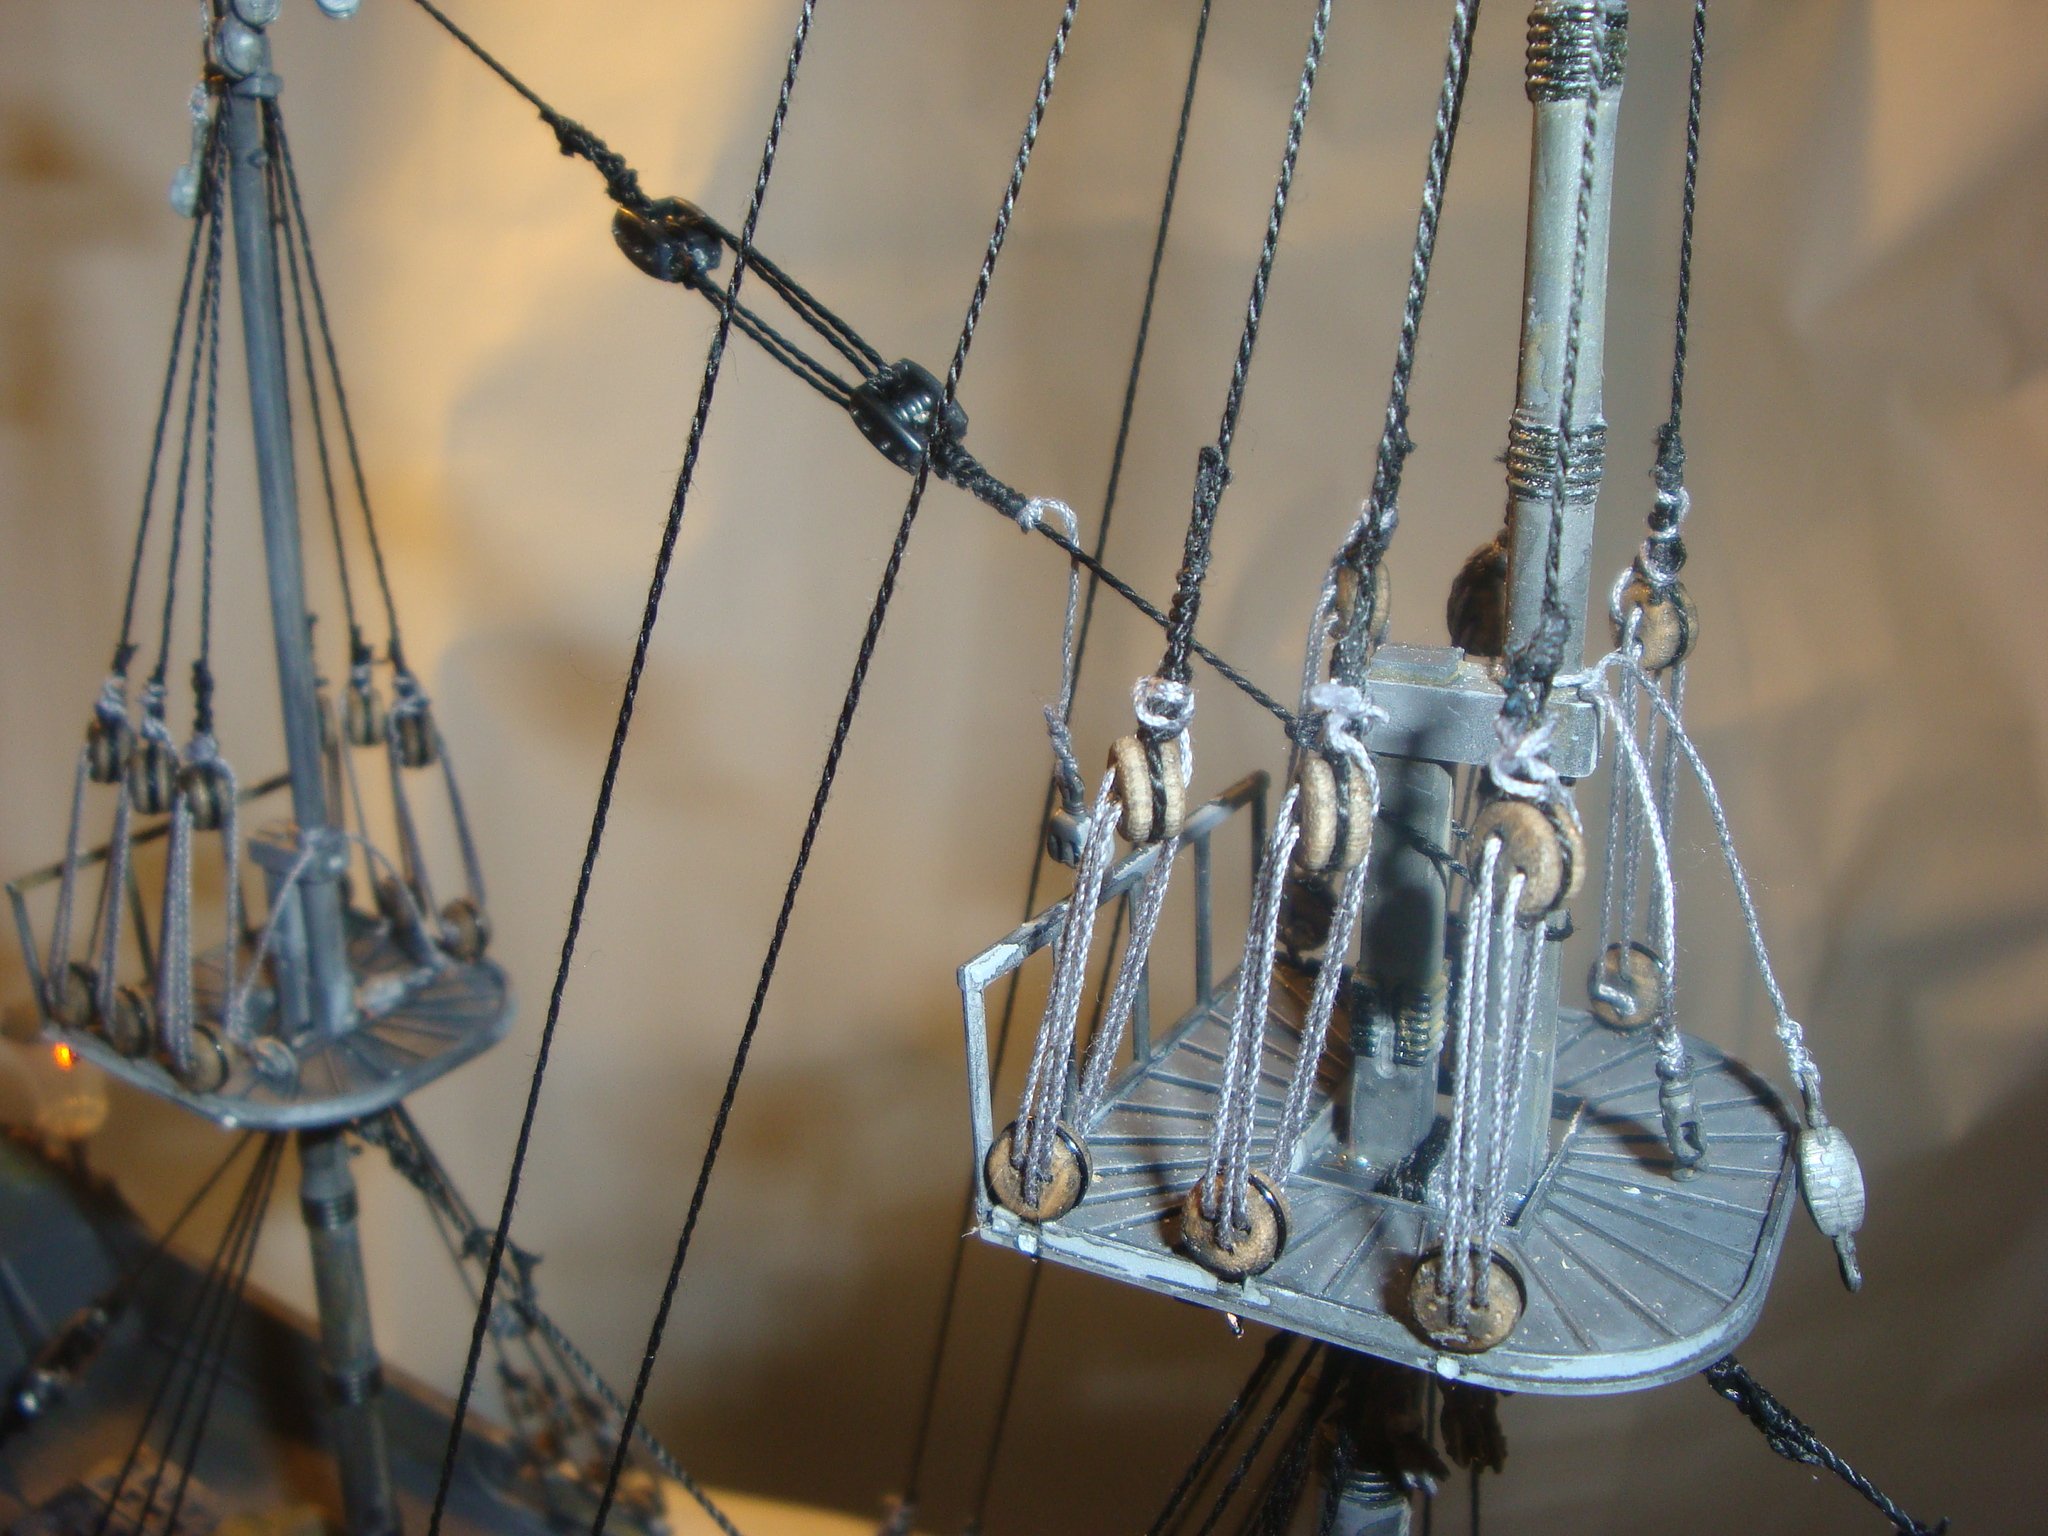
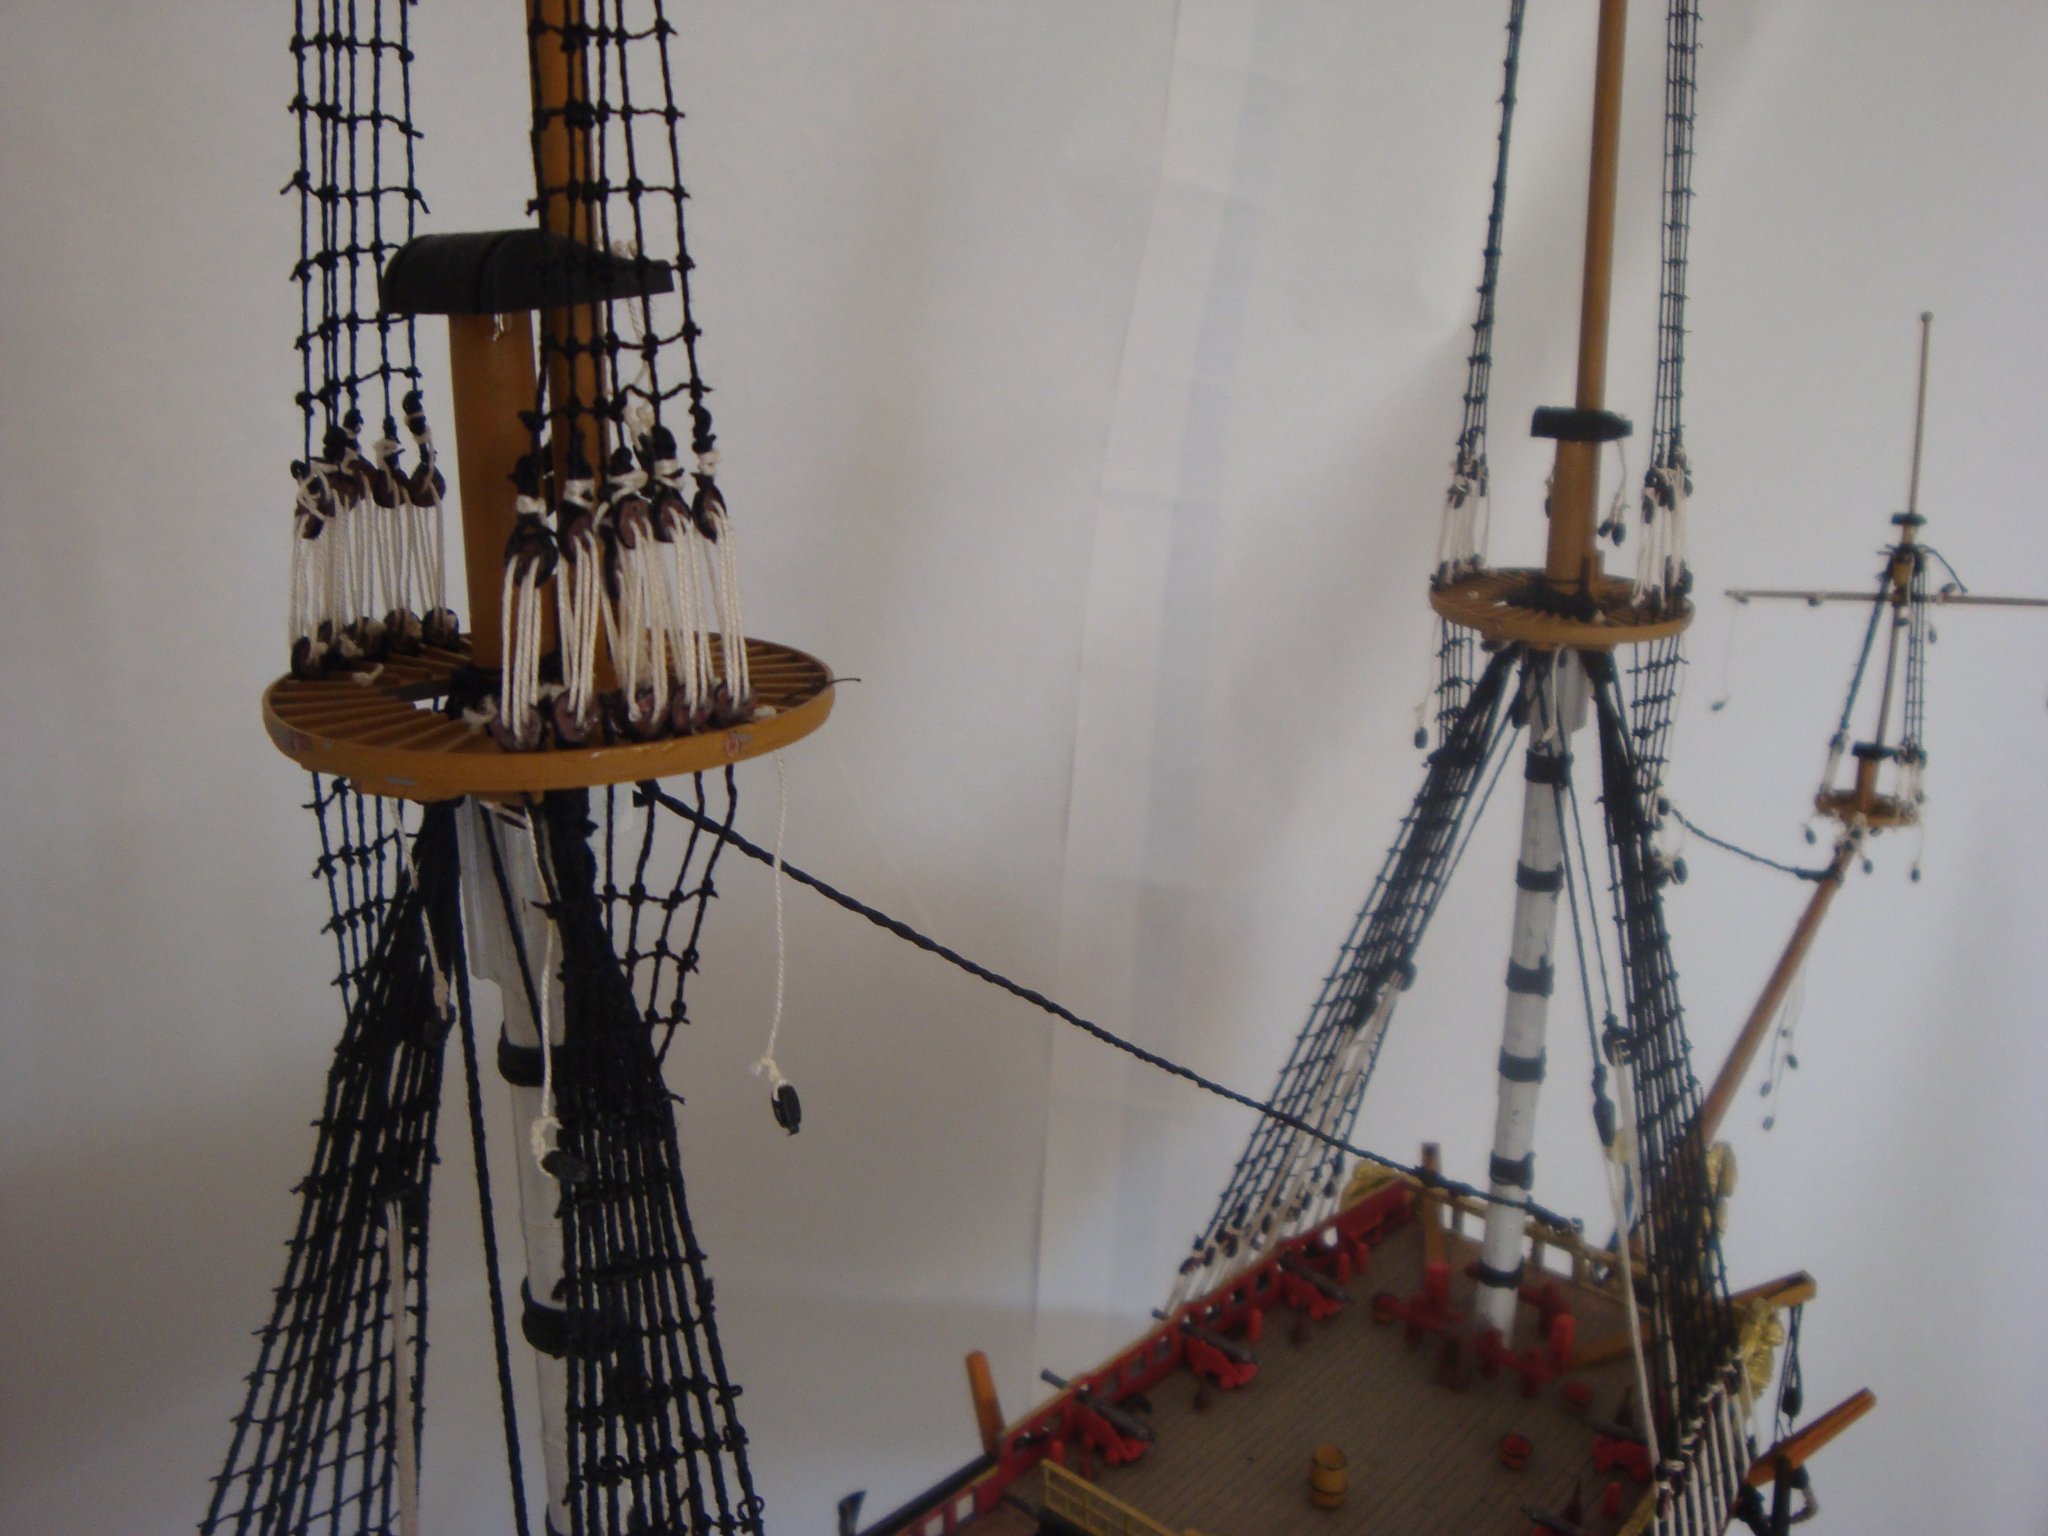
I have finally completed all the shrouds and rat lines, it took me over a month to complete them, although I fully aware that they could have been done better, taking into consideration that is the first time I do this type of work, I think they came out quite decent.
Attached are 3 new photos of how the ship looks after completing the shrouds, my next step is to start working on the cross members and their installation.
Well, until next time, were I hope to have gotten closer to the finish line.
Joe


- GrandpaPhil and Rach10199
-
2
-
18 hours ago, Kelp said:
Hello Joe.
Nice job working on this model! I really like how you painted the gold. What is your technique for painting the gold (what size brush, method, etc.)?
Don
Thanks for your comments, in regard to my technique for painting the small details, here they are:
Nice strong light
Reading glasses
A very small brush
And finally, lots, lots of patience.
I did the painting over 3 or 4 days, and took my sweet time, I do not know the number on the brush, but I used the smaller size on my collection and one of good quality. I would only dip the end of it just to get it wet then very careful I painted the surface. It helped that the areas to be painted are raised.
I did the gold painting before I started to build the ship, I found that it was easier to paint before mounting it, then just go after it was mounted and them did any needed retouching.
The paint I used is the Tamiya Gold Leaf straight, not diluted, it went in easy but, you need to keep it mixed by mixing it with a toothpick every so often. Hope this helps.
Joe -
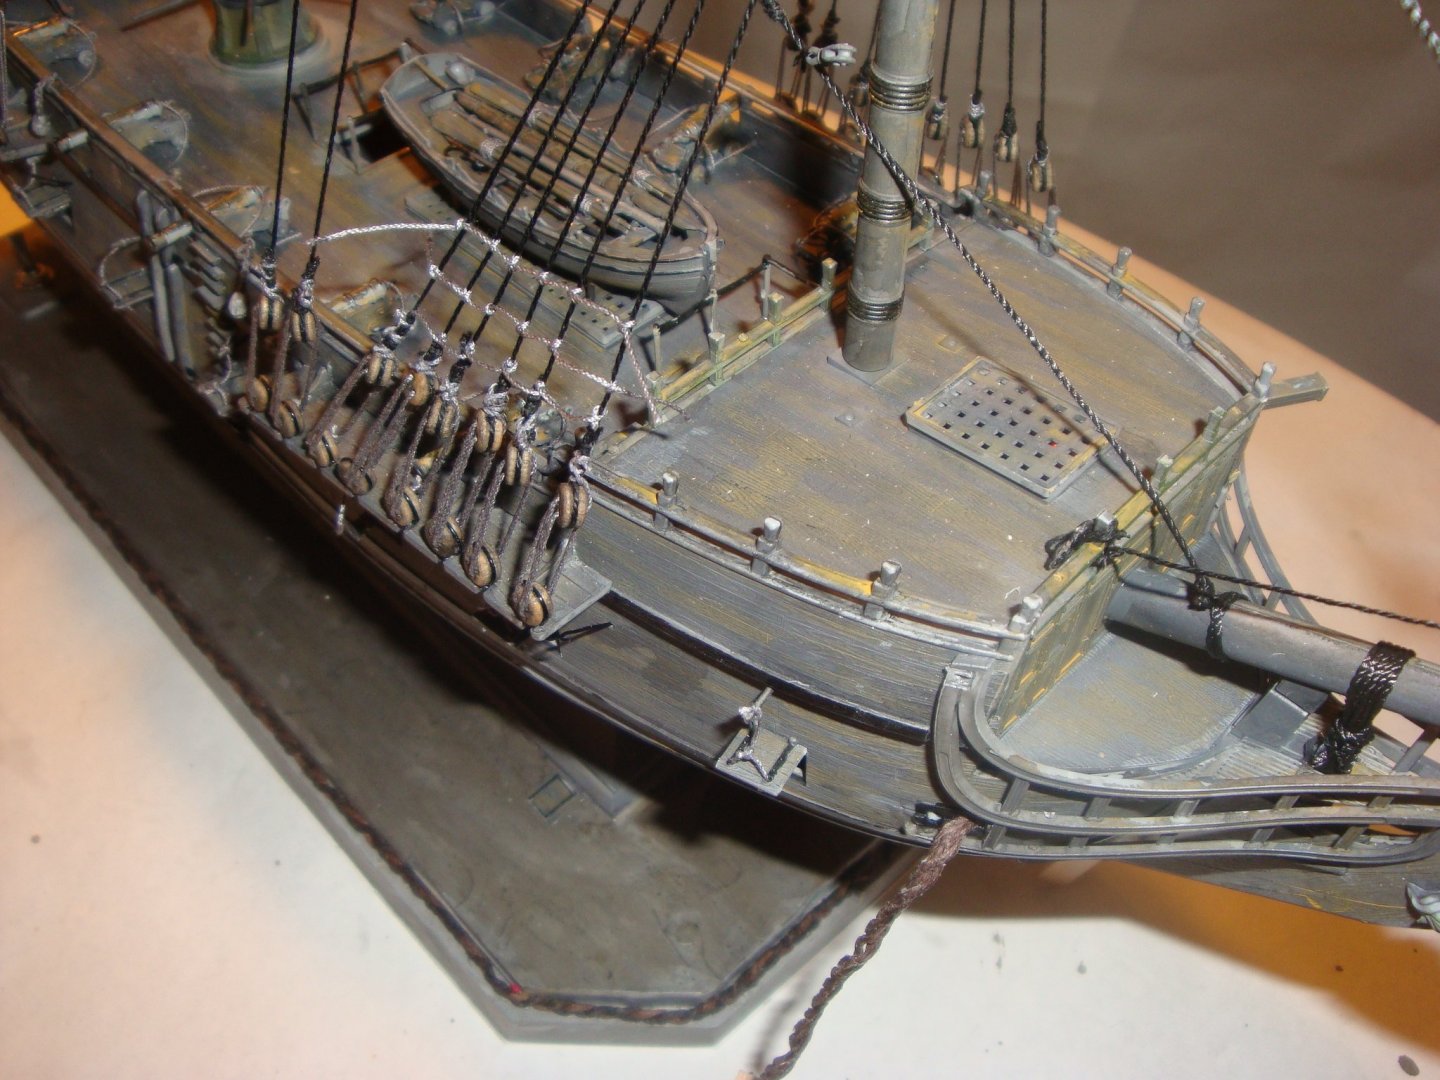
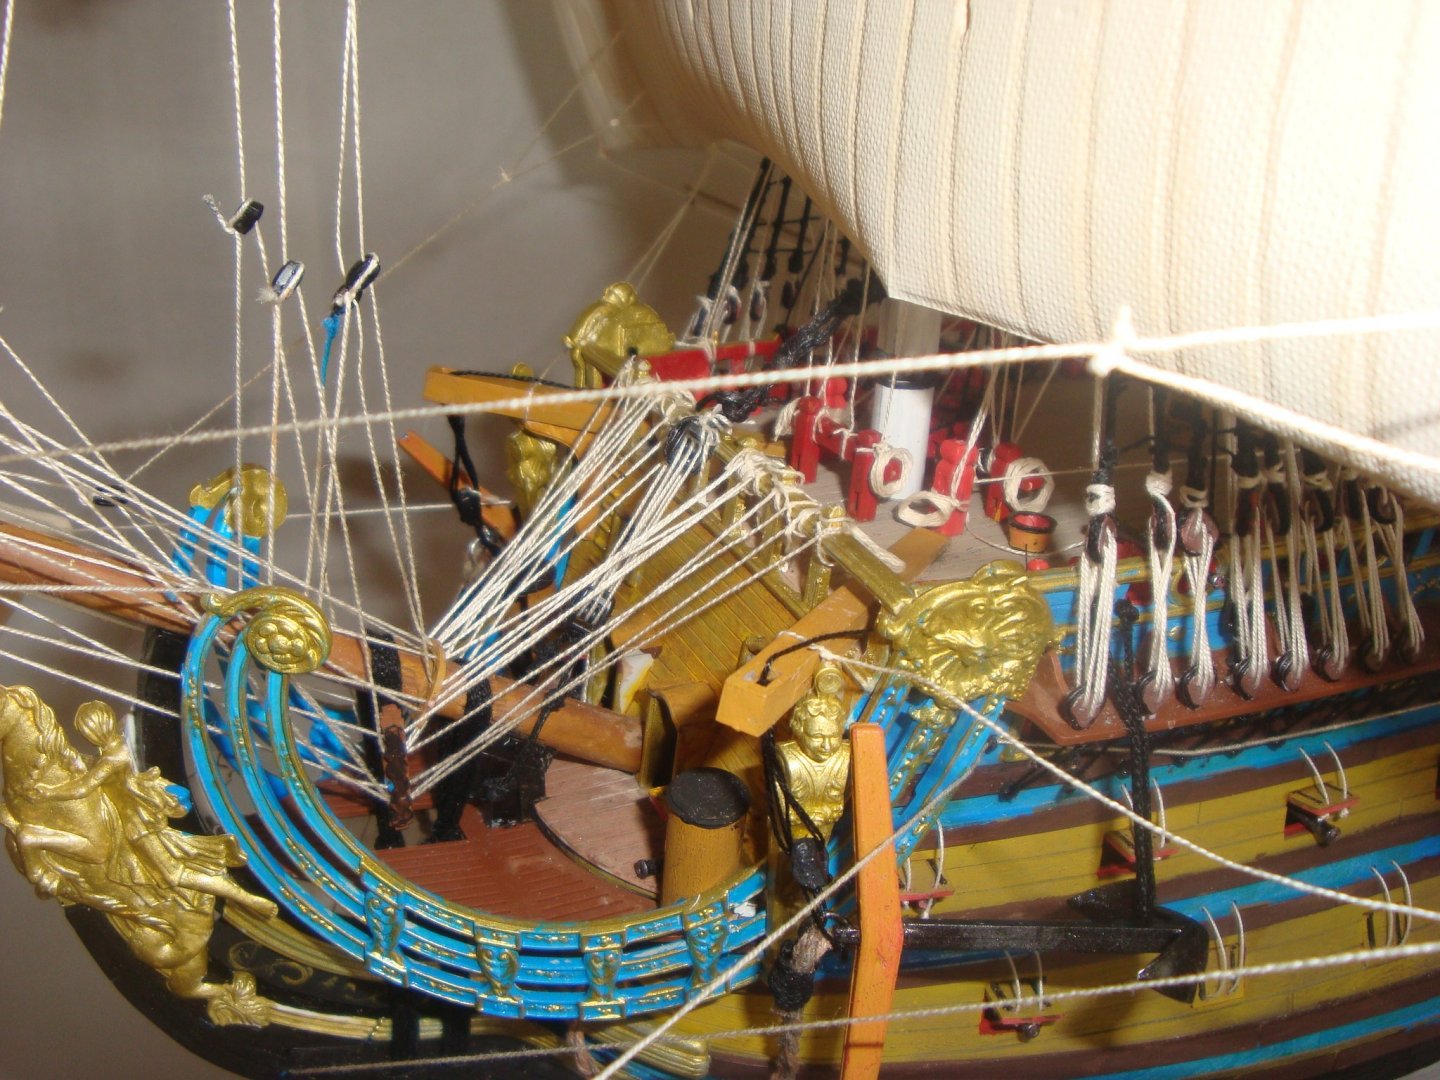
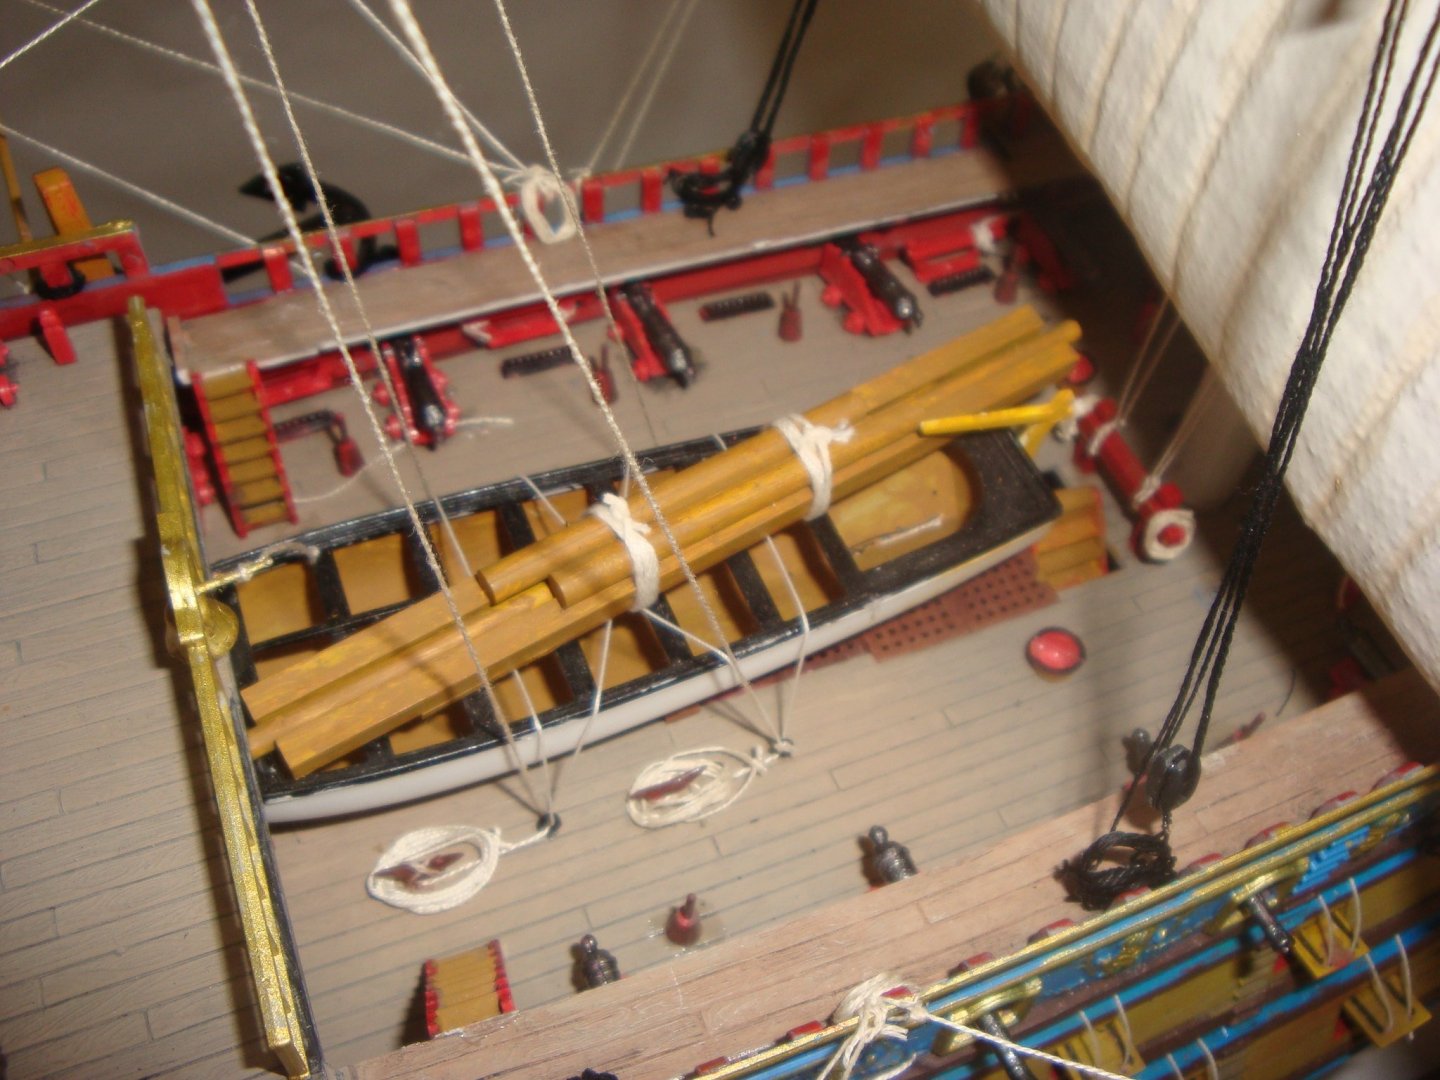
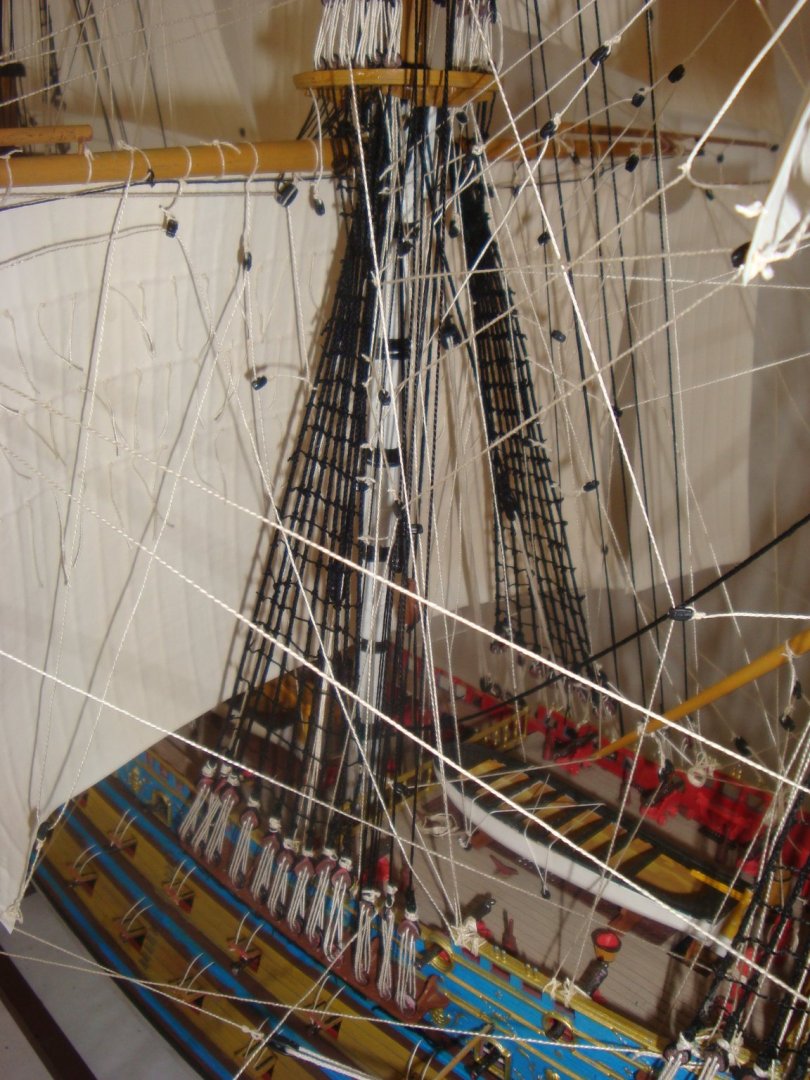
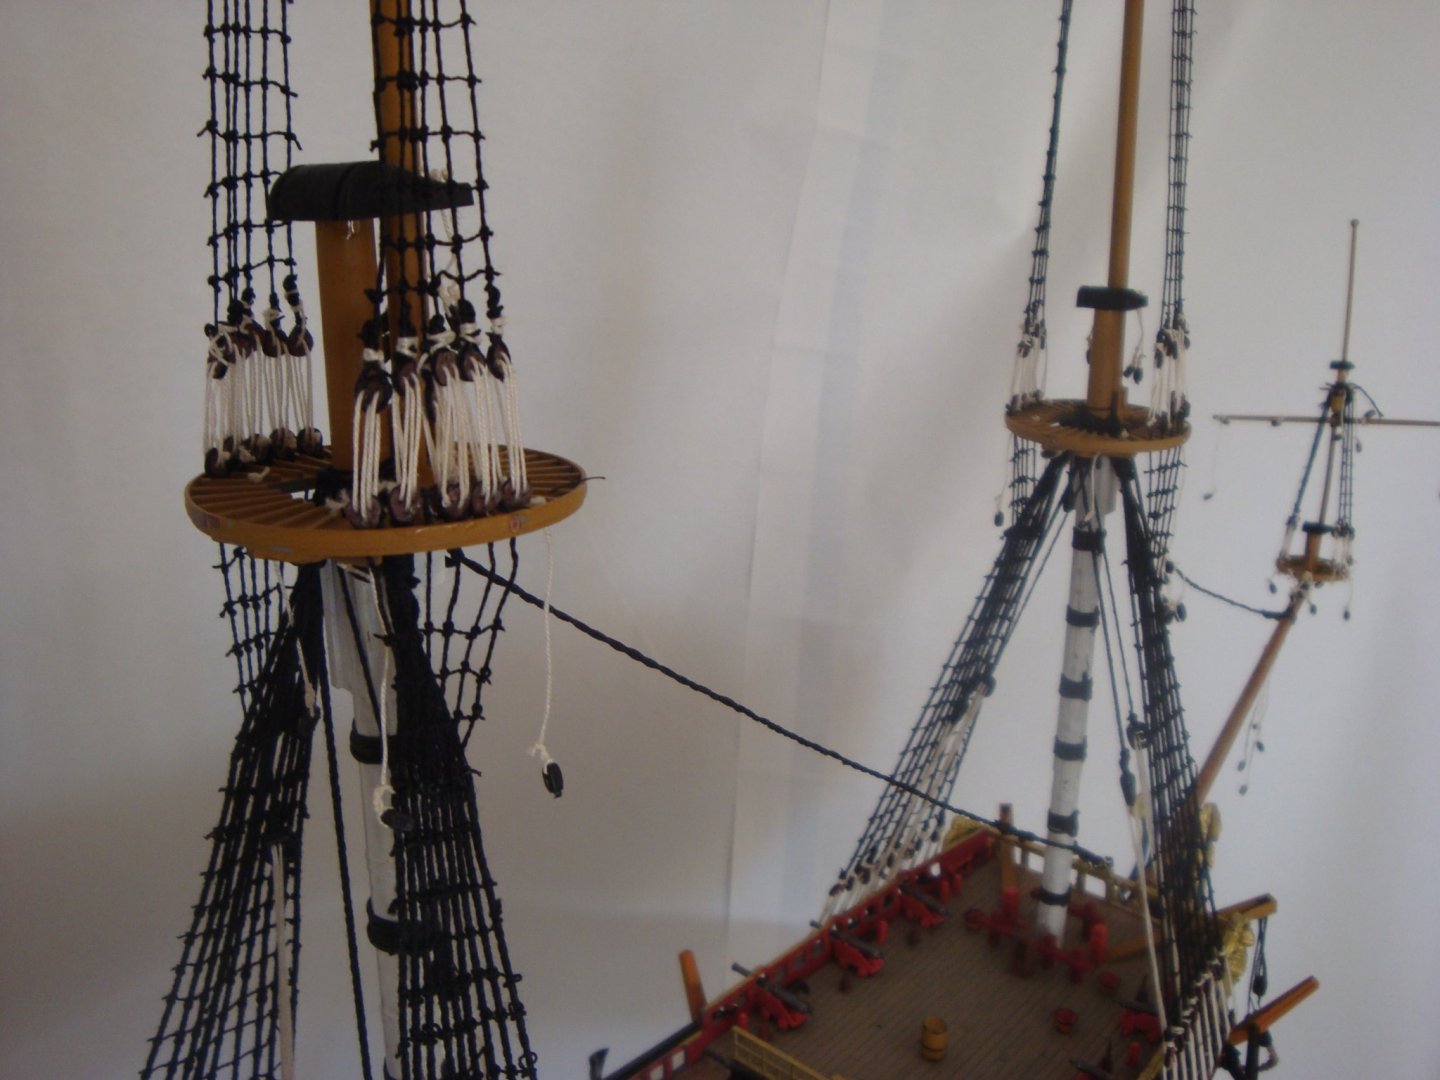
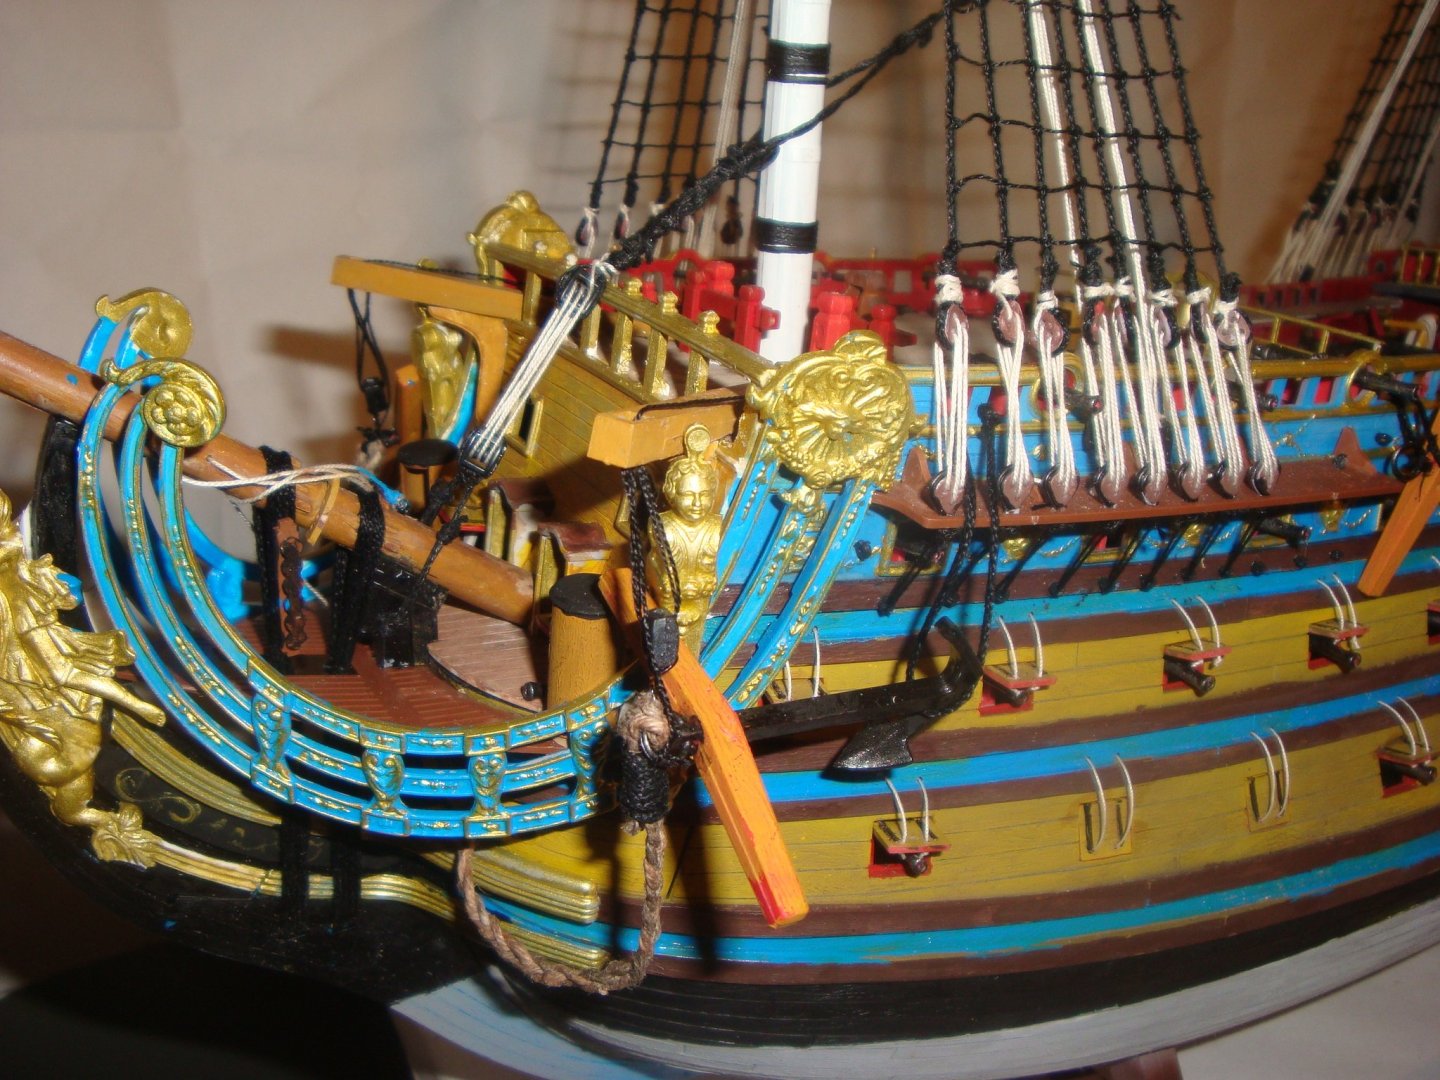
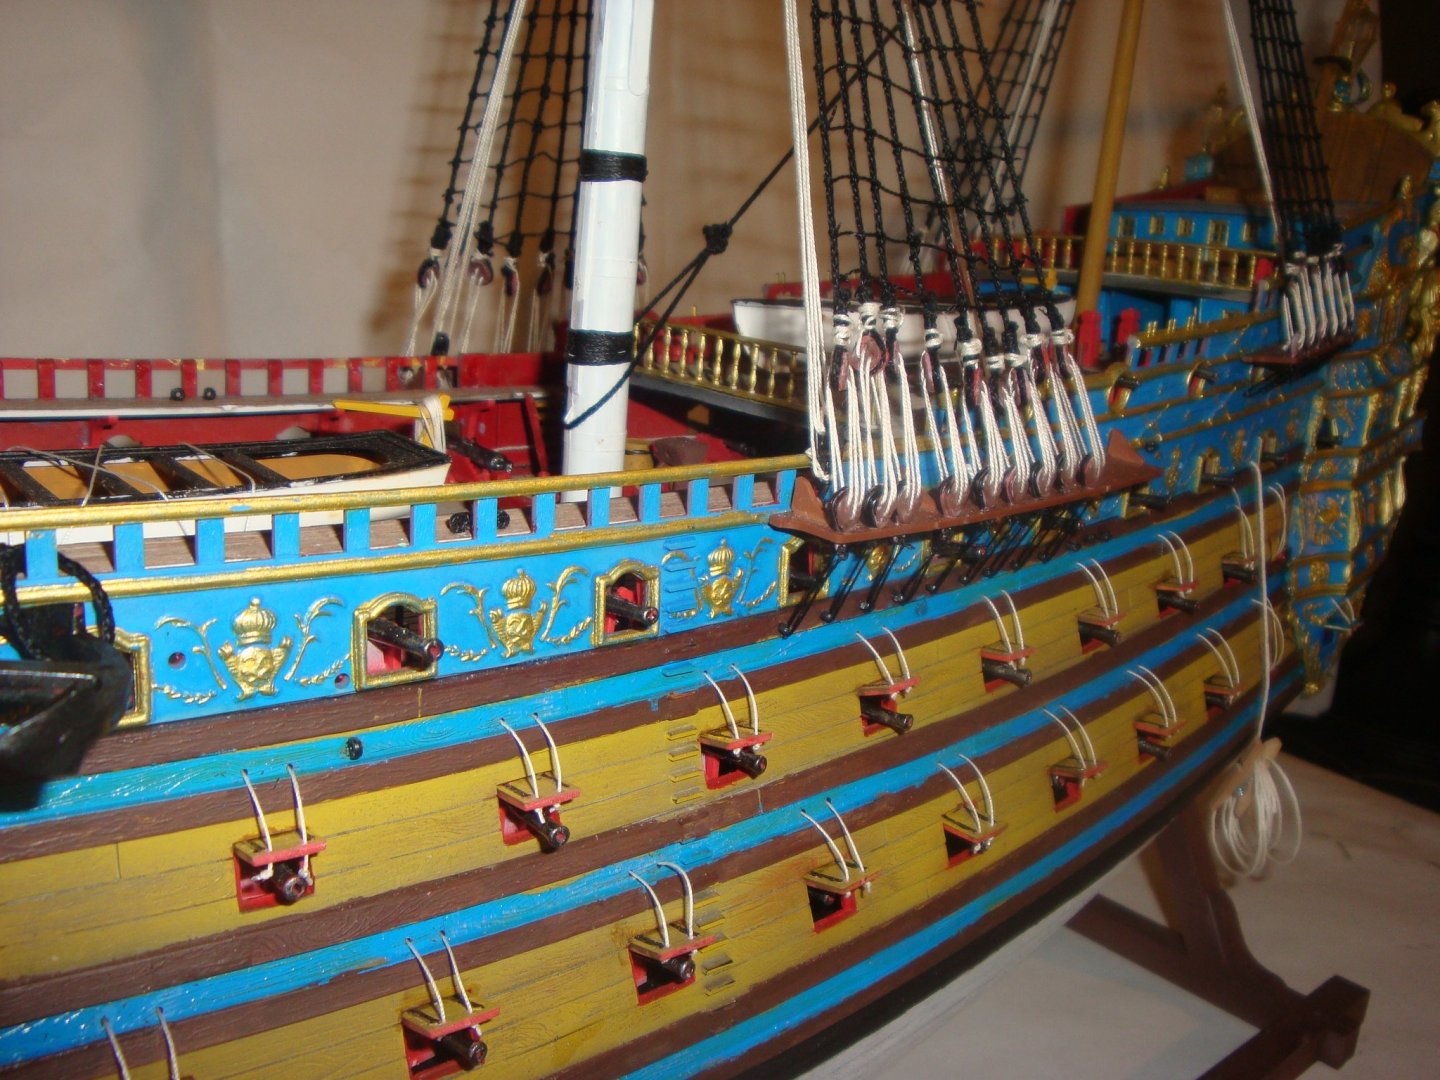
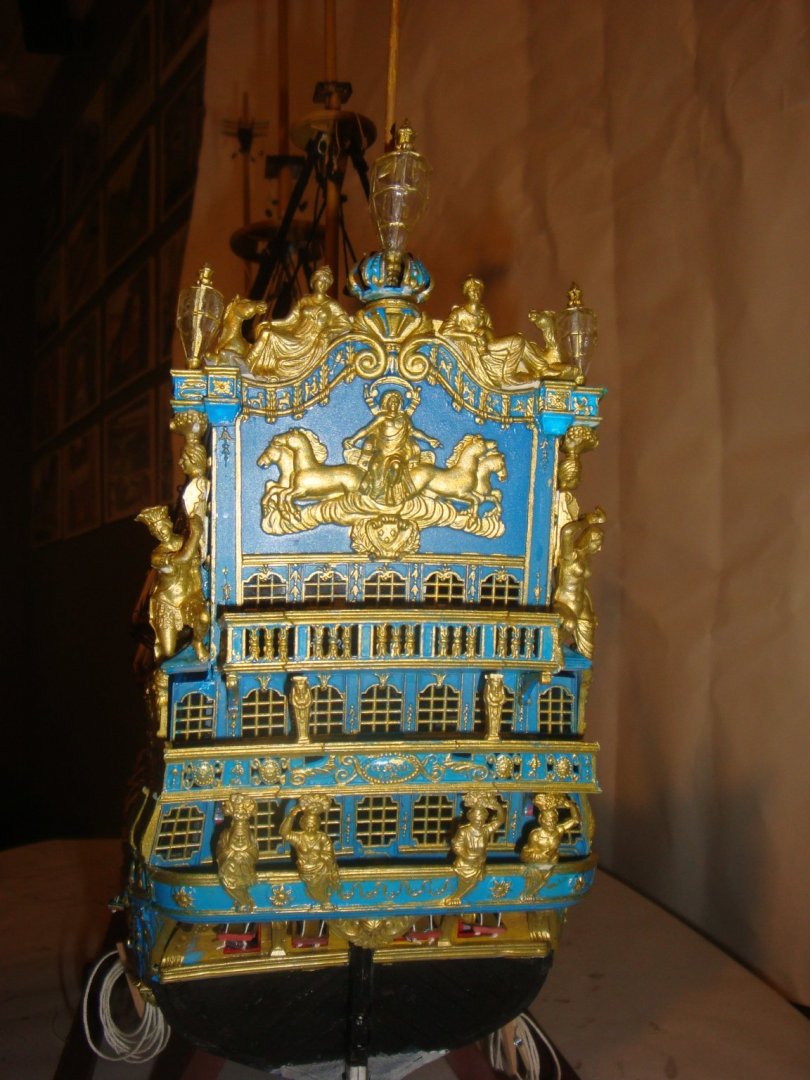
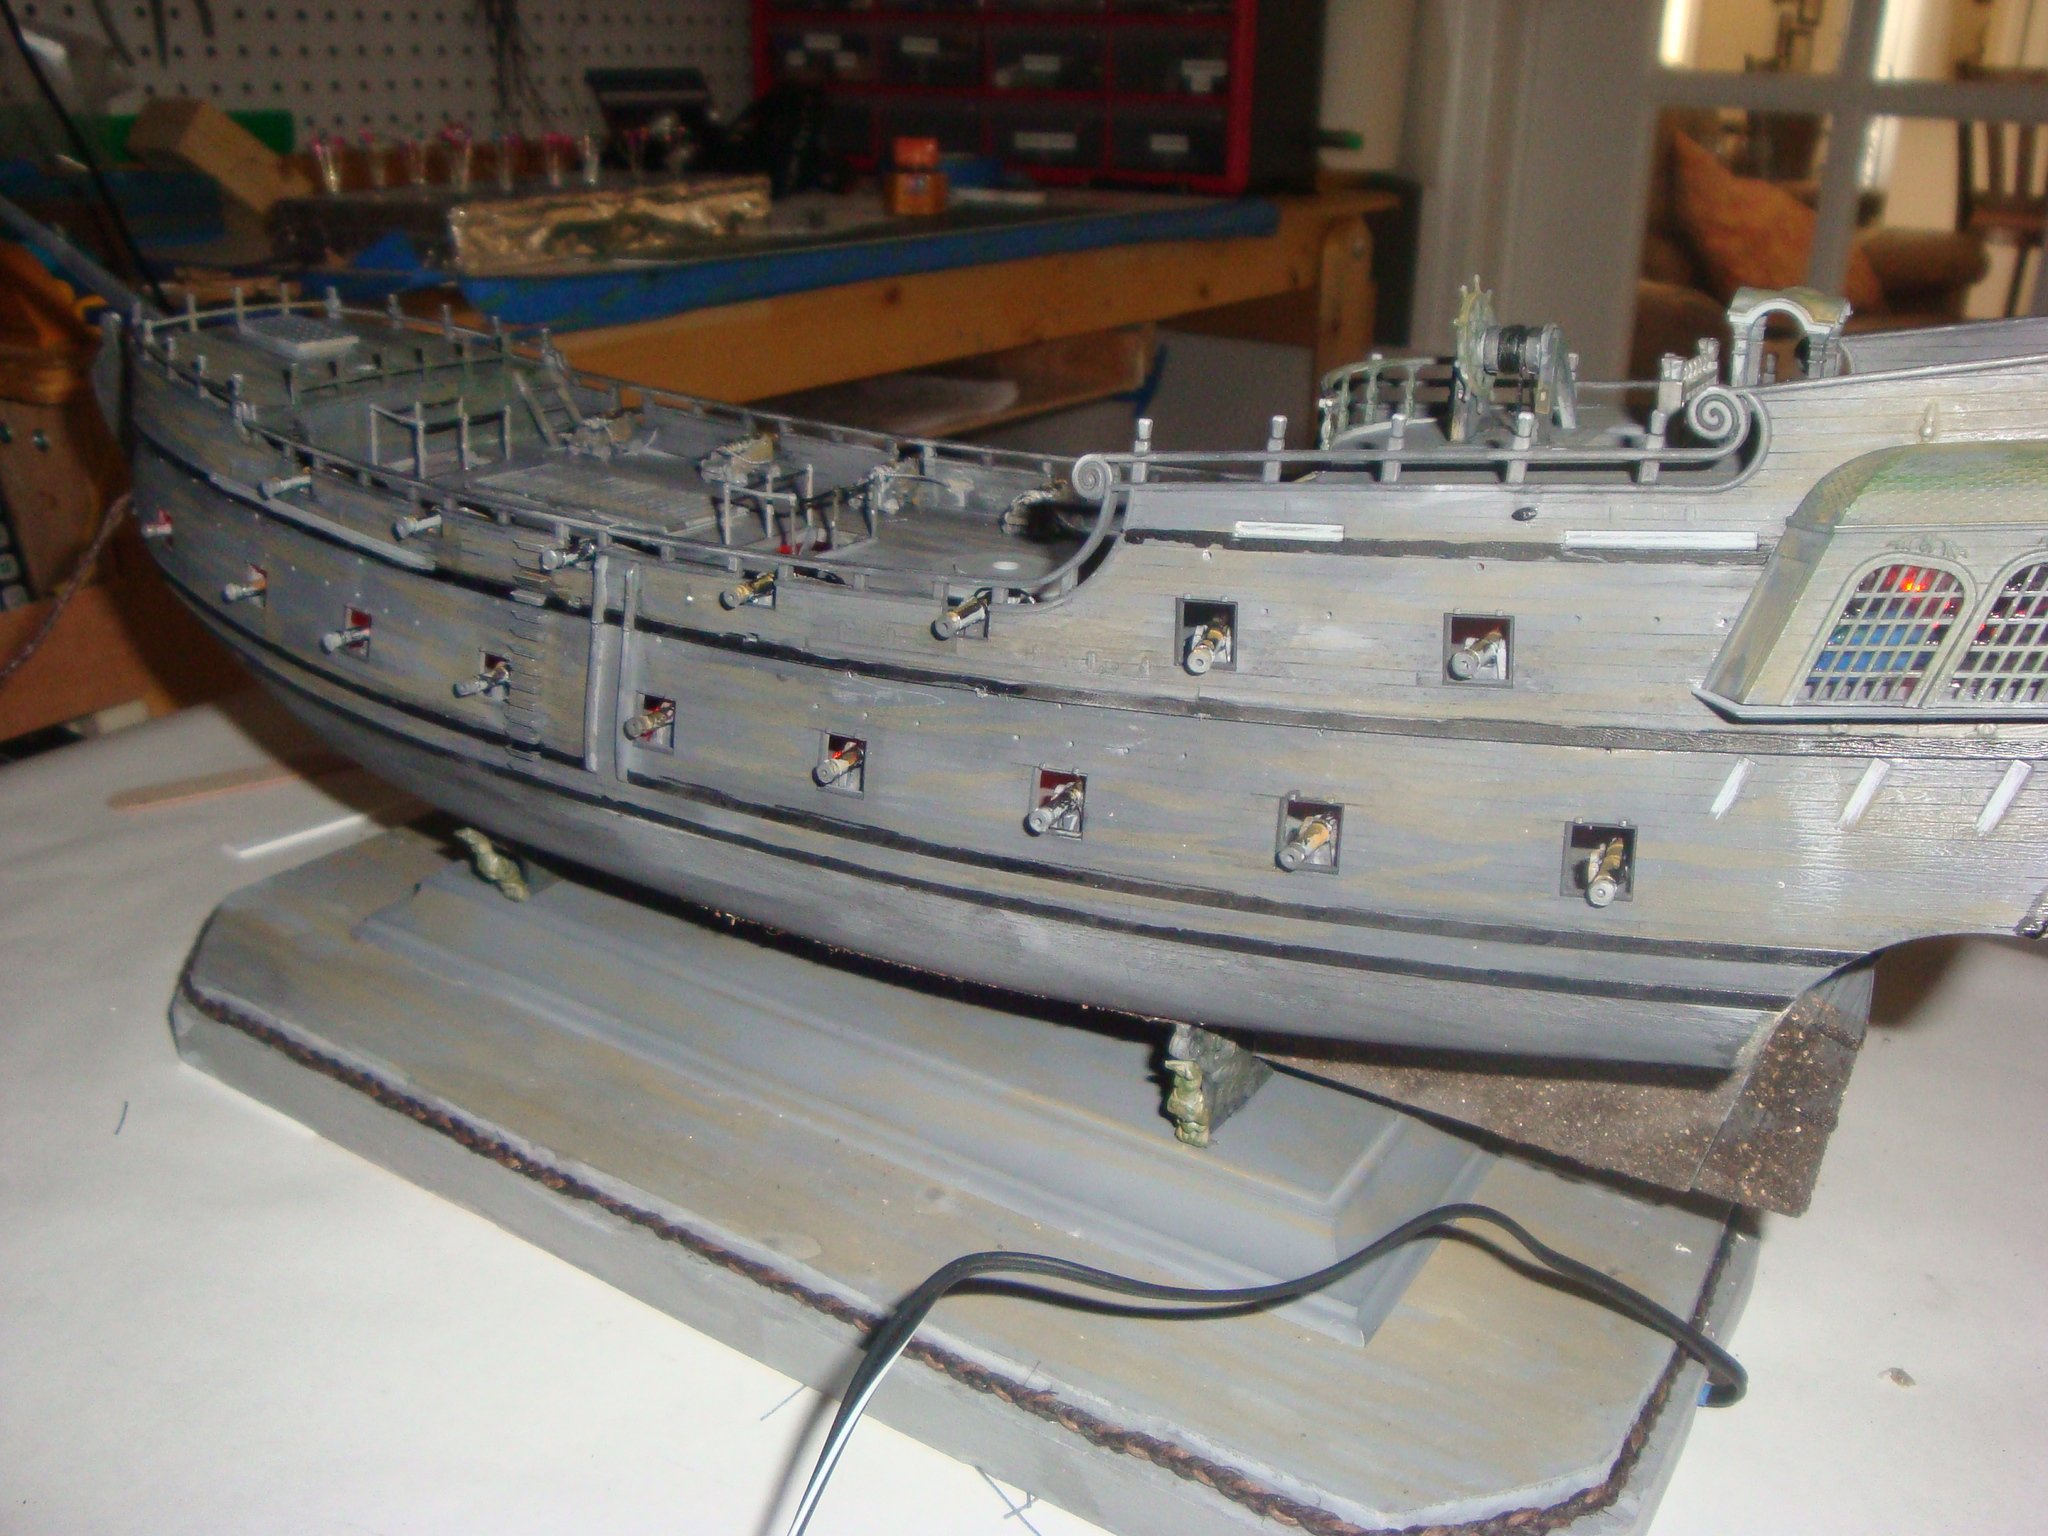
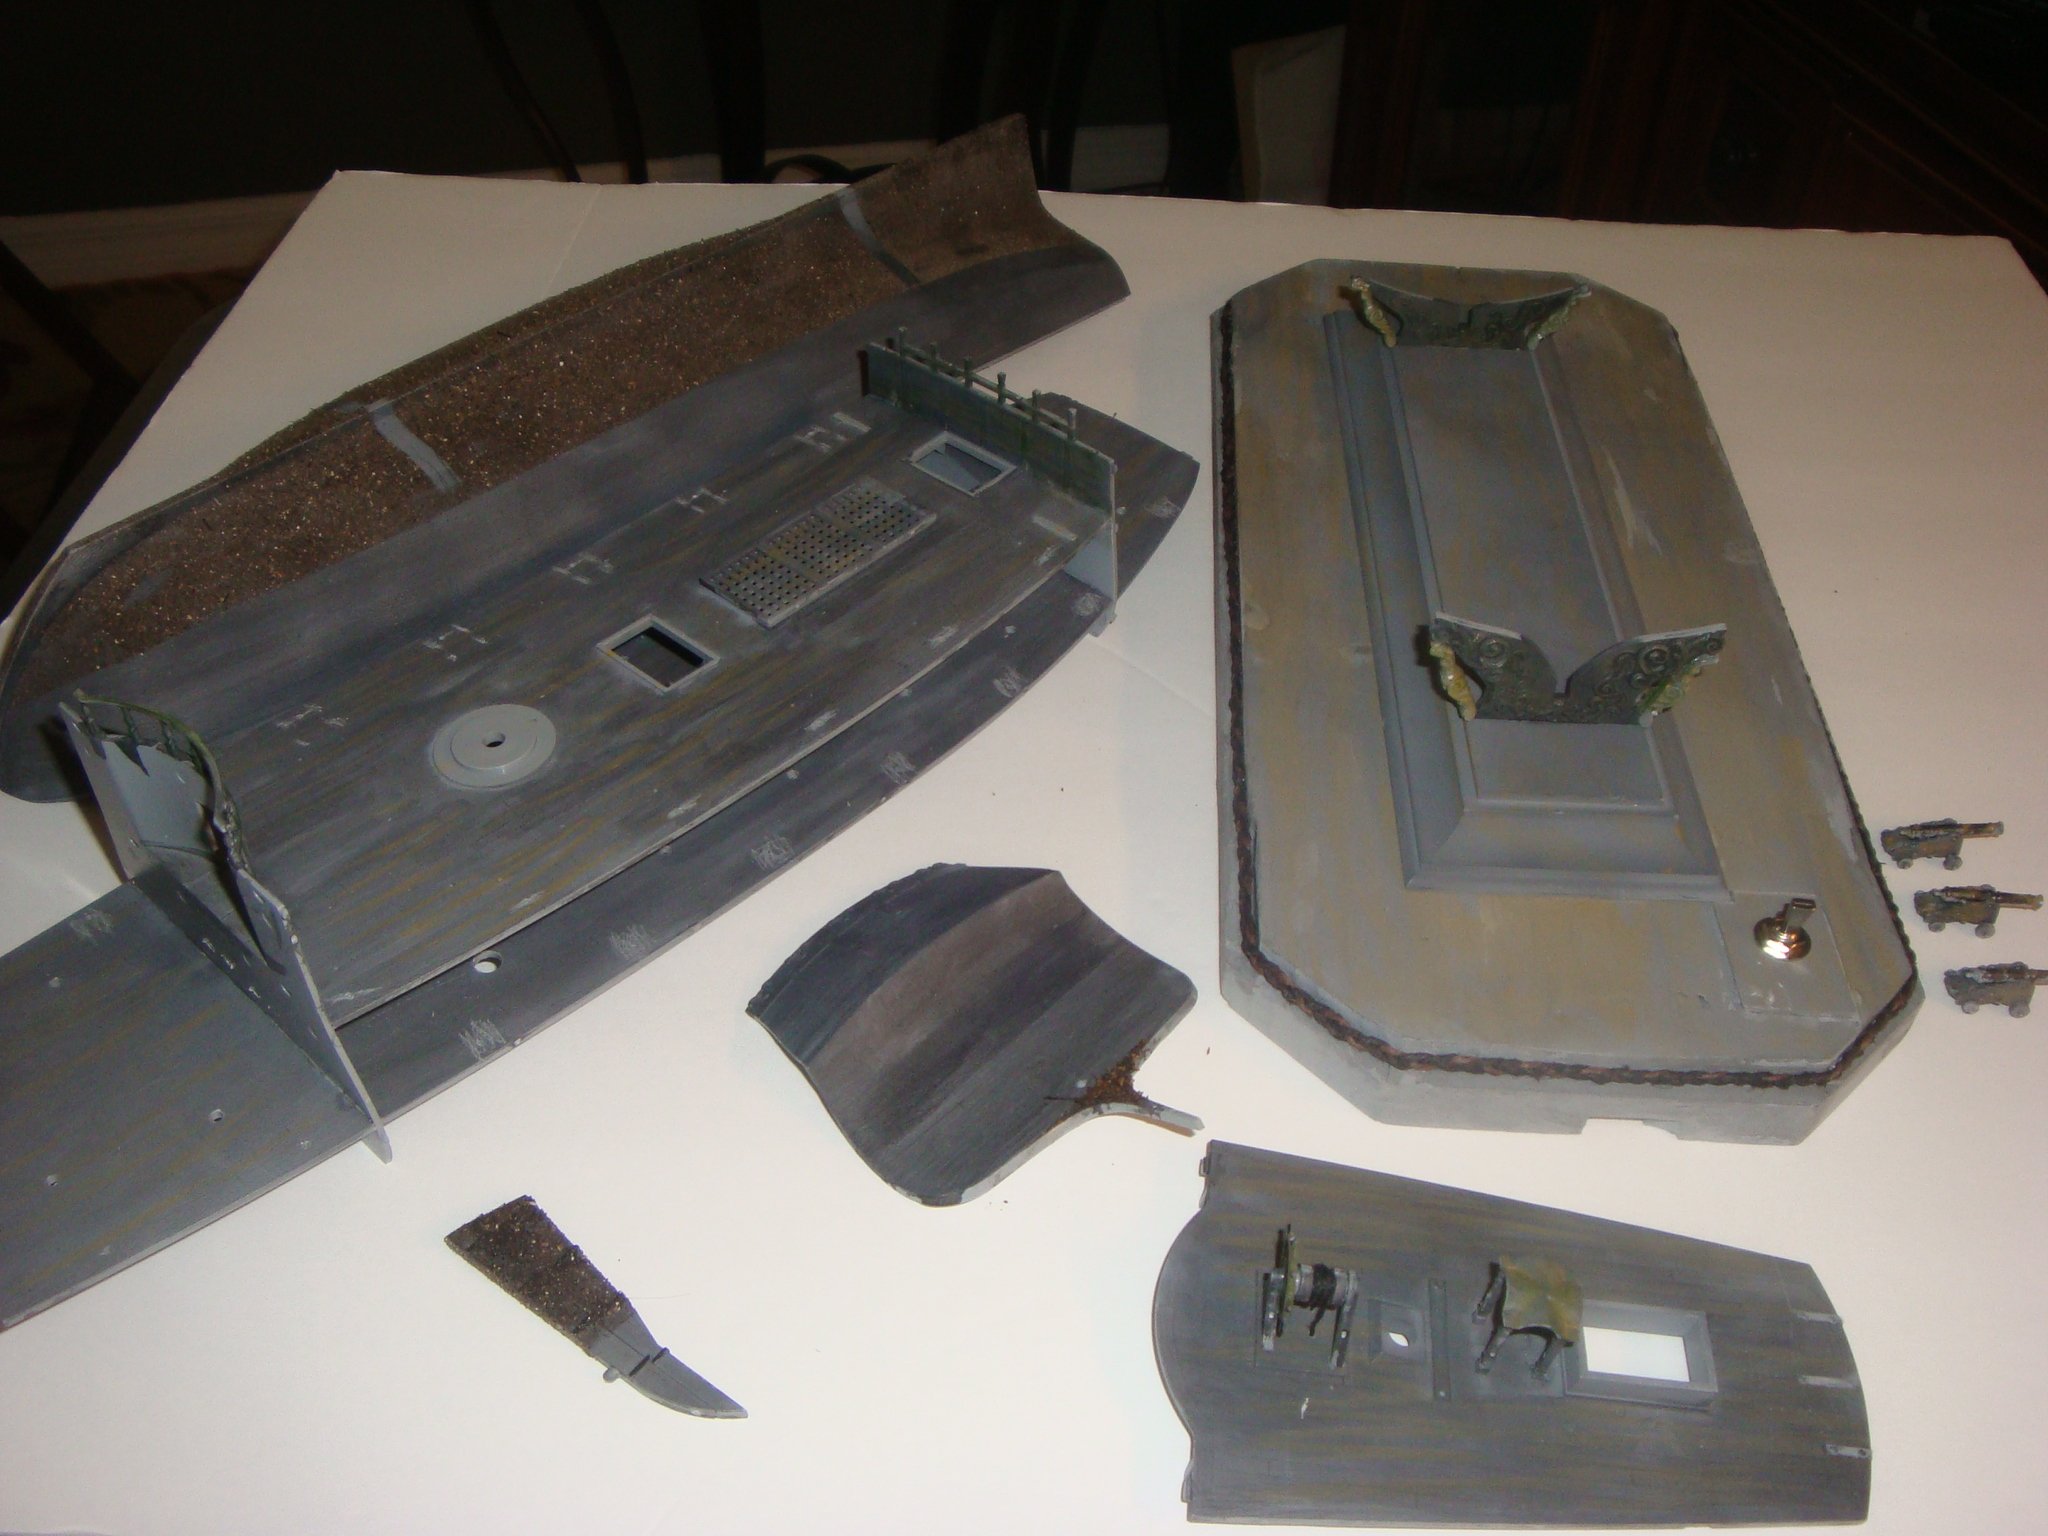
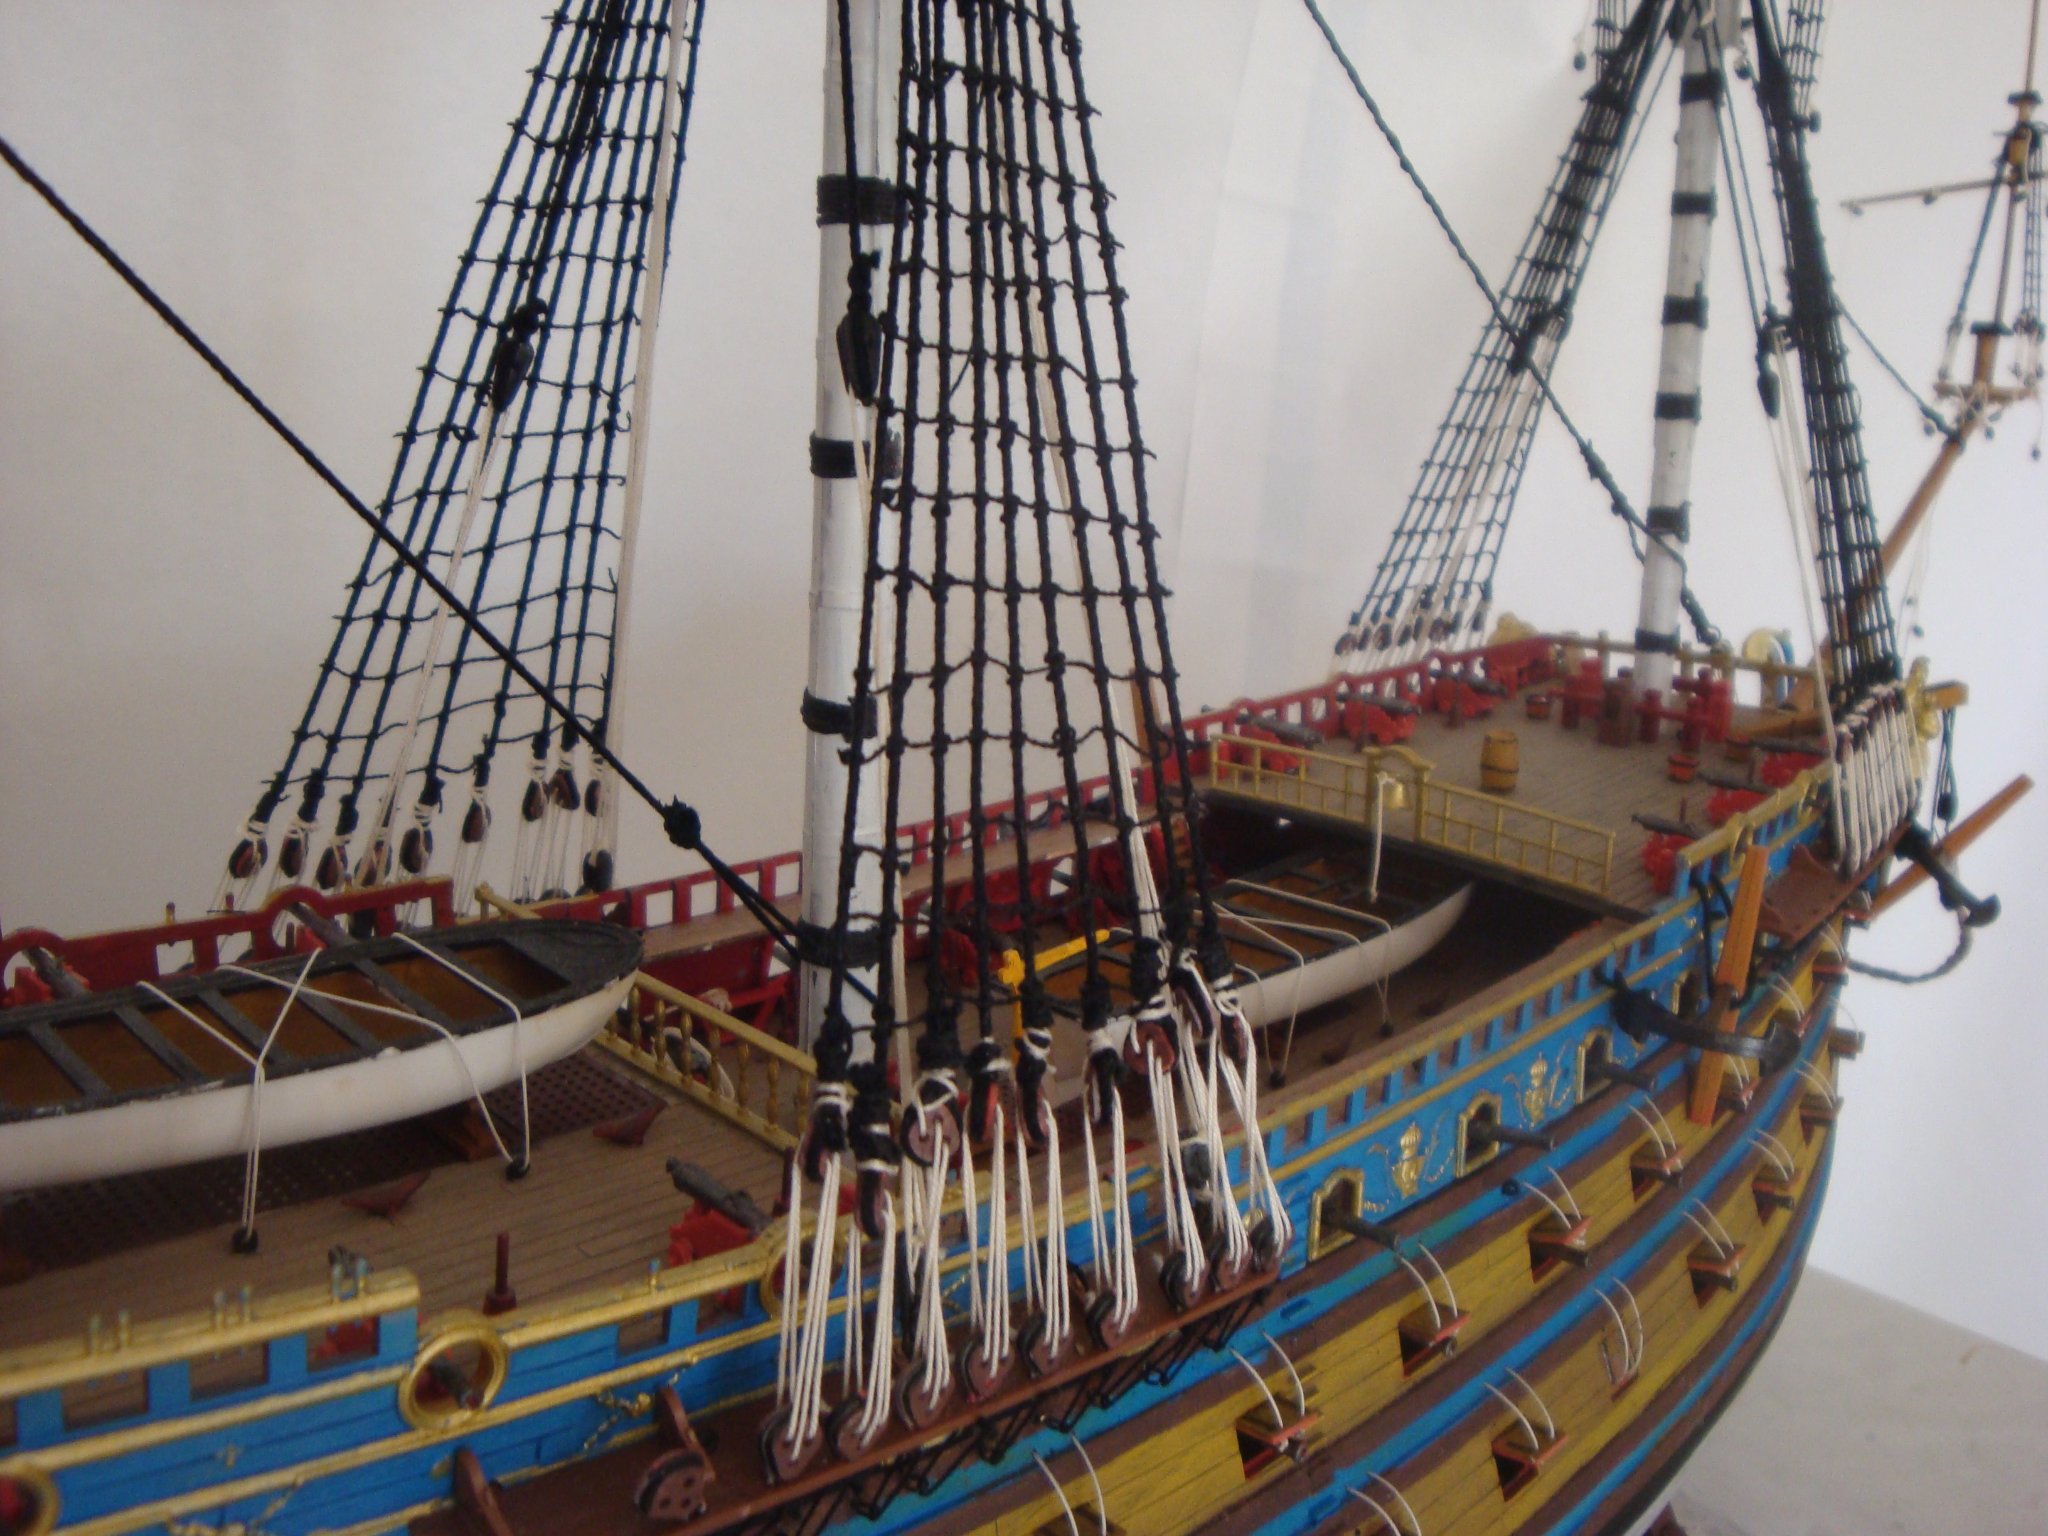
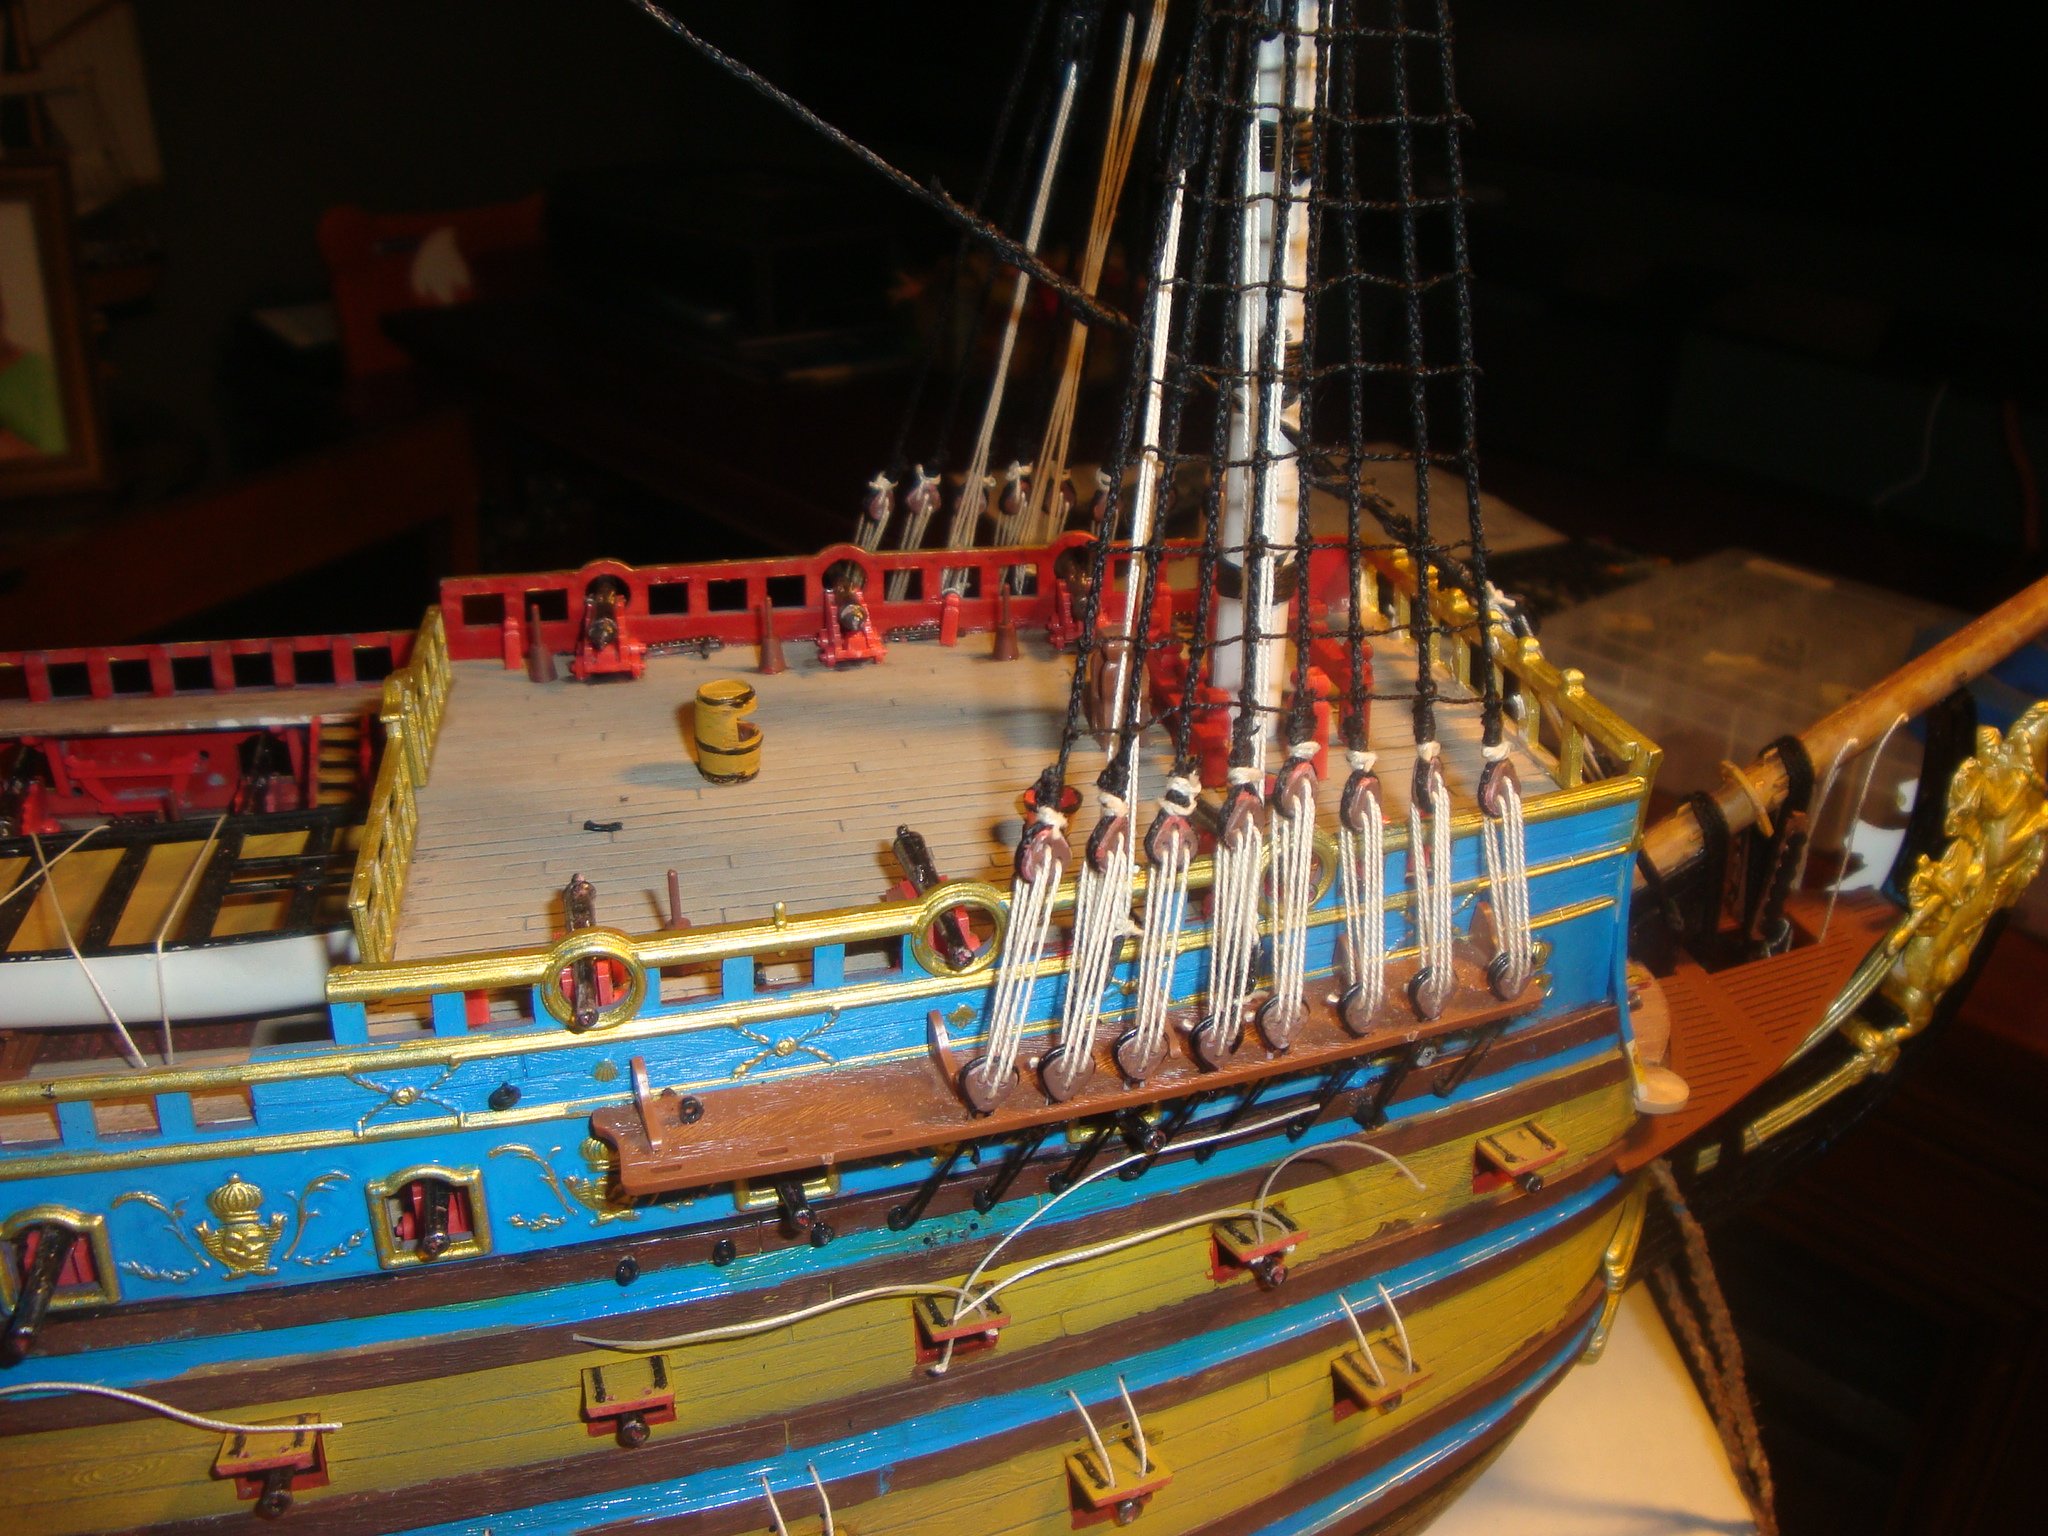
Here is an update. I have completed the lower shrouds for the lower parts of the 3 masts and added the rat lines, I also completed adding the ropes to the gun ports, installed the anchor and added all the parts that contain most of the bright gold color. In addition I added a small piece of plastic part to the area behind the figurehead, painted it black and added some hand painted gold figurines. My next step is adding the shrouds lines to the second mast level. Following are some photos to illustrate my progress, If I can say so myself, the ship is coming better that I expected.
Today, November 3rd, makes 4 months that I have been working on this ship.
Joe
- GrandpaPhil, Rach10199 and Baker
-
3
-
-
The building of this ship has been a slow process, I have run into several problems, including mistakes made due to the hard to follow French instructions, another modeler provided me with the Japanese version of the same instructions that, being a lot clearer, allowed me to continue with the build. Then, when I started to do the shrouds, I got very frustrated due to having to work with such small parts, to the point that I almost abandon the project, but, I rested for a couple of days plus did some research in the Internet, that allowed me to find the solutions to my problems.
Attached is a photo that shows the completed shrouds together with its rat lines of one of the masts, that came out fairly decent. you may also notice that I am adding ropes to the doors of the cannons windows. This is not part of the kit, is my attempt to start doing some customization.
It has been a slow progress, but I am learning a lot and preparing myself to do one of the very detailed fancy wood model.
Until next ime
Joe
Following is the latest photo:

- Baker, GrandpaPhil and Jeff T
-
3
-
Hello there! It has some time since I updated this blog, reason being that I reached a point were, due to the confusing French instructions and rigging schematics, I did not understand what I needed to do next. Luckily, a friend of my that is also into modeling ships, had a set of Japanese instructions for the same ship that are outstanding in how clear the rigging instruction are, together with the French instruction and the English translation I now able to make sense of what and how things are to be done.
As can be seen in the attached photo, I am getting ready to start the first phase of doing the shrouds, I hope I able to handle the very small deadeyes when it is considered that they do not have channels on them to lock the rope in place. So far I have been working on the ship for 2 months, I expect the I still be working on it 3 or 4 months from now. Will see
Joe

-
Thanks, I found it.
I went ahead and look at the rendition of the Royal by Hobac's Historian, He did a magnificent work on the ship, I am afraid that my ship is not going to be as good as his, but, due to my level of expertise, I do not believe that I can duplicate the works that he has done. Maybe, after I have done a few more models and in another 2 years or so, I may be able do something closer to Hobac's Historian work.
Joe
-
46 minutes ago, ccoyle said:
Looks pretty good so far. Is it your intention to add updates to this topic? If so, then I can move it to the build logs section for you.
Cheers!
Please do! but, also please tell me were is the build log section is located within the blog. Thanks
Joe


La Pinta by having-fun - Artesania Latina
in - Kit subjects built Up to and including 1500 AD
Posted
Well, I am back. After I completed the Black Pearl, I decided to build a supposedly "beguines wooden model so I could wet by hands in the building of a wood model. So I tried the Dapper Tom, he boat itself was not too difficult, but the instructions were vague and confusing.
Anyhow, it is now completed so I went ahead and decided to get another, I settle on la Pinta from Artesania Latina. I received the model ad the first thing I noticed is that it does not comes with printed instruction, they all are in a CD.This presented a problem for me since my computer resides in my office on the second floor while my workbench is in the first. I solved the dilemma by dumping all 57 pages in the color printer.
I started to put the ship together by building the keel, it went fairly easy, my next step is to make sure that he angle of the ribs are correct, then will glue the thing up. According to the instructions, the next step is adding the main deck. will see how it goes.
Following is a photo of the keel of the boat.
Joe