tenderfoot
-
Posts
38 -
Joined
-
Last visited
About tenderfoot

-
 Kurt Bainum reacted to a post in a topic:
HMS Winchelsea 1764 by tenderfoot
Kurt Bainum reacted to a post in a topic:
HMS Winchelsea 1764 by tenderfoot
-
JpR62 reacted to a post in a topic:
HMS Winchelsea 1764 by tenderfoot
-
scrubbyj427 reacted to a post in a topic:
HMS Winchelsea 1764 by tenderfoot
-
Edwardkenway reacted to a post in a topic:
HMS Winchelsea 1764 by tenderfoot
-
Gregory reacted to a post in a topic:
HMS Winchelsea 1764 by tenderfoot
-
Rustyj reacted to a post in a topic:
HMS Winchelsea 1764 by tenderfoot
-
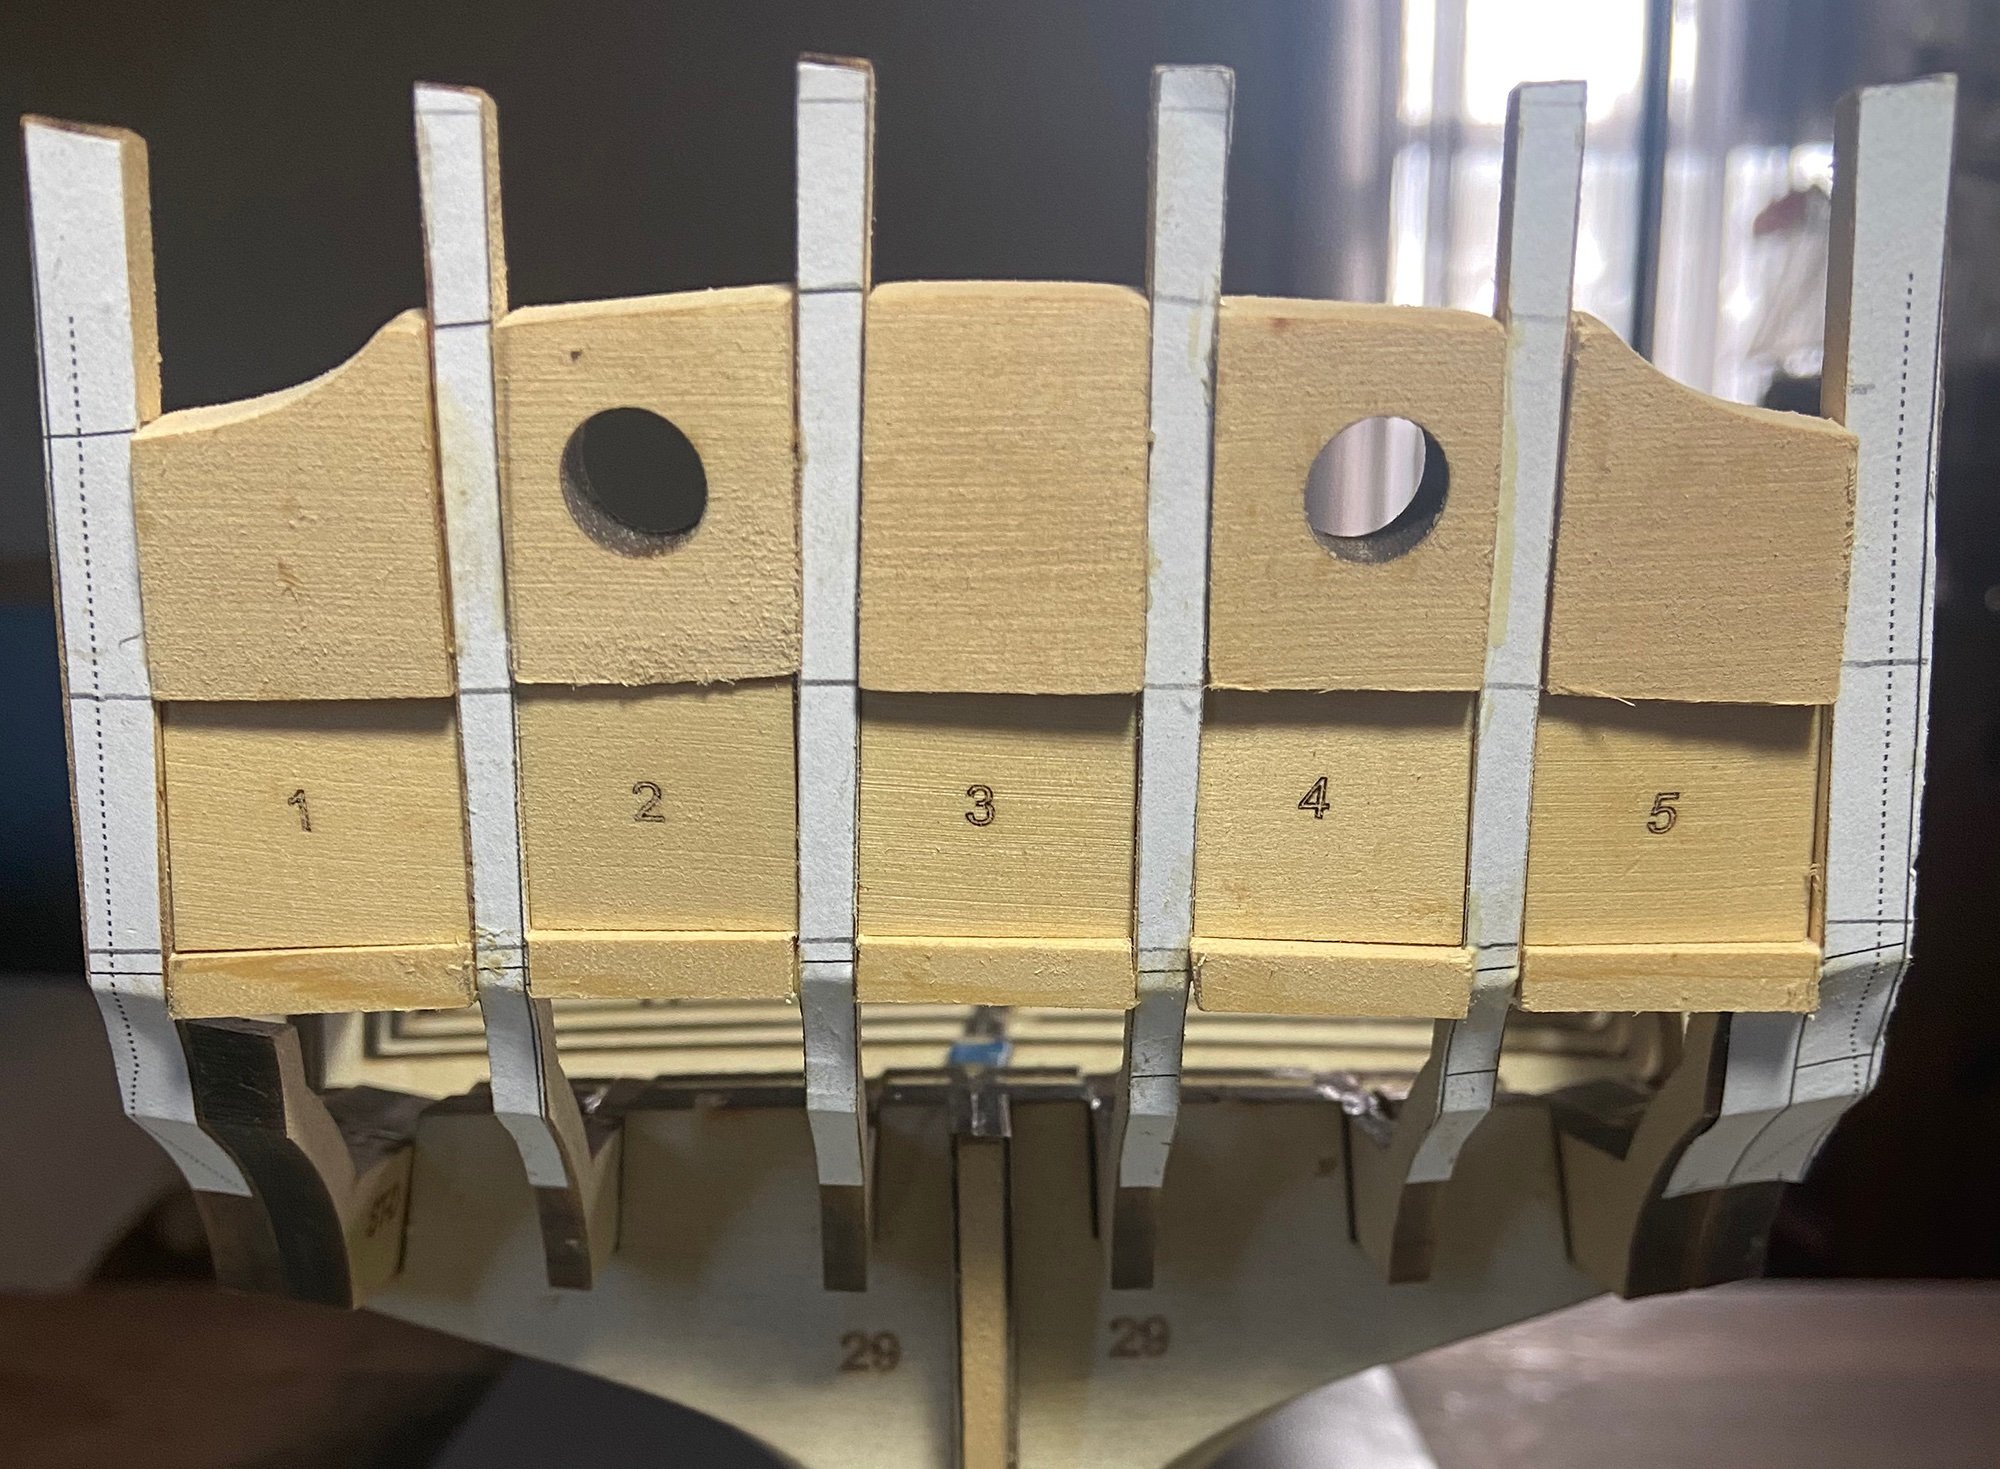
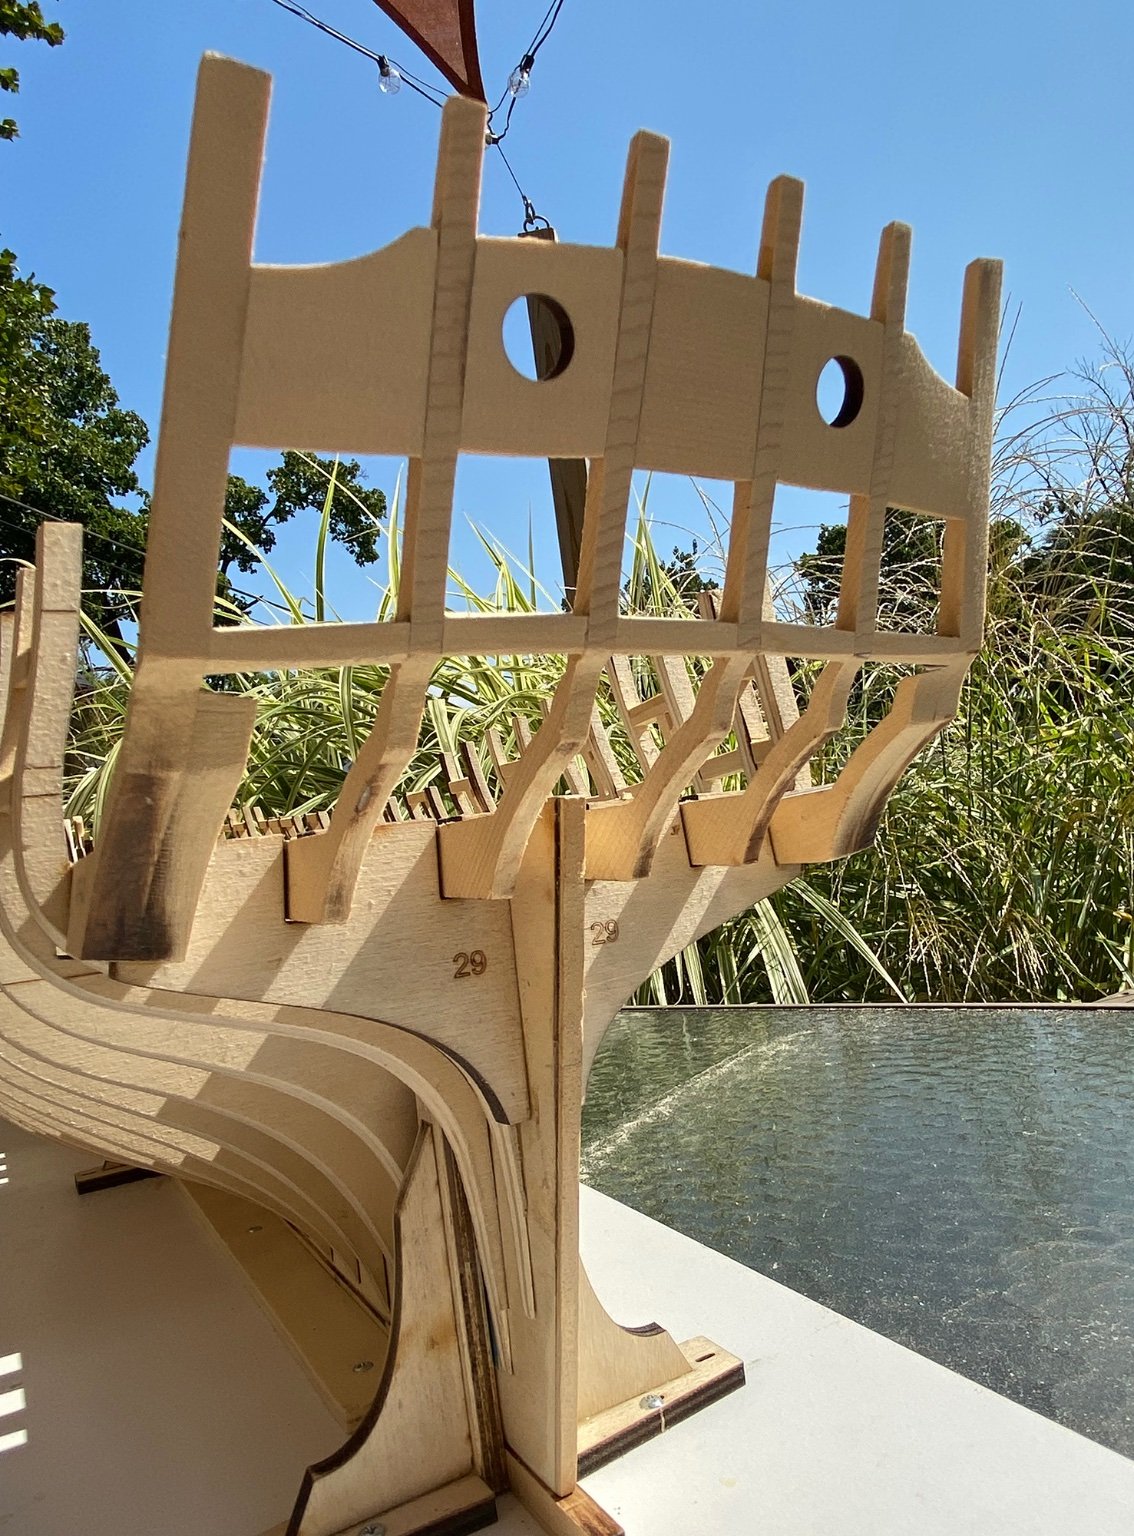
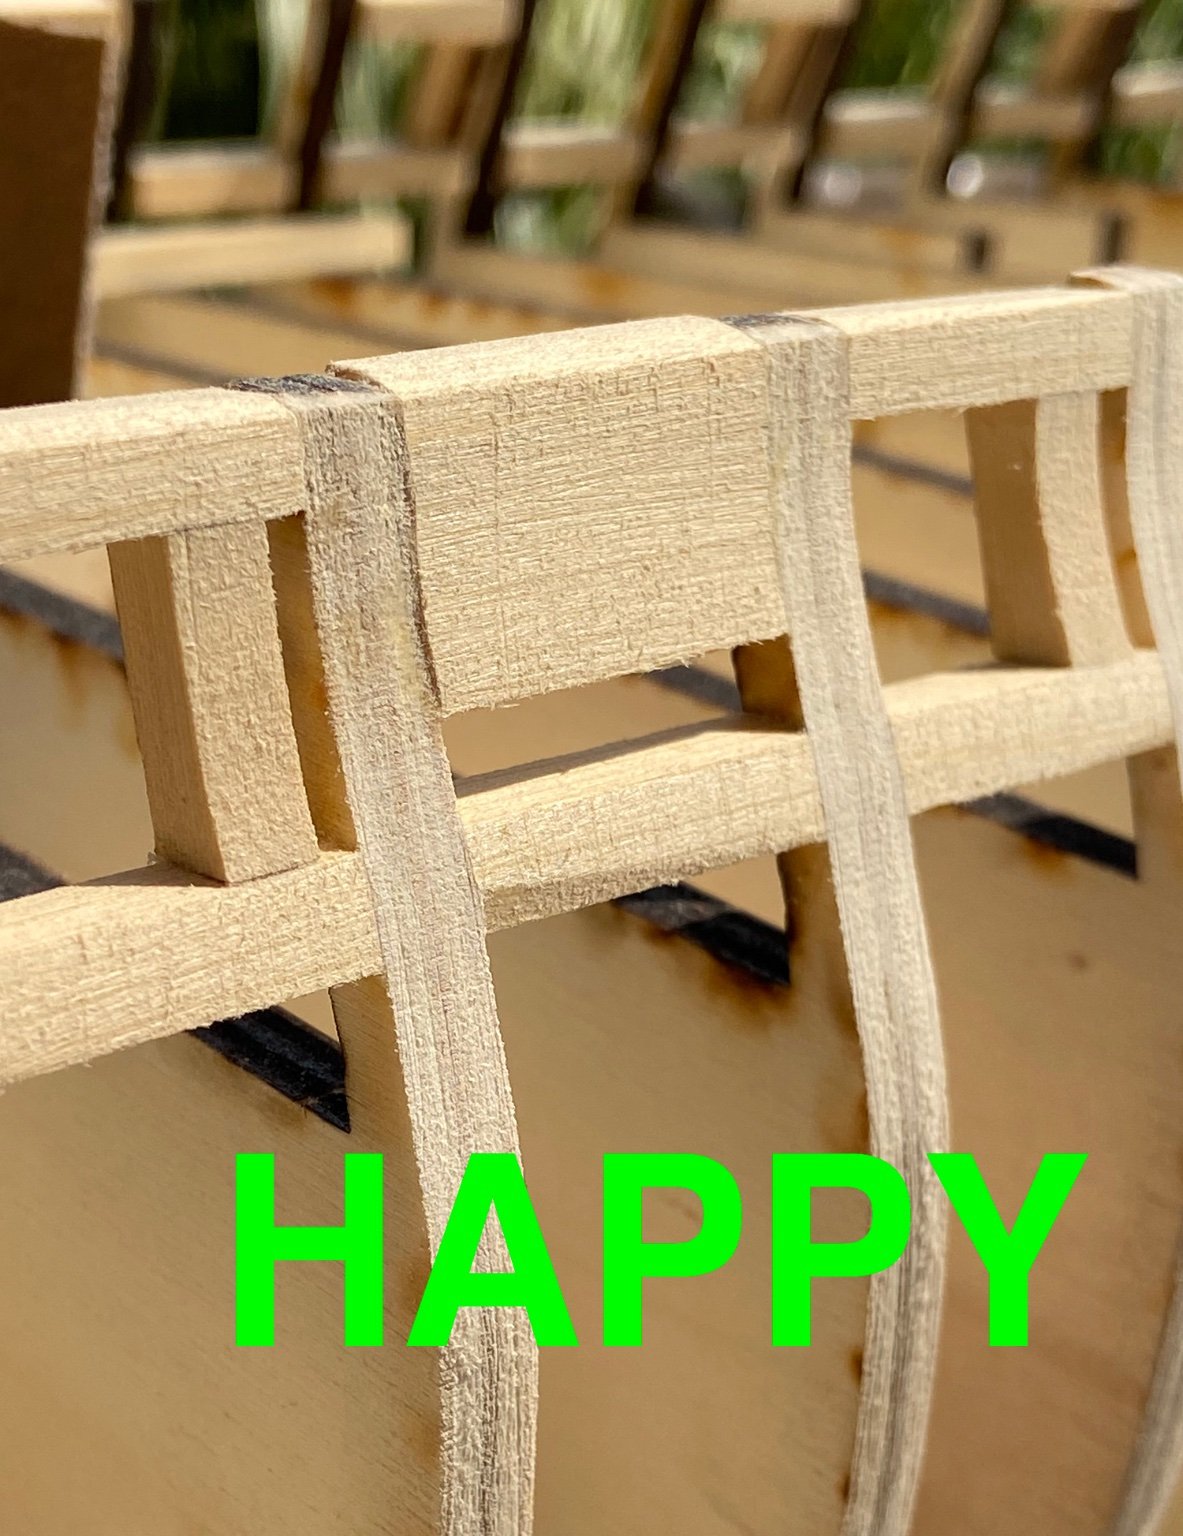
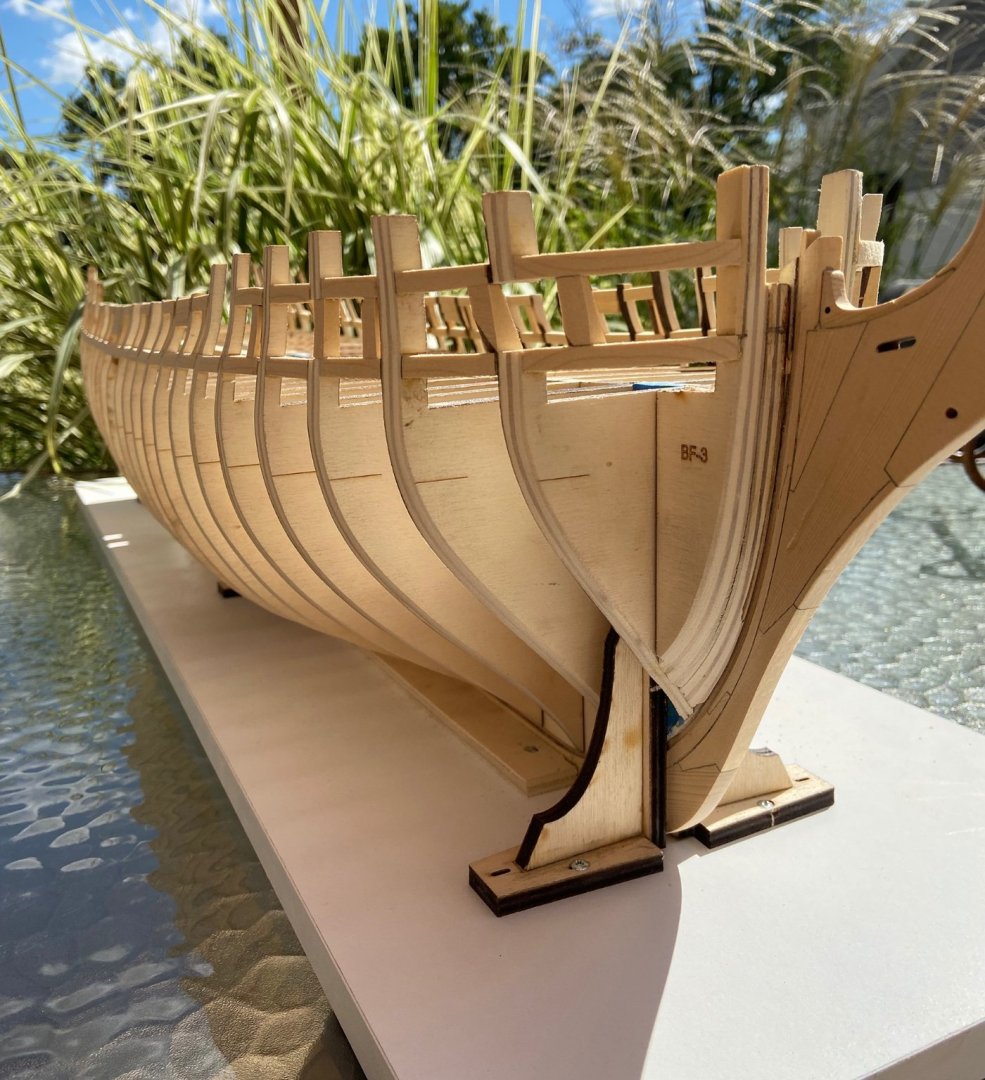
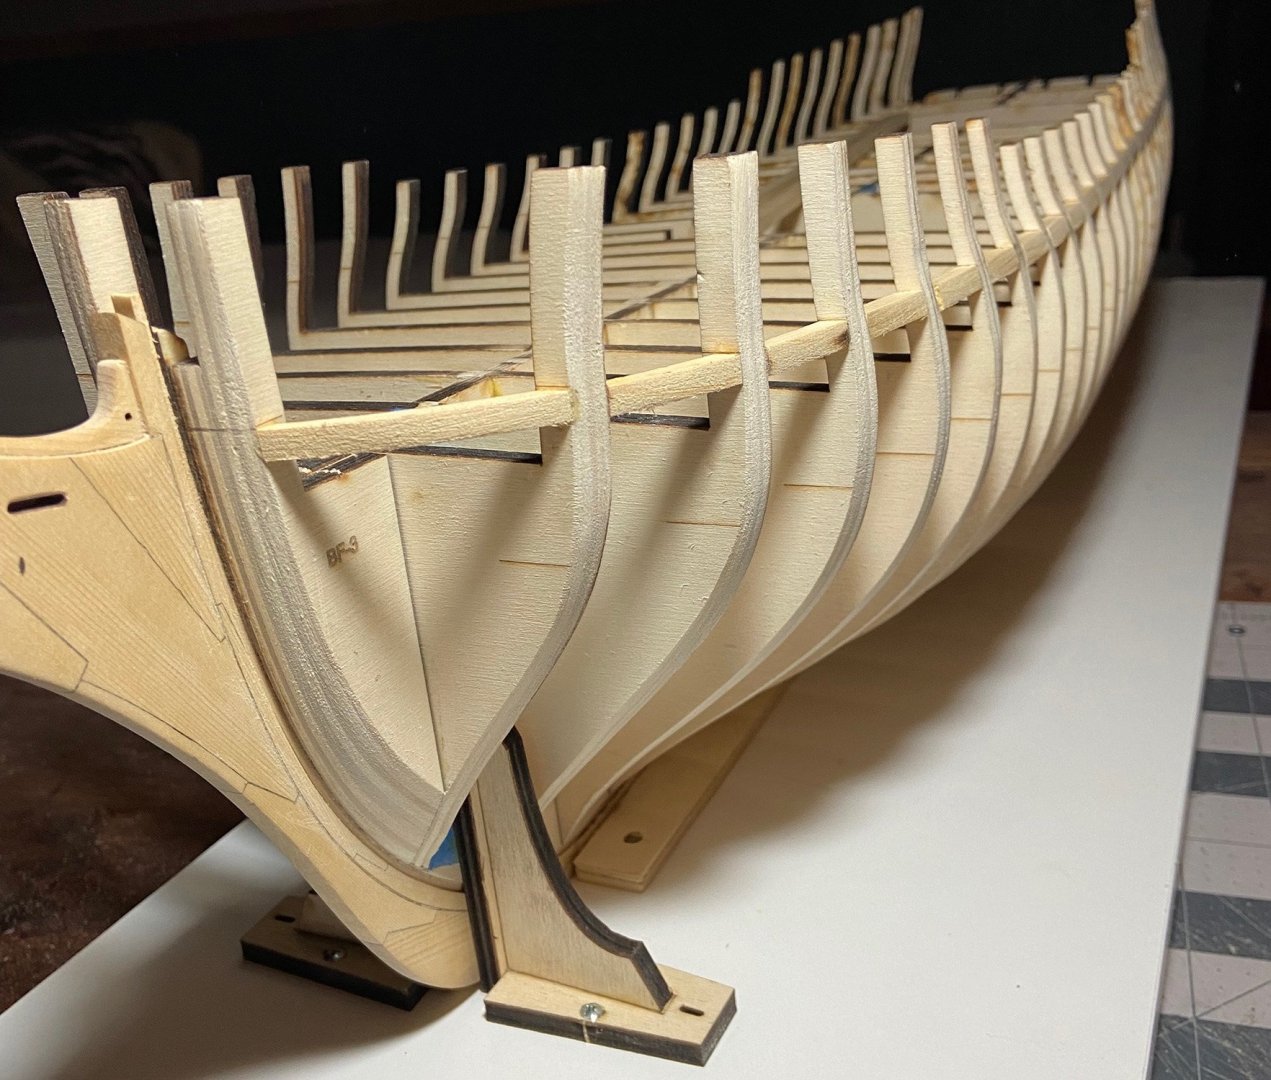
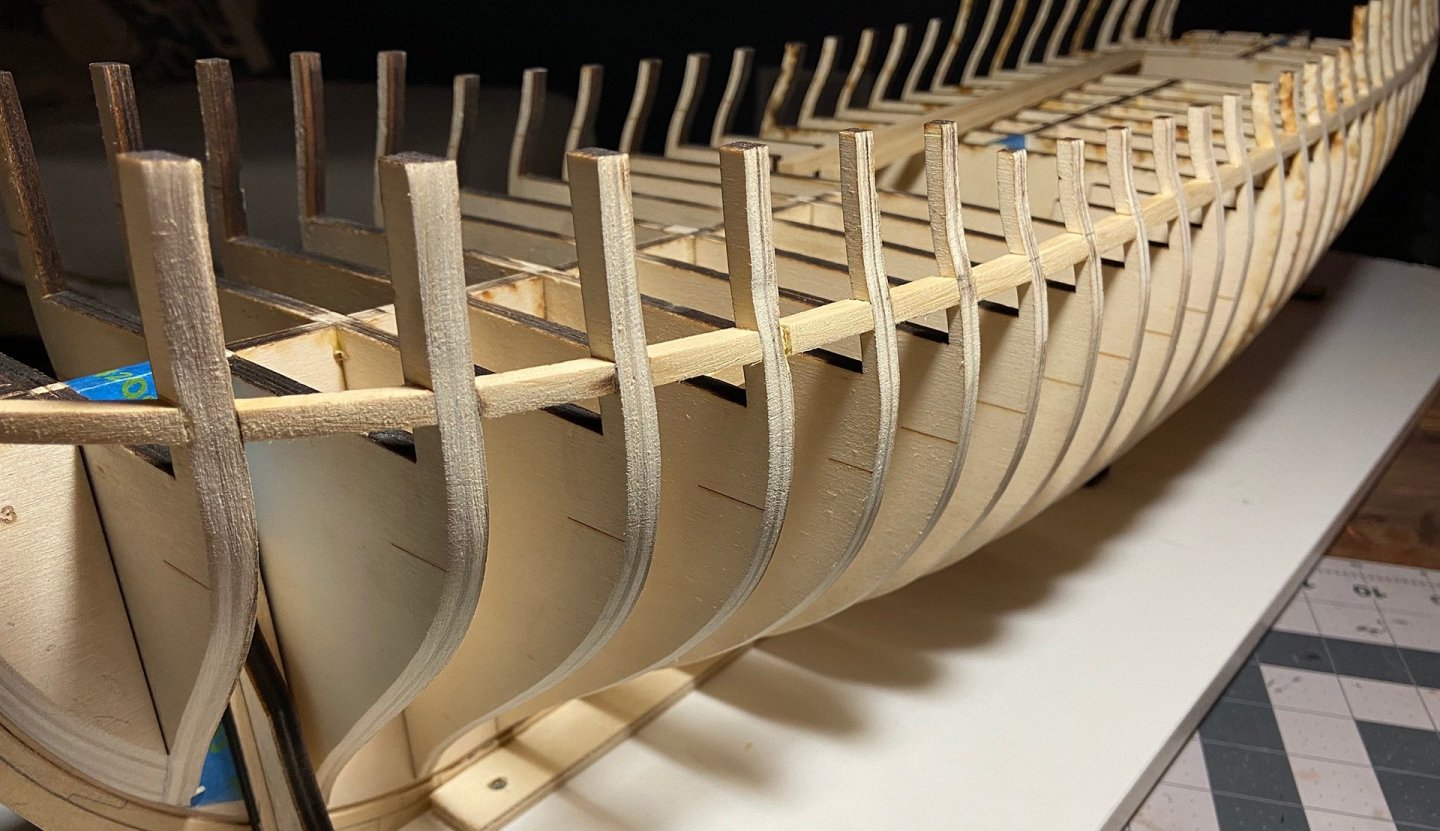
 For me, this was a difficult part of the framing to get done properly. However, with the help of everyone here and a whole lot of patience I think I have it it a pretty good state. The most difficult part was getting the frames to line up properly. As soon as I would have a couple where I want them, a very slight movement of my hand whilst getting the next frame in place and I would find myself starting over again. Eventually I ended up tacking the frames in place similar to what framing carpenters do with new house framing. Once I had the six frames where I needed them, and the spacers held in place without any glue, I applied some glue and let it dry thoroughly. The lower sills weren't much of a chore and went in place fairly easily. The parts above the window openings were a bit more difficult. However, another exercise in patience and a whole lot of sand, test-fit, sand, test-fit and they eventually fit into place quite nicely. I also used the piece supplied by Chuck to ensure that the openings in these top pieces lined up as perfectly as I could get them. Finally, more sanding! Good thing I really enjoy sanding because there is a lot of it on this build. And thankfully, since fairing the hull and through this bit the weather has been incredibly nice so I am able to sand outside. Makes the wife much happier which makes me a whole lot happier. I have to admit that I am still a bit intimidated by this build. I need to get this feeling out of my head and just go with the flow sometimes. Next up is the framing on the sides at the stern...I will practice my not-intimated approach on those.
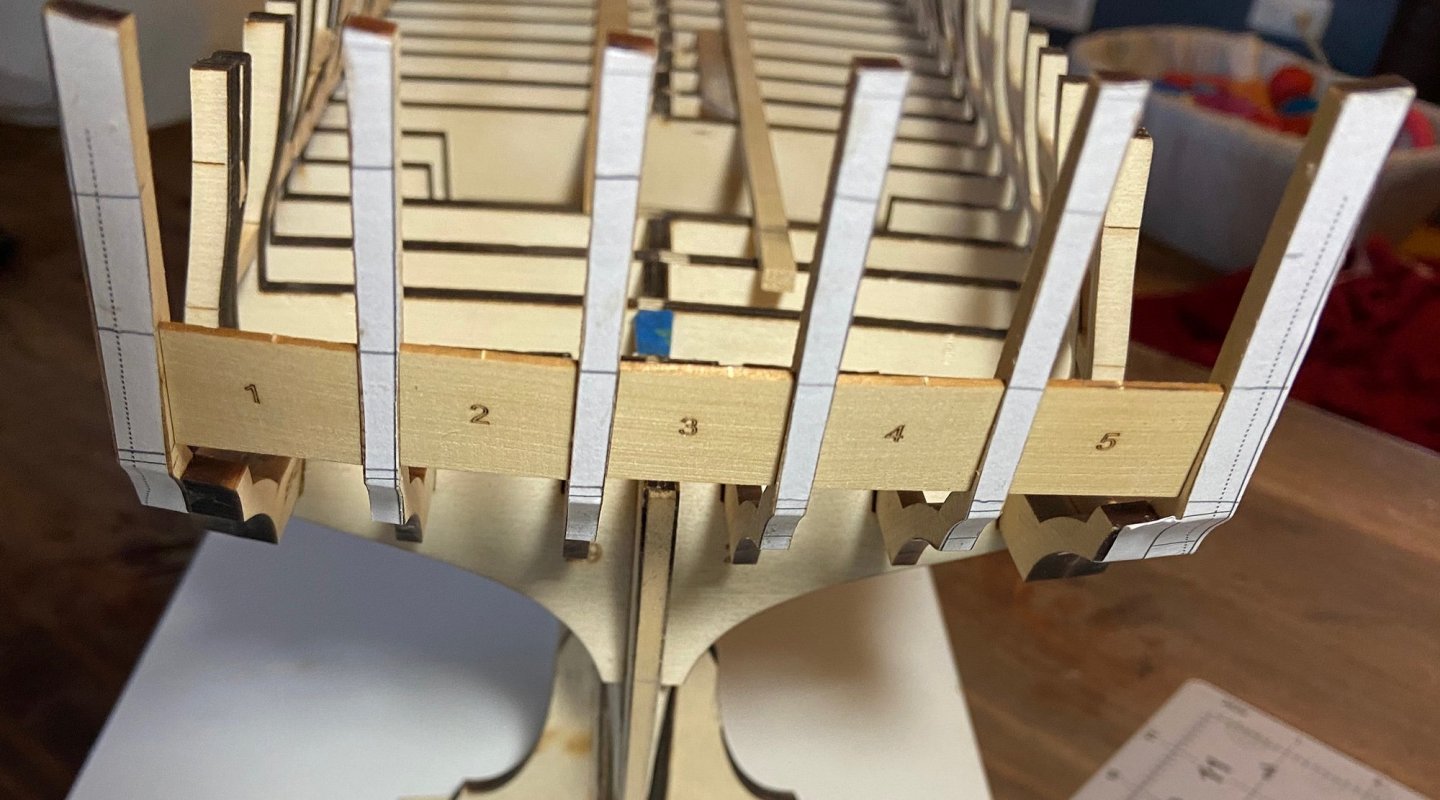

-
scrubbyj427 reacted to a post in a topic:
HMS Winchelsea 1764 by tenderfoot
-
Matt D reacted to a post in a topic:
HMS Winchelsea 1764 by tenderfoot
-
Gregory reacted to a post in a topic:
HMS Winchelsea 1764 by tenderfoot
-
Yes, very helpful. Thank you! And thanks to everyone on this forum! What an excellent group of people to be associated with.
-
This is exactly what I was looking for! Thank you so much.
-
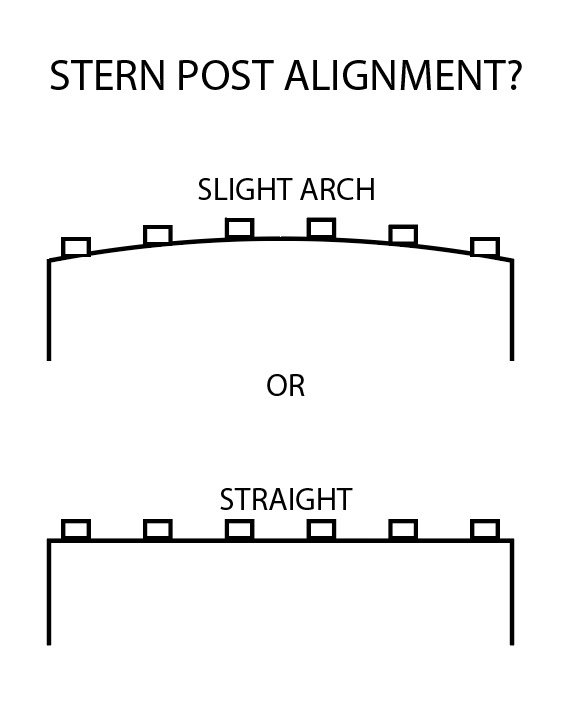
Thanks Gregory. I followed your advice and once again reviewed Chuck's build; however, I am still coming up blank. Read through it a few times and check the photos carefully and I am not finding the answer. In fact, when viewing the photos, the perspective makes it look like the stern frames are in a perfectly straight line from port to starboard, and from other perspectives it looks like there is a slight curve from port to starboard. I really do want to get this right and at the same time I am very aware that I tend to over think things. But Chuck does mention how absolutely critical it is to get these stern frames as near perfect as possible to prevent serious problems later on. Possibly, I am not explaining my question just right or also possible the answer is right in front of me and I am not seeing it. To help me better explain what I am asking I figured a quick drawing would help. The drawing below is a bird's eye view of the stern and shows the 6 stern frames. From this perspective, would the frames have a slight curve in their placement? Or are they perfectly straight across? And if they do have a slight curve in their placement am I correct in assuming that curve is the same as the stern-most area of the decking as illustrated in the drawing provided with the build?
-
Edwardkenway reacted to a post in a topic:
HMS Winchelsea 1764 by tenderfoot
-
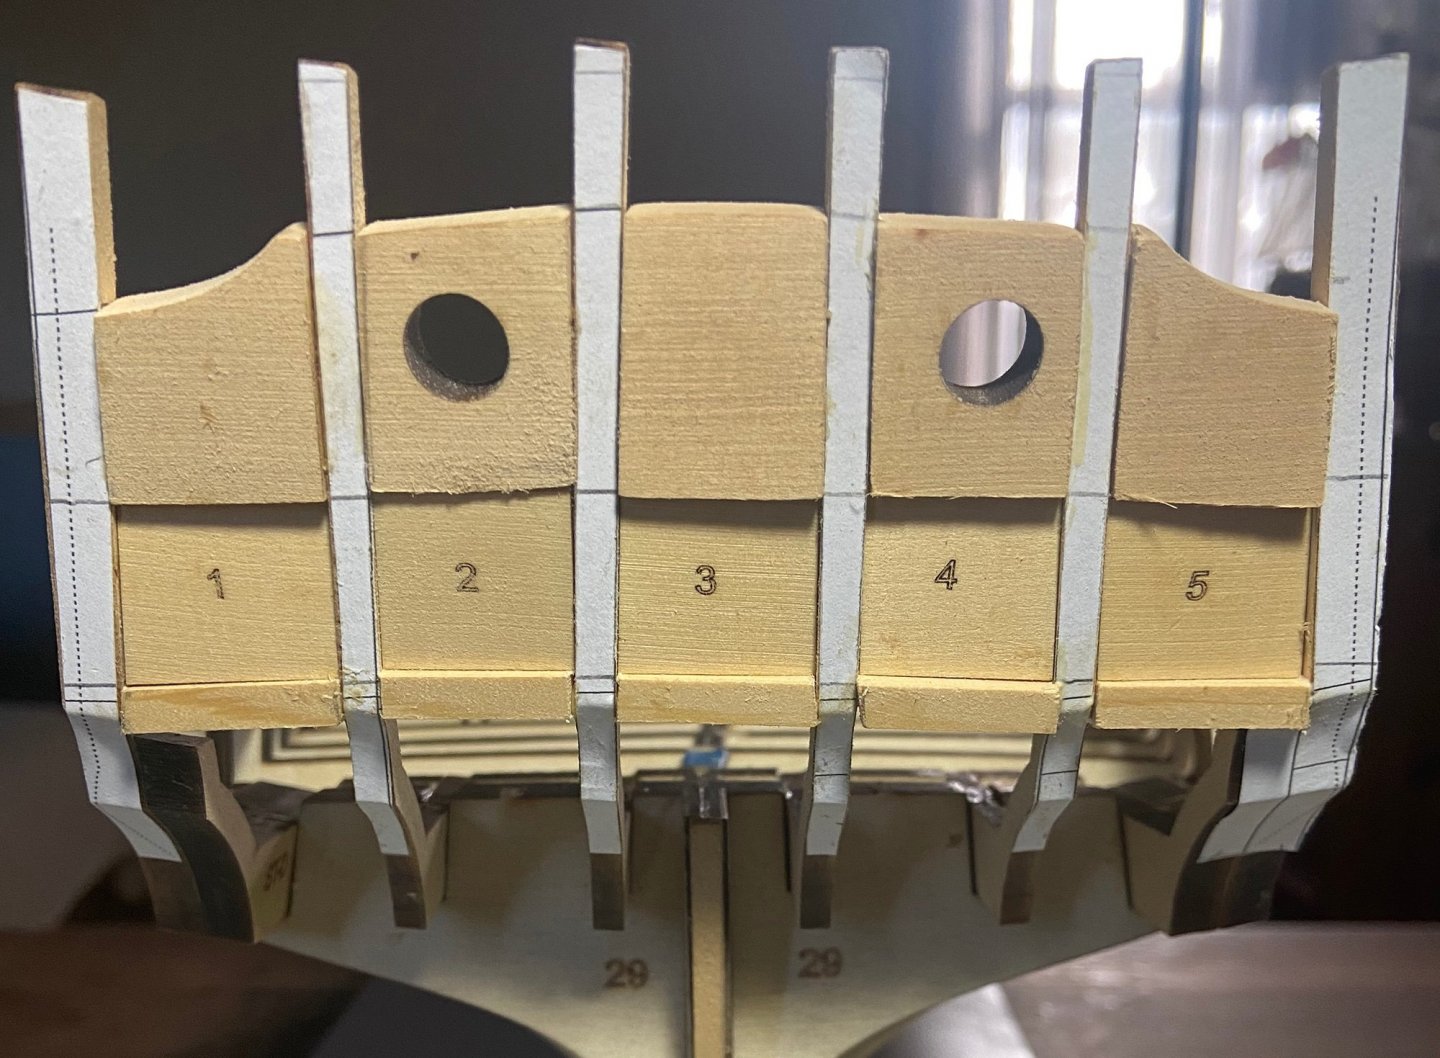
Started working on the stern frames and I am struggling a bit. After checking the drawings I am still uncertain of the final shape. On the plans I find a straight on view of the stern from the stern which is easy enough to understand the X, Y alignment of the frames. However, I have not found a top view that shows how the frames align in the Z dimension. I do see drawings of the deck that show a slight bow at the stern, but I am not certain that this bow is reflected in the very stern of the stern frames or if the bow is only at the deck level and by the time you get to the outboard side of the stern frames they are all on the same plane. If it is slightly bowed as I suspect it is, is the bow the same as the end of the decking in the drawings? Also, any additional suggestions/techniques on how to get these frames as right as possible? Really want to get this part right on the first go.
-
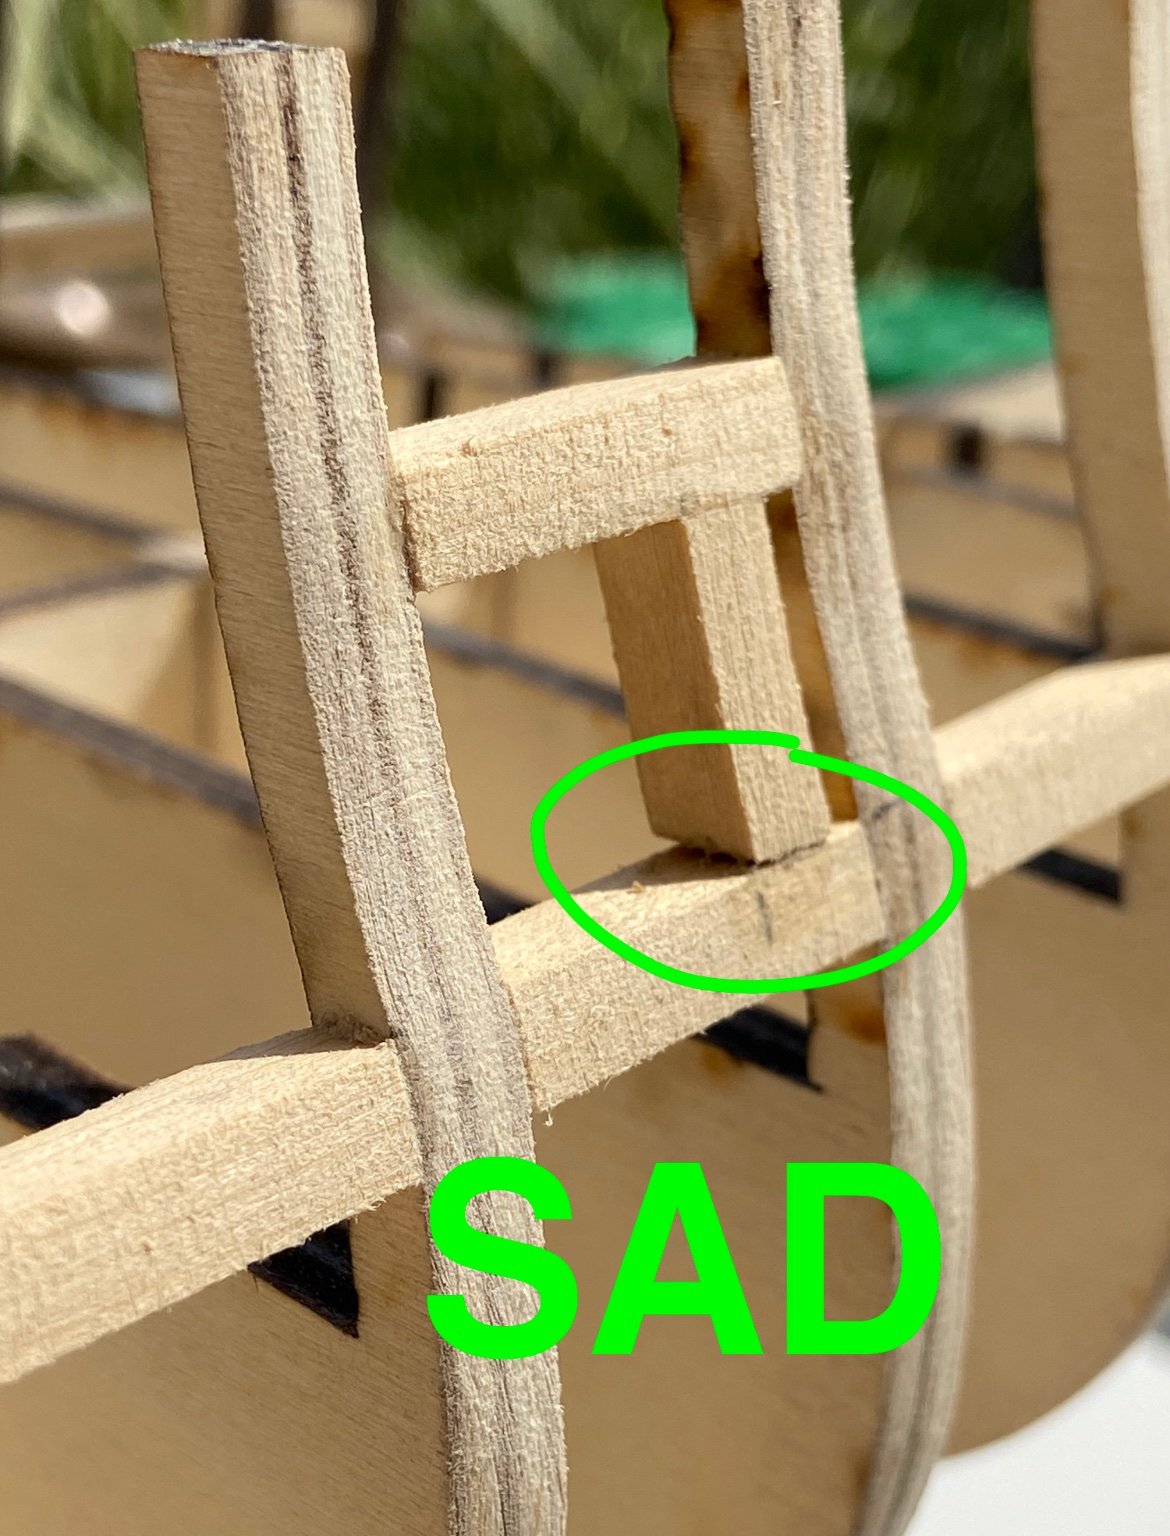
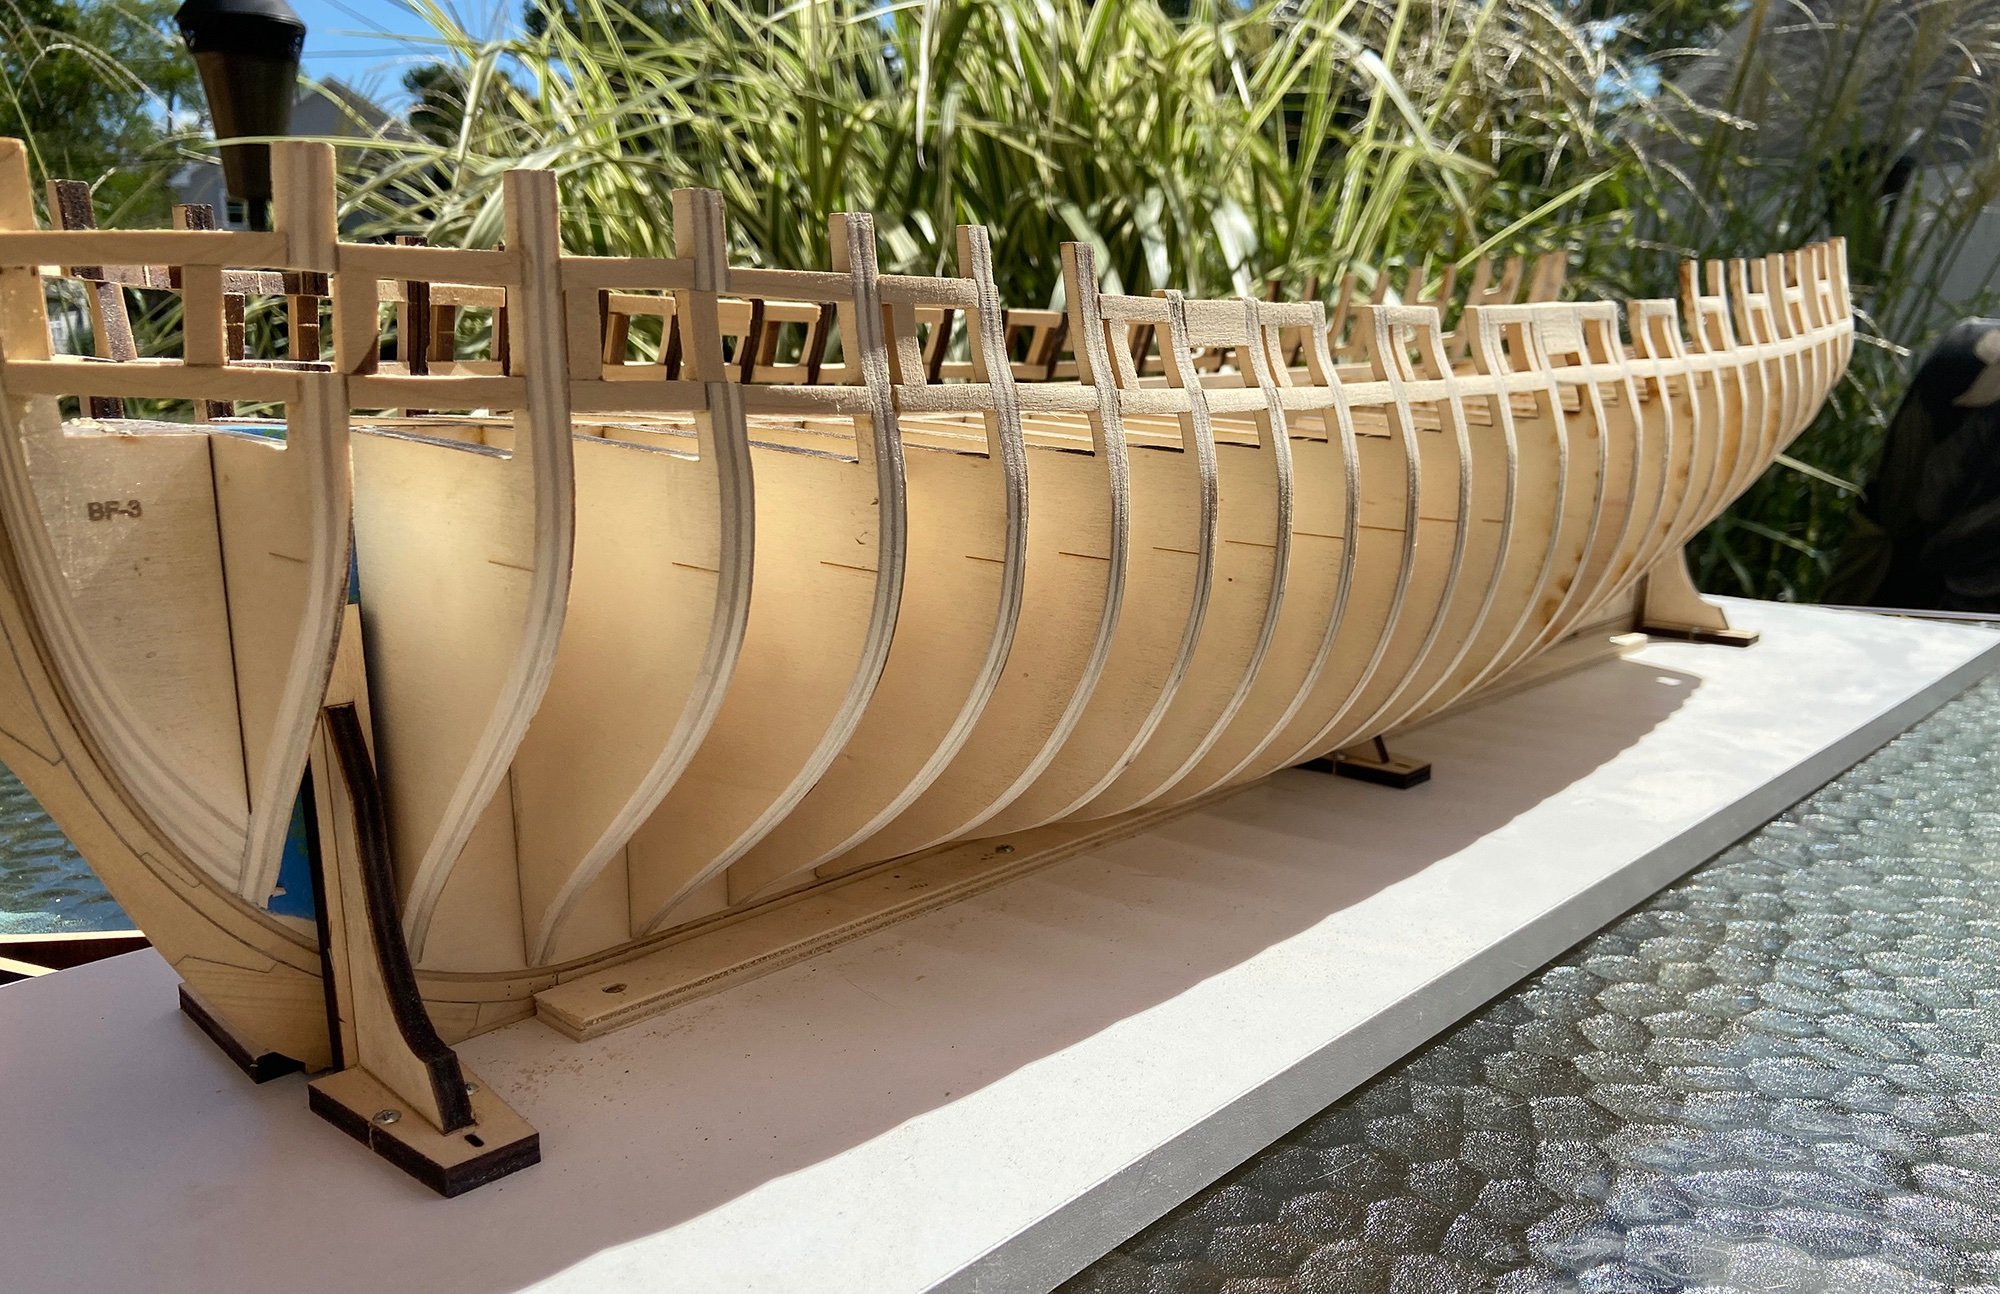
While fairing the port sills I did notice that there was one vertical board that was completely botched. It's not like this was the first one I did so I was simply needing some practice. It's not like this was the last one I did so I was simply getting tired. No! This was done roughly half-way through the process so I simply botched it. How I didn't notice this throws me. As I travel the sides of the ship I am happy over and over again with how well the port framing turned out. Then I hit the one sad one. Thankfully, it was a really easy thing to replace and improve the fit.


-
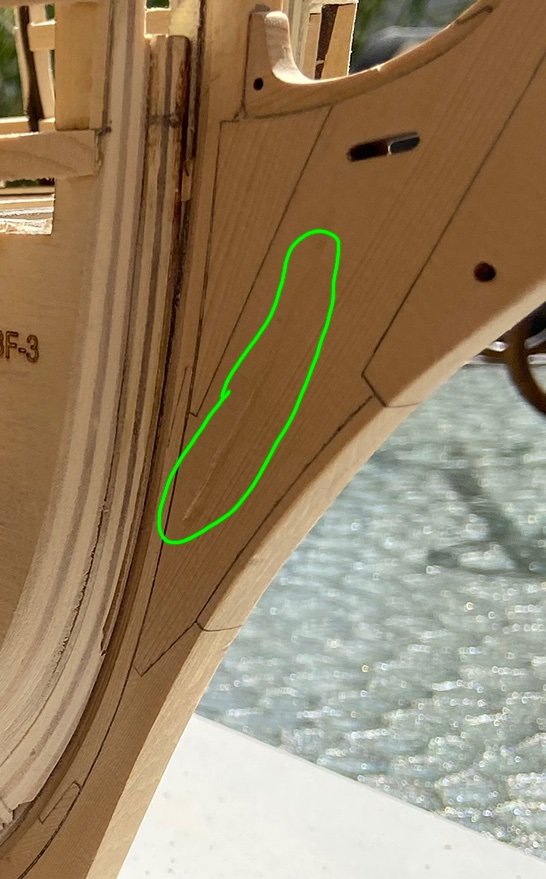
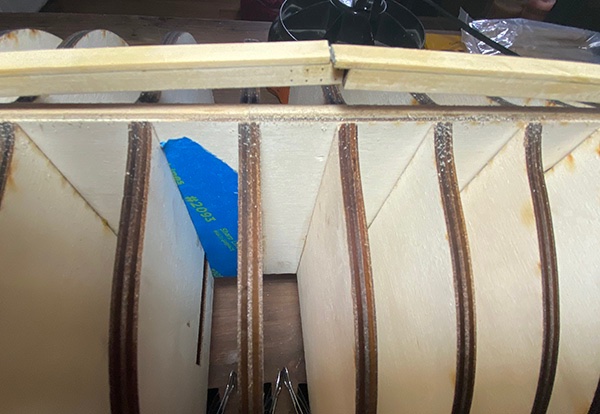
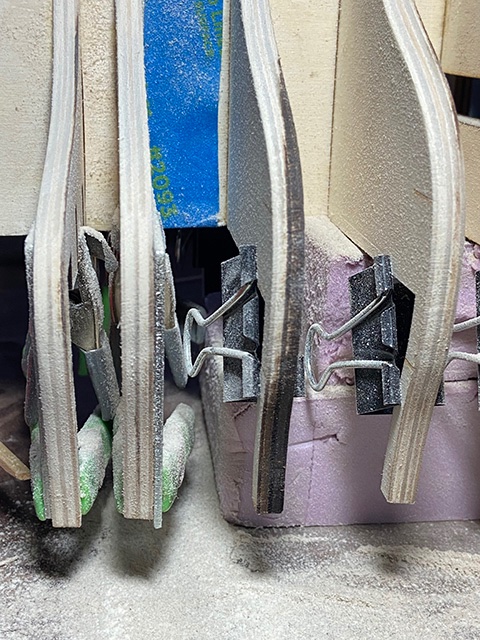
Installed the rest of the sills and faired them down. Really happy with how this is looking. I keep eyeballing things from all different directions to see how the curves flow and how things align and so far, so good. However, I did notice this... Not sure when it happened, or how. But it is heartbreaking and I am not sure what to do about it short of taking the stem apart and creating a new piece. Open to any suggestions.


-
Thank you everyone for the helpful input. Based on this I have decided to forgo the provided planking and get some new, quality stuff from Modelers Sawmill. Visited the site yesterday and the pricing for milled planks is excellent, so made the decision to go that route much easier. thanks again everyone!
-
So true! It is absolutely awful to work with. Now that I have completed several strakes I find that I do not like how it looks either. I think I am going to go with the advice of Jaager and pull it off and start anew with a better wood.
-
That it is, indeed. I have considered doing as you suggest and pulling off what I have already installed. I think it may be my best option although I do dread the thought. That's many hours of work down the drain. However, the more I think of it the more the idea appeals to me. I am not very happy with how this planking looks and going with a different wood will definitely improve the look of the model.
-
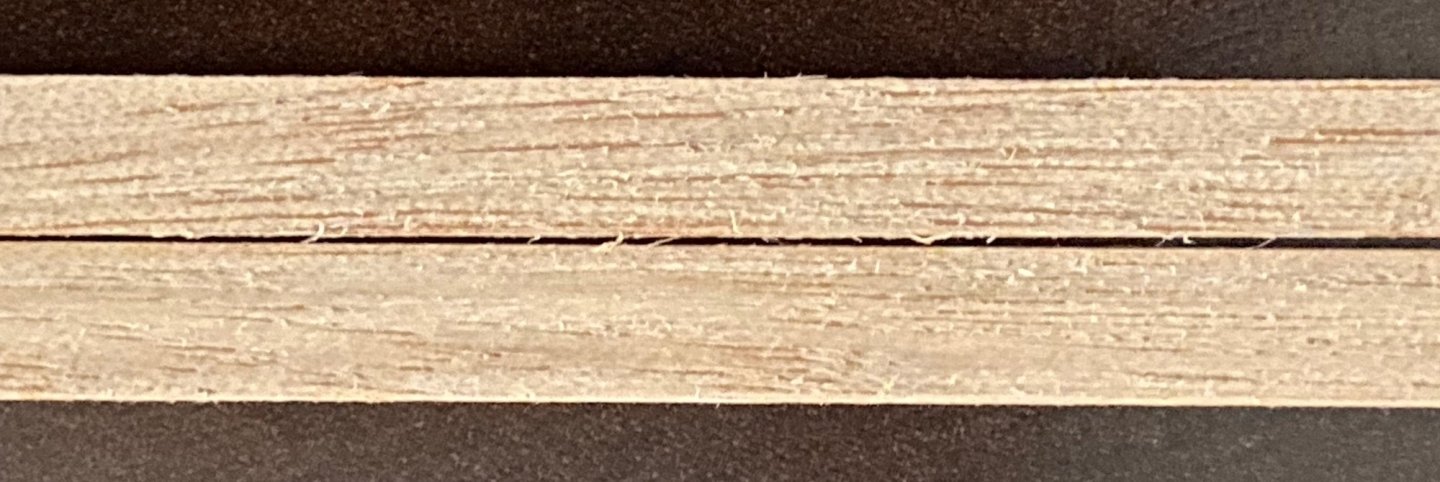
I am working on the HMS Bounty from DeAgostini and have found that I am short in supply on the planking. I am trying to figure out what kind of wood is used for this build so I can mill my own planks and finish the kit. The closest thing I have found to this wood is Light Red Meranti, but I am not very convinced that I am correct. The wood has light grain to it, sometimes it is speckled in places, it is difficult to bend, and difficult to get a clean edge even with a fine grit paper. When a clear poly is applied the very slight redness to it starts to come through. The pic below is the best I was able to do with my cheap phone camera. I will try to get a better one, but in the meantime was wondering if anyone has any ideas on what wood this may be?
-
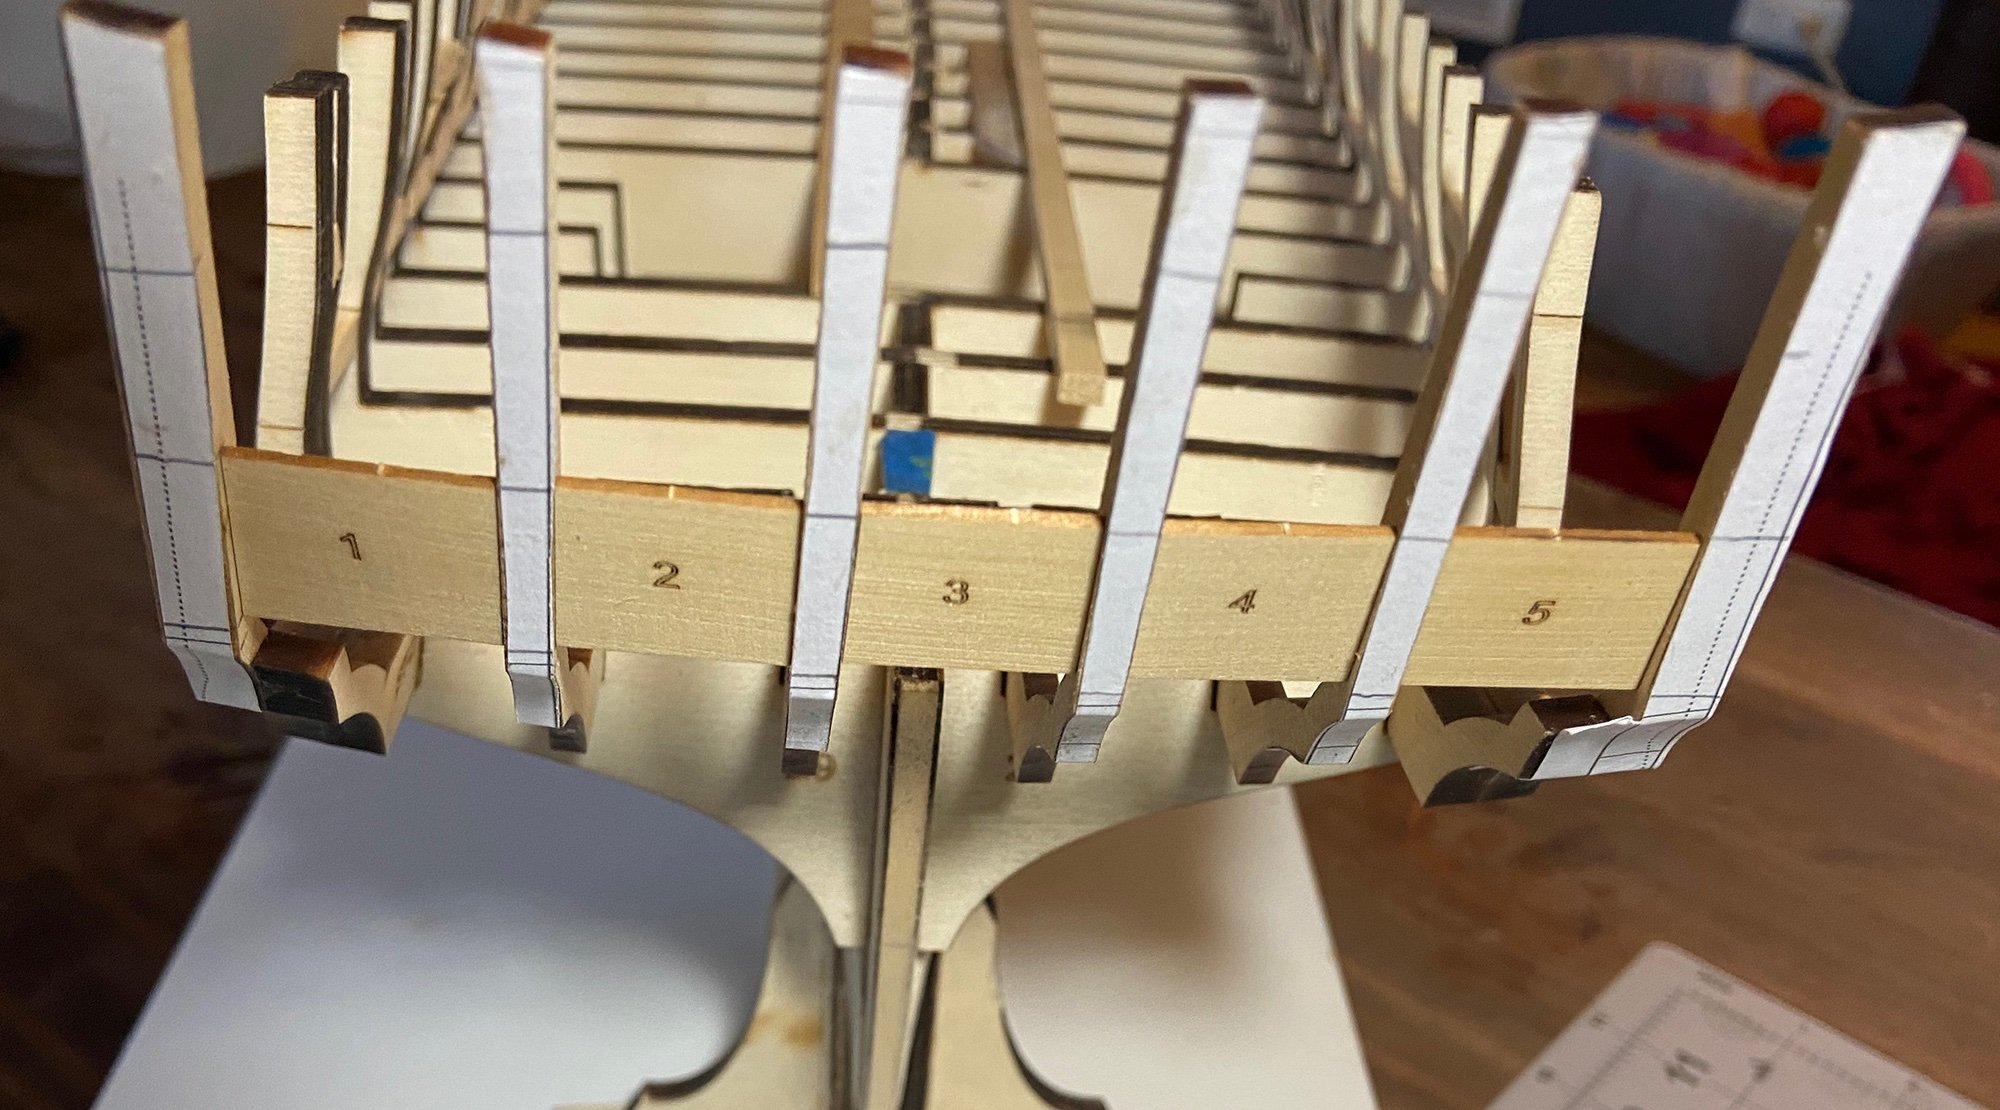
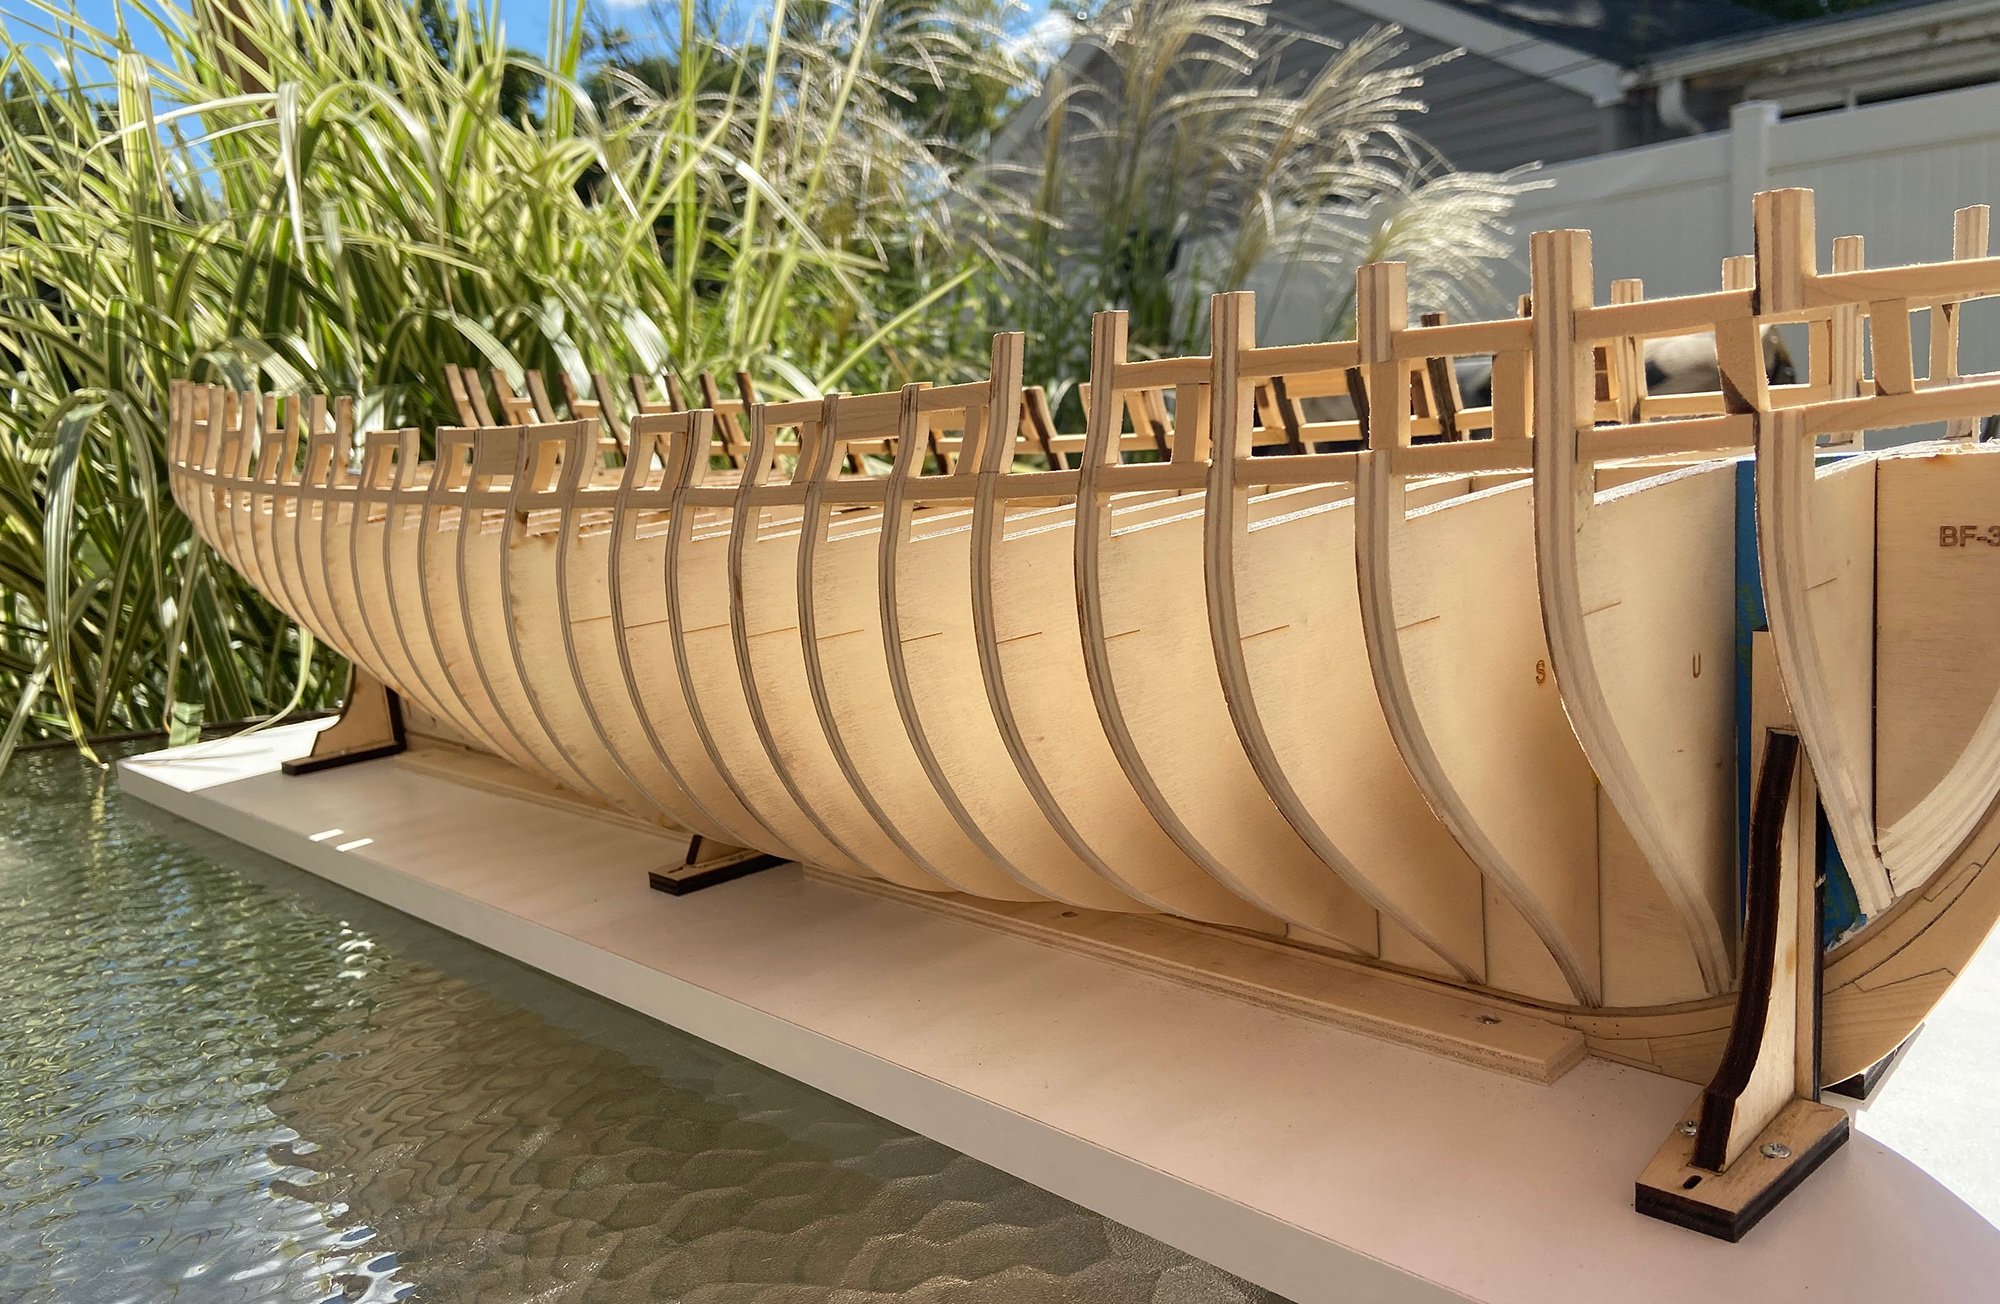
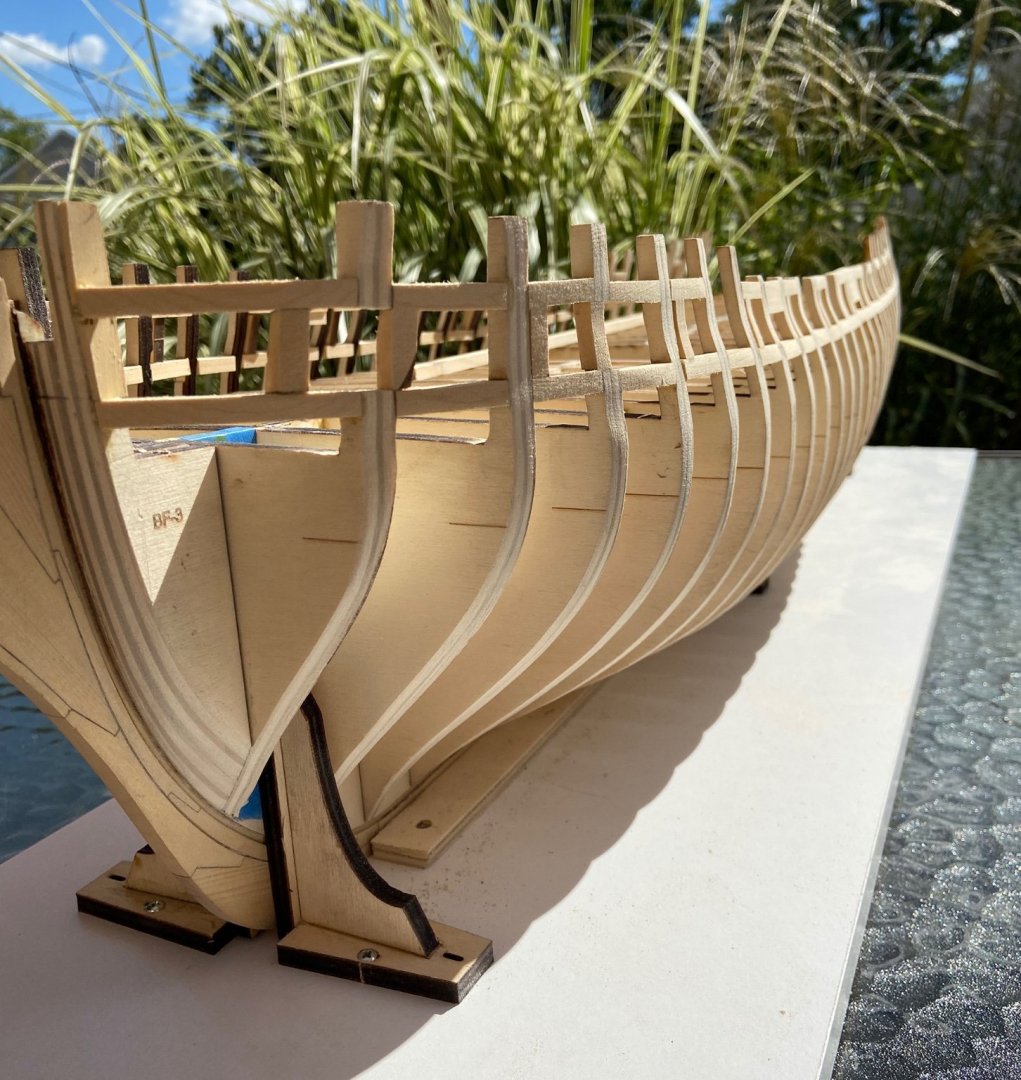
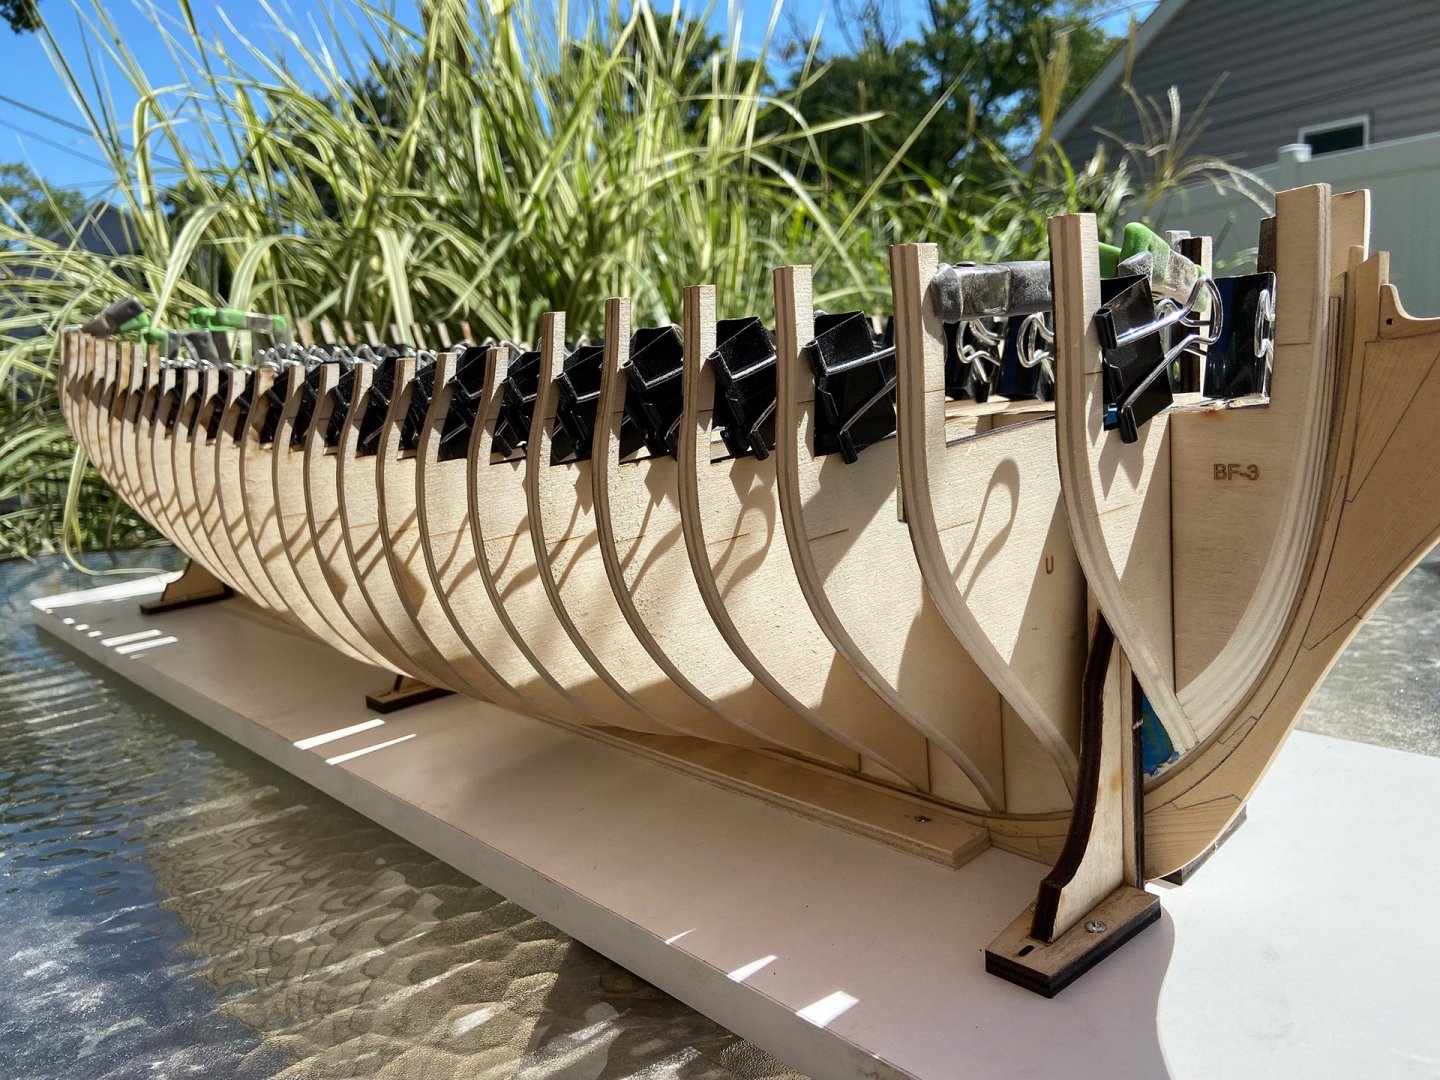
Well, what I originally thought would be about a two week break from working on this build turned into two months instead. Now that I have caught up on other things I was finally able to get back to this the past couple weeks and finally finished fairing the hull. While working on the hull I constantly checked to ensure a plank would lay along the bulkheads very nicely. I did this over and over and over. I did it from all directions. I have only built a couple ships to date and this is by far the longest and most detail minded I have ever been on this part of the build. My past efforts, although they turned out okay, definitely highlighted how critical it is to get the fairing as precise as possible. I am not yet certain that I have it exactly as it should be, but I can say with confidence that I did my best with my current skill set. Midship wasn't too difficult. In fact, the stern on this build was not that bad either. It is the bow that concerned me. I was worried I would not get the proper curve in the bow and end up with strange bends and dips in the planking. Or, that I would overwork the bow and end up with more of a point at the front instead of a nice curve. To help with this, I used the laser cut window sill pieces - the ones that were designed for the first space between the stem pieces and the first bulkhead. I would hold the piece in place to check that the curve was coming along properly and would also try laying a plank along the curve. Between the two I thing I may have finally faired the bow area on a ship properly. Guess I will find out soon enough. I also had the time to begin installing the sills. I followed the provided advice and used some spare wood I had from another build to lay along the hull. I temporarily tacked these in place with a few copper nails and adjusted as needed until I had a really nice curve from bow to stern. While the temporary battens were in place I check that the tops of them were level between the port and starboard side at each bulkhead. This, along with simply checking with my eyes, helped to ensure both sides were nearly a mirror of each other. Finally, I did a check at the bow to ensure the battens lined up nearly perfectly and then did the same at the stern. And then I marked each bulkhead with a pencil. Installing the sills is going about as smooth as I could hope for, so all that extra effort to get the lines marked was well worth it. Learning a lot on this build already! The port side lower sills are nearly complete and I will tackle the starboard side over the next couple days.
-
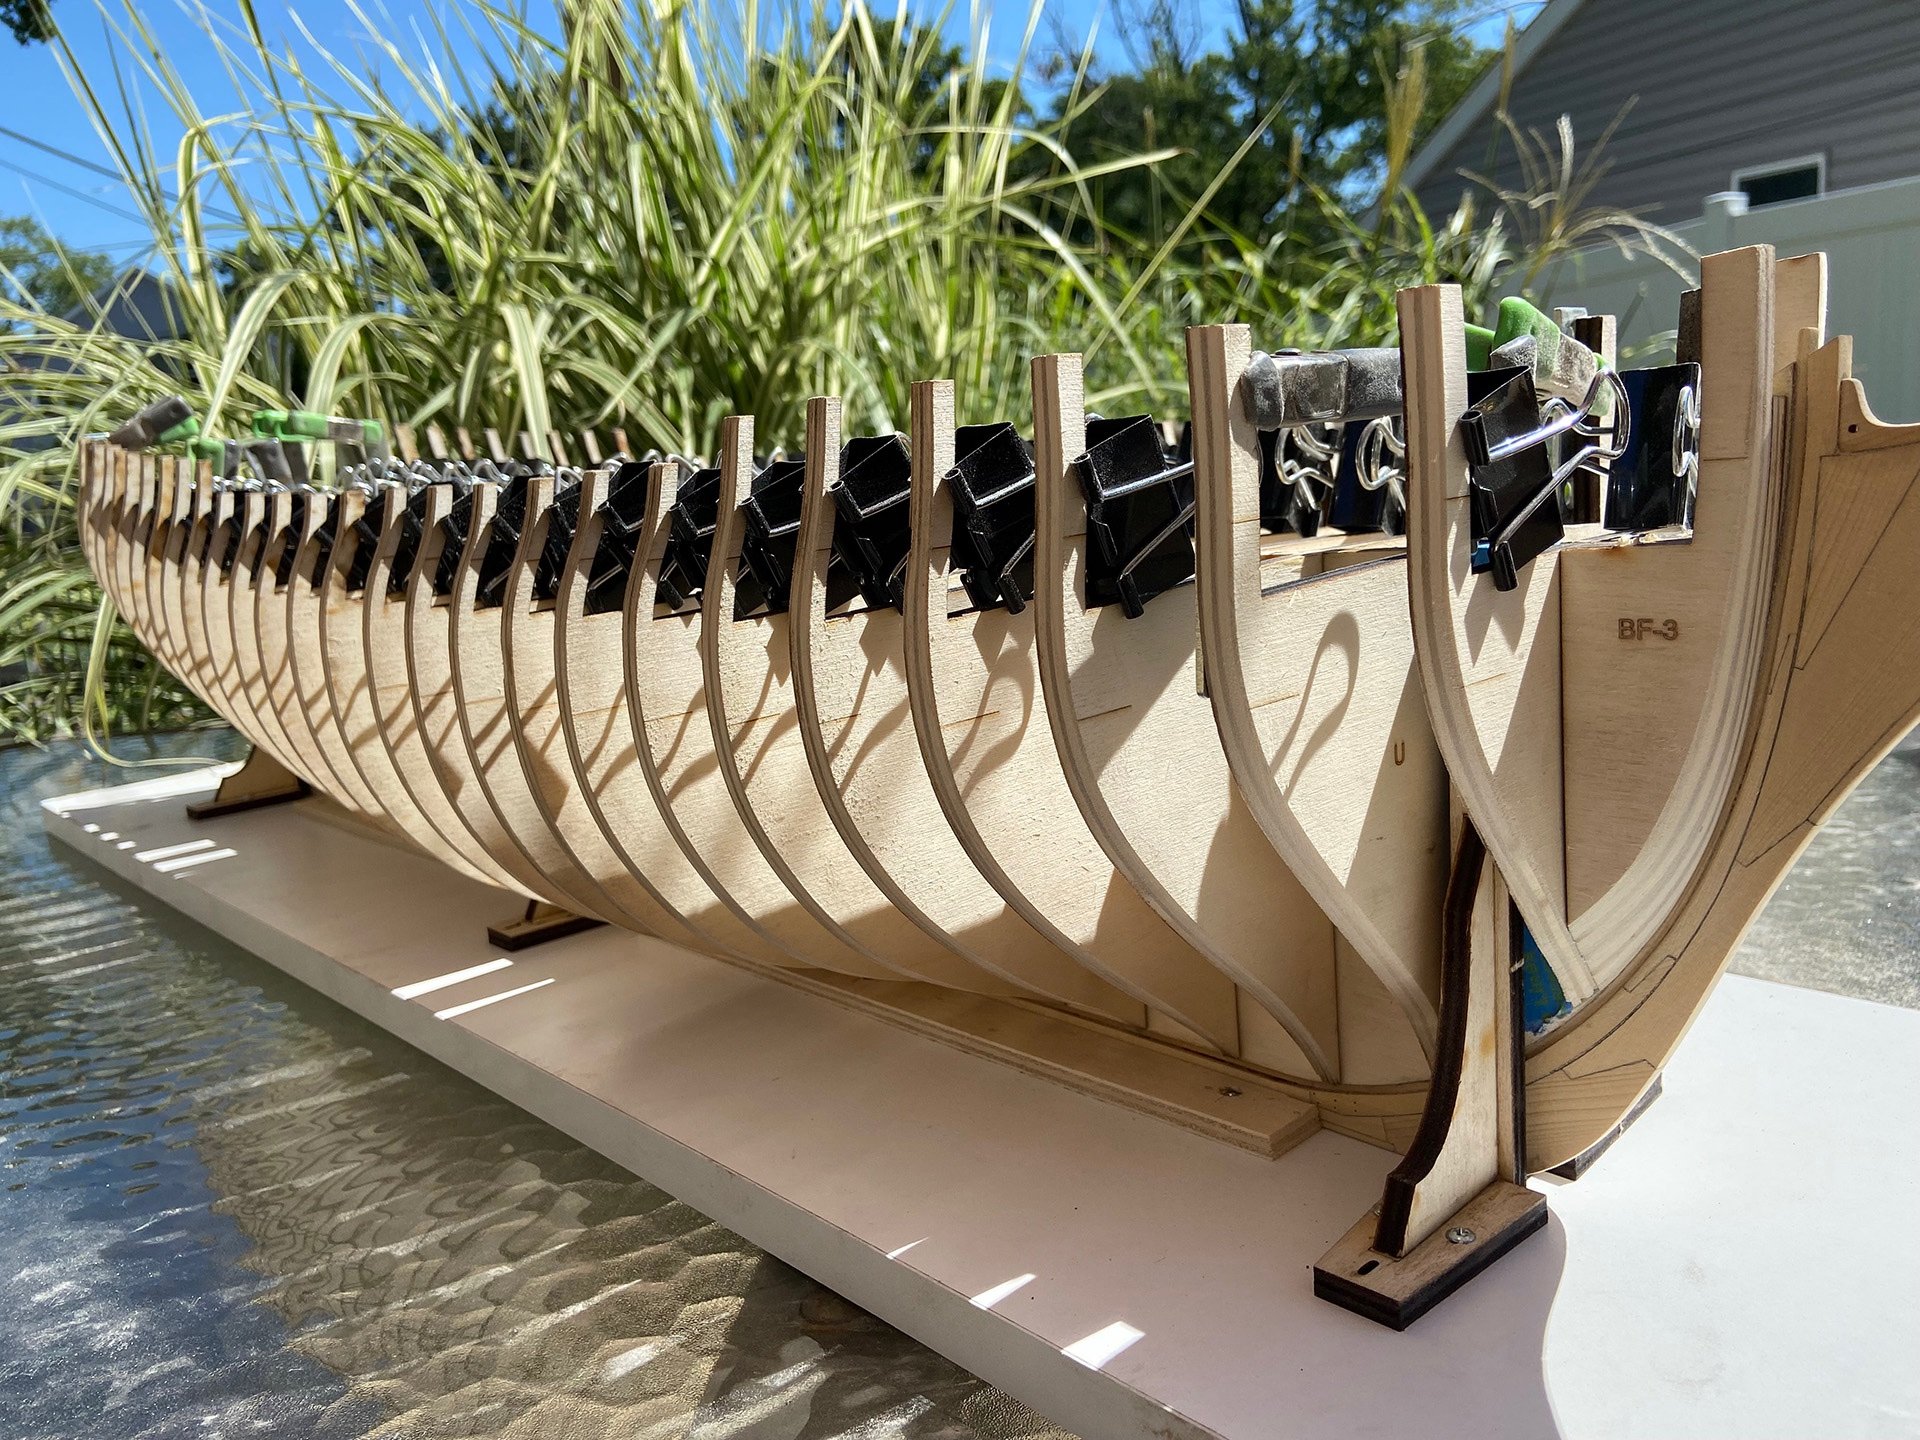
All right, so I did a complete 180 on my decision regarding fairing the hull. At the beginning of this build I made the statement that I would adhere to the directions as provided by Chuck to ensure a quality end result. Yet here I was just a few short steps into it and thinking I knew a better way, at least for my use case. Well, thanks to some excellent input from others on this forum I have once again confirmed my dedication to following Chuck's directions. That said, I continued on with fairing the hull as directed and moved down to the lower portions of the bulkheads. I started with the port side and finished that. Now it is on to the starboard side. I did encounter one issue. It seems that humidity is something I should have taken into consideration when creating my build board. When I initially built it, and set the ship in place, it was still fairly cold and dry outside. Since then, it has turned to extremely hot and humid. The end result, when I went to remove the ship from the build board it was stuck tight. So much so that the keel broke free when I did finally get it to release. Mind you, a few weeks ago the ship slid in and out of the build board with ease. Lesson learned. Thankfully, it was a very easy fix and I was back onto fairing the hull. All went well on the port side and I only have one bullhead that needs just the slightest bit of shimming. You can see this in the pic below with the third bulkhead from the stern. I thought maybe I had installed this incorrectly, however, a quick check of the opposing side and it needs a bit of shimming as well...so all good. This week I will continue with fairing the starboard side and be done with it. Need to take a few days break to allow my fingers to recover. At one point my thumb started cramping. Maybe one day there will be a hull-fairing service out there - just send your hull and get it back perfectly faired. Until then, I guess my fingers are going to get excellent work outs
-
Thank you Frank and scrubbyj427 for your thoughtful input and excellent points. I also have spent a lot of time reading through as many other Winnie build logs as I could and actually found that Stuntflyer took an approach similar too, if not exactly the same as described by scrubbyj427 - BTW, if you haven't perused Stuntflyer's build you should do so...it is absolutely amazing! Granted, I have nowhere near the experience nor excellence in this as Stuntflyer, but I shall try that approach regardless as it does address my concern with breaking the top pieces due to my limited build space and need to constantly move the thing around as I work on it. And I will definitely post the results here soon as I plan to take on this effort through the week.
-
Thank you Frank for the detailed reply. I have taken it to heart and am making better progress on fairing the bow of this build than I have on past builds. It is a slow go as many have mentioned. Good thing I really enjoy sanding - the smell, the feel, the motion - it is all very meditative for me. Thankfully I can do this for hours without pain especially as I find it relaxing. At the rate I am going I figure another 20 hours or so to complete fairing the hull. However, before I continue on I do have a question for others in this forum. Obviously, fairing the lower portions of the hull require one to remove it from the build board. I am hesitant to do this as the top bits of the bulkheads are very fragile. I did reinforce them with clips as instructed by Chuck, but in tandem with this is my limited work space which requires a bit of extra shuffling around, especially for a ship this size. Has anyone faired the top portion of the hull, added the port frames, and then turned the ship over to work the lower half of the hull? I thought this would provide some nice stability for the fragile parts of the bulkheads. However, if the overall experience has been that the bulkheads are fairly solid with the clips then I will continue with fairing the entire hull.