Brinkman
-
Posts
154 -
Joined
-
Last visited
Content Type
Profiles
Forums
Gallery
Events
Everything posted by Brinkman
-
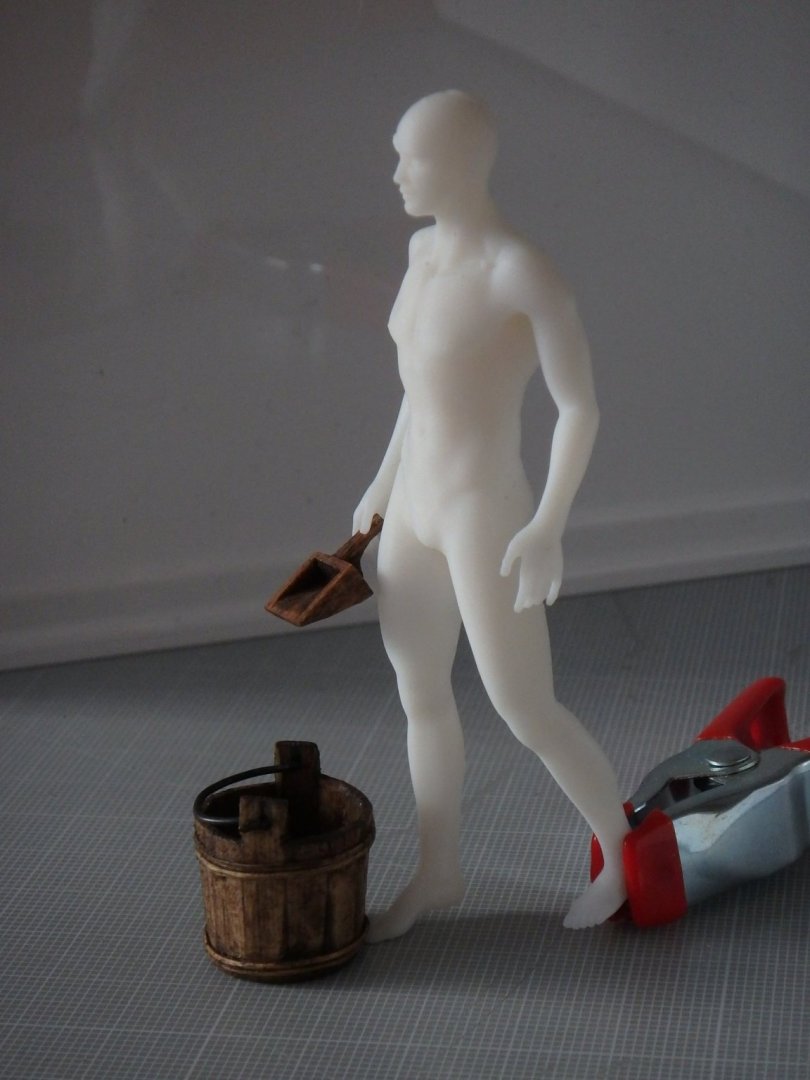
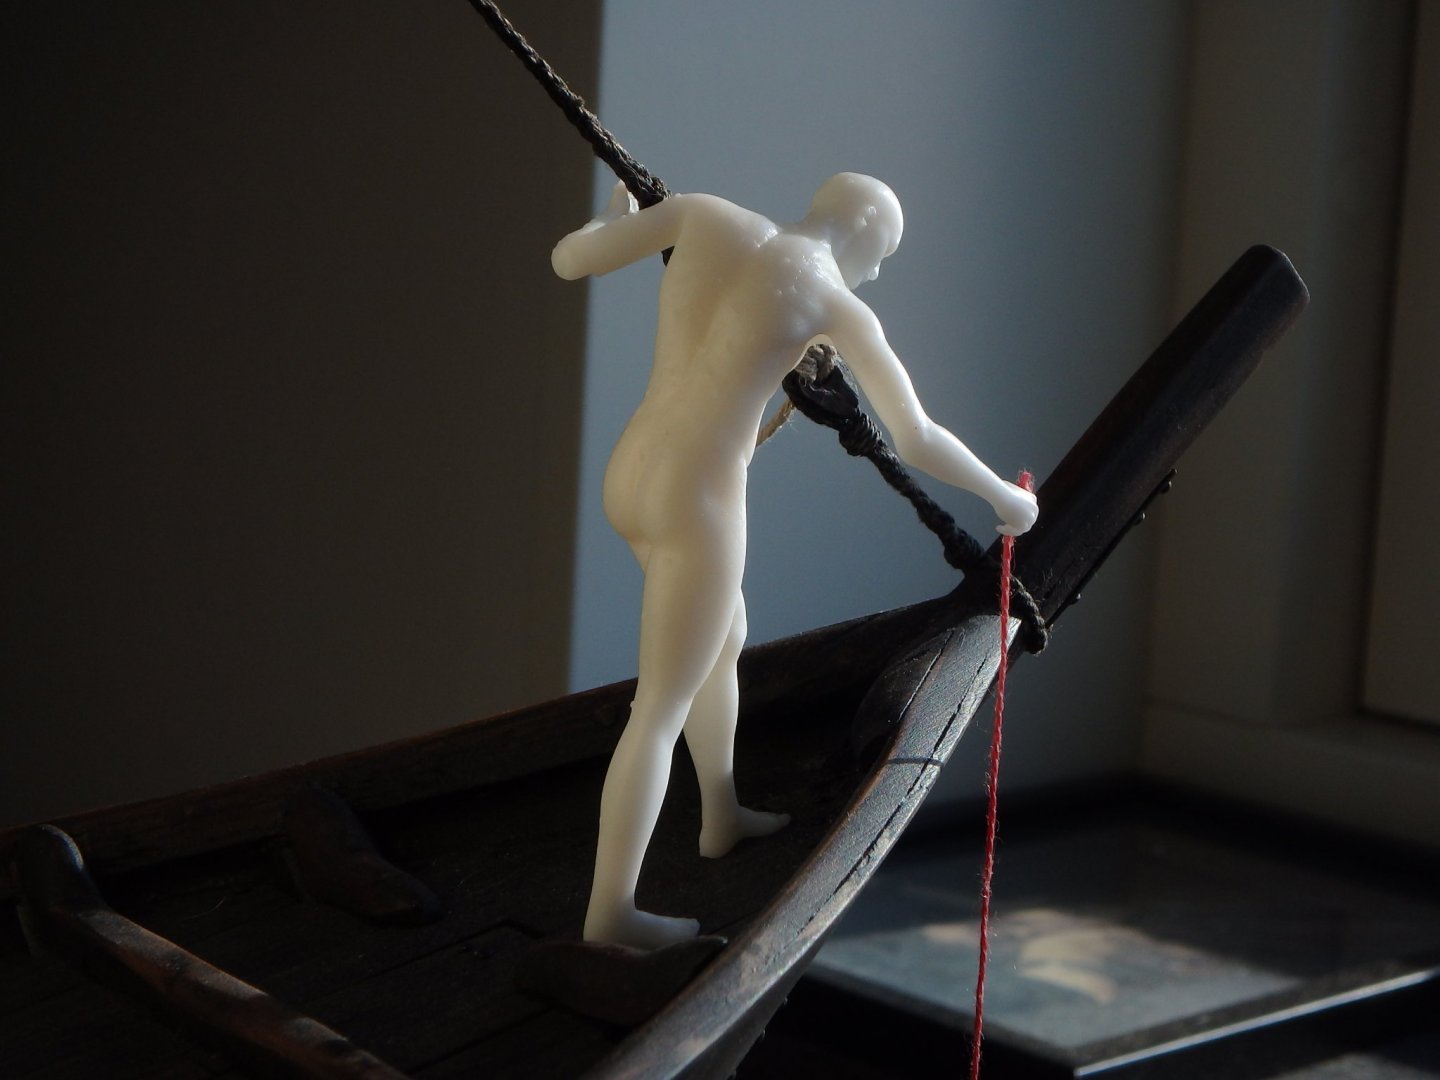
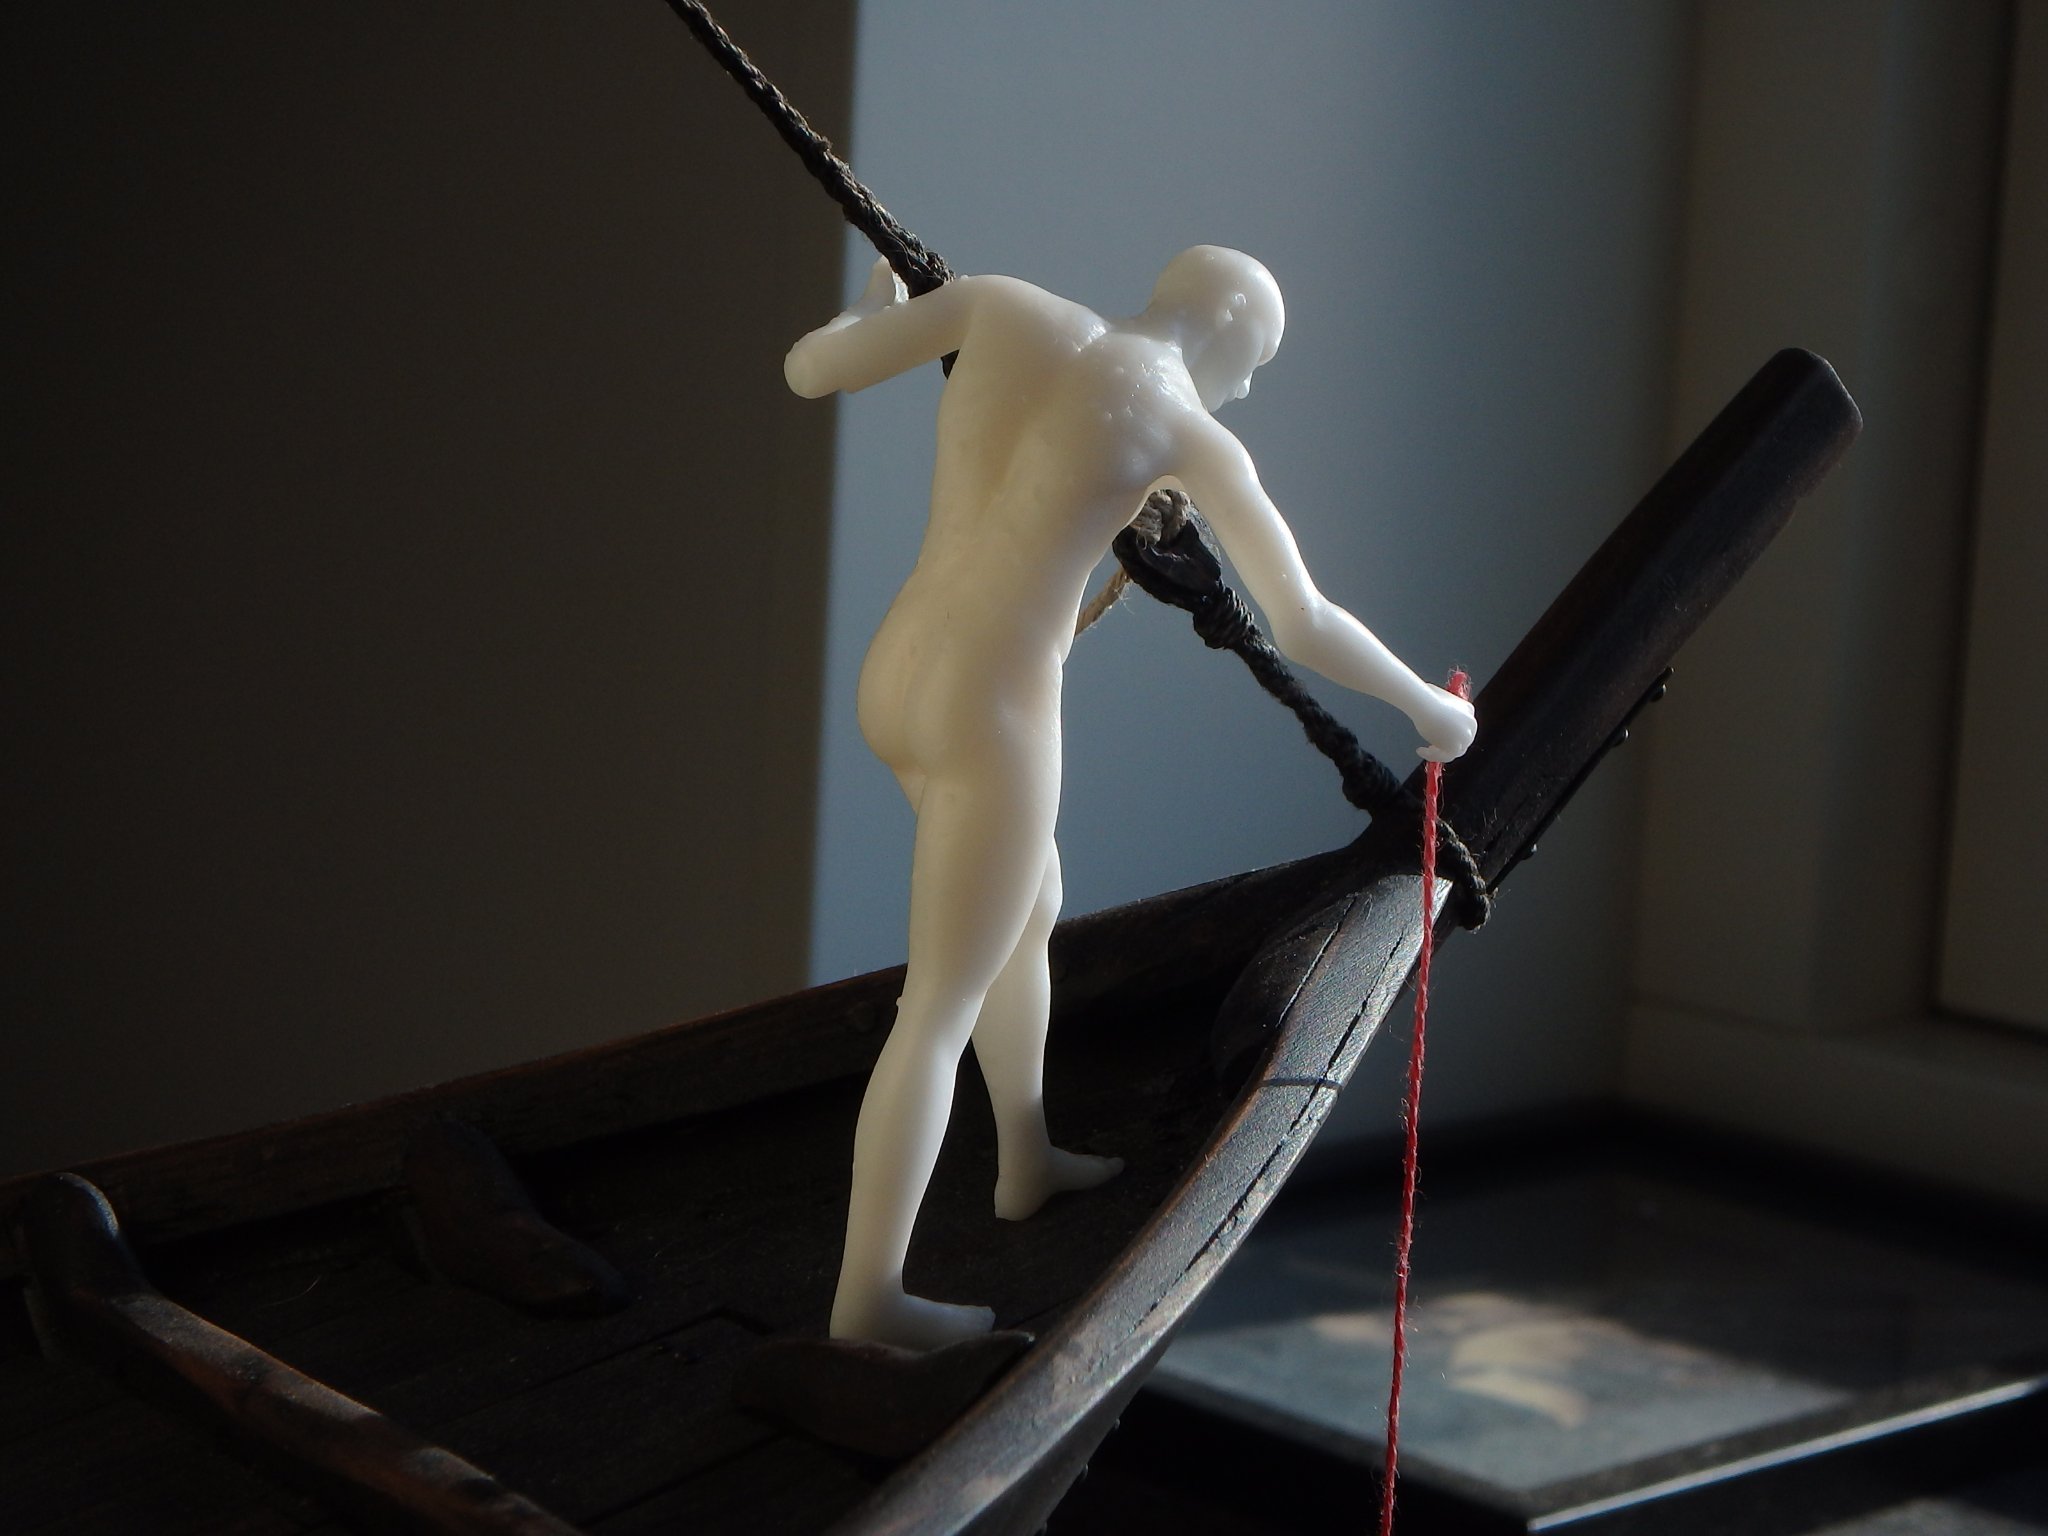
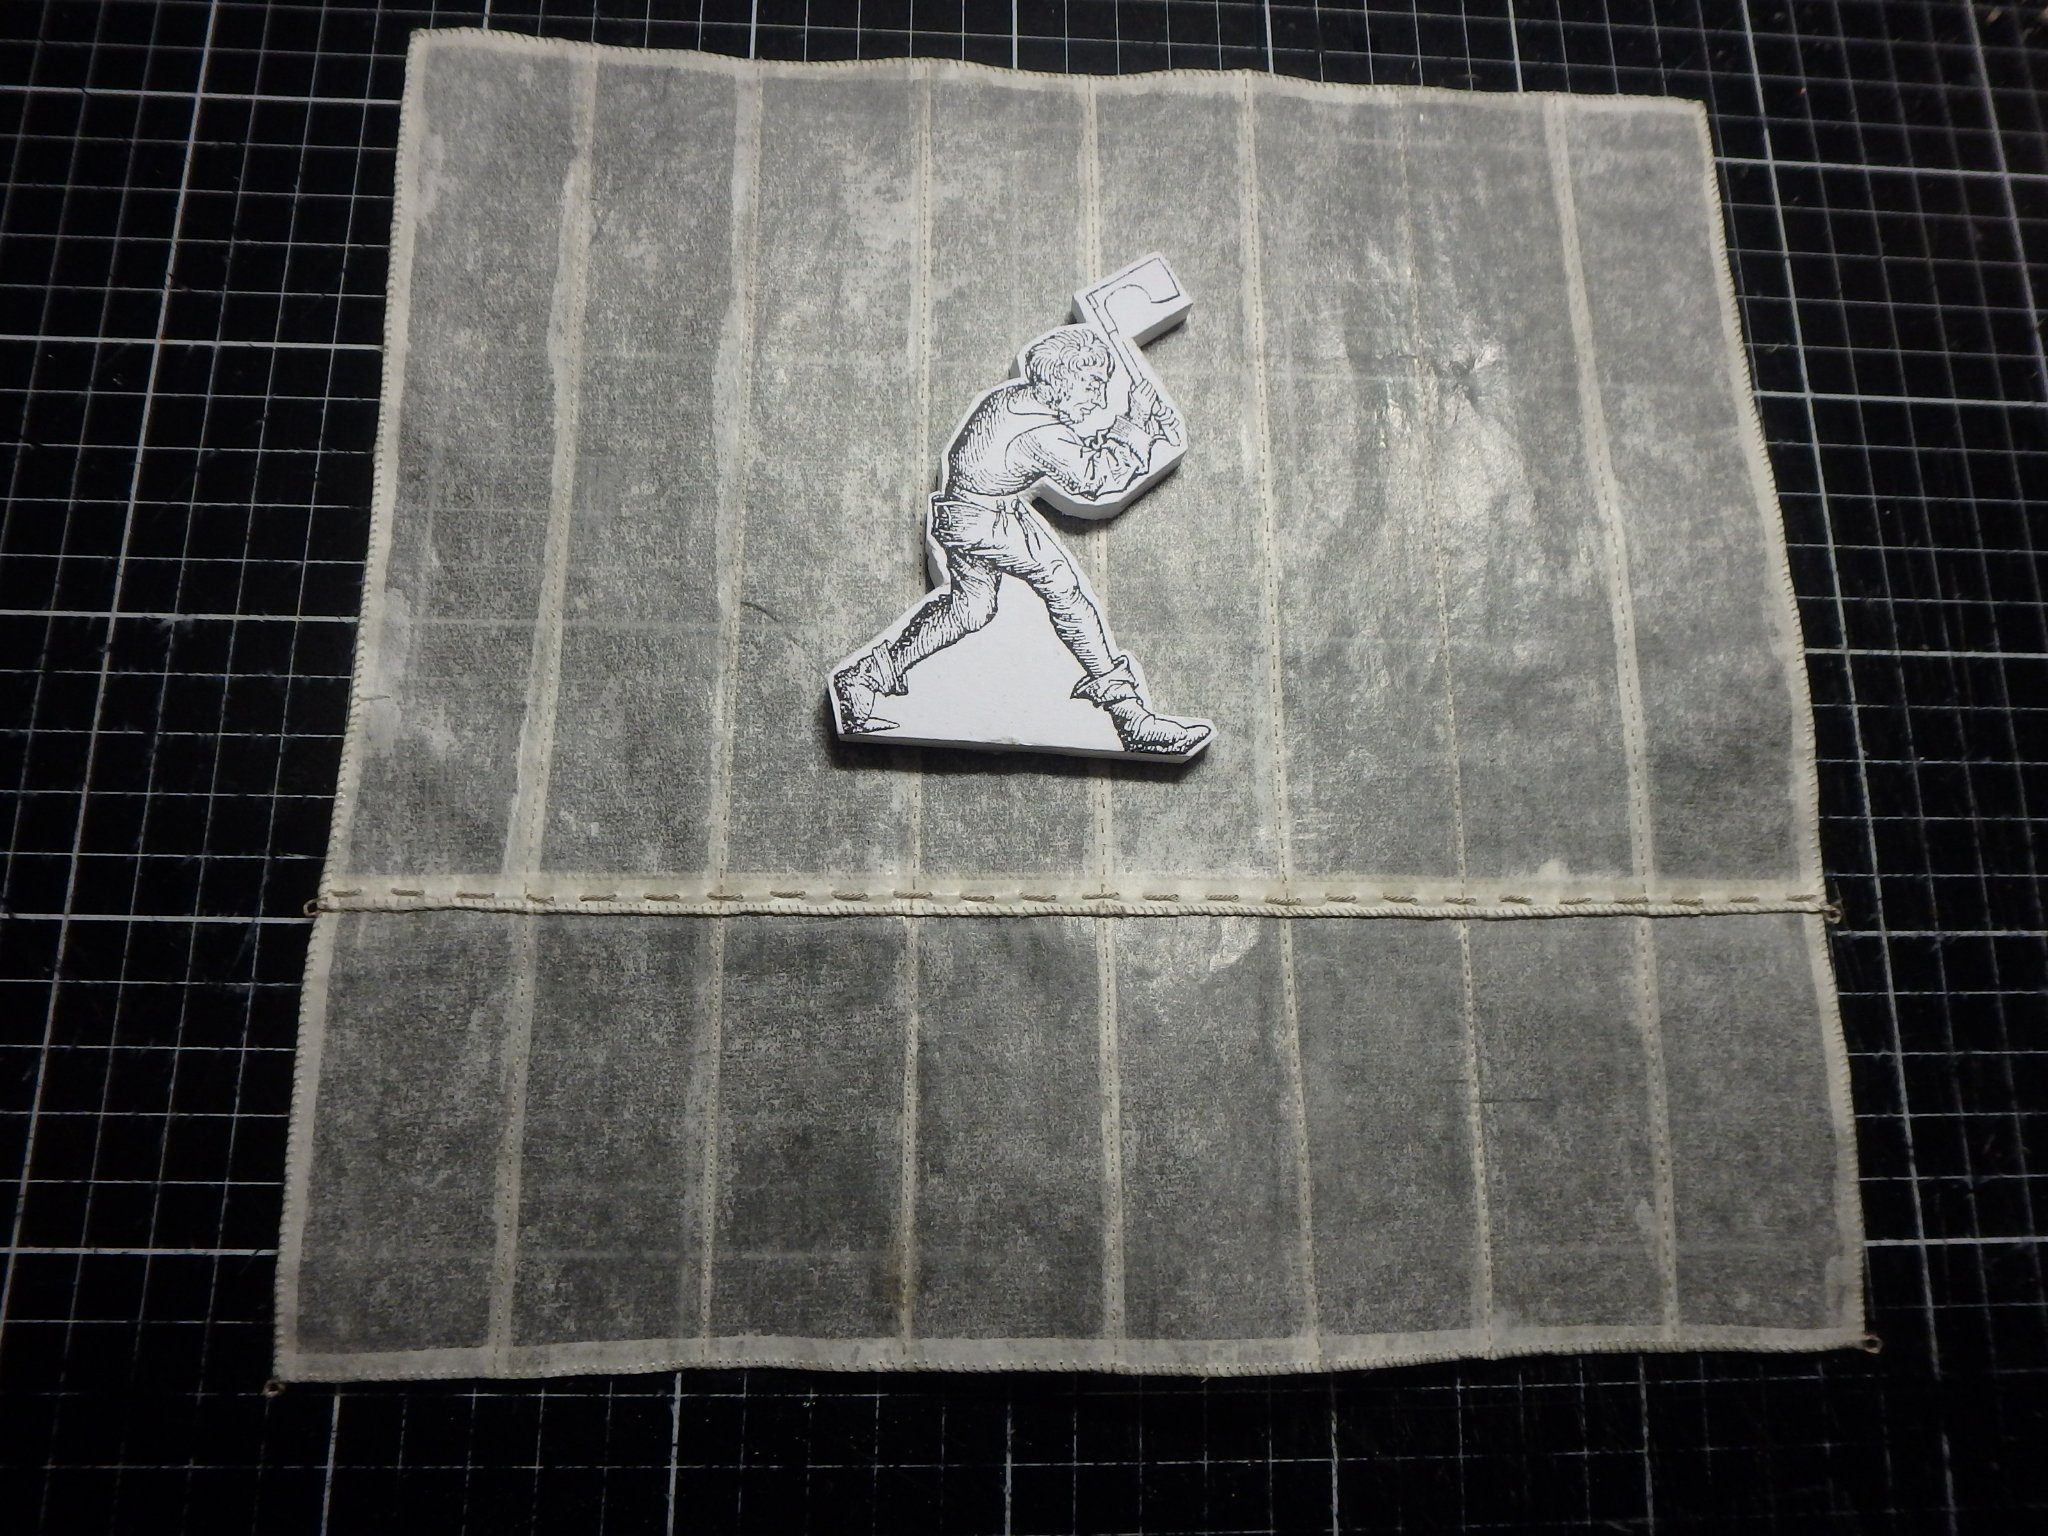
 Remember the figures I made in CAD back in december? My friend had problems with printing them and I couldn't think about it during the move but last week I sent them to a company and now they came back. And were better then I could have hoped for! The guy on the fore deck is sounding, here just shown holding a thread. And I think the bailer and bucket look pretty correct in scale Lets see if I can dress them now...
-
The build comes along really nice! The rivets look amazing and you got a really nice colour on the hull
- 179 replies
-
- 1
-

-
- longship
- Helga Holm
- (and 1 more)
-
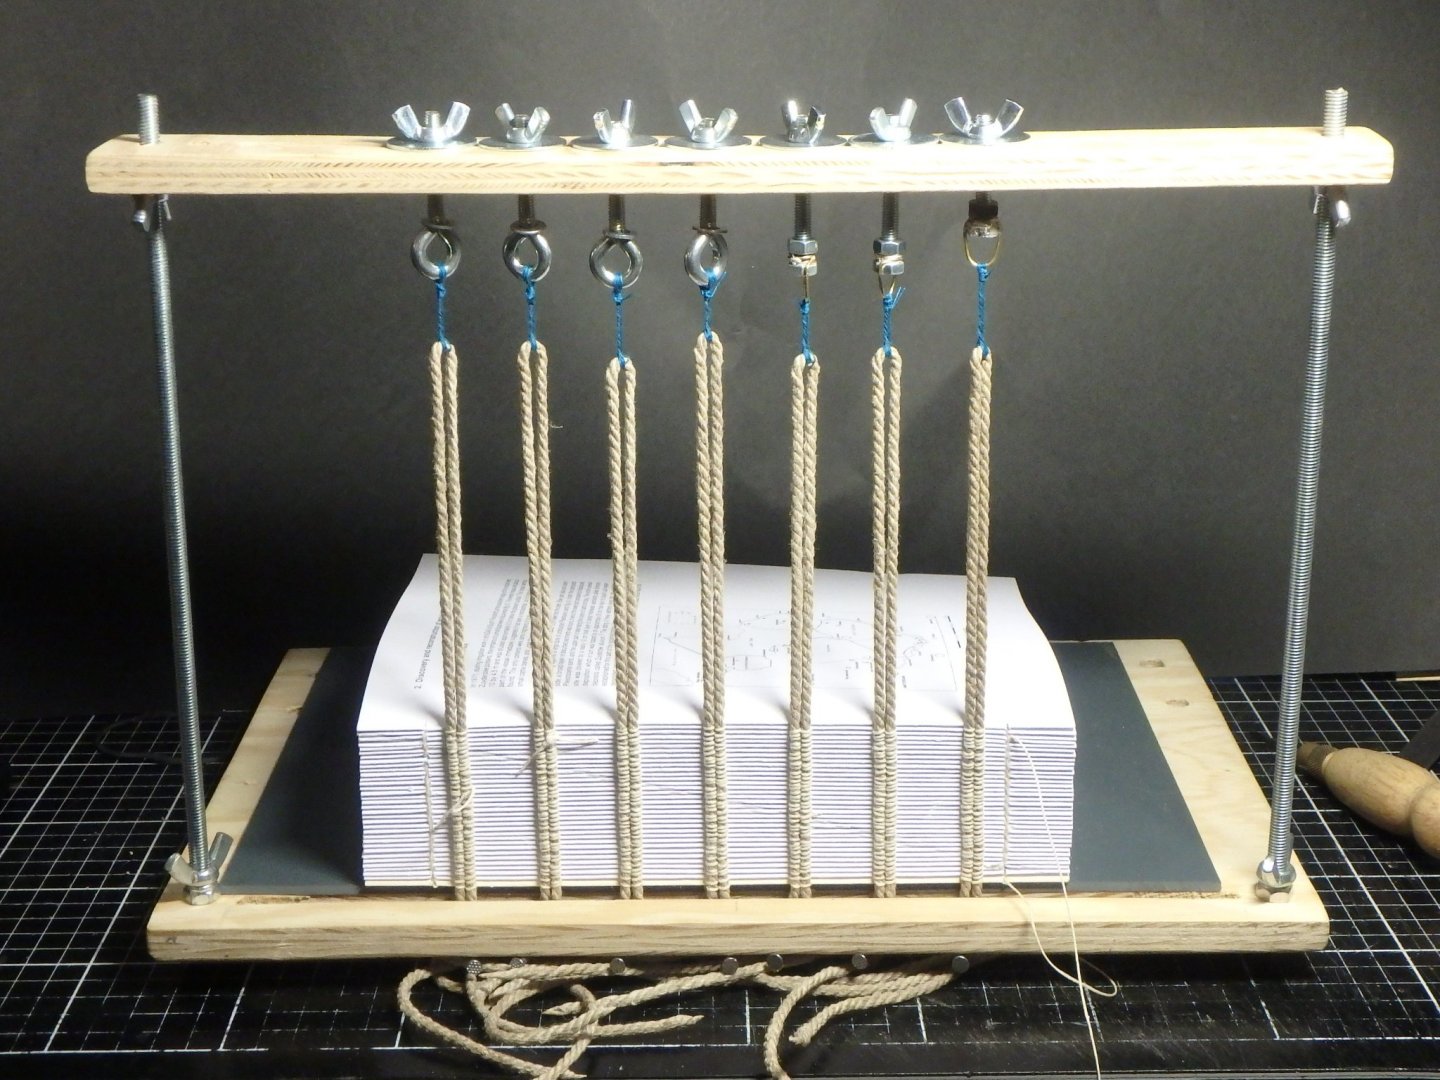
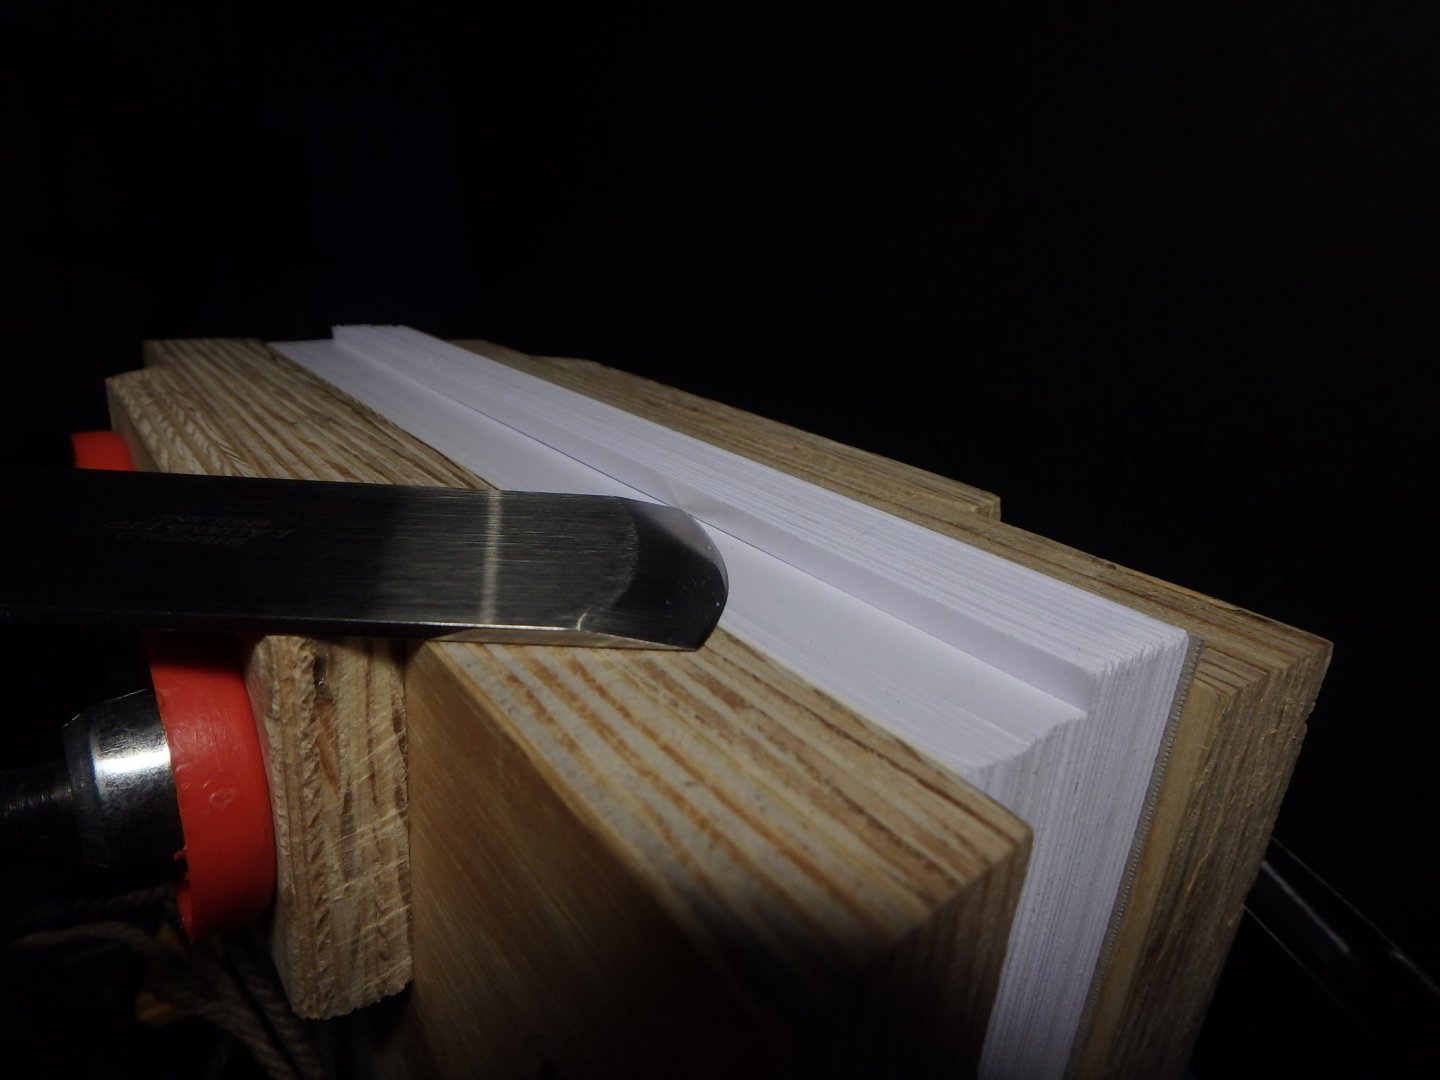
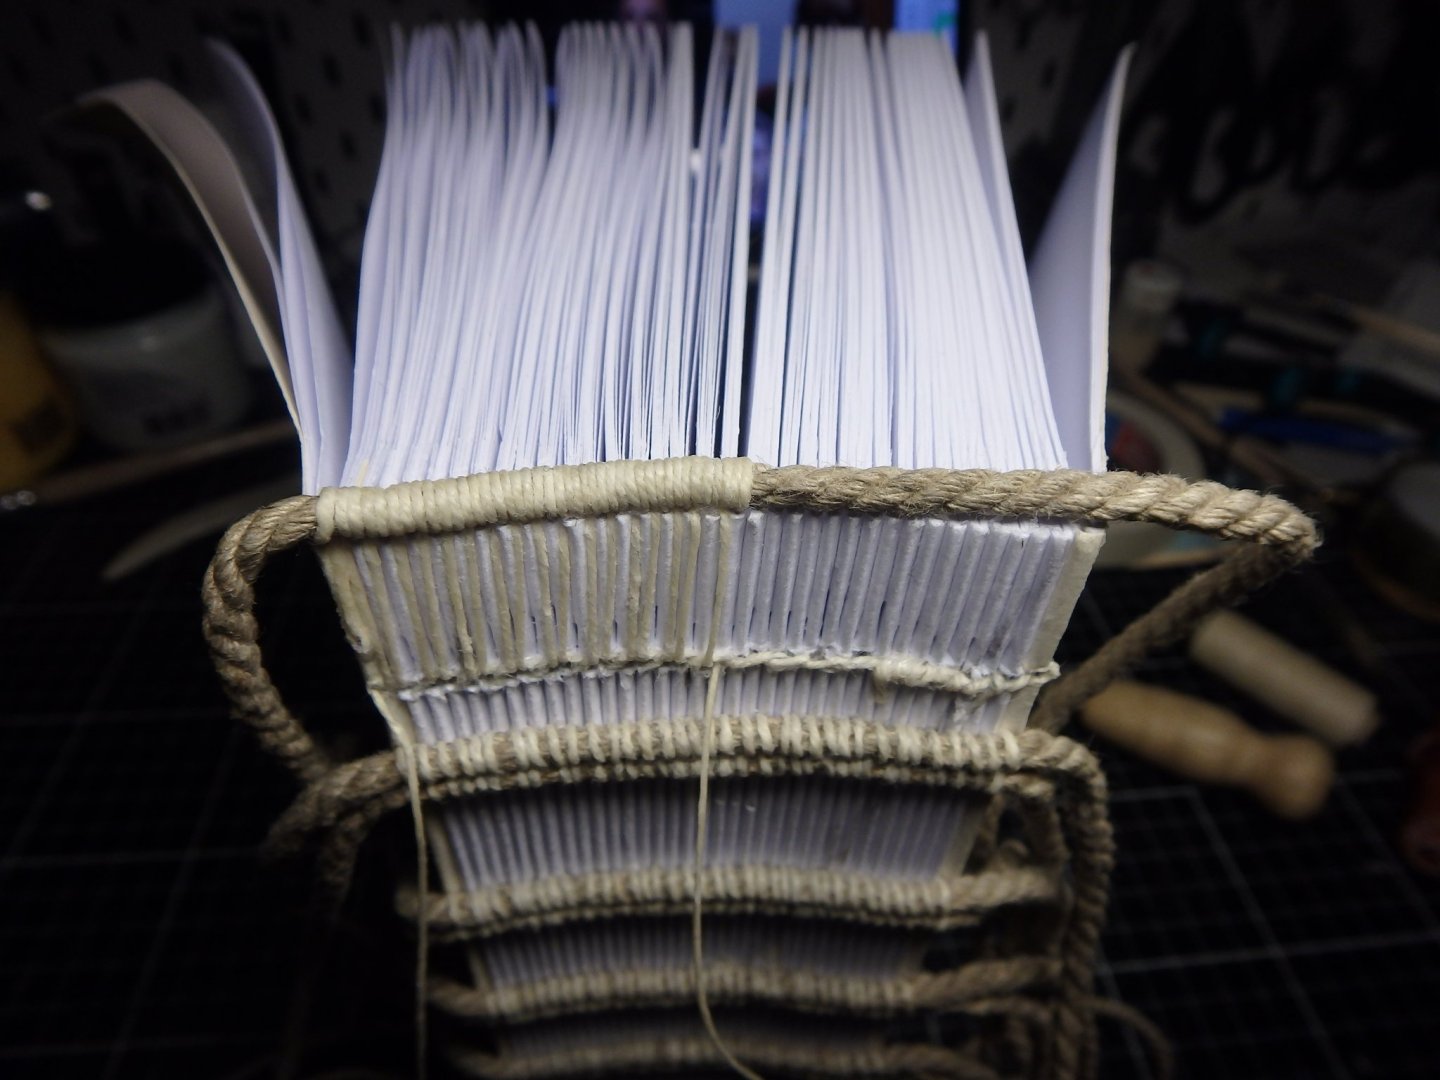
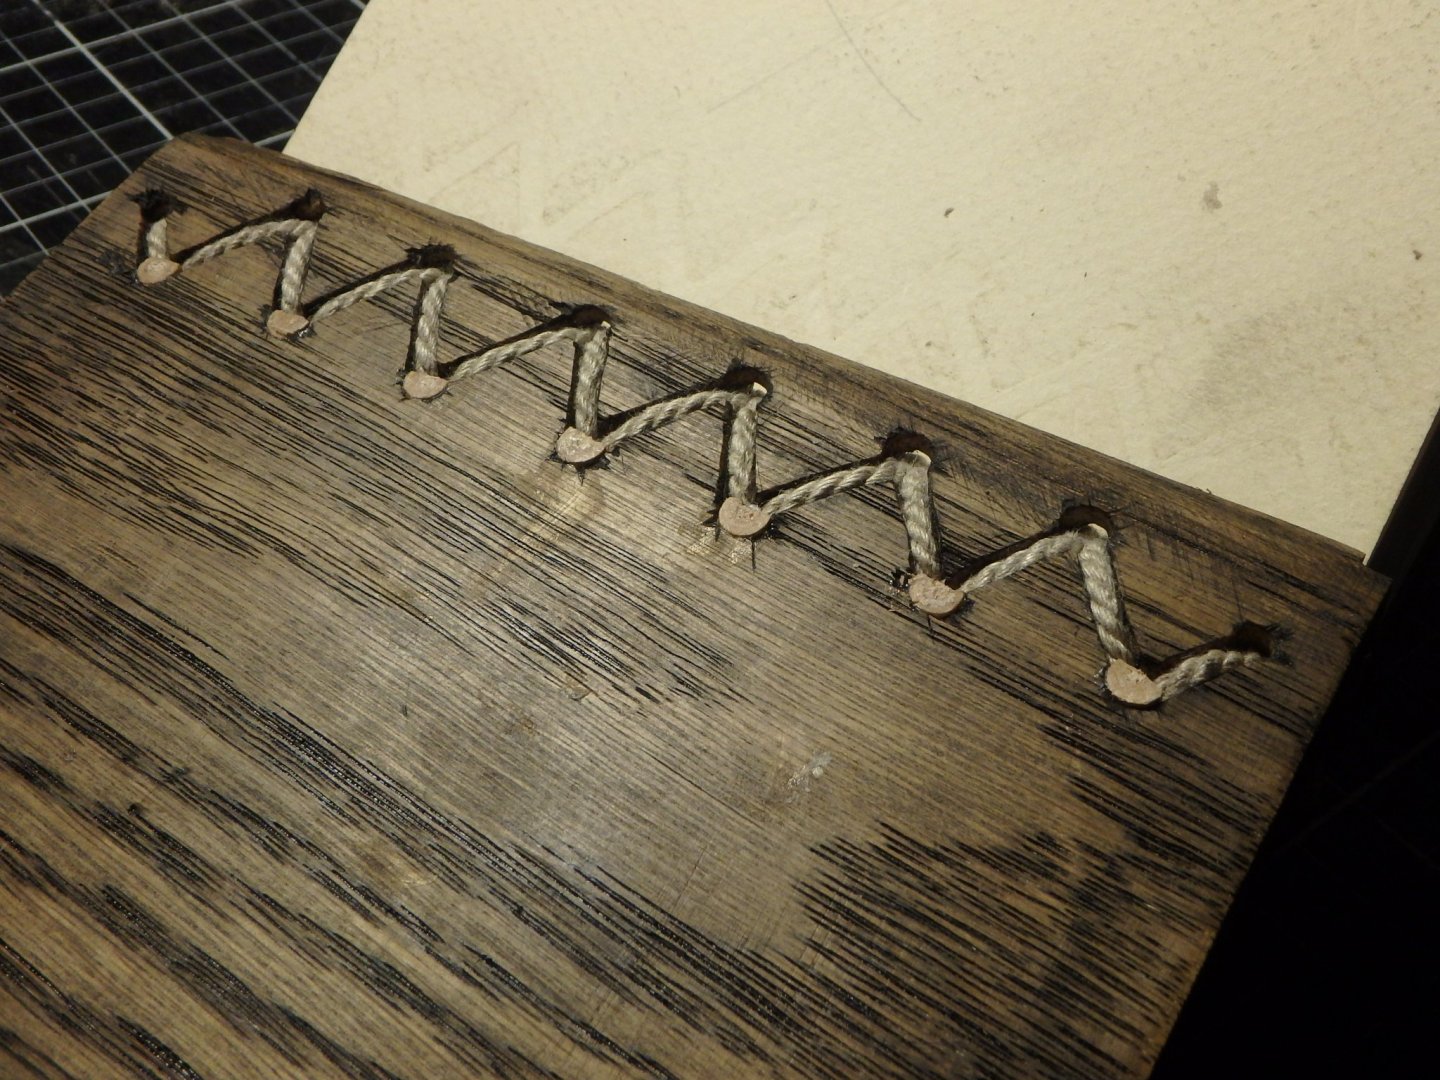
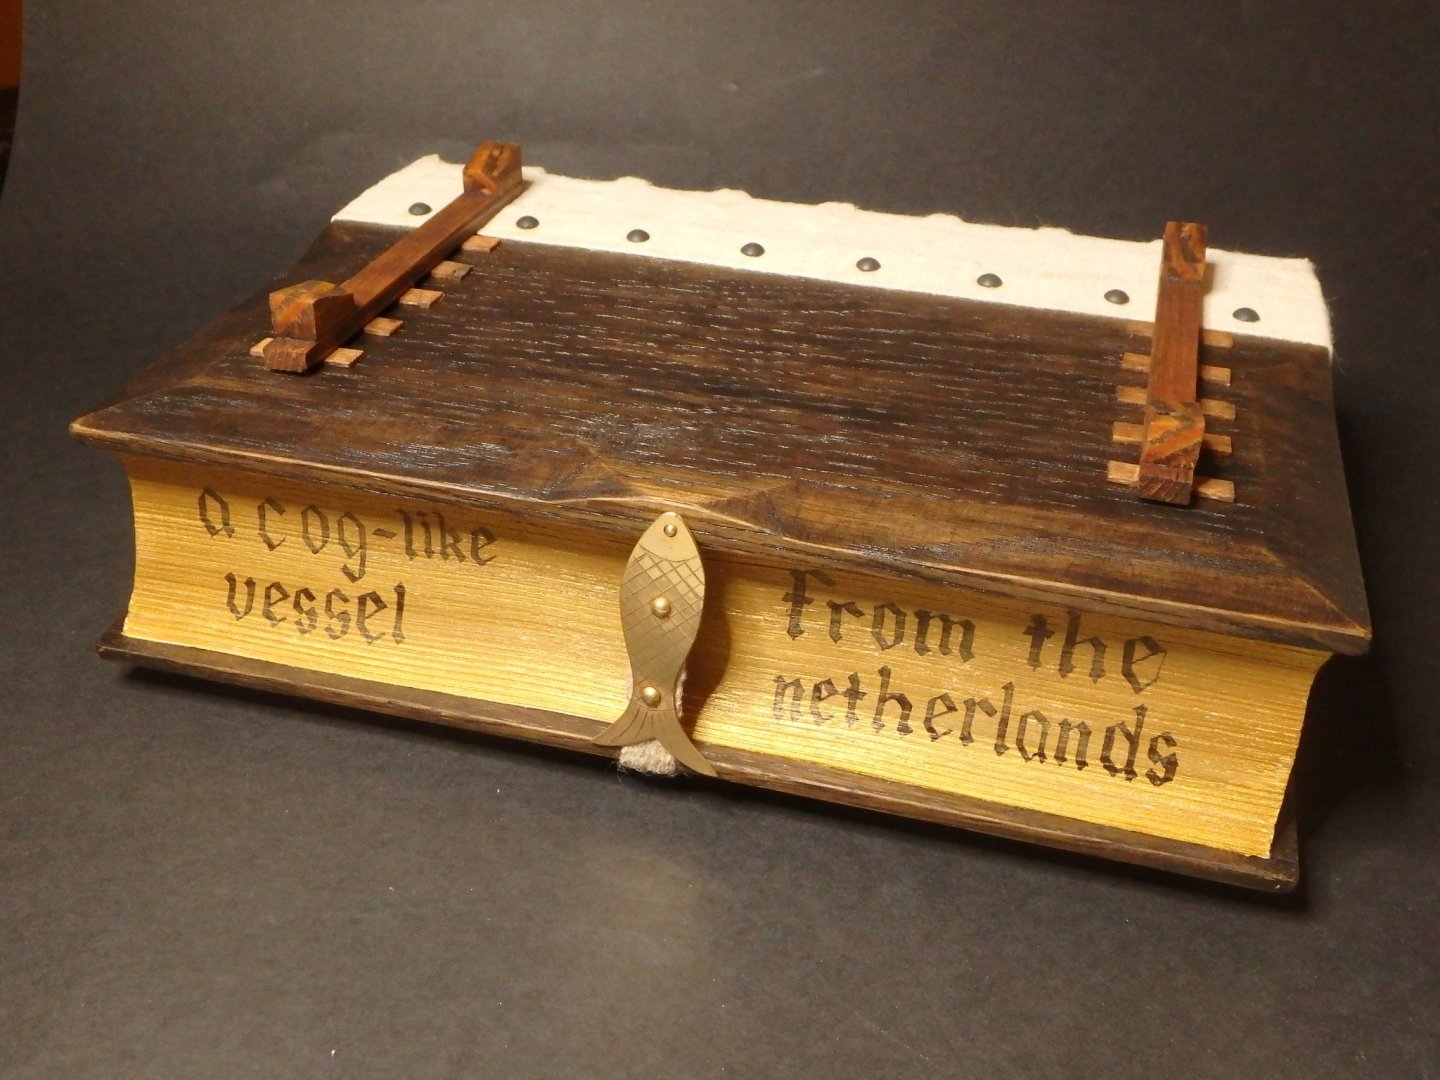
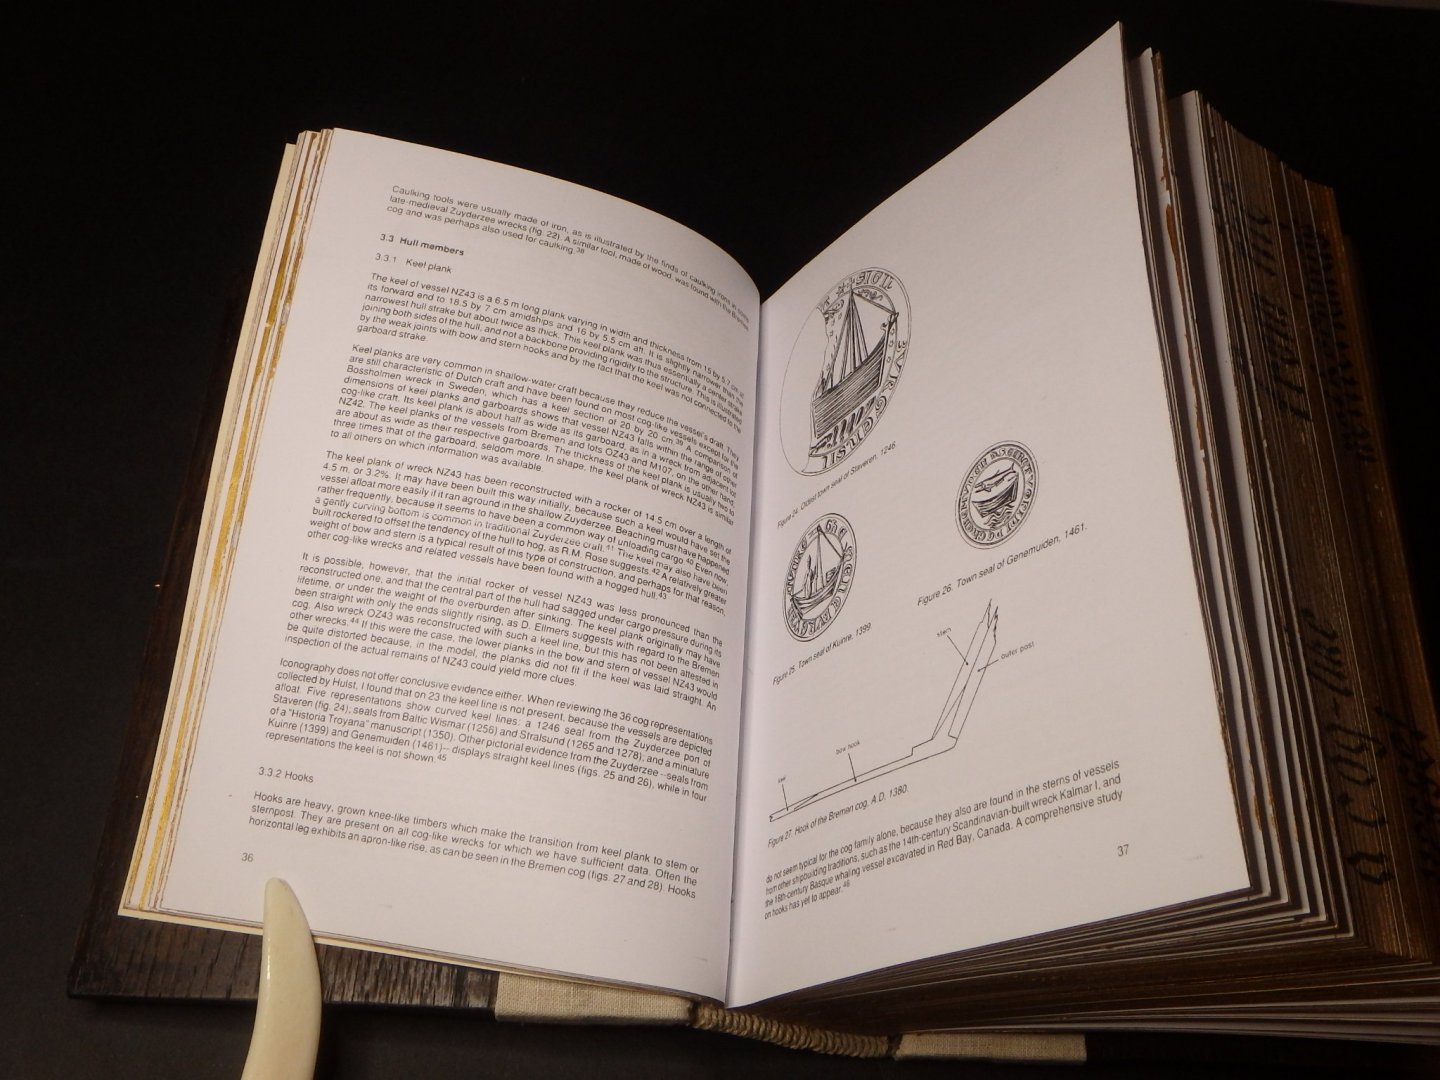
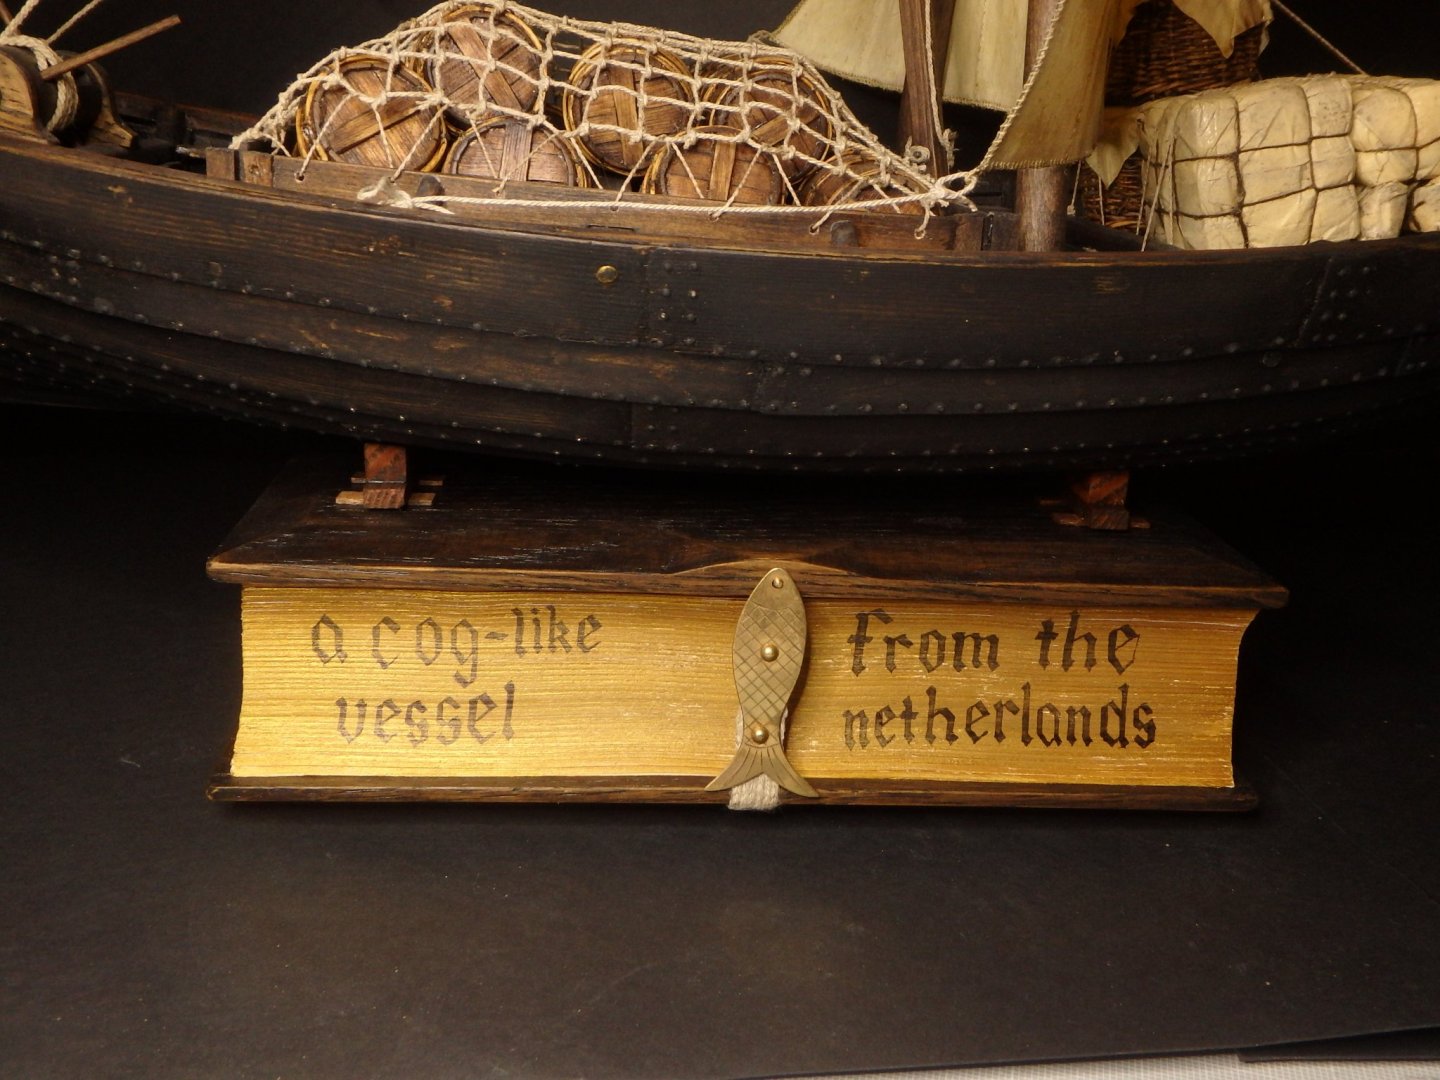
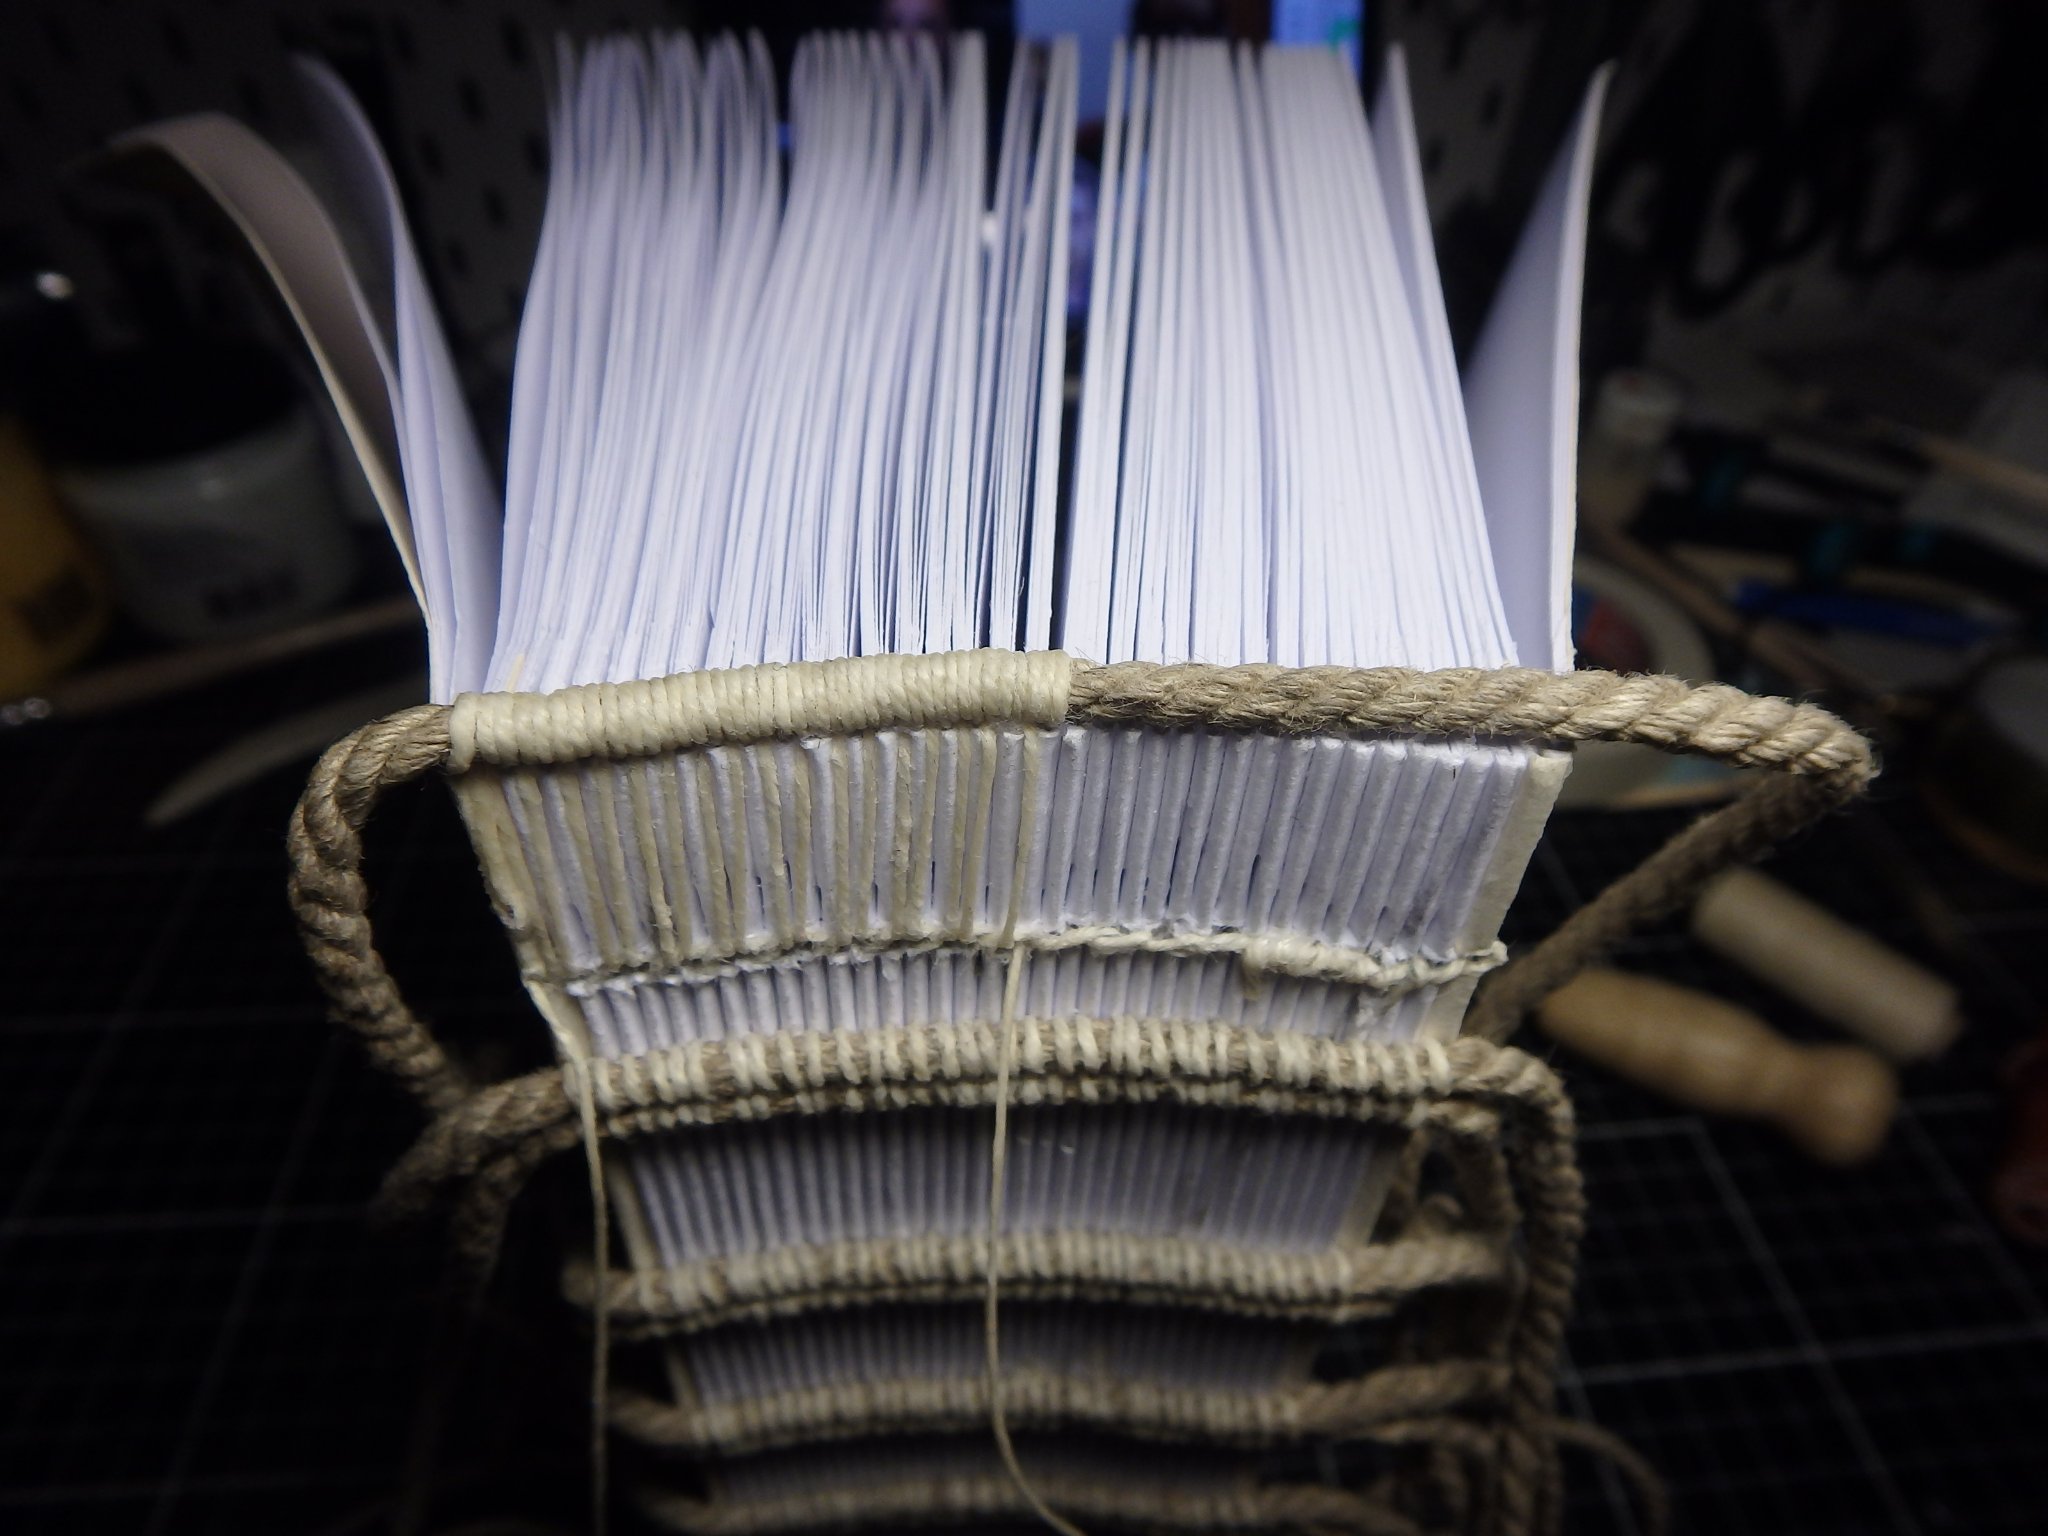
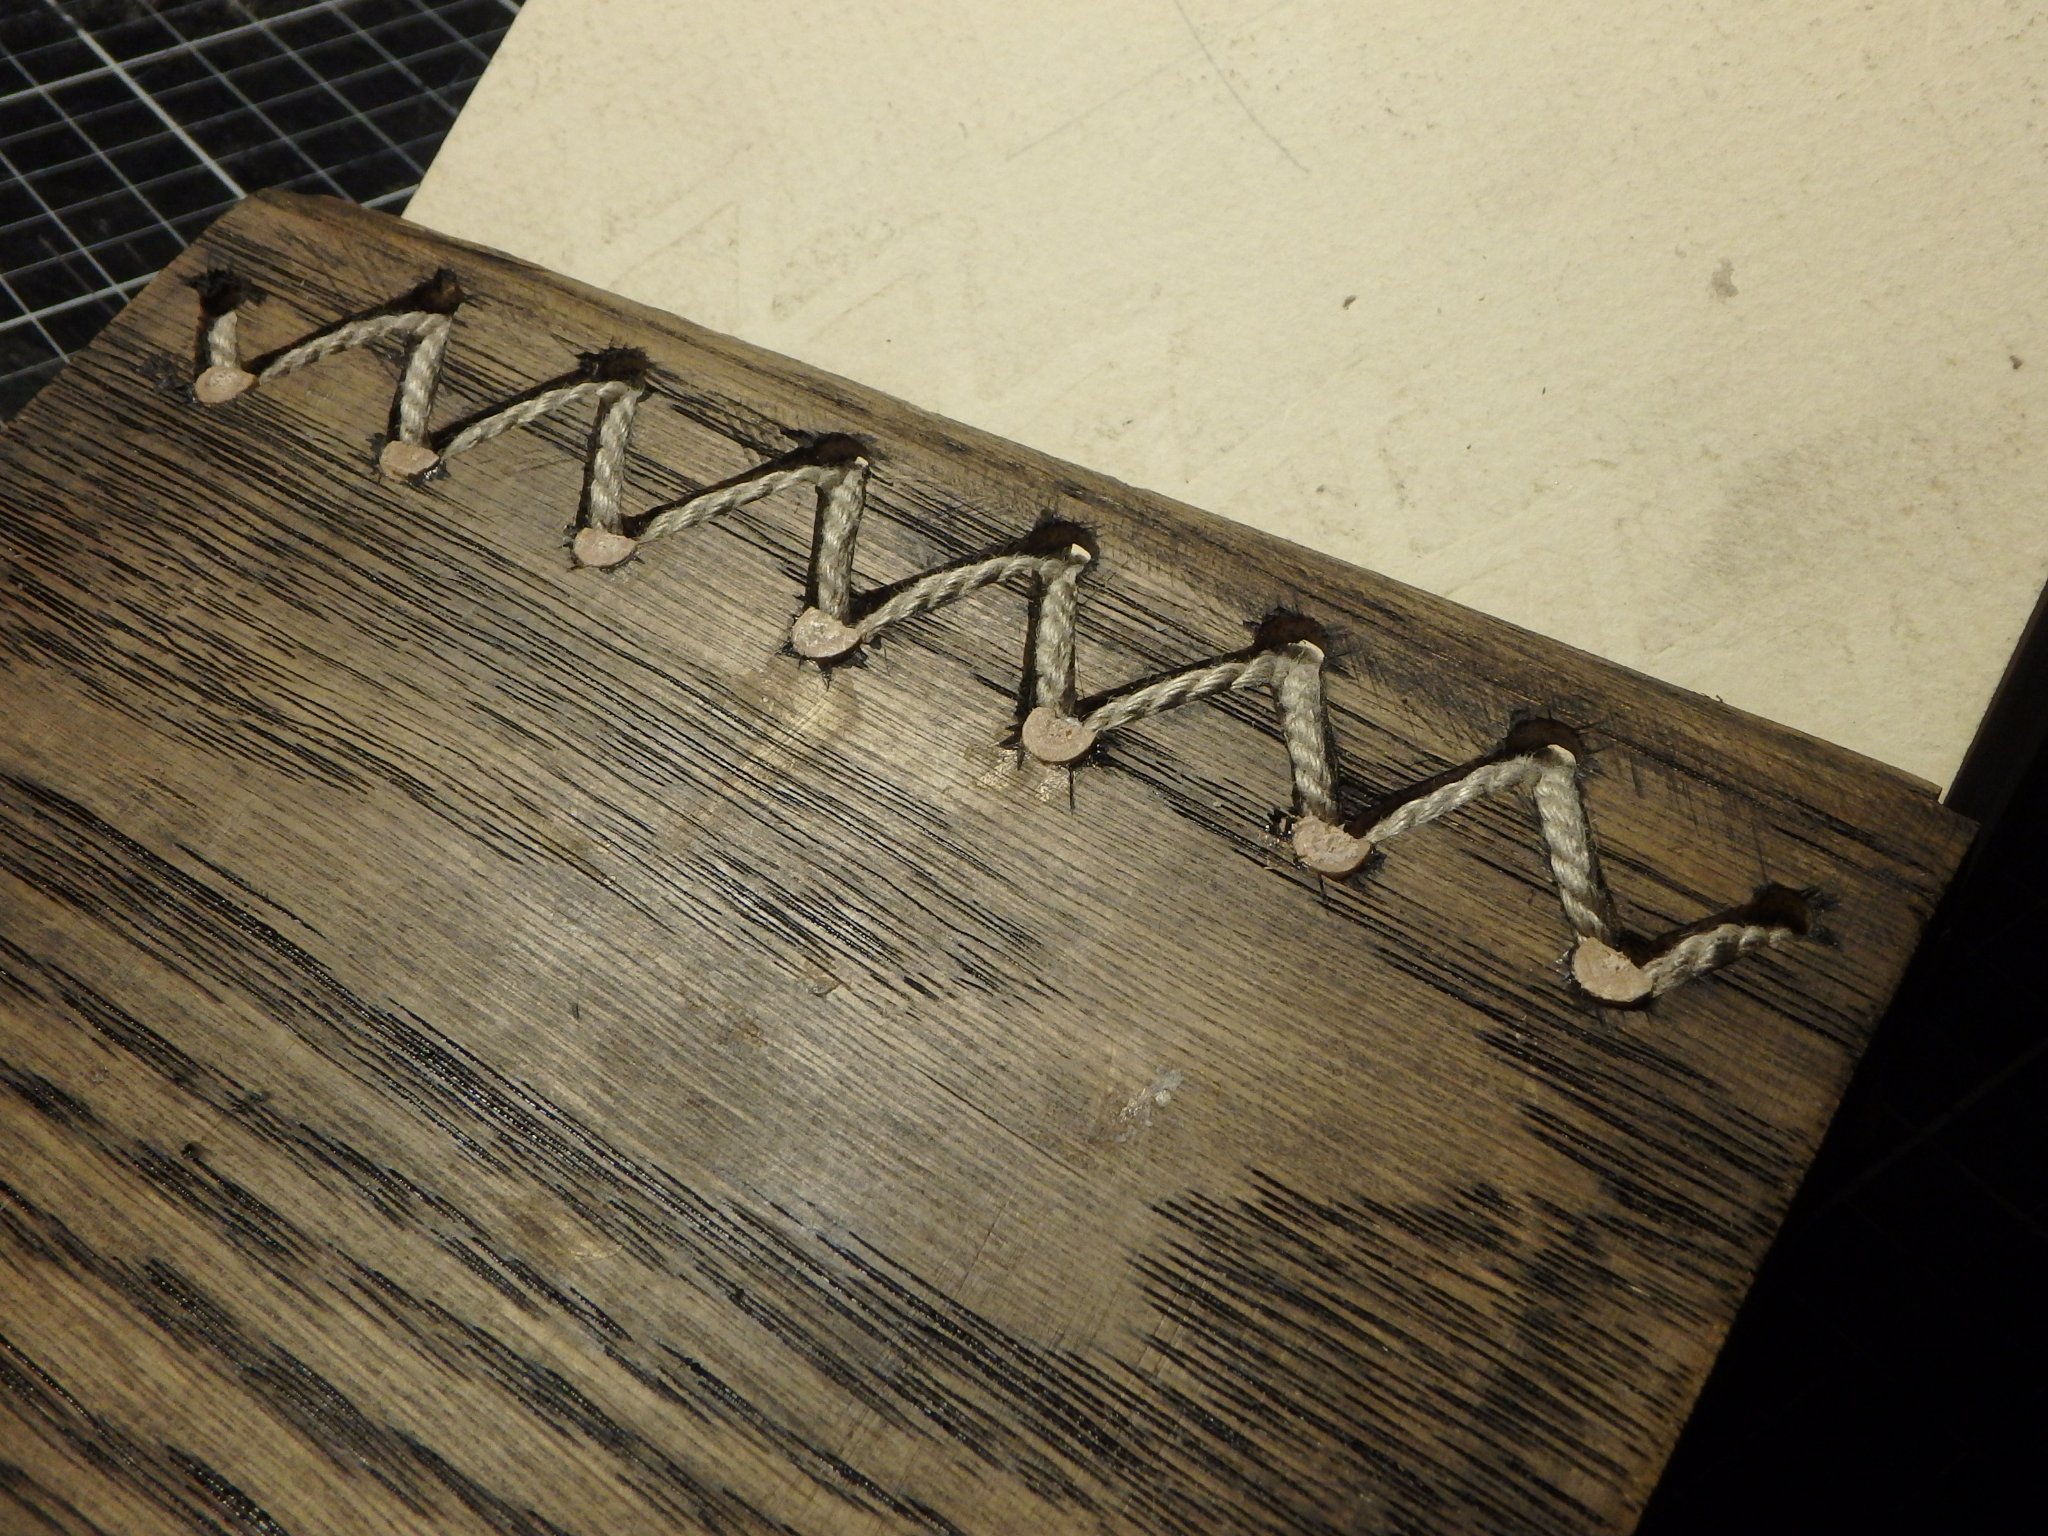
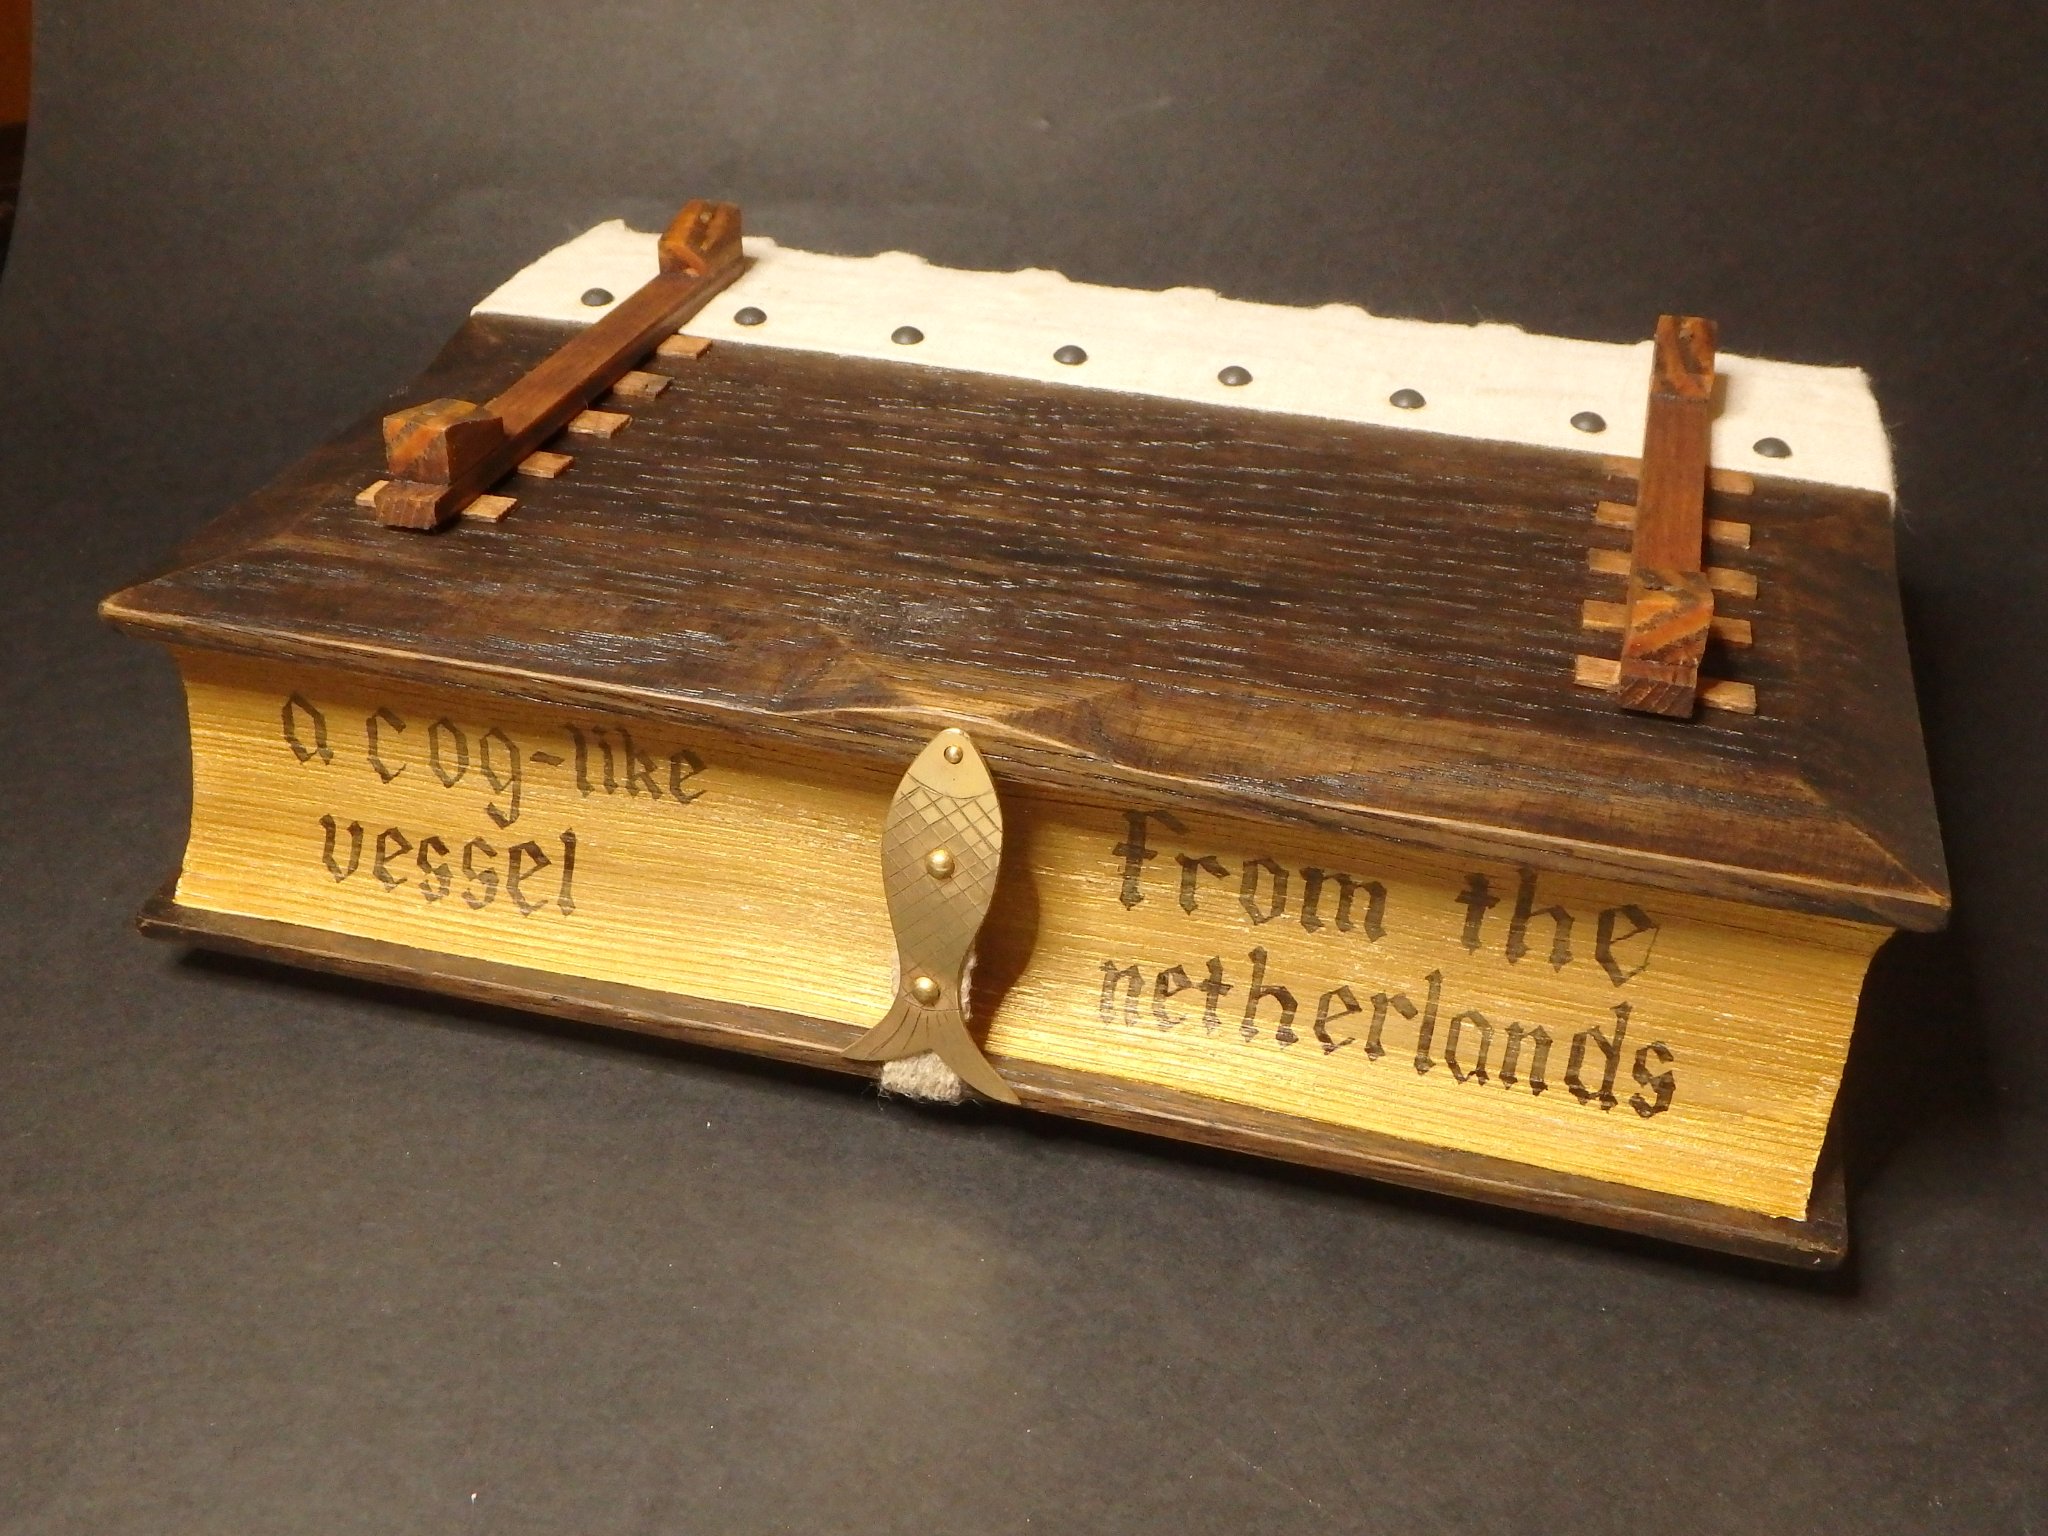
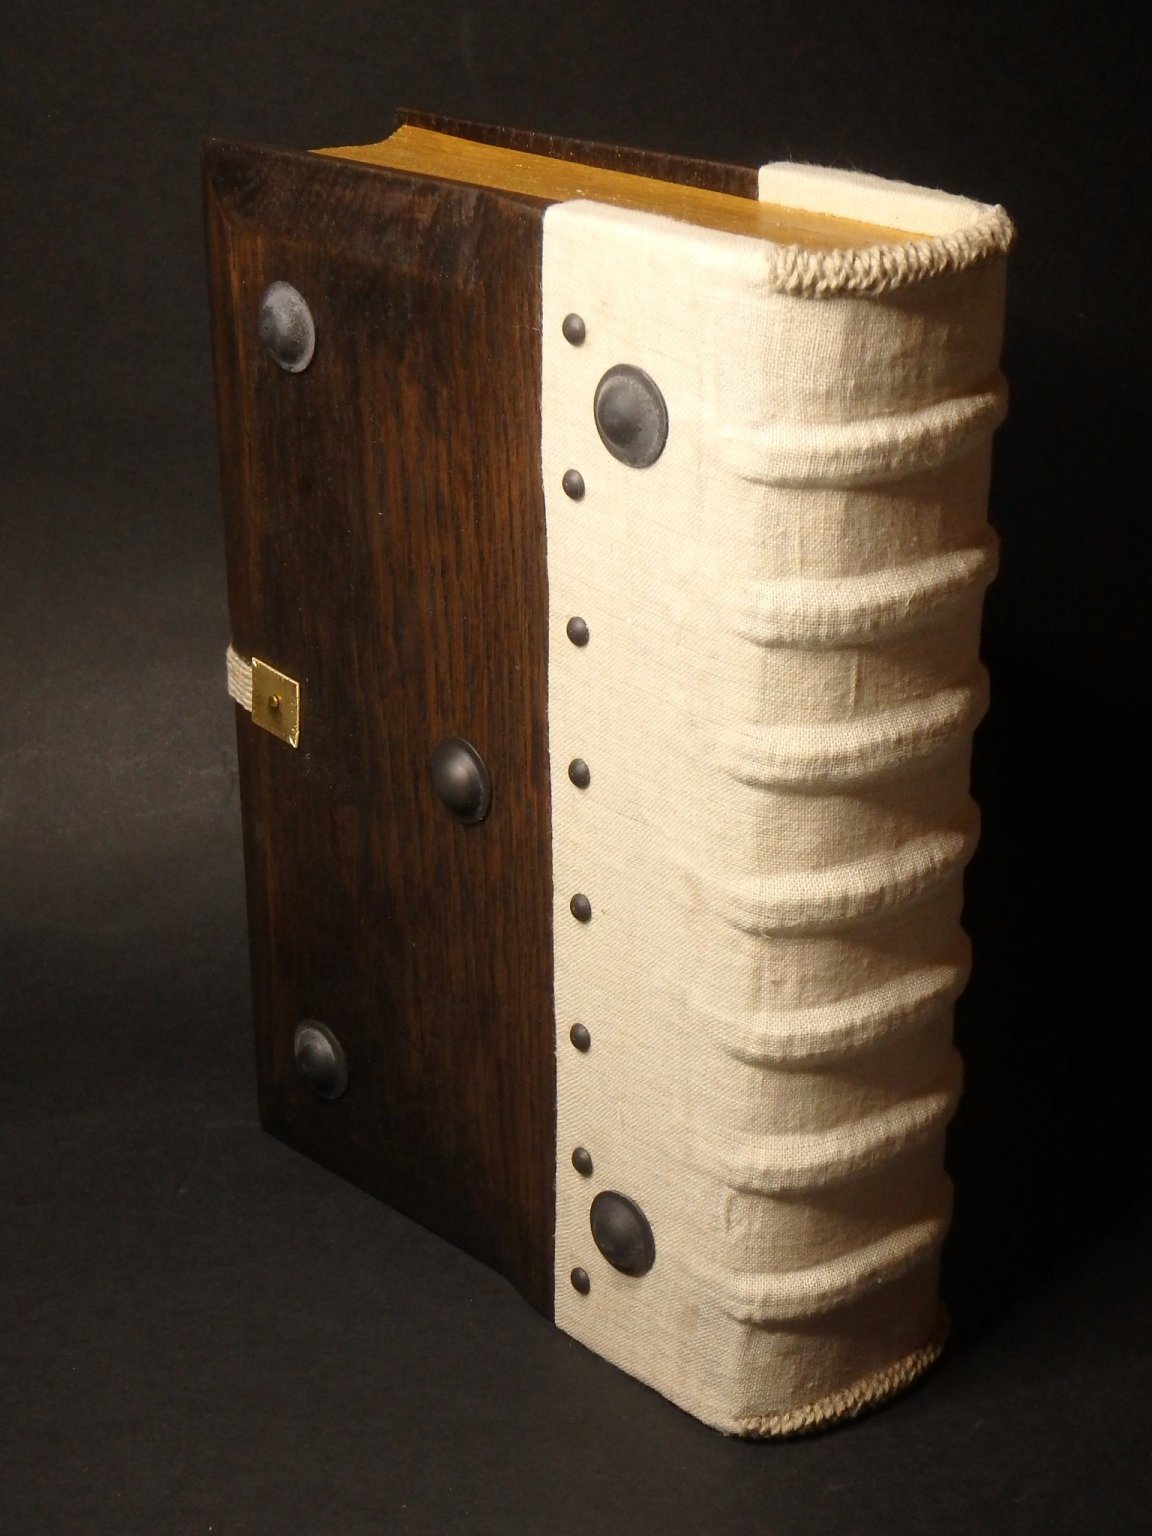
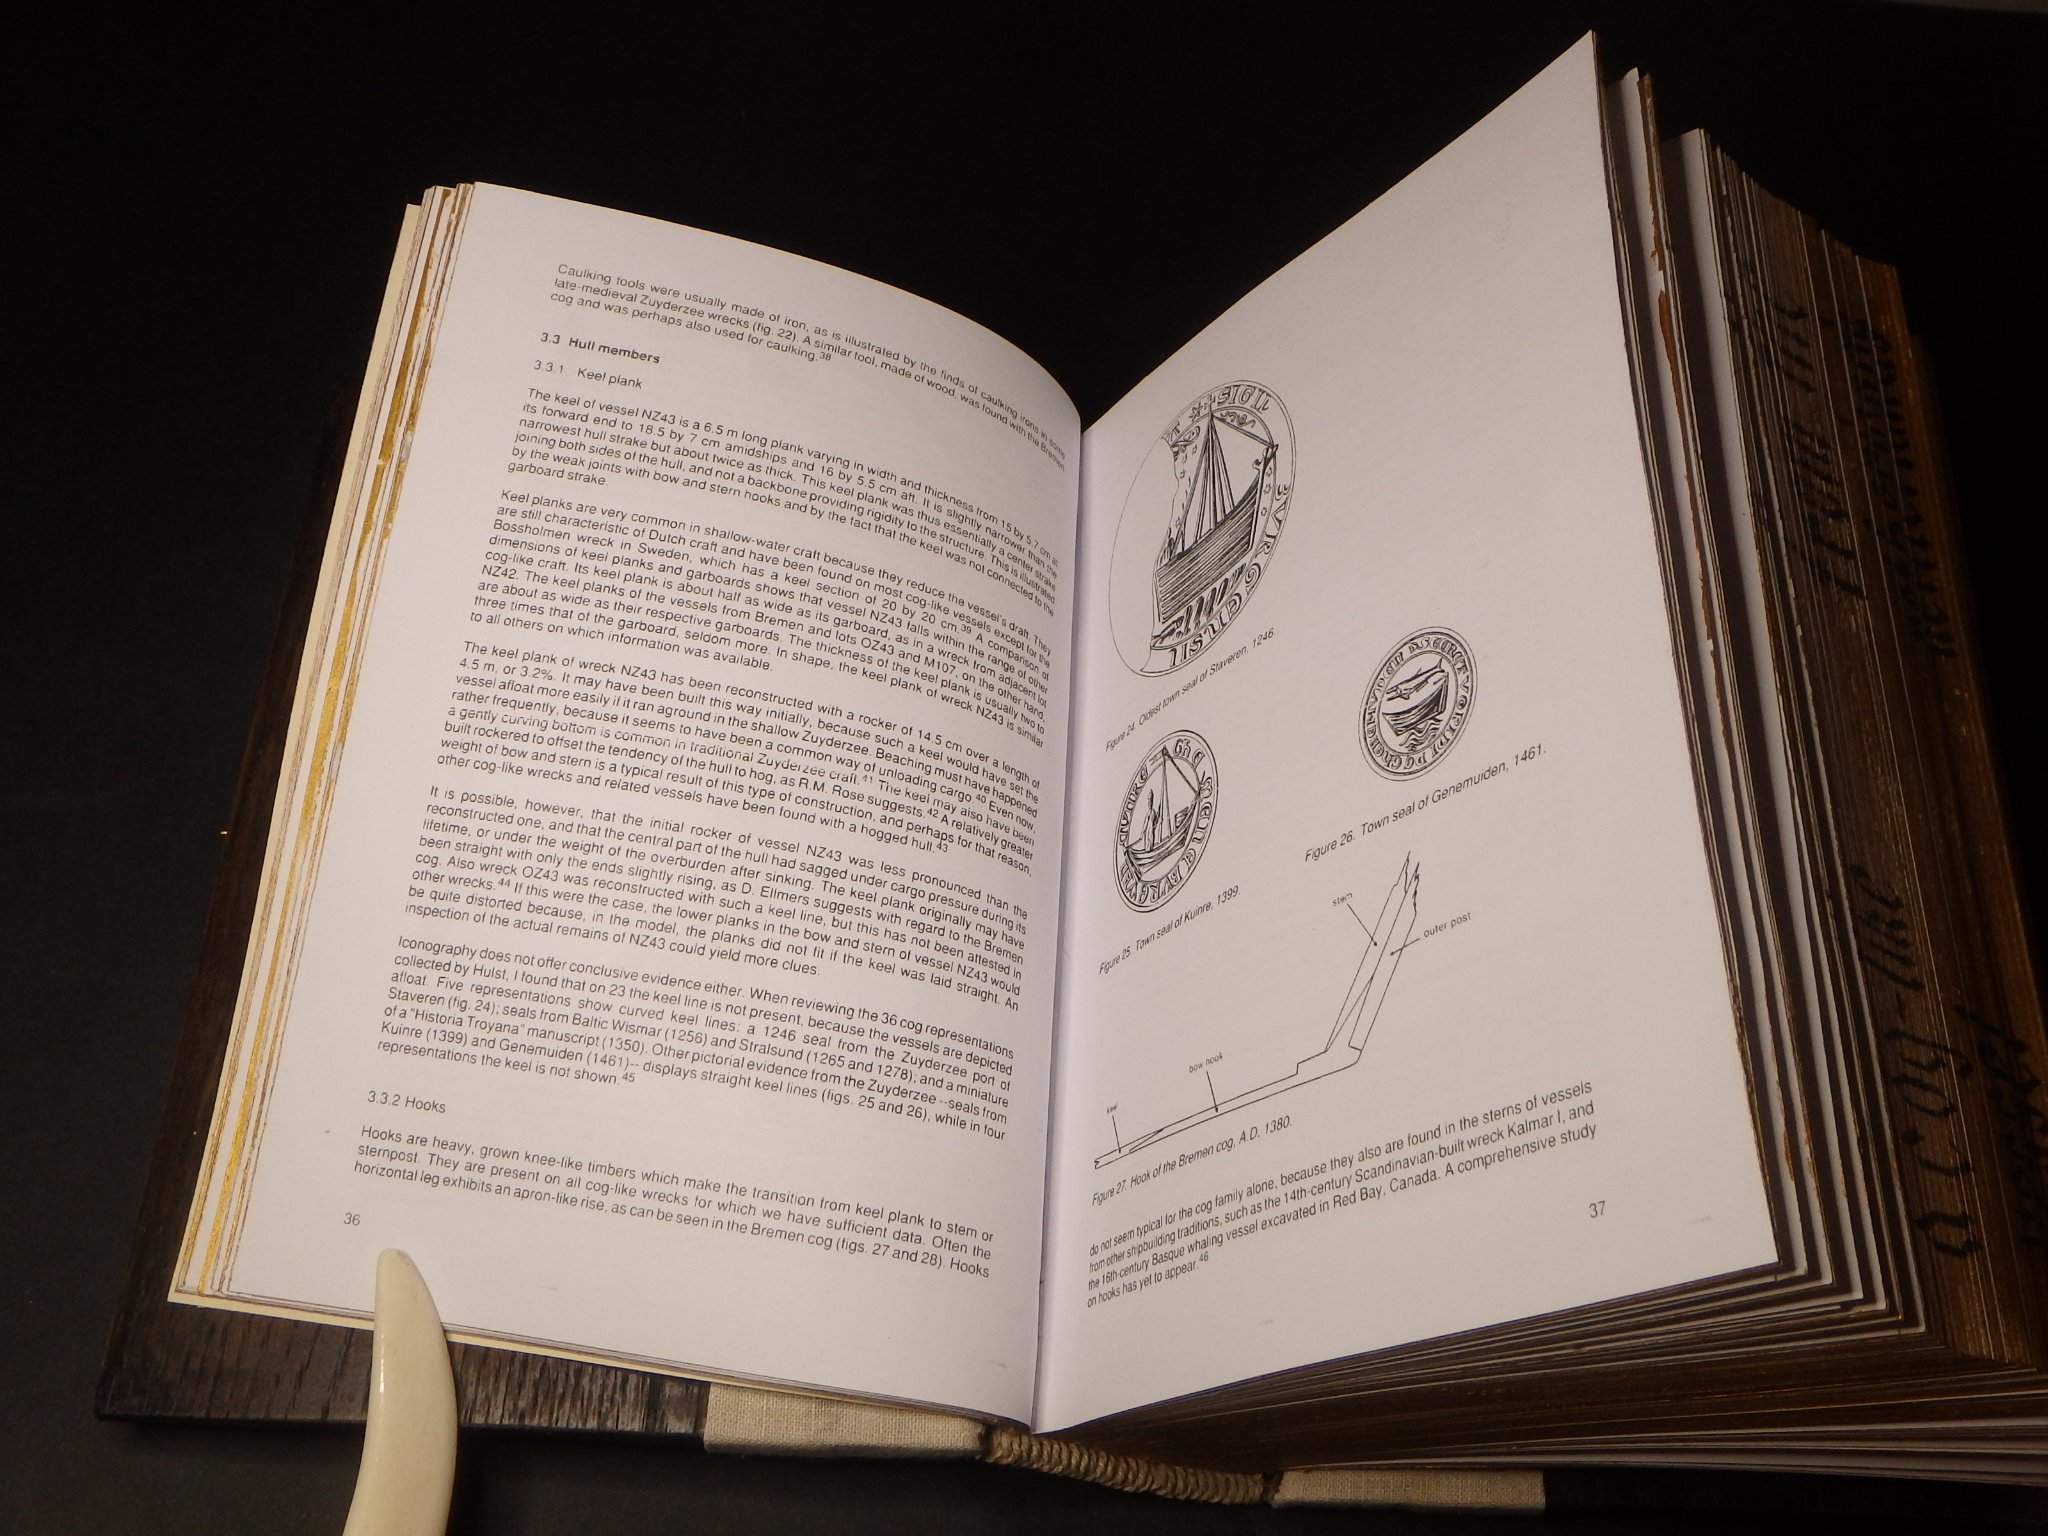
Testing, testing. Is this keyboard on? Sorry for the three month hiatus, but life got in the way. Well, it started as a planned break but then we moved to a new apartment and all interest of building disappeared. But now I got a room as a workshop and just as it started to get in order my interest of building came back! The planned break was due to me building a base for the ship. I got really excited for a really silly idea and thought it best to have it completed before showing it here. You know how I based this ship on a thesis? Why then not use that thesis as a base for the ship, literally? So I bound it in a book and used it as a base. Another hobby I have beside modelmaking is medieval bookbinding and thought it would be fun to bind this text that I now have read so many times. So I printed it and bound it with medieval techniques and in the same style as the cog. -The covers are of pitched oak like the hull. -The spine is covered in bleached linen like the sails. -The row of nails along the cloth is like the rows of nails in the hull. -The raised bands on the spine resembles the hull's frames. -The headbands are covered with the rope used in the rigging. -The herring used as a clasp brings to mind the ship's cargo. This might not be a bookbinding forum, but I think many here would enjoy doing it so I will add couple of pics to give a small taste of it. The pages are collected in signatures and sewn to linen laces. The pages are cut to make them even. Headbands are added as support. And the covers are laced and pegged. And this was the result The title of the thesis is placed on the fore edge as they did back then and no, the thesis isn't really this thick. It is only fills the first third of the book, the rest is blank paper. And it looks like this as a base The funny thing is that this really is the second book I made. The first one was too small. You know what they say - measure once, bind twice.


-
That's a really neat way to get the correct frame shape! Looking very good!
- 179 replies
-
- 3
-
-
- longship
- Helga Holm
- (and 1 more)
-
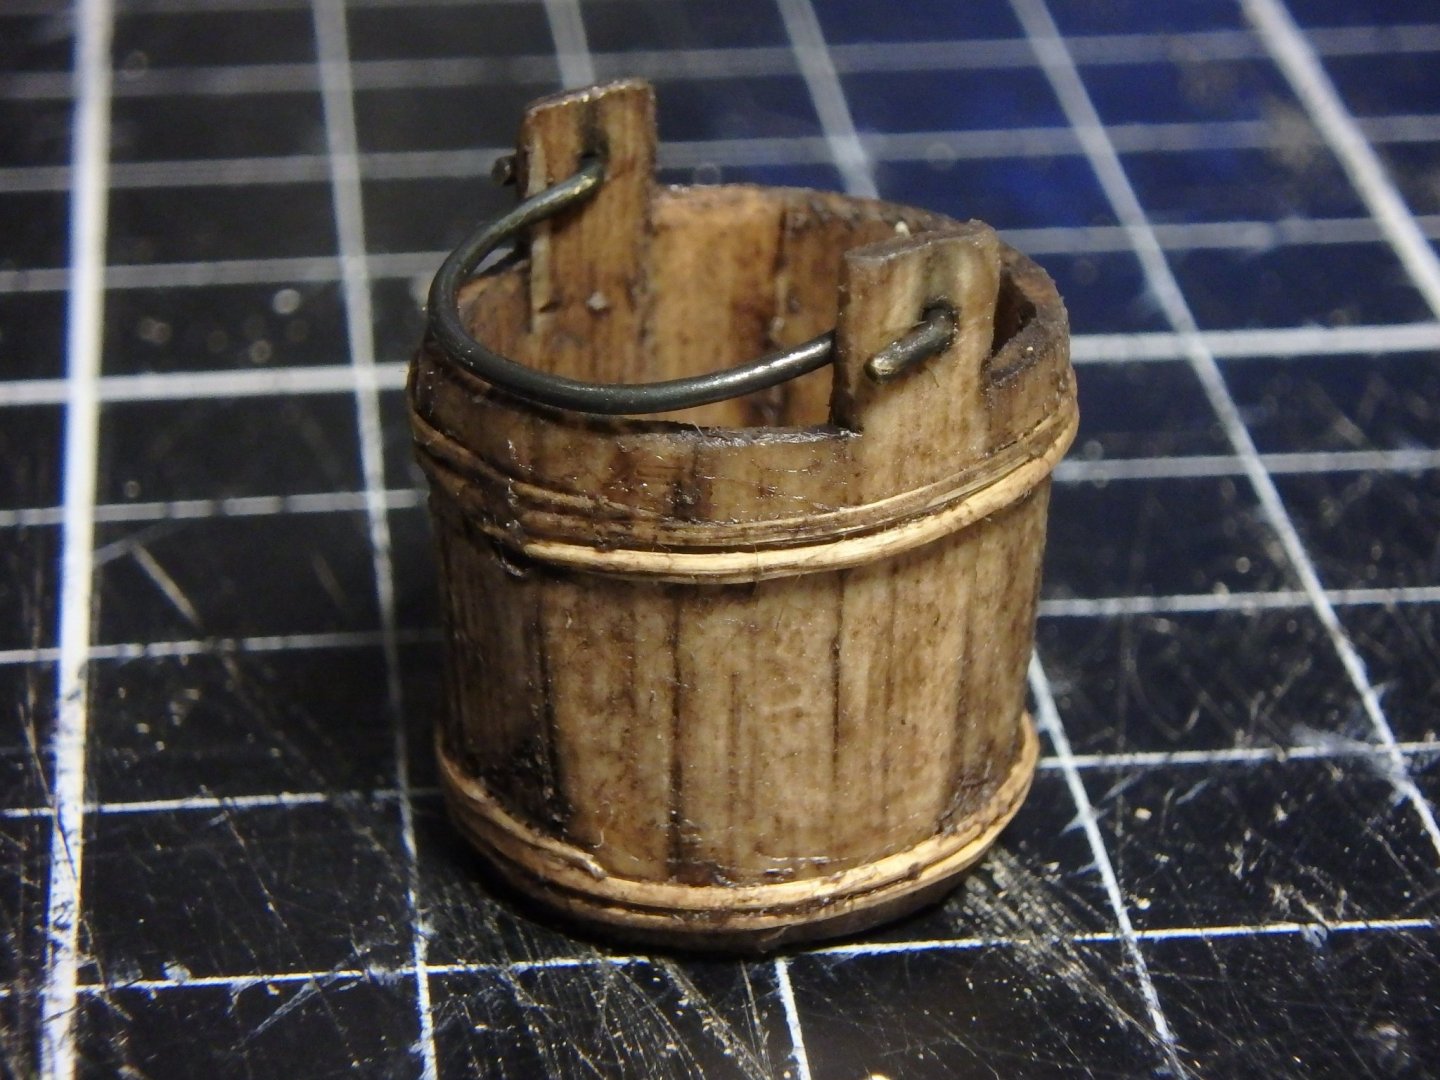
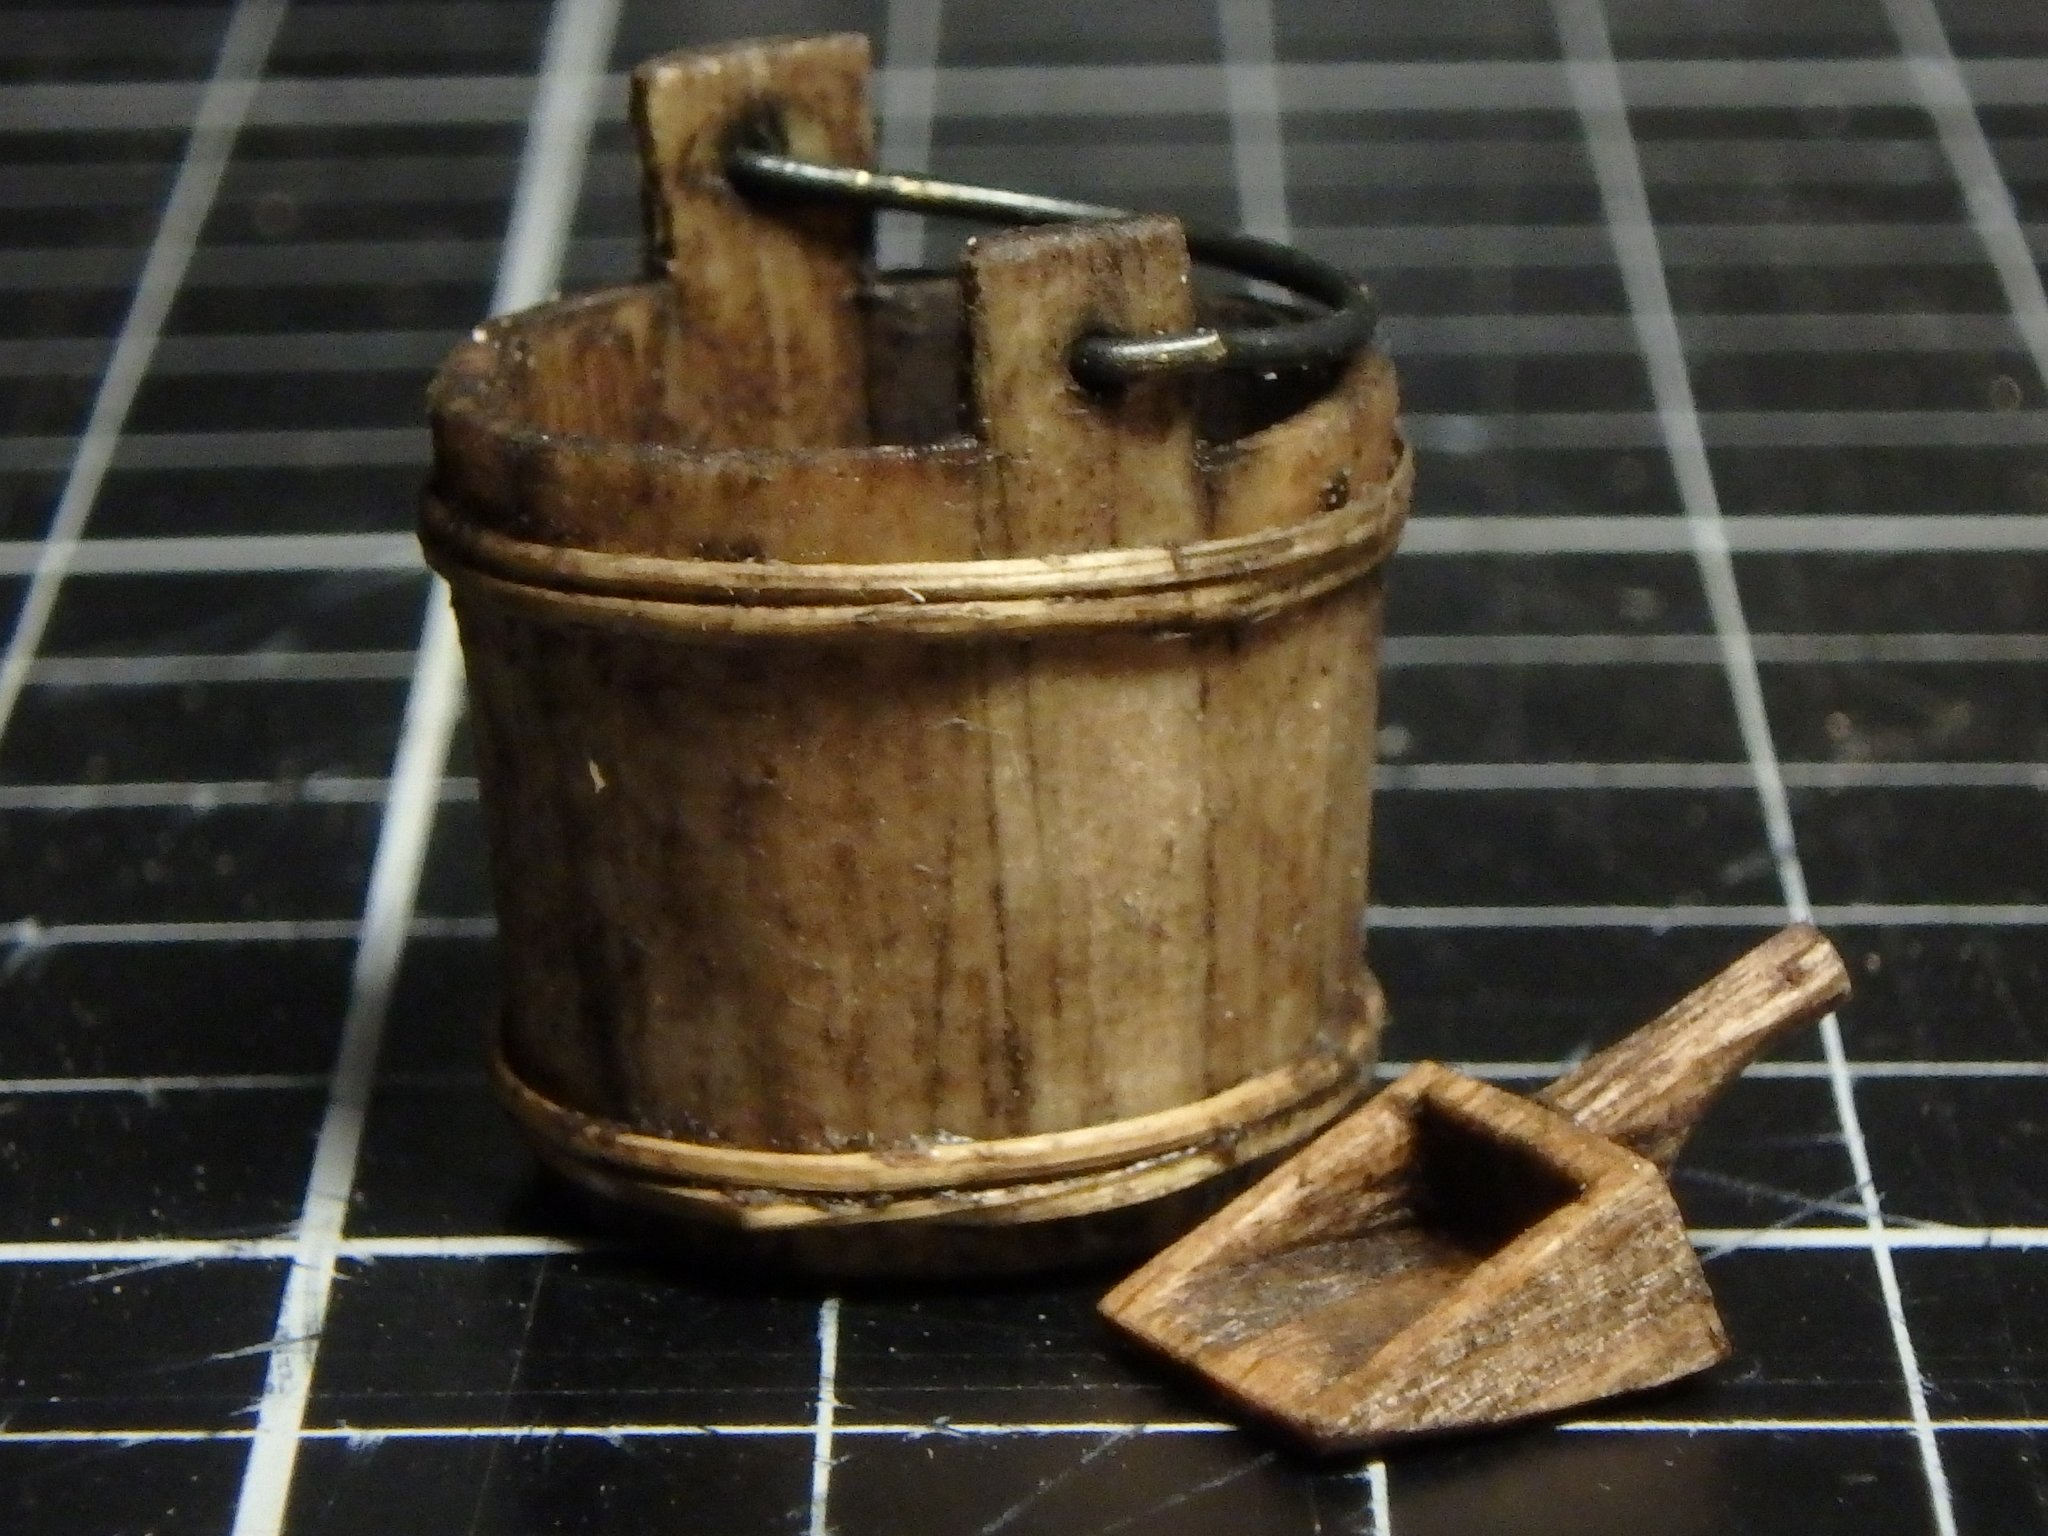
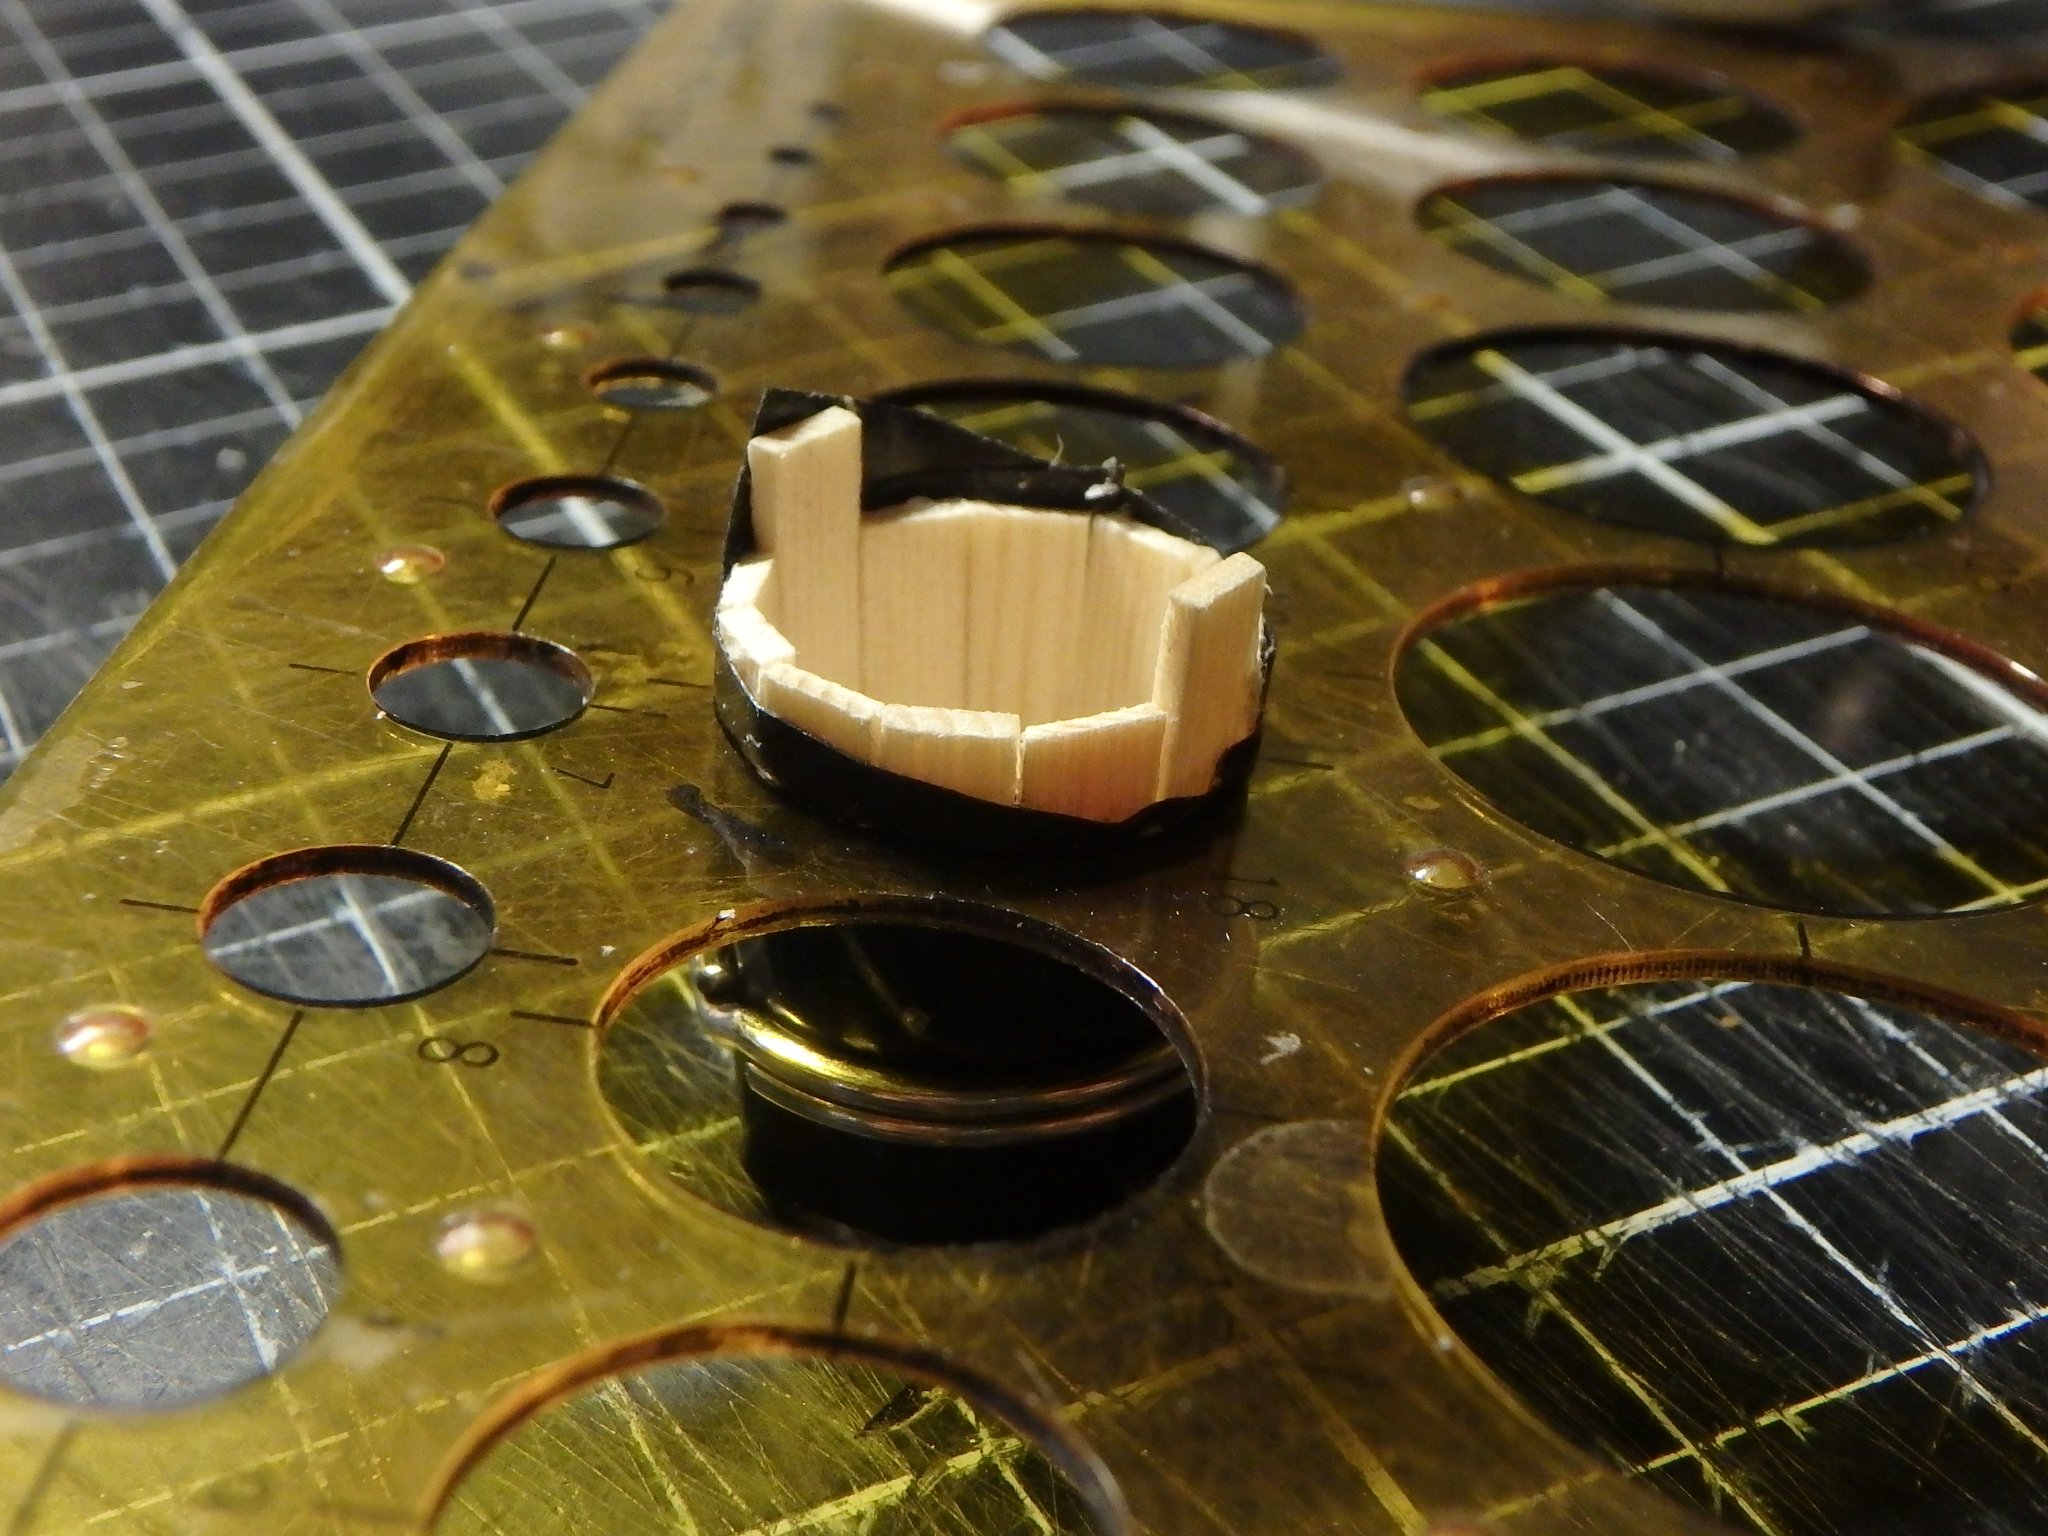
Thank you all for then likes and @Jim Lad and @bolin for your very kind words. And thank you bolin for your thread, the discussion in it regarding sails made me understand what bonnets were and why they were used. I had seen them before but just couldn't understand them at all. The bailer is done. It is based on a viking find, but I guess bailer technology didn't develop all that fast. It looks like it contains very little water, but I measure it to be 0,5 liters (0,15 gallons)

-
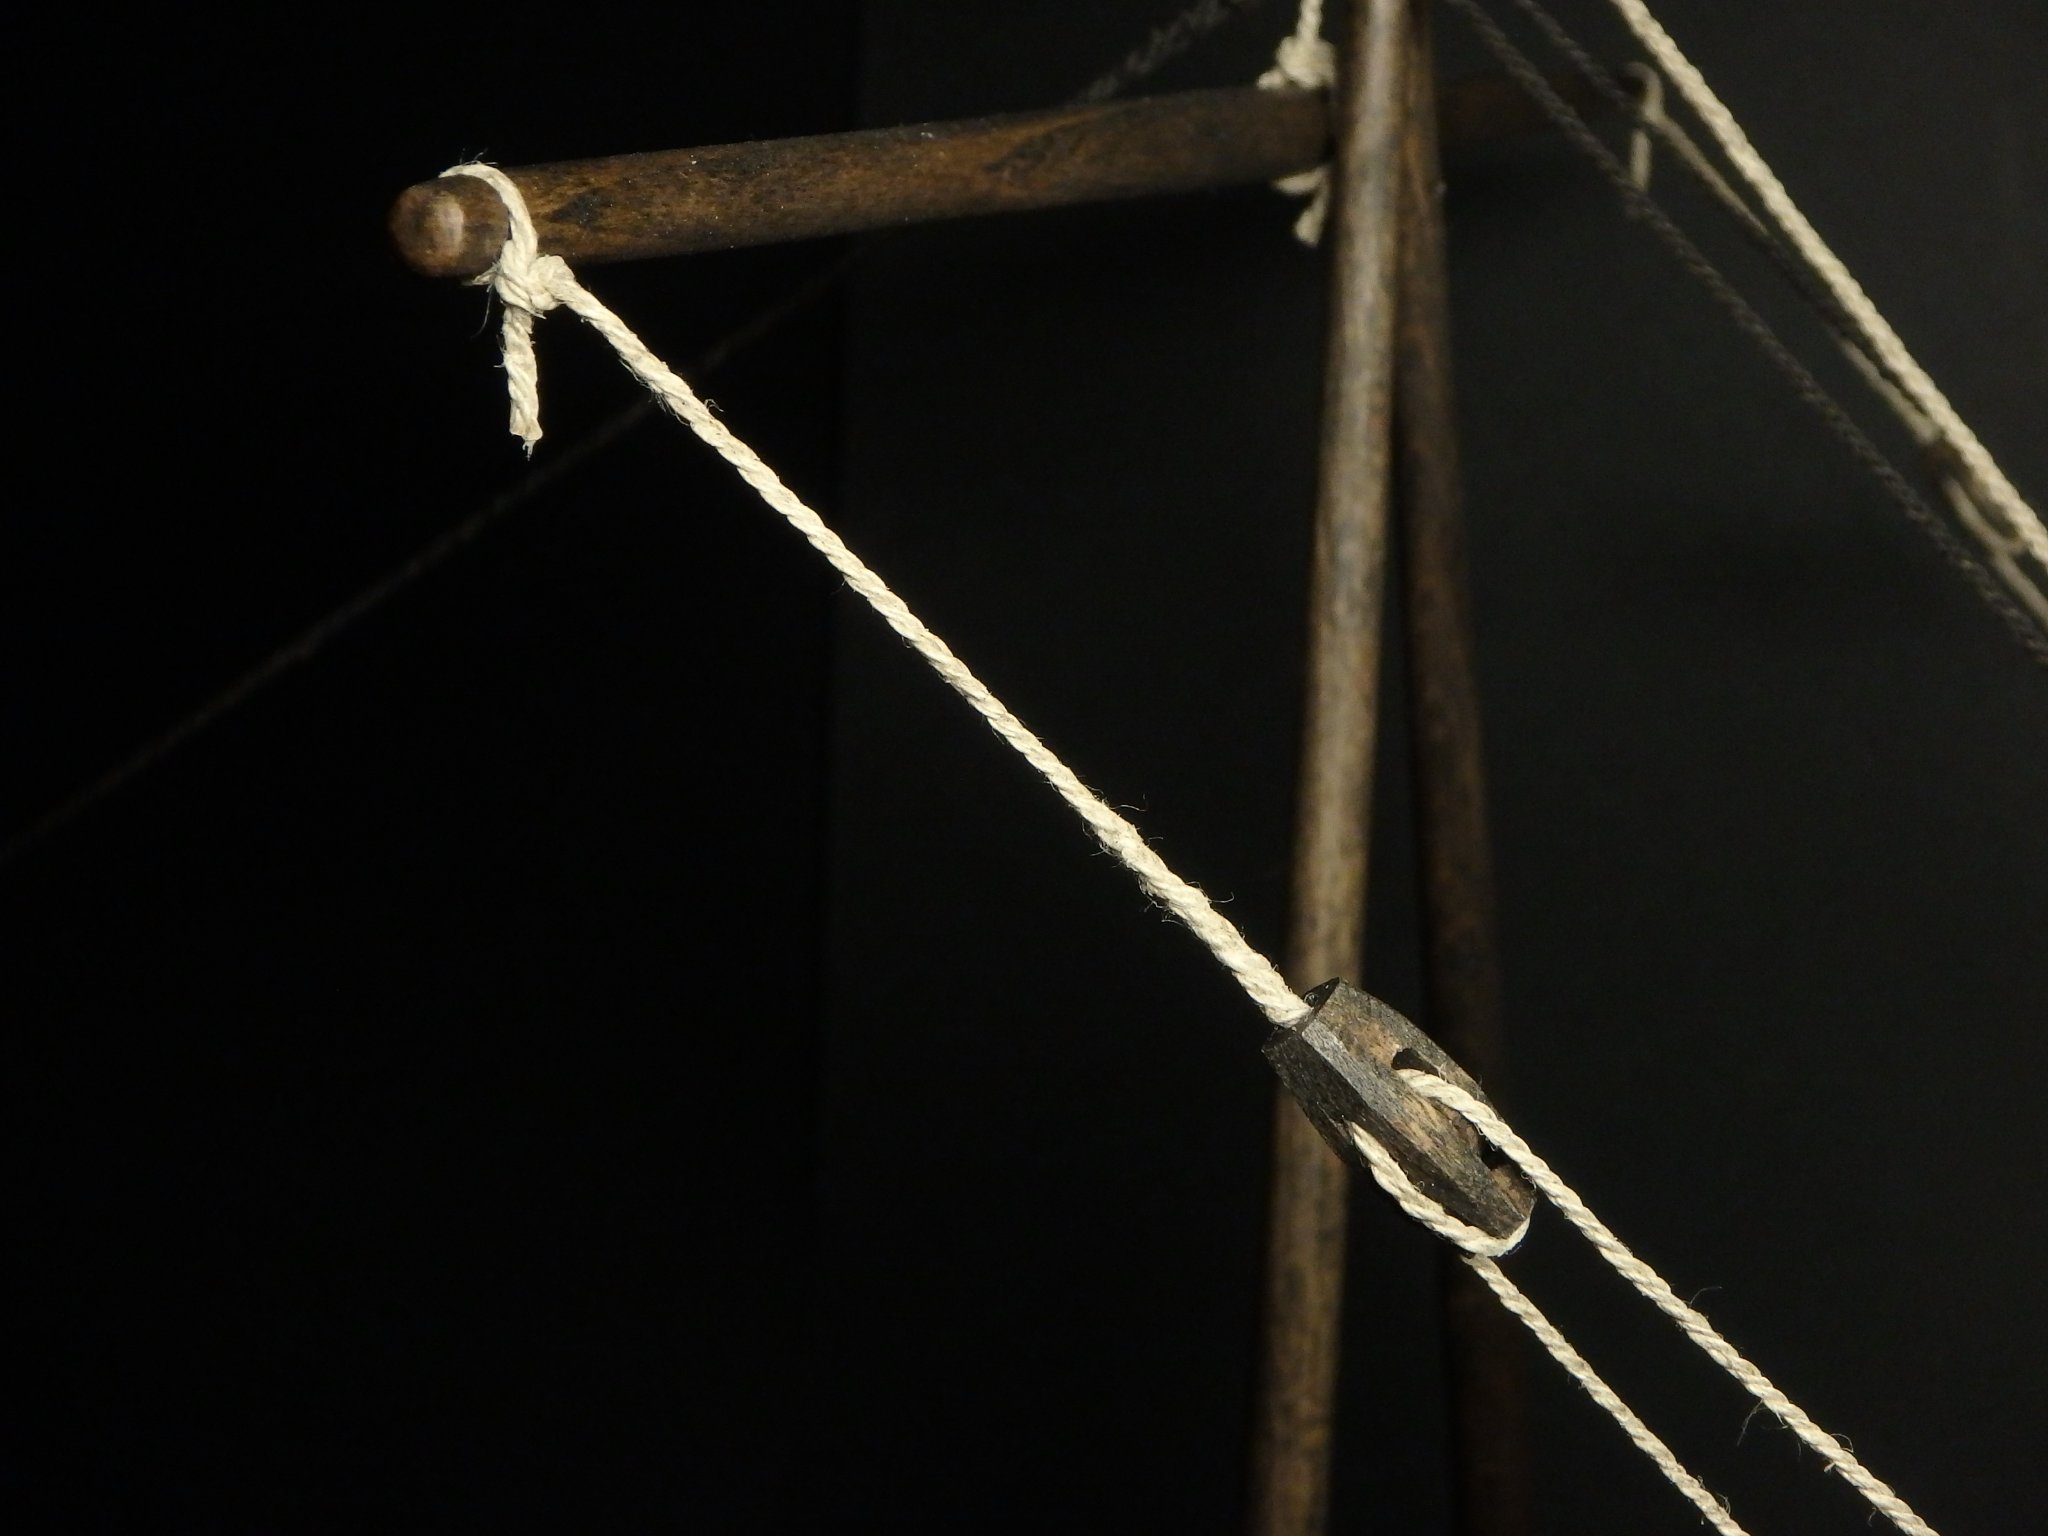
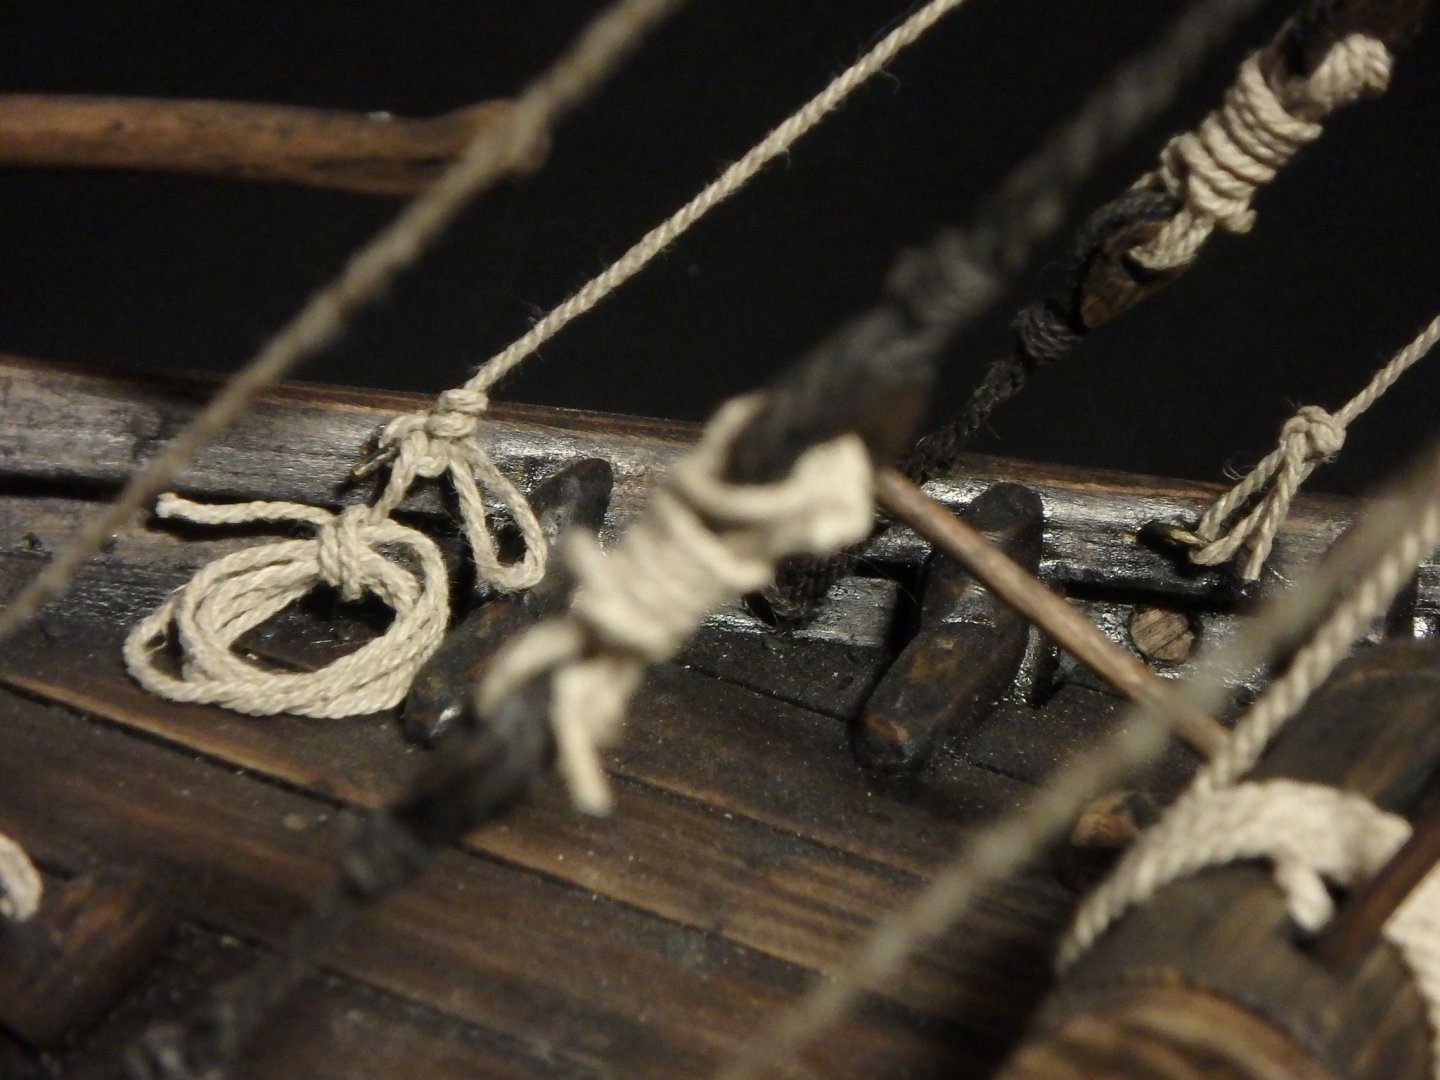
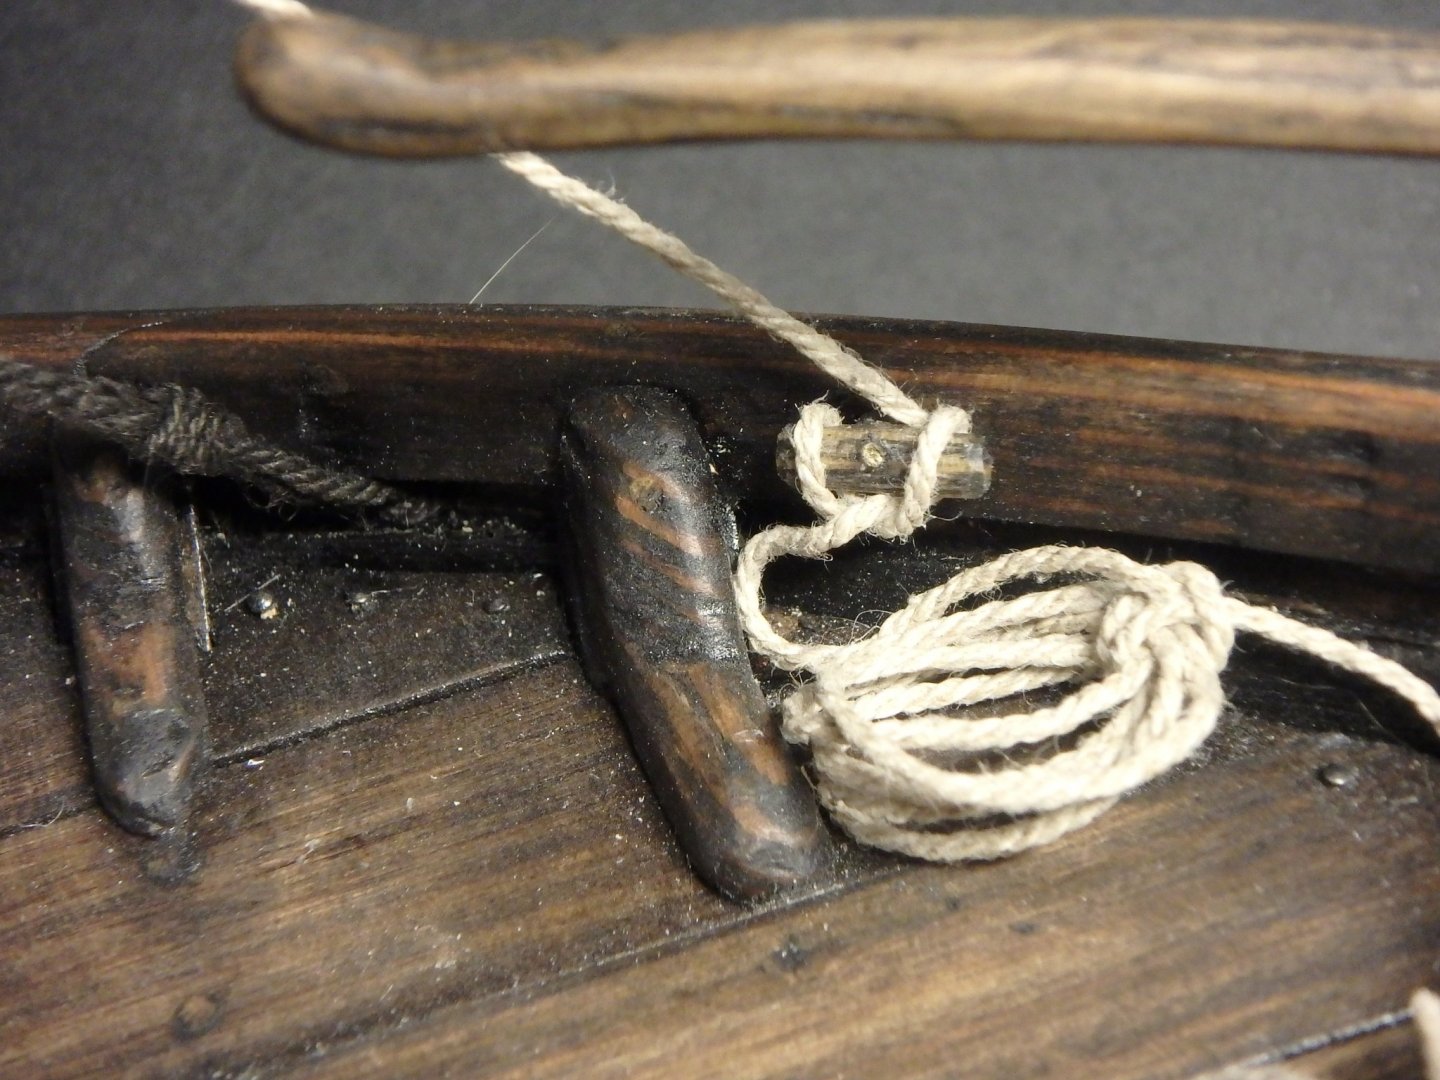
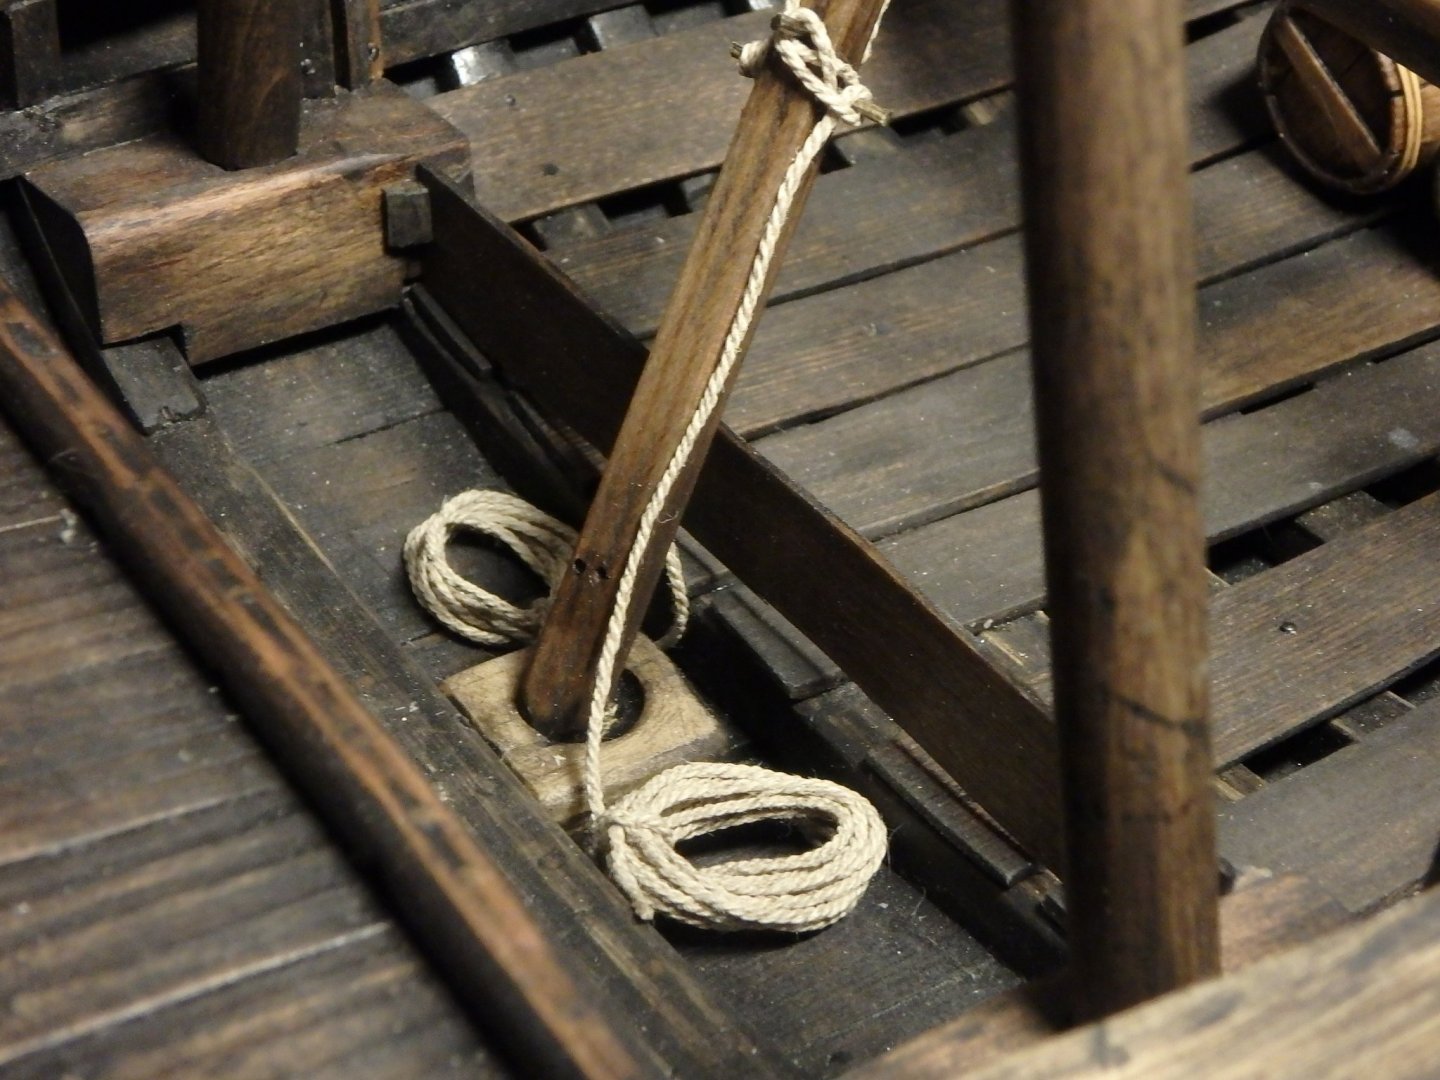
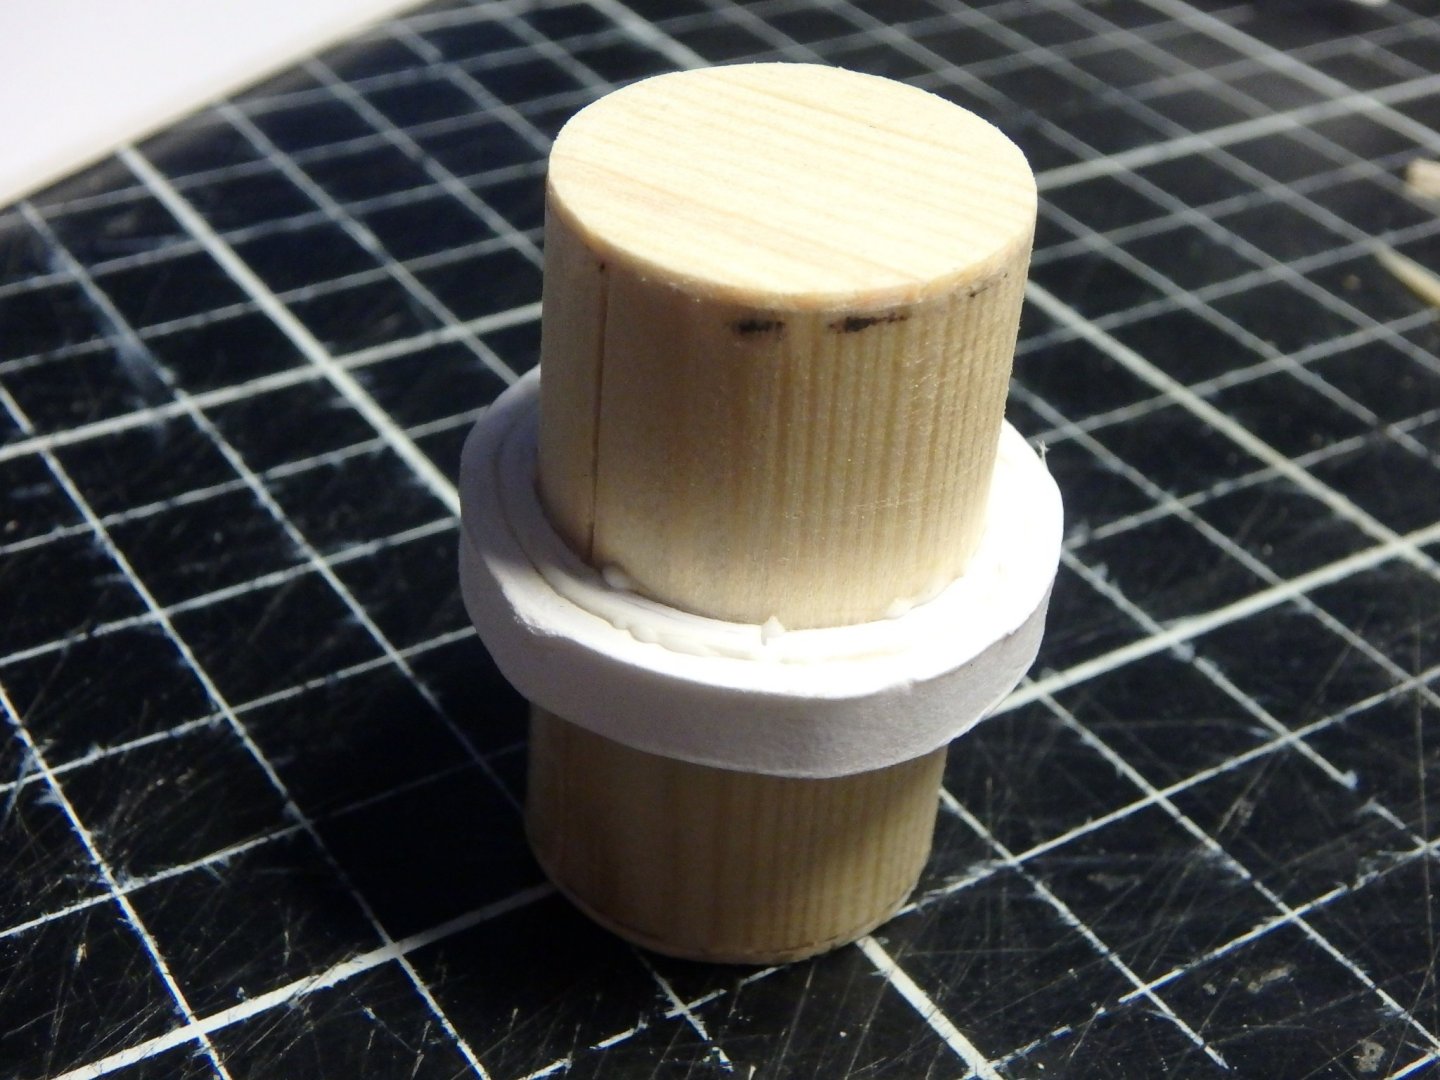
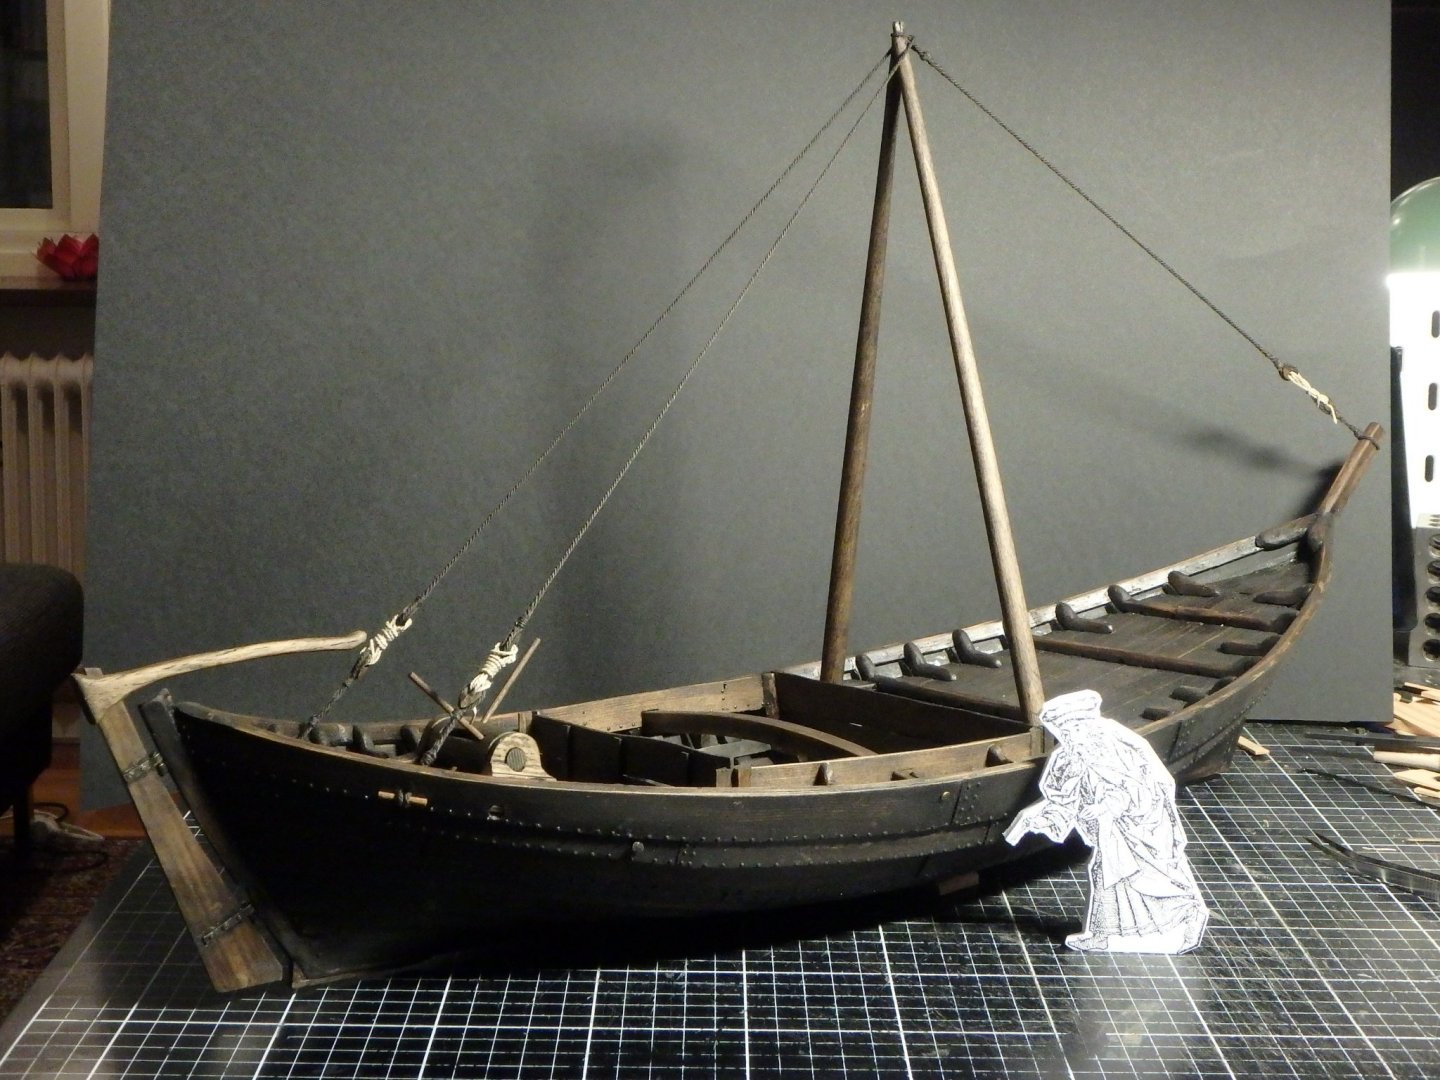
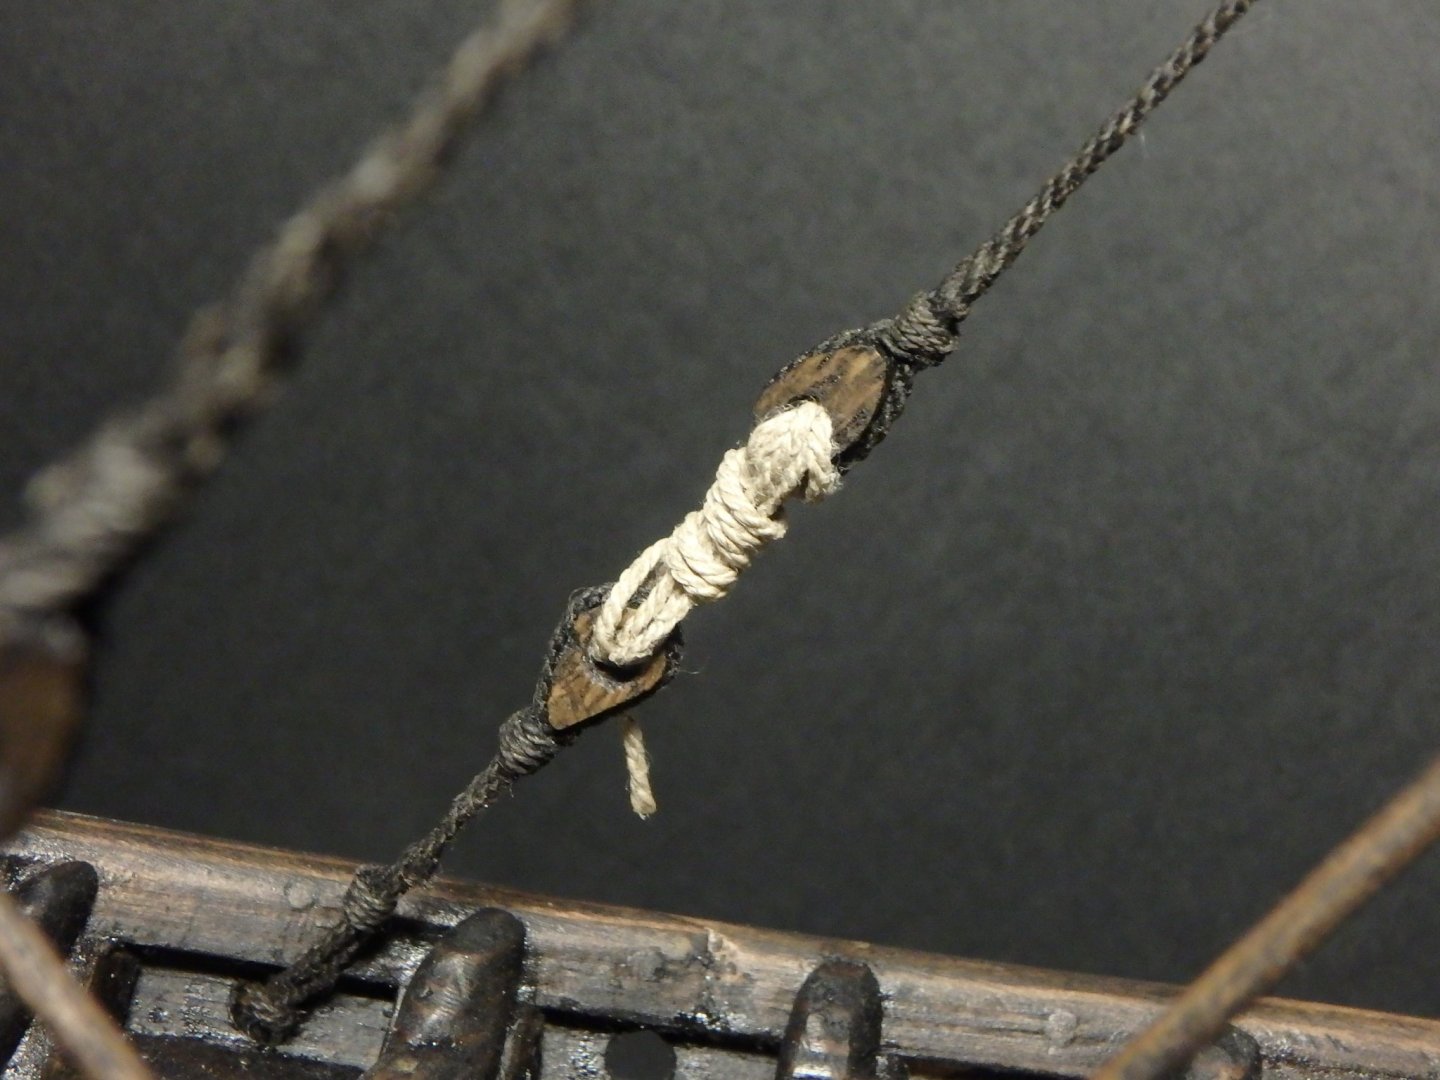
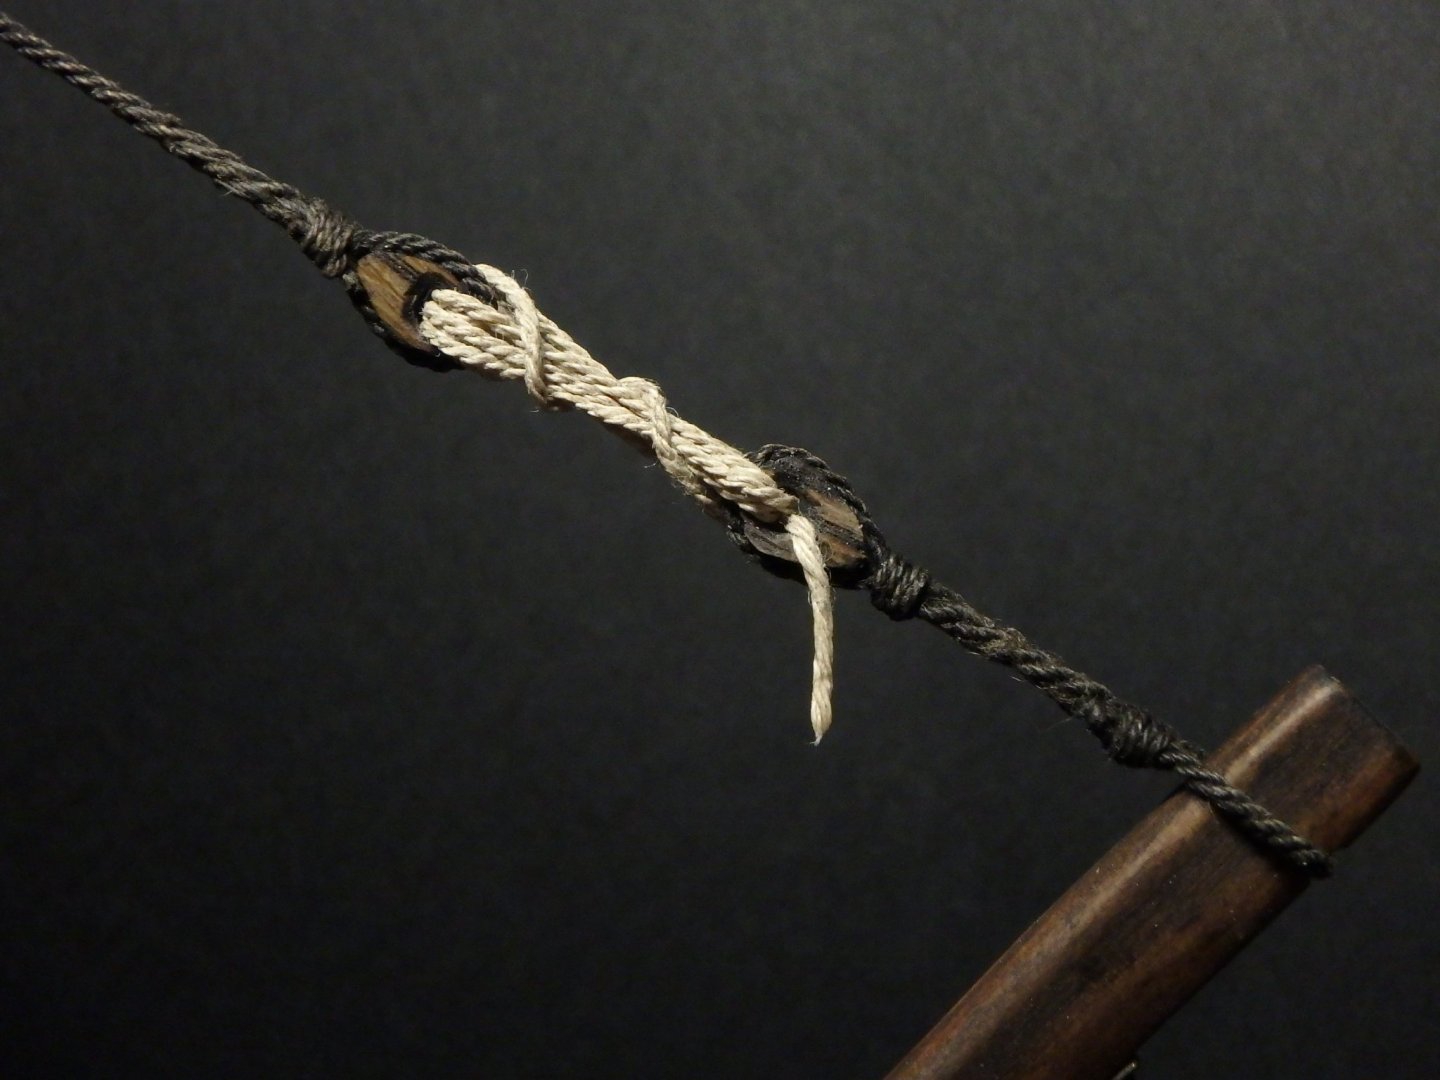
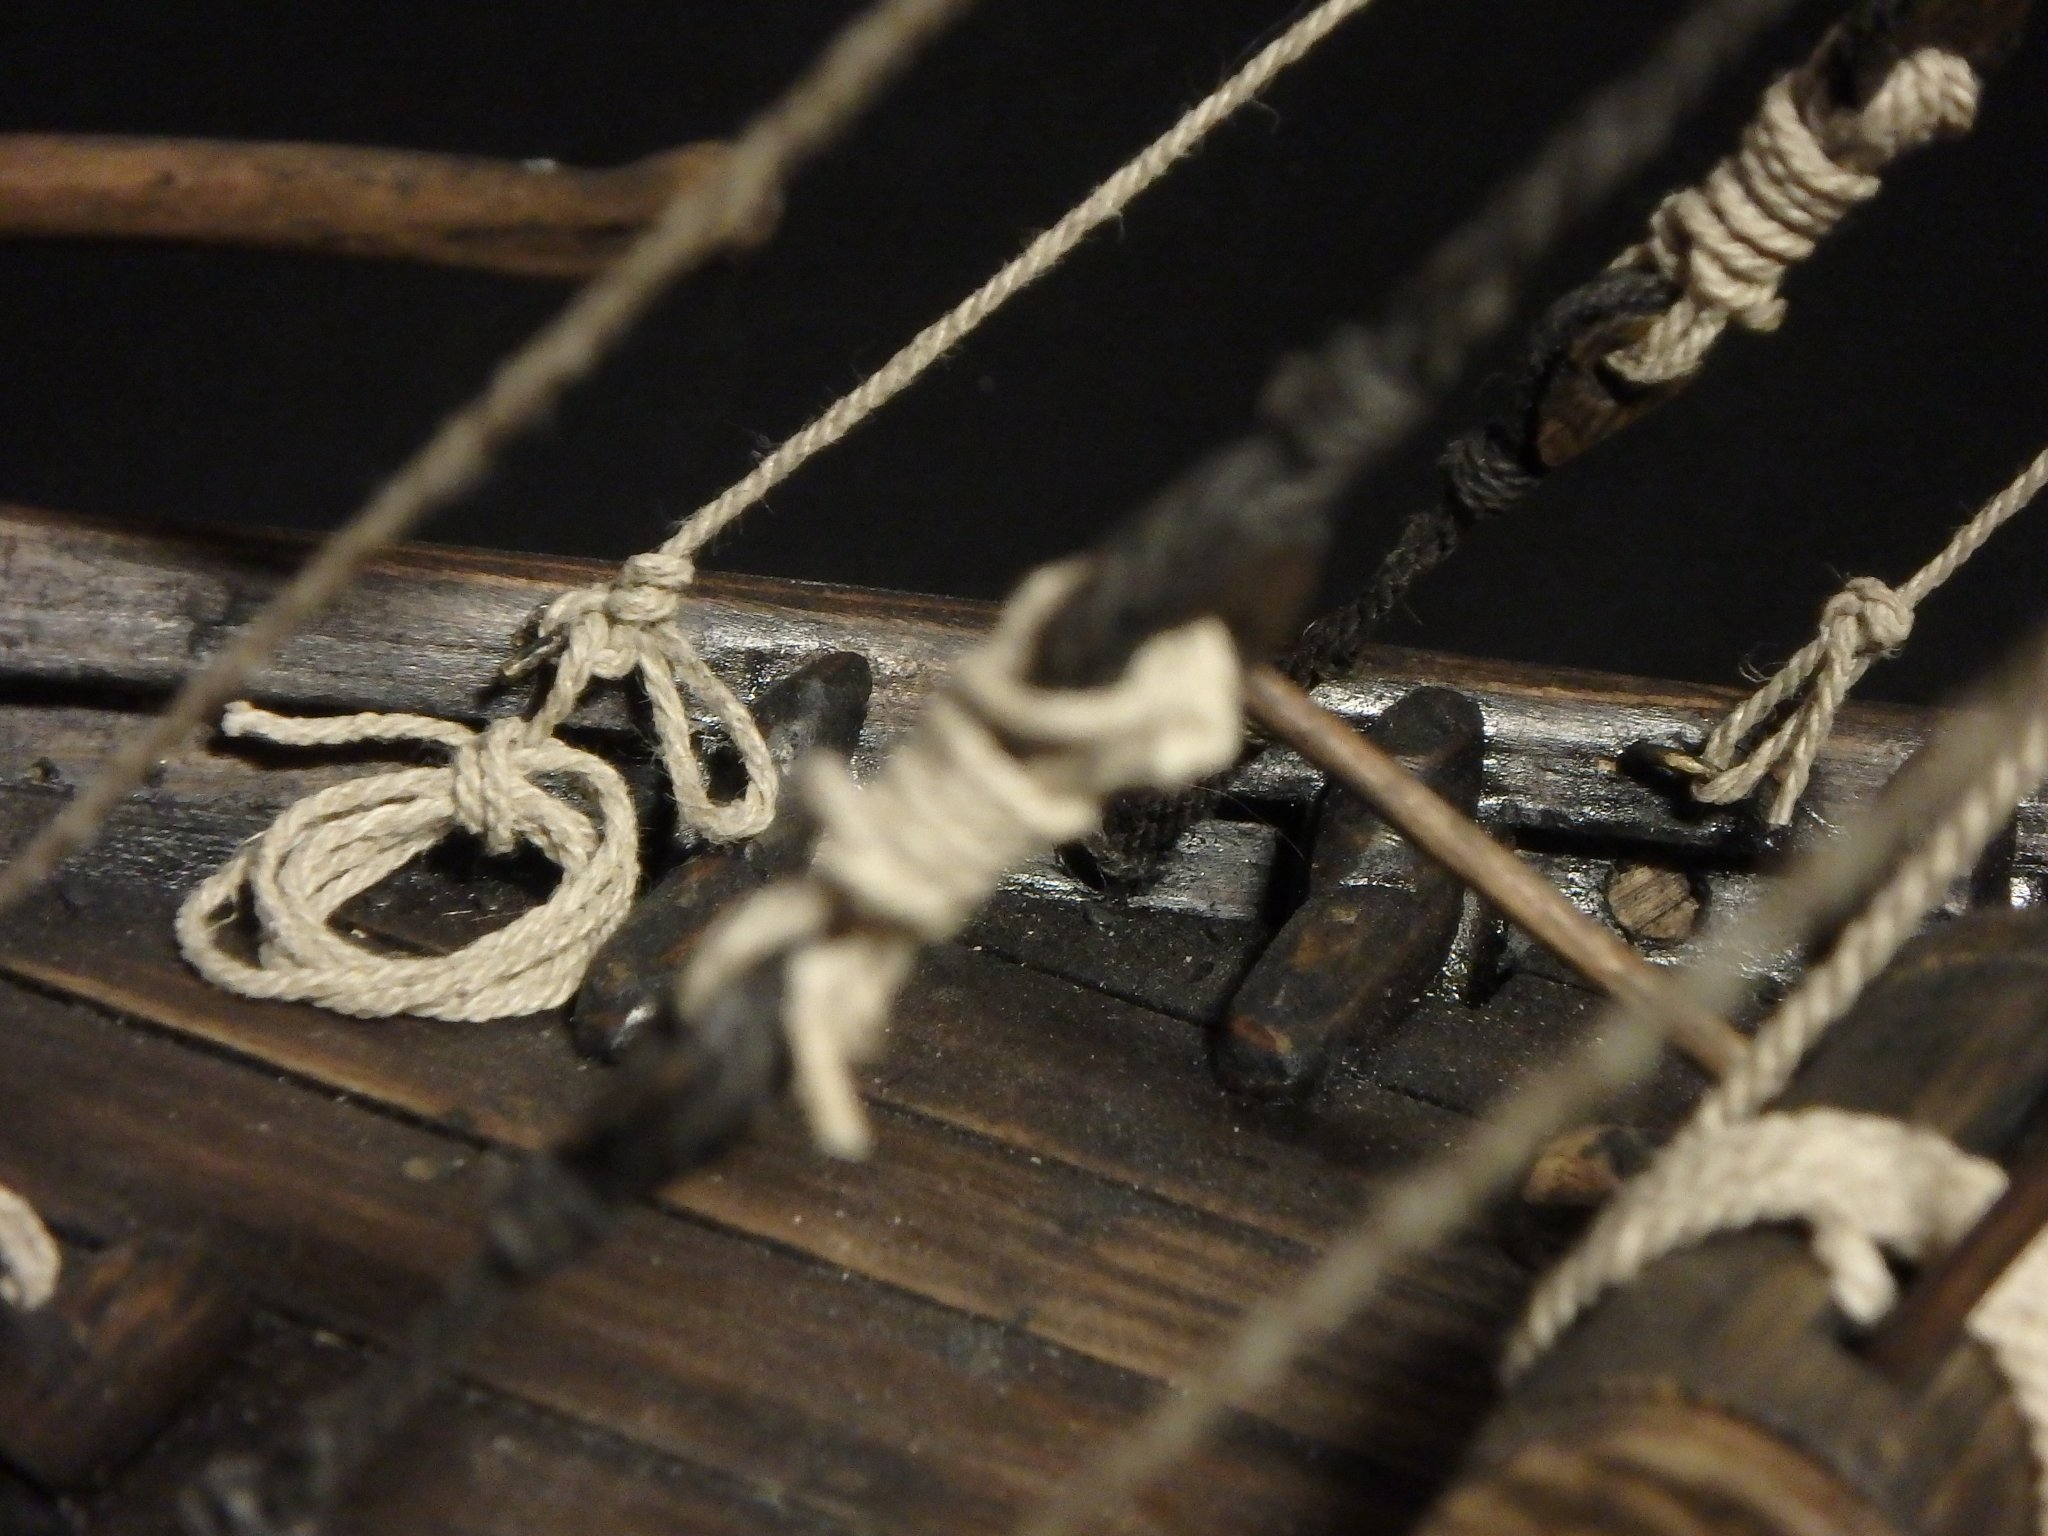
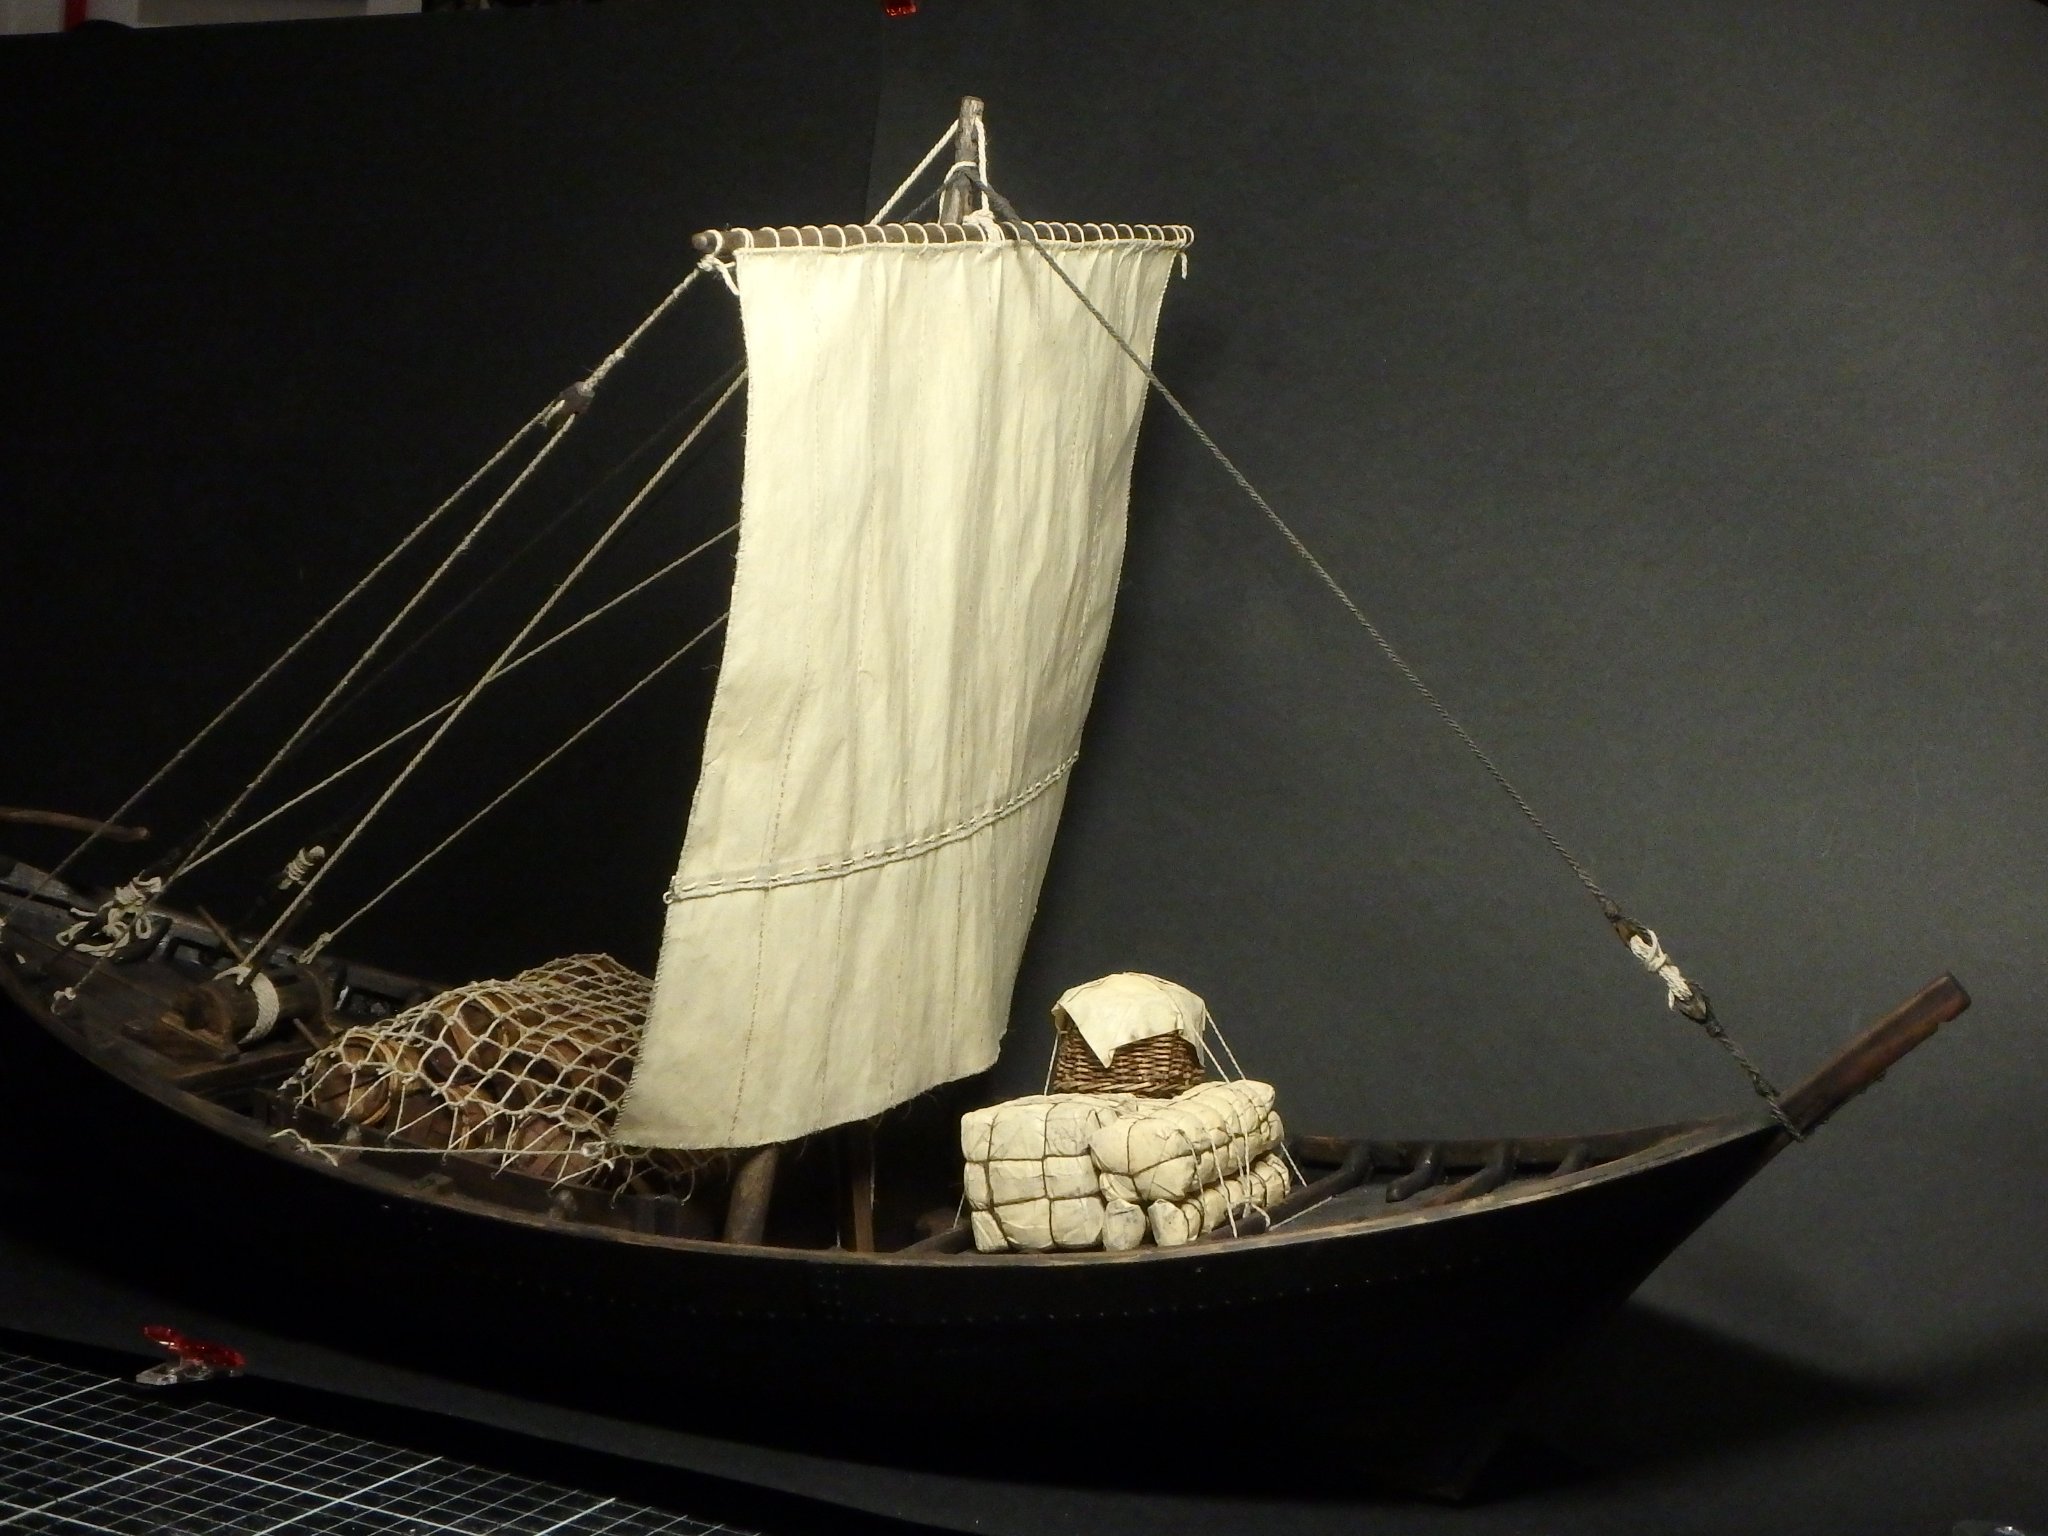
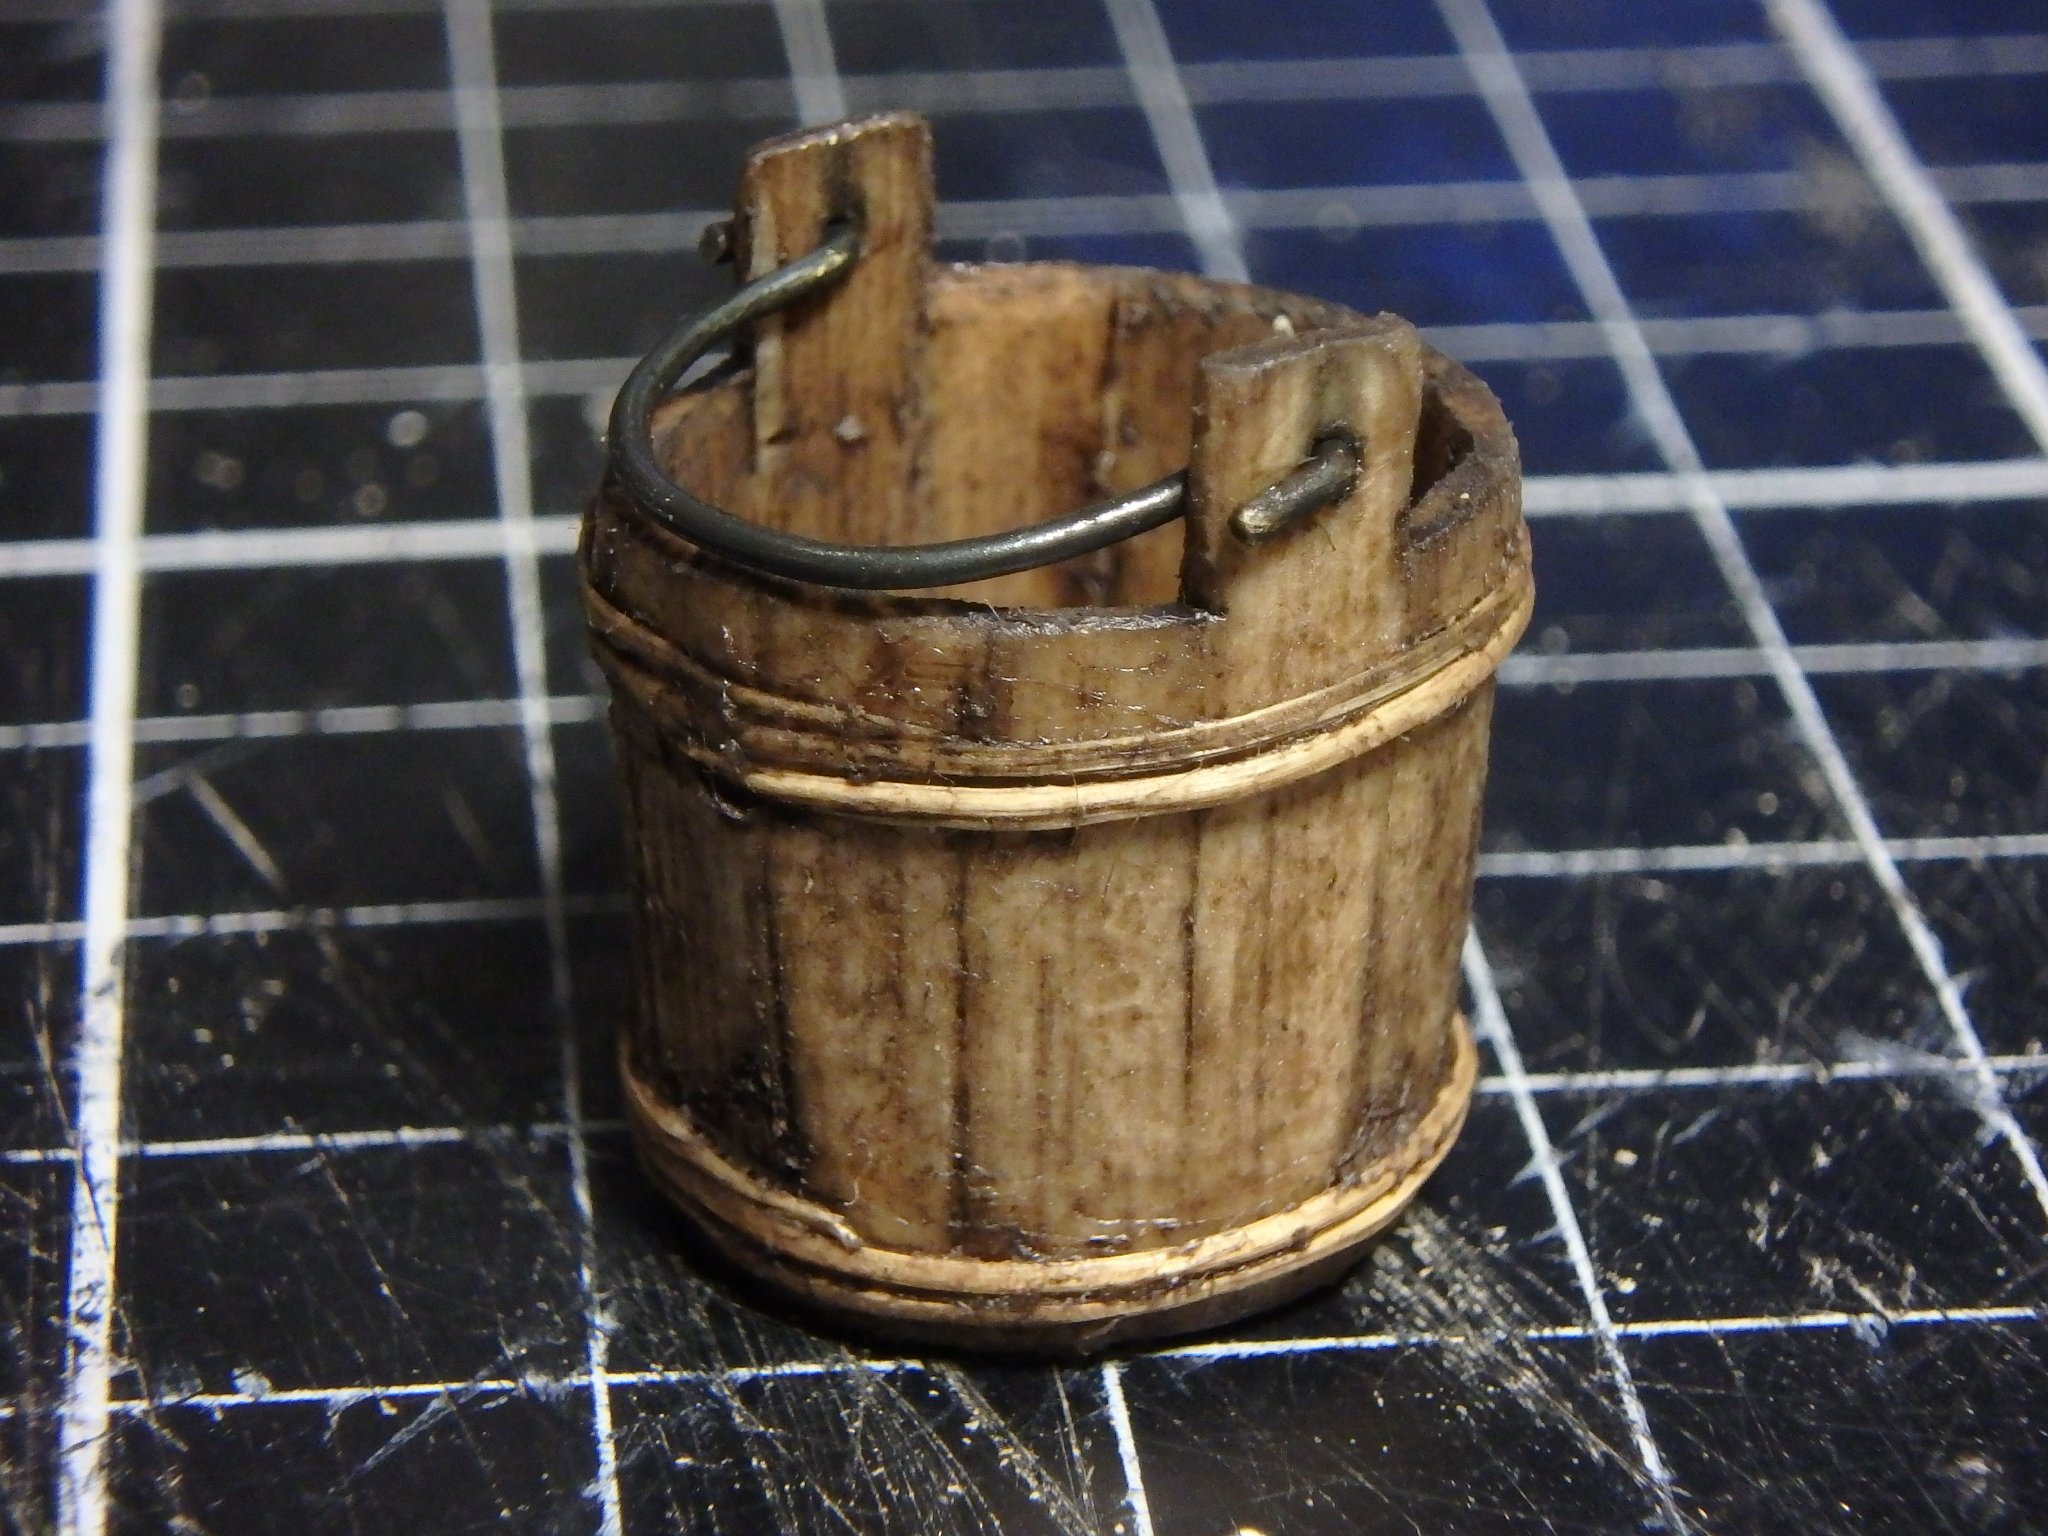
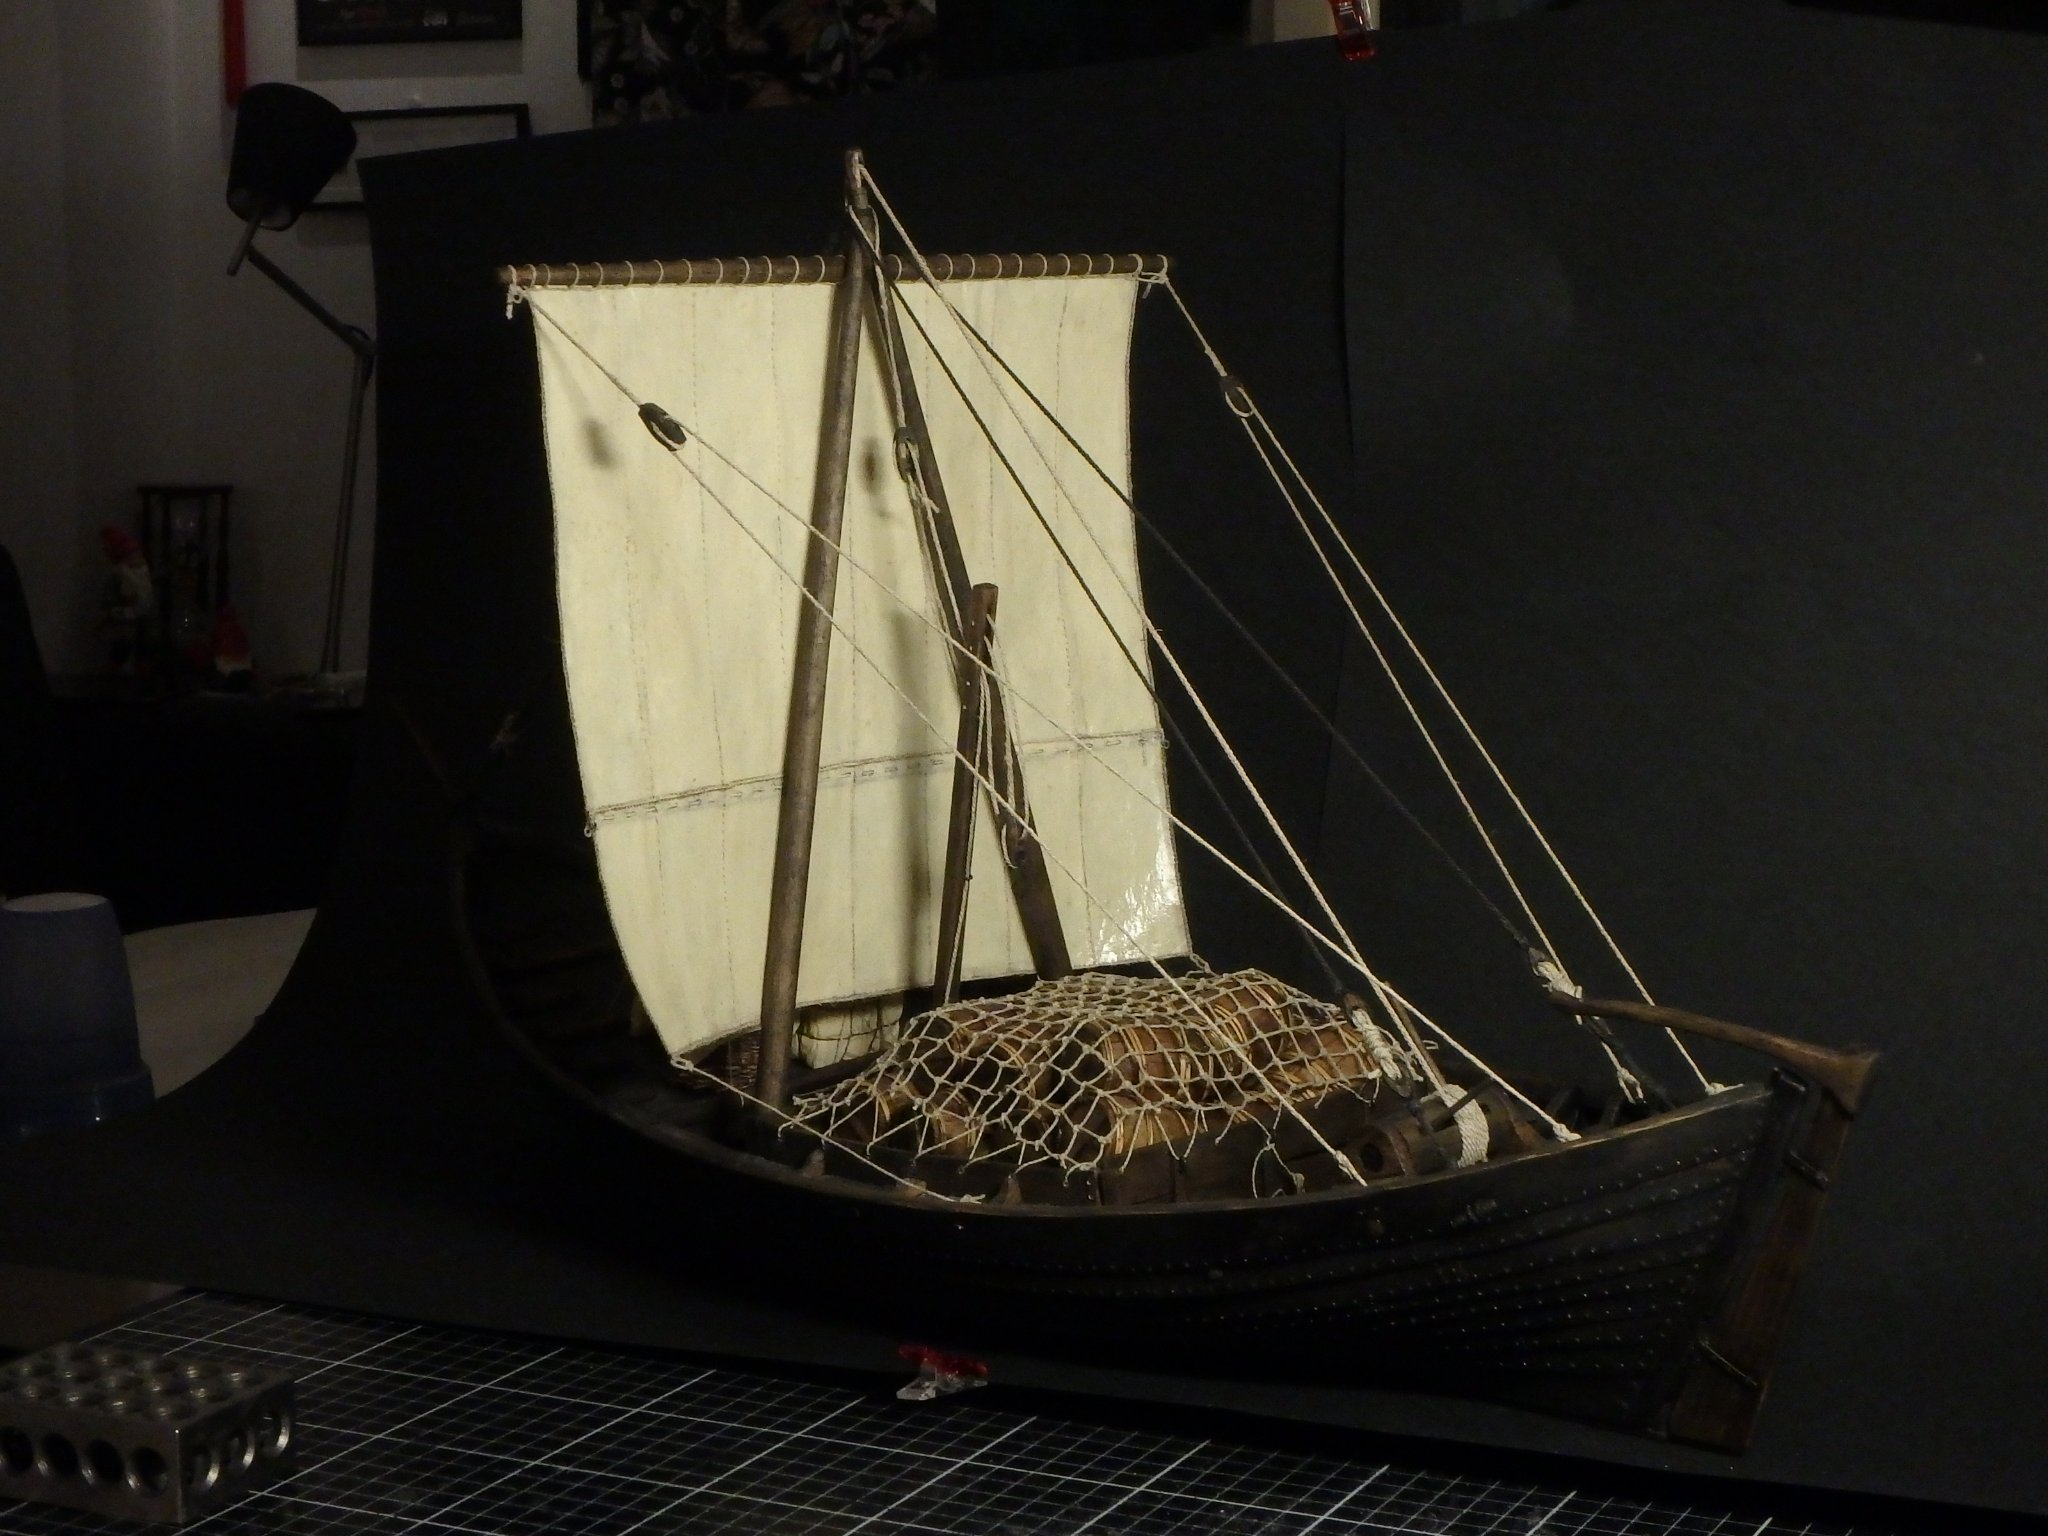
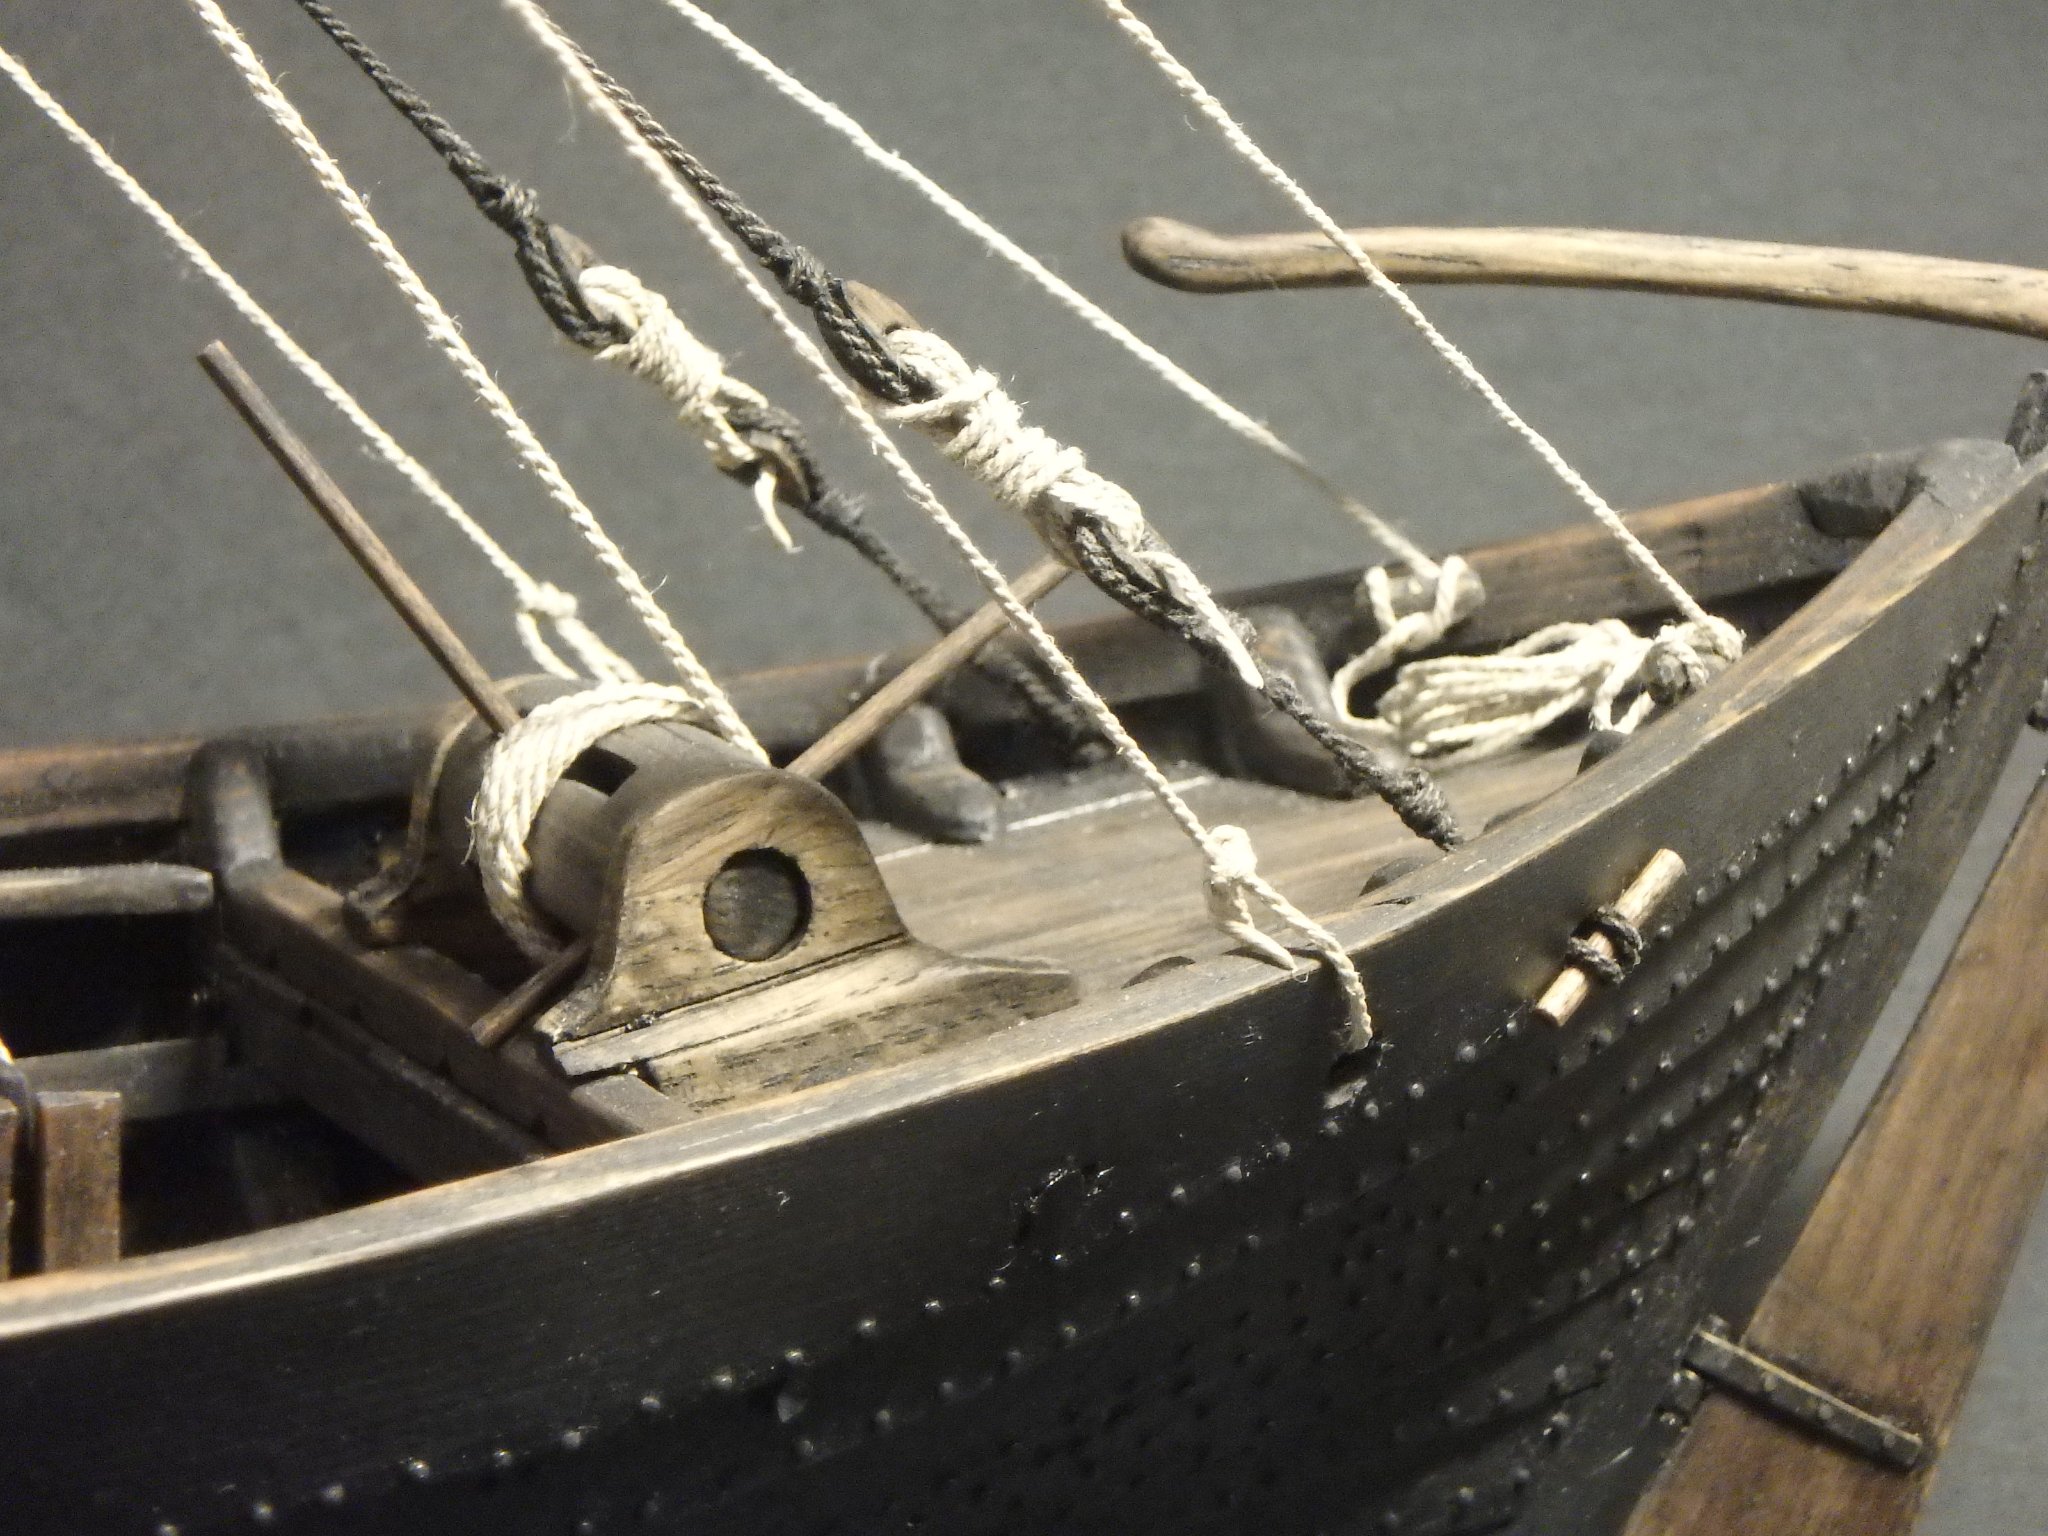
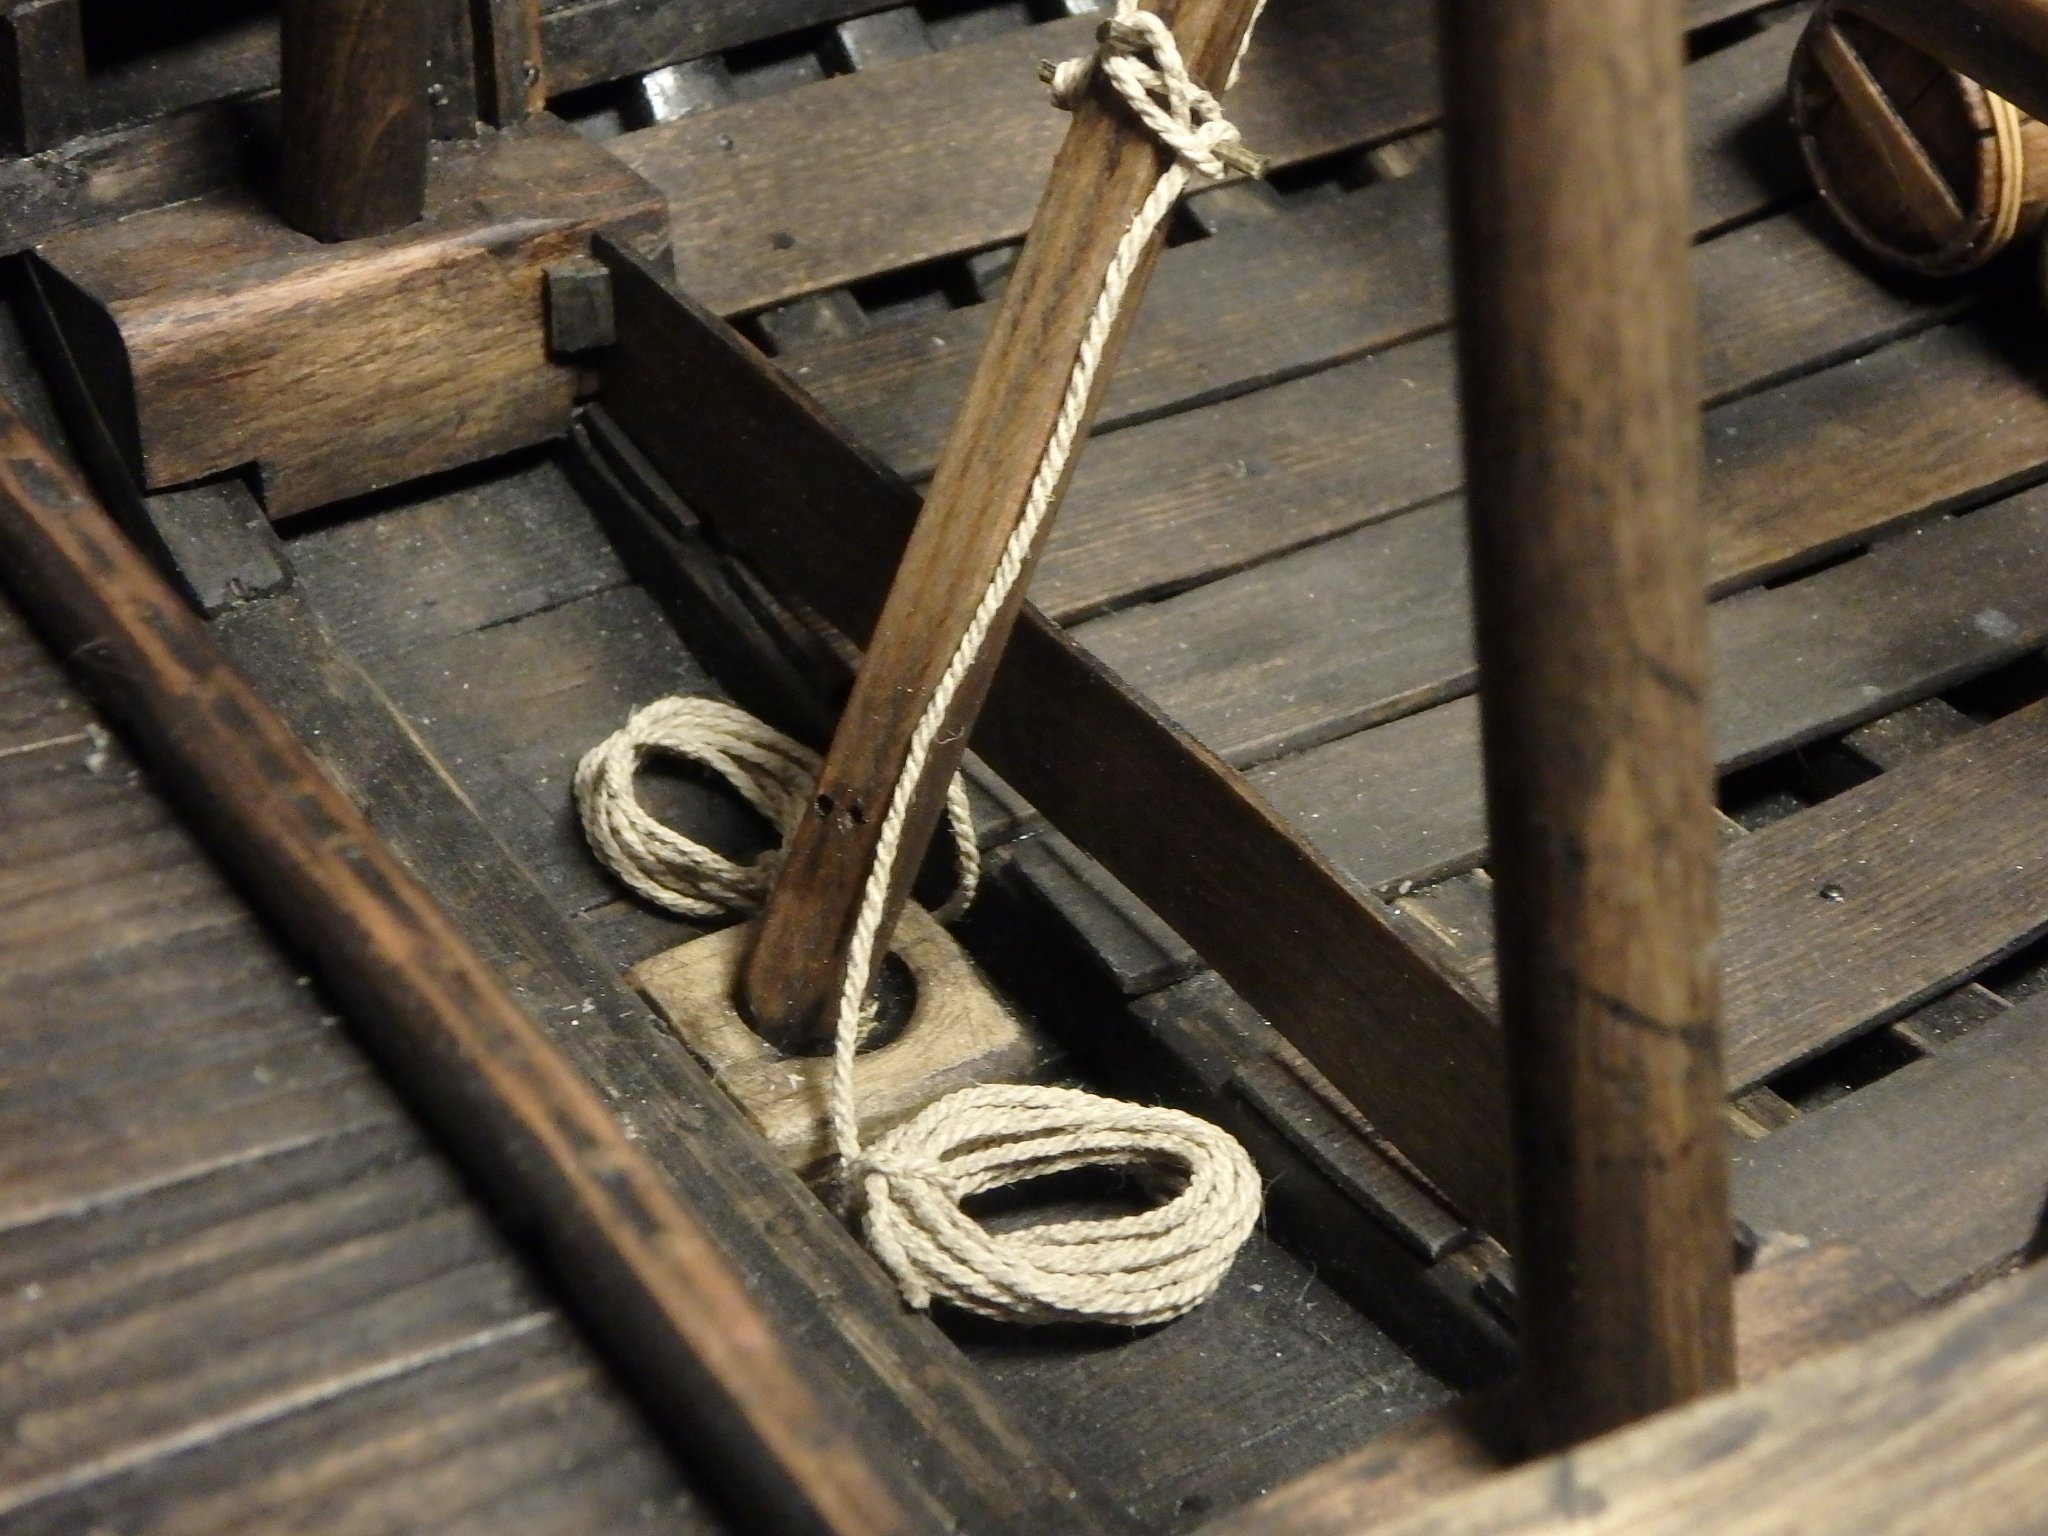
Yesterday I revisited the belaying points for a third time. Last week's were too bulky and had the wrong feeling to them. Then I saw a picture of a ship that was from the 19th or 20th century that just had metal hooks as belaying points. and as I got more satified with the fastening of that side of the braces I also changed the other side's. That used to go under the clamp in a big hole and I moved it to a loop on the inside of the clamp instead. You might not see it, but the toggle for the rearstay is also changed as the old one was jusg a straight pin. This has some shape to it. I've heard that its good to be able to bail the ship. It feels wrong with a pump in this small vessel so I opt for simple bucket and bailer. The bailer is yet to be made, but the bucket was a quick and fun build. I laid out tapered planks on a bit of tape and rolled it into a circle and used different things to pull it tight, just like how you use hoops in real life. It worked much better than I could have hoped and it closed all the cracks. My first plan was to use a rope as handle, but iron handles seem to have been more popular. I also got the main anchor made. I didn't have thick enough brass sheets for the shank or arms, but I had wire that I could hammer flat to the correct thickness. It's a bit hard to say what a medieval anchor looked like as there hardly are any finds and I don't really trust the artists for this kind of details. I made this as a mix of earlier viking anchors and later admiral anchors. The curvature of the arms and the ring in the crown are from the vikings and the separate flukes from later ones. And almost all medieval artists depict the anchors as more stout than either the earlier or later so I have a shorter shank. I'm also done with the sail. It's made from stripes of japanese tissue paper sewed together. These stitches and the ones for the bolt rope is out of scale, but I think it looks ok. A bonnet is laced to the bottom so they are able to decrease the area in strong winds.


-
@bigpetr I really like that you will design your own figures and print them! That feels much more "hand made" then my "ready made" figures I just pose. (Nothing wrong with that either, I just see it as if I would have bought posable figures) It really fits your build that you make the figures in cad along with your ship. It will be really interesting to see the progress in your thread. @Louie da fly Thank you!
-
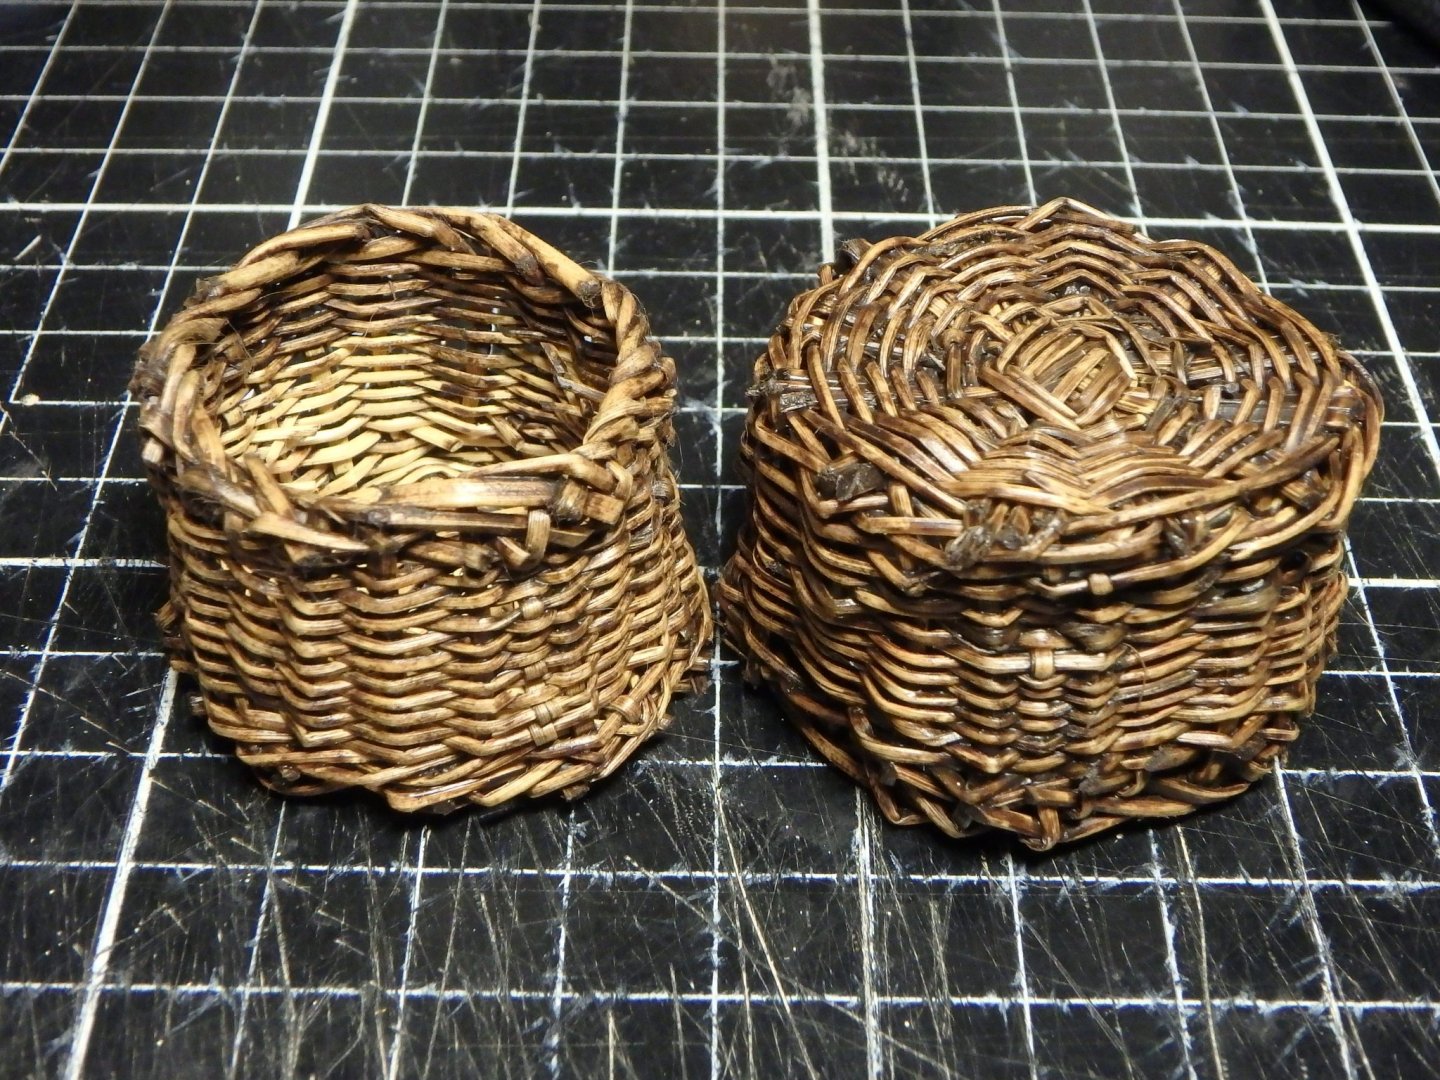
@Chuck Seiler apperantly bricks has been used since 7500 BC! Roman used them and became popular in northen europe in the early middle ages. I understand that there is a step learning curve for many in using 3D technologies, but I wonder if it is as in the eighties when it was thought that everyone using computers in the future would need to be able to code. Perhaps it soon will be really simple to do 3d scans and print it. @Matt D Thank you! It was quite fiddly indeed. I did two failed baskets before these, but I have also weaved a full sized a couple of years ago.
-
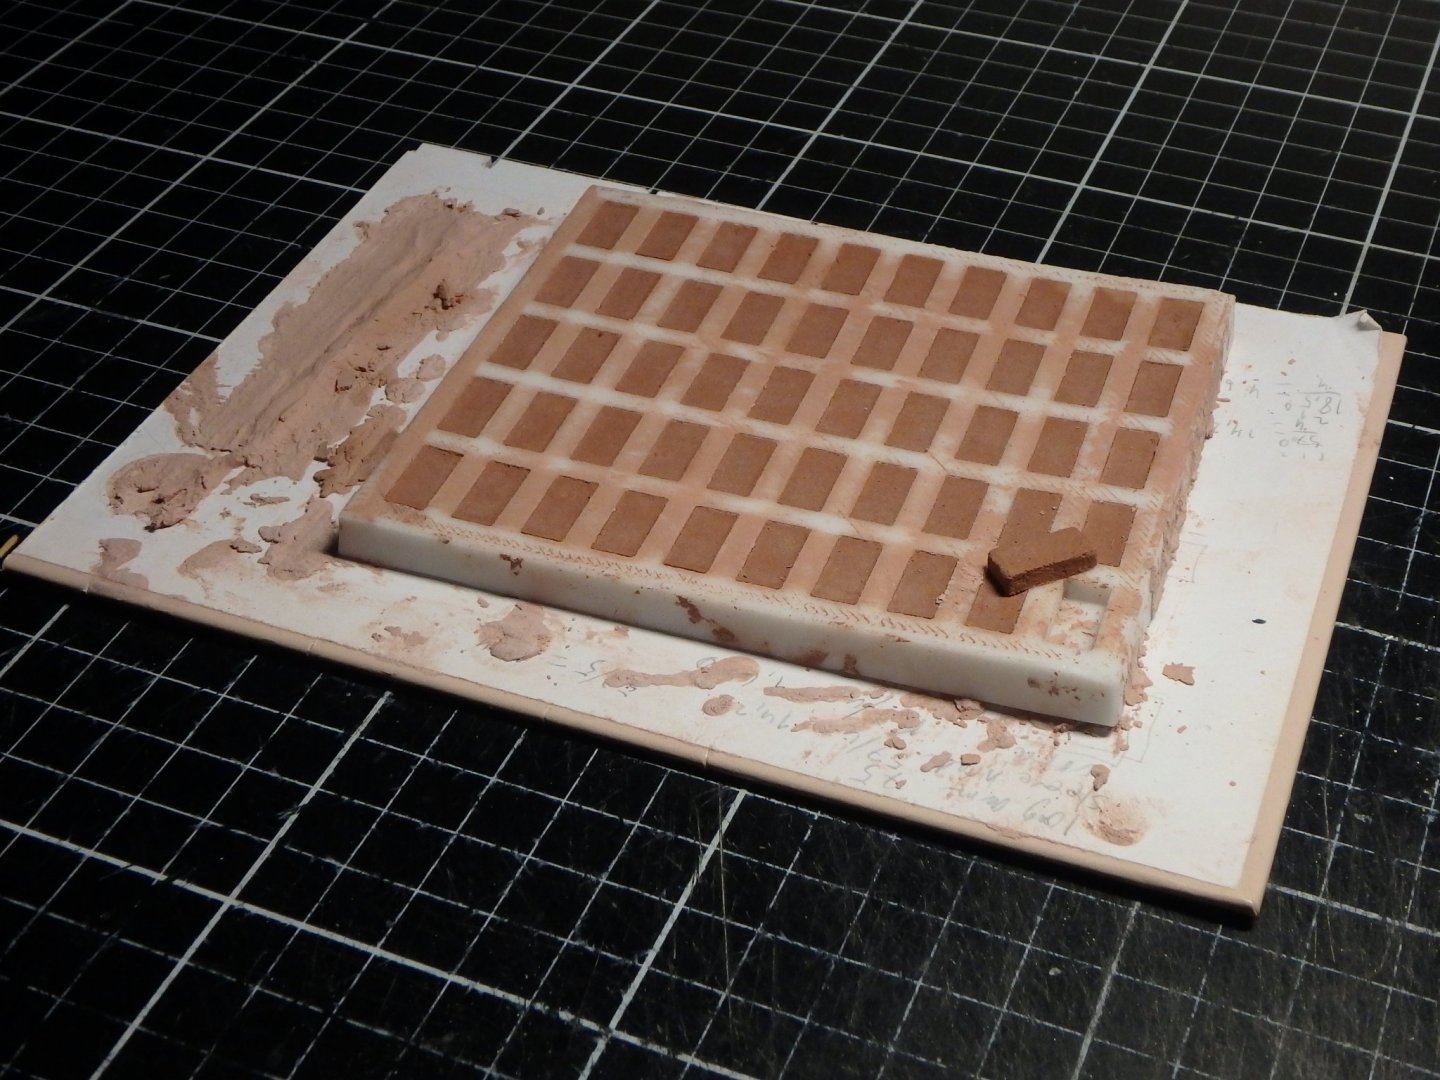
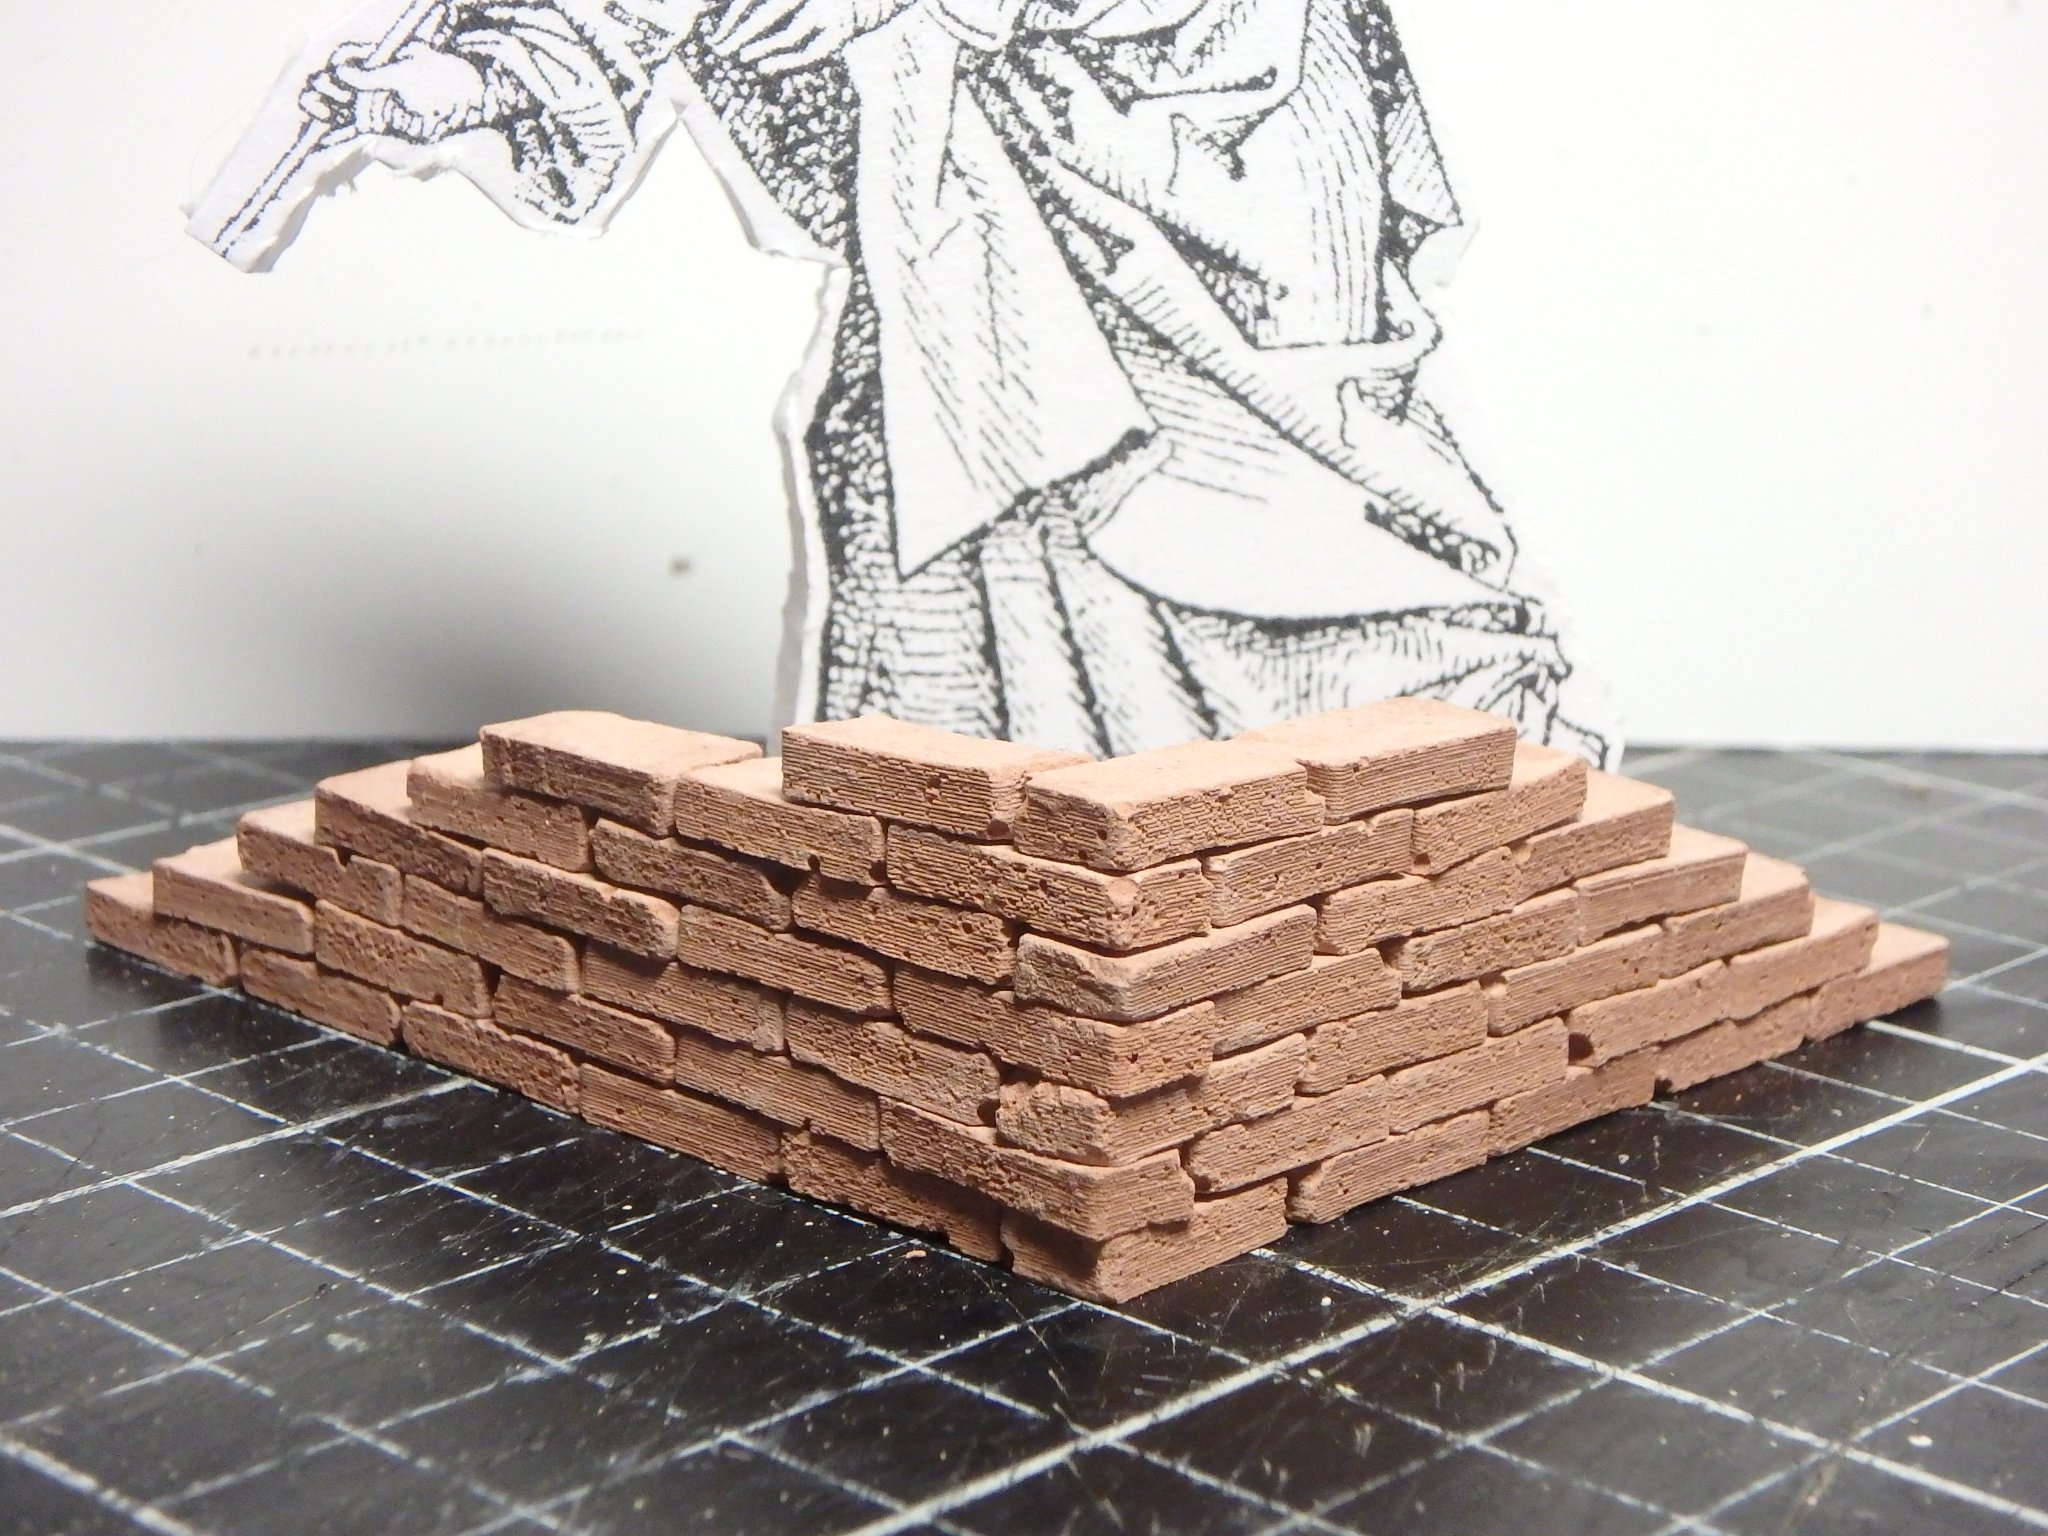
Yes, it will be exciting to see how 3d printing will transform modelmaking! I'm sure it will be much easier for smaller companys to sell custom resin kits. But I find it hard to find the line of how much to do in cad. Once I built an airplane and did details like engine, cowl, machineguns and wheels in cad and the rest with traditional methods. But it left me wondering why I didn't do it all in cad as I anyway did some bits that way. I think I will not feel the same way with this model. It will be exciting to see how the figures will fit! I can always bend the limbs afterwards as it will be covered be clothing. But I'm a bit conserned about their proportions. They have correct proportions, but miniatures often are beefier and exaggerate heads and hands so perhaps these will look wrong? Yes, the person will hold a line with a weight. I think it will look good to have something extend beneath the ship when it sits on it's stand. I was really lucky to find a mold for the bricks that made them 28x13x7 cm! Just about the right size.
-
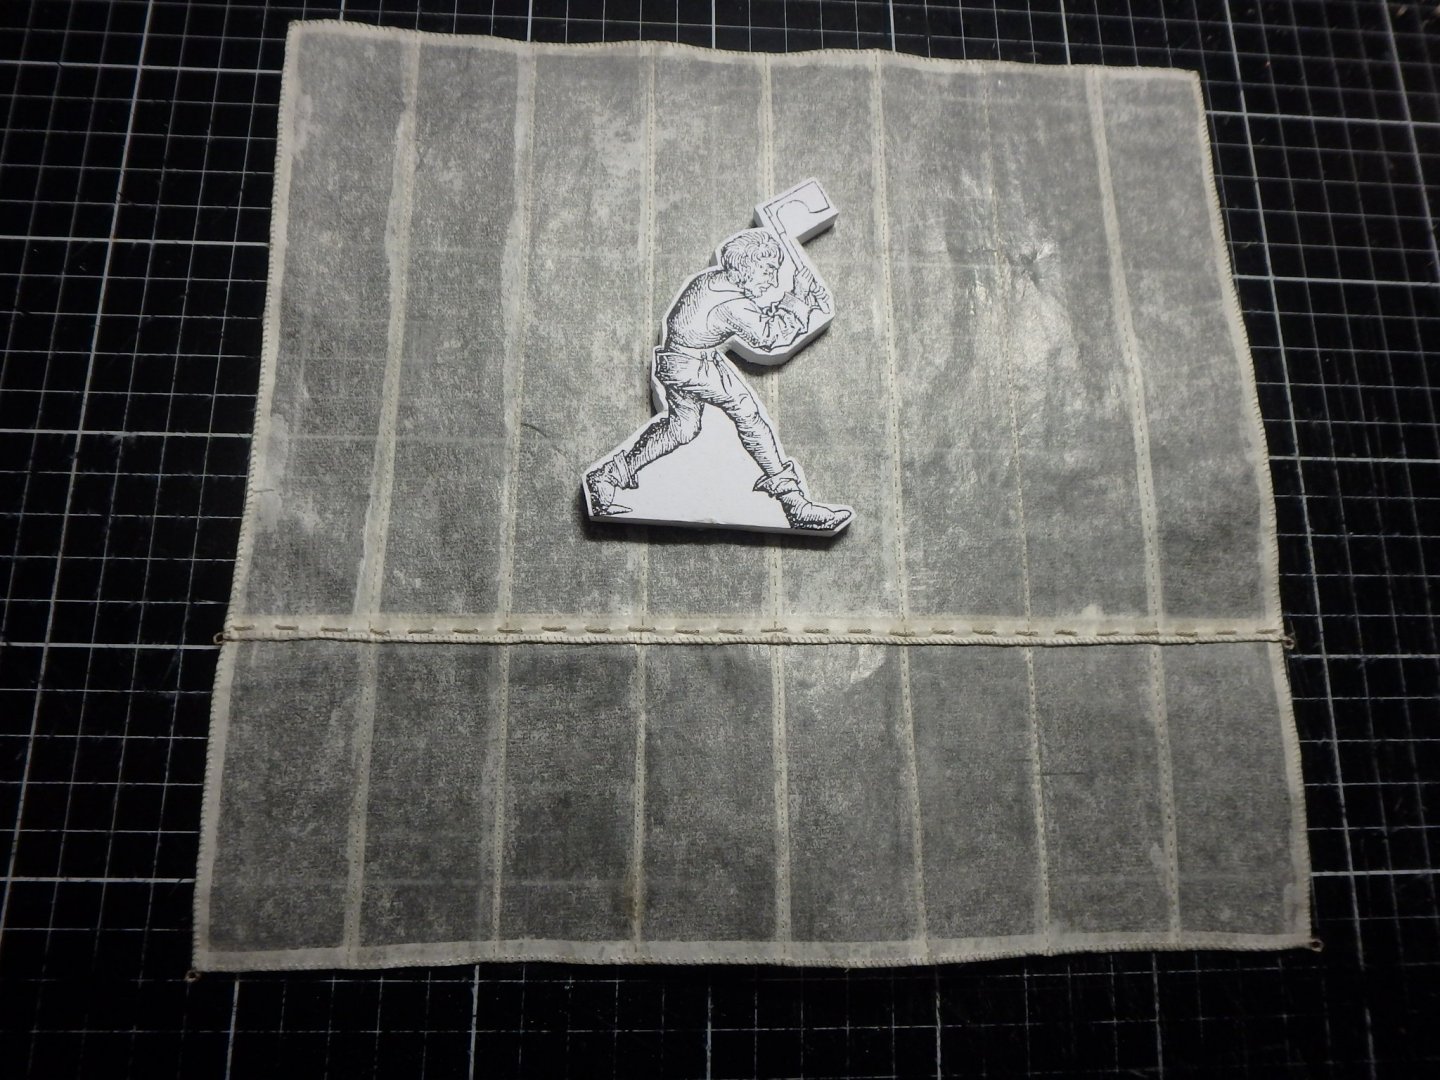
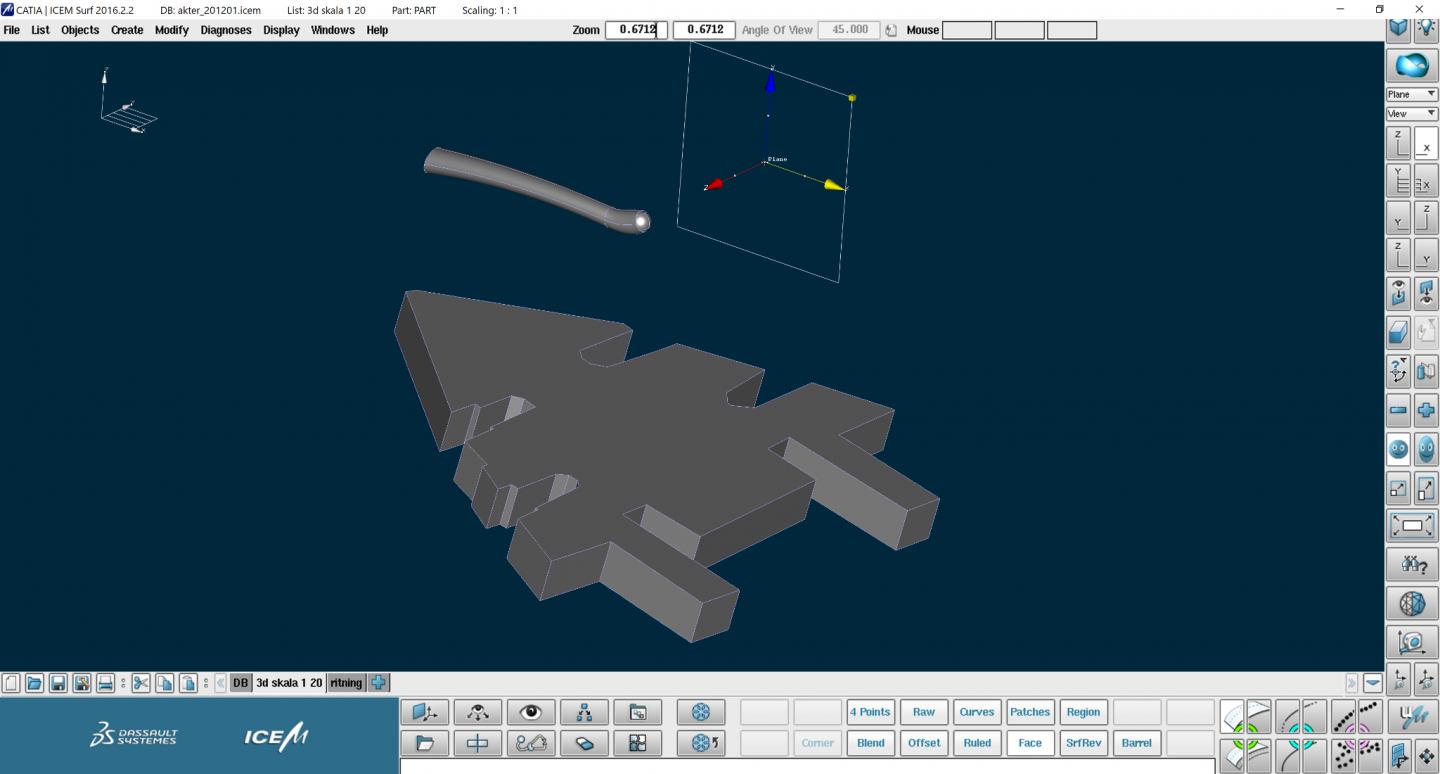
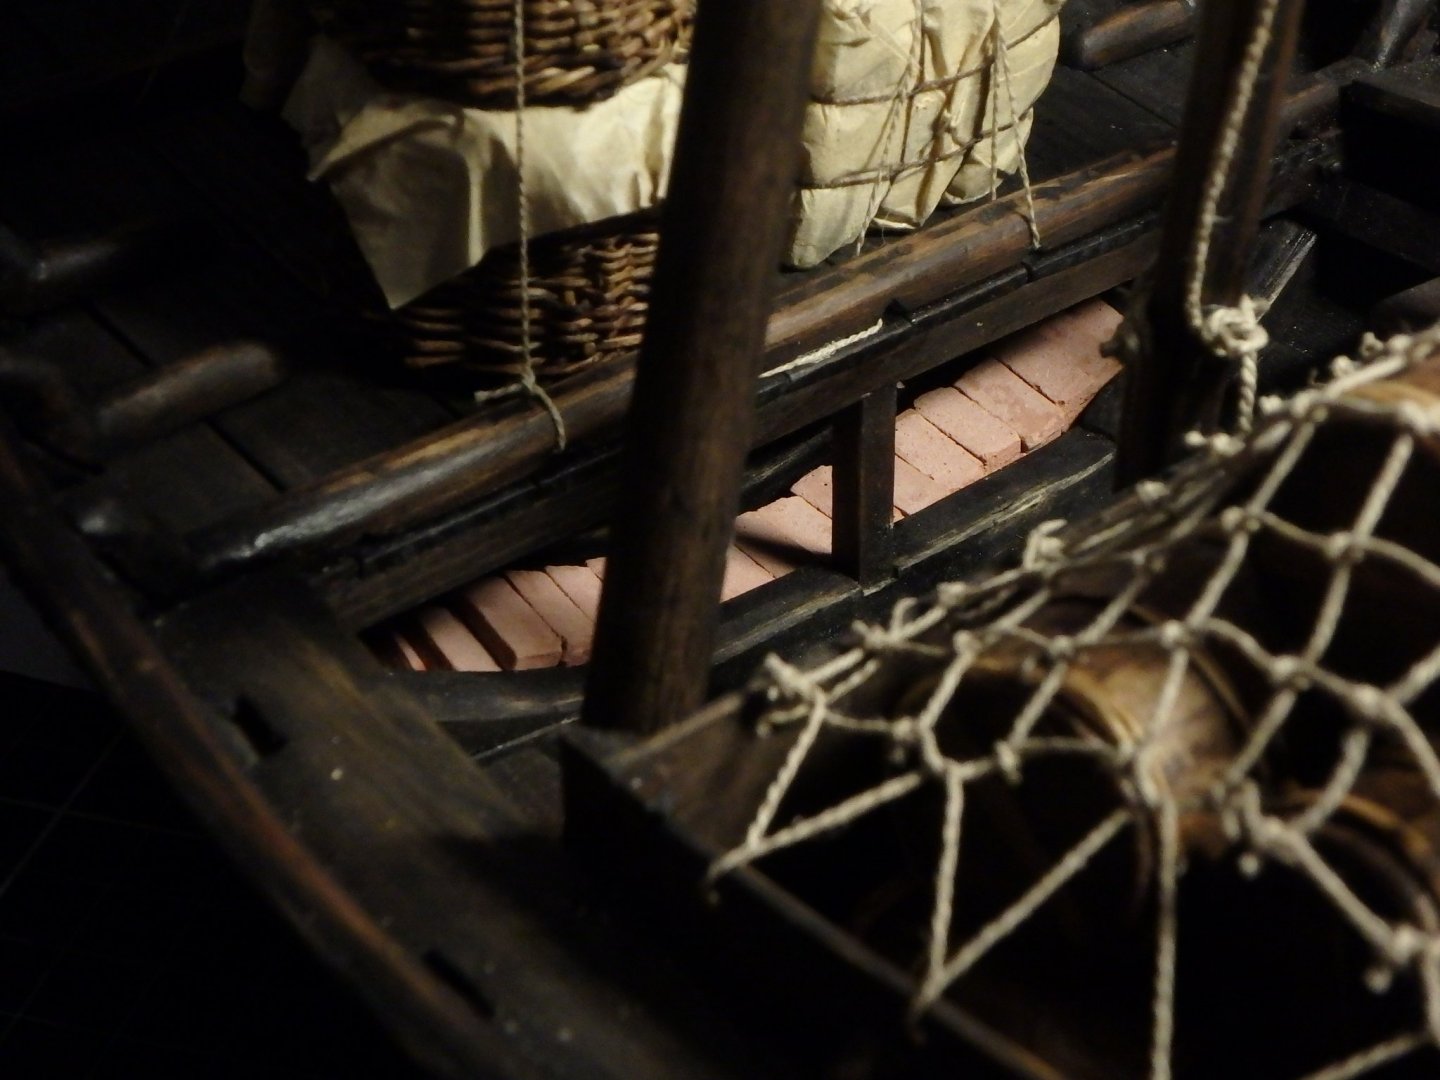
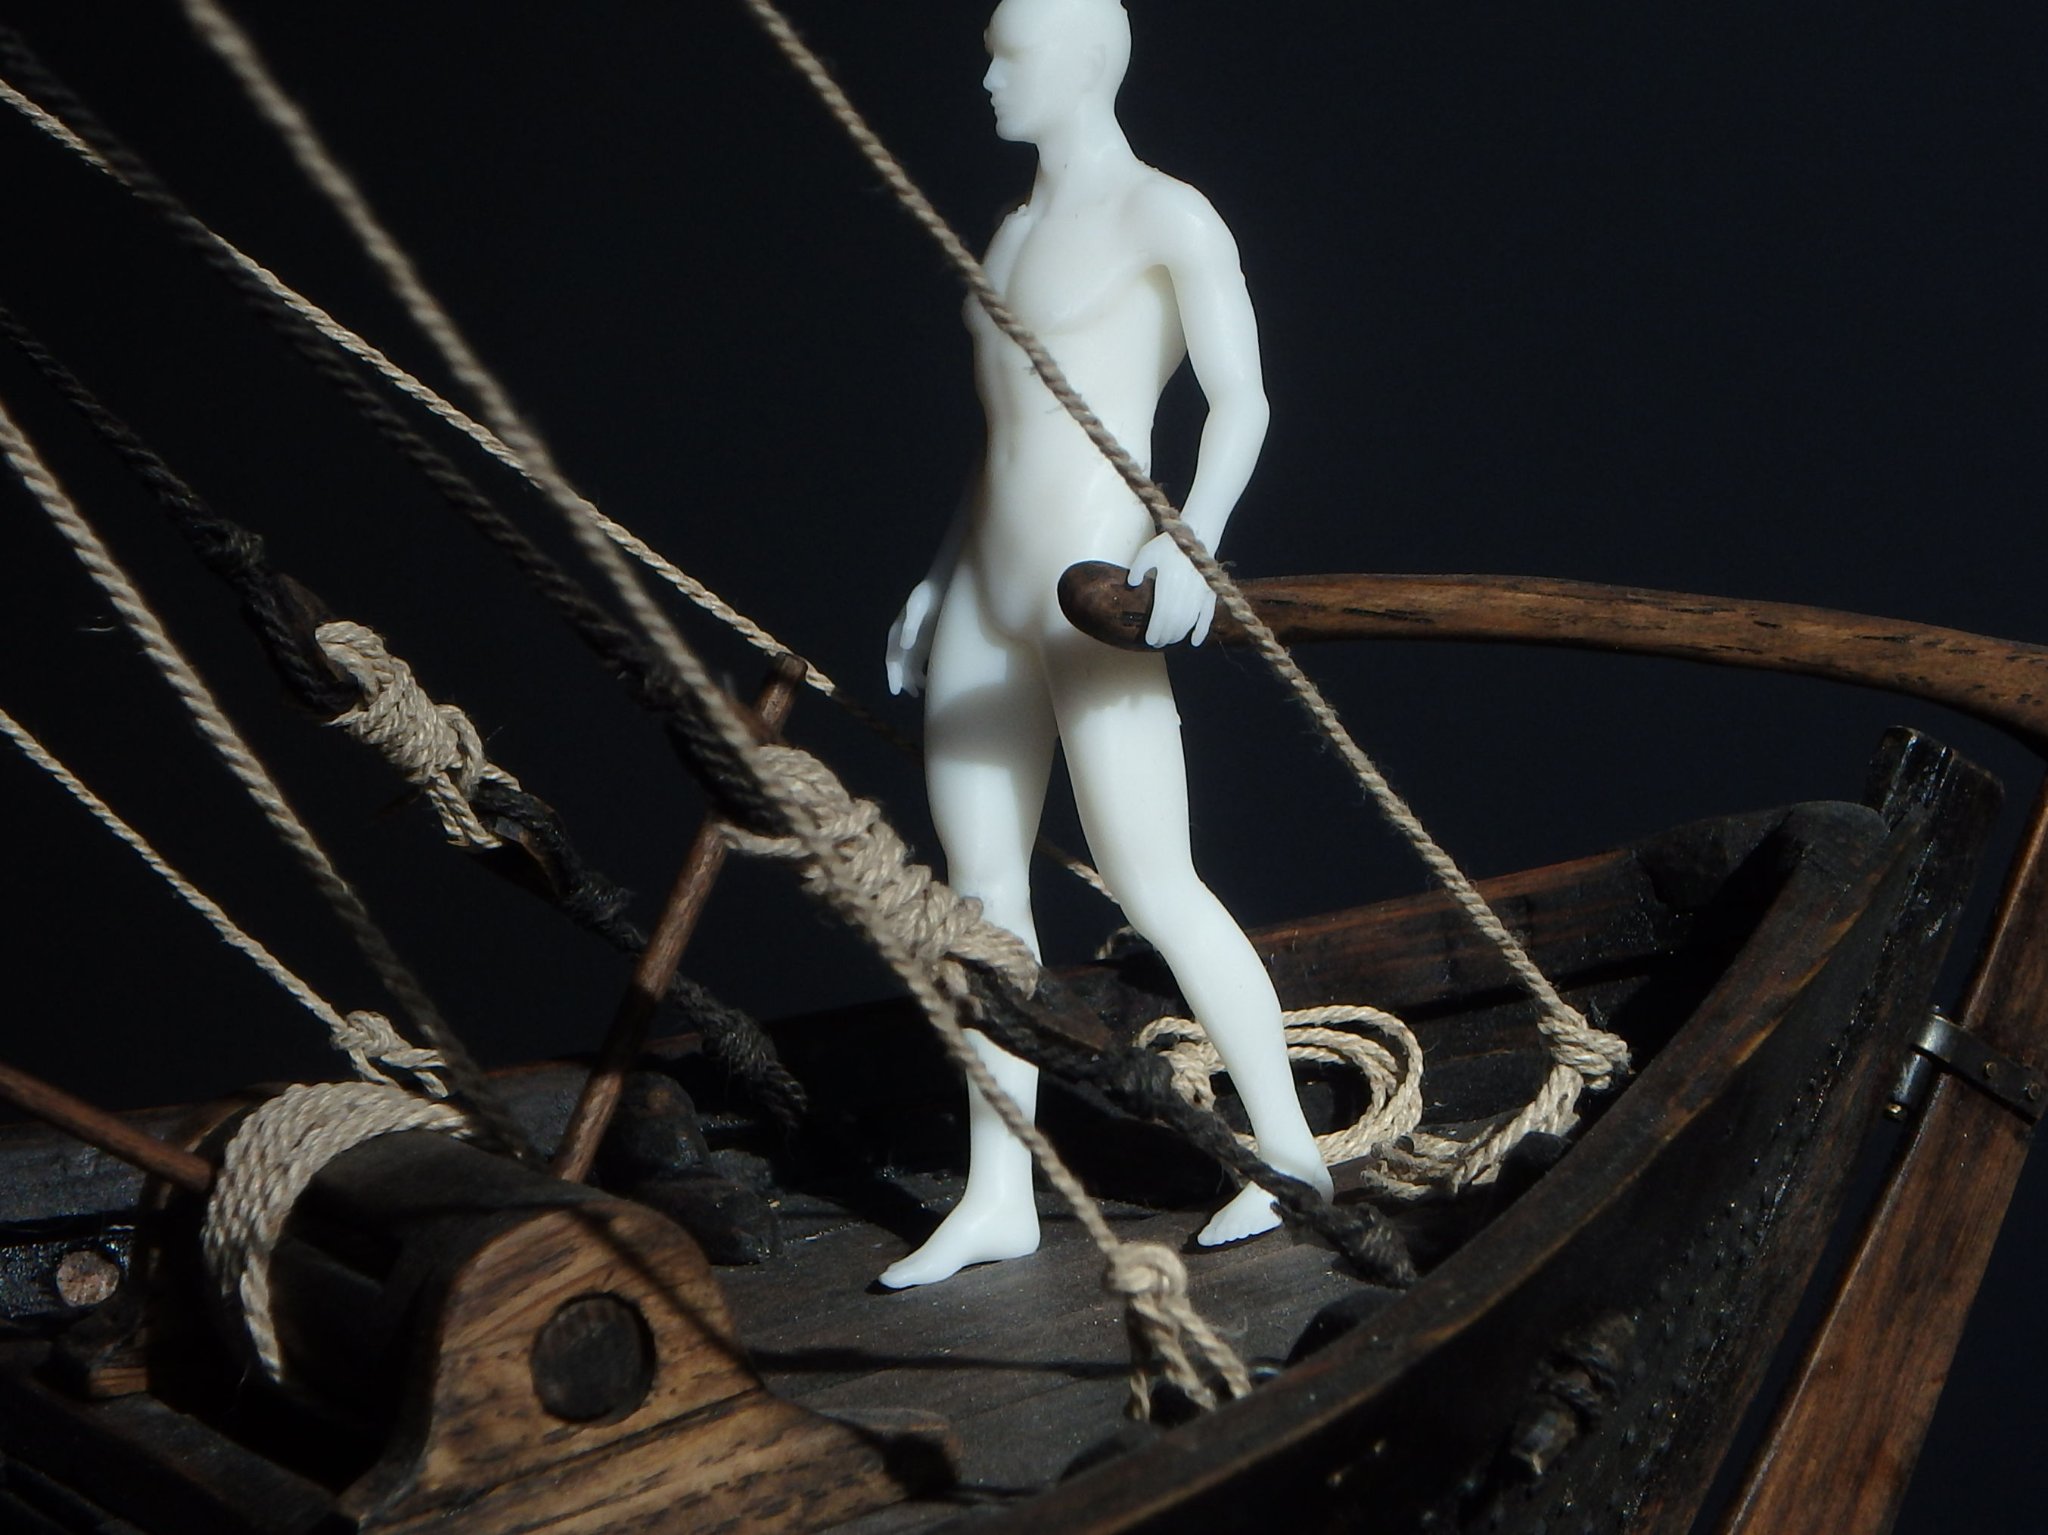
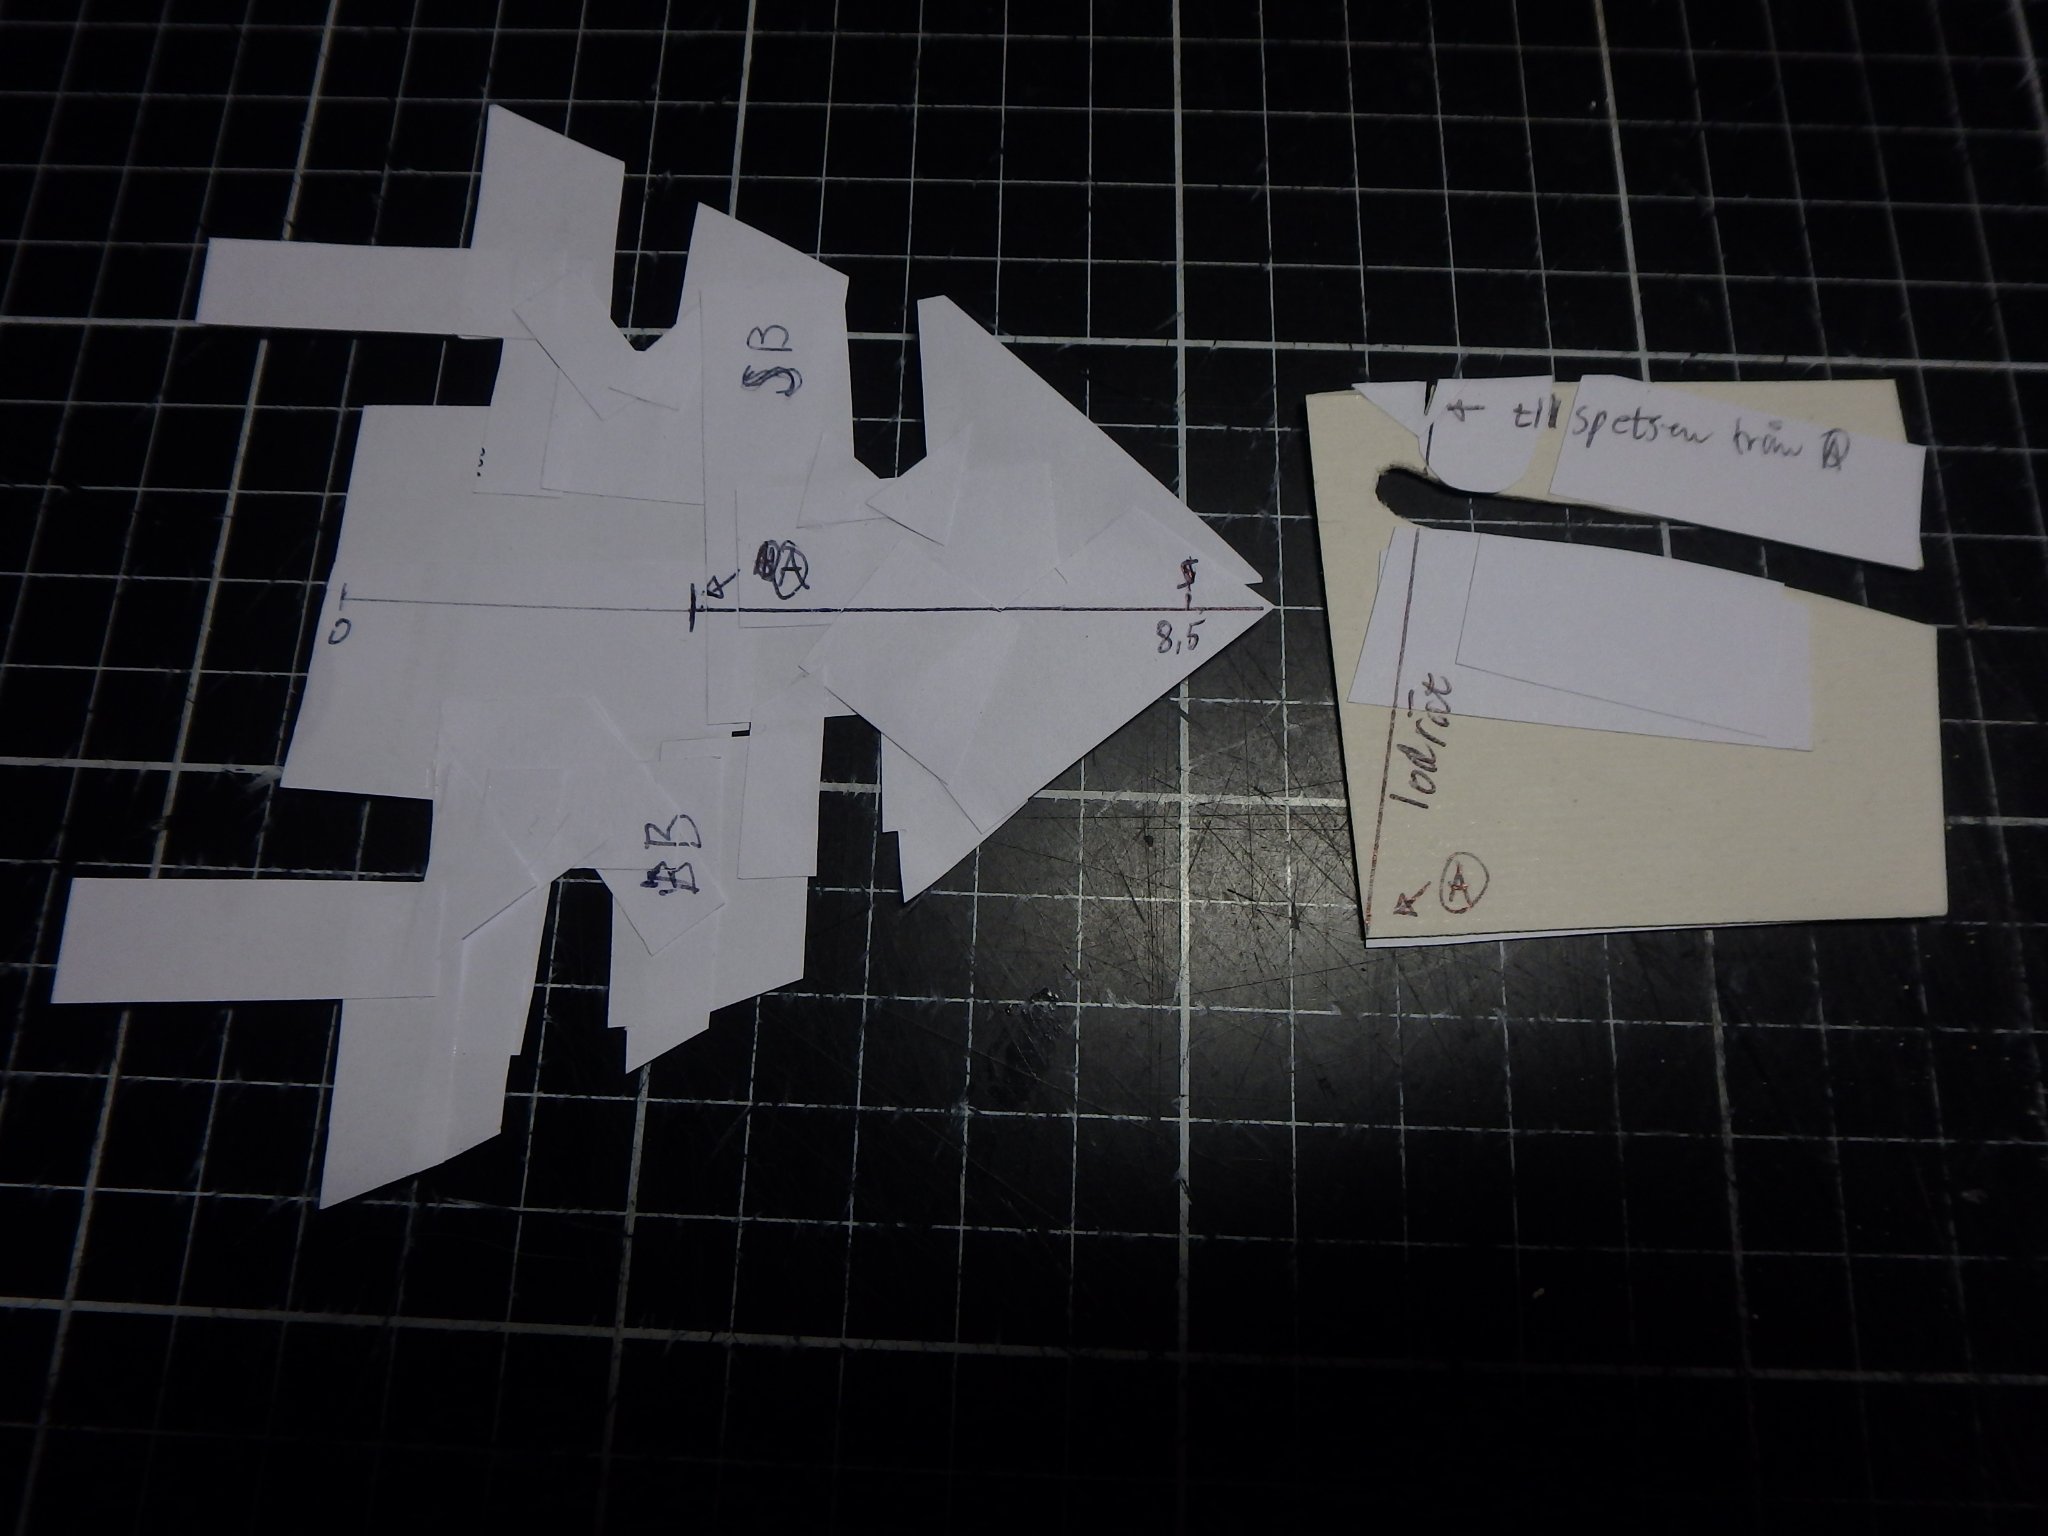
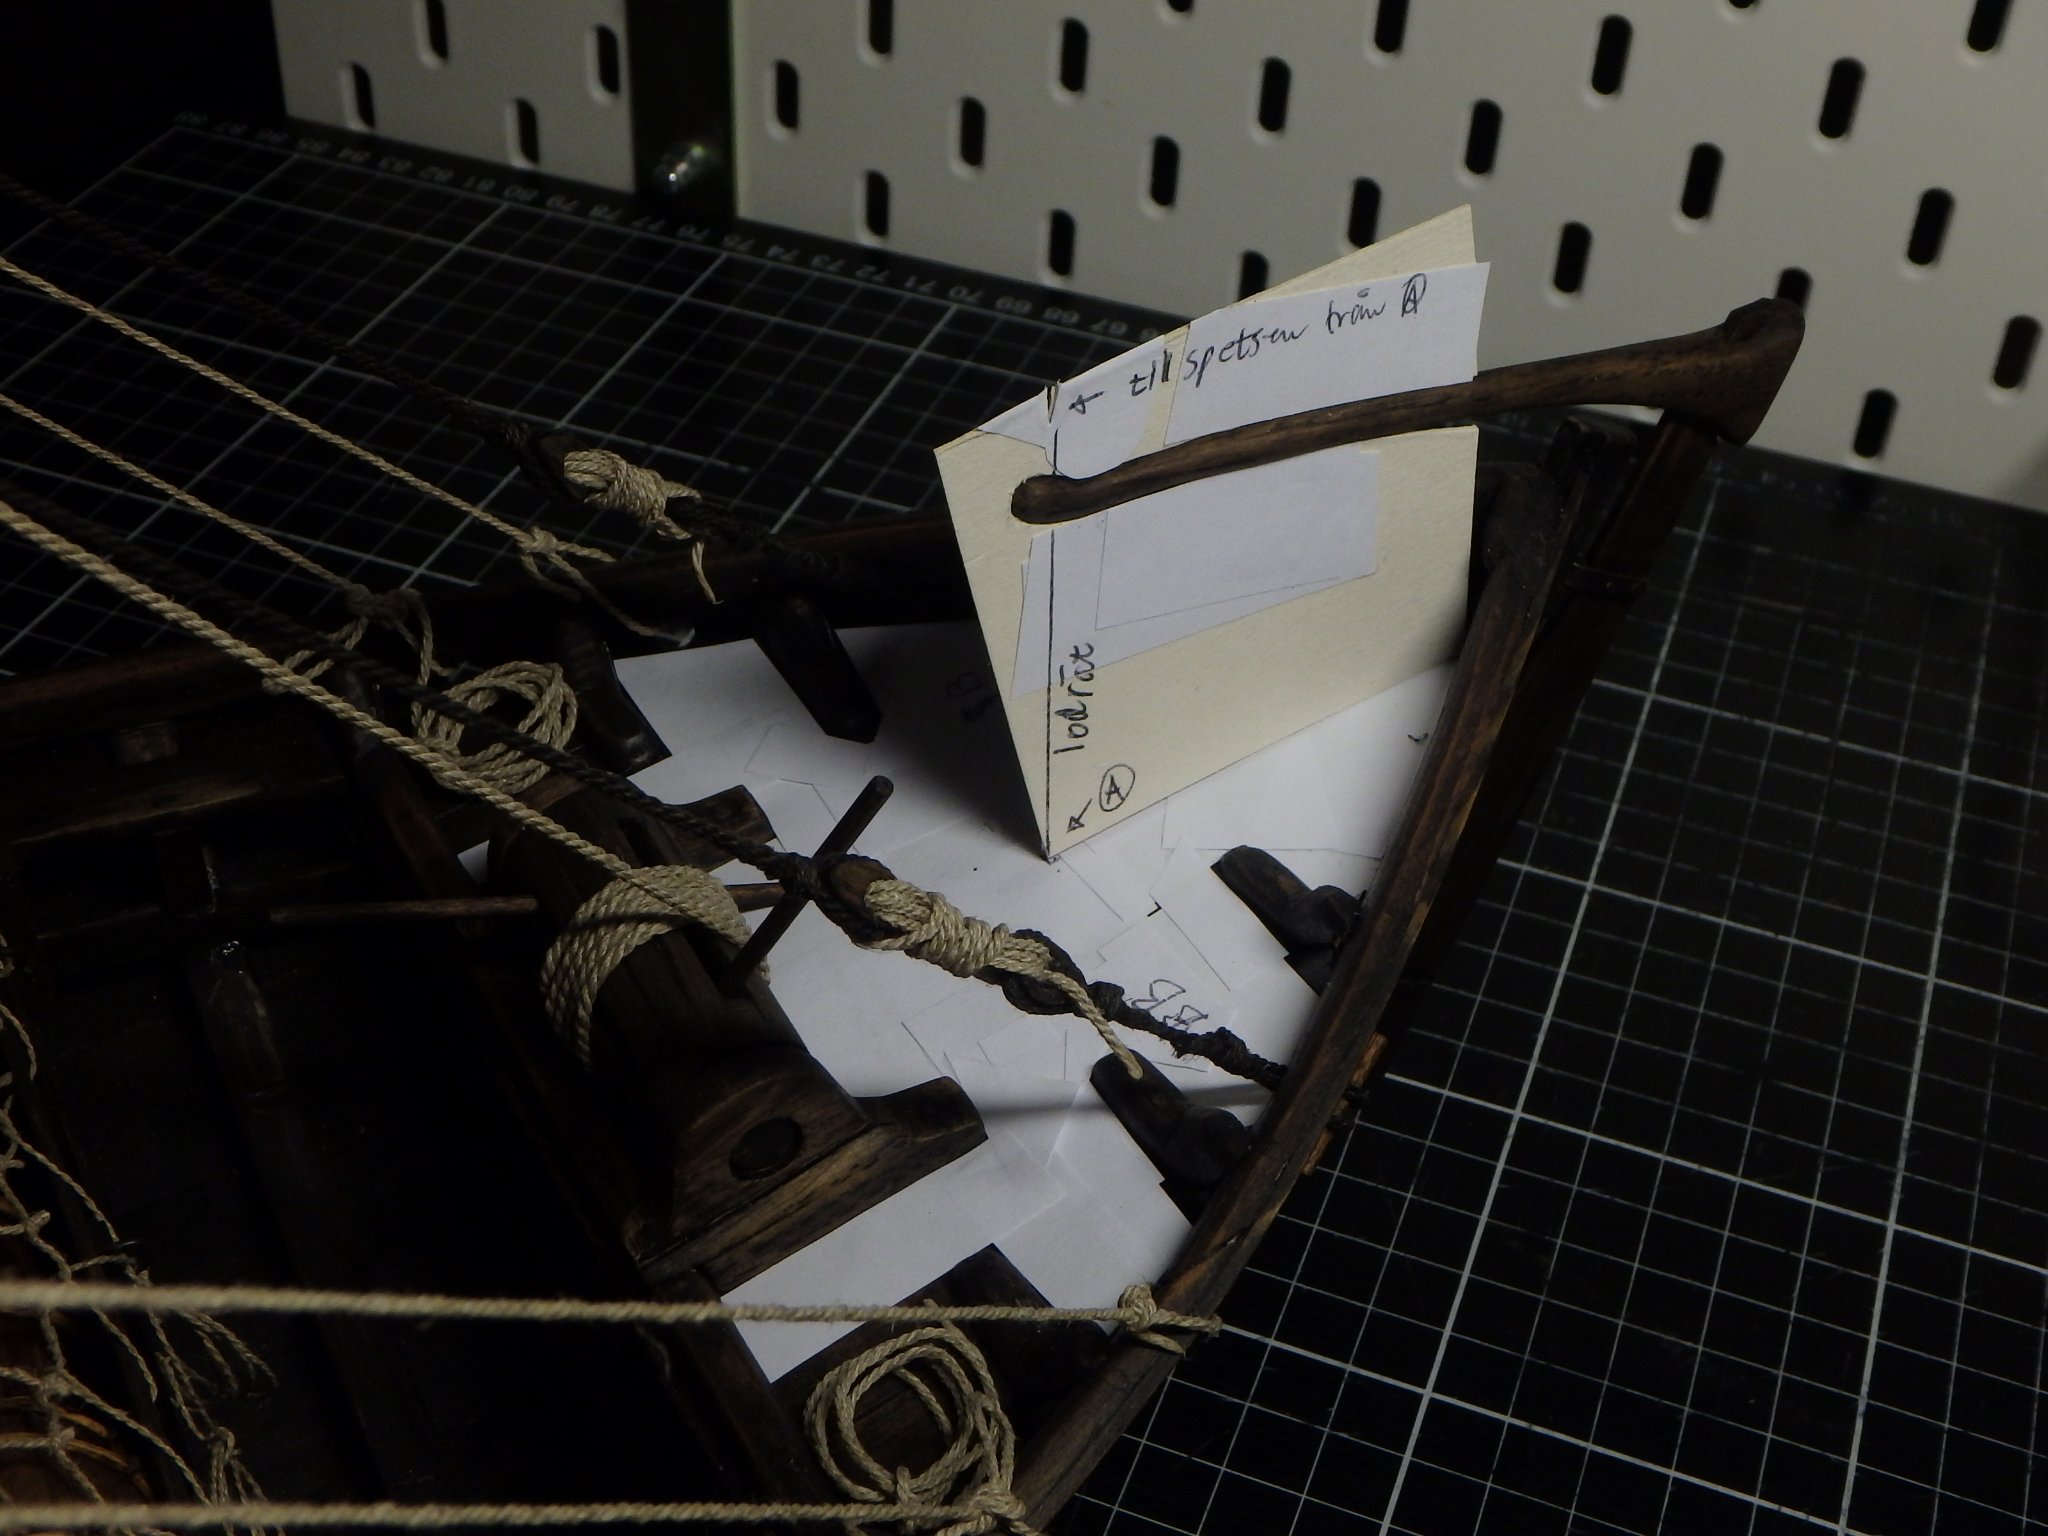
Thank you all for the encouragement! I've been working on four sub projects this last week - cleats, ballast, figures and sail. I can't really say much about the sail yet as I've mostly just done test pieces for now. First project was better belaying points. I really didn't like how the braces were fastened as they are adjusted all the time when sailing. And there must be some more medieval way of doing this, but I installed more modern looking cleats where the helmsman can adjust them almost while still hold the tiller. Earlier I had planned to have bricks as the main cargo as there was a similar wreck that still had it in the hold (calculations show that it had too many bricks in it, and therefore it sank). So I ordered a mould for bricks of the correct size. But I didn't need it any more as I made barrels for cargo. But the thesis I based this on mentioned the use of bricks as ballast! The advantage of bricks instead of stones as ballast is that you can sell it with a profit if you don't need it anymore. The ship is a bit tailheavy and migth need some ballast under the fore deck. Bricks became a popular building material at this time in the low countries and was a big industry. For figures I tried to find posable figures in the correct size but decided to try to 3D print them instead. I work with CAD all day and want to do it as little as possible in my free time so I'll print them naked and as @Louie da fly suggested make the clothing out of rice paper. I first needed to build a 3d model of the ship to get the poses correct. But I only needed the decks and what the figures interact with. So I made simple patterns out of paper. that I scanned and built in the cad program I normally work in, Icem Surf. (Yes, it looks as if it hasn't been updated since the nineties, but it's the leading program in my profession) Then I imported this into the program called Poser (The tiller got a bit bigger than in the physical model as I just made a rough sketch in cad) And did the same for a person in the front of the ship. The vertical cylinder in his right hand represents a sounding line. Now I'm waiting to get them back from a couple of friends with a SLA printer.


-
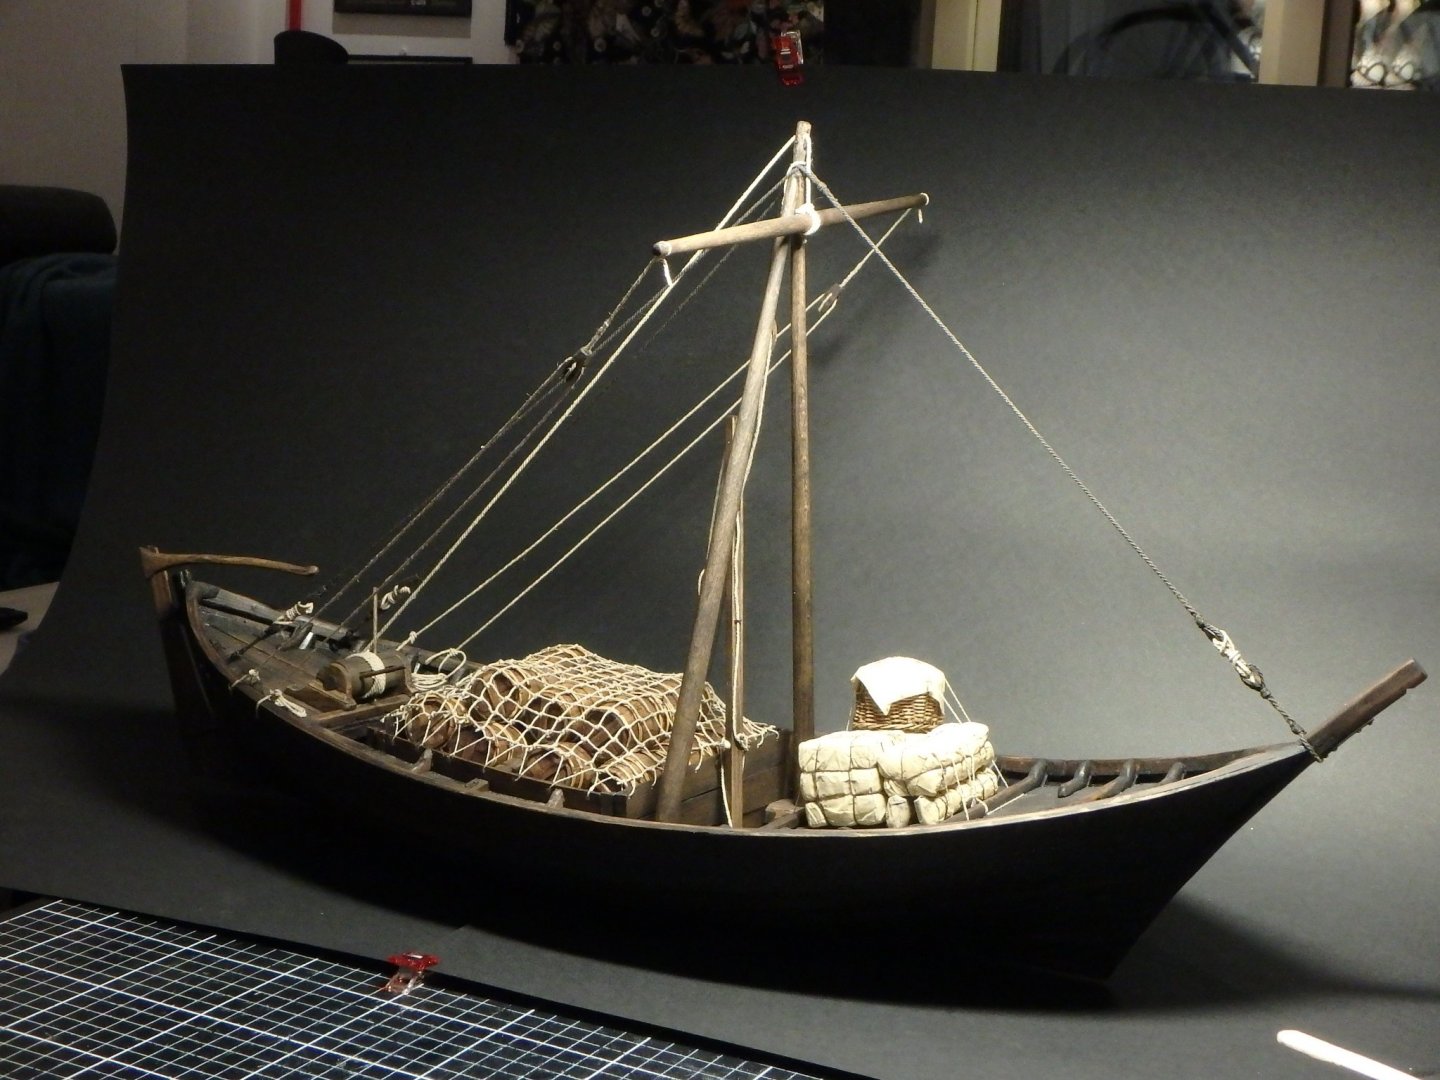
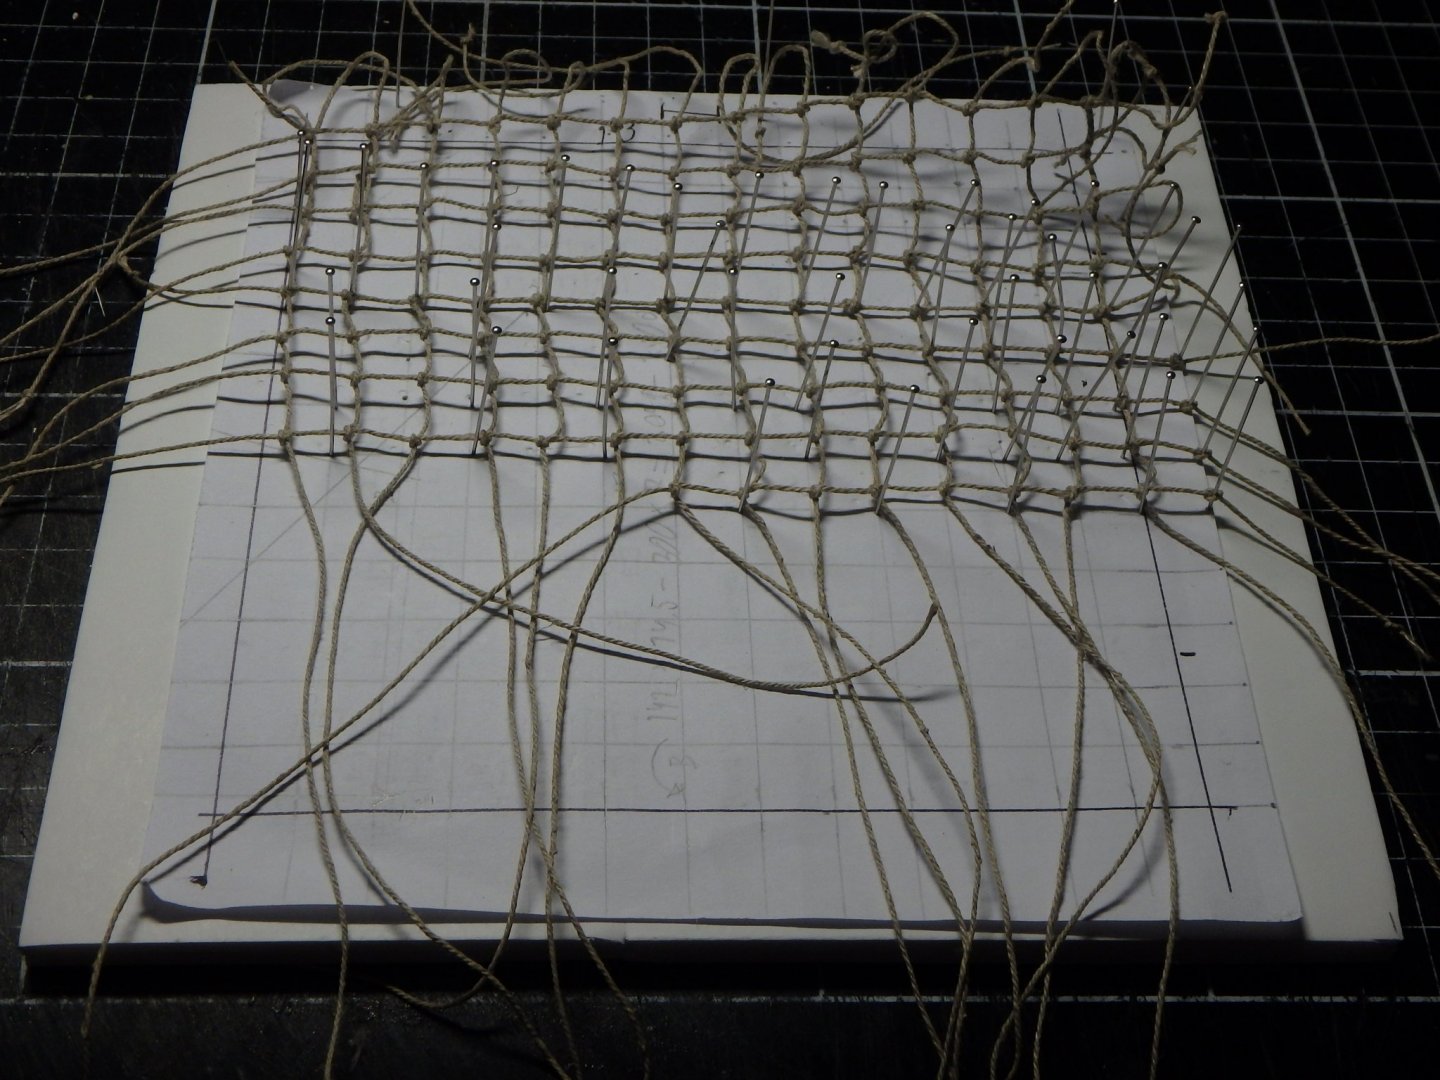
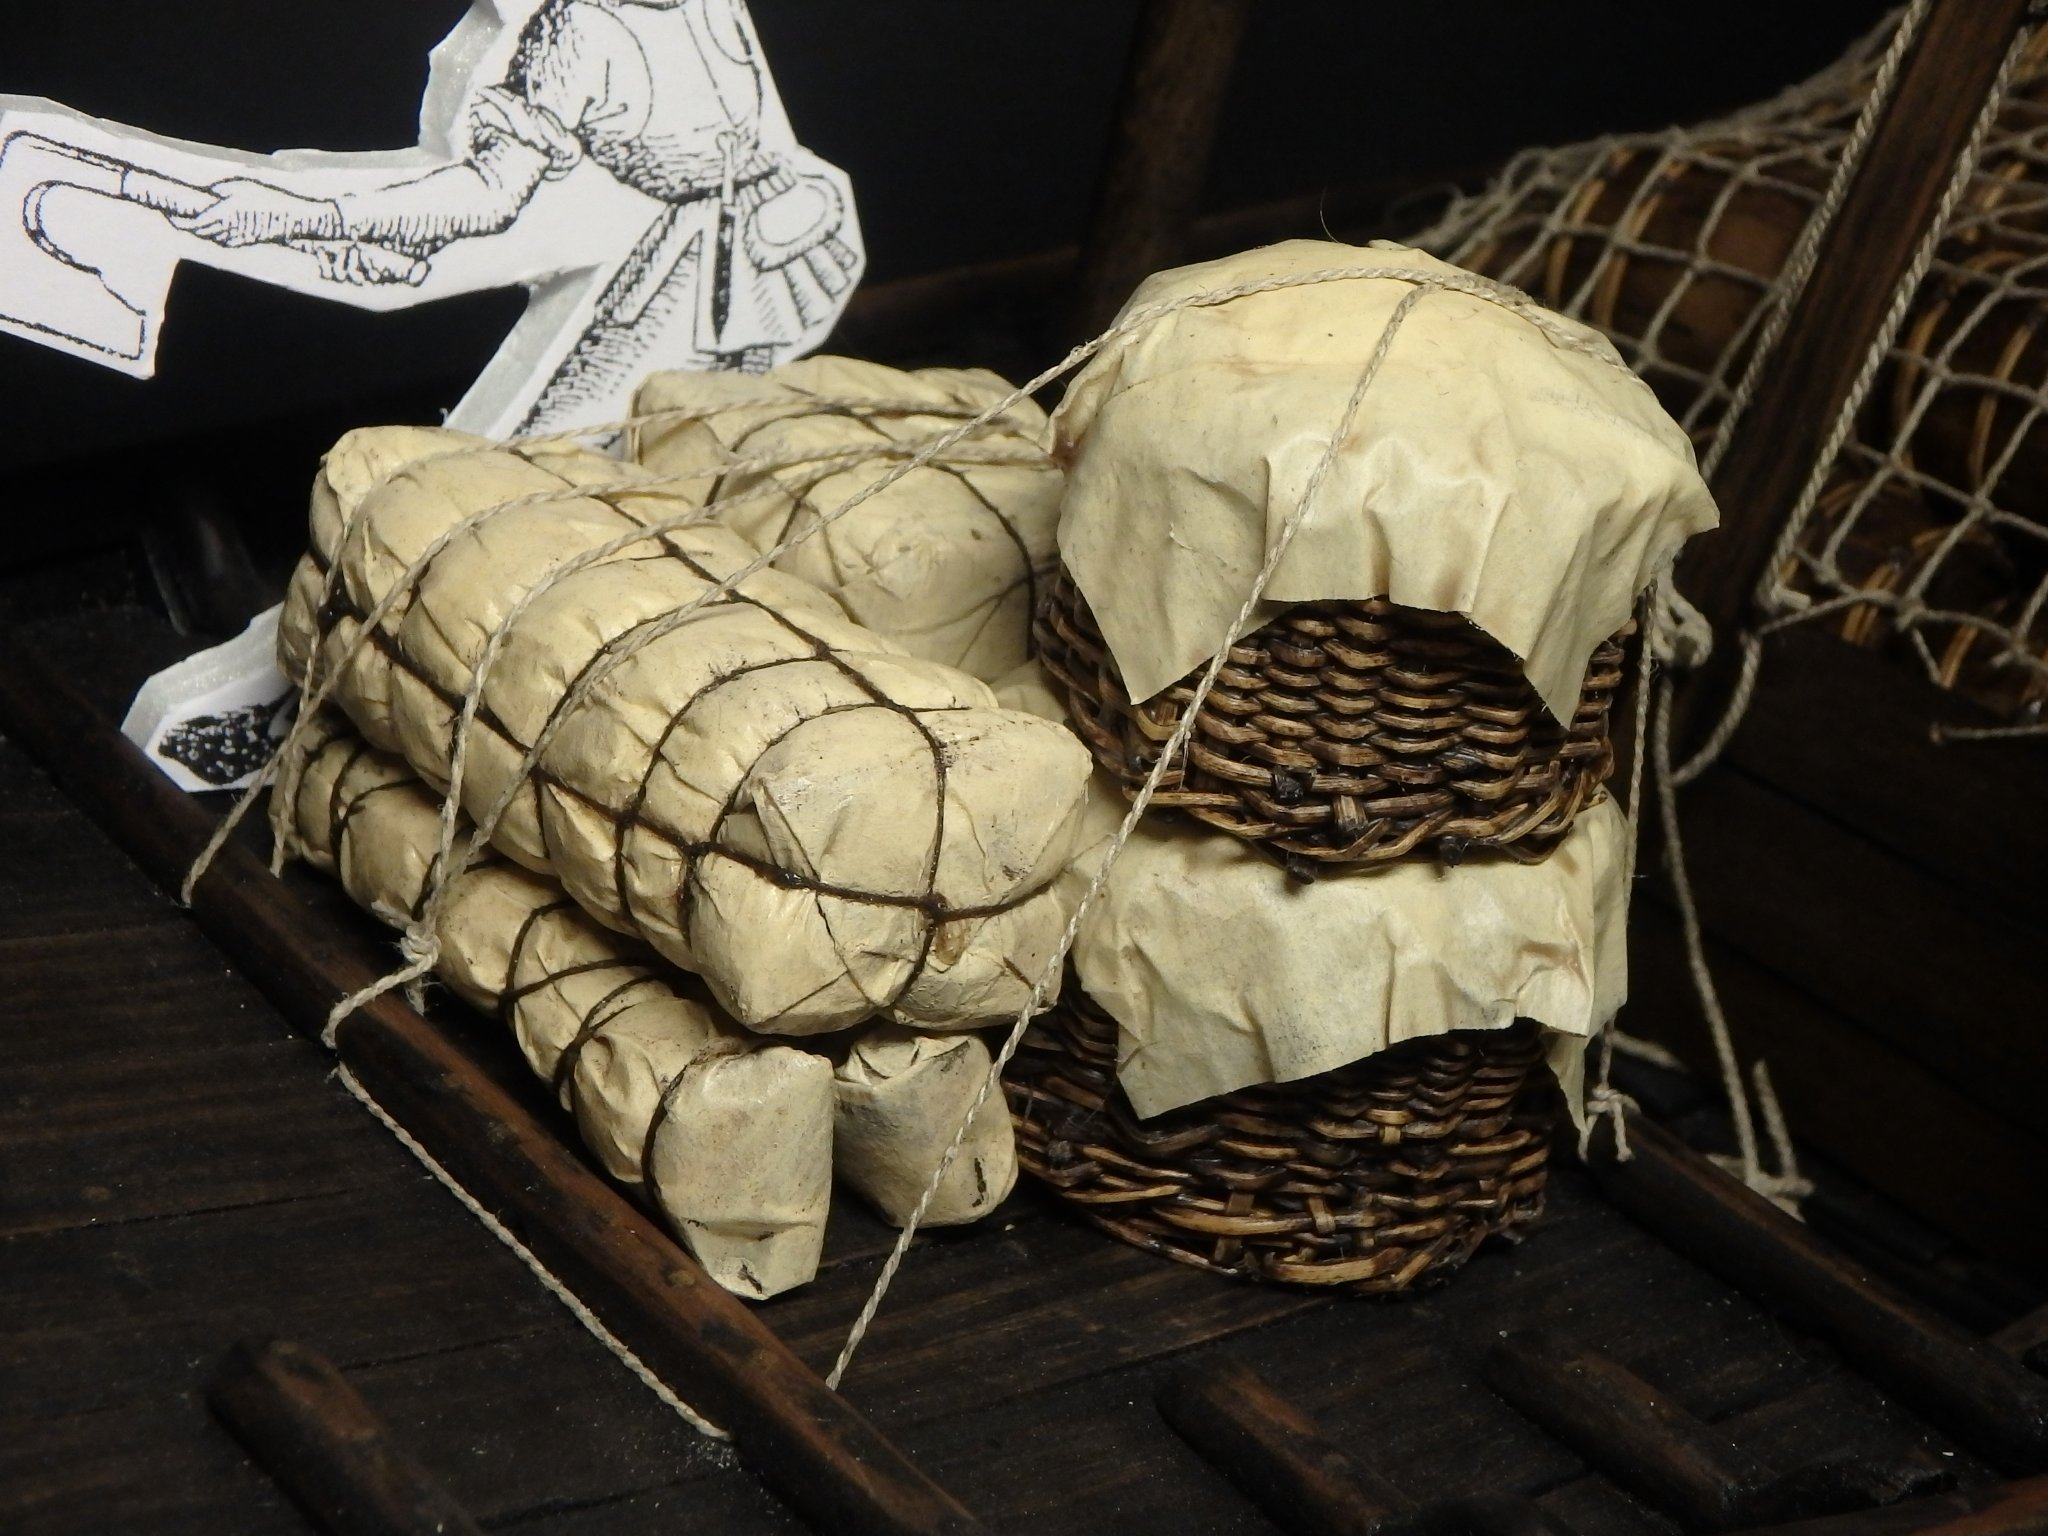
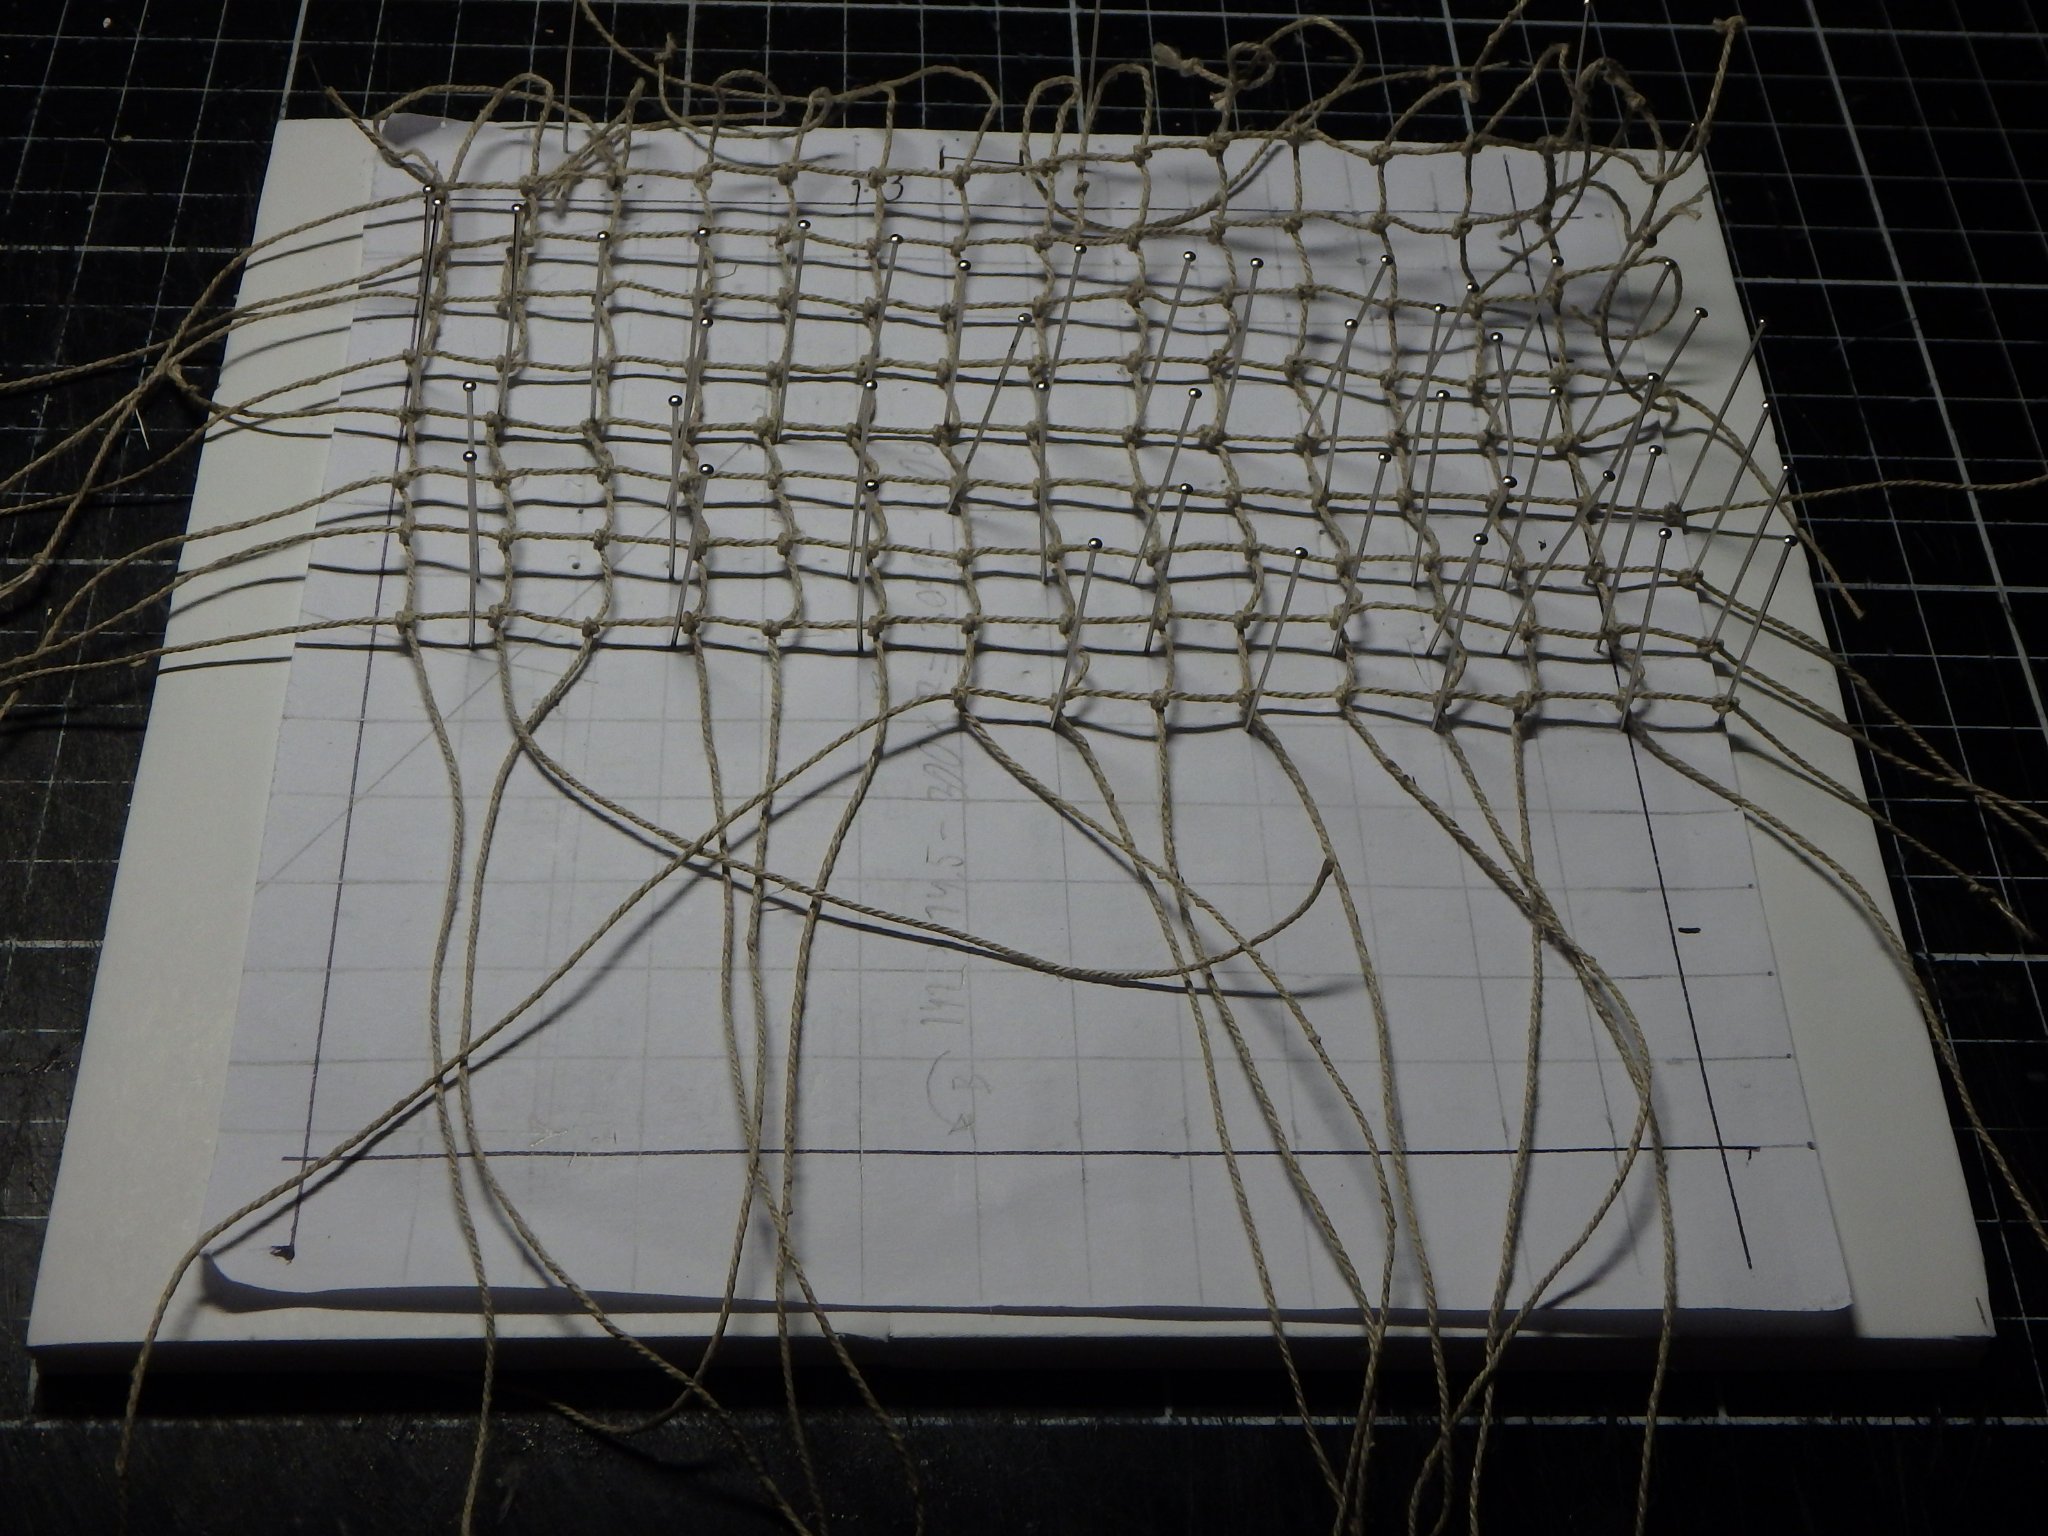
The chose came down to cargo netting the barrels as they lie too haphazardly for nice tie downs. I drew a grid to use as a guide and started knotting. It's funny how I knew the knot in my hands after making 200 of them, but then I had to think about how to do it as the standing part at one point got really short and then I had no idea of how to do it any more and had to rewatch the instructions again. The barrels is as I said the primary cargo and I guess the boat perhaps left the fishing village loaded with salted fish once a week, but I guess they also tried to get more things to the market as well and loaded miscellaneous wares on the foredeck. I got a lot of millet straws left over from making the barrel hoops and tried to use them for other uses that you use willow for. Like baskets. At first I wanted to show their contents as well, but I guess you would cover them up with cloth to protect them in transport. I have started to look into making the sail and was suprised of the tips of using paper. One thought I have had through out the build is to use locally sourced non specialized materials and this silkspan paper sounded very specialized. But reading a bit more I see that it's basically what I have used on airplanes and that's basically just washi paper from the craft store. And it really acts like cloth in this scale! So I made some cargo for the fore deck. You see this kind of bales all over the medieval imagery in all shapes and sizes The are made of sleeping pad foam covered in washi paper.


-
@Ab Hoving ah yes, you are right - bowlines. I think my plans had them in mind in the beginning, but that I then removed them for some reason. Maybe I will have them to give the bowsprit something to do. @Jonathan11 Thank you for your kind words and pics. That's some good tiedowns, better than what I first had in mind. I'll see if that or the netting turns out best.
-
Thanks @Jim Lad, I guess rope net would be best. I was a bit scared it would detract from the barrels too much, but perhaps it just will look good. It will any way be fun to make. Strong rope nettings were also used by hunters according to images.
-
Thank you all! Yeah, I think you're right @Louie da fly, they should be tied down. I don't know how to do it so I will put off doing it until I'm forced to come up with an idea 🙂
-
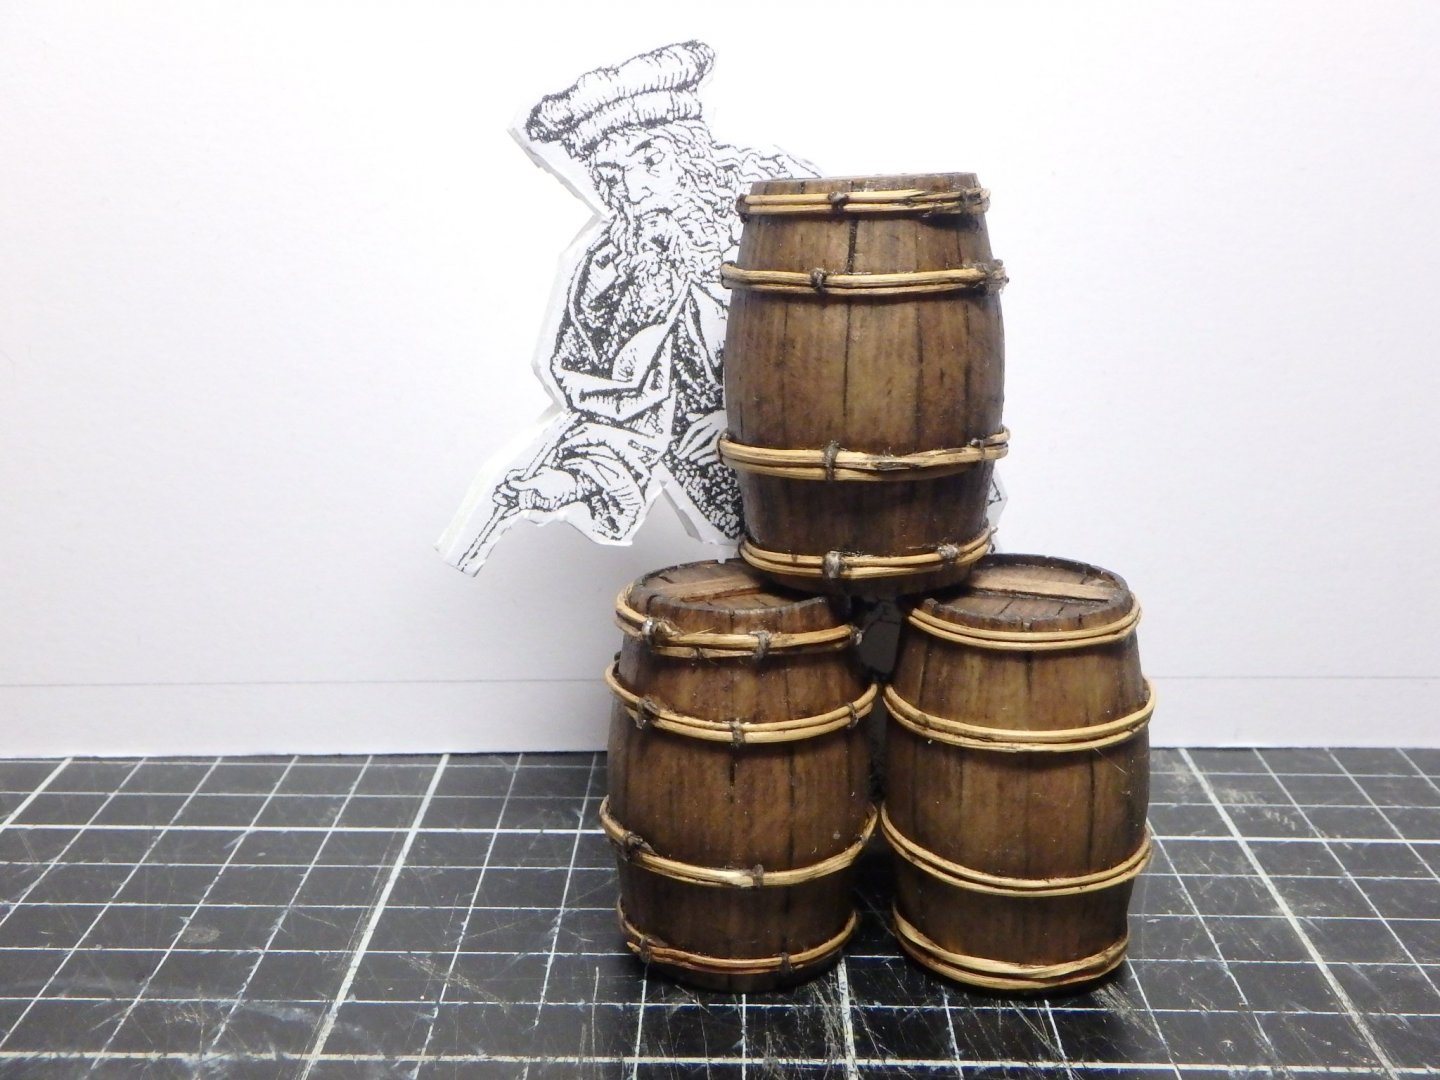
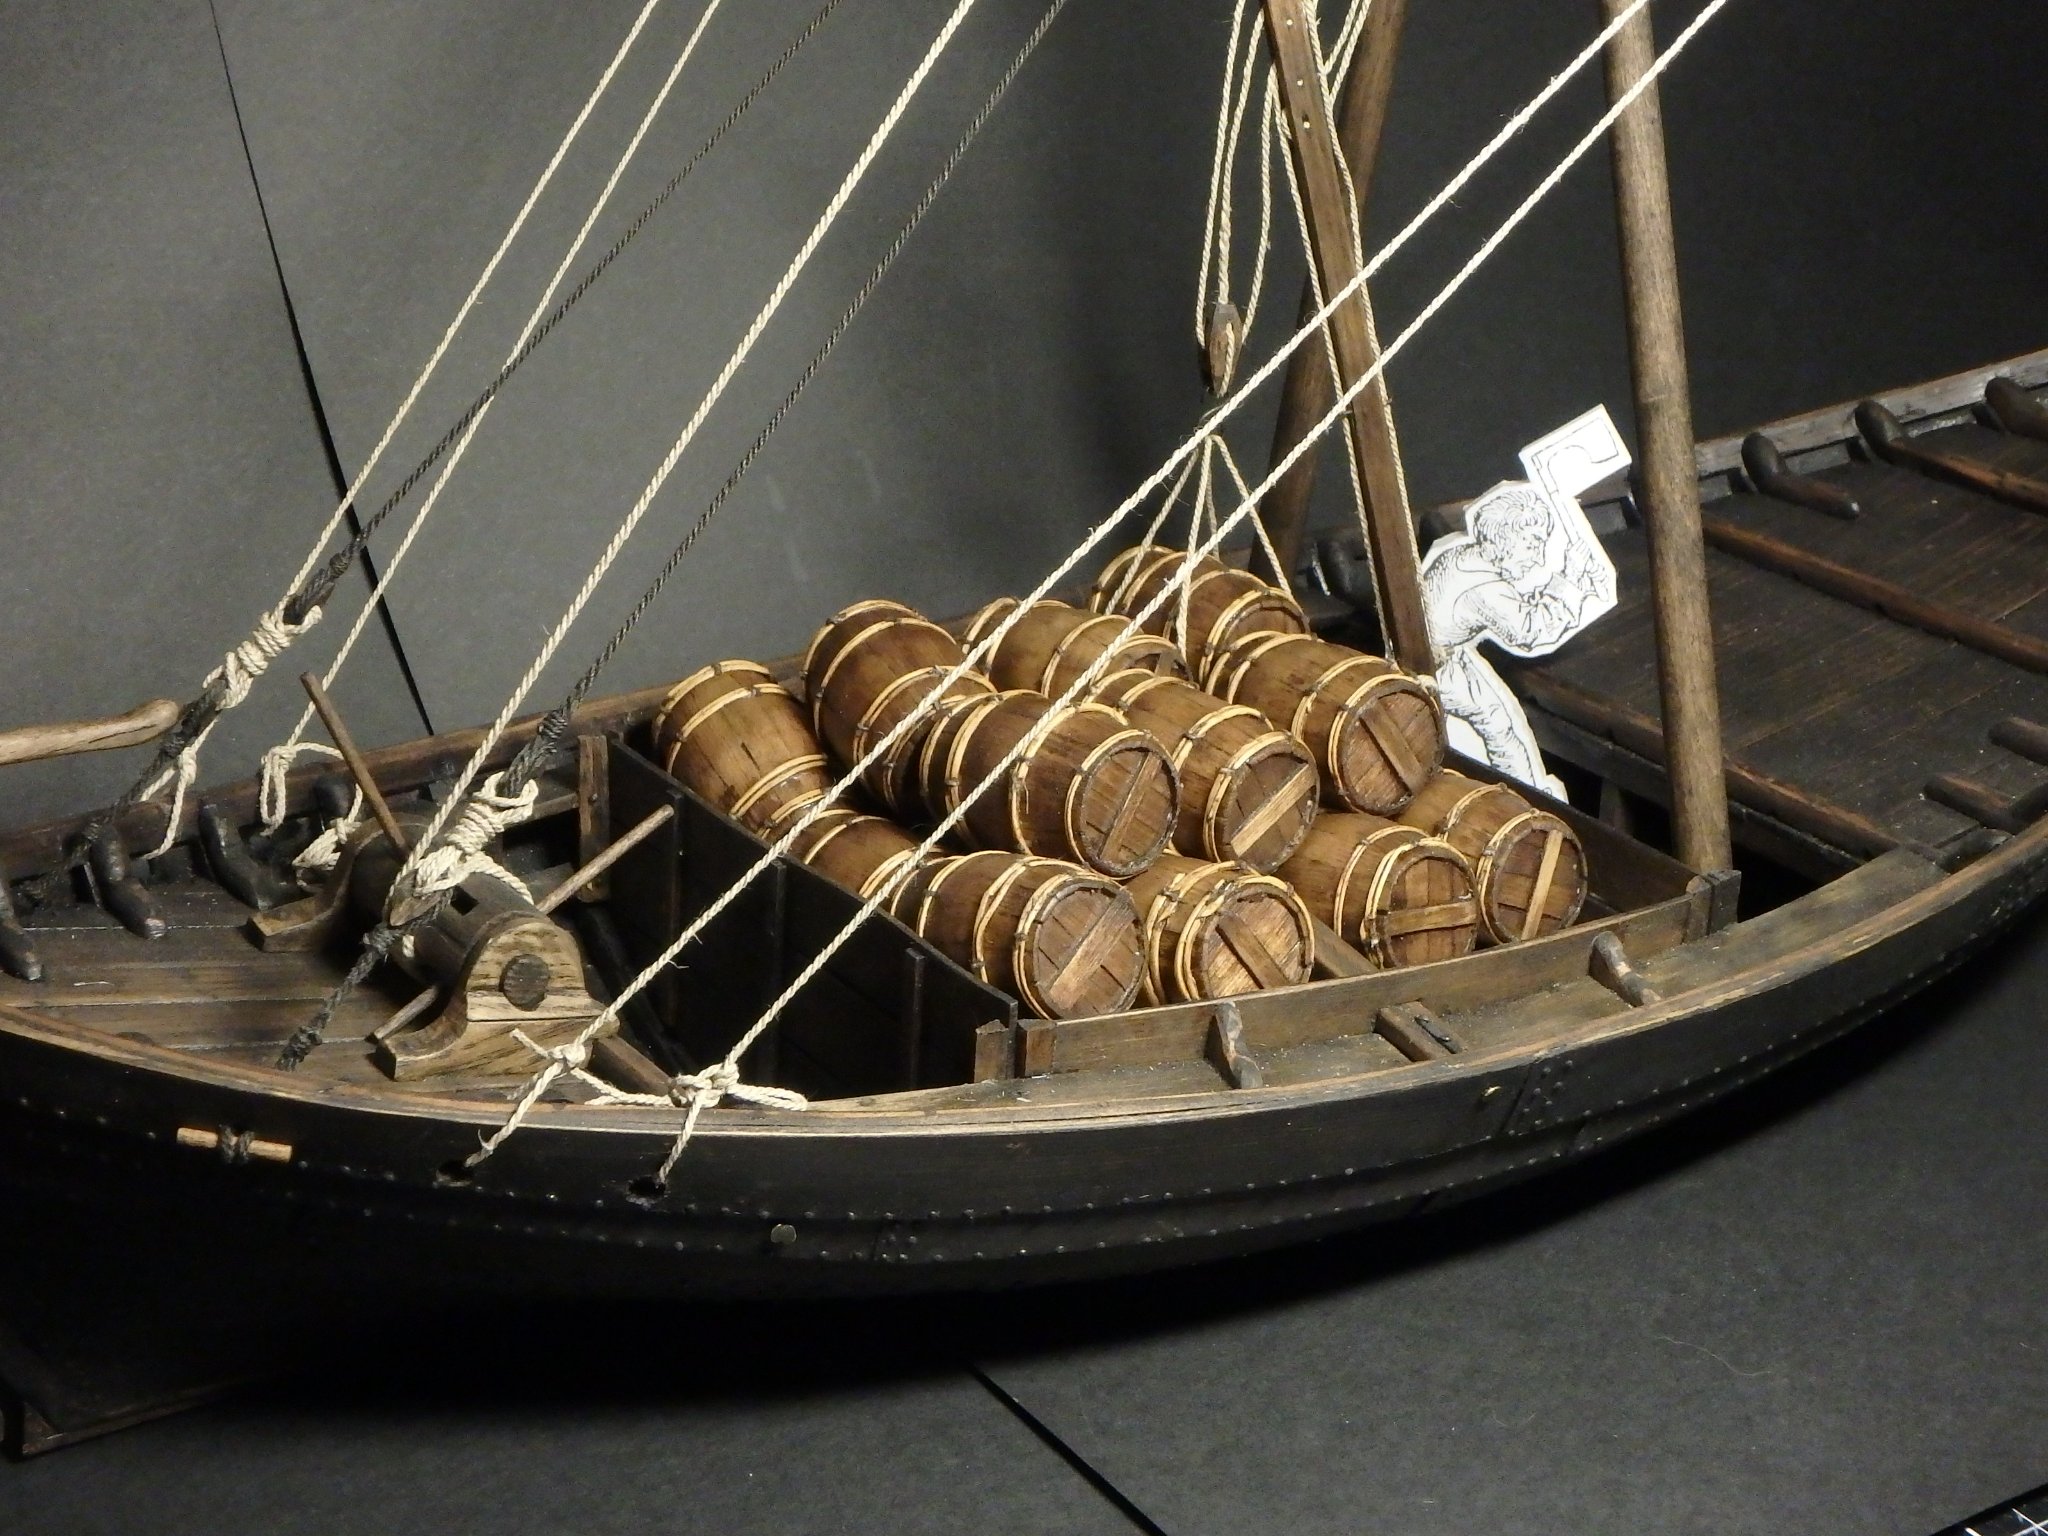
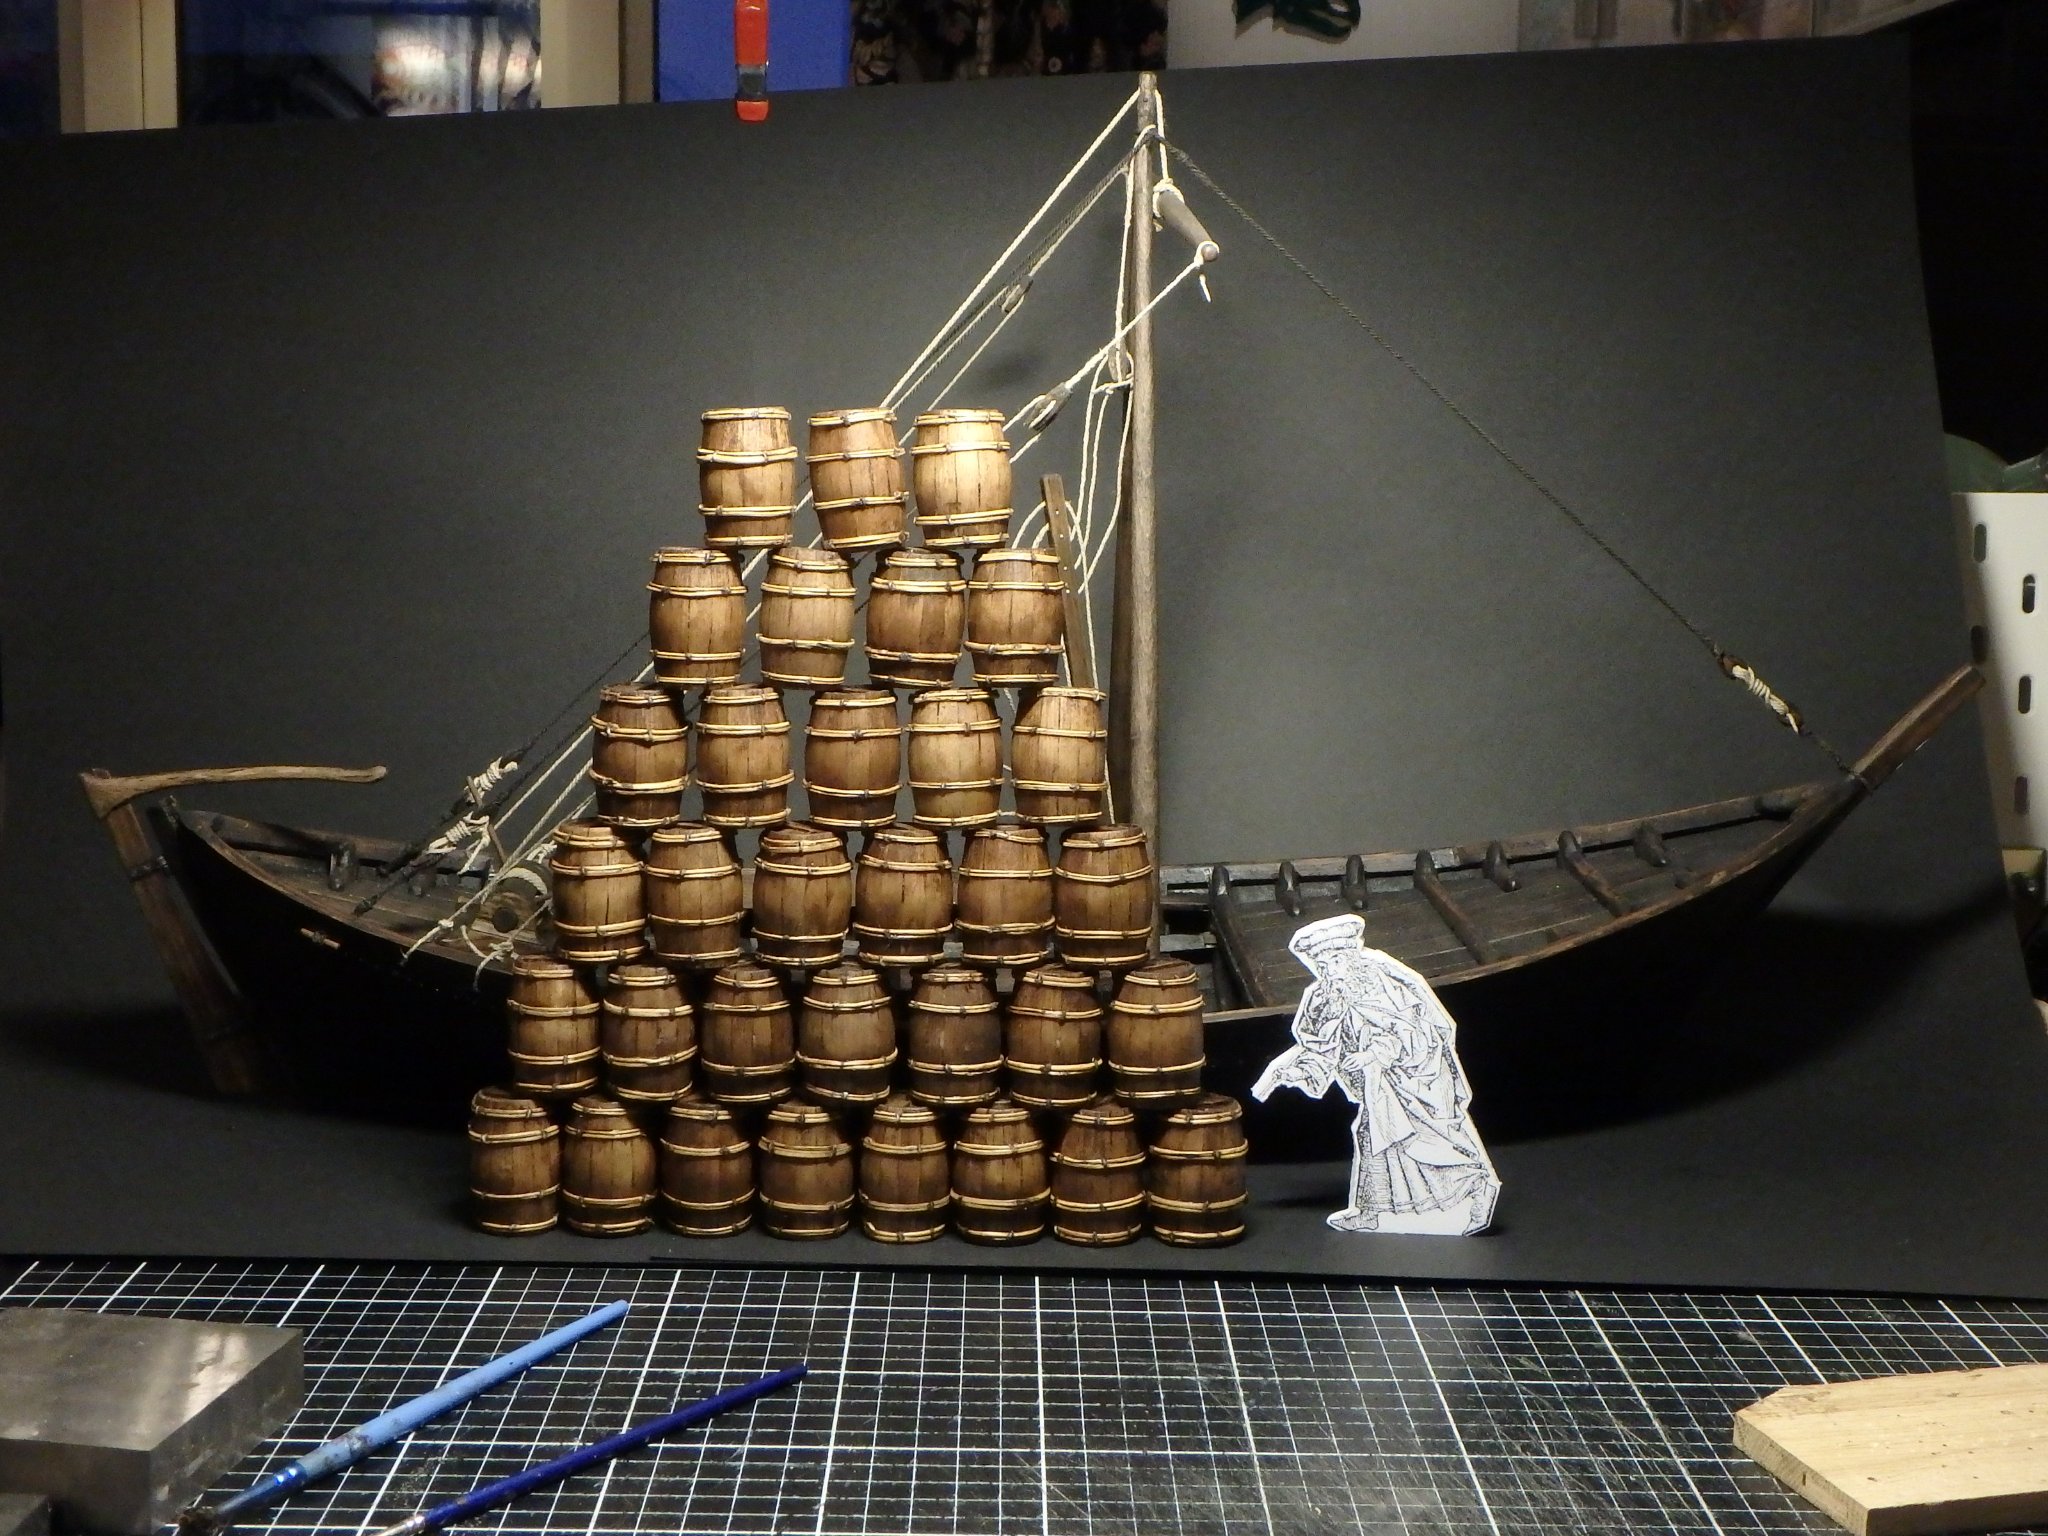
Thank you @Louie da fly and @Binho for the images of barrels, I didn't know willow hoops were used for that long! When I in my post two weeks ago said that I would make 30 more barrels, ie. 33 barrels in total, it was just a rough number. But it turned out to be the exact number I needed to fill the hold. Some barrels turned out worse than others and I marked 15 of them with an X in the ends to make sure that I use them in the bottom layer where they hardly will be seen. I consider the barrels the main cargo but will also make some auxiliary to be stowed elsewhere. My father sailed a lot when he was younger and was a conscript in the swedish navy and when we discussed the ship he only objected to the forestay. He thought it looked too weak to have it fastened in the end of the bowsprit. And I agree so you can see it has moved backwards. And that means I'm back to not really understanding why I have a bowsprit at all. But otherwise he liked the ship which makes me happy.


-
That's some amazing work by@Siggi52! It's amazing to see the skills of the people here, thank you for the link as inspiration.
-
Thank you all! Yes, I would like to add people. At least I don't have to do 50 of them ;-). But I'm not sure of how. Either I could aim for something "symbolic", something like my cardboard cutouts but in 3D just to provide a sense of scale. Or I could do something more realistic. But I don't know how to do the clothing. Let's say that I found good poseable figures, then I could either cloth them by sculpting in clay; this would give the best results but I'm really bad at sculpting. Or I could sew. That I can do, but I really don't like the way many figures in this scale loo with sewn clothing as the clothing all look so oversized. There must be similar forums like this for serious dollhouse builders and perhaps they have good methods I should look into.
-
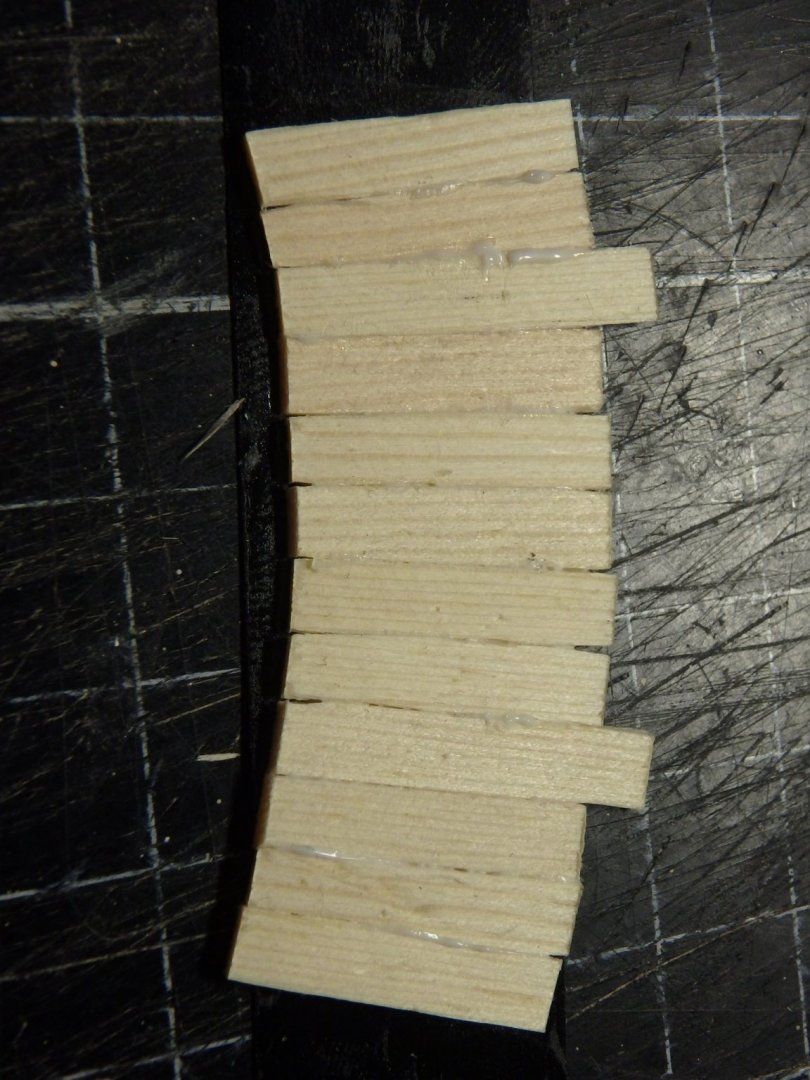
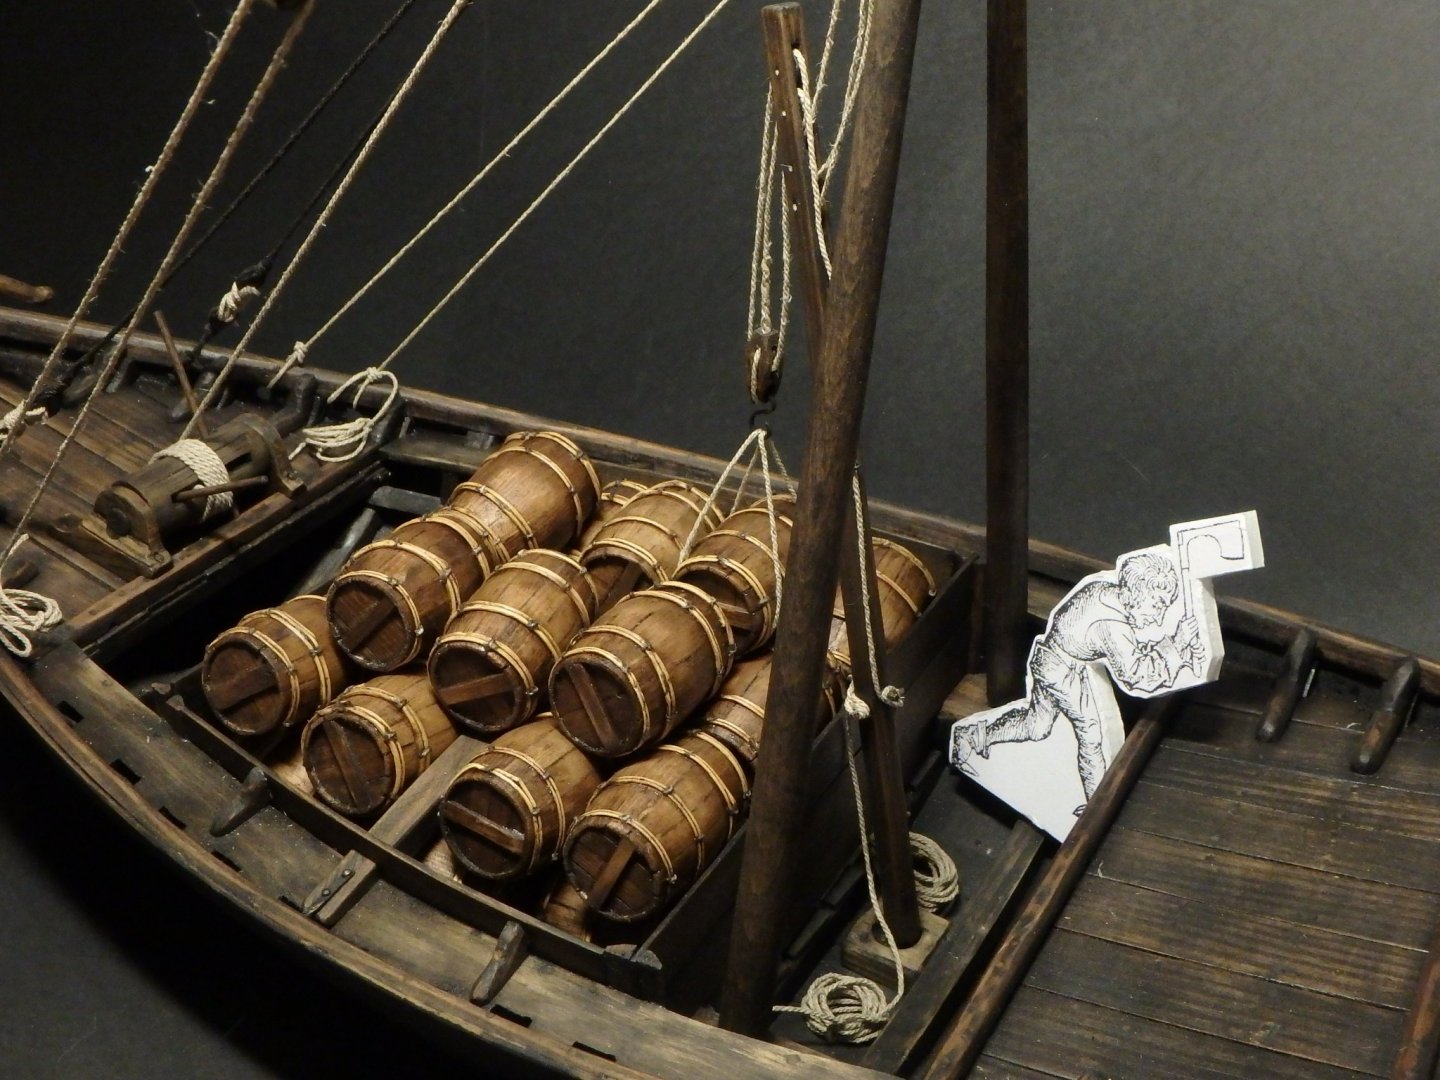
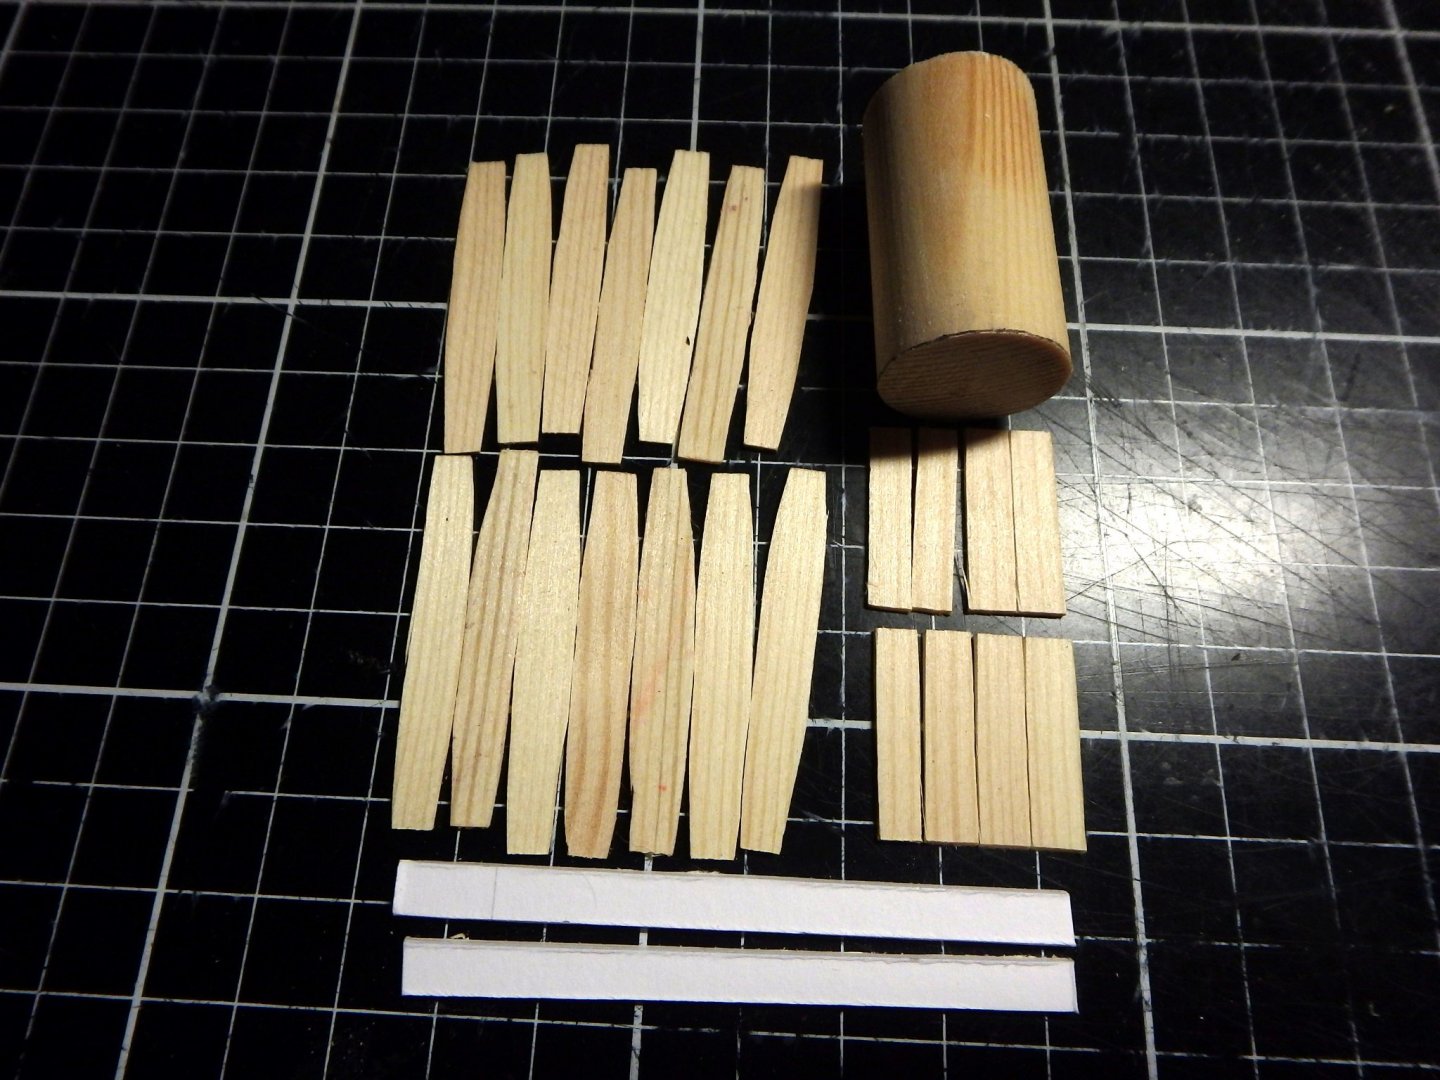
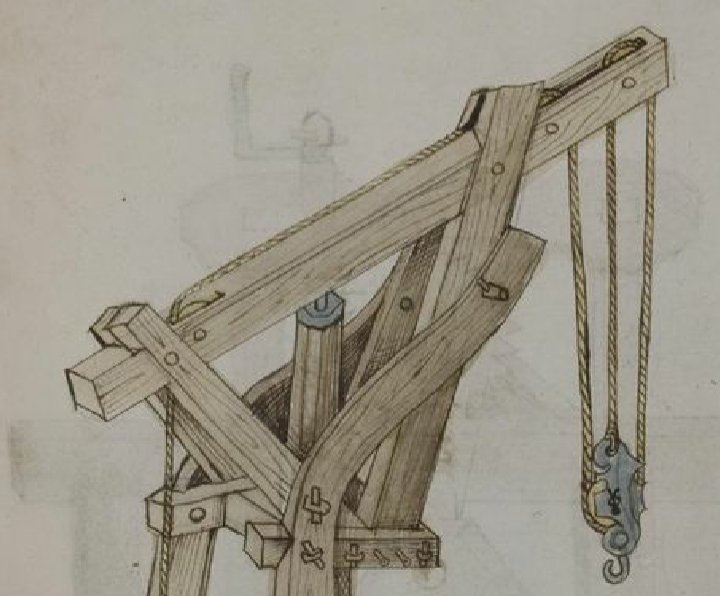
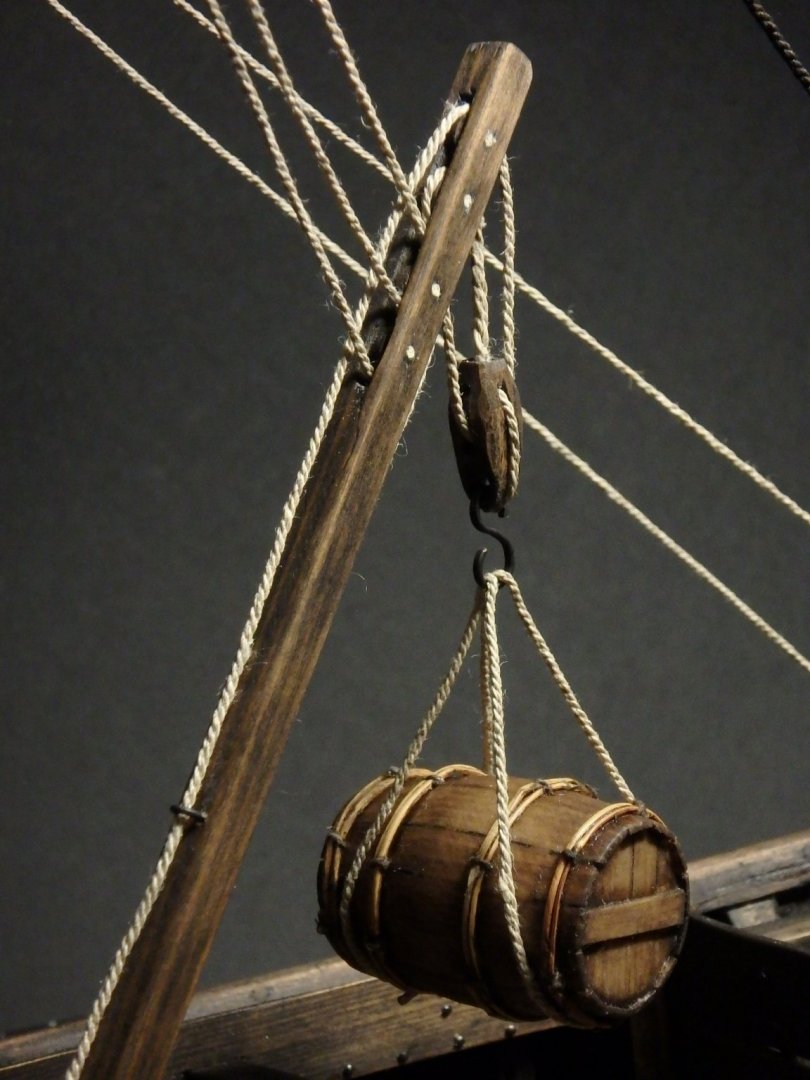
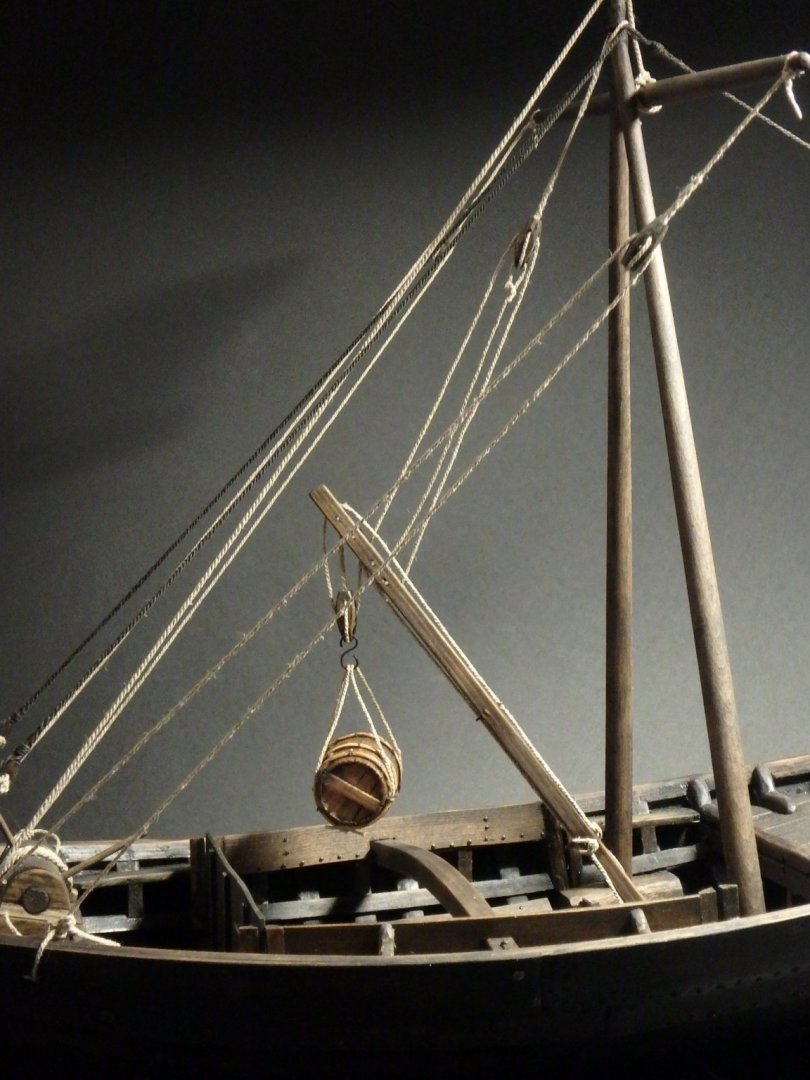
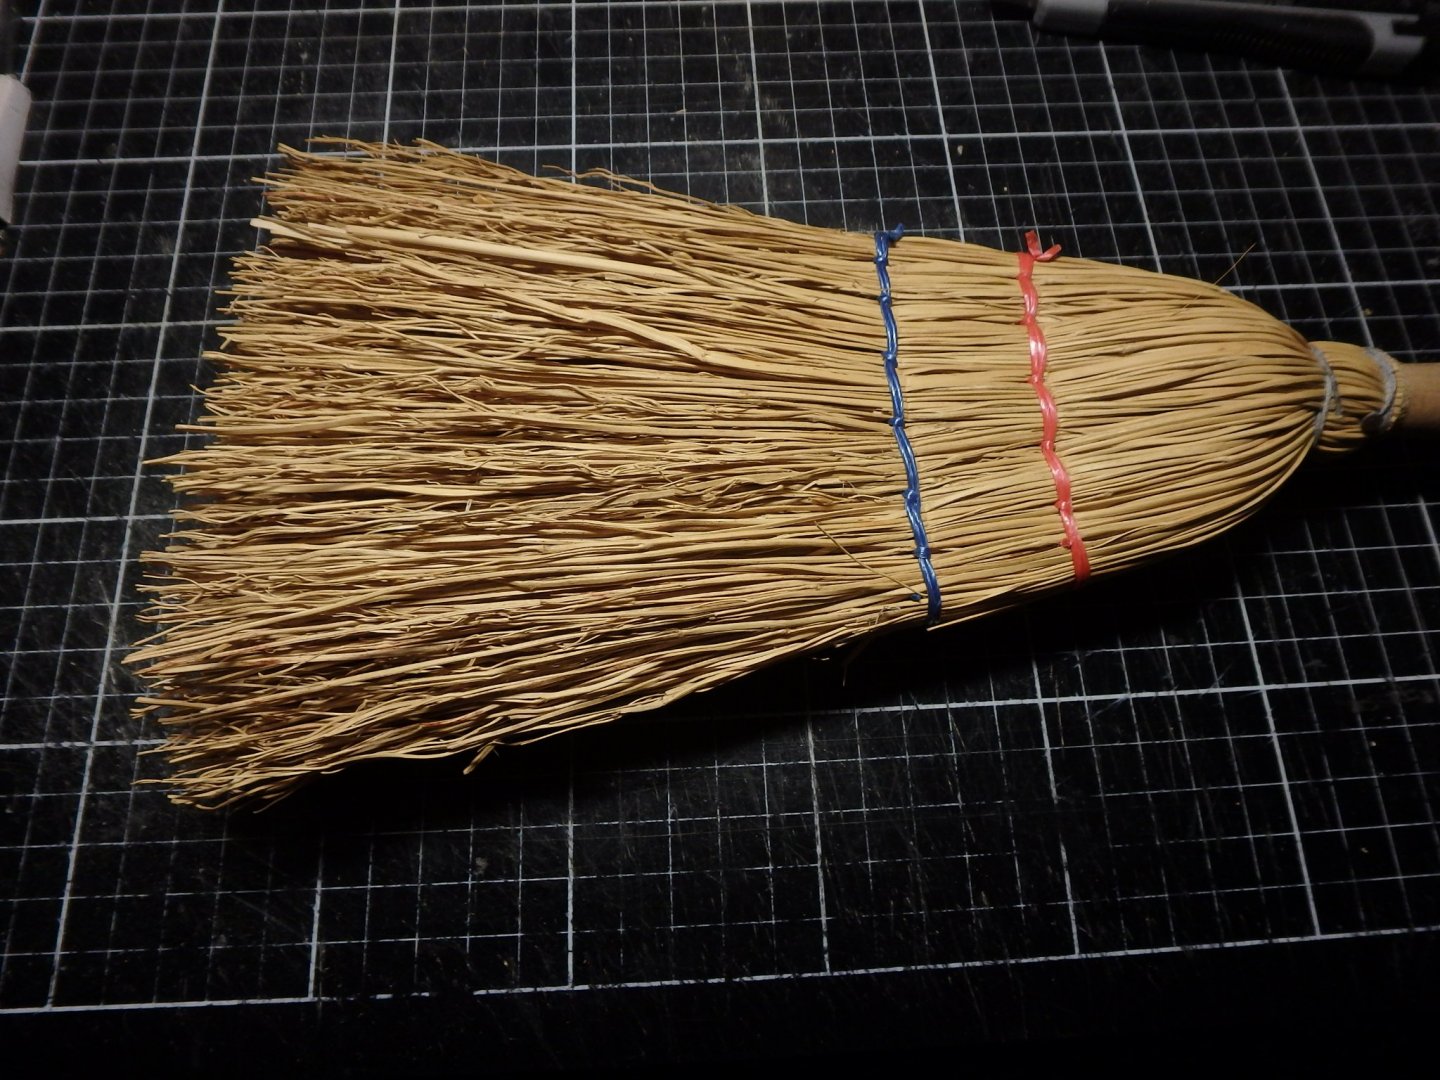
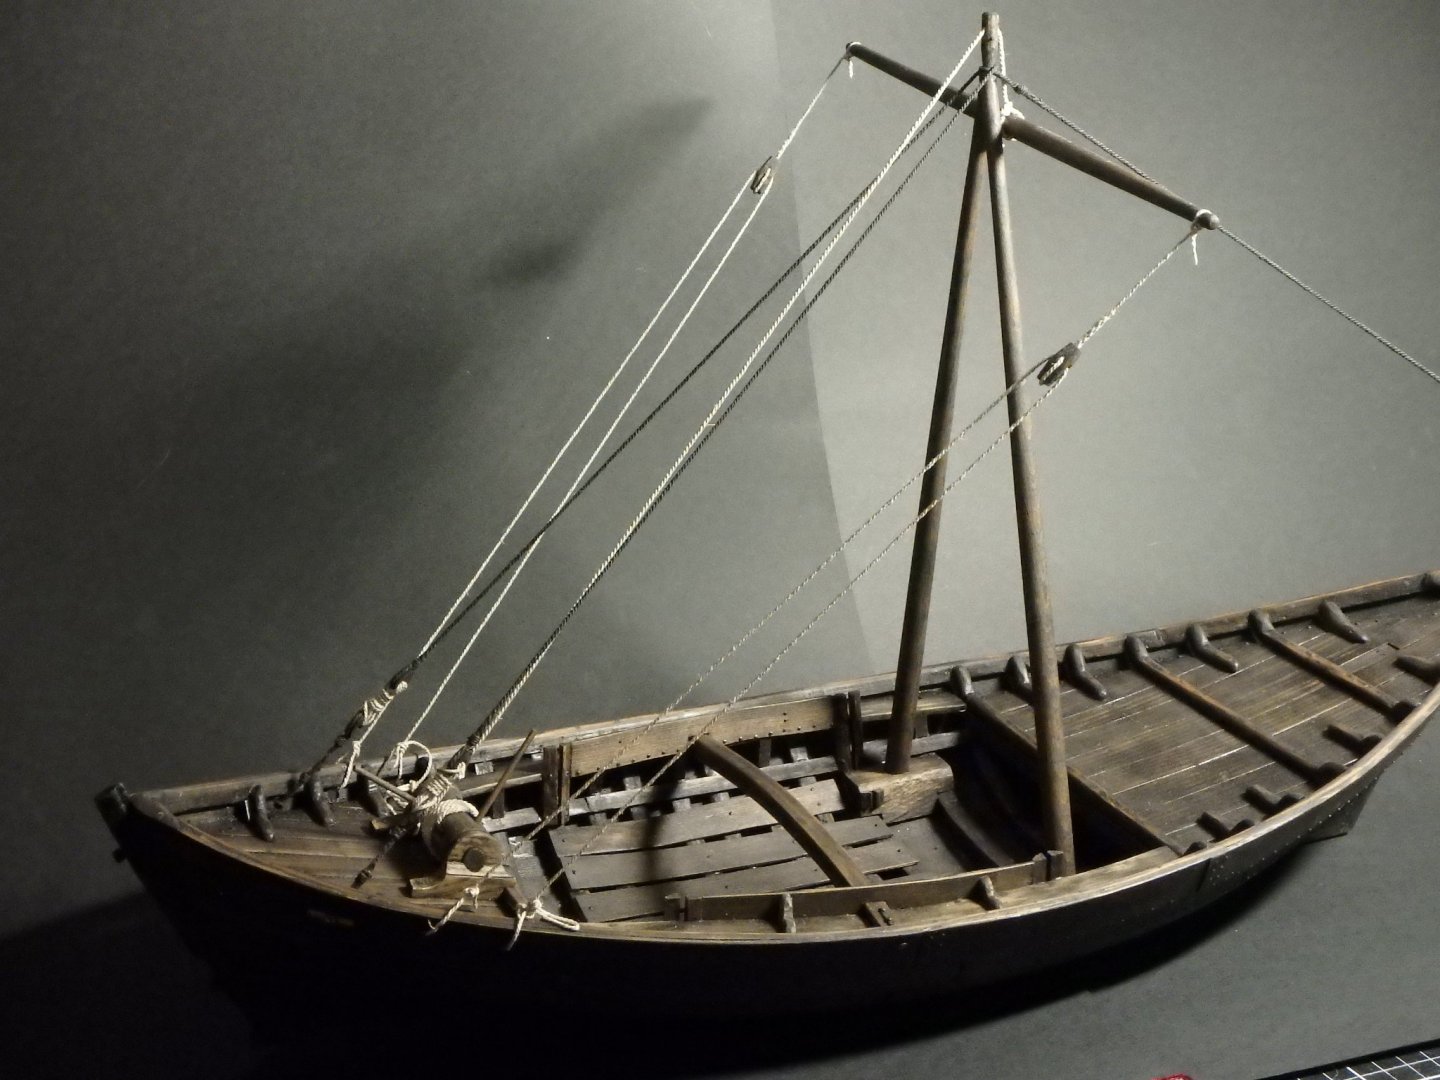
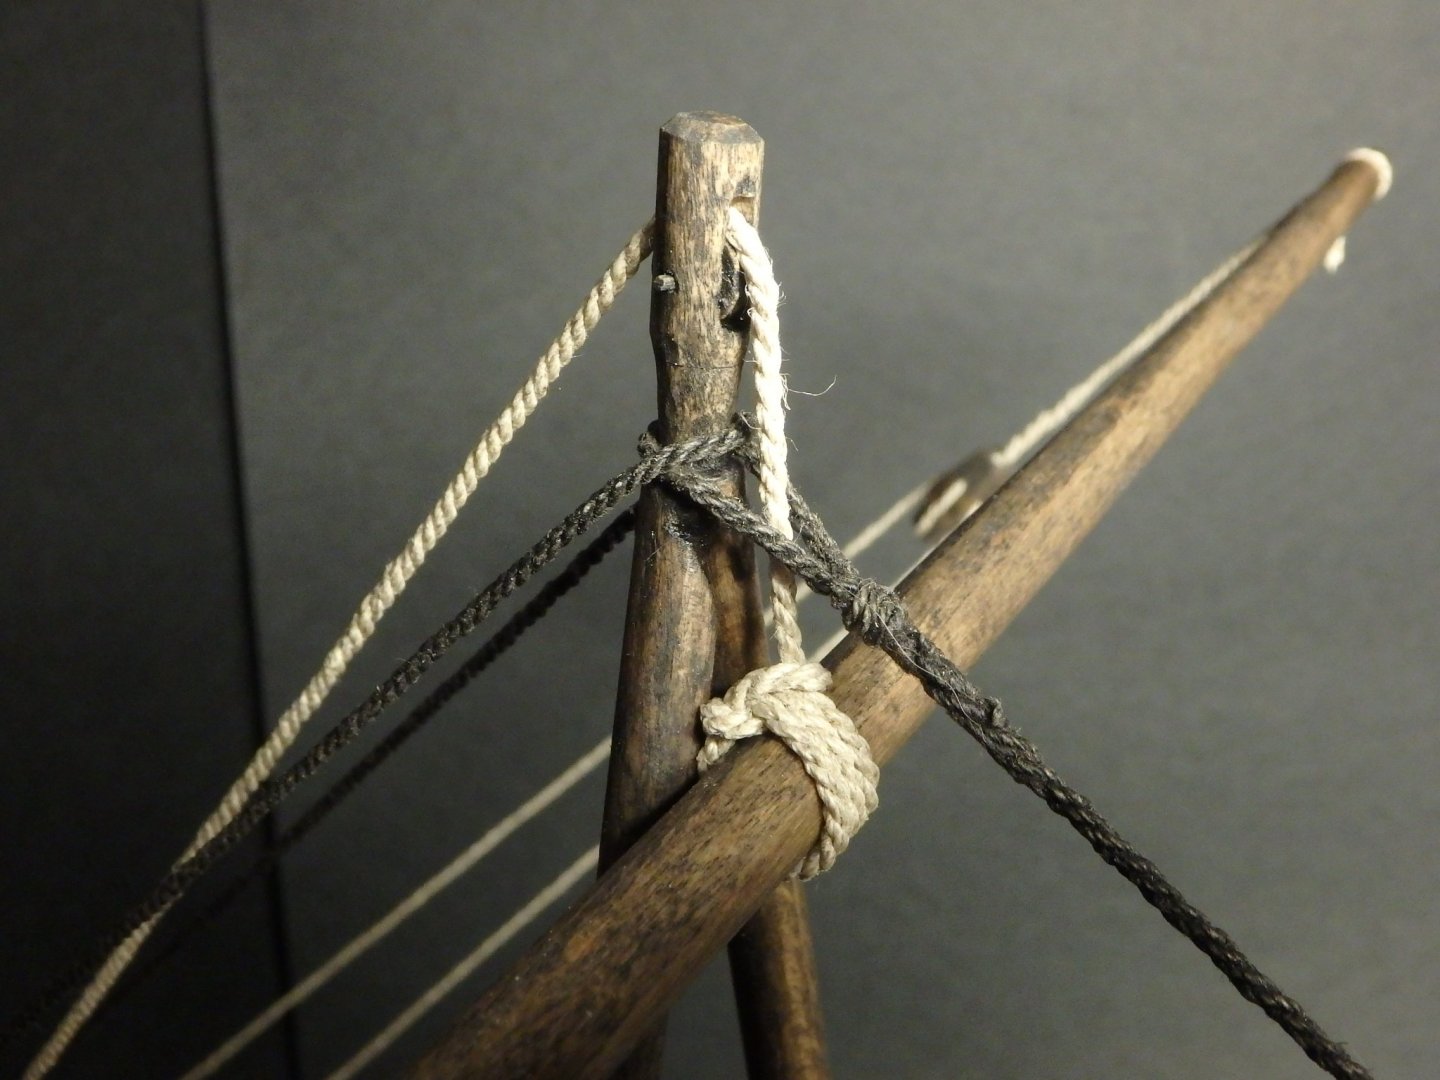
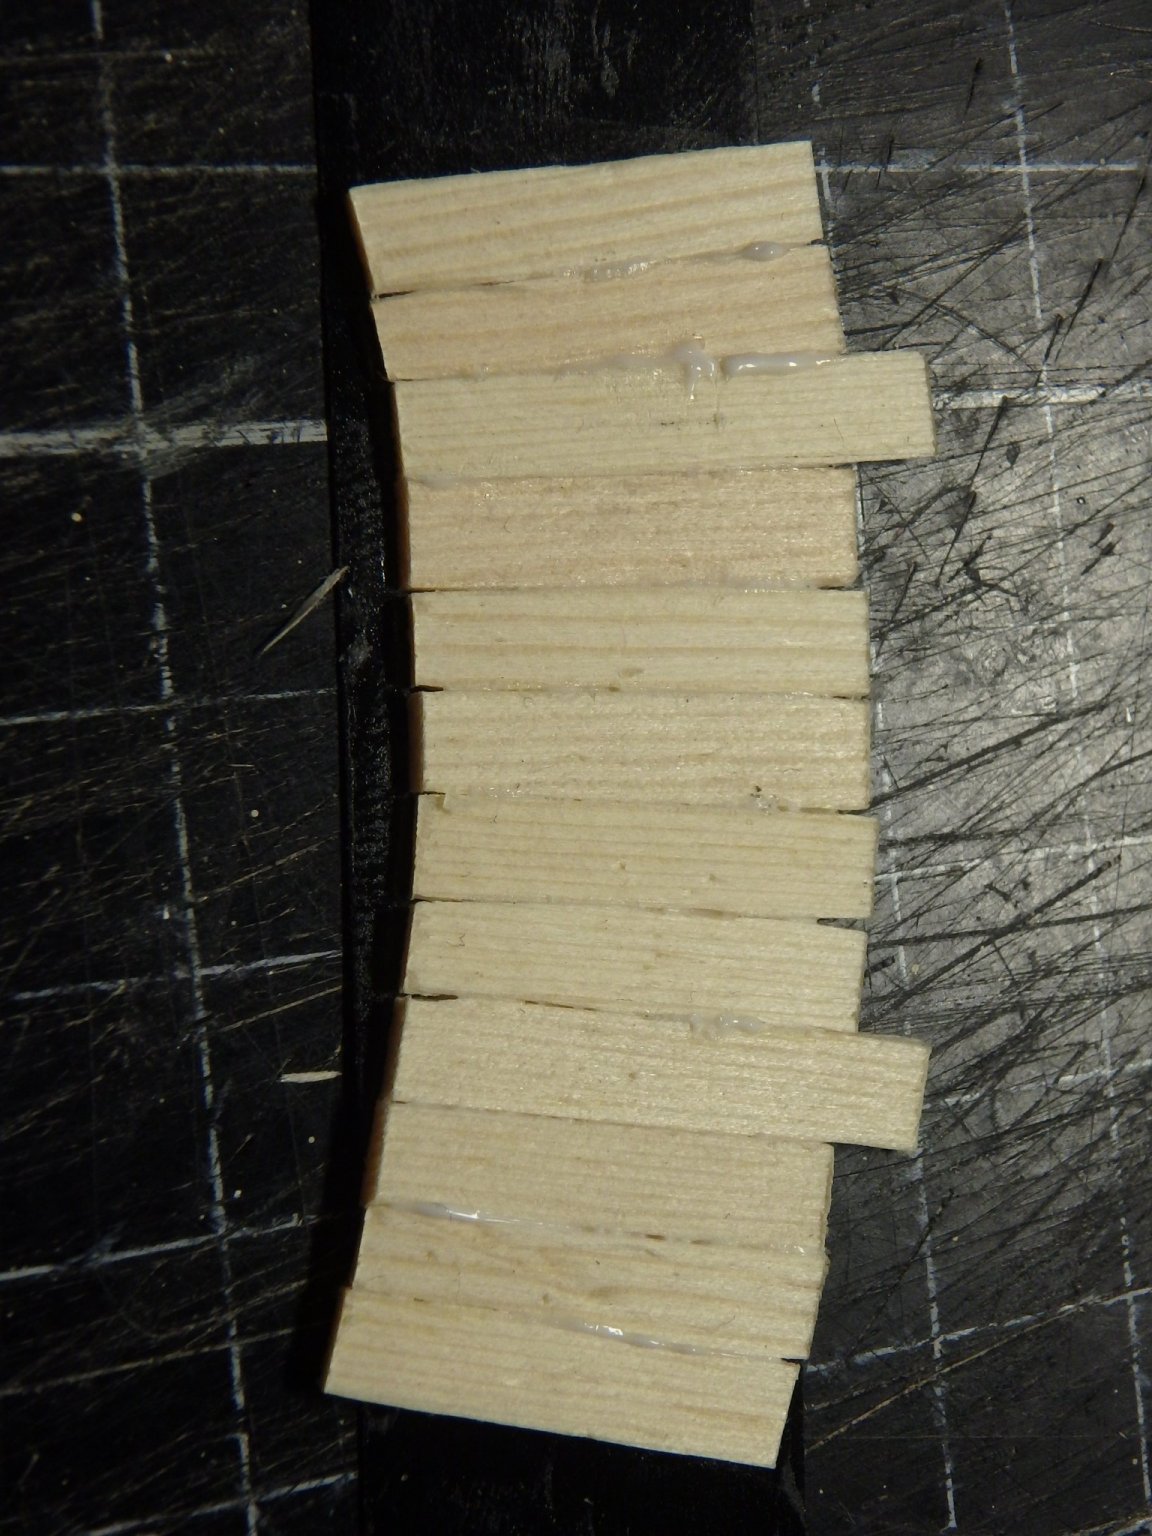
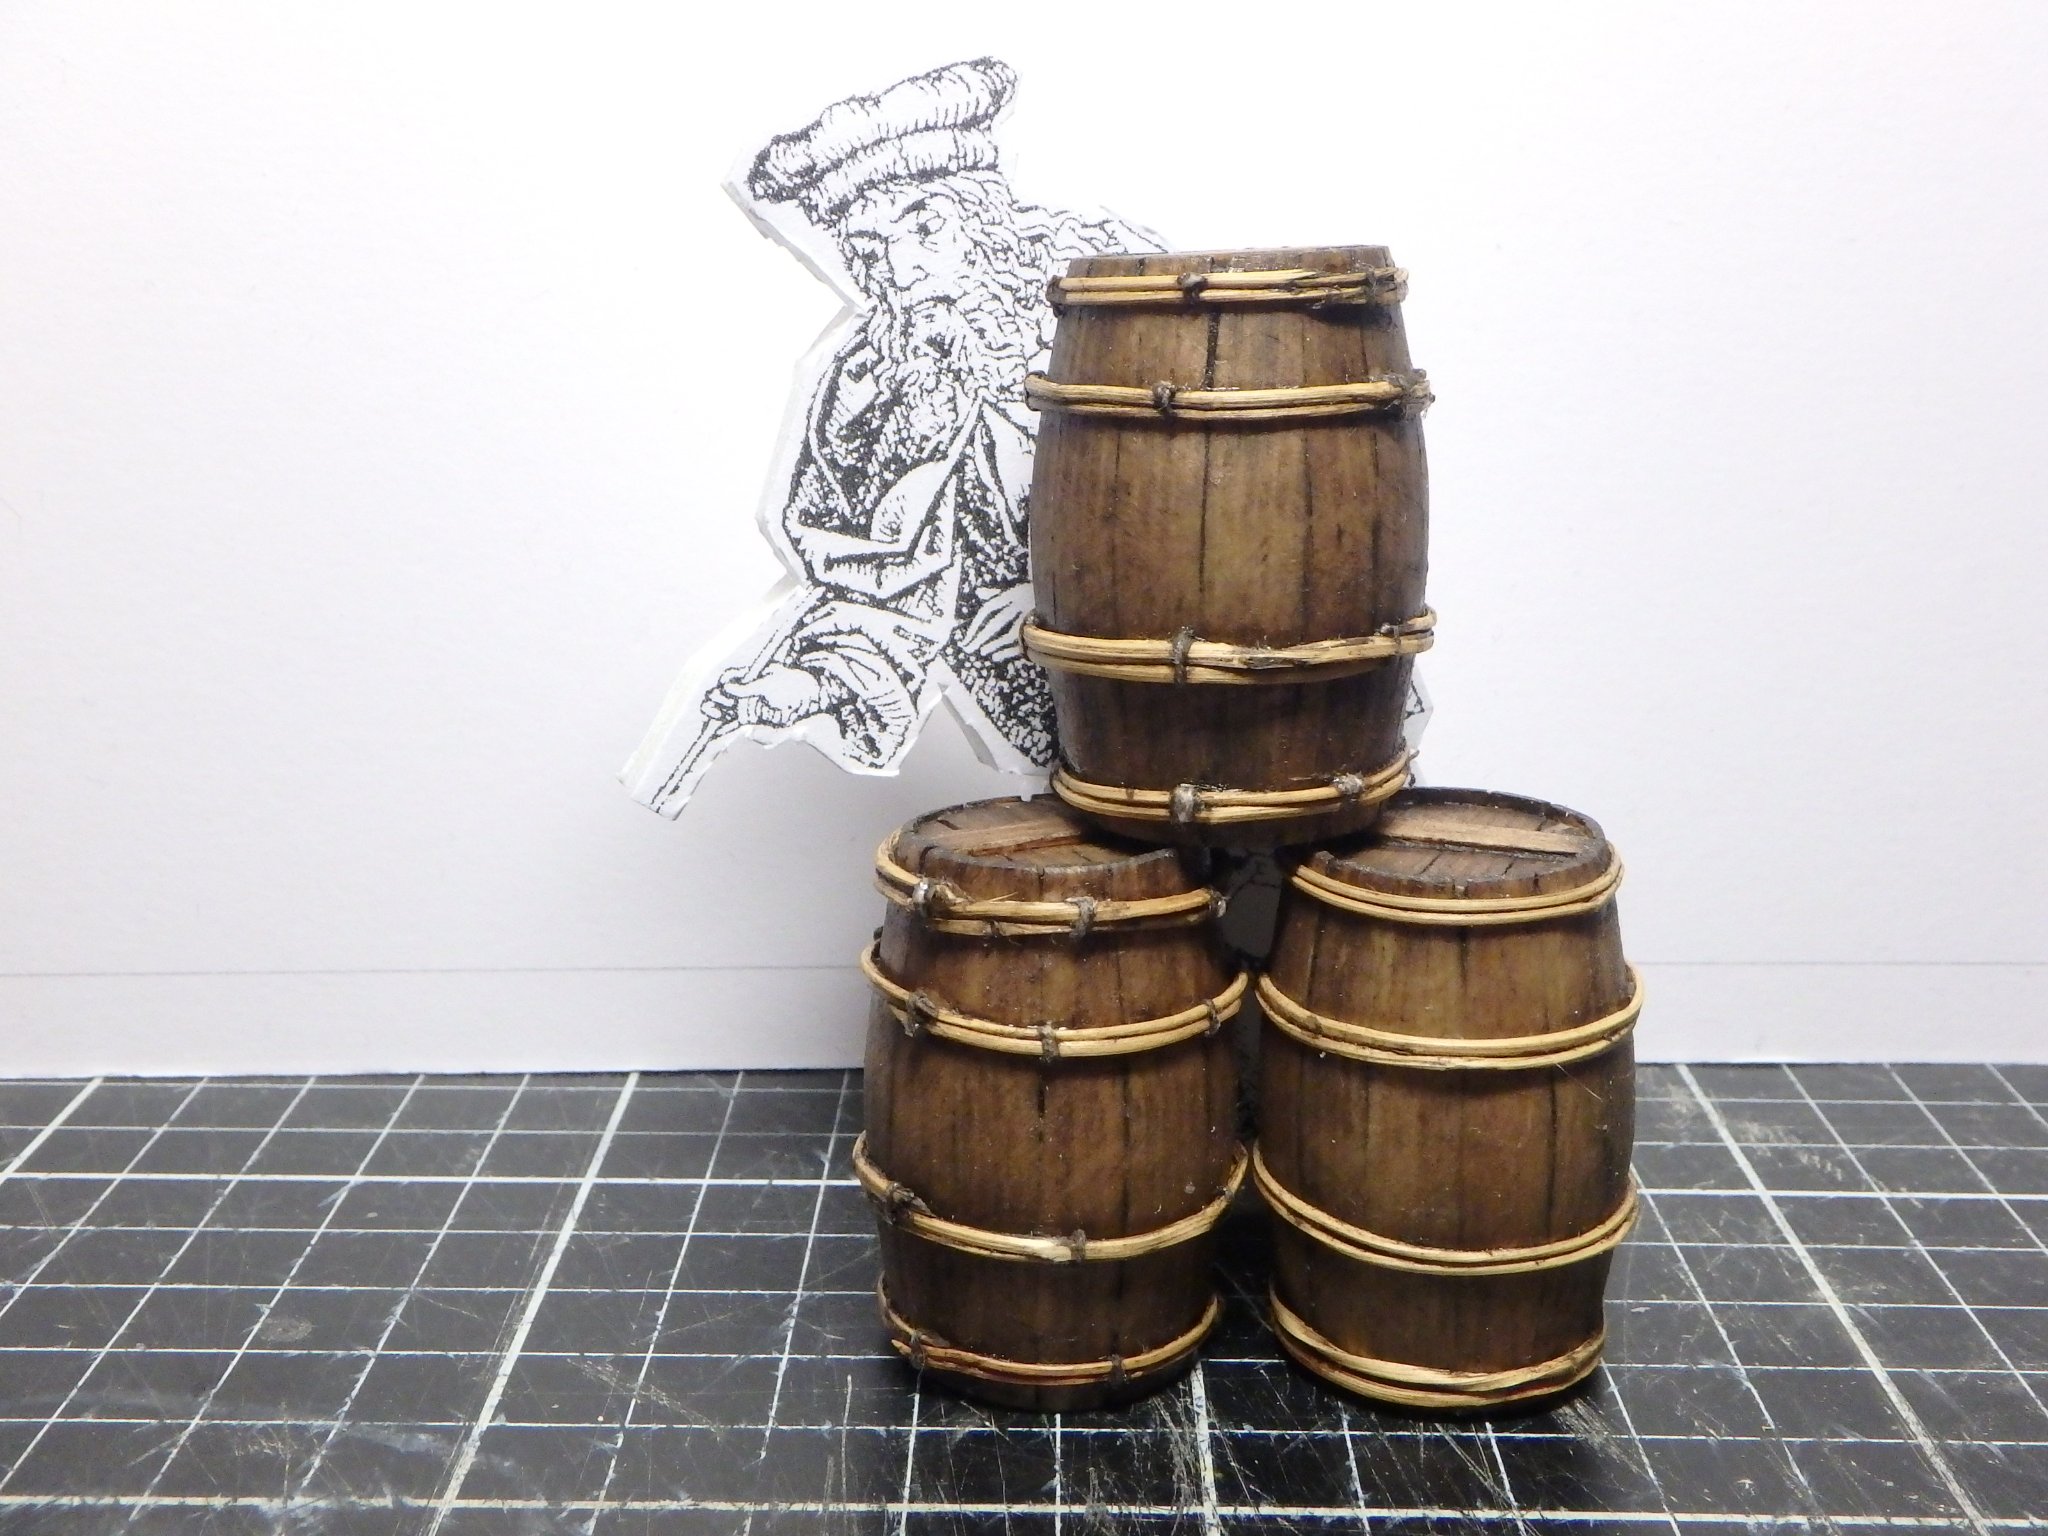
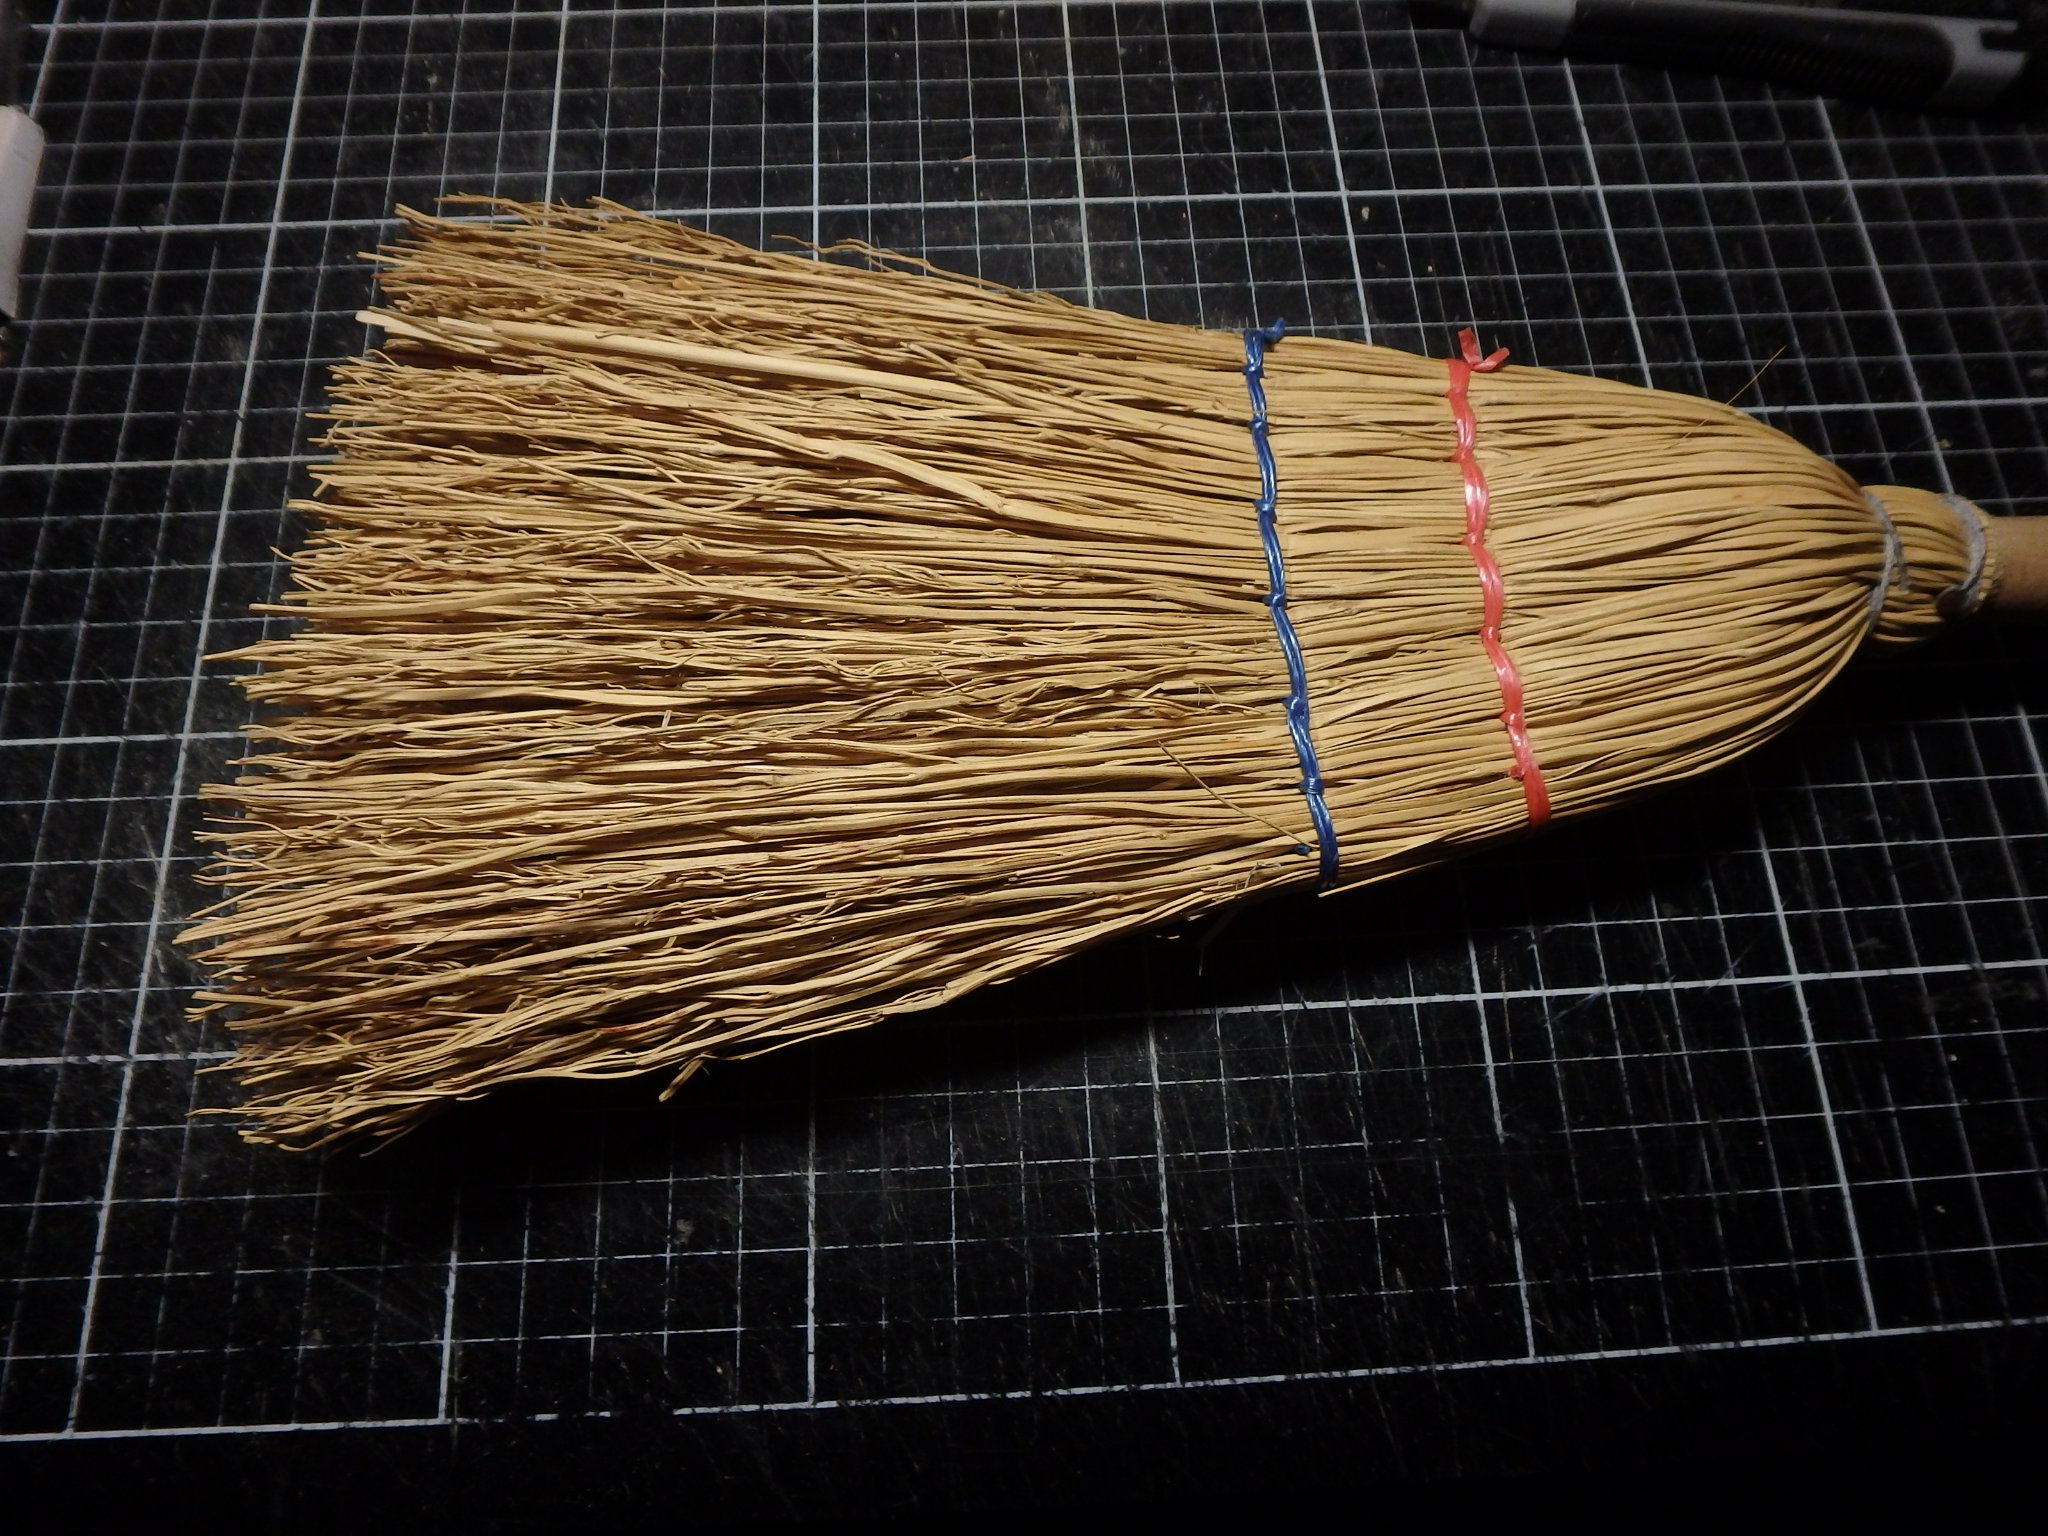
The lifting boom is in place. It has integrated sheaves as per this image. The two blocks basically are single blocks combined with a heart. One of them is hung from the masttop and the other has a simple S hook. It has a simple step to keep it in place and simple belaying points. Yearlier I mentioned the front bulkhead having removable planks. Here we see just the first plank in place so the boom gets better reach. This ship should have cargo to look complete and I started making barrels. I really like the method I see on this forum where you use a tablesaw to make wedges that you turn barrel shaped. But I don't have the space for a table saw nor a wood turner. So I used a method I saw on pinterest where you make a cylindrical core with a spacer and bend planks around it. The hoops are made from this brush I picked up from a charity shop. The master inspects the first batch of barrels. Now lets do thirty more. The barrels are of the standardized hanseatic league size for transporting herring.
-
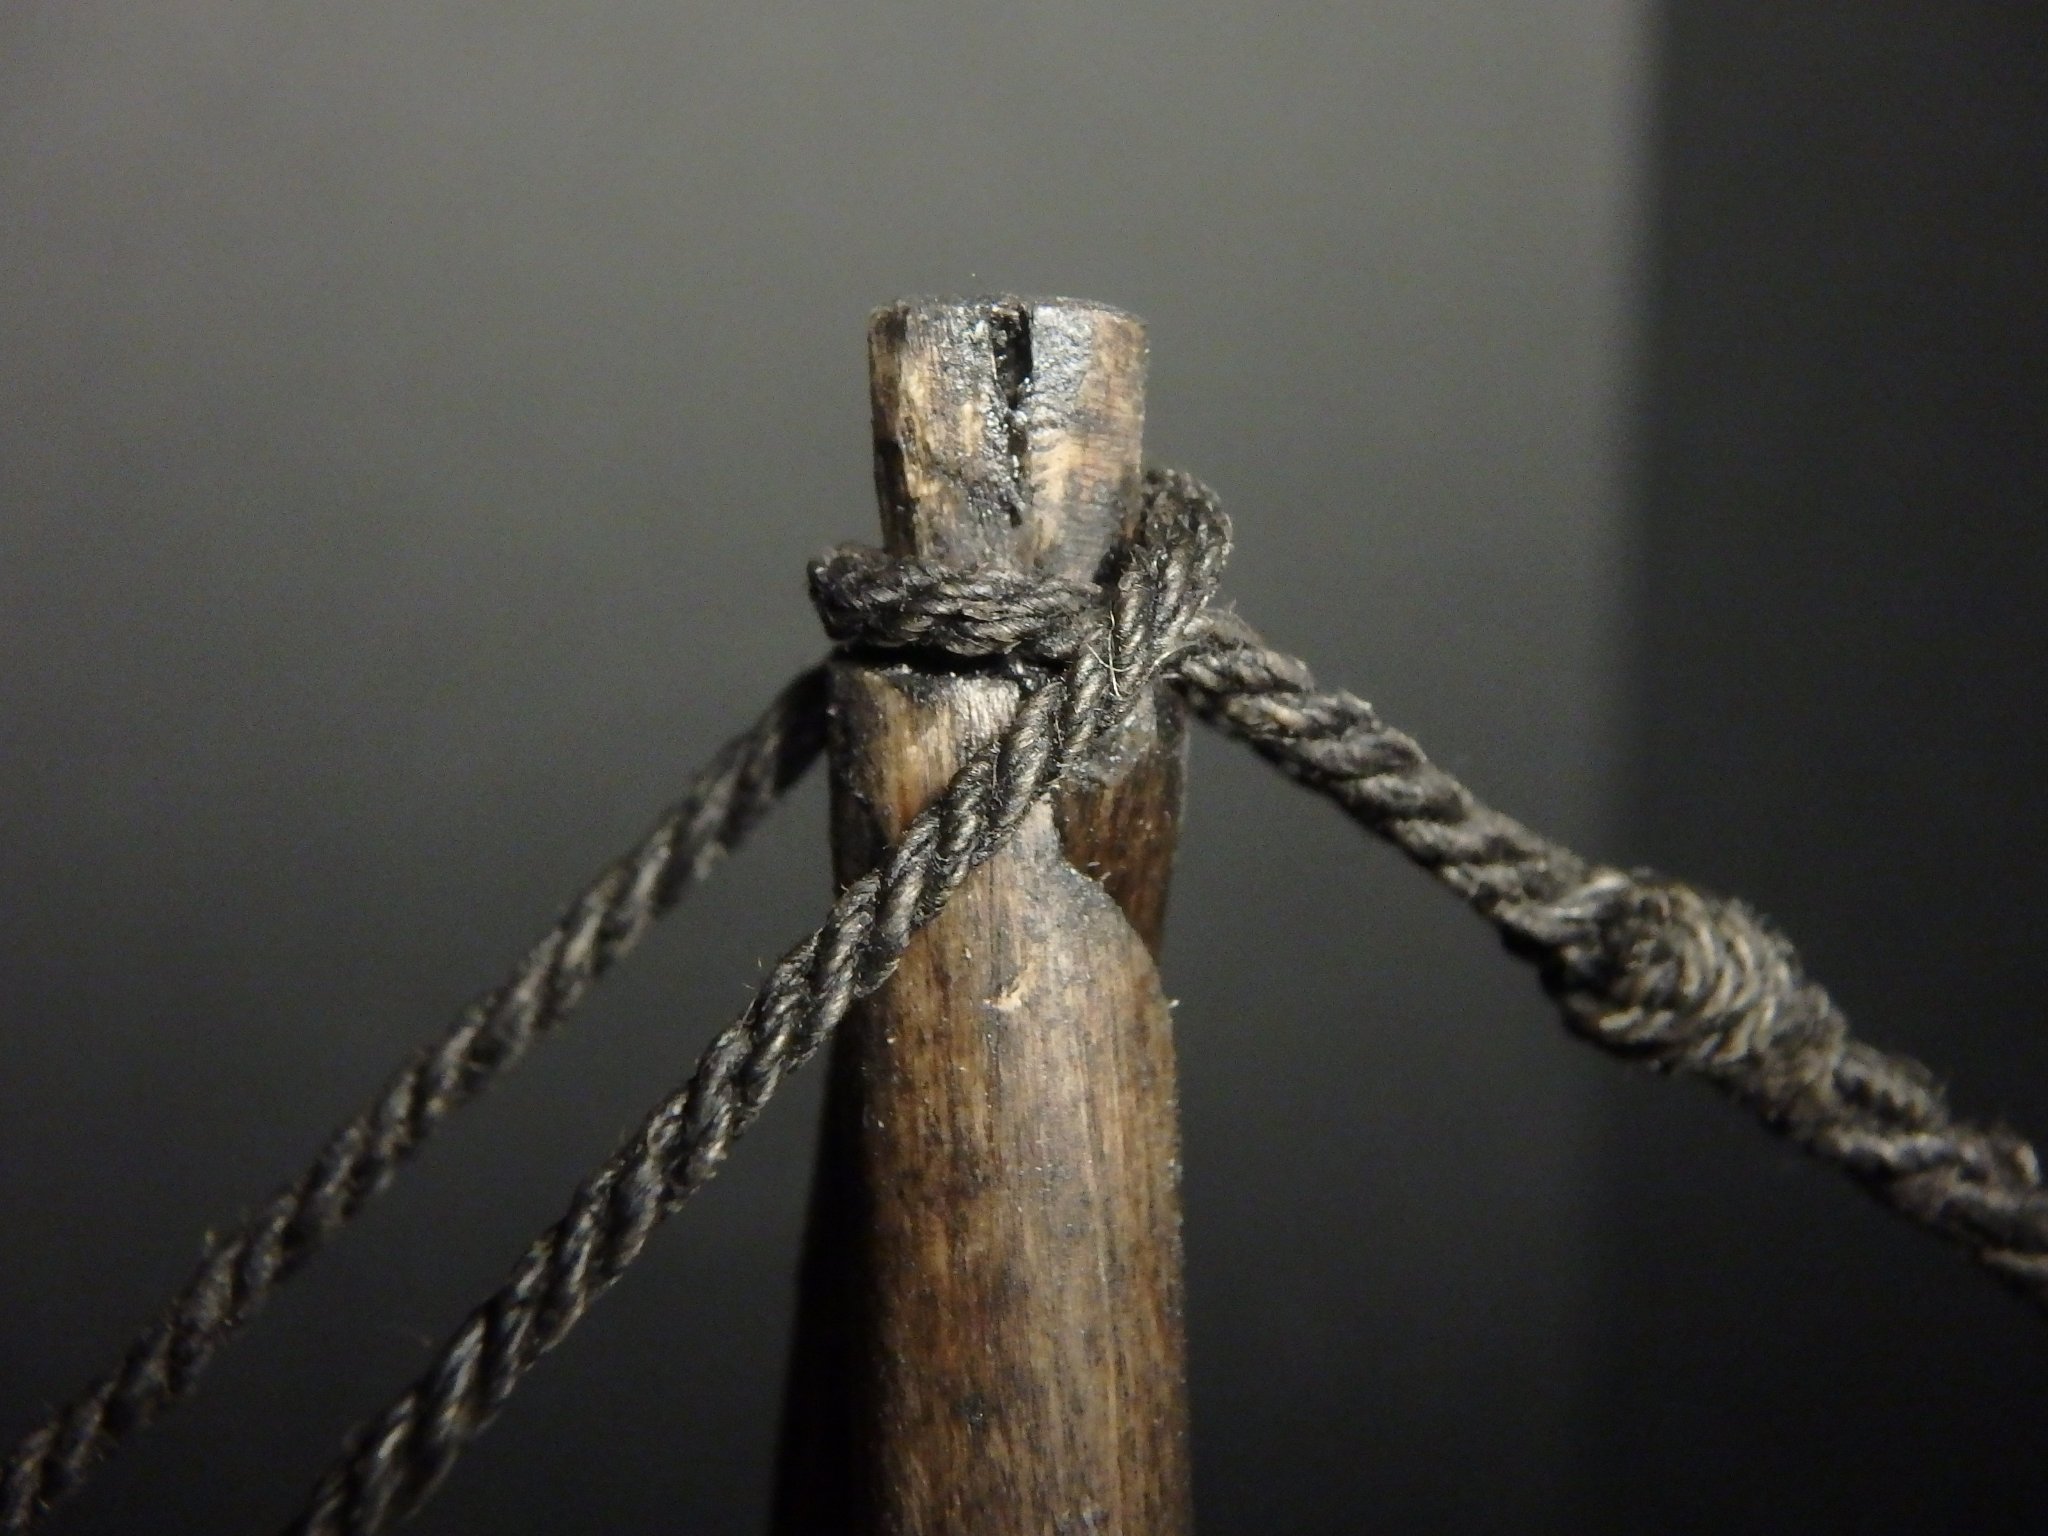
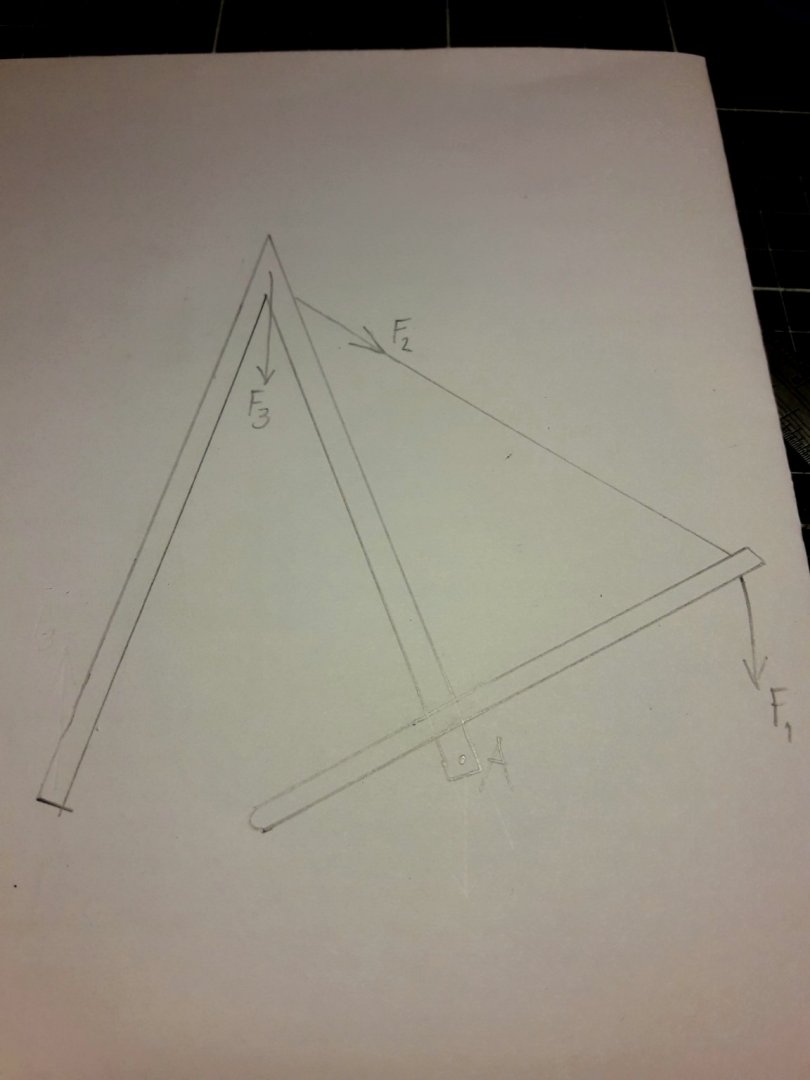
Thank you for asking that Steven! From the start I thought that I didn't need shrouds as the mast is very stable athwartships. But your question forced me to think about it again and now I see that when the lifting boom turns sideways it will try to overturn the mast around point A in the sketch. F1 is the load on the boom F2 is the resulting force as the boom is attached there by tackle. F3 is the force made by the mass of mast, yard and sail. When calculating tourqe I see that the mass of the mast actually is enough to resist it from turning over. And the stays will provide safety margin to keep it safe.
-
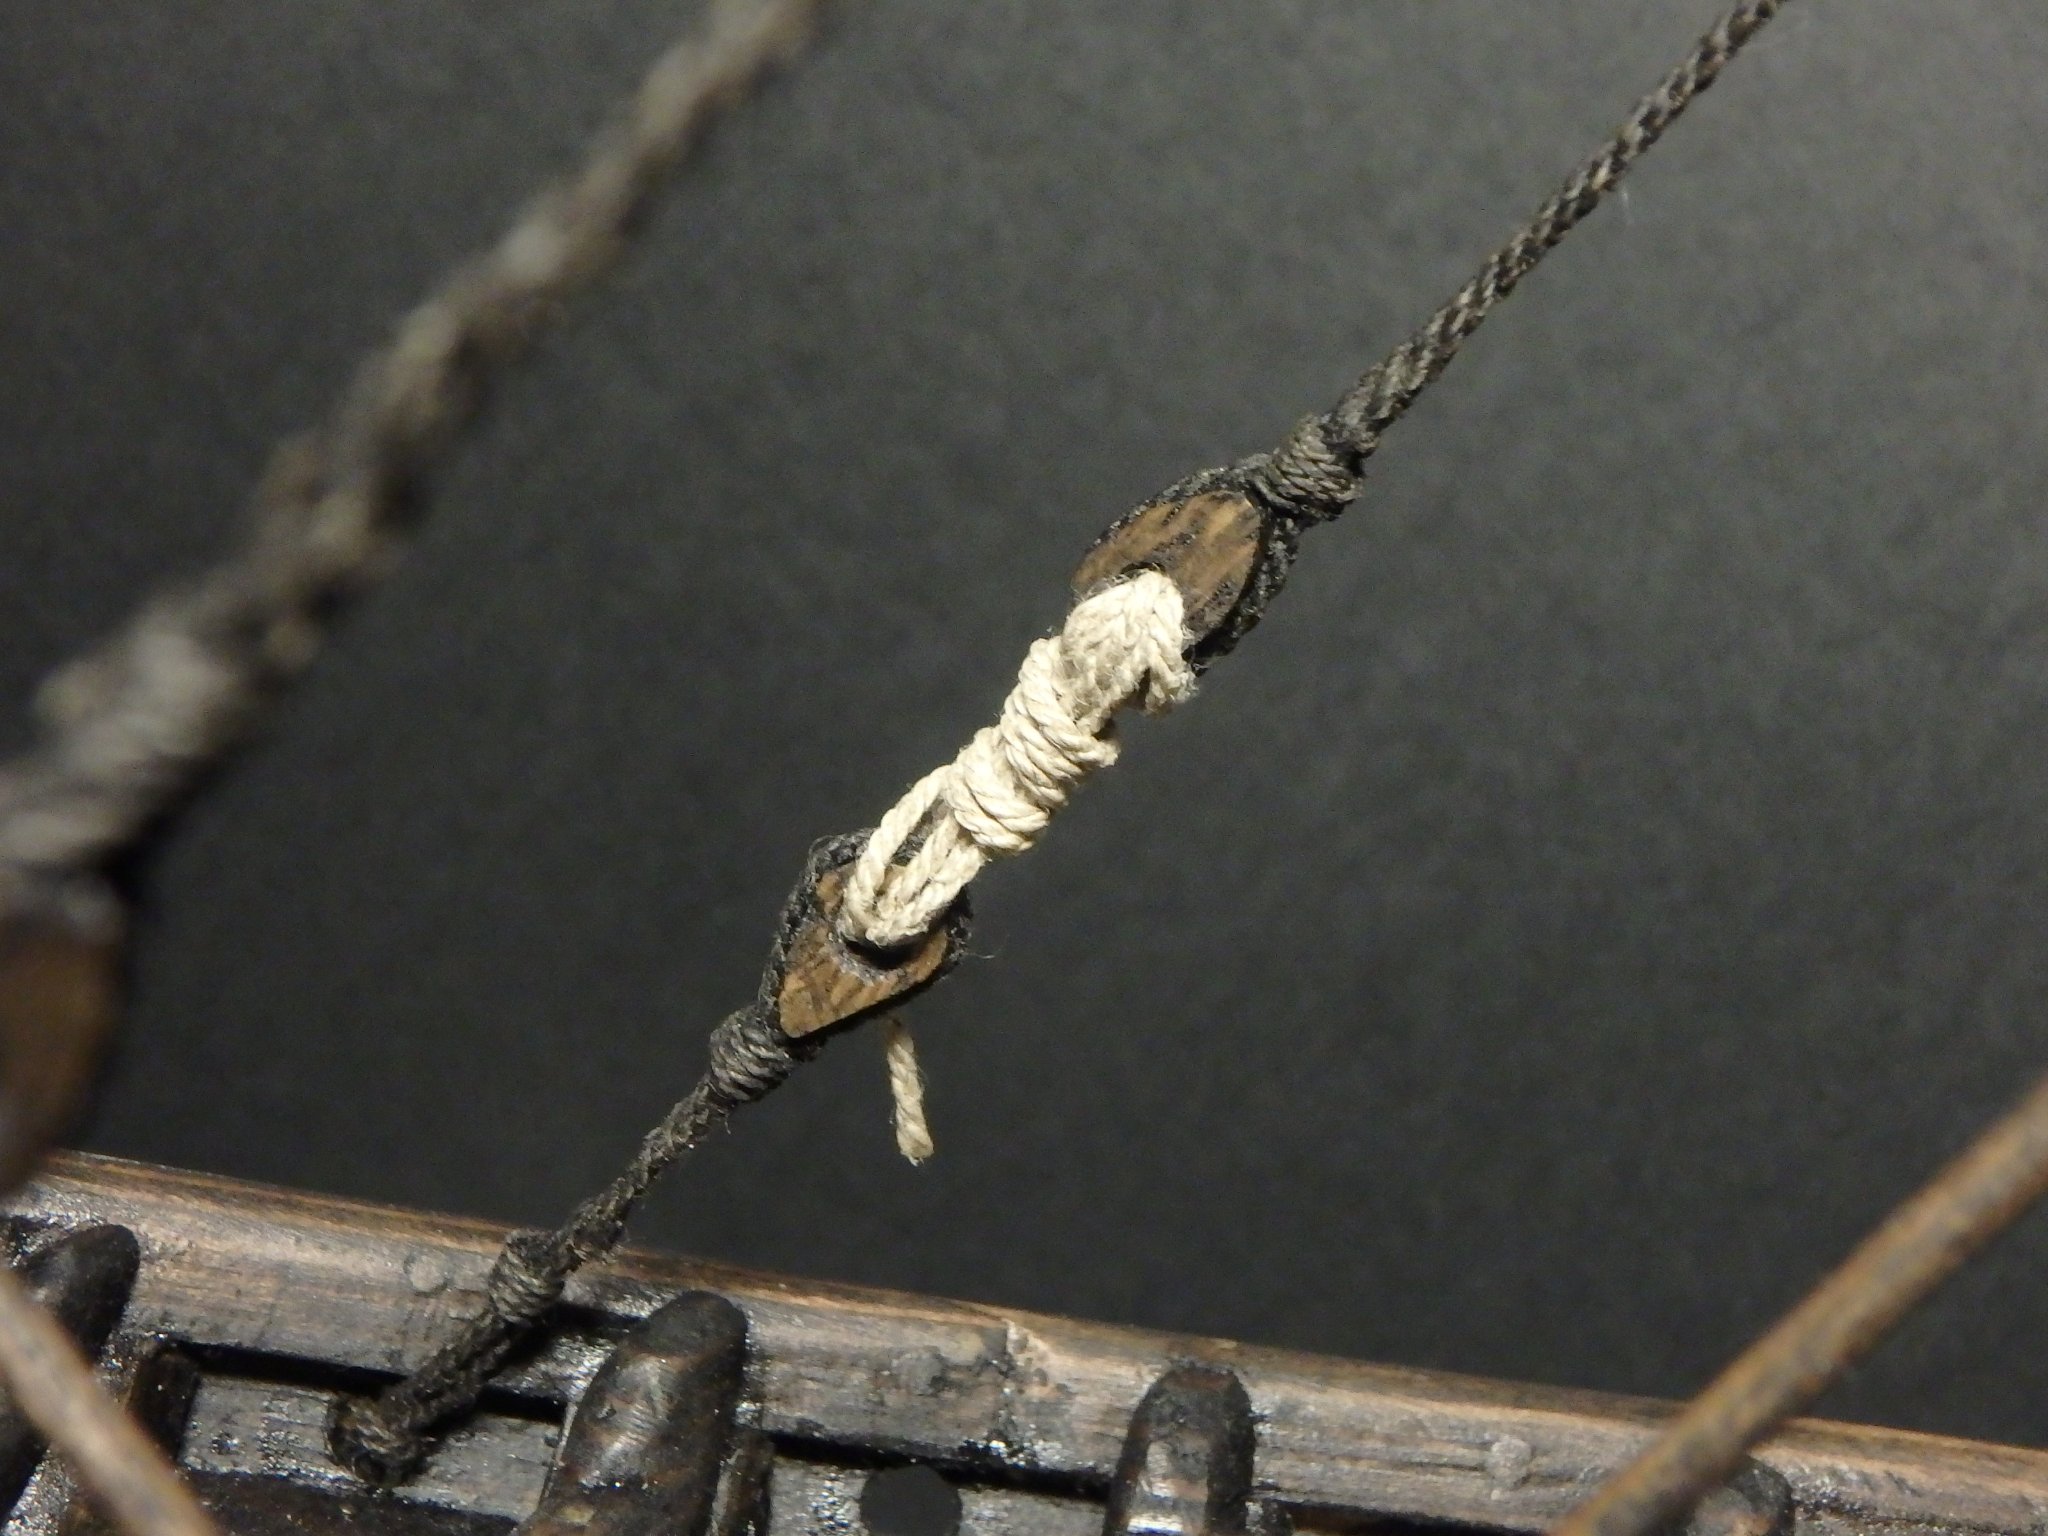
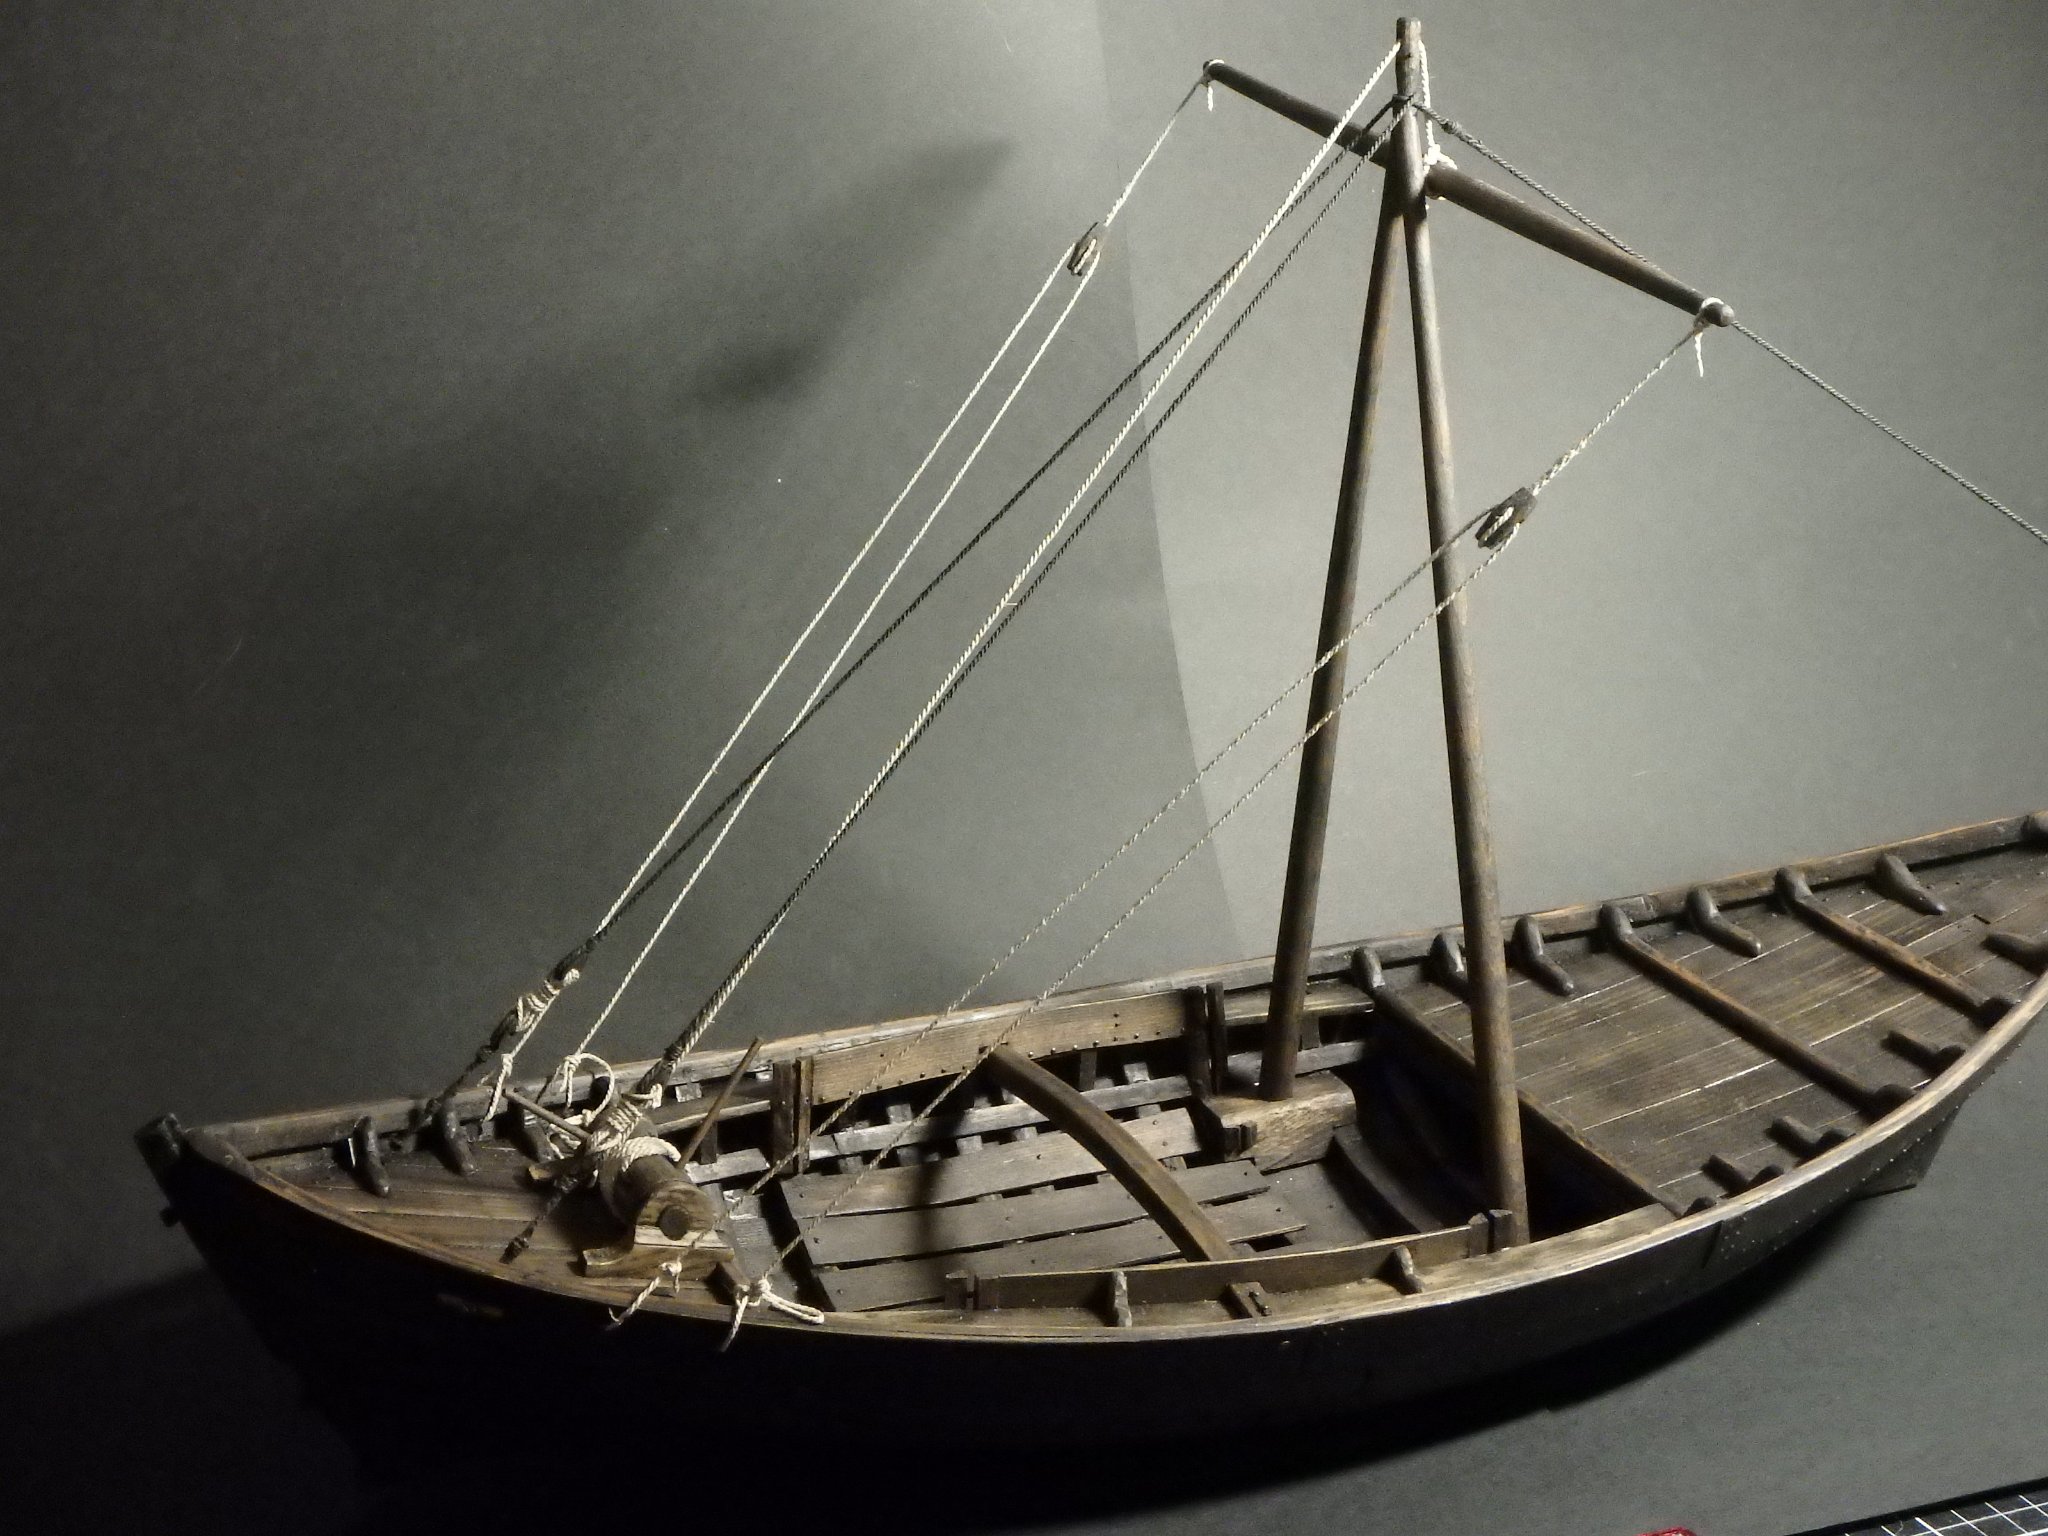
Thank you for the likes and comments! The yard is in place. I thougth of a couple of different ways of attaching a block for the halyard at the mast top and decided to rebuild The blocks for the braces are based on finds from a similar ship to mine The aft deck is getting quite busy now Now on to the lifting boom.

.thumb.JPG.1ccb5b65d3290032e363d811609ba3bc.JPG)

-
Looks like a good start! In many ways I actually think it's more interesting to follow a build by someone with limited resources than someone that has the ultimate workshop at his disposal.
- 14 replies
-
- 3
-
-
- card
- flying dutchman
- (and 1 more)
-
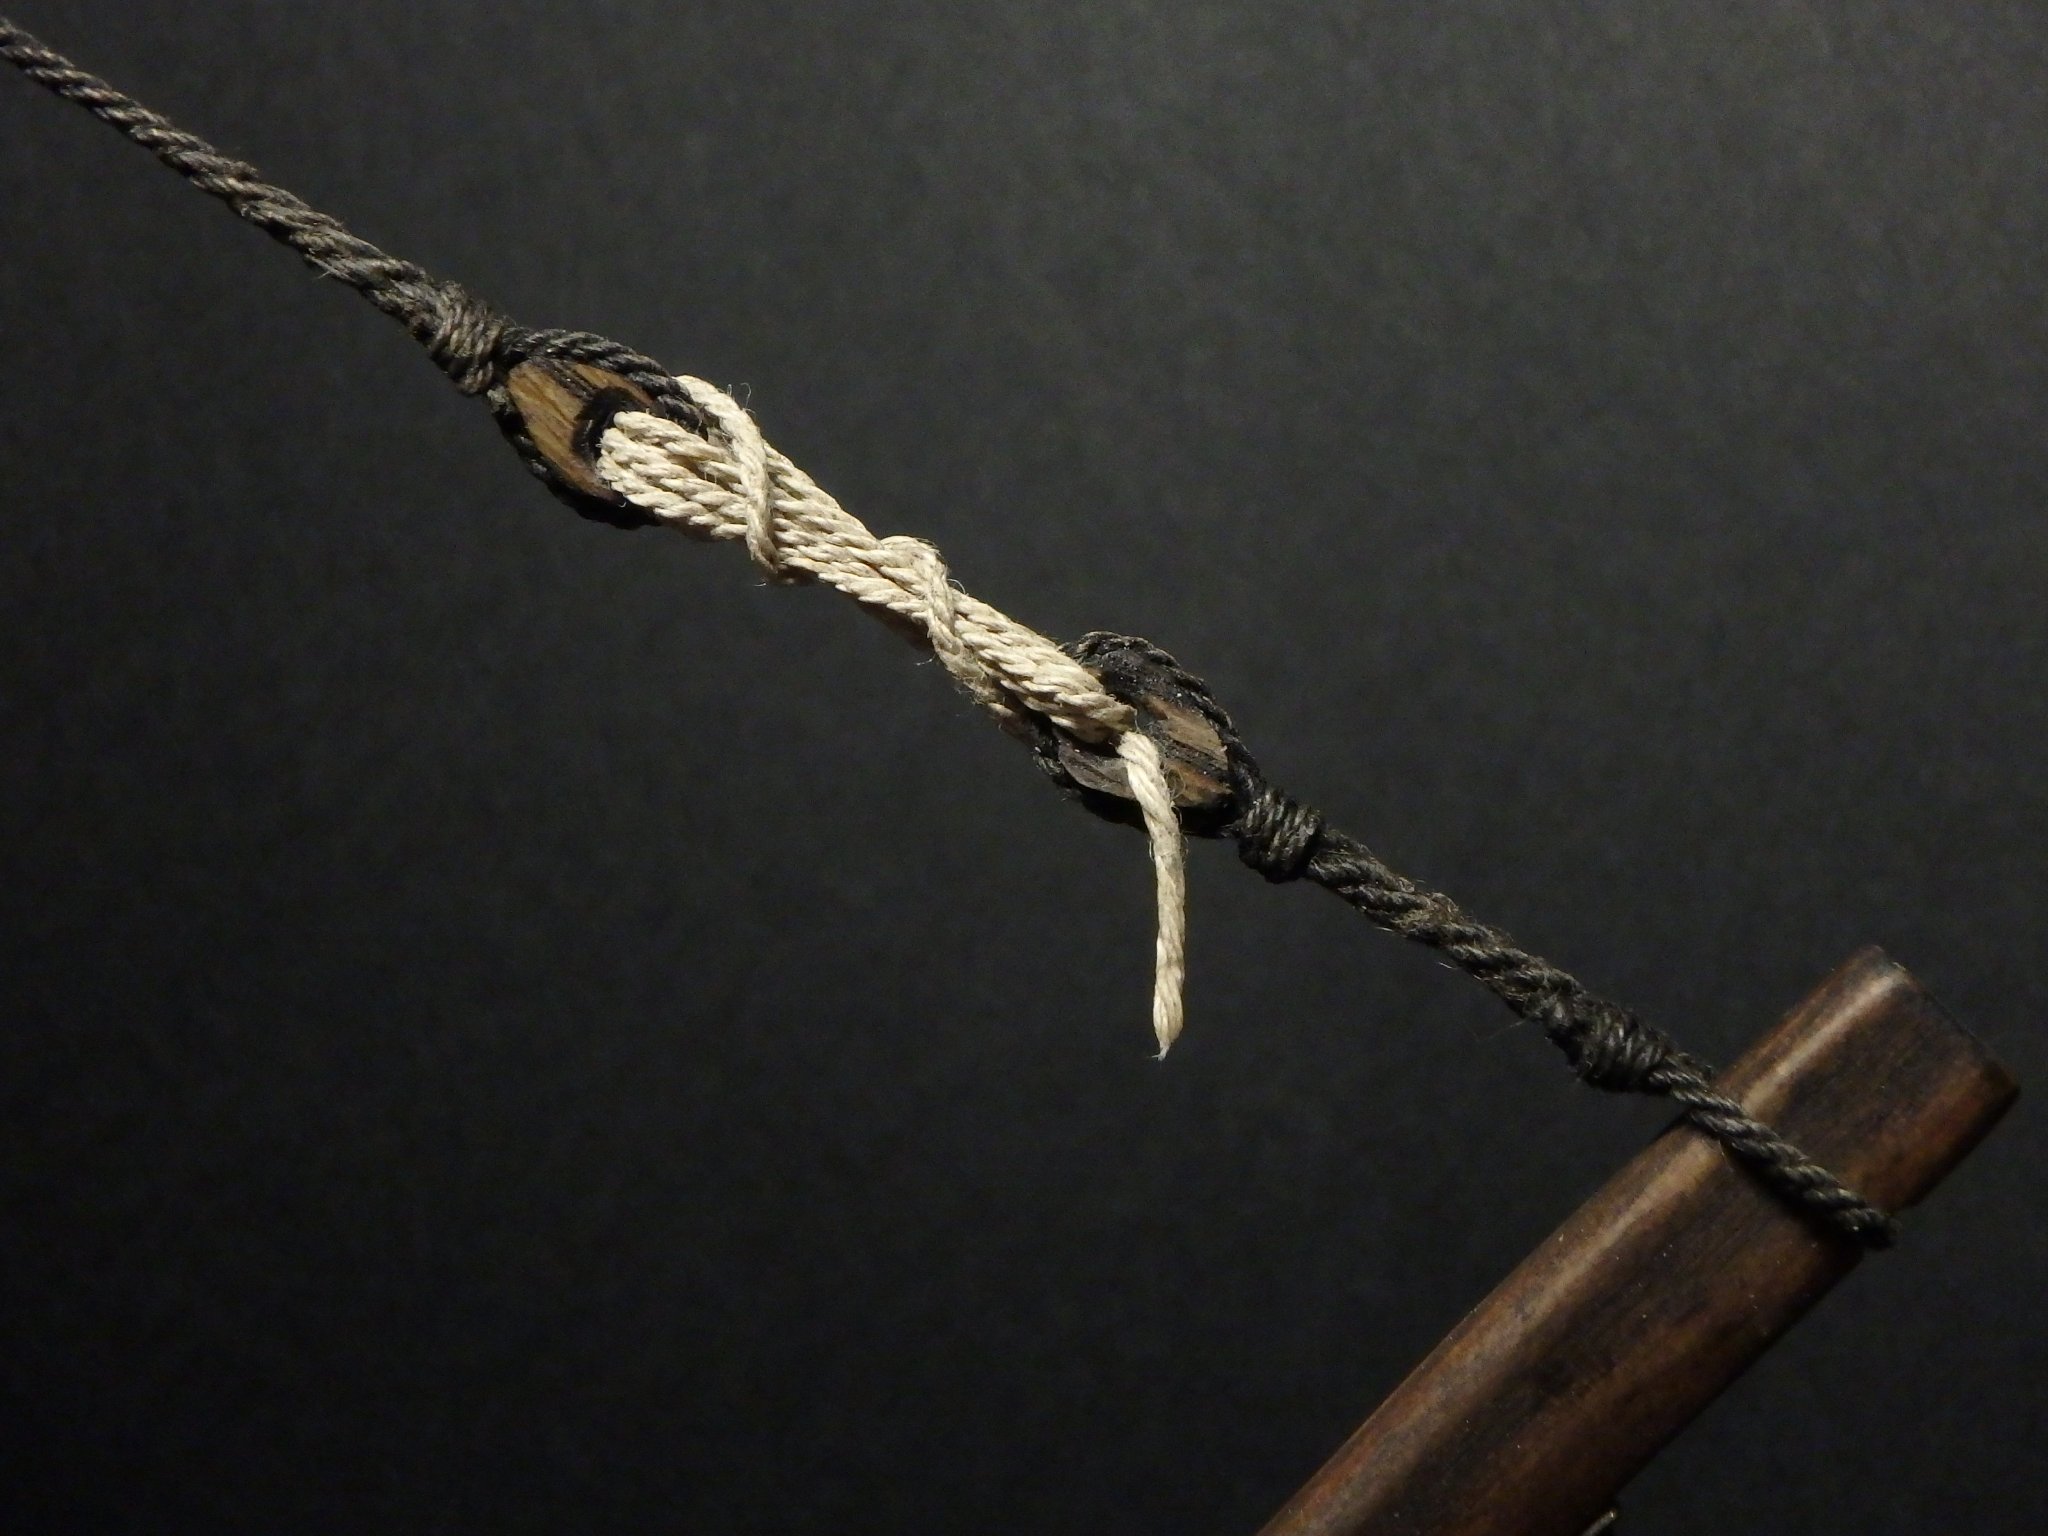
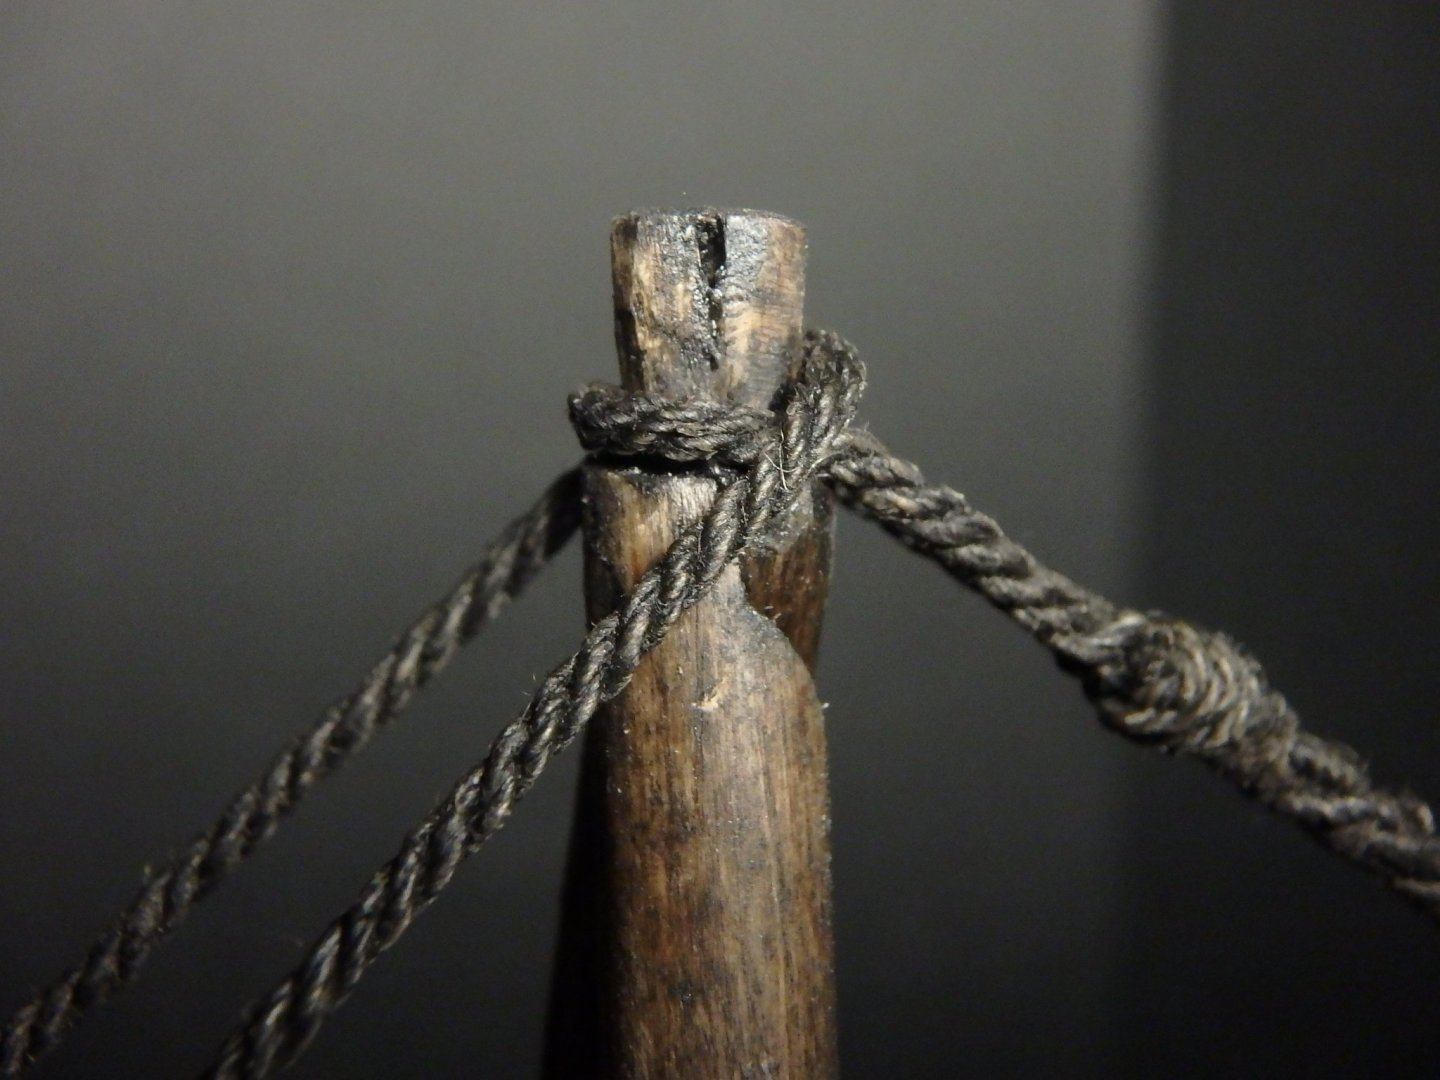
It now has a mast. I have spliced rope before, but never this much! Every end is spliced and even the lanyards connecting the hearts are spliced. The frontstay is of sligthly thicker rope than the backstays as it is a single rope, but the backstays take up a lot of more force. I don't know how I will do with these lanyards in the end, but I know that I will adjust them many times before this is over so I will fasten them like this for now. I know that the "modern" way of fastening hearts is like this but I used splicing with a single seizing instead as I think it looked simpler even if it isn't.


-
Simple rope making machine in Lego
Brinkman replied to Brinkman's topic in Modeling tools and Workshop Equipment
Thank you for the comments and Steven, you are most welcome after all the help you have given me and others here -
Steven, it's a really simple build! I don't know what the parts cost, but it can't be much. Feel free to ask any questions you have about building and using it. I did a seperate thread for it over in the equipment section


.JPG.e7844160a6b0e947149b625a607c8ae1.JPG)