broden
-
Posts
33 -
Joined
-
Last visited
Content Type
Profiles
Forums
Gallery
Events
Everything posted by broden
-
HMS Terror by Broden - OcCre - 1:75
broden replied to broden's topic in - Kit build logs for subjects built from 1801 - 1850
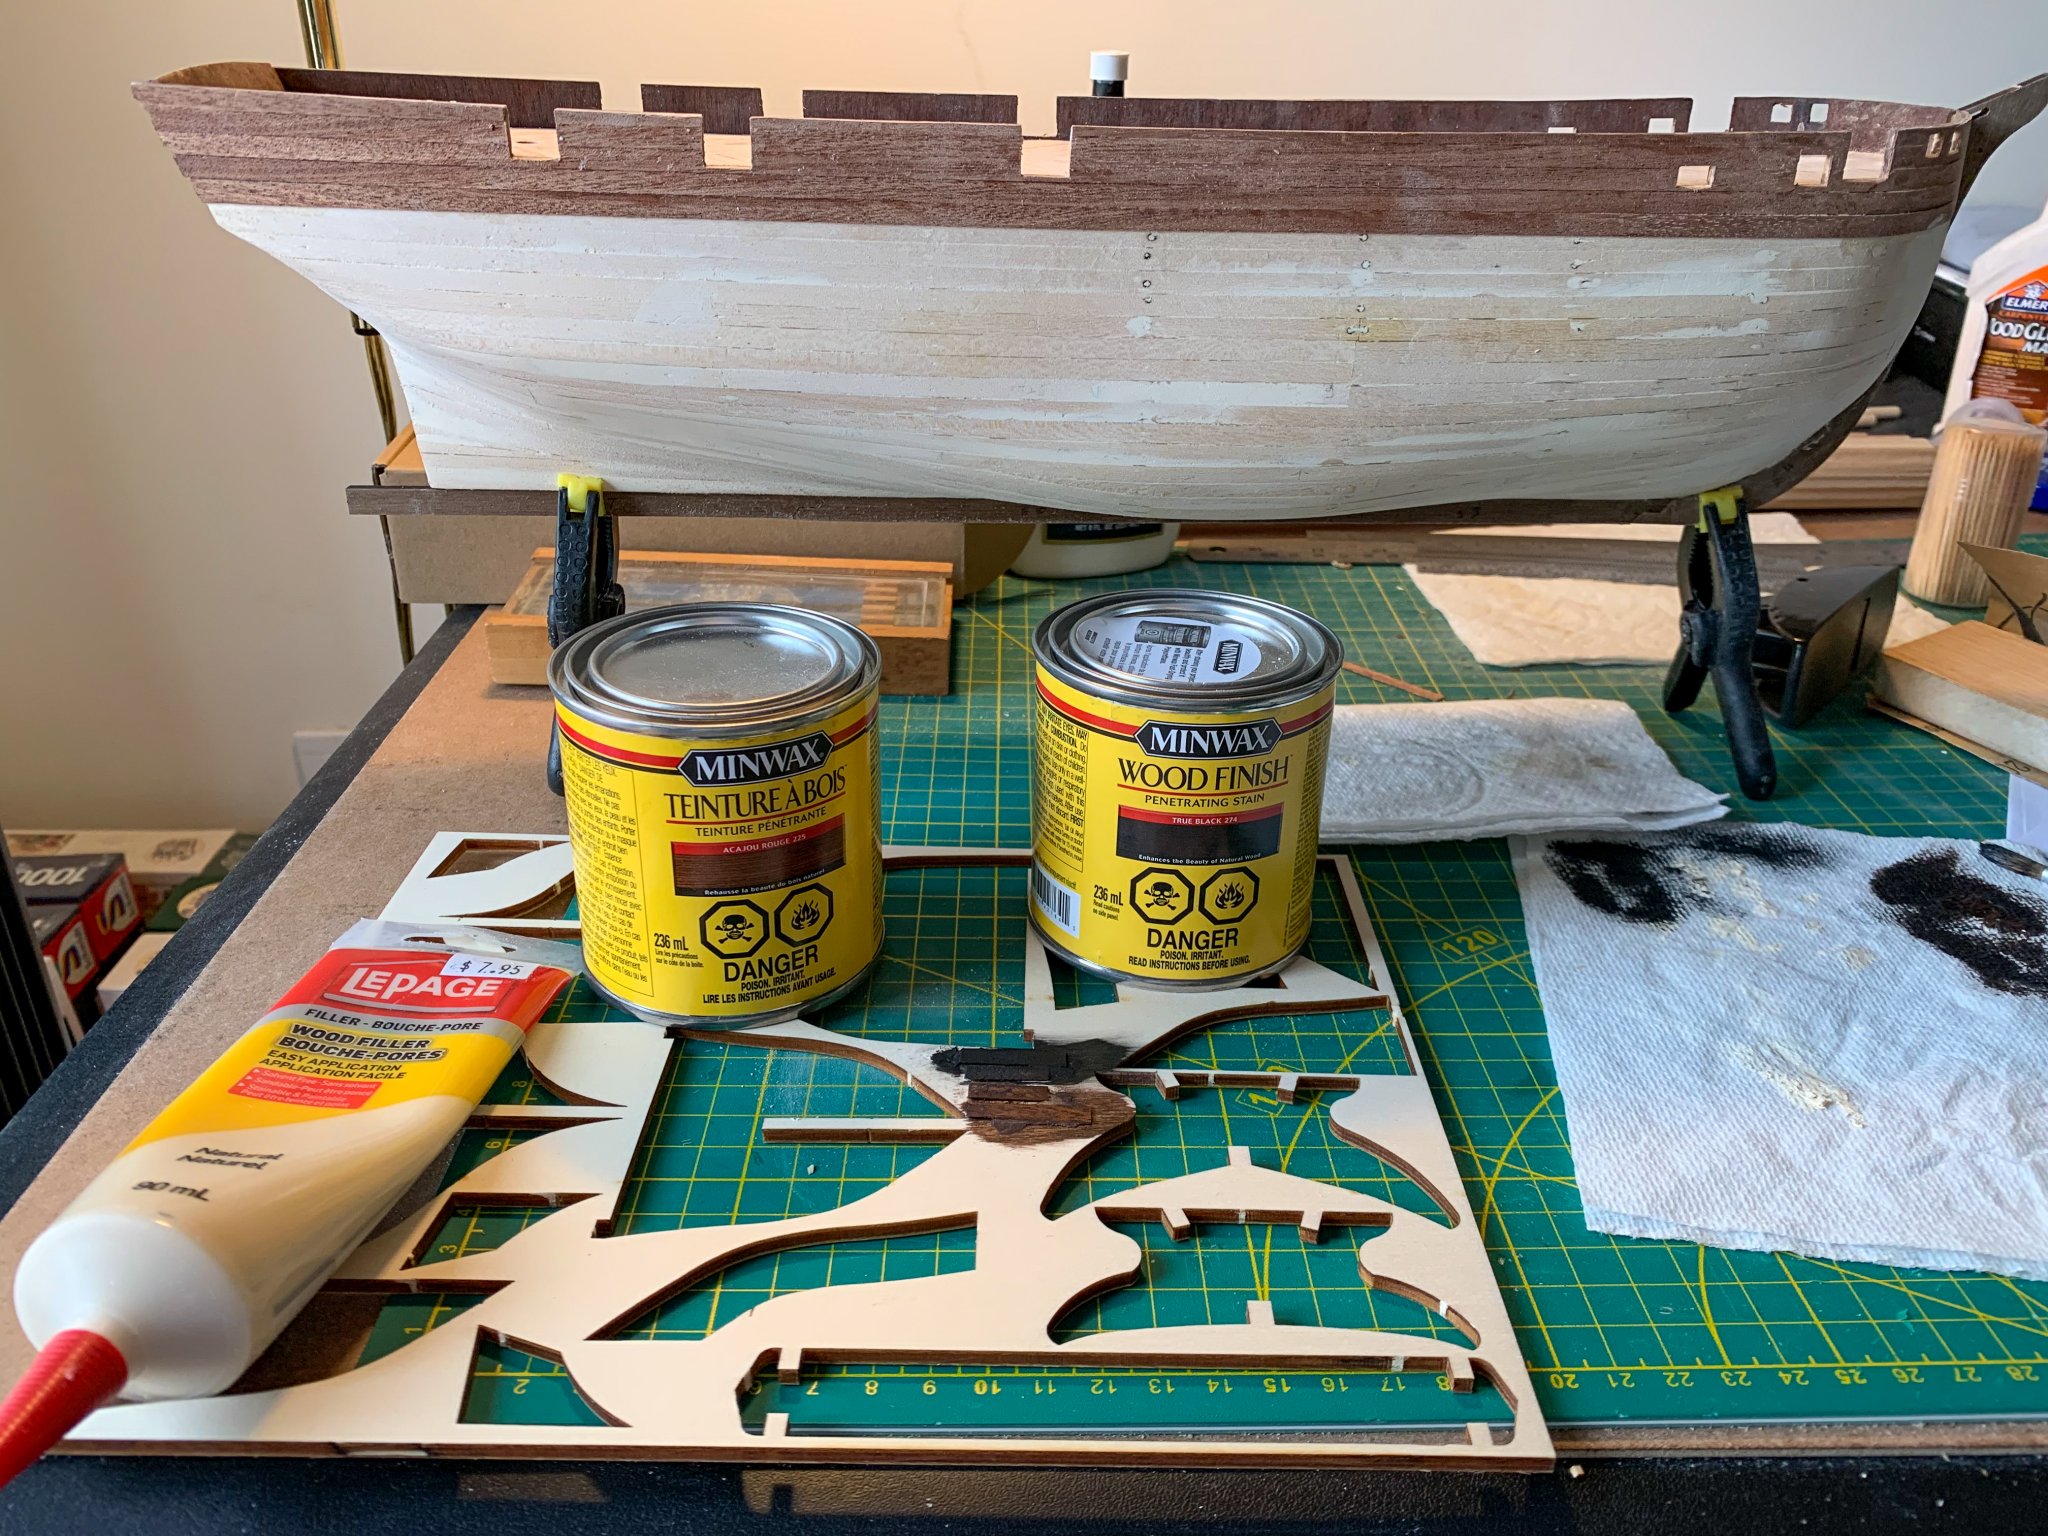
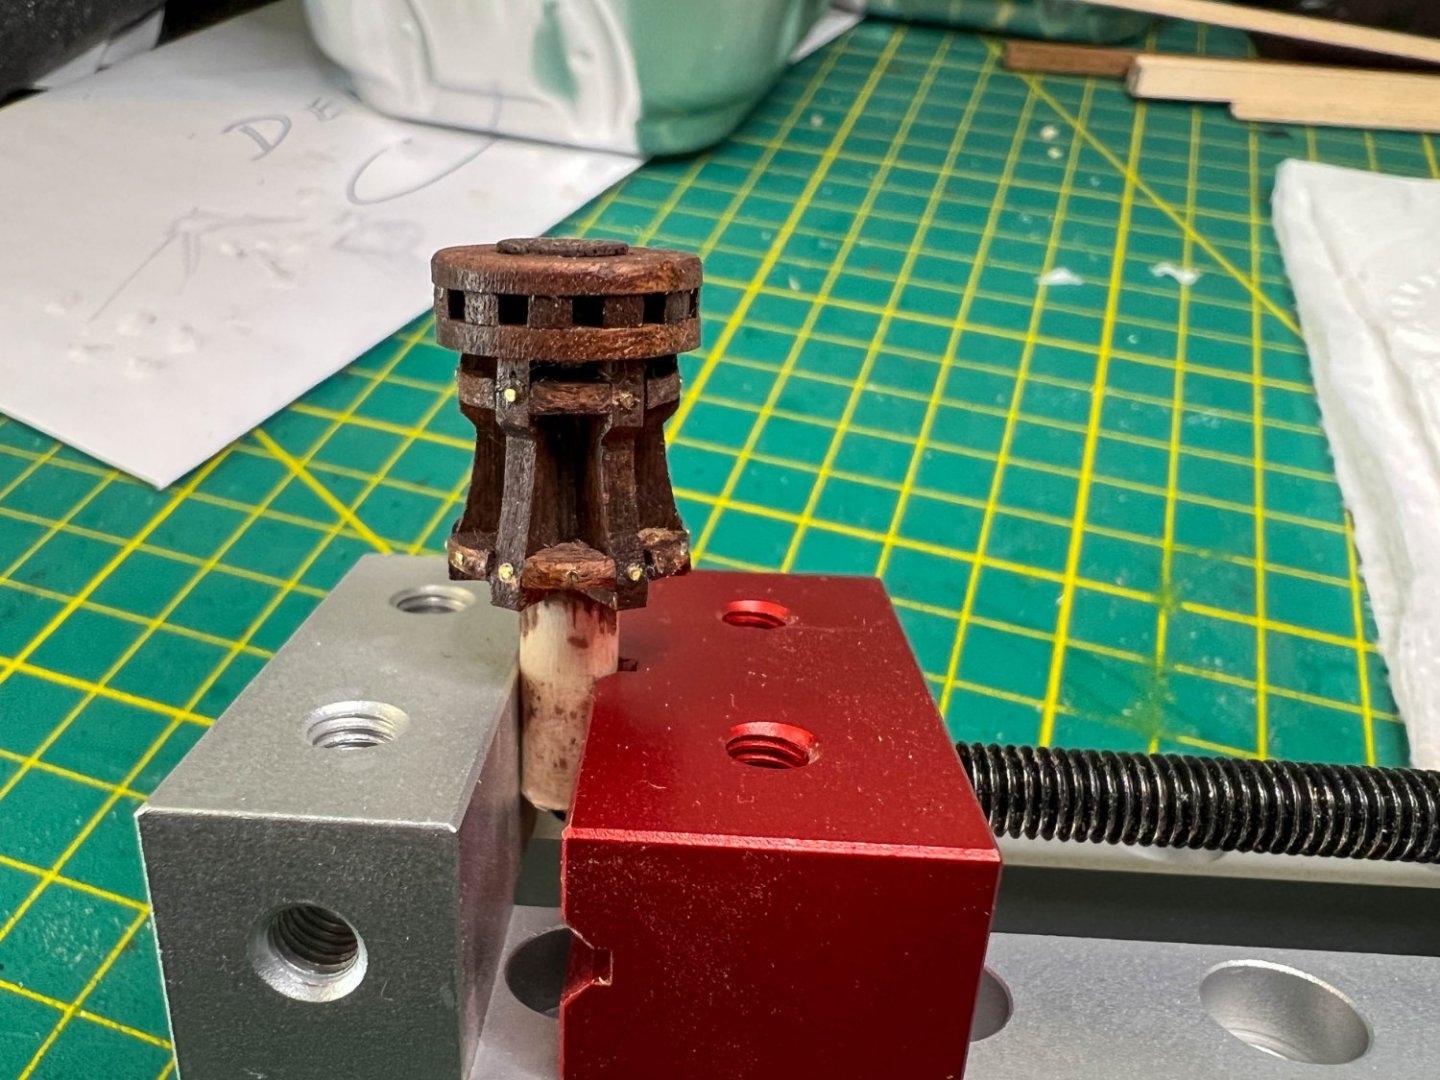
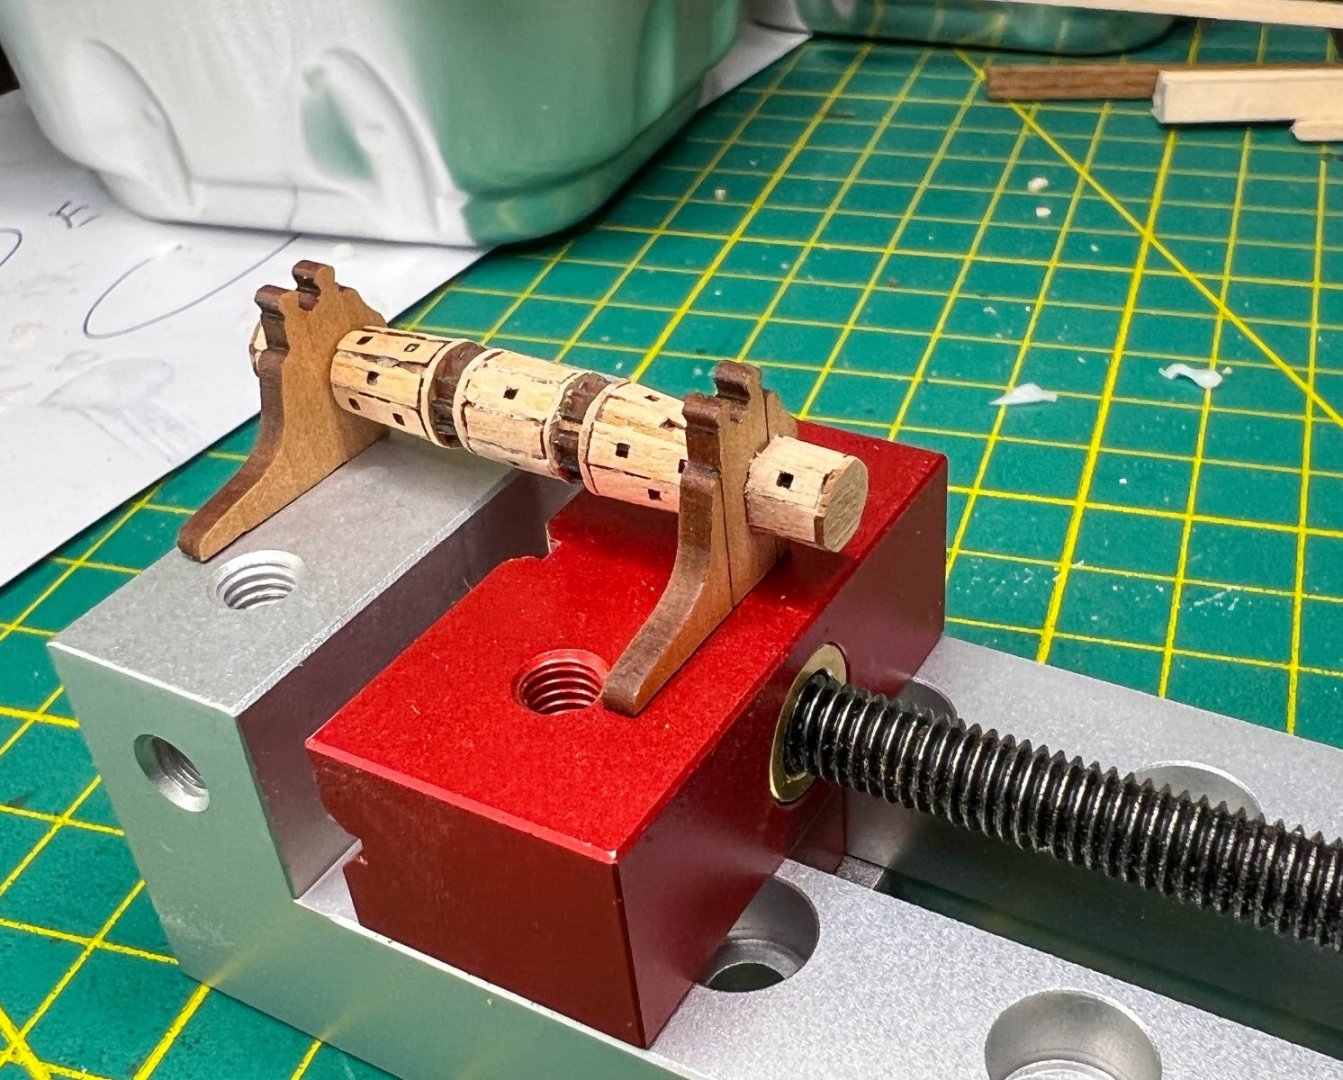
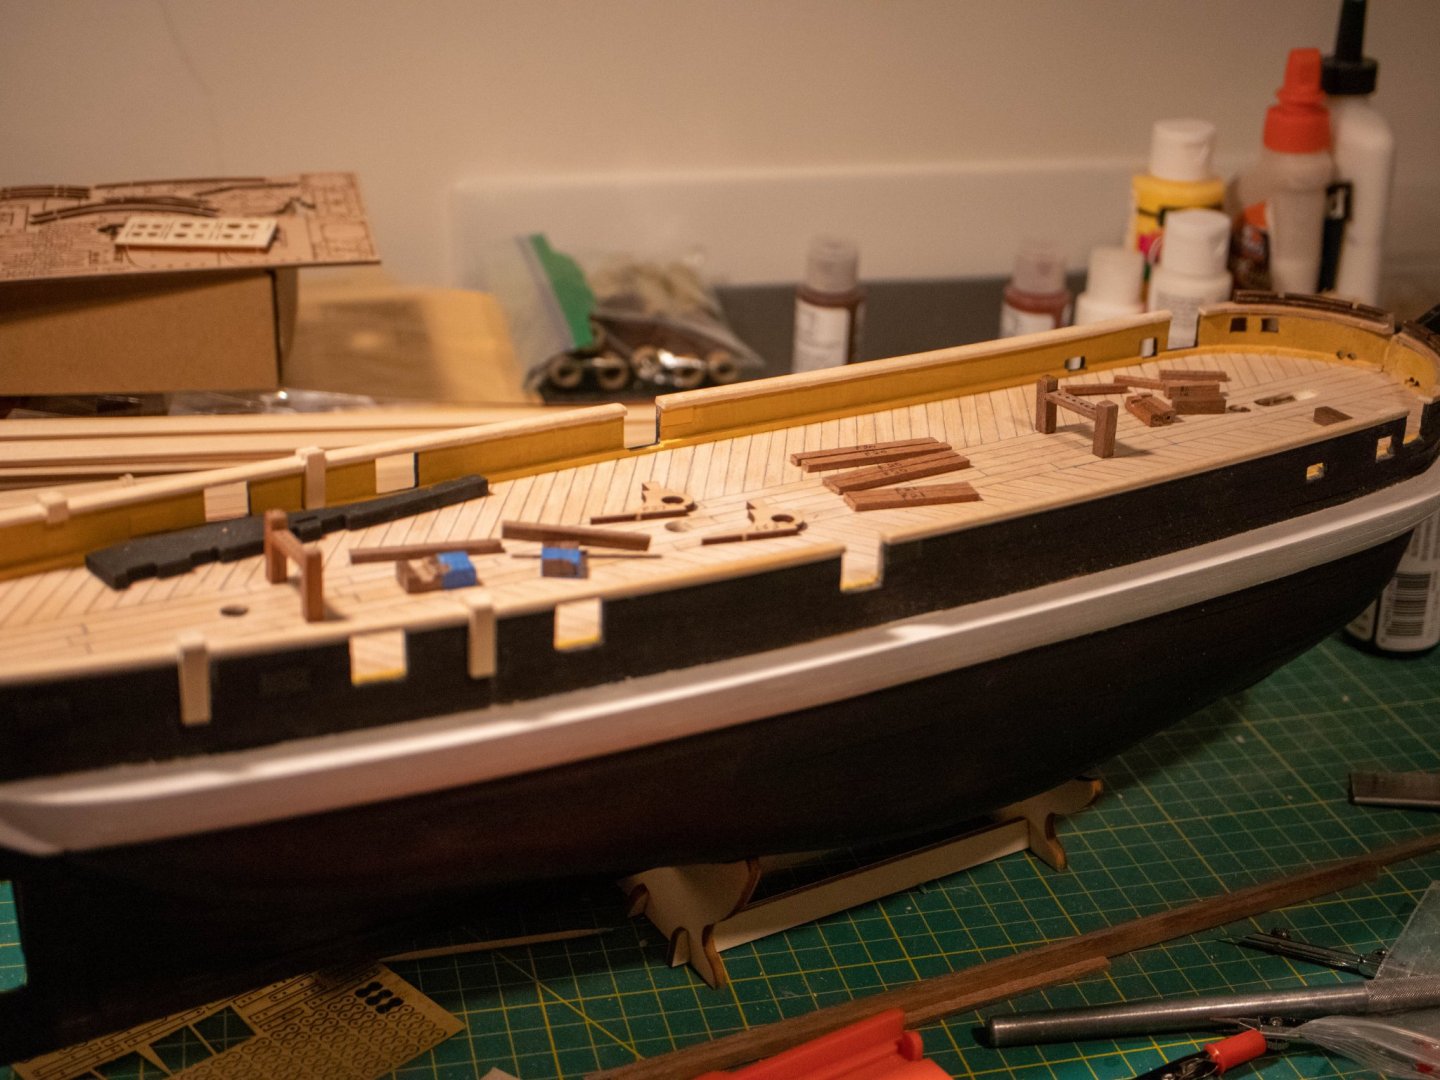
I have built some of the deck furniture. Not all yet, but I am getting close. A 10 spoke helm kit, a Master-korabel Capstan kit and windlass kit. Hopefully they will get placed on the deck next.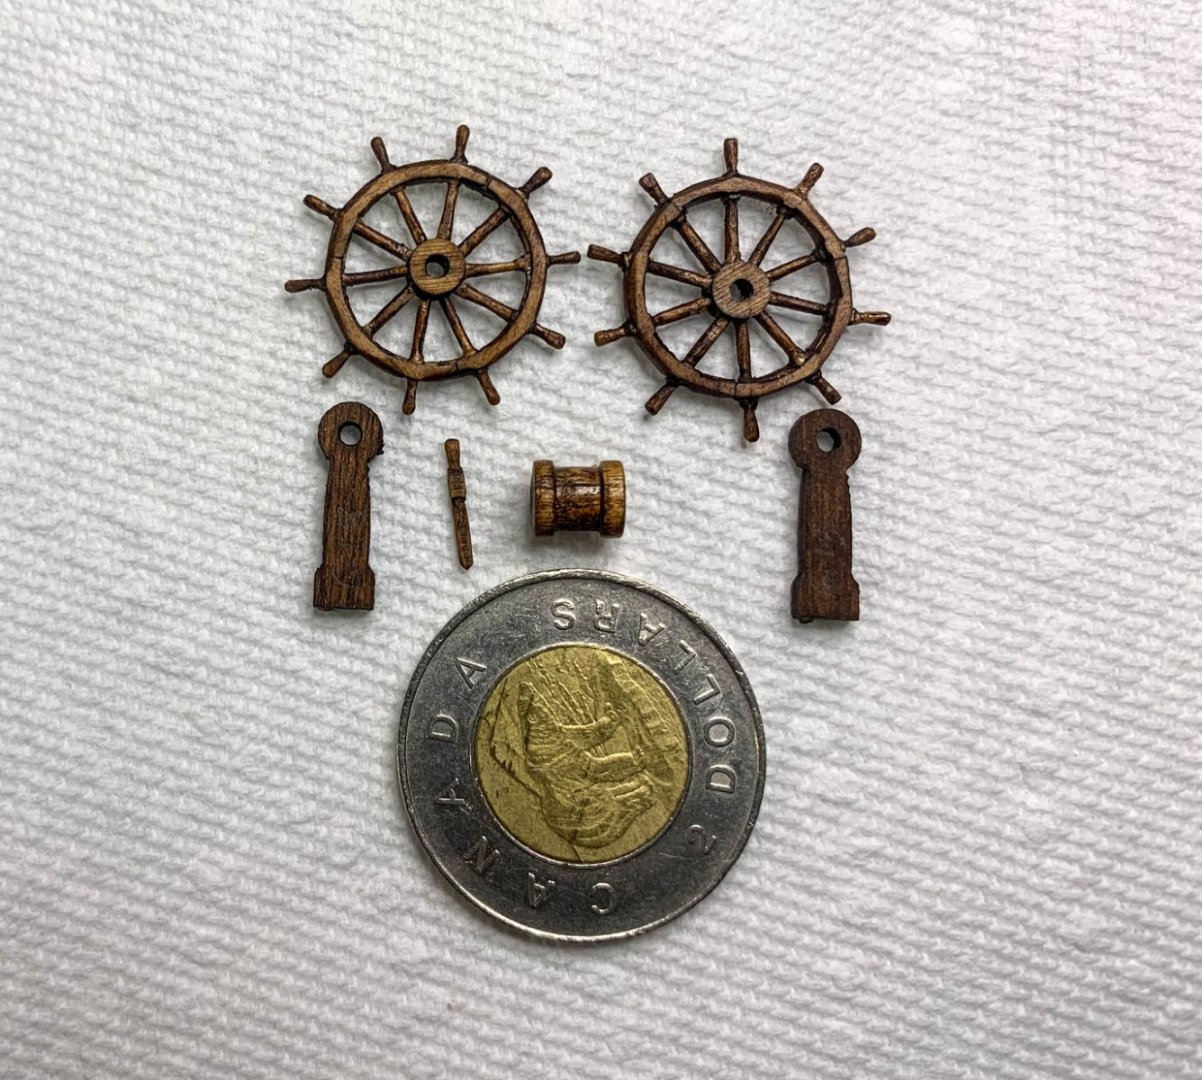
-
HMS Terror by Broden - OcCre - 1:75
broden replied to broden's topic in - Kit build logs for subjects built from 1801 - 1850
Thanks, Clearway. I went back over your build log and I agree that the lack of a binnacle is strange and that the unit you suggested is a possible reason. I also saw on the admiralty drawings that in fact the bell is in fact forward of the windlass and aft of the foremast. So questions answered and the slow build continues. I purchased a windlass, pump and capstan kits by Master Korabel. All of which are challenging and very detailed. I'll post pictures. -
HMS Terror by Broden - OcCre - 1:75
broden replied to broden's topic in - Kit build logs for subjects built from 1801 - 1850
Hello, I am still working "slowly" on the deck furnishings and have 2 questions. First the location of the ship's bell. OCCre has it aft of the fore mast and forward of the windlass. It seems to me that normally it would be near the helm. Second question is there no binnacle, or have I missed something. Any help appreciated. Thanks -
HMS Terror by Broden - OcCre - 1:75
broden replied to broden's topic in - Kit build logs for subjects built from 1801 - 1850
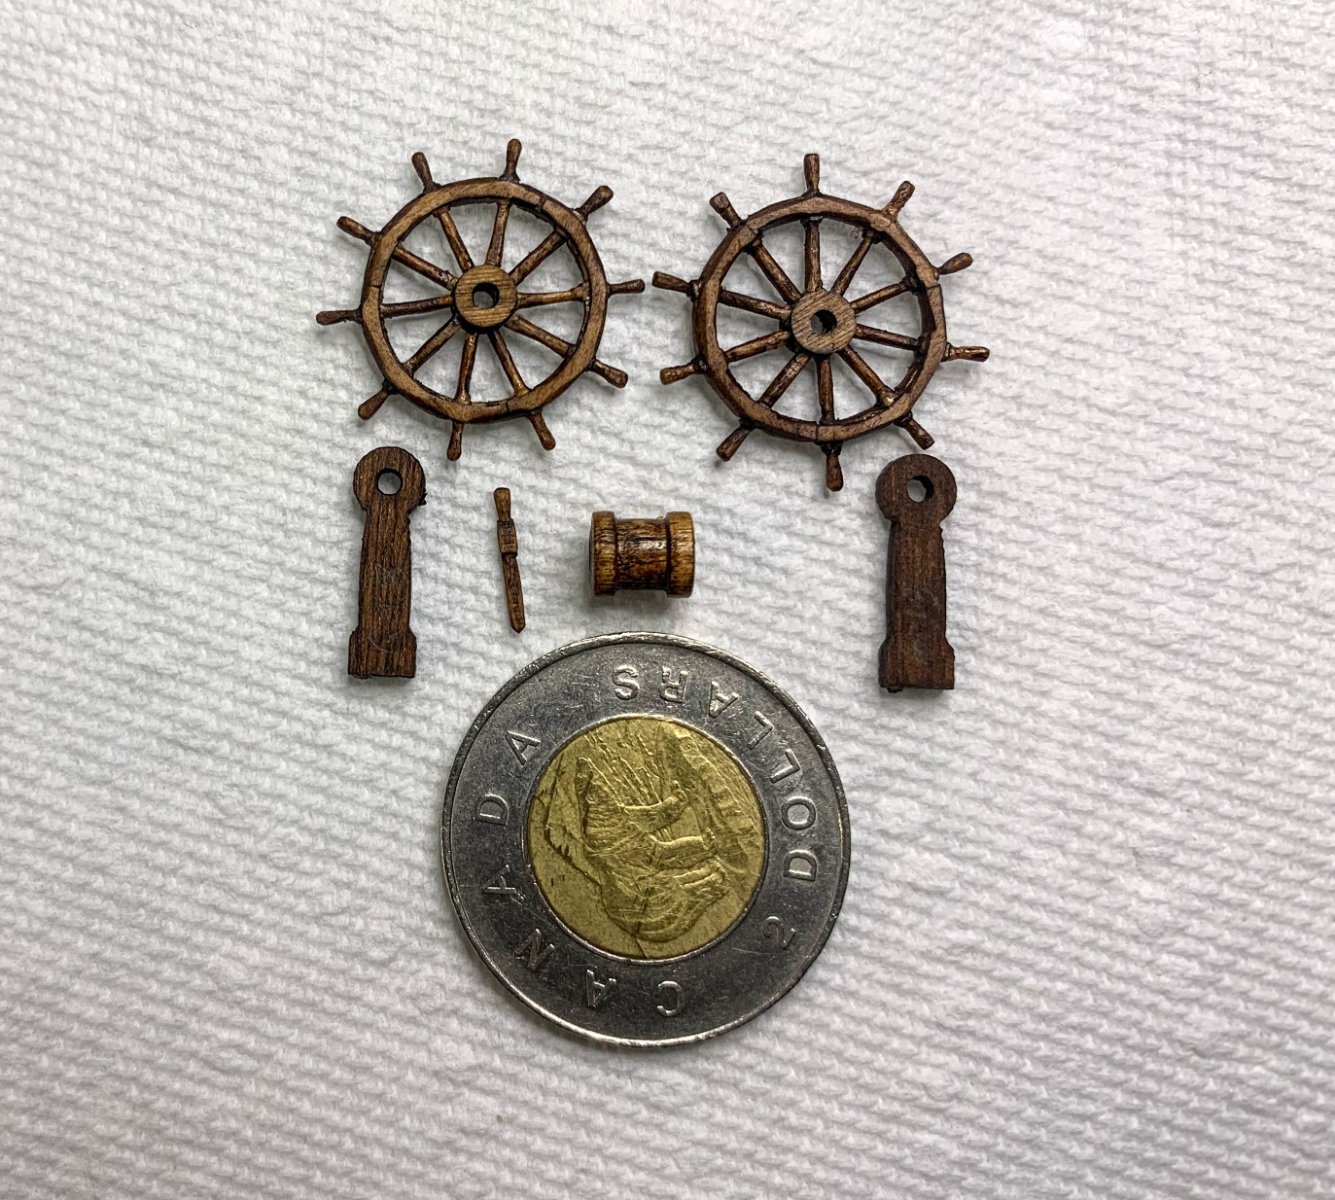
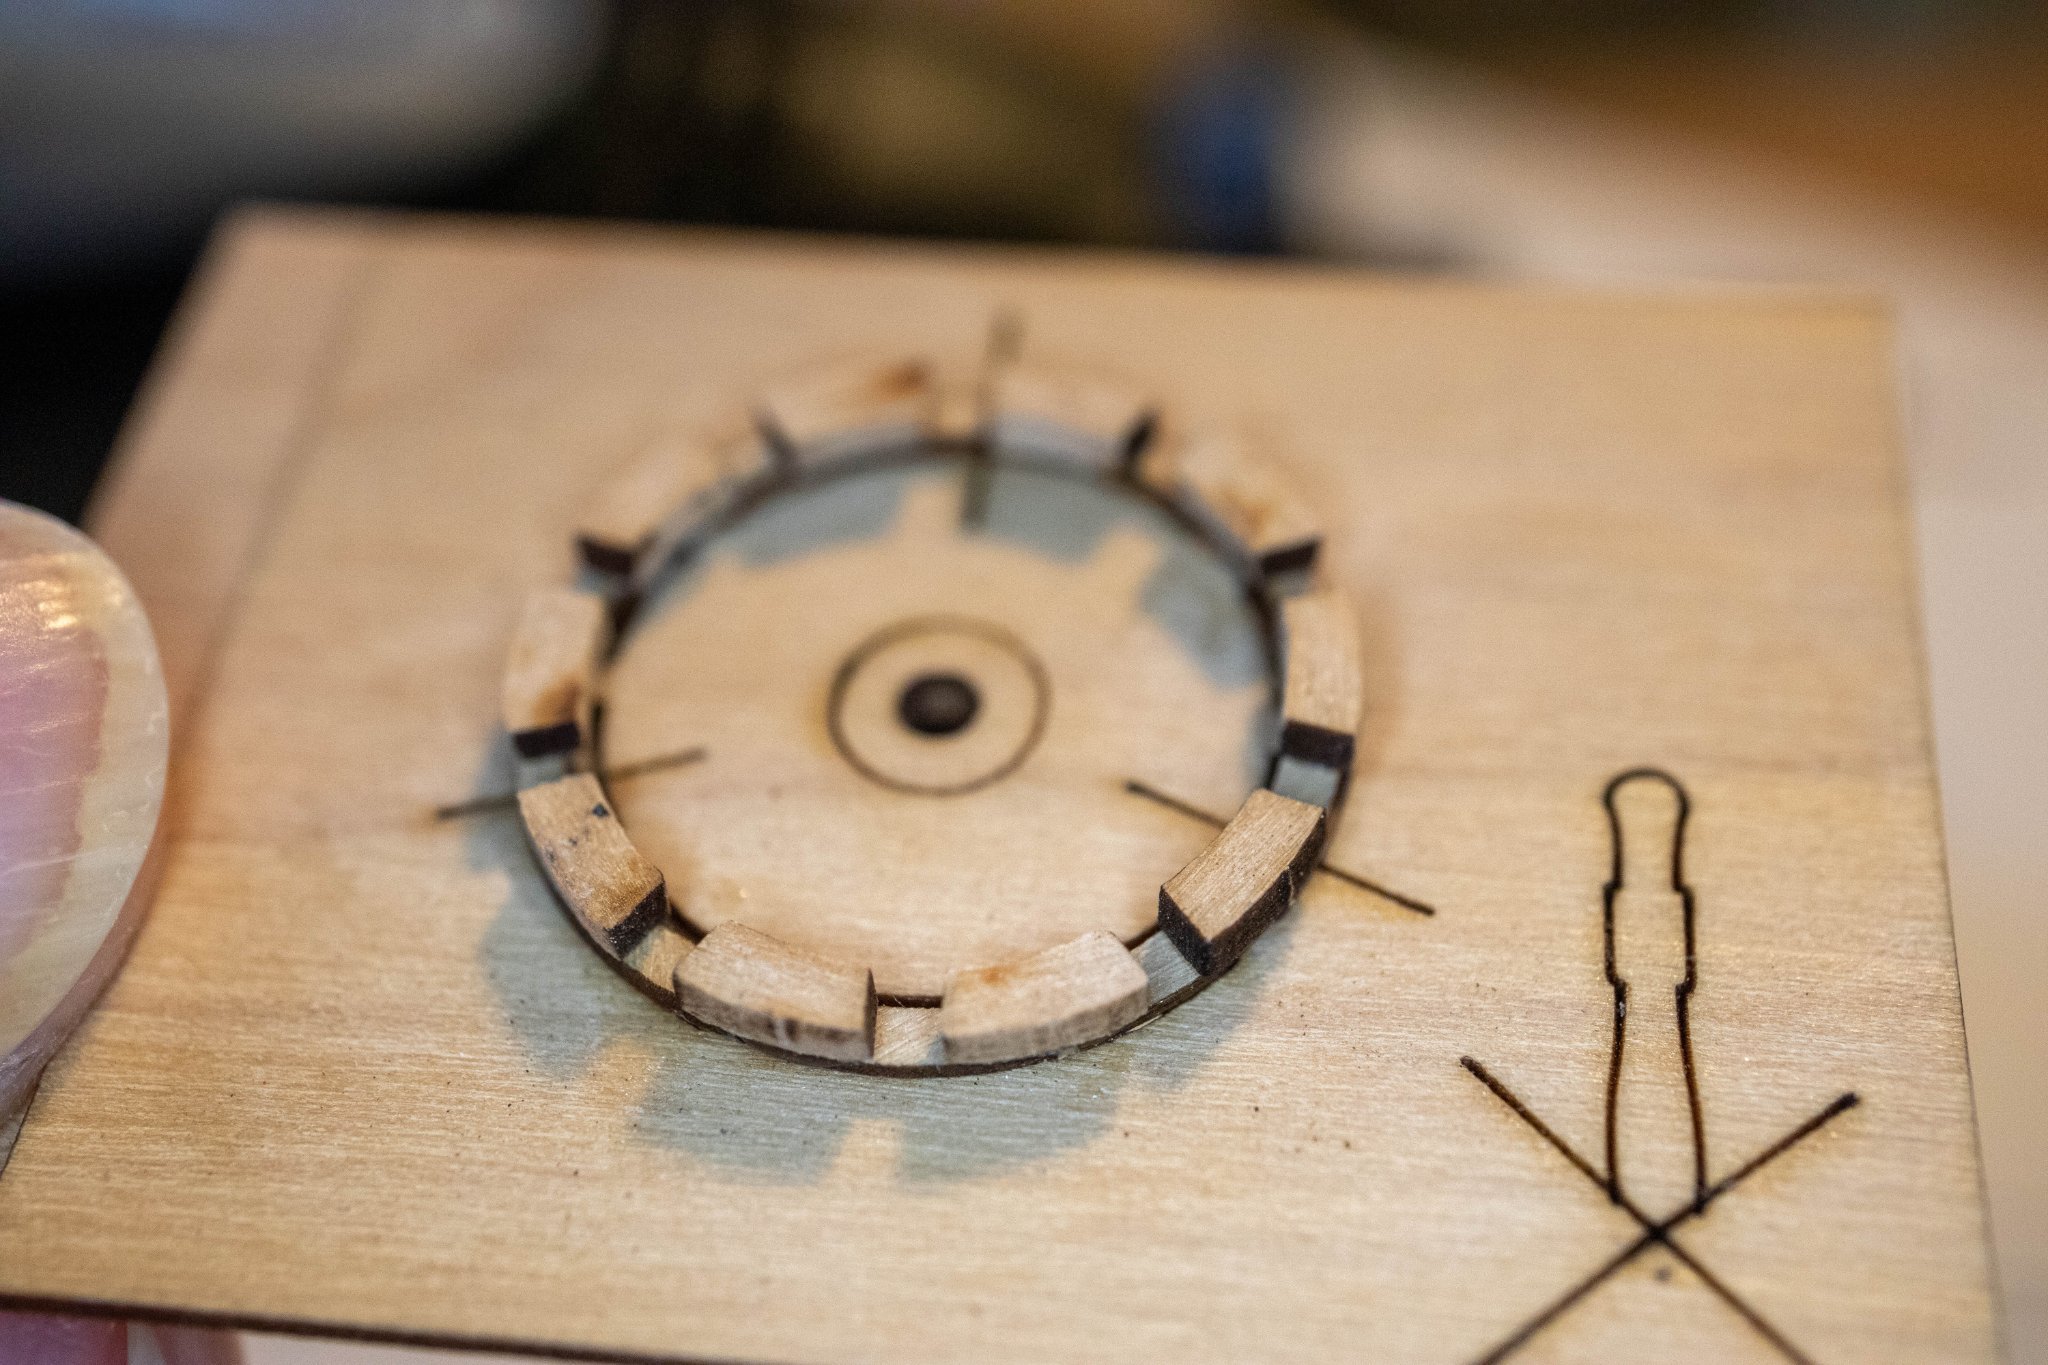
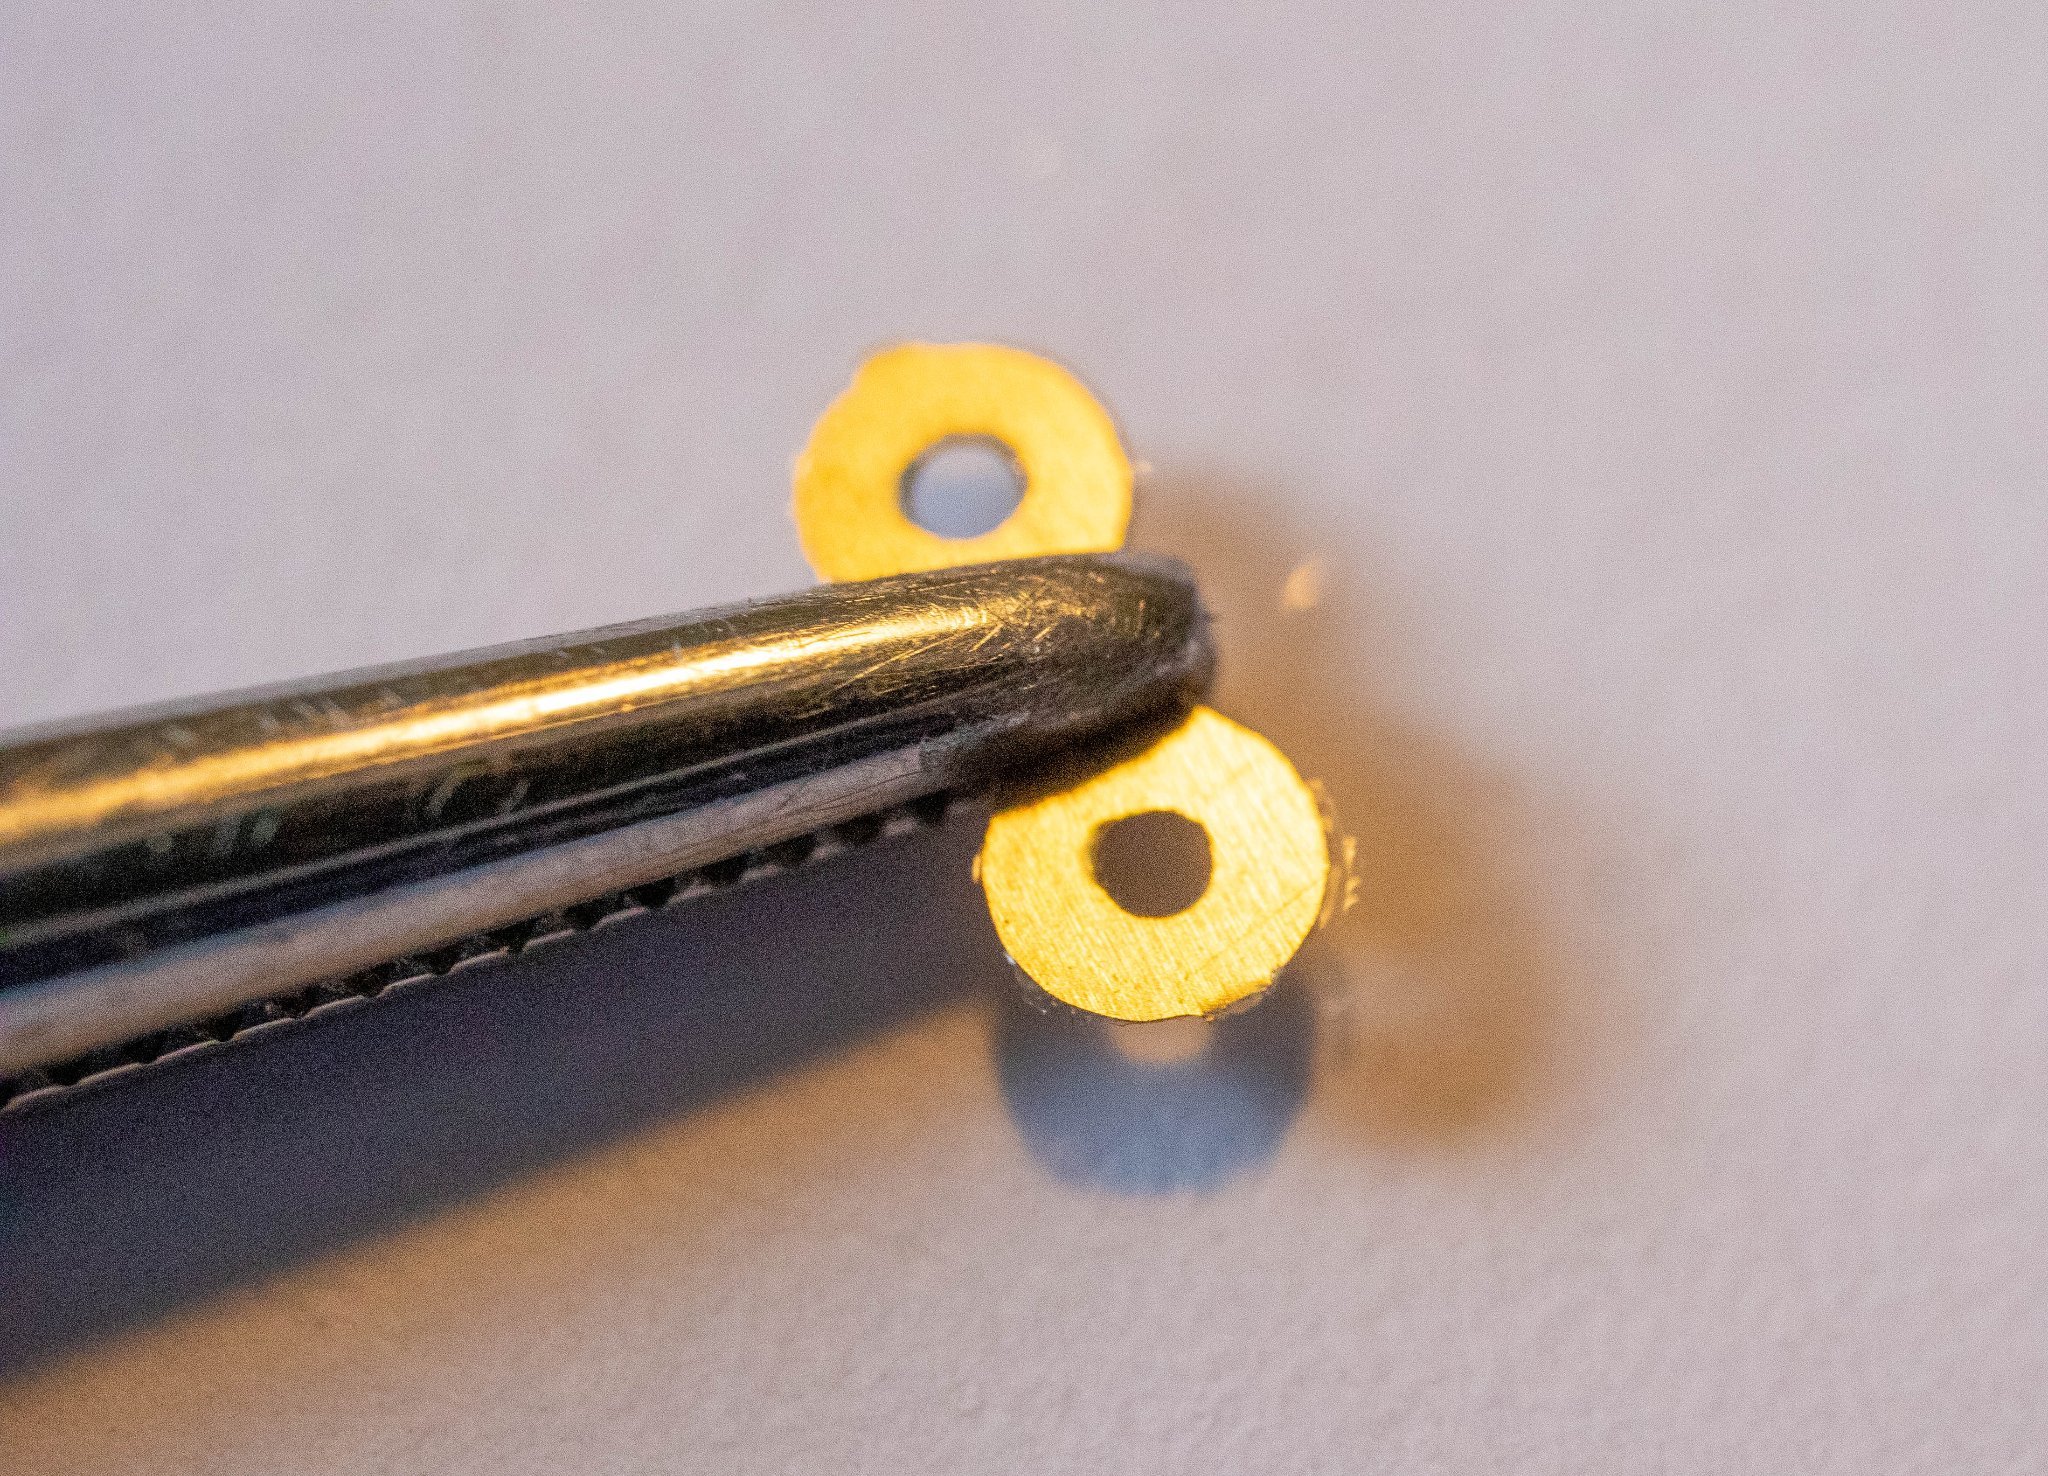
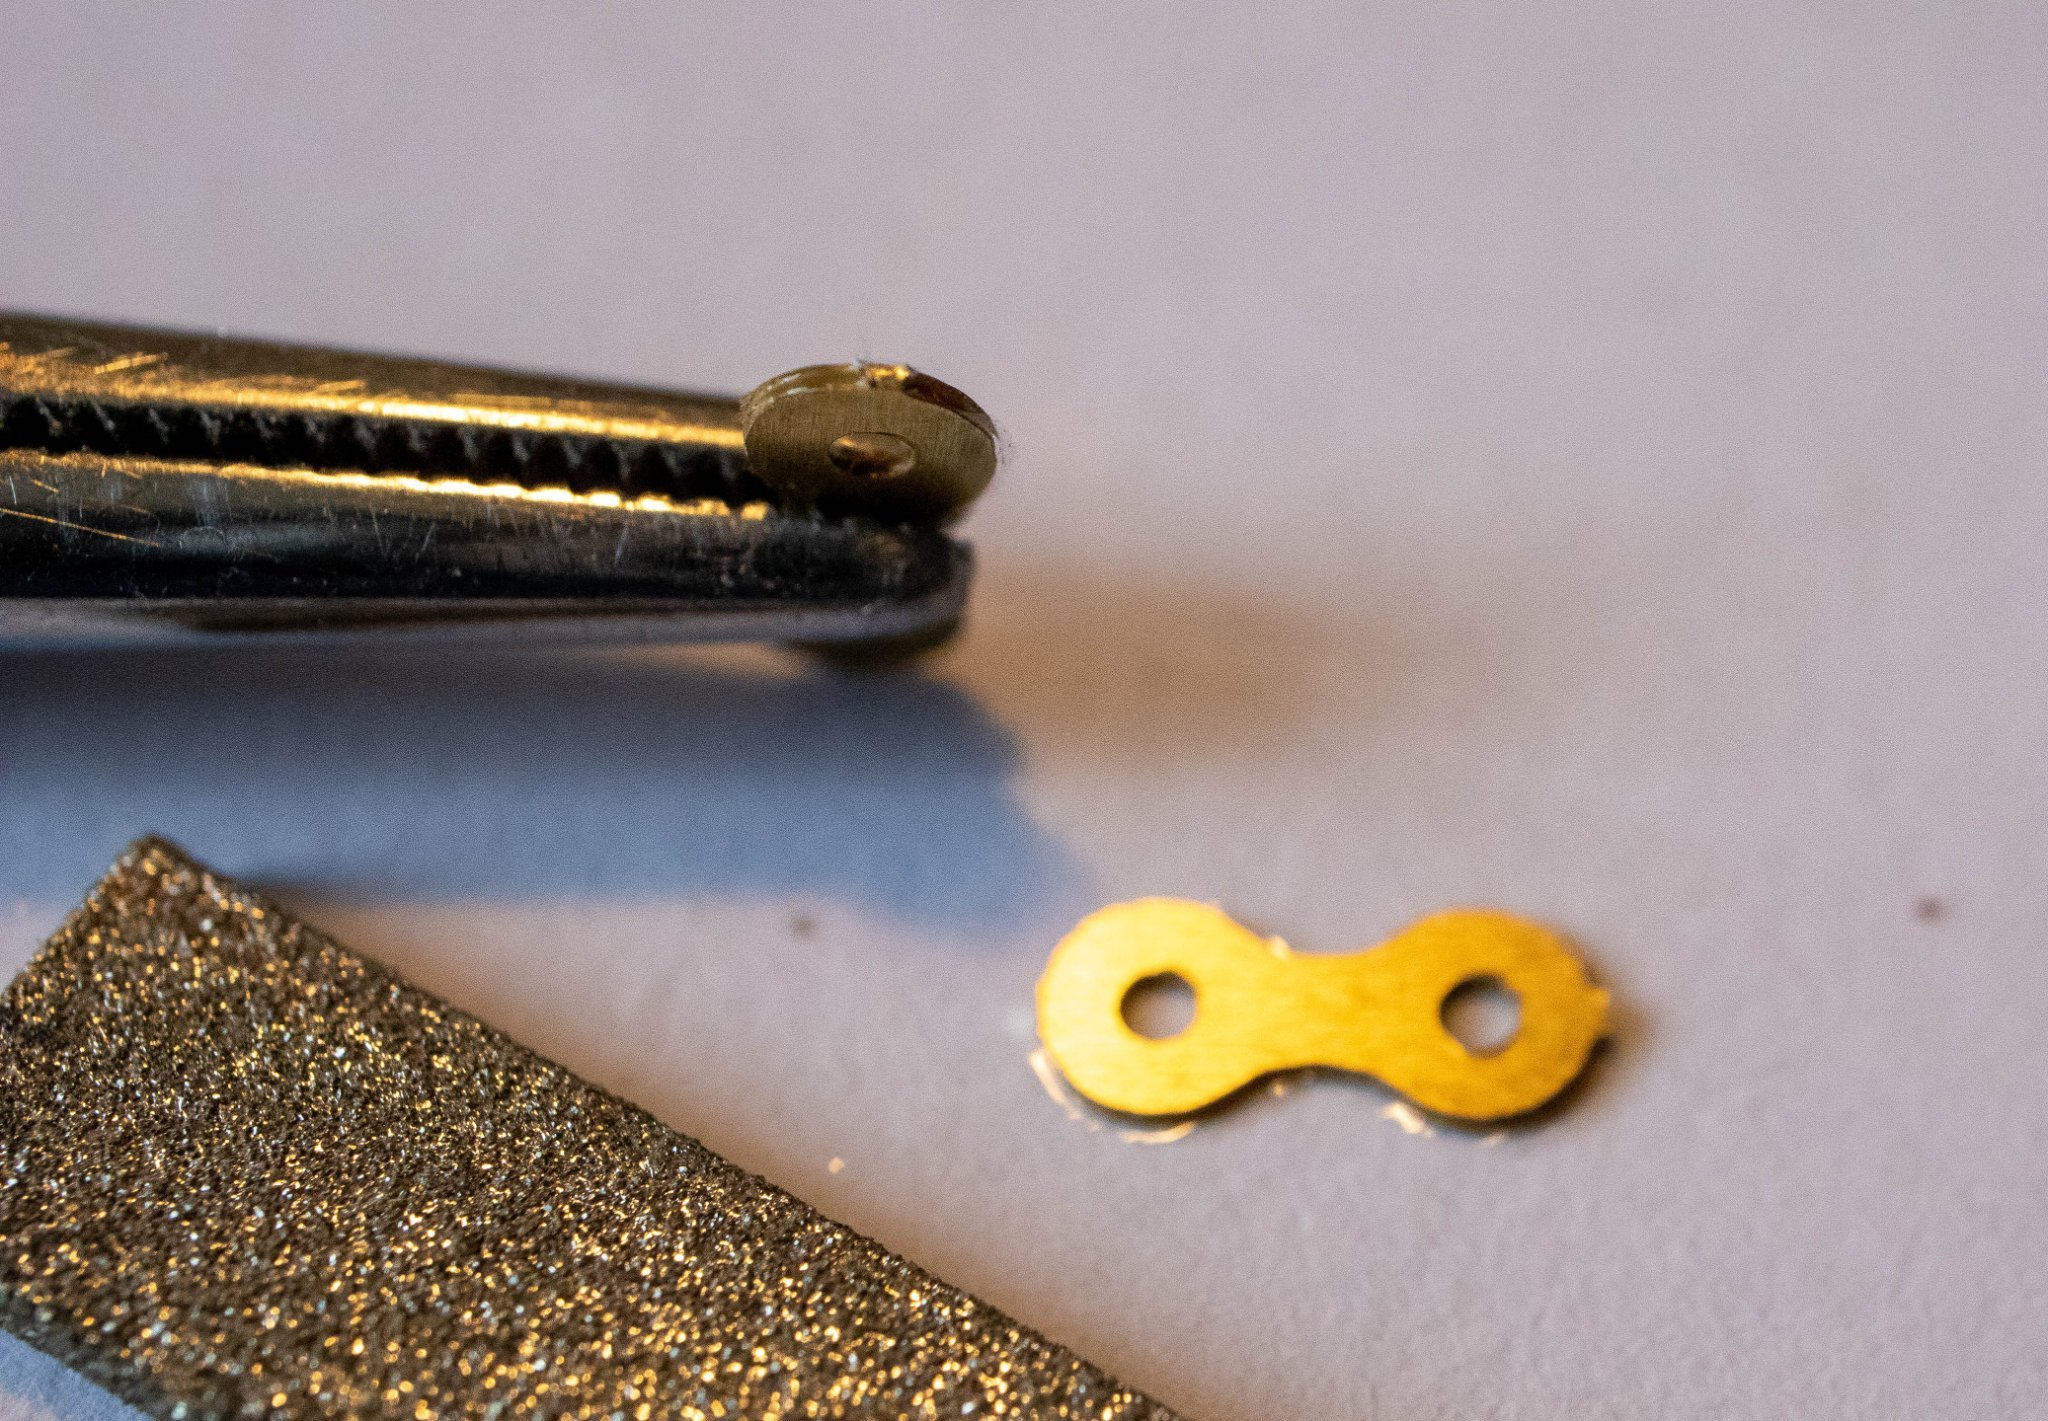
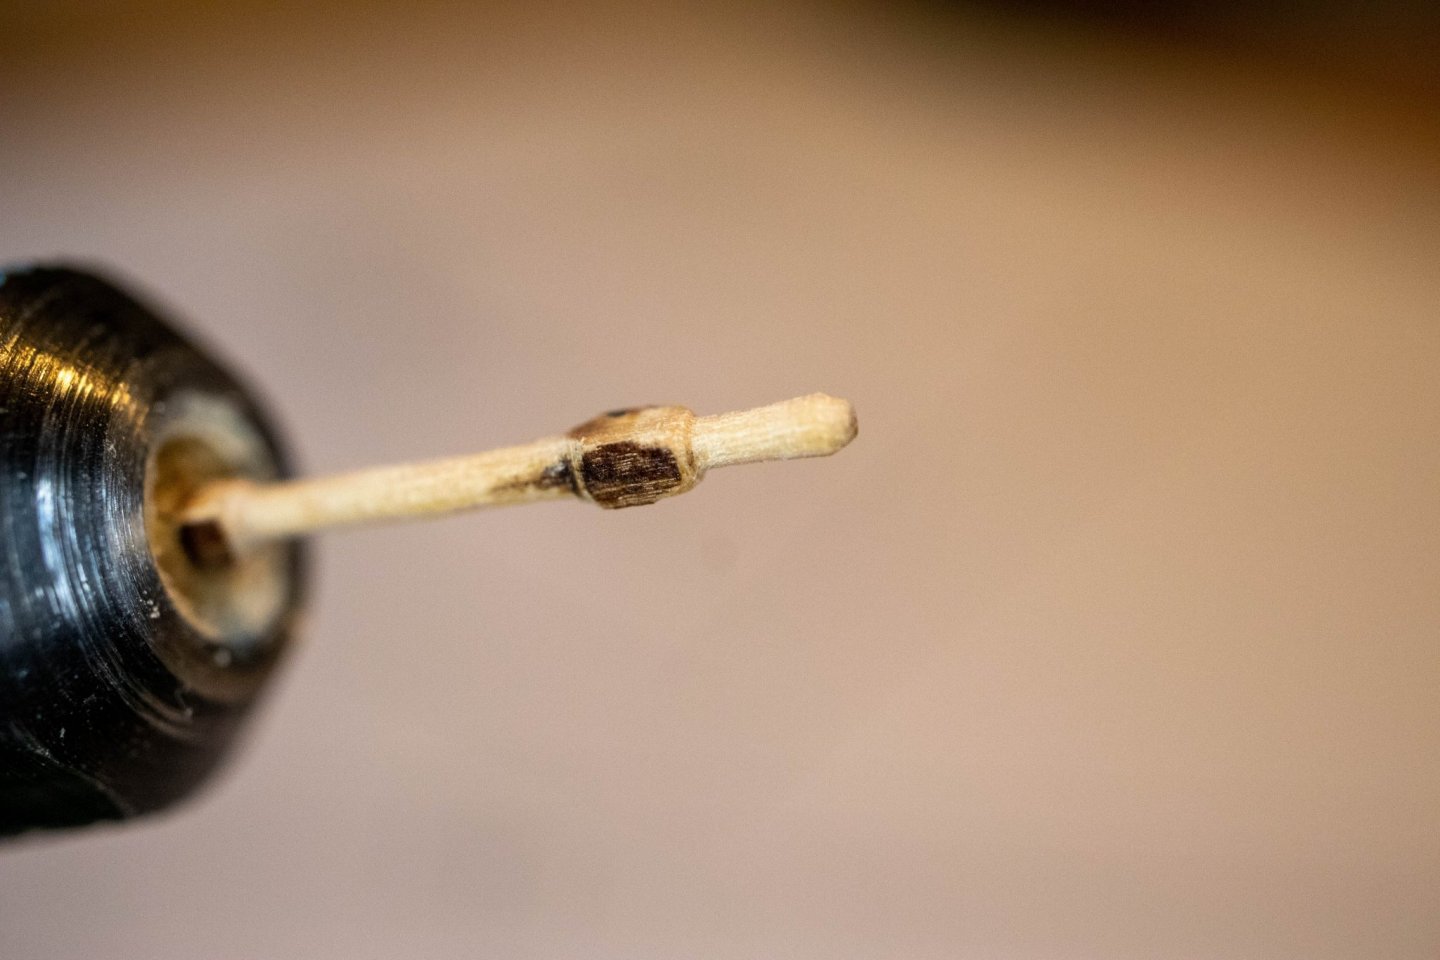
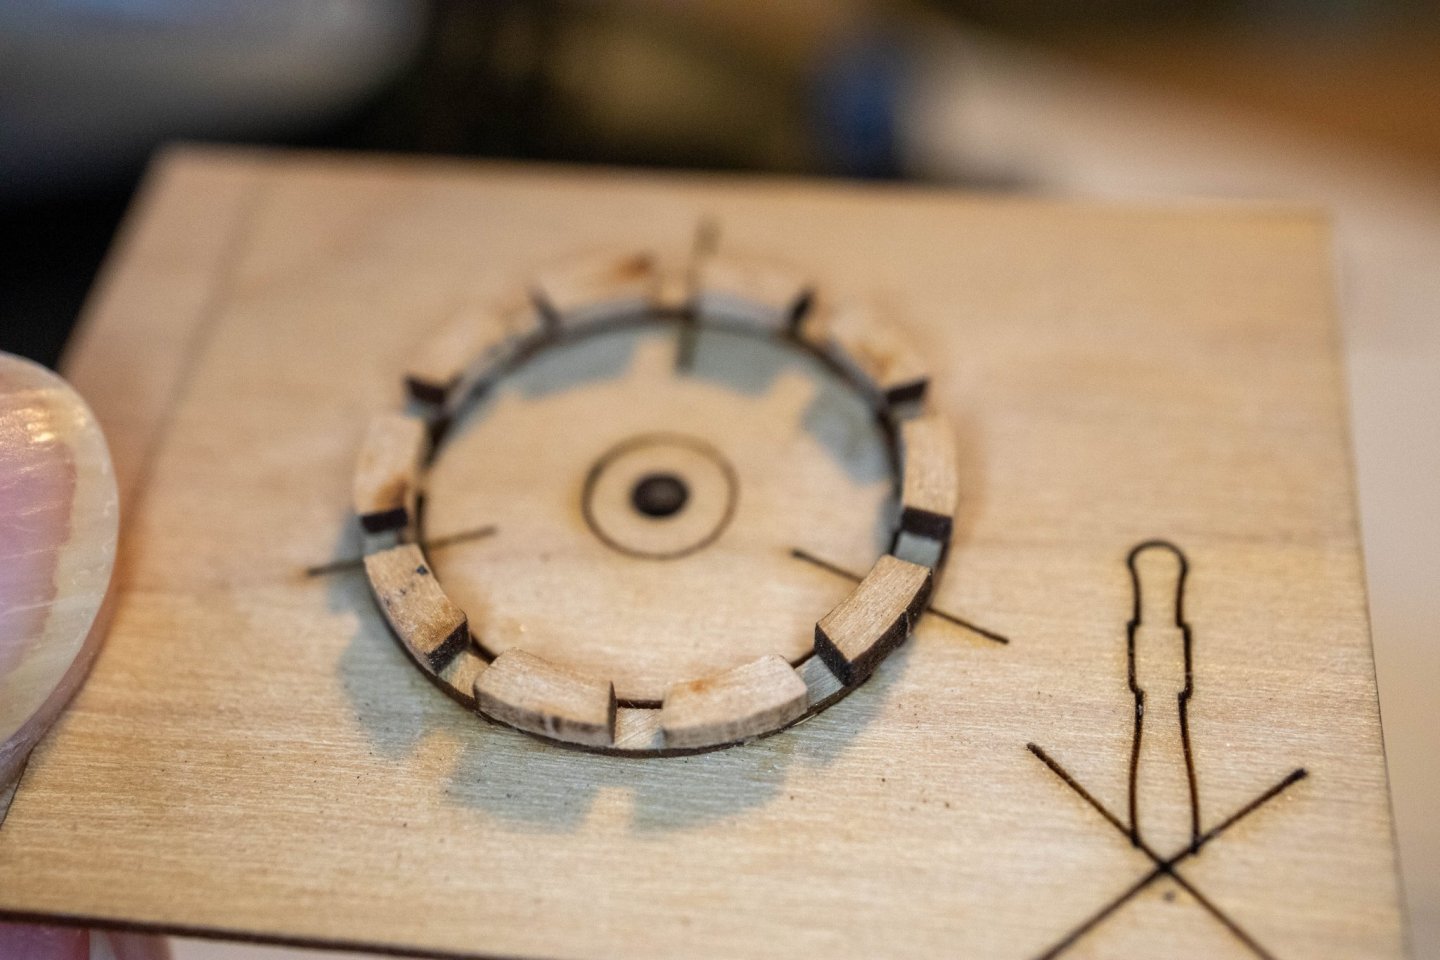
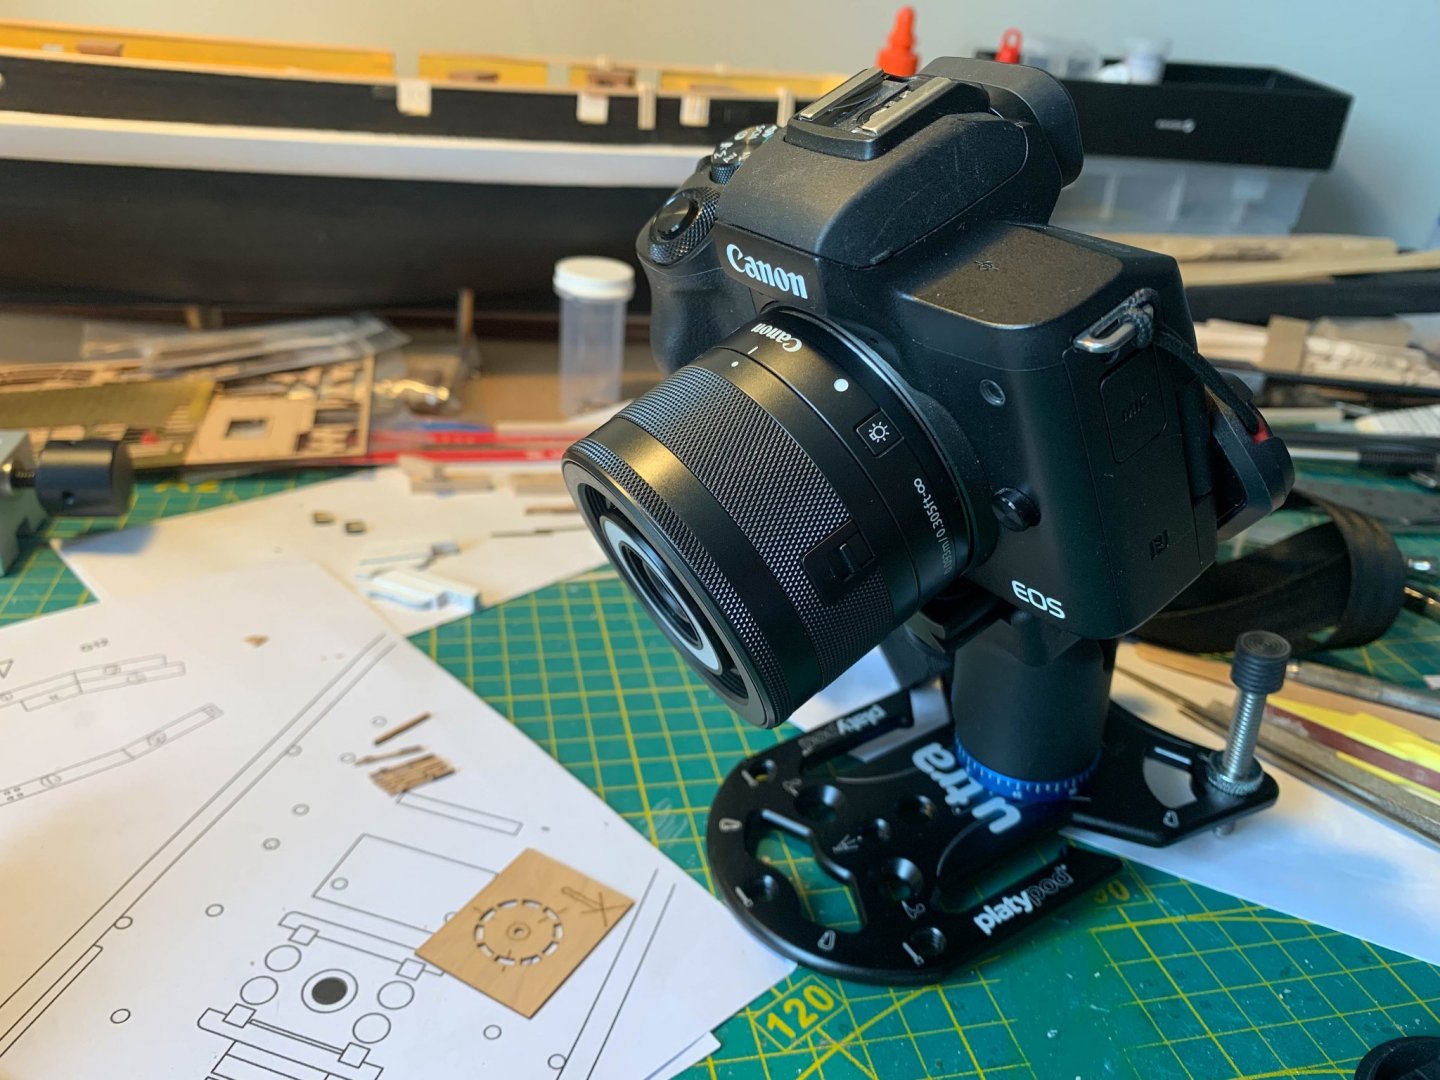
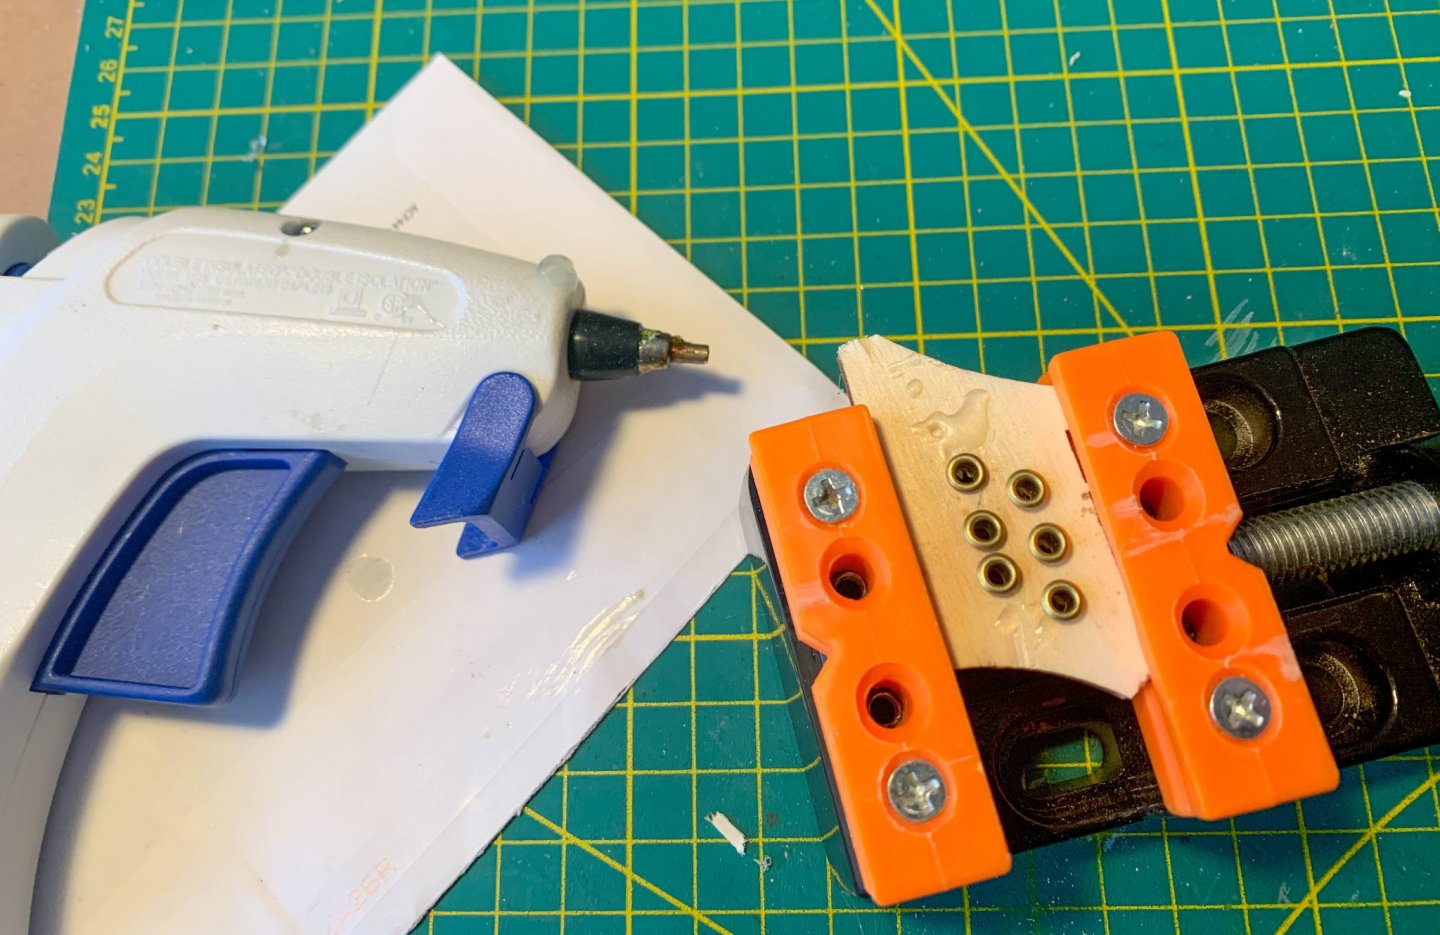
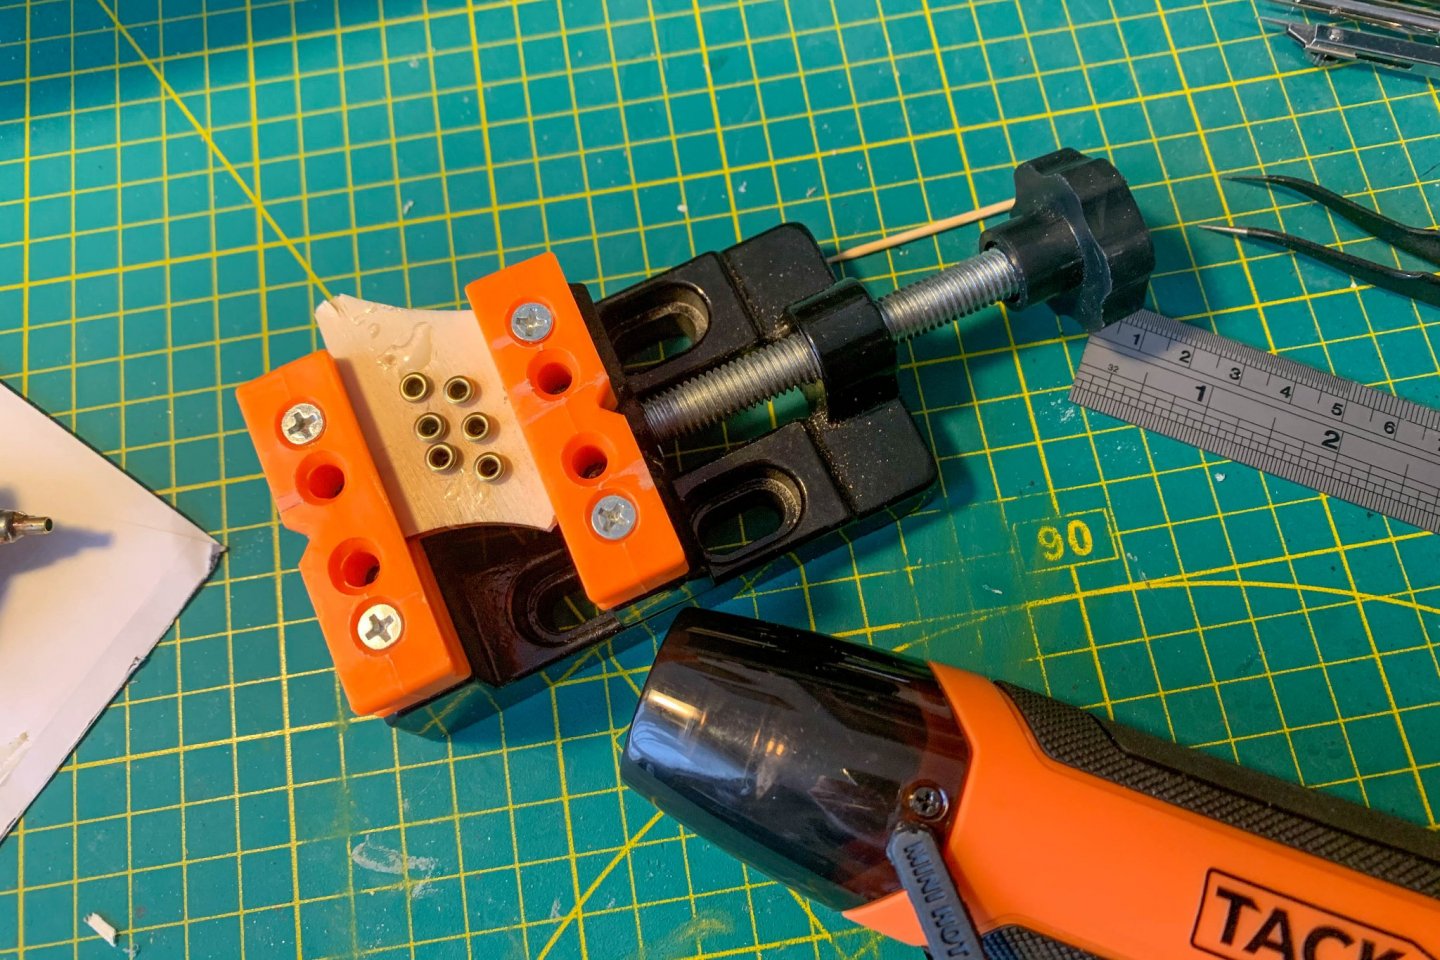
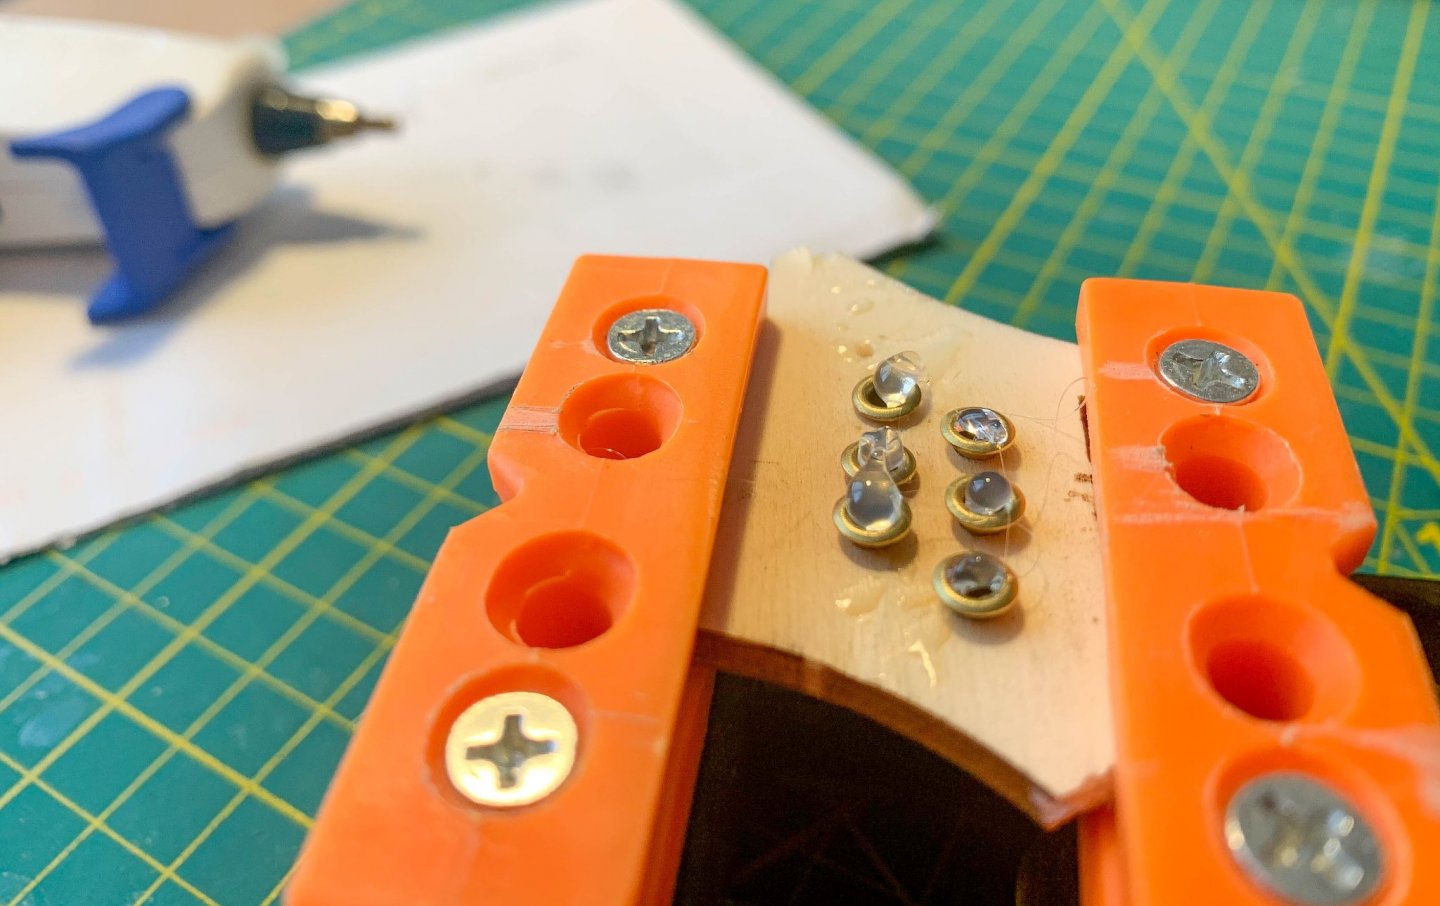
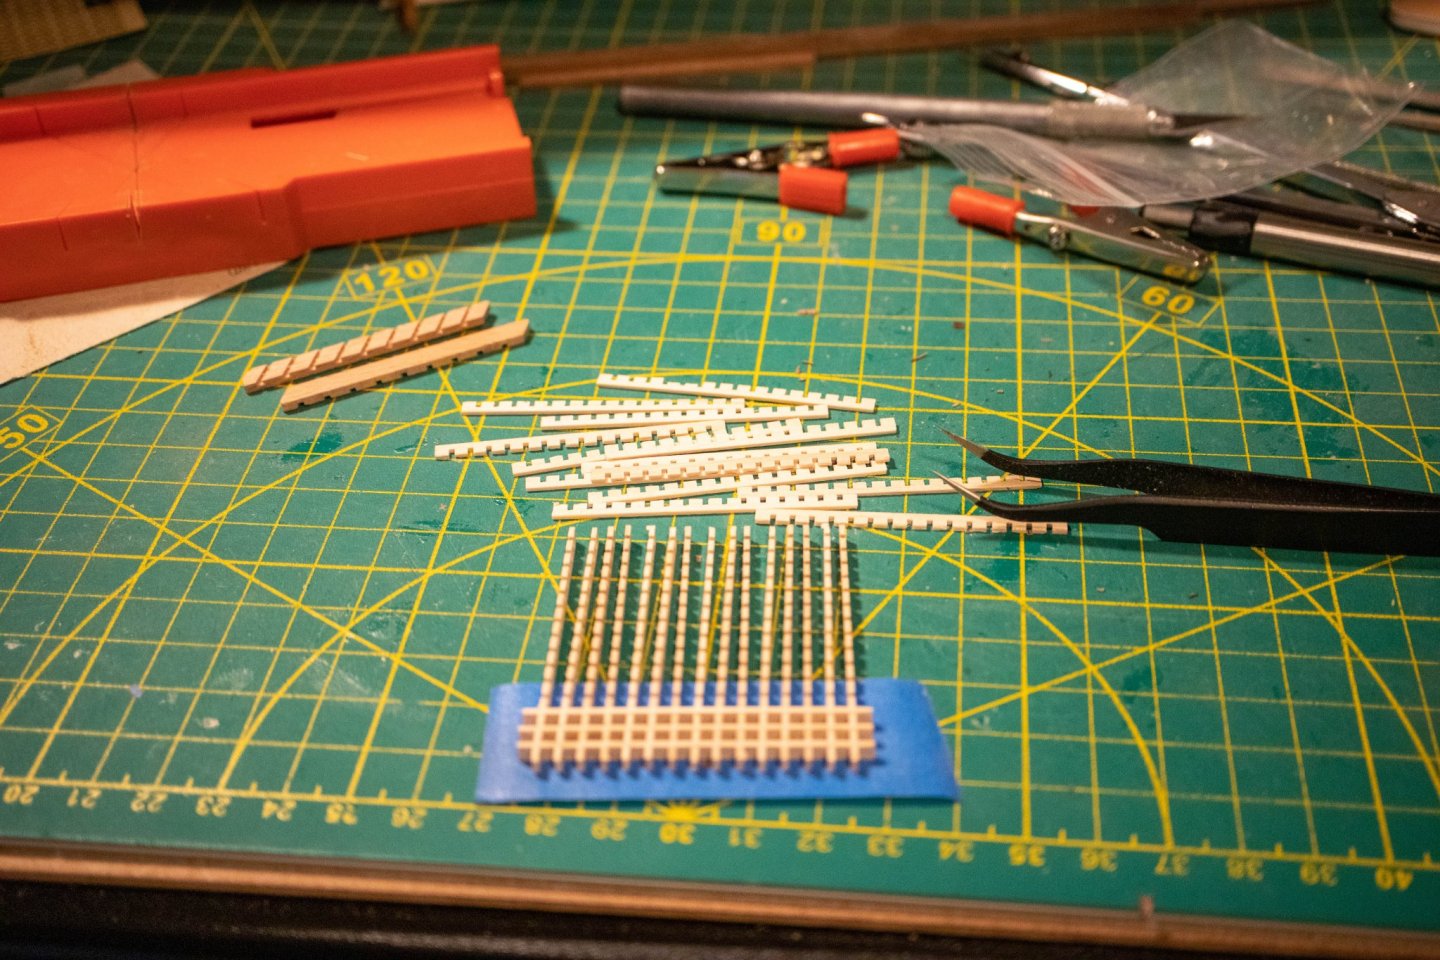
The ship yard is again open. I had an open heart aortic valve replacement at the end of April and did not get back to HMS Terror until a few weeks ago. The model has been on my mind throughout the recovery process. I have assembled the forward catheads, but not mounted them yet and have spent the last several sessions shaping the components of the Syrenshipmodel helm wheel kit then assembling the first of 2 ten spoke wheels. The spokes were a challenge. The suggestion to turn them in a Dremel drill did not work out for me. I found it near impossible to center to tiny spokes in the Dremel chuck. I have a full size wood lathe, but all the chucks I have are way too big the handle wood of that size. I ended up manually shaping the spokes using the Dremel as a hand sized mandrel. I spent some time today shaping the assembled wheel and will post pictures when it is cleaned up. I have also been playing around with a set up to photograph bit and pieces and to get real close up images. Here are a few photos of the camera and stand with a couple of detail shots.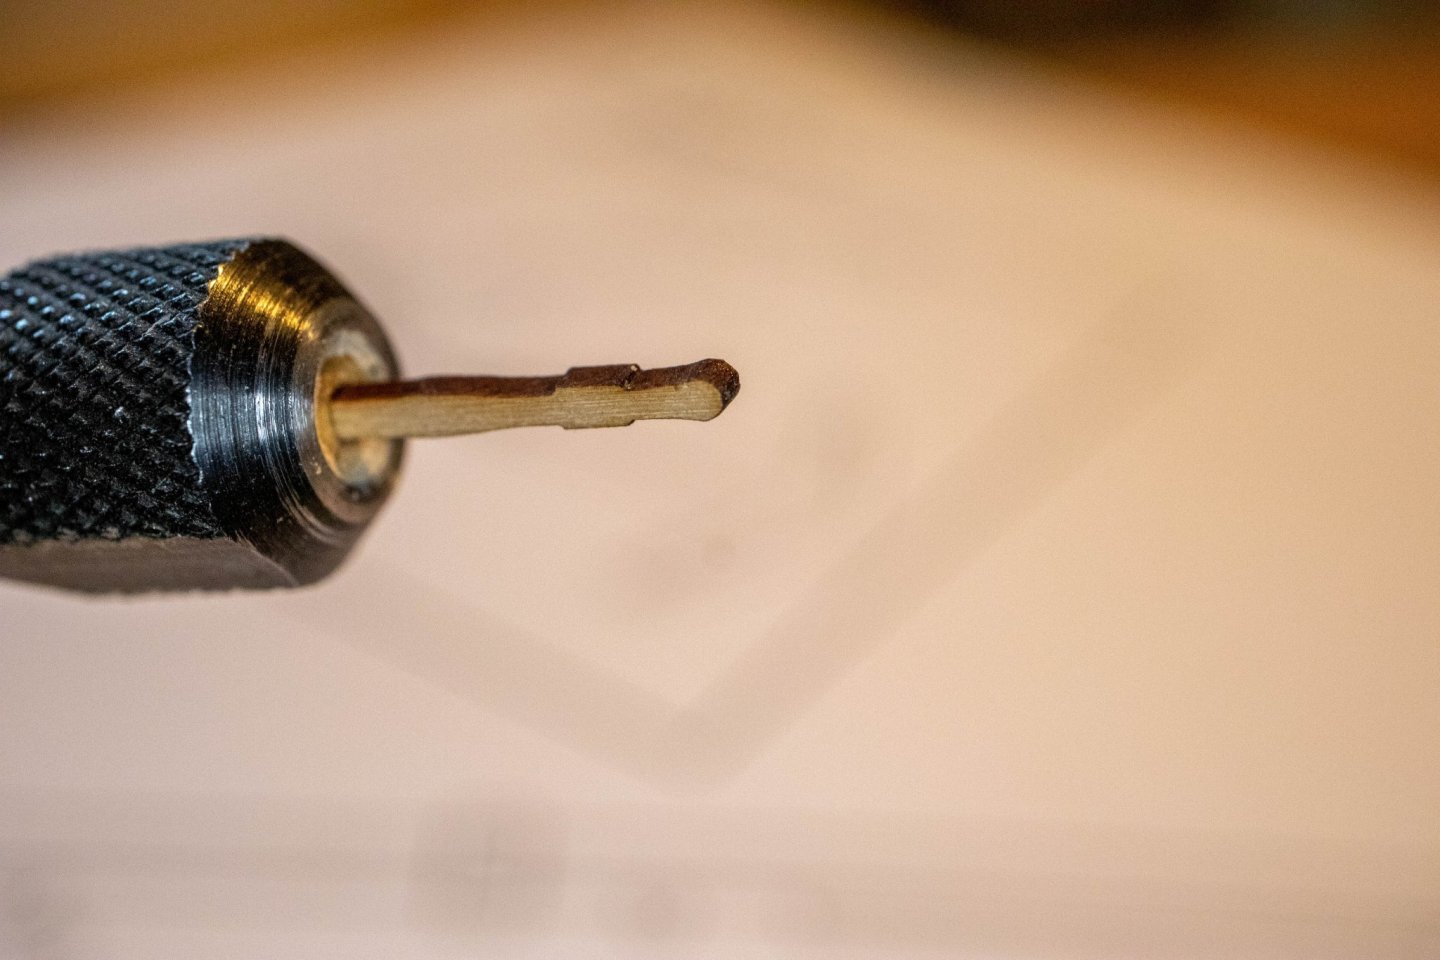


-
HMS Terror by Broden - OcCre - 1:75
broden replied to broden's topic in - Kit build logs for subjects built from 1801 - 1850
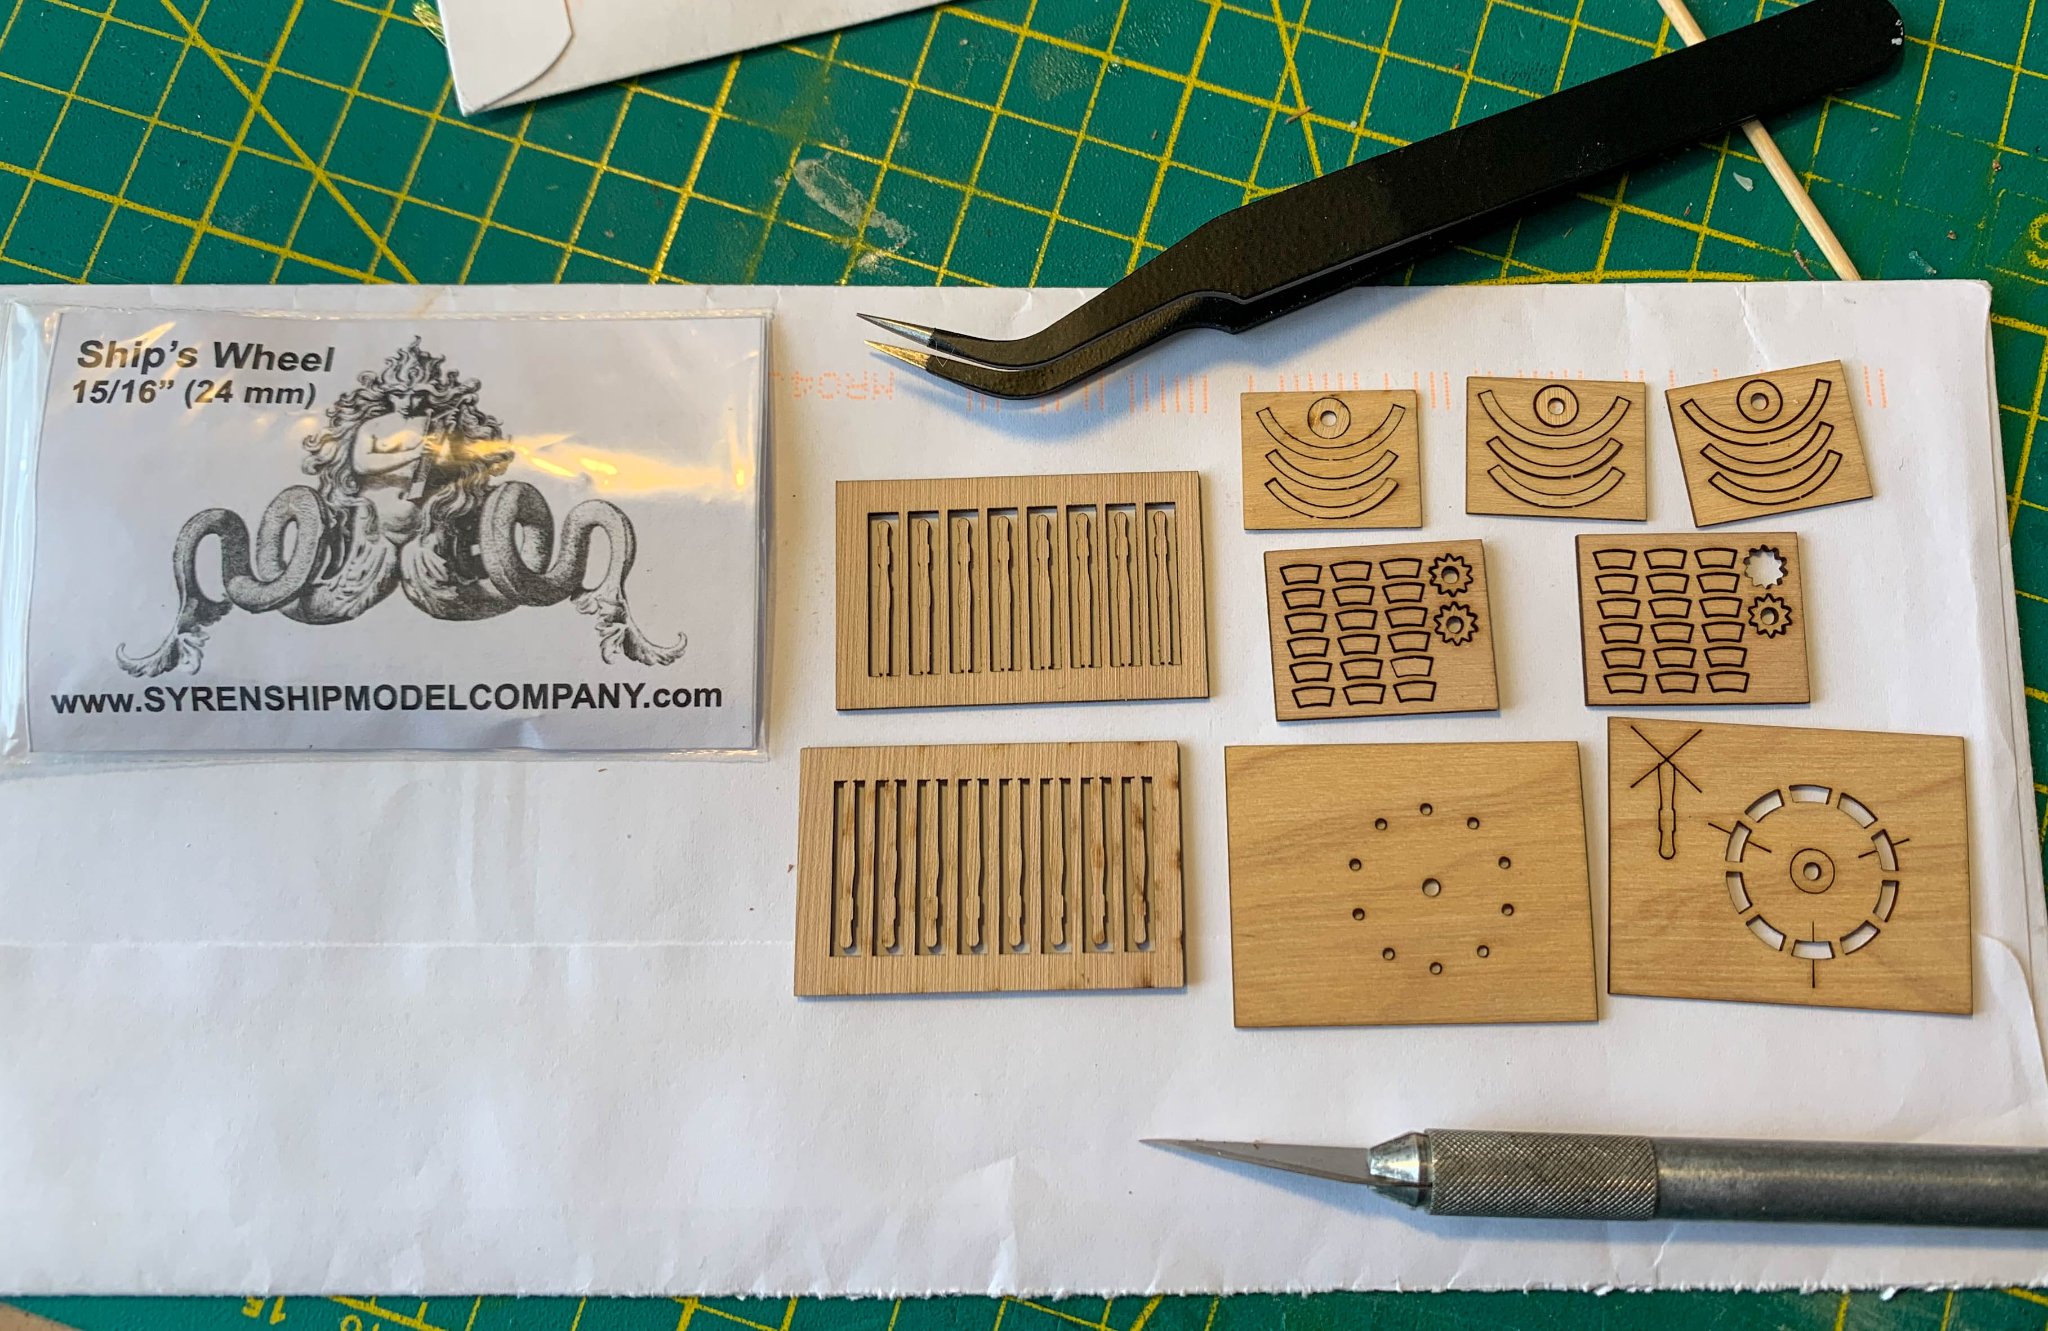
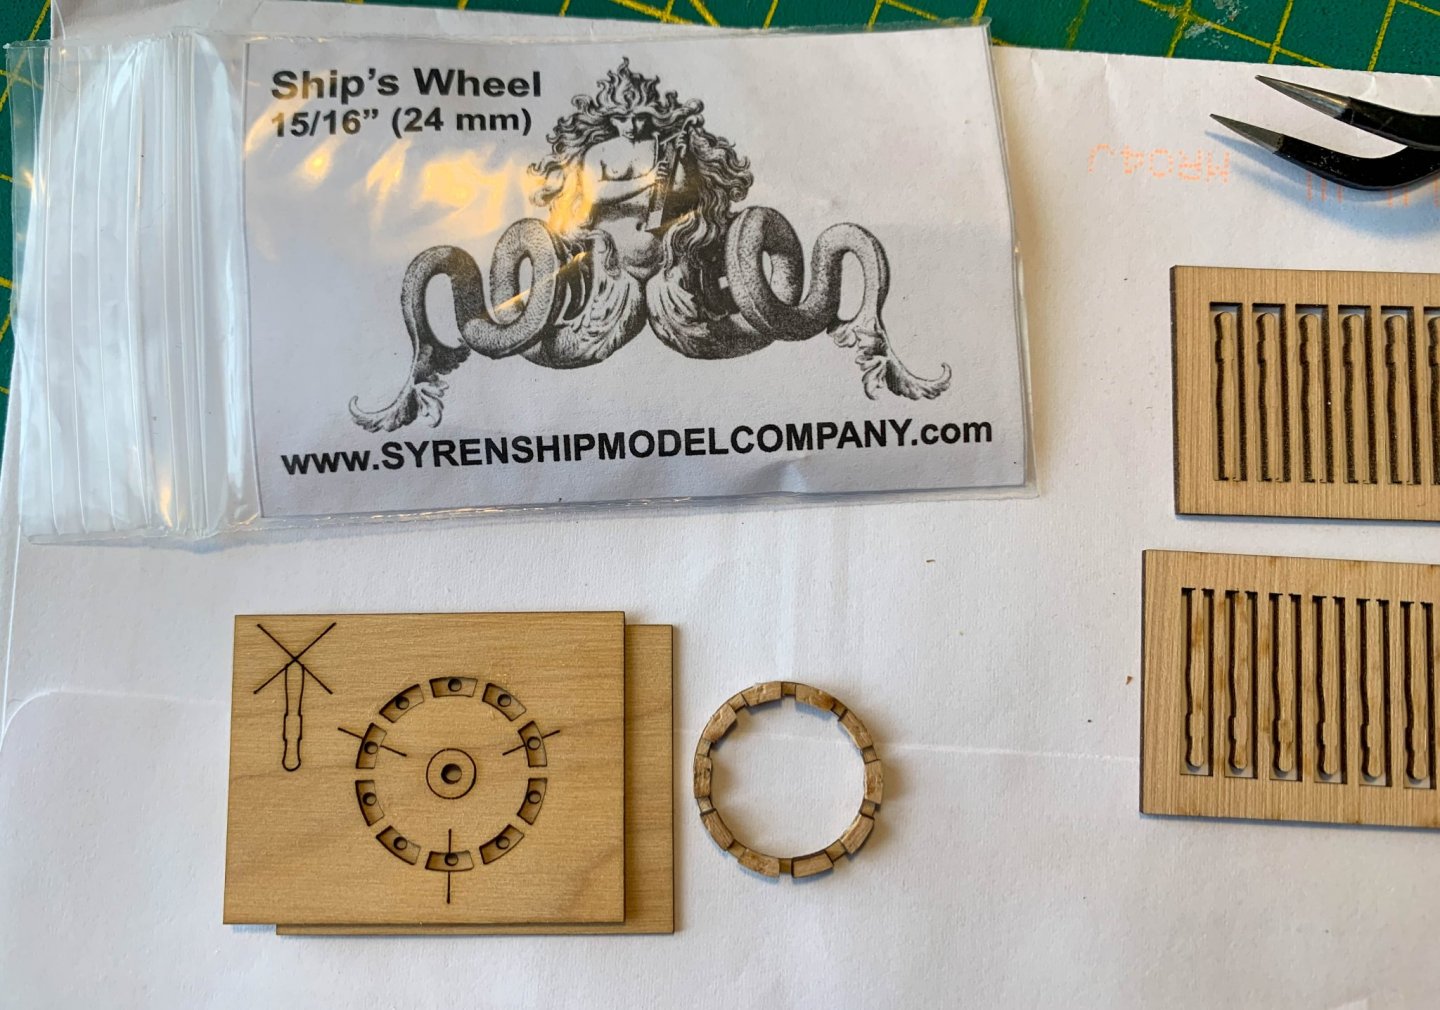
Good Day, I invested in a pair 10 spoke helm wheel kits to replace the castings supplied with model kit. I am impressed with the content and quality of the ship's helm kit supplied by Syrenshipmodel company. The instructions in the form of a .PDF file on the website are well illustrated and very clear. The parts are fragile and very small and are an exercise in using tweeters, tooth picks and steady hands, but fun to do. The supplier is generous with the parts in an effort to support those of us who may break a few. The first image is the first sub assembly with the assembly jig, the second is the a full kit contents. I am about to start trying to shape the spokes. I am sure they will be a challenge.
-
HMS Terror by Broden - OcCre - 1:75
broden replied to broden's topic in - Kit build logs for subjects built from 1801 - 1850
Thanks Keith. I keep assuming that the drawings in the kit are clear. A newbie assumption. Dennis -
HMS Terror by Broden - OcCre - 1:75
broden replied to broden's topic in - Kit build logs for subjects built from 1801 - 1850
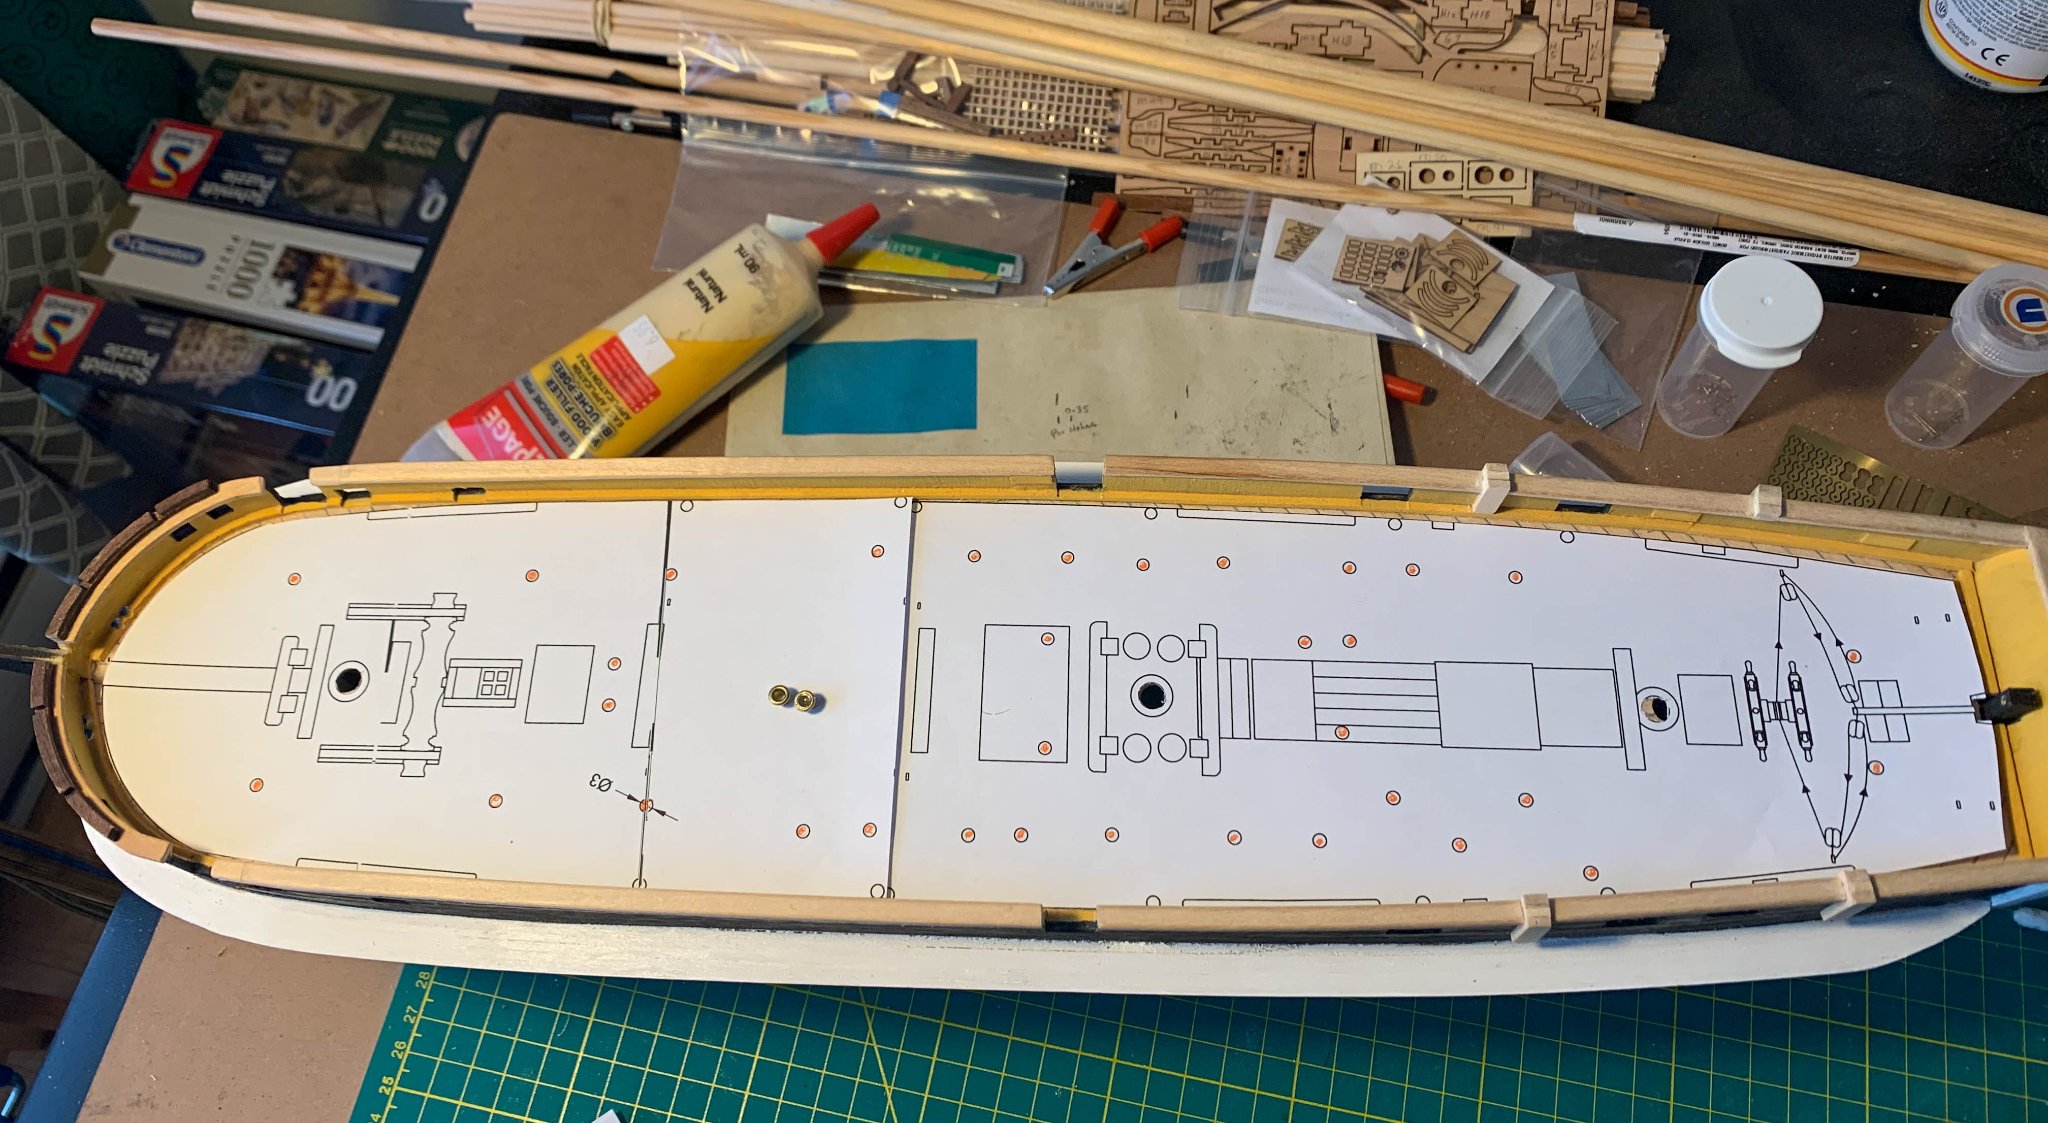
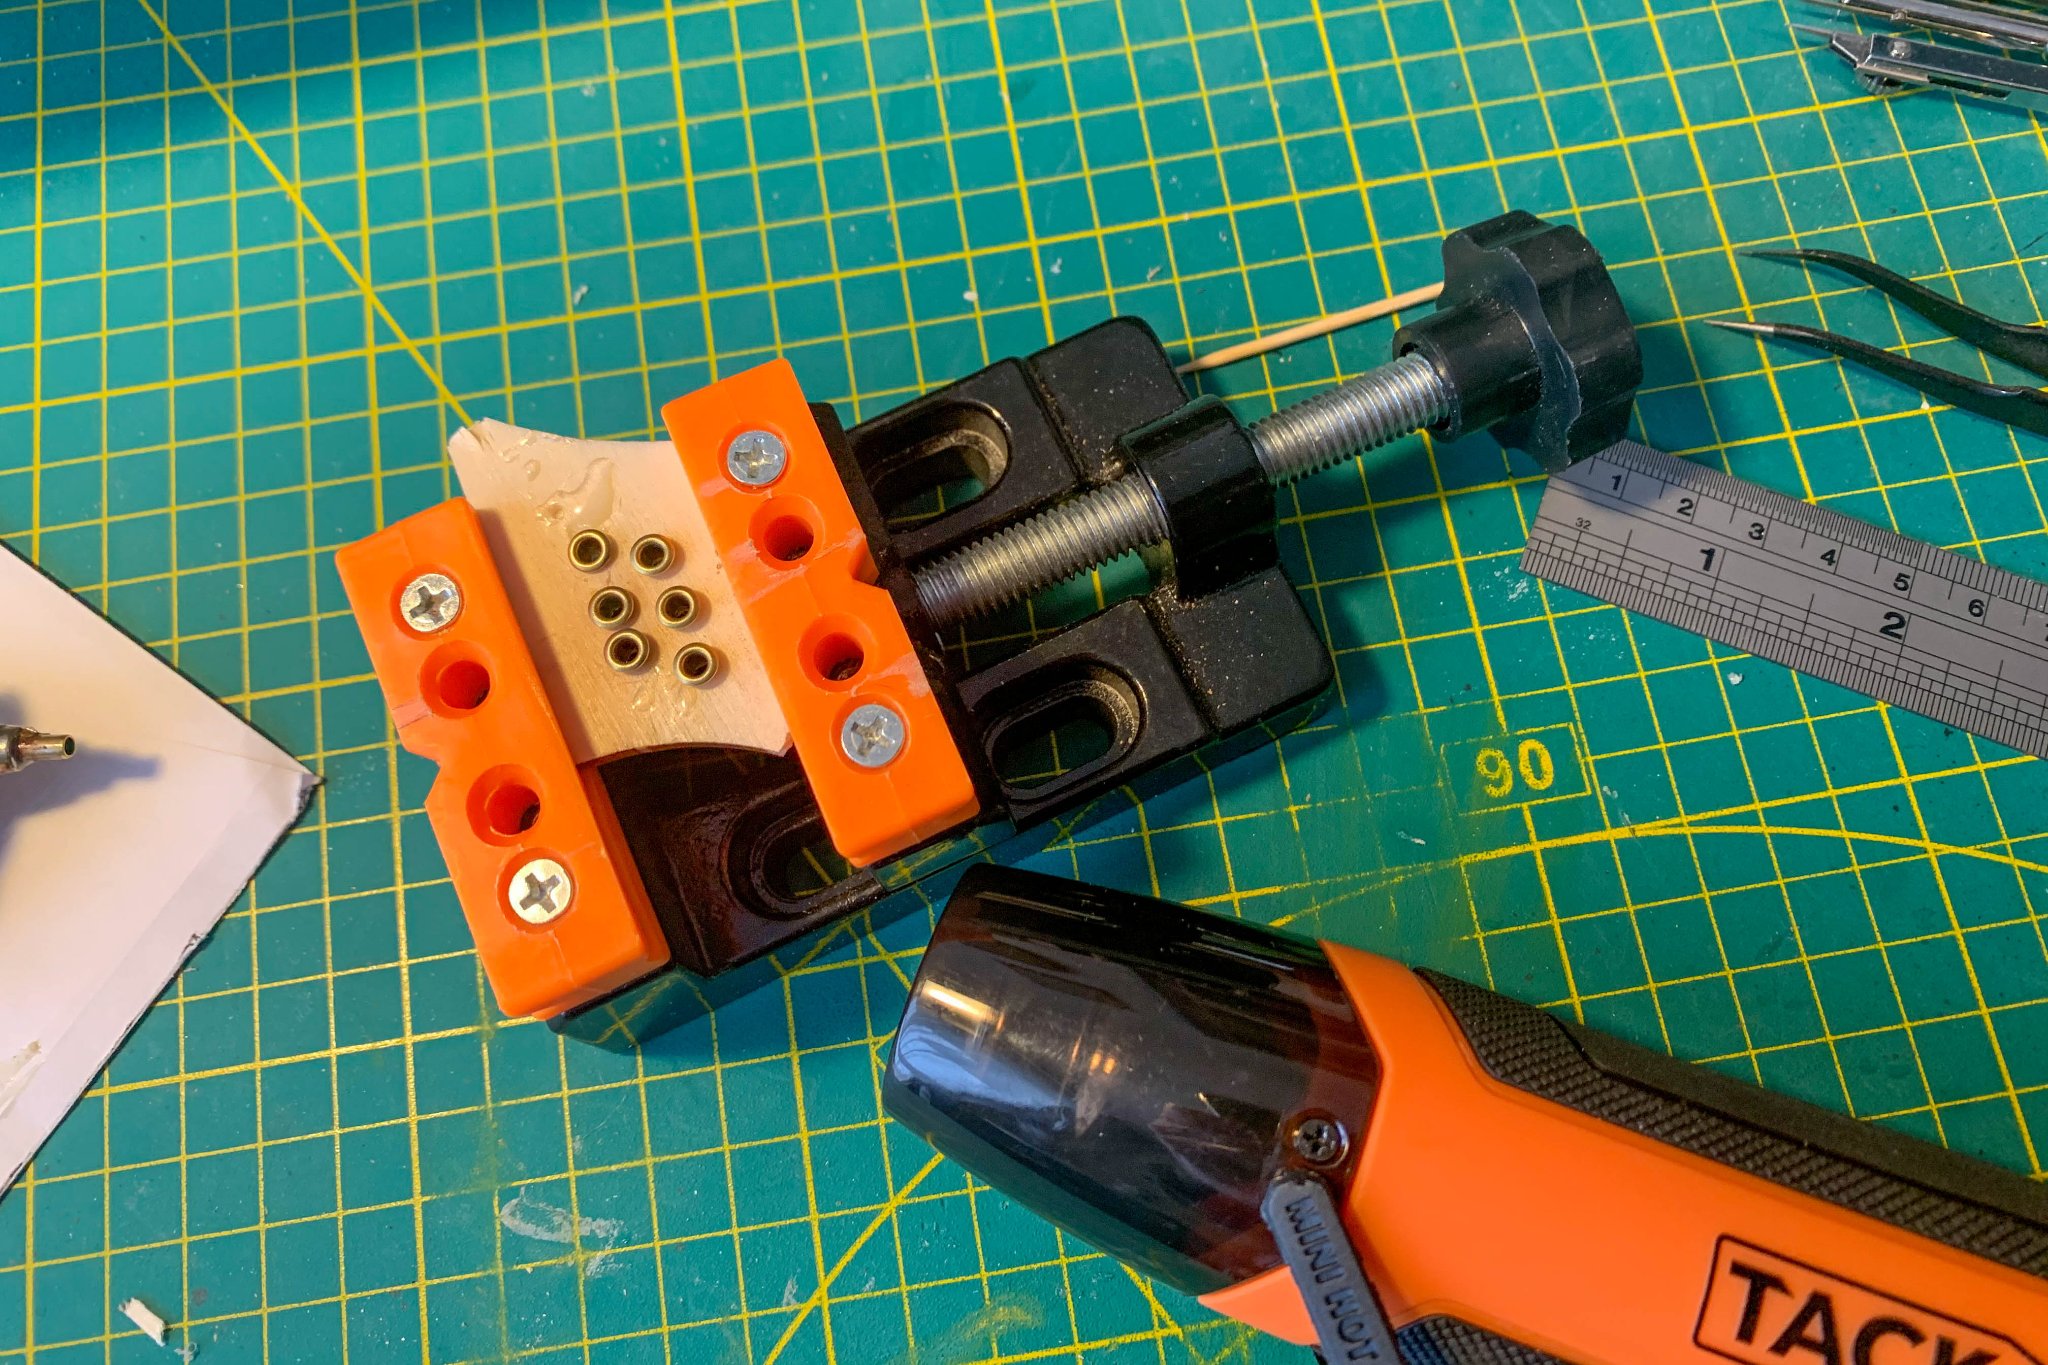
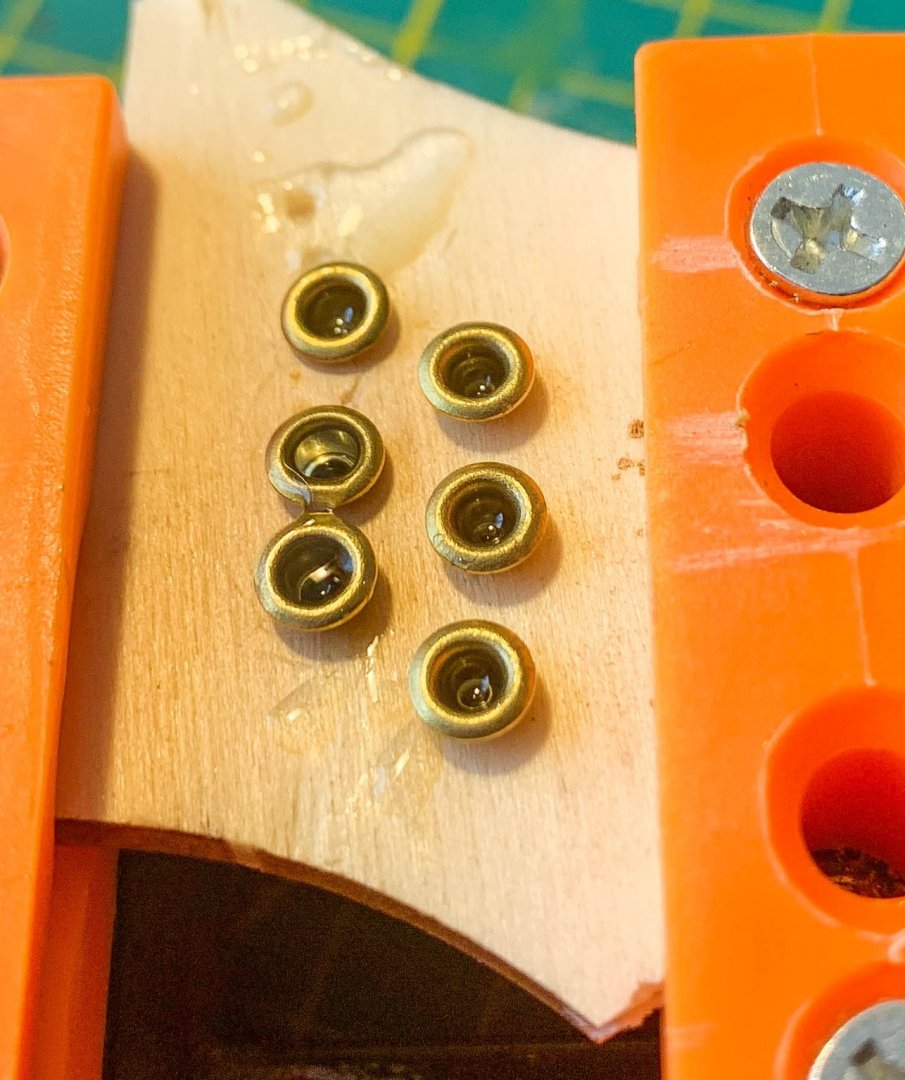
Next. I worked hard to get a deck and planking just the way I wanted it to be. Now according to the plans I have to drill holes in it to put in “Lights” or portholes, actually 32 of them. One of the Keiths, and I apologize, it was a while ago I do not remember which one filled the little lights with hot melt glue to simulate glass. I do not know if all admiralty ships had lights in the main deck or if it was a modification to Terror and Erebus for their exploration missions, but they are in all the builds I see on this site. Hot glue is a pain. I know may crafters live by the stuff, “she who must be obeyed” among them. The dammed stuff won’t let go and there are fine strings of glue everywhere. It runs when you do not want it to run and freezes instantly to any cool surface. It burns badly if you get clumsy. Doing 32 of these tiny tubes individually would take forever, so a jig is in order. Six at once seems reasonable. Add hot melt as cleanly as possible, Re-heat with nifty heat gun so the the glue sinks into the brass fitting, let cool then on to the next six. When all is said and done and any visitor looks at this model they will probably not notice the lights or even if they have simulated glass in them, but I will know.

-
HMS Terror by Broden - OcCre - 1:75
broden replied to broden's topic in - Kit build logs for subjects built from 1801 - 1850
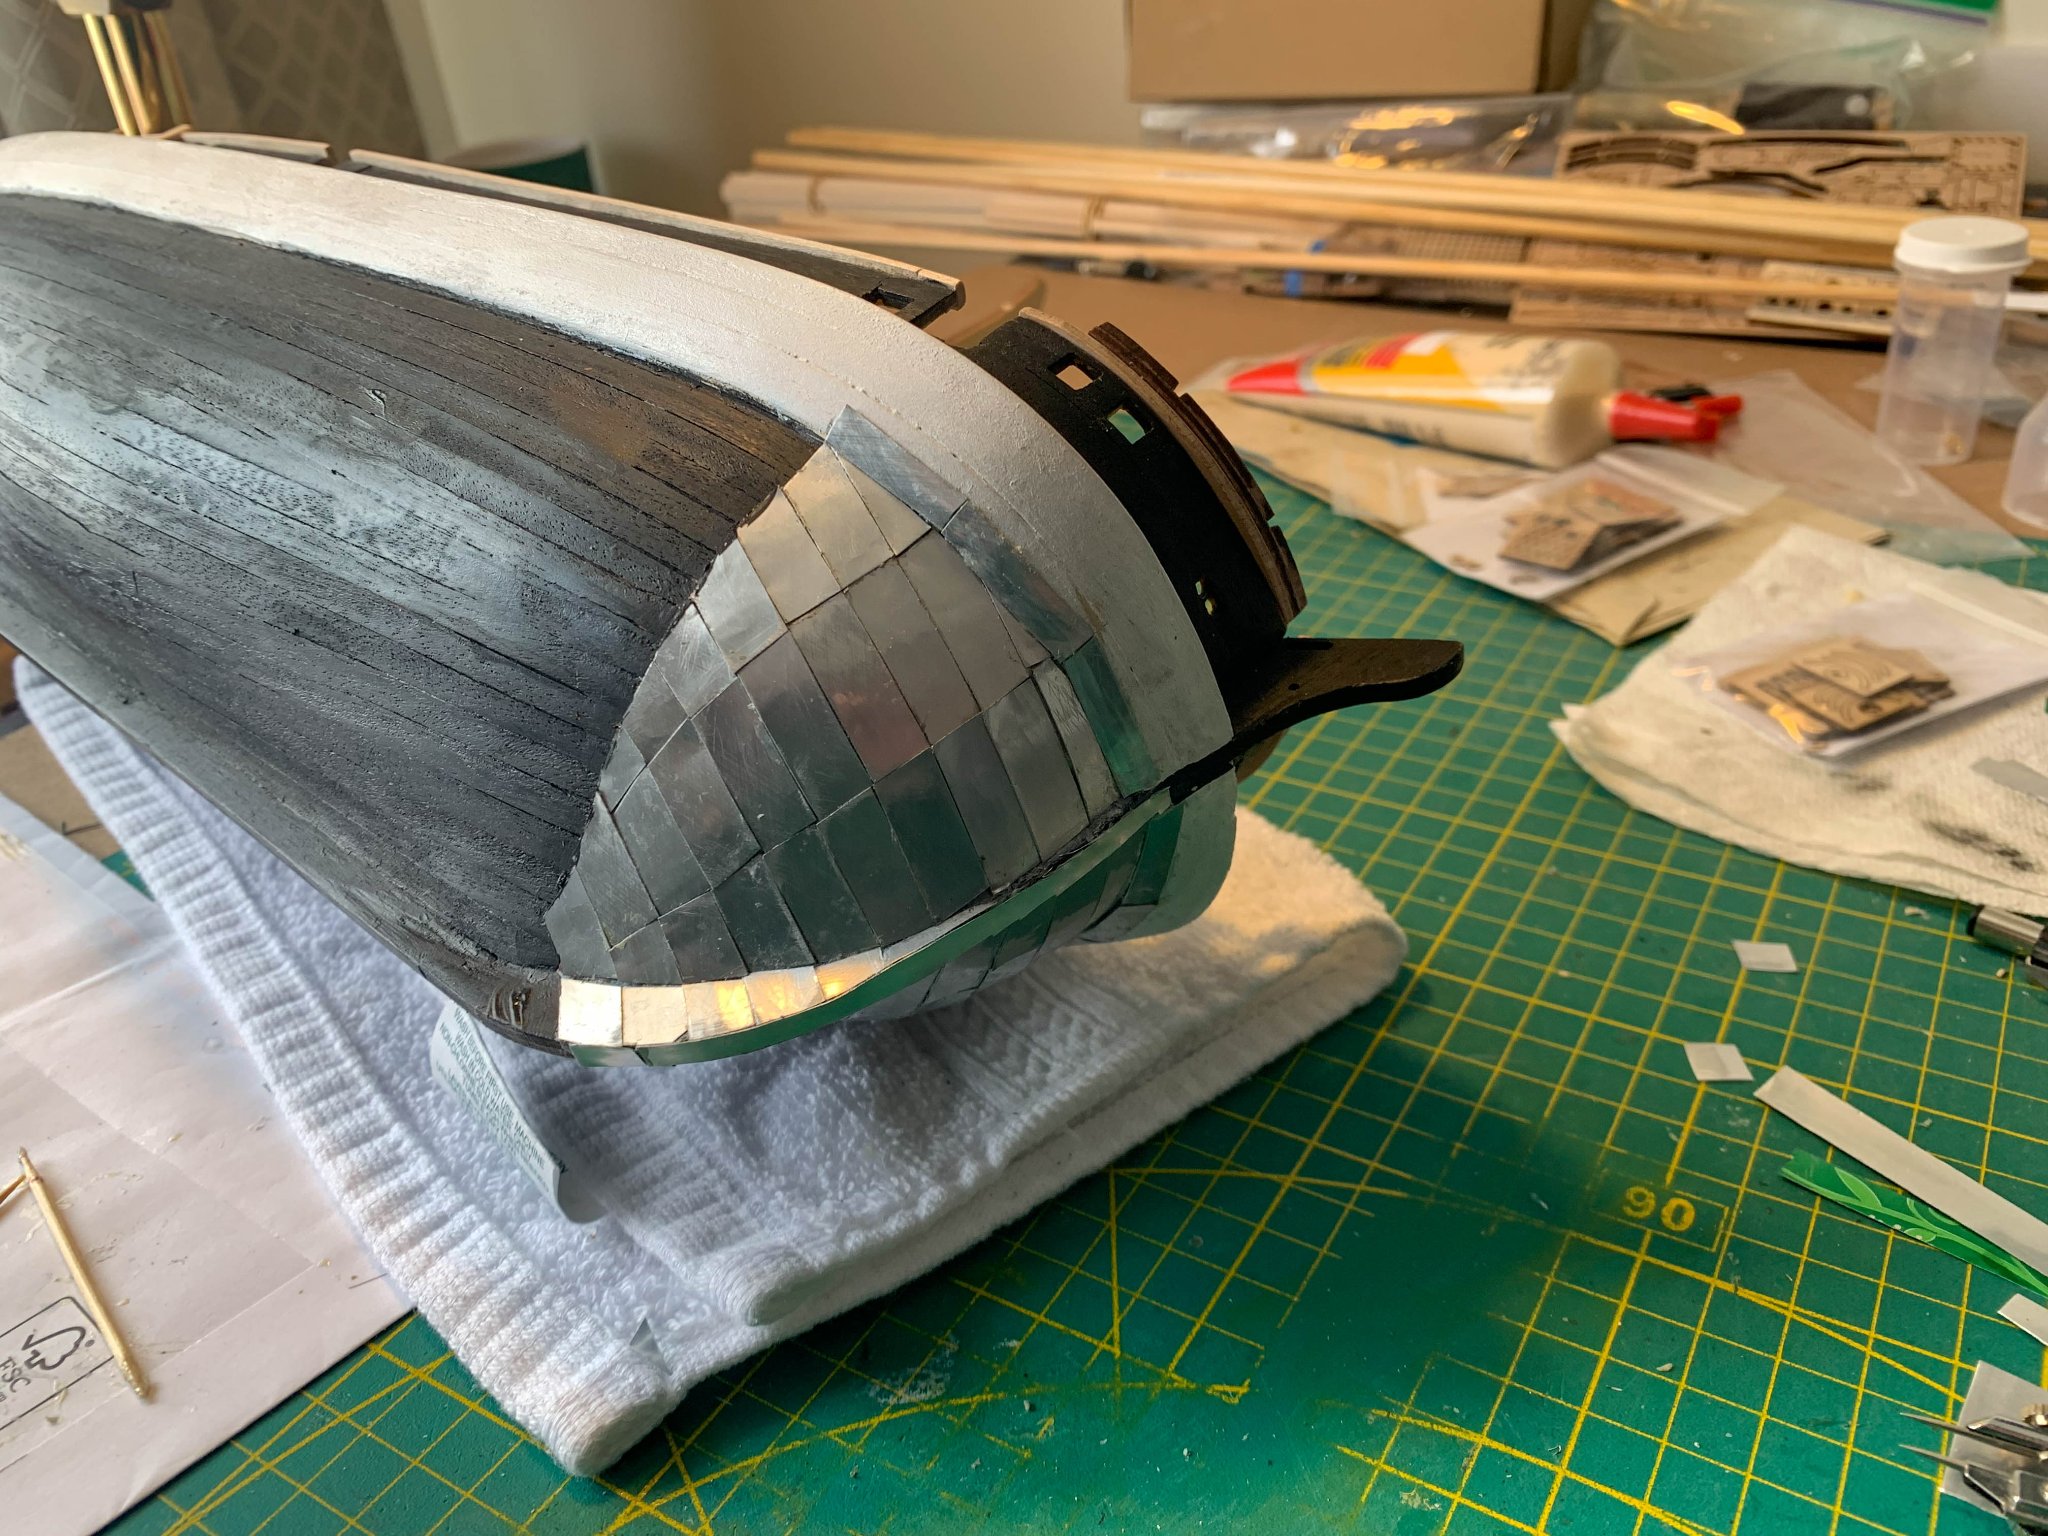
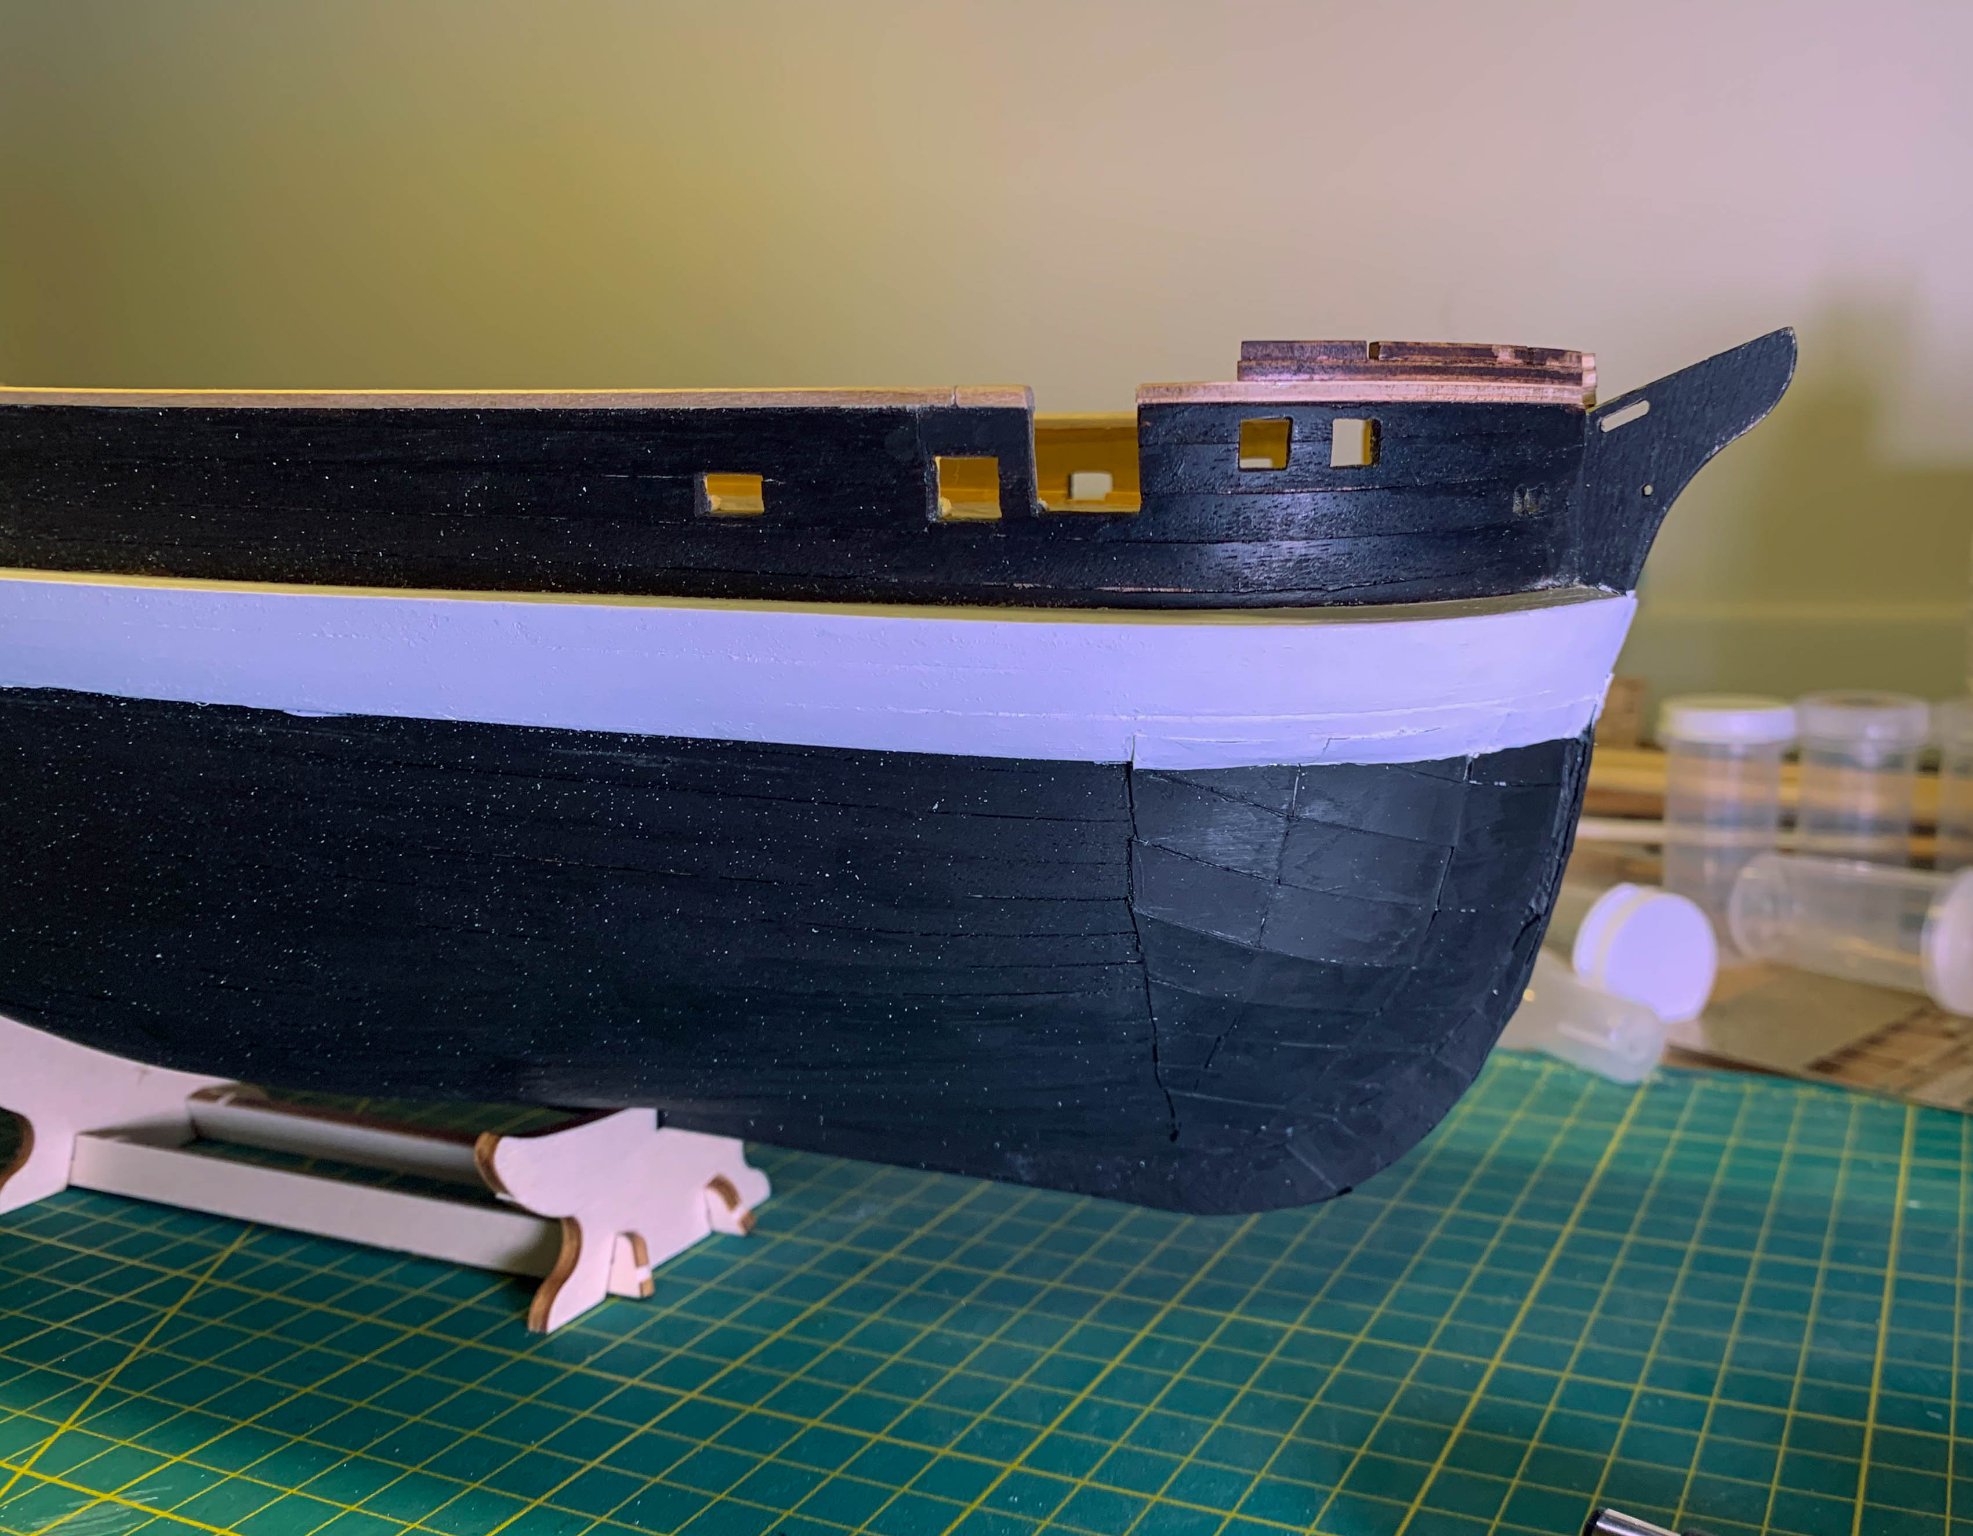
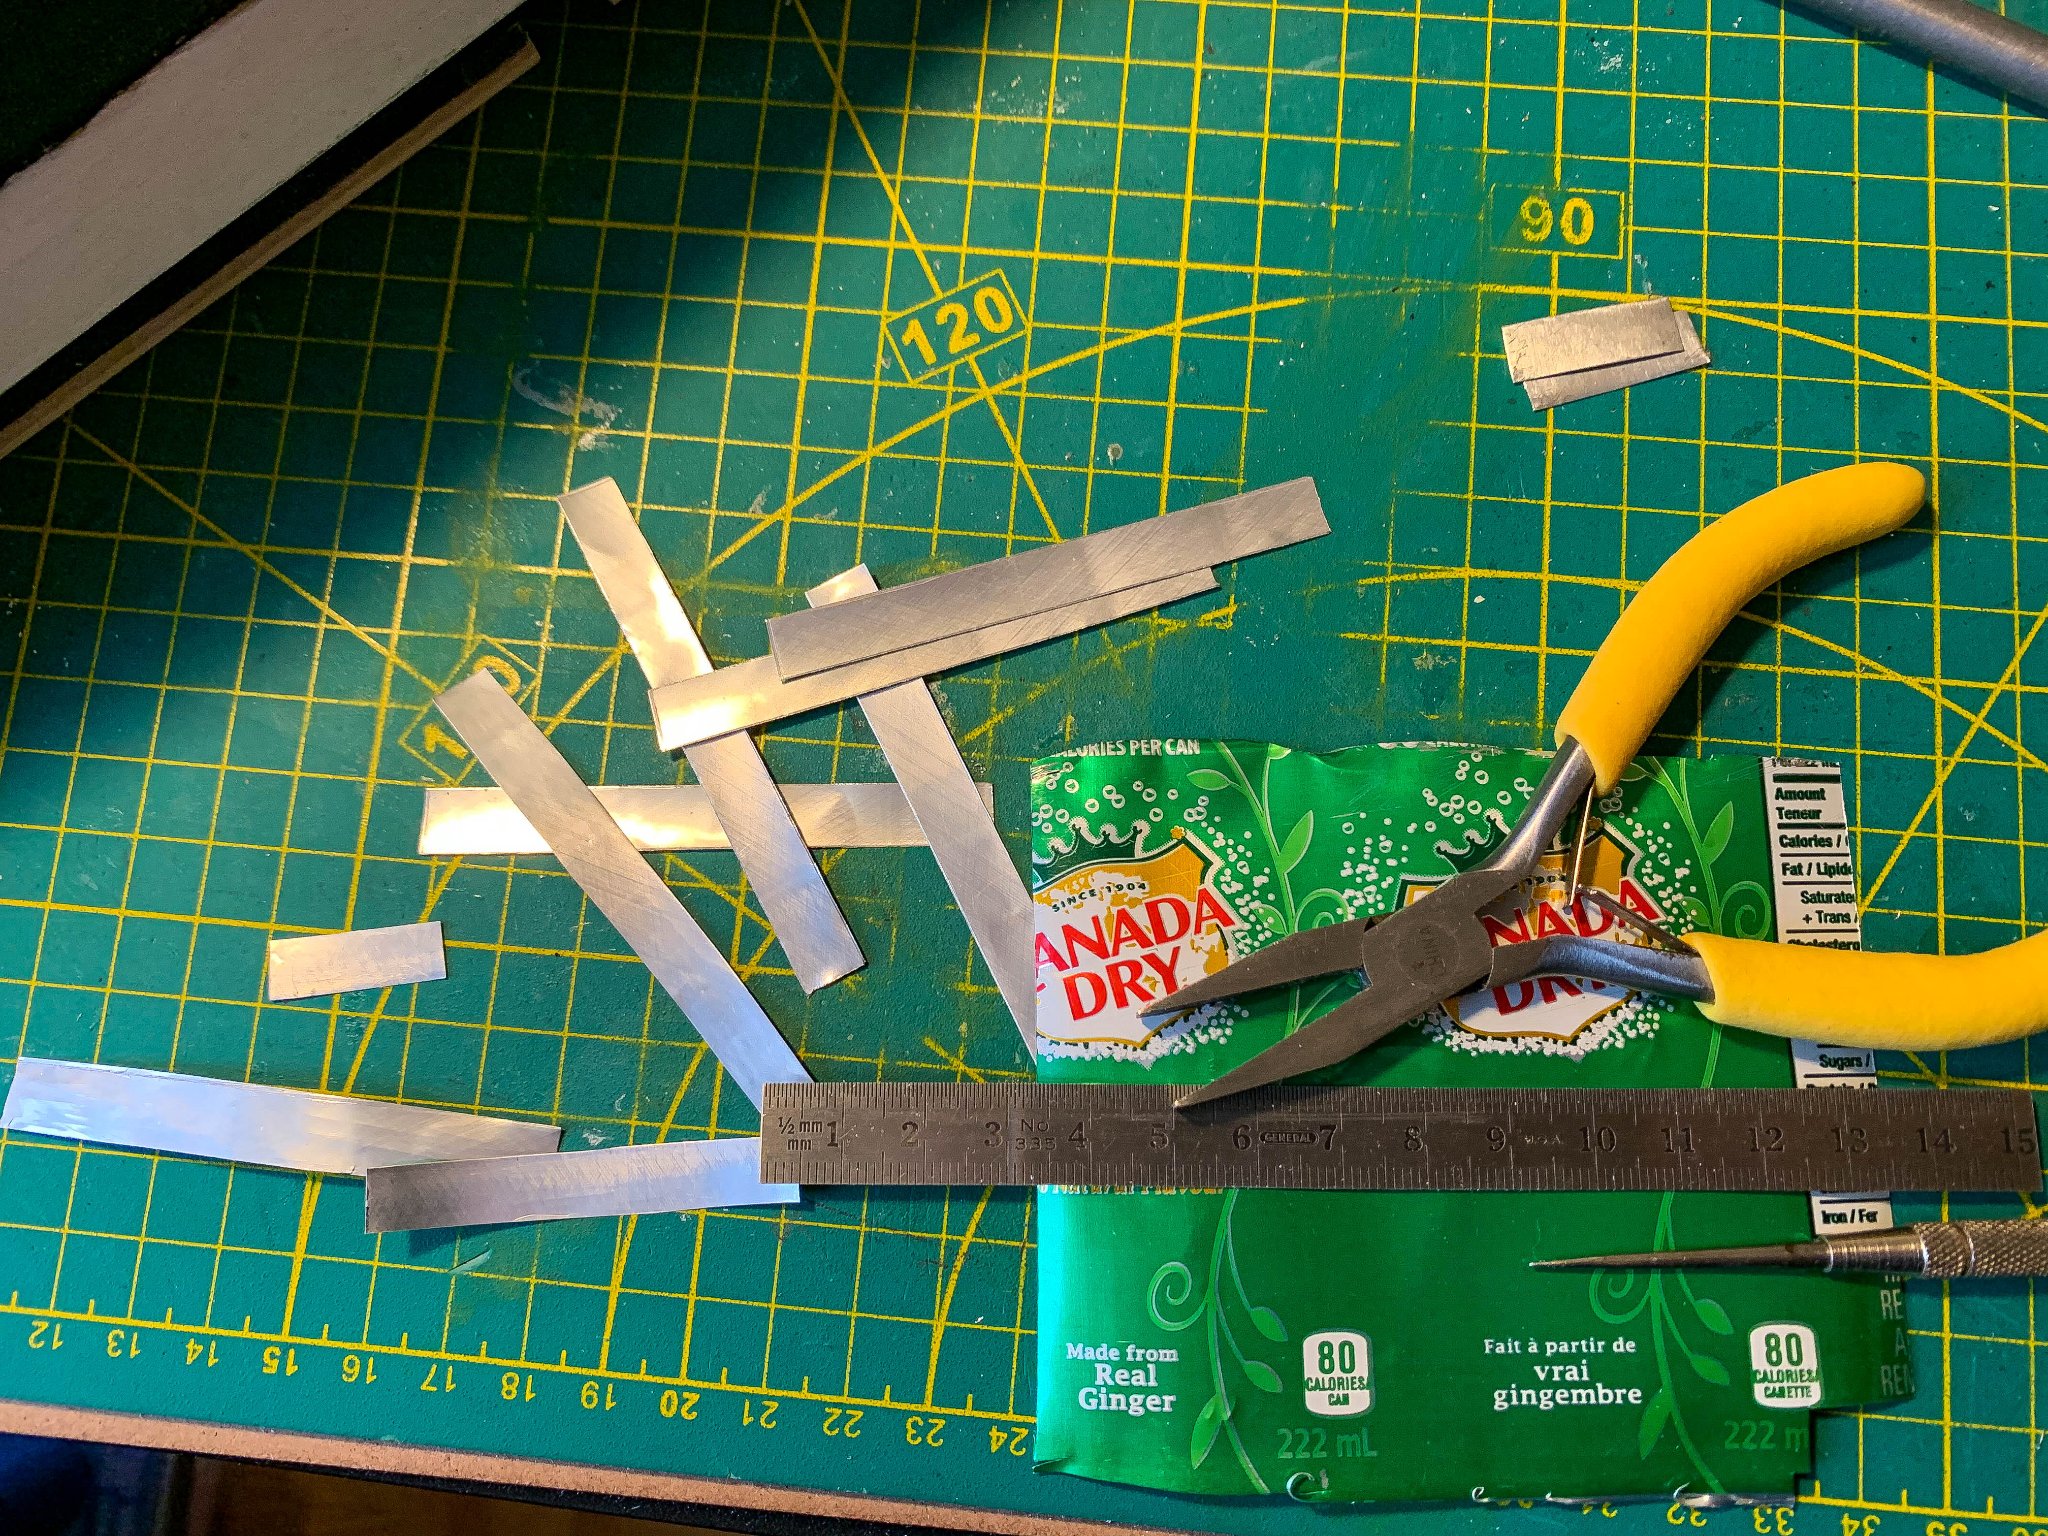
The bow plating is finally all in place. I tried 3 types of glue. White PVA, contact cement and CA (instant glue). The most difficult to use was the contact glue. You get one shot at placing the part, but it sticks well. By the way the local product is by Lepage and is a low odour contact cement. I used CA for the very narrow bits and for any corners that decided to stick up. I am a bit concerned that the PVA that I used in a few places may not last, but we will see. I used my own aluminum cut from soda cans it was easy to shape and bend. Below are pics of the bow painted and before paint. " A little paste and paint a model builder makes" I am very glad to finish that bit of the build. Now on to the deck furniture.

-
HMS Terror by Broden - OcCre - 1:75
broden replied to broden's topic in - Kit build logs for subjects built from 1801 - 1850
I could not figure out how to add more text to the post above, so I'm adding in a second post. The supplied material for the plating seems a bit thick and stiff, but the suggested contact cement method might work if done plate by plate. I decided to try a thinner aluminum, so I am cutting up a soda can. It is thinner, but still some what stiff, but bends much more easily. Picture below and comments welcomed. Happy Holidays and stay safe. Dennis
-
HMS Terror by Broden - OcCre - 1:75
broden replied to broden's topic in - Kit build logs for subjects built from 1801 - 1850
Merry Christmas All. We in Quebec, Canada are starting our second lock down today. It is supposed to 18 days, but I think it will go much longer. What a mess. Back to the isolated world of building HMS Terror. I have questions, lots of questions. First are these images in the instructions suggesting two possible layouts of the sheathing for the bow or is one just wrong?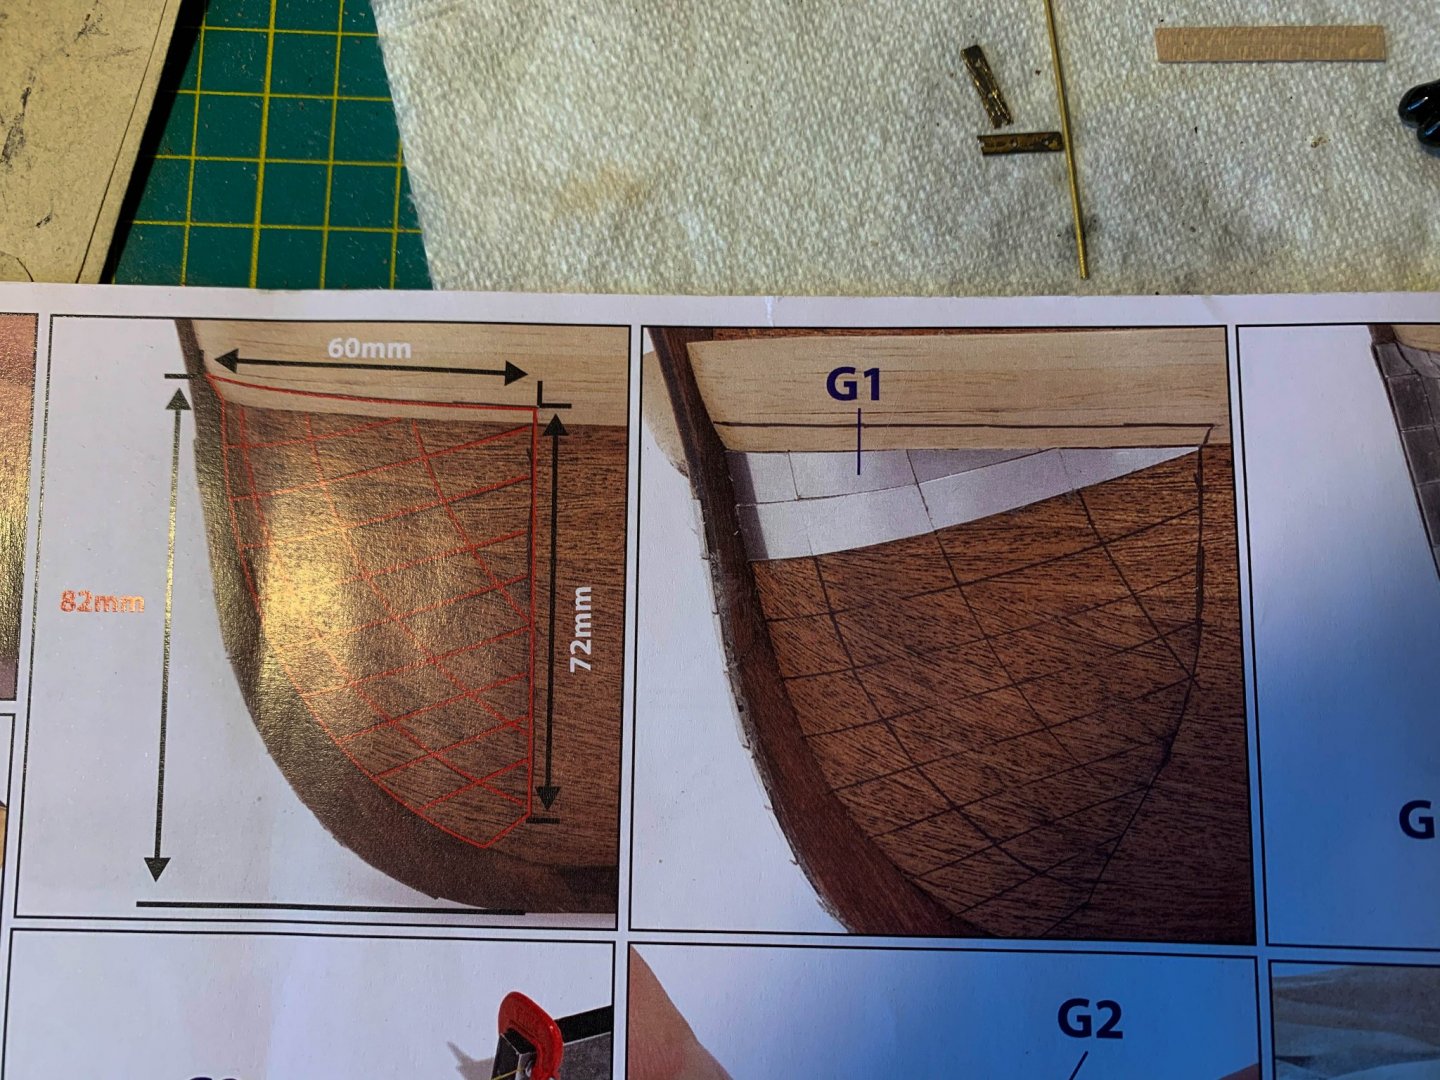
-
HMS Terror by Broden - OcCre - 1:75
broden replied to broden's topic in - Kit build logs for subjects built from 1801 - 1850
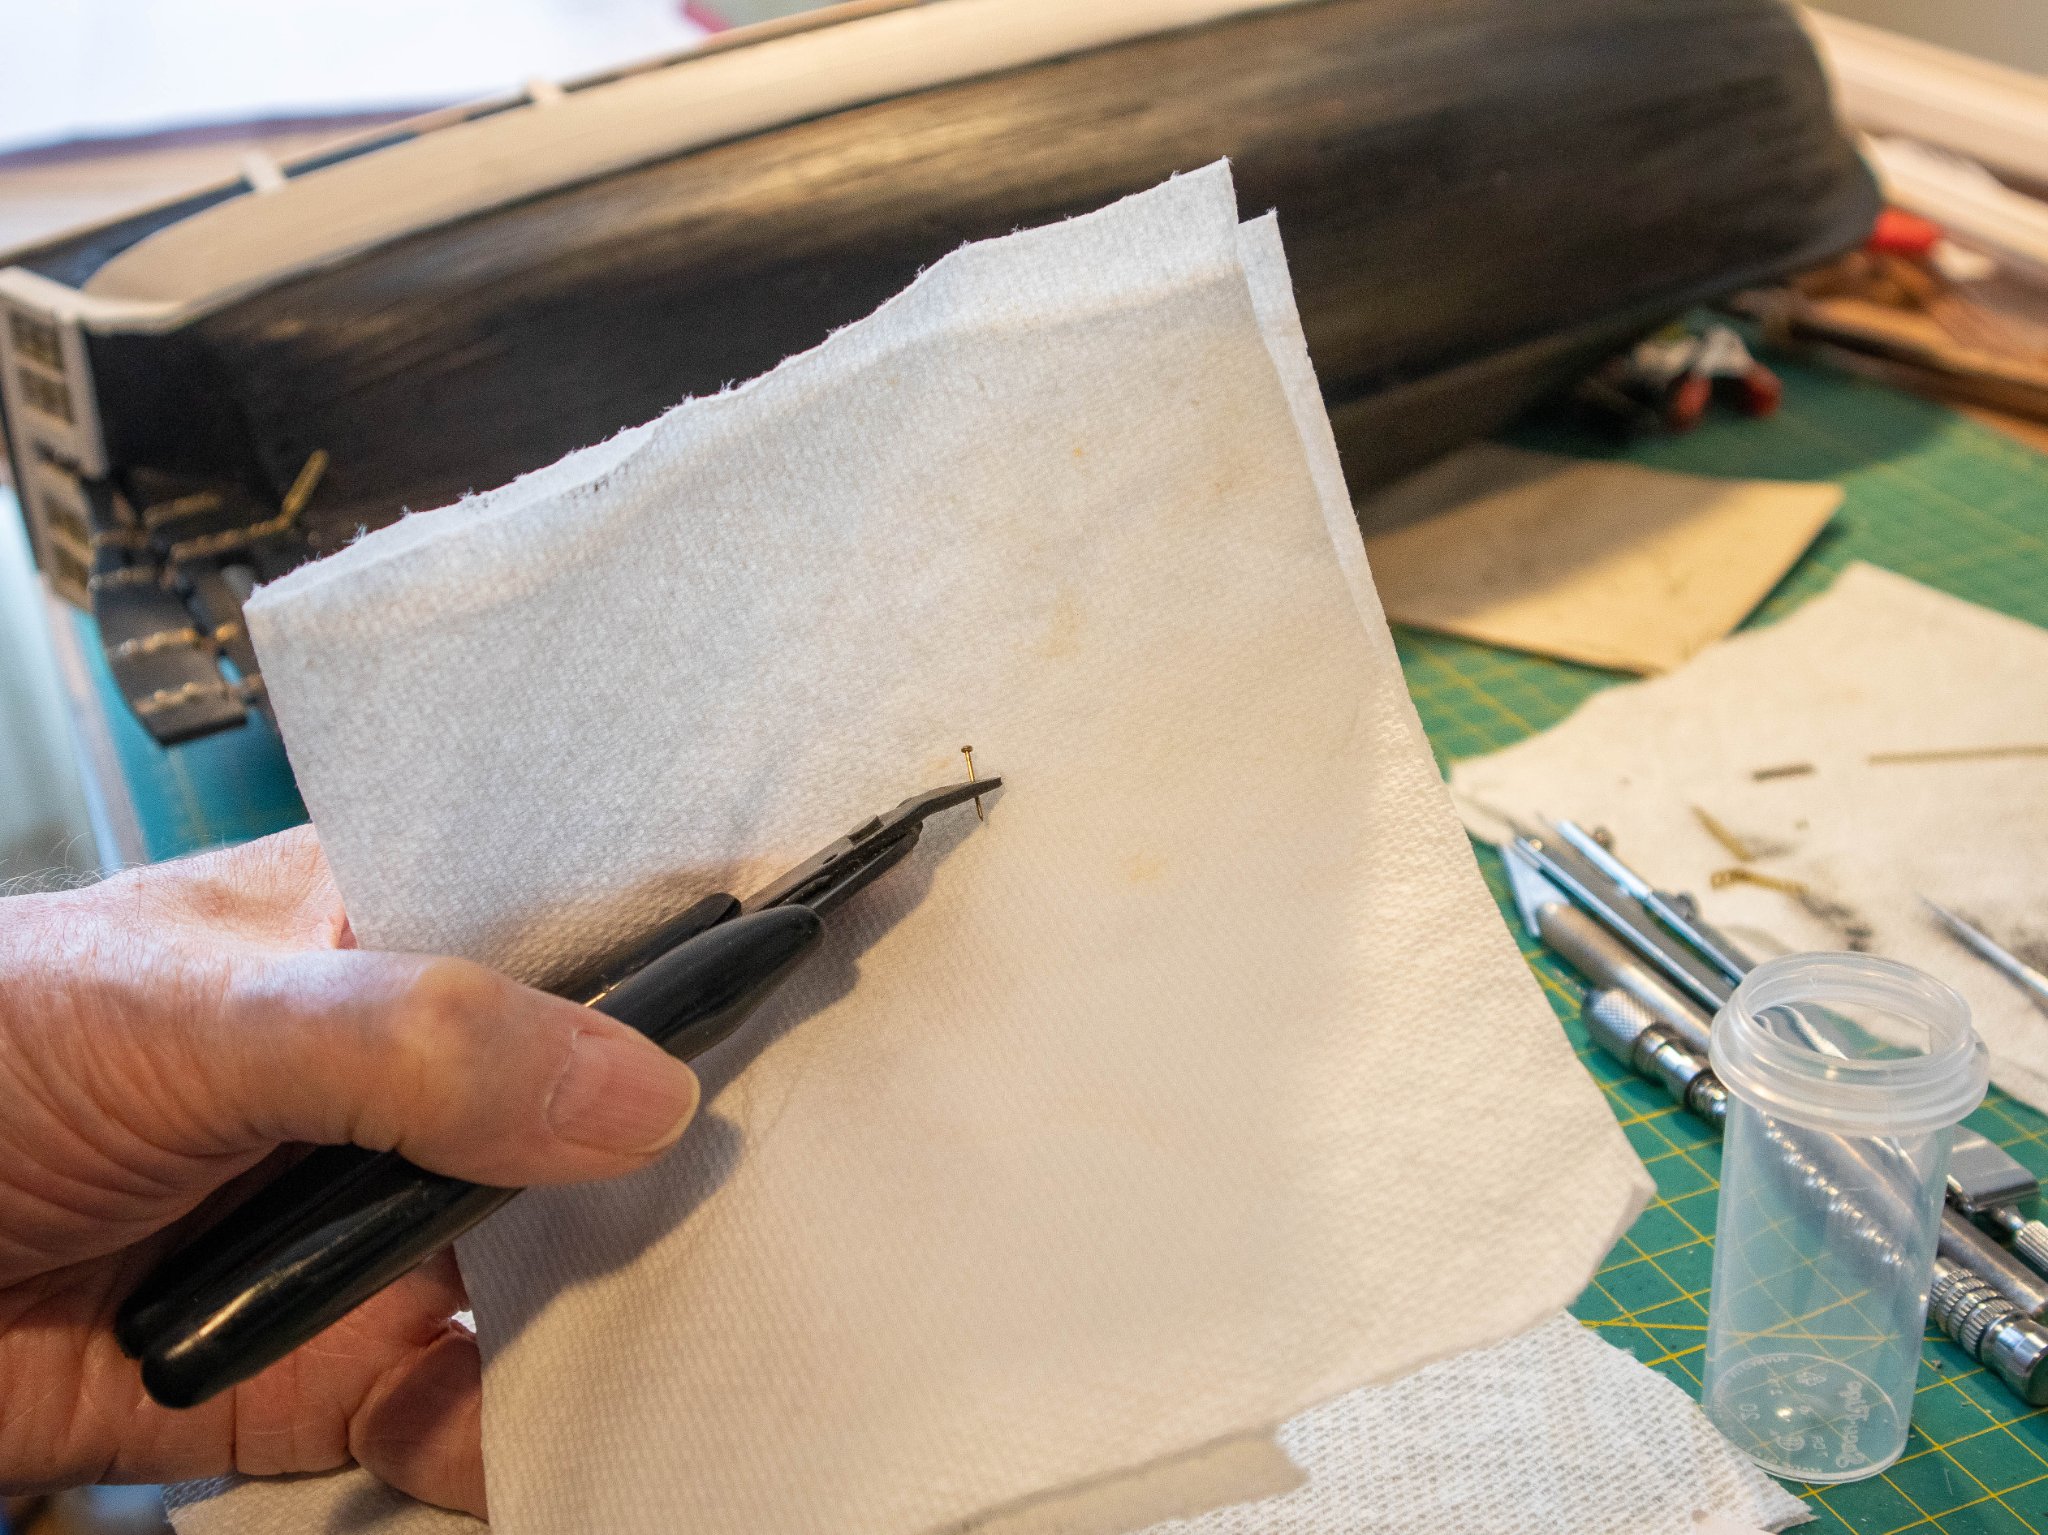
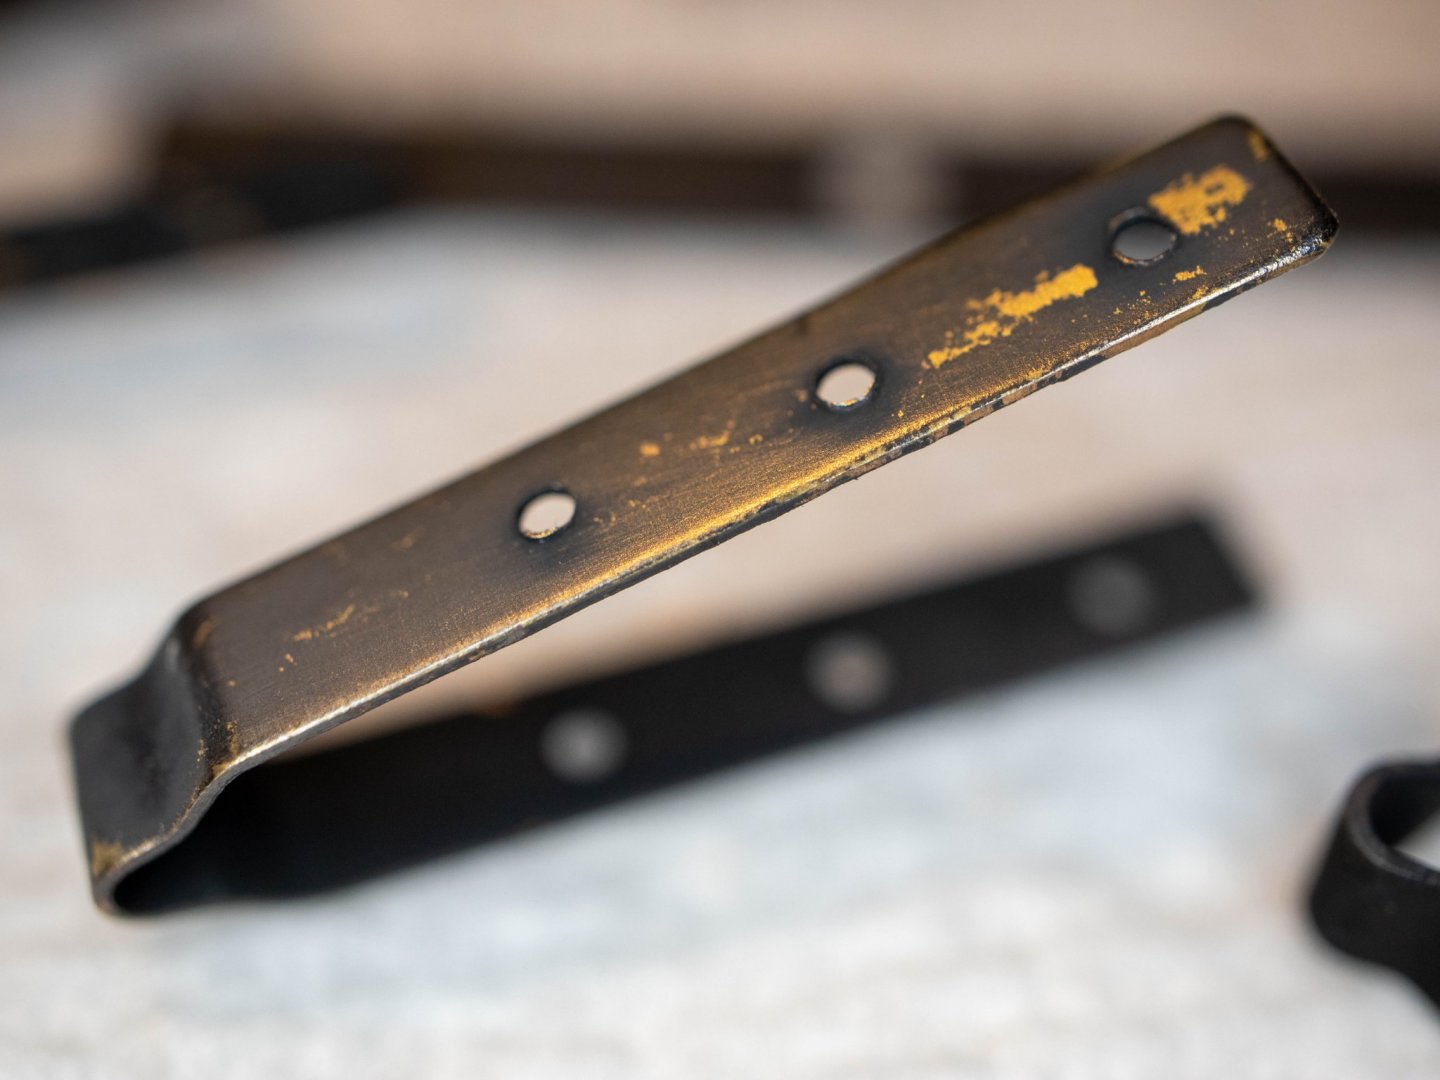
Thanks for the views and comments. One thing that gave a lot of trouble while working on the stern and rudder was the rivet heads. Being a first time builder cutting the pins supplied by Occre led to many bits of pin launched into space by the cutting pliers, too short to hold and fit into the holes in the brass pinions. So i worked out a couple of processes that may help the next newbie. First bend and fit the brass bits to the rudder and hull. Glue them in place, not an easy task for me. Then drill the holes. I used an awl first then a drill bit in a pin vice. You do not need to drill too deep just enough to get the pin head in place. Cut the pins while wrapping the pliers in a bit of paper towel. Wrapping your bare hand around the cutting process is much less effective and I had a couple of pins stuck in my palm. The paper towel really helps. I used curved forceps to handle the pin heads after cutting. I dipped each pin head in a drop of CA glue then placed it in the hole drilled in the brass straps and pushed it home. Hopefully to stay put until dry. That is the method I am using. I do not know if it is the best, but it is working for me. Dennis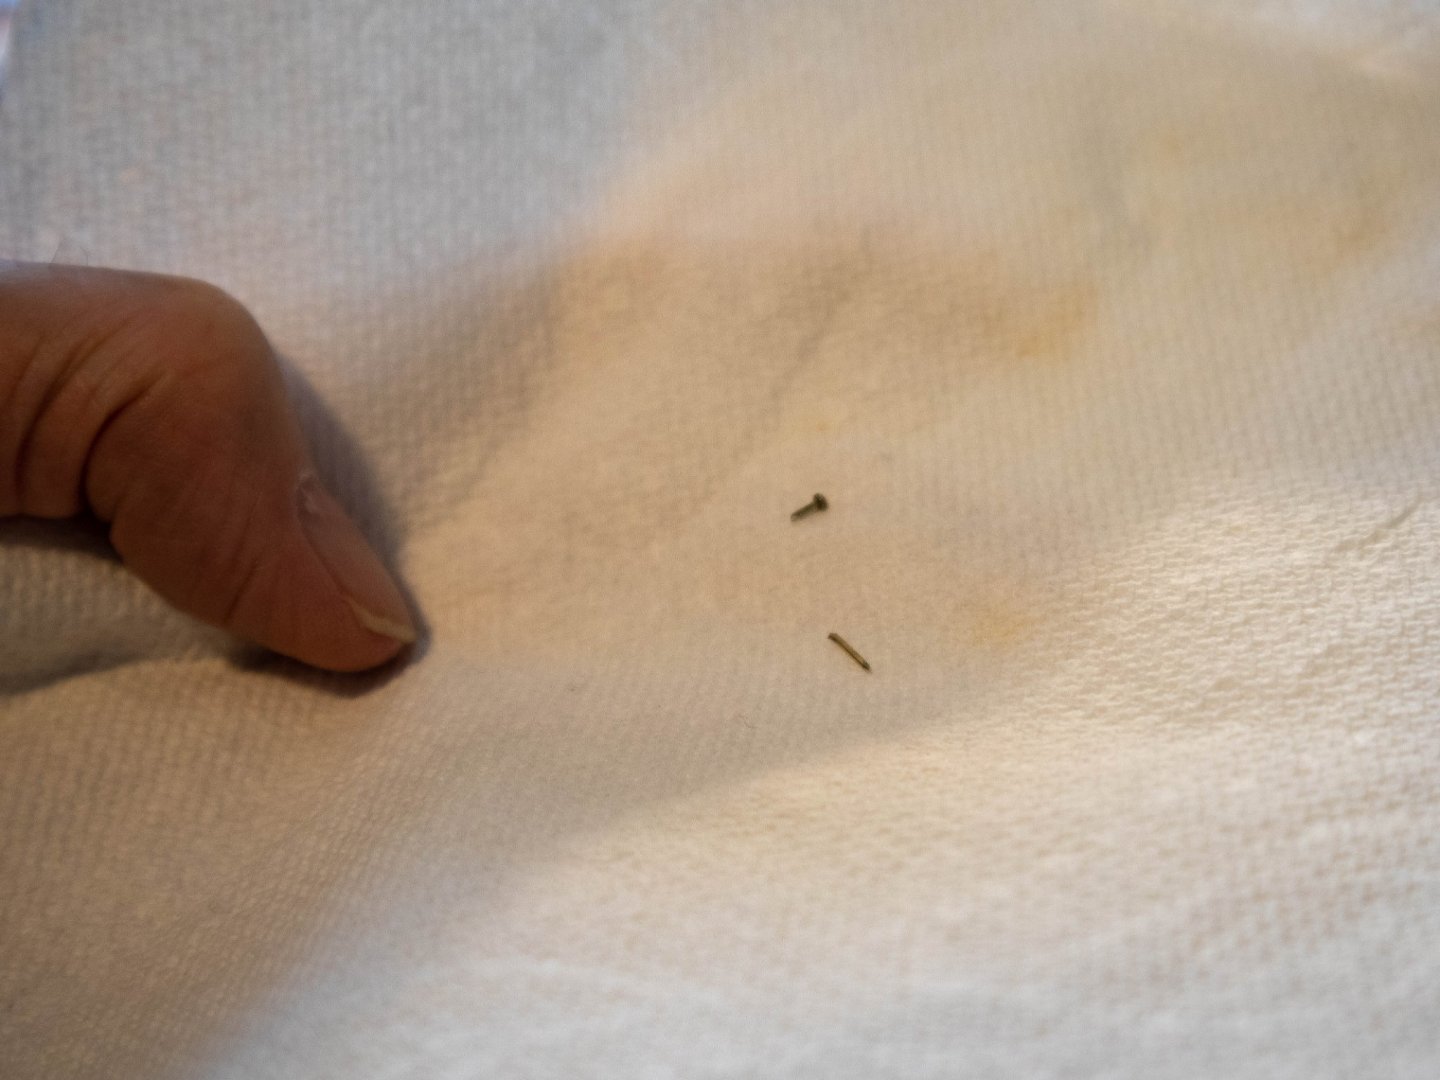

-
Hi, Daniel, Michael Palin's book "Erebus" gives a pretty good history of the journeys of both of Franklin's ships. It might give you some of the detail you need. Great work on the stern. Looks very fine. Dennis
-
HMS Terror by Broden - OcCre - 1:75
broden replied to broden's topic in - Kit build logs for subjects built from 1801 - 1850
Evening All, Thank you for the comments on blackening brass. I tried a couple of approaches to do the job with limited success. I soaked the parts in acetone to get off any lacquer of grease washed them, then put the parts in "Birchwood Casey Brass Black" they immediately turned black. After about 10 minutes I put them on paper towels to dry. Well the black comes off easily, but leaves the brass a gunmetal blue. Pictures below. The plan is to still blacken the iron under the water line and leave the deck brass in it's original colour, with the exception of the anchor chain. So the black flat paint will have to do. I did read the articles on blackening, the effort needed does not seem worth it to me. The shipyard has acquired a dremel drill press accessory, which might help me drill a vertical hole as long as I get the part horizontal in the vice. The leaning curve is still on the up hill side!

-
HMS Terror by Broden - OcCre - 1:75
broden replied to broden's topic in - Kit build logs for subjects built from 1801 - 1850
Progress has been slow, and will probably continue that way. I have started on the deck furniture. I am having issues with being accurate as I cut stock for the frames for the pin rails. The miter box I have is plastic and the razor saw gets hung up often, but I am learning to be much more gentle with my cutting and it seems to be getting better. I am fortunate to have a friend who is a luthier and gave me some 4 x 4 mm and 2 x 4 mm walnut to help with my wastage. The other builds on this site are very helpful and I am getting lots of help from the posted pictures. I am now considering whether to blacken some of the brass or not. The rudder strapping and anchor chains seem to be out of place on a painted hull if they are brass. Most of the deck fitting are fine as brass. Any opinions?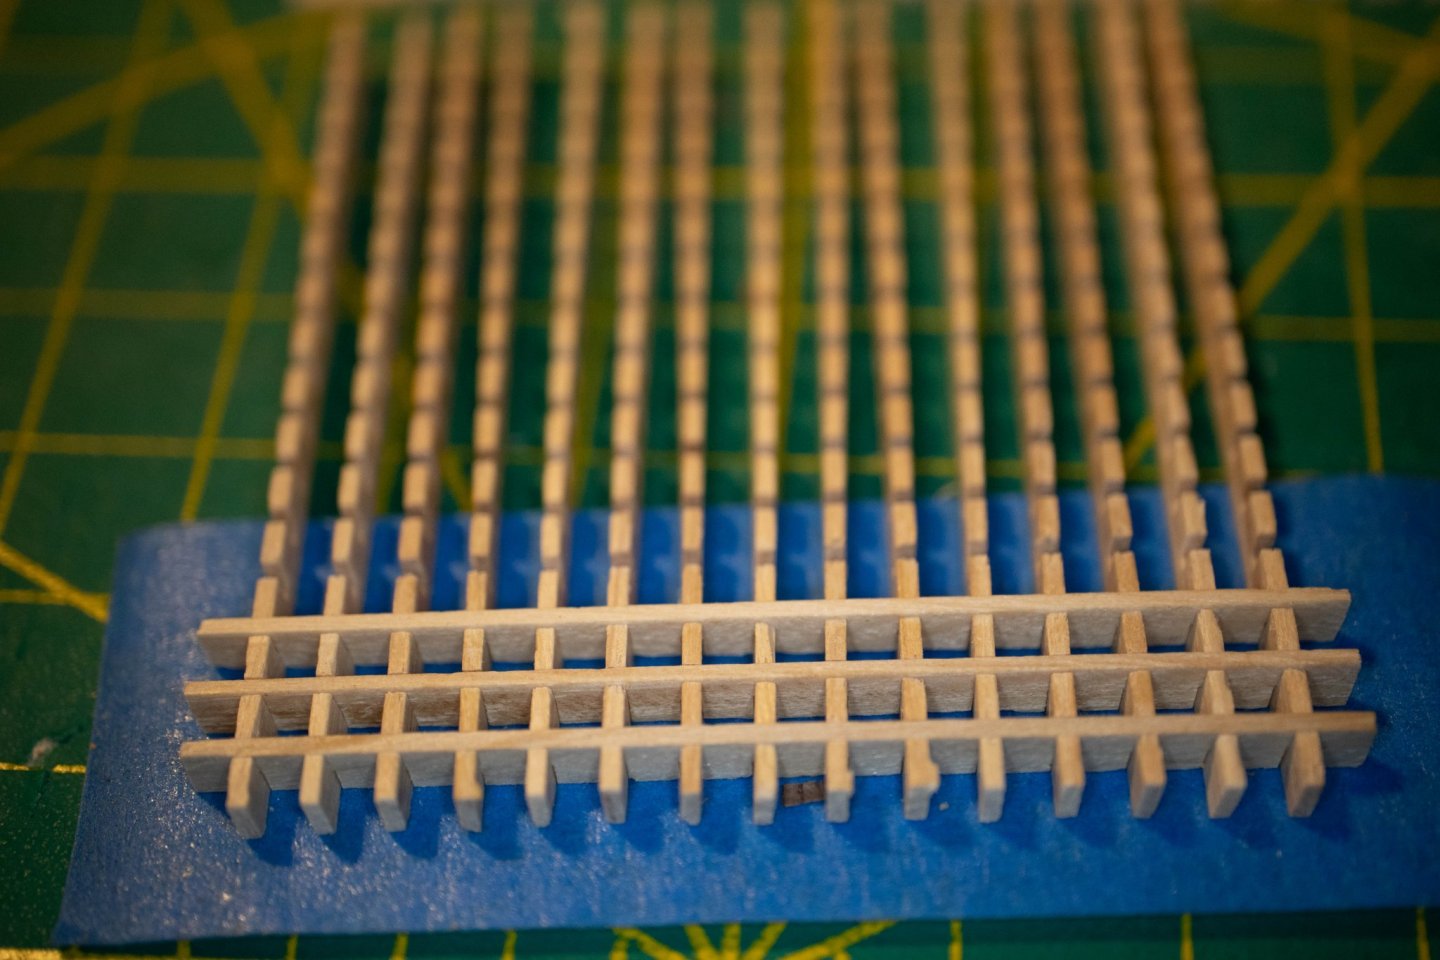

-
HMS Terror by Broden - OcCre - 1:75
broden replied to broden's topic in - Kit build logs for subjects built from 1801 - 1850
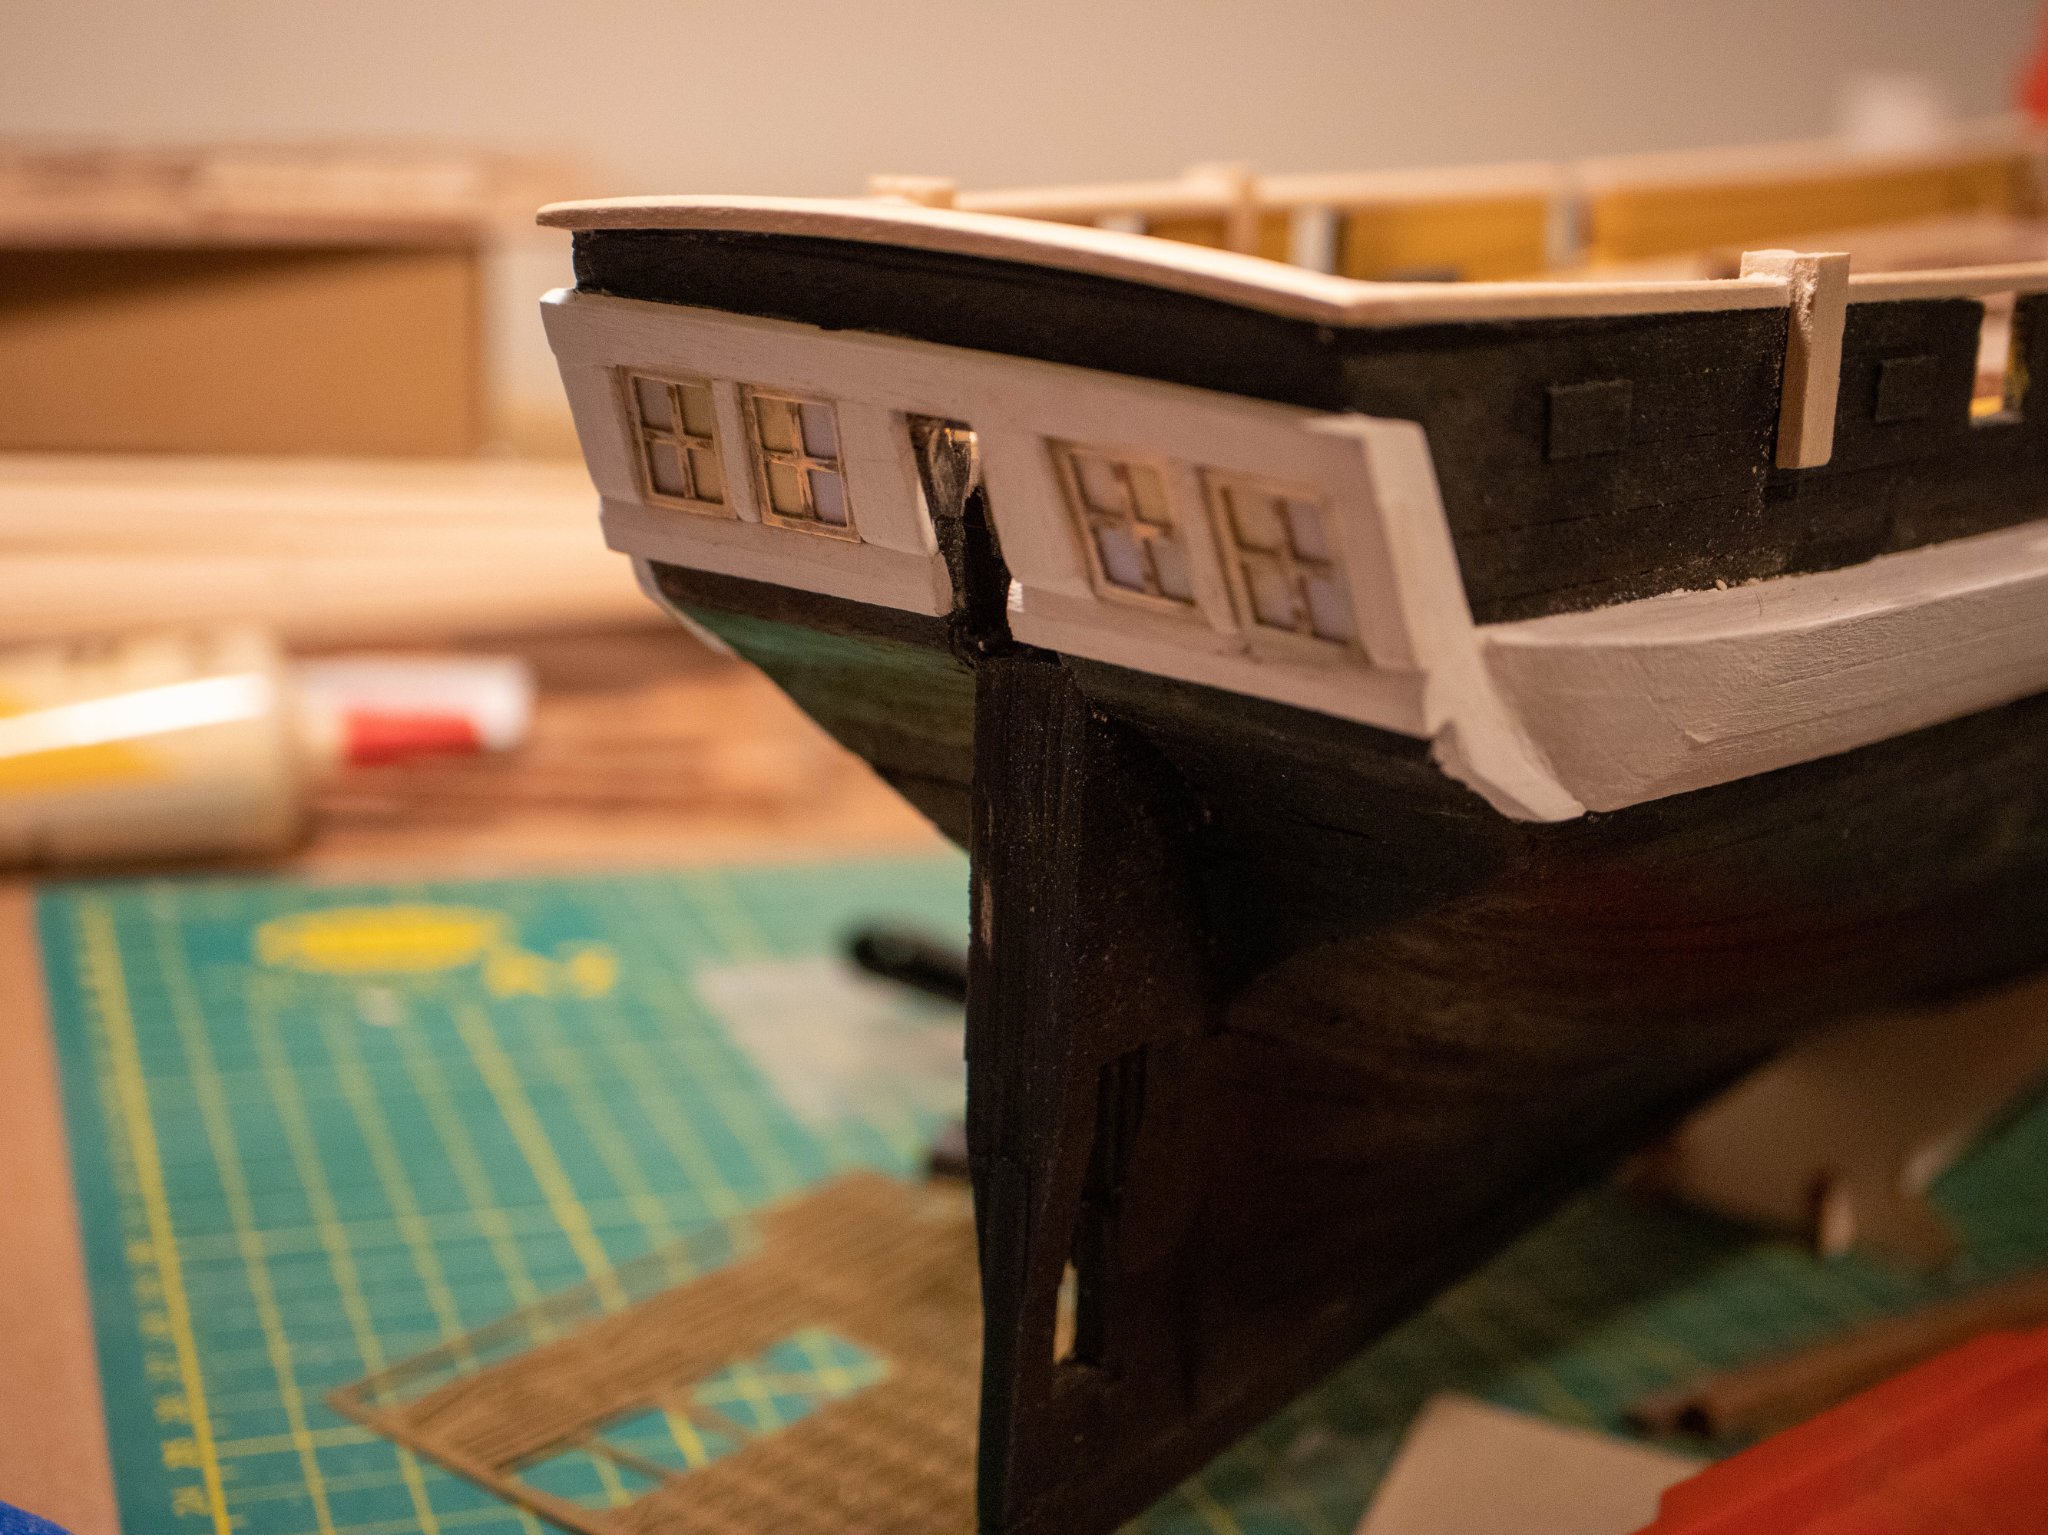
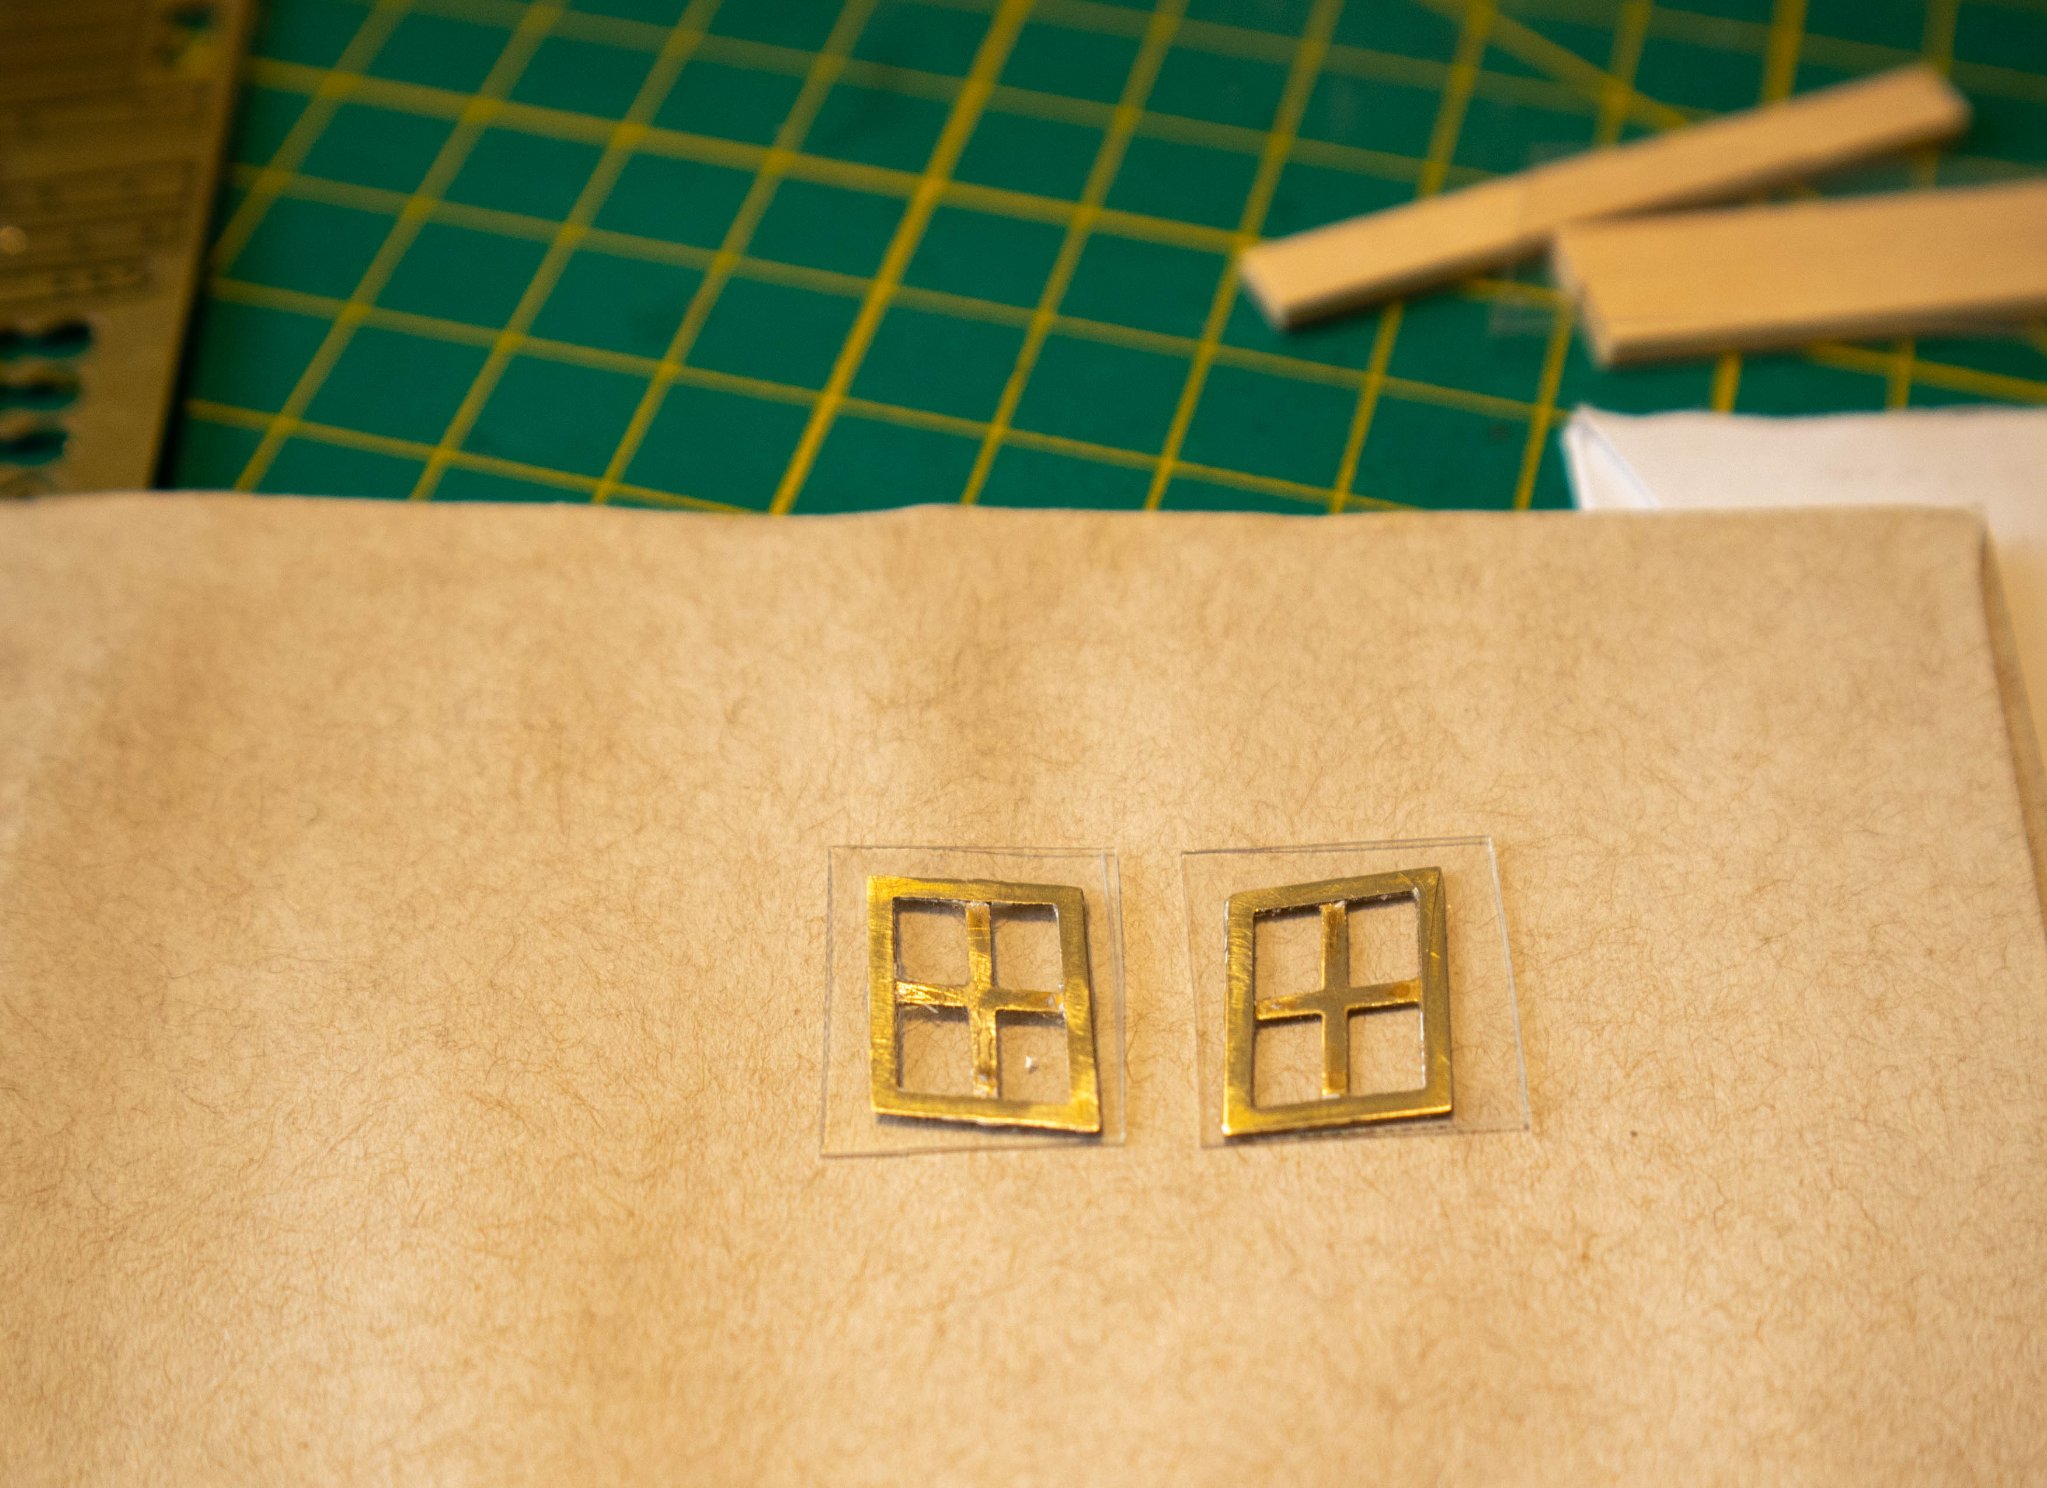
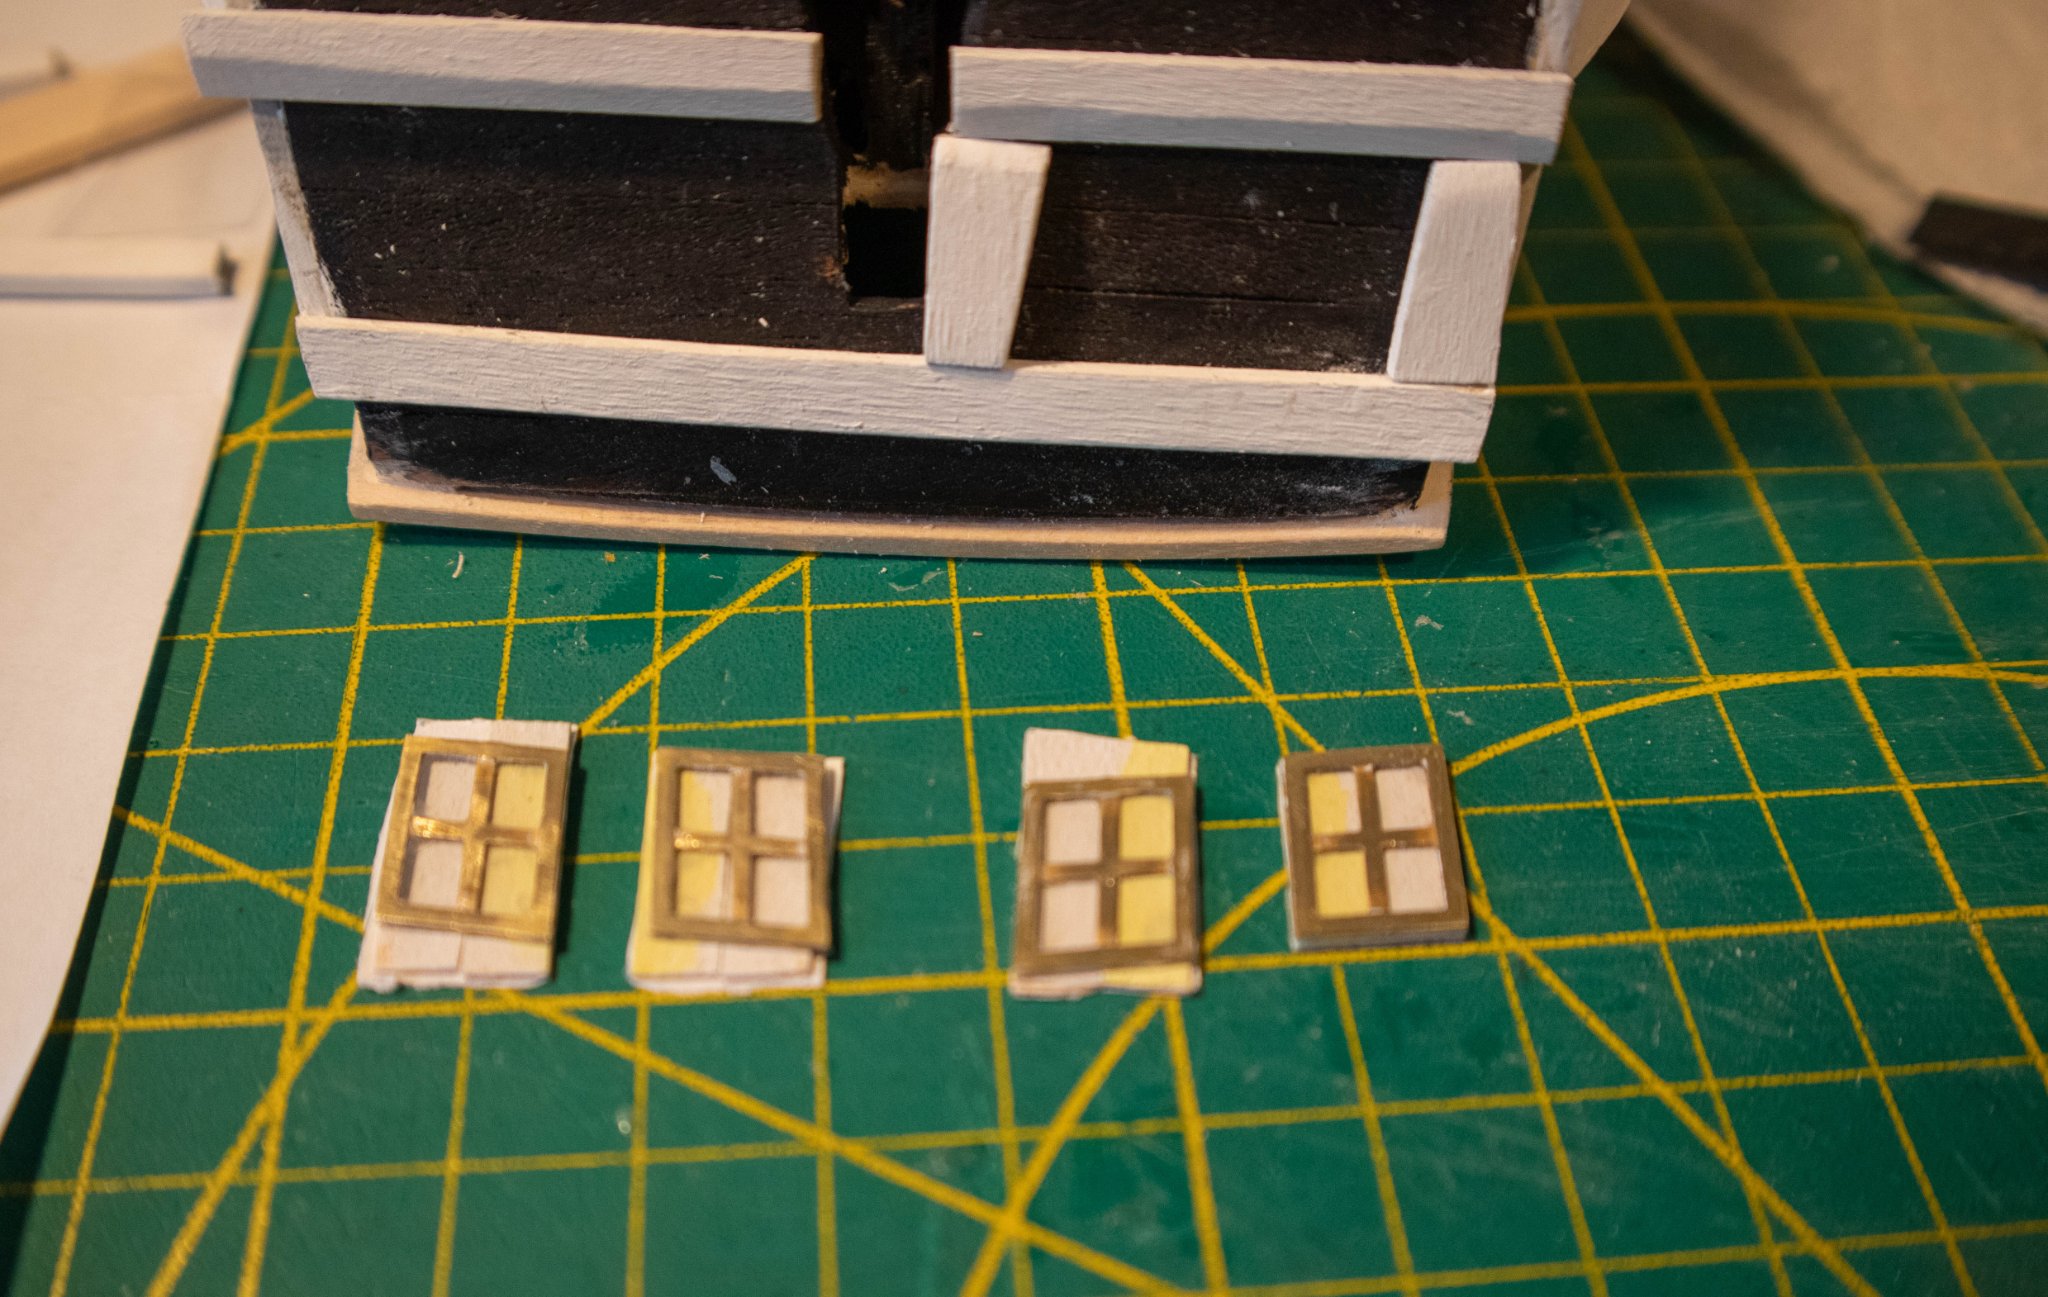
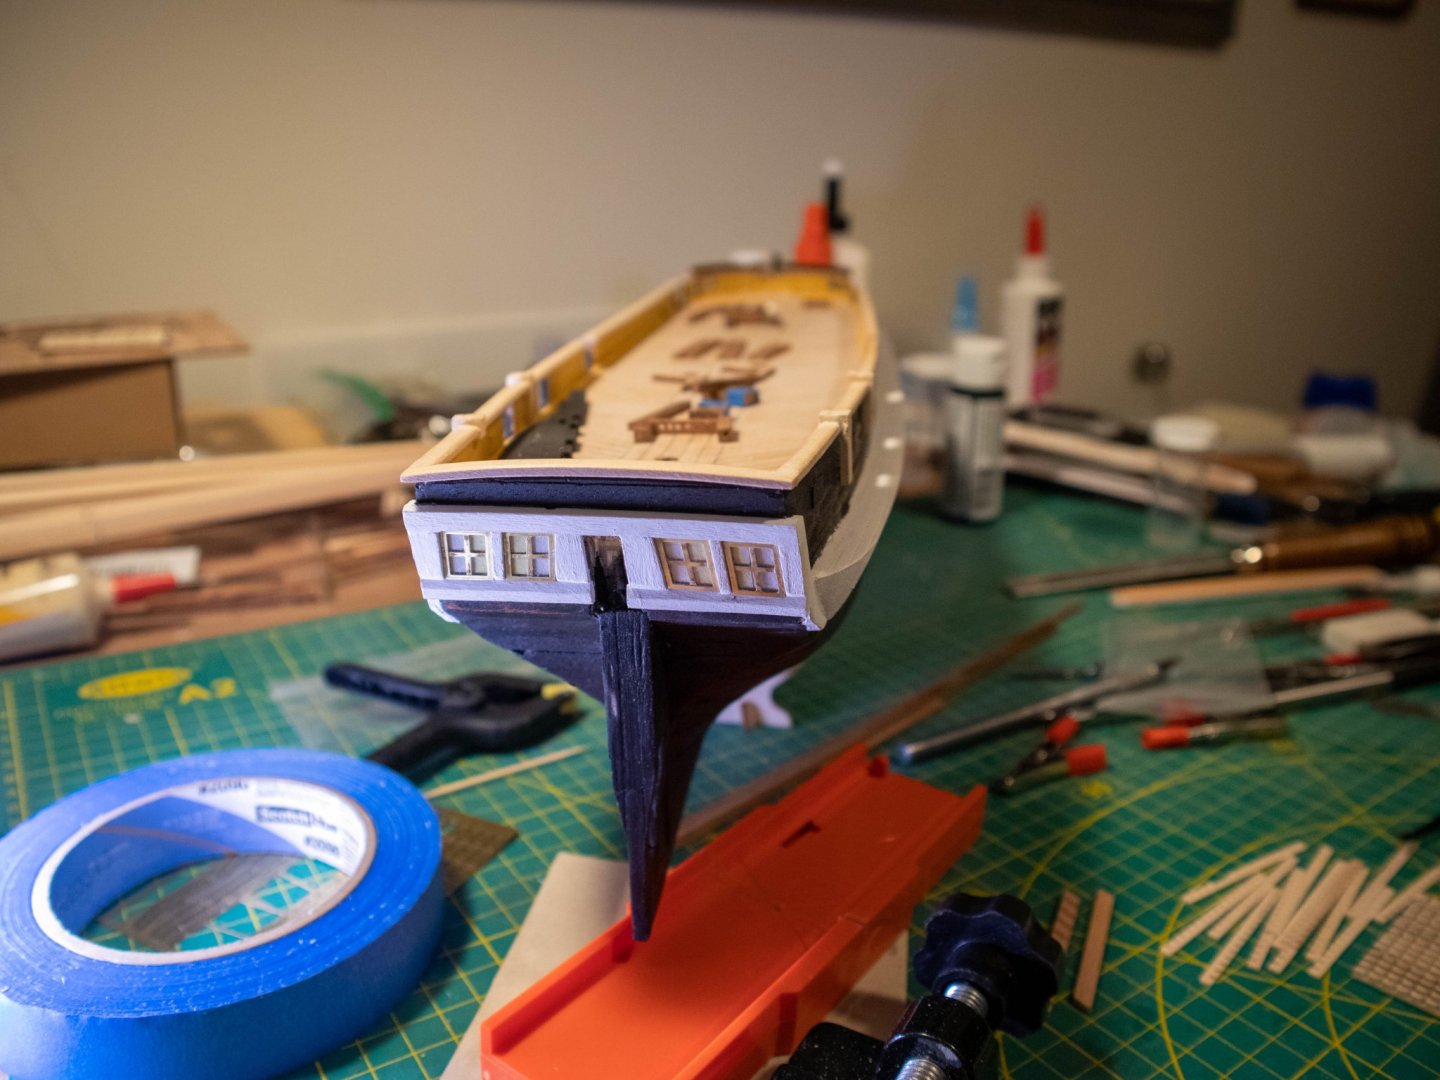
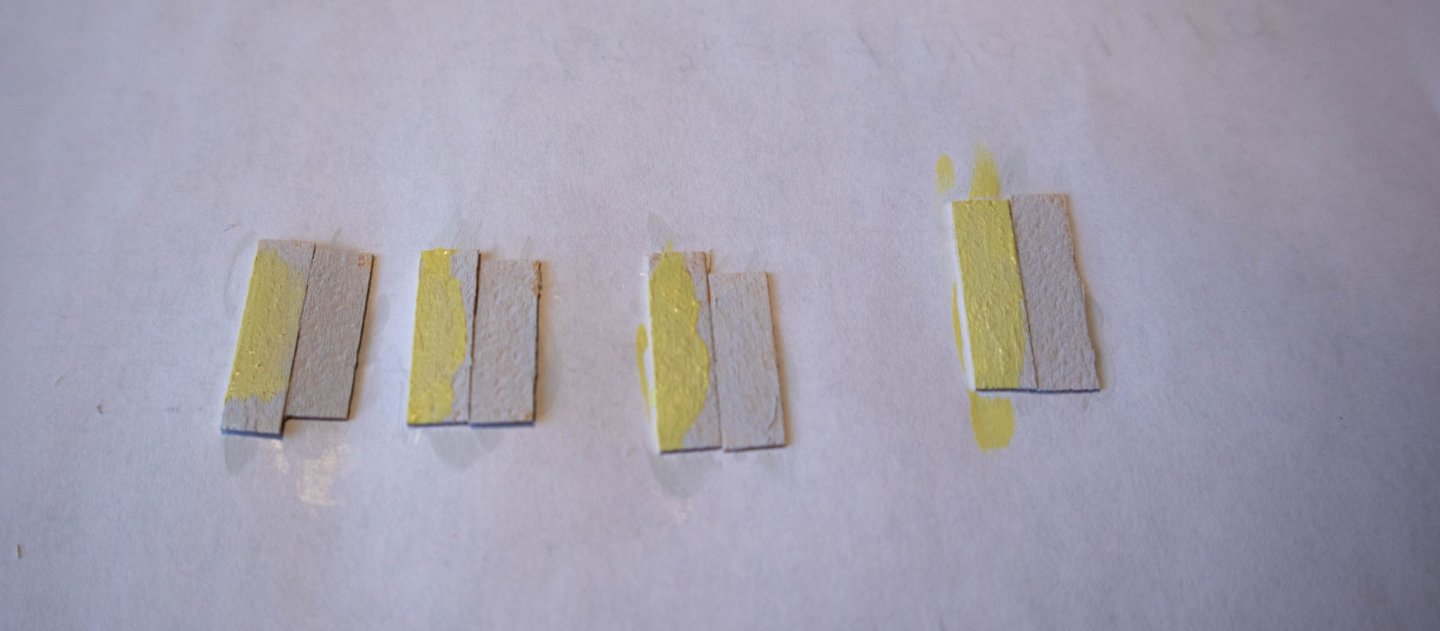
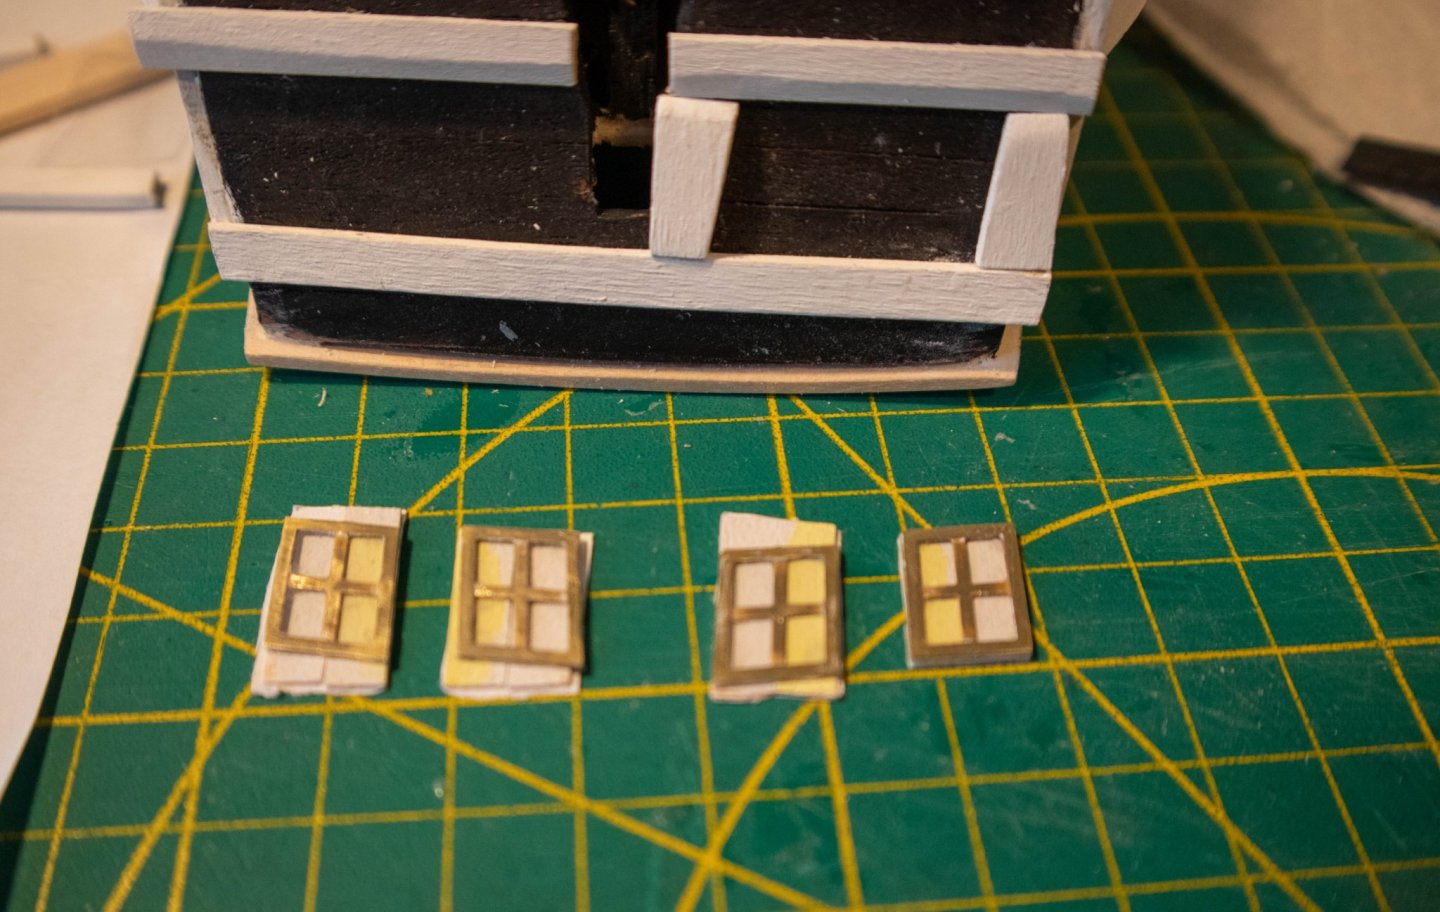
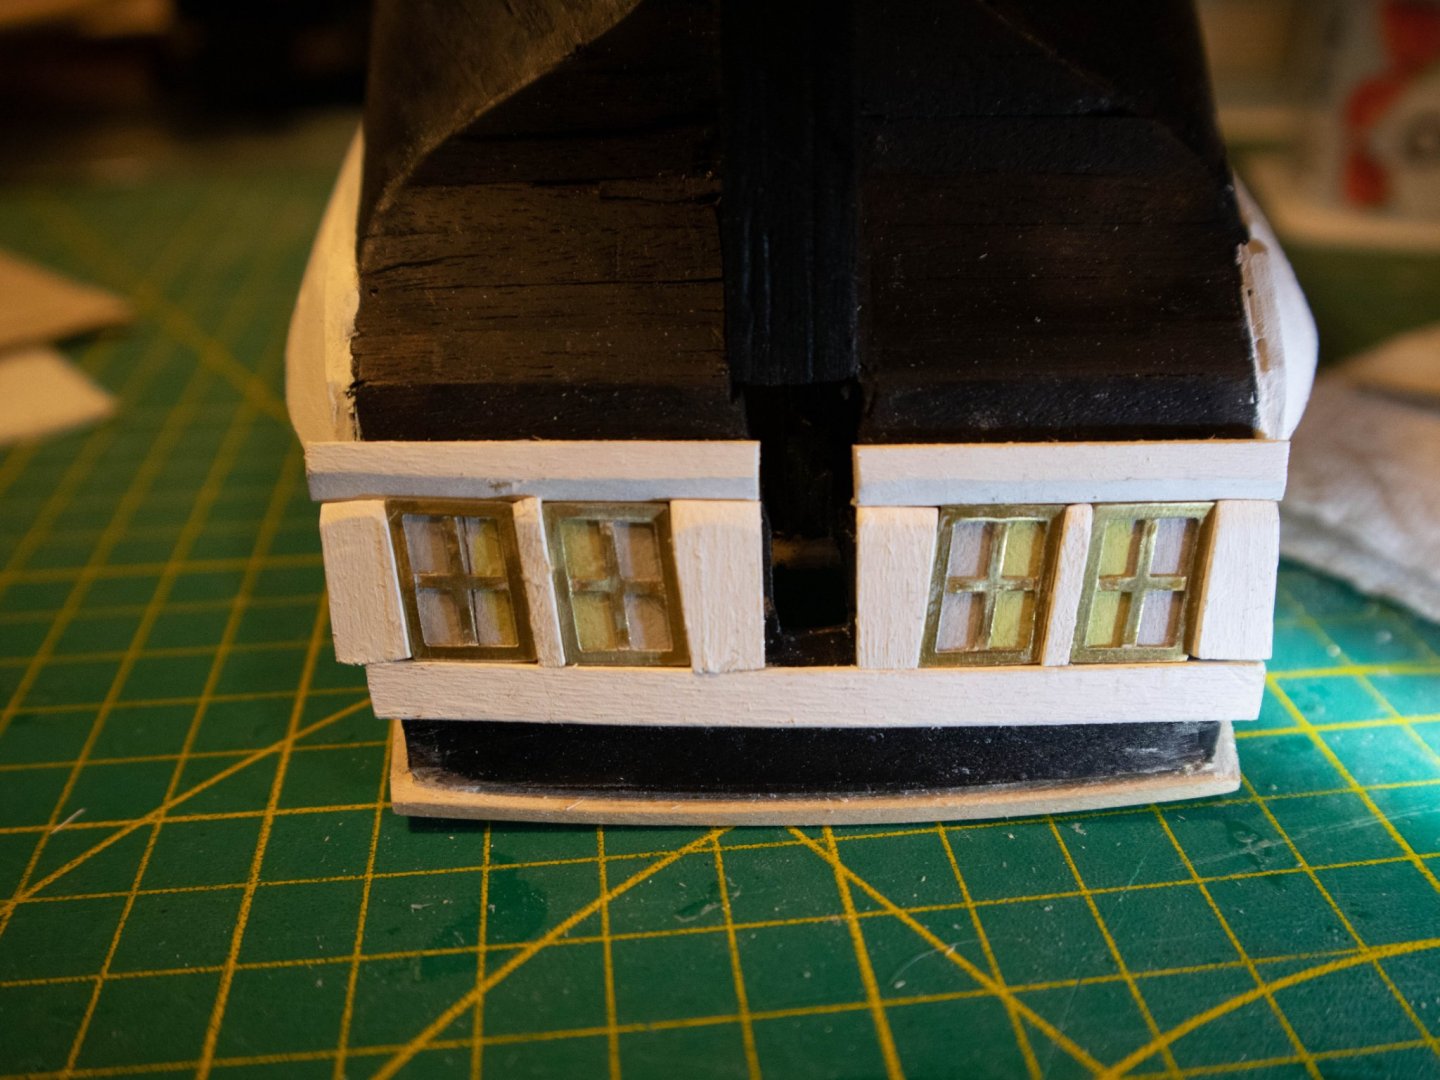
I have spent a lot of time looking at the OcCre plans and images as well as several builds in this forum of the Gallery windows their framing. I did not like the paint the back boards blue approach or the bulk of the framing. It seemed out of scale as well as the depth of the windows in the framing timbers. I decided to back the brass frames with clear celluloid and then with 1 mm stock which I painted light grey with a shade of pale yellow it give the impression of candle light. It certainly is not everything I wanted it to be, but I feel it is a little more customized. Here are a few images, note there is trim needed on the ends of the frames, that is for tomorrow. DB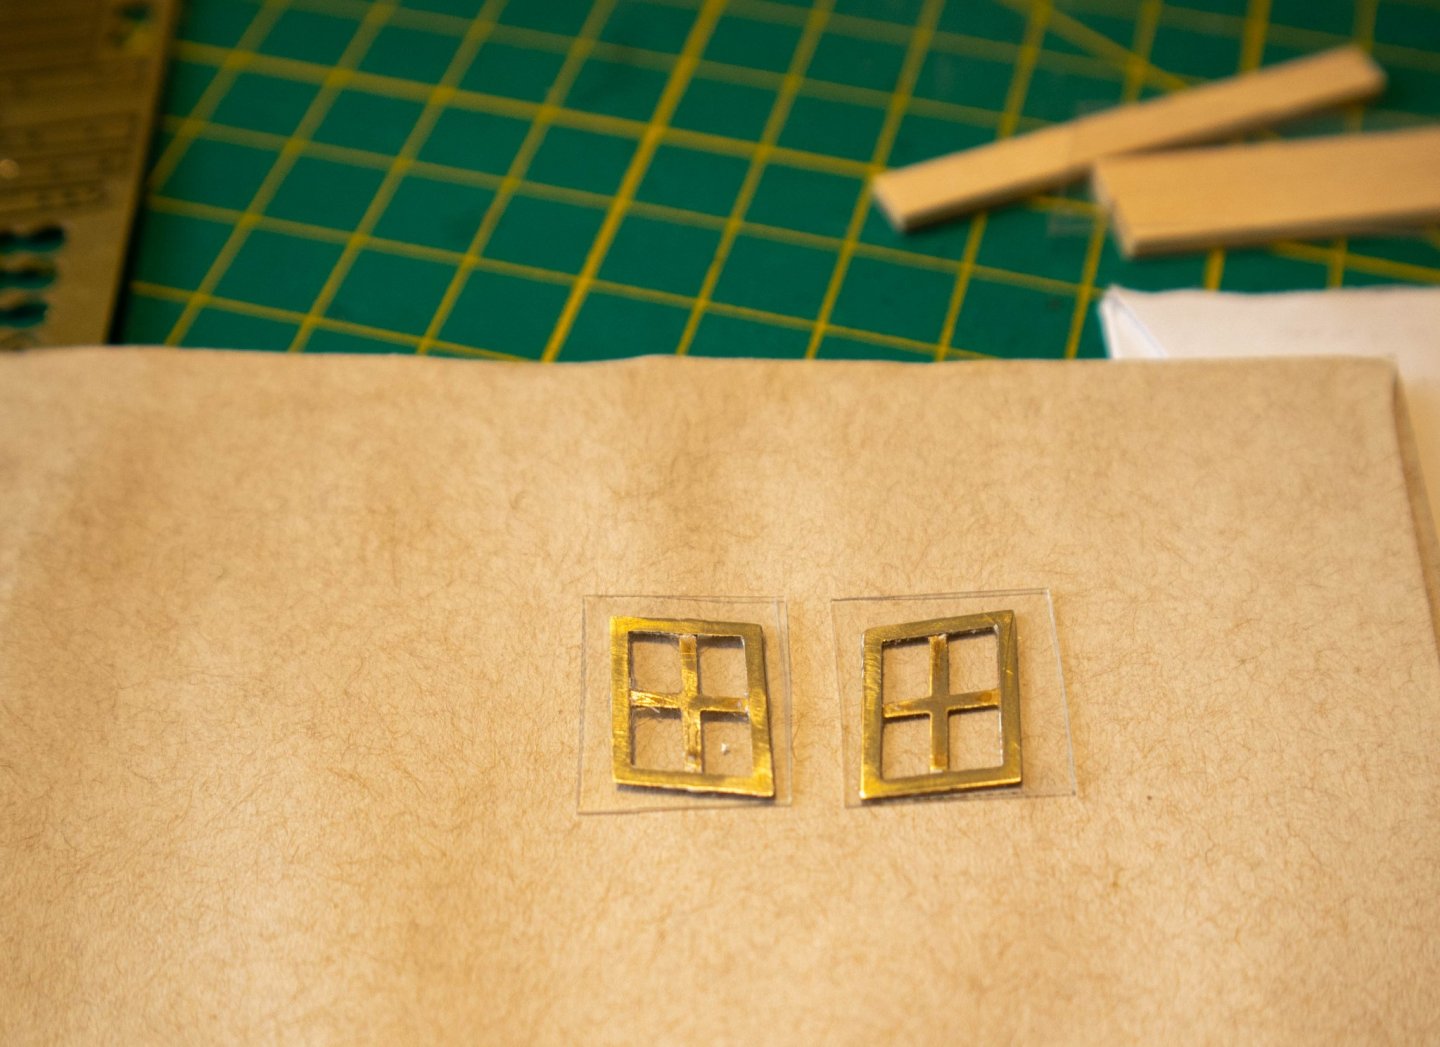
-
HMS Terror by Broden - OcCre - 1:75
broden replied to broden's topic in - Kit build logs for subjects built from 1801 - 1850
Hi clearway, So HMS Terror mast should be fitted with rope bindings as shown in the OcCre plans. As I have said this is my first wood ship model and I am learning and watching what other more experienced modelers are doing. Thanks for the heads up, it is appreciated. DB ps I am still getting "Keith" and "Keith S" mixed up. -
HMS Terror by Broden - OcCre - 1:75
broden replied to broden's topic in - Kit build logs for subjects built from 1801 - 1850
Actually here is a link to the whole manual. https://www.ssgreatbritain.org/brunel-institute/manual-maritime-curatorship DB -
HMS Terror by Broden - OcCre - 1:75
broden replied to broden's topic in - Kit build logs for subjects built from 1801 - 1850
Hey Keith, Just stumbled across a .pdf file related to the SS Great Britian that has a good deal of detail of deck fittings including historical stuff. It might be of some value for your research. Here is a link: https://www.ssgreatbritain.org/sites/default/files/kcfinder/files/C Fittings.pdf DB -
HMS Terror by Broden - OcCre - 1:75
broden replied to broden's topic in - Kit build logs for subjects built from 1801 - 1850
Progress continues. I had a lot of trouble fitting the stern post, not too certain why, but it is attached and lined up properly. The black stain has been applied and I am beginning to add the deck rails. Of course in the mean time I built a new desktop computer which took a fair amount of time. Next steps, finish installing the deck rails, paint the ice bumper ( I'm sure there is a better term for that), Start on the deck furniture and source 8mm and 7mm dowels for the main and fore masts. I read comments here, I think from "clearwater" that the kit masts were not the correct size and the the masts were strapped with iron bands not rope. Is there any data on the position and size of those type of mast reinforcement? Any info will be greatly appreciated. Thanks DB
-
HMS Terror by Broden - OcCre - 1:75
broden replied to broden's topic in - Kit build logs for subjects built from 1801 - 1850
The process continues. I have added the strakes (ice bumpers) to the hull. A lot of sanding. Fortunately we had a spell of good weather and was able to use my dremel outside. I hope that next week I can do the same for the prop enclosure. I painted the inside of the bulwarks Admiralty yellow as suggested one of the build logs. Certainly better than the blood red used on ships of war. My friend who is a mechanical engineer is eager to find out how they attached the propeller and how it was removed and reinstalled at sea. He has been unable to find any details yet on the mechanisms used. The little ships boats are a serious challenge. The parts a tiny and fragile. The instructions and build method are probably unique, but the whole build is fun if your eyesight is good, you have fine tweezers and your hands do not shake too much. DB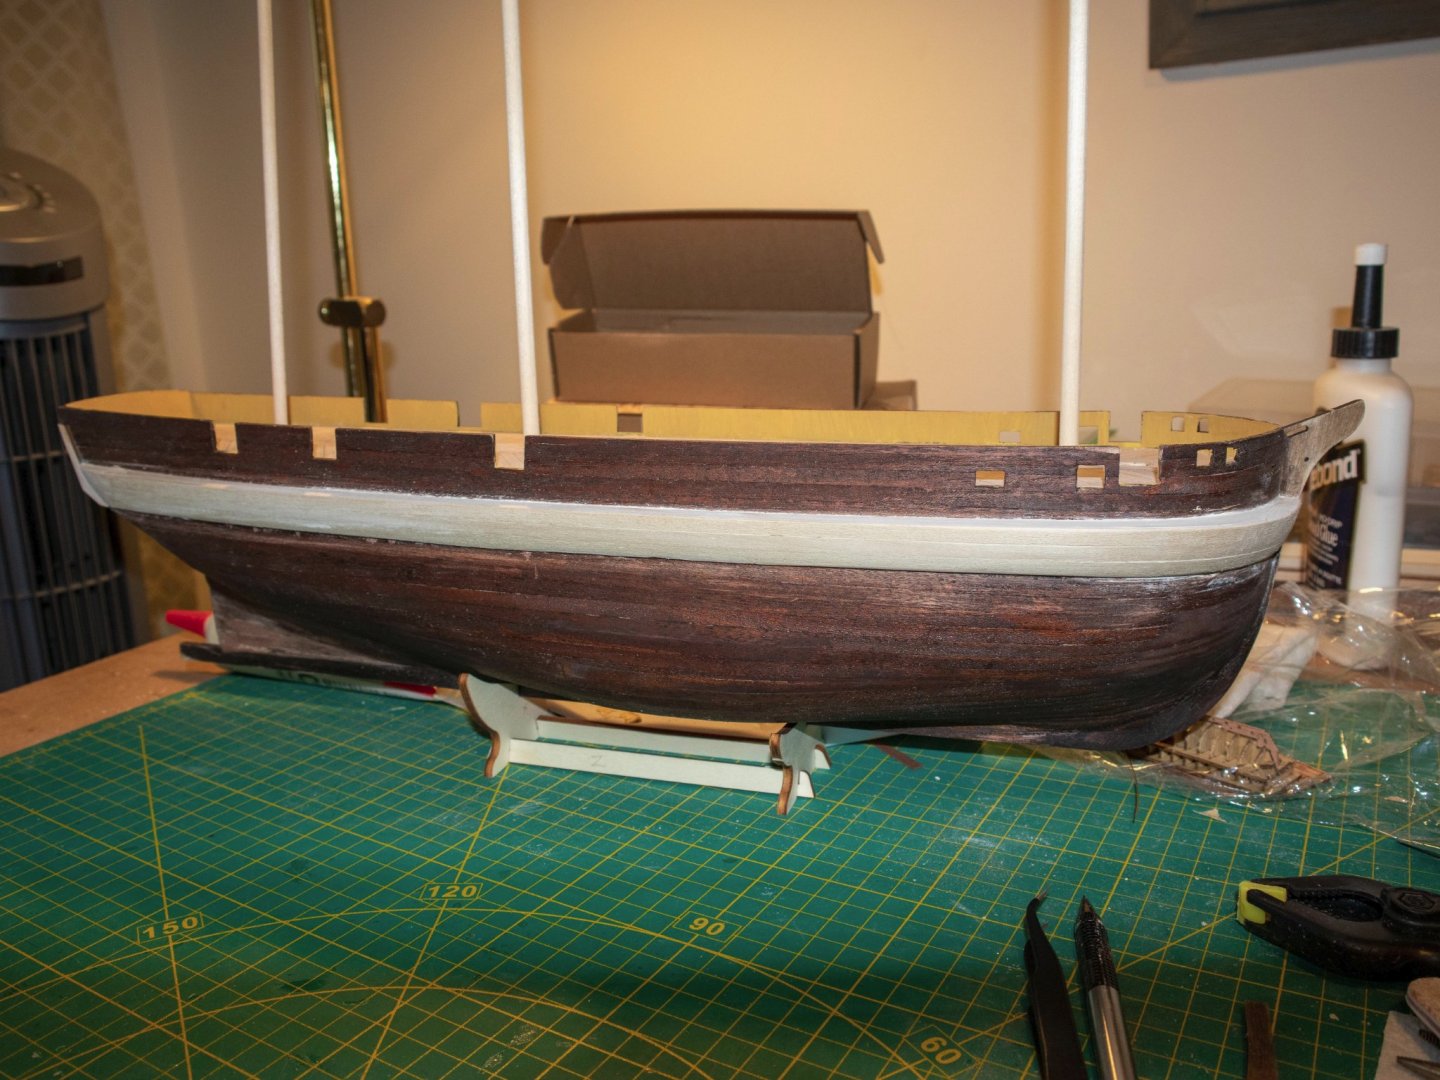
-
HMS Terror by Broden - OcCre - 1:75
broden replied to broden's topic in - Kit build logs for subjects built from 1801 - 1850
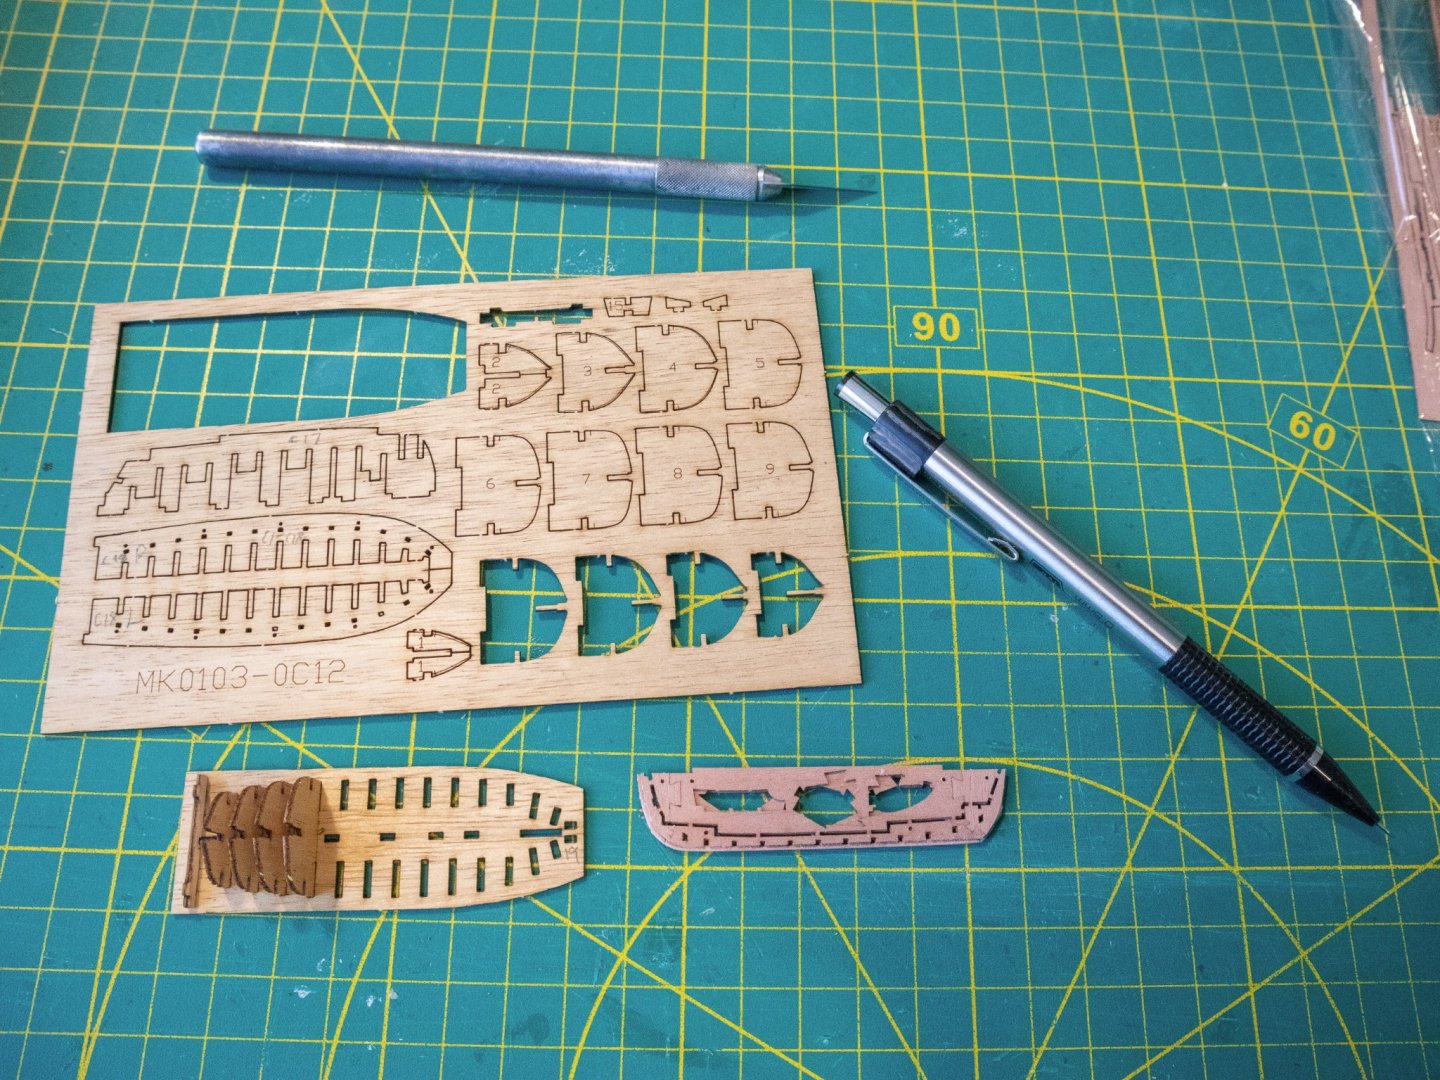
Hi Geowolf, Your finish planking looks pretty good as well. My next step will be the same as yours. I had a close look at the kit deck boats and I was not impressed with the cast metal ones, so I spent more money and got the Master Korabel launch kits. They are at 1/72 which I felt was close enough to 1/75 to be usable. They are a serious challenge. The parts are very tiny and there are lots of them. Each small boat will present many hours of careful work. When I started the Terror build I expected it to take a long time maybe the full winter, which here in Montreal can last from November to April. The second wave of Covid is rising here, so home time will very likely be available. Here are some pictures of the kits at a very early stage. Stay well. DB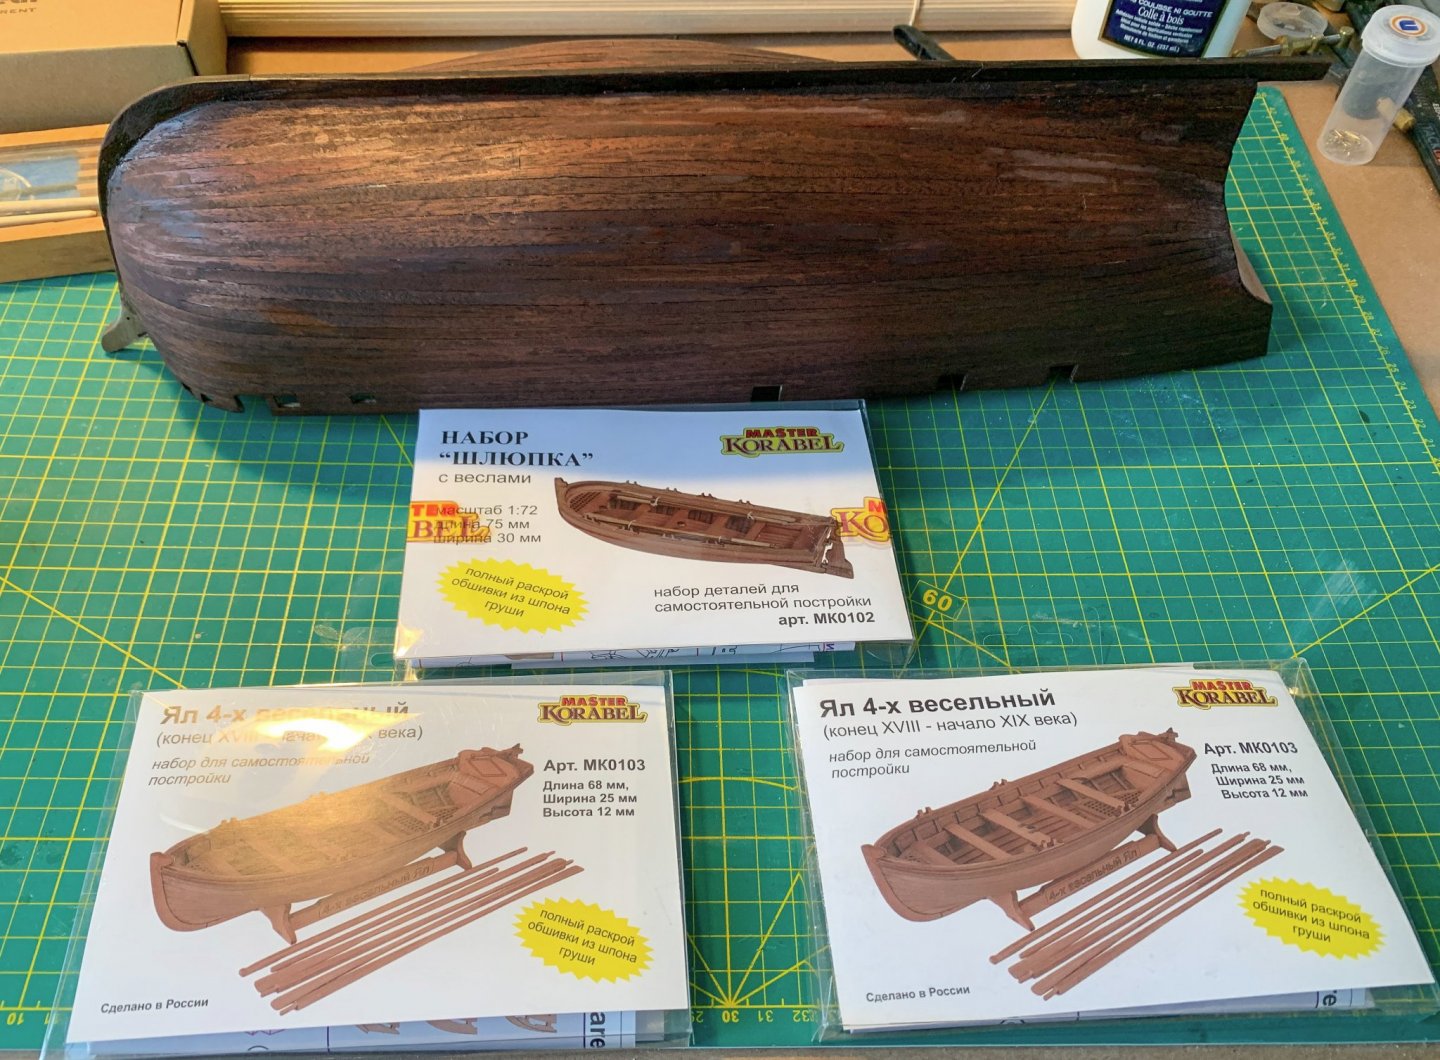

-
HMS Terror by Broden - OcCre - 1:75
broden replied to broden's topic in - Kit build logs for subjects built from 1801 - 1850
By the way my decision is made. I will be staining the hull black and the rub strip white. DB -
HMS Terror by Broden - OcCre - 1:75
broden replied to broden's topic in - Kit build logs for subjects built from 1801 - 1850
Thanks, Geowolf and all the other builders of HMS Terror. I am reading all the builds and am very impressed with the care and detail that you are all putting into this great little ship. I am a newbie and everything I see and read helps. Again thanks Well I did the second layer of planking. The picture is of one side with a coat of mahogany stain applied. If you look closely you will see where I got into trouble. The thin strips do not bend well. Actually they do bend, but they are so thin that they leave a split on a curve. There was a judicious use of wood filler where the lines of planks have gaps between planks. the worst bits are in the bow. Fortunately there will be the reinforcement iron plates there to hide most of the really ugly fixes. On my next build, and there will be a next build, I will not try to use continuous planks on the second planking but use 25 foot long planks to scale as was done on the original ships. Now it is on to the bolster "rub strip" where there is a correction from 15mm to 20mm for the location as pointed out in Keith's build. DB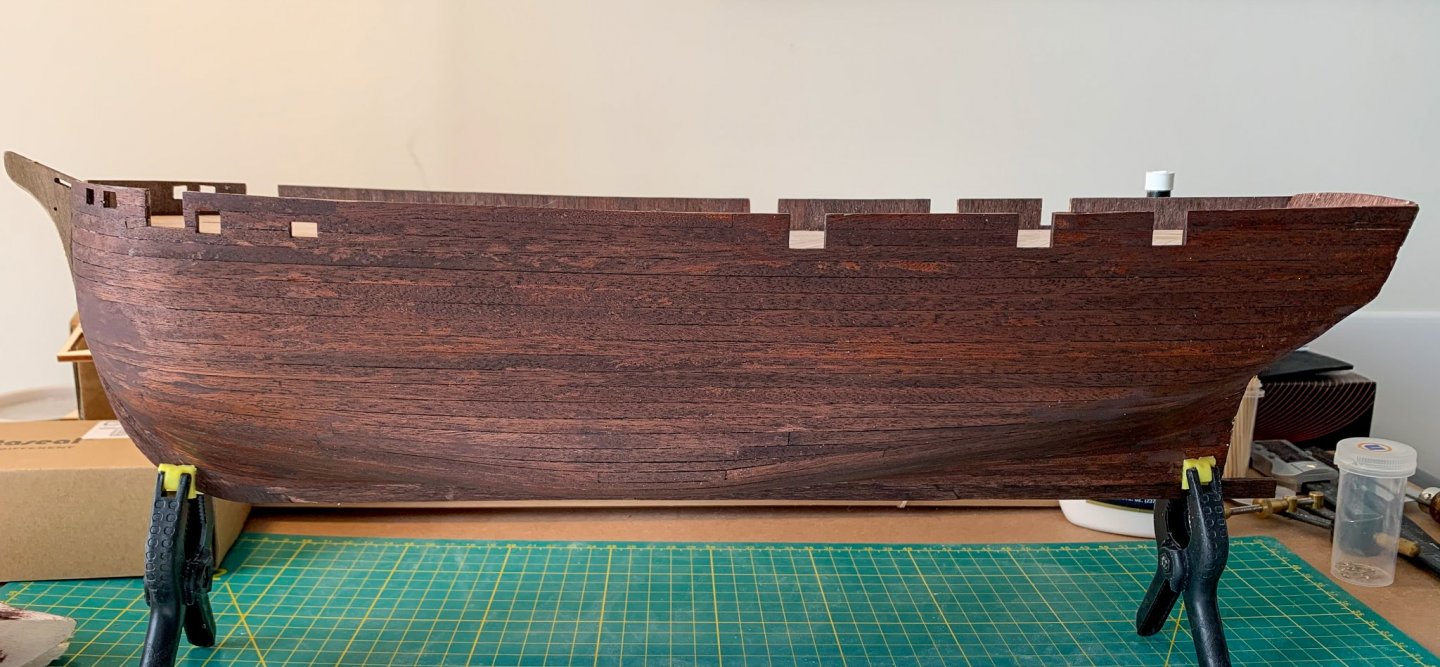
-
HMS Terror by Broden - OcCre - 1:75
broden replied to broden's topic in - Kit build logs for subjects built from 1801 - 1850
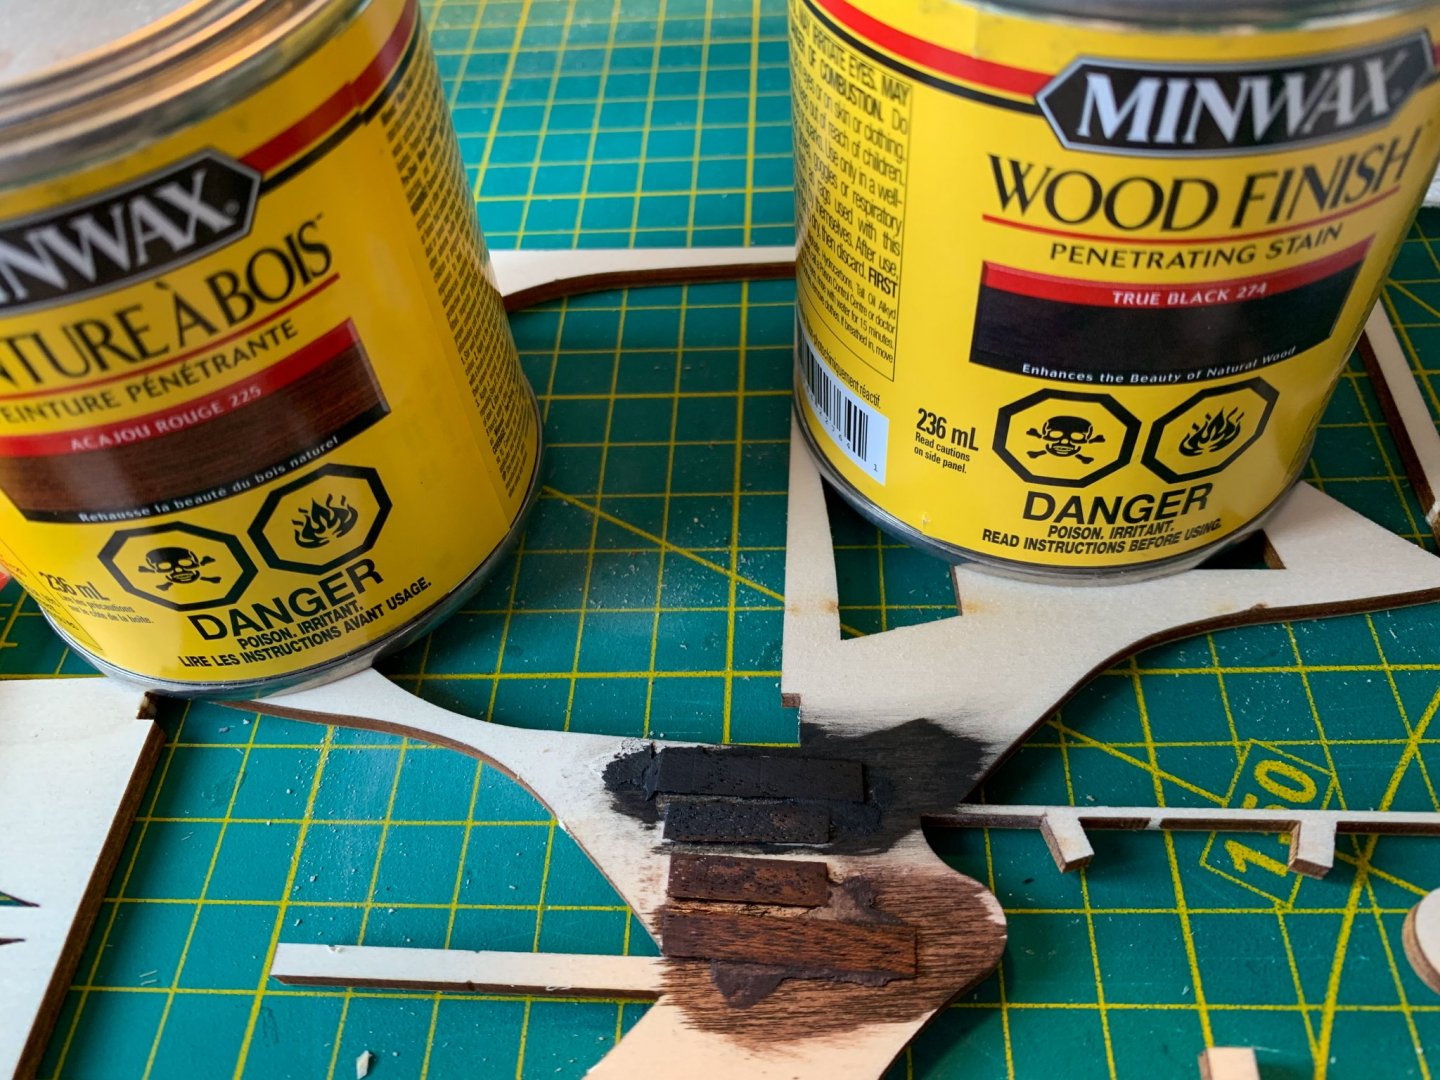
Hi from His Majesty's dockyard Lasalle. The first layer of planks are done. No gaps, a couple of dips that a generous helping of wood filler resolved. I have laid on the second layer planks for the gunwales and discovered how fragile those strips of, what looks like mahogany really are. They chip and crack way too easily. So the issue of using wood filler came up. The brand I am using does take stain well, but it still looks like there is wood filler there. The pictures below show my test bits. The mahogany stain lets the wood filler show through, but the black stain really covers everything up. I was surprised how black that stain is. Still considering leaving the hull unstained or going with the black and white colours. I put on the stem post and the keel to make sure the planking was tight to the structure. I do not know if that will come back to bite me later or not. It seemed to be the right time to put them on. The pictures are the first layer of planks almost complete. The test strips with wood filler on all for strips.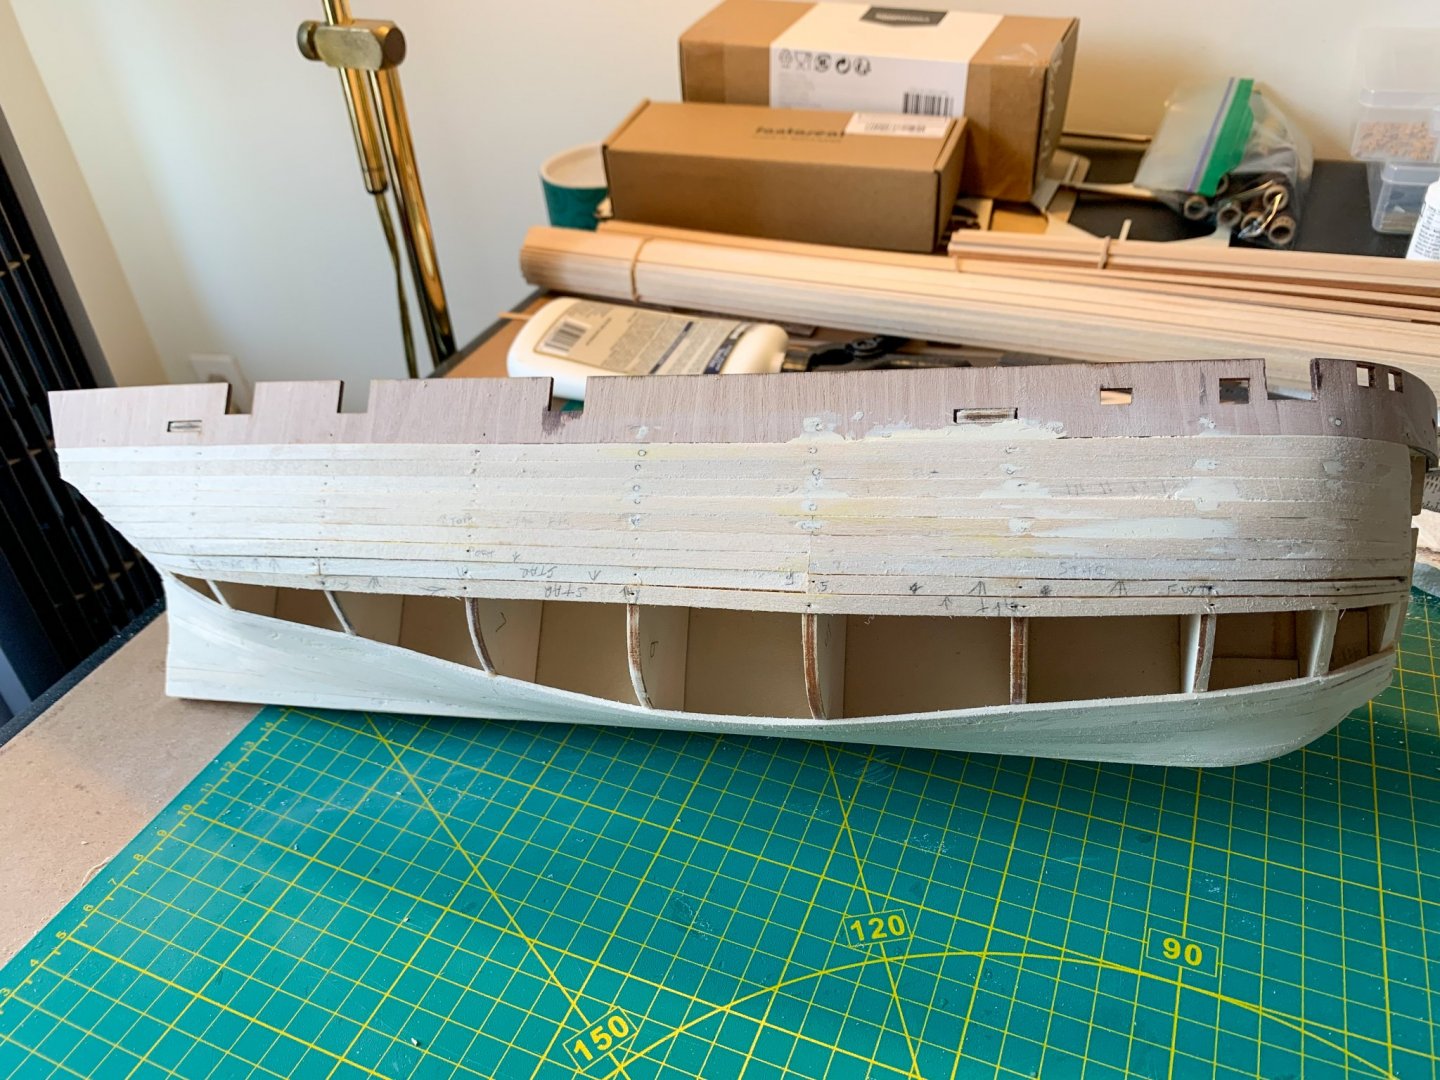

-
HMS Terror by Broden - OcCre - 1:75
broden replied to broden's topic in - Kit build logs for subjects built from 1801 - 1850
Thank you for your comments, ObviousNewbie. It is great to have people pay attention to each other's builds. I watched the YouTube videos on planking. I carefully measured the frames, used a spreadsheet to calculate the amount of taper at each frame. Then I consider the planking rules, only taper the top of the planks stealers are OK at the stern , but not on the bow and planned how I was going to plank. Then I watched the OcCre build video and saw what that guy was doing in astonishment. He was slapping on planks, putting in slivers all over the place and then sanding the hell out of the whole hull. I had to rethink what I was doing and why. It is the first layer of planks nobody will ever see it again even myself. So what is the real objective. Cover the frames is such a way to ensure the shape of the hull is plane and fair as a basis for the finish layer of planks. Use the first layer for mistakes and make sure I avoid them on the finish planks. OK pressure off. The instruction sheets deal with the pins by filing them off with a large file. Tried that on first 4 planks. It would work if every plank was perfect, not if there is any sanding to be done. The remaining pin shafts destroy the sandpaper. So once the glue is dry pull out the pins. Enough rant. I am really enjoying building this hull. I have 11 planks on each side of the hull and it is going well once I stopped worrying about being technically perfect. More pictures when planking finished. Cheers DB