JohnRC
-
Posts
41 -
Joined
-
Last visited
-
 catopower reacted to a post in a topic:
Chinese Pirate Junk by JohnRC - FINISHED - Amati - 1:100
catopower reacted to a post in a topic:
Chinese Pirate Junk by JohnRC - FINISHED - Amati - 1:100
-
catopower reacted to a post in a topic:
Chinese Pirate Junk by JohnRC - FINISHED - Amati - 1:100
-
catopower reacted to a post in a topic:
Chinese Pirate Junk by JohnRC - FINISHED - Amati - 1:100
-
catopower reacted to a post in a topic:
Chinese Pirate Junk by JohnRC - FINISHED - Amati - 1:100
-
catopower reacted to a post in a topic:
Chinese Pirate Junk by JohnRC - FINISHED - Amati - 1:100
-
catopower reacted to a post in a topic:
Chinese Pirate Junk by JohnRC - FINISHED - Amati - 1:100
-
catopower reacted to a post in a topic:
Chinese Pirate Junk by JohnRC - FINISHED - Amati - 1:100
-
GrandpaPhil reacted to a post in a topic:
America by JohnRC - FINISHED - Corel - 1:155
-
Baltic_submariner reacted to a post in a topic:
Chinese Pirate Junk by JohnRC - FINISHED - Amati - 1:100
-
GrandpaPhil reacted to a post in a topic:
Mayflower by JohnRC - FINISHED - Corel - 1:140
-
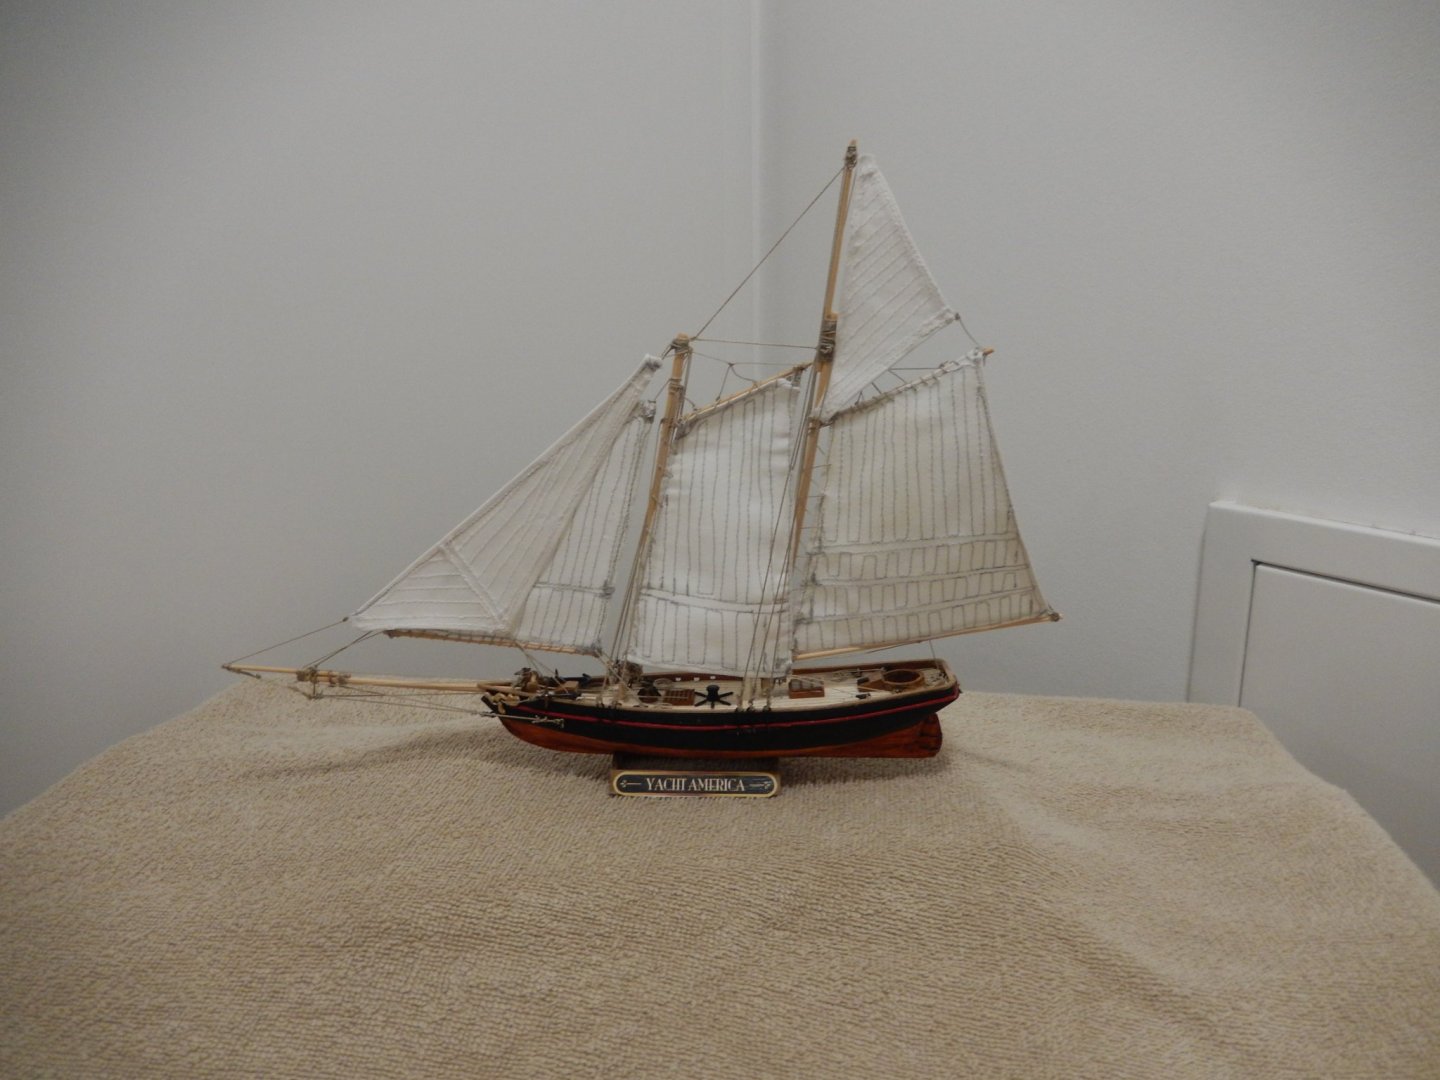
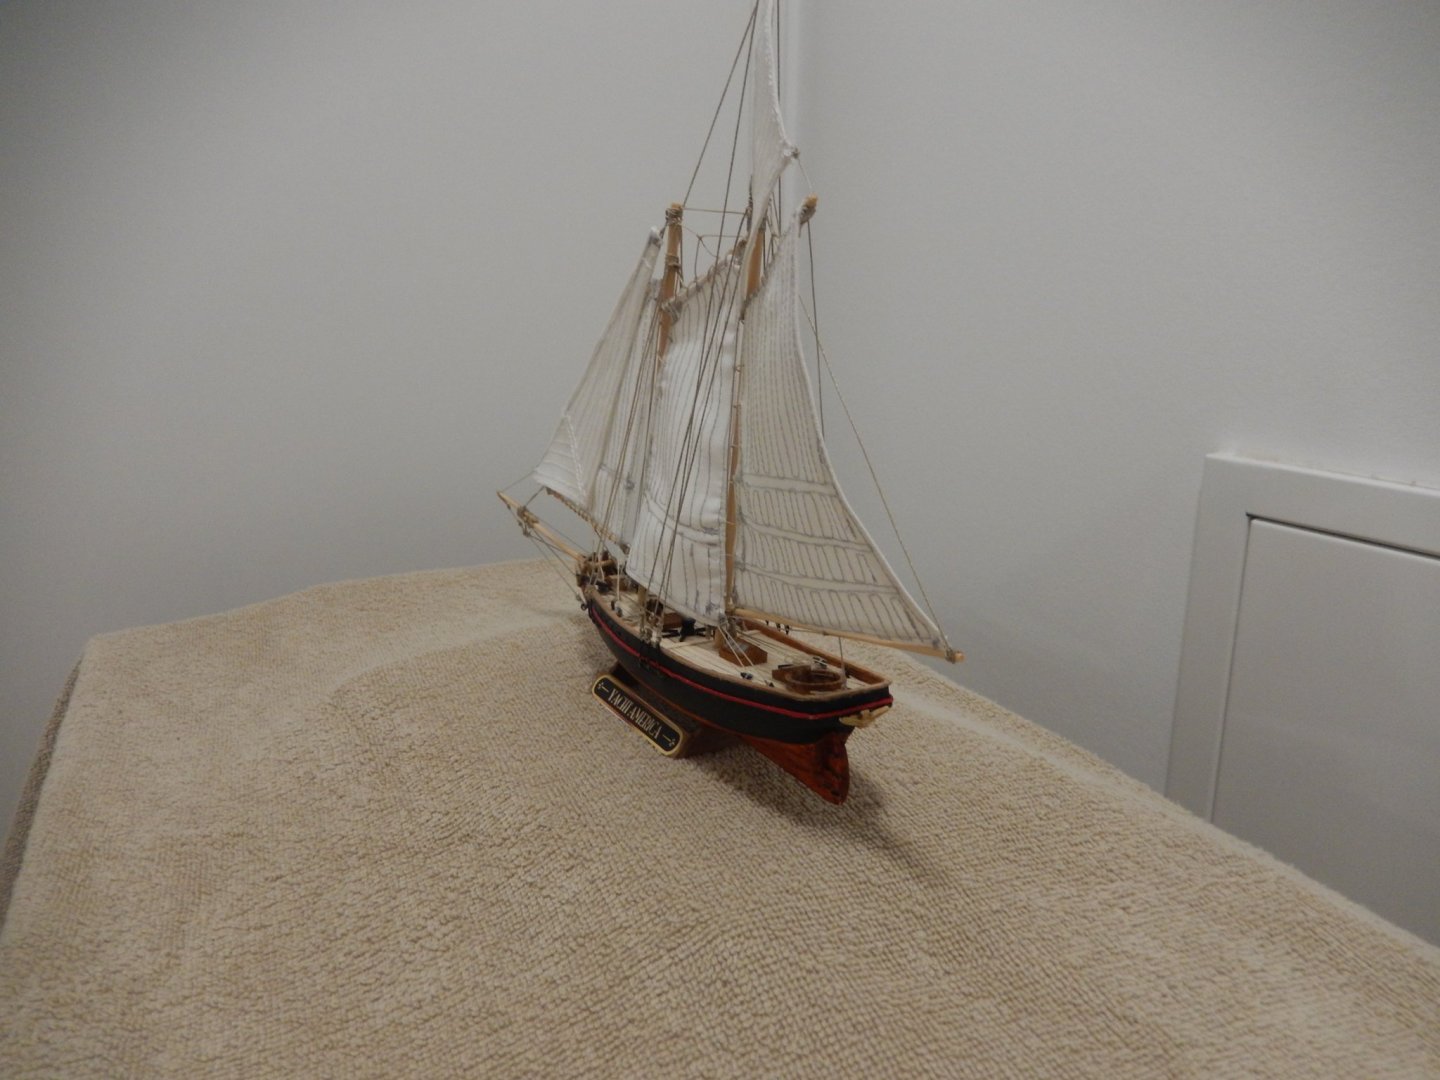
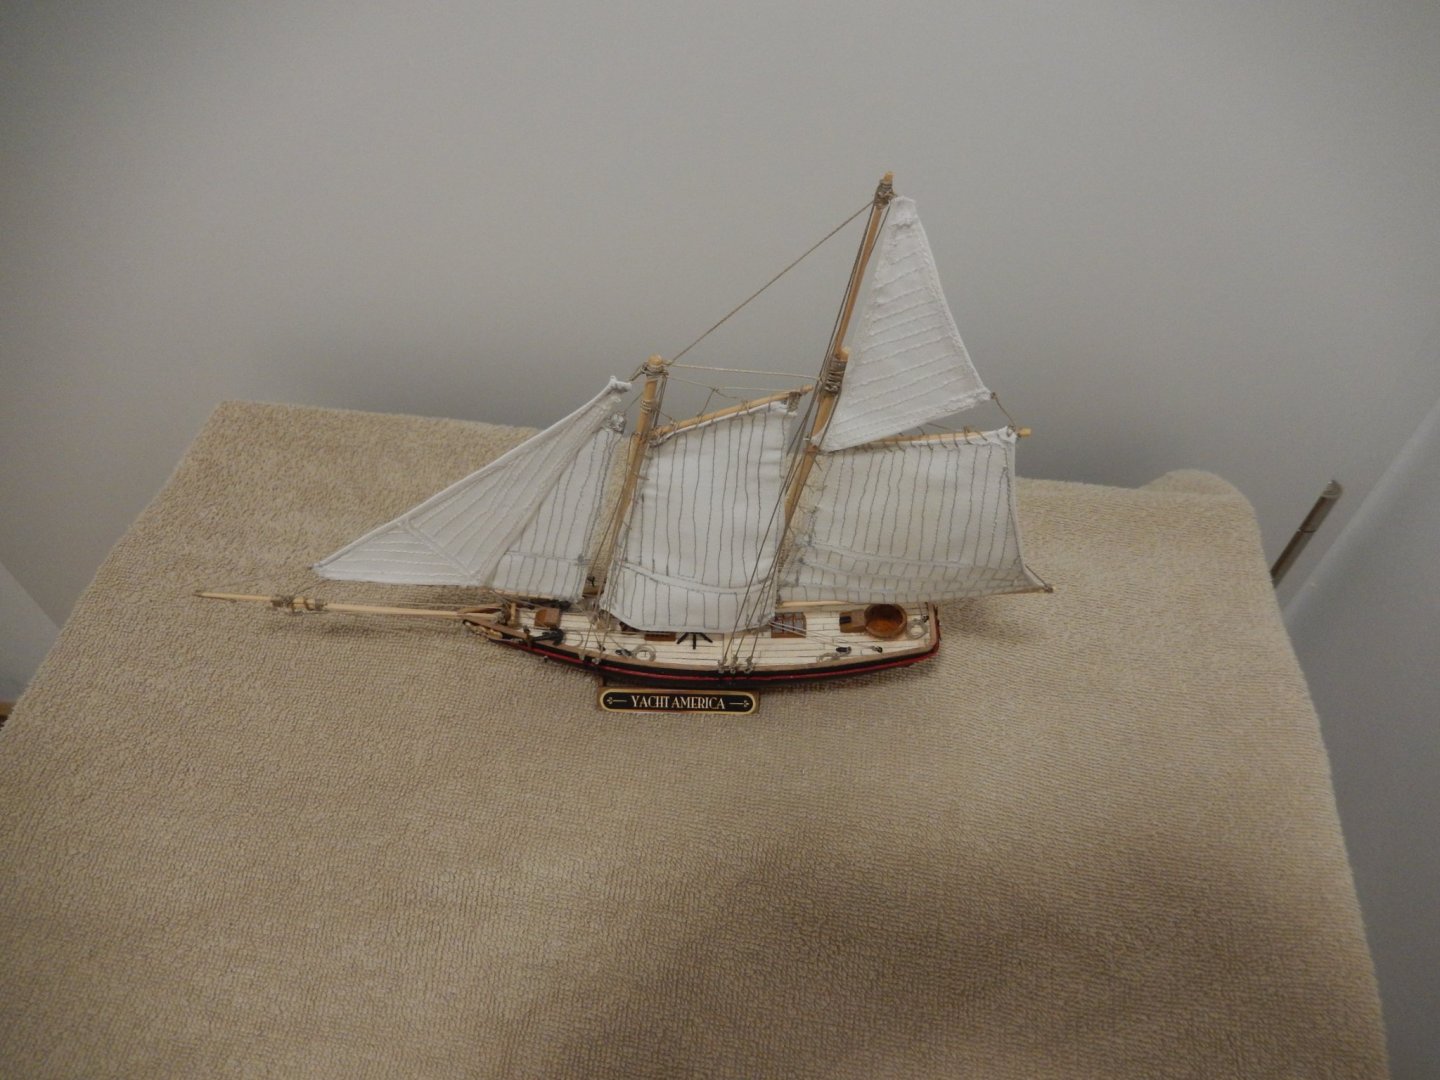
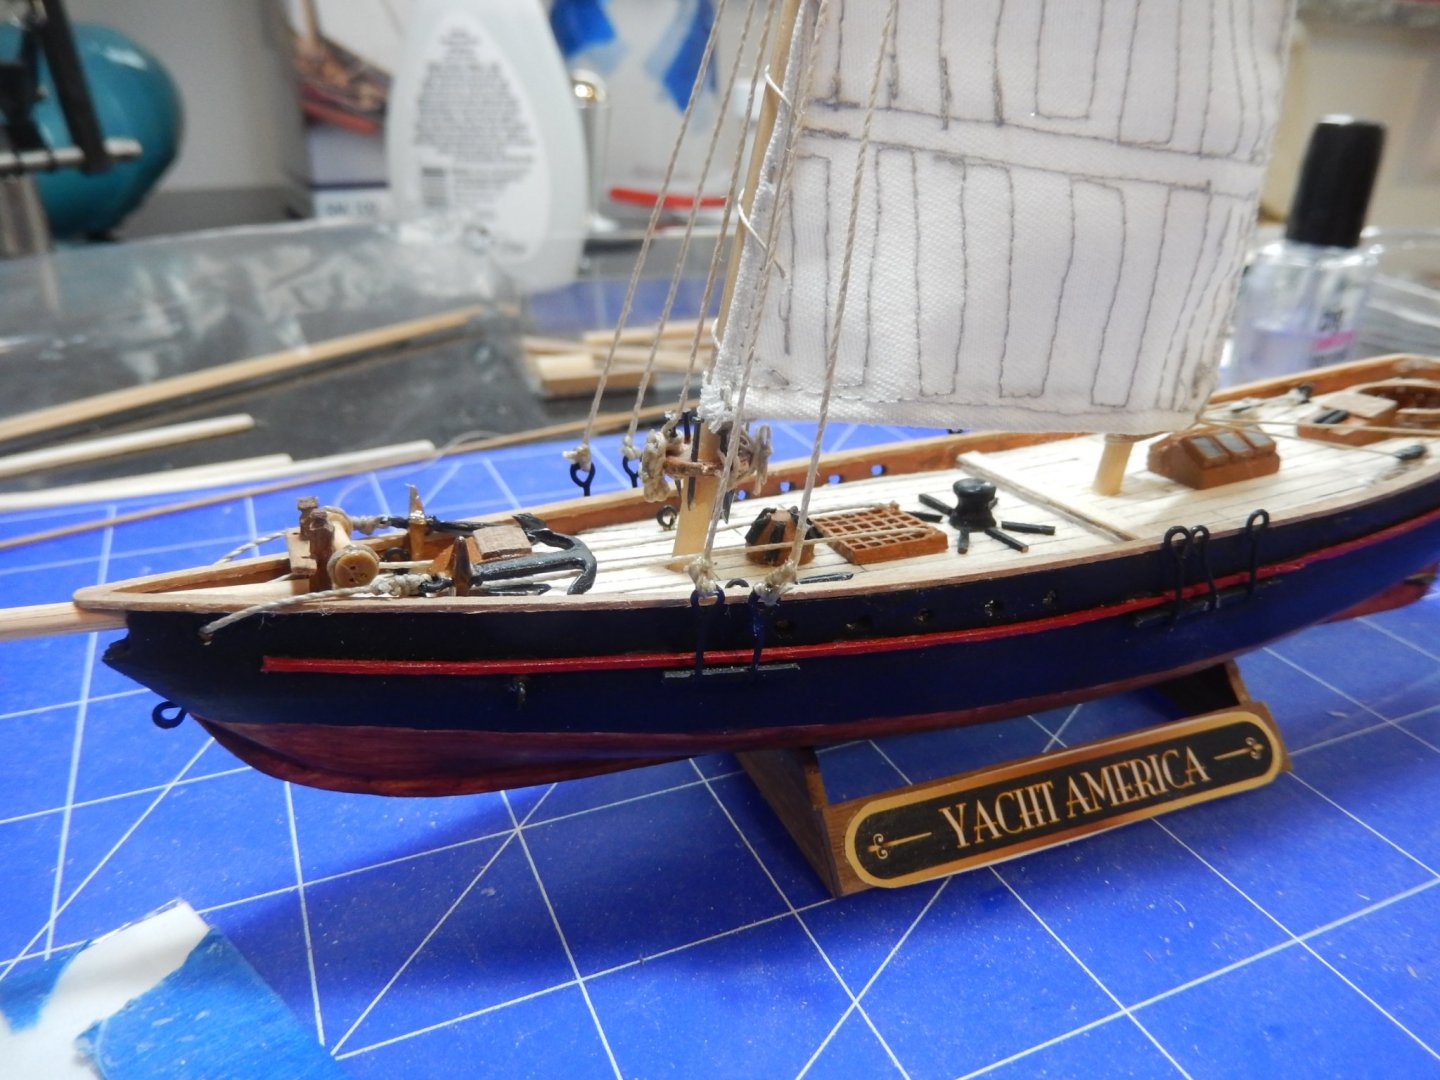
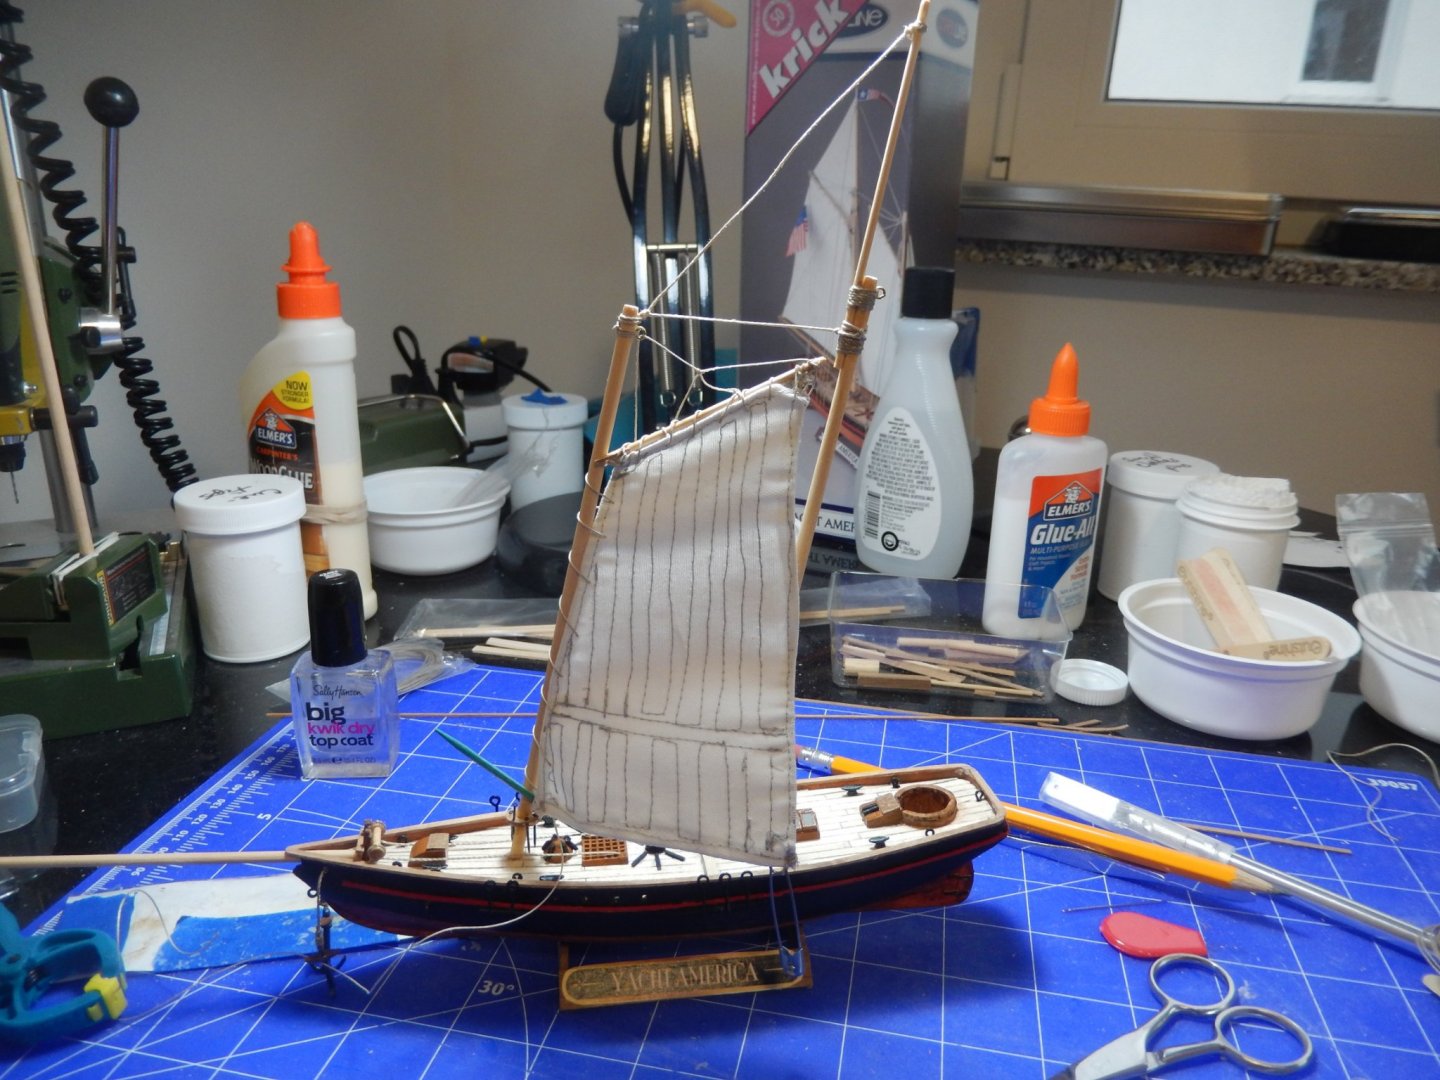
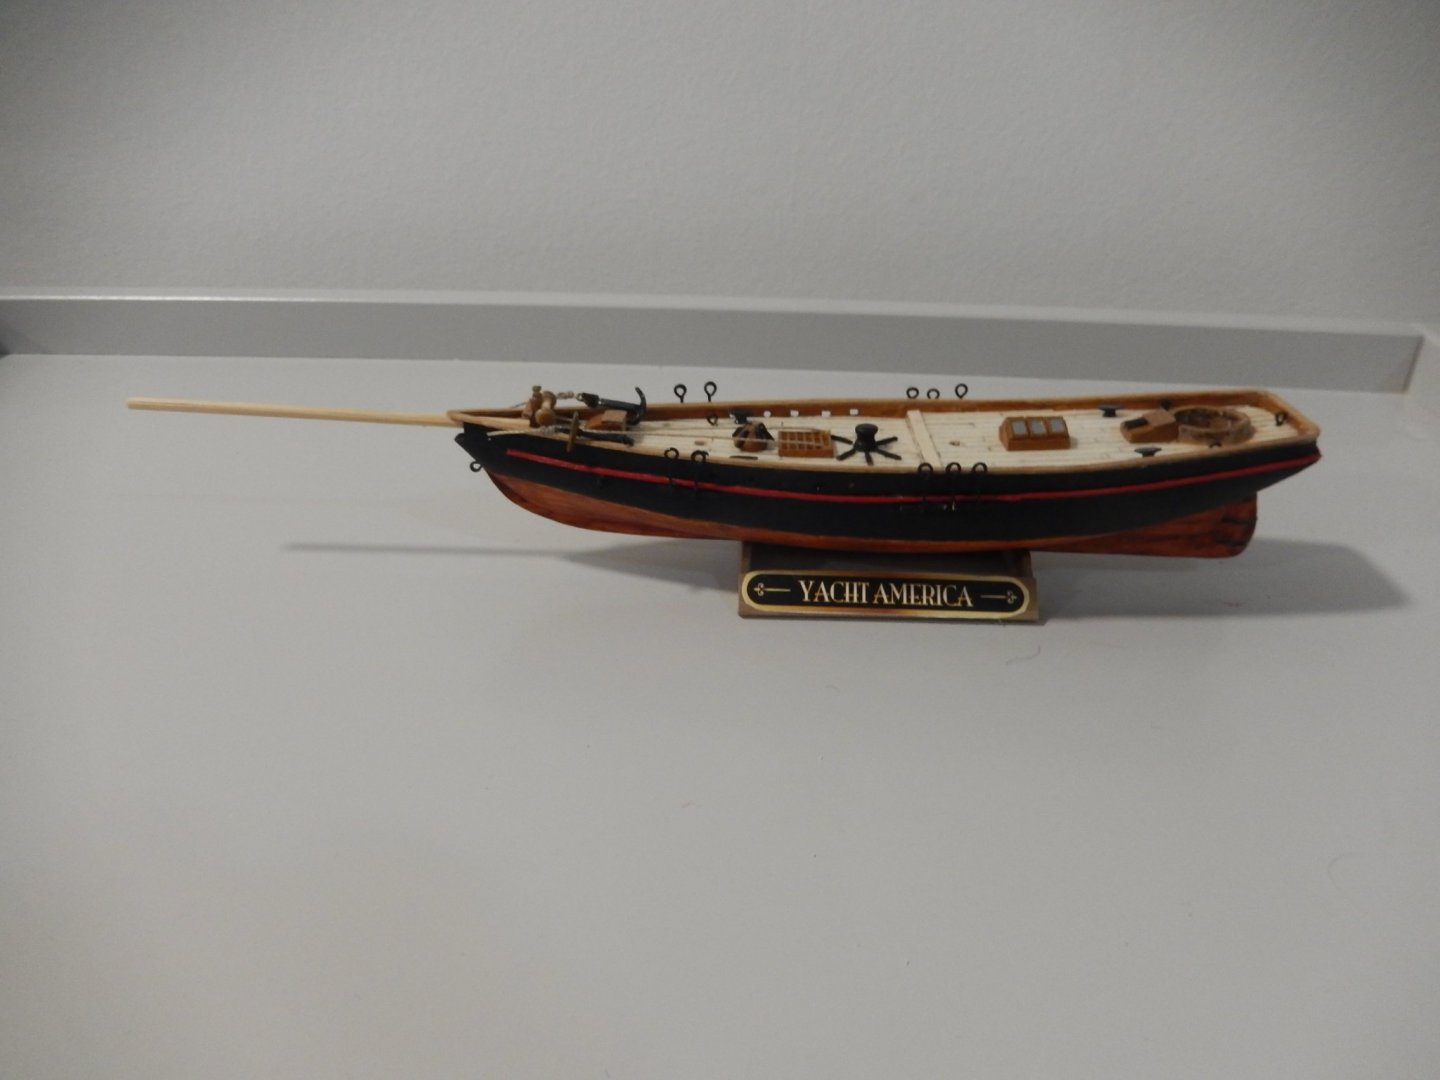
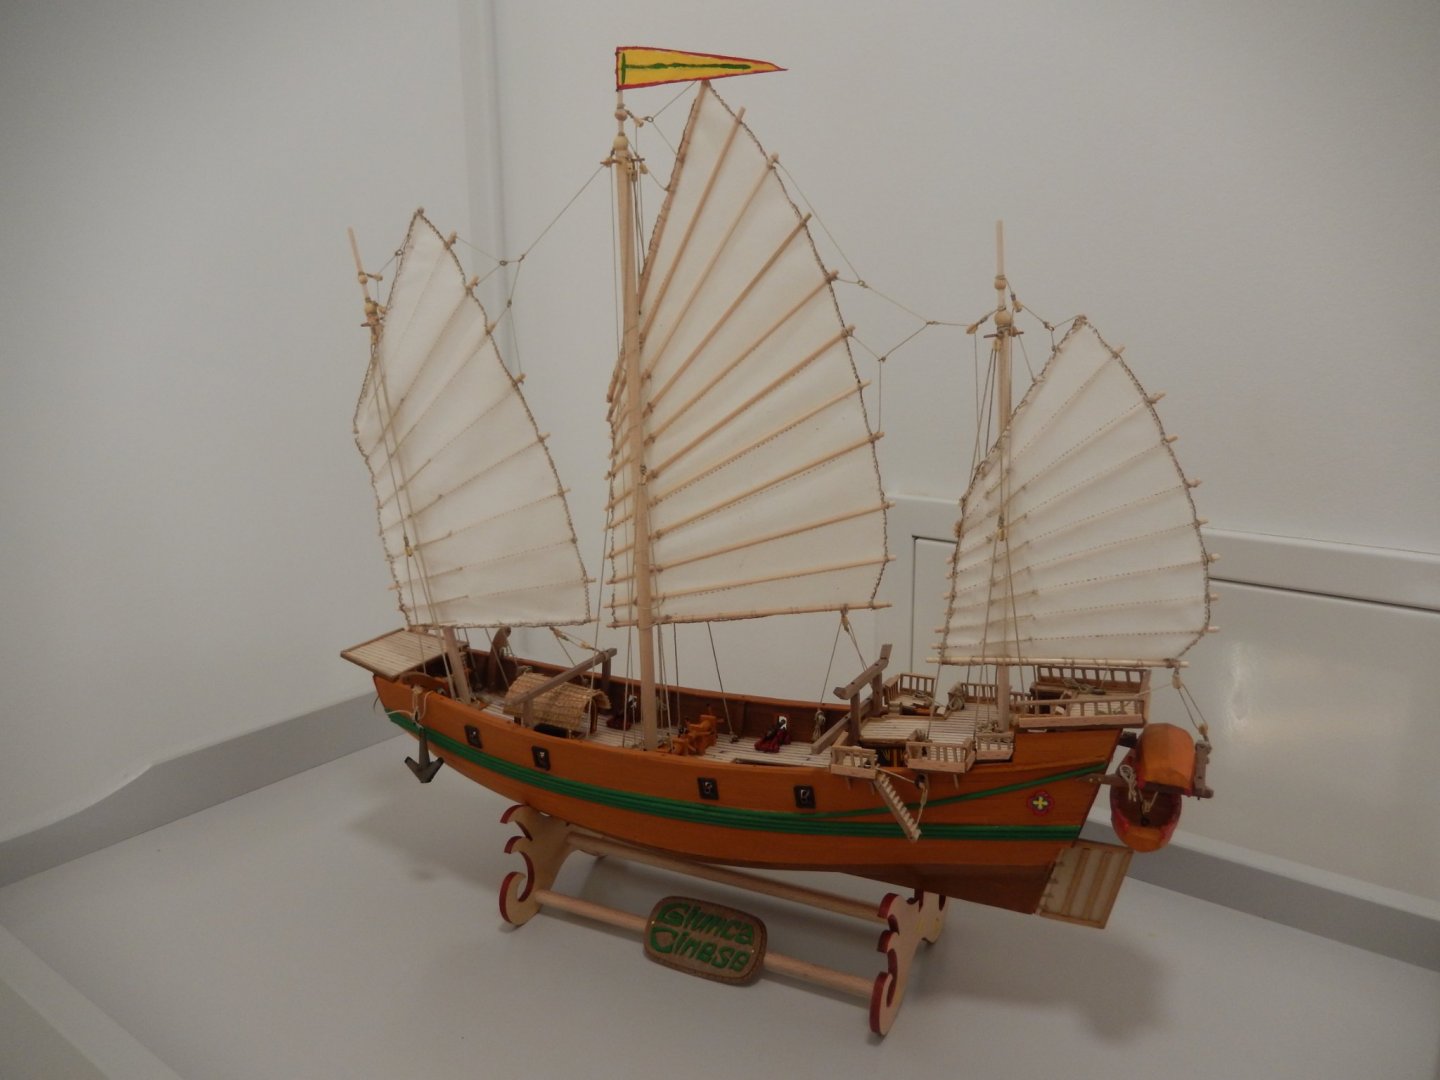
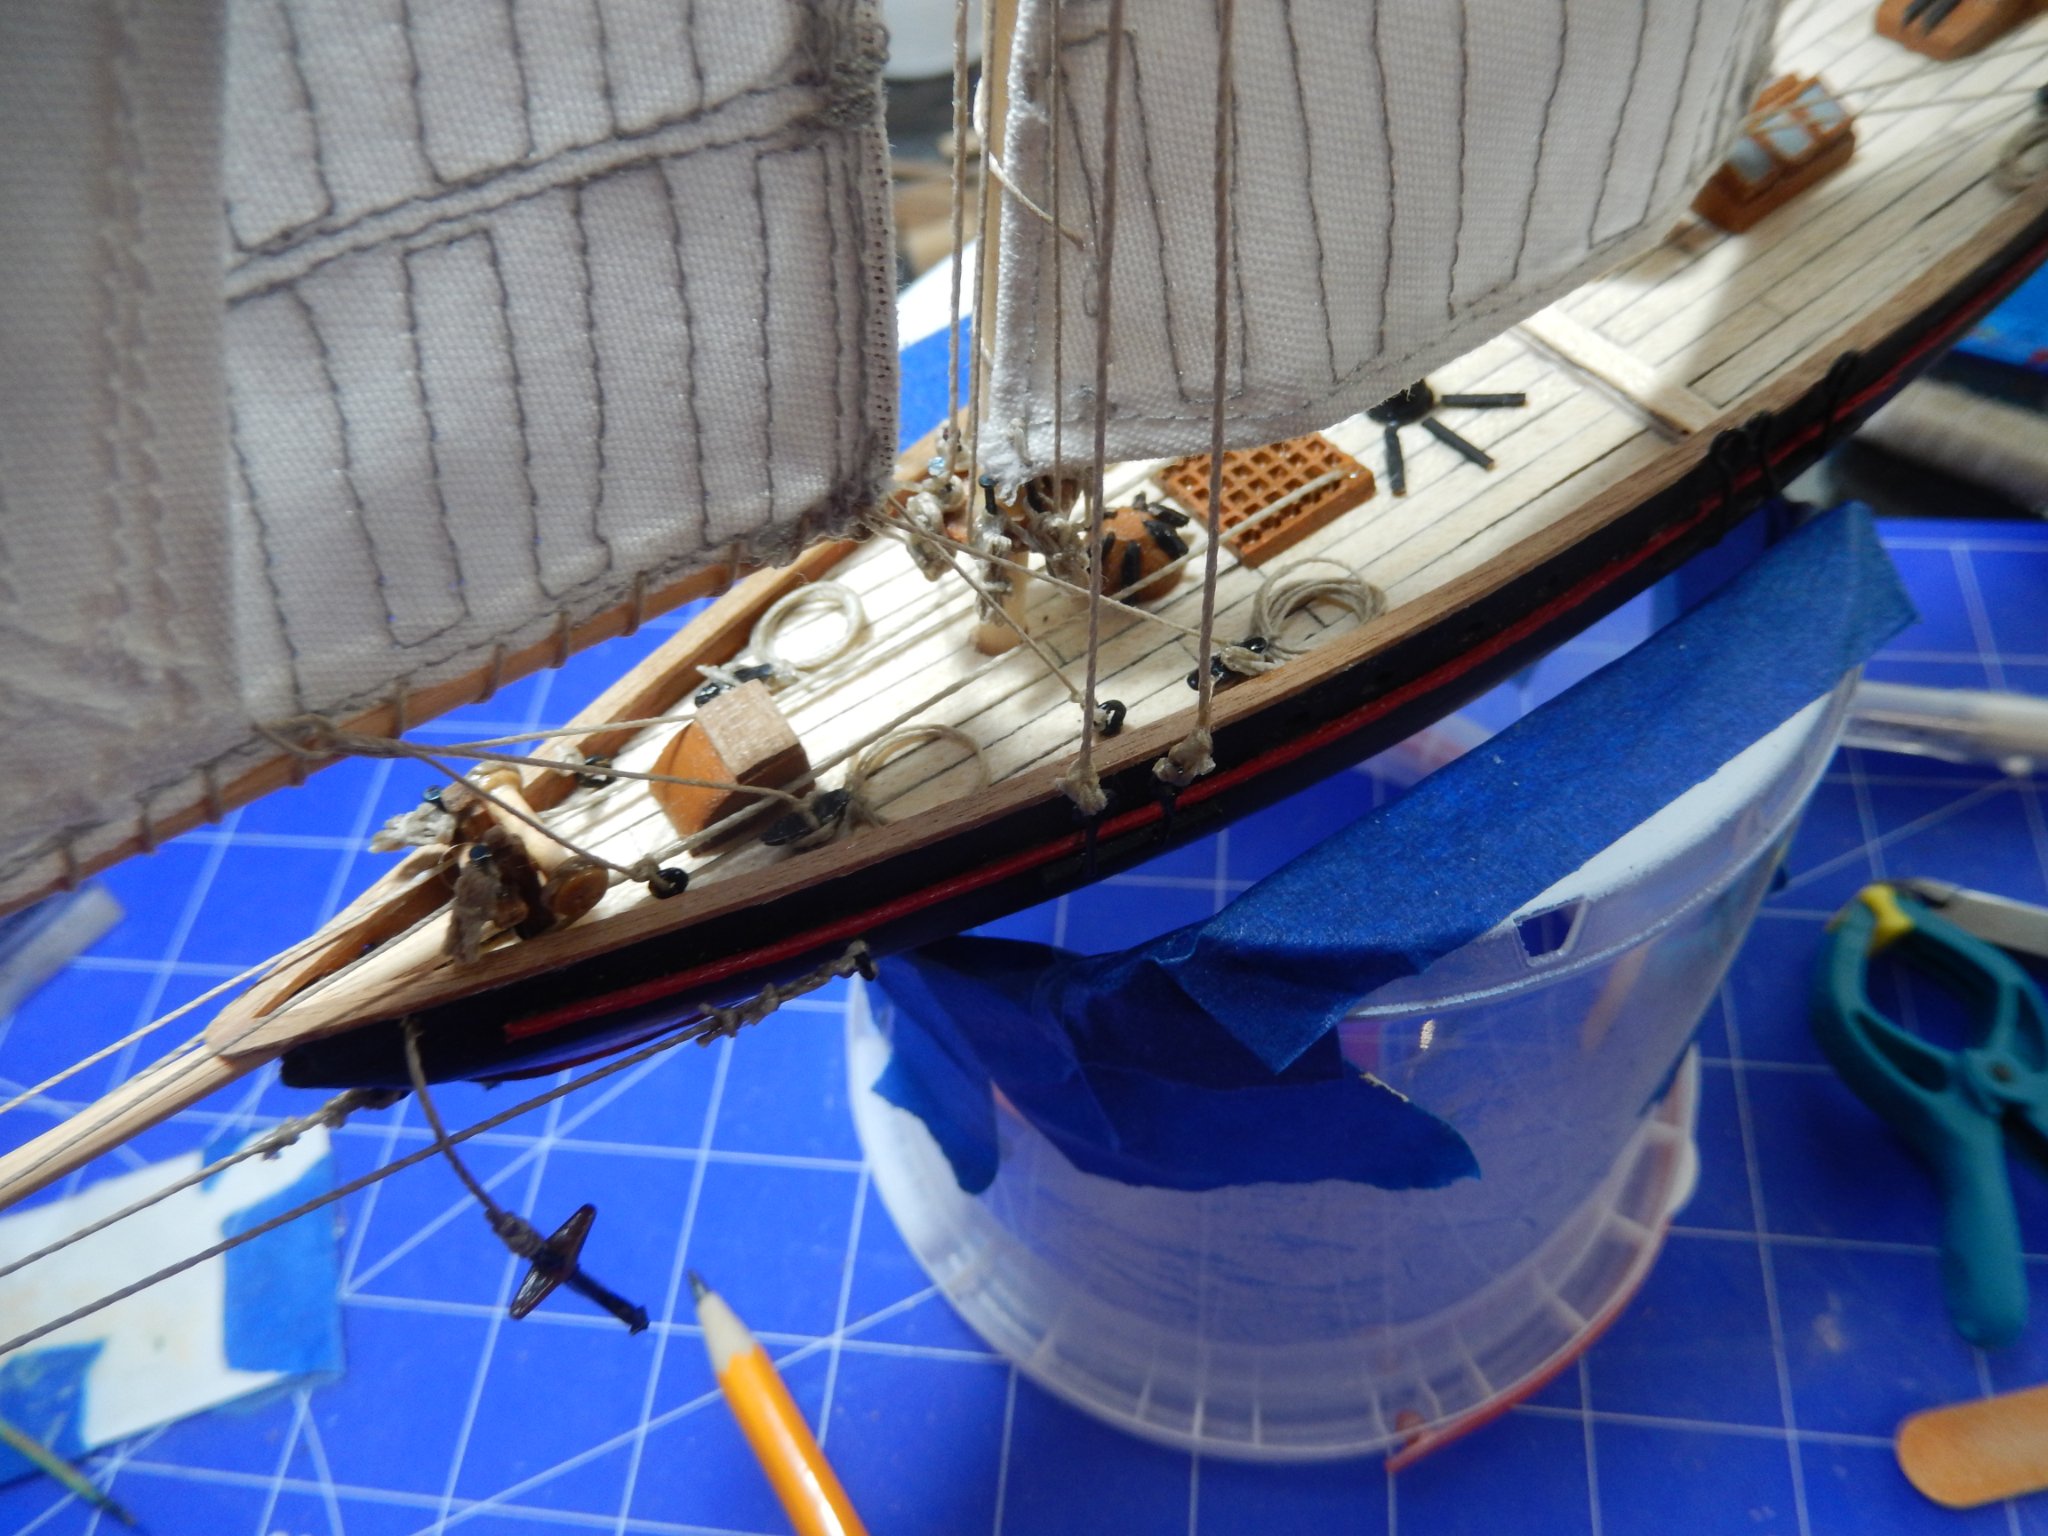
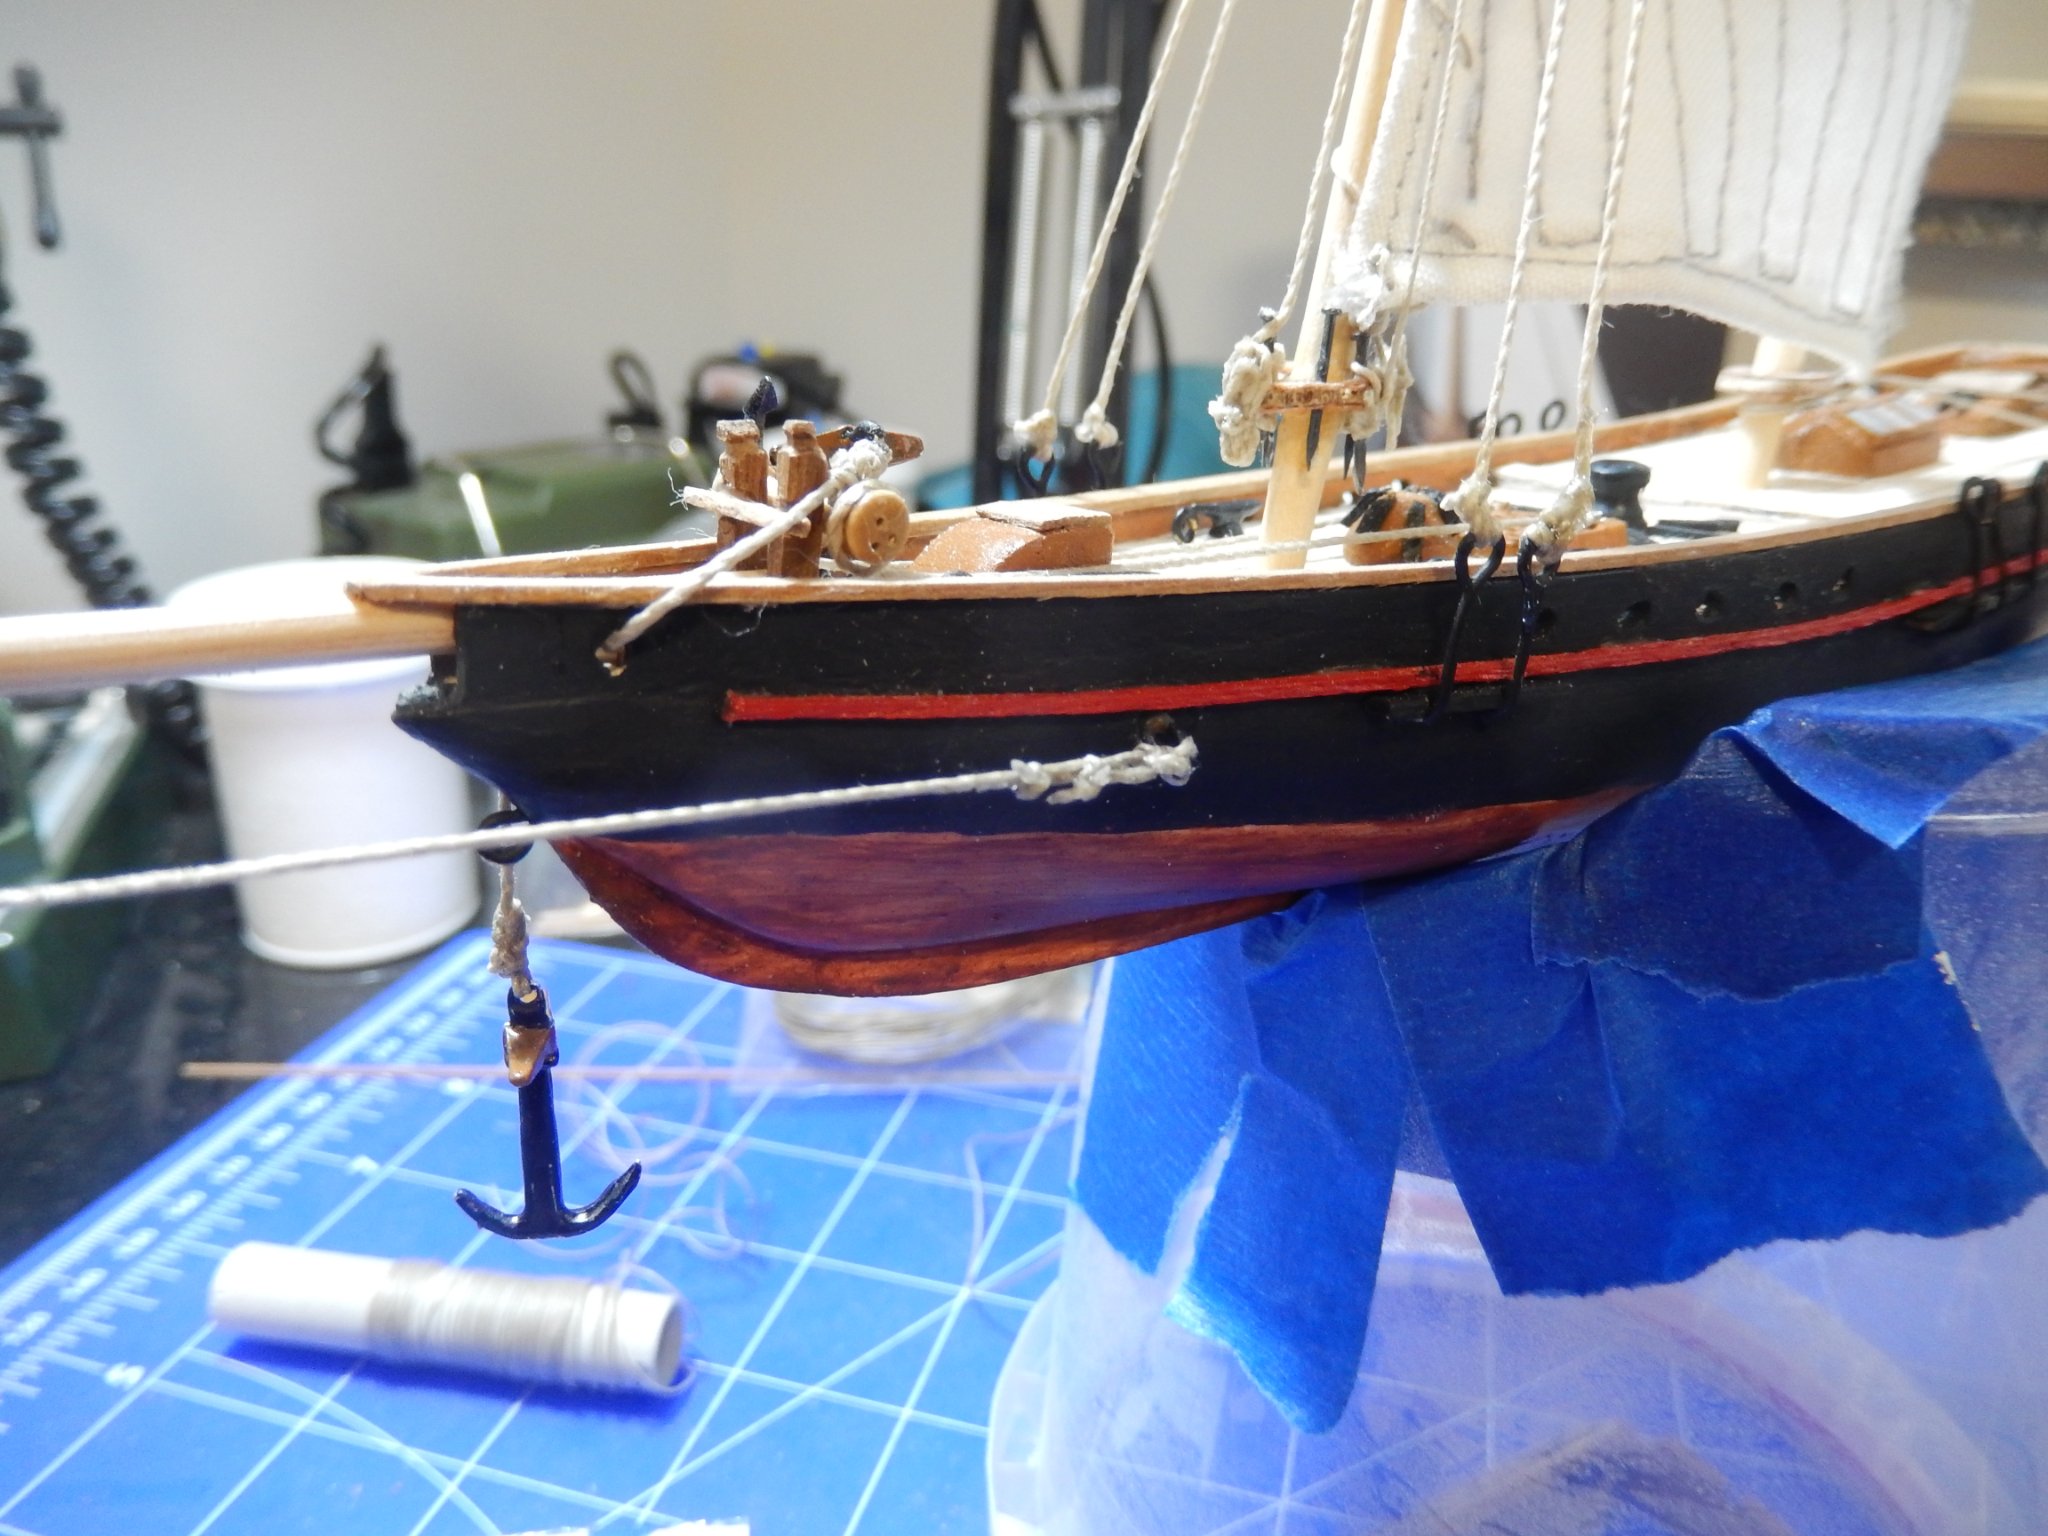
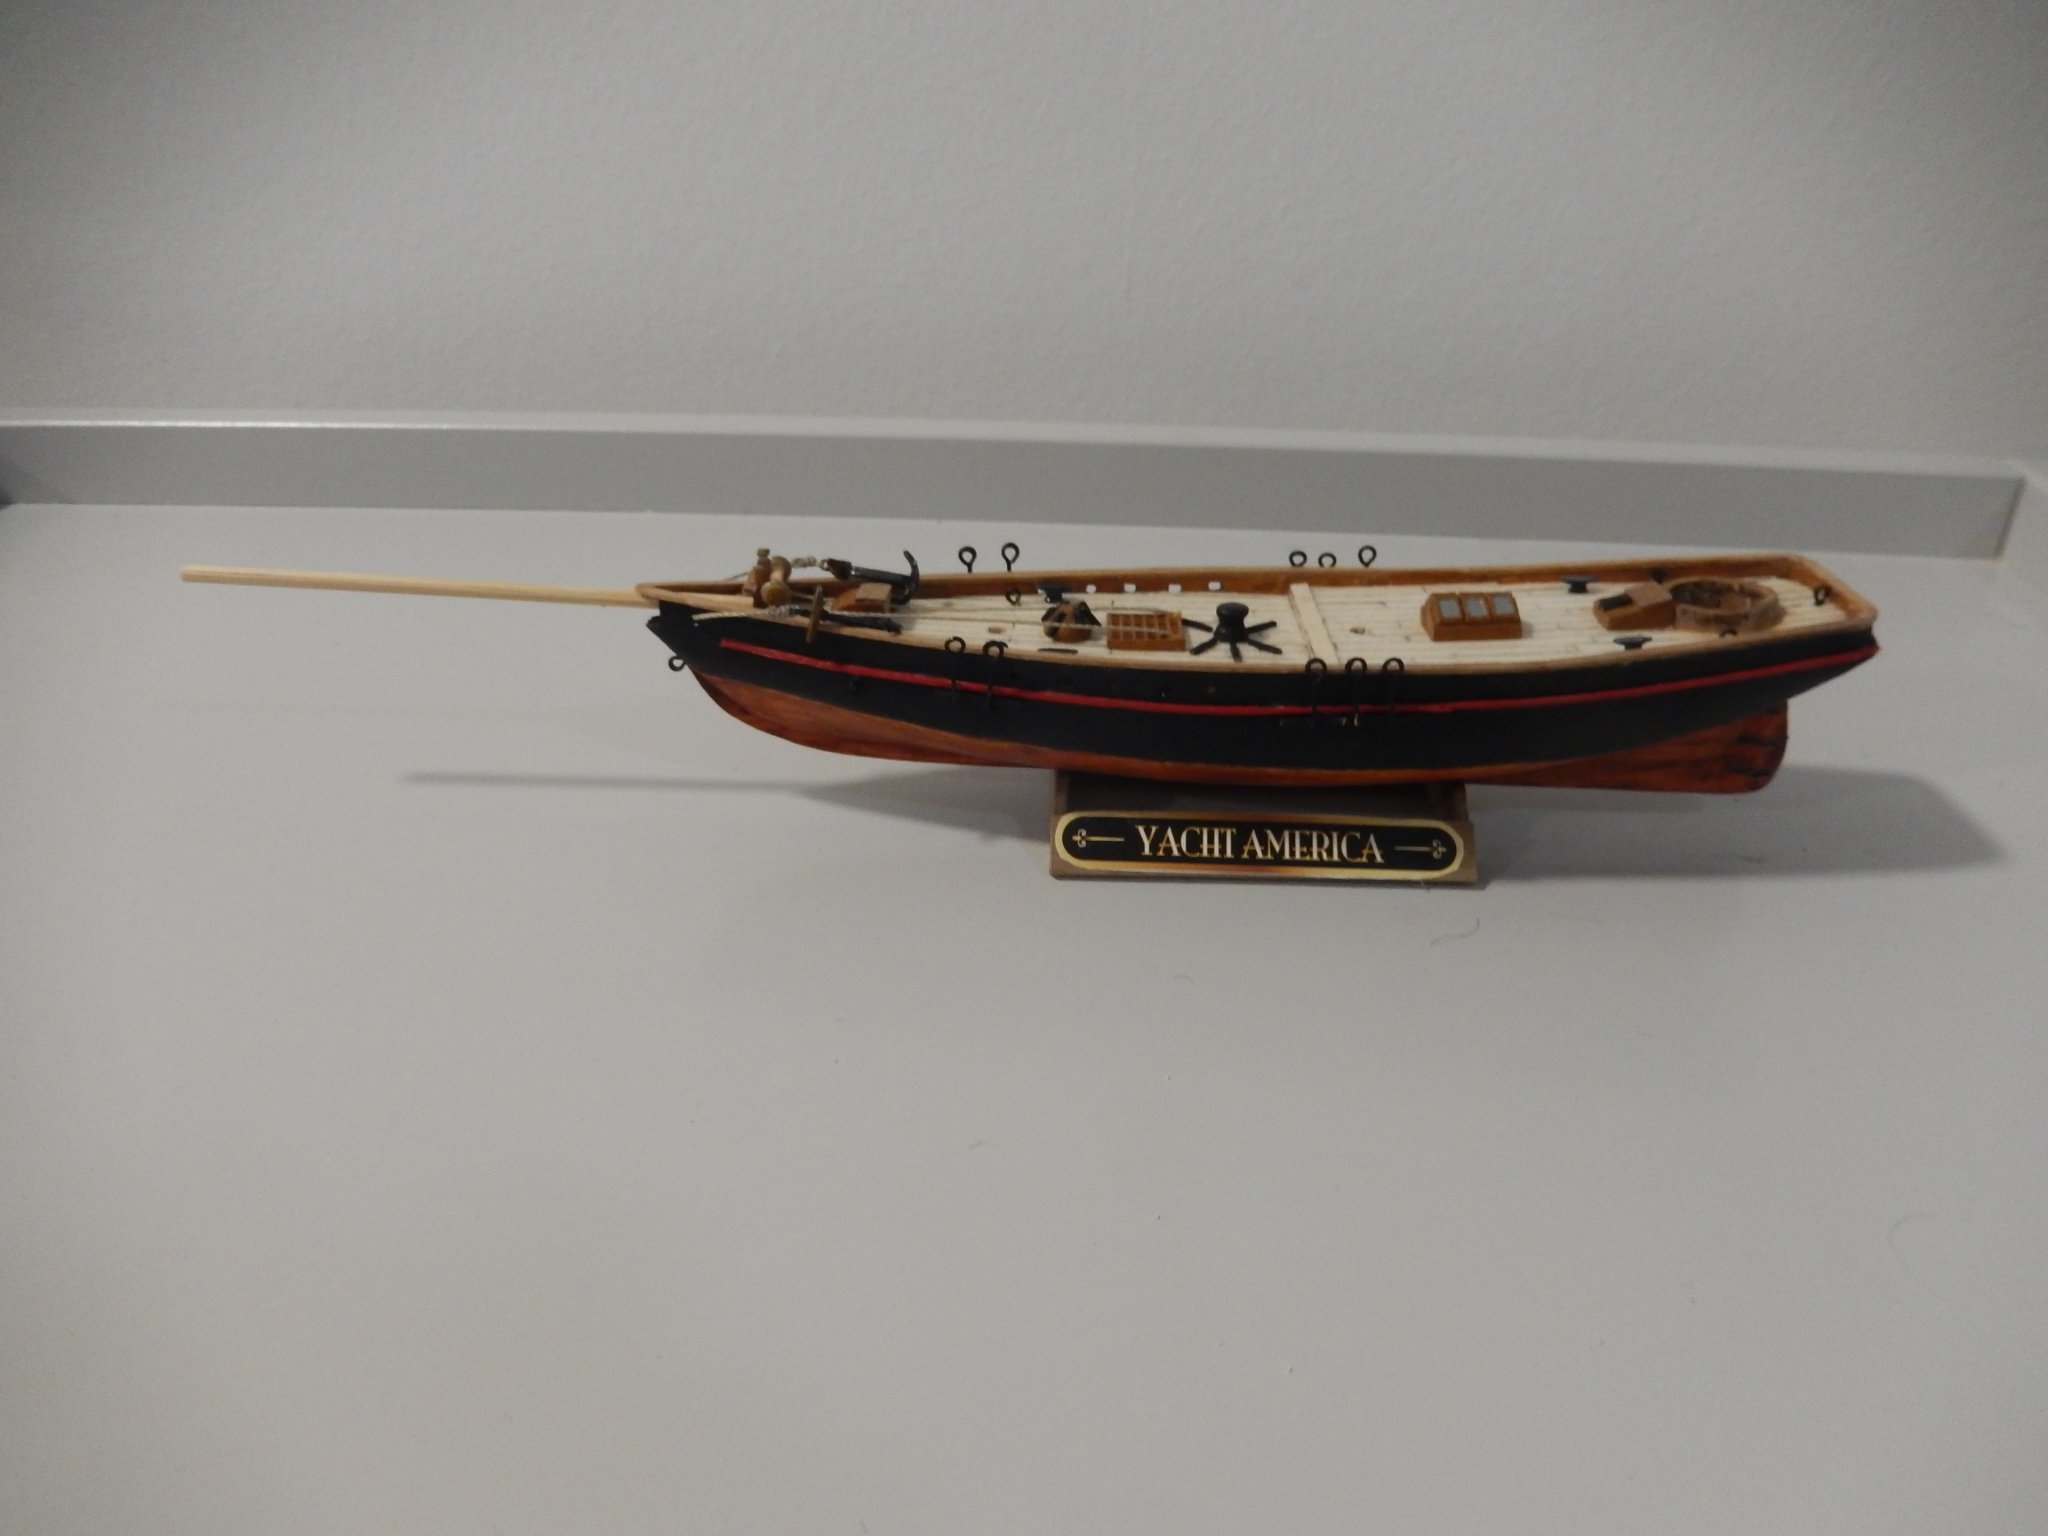
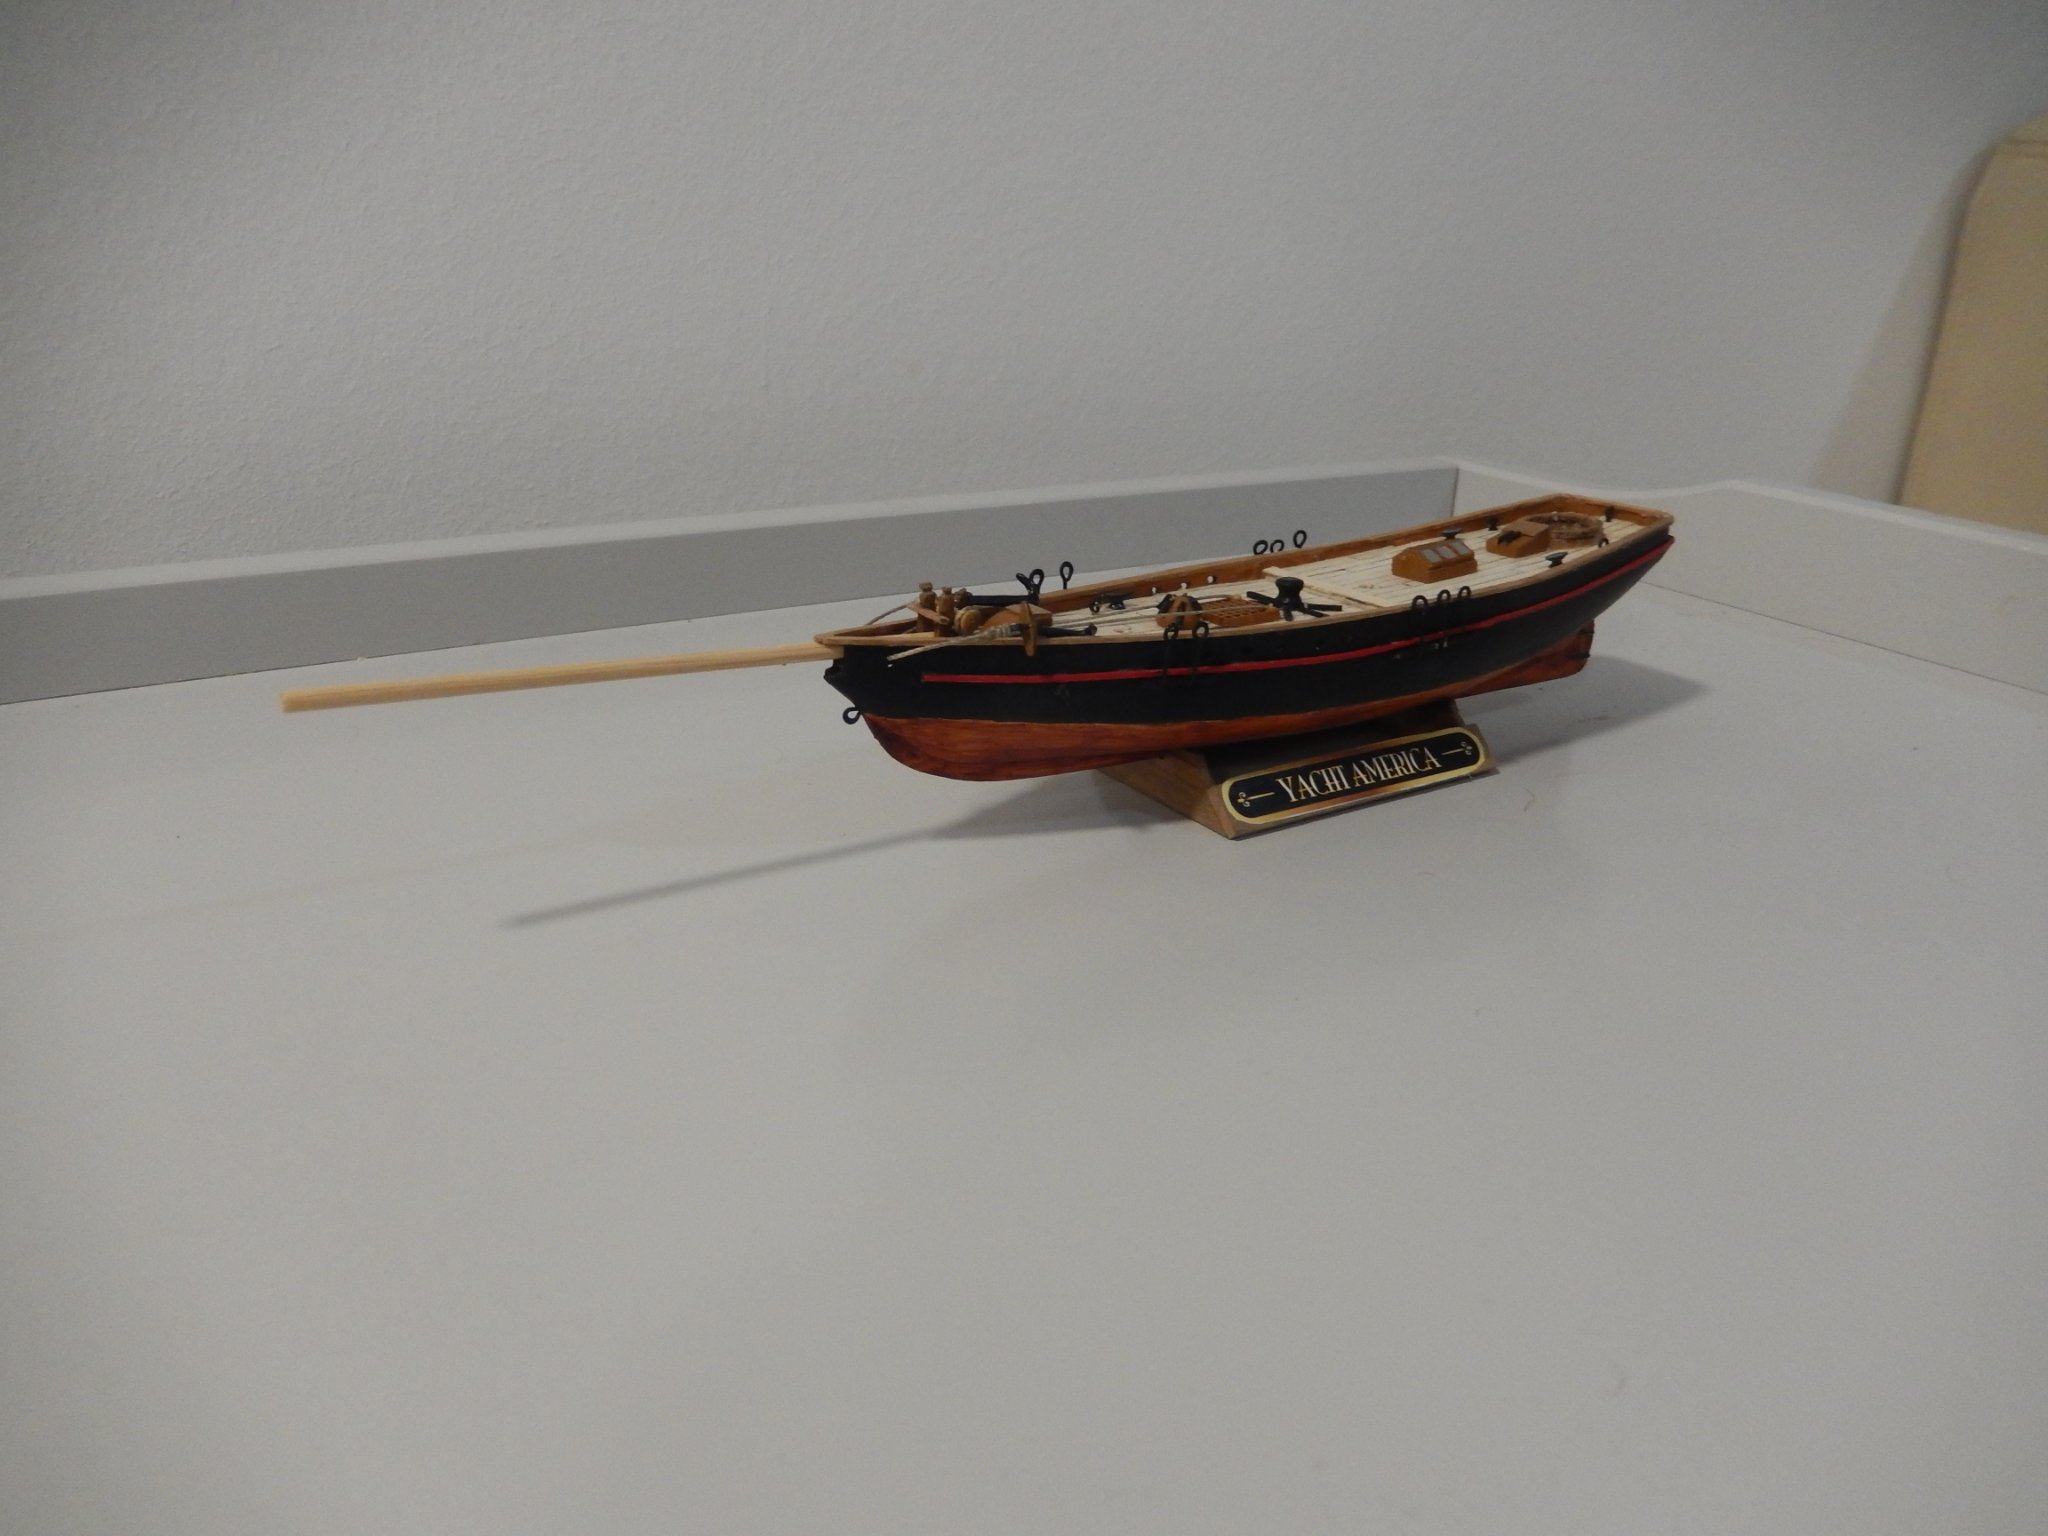
Done! Completed hanging the rest of the sails along with the rigging. The only things not finished are the pennant and the flag. The pennant is OK so I treated it; its drying and will get put in place tomorrow. I not happy with the flag – there weren’t 50 states in the US back in 1850. I’m going to see if I can find the correct flag; if not, I’ll hang the one that came with the kit. That’s it for ships for a while. Have two different kits waiting in the wings: Sopwith Camel rotary engine and ship’s cannon. Haven’t decided which to do first.

- 7 replies
-
- 2
-
-
- America
- solid hull
- (and 2 more)
-
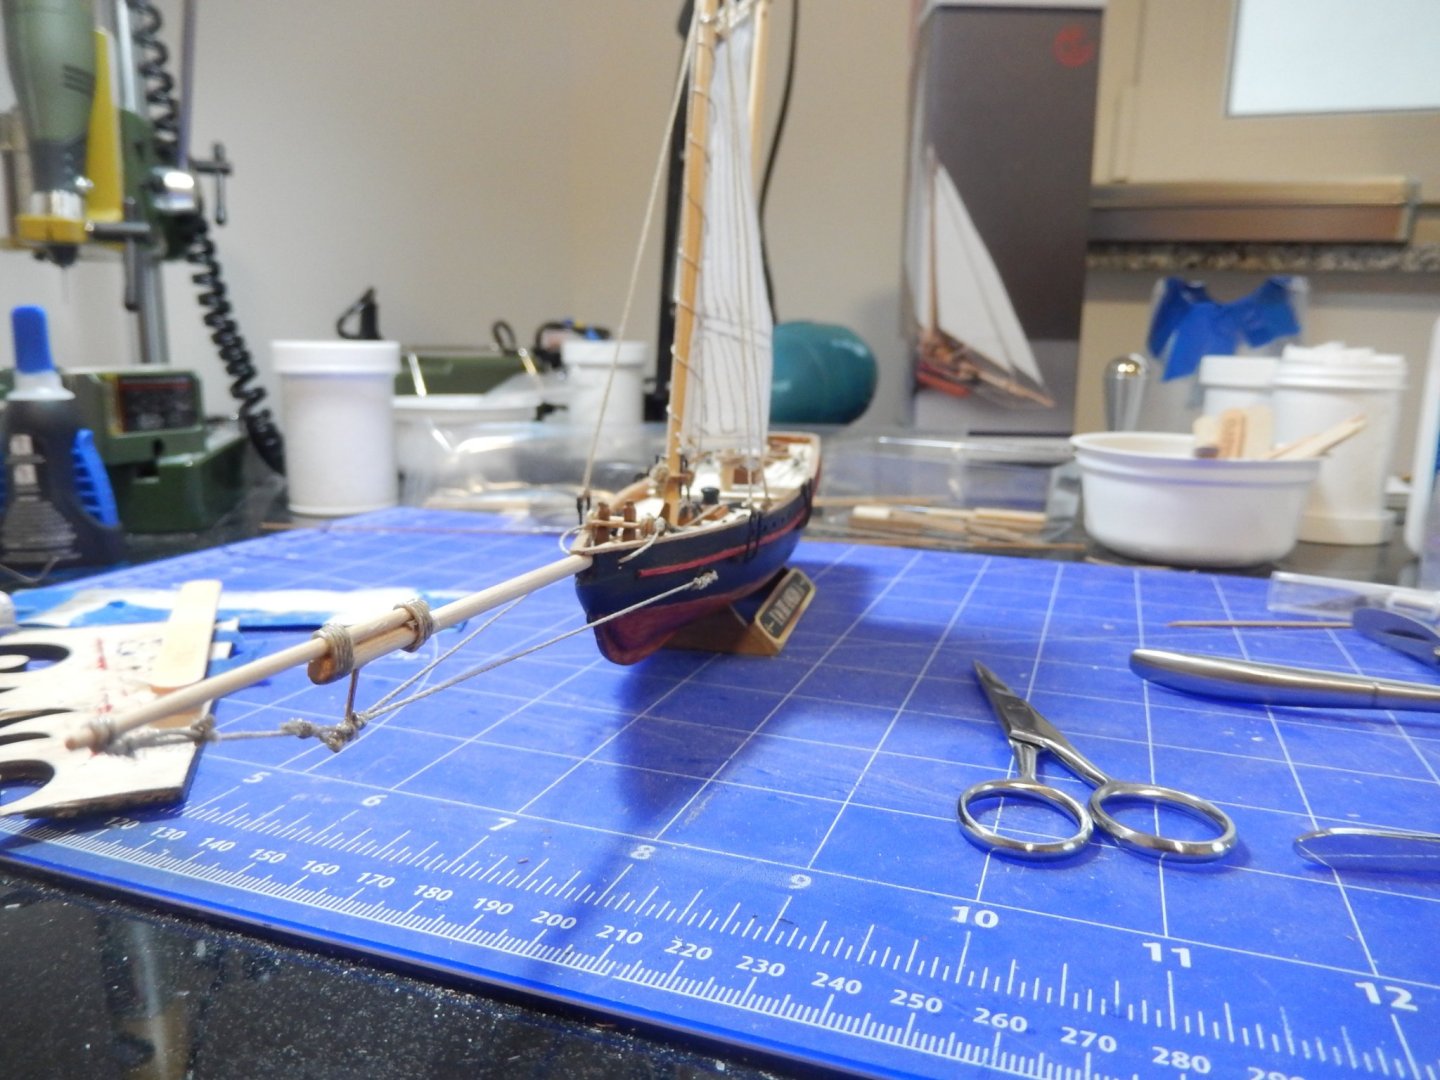
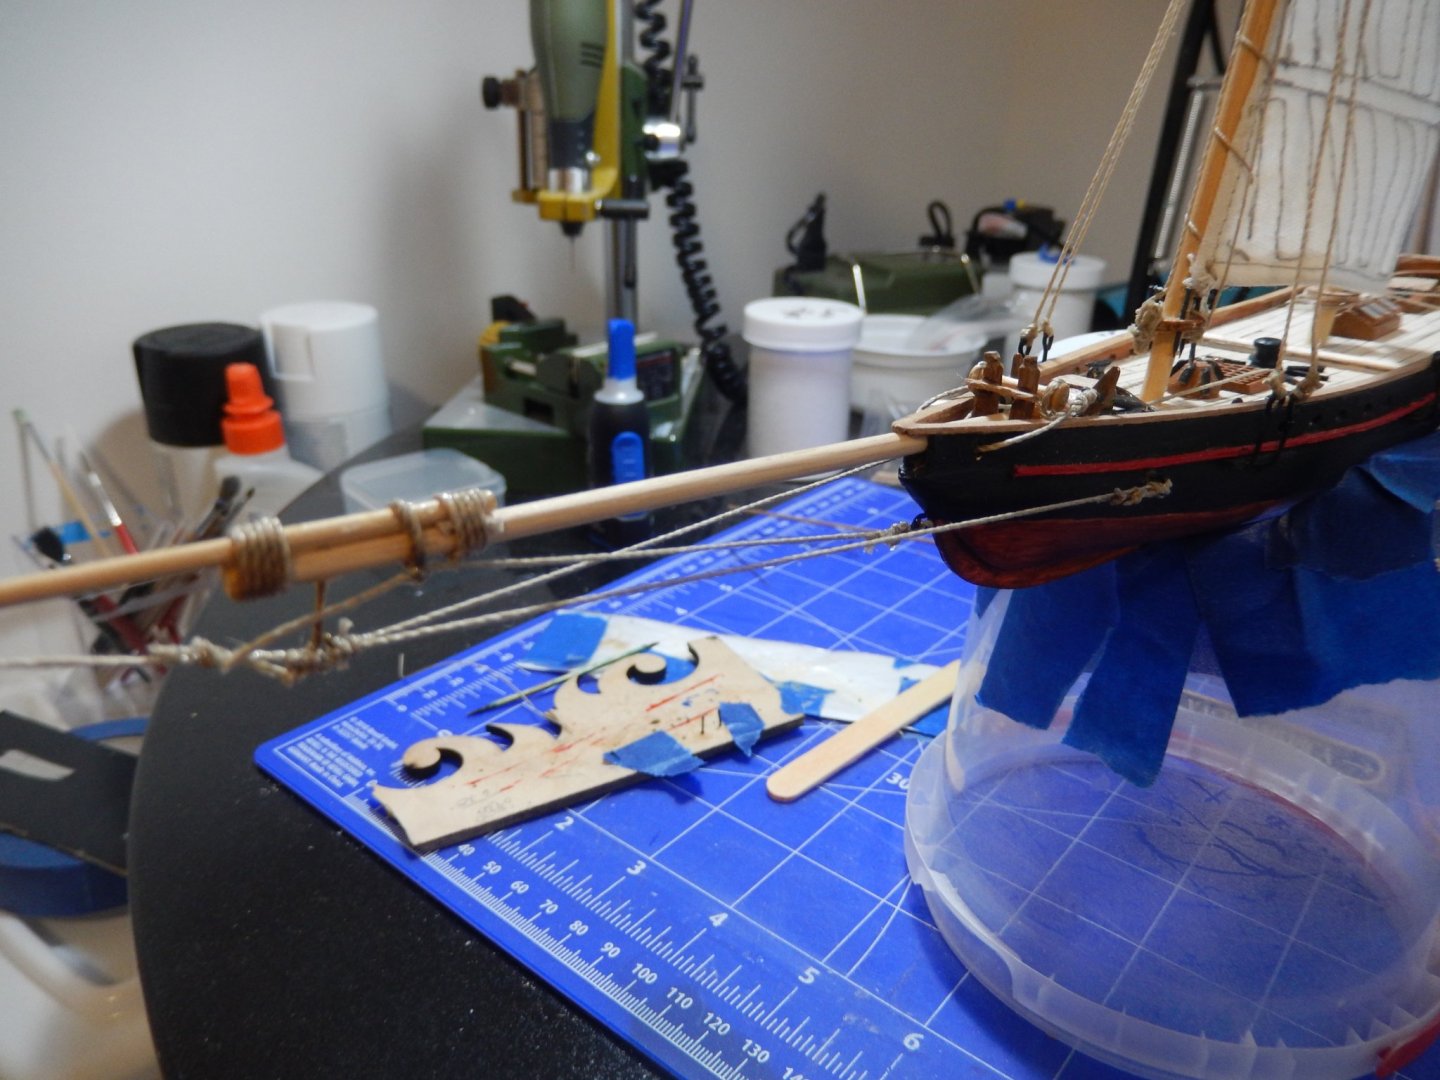
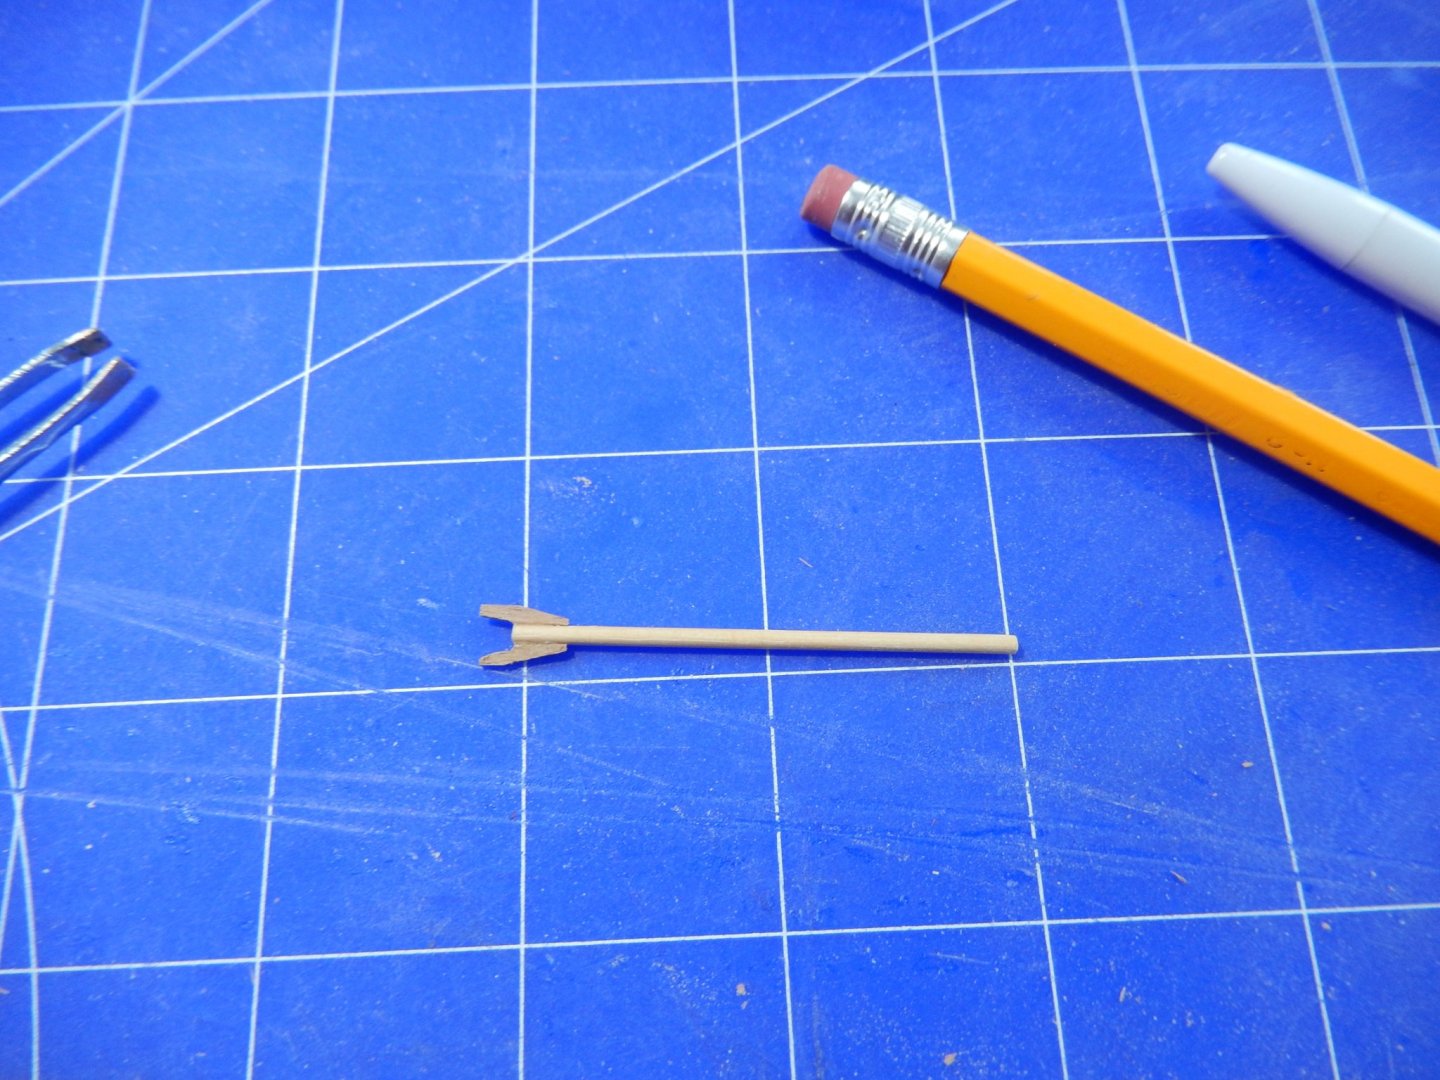
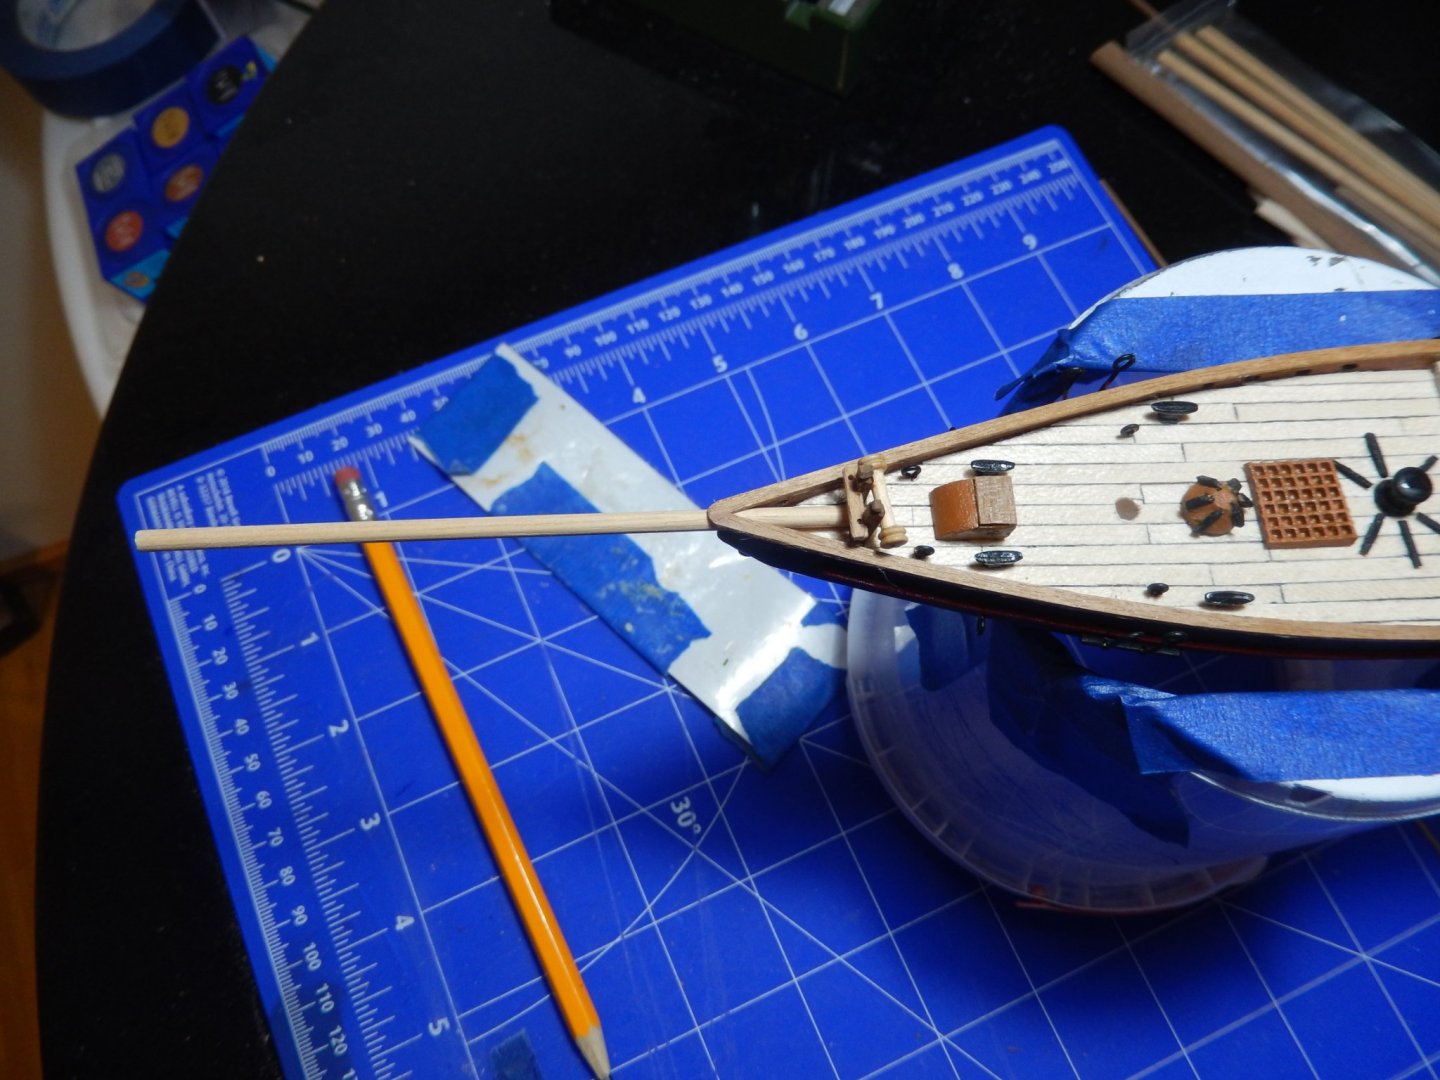
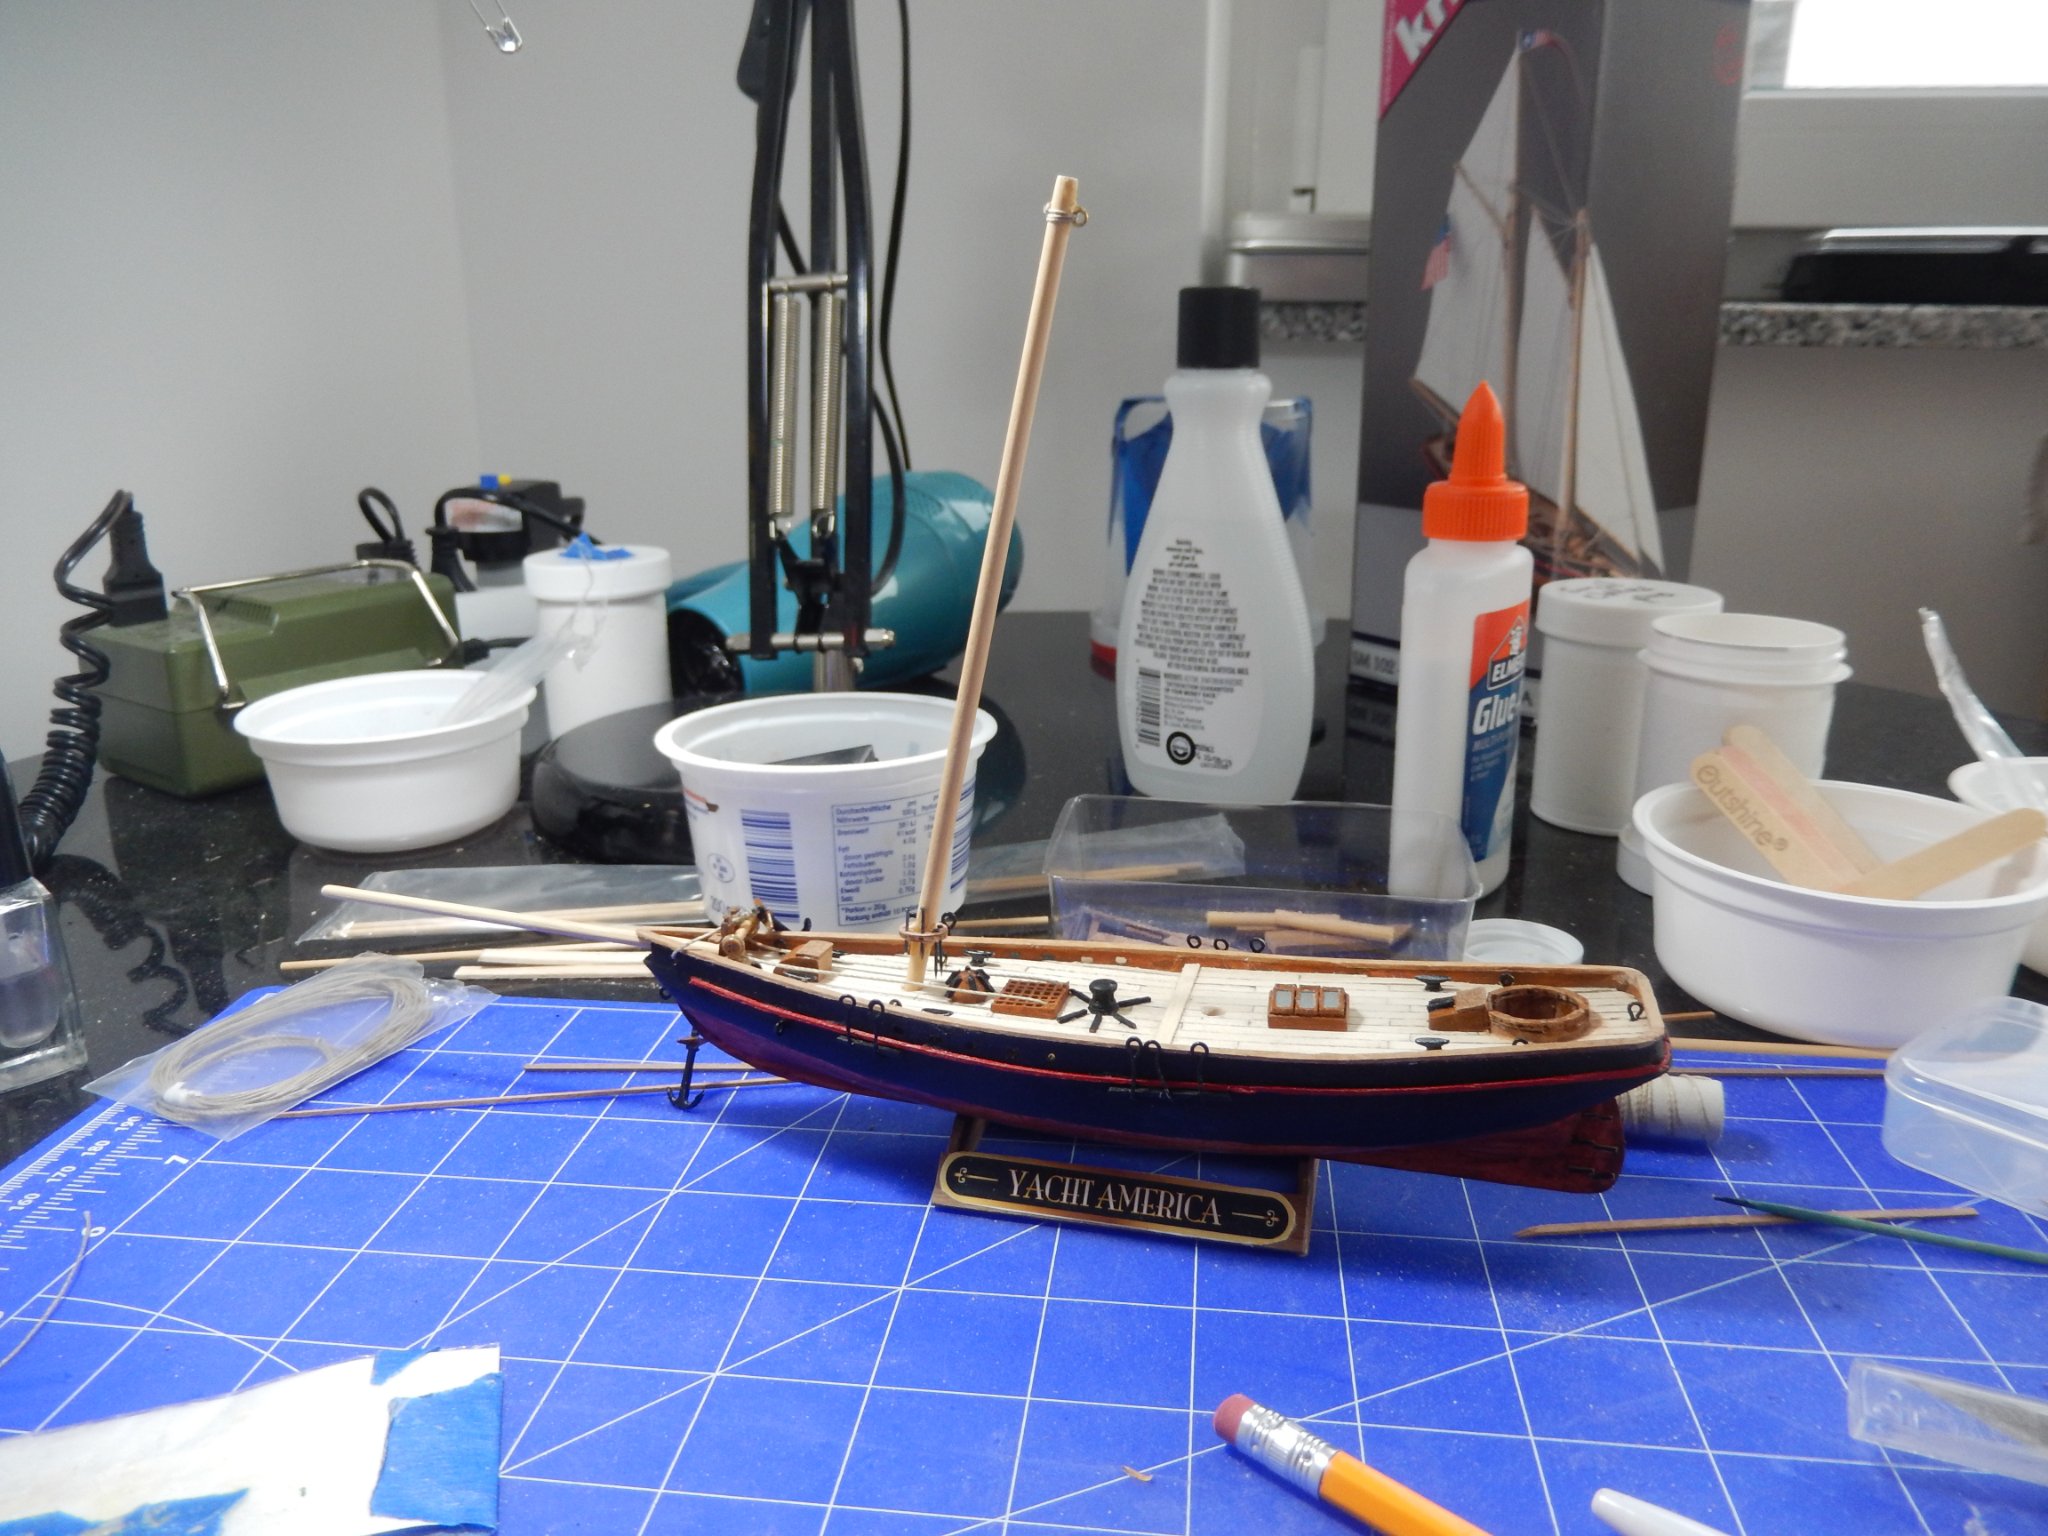
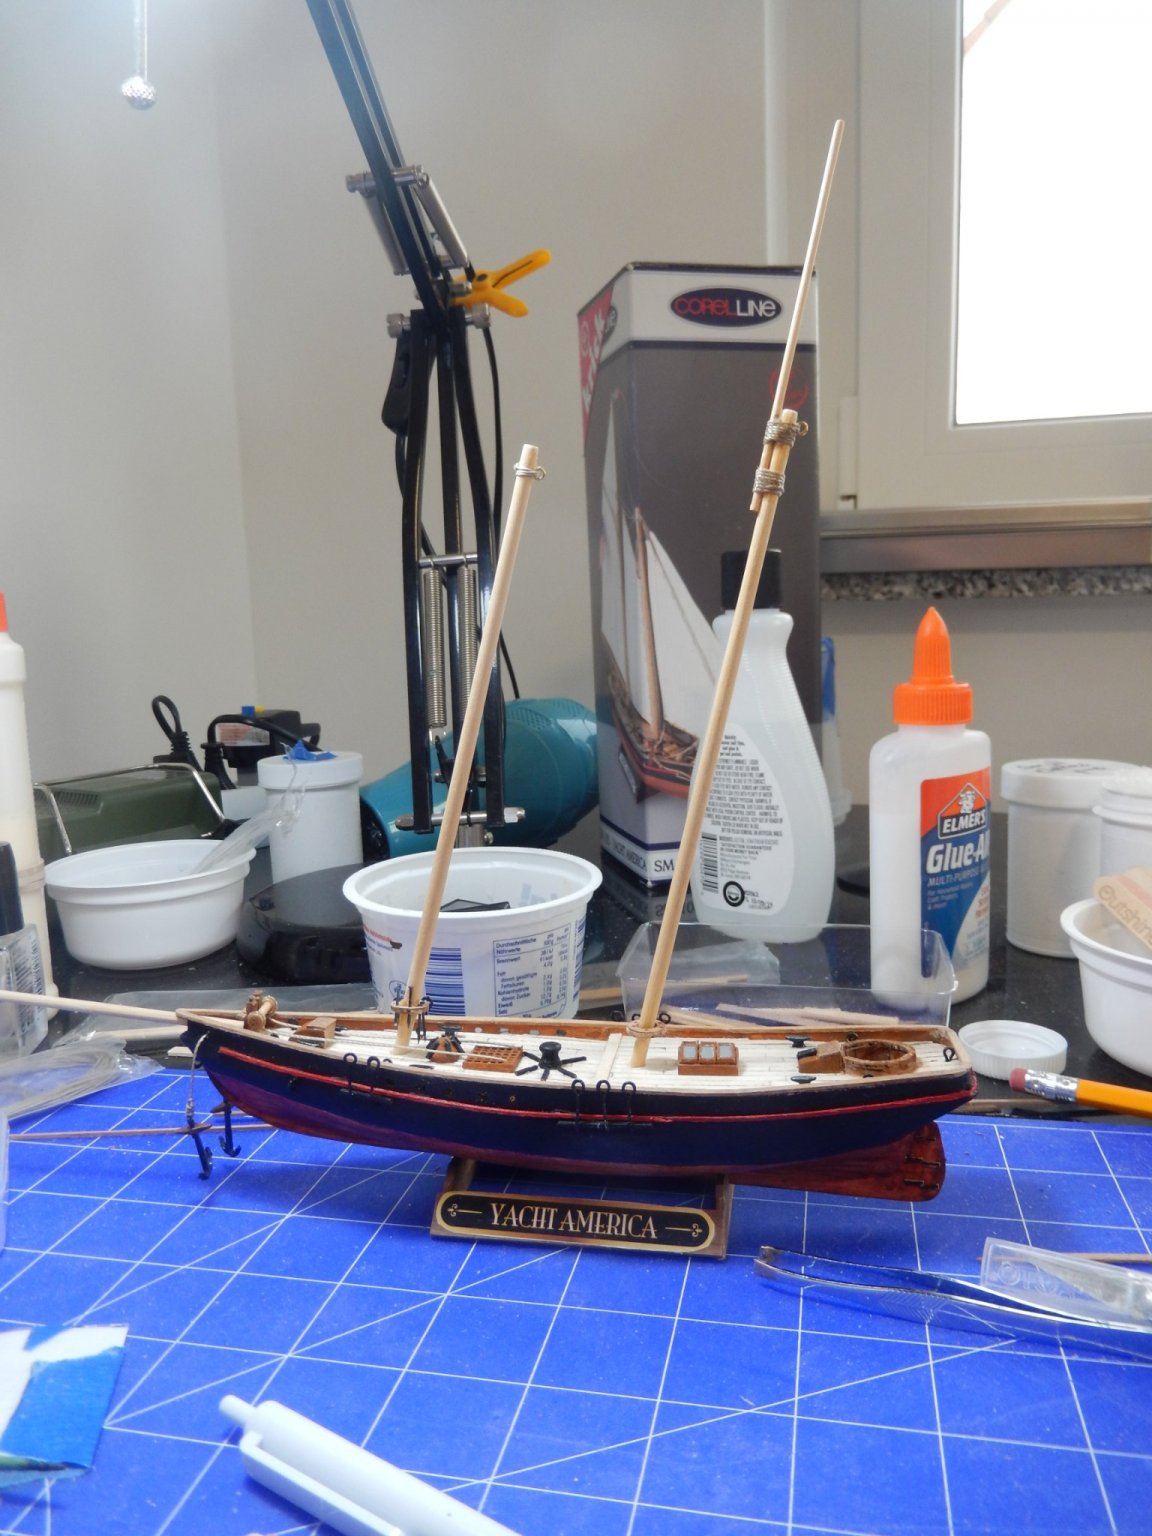
20210131 As expected I wasn't able to get any work done on the ship during the week. Saturday was spent rigging the foremast and sail and then starting on the bowsprit. Managed to crack the circular pin rail at the bottom of the foremast while doing the 2nd line; managed to piece it back together with some CA so not a major catastrophe. Reading through the instructions and reviewing the plans I decided to work on the bowsprit after the foremast as the 2 jib sails are rigged to lines from the foremast. Just figured it would be easier all around to finish the bow area before working on the main mast and sails.


- 7 replies
-
- 1
-
-
- America
- solid hull
- (and 2 more)
-
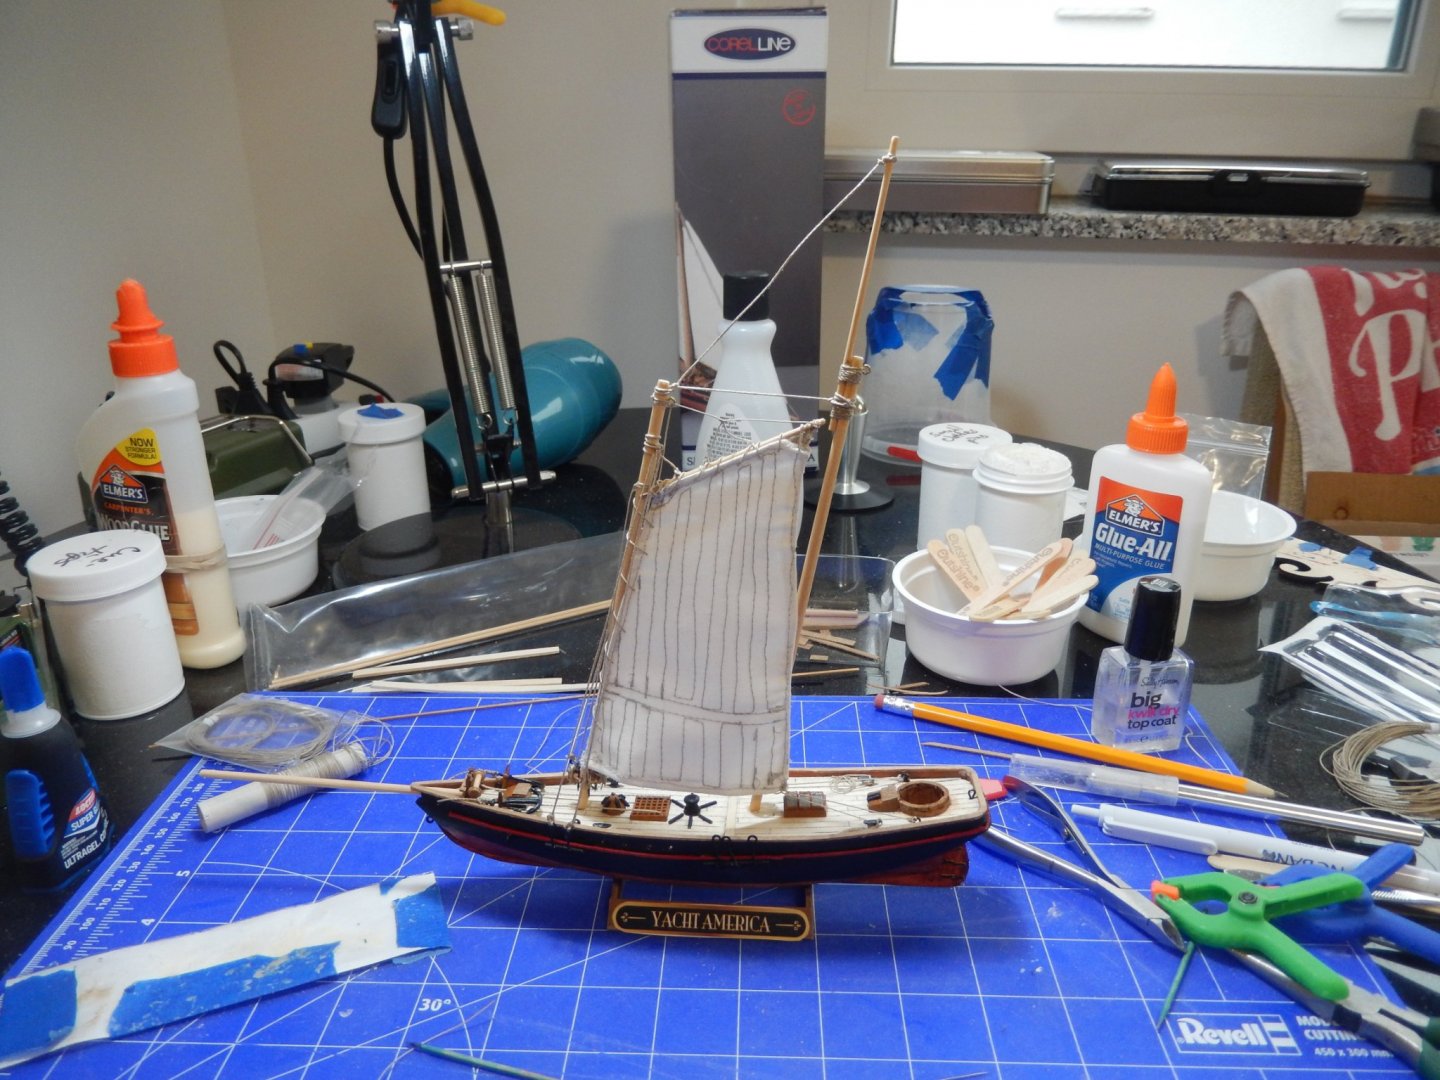
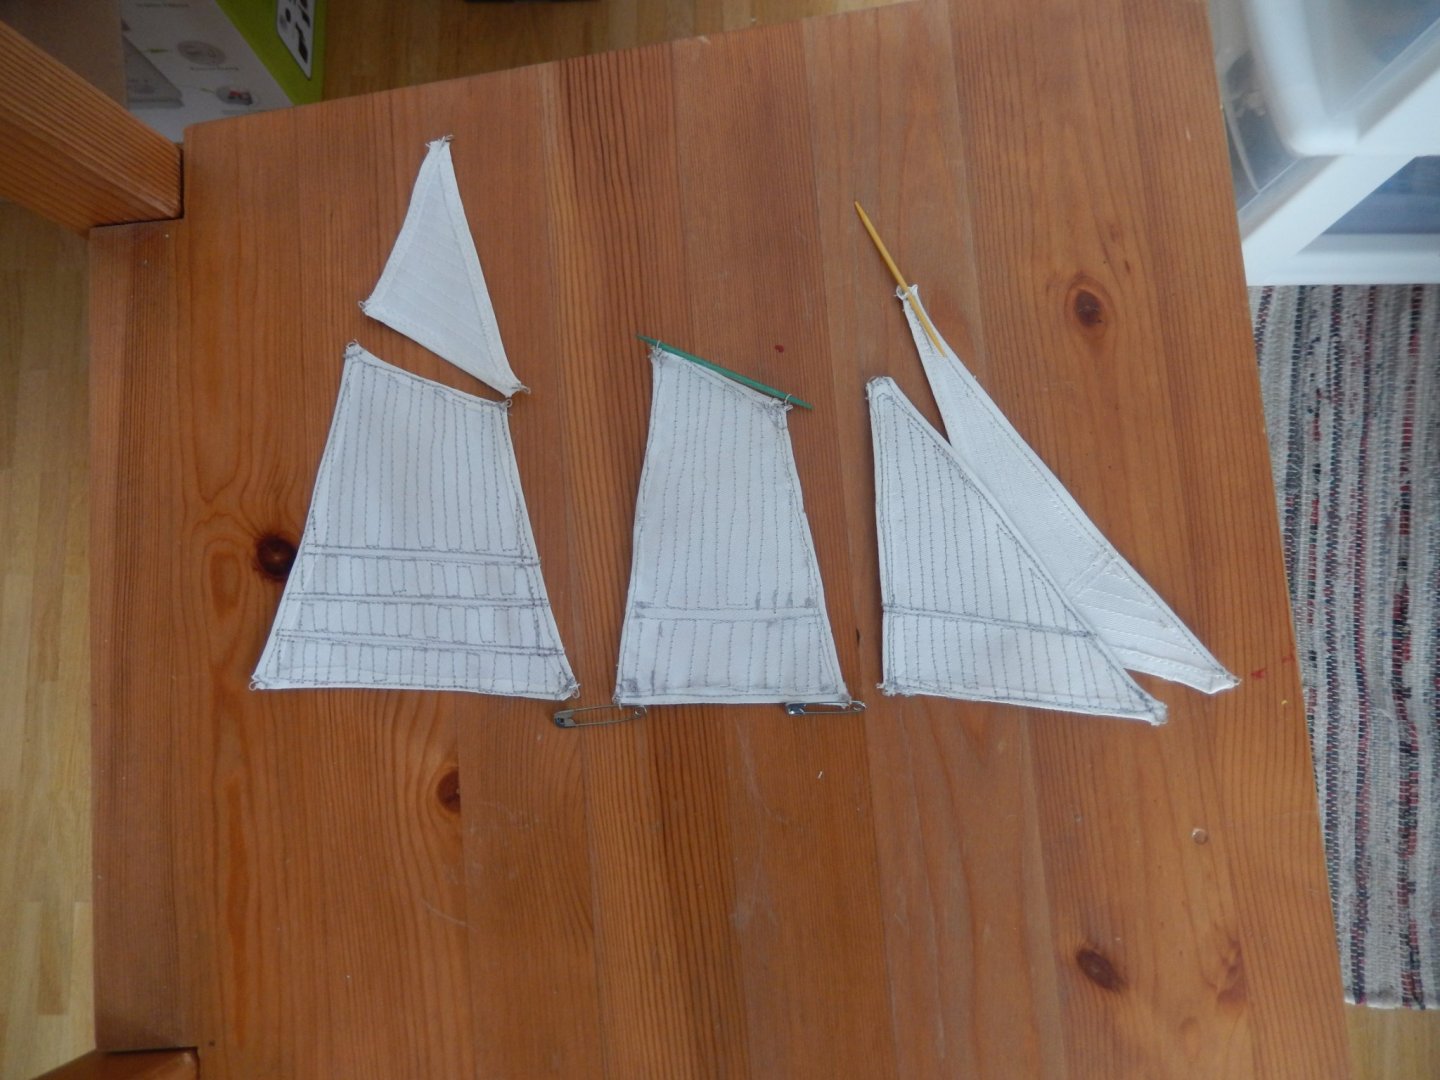
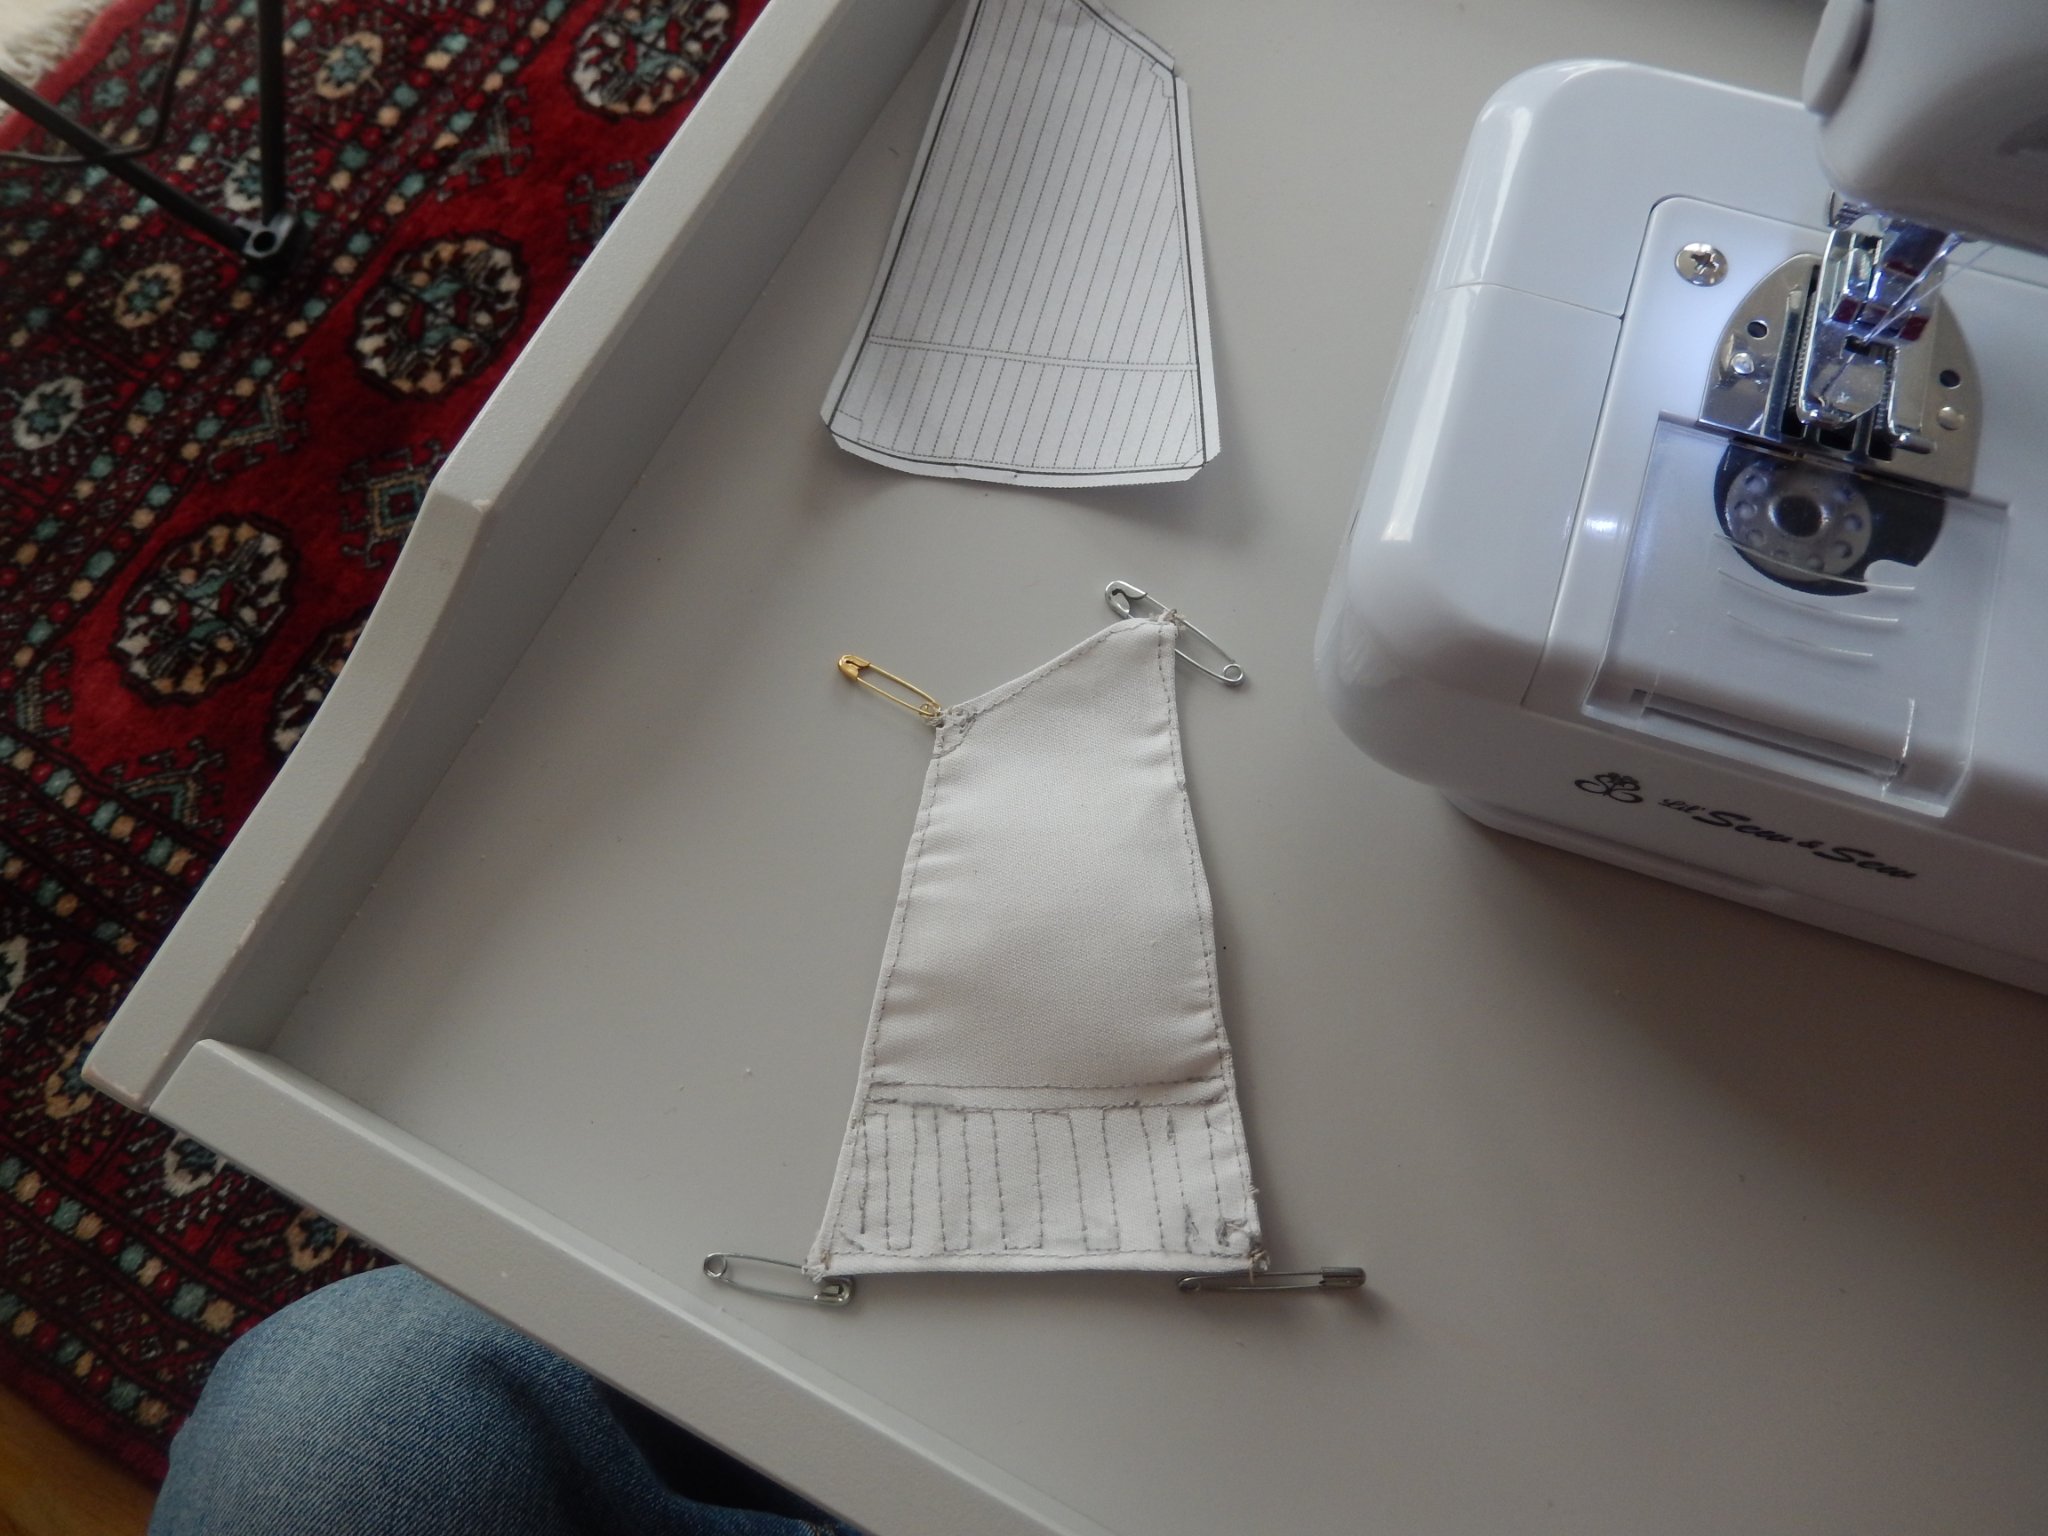
20210124 This past week was all about sewing the sails and stepping the masts. By yesterday afternoon I had the foresail lashed to the mast and was starting to run the rigging. Stopped because I’d been working for about six hours and was starting to get tired; no need to make avoidable mistakes. The directions said to fold in the edges over some small diameter line, glue them down and then use a pencil to draw on the reinforcing lines on the sails. I decided to do it differently (sew the edges down after ironing/starching the heck out of the cloth then sew the reinforcing lines). In the process I learned some things that will allow me to do this differently (and better) the next time I sew sails. The reinforcing lines are a bit far apart as I had difficulty seeing exactly where I was each time I started a new line of stitching (when the stores open again I'll see if I can find a clear presser foot for the machine). Also, I ran out of the light gray thread that I used on the 3 major sails (mainsail, foresail, topgallant) so the jib and spinnaker ended up with white thread as the reinforcement (perhaps I should have sewed all of the sails with white thread; the not-so-straight reinforcing lines wouldn't have stood out quite as much). The end result is acceptable and I think they’ll look OK once I get them rigged. I only finished the top gaff for the foresail but took two tries to get it right. Still learning. Hopefully the main sail gaffs will be done right the first time. I won’t have much time available this week to work on the ship due to work stuff but hopefully I’ll get an hour or two during the week and part of a day next Saturday/Sunday to put in some time (weather dependent; if the weather is good I’ll spend one day in the mountains hiking). The plan is to finish rigging the foresail/mast and then start on the main. The plan is, as usual, flexible as I see no need to have clear ‘gotta hit them’ goals in this process.


- 7 replies
-
- 1
-
-
- America
- solid hull
- (and 2 more)
-
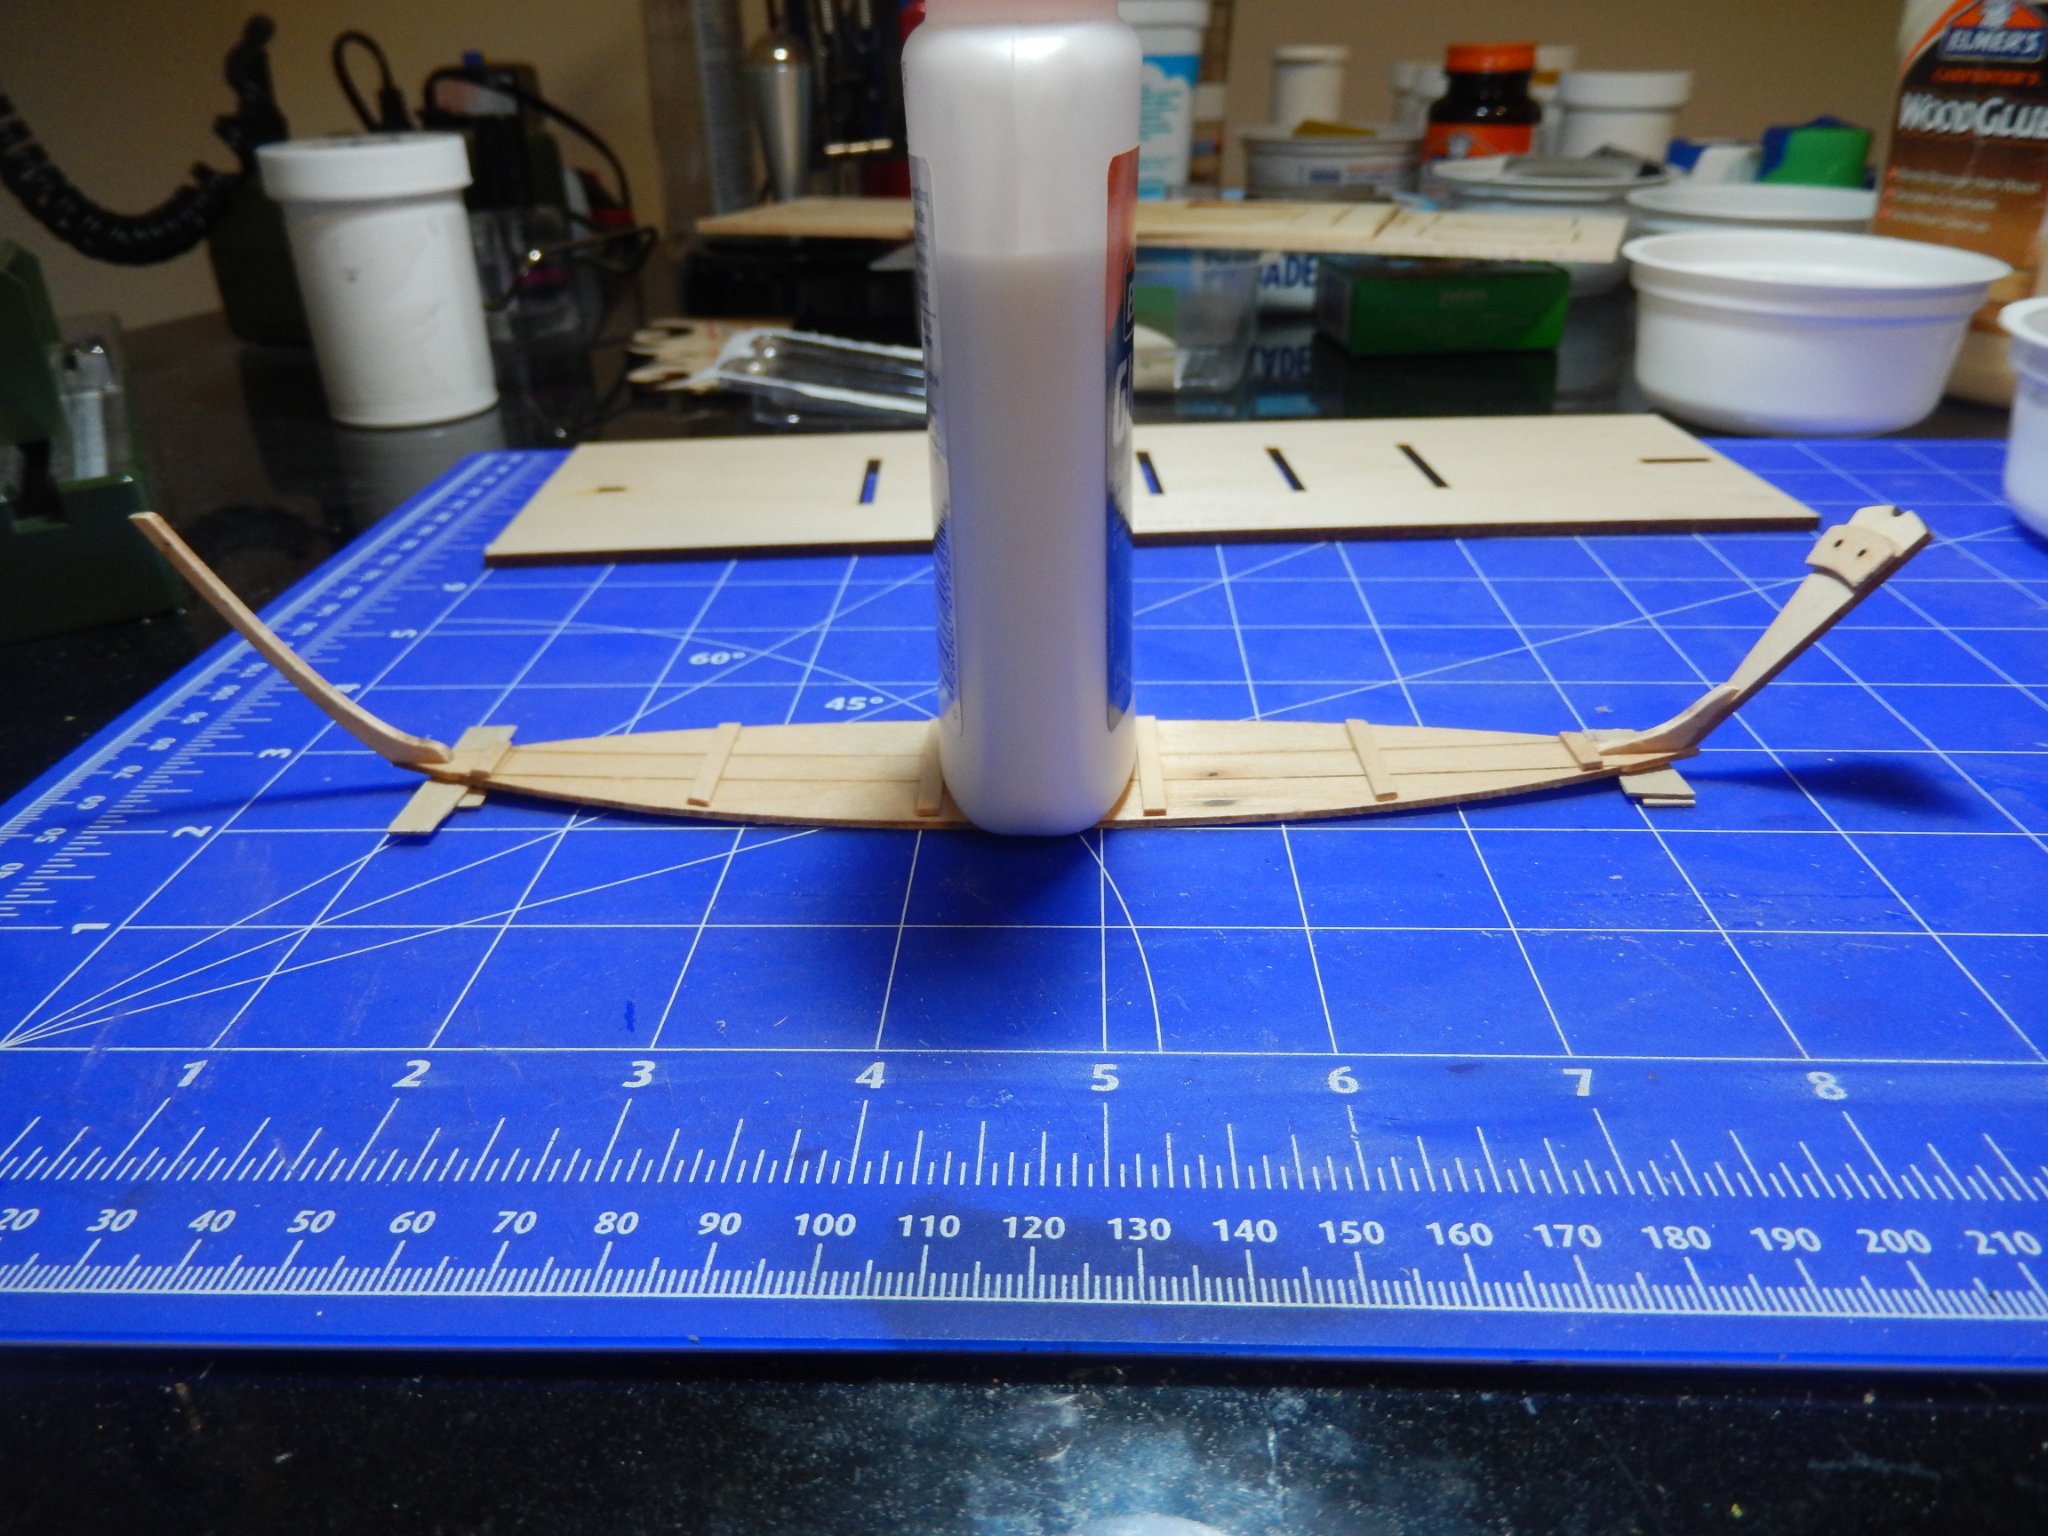
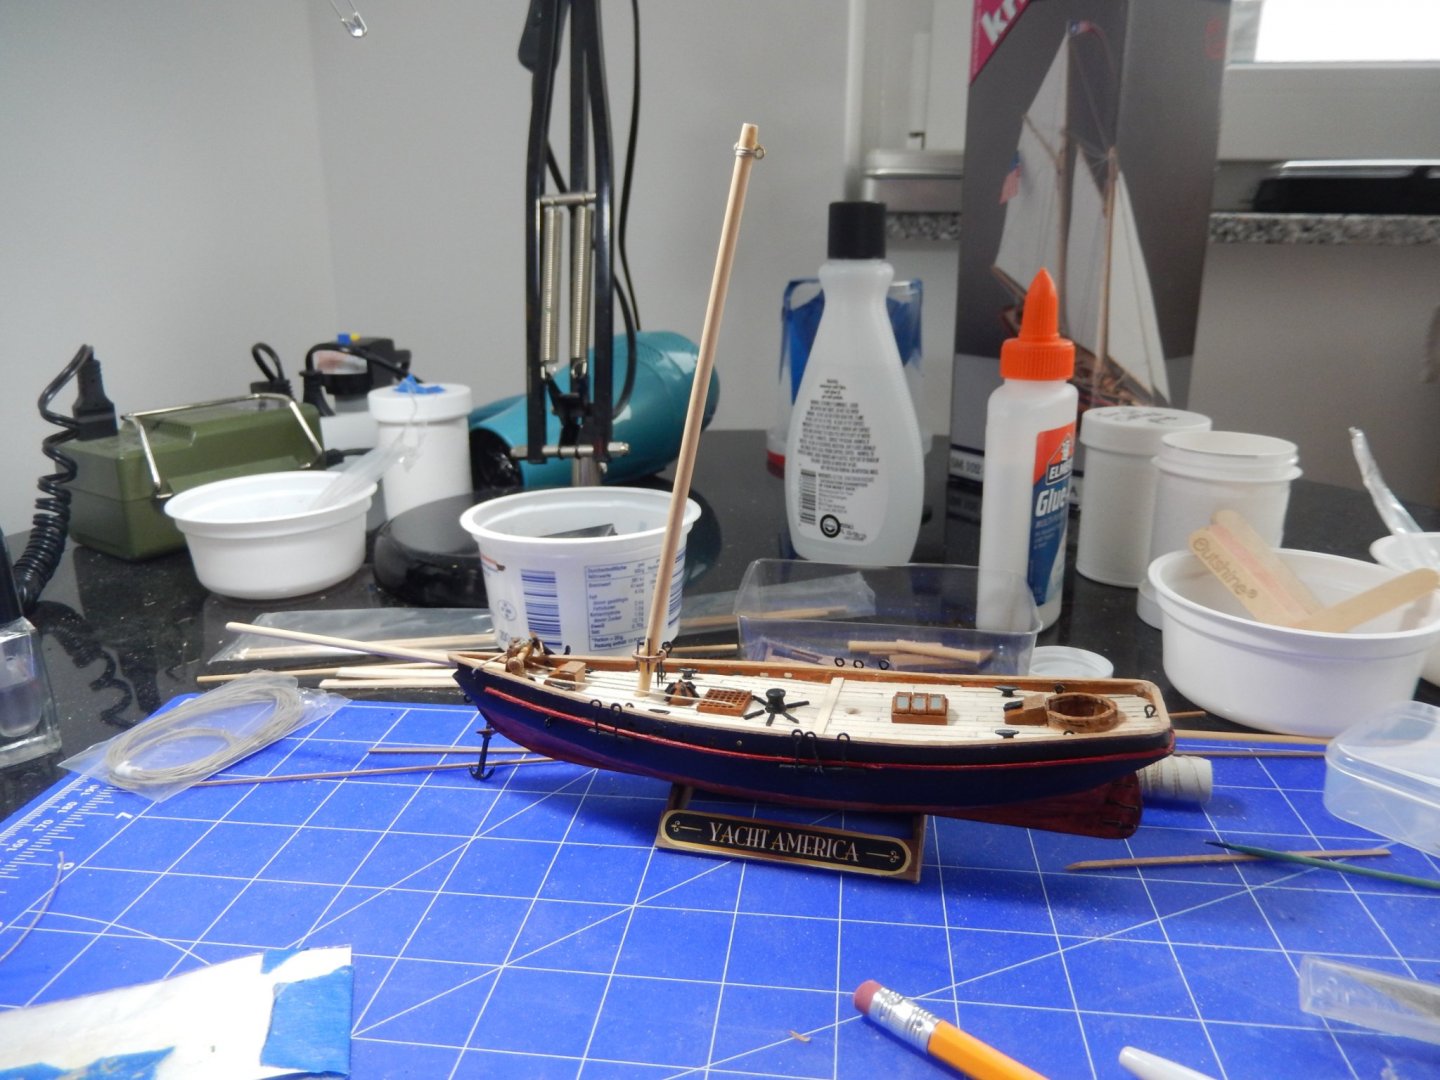
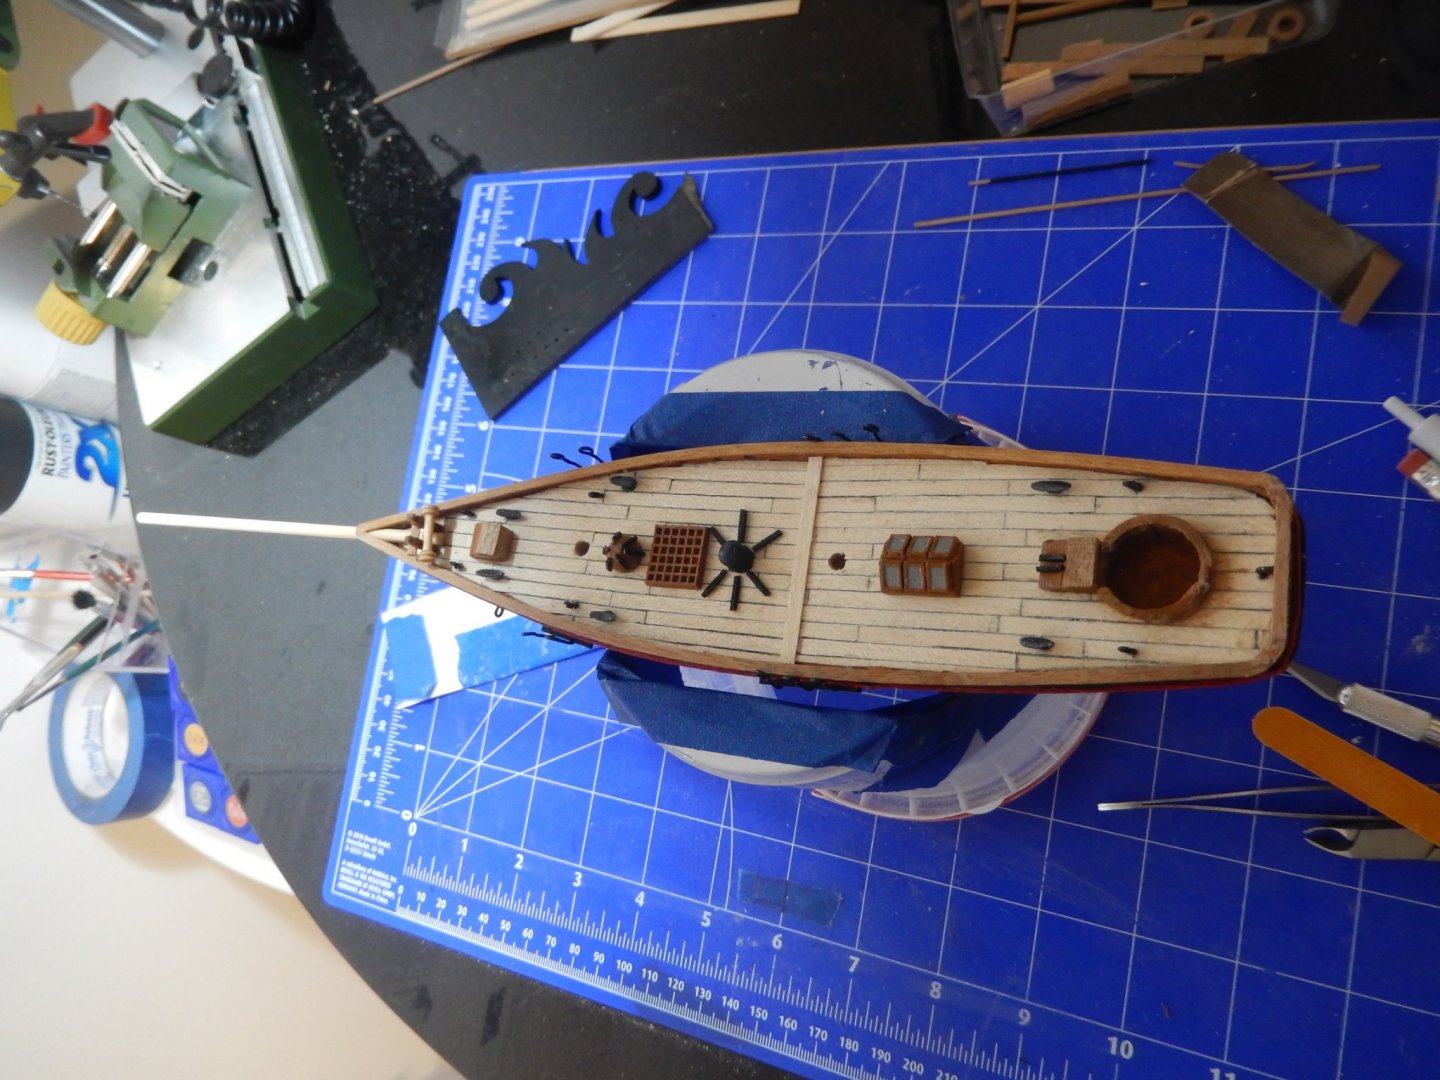
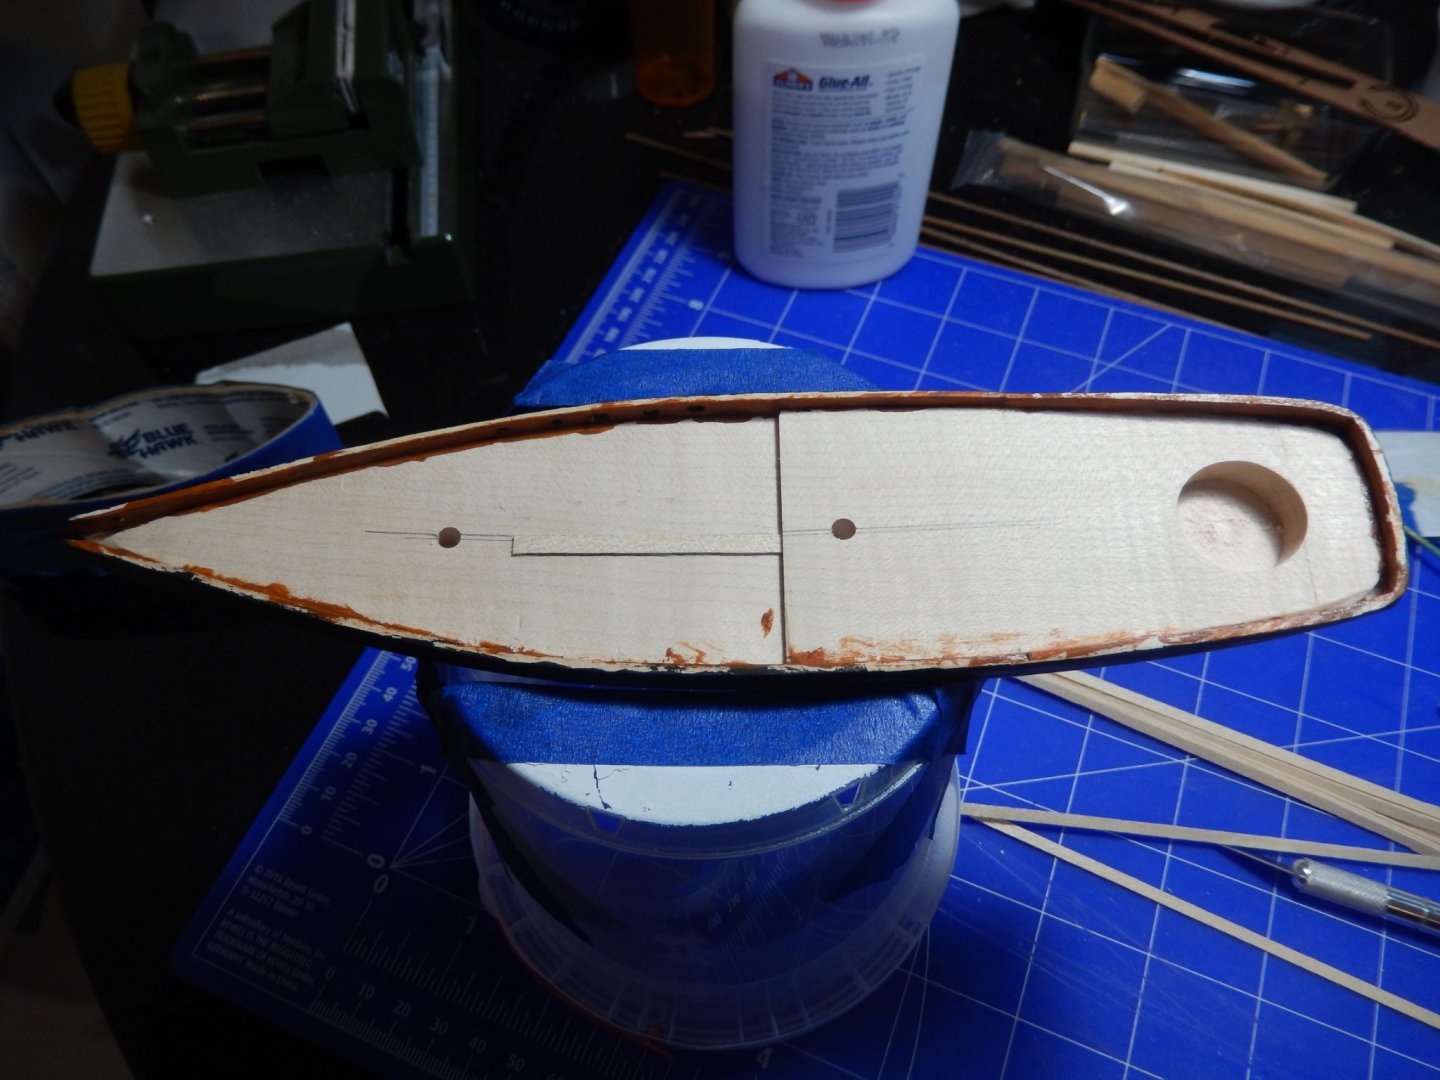
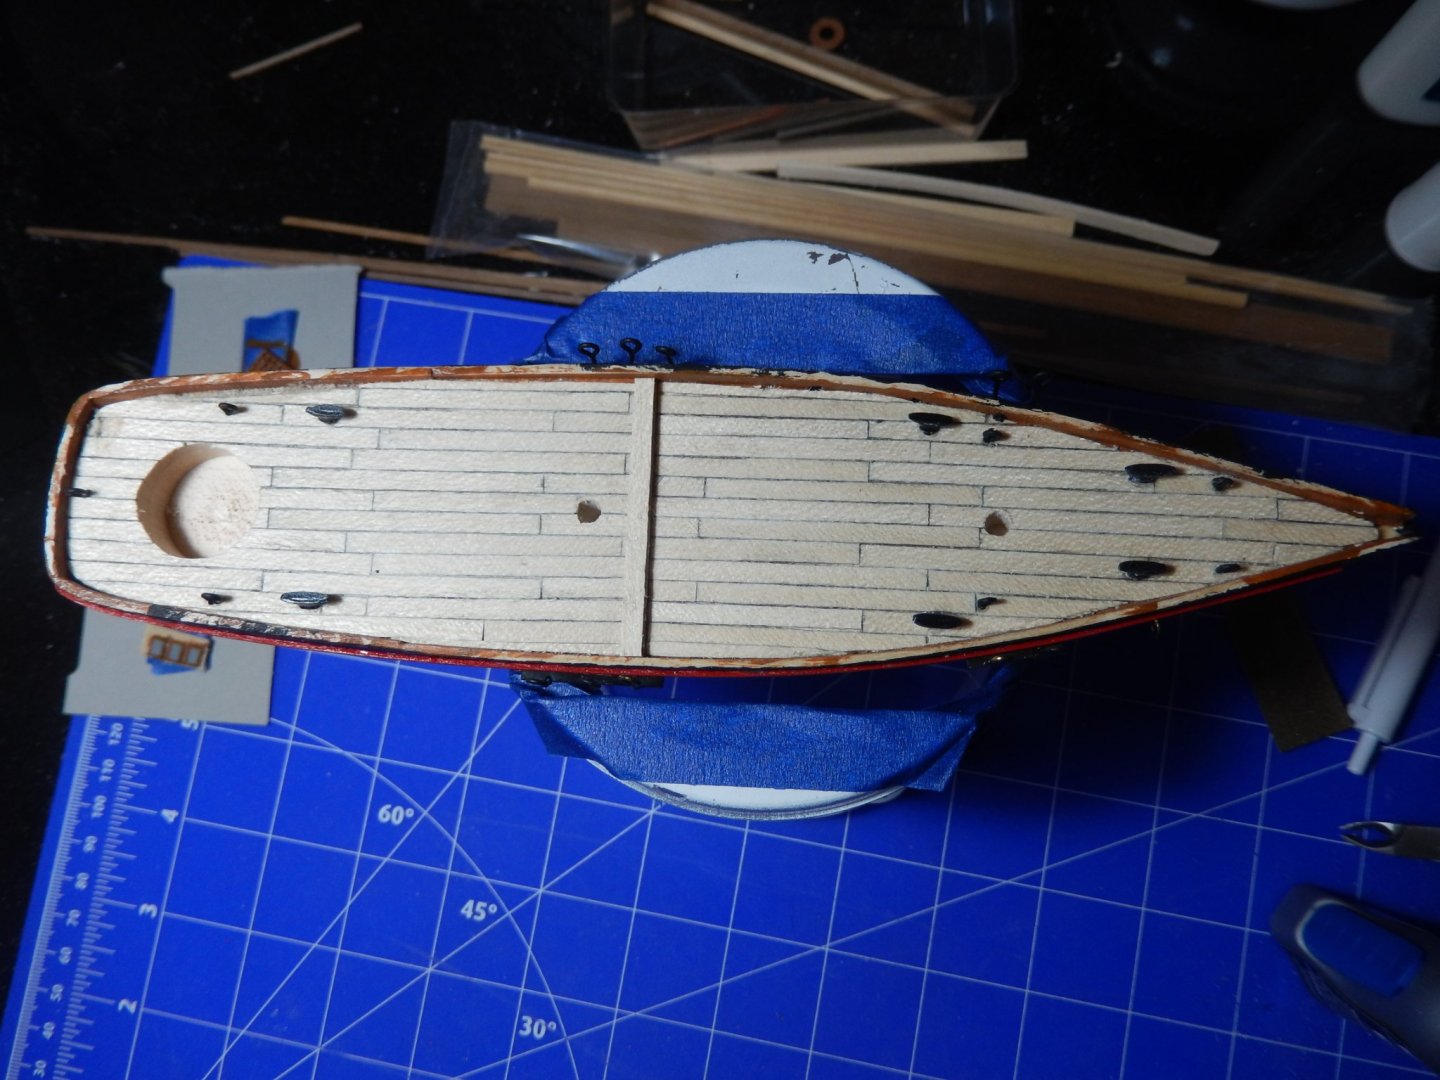
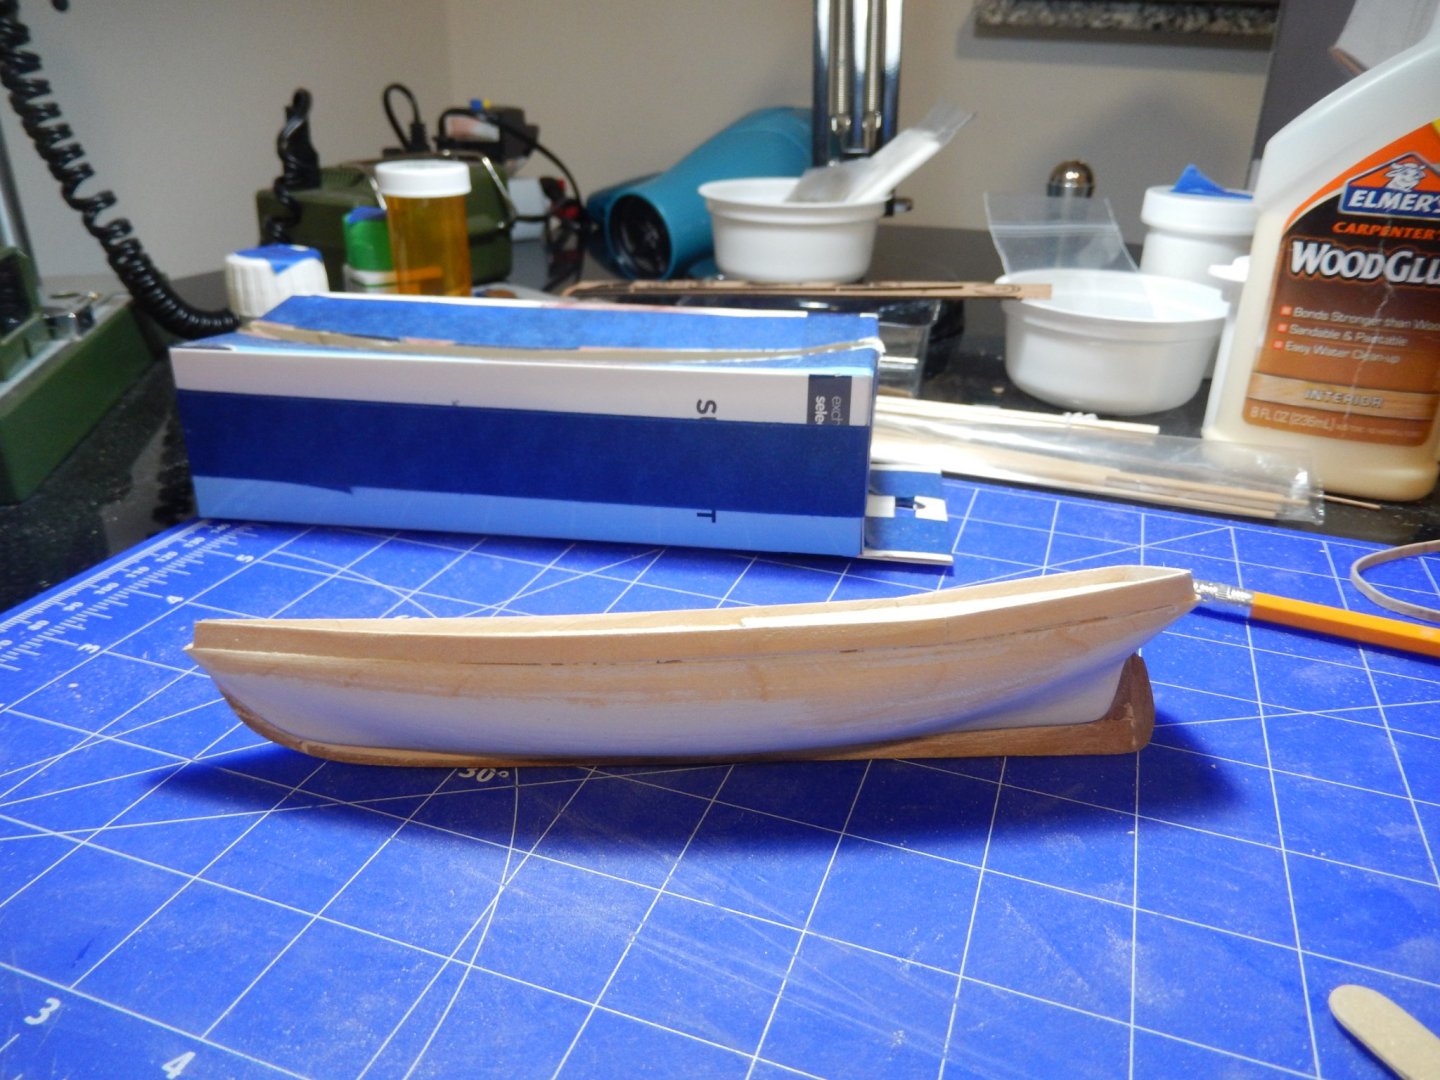
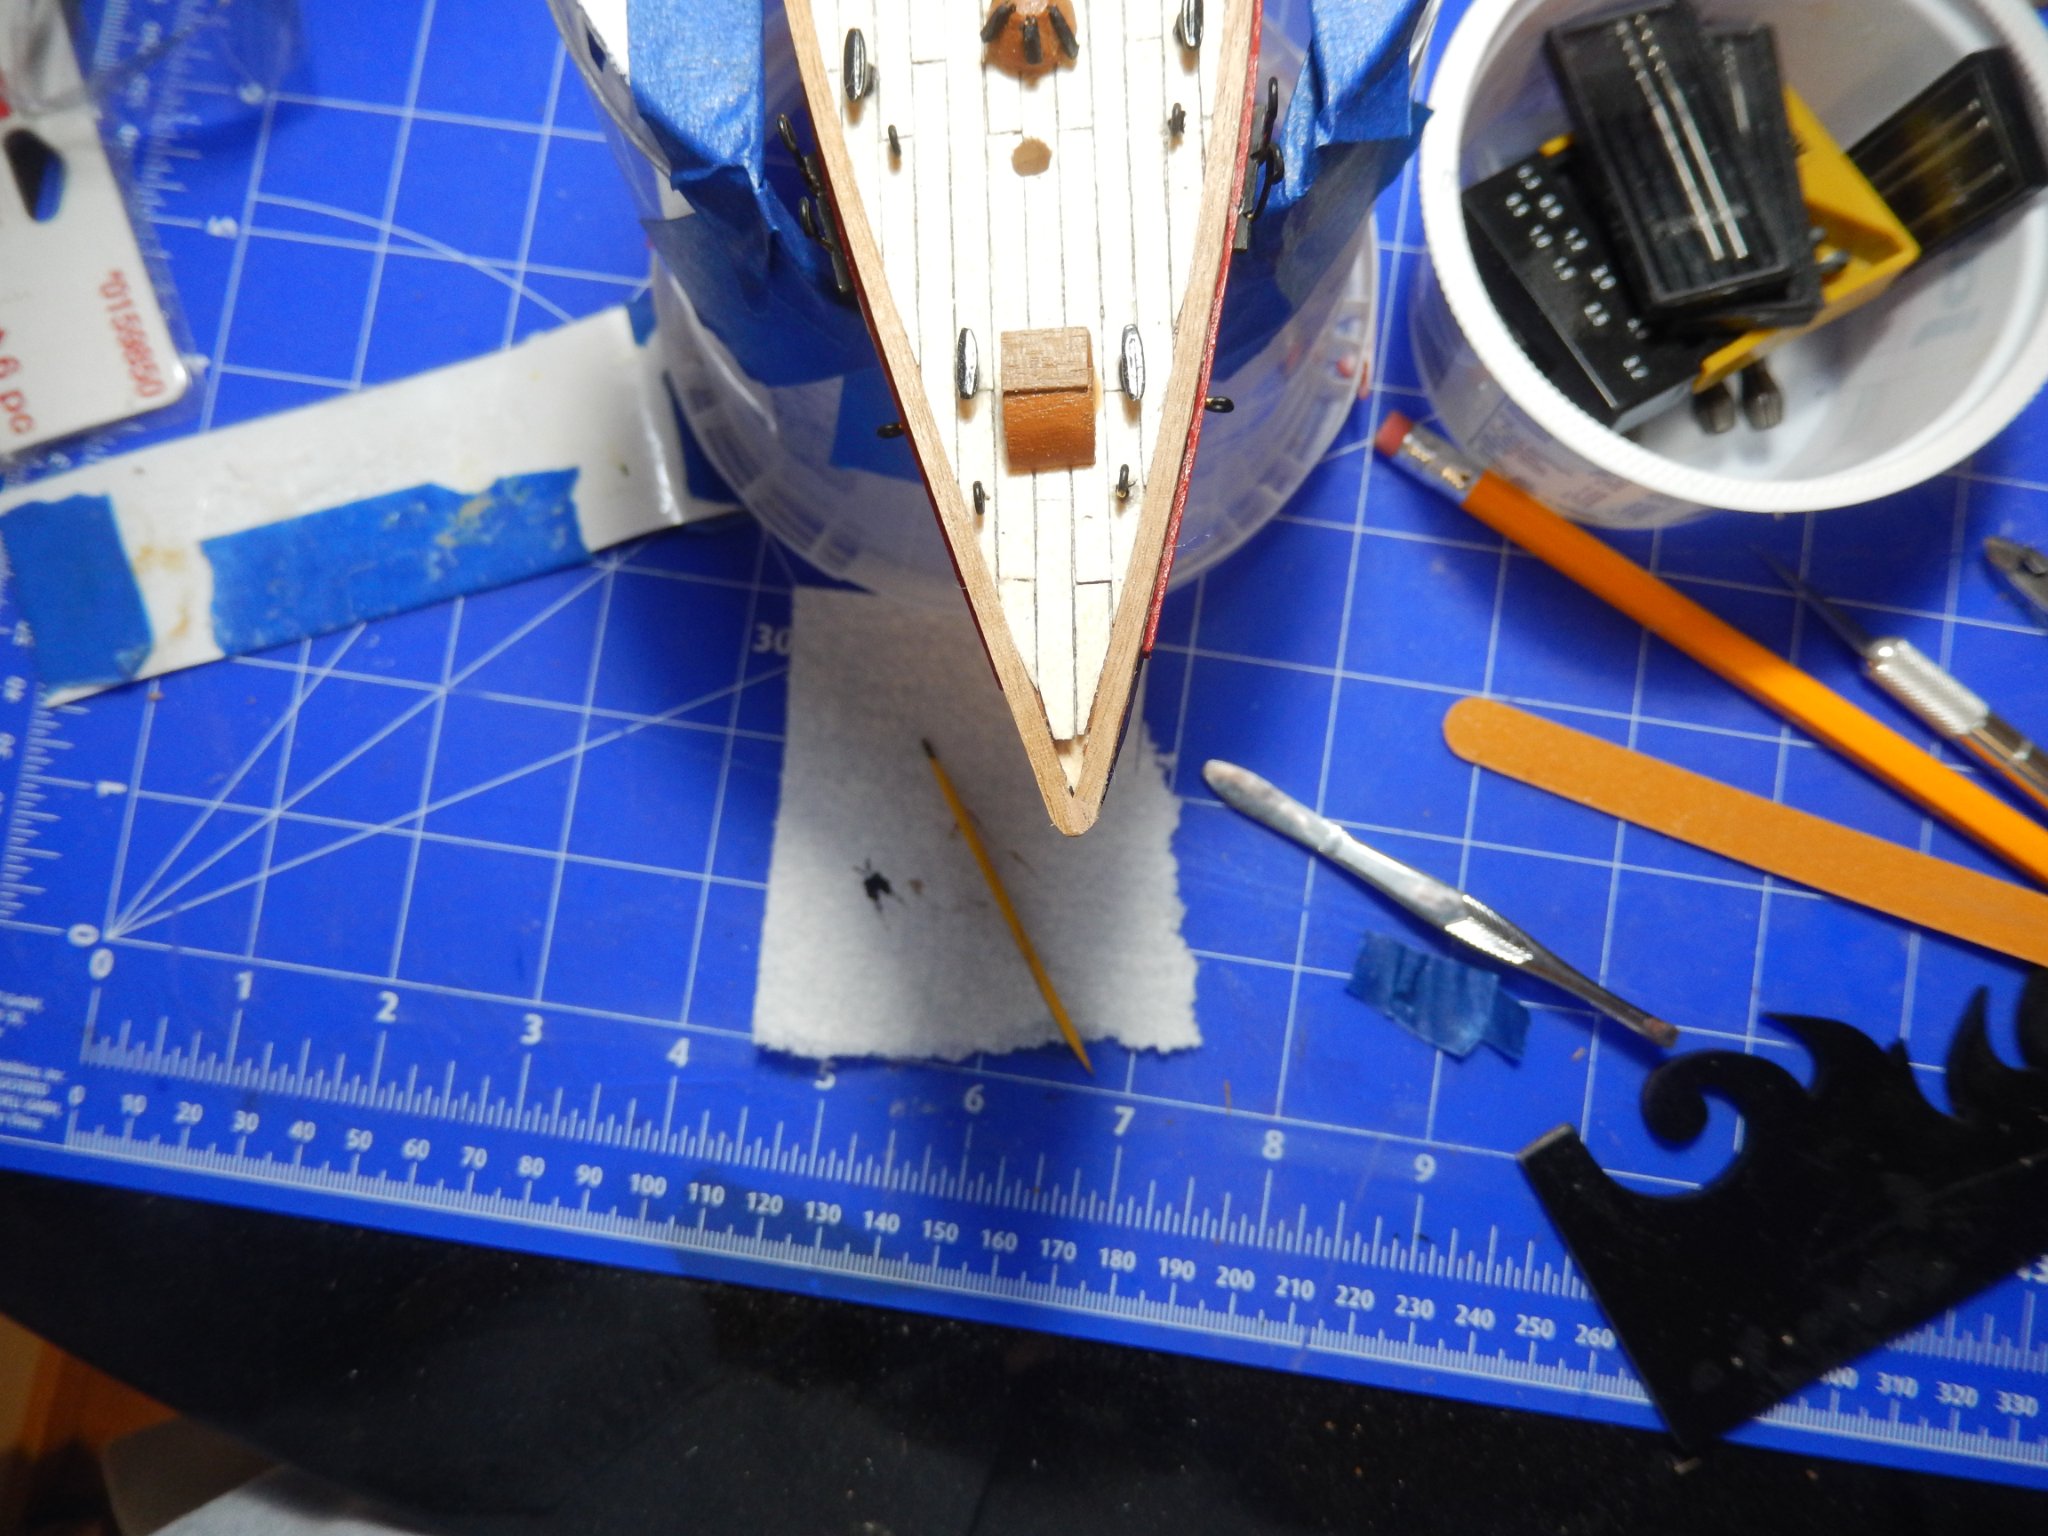
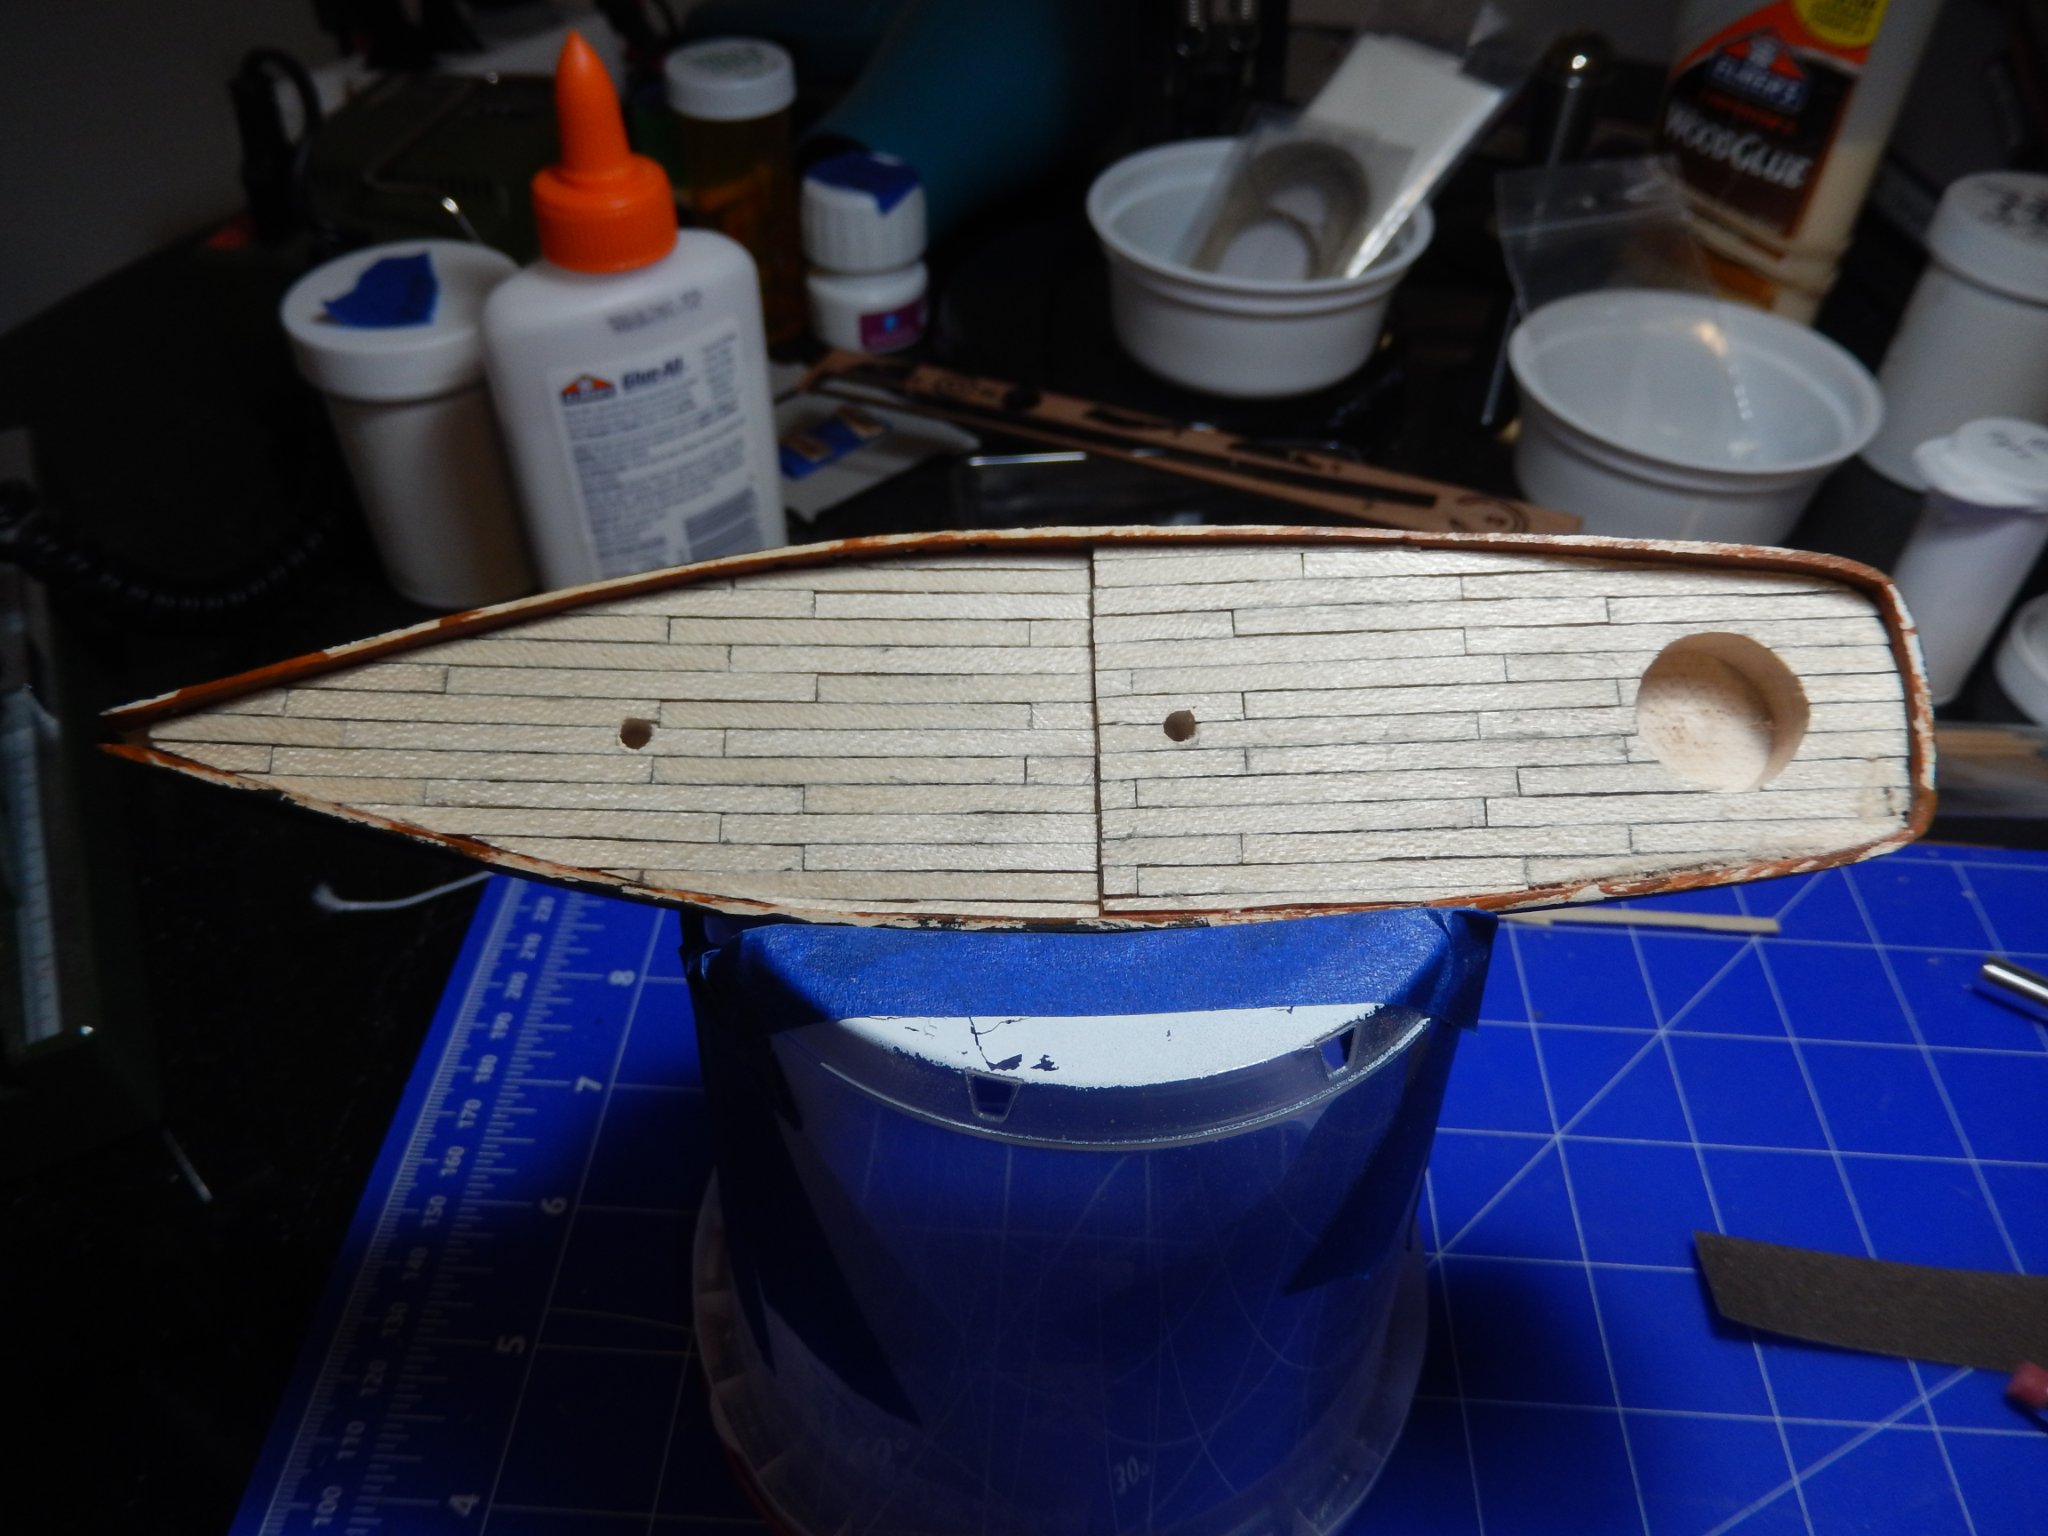
20210115 Have made steady progress; hull is complete with all items installed including bowsprit (more shaping needed) and anchors. Along they way I re-learned that one needs to read measurements on the correct scale (yep, there is definitely a difference between mm and 1/16’s of an inch) and sometimes you just have to say ‘enough for tonight; will finish up tomorrow’). Being patient with the X-Acto knife, a set of ingrown toenail clippers (repurposed as plank nippers), needle files and some emery paper allowed me to finish the side rail cap including the rounded bow and stern corners. The challenge this weekend and the coming week, when I’m not out in the mountains, will be recreating the sails so I can install them on the masts once they are shaped, installed and rigged. Looking forward to what is still to be.


- 7 replies
-
- 2
-
-
- America
- solid hull
- (and 2 more)
-
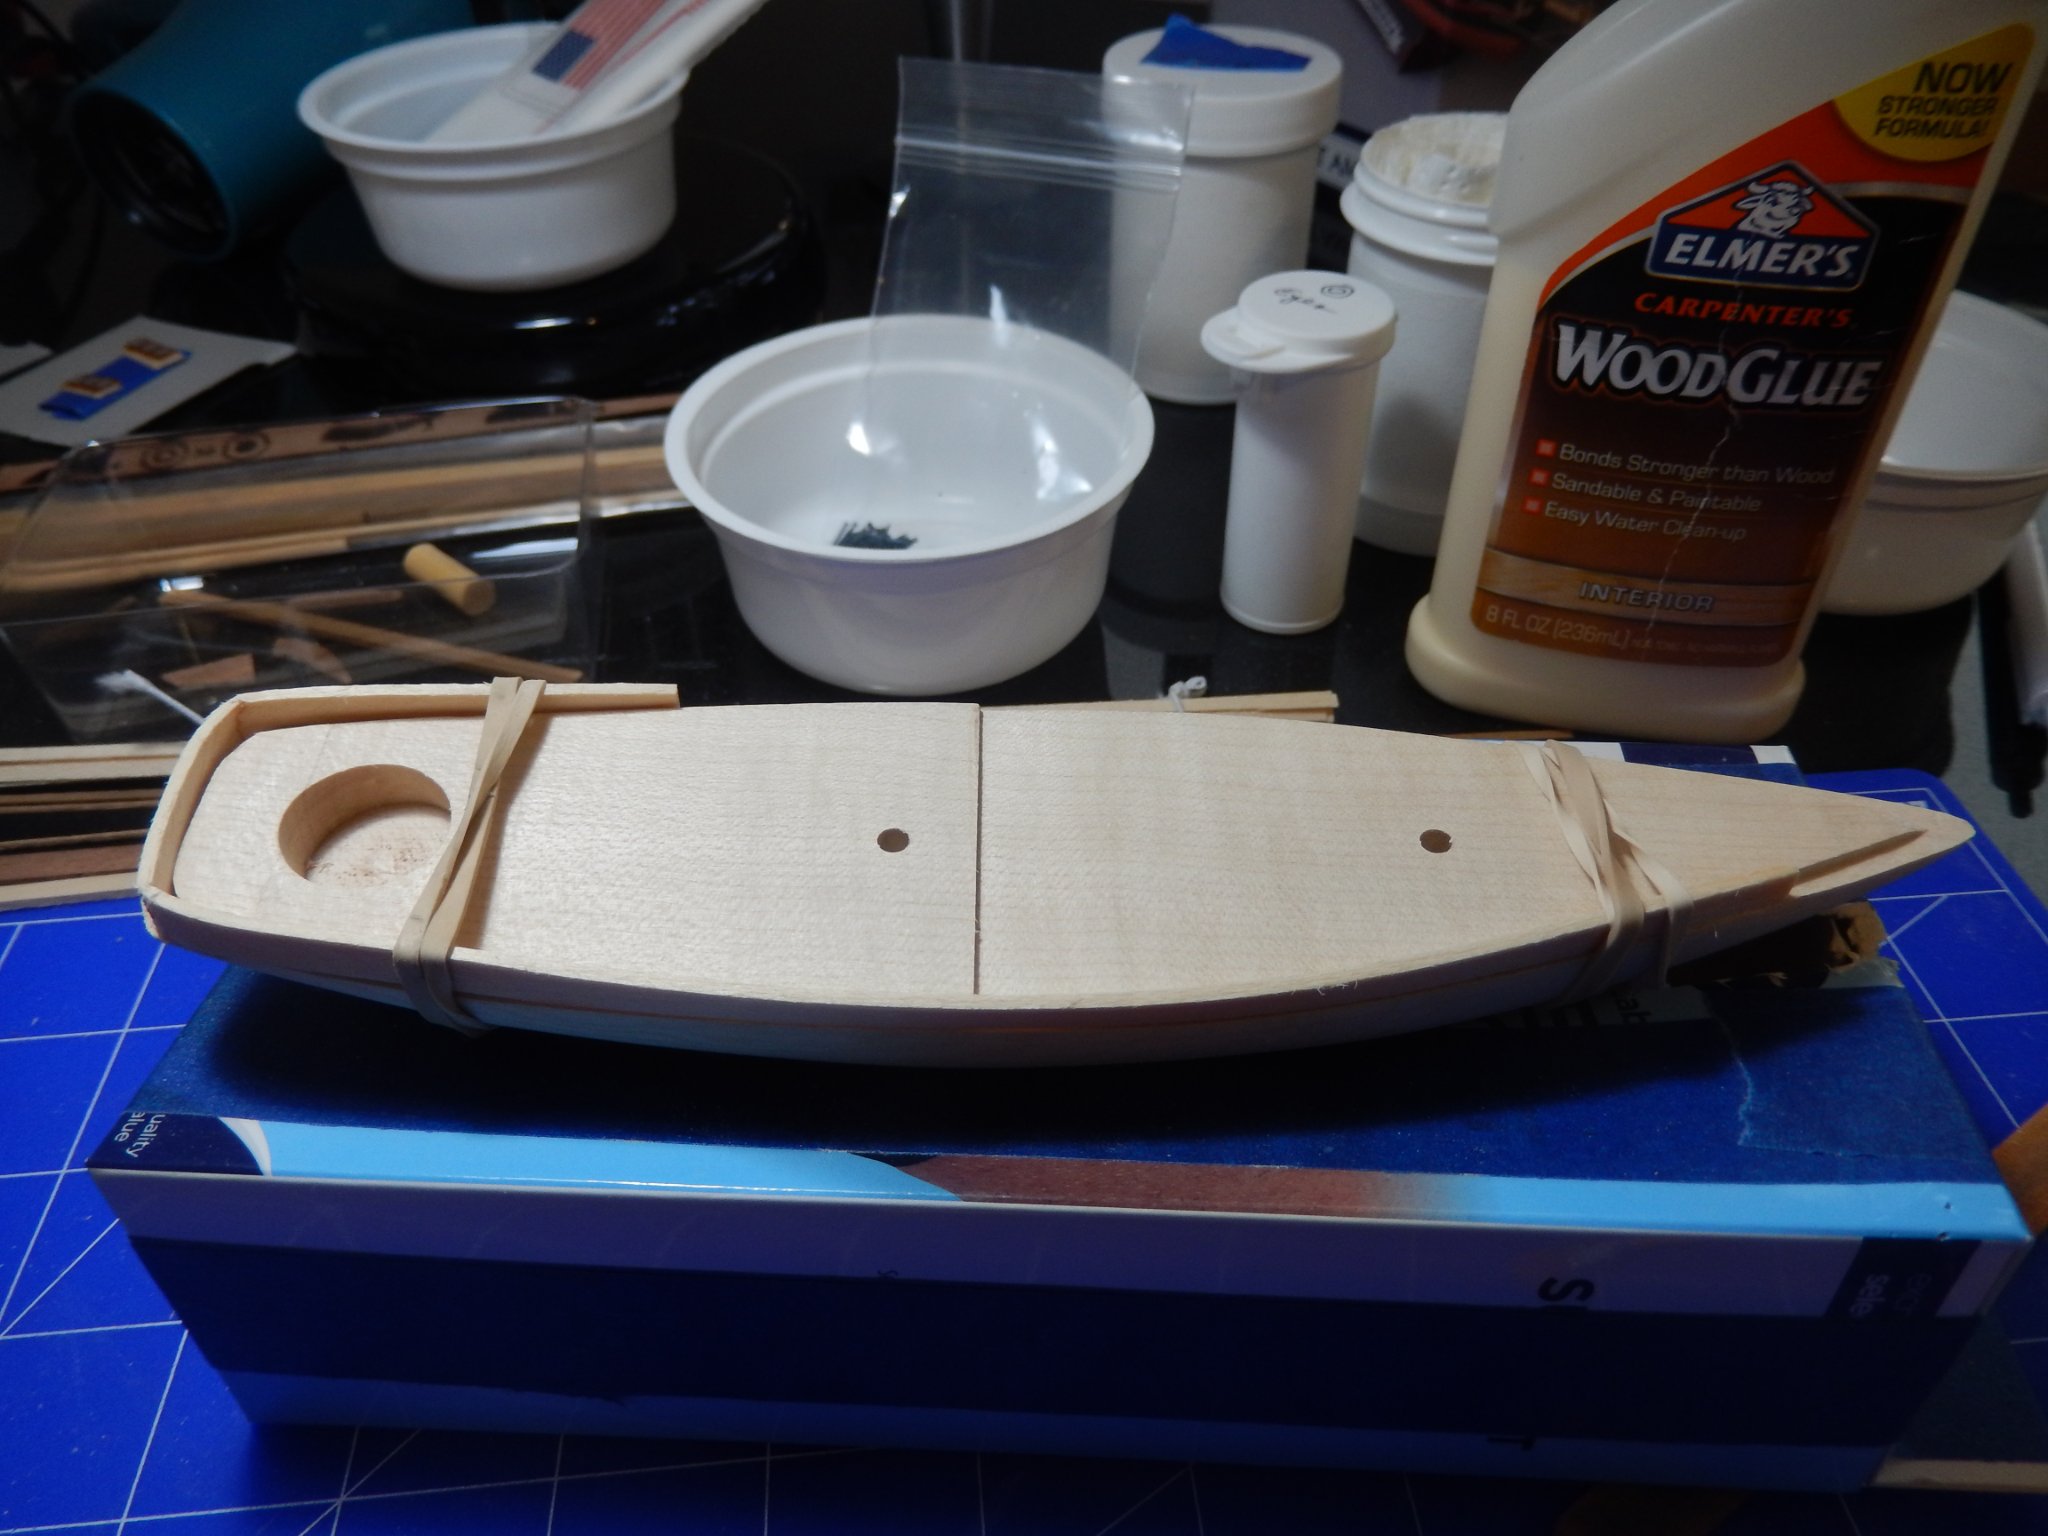
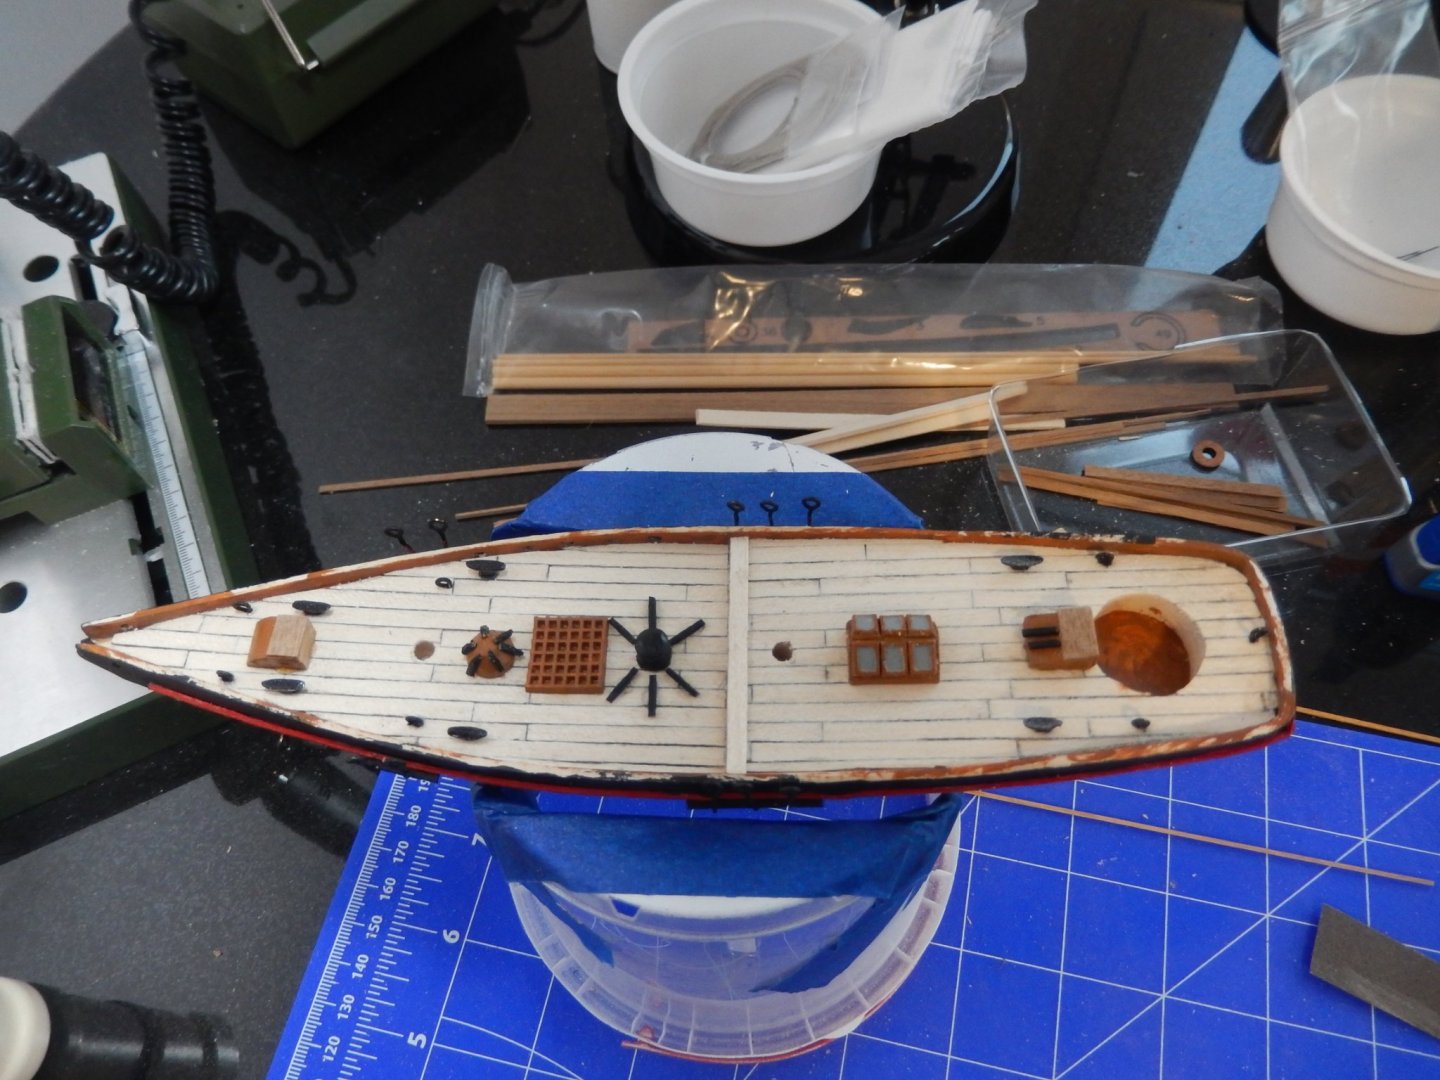
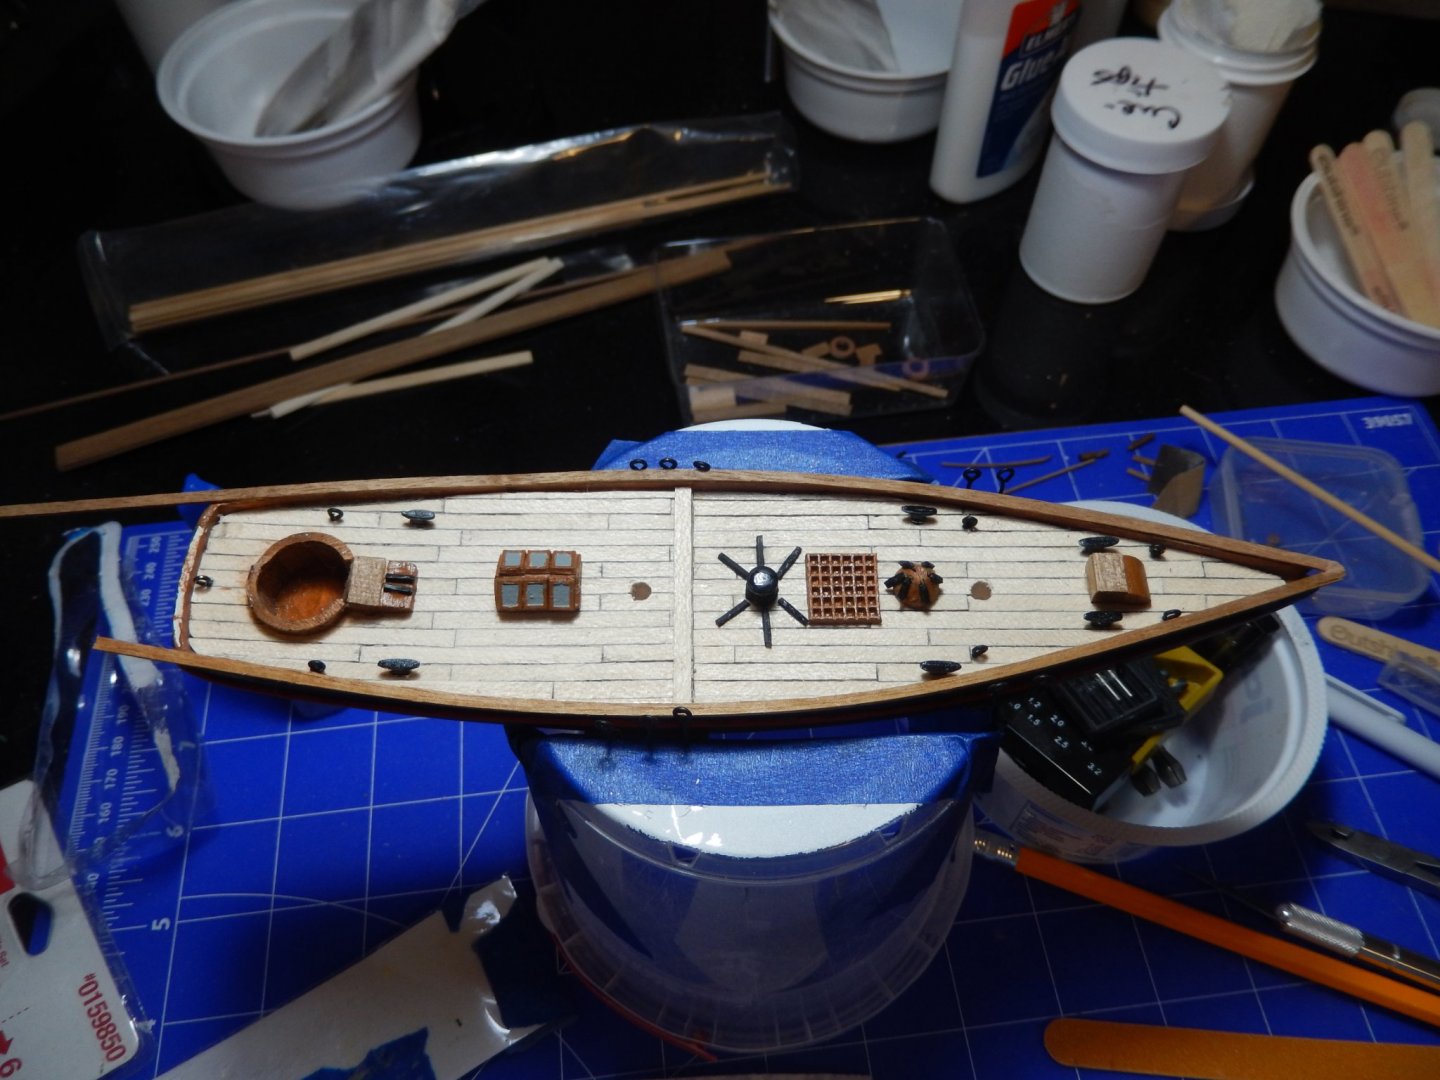
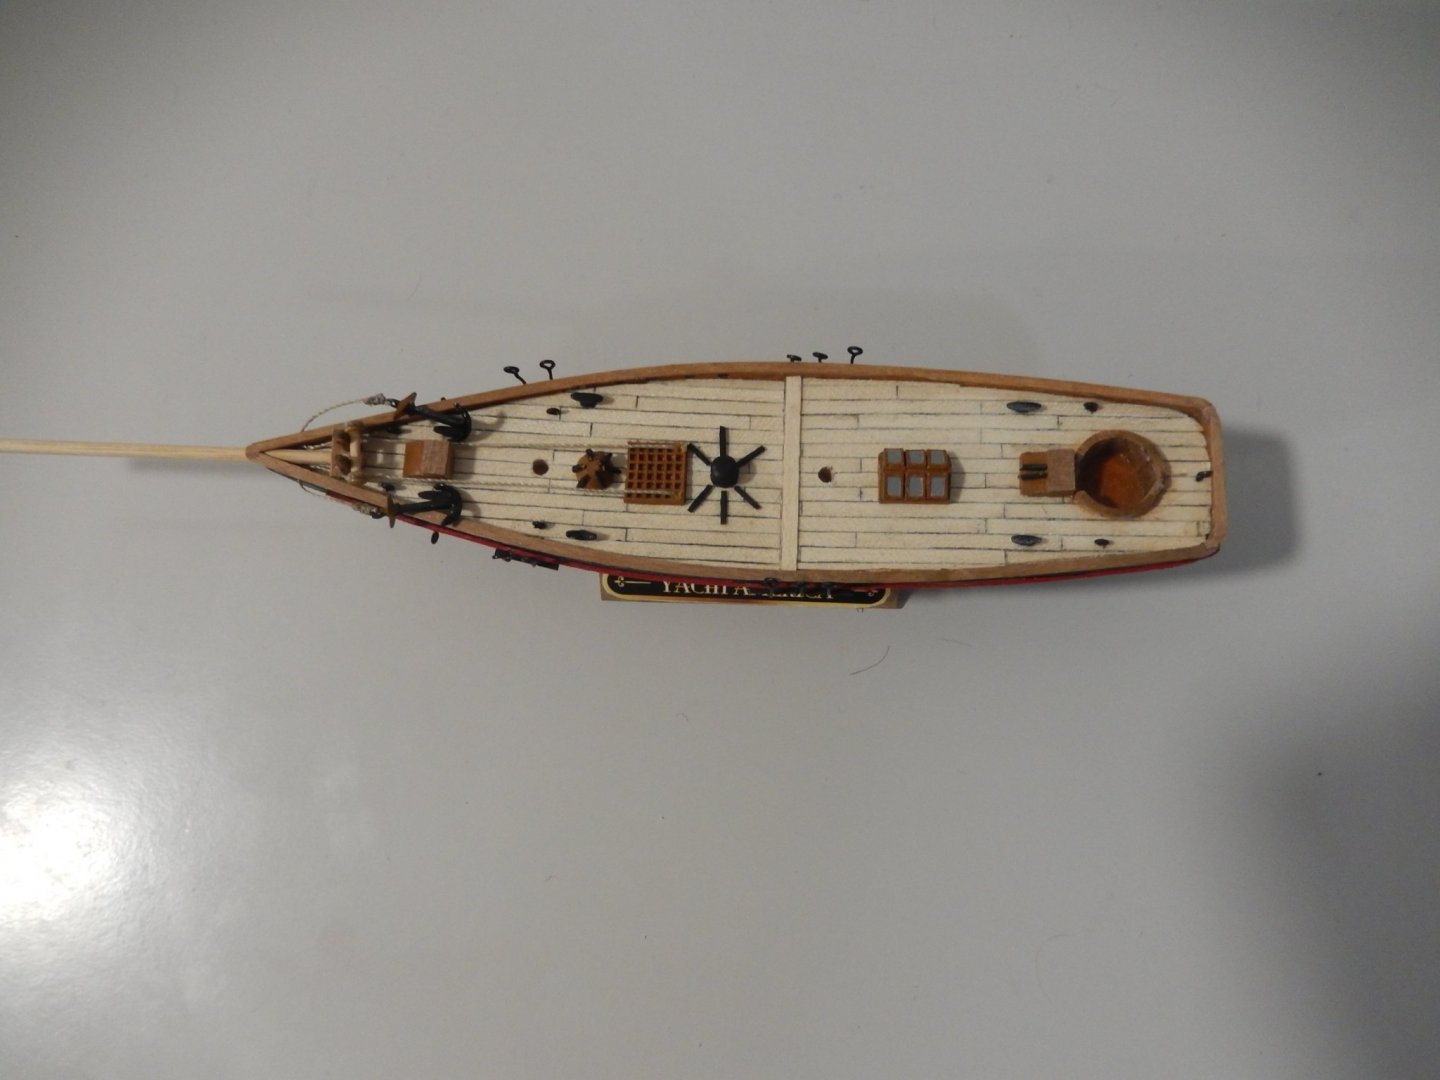
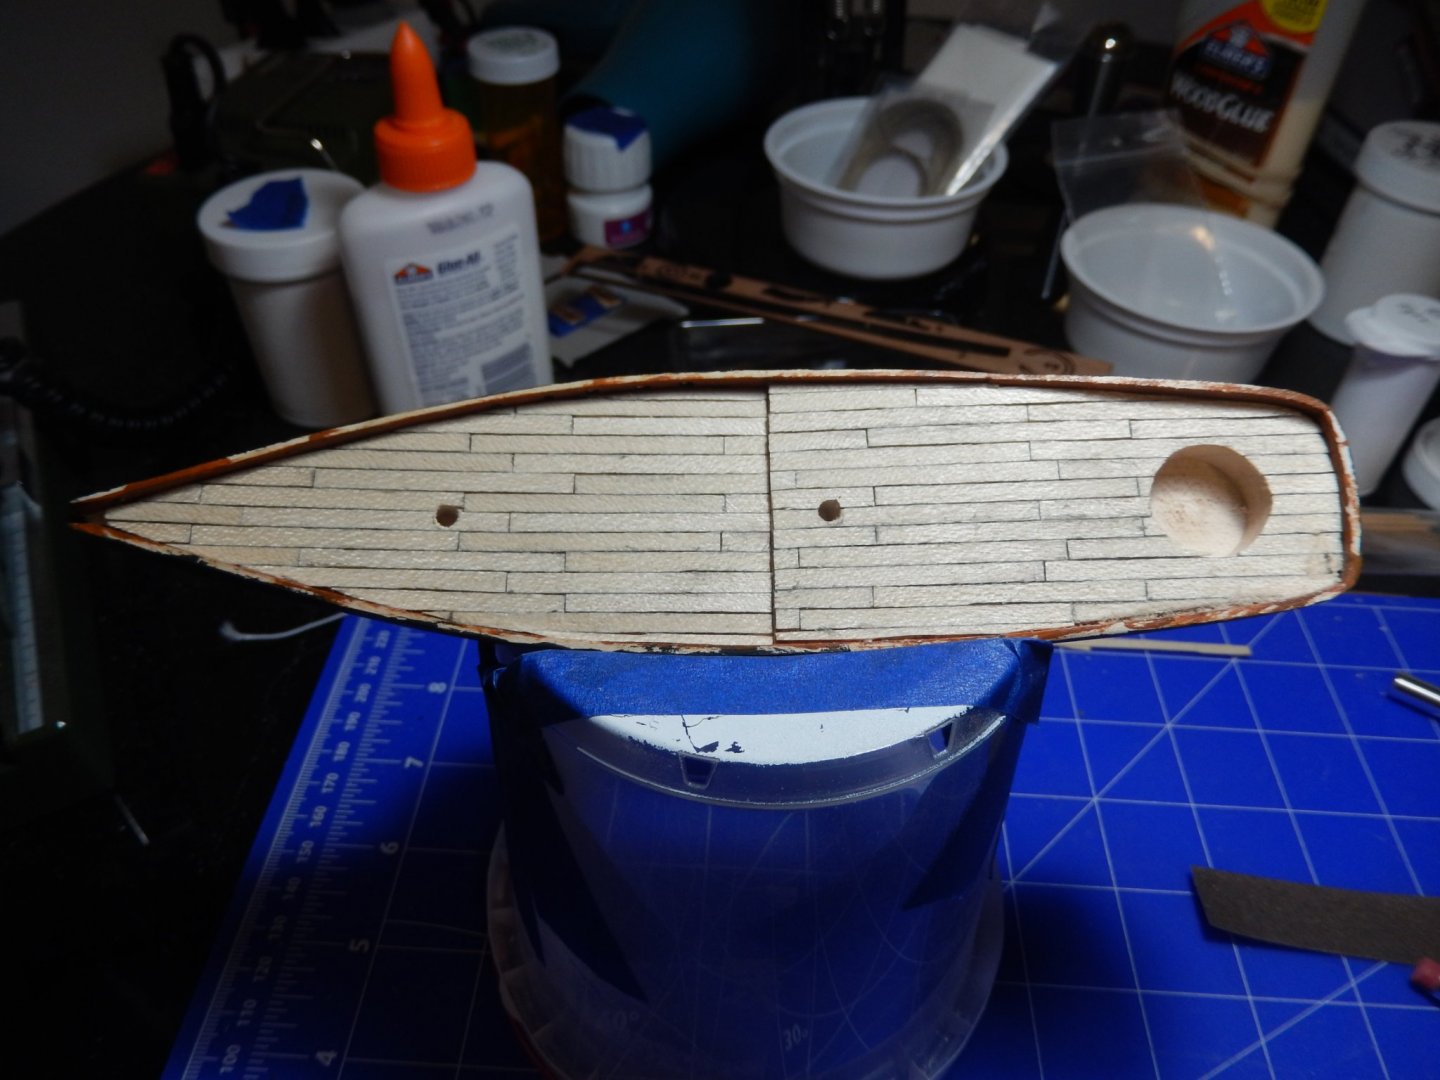
20210109 Slow work the last few days. Took time off to hit the mountains for some winter hiking & snowshoeing; will do some more during weekends this month. A lot of painting these days – hull (upper and bottom), trim, fittings. The upper hull & fittings are black, the trim piece is red and the bottom hull was painted with several coats of bronze until I got it looking like I wanted. (Don’t have any copper paint in my stock and the stores are closed for several more weeks so bronze had to do.) I also painted gratings, windows, anchors and bright work for the stern & bow. Planked the deck and put a couple of coats of shellac on it. Have installed cleats and rigging eyes. Still have lots of work to do on the deck – cockpit area, skylight structure, windlass, some other items. Decided to hold off on gluing on the railing on the top of the hull sides until I get things installed on the deck. Have to figure out the cutting & installation of the rail around the stern curve. Think I may need some of the 1x2 mahogany left over from a previous project.

.thumb.JPG.be62199c51551ad0afb780a26b2e5f80.JPG)
-
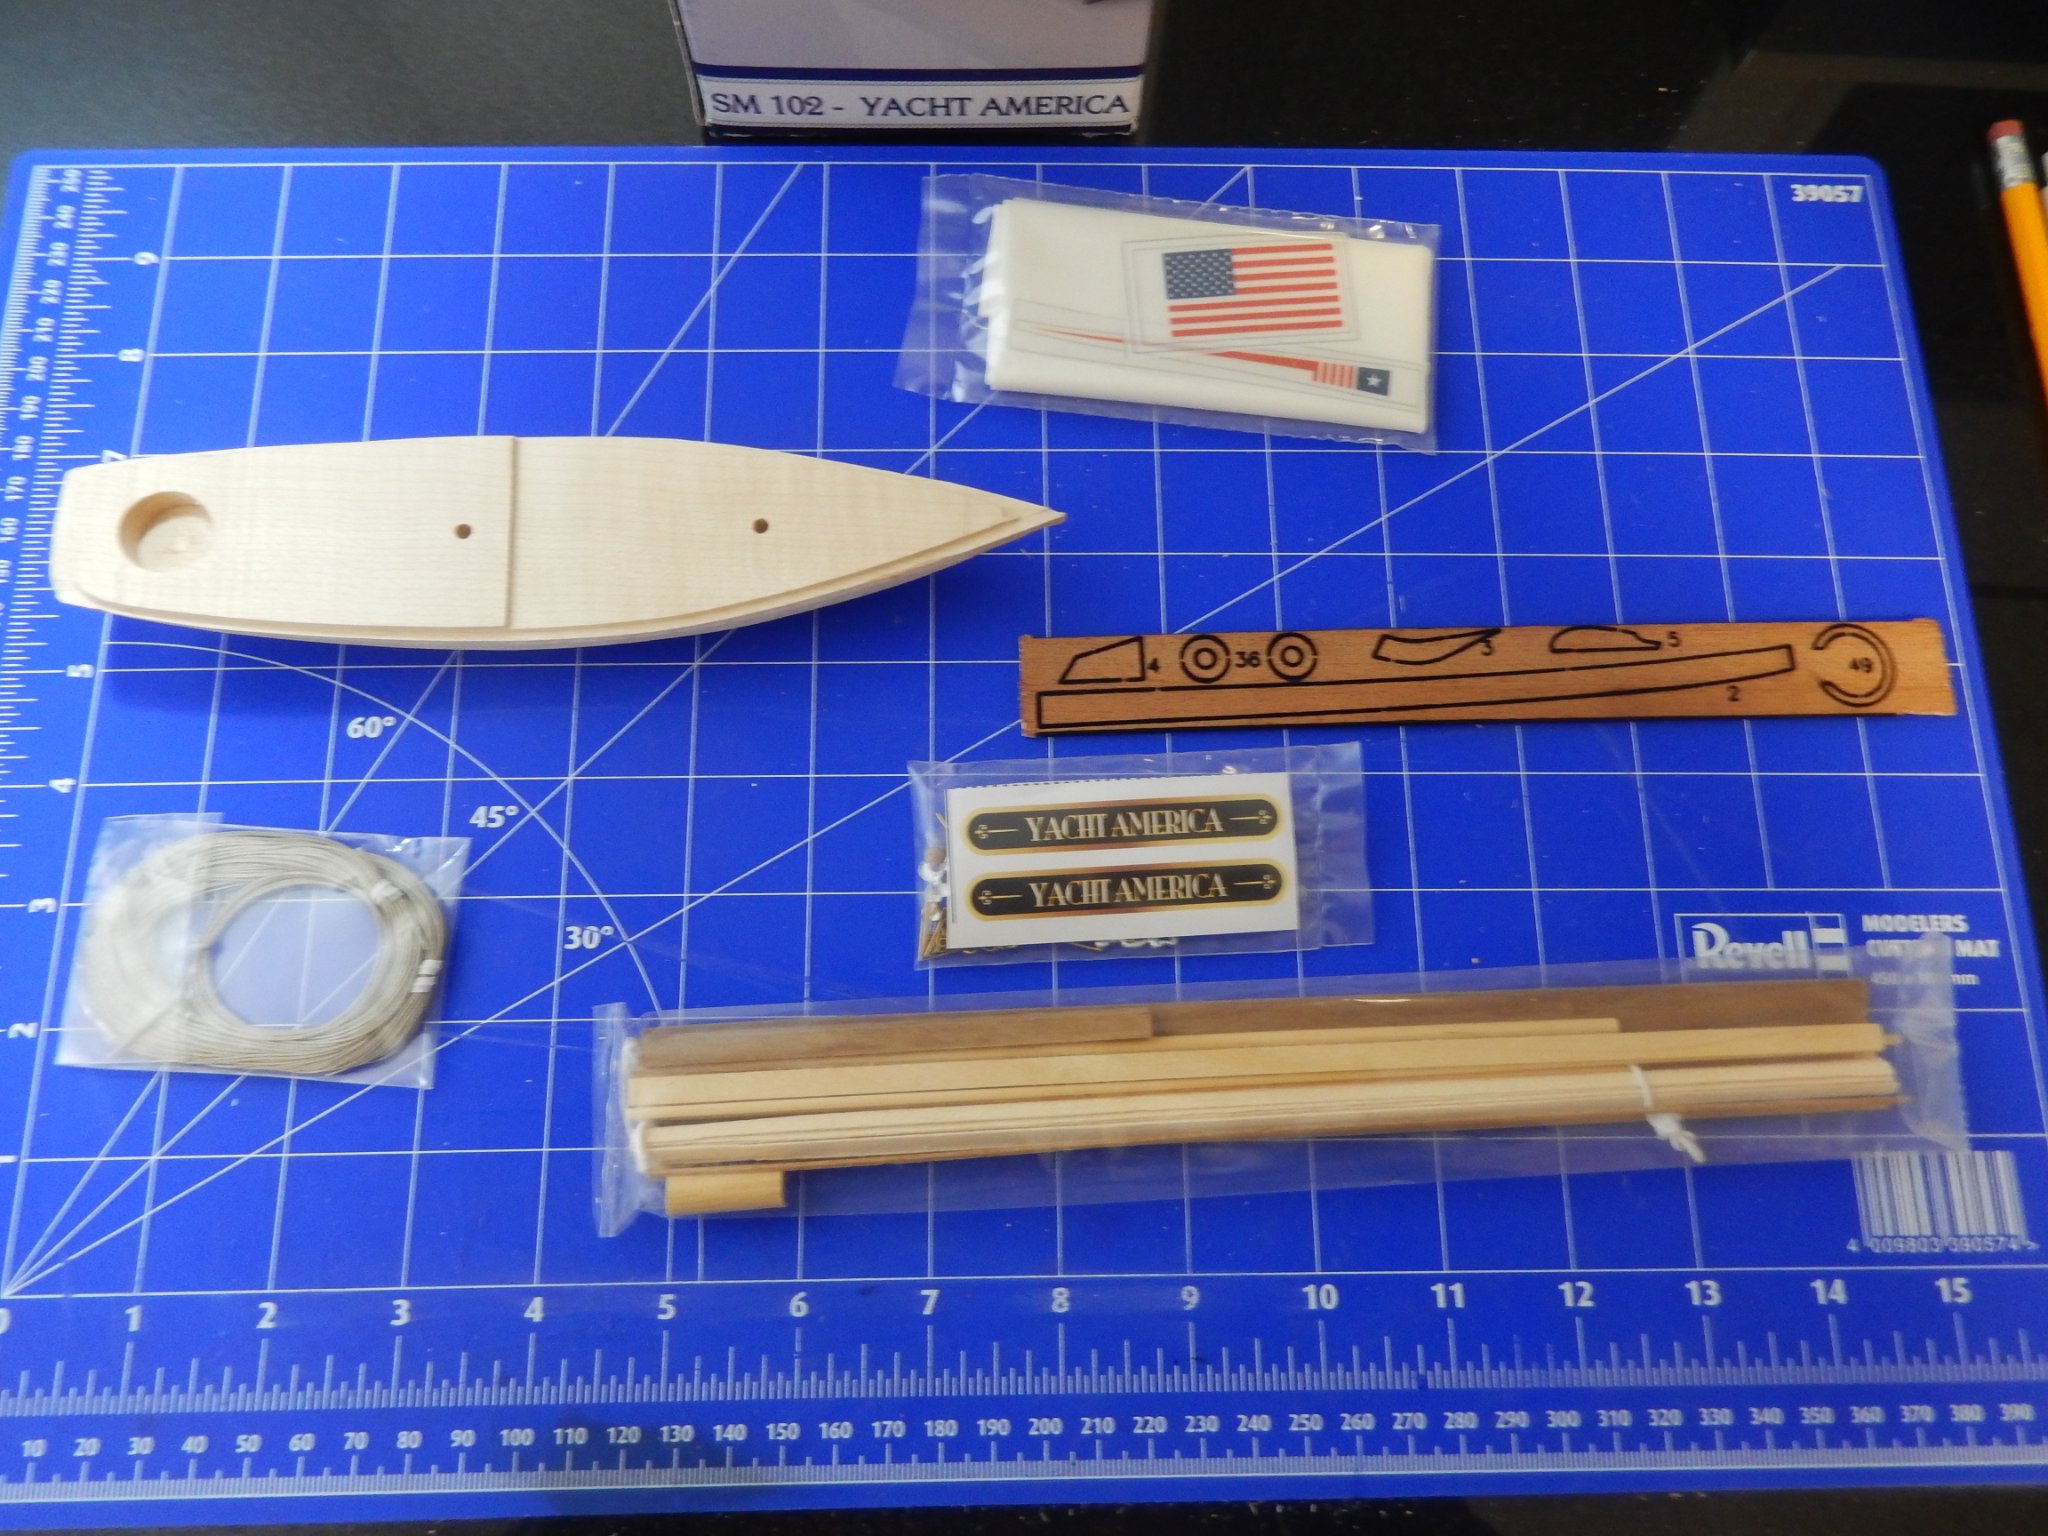
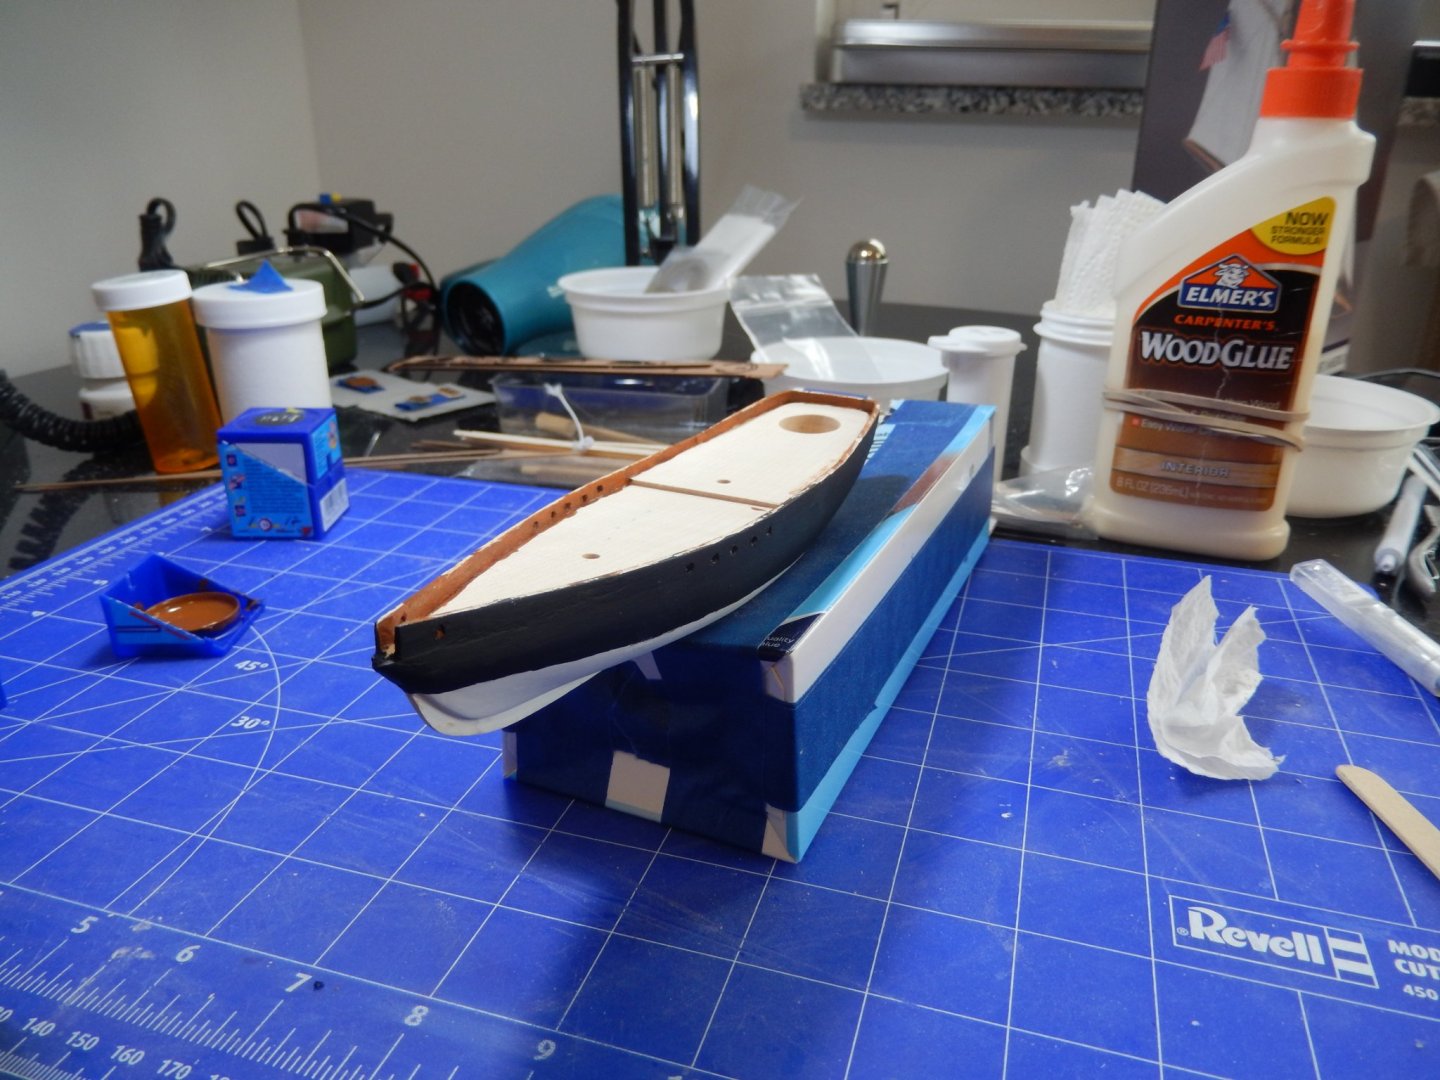
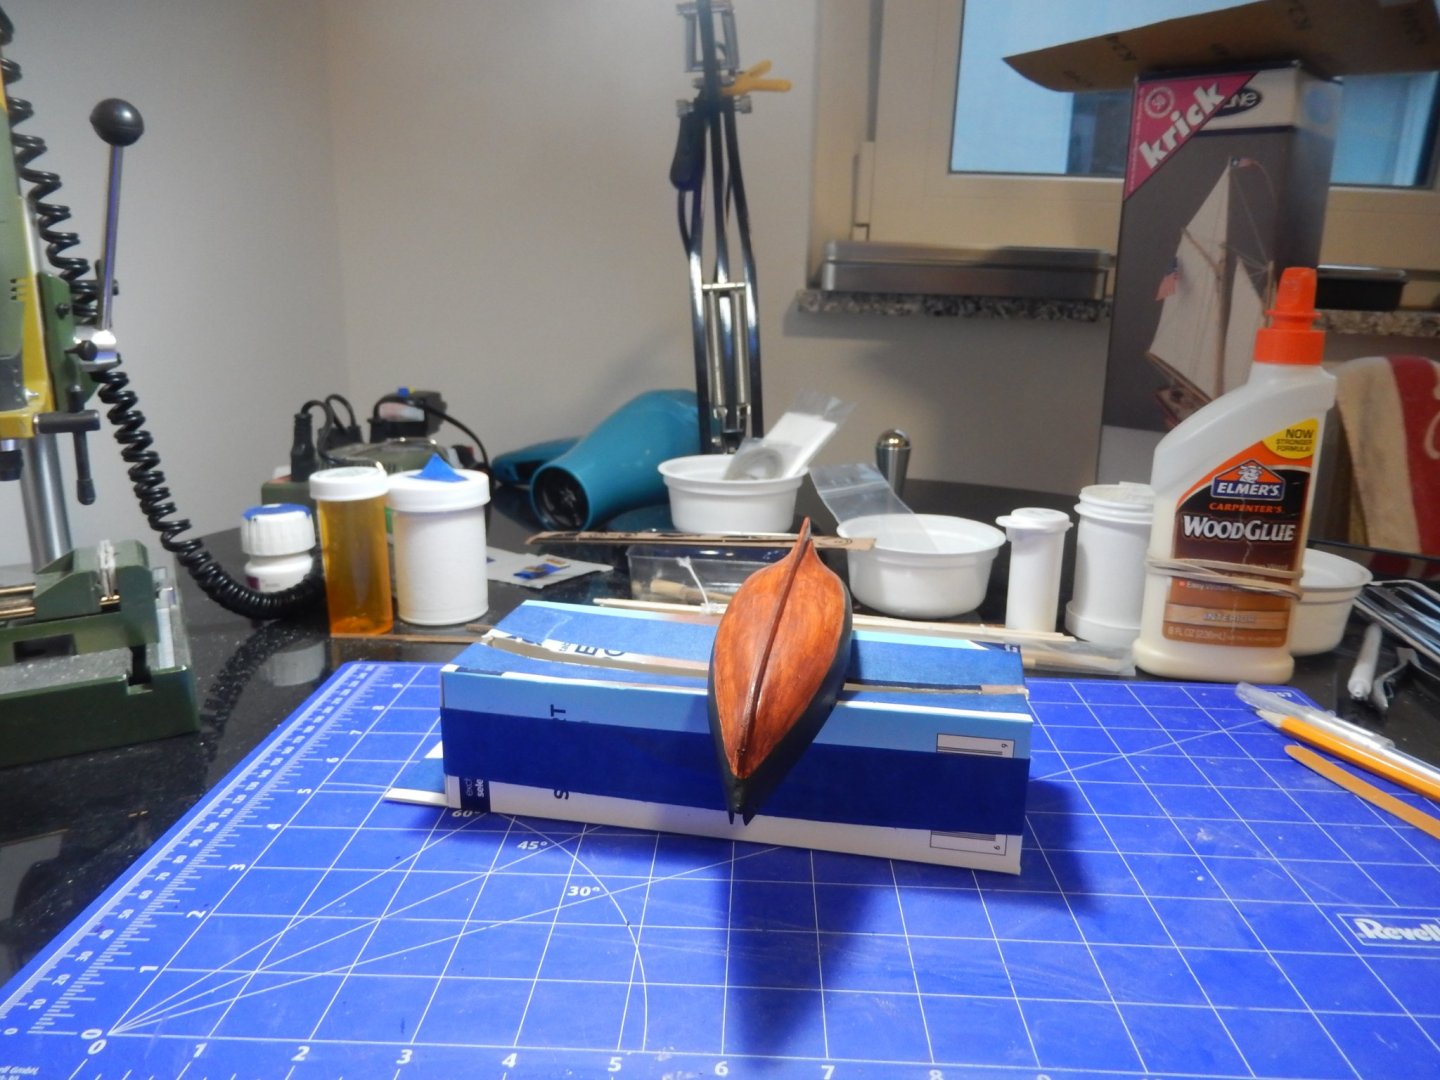
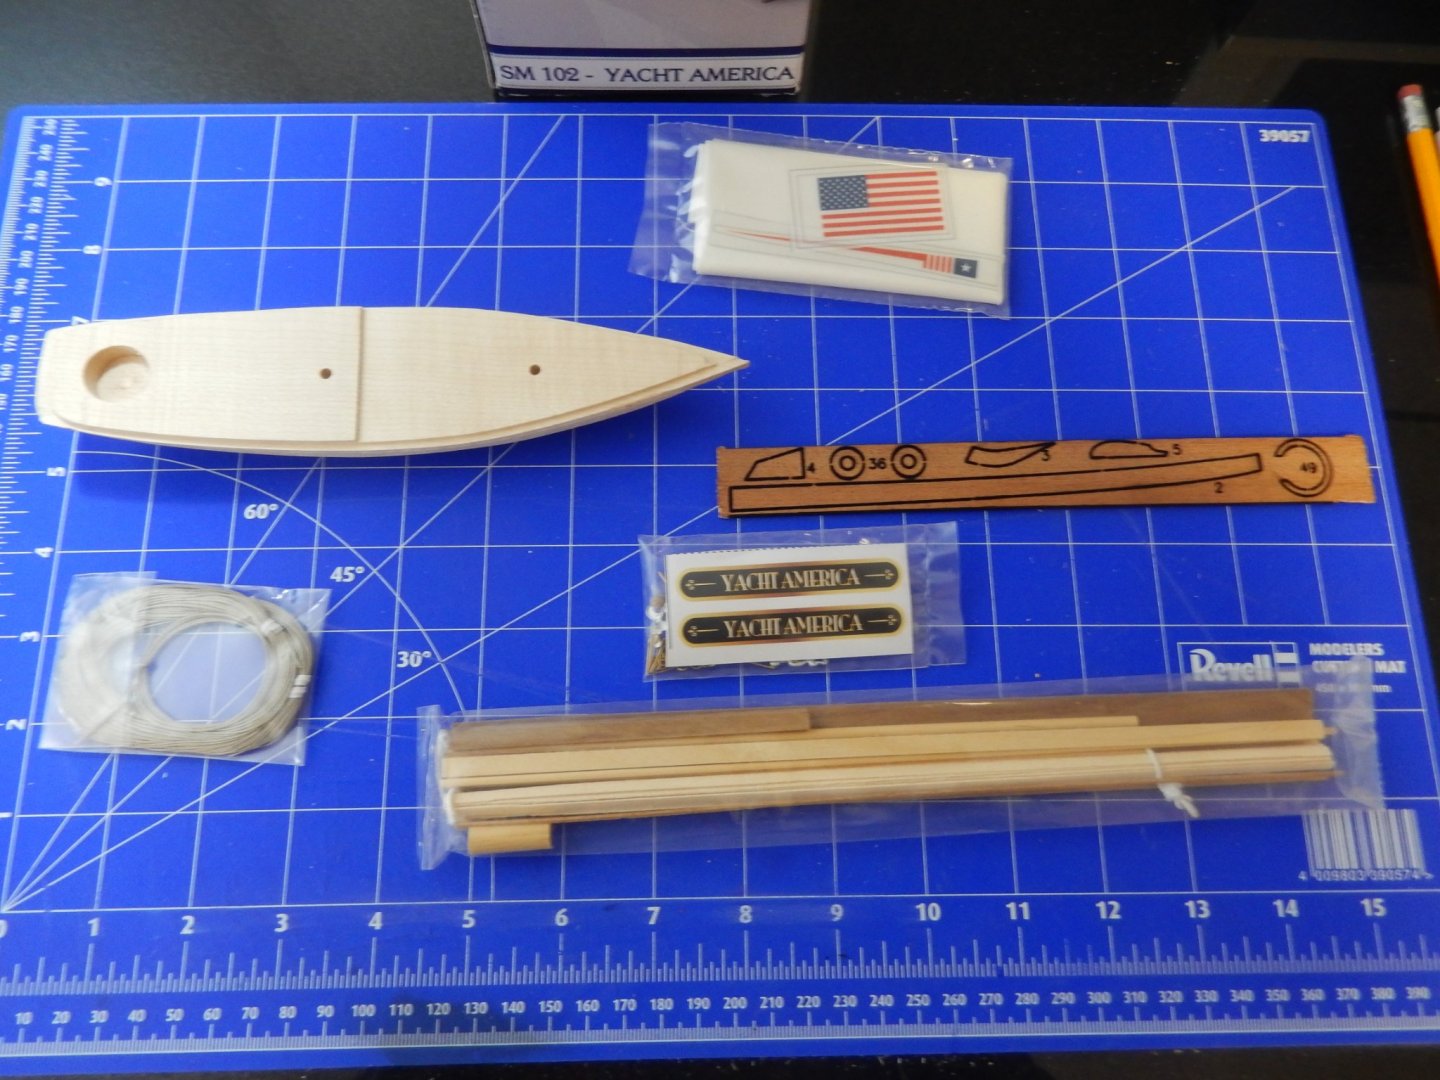
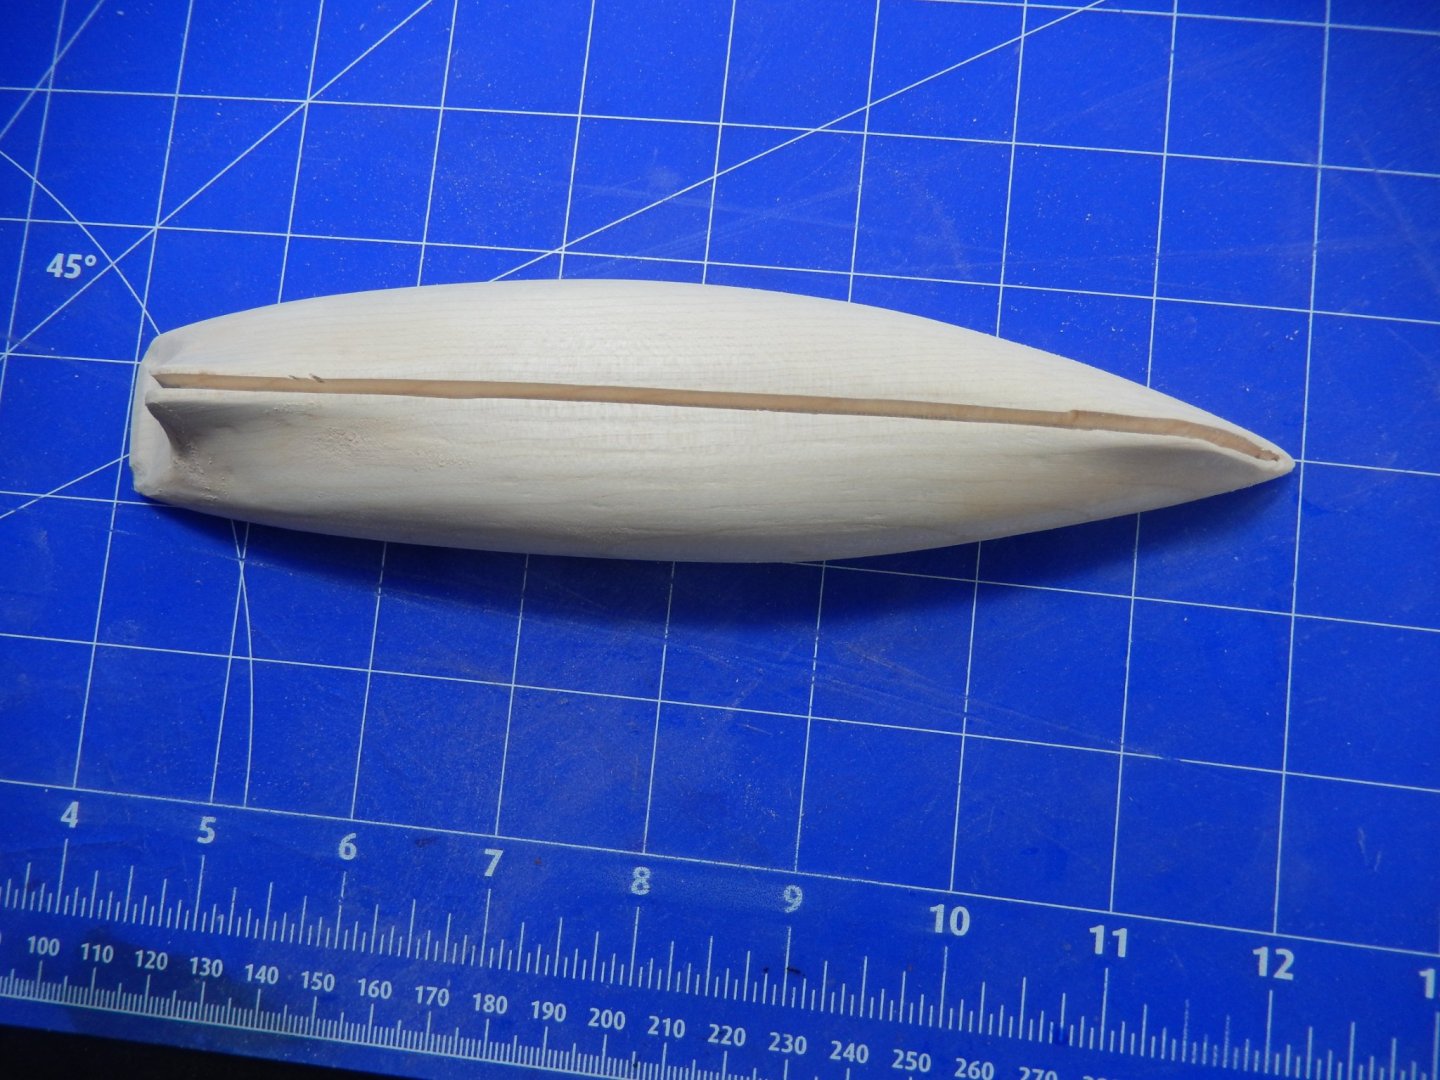
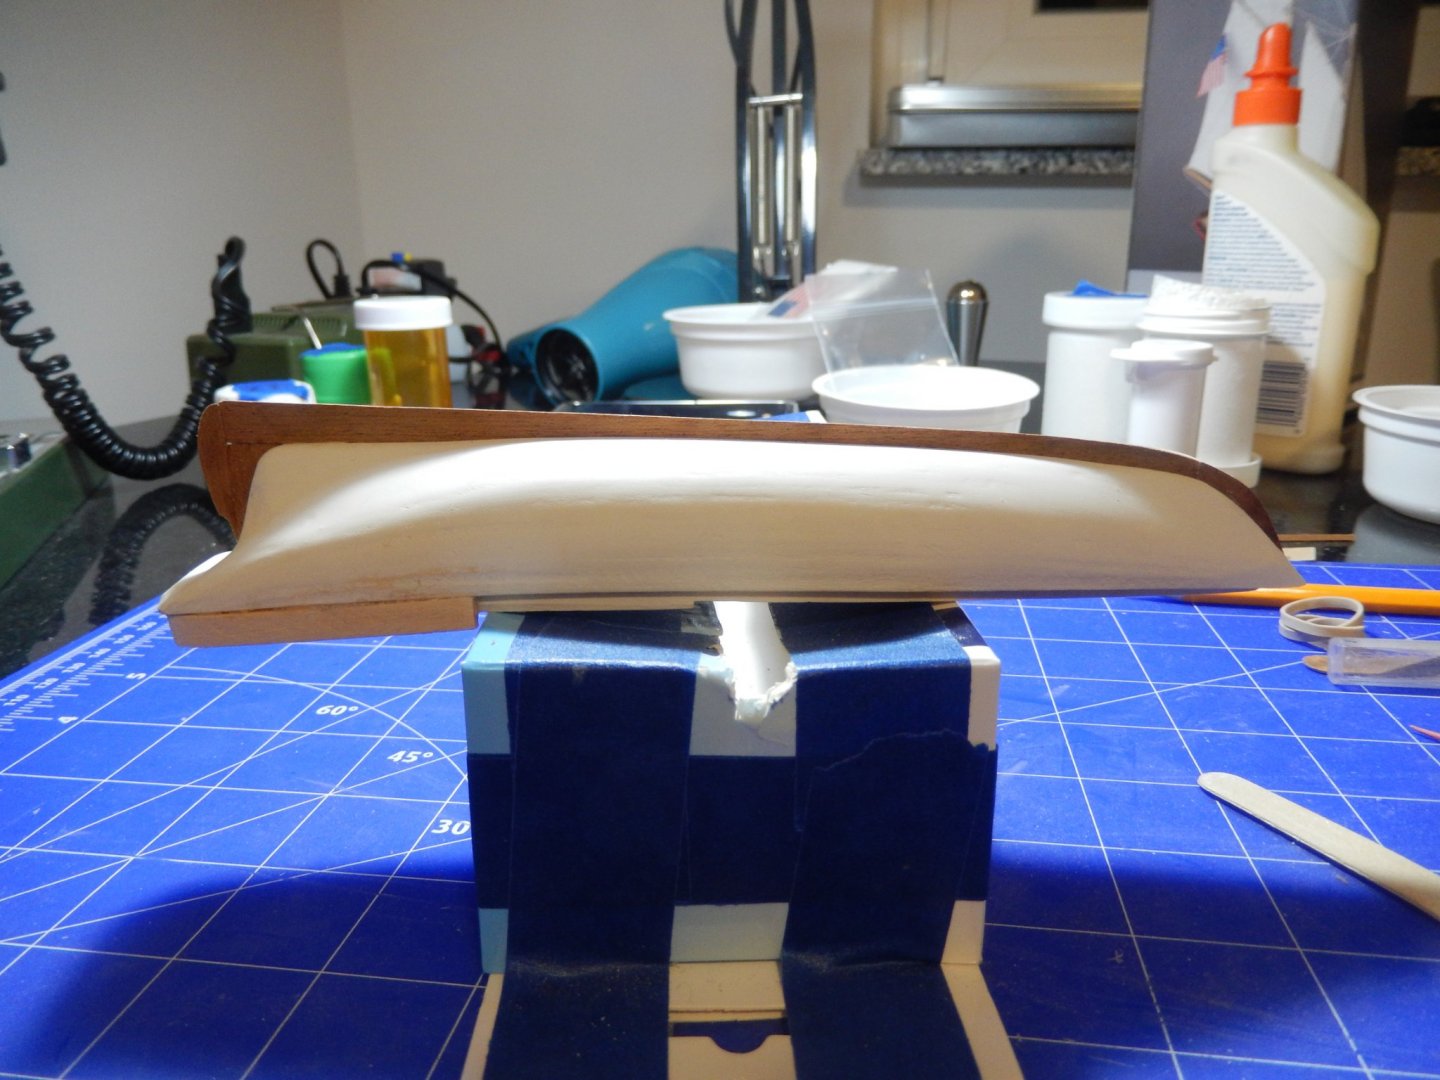
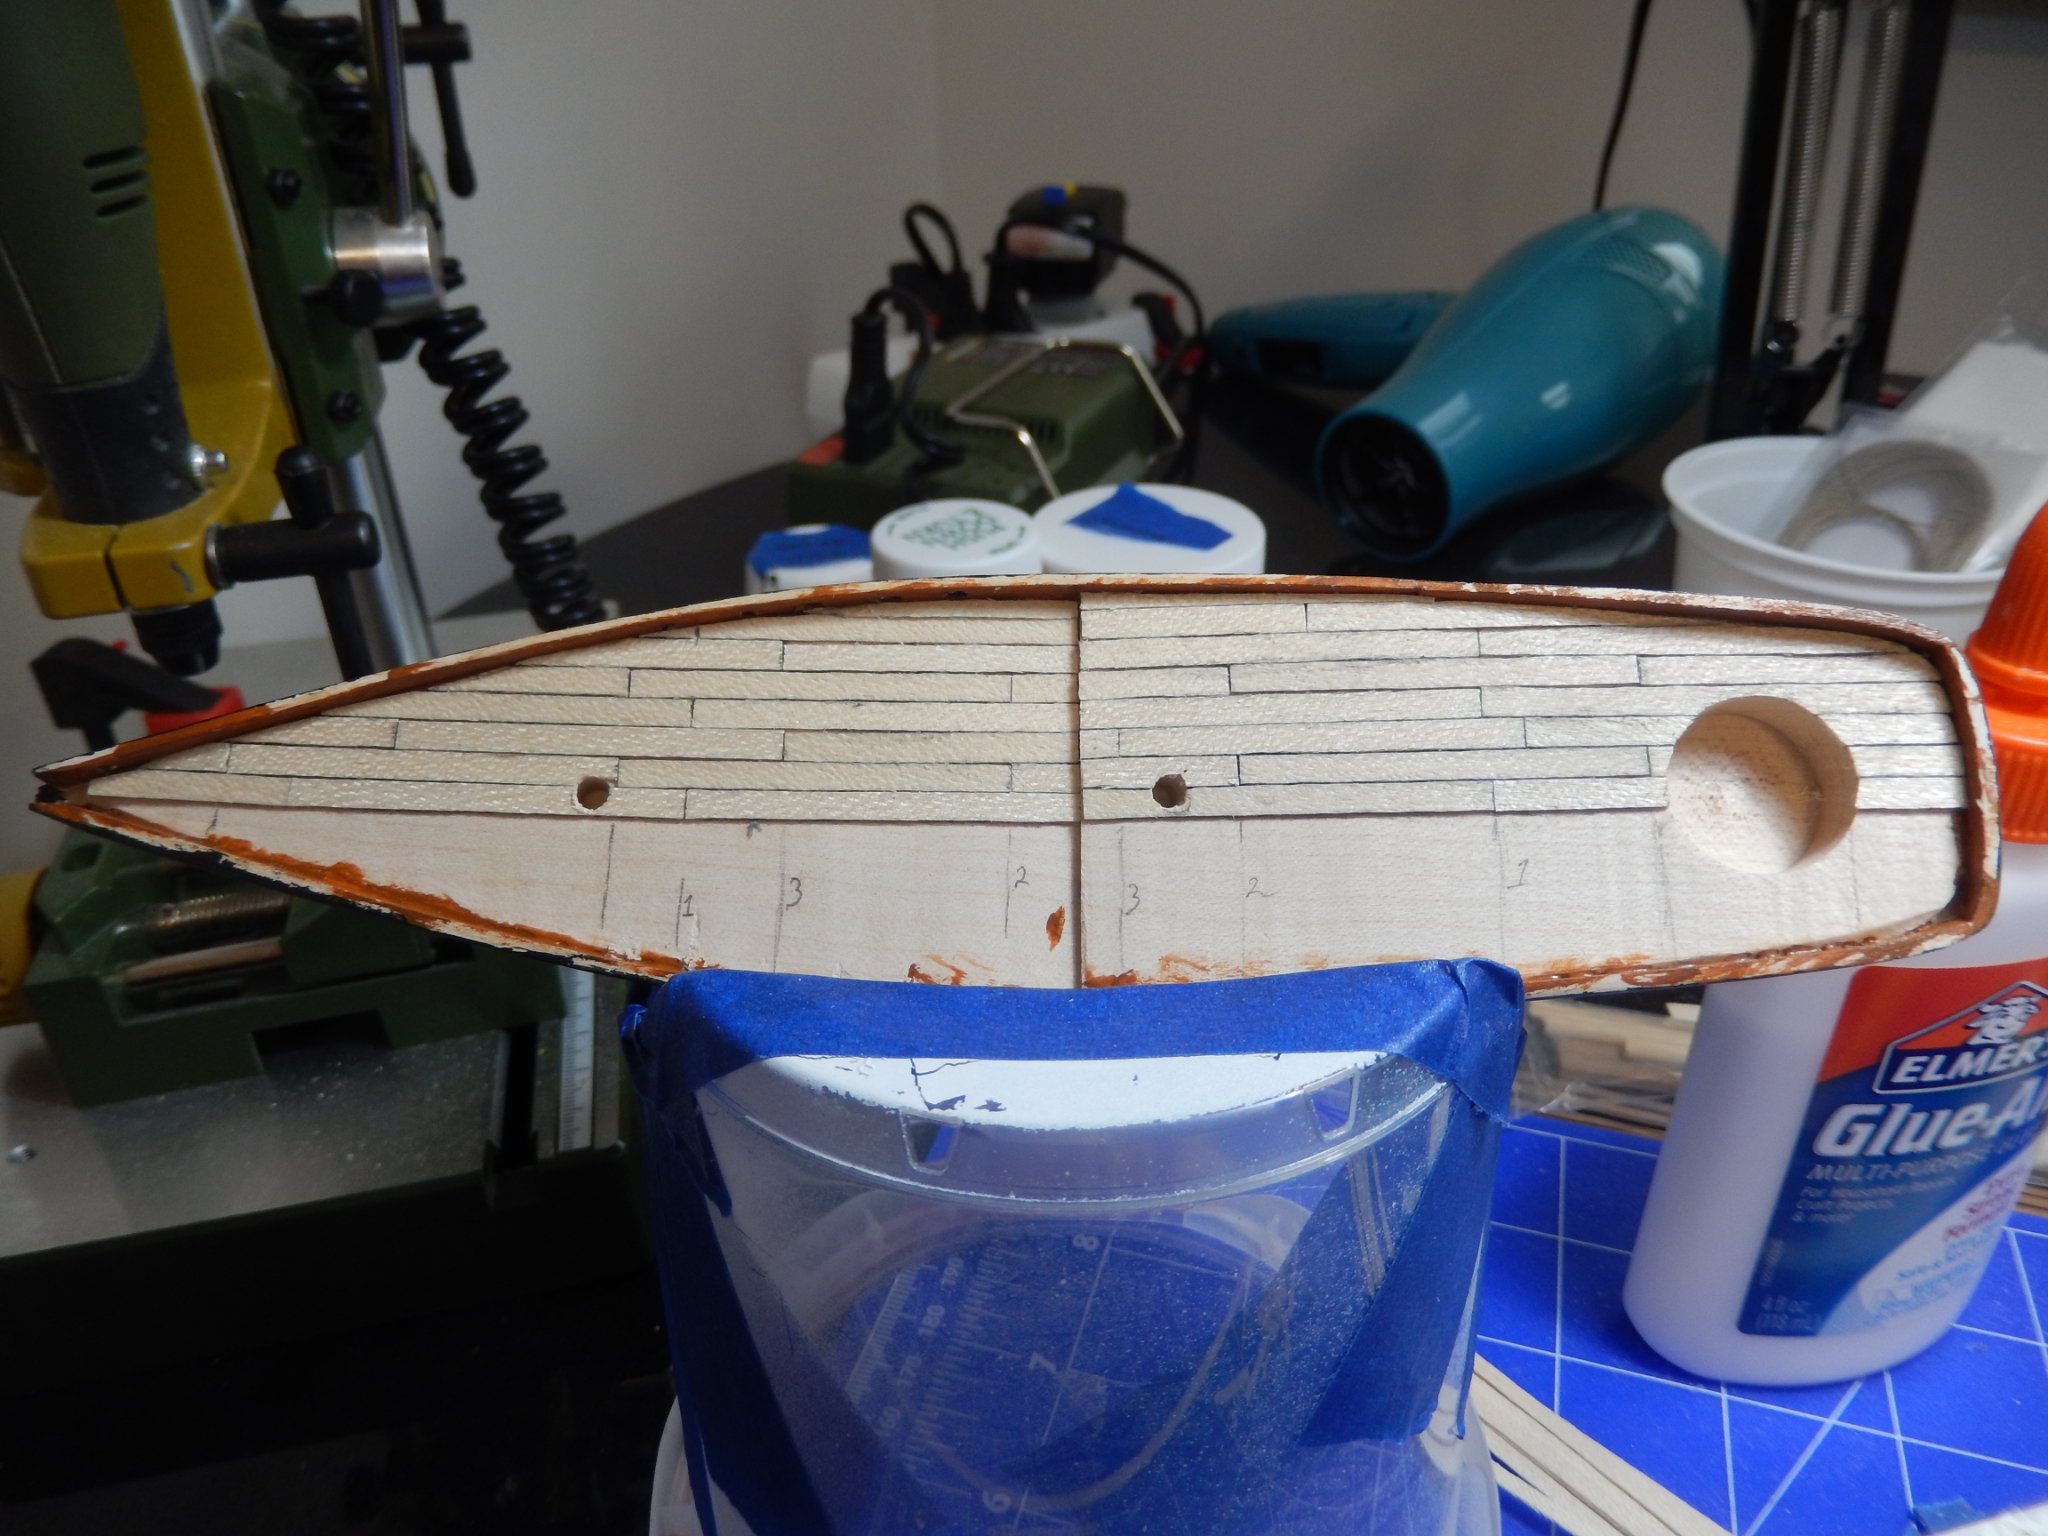
20201230 Got started on the Yacht America (Corel, 1:155, solid hull) on Sunday – which became sanding day. I also painted some of the smaller metal parts (anchors, cleats, bright work [primed only]) as glue was drying. As of this evening I have the hull sanded, keel in place and part of the upper works completed. I gave the hull a light prime coat of white paint along the way which actually helped bring out some of the minor hull imperfections that I hadn’t seen so it was back to sanding. I filled in along the keel (machined slot was a hair too big in a couple of spots) so there was more sanding needed in that area. Will do some more work on the hull tomorrow (hopefully finish at the end of this interesting year – yea!) and then plank the deck sometime this weekend.

- 7 replies
-
- 1
-
-
- America
- solid hull
- (and 2 more)
-
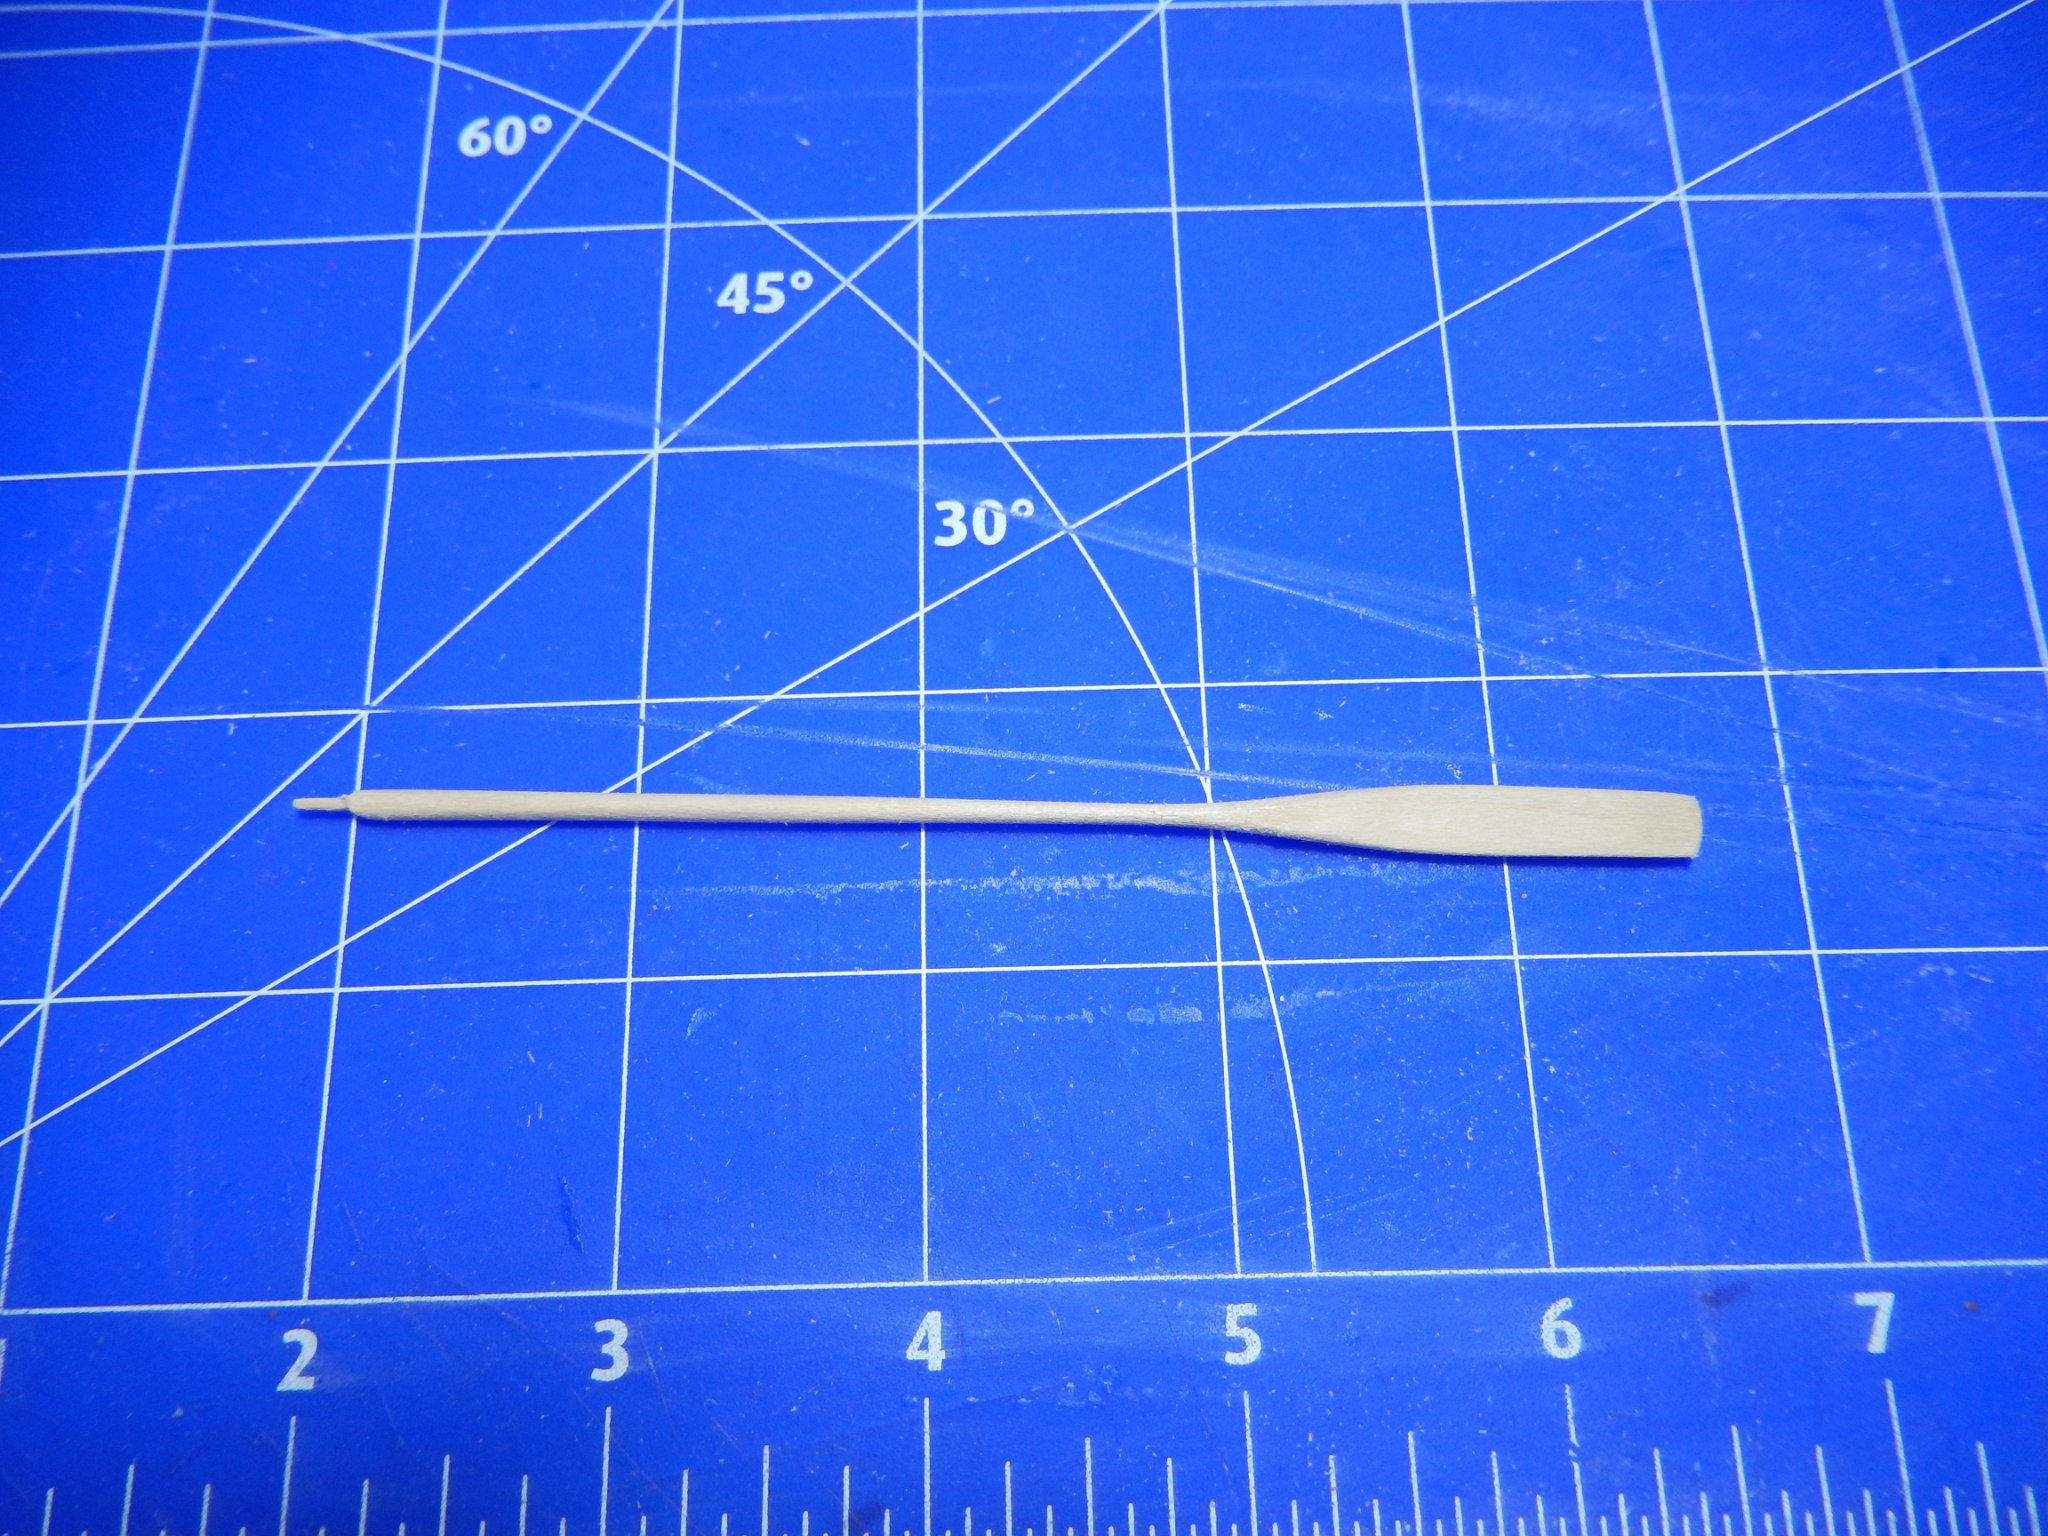
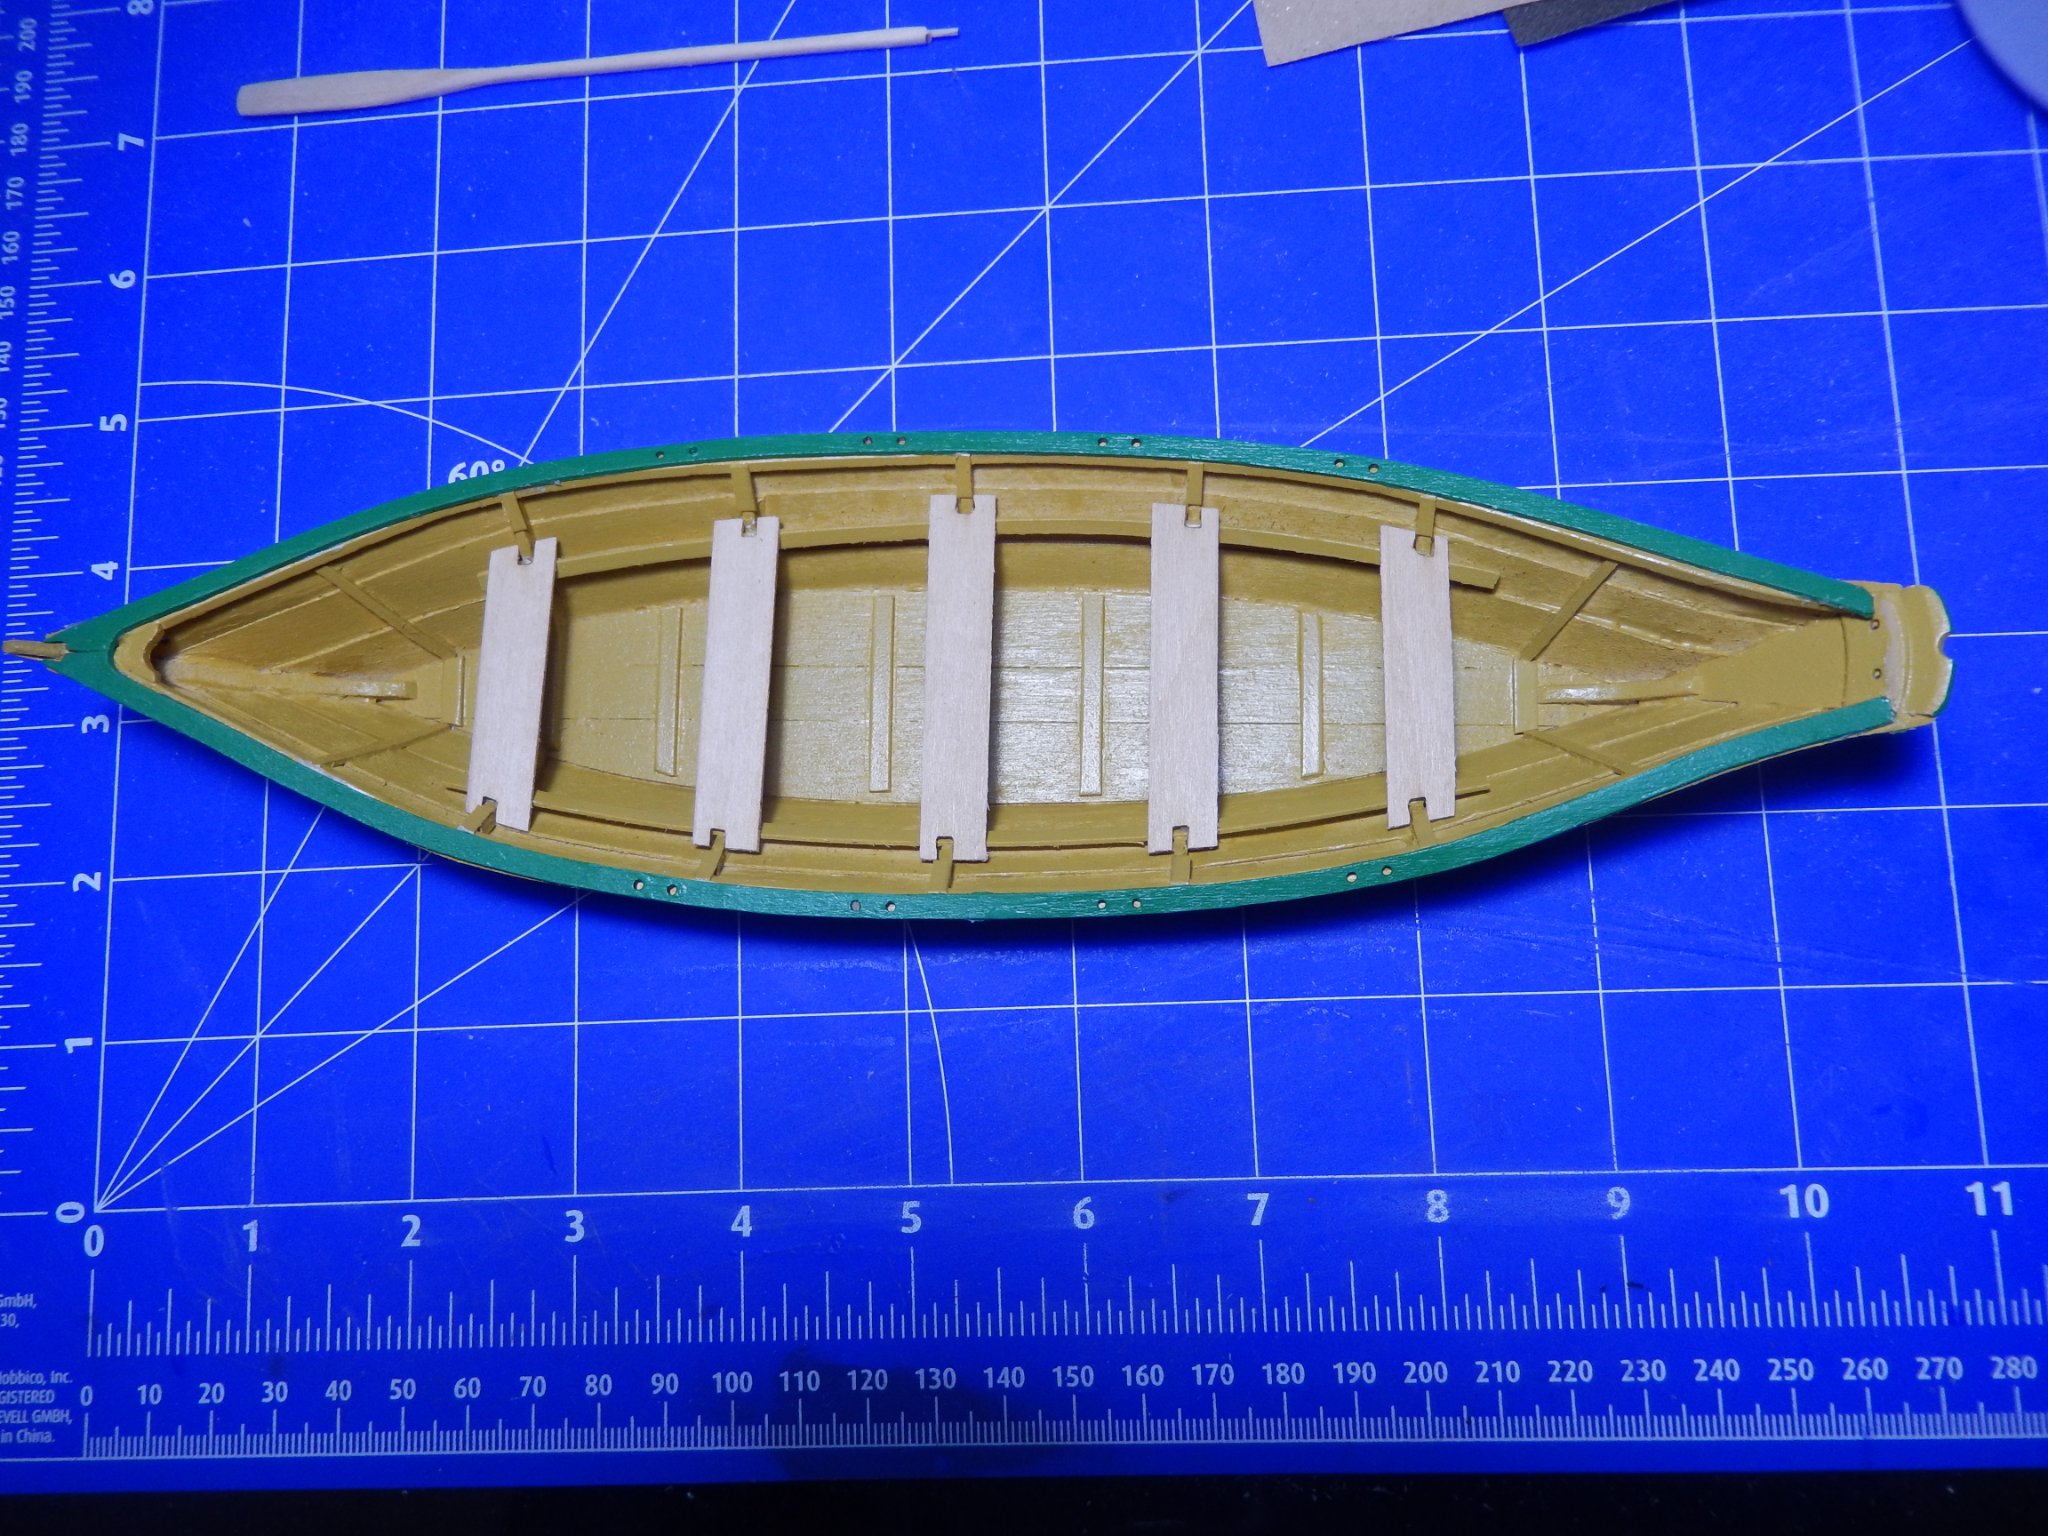
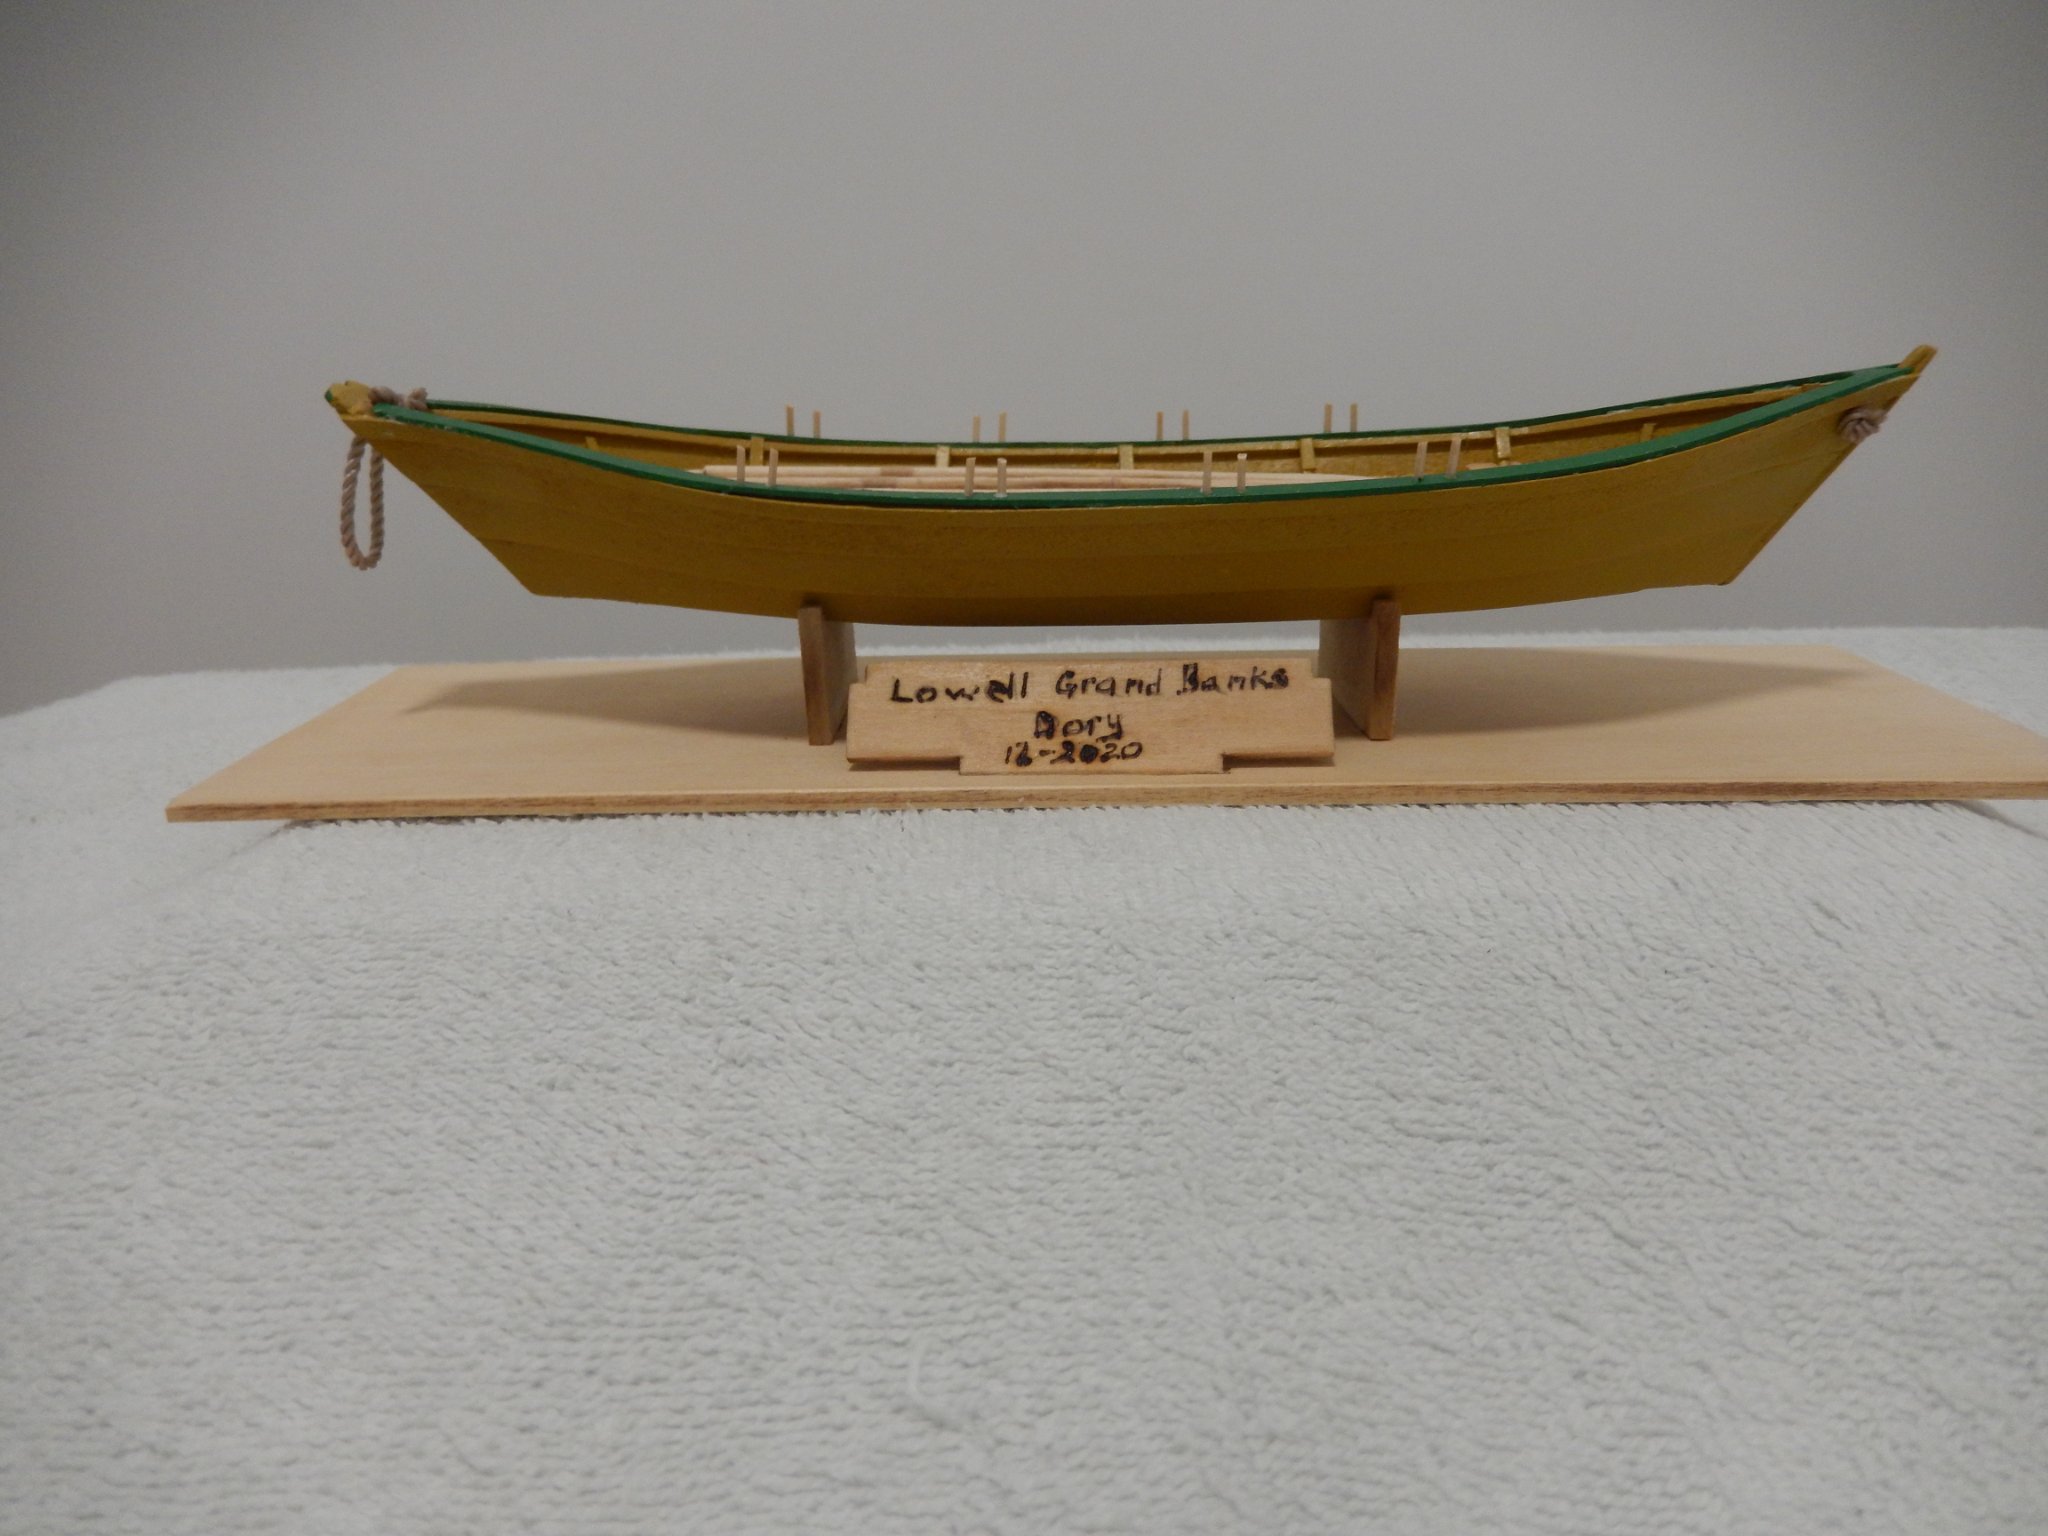
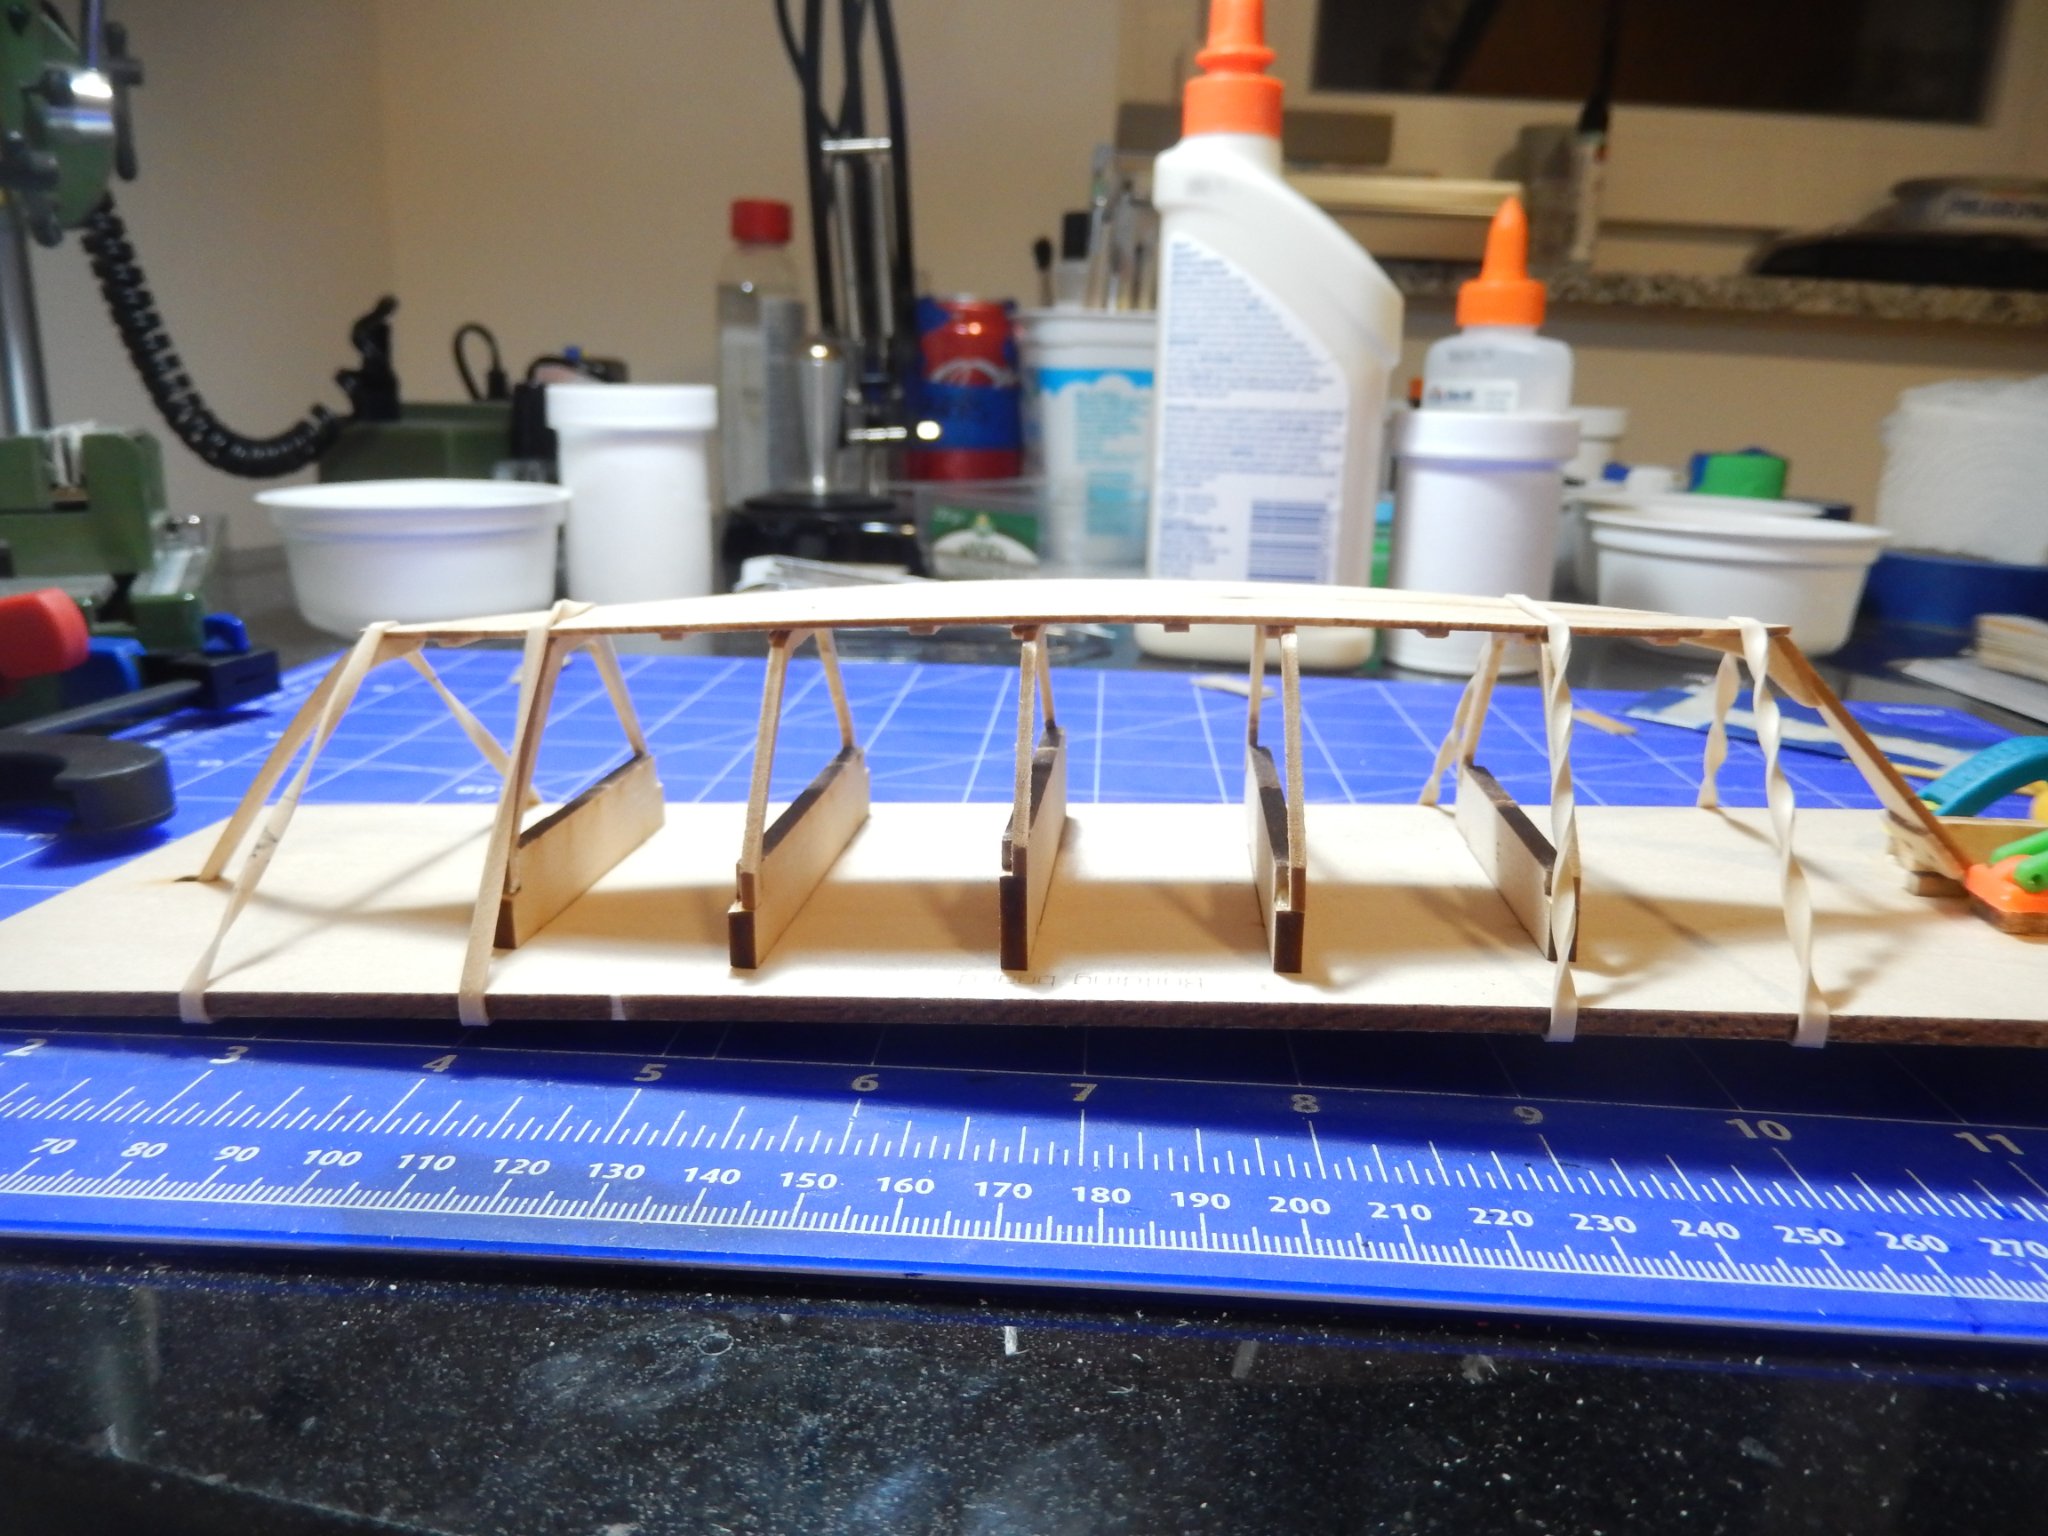
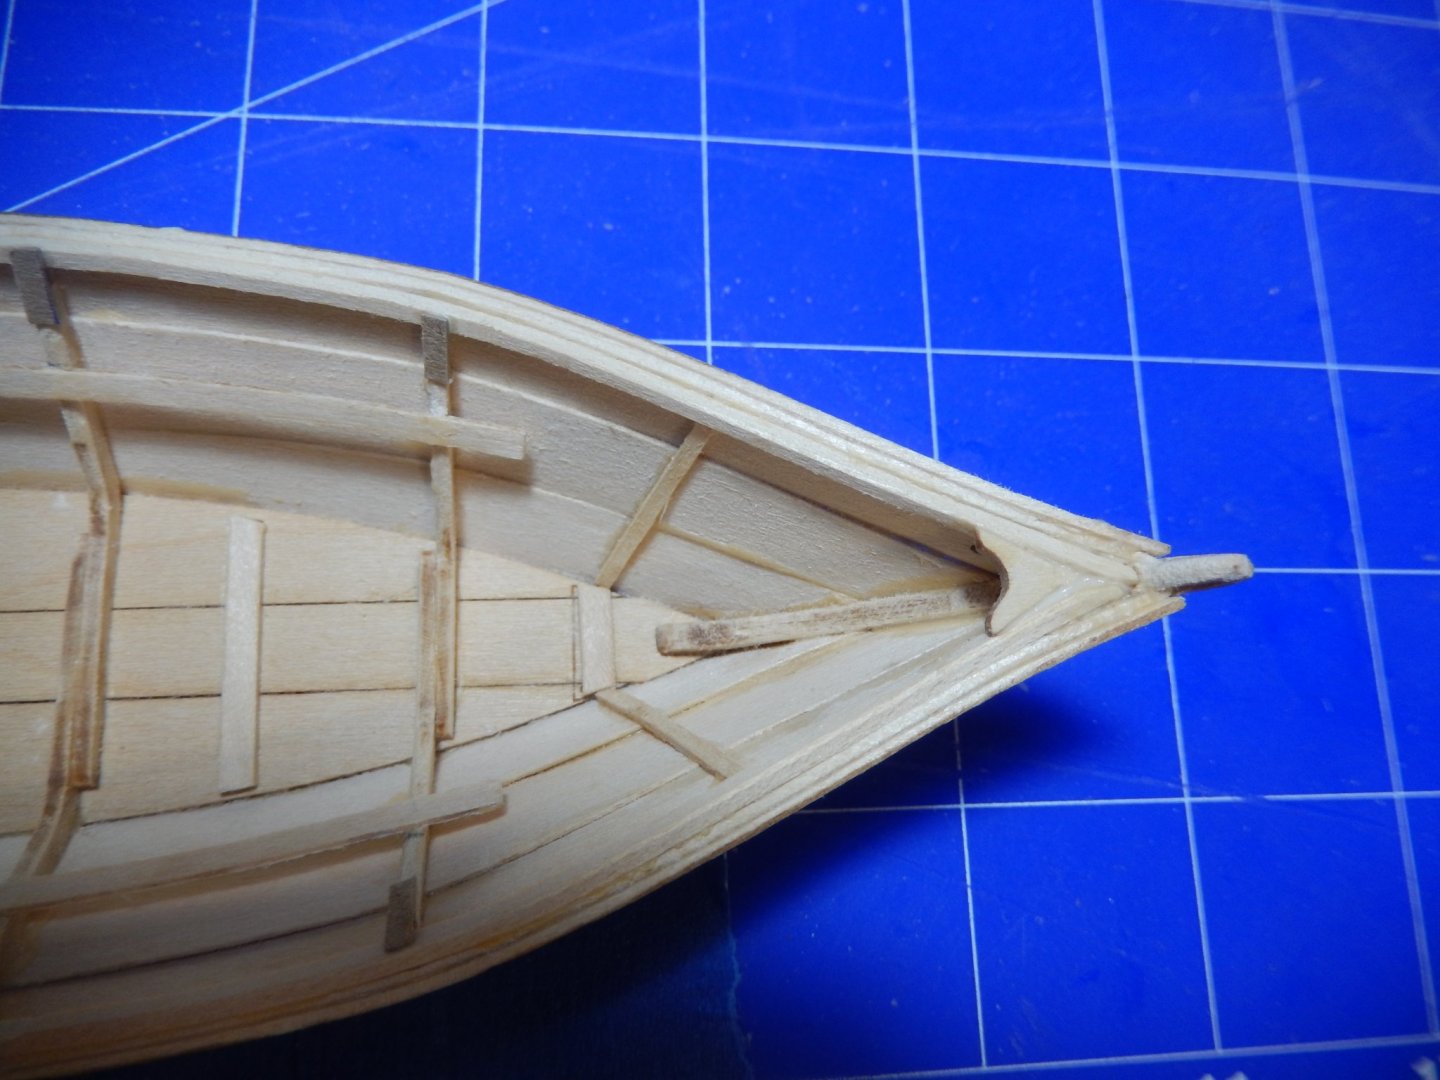
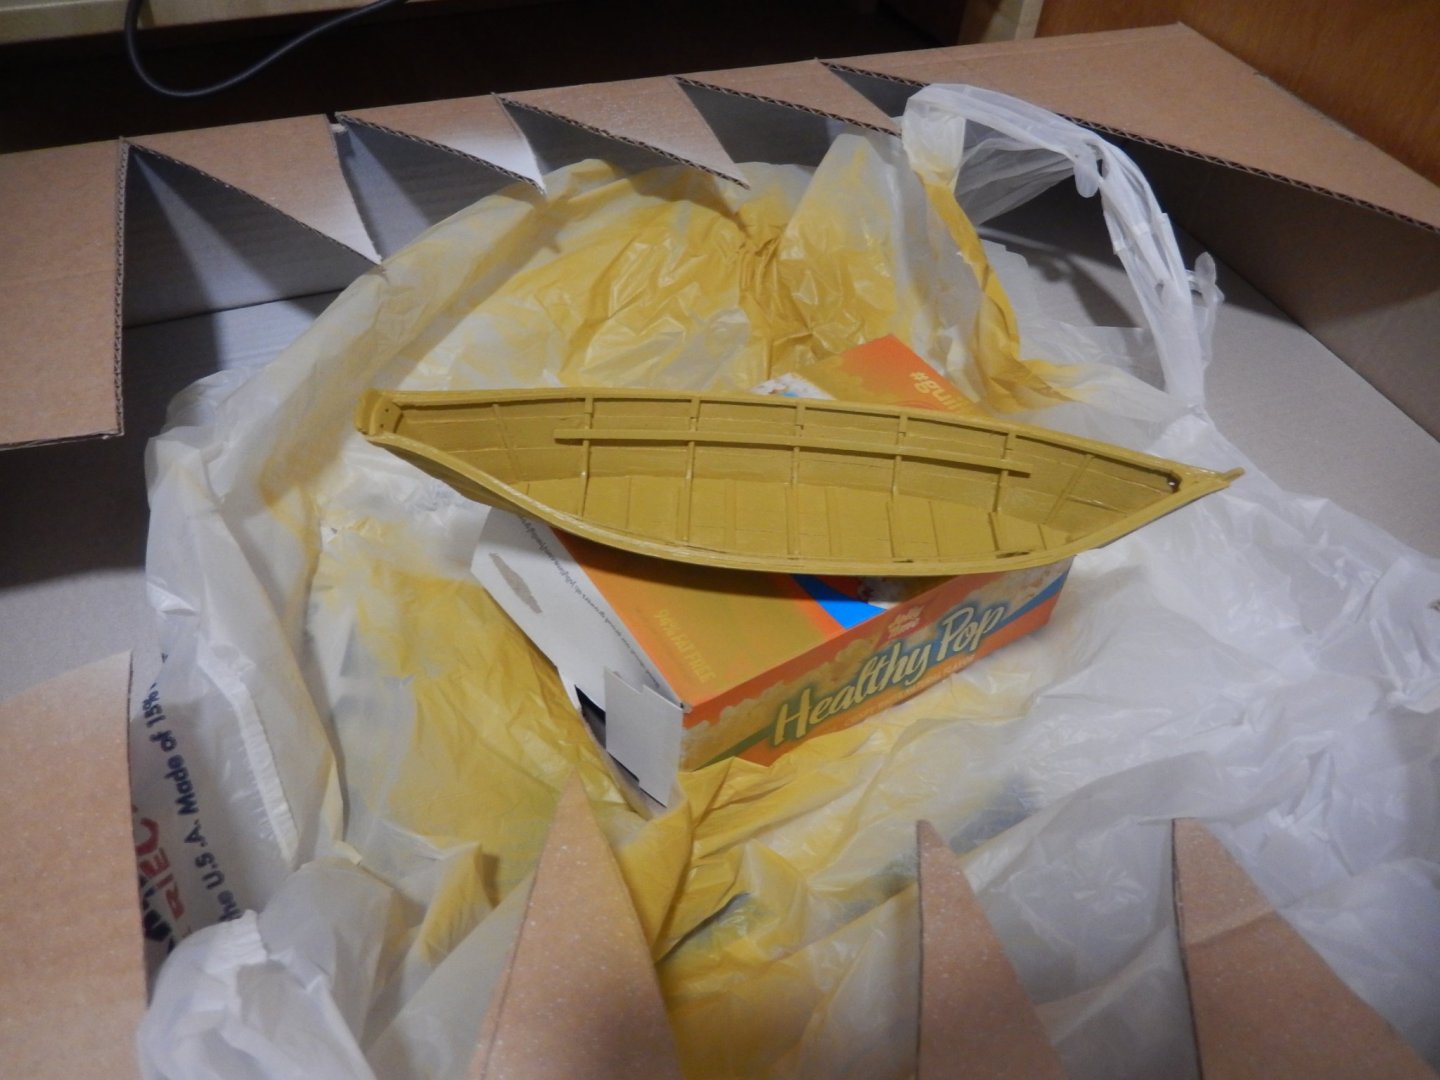
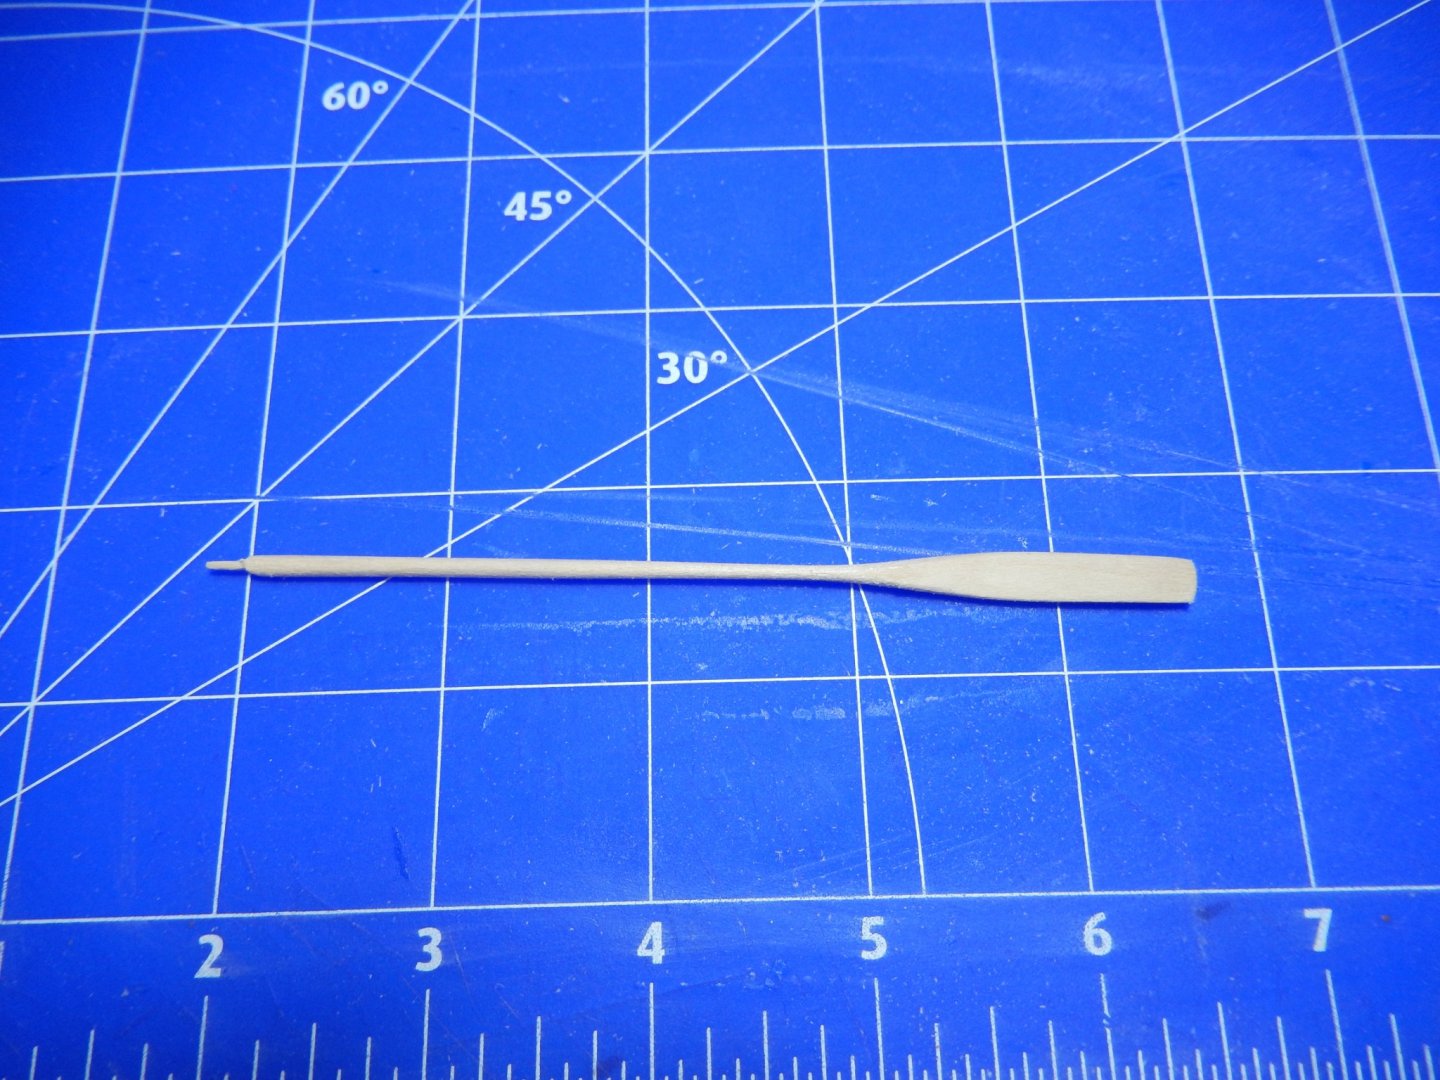
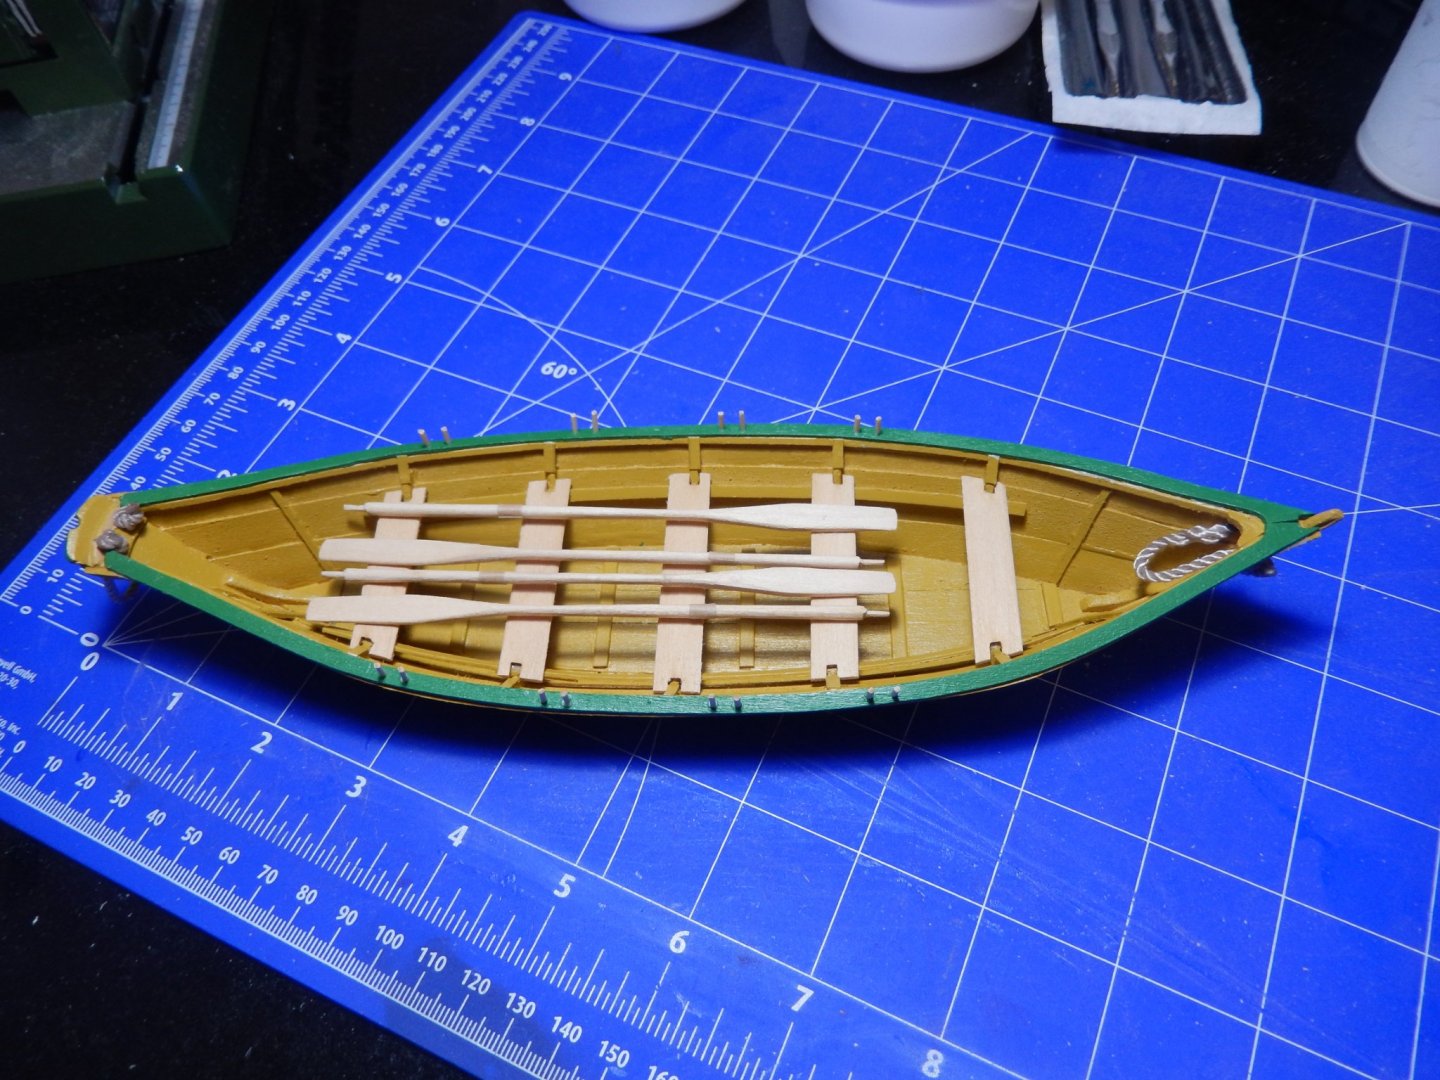
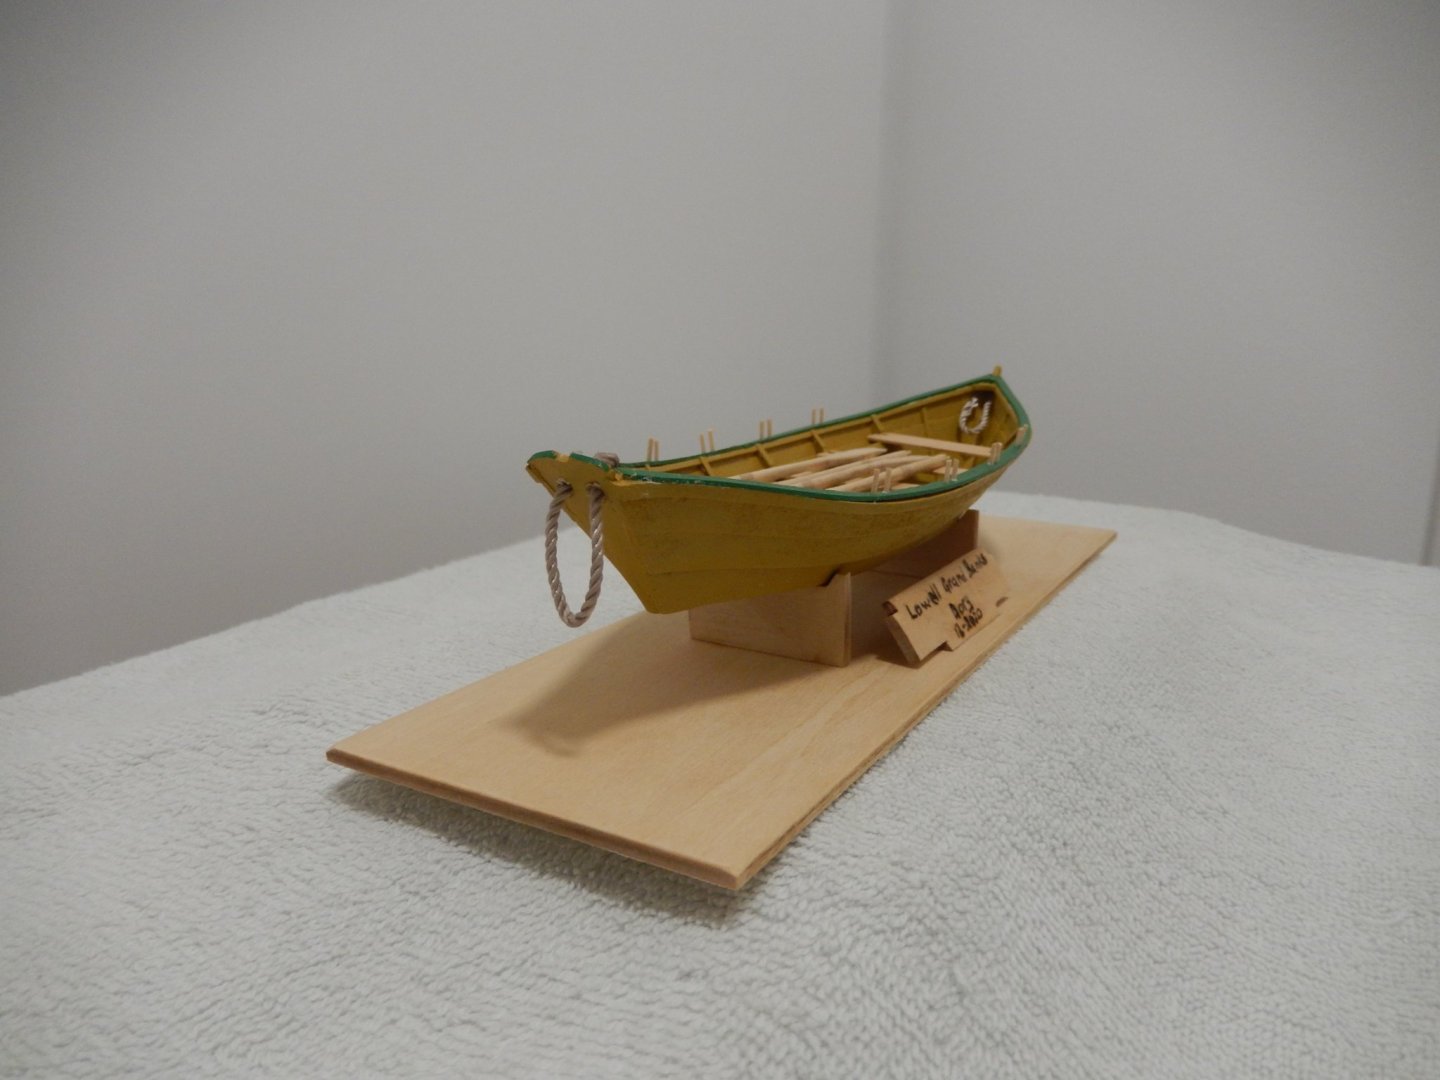
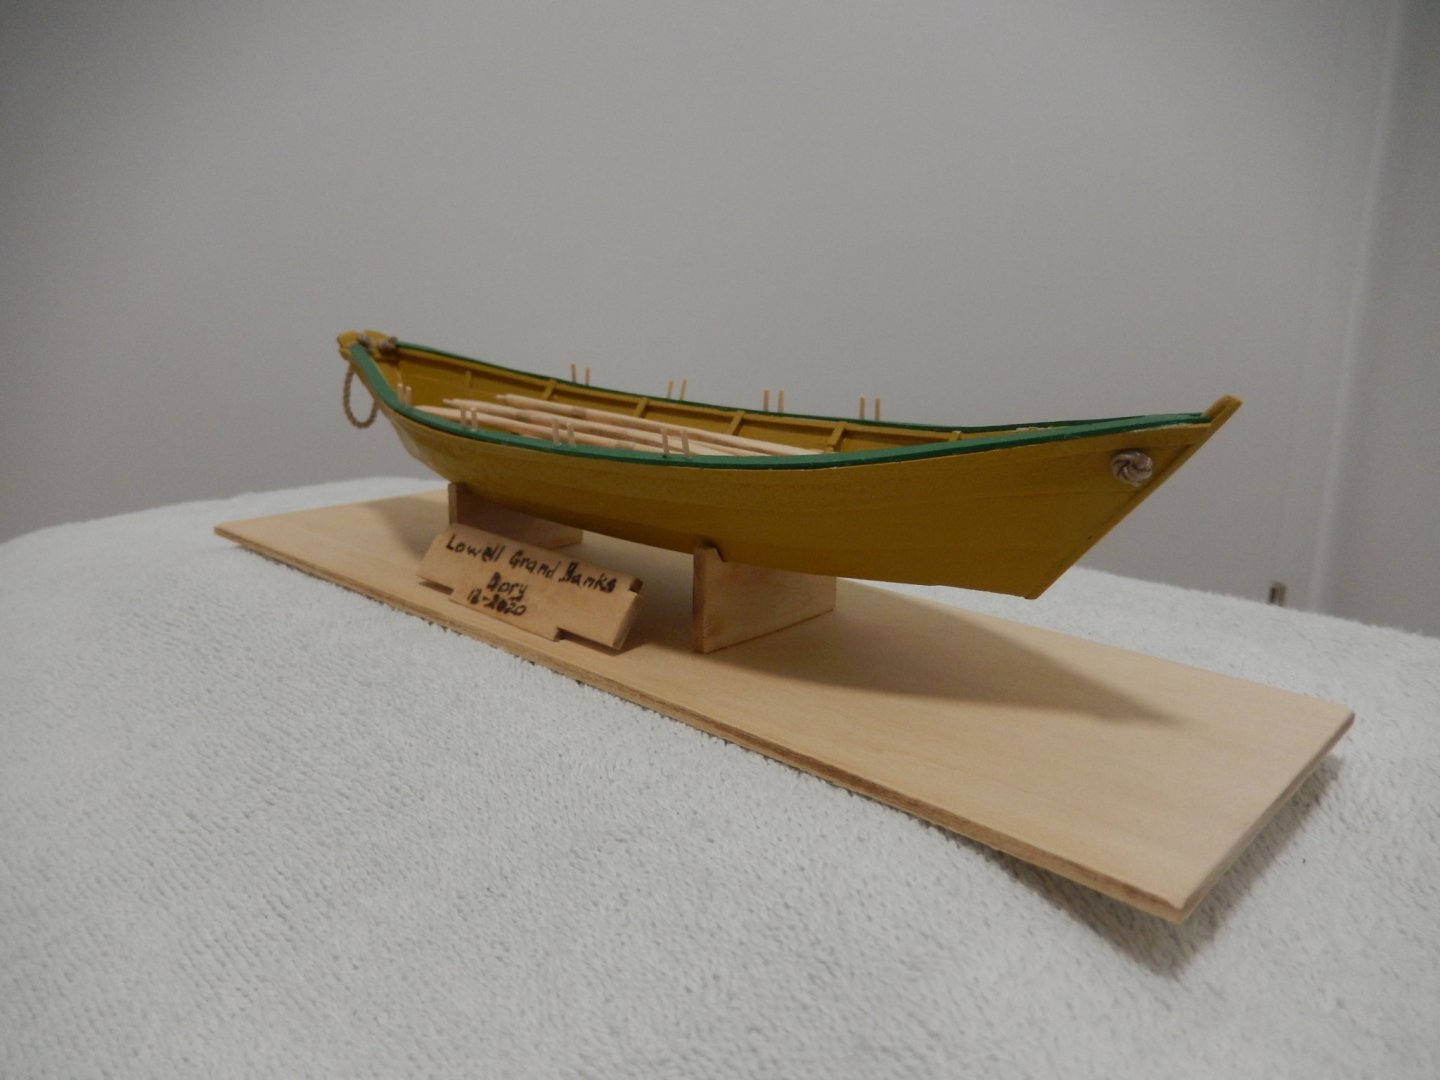
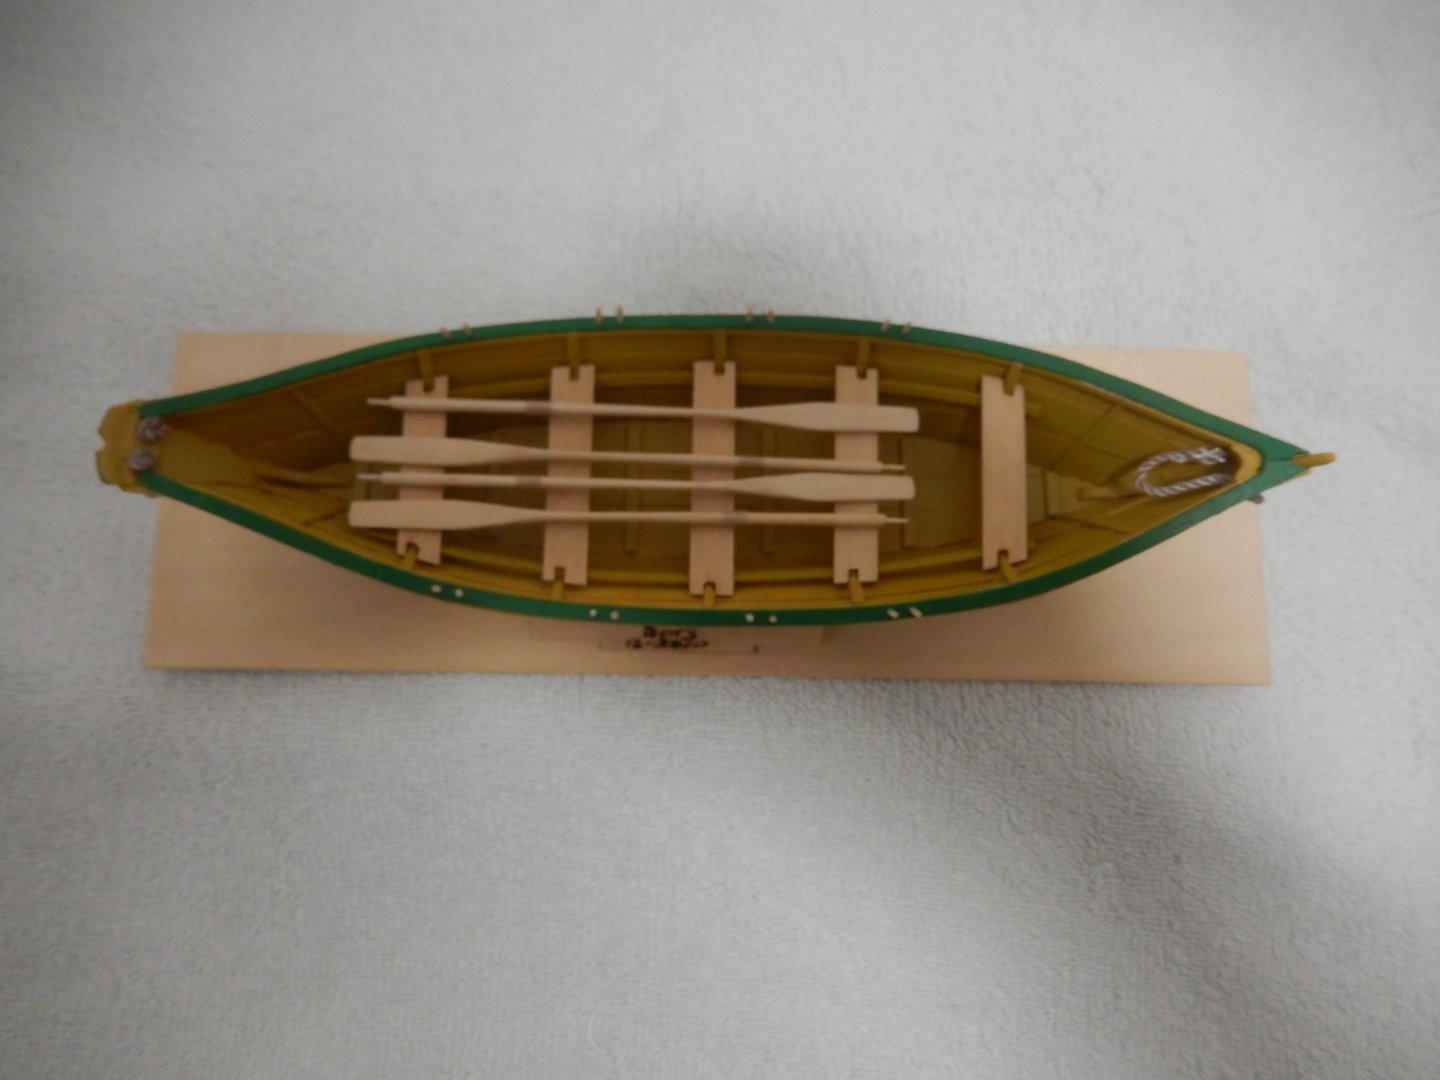
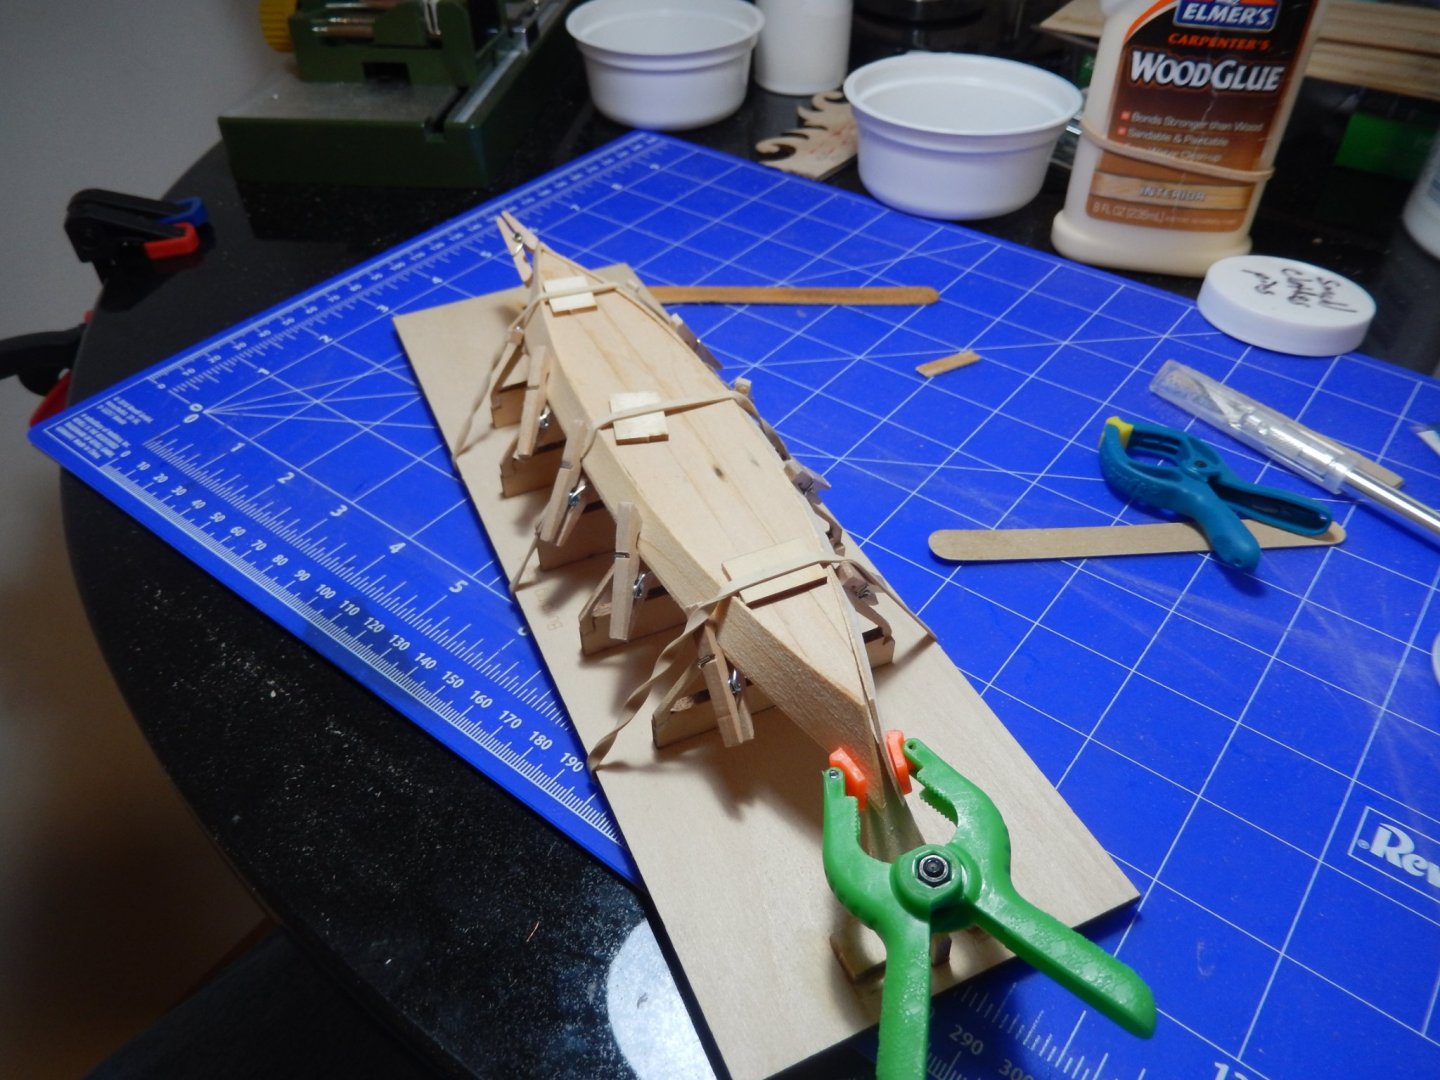
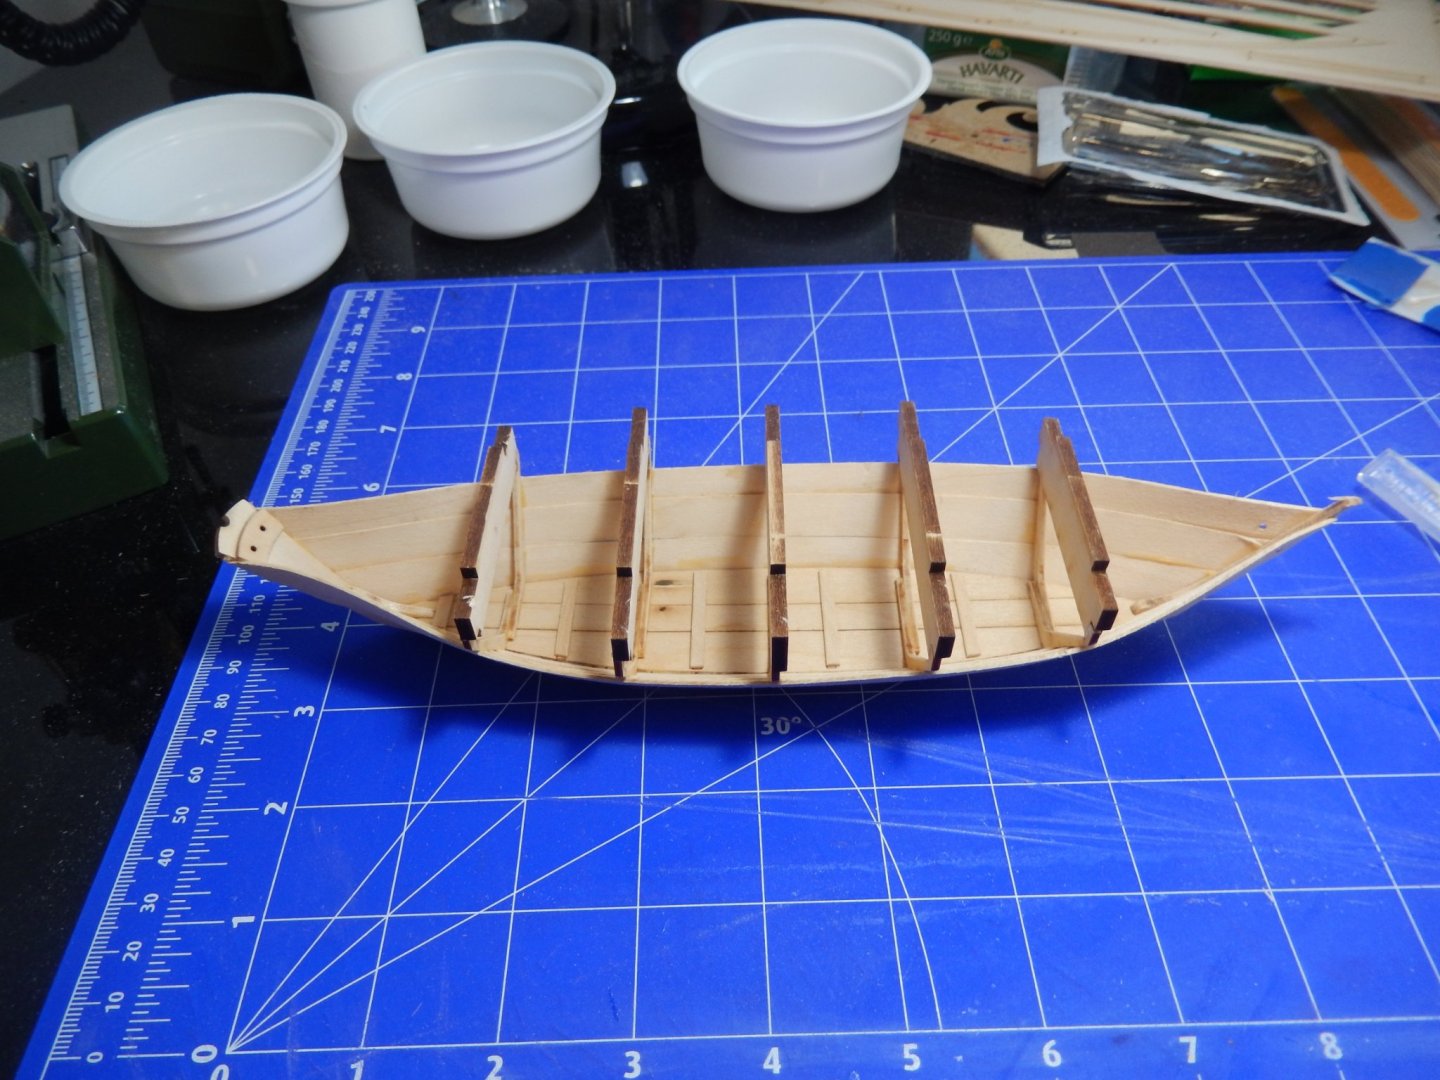
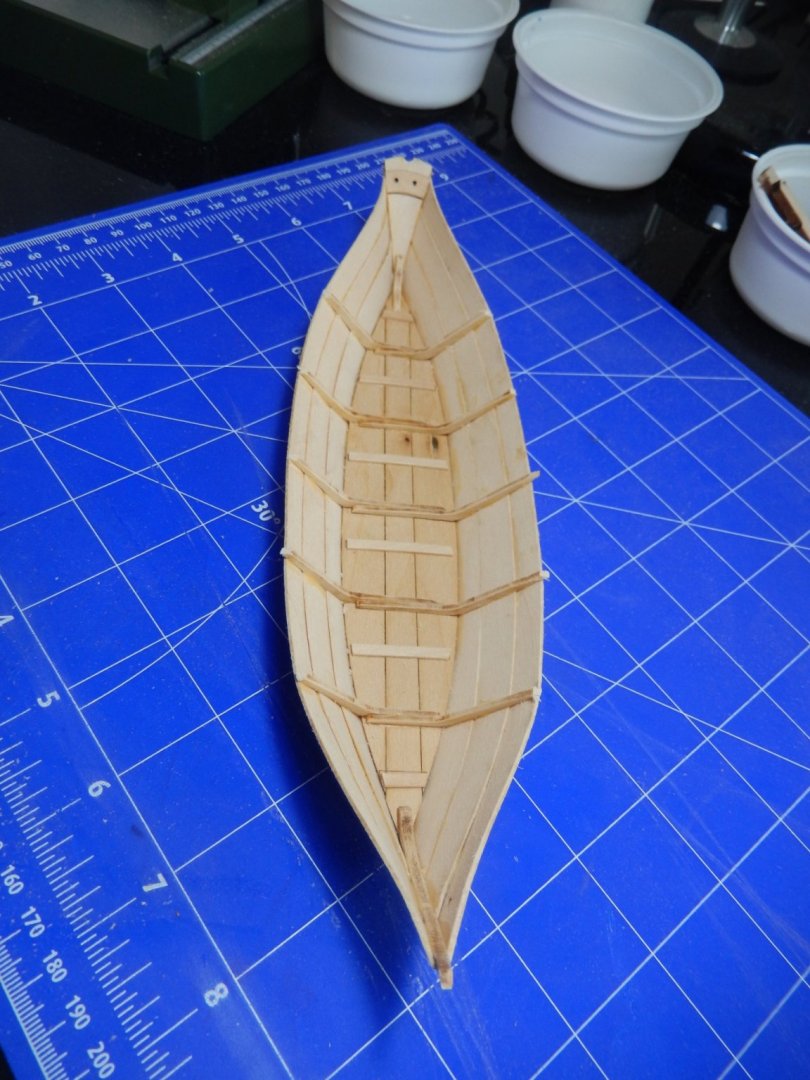
s'20201224 Reached the point this past Monday evening where I just knew that I would get the dory finished before Christmas. Things just started clicking once I had the bands glued on and the gunwales bent. I had decided a couple of weeks ago, before the non-essential stores were closed, that I would spray paint the hull. I located a can of mustard yellow for the hull (cap color closely matched the color chip on the pot of ochre brown that I also bought just in case). Sprayed on a universal white primer once all the hull pieces (except the caps) were installed and while that was drying started on the oars. Some whittling and lots of sanding but nothing tedious. Just being careful and taking time to get it done. Felt like the tortoise in the fable. Painting the caps with the green I had from another project then glued them on. I finished the thwarts and oars with a spray-on clear coat and then glued them in place. The rope supplied for the beckets was a bit too large a diameter for the holes in the stem and tern so I enlarged the holes a bit then pulled the rope through with a lop of thread and knotted the ends. The stand was also finished with a spray-on clear coat. The instructions mentioned a plaque that could be glued on the display stand but one was not in the kit. I decided to make one using the piece that held the middle frame to the assembly board and trying my hand at wood burning. I think the result fits the model. This was a good change from the sailing ships and a fun little model. Am considering building a couple of more of these (or something similar) this coming year for the grandkids' birthdays. Have Corel’s Yacht America (1:155 solid hull) standing by and a couple of models somewhere in the mail (an 18th century French shipboard cannon and a Sopwith Camel engine). Also have a few hundred piece 3D wooden mechanical puzzle that I was sent for Christmas. Plenty to keep me busy over the next few months.


- 8 replies
-
- 6
-
-
- Finished
- Model Shipways
- (and 1 more)
-
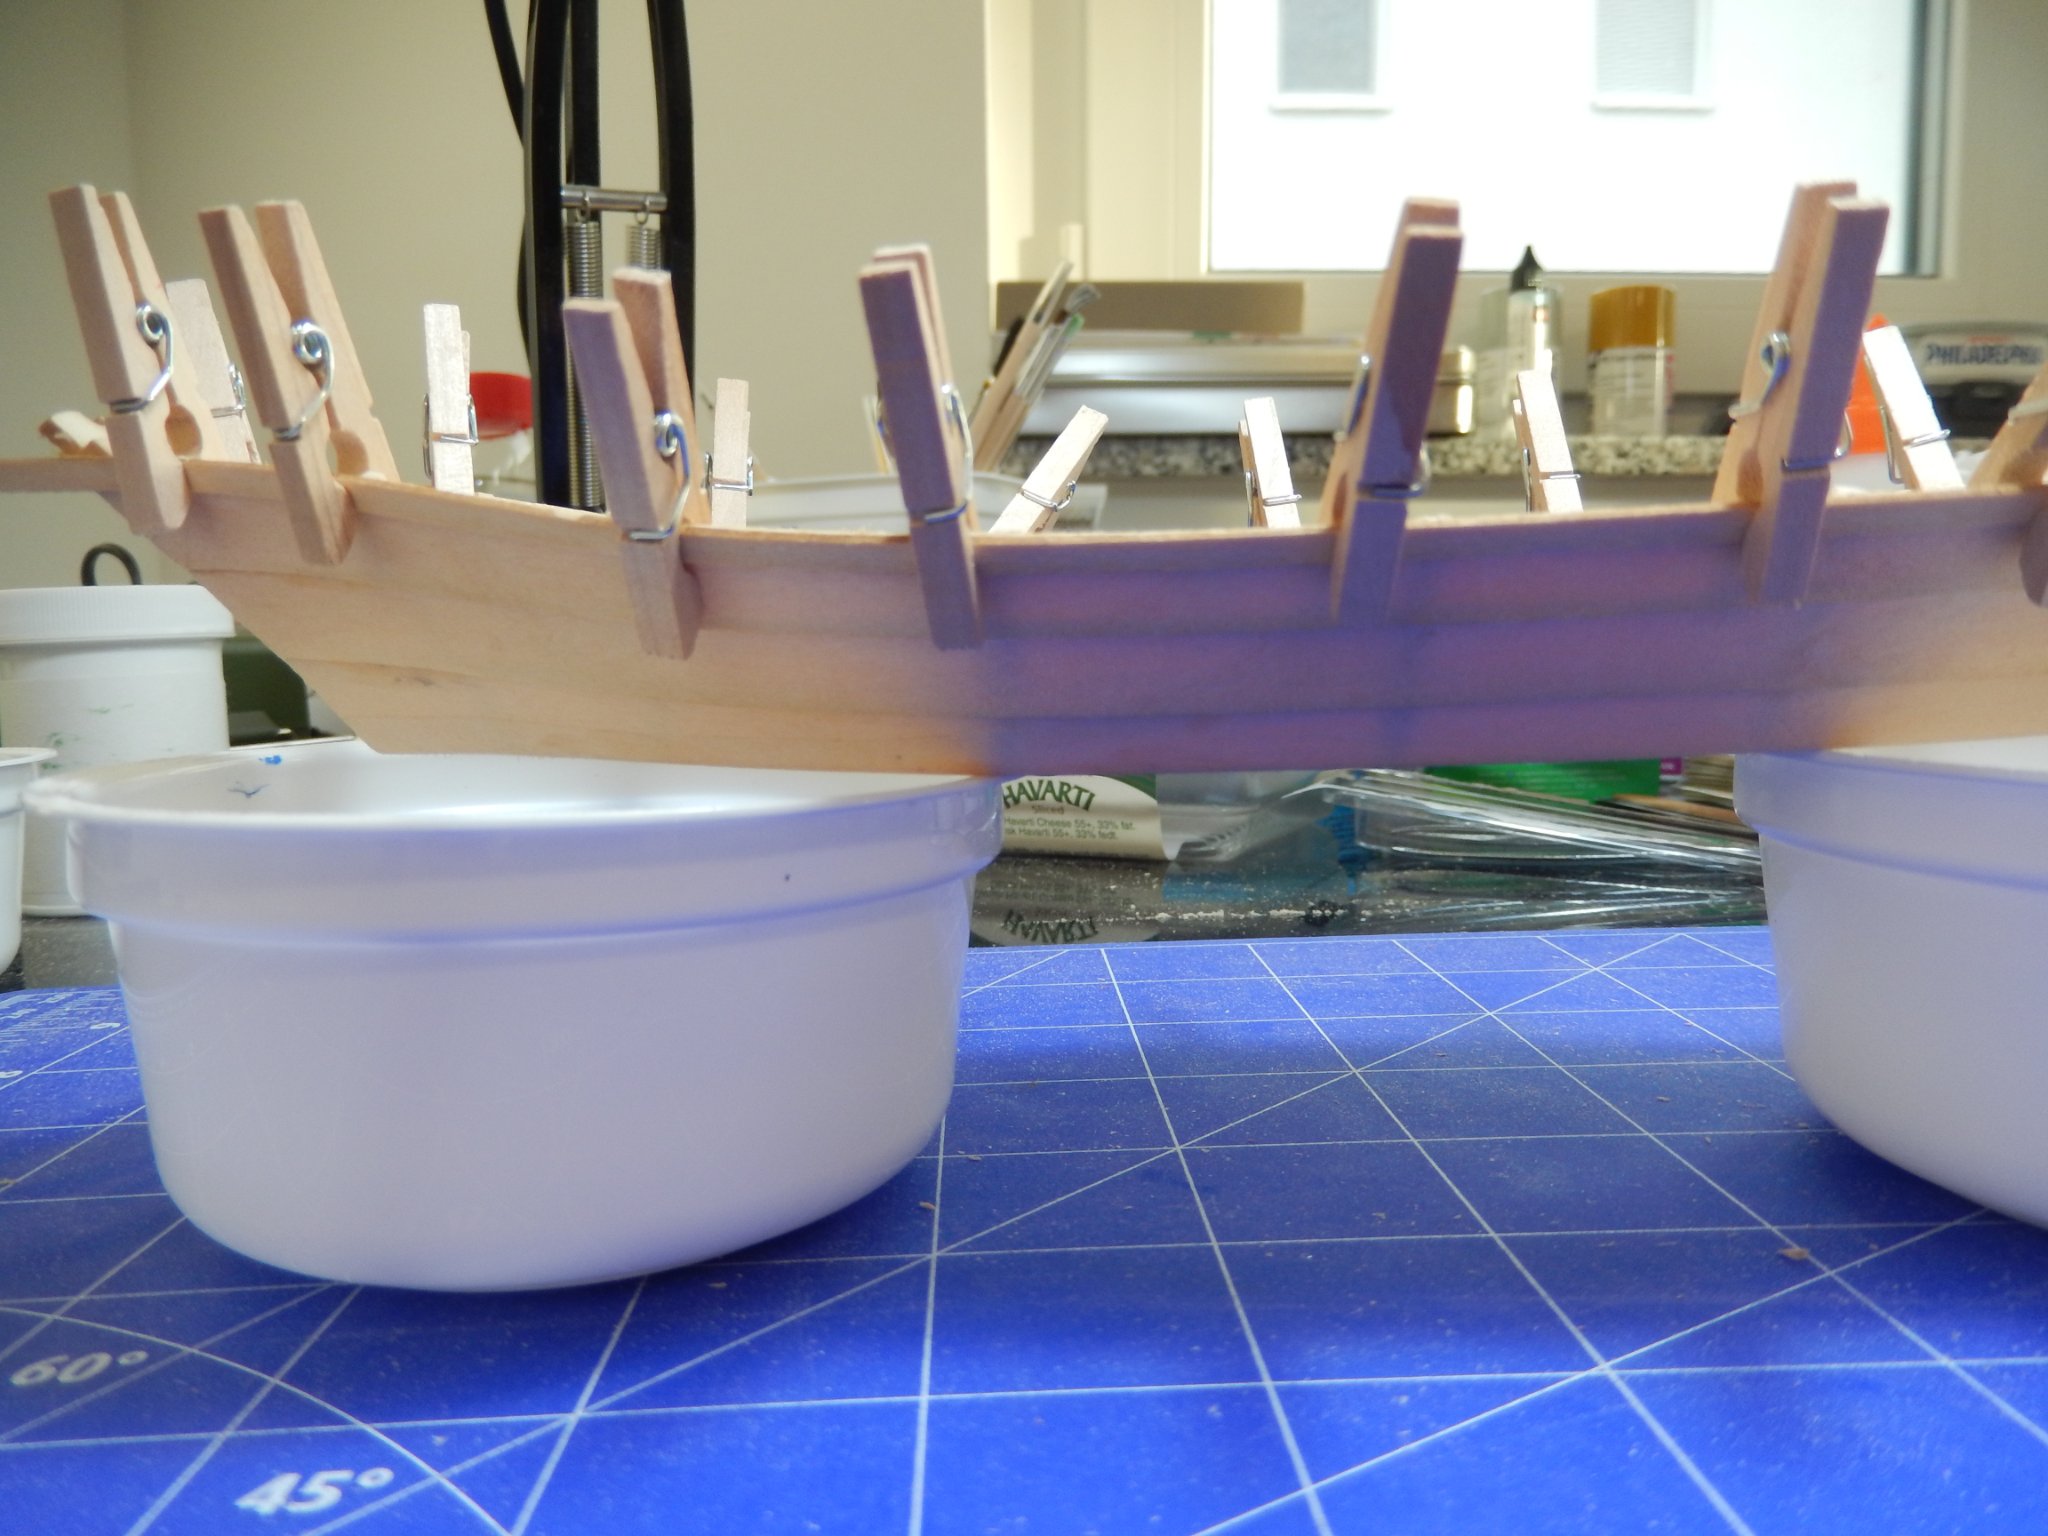
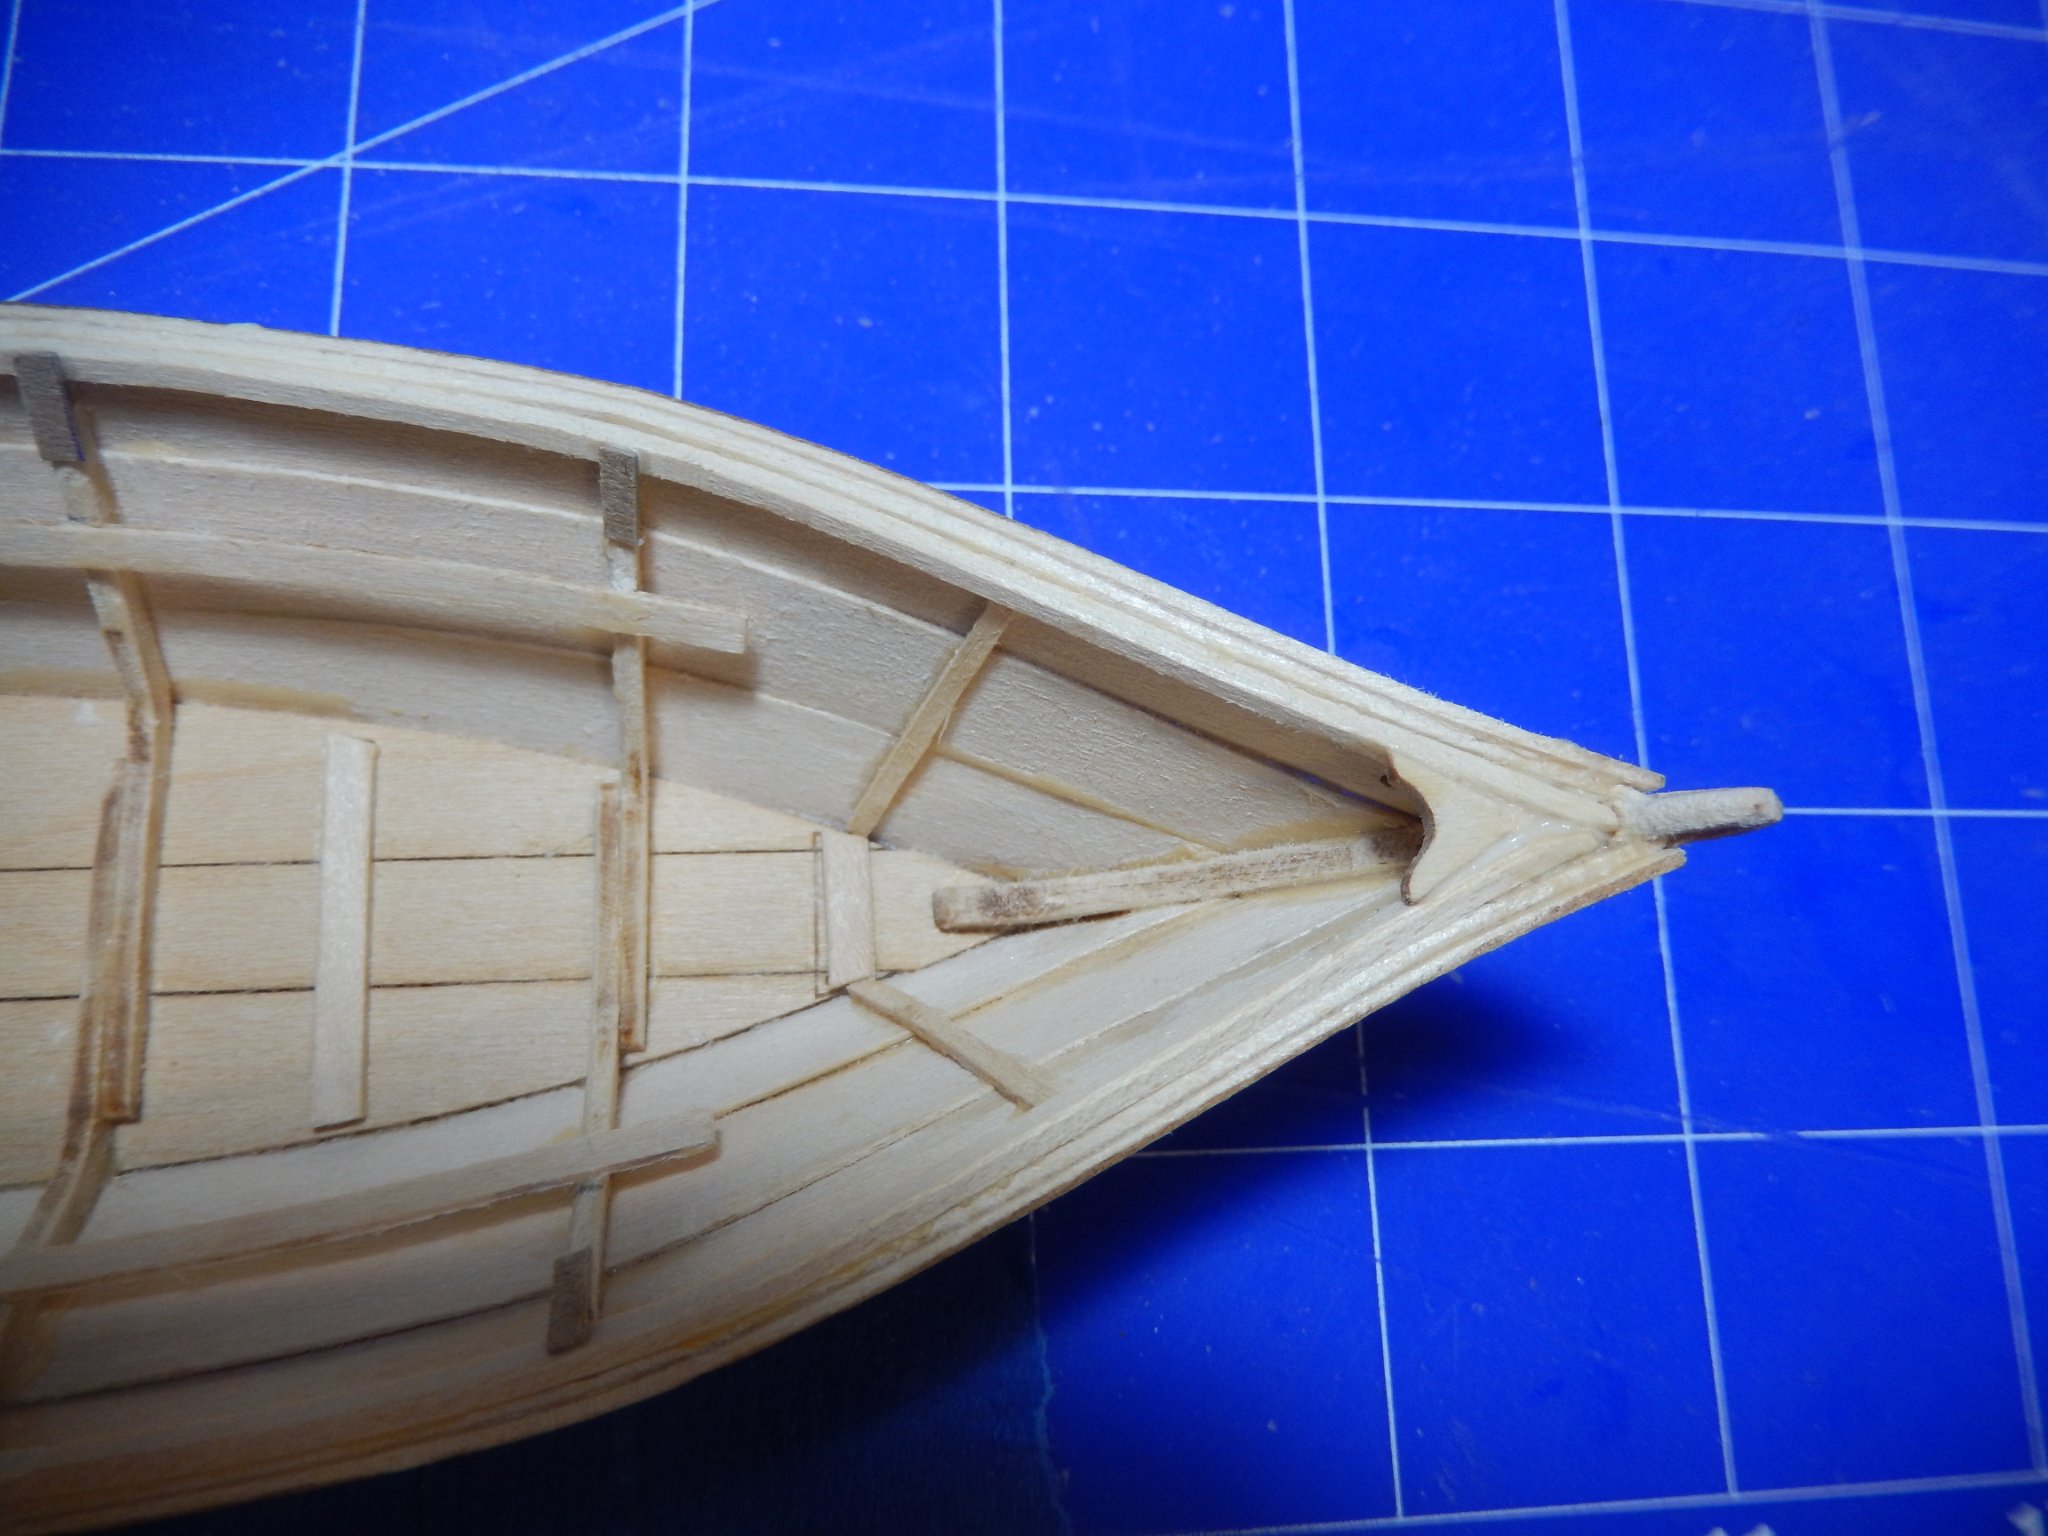
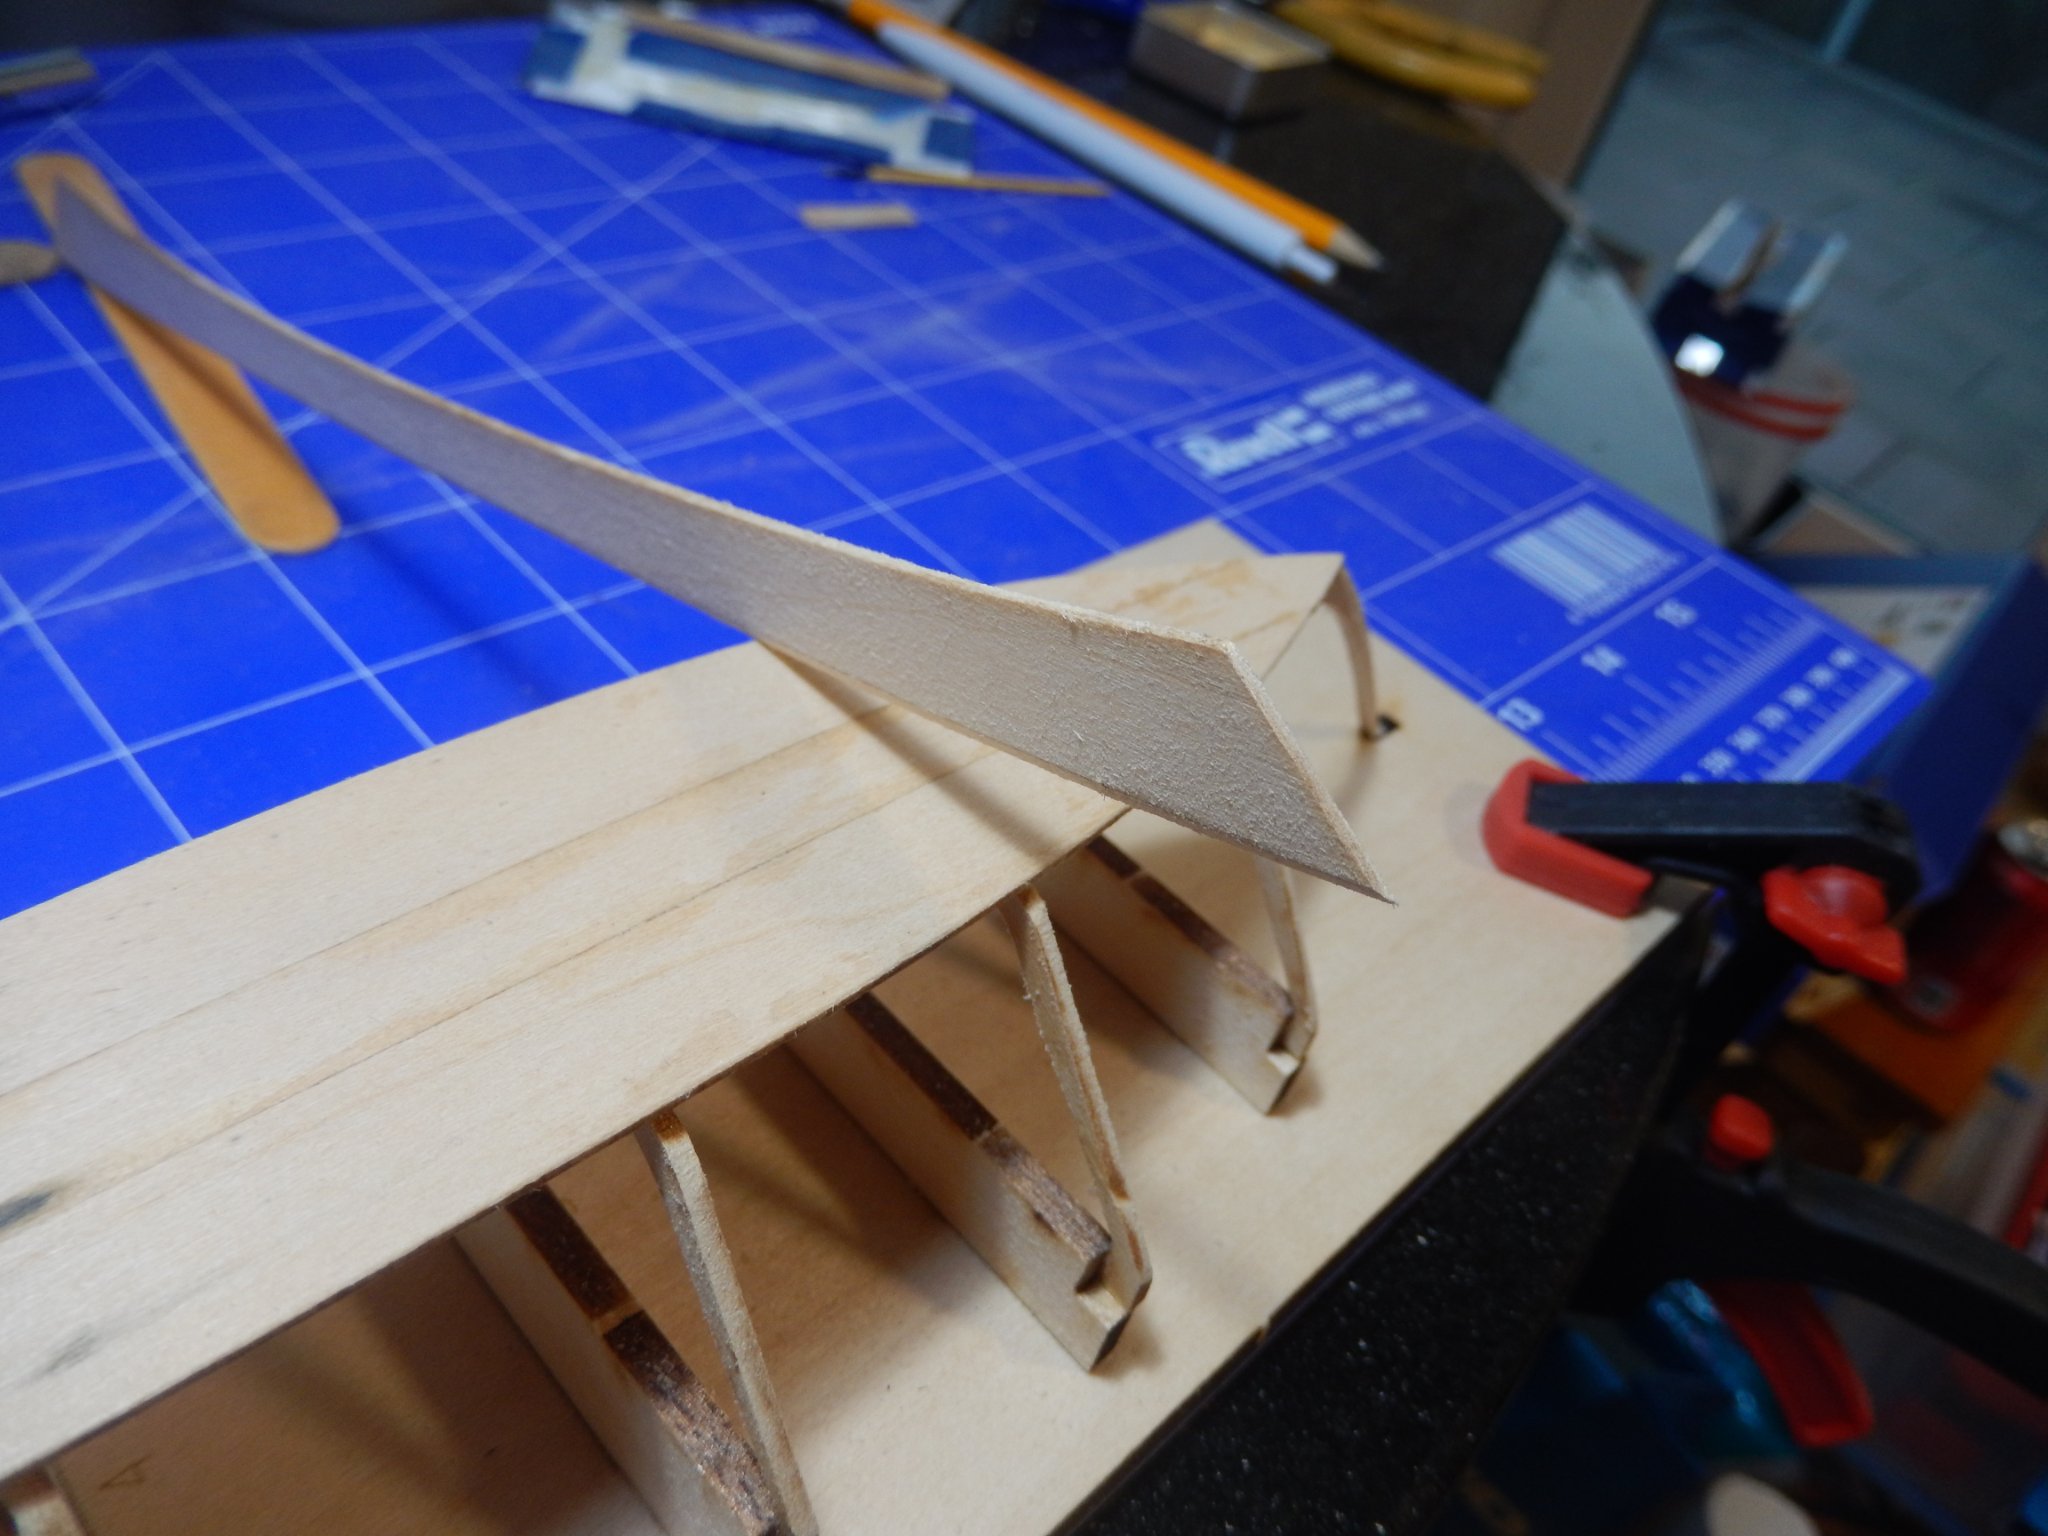
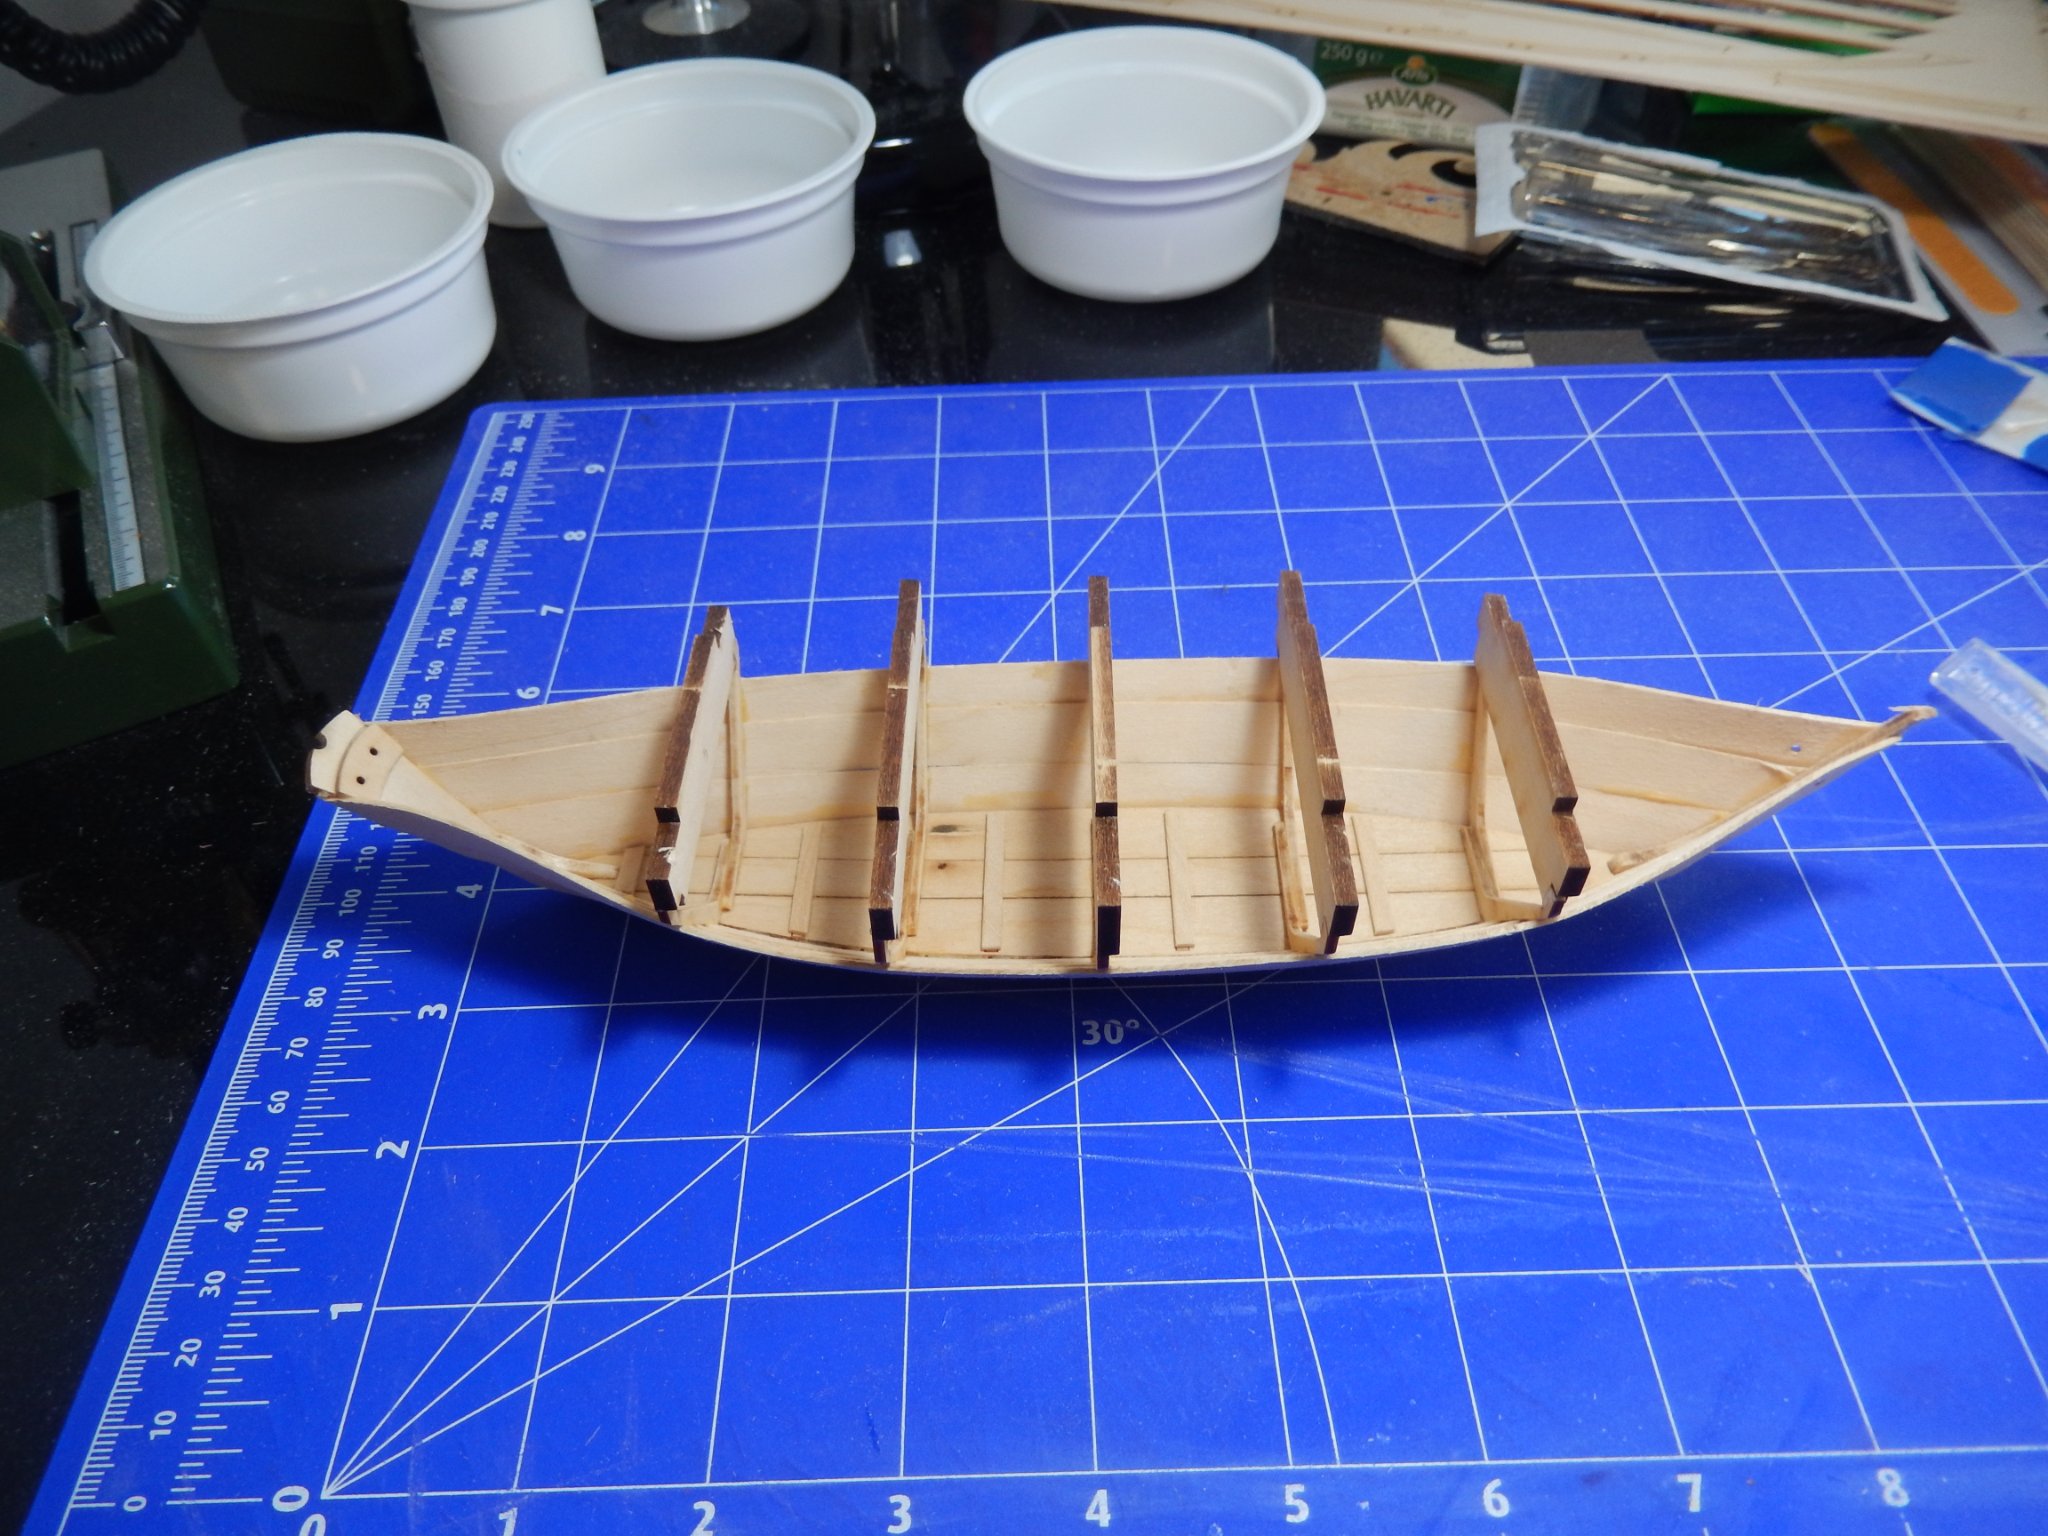
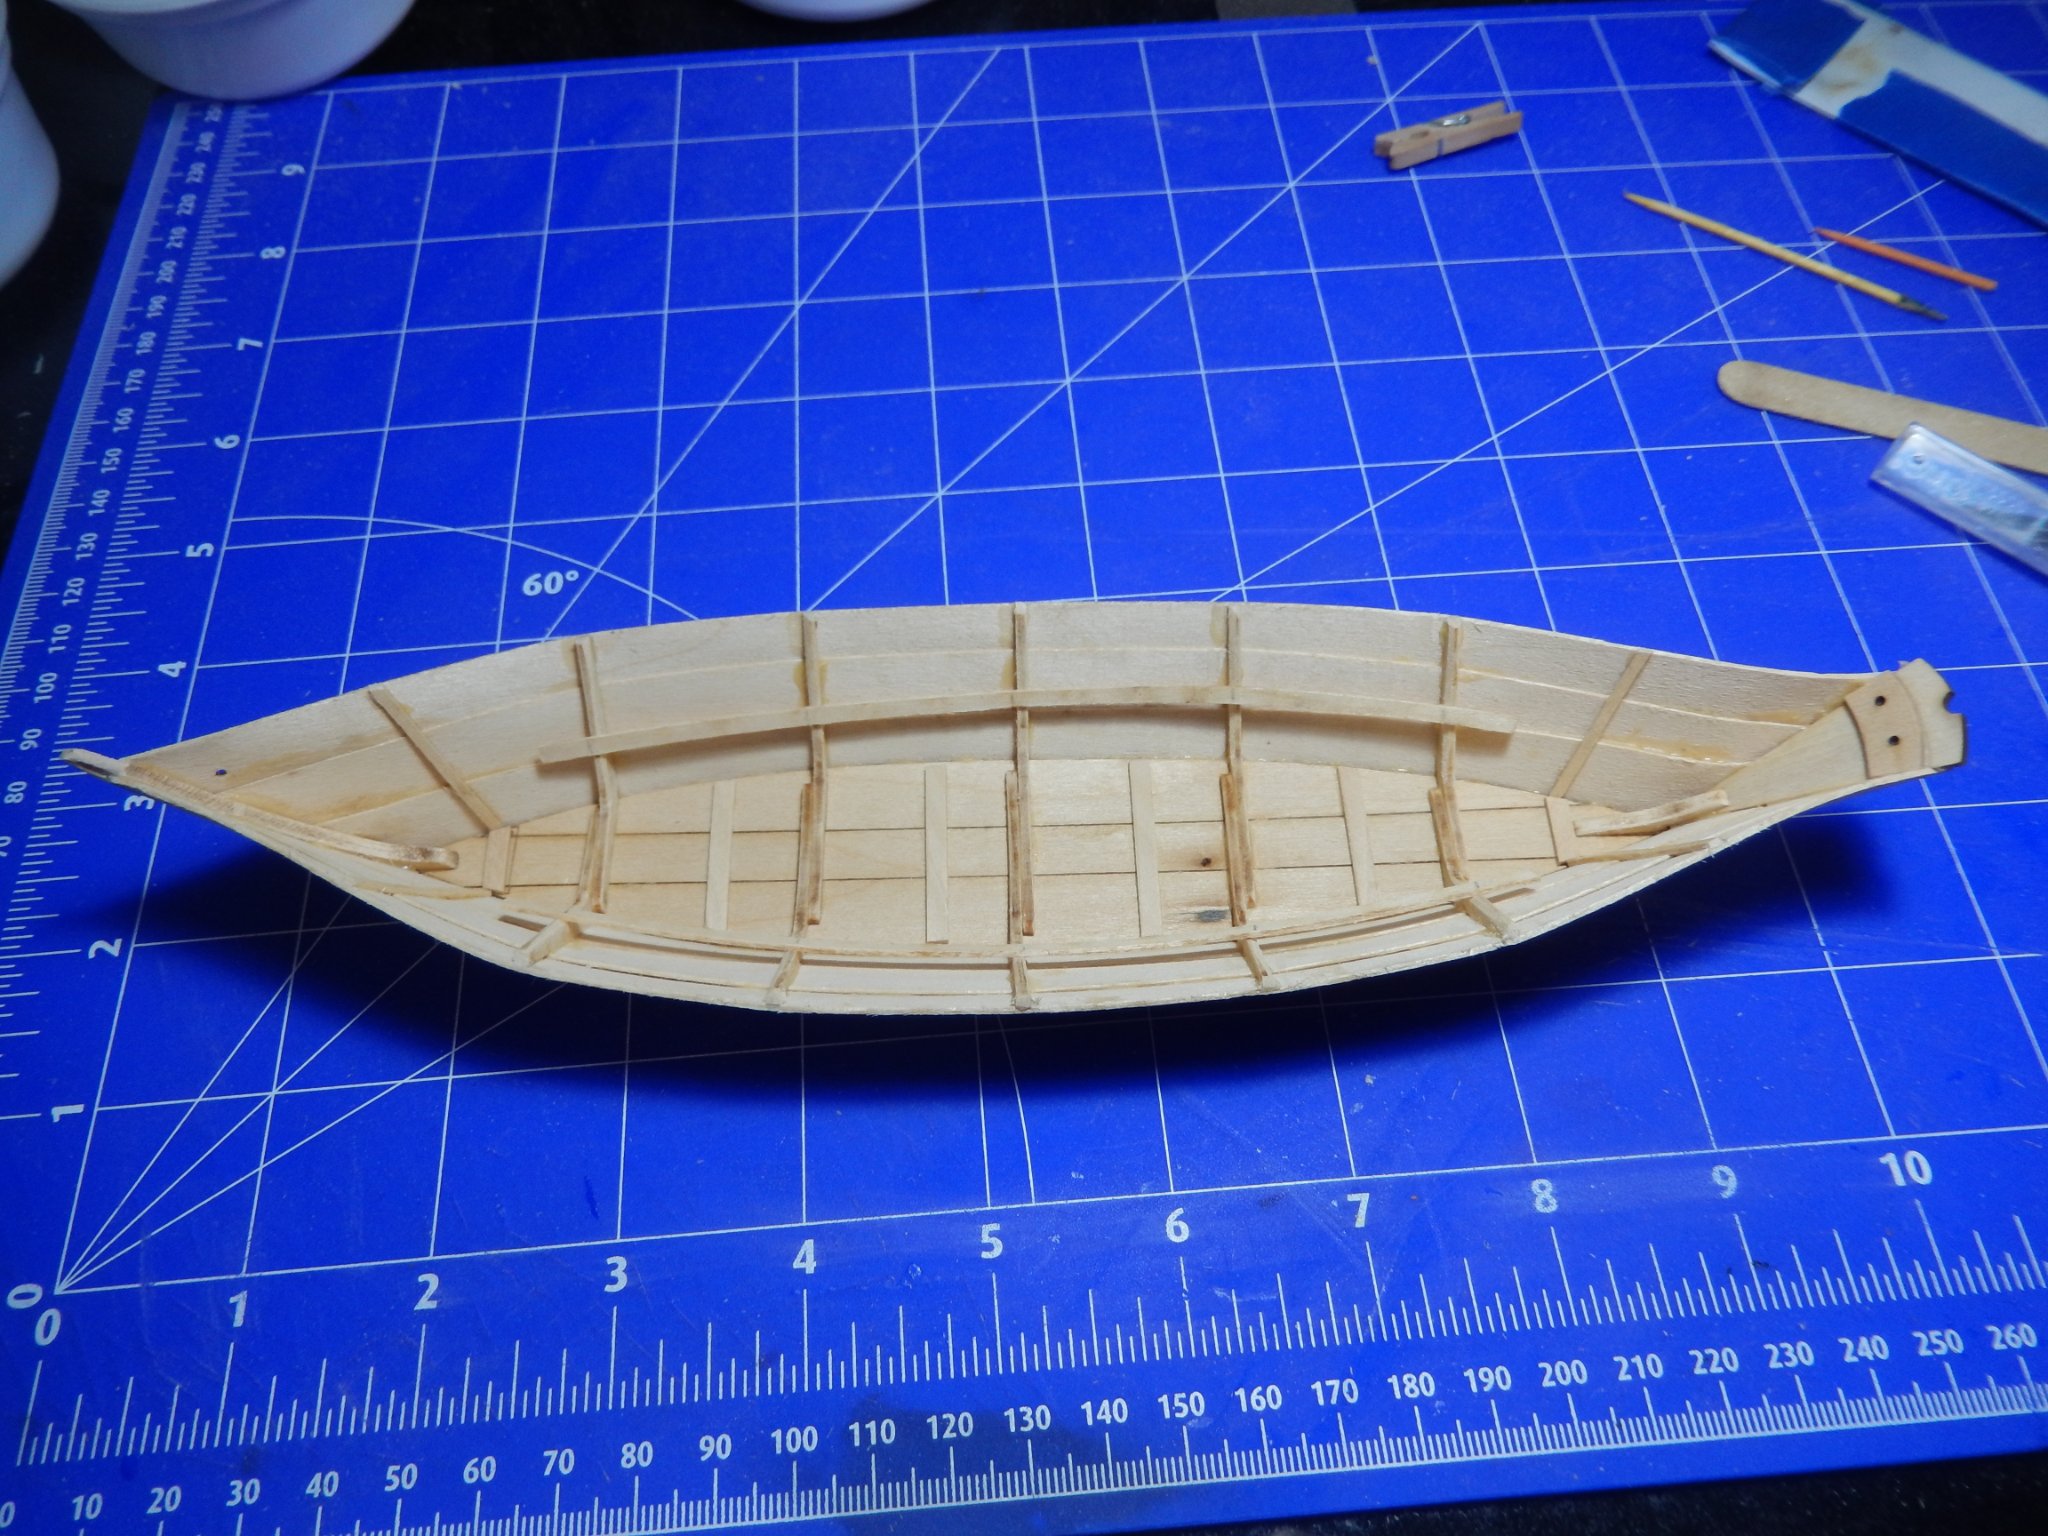
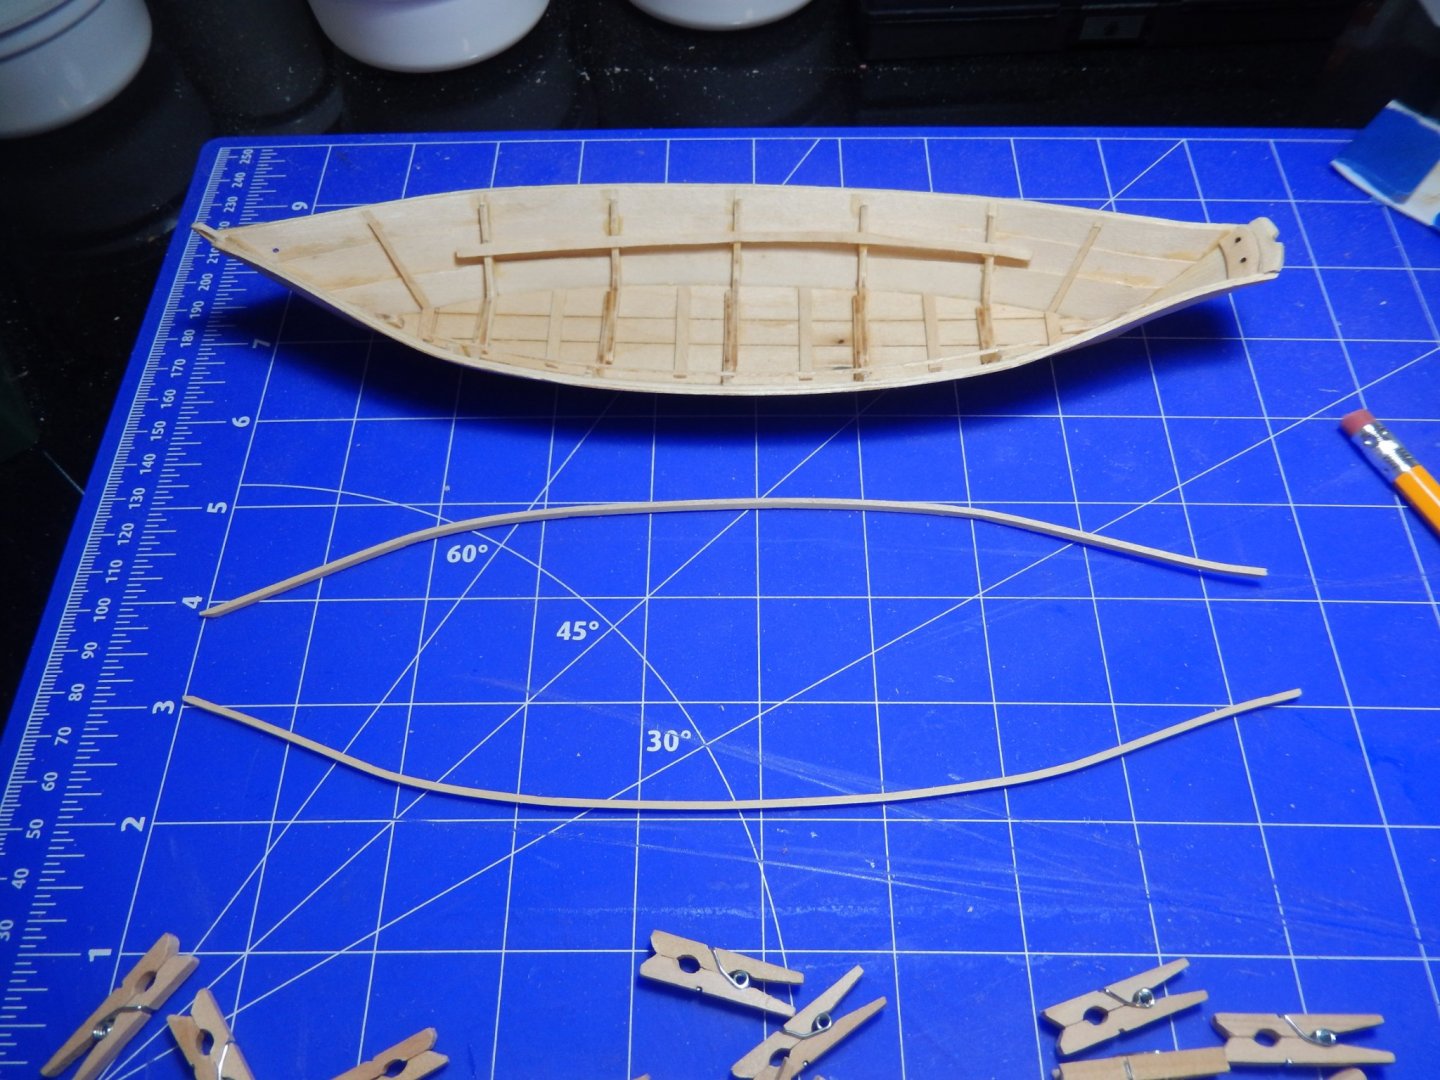
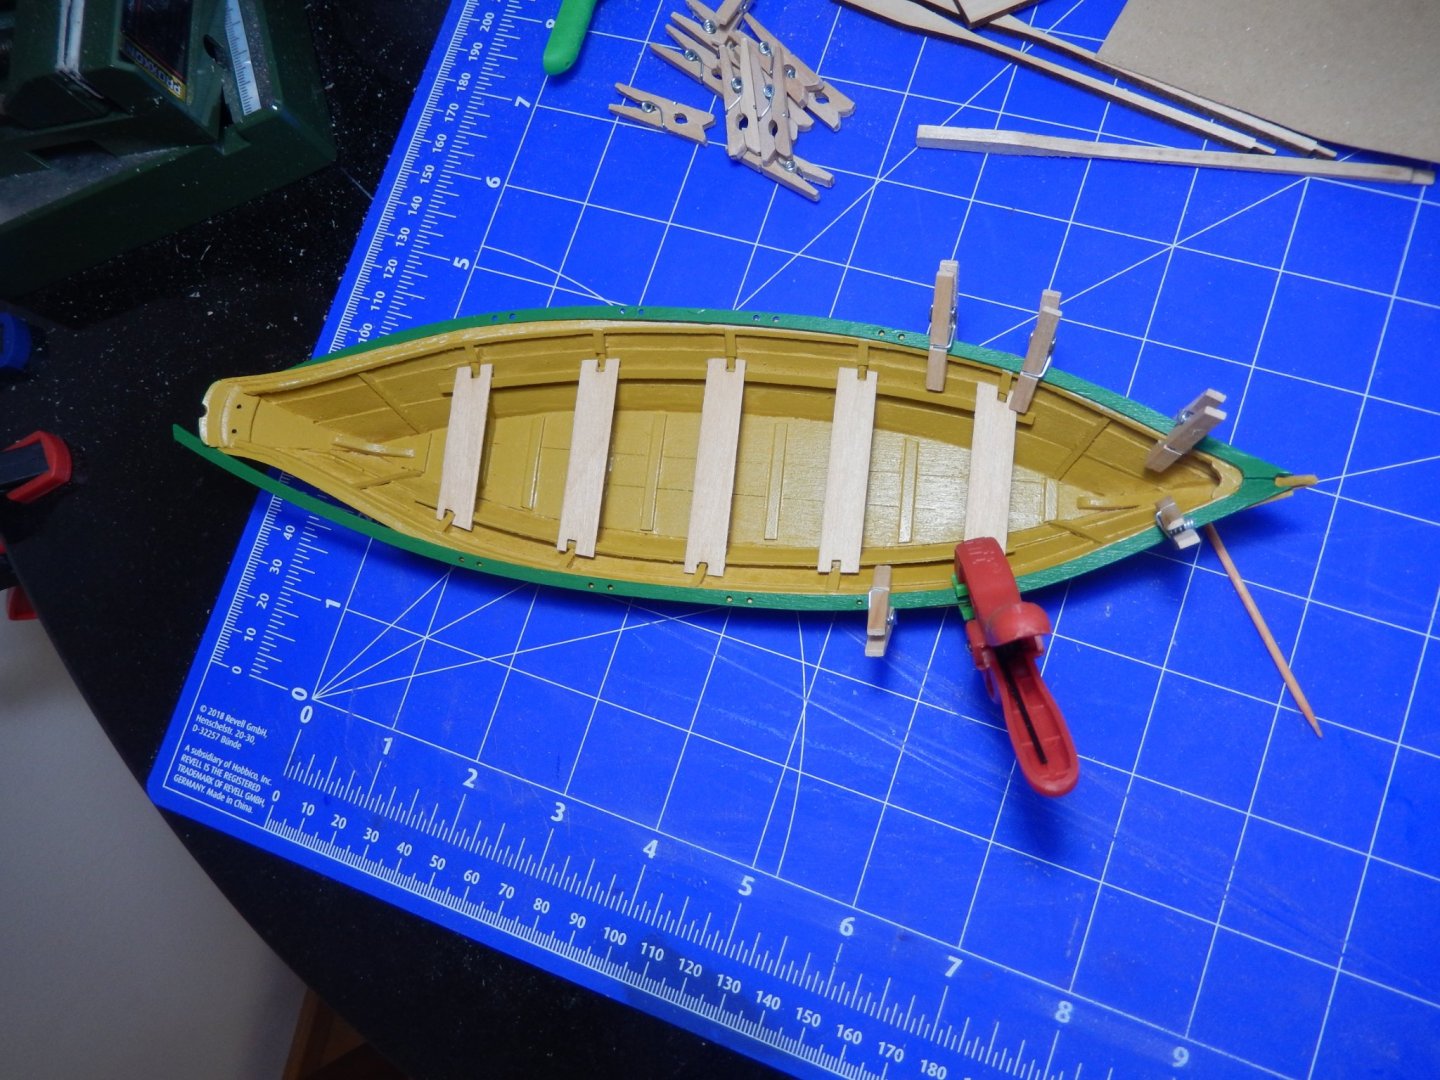
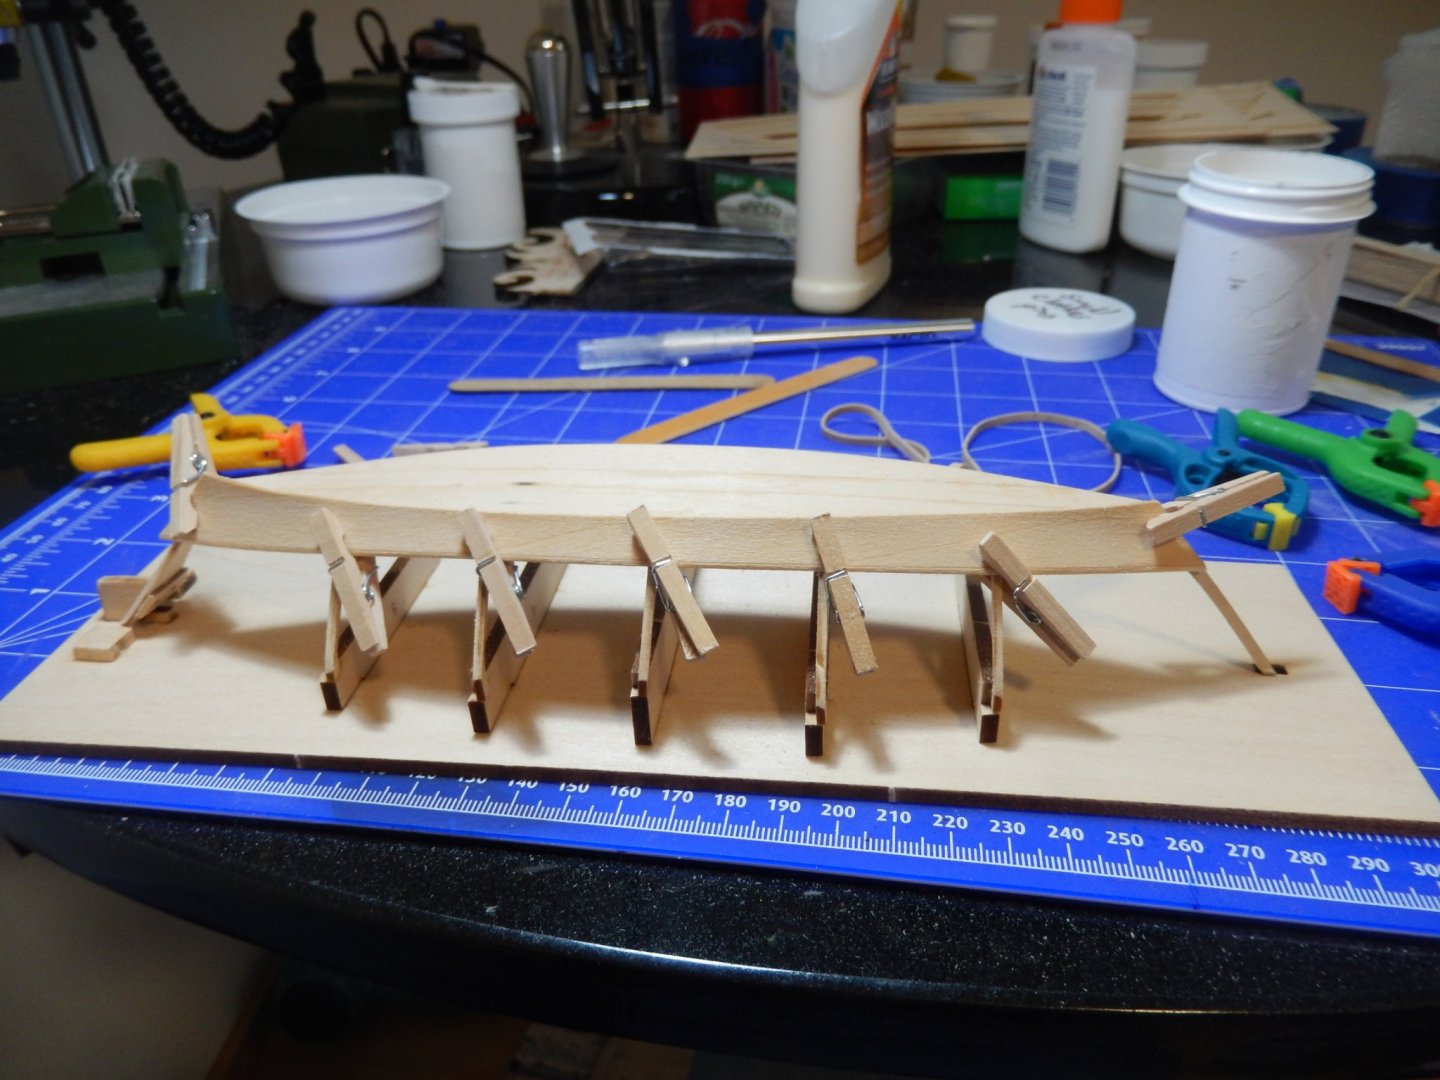
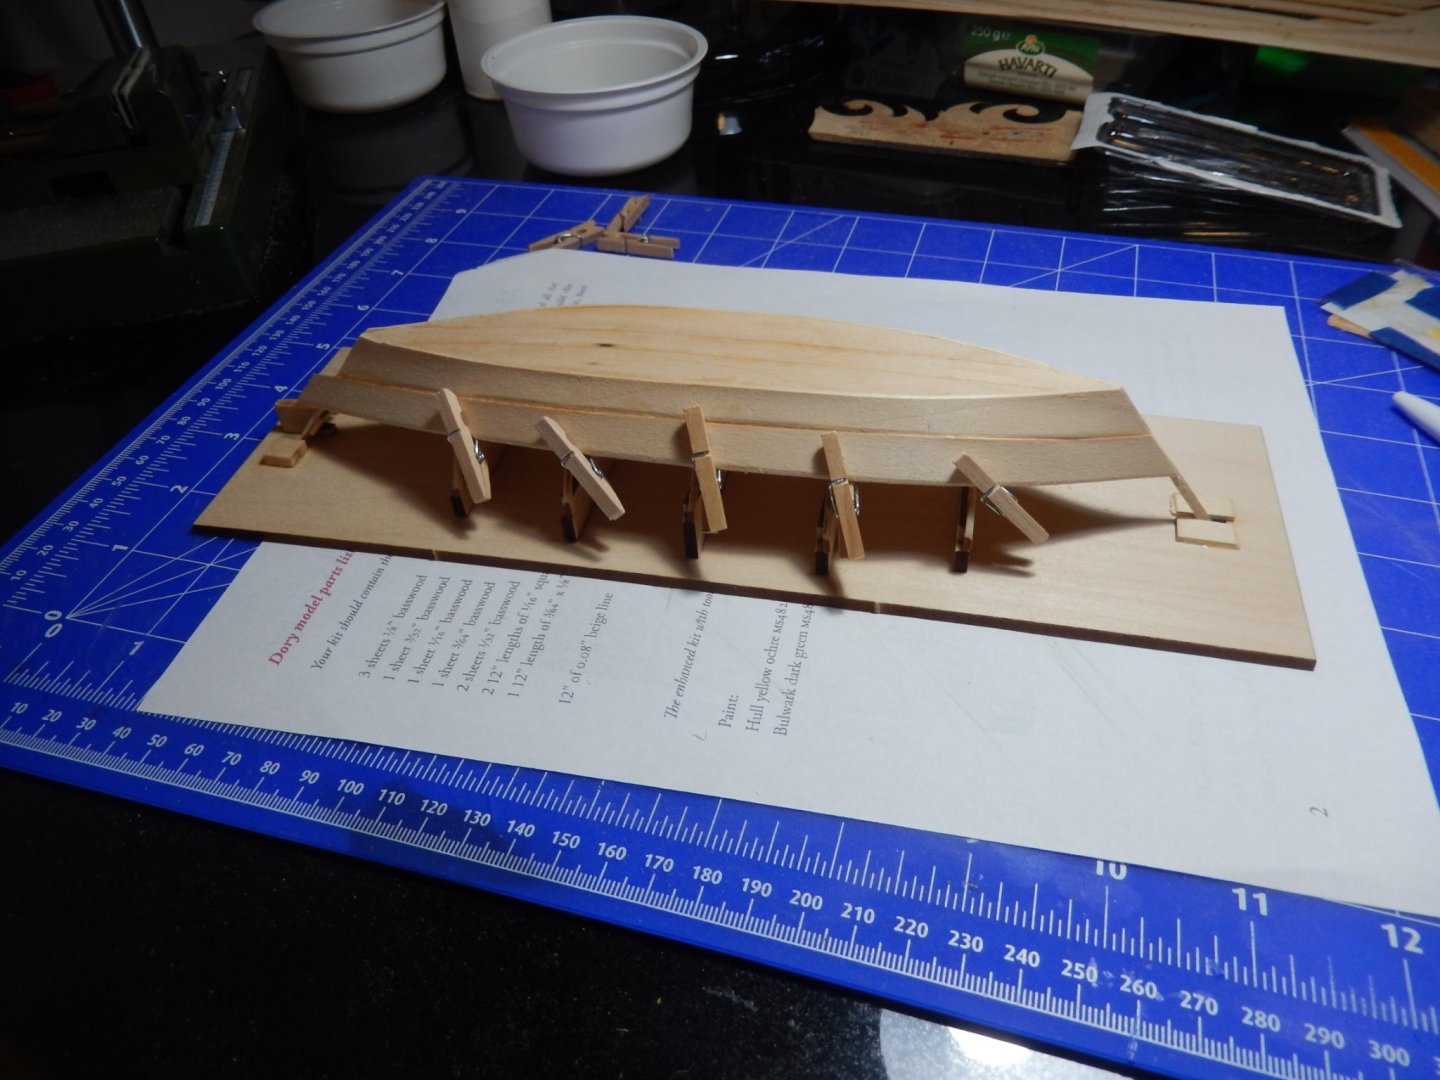
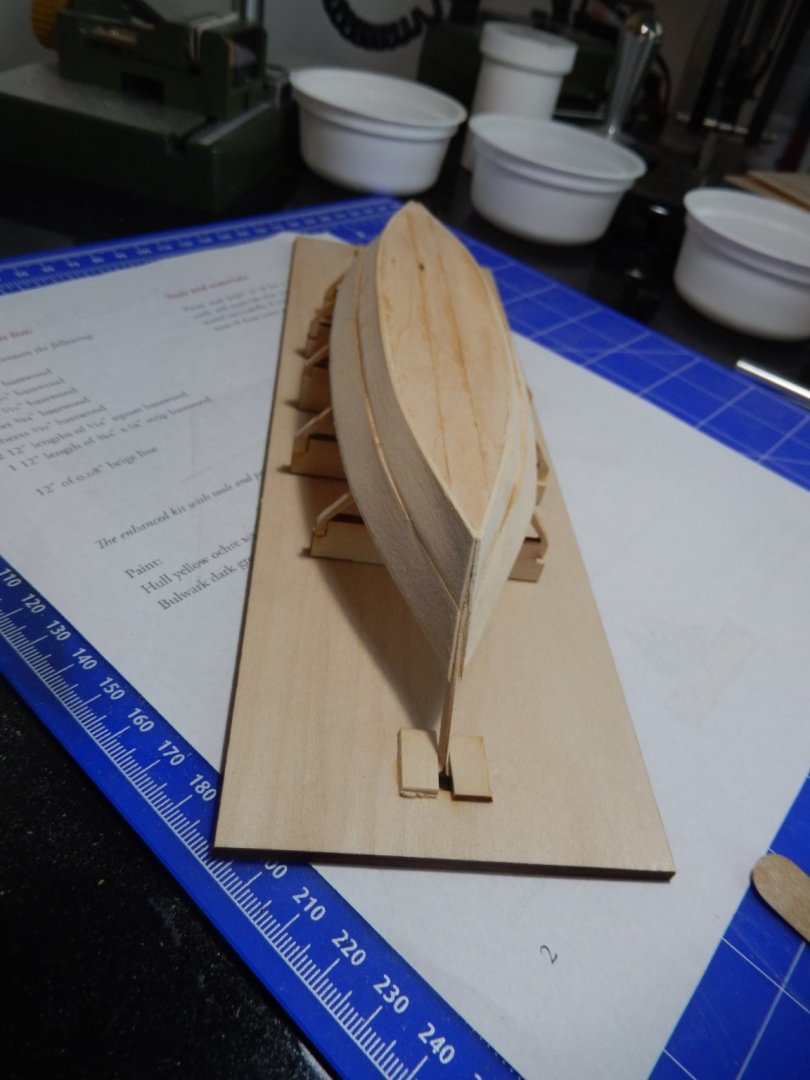
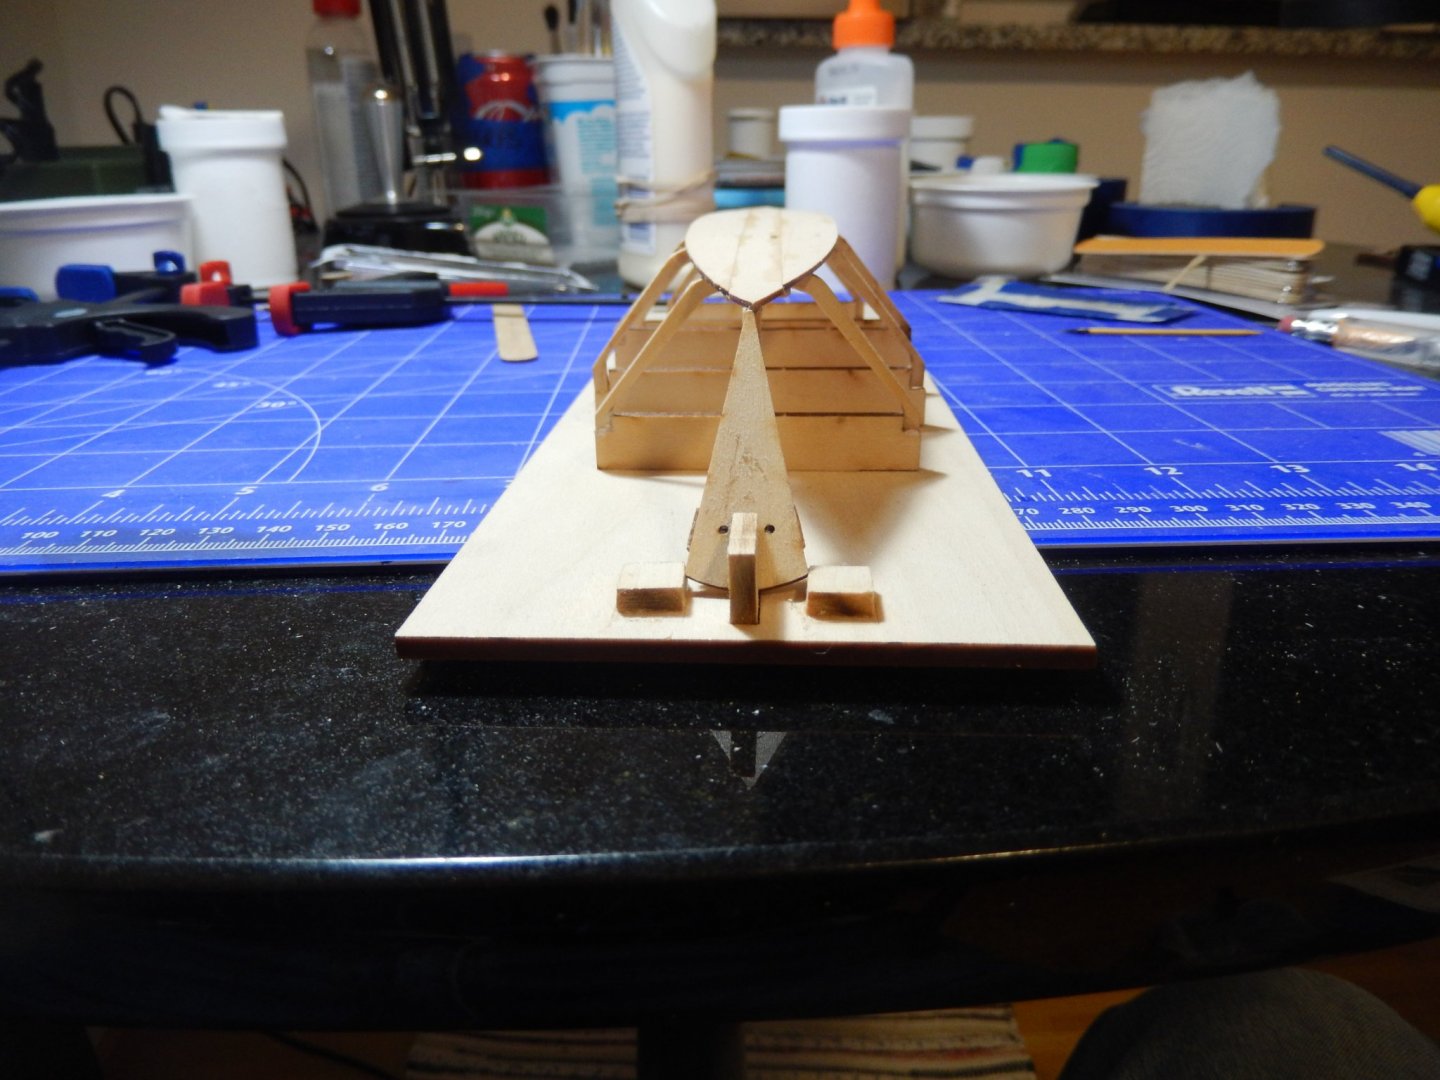
20201220 Worked an hour or so after work during the week and a few hours yesterday (beautiful day out; too nice to spend all day inside so hit the trails on the bike). All progressing slowly & steadily: sand plank, bevel plank edge, taper ends, soak, bend, sand, glue, sand ends even with stem & stern, repeat with next plank. Installing the risers was interesting only because I tried to figure it out from the plans (if there were marks on the frames as mentioned in the instructions, I sanded them off somewhere along the line). Once I had the risers glued in something just didn’t look quite right (2nd to last pic) so I fit a couple of the thwarts; yep, risers were too low in the boat. Pried risers off, set bow thwart so it sit evenly on the bow frame, marked frame, used that as a guide to re-install risers. Test fit the thwarts afterwards and all good. Today working on the bands (last pic shows them drying after soaking in hot water), gunwales, etc. Painting and final assembly during the week.


- 8 replies
-
- 5
-
-
- Finished
- Model Shipways
- (and 1 more)
-
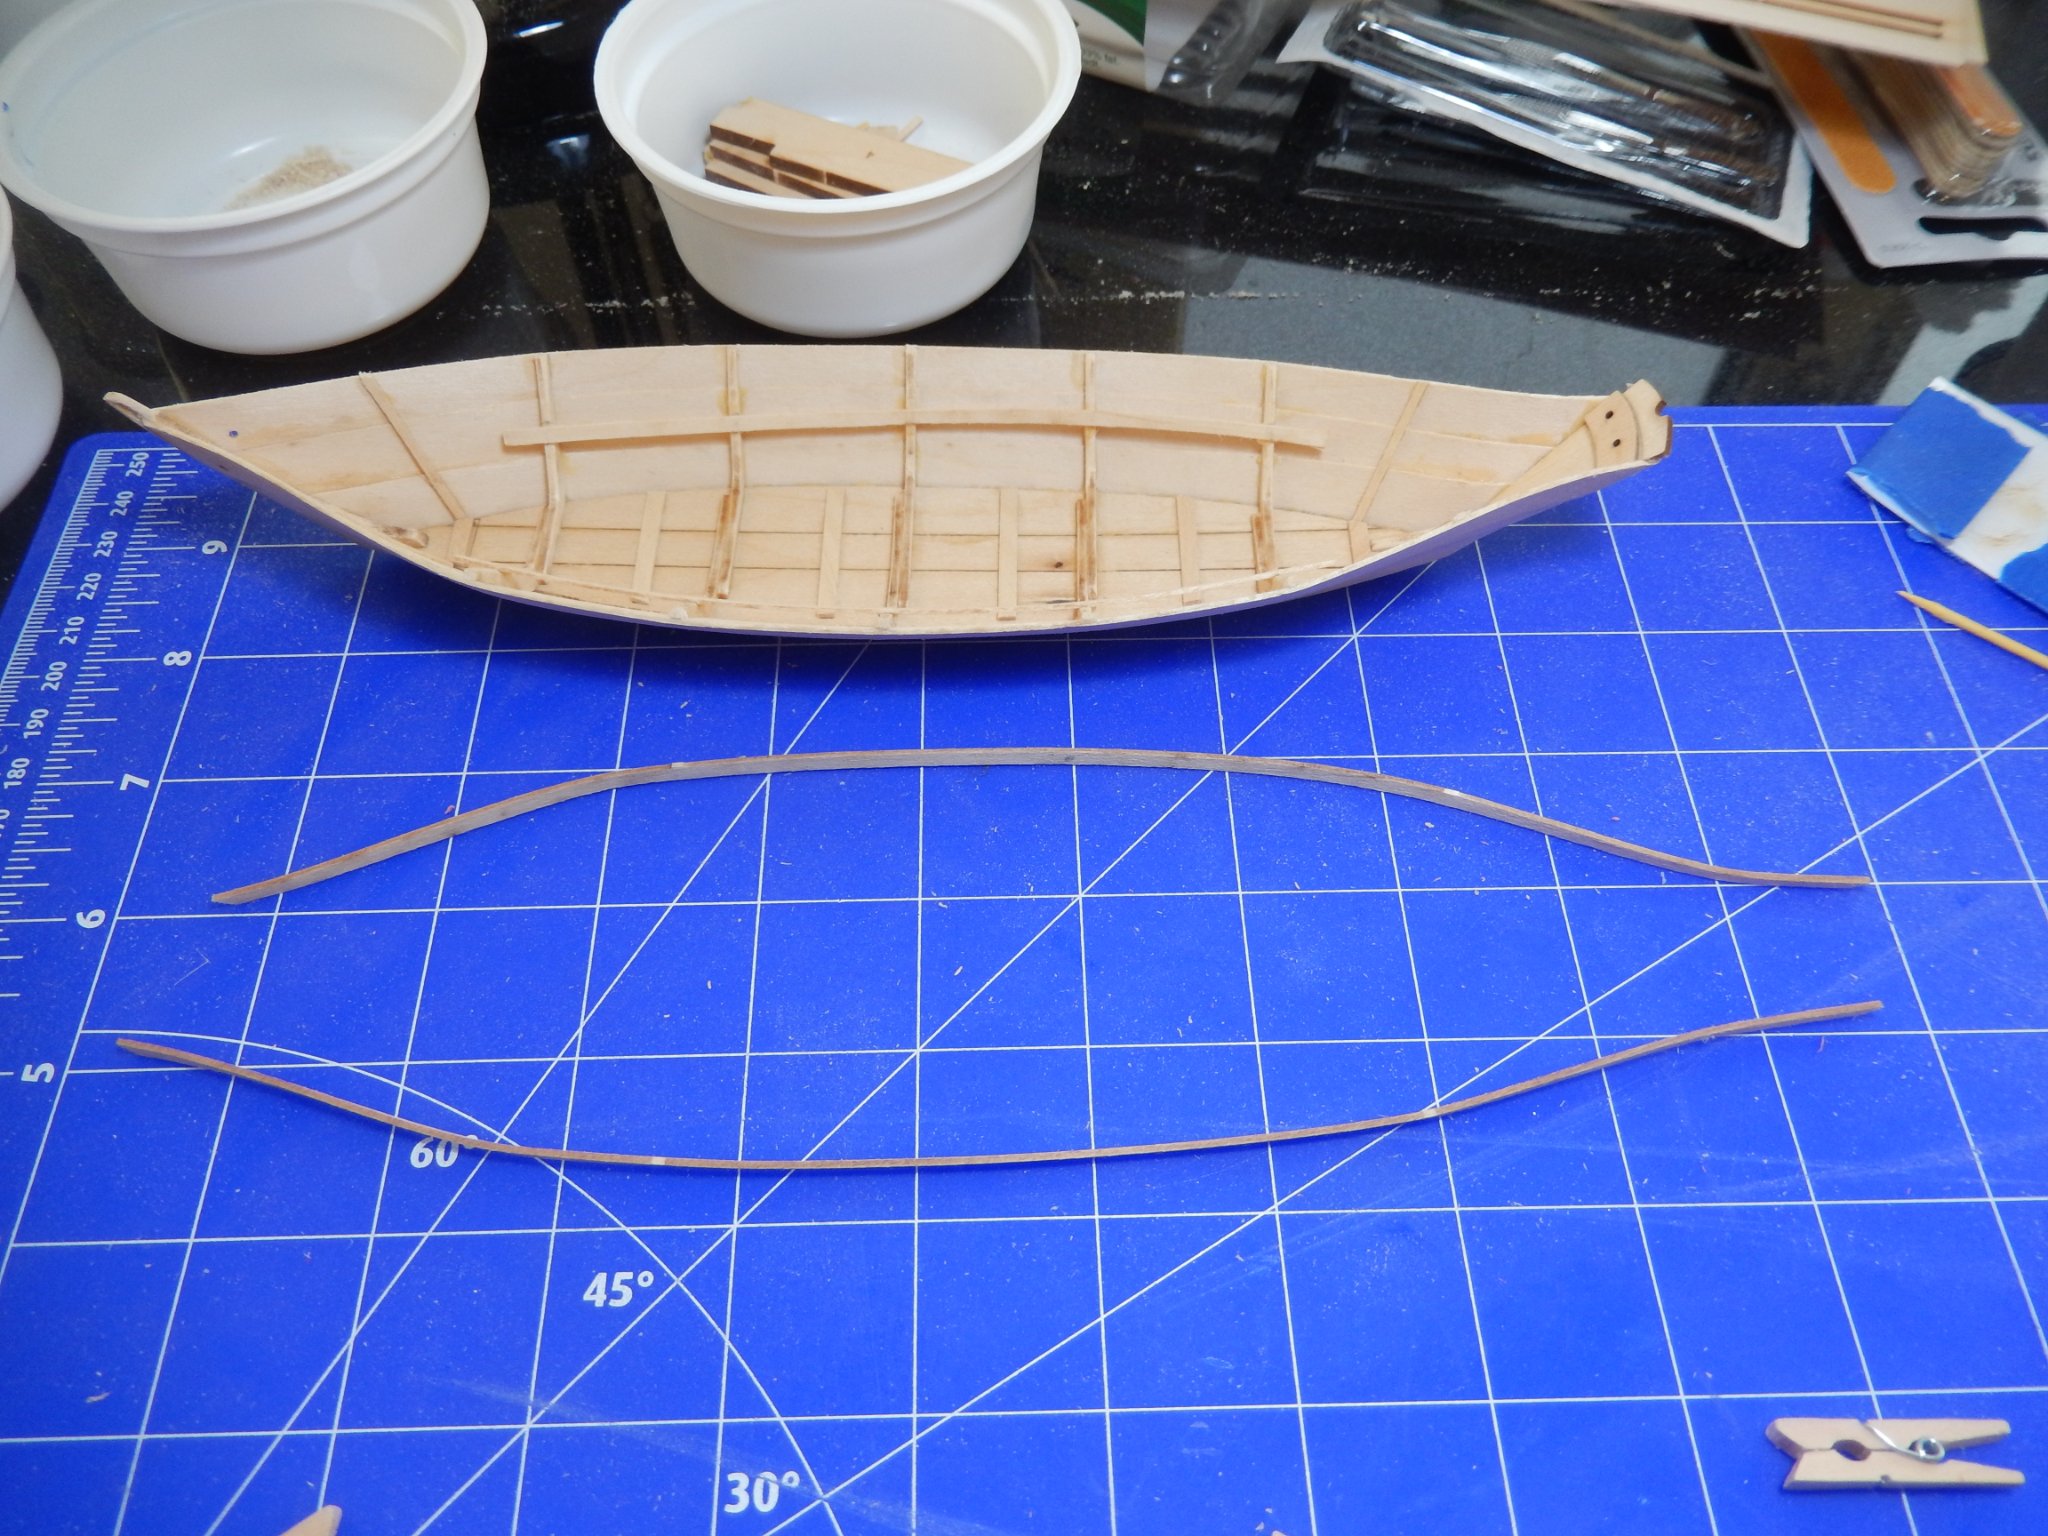
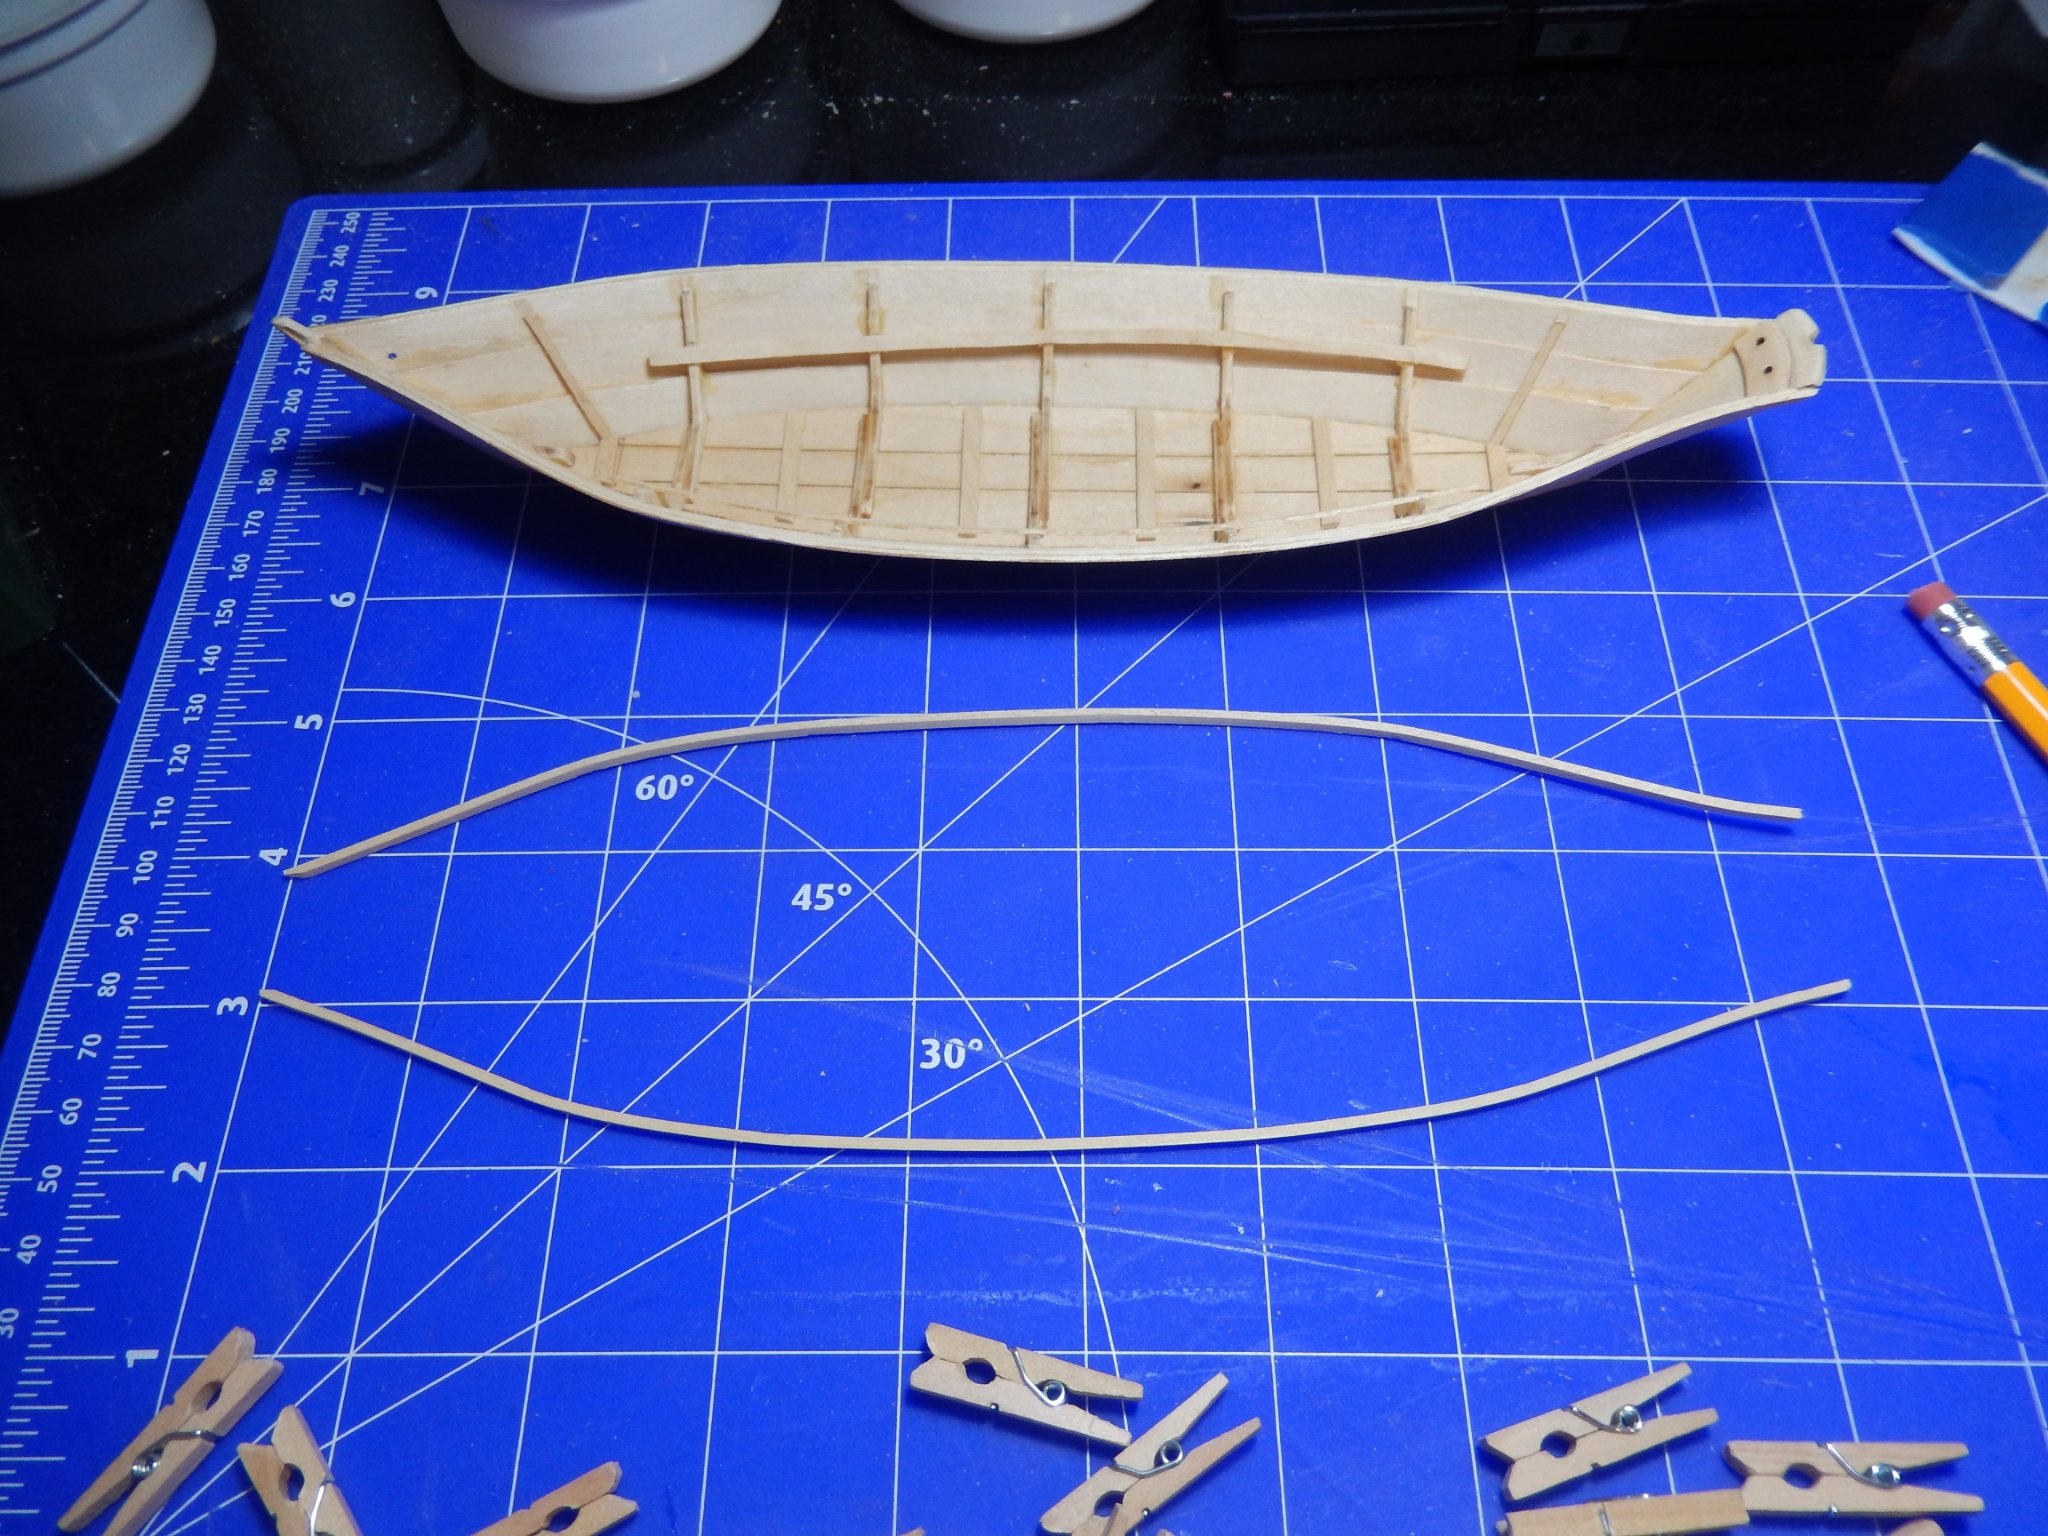
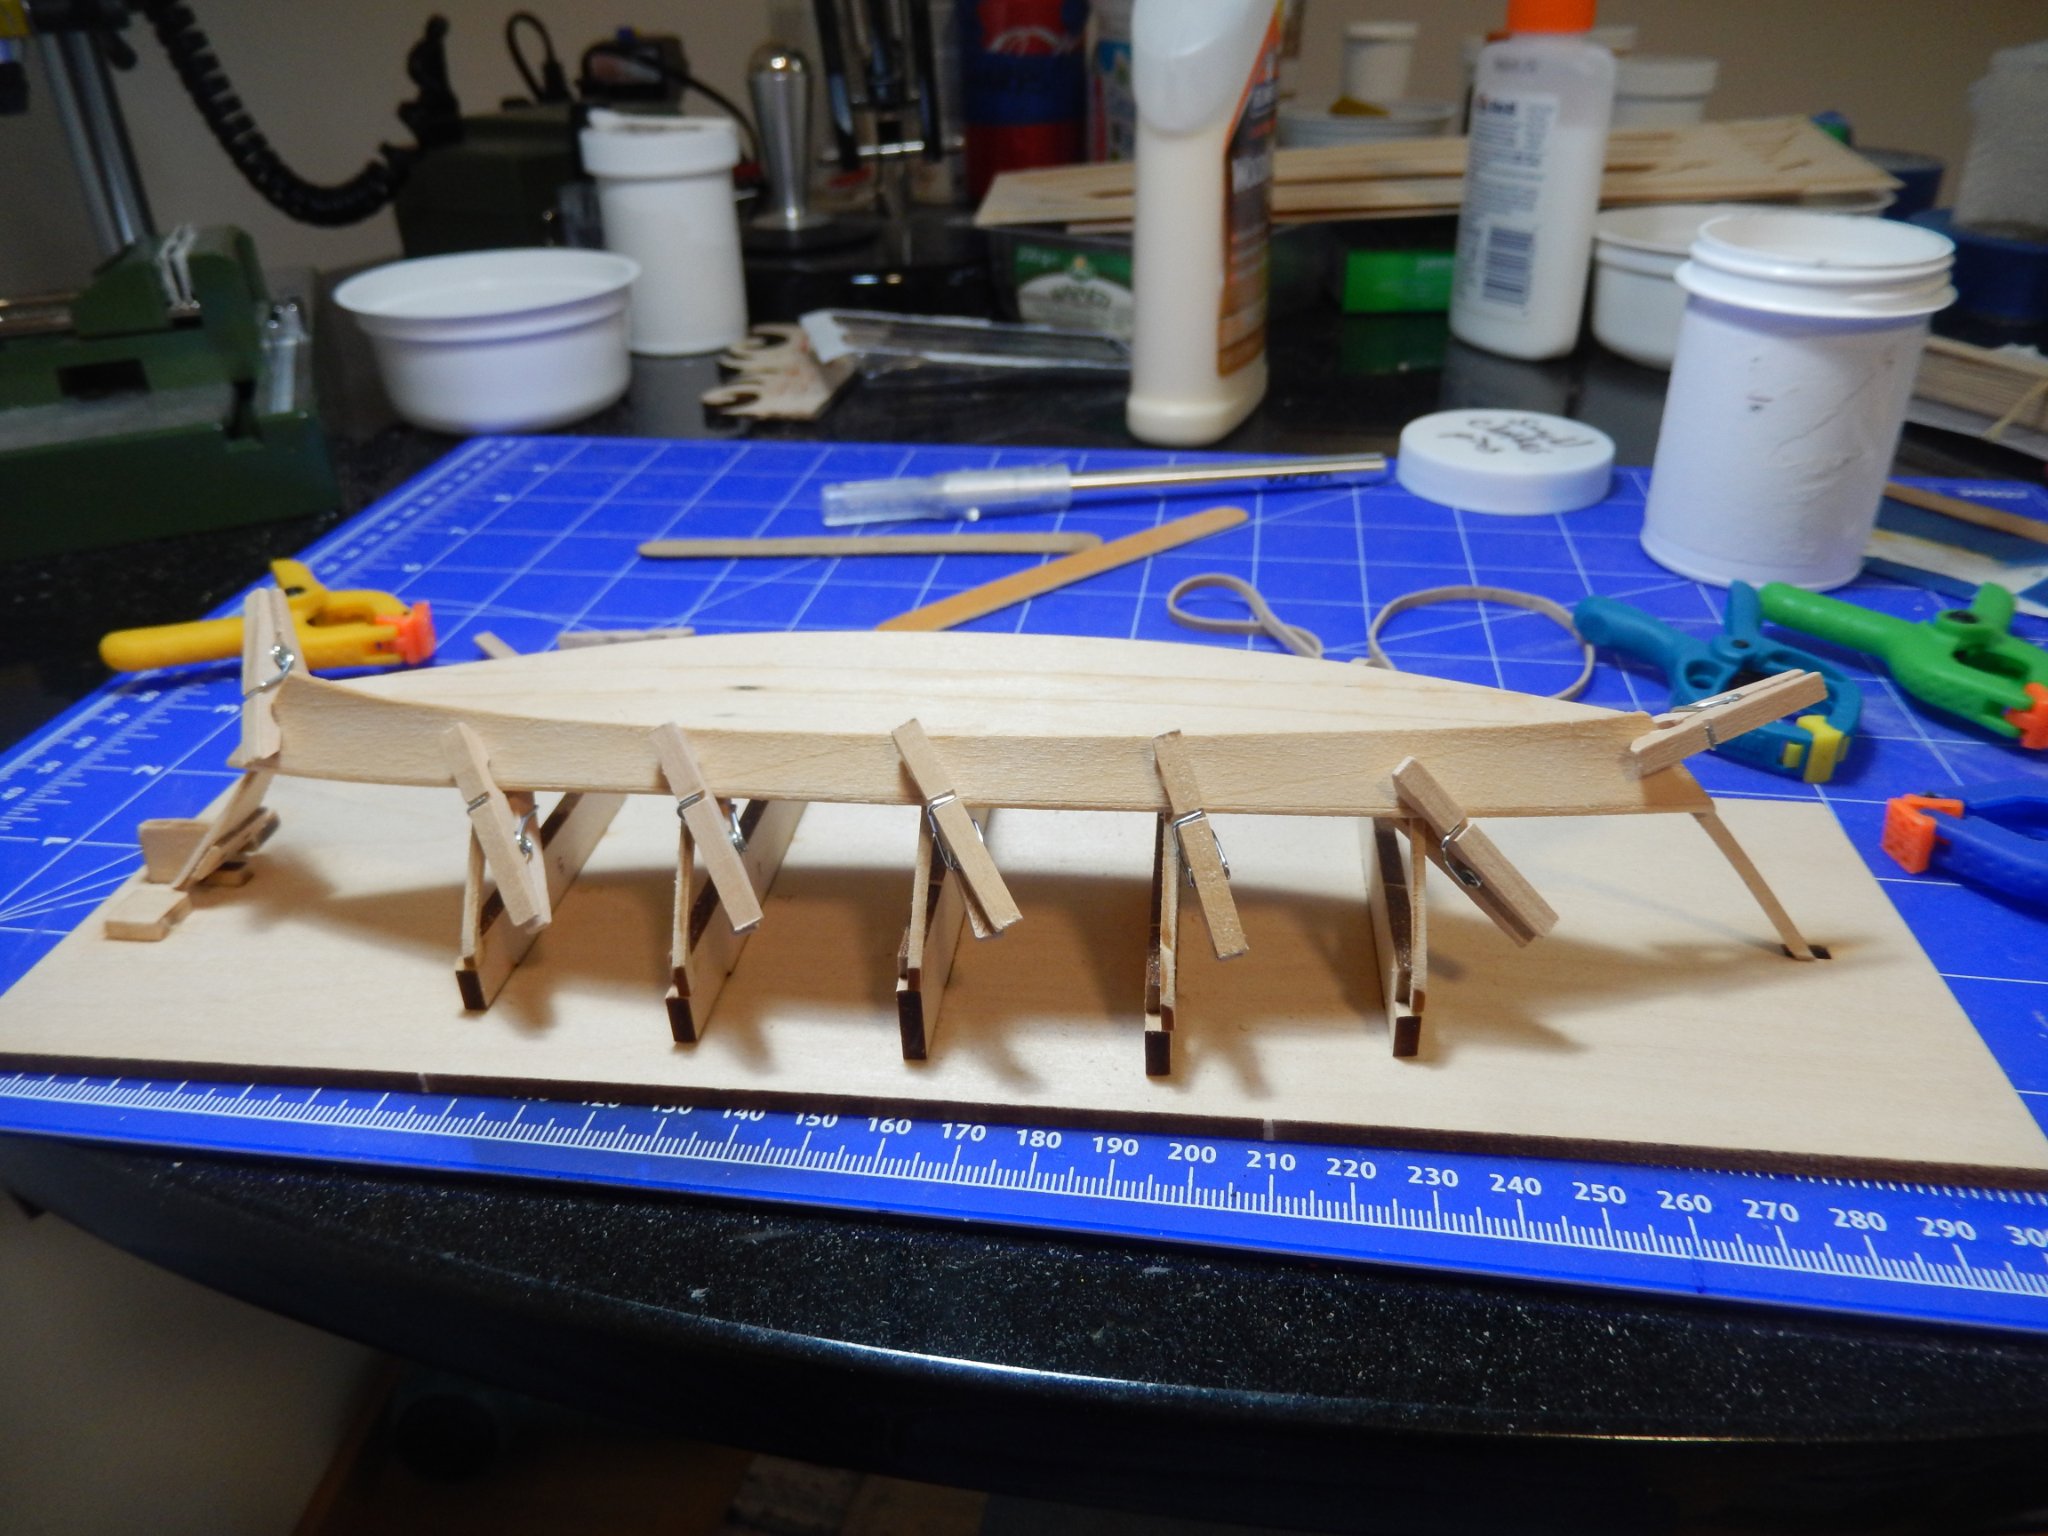
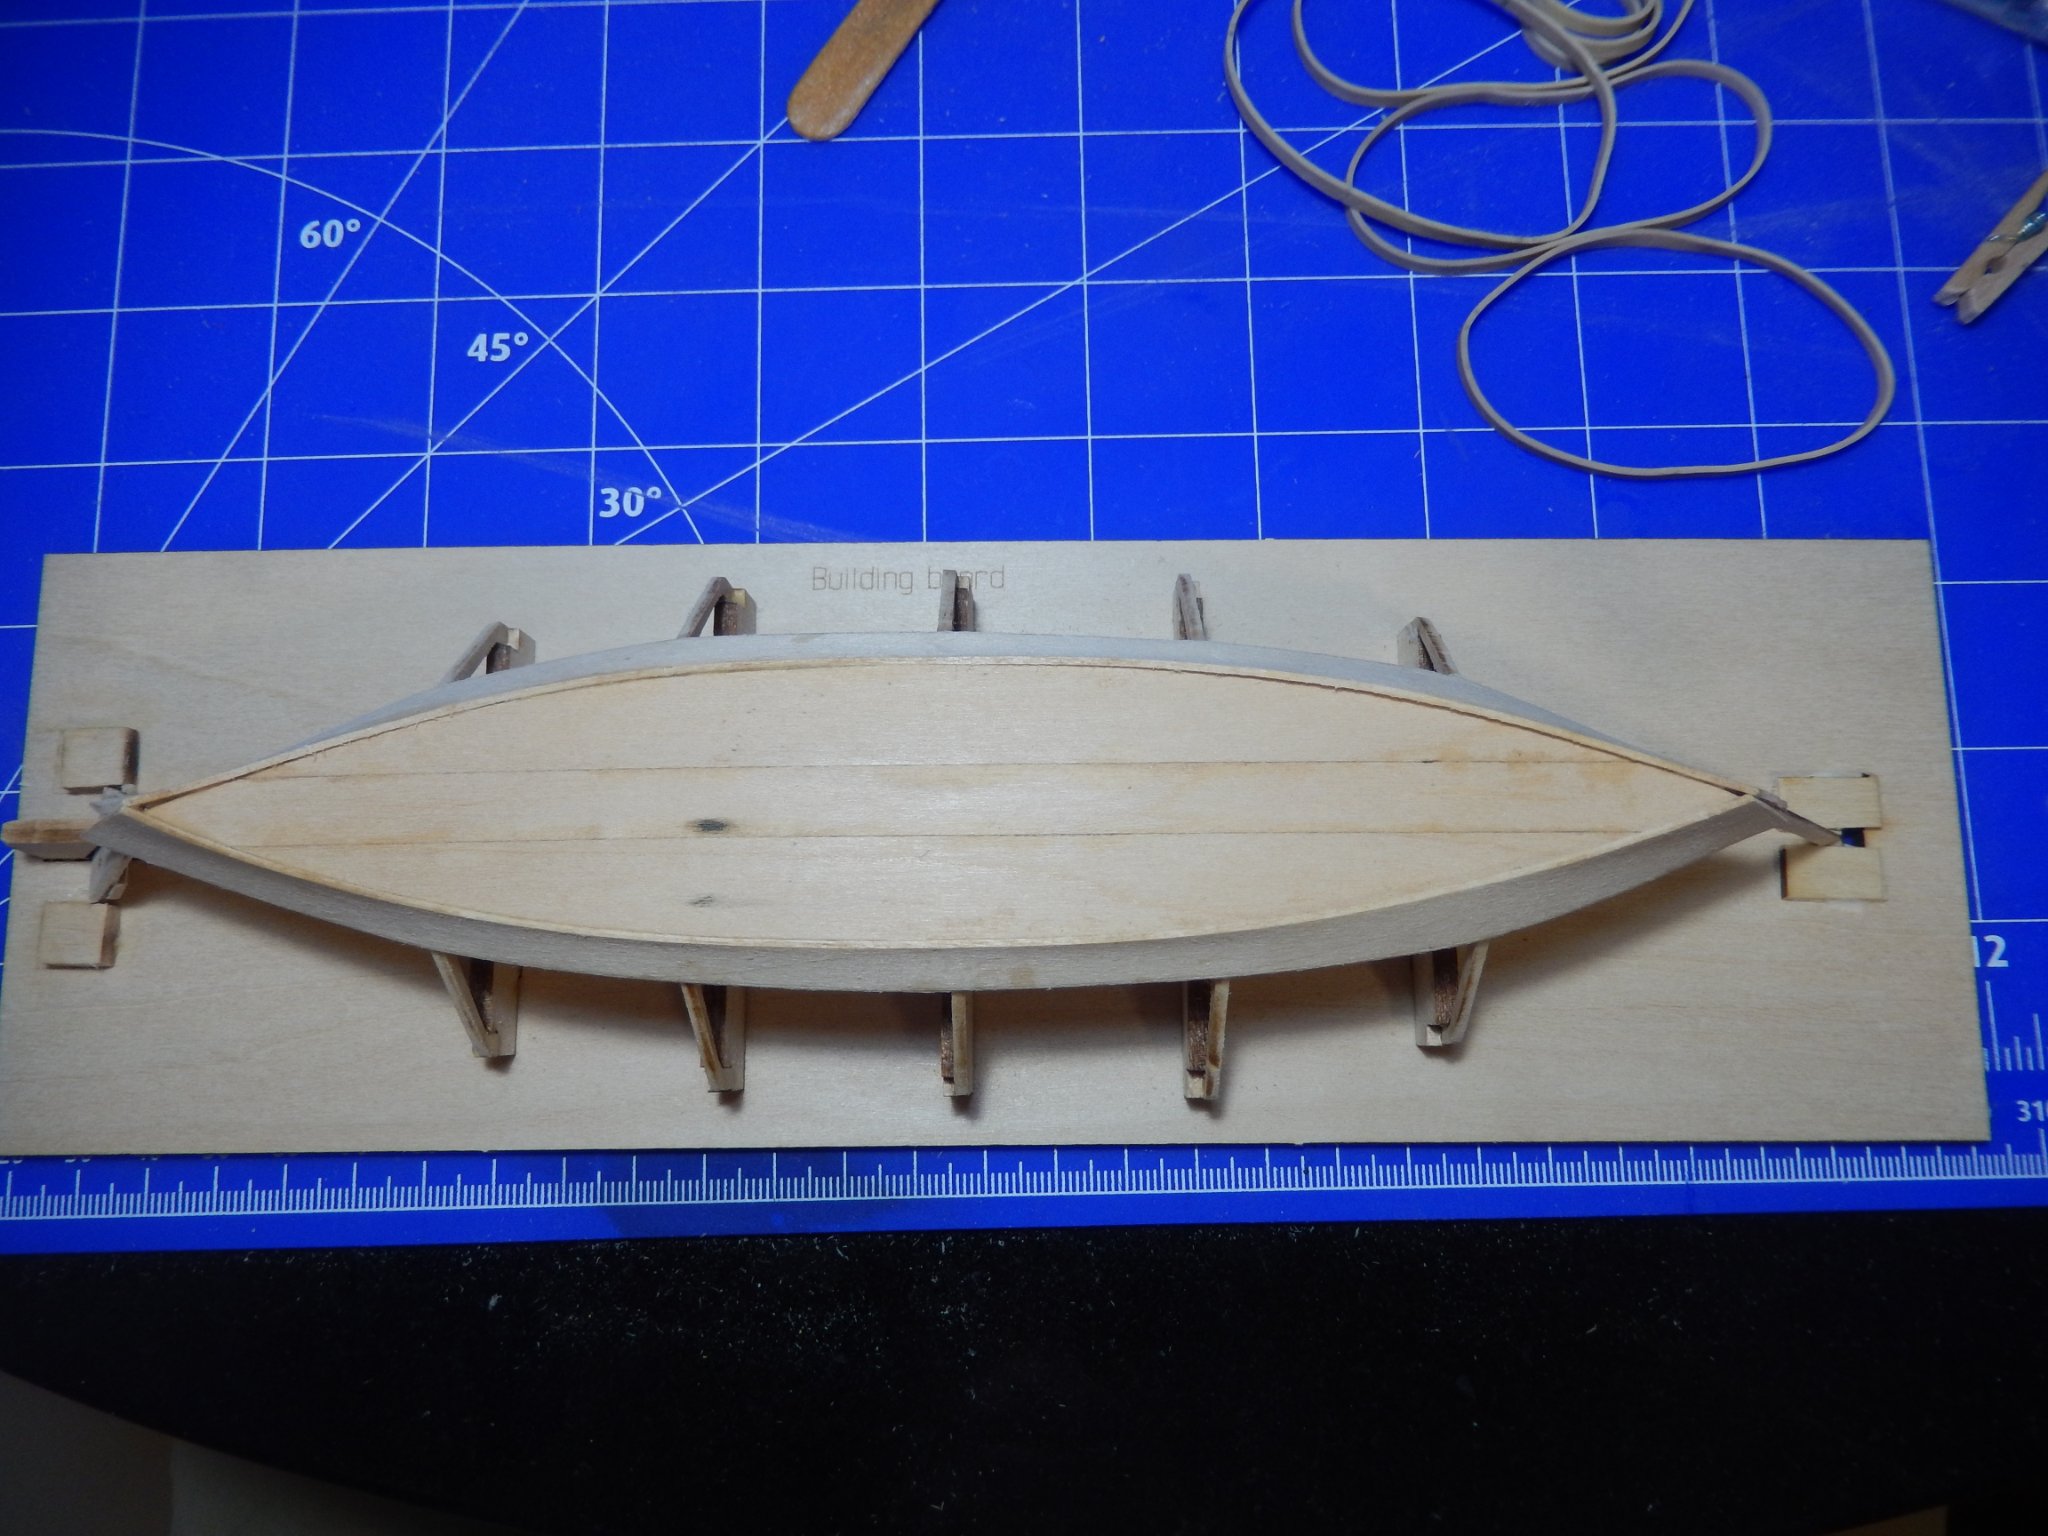
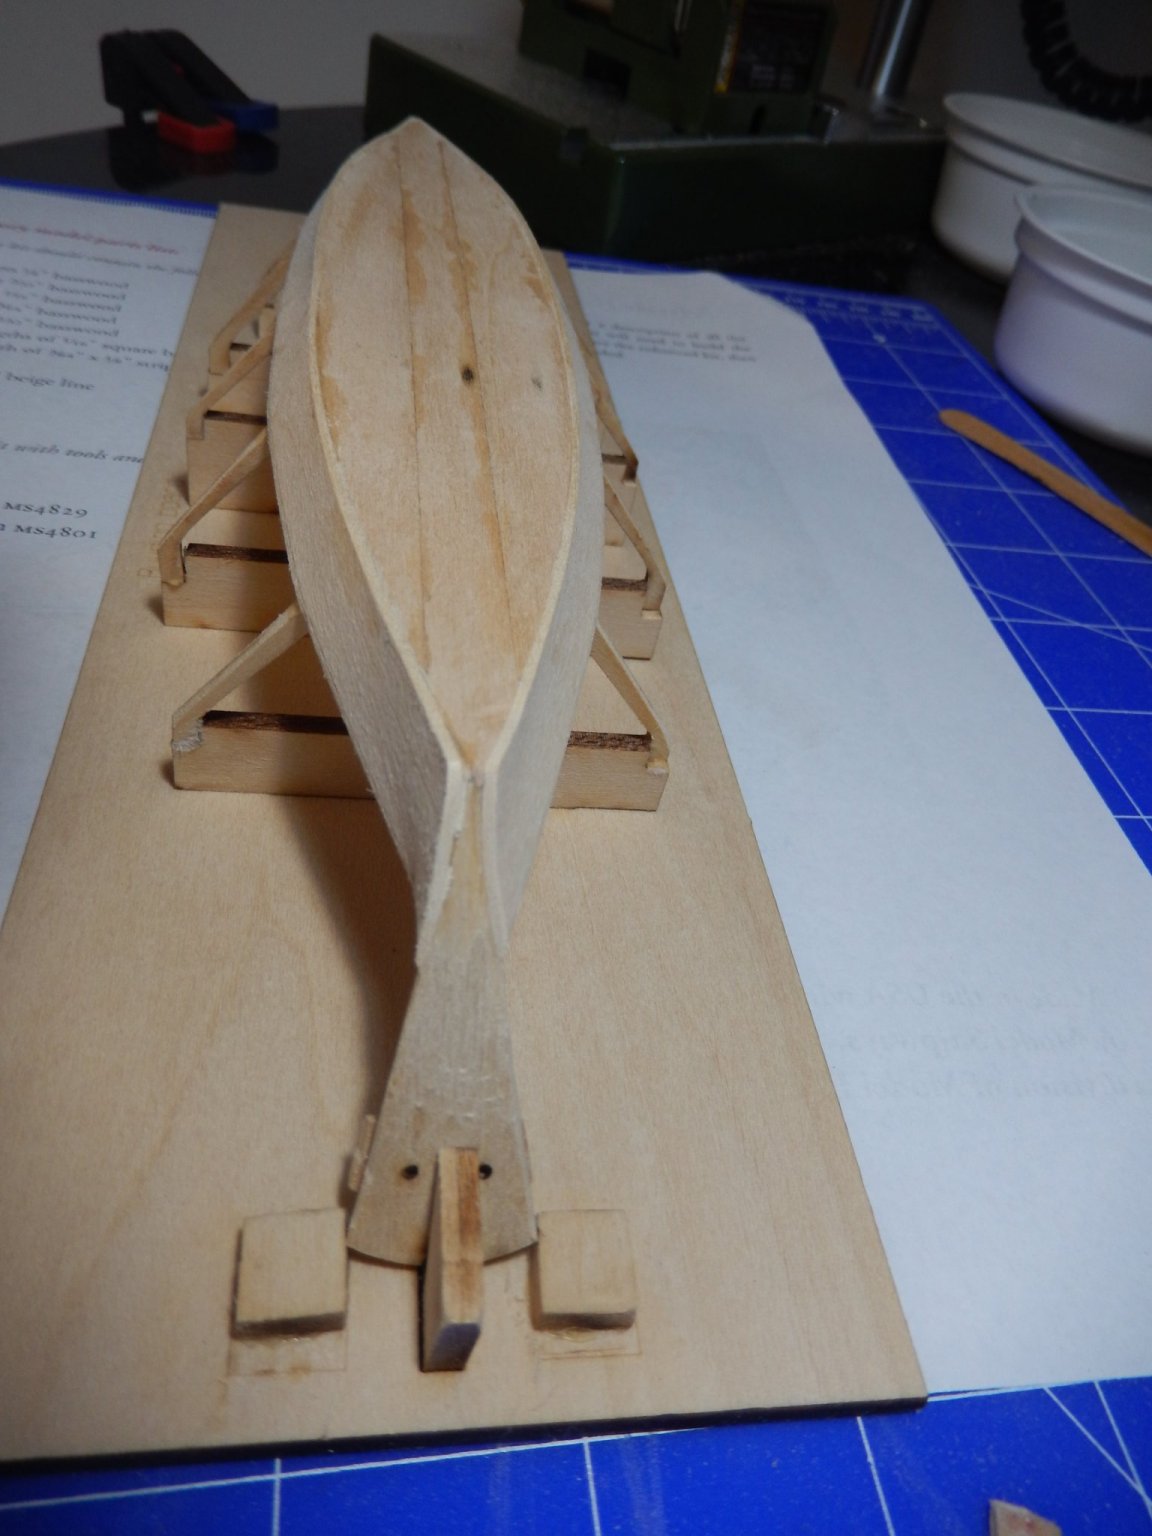
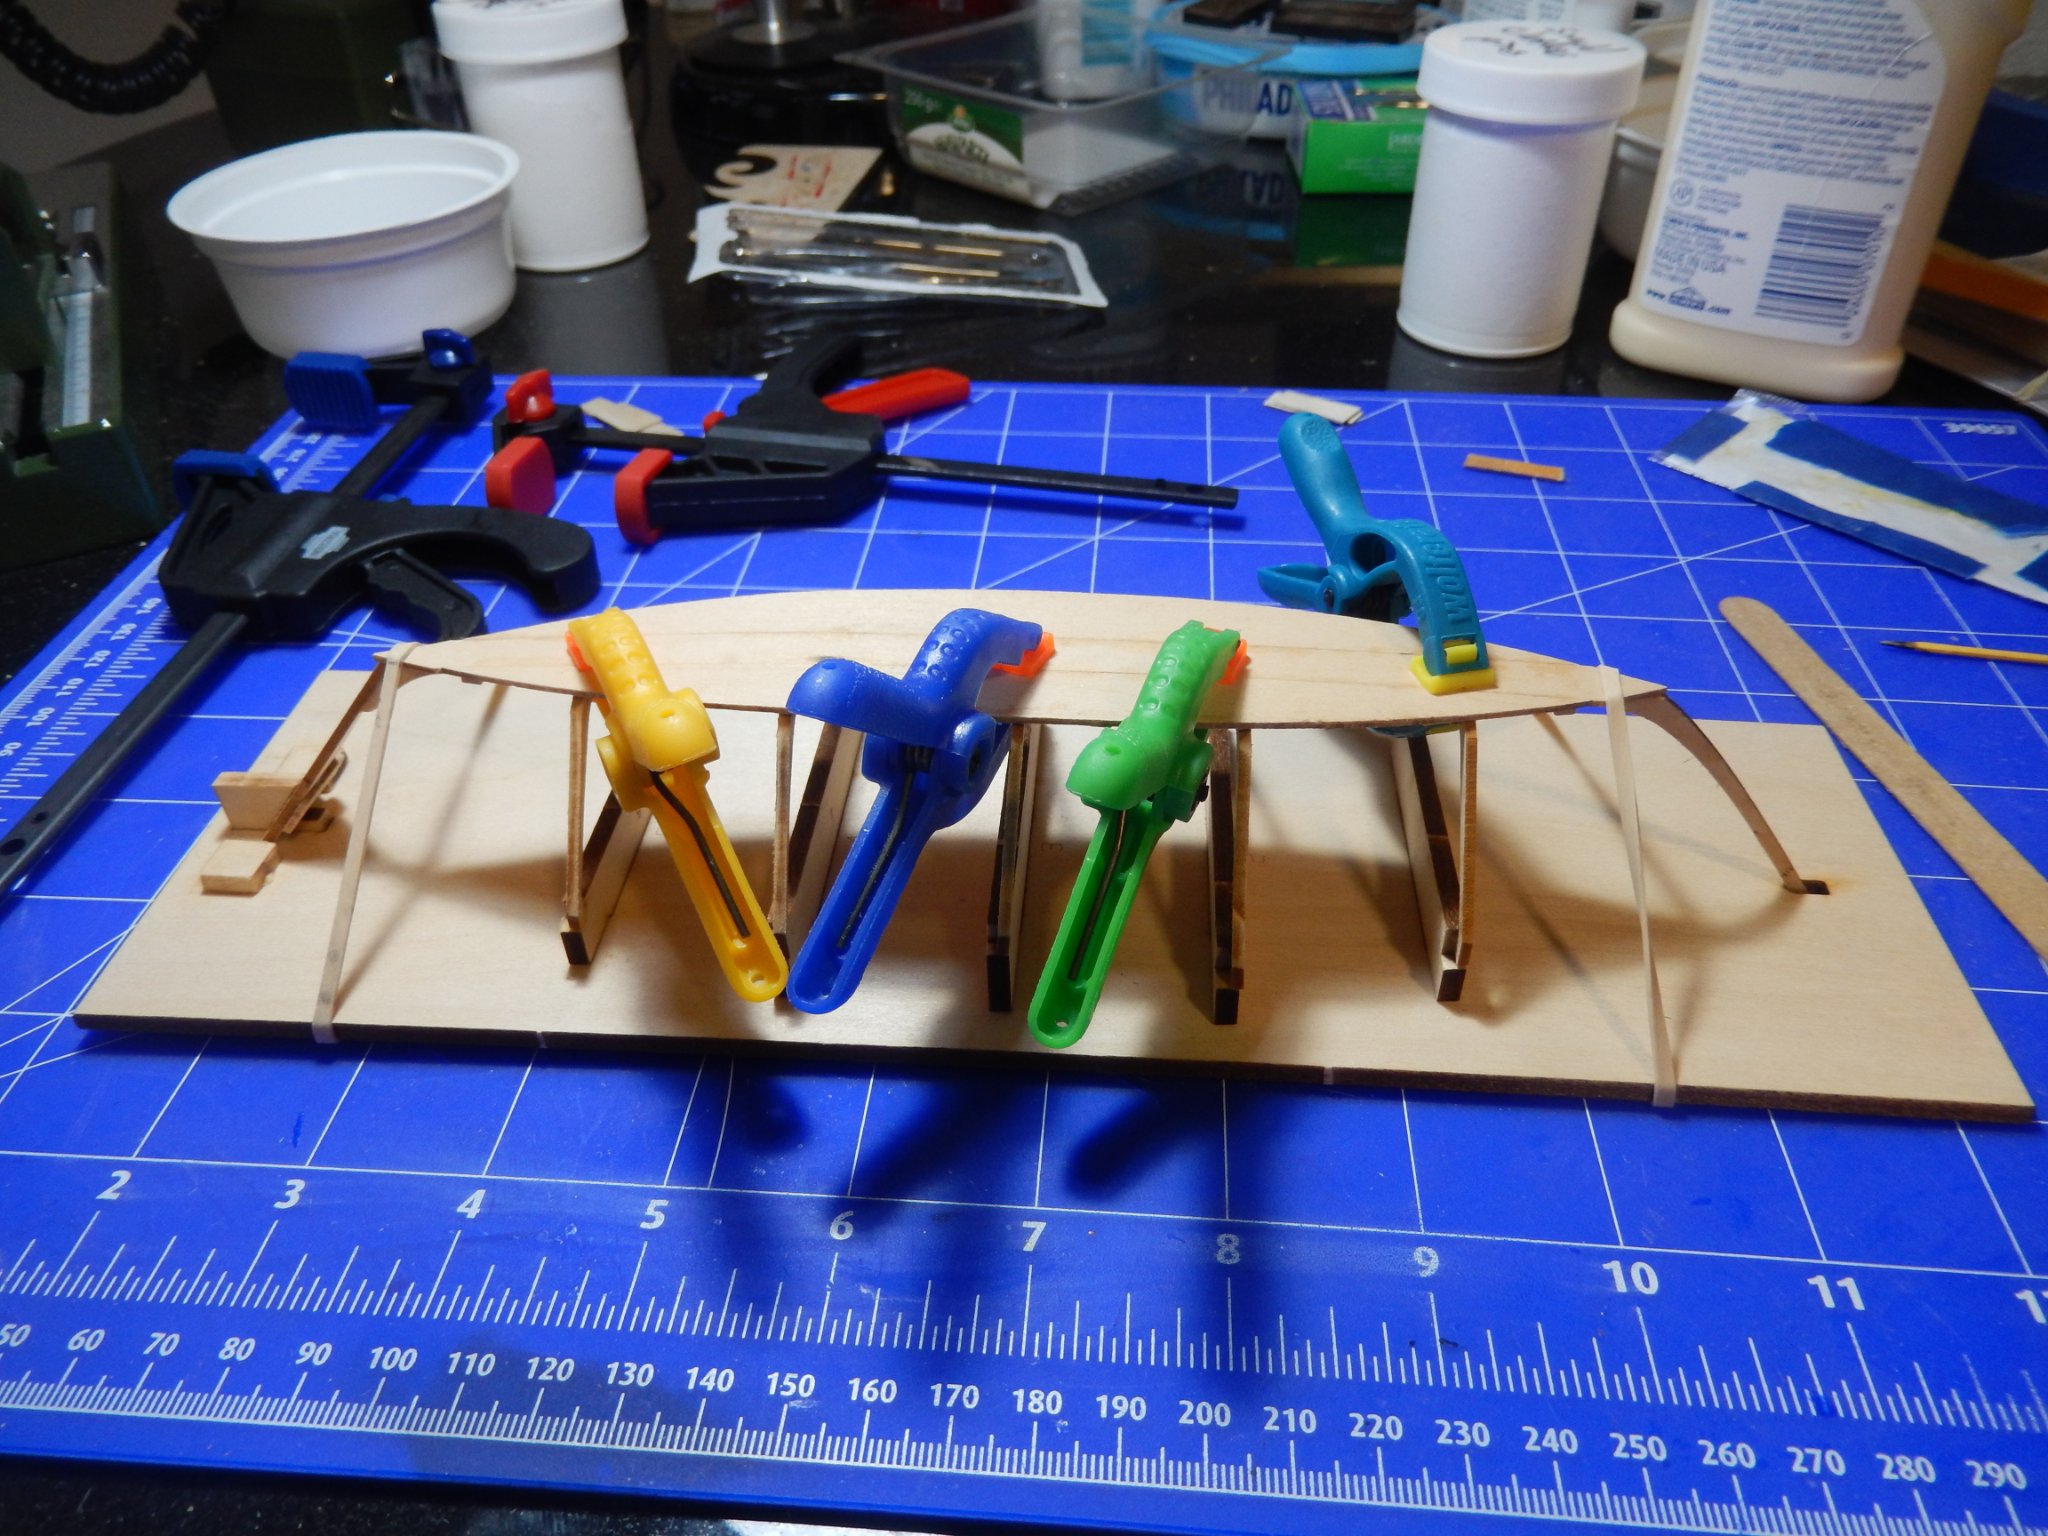
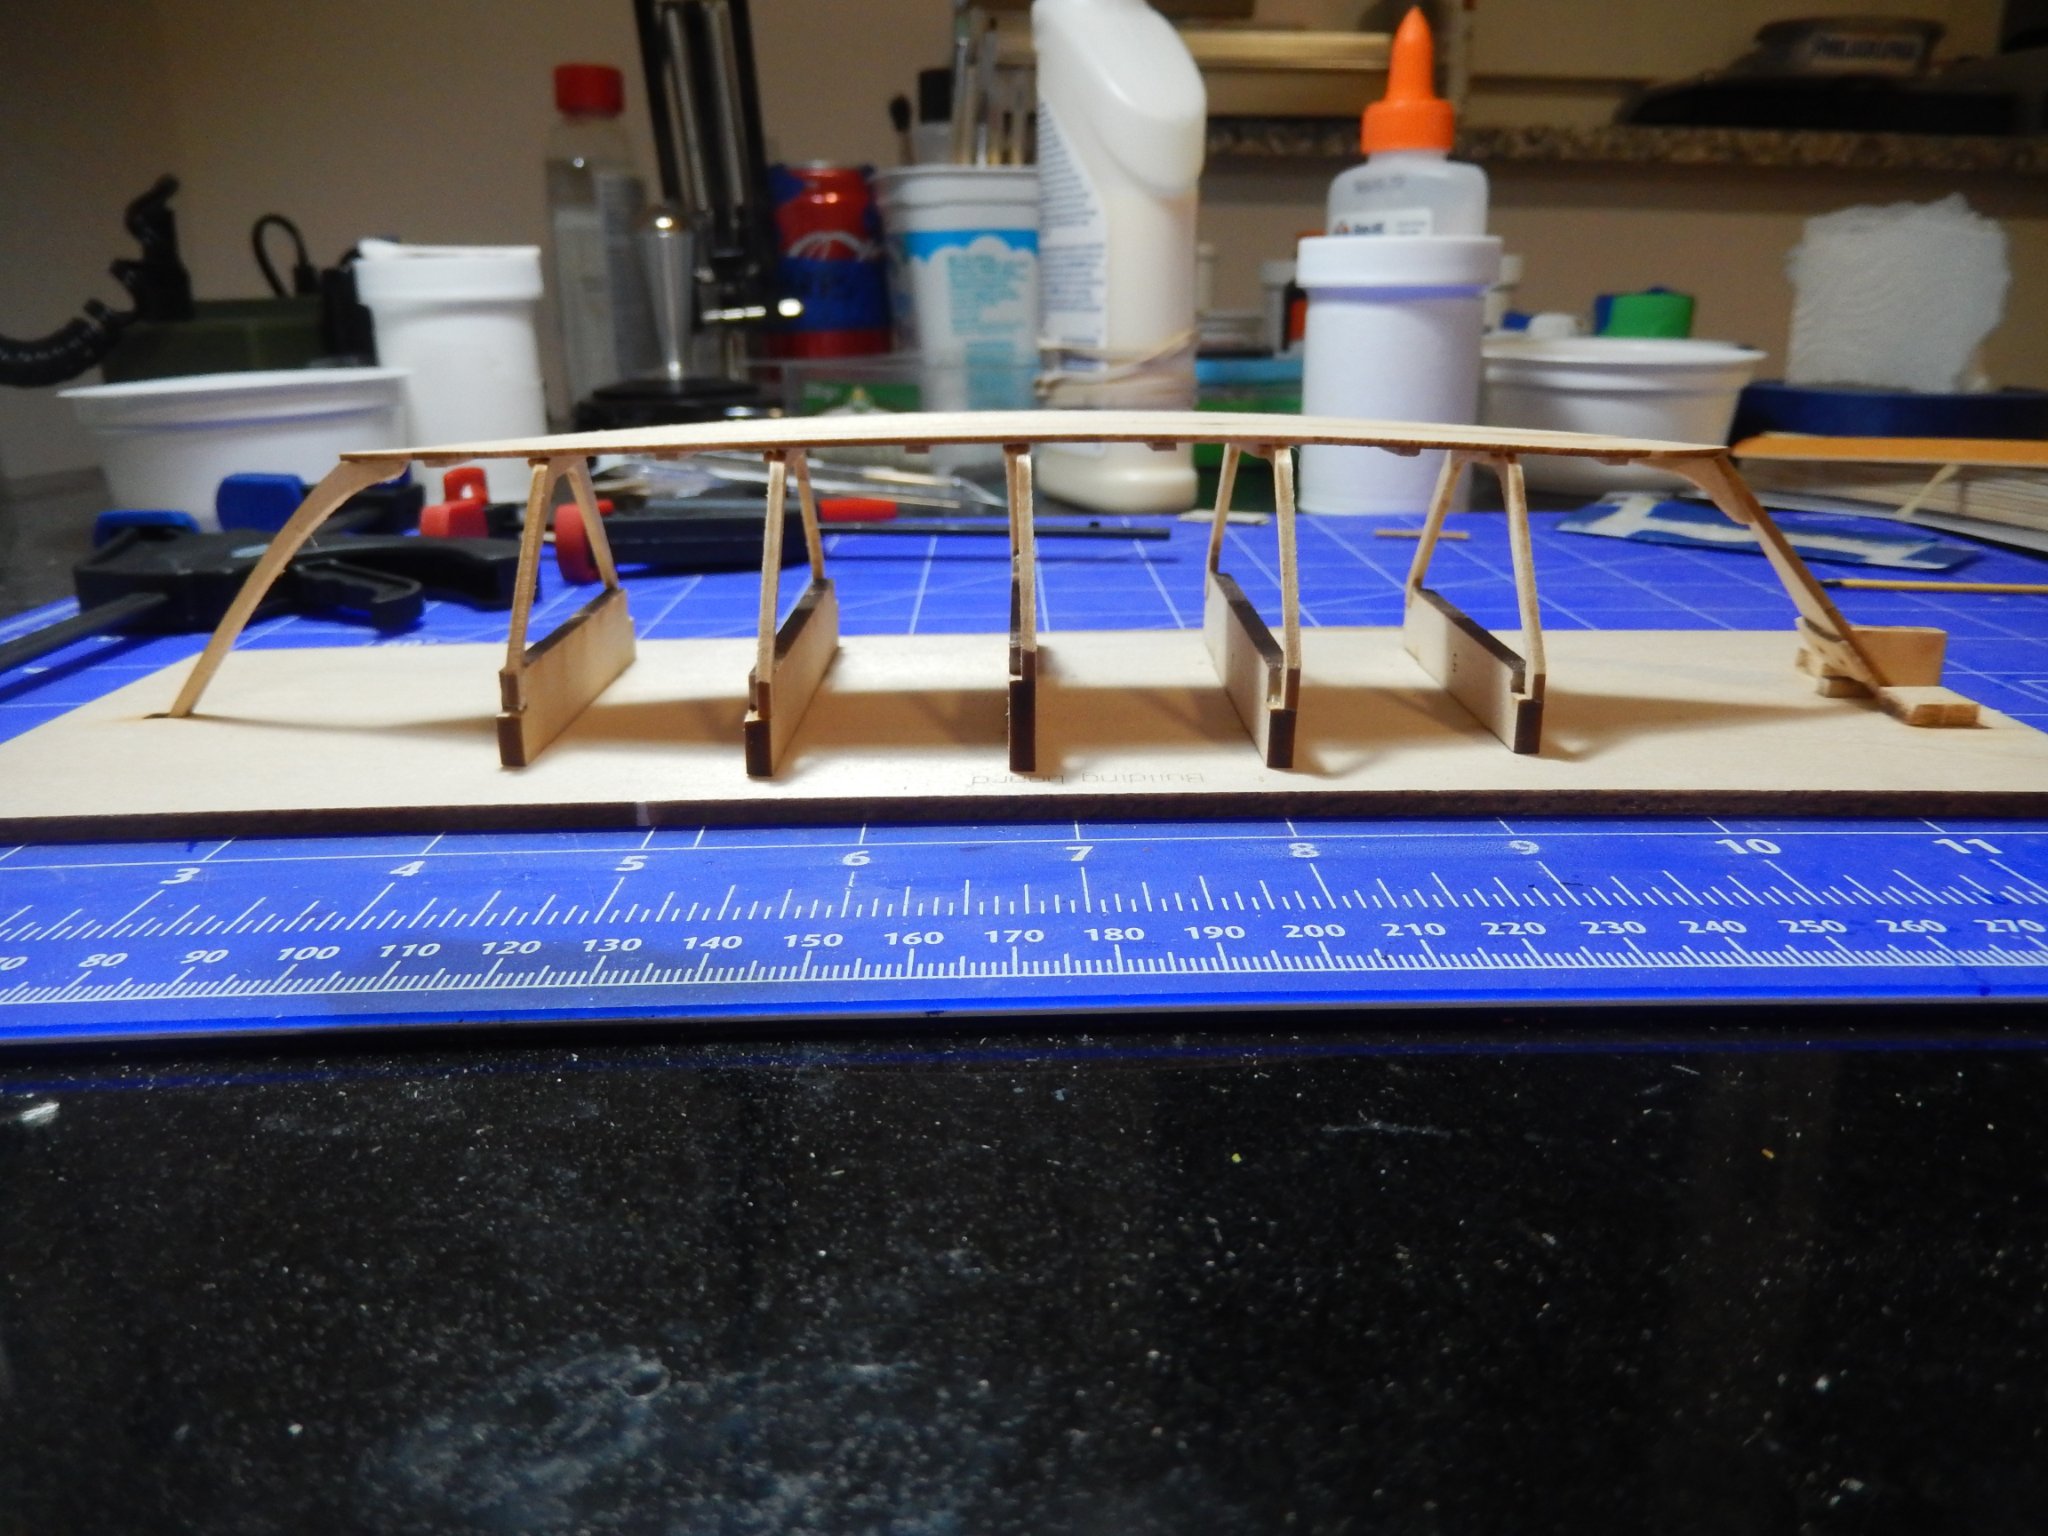
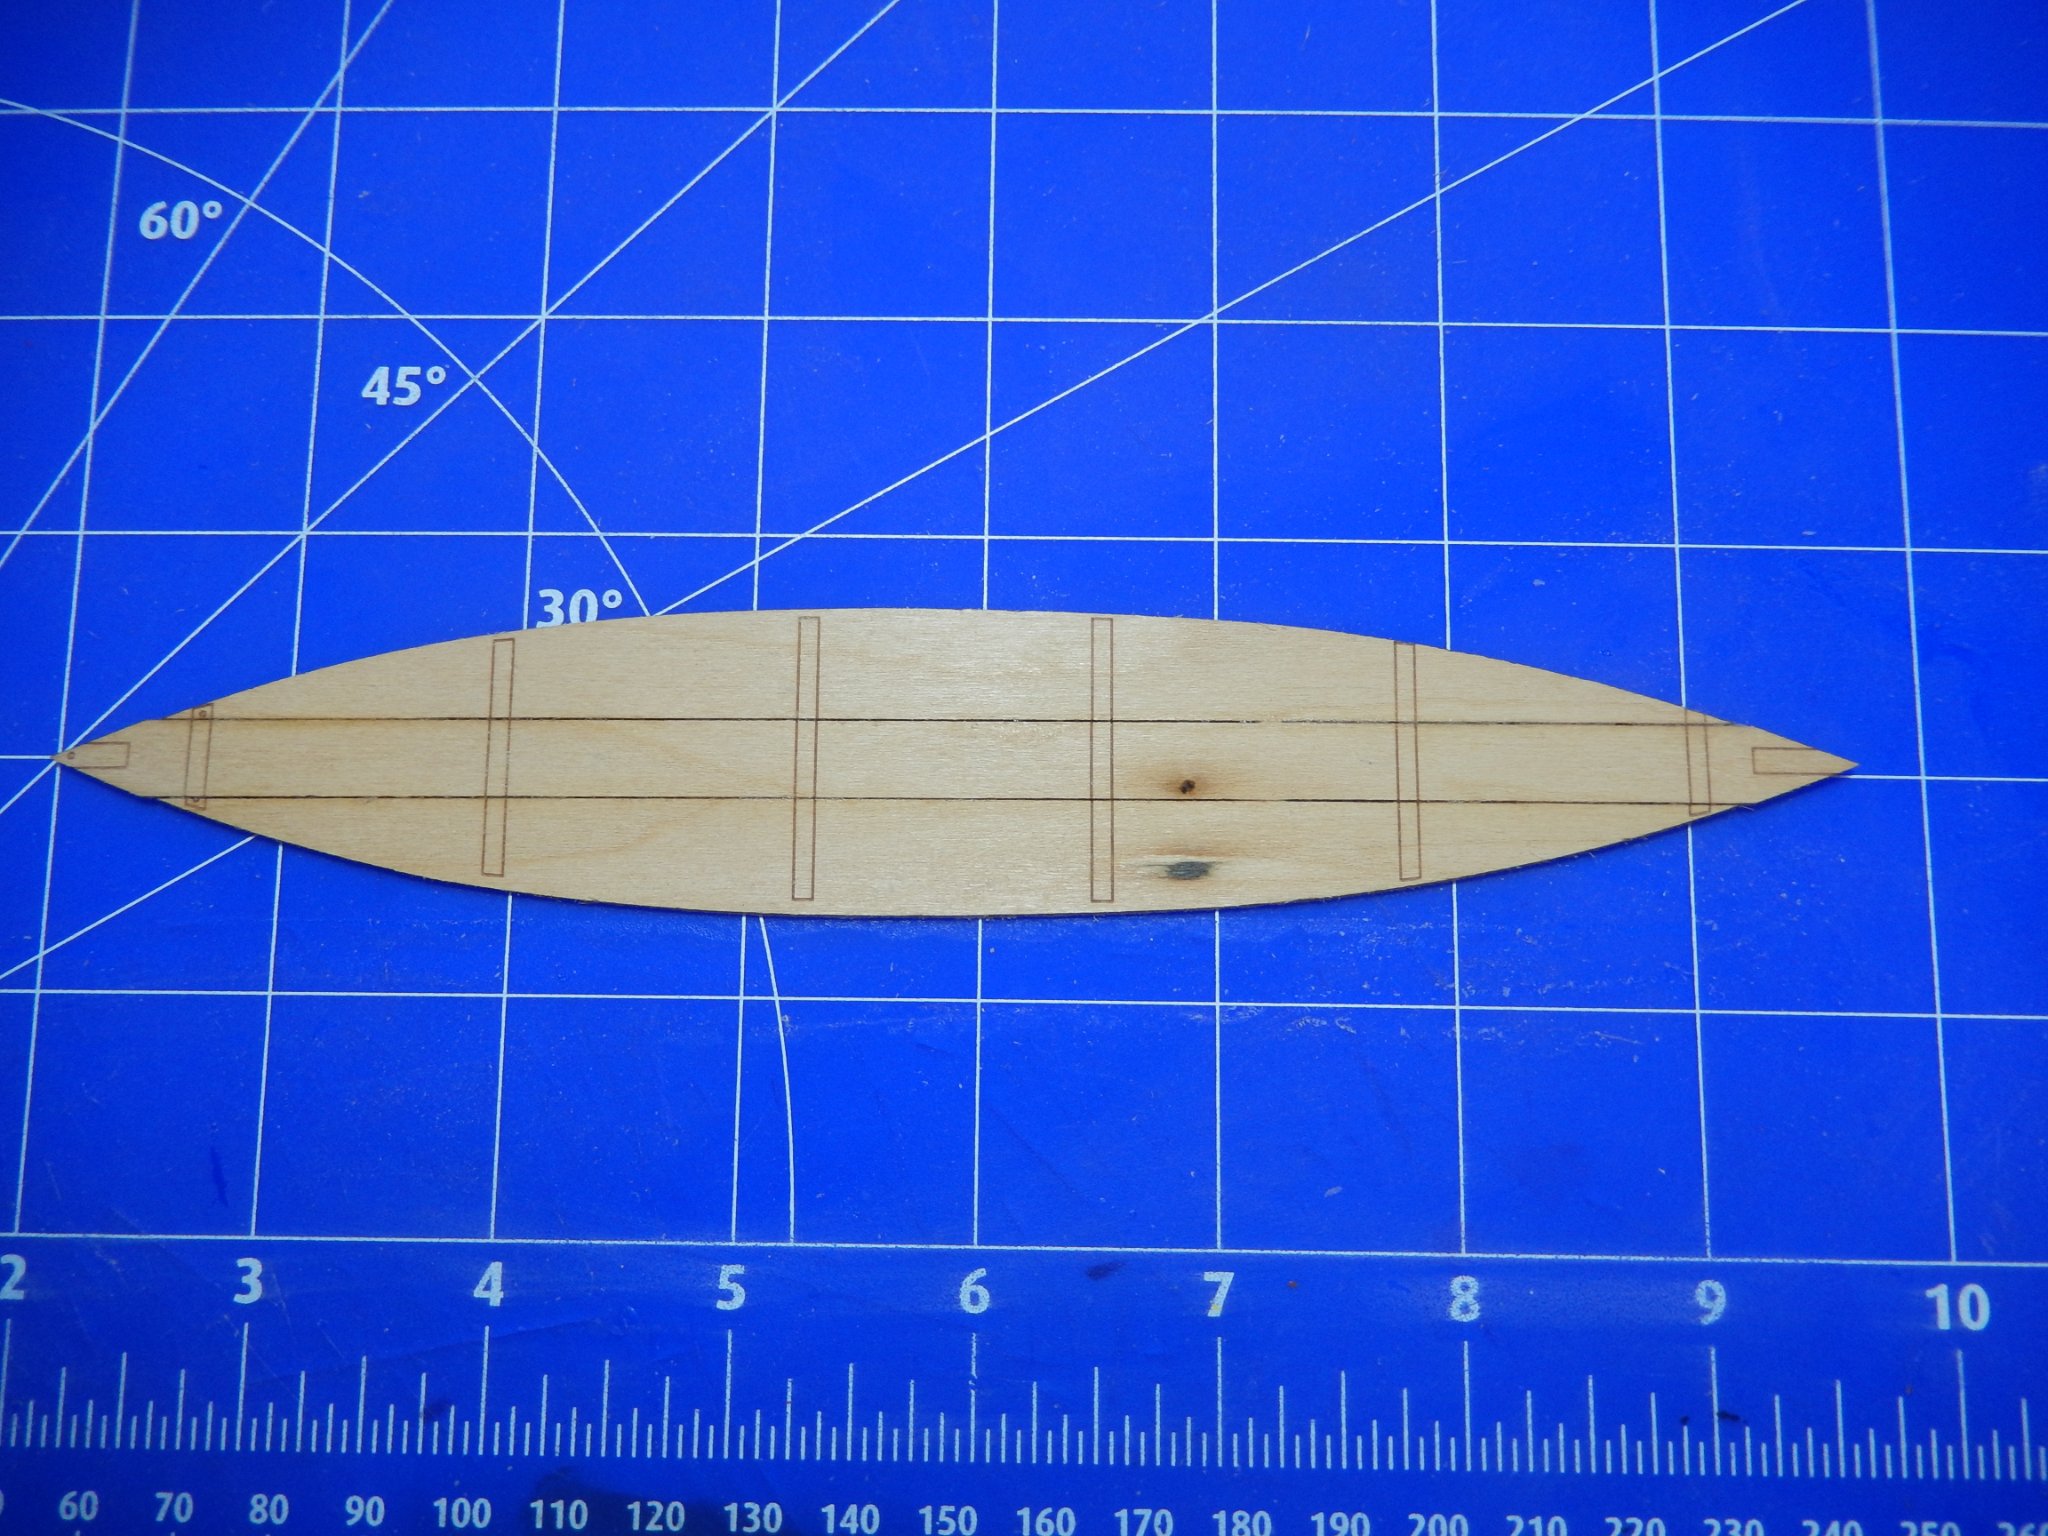
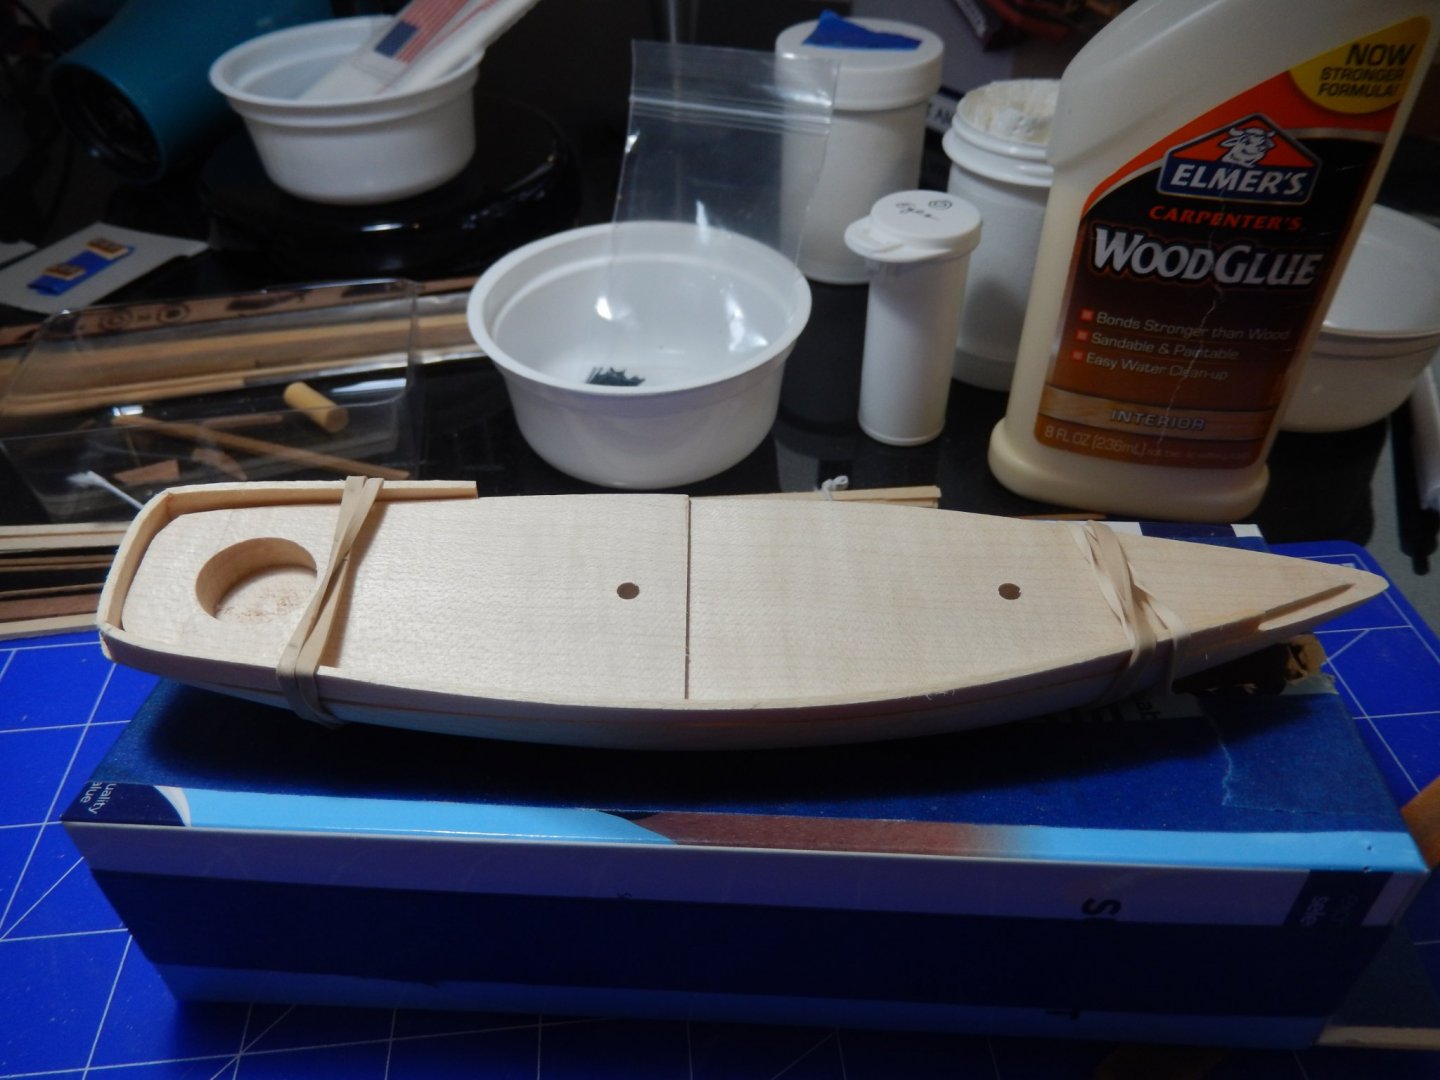
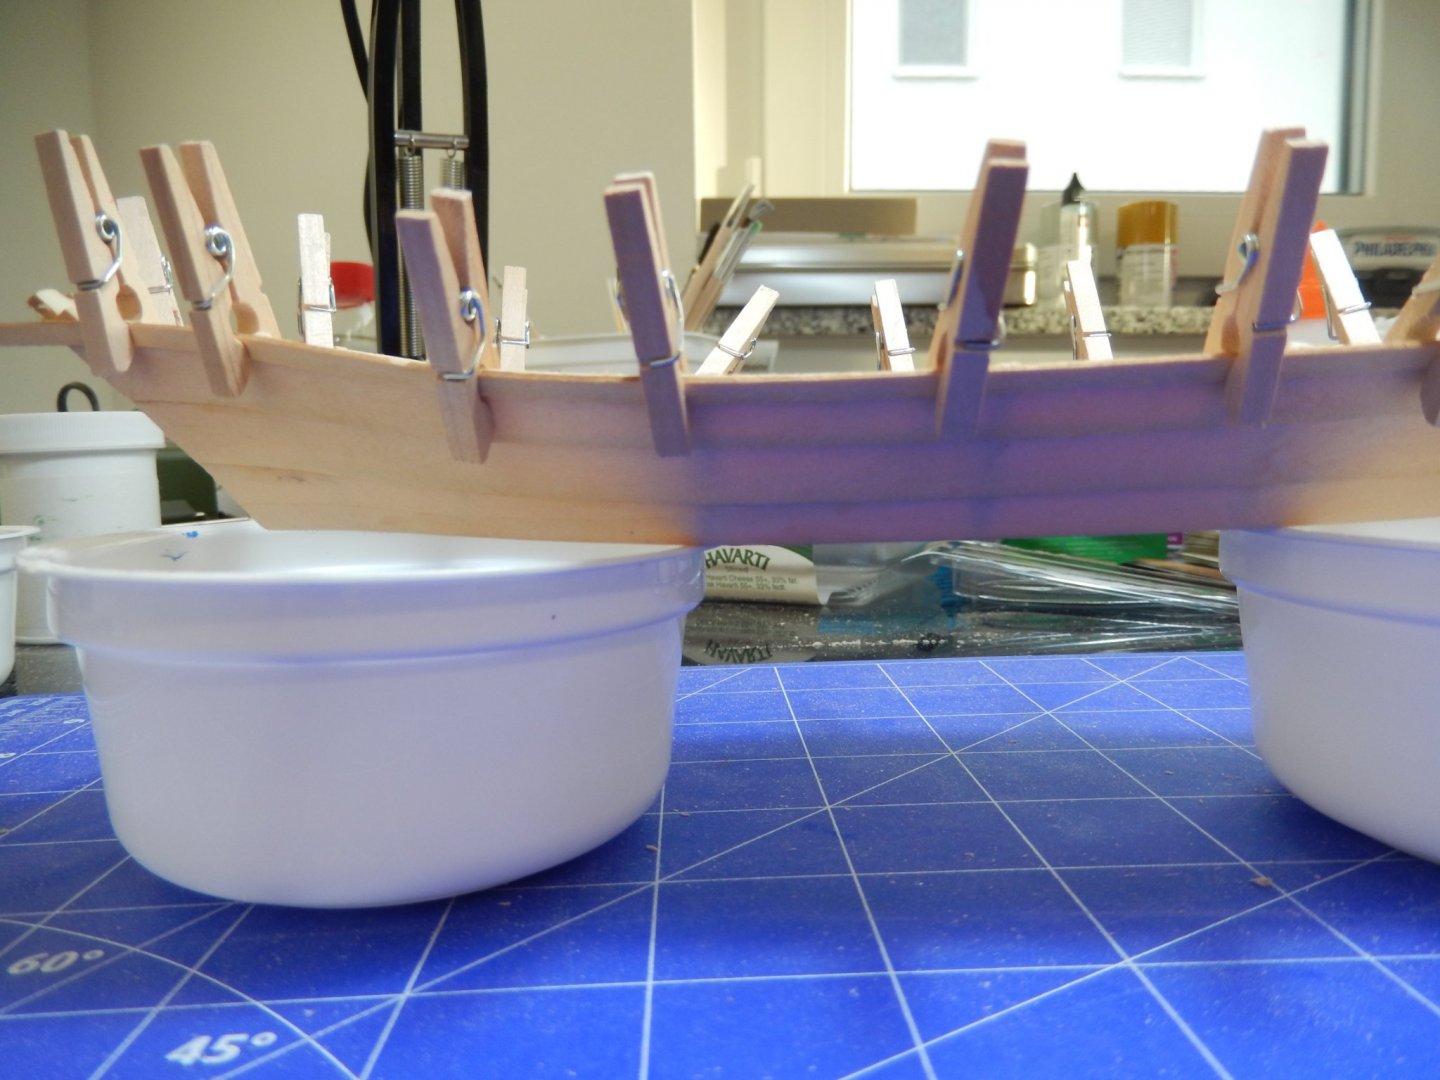
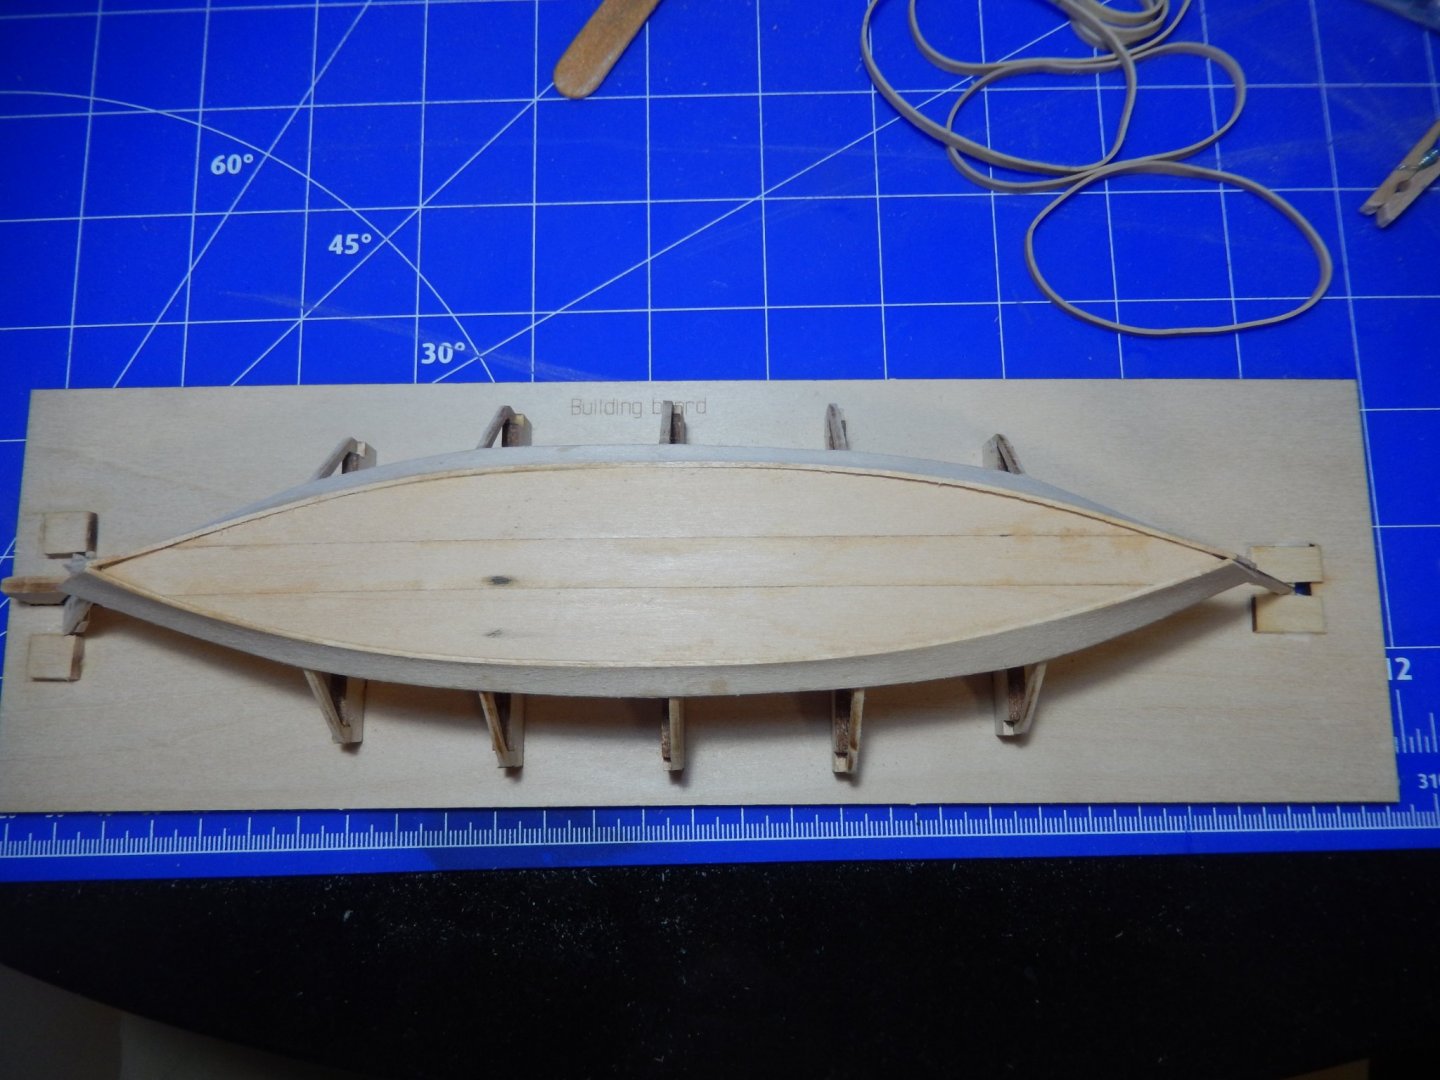
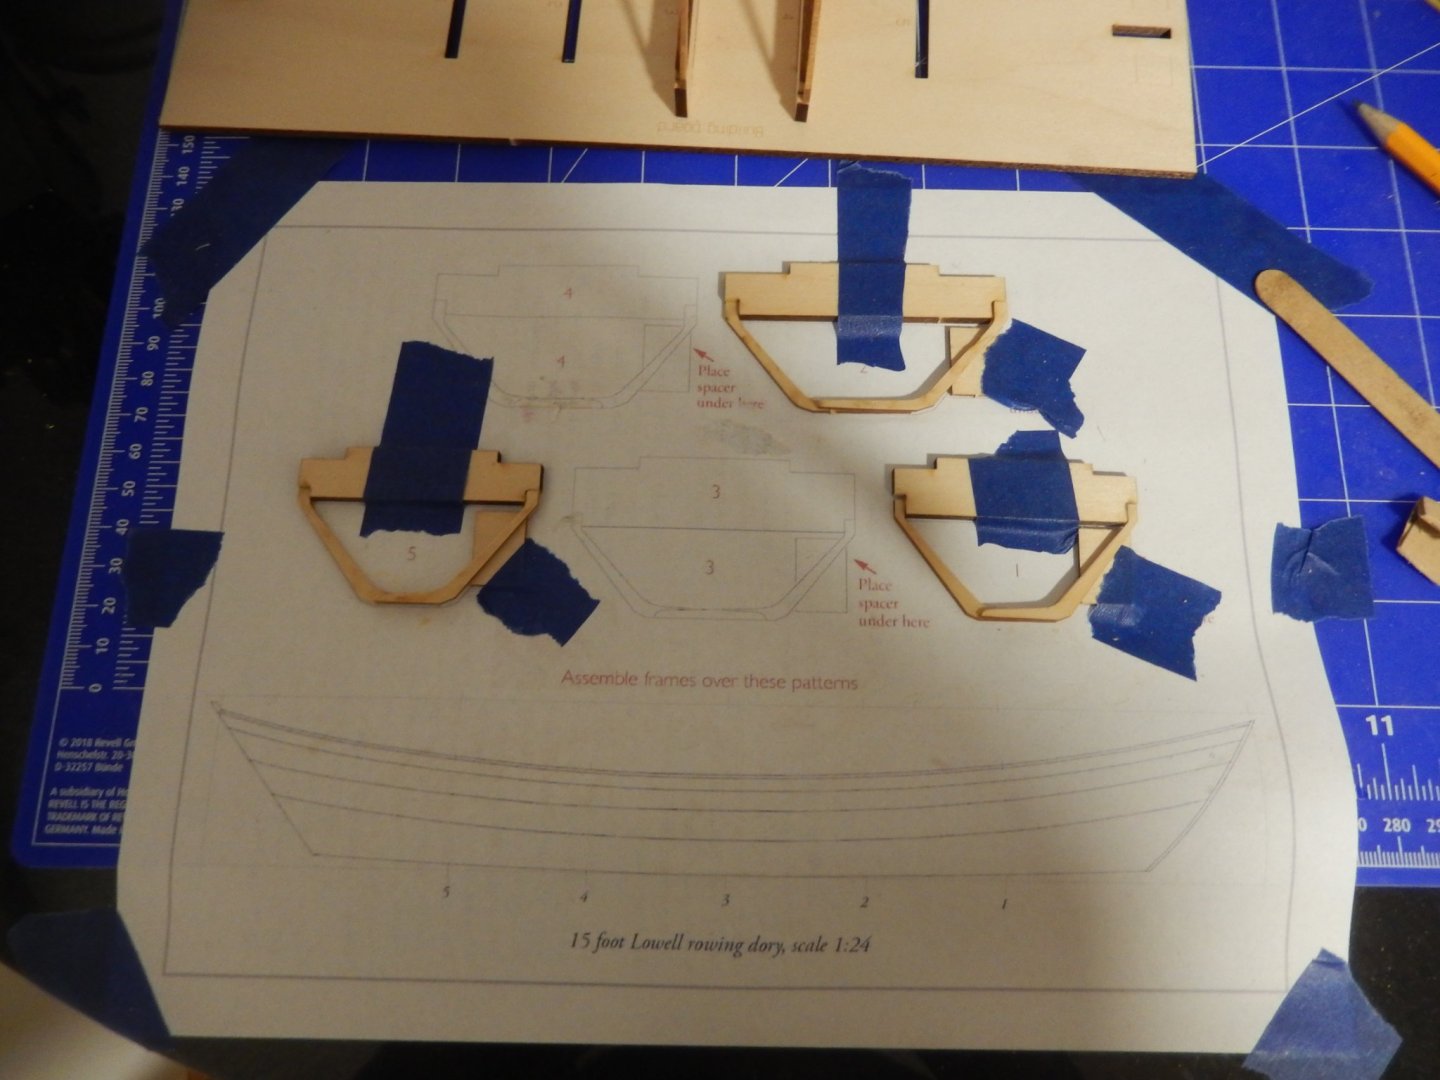
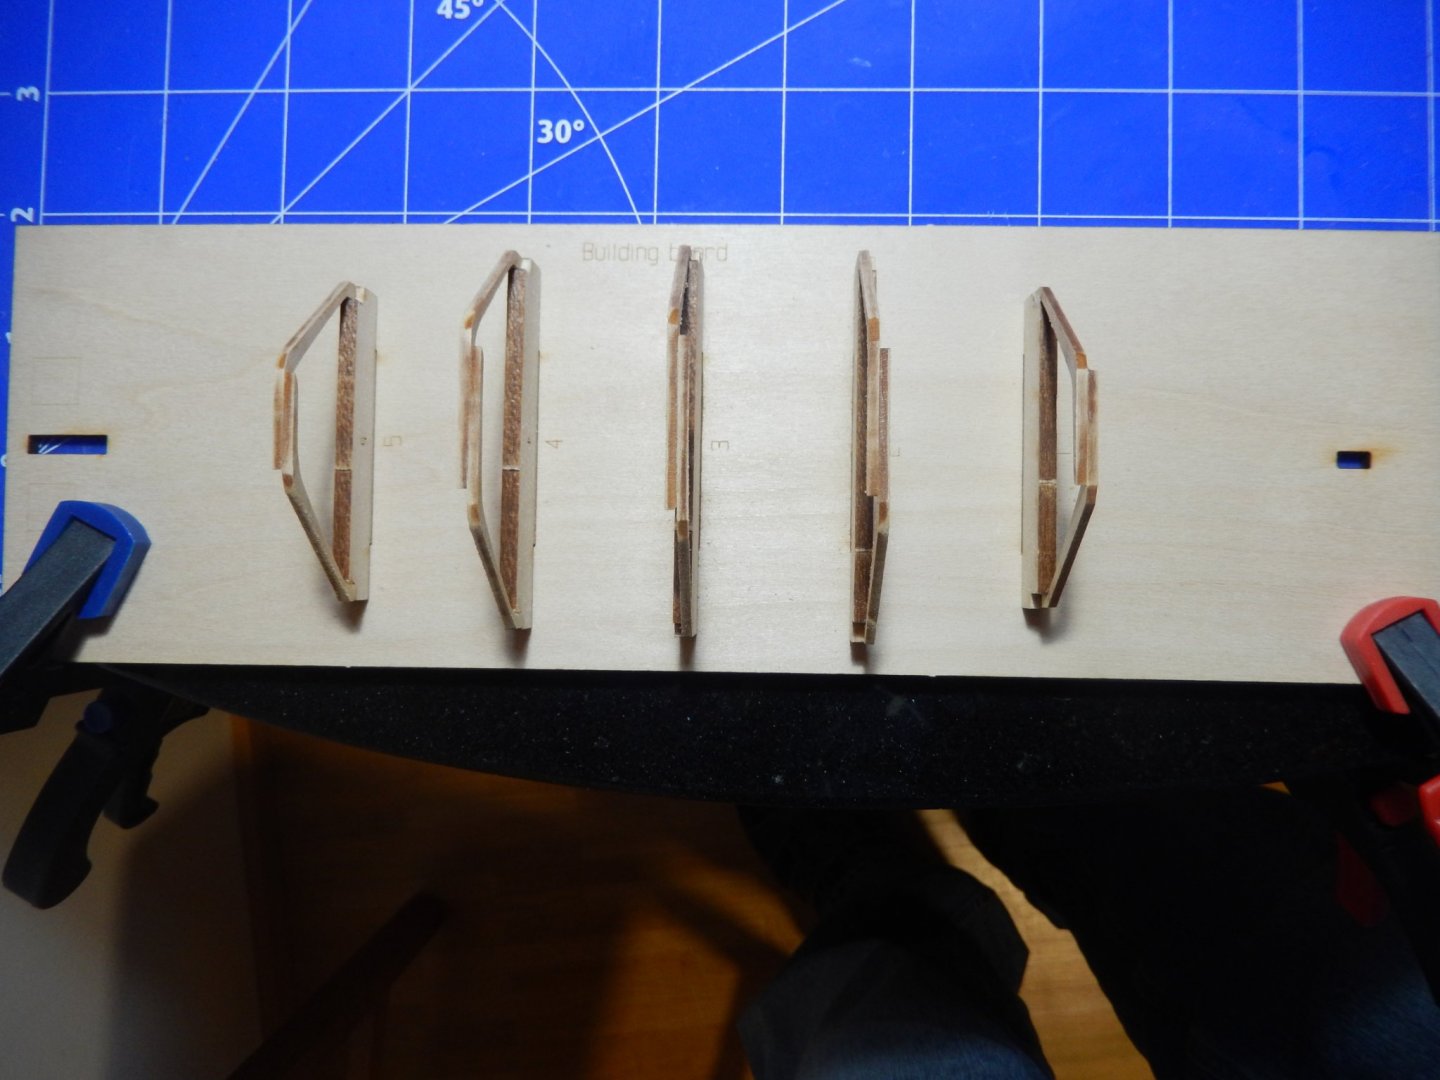
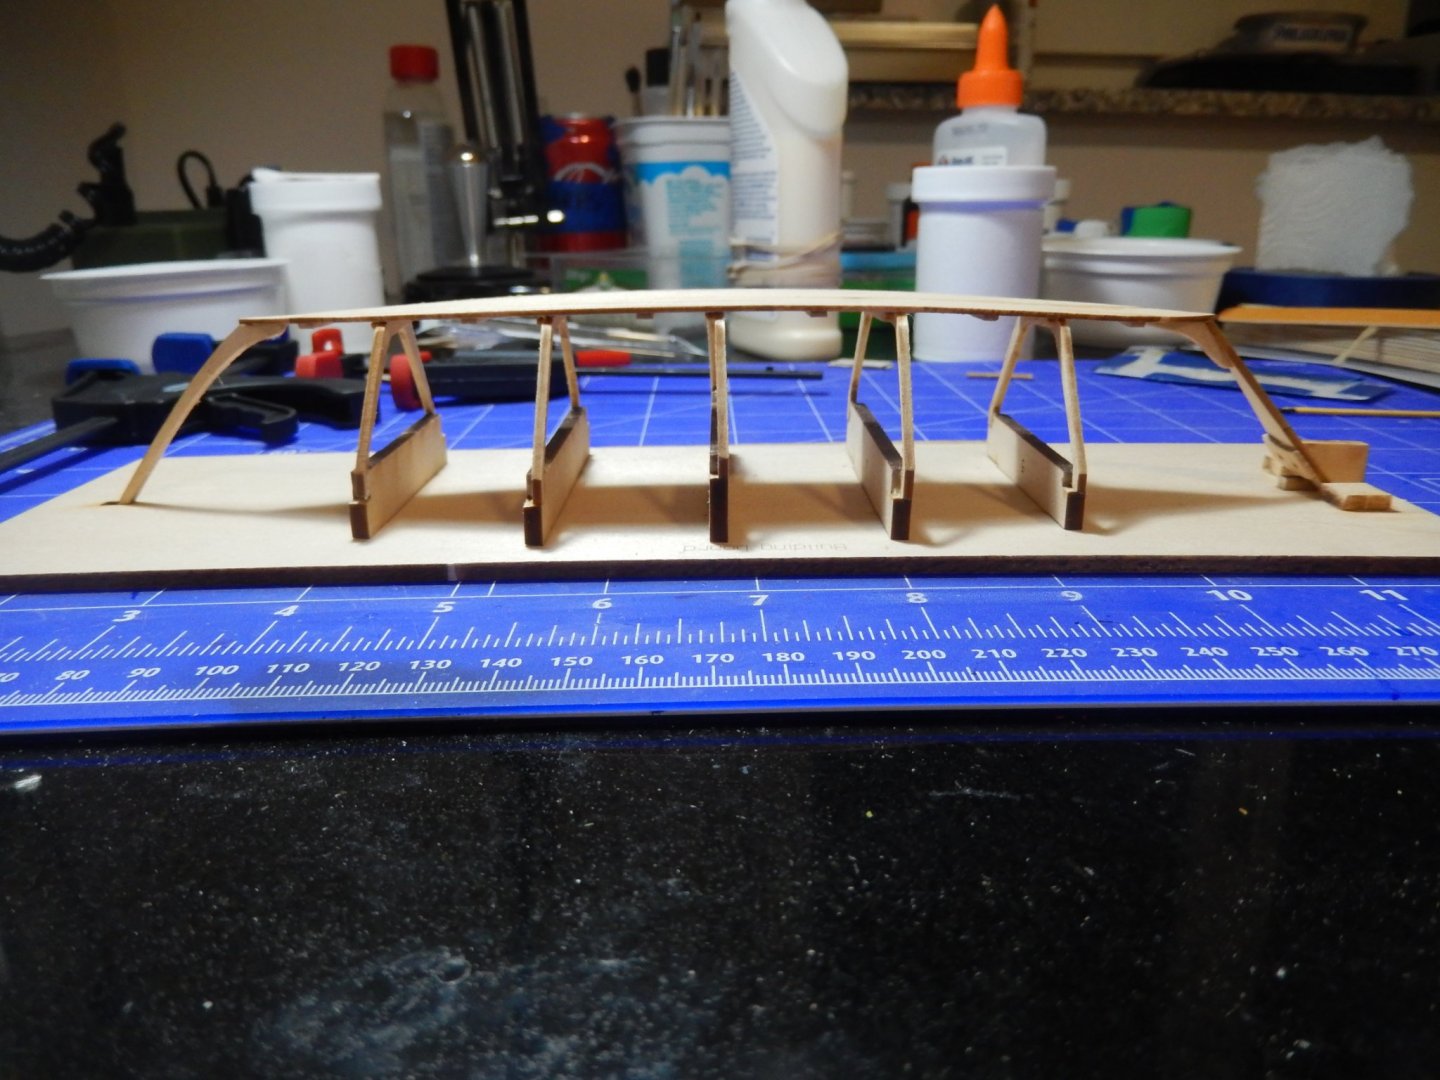
20201212 Have the frames assembled, set up on the building board and the boat’s bottom (to include stem & transom) glued to the frames. The instruction book is really quite detailed and easy to follow so every has been straight forward so far. The frames are assembled on top of a page in the instruction book. I xeroxed the page, taped it to the cutting board and assembled the frames. The wood is quite thin so it requires a light touch while sanding. Same once the frames are on the building board and a bit more sanding has to be done to bevel them so the bottom fits properly. There are a couple of small blocks that are glued to the build board to help keep the transom from moving side to side. They didn’t seem to be doing the trick when initially installed so I pried them up, and moved them just a bit forwards so they could keep the transom from moving. Taking the time to dry fit before gluing sounds trite, but I needed to fight the tendency to ‘glue then adjust’ and make sure I had things setup properly first. The result to this point is a frame structure and bottom ready to have the first planks installed. More sanding ahead….


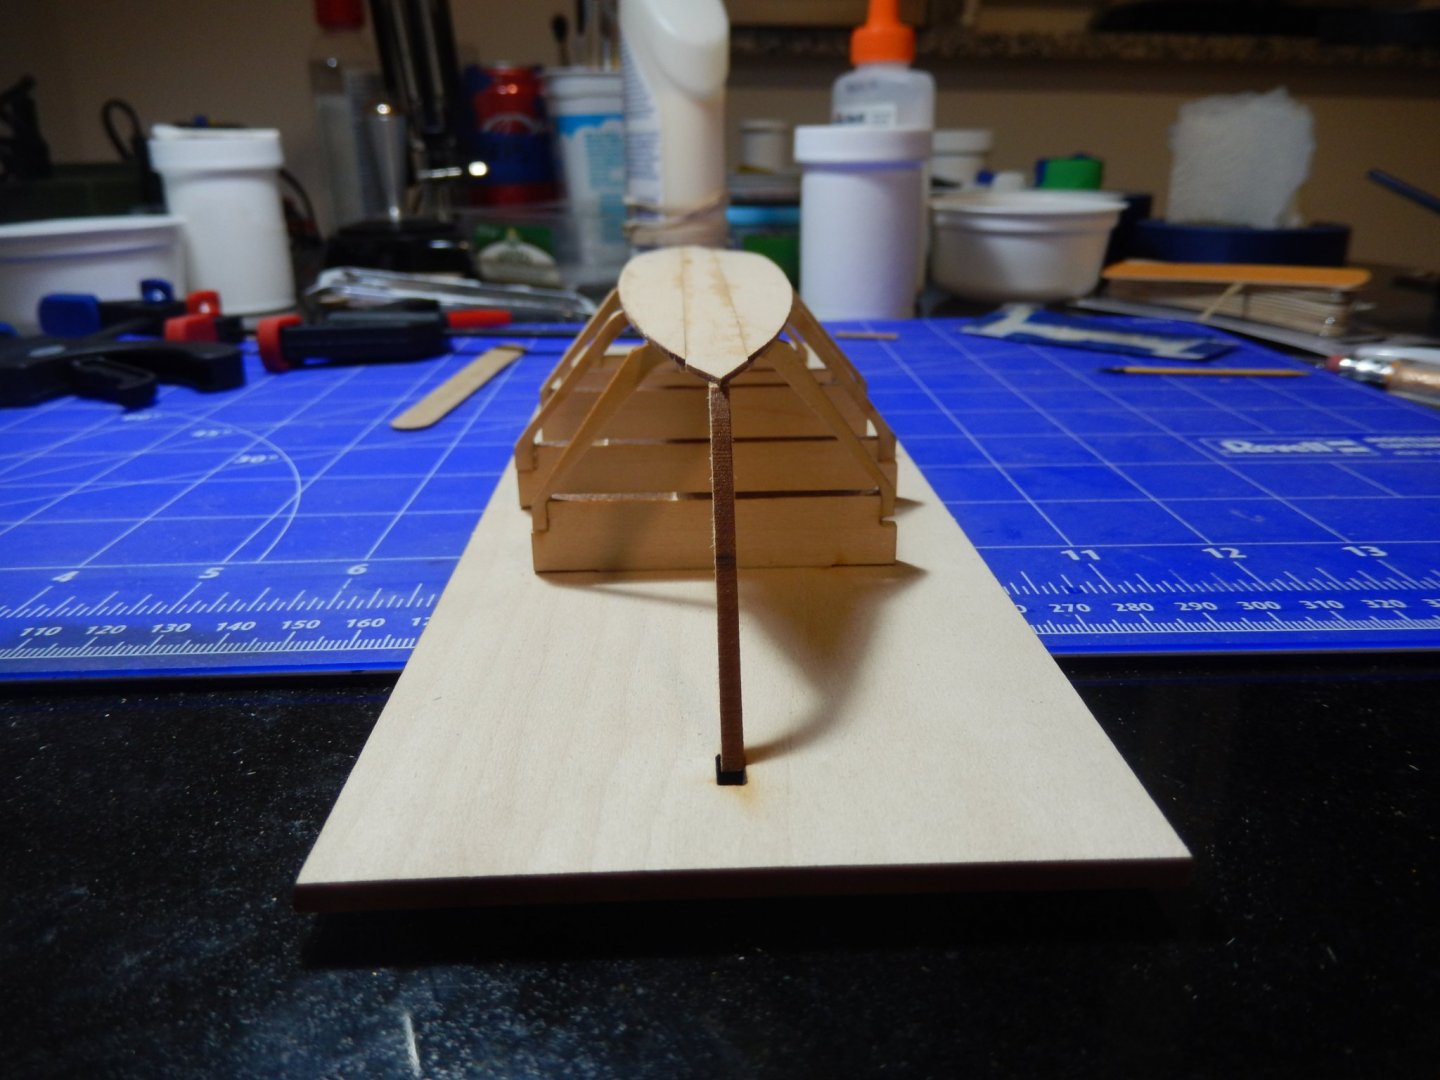
- 8 replies
-
- 4
-
-
- Finished
- Model Shipways
- (and 1 more)
-
JohnRC reacted to a post in a topic:
Lowell Grand Banks Dory by JohnRC - FINISHED - Model Shipways - 1:24
-
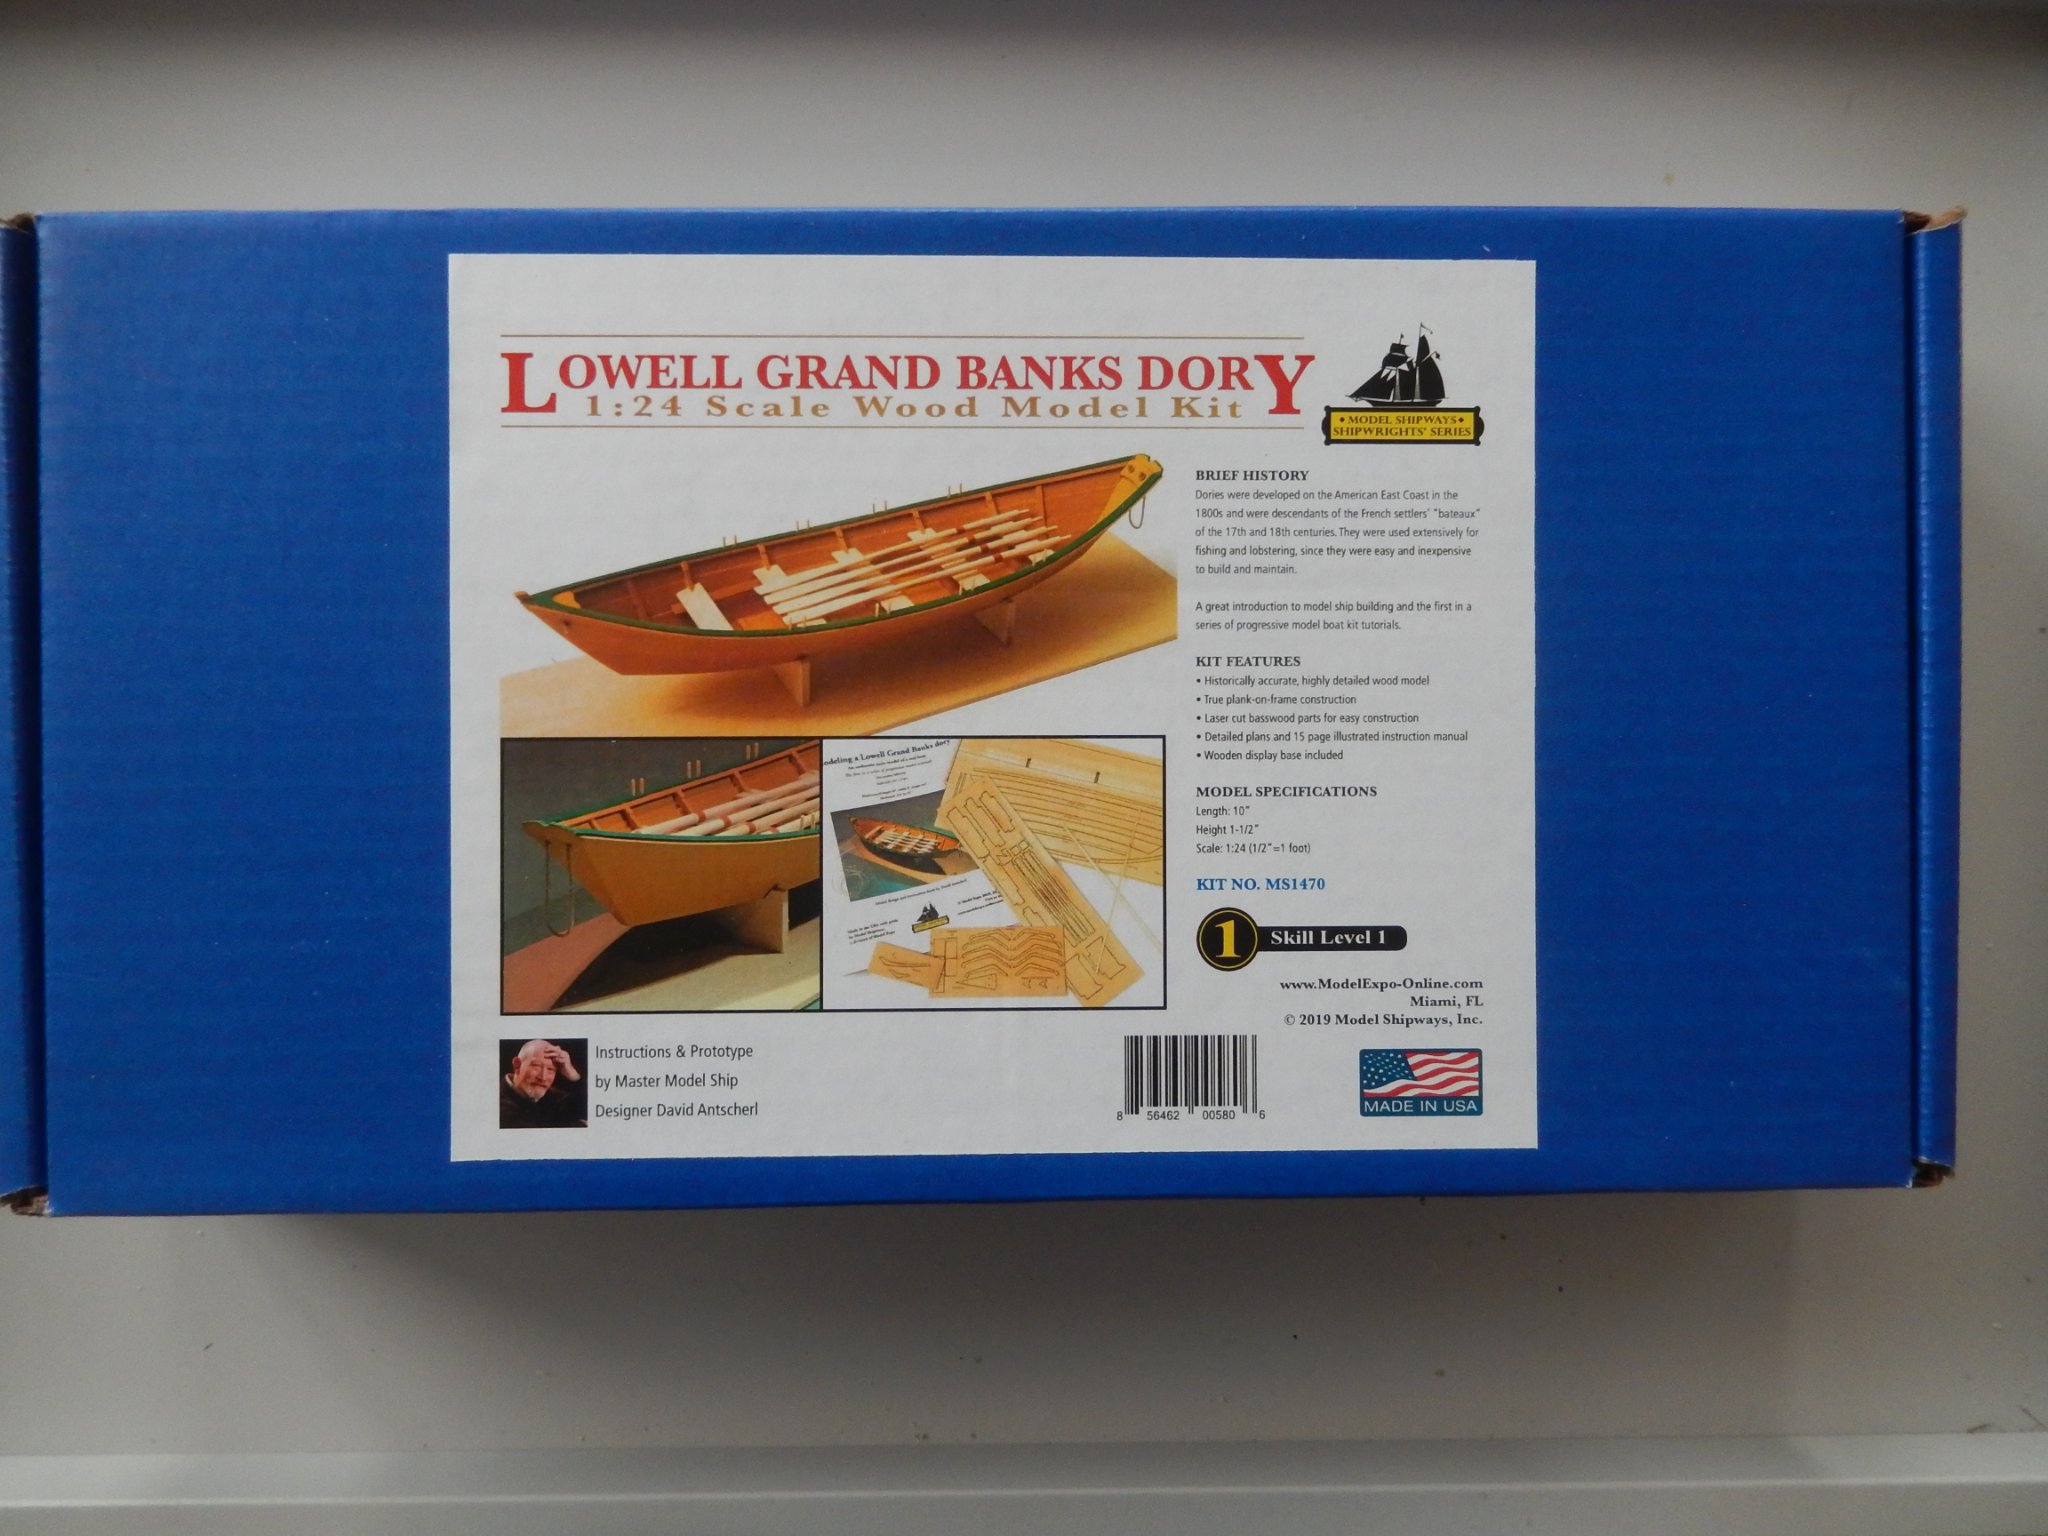
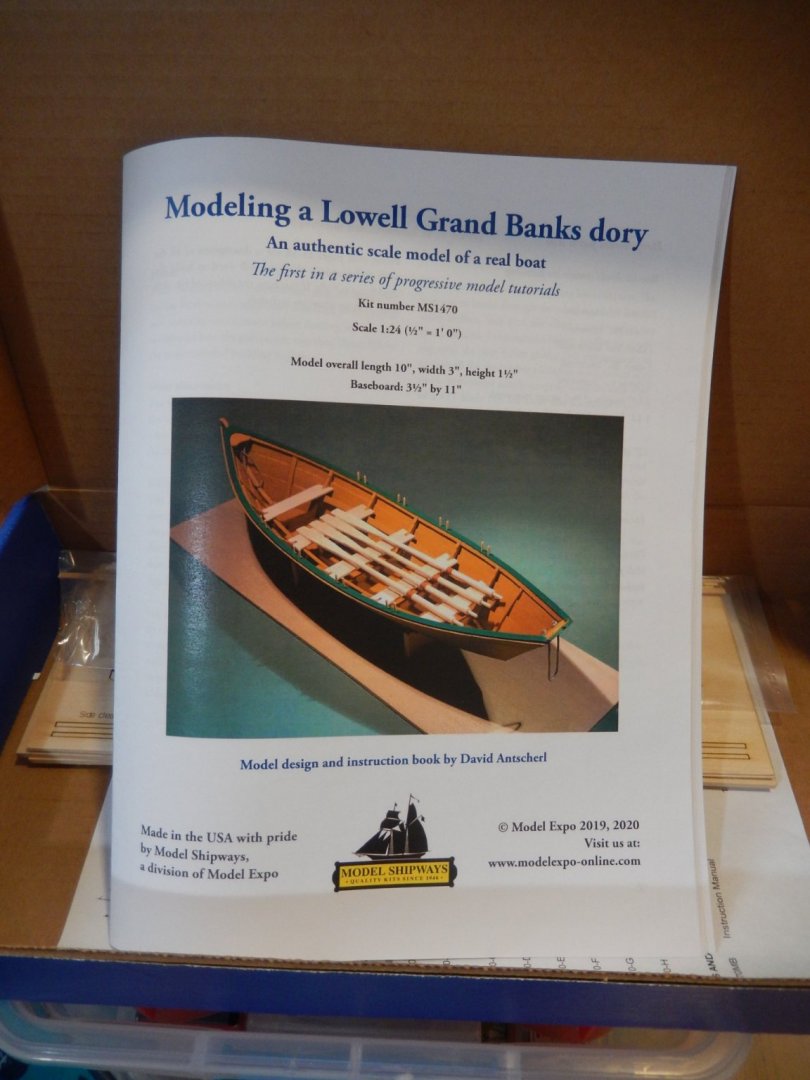
20201209 Started work on the Lowell Grand Banks Dory. This is billed as a starter kit but no matter; I decided to try my hand on an open boat that is bigger in scale than the two sailing ships I've finished over the past several months. I like the look of this boat; think it might look good in one of the grandkid’s rooms. Anyways, so far all I’ve accomplished is to inventory the parts and assemble the bottom of the boat. Have the frame pieces laid out and ready to glue up; will get that done in the remaining evenings this week and then start work on the hull this weekend.


- 8 replies
-
- 7
-
-
- Finished
- Model Shipways
- (and 1 more)
-
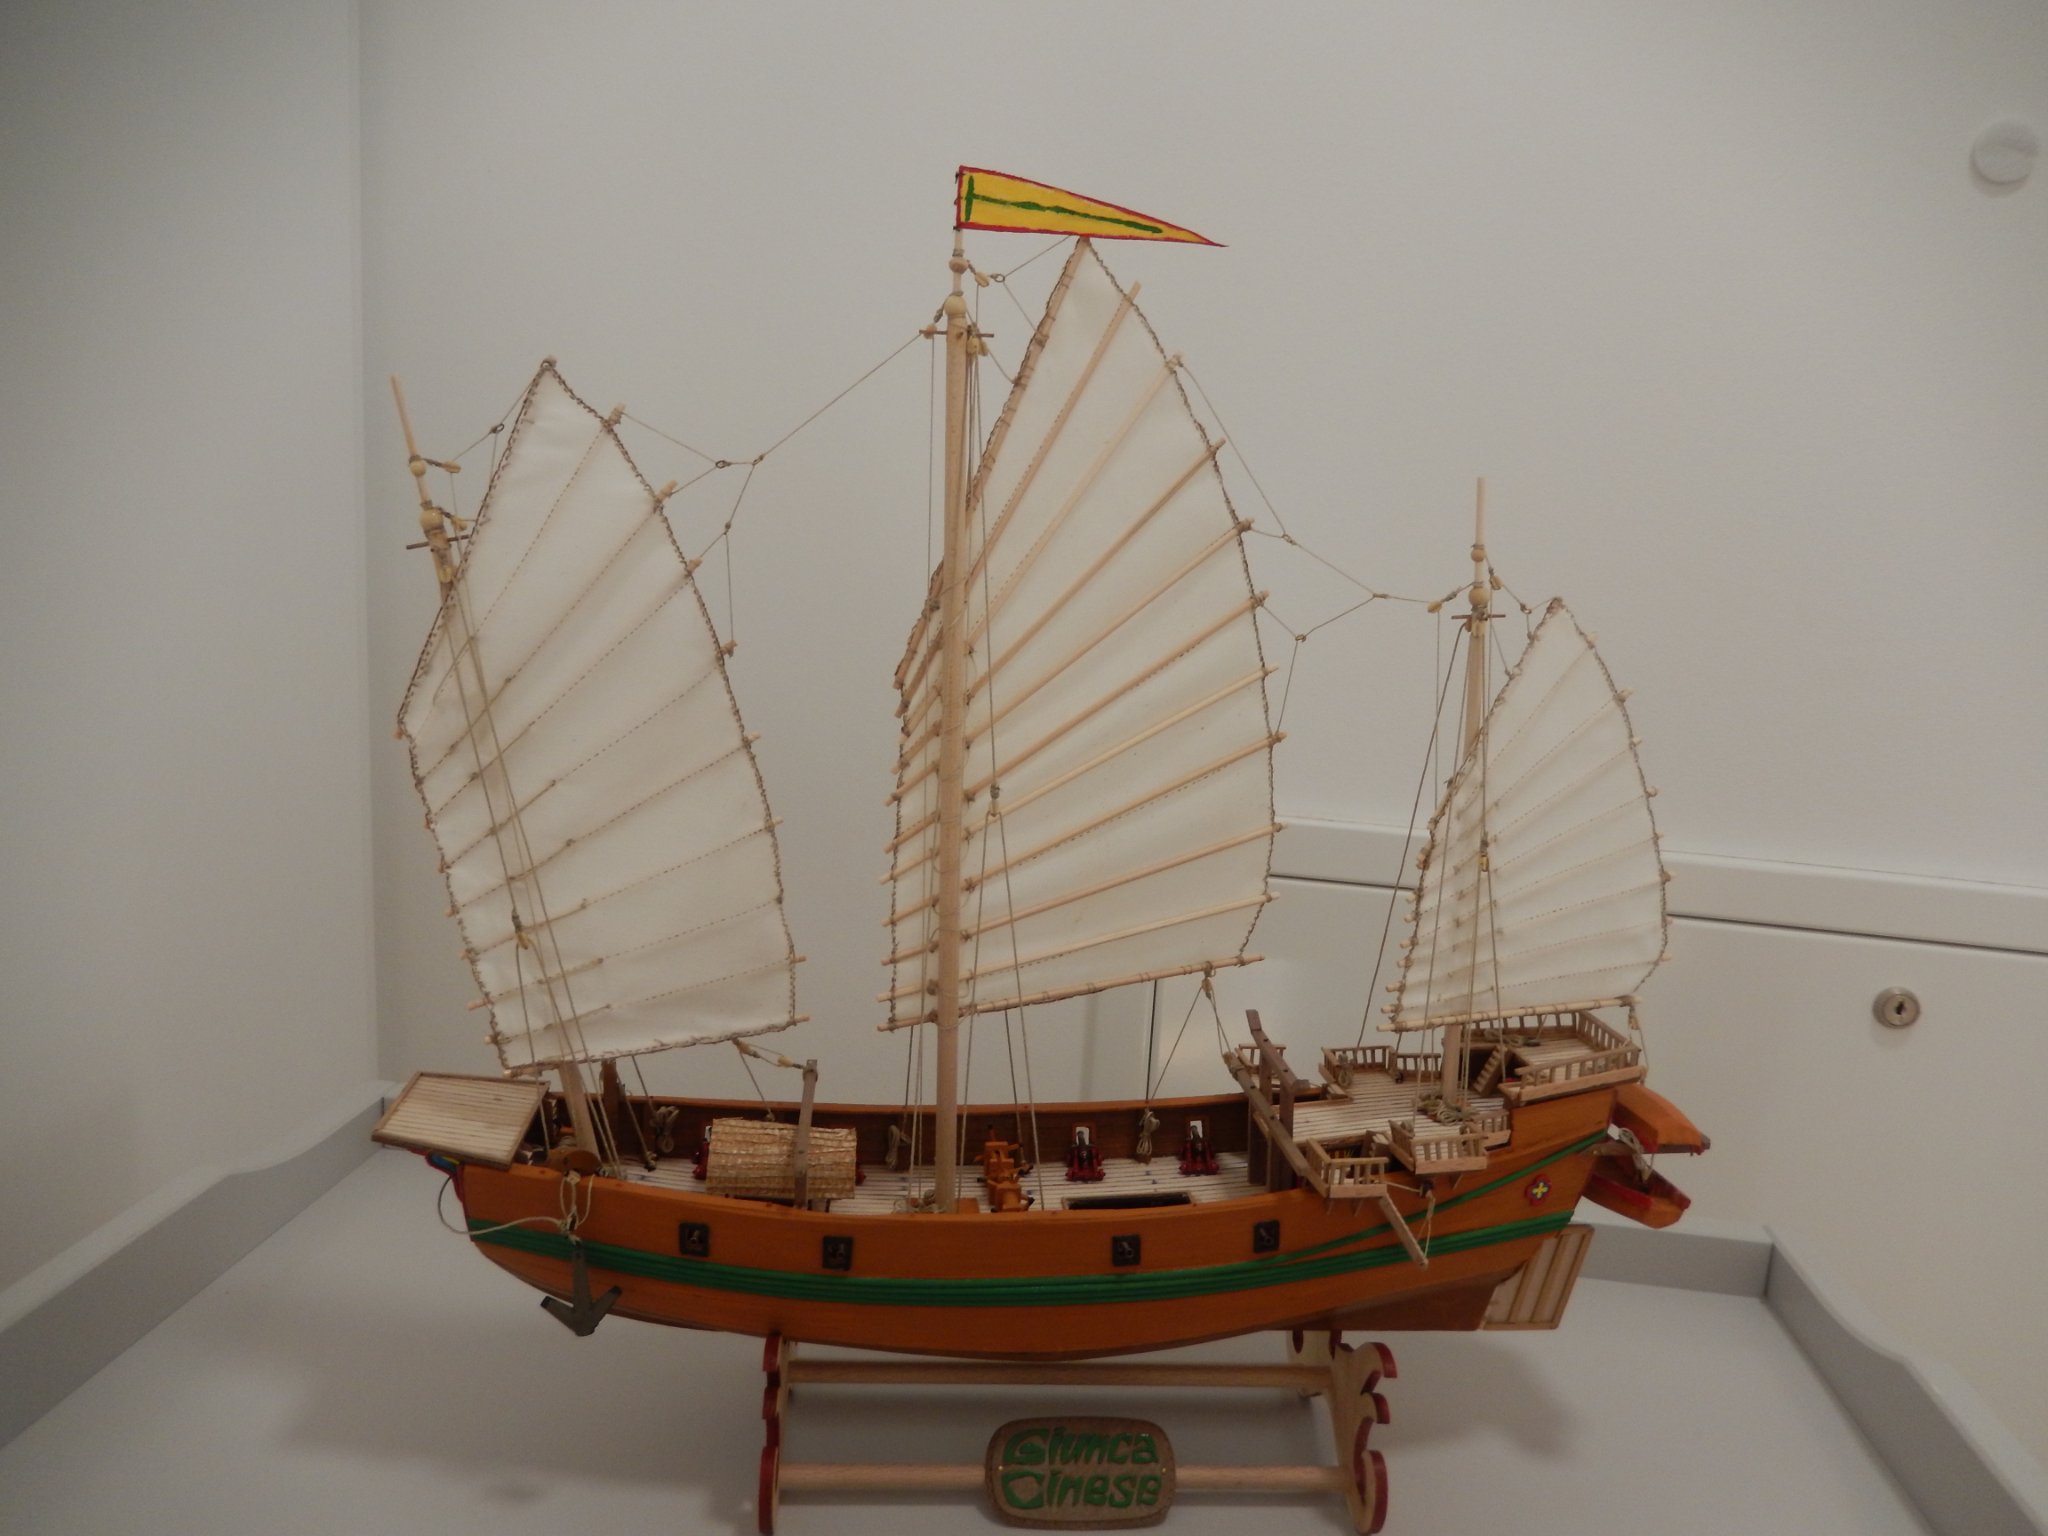
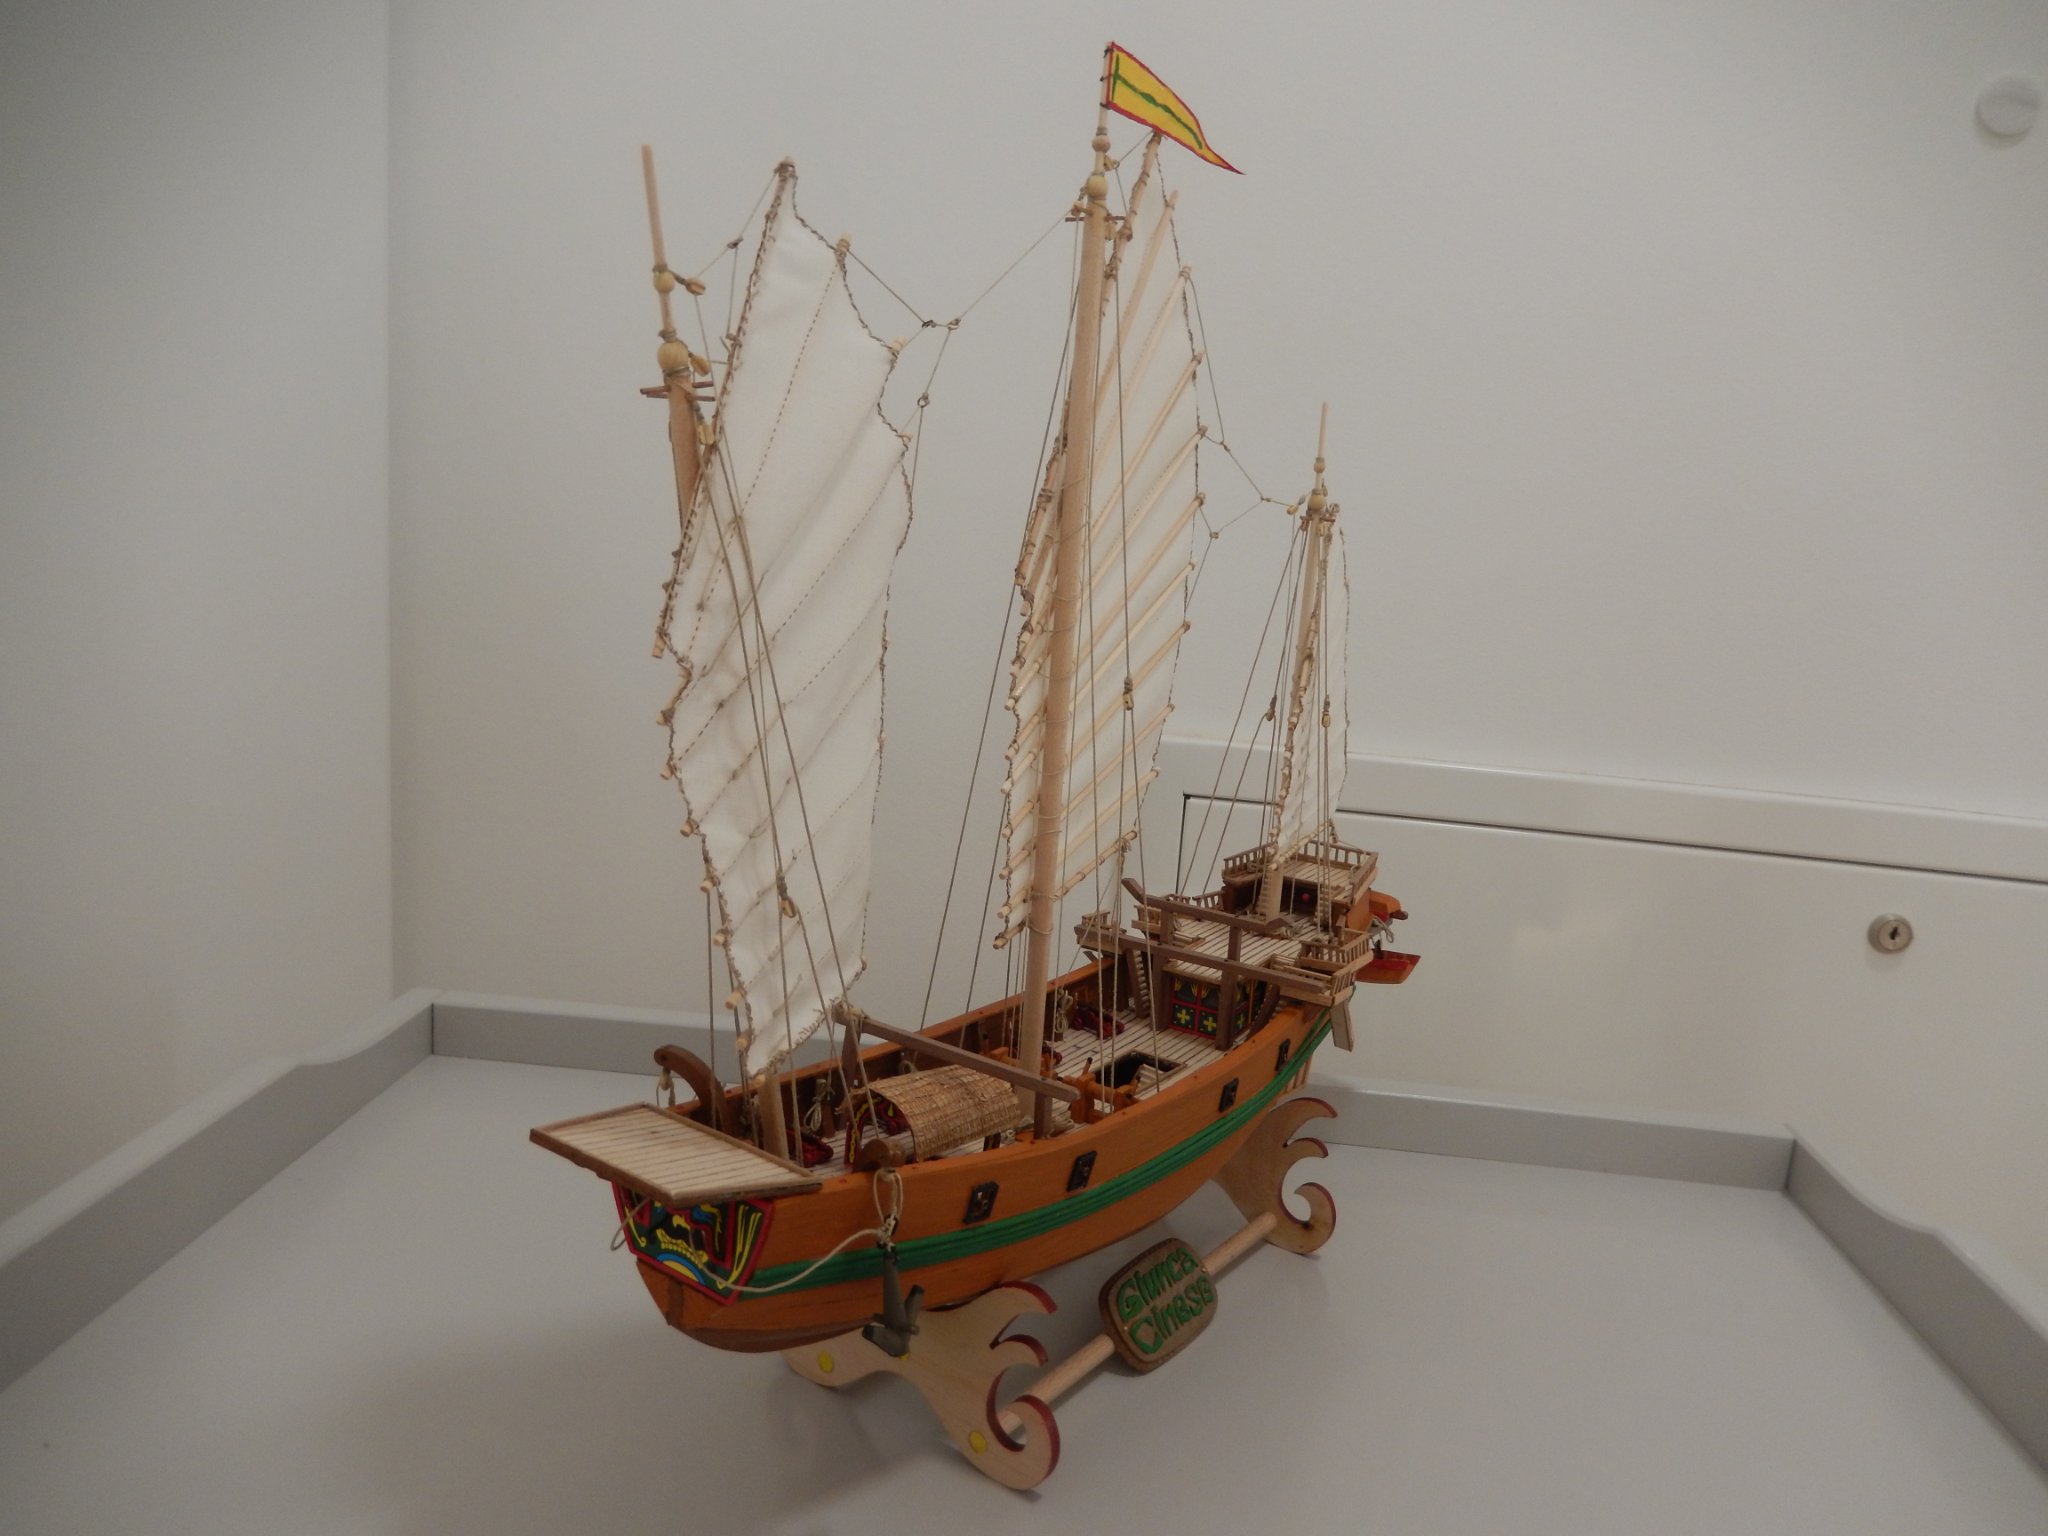
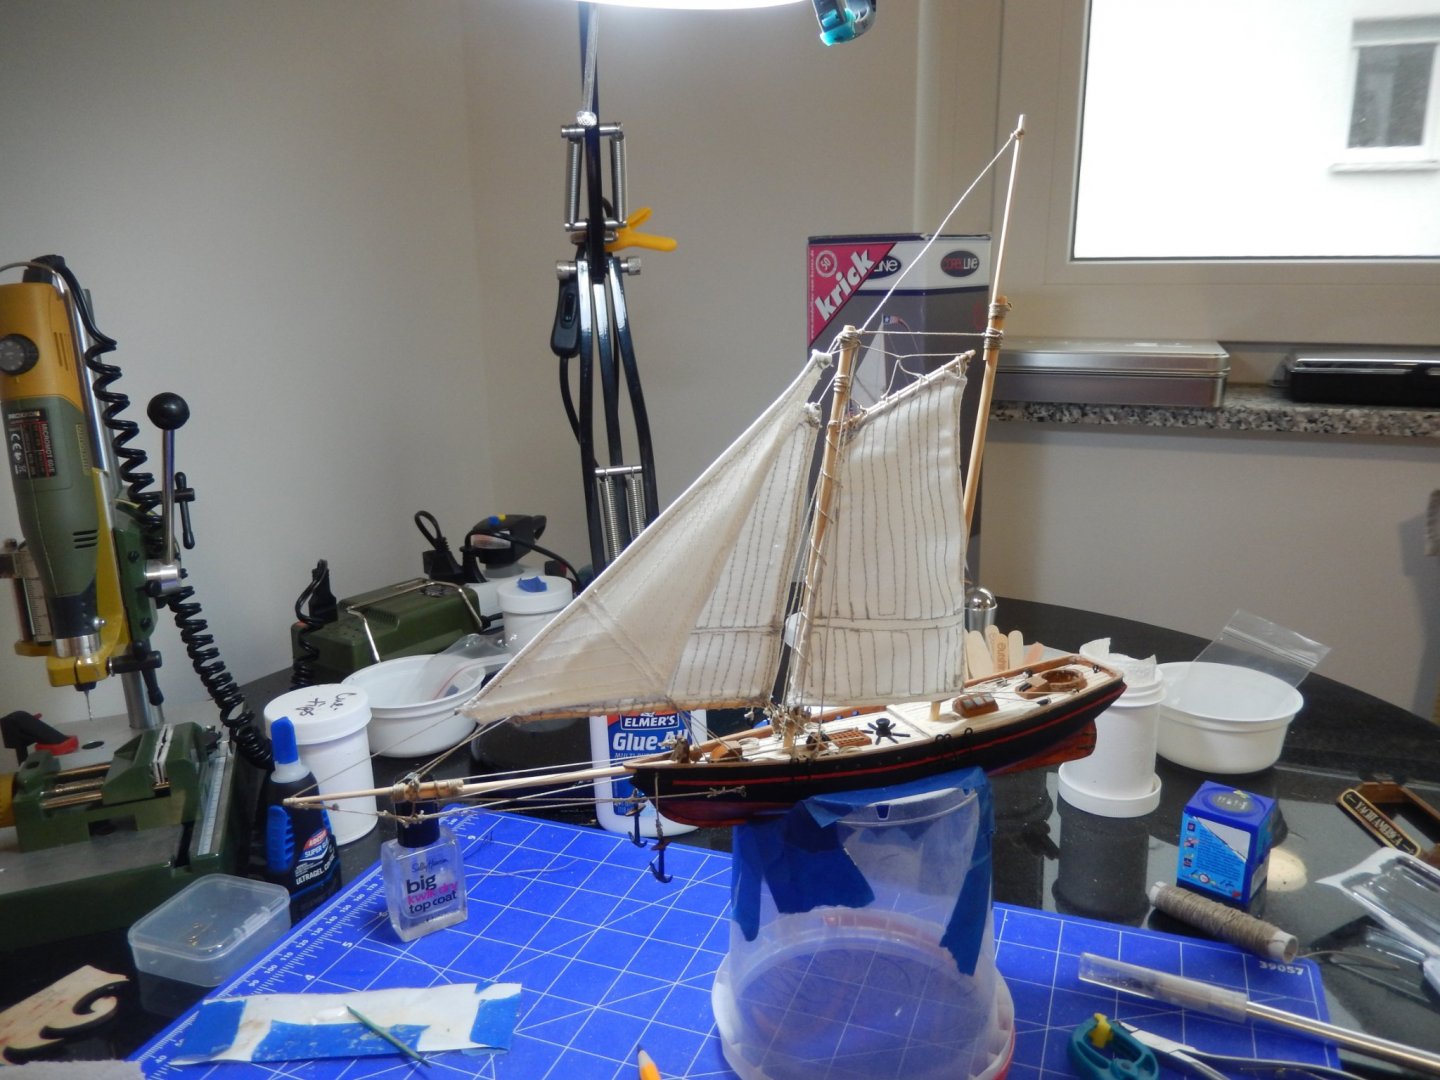
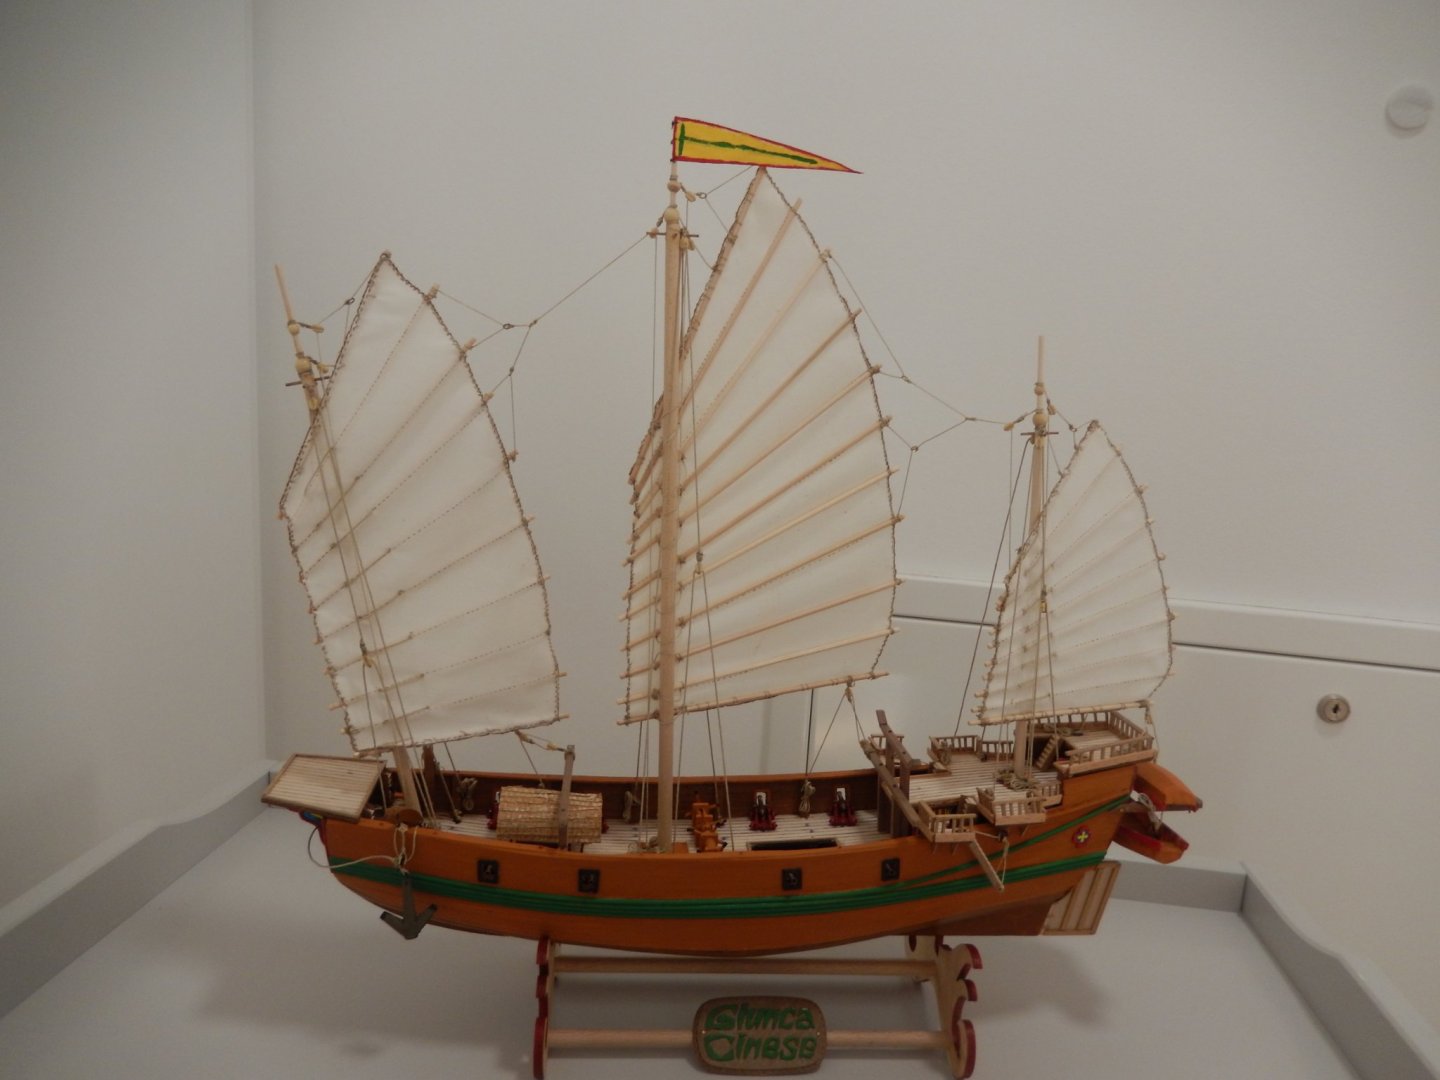
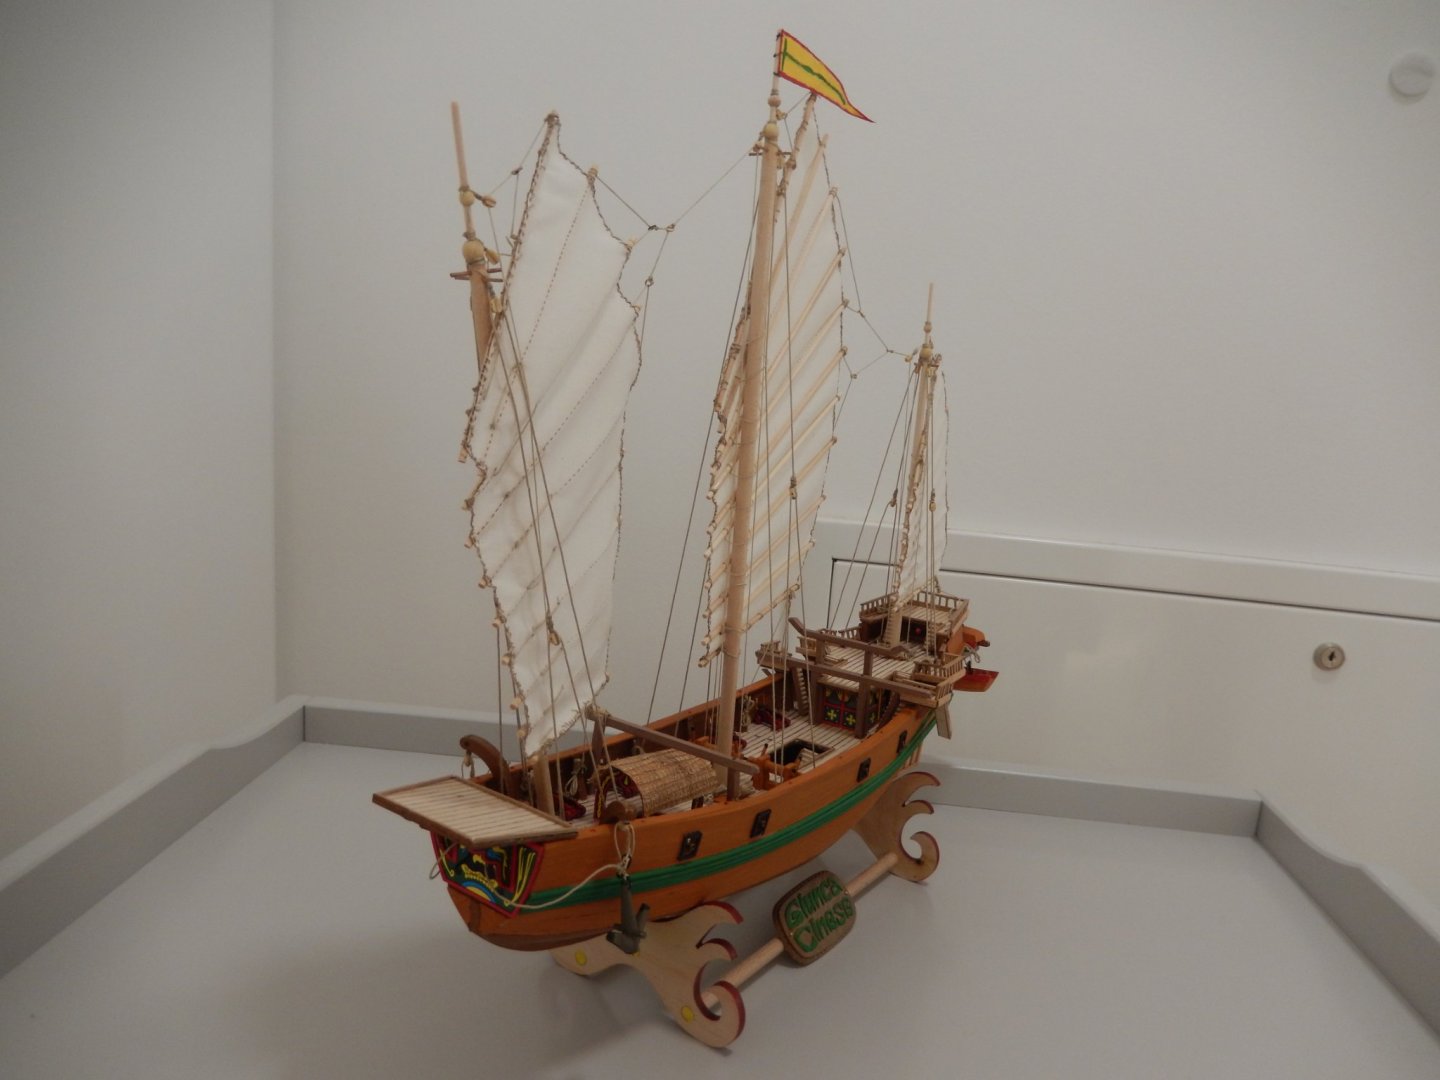
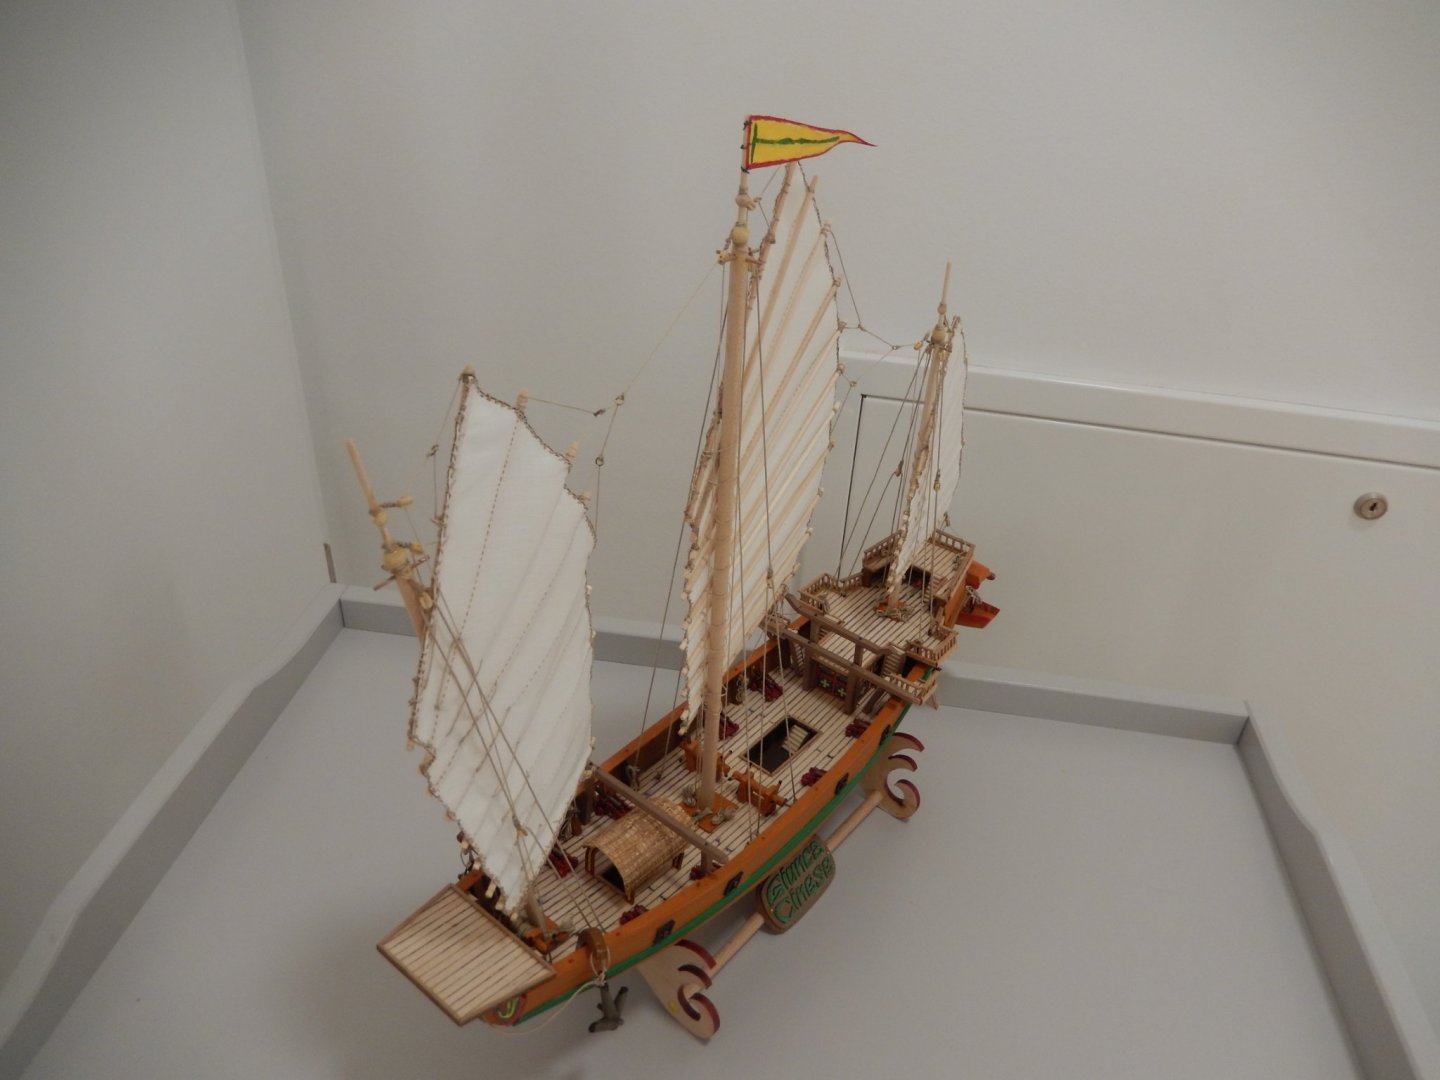
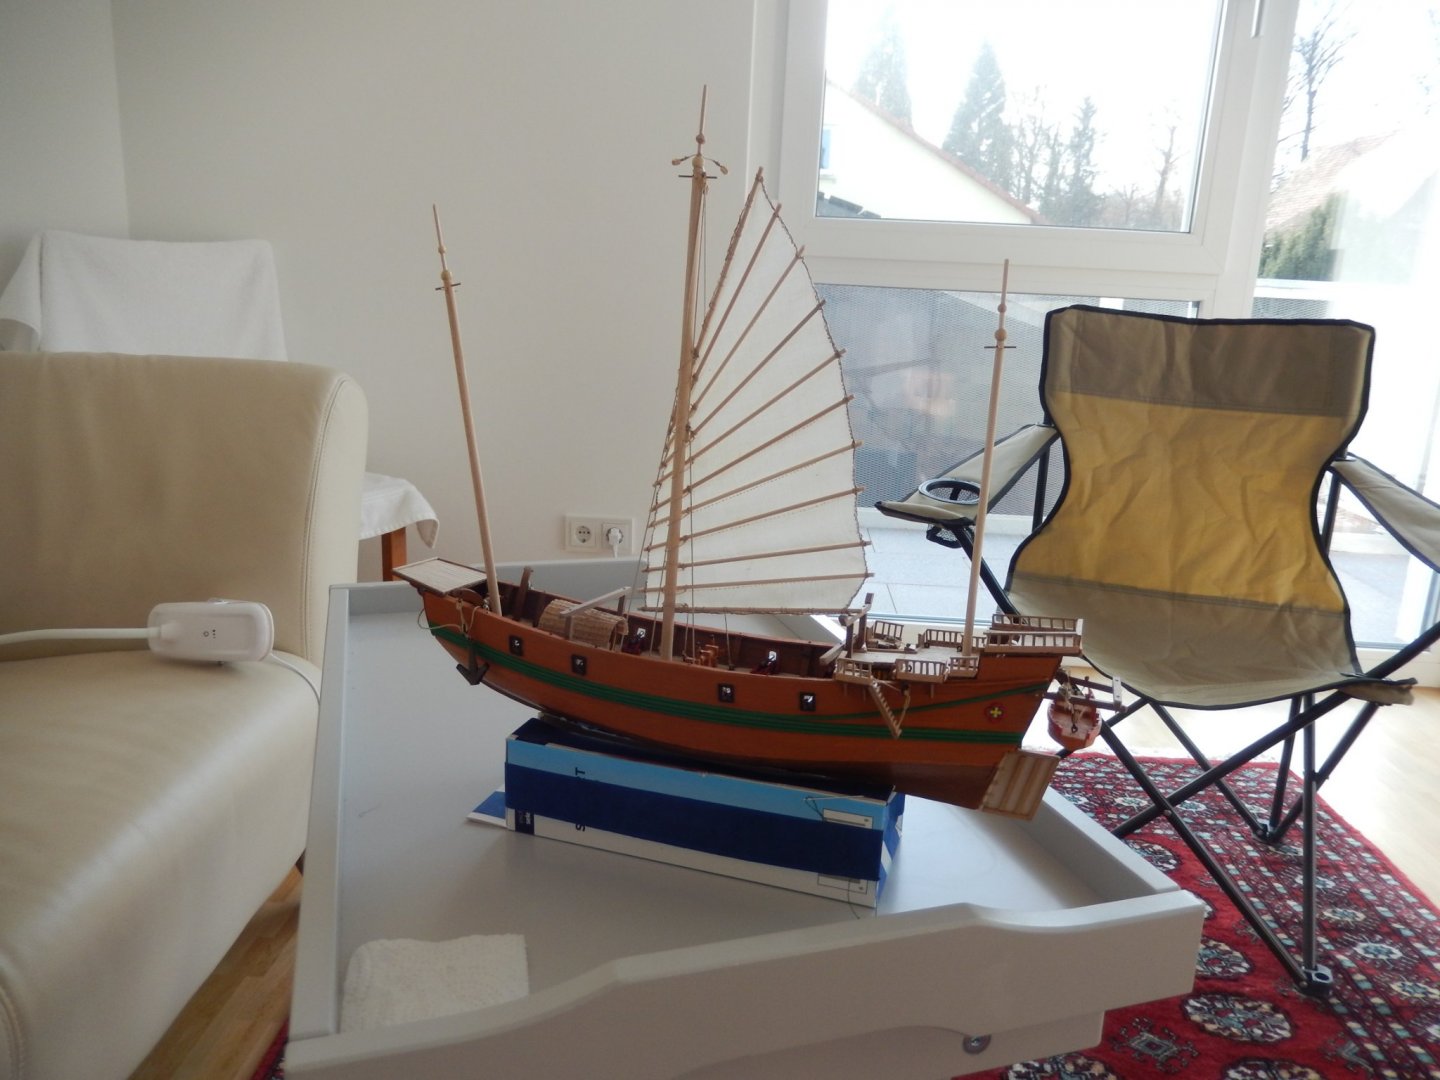
Finished rigging the mainsail on Monday evening; assembled the fore sail with foremast standing rigging on Saturday; completed the fore sail running rigging & added a homemade pennant today – end result: work complete! This has been a fun project. As for what’s next I haven’t decided yet – I have the Revell 1:72 Stearman Kaydet and the Model Shipways 1:24 Grand Banks Dory waiting. May do the ‘Yellow Peril’ first just for a change of pace but expect to start work on the dory before Christmas.
- 27 replies
-
- 5
-
-
- Amati
- chinese junk
- (and 1 more)
-
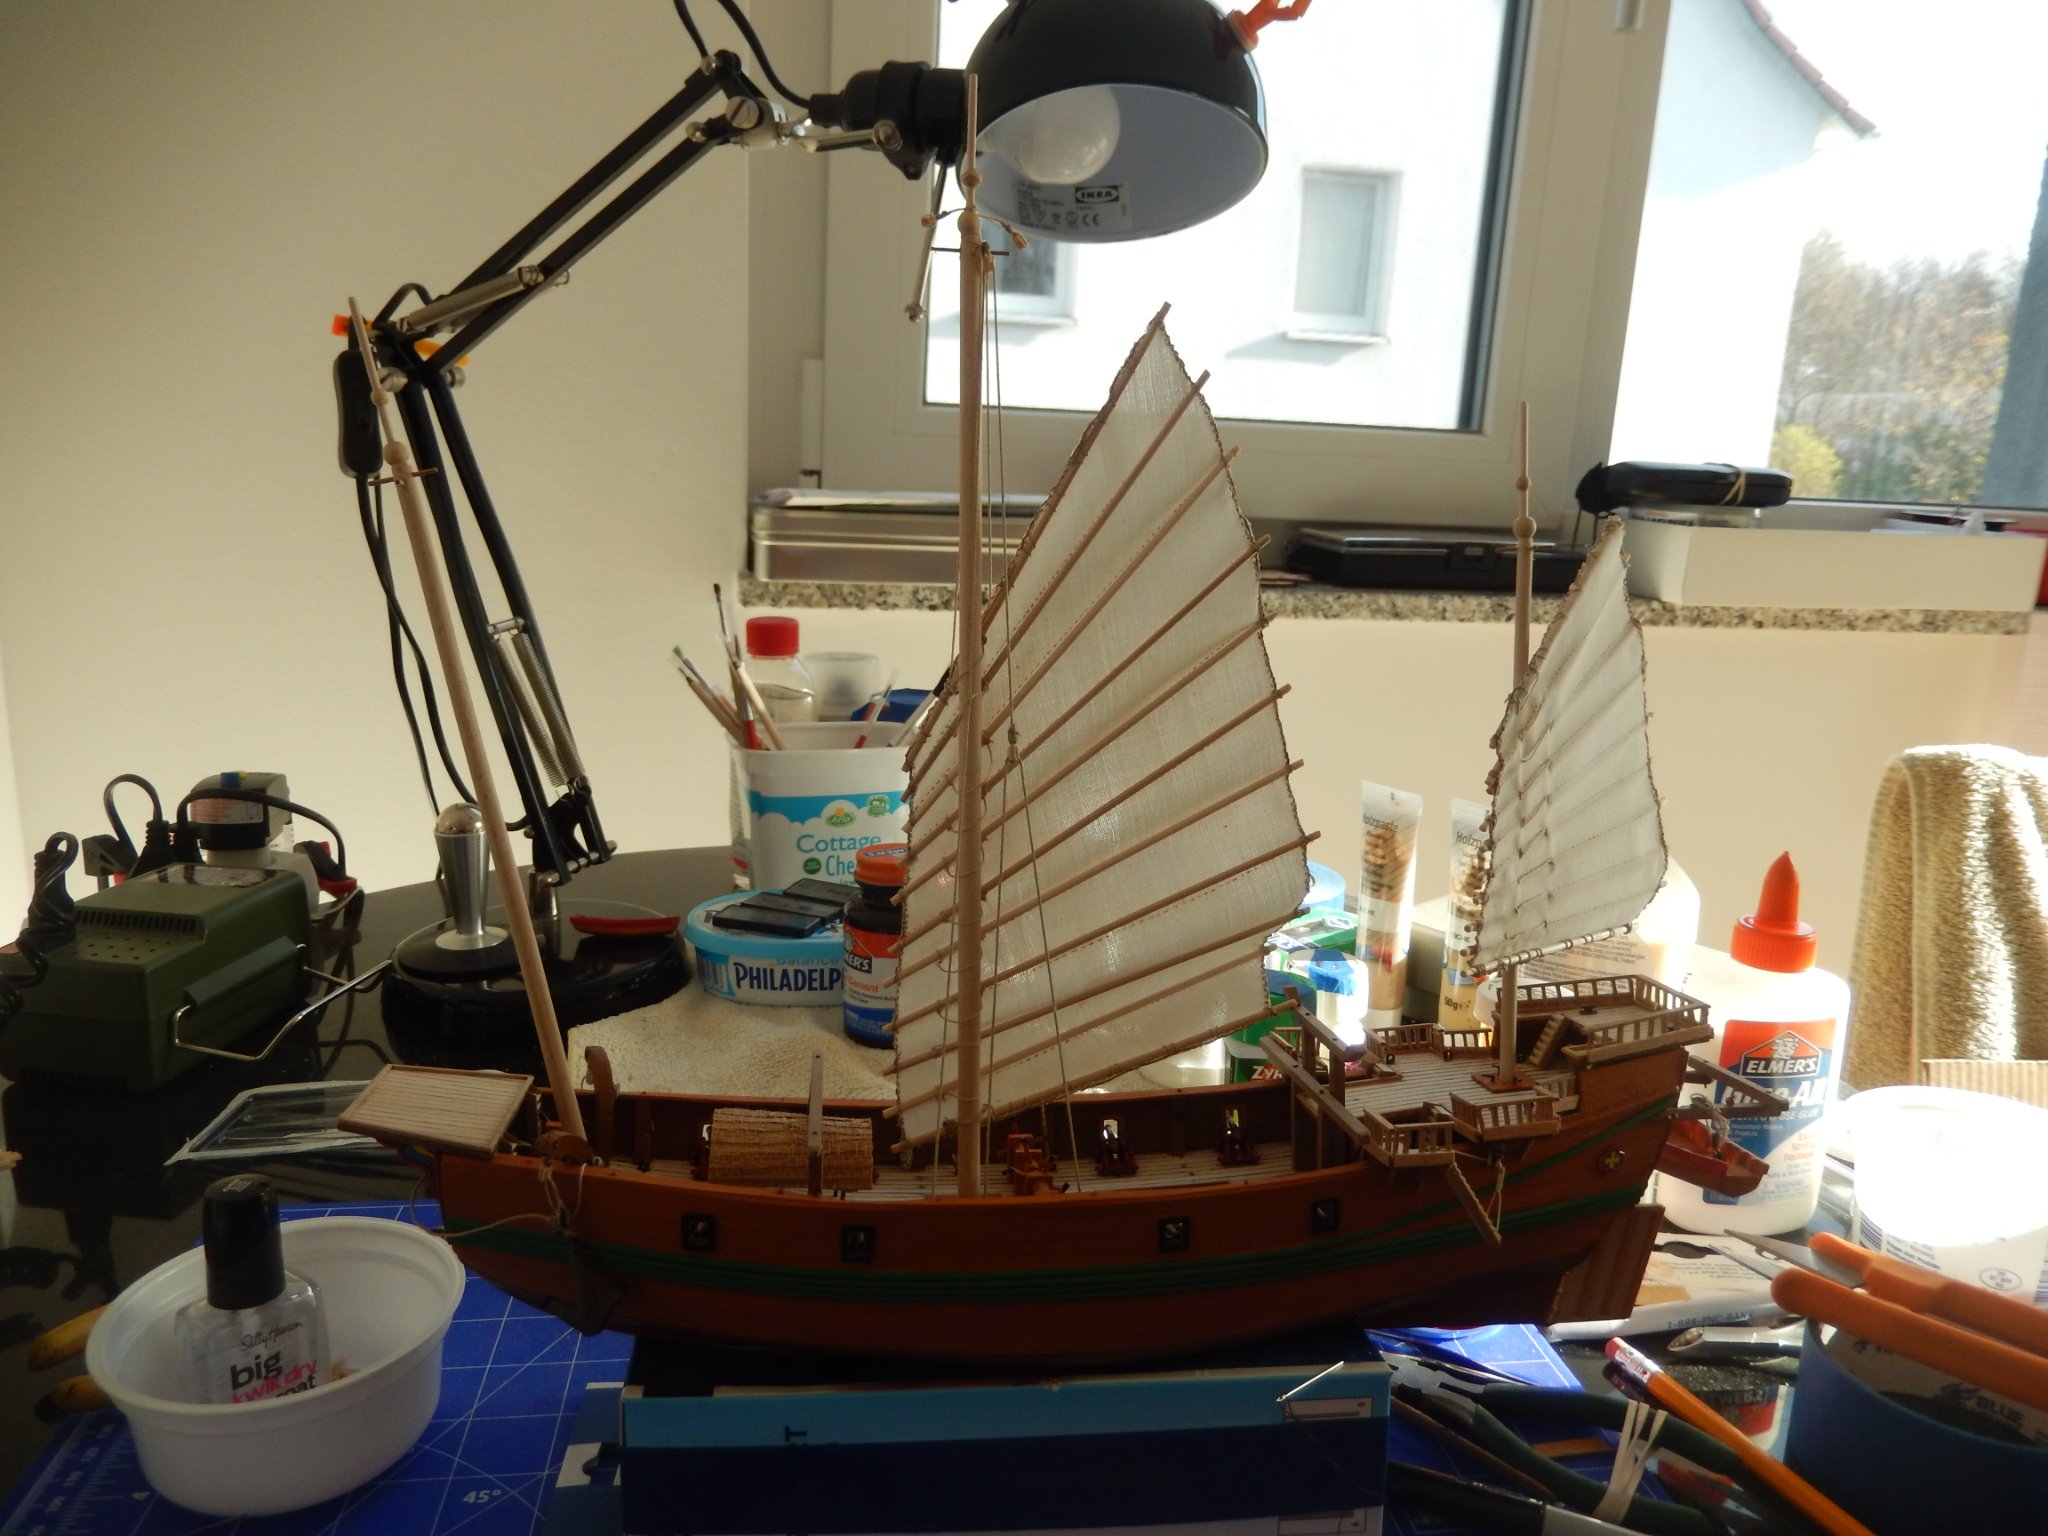
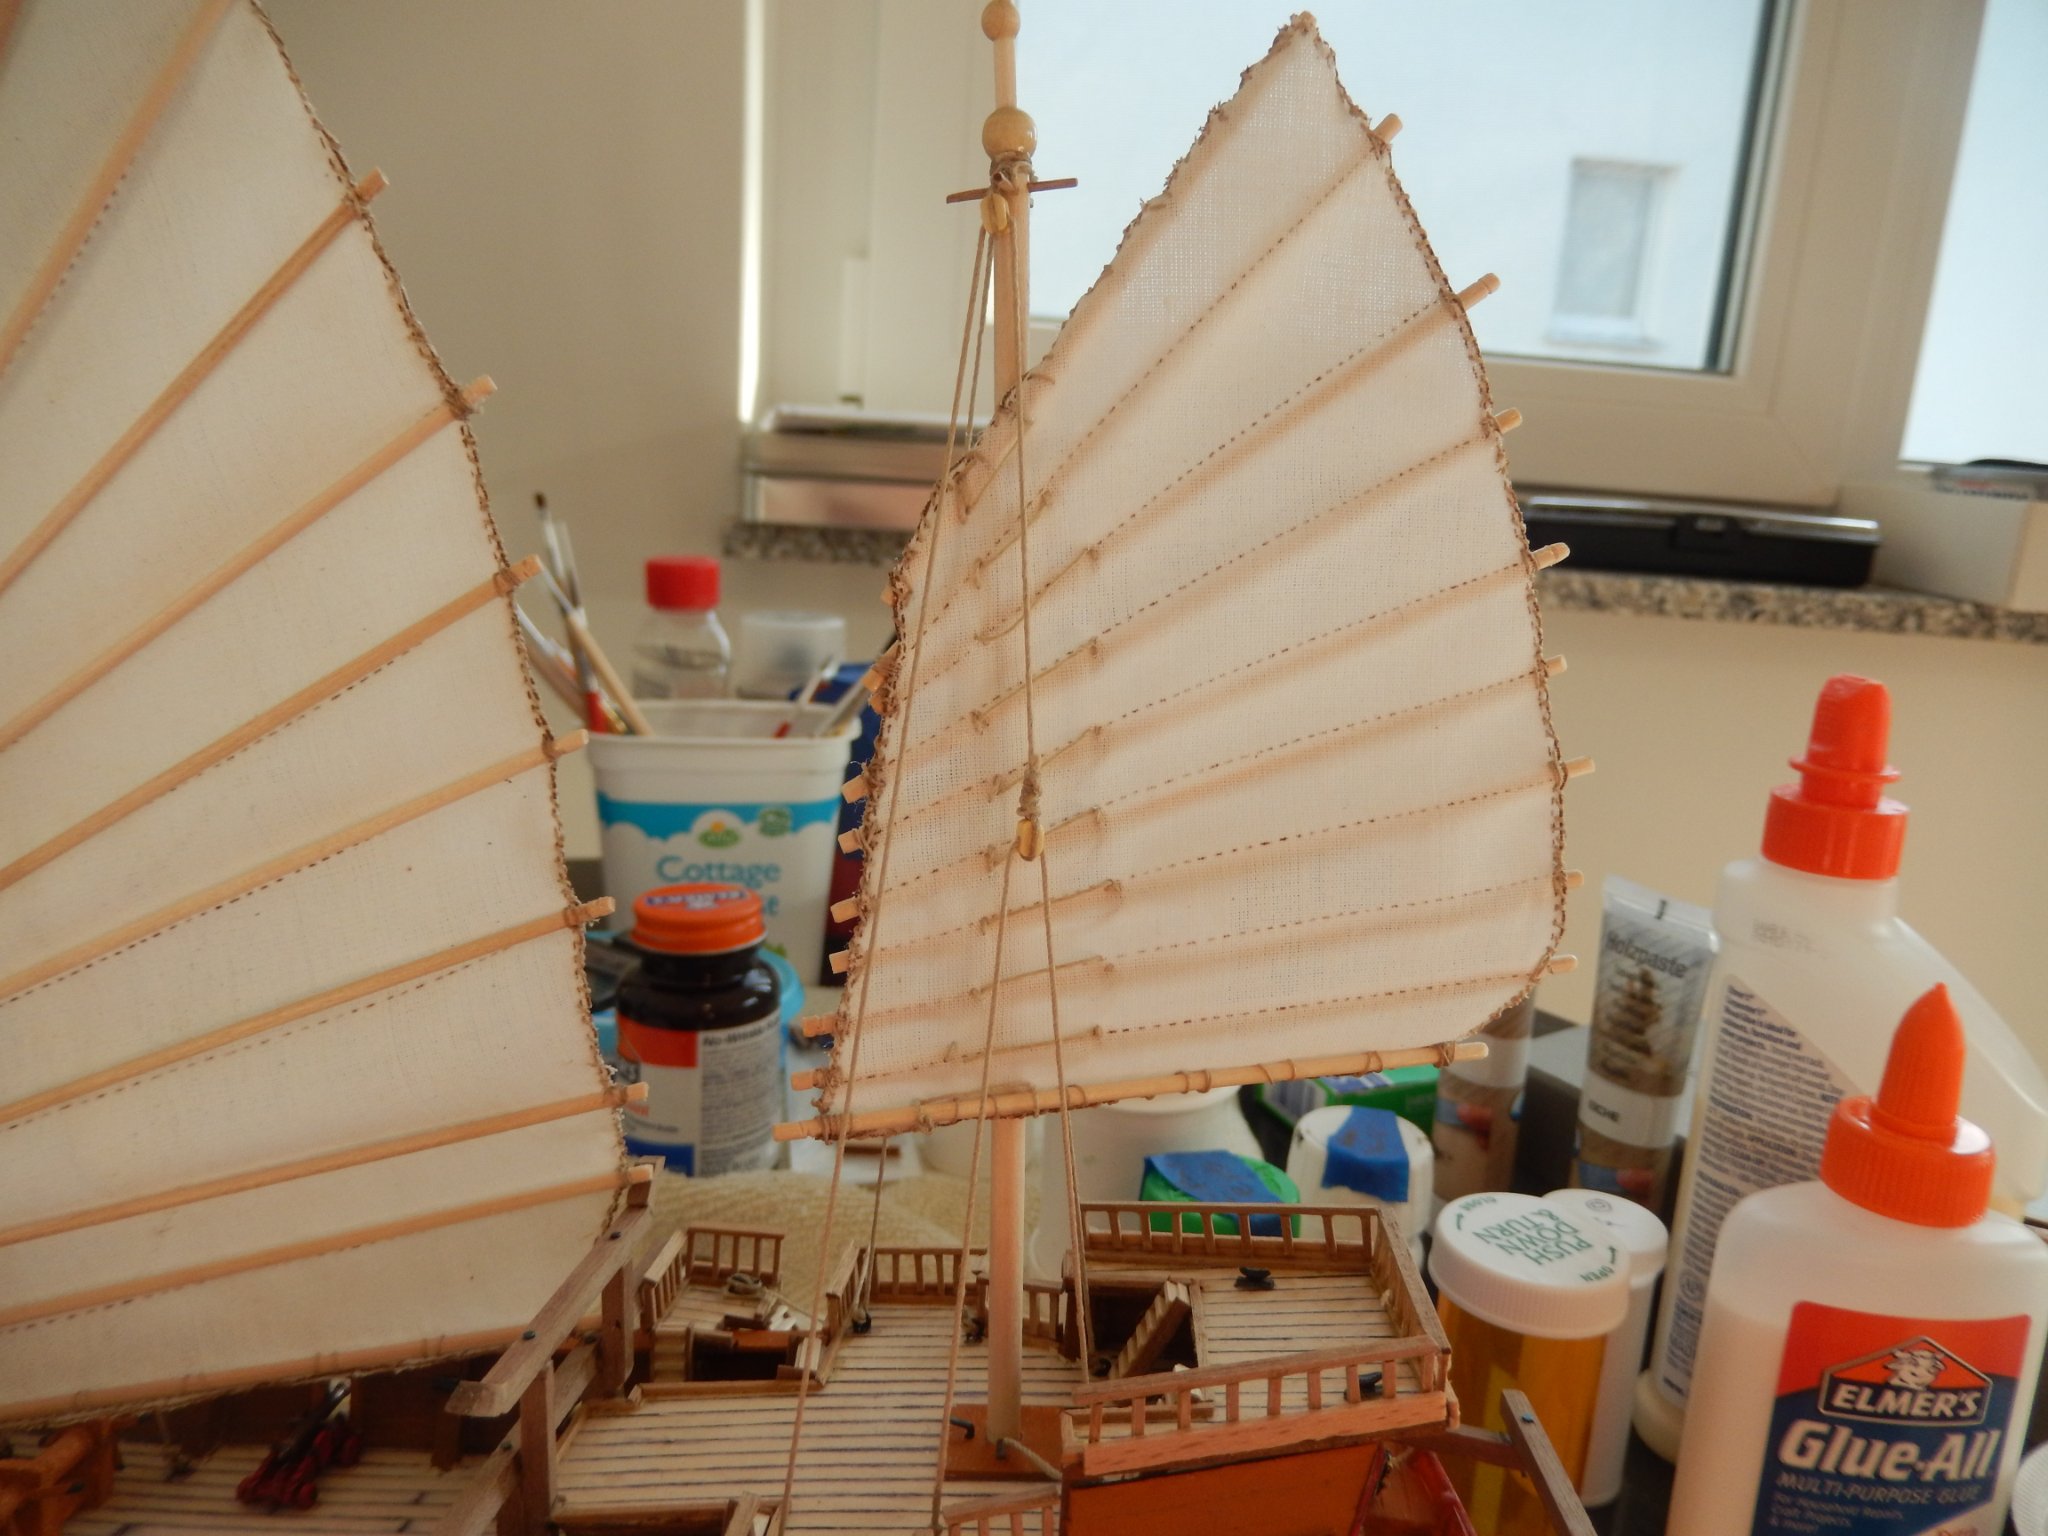
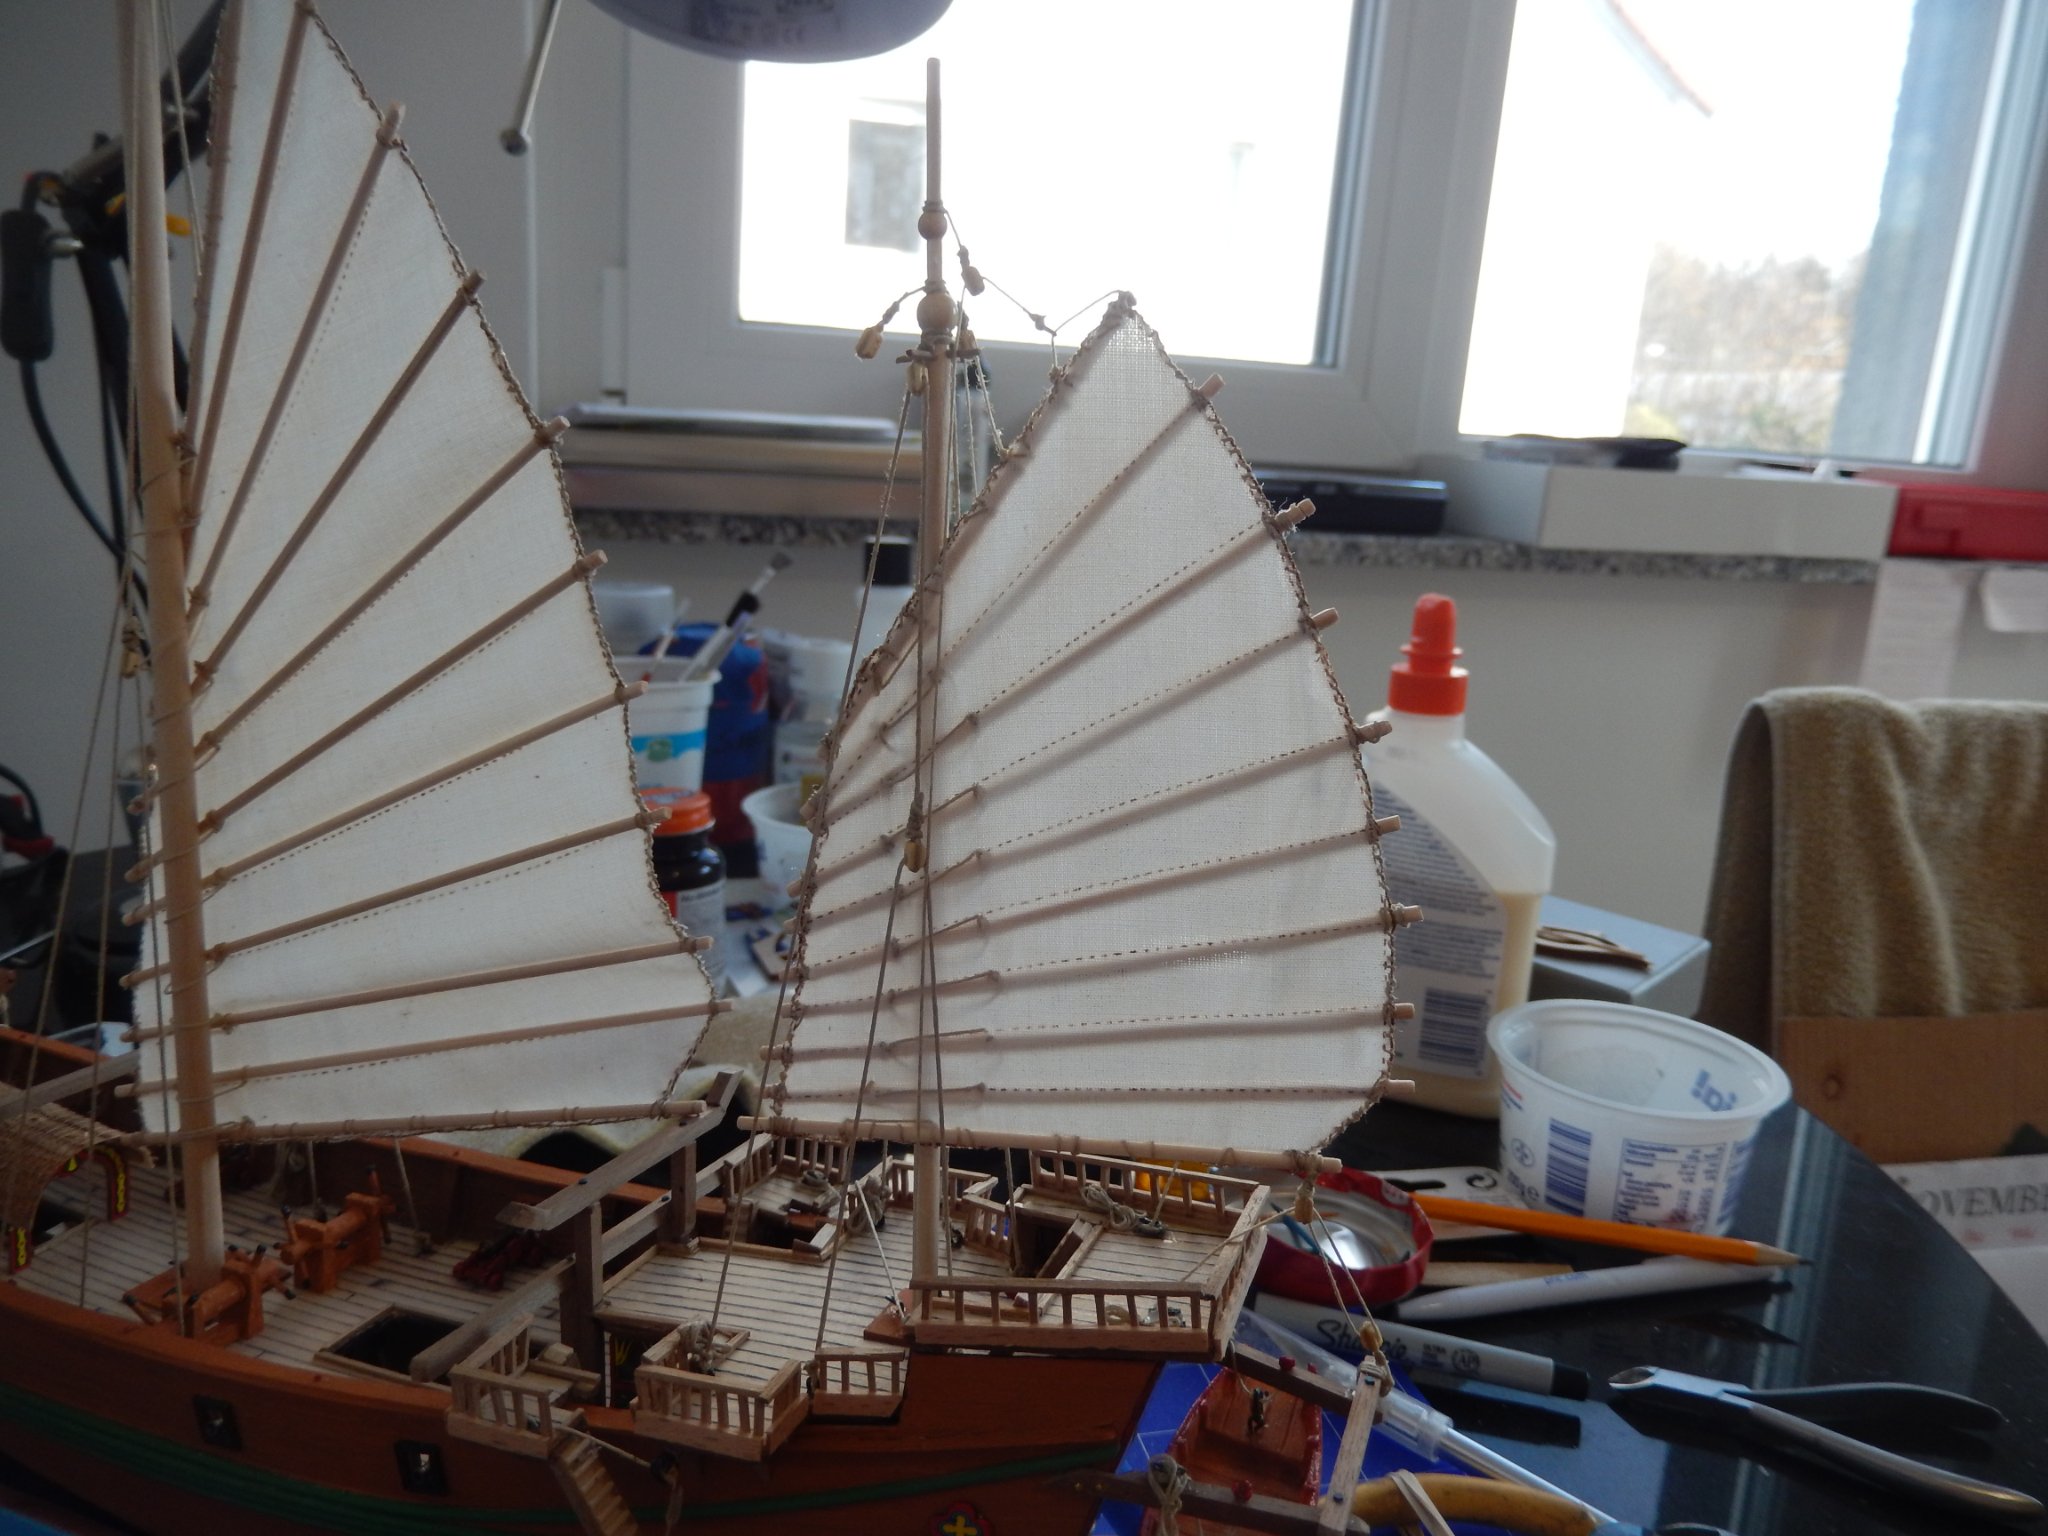
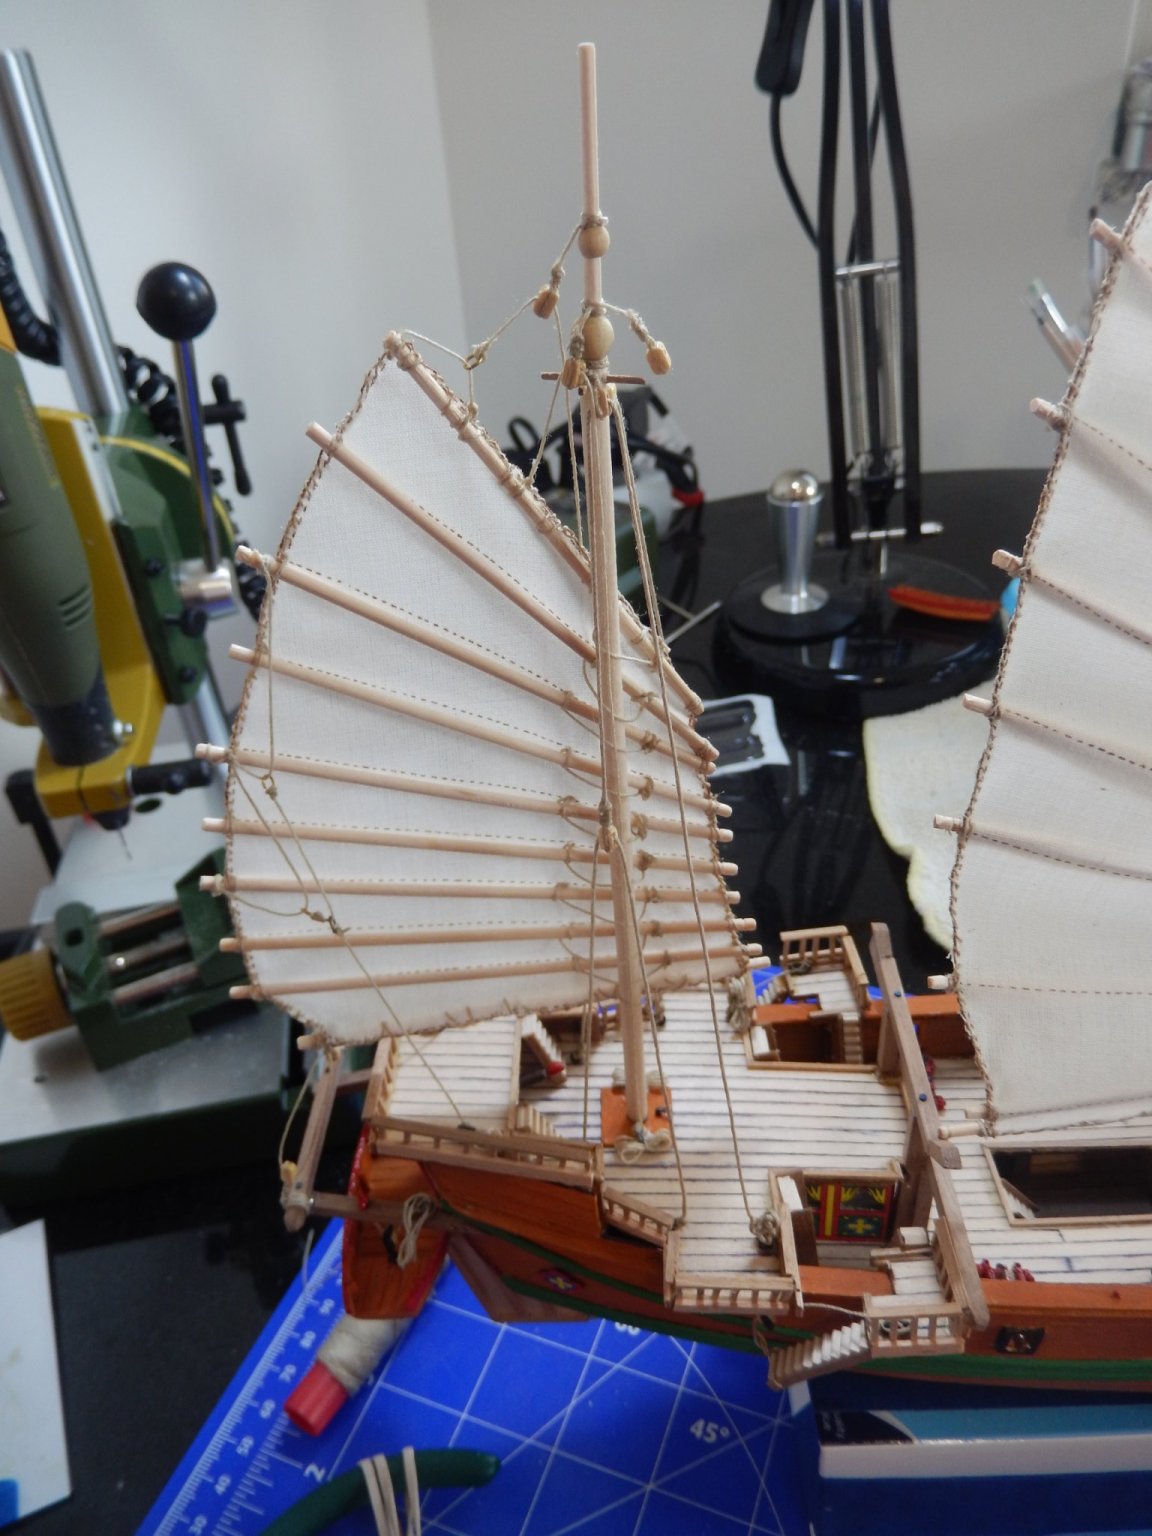
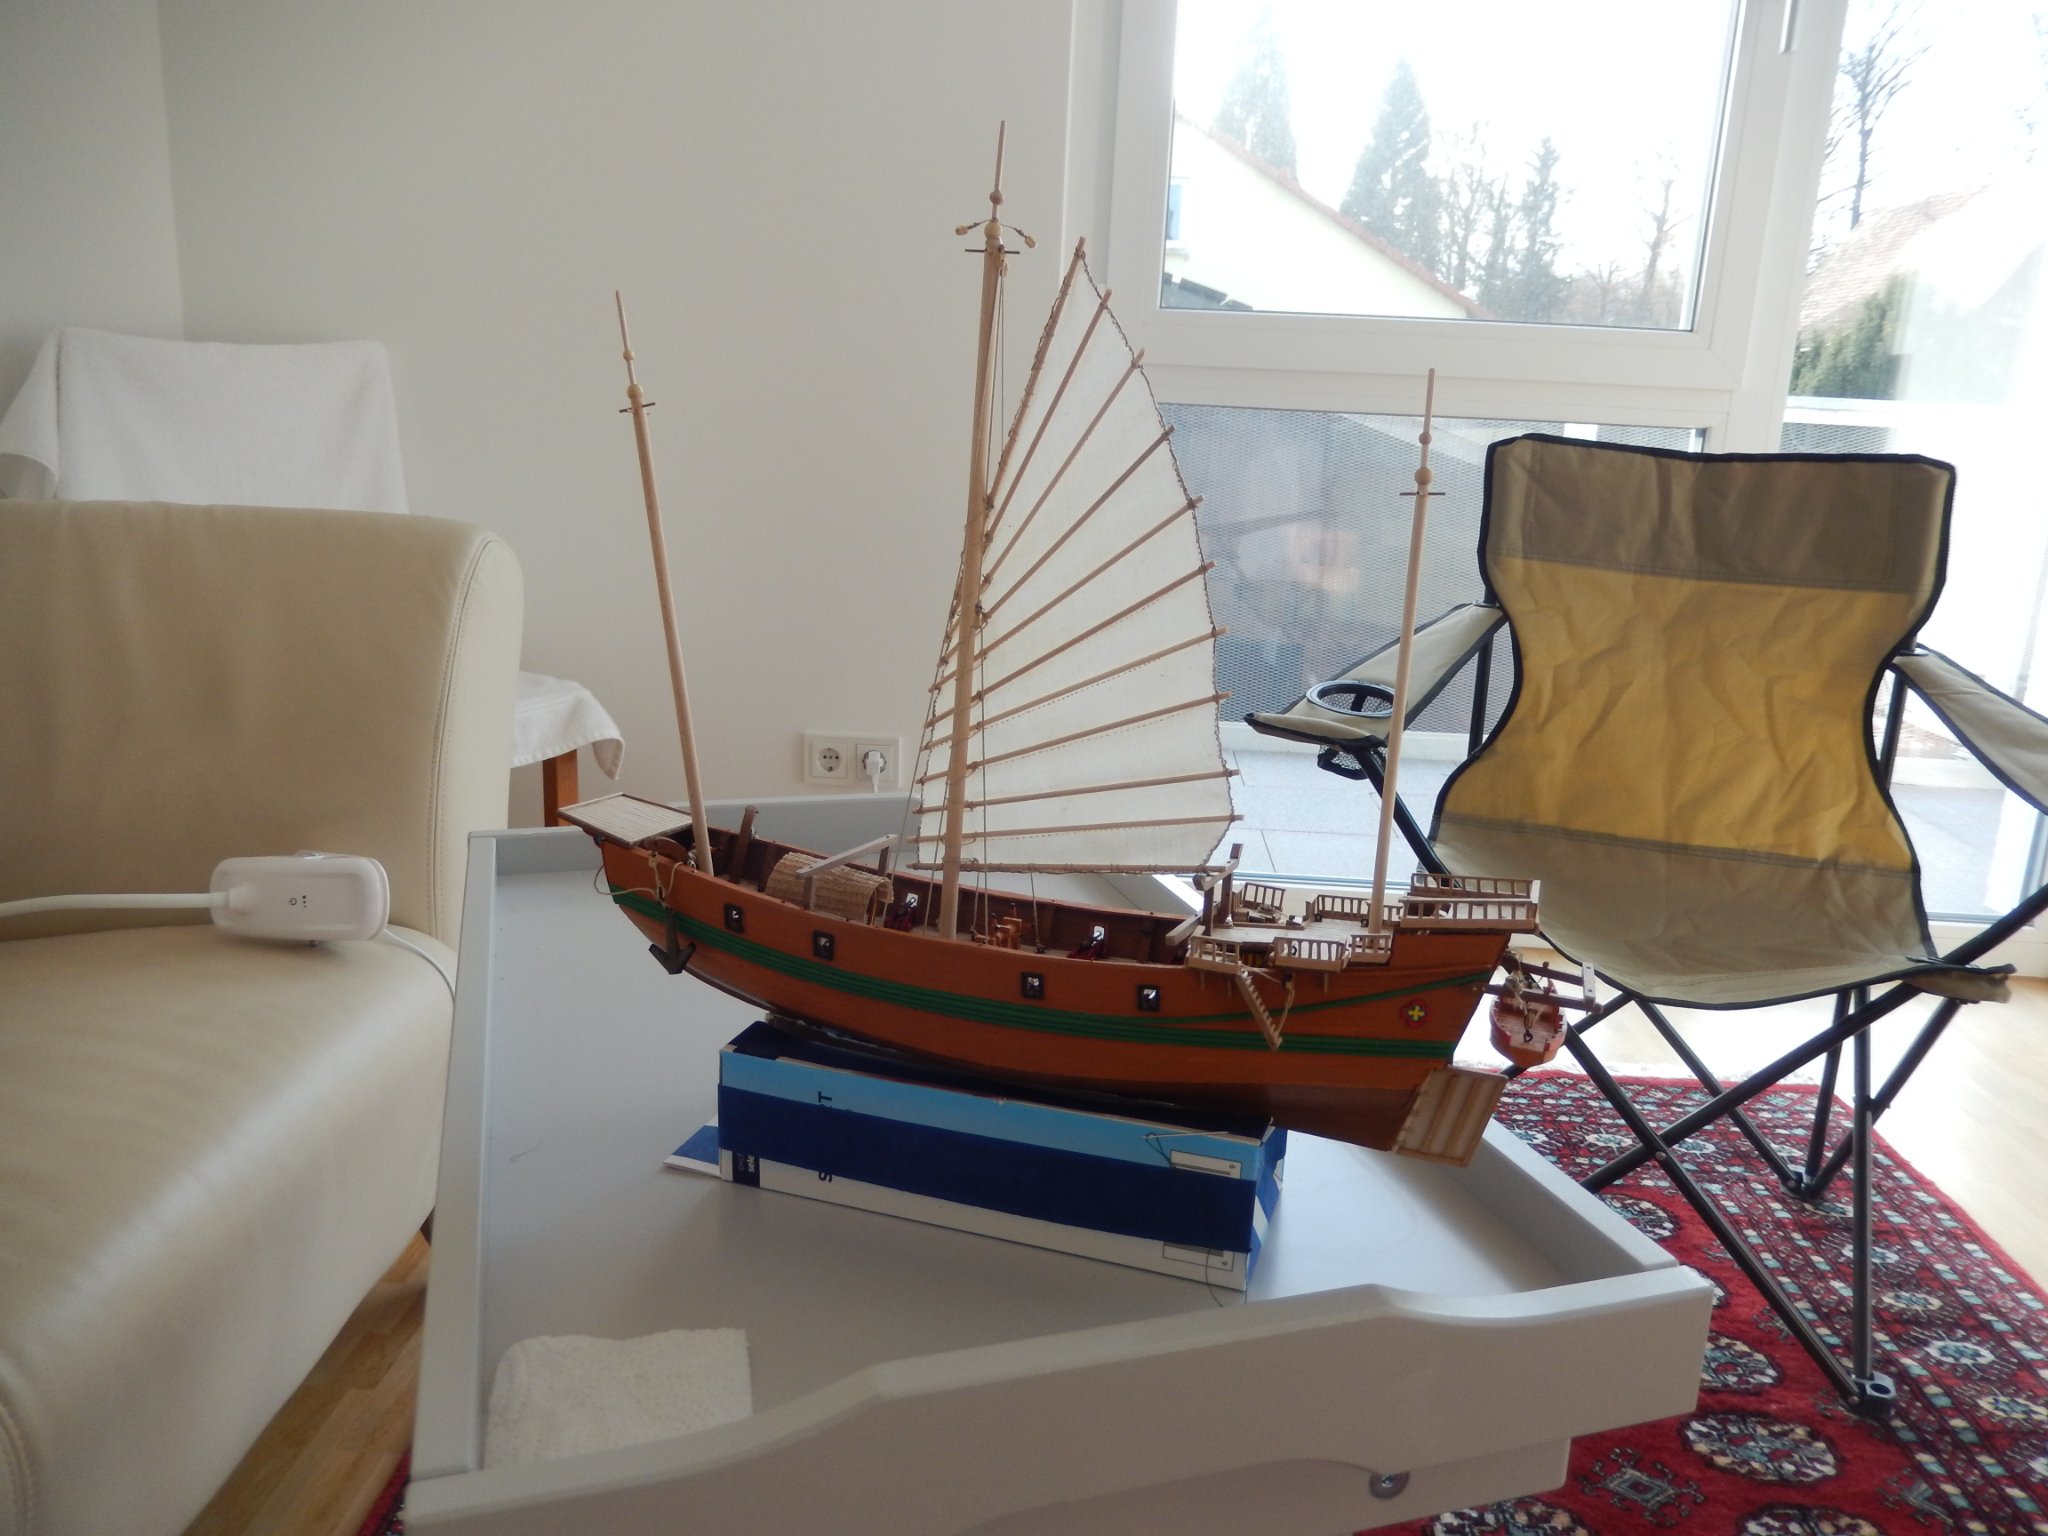
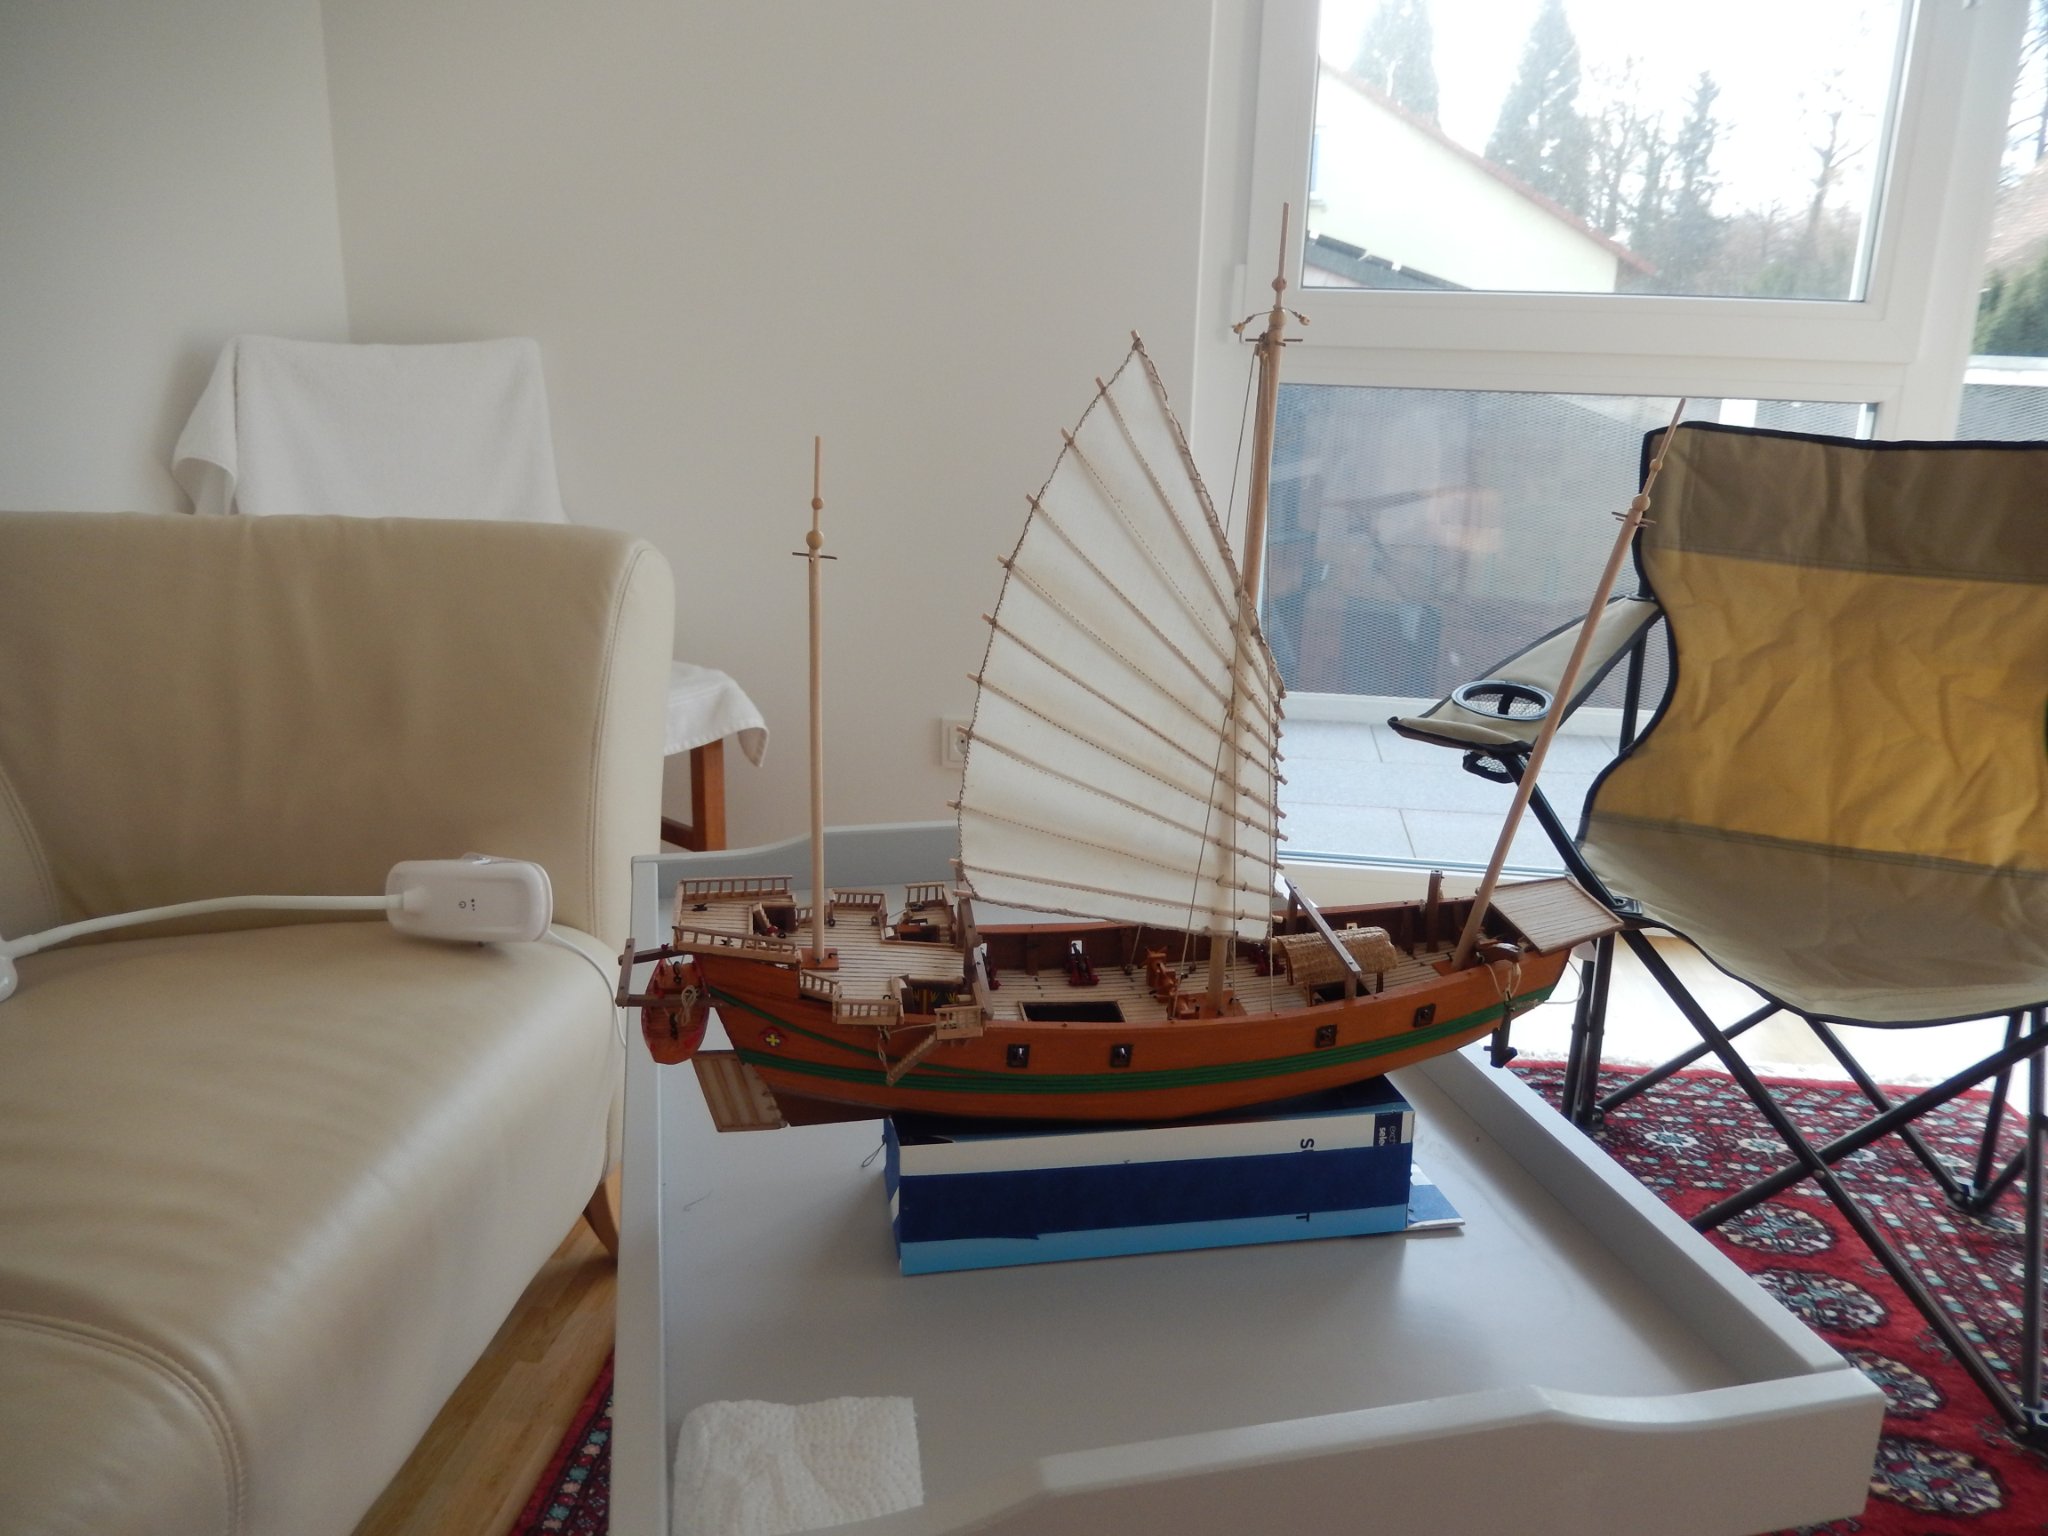
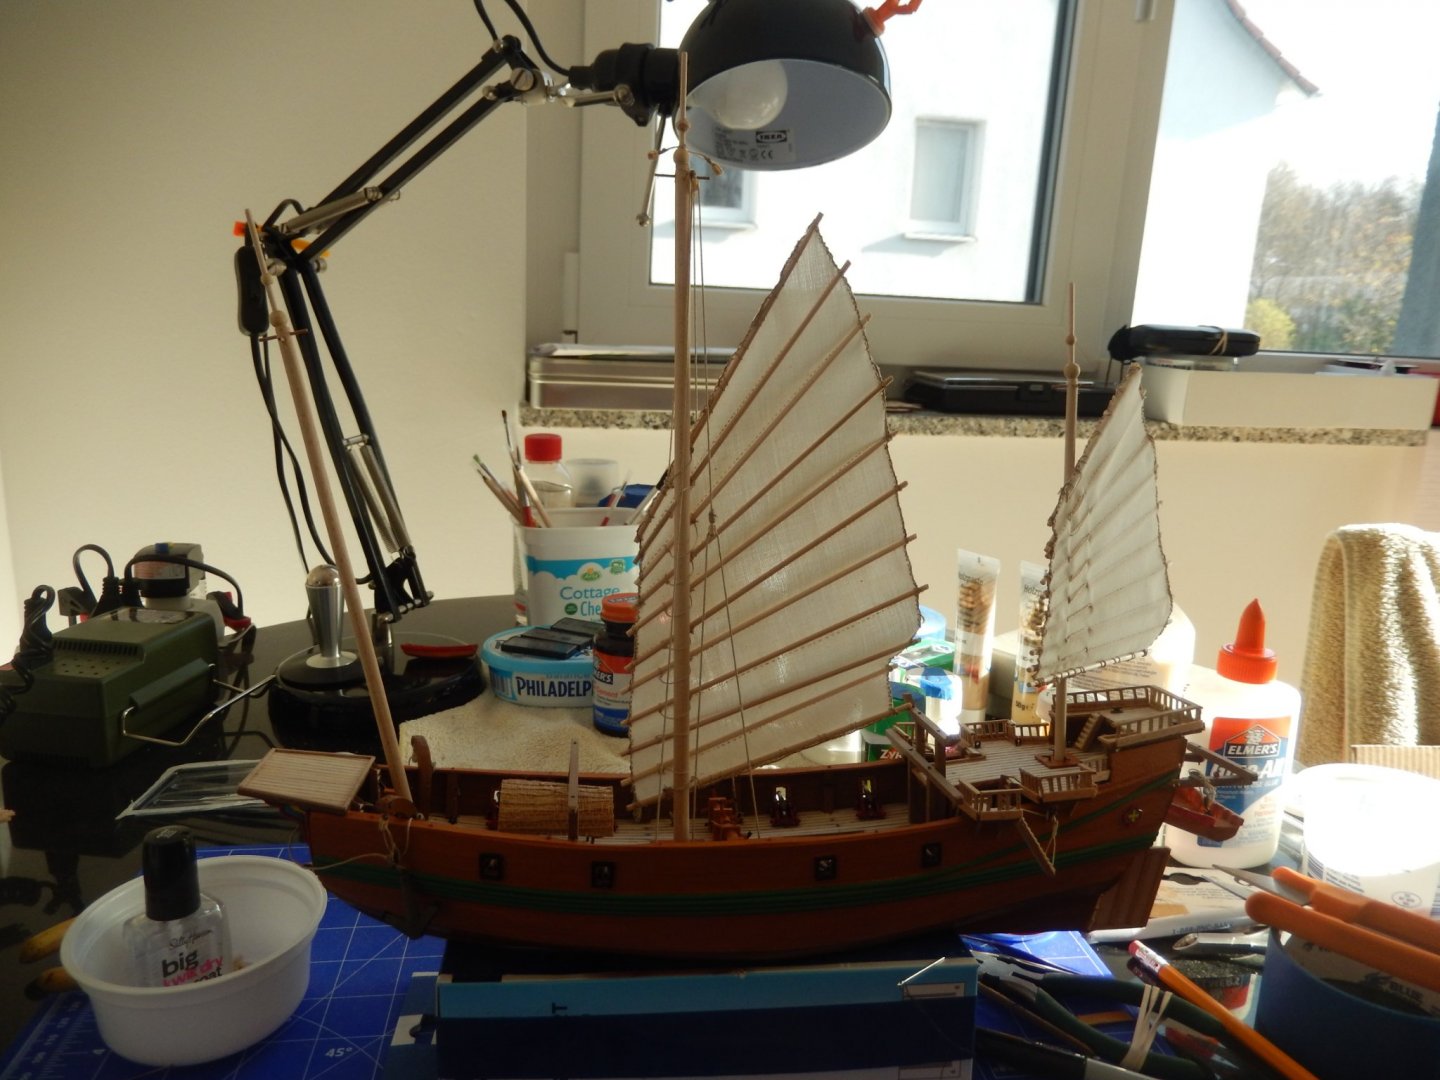
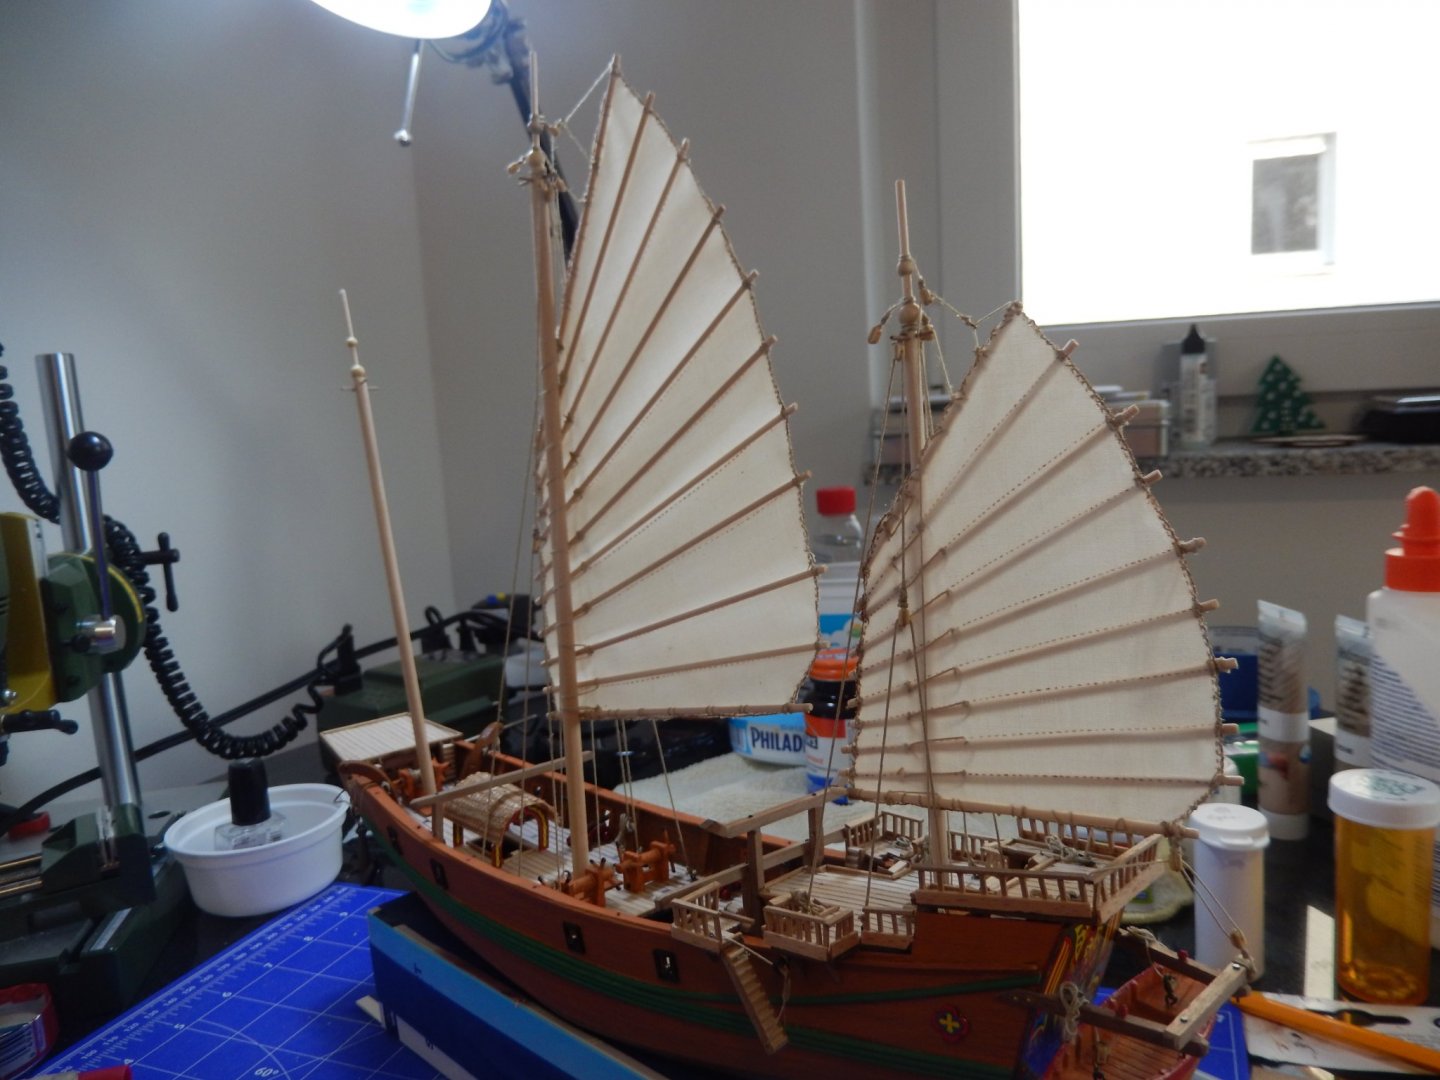
20201122 Making progress today during a 6-hr session drilling out blocks, threading line, tying eyes and tying knots. Finished prepping the mizzen sail yesterday and mounting it to the mast. Started today fixing the standing rigging to the mizzen mast then working the running rigging through the various blocks and eyes down to the eyes, cleats and upside-down ‘L’ brackets. Finished off the day with the two main parts of the main sail running rigging. The blocks have been interesting. None of them had holes large enough for even the medium size line (0.5 mm); the holes seem to be a tad smaller in diameter (maybe 0.4 mm). I’ve been drilling them out to 1 mm as I need them; this is a big enough hole for the medium and large (0.75 mm) line and leaves plenty of wood around the hole. Trying to get them threaded is a pain so I fixed a loop of thread to a sewing needle and use that to pull the line through the holes in the blocks (just have to make sure that the knot in the thread goes through the hole in the block first or the line gets jammed in). This week will be finishing the main sail running rigging, finishing assembling the fore sail and then rigging the fore mast & sail. Goal is to have the ship completed by the beginning of December.


- 27 replies
-
- 3
-
-
- Amati
- chinese junk
- (and 1 more)
-
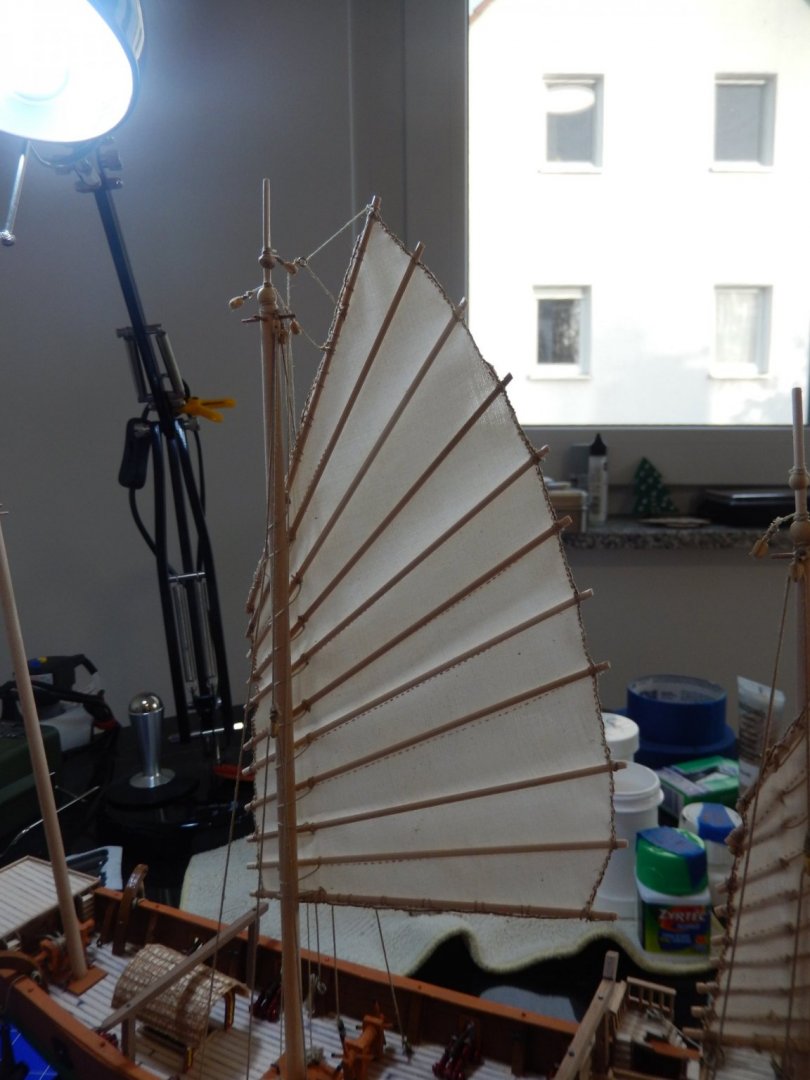
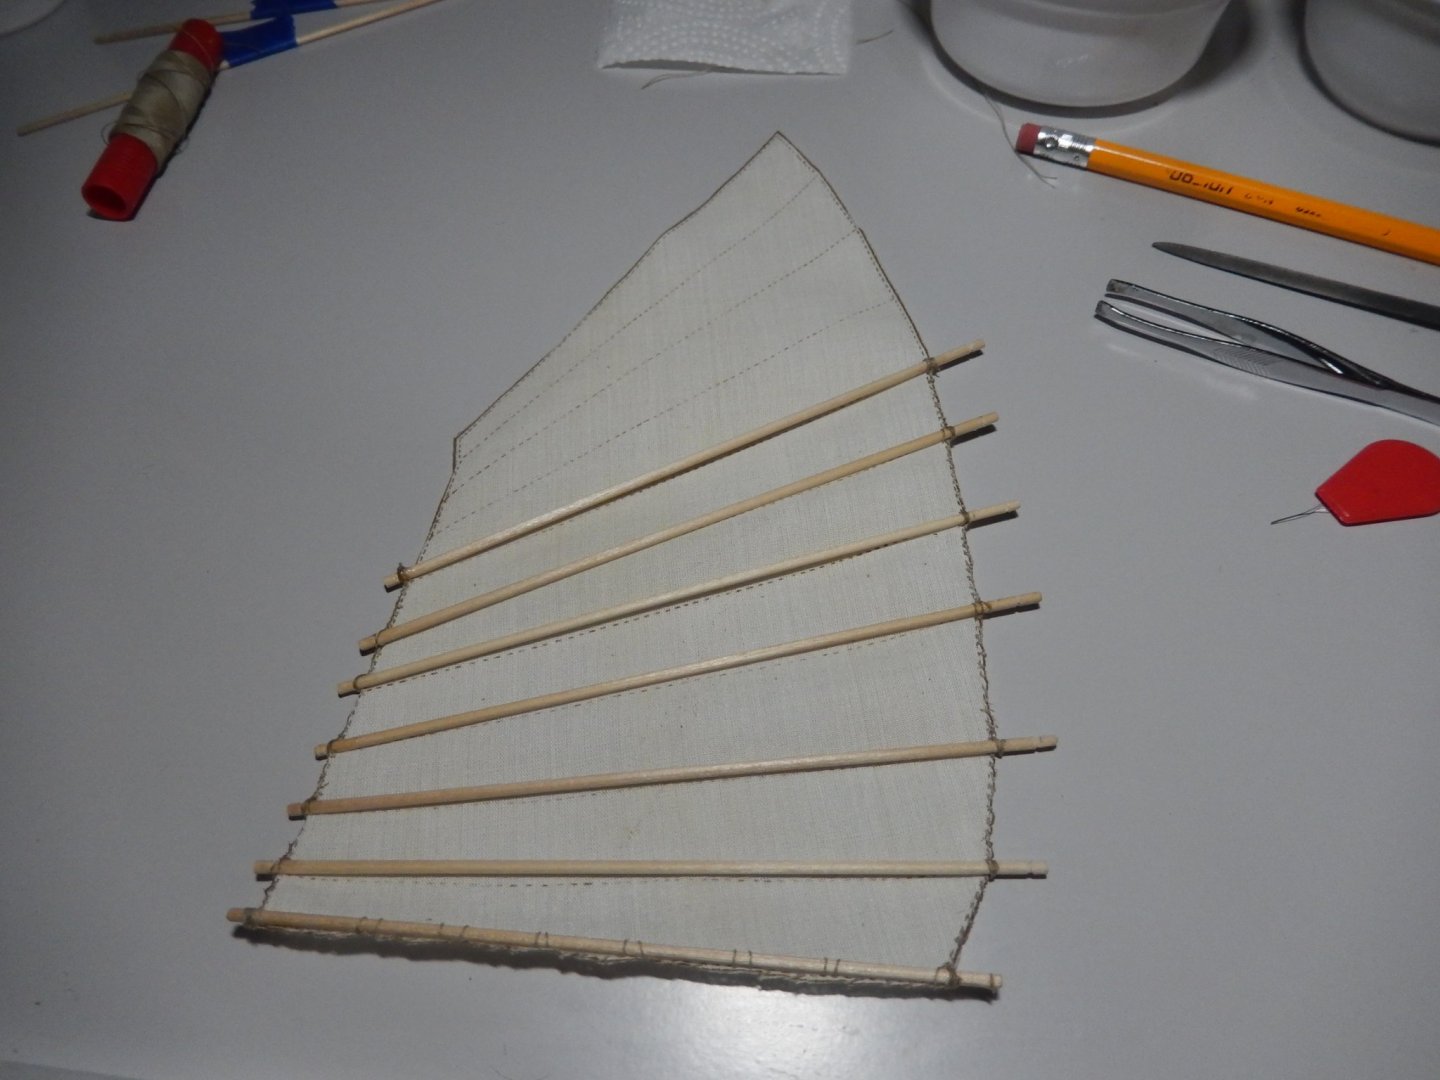
20201115 Finished the standing rigging on the main mast and after spending some time looking at it, and the plans of the sails, decide that I would hold off on the standing rigging for the fore and mizen (wonder if that is proper terminology for a junk?) masts. I finished the main sail this week (hand-stitched so the battens could be easily incorporated) and then had an interesting time attaching it to the main mast with needle & largest (0.75 mm) thread while working around the standing rigging (had to ‘unsew’ a couple of times as I accidentally caught the rigging in the sail hold-downs). I’m pleased with the end result but definitely will wait to install the standing rigging on the other two masts until after I have the sails installed. One thing I found out is that the Amati plan seems to be a bit larger than 1:1. When I used the plans to measure the ‘bamboo’ battens and then cut them to those lengths they turned out to be about 6 mm too long for the supplied sails; not enough to be concerned with but still a bit annoying. I’ll cut the rest of the battens to length against the fore and mizzen sails to avoid further wastage. My masts are also about 6 mm too tall but I’ll just leave that; will give me some room for masthead pennants. This week I’ll finish and mount the fore and mizzen sails and then start to work on the rest of the rigging.

- 27 replies
-
- 5
-
-
- Amati
- chinese junk
- (and 1 more)
-
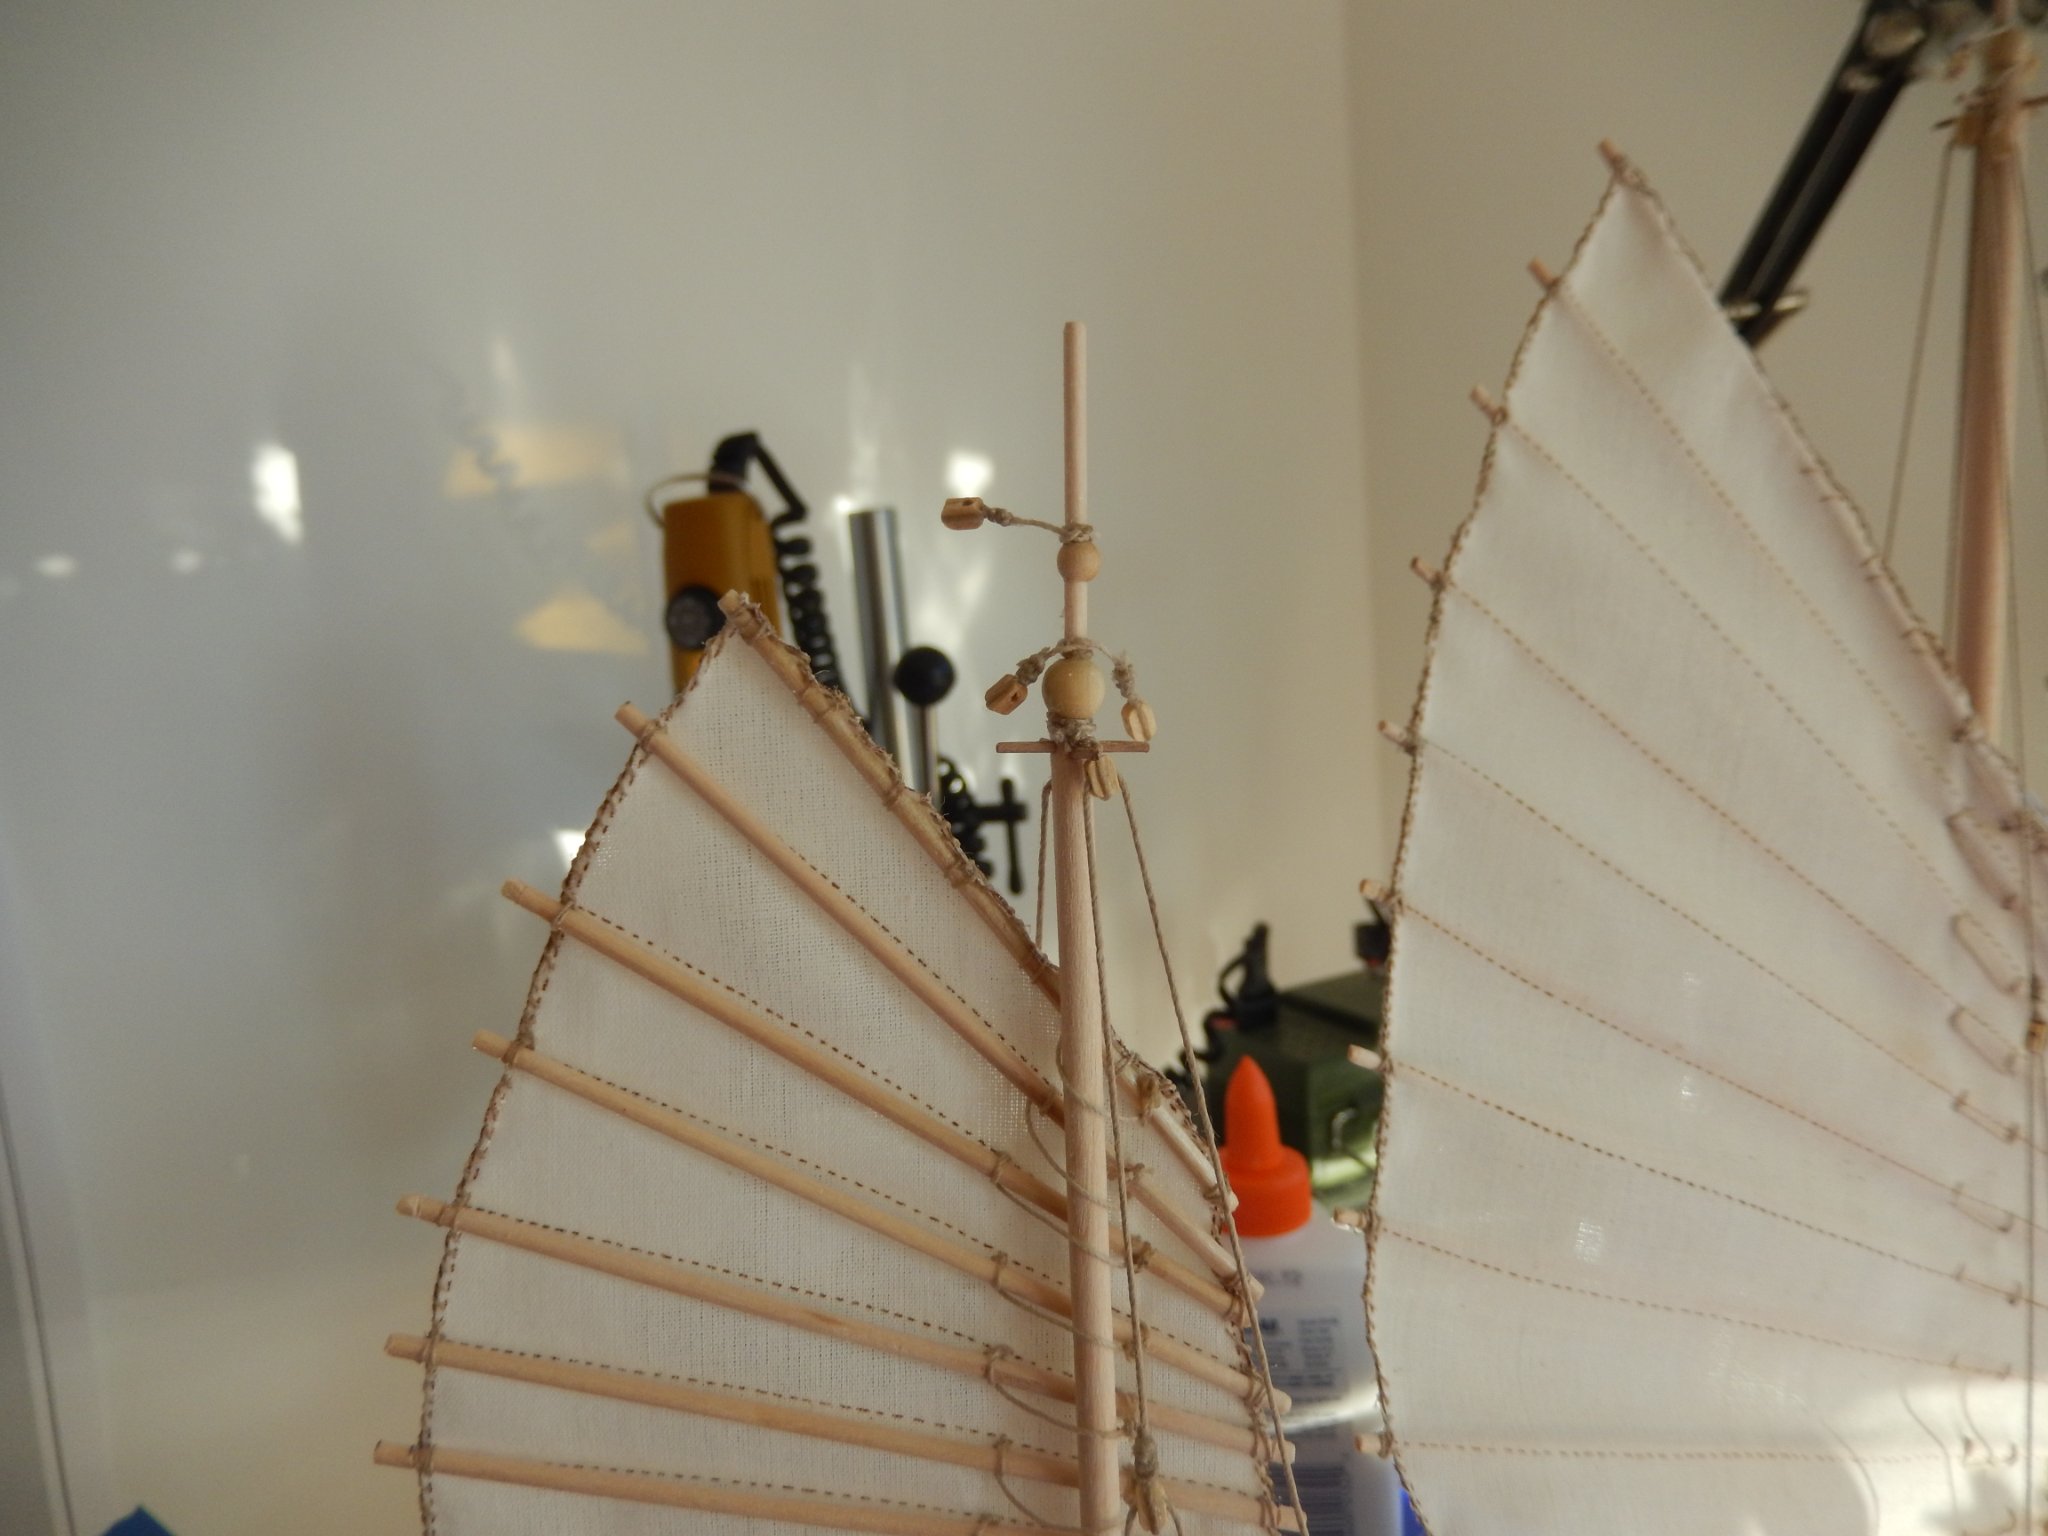
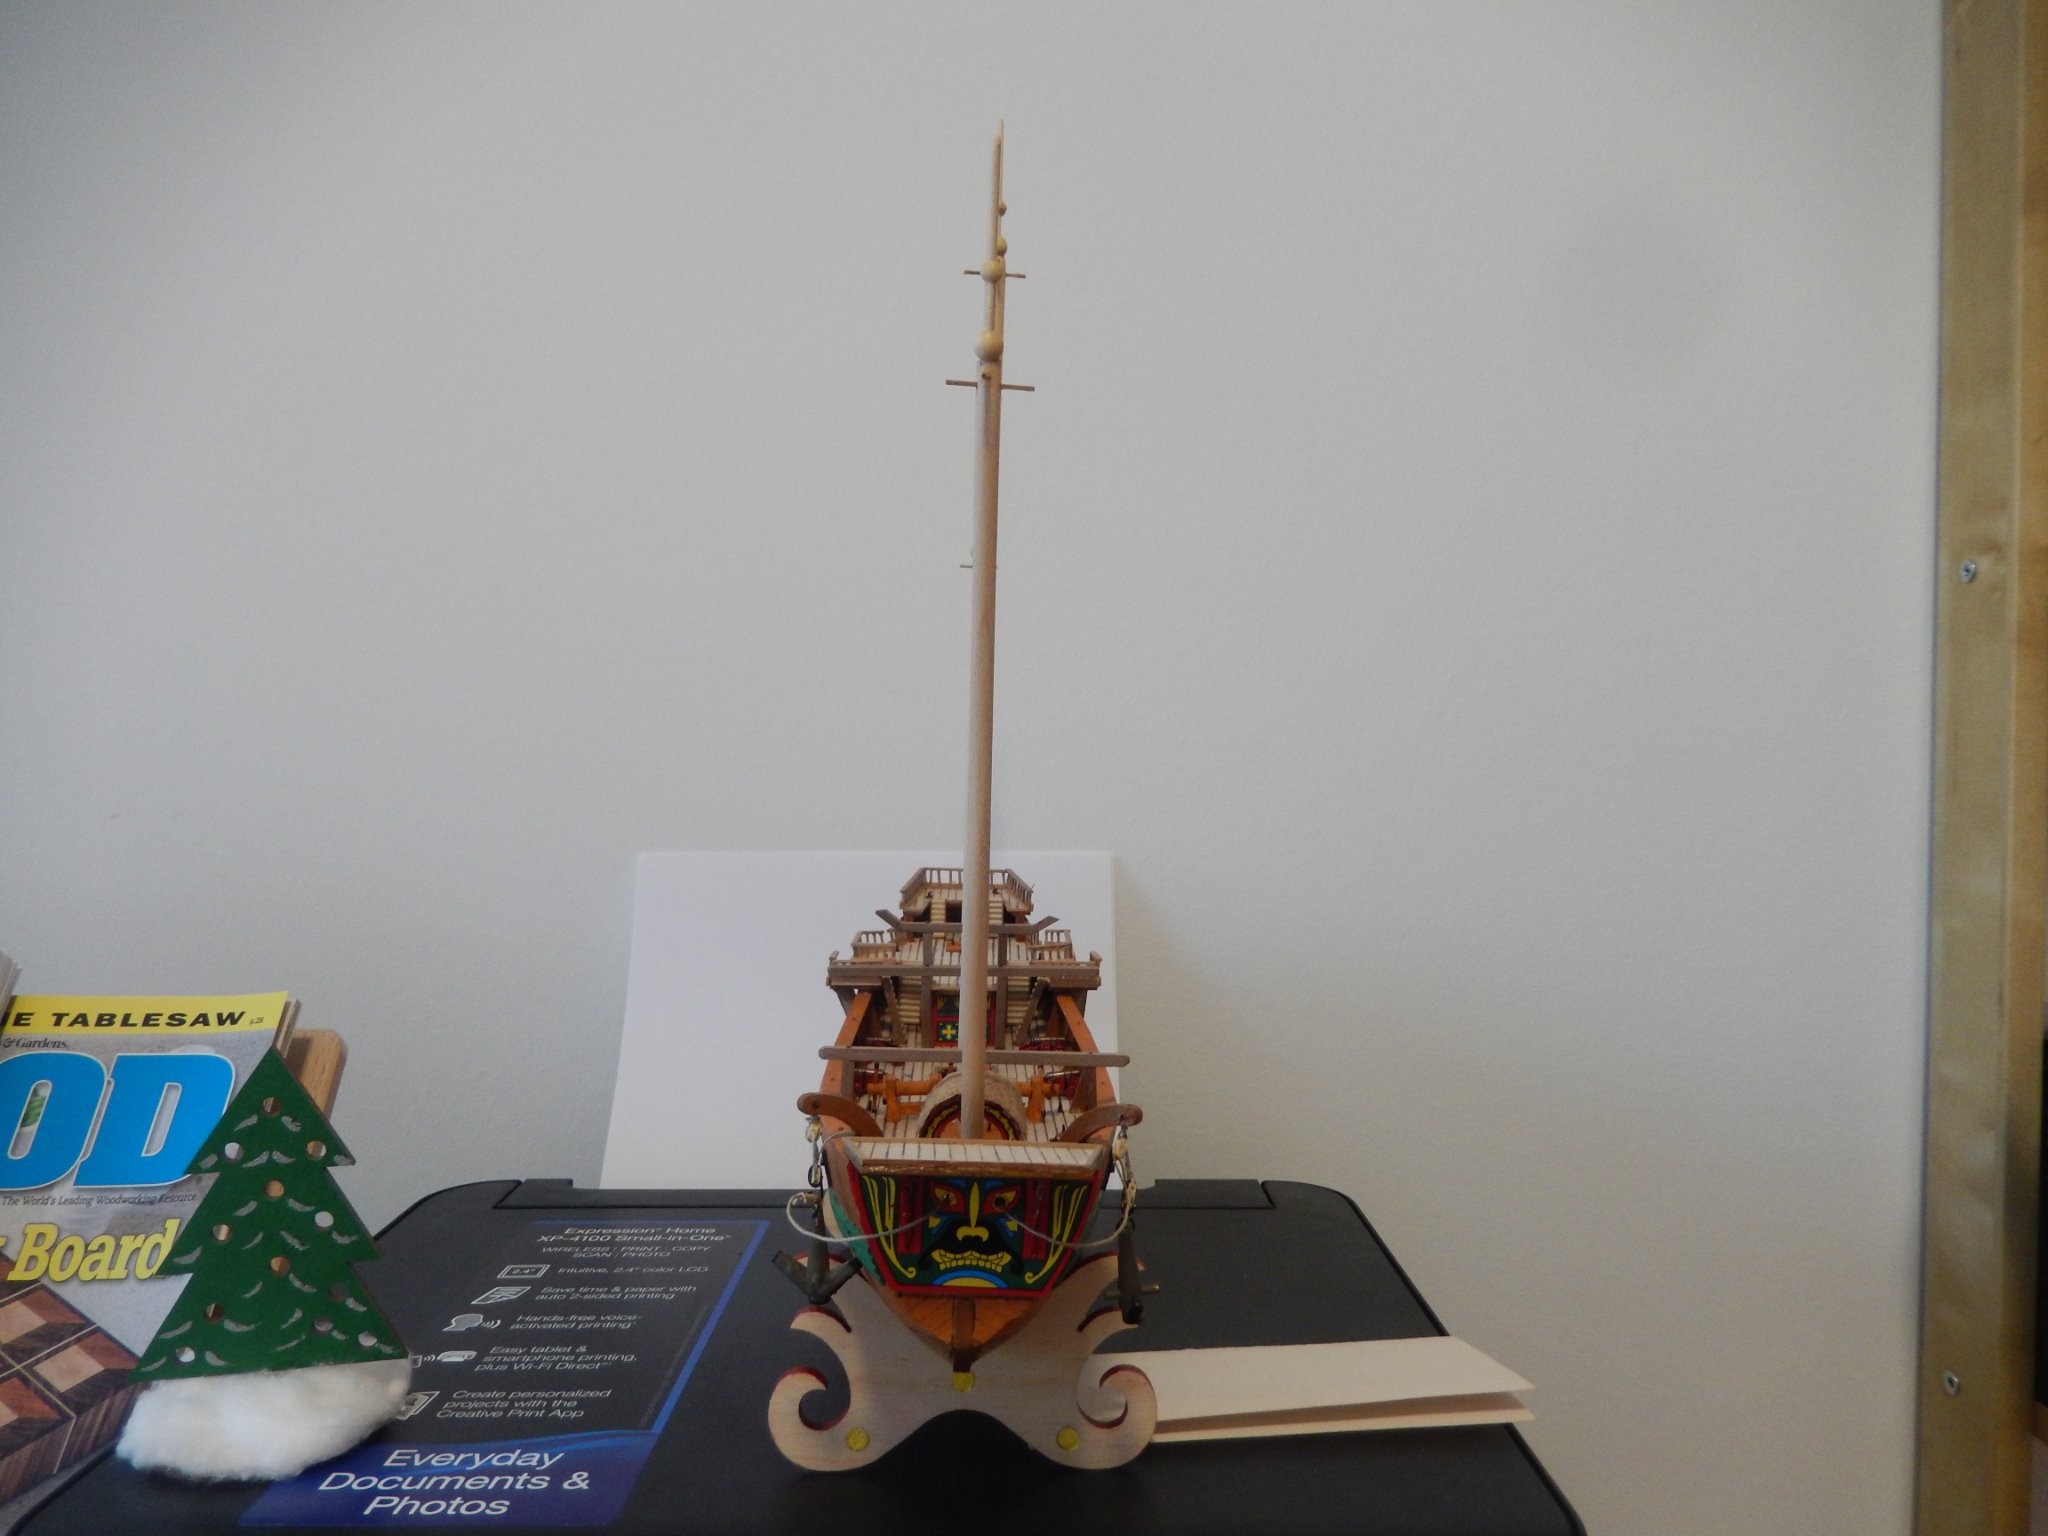
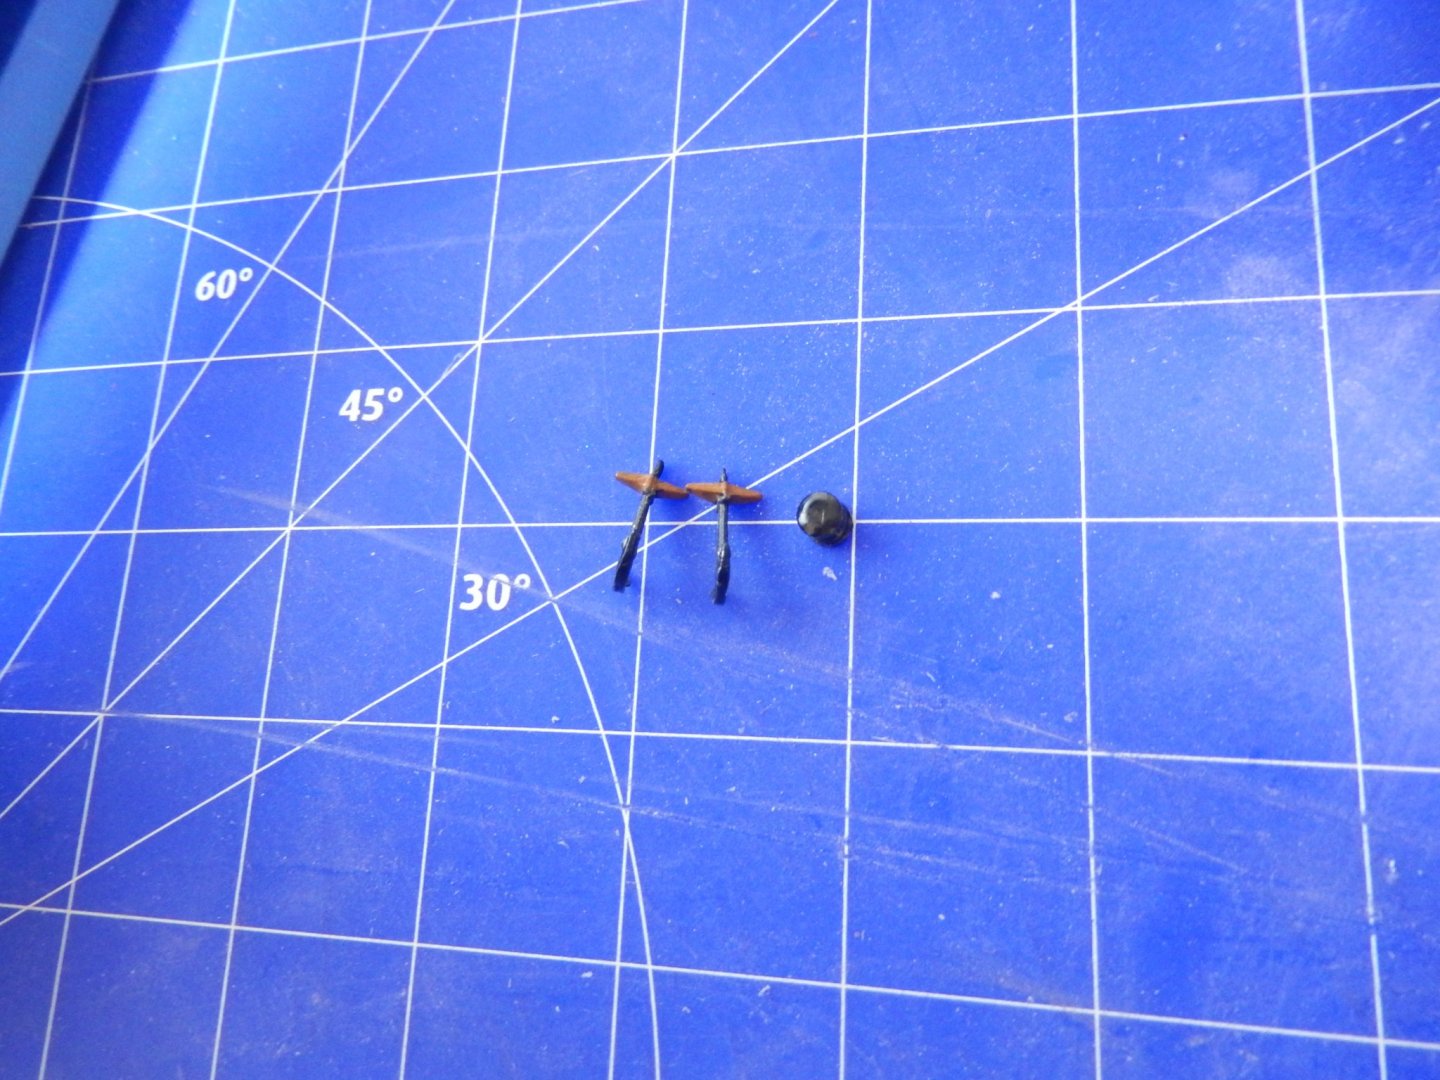
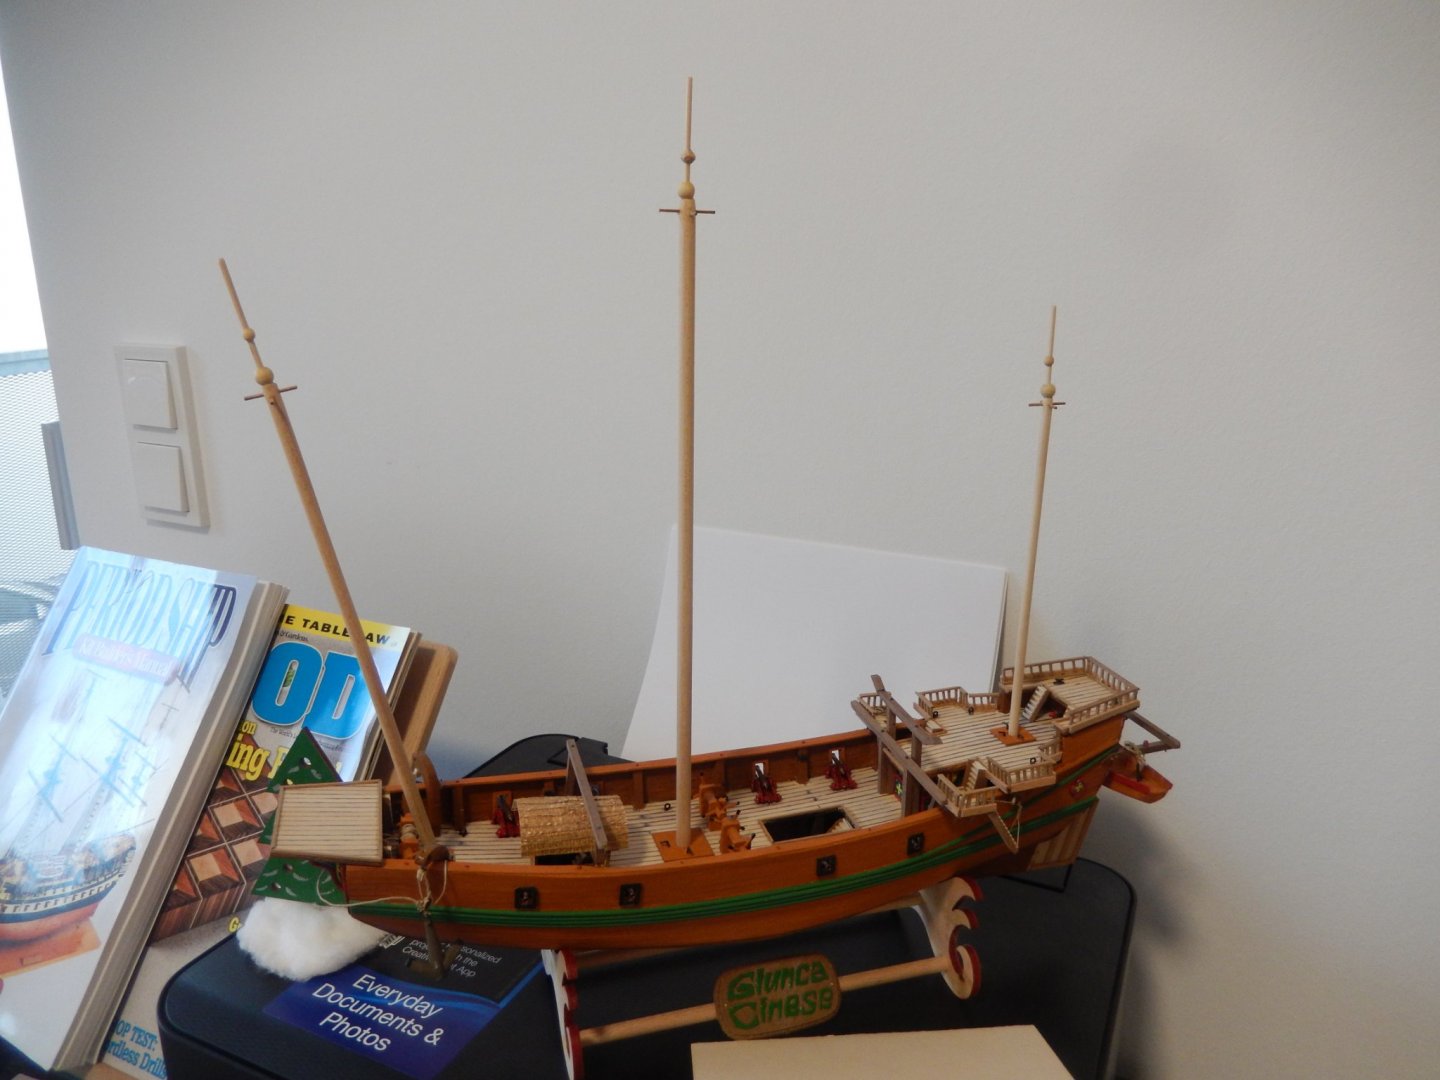
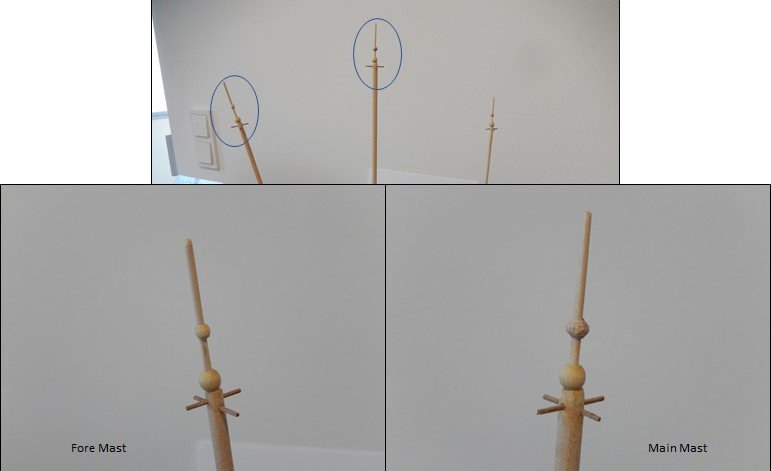
20201108 Finished the Christmas ornament project this morning and went to work on the masts for the ship this afternoon. Have them all cut, tapered, assembled and stepped. Will start for on the rigging tomorrow evening. On top of each mast is a smaller diameter ‘flag’ mast. At the base of each ‘flag’ mast is a large bead; a smaller diameter decorative bead is located a bit higher on the ‘flag’ masts. The beads that were supplied had holes that were about 1 mm in diameter; too small for the 2 mm ‘flag’ masts. While drilling out the holes I – oops - dropped one of the smaller beads onto the floor. No idea where the bead went and after several minutes of searching, I gave up and made a replacement from some of the excess mast stock. The right side of the ‘flag’ mast photo shows the small bead provided; the left side shows the replacement I made. (Not too bad a job in my, obviously biased, opinion.)

- 27 replies
-
- 2
-
-
- Amati
- chinese junk
- (and 1 more)
-
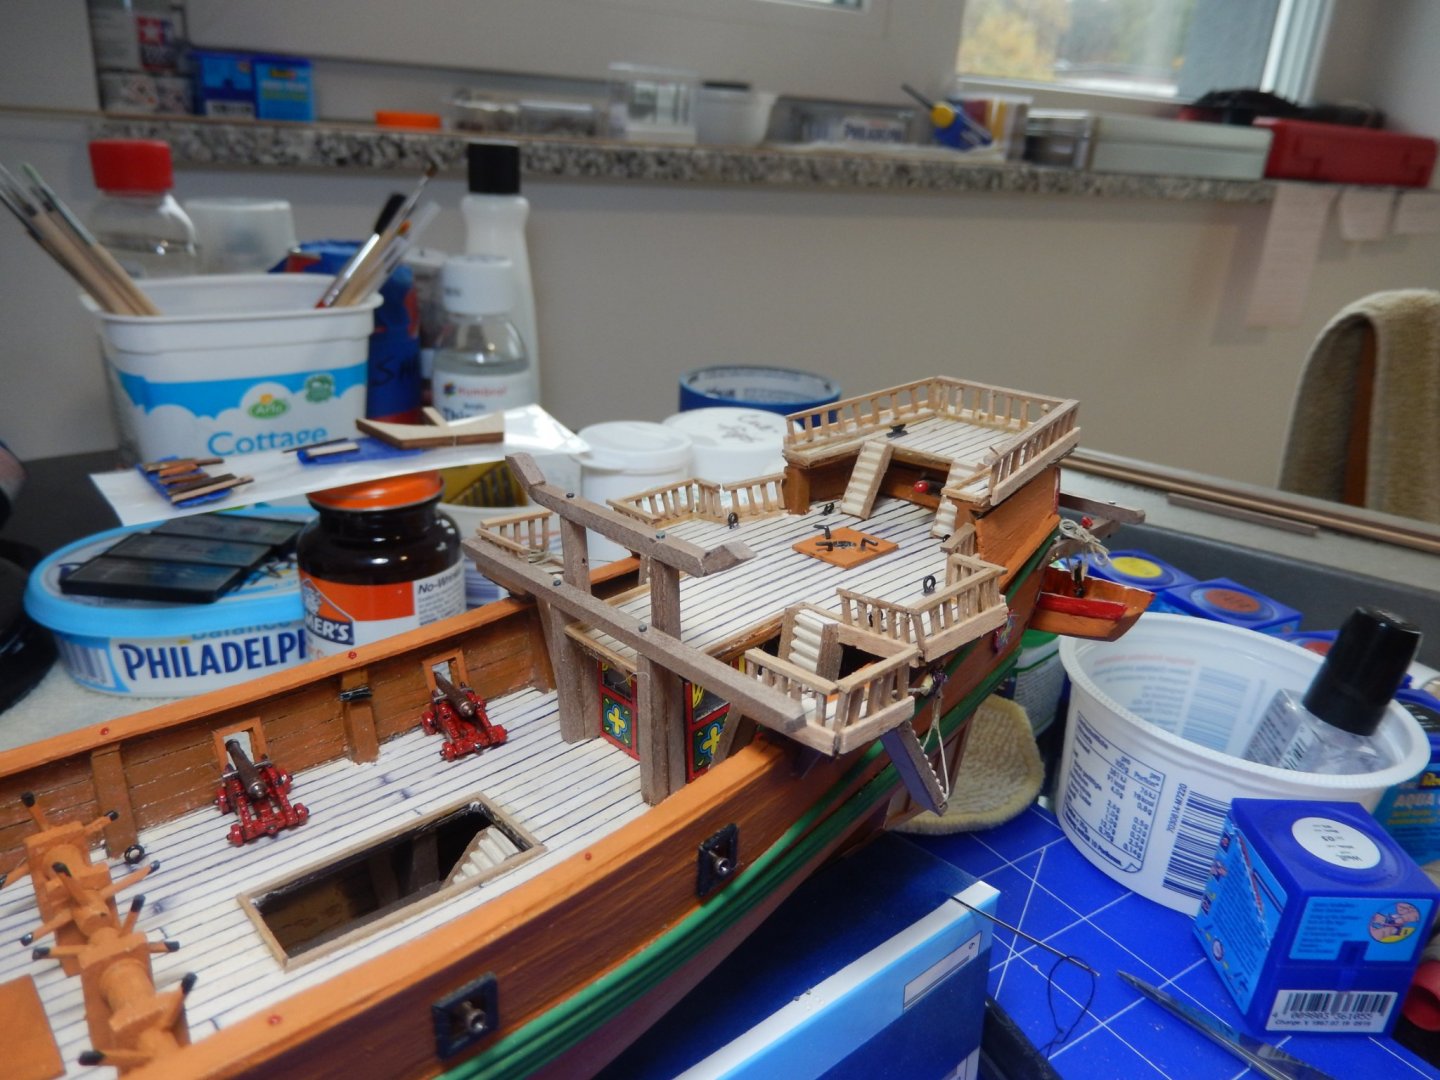
20201101 Slowed down on work on the ship so I could start tackling some craft work on Christmas ornaments & decorations for the grandkids. Completed all of the deck railings today and will start shaping masts this week. Hope to have the masts installed by the end of the week so I can start on the rigging.
- 27 replies
-
- 2
-
-
- Amati
- chinese junk
- (and 1 more)


.JPG.ecbf3dc3f985235f1c56462143bb3a0a.JPG)