Neil10
-
Posts
29 -
Joined
-
Last visited
-
 mtaylor reacted to a post in a topic:
Painting Problems
mtaylor reacted to a post in a topic:
Painting Problems
-
Ryland Craze reacted to a post in a topic:
Painting Problems
-
Canute reacted to a post in a topic:
Painting Problems
-
Painting Problems
Neil10 replied to Neil10's topic in Painting, finishing and weathering products and techniques
Thanks for suggestions. Decided to sand everything down, spray a primer coat and start again. However will use low tack painters tape for general masking this time and try to detack pinstripe tape before applying. -
Assembling the hull on my first boat kit went quite well although I had to use a moderate amount of filler to address some planking challenges. The filler came from a reputable model boat supplier and was nicely soft enough to easily sand into shape when dry. Time to paint….and that’s when the problems started. Minimal adhesion of paint over any filled areas. Removing masking tape pulled off acres of paint and I’m left with a mess. Suspect that I may have to sand it all off and start again. For paint I was using brushed acrylic and a rattle can of touch up paint. No undercoat. For tape I was using Frog plus a commercial pinstripe for the water-line. Where did I go wrong? Suggested solutions please!
-
yvesvidal reacted to a post in a topic:
Mare Nostrum by Neil10 - Artesania Latina
-
hof00 reacted to a post in a topic:
Mare Nostrum by Neil10 - Artesania Latina
-
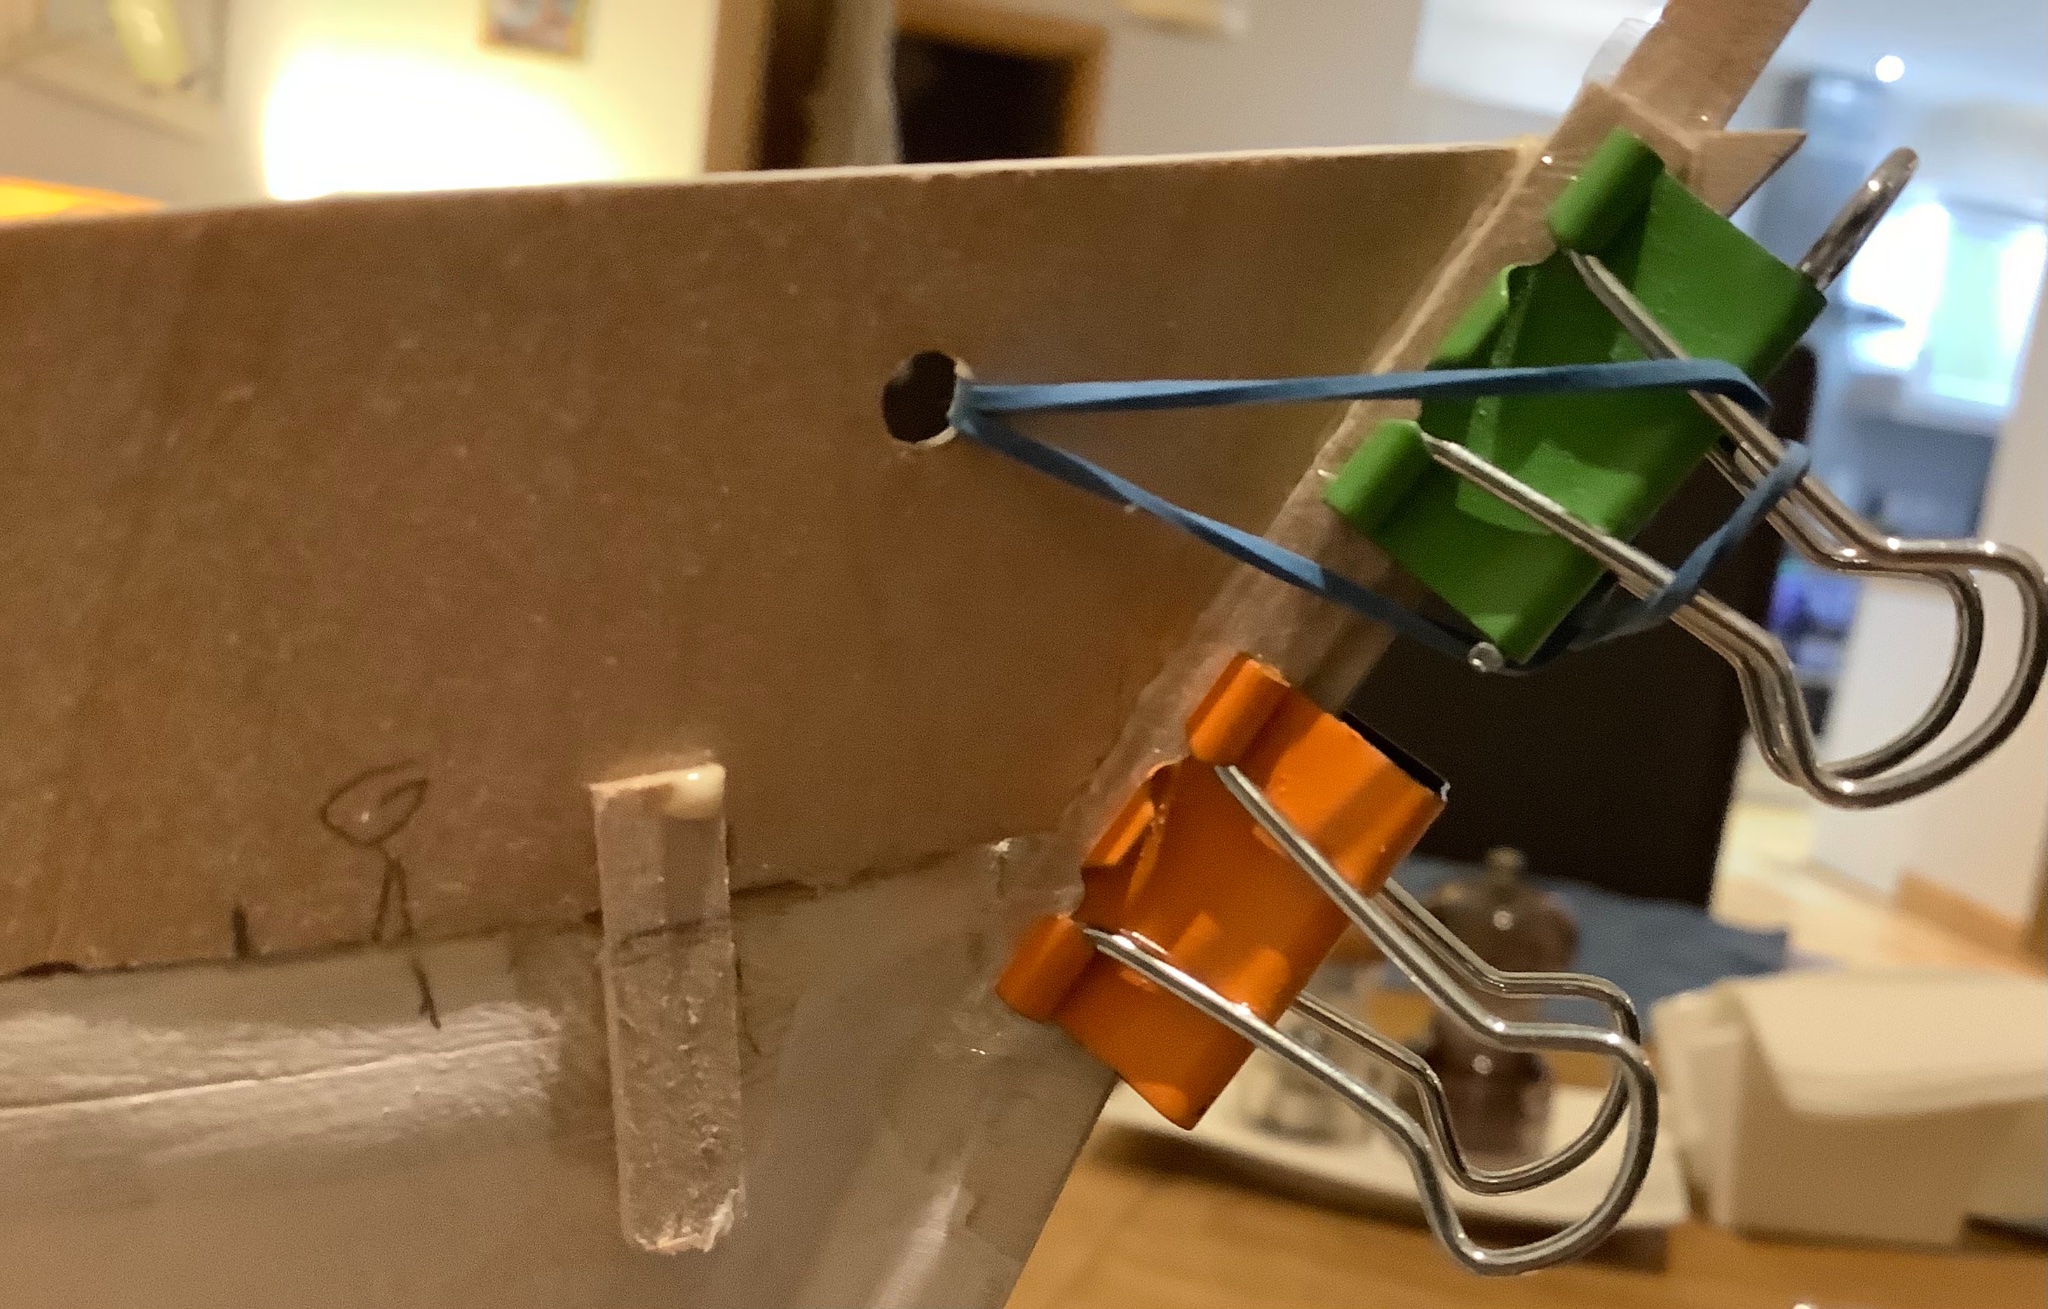
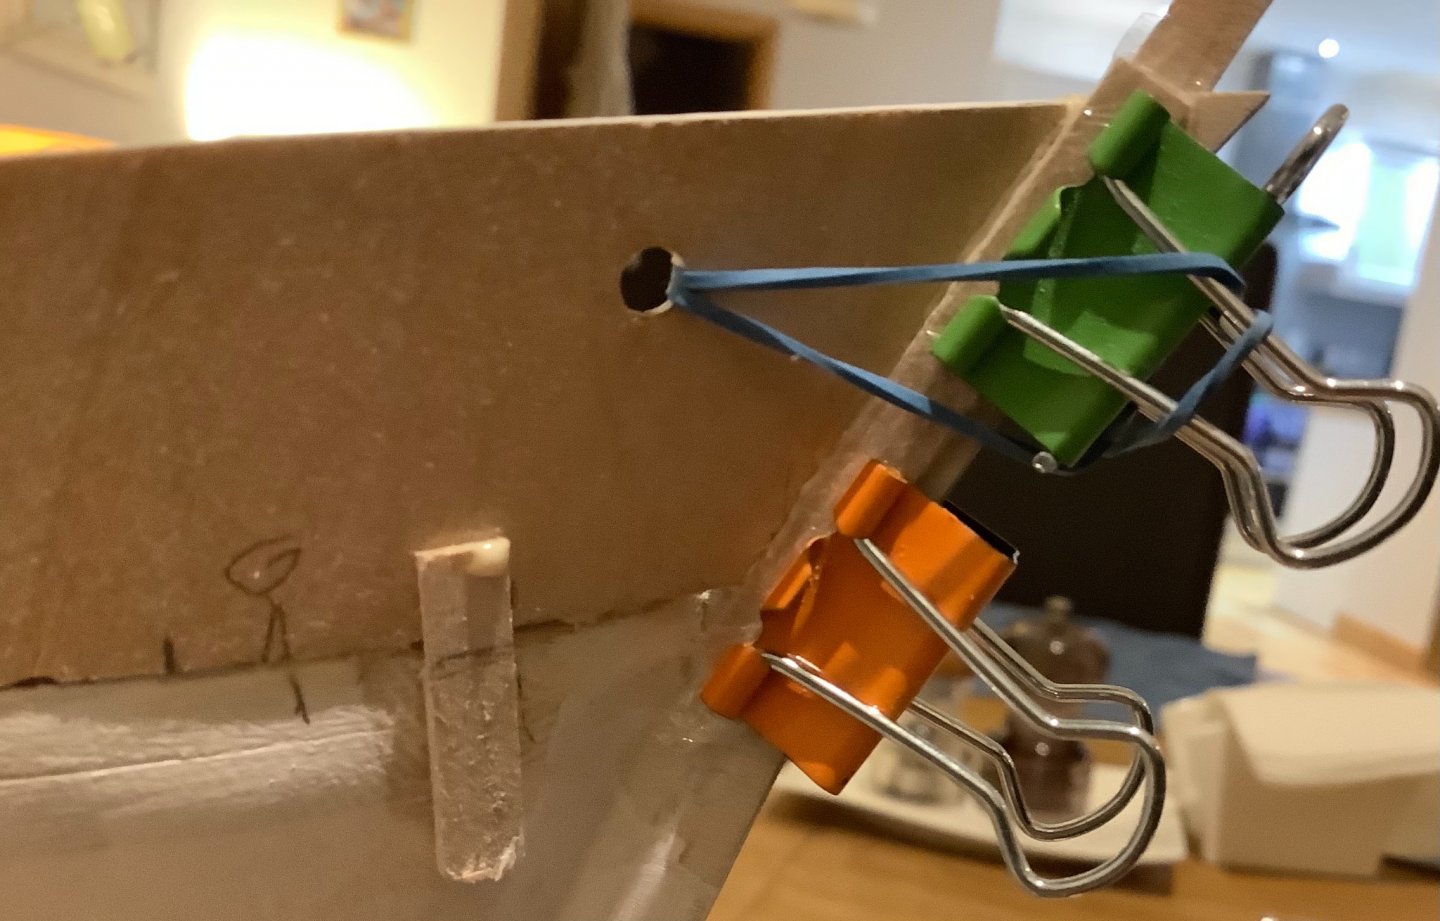
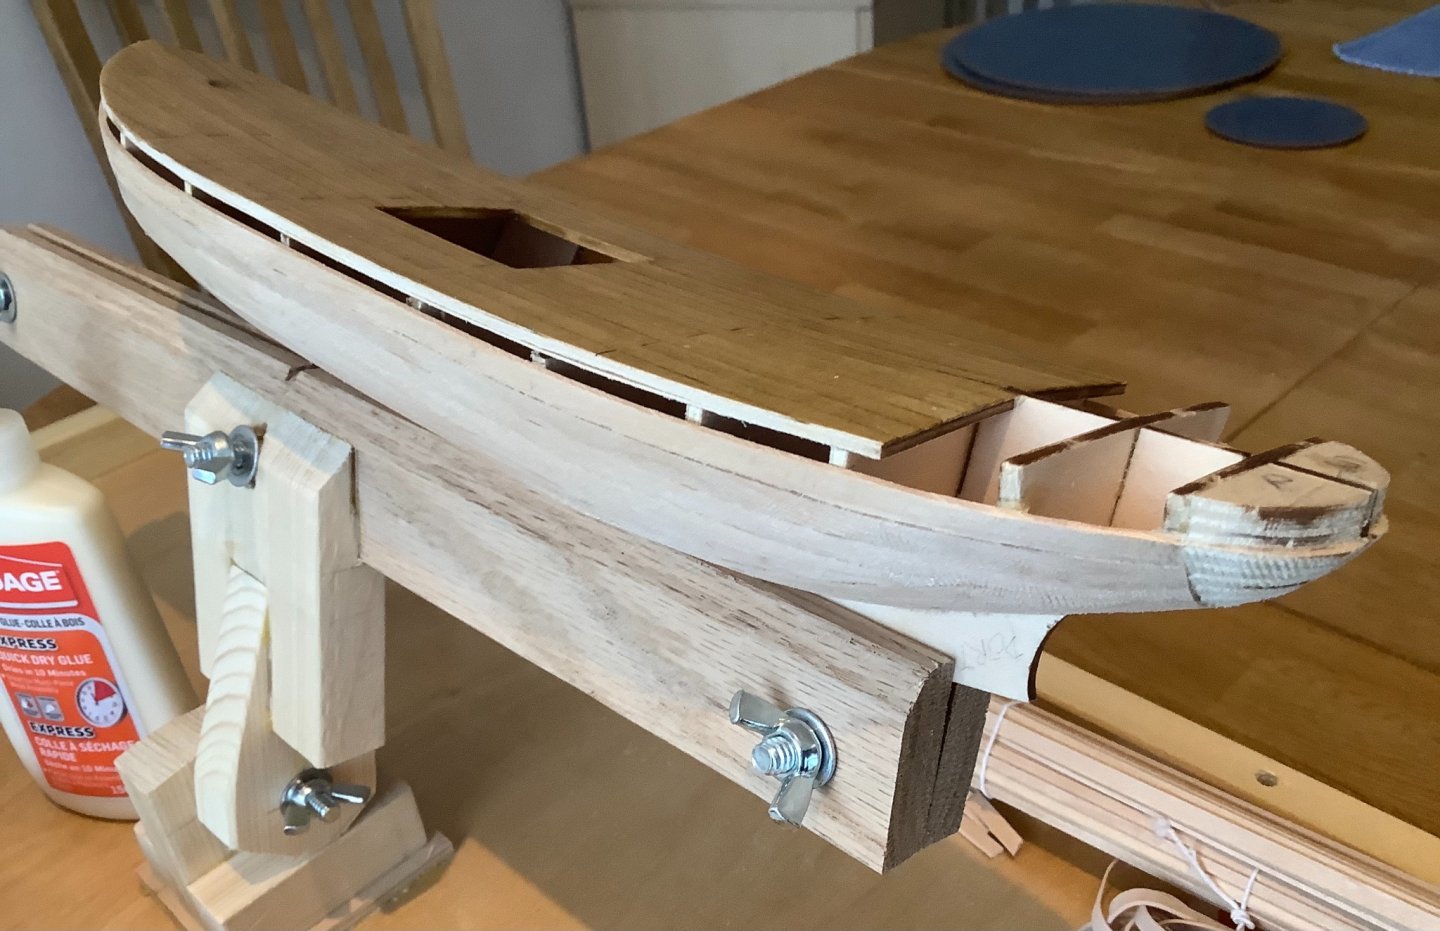
Spent a long time planning how to fit and attach the bulwark in the bowsprit area. Needs to be very exact to have a chance of looking ok. Complicated by complex shapes and limited attachment points for clamps and elastic ties. Decided on a solution that involved gluing a temporary cleat to the top of the boat side, clamping a stop to the bowsprit to create a shoulder to locate the end of the bulwark (wrapped this stop in clung film to prevent stop being glued in place) and using a light elastic band to pull the joint together. Seems to work quite well but will see what it looks like in the morning when the glue has dried. The interior face of the bulwark was pre-painted to eliminate the need to paint in-situ and risk damage to the deck planks.
- 20 replies
-
- 2
-
-
- artesania latina
- mare nostrum
- (and 1 more)
-
hof00 reacted to a post in a topic:
Mare Nostrum by Neil10 - Artesania Latina
-
Ryland Craze reacted to a post in a topic:
Mare Nostrum by Neil10 - Artesania Latina
-
Ryland Craze reacted to a post in a topic:
Mare Nostrum by Neil10 - Artesania Latina
-
yvesvidal reacted to a post in a topic:
Mare Nostrum by Neil10 - Artesania Latina
-
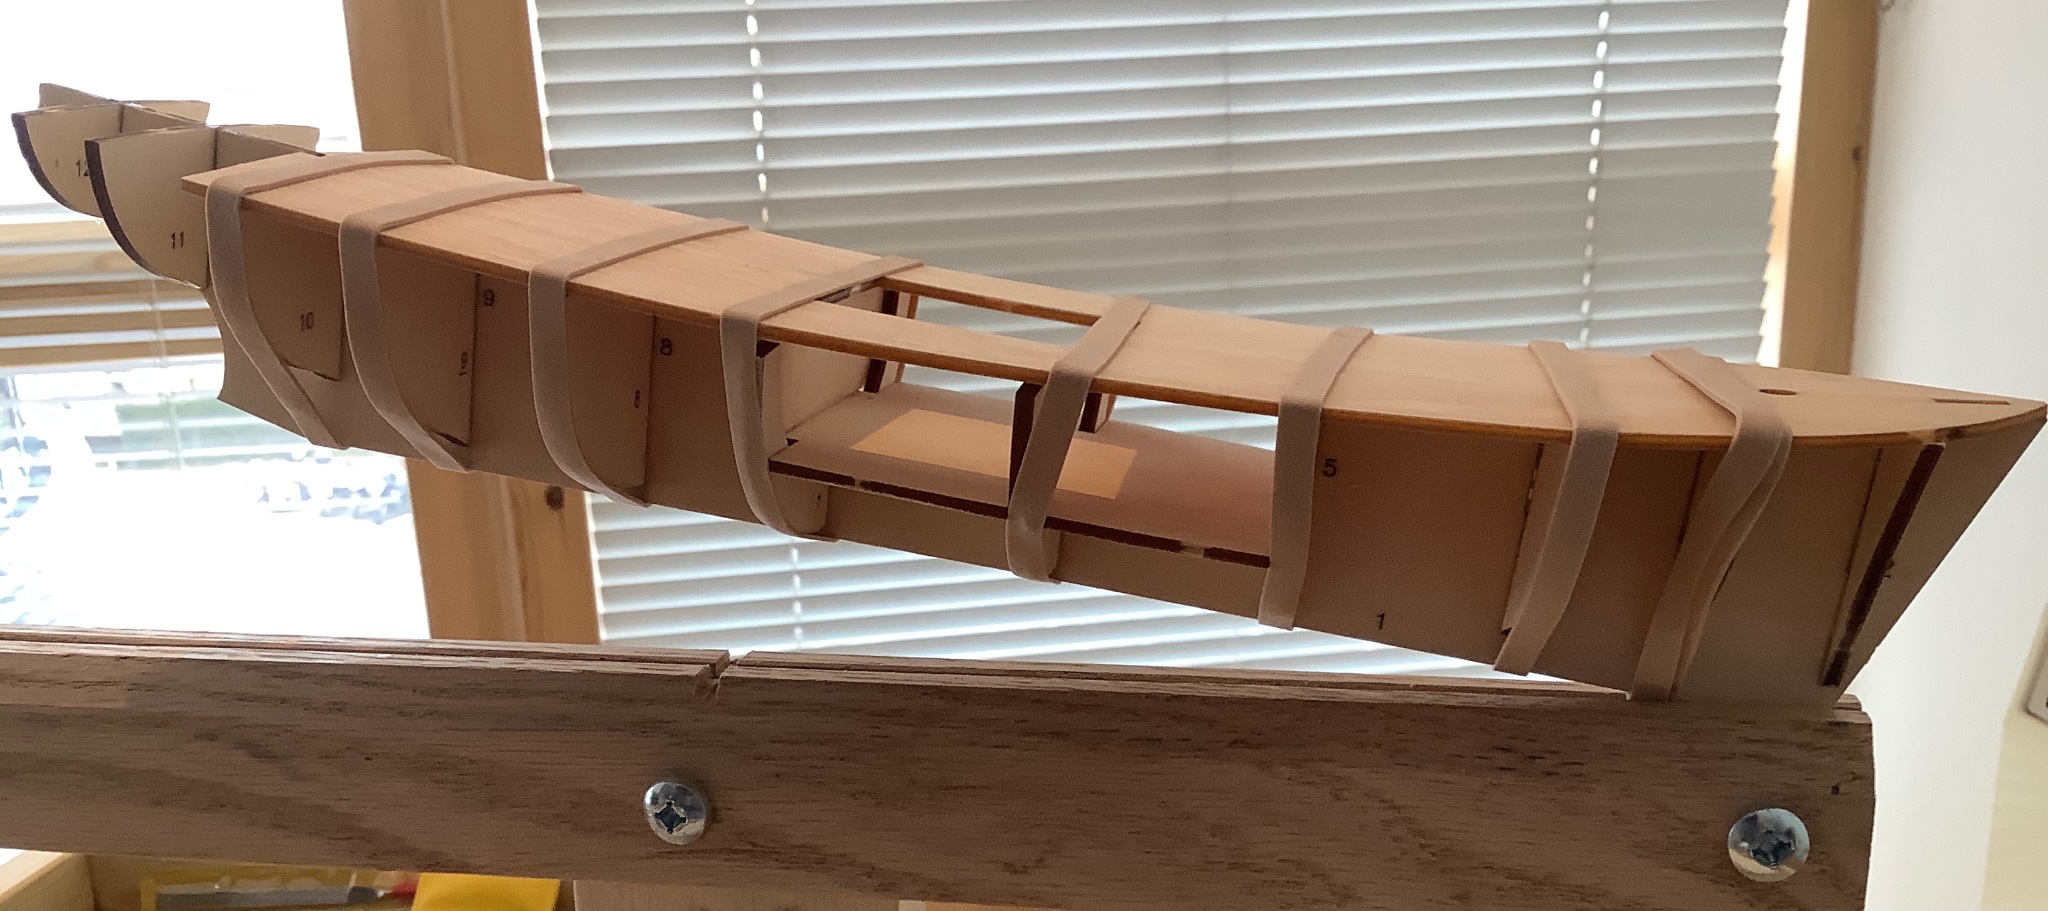
Progress is quite slow but planking almost complete. A great replacement for socialising during Covid. To date have effectively used a 6” rasp to roughly contour the hull and smooth the plank joints. Much faster than sanding and the small flat face of the tool gives excellent control. Next step is to use filler on gaps and low points and then sandpaper for final smoothing. Next install the bulwarks which will entail a lot of pre-bending at the stern. Am Inclined to pre-paint the interior face of the bulwarks rather than face the challenge of painting in situ.
- 20 replies
-
- 3
-
-
- artesania latina
- mare nostrum
- (and 1 more)
-
hof00 reacted to a post in a topic:
Mare Nostrum by Neil10 - Artesania Latina
-
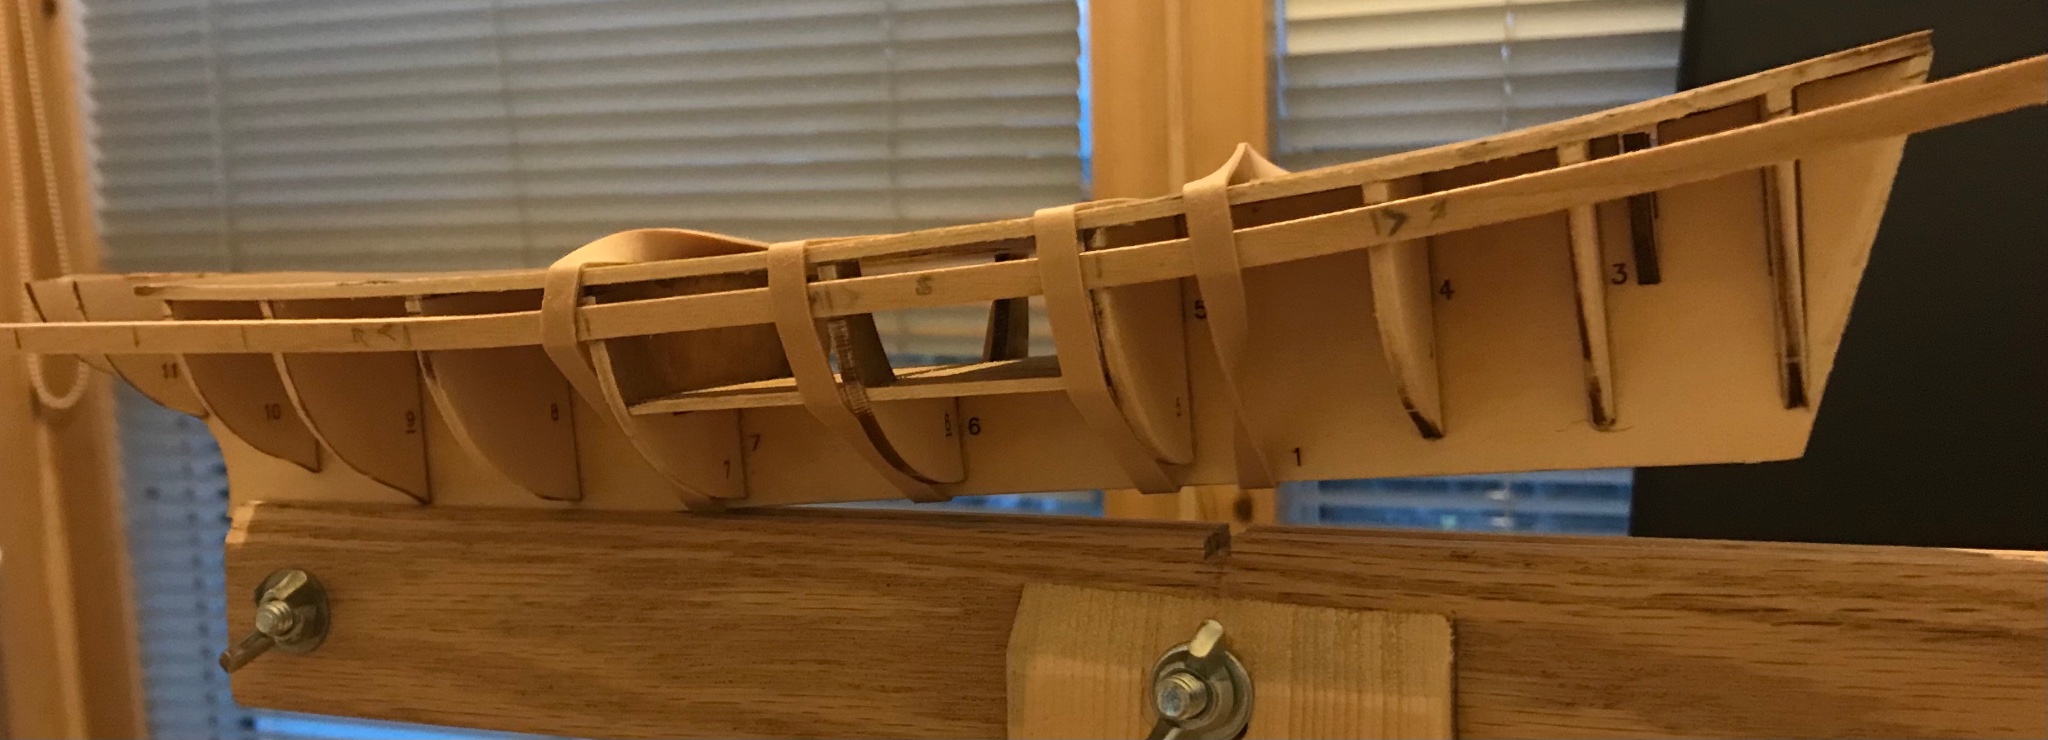
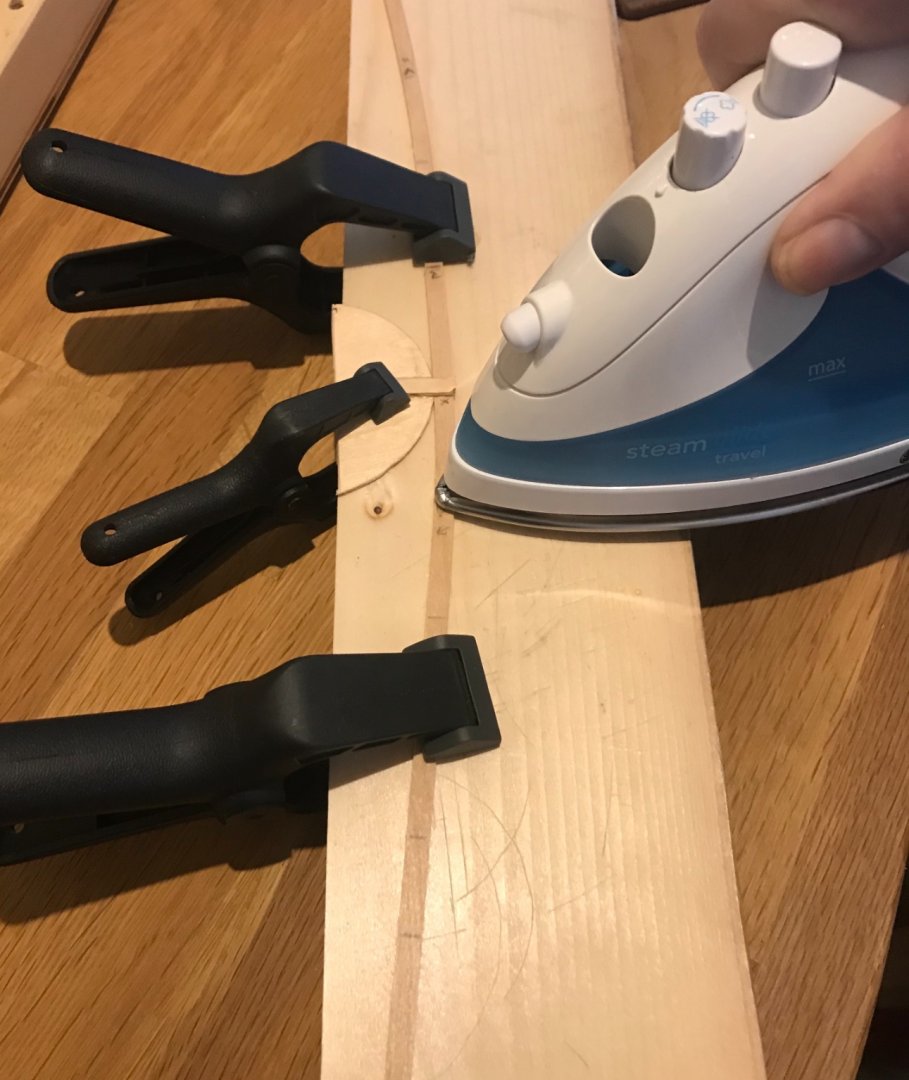
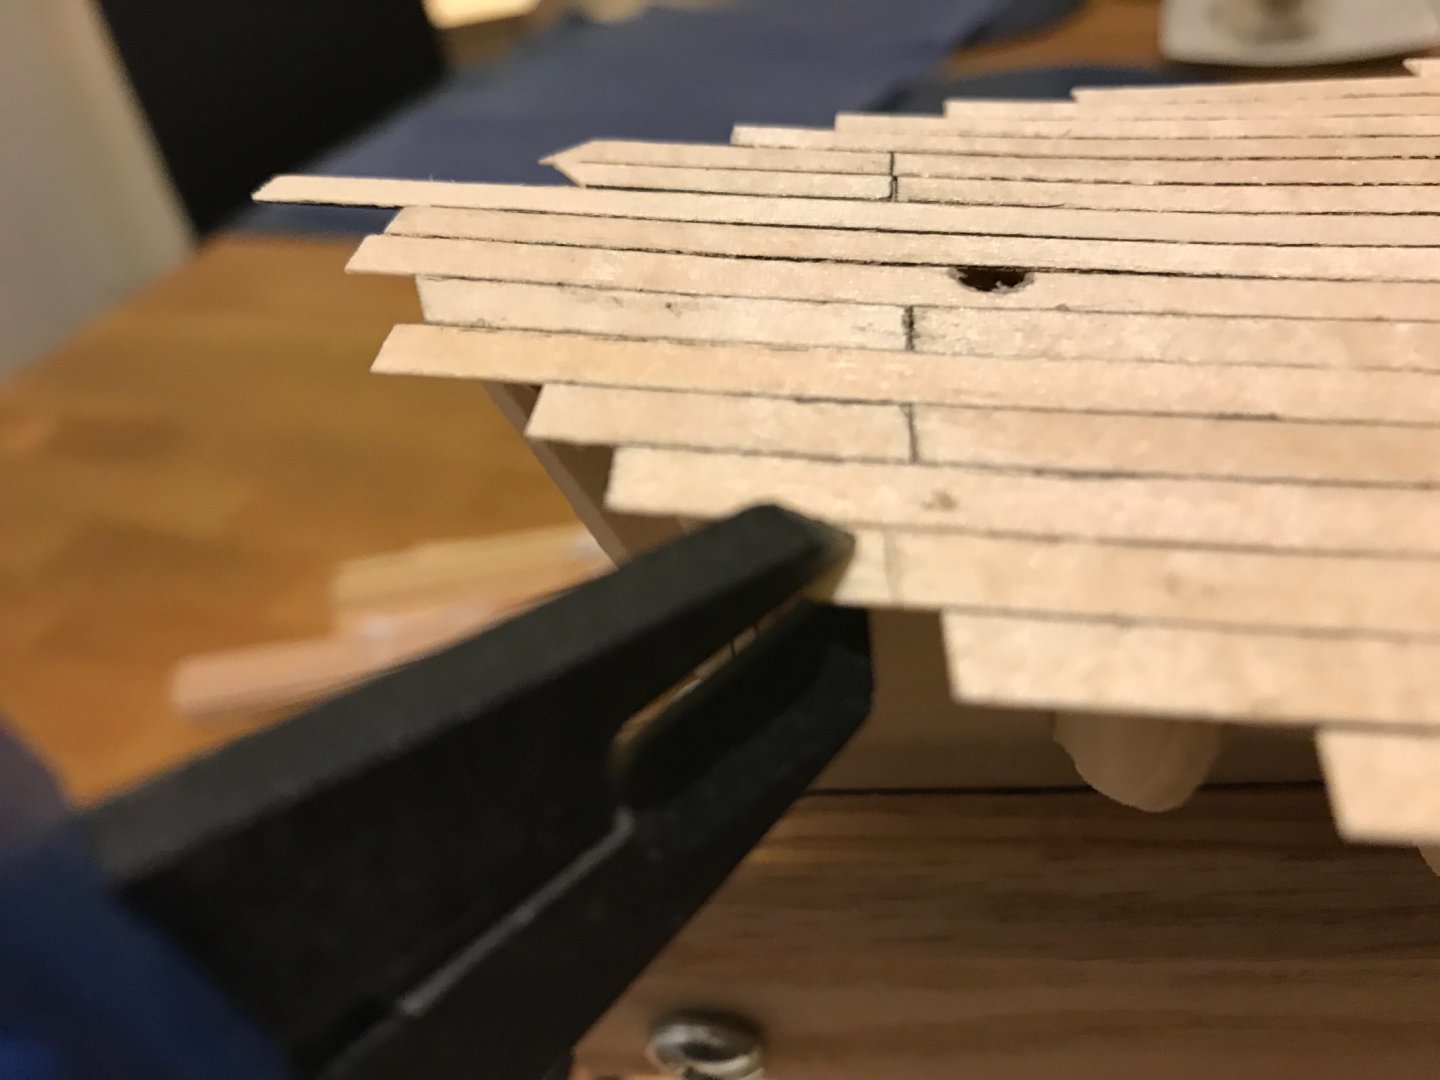
After a Xmas break back to work planking the hull. Interesting challenge getting planks to bend in two plains. Have now adopted the approach of bending in place on the hull using a travel iron and a little water rather than on a jig as shown in post #17. This seems to work well and is definitely faster but leads to occasional slightly singed fingers. Since my target is a painted single planked hull, which is the kit objective, perfect fit is not essential. Filling and sanding will cover any blemishes! The kit instructions suggest no interest in a “nice” planked finish but I have been experimenting with the target of a better quality job by tapering planks at bow and stern. Fully aware of advice not to taper planks beyond 50% but decided this was mainly for model authenticity so have fully tapered some (see plank near false keel) to minimal width as needed. This will not show under the paint!
- 20 replies
-
- 3
-
-
- artesania latina
- mare nostrum
- (and 1 more)
-
First hull plank edge bent with travel iron to get vertical curve about right and glued into position around mid ships prior to bending horizontal curve in towards the bow in place using the same method.

- 20 replies
-
- 3
-
-
- artesania latina
- mare nostrum
- (and 1 more)
-
Compound Plank Bending
Neil10 replied to Neil10's topic in Building, Framing, Planking and plating a ships hull and deck
Wow. Fascinating technical discussion. Thanks. On reflection I realize that the plank probably needs to be bent beyond desired set before applying heat because it will always spring back a bit afterwards. If this is correct, bending around bulkheads probably not ideal because initial overbending obviously not possible. Now have my eyes on the Admiral’s wooden rolling pin as a bending former! -
Just completed my first plank edge bending initiative to match the deck lift towards the bow of the model using Chuck’s travel iron method. Went well. Now I need to bend the same plank in the opposite plane to follow the curve in to the bow. Started thinking about what to use as a former for this bend and realized that the curve created by the bulkheads was a candidate. In other words bend the plank in situ on the model with the travel iron. Is this a good idea? Will there be a tendency to lose the vertical bend in the same plank as I go down this route? Suggestions please.
-
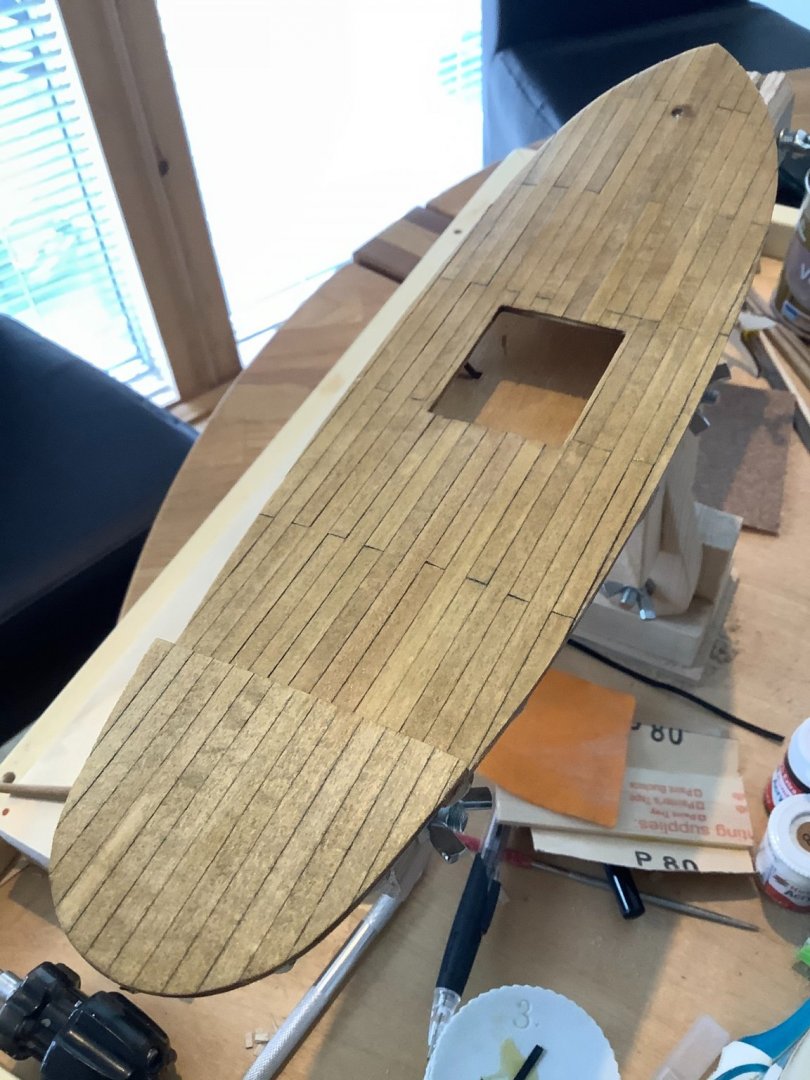
Deck planking completed but not the way the kit instructions contemplated. They wanted me to paint the deck, which obviously an easy solution for beginners, but I wanted the challenge of allowing the individual planks to show. Seems to have come out quite well. The planking on the raised stern section is better than the main deck as my skills improved. Next step is to start planking the hull which can start next week when my plank bending travel iron arrives!
- 20 replies
-
- 3
-
-
- artesania latina
- mare nostrum
- (and 1 more)
-
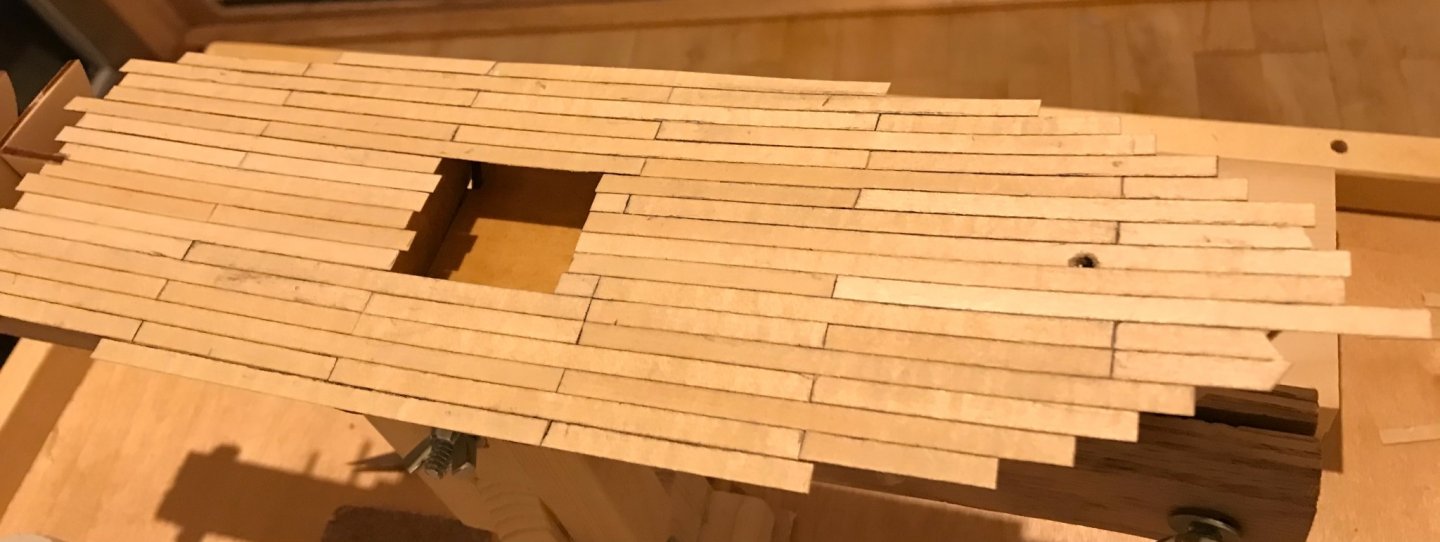
So progress has been quite slow but steady. Used a small (6”) rasp to fair the edges of the bulkheads, much faster than sand paper and the rasp handle gives good control. An ultra cheap set of miniature files and rasps from the internet was a good investment. Still need to fine tune the fairing by trial fitting of a plank. Then went on to plank the main deck using a 2B pencil on the edges of the planks to make the joints stand out. A fair amount of lead smudging is dirtying the deck but trust that a little light sanding will clean this up before applying a light coat of matt polyurethane to protect the planks. Aware that brushing might spread pencil lead around so this will have to be done very carefully. You will note that the plank layout, or at least the joints, is not uniform. Not sure when I lost control of the symmetry and this was definitely an “Oh s**t” moment. Thought about this for a long time, and decided that, after all the deck furniture is installed only you professionals will notice. OK so I’m lazy! Now need to trim the planks to the correct deck outline. Decided that cutting downwards is the only way to prevent splintering so will use a digital caliper to transfer the hidden under deck shape to the top sides to pencil in a cutting line.
- 20 replies
-
- 3
-
-
- artesania latina
- mare nostrum
- (and 1 more)
-
Nails and Glue
Neil10 replied to Neil10's topic in Building, Framing, Planking and plating a ships hull and deck
The model scale is 1:35 and is one of the standard beginners kits - Mare Nostrum. I have a lot to learn! The fishing line solution for deck nails sounds exotic but, being a total beginner, I’m looking for something a little simpler. The kit instructions are generally excellent but on this topic they do little more than hint at showing deck nails. See red dots on attachments! Looks like medium CA would meet my needs if I decide not to use wood glue. Thanks everyone.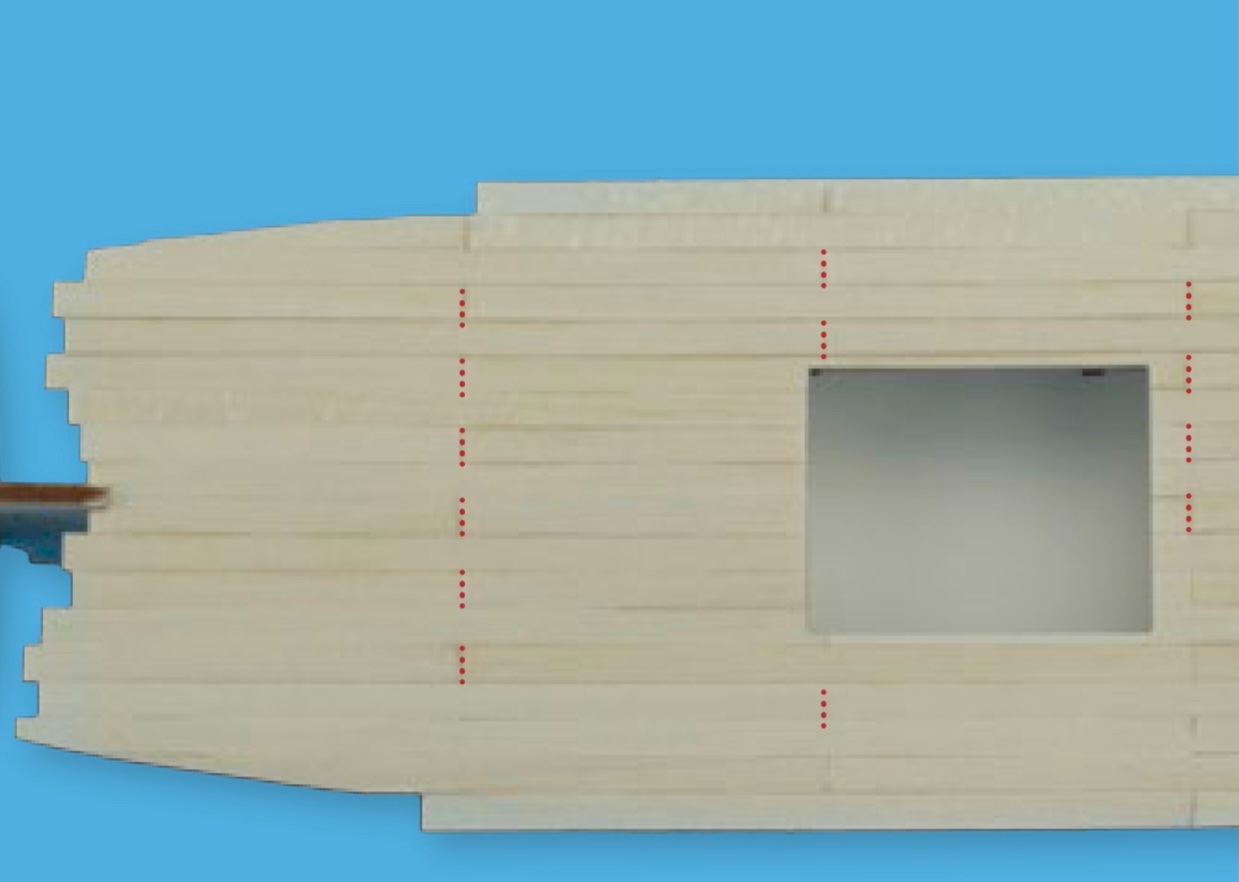
-
A couple of questions. Firstly CA glues for modellers seems to come in three grades. Very thin and fast setting which I associate with fixing broken China through an intermediate grade to the thickest and slowest setting. I don’t think I want to order the thin fast stuff for planking but am undecided about ordering the intermediate or slow CA. Suggestions please. Secondly I want to simulate the effect of deck planking nails. Presumably I need a technique that will allow me to accurately place a minute quantity of ink(?) on the chosen spot which will not get smudged later when I brush on poly to protect that deck planks. Again suggestions please.
-
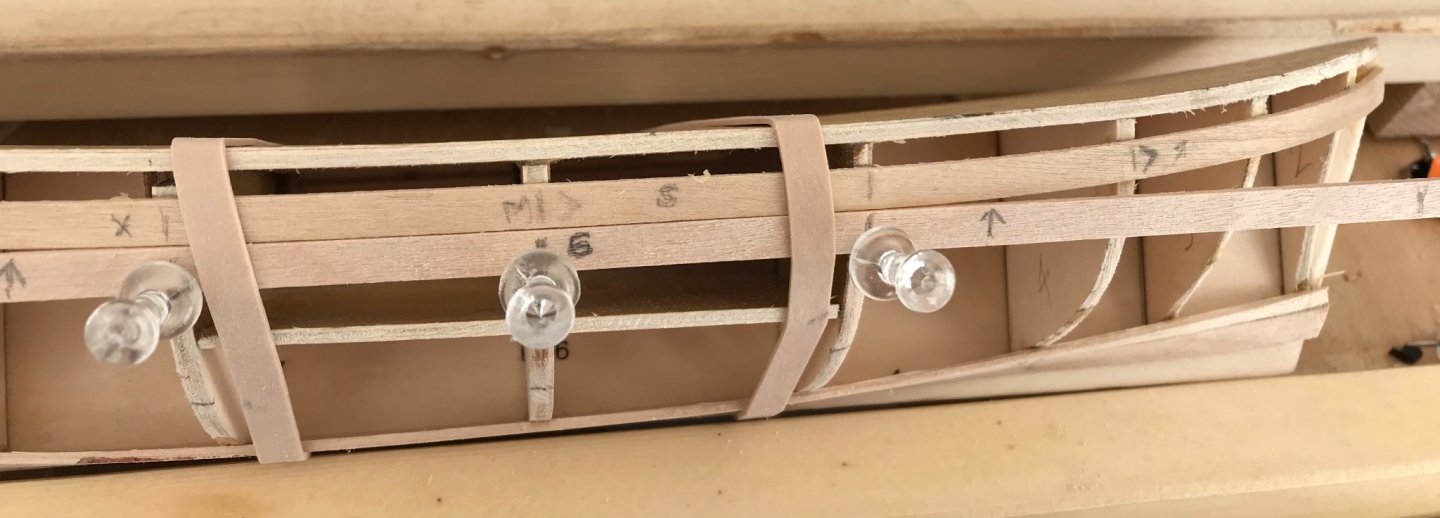
After gluing all the bulkheads discovered that one was misaligned. I had carefully ensured that they were all set at right angles to the false keel (in plan view) using clamps and Lego blocks. After the glue dried I looked along the keel line from the bow and discovered one (only!) frame was slightly rotated. Time to discover ungluing! Discovered that I could not buy isopropyl alcohol locally and the substitute of surgical spirit proved useless. Ordered what I needed from the internet, to fix inevitable future problems, and decided that I could use sanding to deal with the immediate issue without waiting for Amazon. Trial fitting of the false deck piece suggested that it might flex into position without using any pre-bending techniques. However decided to pre-bend anyway - just for the experience. Put the piece into a preheated baking dish, poured on boiling water and left it in the oven for ten minutes. A quick surface wipe to remove excess water then elastic bands used to bind it into place while cooling and drying. Certainly seemed to be quite flexible after time in the oven! See illustration. Hopefully it will have a nice natural bend when dry.

- 20 replies
-
- 1
-
-
- artesania latina
- mare nostrum
- (and 1 more)
-
Installing bulkheads going very smoothly and will soon be on to planking. The illustrations in the instructions show a vary basic planking techniques which I suppose is appropriate for beginners. Things like tapering a plank to a sharp point to fit the gap. I could go down this route, but having studied the planking advice on this site I’m going to try for something a bit more sophisticated, partly as a personal challenge but also because I’m still undecided whether or not my workmanship will be adequate to use a natural finish on the model - which I know will show every single defect! The kit is designed for single planking, using filler to fill the gaps and finally painting to cover up all the shortcomings. I have decided that I should try to complete the planking to the best of my ability and only then do I need to decide whether it needs hull painting to cover up mediocre workmanship. Looking forward to the challenges of plank bending. Stay tuned!