
Keithbrad80
-
Posts
416 -
Joined
-
Last visited
Content Type
Profiles
Forums
Gallery
Events
Everything posted by Keithbrad80
-
congrats bitao, your work is some of the most incredible I have ever seen. I am very much looking forward to following along on your next build! Bradley
-
Minwax makes a good pre-stain. I think it comes in a red can, it makes your stain much more even. Good luck! Bradley
- 600 replies
-
- 1
-

-
- Flying Fish
- Model Shipways
- (and 2 more)
-
Hi George, excellent work so far! If I remember correctly I drilled the hawse holes parallel to the centerline, it was a pretty tough hole to drill properly but that’s how I read it from the plans. Everything looks great! Bradley
-
It’s likely the study is still ongoing and their conclusions haven’t been made yet, because of this the information will continue to be sensitive until the report is written. They don’t want private citizens interfering with a study that a university likely paid a lot to do, so it makes that only other institutions can access that information, you may have to wait until the study is published. Bradley
-
PVA wood glue is usually the go to, also known as wood glue. It comes in several colors depending on the color you want it to be when dry. White PVA wood glue dries clear. There are lots of discussions on glue and the different types here at MSW. On the main screen do a search for ‘glue’ and you should find help with application and types of wood glue.
-
model of an old-fashioned telephone
Keithbrad80 replied to Bitao's topic in Non-ship/categorised builds
Wow, this to me is incredible. From the selection of wood to shiny brass, even the fact that it really plays a little time when wound up is amazing, what kind of wood did you use? It looks maybe a burl? The veneer you used on the body must be paper thin, I count potentially 5 different wood species? Incredible work as always. Bradley -
Bitao, I read through your log once again, your speed through this build and the accuracy at which you build things must mean you don’t have time to remake something if it’s not right. At least that’s what I’m assuming, that must mean that everything you build is pretty much perfect right out of the gate. Simply amazing. Bradley
-
Nice work George, You were braver than I to plank around the coamings. Looks great so far! Bradley
- 600 replies
-
- 1
-
-
- Flying Fish
- Model Shipways
- (and 2 more)
-
I think you have it backwards, the pounce wheel presses into the copper tape, creating concave dimples, flip the tape over and use the pounce wheel to create convex dimples that would better simulate rivets. Here’s a post of a user Devildog36 and his Thermopylae build he thought the copper plates were made of wood and made wood “tiles” that replaced his second planking. This sounds lot of extra work to me! Bradley
-
As promised I’ll be following along! Bradley
-
Wow fantastic work, I’m not sure your as much of a beginner as you think! This is superb workmanship. Congratulations on completing this awesome build. Bradley
- 949 replies
-
- 1
-
-
- syren
- model shipways
- (and 1 more)
-
Those are the highest quality flags I have ever seen on a model. I haven’t looked through your log in a while and Your work is top notch, for a kit you really did a fantastic job and I’m looking forward to your next model! Bradley
- 949 replies
-
- 3
-
-

-
- syren
- model shipways
- (and 1 more)
-
If he plans to sheath below the water line, Chucks post about the foil might work the best. Bradley
-
Justifying the purchase of a mill
Keithbrad80 replied to Captain T's topic in Modeling tools and Workshop Equipment
In my house I have to check with the admiral before buying an expensive tool, her question is always “what are you going to use it for” and my answer is always “I don’t know yet”. My justification for that answer is some tools are so versatile it would take me all day to describe the many projects I could use it for. A mill for instance, you are really only limited by your imagination, you may say now that a mill may only serve this one specific purpose but you will soon realize that with slightly different bit or some shop made tooling might produce something you may never even imagined. I don’t have a mill but I use my friends full sized mill all the time, if I had more space I would buy one without question because of all the things you can make with it. I will also add that some tools are even better with the presence of other tools, though it takes time to collect high quality tools like bandsaws, drill presses and lathes, using all of them together can create some really precise and very good looking products. If I were looking at a mill right now I would first think fo the things I would actually use it for, like the stuff I know I would use it for right away. But then I start to think about other possibilities, maybe one day you come across something that could be made using hand tools or something but could be made faster and easier with a mill. Blocks are the first thing that come to mind, Chuck has proven that with the right tools and skill you can make thousands of very high quality blocks in a short time, more importantly they are all identical. If you have the money and space I say go for it, you will find something to use it on and if you don’t return it or sell it to someone else. I’ve purchased expensive tools before knowing that I would only use it a handful of times, but also knowing I could sell that tool when I’m done and get back at least some of my money. If a tool does what I want it to and it cuts back on time then I vote go for it. Bradley -
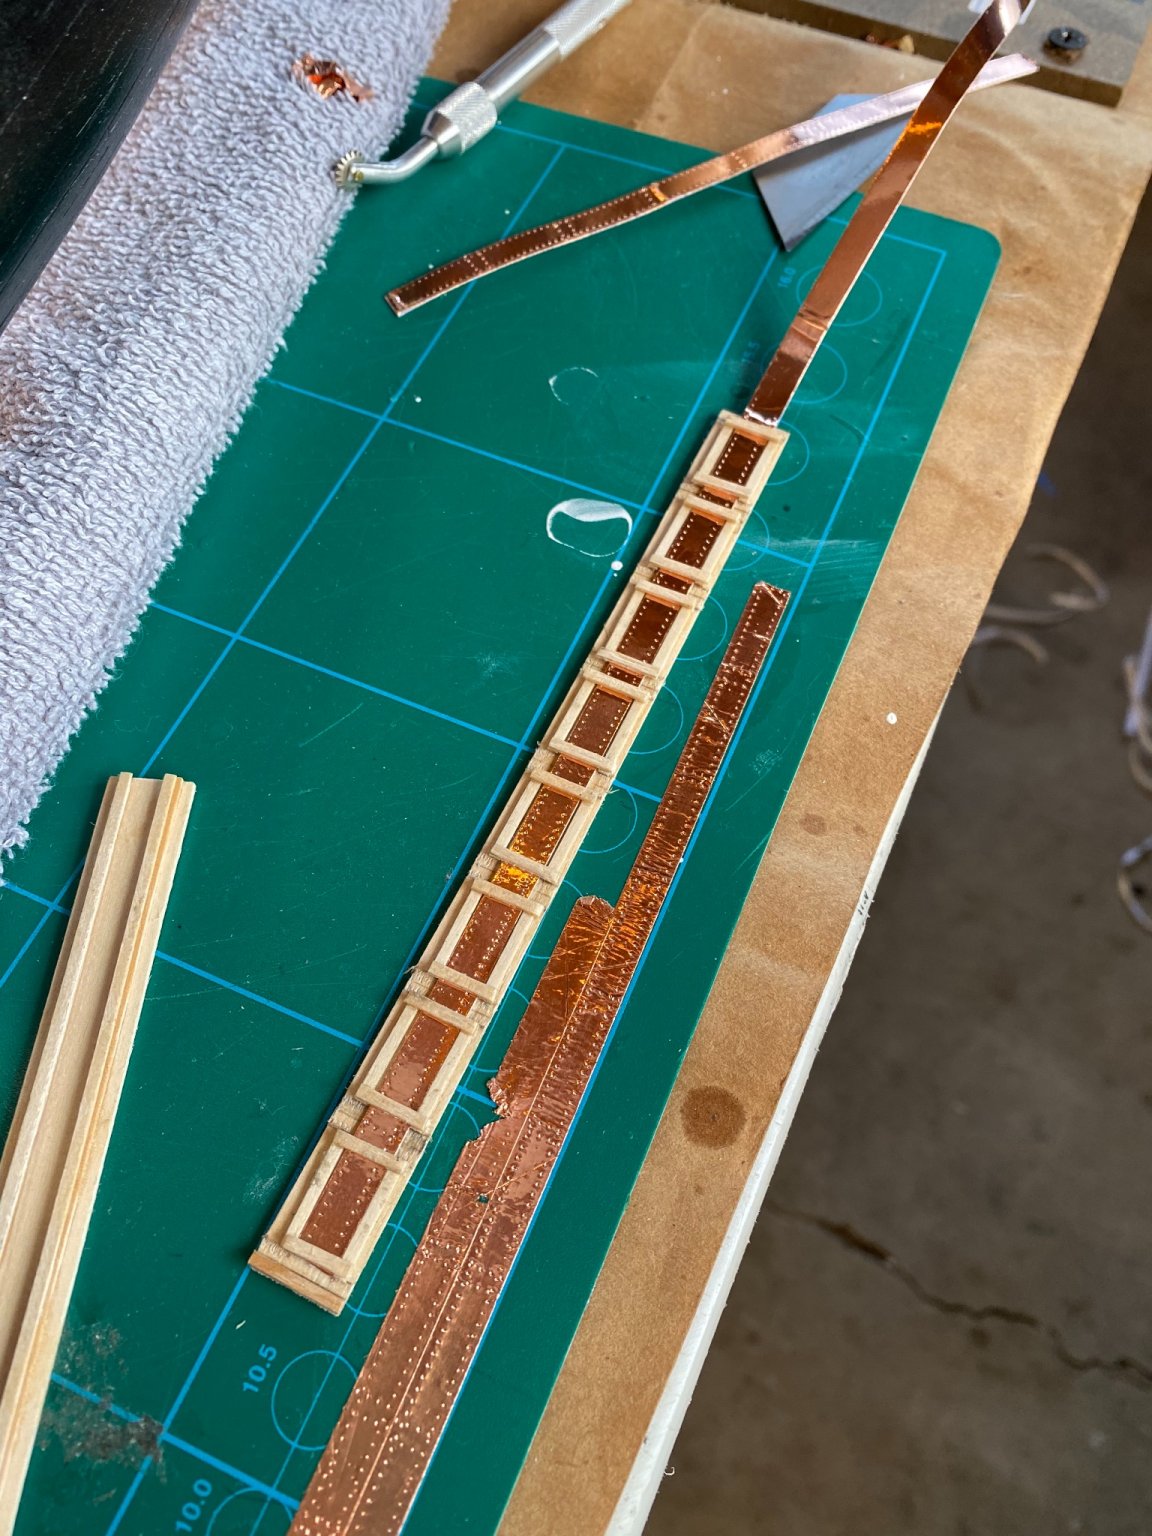
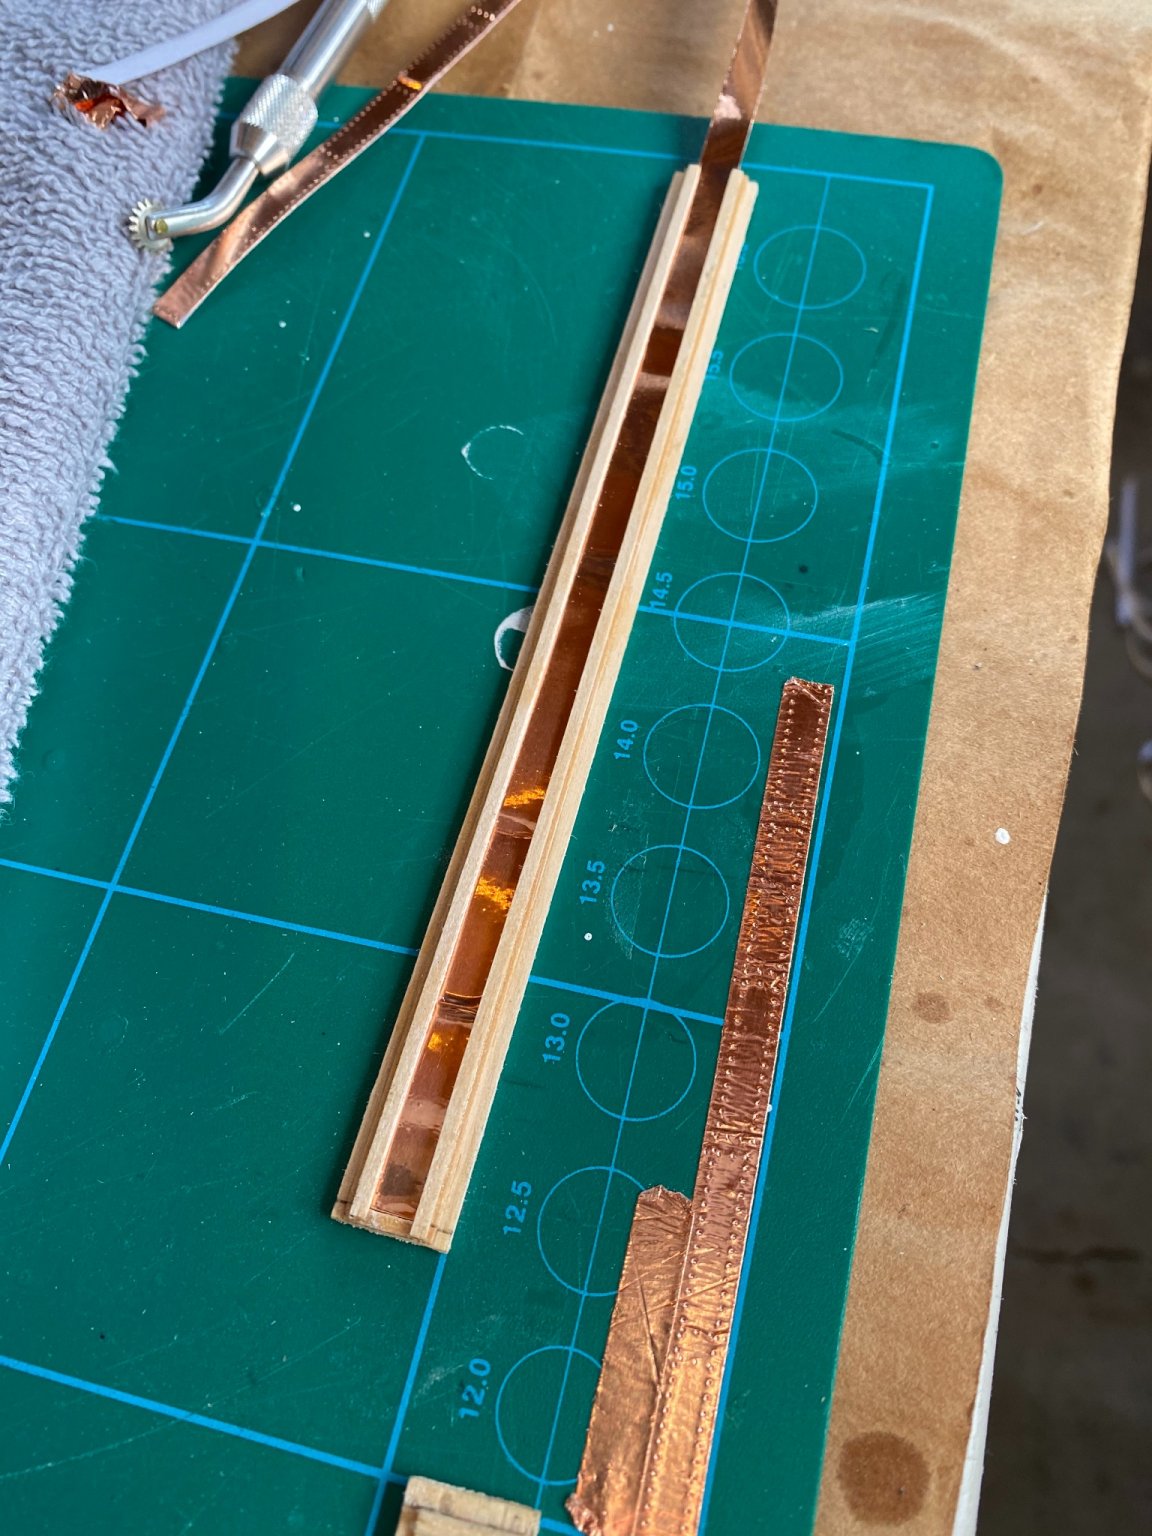
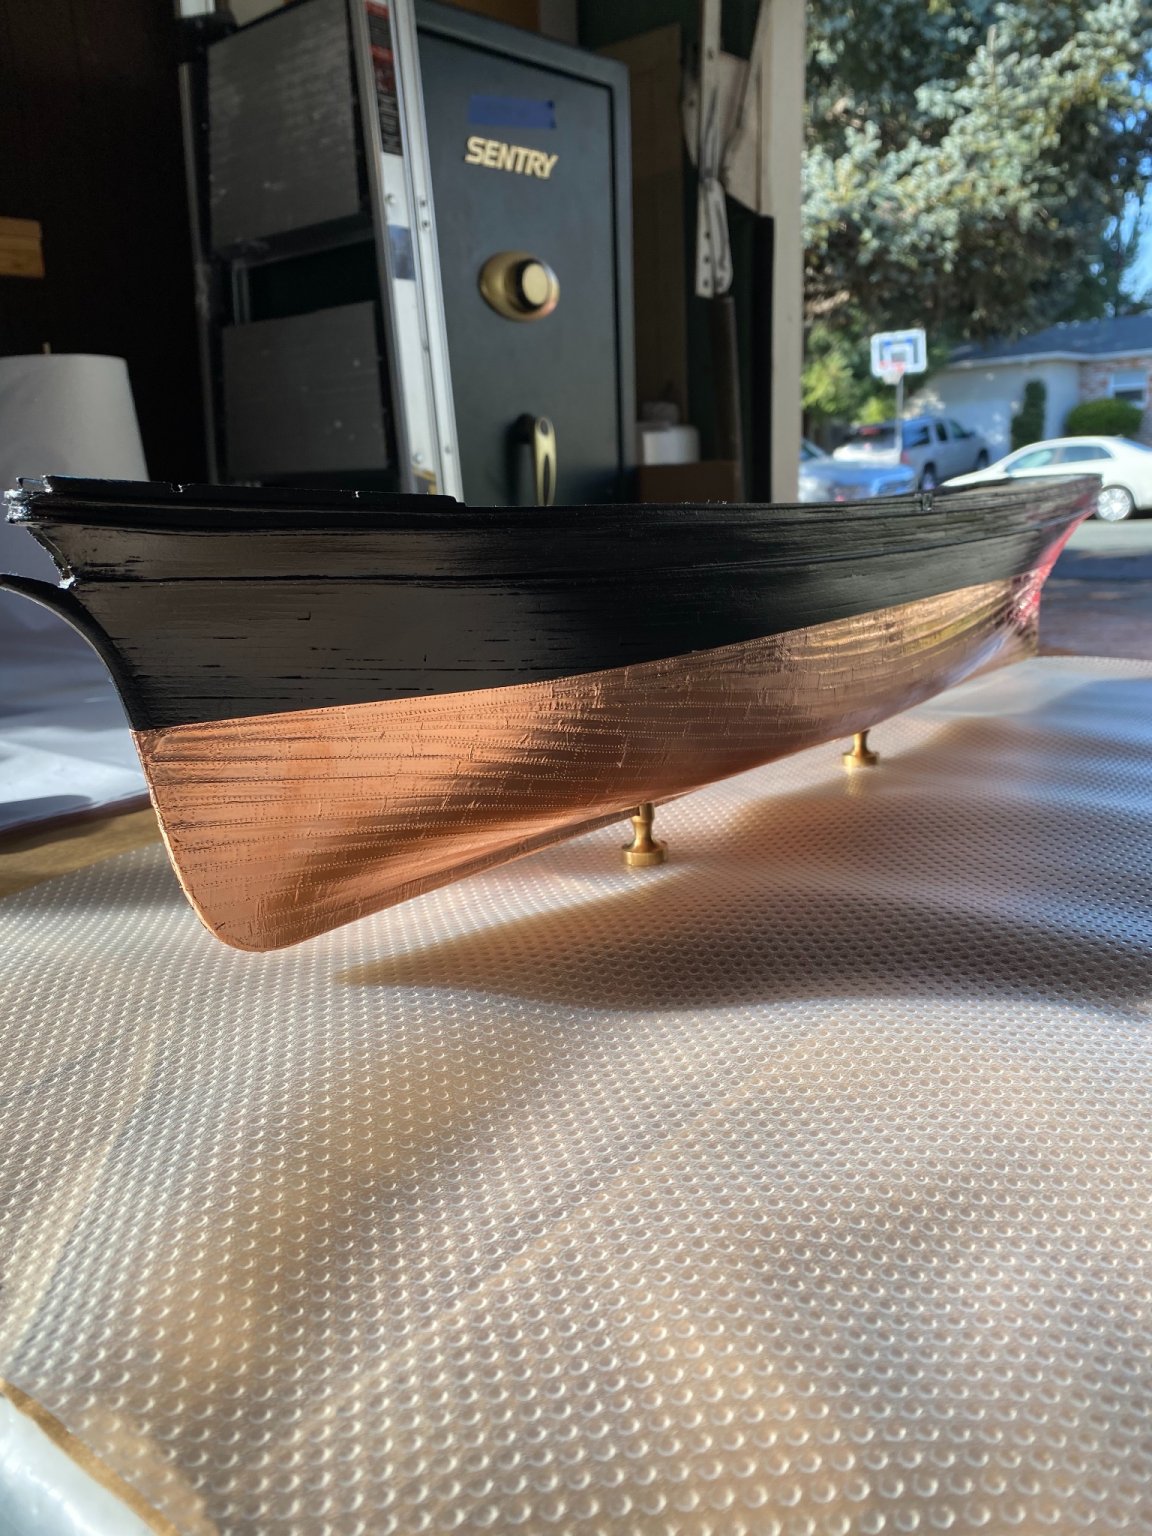
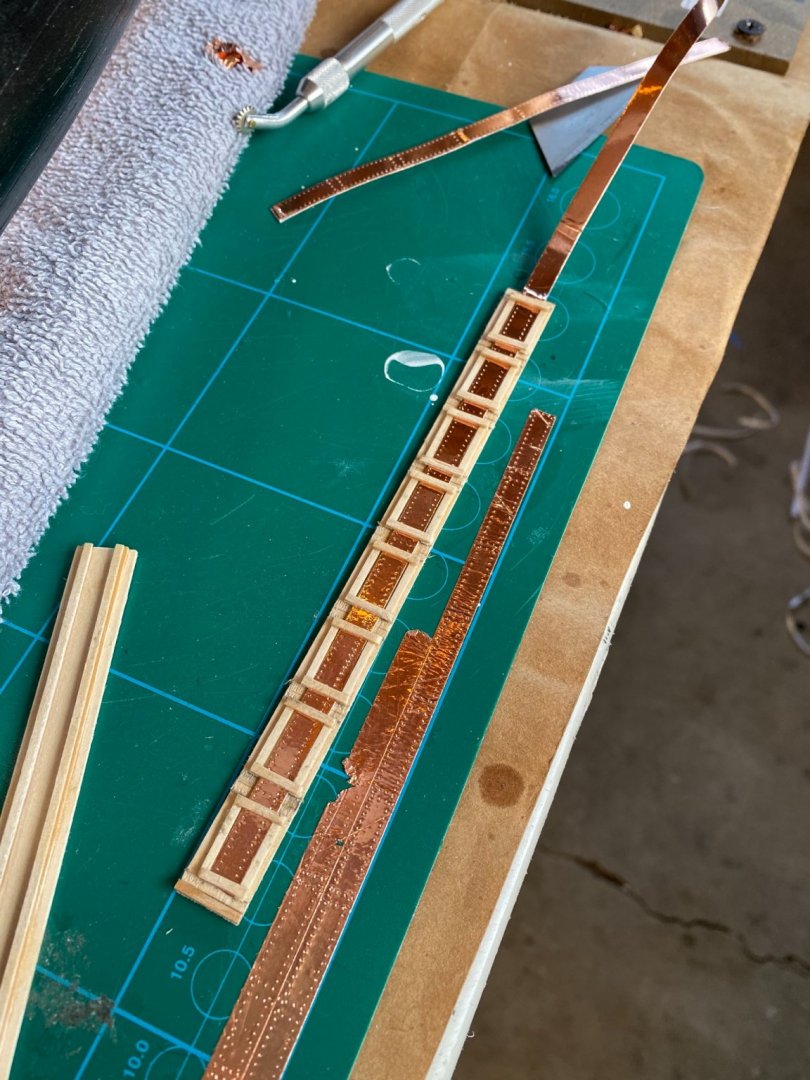
I like pounce wheels. The tooth ratio of the wheel can be changed to pretty much any thing you want and they can pretty easily be made with a mill if you have one and jigs can be created to quickly replicate rivet patterns. For my flying fish I used copper strips and made a few jugs that I can slide the tape into use my pounce to quickly create several plates then cut those out and put on the model. here’s my coppering job, it’s not the best but I think it could be easily improved. and he’s the jig I made to make the riveting pattern. Different jigs could easily be made that replicate different patterns of rivets and smaller pounce wheels with a sharp tip can create really small divots very close to each other. Here’s my jig I used for this one. part 1: part 2: I took my tape and slide it in the part 1 jig to make the horizontal rivets then part 2 makes the vertical rivets that separate each plate. Bradley


-
Chris, fantastic job on an awesome project! I’m sure this canoe will bring you and your kids some very good times. Bradley
-
MC1018 Lathe Drive Belt
Keithbrad80 replied to hof00's topic in Modeling tools and Workshop Equipment
This belt should fit your lathe. It’s not to expensive either, I’ve never used a Rockler belt but if you want any other brand the same belt size should do. Good luck! Bradley -
MC1018 Lathe Drive Belt
Keithbrad80 replied to hof00's topic in Modeling tools and Workshop Equipment
I don’t own nor have I operated this specific lathe, but in most cases the belts can be bought else where rather than through the supplier of the lathe. The supplier of the lathe likely doesn’t produce their own belts (I’m guessing) and so they won’t be to eager to send out another belt when it won’t make them money. As long as you get the same kind (size) of belt that your lathe uses you won’t have any issues, I would read through the manual and find the belt size before purchasing any thing, on the belt itself is usual a serial number or some other way of identifying what kind of belt it is. I did a quick google search for Rockler Excelsior Mini Lathe Drive belts and got the link below, it might be a good starting point for finding the right belt! https://www.amazon.com/DRIVE-ROCKLER-EXCELSIOR-LATHE-MC-1018/dp/B0725Q19KL Bradley -
What an awesome model! I honestly would have believed you if you said this wasn’t your first model. Congrats on finishing this one! I’m looking forward to your next build. Bradley
- 222 replies
-
- 1
-
-
- First Build
- Lady Isabella
- (and 2 more)
-
I wish... Work really picked up then a friend approached me about starting a new business so that’s what I have been doing... Knowing I wasn’t going to have time to work on any thing for the foreseeable future I had to pack everything up to keep it safe, while I enjoy my work I do wish I had more time to enjoy my hobby. One day I’ll get back to it and finish the flying fish. It’s packed away very nicely with all the parts and plans there with it so one day I can just jump right back in it. I still find time to visit the site almost daily but one day I’ll be back in full swing! Thanks for checking in btw. Bradley
-
That looks really great George! The green really shows the research you did for this build. I had a lot of trouble with this part so it’s good to see you breeze through it! Bradley
- 600 replies
-
- 1
-
-
- Flying Fish
- Model Shipways
- (and 2 more)
-
Wow this looks great! I was up and down about painting mine at all until it was a little late. It’s good to see you painting as you go for a much cleaner result! Bradley
- 600 replies
-
- 1
-
-
- Flying Fish
- Model Shipways
- (and 2 more)
-
Hi bbb555, I built two of these models last year for a gift and enjoyed the build. If you have any questions at all you can start a build log for the entire build or you can message me directly. I’m happy to answer any and all questions, I took a lot of pictures I didn’t post as well so those maybe helpful for you. Bradley
-
That’s some pretty fine detail for such a small model. It’s a very cool family heirloom that I’m sure you will pass on to your kids. Thanks for sharing! Bradley
-
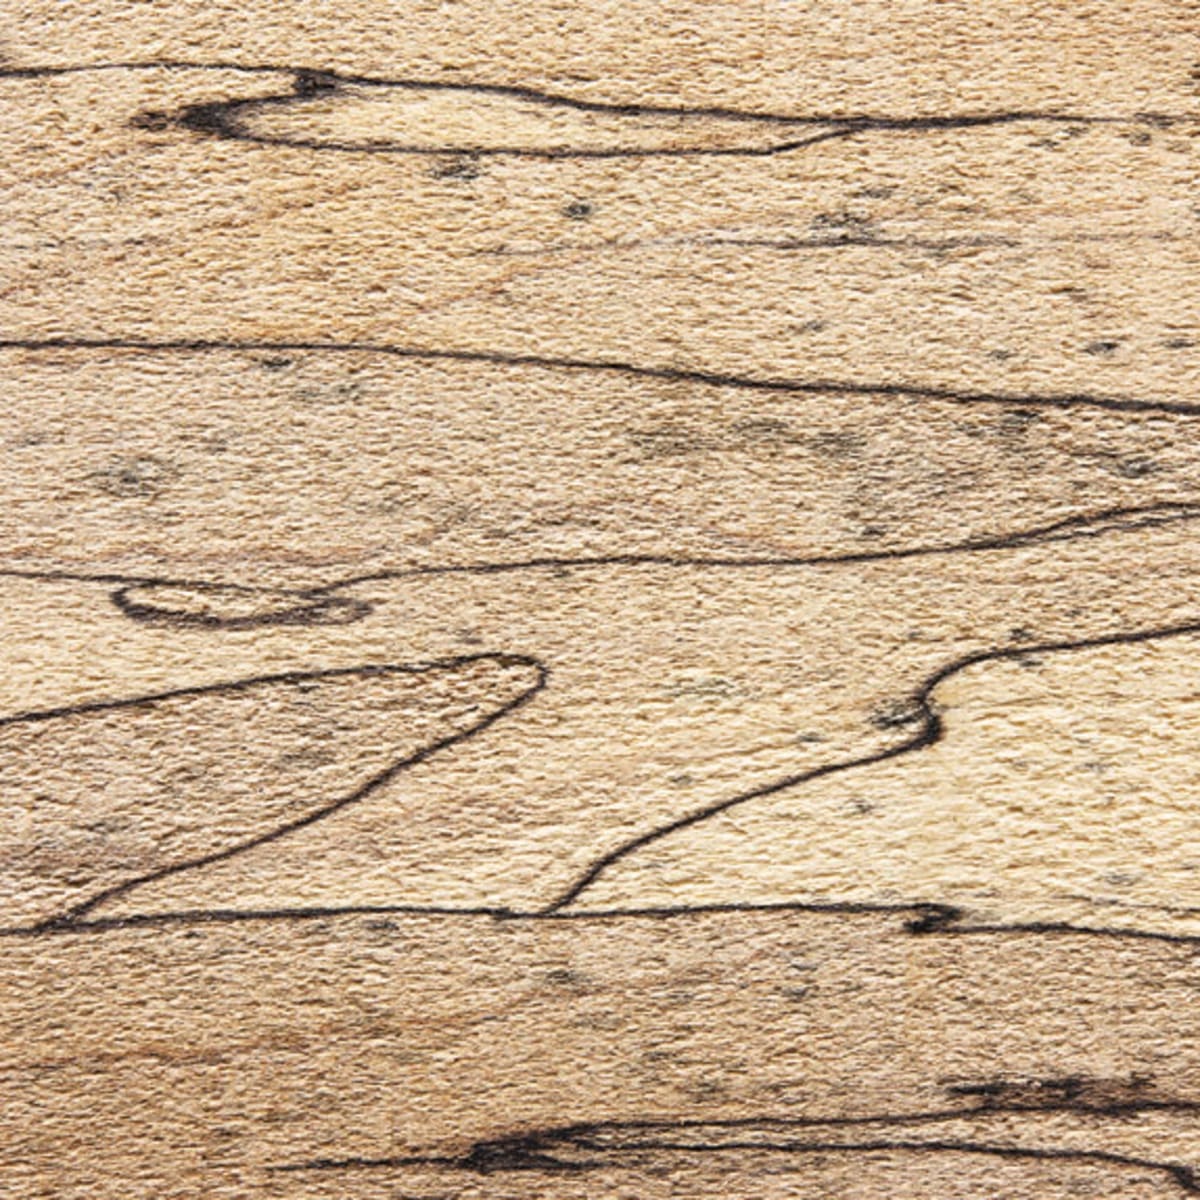
I vote hold onto the wood, if you still have it, for one reason only, spalted wood. If you do any other wood working and want a really incredible piece of wood spalted maple looks really cool. It’s basically a fungus that grows within trees and leave really a nice pattern throughout the wood. If you don’t do other wood working I guarantee other wood workers would buy it from you. Keep the maple in a plastic bag until it reaches a high humidity and moisture content, leave it in the bag for a while maybe a few months, check it periodically. Here what it will look like once spalted: Bradley