HMS Peregrine by TheCommodore - Corel - 1:96 (my first build)
Hi folks. My first kit arrived a couple weeks ago as classes let out, so I've got plenty of time to spare on what will hopefully be the first in a nice fleet. I had a hard time deciding what hobby I wanted to pick up, but after seeing the community of model shipwrights, especially on this forum, this just felt right. It looks like there's a lot of material for beginners on up, and everyone seems incredibly supportive. That's actually the biggest reason I'm posting, because I tend to get sidetracked and discouraged, especially on projects that require this much patience, and you guys seem the type to gently push me along.
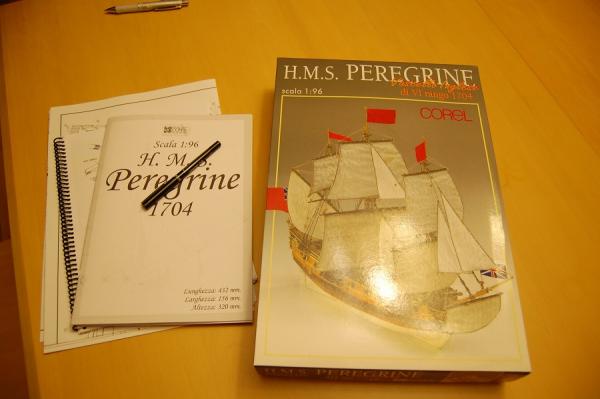
I got this kit from modelexpo-online.com during the April sale for $77 bucks. I was originally planning on something else, but this is a cooler ship at a price I could actually dig into my wallet for. It's listed as an intermediate, but none of the beginners appealed to me much, and the pictures of this kit make me absolutely rabid about finishing. I remember reading somewhere on this site that the most important part of a build is being invested in your project, so I figured that the difficulty could take a backseat to my interest for now. Also, I was set on starting with plank-on-bulkhead. From what I understand they're the most realistic to building a full size ship, so go big or go home, right?
So, this is my first try. I'm not too far in right now, but I'll be trying to update it weekly, so stick around, laugh with me at my mistakes, talk me through the tough spots, and enjoy what you're helping me build. And I have absolutely no shipbuilding or woodworking experience, so if I'm misnaming things or if there's a tool/technique you think would help me out, let me know. I'm here to learn.
The Prep (30-50 hours)
Before I even ordered a kit, I read all the recommended pdfs on this site to make sure I knew what I was getting into and if I even wanted to invest money in this. Then I bought 3 books: How to Build First-Rate Ship Models from Kits by Ben Lankford, Ship Modeling Simplified by Frank Mastini, and Ship Modeling from Stem to Stern by Milton Roth. These I picked partly on seeing their names dropped on sites, and partly because they were cheap on Amazon. I've read them all a couple times, but I don't feel safe saying much about them yet since I haven't applied most of the information in them. Knee-jerk reactions are that they all have their merits and weaknesses, but together cover mostly everything I'd want so far. Picking out the kit and a preliminary tool set was also a big hassle. I'm picky and cheap so I did lots of research first. Maybe I'll post my toolkit contents later (although it was mostly picked out from the recommendations on this site).
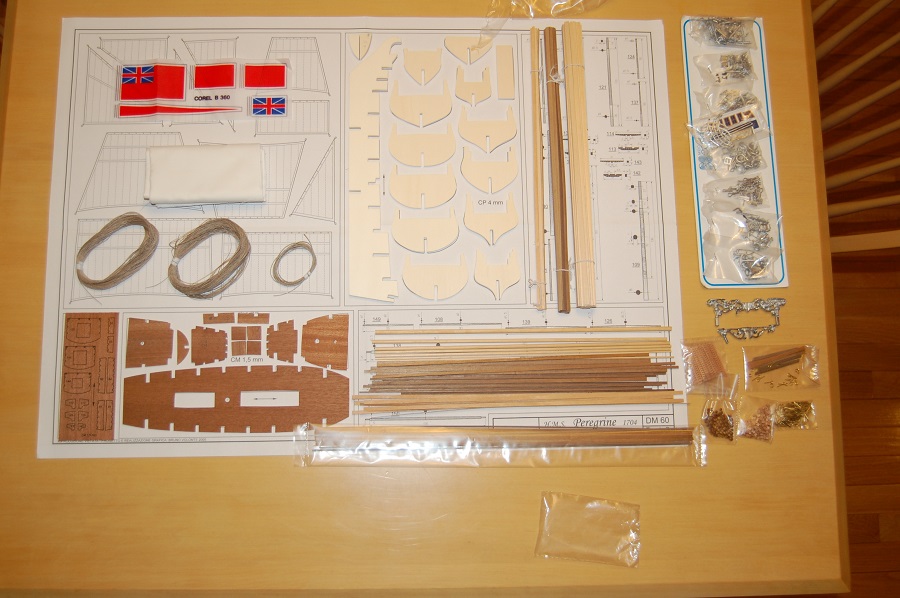
The Kit (2 hours)
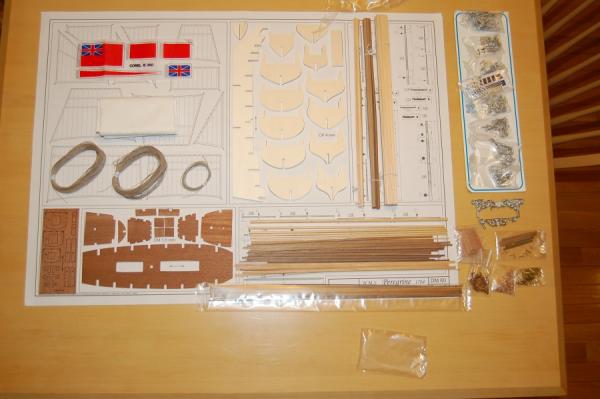
Man, I love that box art. I've done a fair bit of reading about kits, but I was still a little naiive about some things. I didn't realize I'd need to make my own sails, I was a little surprised the flags looked so cheap, and the the metal fittings all need to be filed a lot. I'm also a little nervous about having to cut out the bits from the ply on the bottom left. It's more work than I expected, but I'm really happy with the quality of the kit. The sailcloth looks sturdy, the rigging line is strong and good looking, the fittings are detailed. It's just a little intimidating to lay it all out. I read the manual and briefly studied each tavola (some lovely Italian for you) and catalogued everything. It seems to be all there, but I don't know if that's rare, so I started worrying I just miscounted or missed something in the record altogether.
The Bulkheads (~15 hours so far)
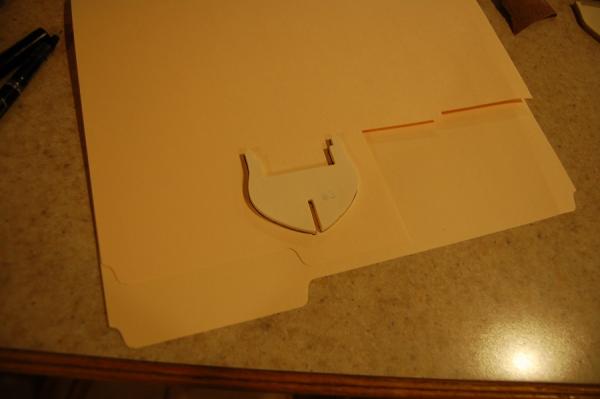
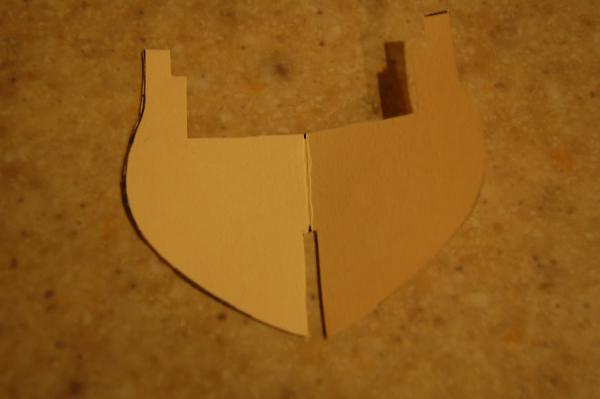
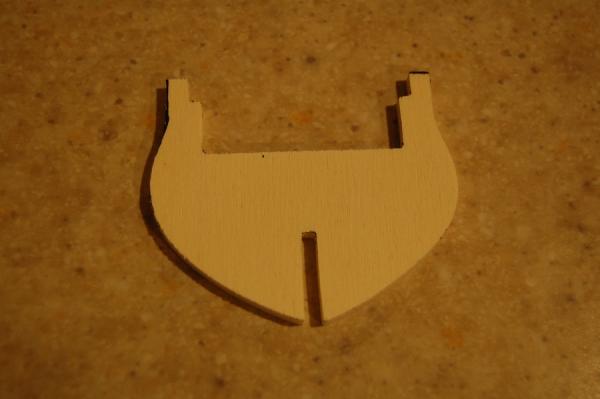
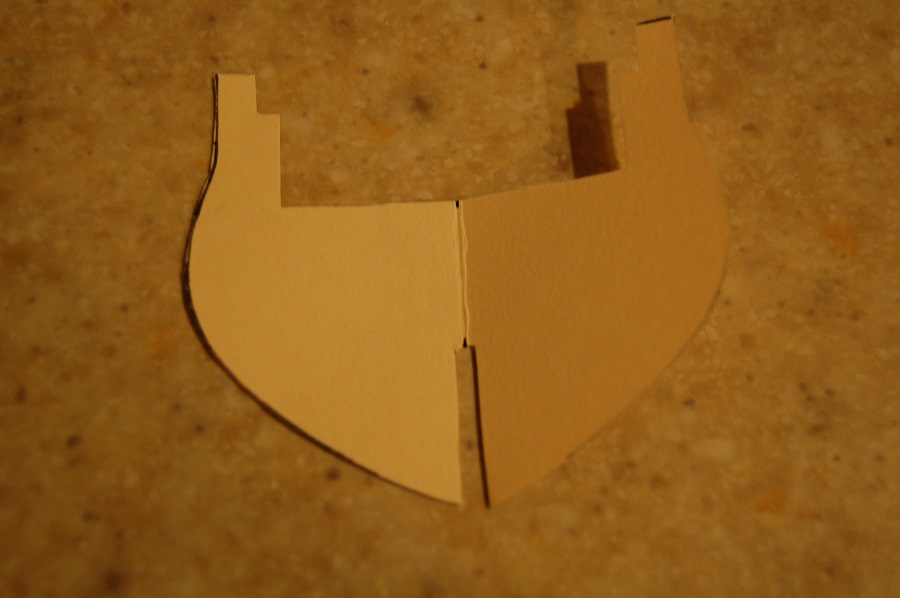
I started off by checking the bulkheads for symmetry. Again, I wasn't exactly sure what I was in for here, how much they're usually off by or what the tolerance for error is, so I eyeballed it first (without reshaping anything) just to see if anything looked off. Only one did by eye, but to be totally sure I traced everything on manilla folder, cut it out carefully (this part was actually tricky because cutting the line didn't give me a good result. I used a pen that bleeds a bit and then cut just inside the line for a good fit). Then I found the midline, folded over, inked in the spots that didn't overlap, trimmed those off, then re-laid the cutout on the bulkhead, inked in the deviations, and filed them off with a smooth cut file and sandpaper. Here's an example picture for one bulkhead.
Inked parts were about to get cut off
Laid the resulting symmetrical template back on the wood, inked in the differences and filed.
After I did this for all the bulkheads, I started fitting them into the keel. Here was my first little mistake. On the first bulkhead, I decided to go with sandpaper, not realizing that I wasn't putting equal pressure on the groove I was trying to expand. I ended up bowing out a little bit of the bulkhead's slot so it obviously aligns a couple degrees off perpendicular to the keel (now I put my sandpaper on a metal ruler to apply even pressure. Just like everything else in life, it's the little things that get you). I don't think this is a huge deal, but I learned to take my time and spend minimum half an hour on each, fitting and re-fitting s-l-o-w-l-y. All the rest so far visually align close to perpendicular, which should be a bigger help when I ultimately square them up and glue someday.
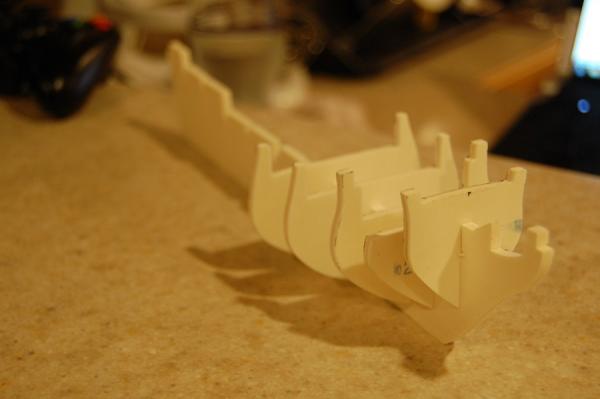
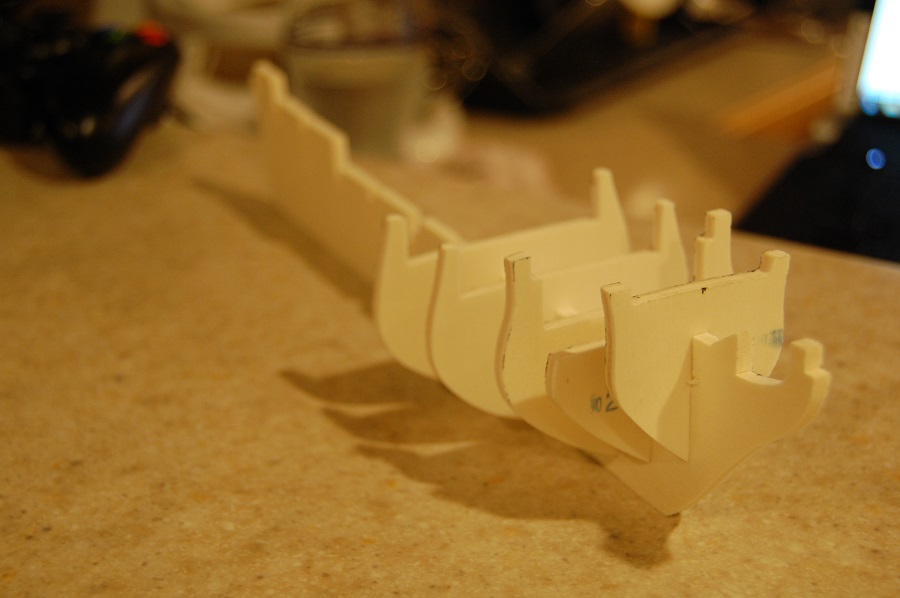
This is about as far as I've come in the last week. I'm making good, slow progress with about 3 hours of work a night including lots of research and second-guessing myself, hahaha. The bulkheads all fit in snug, now the next step is aligning them for depth. Here's where I left off for the day.
I'm really proud of this so far. My friends aren't super impressed, but I know how much work I've put in and what it will ultimately become. I'm really looking forward to the next few months.
One thing I'm a little concerned about is cutting a rabbet. Lankford's book recommends it even though my kit doesn't give me much help. I see pretty clearly where I should carve on the lower portion of the stern, but the bearding and rabbet line on the bow and down at the bottom of the keel aren't intuitive to me. The keel on this is in one piece and I'm concerned that if I carve out the way the book says, there won't be much keel that sticks out below the planking at the very bottom because the middle bulkheads are pretty low already. Also, determining the depth of the cut seems like it will be difficult because the planks aren't bent to the correct shape yet, so I don't know how they'll truly lay. Anyway, that's a concern for another day.
Thanks for reading, I'd appreciate any and all advice you could give,
The Commodore