Cap'n Snack
-
Posts
45 -
Joined
-
Last visited
Content Type
Profiles
Forums
Gallery
Events
Everything posted by Cap'n Snack
-
 Hey LLM! I'm sure you're right about cutting some of the deck details away... but did you simply stick the wooden decking onto the molded deck surface? Or did you chisel away every 'slat' that was molded into the plastic?
 -
Thanks JeffT! I'm hoping you're right and I can follow your lead!
-
Thanks for the advice; I agree, many of the original plastic parts will need to be cut away or replaced, but I'm just not sure if have to remove the molded deck as well.
-
Hello all! I will soon begin on the Hasegawa 1:350 Mikasa, and was wondering if anyone could direct me to a resource, or let me know about adding the wooden decks to it? Do I need to scrape away the molded deck? Or does the adhesive simply go over top of it? Any info would be a great help, and thanks in advance! Cap'n Snack
-
Thanks LLM! I'll keep my eyes peeled... jesus, just typing that made me really examine that statement. Peeled eyes? Gross.
-
Well, waited too long and now the sets are all gone from eBay... gotta remember to act when I see something, otherwise... POOF!
-
Stunning work there! It's been my dream to build this thing for years, so i wanna do it right... and I KNOW it's going to go slow. But that's what I want... great inspiration, thanks!
-
I agree! it's absolutely incredible!
-
Fantastic help, LLM, thanks so much! It confirms my concerns; the new Hasegawa Akagi is on its way to me now, along with Detail Set 'B'. I wanted to get the Super set as soon as possible, as it seems to be the toughest one to find, other than the seller in Korea I mentioned (although now a Japanese seller has popped up with one as well for roughly the same price...) The other bits seem a BIT easier to find... and I'm not sure they'll rerelease any of the sets, so better to just get these ones as I can afford them. Thanks again for your generous time!
-
If I'm not wrong, there's the 'limited edition super set' and then there's sets 'A, B and C' sold separately... the 'super set' has three frets inside... that i believe are listed as 'A,B and C' which has caused me some confusion. Thanks for the heads-up on shipping from Korea... I'm not in a rush, I'm just collecting everything I'll need for the Akagi; it's my dream kit!
-
This seems to be my understanding as well – there's the 'limited edition super set' and then there's sets 'A, B and C' sold separately... as well as LLM's mentioned wooden deck and jackstays sets. The 'super set' has three frets inside... that i believe are listed as 'A,B andC' which adds to my confusion. I'm pretty sure I need 'em all!
-
thanks LLM! I've seen one vendor who seems to have cornered the market for this set on ebay!!
-
That's definitely the only place I've seen the set so far... but only from ONE vendor! They seem to have cornered the market right now! Thanks for the reply!
-
Hi All! I figured I'd ask if anyone is thinking or willing to sell the Hasegawa #40071 Detail-Up Parts Super set? I'm planning on building the 1/350 Akagi, but this item is long sold-out online (except for one seller on Ebay in Korea...) anyone not planning on using one in their collection? Or am I completely out of luck? Thanks in advance!
-
... well, I AM considering the wooden deck and PE parts for the Mikasa, which seems much more involved. However, another thing I will do differently is attach the PE details tot he hull and superstructure before painting it. Maybe I'll have more luck that way? Thanks very much!
- 26 replies
-
- 5
-

-
- Yukikaze
- First Build
- (and 3 more)
-
Good luck to you Mike whenever you get to your Yukikaze!
- 26 replies
-
- 5
-
-
- Yukikaze
- First Build
- (and 3 more)
-
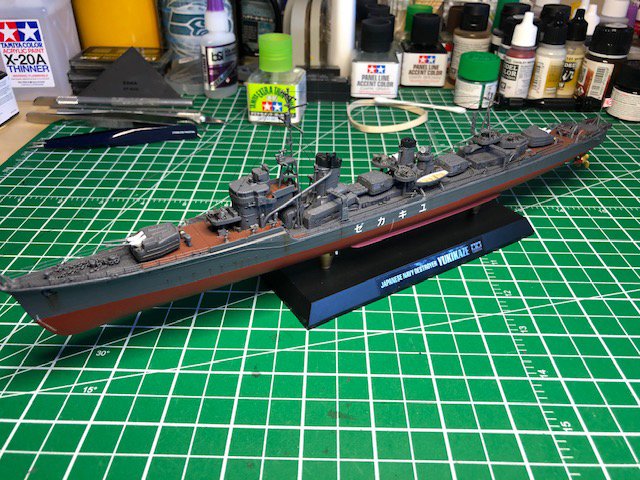
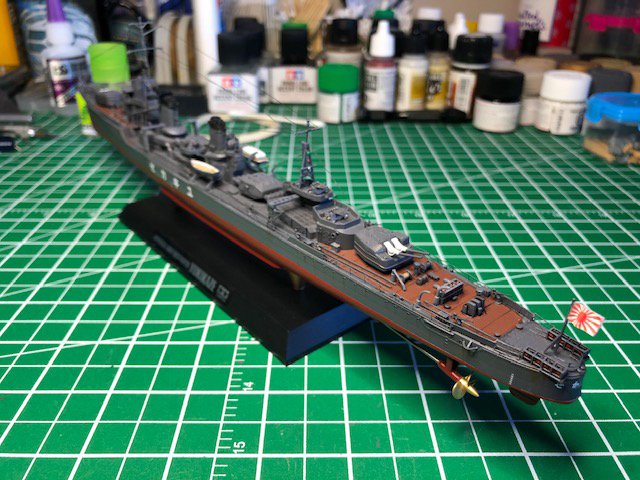
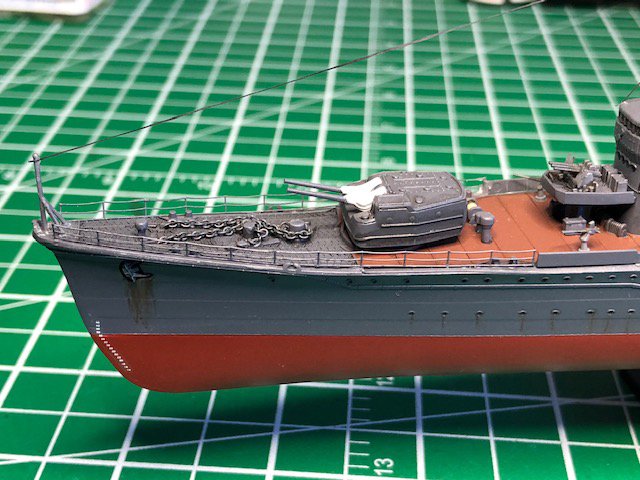
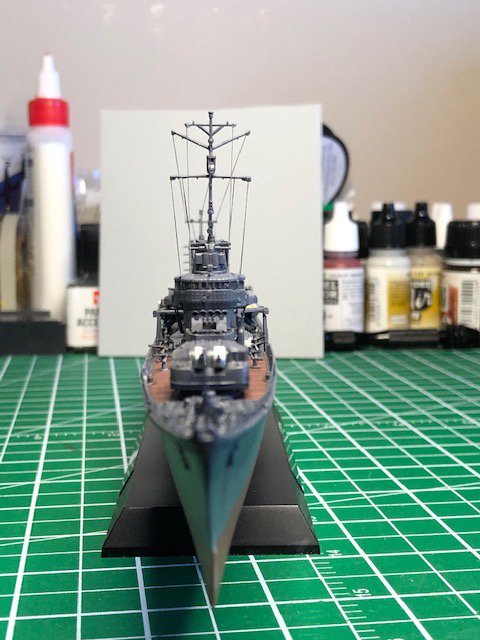
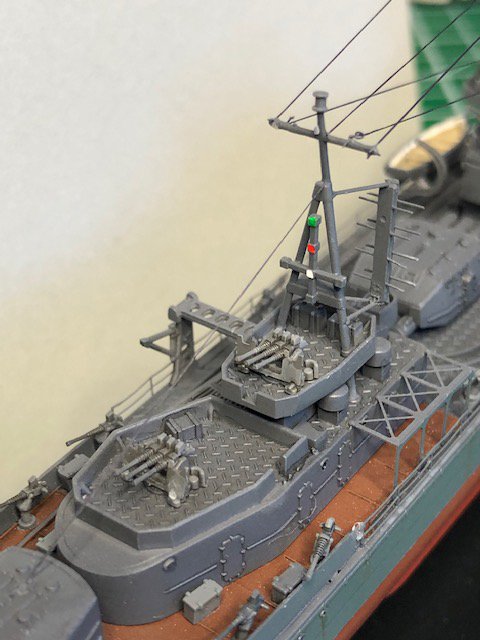
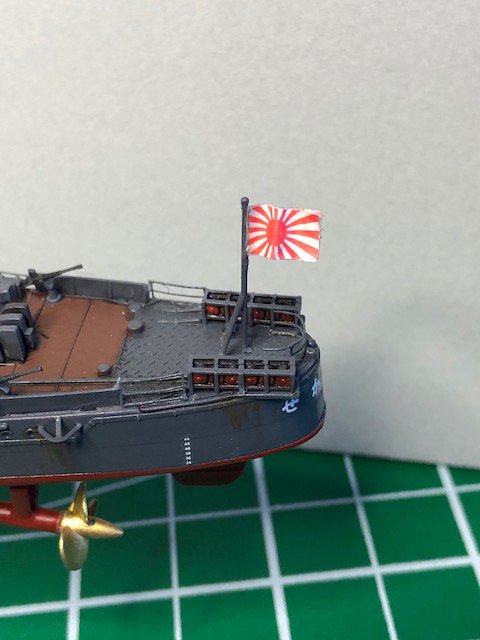
Well, I guess I didn't make enough entries for my first Build Log... sorry about that. I finished the Yukikaze superstructure without any added details (or drama!) choosing to paint the gun mounts a lighter colour (Tamiya XF-75 Kure Arsenal) just to get them to stand out a bit from the rest of the model. After applying a quick wash to them, I think the effect is fine. CE glue was very difficult to come to grips with. I suppose I worried that I wasn't using enough when applying the PE railings, but everything seems to be hanging on fairly well... if something went on a bit crooked, I chose to leave it, for fear of having to do it all again, and possibly making a mess of the deck... I've fallen in love with PE parts though; they make all the difference, and I can see why many people insist on adding them in. Practice will improve my skills I'm sure. I used EZ-line 'fine' rigging, and in lieu of adding posts or hard points tot he superstructure or hull, I sort of 'winged it' adding them to approx. places on the ship. Not totally accurate, but for me it was an exciting add-on to the model. Again, my fear of CE glue kept me from being as careful as I should have been, but I think I was able to cover up the most egregious blobs of glue (again, to the naked eye it seems acceptable) Some very light dusting of Tamiya Weathering Master set 'B' (snow, soot and rust) picked out some highlights, and some experimenting with the AK Interactive Weathering Pencils sets (Greens and browns, the 'sepia' colour in particular) helped create rudimentary rust streaks... I also realized I'd glued the cross-braces near the forward stack backwards. D'oh! Finally, I attempted to give the paper flags that came with the kit a bit of dimension, so I used watered-down white glue to attach and 'wrap' the flag around a piece of kitchen tin foil... then simply shaped it a bit to look like it's fluttering in the wind. It worked fairly well! Overall, I realized I'd attempted washes and weathering before applying a semi-gloss coat over the base paint, and that made things a bit rougher than I would have like... also, CE glue was intimidating, but I felt like I was coming to grips with it by the end of the project... For my first ship, I enjoyed building this kit a lot and – of course – LEARNED a lot during the process. I THINK Santa is bringing me the 1/350 Hasegawa IJN Mikasa for the holidays, so I will hopefully be evolving my abilities even further. Thanks to all for good advice, encouragement, assistance and kind words! C & C very welcome!!!
- 26 replies
-
- 11
-
-
- Yukikaze
- First Build
- (and 3 more)
-
Thanks very much! I am also assuming it'll be some of both as you say. I hope it's not necessary to shave down all deck textures from the plastic, as that'll take a lot more patience than I possess!
-
Hi all; I'm planning my next attempt at ship modelling – the 1/350 Hasegawa Mikasa. https://www.hlj.com/1-350-scale-ijn-battleship-mikasa-120th-anniversary-of-launch-hsgsp470 After my initial foray into PE parts, I was interested in the wood deck that Hasegawa has available for this model, but had one major question... Will I simply apply it over the plastic deck on the model? Or do I have to ‘shave down’ the deck details in the plastic before applying? https://www.hlj.com/1-350-scale-ijn-mikasa-wood-deck-panel-hsgqg48 Any information would be appreciated. Thanks in advance!
-
I am totally using your great work as a guide for rigging my own attempt at the Tamiya 1/350 Yukikaze this weekend! Thanks for taking it on first!!!😀
-
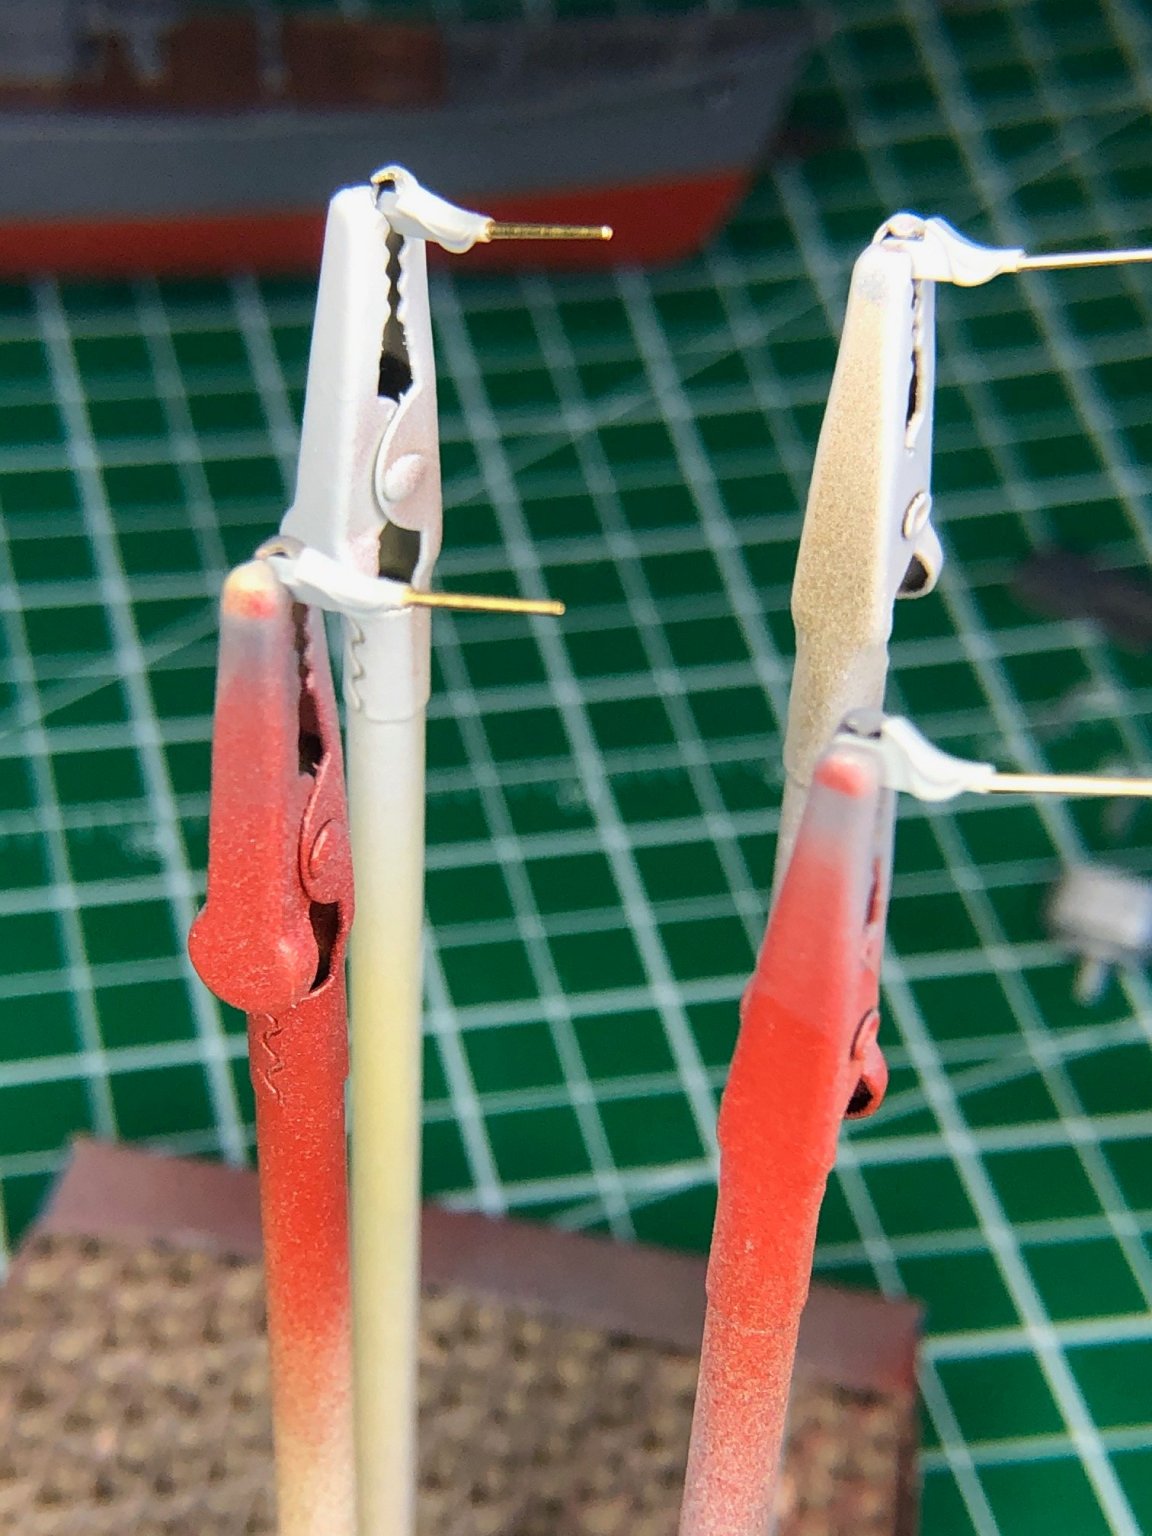
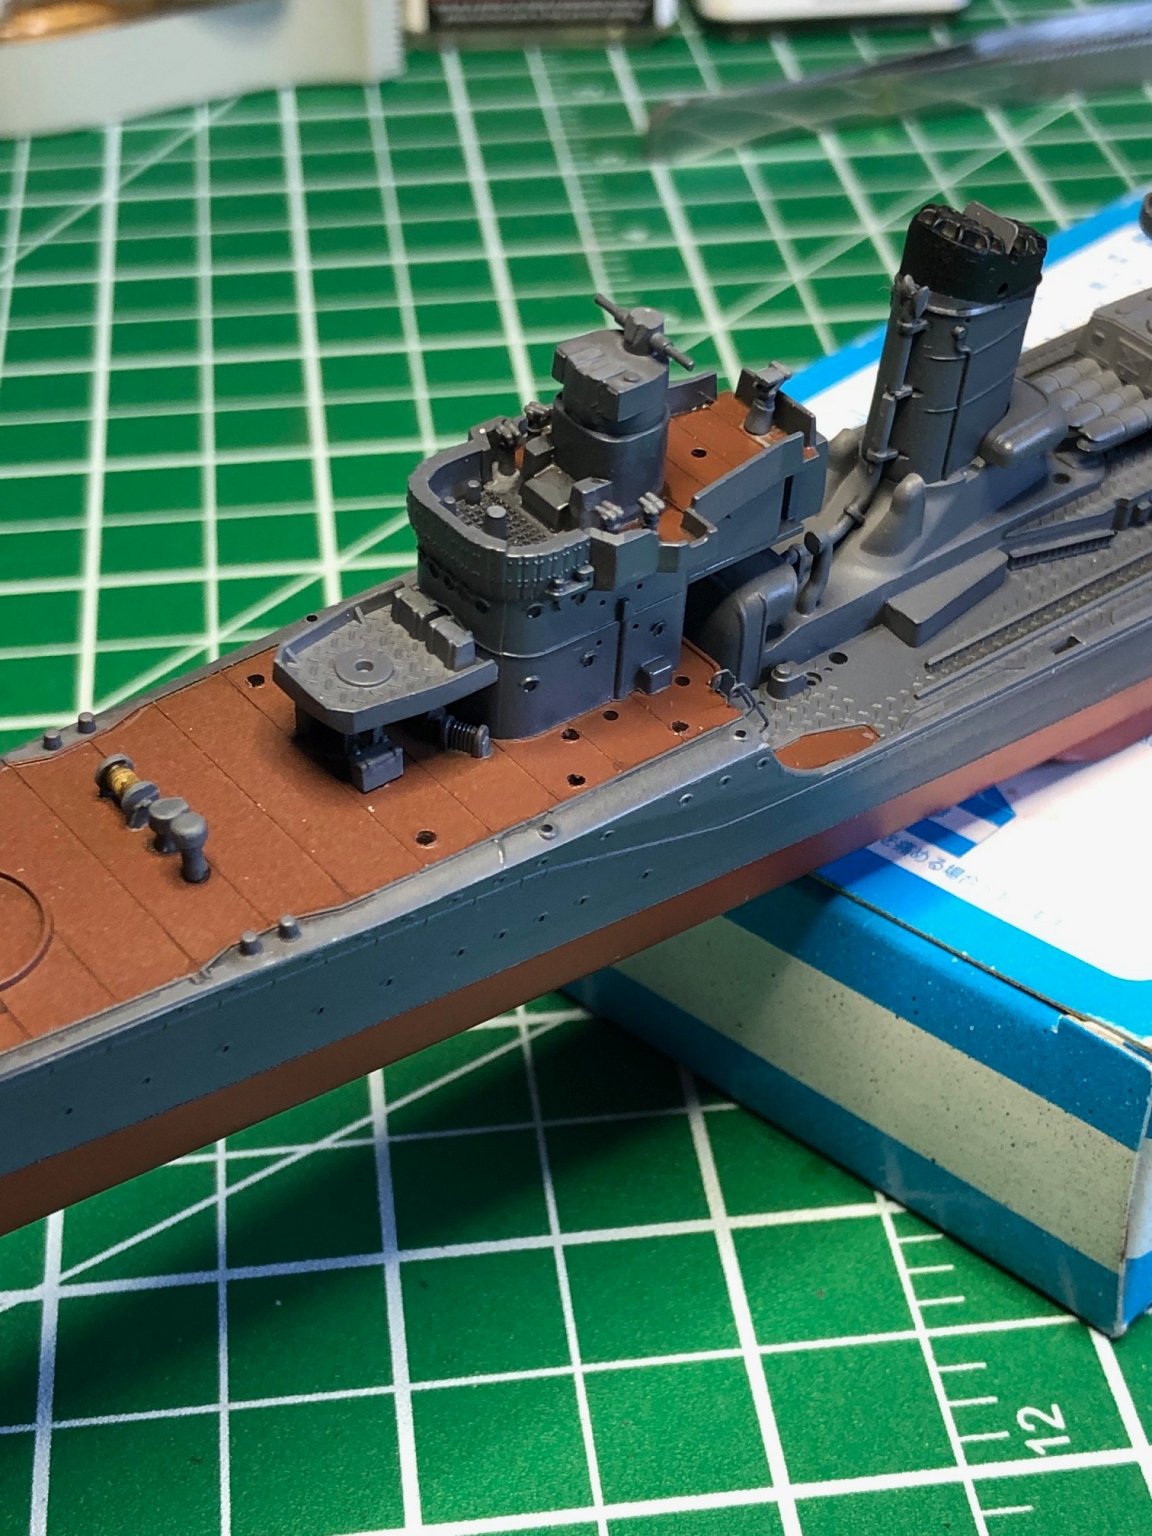
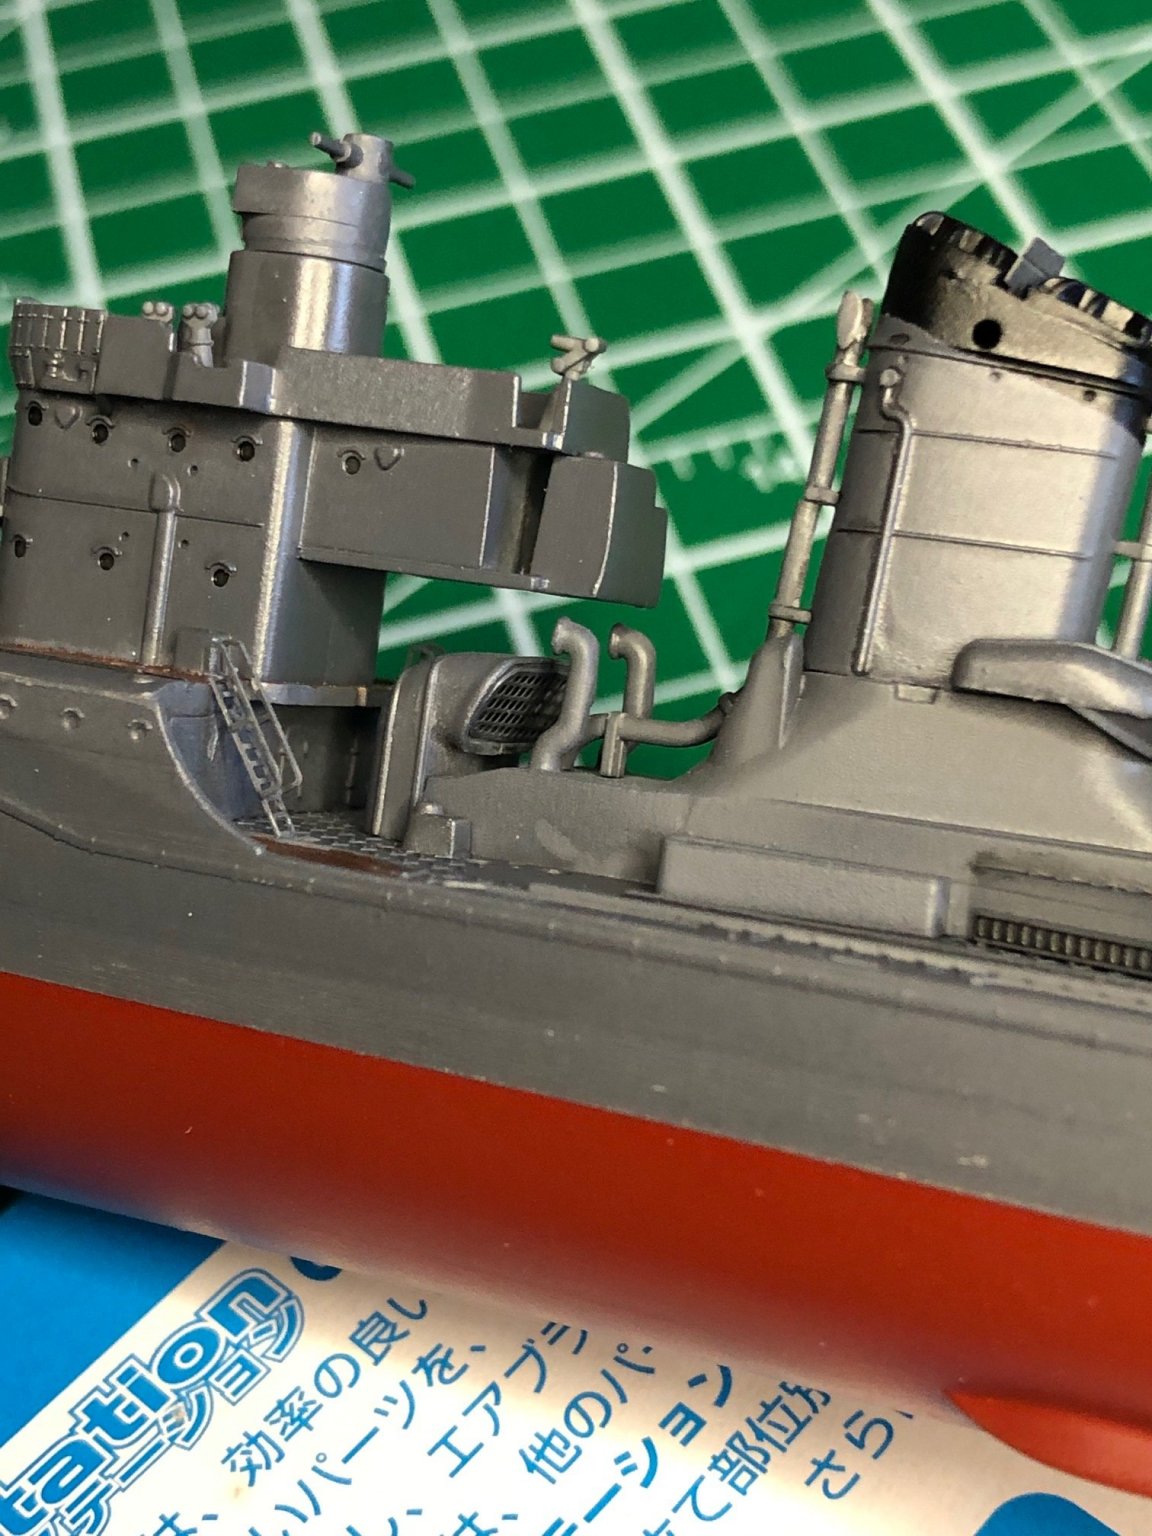
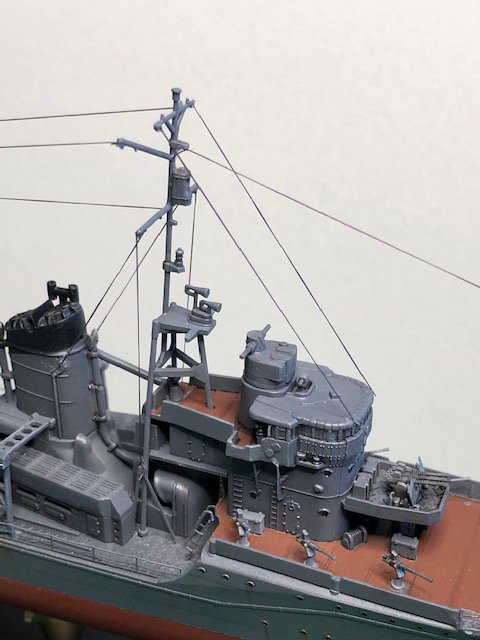
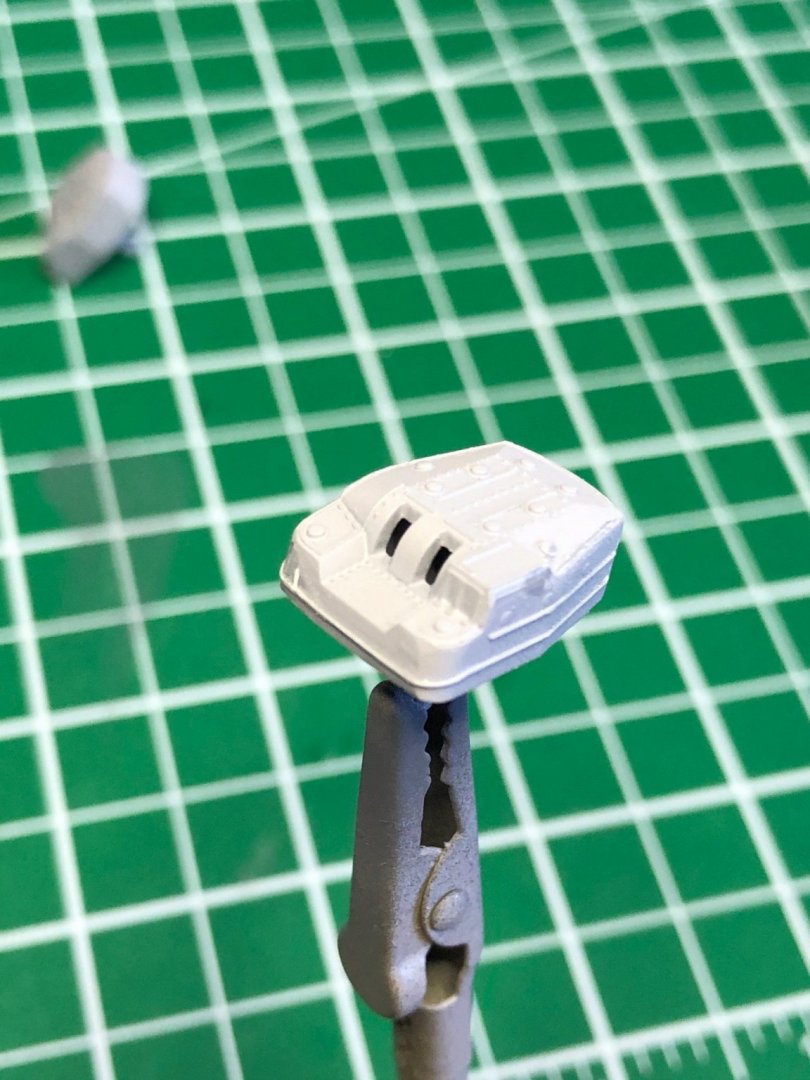
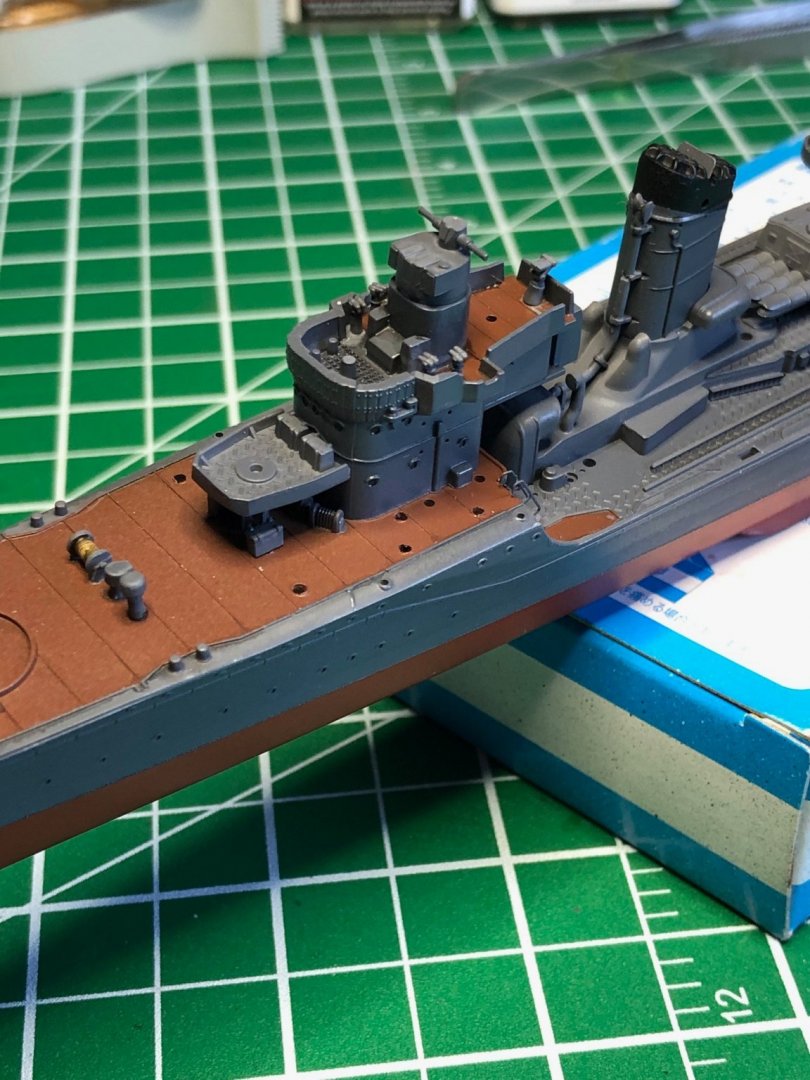
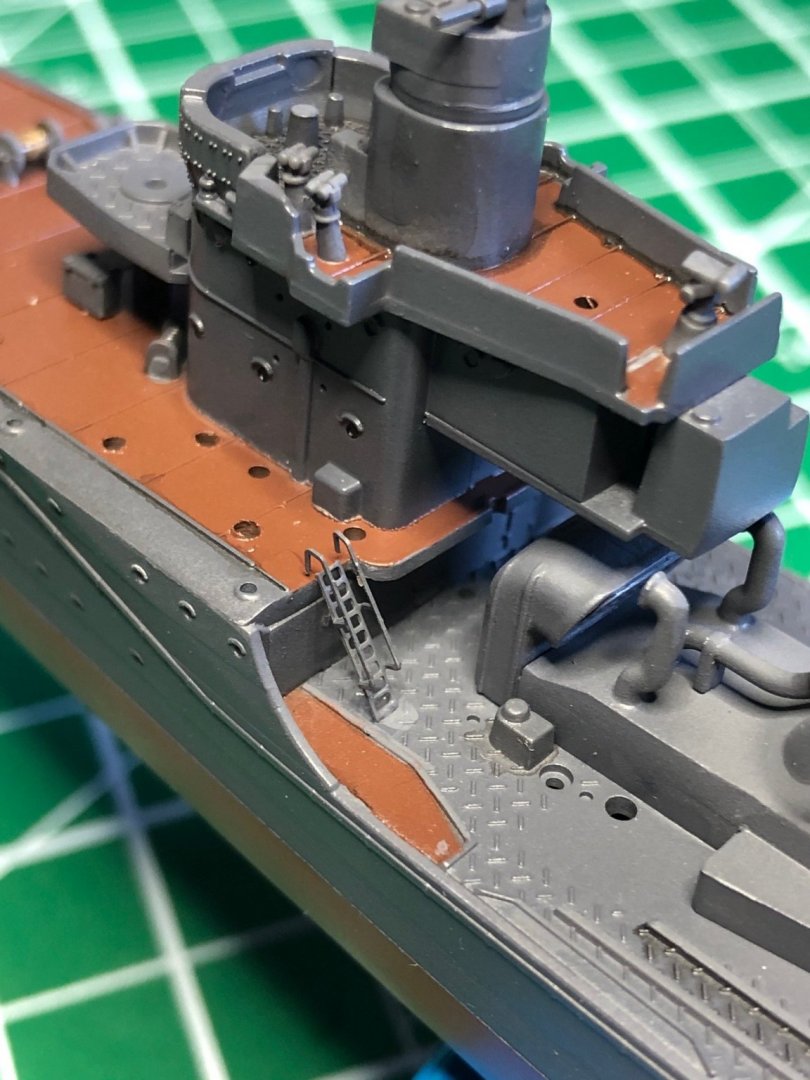
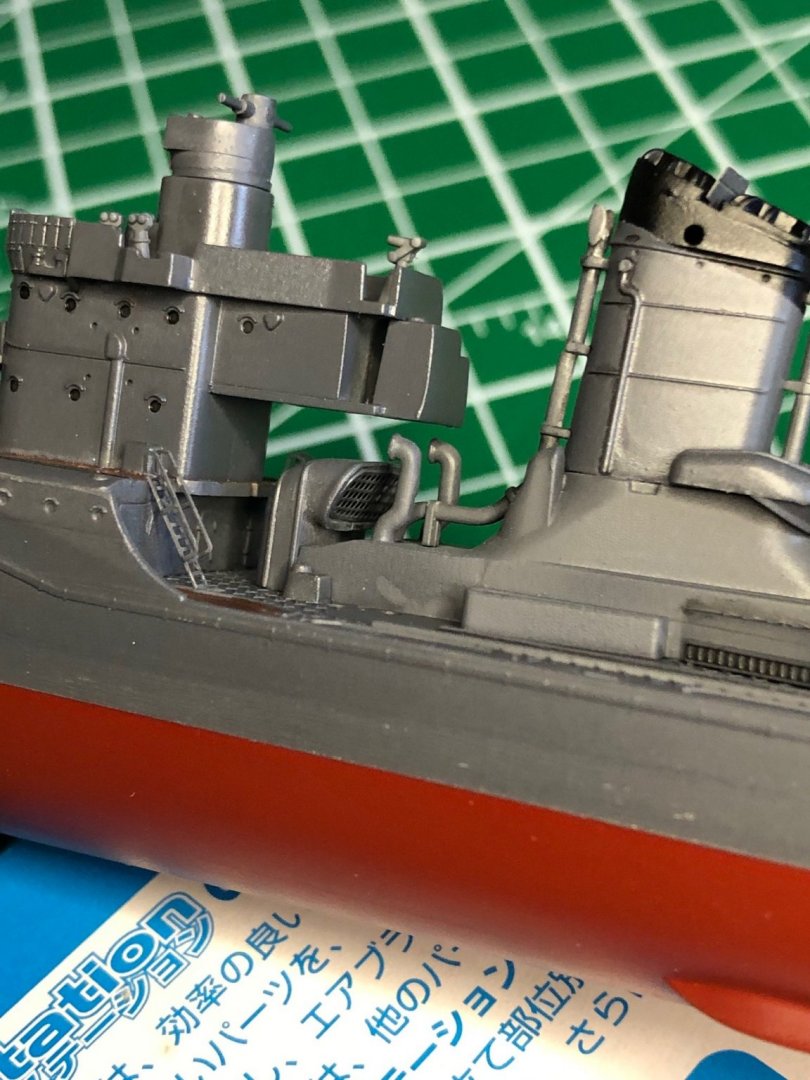
Okay, here's some more progress... I drilled out wee little holes in the gun bases for the 12.7 cm Fine Molds PE barrels I bought... not a great picture (sorry) but I'm happy with the results. The metal is primed and ready to paint. I wasn't too happy with the fit of the turrets; they are molded in 4 pieces (top, sides and bottom) so, using my limited skills, I filled the spaces with Tamiya putty and sanded them down... after a quick layer of primer, I fixed a few more edges as best I could, and am ready to airbrush them. I've applied the superstructures for the most part... I'm still coming to grips with CA glue (special thanks to everyone who helped out in my other post about that!!) so it looks rough in-camera, but acceptable to me to the naked eye. The PE ladders supplied with the kit looks great... except for the blob of CA glue I left at the base! Maybe some poor IJN crewman dropped a bucket of paint on his way down the ladder? The PE 'grill' under the forward superstructure went in nicely, but it 'tipped' out a bit at the top as it was drying. Ah well. I'm figuring I'll put almost everything on EXCEPT for the absurdly flimsy masts and towers and THEN apply the PE railings... then try my hand at some weathering effects. Overall, this kit is exactly what I was hoping; a lot of fun, and a GREAT test bed for working with CA glue, TINY parts and PE parts.

- 26 replies
-
- 7
-
-
- Yukikaze
- First Build
- (and 3 more)
-
Admittedly, this is something I tried, along with my 'glue applicator' (which is a fancy plastic version of the toothpick, IMO) I certainly felt like Godzilla trying to use knitting needles!
-
I'll head out to the local hobby store on the weekend and see if they have loopers!