edwinb
-
Posts
9 -
Joined
-
Last visited
Content Type
Profiles
Forums
Gallery
Events
Everything posted by edwinb
-
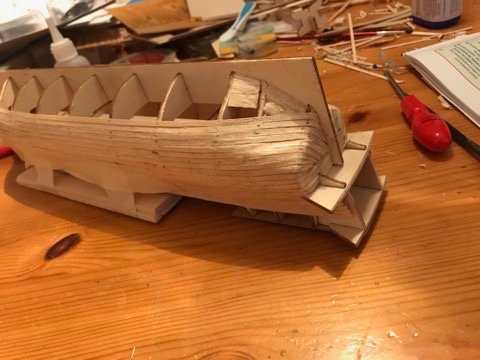
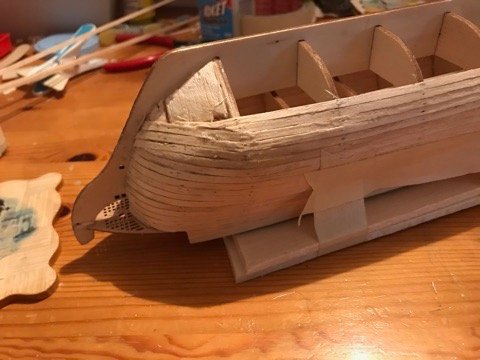
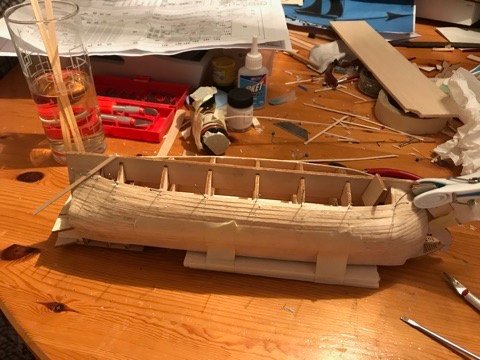
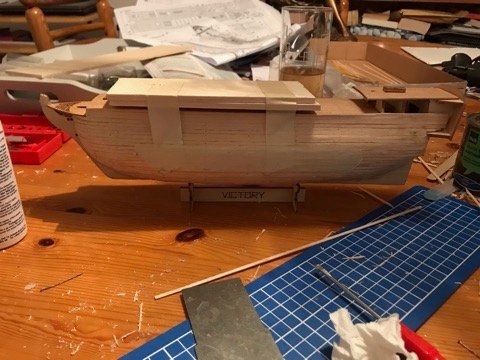
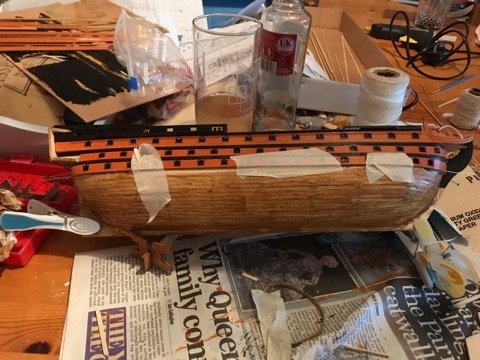
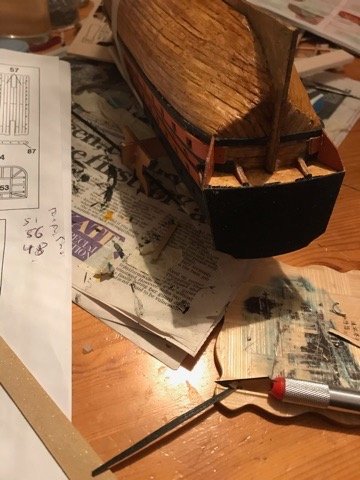
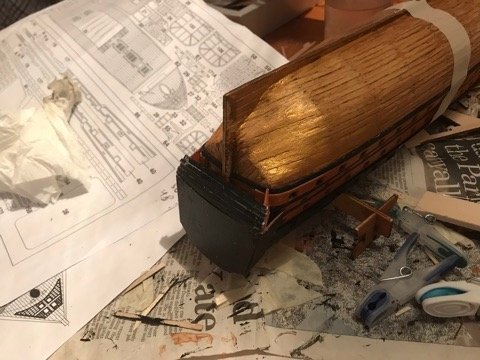
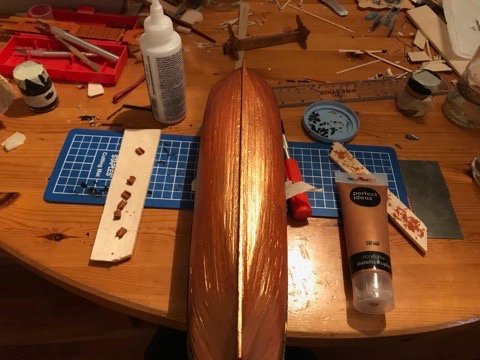
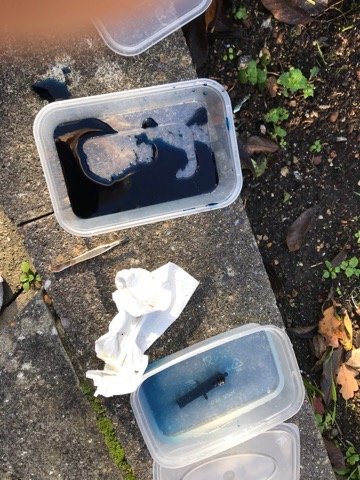
fairly happy the way the back end planks laid, all well soaked and fitted- allowed to dry then removed and glued back on, if the pegs and pins didnt work just held in my hands and watched telly for a while- not rushing for the bus this week 😞 some things not going well, this was too sharp trimming of the bow balsa wood impacting on the planks, broke a couple in the process here is the stacked 2 sheets of balsa on the deck to protect the prow on the bow after it broke while pushing in planking pins, glass with planks soaking and a small set of model knives I found usefull , Ive used the paint pots as formers for the wet planks holding them in place with masking tape to dry overnight- that worked a treat with about the right curvature Getting to a close I had to fit some bits o balsa inside as formers to fit the ends of the shorter planks, would have been so much easier if it had been anticipated, screwdriver to scrape off glue excess fixed the prow, now was the time to fit the front deck face 46D- too easy and I didnt read ahead the ochre painted sides need the ends well soaking at bow and stern- took a couple of attempts to bend enough and the glue wasnt strong enough to hold in position when it wasn't , 1st experiments with hull colour- coffee stain compared with a light coloured varnish- didnt like either and also didn't like the idea of the copper plating kit from mantua or this copper paint over the brown, Grandson showed me his model (caustically mentioned he only took 2 days to build it) and pointed out that it was much redder so i've finished with a coat of ochre coated in perfect ideaz metallic copper which is quite pretty and shows the planks this is the chemical treatment for the bright brass to make black, worked a treat but had to leave for say 5 minutes instead of the 1 minute written on the bottle and i just soaked it rather than sponged , leaves any really fine detail unblackened eg the bore of the barrels are still shiney - nicely black tipped mums tweezers 🙂
-
Mums clothes pegs and sewing pins coming in handy, the bobbleheaded pins from ebay fell apart, Ive noticed small details like the steel types in the pins- thin/thick brittle/bendy small/large heads- the thin bendy large headed pins being much better, the pegs grip better with a bit of carving on the jaws

-
Hi Eugenio its very small, I struggled with the channel knees , a few broke apart when I tried to extract them from the sheet, too small for the materiel. At this point I would recommend anyone needing instructions not to buy this kit - cant find some items- eg 48, 51, 56 - just gave up looking and moved on 🙂 I took some pics on the way but didn't have time to upload yet thanks for the interest Edwin
-
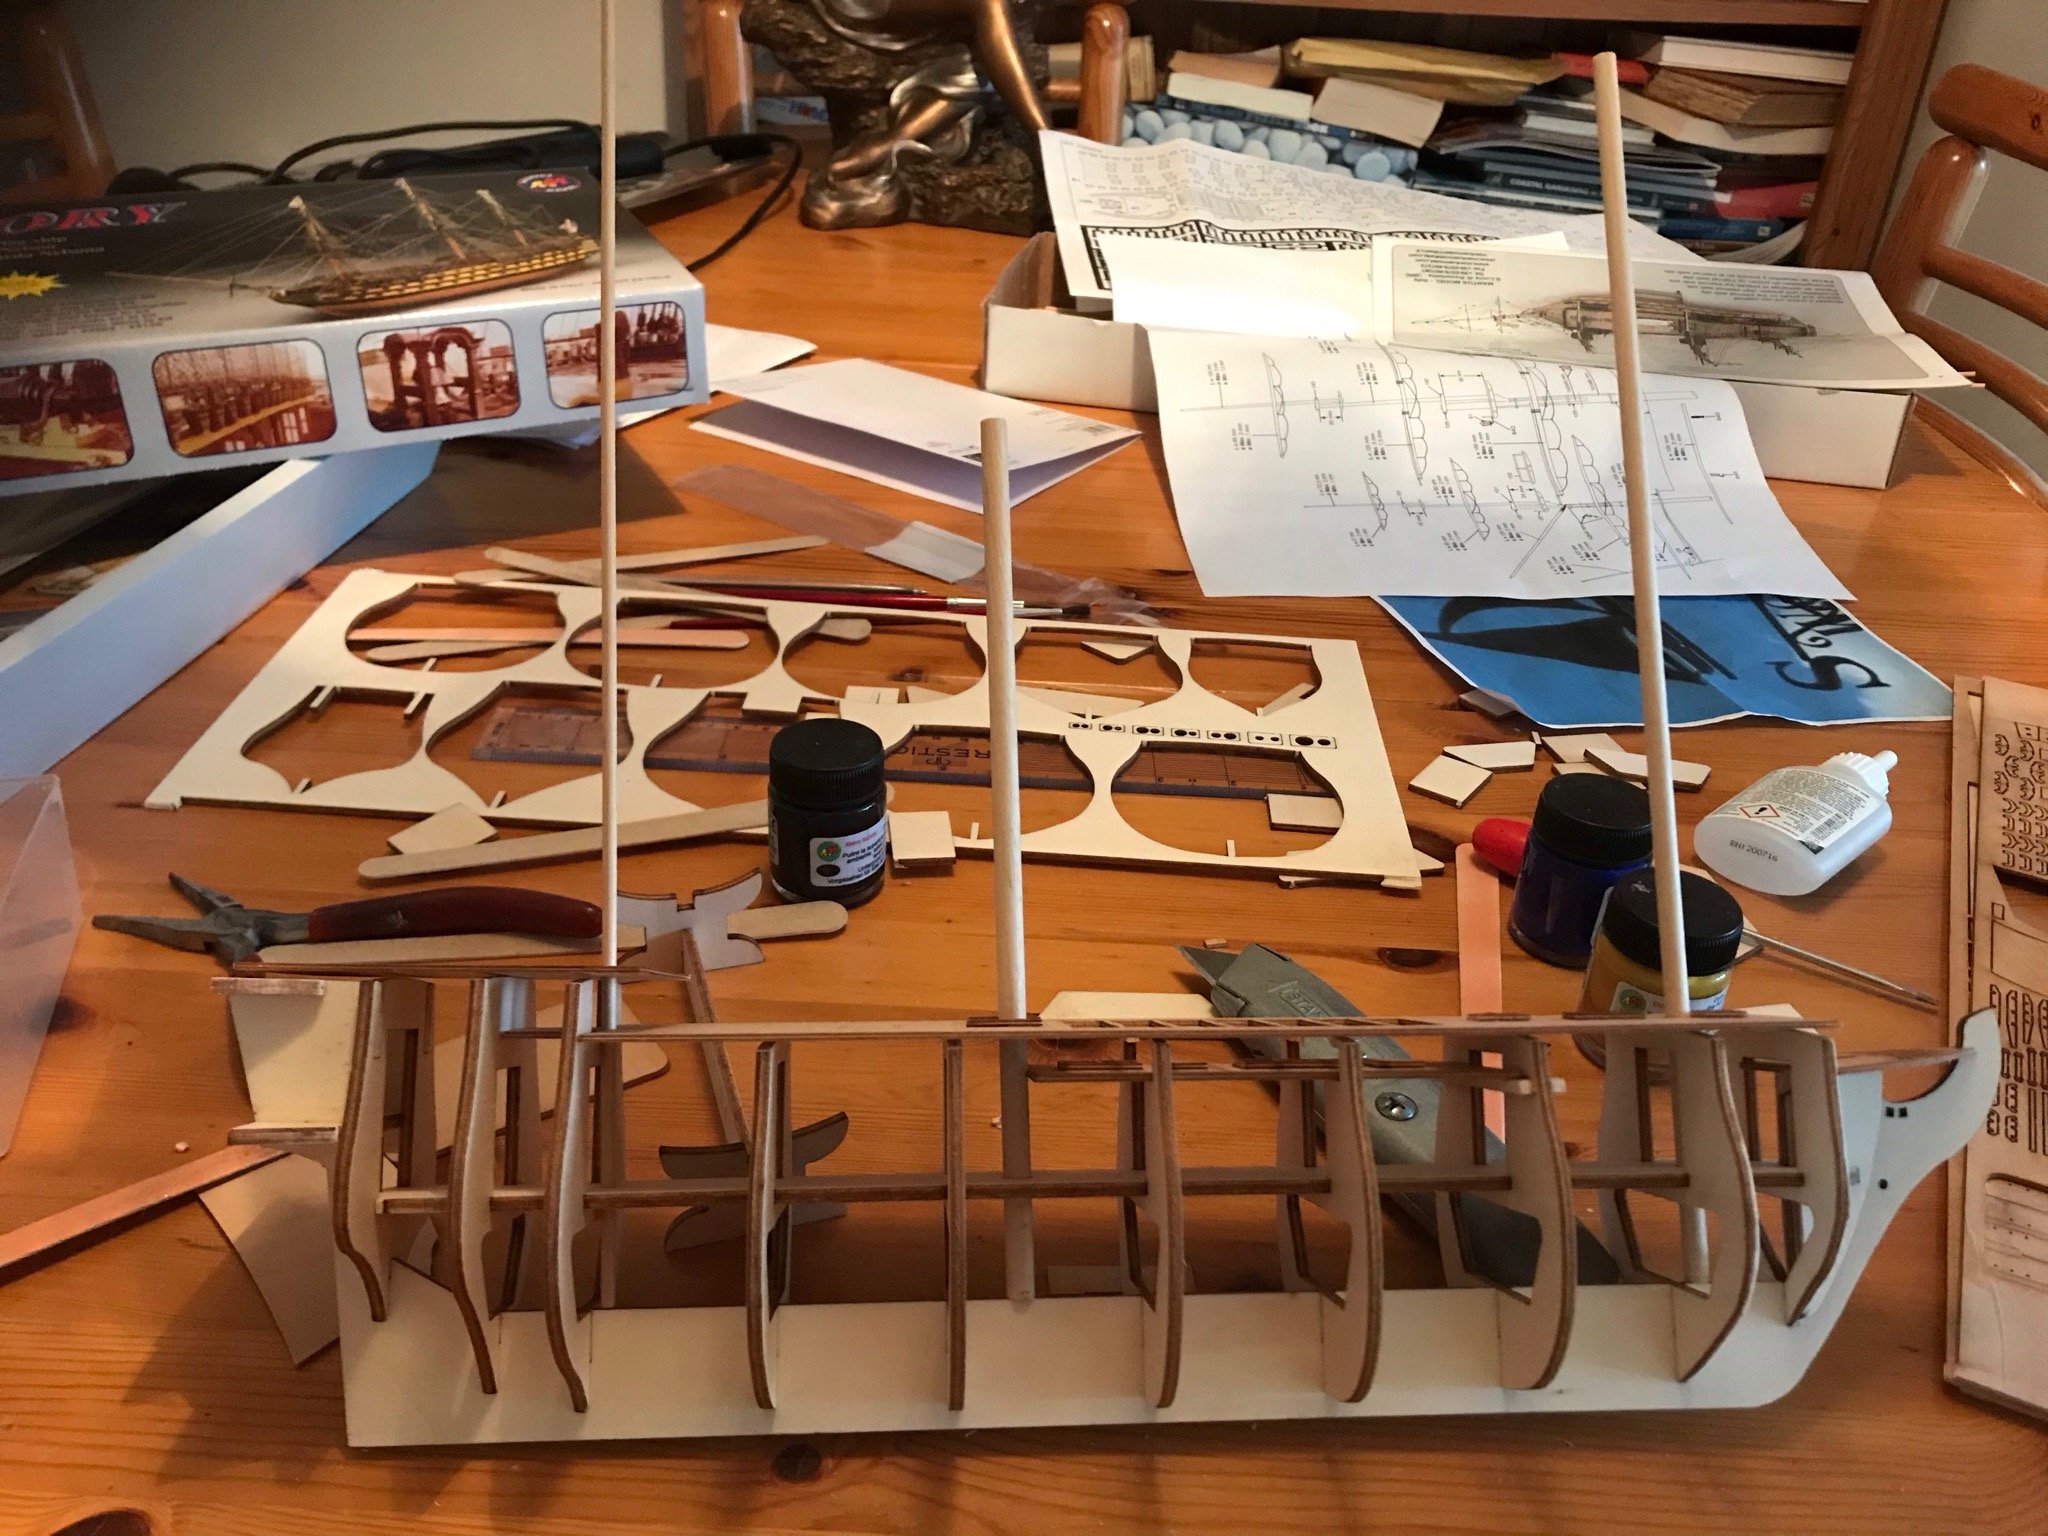
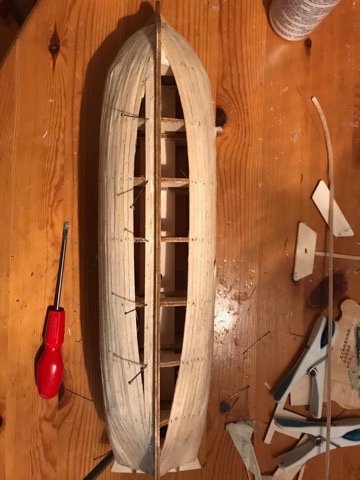
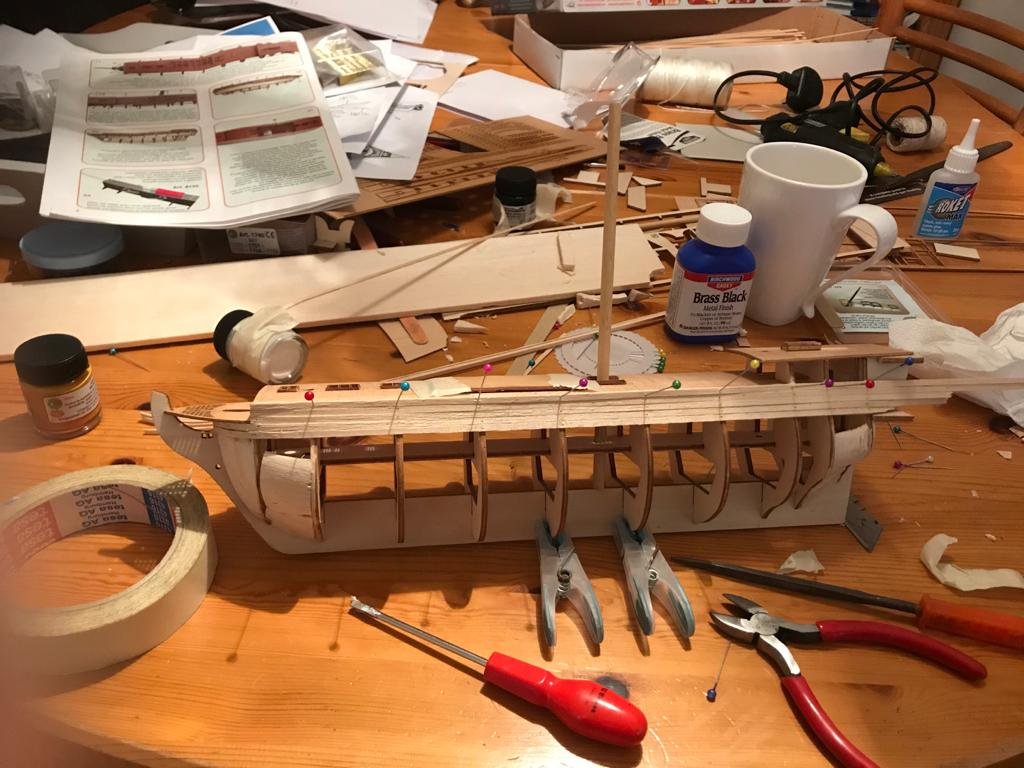
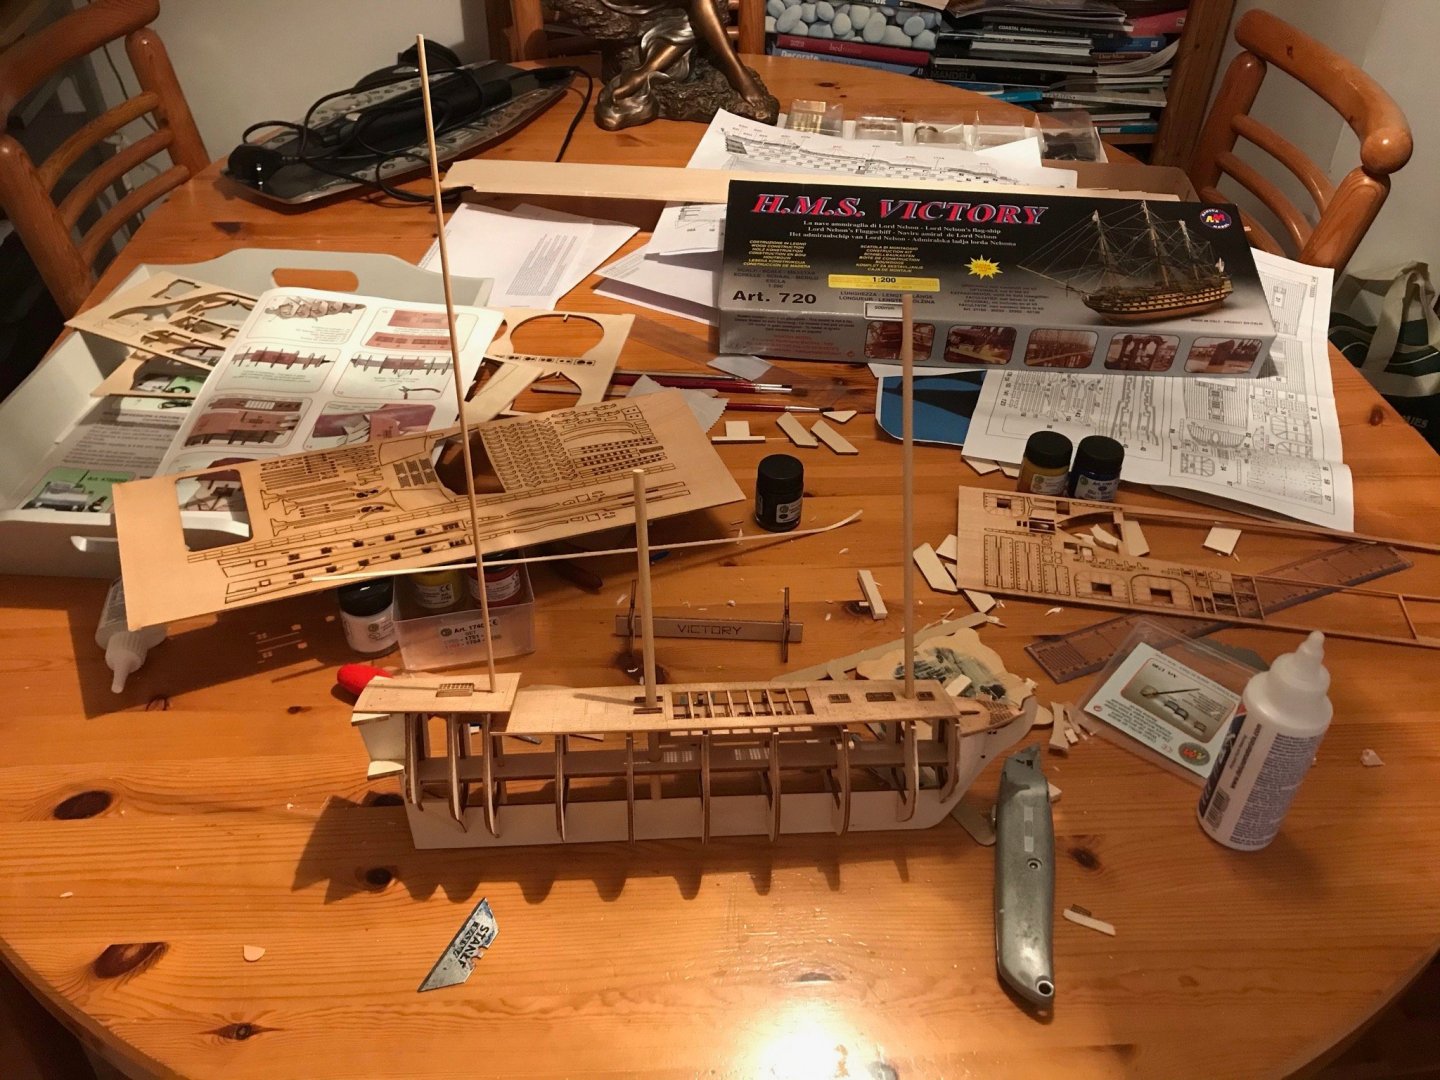
At last planking started after doing dry run and then shaving a bit off the front of deck because the no1 frame is narrower than the deck (?). Around are the additional acquisitions found to be necessary eg - brass black because all the cannons are shiny brass, triangular file because the sandpaper wasn't hard edged enough for the decking trim, masking tape which held decking while gluing and can be seen wrapped around the paint pot bending the 10 minute soaked ends of the planks , pins with plastic ends which are difficult to push in and the heads come off when pulled out- not recommended, the screwdriver is great for small smear of edges with glue and the tissues essential for cleaning the excesse and wiping tears- 5 planks done- better than a hard day at the office but only just. I haven't used the hot glue gun yet but have got it to hand in case things start to fall apart.
-
https://modelshipworld.com/uploads/monthly_2020_07/IMG_20200716_155146.jpg.f3f67f90076b55b28d9d87cea9830784.jpg https://modelshipworld.com/topic/20337-hms-victory-1737-by-ekis-finished-artesania-latina-scale-184-inspired-by-the-victory-of-1737/?tab=comments#comment-619594 I found these helpful and taking The Lazy Saint suggestion am padding the first 2 forward and aft frame spaces with balsa
-
hi Dieter well on the way with the planks i see, im interested in the aft end planking pattern but can offer no ideas yet best of luck Edwin
-
Using balsa to fill in fore and aft areas for planking, tried bending dry but too difficult so am going to try soaking the planks I am reading a bit on planking and trying to find pattern especially for the stern which appears complex
-
Glued the first piece and instructions unclear as to forward or aft face so I did both but only aft face is required for deck support, Just lightly sanded ( the requisitioned pack of nail files litter the table now ) masts and all the small 'nibs' on the cut out pieces

-
Just started this project as a gift from my grandchildren, as well as the box kit I also added the paint set, with brushes and cement from the shop after reading the instructions This was followed by balsa and a stanley knife after see this site when I got stuck The model build is well documented in HMS Victory by The Lazy Saint - Mantua - Scale 1:200 - Third wooden ship and I am sooooh very grateful for that effort, I would like to contribute the difficulties I find as an aid to any other novices stumbling the same path I just followed instructions and dry assembled to this step . I am uncertain as to cutting the masts which I inserted to align the decks because the dimensions dont say if from measurement is from the deck, or lower up to the limit of sitting on the keel so i'm reading the Anatomy of The Ship which i can probably scale the drawings to check